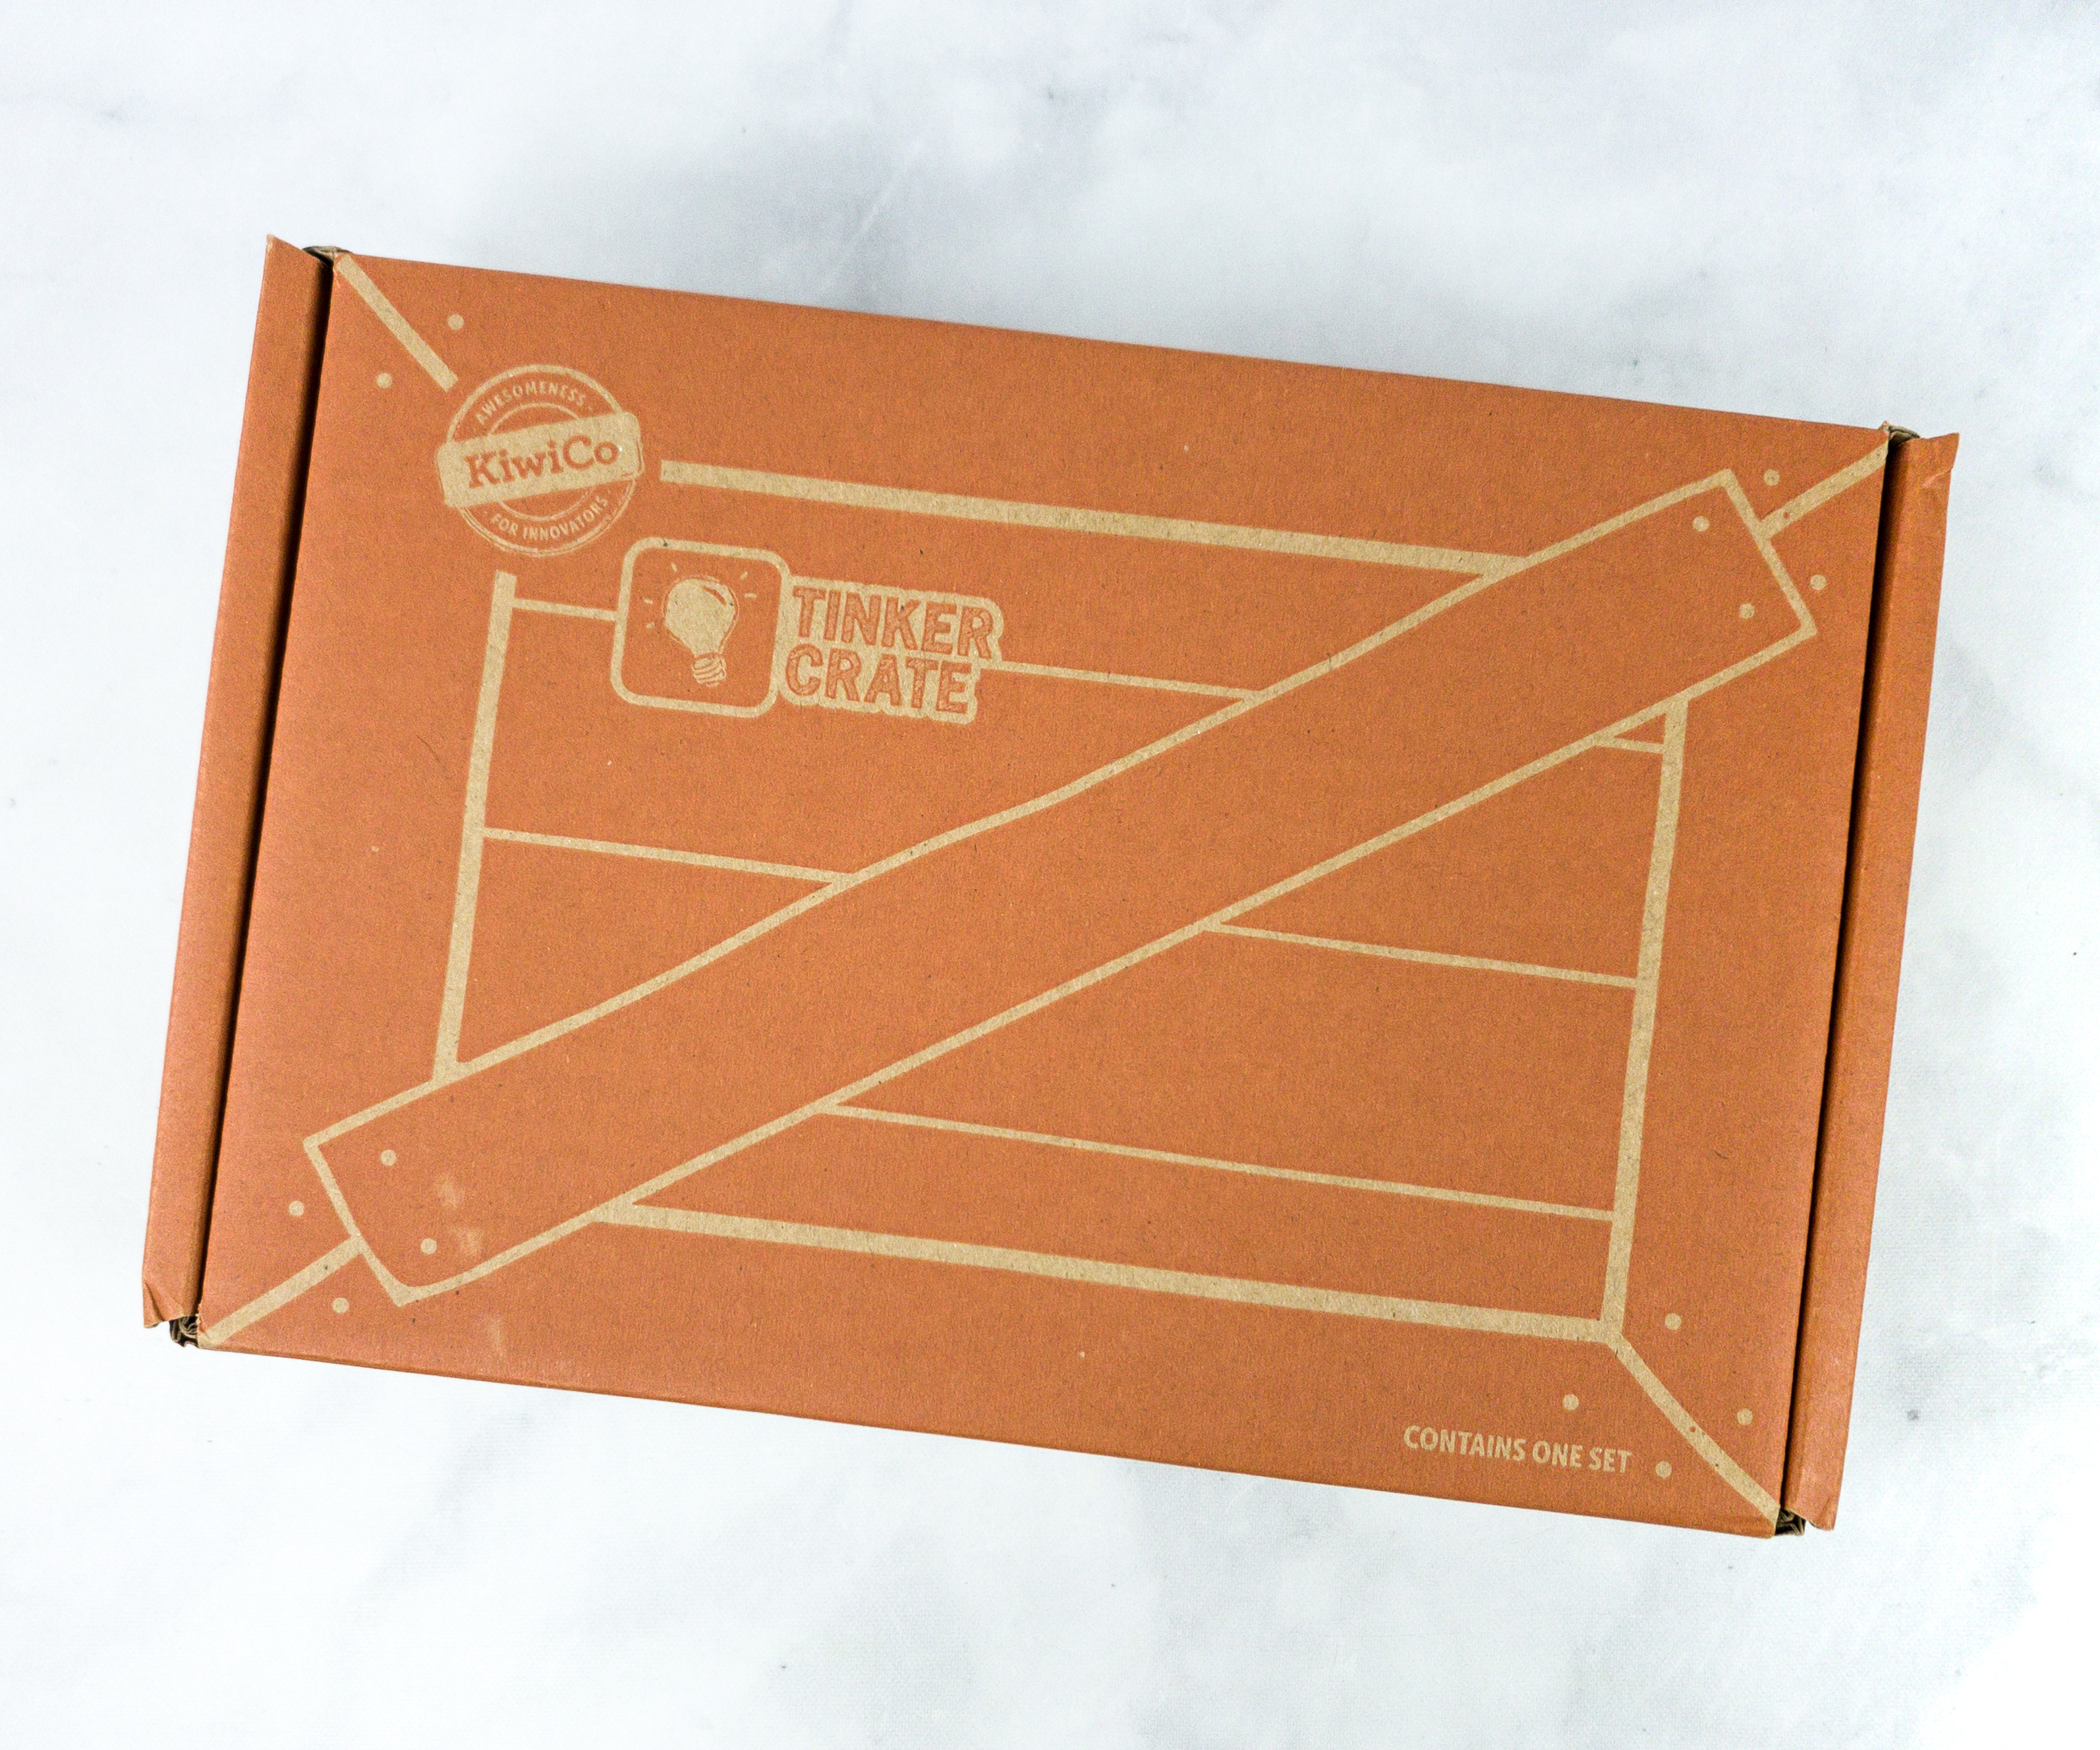
Tinker Crate is a subscription box that inspires kids to learn about science, engineering, and technology, all while having lots of fun. Each month, the box explores a field of study within a STEM (Science, Technology, Engineering, and Math) discipline. Kids practice their problem-solving skills and learn how to engage in both structured and open-ended exploration and investigation. Most boxes walk the tinkerers through the construction of fairly complex mechanical devices.
DEAL: Use this link to save 30% on your first box of Tinker Crate! (or Kiwi Crate and the KiwiCo family subscriptions Koala Crate, Panda Crate, Atlas Crate, Doodle Crate, Maker Crate, and Eureka Crate).
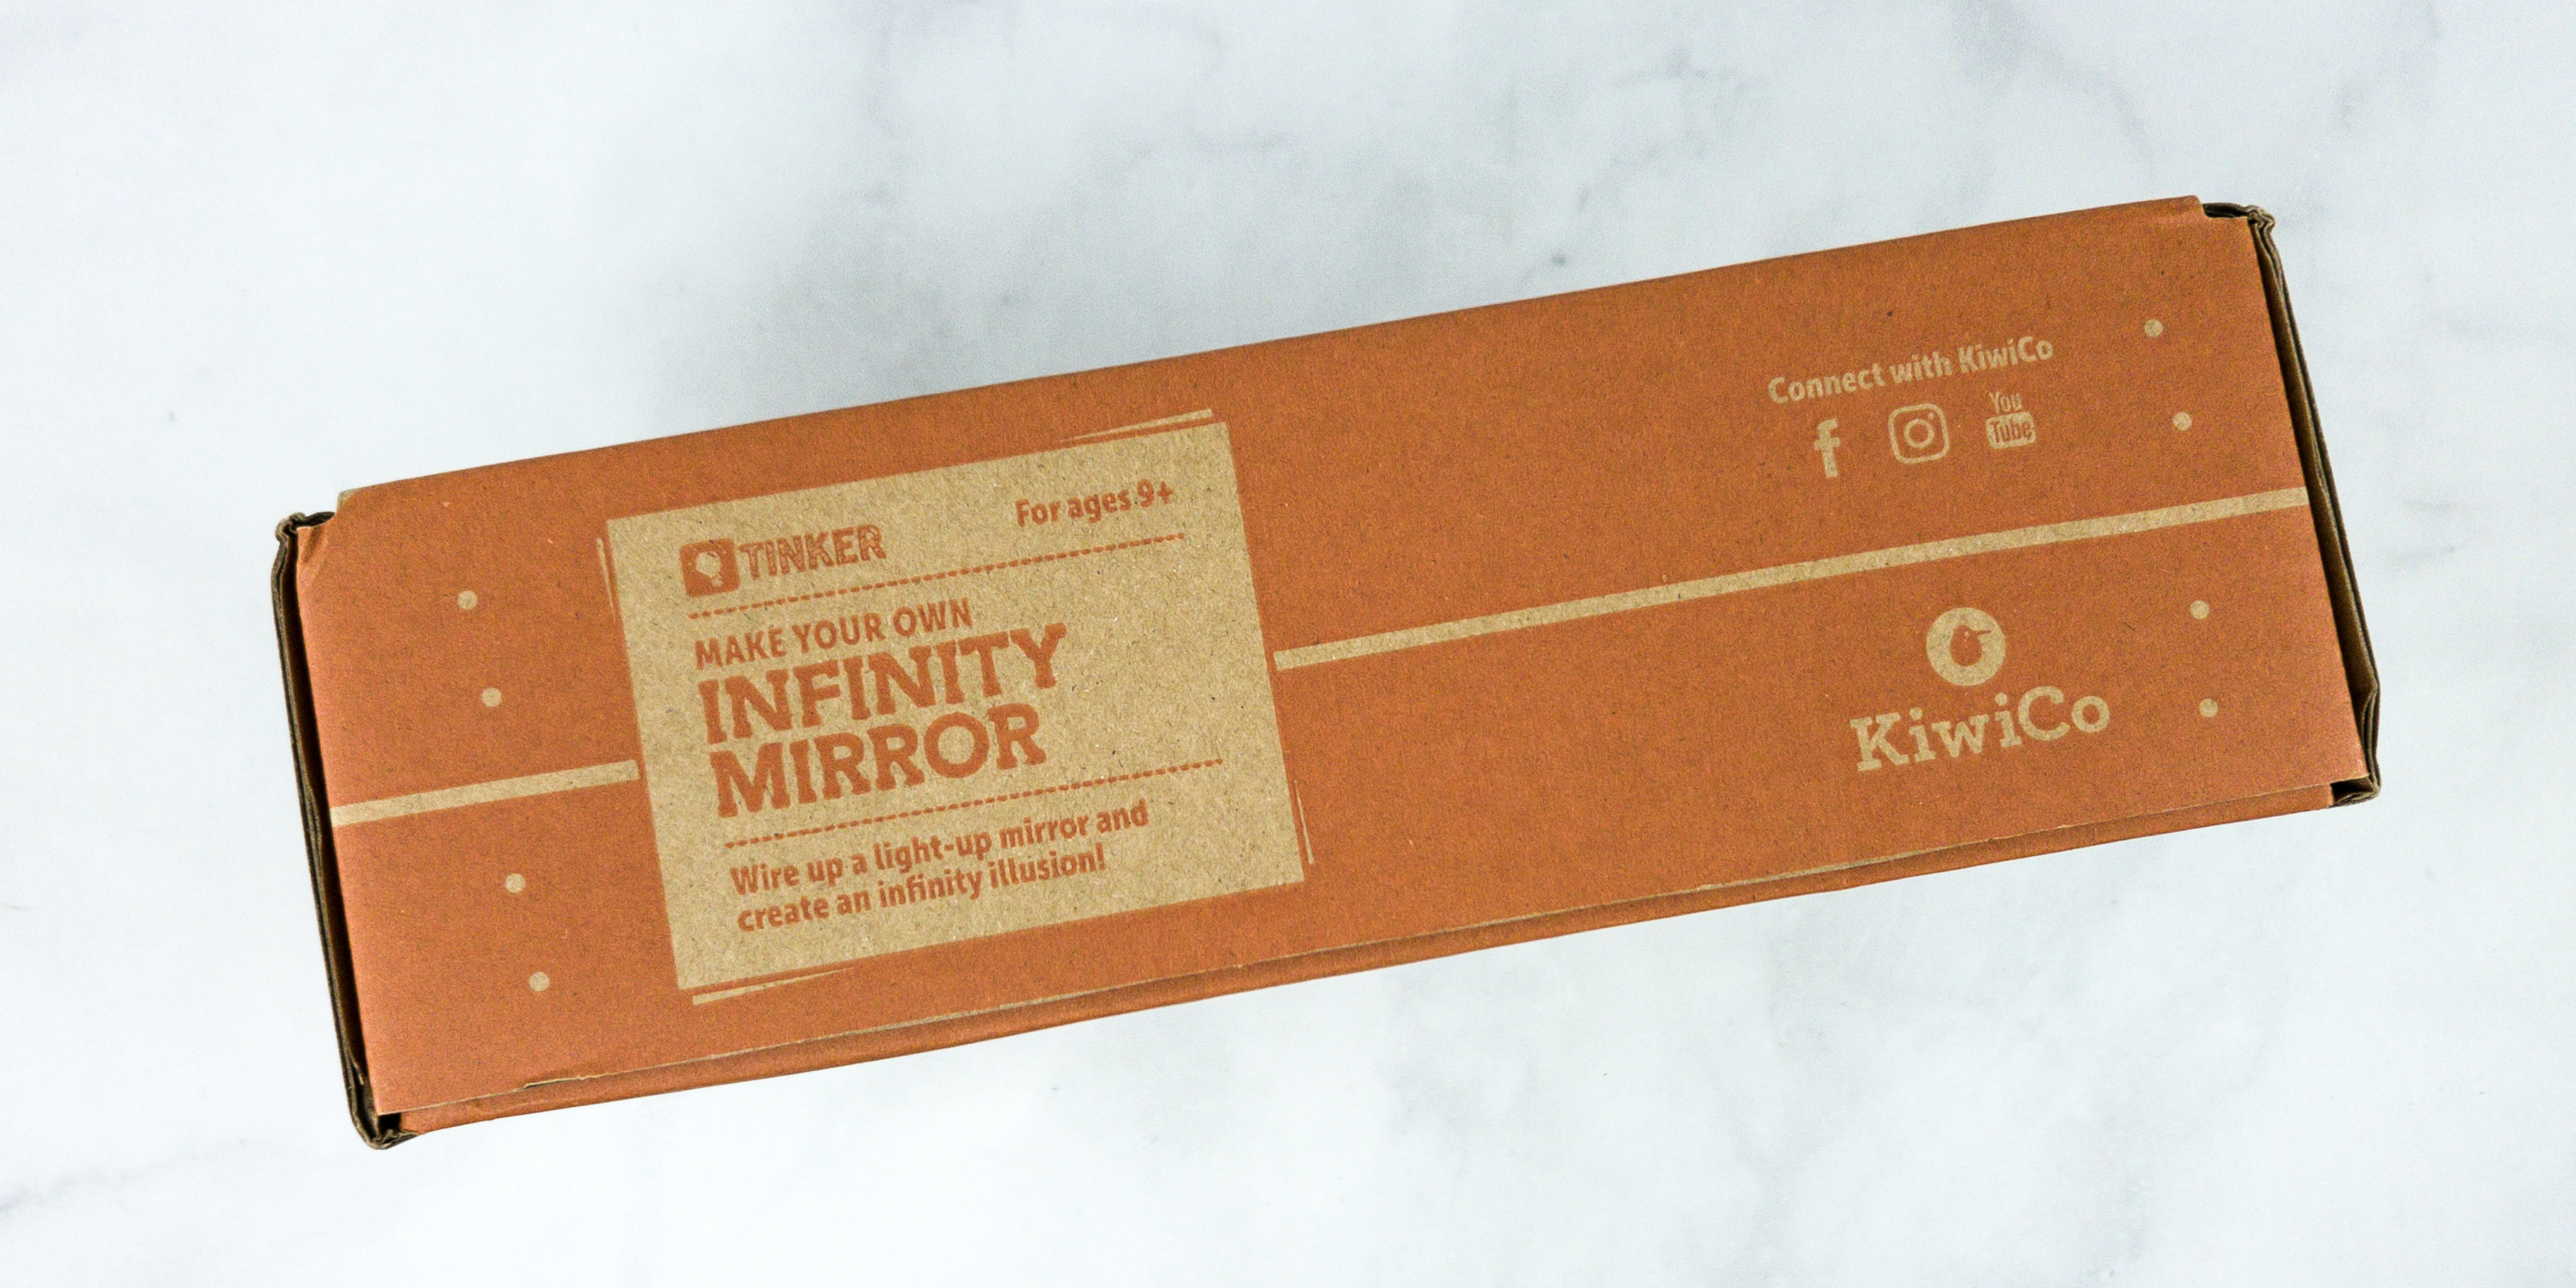
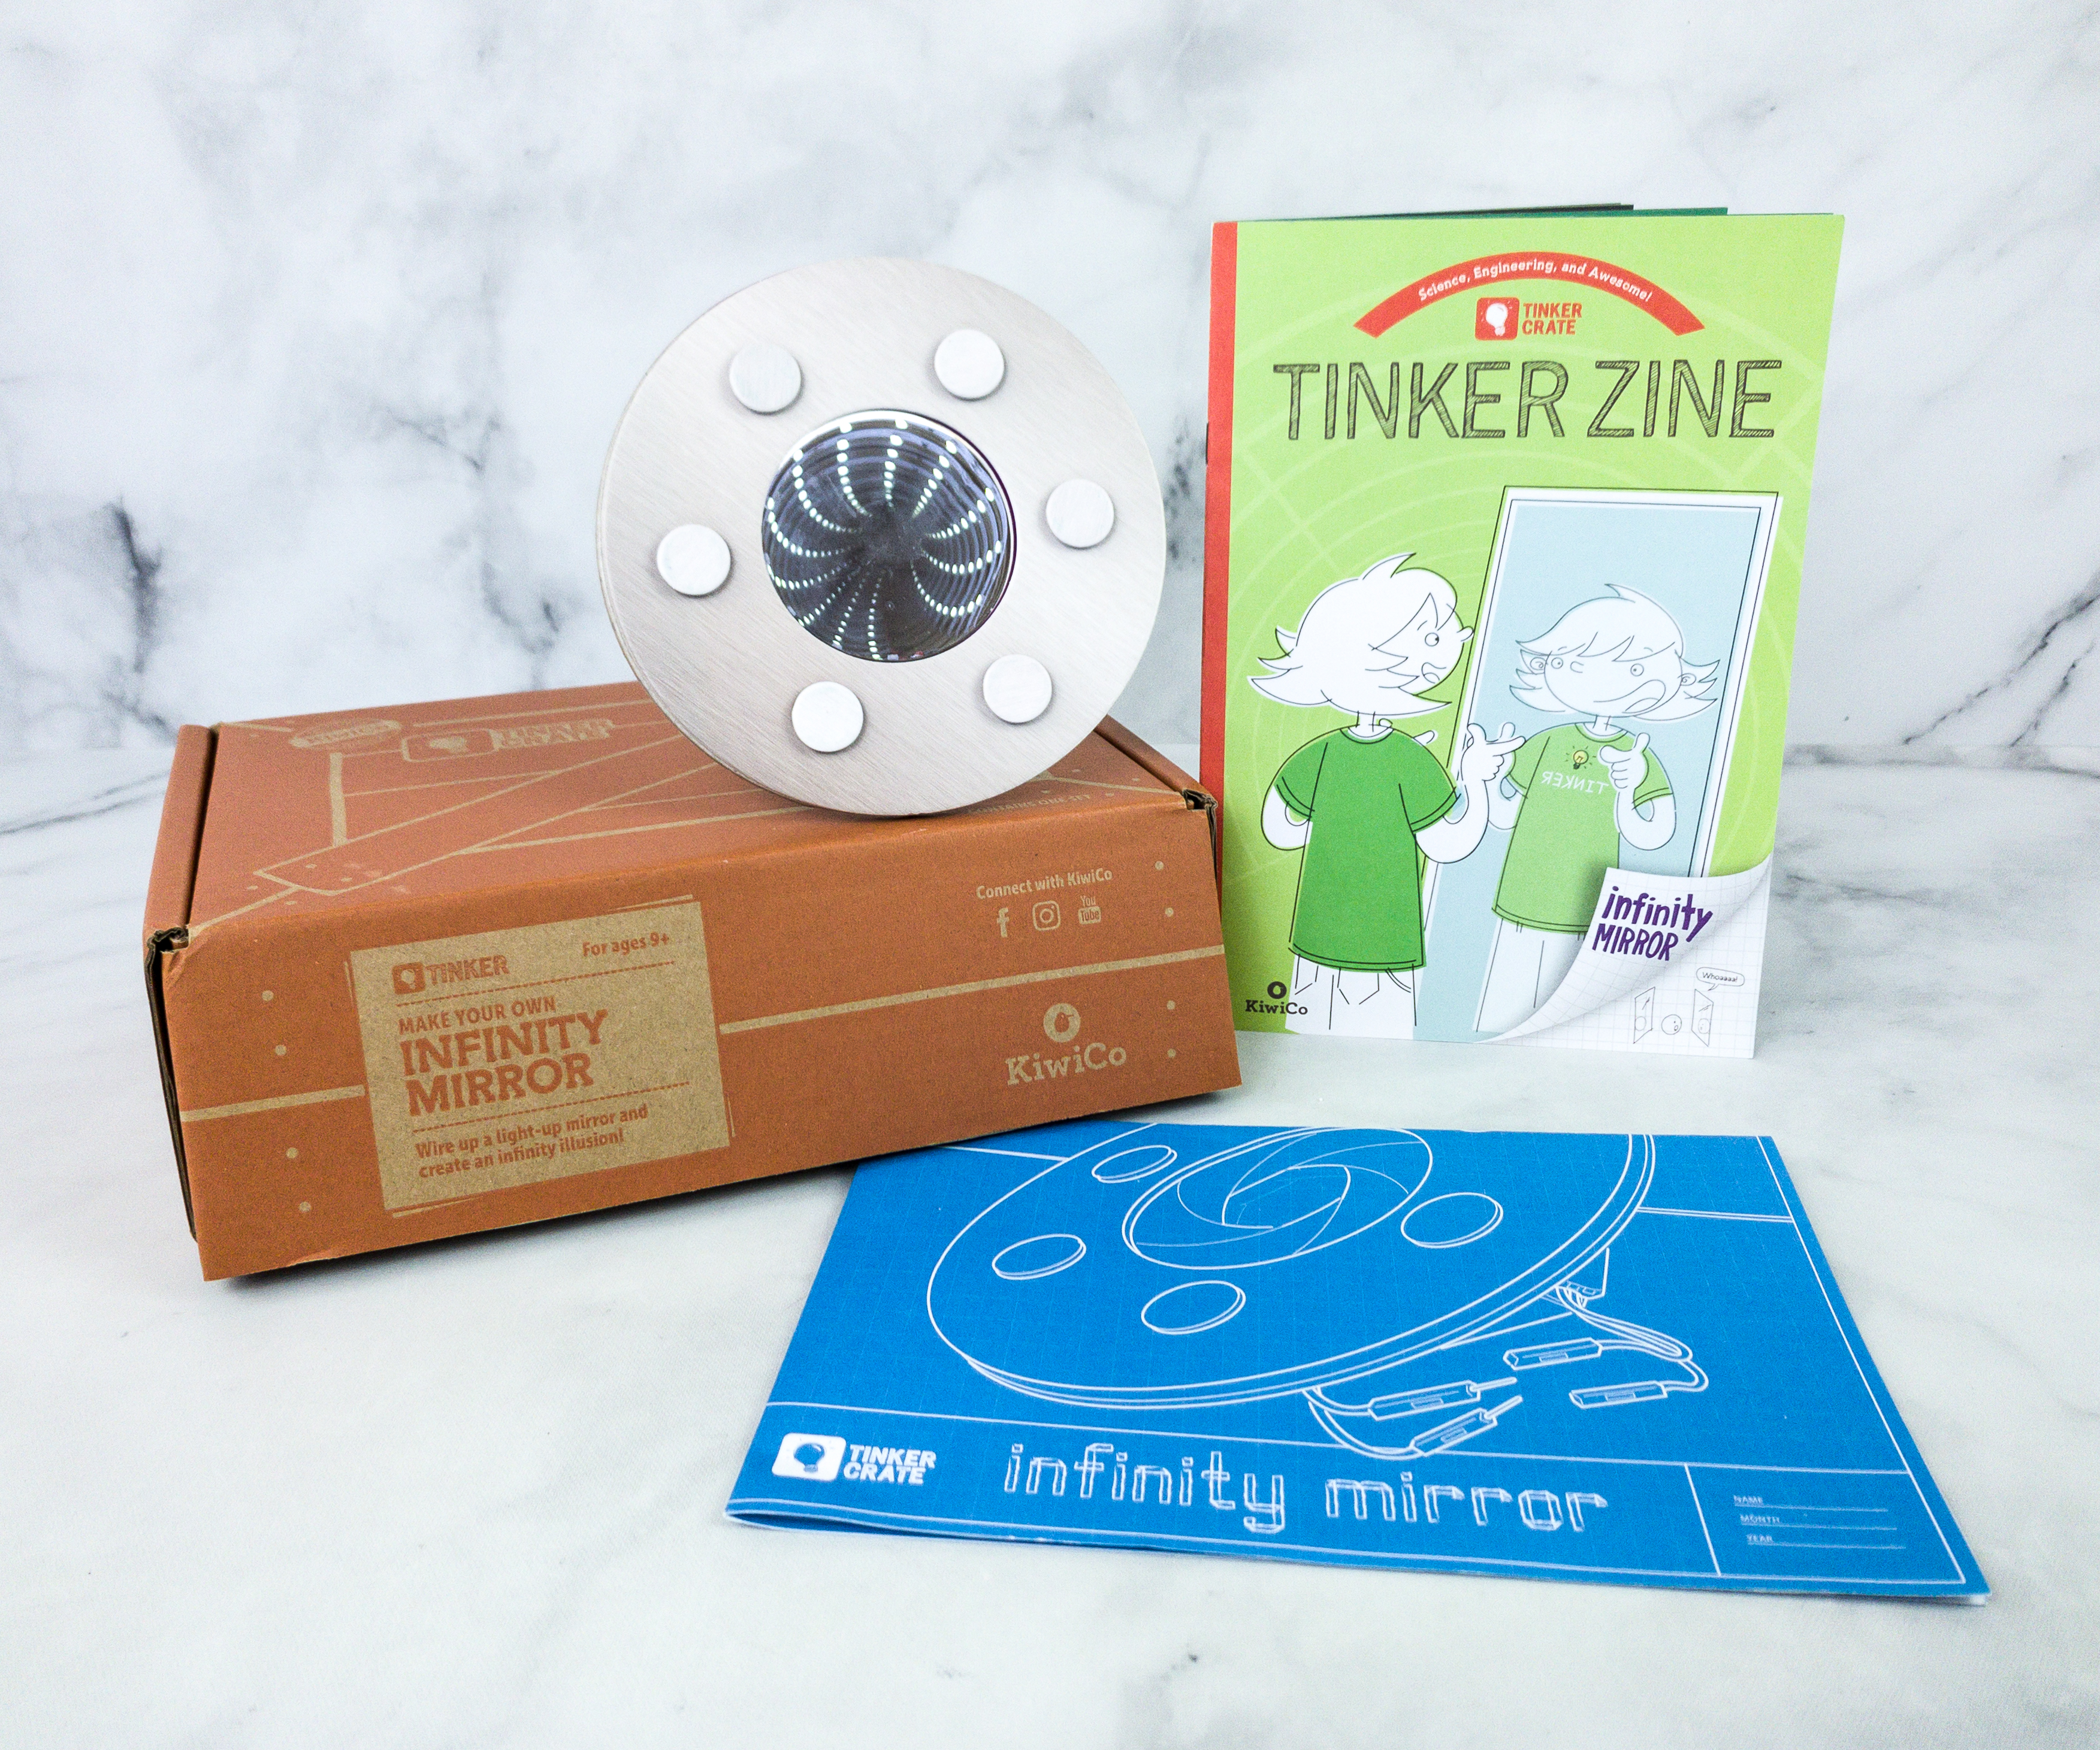
This month, we are building our own INFINITY MIRROR!
Wire up an infinity mirror and explore an infinity illusion.
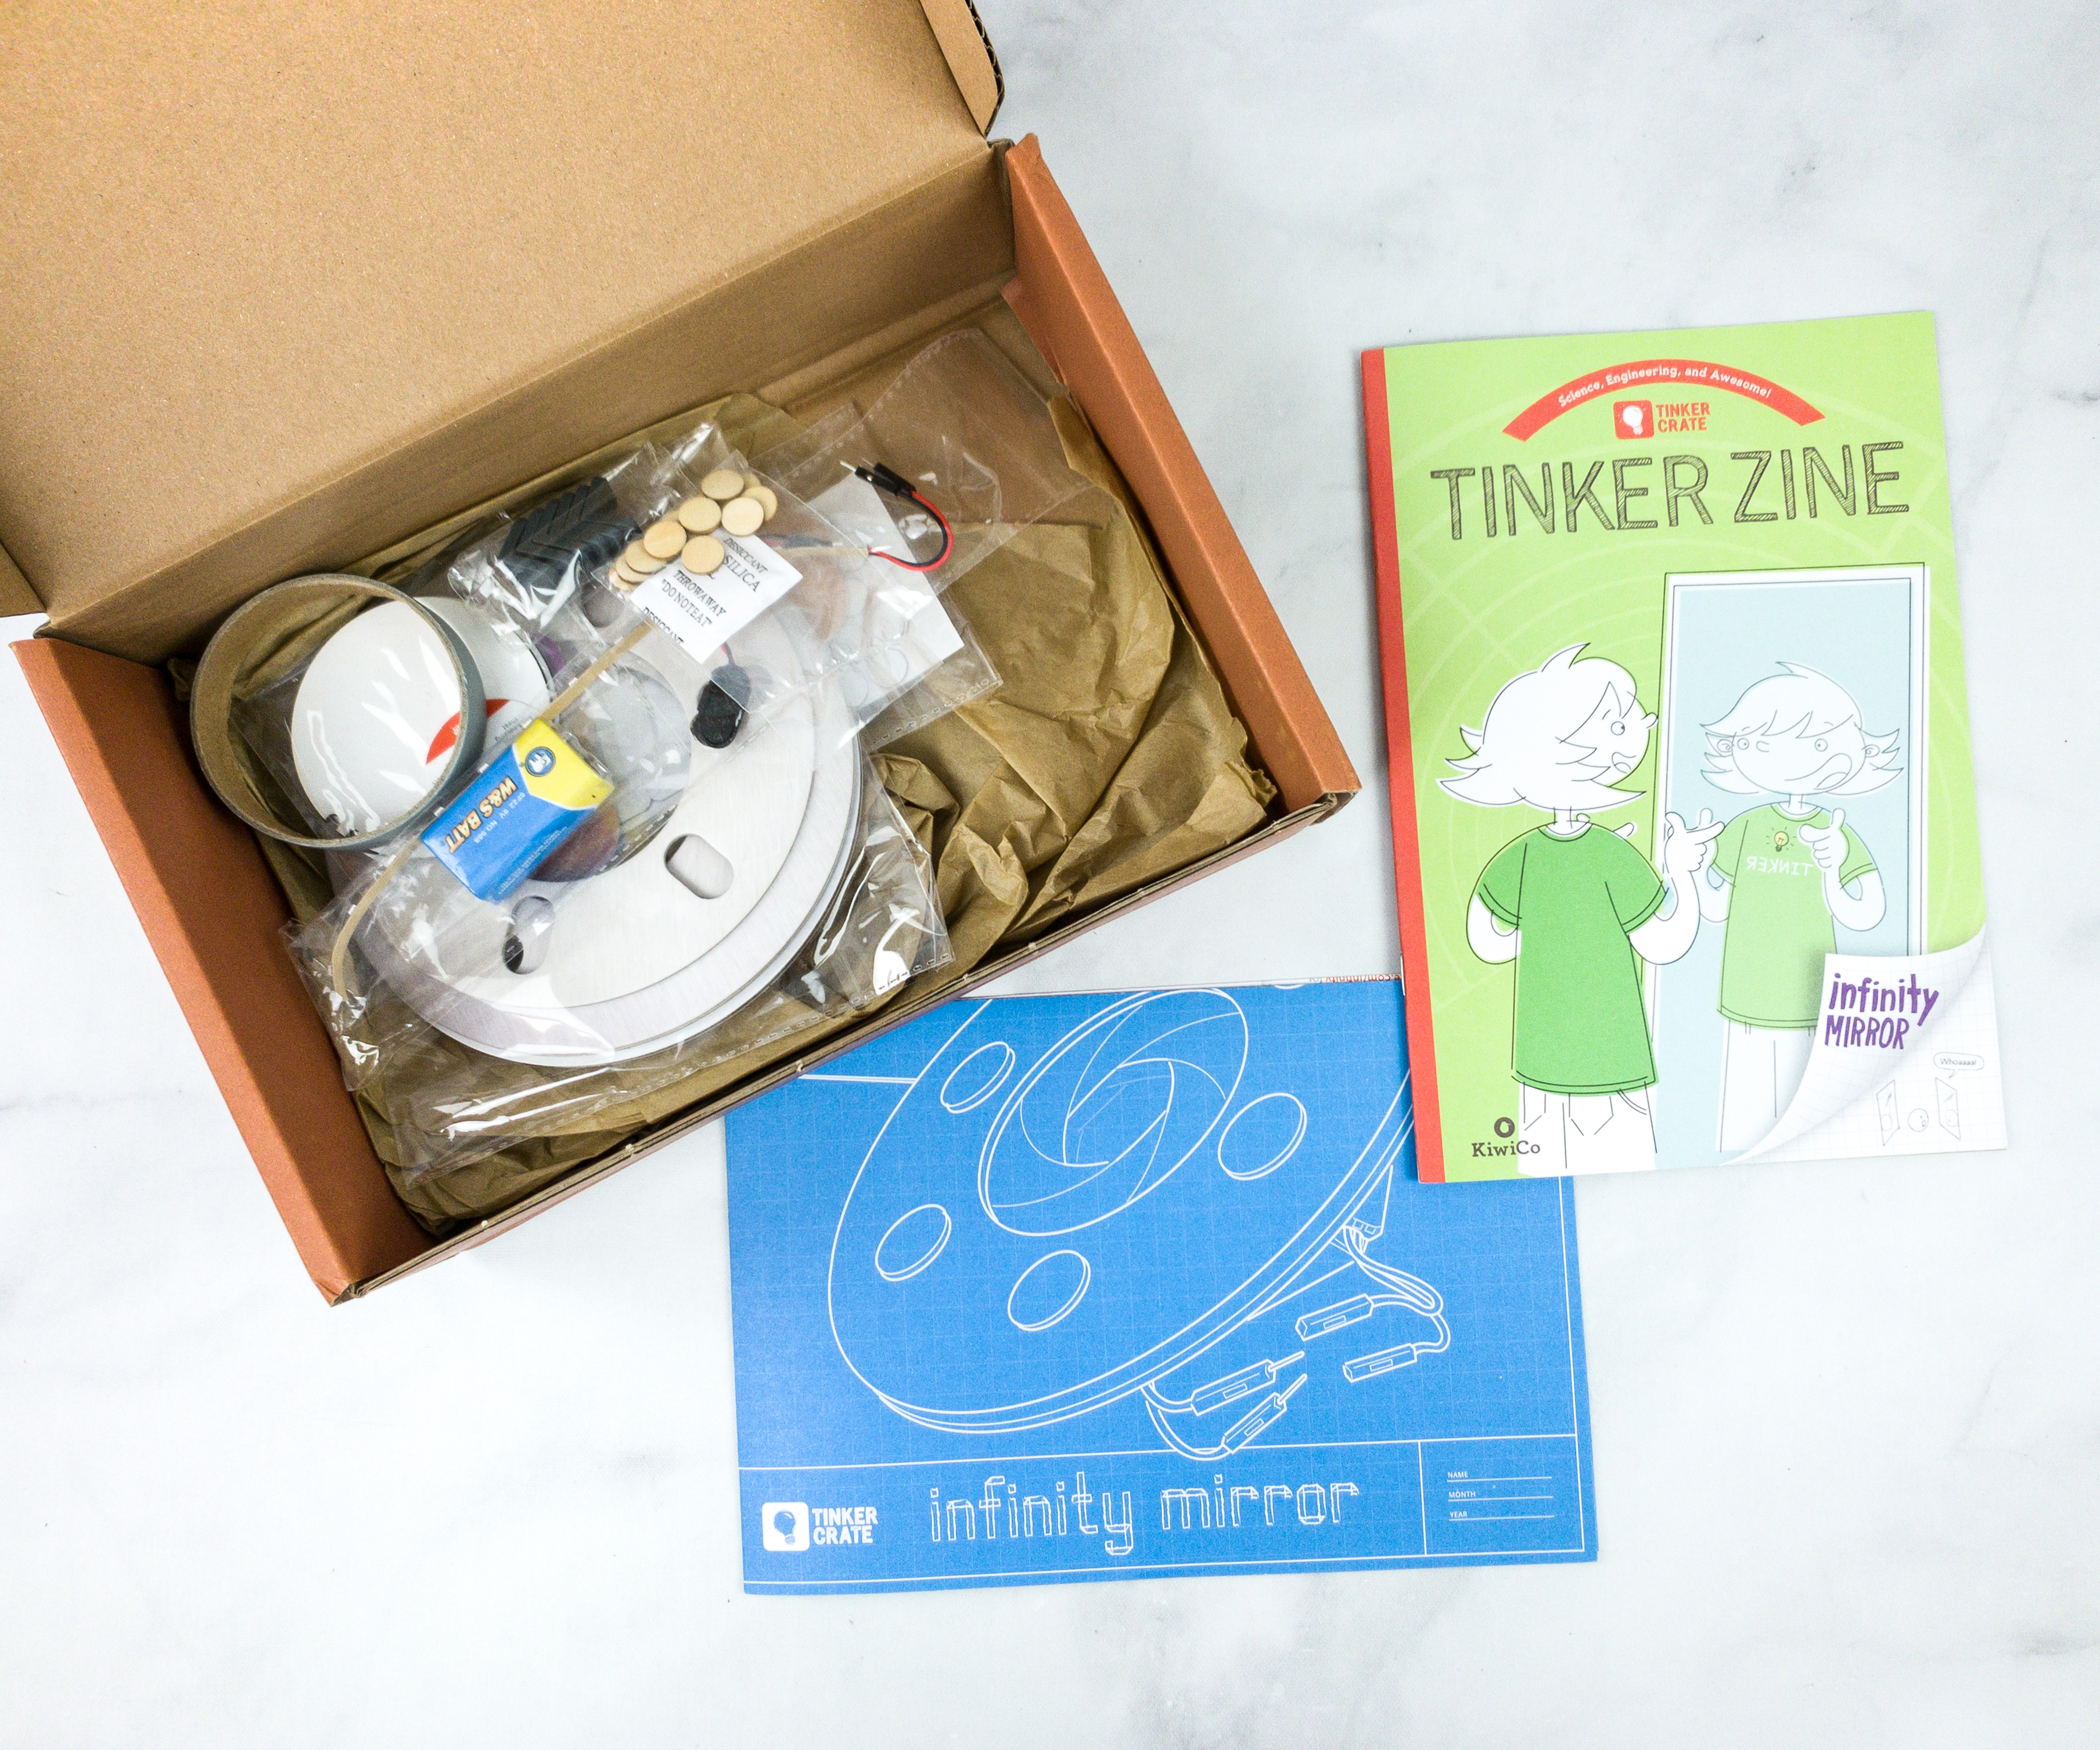
Everything arrives together in a single Tinker Crate – the supplies, a fold-out instruction sheet, and the Tinker Zine.
Tinker Zine
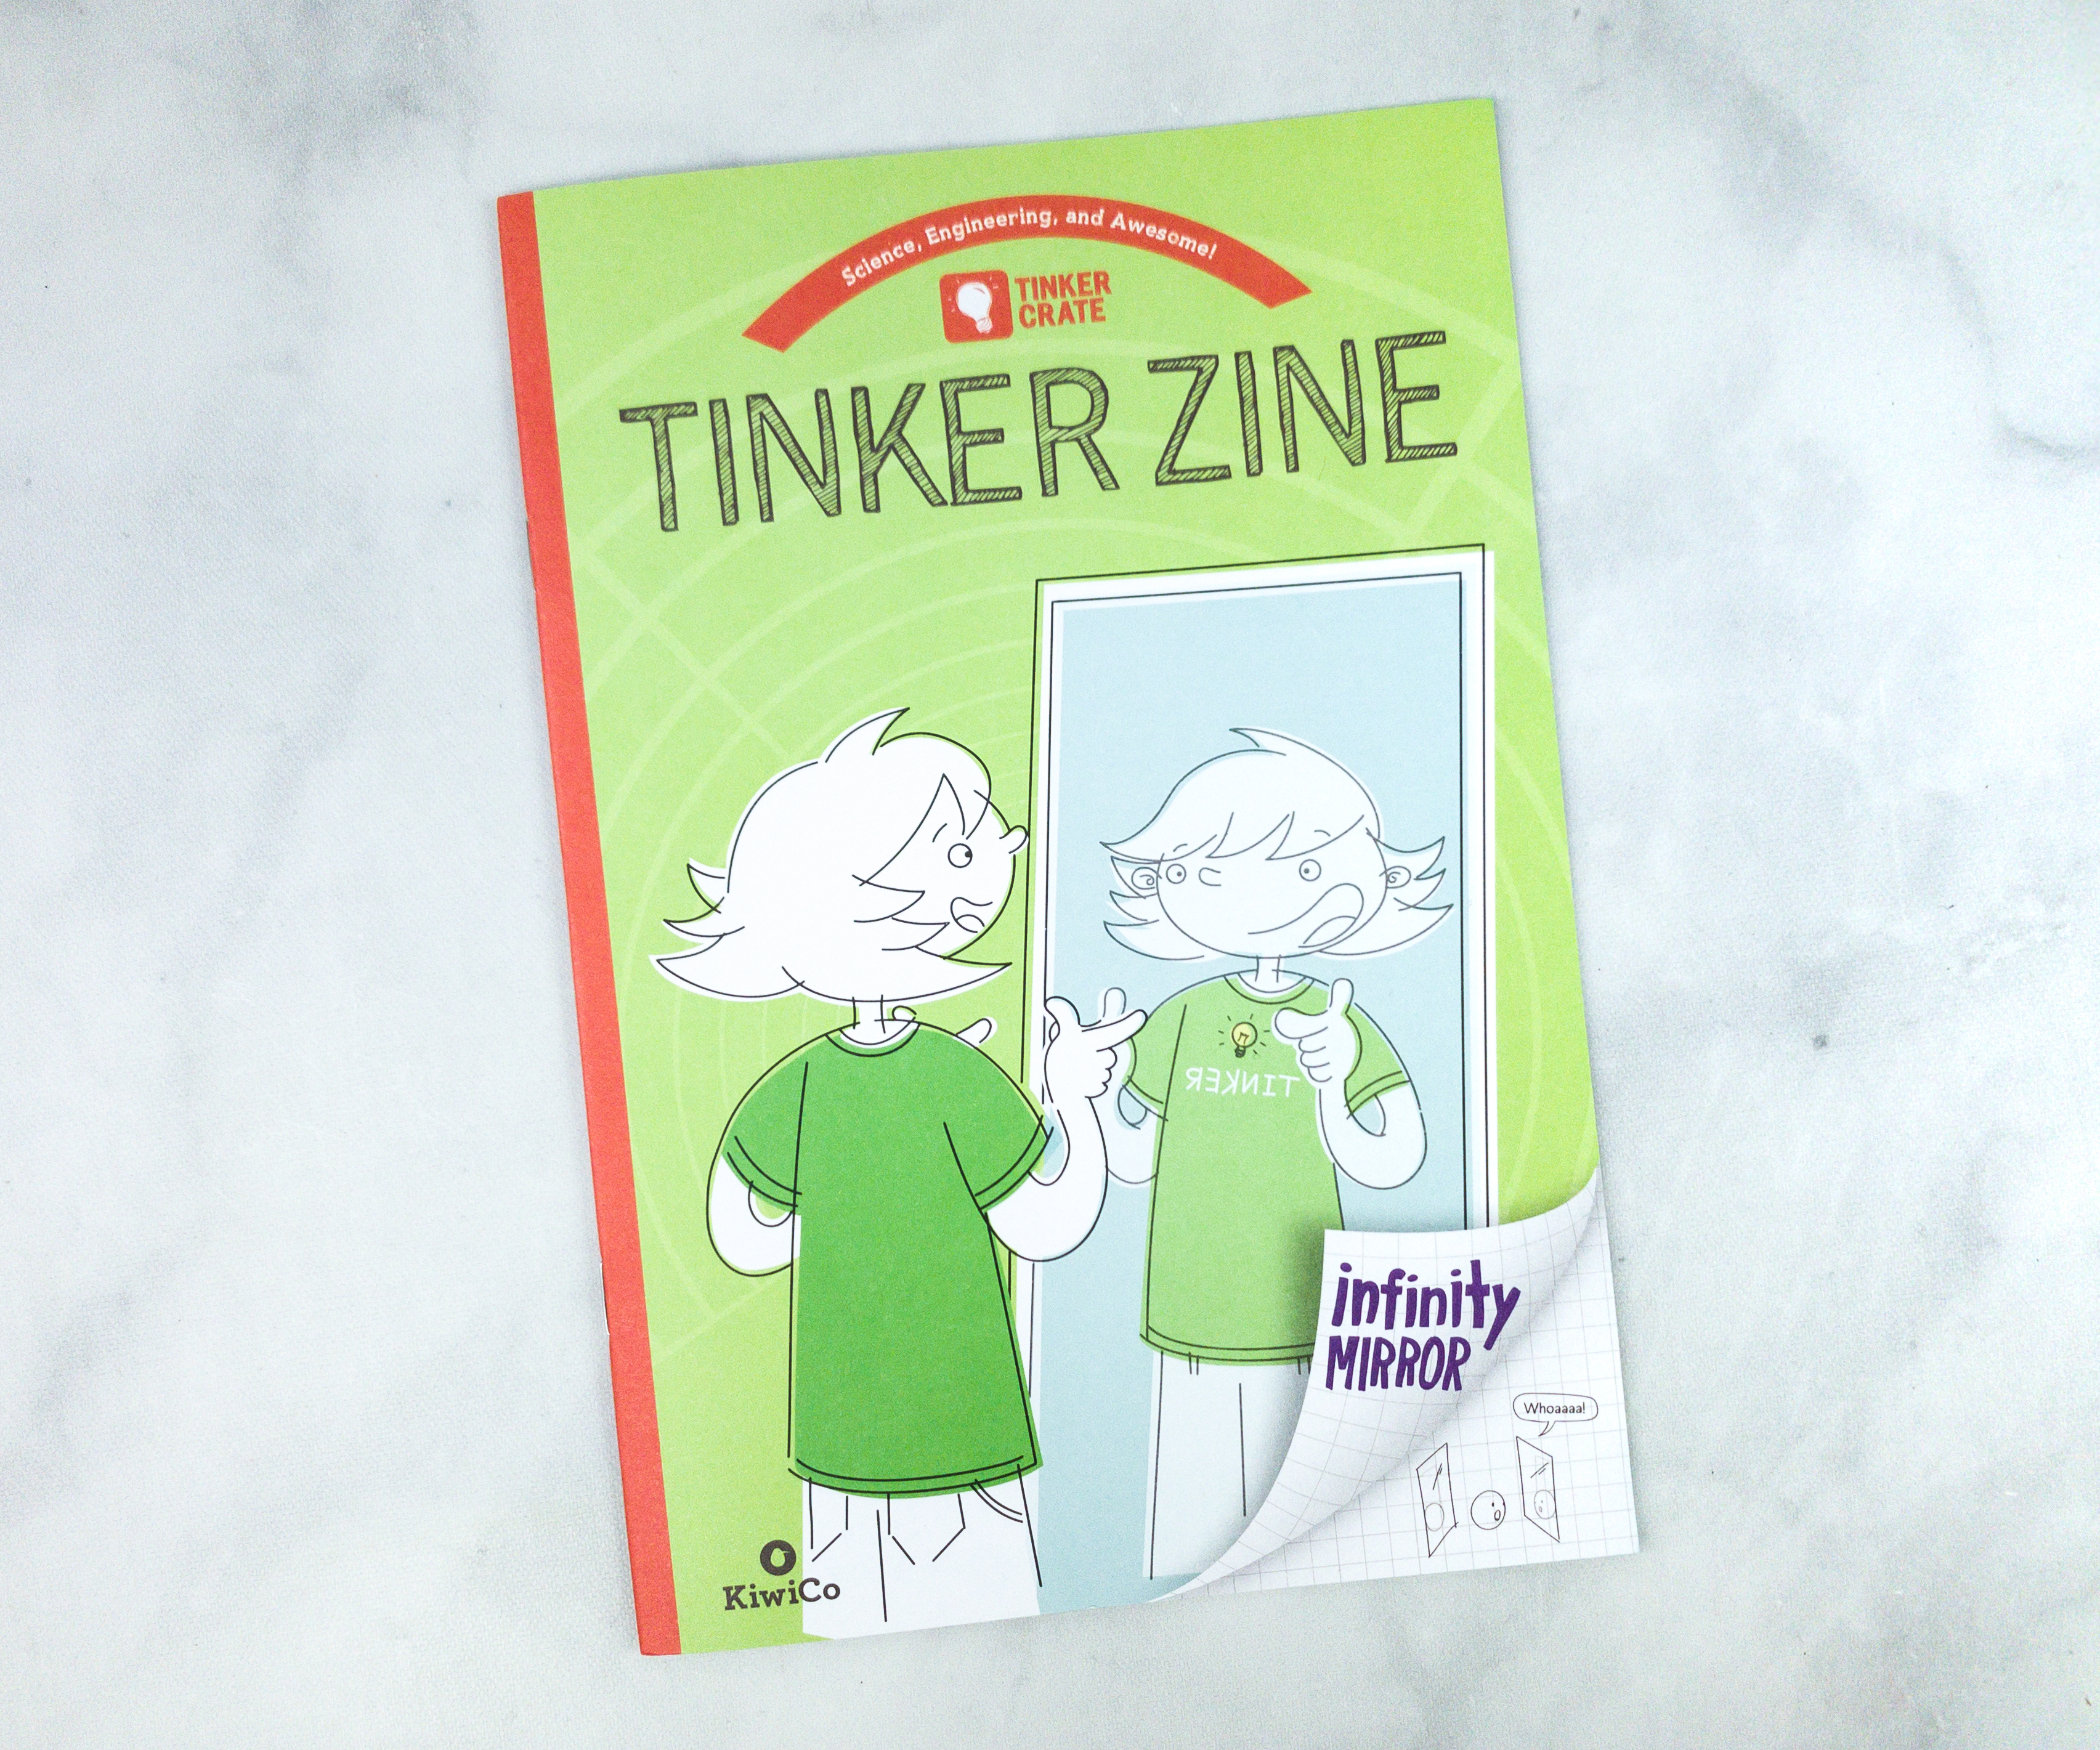
The main project is always a great hands-on activity and a great demonstration of the scientific principles featured in the box, but the Tinker Zine is full of well-written, historically, and scientifically accurate background and explanatory materials. This where the lessons really take shape!
KiwiCo
Inspiring young innovators with seriously fun and enriching hands-on experiences.
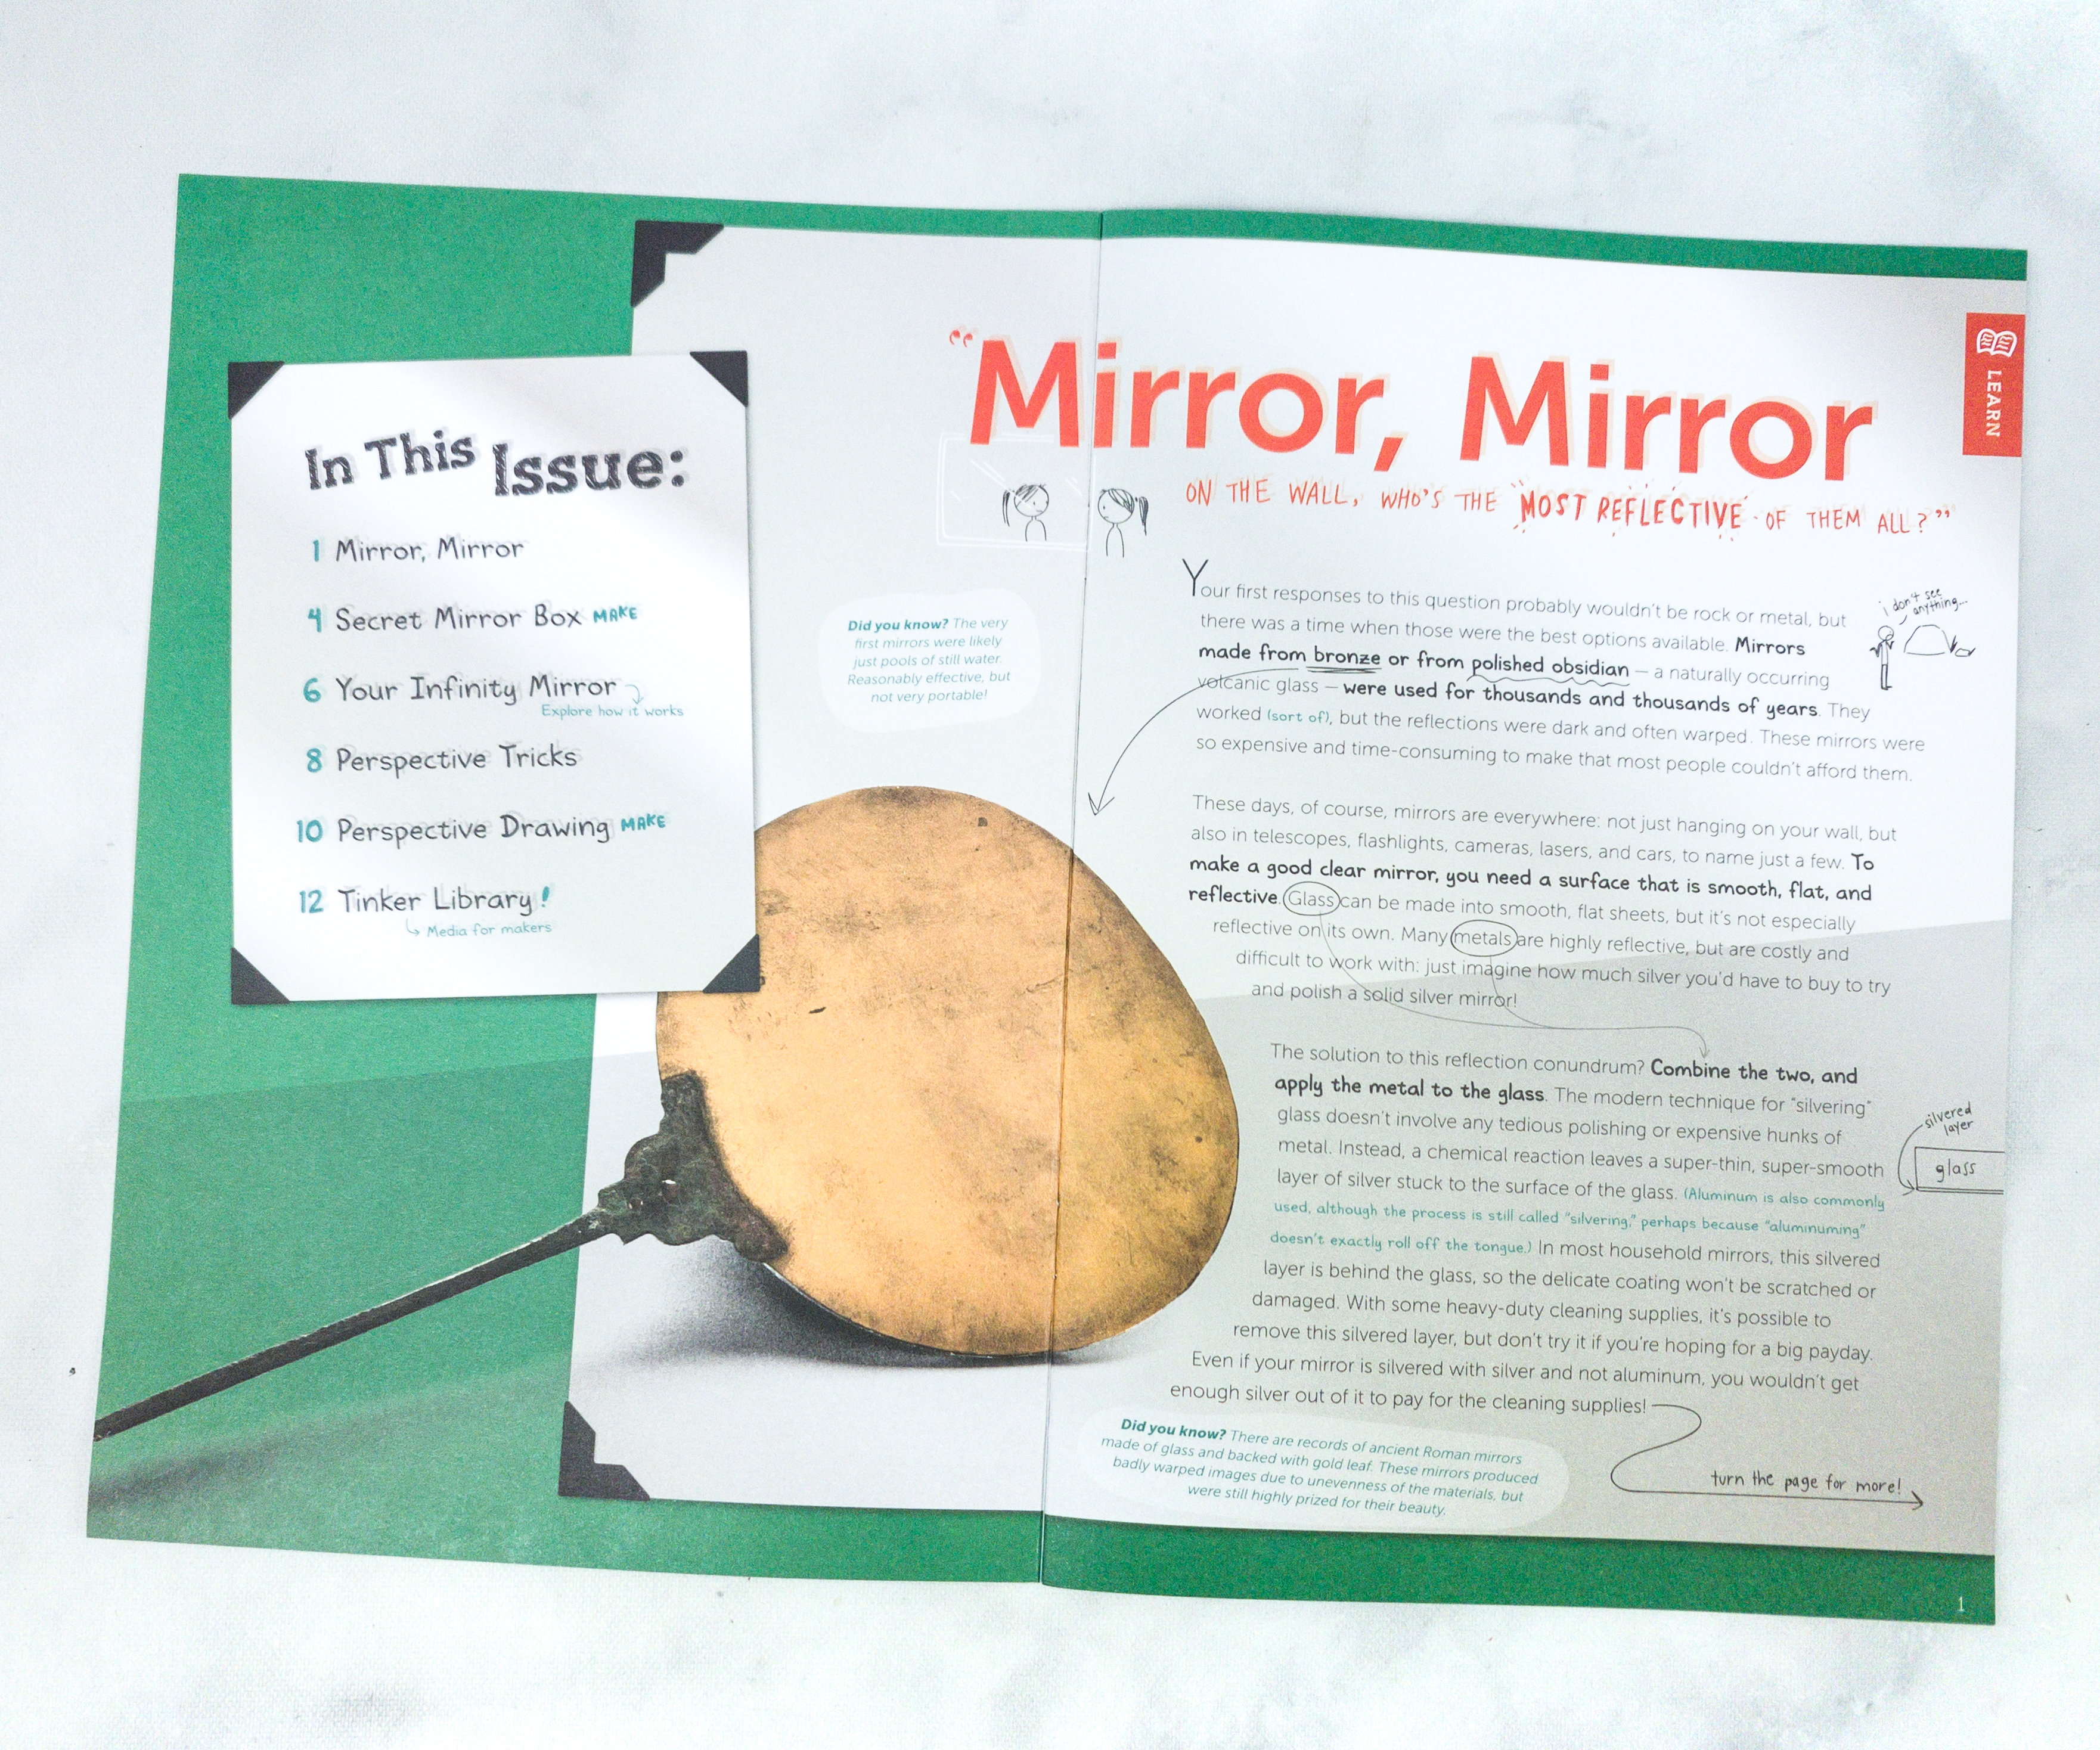
This month’s Tinker Zine is all about mirrors! On this page is the history of mirrors, where they discussed the first kinds of mirrors used by mankined. They weren’t made with glass but bronze or polished obsidian!
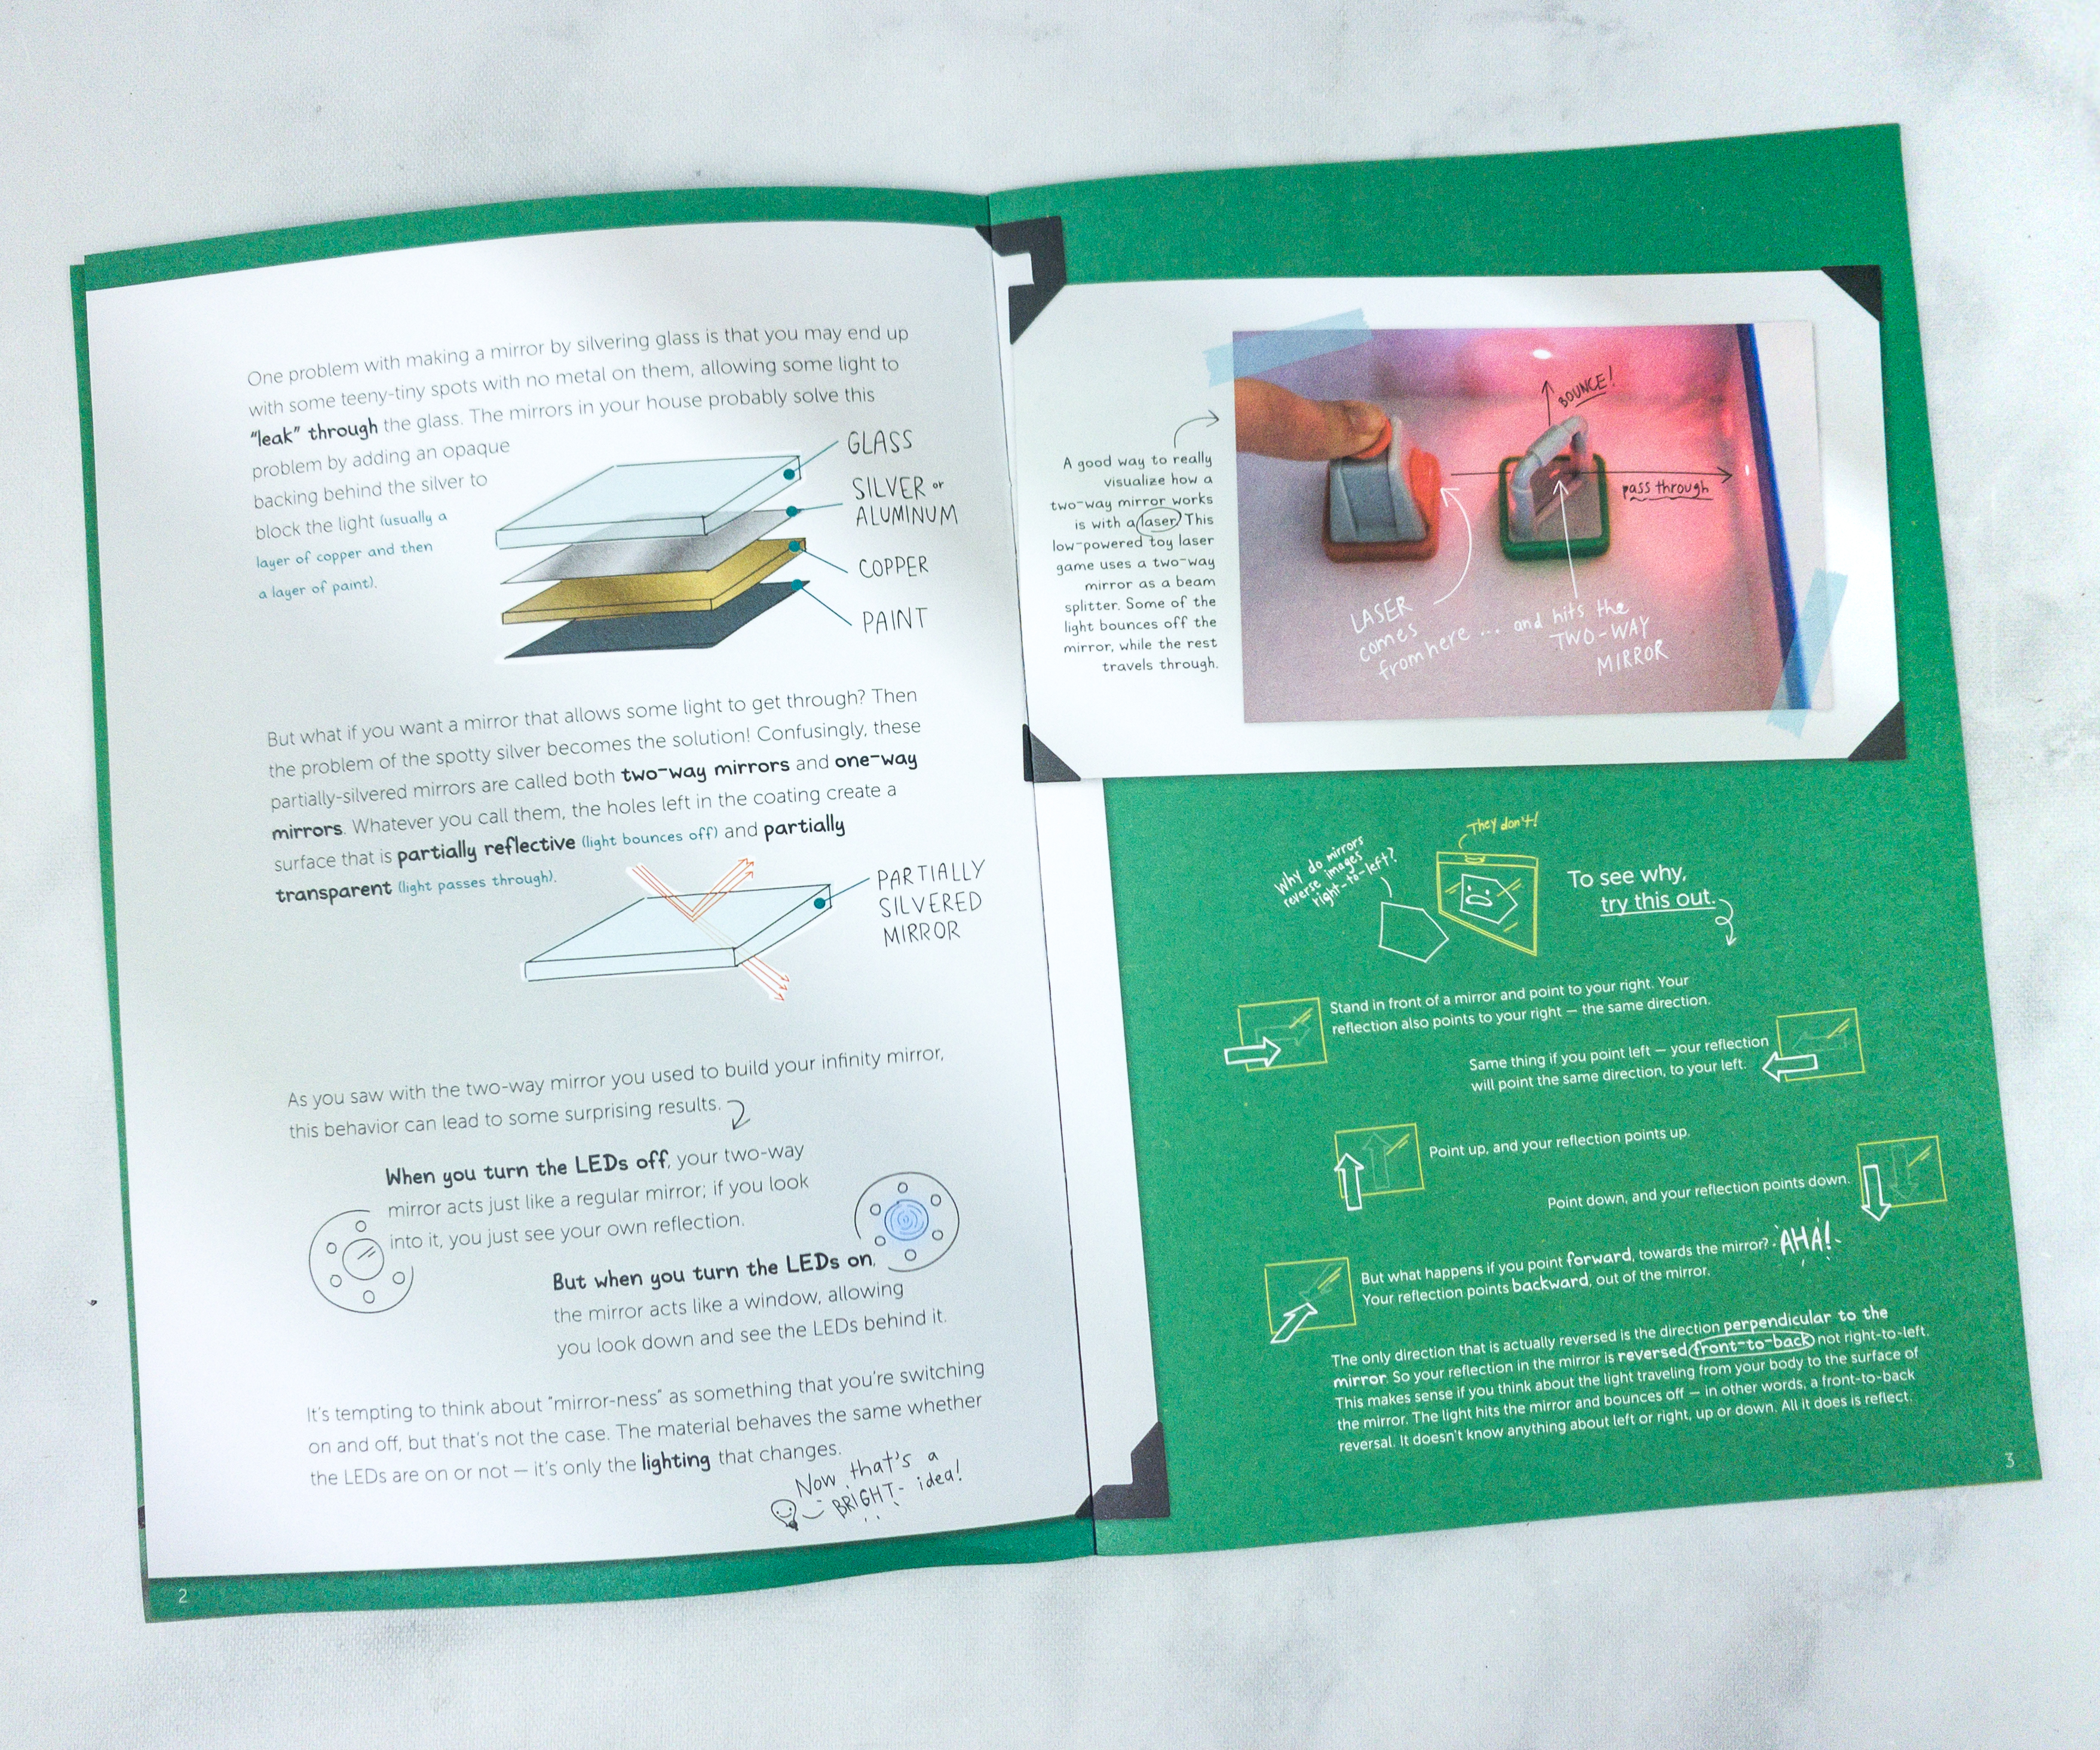
The booklet also explains how this month’s project works.
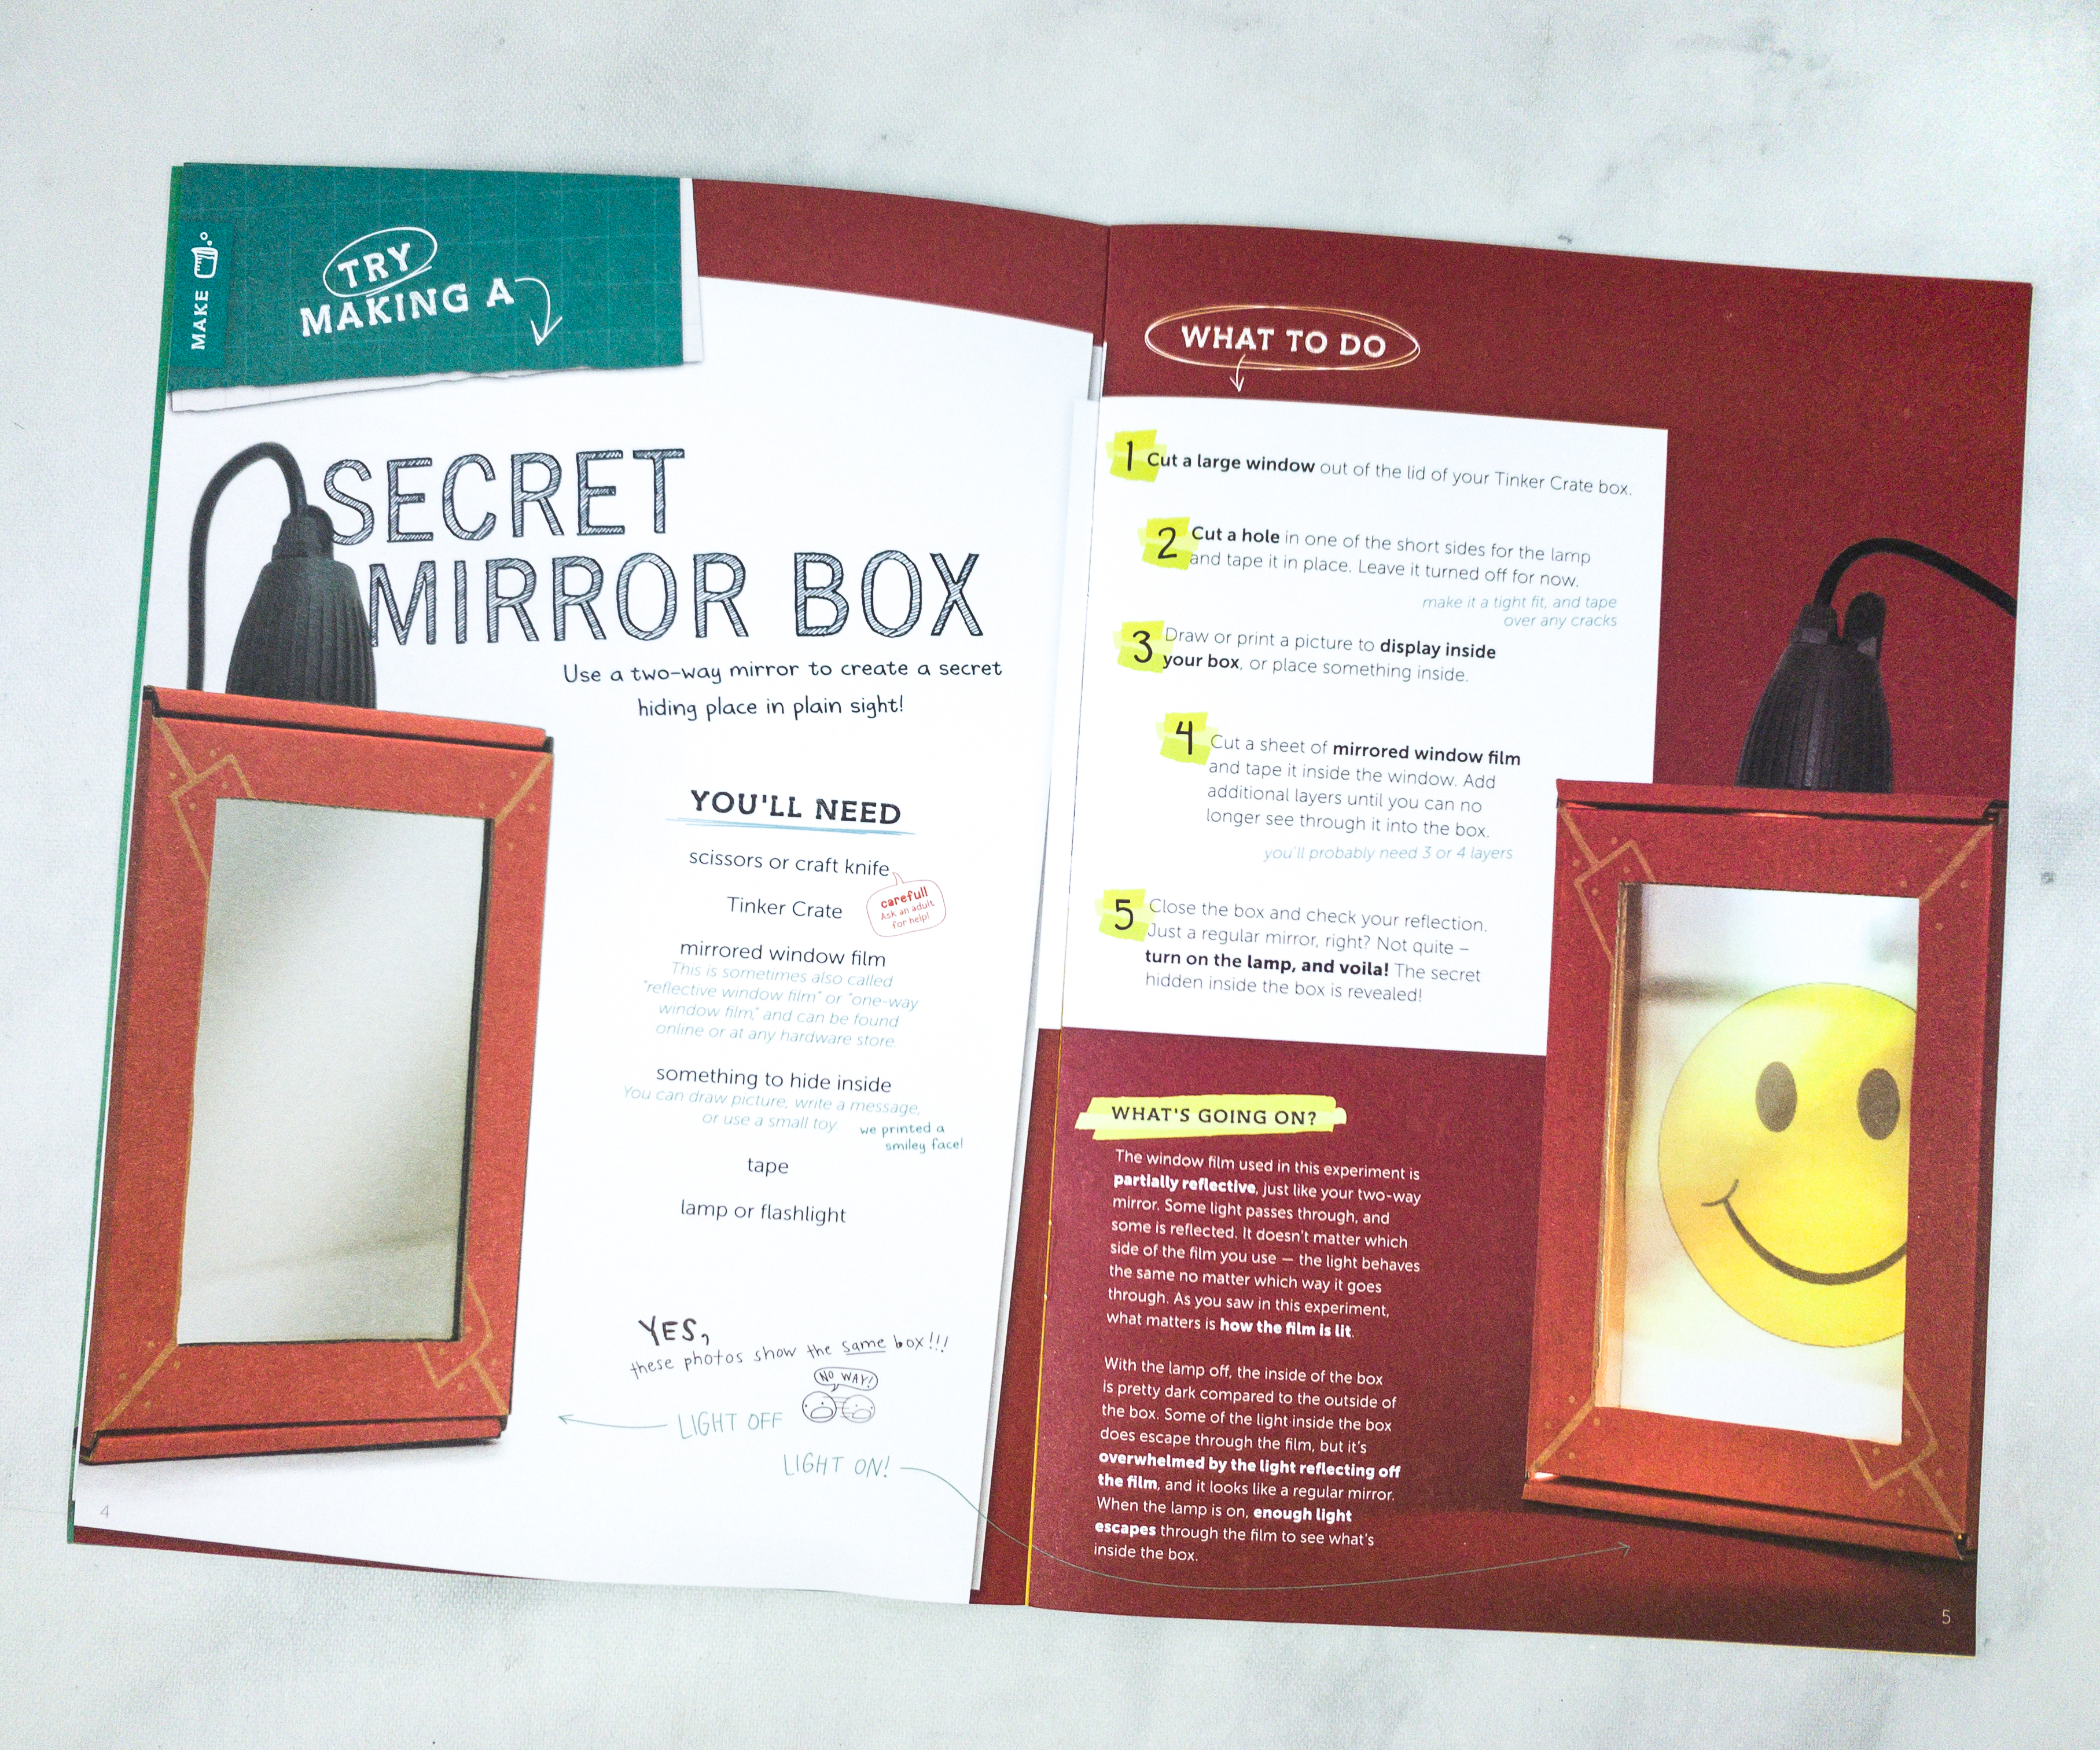
One of the suggested activities on the booklet is Secret Mirror Box. For this, you will need scissors or craft knife, mirrored window film, tape, lamp or flashlight, and anything you want to hide inside the box like a photo or a small toy.

It also tells us more about the illusion that our Infinity Mirror will make, which is a glowing tunnel of light.
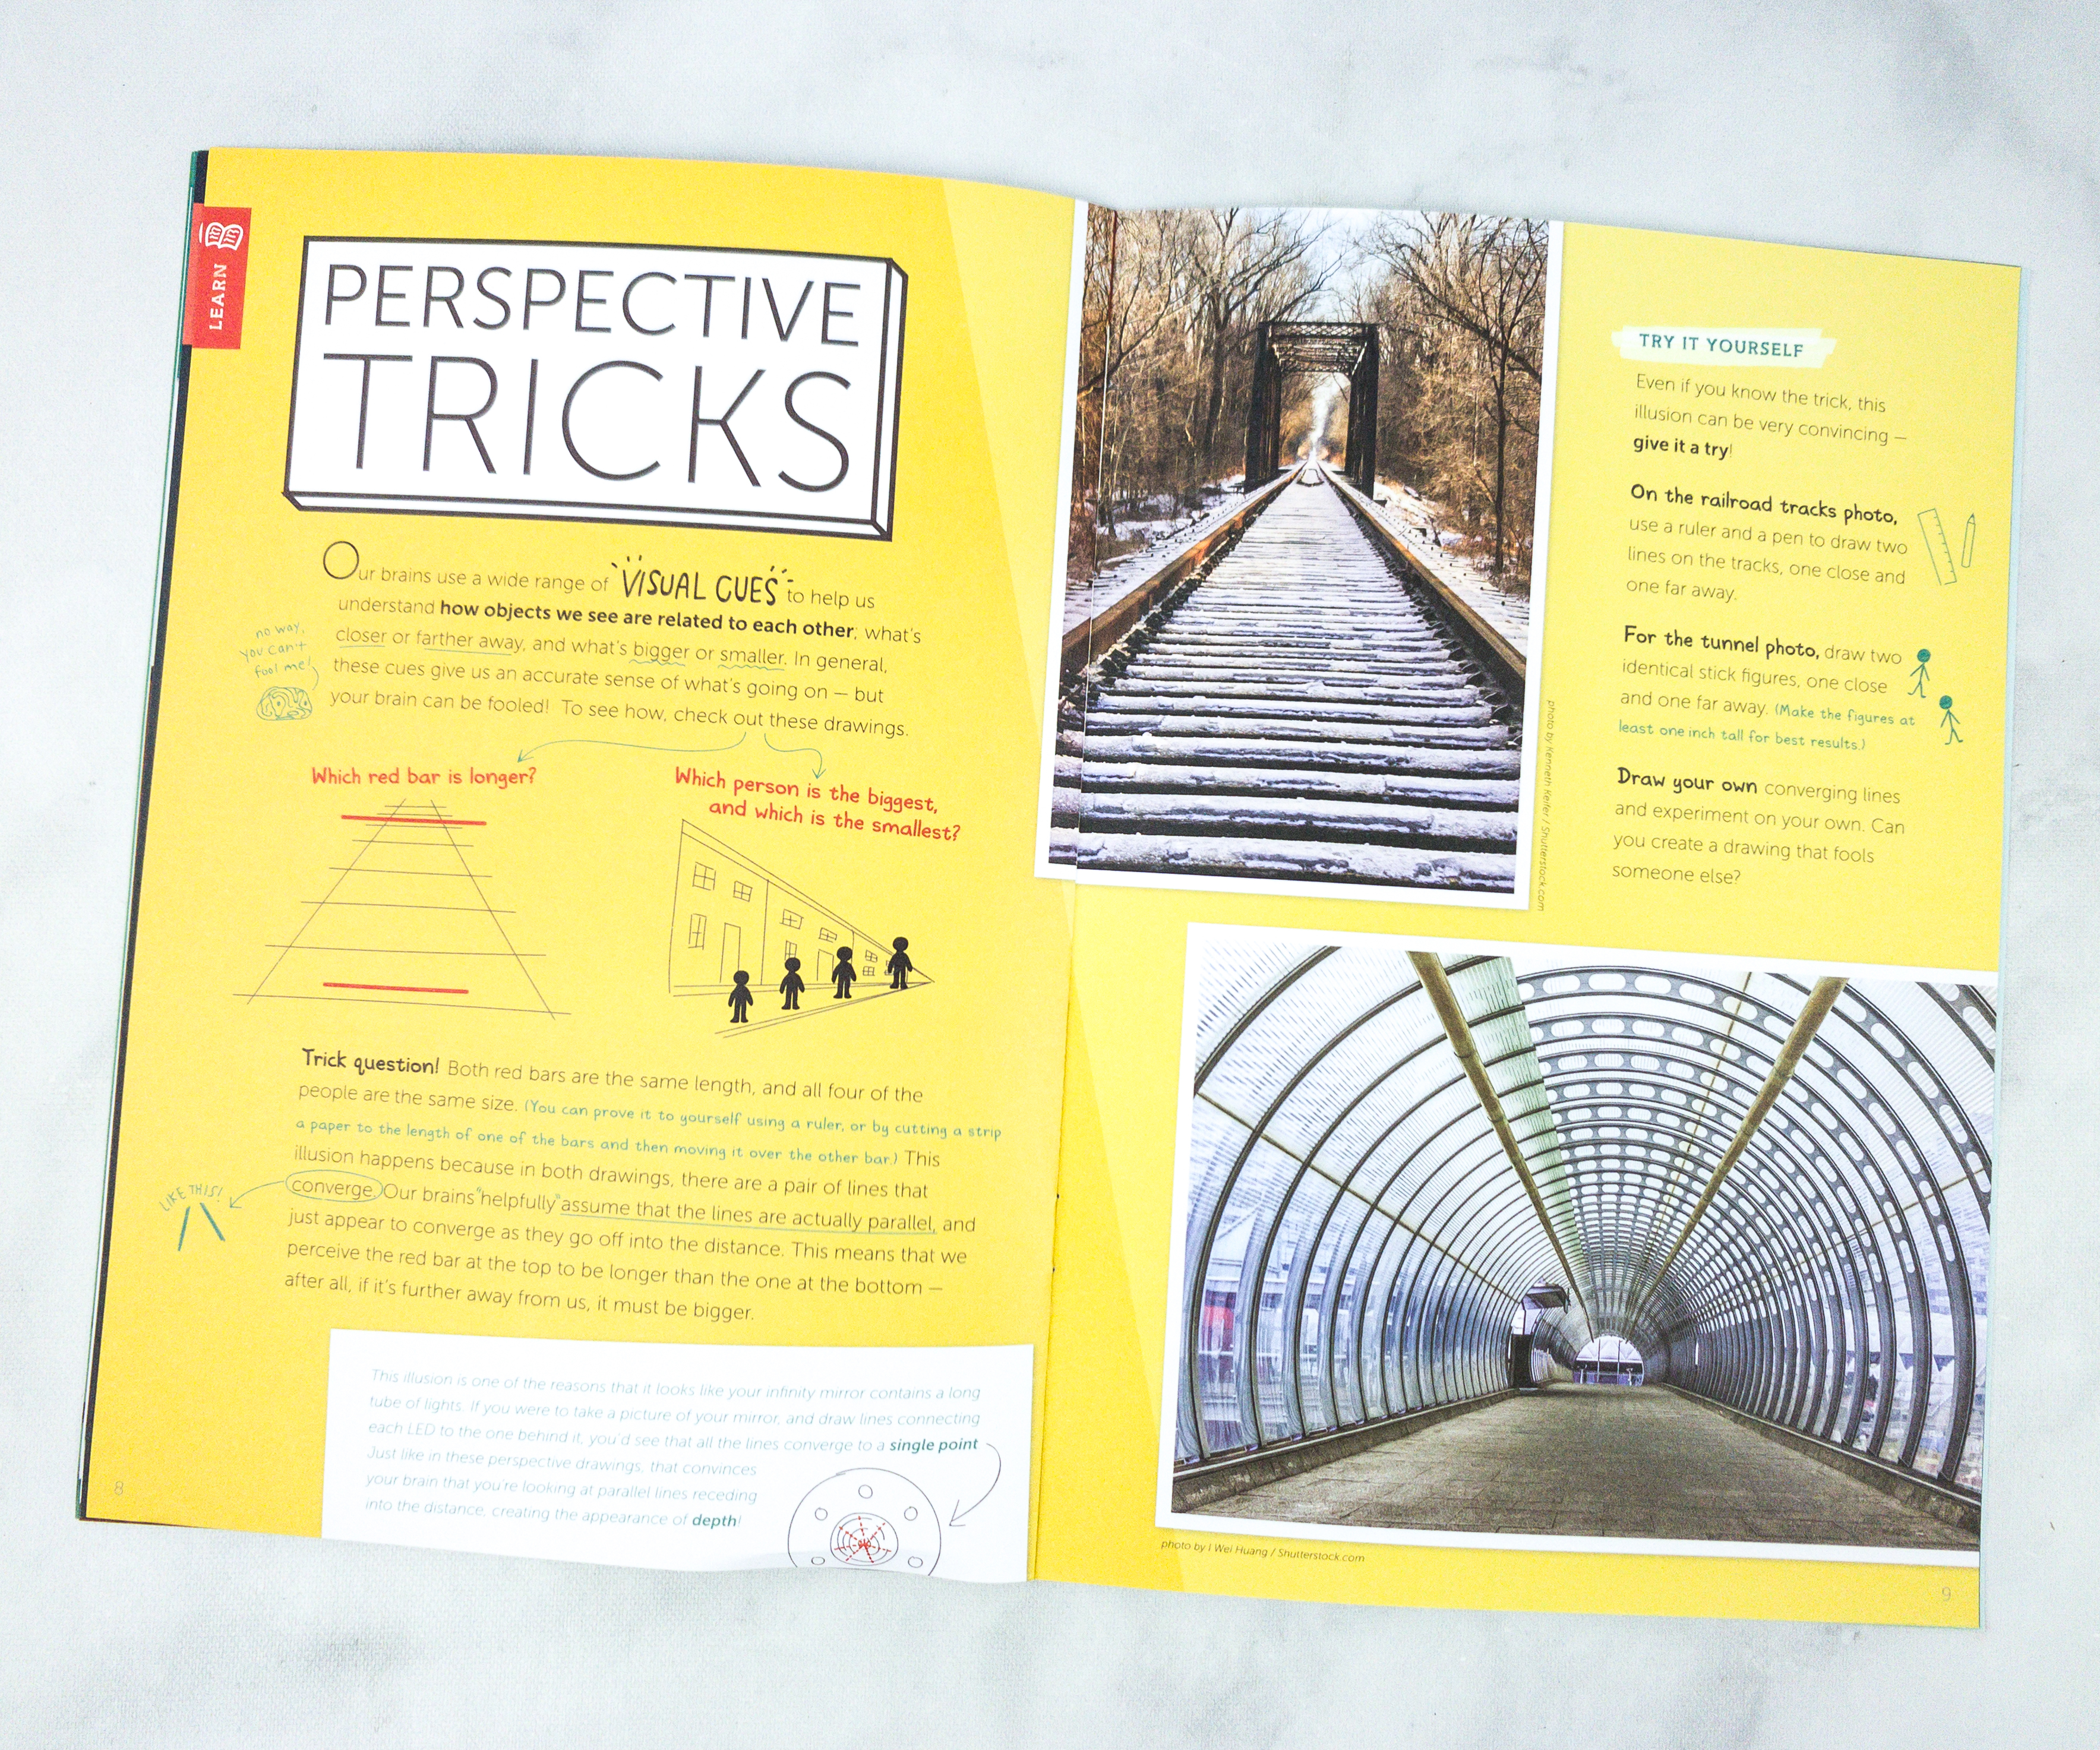
This article is about perspective tricks and there are even sample photos that help explain them!
Our brains use a wide range of visual cues to help us understand how objects we see are related to each other; what’s closer or farther away, and what’s bigger or smaller. In general, these cues give us an accurate sense of what’s going on — but your brain can be fooled!
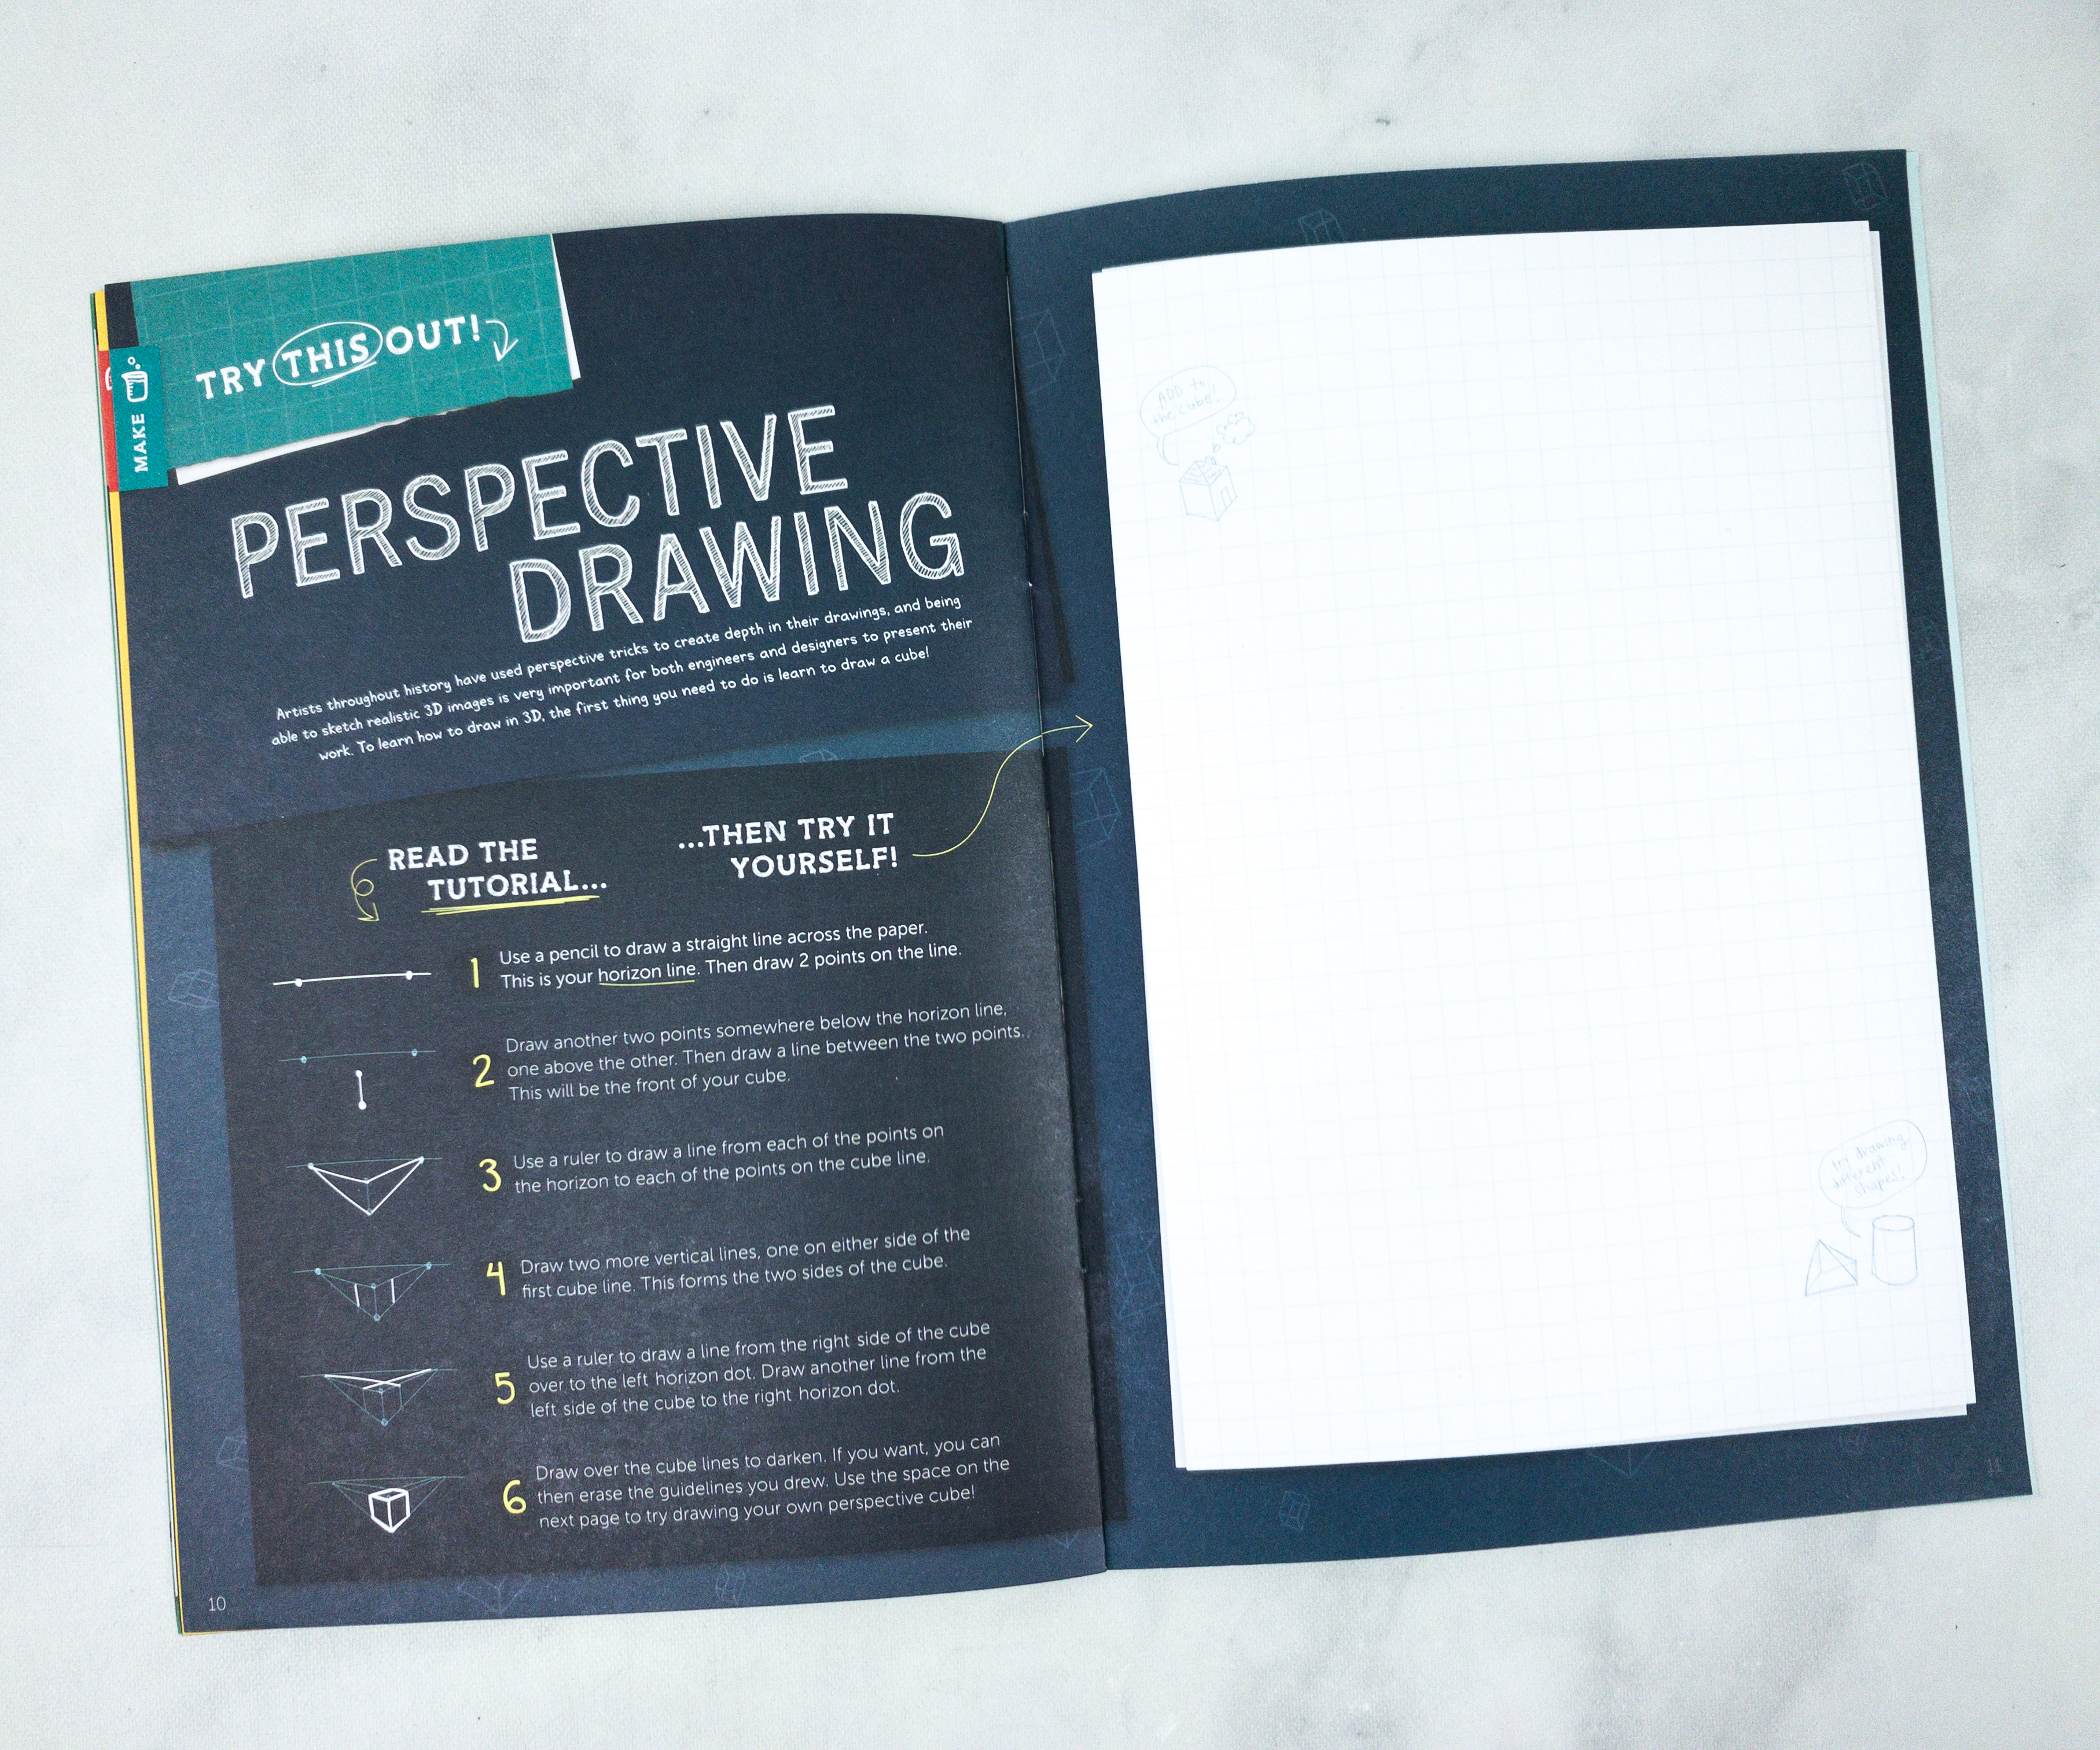
Here’s another activity that the kids can try, which is about making their own perspective drawing. There’s an easy-to-follow tutorial that they need to read before proceeding with the drawing!
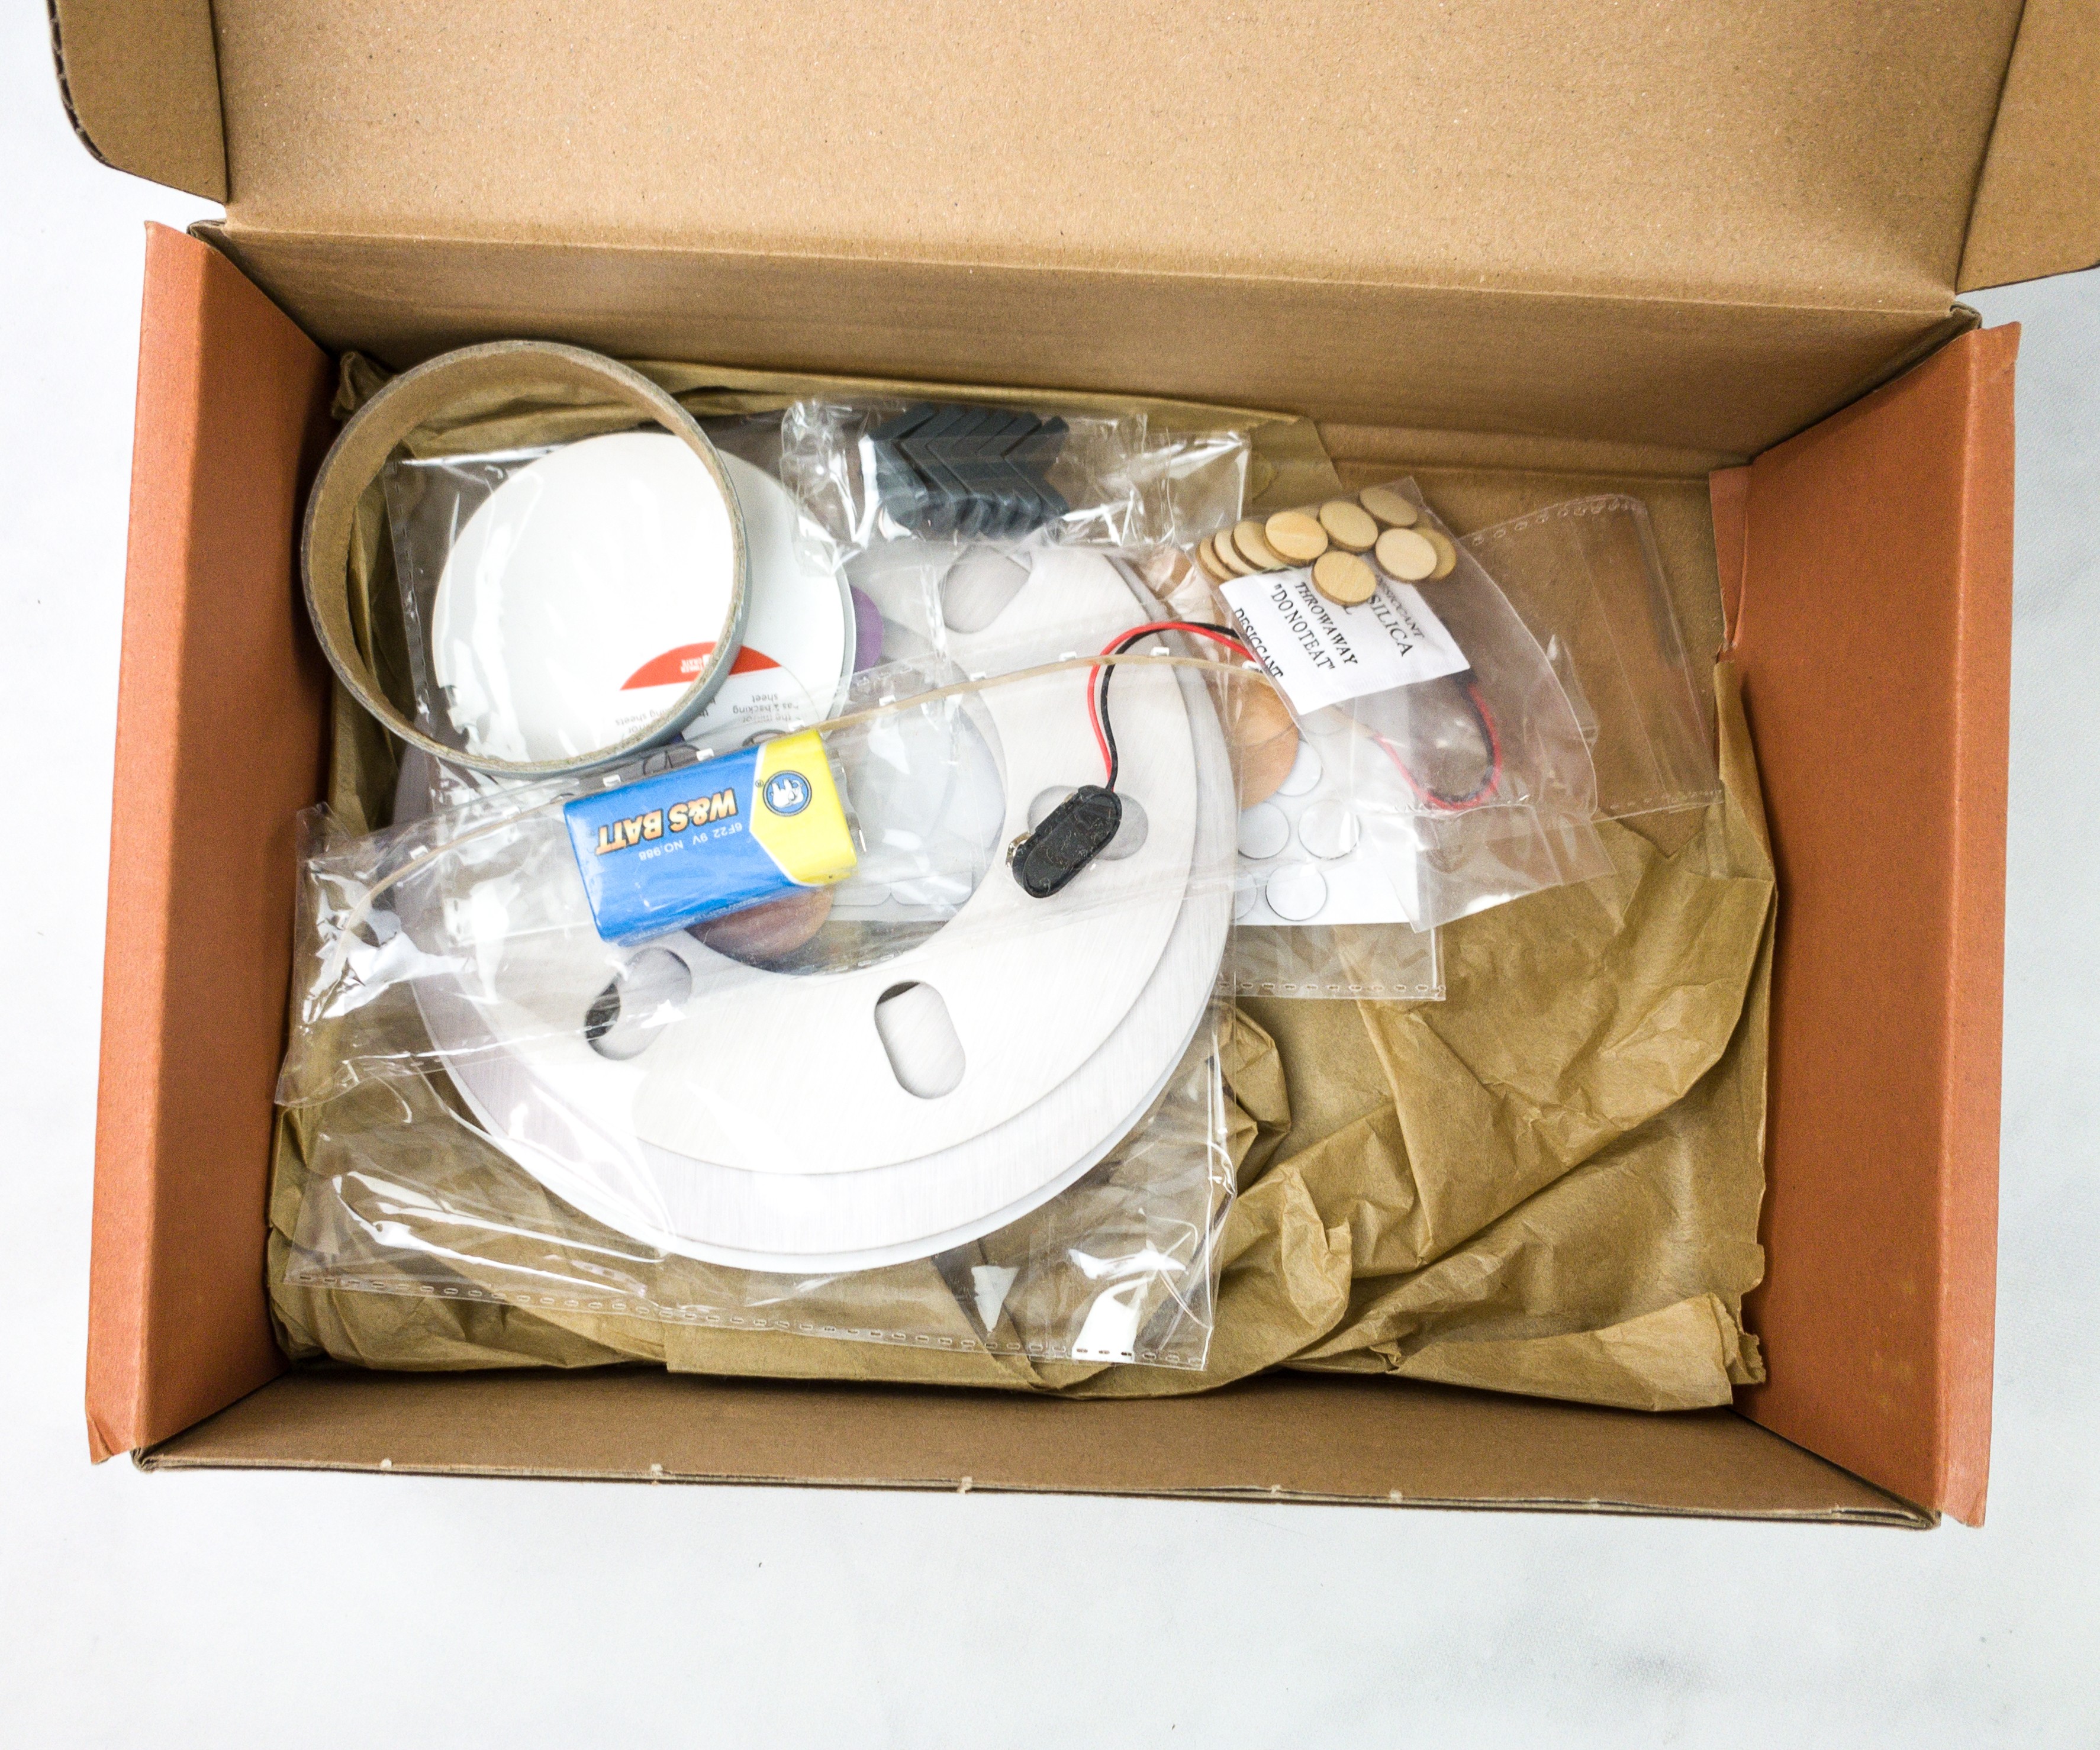
Some of the materials for the project were packed in plastic.
Tinker Crate Blueprint + Materials
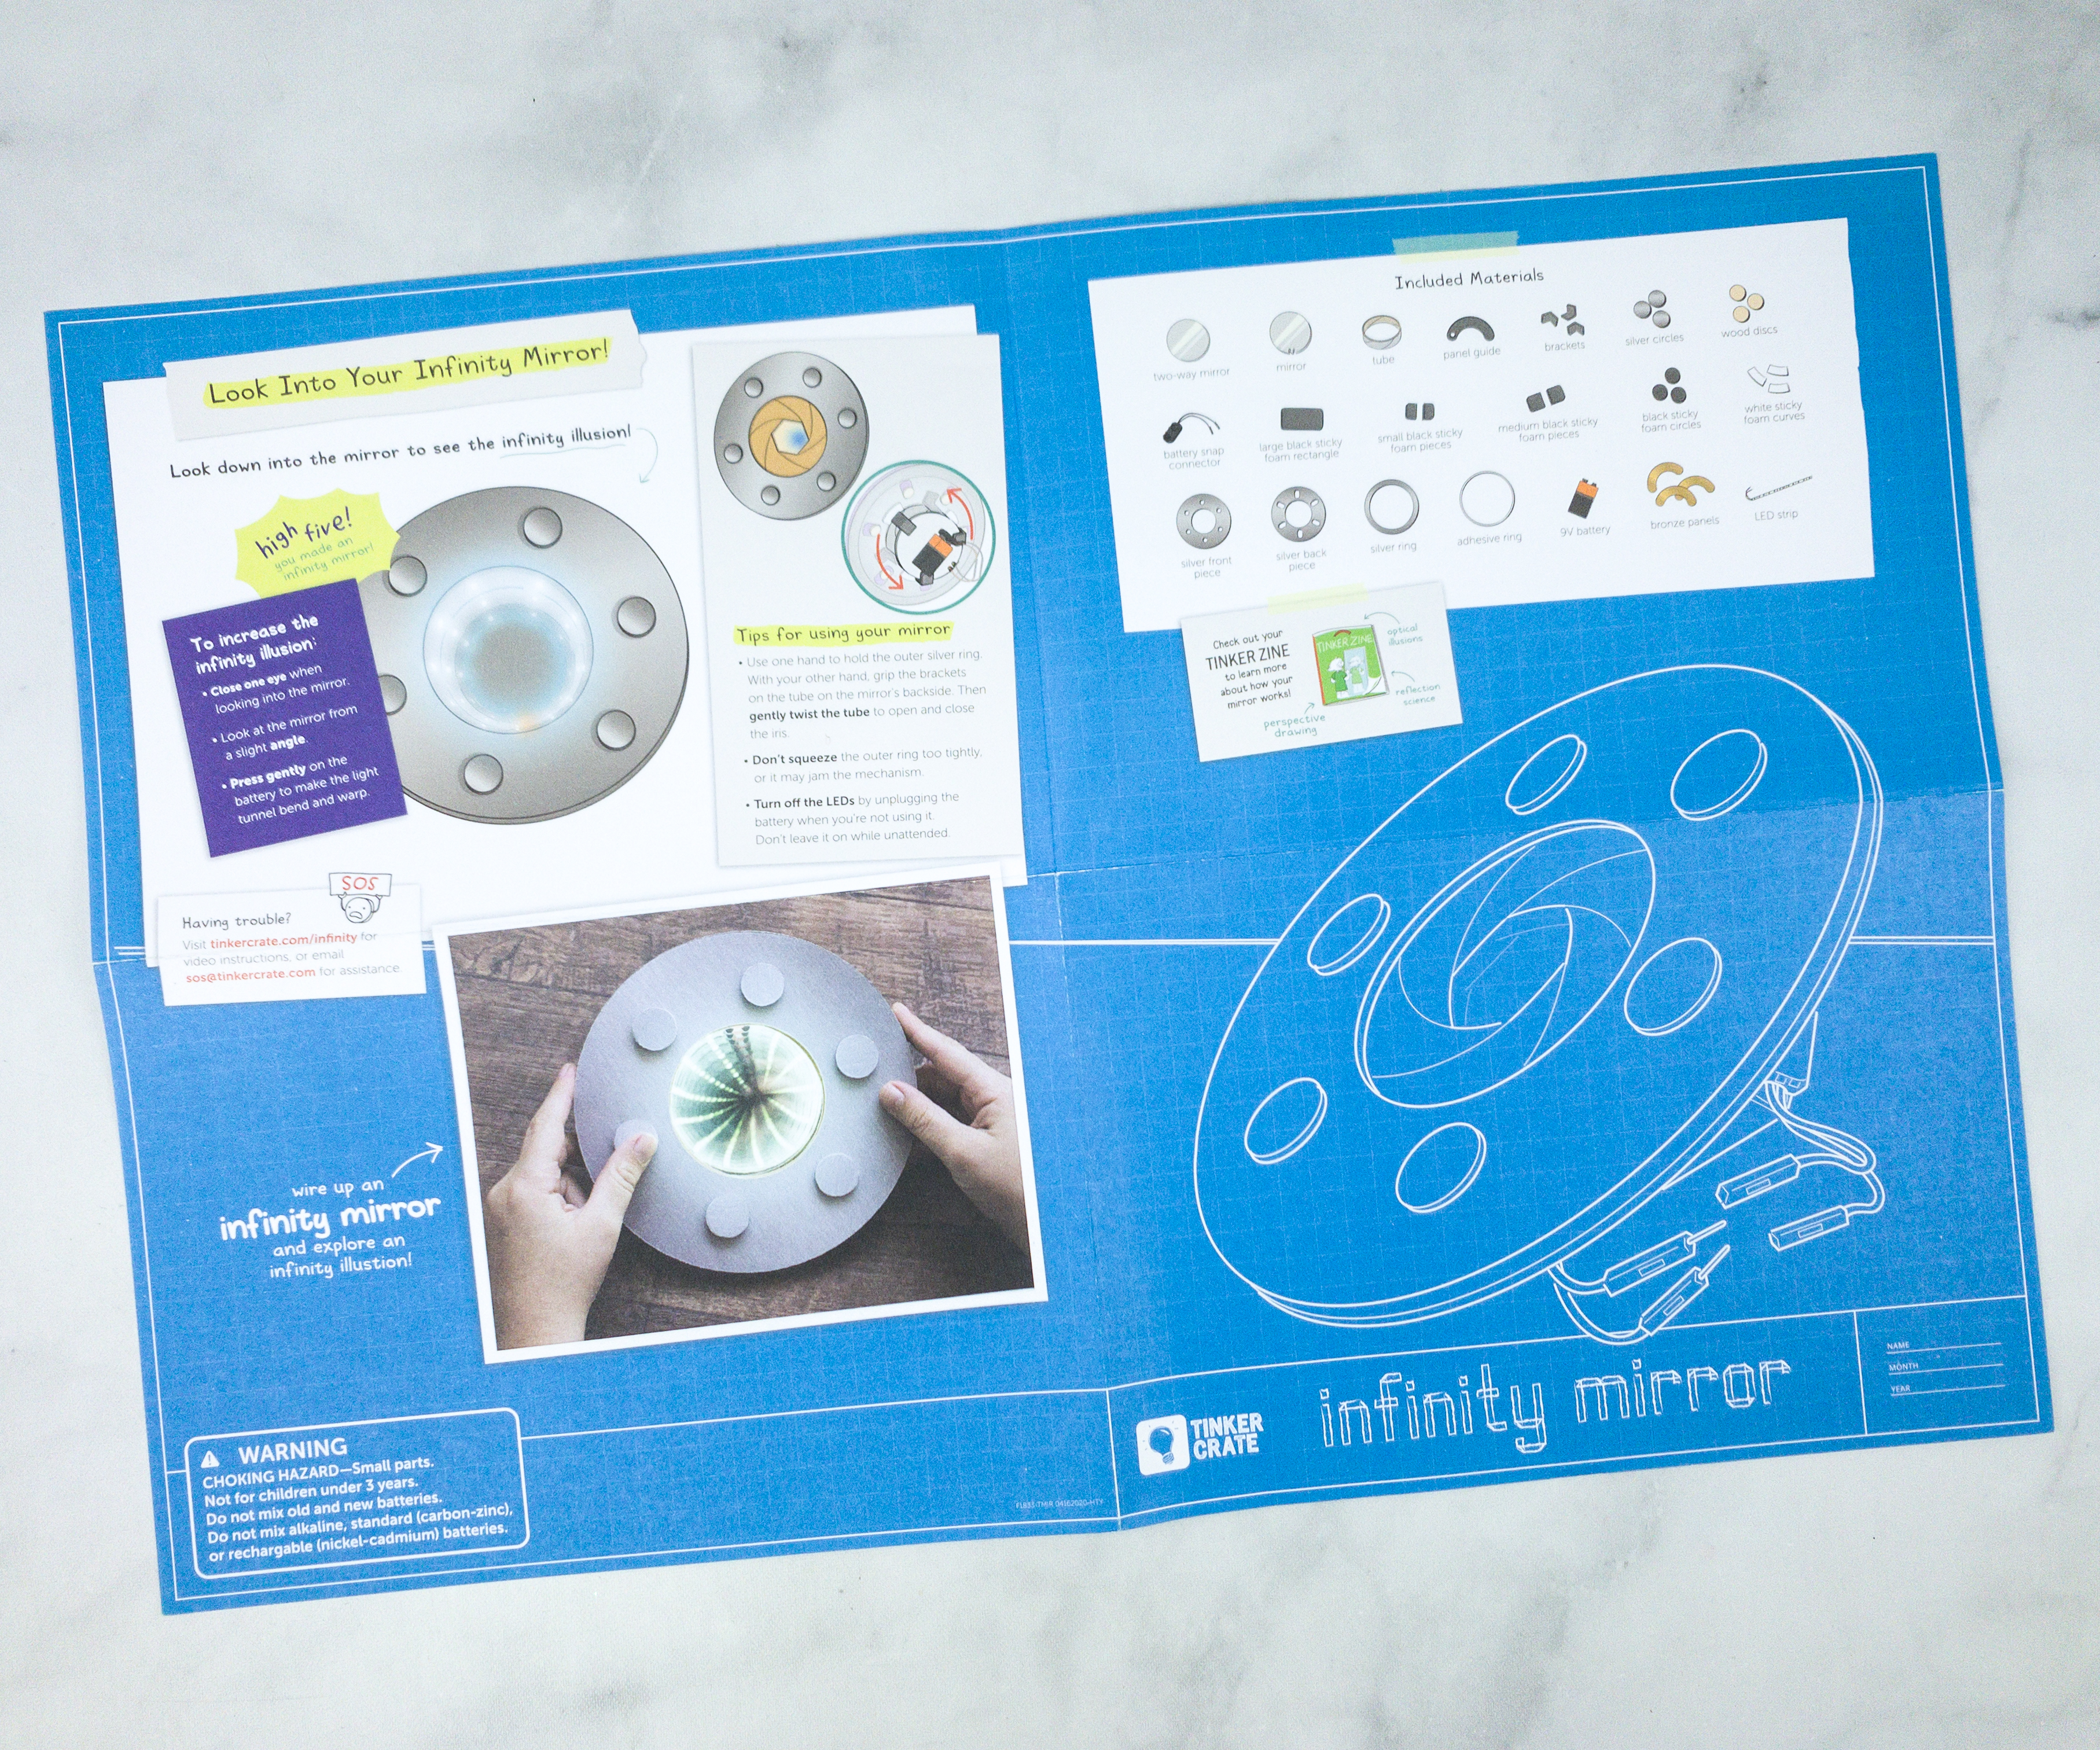
The instructions and other project info are printed on a faux blueprint fold-out sheet.
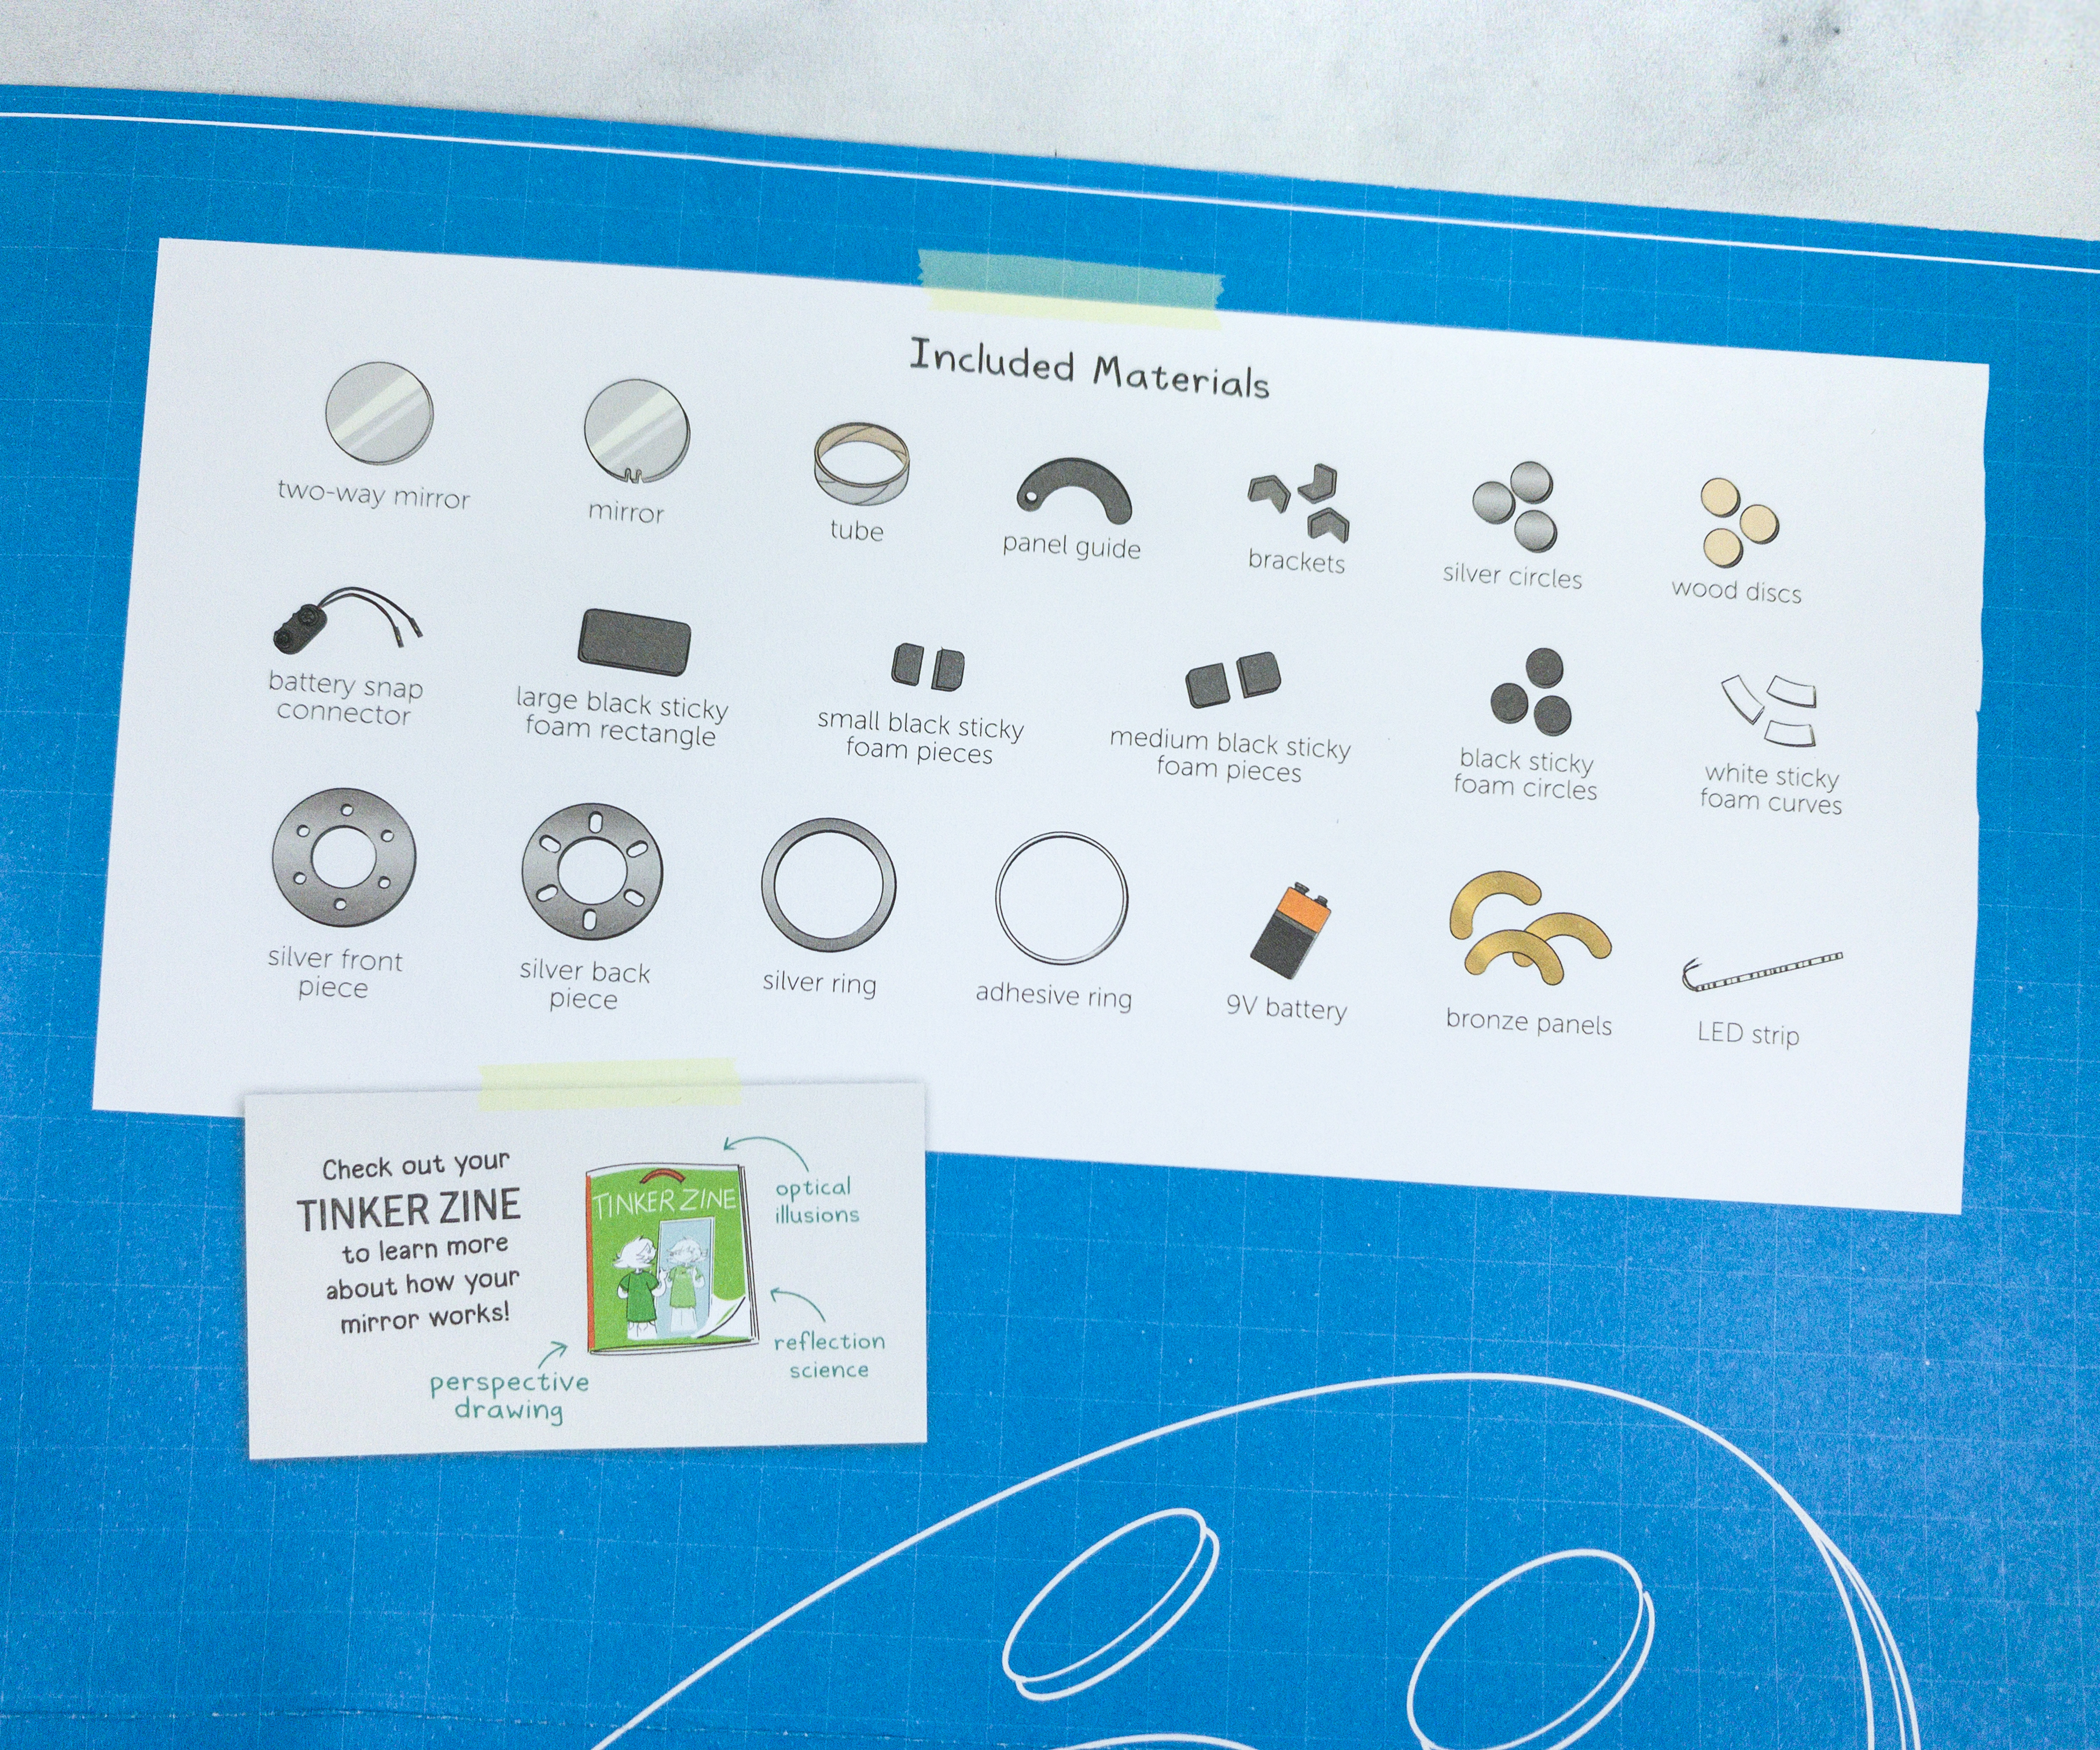
One side of the sheet has pointers for using your newly-constructed device, plus an inventory of all the supplies provided in the crate.
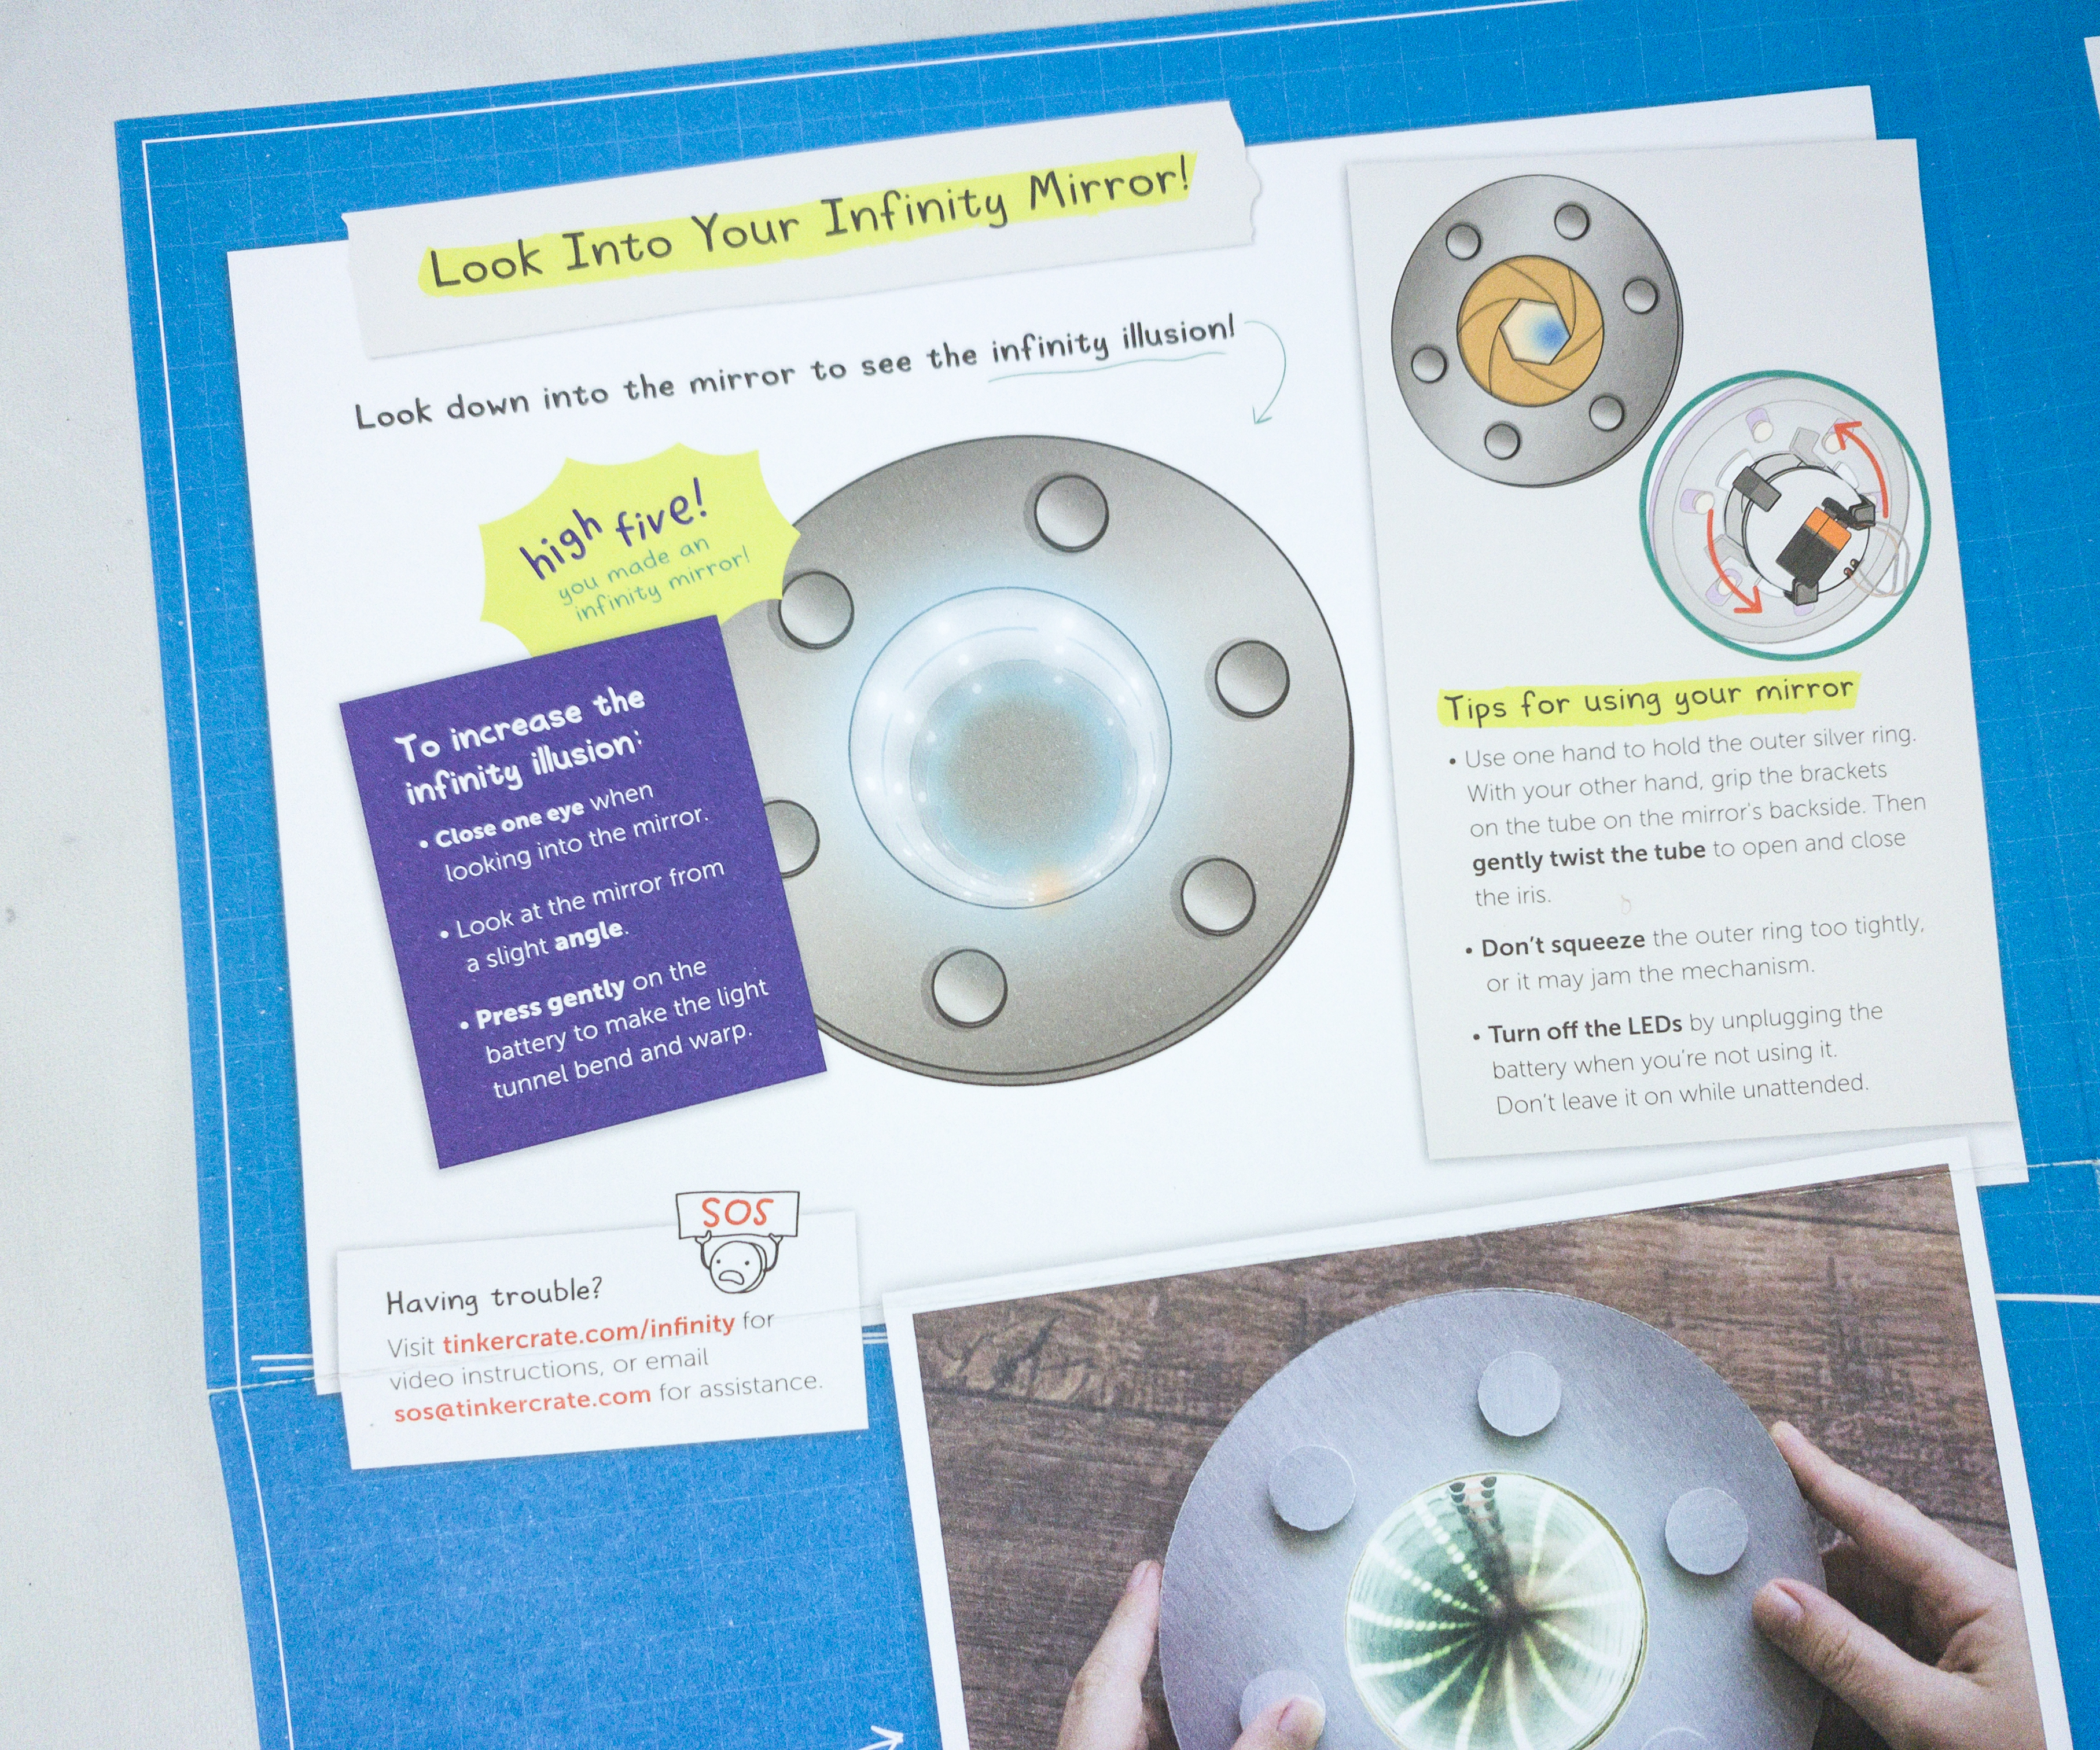
This sheet also gives you a glimpse of how the end product would look like, and how it works. There are also some operation tips, and of course, troubleshooting! If you are having trouble making the project, you can also visit their website for more detailed video instructions.
Tinker Crate Activities

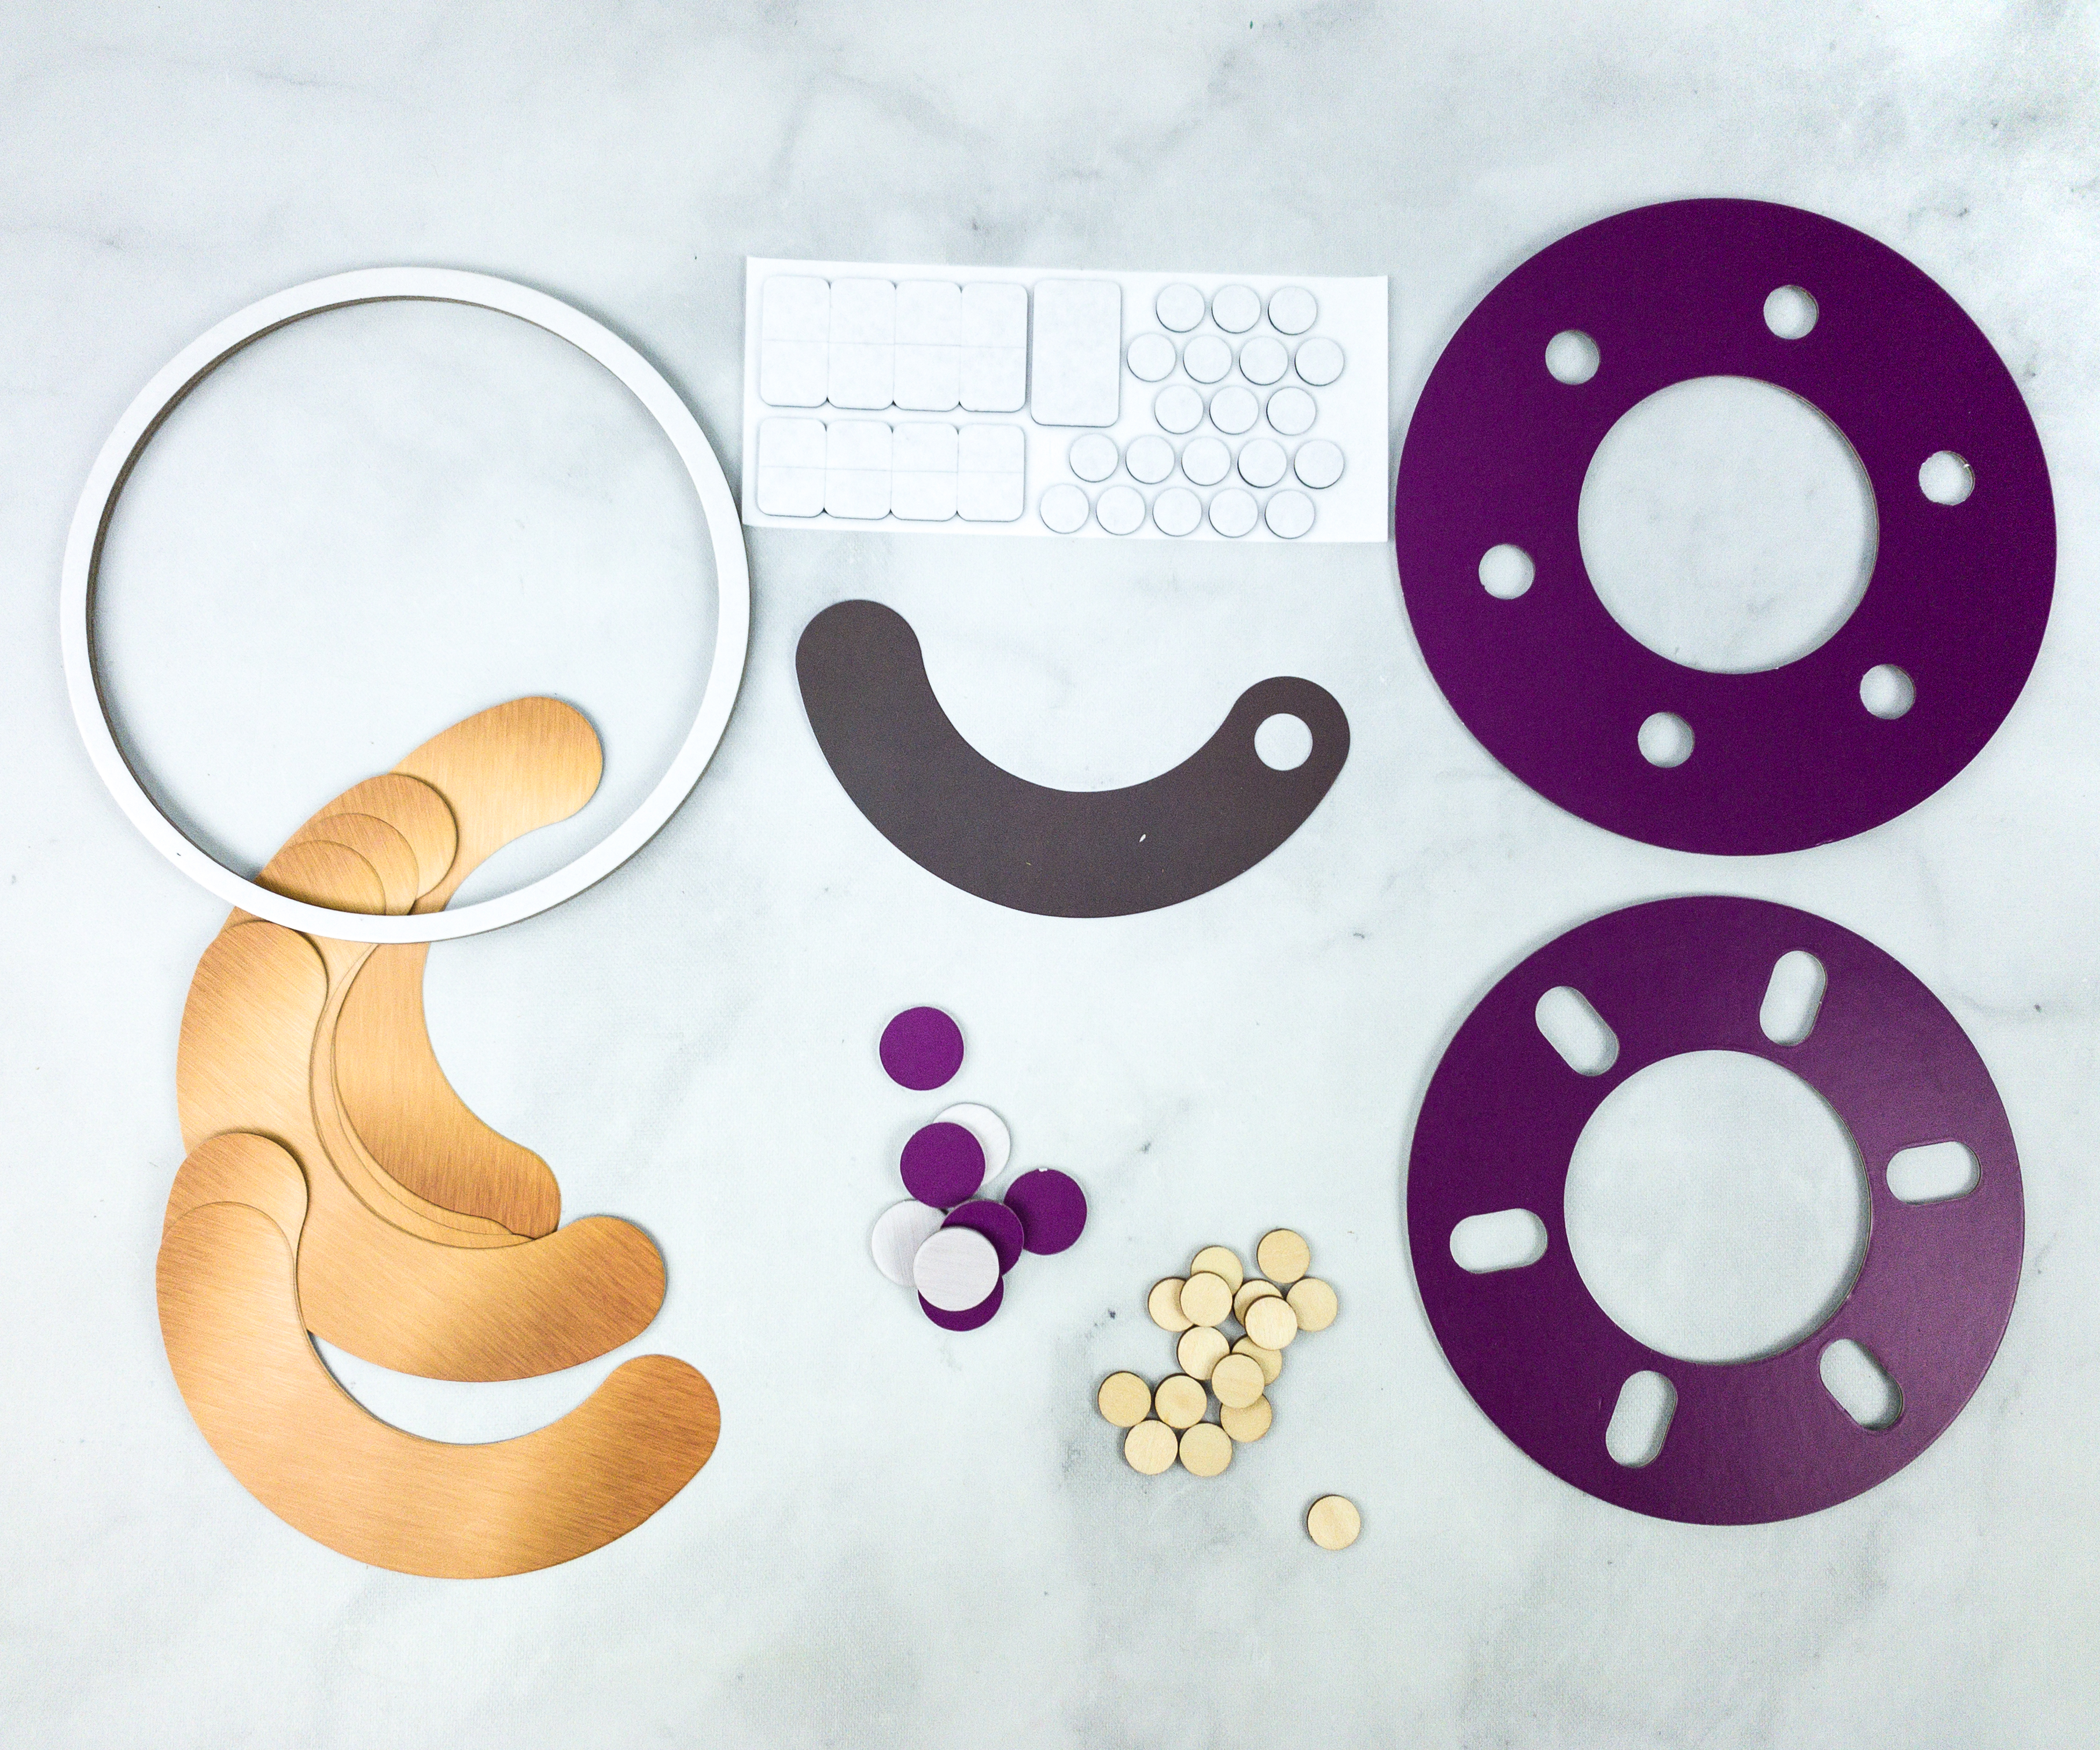
For this project, the crate provided the following materials: two-way mirror, mirror, tube, panel guide, brackets, silver circles, wood discs, battery snap connector, large black sticky foam rectangle, small black sticky foam pieces, medium black sticky foam pieces, black sticky foam circles, white sticky foam curves, silver front piece, silver back piece, silver ring, adhesive ring, 9V battery, bronze panels, and LED strip.
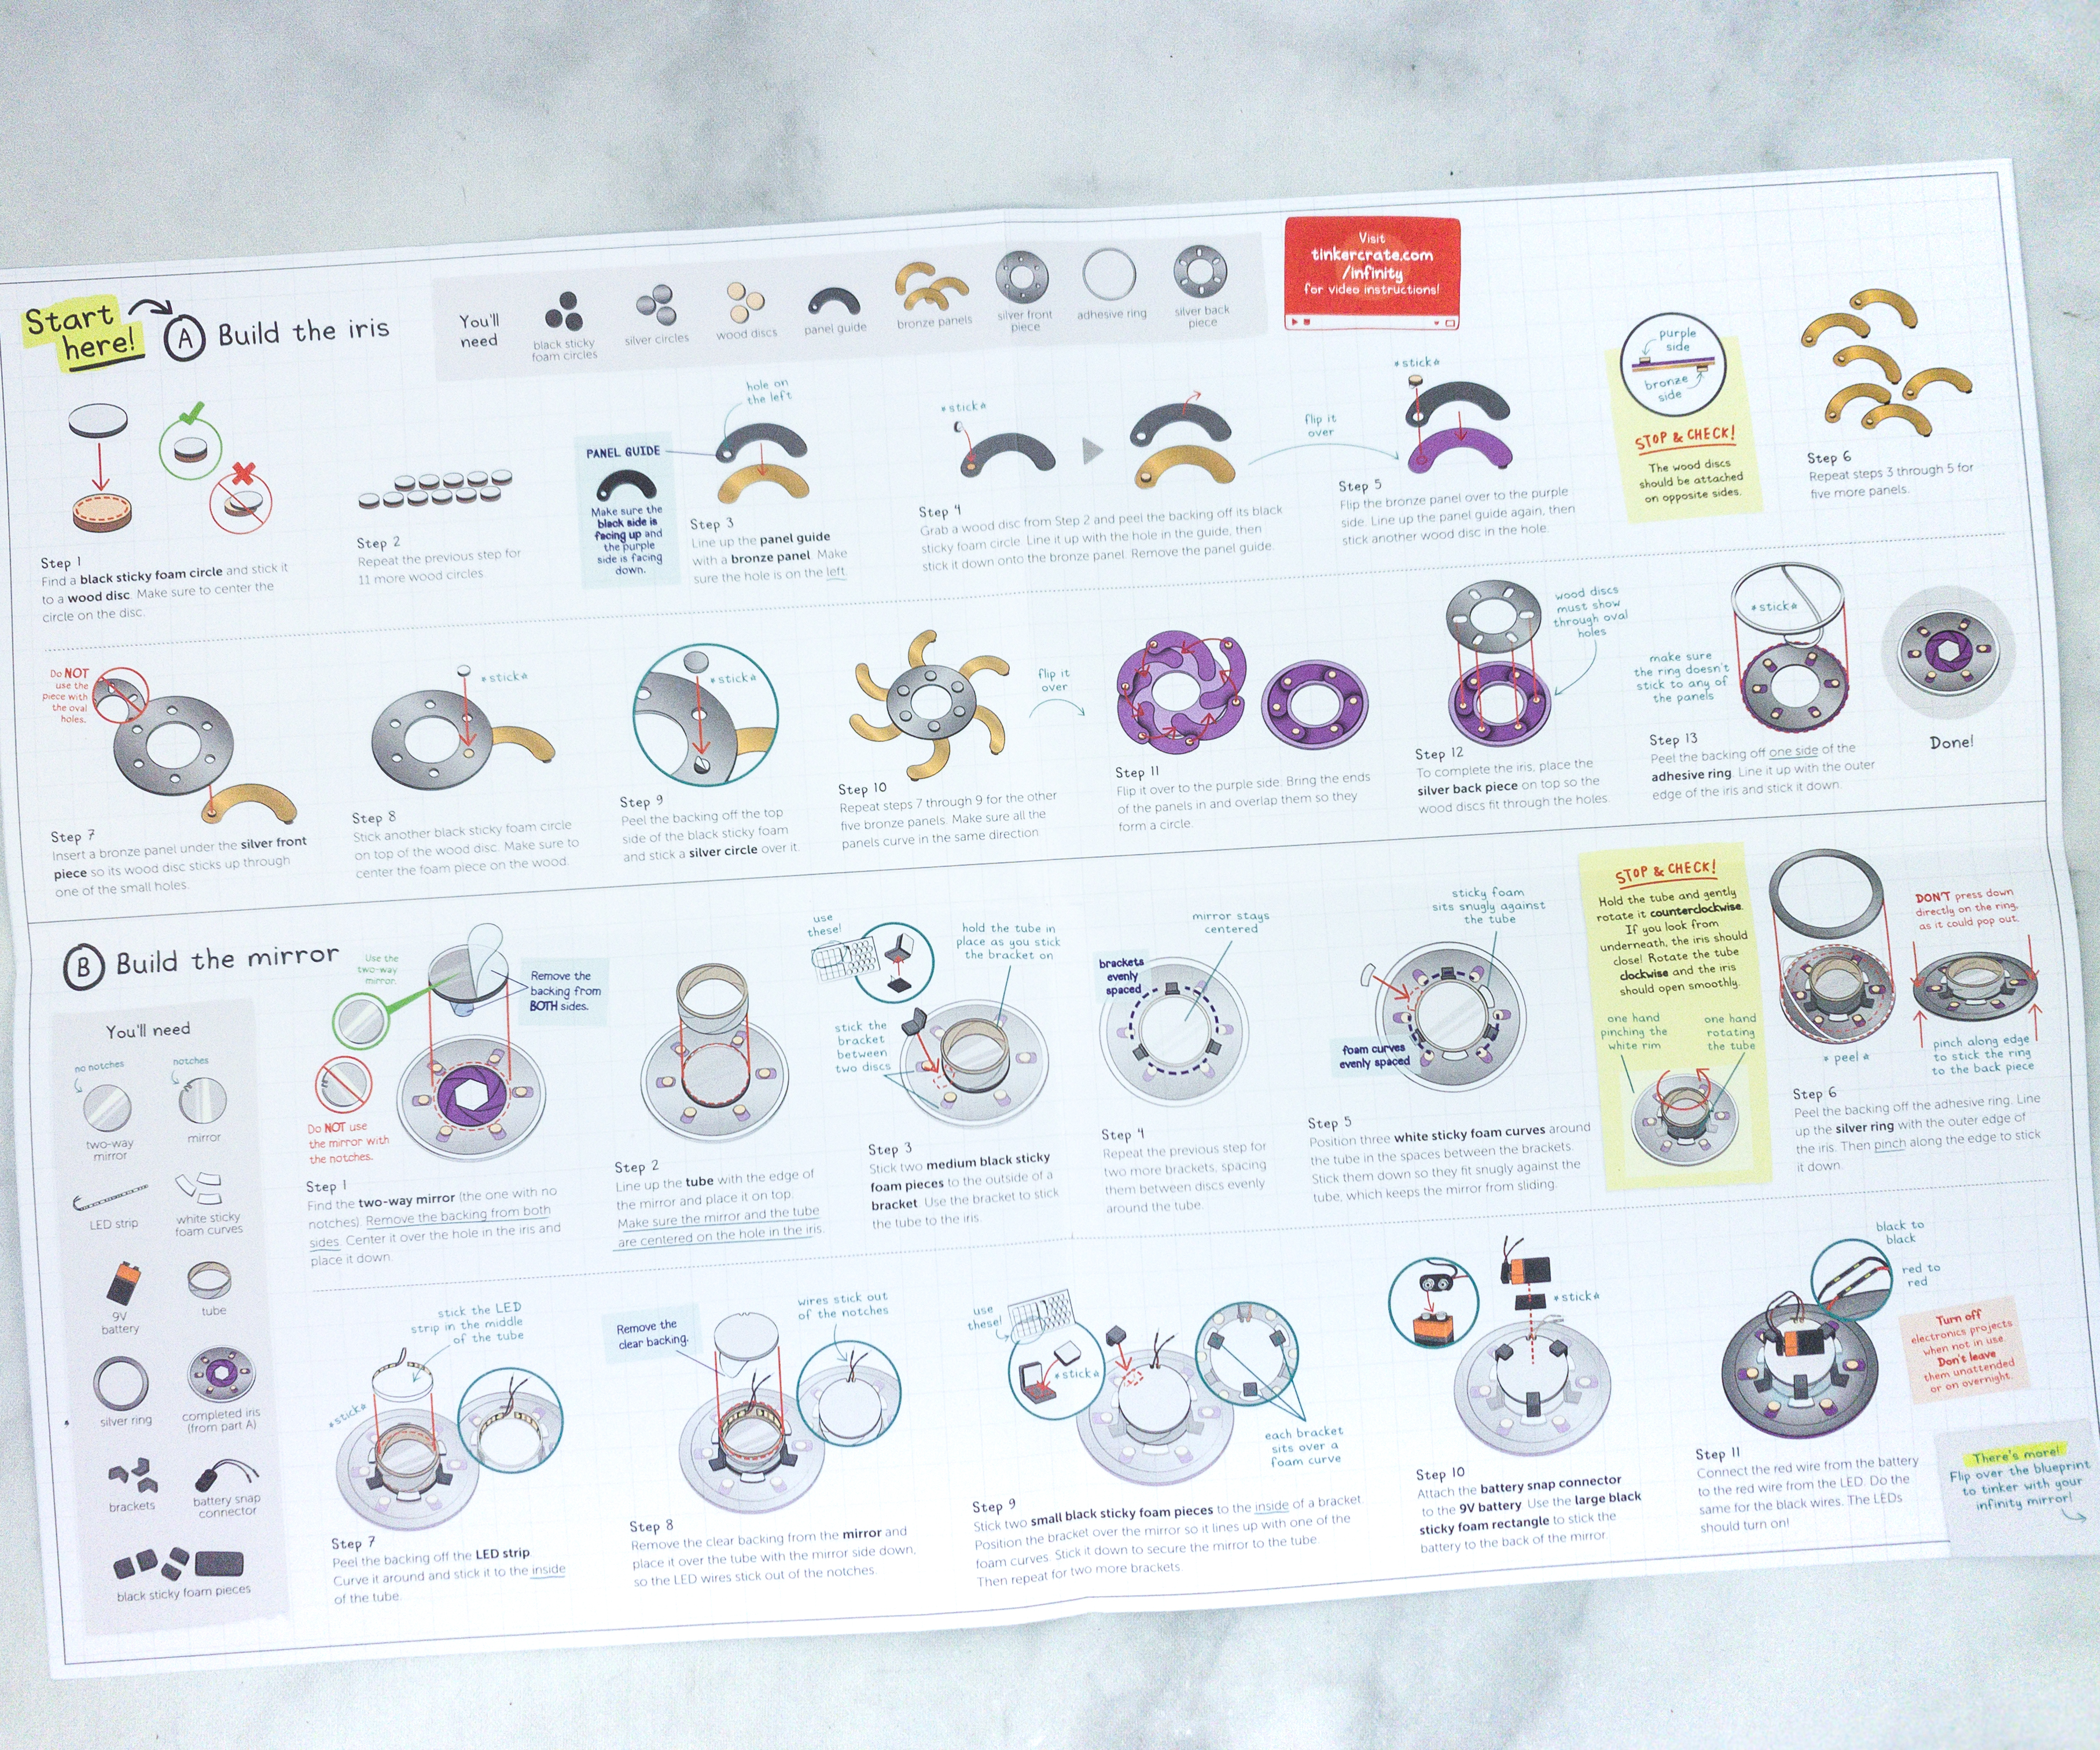
The faux blueprint has illustrations of all the materials needed for each portion of the assembly. For more complex builds, this is really handy for getting out just what you need for the current step.
You can also stop and check your progress for certain steps so in case there are some problems, you can troubleshoot right away and continue finishing the project with lesser worries.
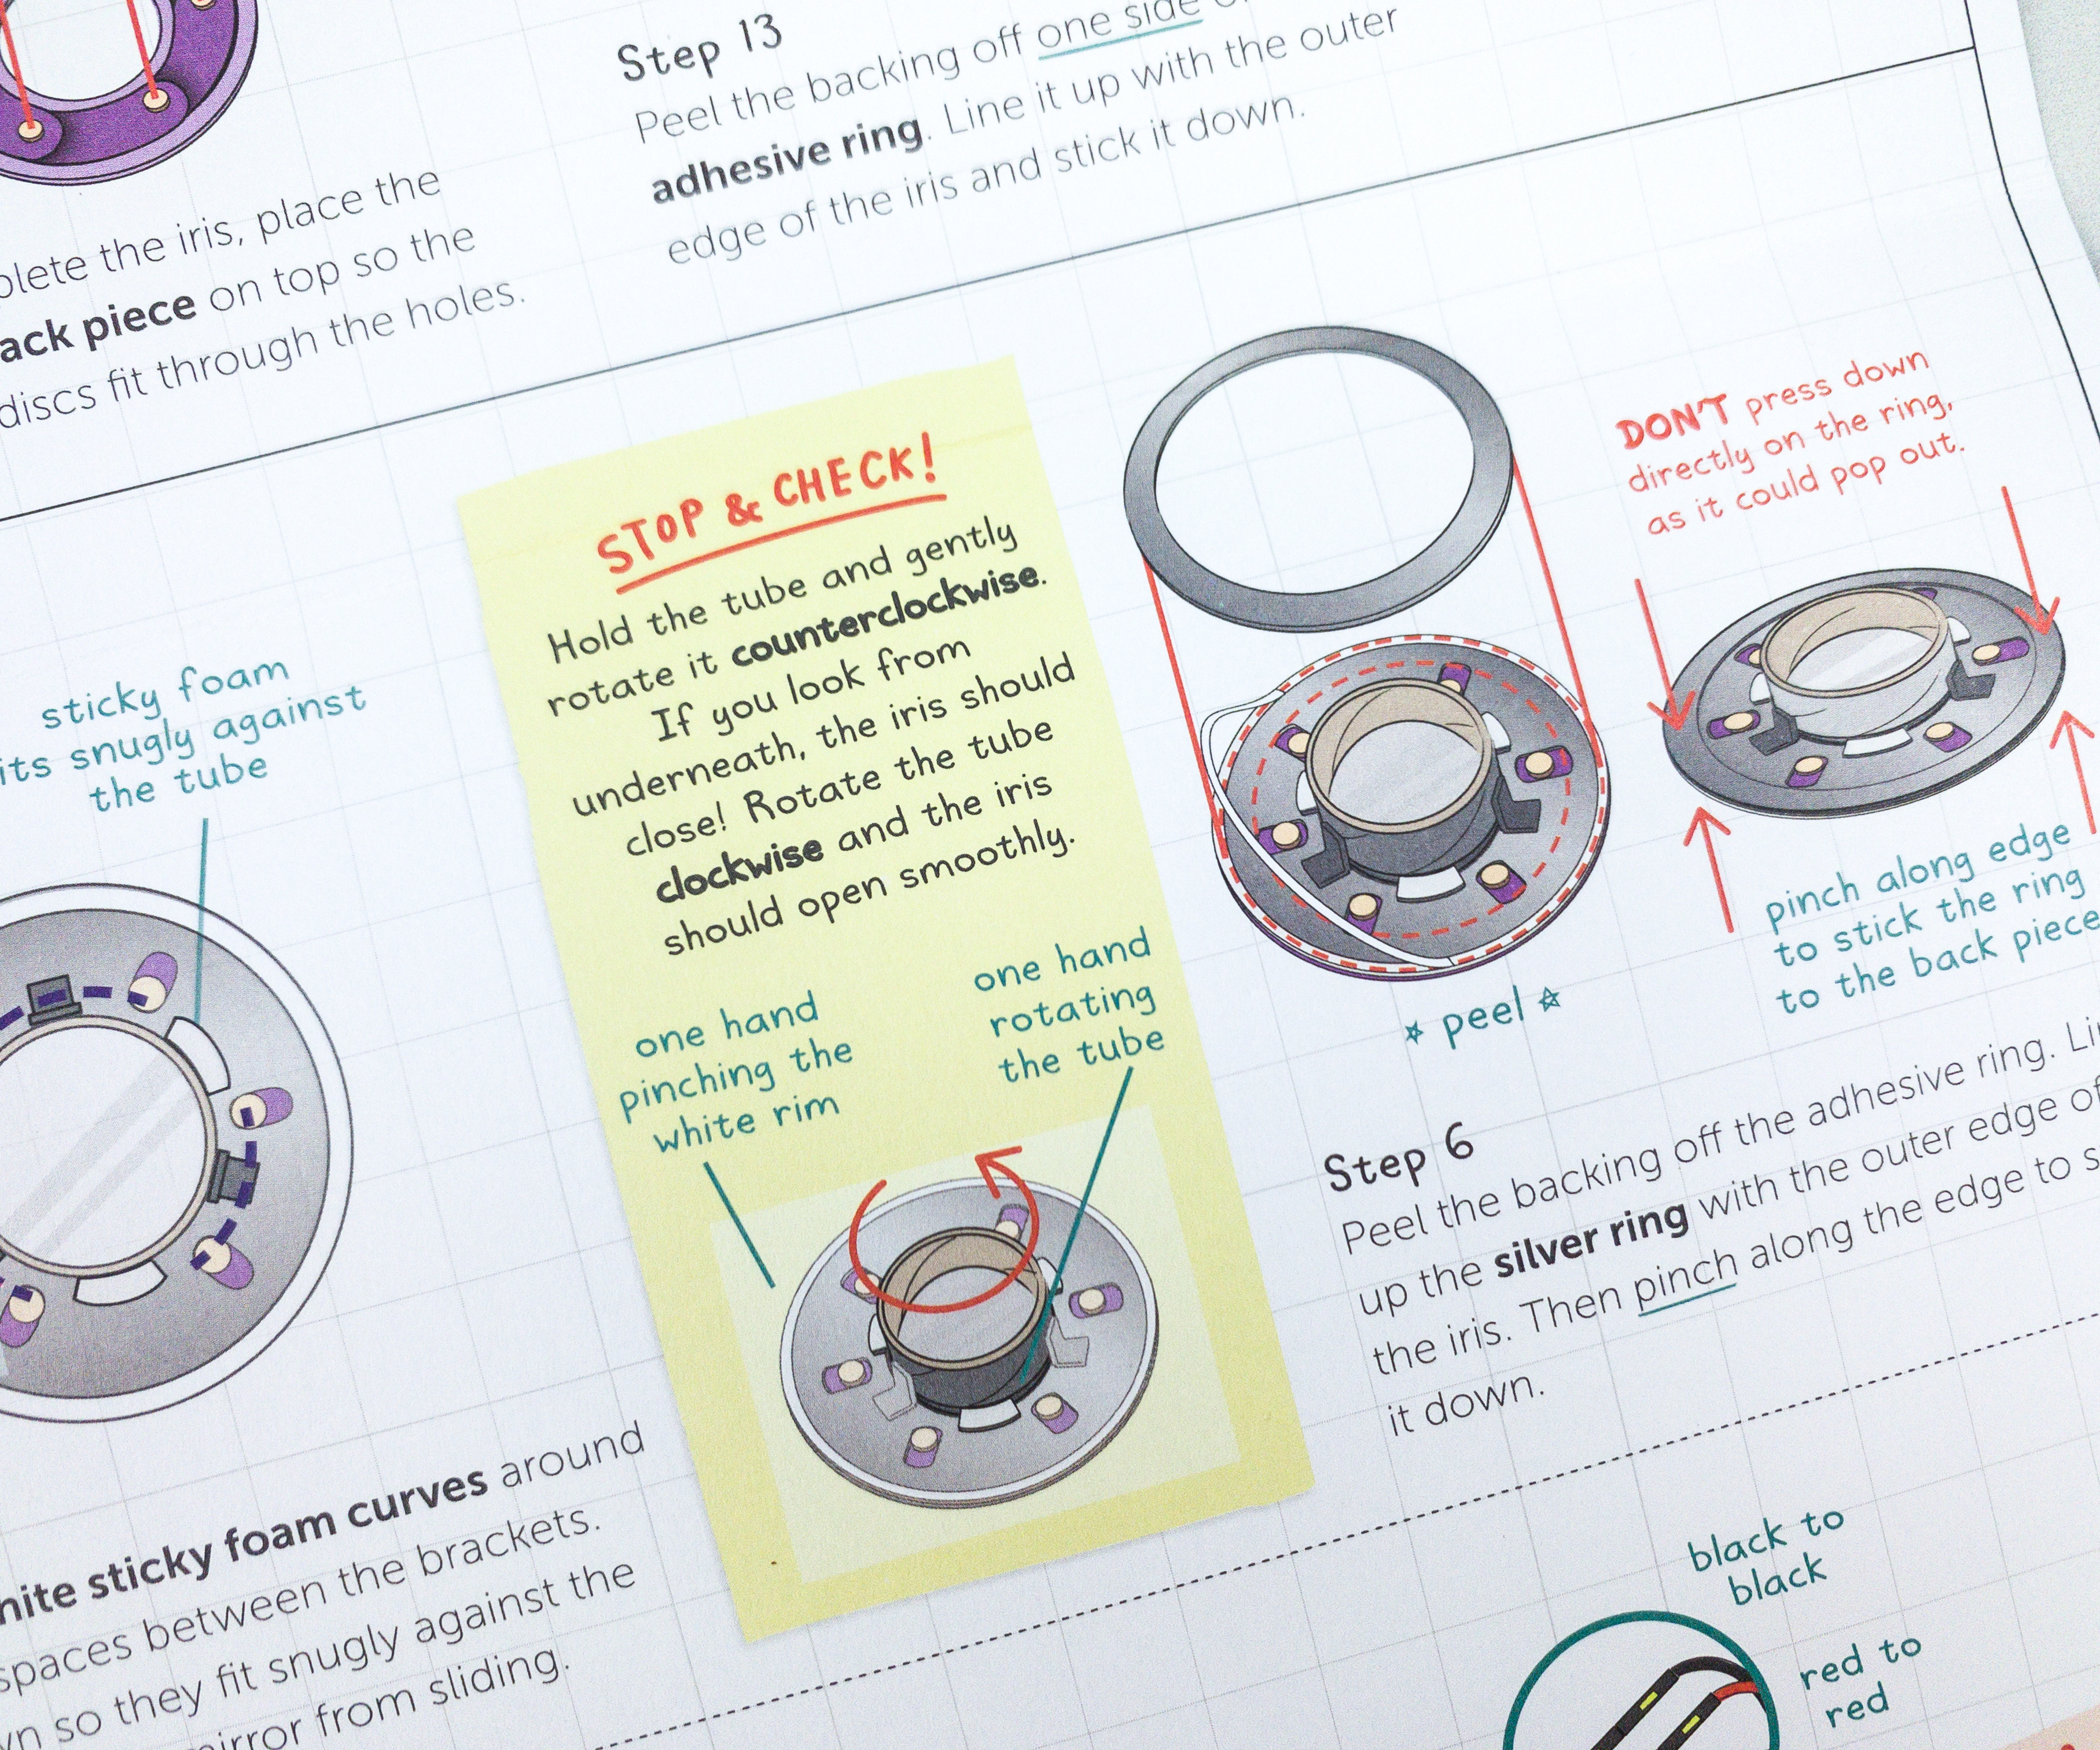
This is an example of a step where you need to check your progress. Here, you should hold the tube and gently rotate it counterclockwise. The iris should be closed when you do it and if you rotate it clockwise, it should open smoothly.
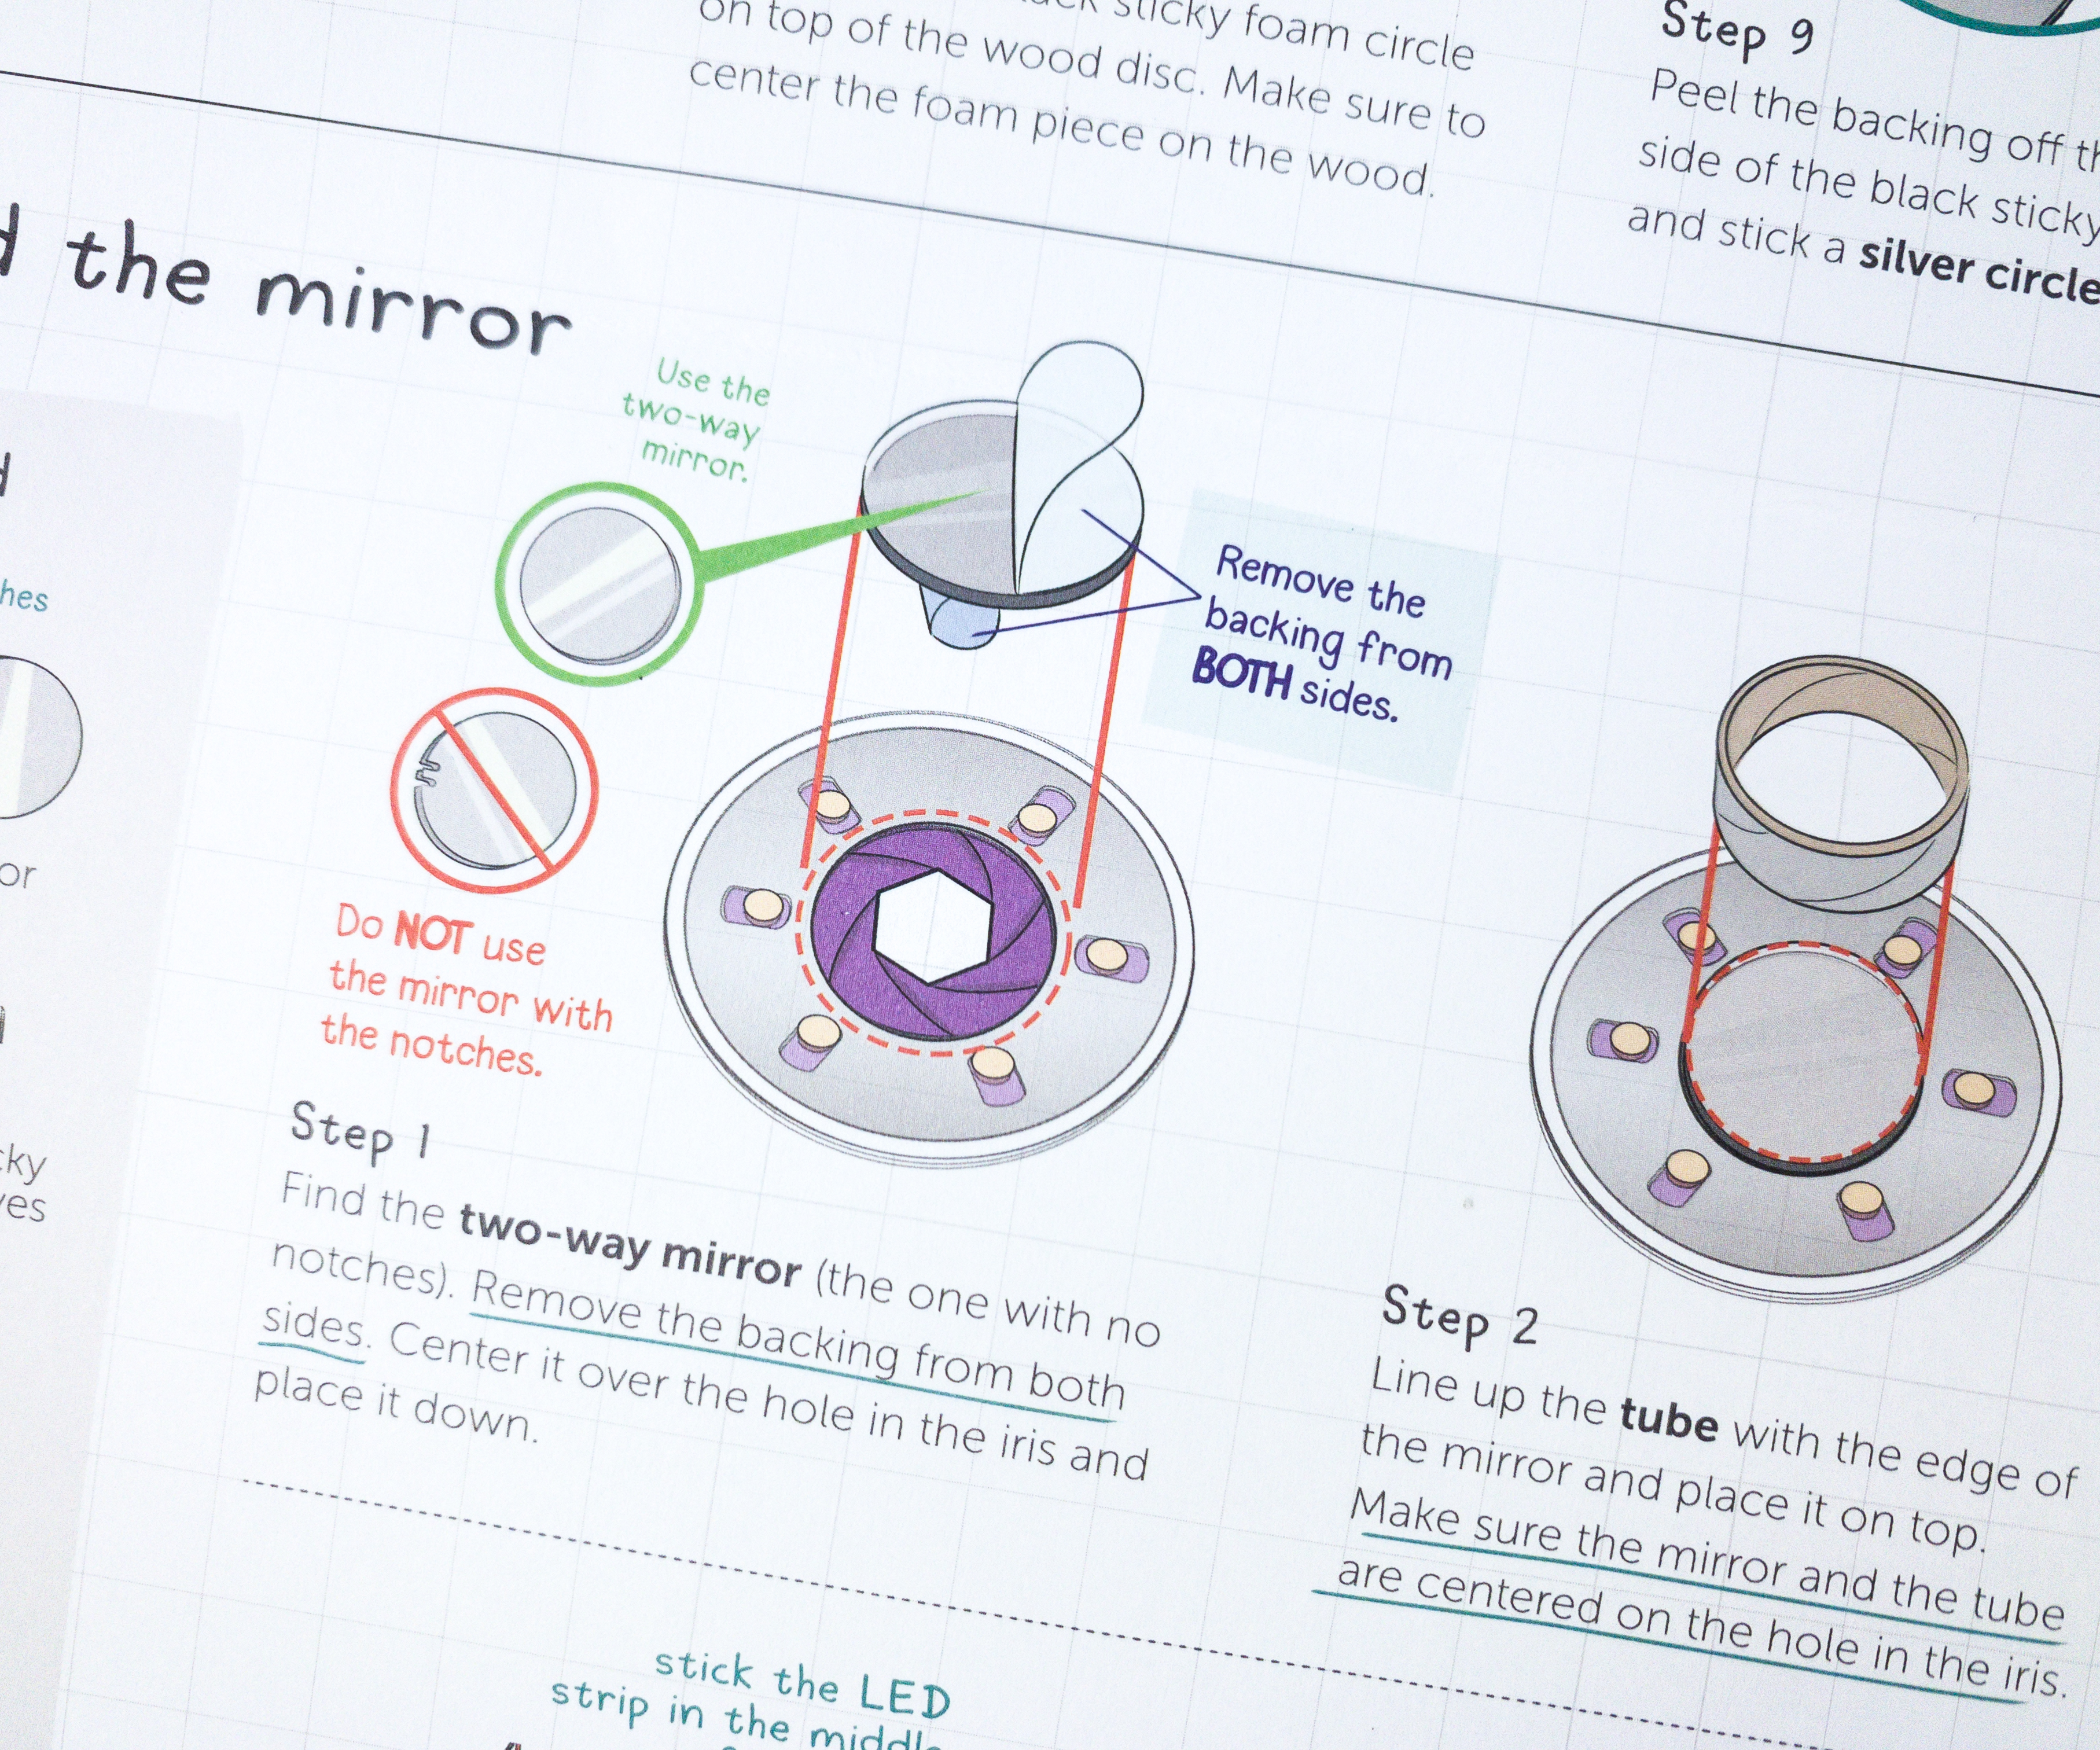
There’s also this step when you will use the two-way mirror. It also warns us that we should not use the mirror with notches.
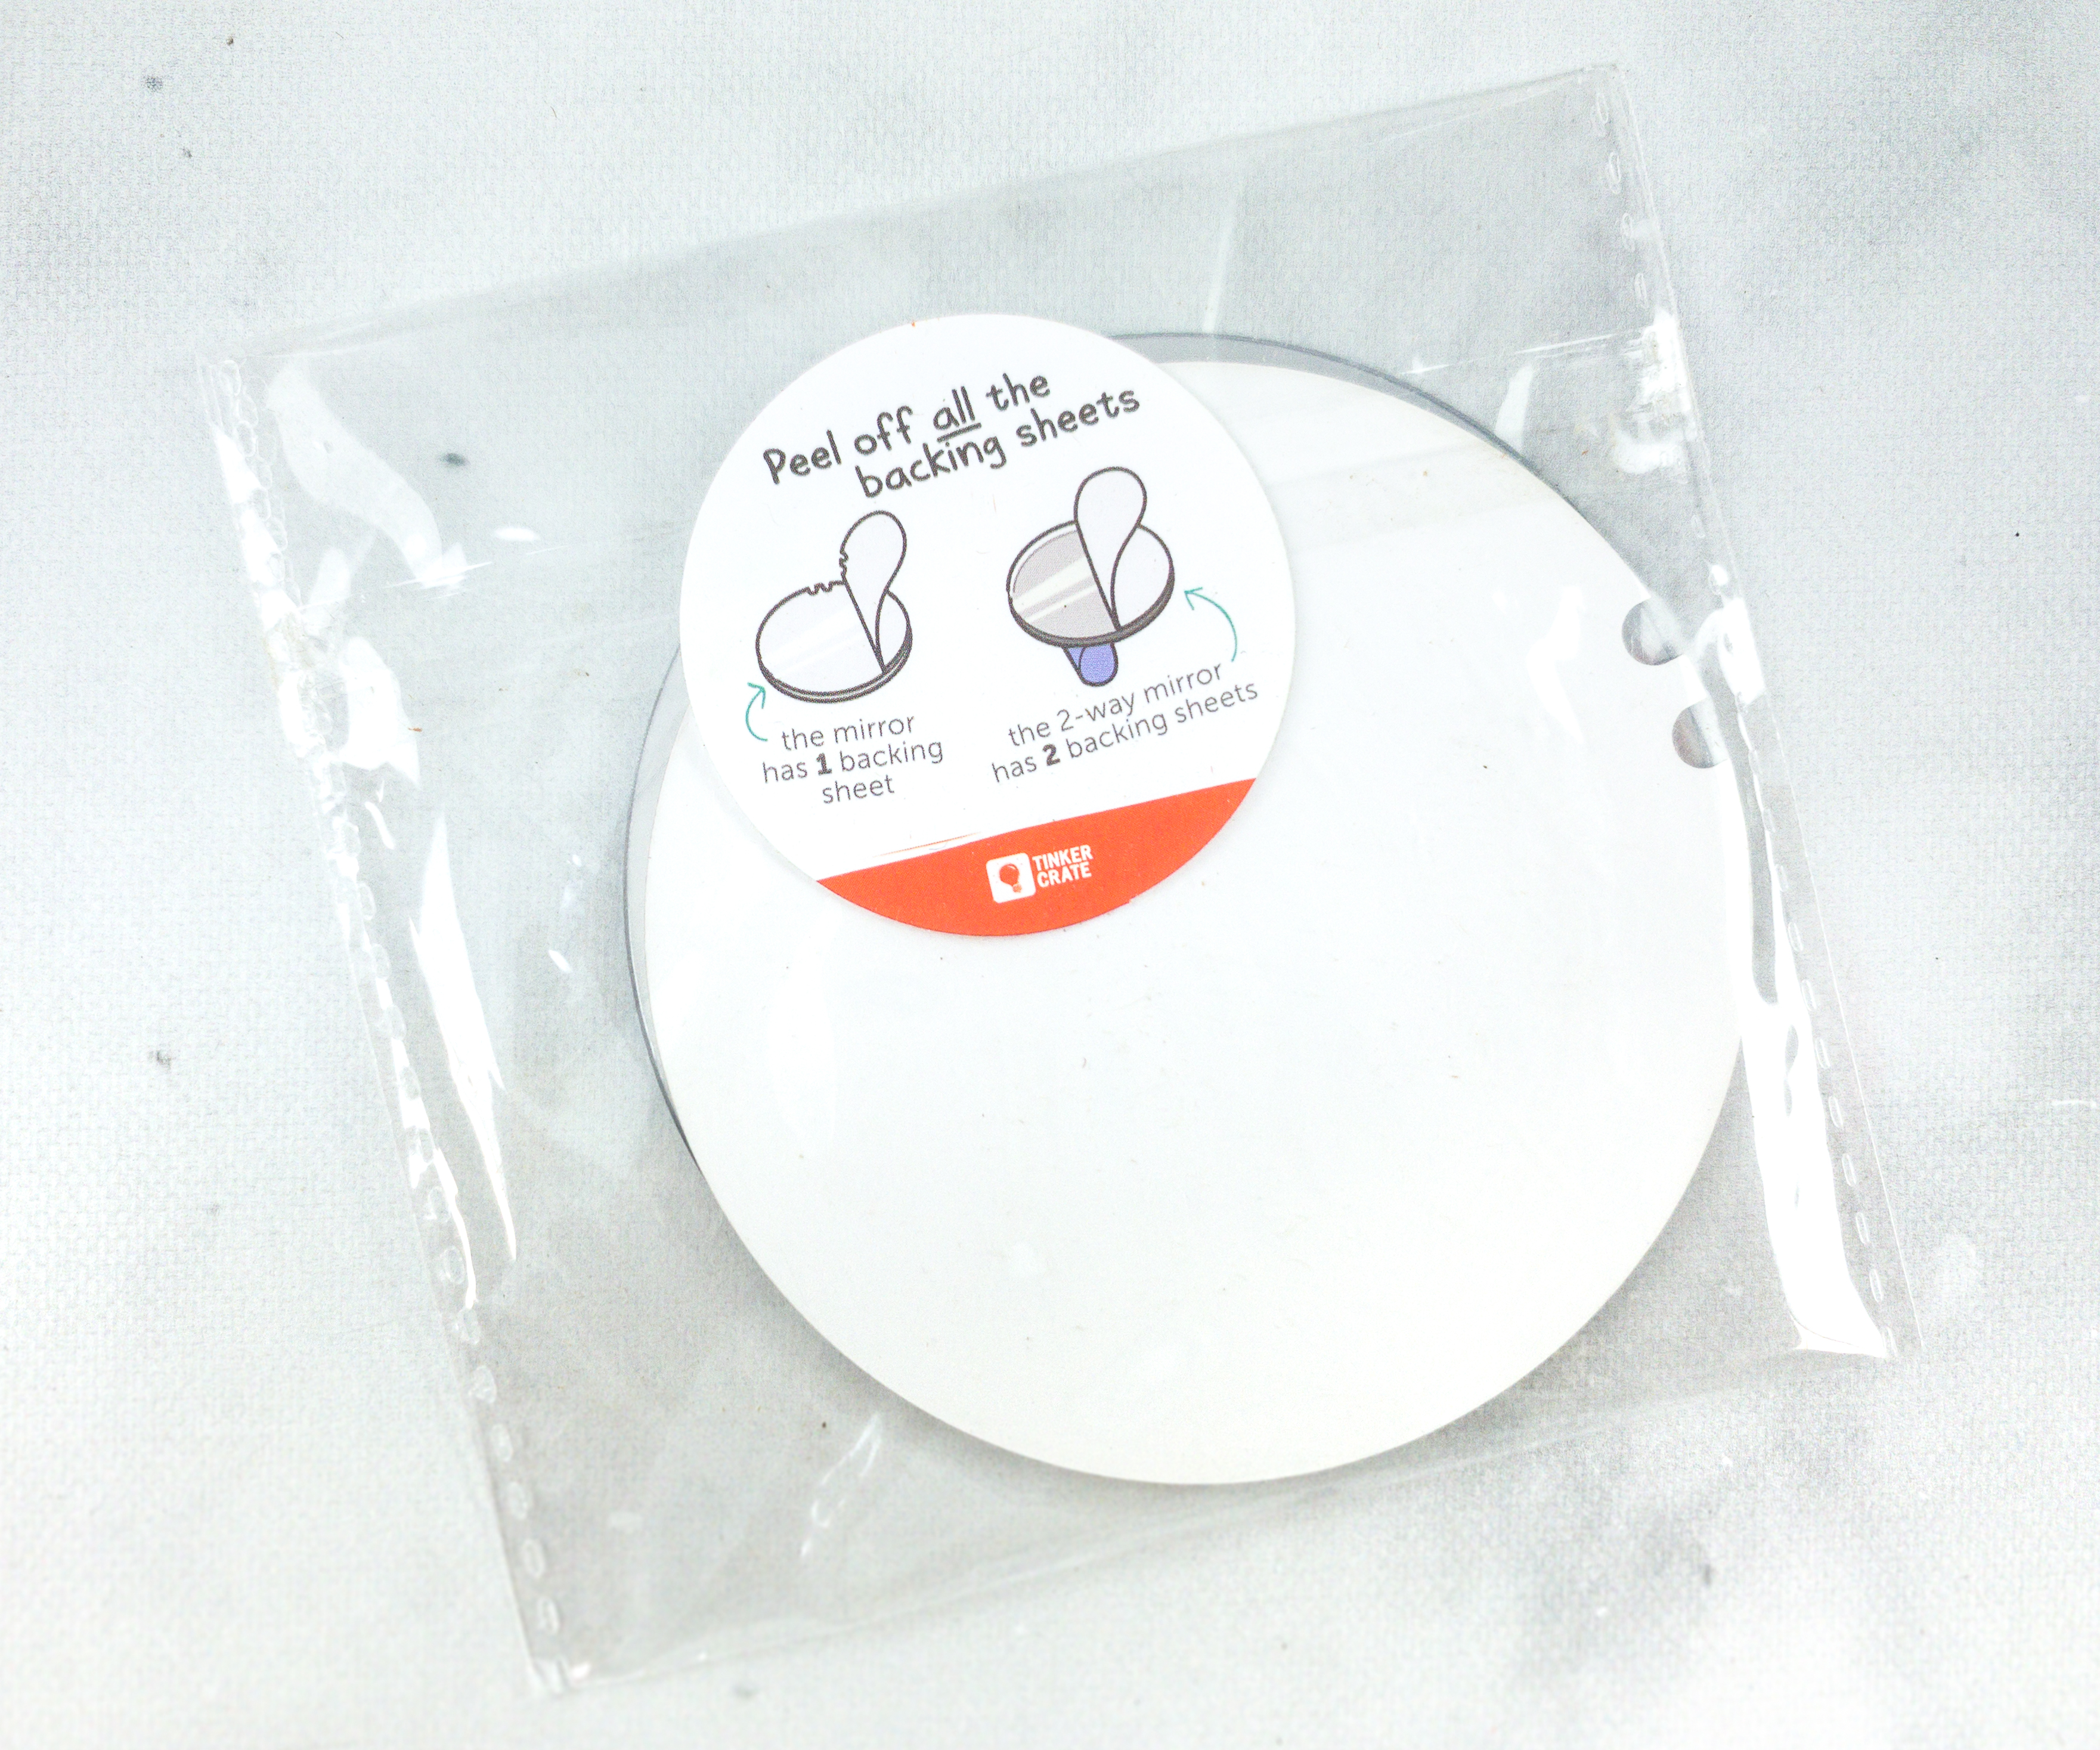
This pack contains the mirrors. They also explained the difference between the two when it comes to backing sheets. The mirror only has a backing sheet, while the two-way mirror has 2 backing sheets.
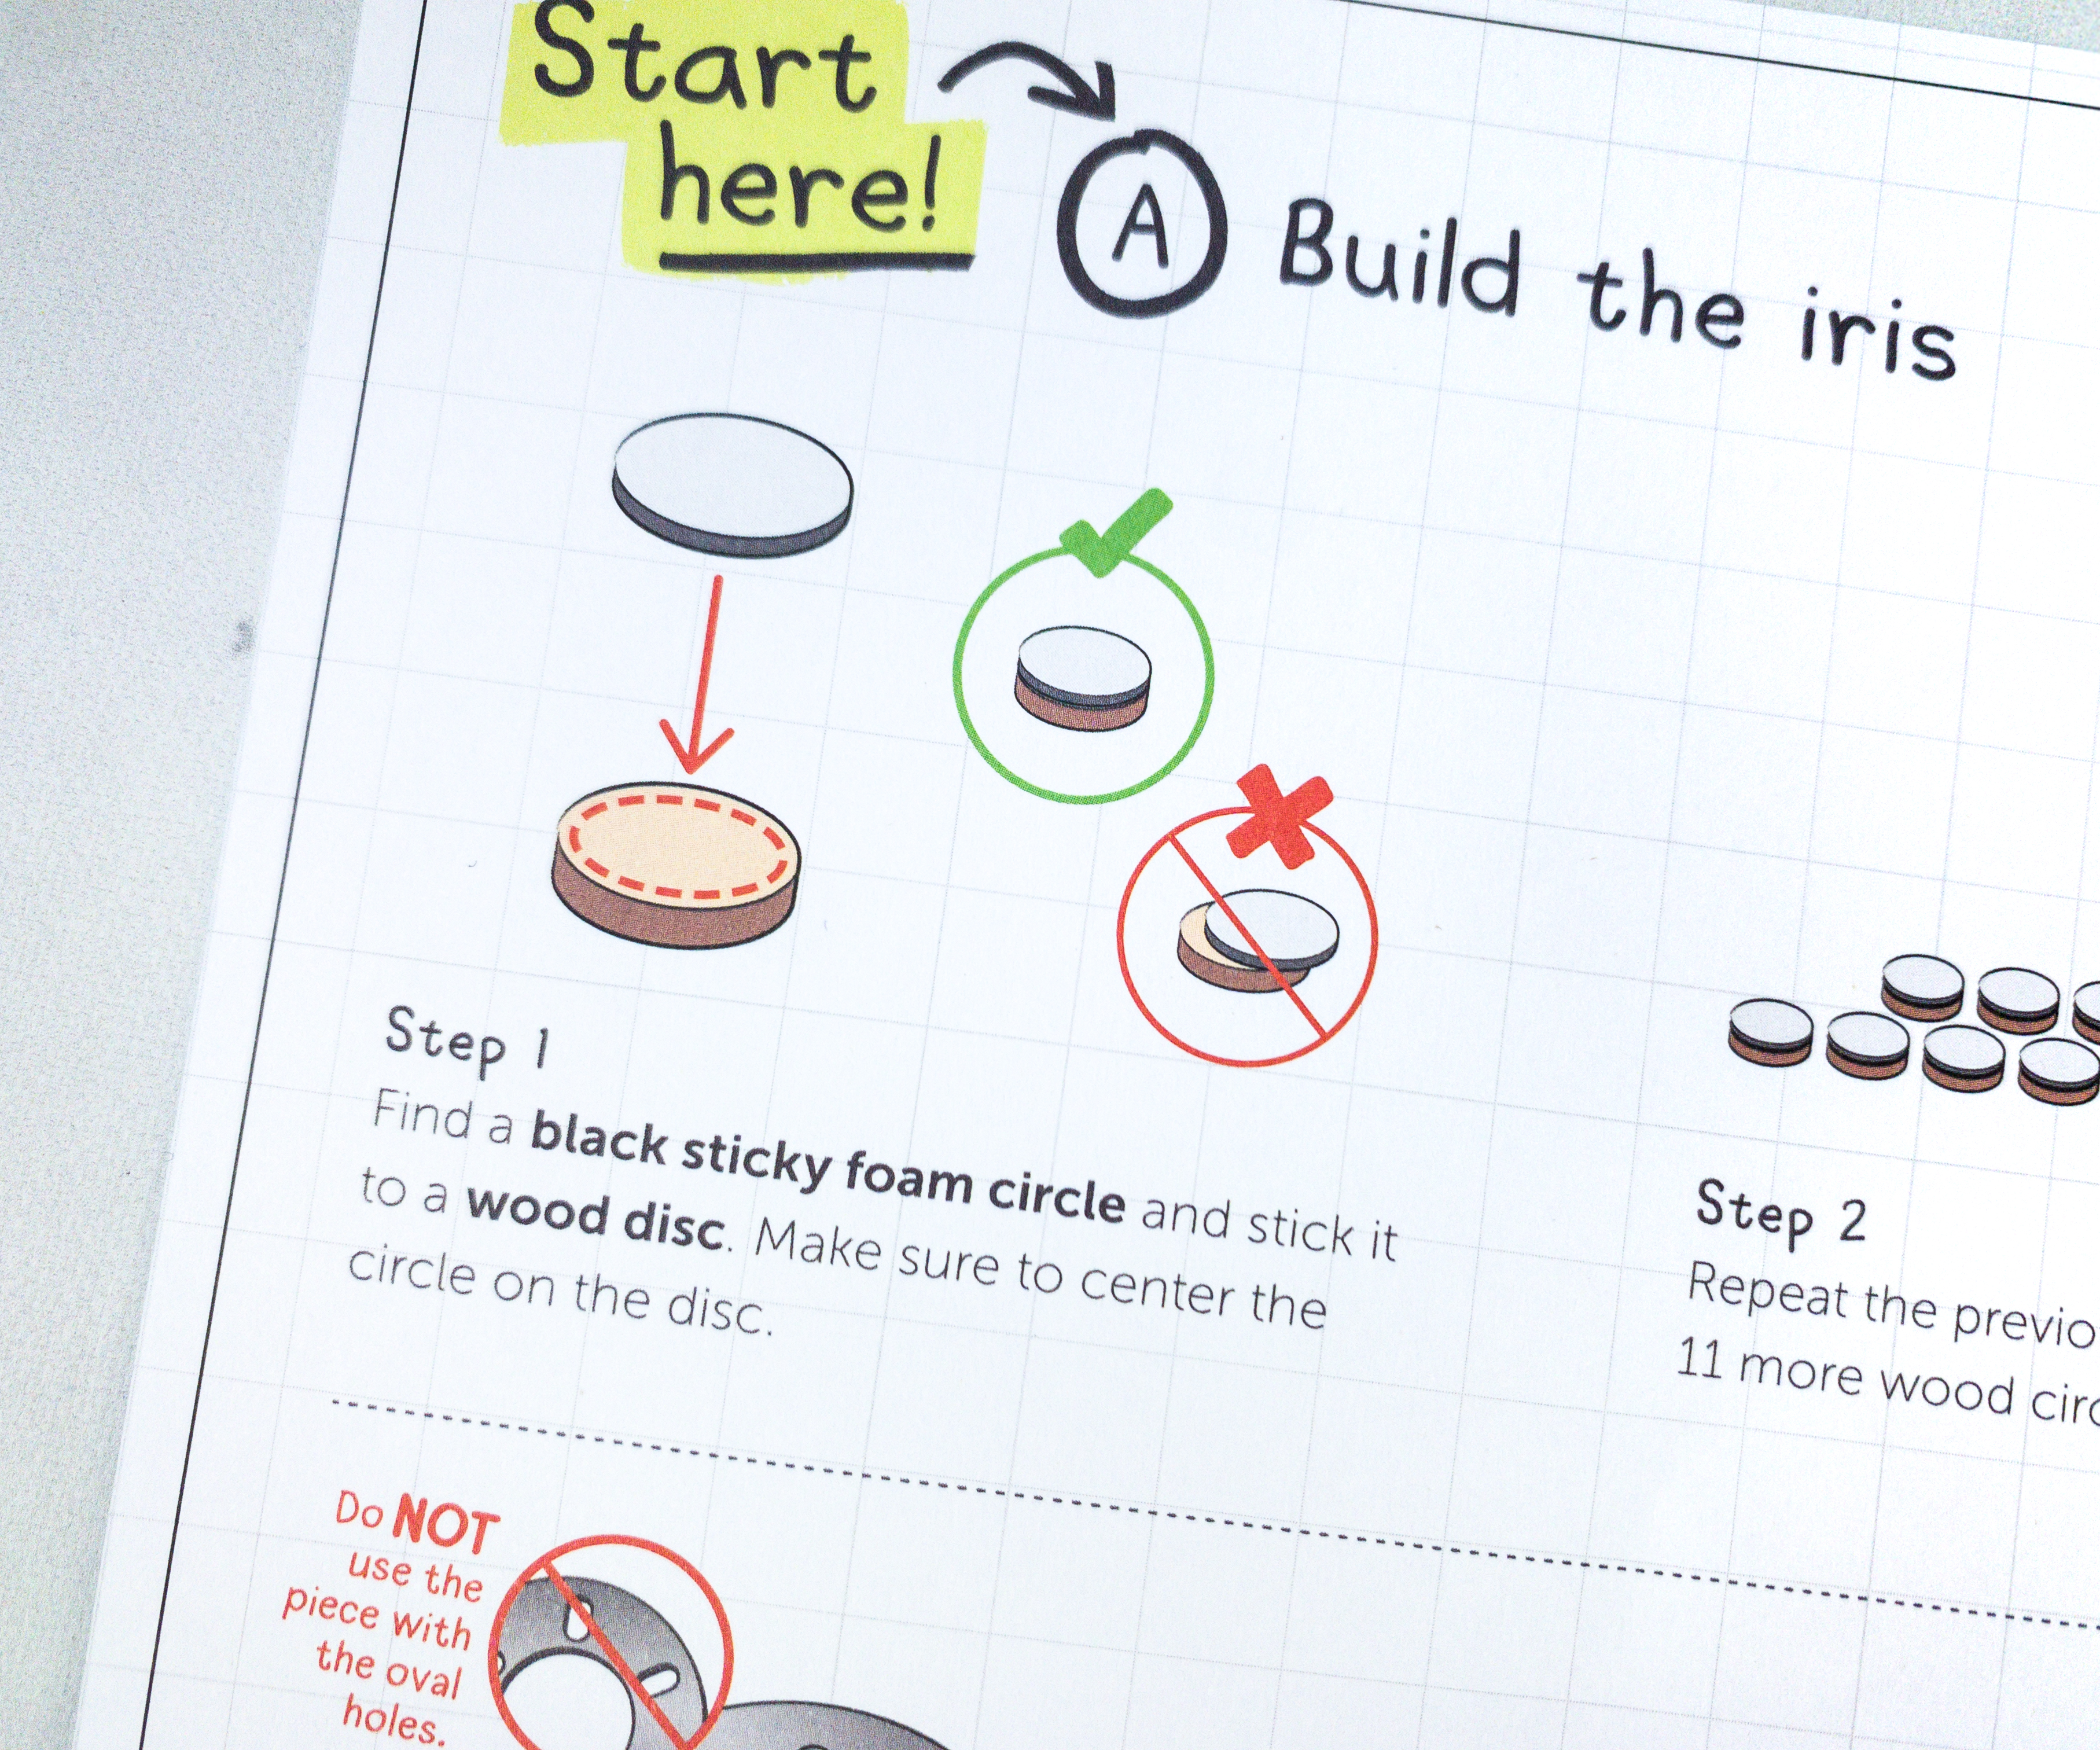
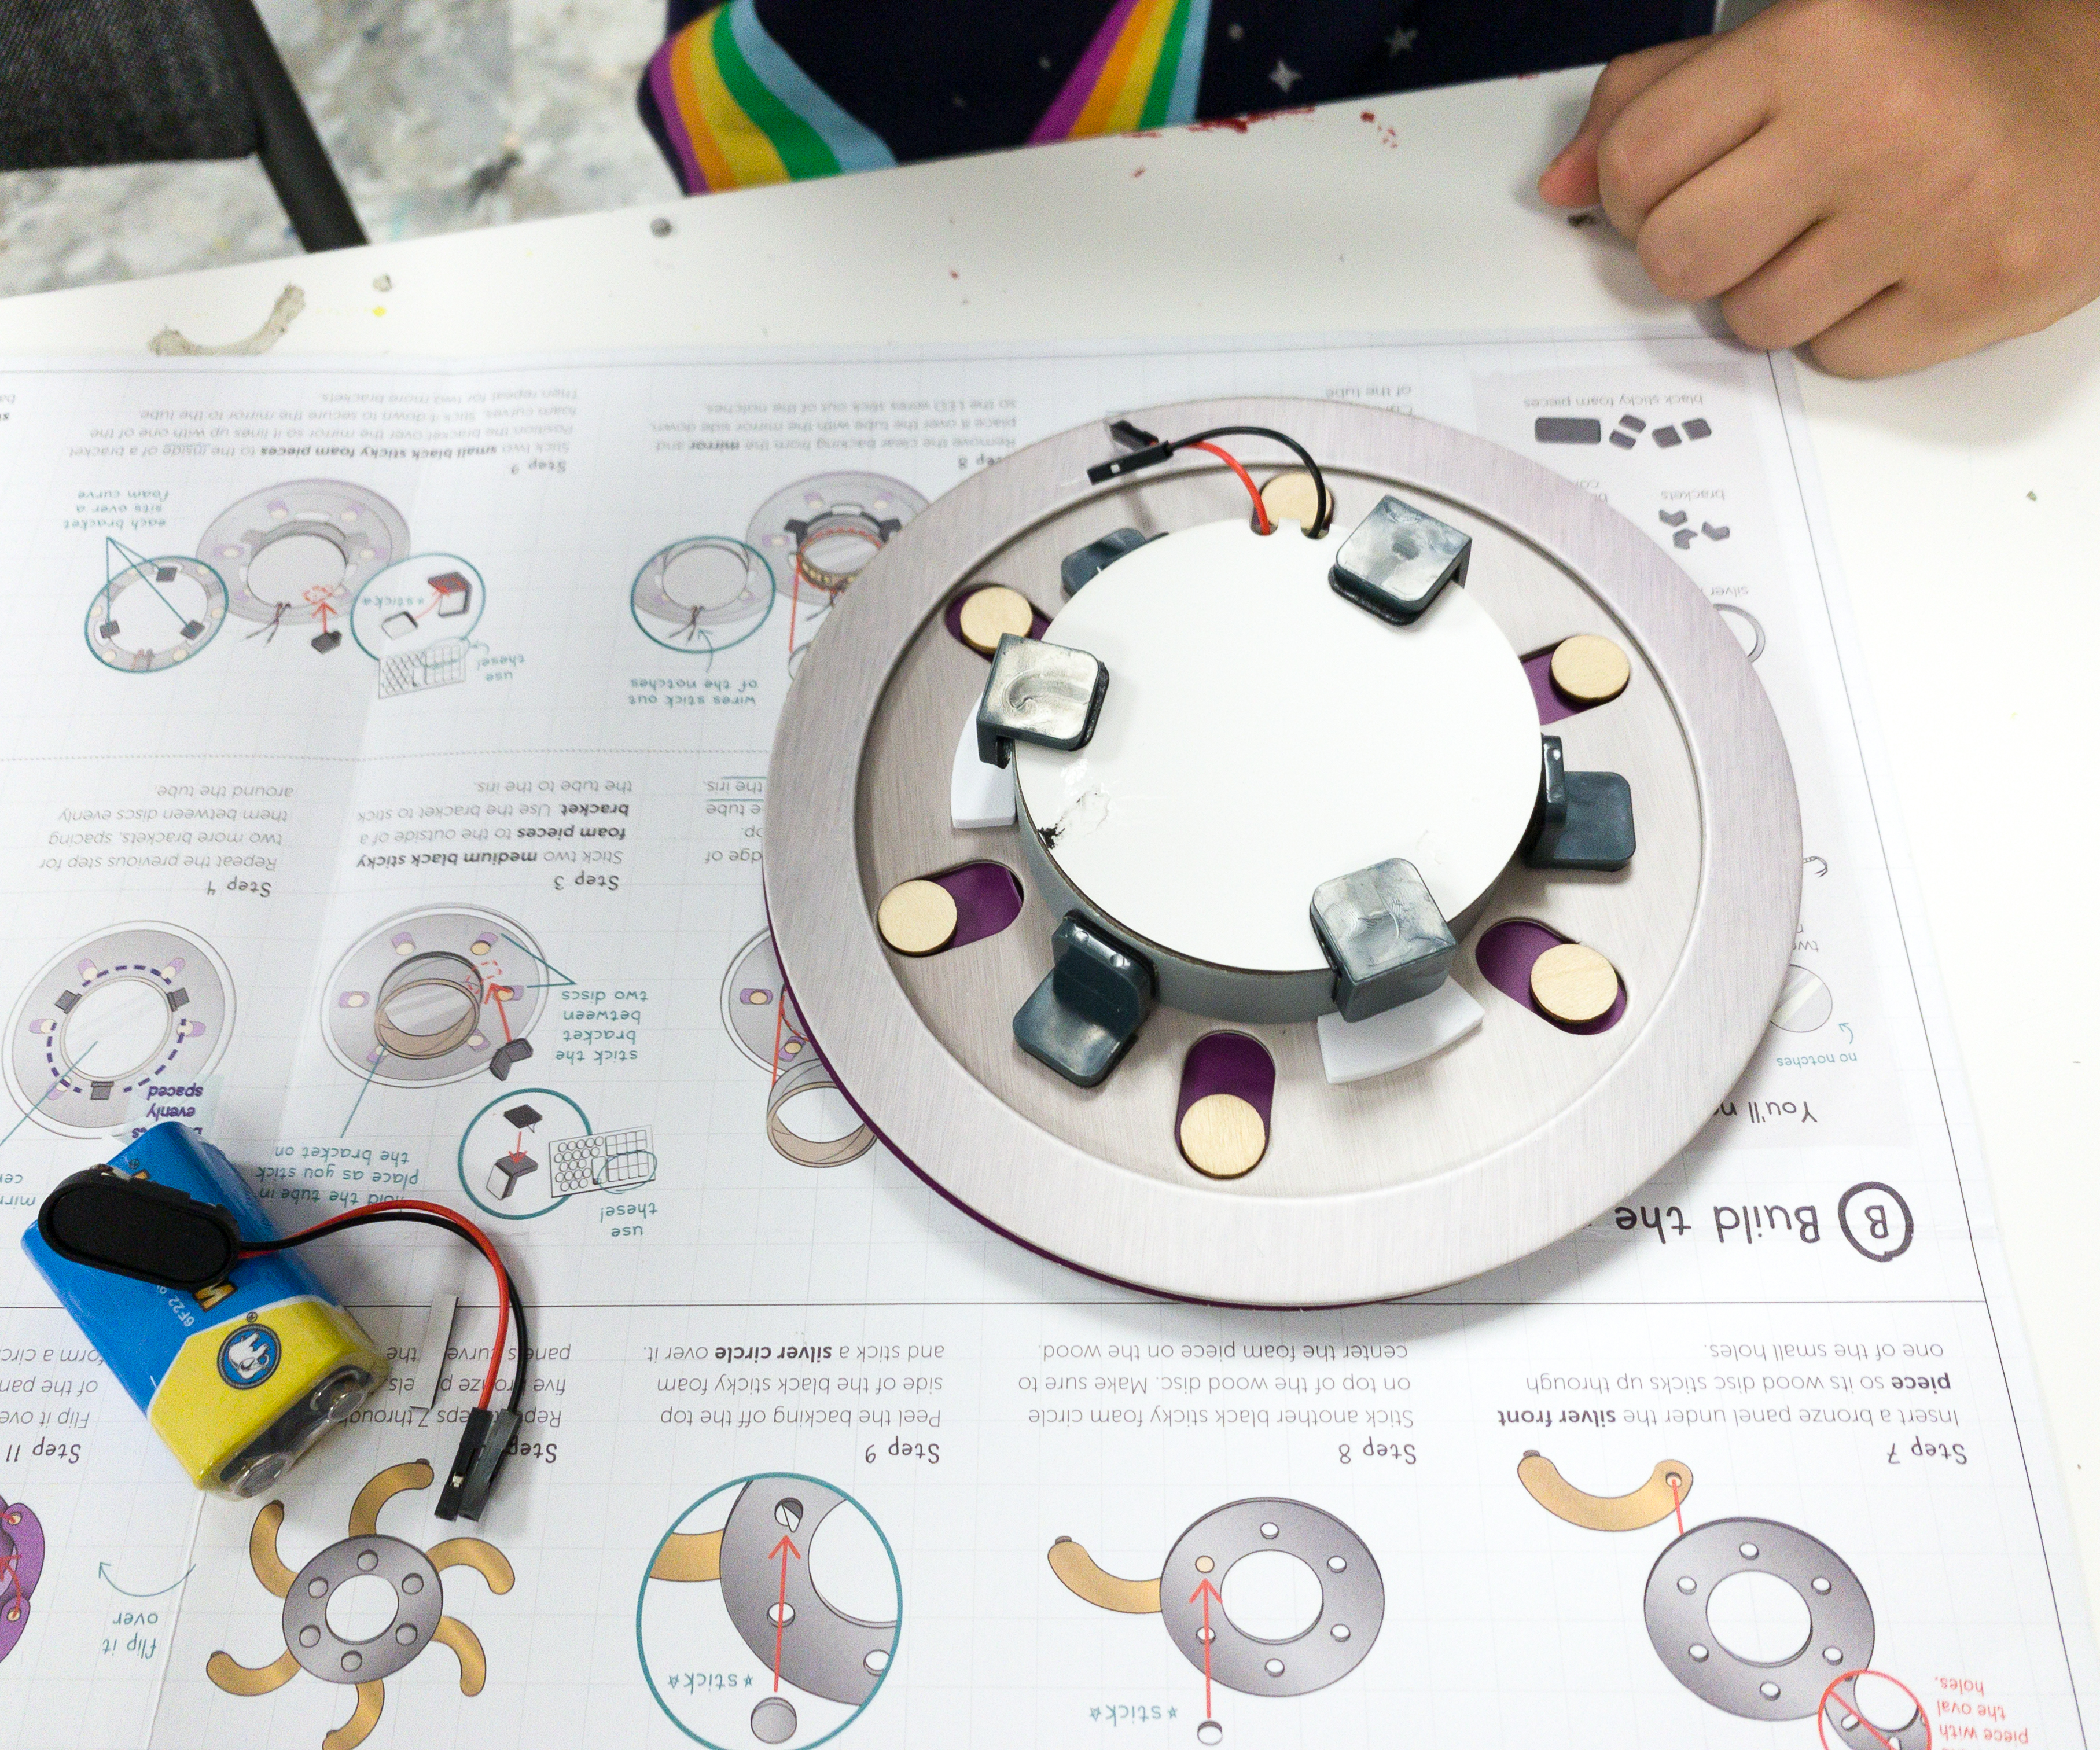
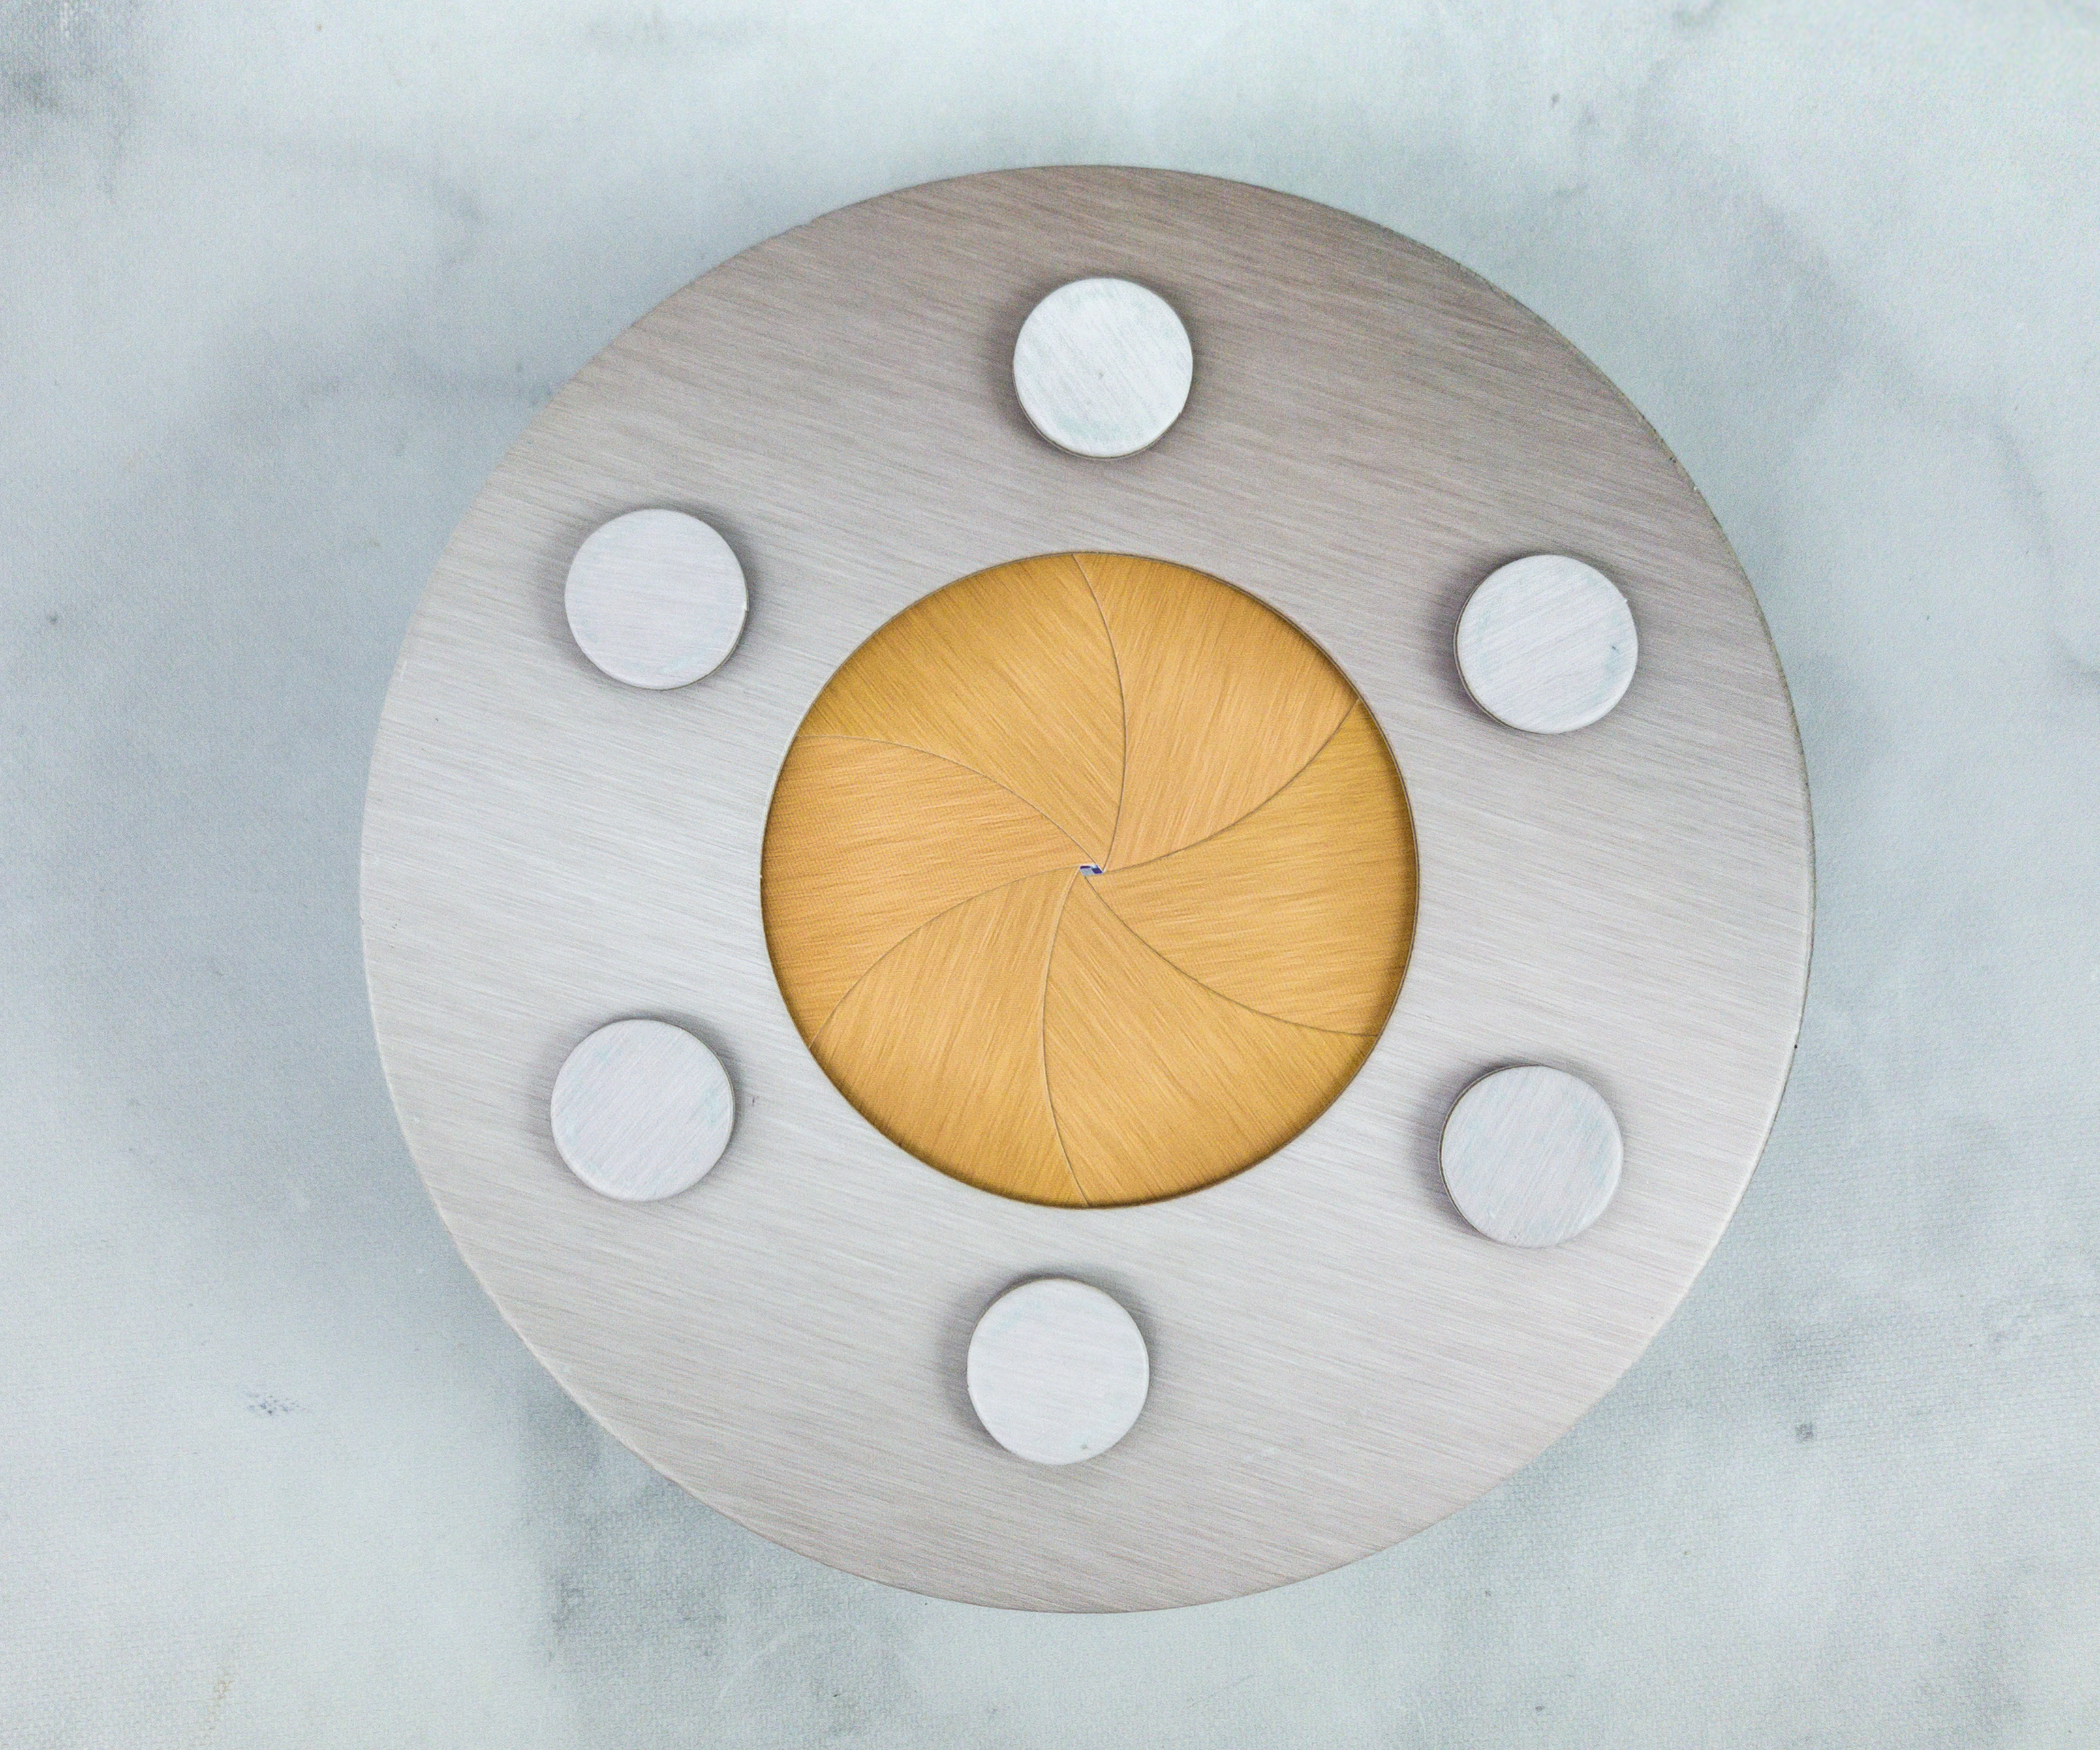
To build the iris, we used the following materials: black sticky foam circles, wood discs, silver circle, panel guide, bronze panels, silver front piece, silver back piece, and an adhesive ring.
My son attached the bronze panels on the silver front piece.
He used the foam circles on top of the wood discs and made sure that the foam piece is centered.
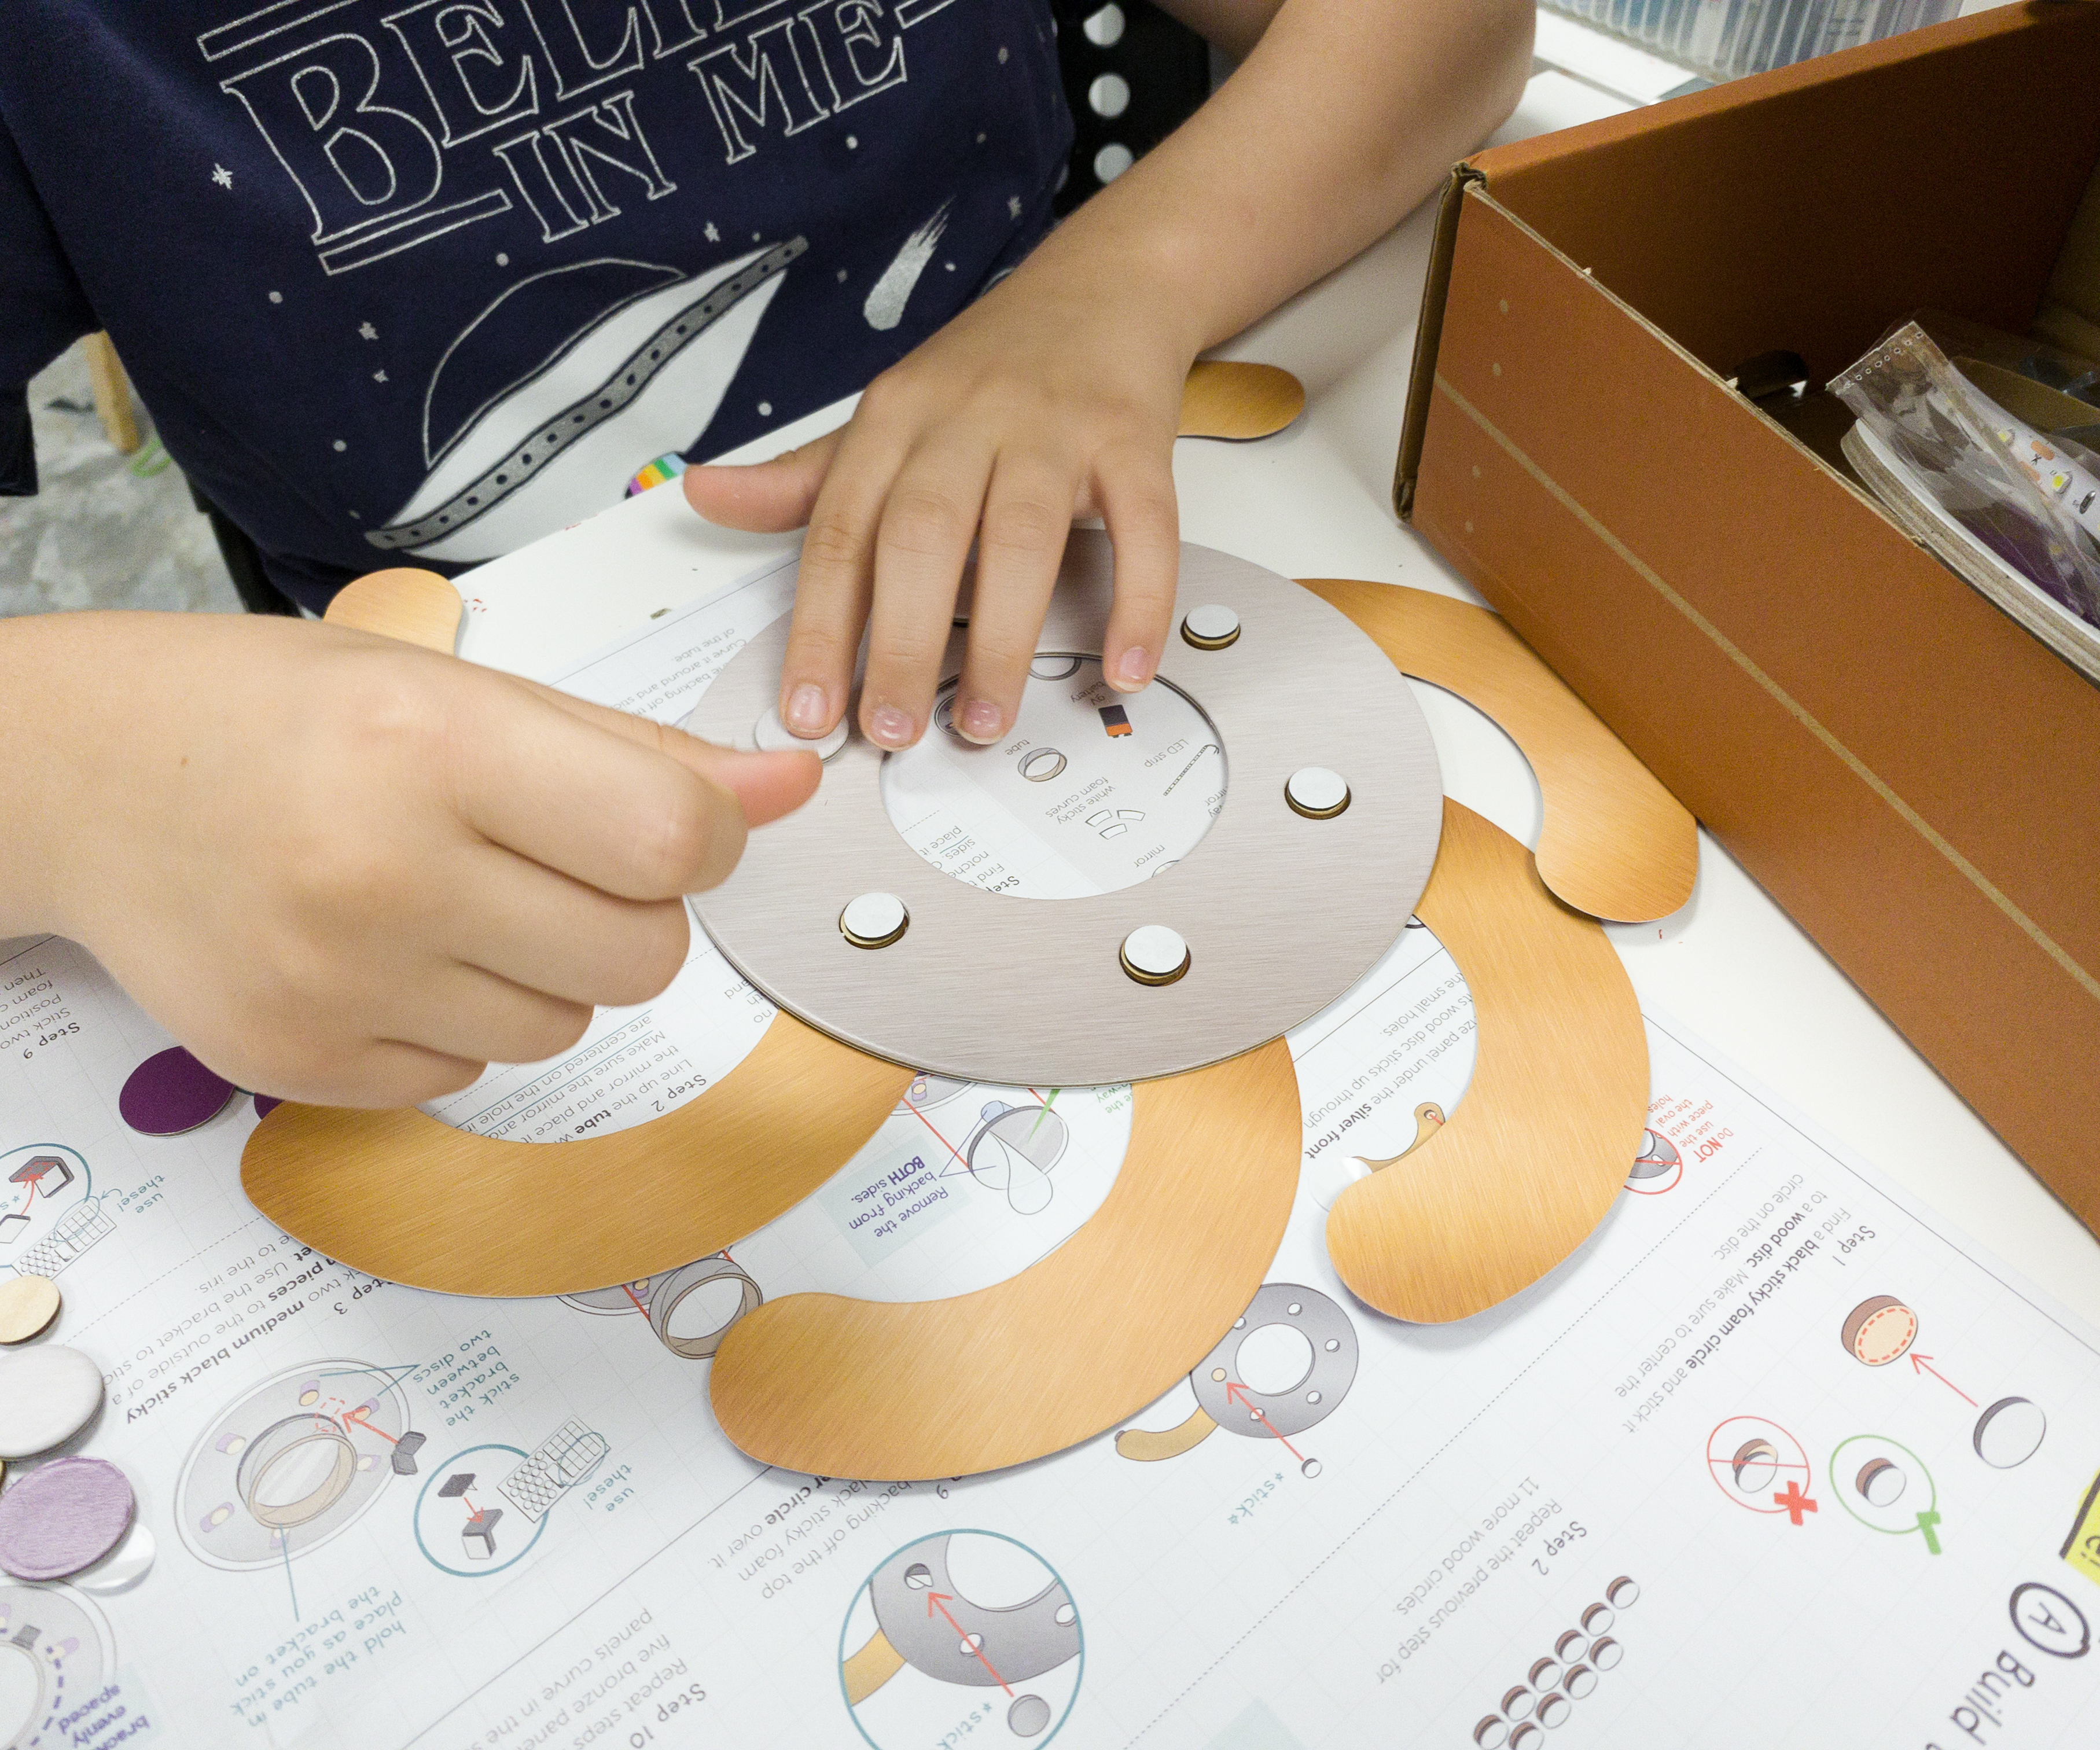
He also attached the rest of the bronze panels.
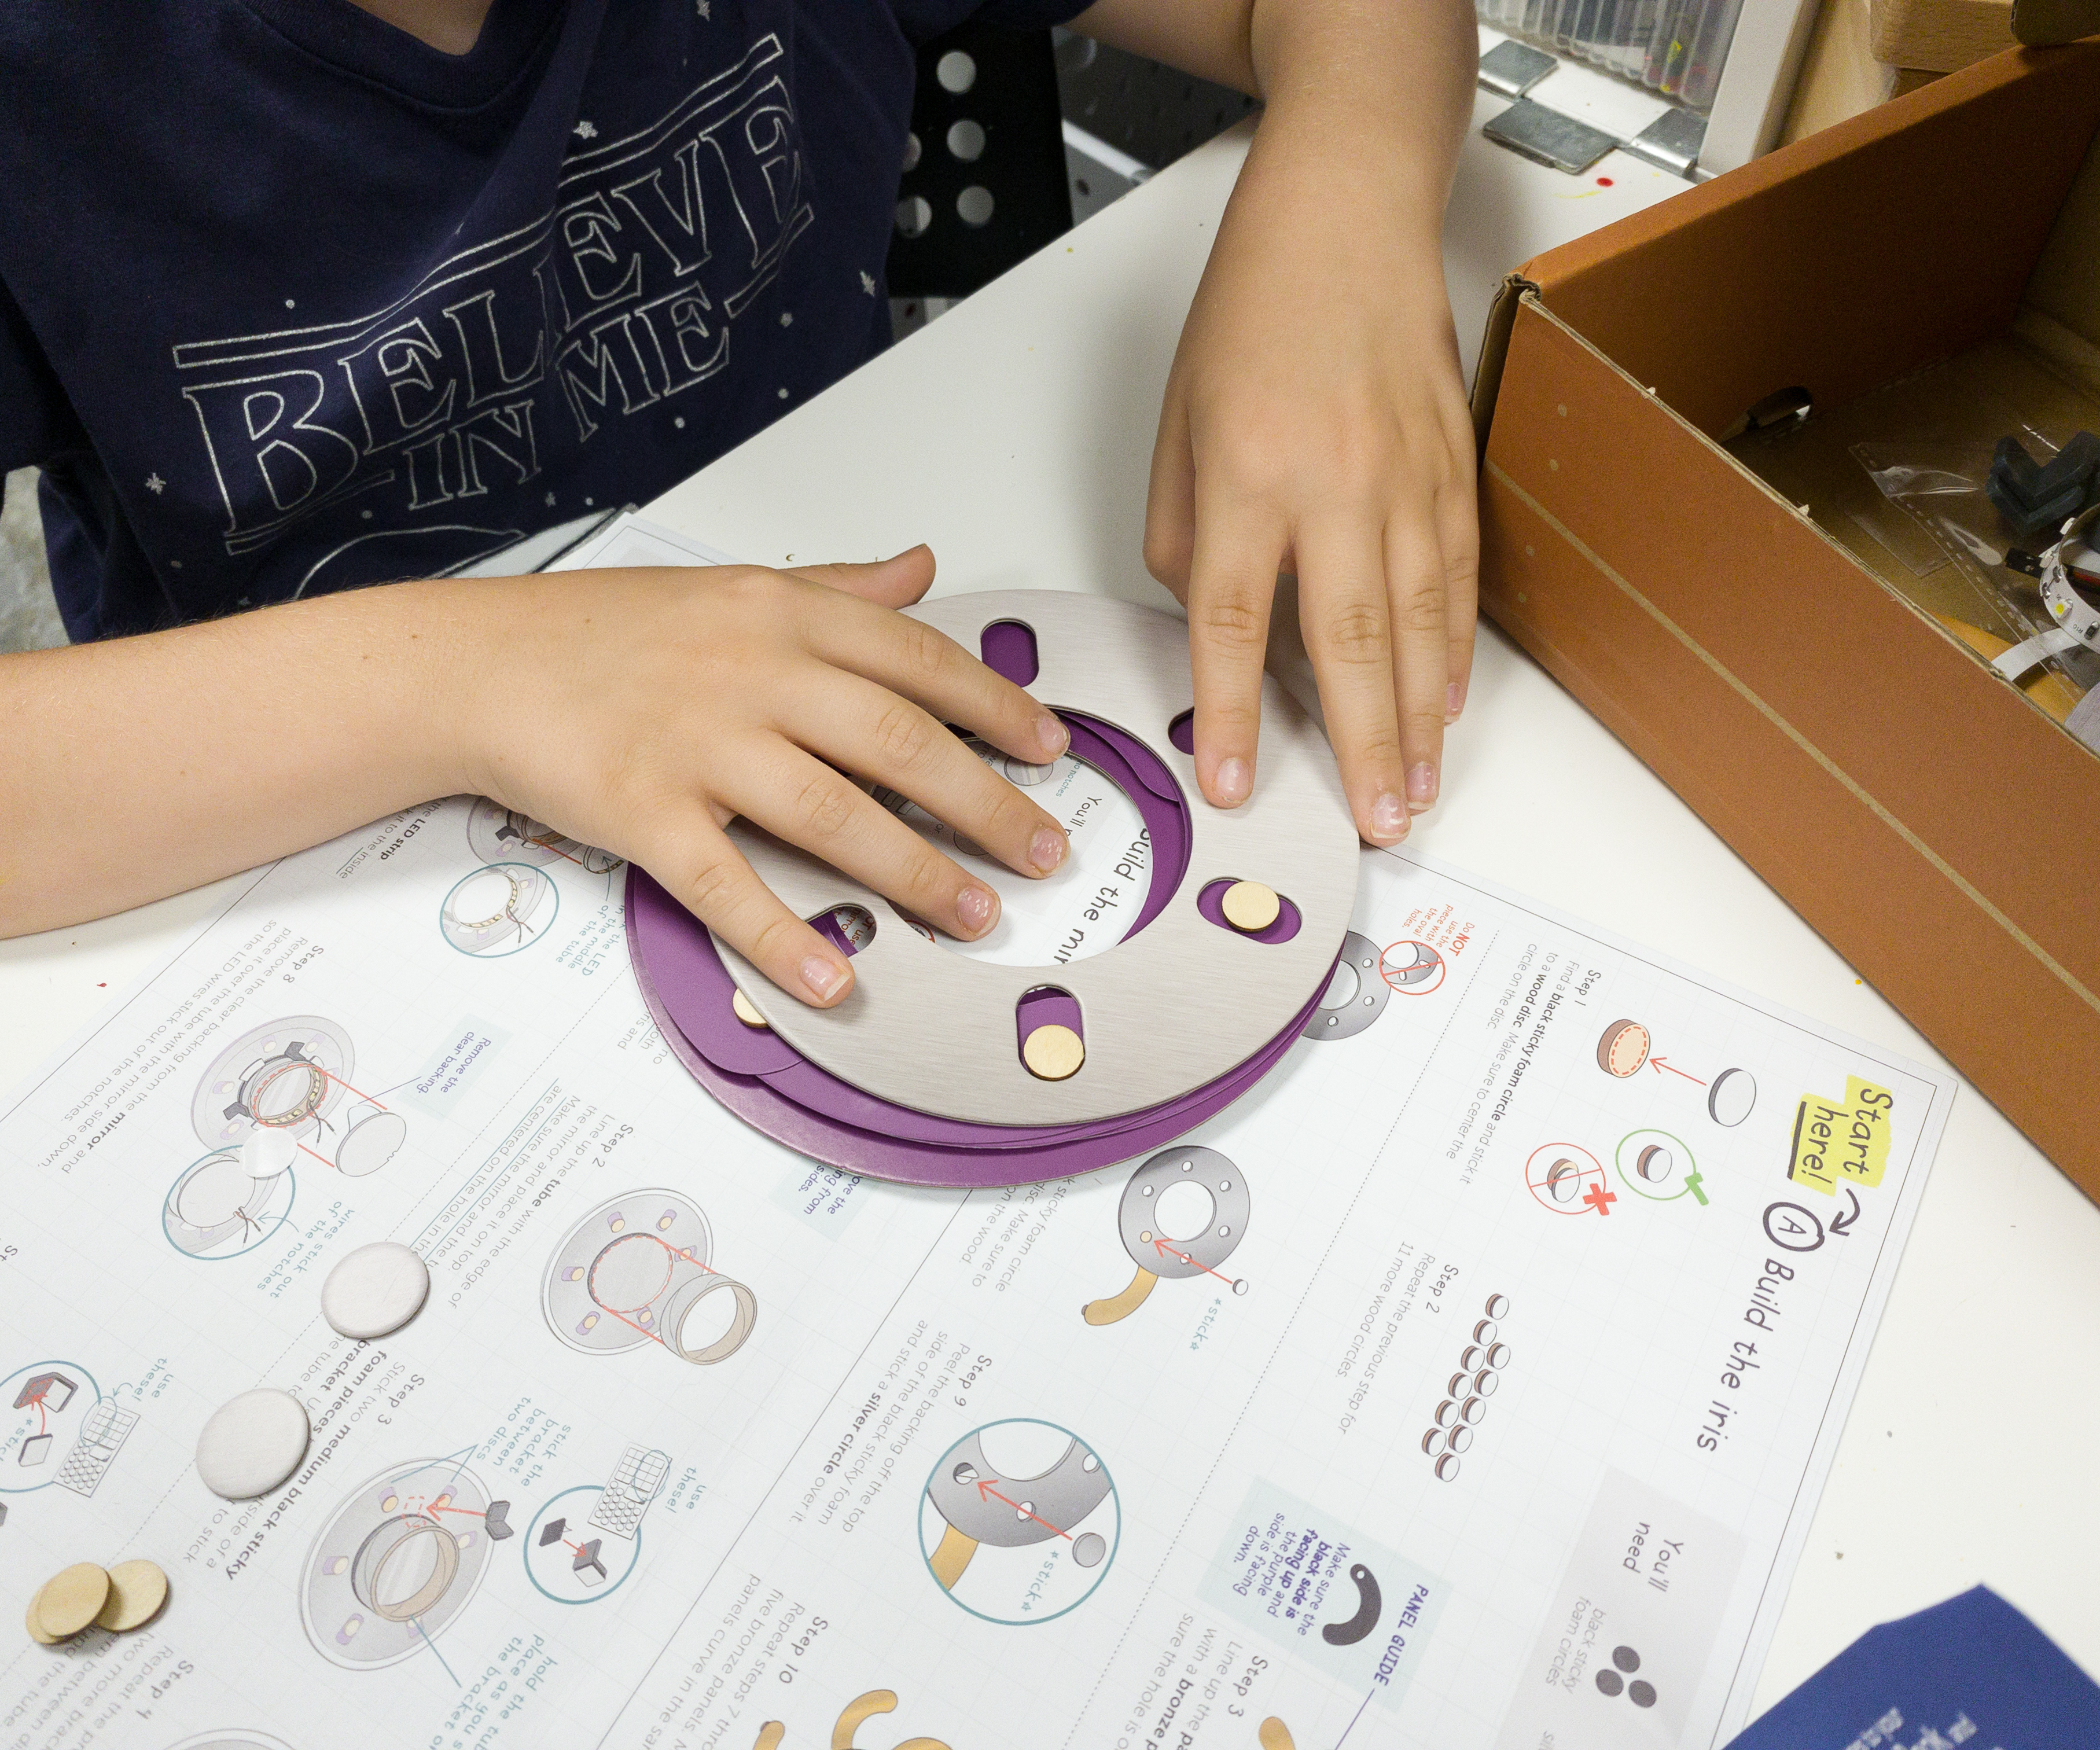
For the panel guide, my son made sure that the black side is facing up, while the purple side is facing down.
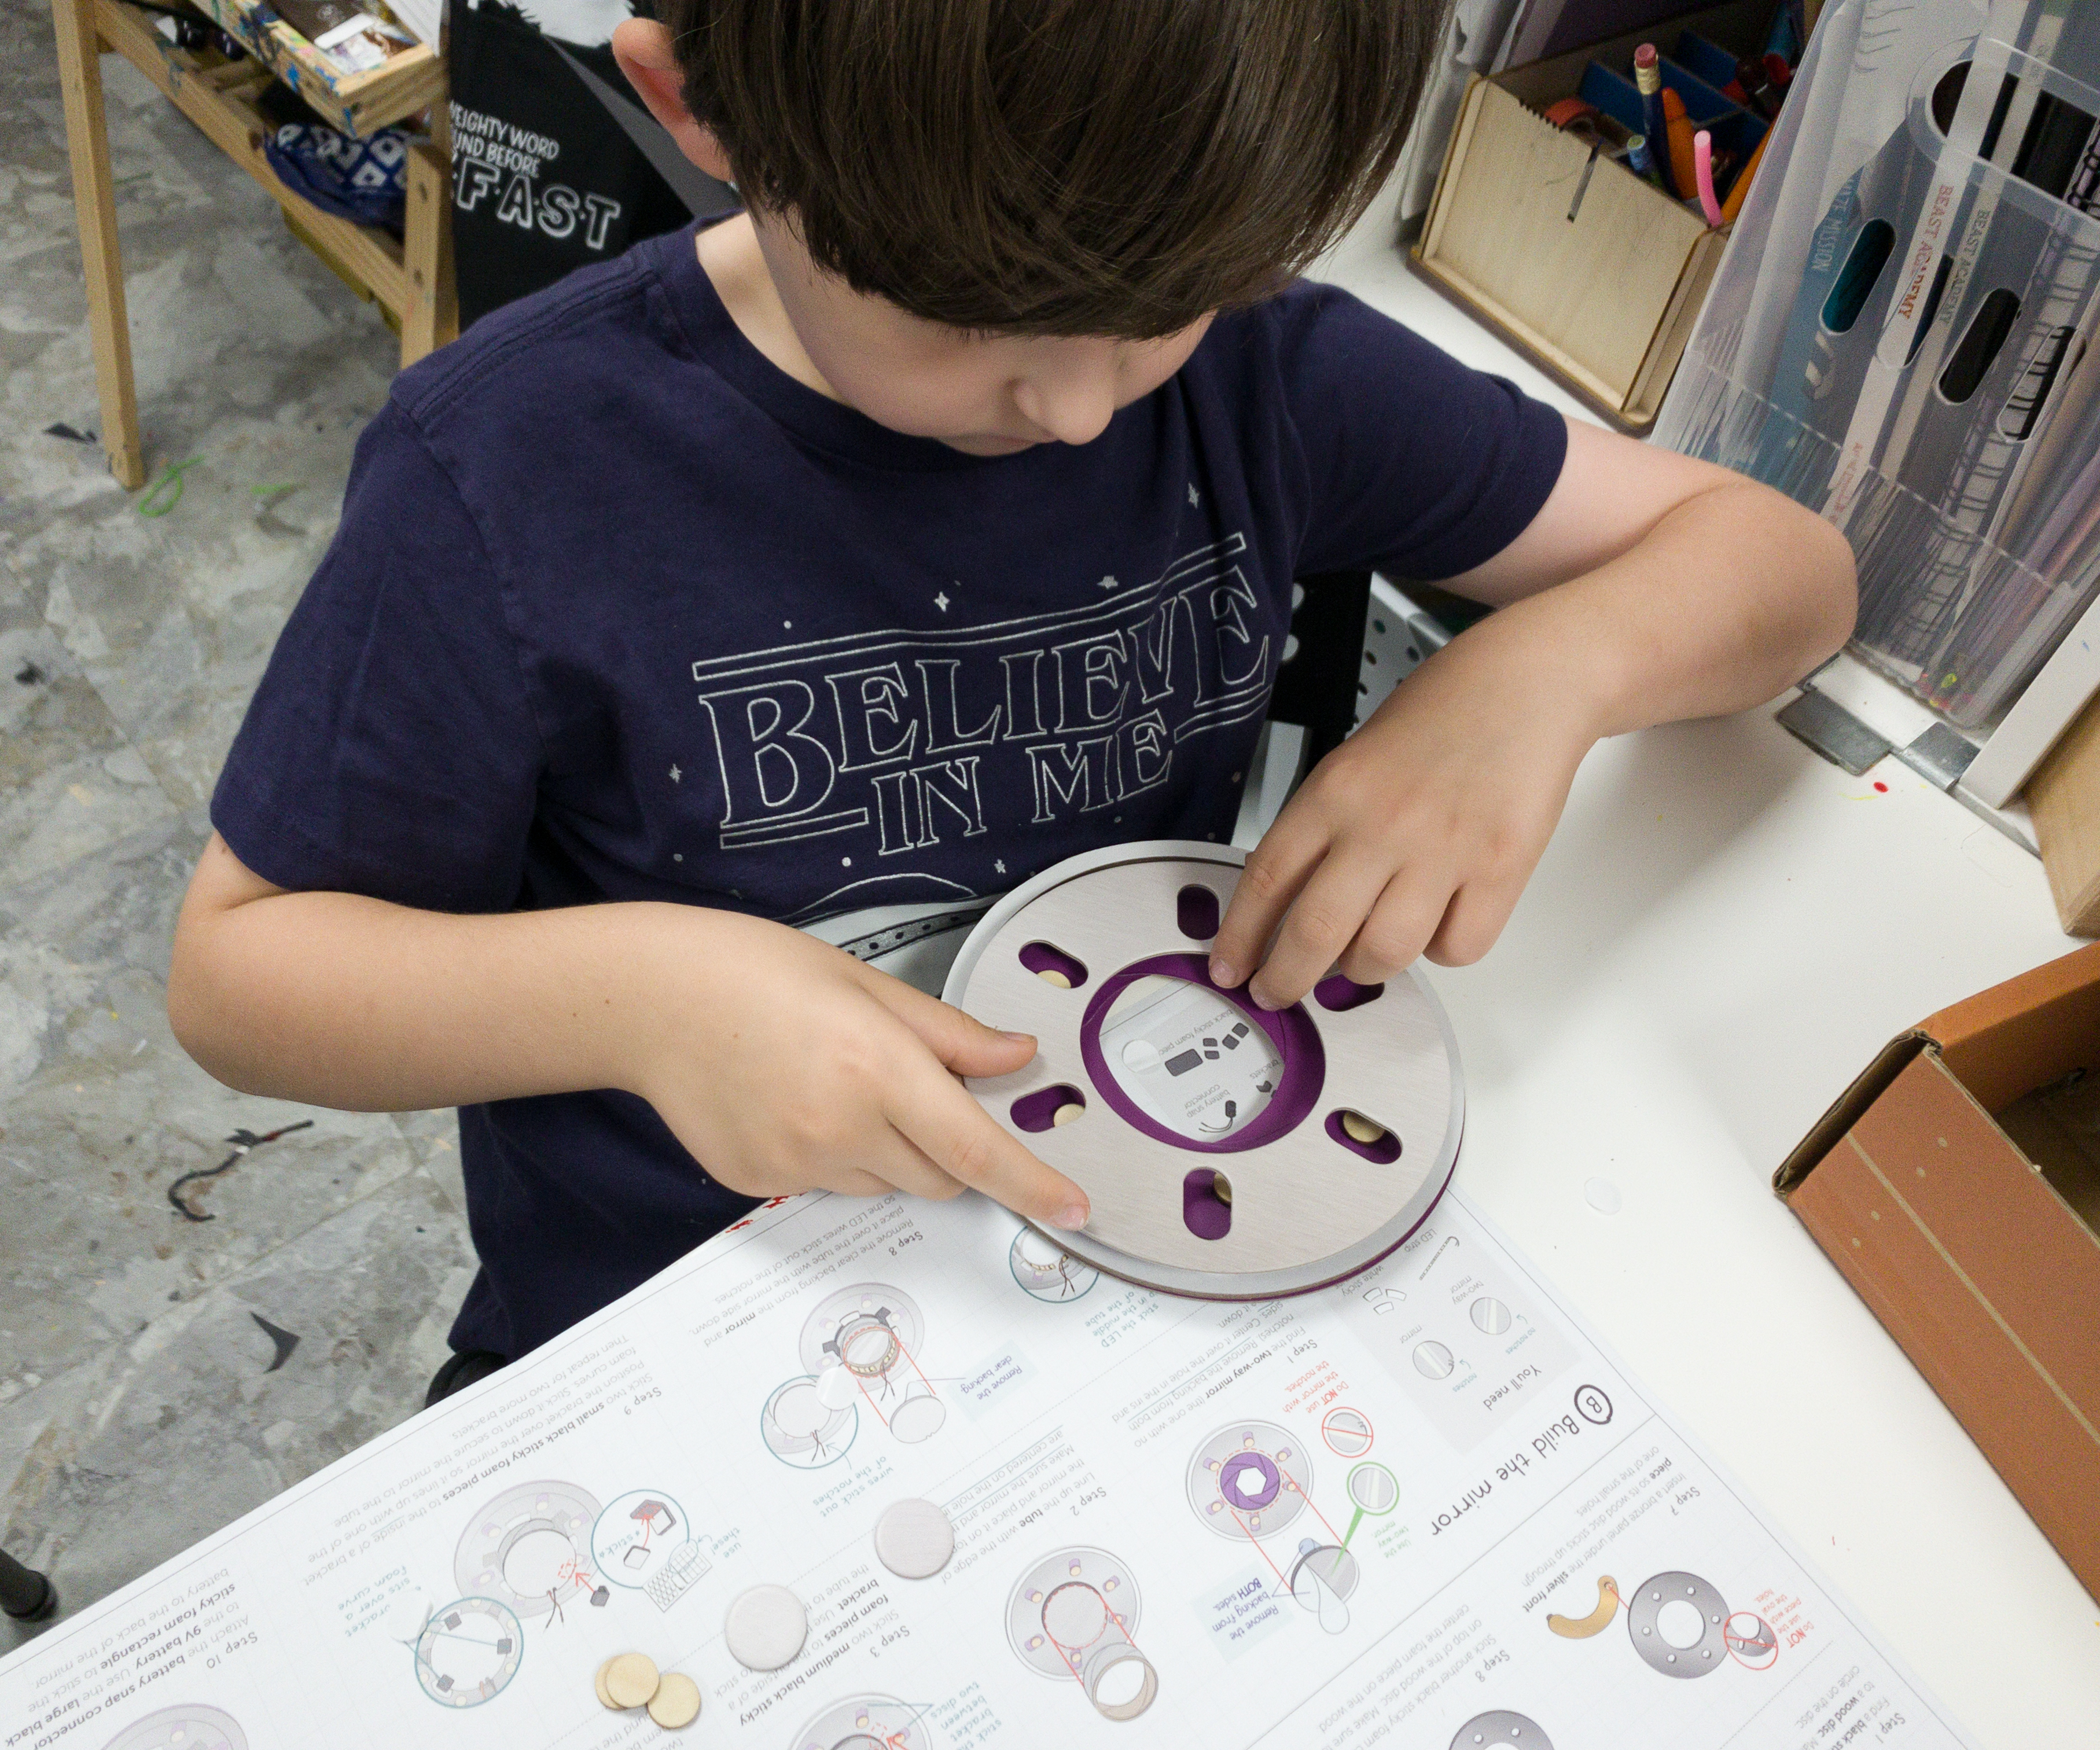
He did the adjustments to align them properly.
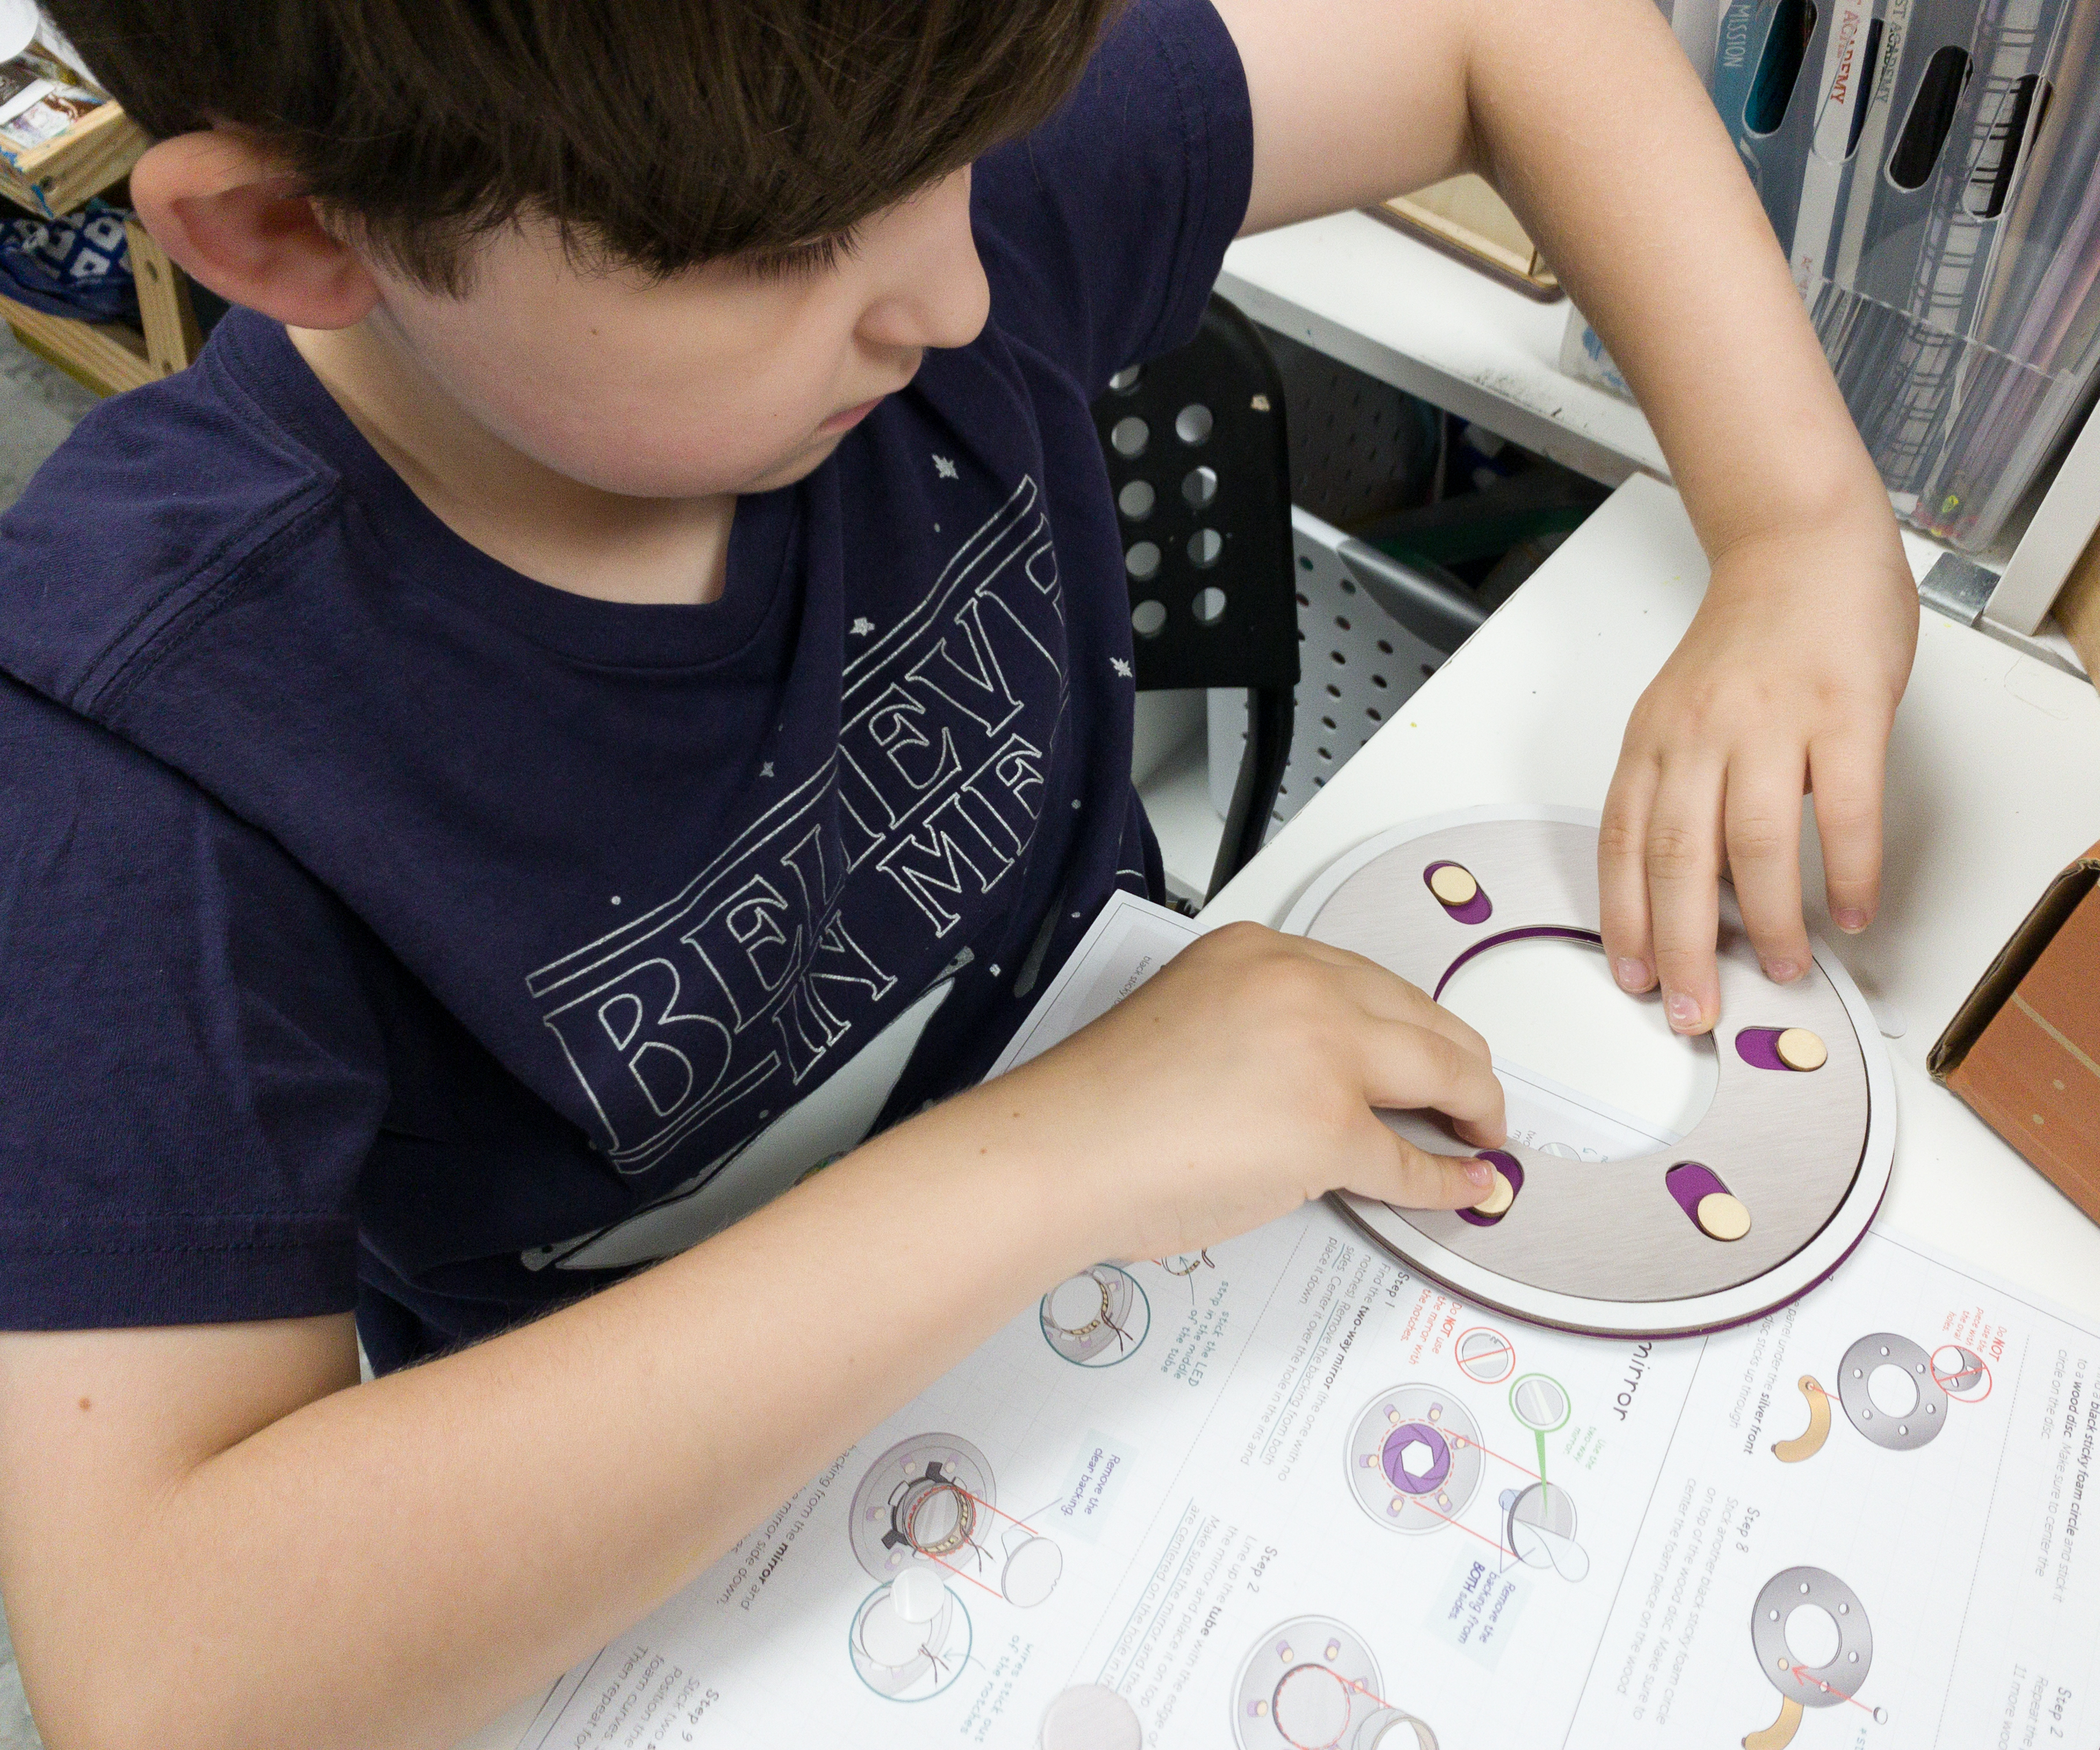
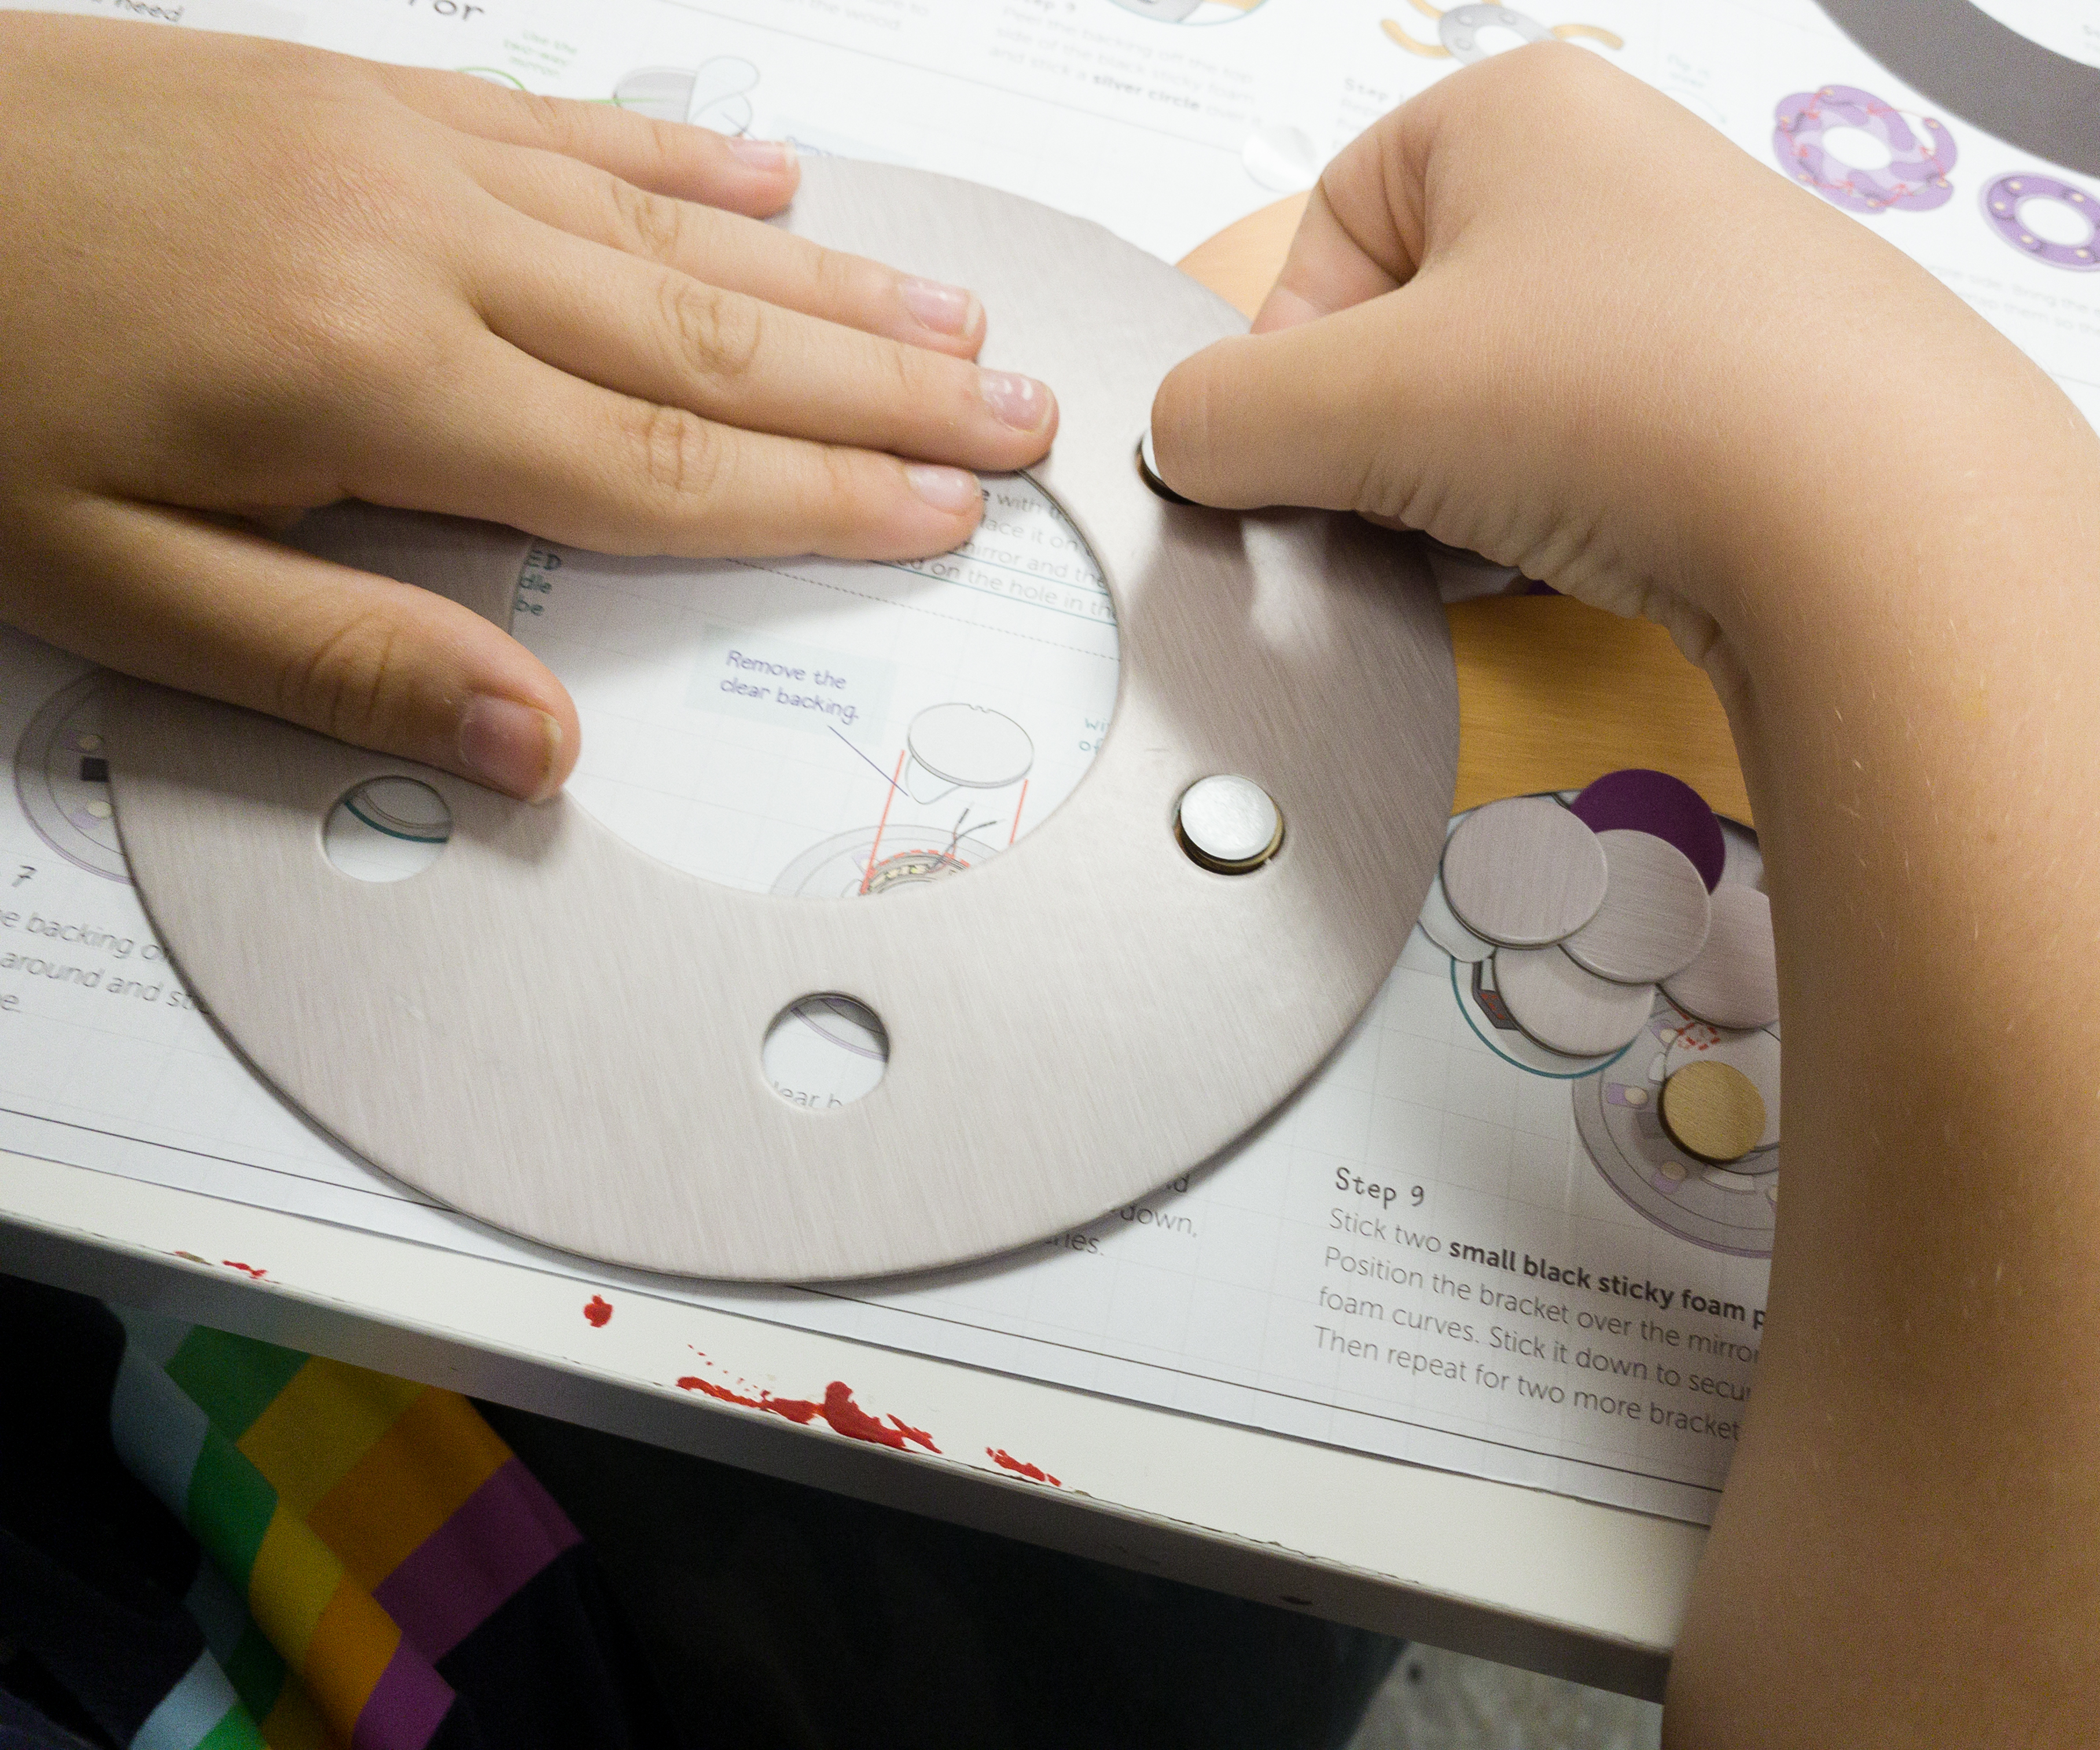
It’s time to add the silver back piece. He also made sure that the wood discs are showing through the holes.

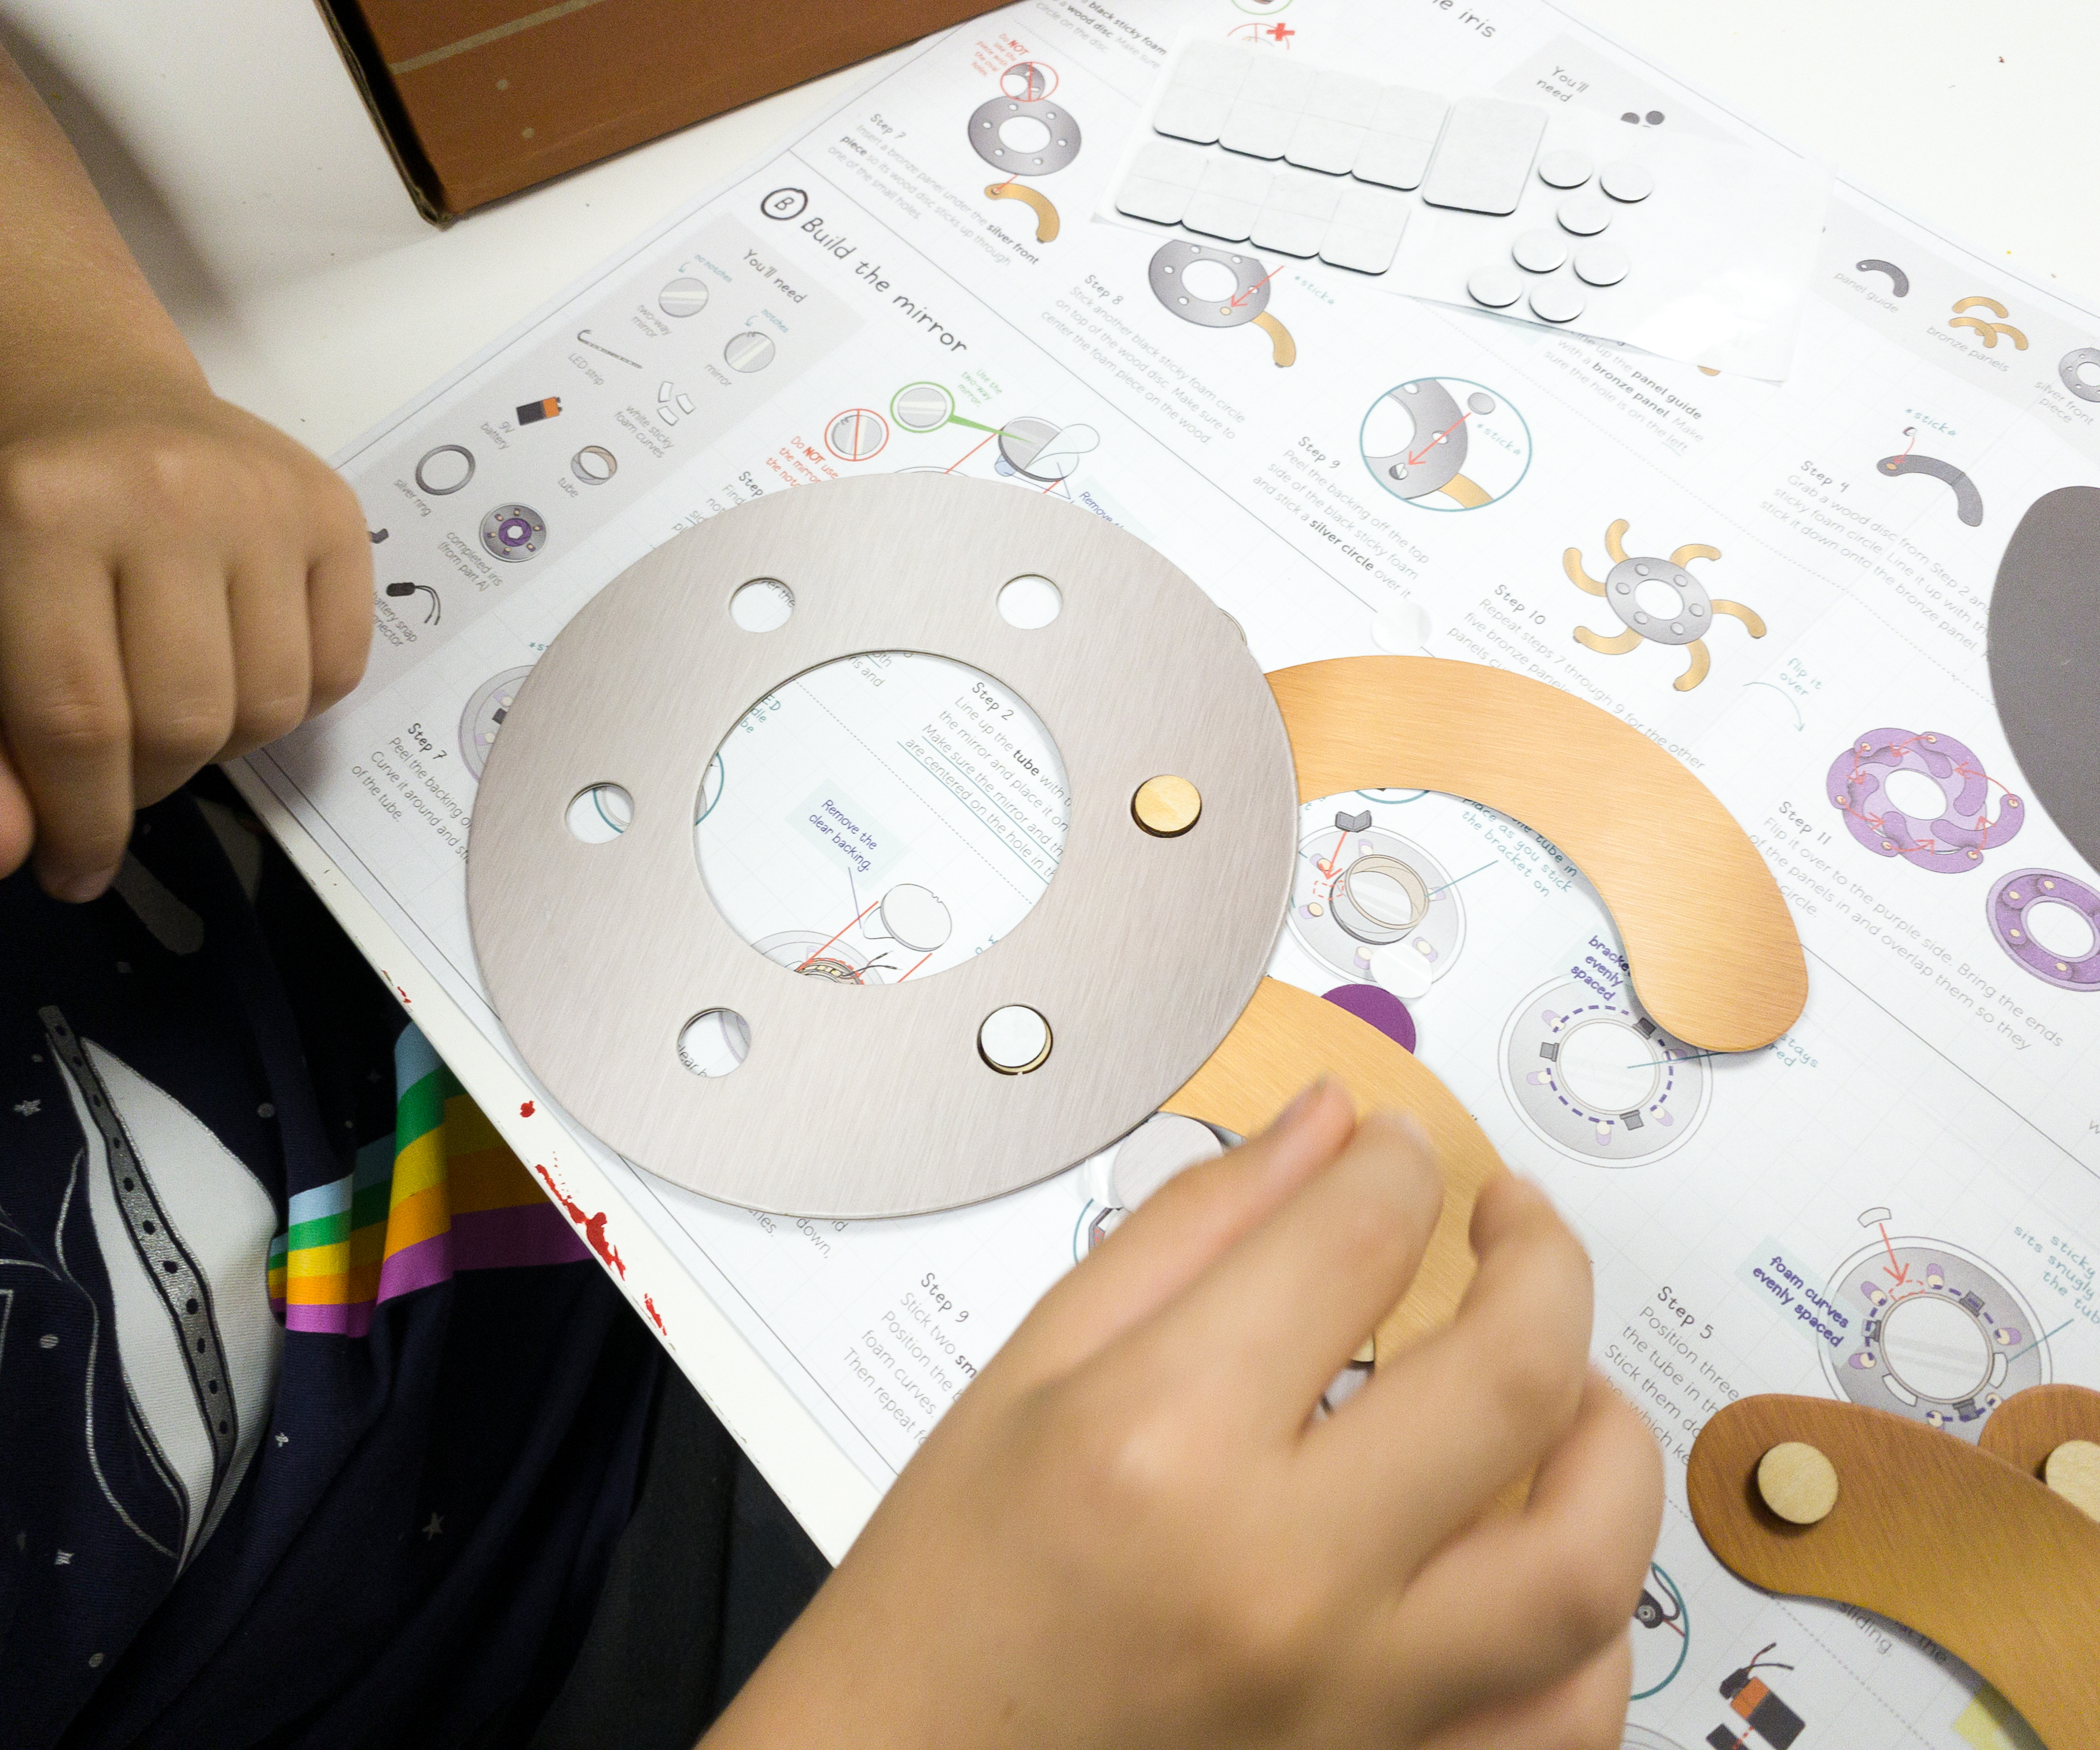
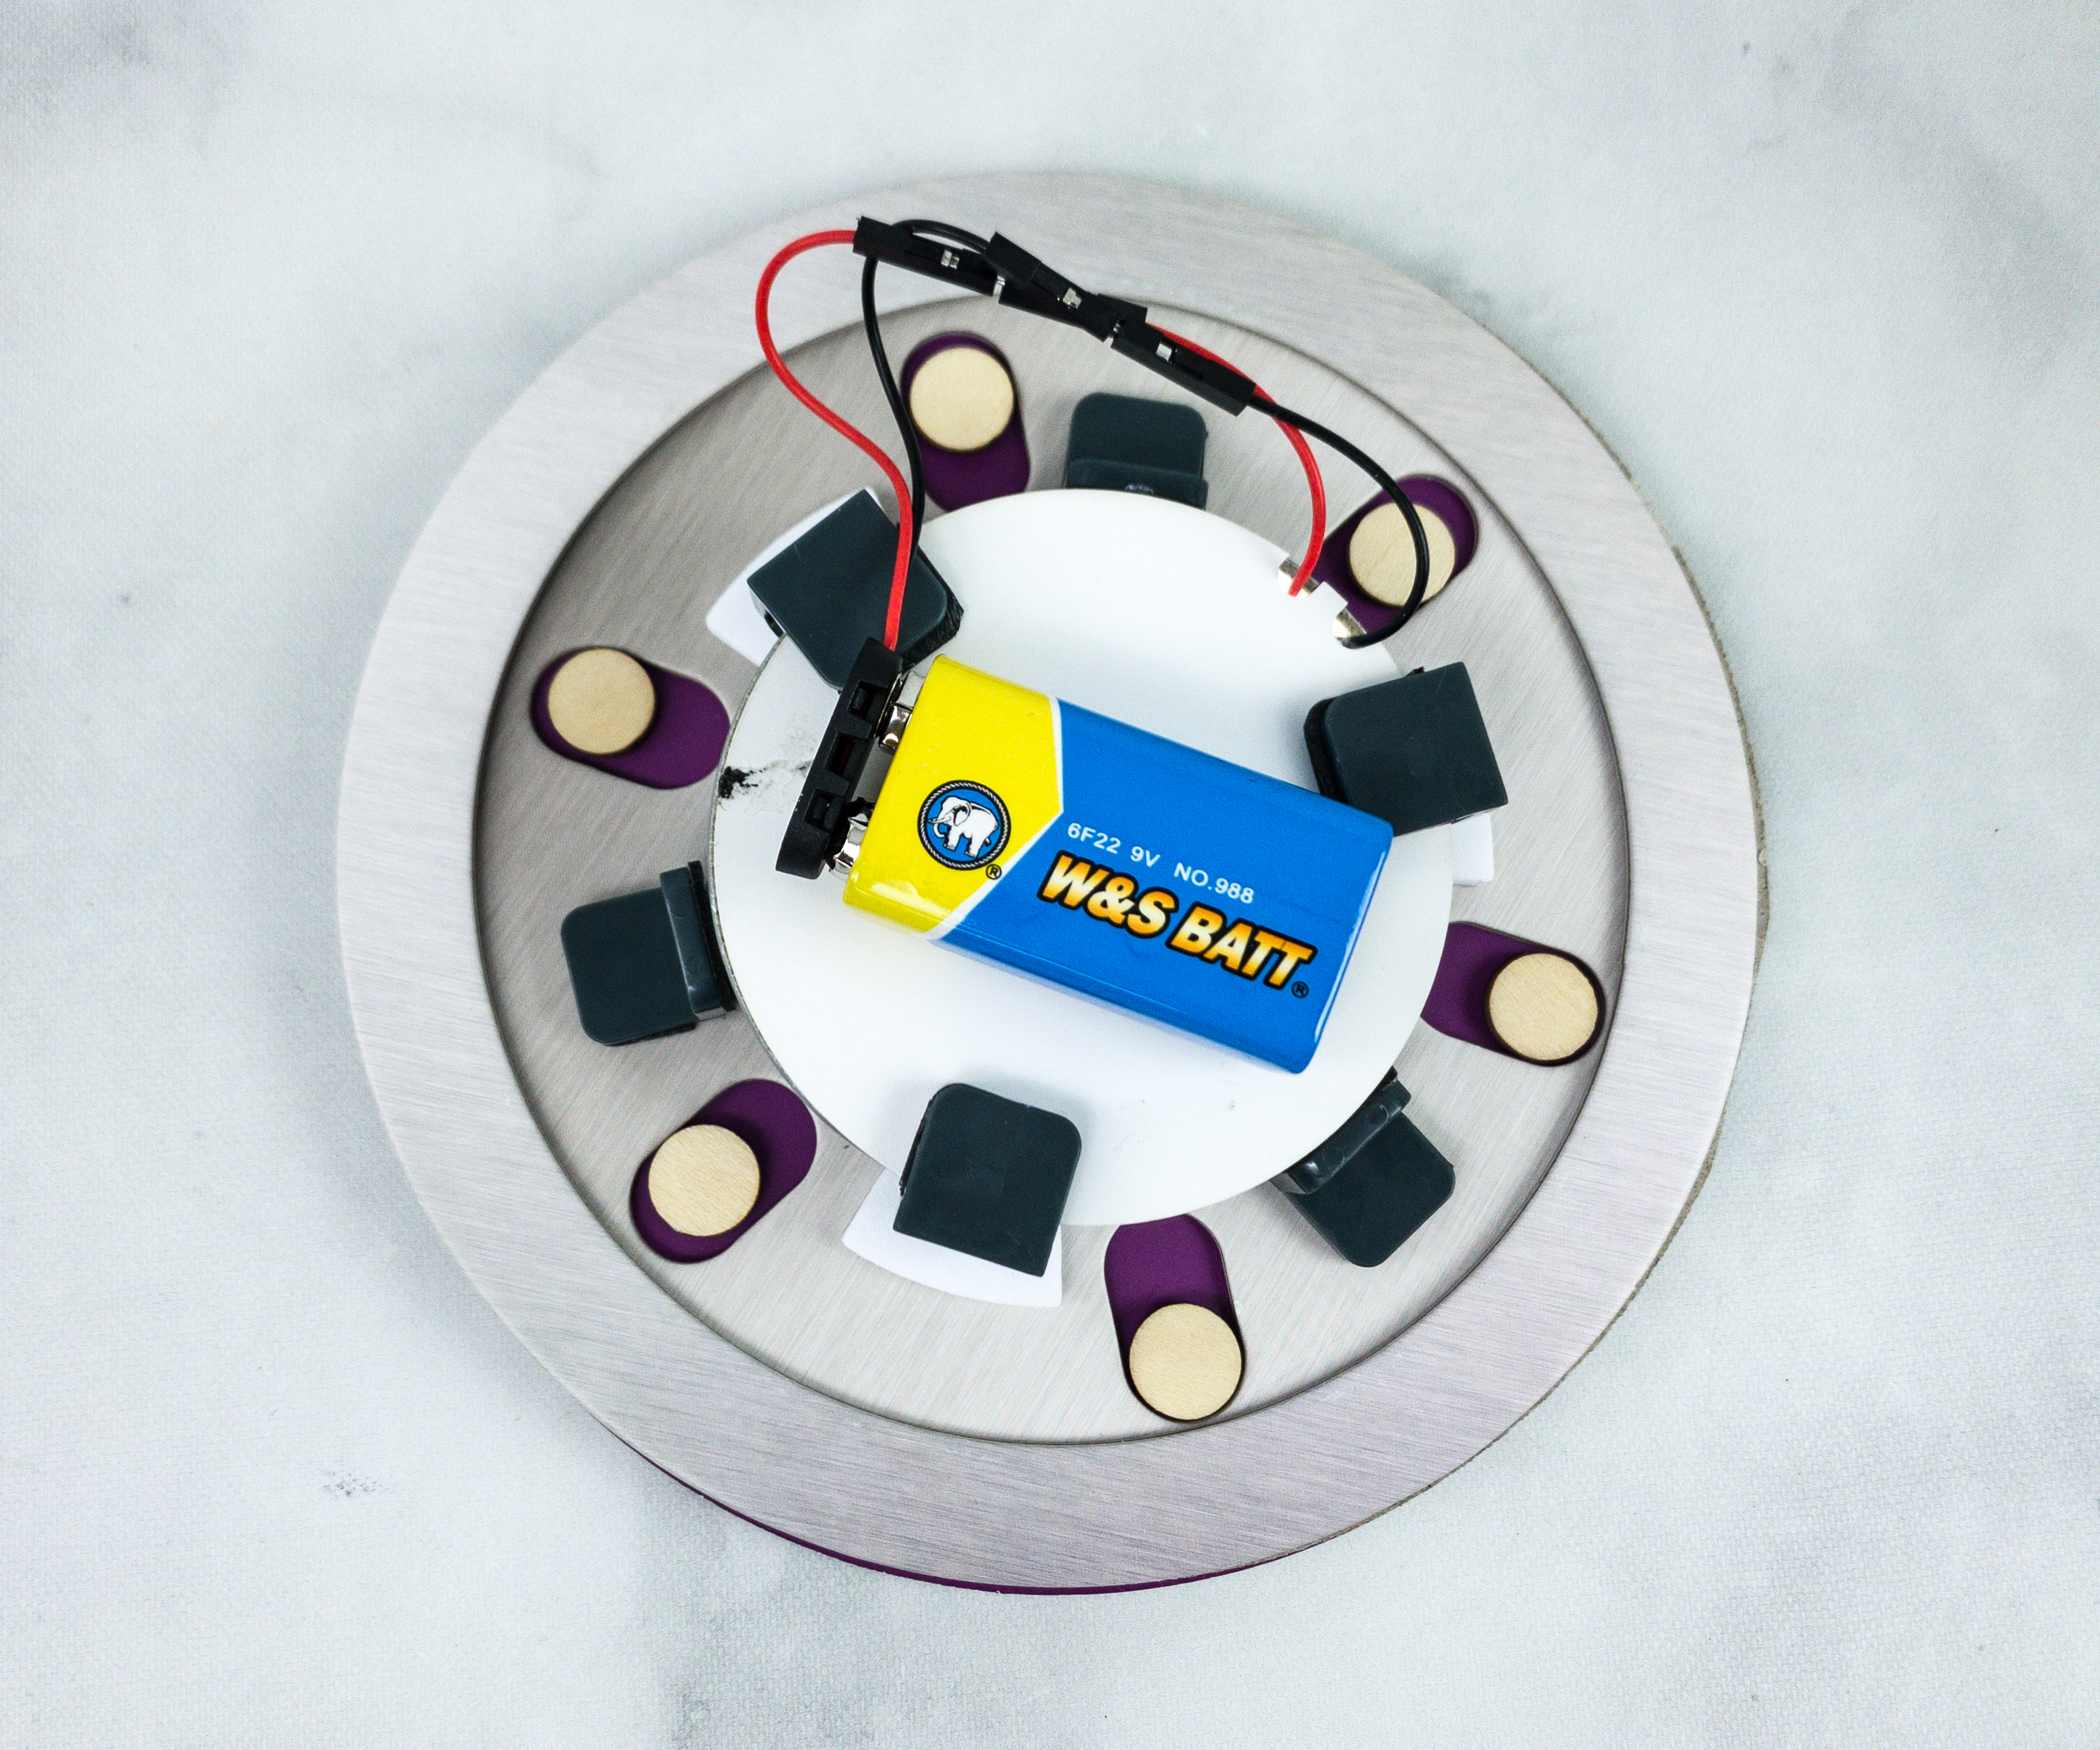
To build the mirror, we used the following: two-way mirror, mirror, LED strip, white sticky foam curves, 9V battery, tube, silver ring, completed iris, brackets, battery snap connector, and black stick foam pieces.
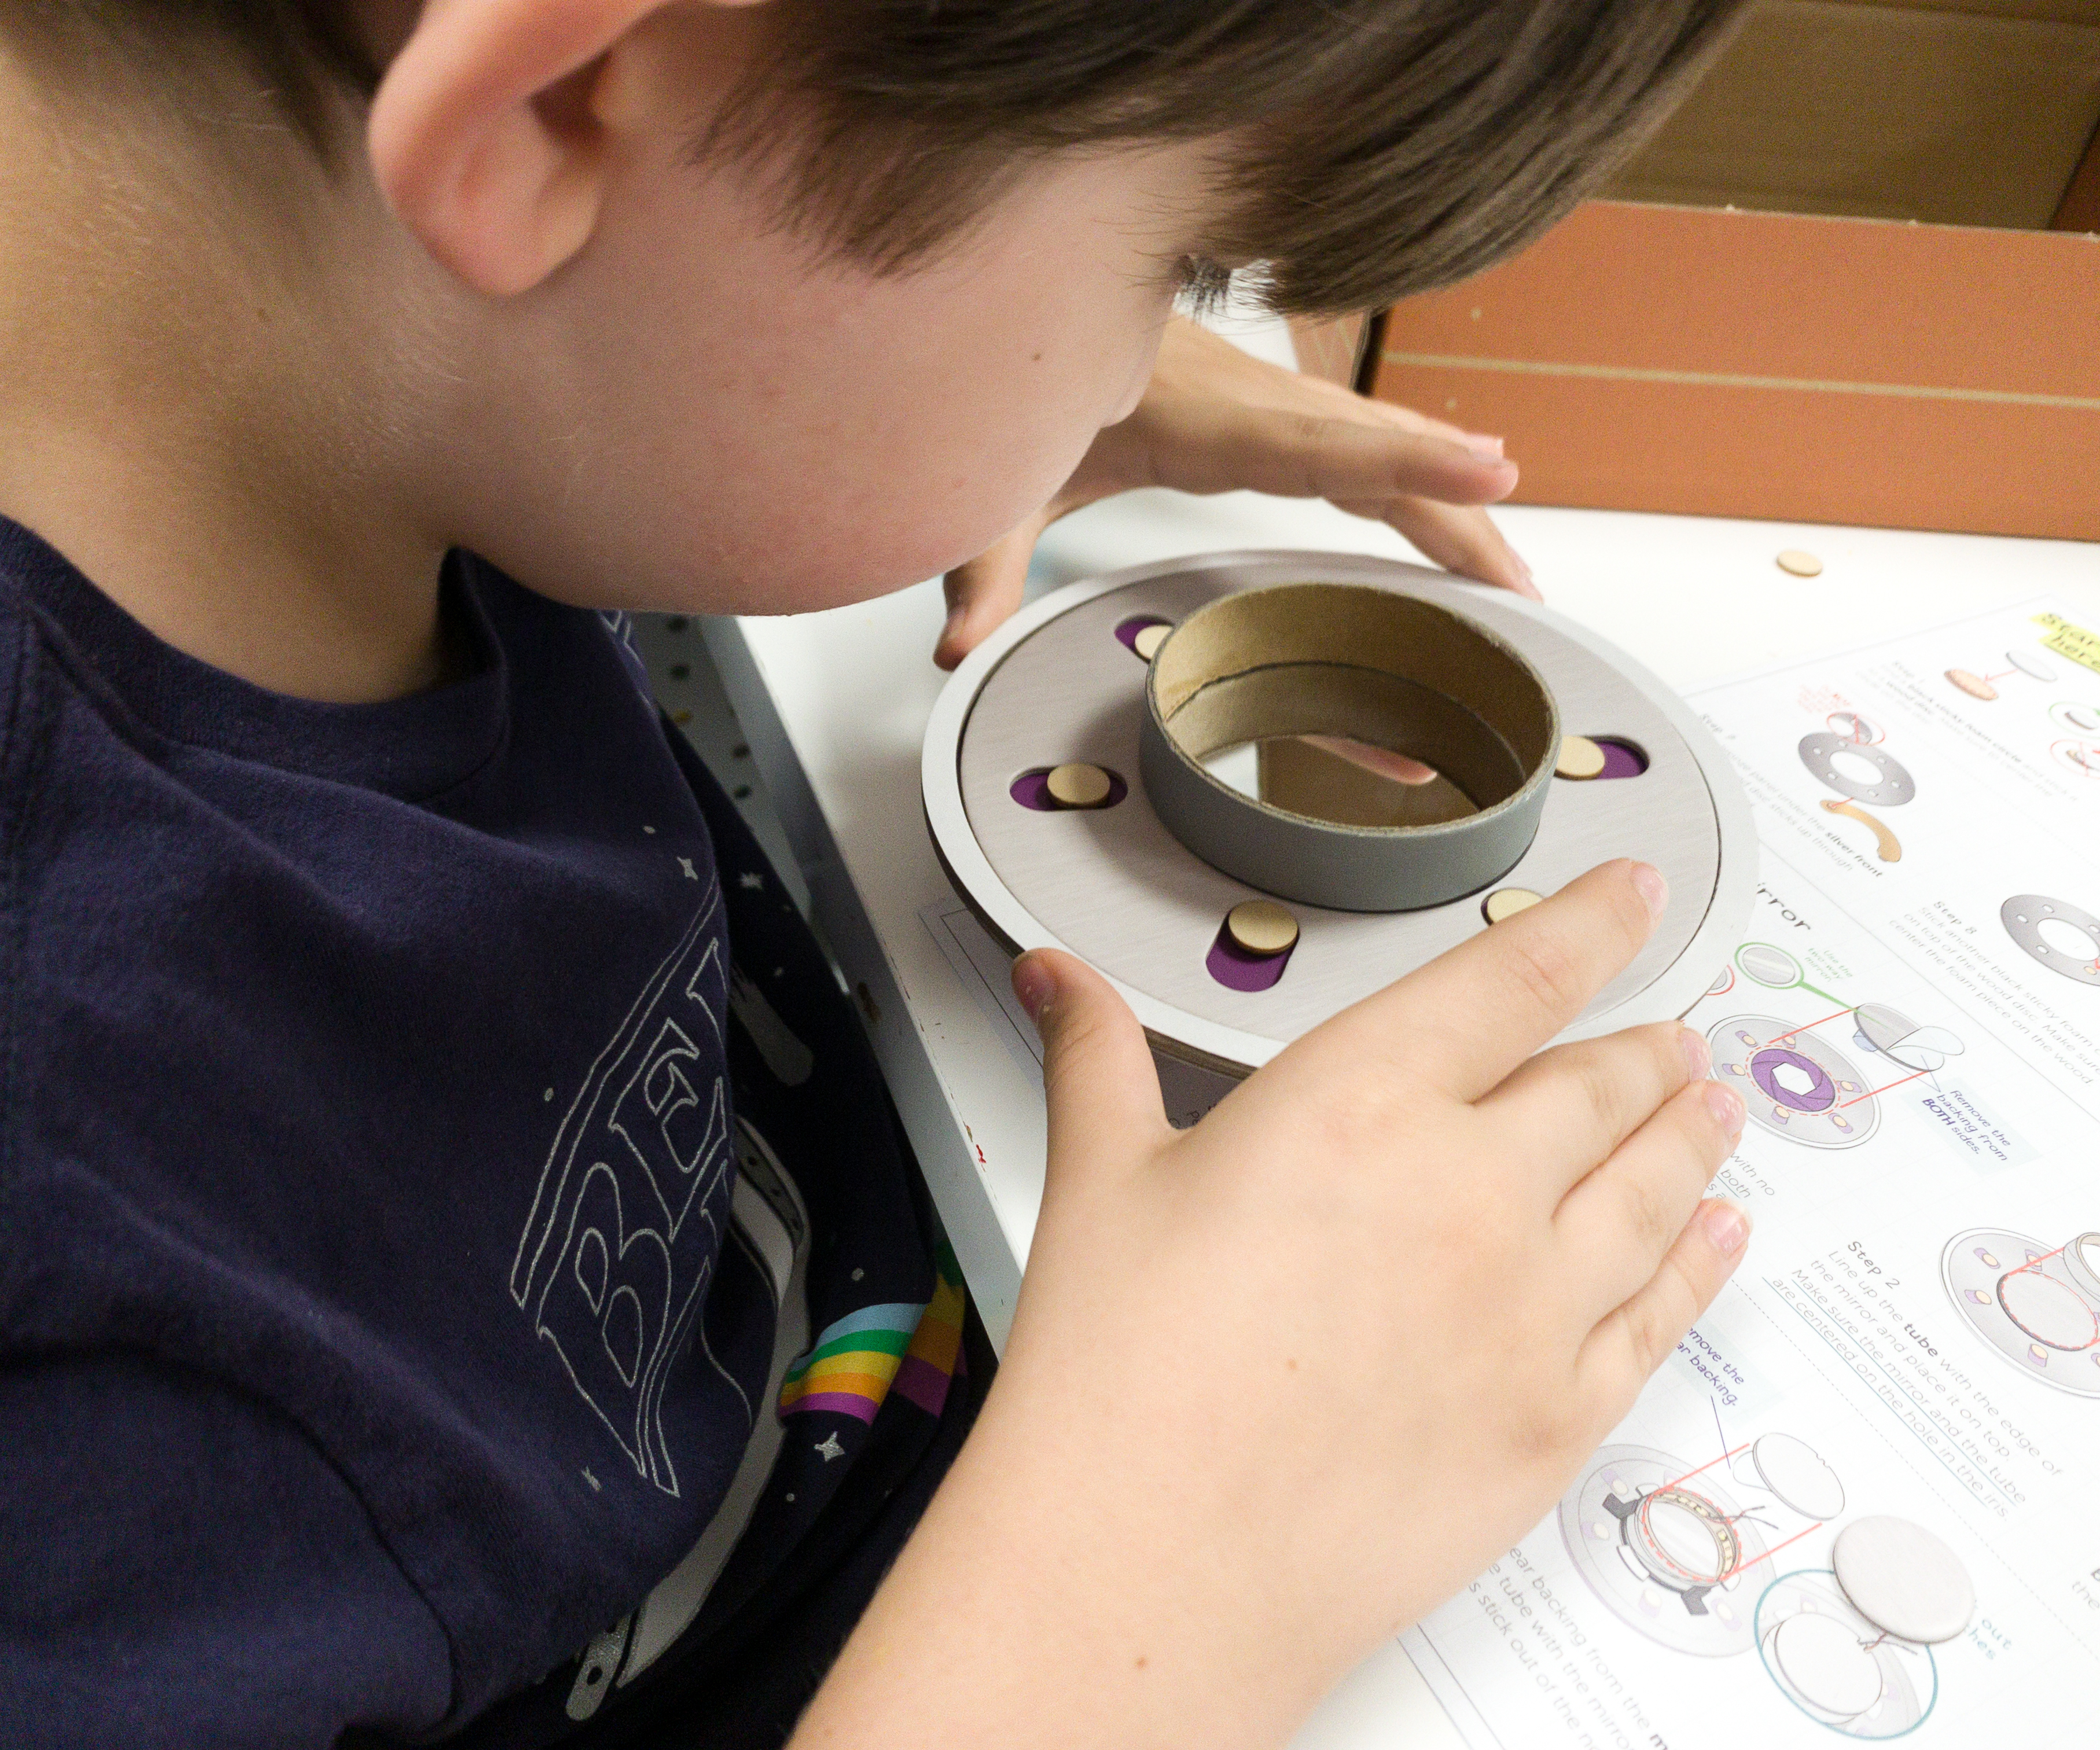
First, he centered the two-way mirror on the hole on the completed iris, then he lined up the tube.
He also put the silver circle on the iris.
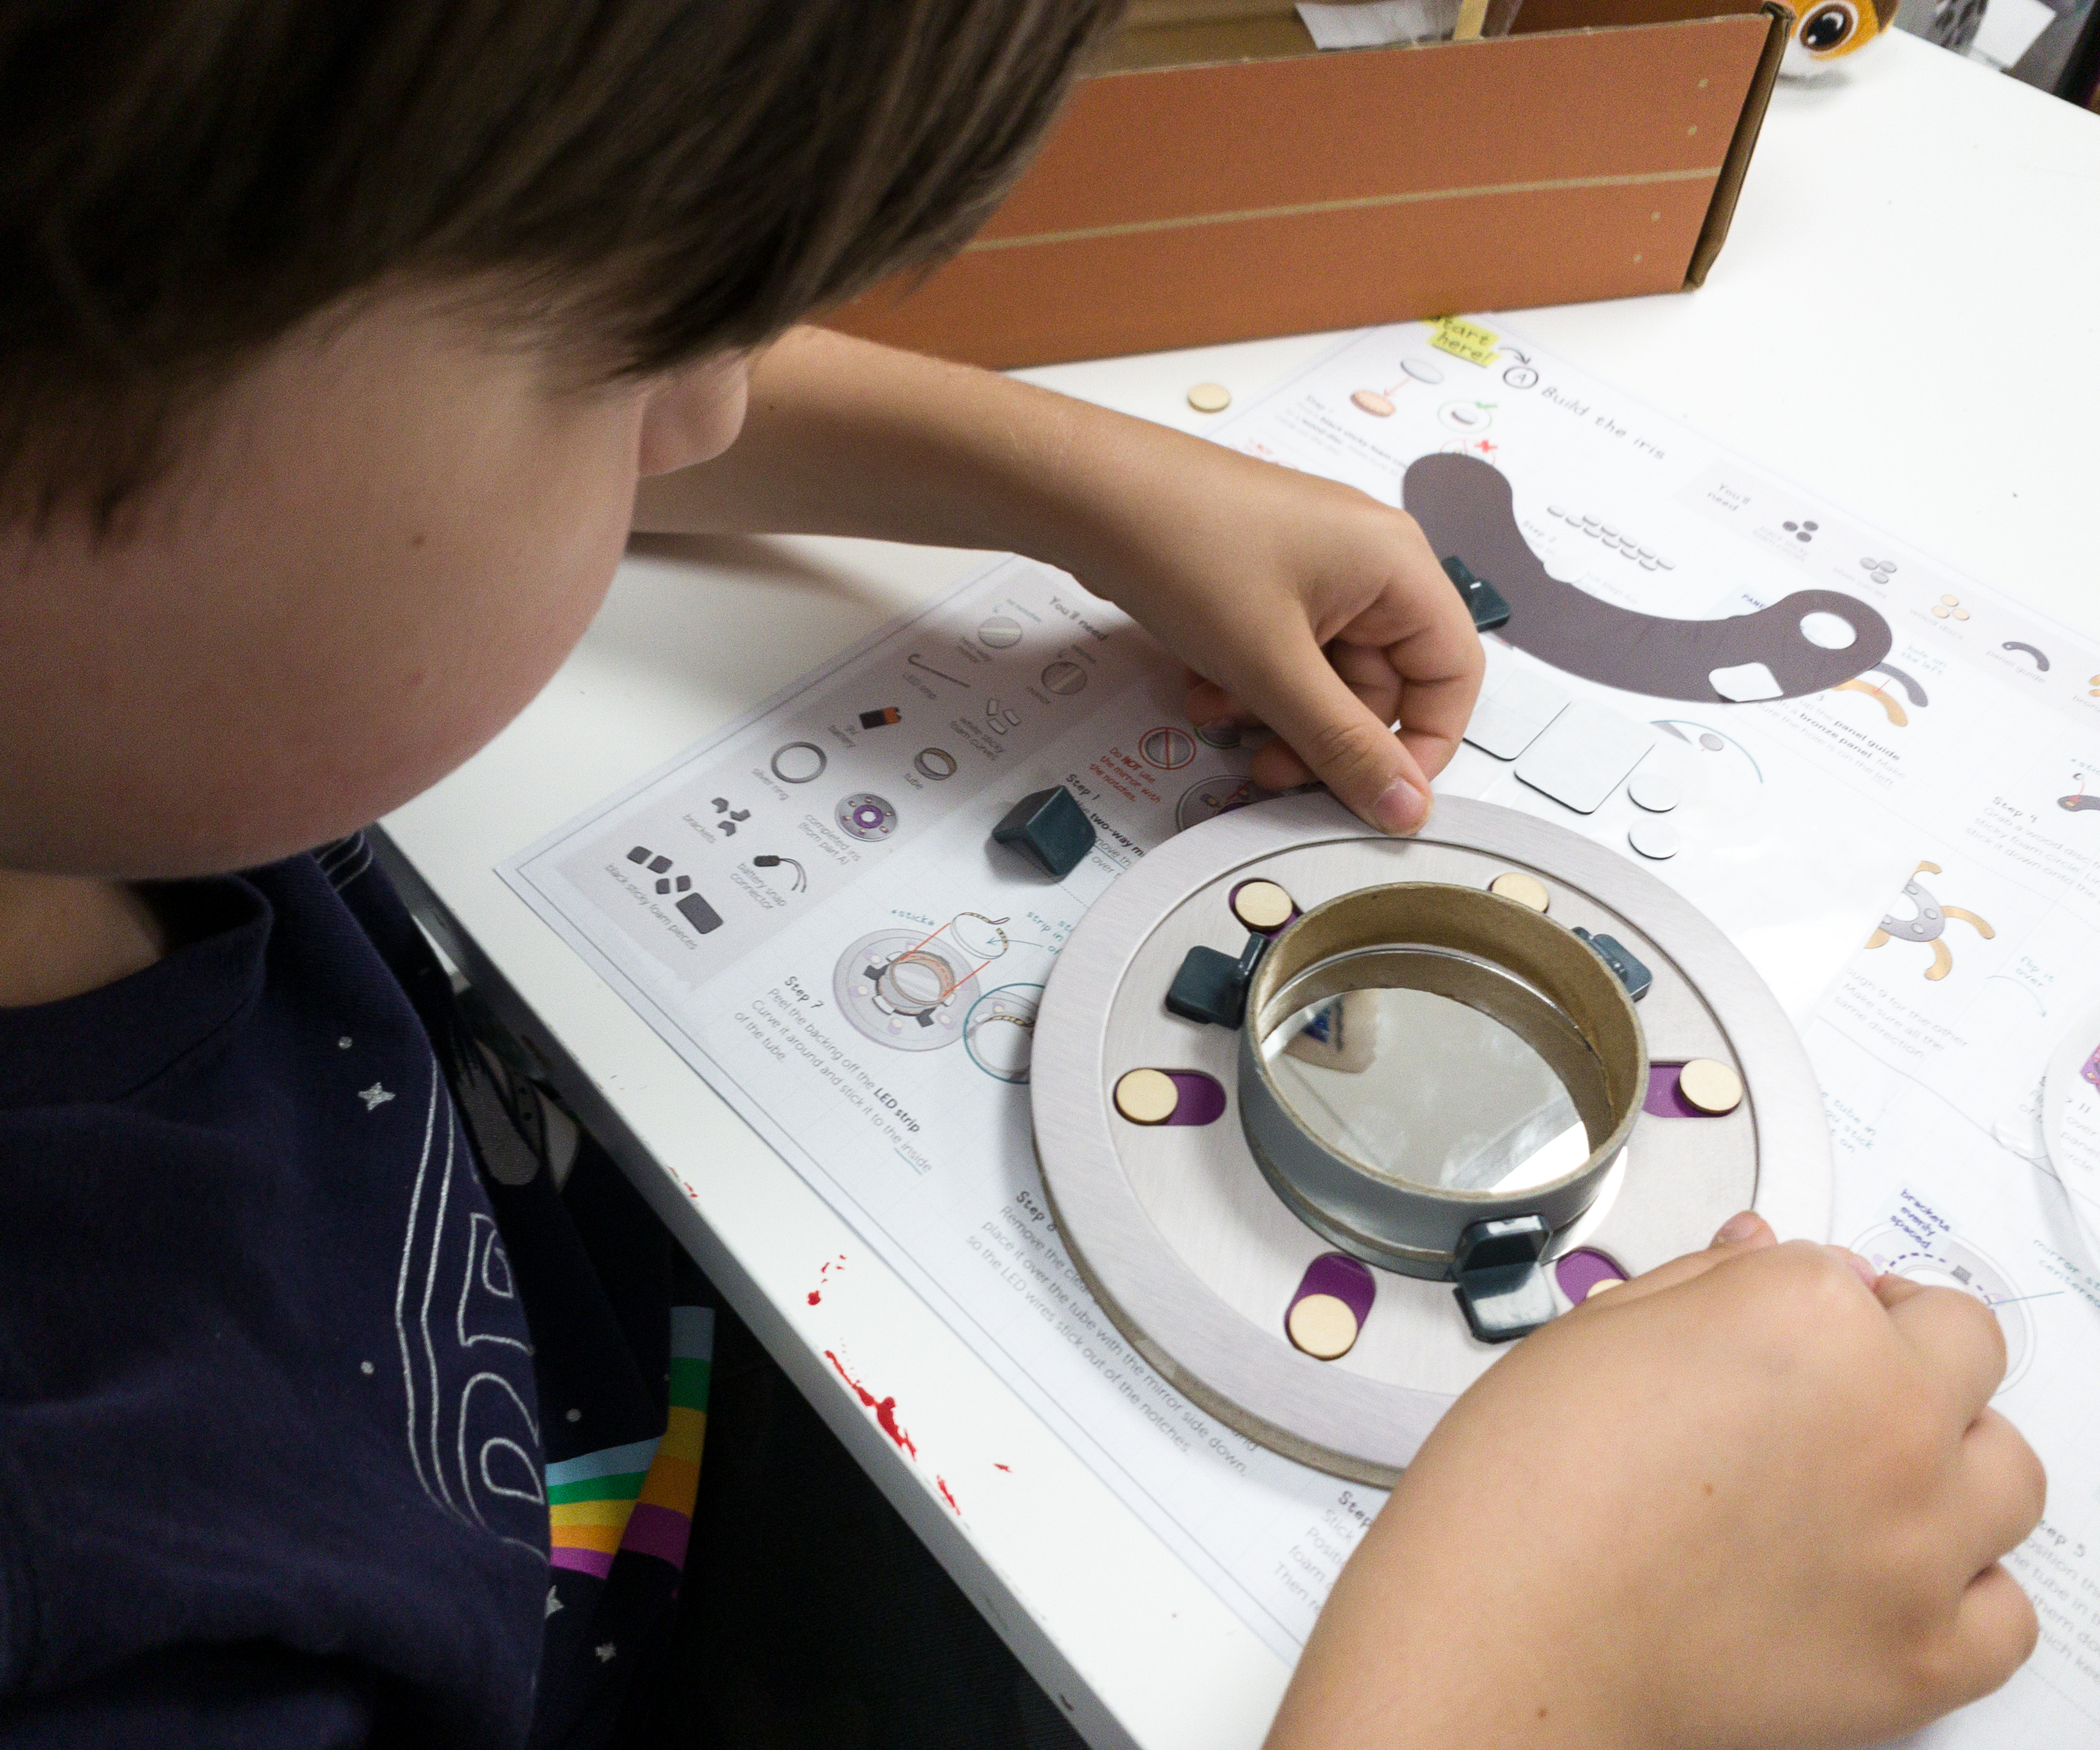
Next, he attached the mirror (with notches) on the other side of the tube. It’s time to stick the battery snap connector and battery to the back of the mirror.
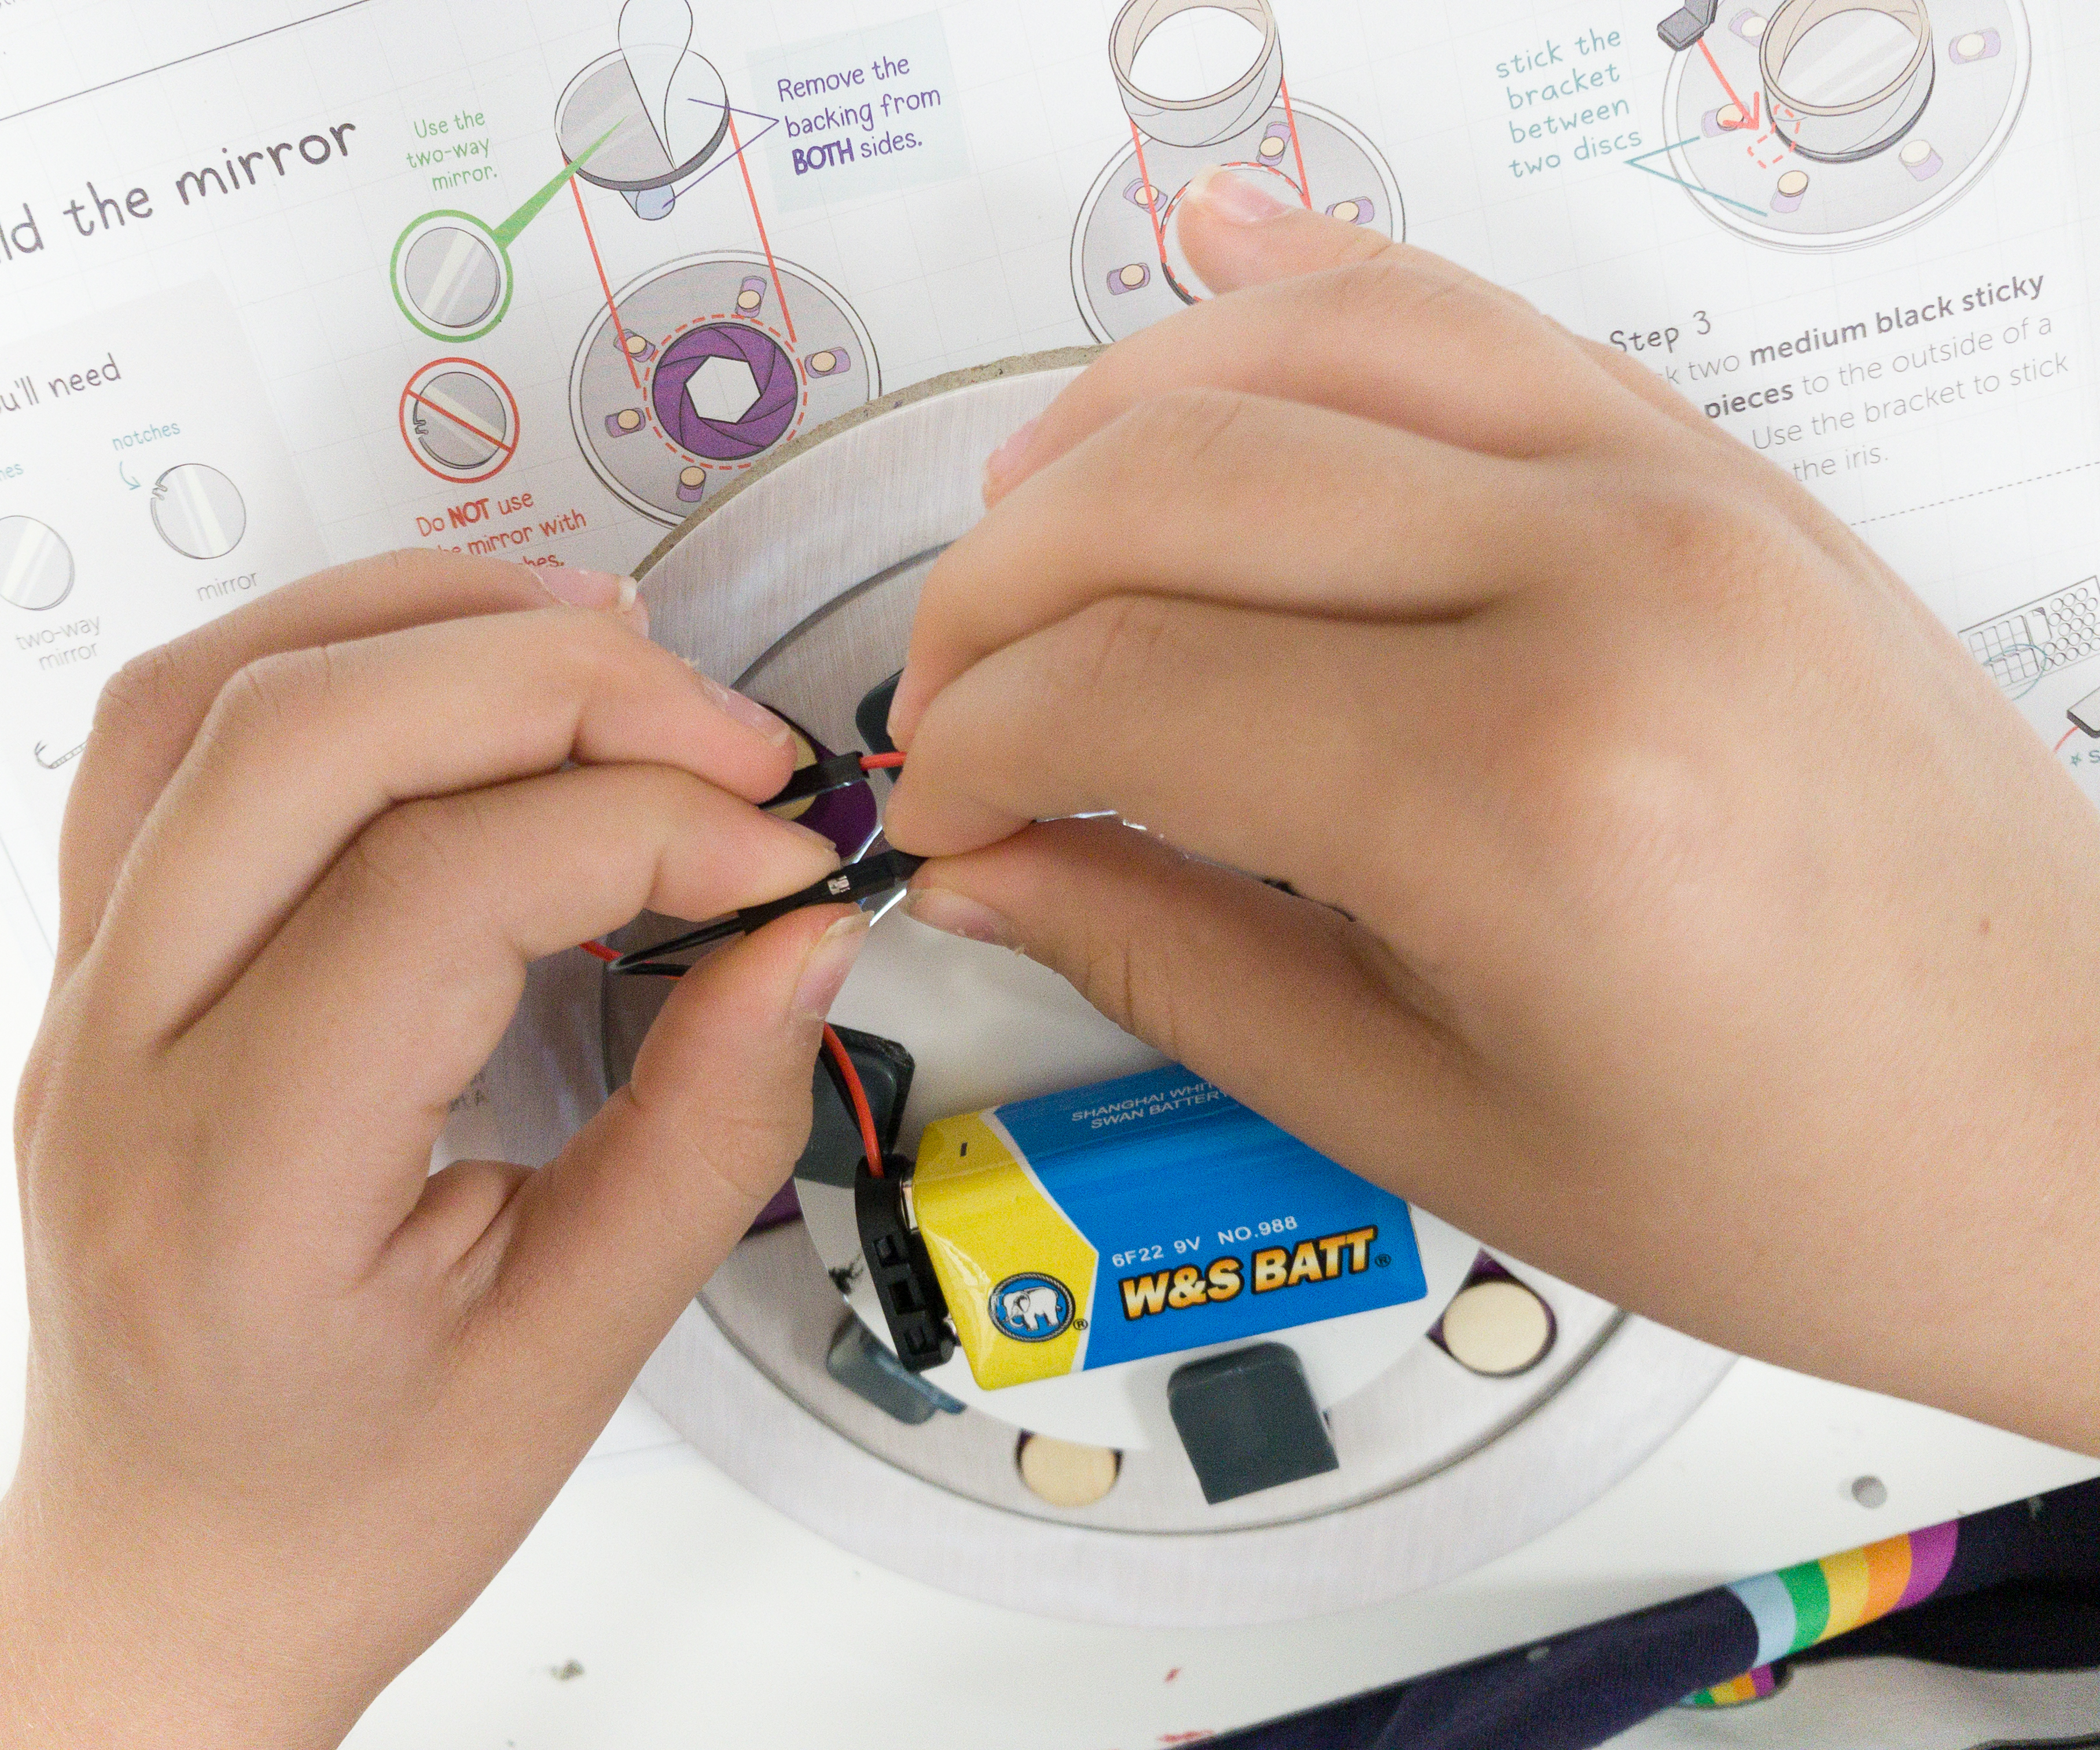
My son also connected the wires of the battery and the LED strap.
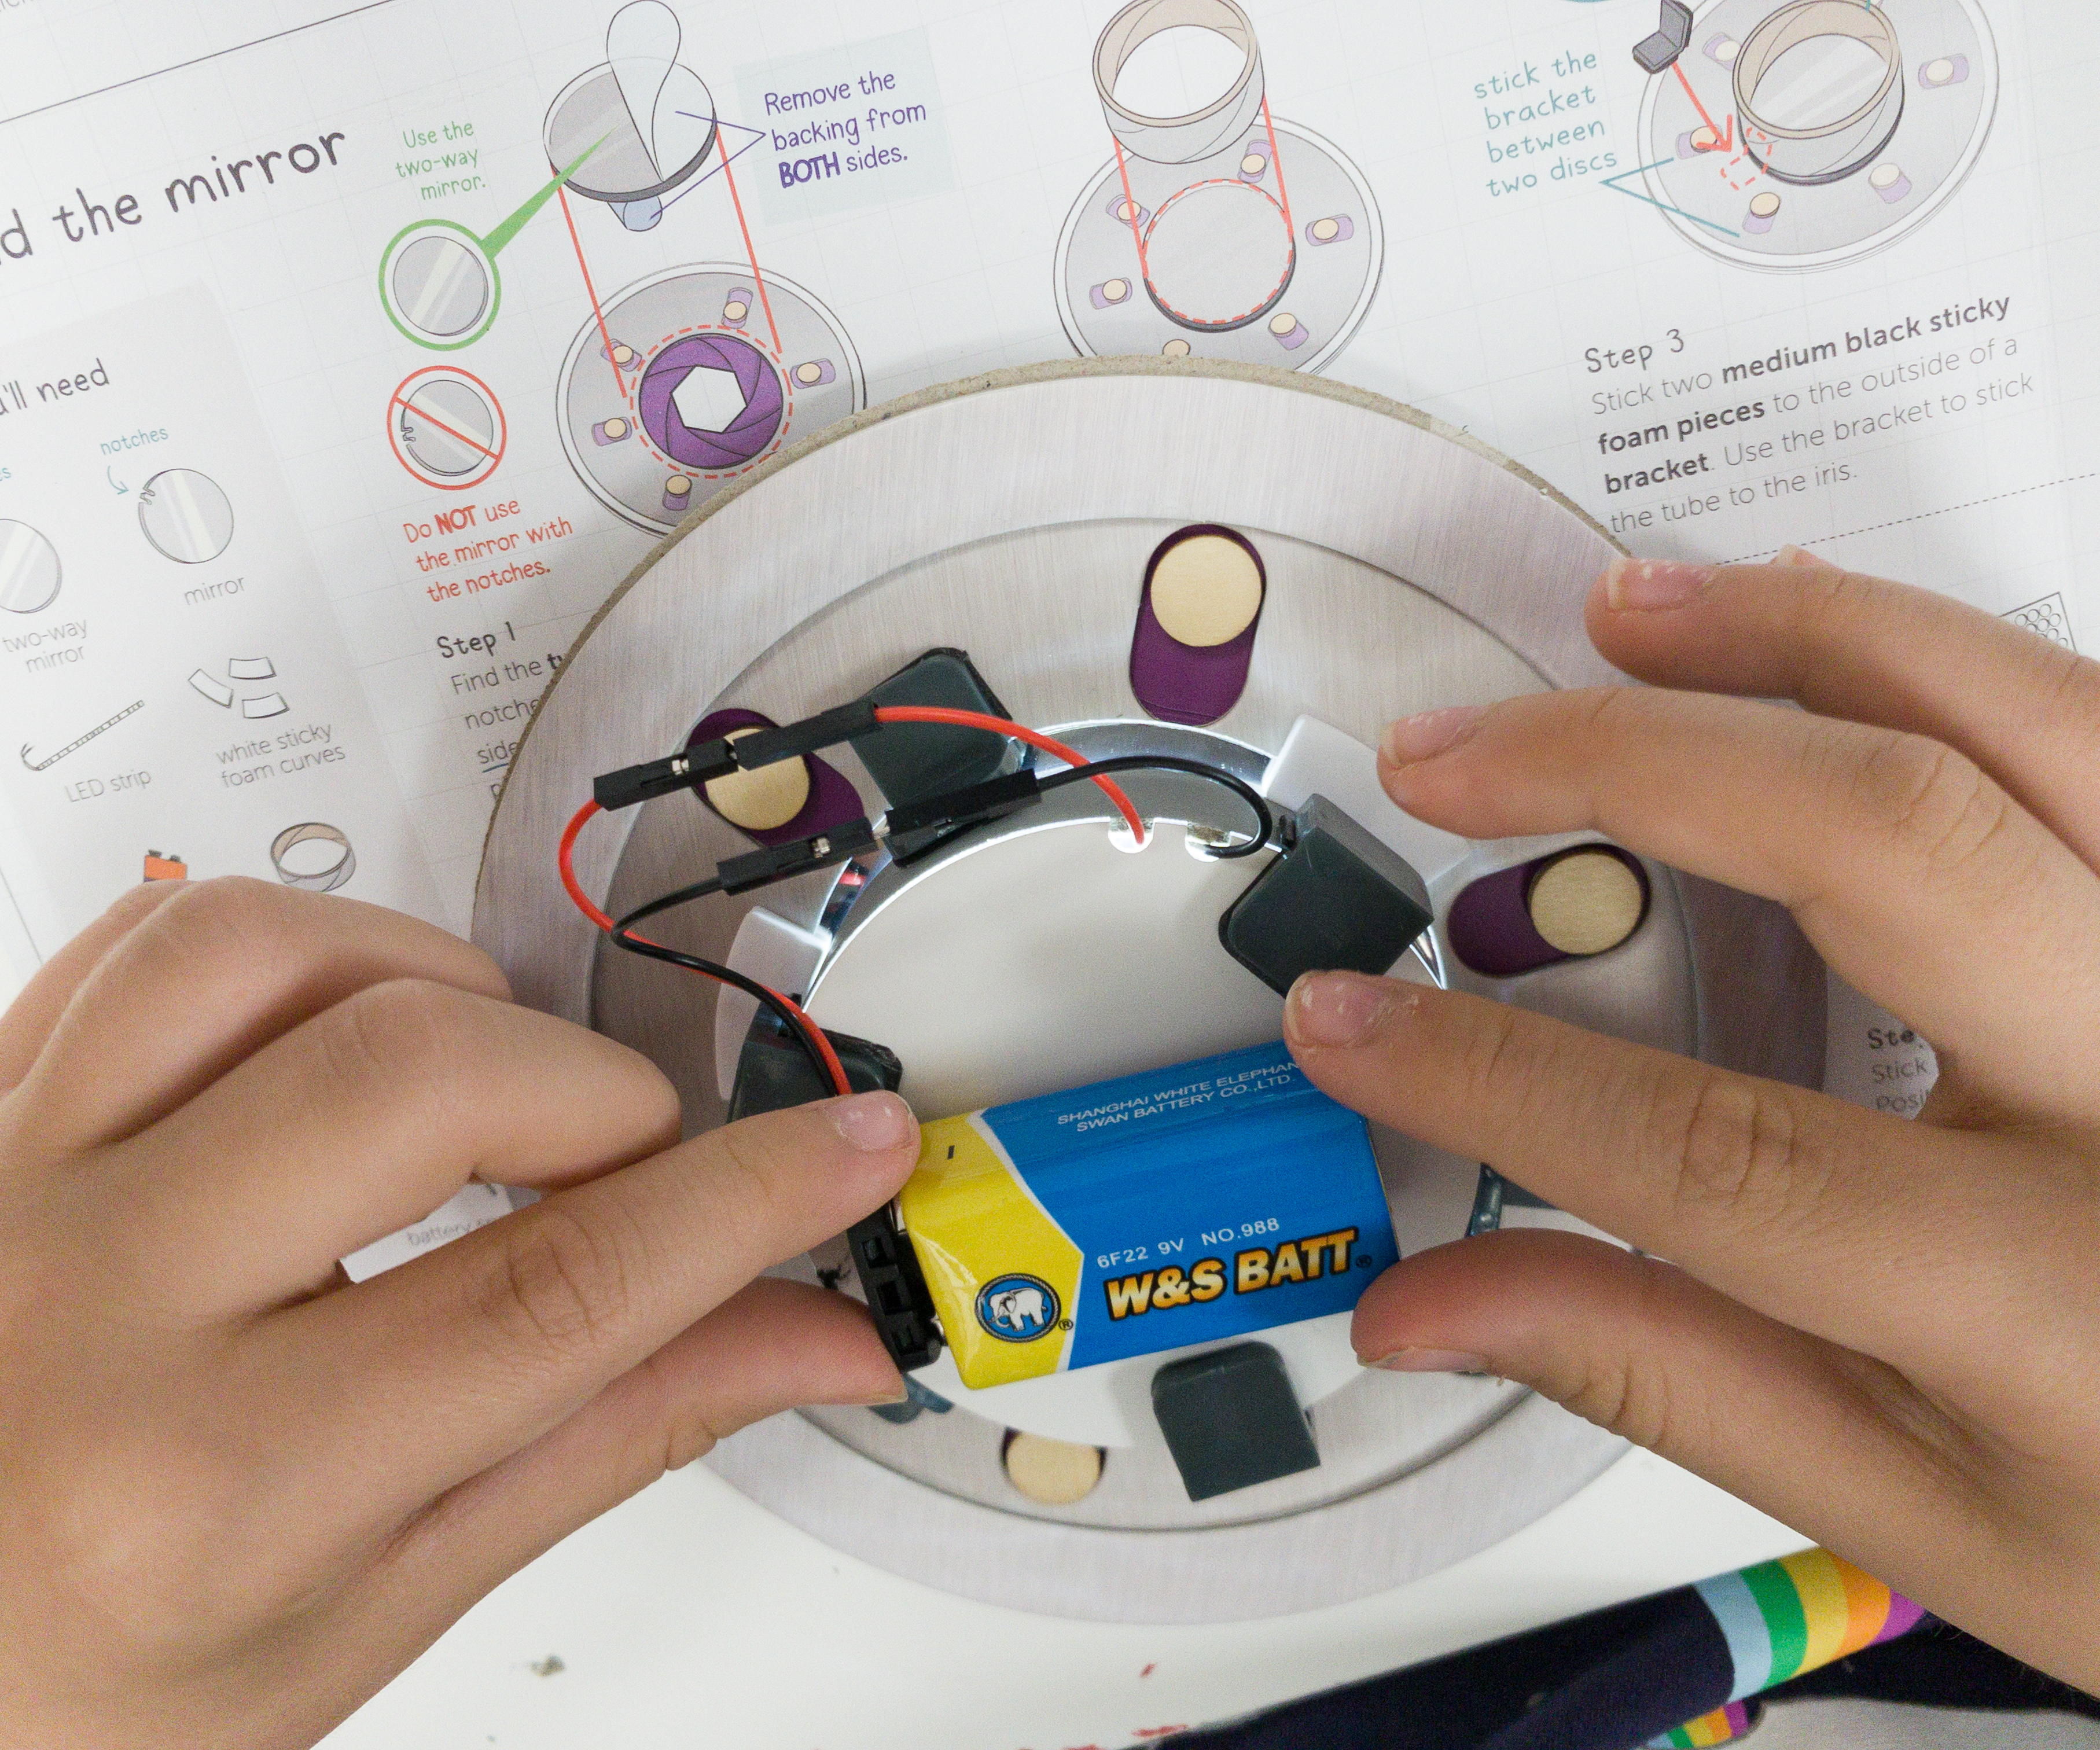
Once they’re properly connected, the LED strip should light up, like this one!
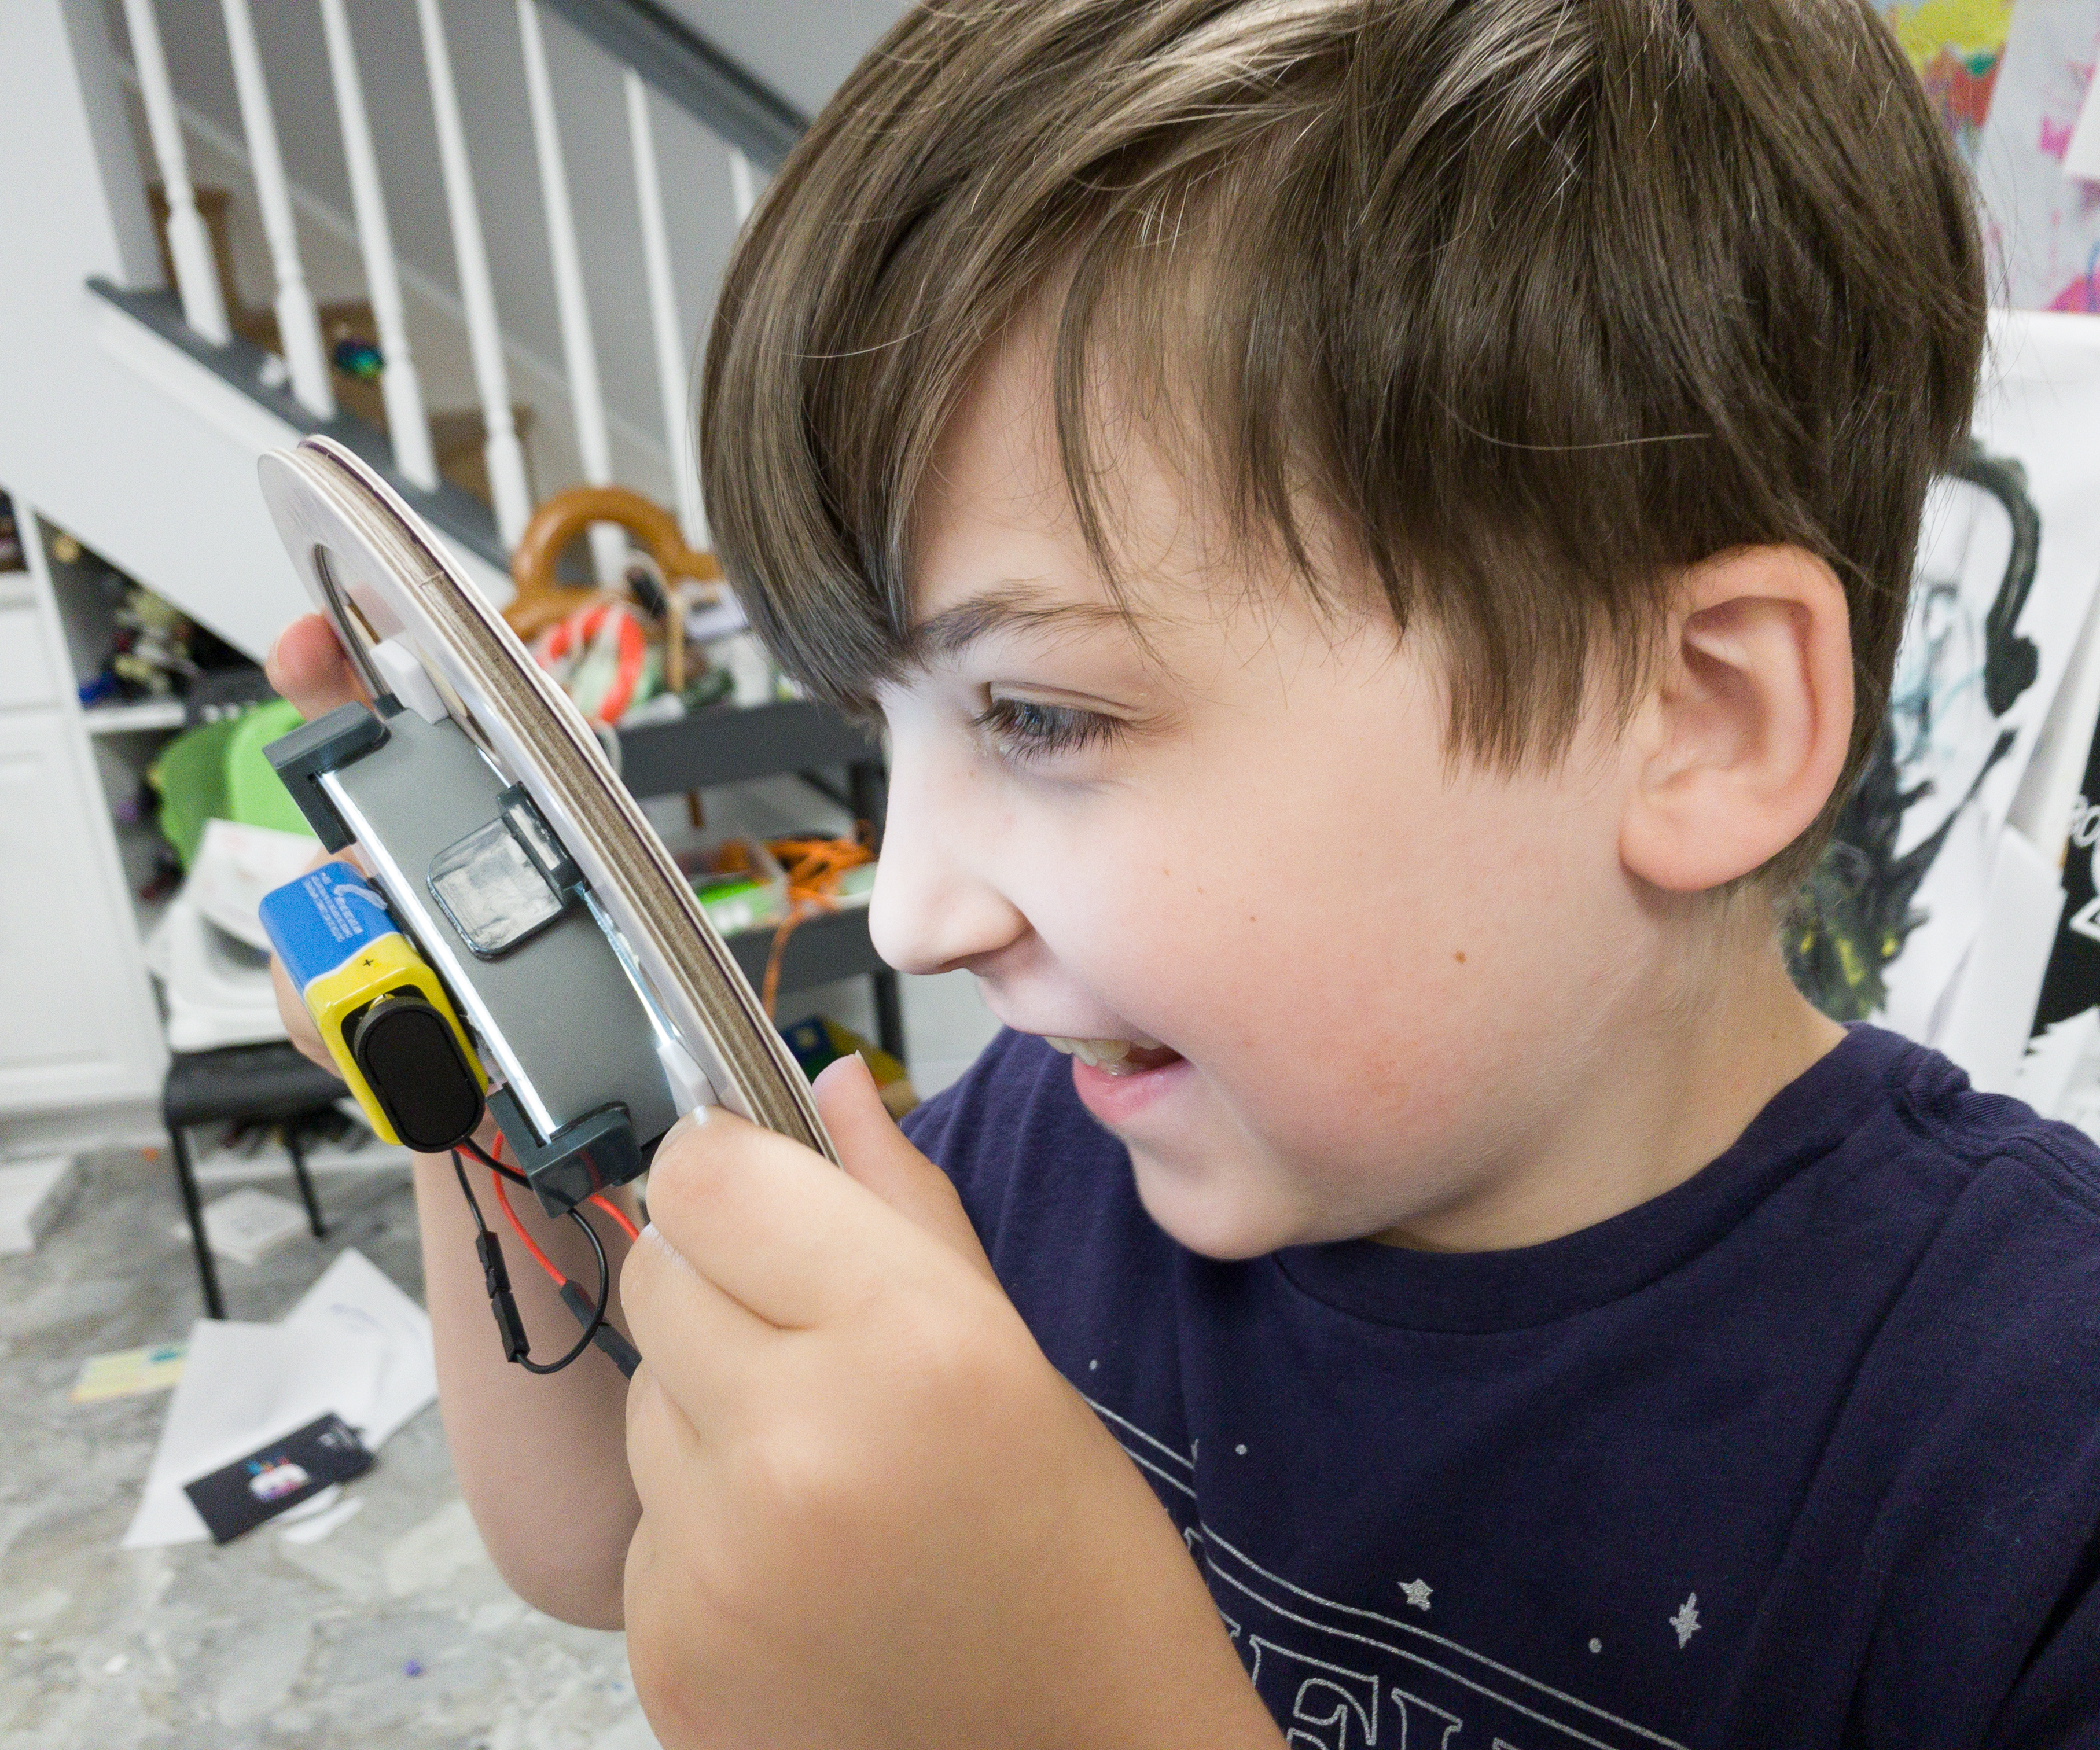
My son felt victorious when he saw the LED strip light up! We’re excited to try and tinker this project further!
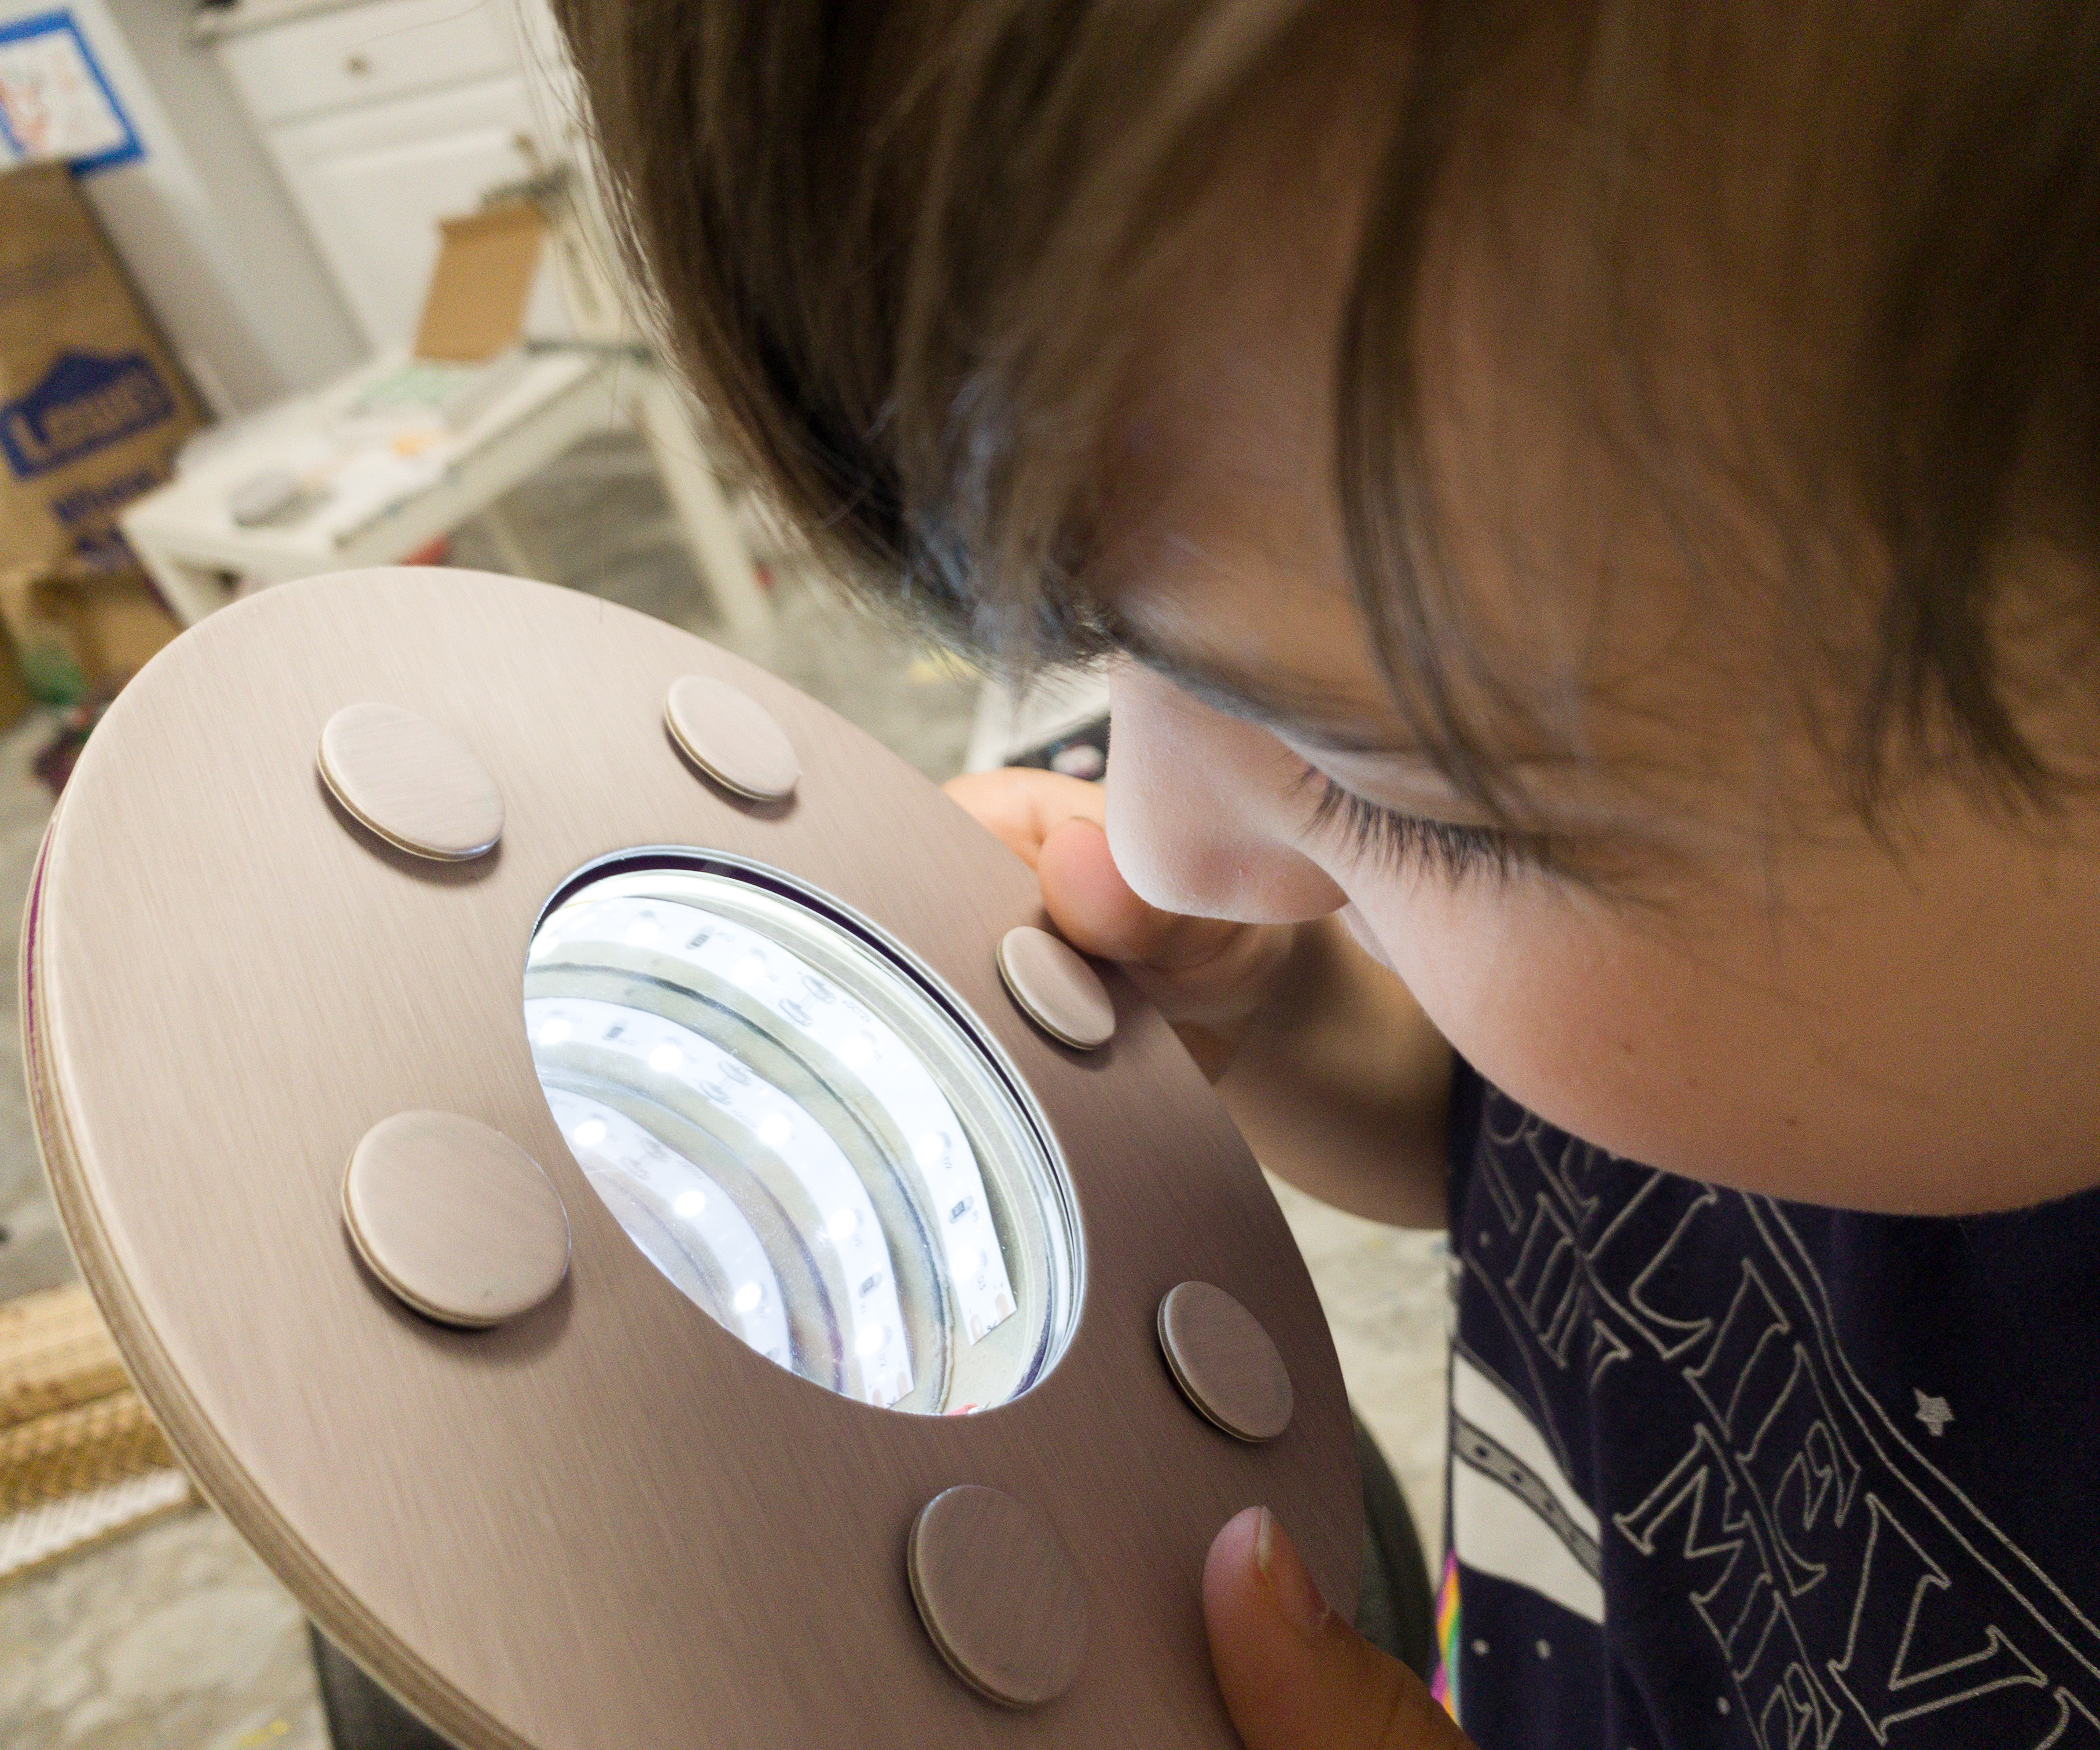
Now, we can see a never-ending tunnel of light!
When not in use, this should be turned off!
The iris looks like a portal!
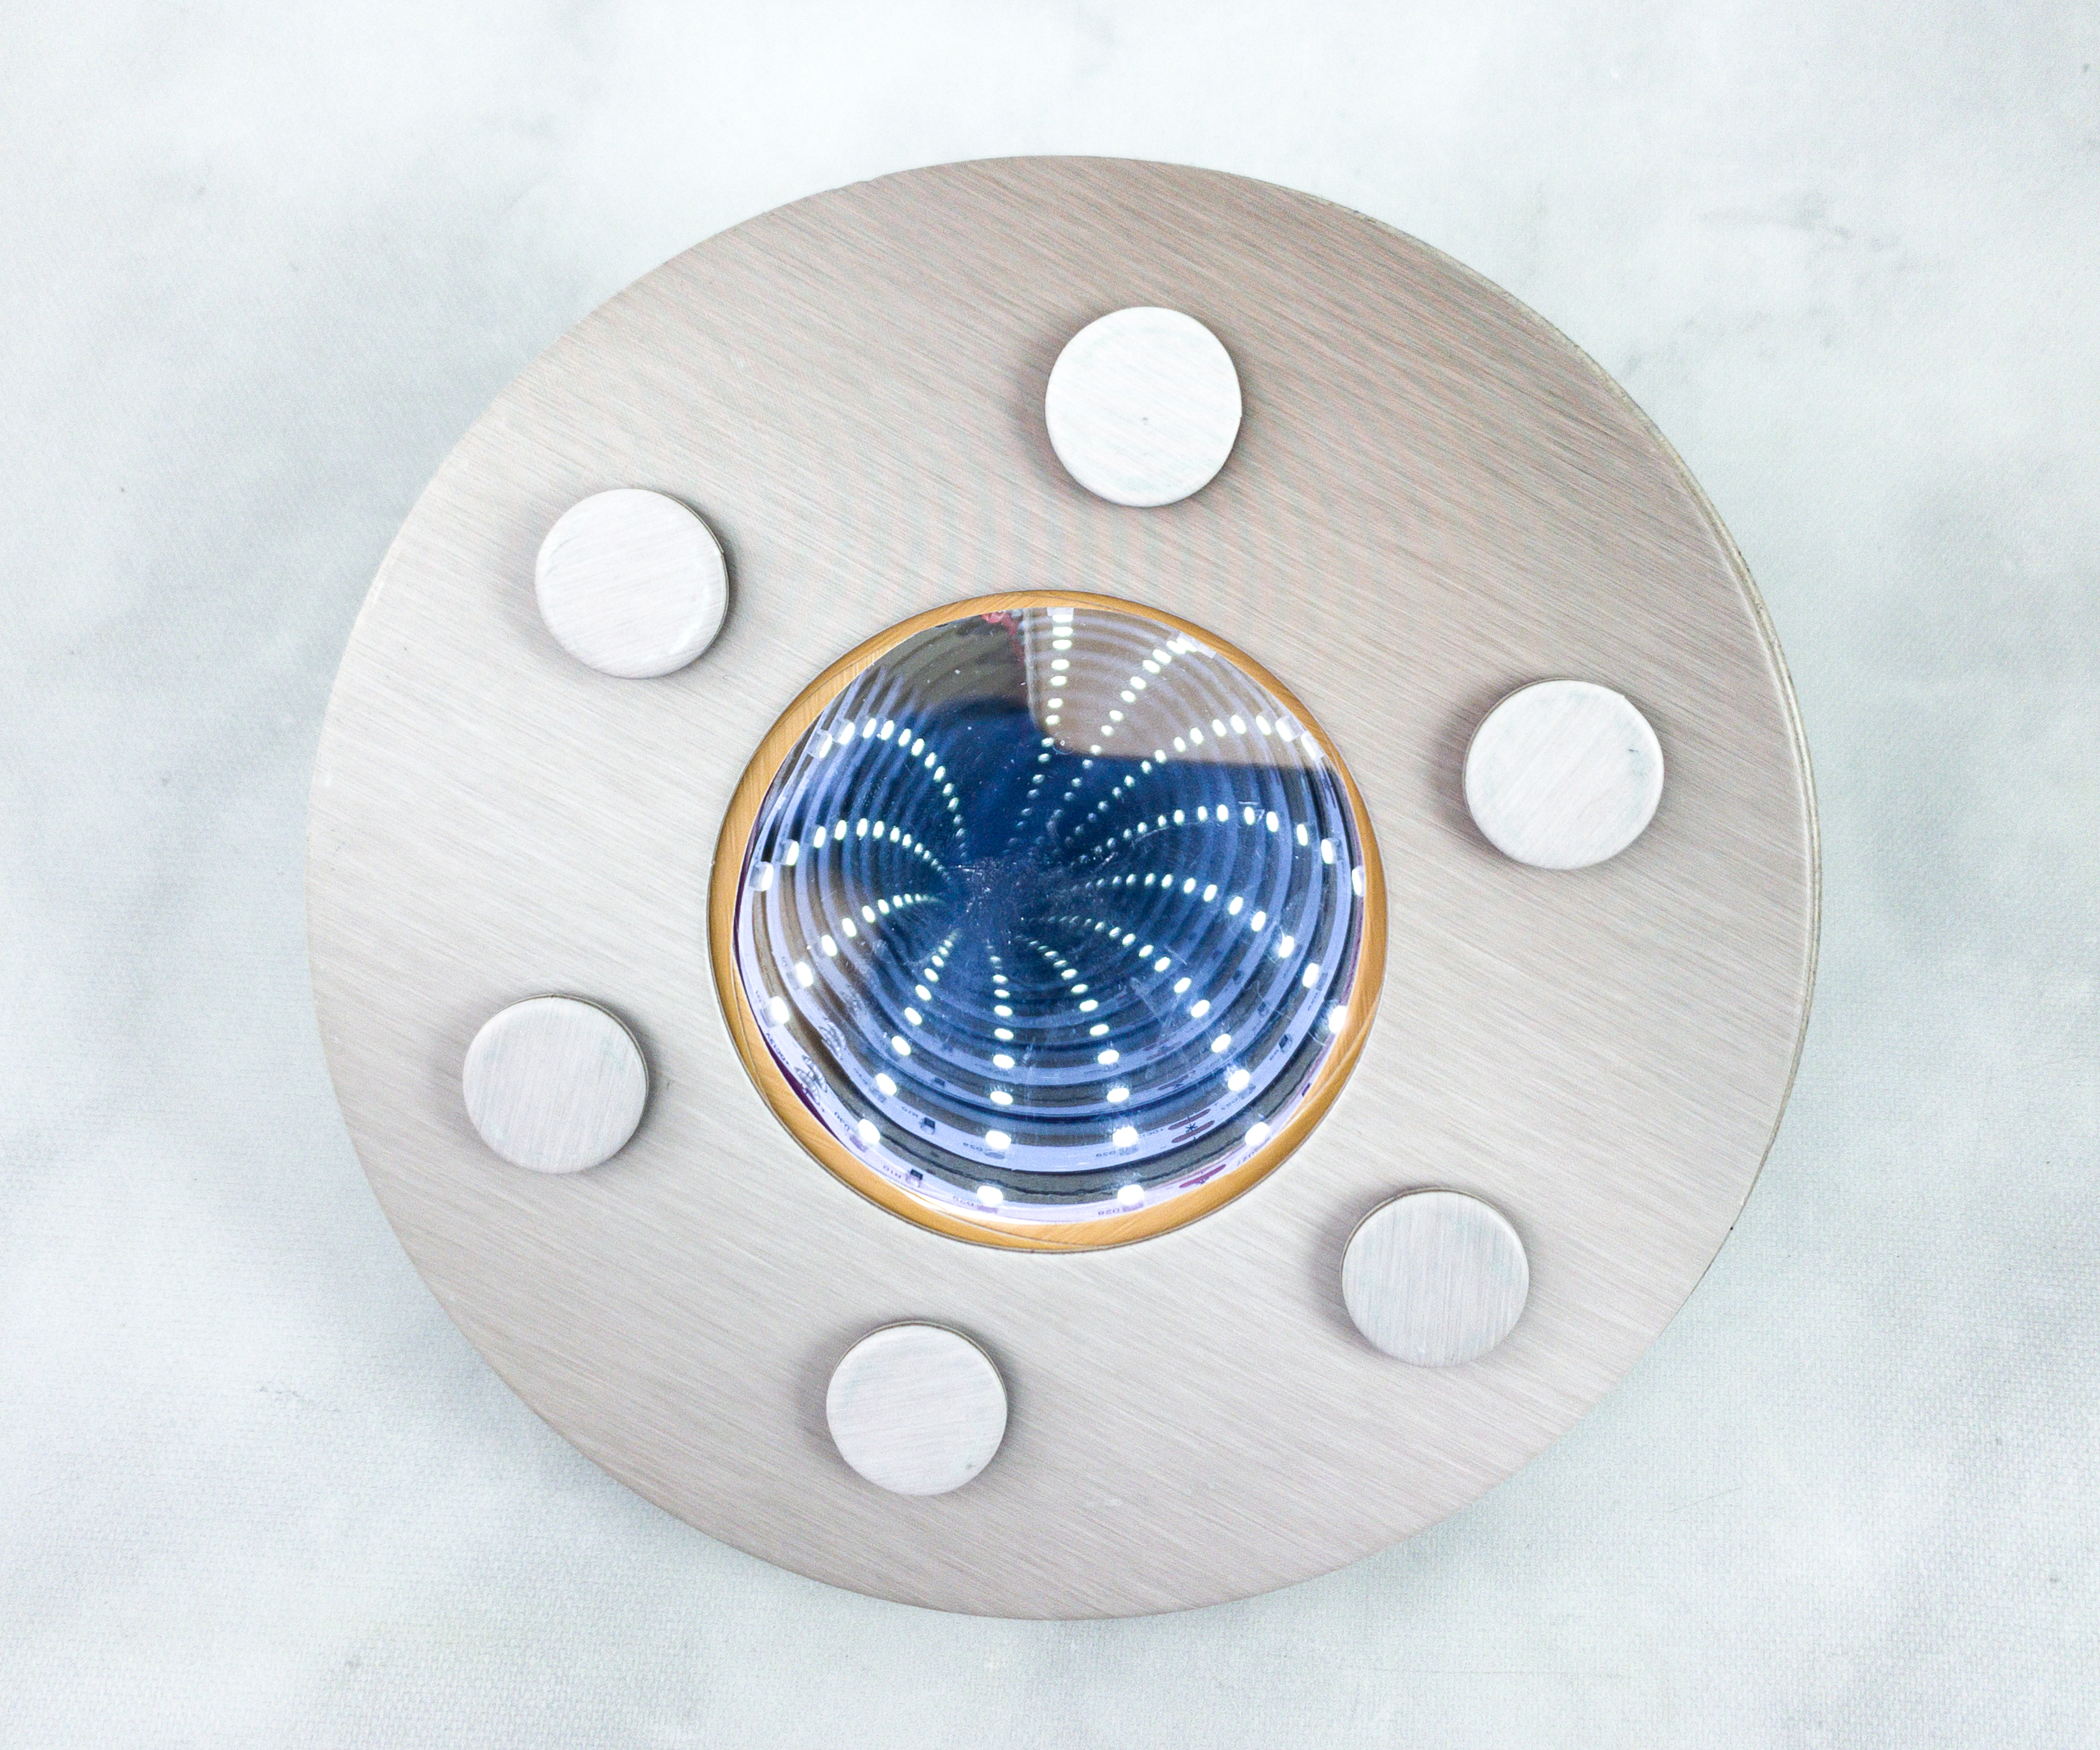
When you open it, it looks awesome!
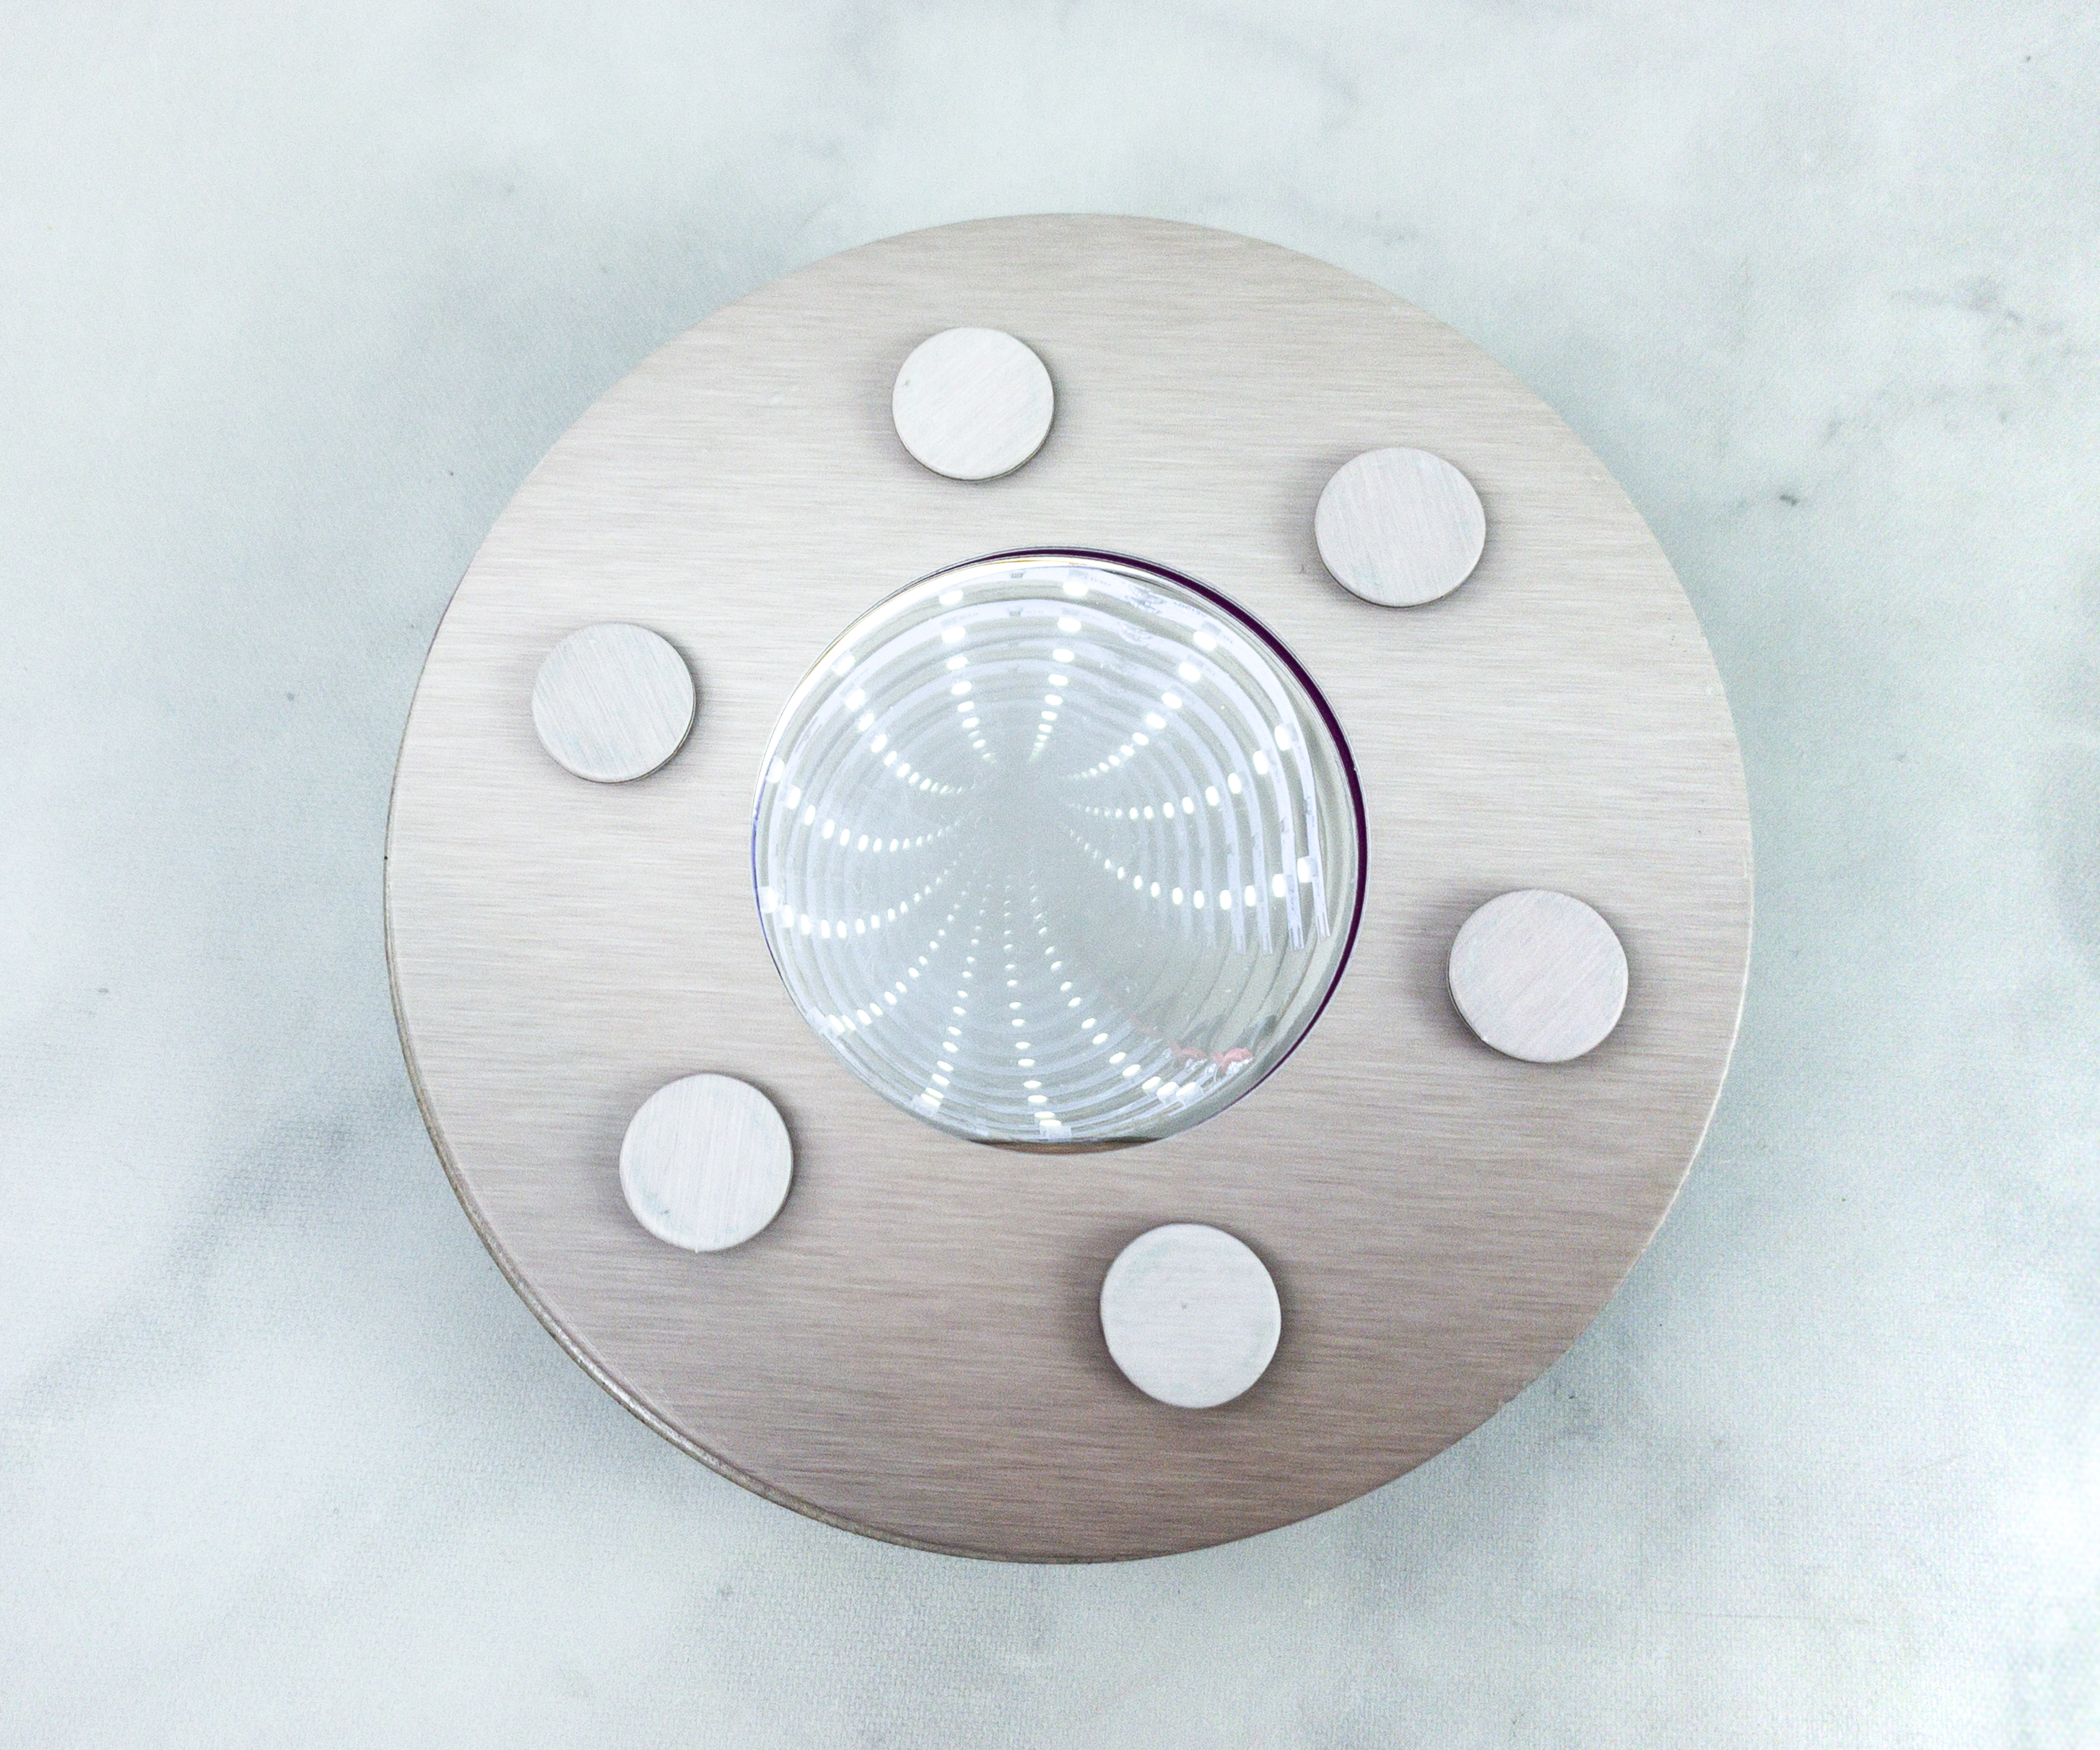
You can also press the battery gently to make the light tunnel bend and warp! It’s like a scene from a Sci-Fi movie!
We accomplished another fun and awesome project!
Tinker Crate Extensions
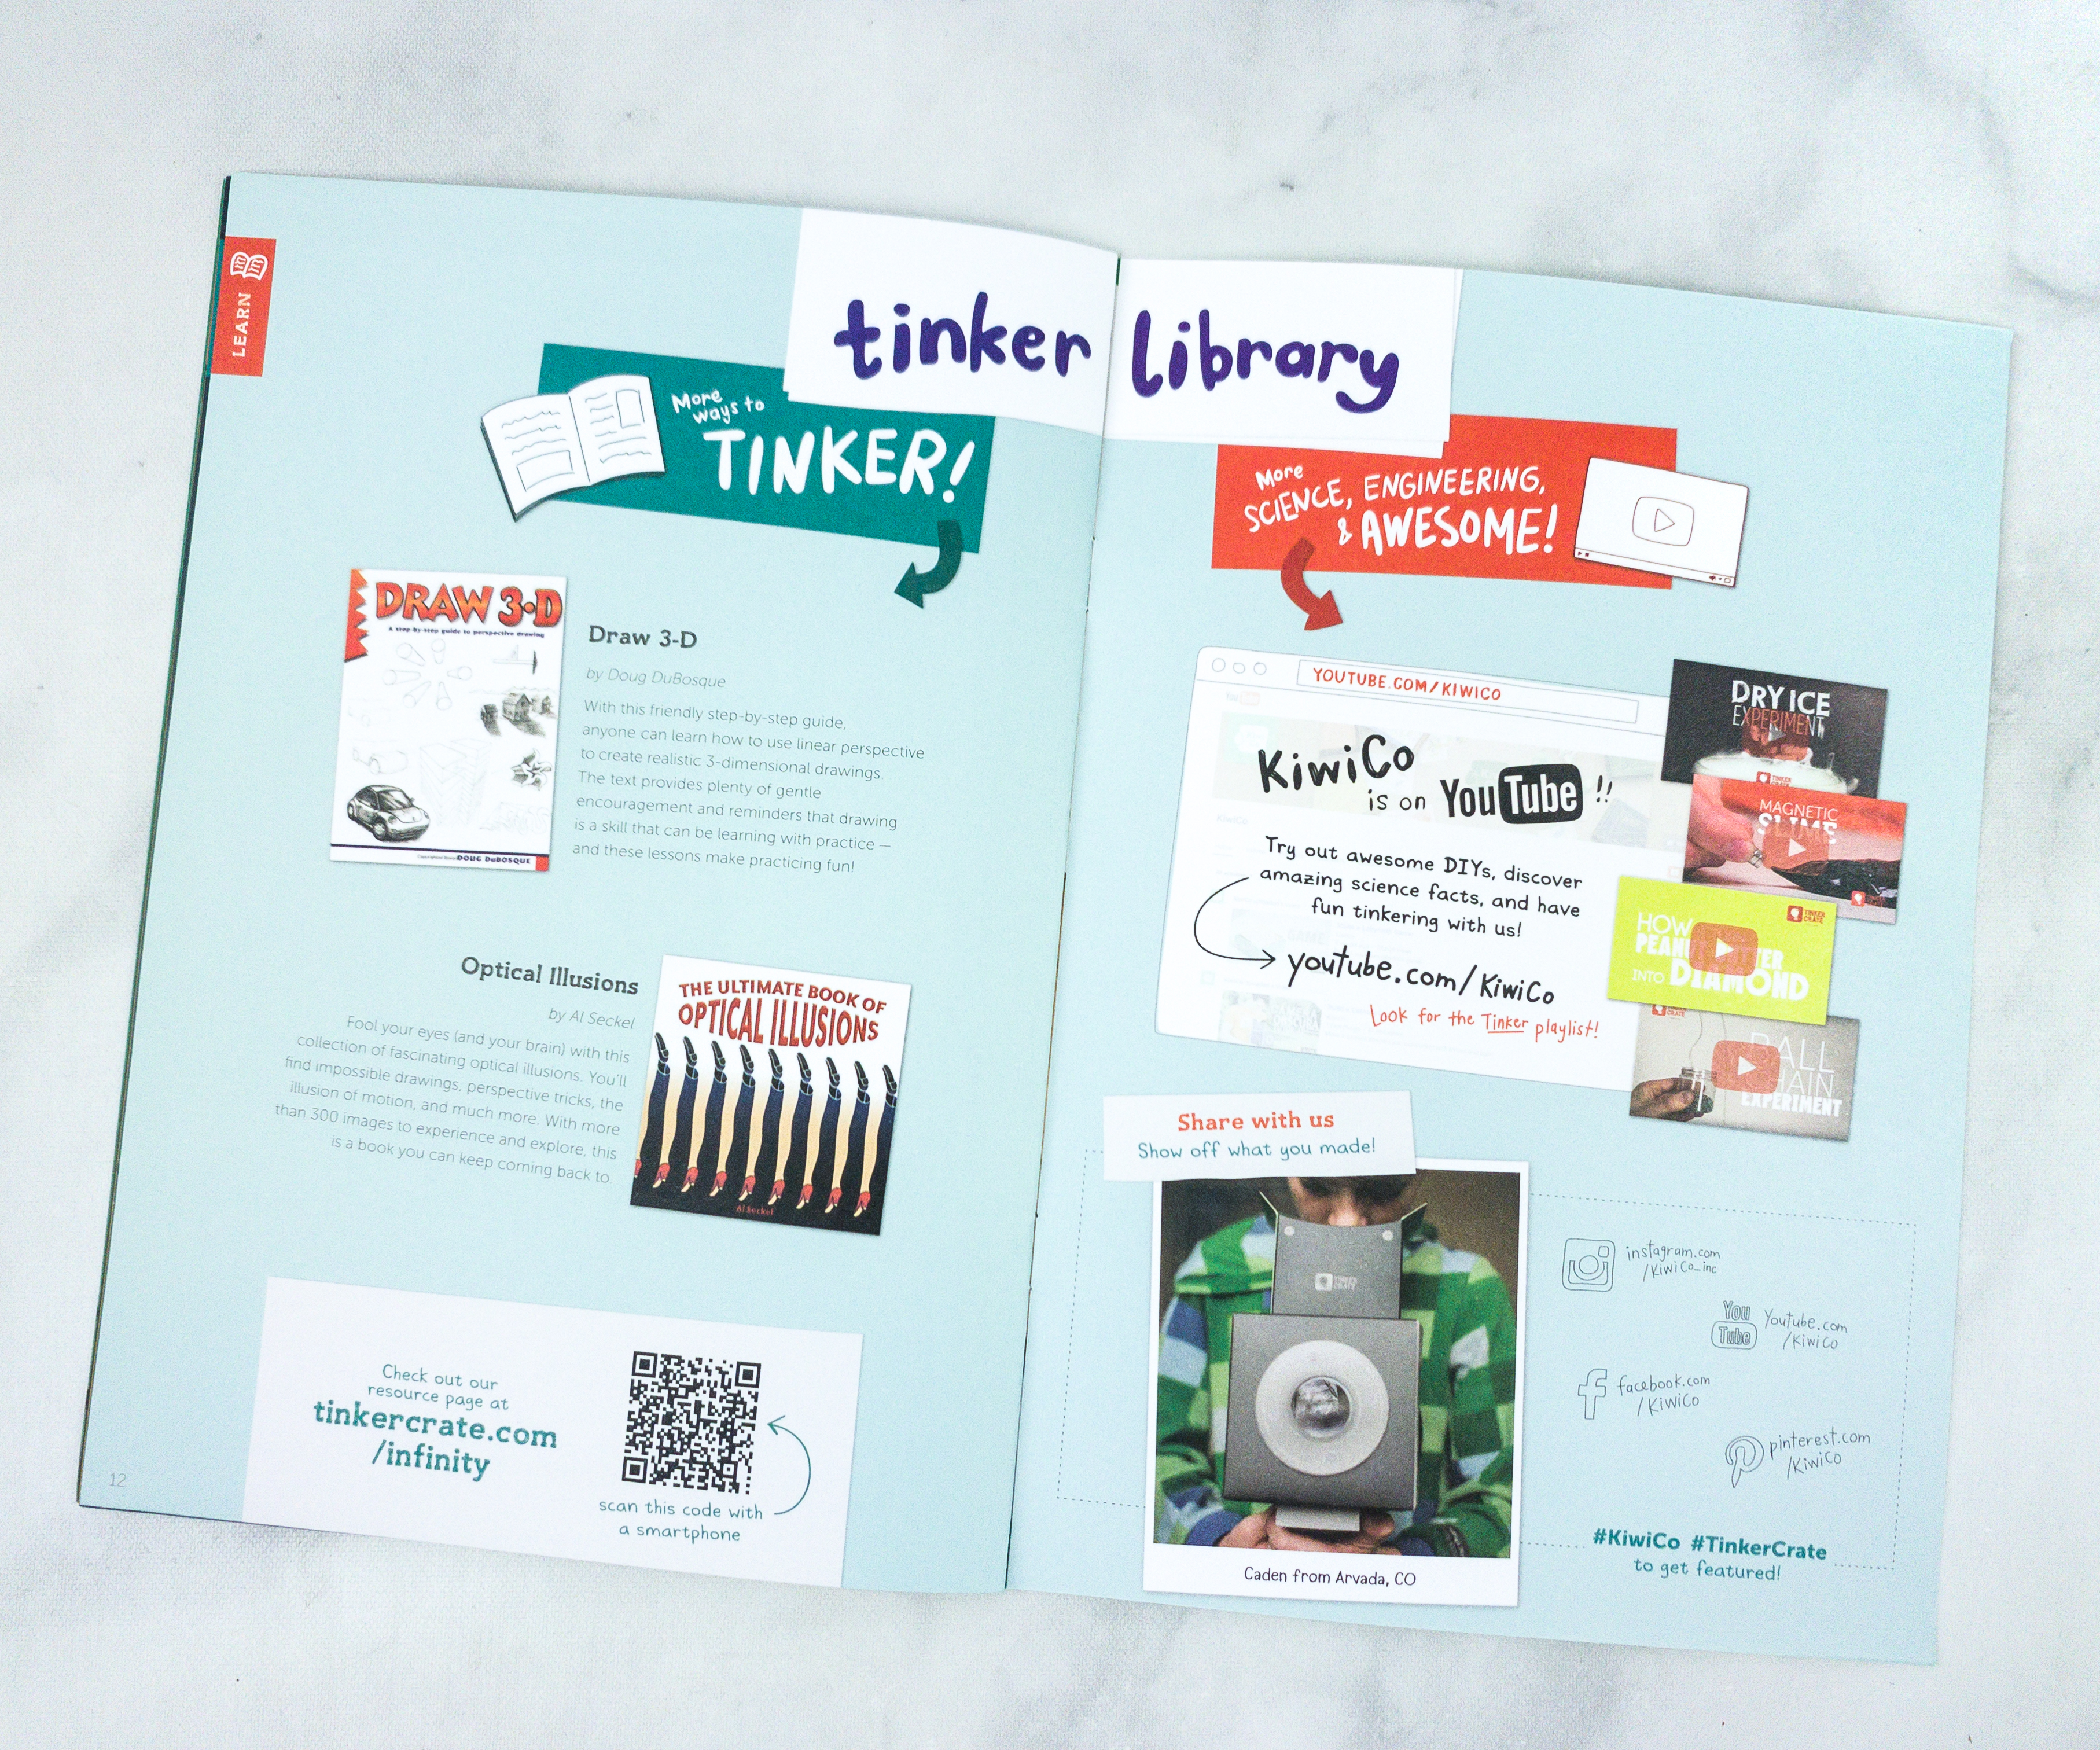
The Zine also provided more ways to tinker via the Tinker Library, where they suggest books that we can try: Draw 3-D by Doug DuBosque and Optical Illusions by Al Seckel. There’s also a page where kids can sketch out notes and ideas!
We’re extremely happy and thrilled with this month’s project! My son enjoyed building the Infinity Mirror, and the finished product felt like something from a Sci-Fi movie! The optical illusion that we were able to pull-off is great! Tinker Crate is definitely a box to beat when it comes to useful projects coupled with scientific principles that the kids can also use in their everyday activities. The crate provided all the materials and a complete guide so that the project will go on smoothly and will be finished in no time. There are also other suggested activities and even learning materials like apps or books that we can also try. The box is perfect for learning at home too!
Have you tried Tinker Crate yet with your kids?


Comments