Eureka Crate is a monthly STEM and maker subscription box that teaches kids and adults how to apply principles of science and math to make awesome things you will love to use every day – from an articulated desk lamp to an electric pencil sharpener to a wooden ukulele. Every Eureka Crate includes an engineering project, detailed step-by-step instructions, everything you need to complete the project, a Maker’s Guide that explains all the design, process, and engineering behind the design, plus a design challenge to take your project knowledge to the next level!
DEAL: Save 30% on your first month! Just use this link to subscribe, no coupon code required! You can also use the same link to save 30% on the first month of any other KiwiCo crate – just check out this page to discover which box is right for you.
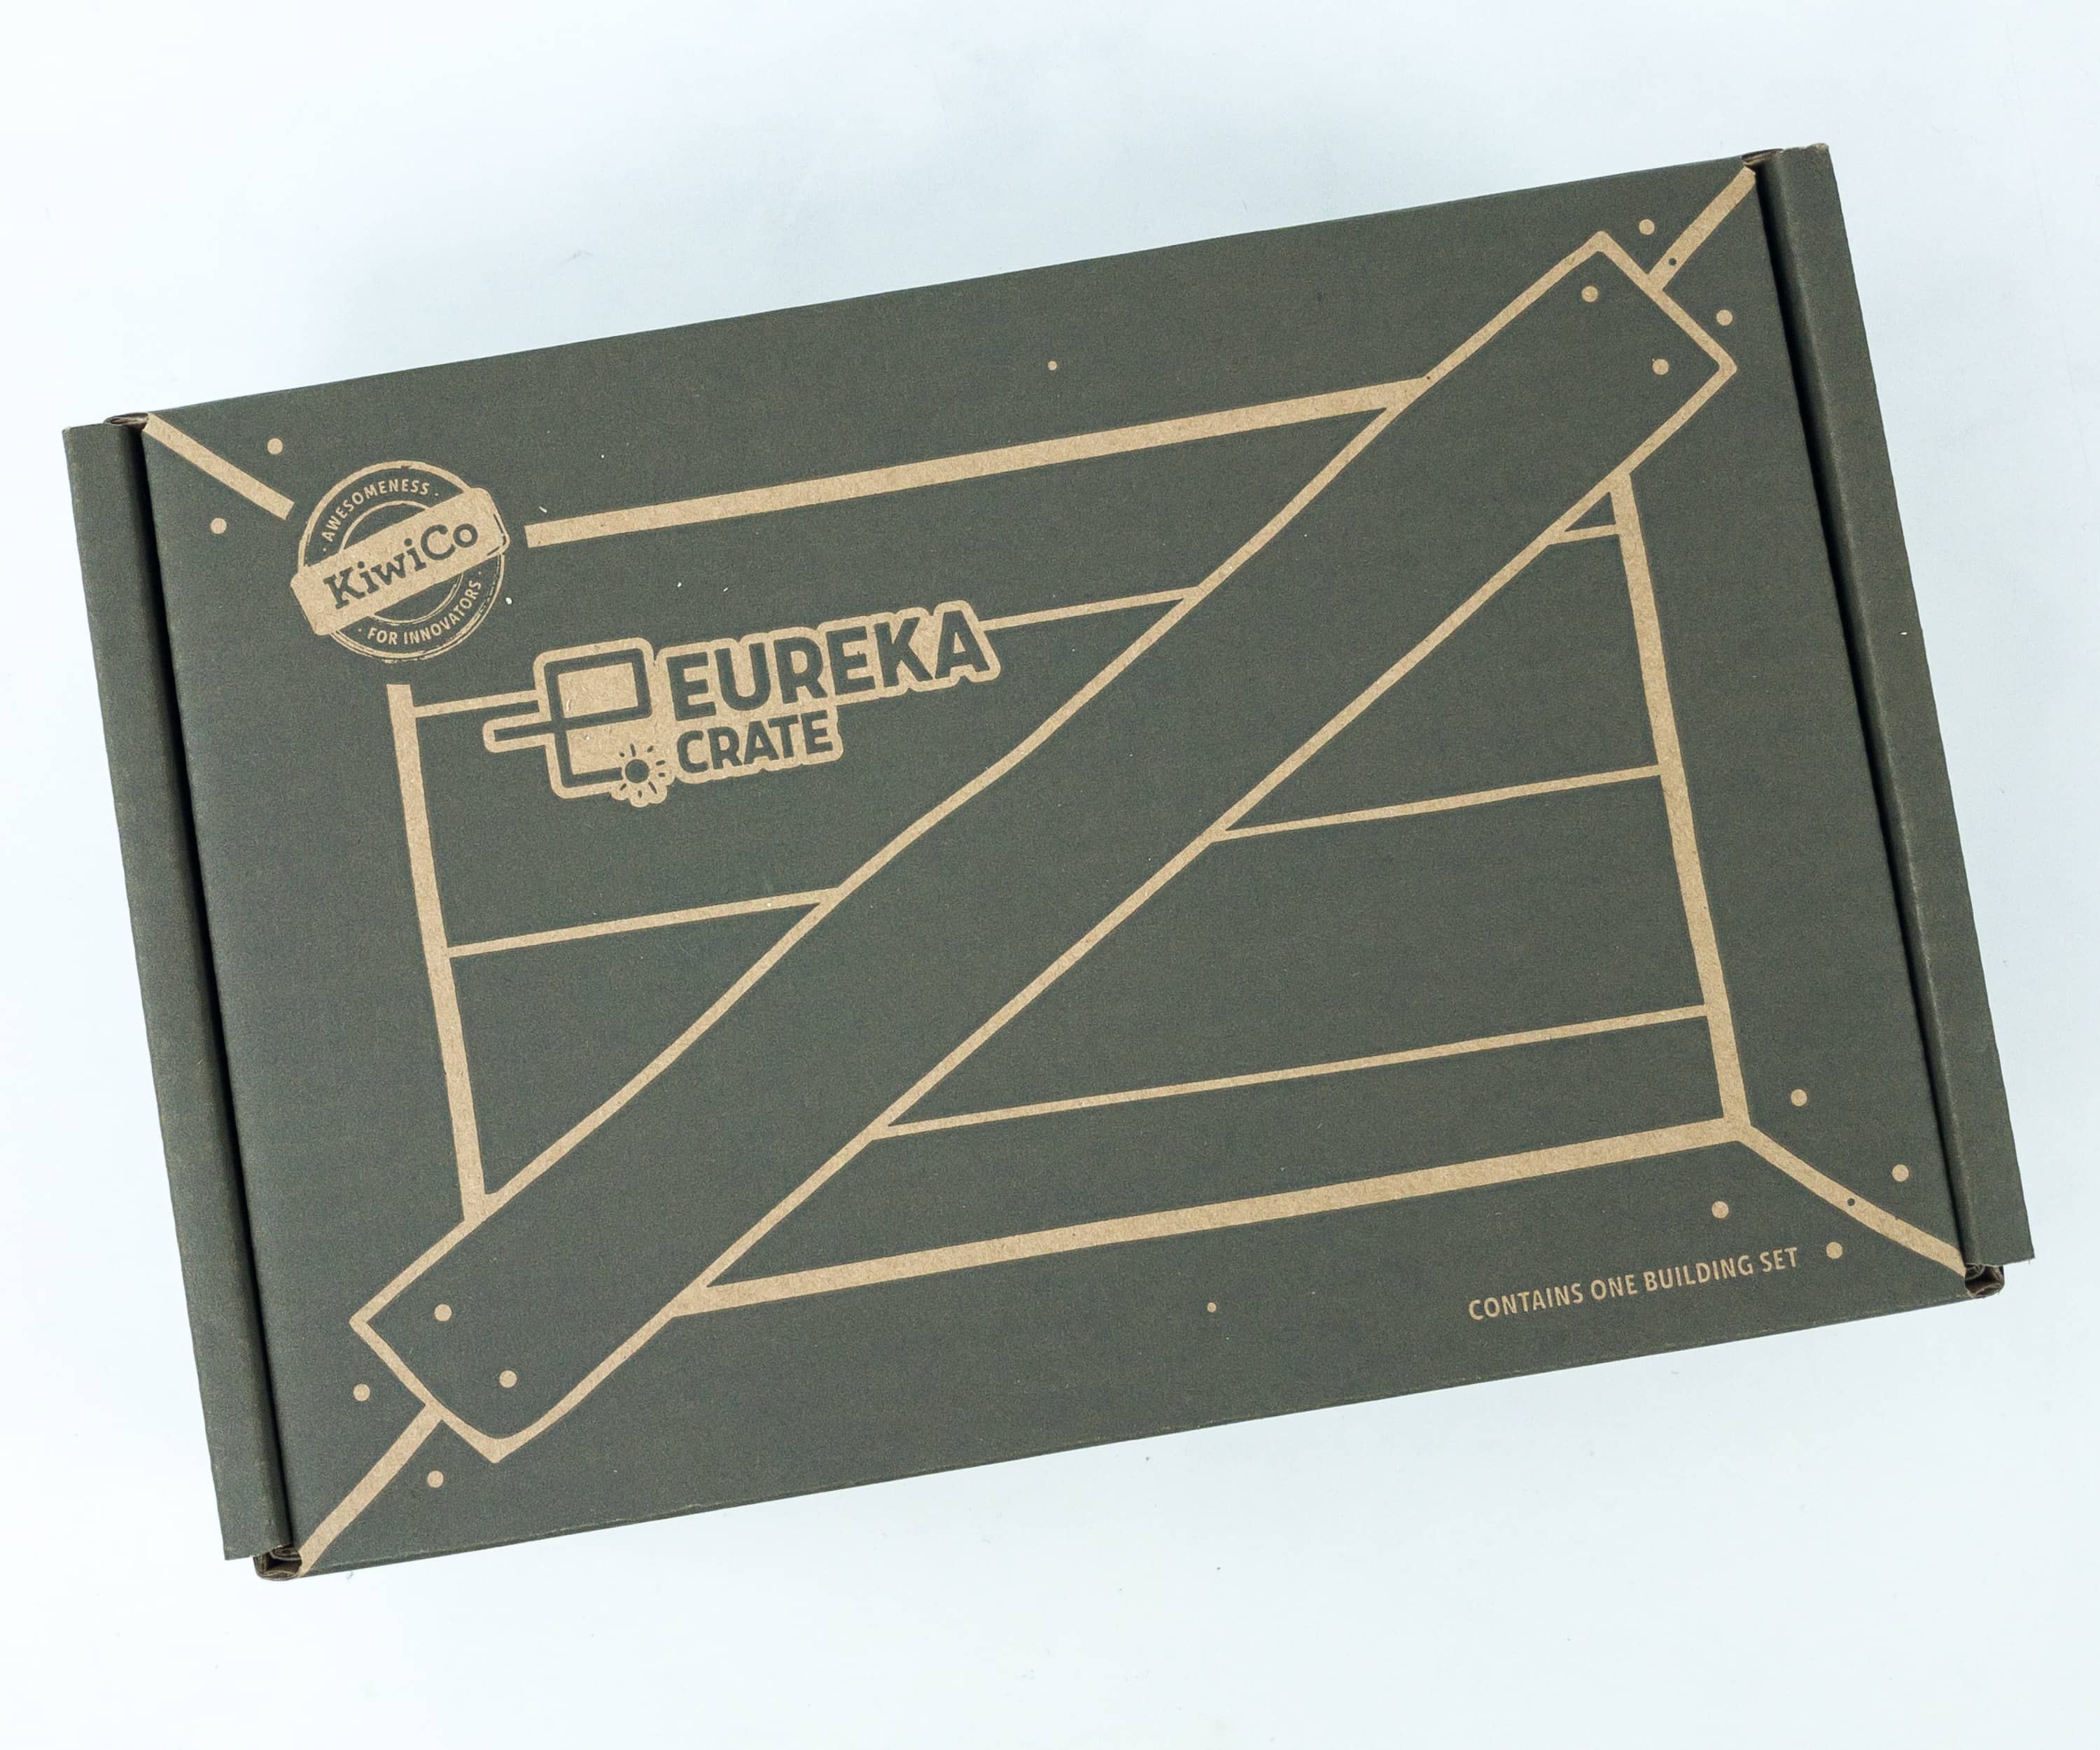
Eureka Crate is KiwiCo’s latest subscription! Eureka Crate is designed for ages 14-104. If you’re ready to graduate from KiwiCo’s other boxes or just can’t get enough (or are just too old for their other subscriptions), you’ll love this box, which is designed to create a hands-on learning experience using everyday items to delve deeply into the science and math principles they embody, along with the design process of the month’s project.
We’re so excited to make this project!
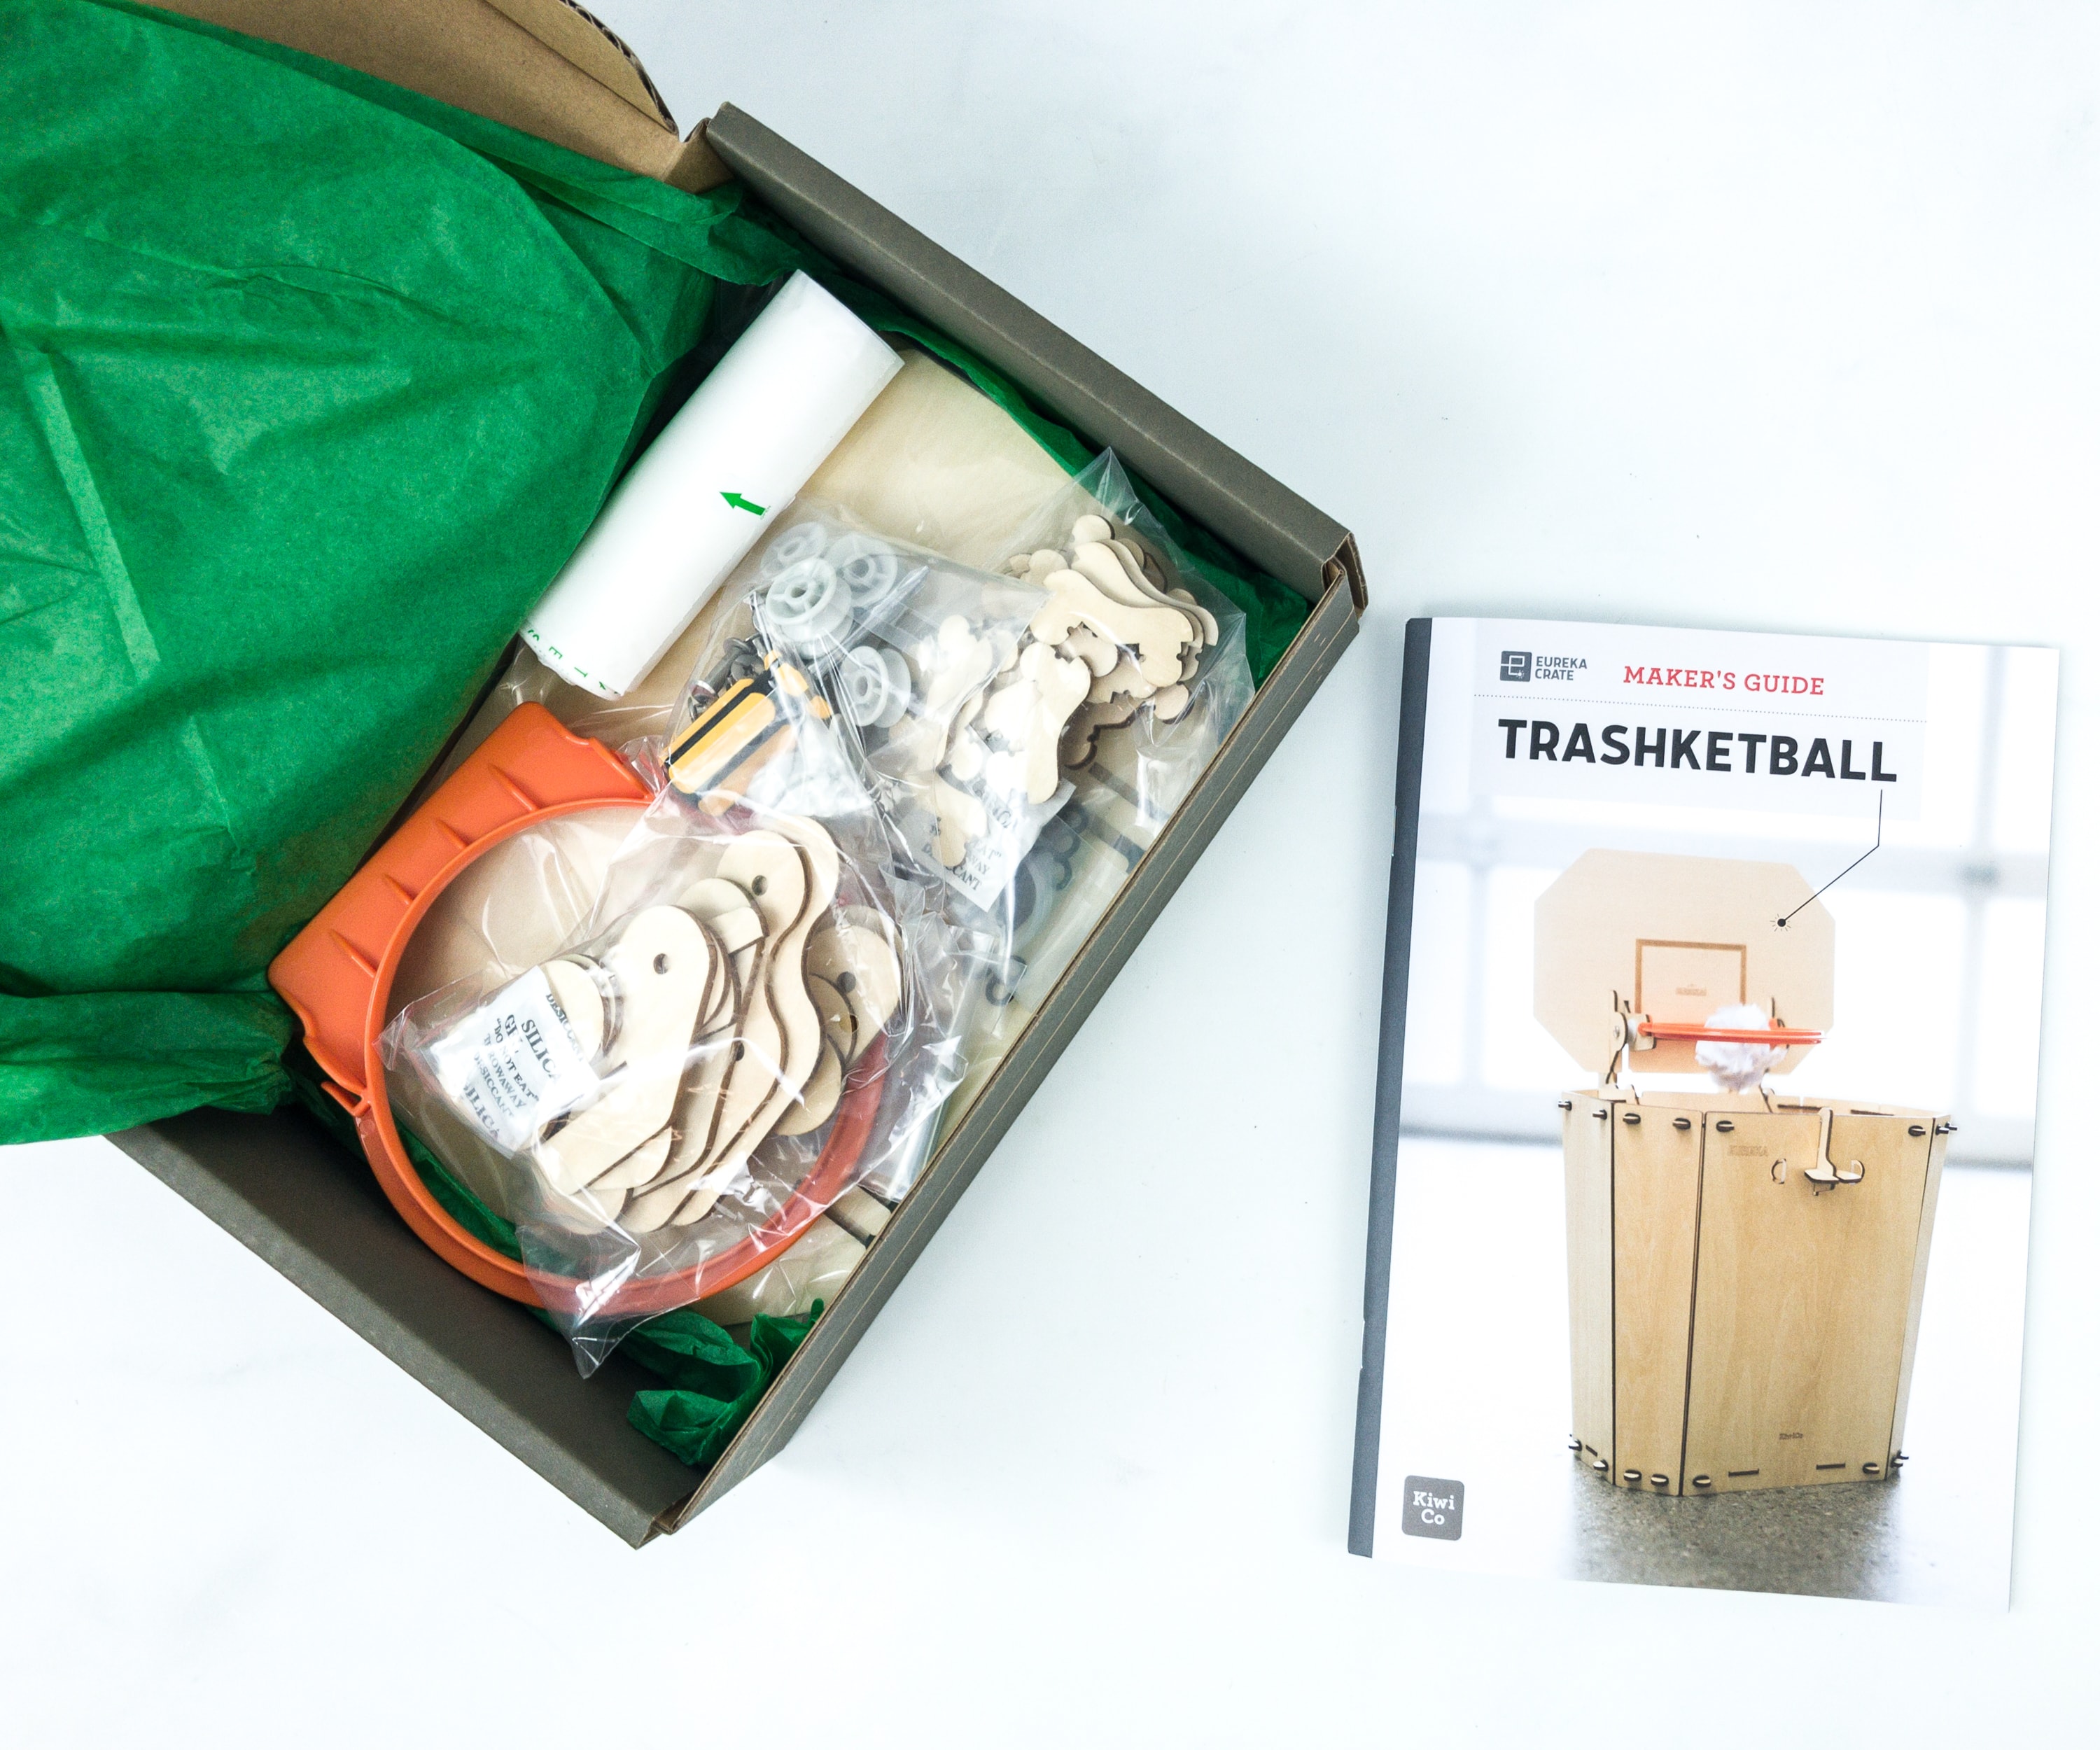
Everything in this month’s box!
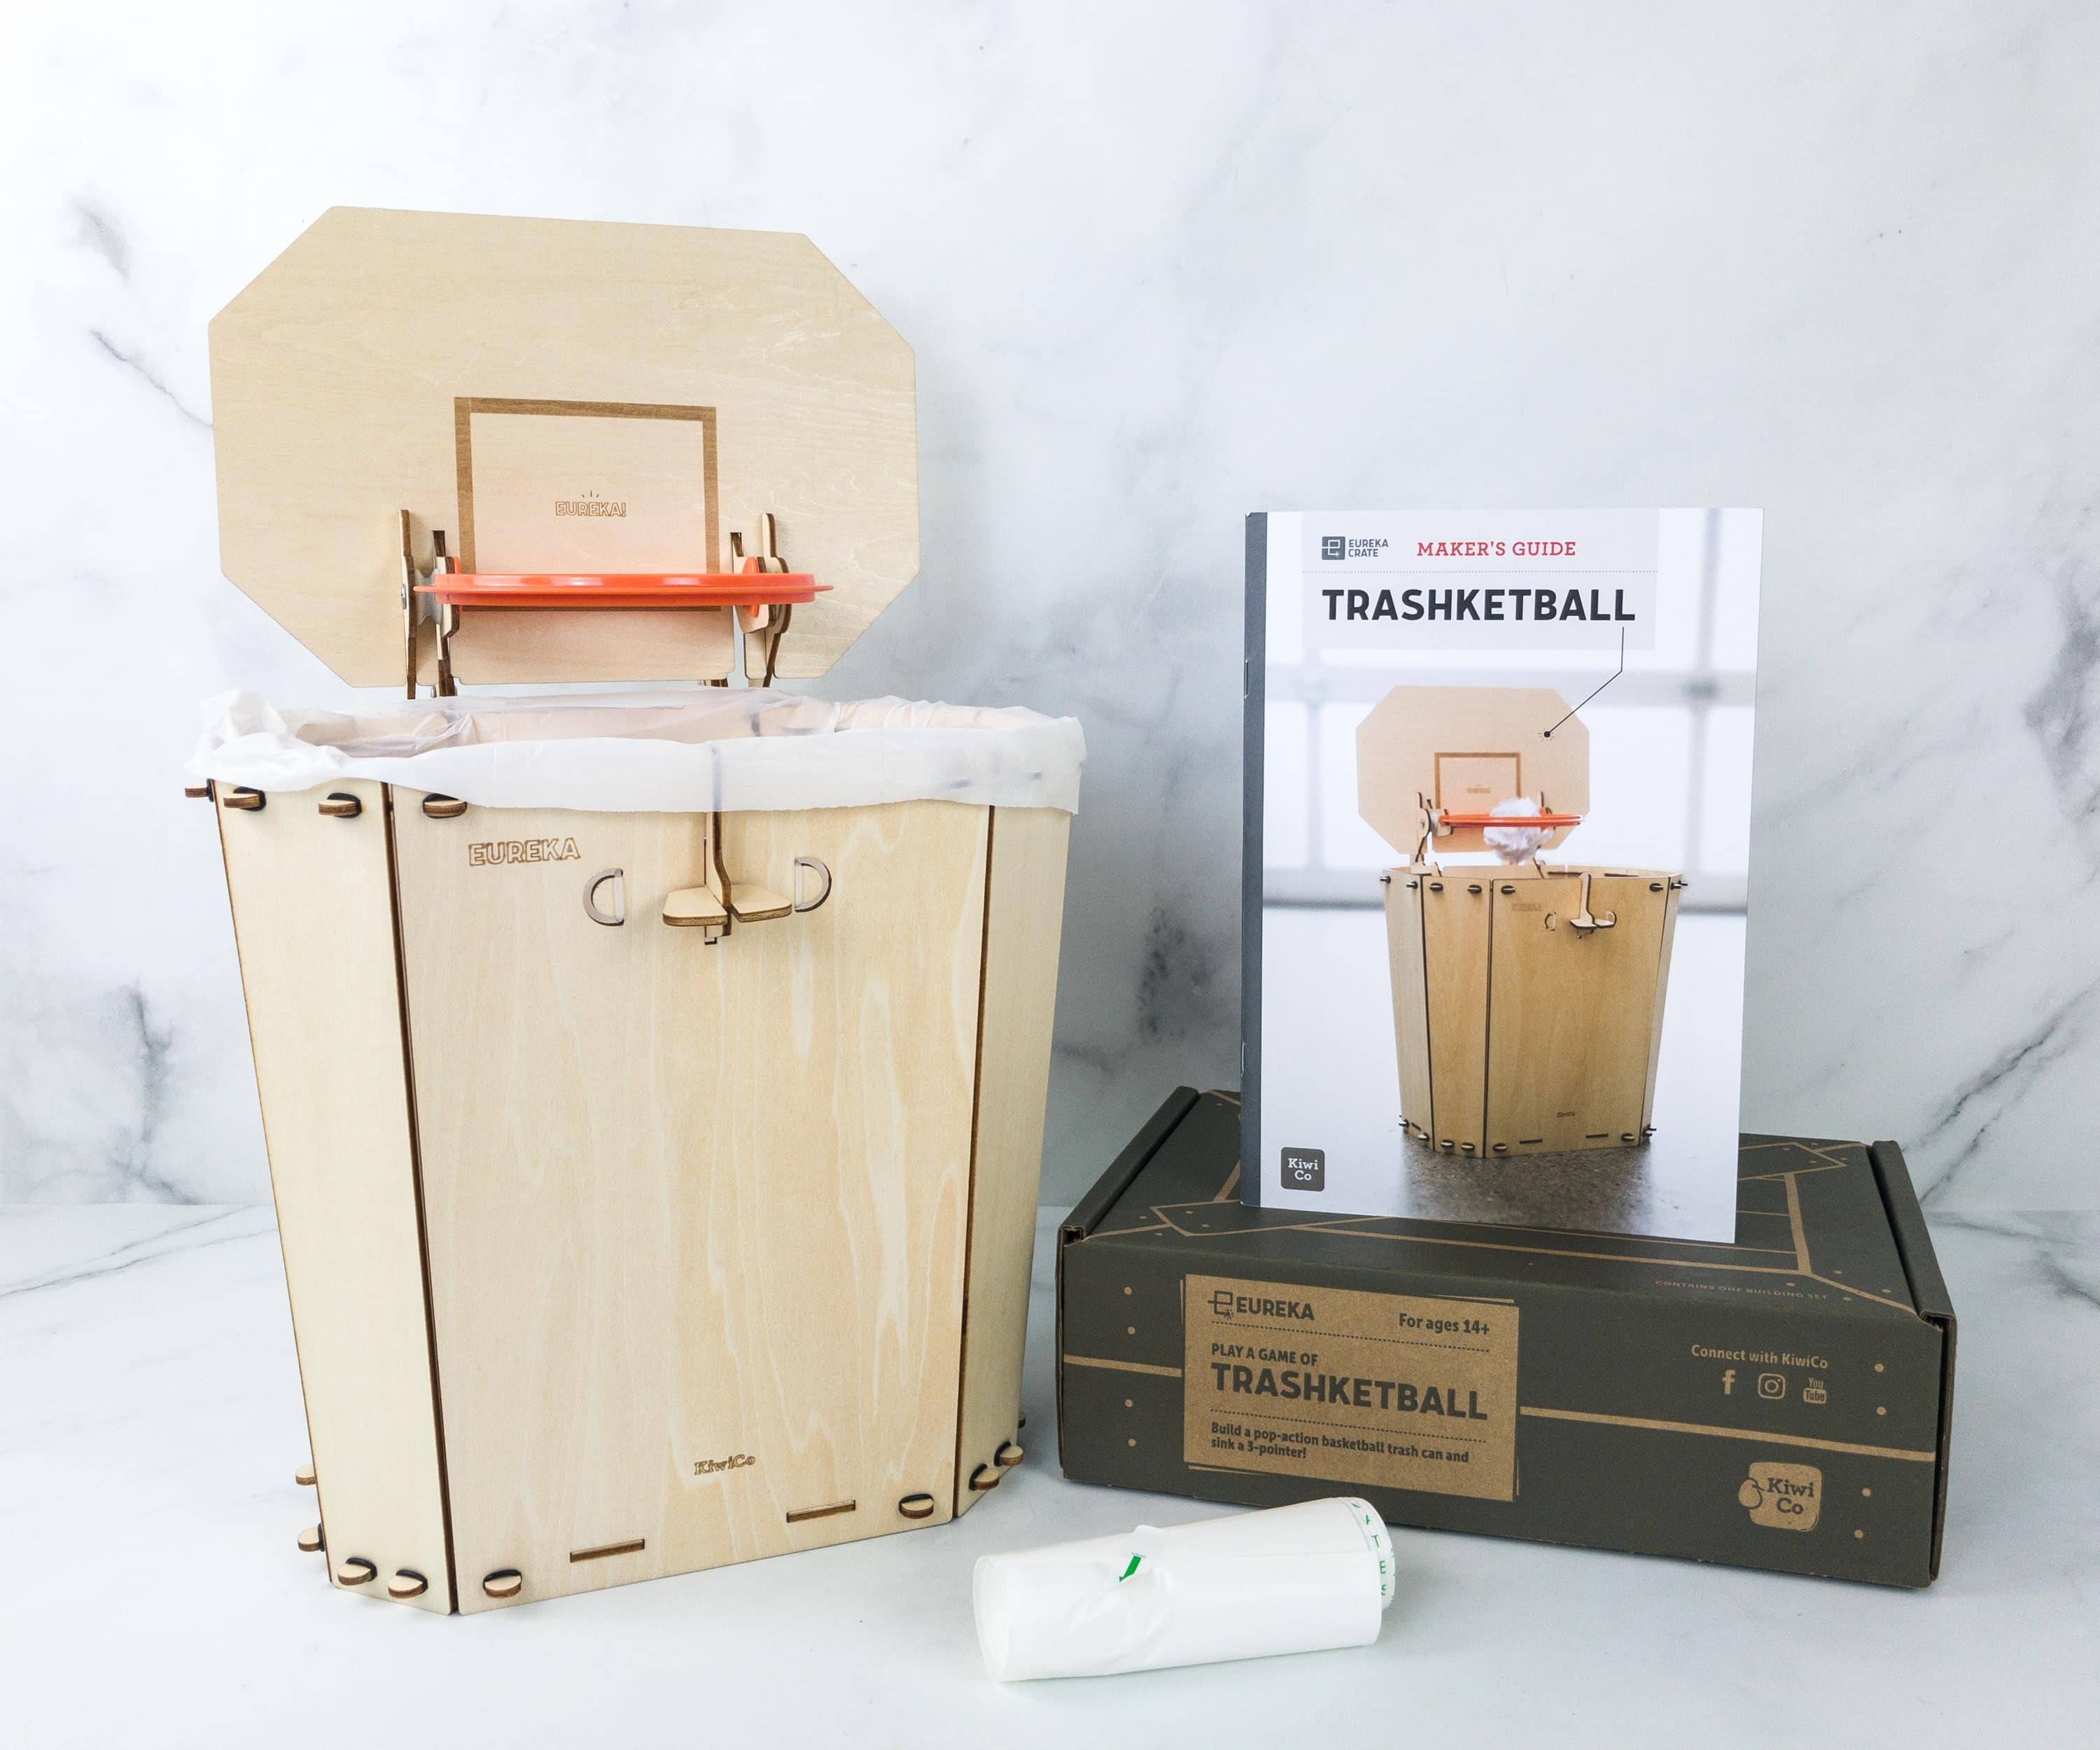
Eureka Crate Maker’s Guide
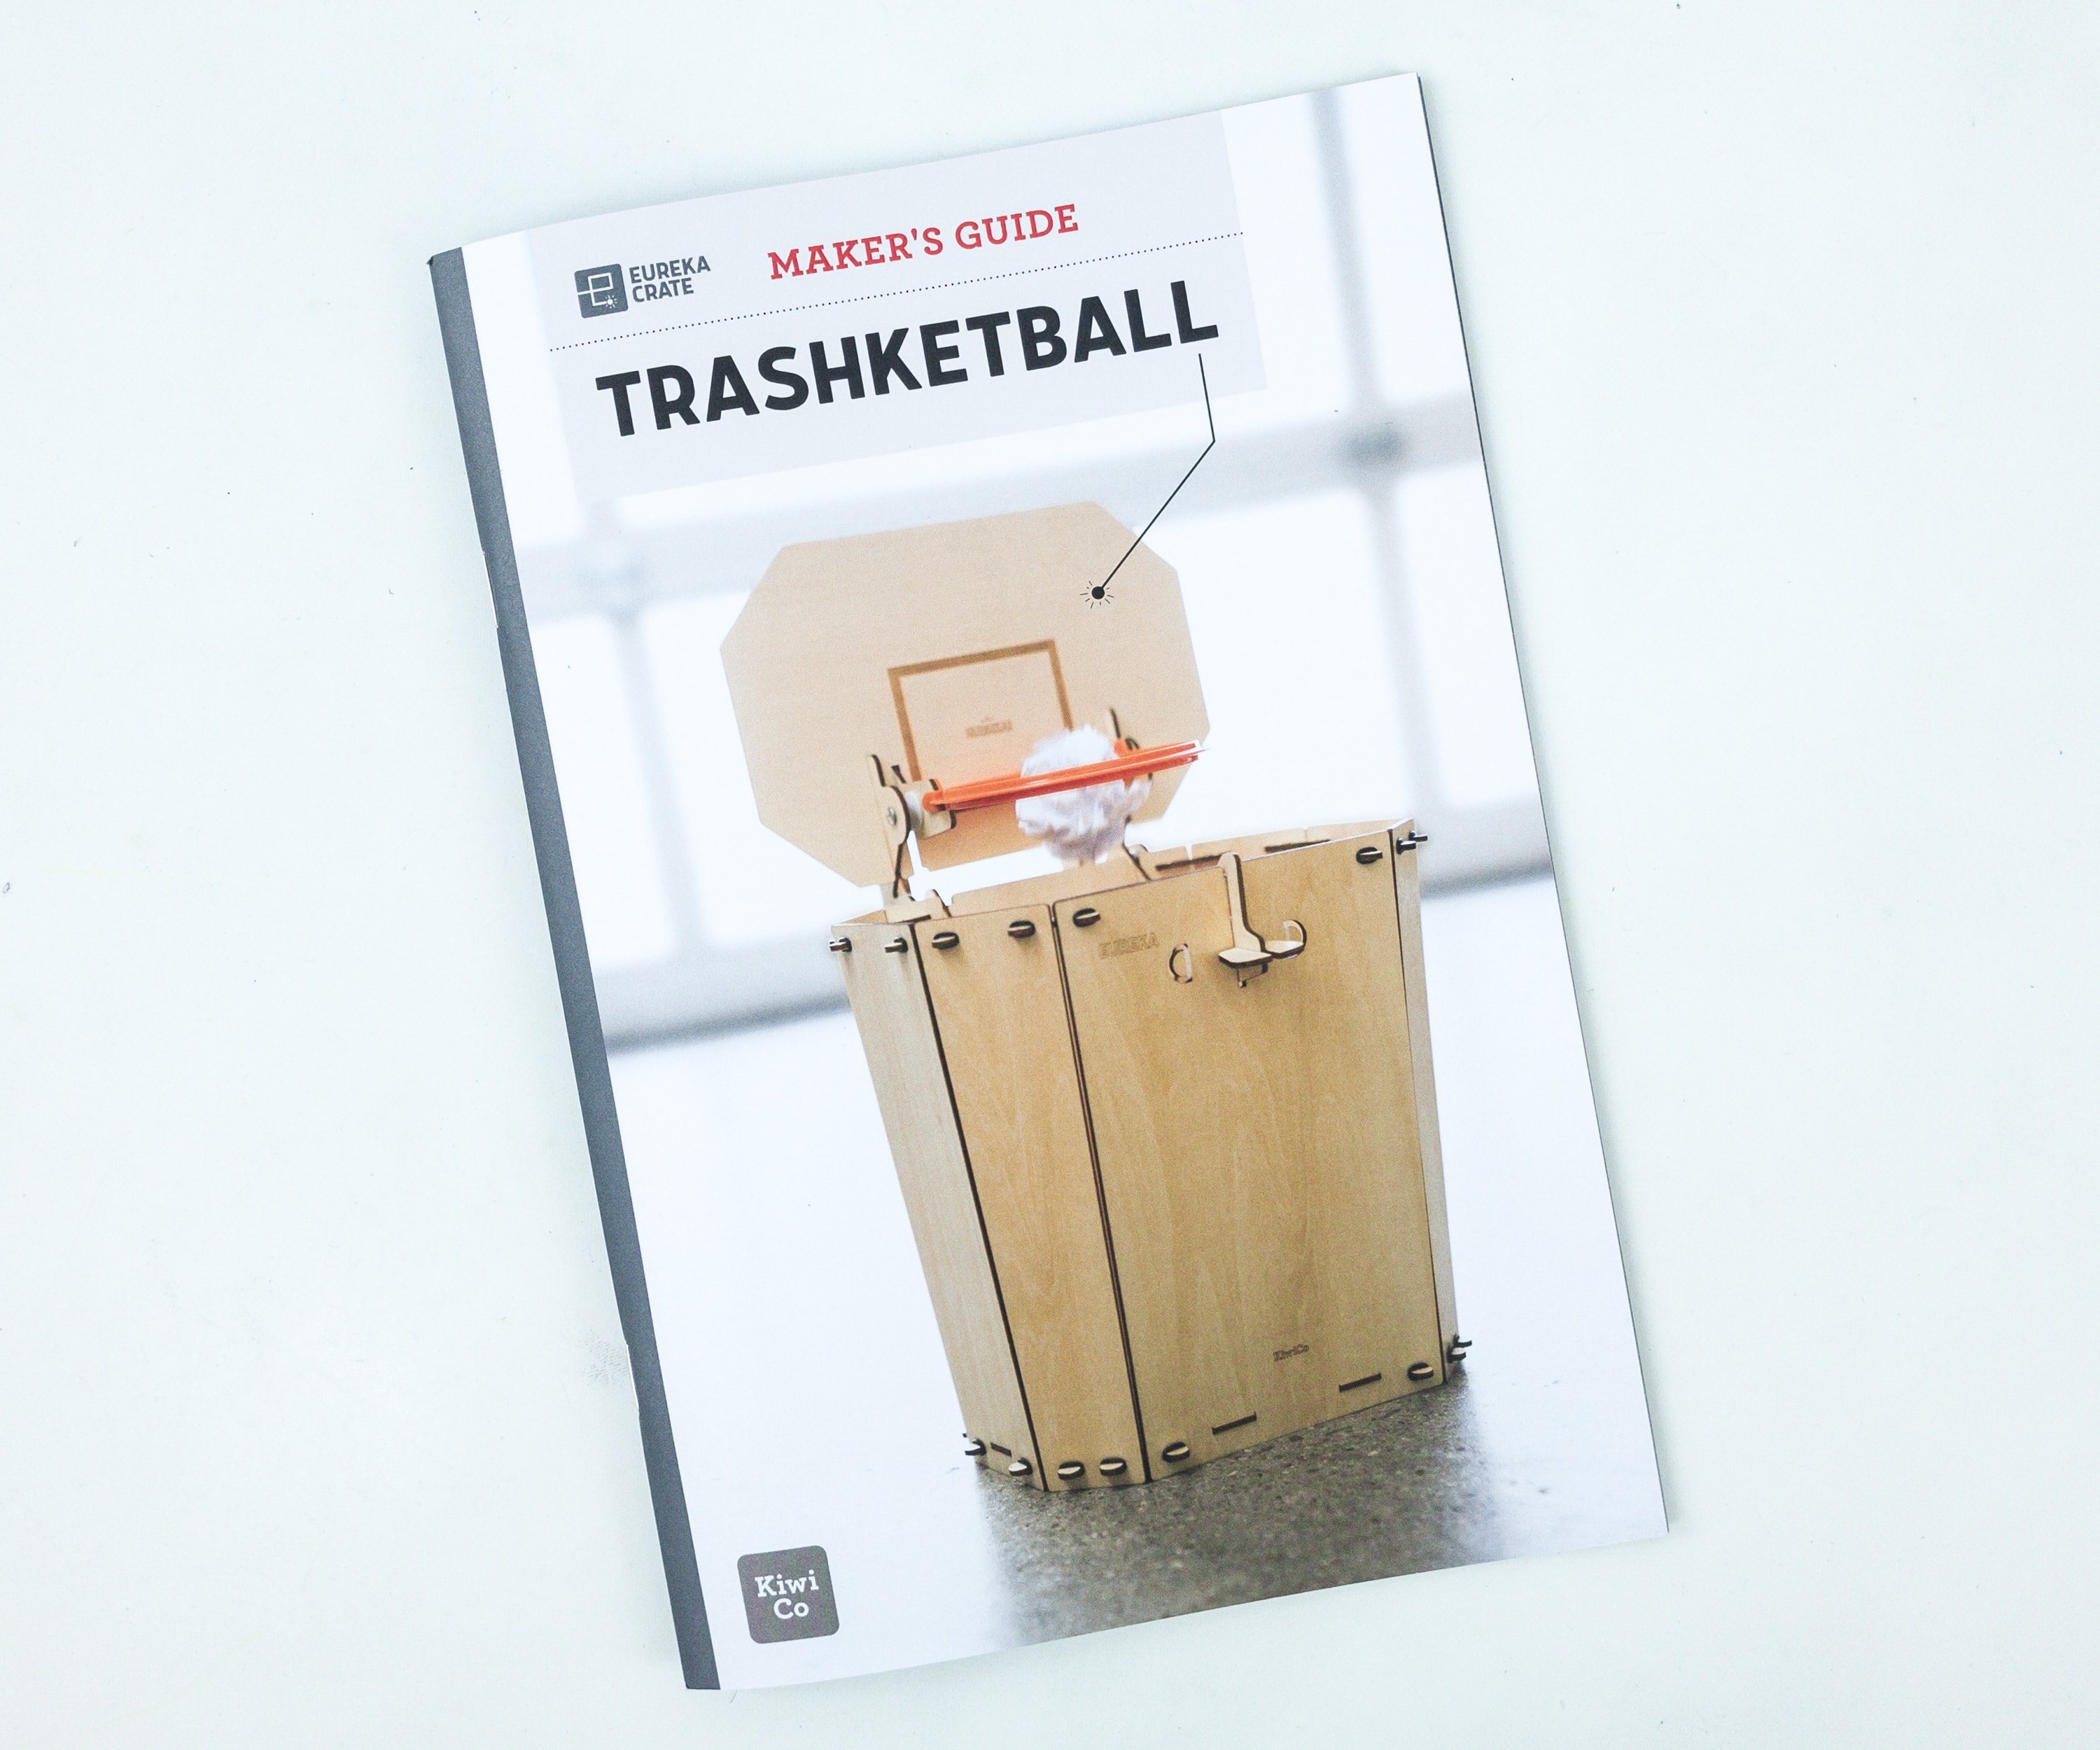
Like the other crates from KiwiCo, Eureka Crate includes a booklet.
One of KiwiCo’s goals is to equip the next generation of innovators with the tools and confidence for creative exploration and problem-solving.
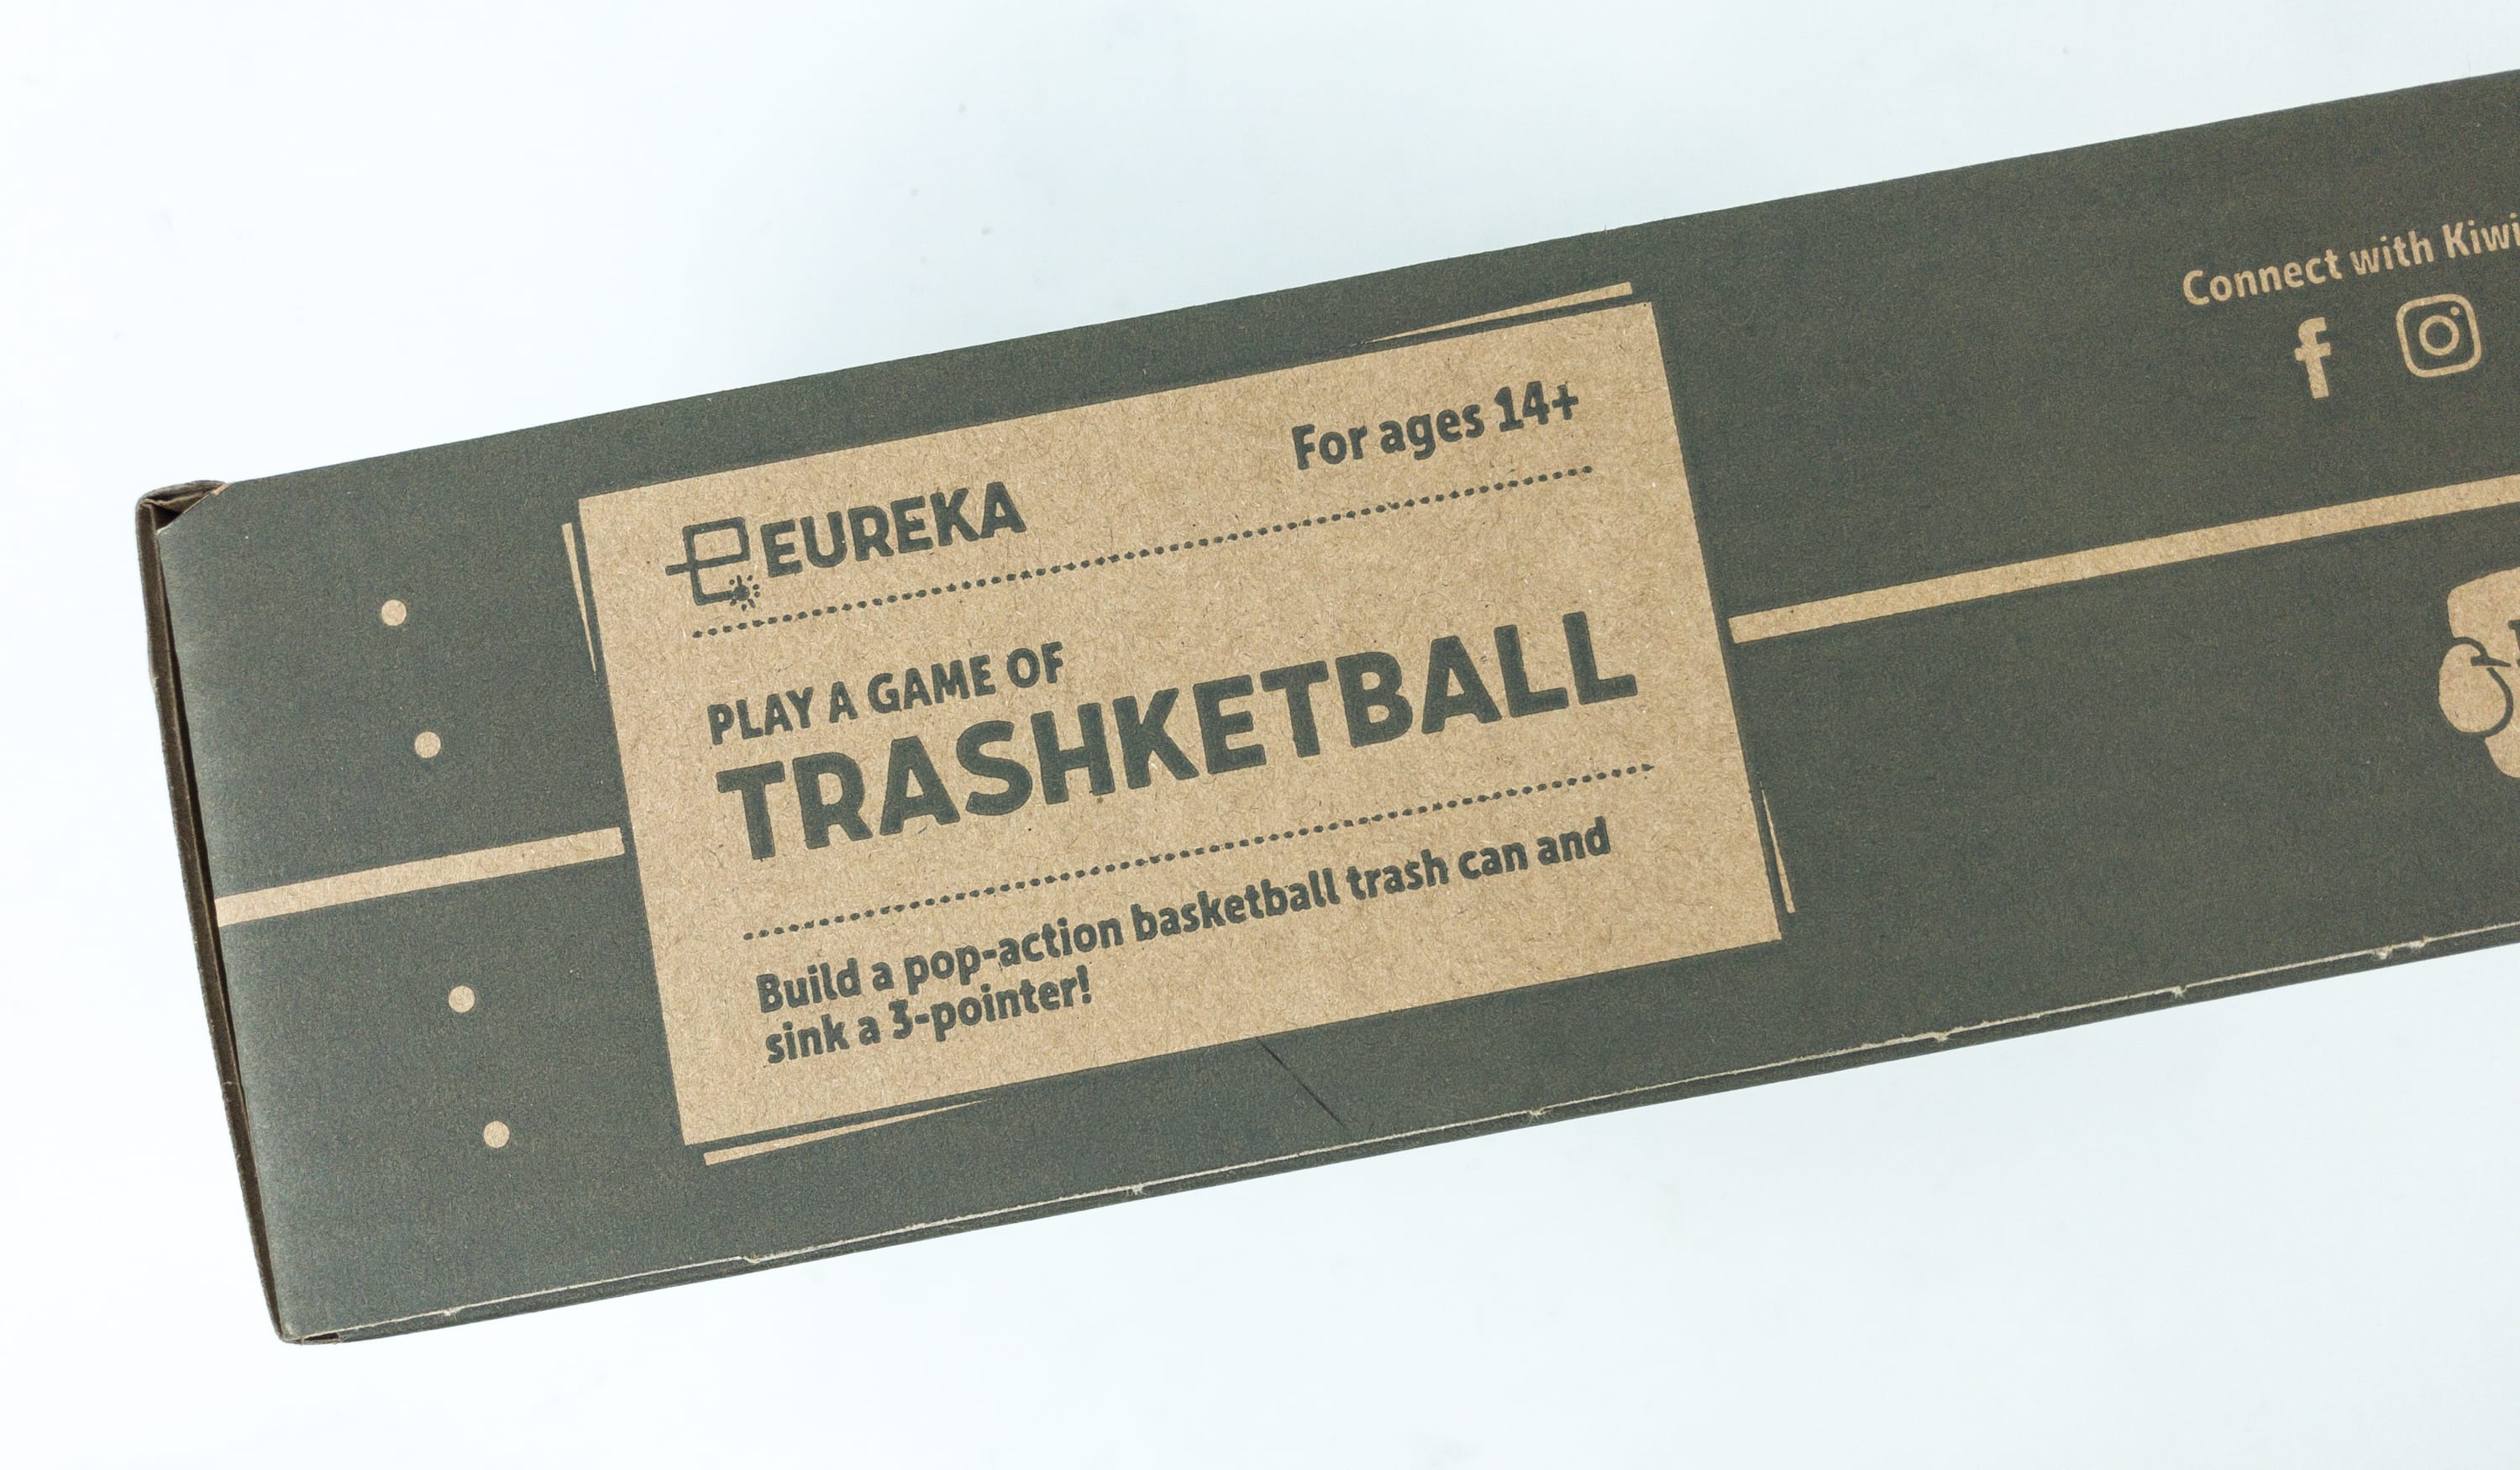
TRASHKETBALL
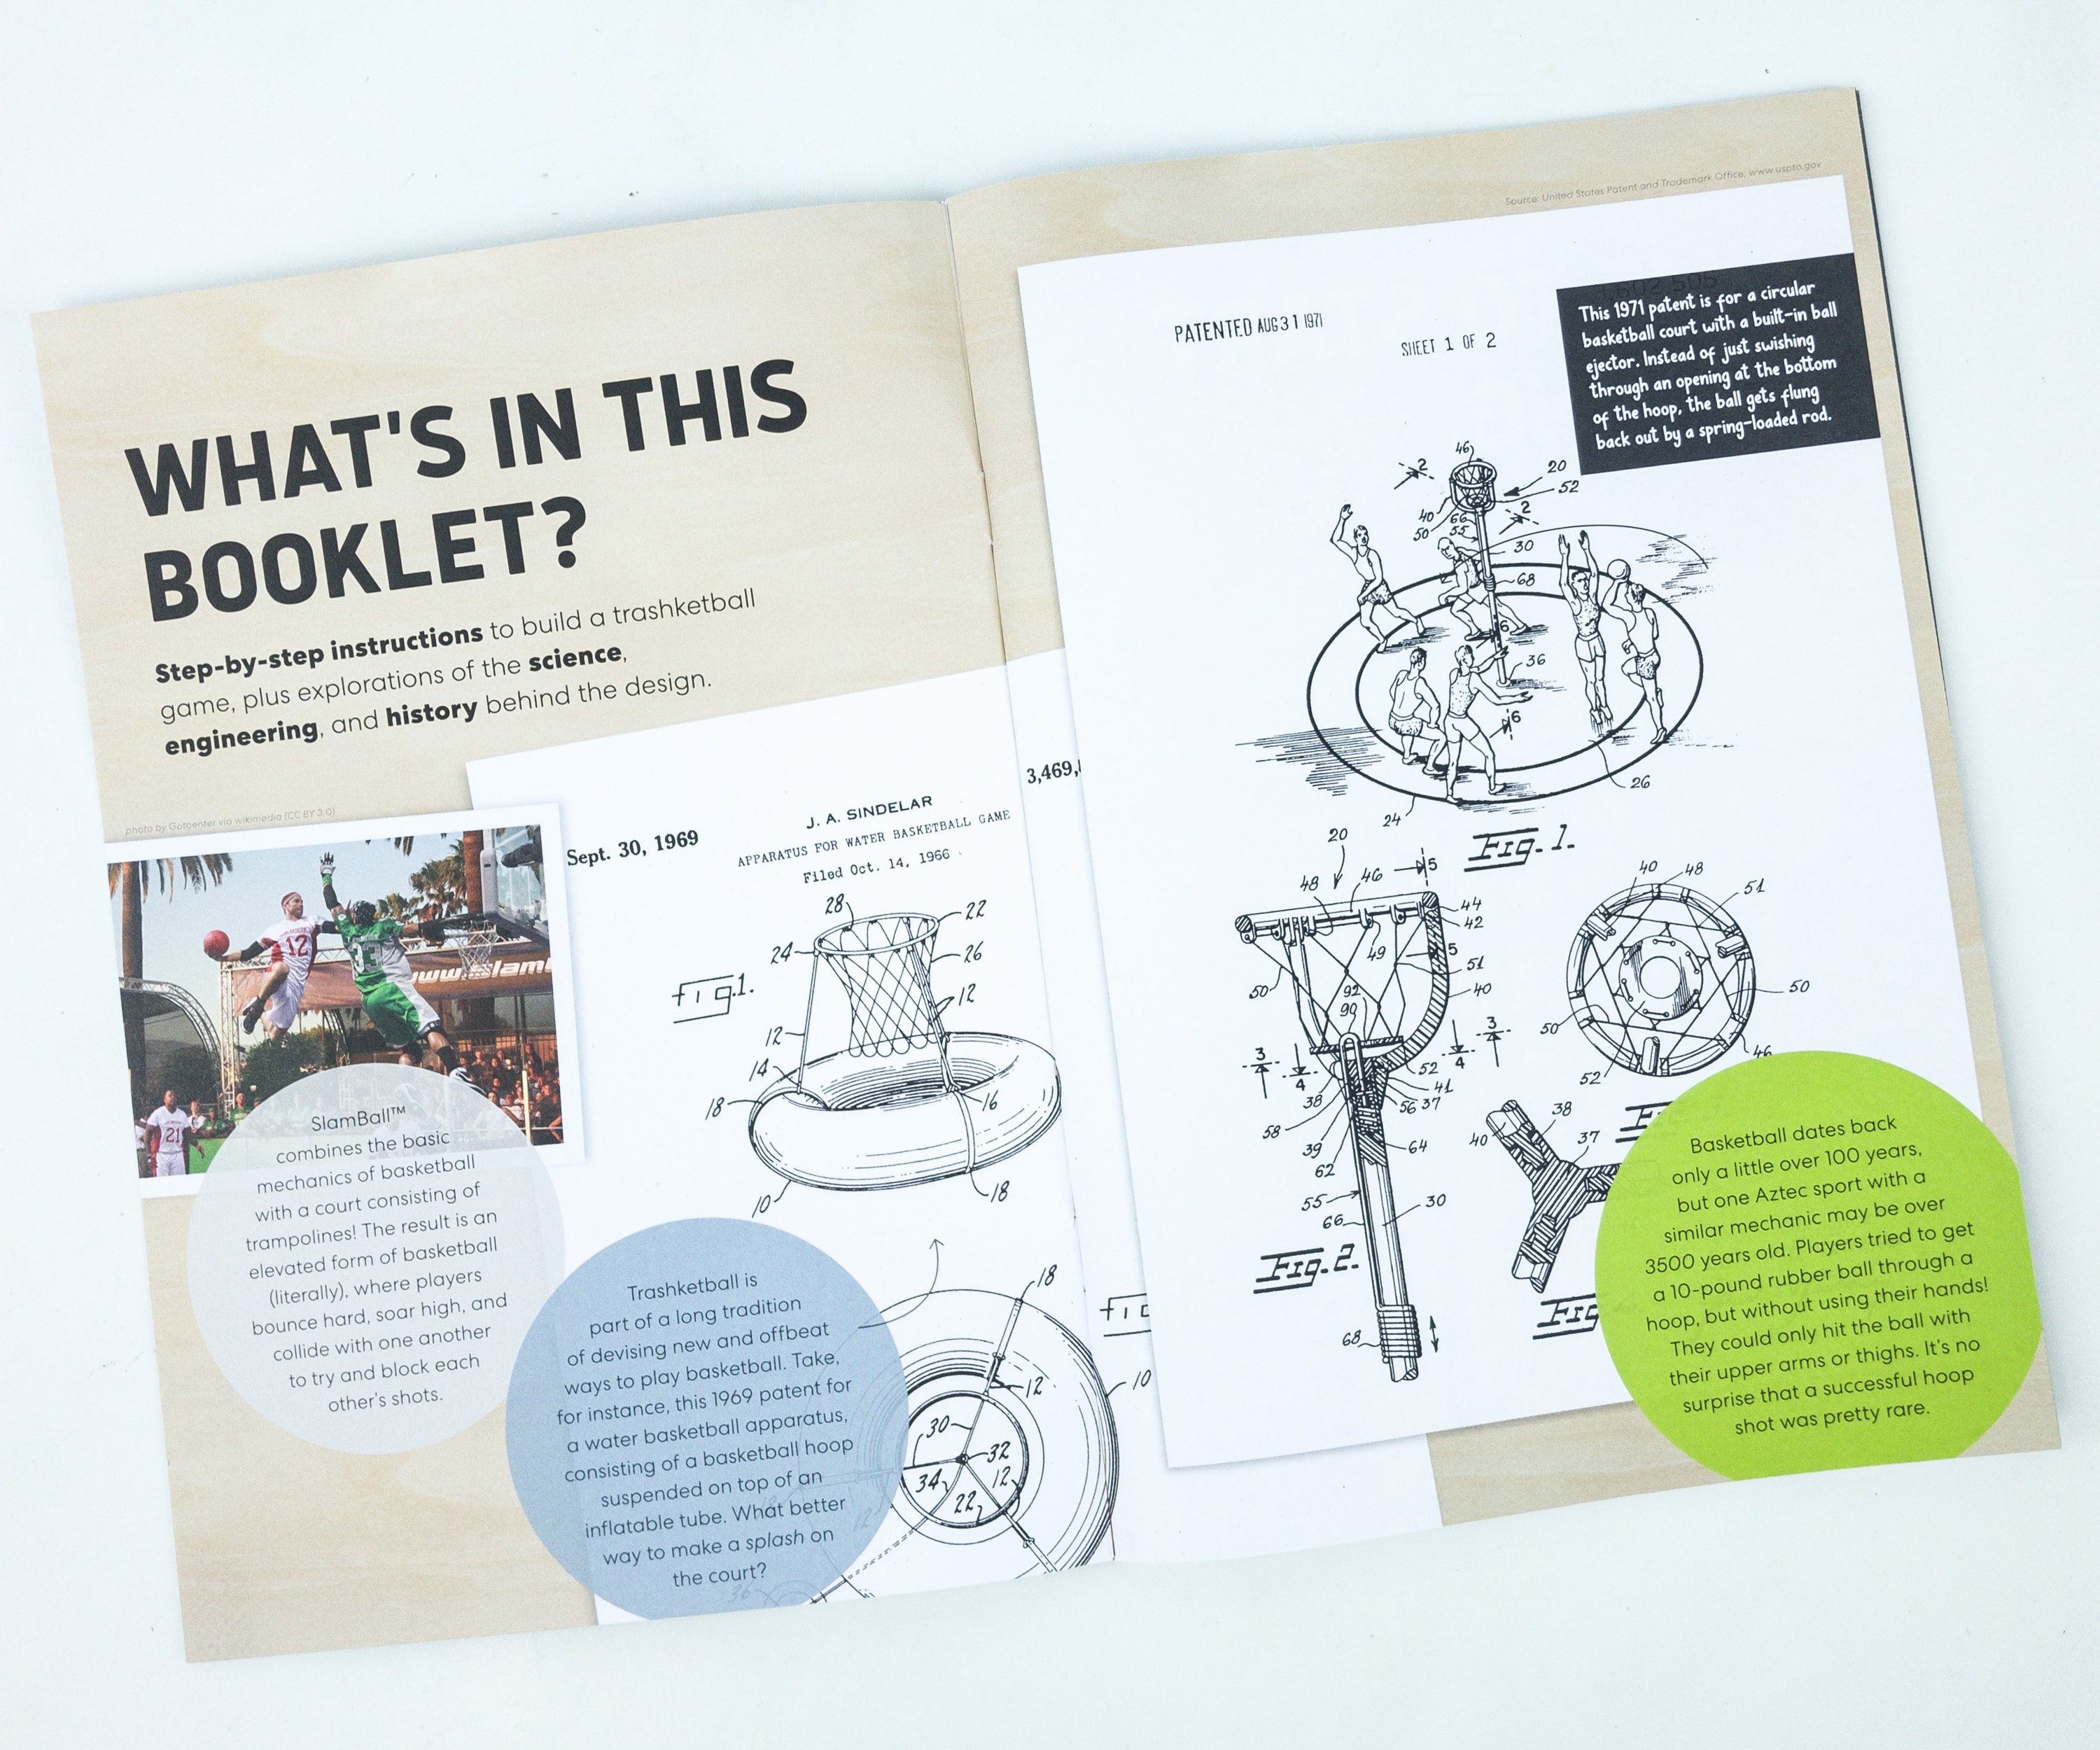
The booklet gives a complete history and details about this month’s project. They also included some fun facts and trivia related to the theme.
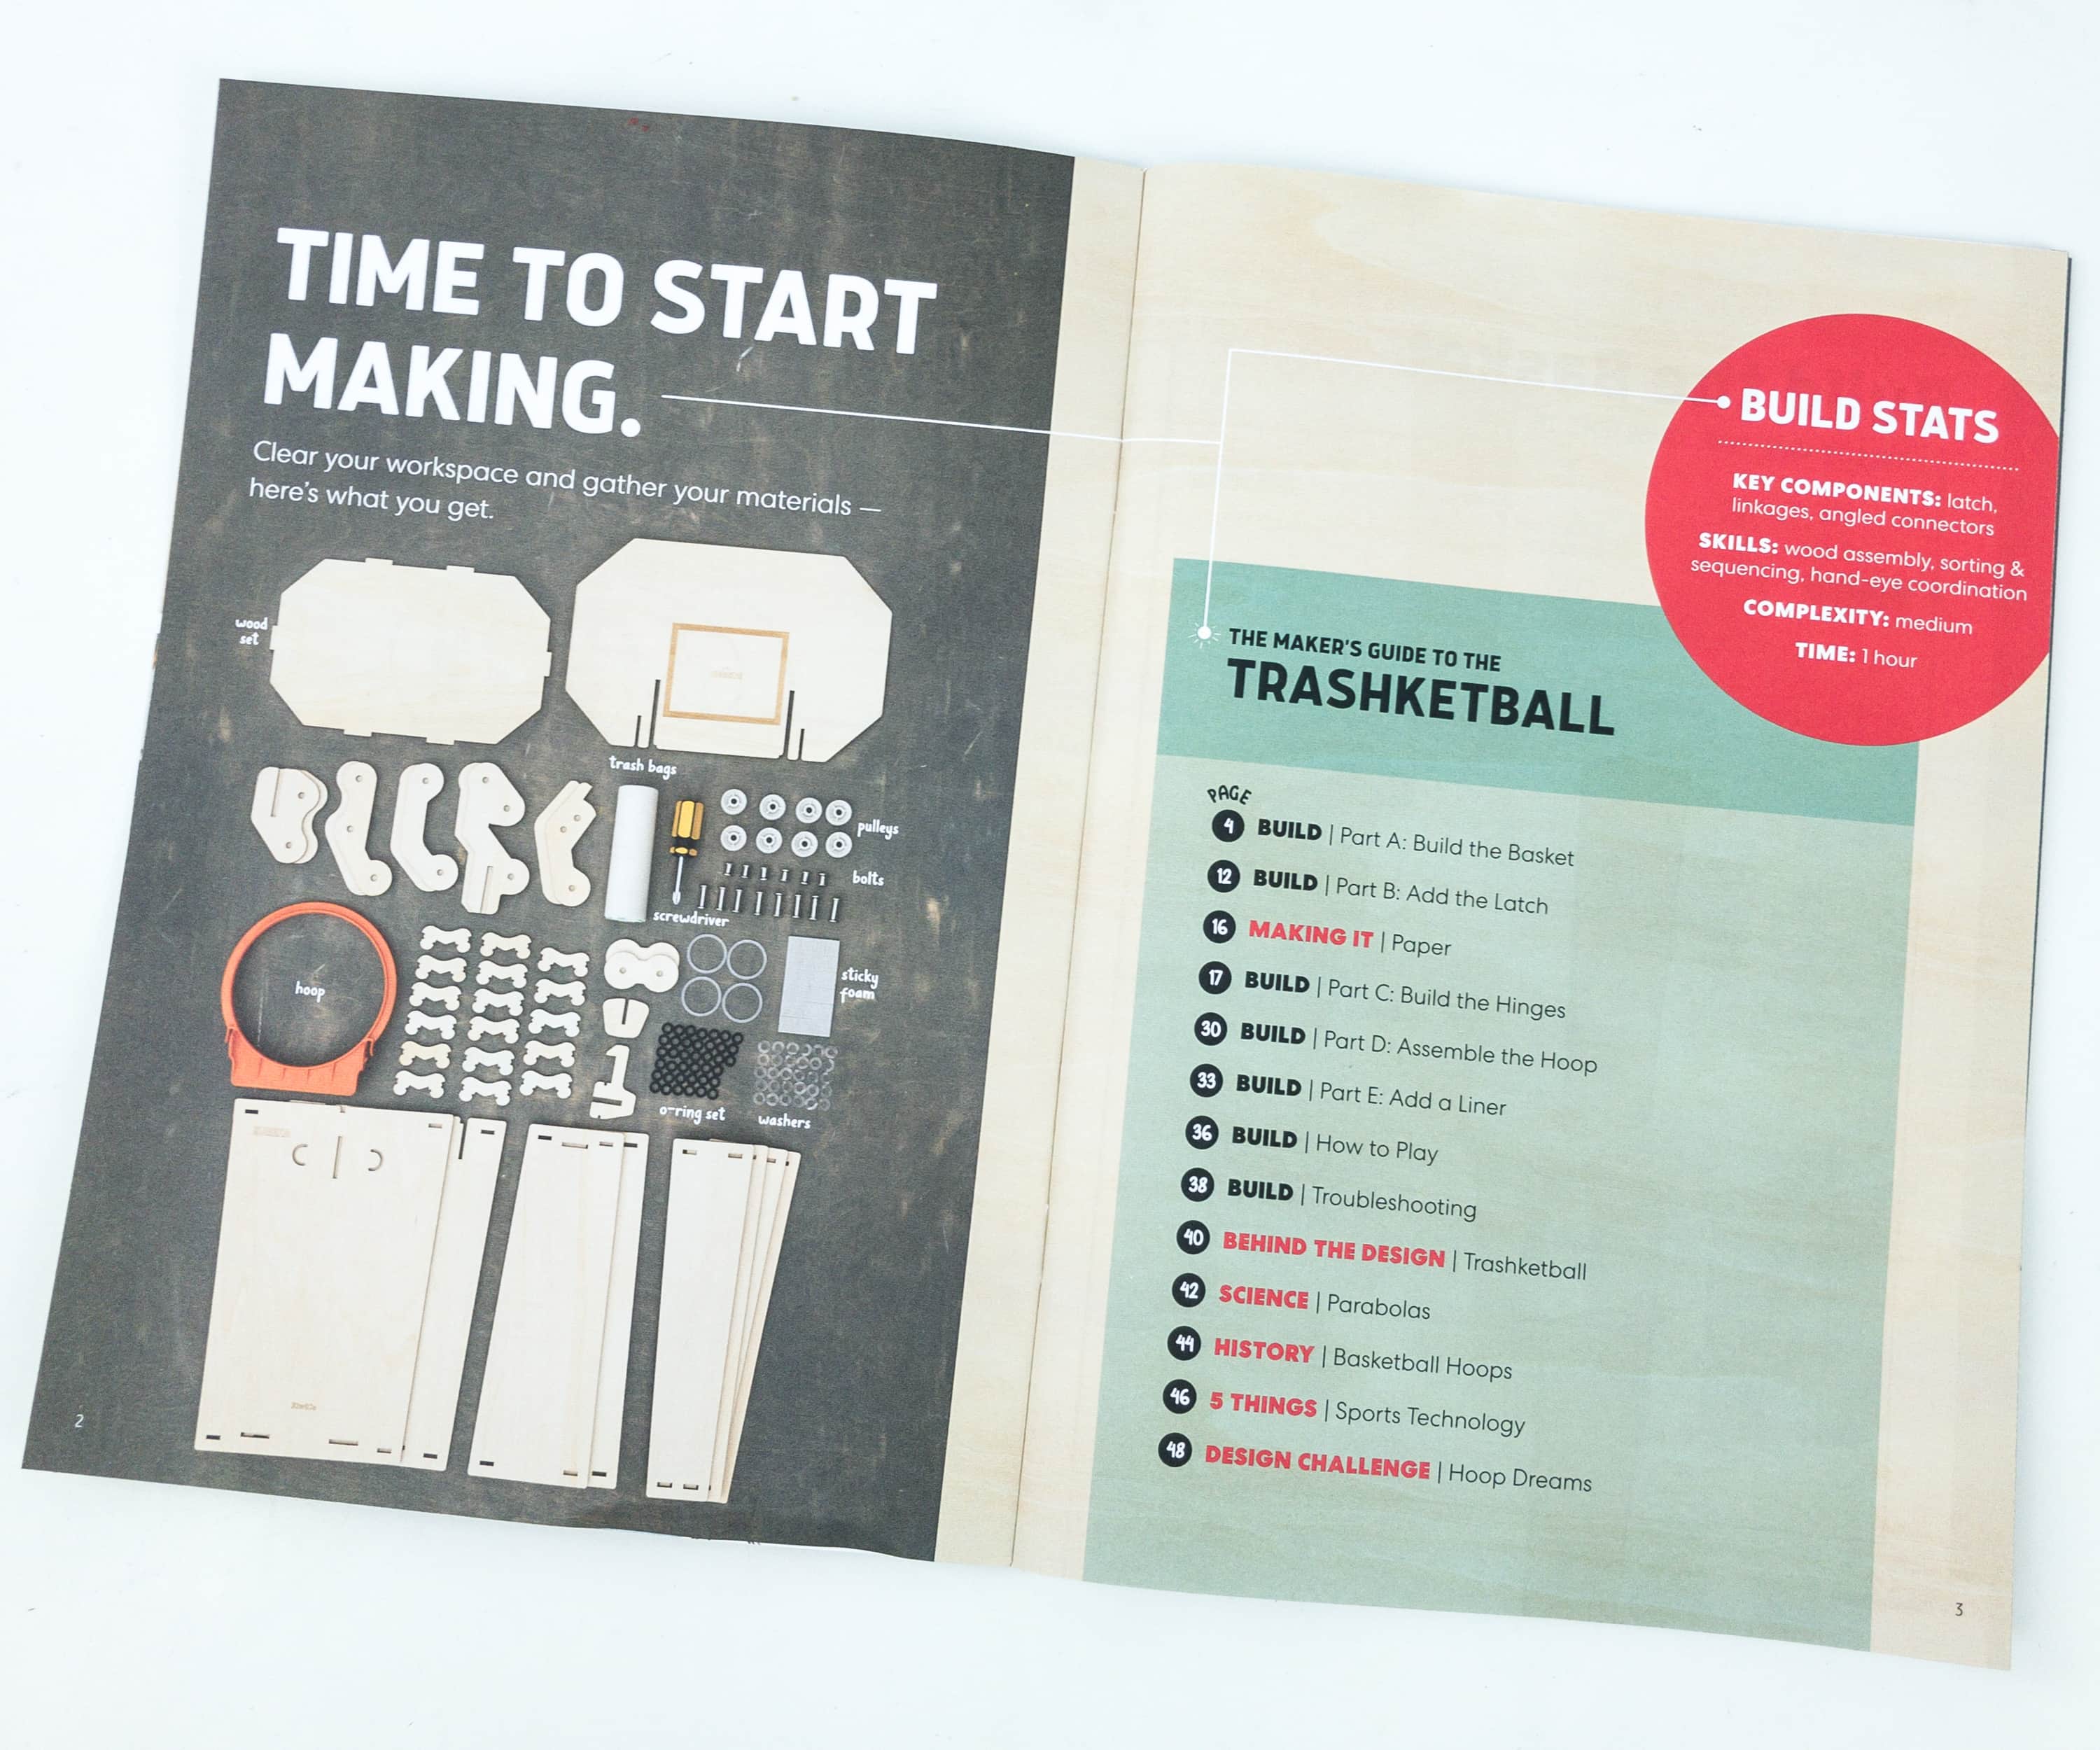
Eureka Crate Materials
This booklet means business as it jumps right to the activity.
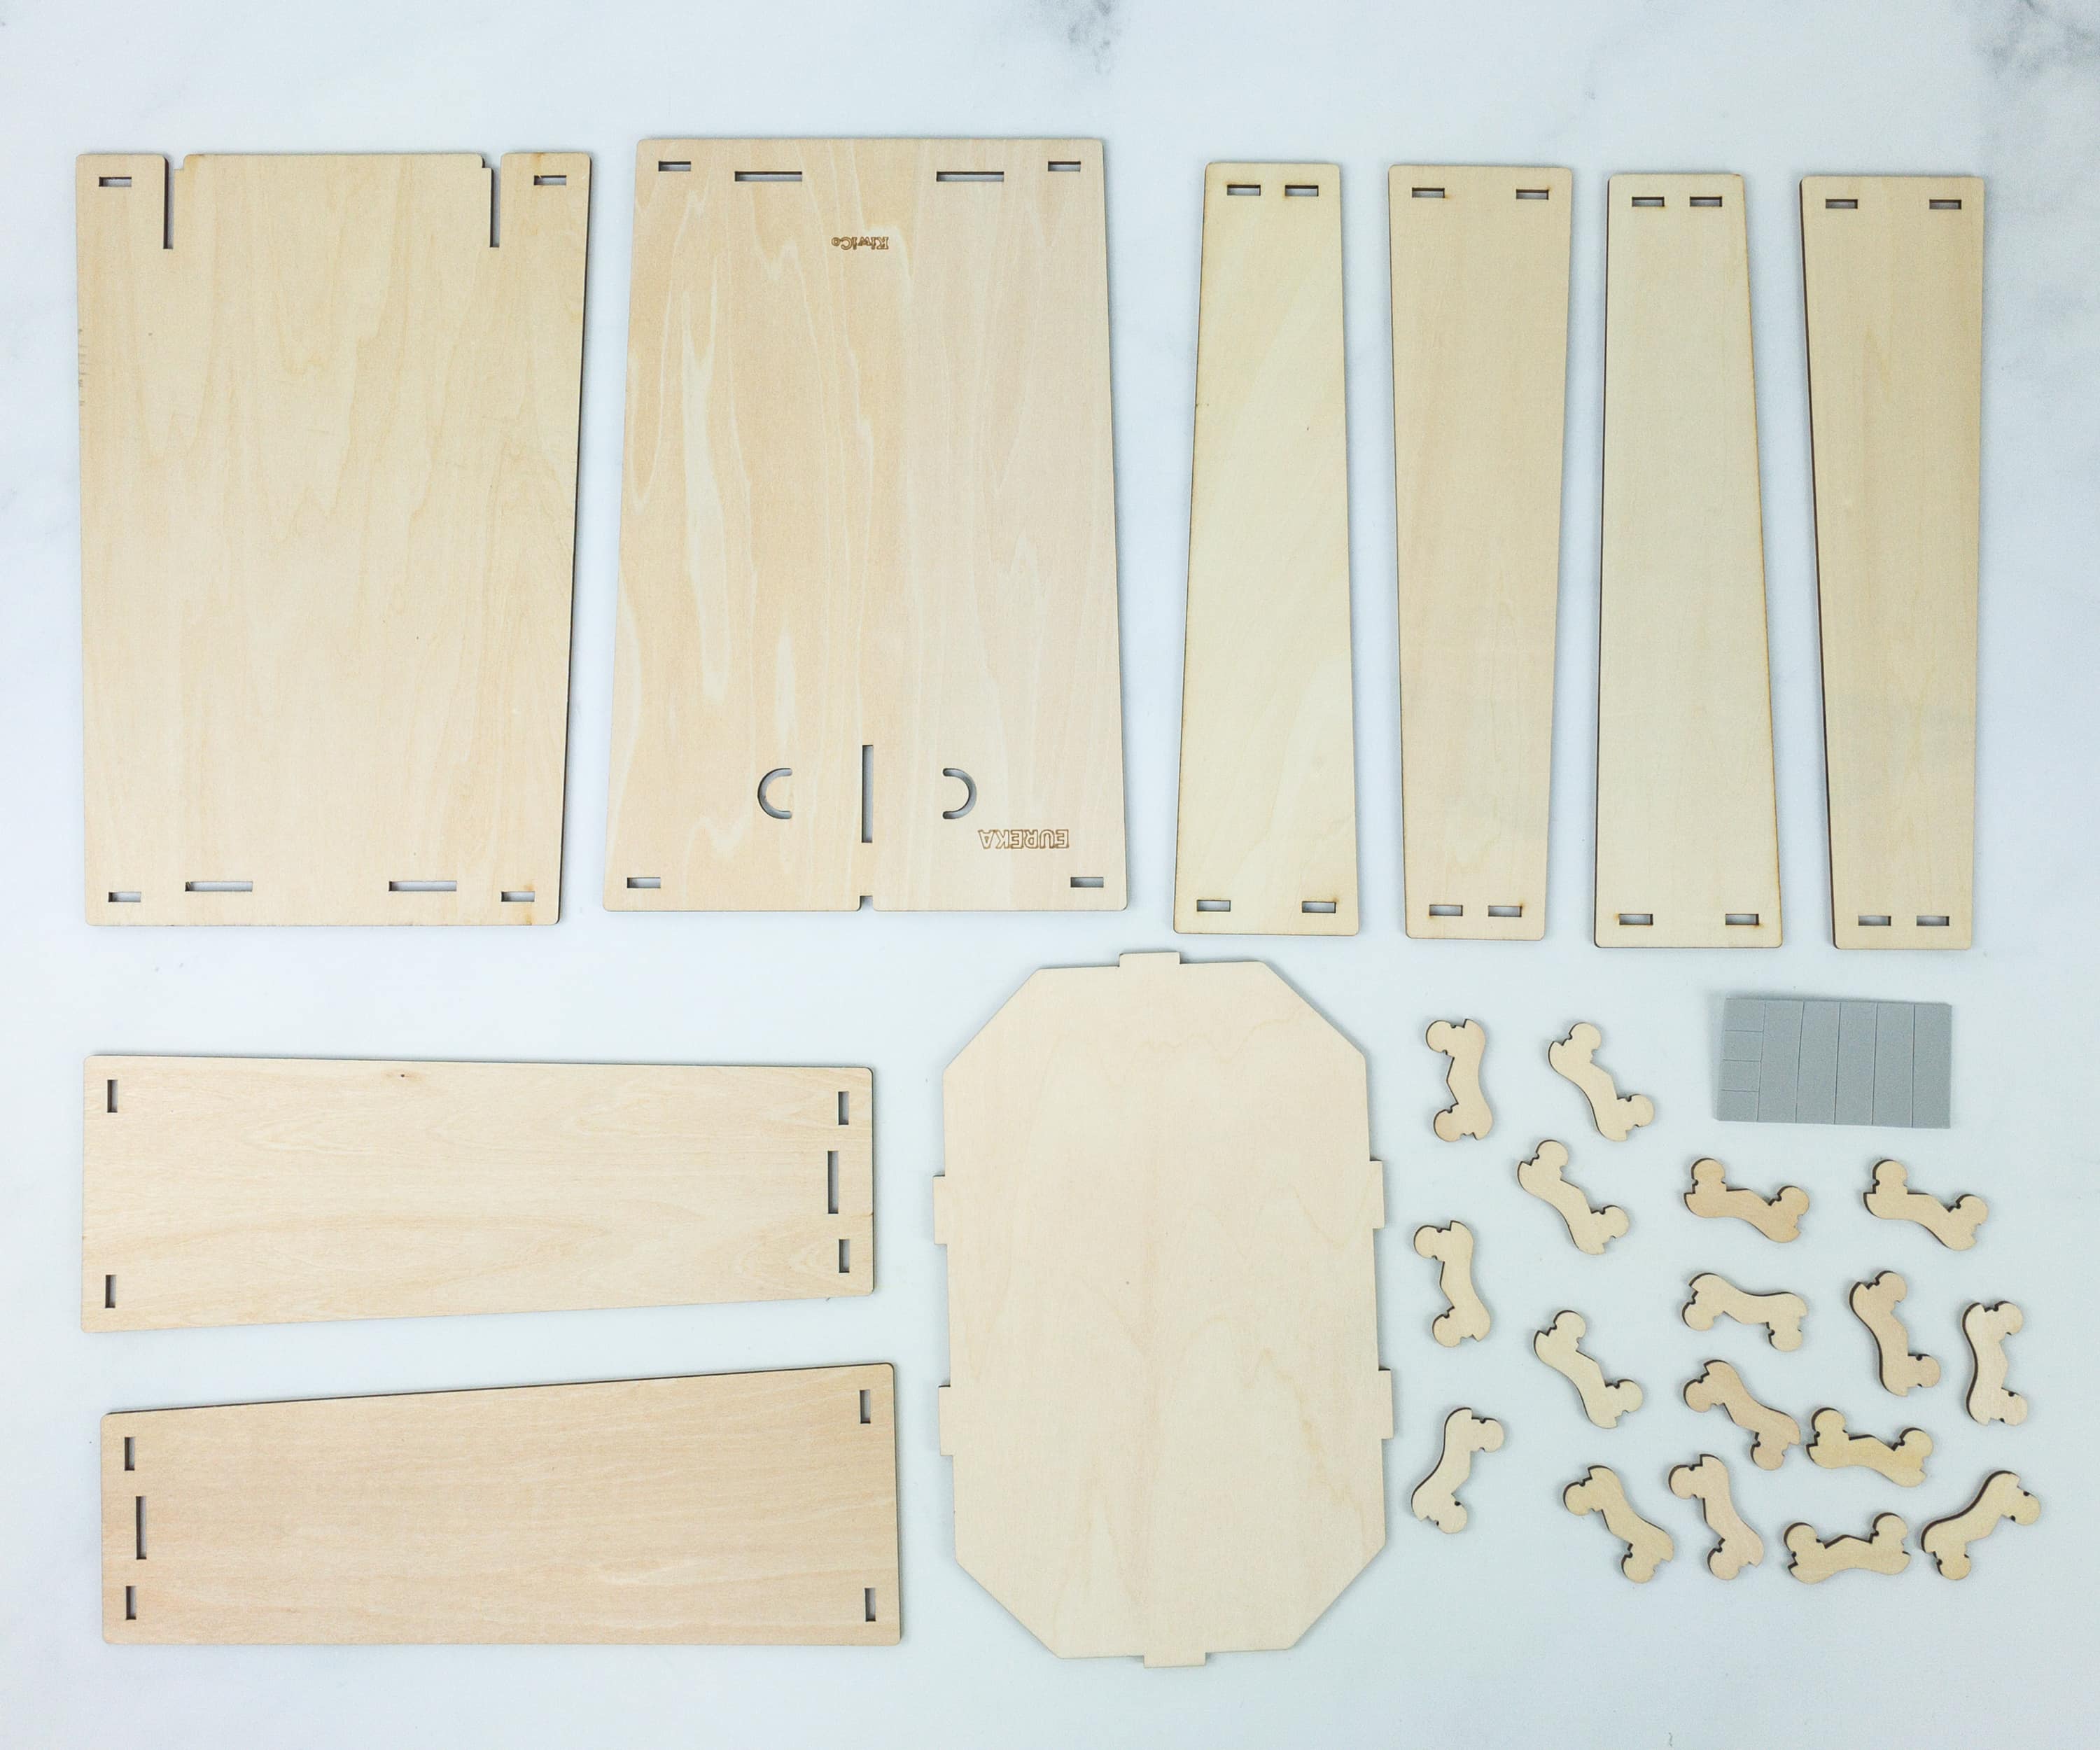
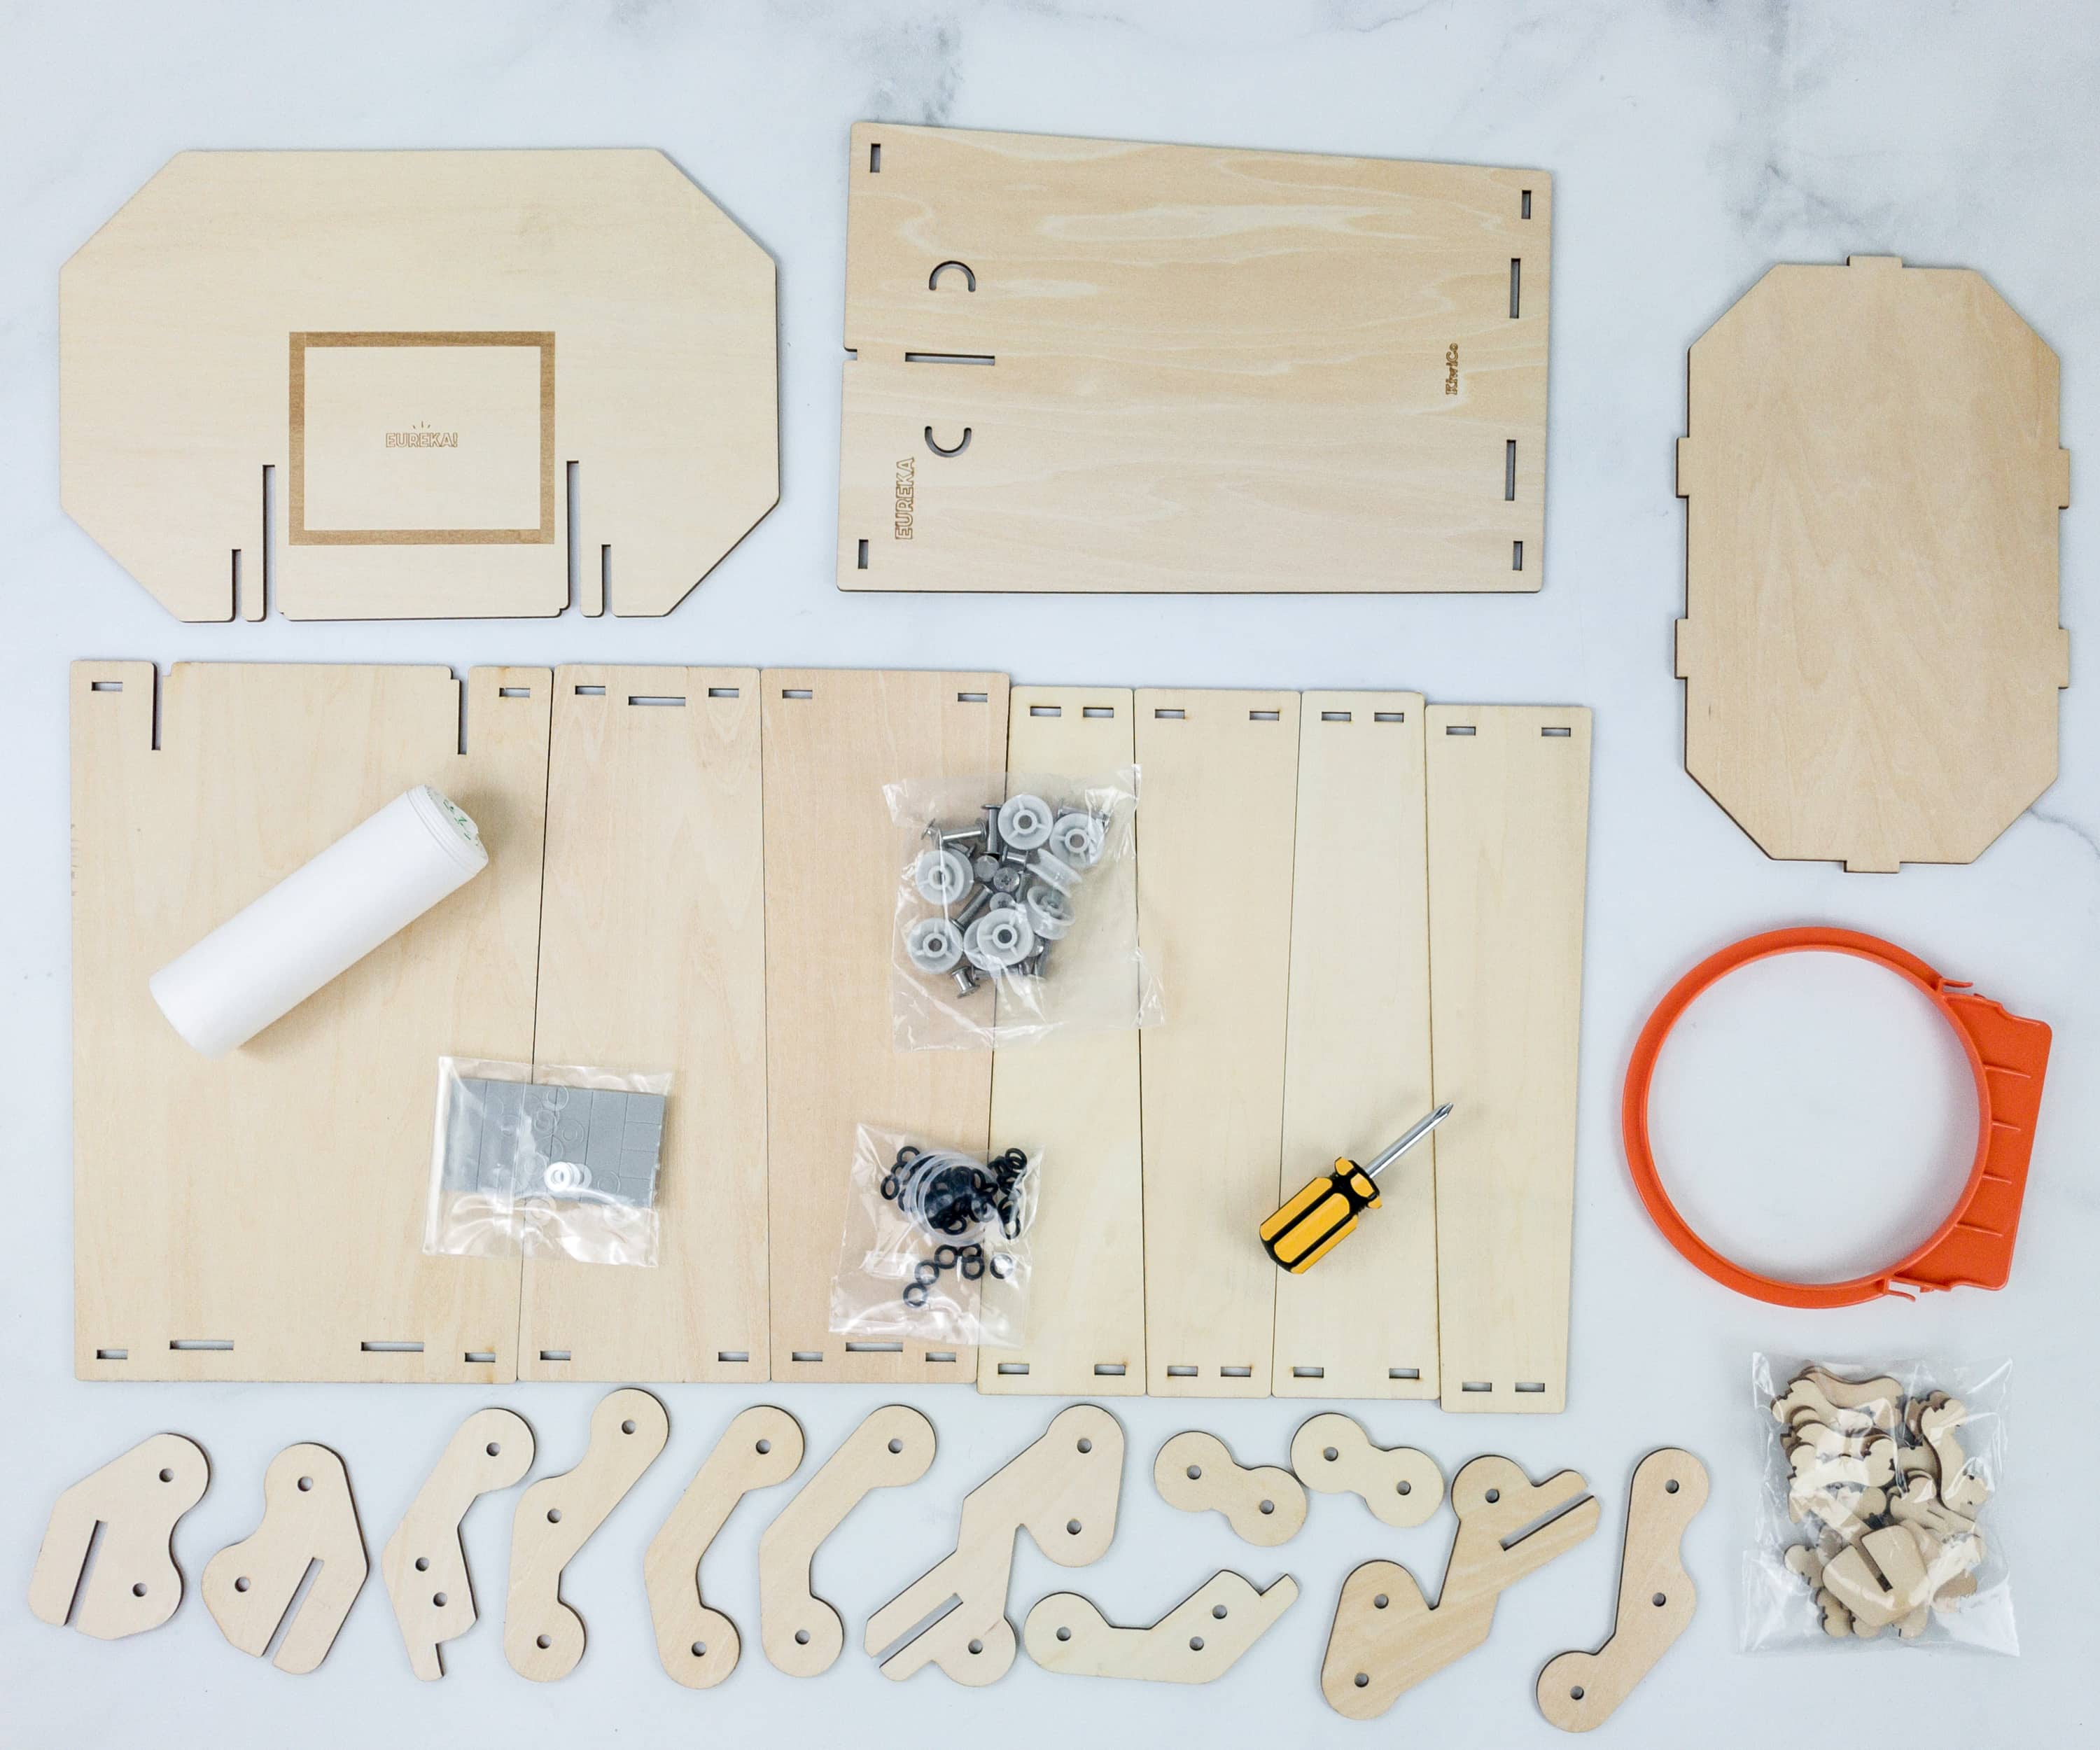
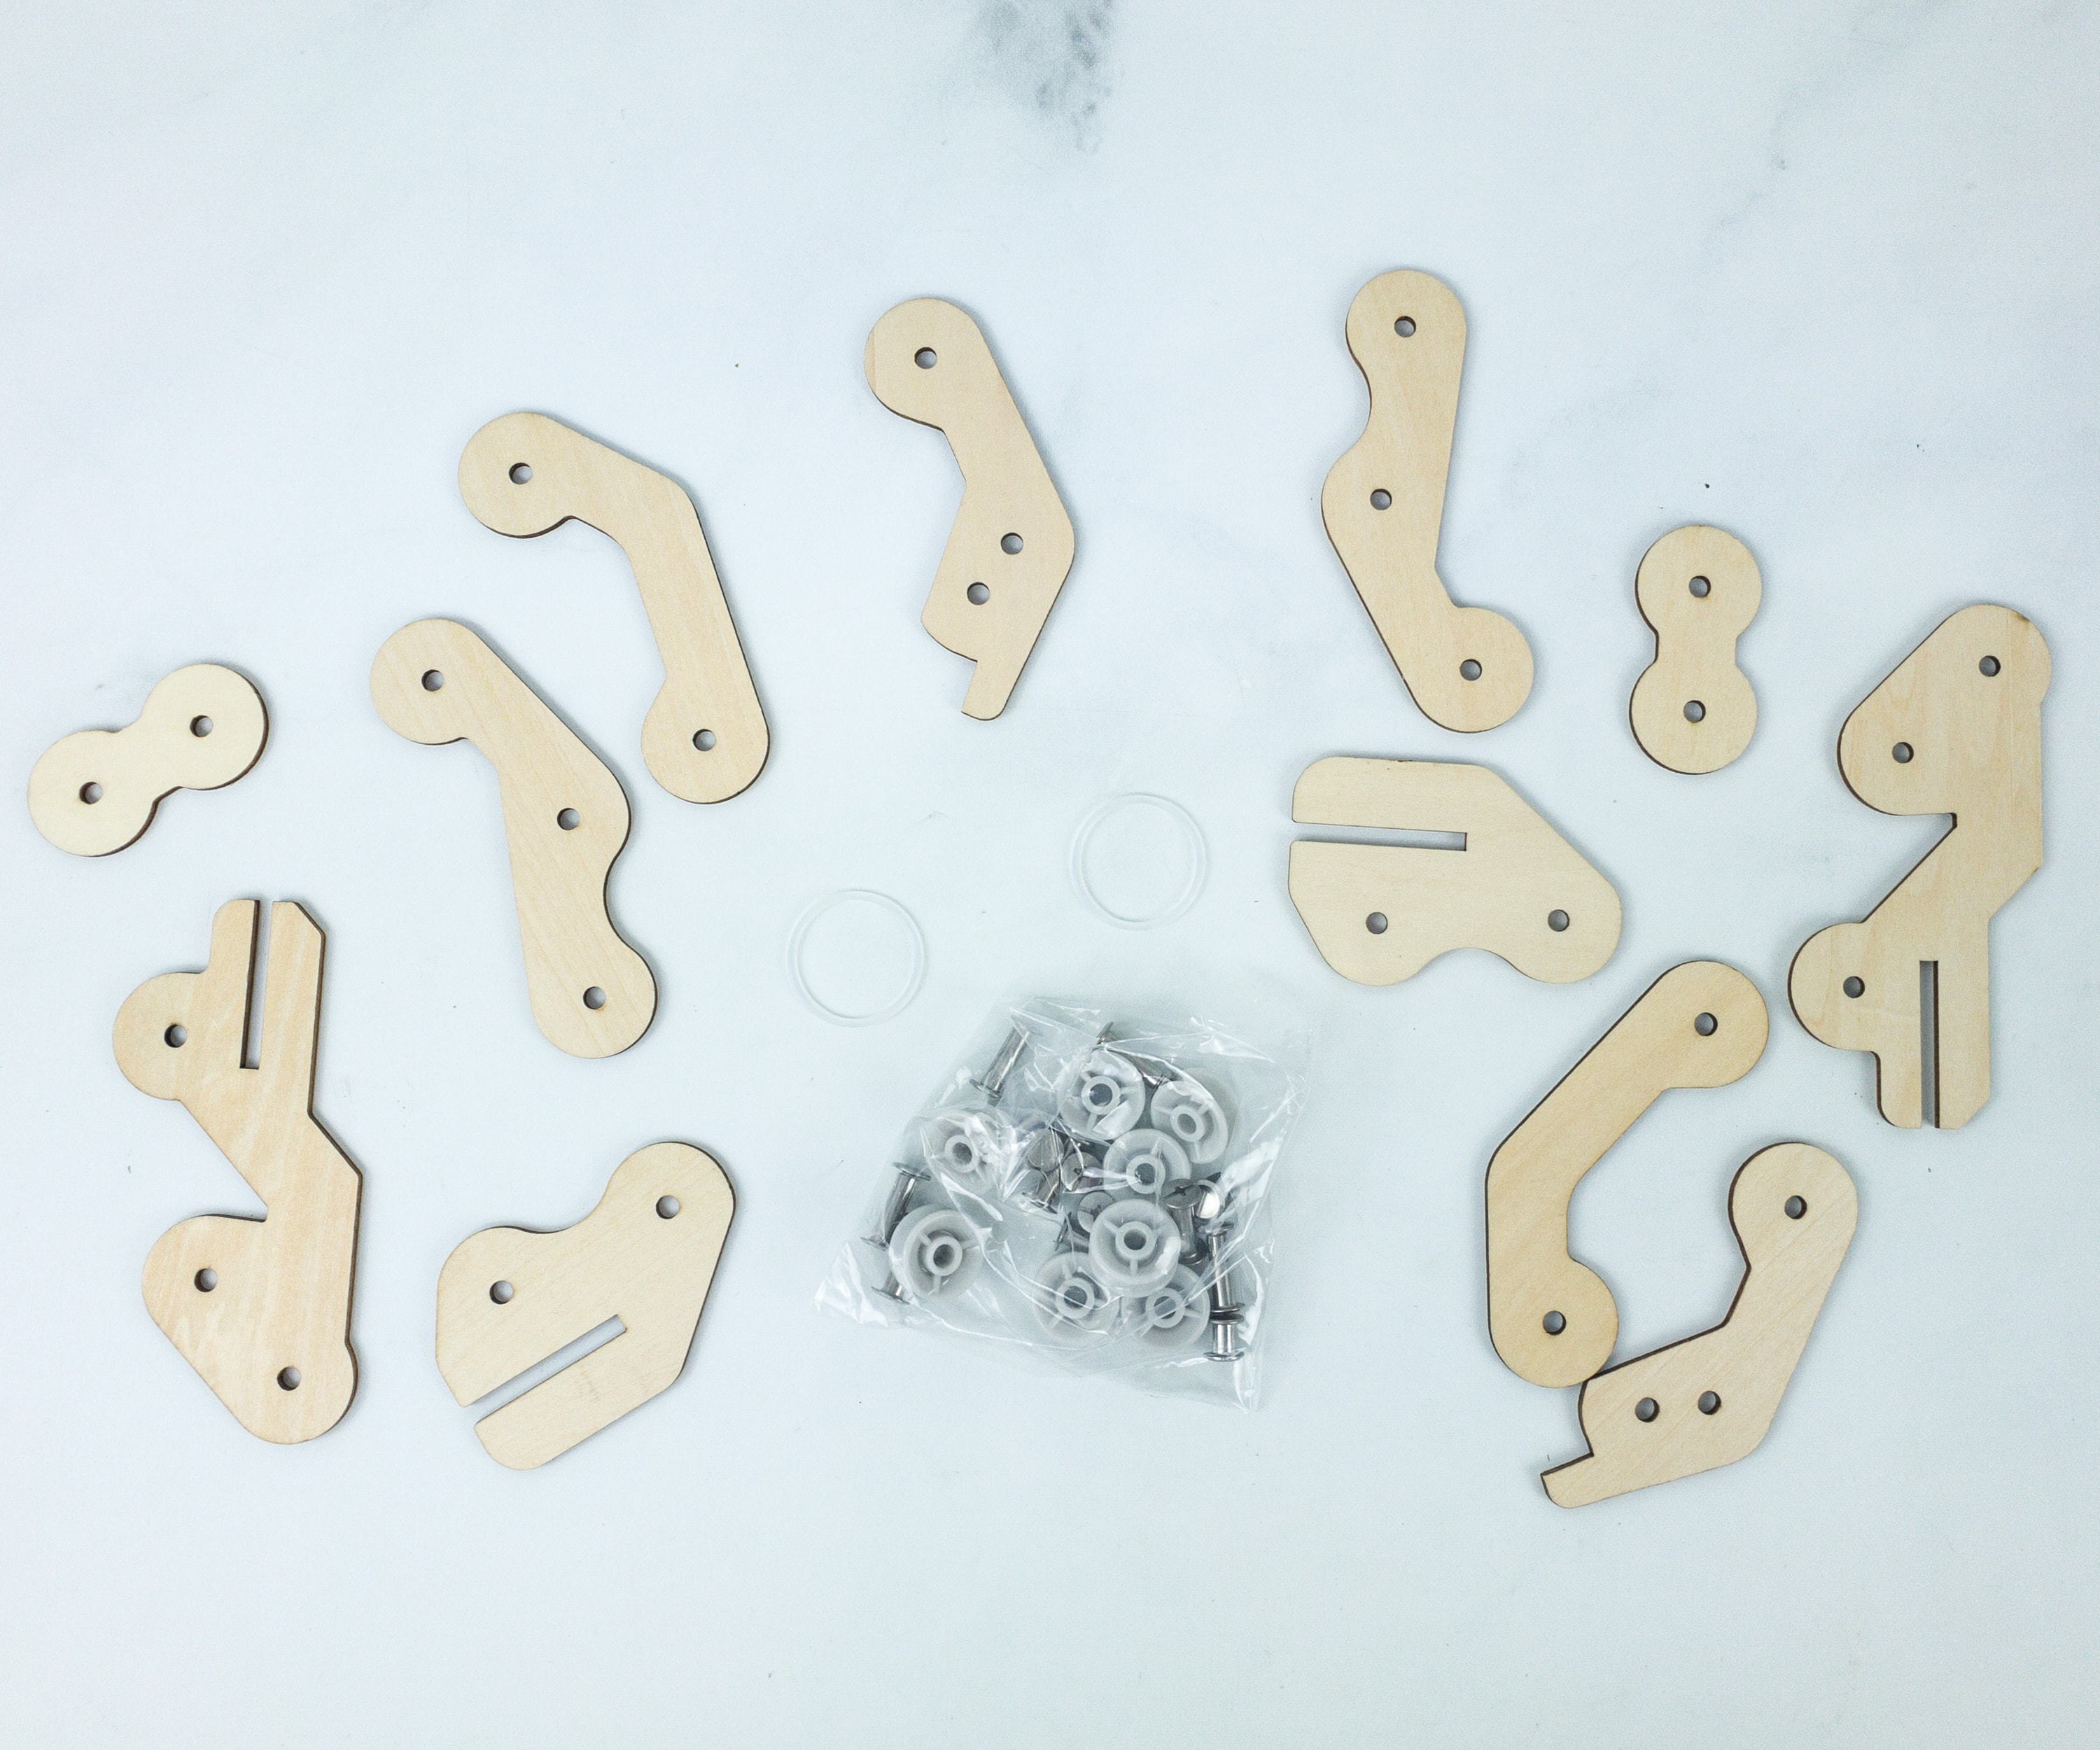
Here are some of the materials! You may check if you have the complete parts by comparing it to the picture in the booklet.
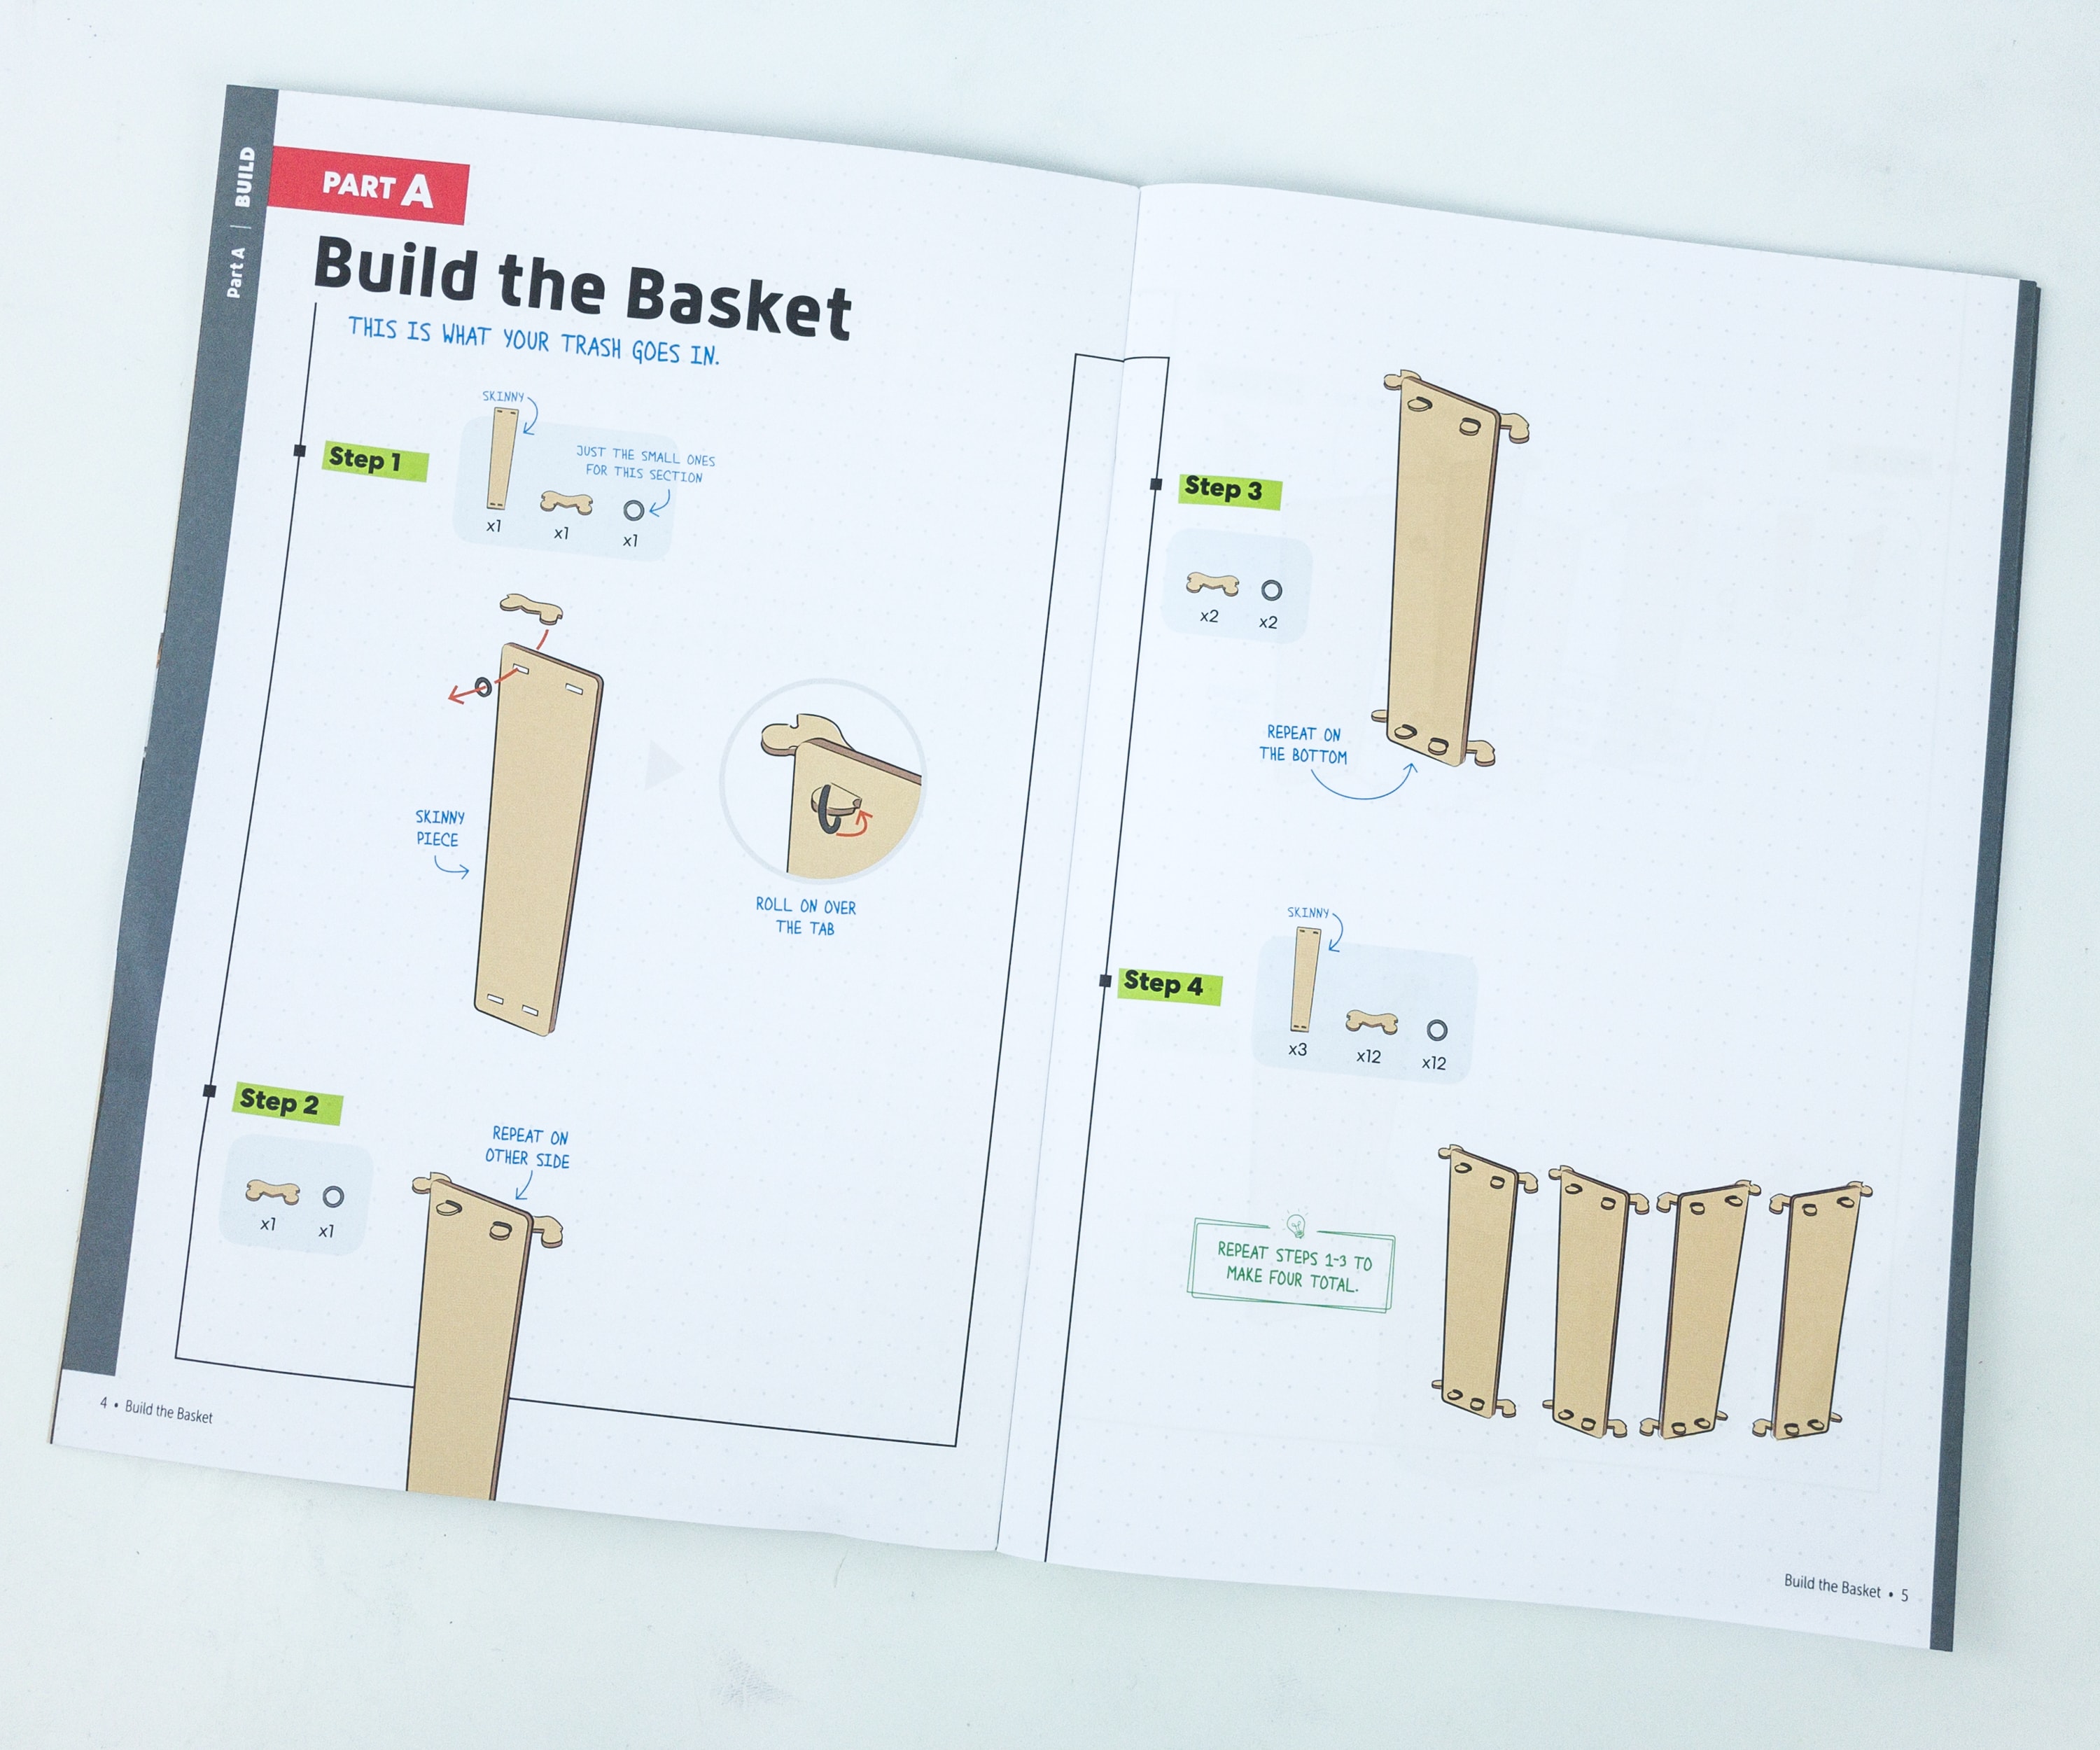
There are several parts to this project. We started off with part A, which is to build the basket. The instructions kept the continuous flow of the activity easy to understand, while the drawings were very detailed too.
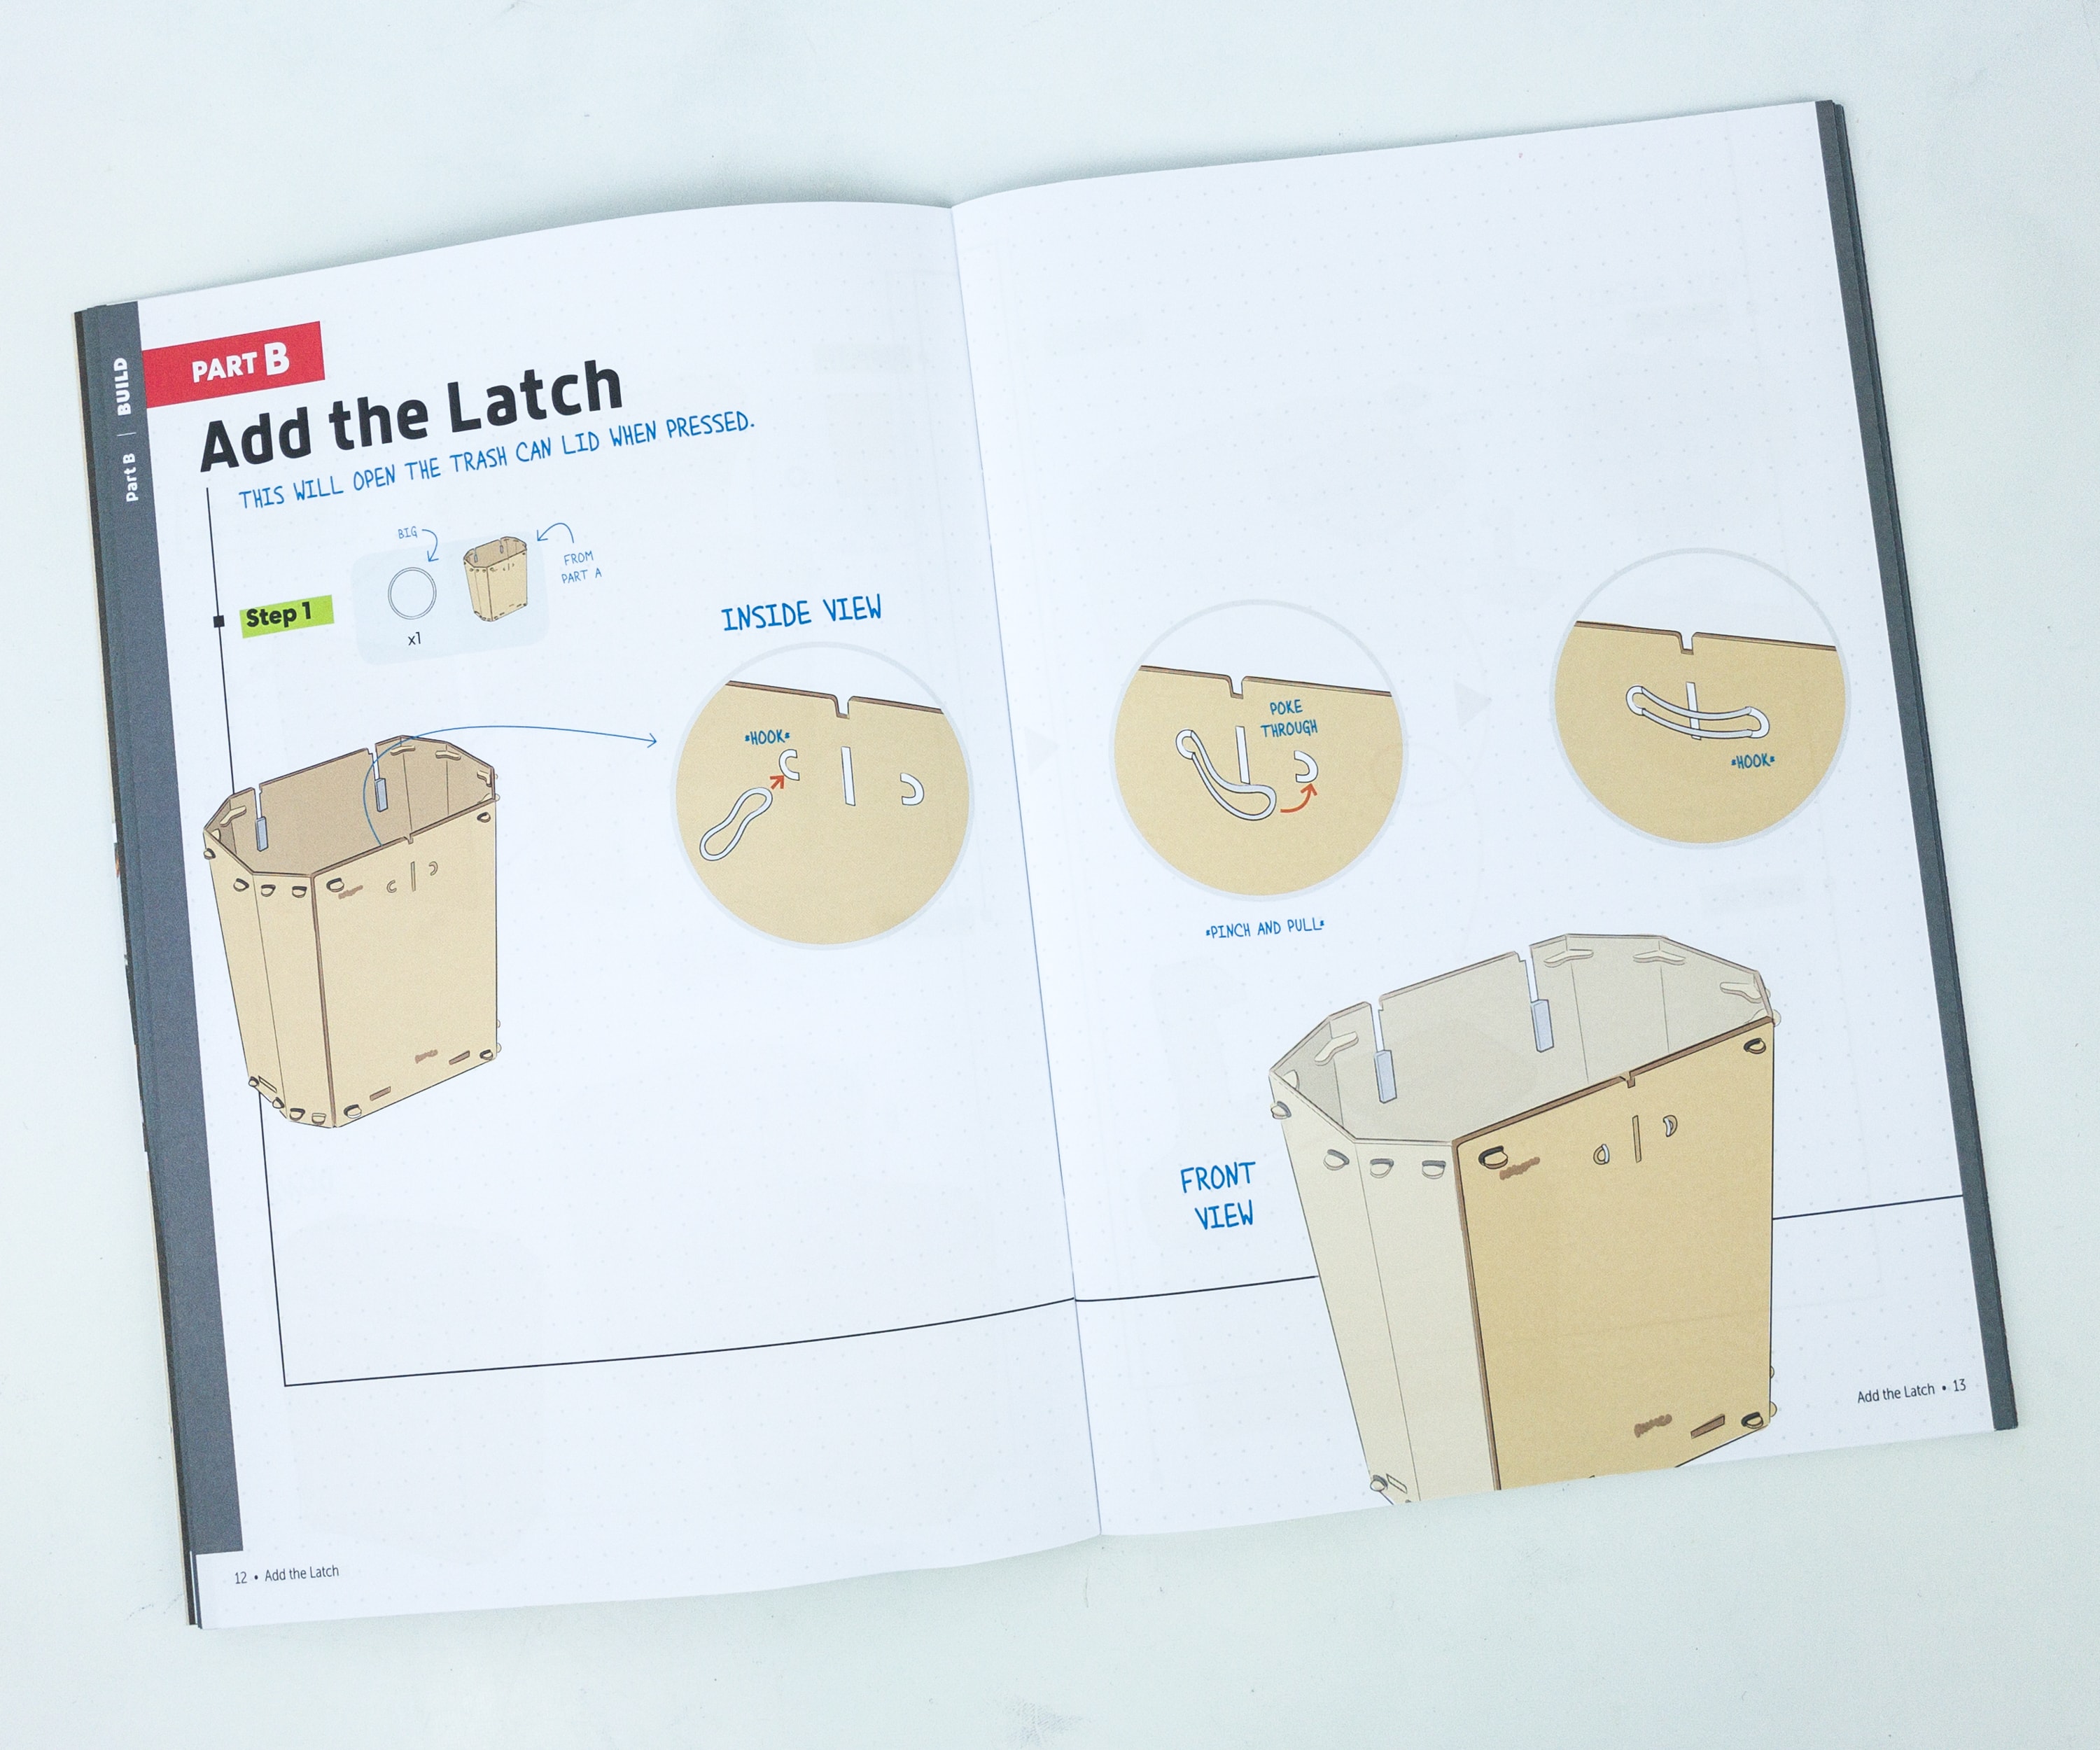
For Part B, we need to add the latch, it will open the trash can lid when pressed.
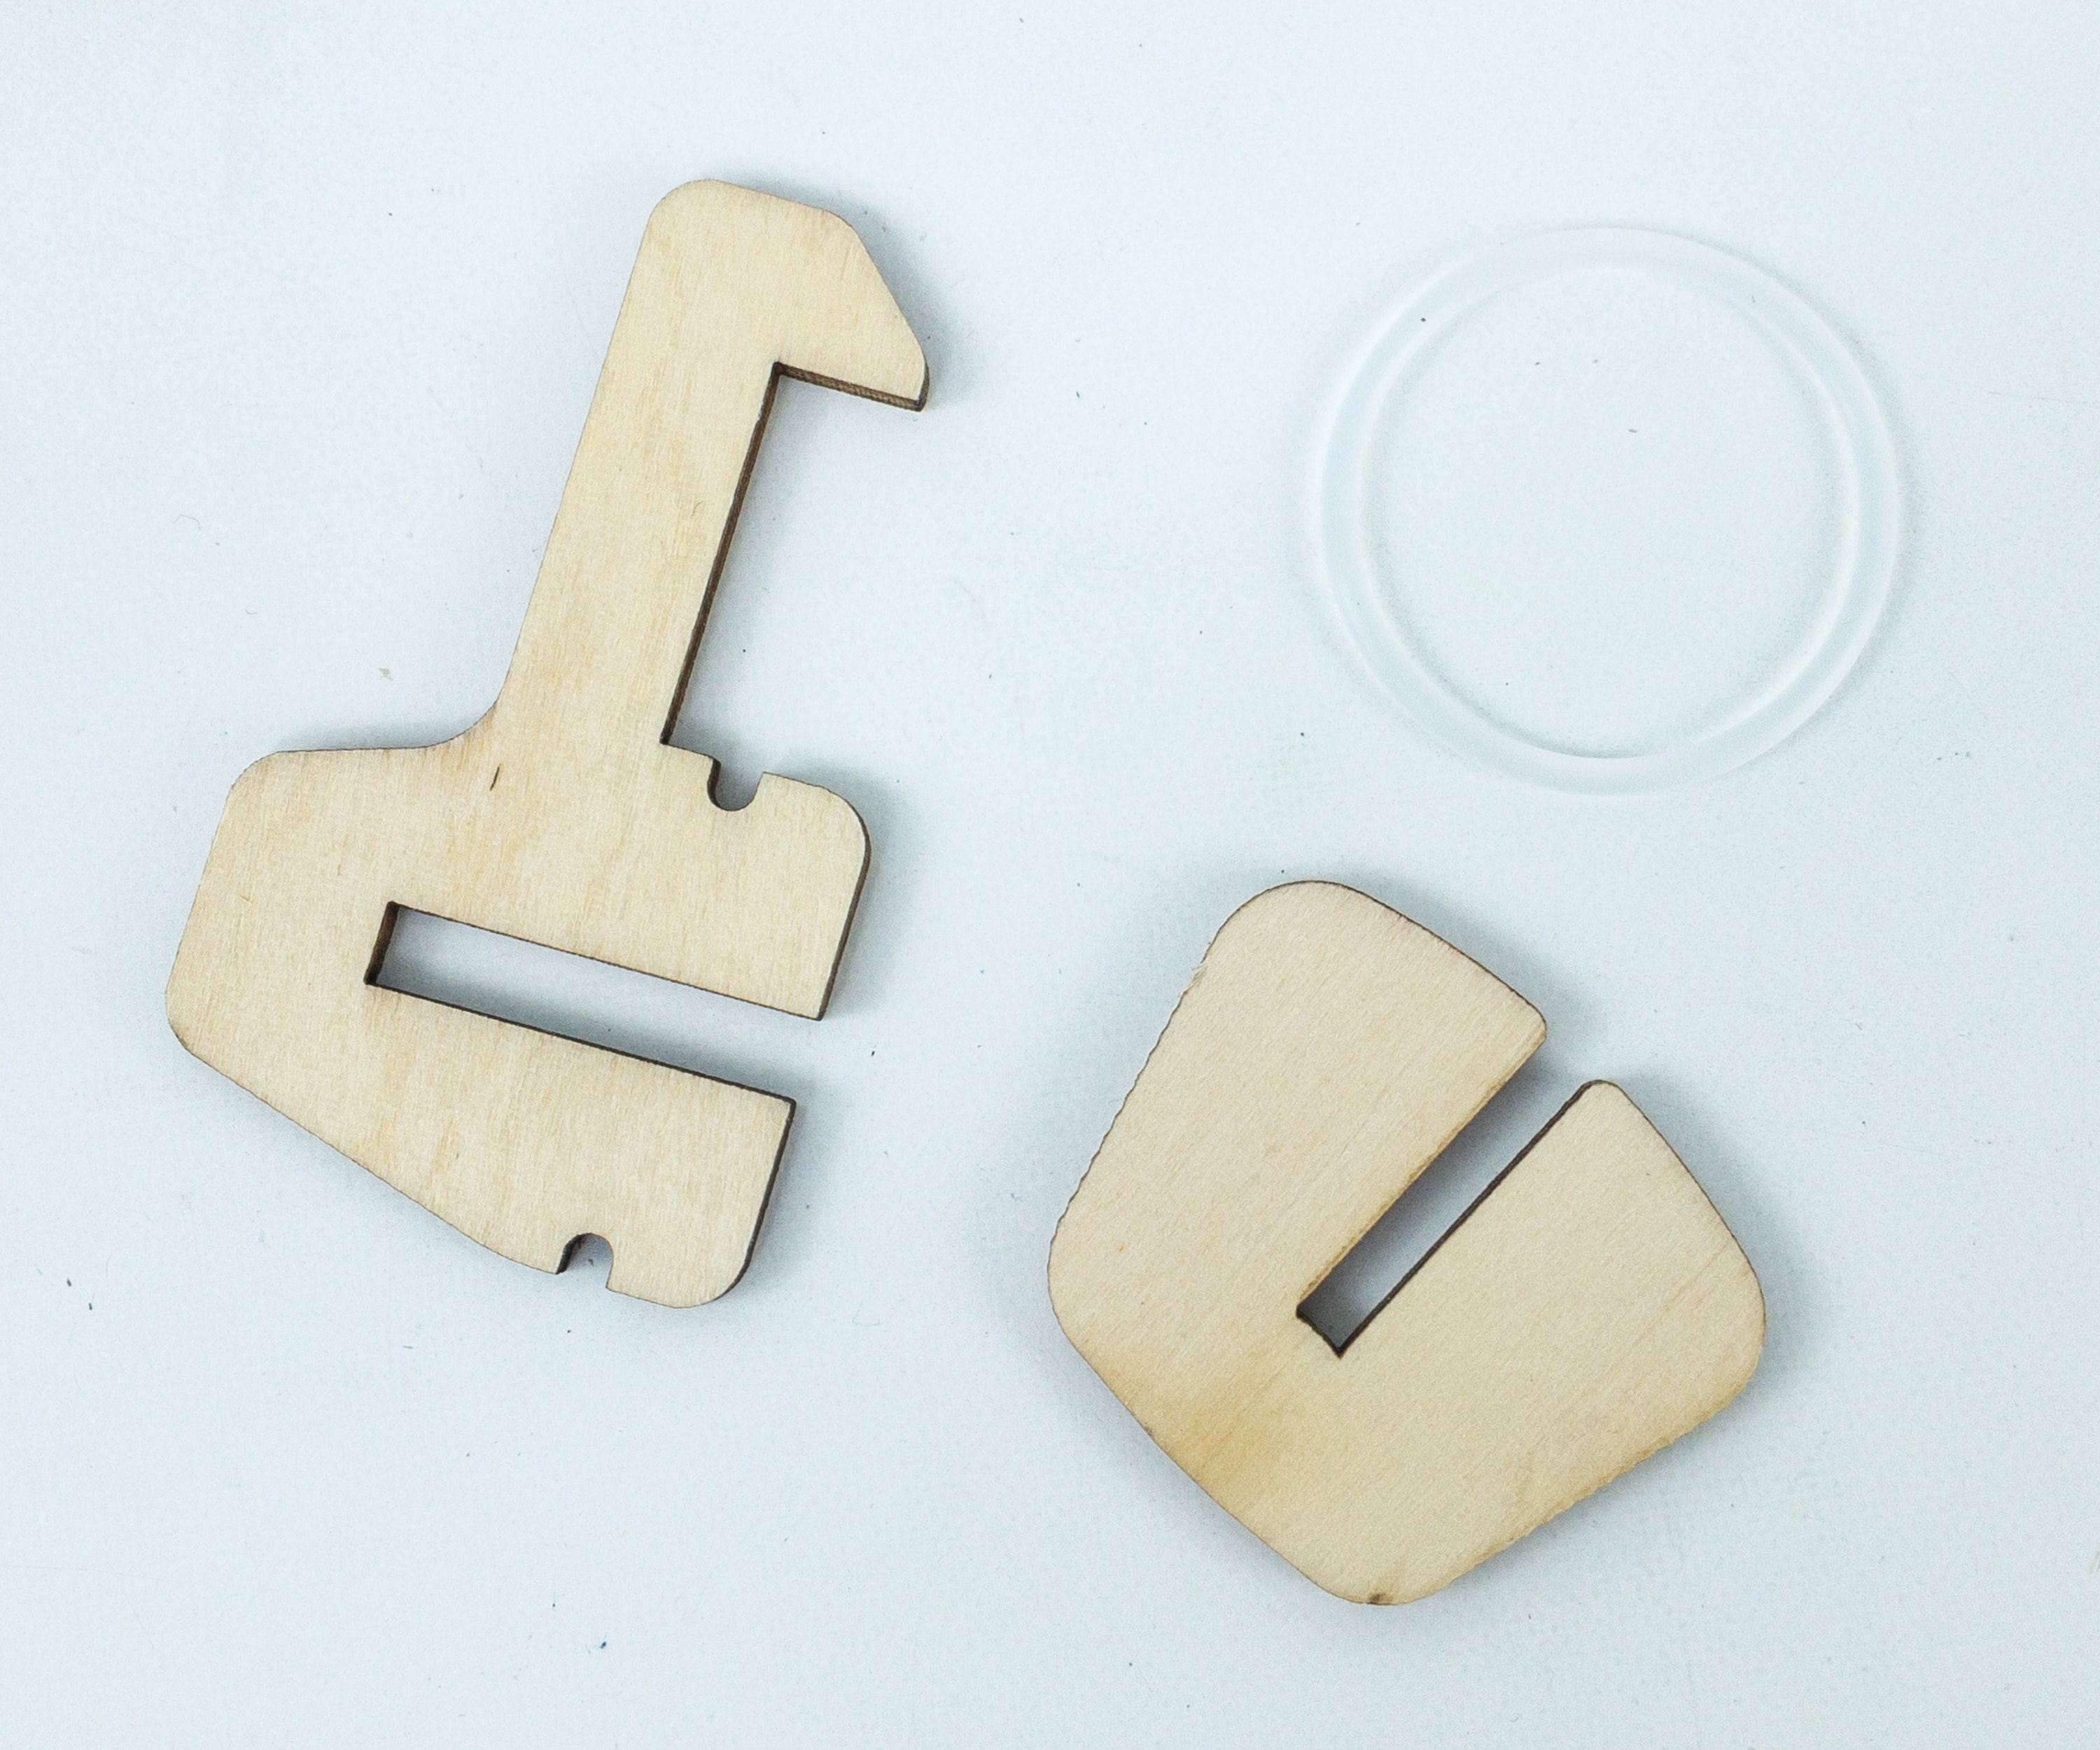
For this part, we’ll need the hook and the big clear o-ring.
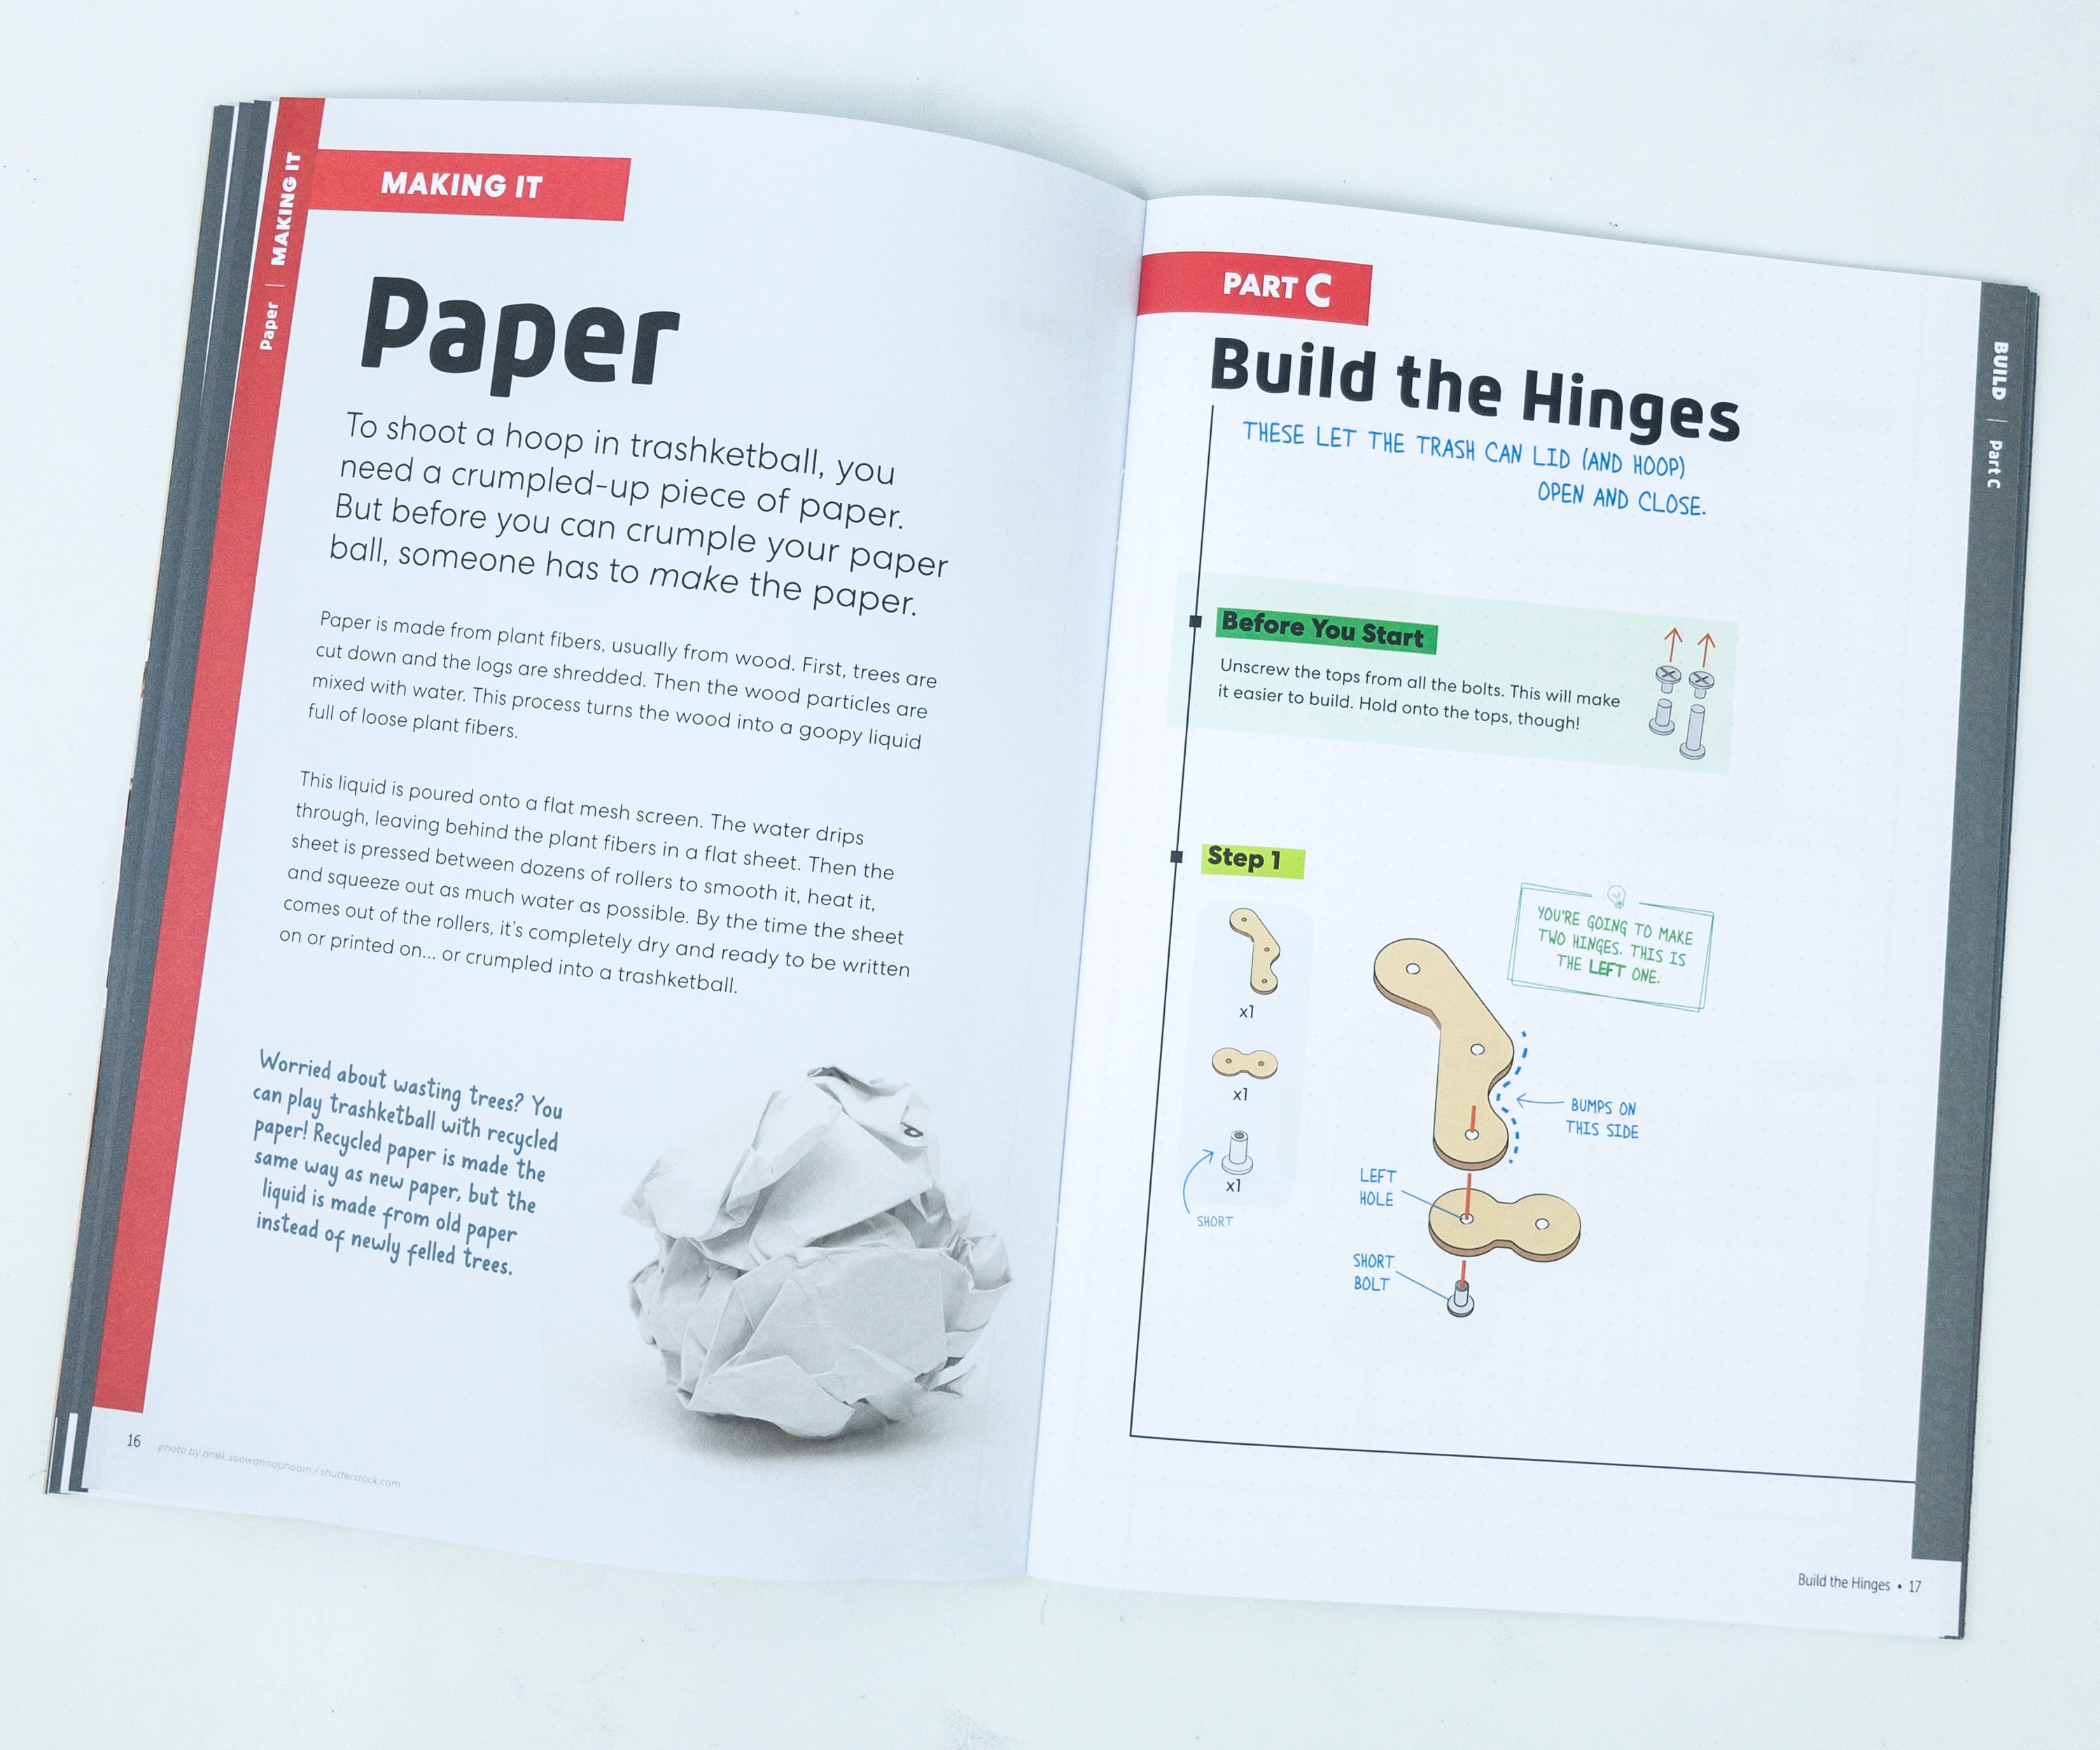
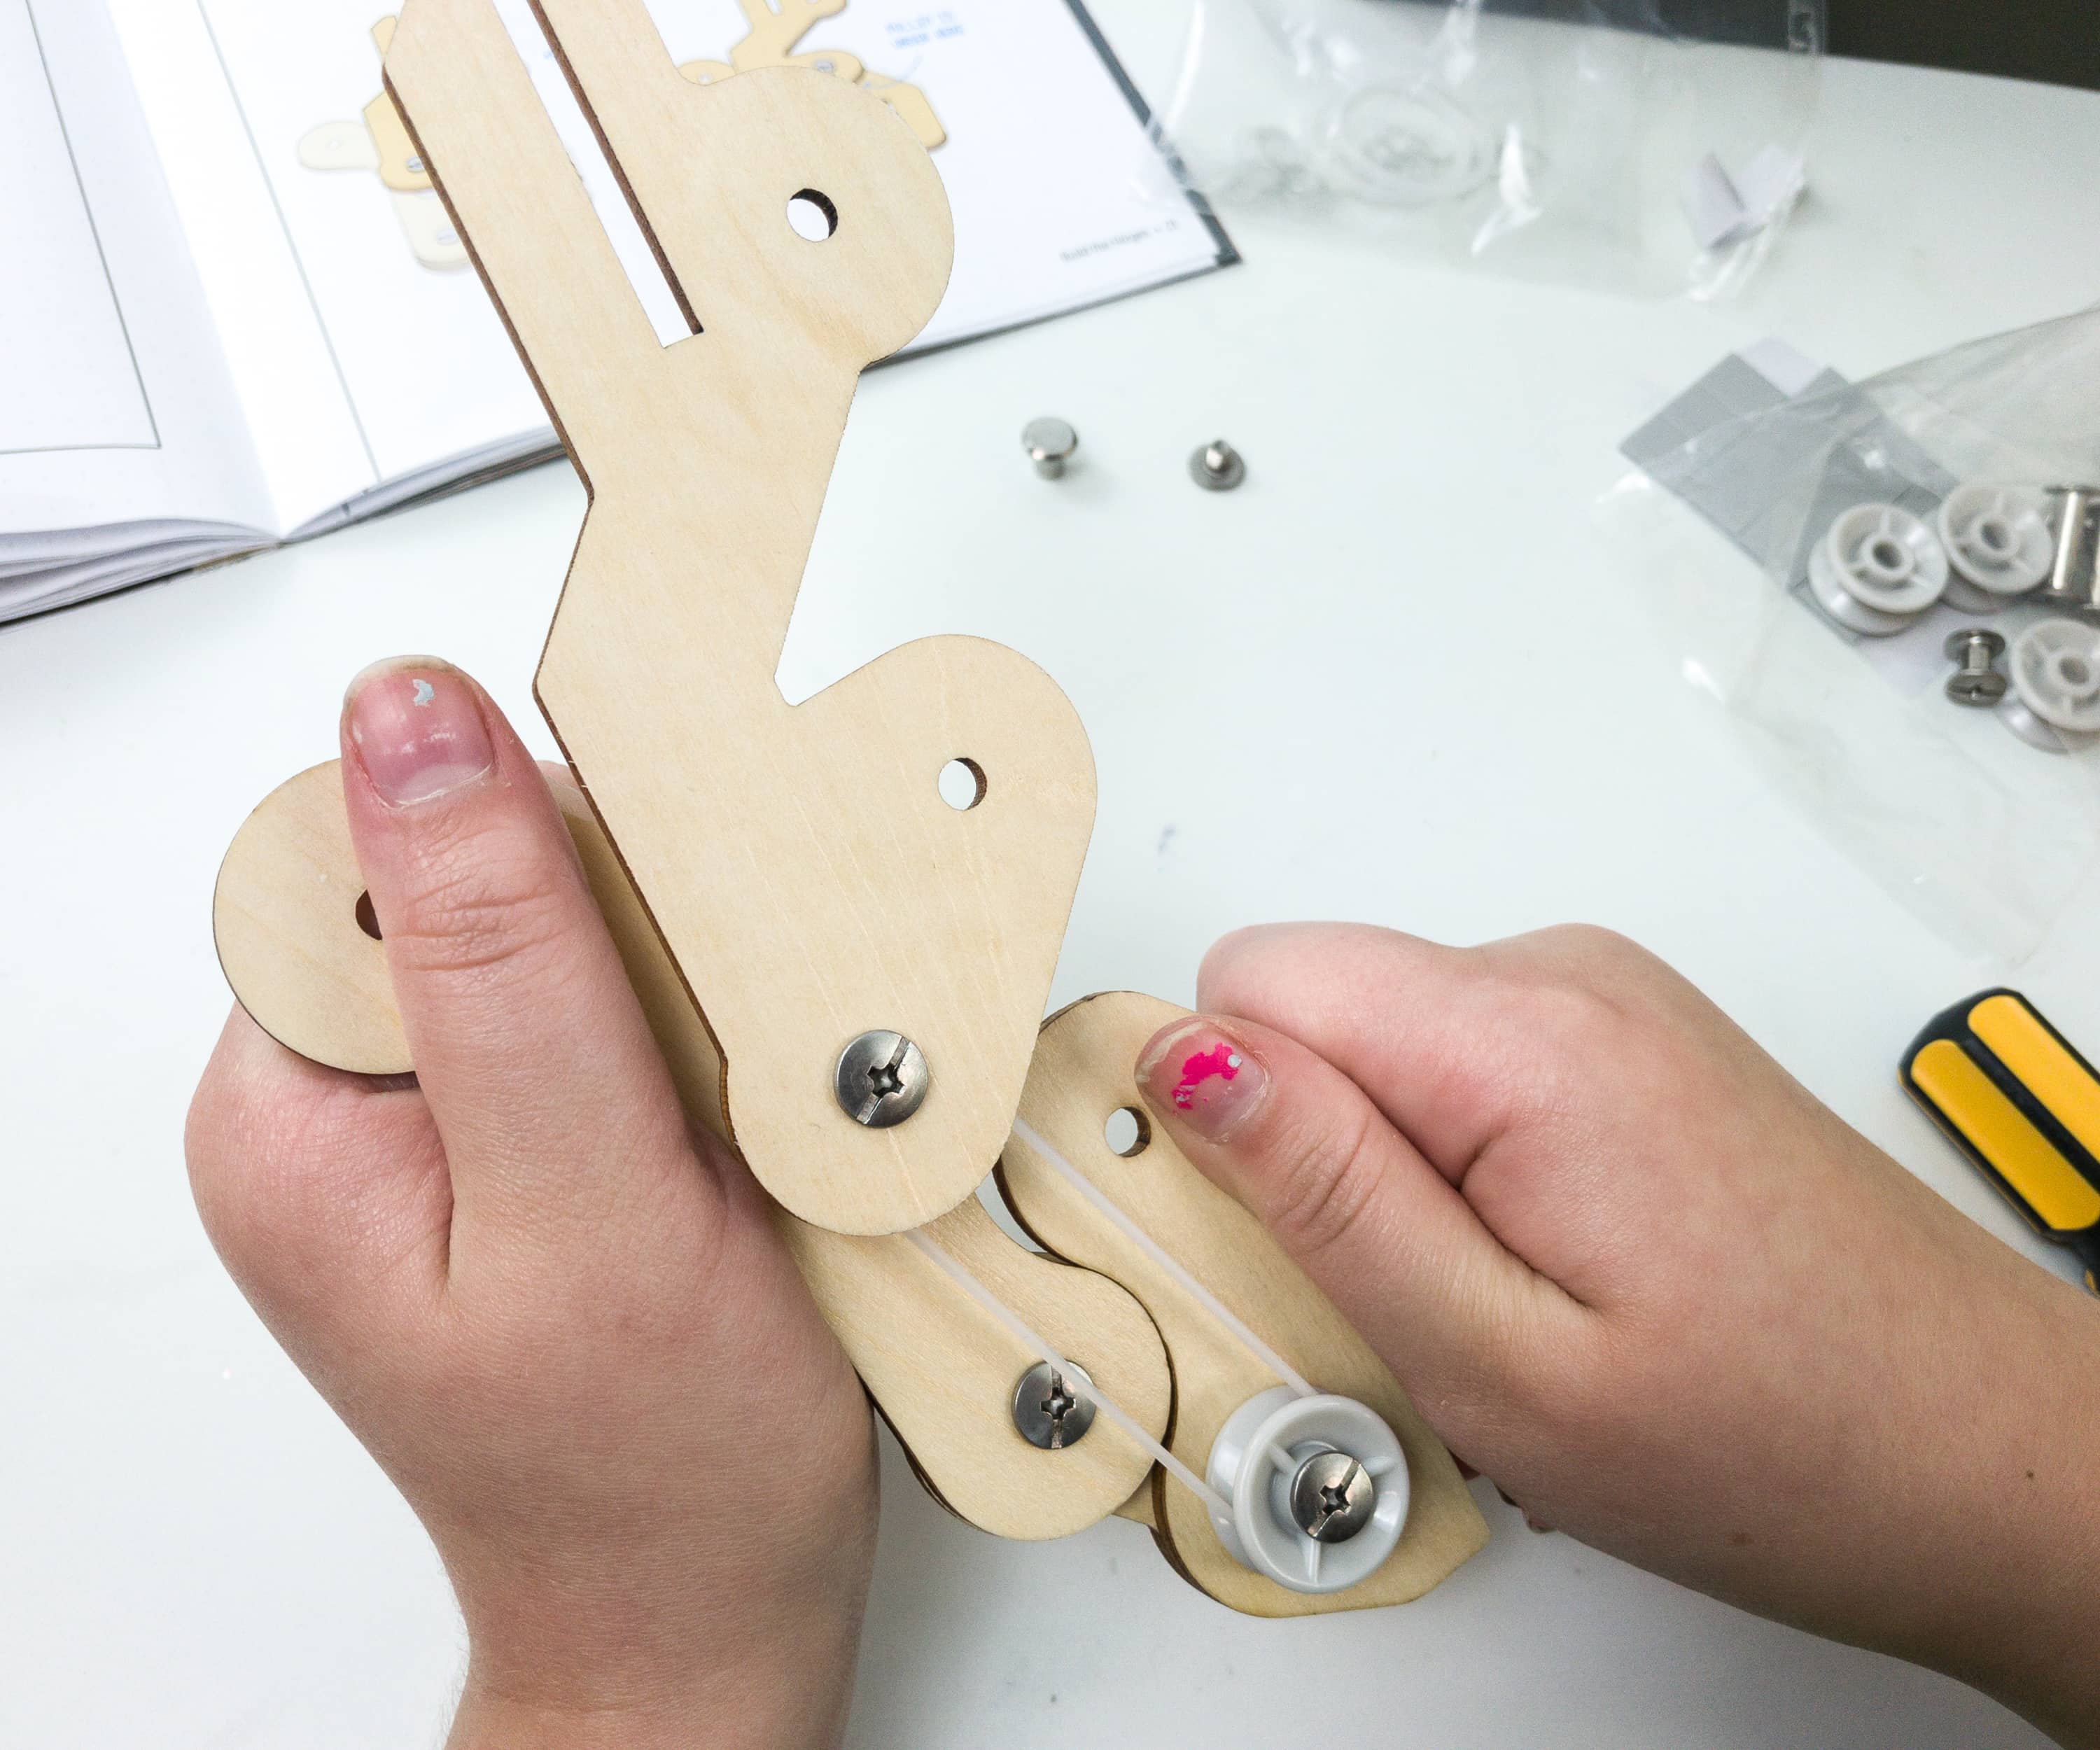
To shoot a hoop, of course, we’ll need a “ball”! In this case, a crumpled paper will serve as our ball! For part C, it’s time to build the hinges.
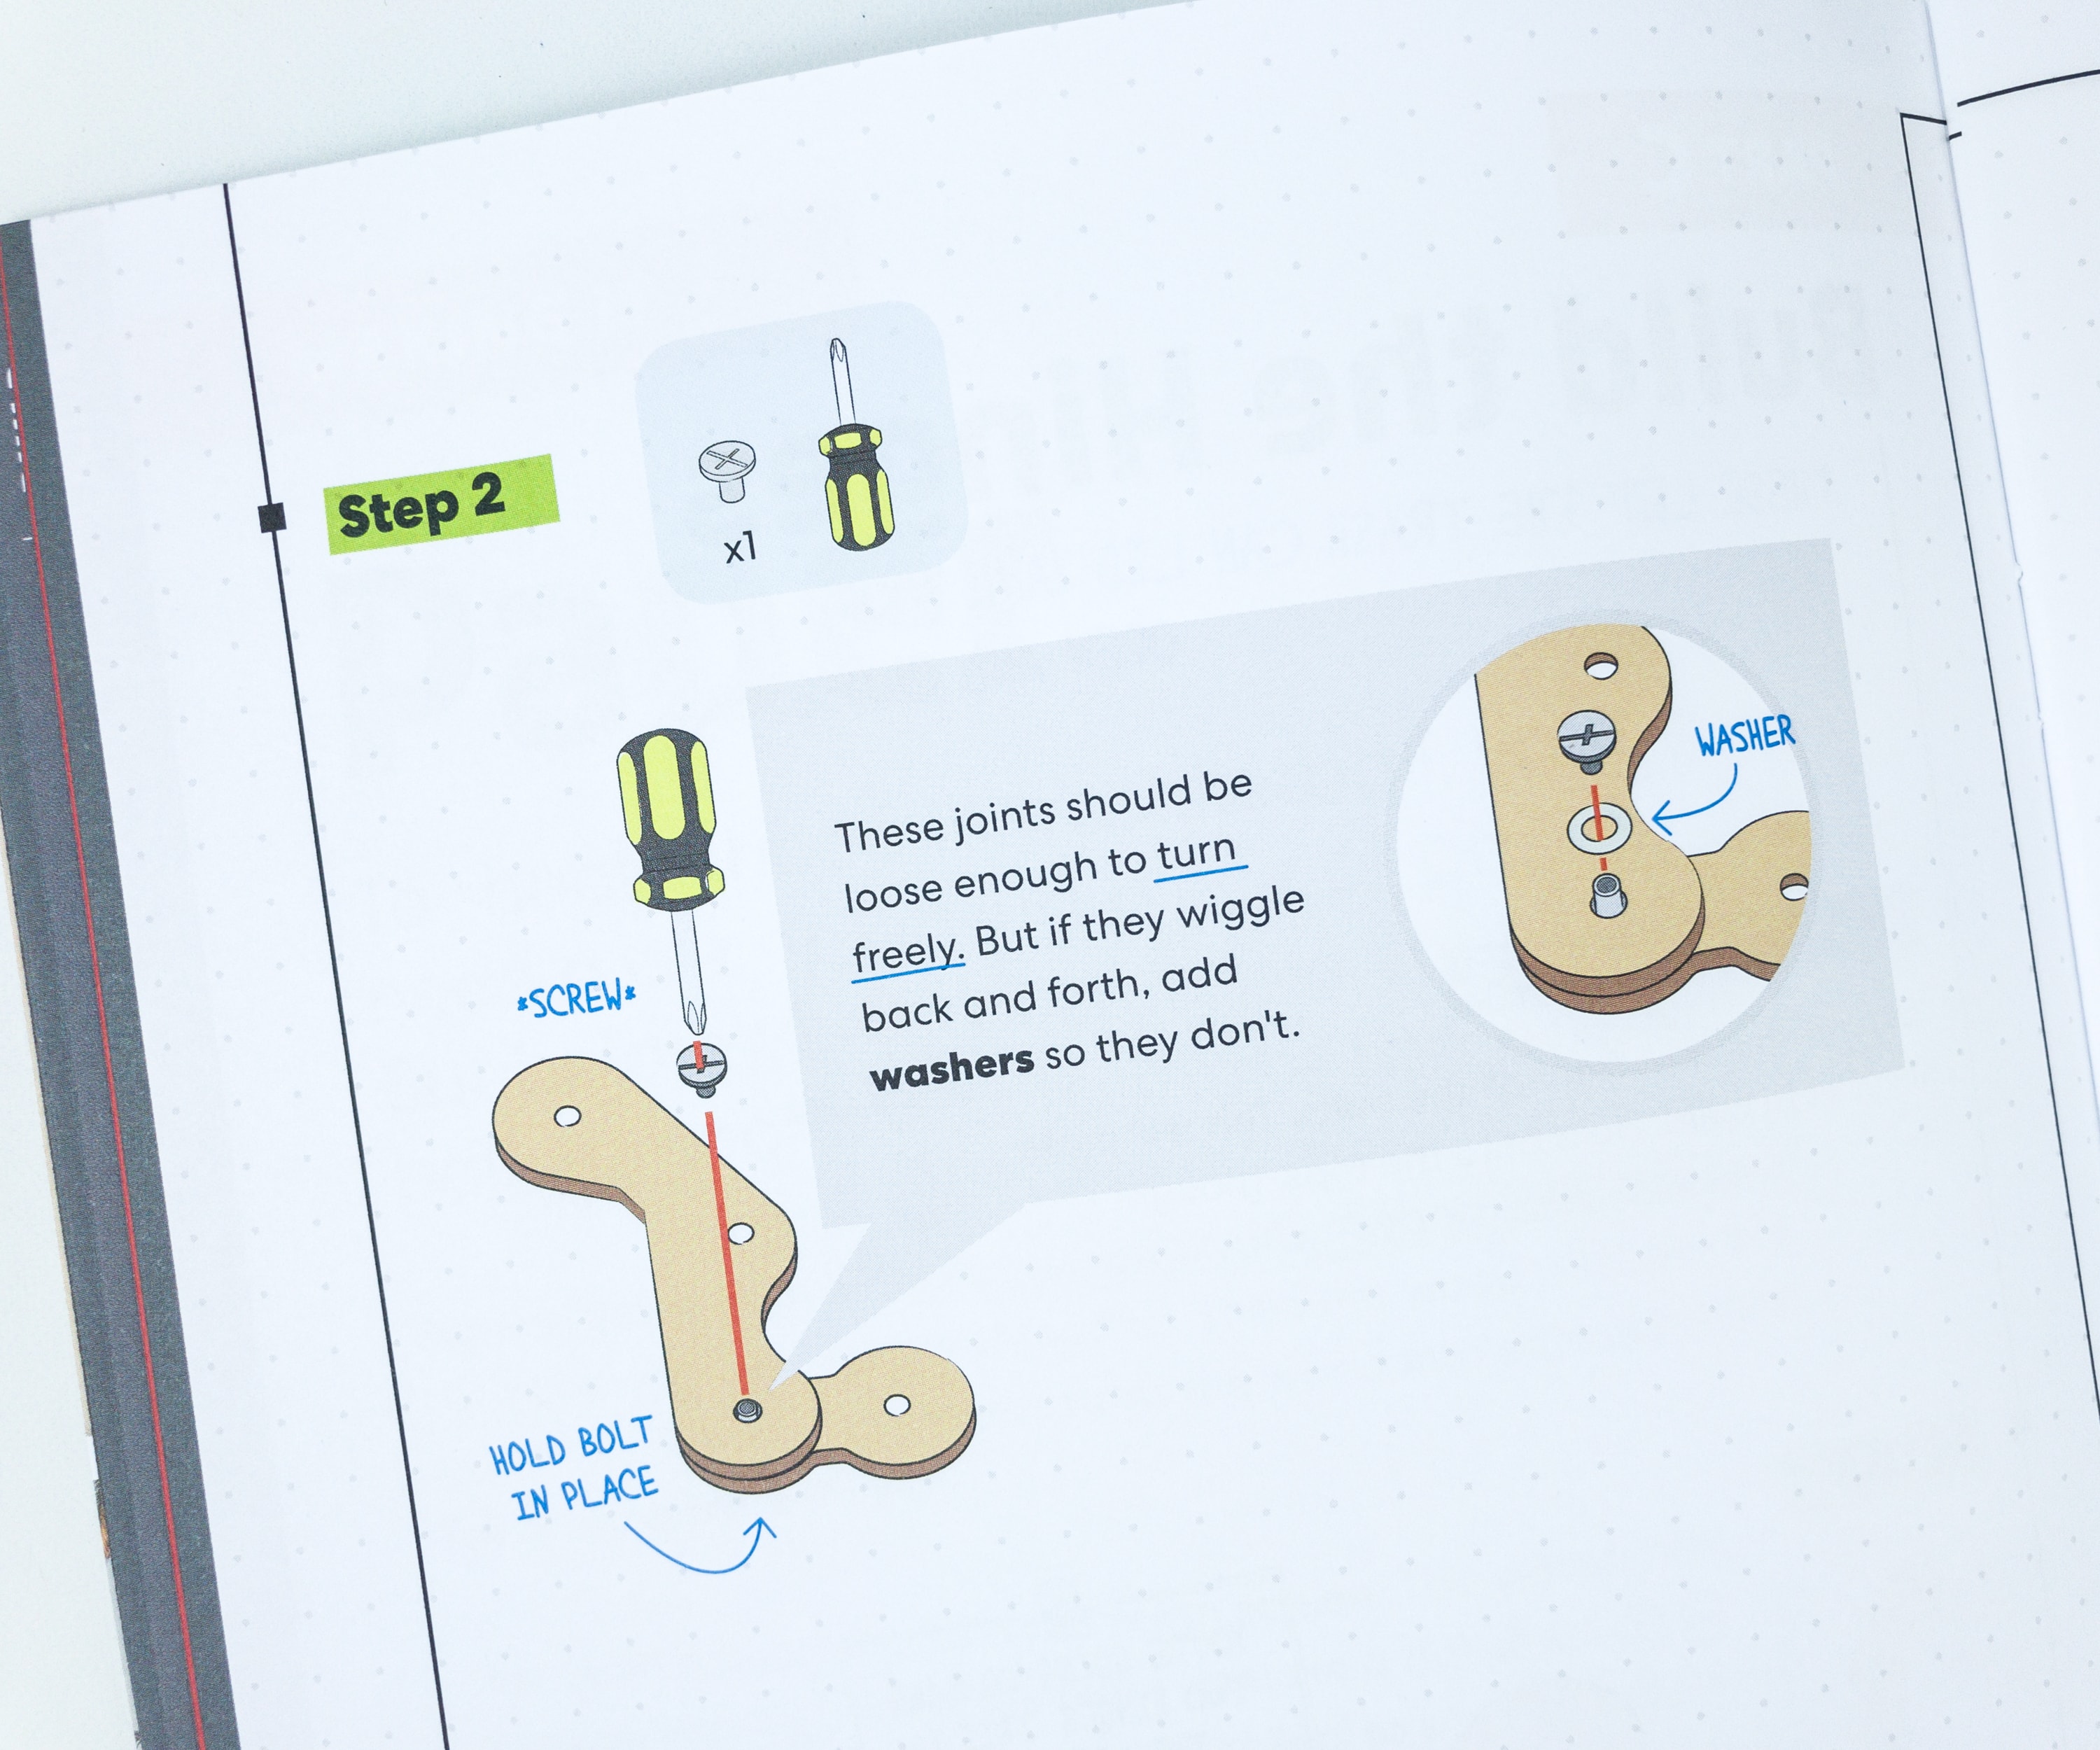
The hinges will let the lid open and close!
We’ll need more parts and pulleys for this next part!
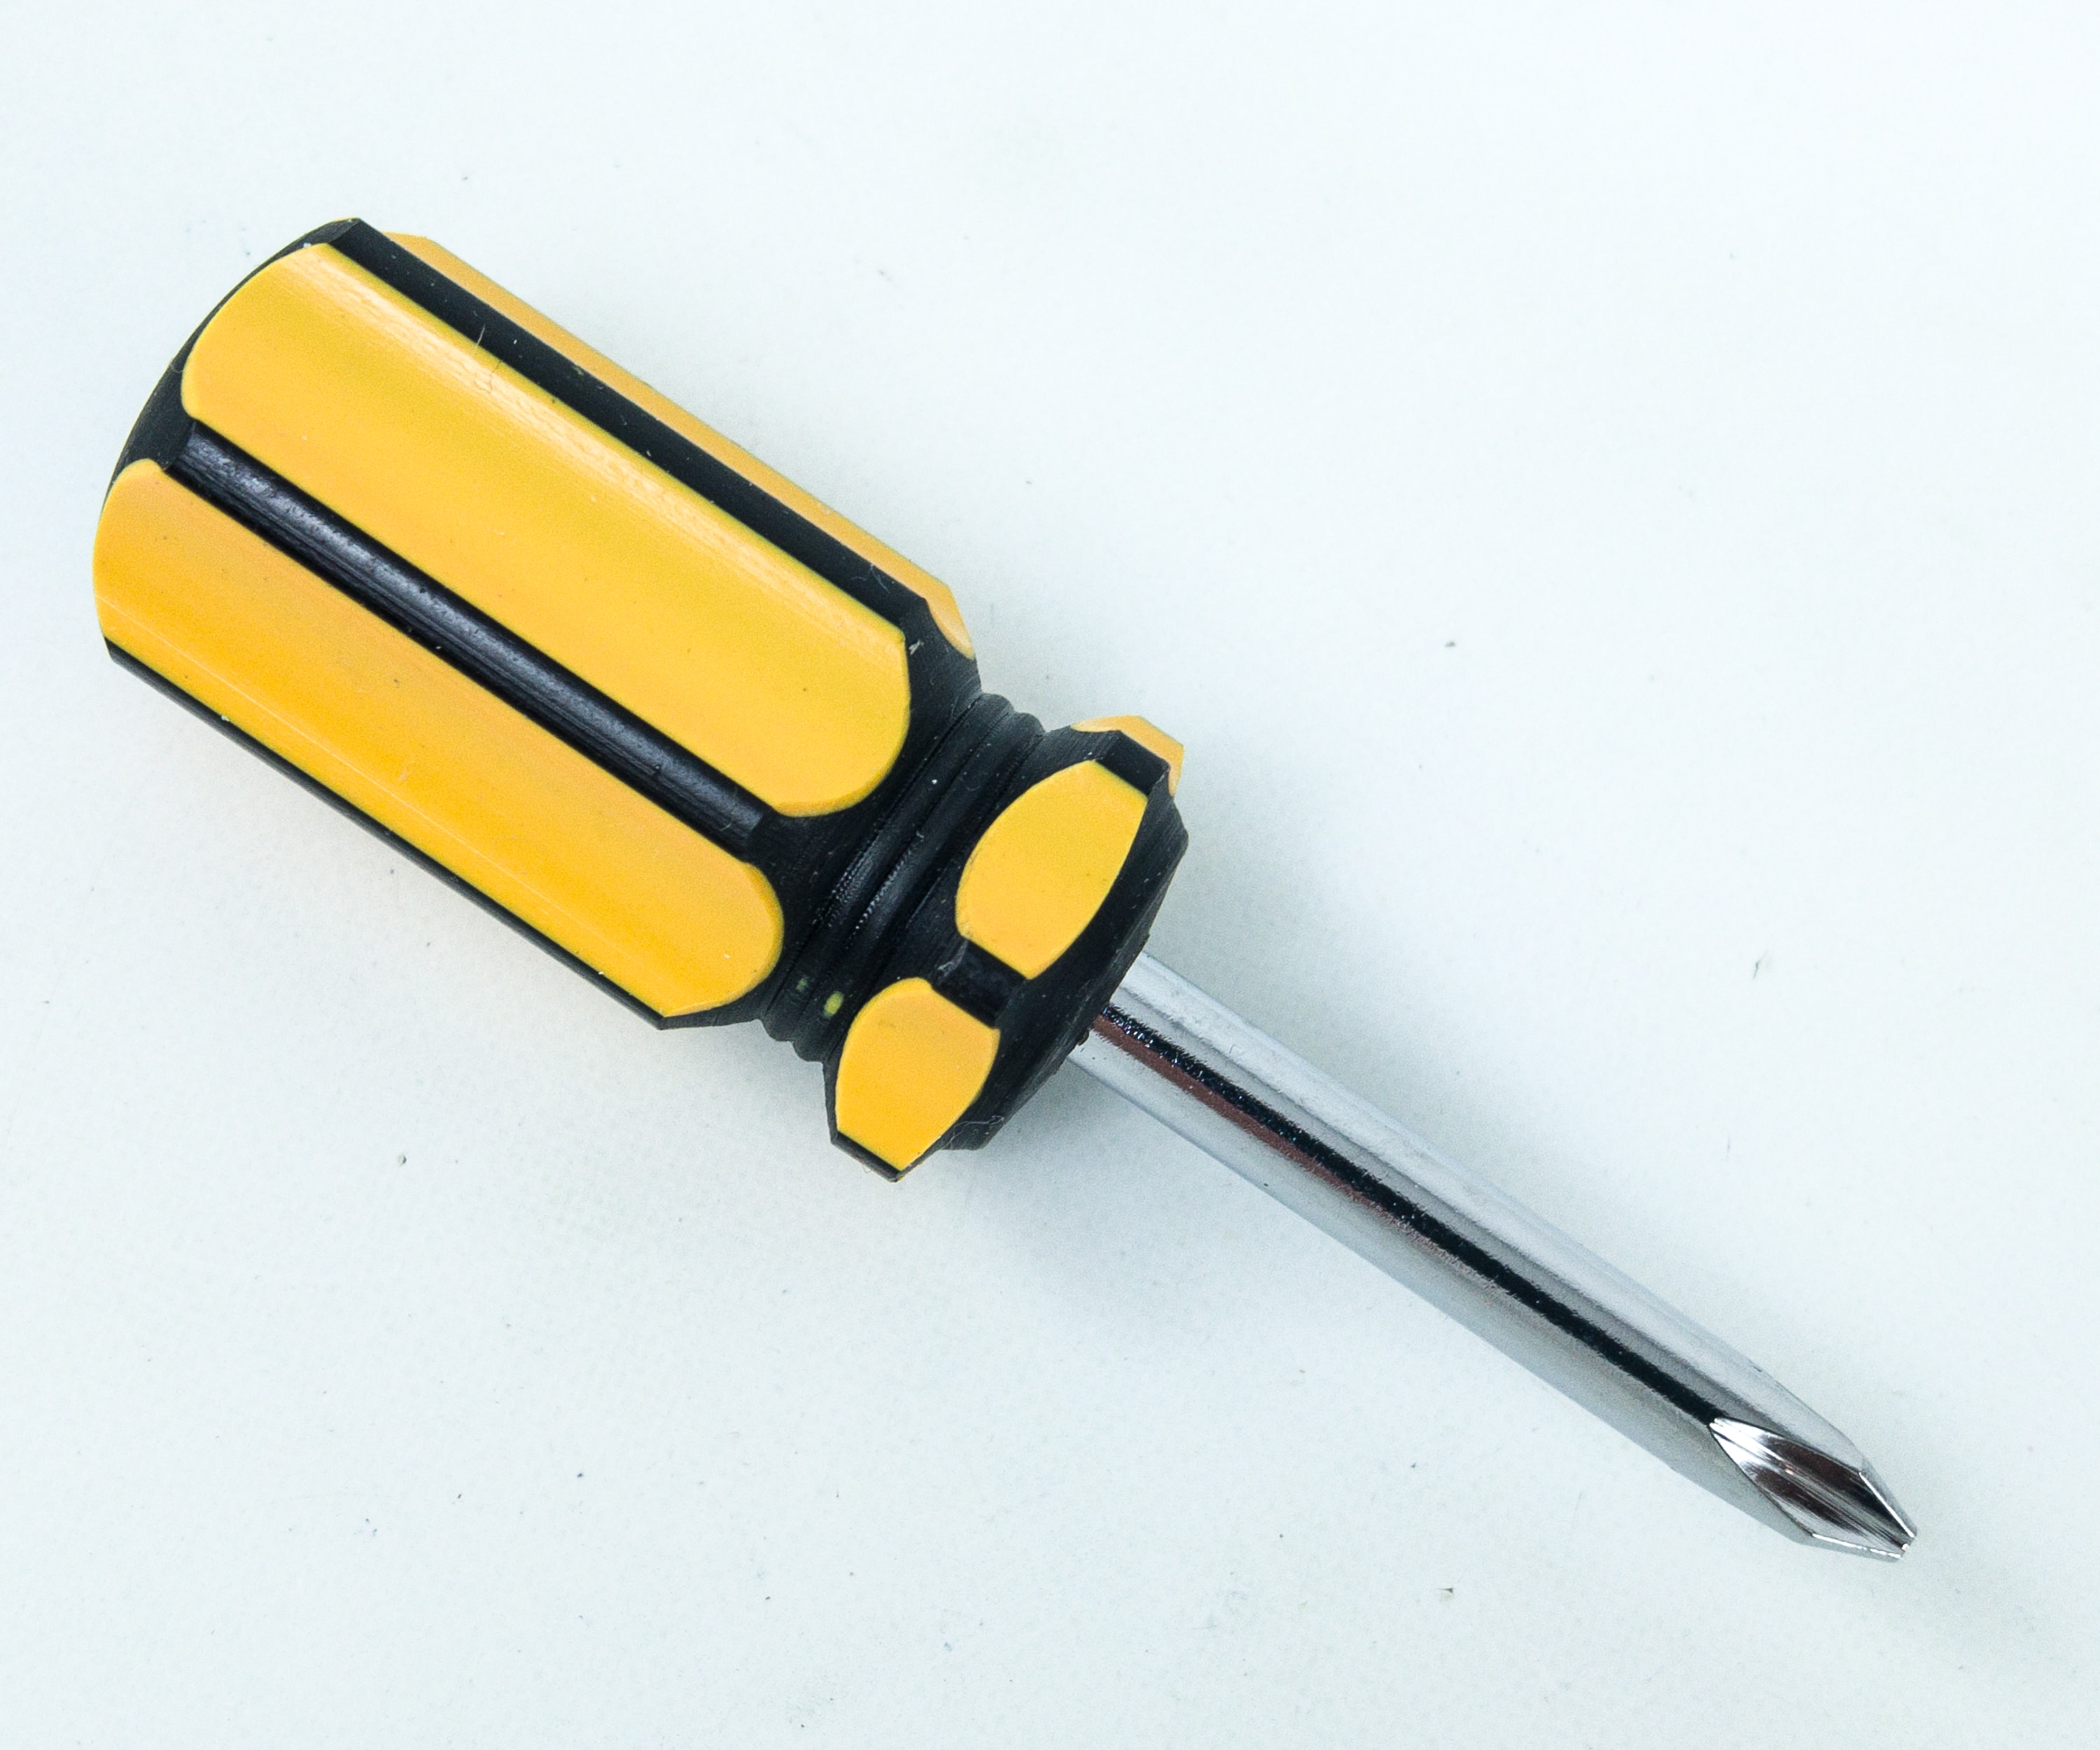
We also got a screwdriver that can be used to hold the bolts in place.
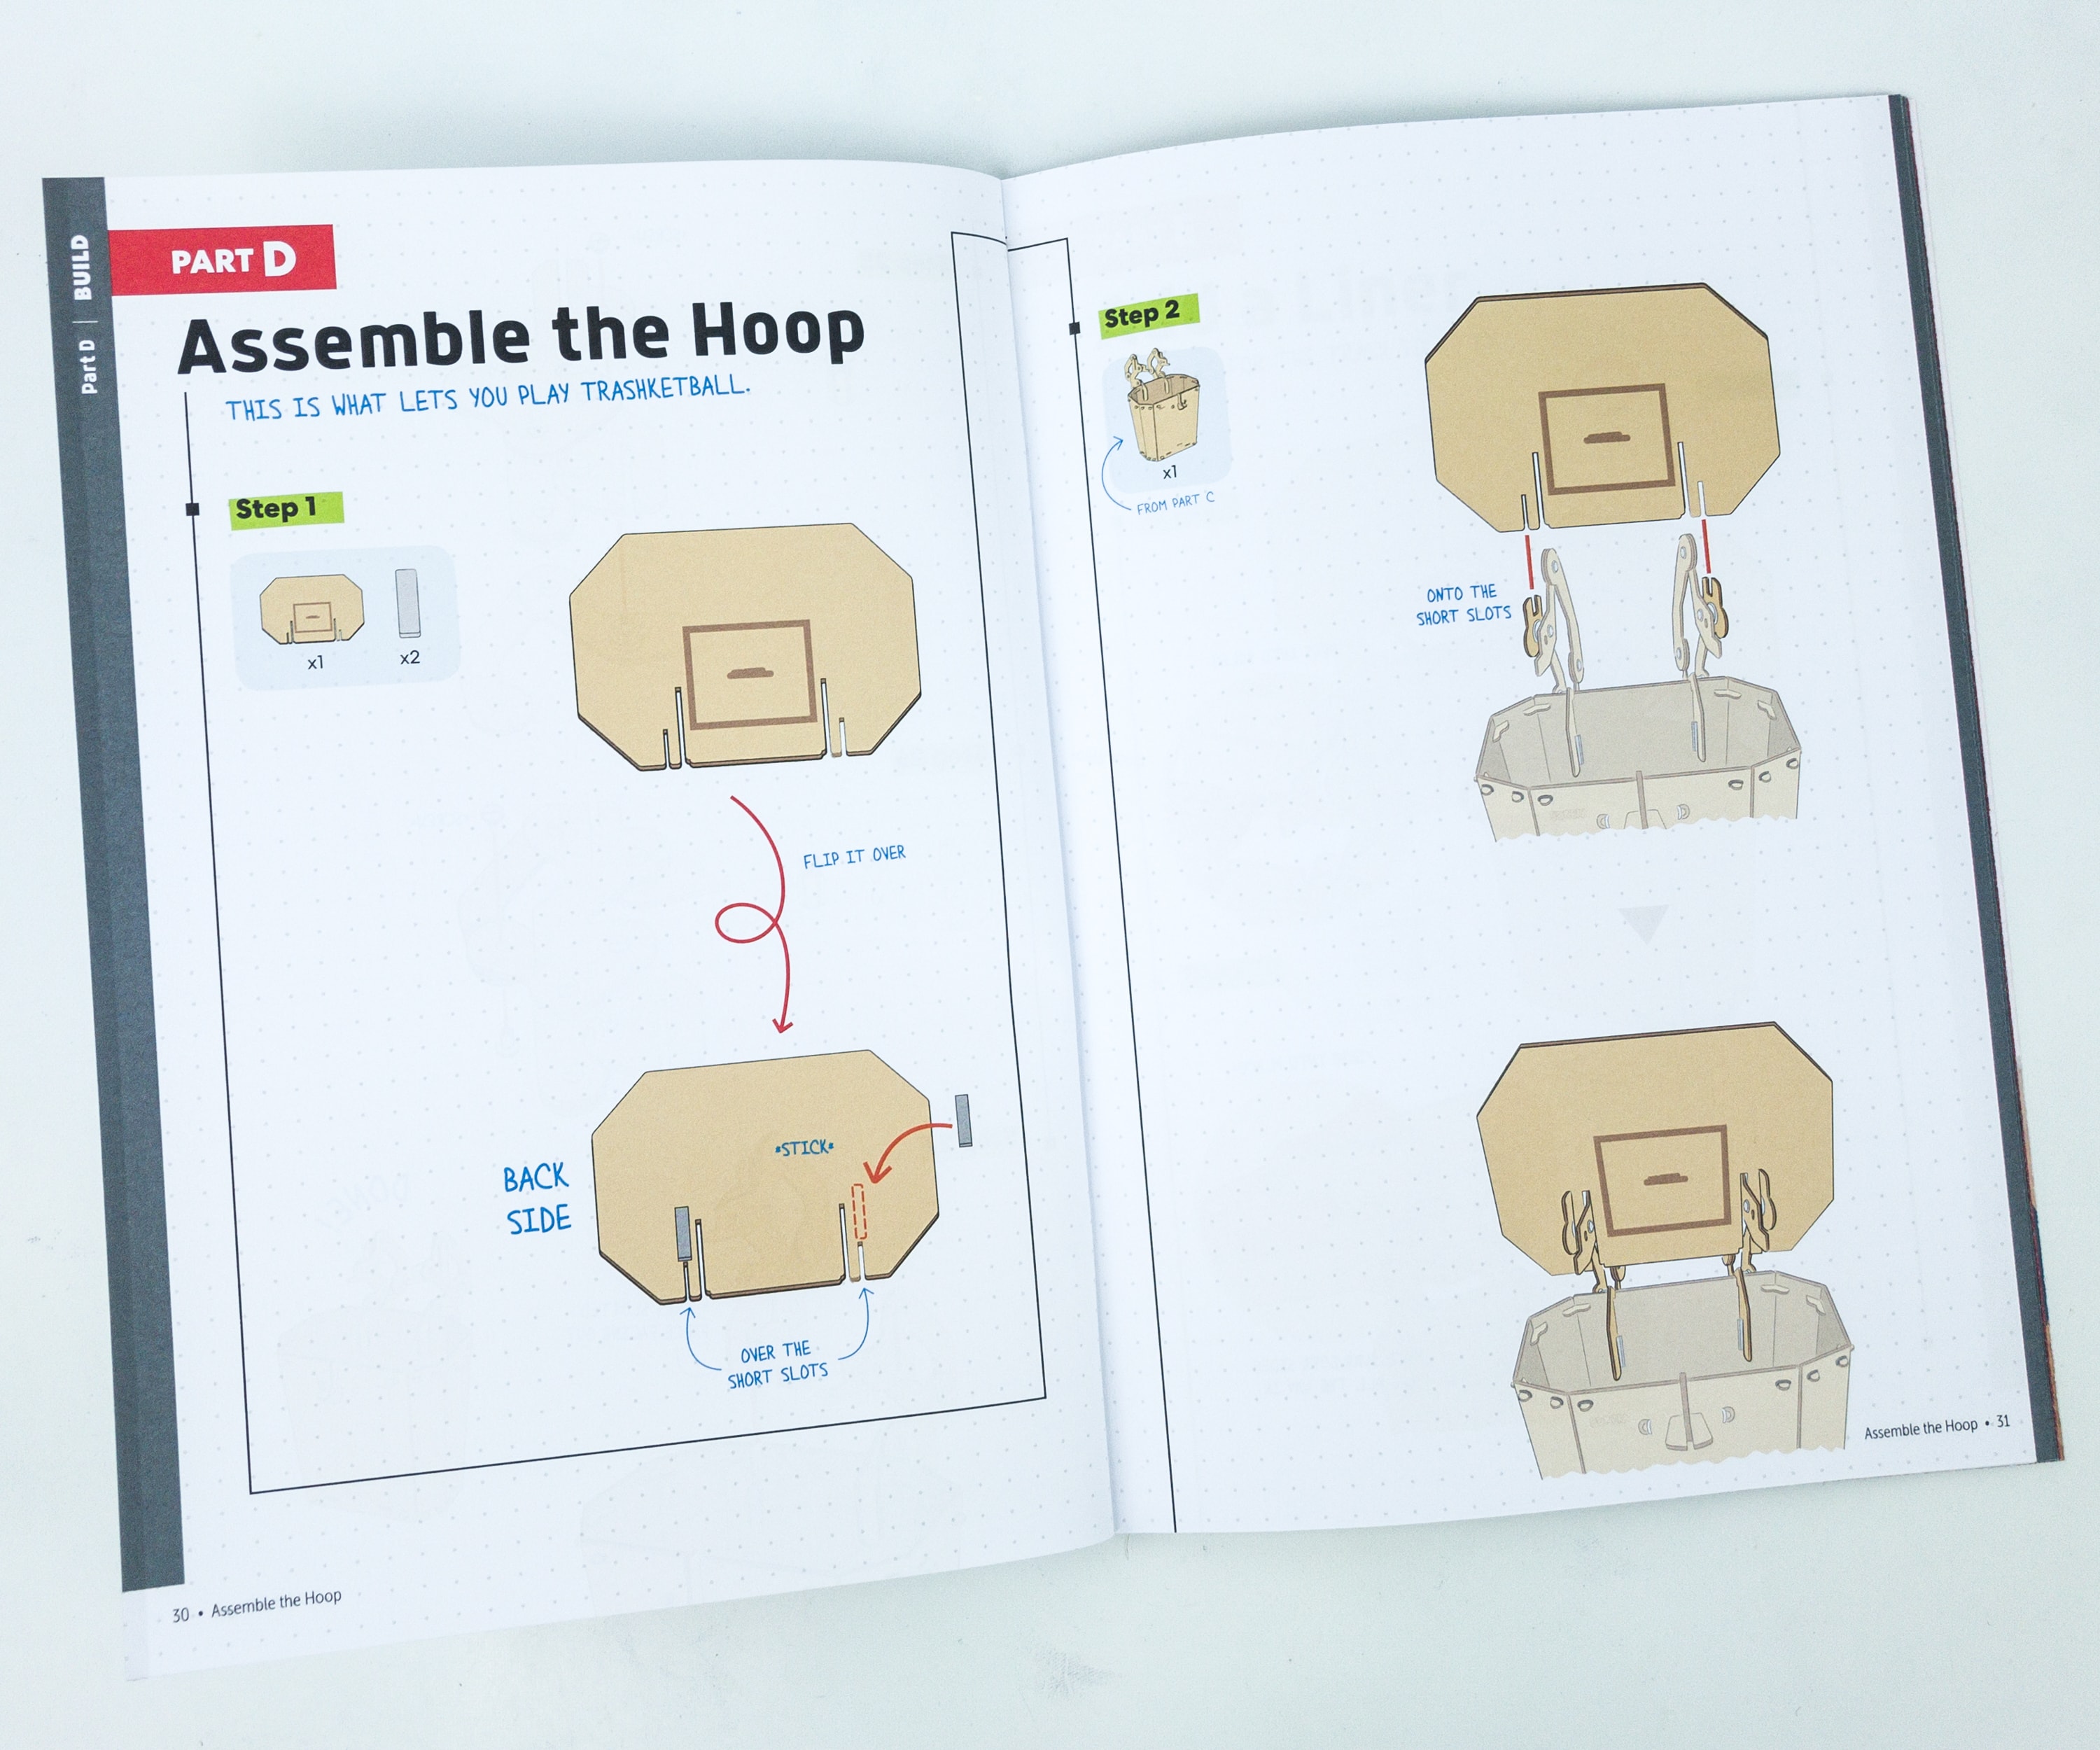
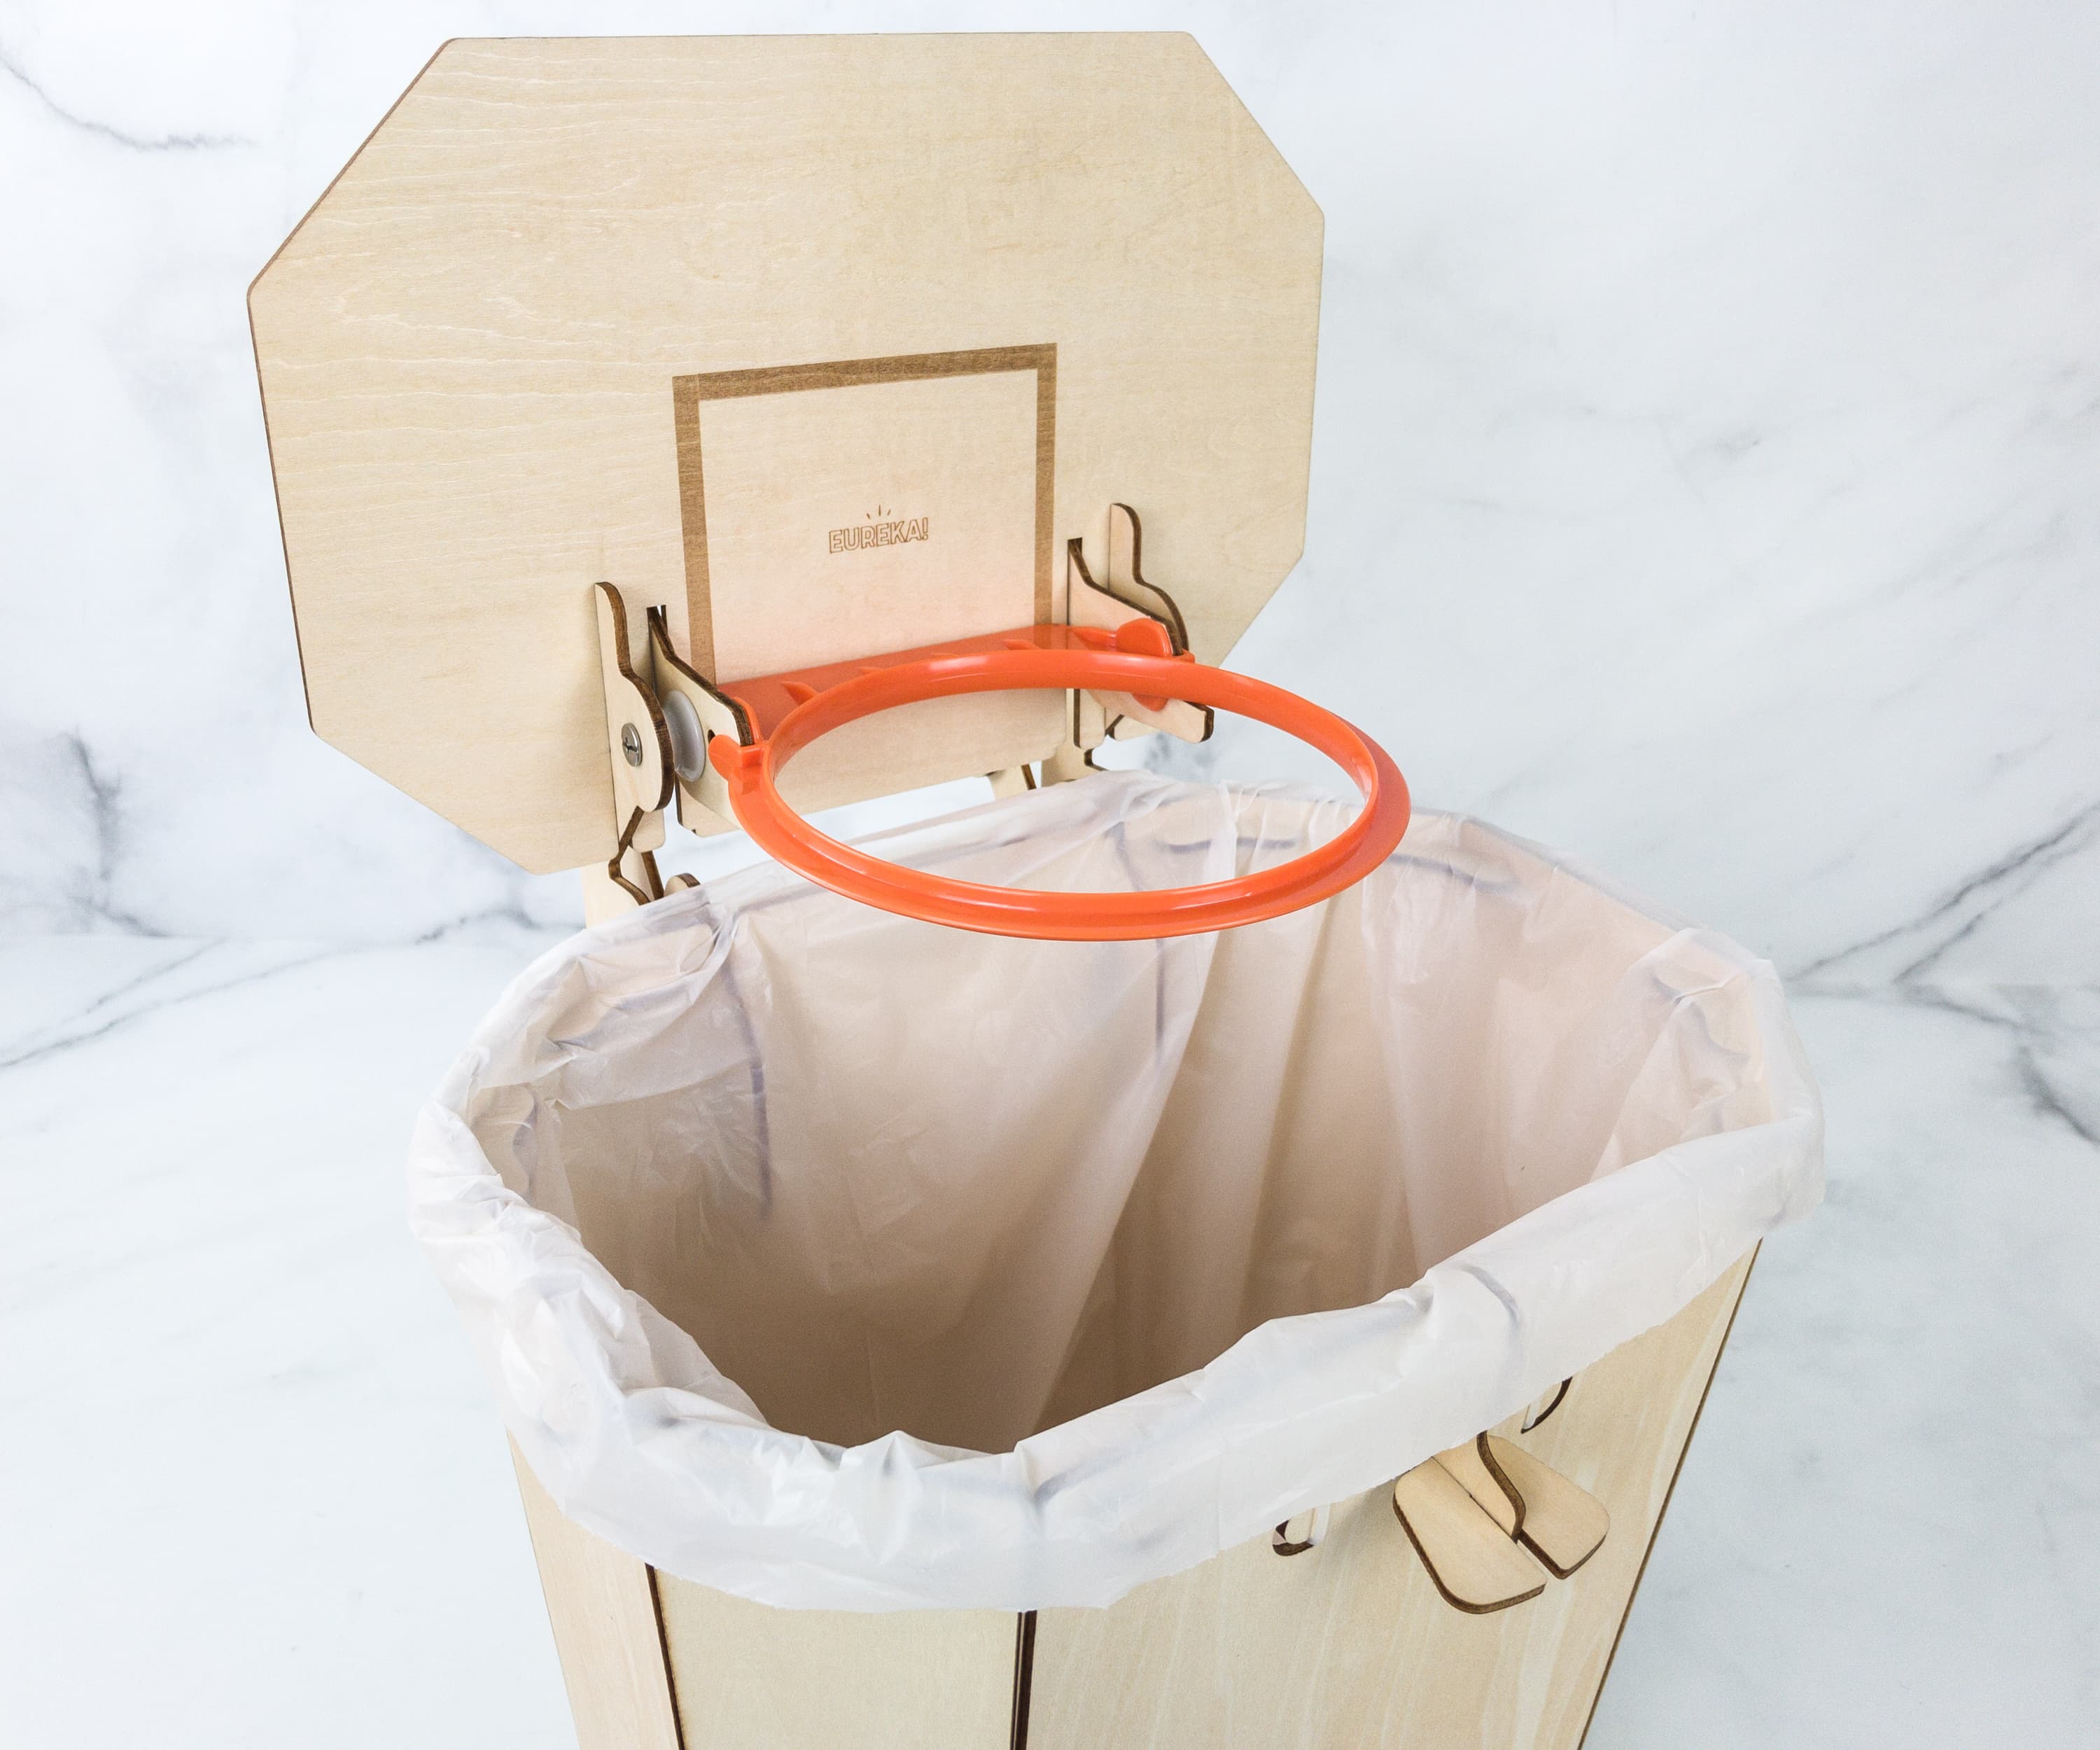
For Part D, it’s time to assemble the hoop! We’ll need the finished parts like the basket and the board.
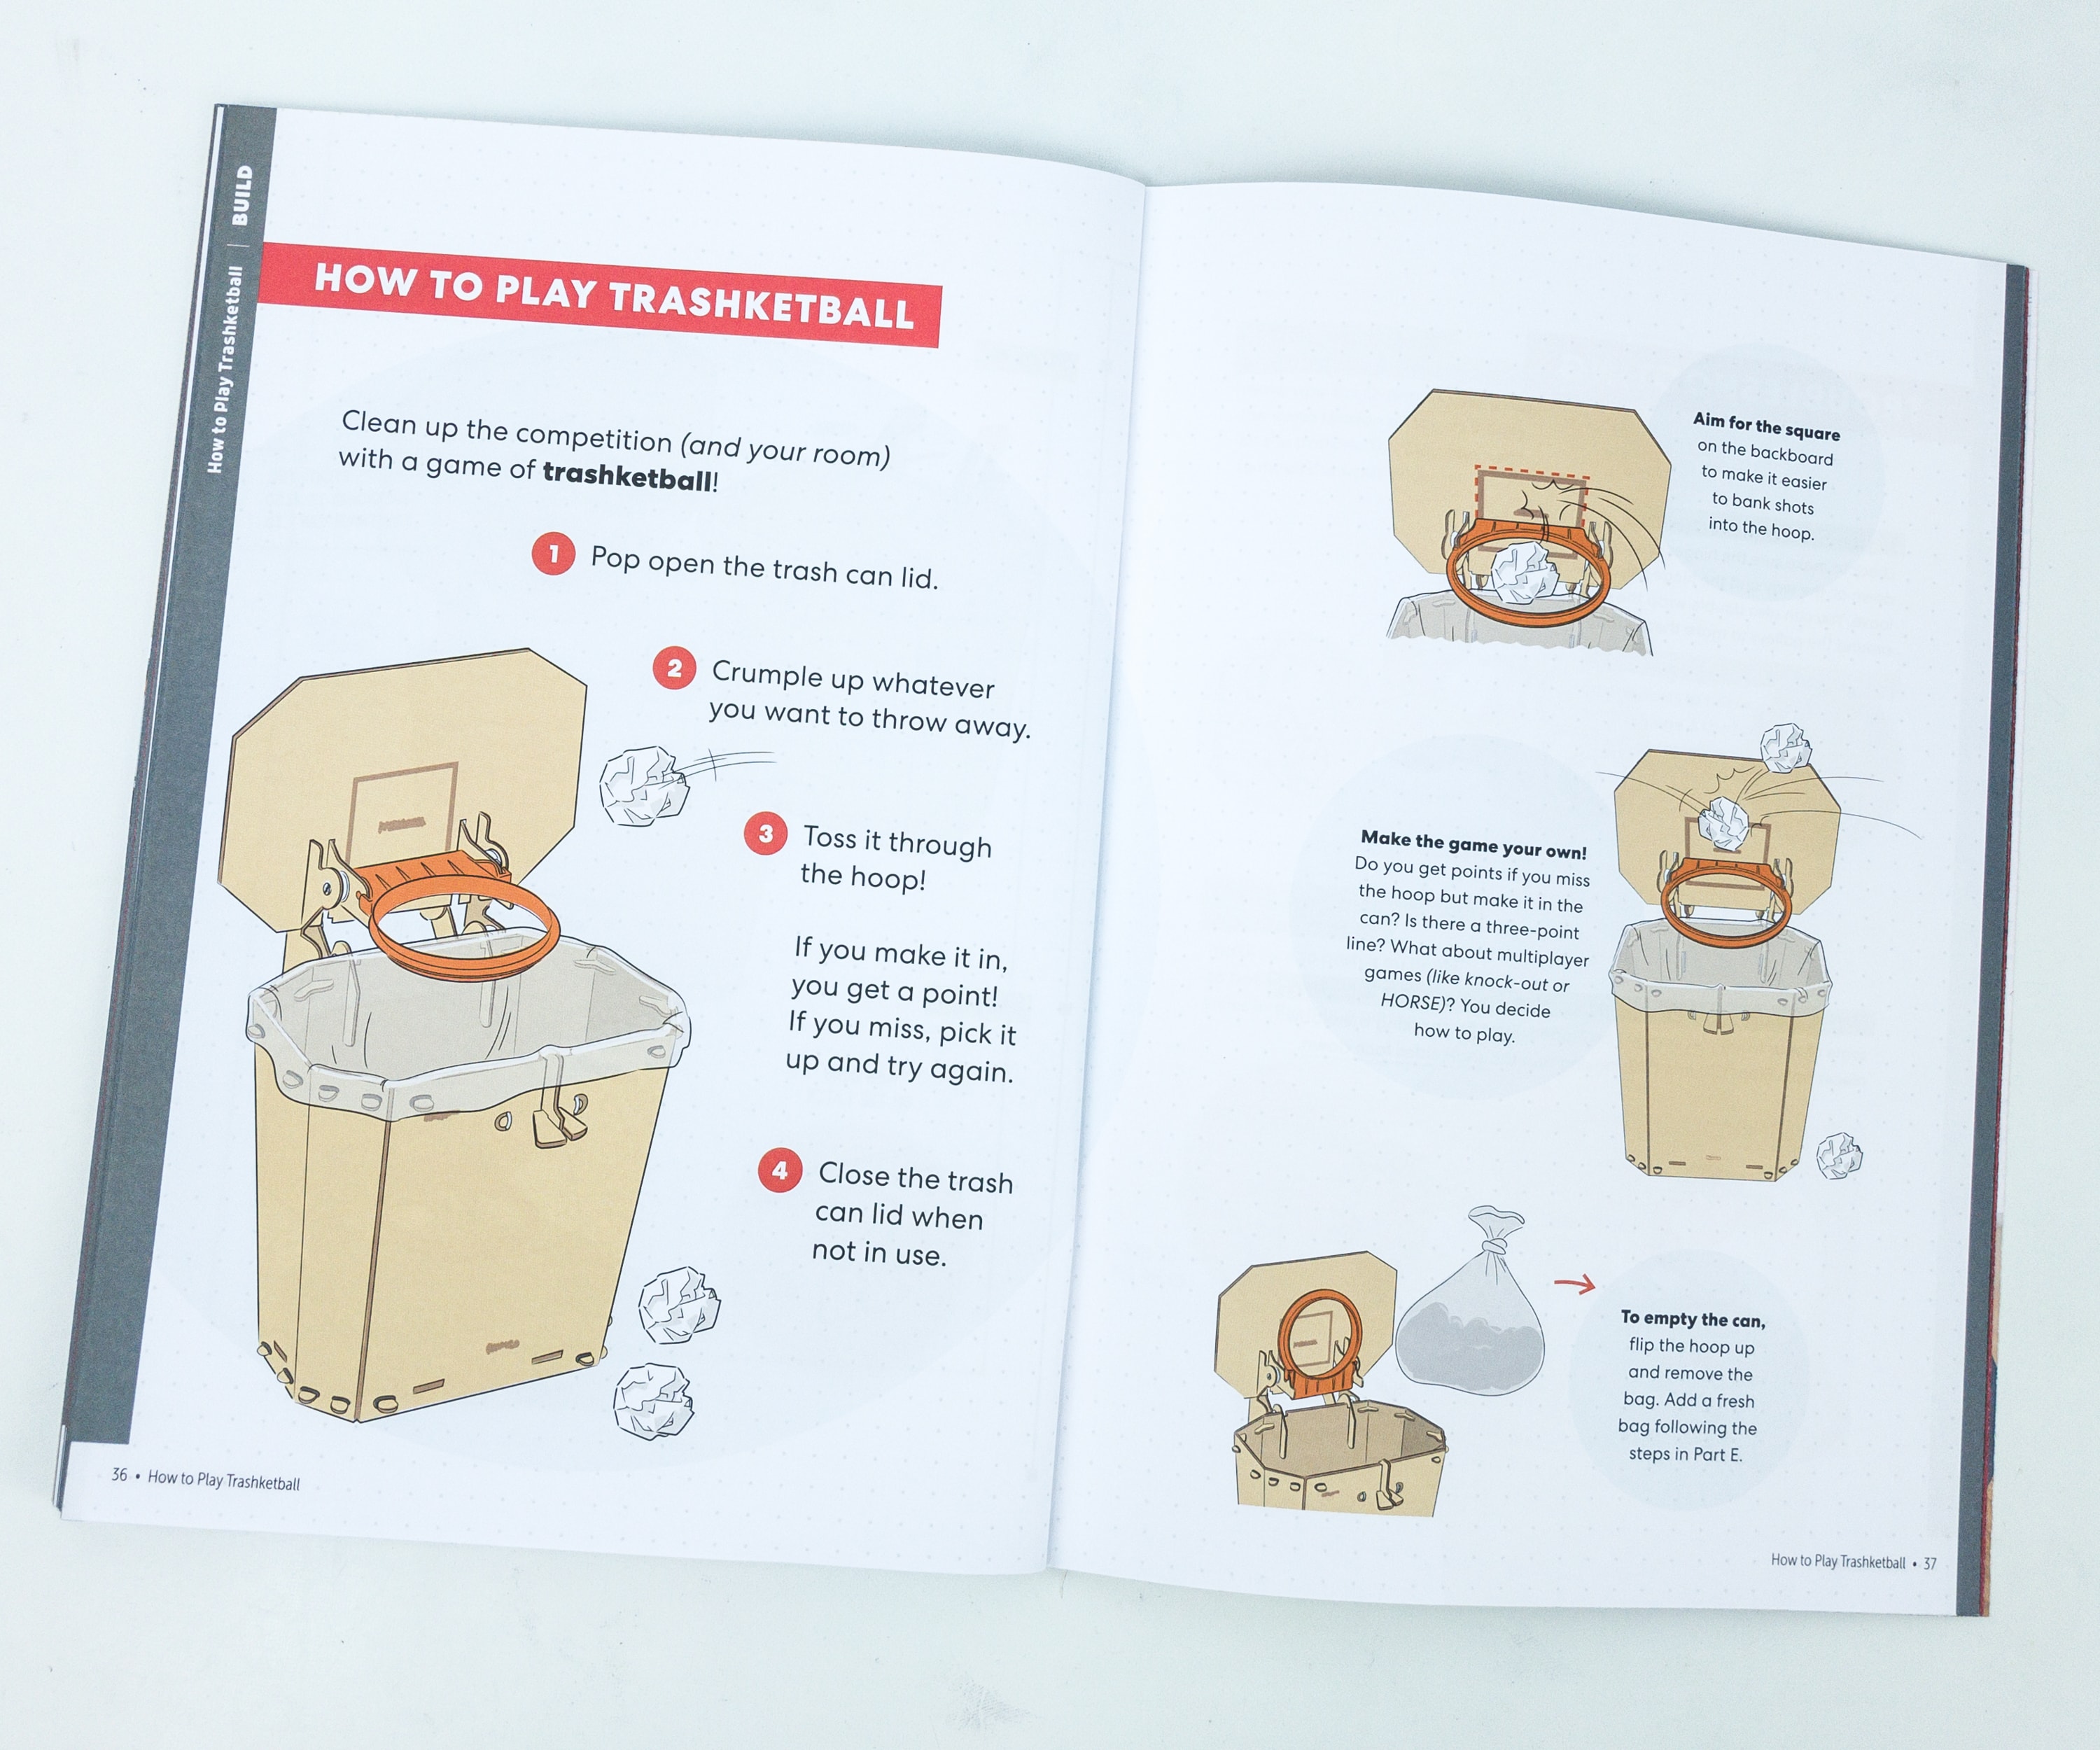
The booklet included step-by-step directions on how to use the trashketball when everything’s already set up.
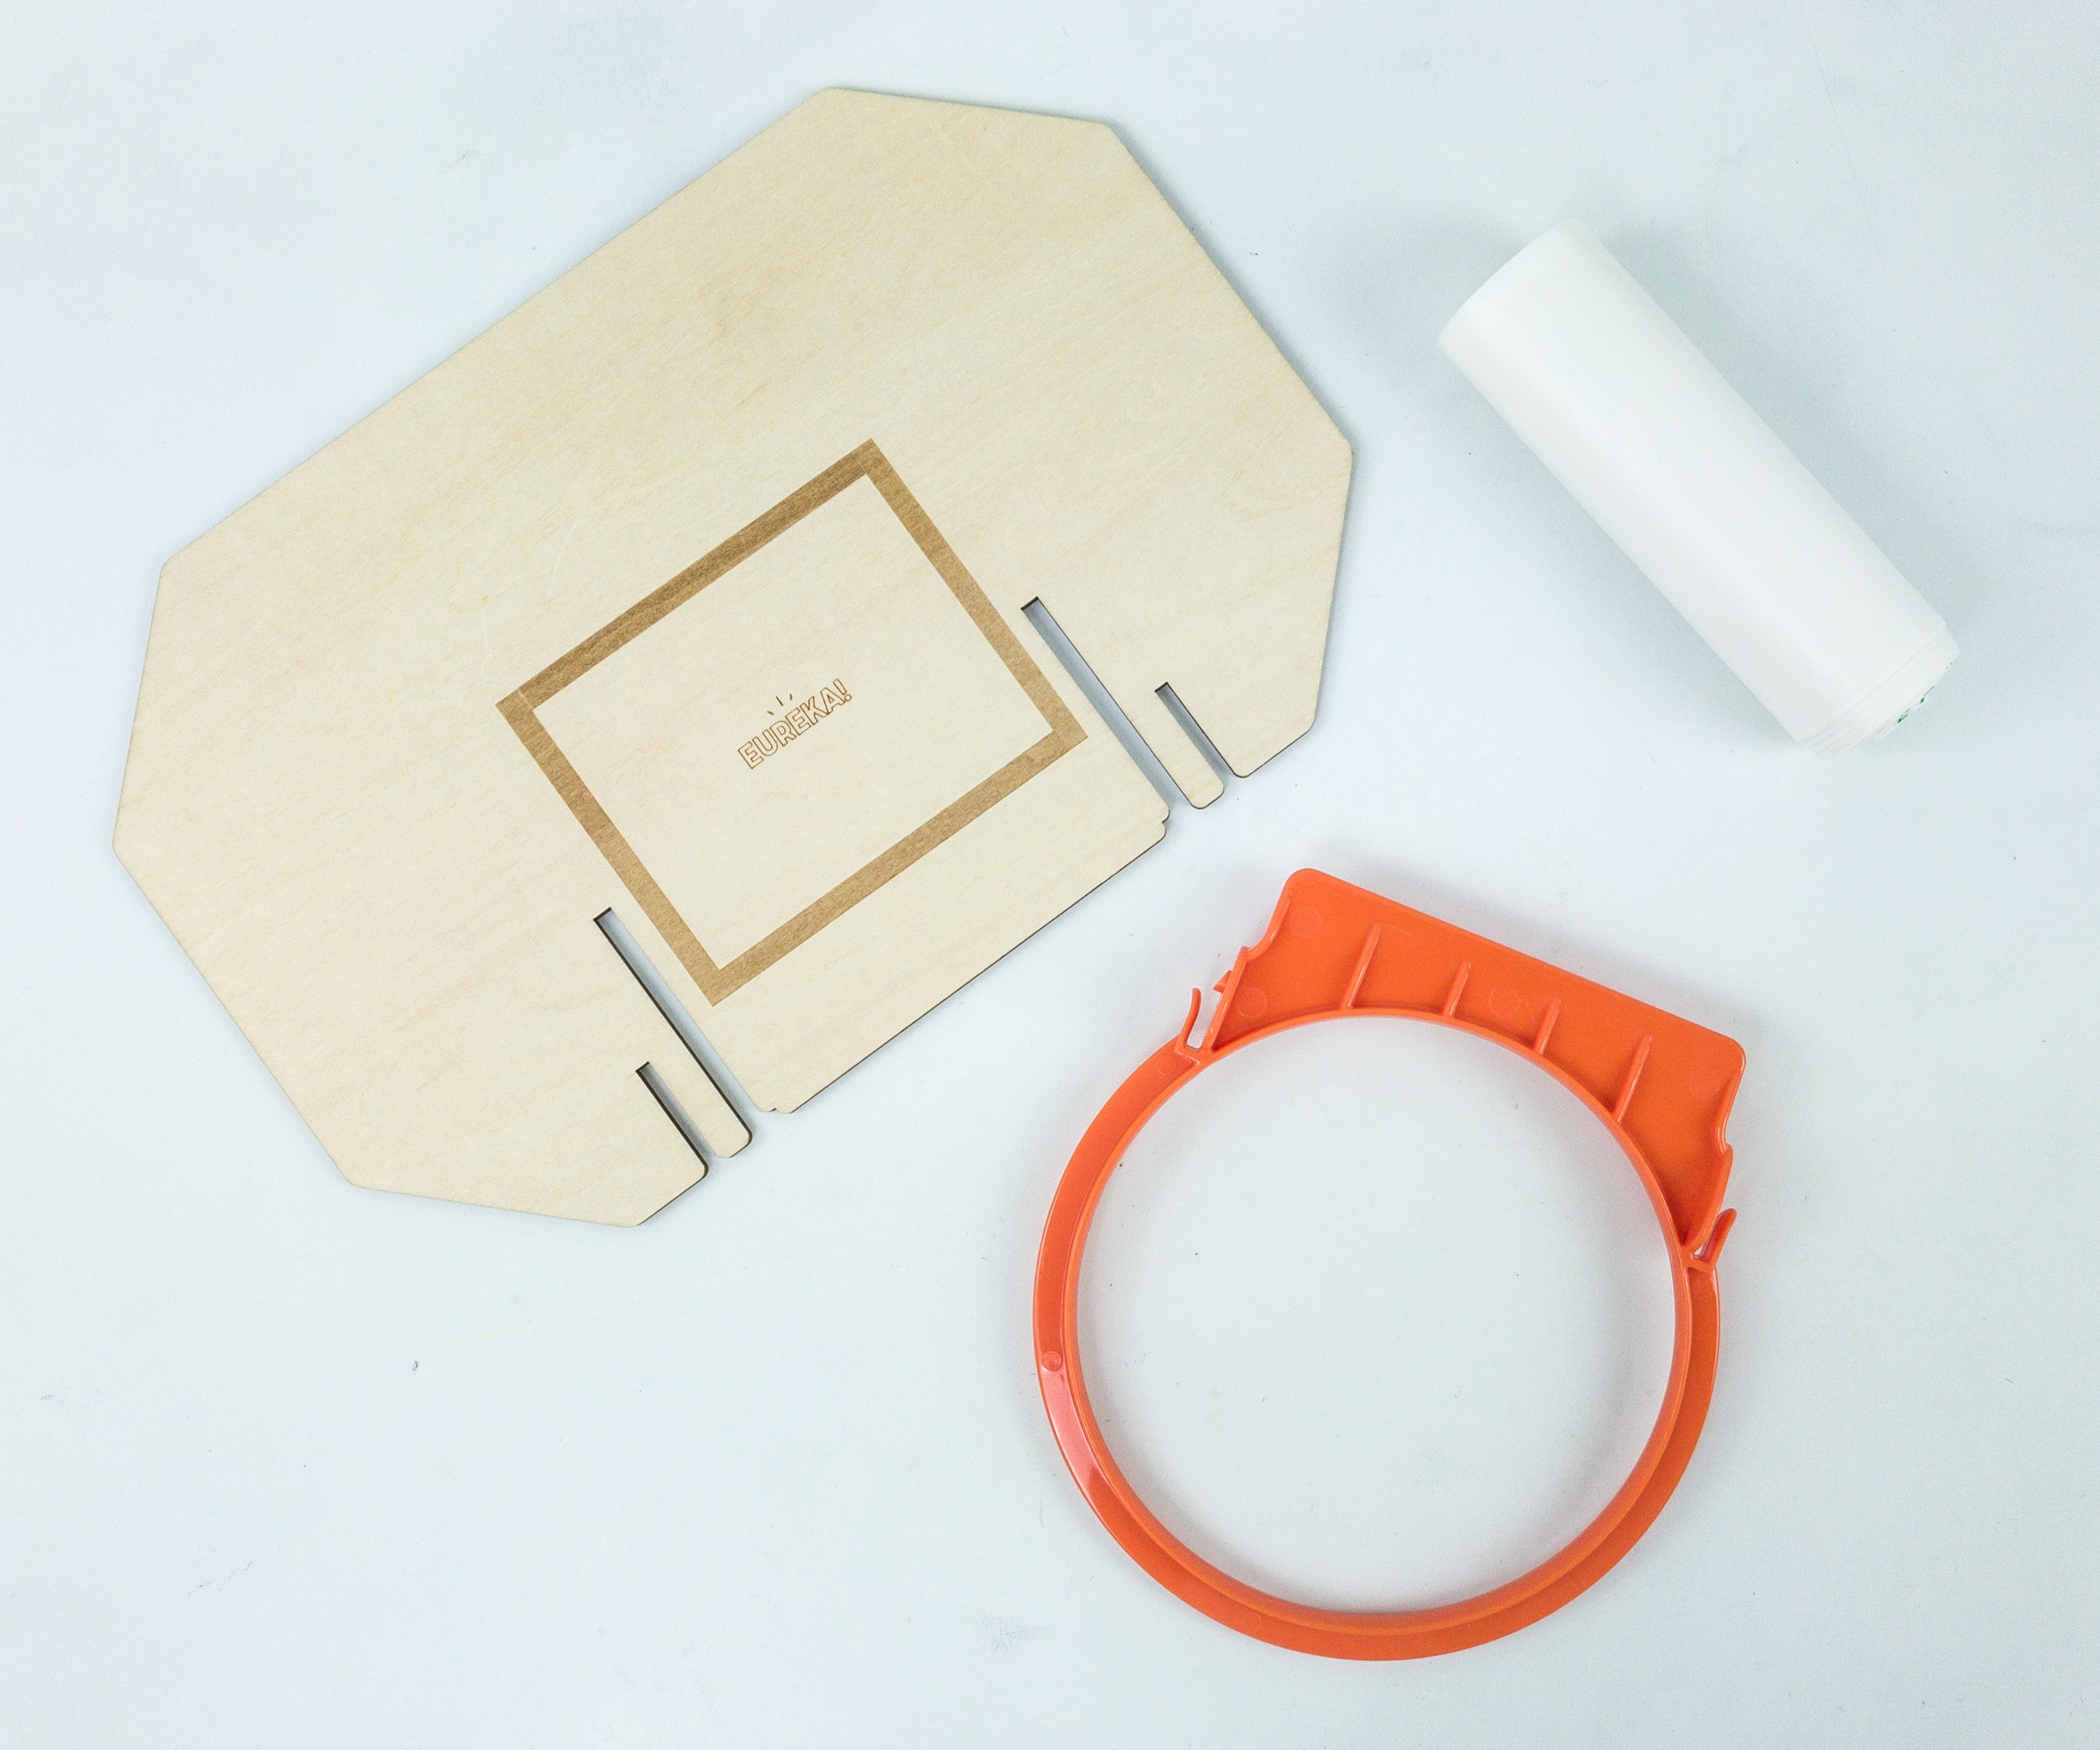
For the hoop, we’ll need the board, the ring, and some trash bags!
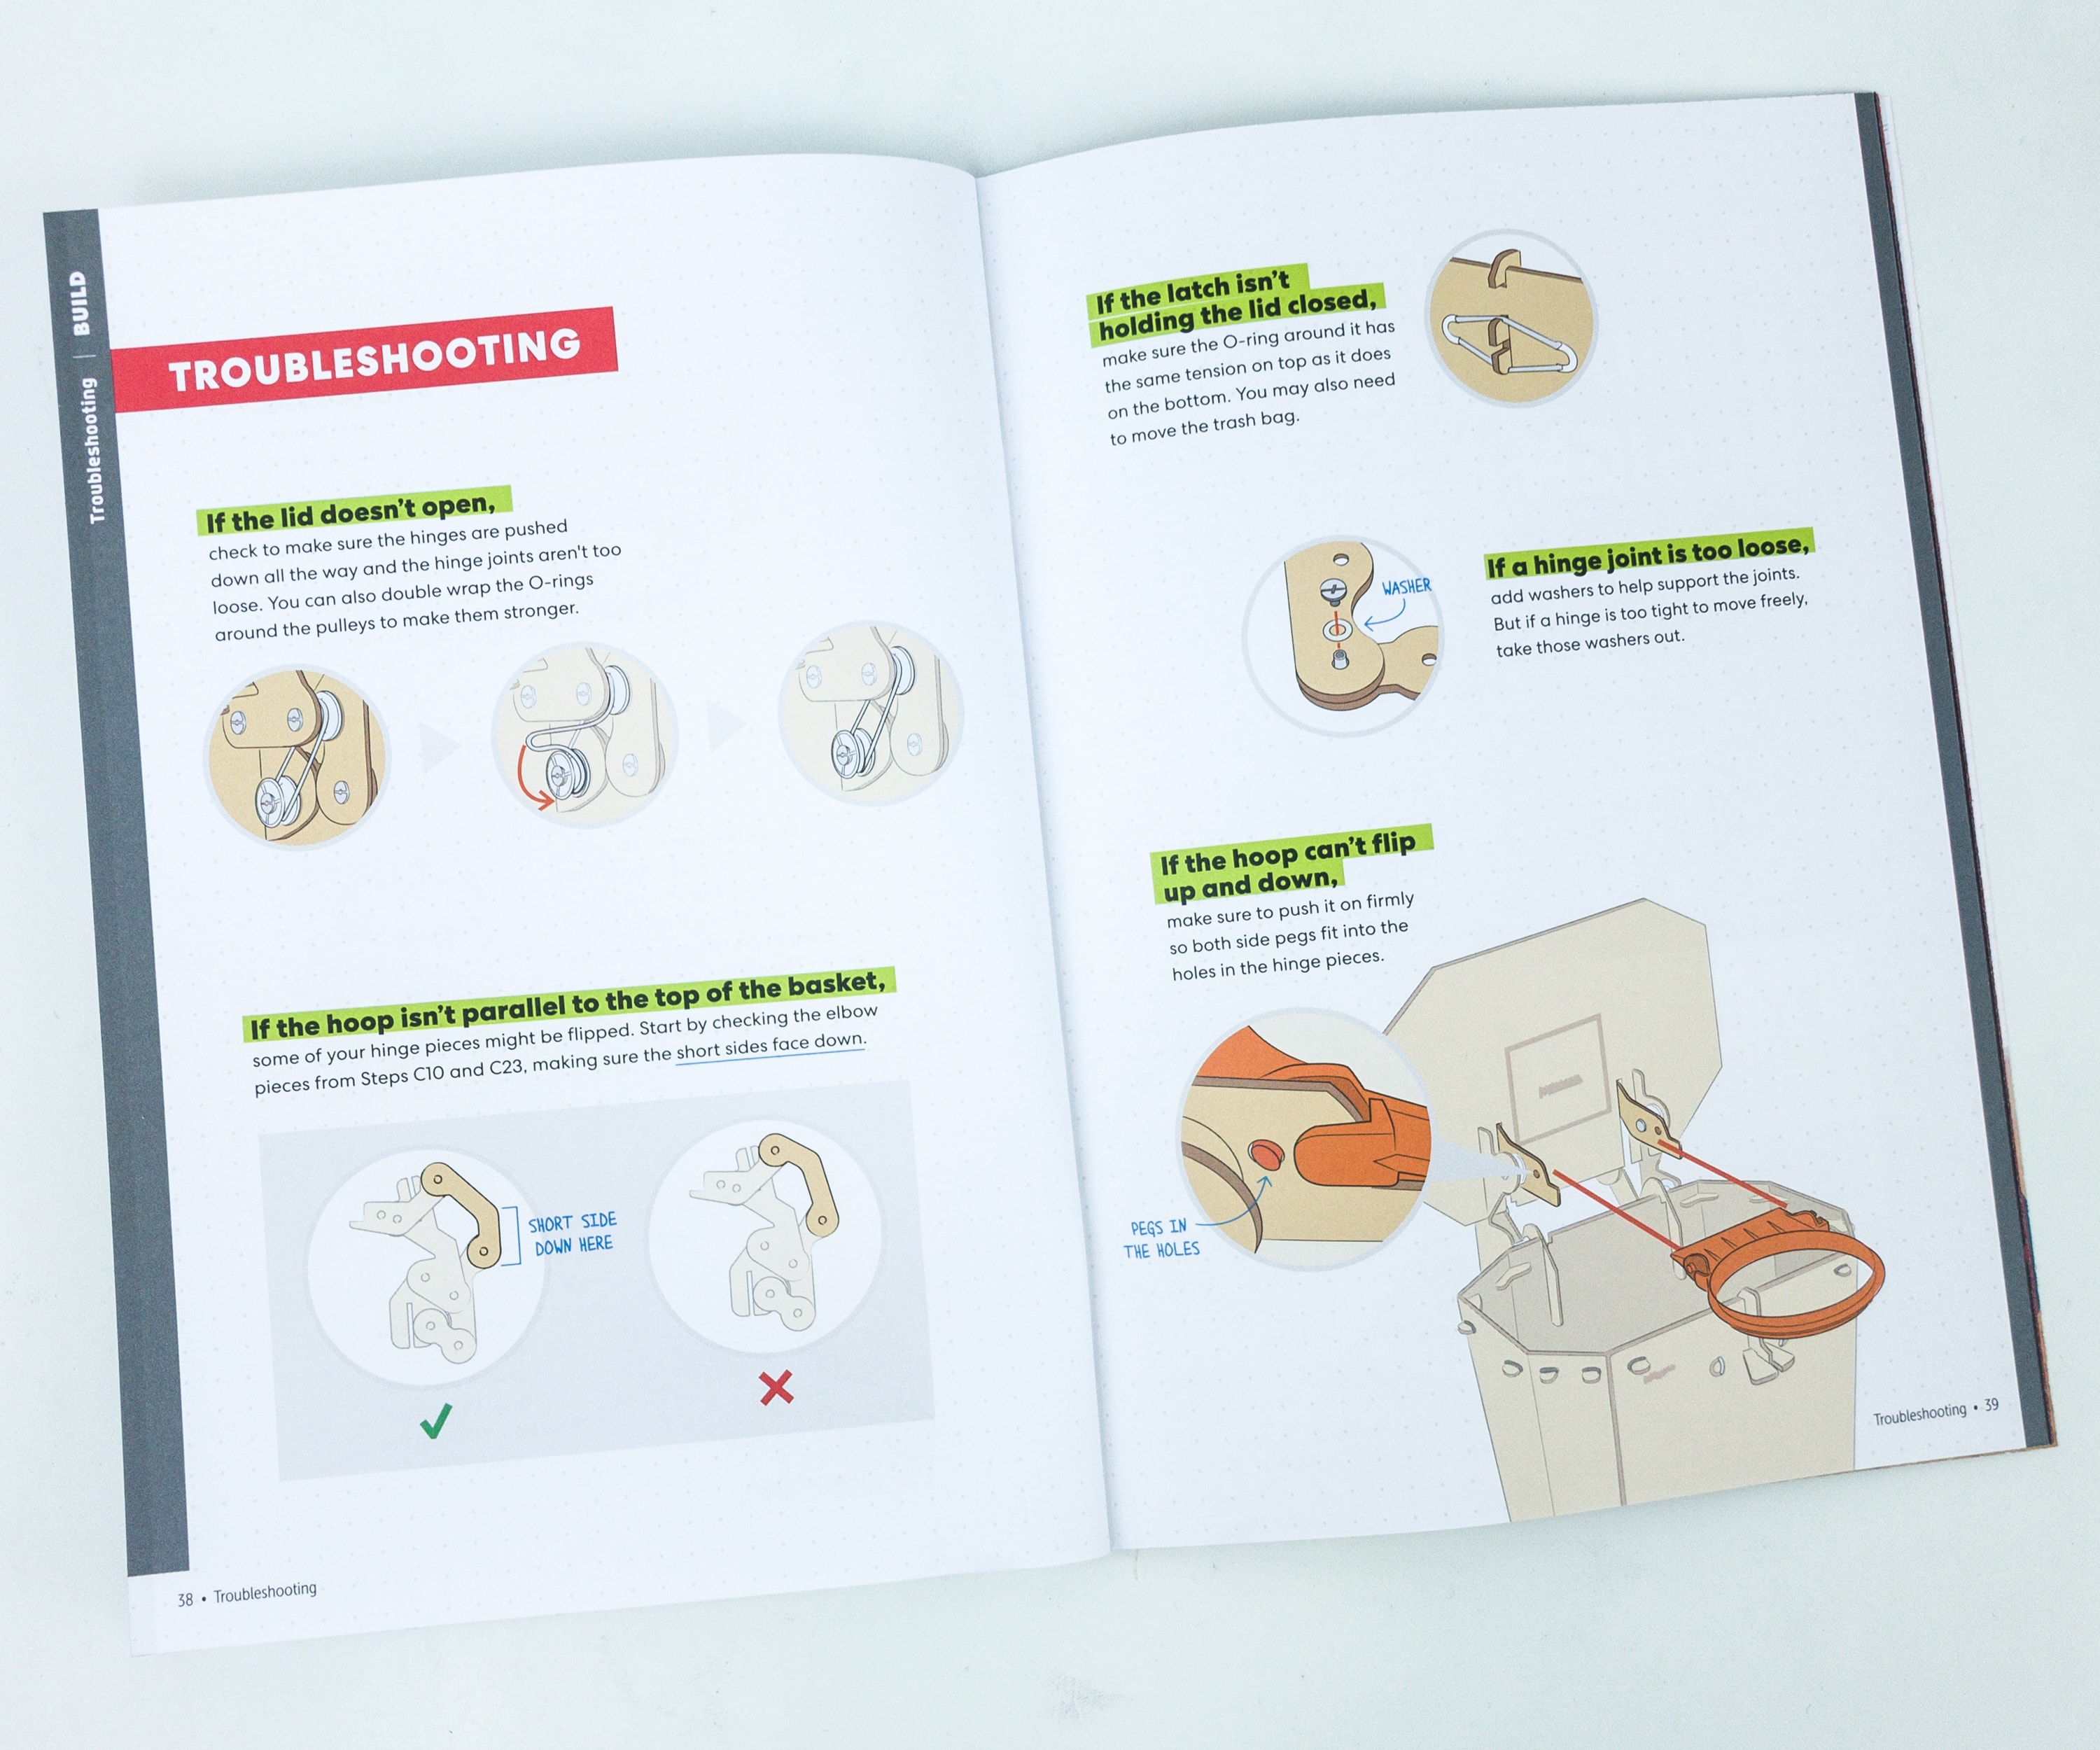
In case you encounter some problems with the trashketball, the booklet also included troubleshooting of some common problems encountered when using it.
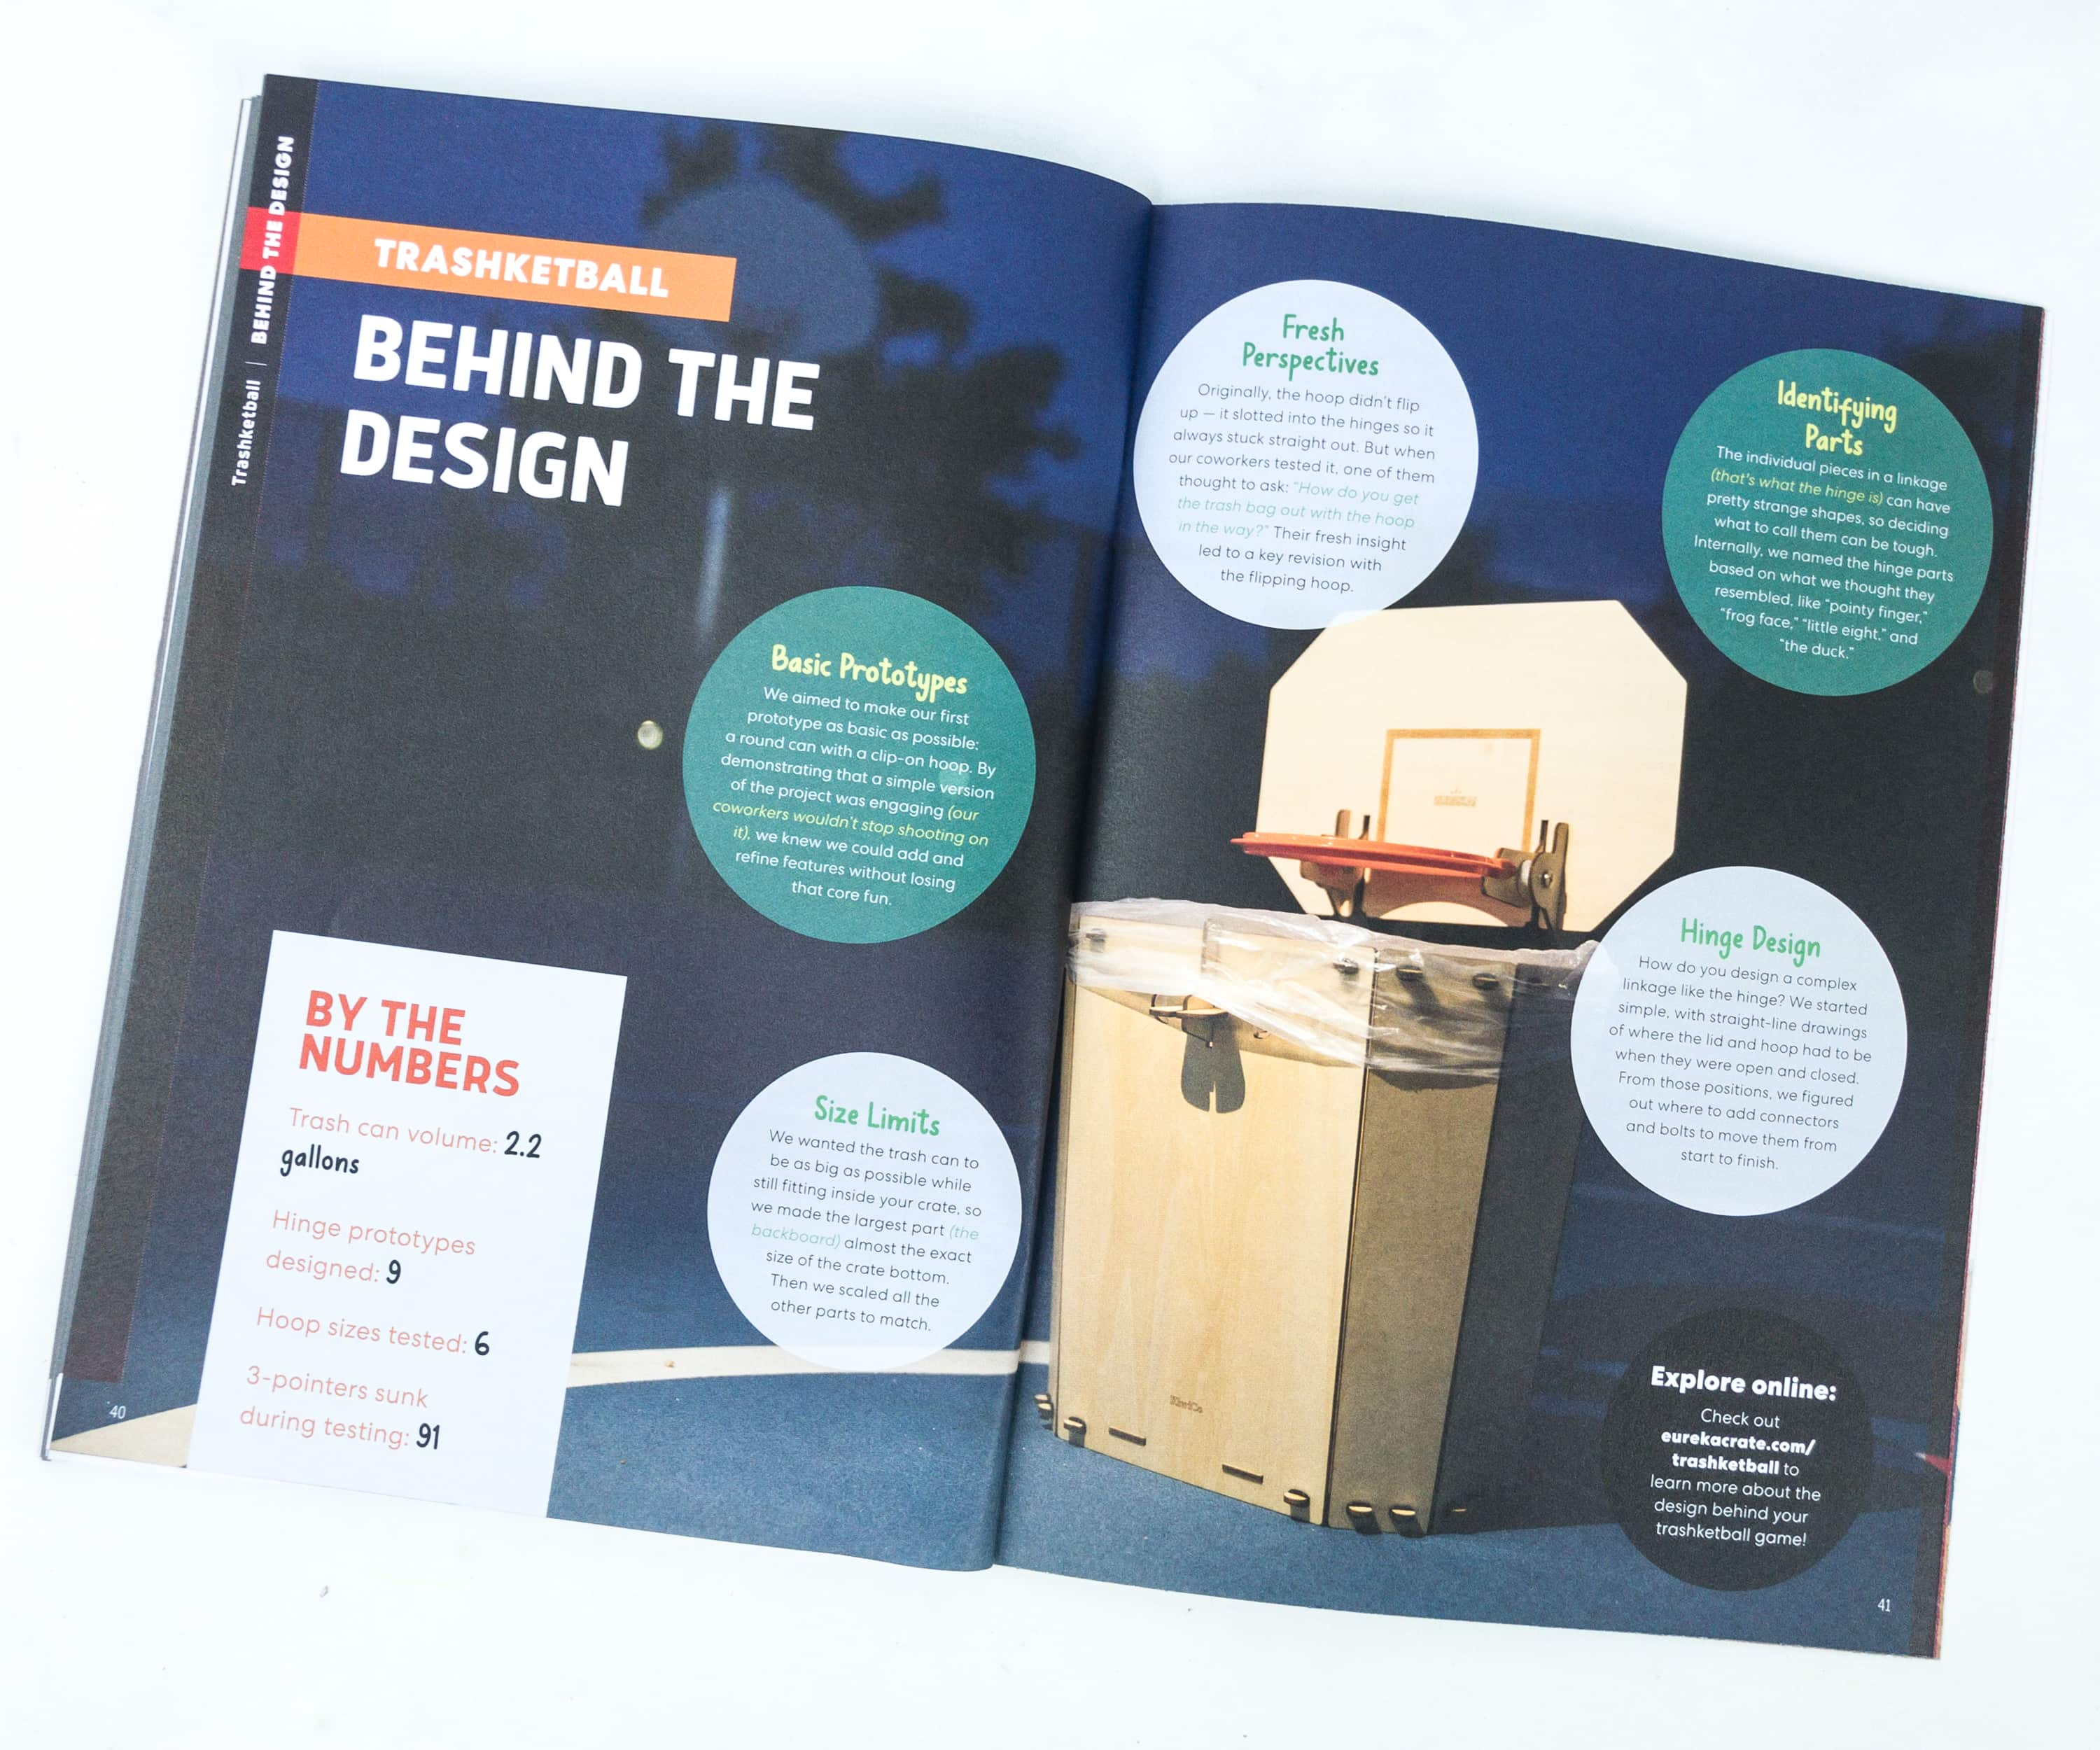
The booklet also provided us more information about this fun project, and also lets us know more behind the design.
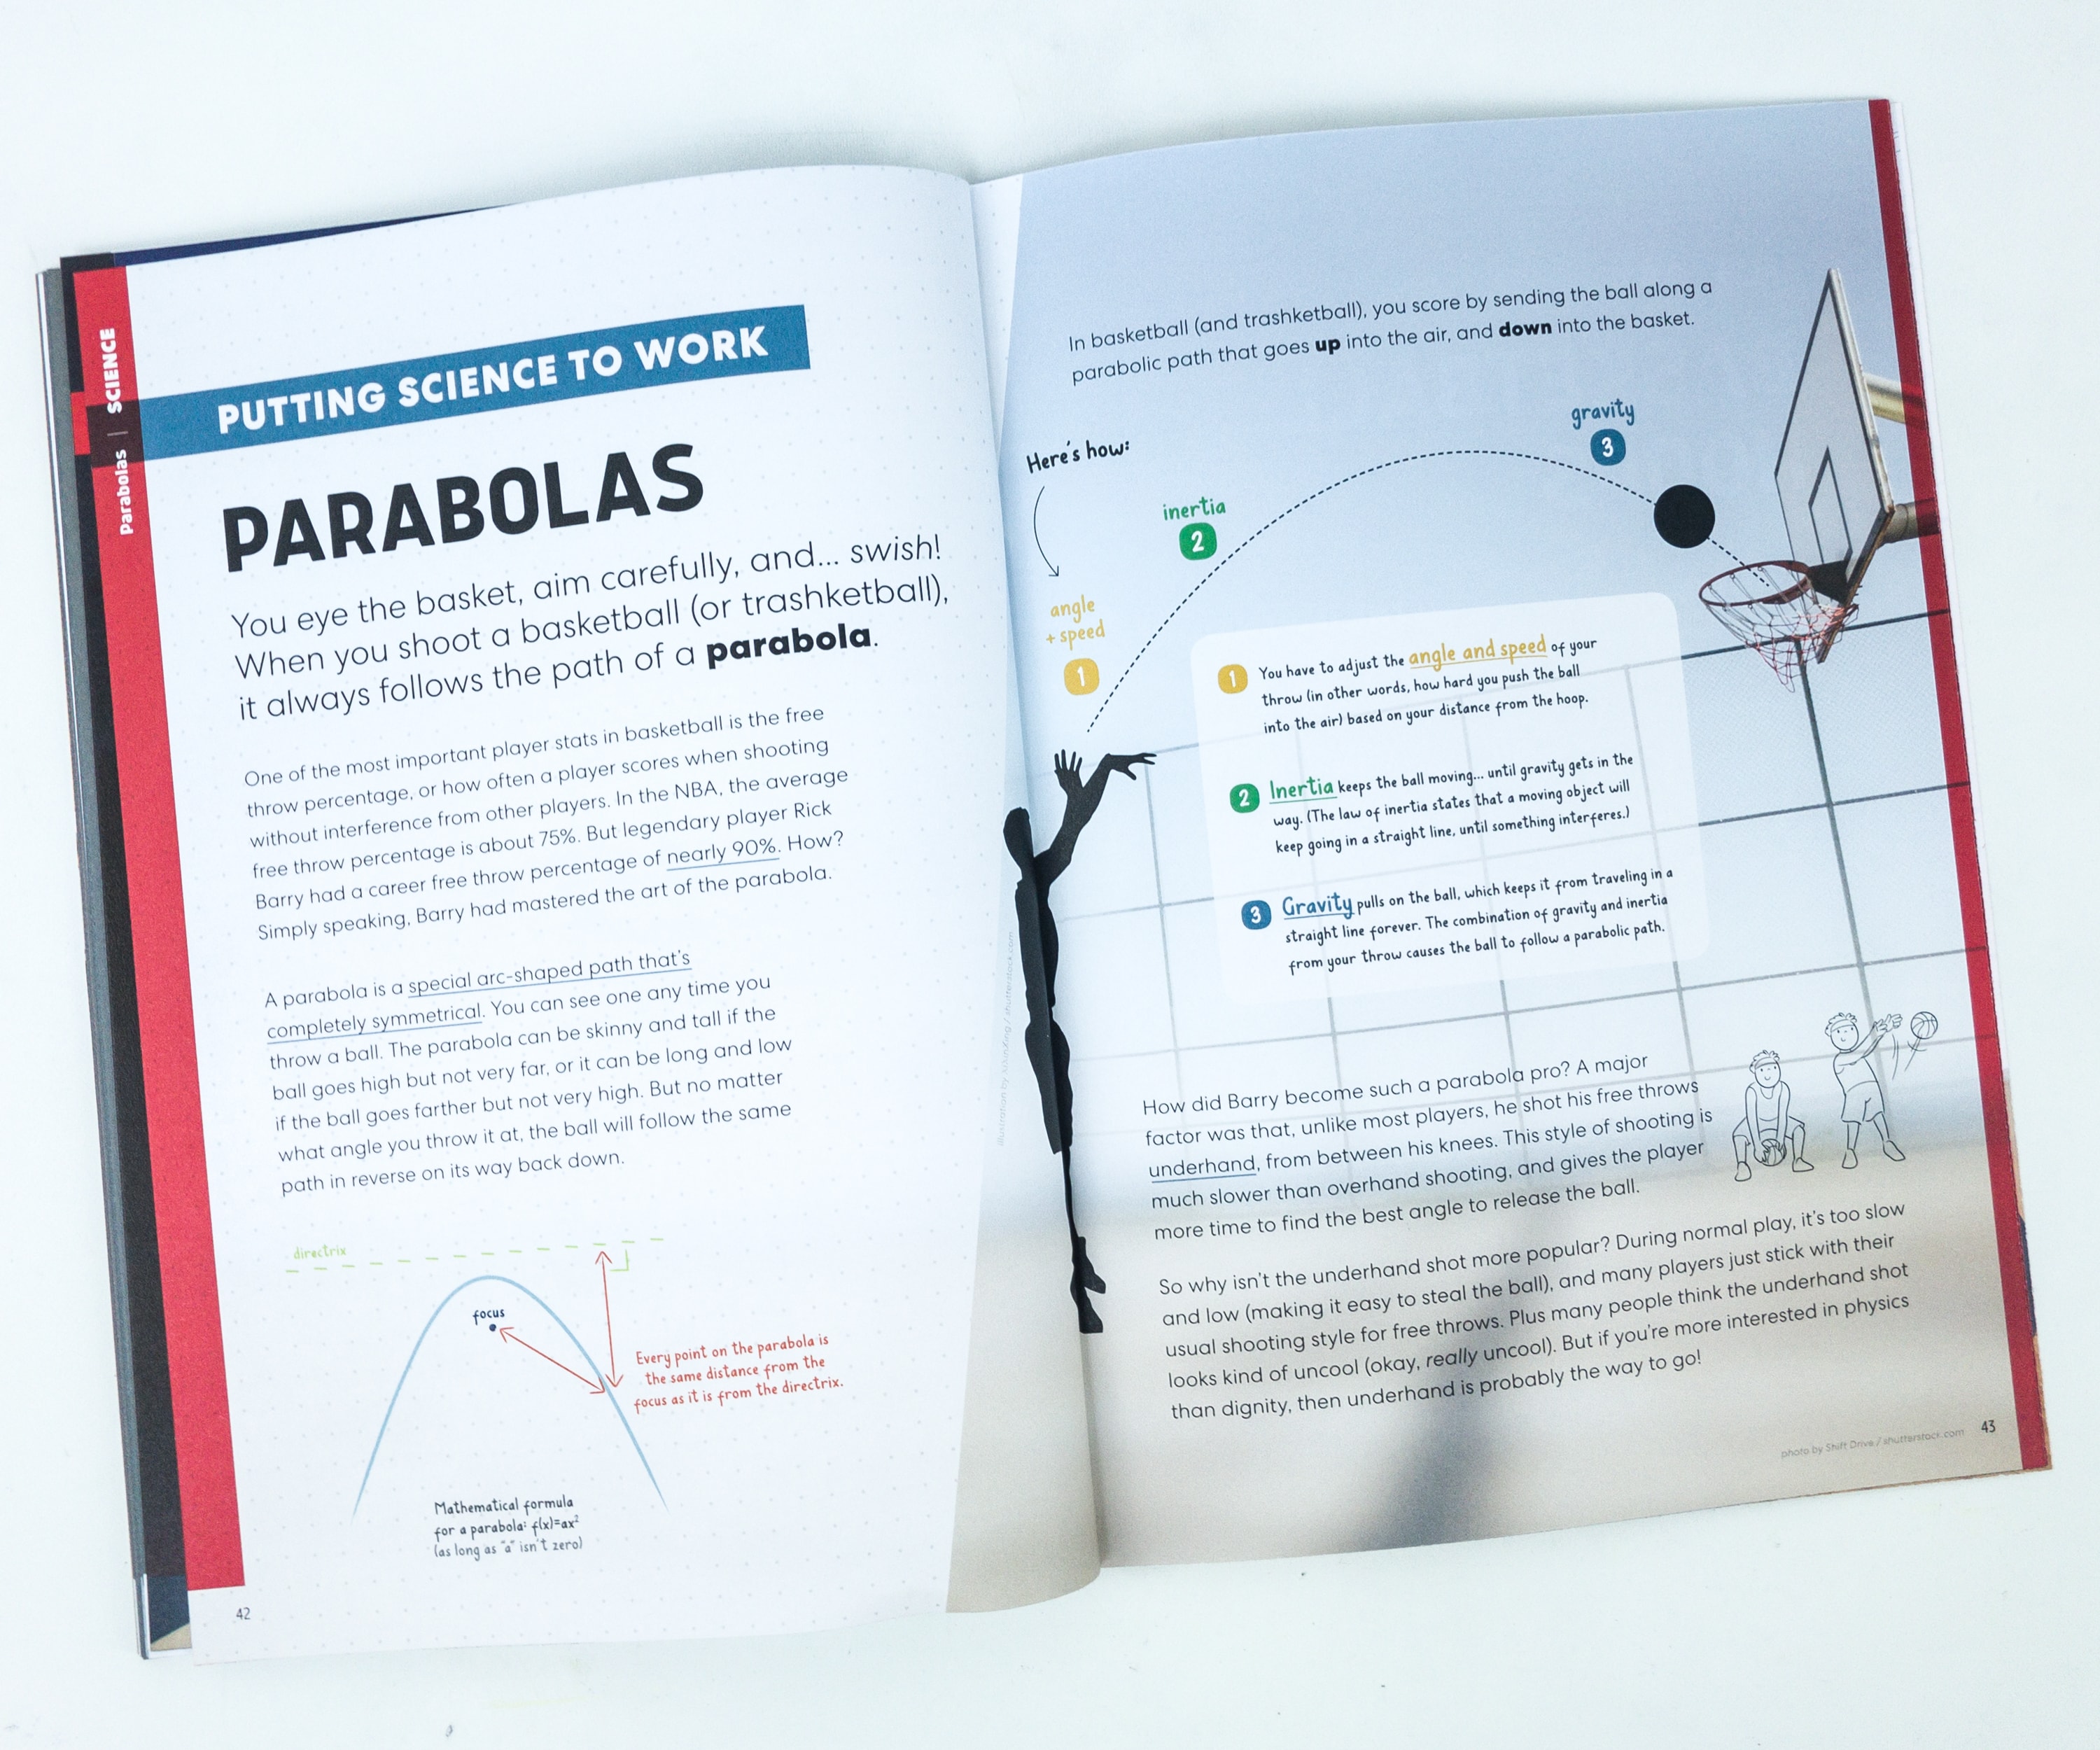
There’s a full article on the phenomena behind how the trashketball works, and it explains more about parabolas! When you shoot a basketball, it always follows the path of a parabola.
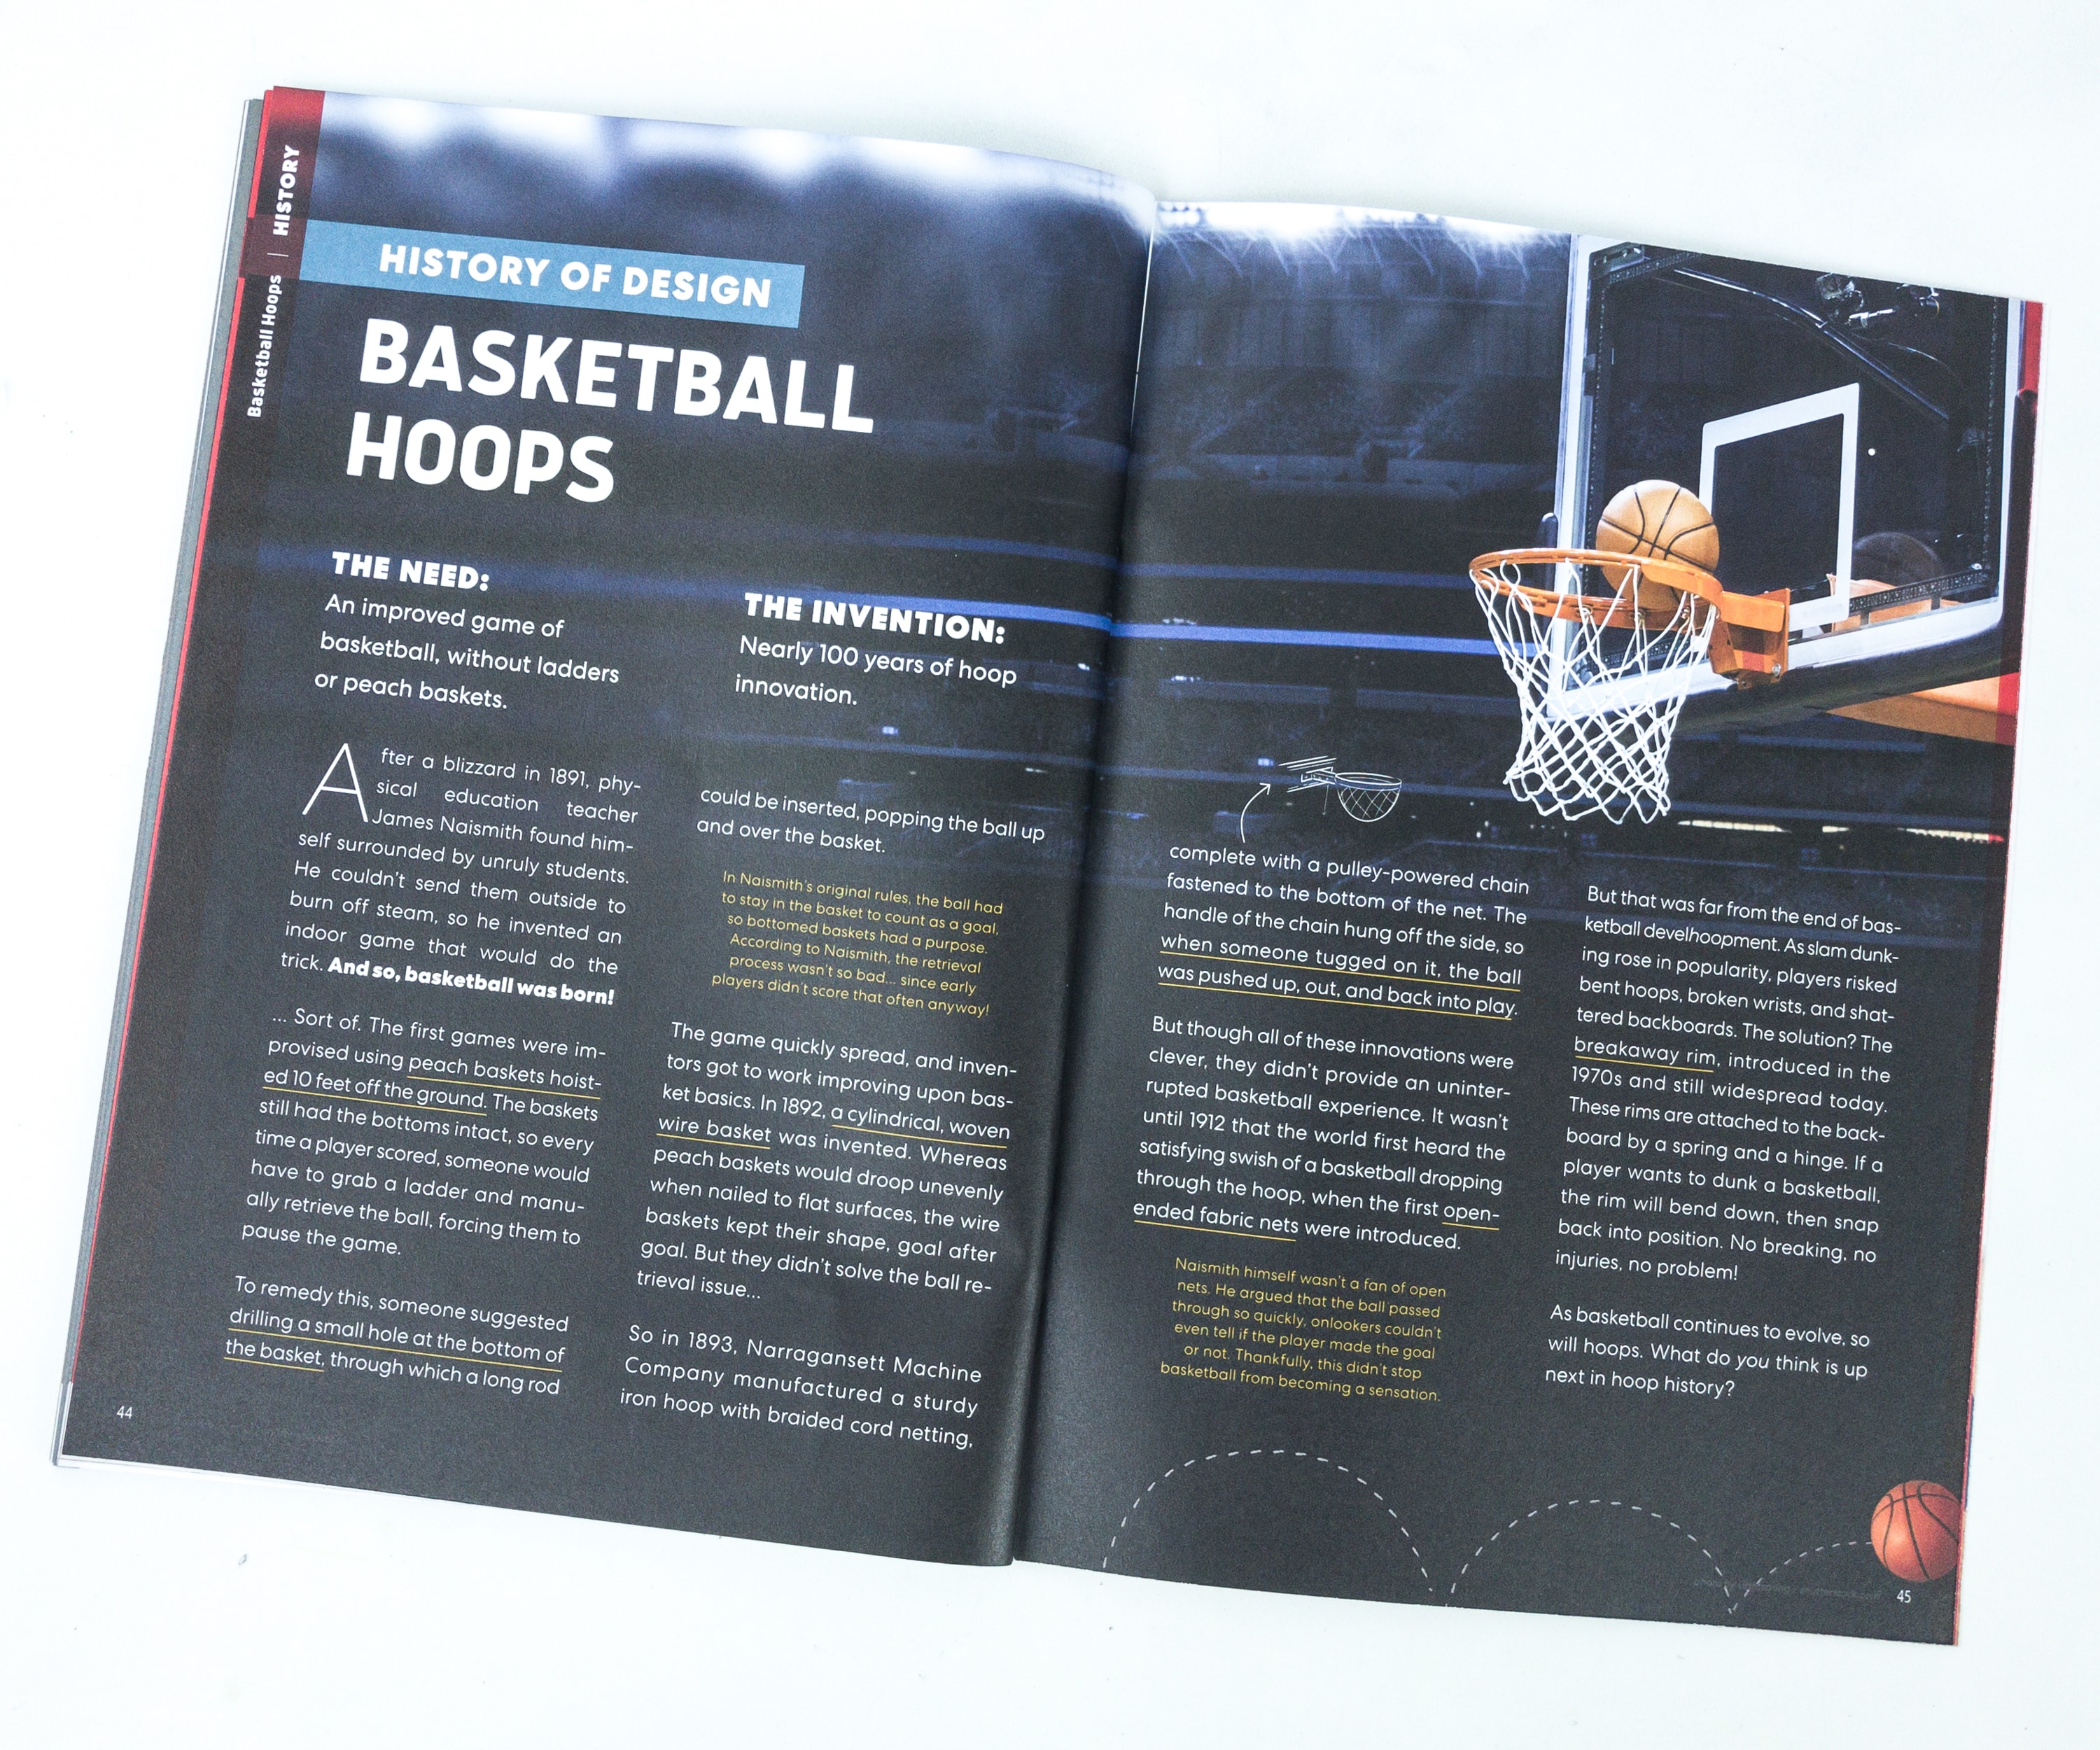
They also included the history of one of the most beloved sports around the globe, basketball!
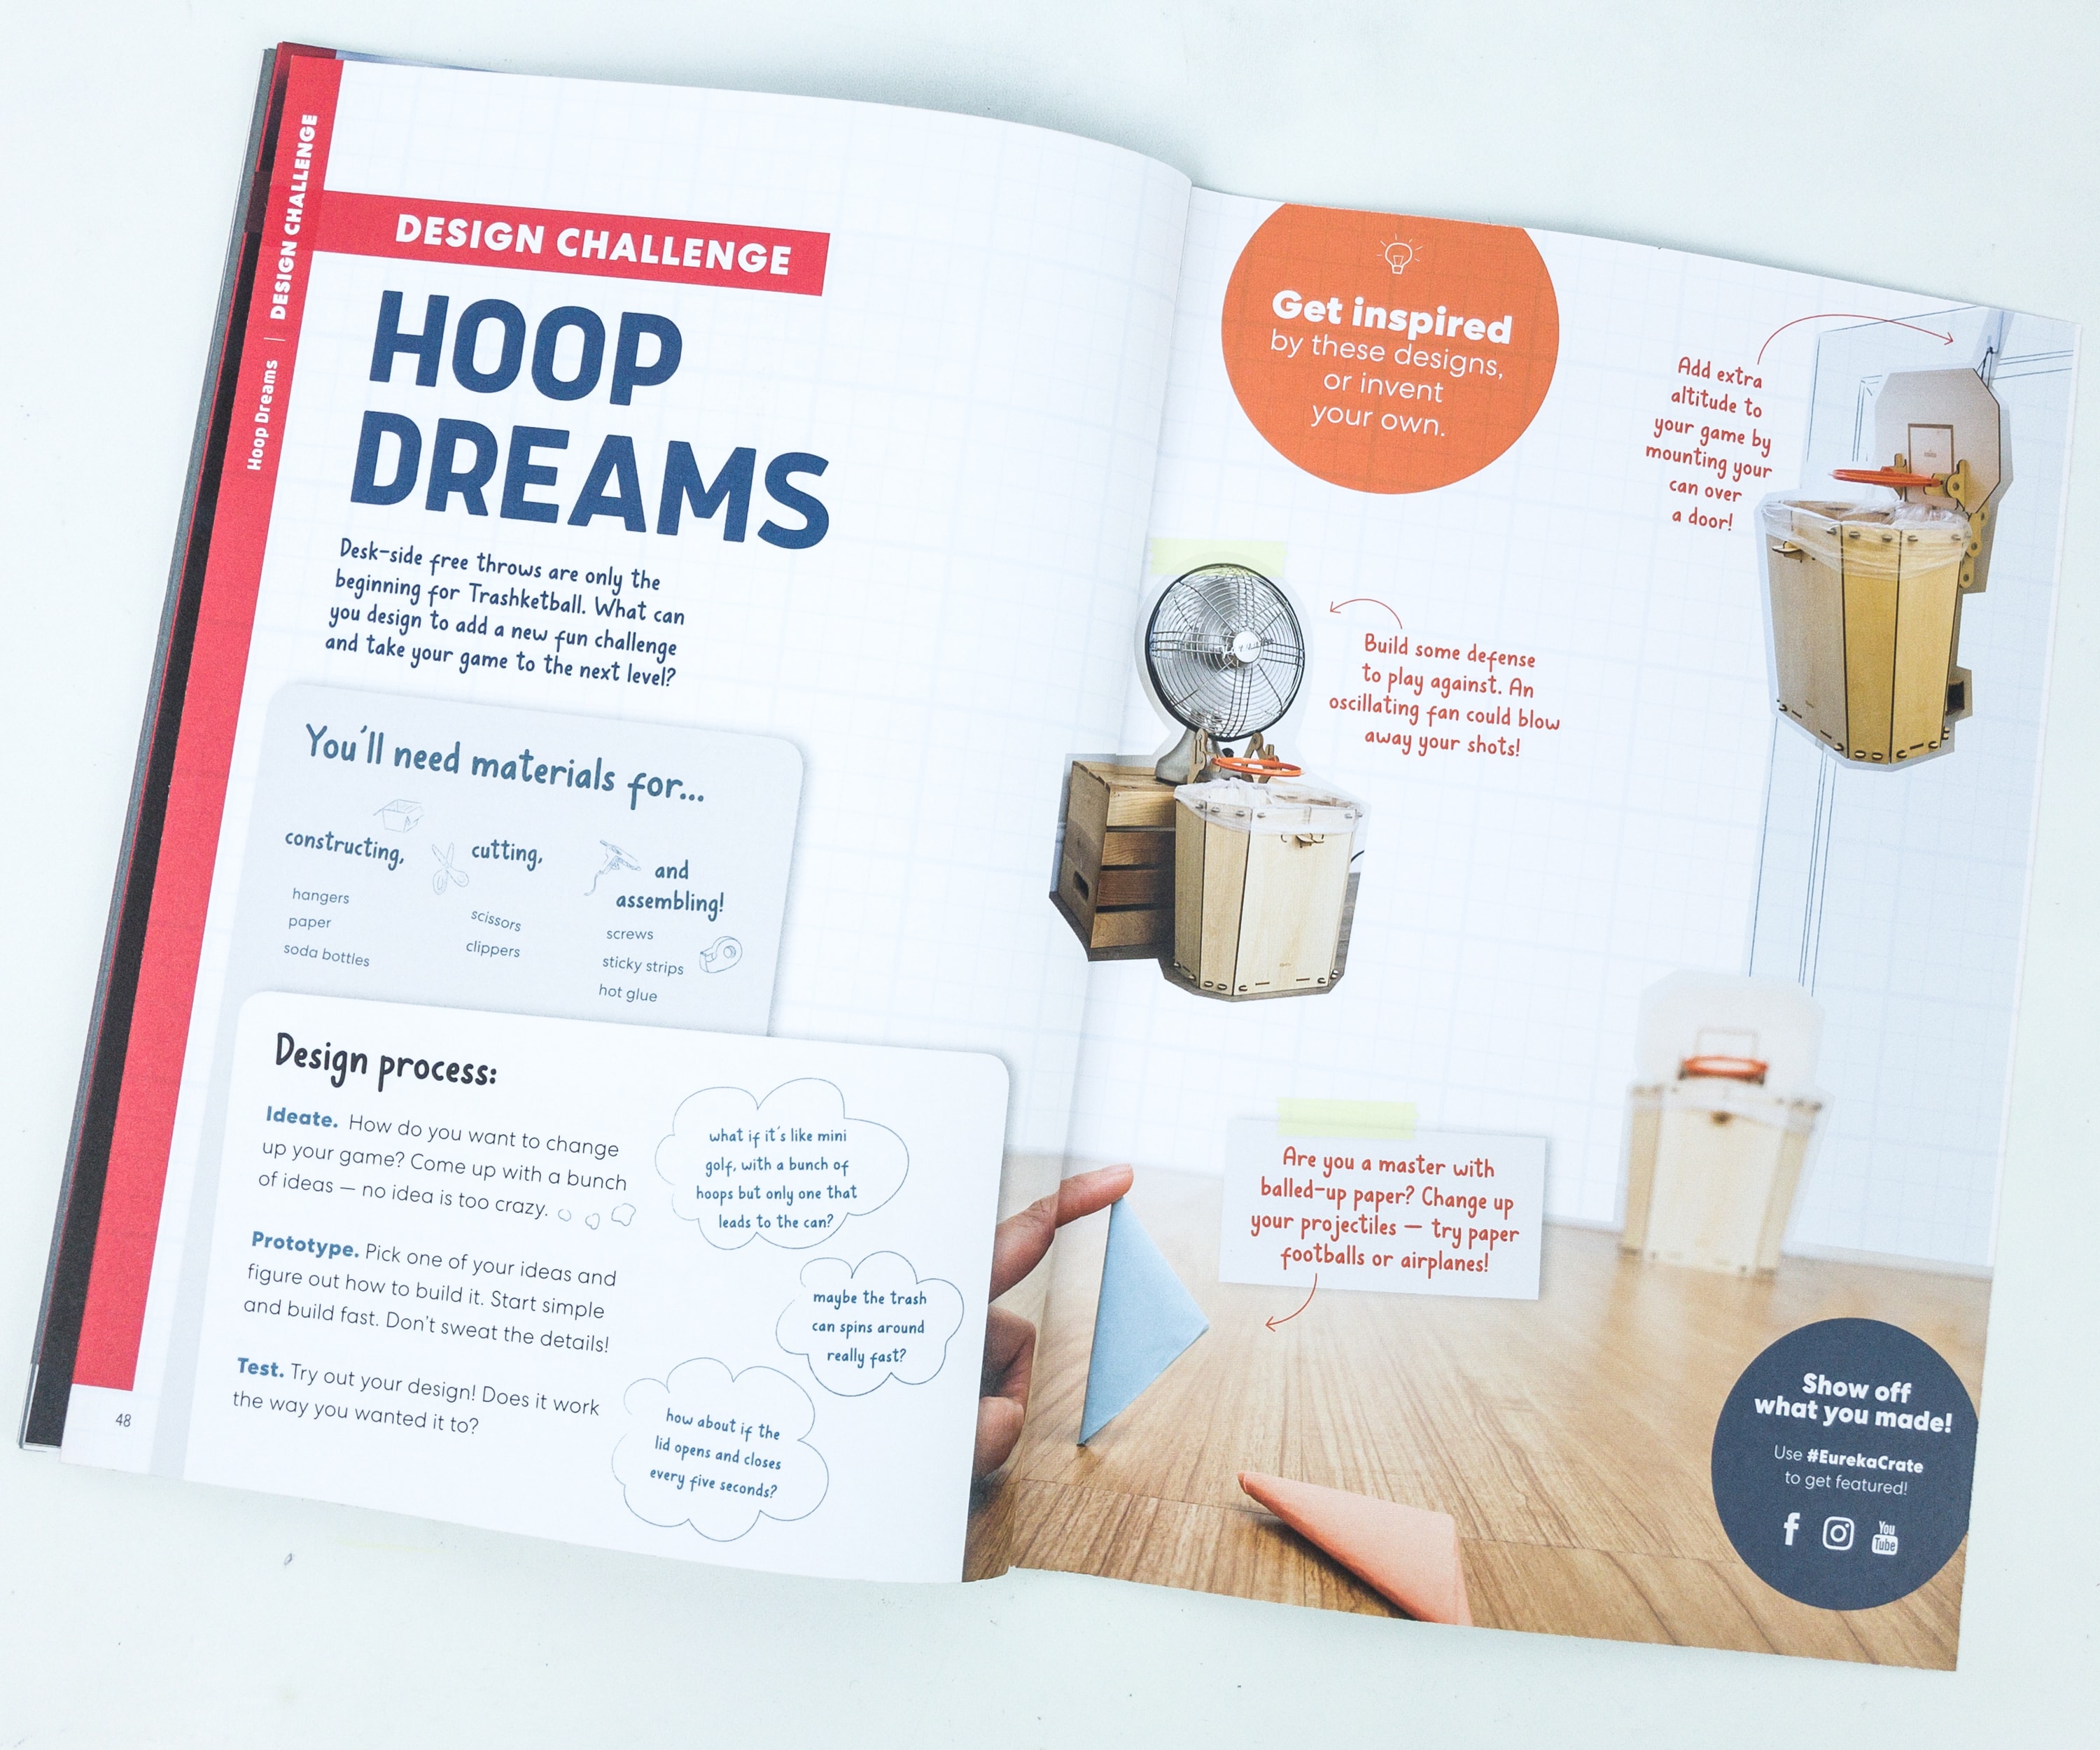
For the Design Challenge, they’re encouraging us to do some hoop dreams. They also included some design inspirations.
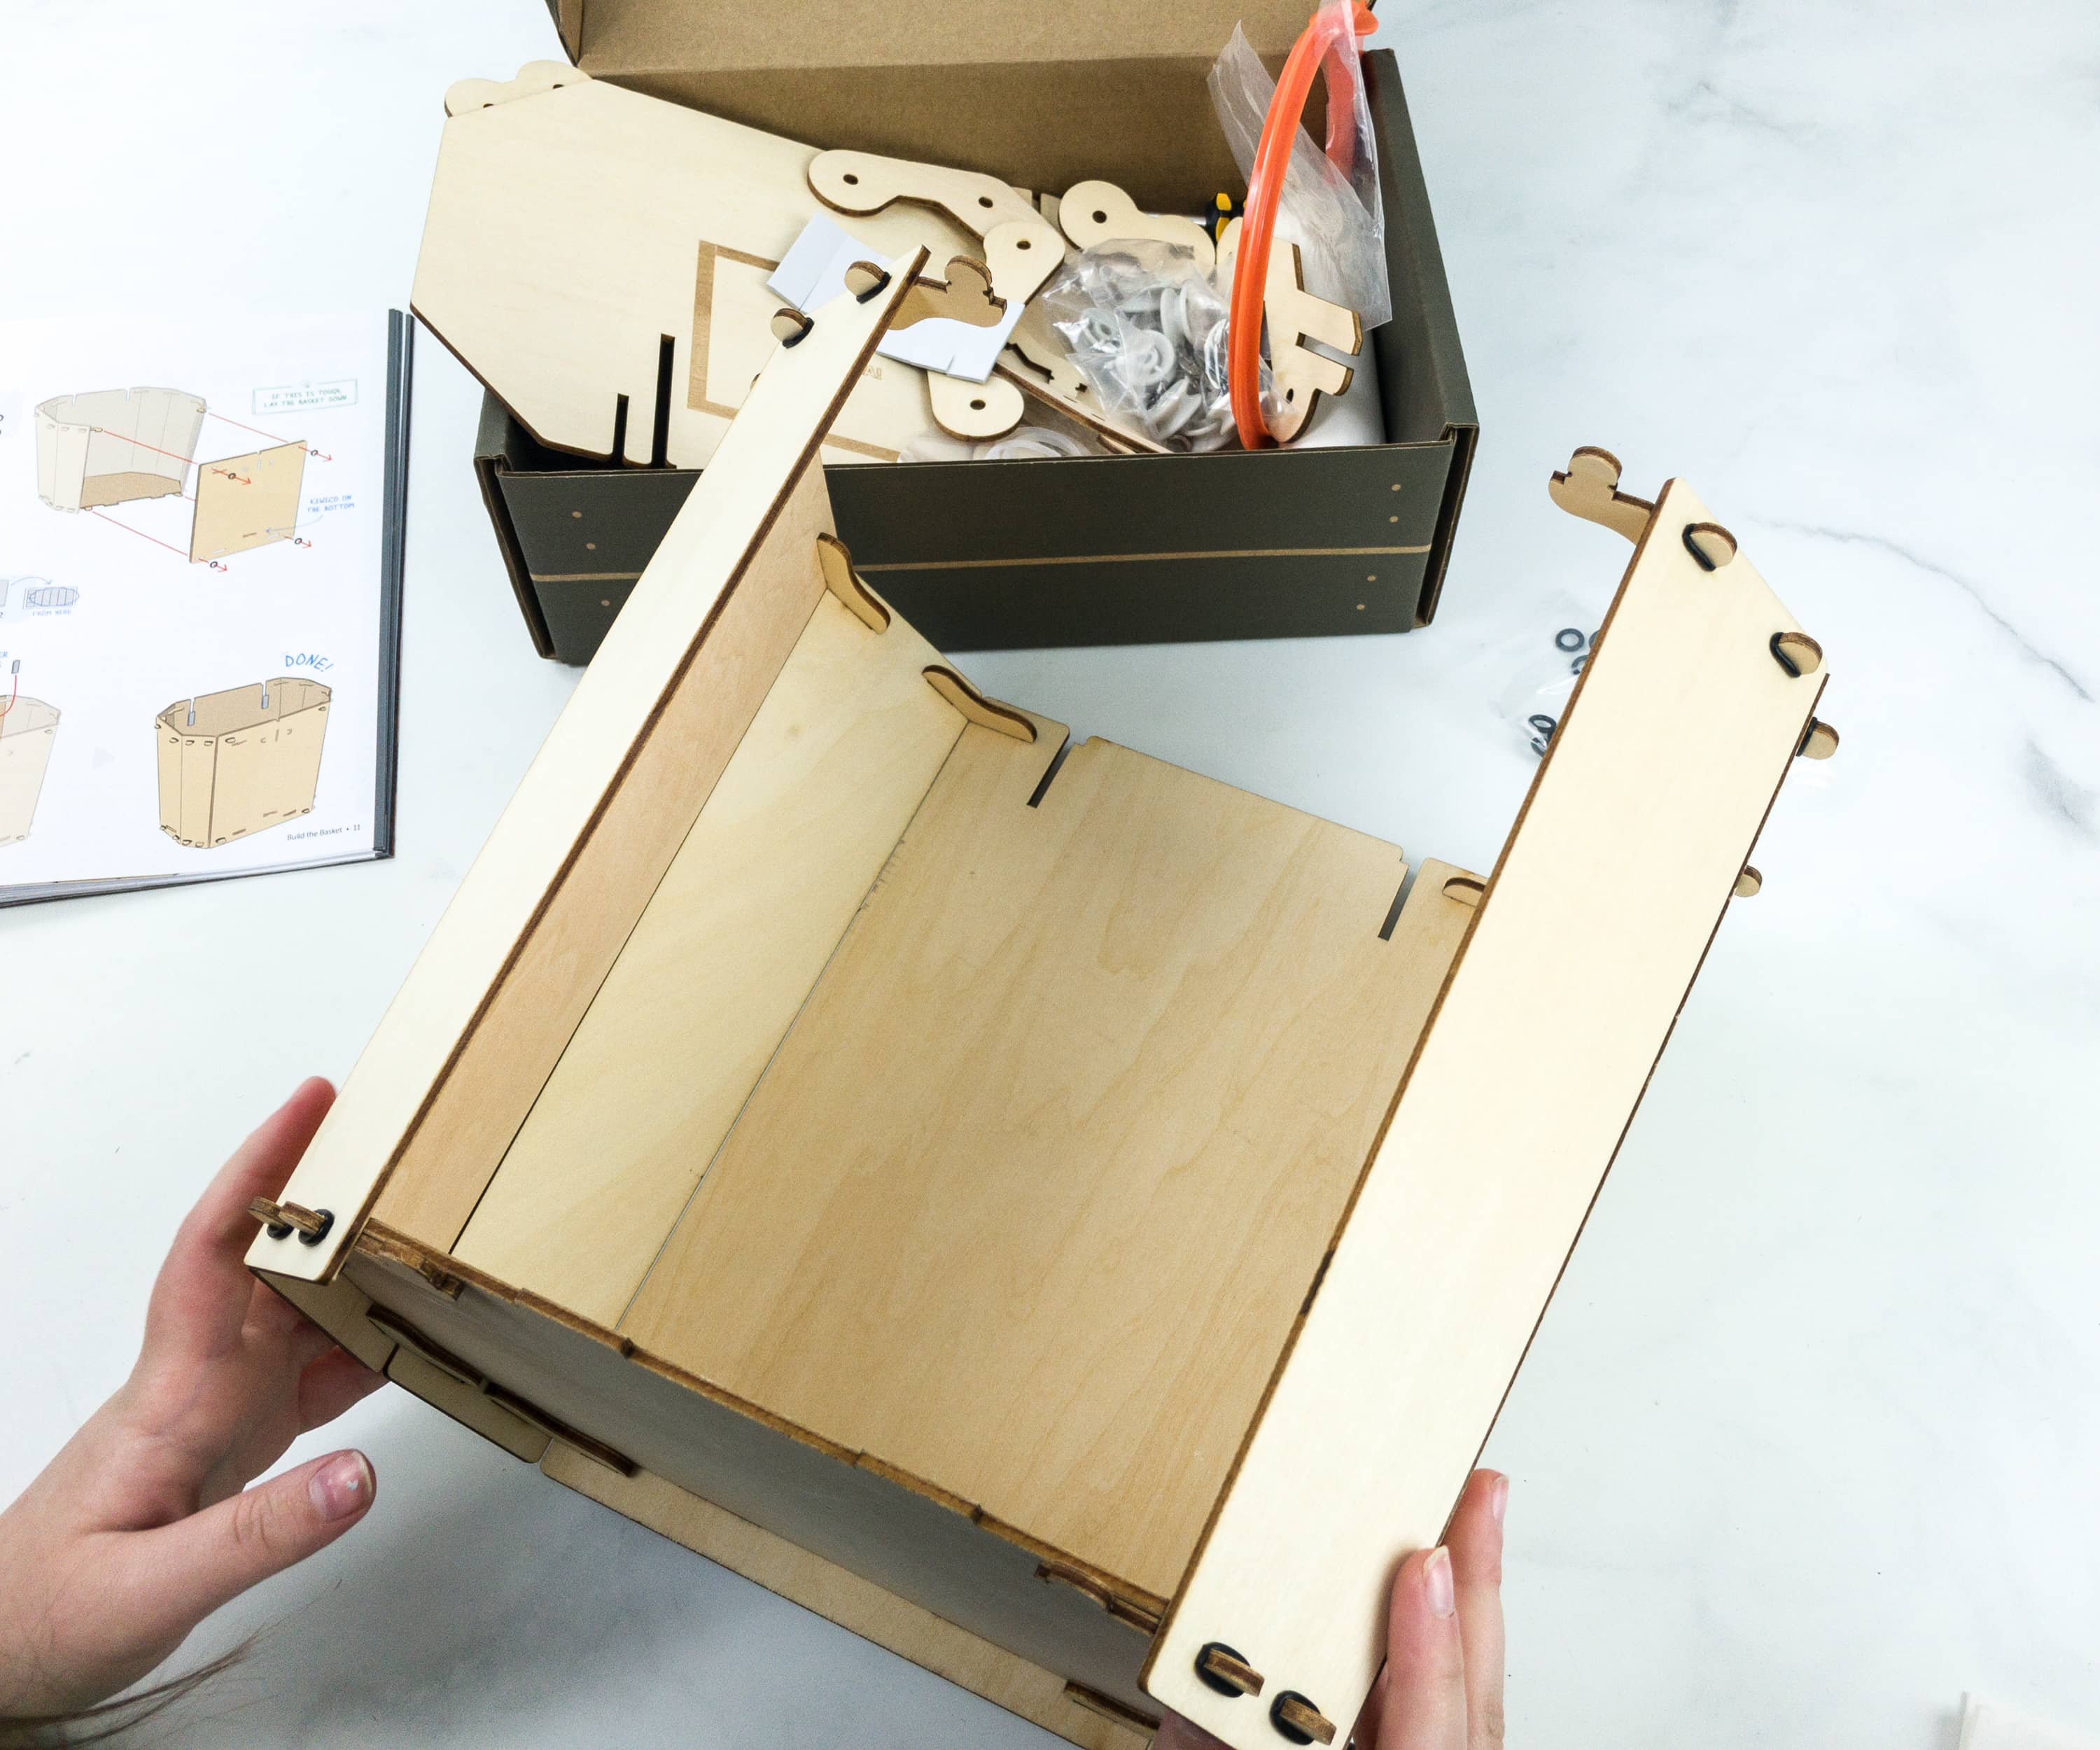
Assembling the basket is much easier as we only copy what’s on the illustration.

There may be more hinges and screws but studying the instructions first will make it less overwhelming.
The latch is important part of the project as it is the mechanism that will open the lid of the trashketball.
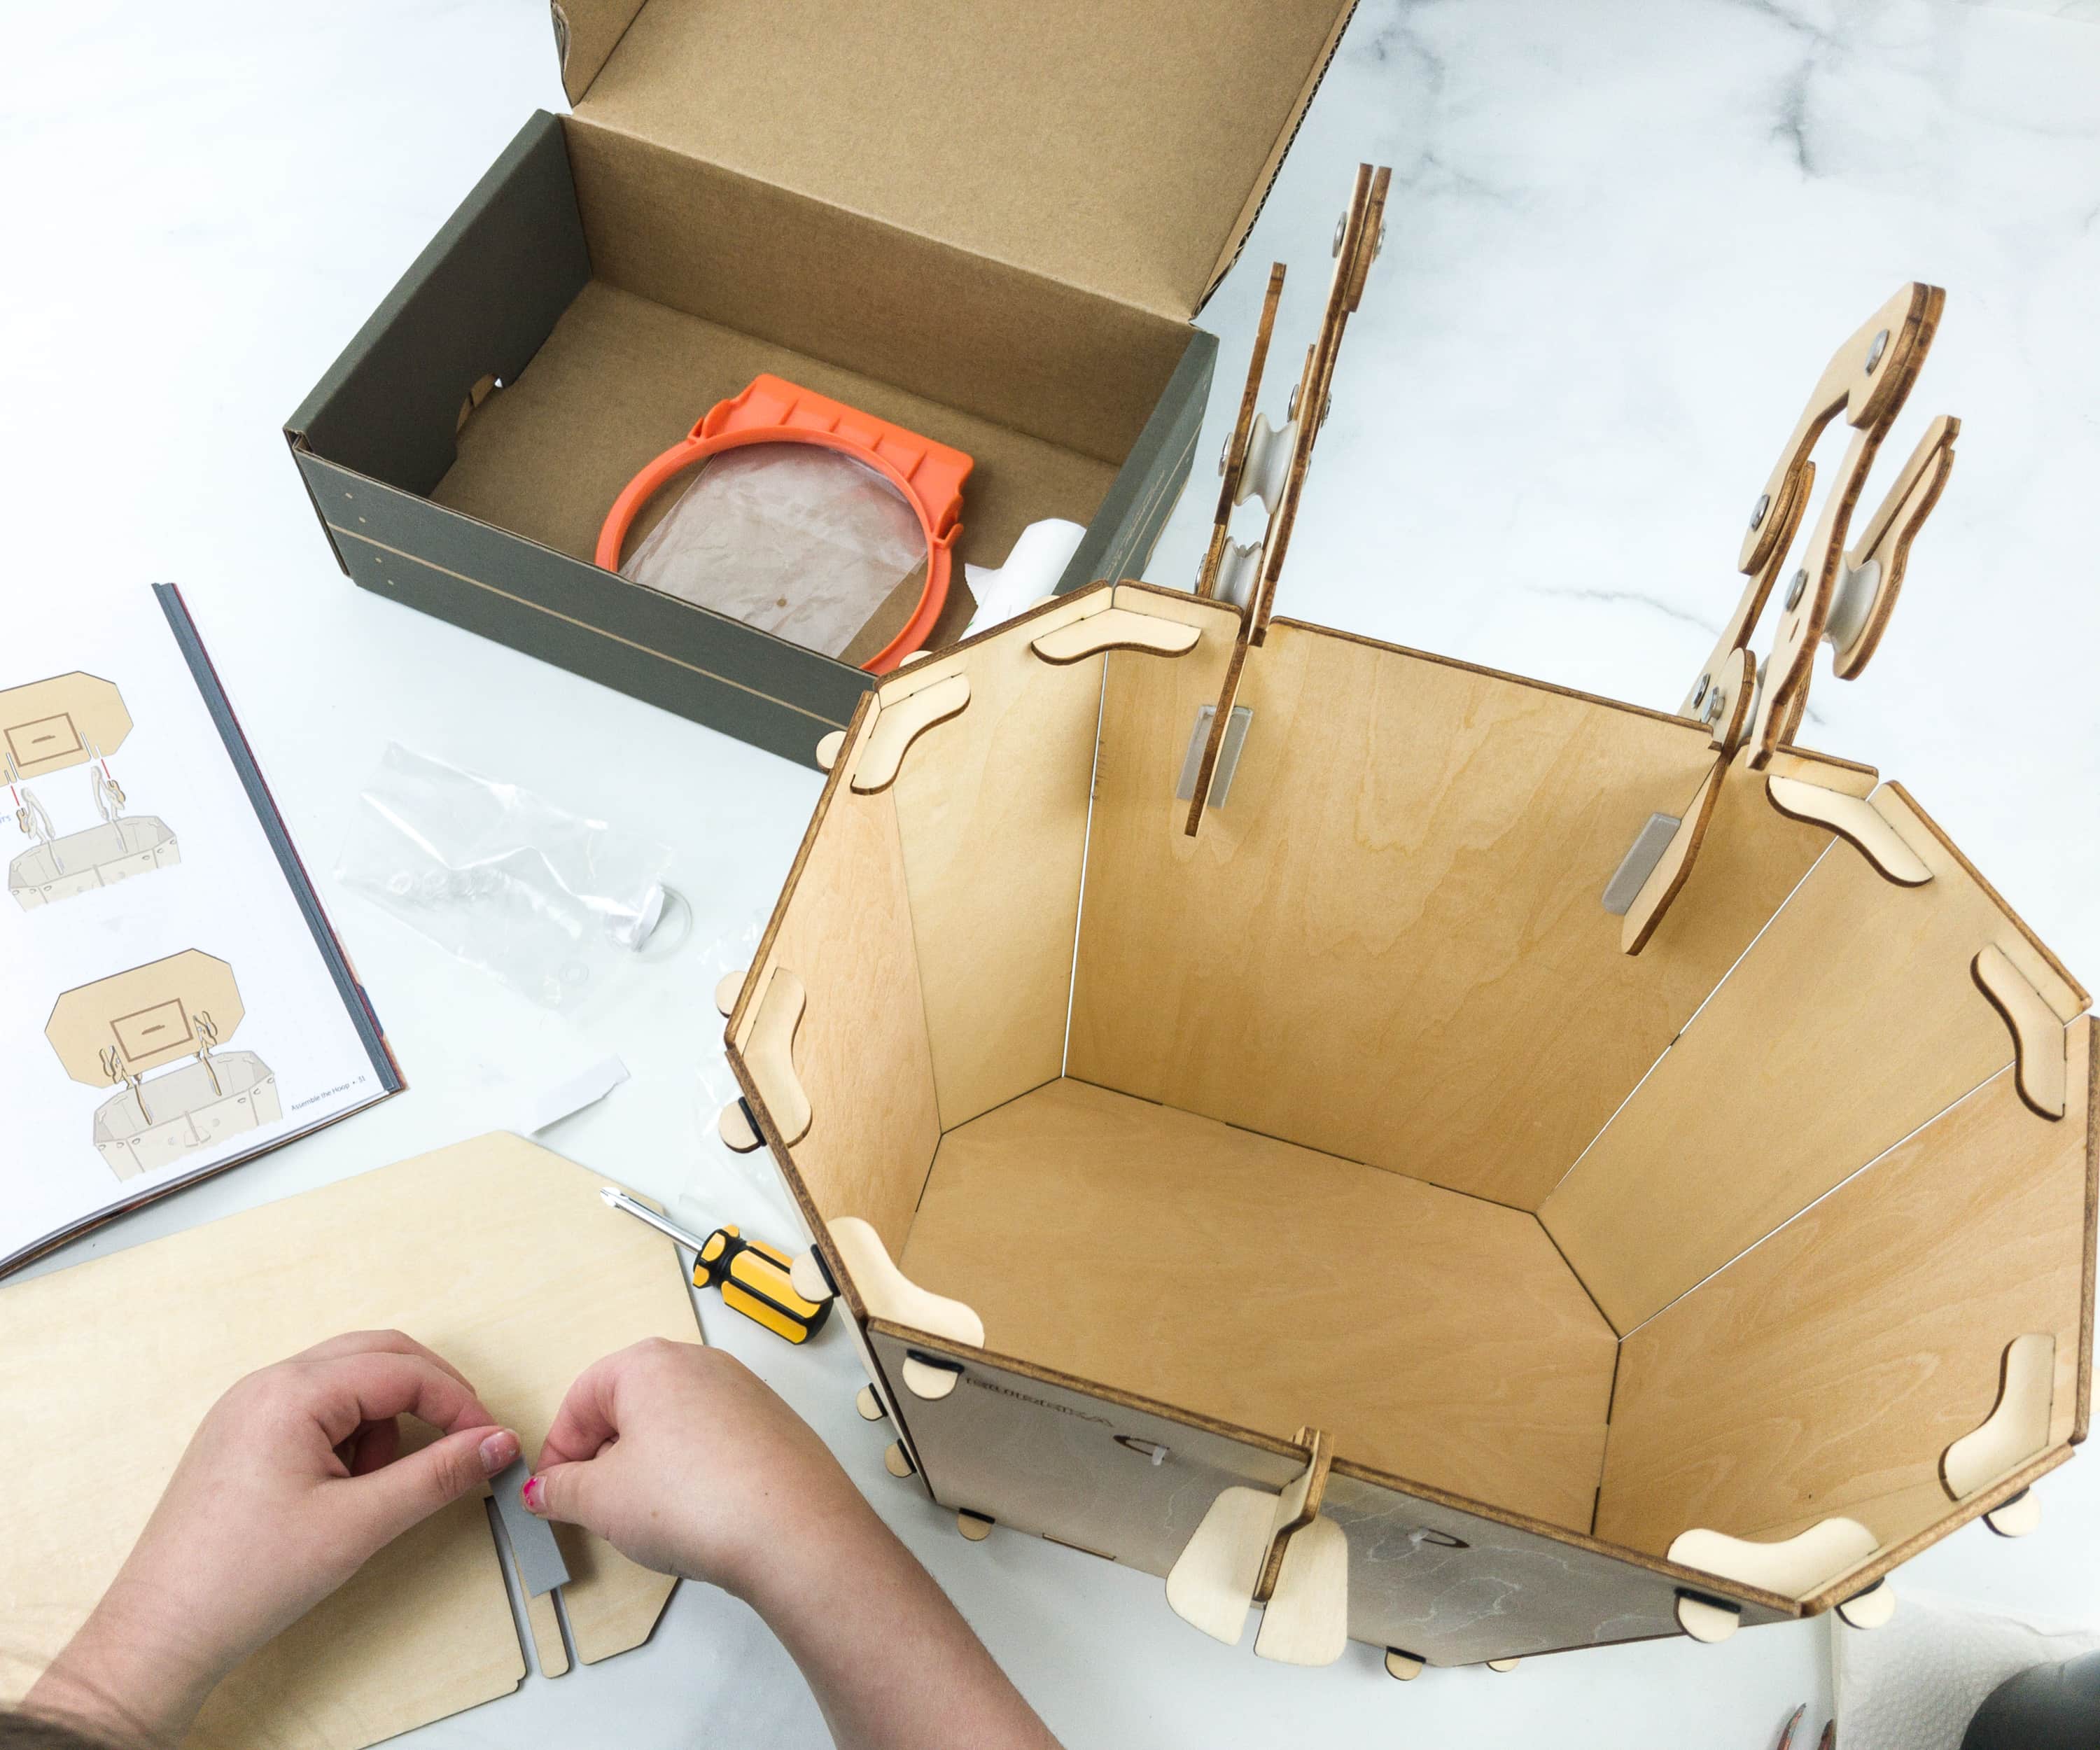
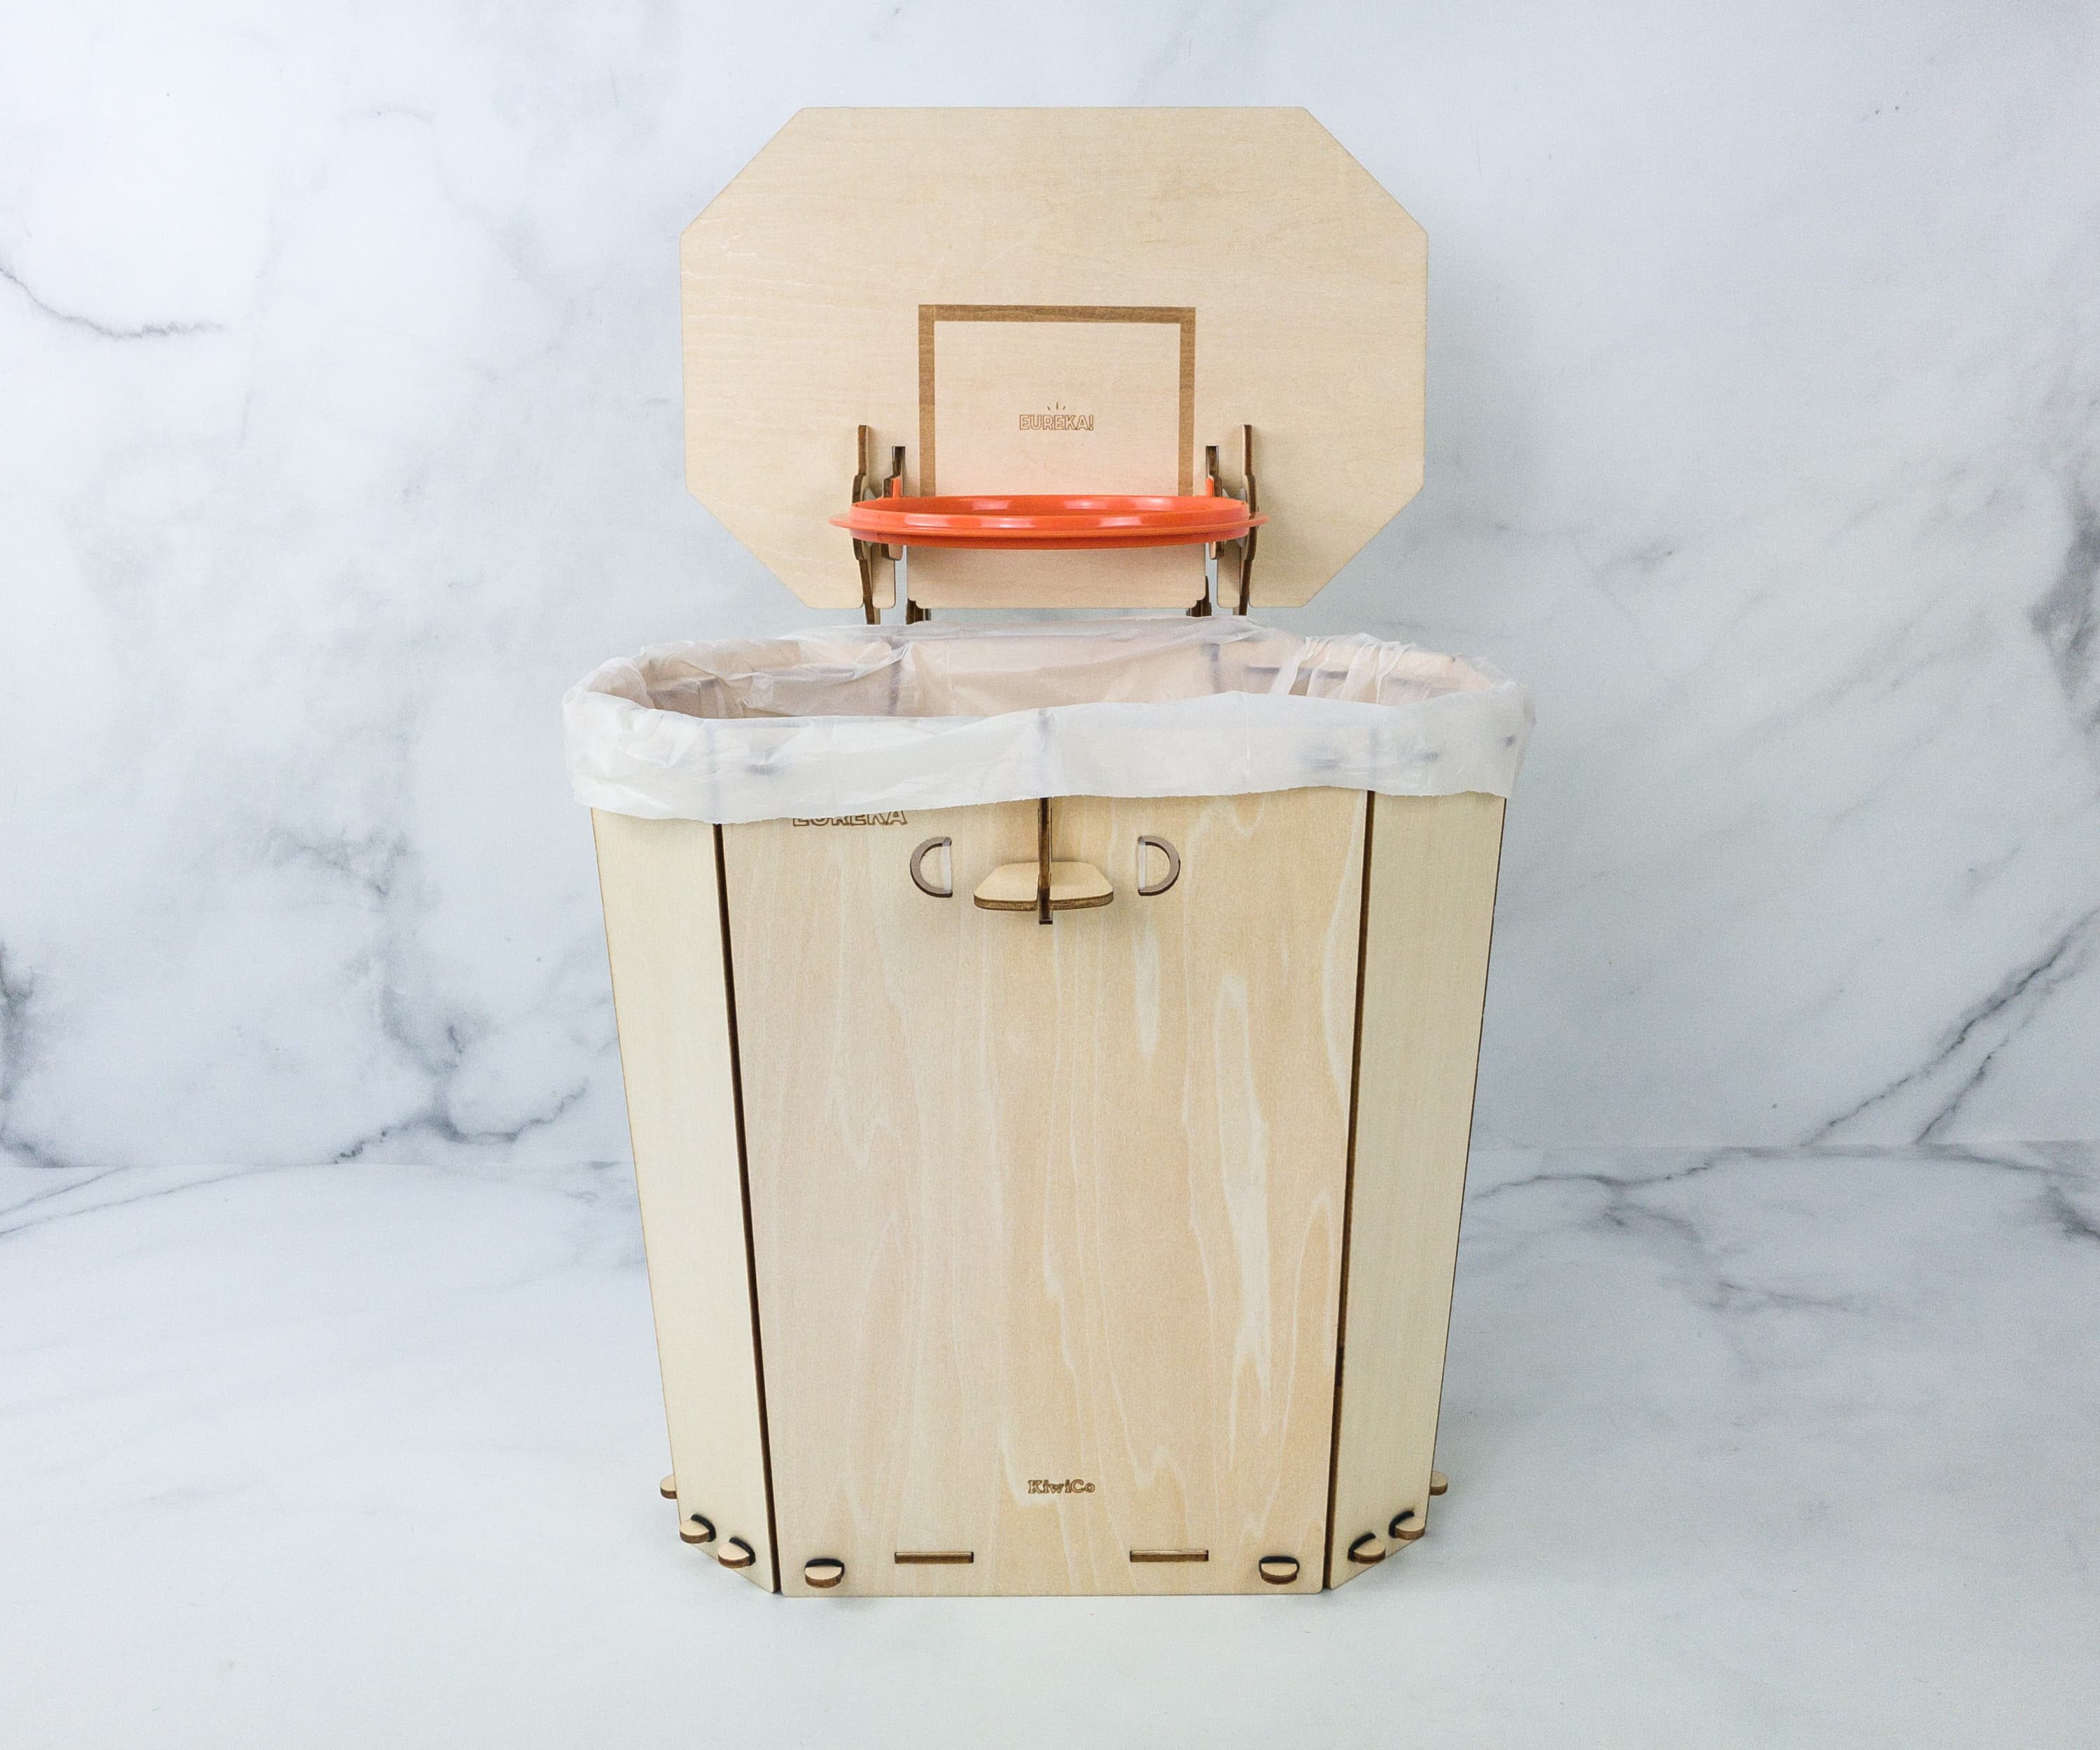
After completing the basket along with the lid, it’s time to add the board!
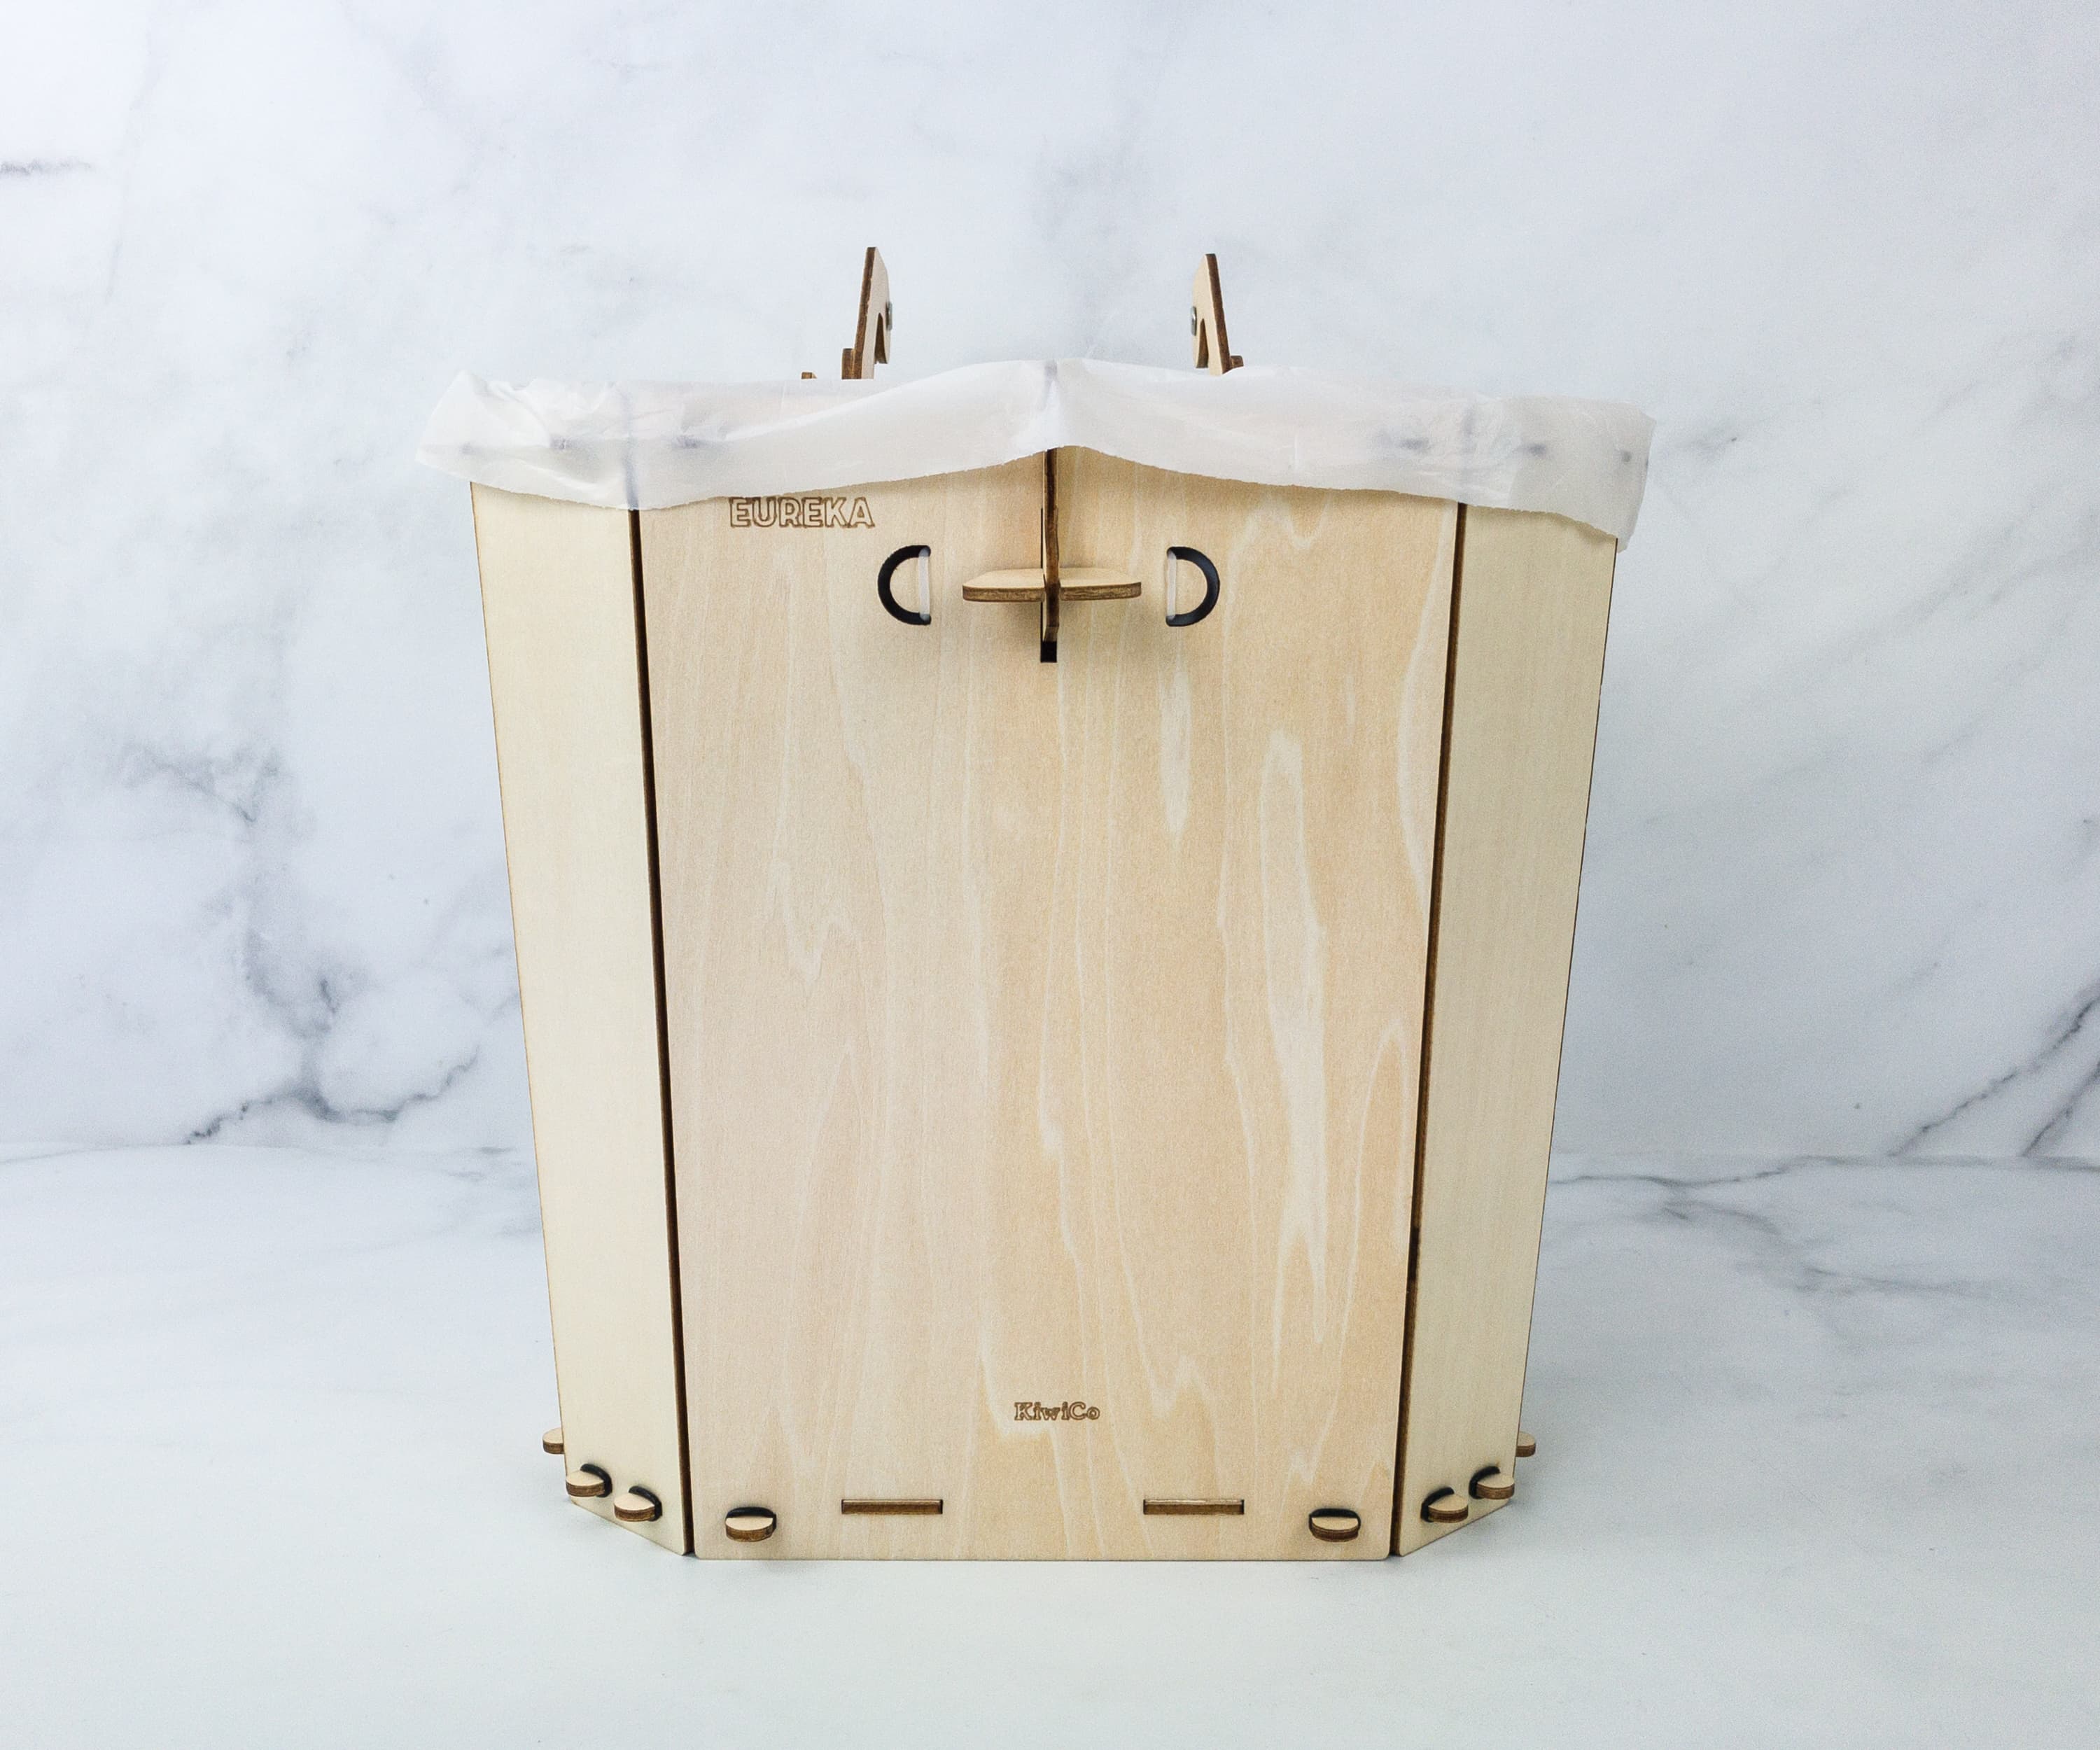
Ous trashketball is looking great!
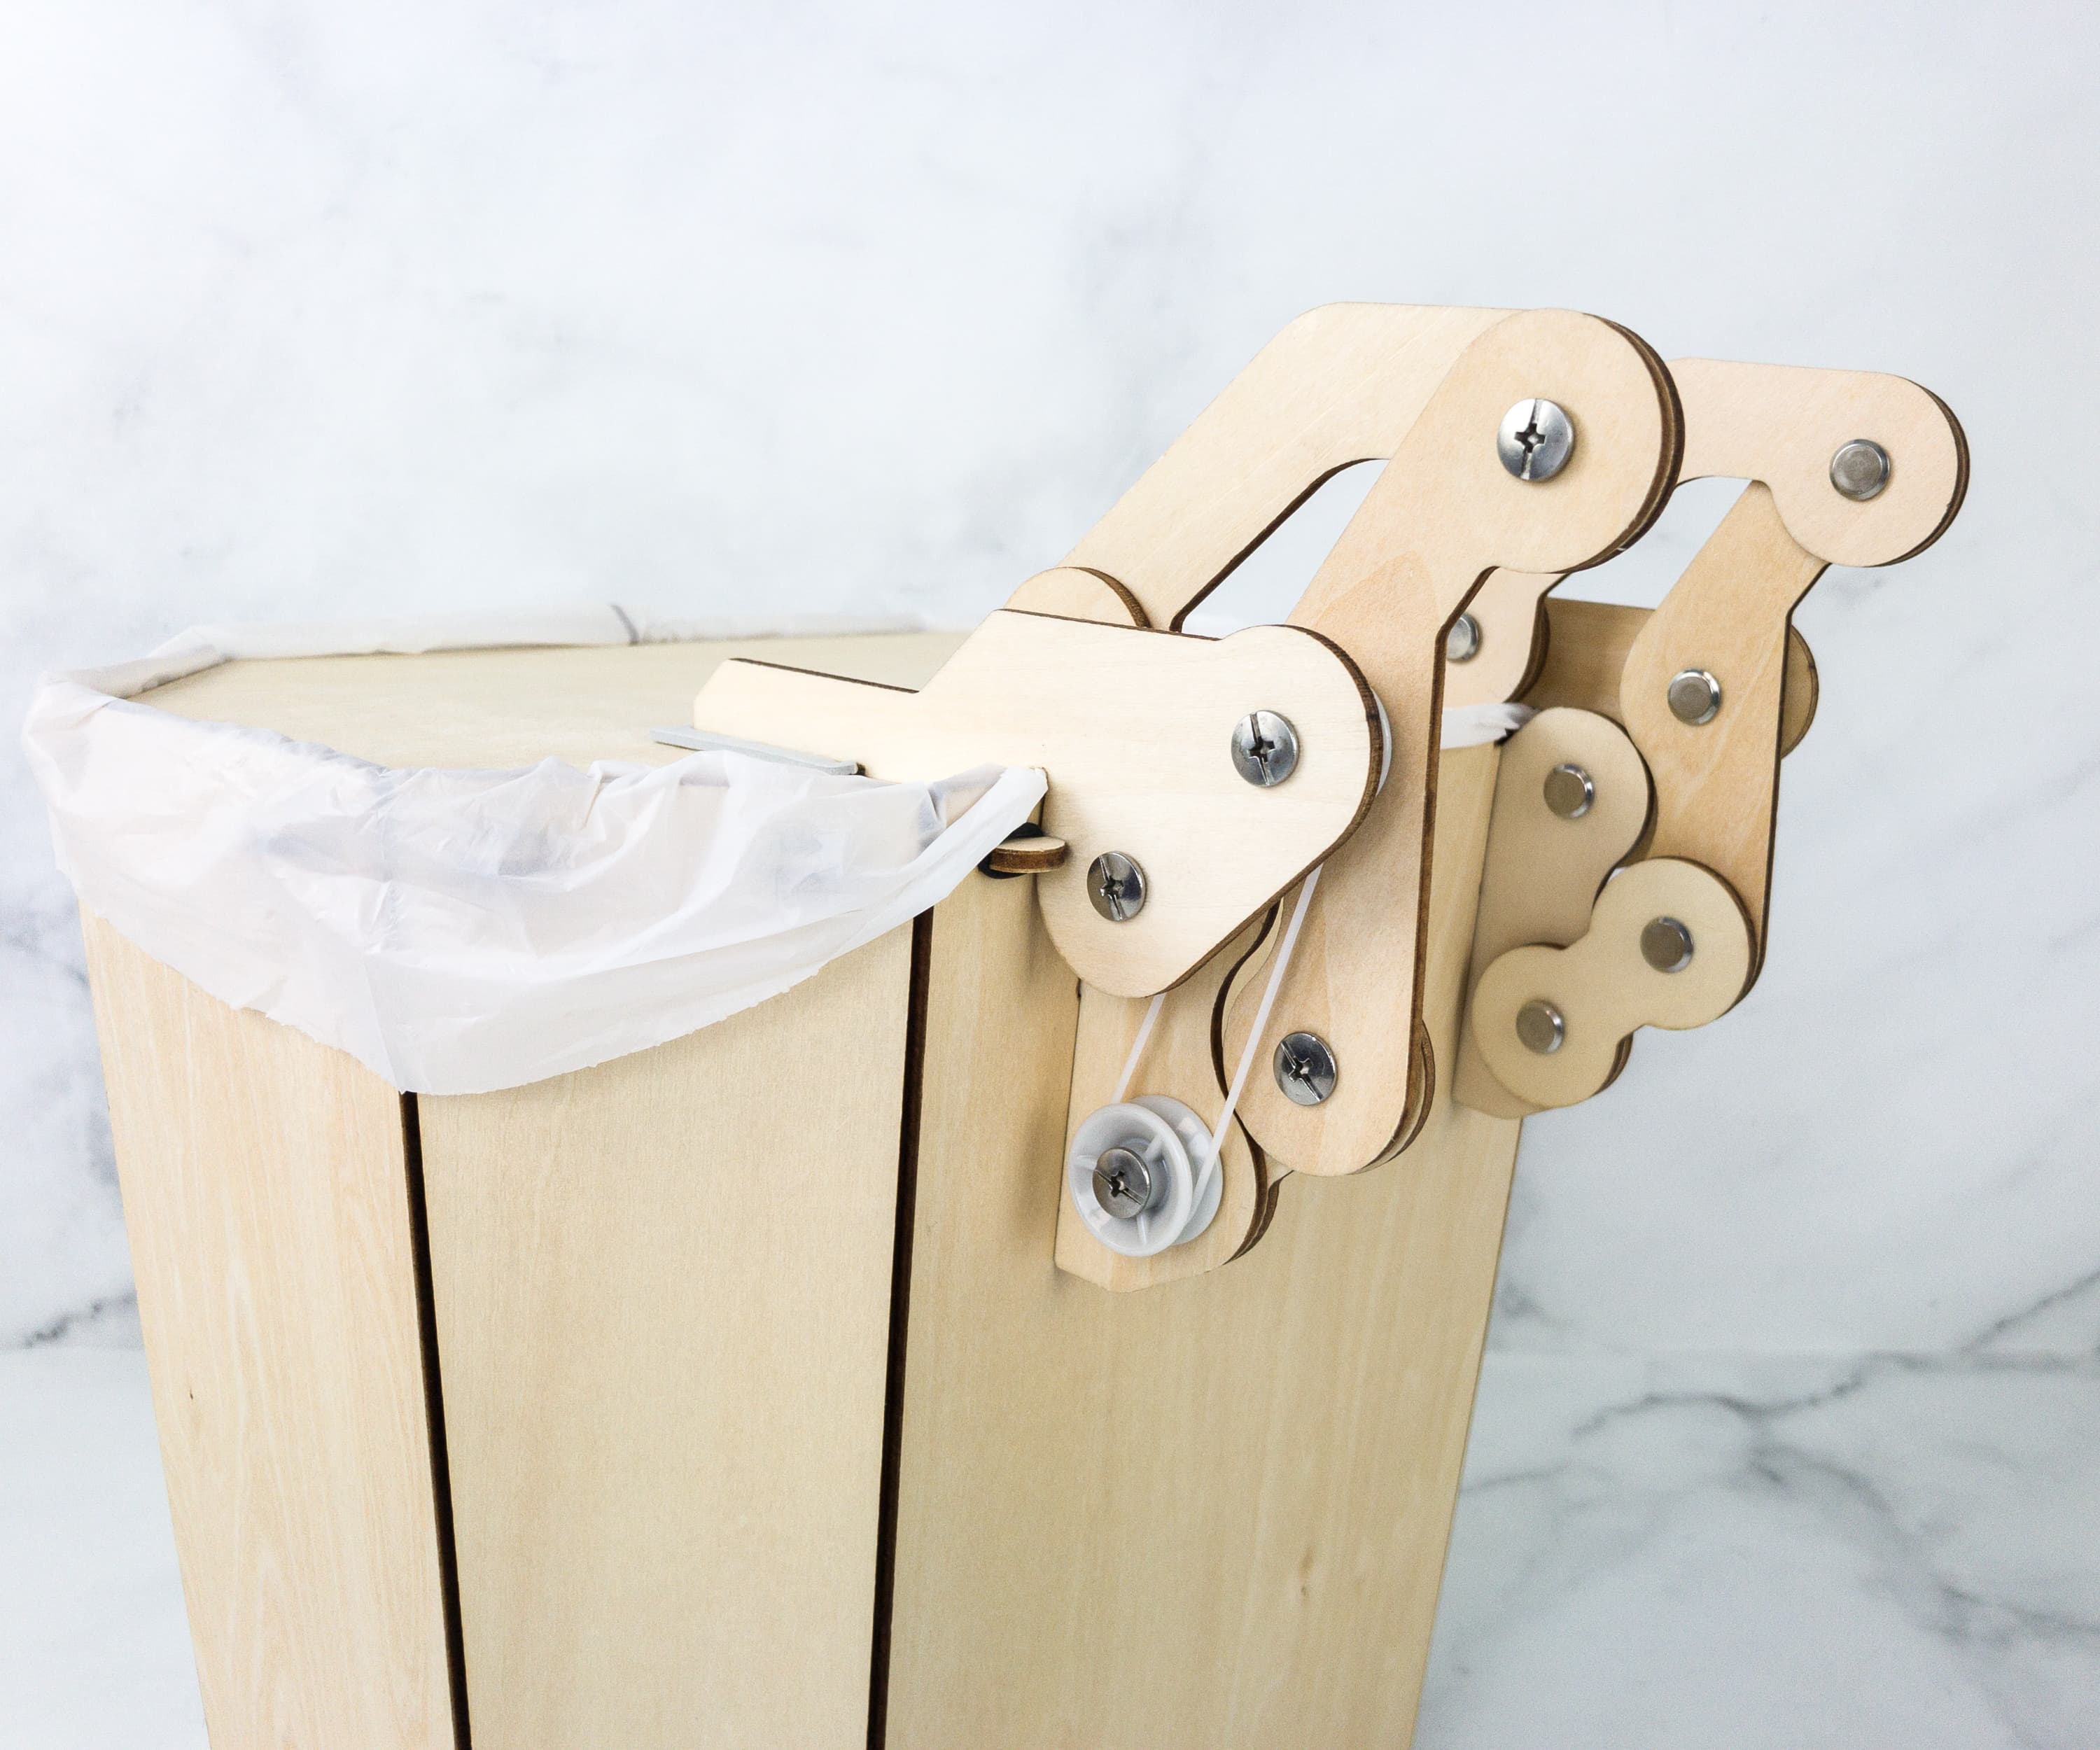
Looking at the mechanism, it looks so cool!
We can’t wait to shoot some hoops in it!
This is a nice way to teach the kids to throw their trash in the right place as well. Clever, isn’t it?
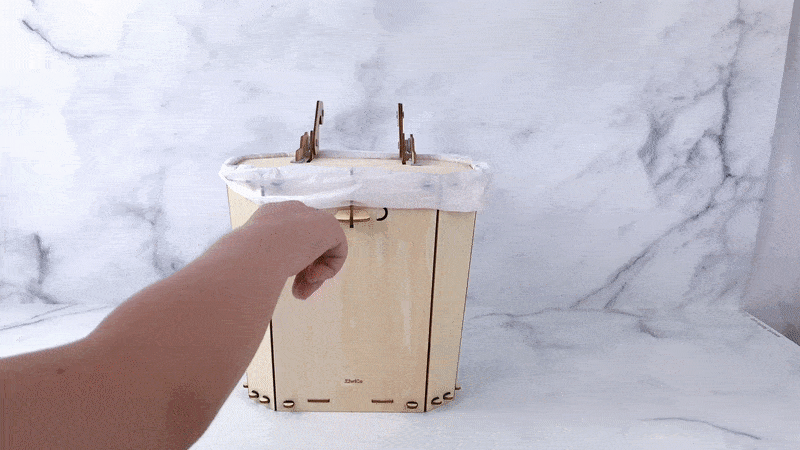
And that’s how it works!
We’re really impressed at how it immediately reacted and opened its lid!
We’re so happy with how the project turned out, and we can’t wait to play with it. It can be used after as a paper trashcan.
Fun and learning always come hand in hand in this crate! Eureka Crate never fails to amuse us with the projects they come up with which are really enjoyable to do and use. This trashketball is definitely a great project, it teaches kids about accuracy and parabola and also reminds them to keep their trash in the right place. The booklet is also a helpful learning tool as it includes fun and useful facts, from the history of the item, up to the science behind each project, plus design challenges! The box is ideal for kids and adults alike!
What do you think of this month’s Eureka Crate?


Comments