Eureka Crate is a monthly STEM and maker subscription box that teaches kids and adults how to apply principles of science and math to make awesome things you will love to use every day – from an articulated desk lamp to an electric pencil sharpener to a wooden ukulele. Every Eureka Crate includes an engineering project, detailed step-by-step instructions, everything you need to complete the project, a Maker’s Guide that explains all the design, process, and engineering behind the design, plus a design challenge to take your project knowledge to the next level!
DEAL: Save 30% on your first month! Just use this link to subscribe, no coupon code required! You can also use the same link to save 30% on the first month of any other KiwiCo crate – just check out this page to discover which box is right for you.
Eureka Crate is KiwiCo’s latest subscription! Eureka Crate is designed for ages 14-104. If you’re ready to graduate from KiwiCo’s other boxes or just can’t get enough (or are just too old for their other subscriptions), you’ll love this box, which is designed to create a hands-on learning experience using everyday items to delve deeply into the science and math principles they embody, along with the design process of the month’s project.
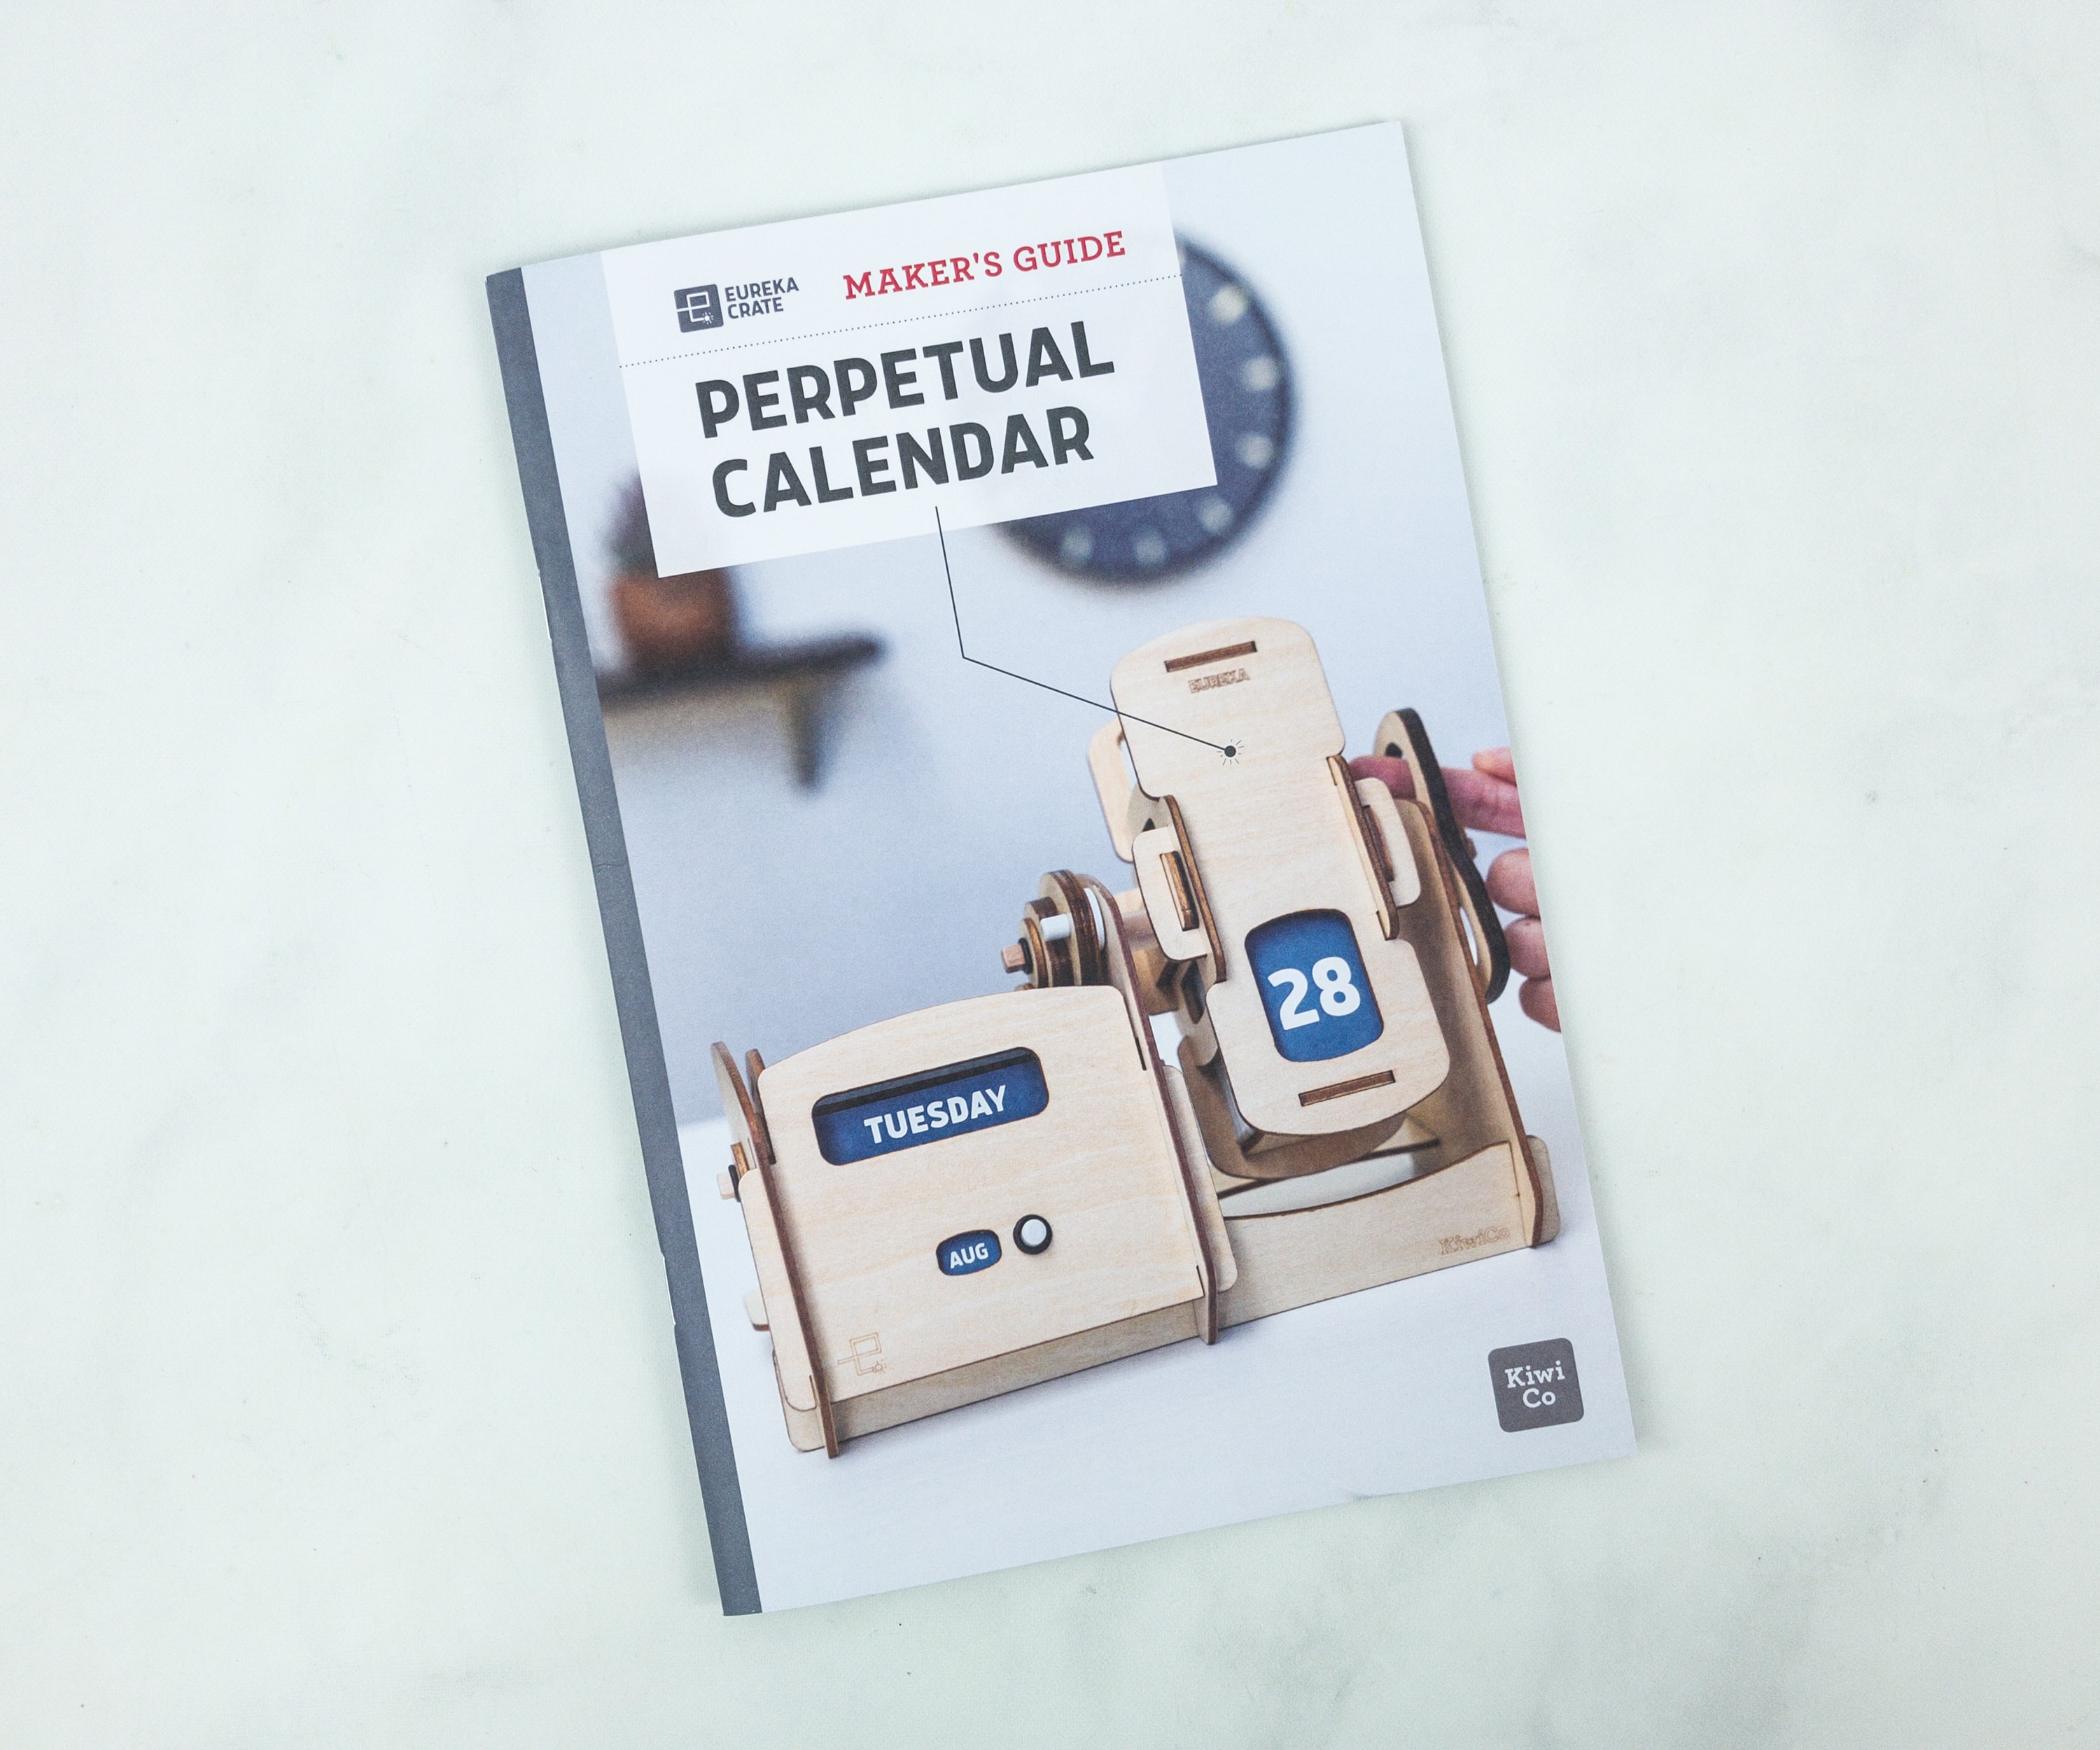
Eureka Crate Maker’s Guide
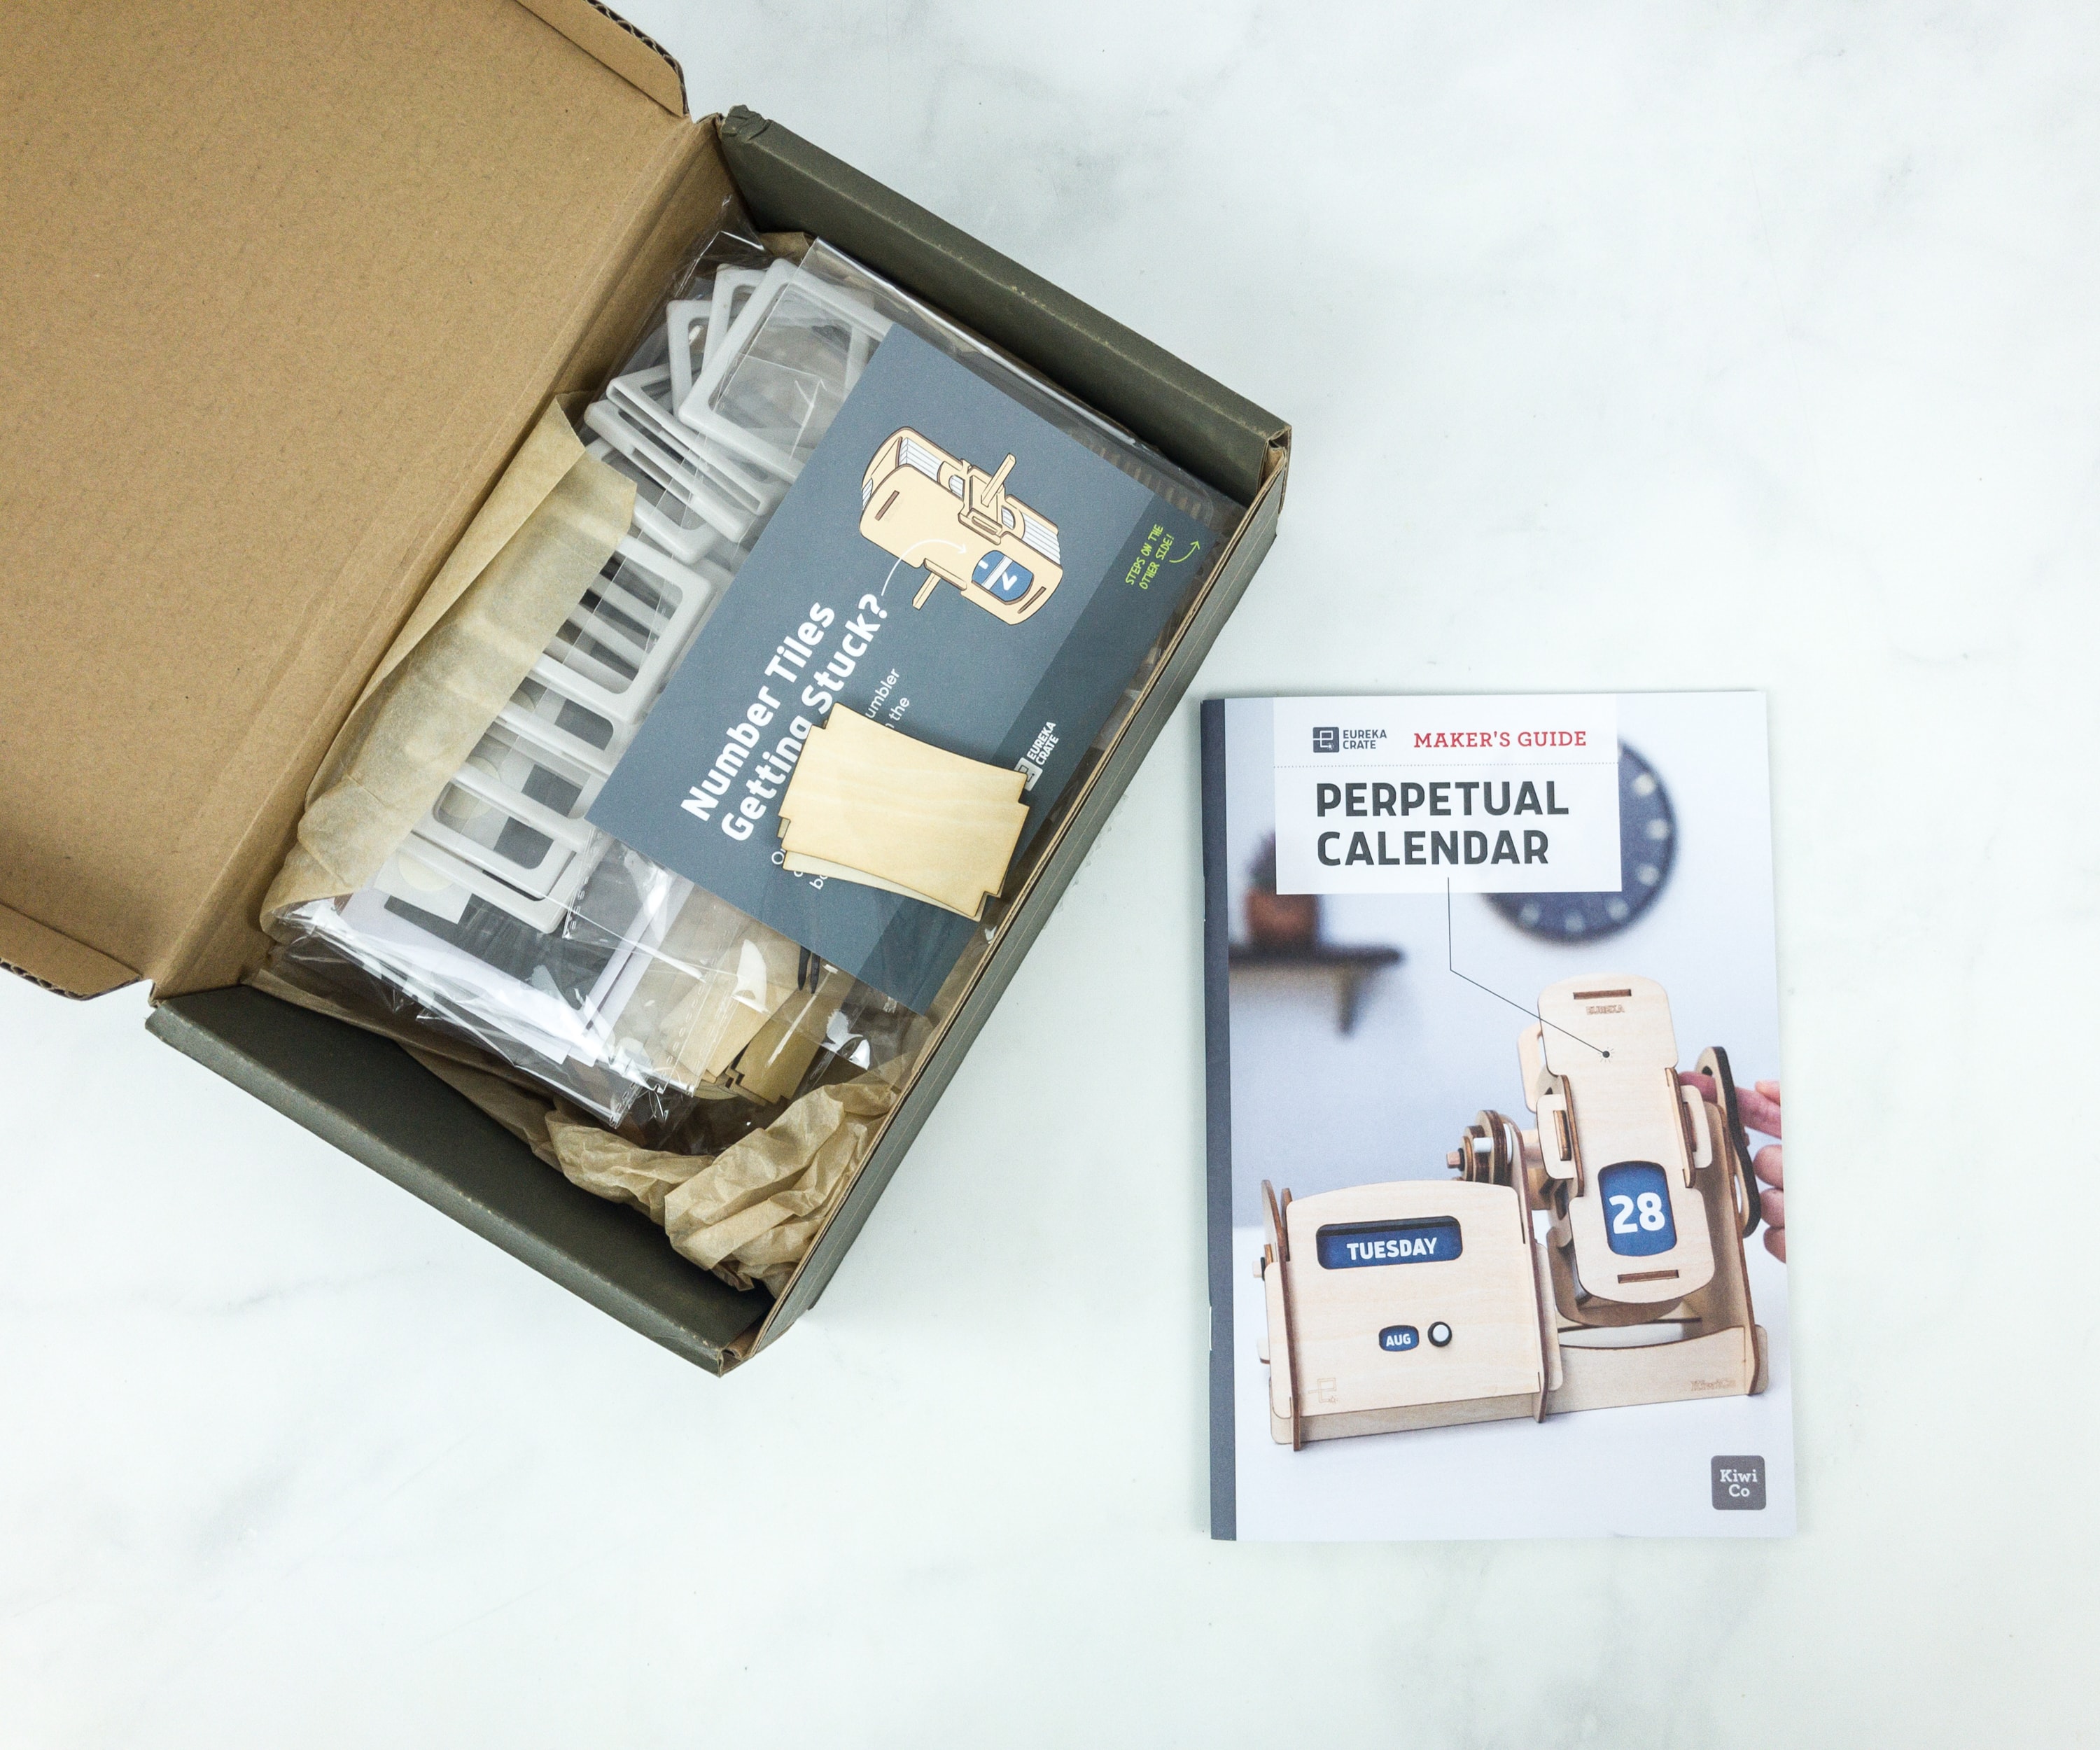
Like the other crates from KiwiCo, Eureka Crate includes a booklet.
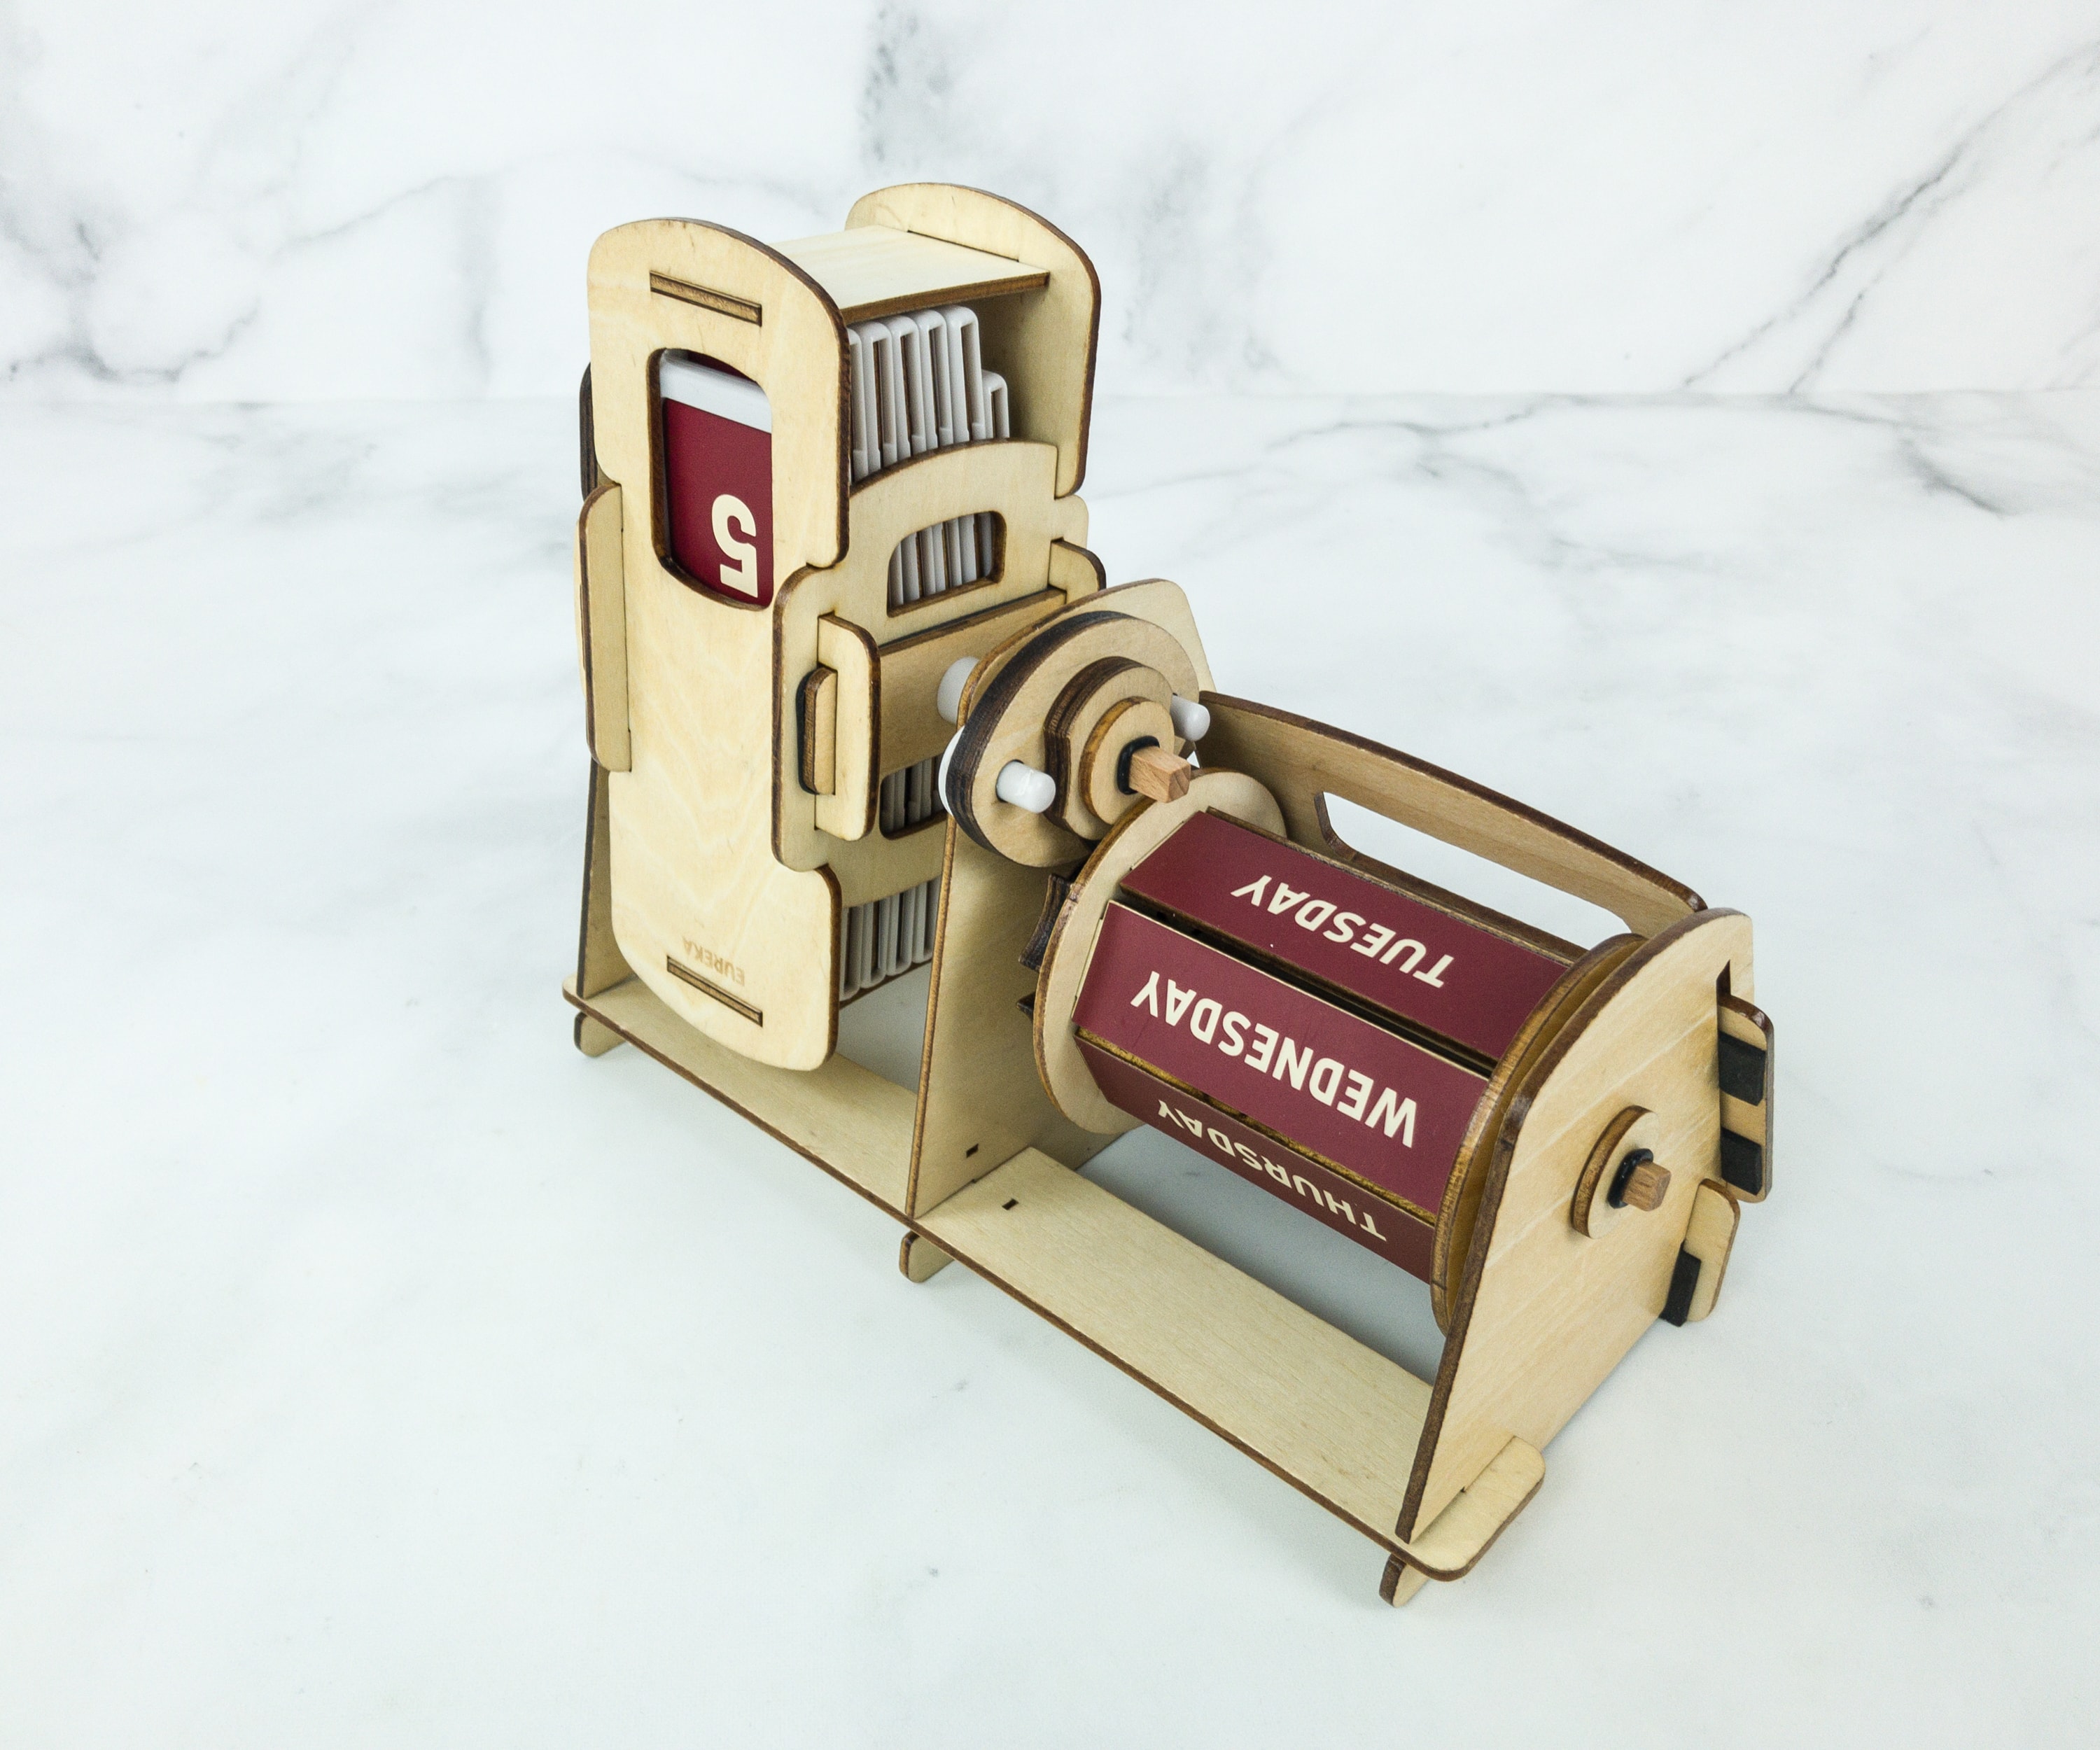
Perpetual Calendar
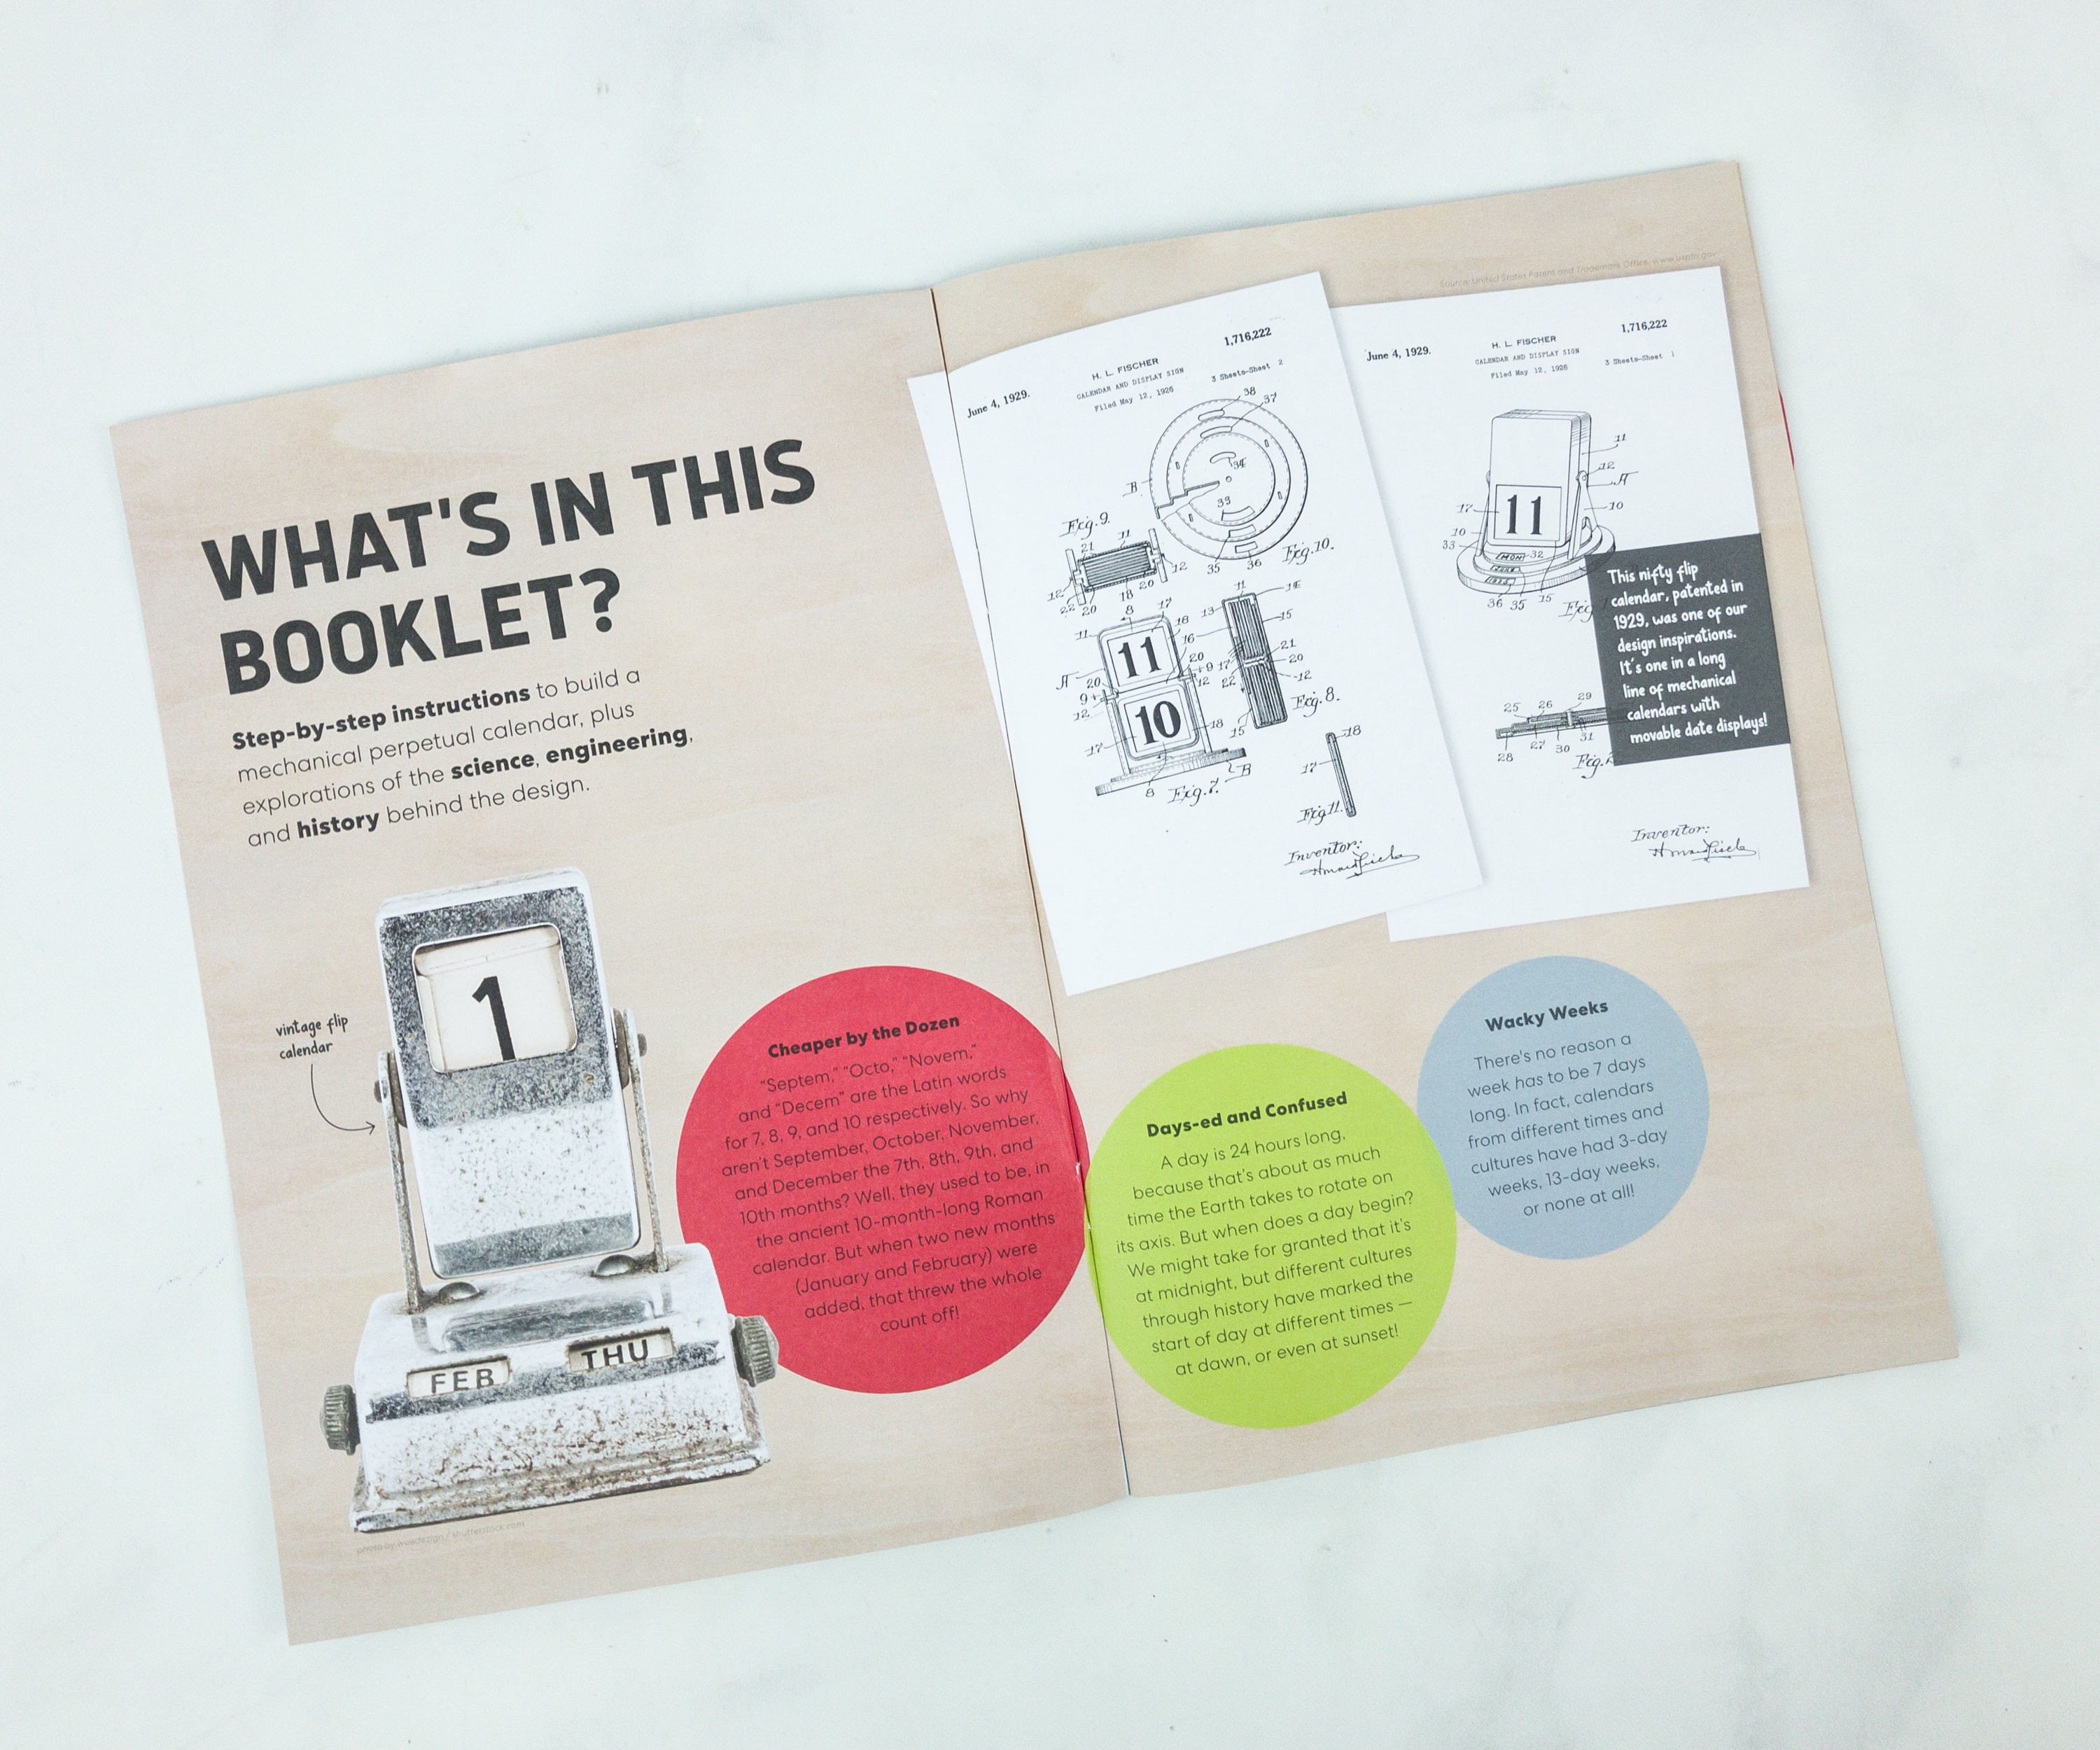
We are lucky we have it easy. Our ancestors took years to make a calendar that works. The introduction welcomed us with fast facts and illustrations.
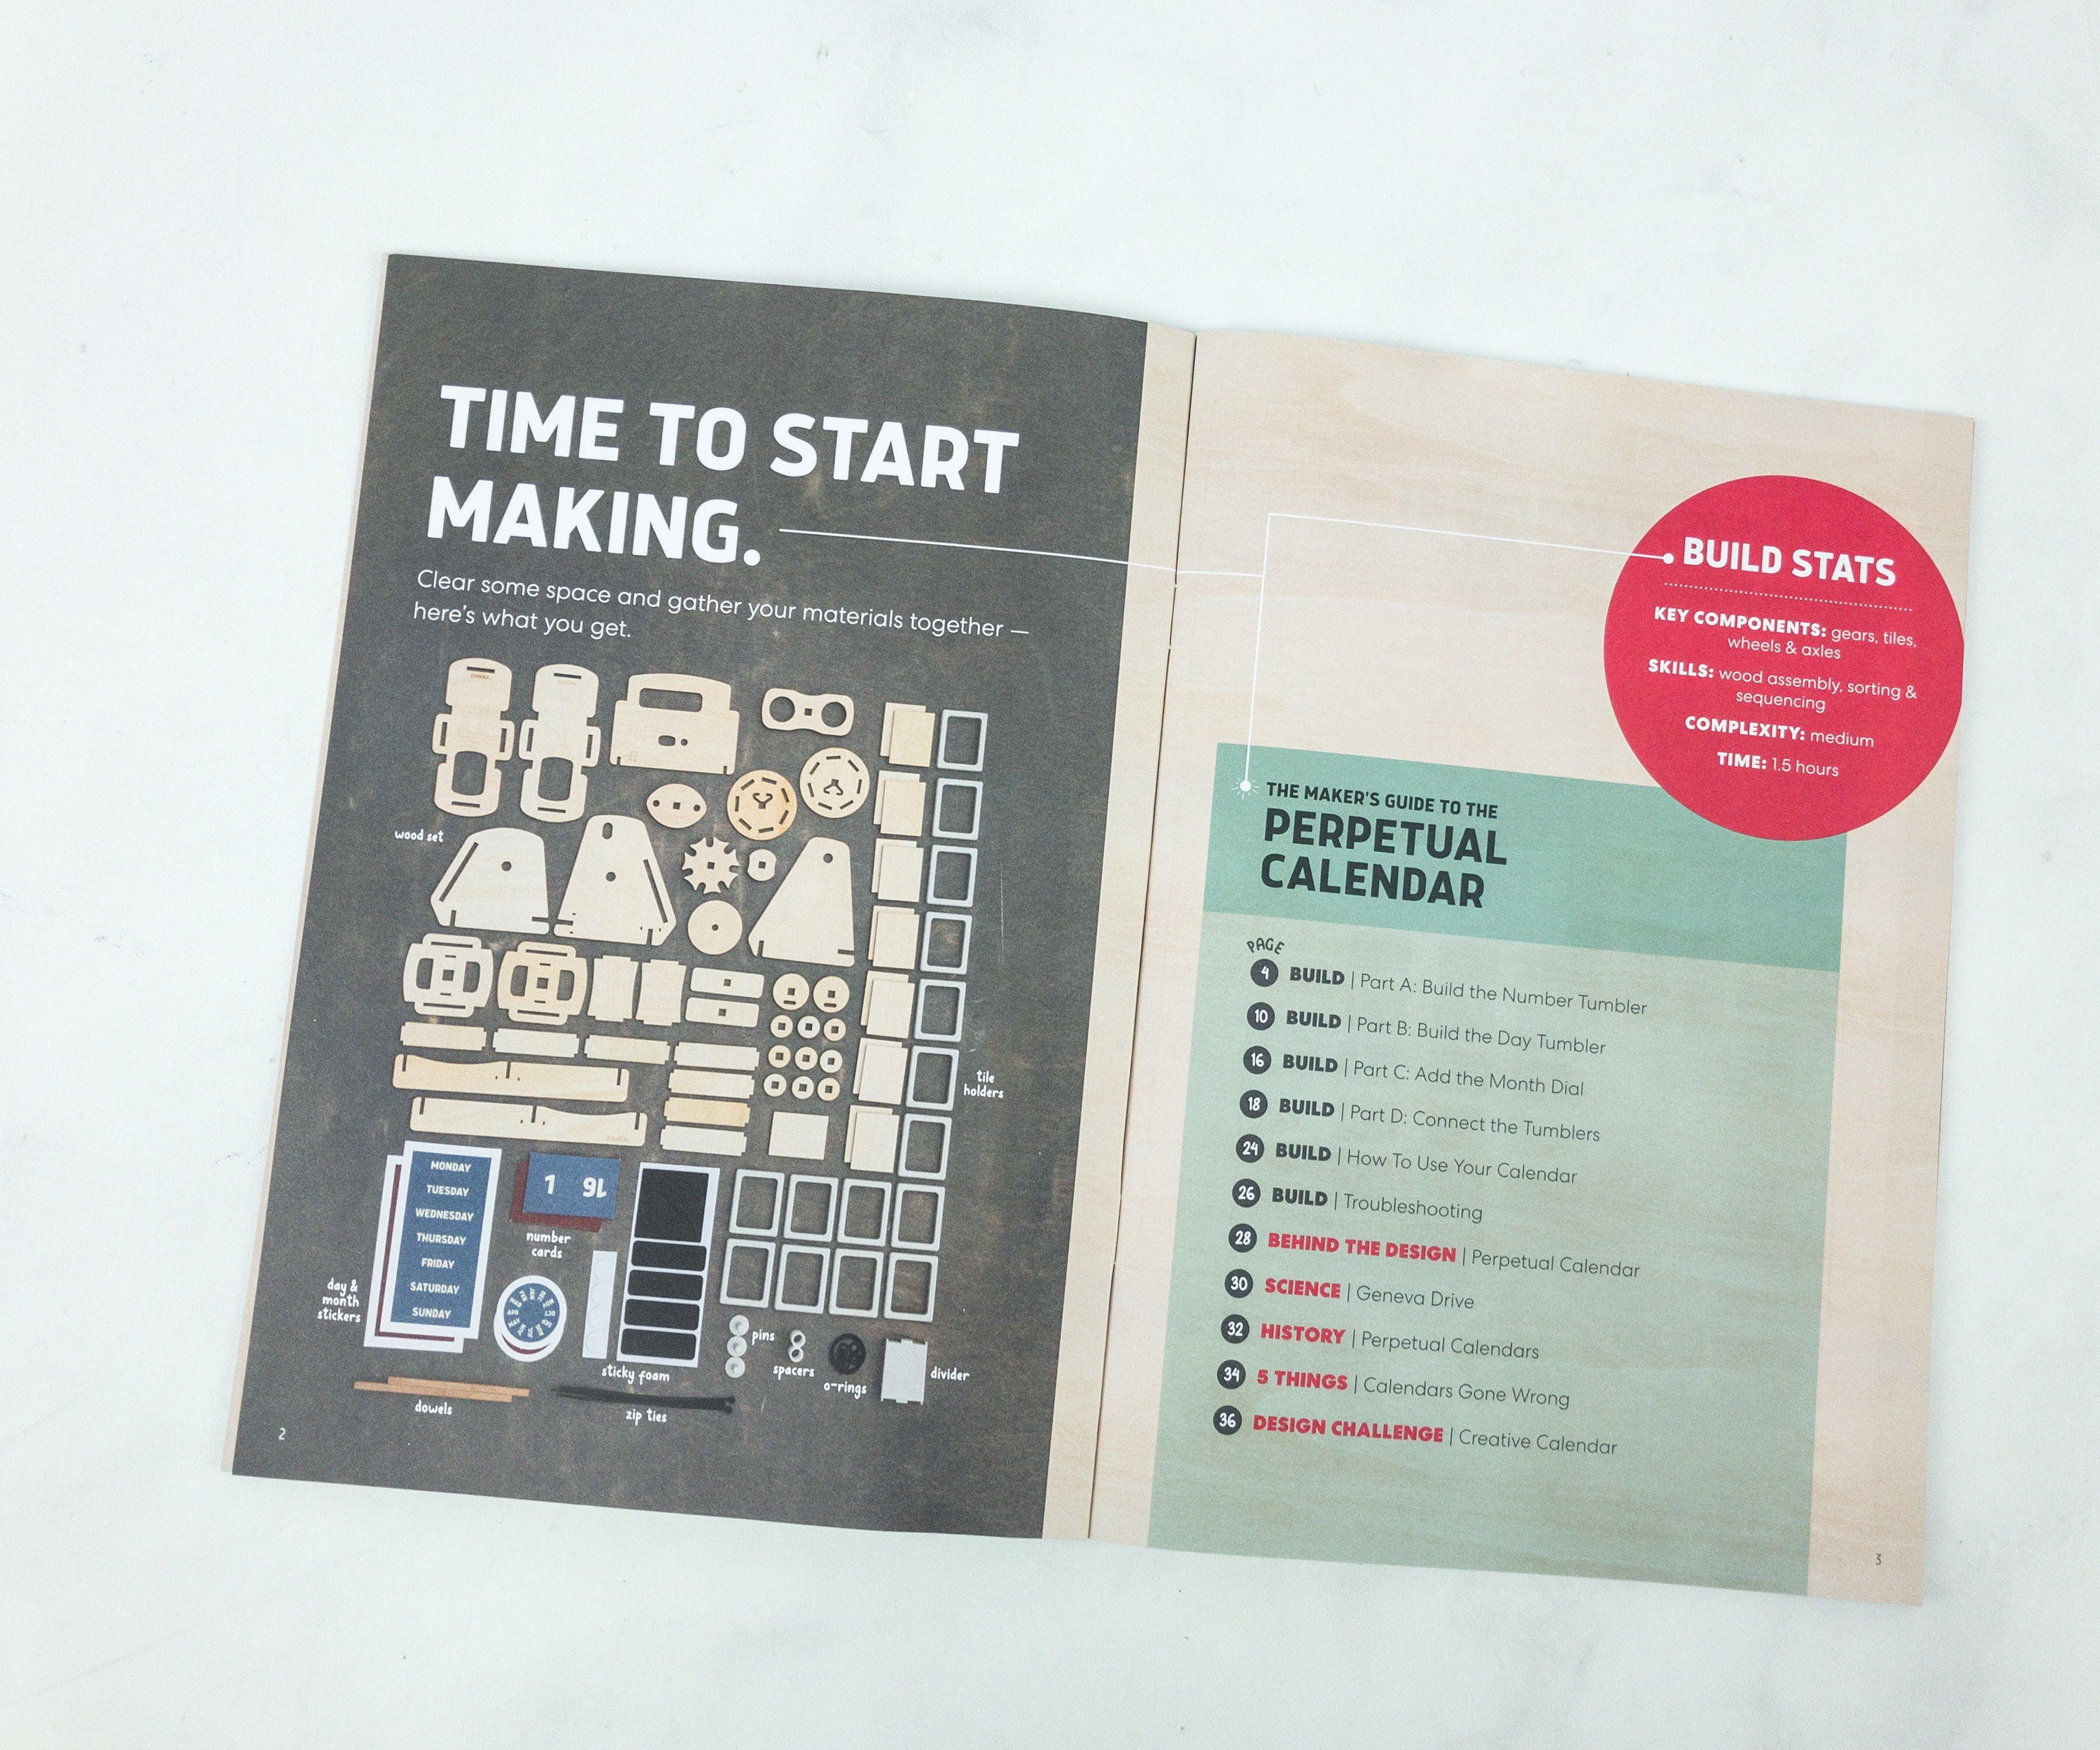
This booklet means business as it jumps right to the activity.
Eureka Crate Materials
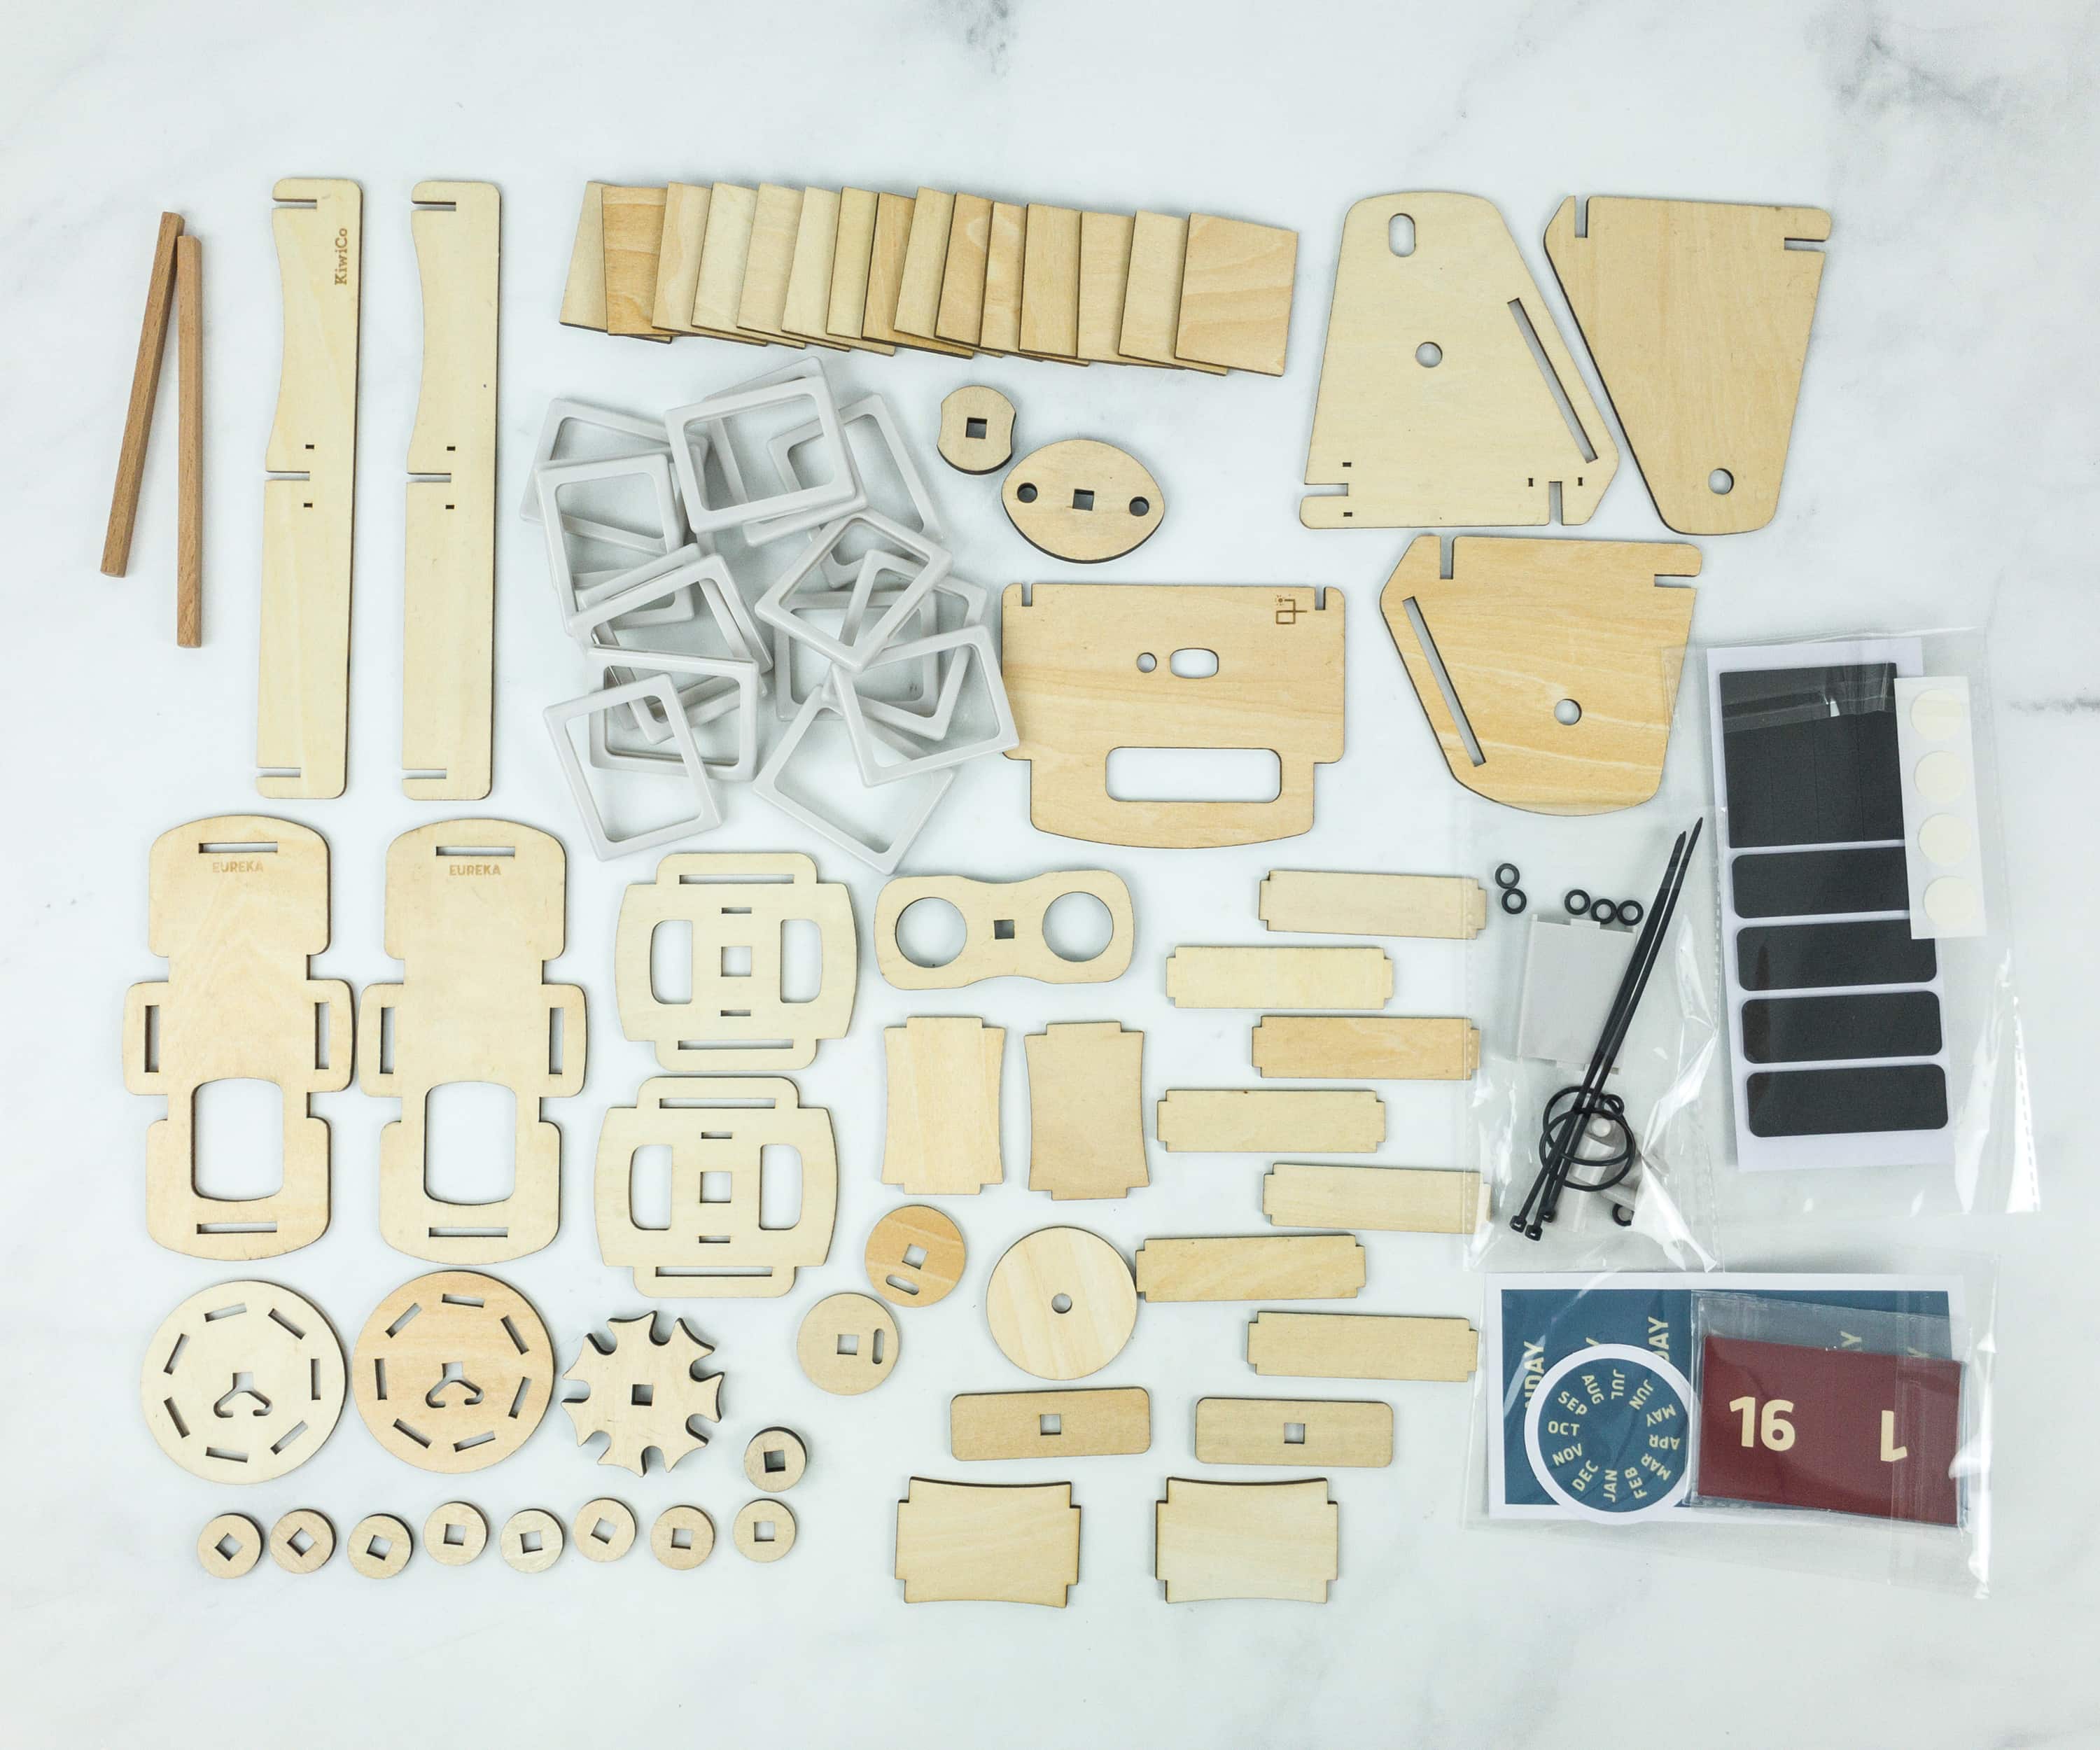
Here are the materials! You may check if you have the complete parts by comparing it to the picture in the booklet.
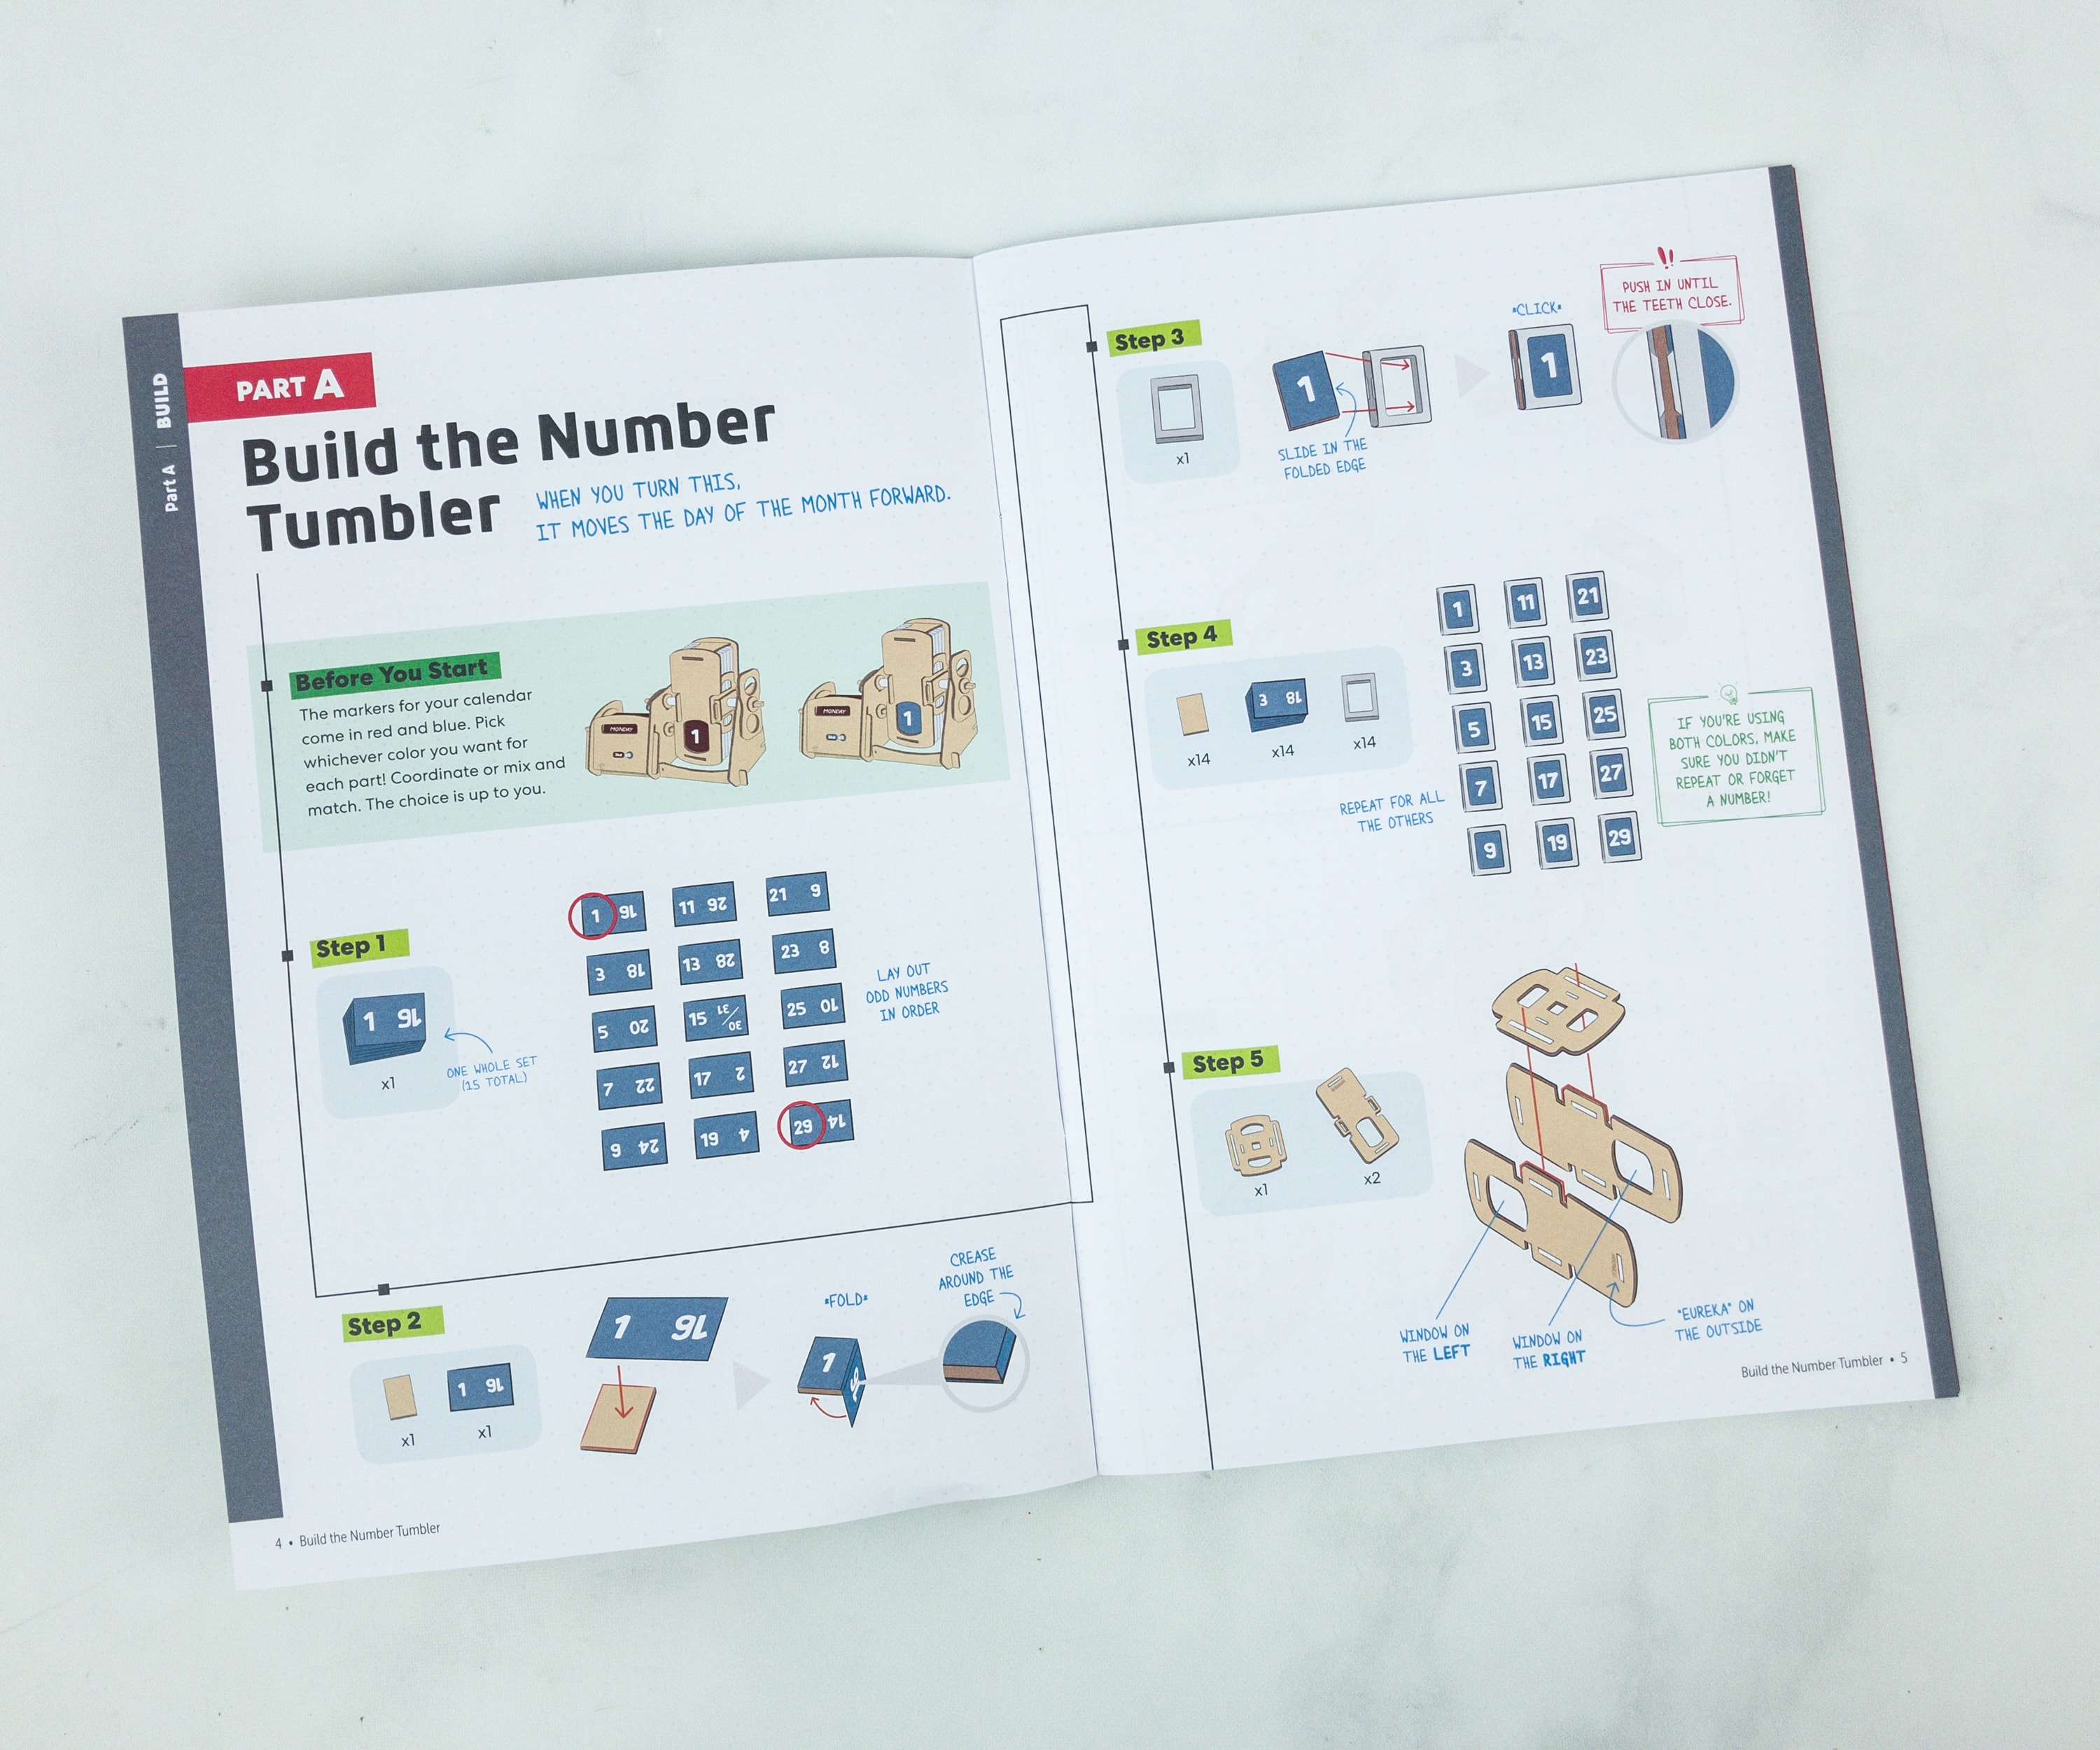
The instructions kept the continuous flow of the activity easy to understand. The drawings were detailed too.
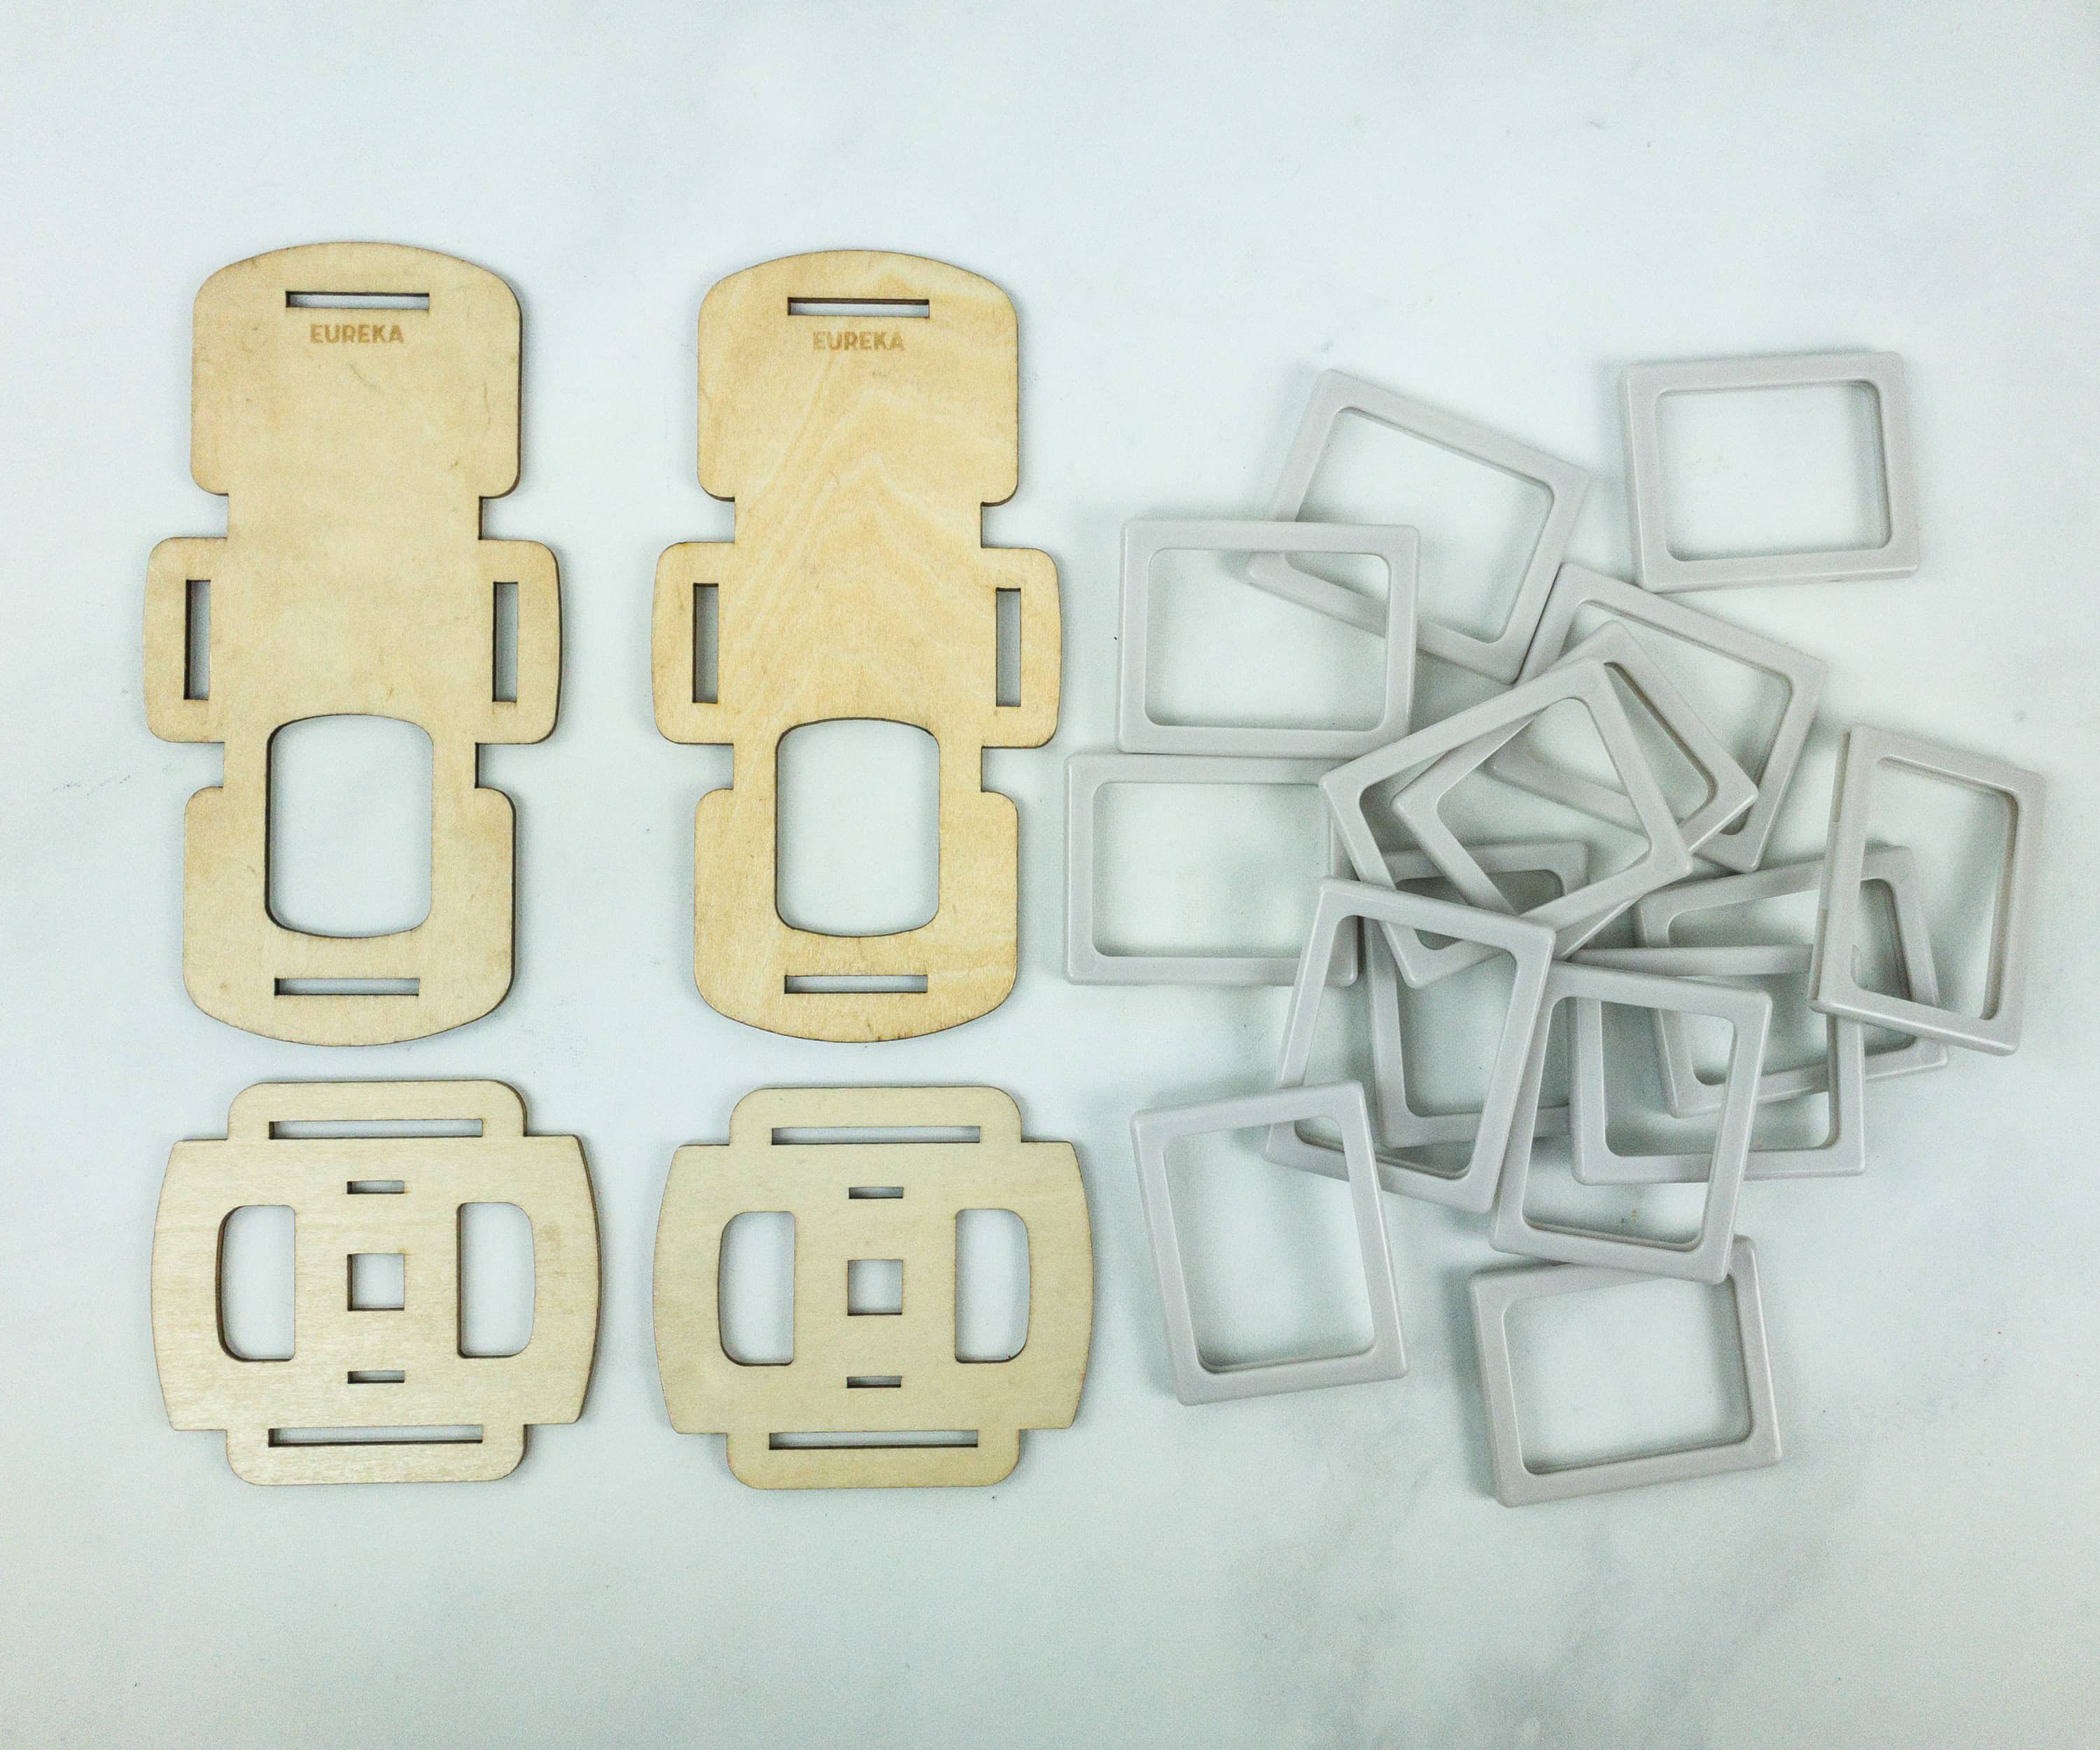
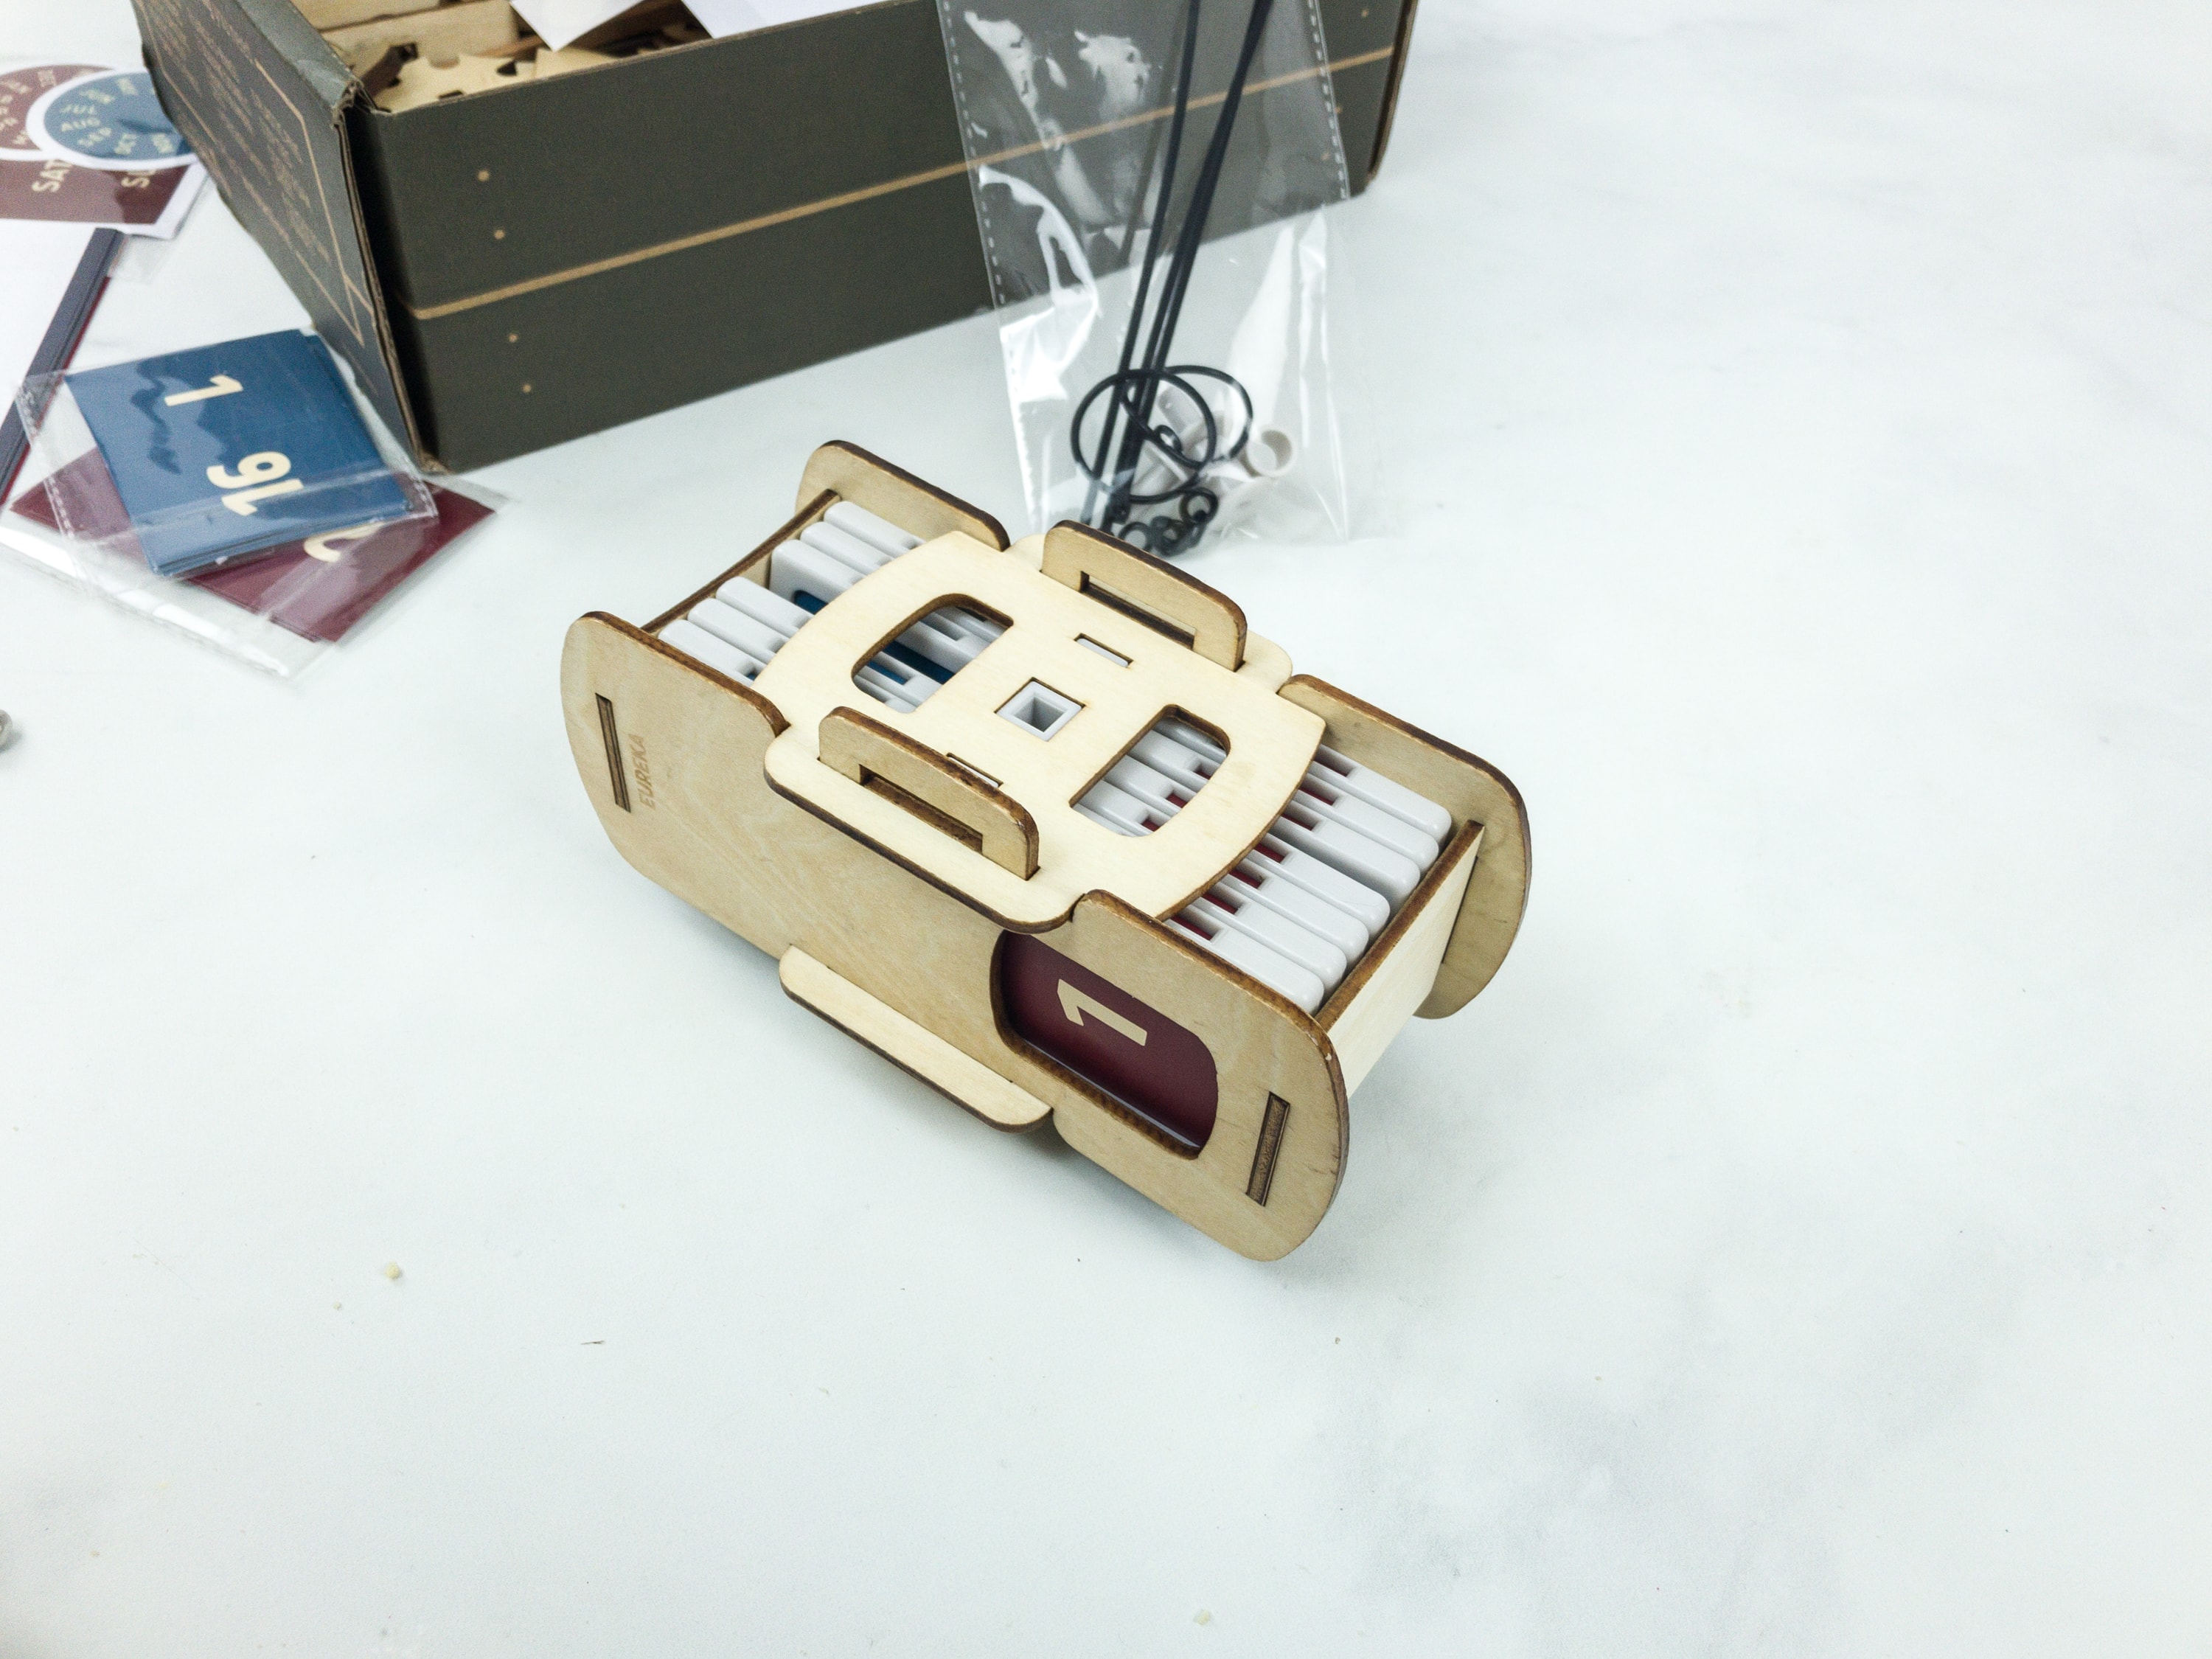
These are the base parts of the number tumbler. My daughter isolated the needed materials based on the activity she’s doing to make it organized and less confusing.
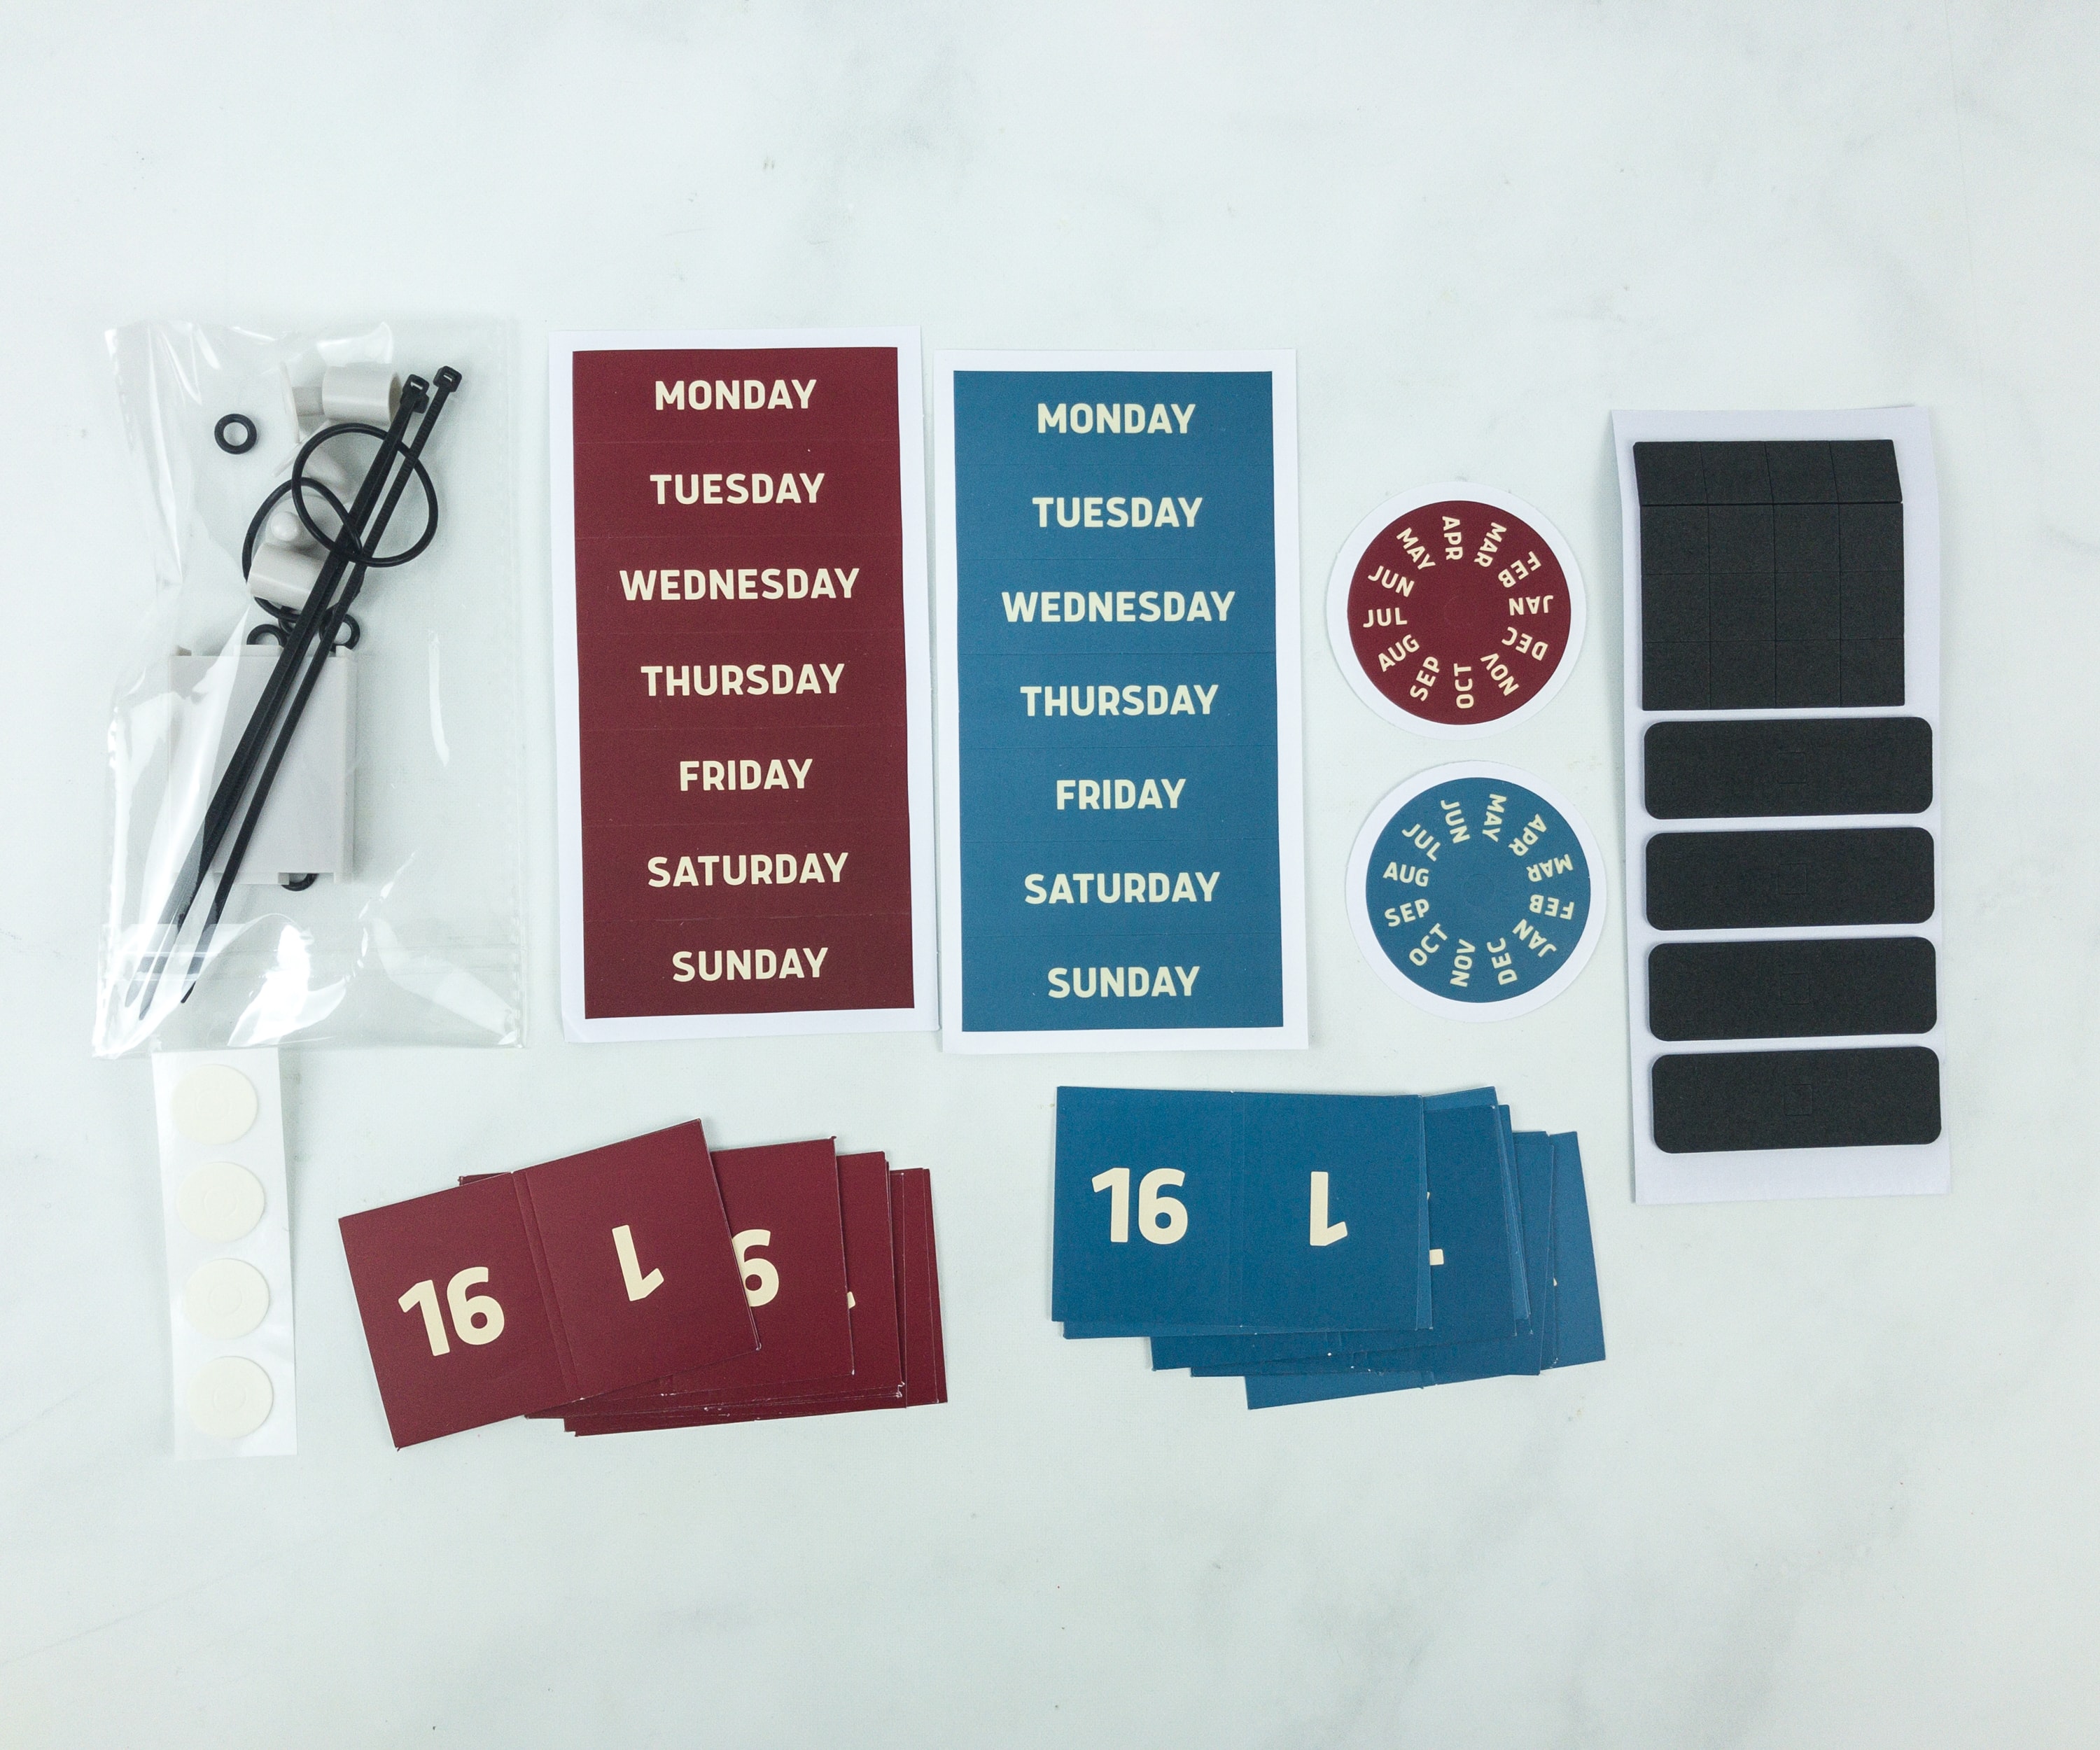
Stickers! We have the dates, days of the week and month labels.
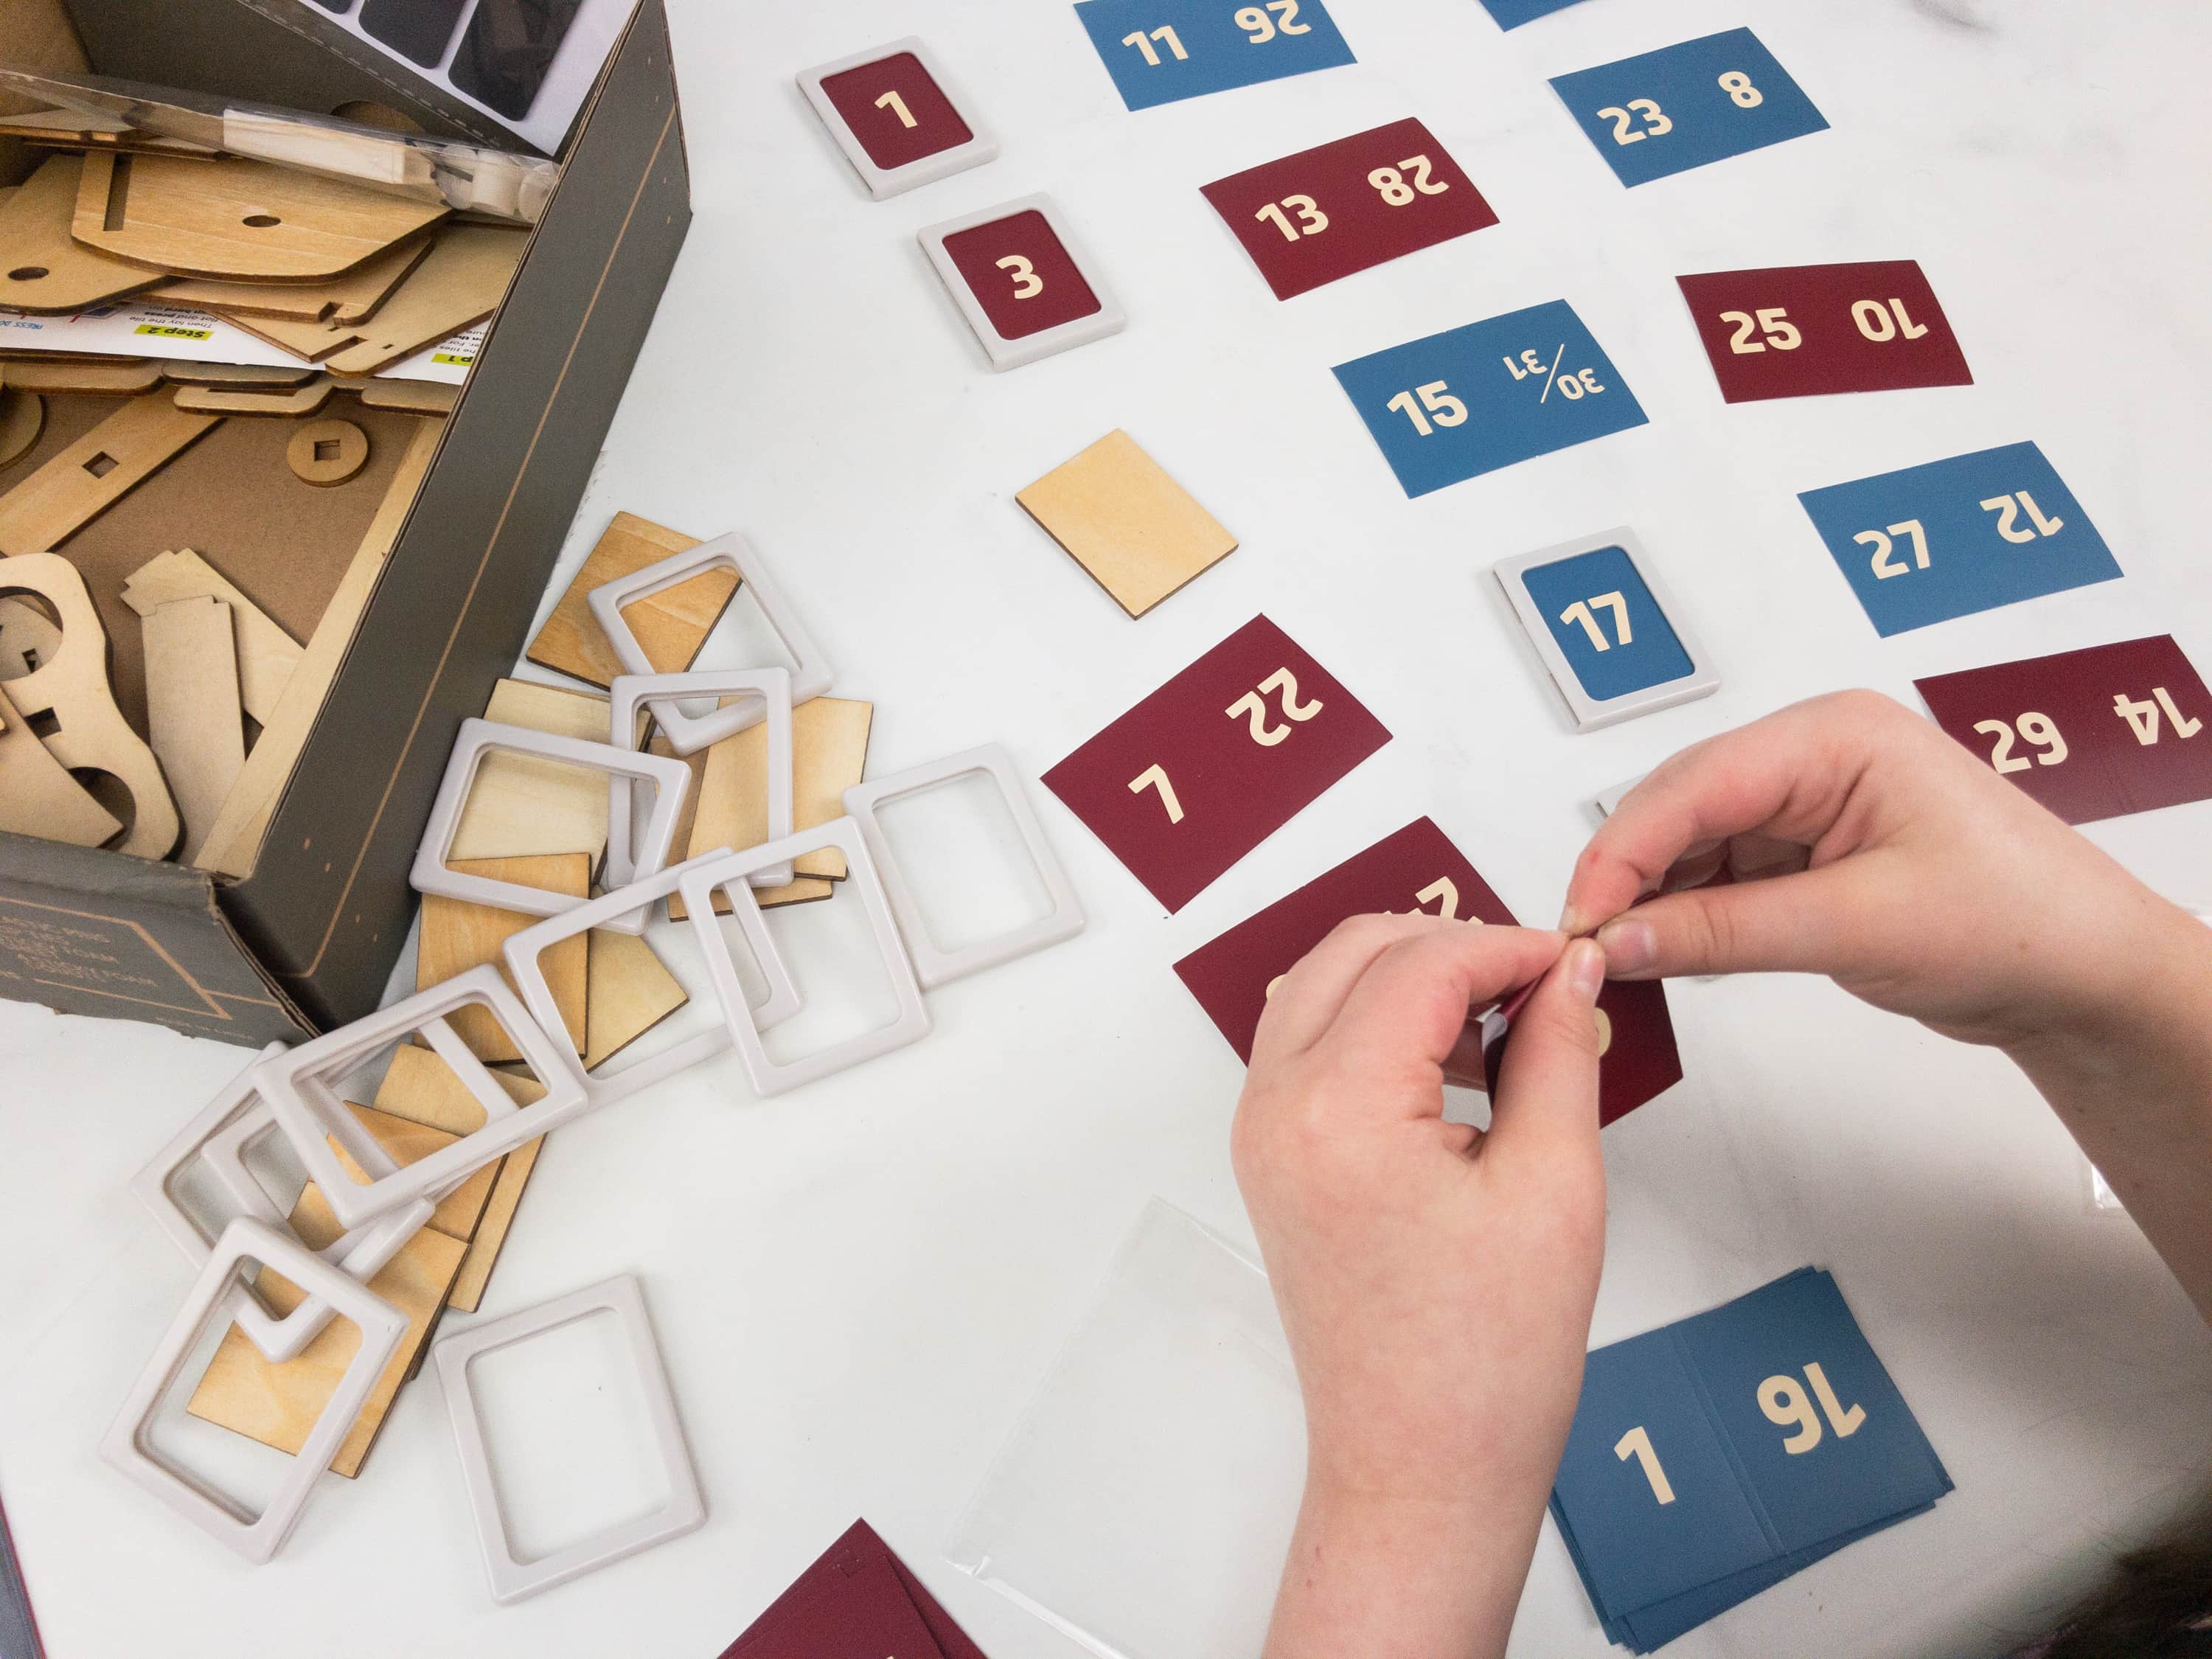
She did well and followed the instructions. She wrapped the small rectangular pieces with numbered stickers, slid them inside the small plastic tiles and made sure they are all secured in place.
After the assembling of the main parts, she neatly stacked the numbered tiles in order.
She used half of the numbers in red and half in blue to make it more exciting!
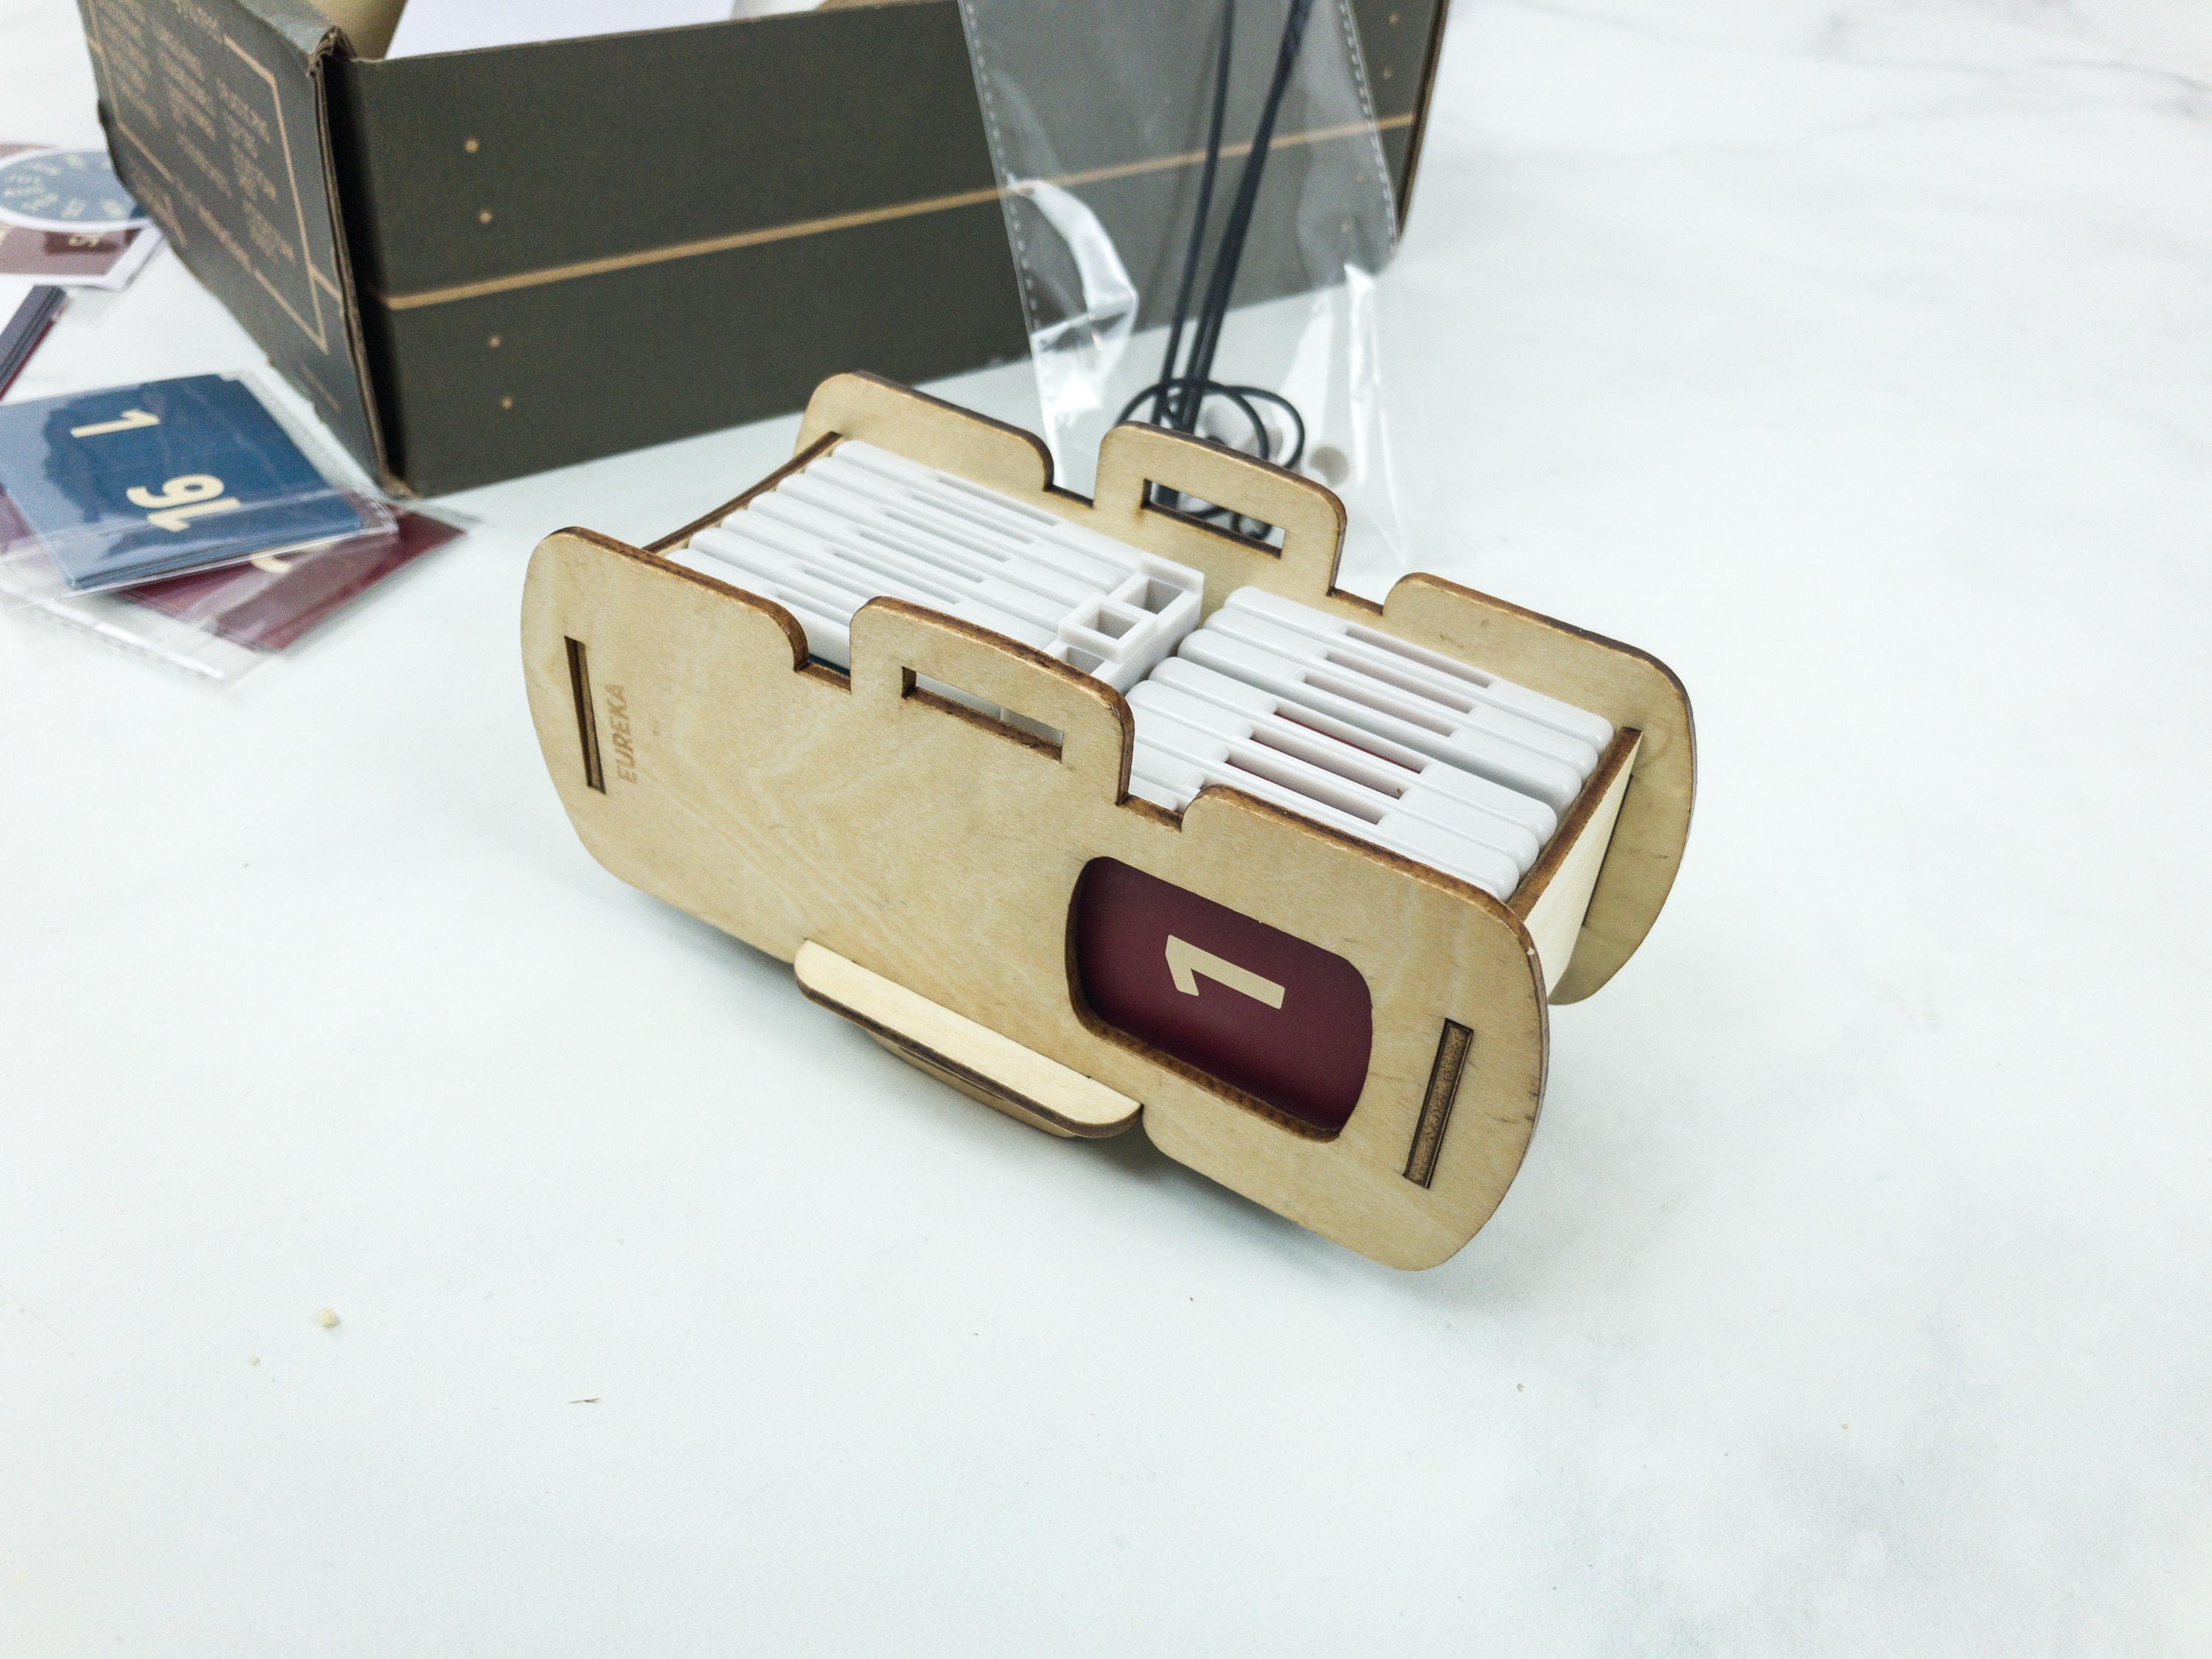
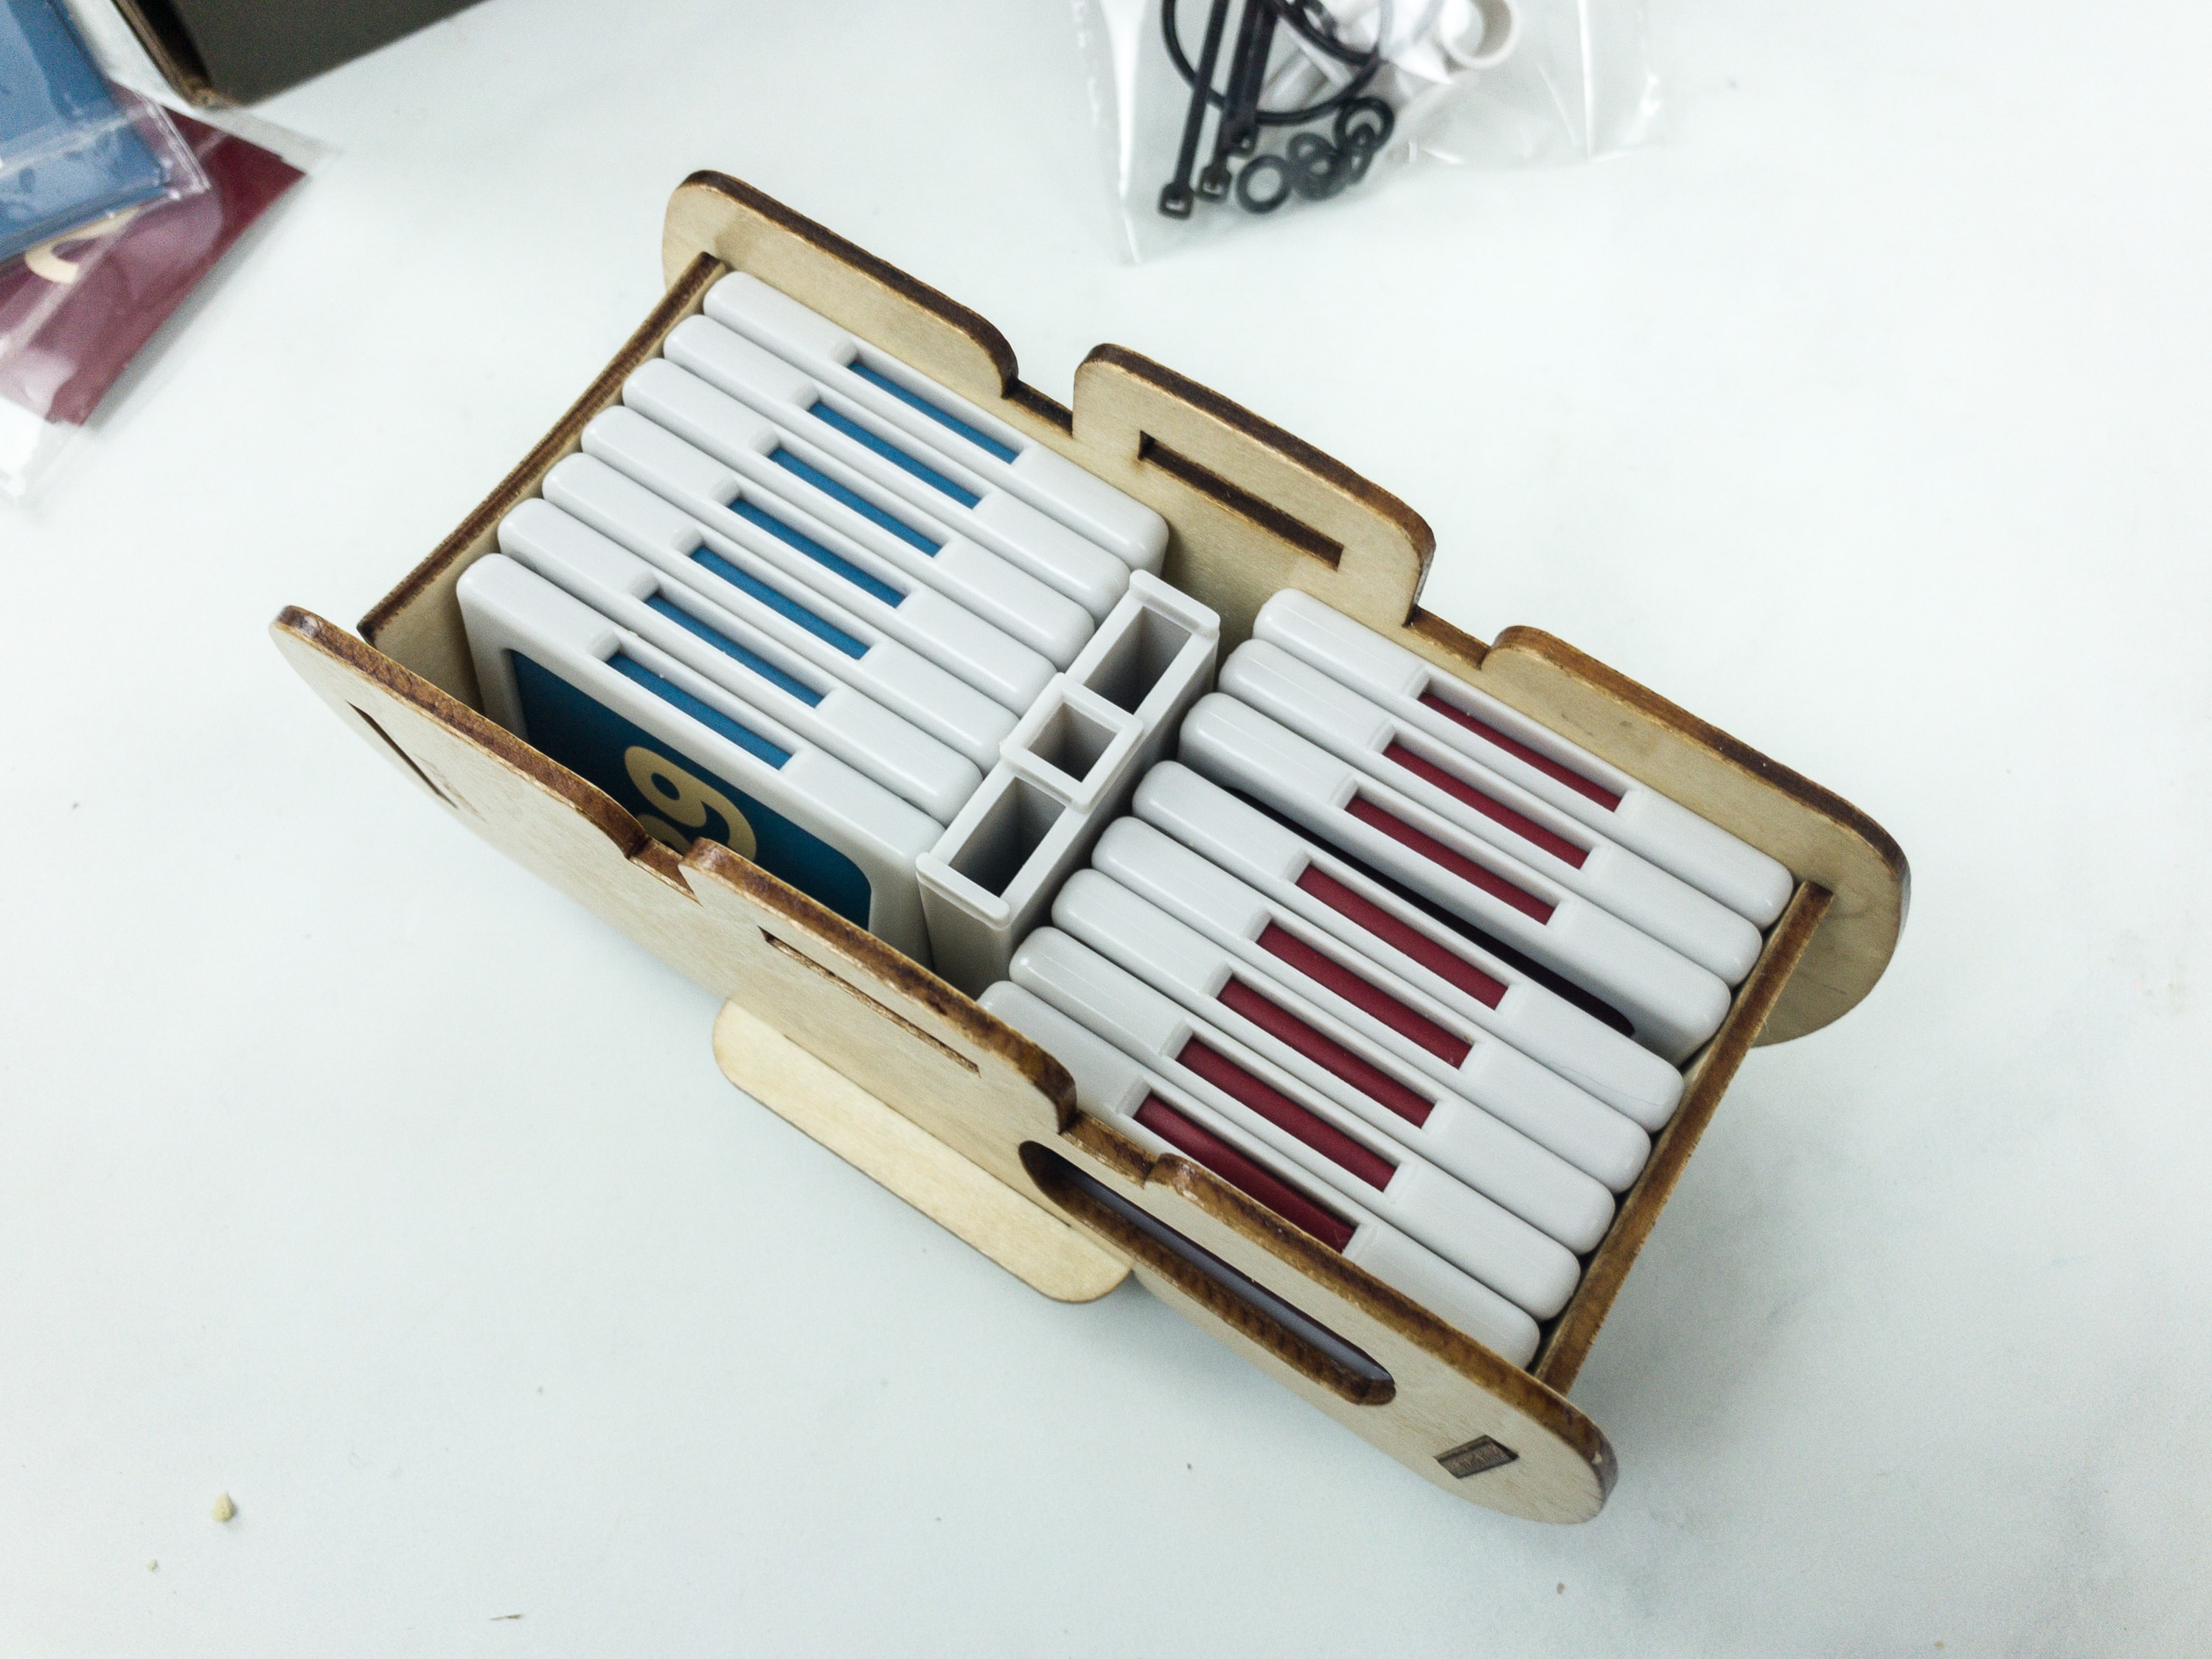
Every piece has a snug fit!
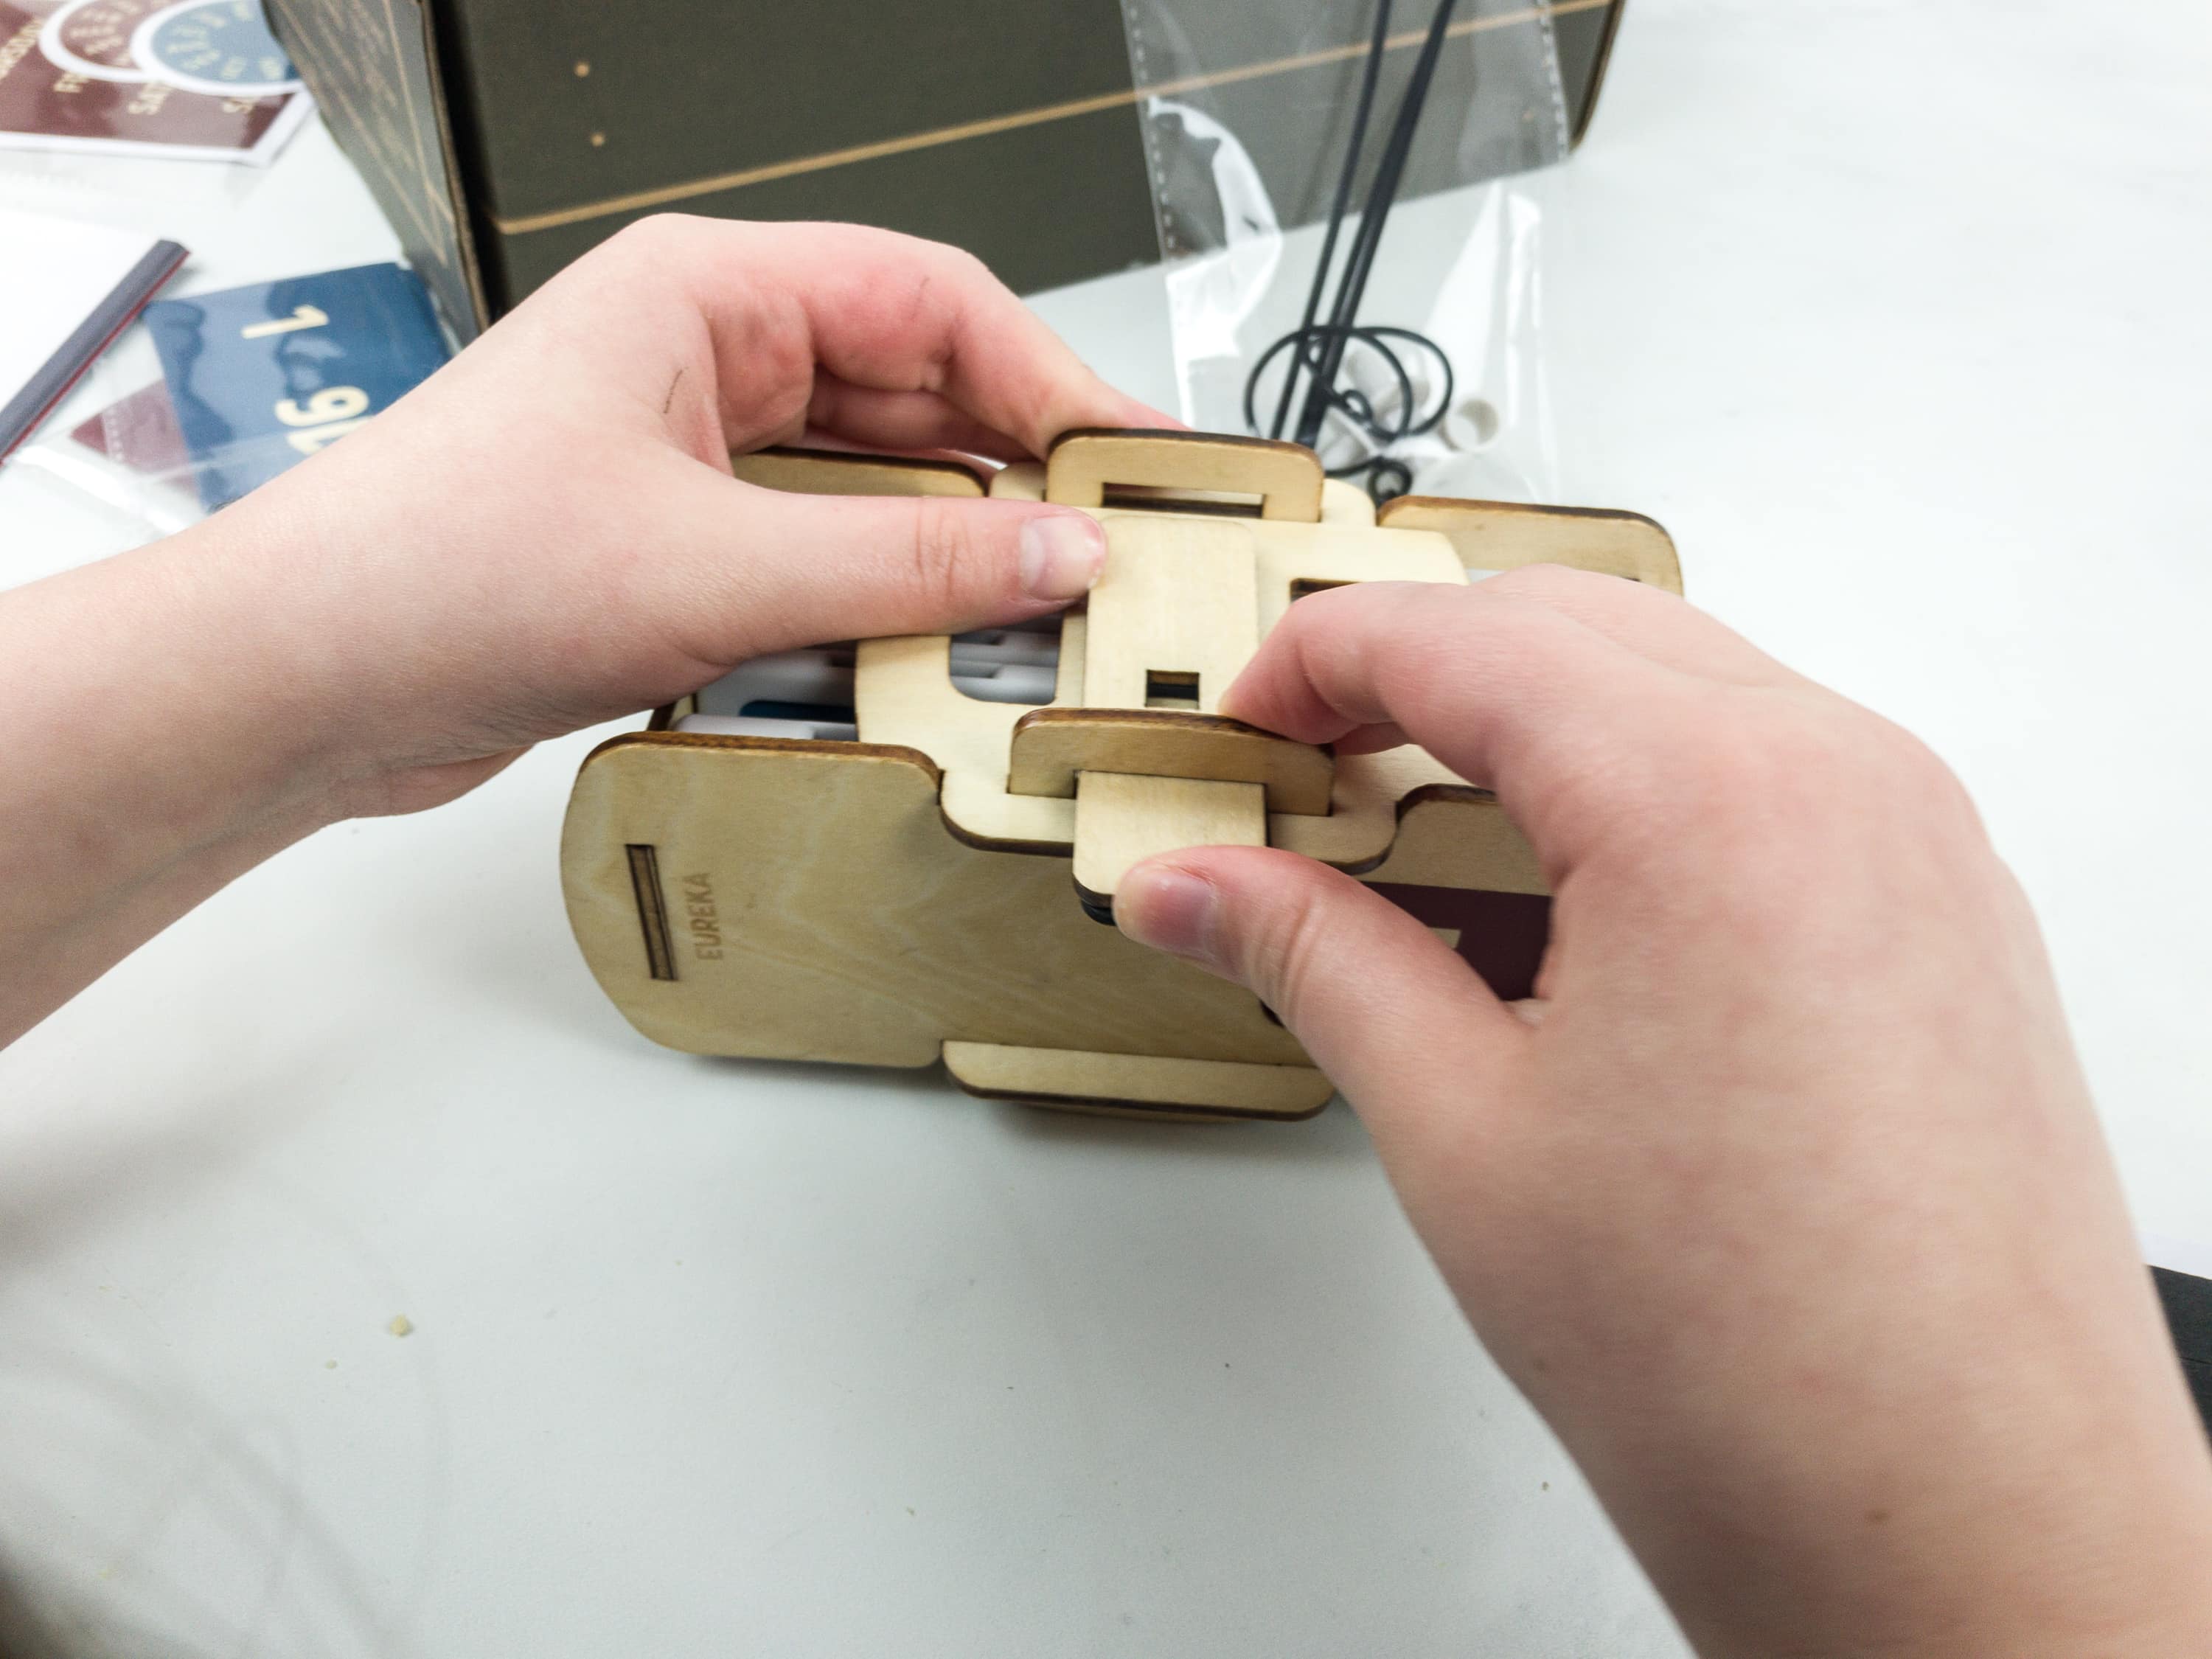
She locked it in place with another piece of board that is symmetric to the other side.
The Number Tumbler is finished! Now, we can move on to the next part!
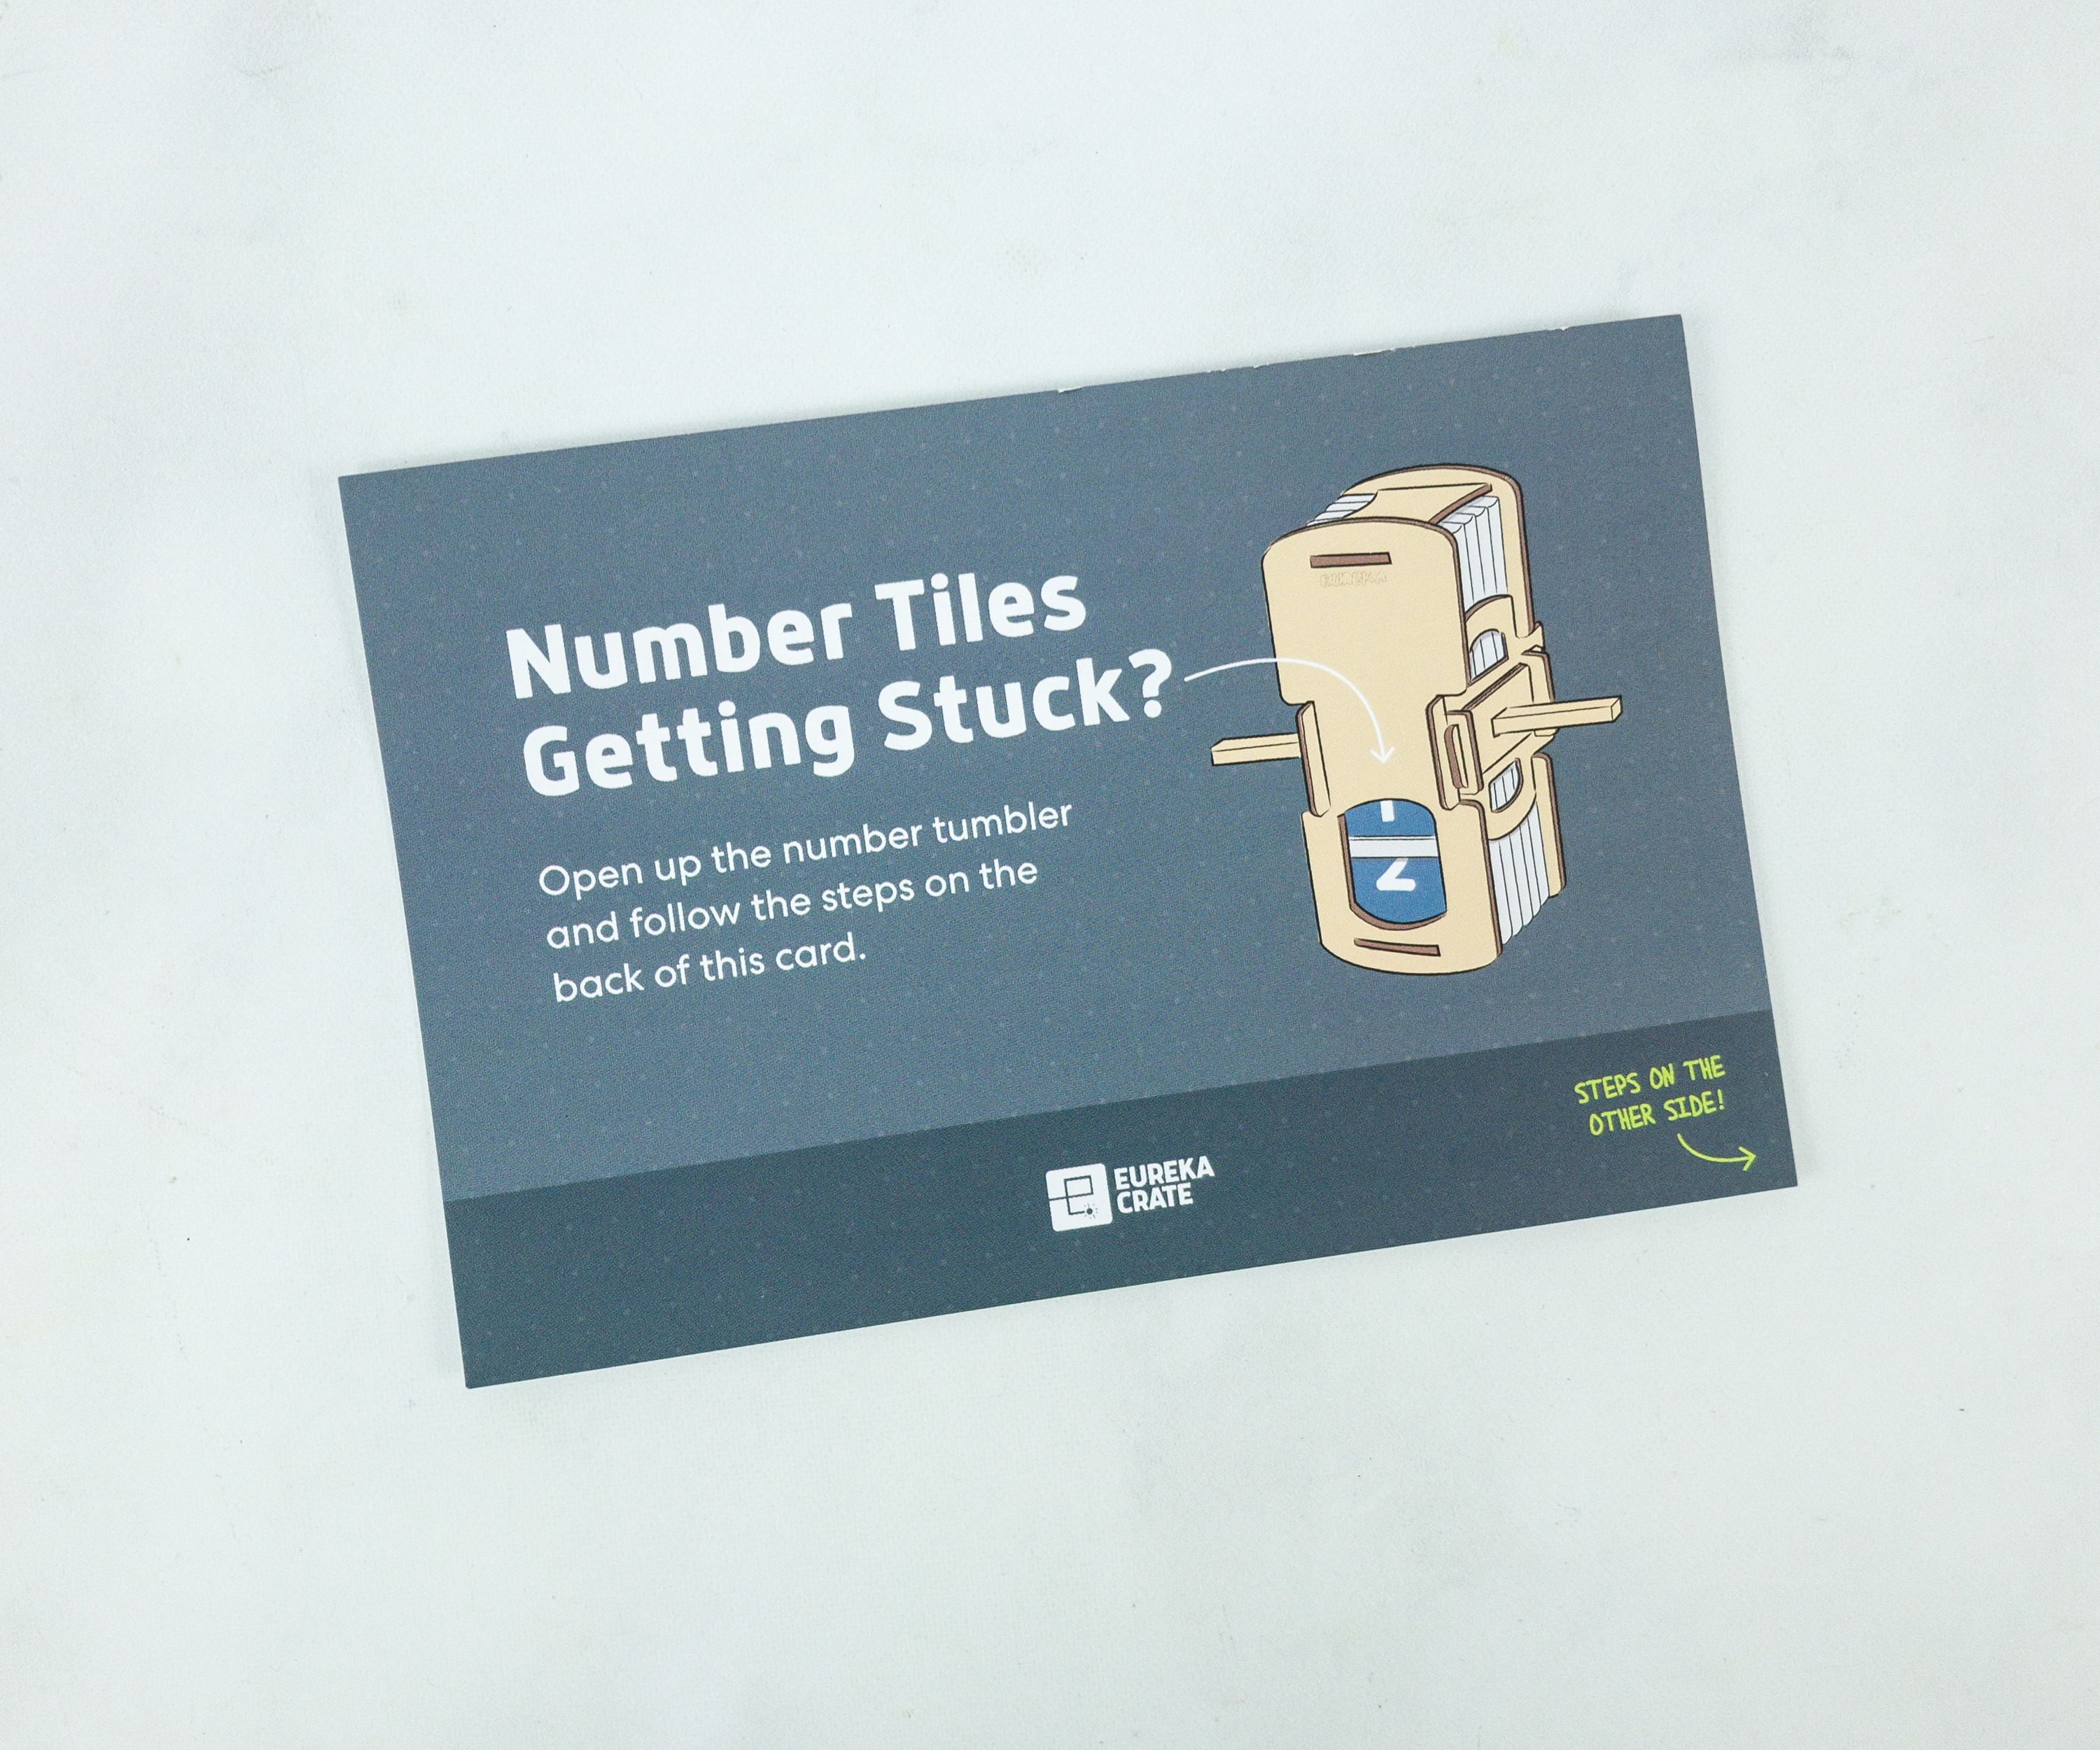
There are vital troubleshooting tips too! So don’t lose the card!
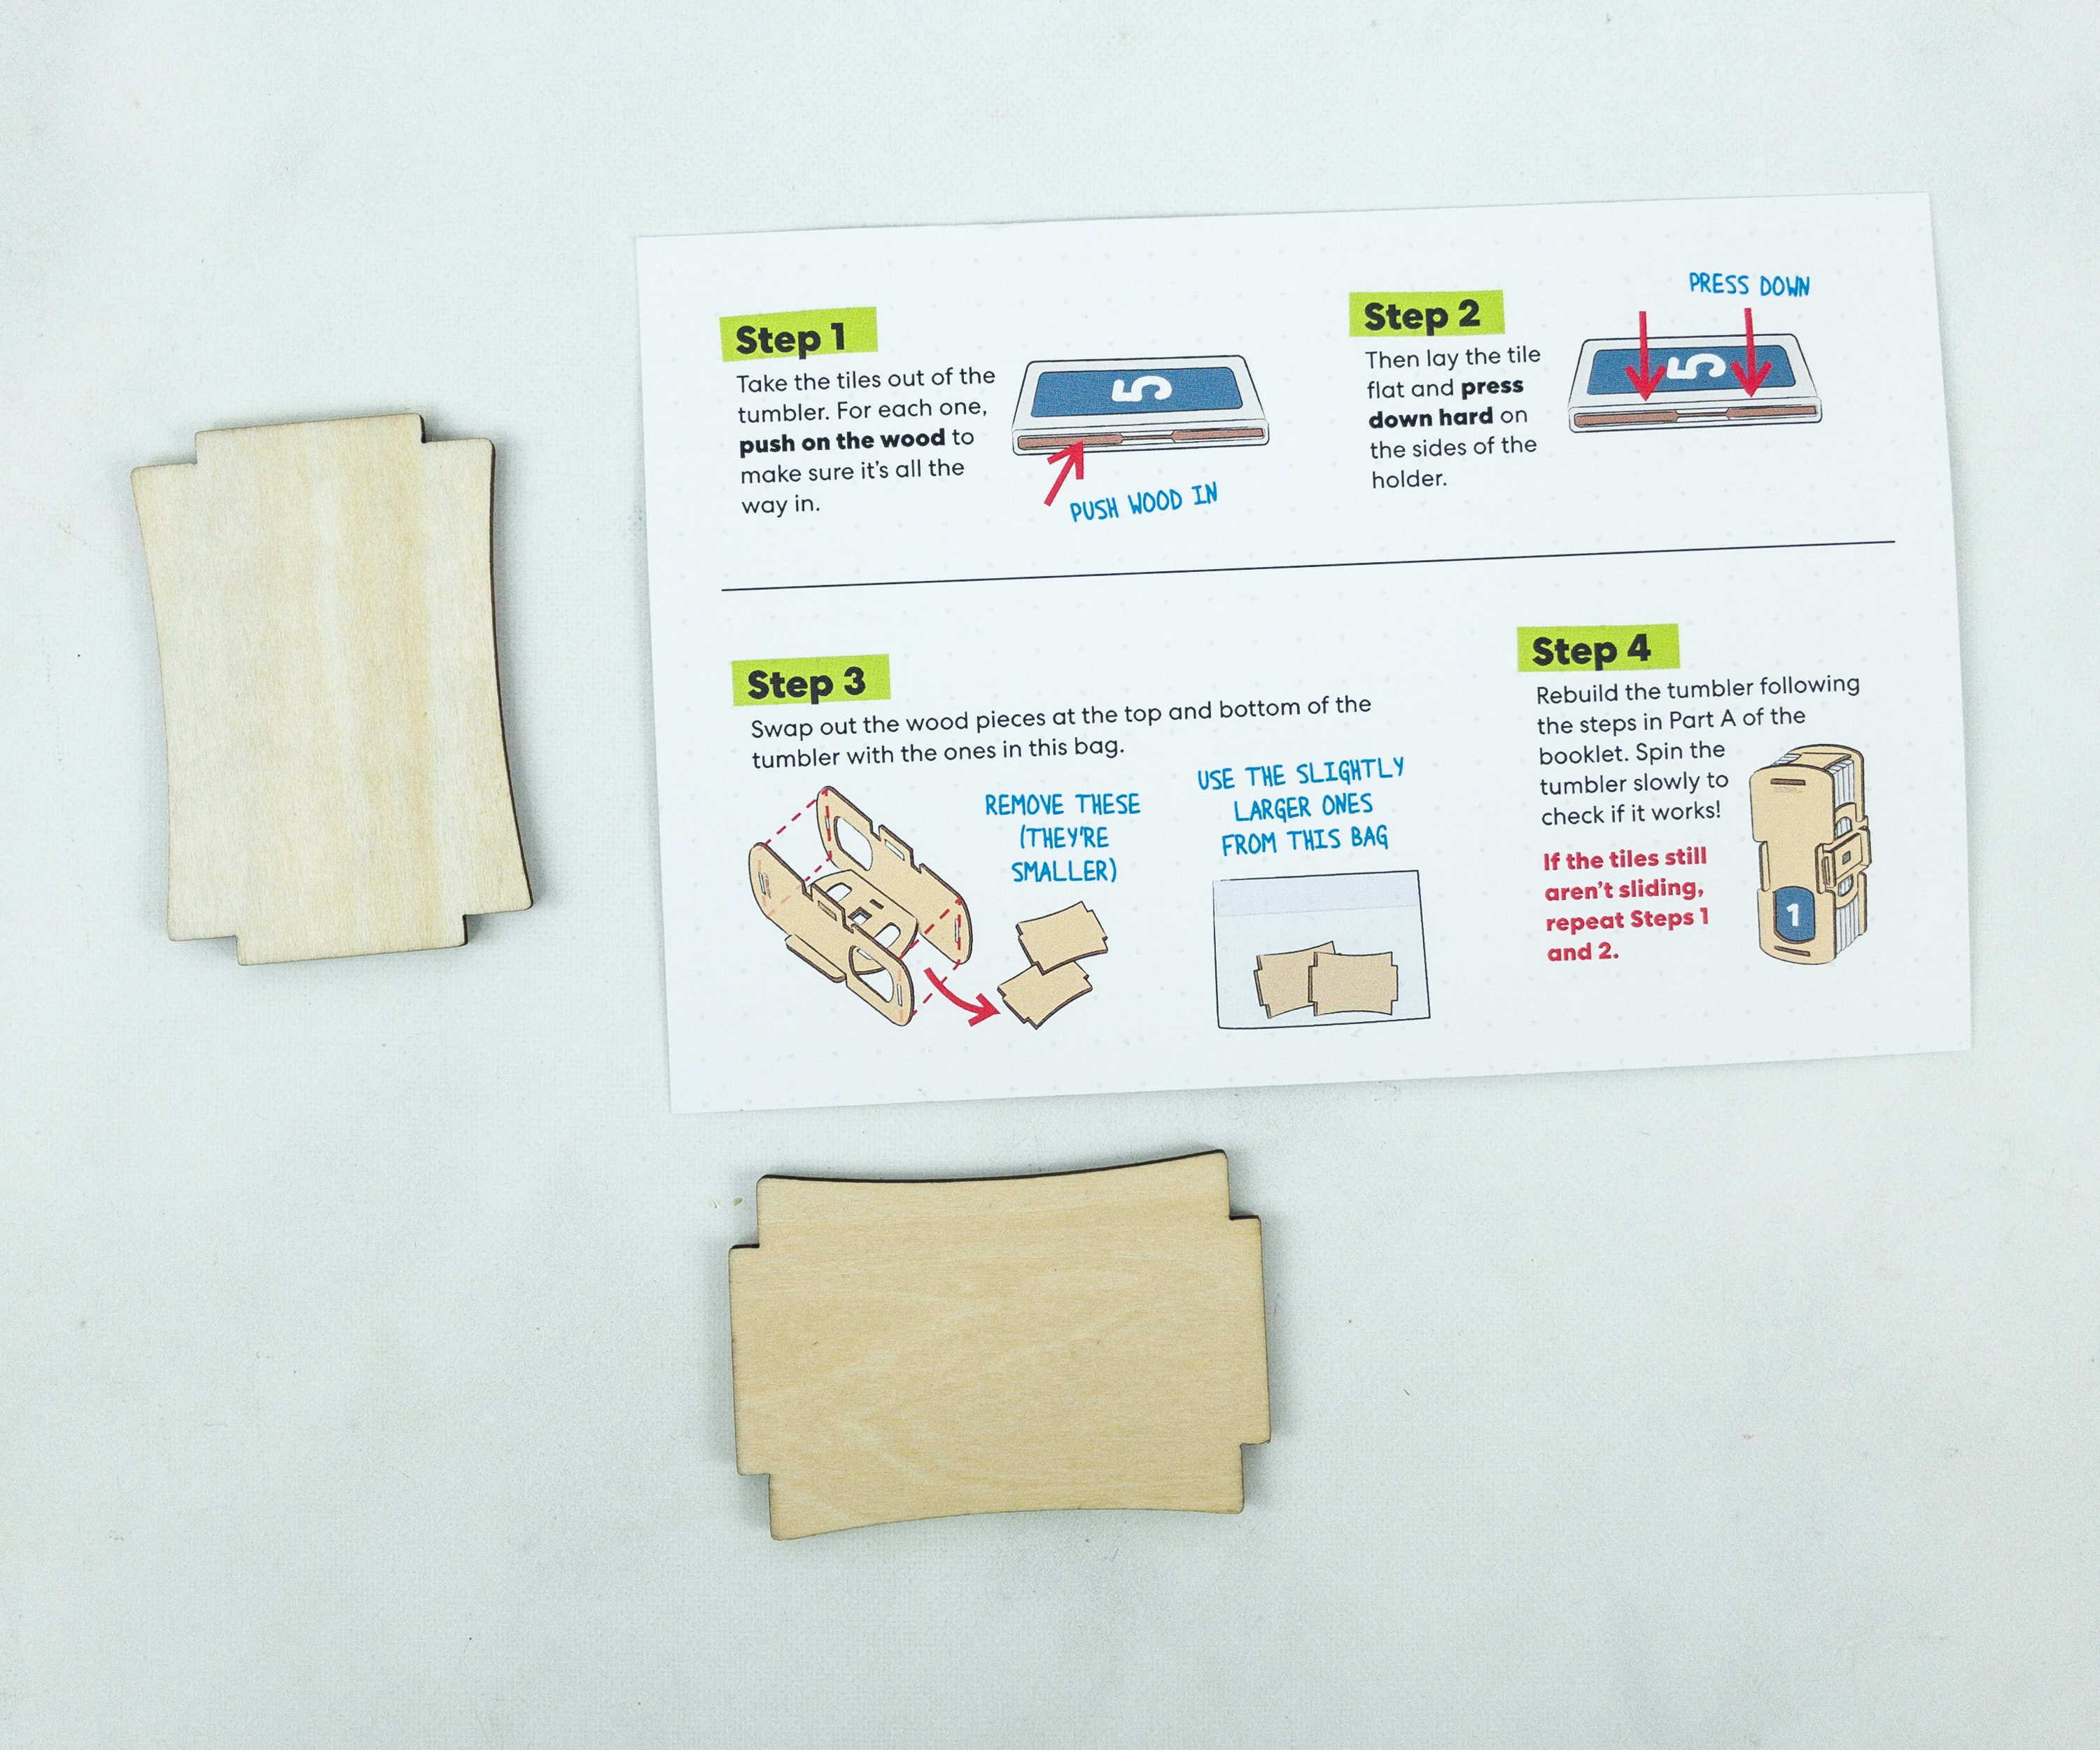
This is a favorite KiwiCo feature because they just don’t leave you hanging. The tips inspire you to try different things and not give up on the activity easily.
Just keep the pieces aligned so that it will be easier to manipulate.
Again, she only got the items needed to make the activity successful so there’s no clutter in the workspace.
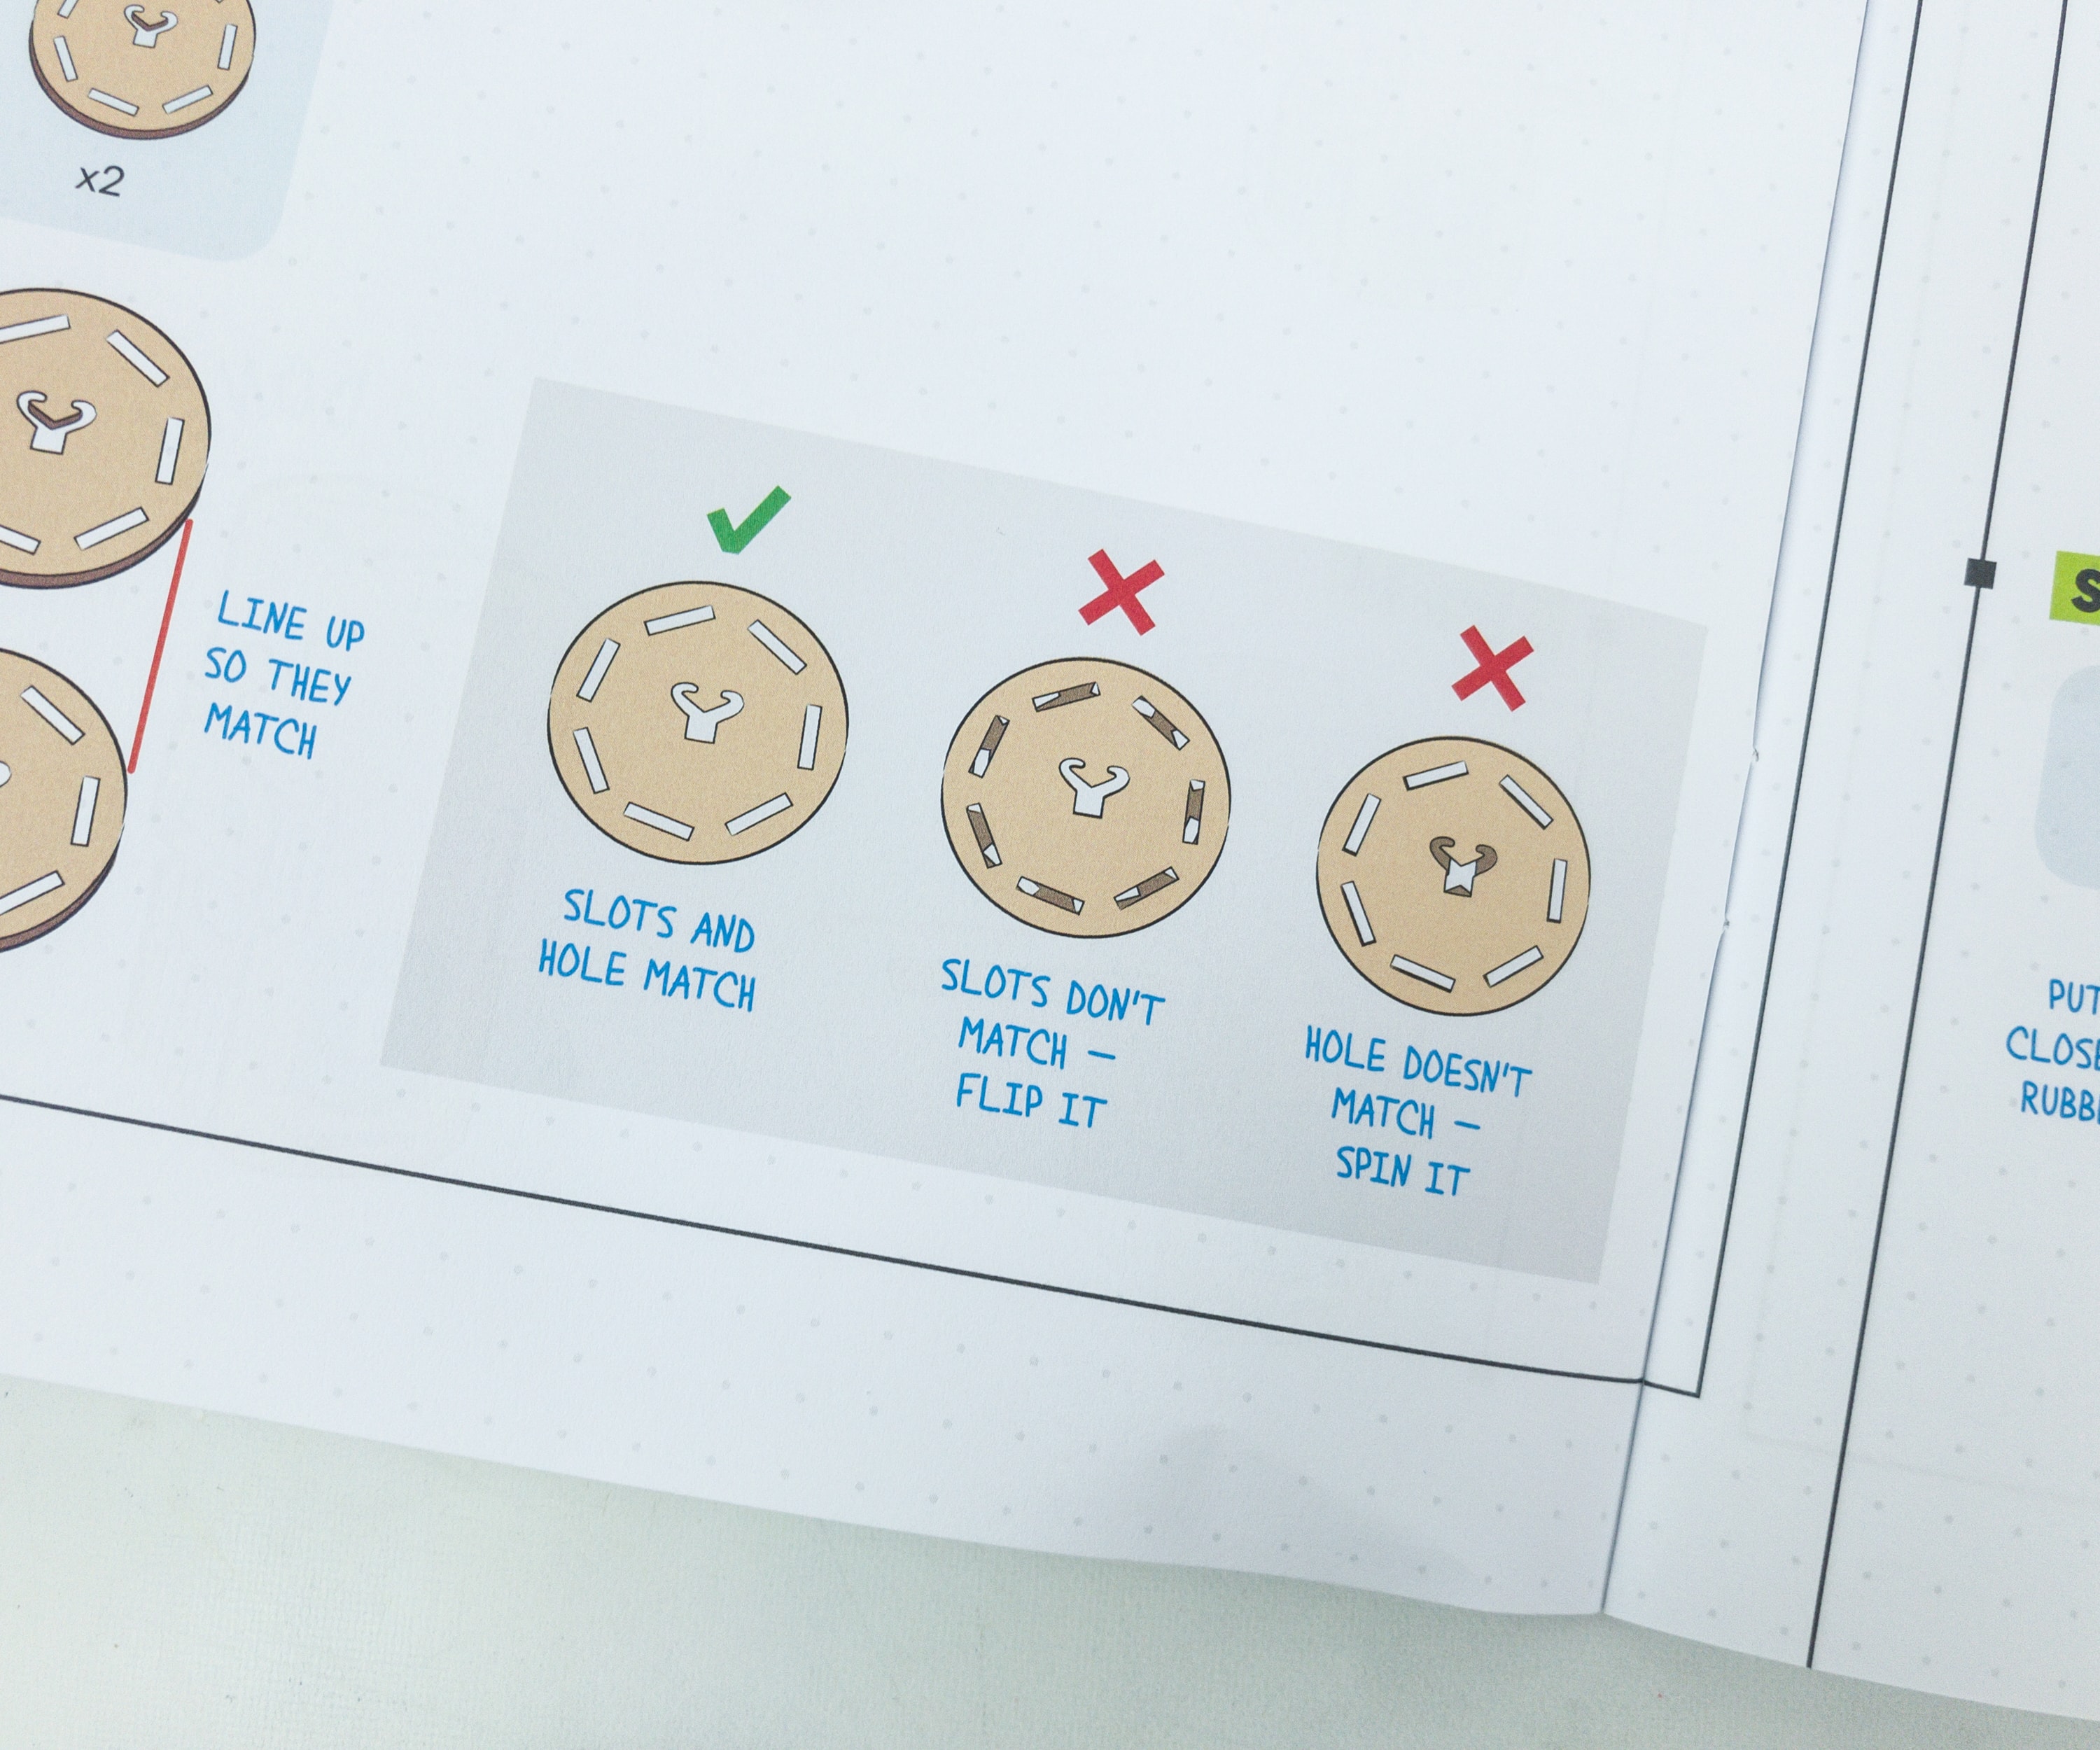
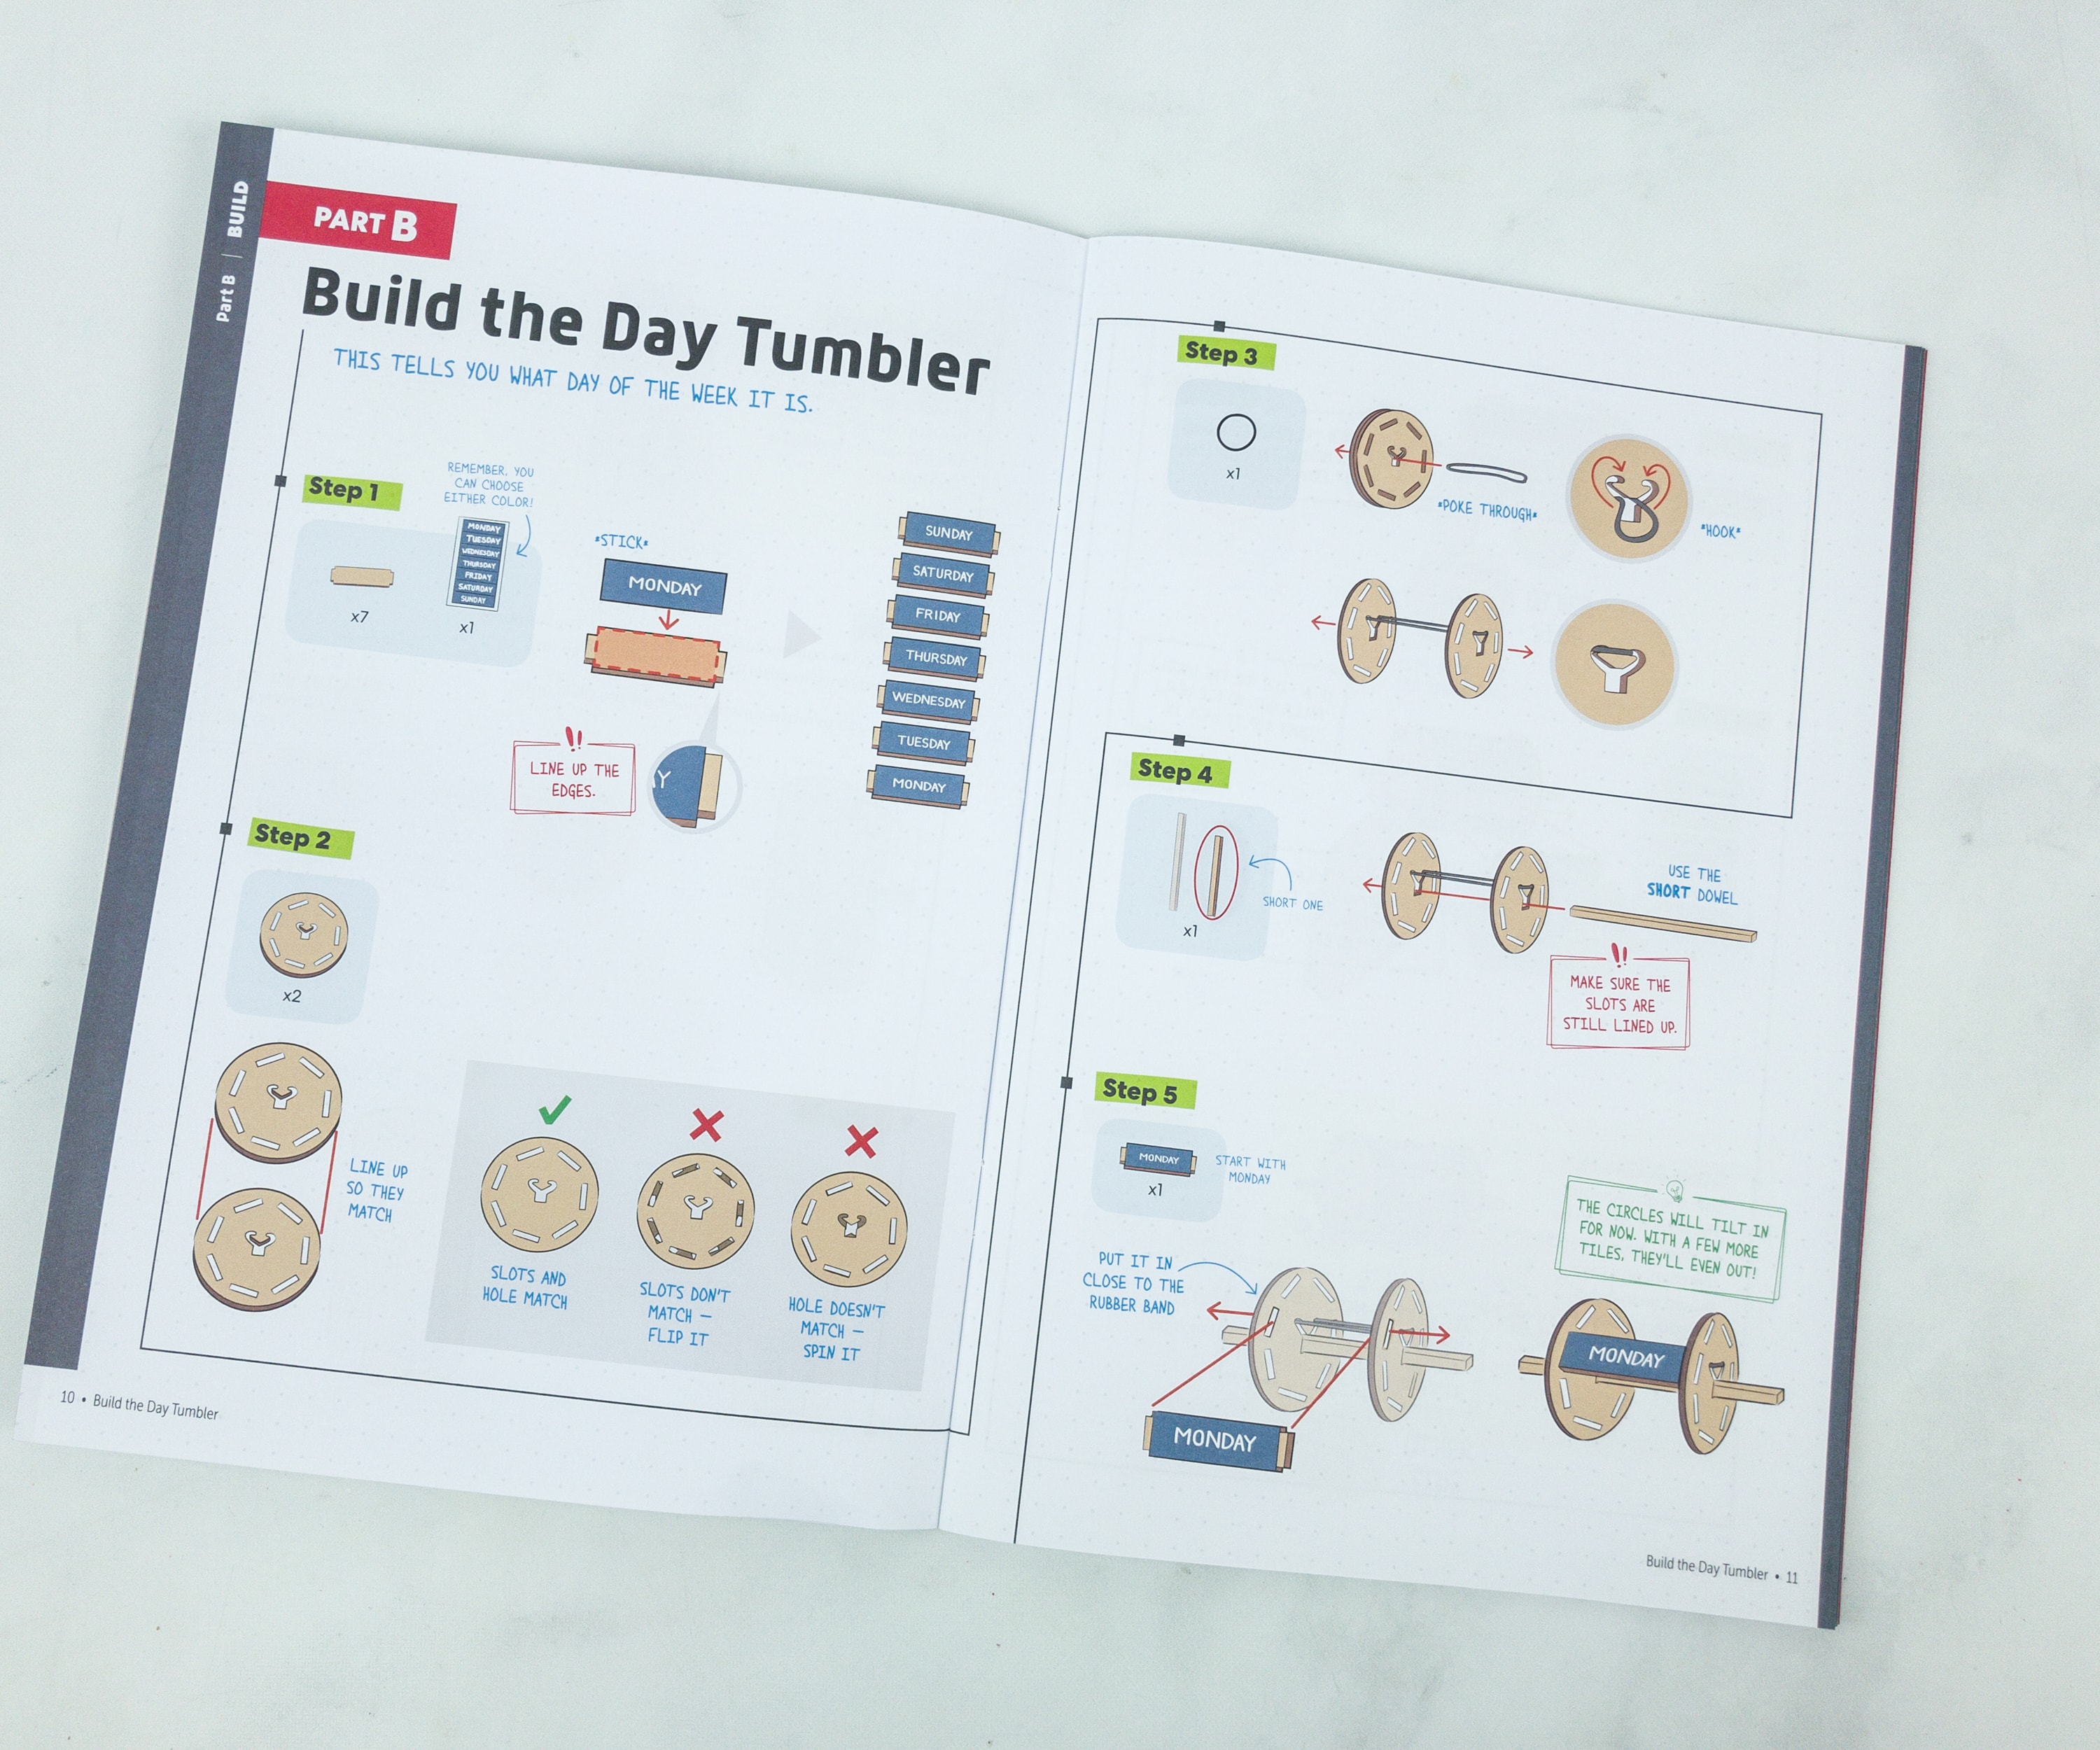
The instructions are also showing you what not to do to prevent any mistakes and better facilitates the workflow too.
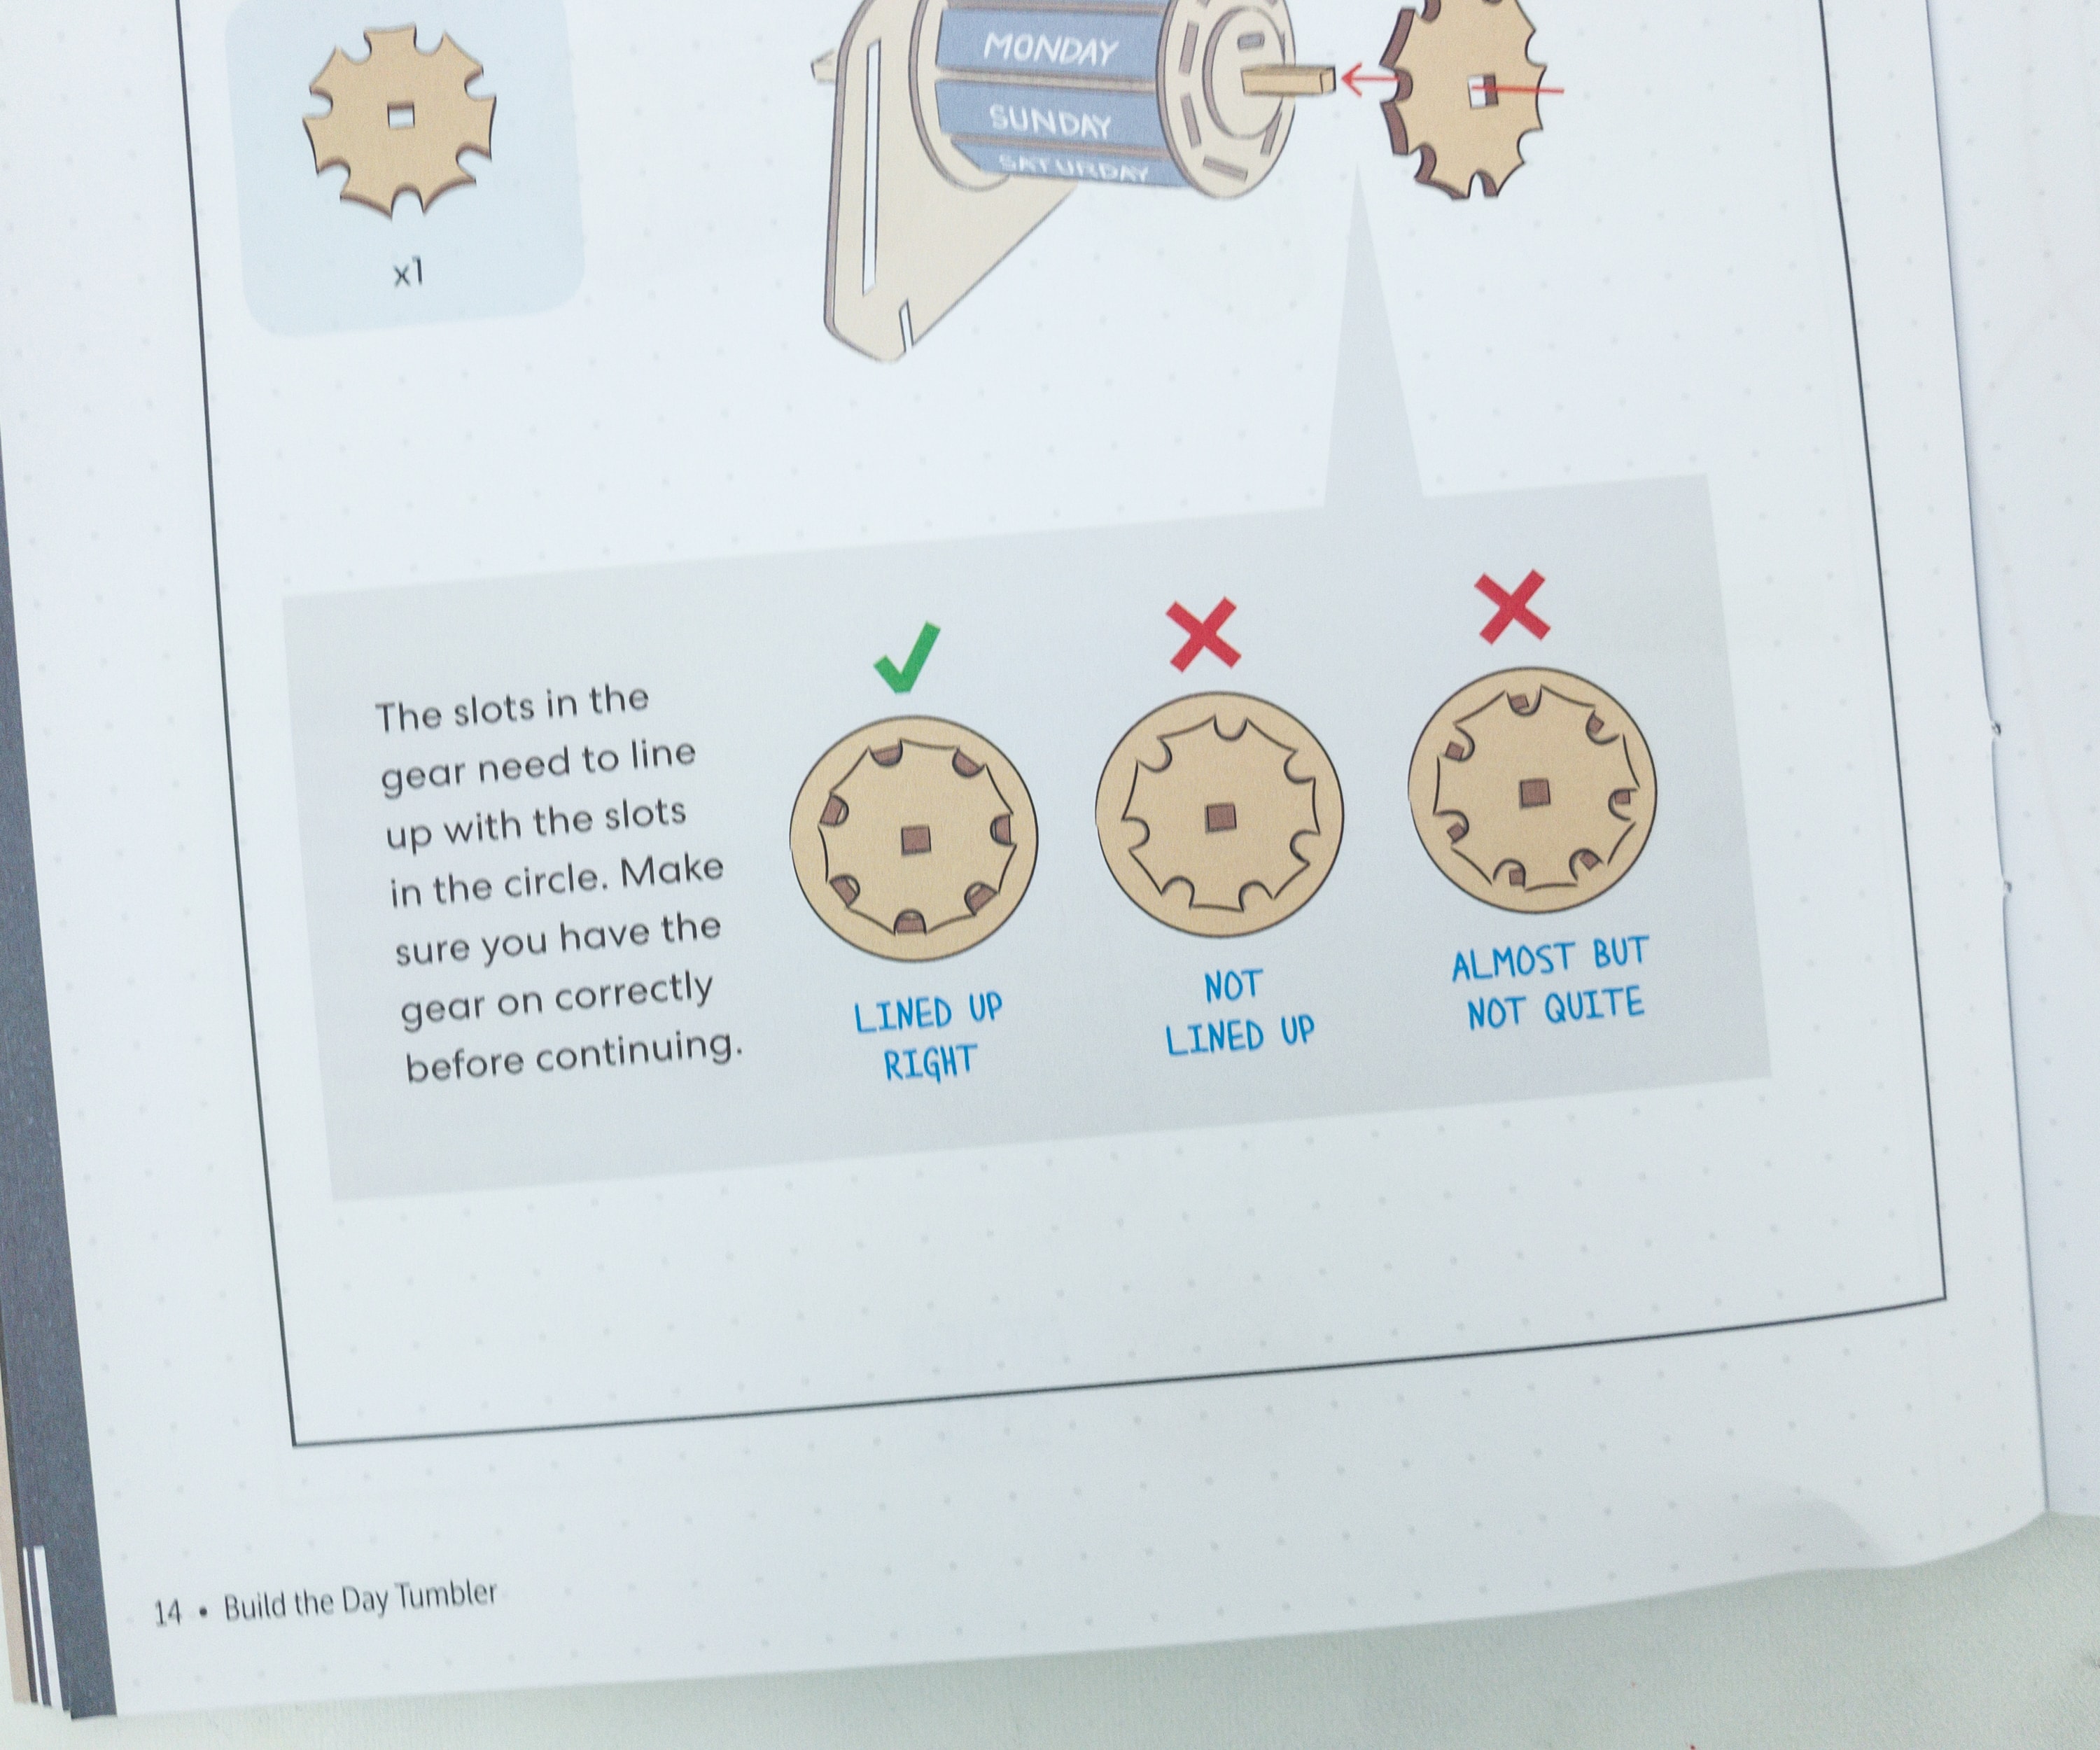
The instructions are not too wordy and can easily get the details just by looking at the drawings.

Tiles, tiles, and more tiles! We used them all to make the Part A and Part B activities.
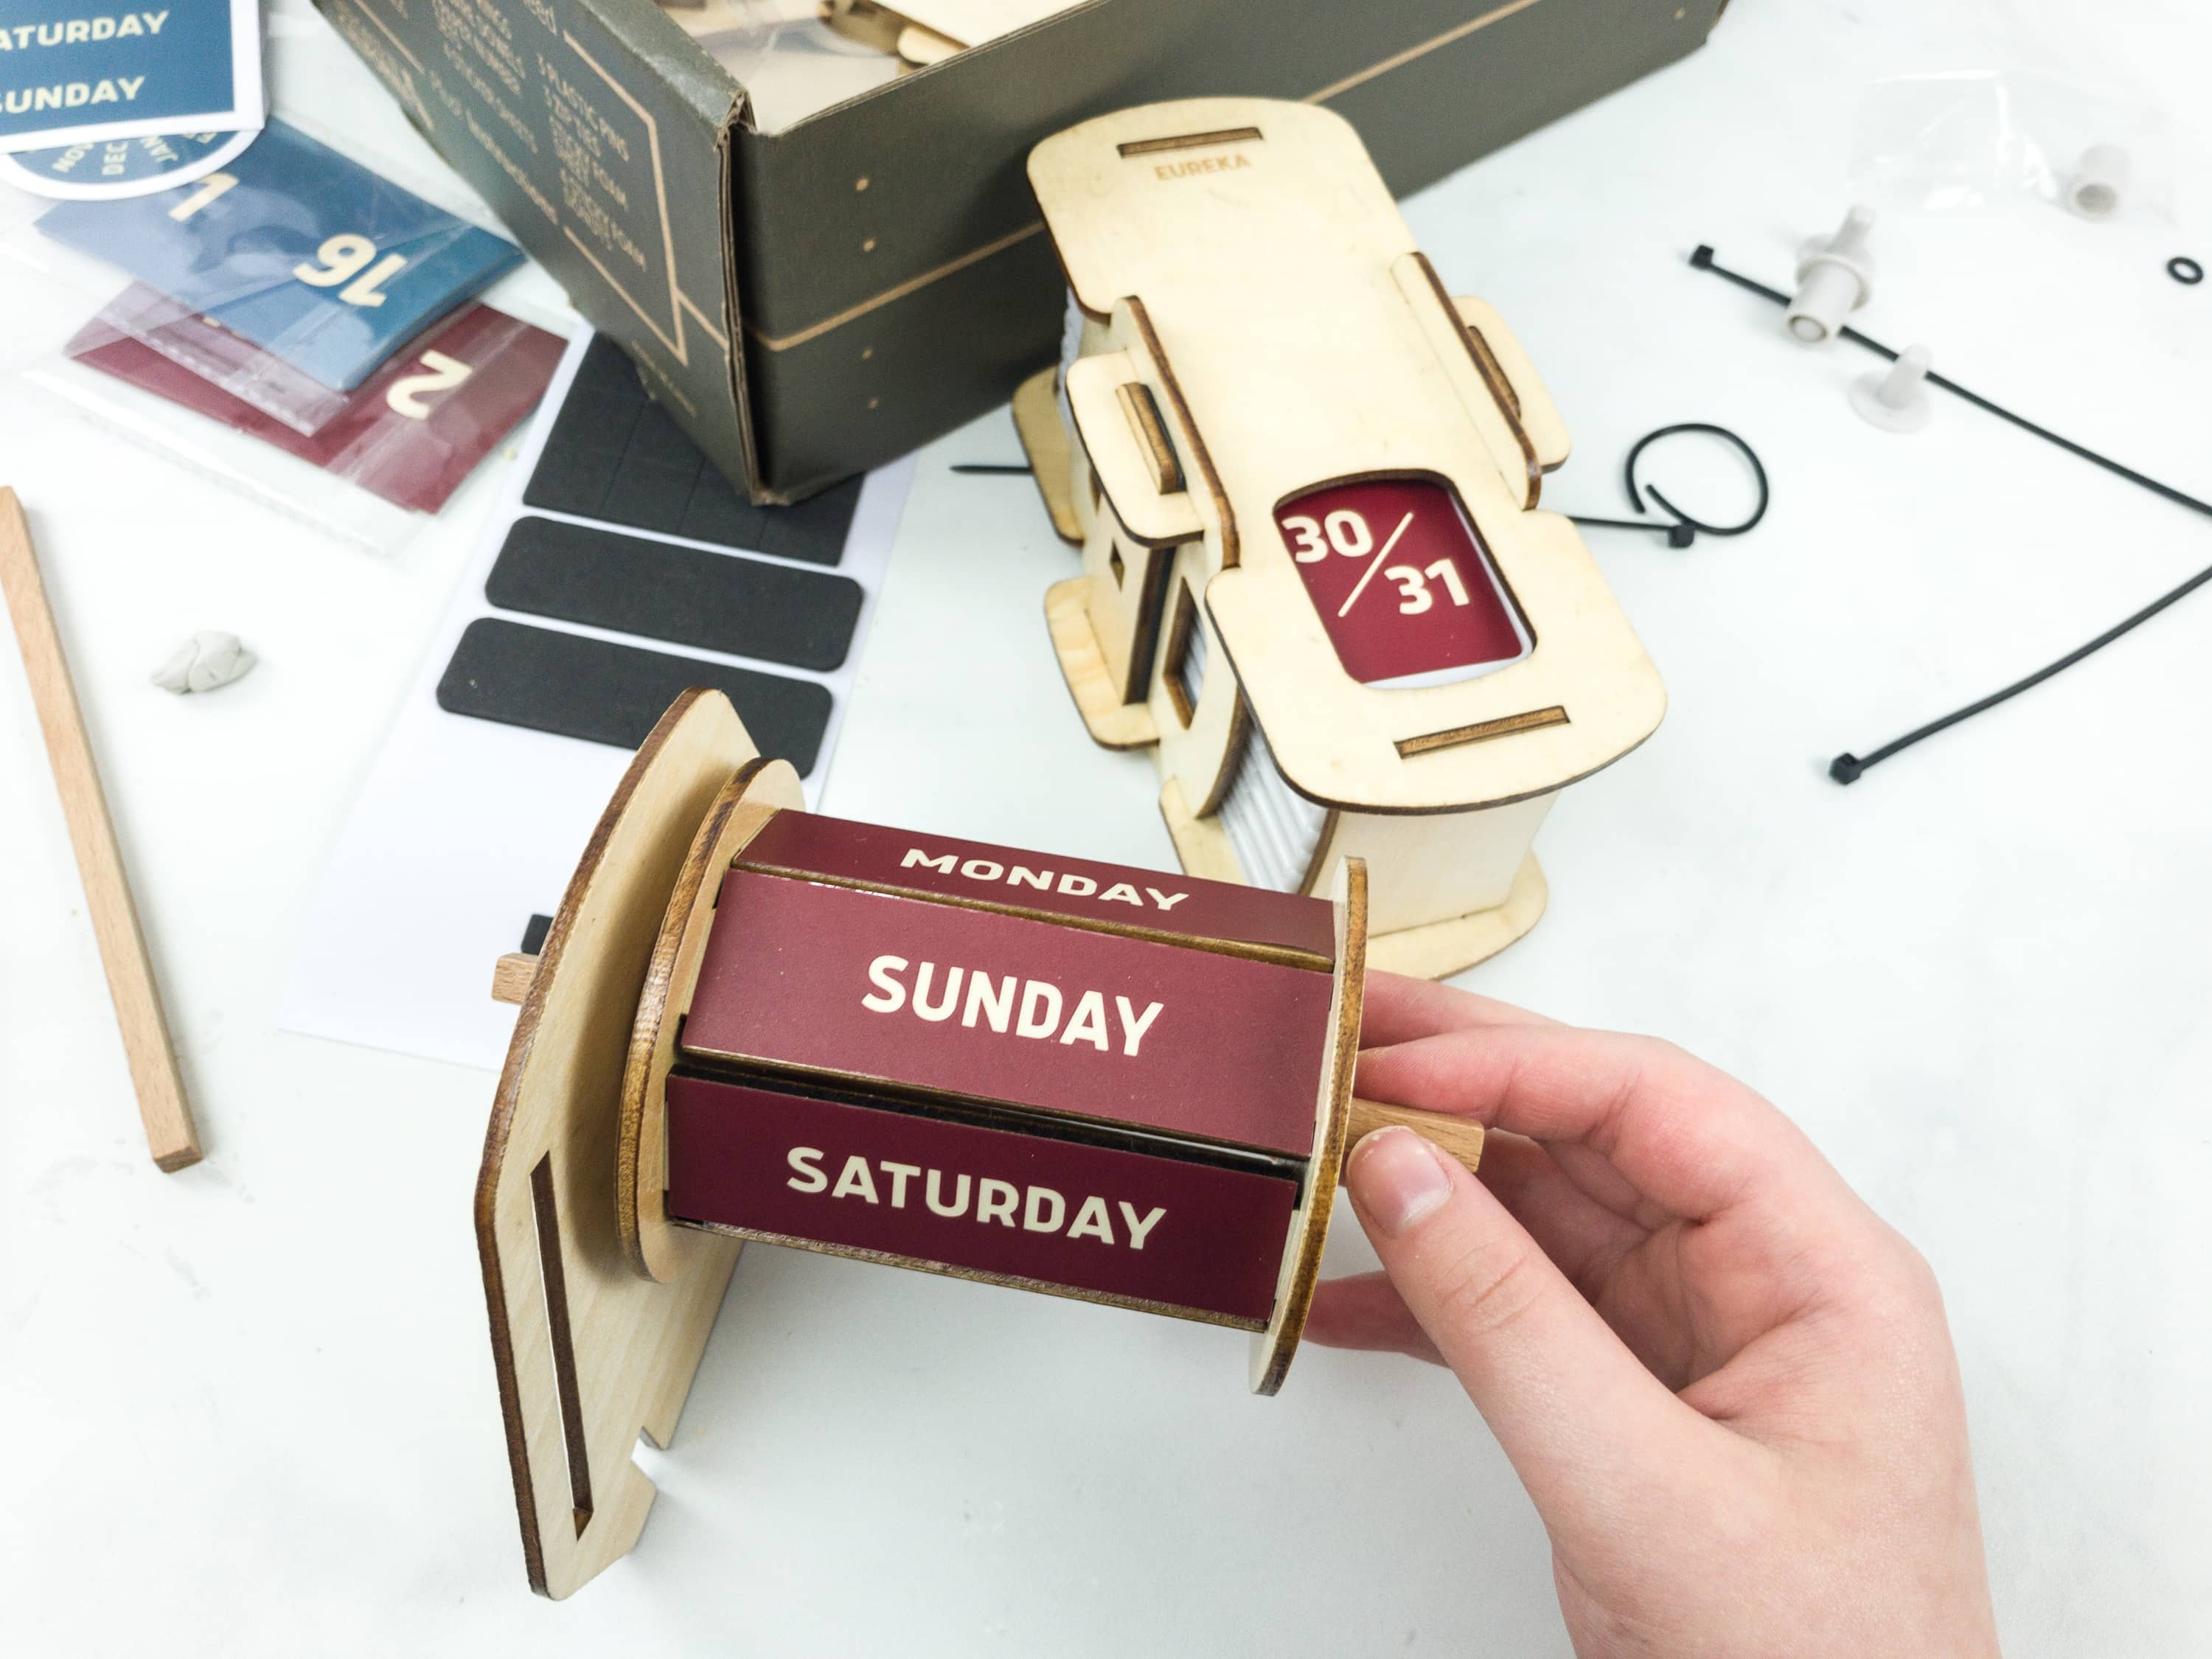
We tried rotating it first to see if it’s working nicely.
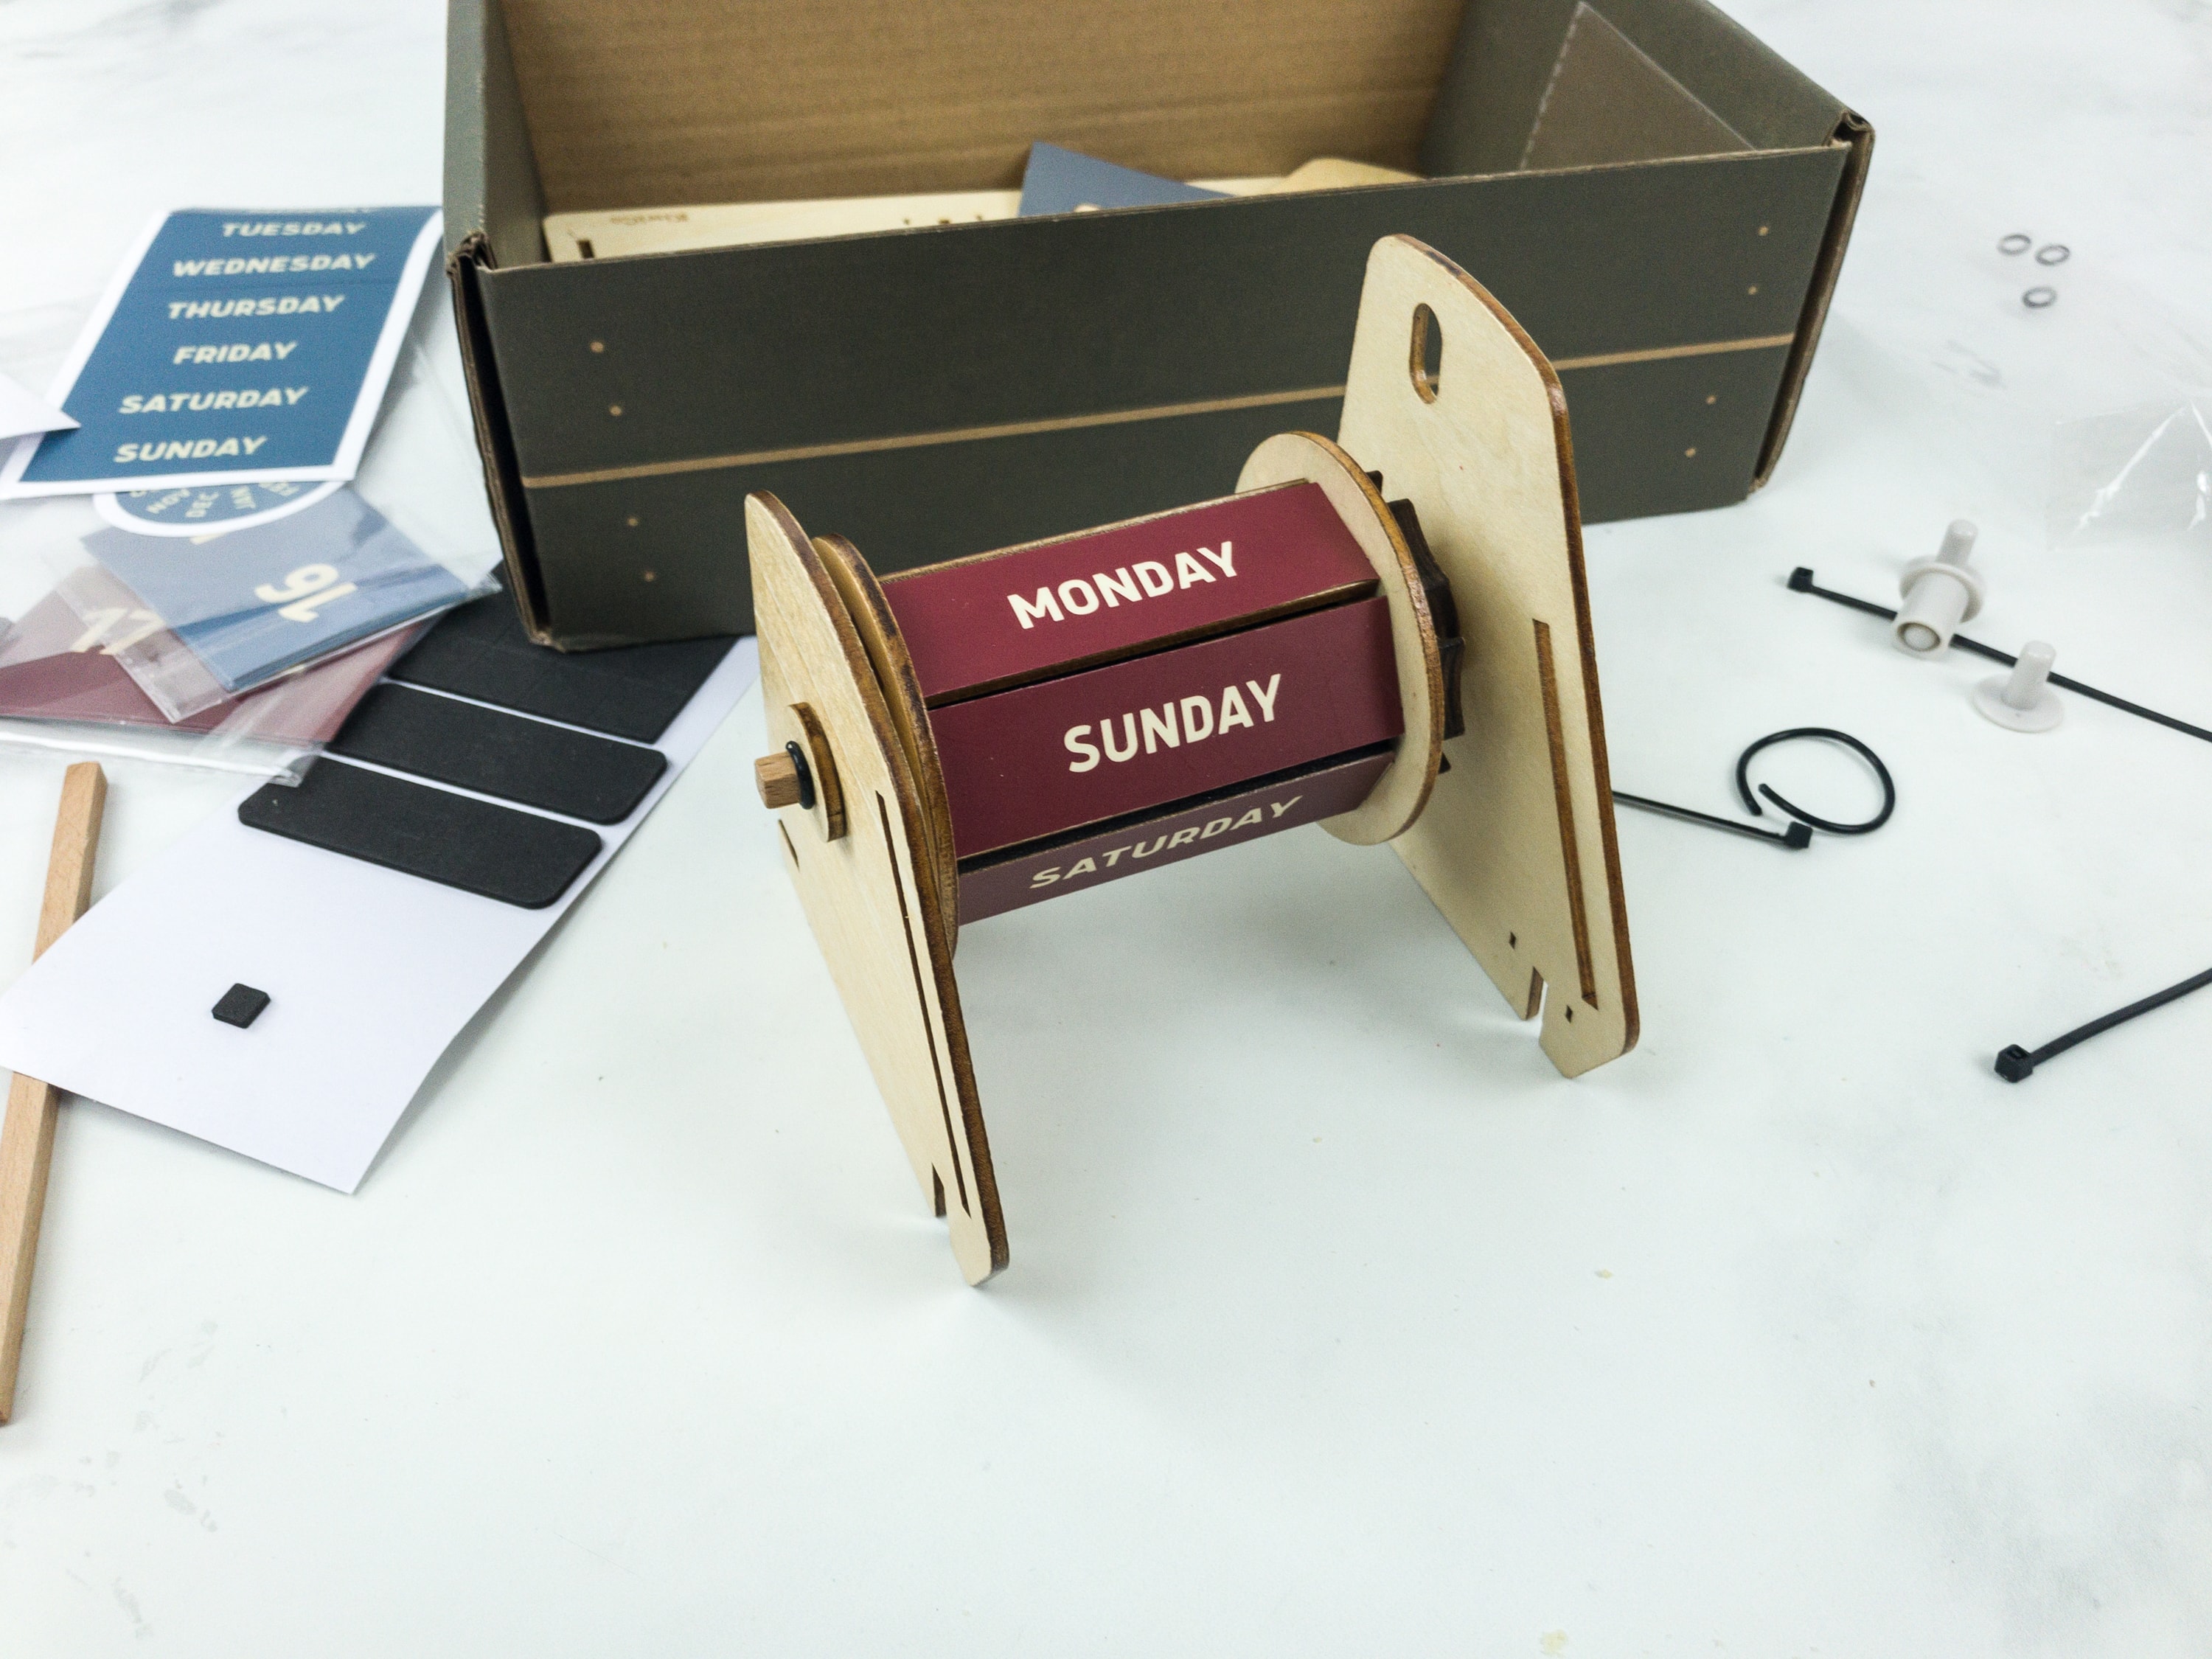
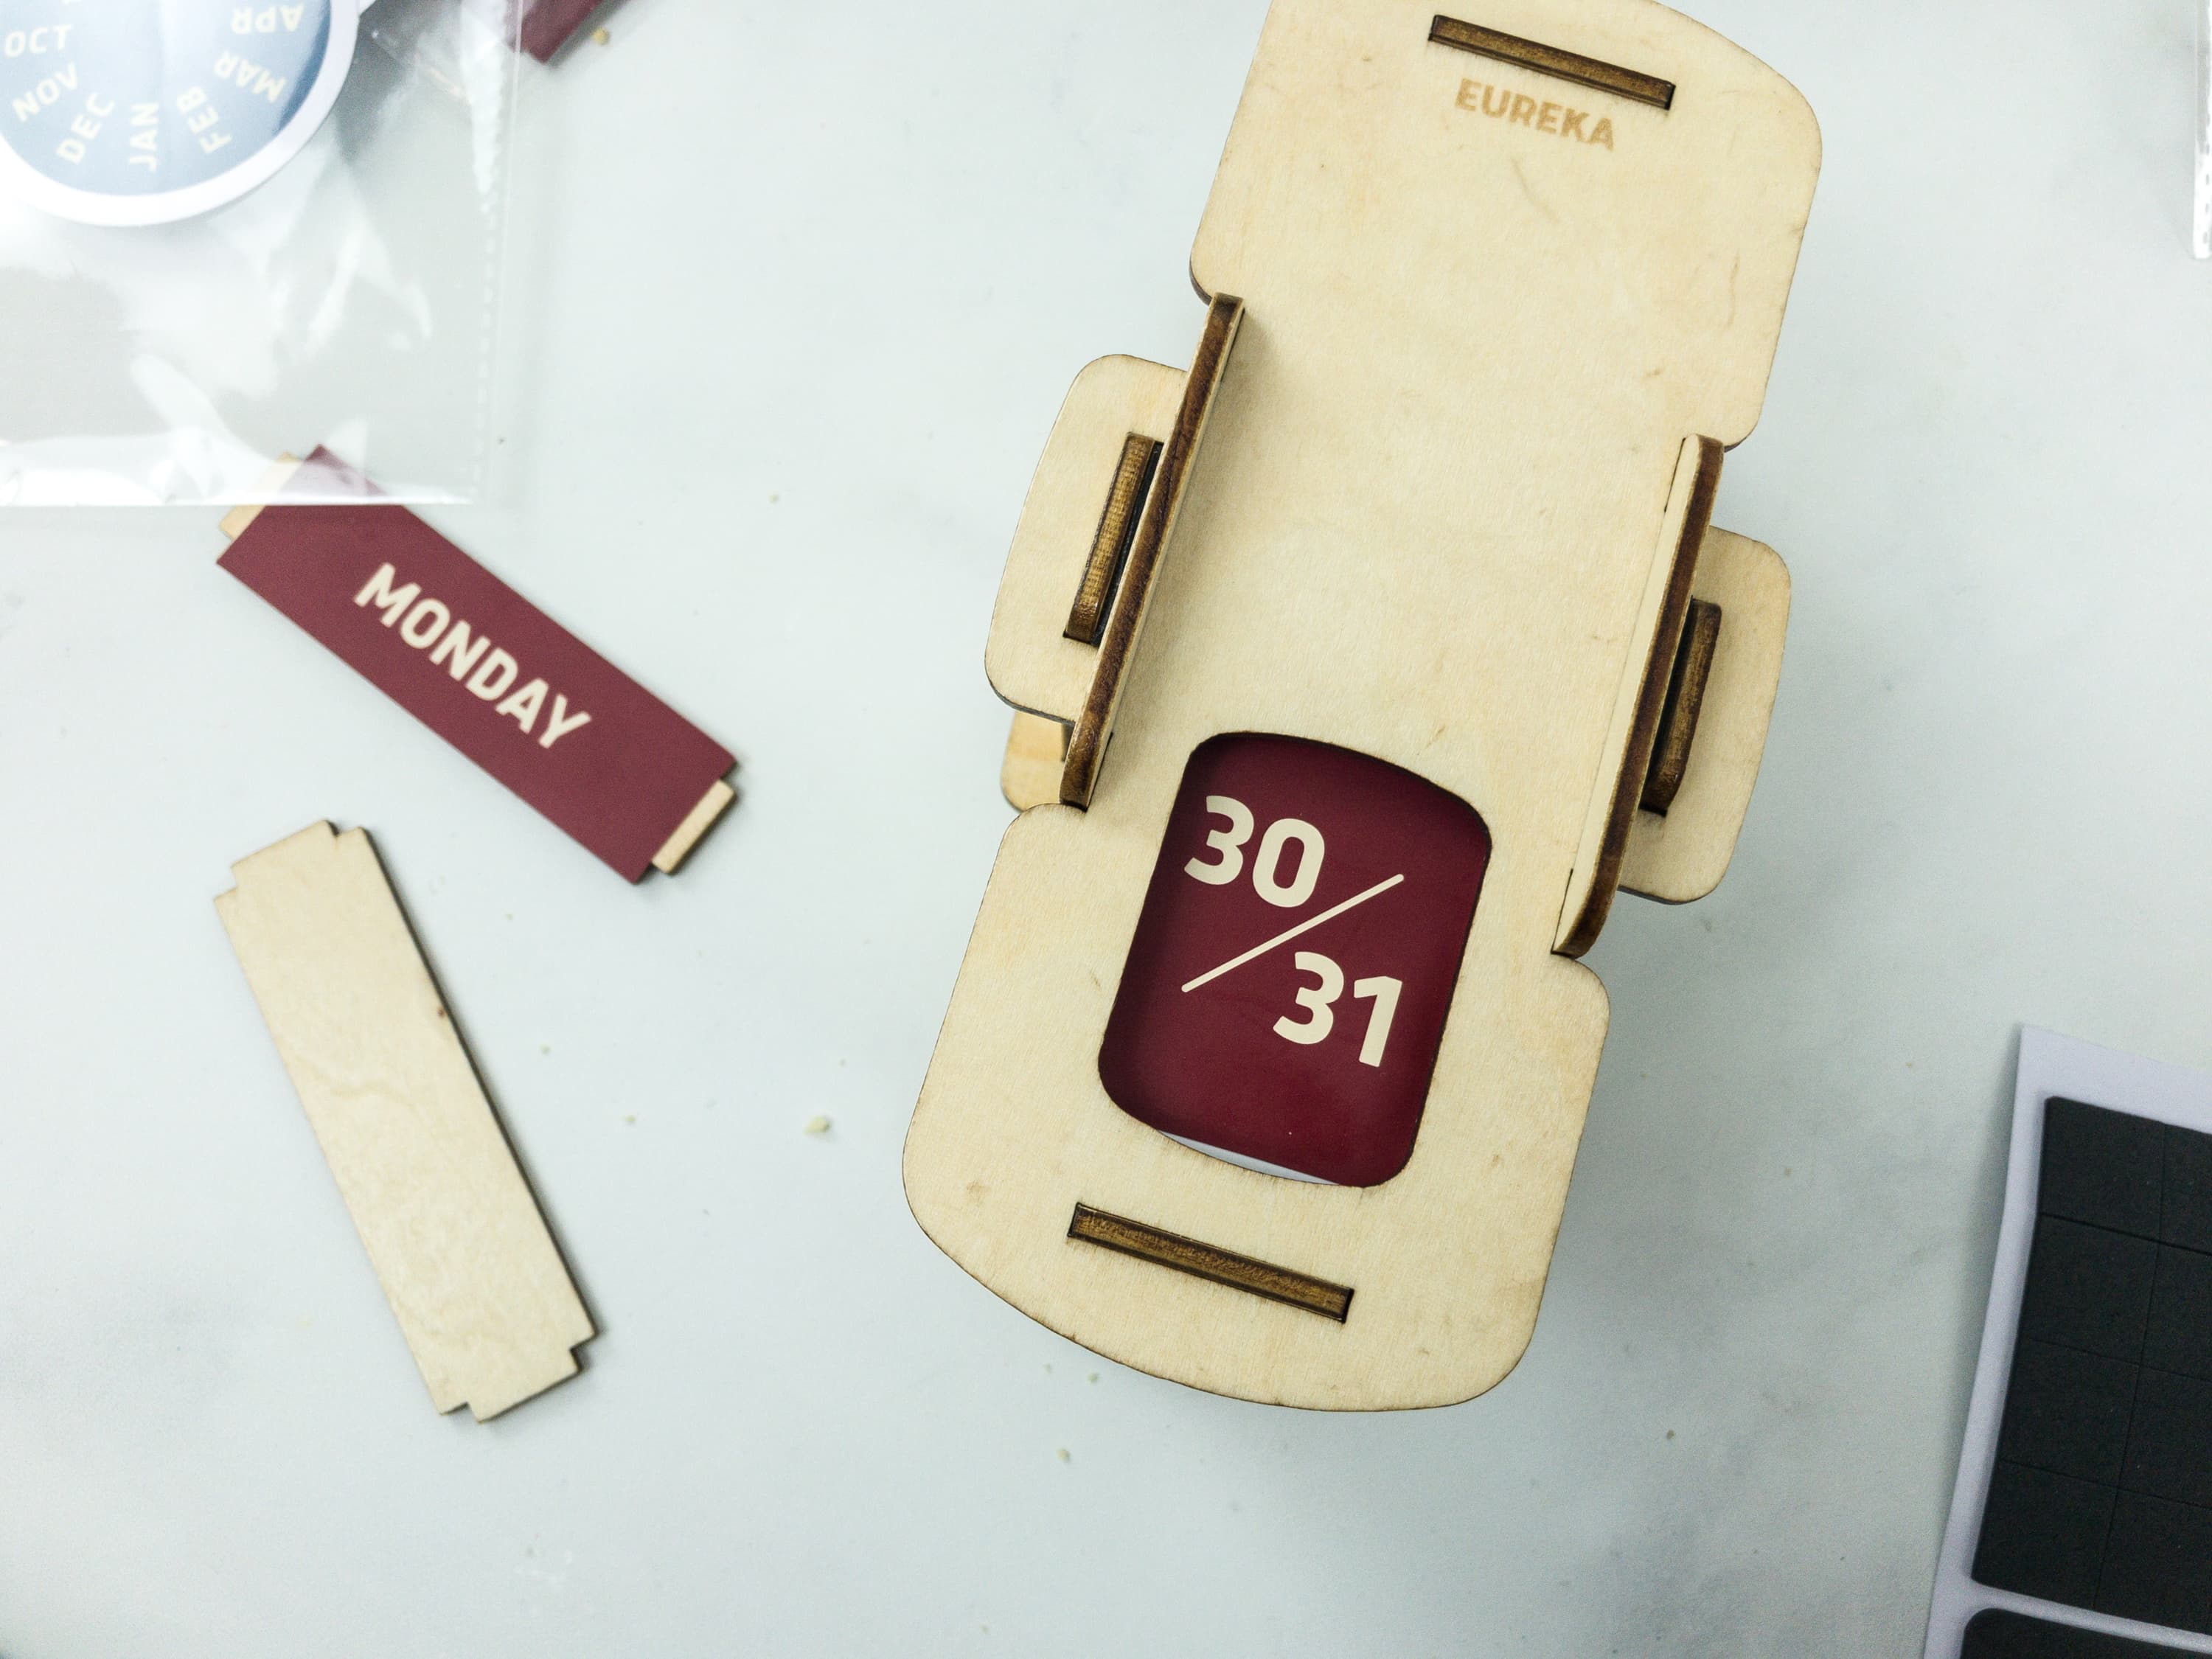
Voila! Day Tumbler is finished!

It is time to add the month dial!

This is how you attached the Number tumbler and date tumbler together.
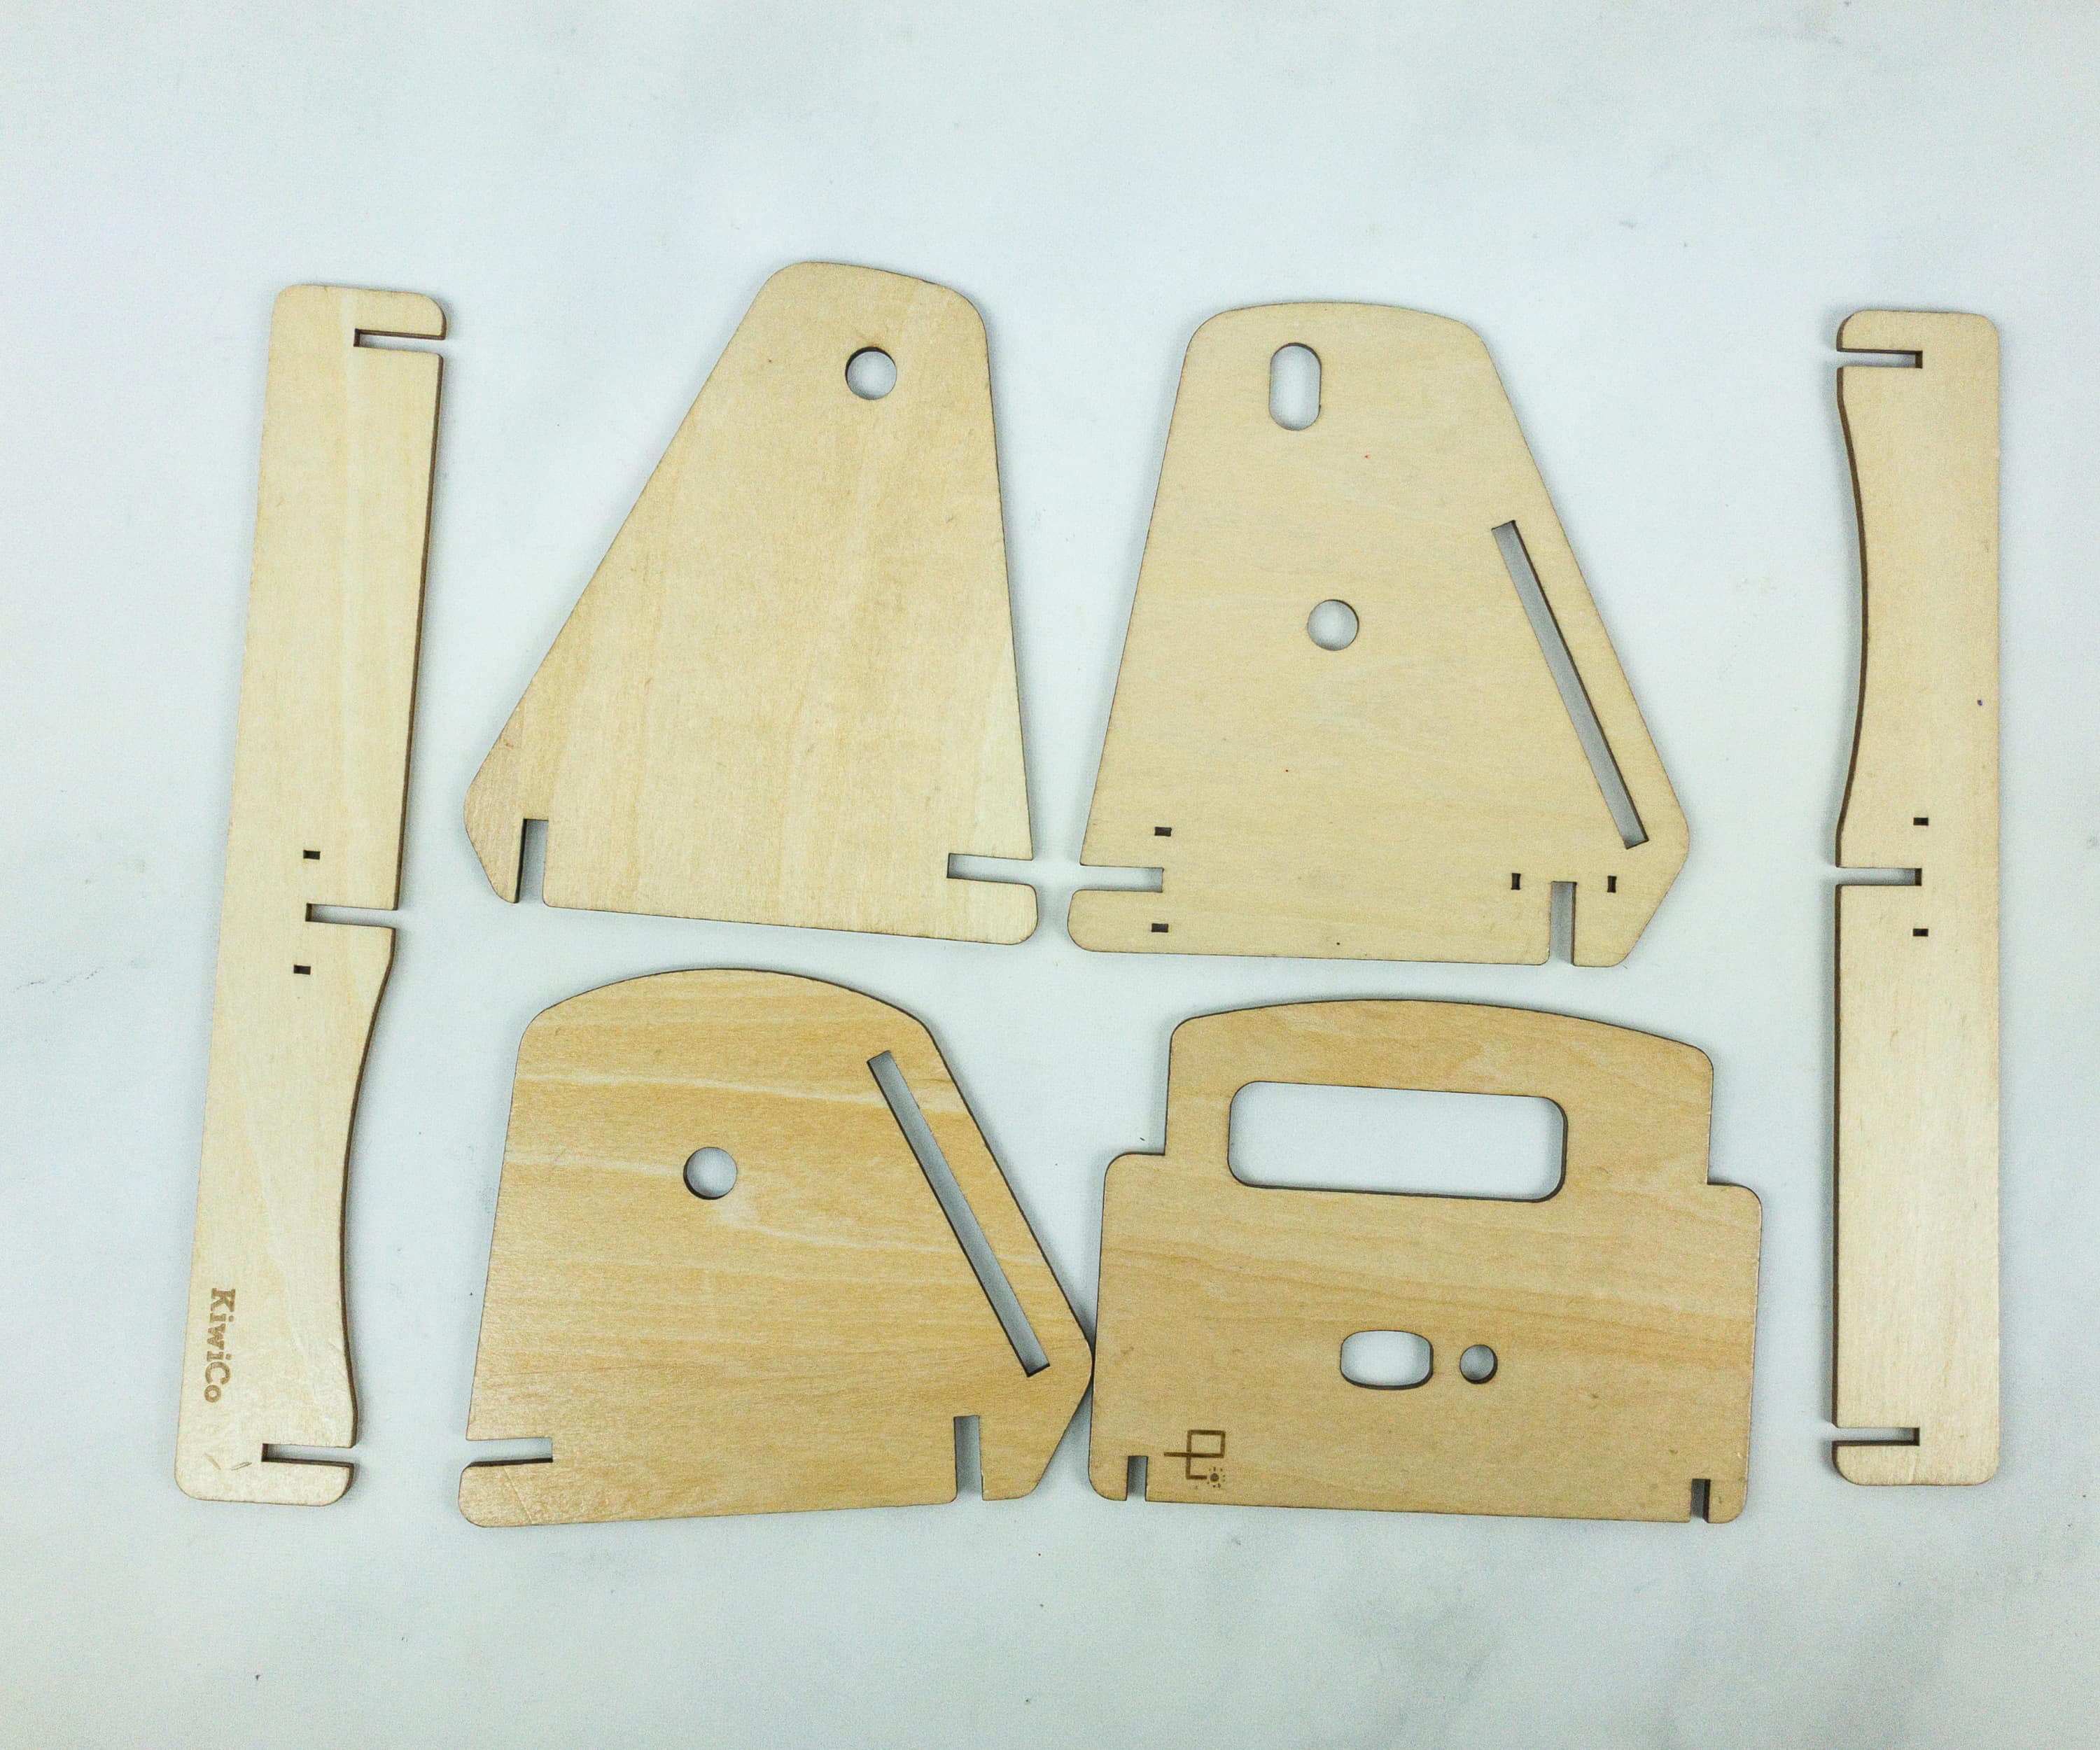
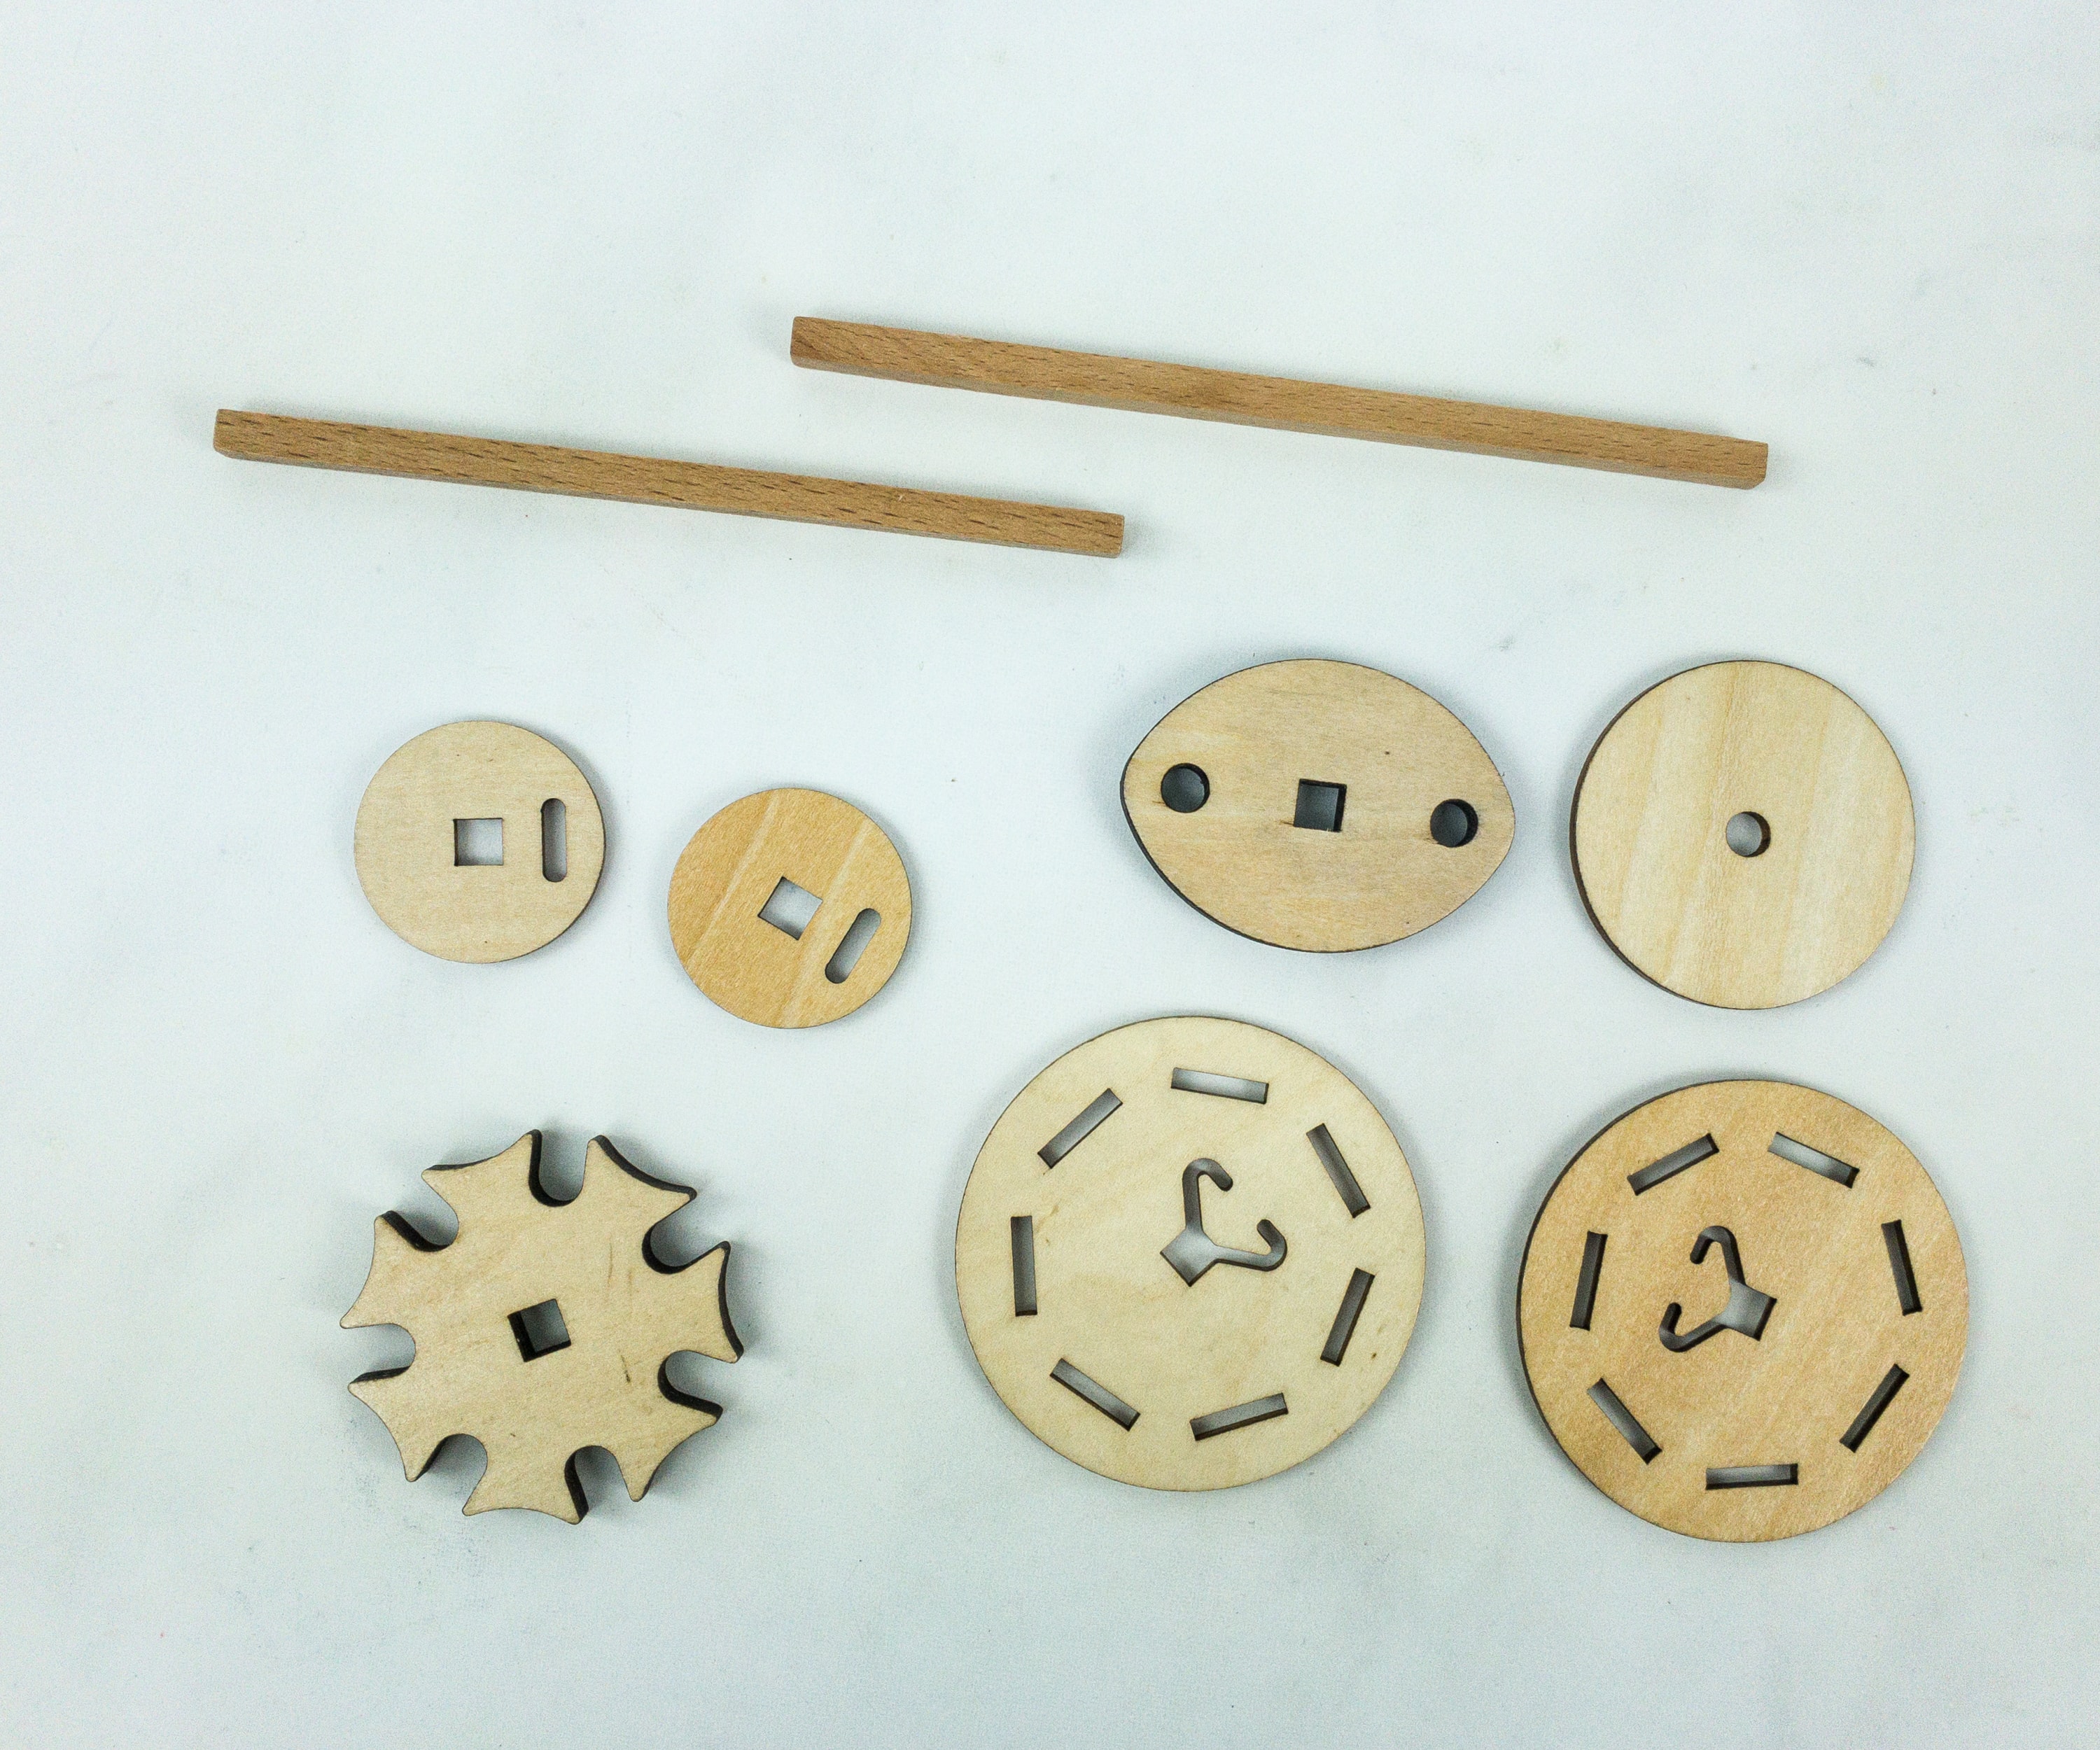
She separated the parts from sizes. Here are the big parts that mostly make up the base.

She gets everything working by paying attention to the smaller details too.
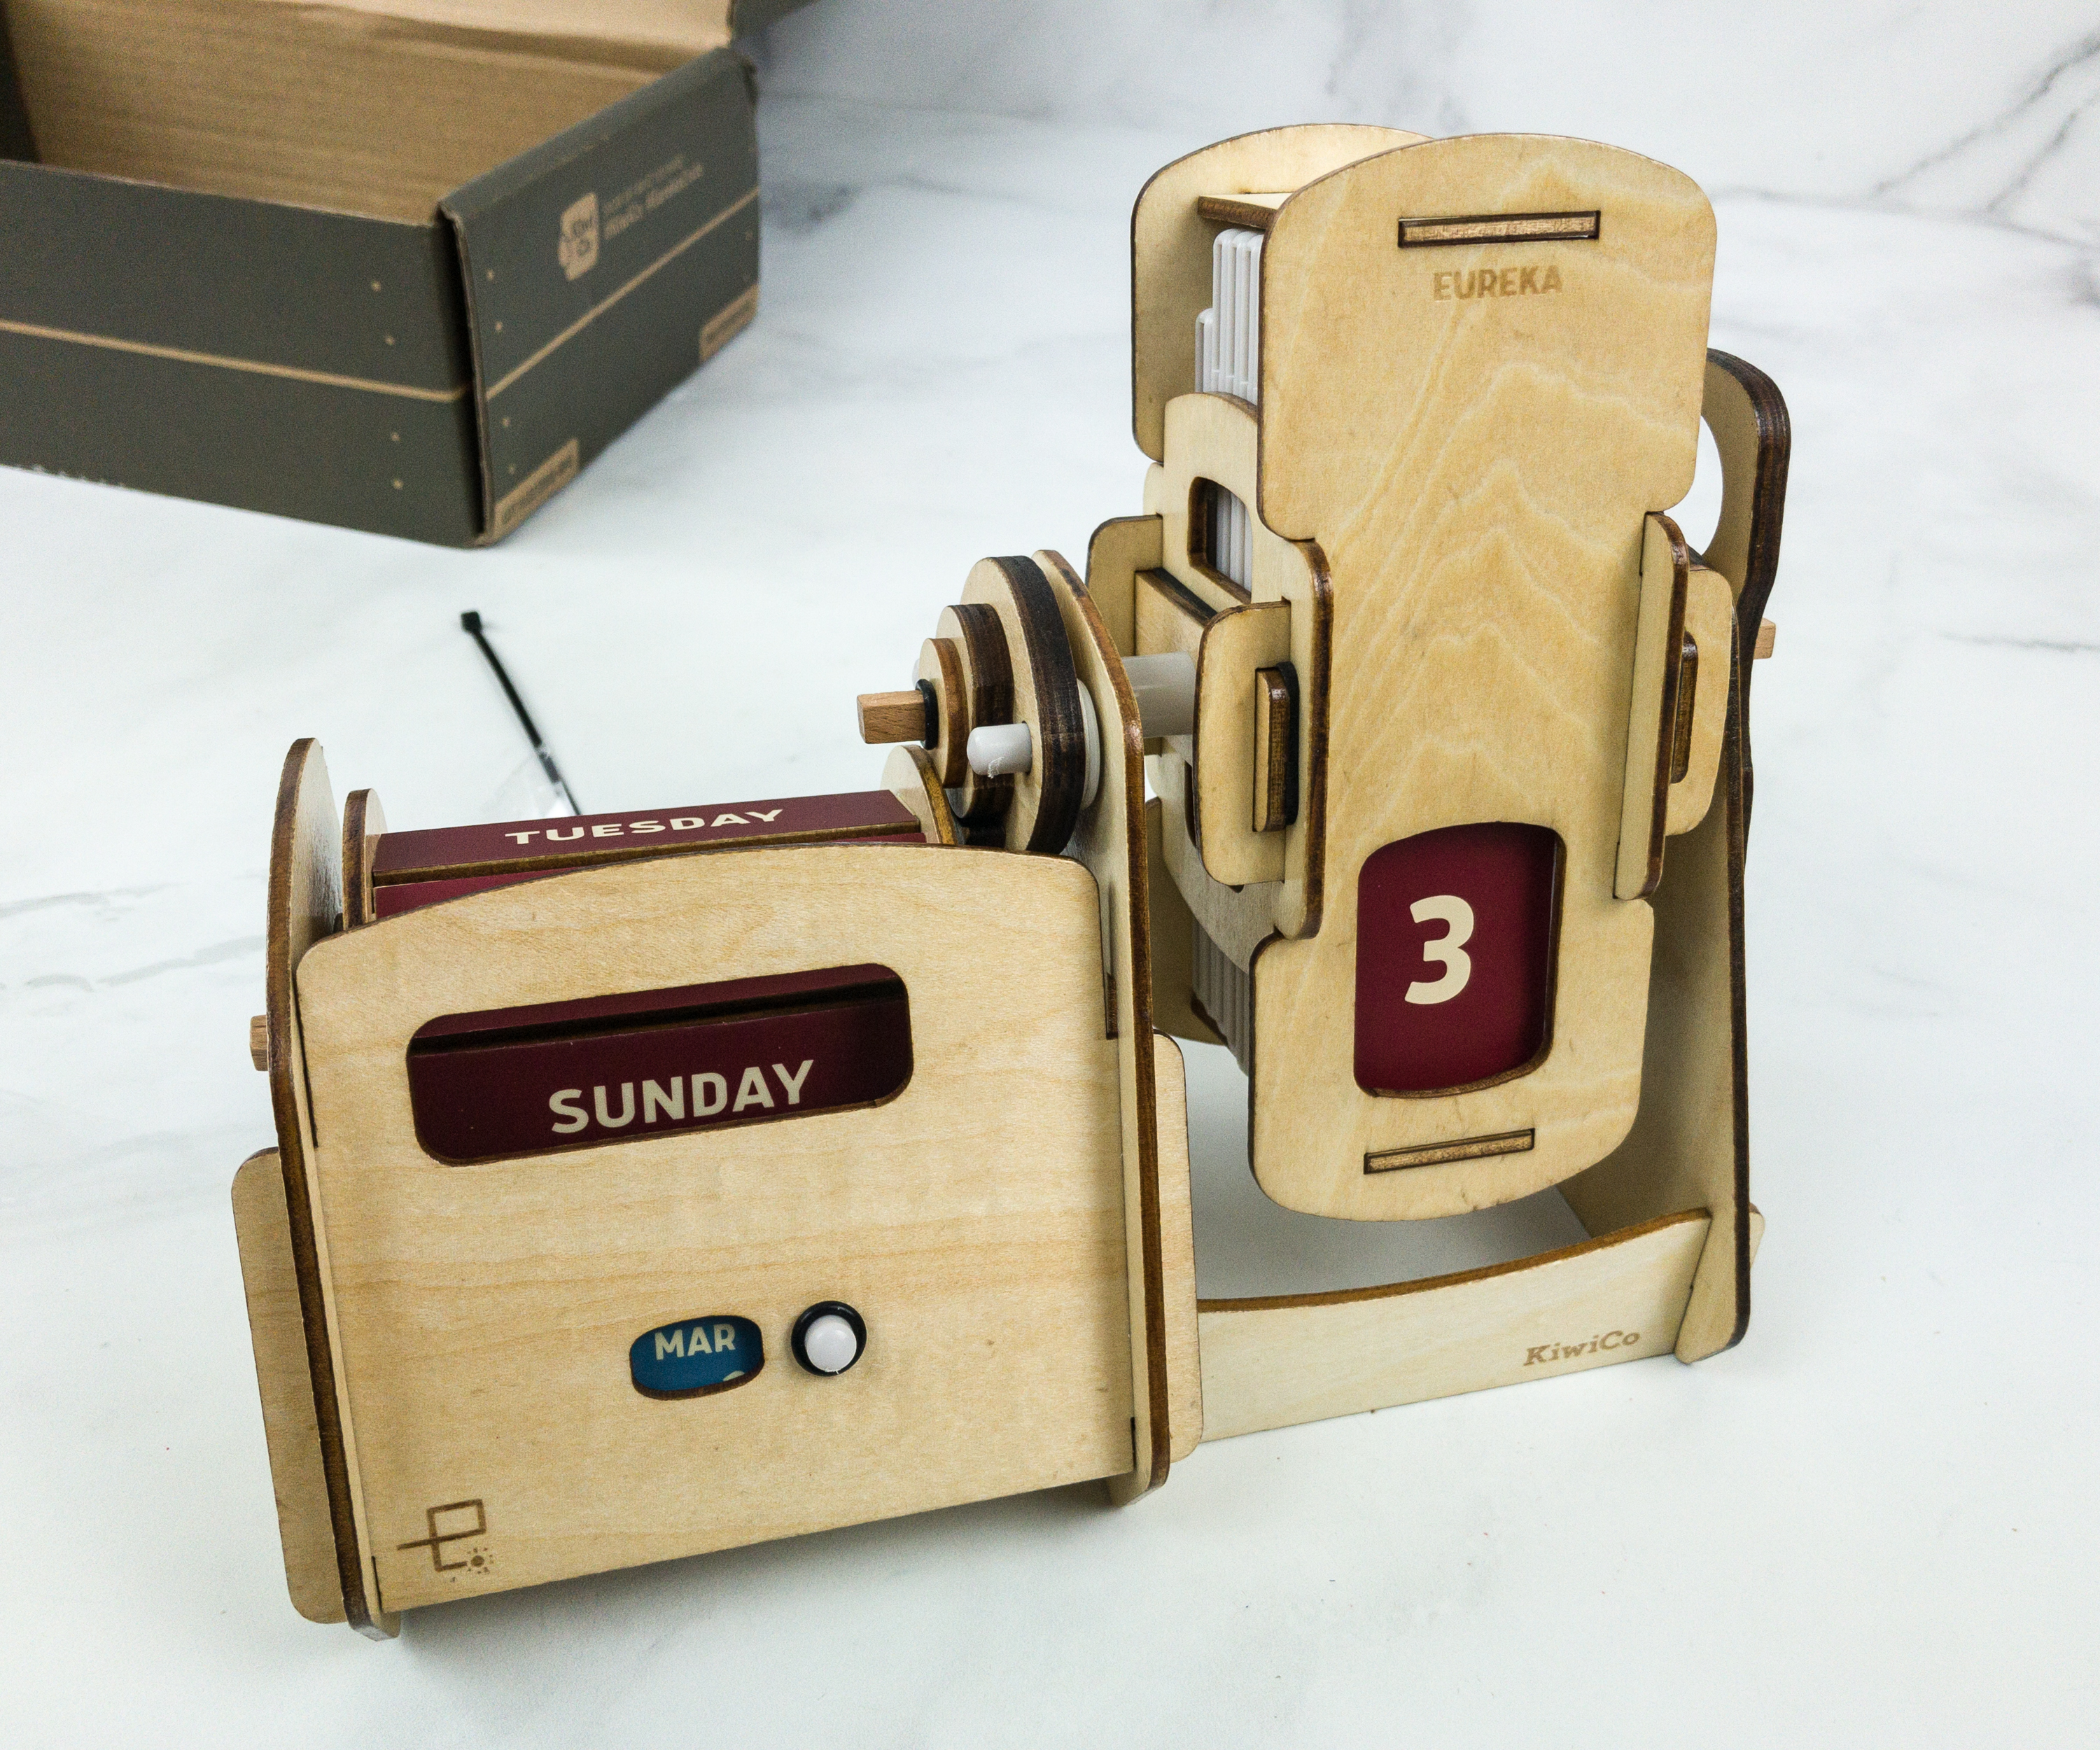
The finished product is very cool. You can use it every year and a great calendar to display on your desk. We really dug playing with the gear mechanism.
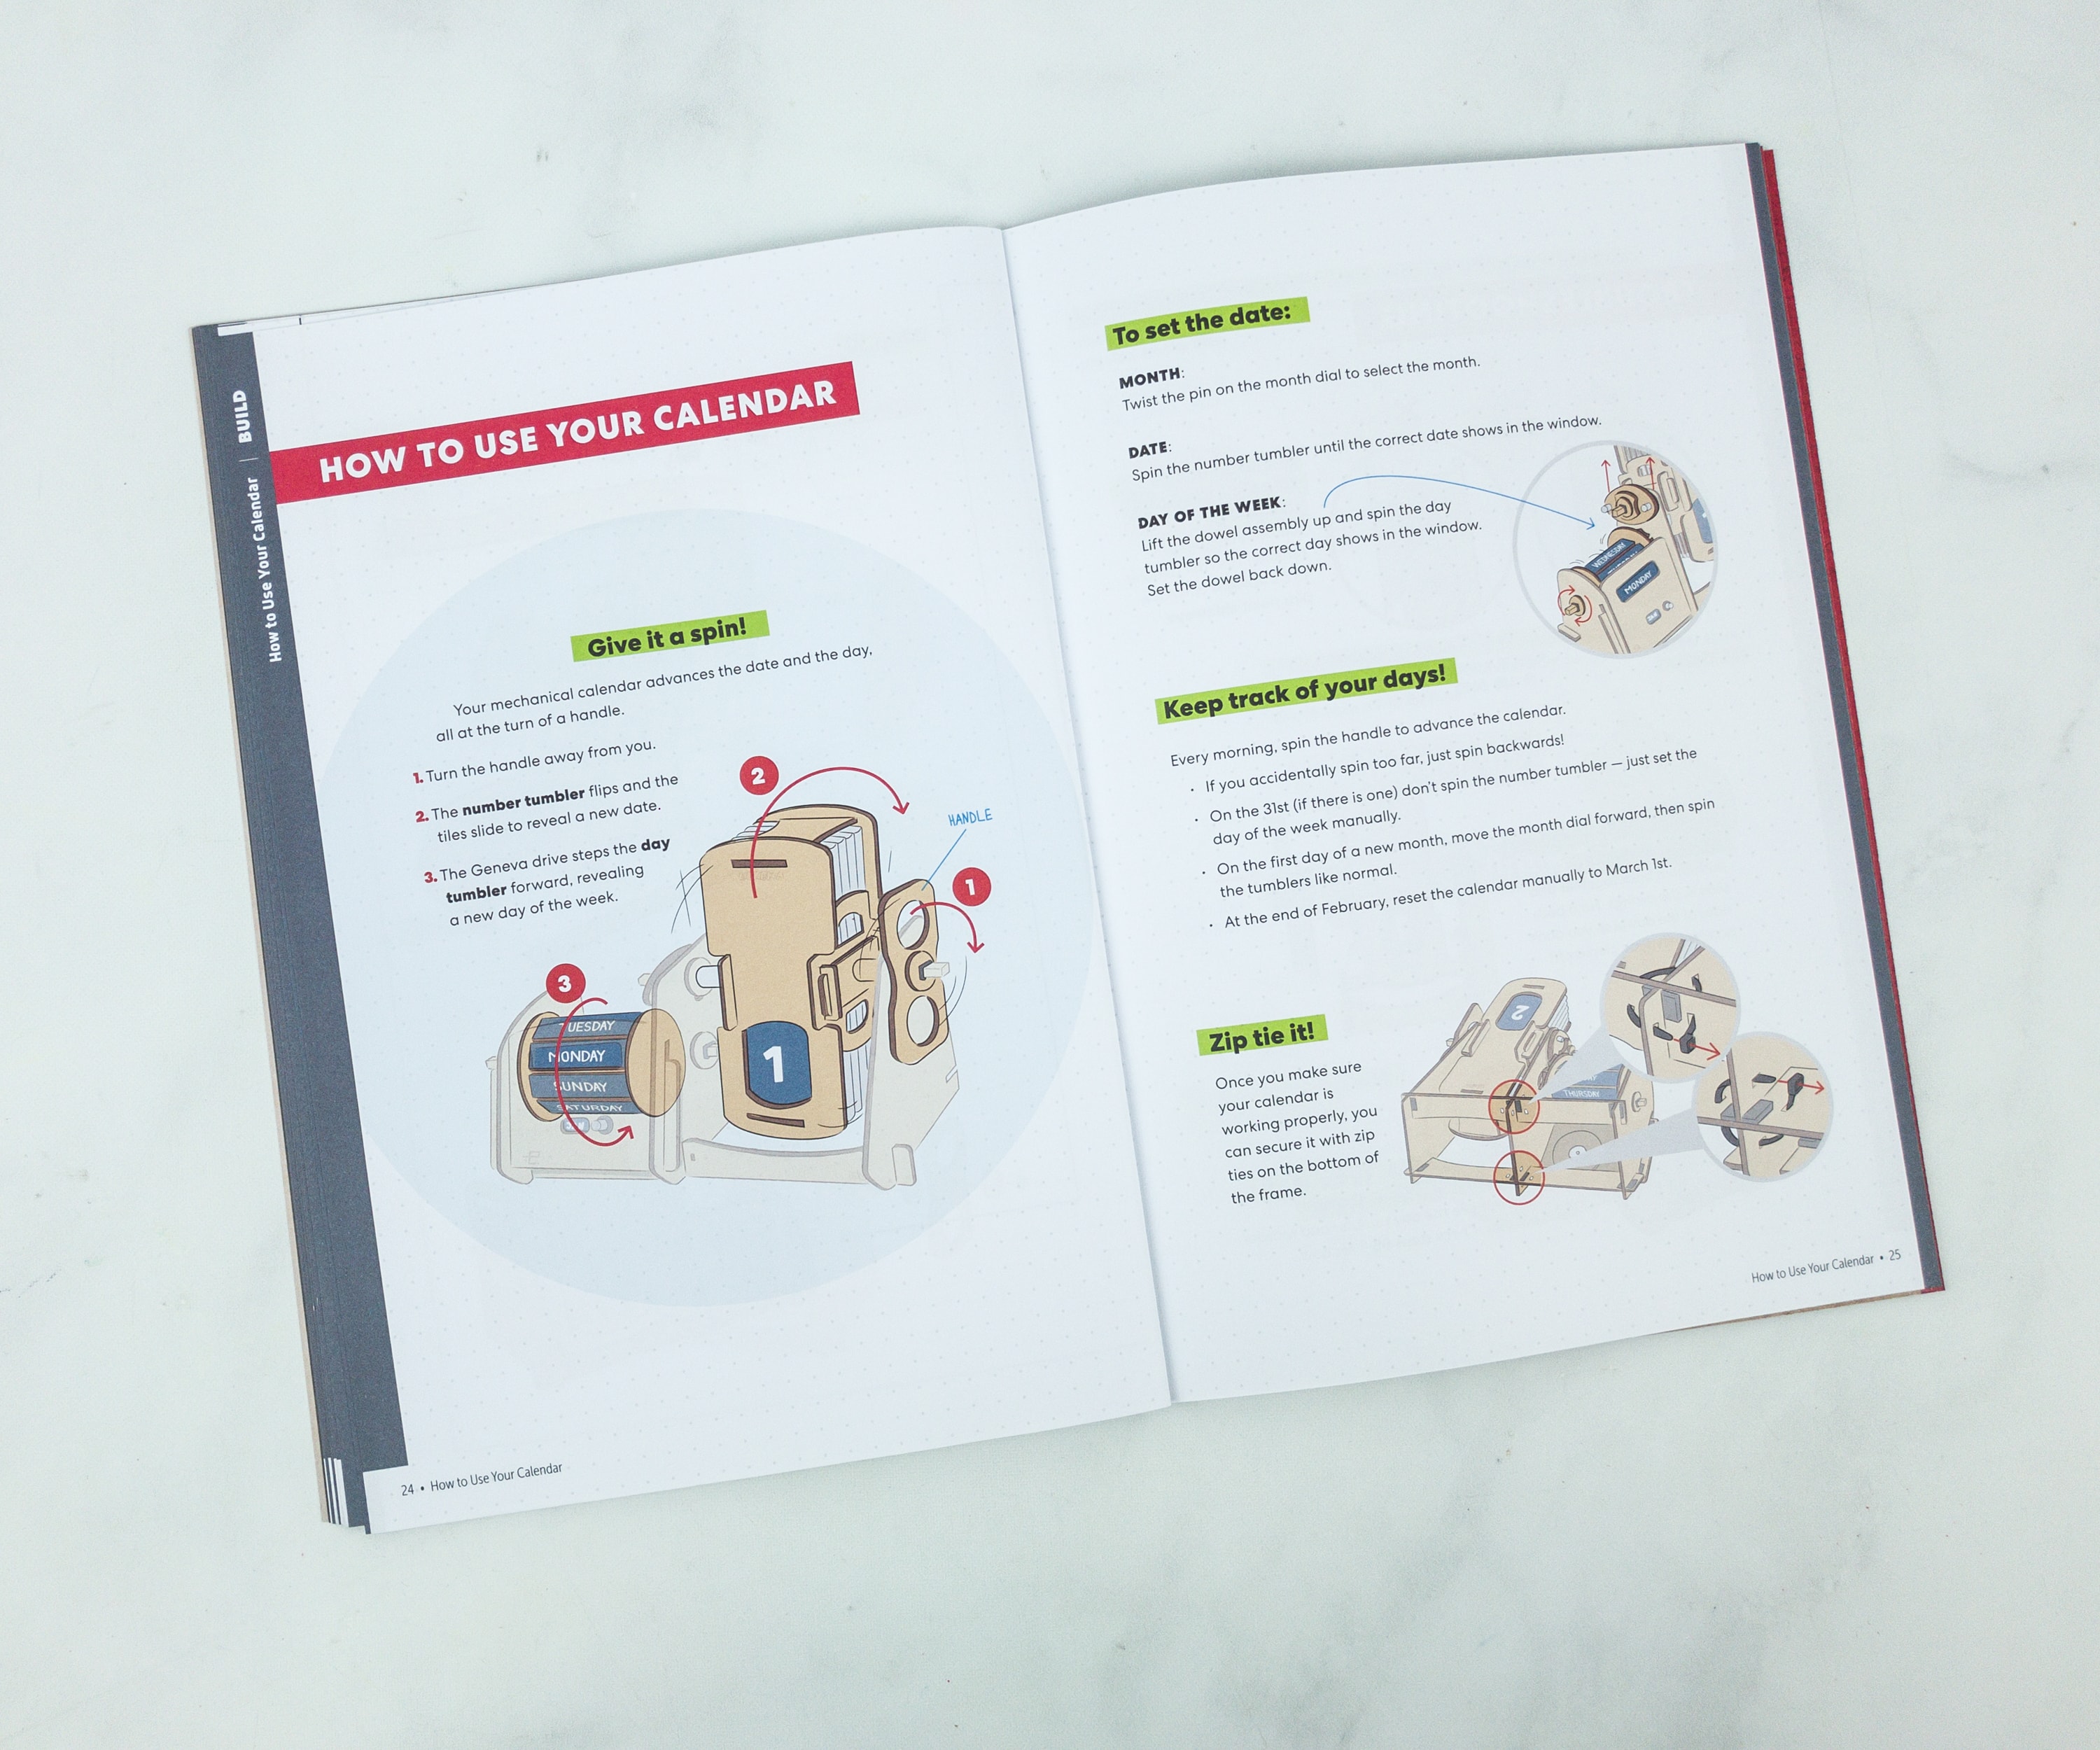
This page is showing us how to correctly use it. It’s good that if you were carried away in spinning the knob, you can just twist or spin it back. You don’t have to keep spinning the whole cycle just to get back to your wanted date.
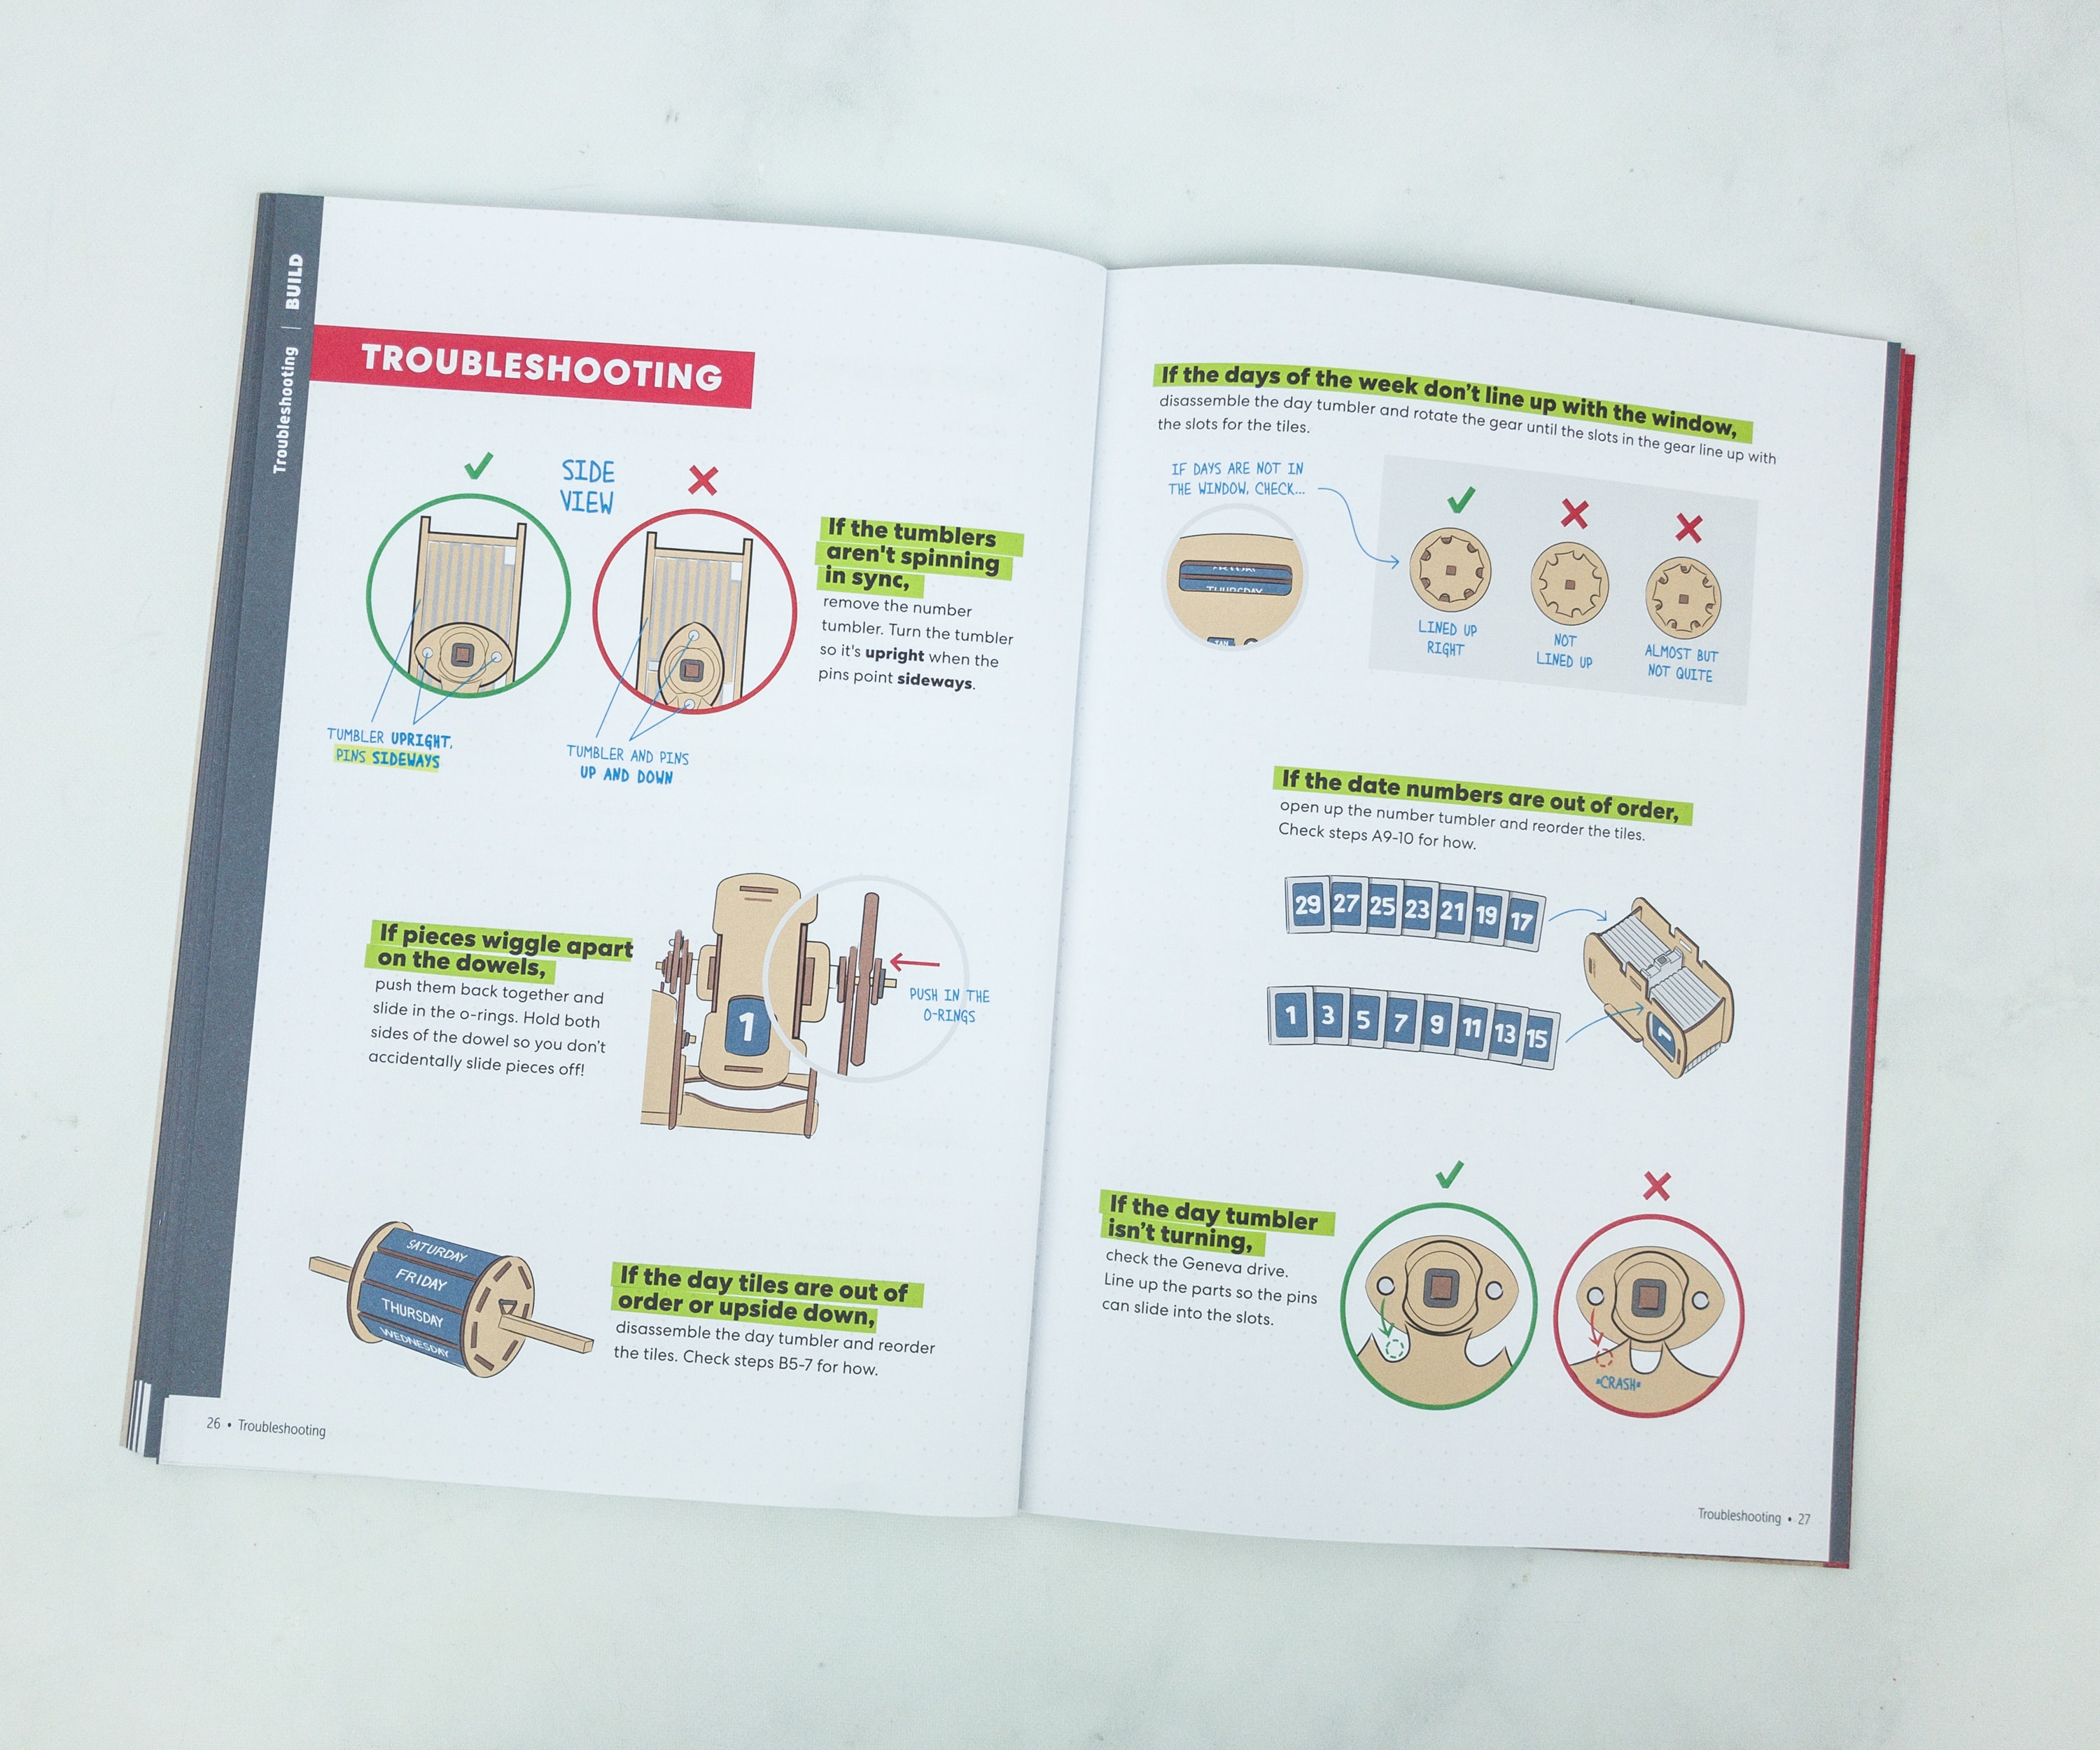
There’s a troubleshooting page you can go back to as a way of checking if you did everything right.
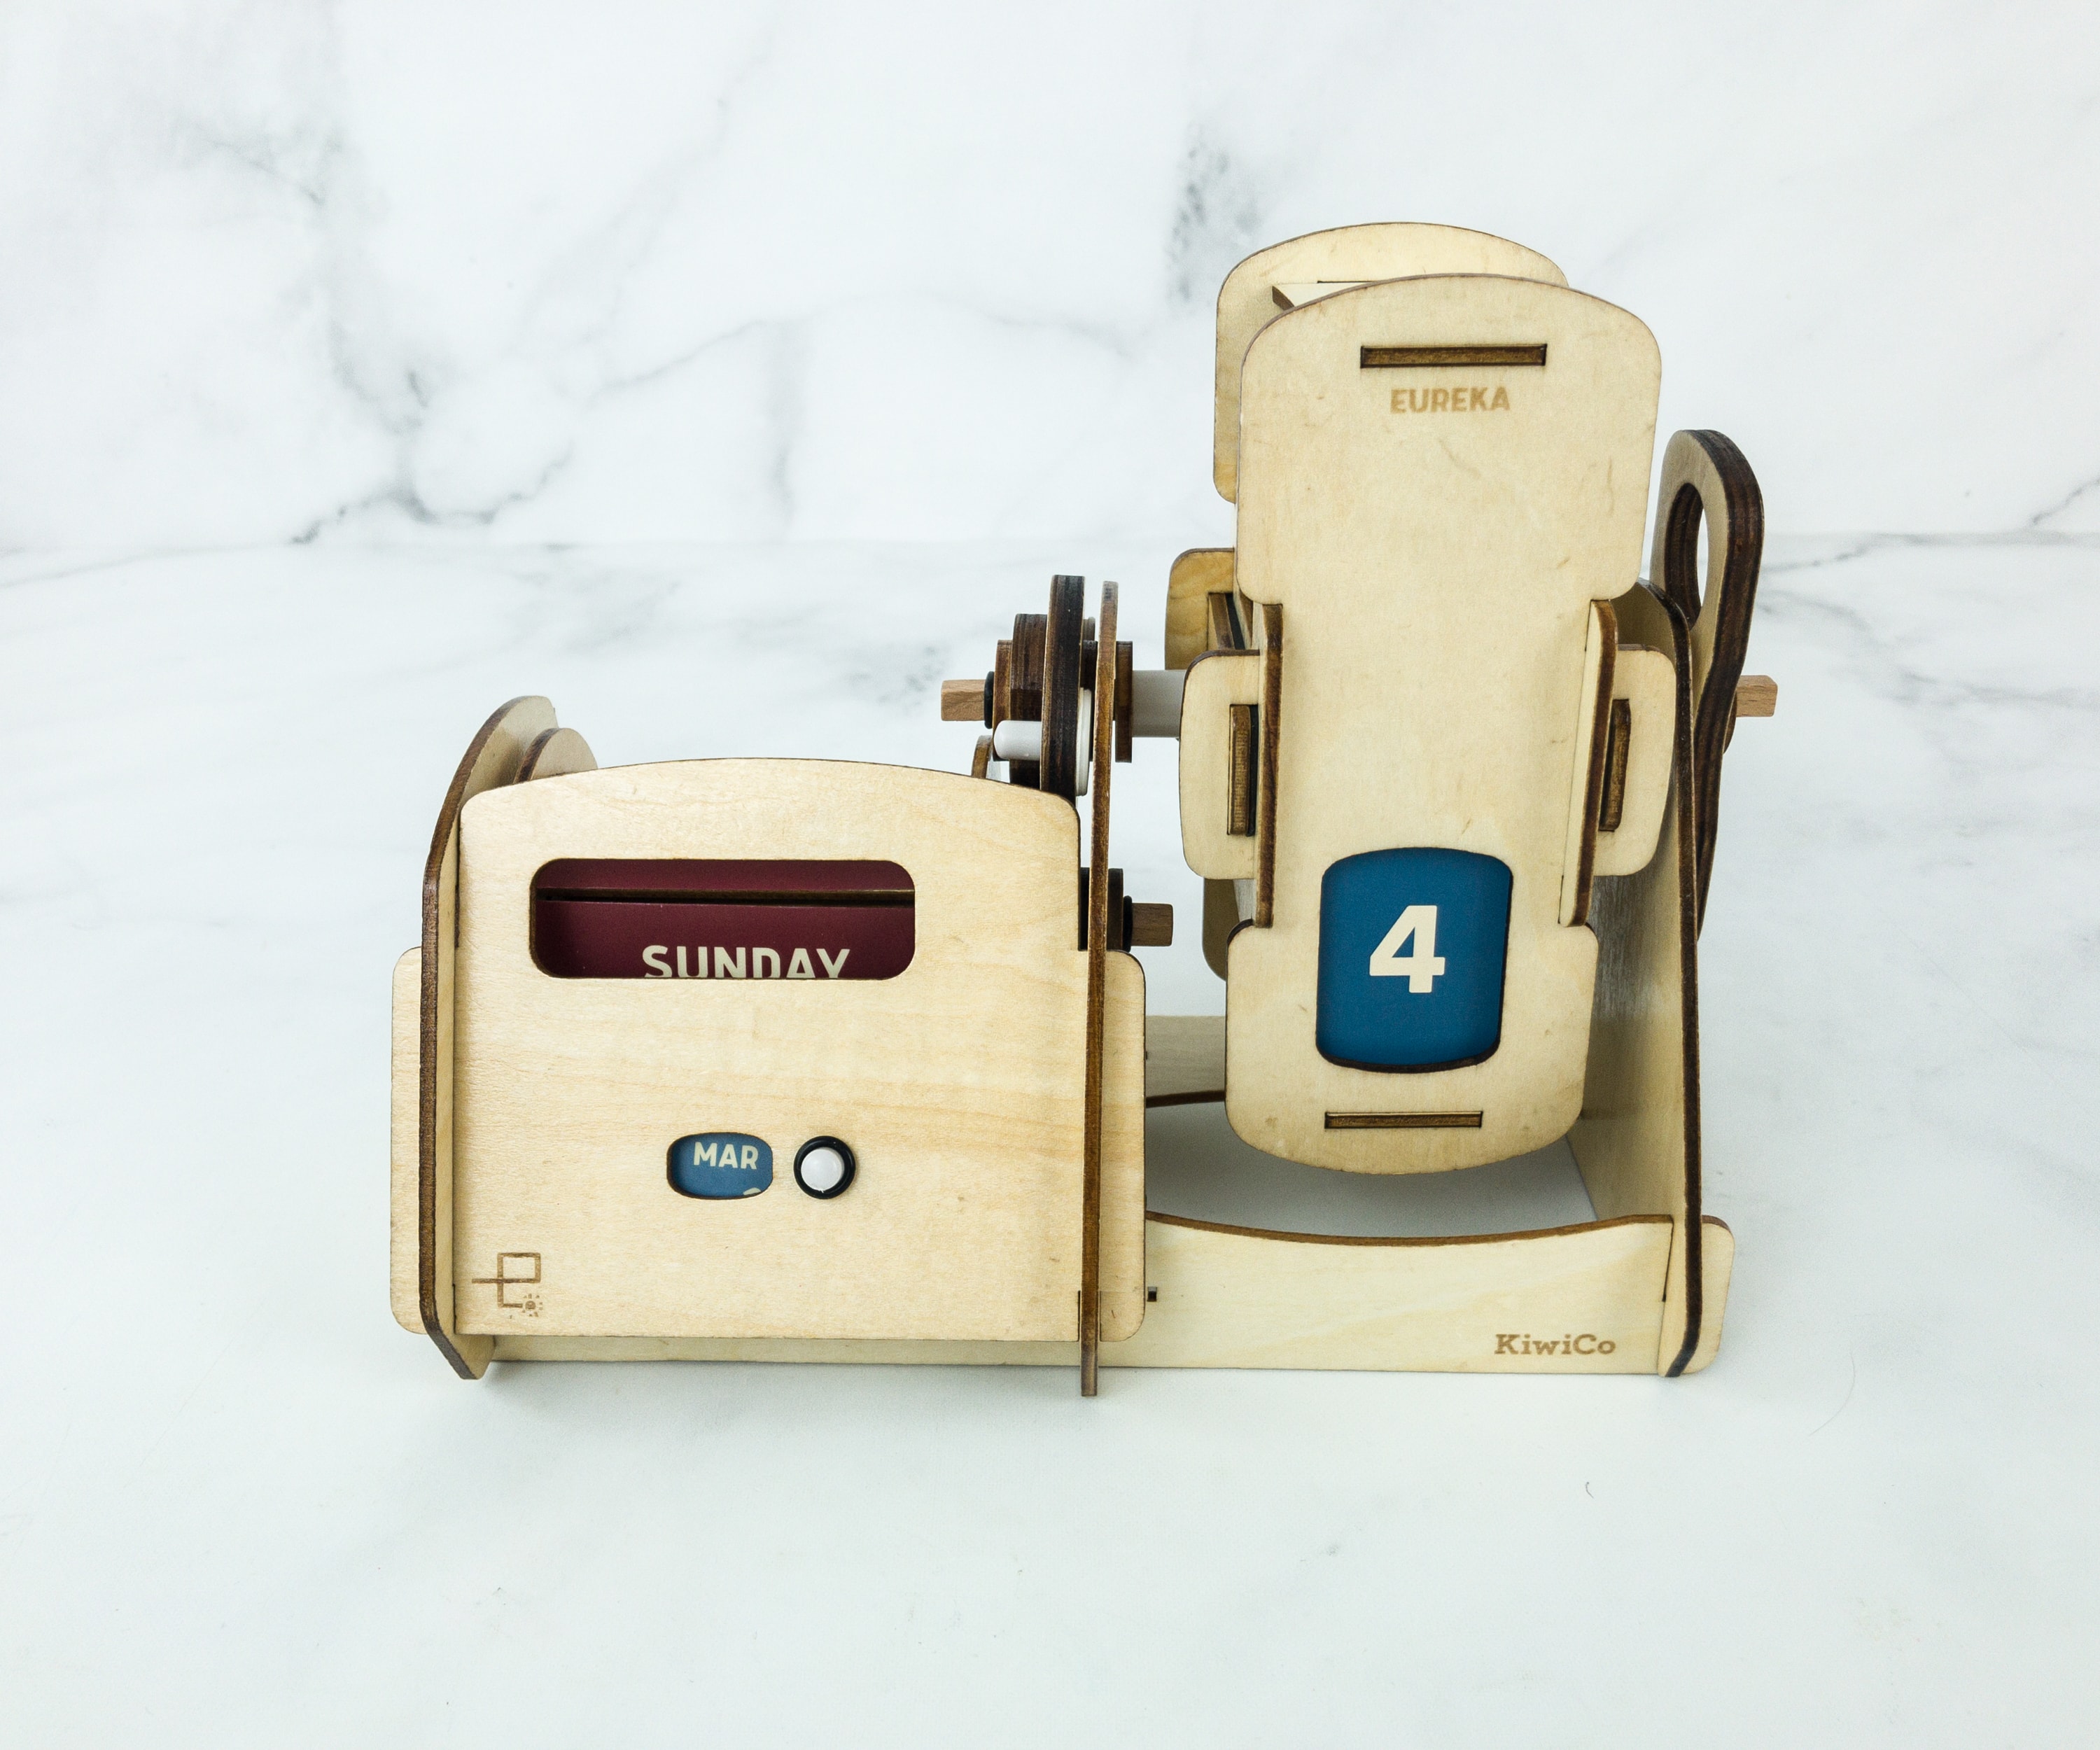
This looks so good! If you want, you can design it or paint something on it before assembling to make it more personalized or make it fit your room aesthetic.
This is great as the design facilitates usage over time as opposed to buying calendars every year.
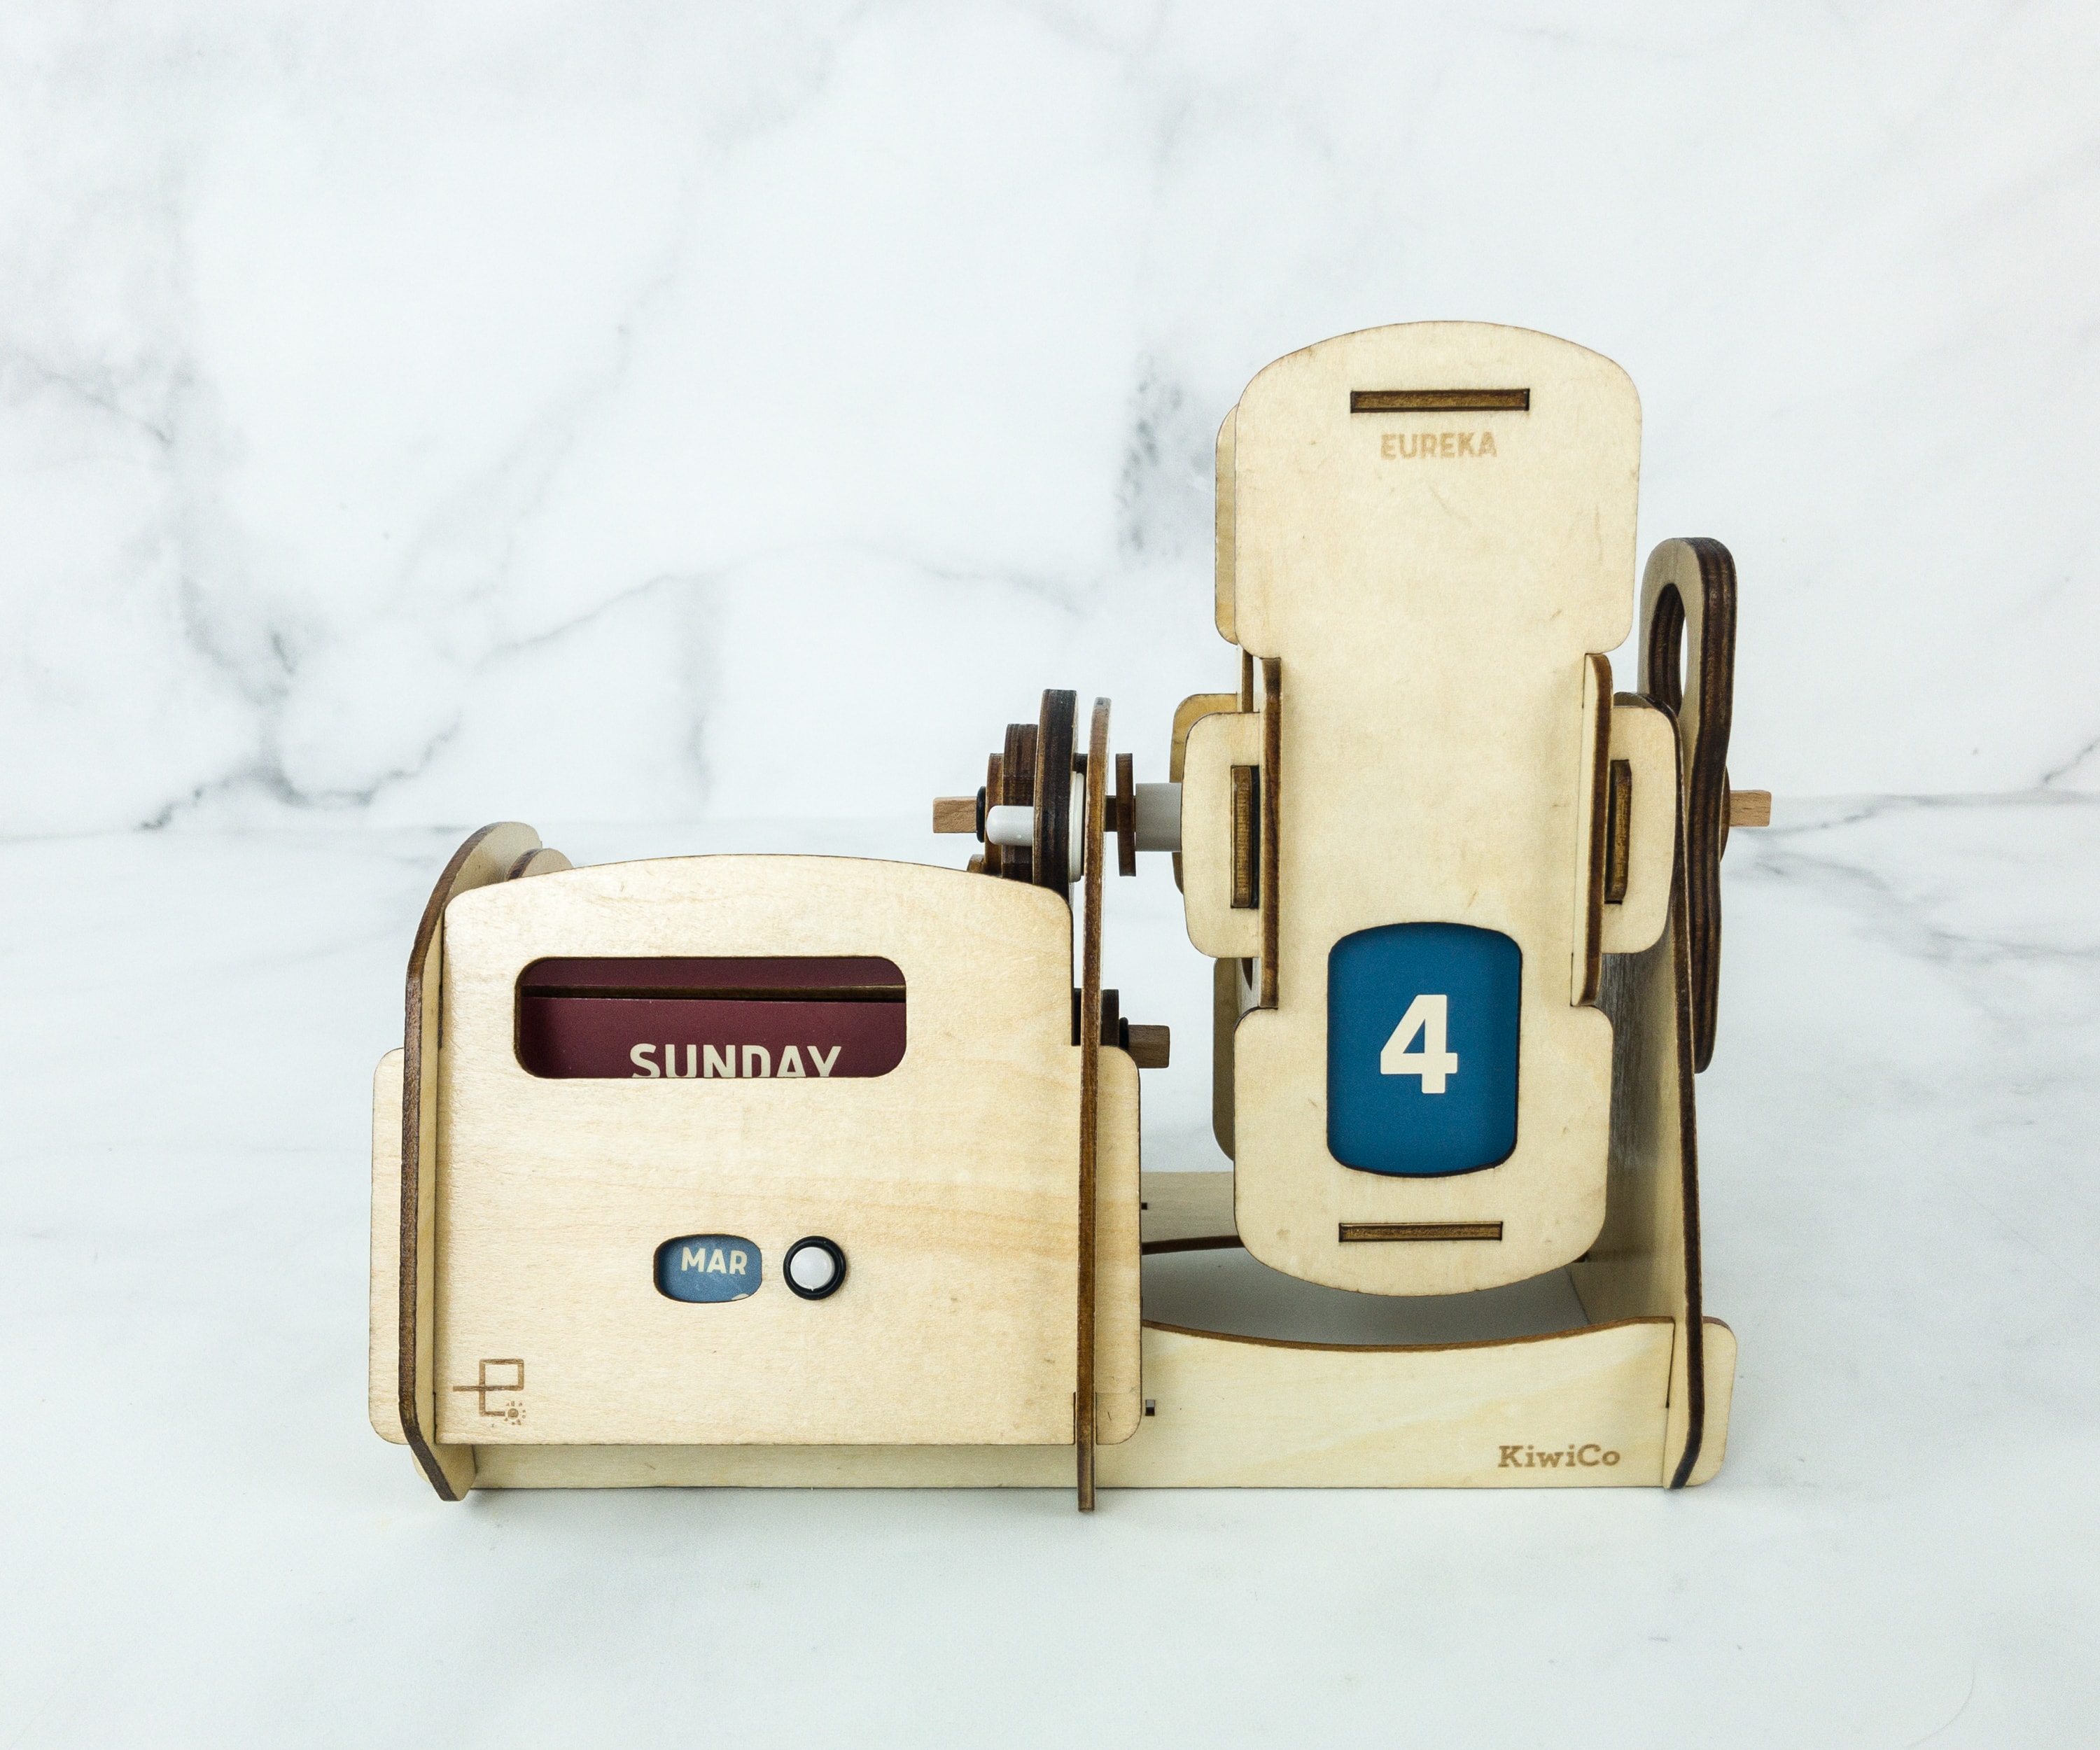
This is channeling some vintage vibes.
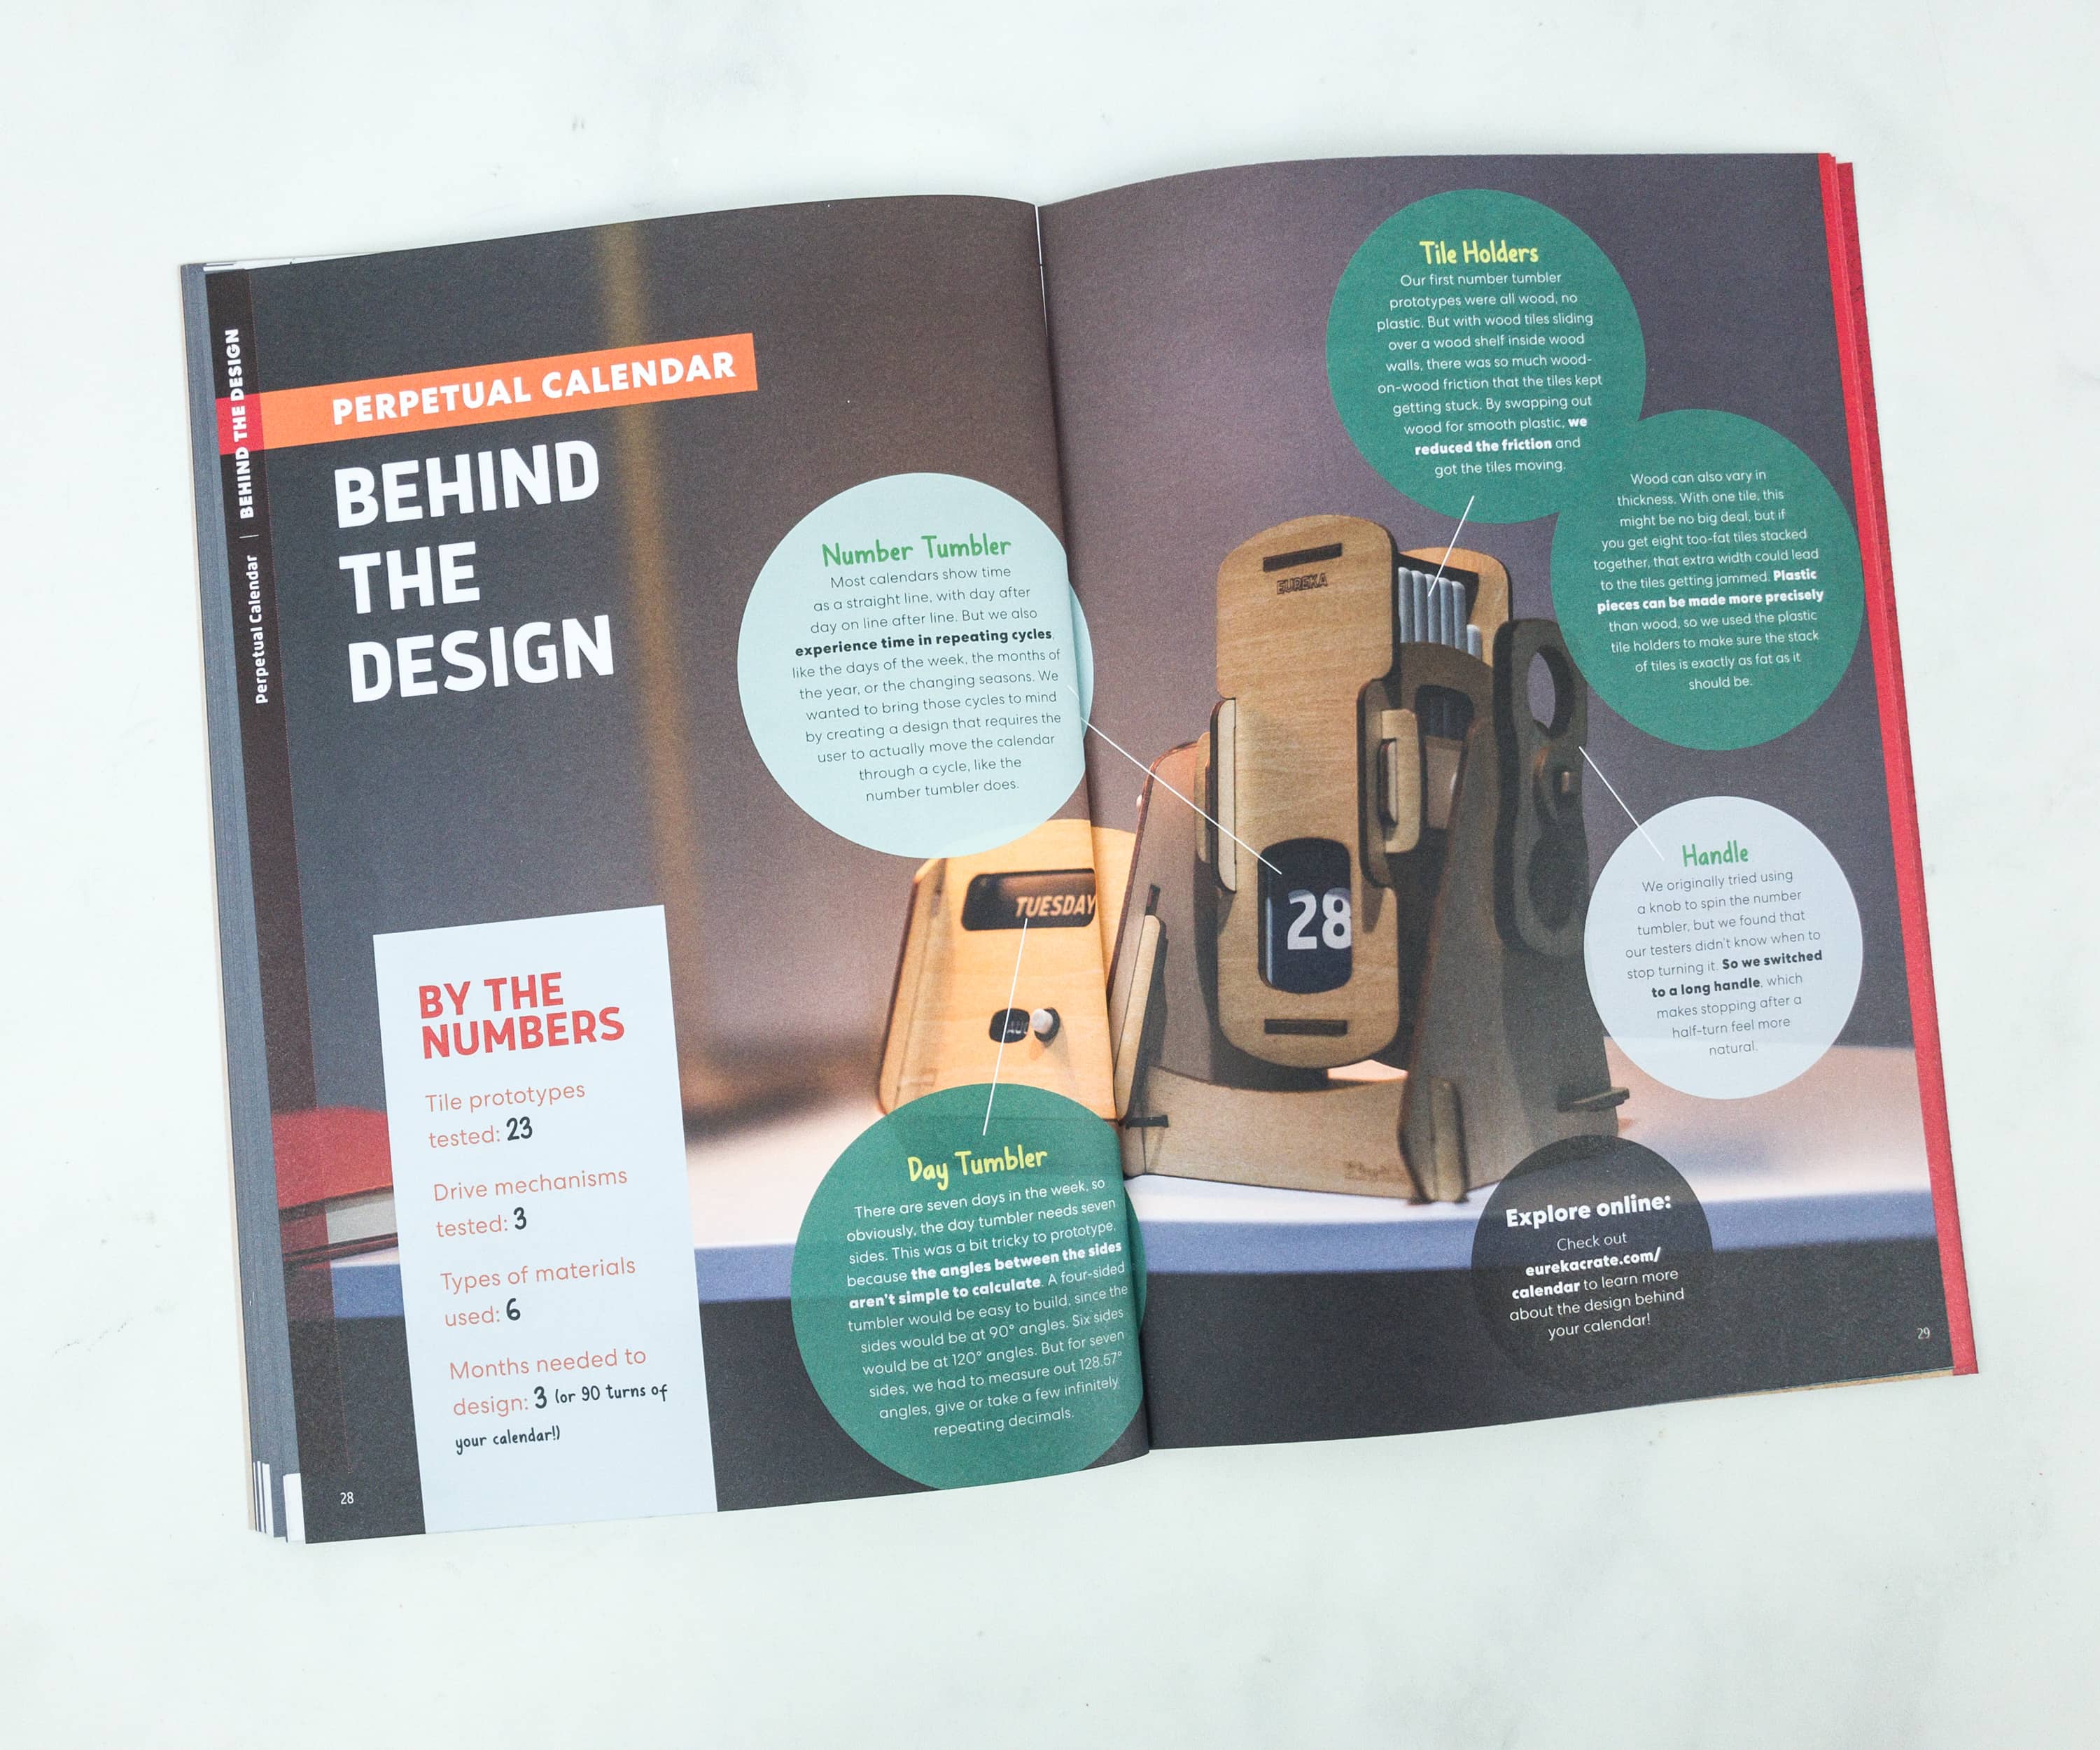
KiwiCo really did a good job by testing the prototype firsts. They presented us the best version of the perpetual calendar that is durable and effective.
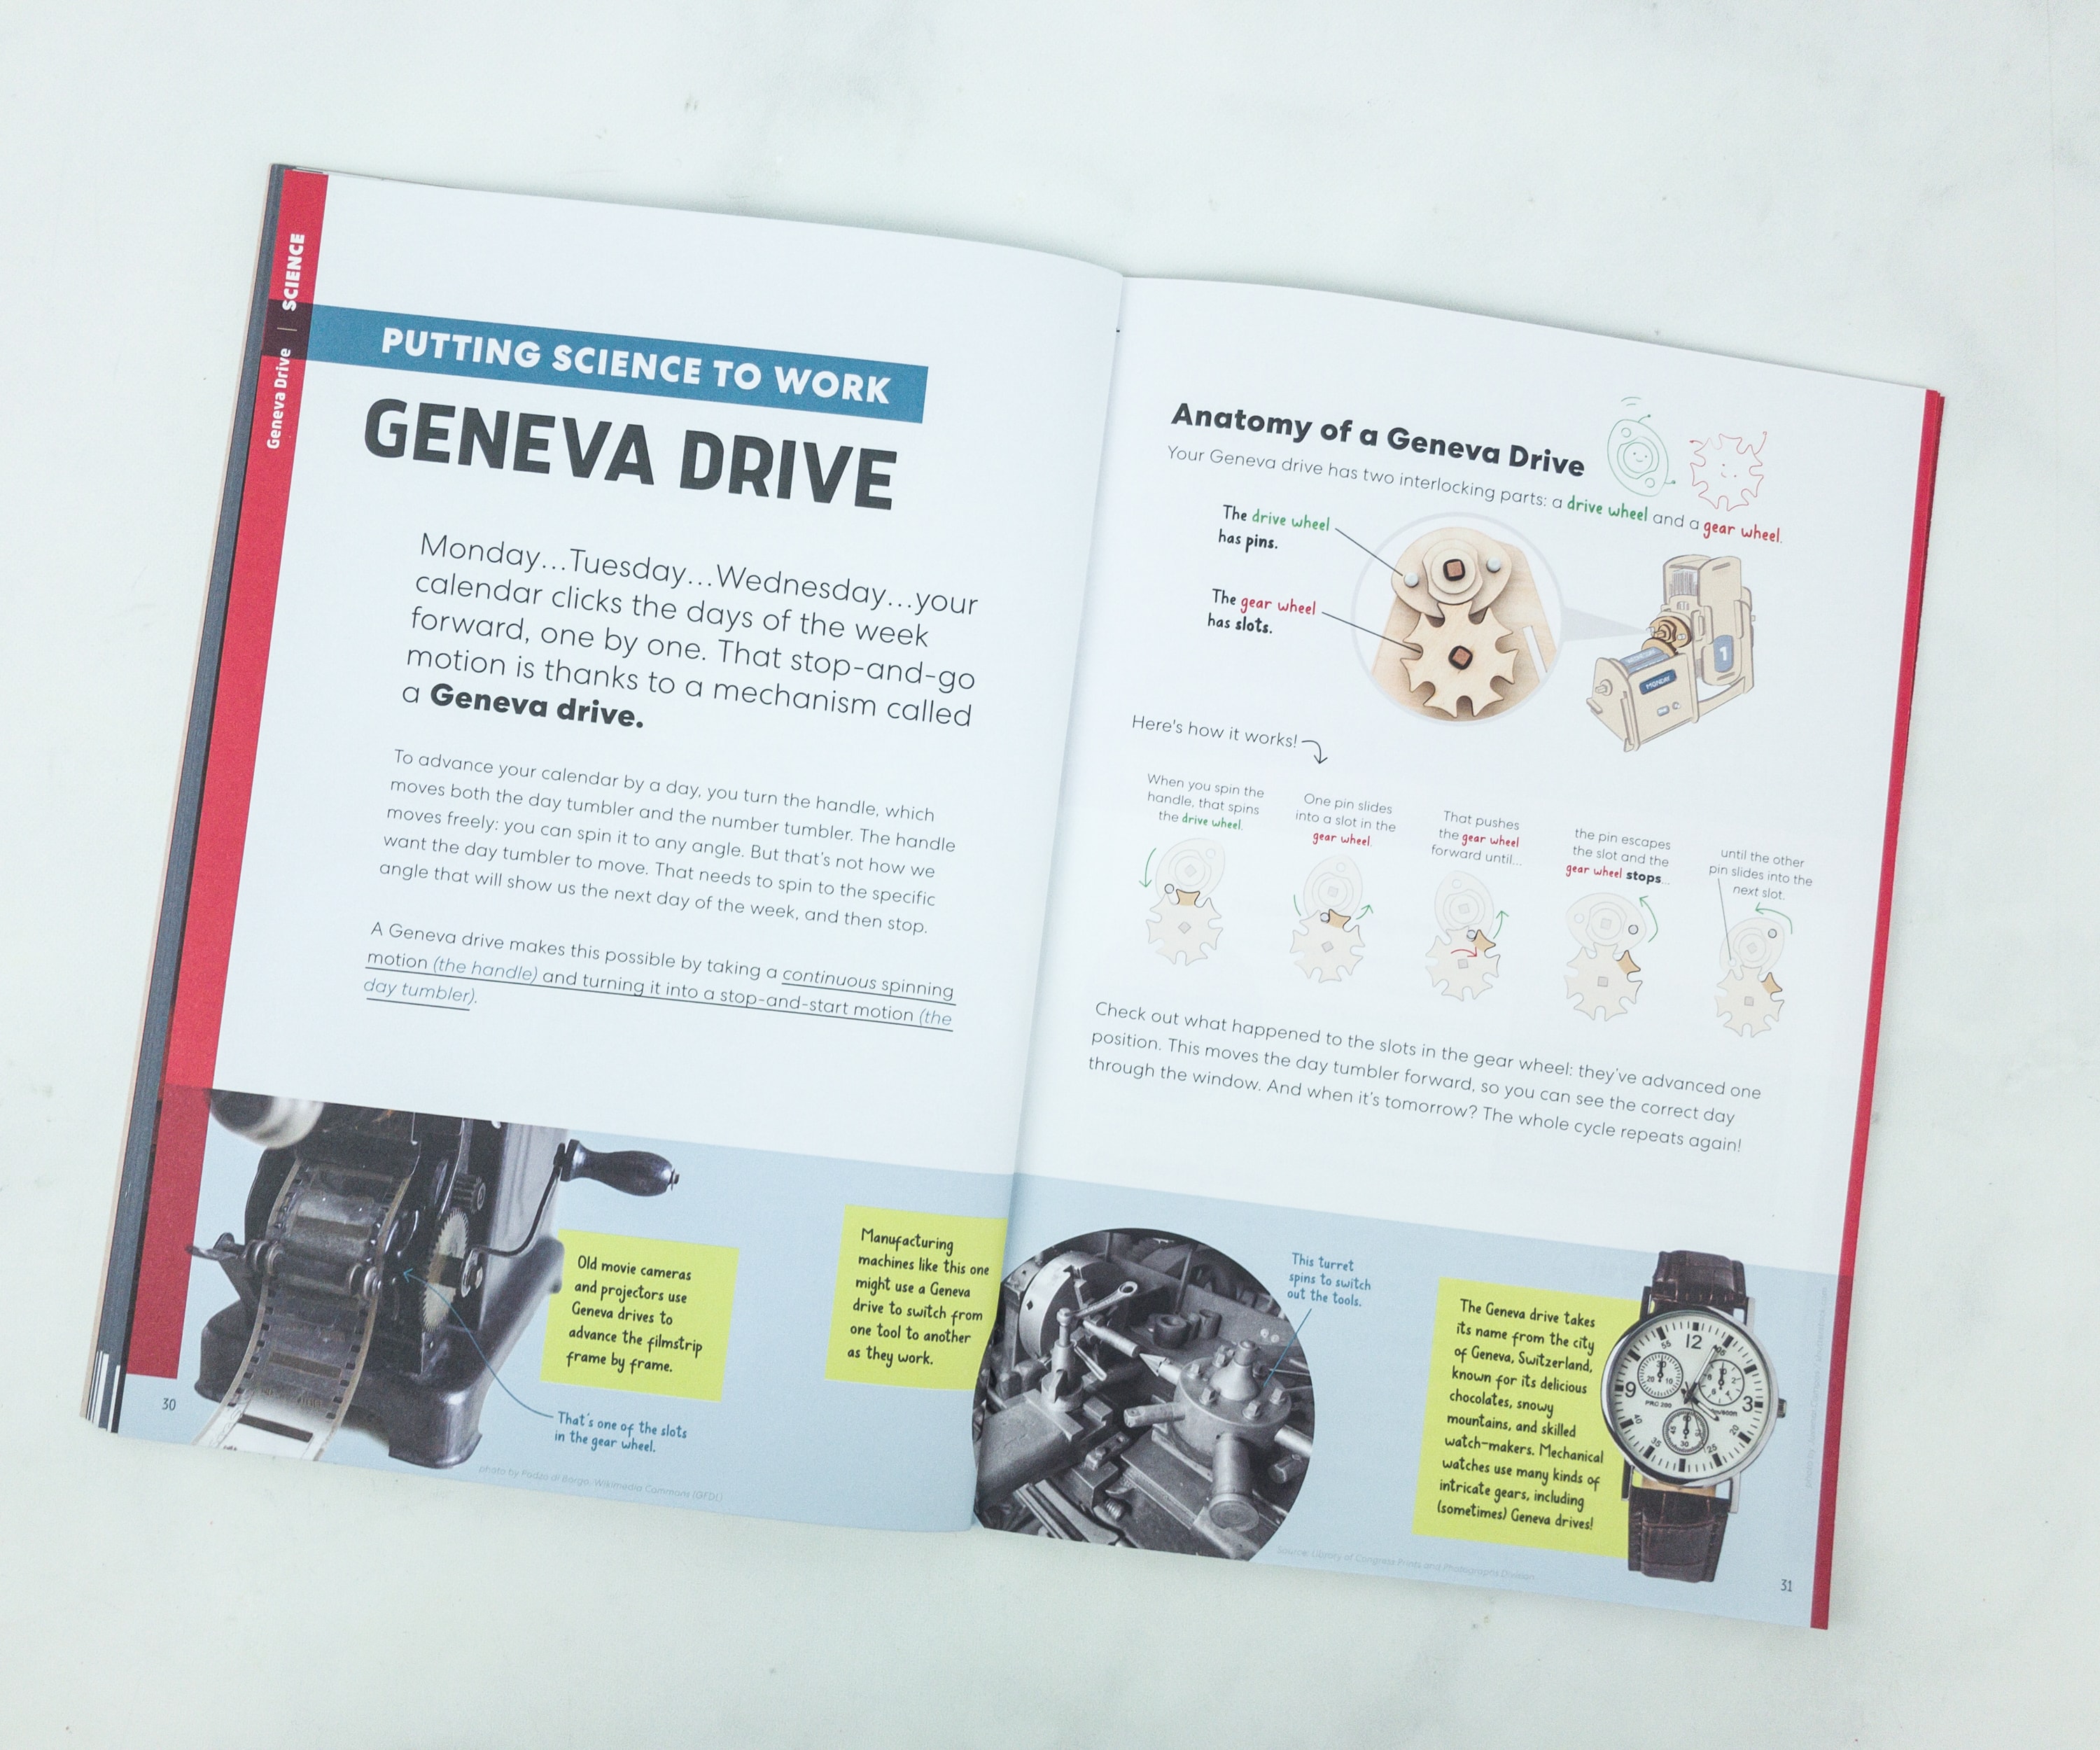
The Geneva drive is used in the mechanism of the perpetual calendar we made and sometimes in watches too! Now how else can we extend this? ?
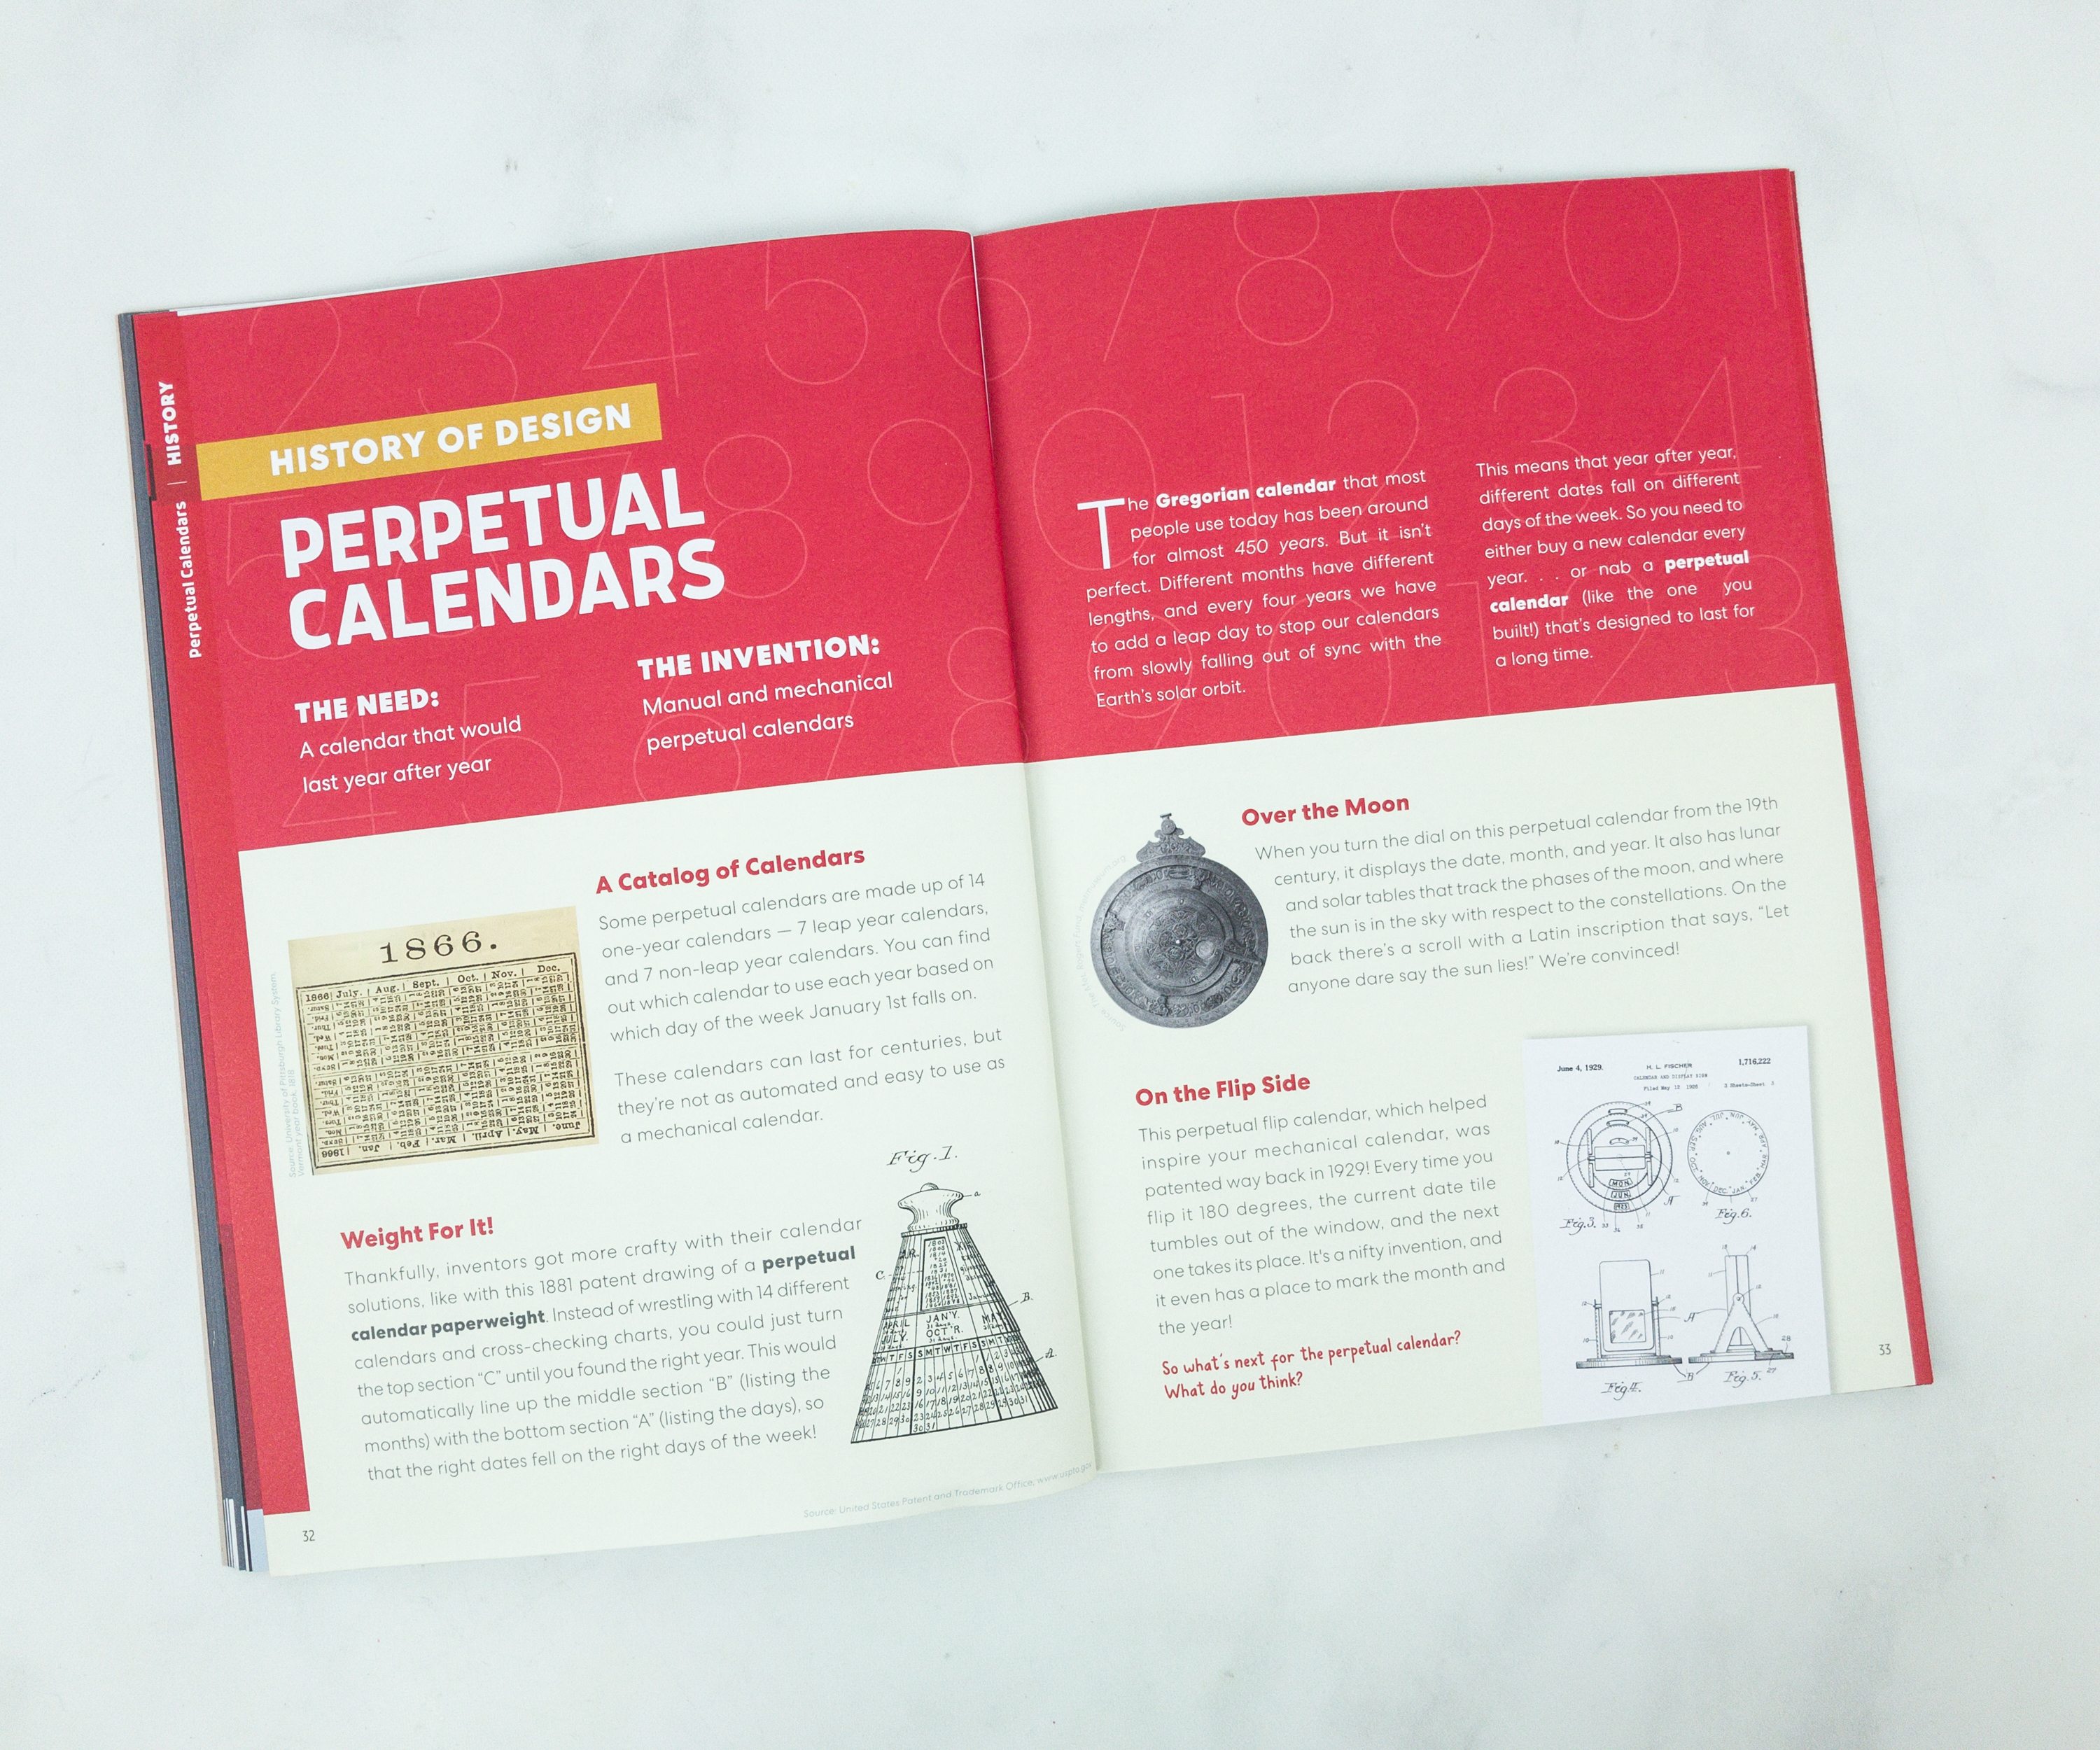
We love this history of calendars!
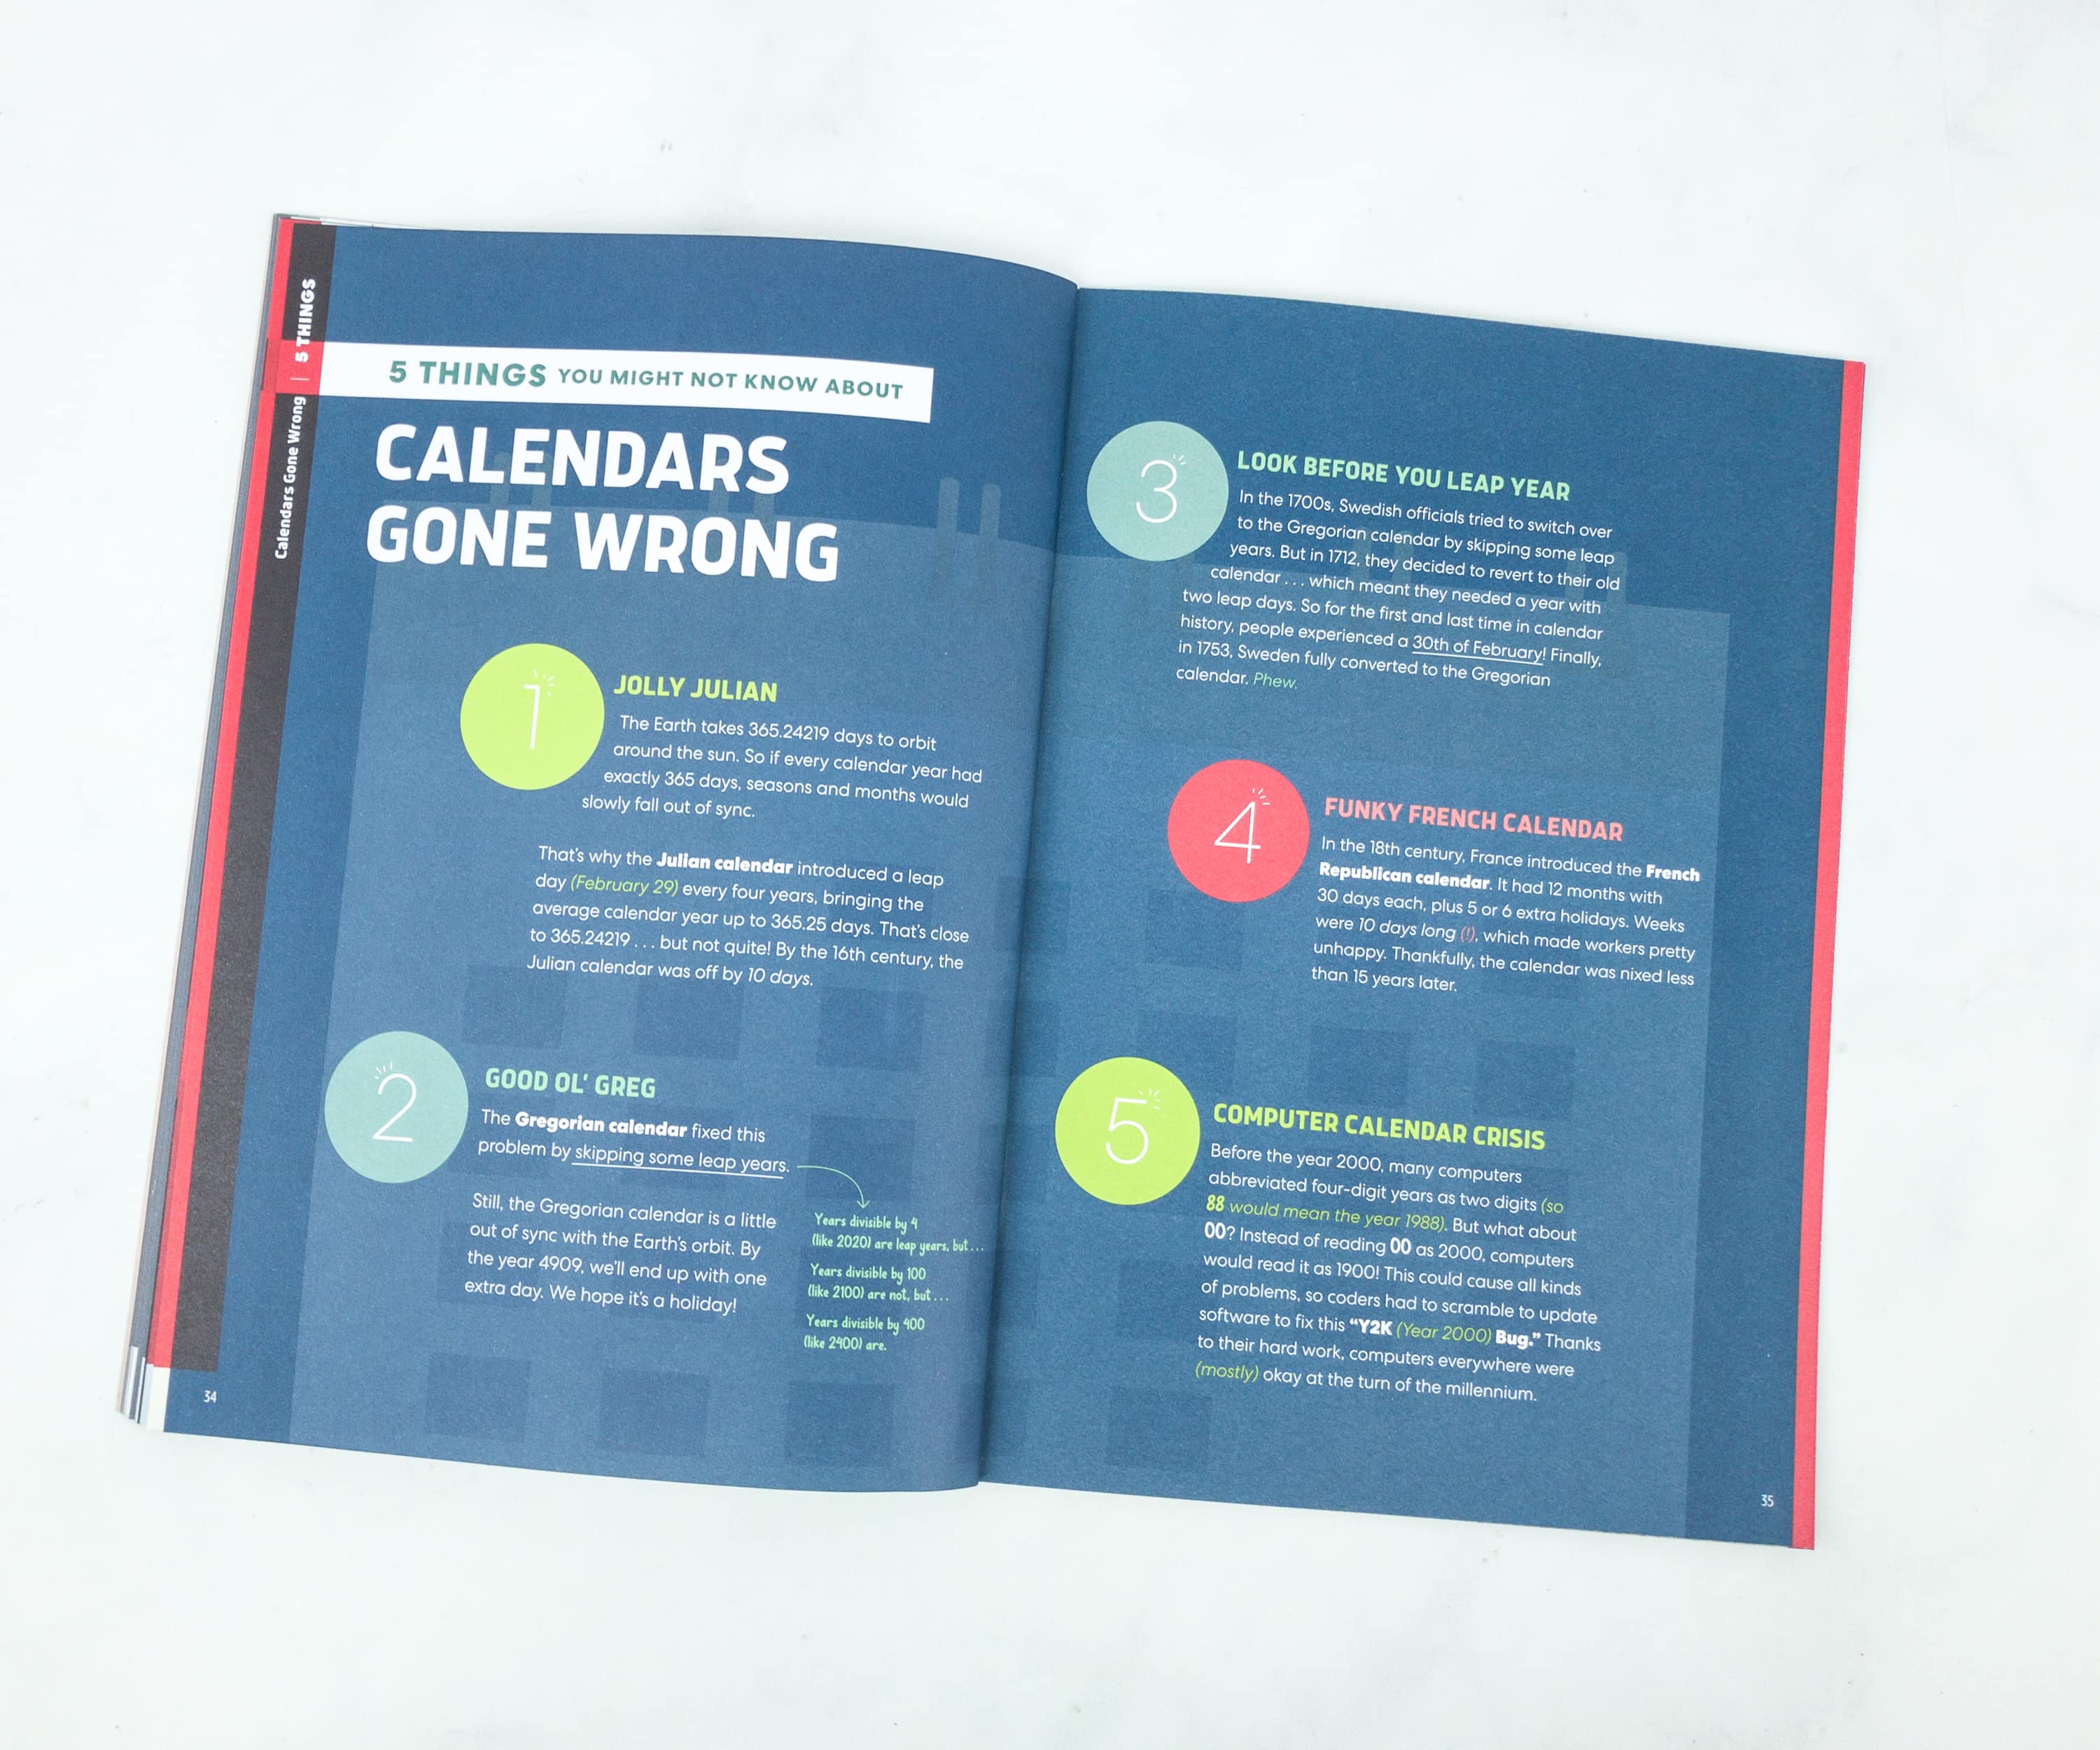
There’s a lot of trial and errors and we owe it to our ancestors that worked up the Gregorian calendar which we use today. It may not be perfect but it works.
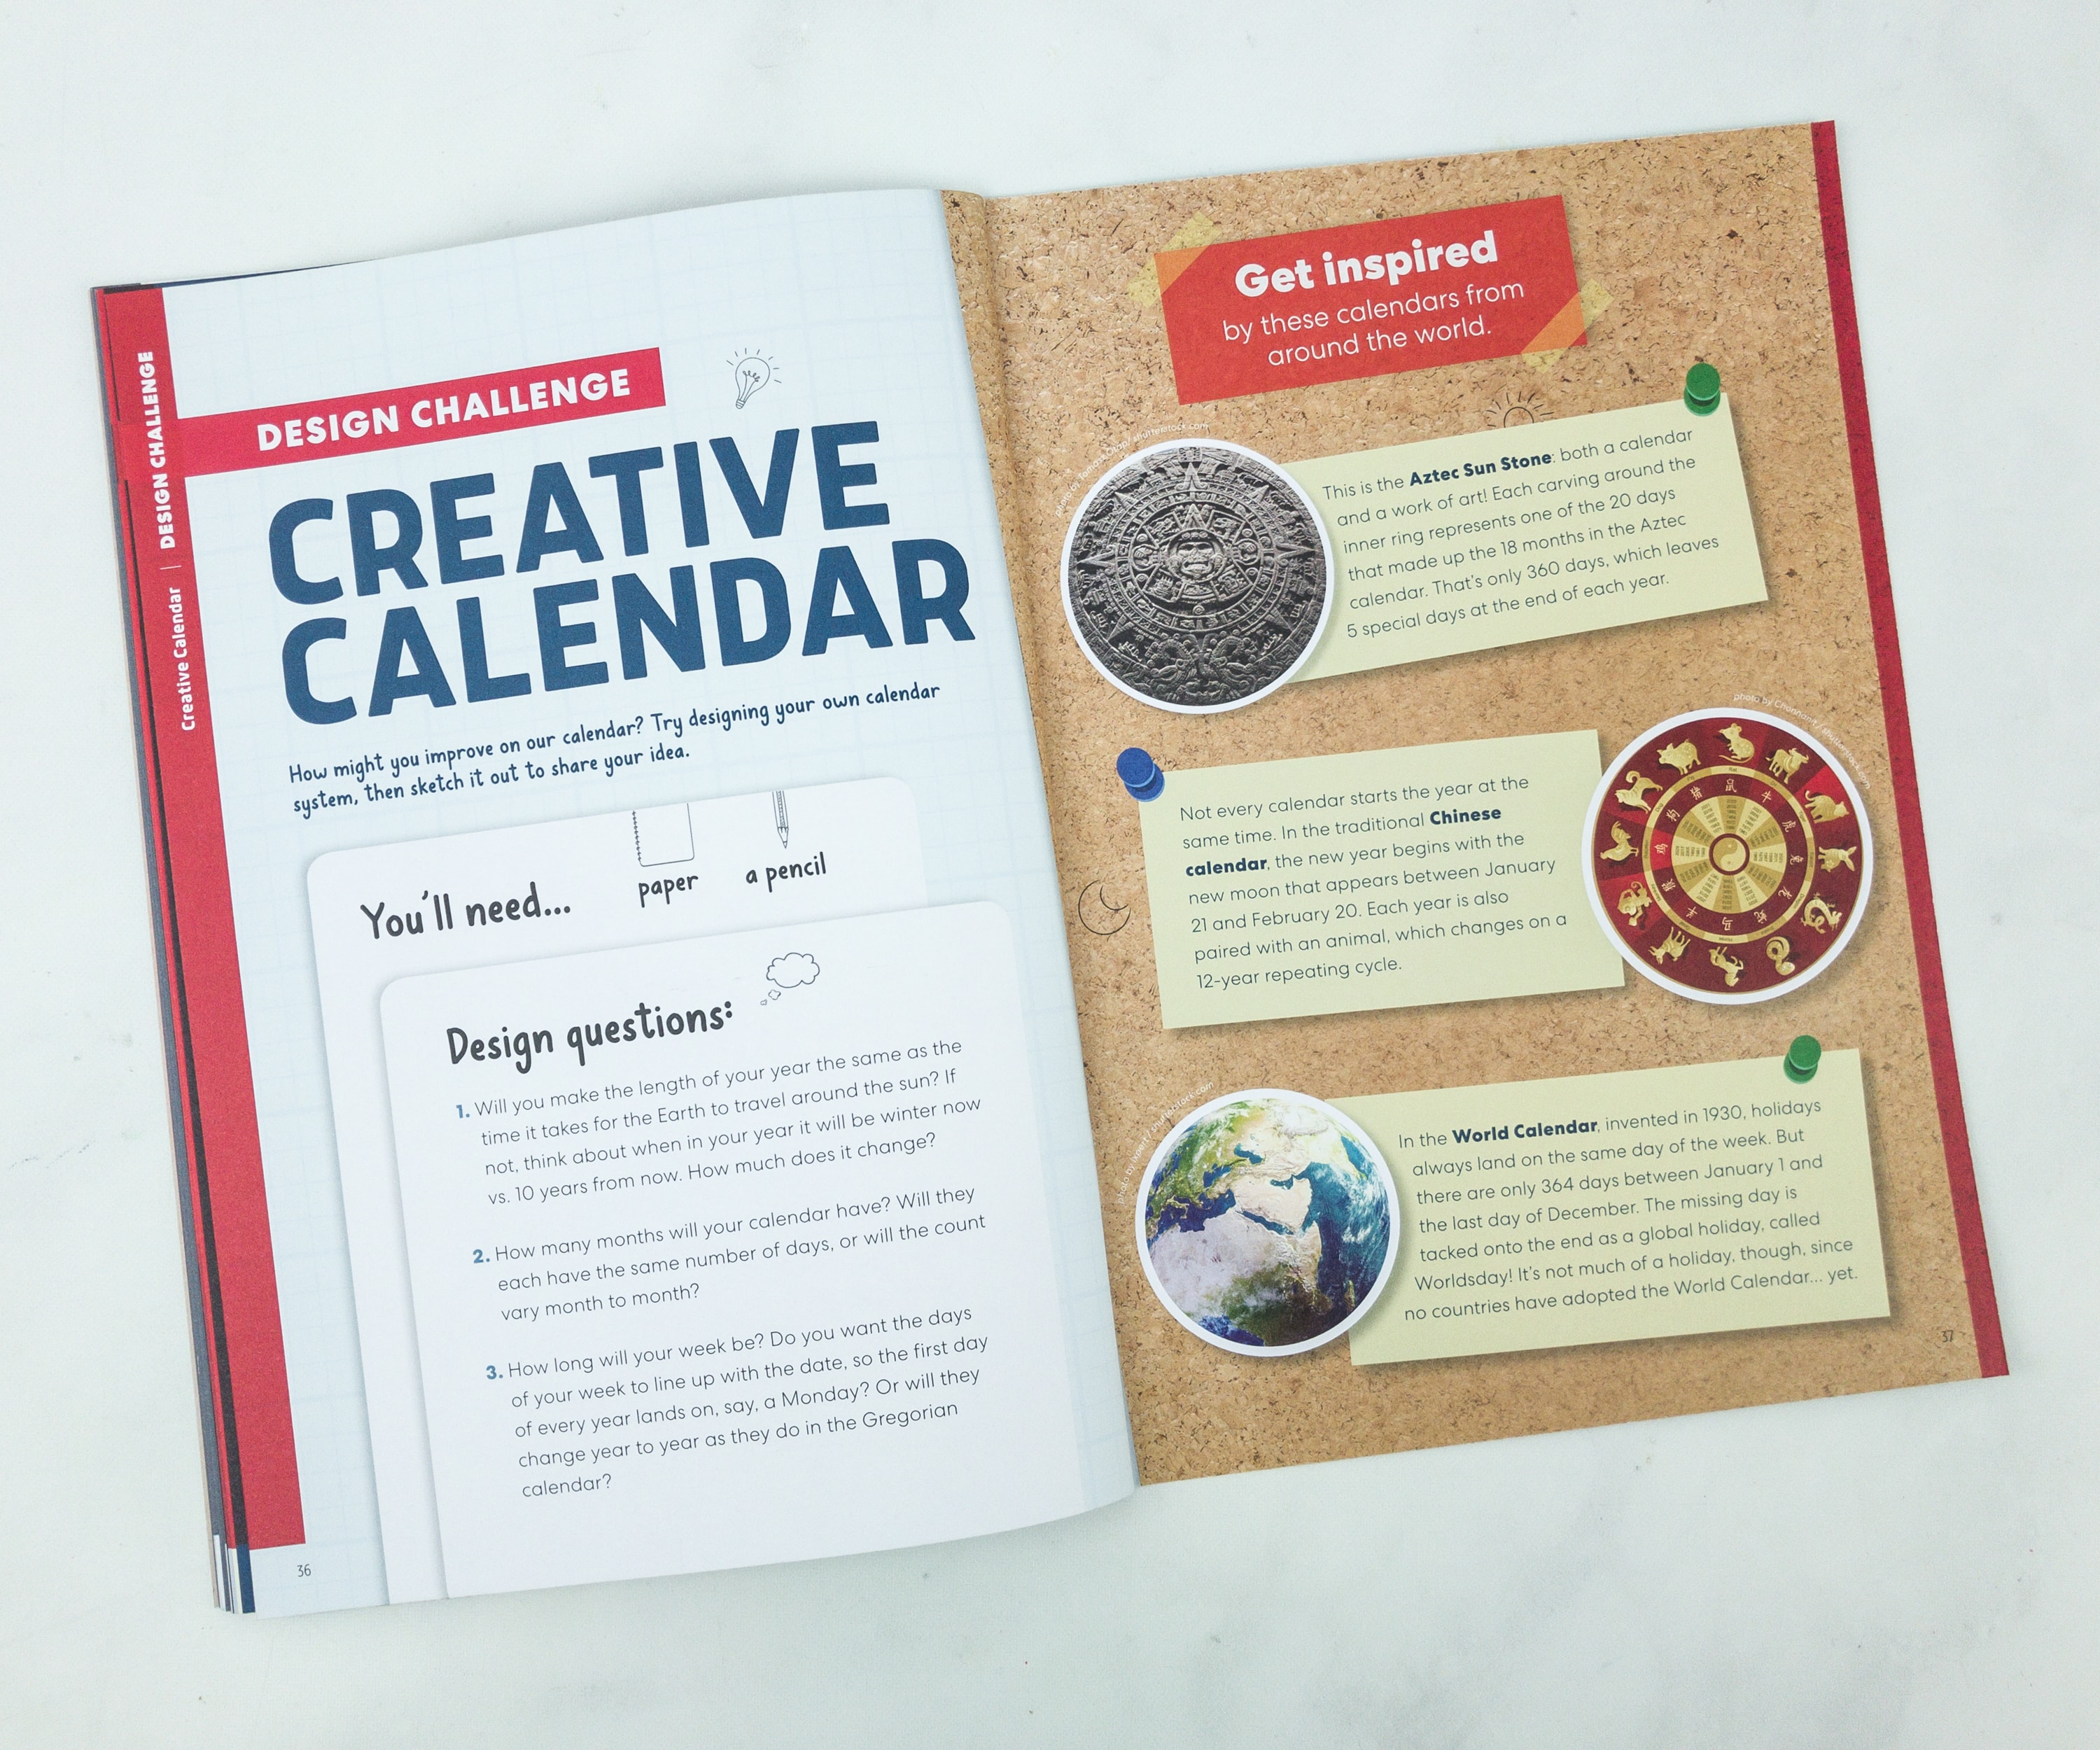
Can you get creative with your own calendar?
If you’re looking for more complex and challenging activities to try, Eureka Crate is an excellent choice! Using this, you can have quality time with your kids/teens and learn about engineering and mechanisms together. This activity is not messy either. Almost all the materials are used and we can just store the other items in the plastic or box it came with. Even to the last page, they are encouraging makers to formulate their own ideas and design their own calendar. You never know, the biggest discoveries always come from the smallest idea. KiwiCo really expanded and has boxes for all ages.
What do you think of this month’s Eureka Crate?


Comments