
Eureka Crate is a monthly STEM and maker subscription box that teaches kids and adults how to apply principles of science and math to make awesome things you will love to use every day – from an articulated desk lamp to an electric pencil sharpener to a wooden ukulele. Every Eureka Crate includes an engineering project, detailed step-by-step instructions, everything you need to complete the project, a Maker’s Guide that explains all the design, process, and engineering behind the design, plus a design challenge to take your project knowledge to the next level!
DEAL: Save 30% on your first month! Just use this link to subscribe, no coupon code required! You can also use the same link to save 30% on the first month of any other KiwiCo crate – just check out this page to discover which box is right for you.

Eureka Crate is KiwiCo’s latest subscription! Eureka Crate is designed for ages 14-104. If you’re ready to graduate from KiwiCo’s other boxes or just can’t get enough (or are just too old for their other subscriptions), you’ll love this box, which is designed to create a hands-on learning experience using everyday items to delve deeply into the science and math principles they embody, along with the design process of the month’s project.
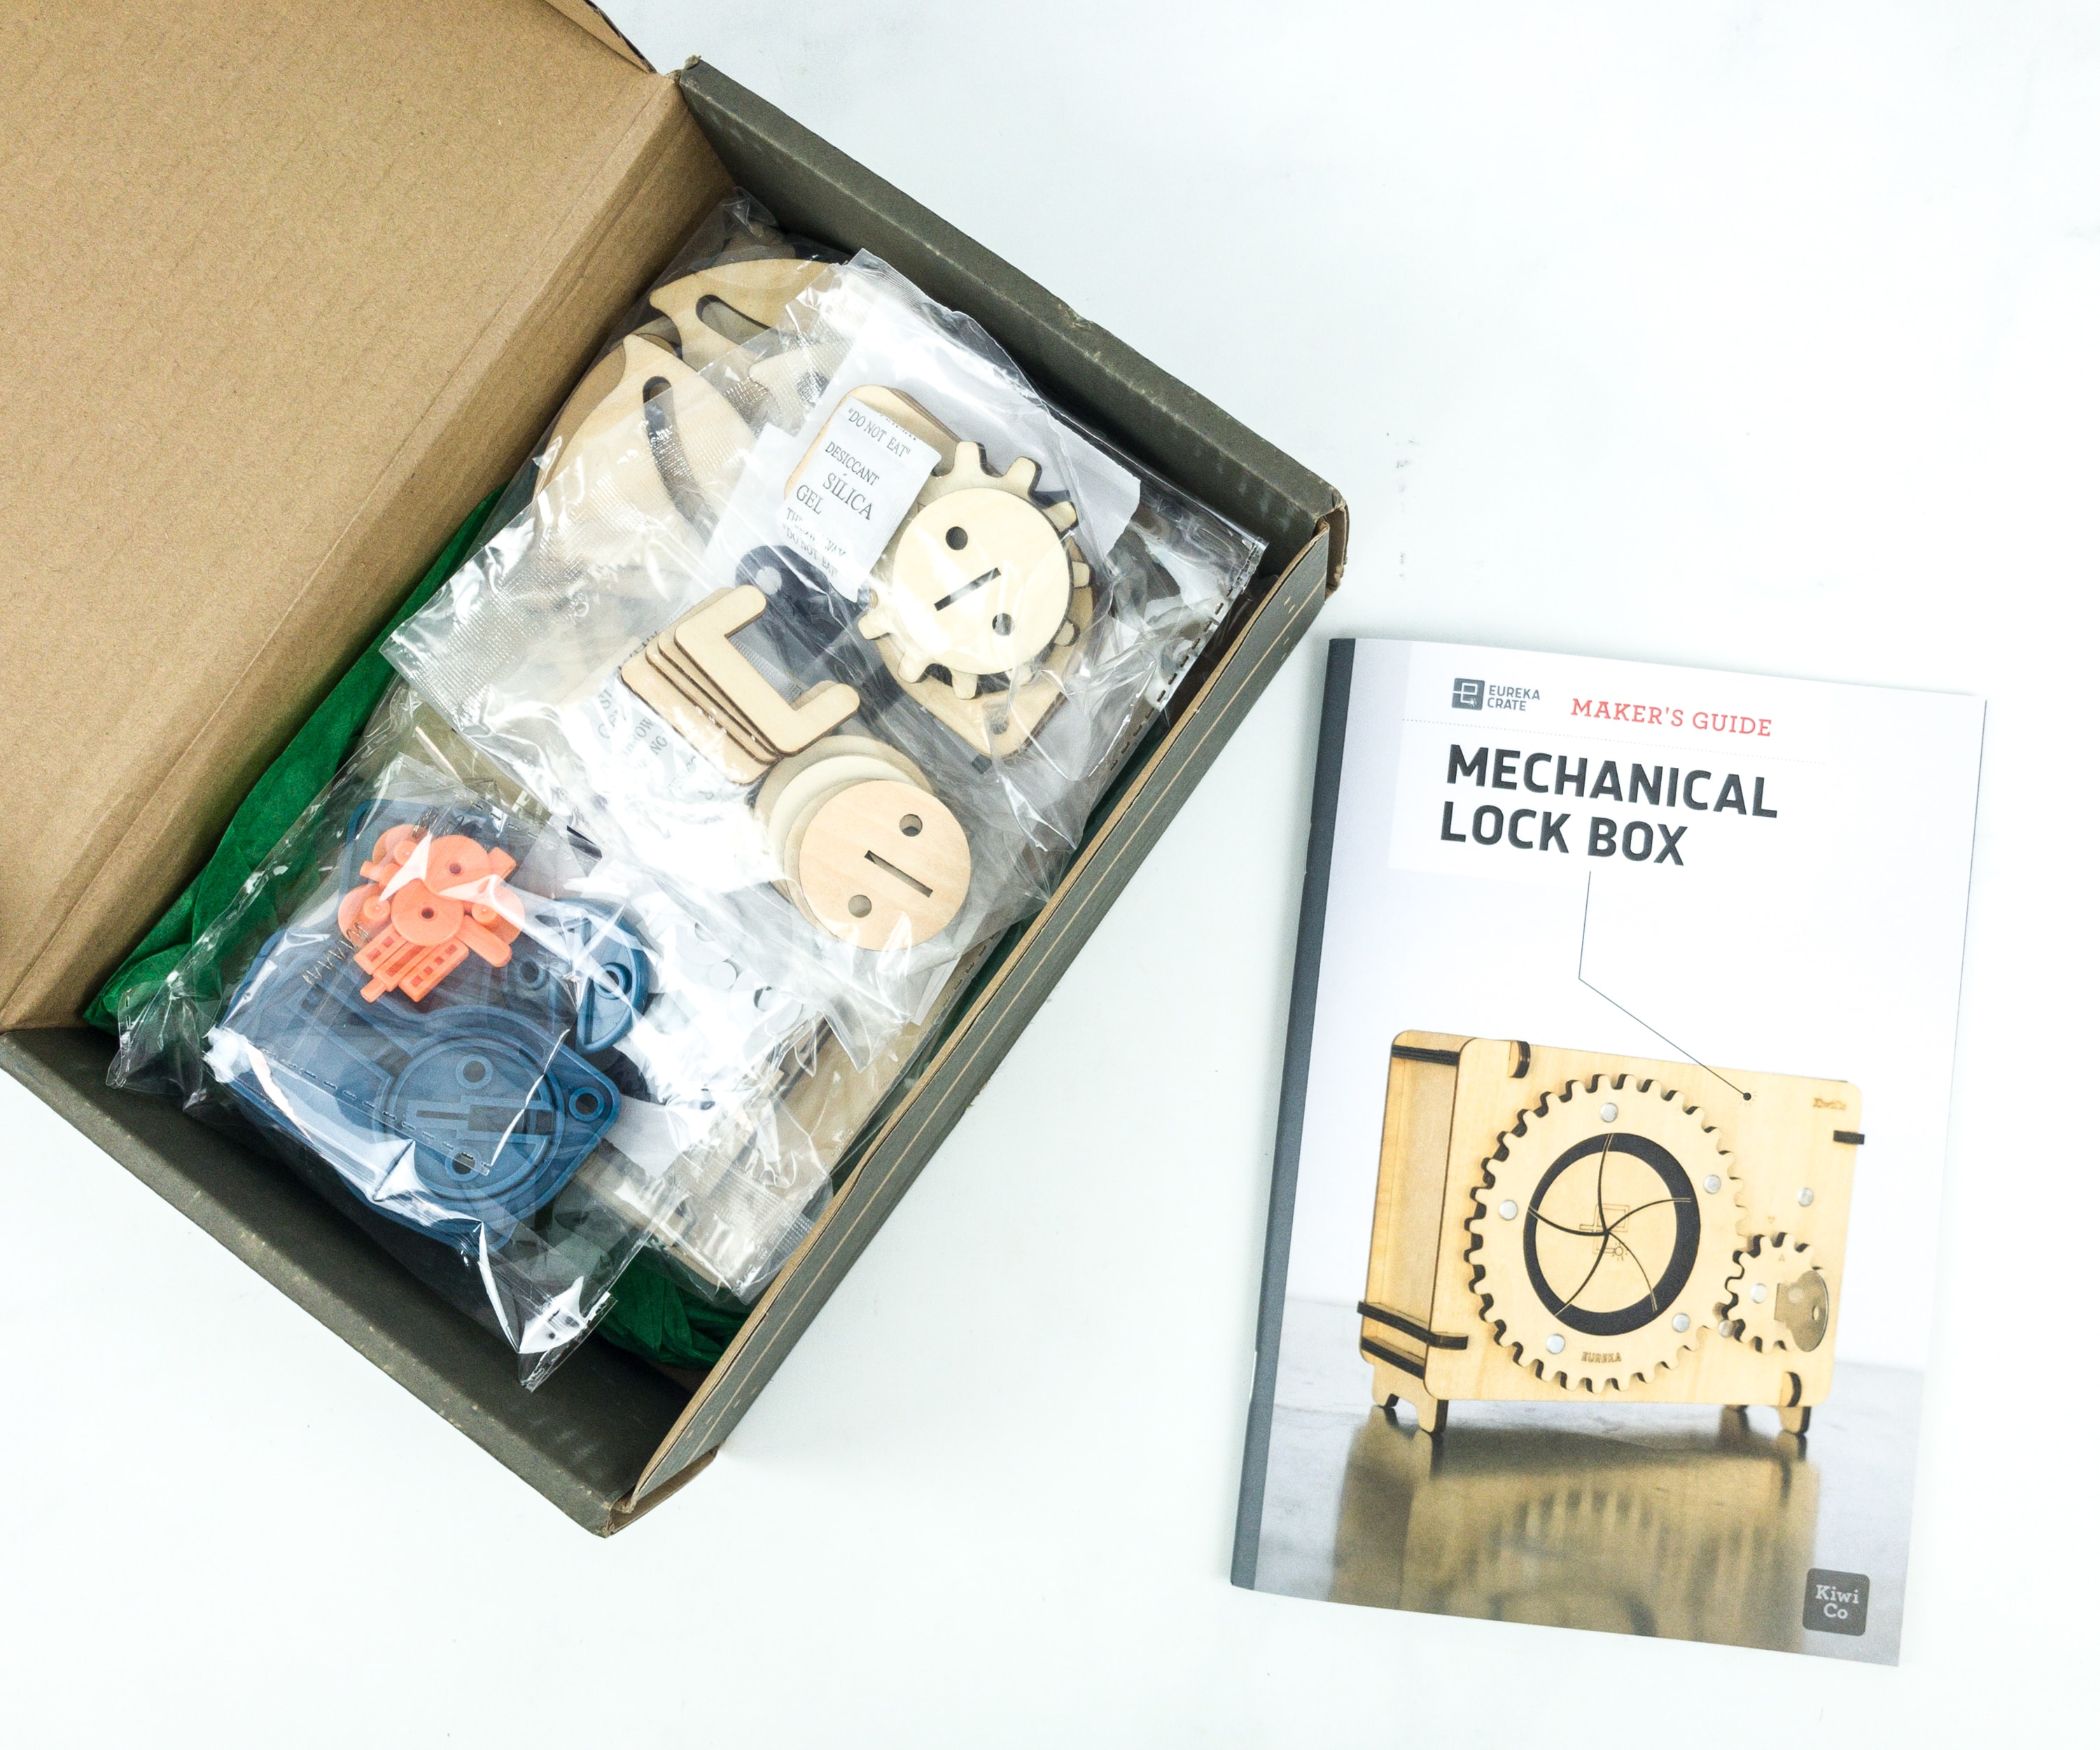
Some of the parts of this month’s project were inside plastic pouches.

Everything in this month’s box!
Eureka Crate Maker’s Guide
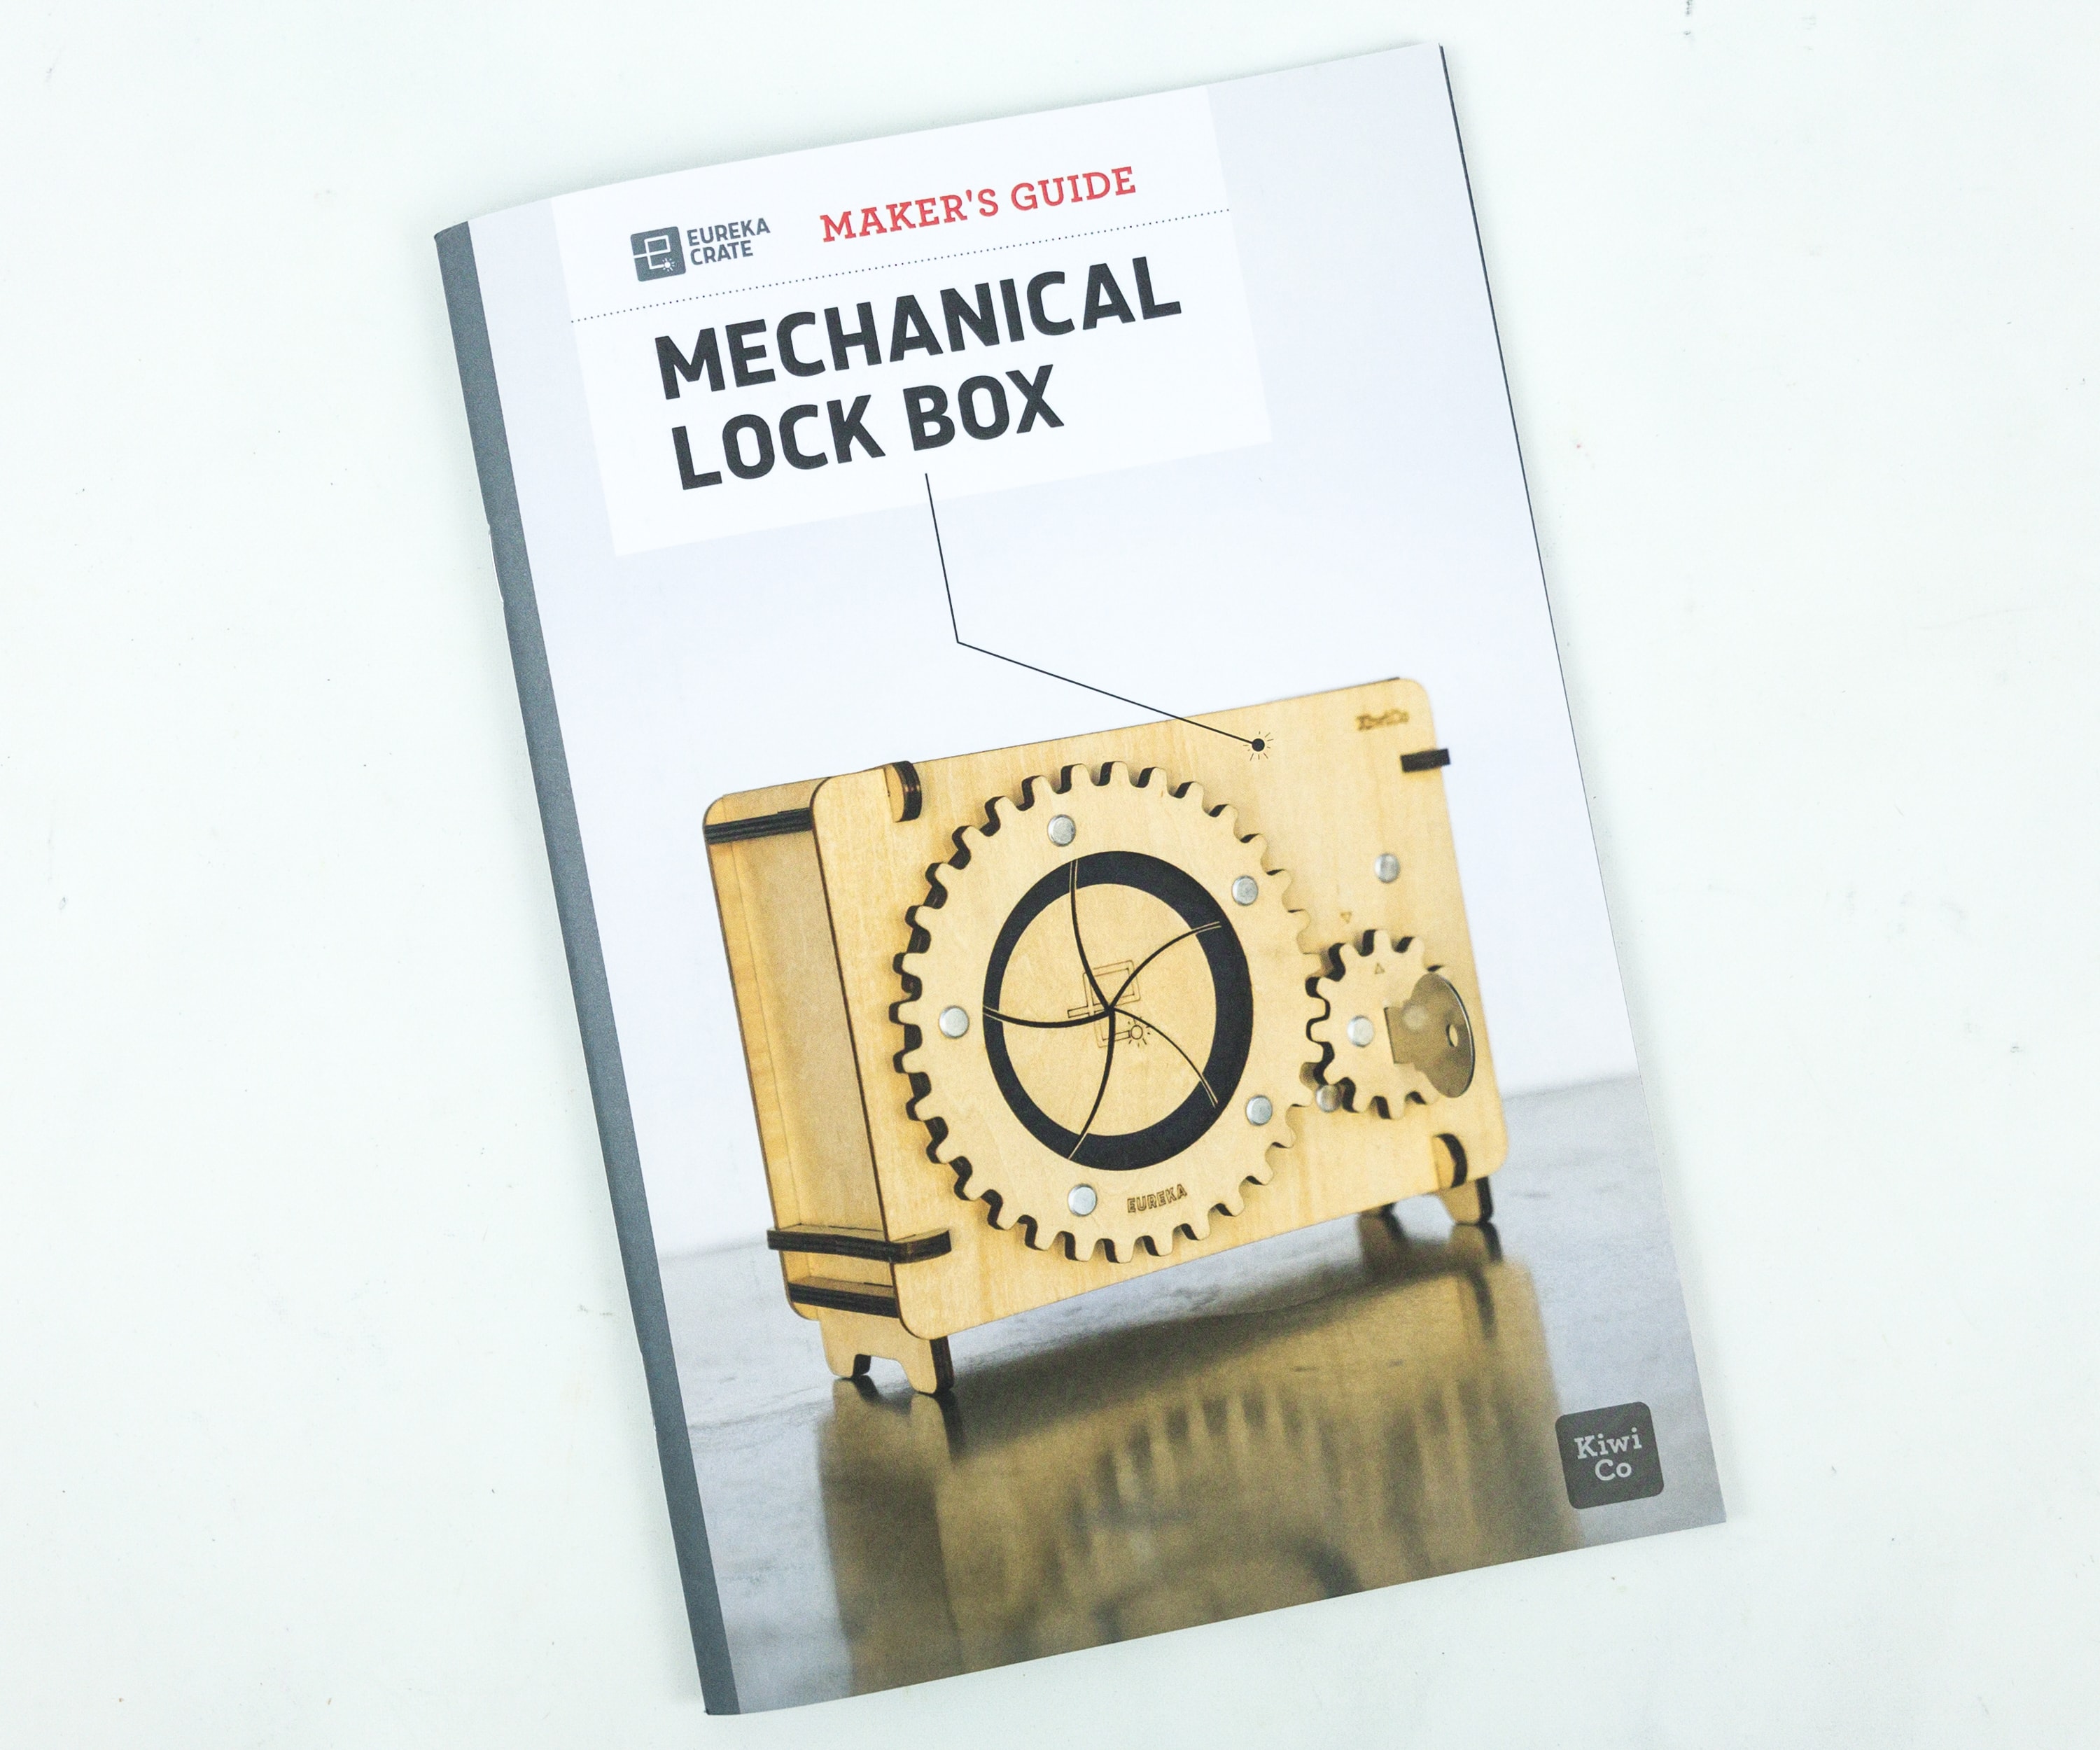
Like the other crates from KiwiCo, Eureka Crate includes a booklet.
One of KiwiCo’s goals is to equip the next generation of innovators with the tools and confidence for creative exploration and problem-solving.
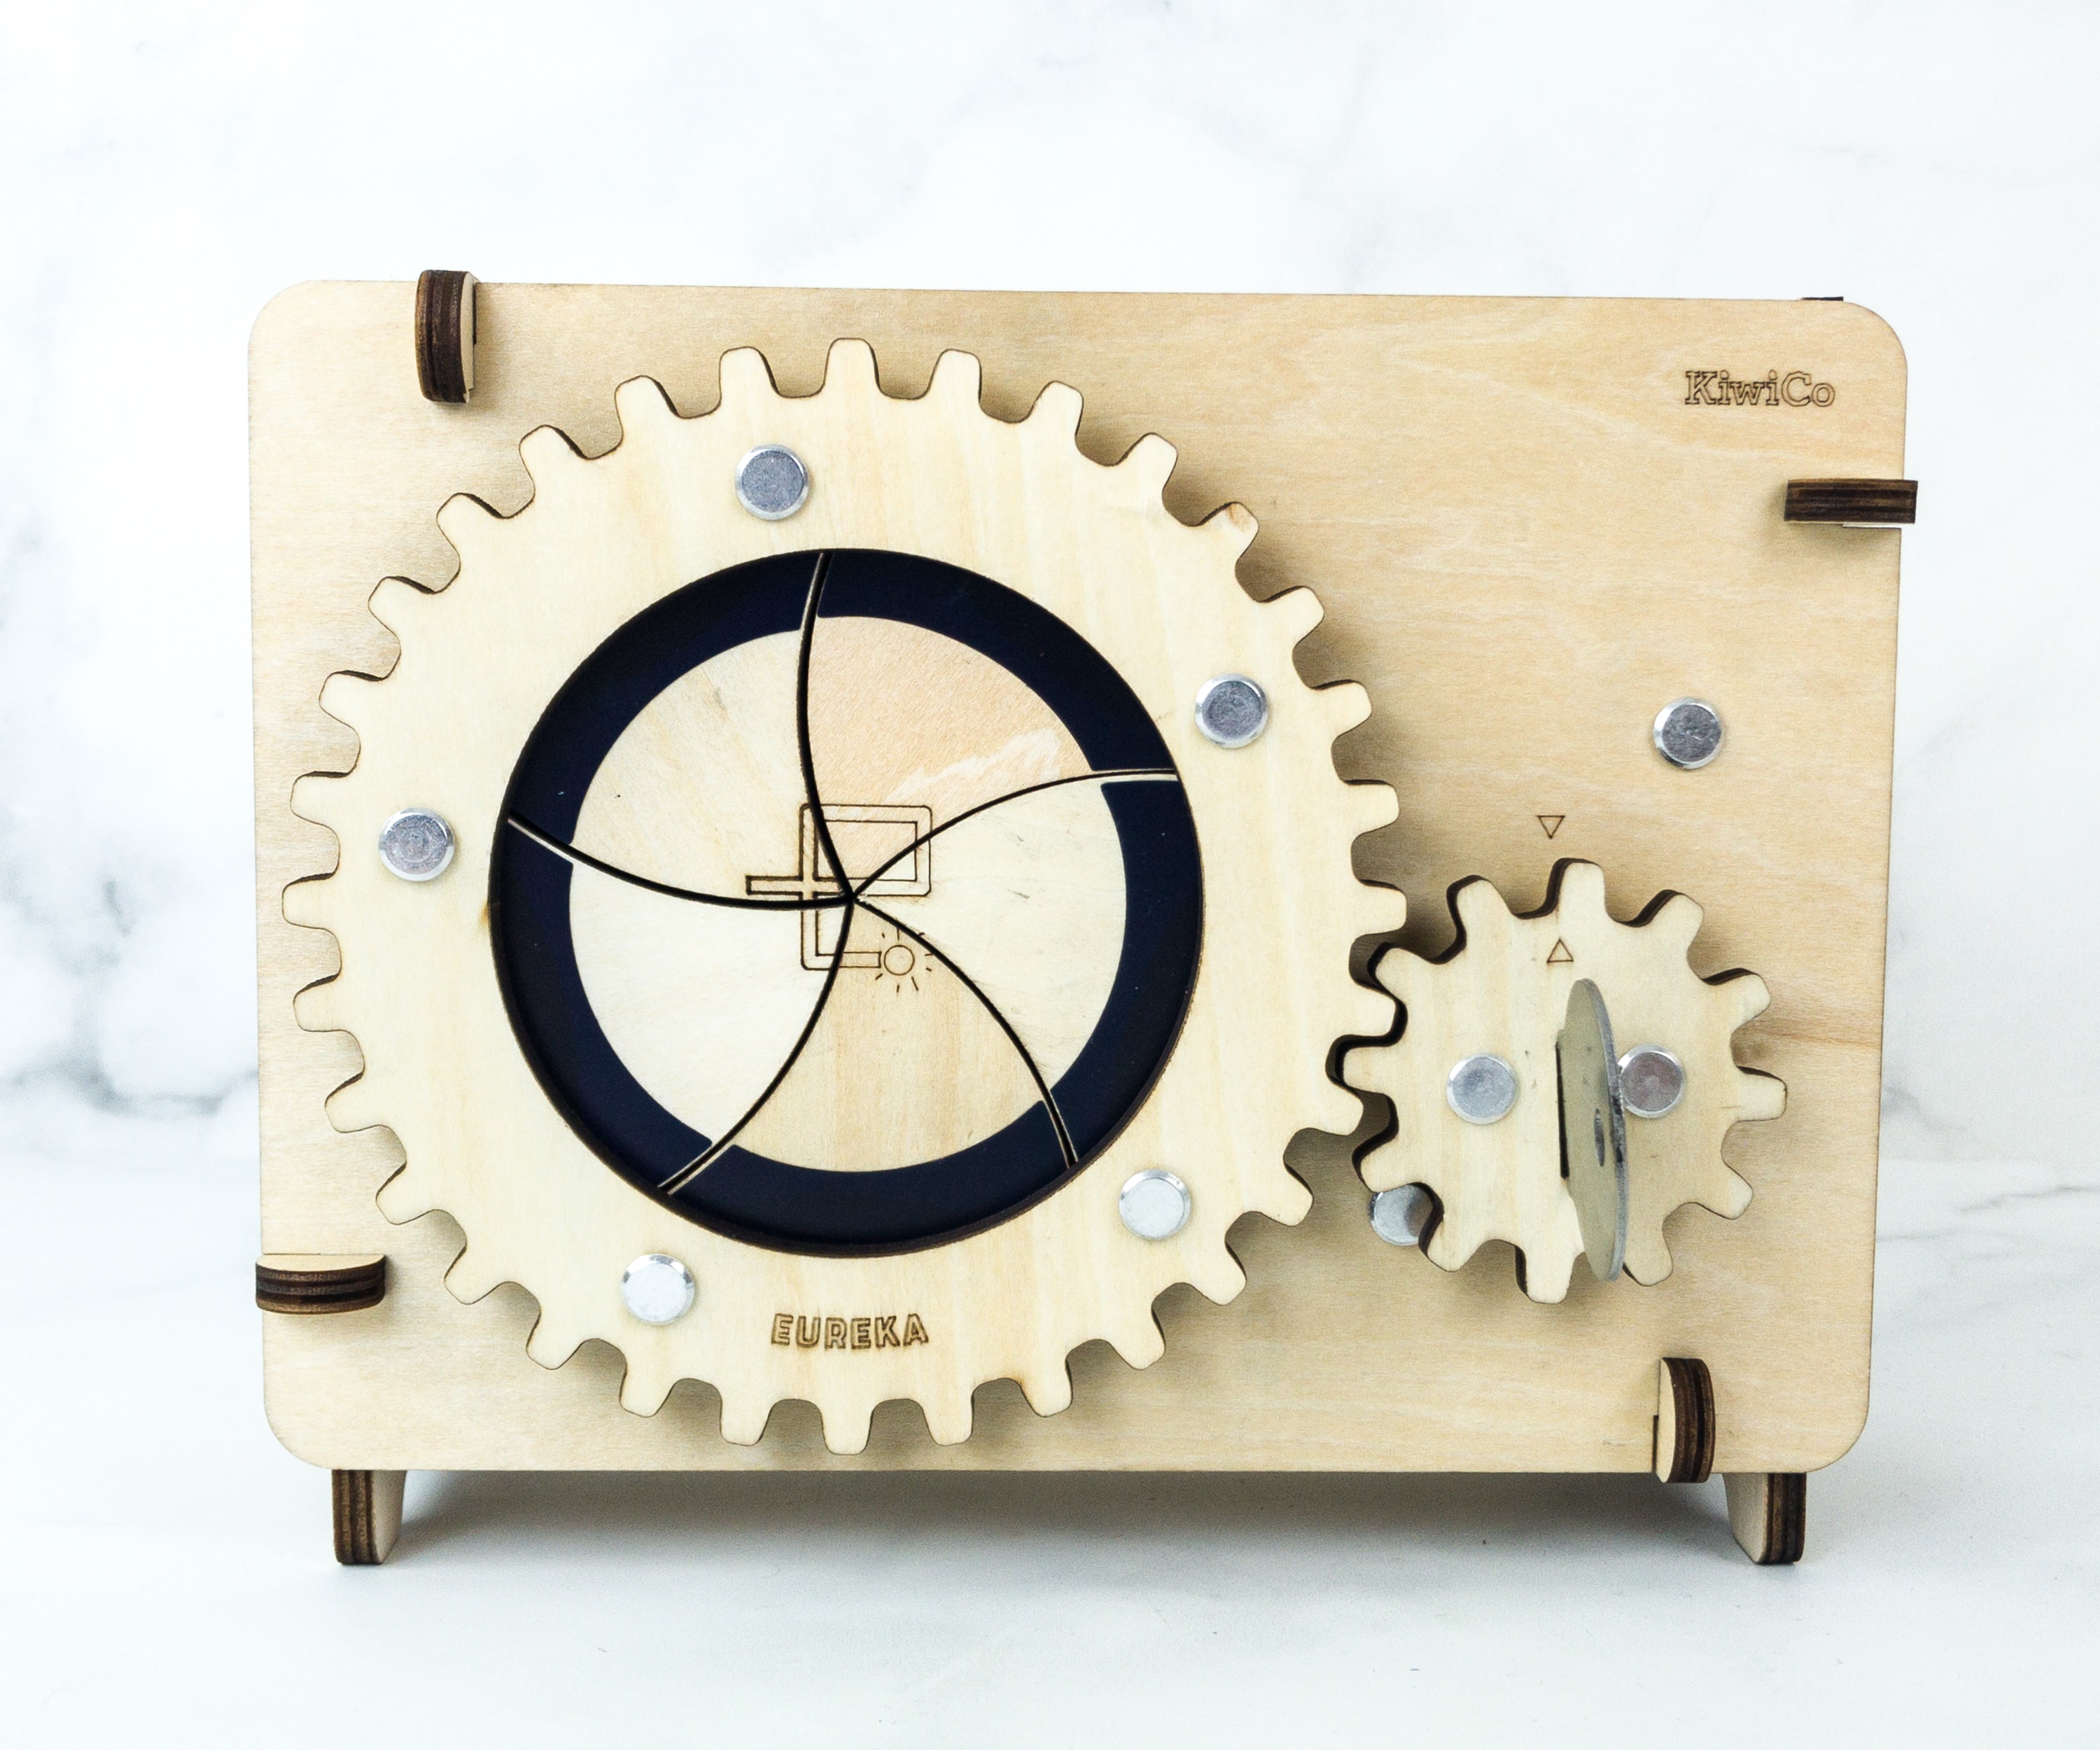
Mechanical Lock Box

The booklet gives a complete history and details about this month’s project. They also included some fun facts and trivia related to the theme.
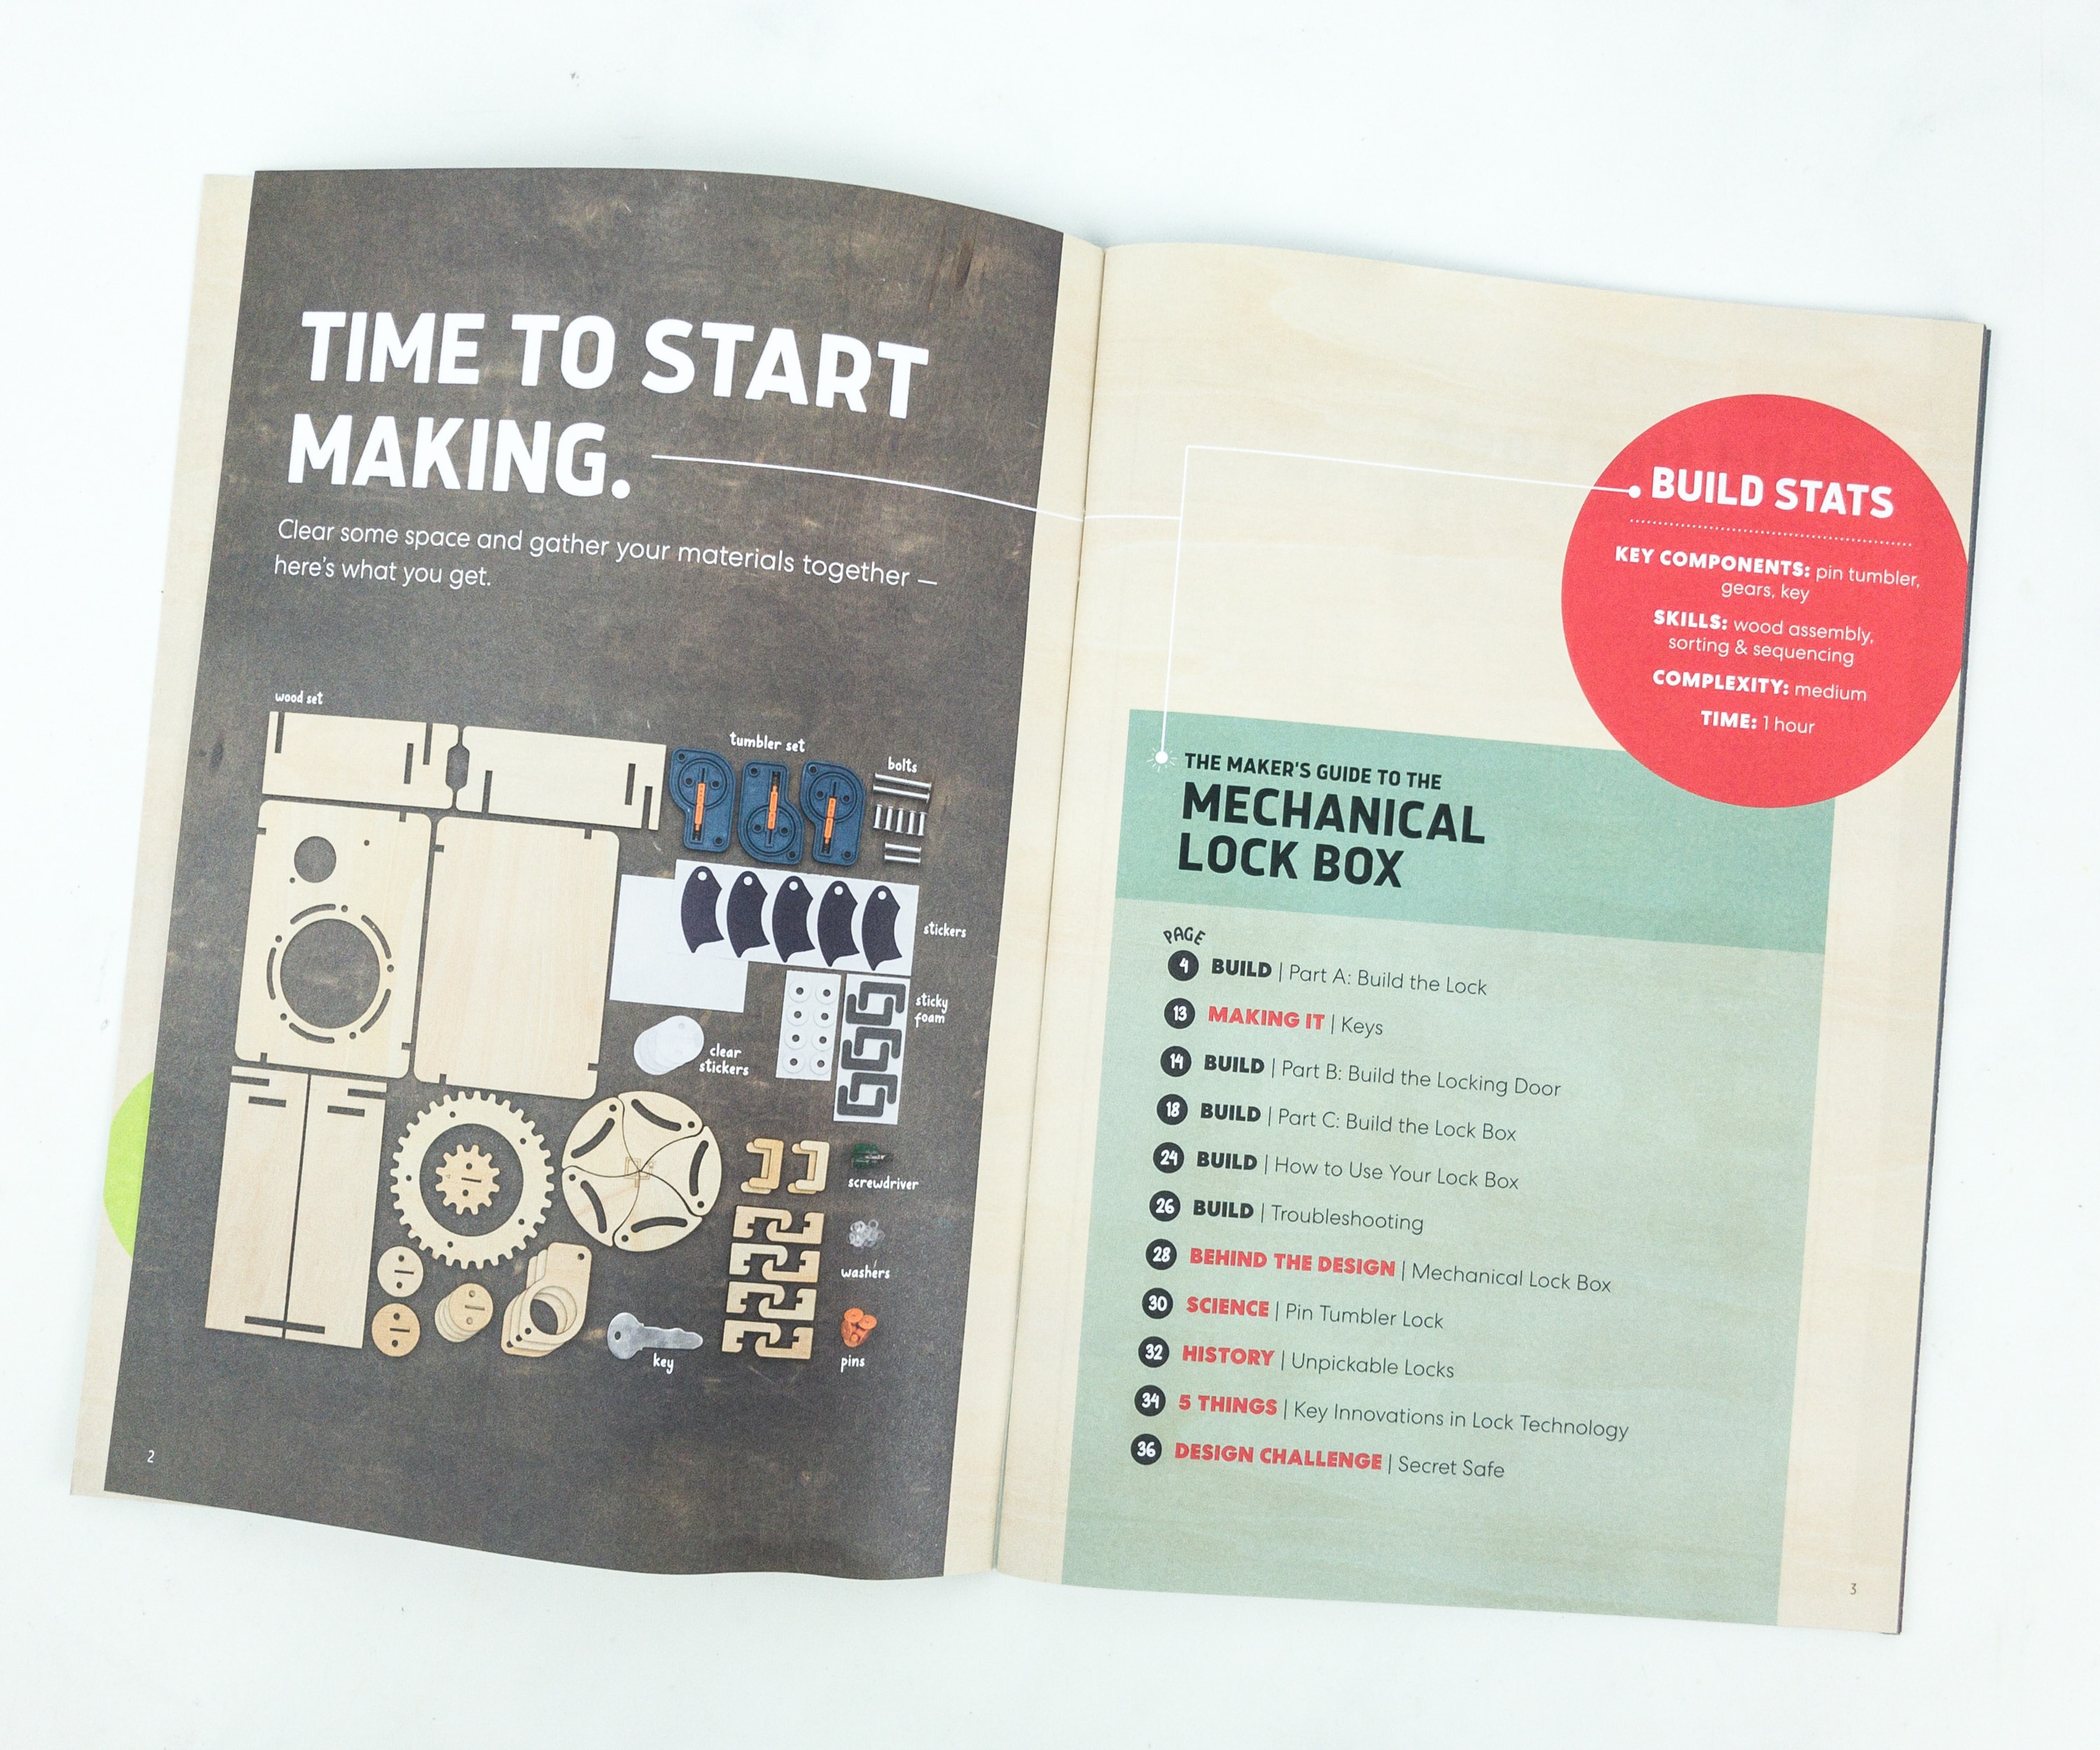
This booklet means business as it jumps right to the activity.
Eureka Crate Materials

Here are the materials! You may check if you have the complete parts by comparing it to the picture in the booklet.
The instructions kept the continuous flow of the activity easy to understand. The drawings were very detailed too.
We usually group the materials according to their sizes, this way we can easily see the next part to be used, and it really makes it easier for us to construct the project.

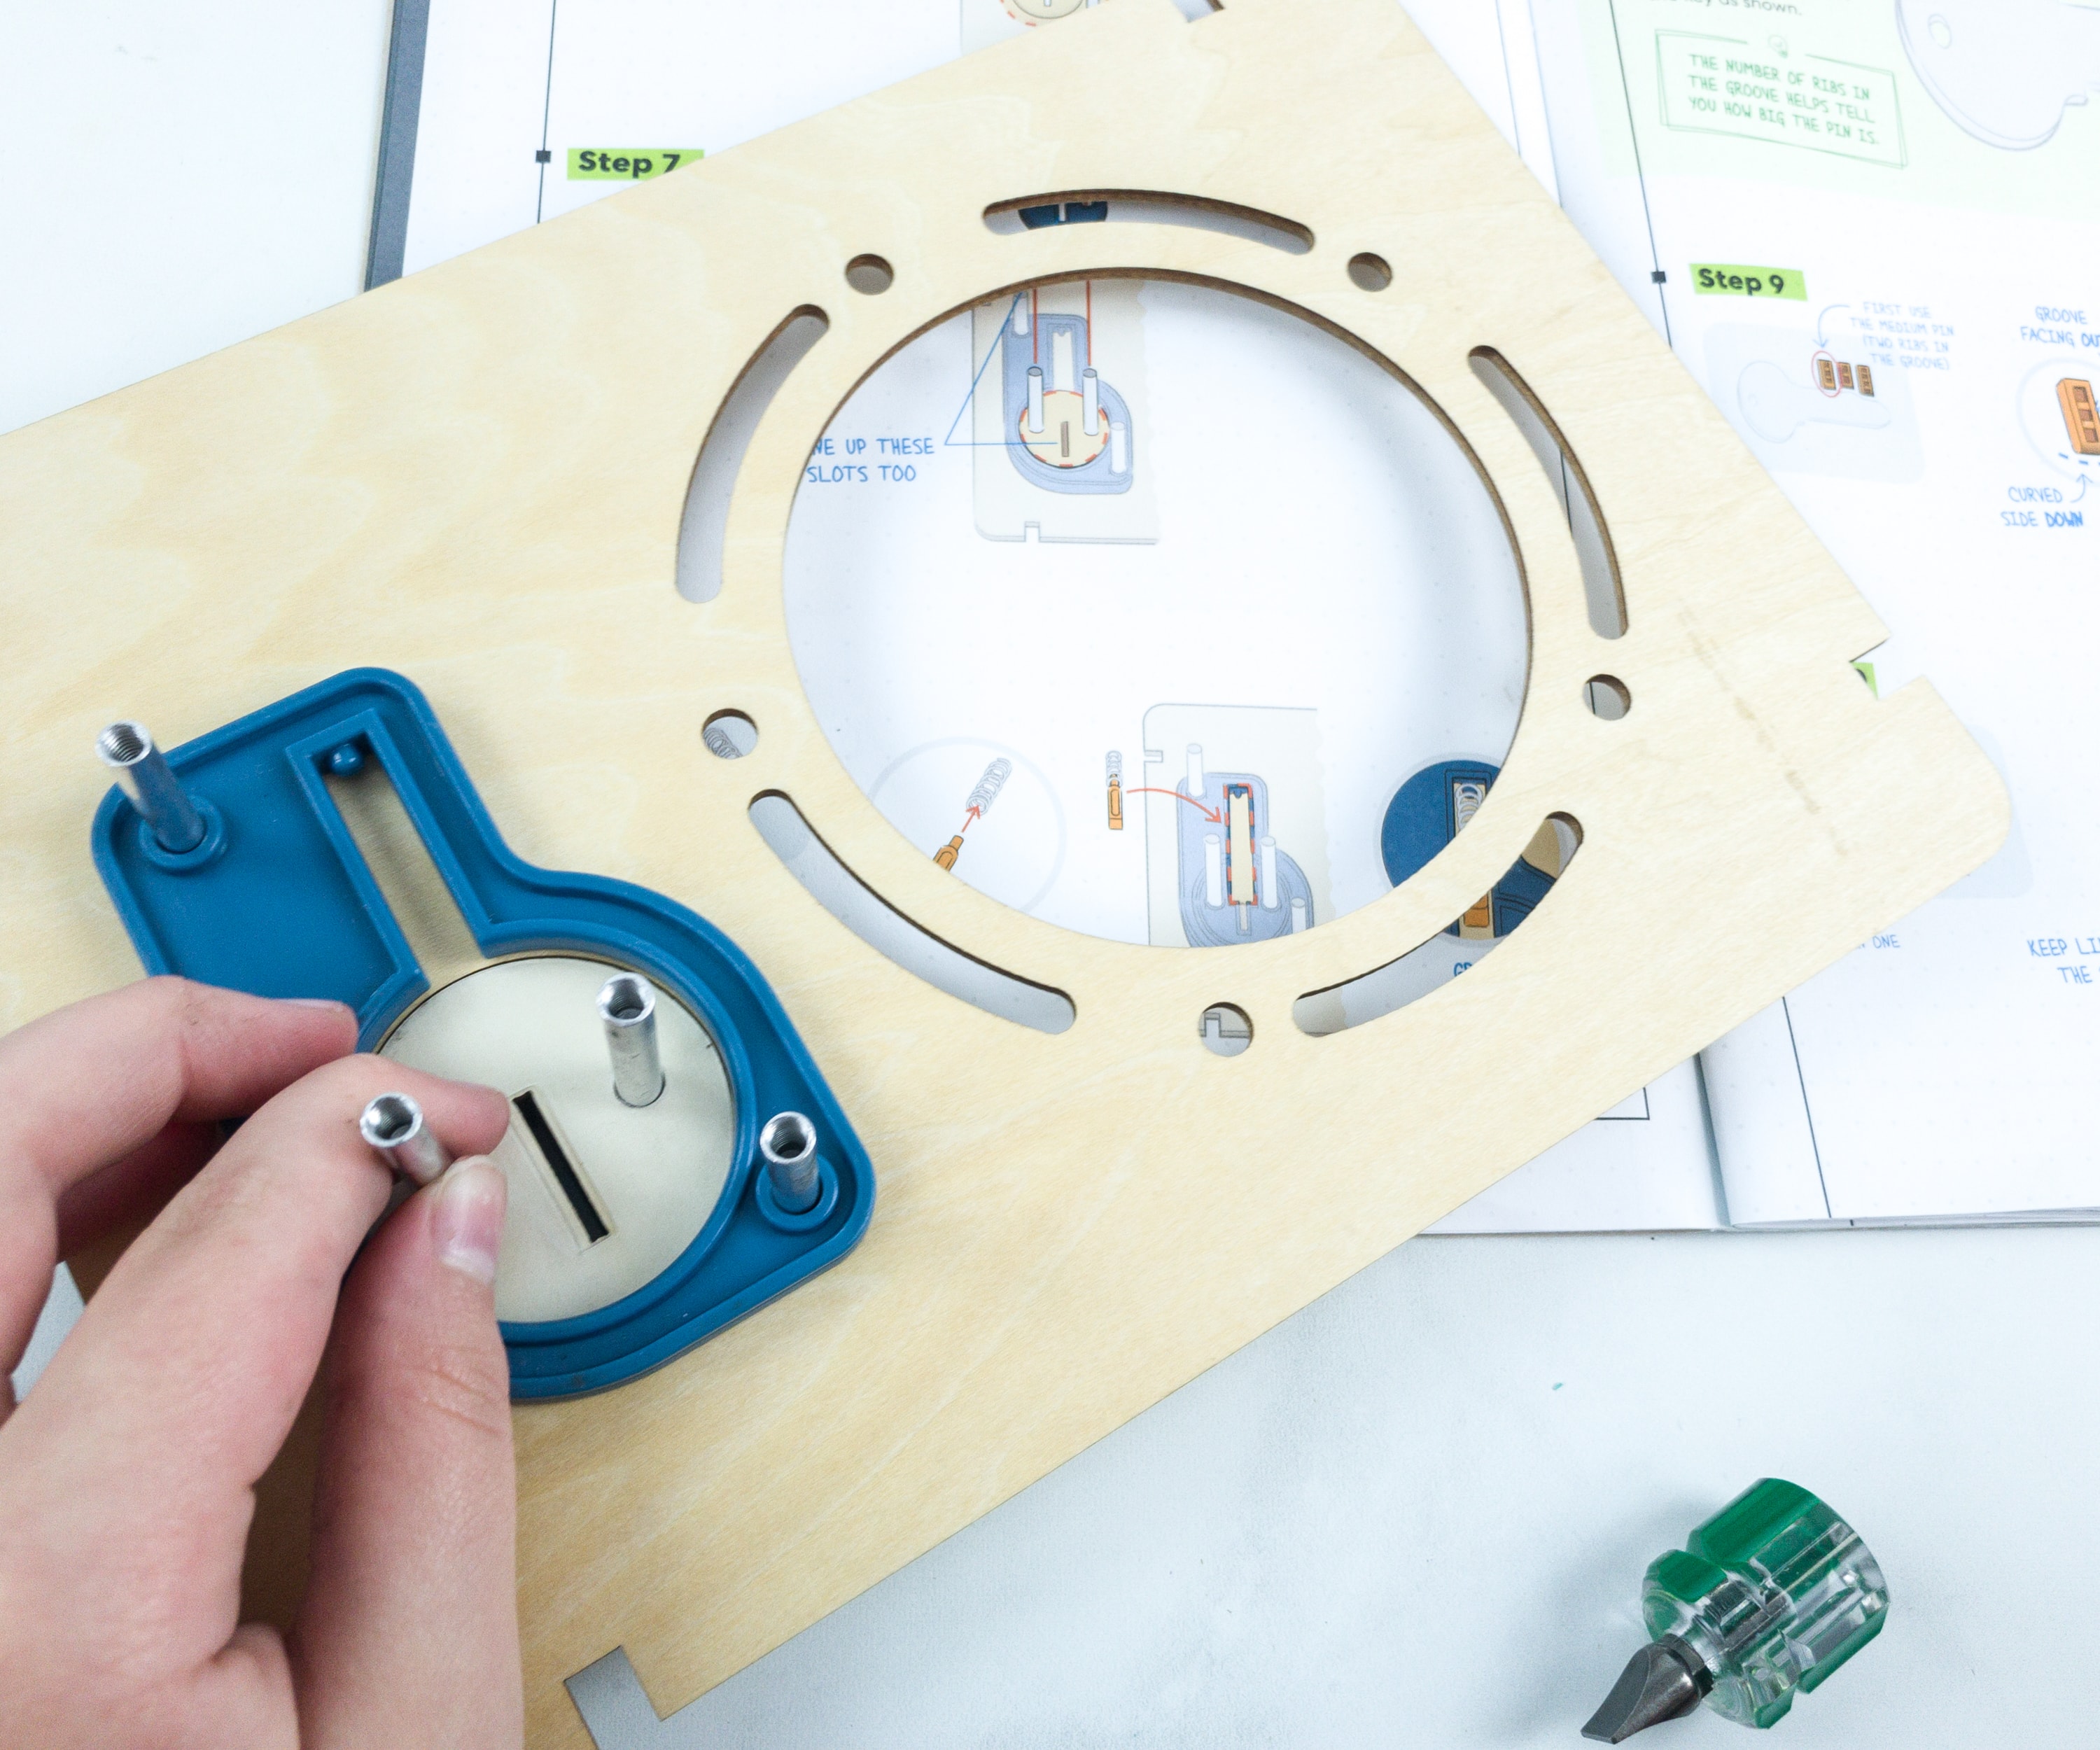
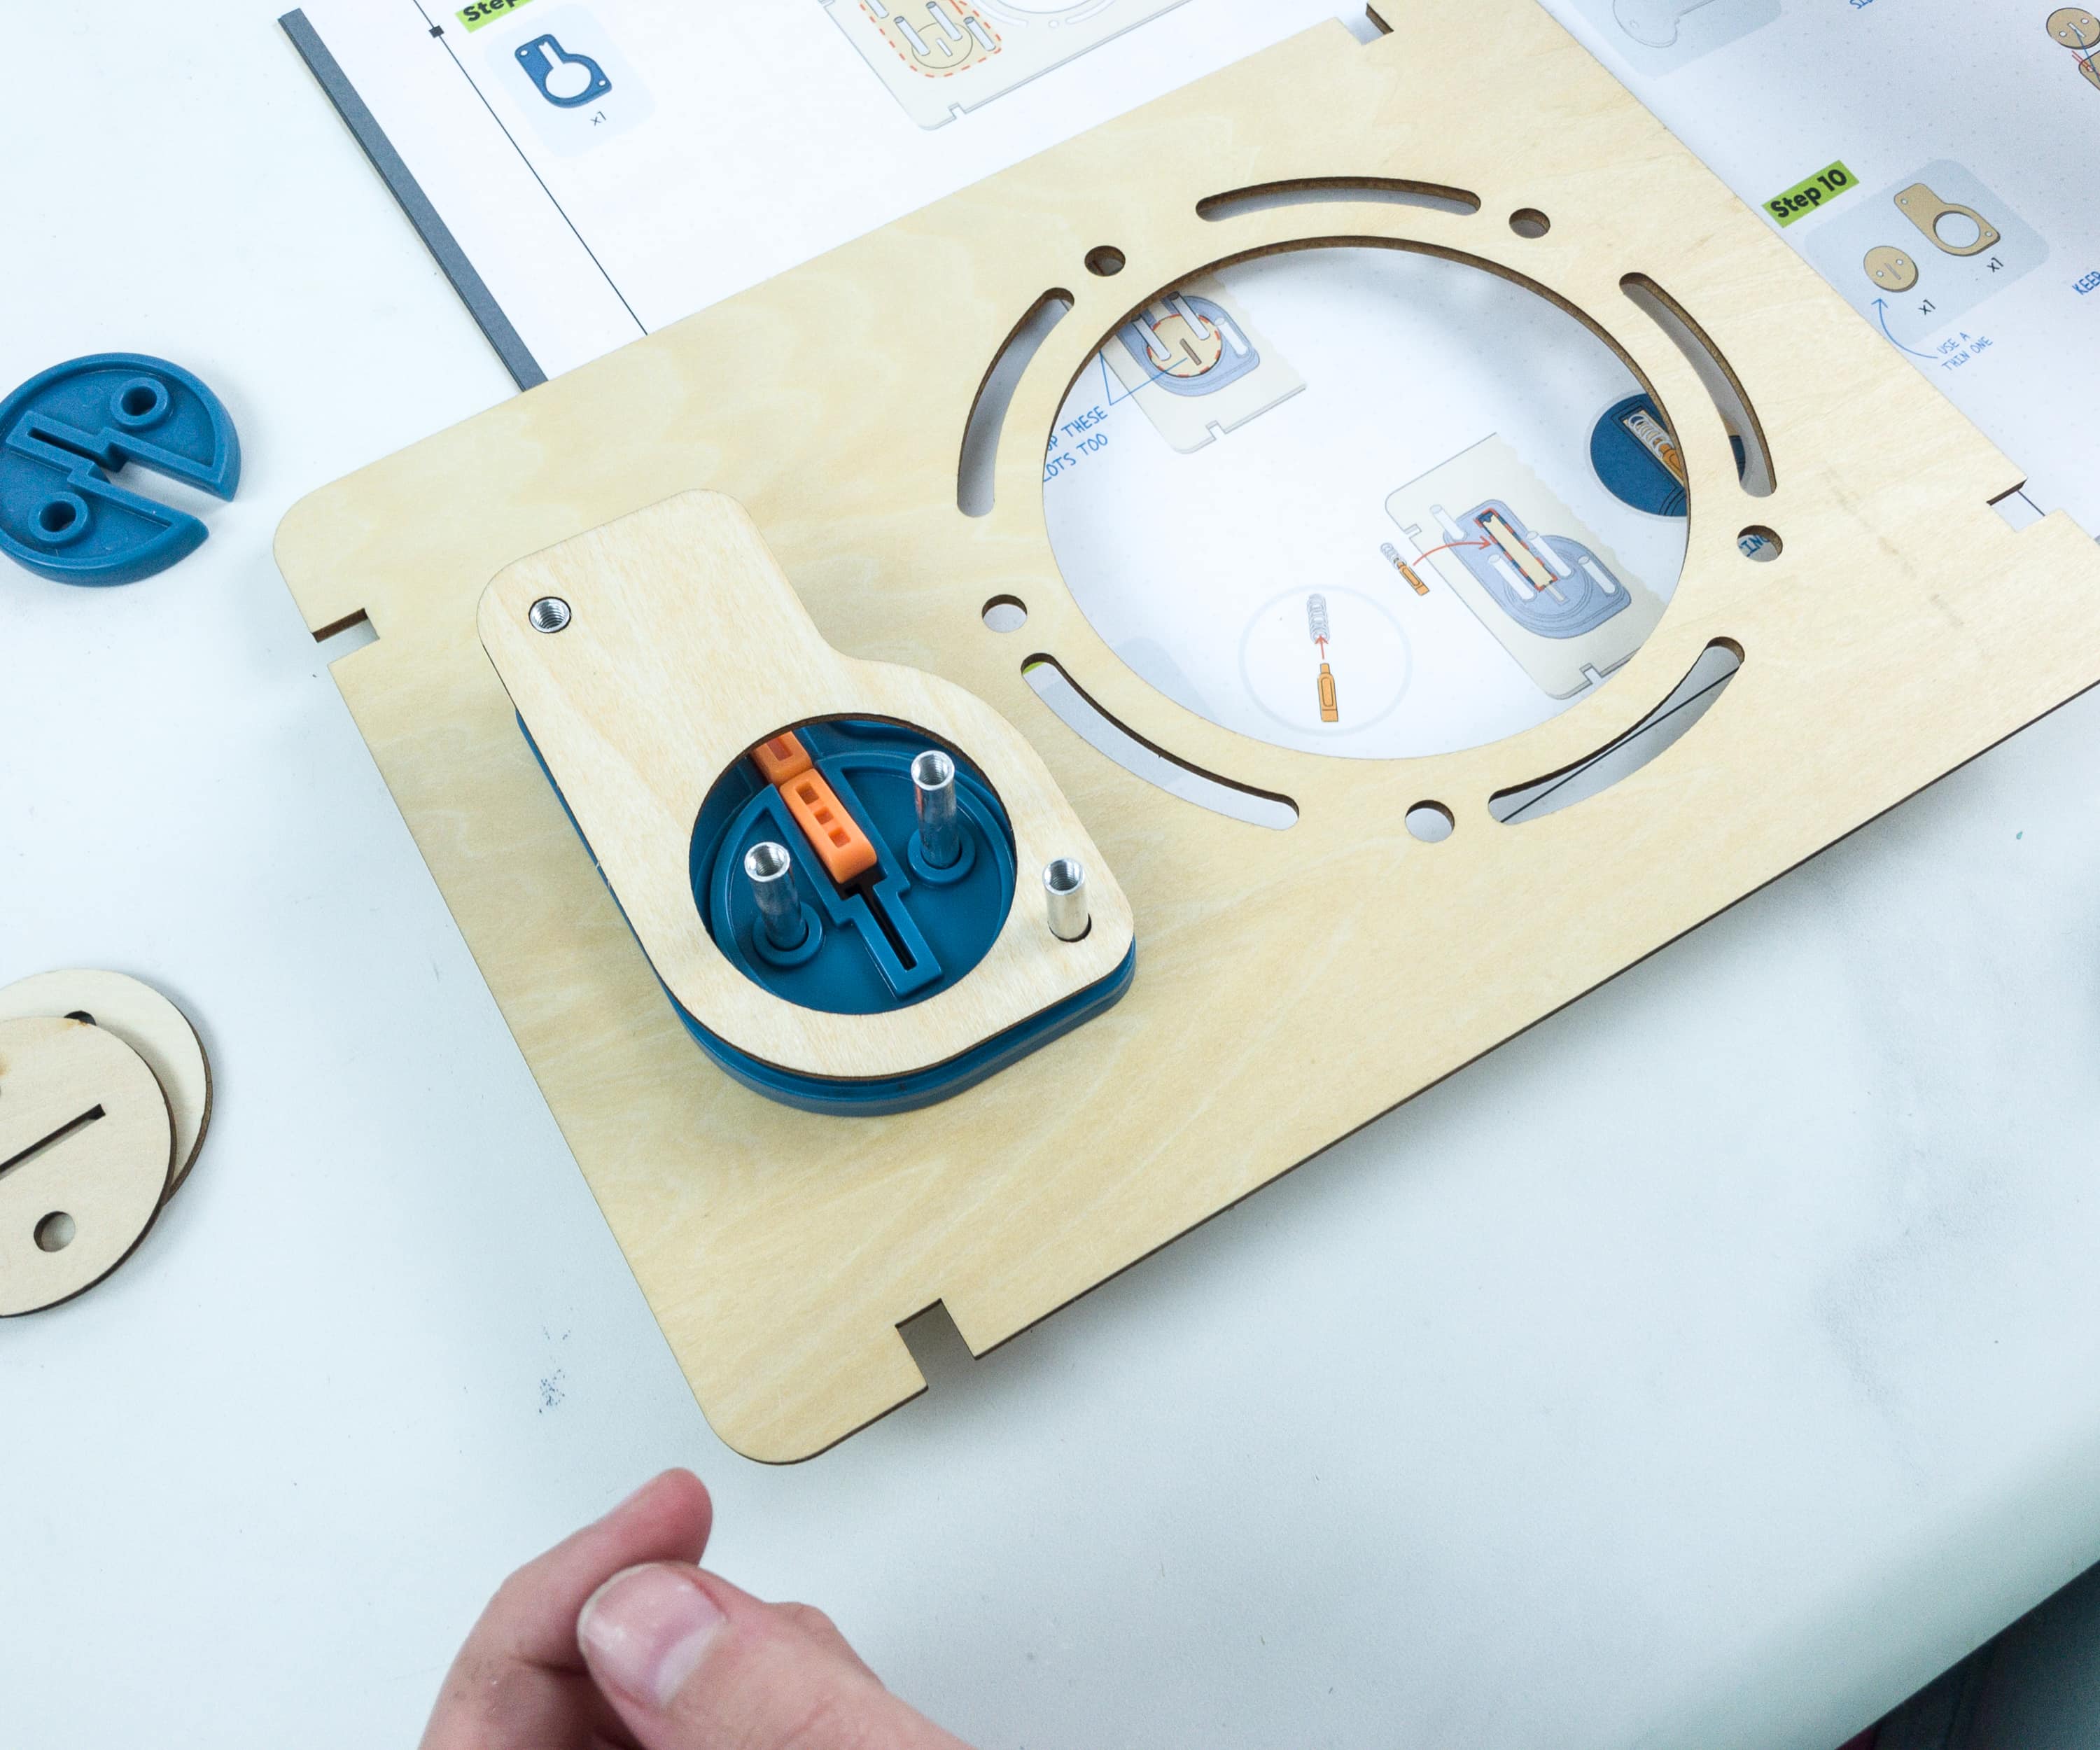
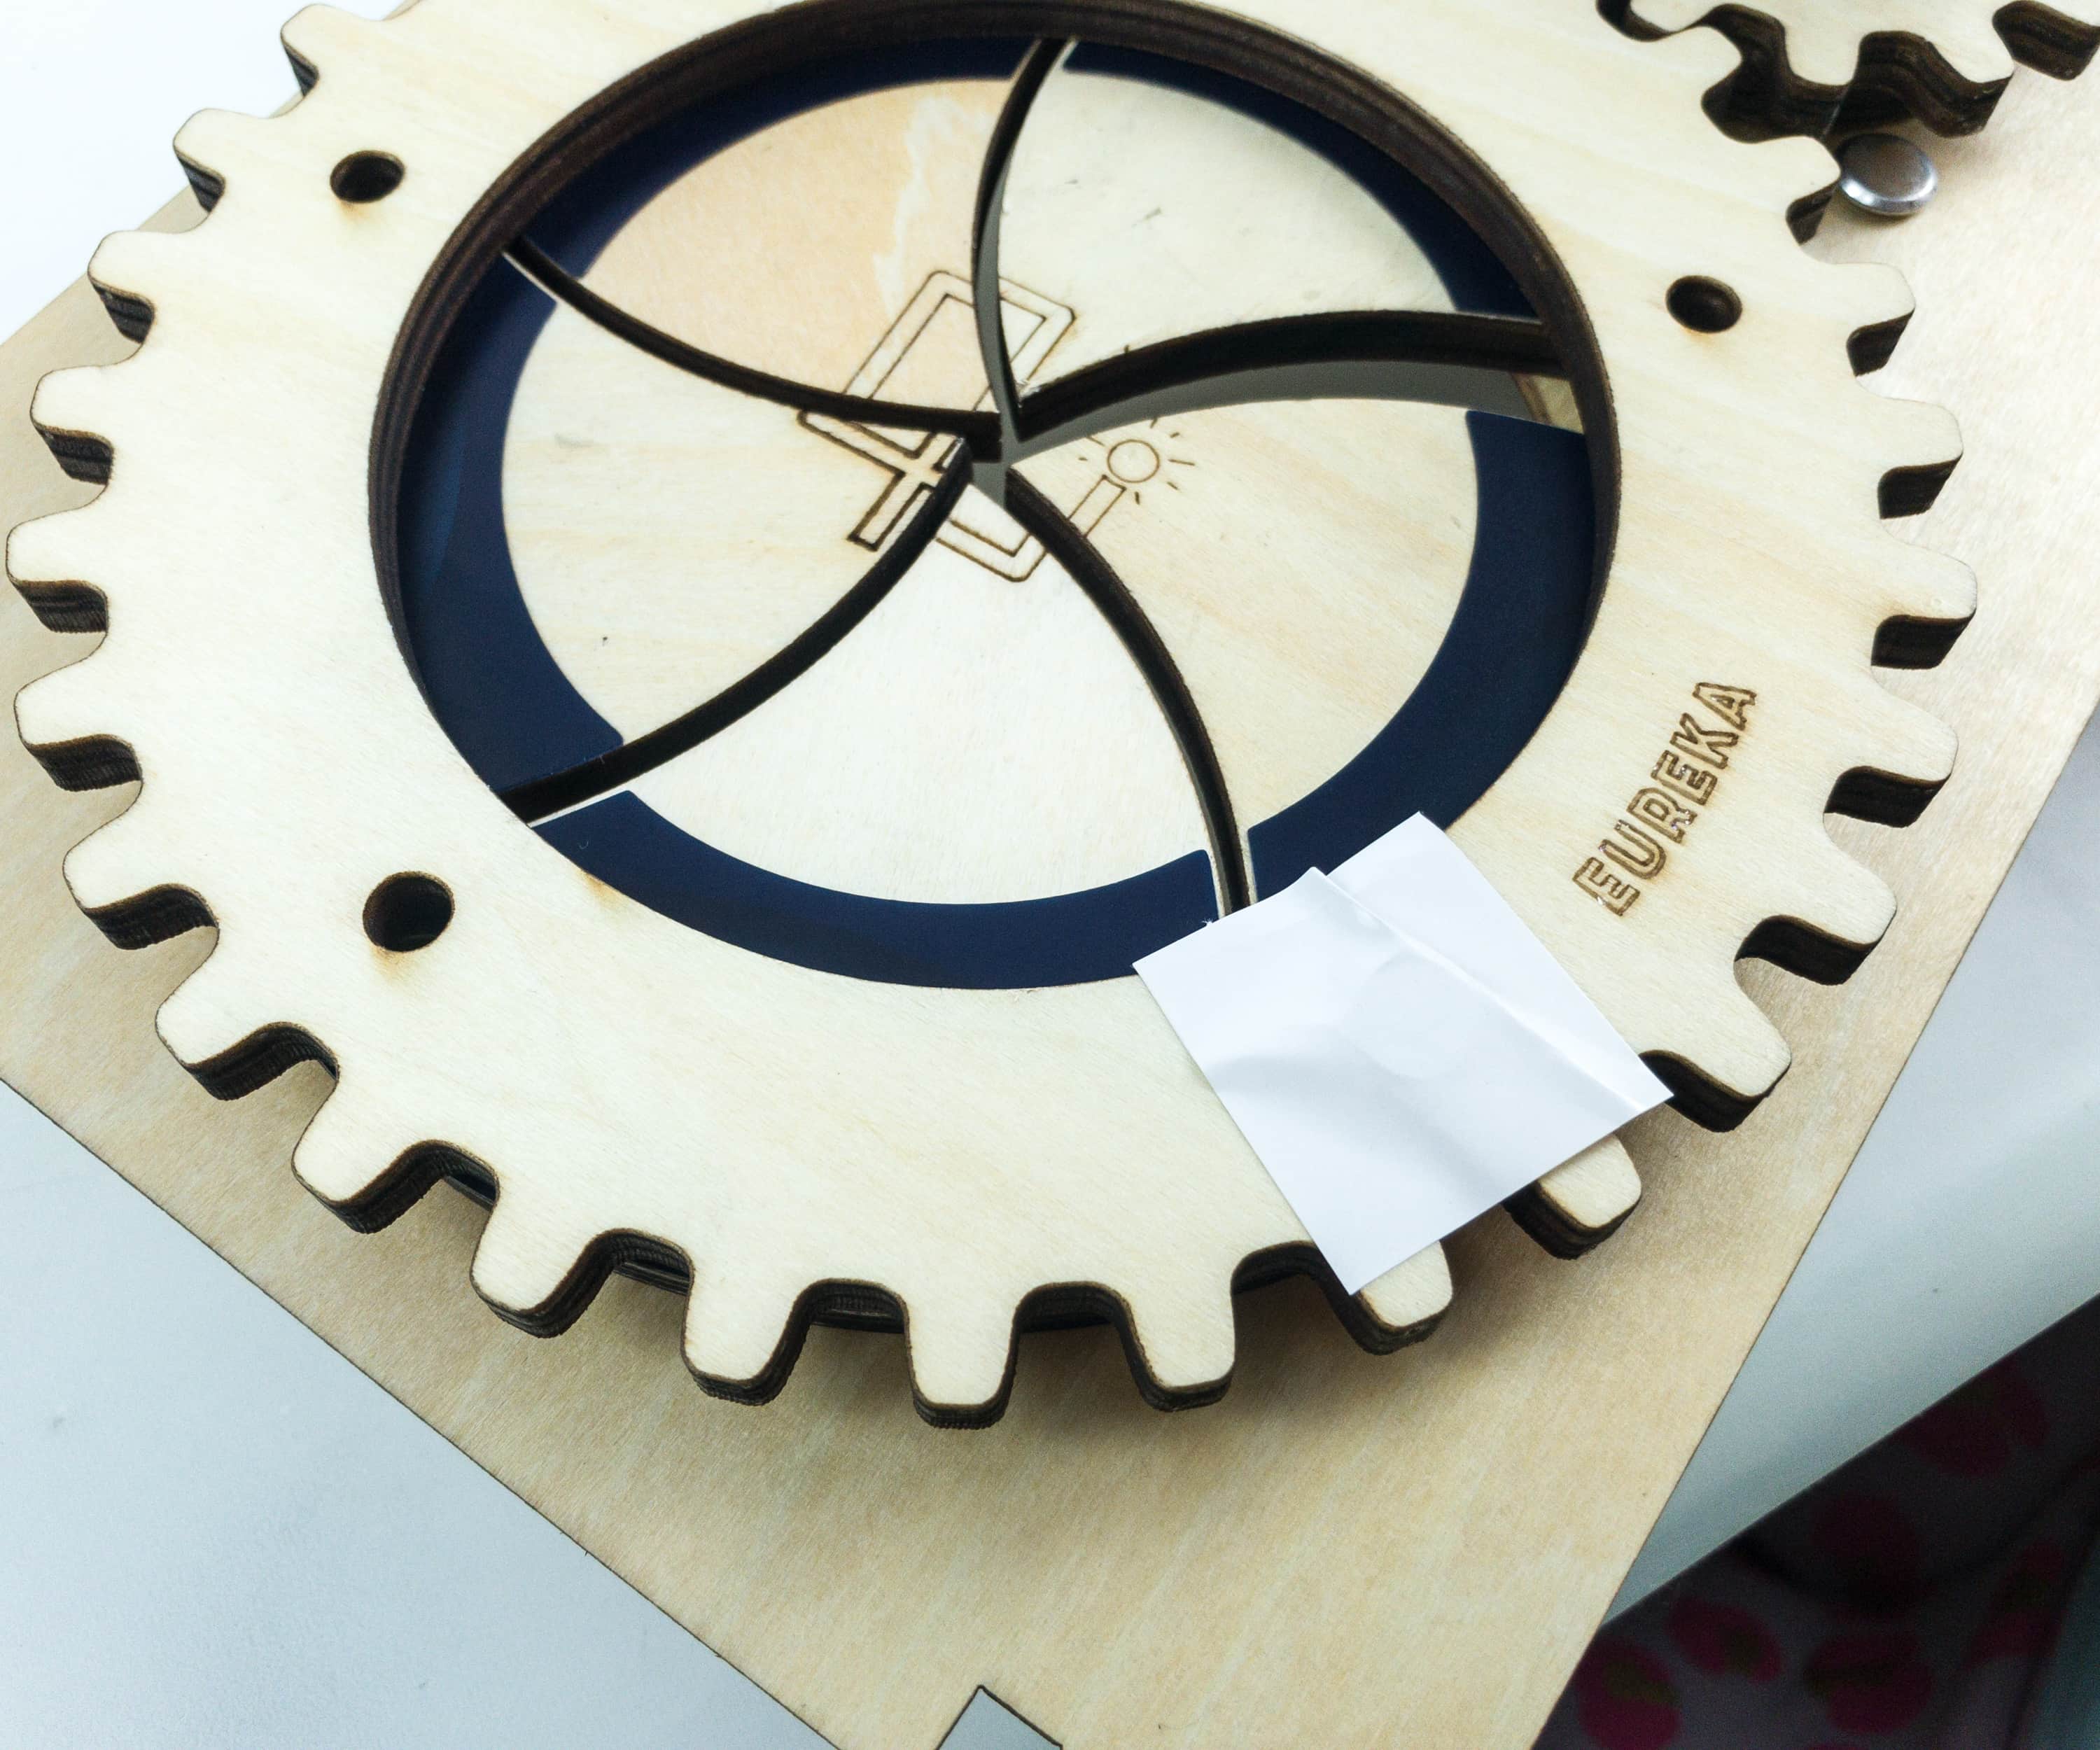
There are two holes featured on the main board, the larger hole is for the locker door and the small one is for the pin tumbler lock.
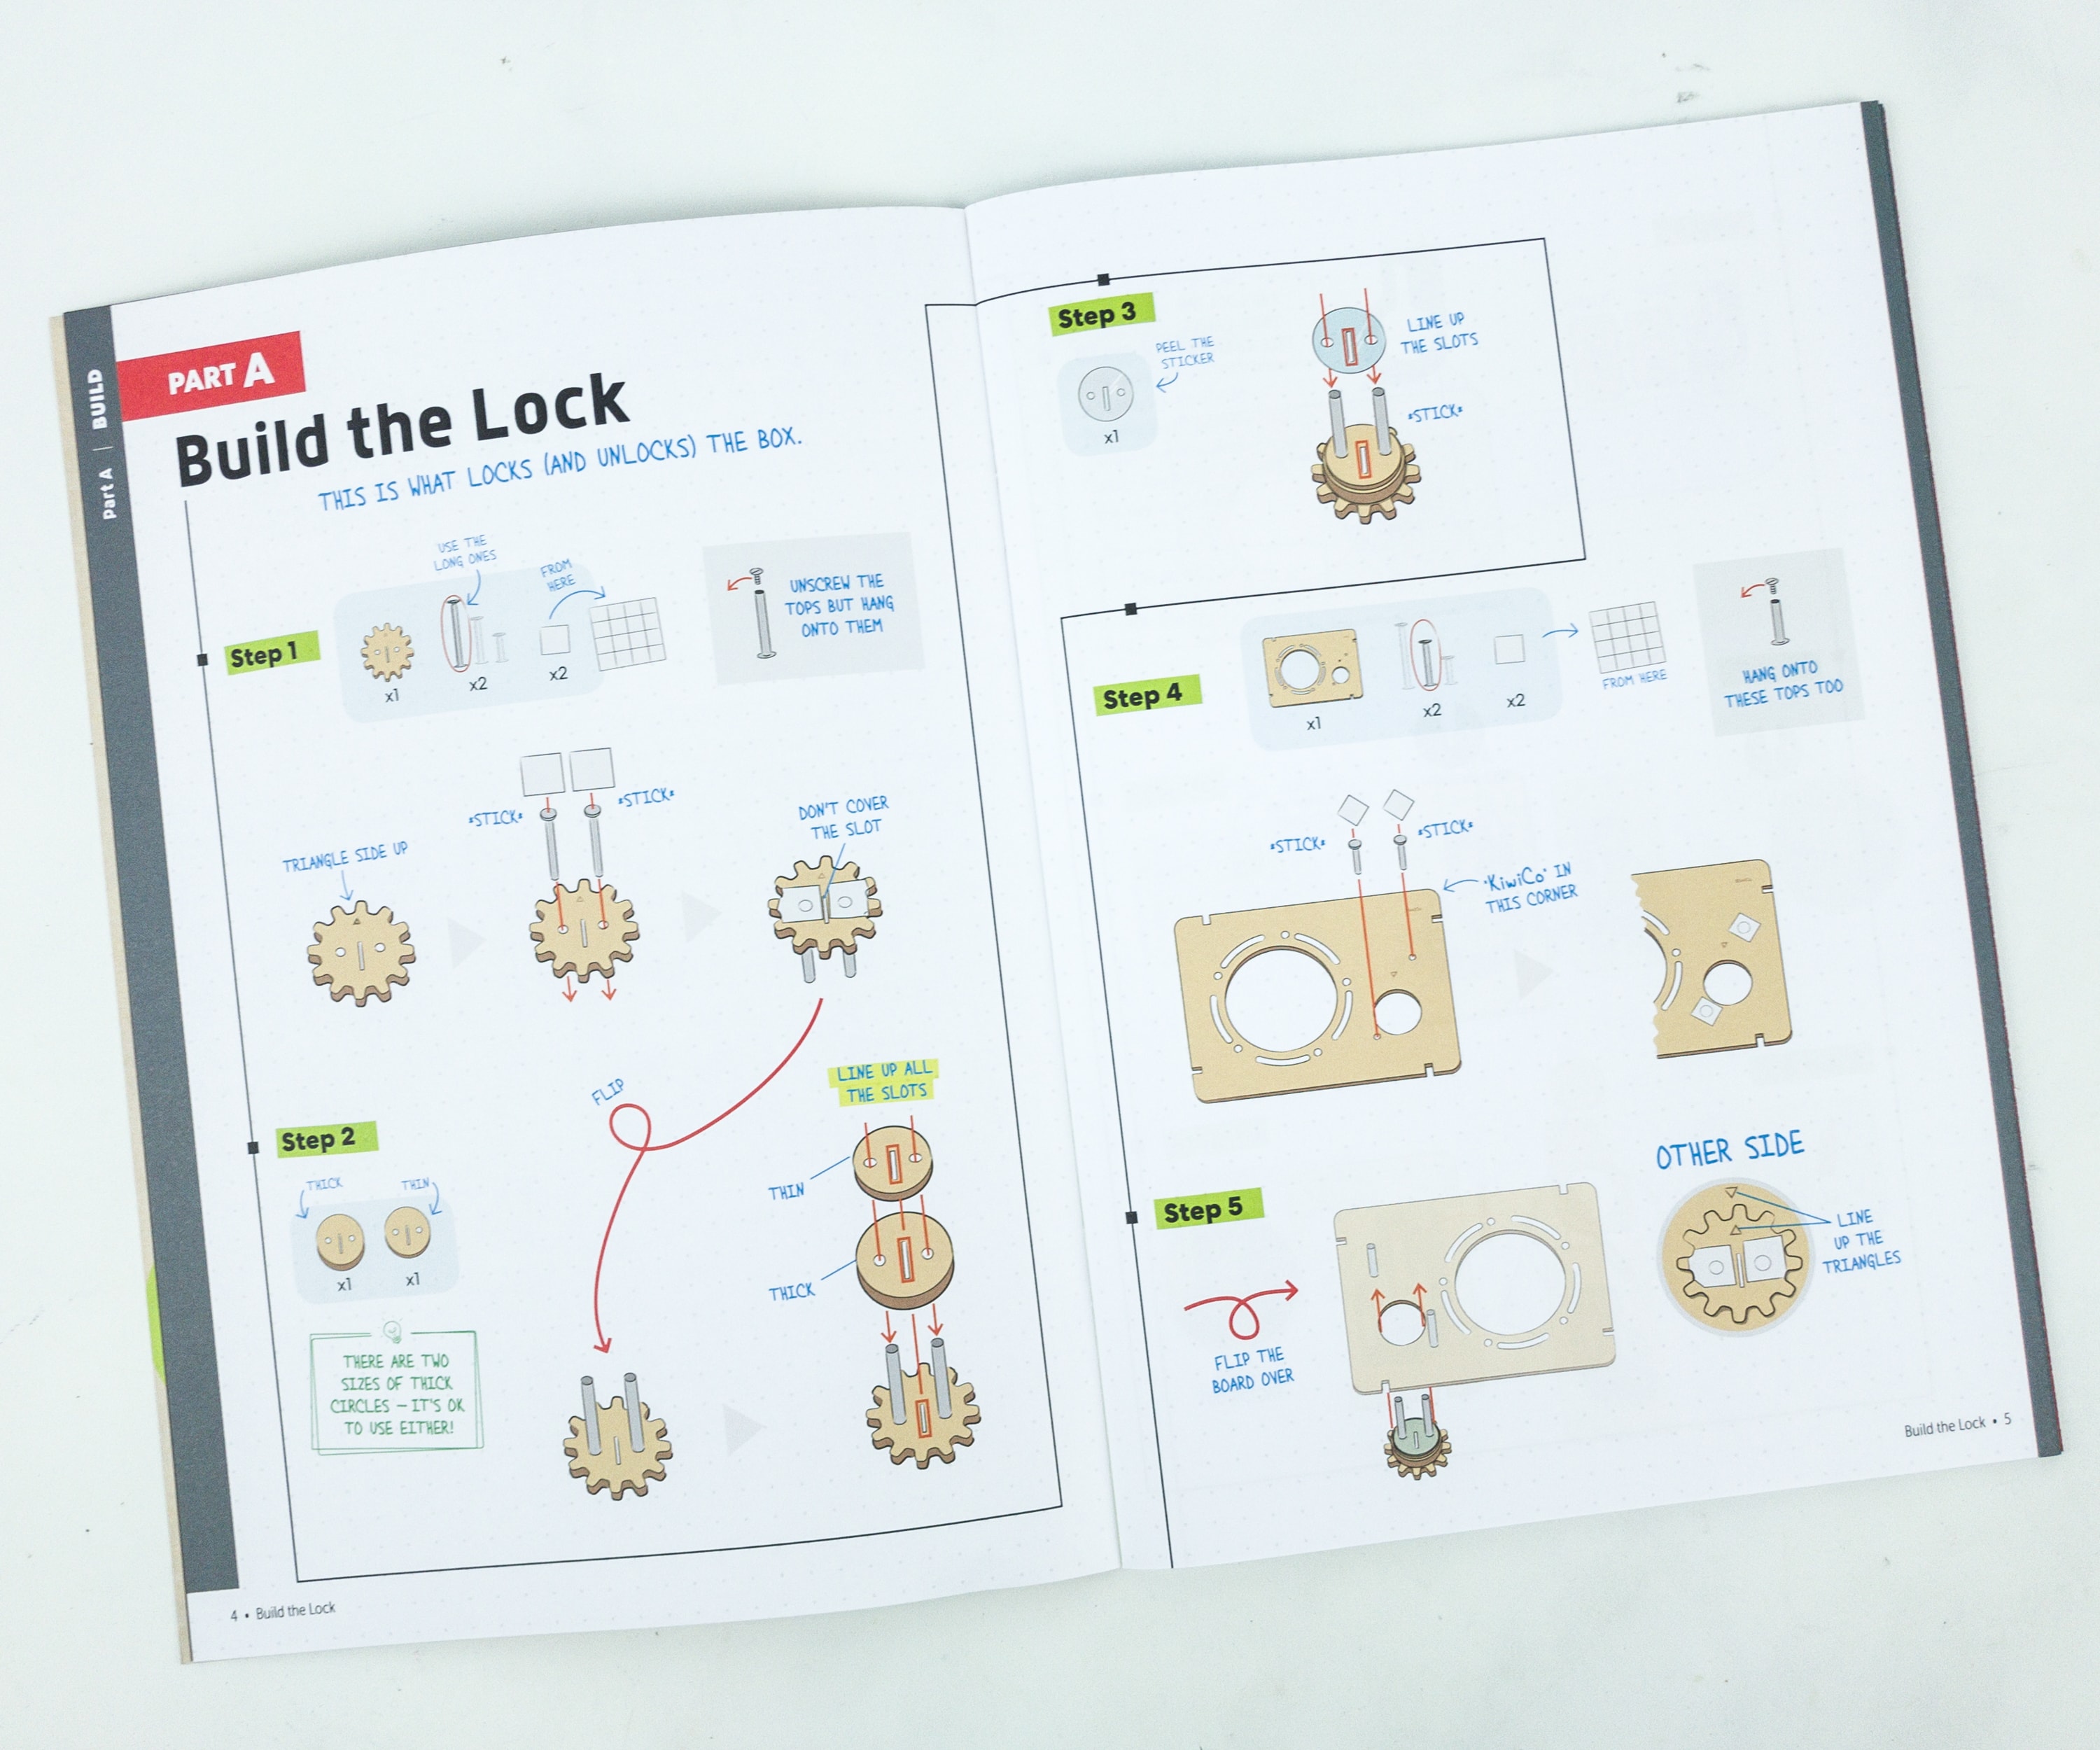
My daughter started by building the lock, since it is smaller and a bit faster to do. The instructions are very detailed, follow them carefully and you’ll have no problem making it.
Make sure that the bolts are screwed properly, as you might encounter problems if the lock is poorly screwed.

Here is how the pin tumbler lock should look like once done.
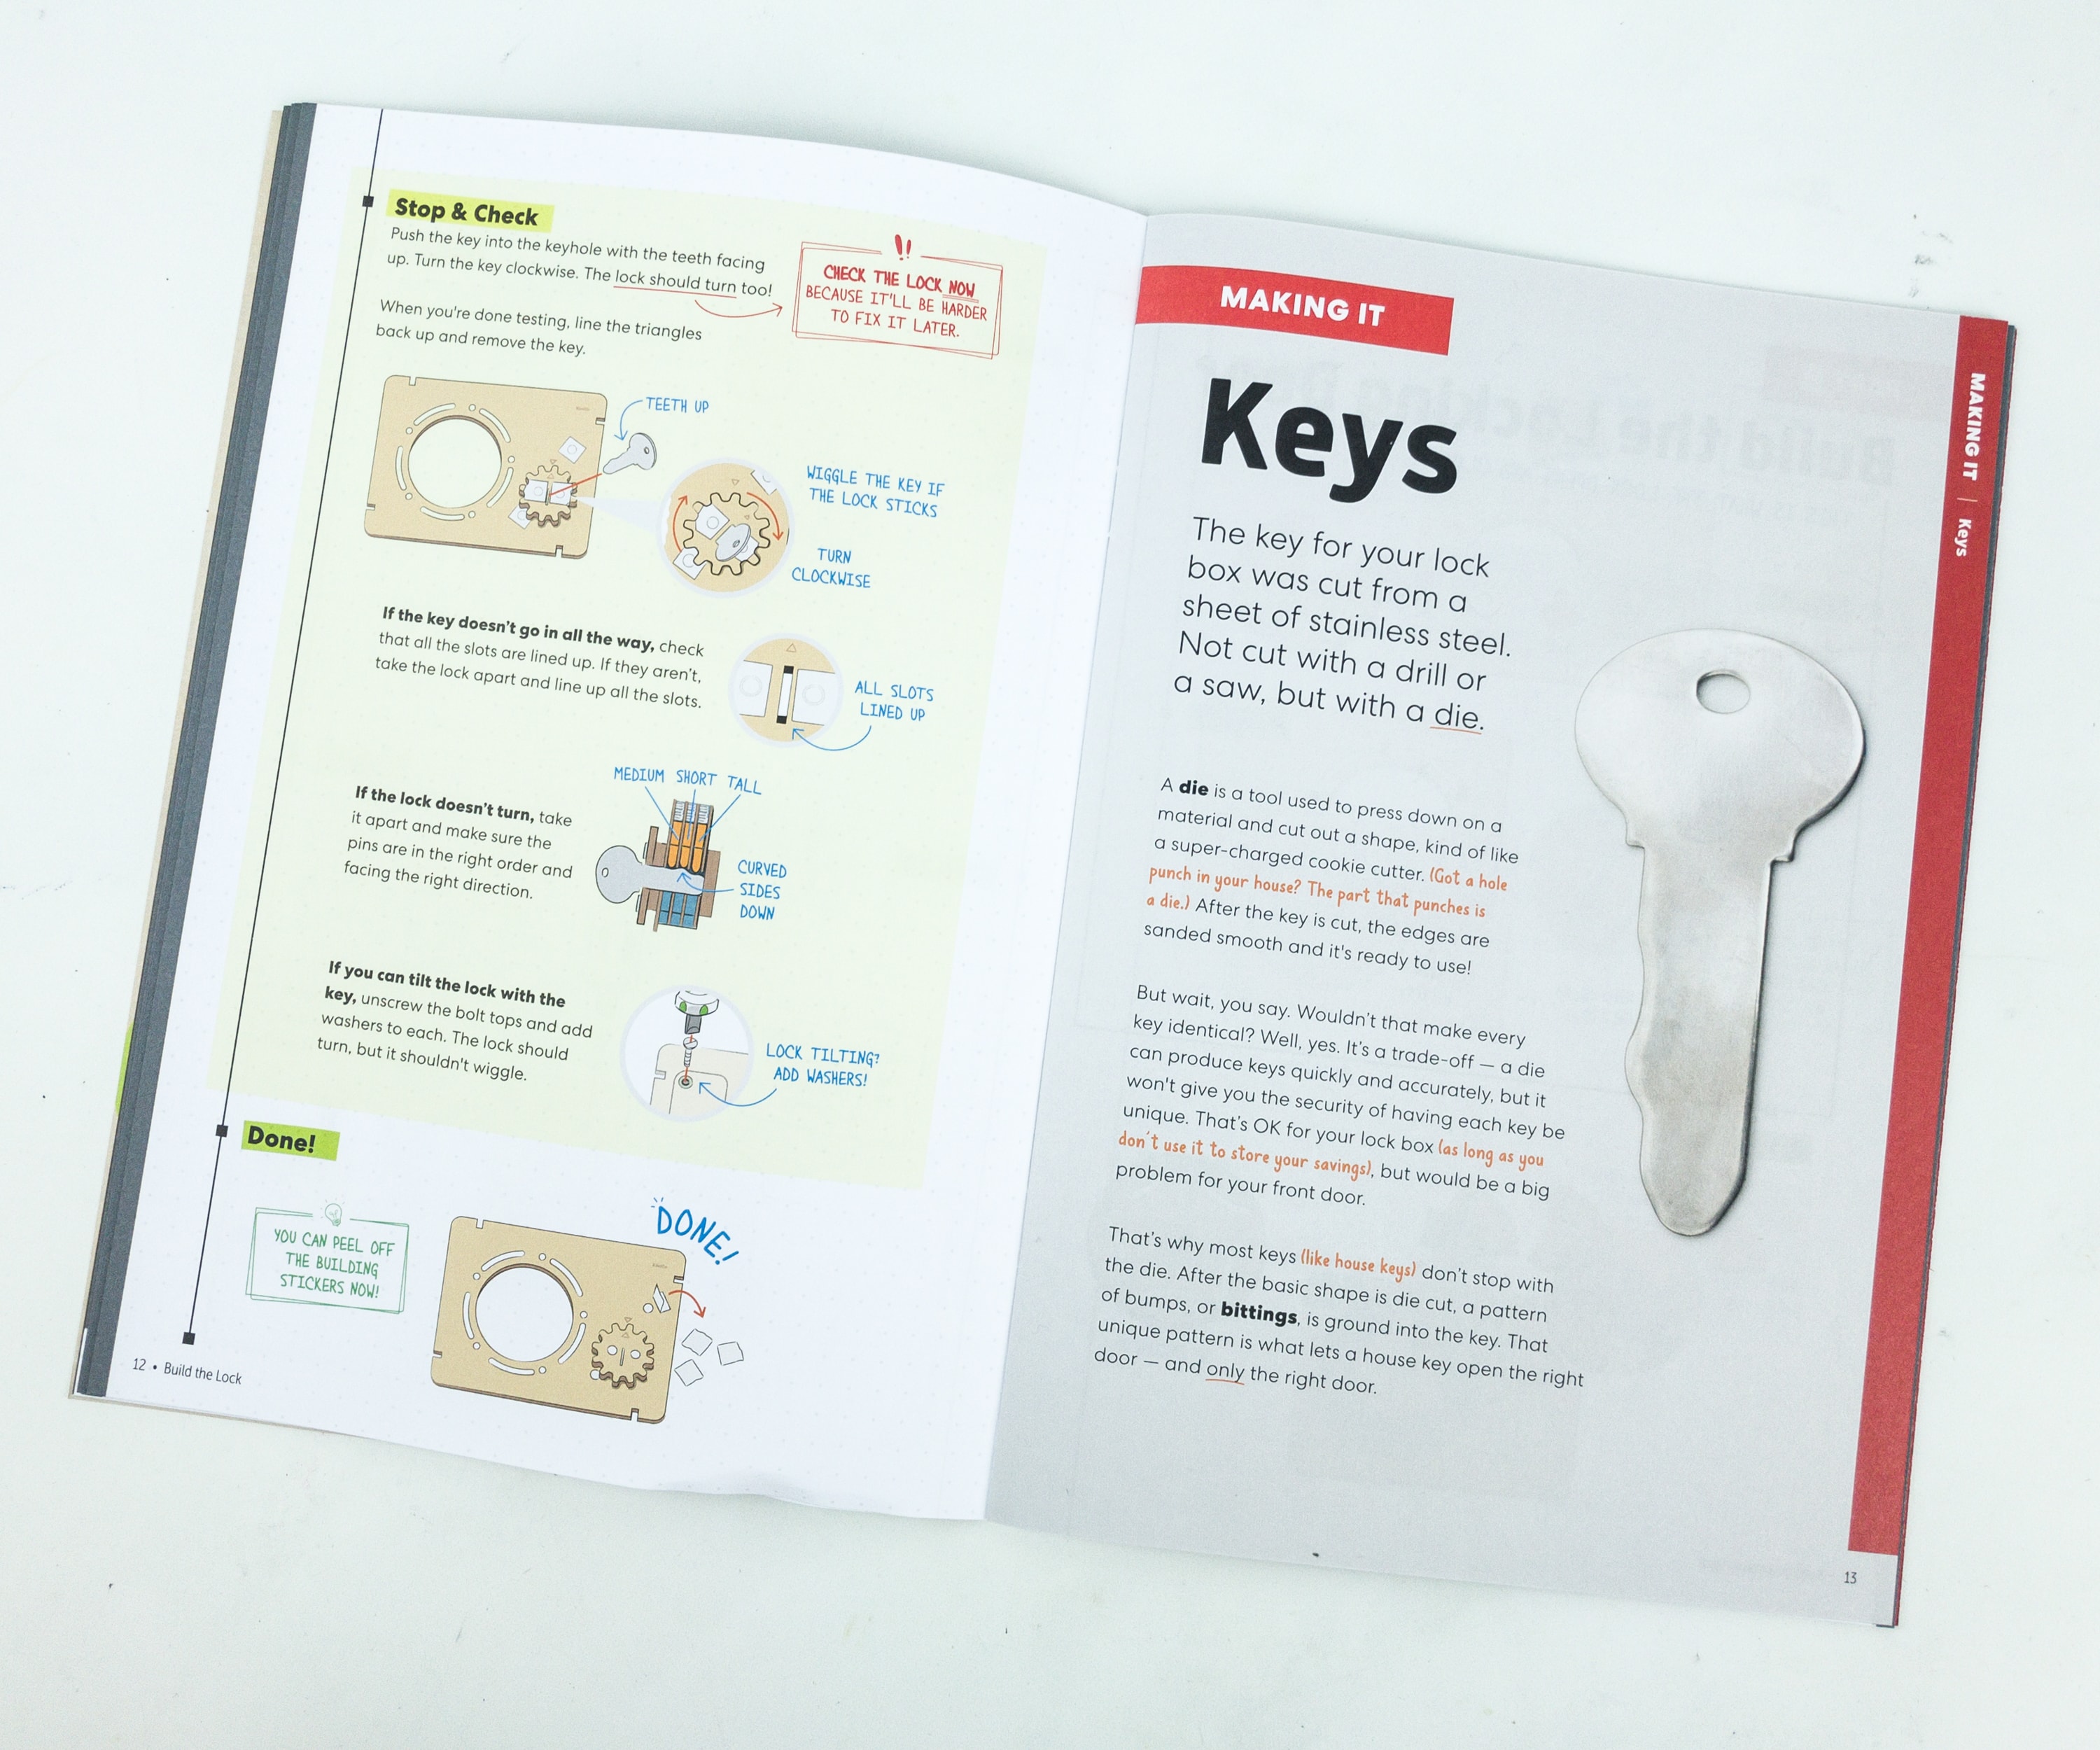
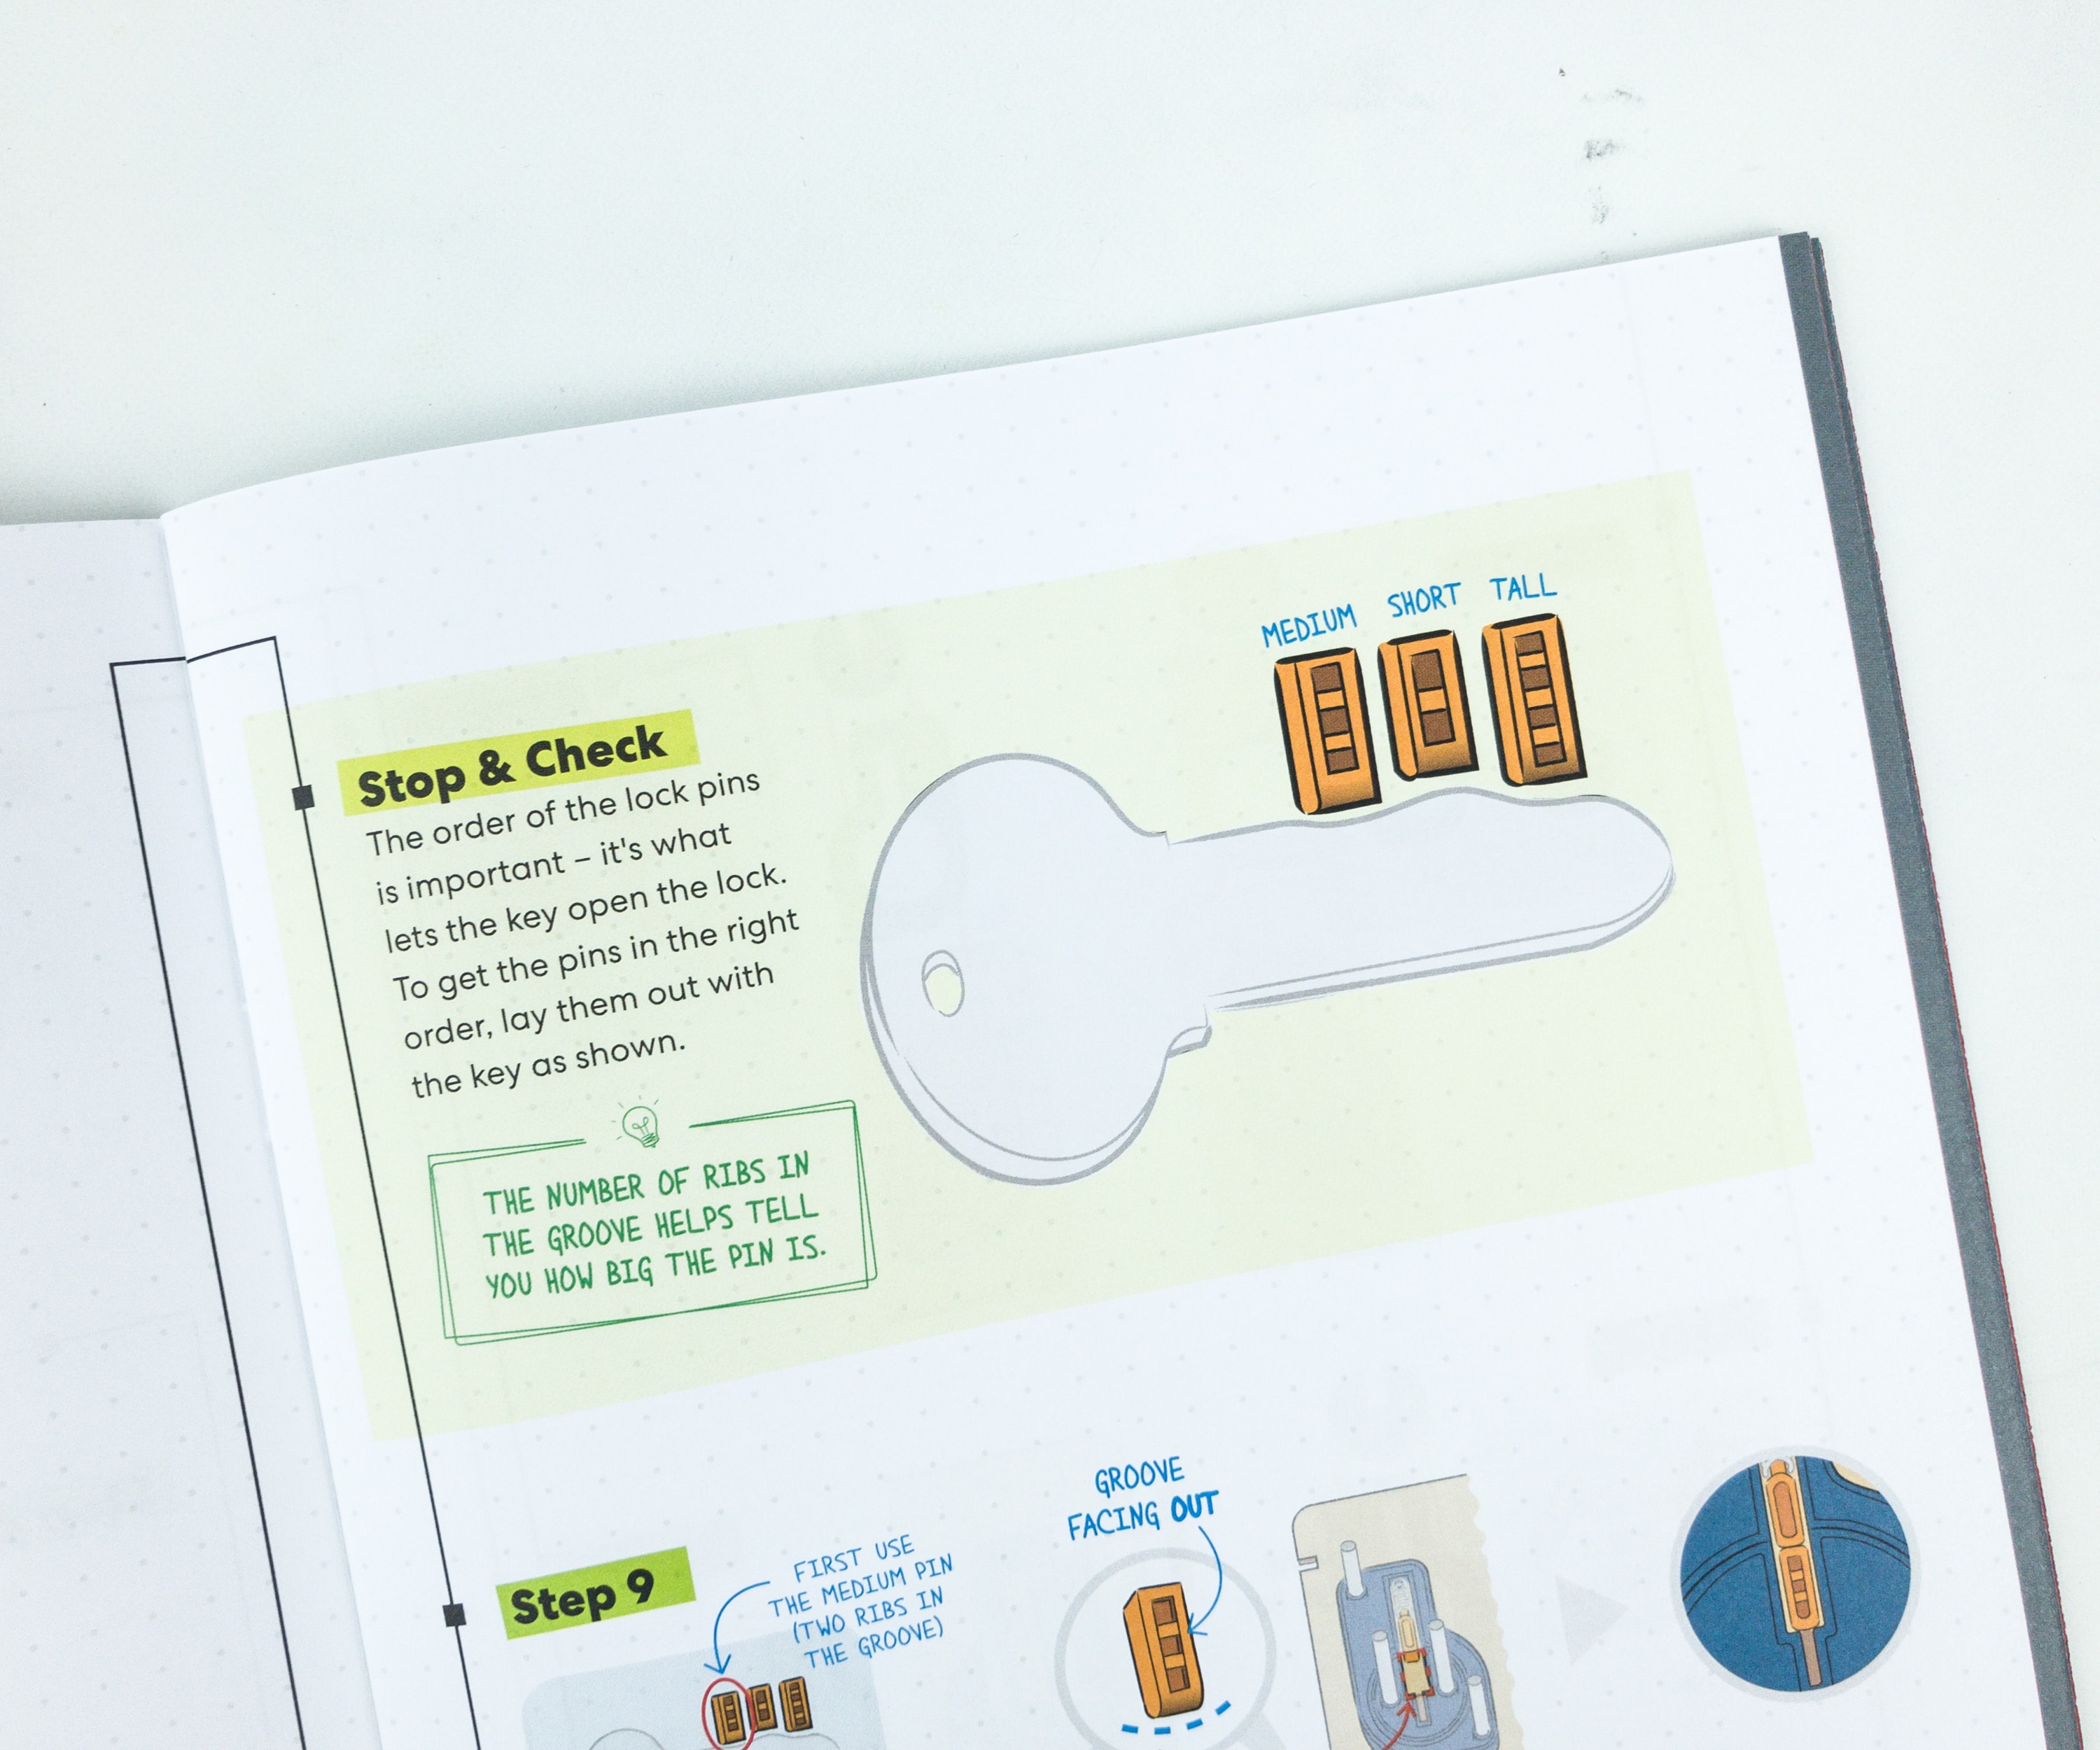
Each lock has its own specific keys to open it. Explained on this part of the booklet are the ways on how the keys are usually made, and how they are formed to be unique and distinct for a specific lock.
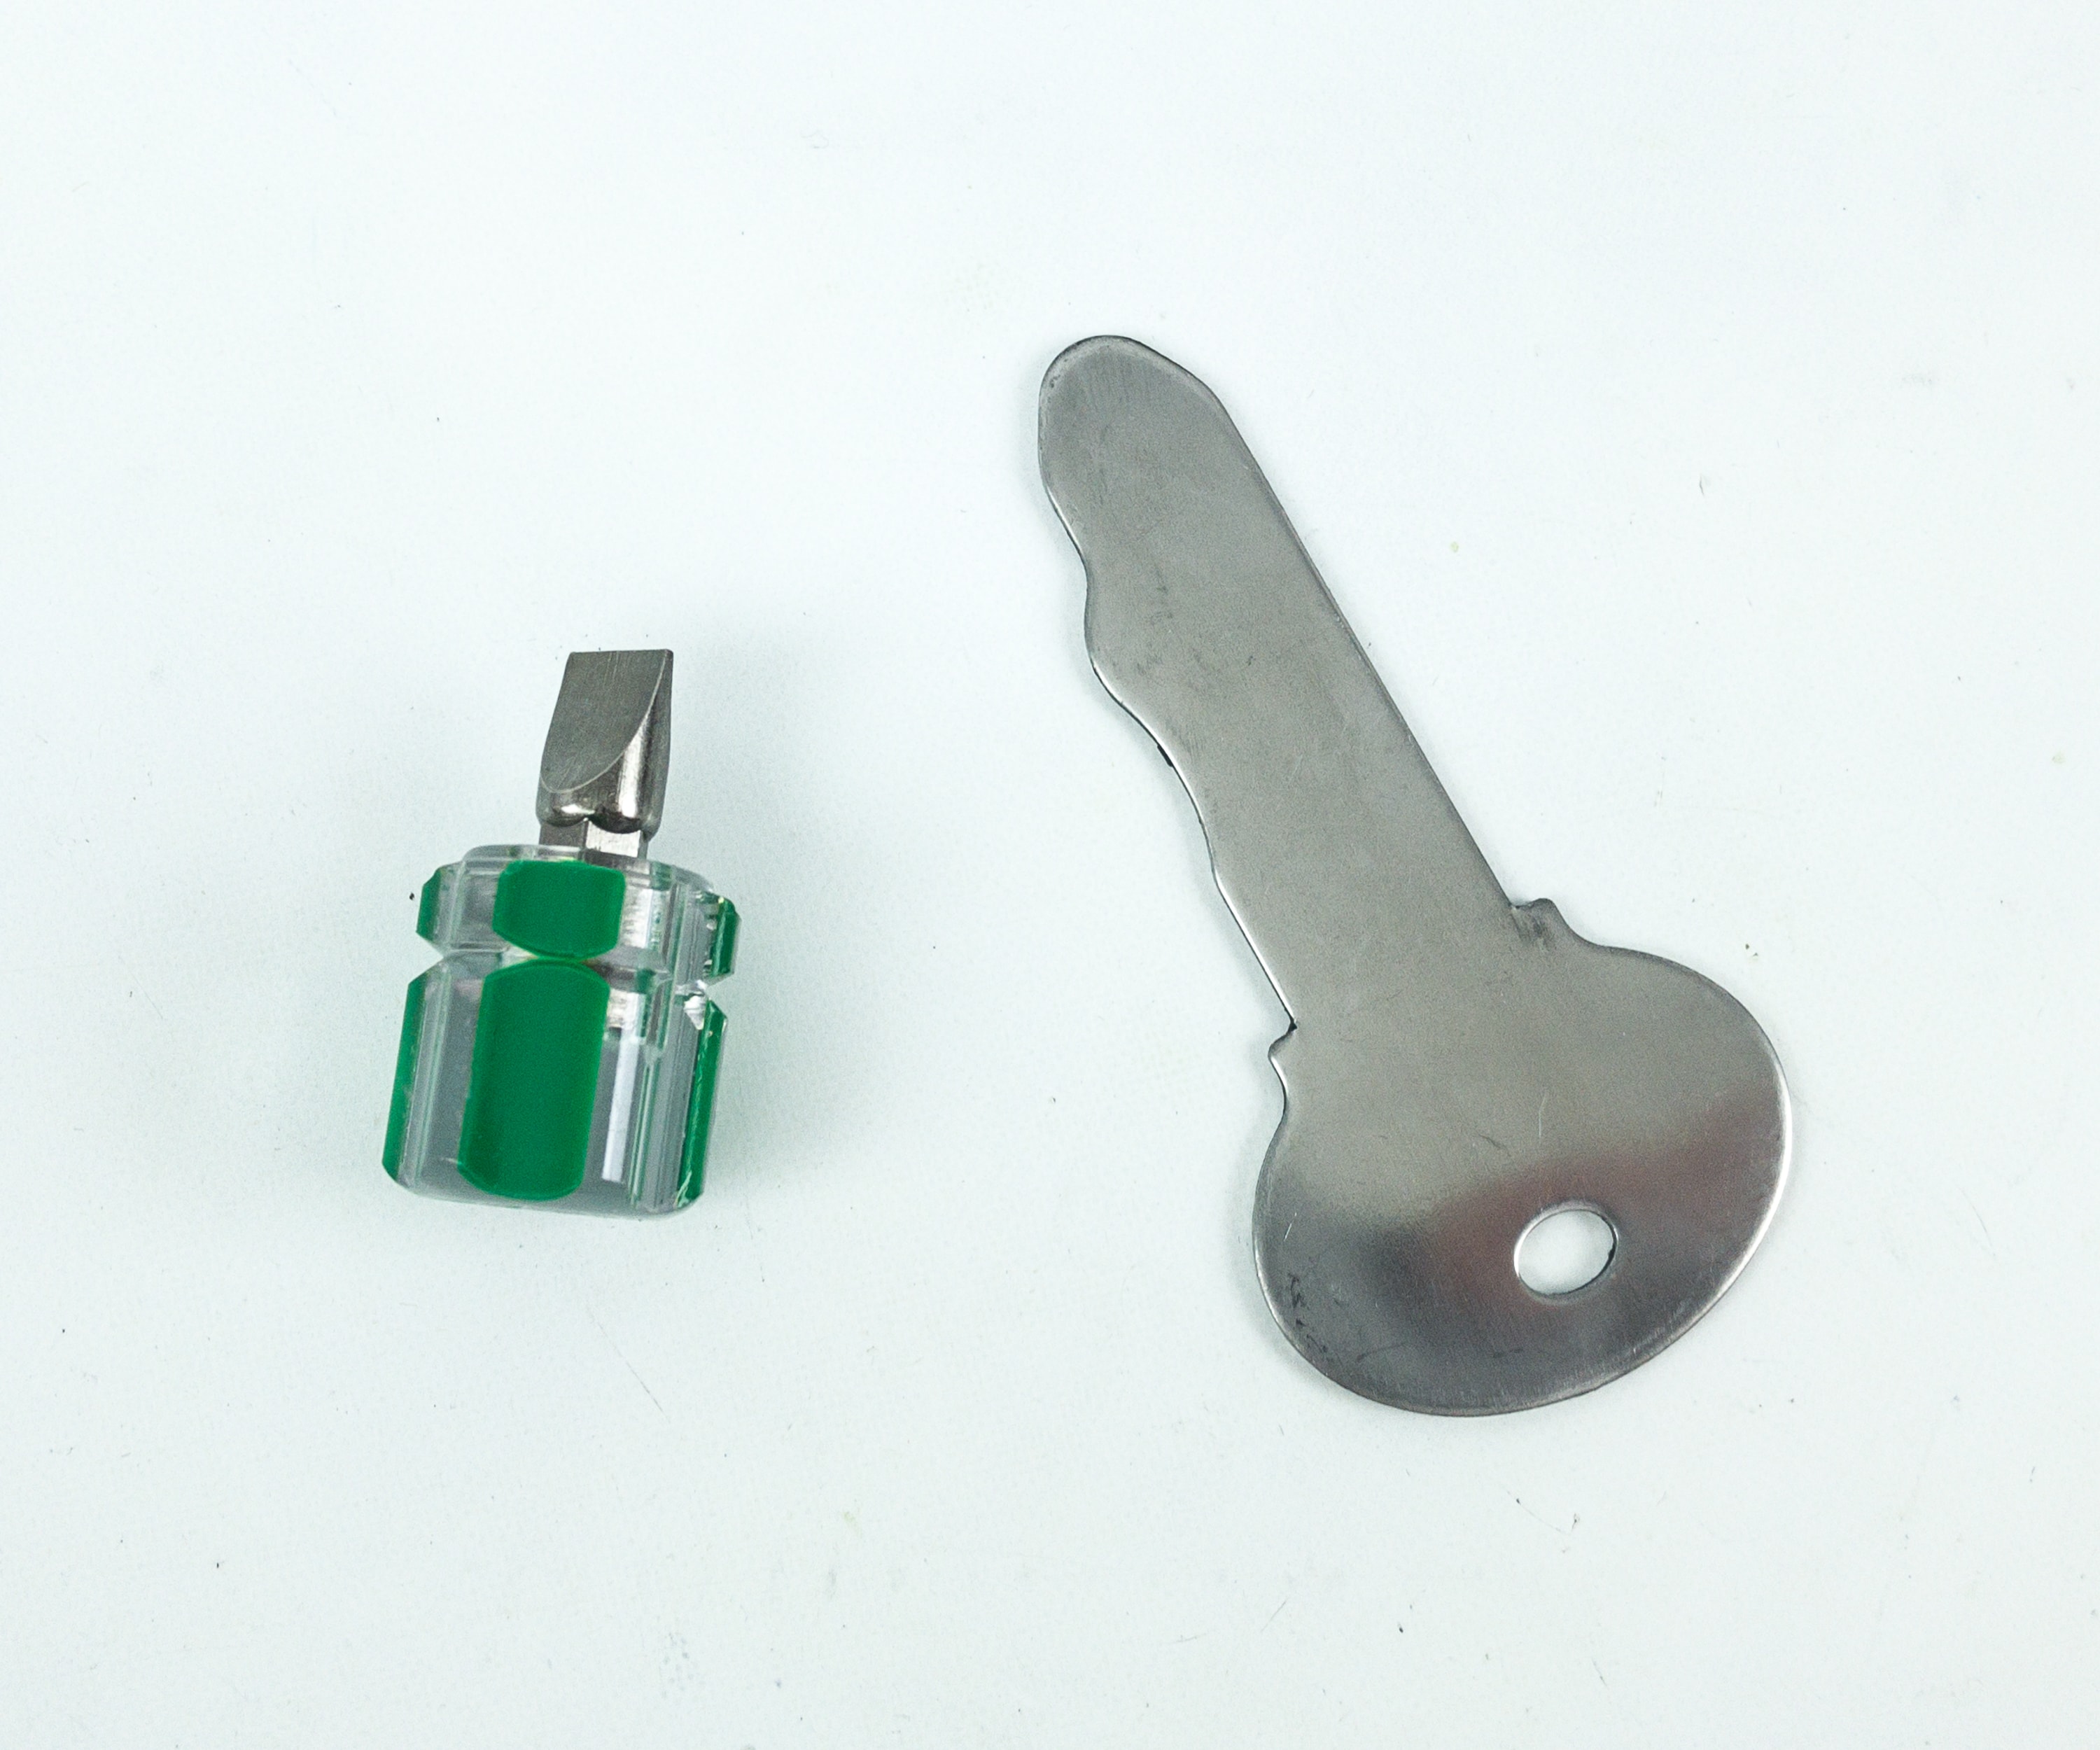
For this part of the project, we will be needing a small screwdriver and of course, the stainless steel key.
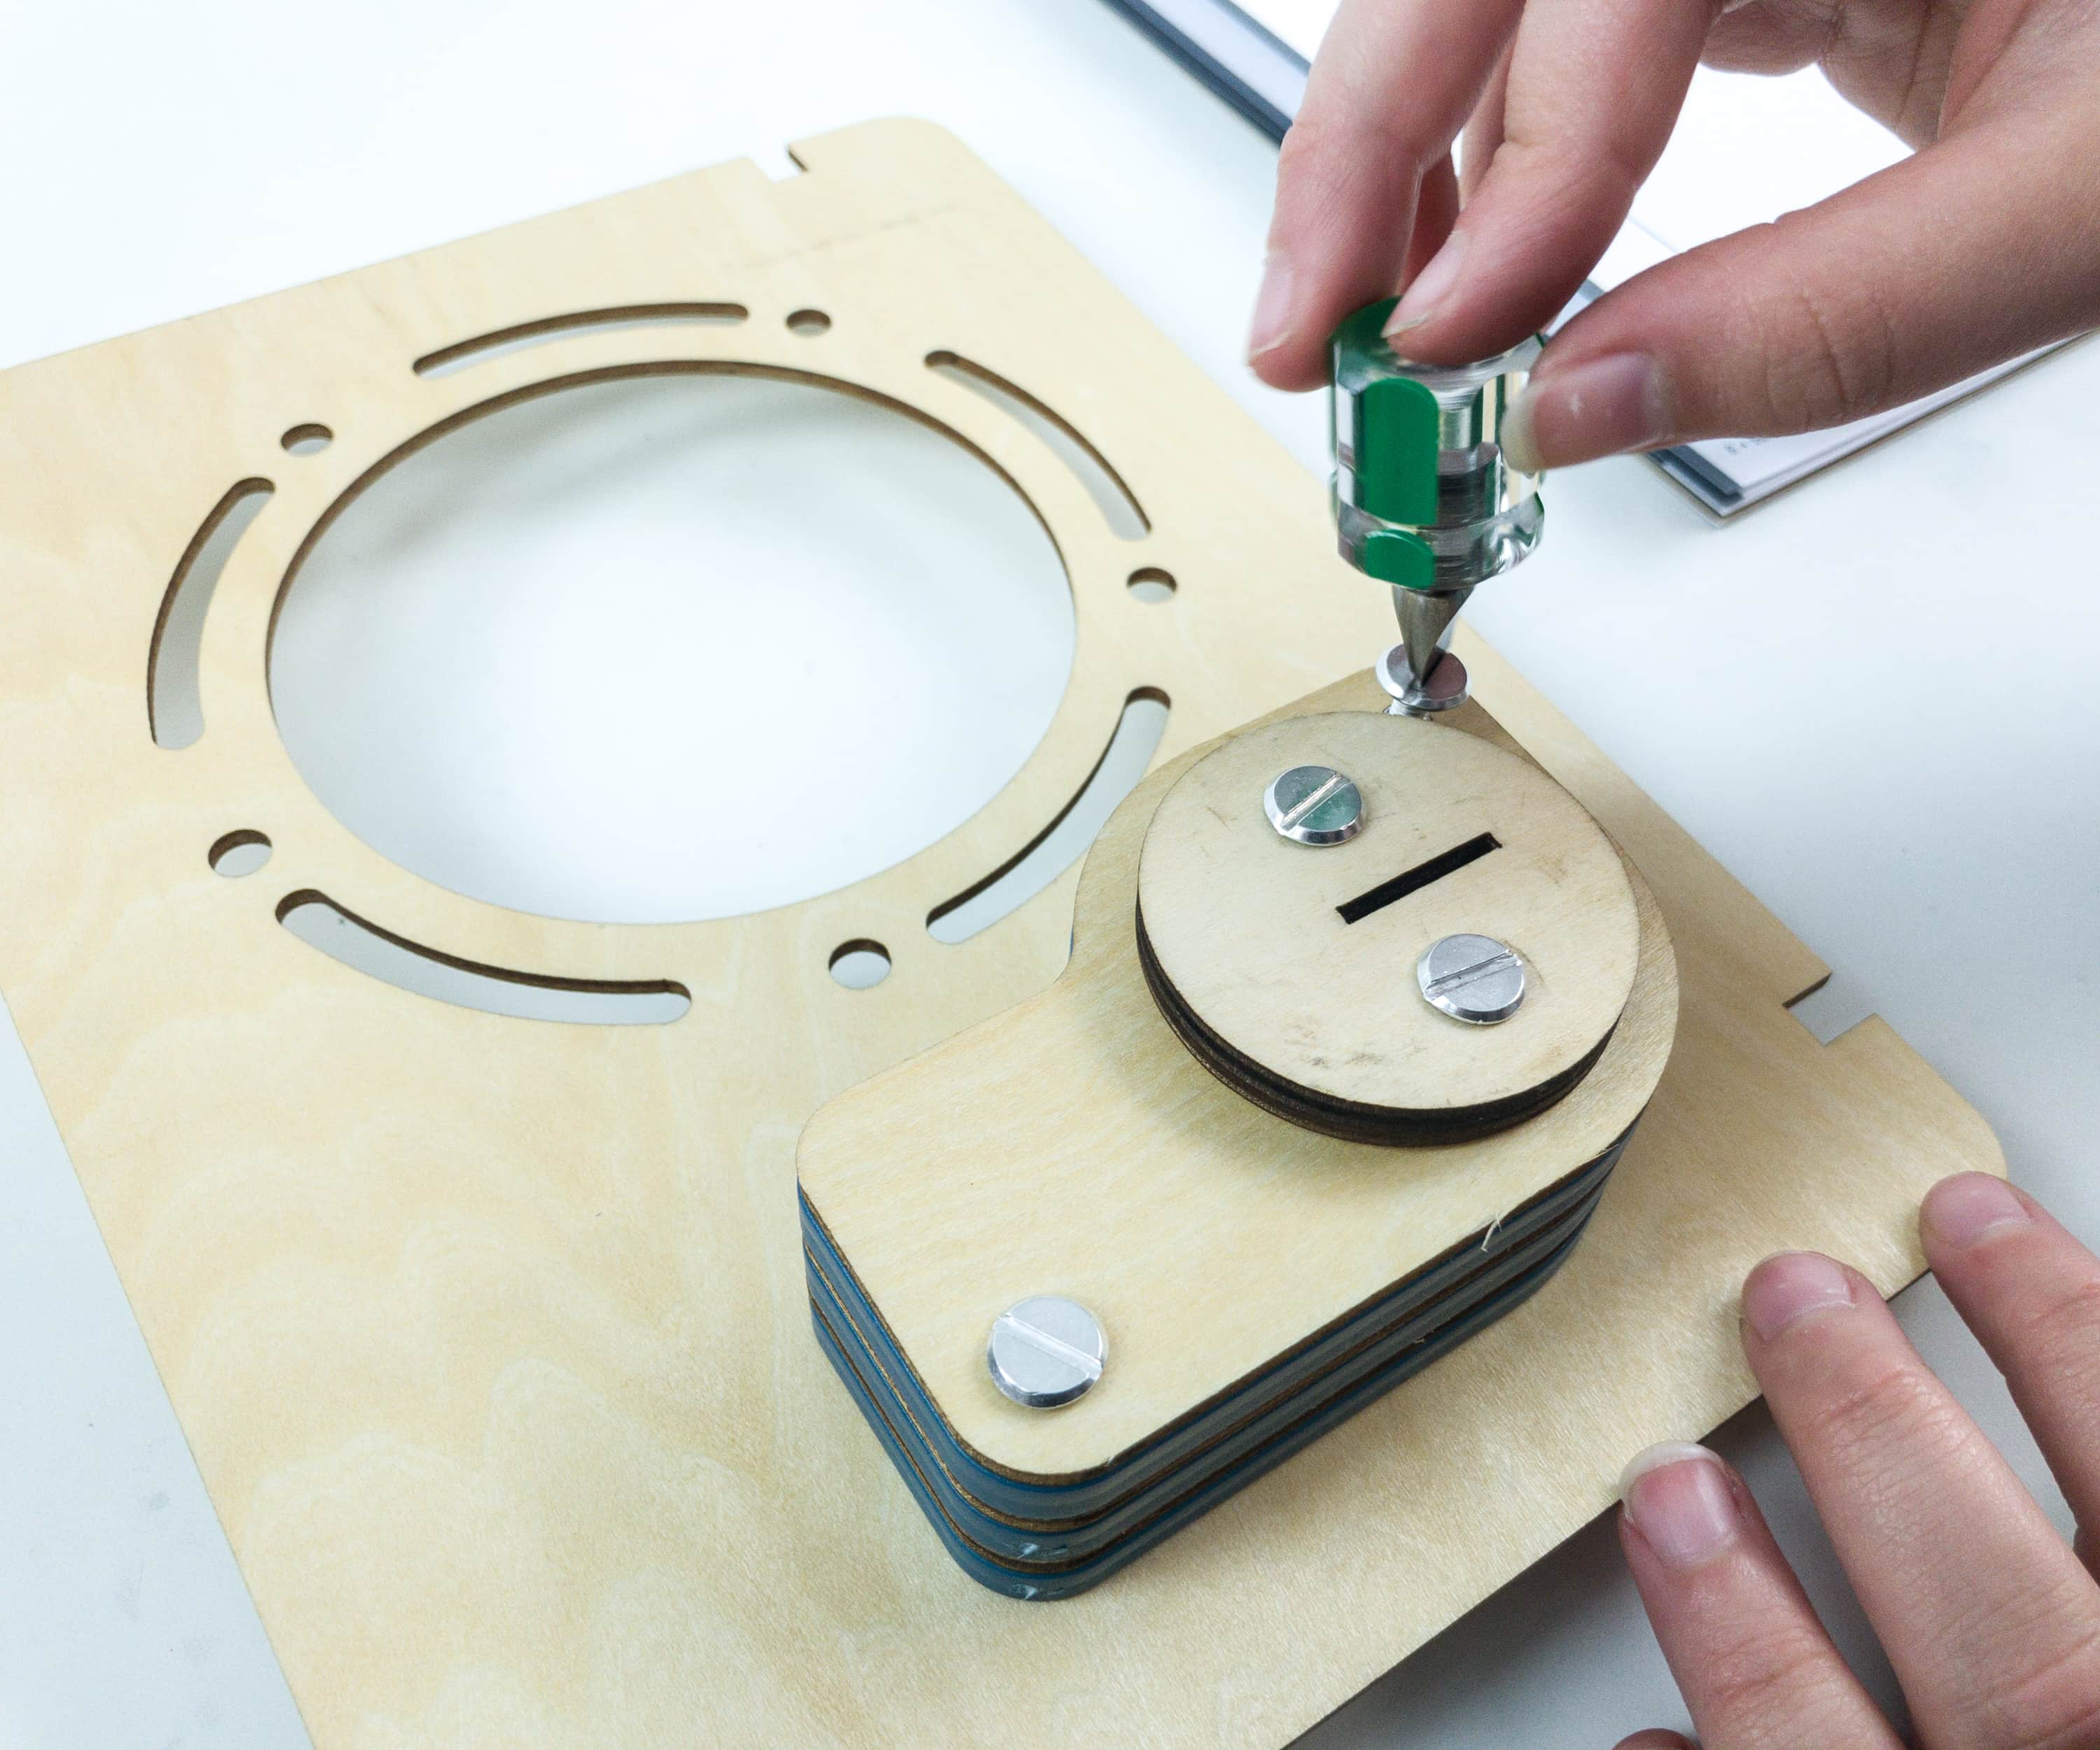
The booklet requires us to test the key on the key hole, if it fits perfectly and can easily unlock the pin tumbler lock. Once they’re good, then that is the only time you can start tightening the screws using the small screwdriver provided.
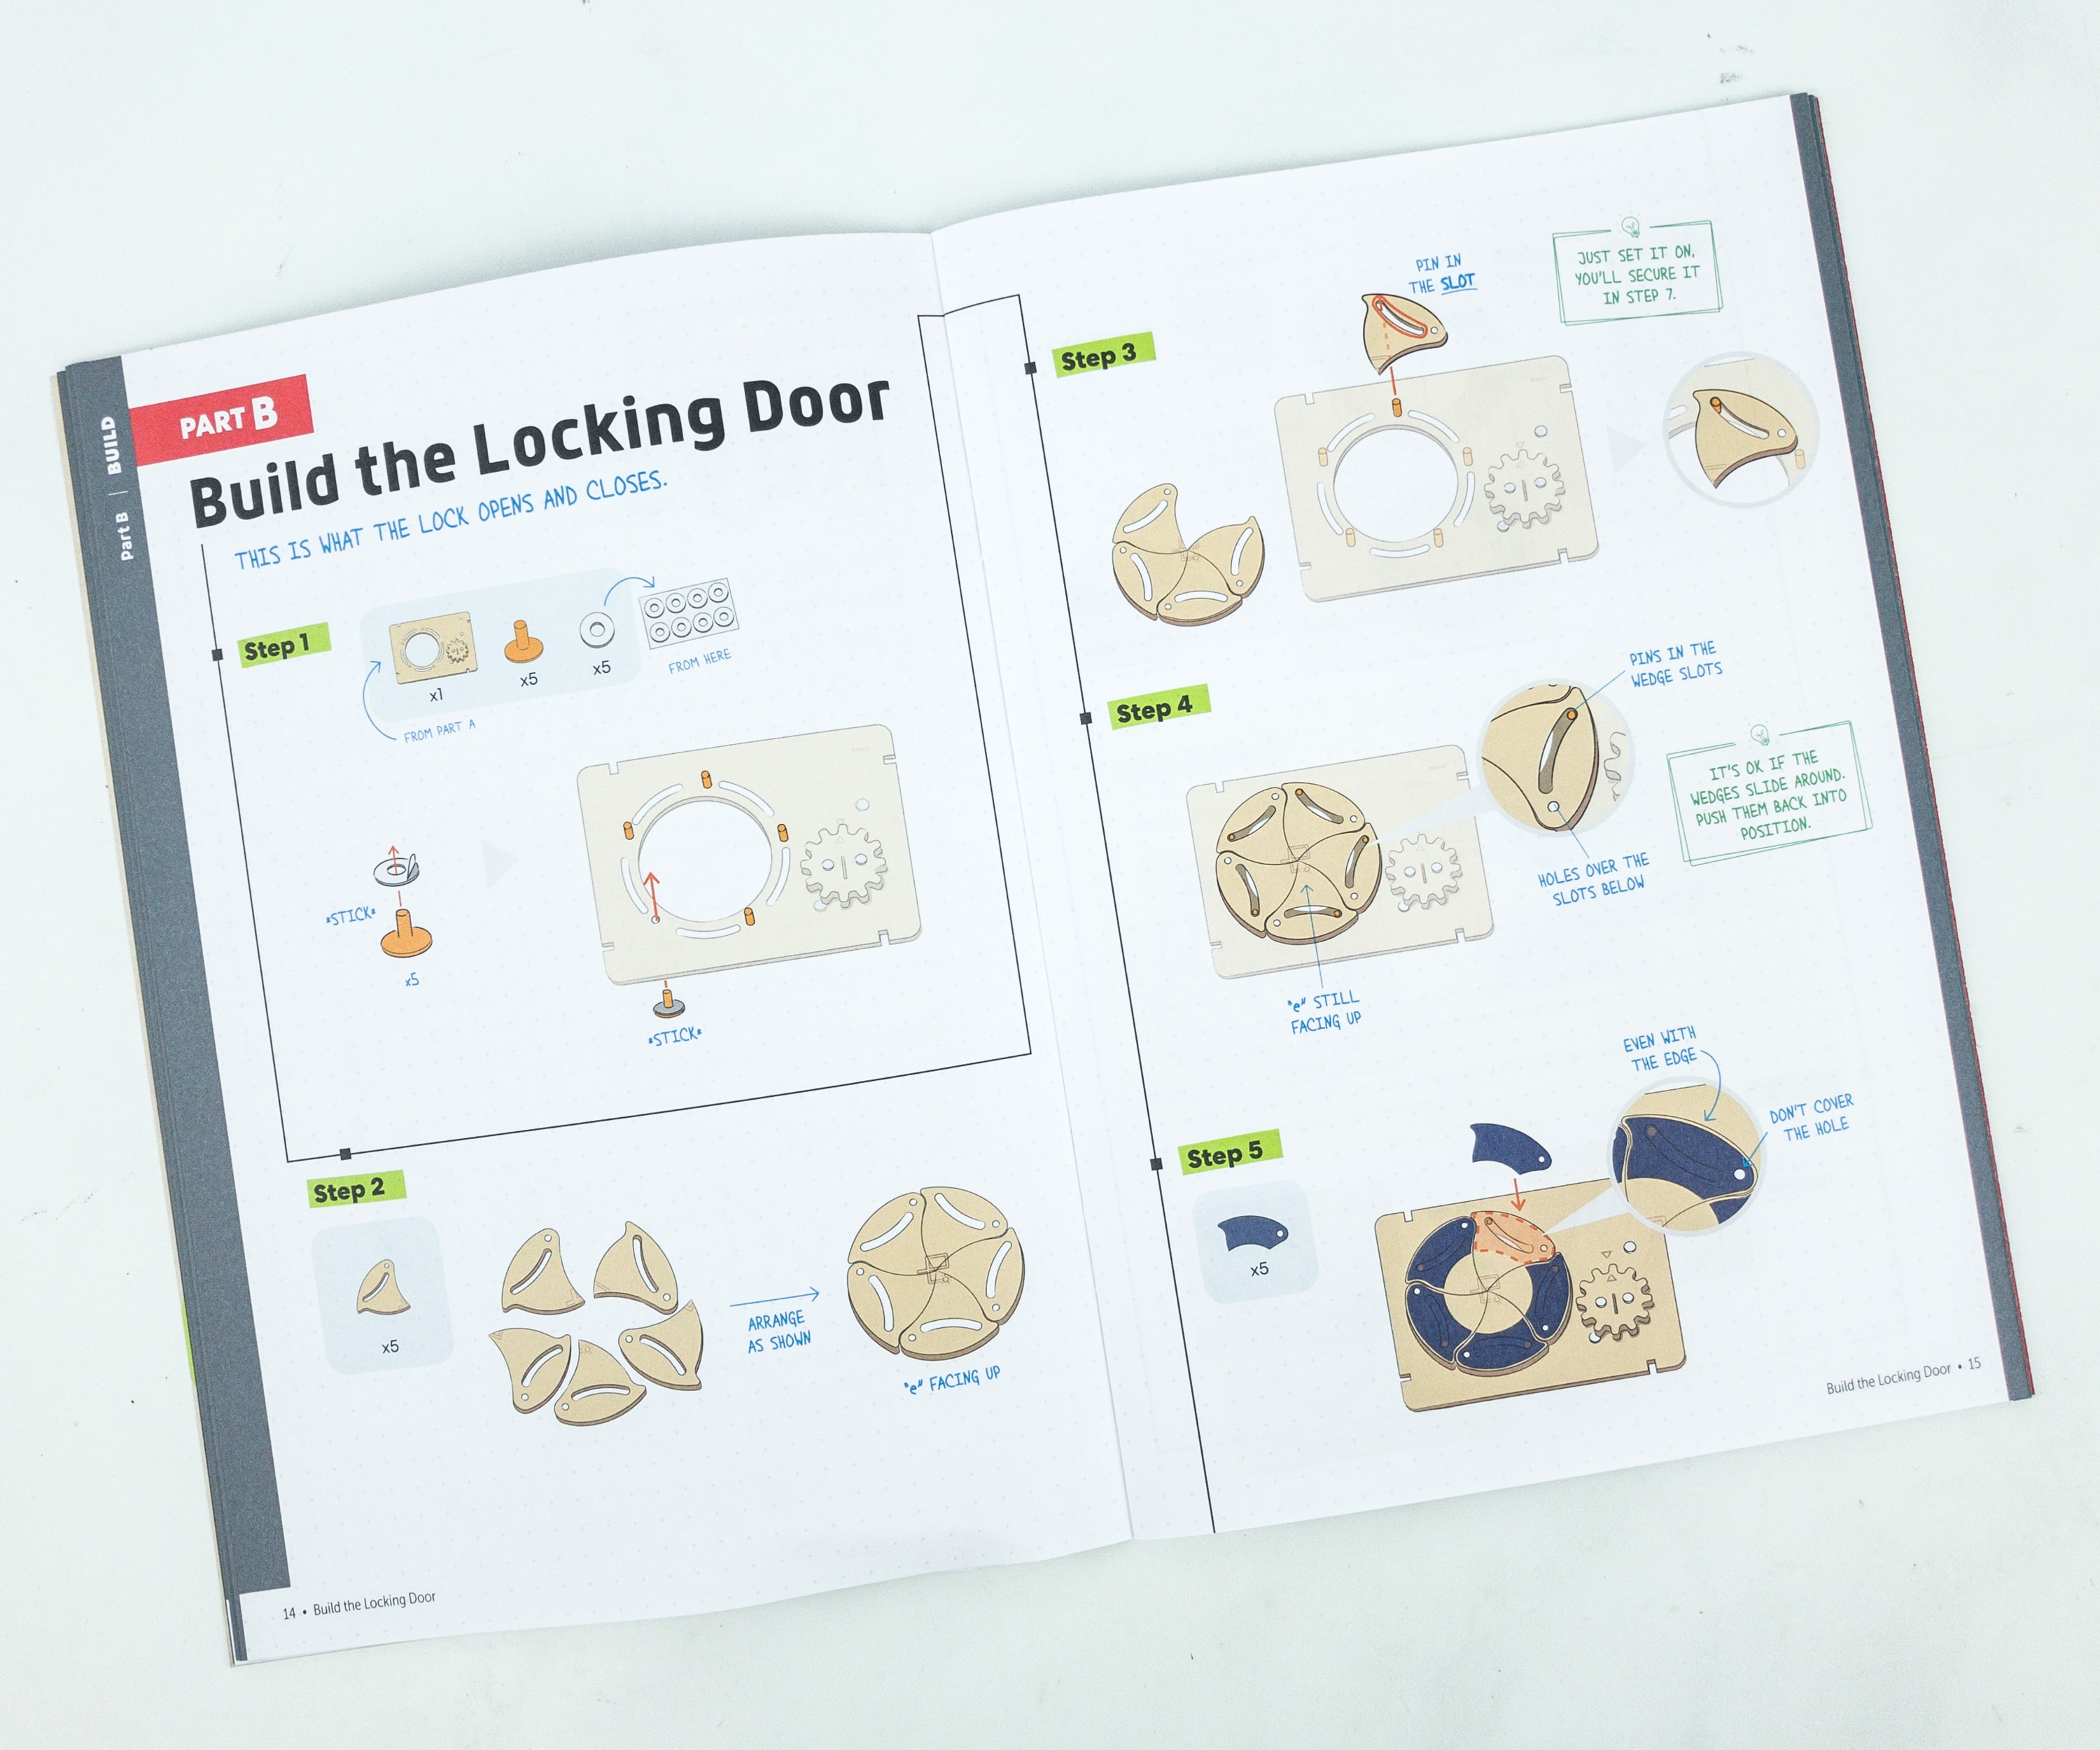
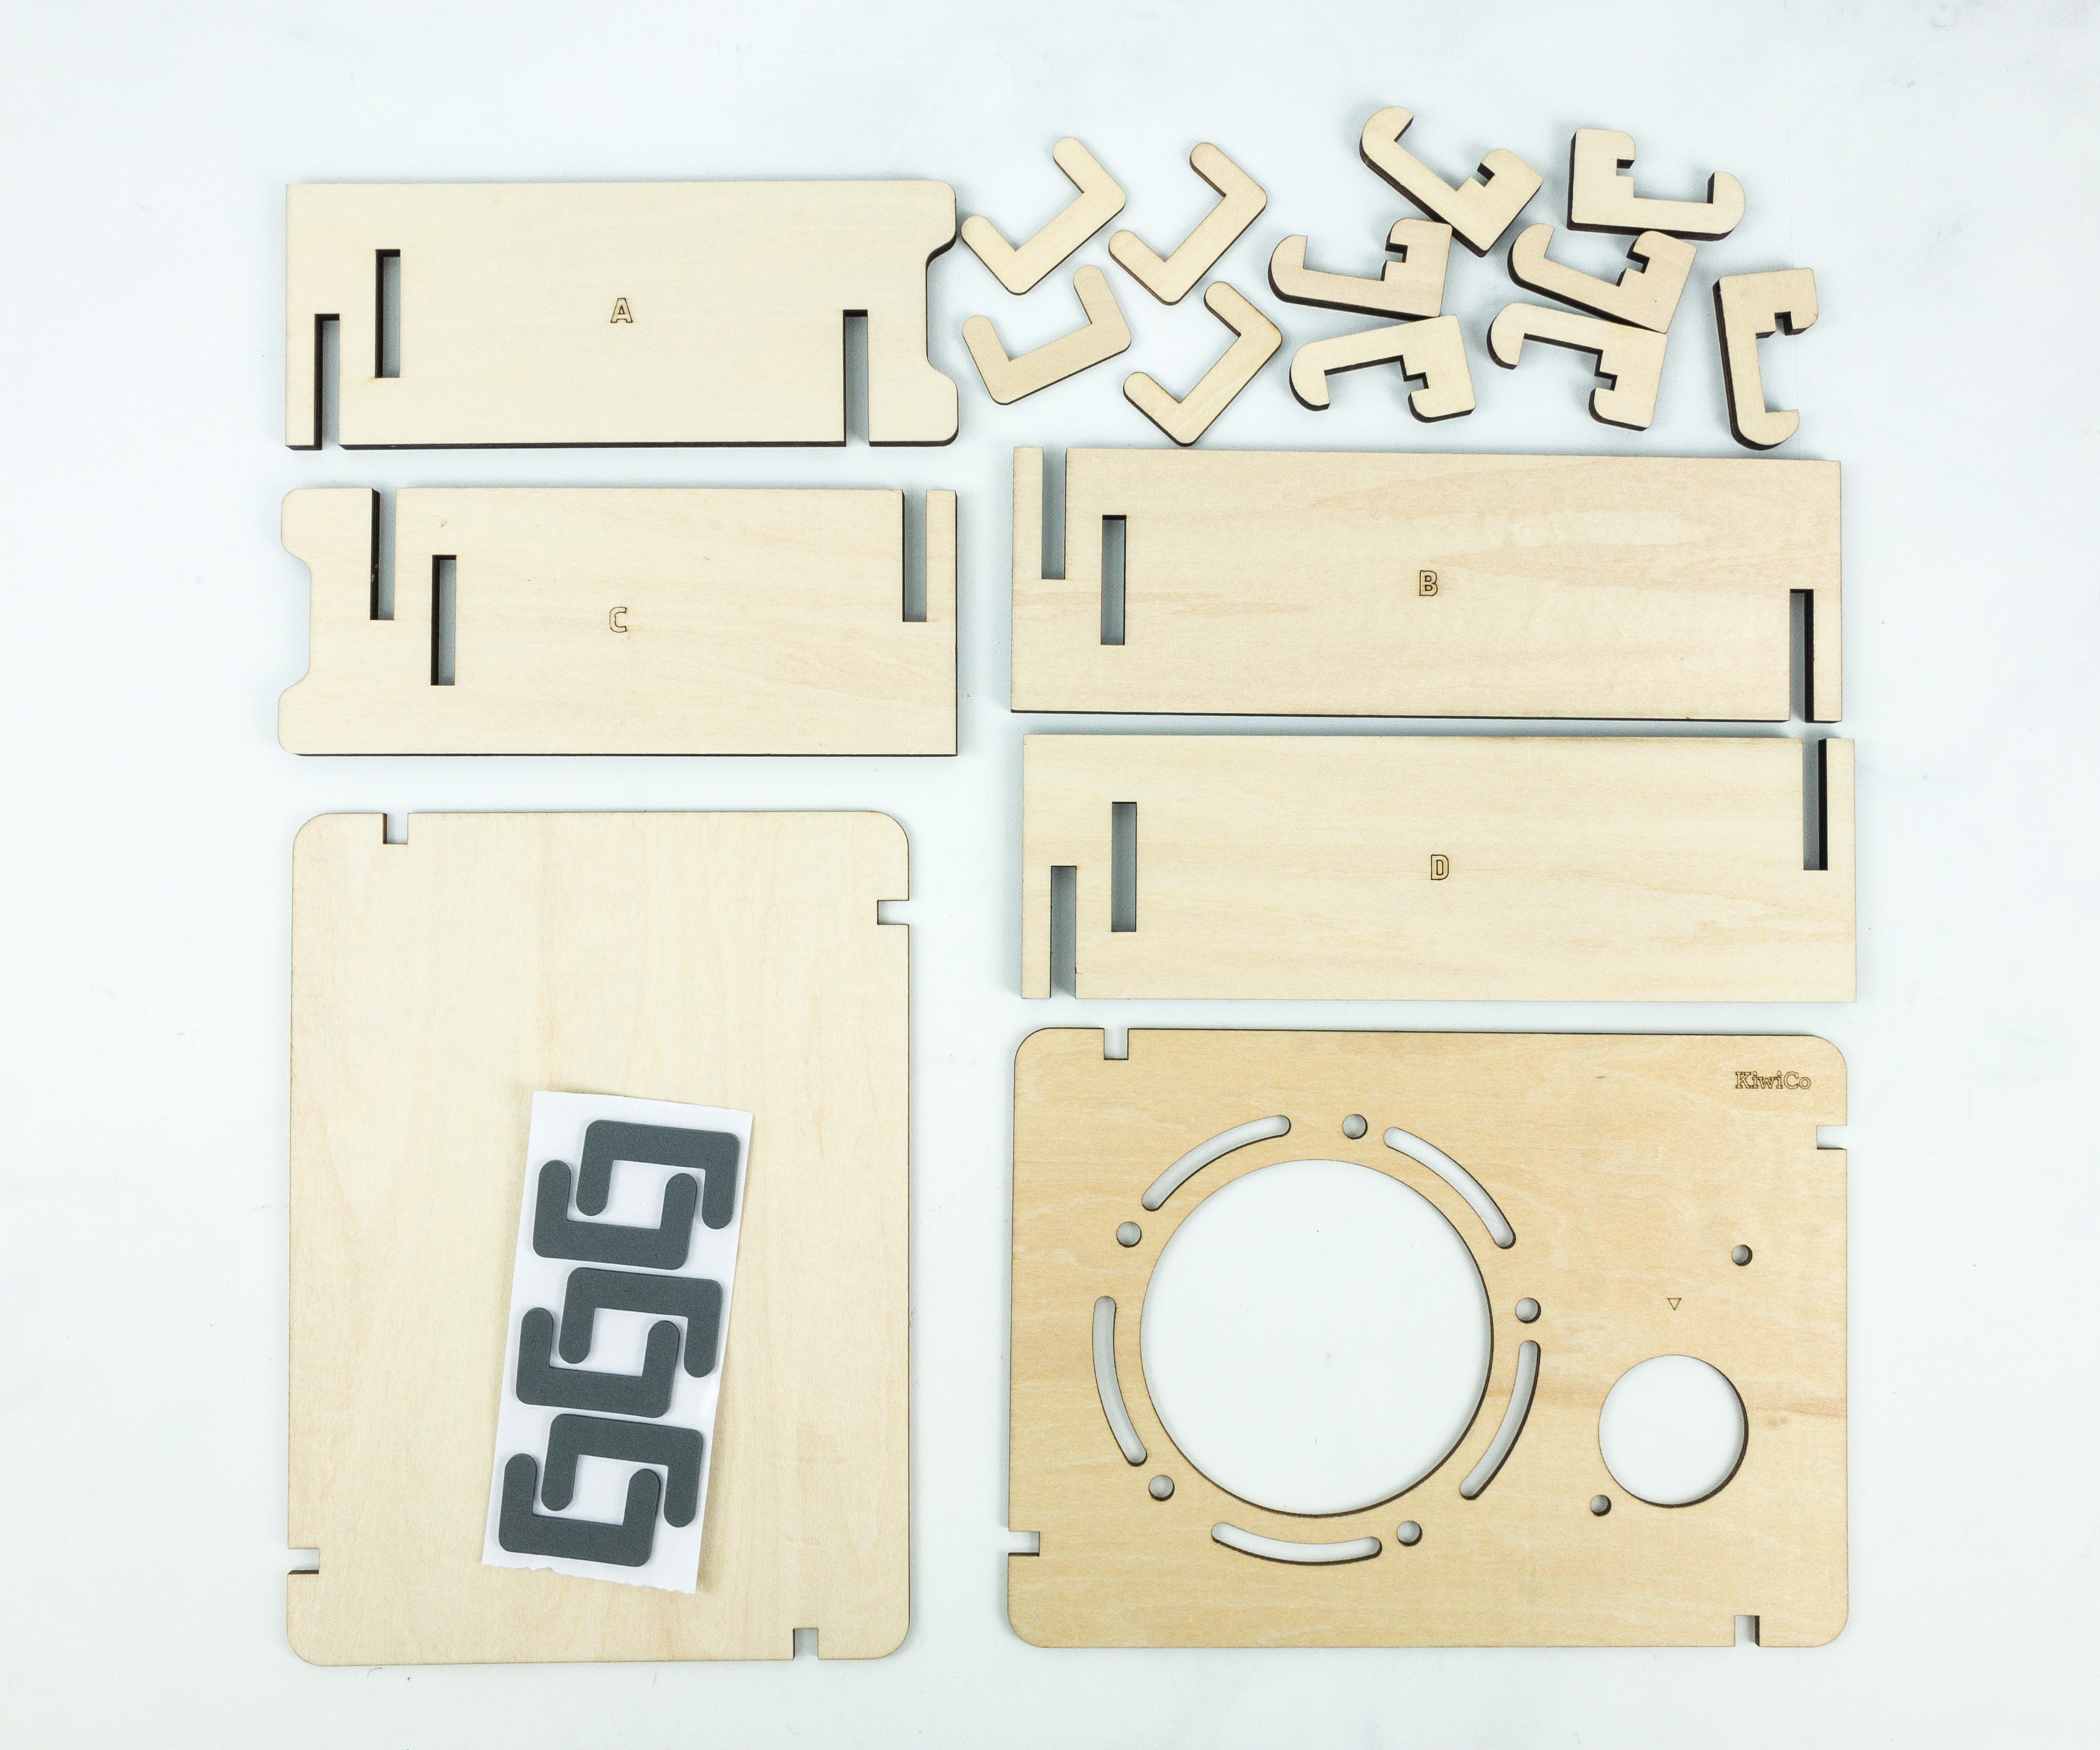
The second part of the project is about building the locking door!
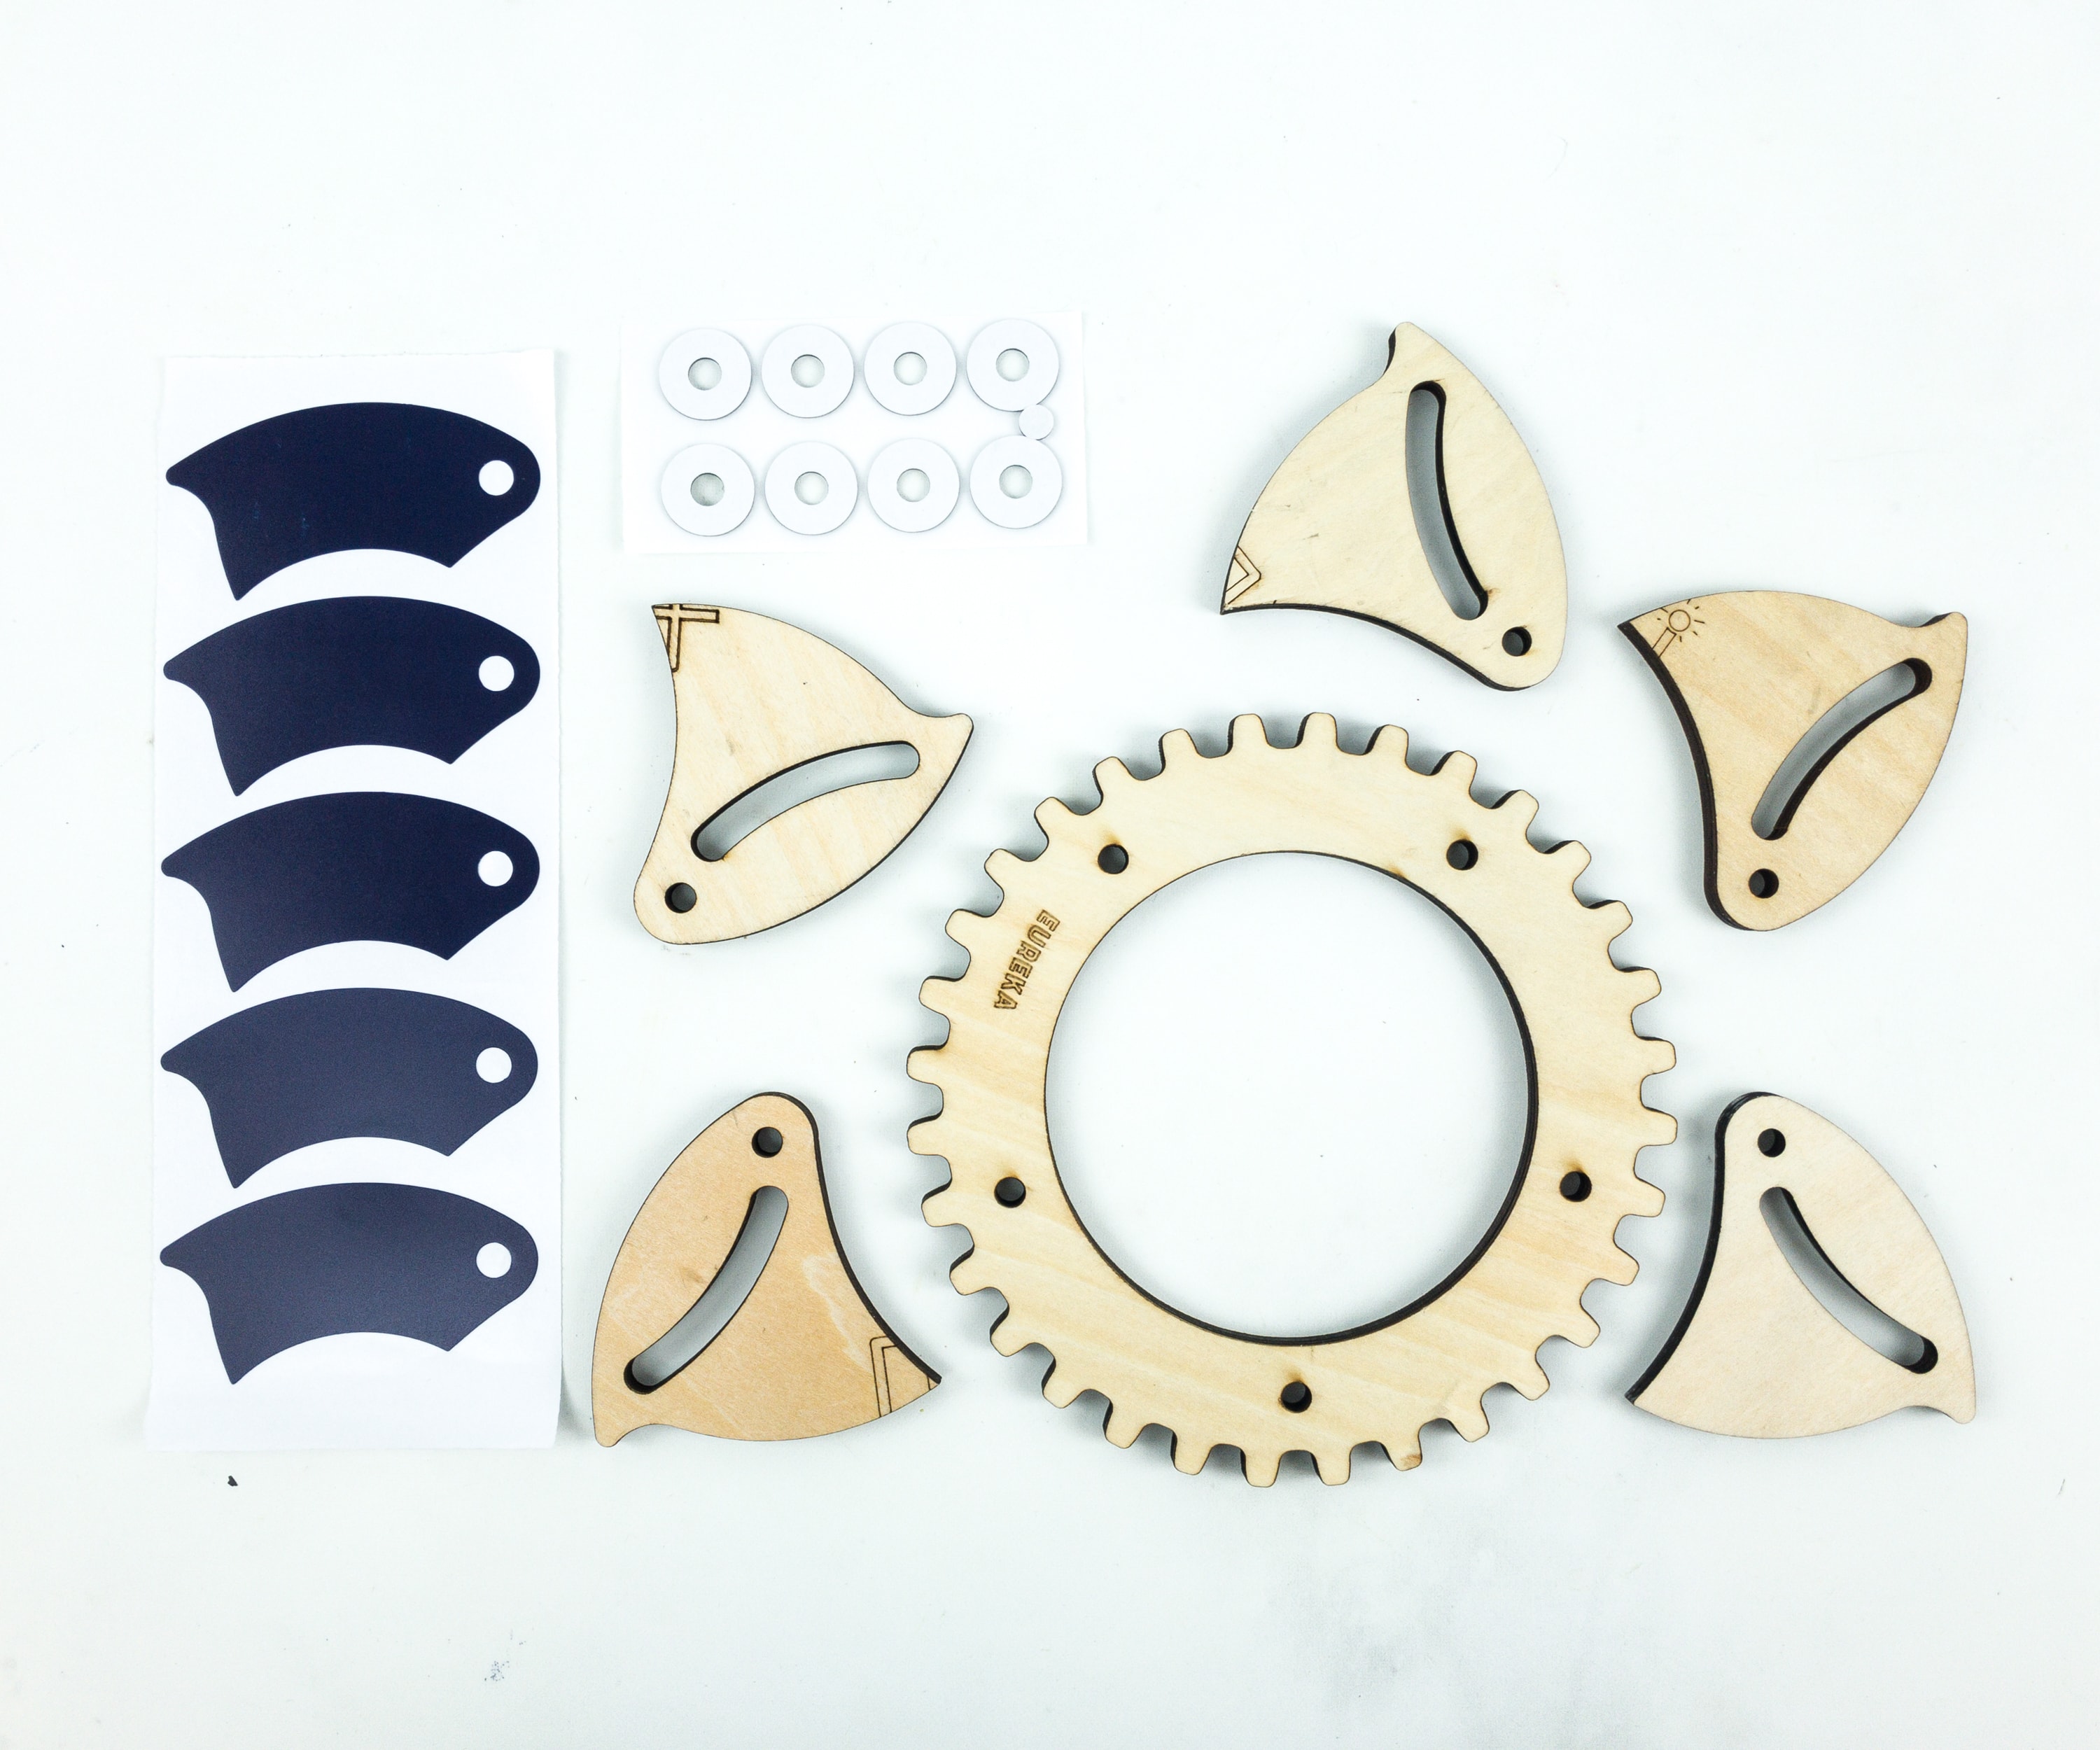
Here are all the items we need for the second part of the project. They consist of wooden pieces, stickers, and washers.
What I love about this booklet is that they have a Stop & Check portion where you can review the procedure you made and see if it was done properly.
The booklet also knows where and what you might have done wrong, so they have also prepared some tips and key guidelines to correct it.
Using the stickers, cover the upper part of the wooden block and make sure not to cover the hole on the upper right part of the wood.
Once done, put the washer and bolts on the holes and lock it tightly.
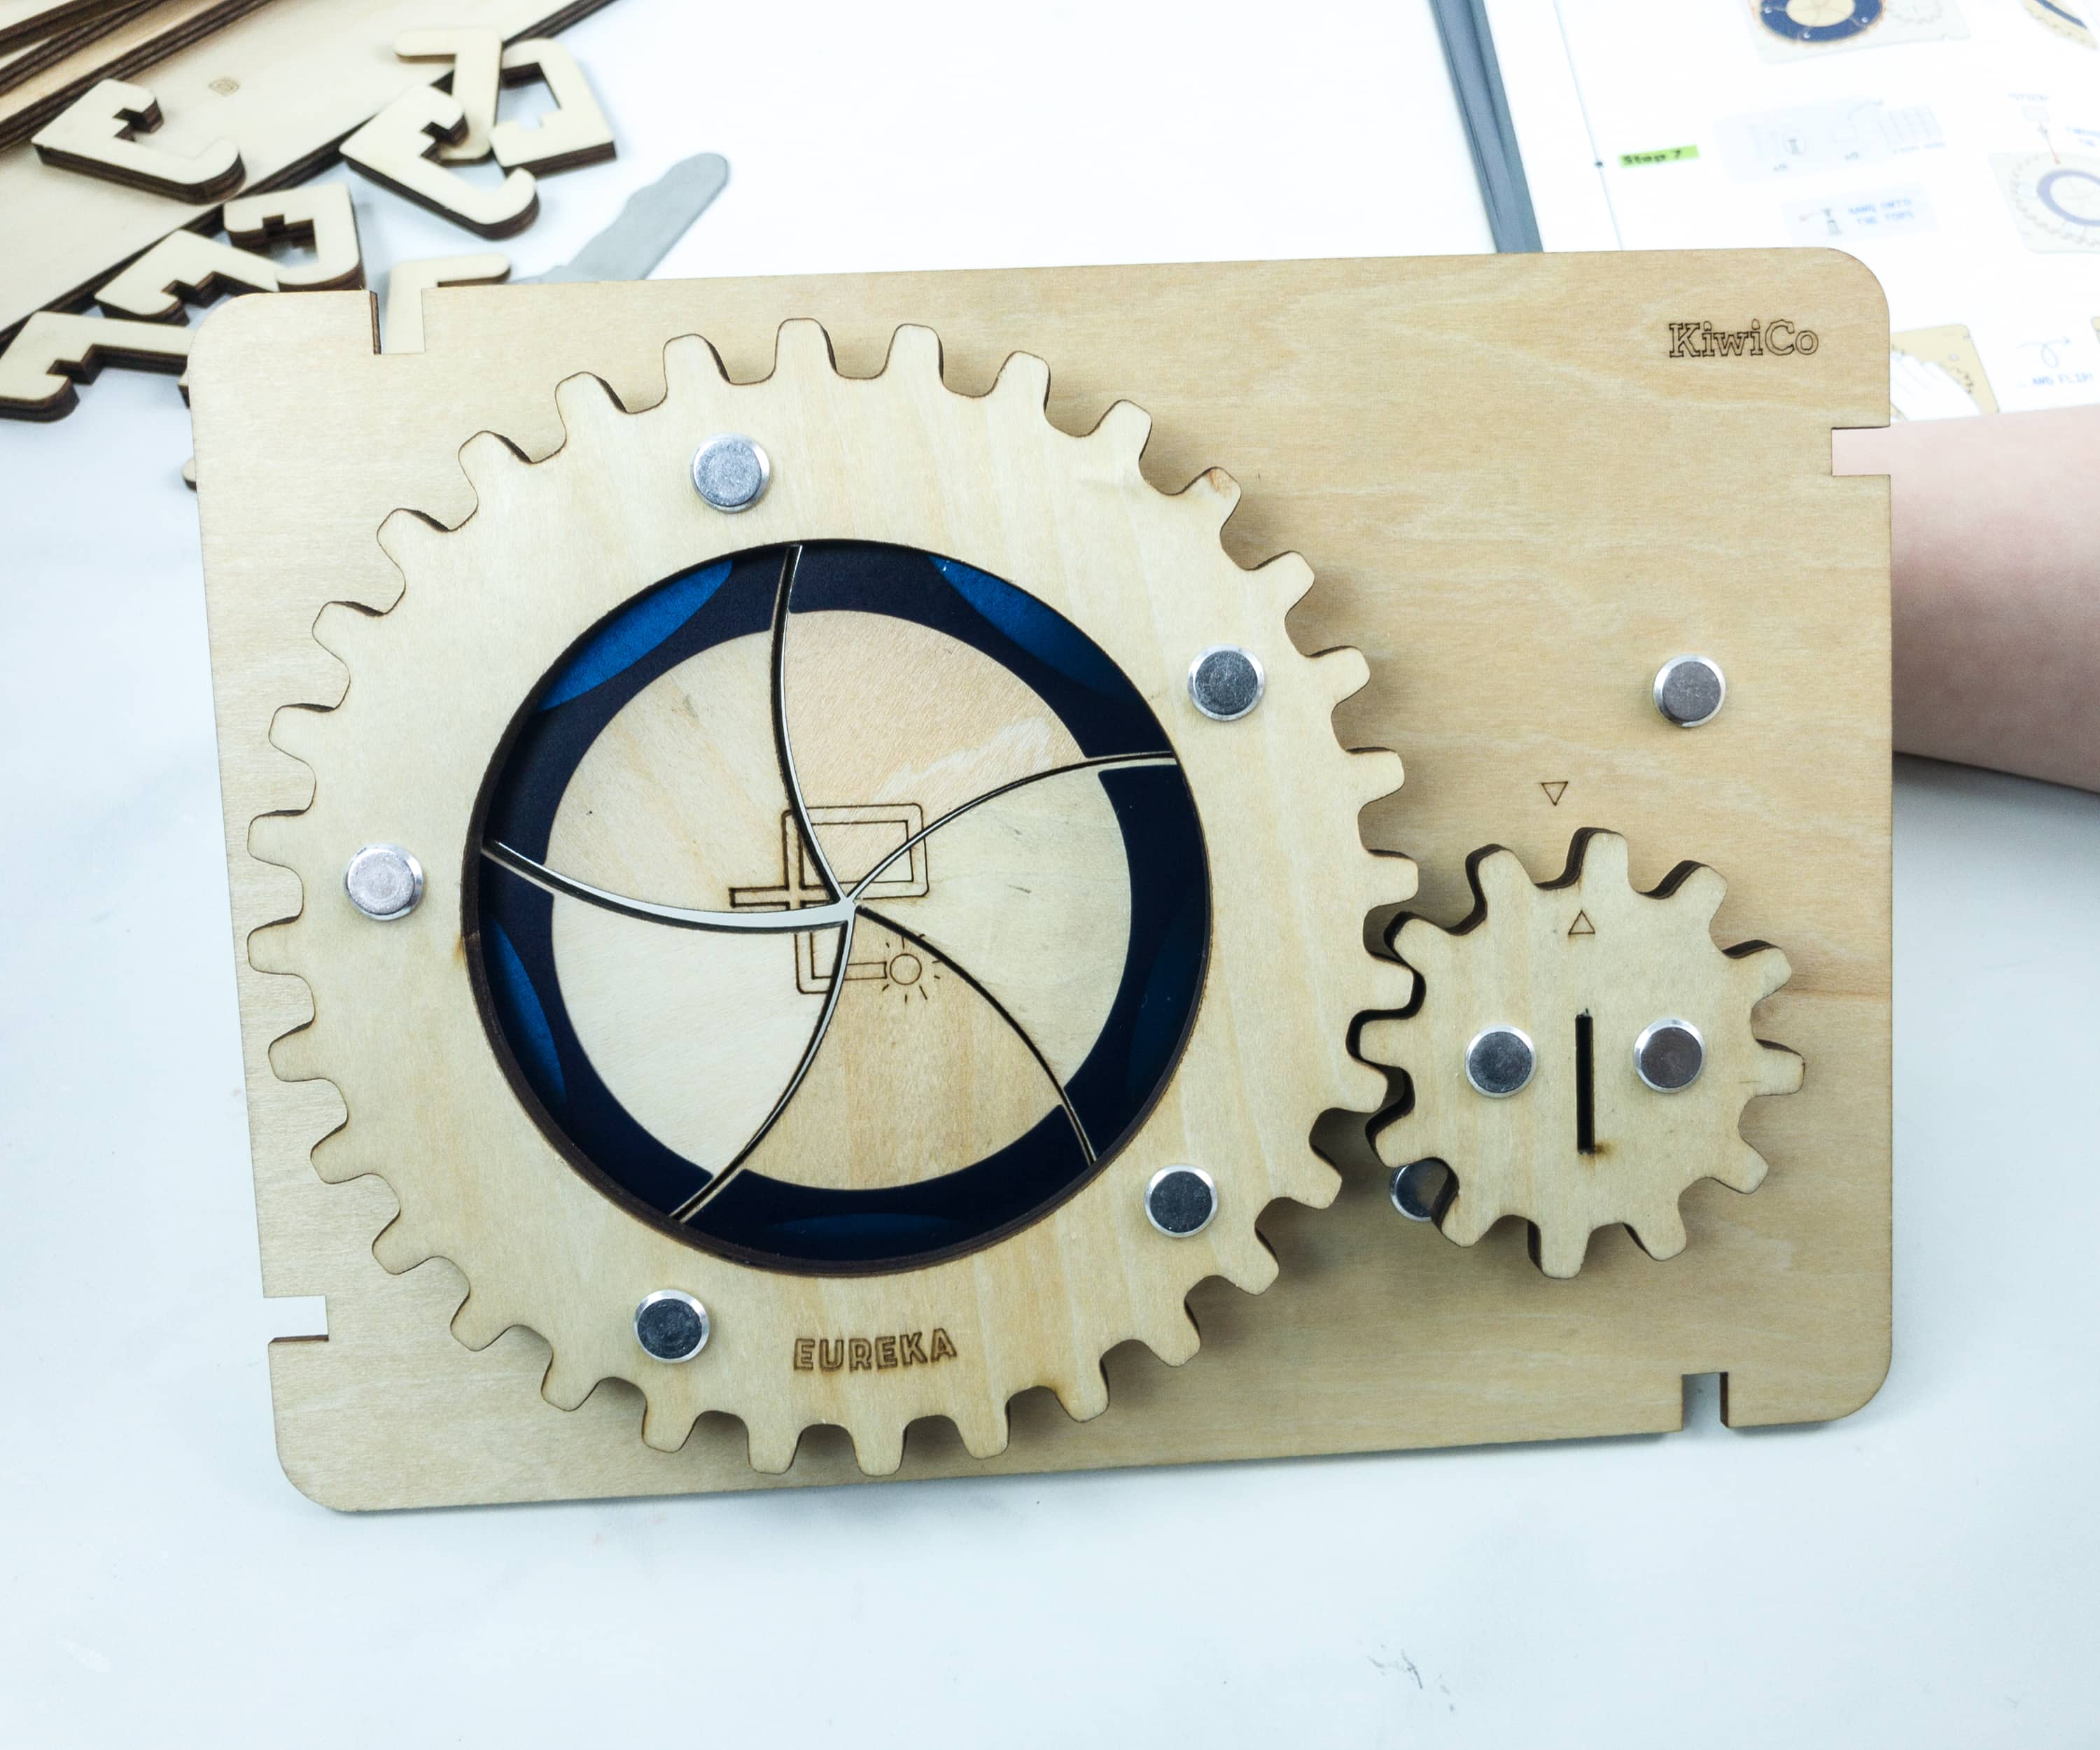
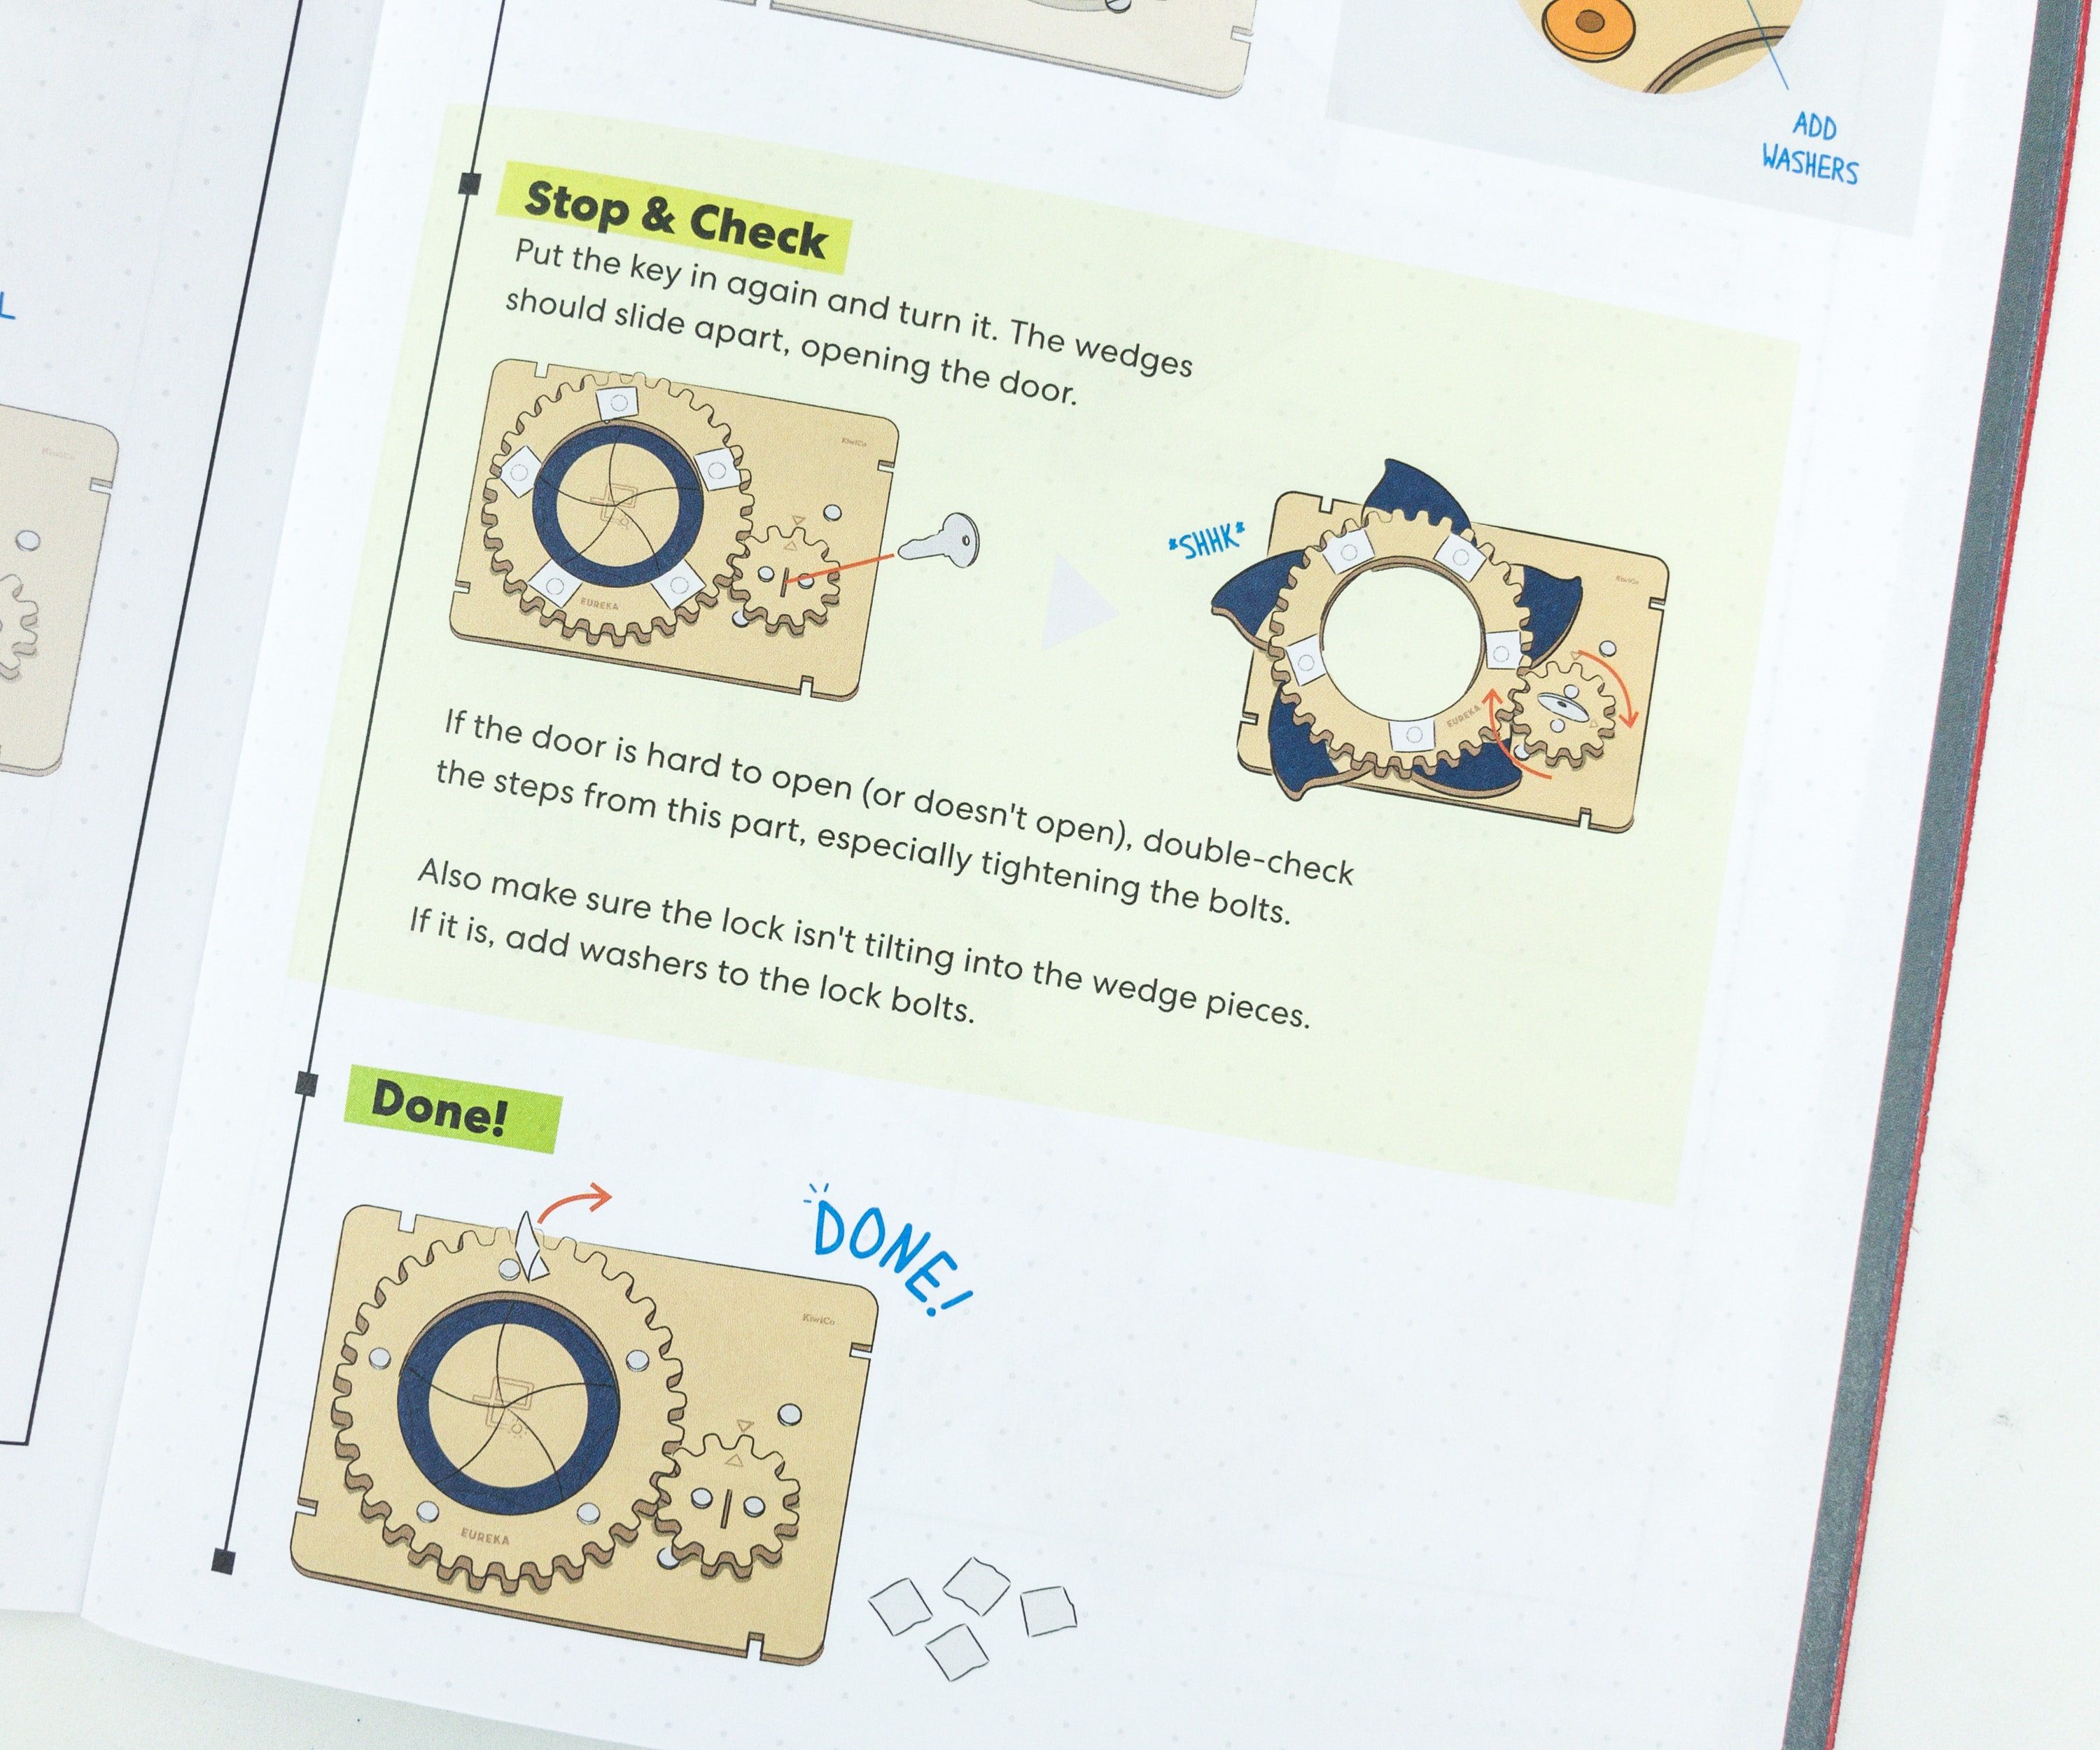
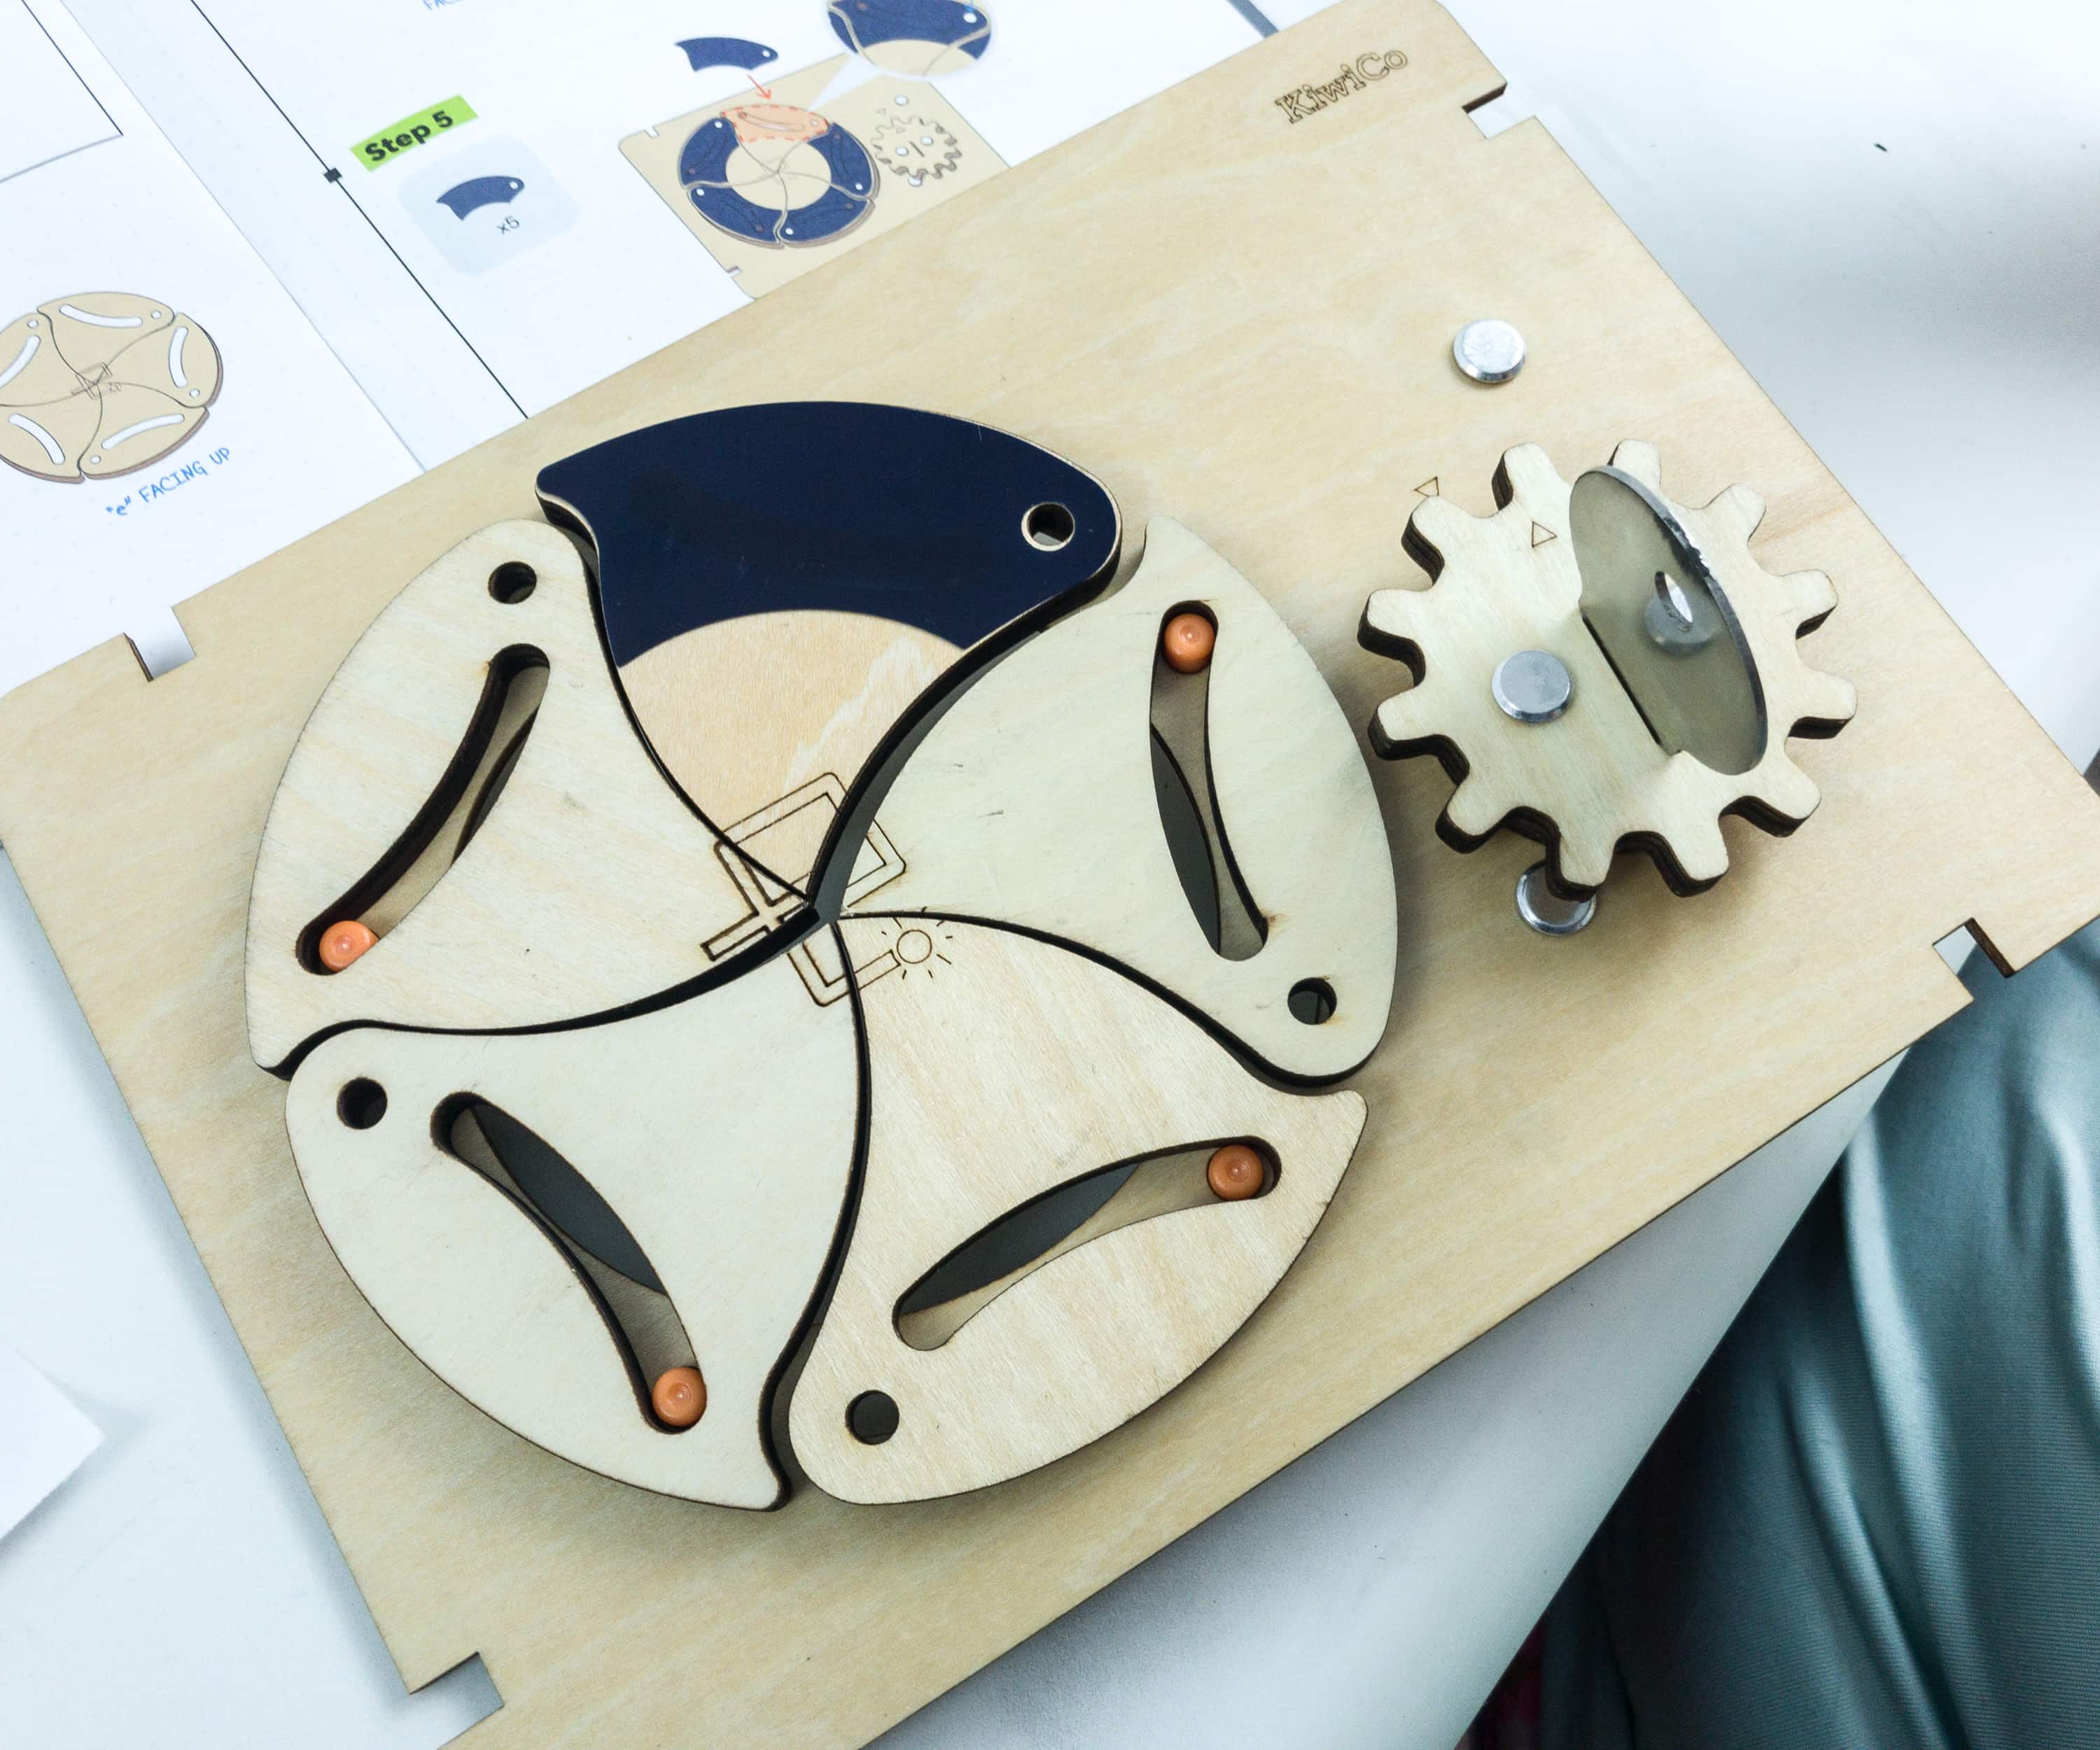
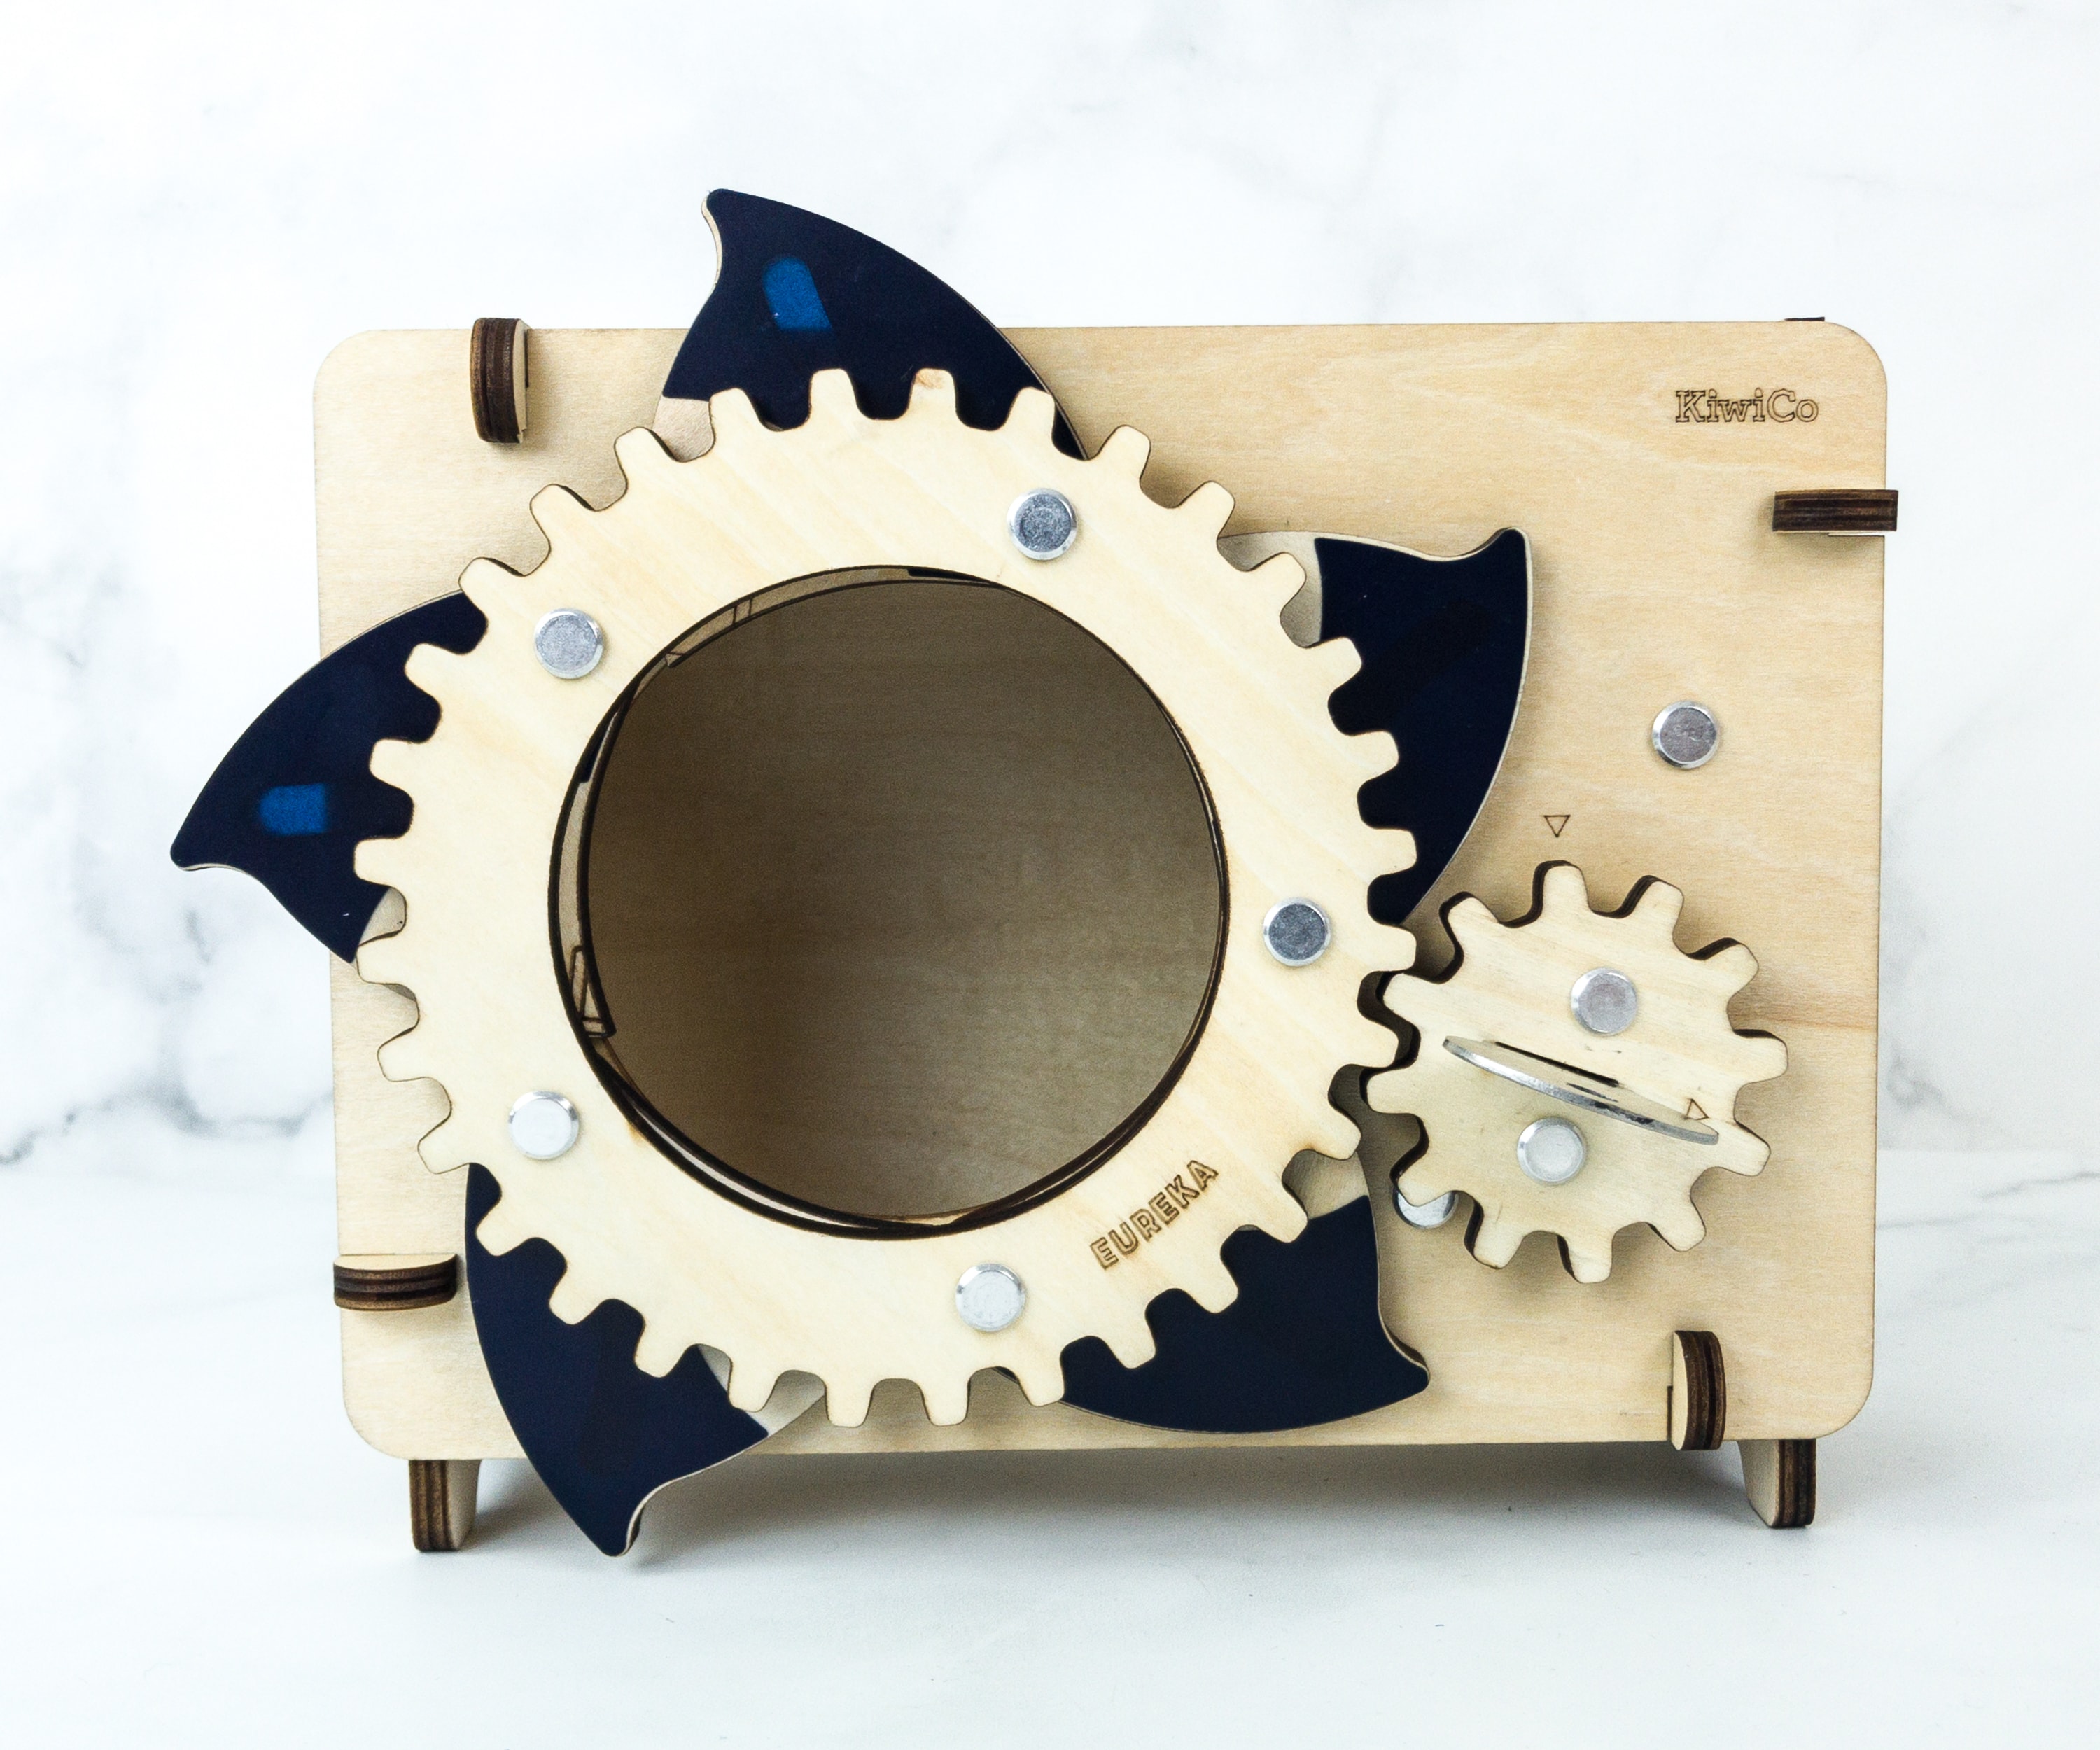
Here’s how the lock door should look like once done!
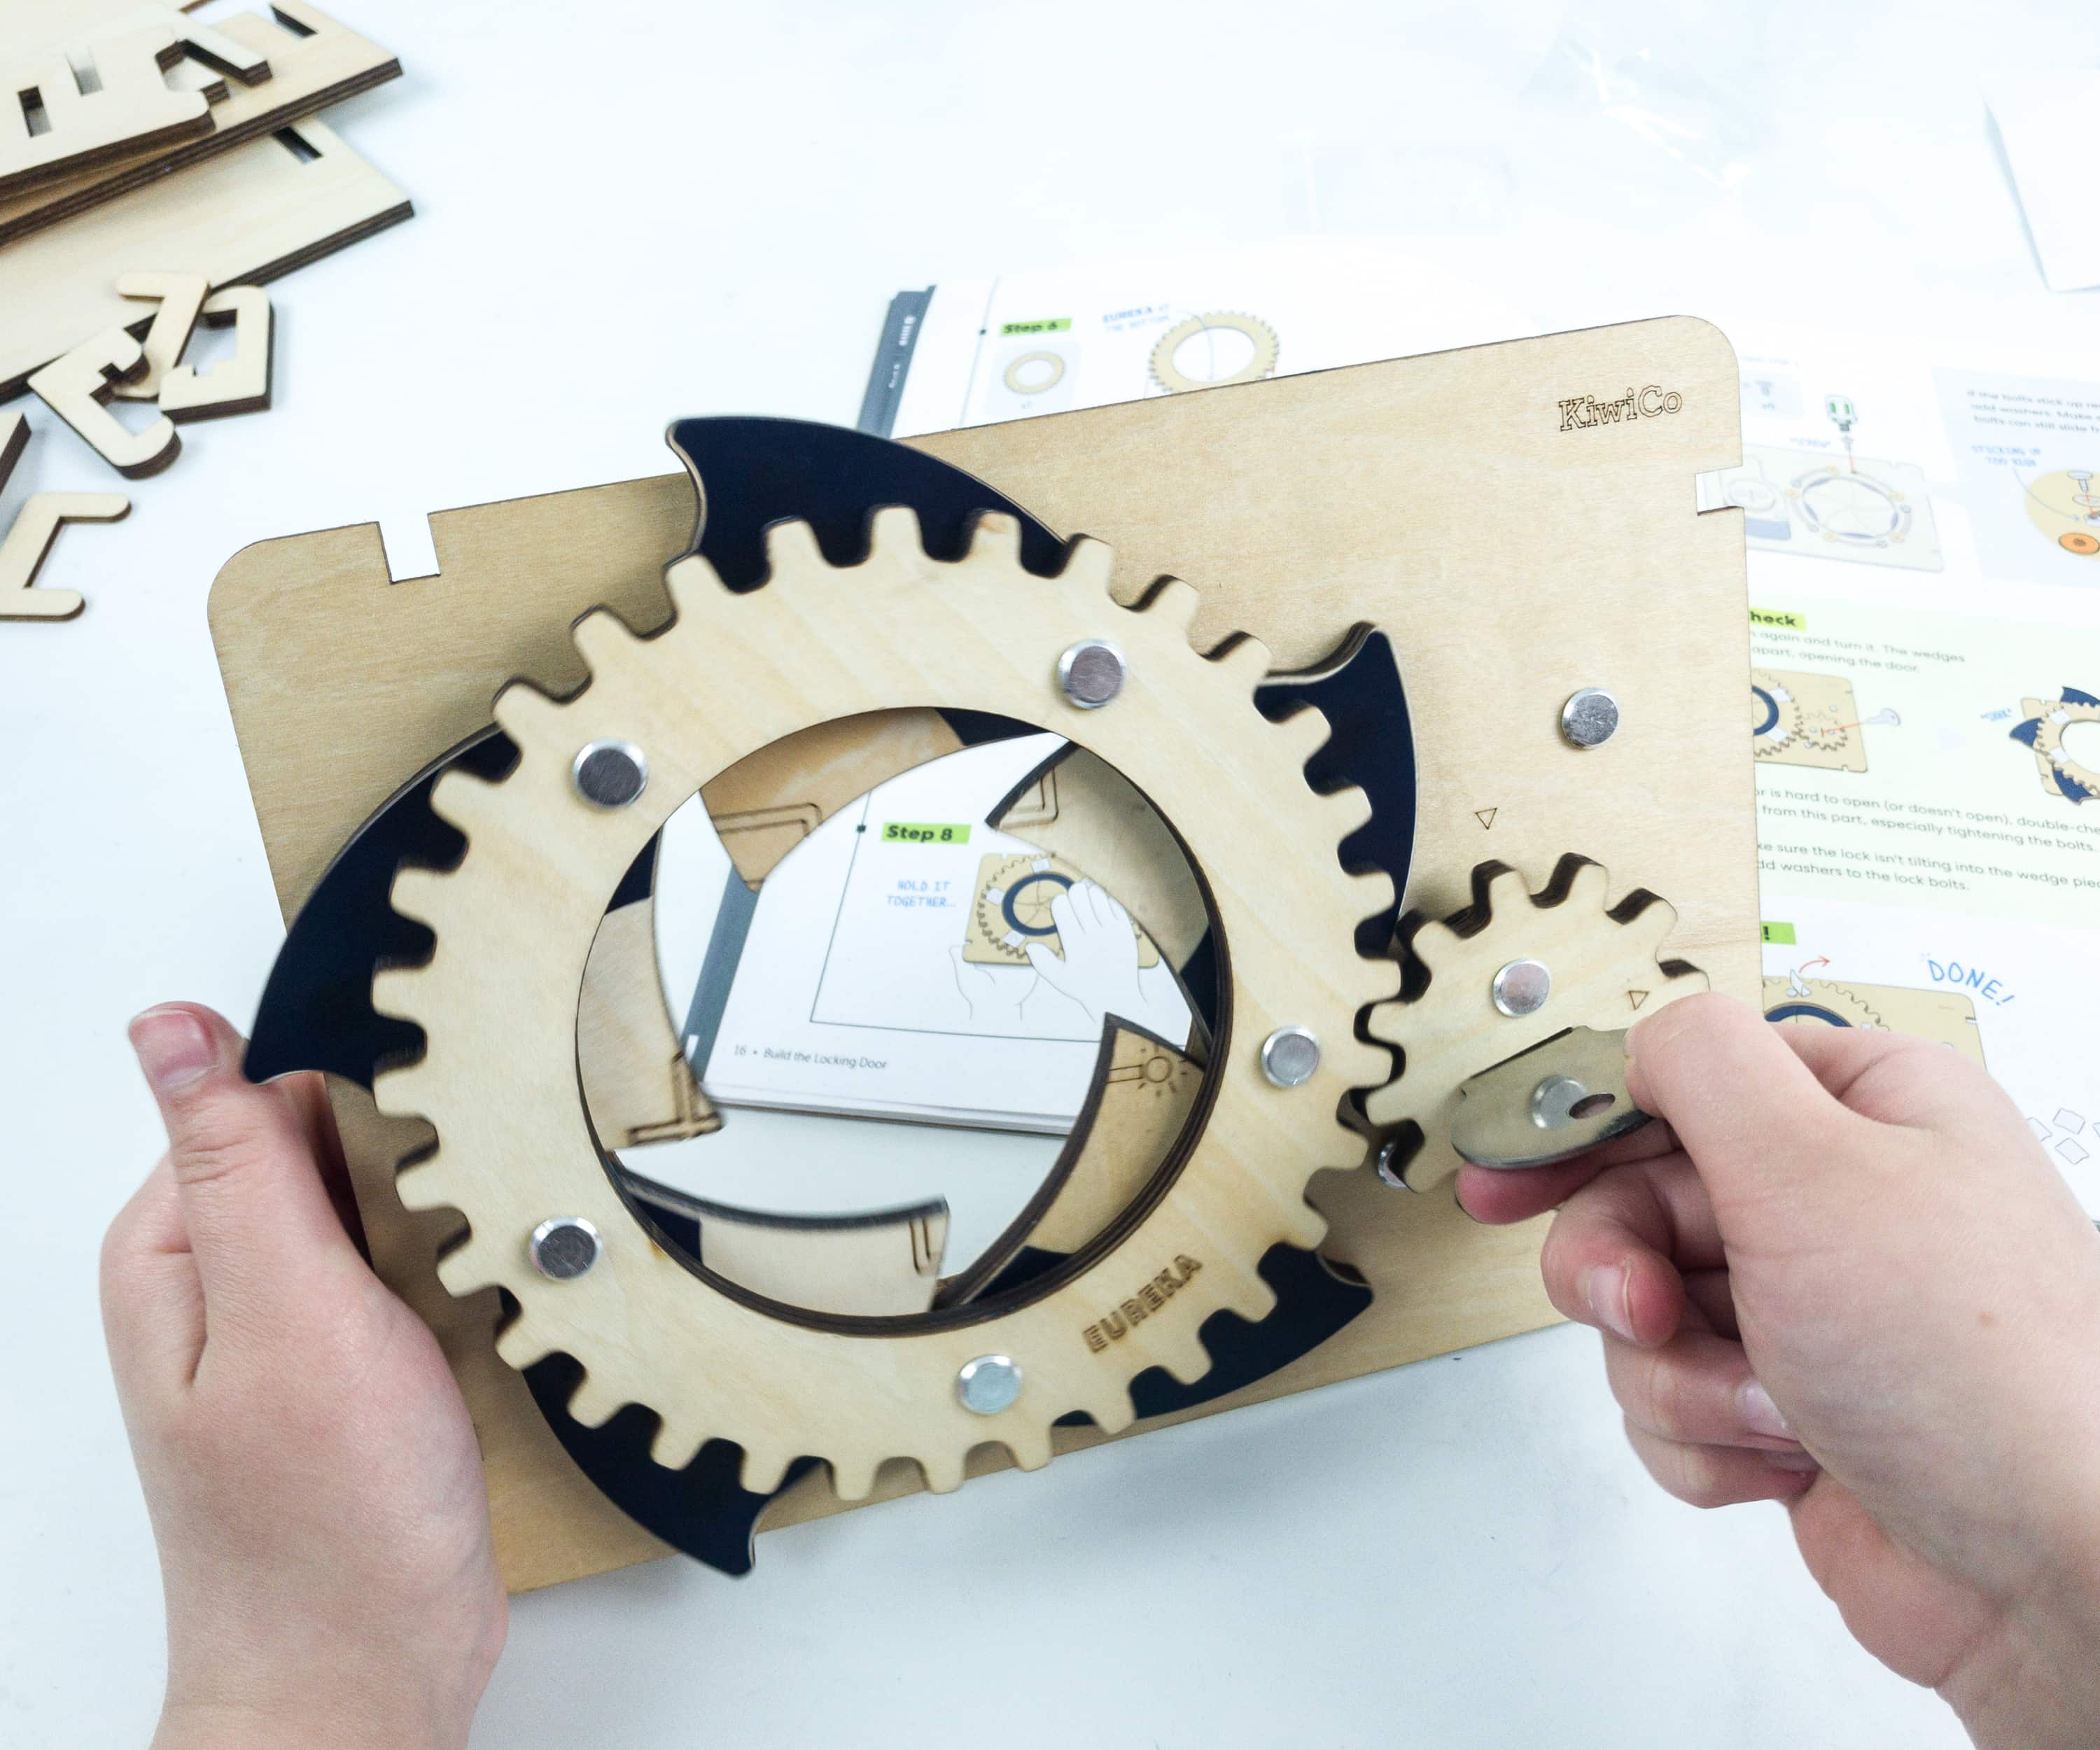
Put on the key, rotate, and unlock the door!
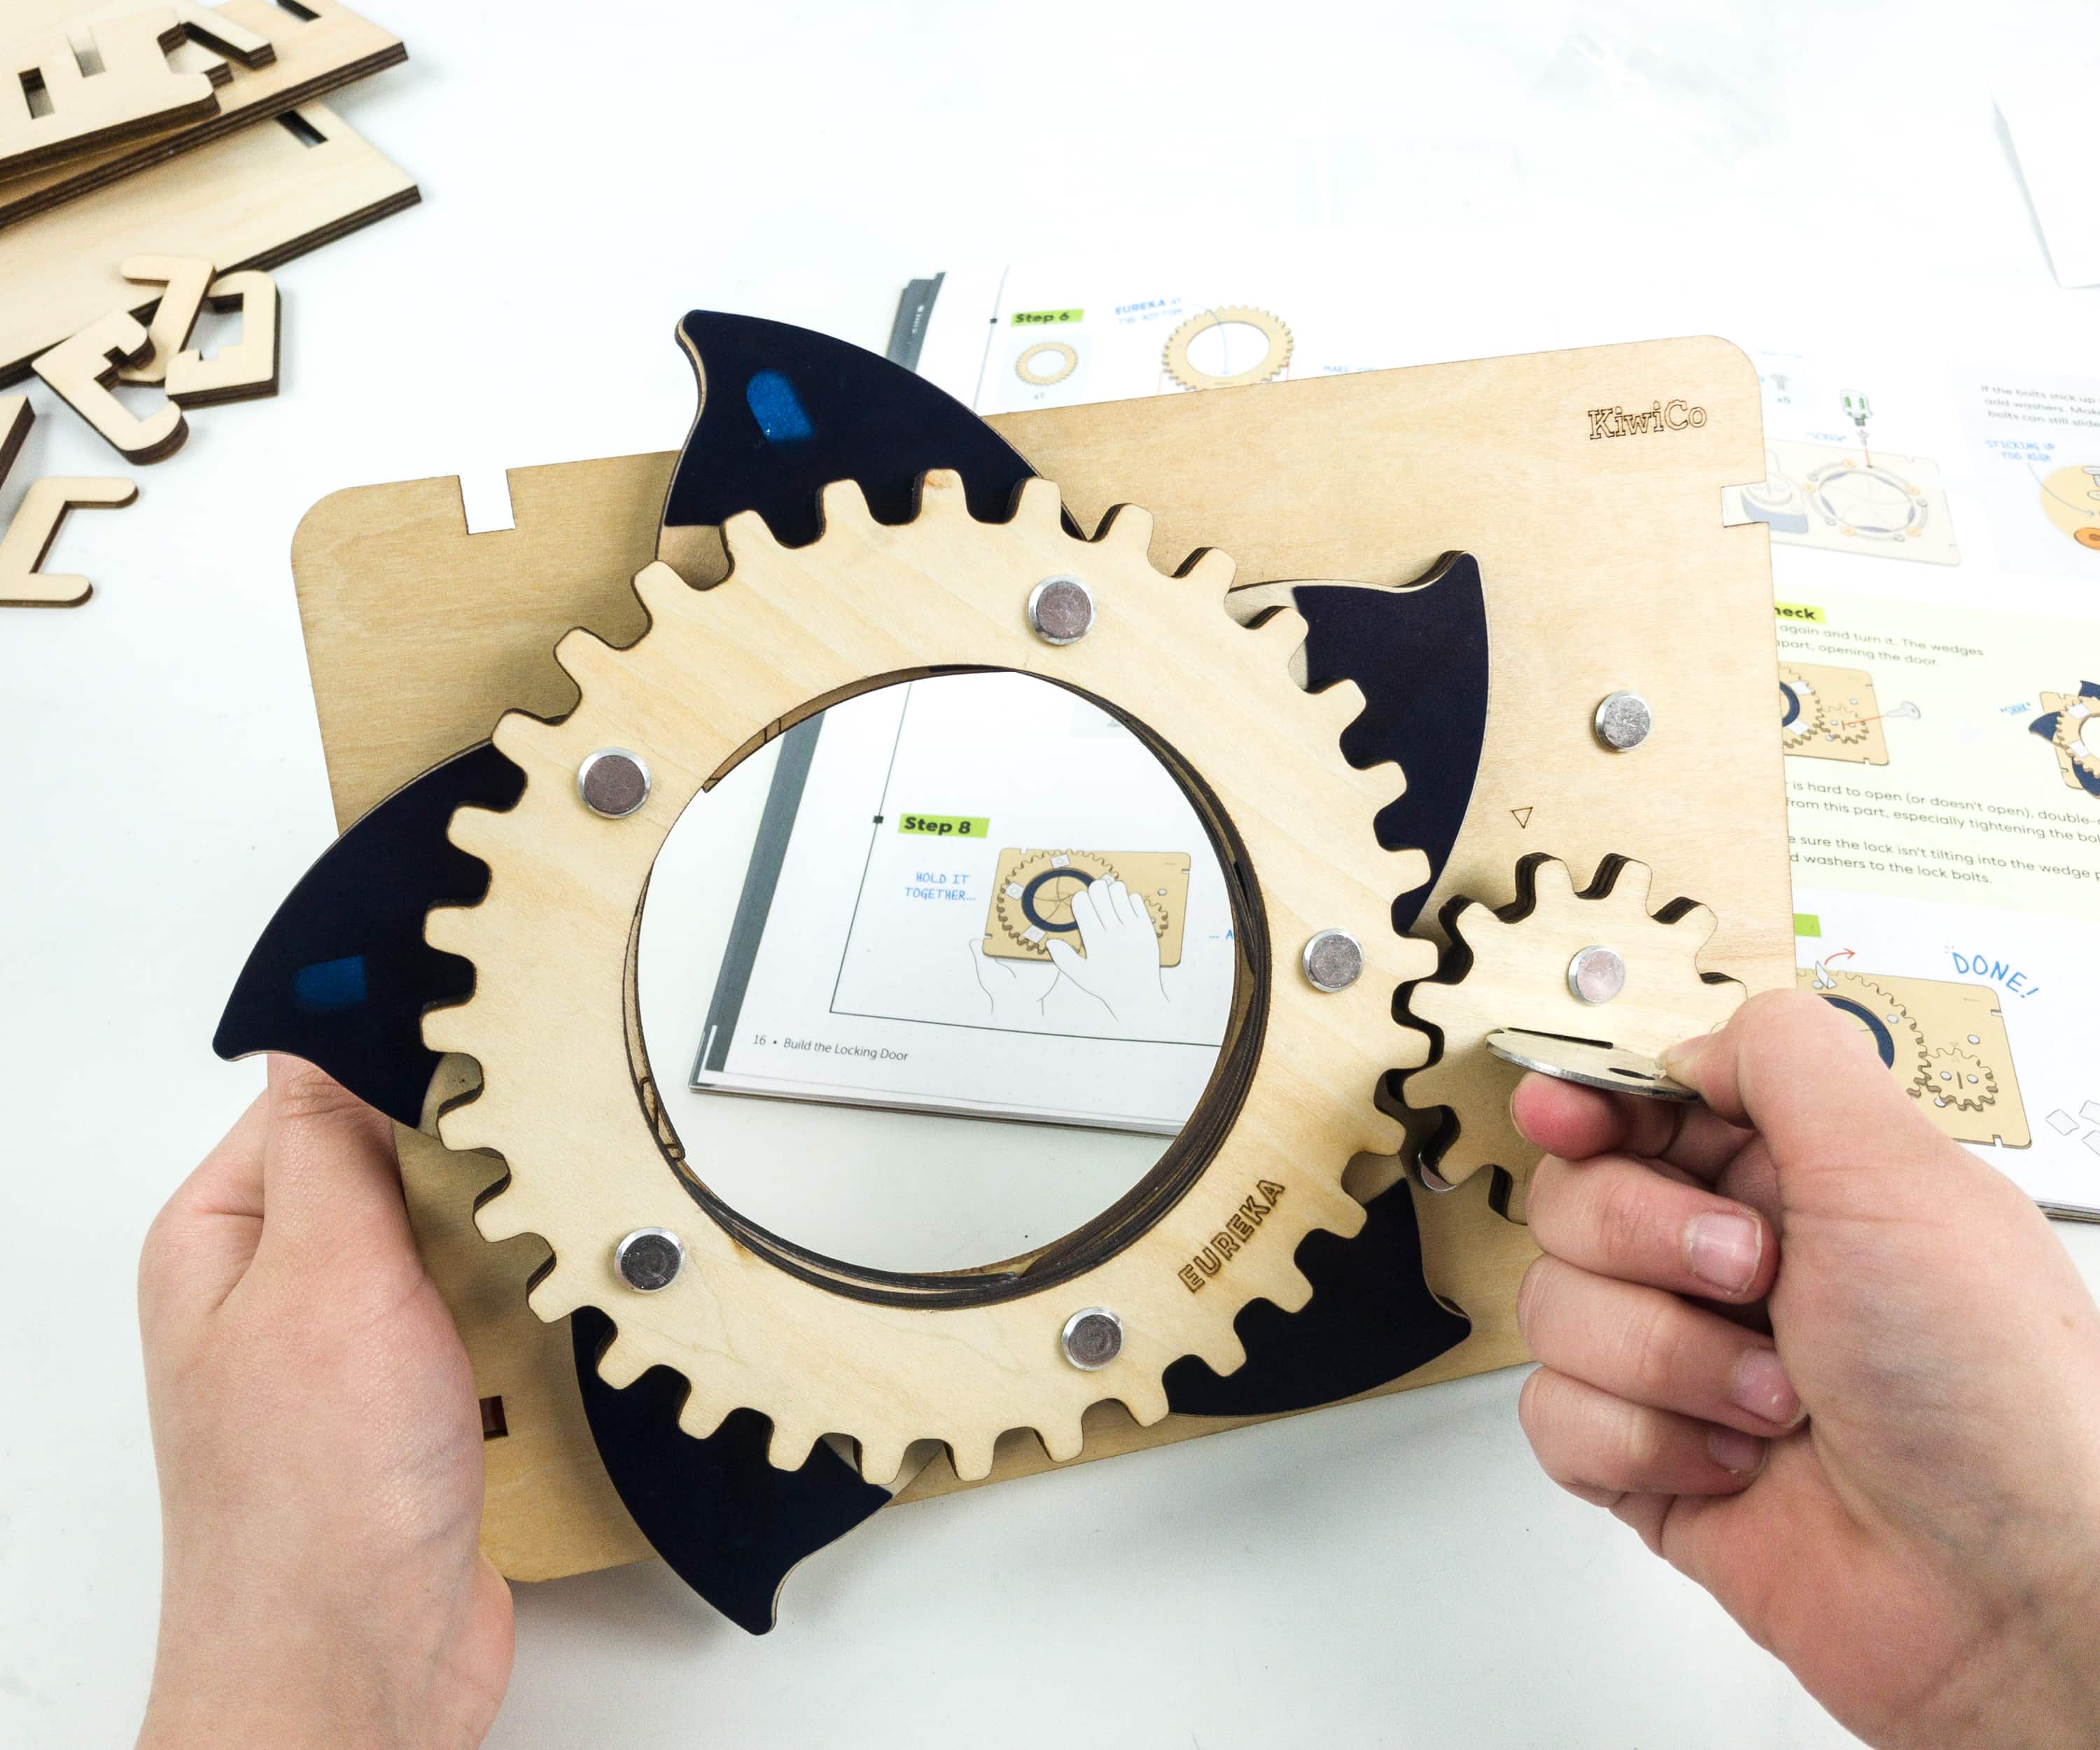
The lock door looks pretty much like a huge starfish when fully opened.
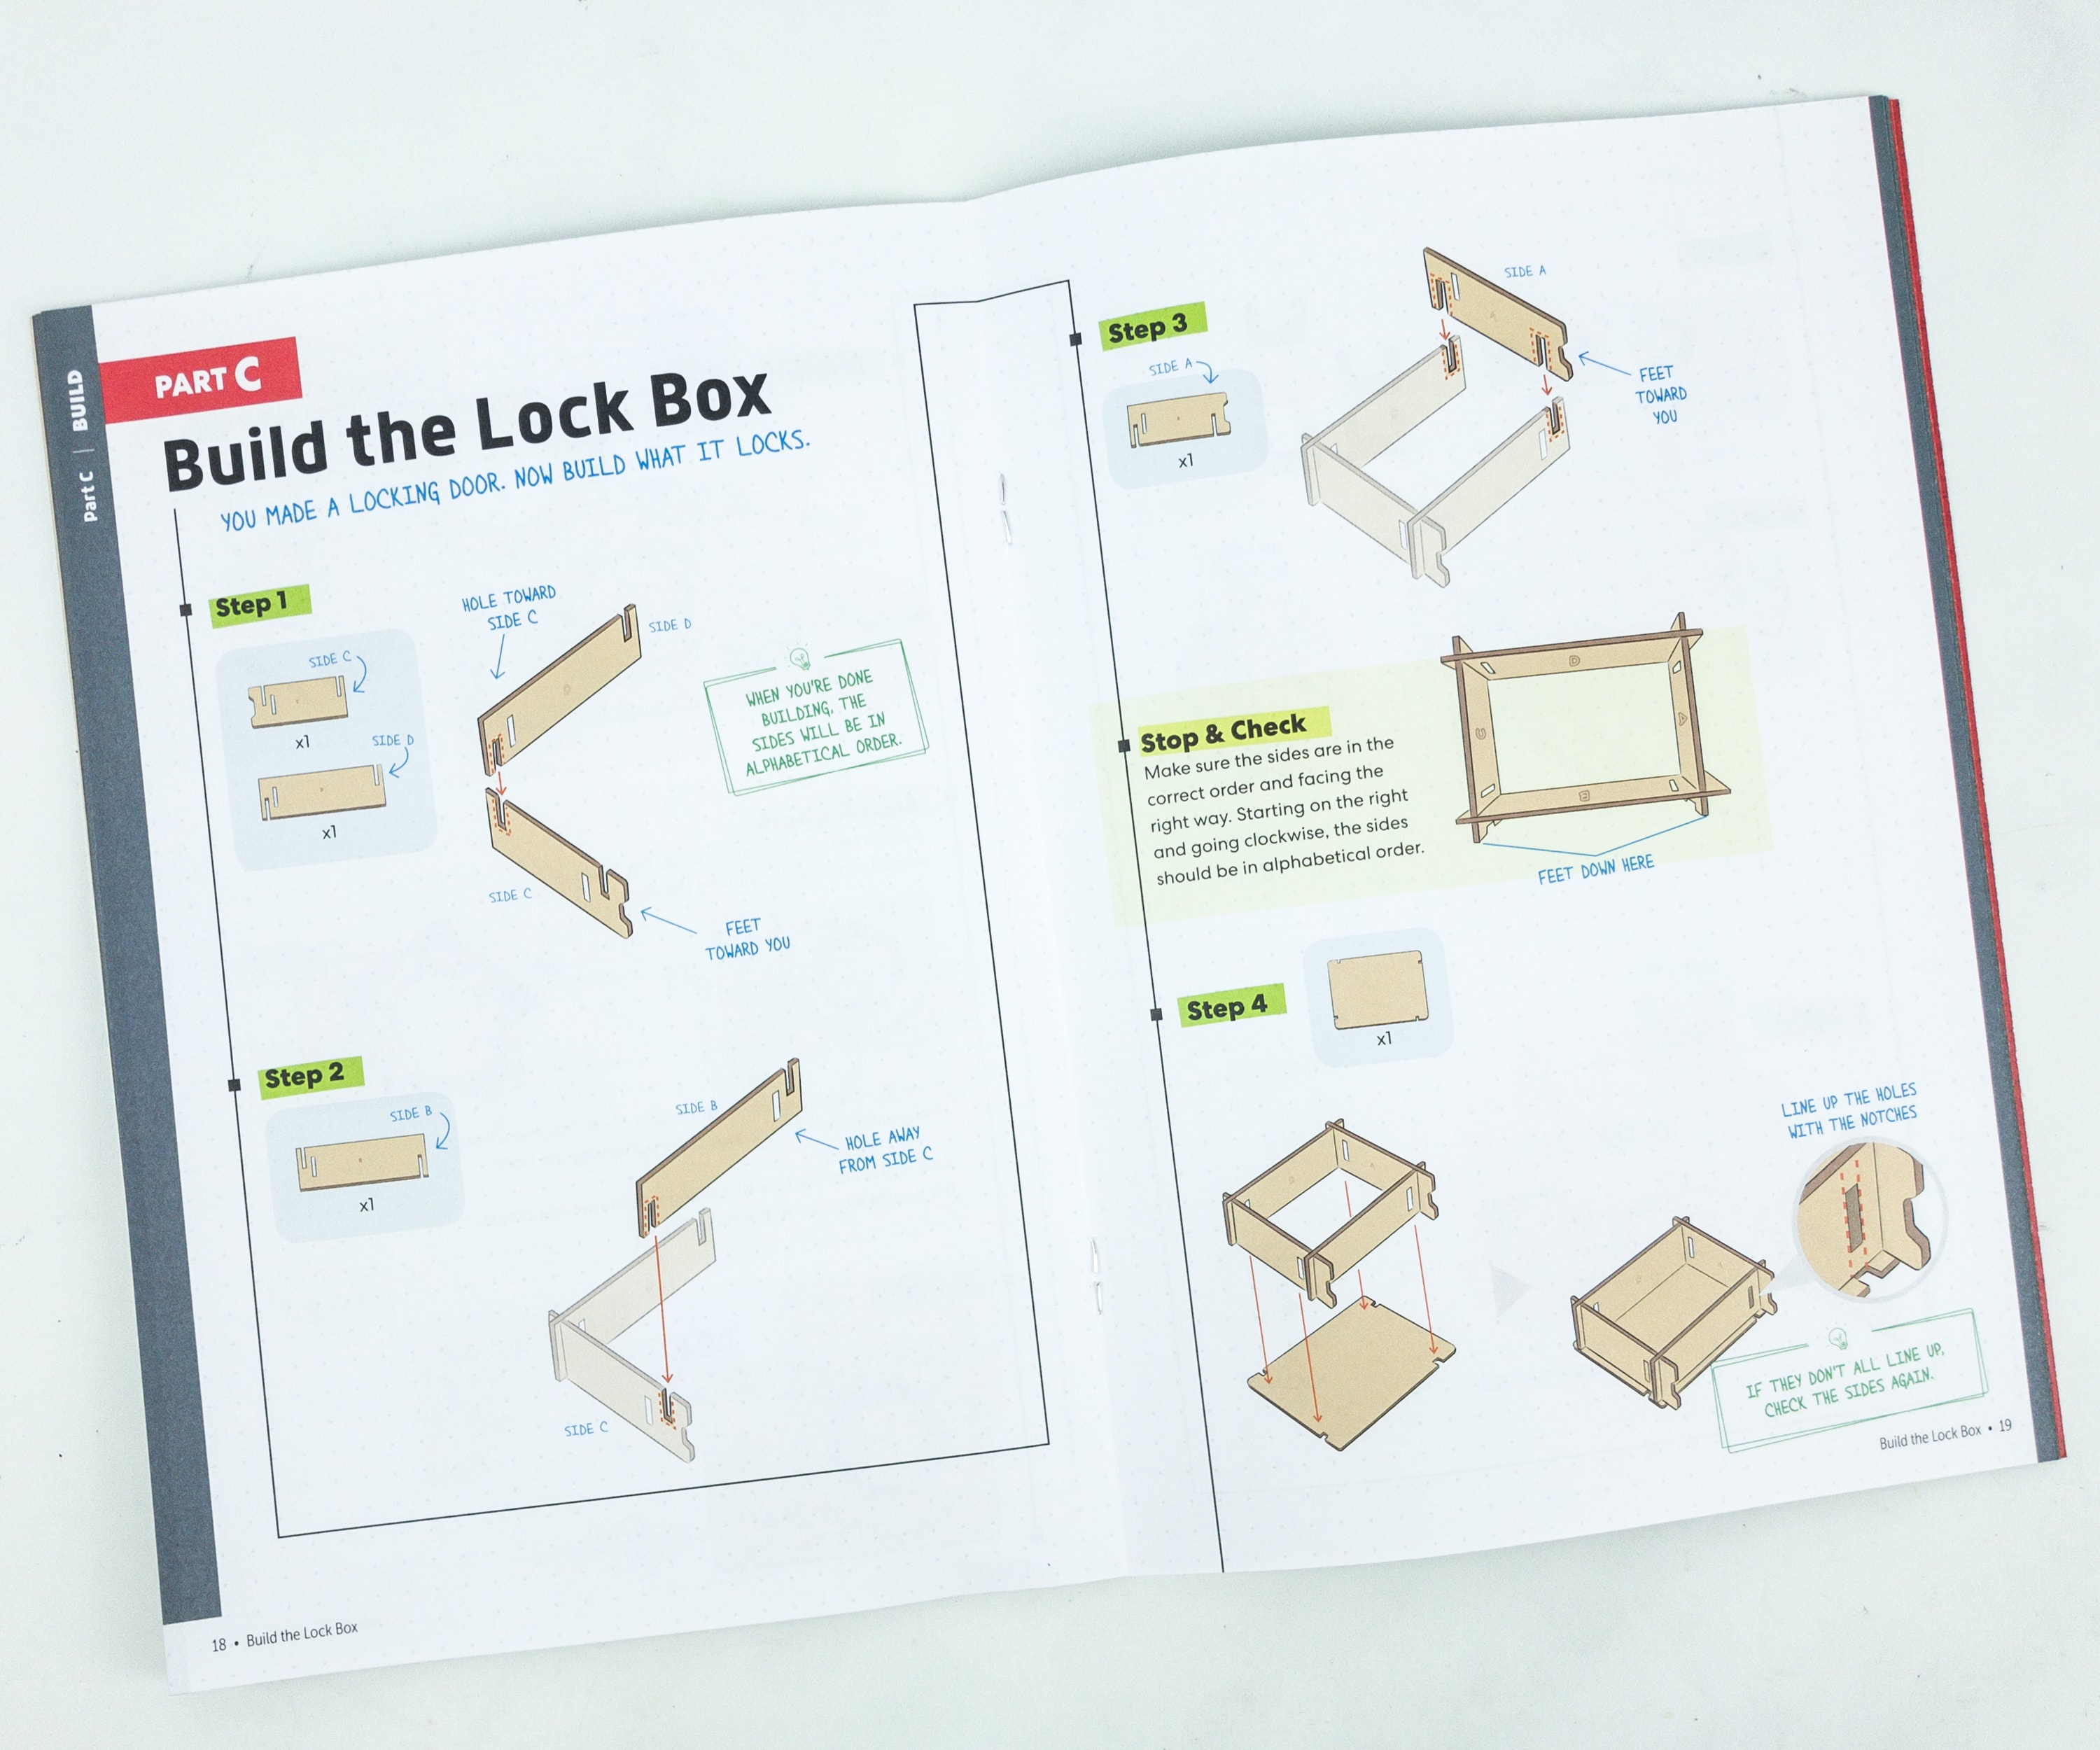
The third part of the project is building the lock box.

According to this part of the booklet, you are not required to put the lock on the Side C of the wall.
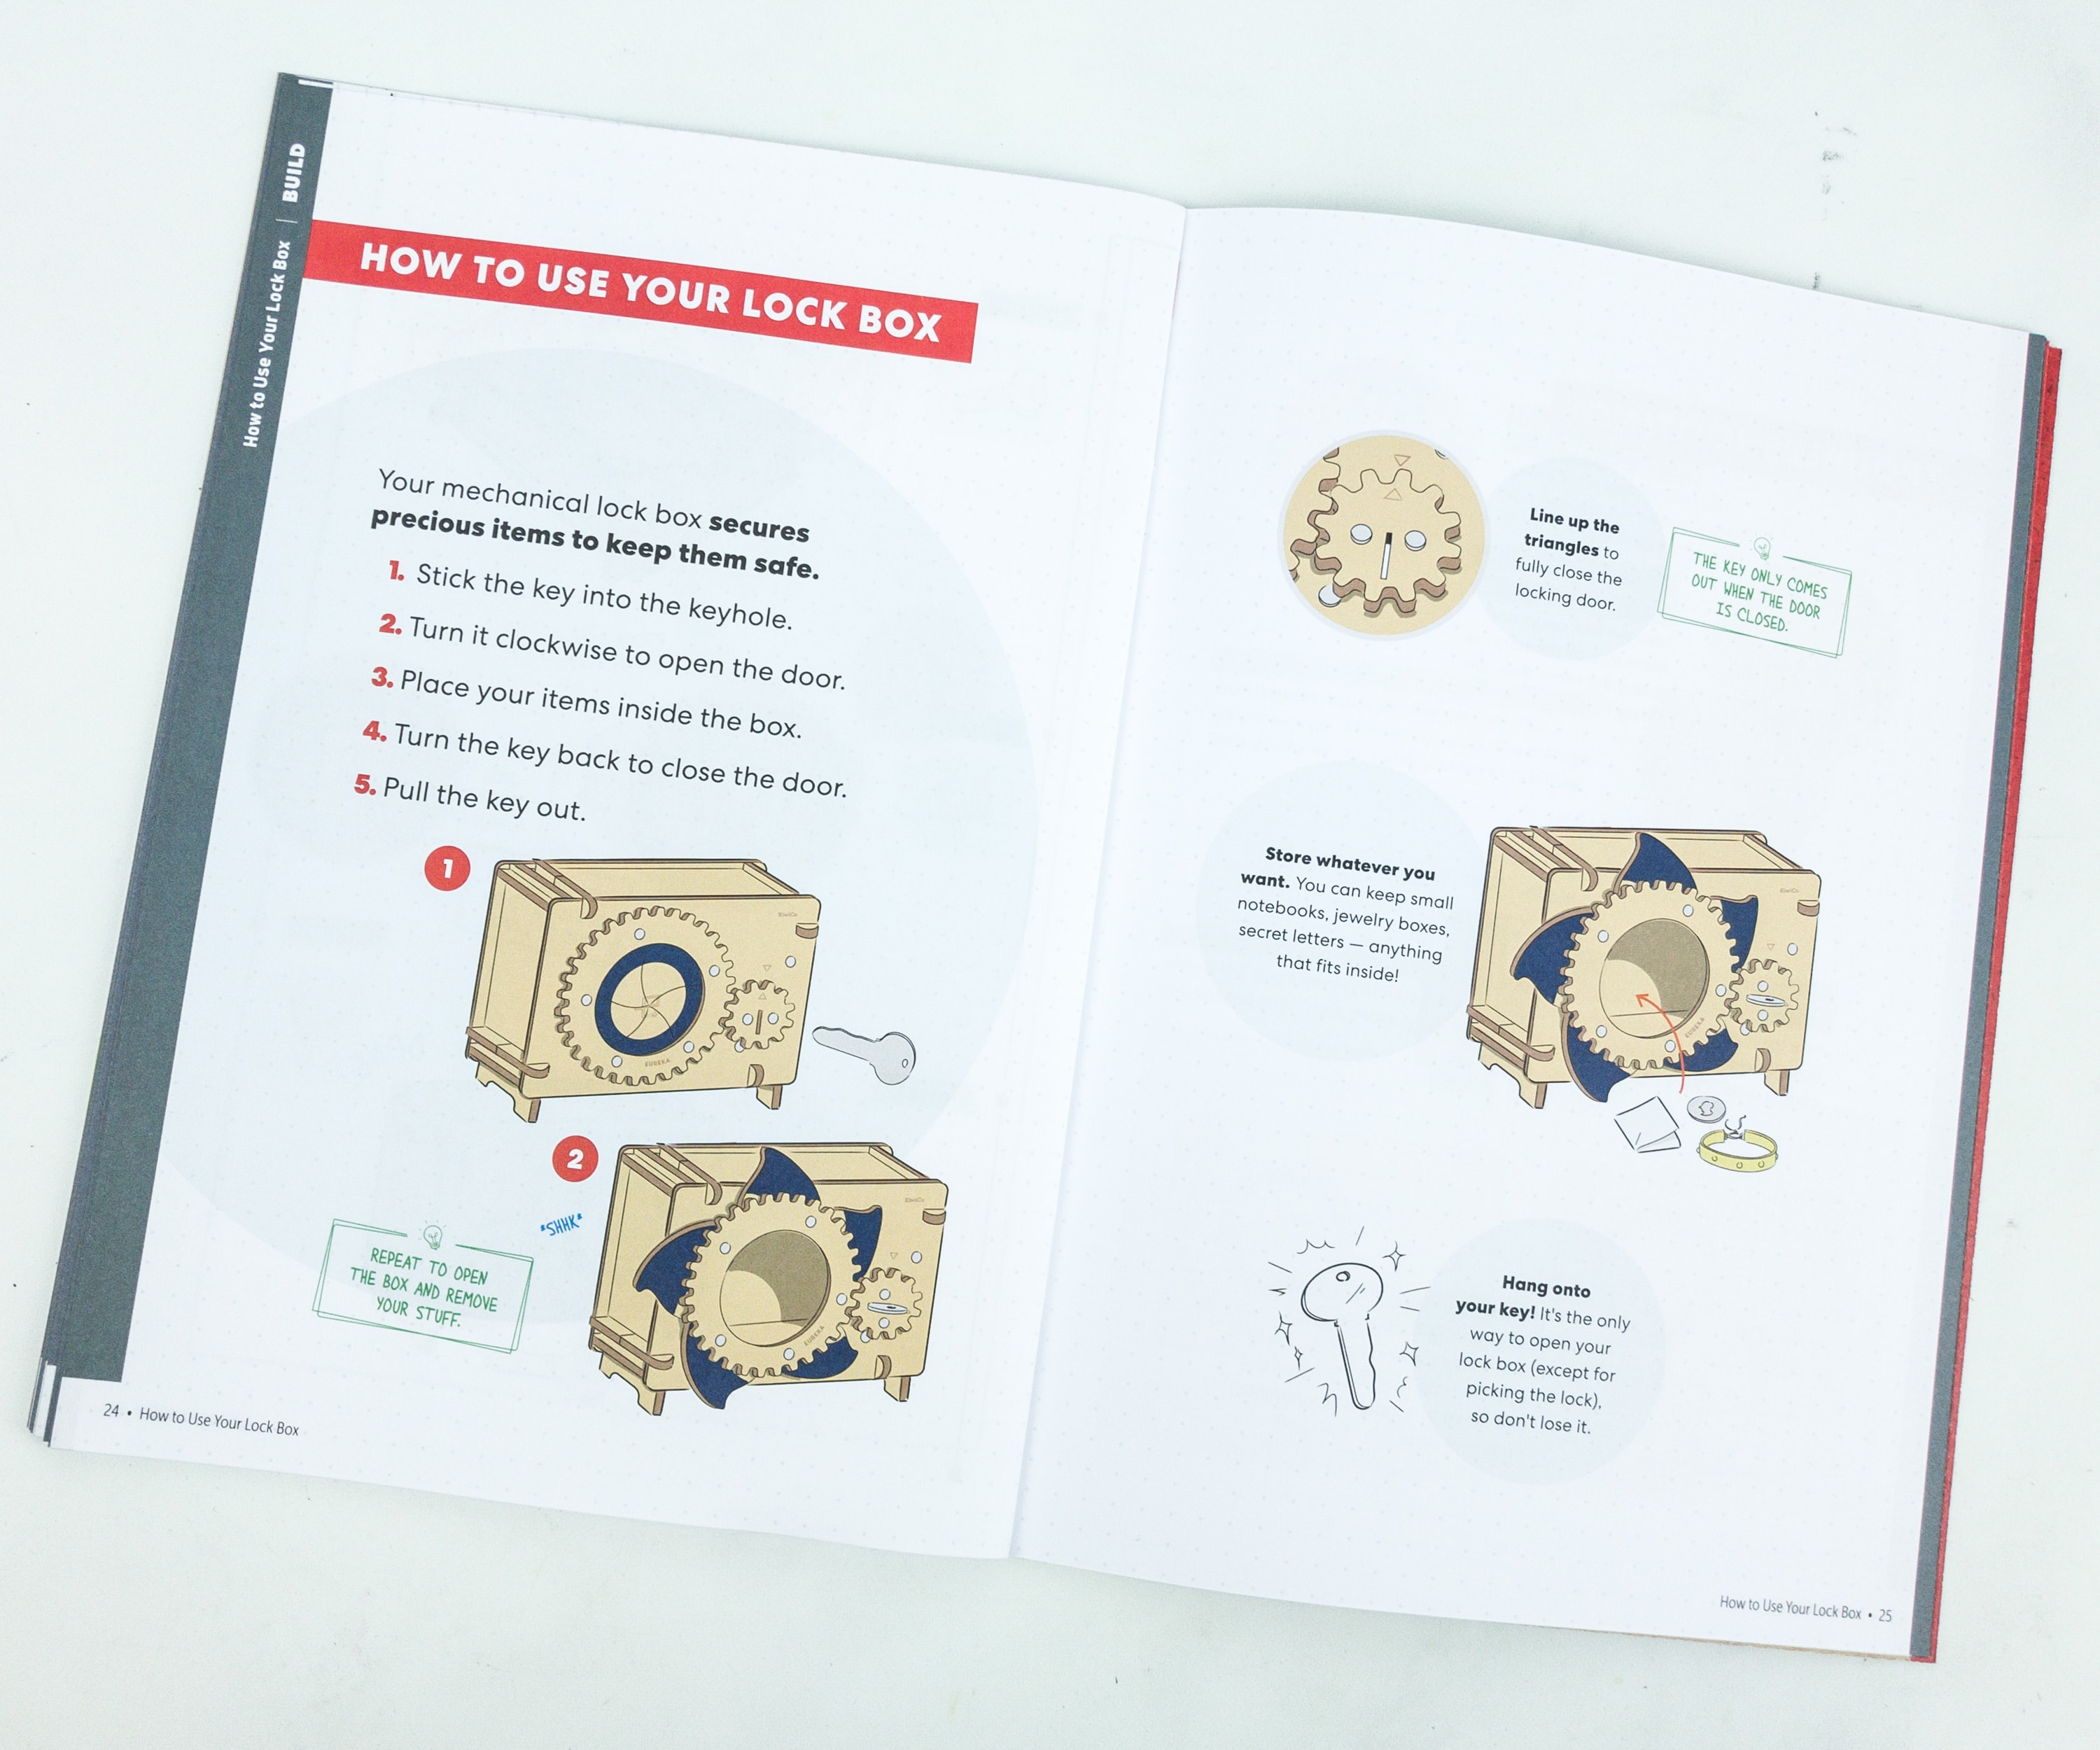
A lock box is very important, especially if you have precious items you need to keep safe. On the booklet, they featured five simple steps on how to use your wooden lock box.
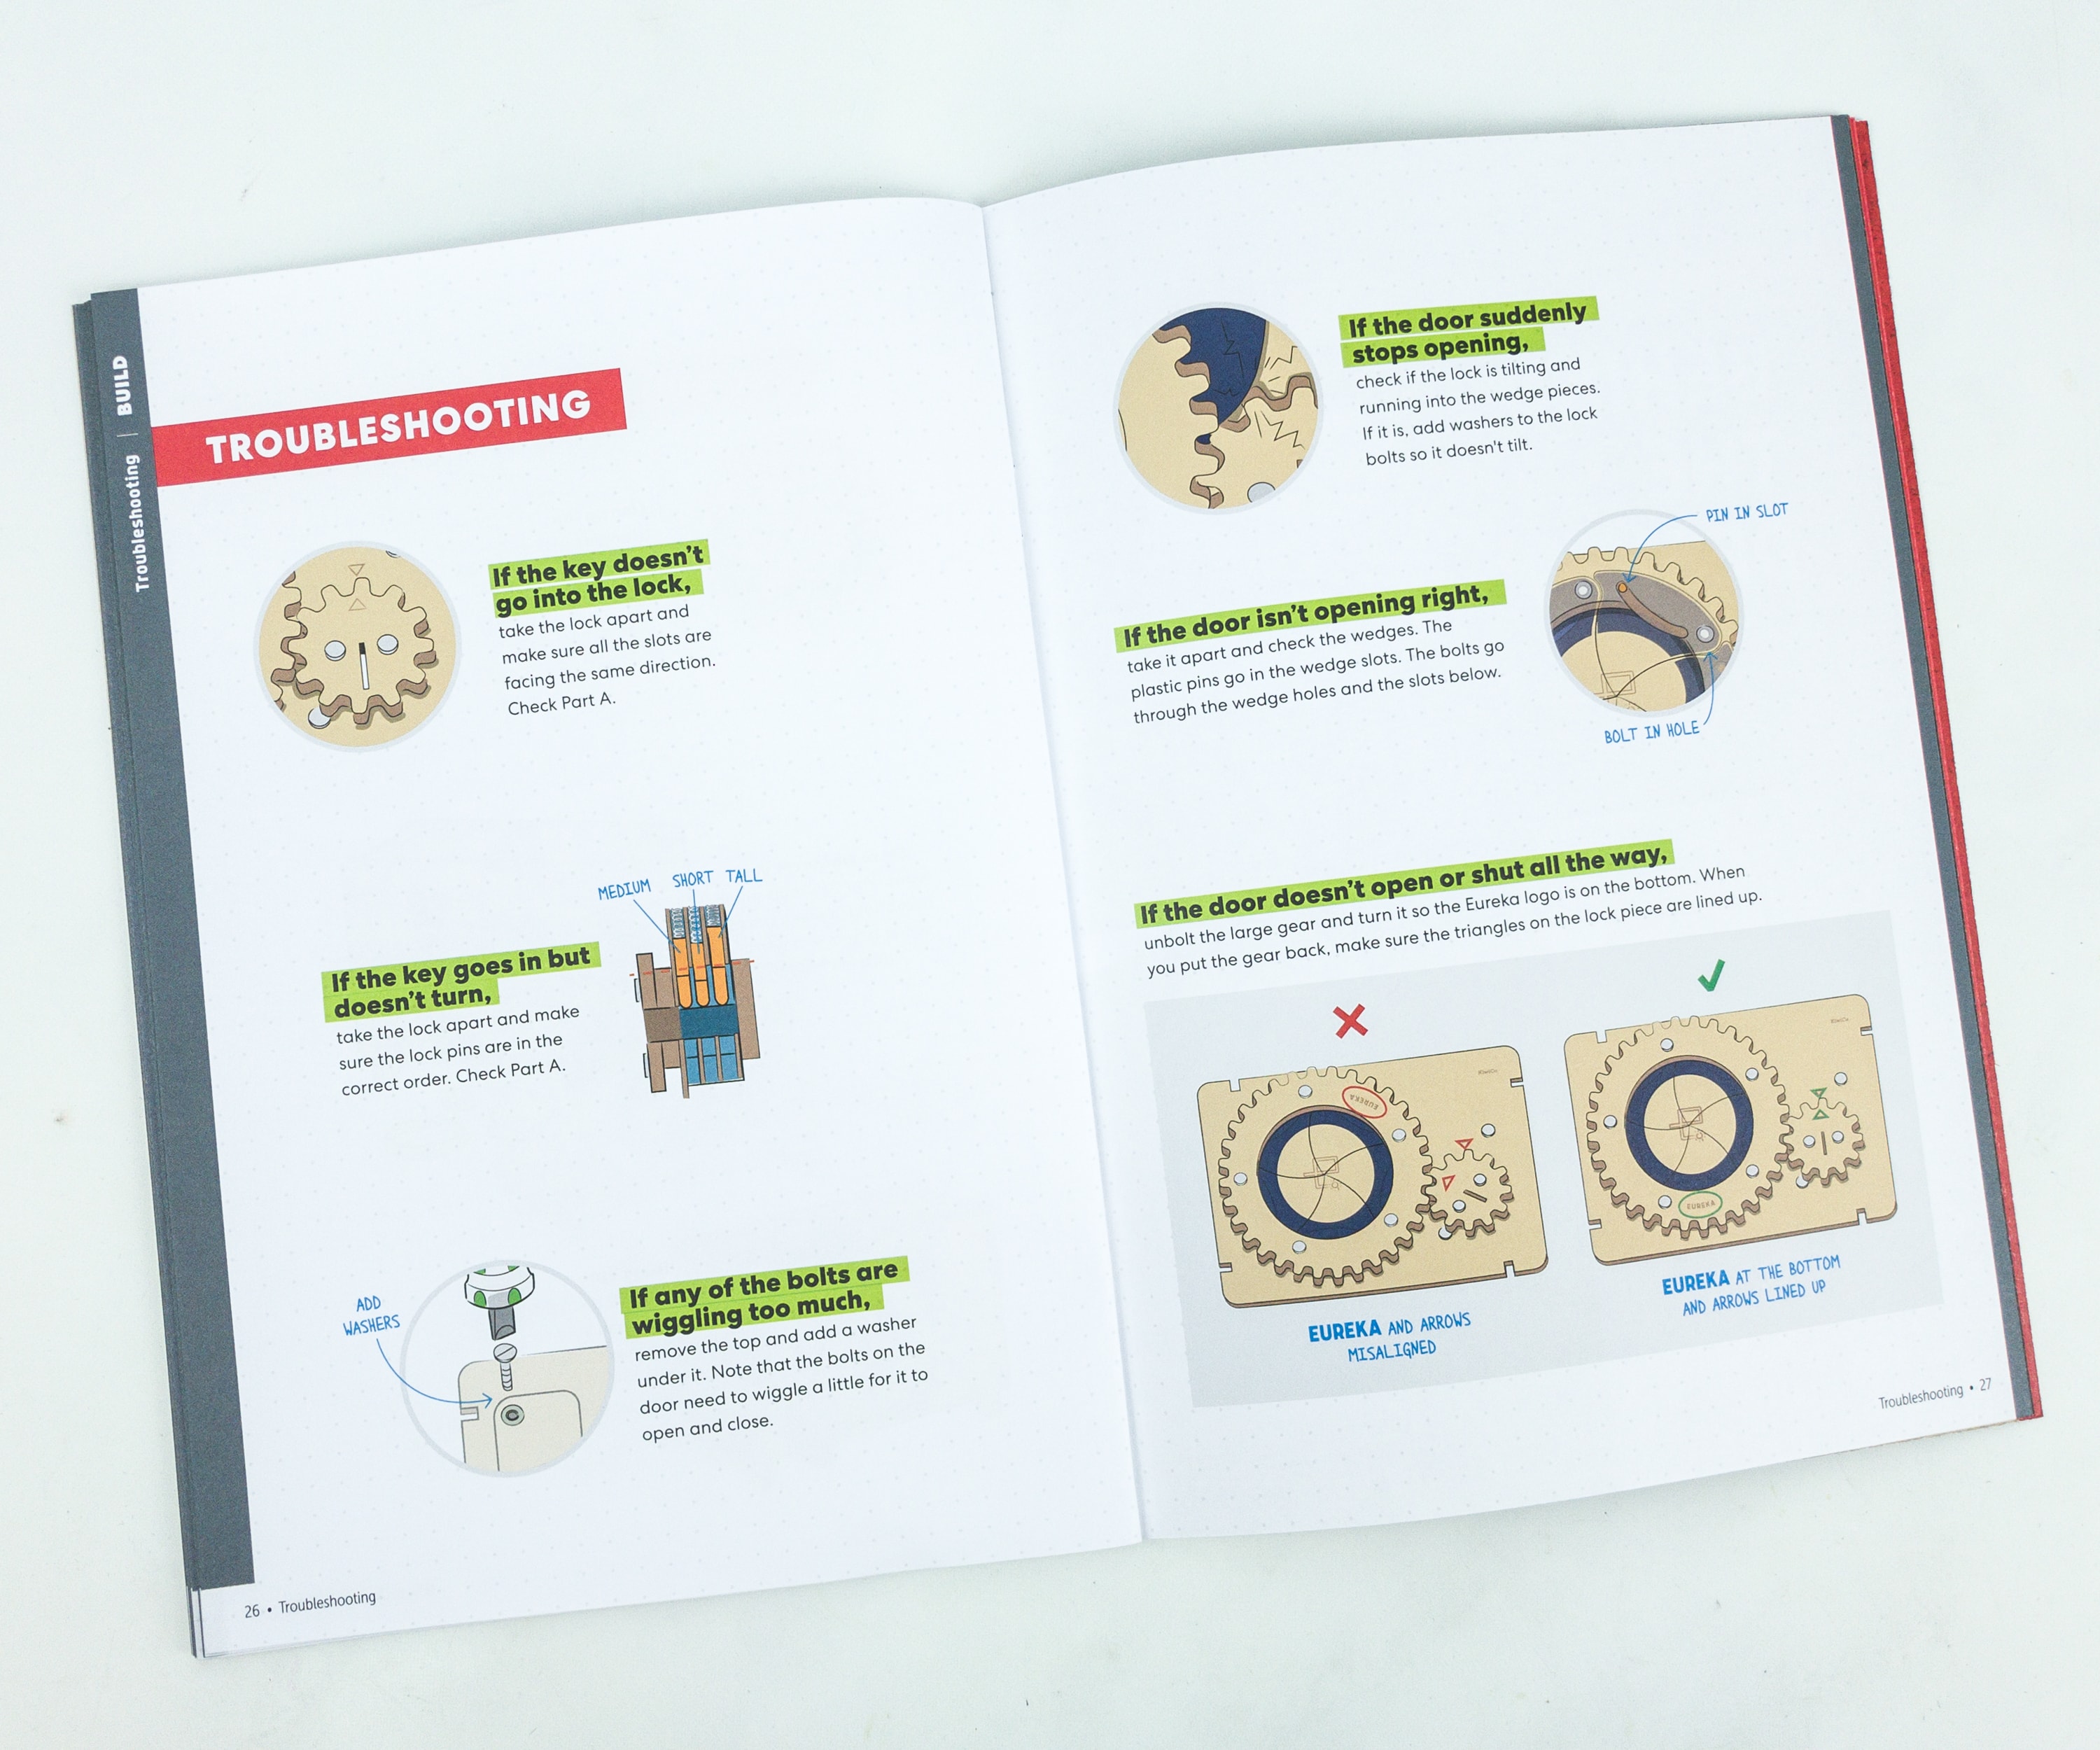
There’s a lot of possible scenarios why your lock box won’t work properly. Featured on this part of the booklet are some possible problems that you might encounter, with ways to easily troubleshoot them.

They even explained the lock box’s design, with a brief description for each of its parts.

The pin tumbler lock is one of the most common and definitely the most convenient lock used in almost every household. They are normally seen on doors, cabinets, and even padlocks.
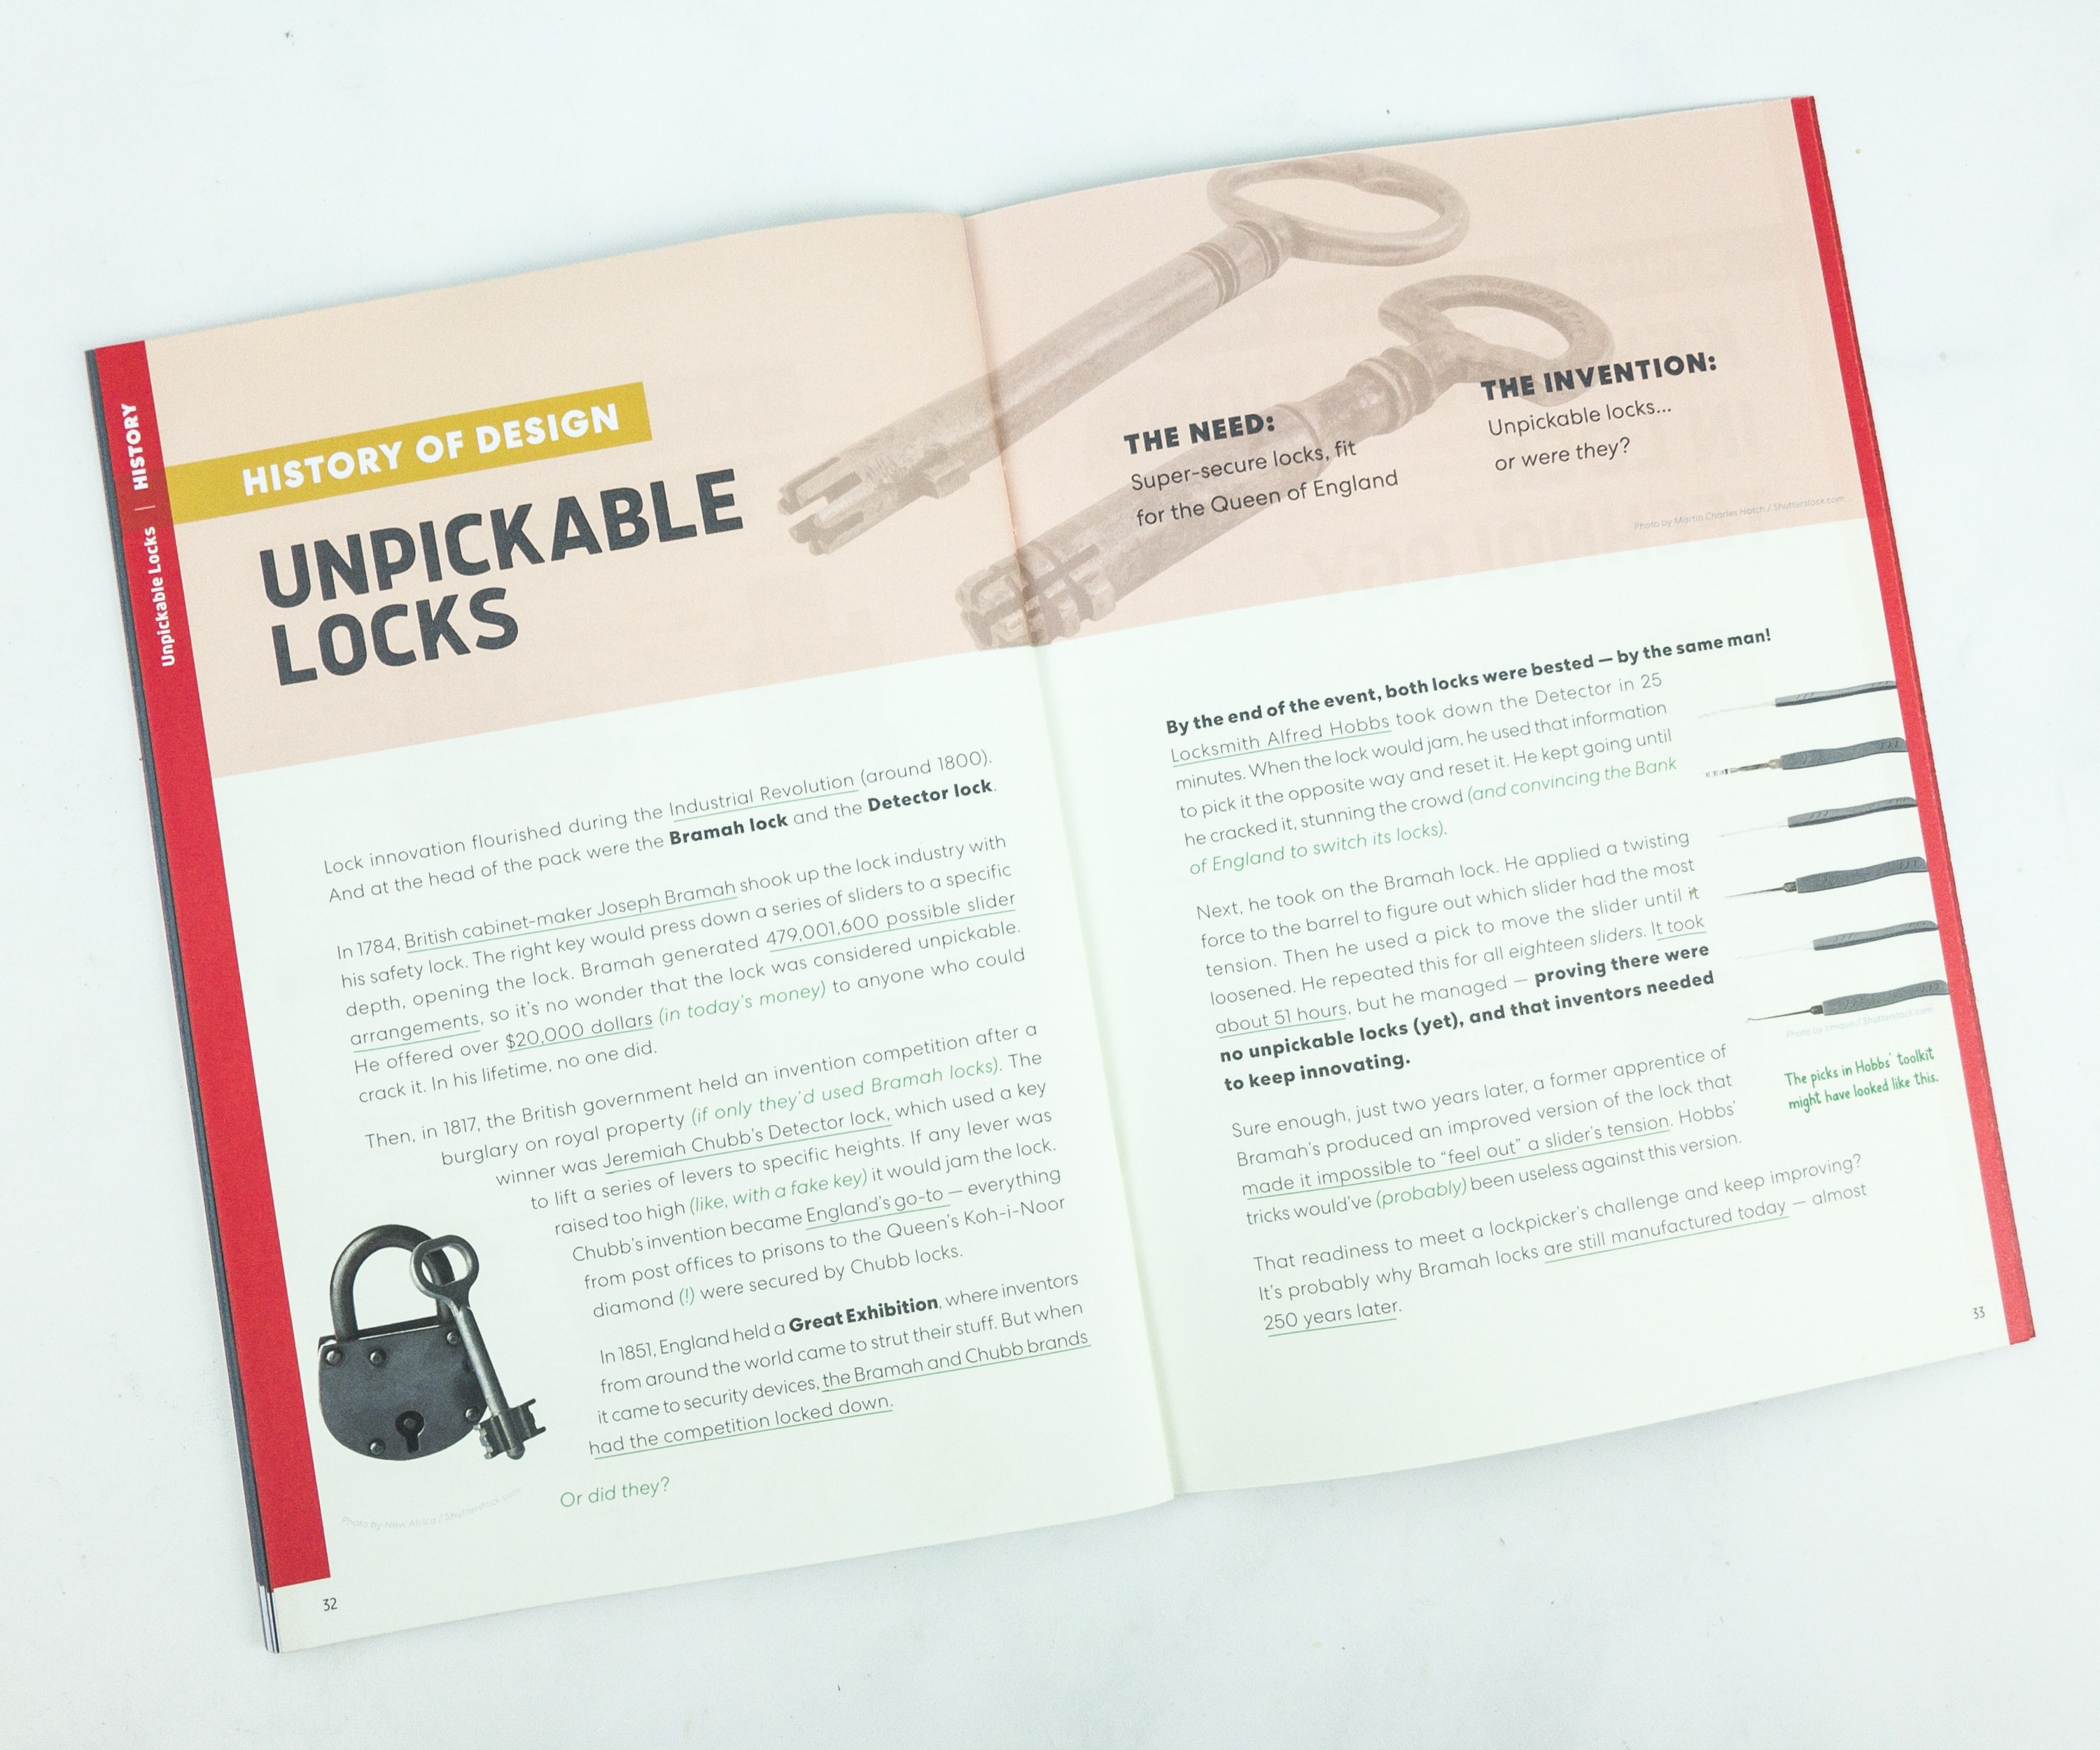
In this article, we got to know more about Alfred Hobbs, the locksmith who was able to unlock the famous locking devices made by Bramah and Chubb in 1851.
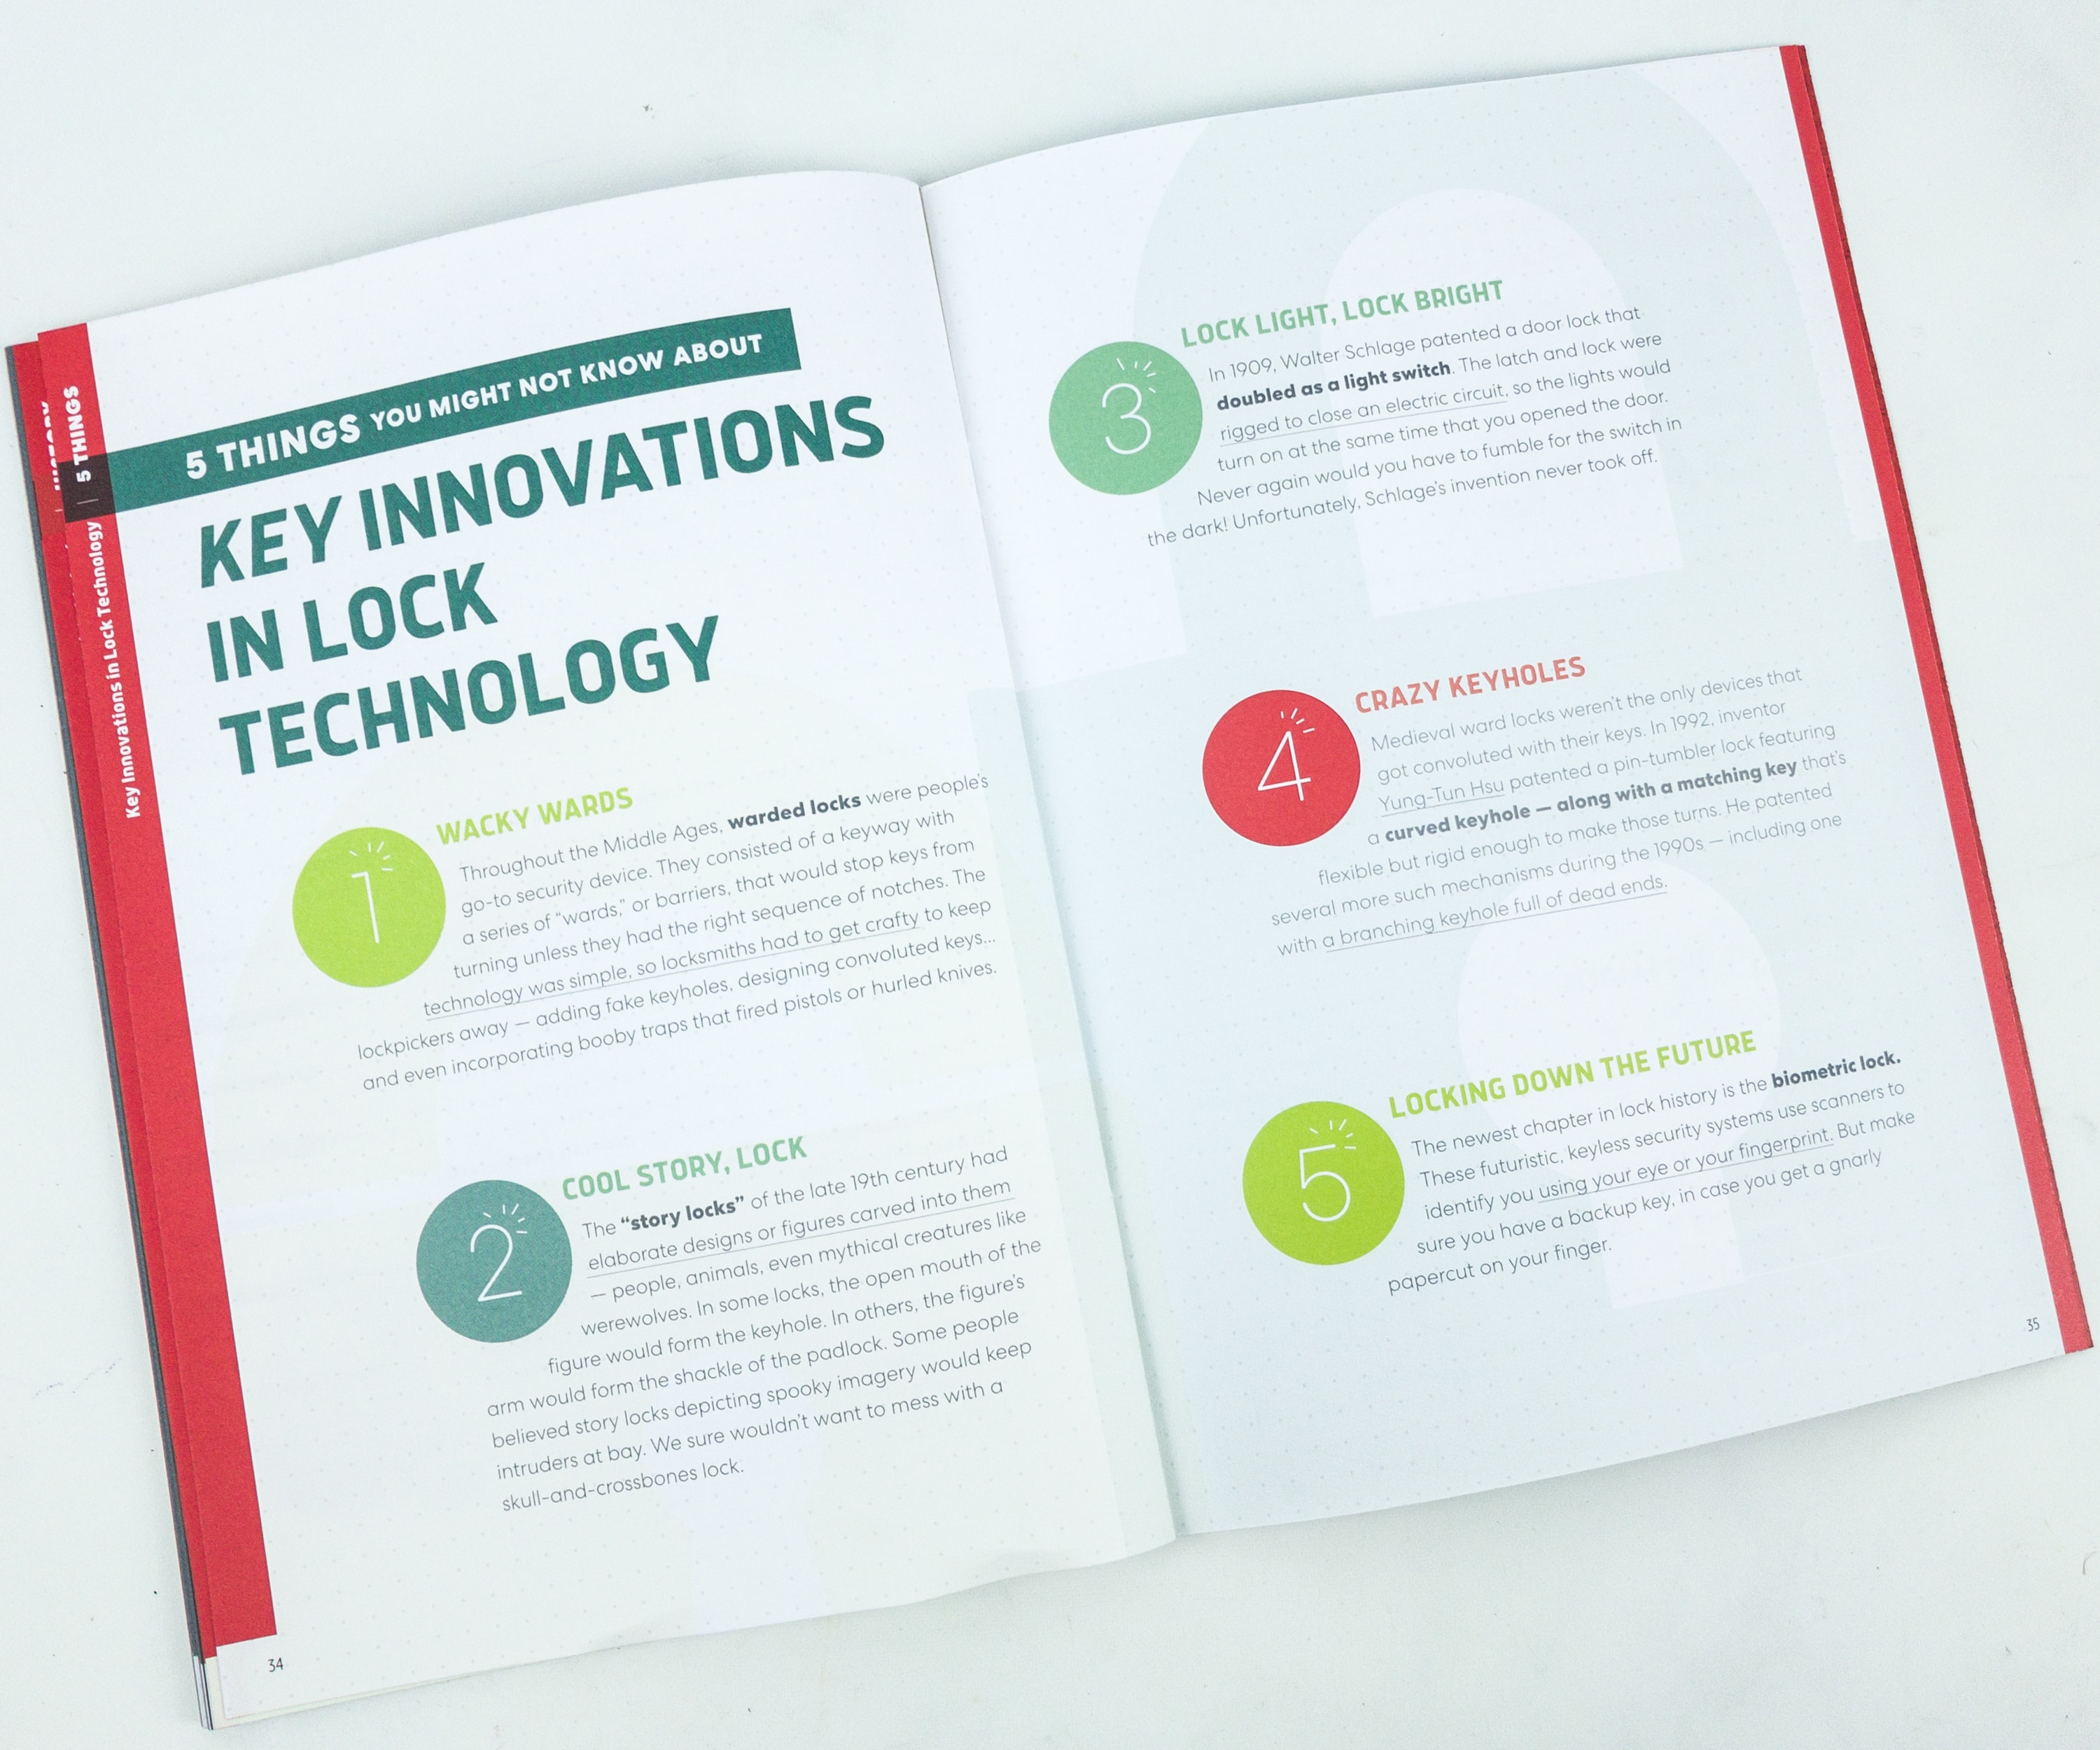
There’s a total of 5 key innovations that made a drastic improvement on our modern lock technology. You can check and see them all on this part of the booklet.
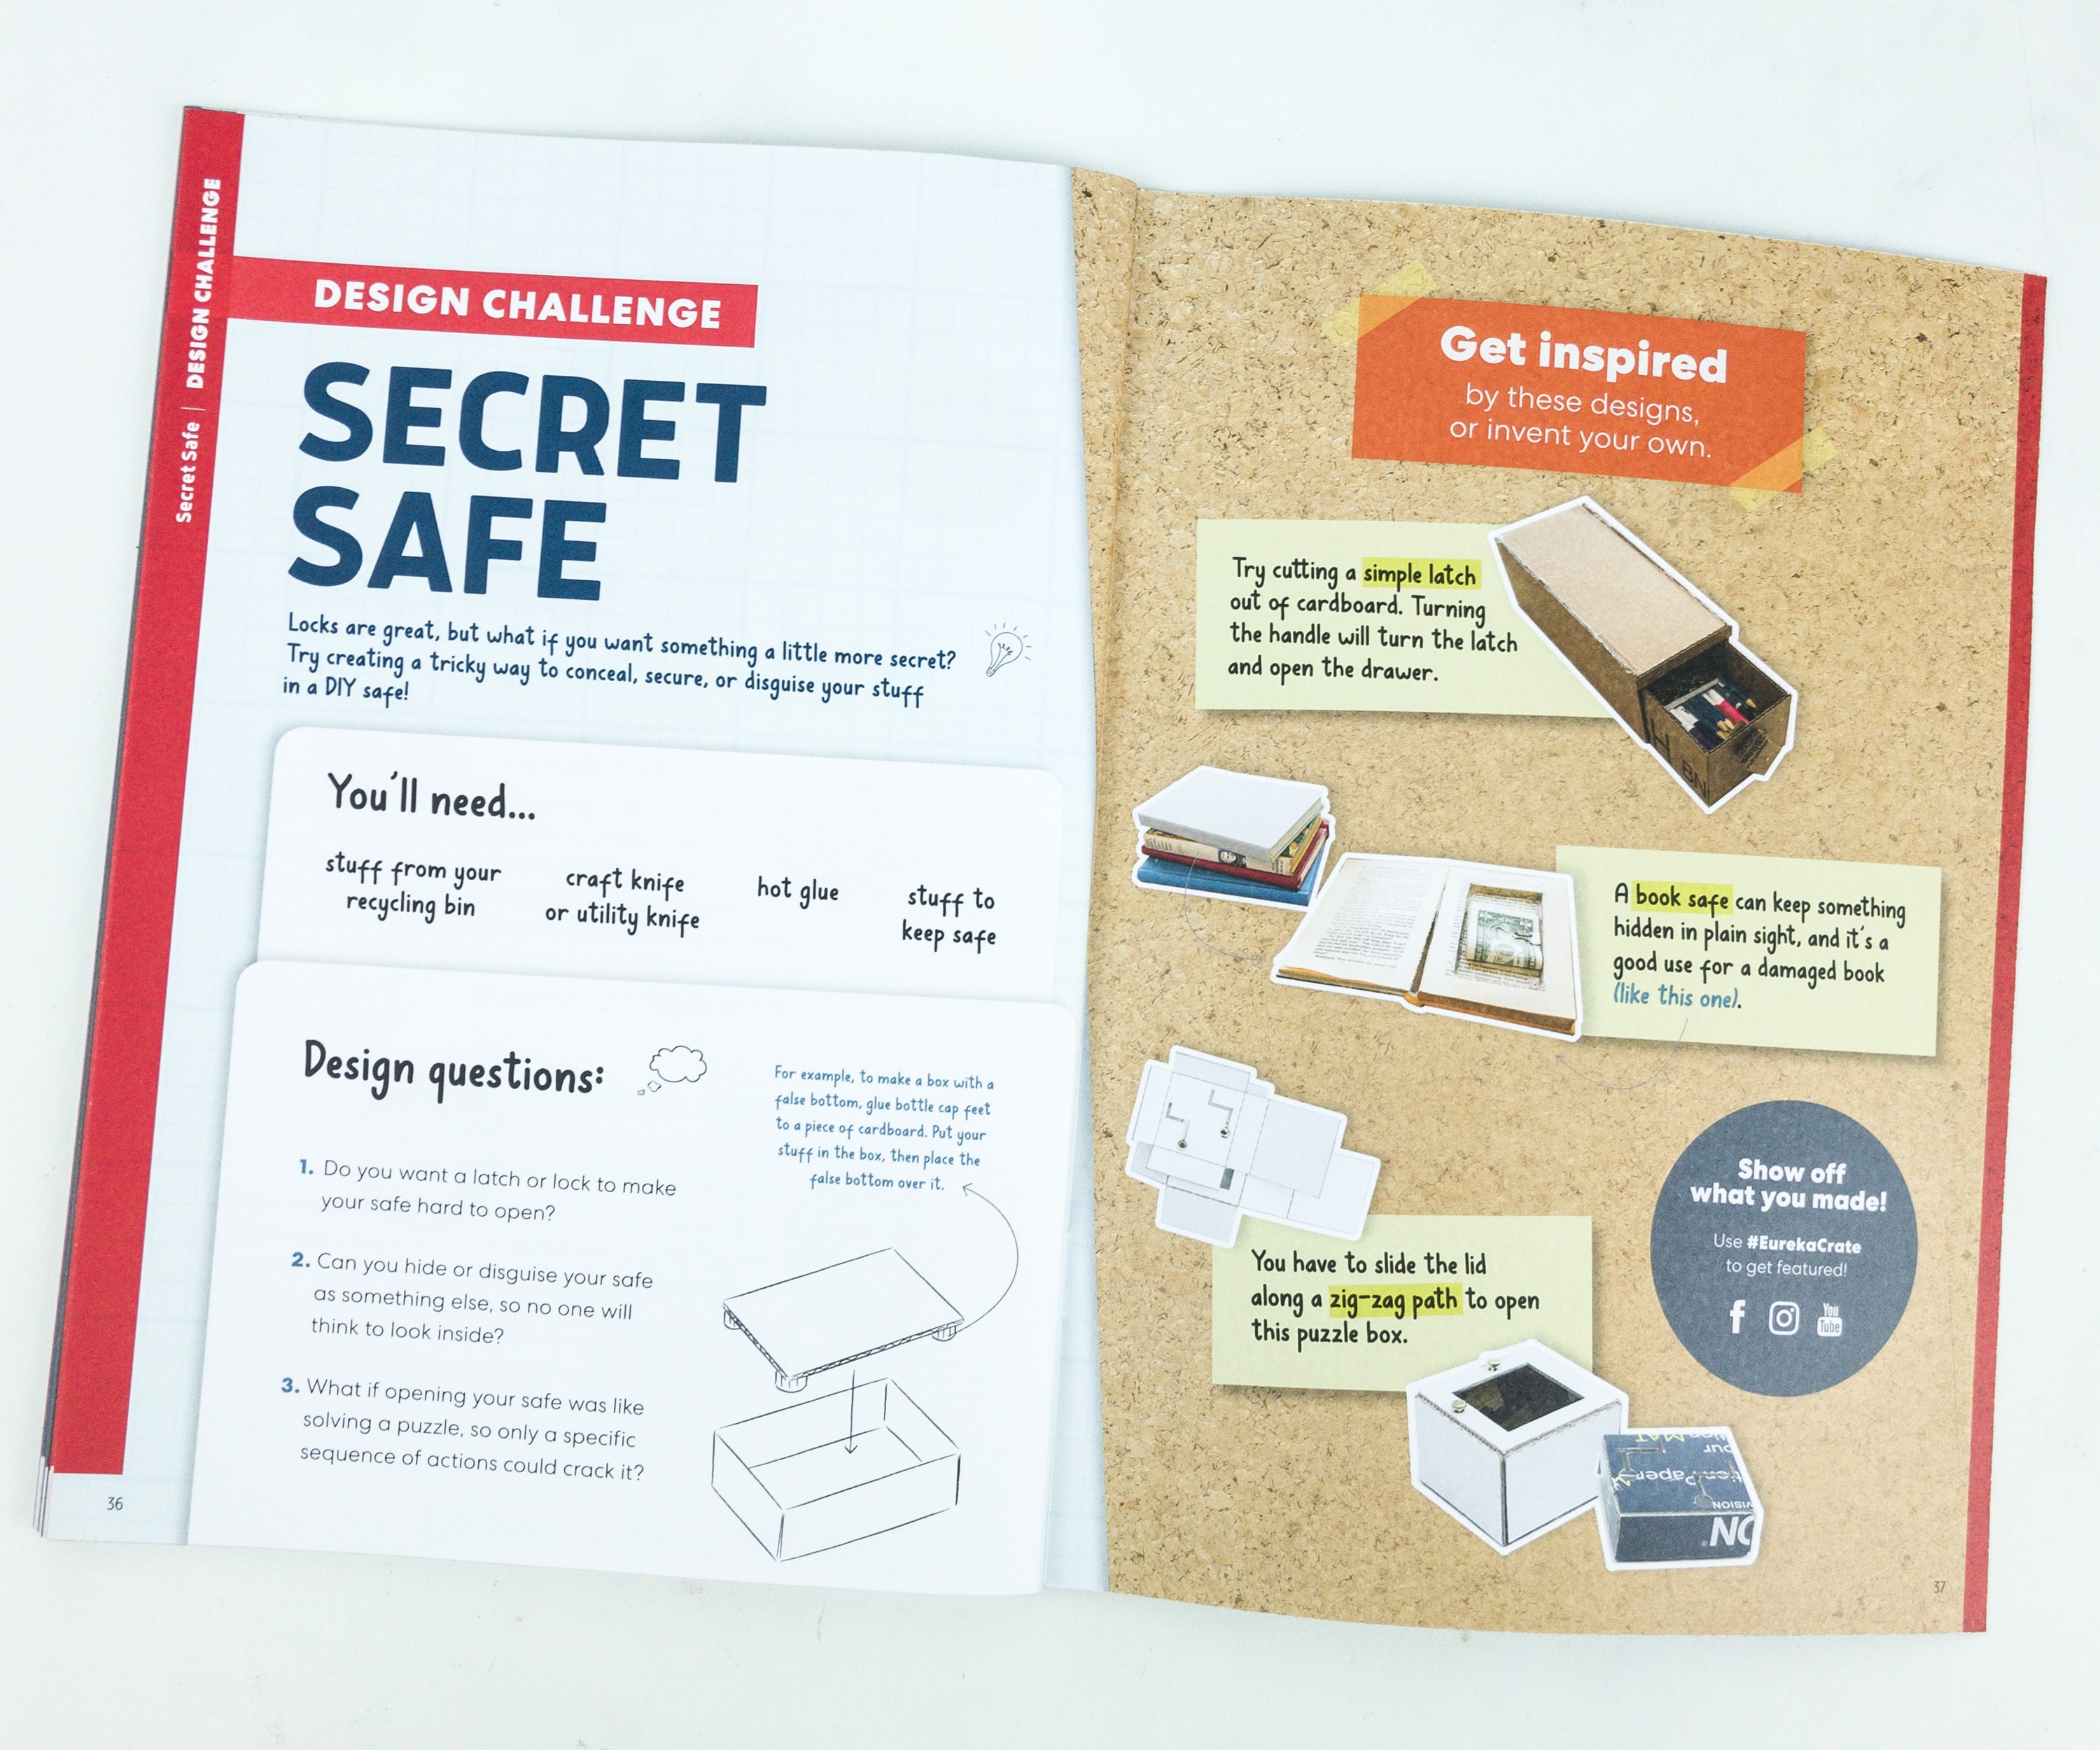
For the Design Challenge, they’re encouraging us to make our own DIY safe!
Our lock box is finished! It looks so awesome!
Our lock box has ample space inside. We can put toys, gadgets, and even accessories inside it!
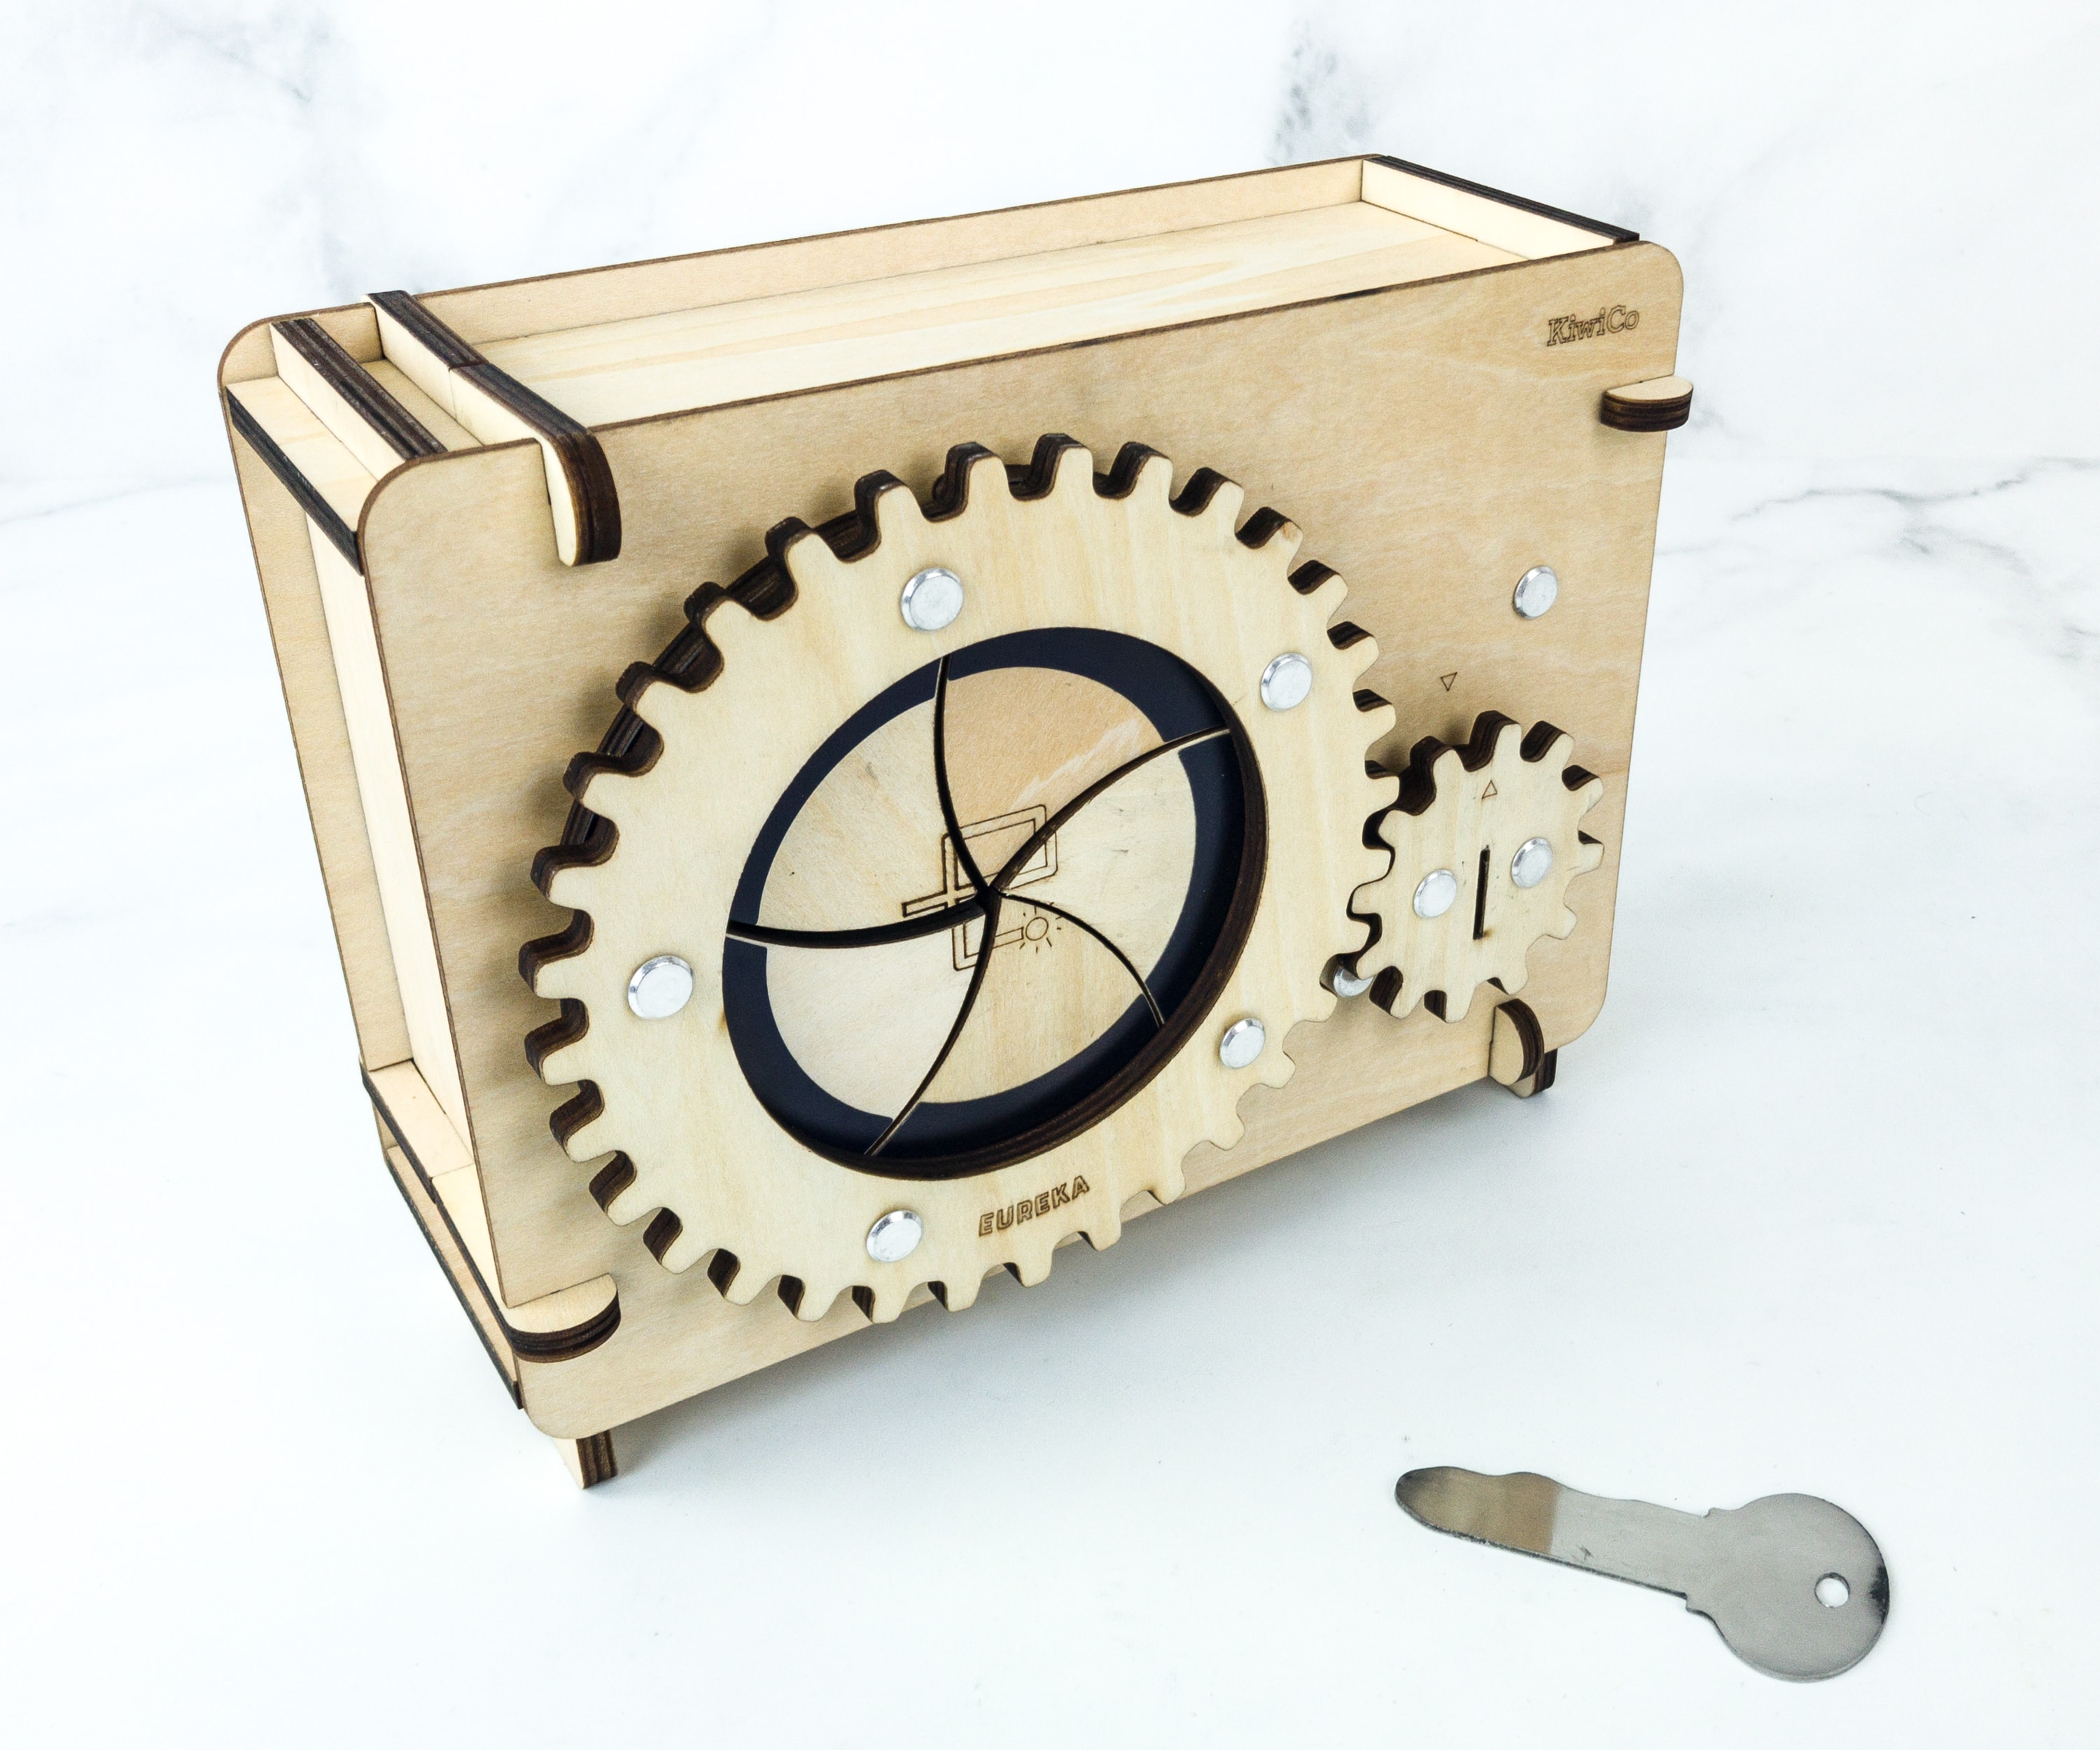
We suggest putting a keychain on your key to avoid the possibility of losing it.
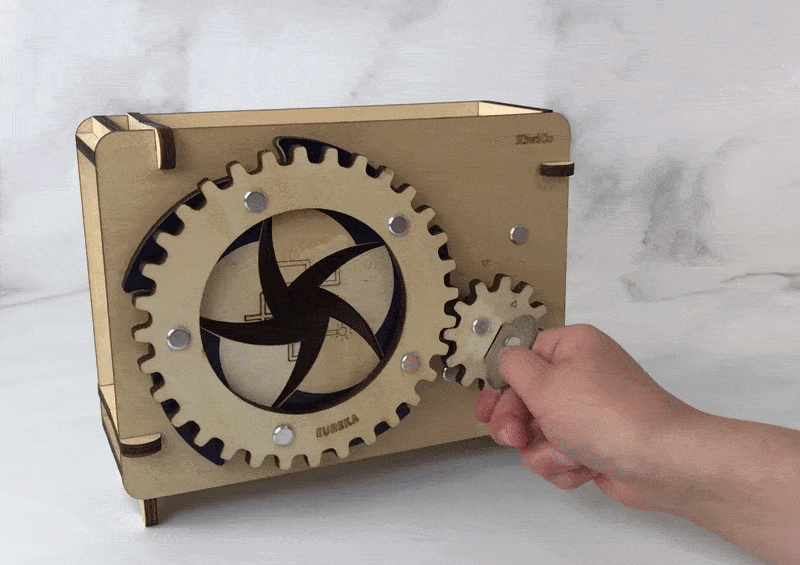
It works great!

Eureka Crate is really an amazing subscription! They always bring unique and complex projects that enhance one’s analyzing skills and creativity. For this month’s project, we’re able to make our own lock box which we can use to keep important items like gadgets and accessories. The kids want to put toys in it, and that’s great too! What’s great about this subscription is that they help us to engineer solutions that can be applied to real-world problems. My daughter, as usual, didn’t have a hard time putting everything together and only required a little help because the materials are already provided and the instructions are easy to follow too. It’s really a good subscription, and we highly recommend this box as it is fit for all ages!
What do you think of this month’s Eureka Crate?


Comments
I lost my instruction booklet for the mechanical lock bock. Can someone tell me where to find another copy. Been looking online
Everything about this crate was quality EXCEPT for the cheap plastic bolts and screws. The screws had shallow threads and leftover flashing on them. The bolts had an oversize rim at the threaded end and would not fit through the blue pieces. I had to file off the excess before my daughter could assemble the kit. ALL of the screws stripped out. I assumed this was my daughters fault and tried several myself. No, it was shallow threads and poor materials. I couldn’t get them to hold without stripping either. This was our first crate and NOT a good first impression. The poor hardware turned a really cool project into a frustrating experience. I will be ordering some aluminum binding bolts and screws to fix the problem.
Hi,
I just received this kit today for a “Christmas subscription” kick off. If the screws etc are an issue, what size did you purchase to resolve the issue? Thank you