
MEL Physics is a monthly subscription from MEL Science that sends Physics-related experiments for kids ages 9-14. You can subscribe to the box for $34.90 each month. Each monthly kit contains 2-3 science experiments with enough materials to try it twice, plus step-by-step instructions. All the experiments are designed for home use.
DEAL: Save 25% on your first month! Just use this link and coupon code HELLO25
DEAL: Get your first box FREE! Just pay $5 shipping! No promo coupon code needed – use this link to grab the deal! (USA only) Deal ends 12/2. Second month charge occurs 12/17.
This is a review of the MEL Physics – Reflections box.
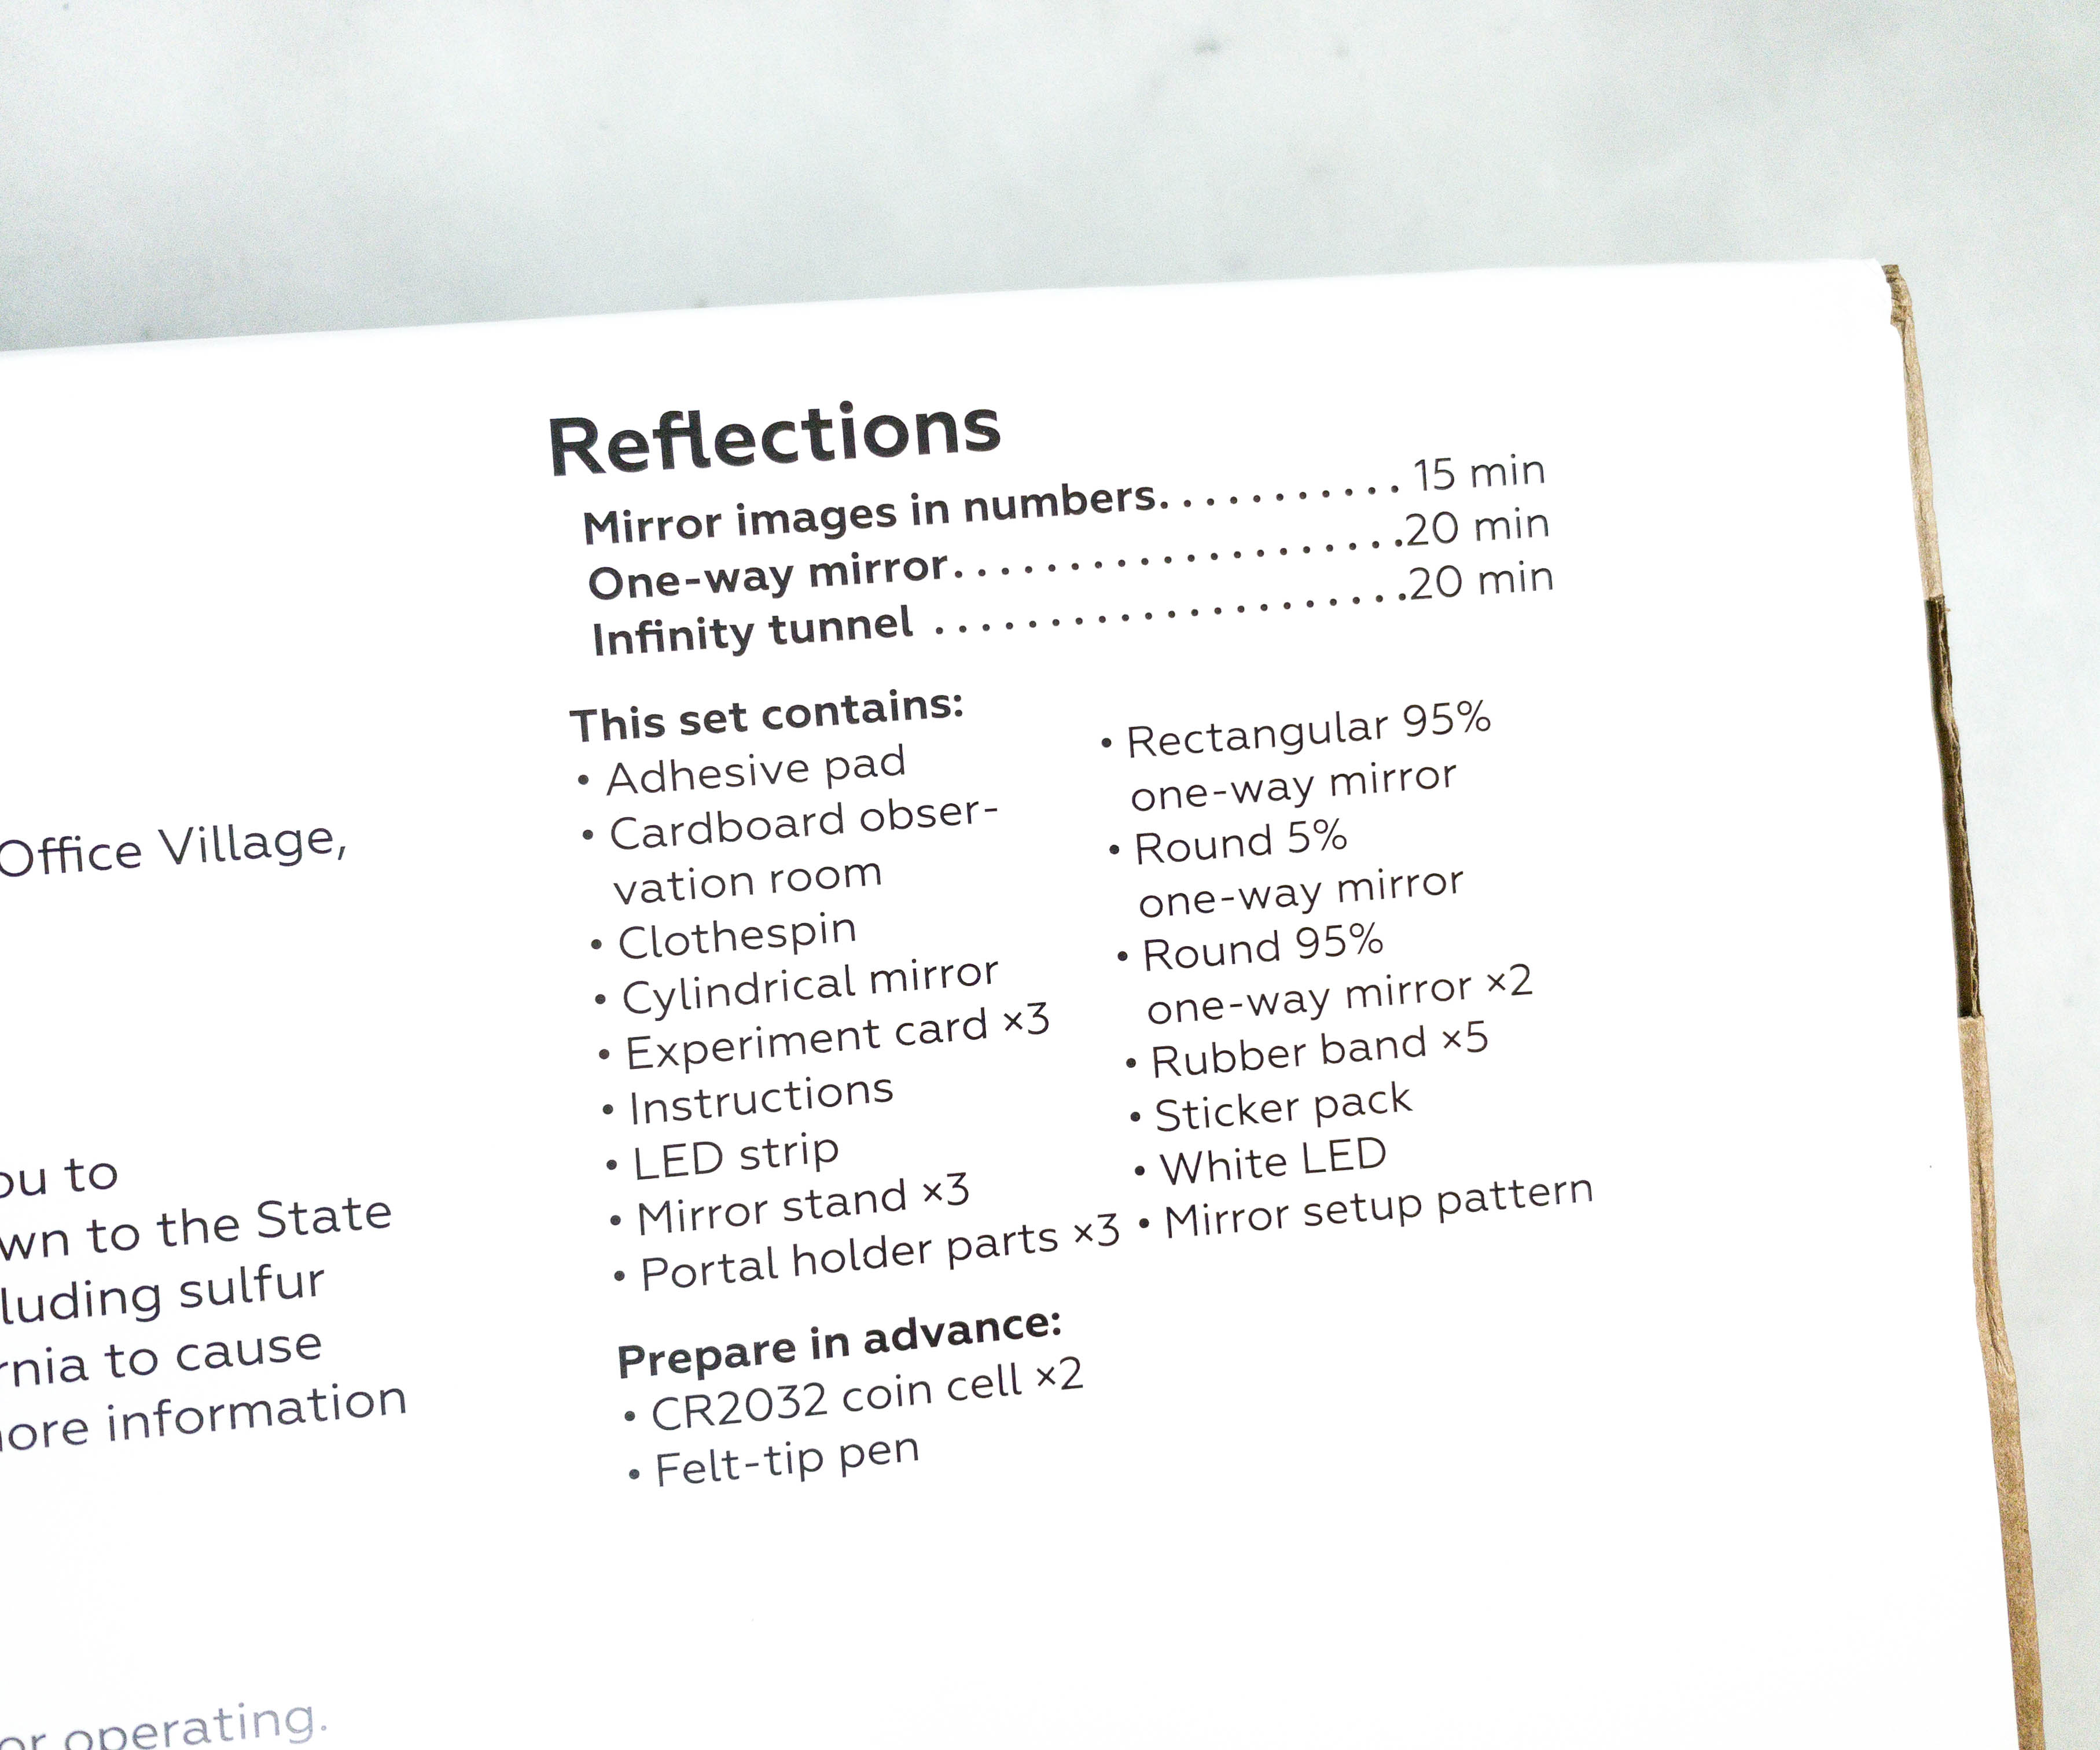
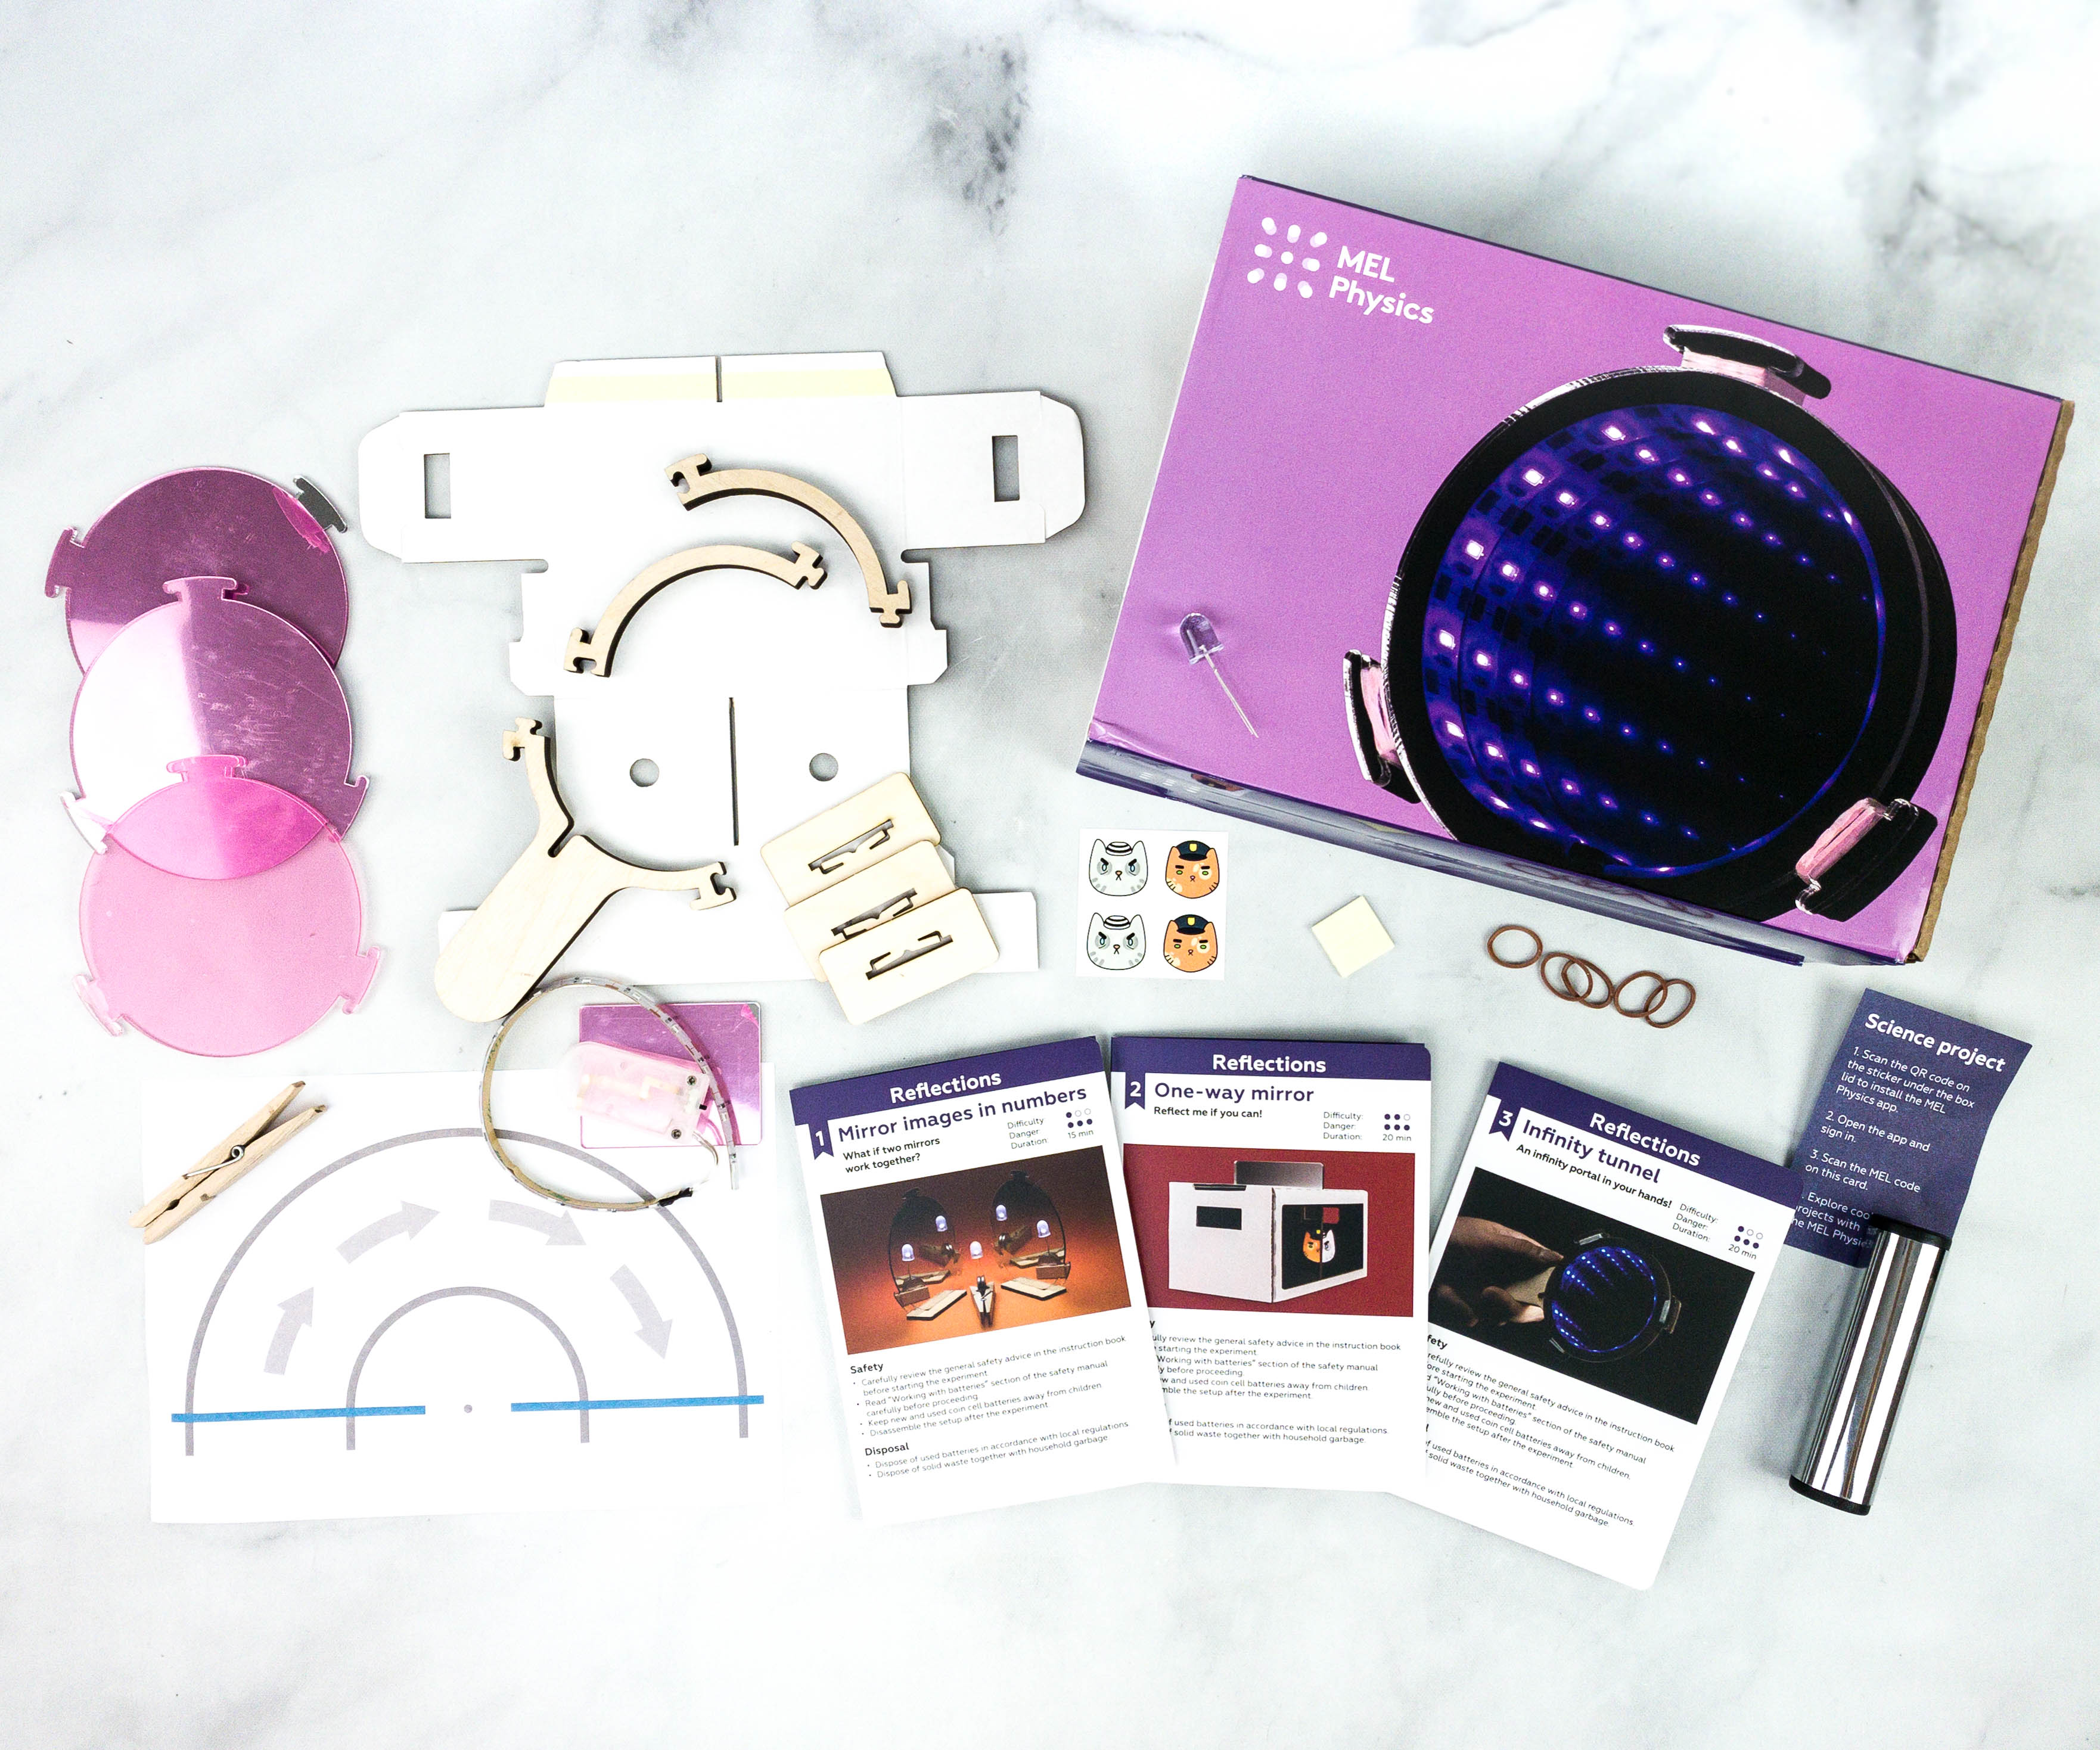
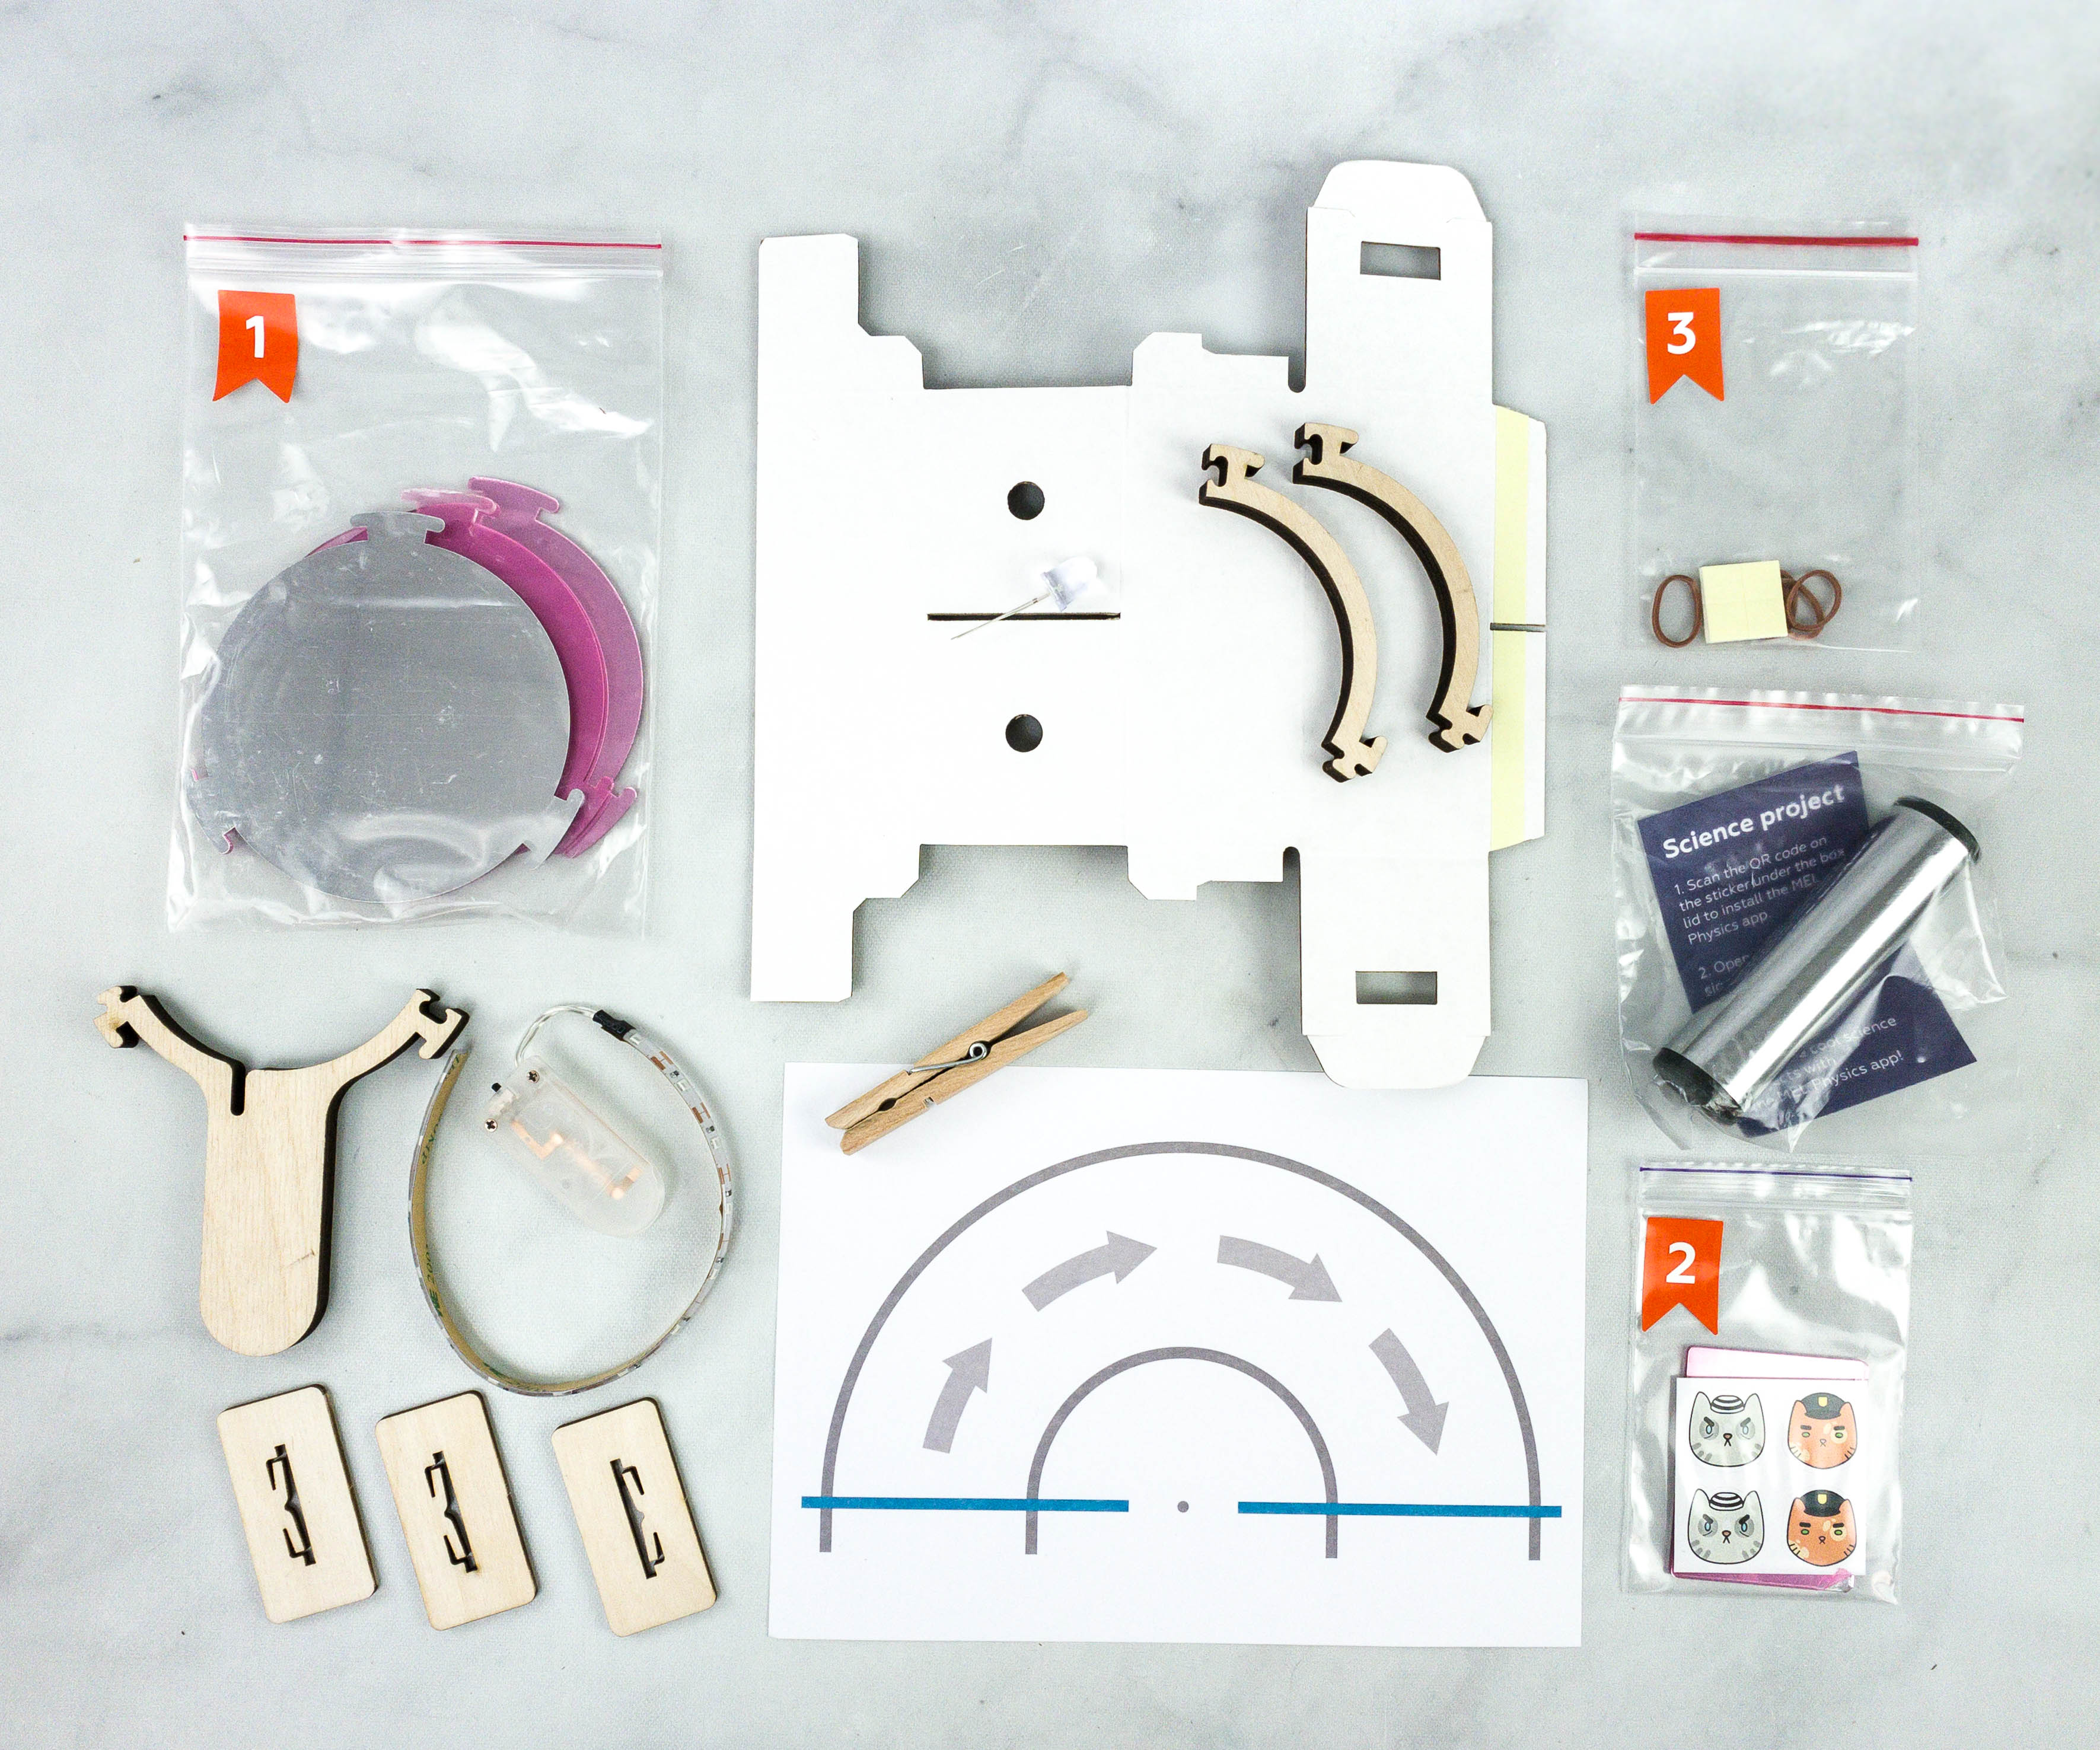
Featured on this portion are the three activities we need to complete and a list of the materials included plus what we need to prepare in advance.
We’re so excited to finally open this box!
Featured on the box’s flap is a QR code for easy download of the MEL Science app.

The materials are arranged and packed per activity.
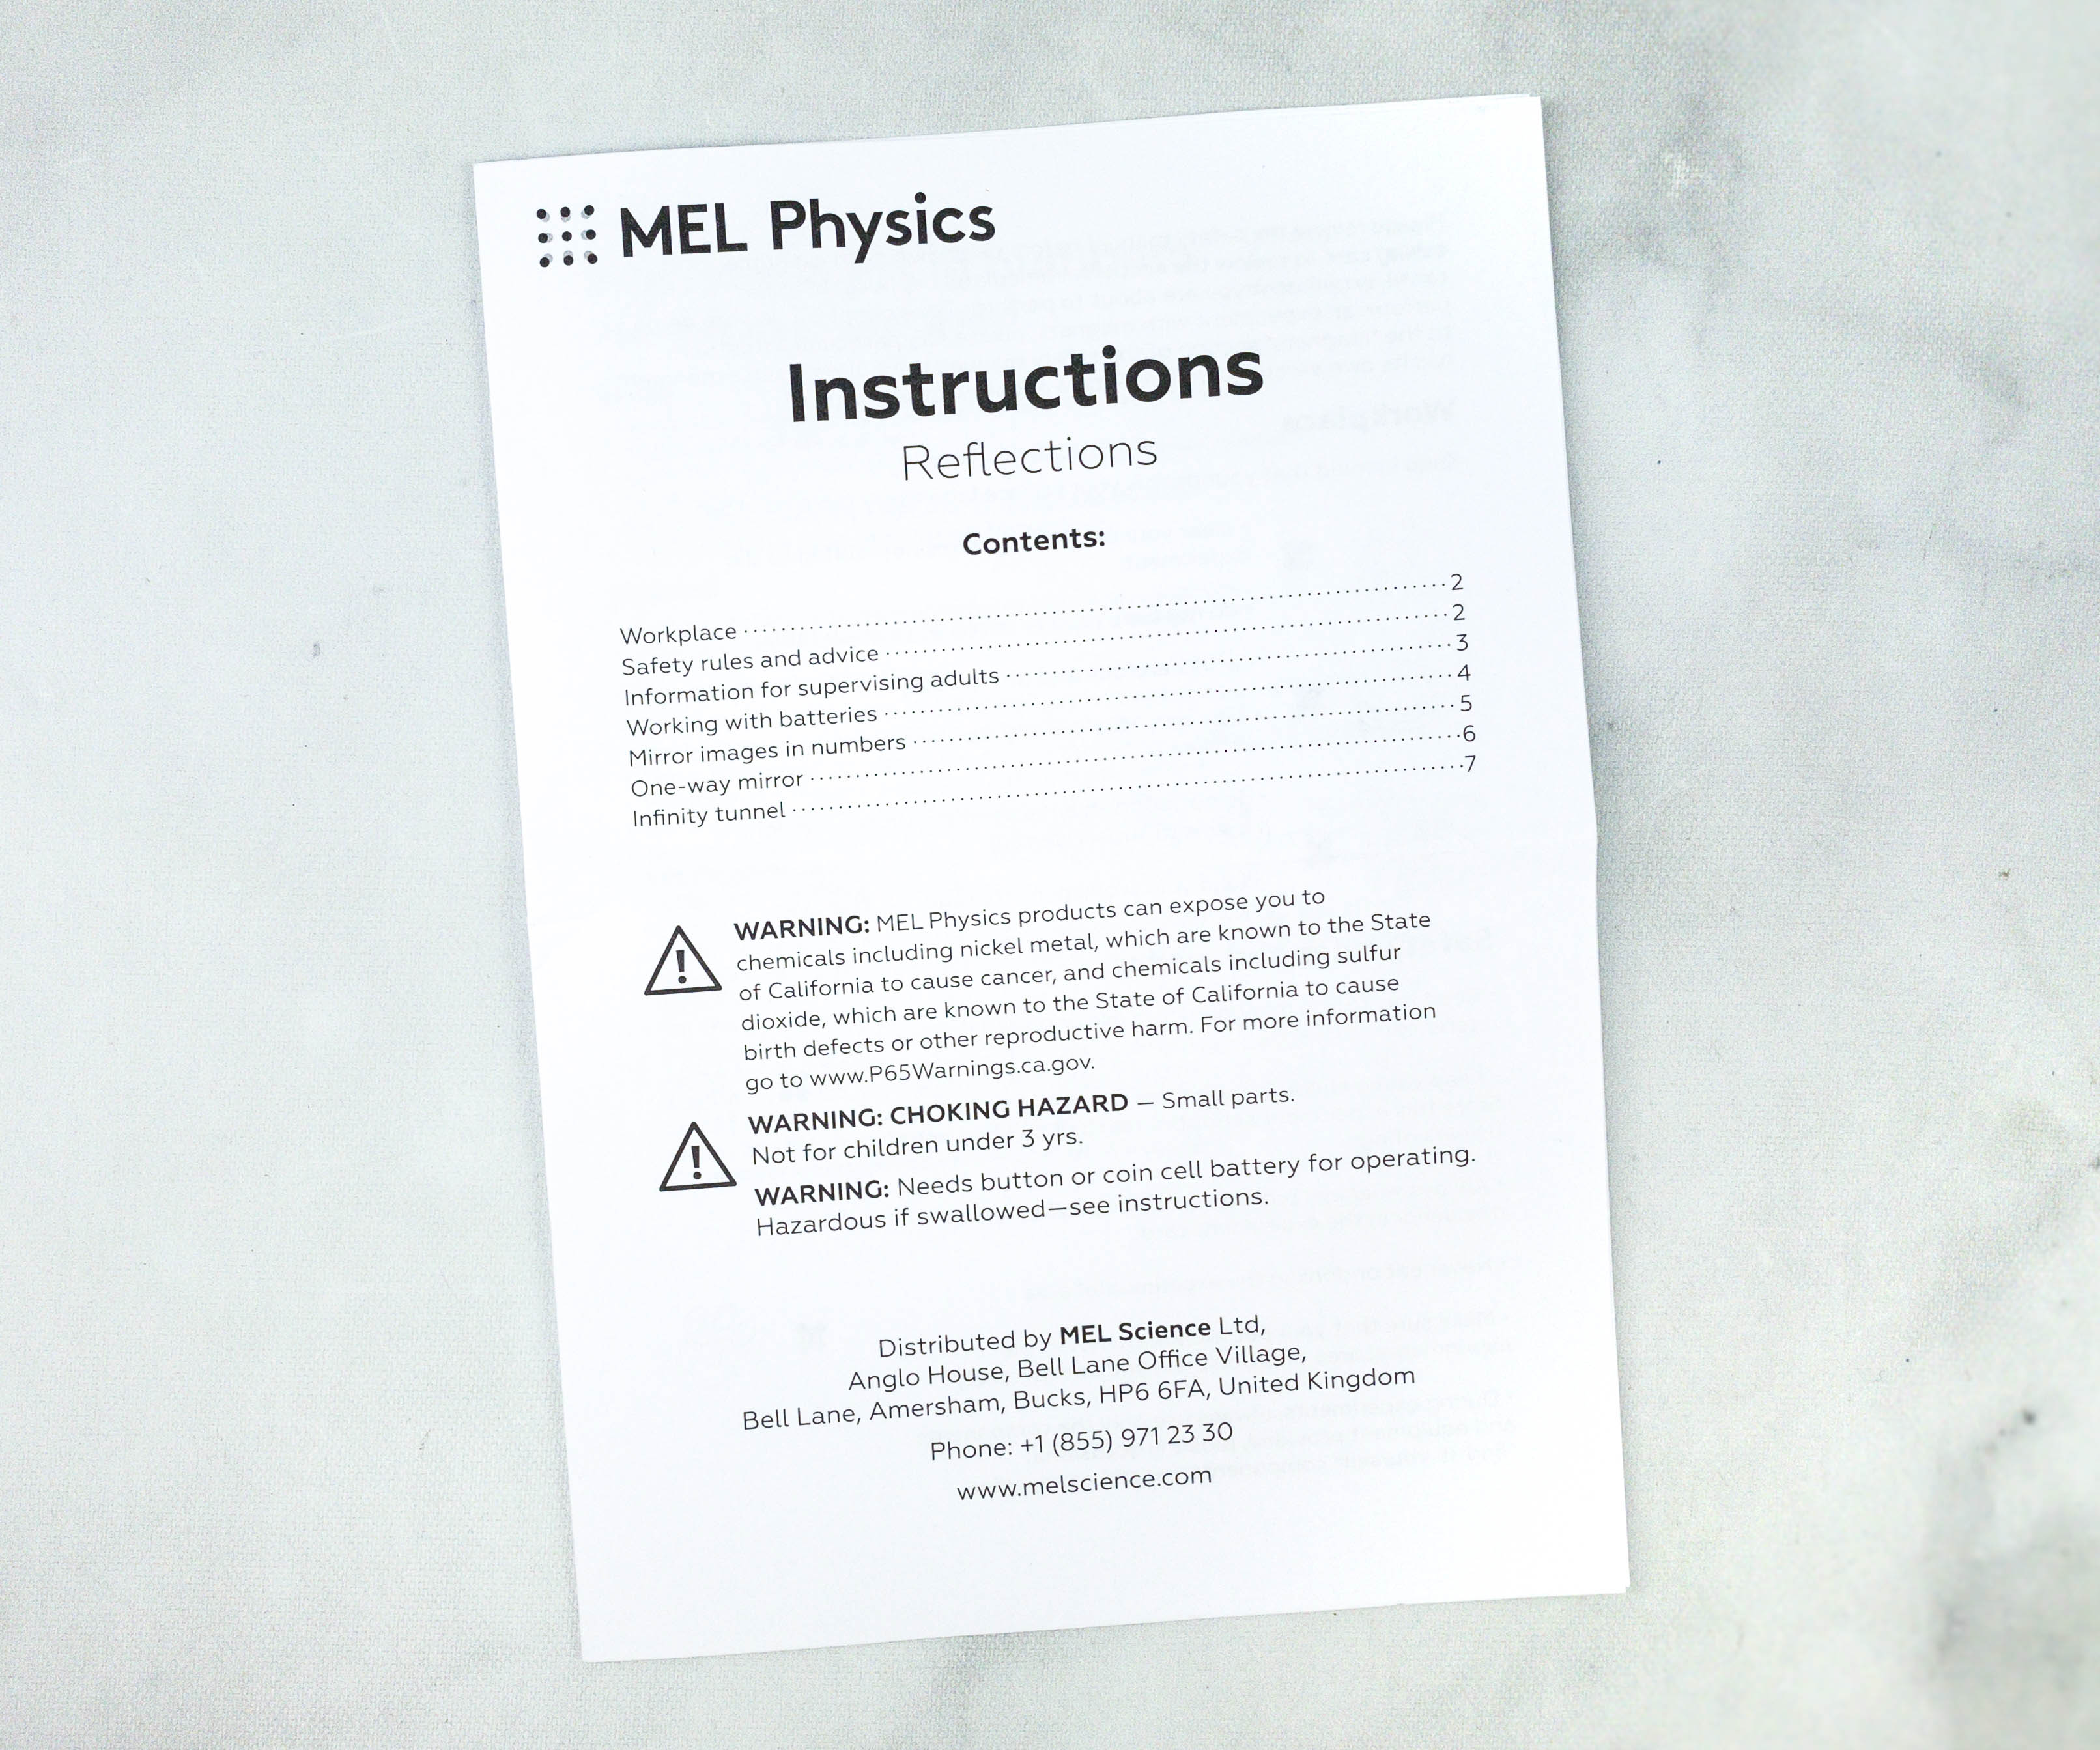
This month’s box comes with an information sheet.
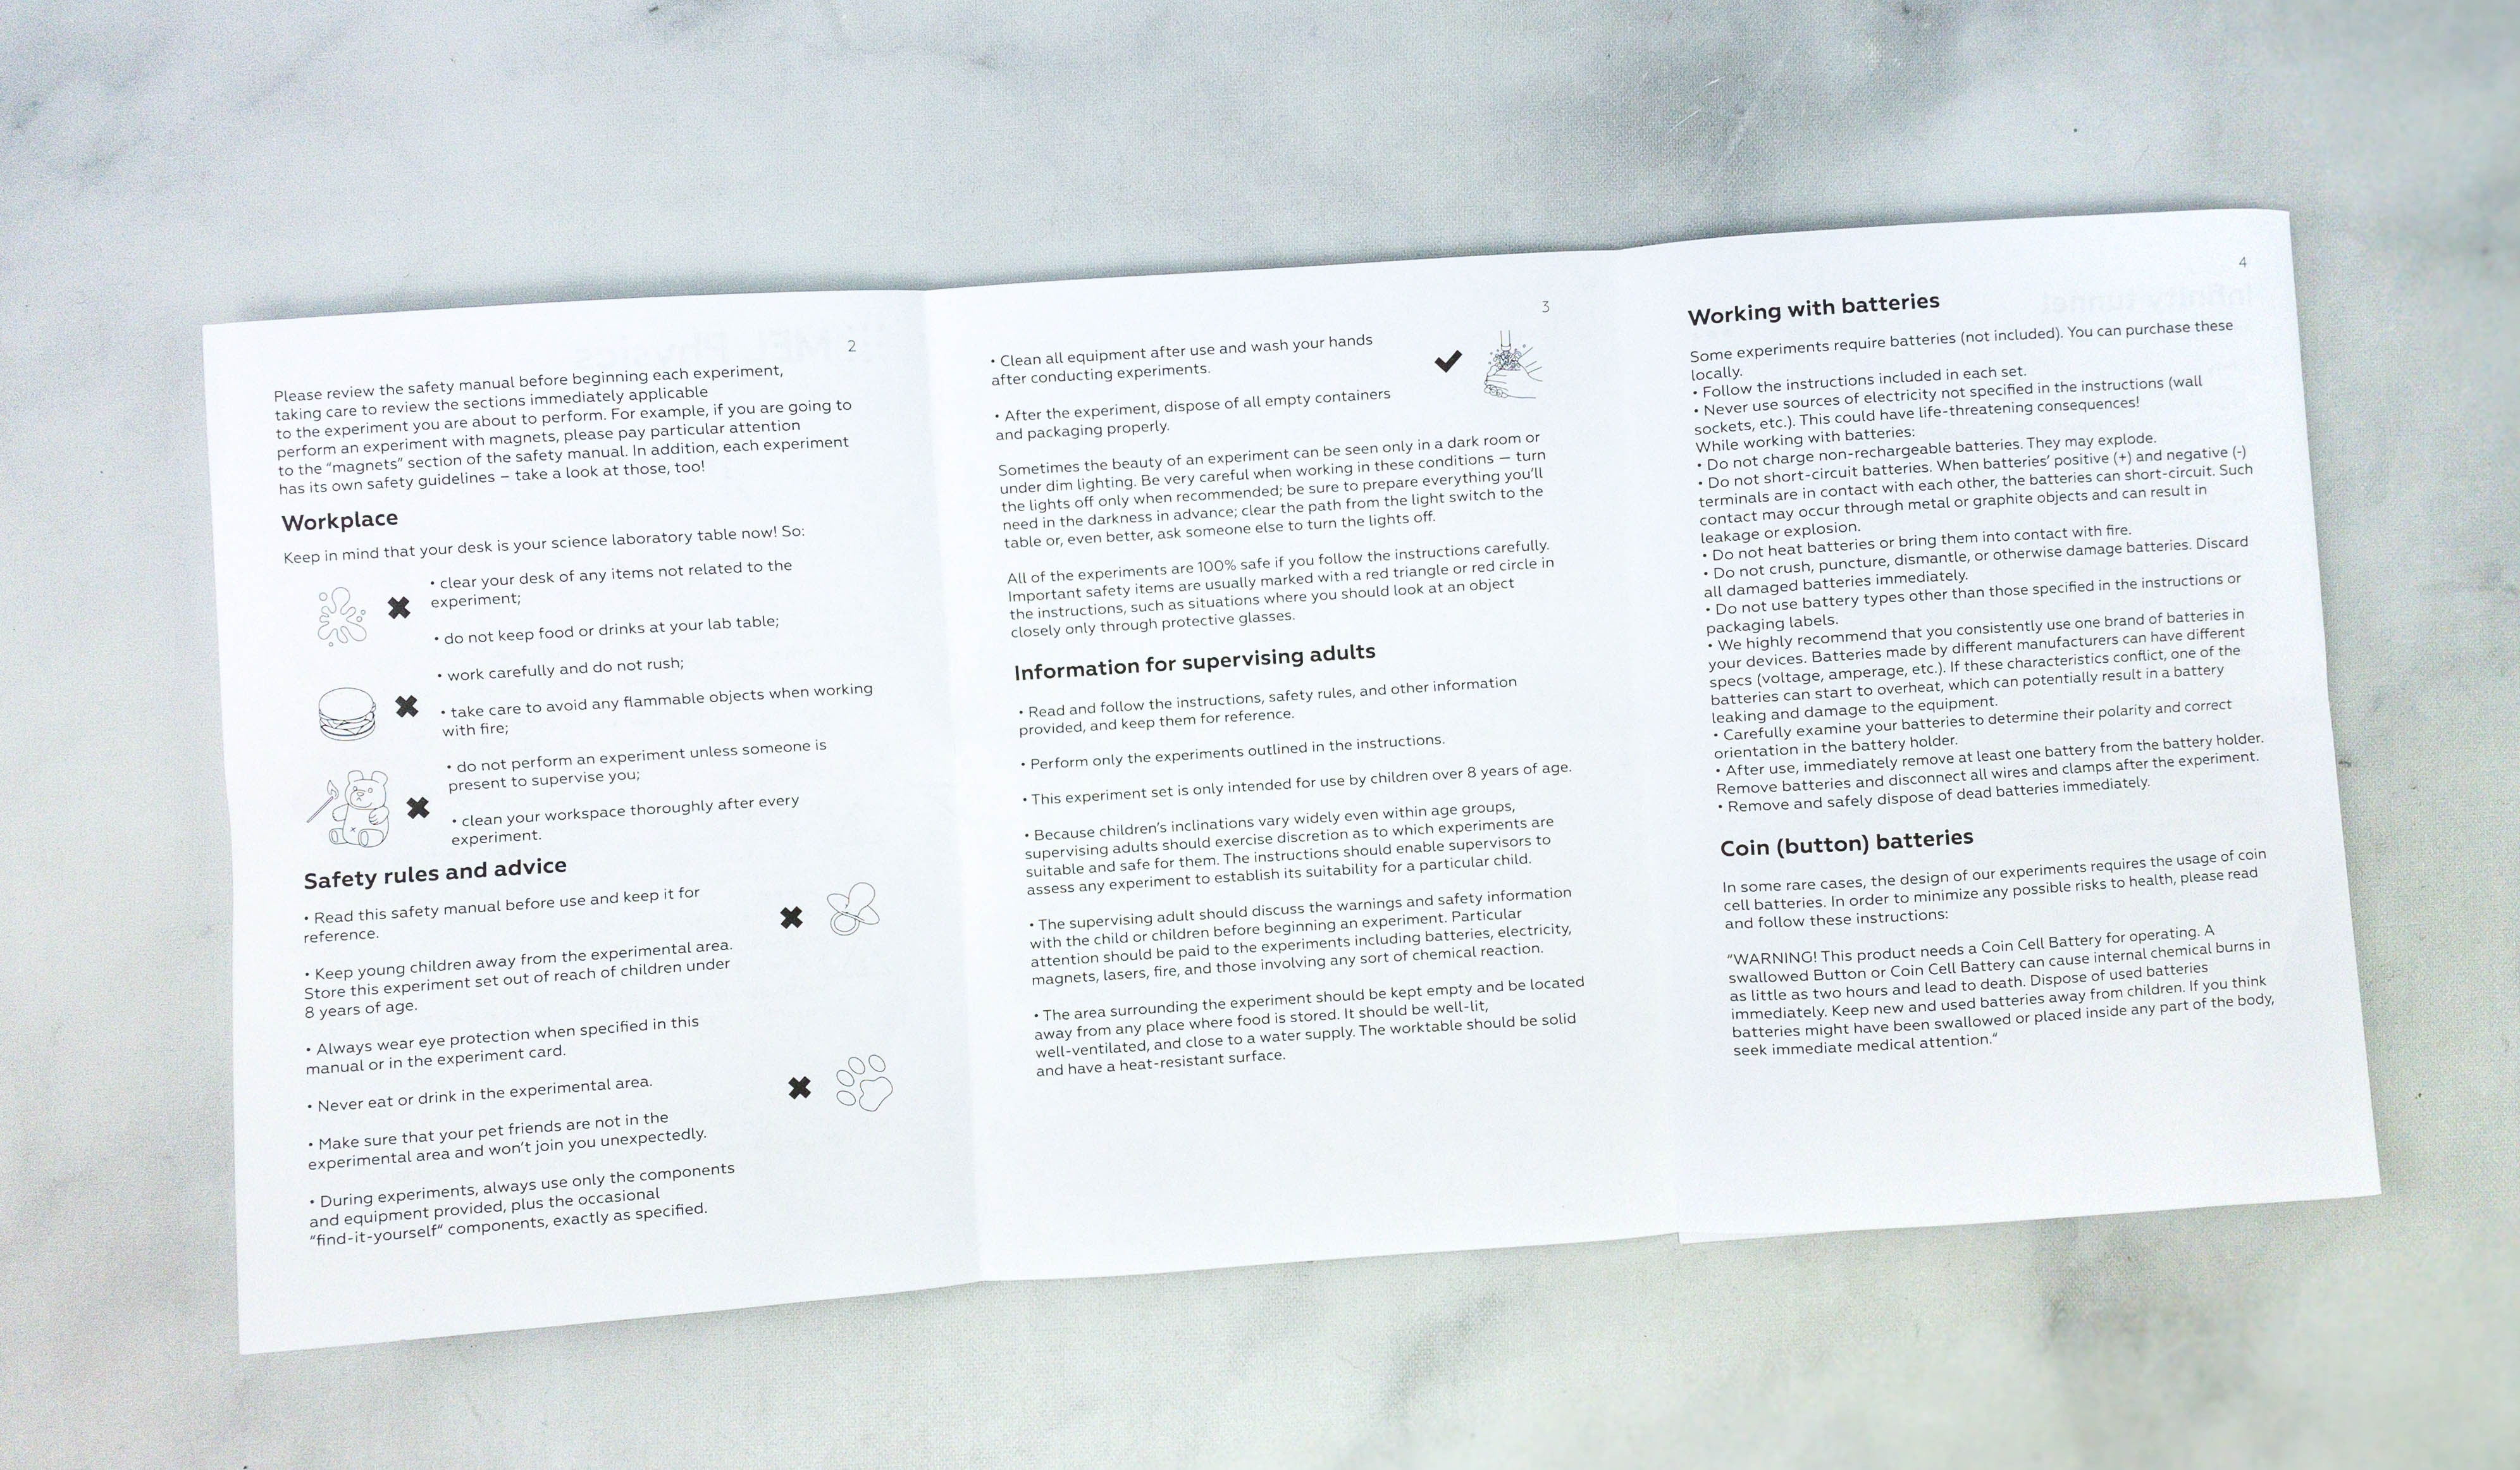
The sheet provided us with a few reminders regarding our workplace, safety rules and advice, and instruction for the supervising adults.
It has a list of detailed instructions for each activity. There are also reminders on how to properly dispose the waste after every experiment!
We have the instructions and reminders for the other activities as well.
Everything in my box!
Some of the materials were packed in ziplock bags, and they are also properly labeled!
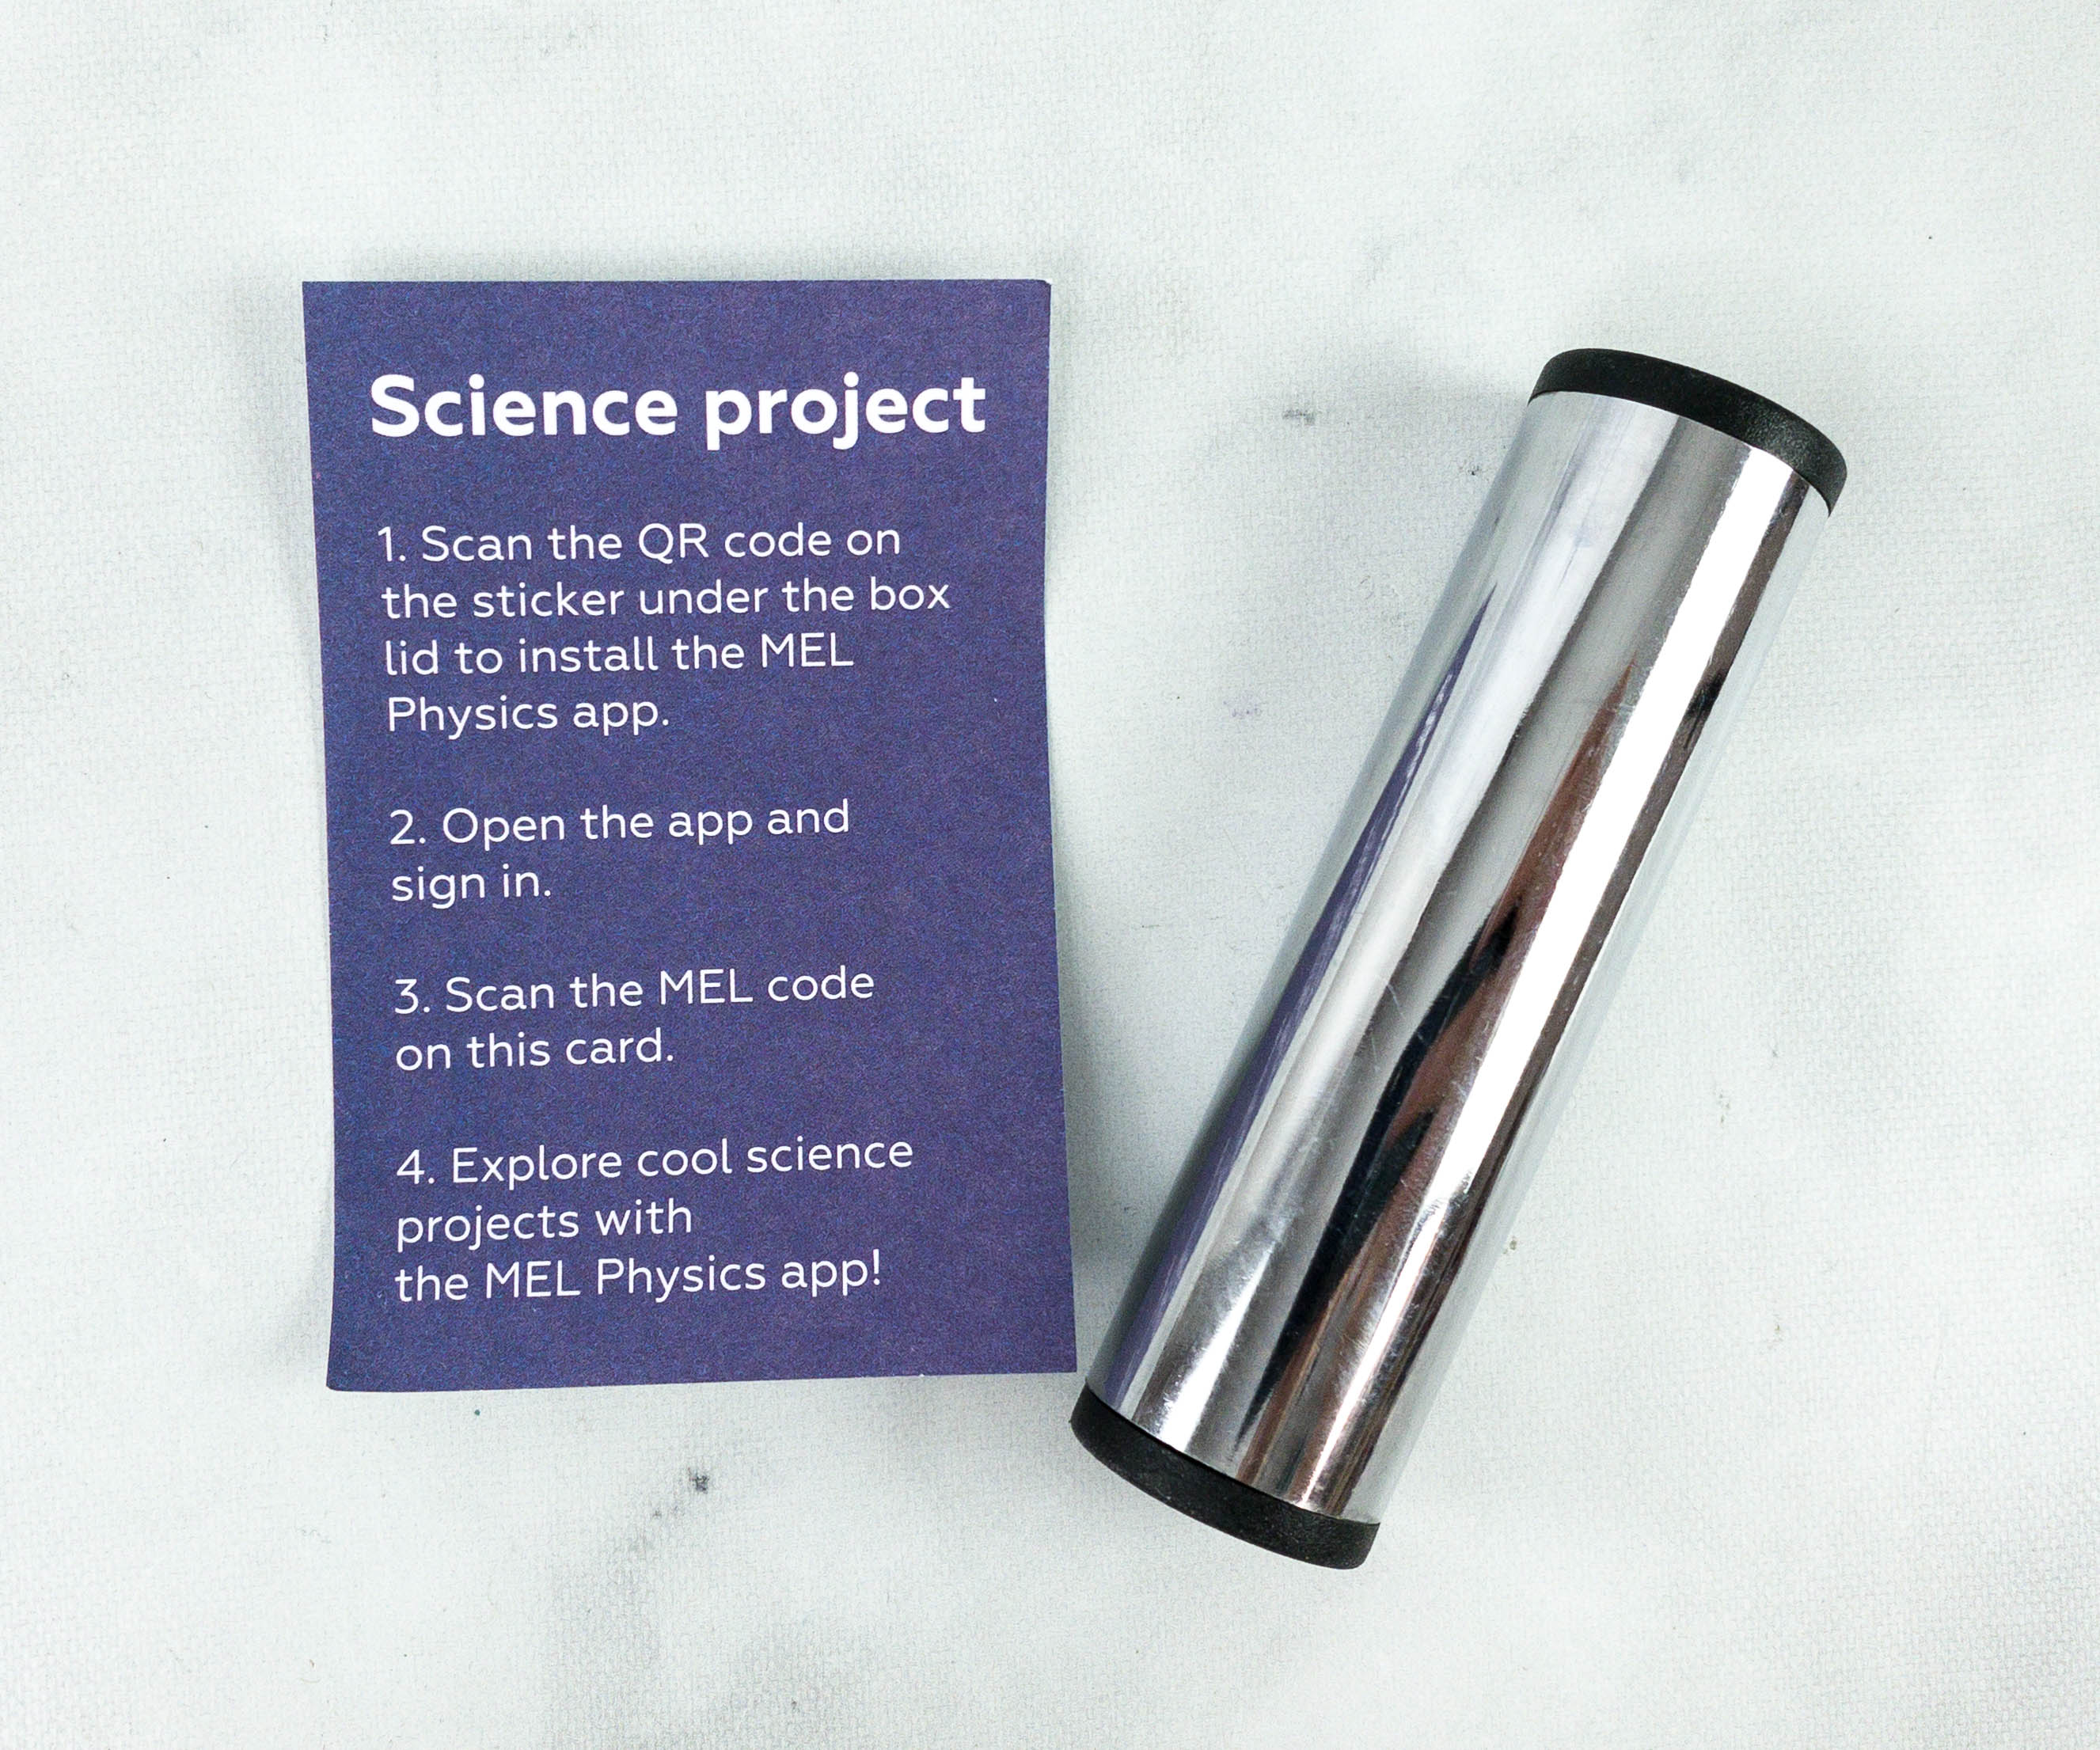
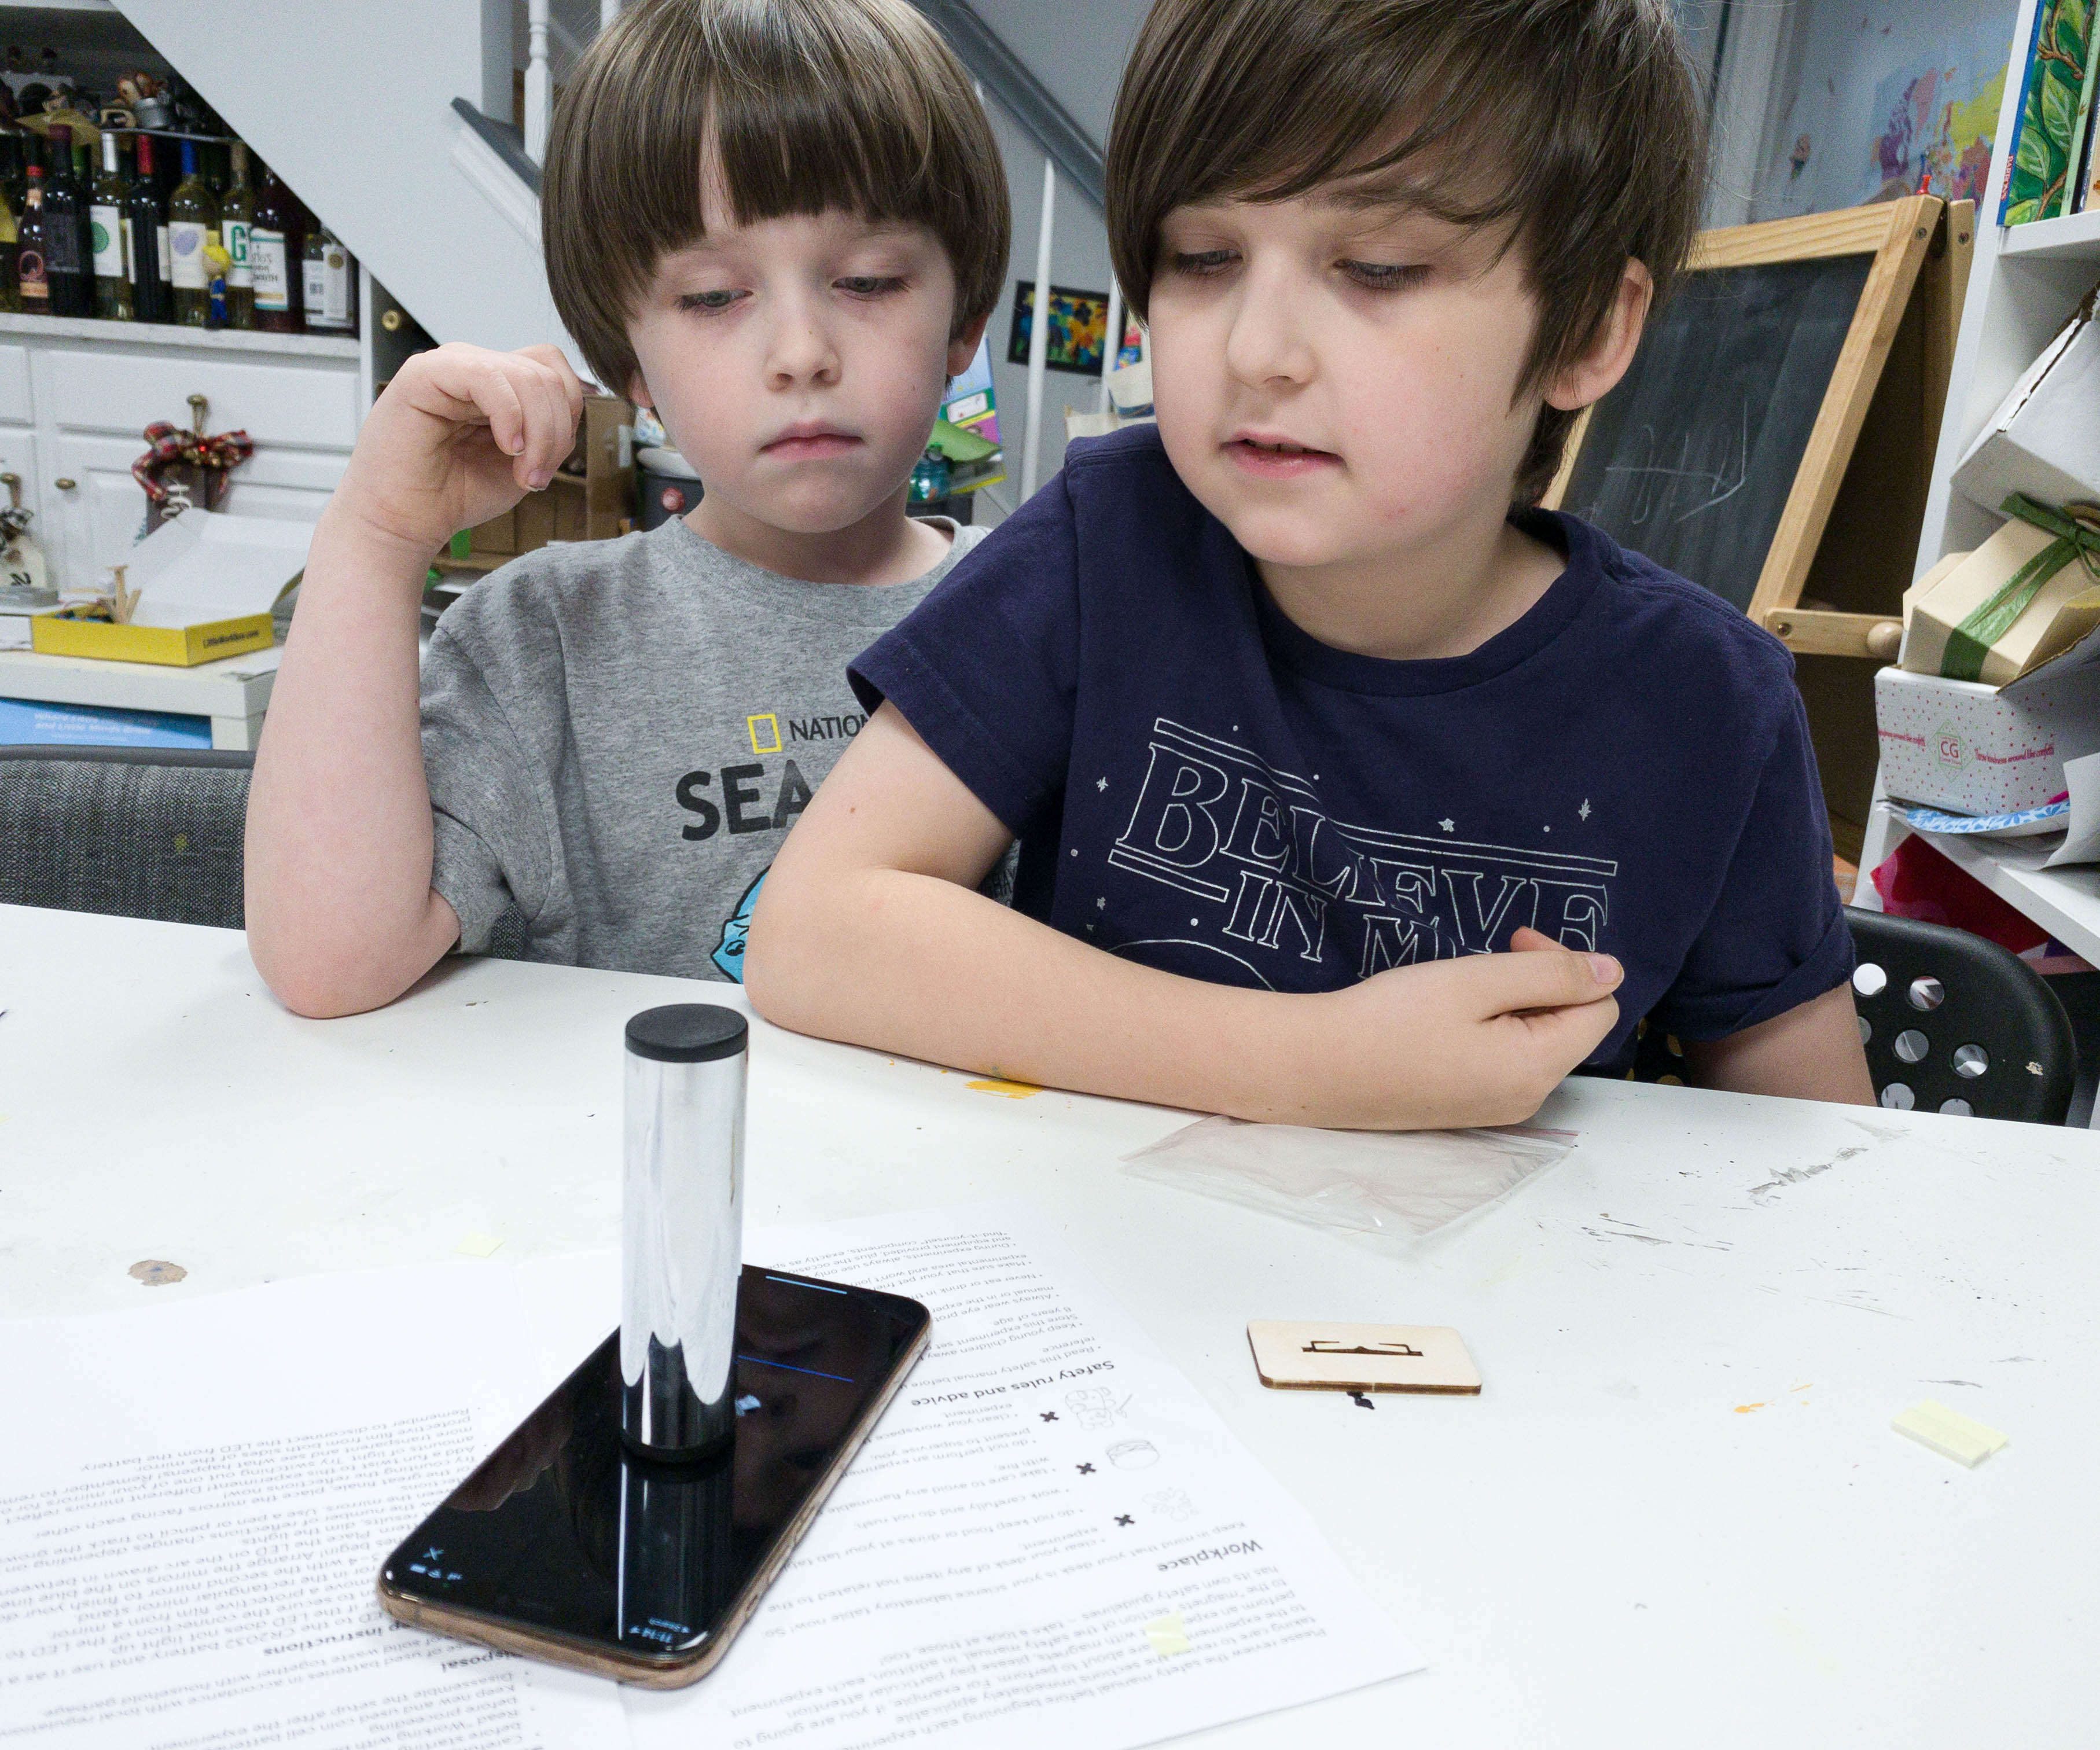
They included a warm-up activity for the kids using the cylindrical mirror. There’s also a card that lists instructions on how to access the app.
Here’s the MEL QR code at the back of the card.
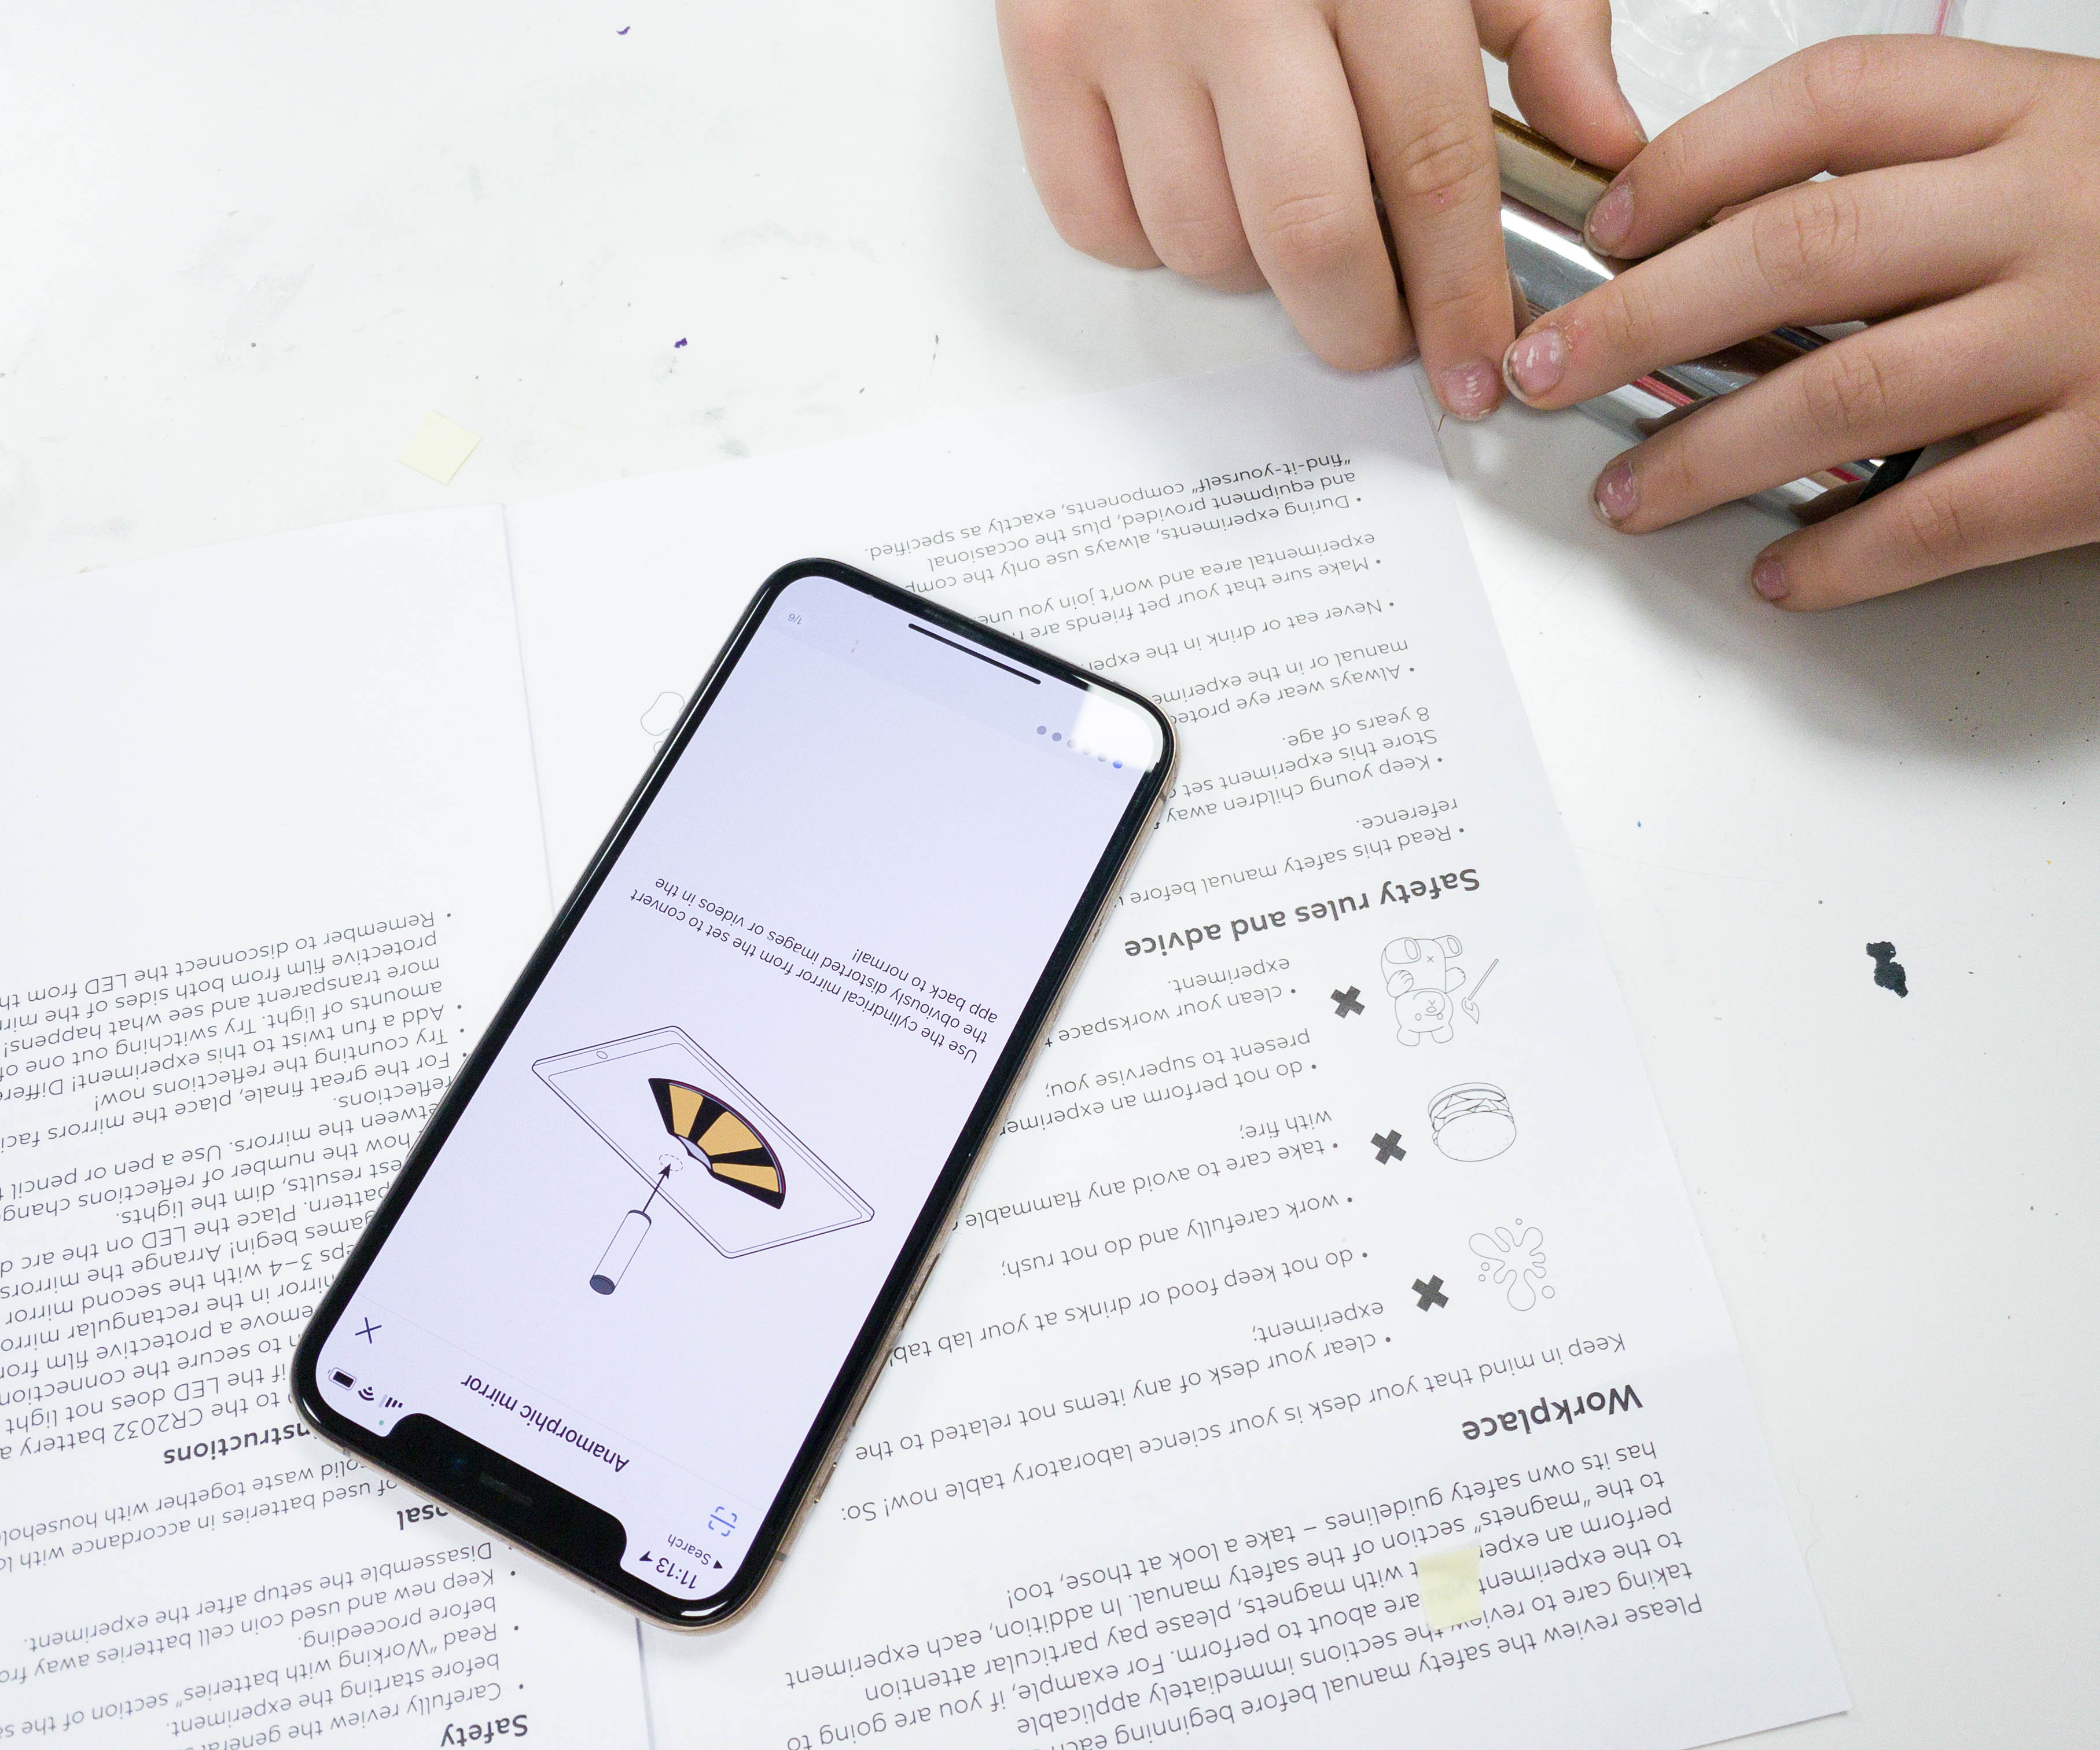
The instructions are clear and the app provided illustration on how to do it properly.
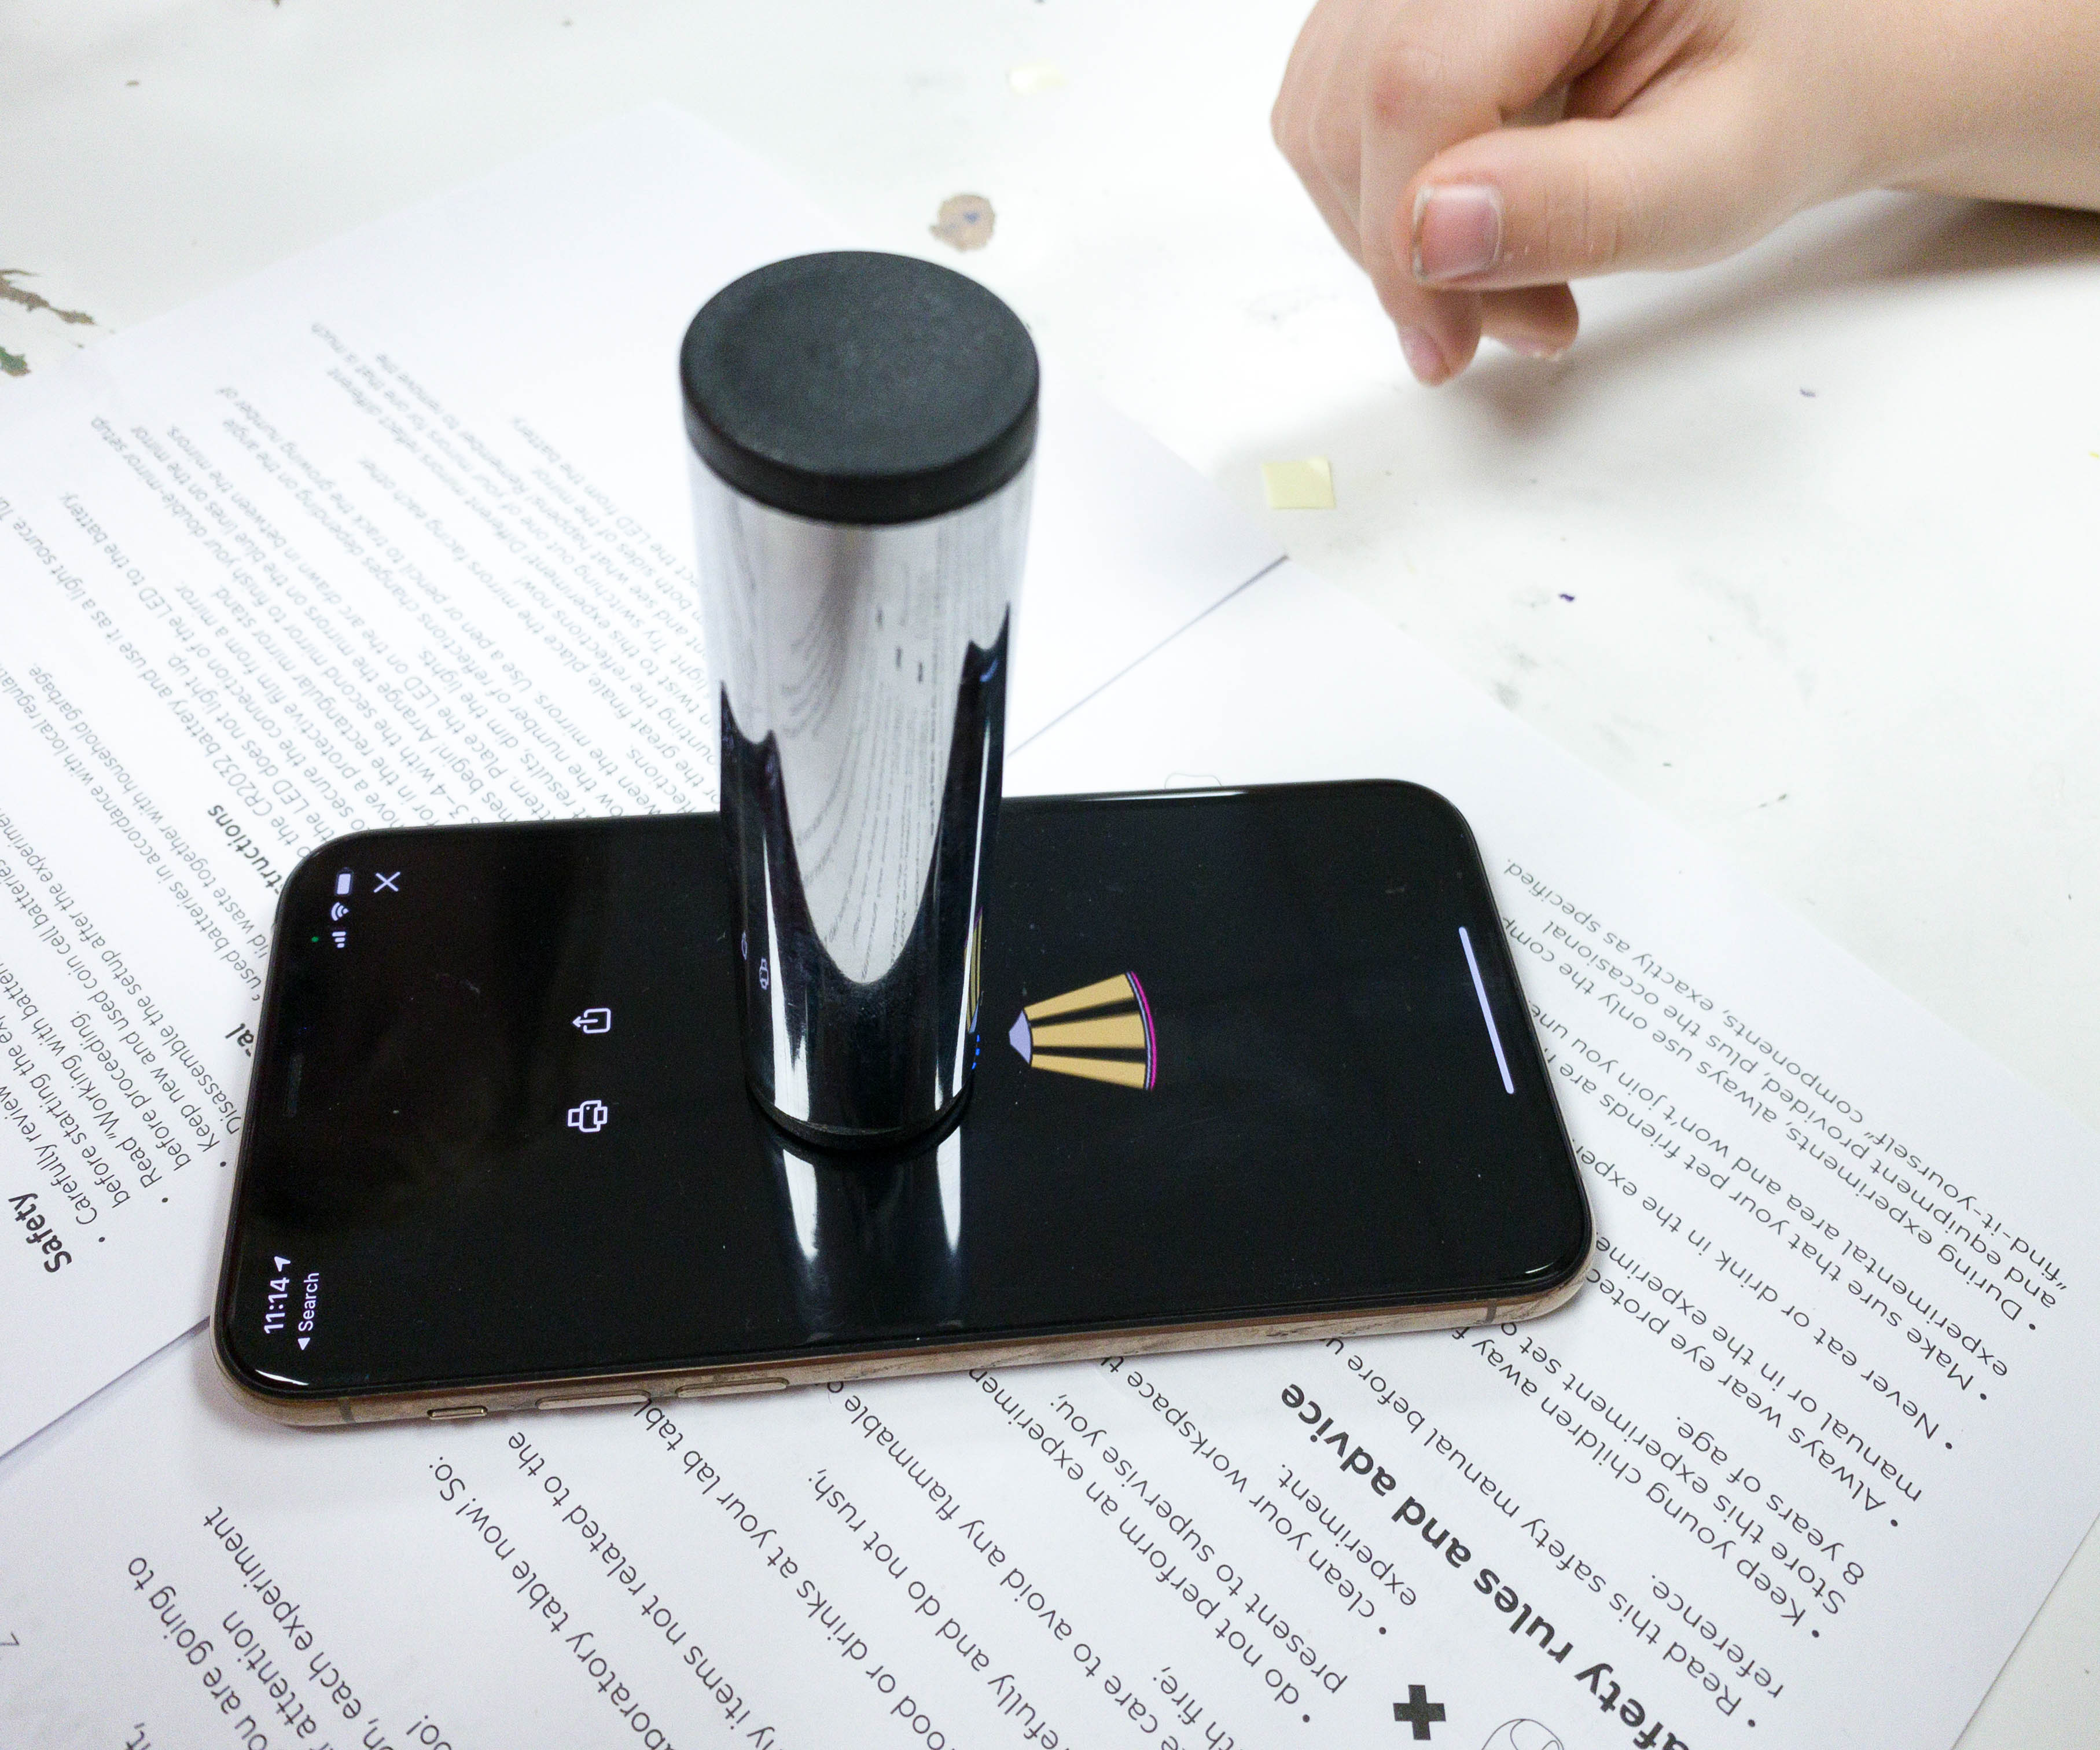
The kids started by placing the cylindrical mirror on top of the gadget.
By carefully aligning it to the pattern in the app, they observed how the distorted image looks like in the mirror.
My kids were amazed by how the images appeared. It also changed on different angles!

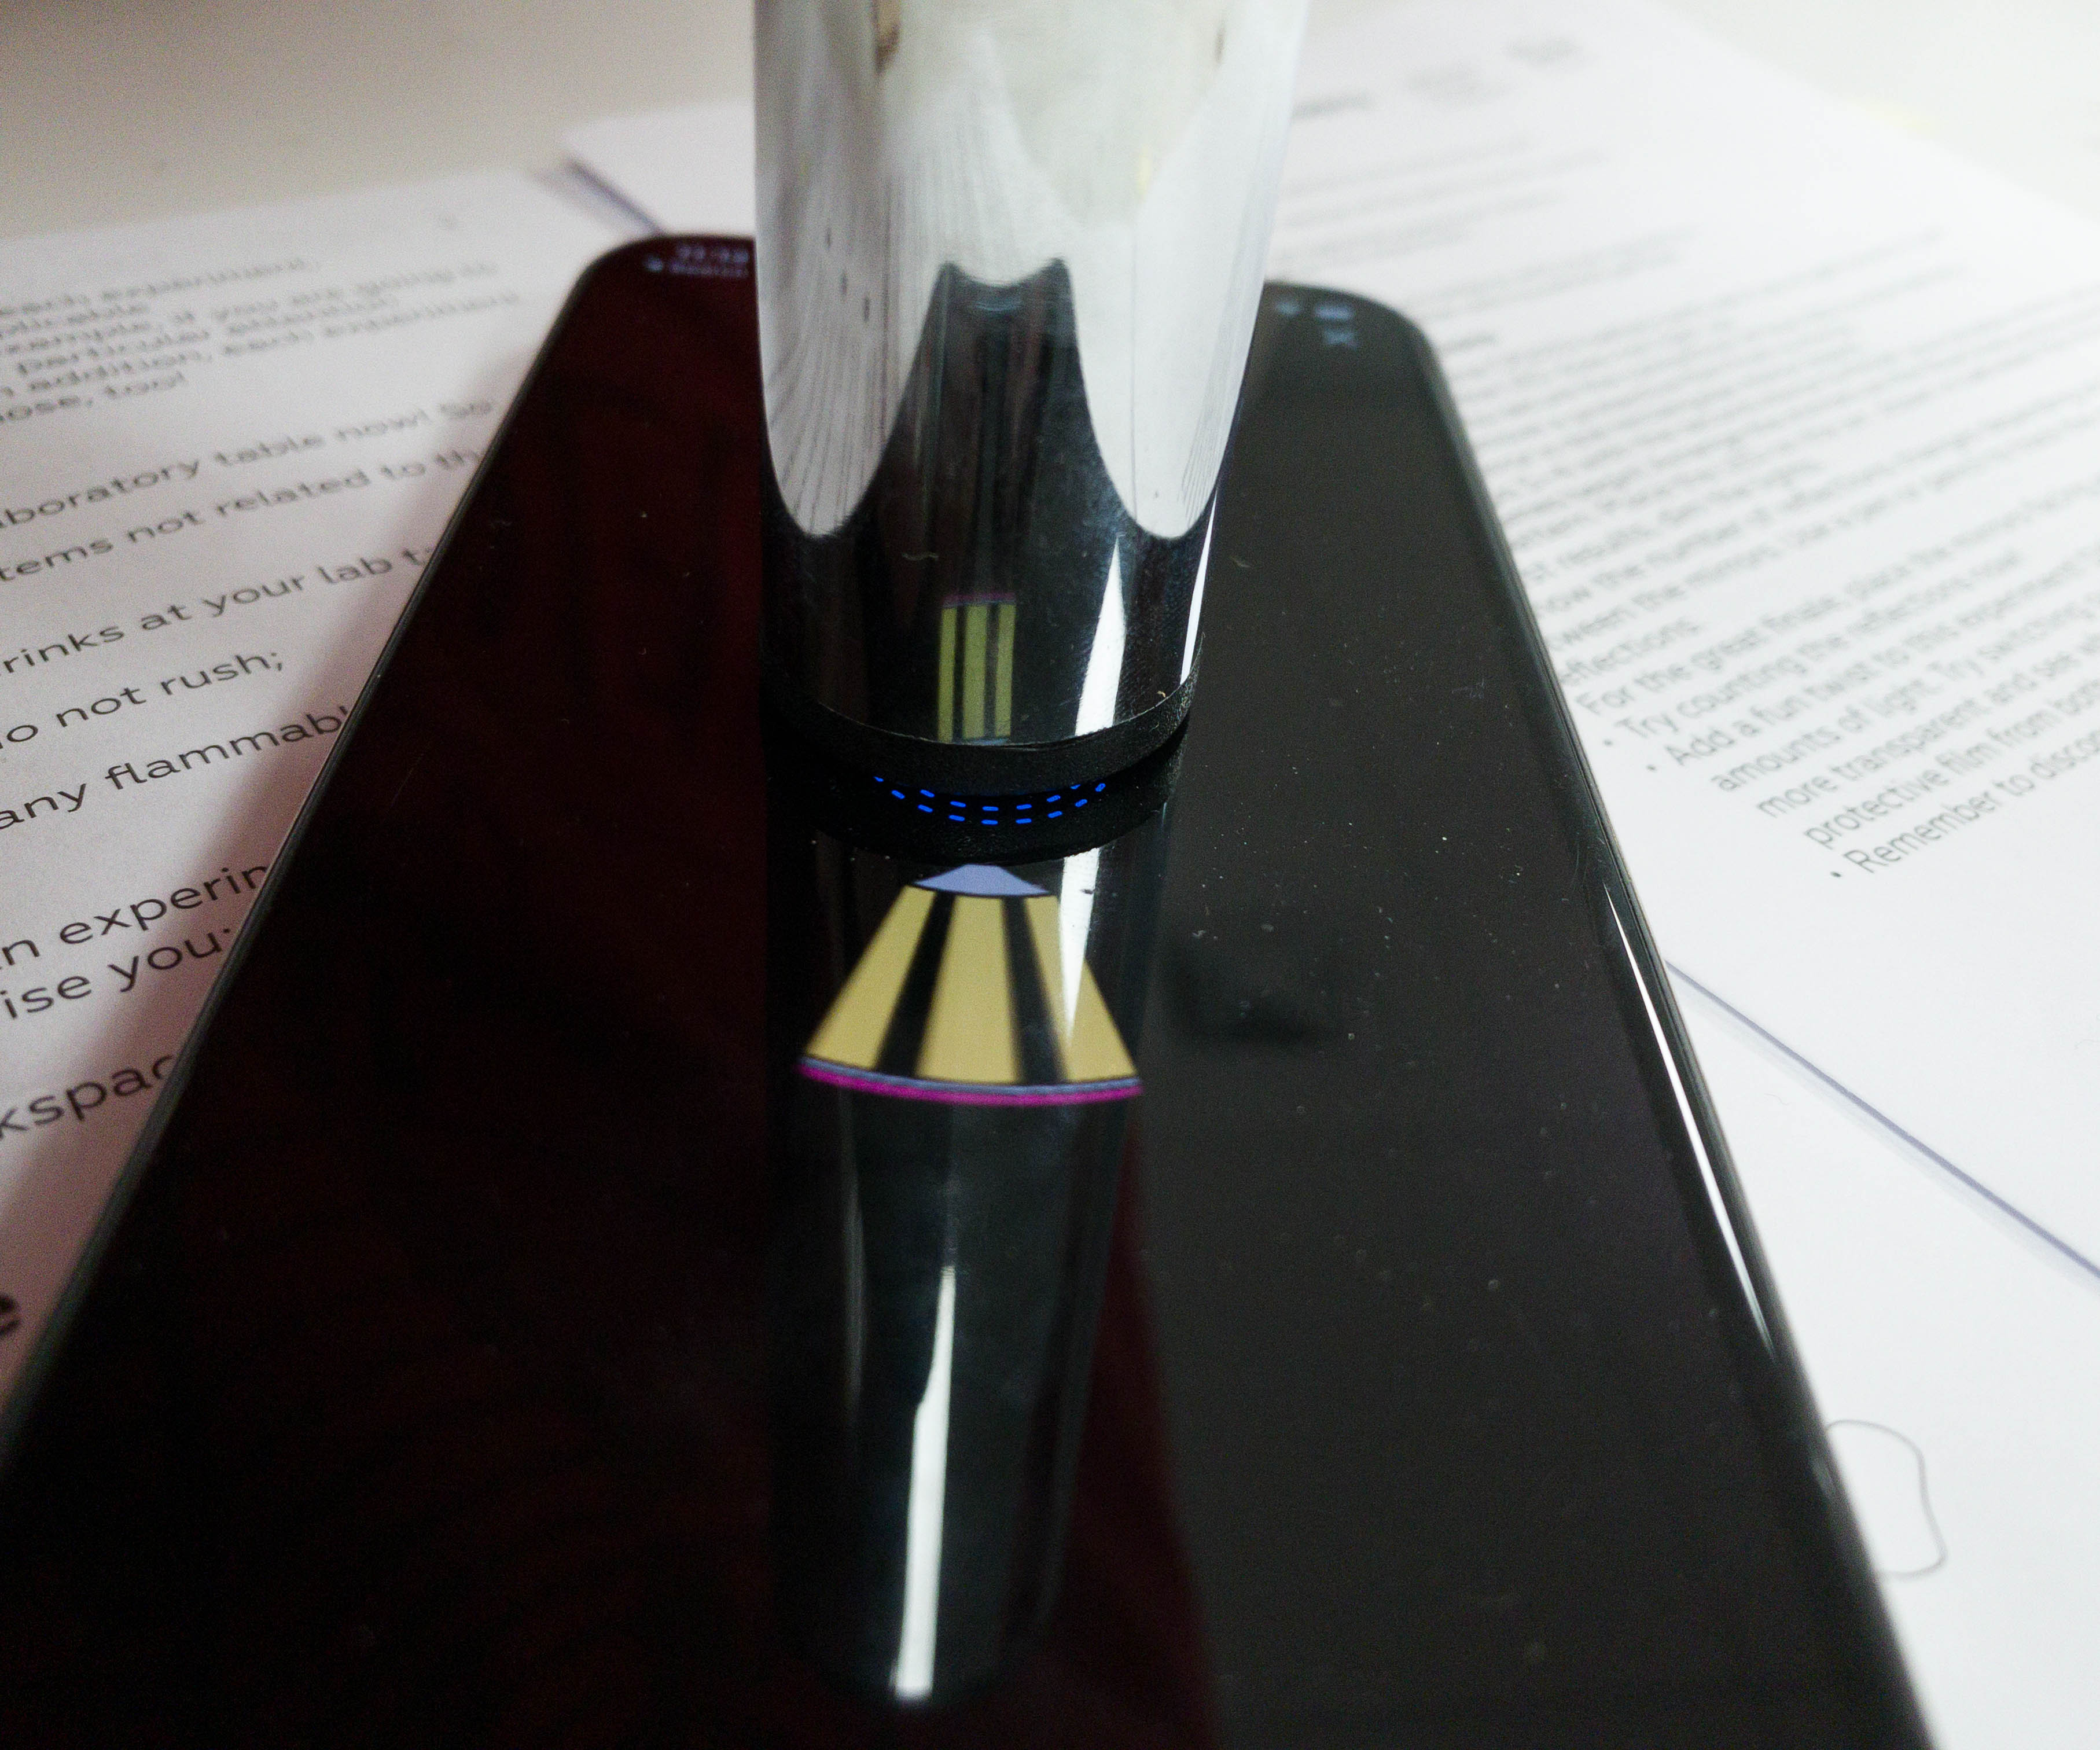
There’s even a rocketship on one of its images!

You can even print the sample images from the app!

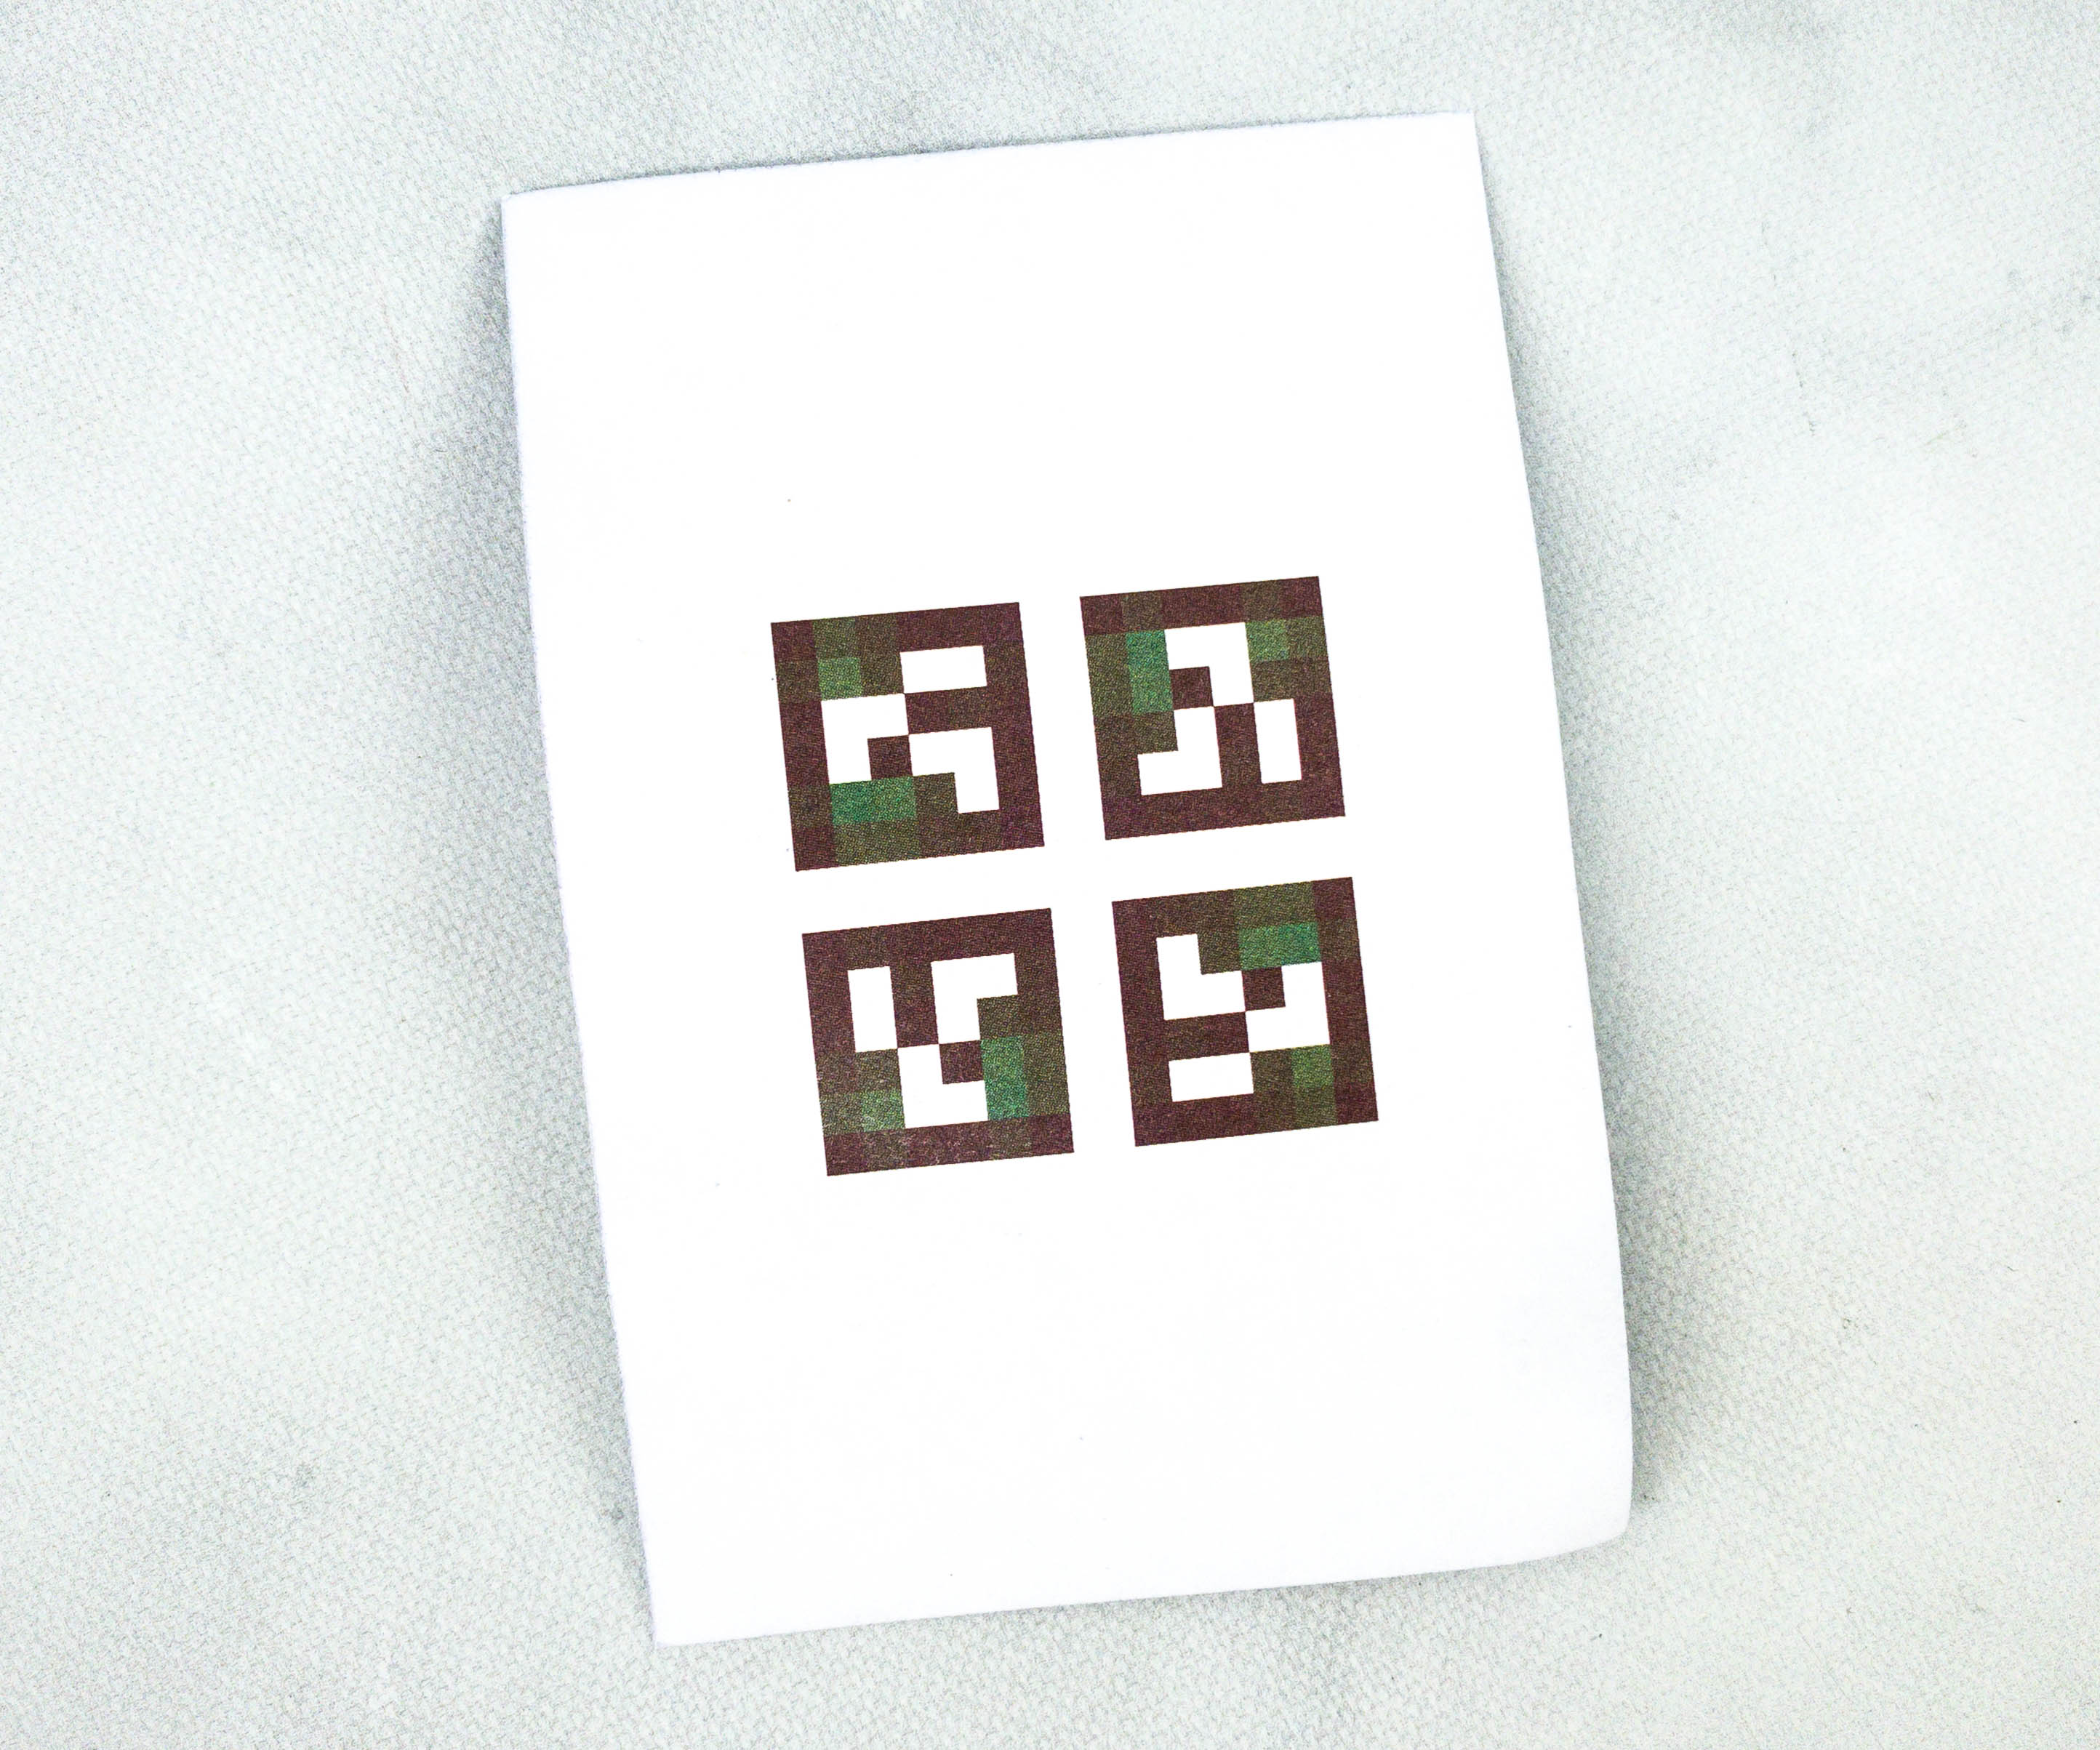
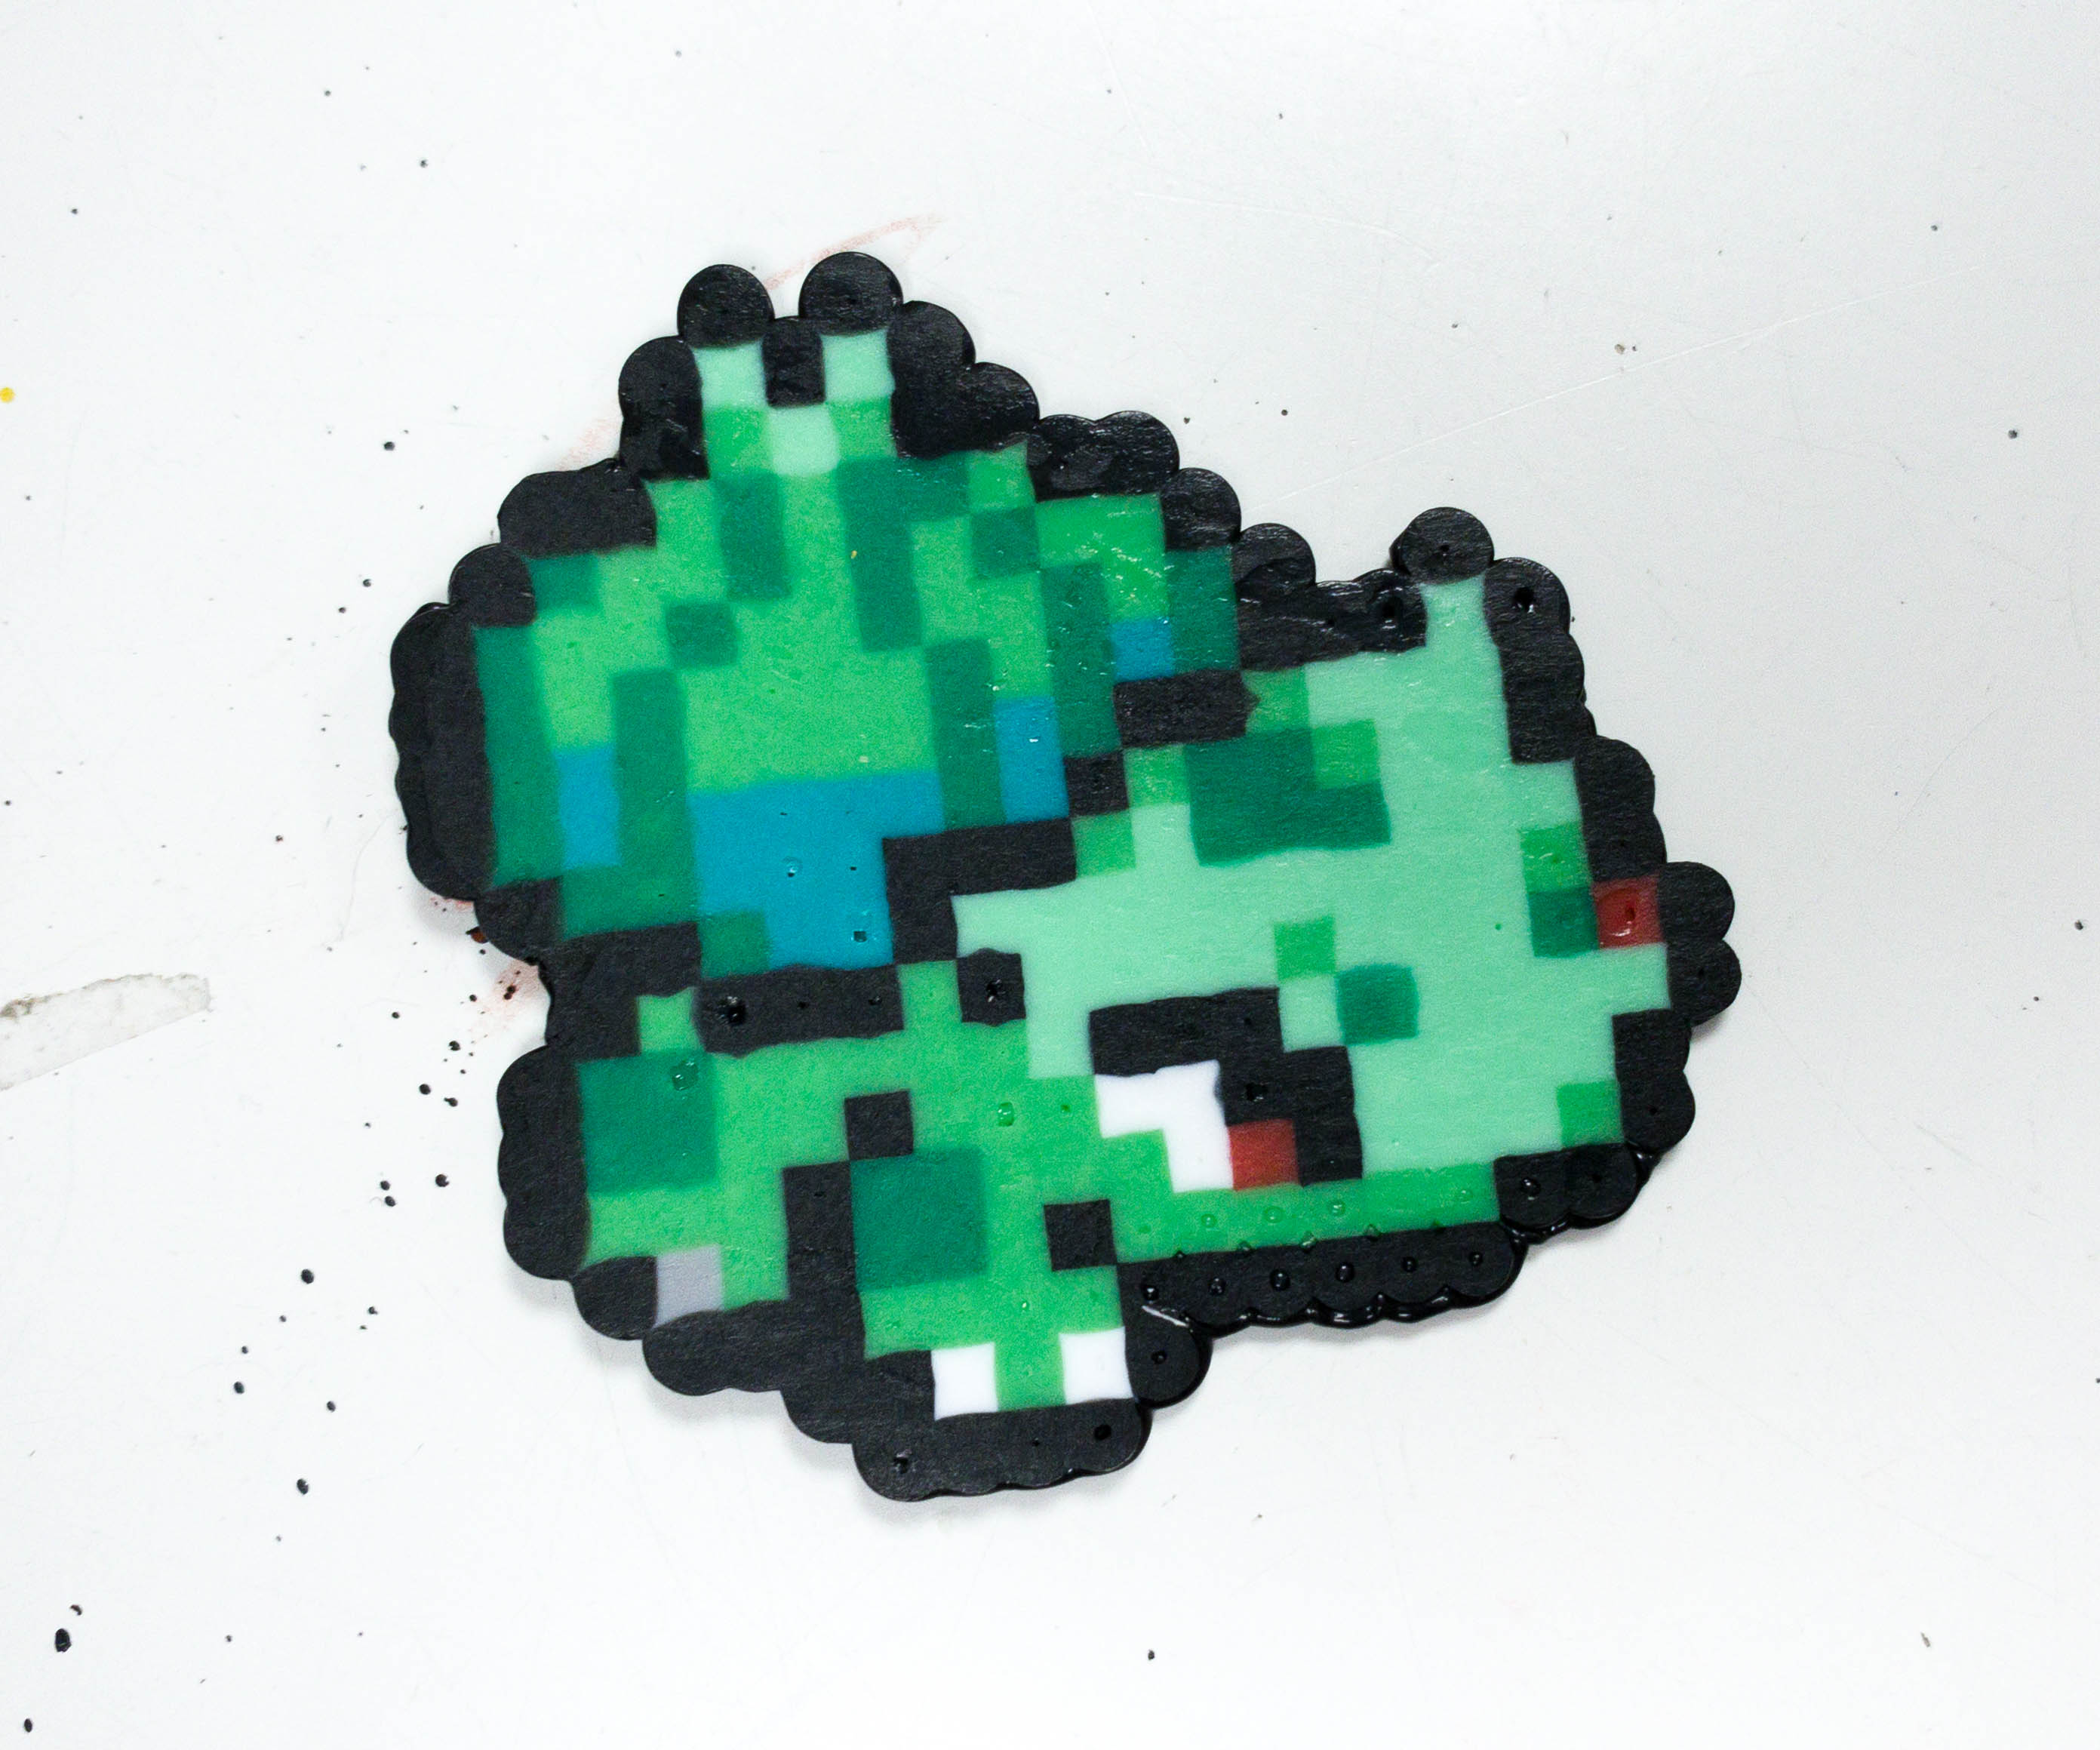
My kids also used actual photos.
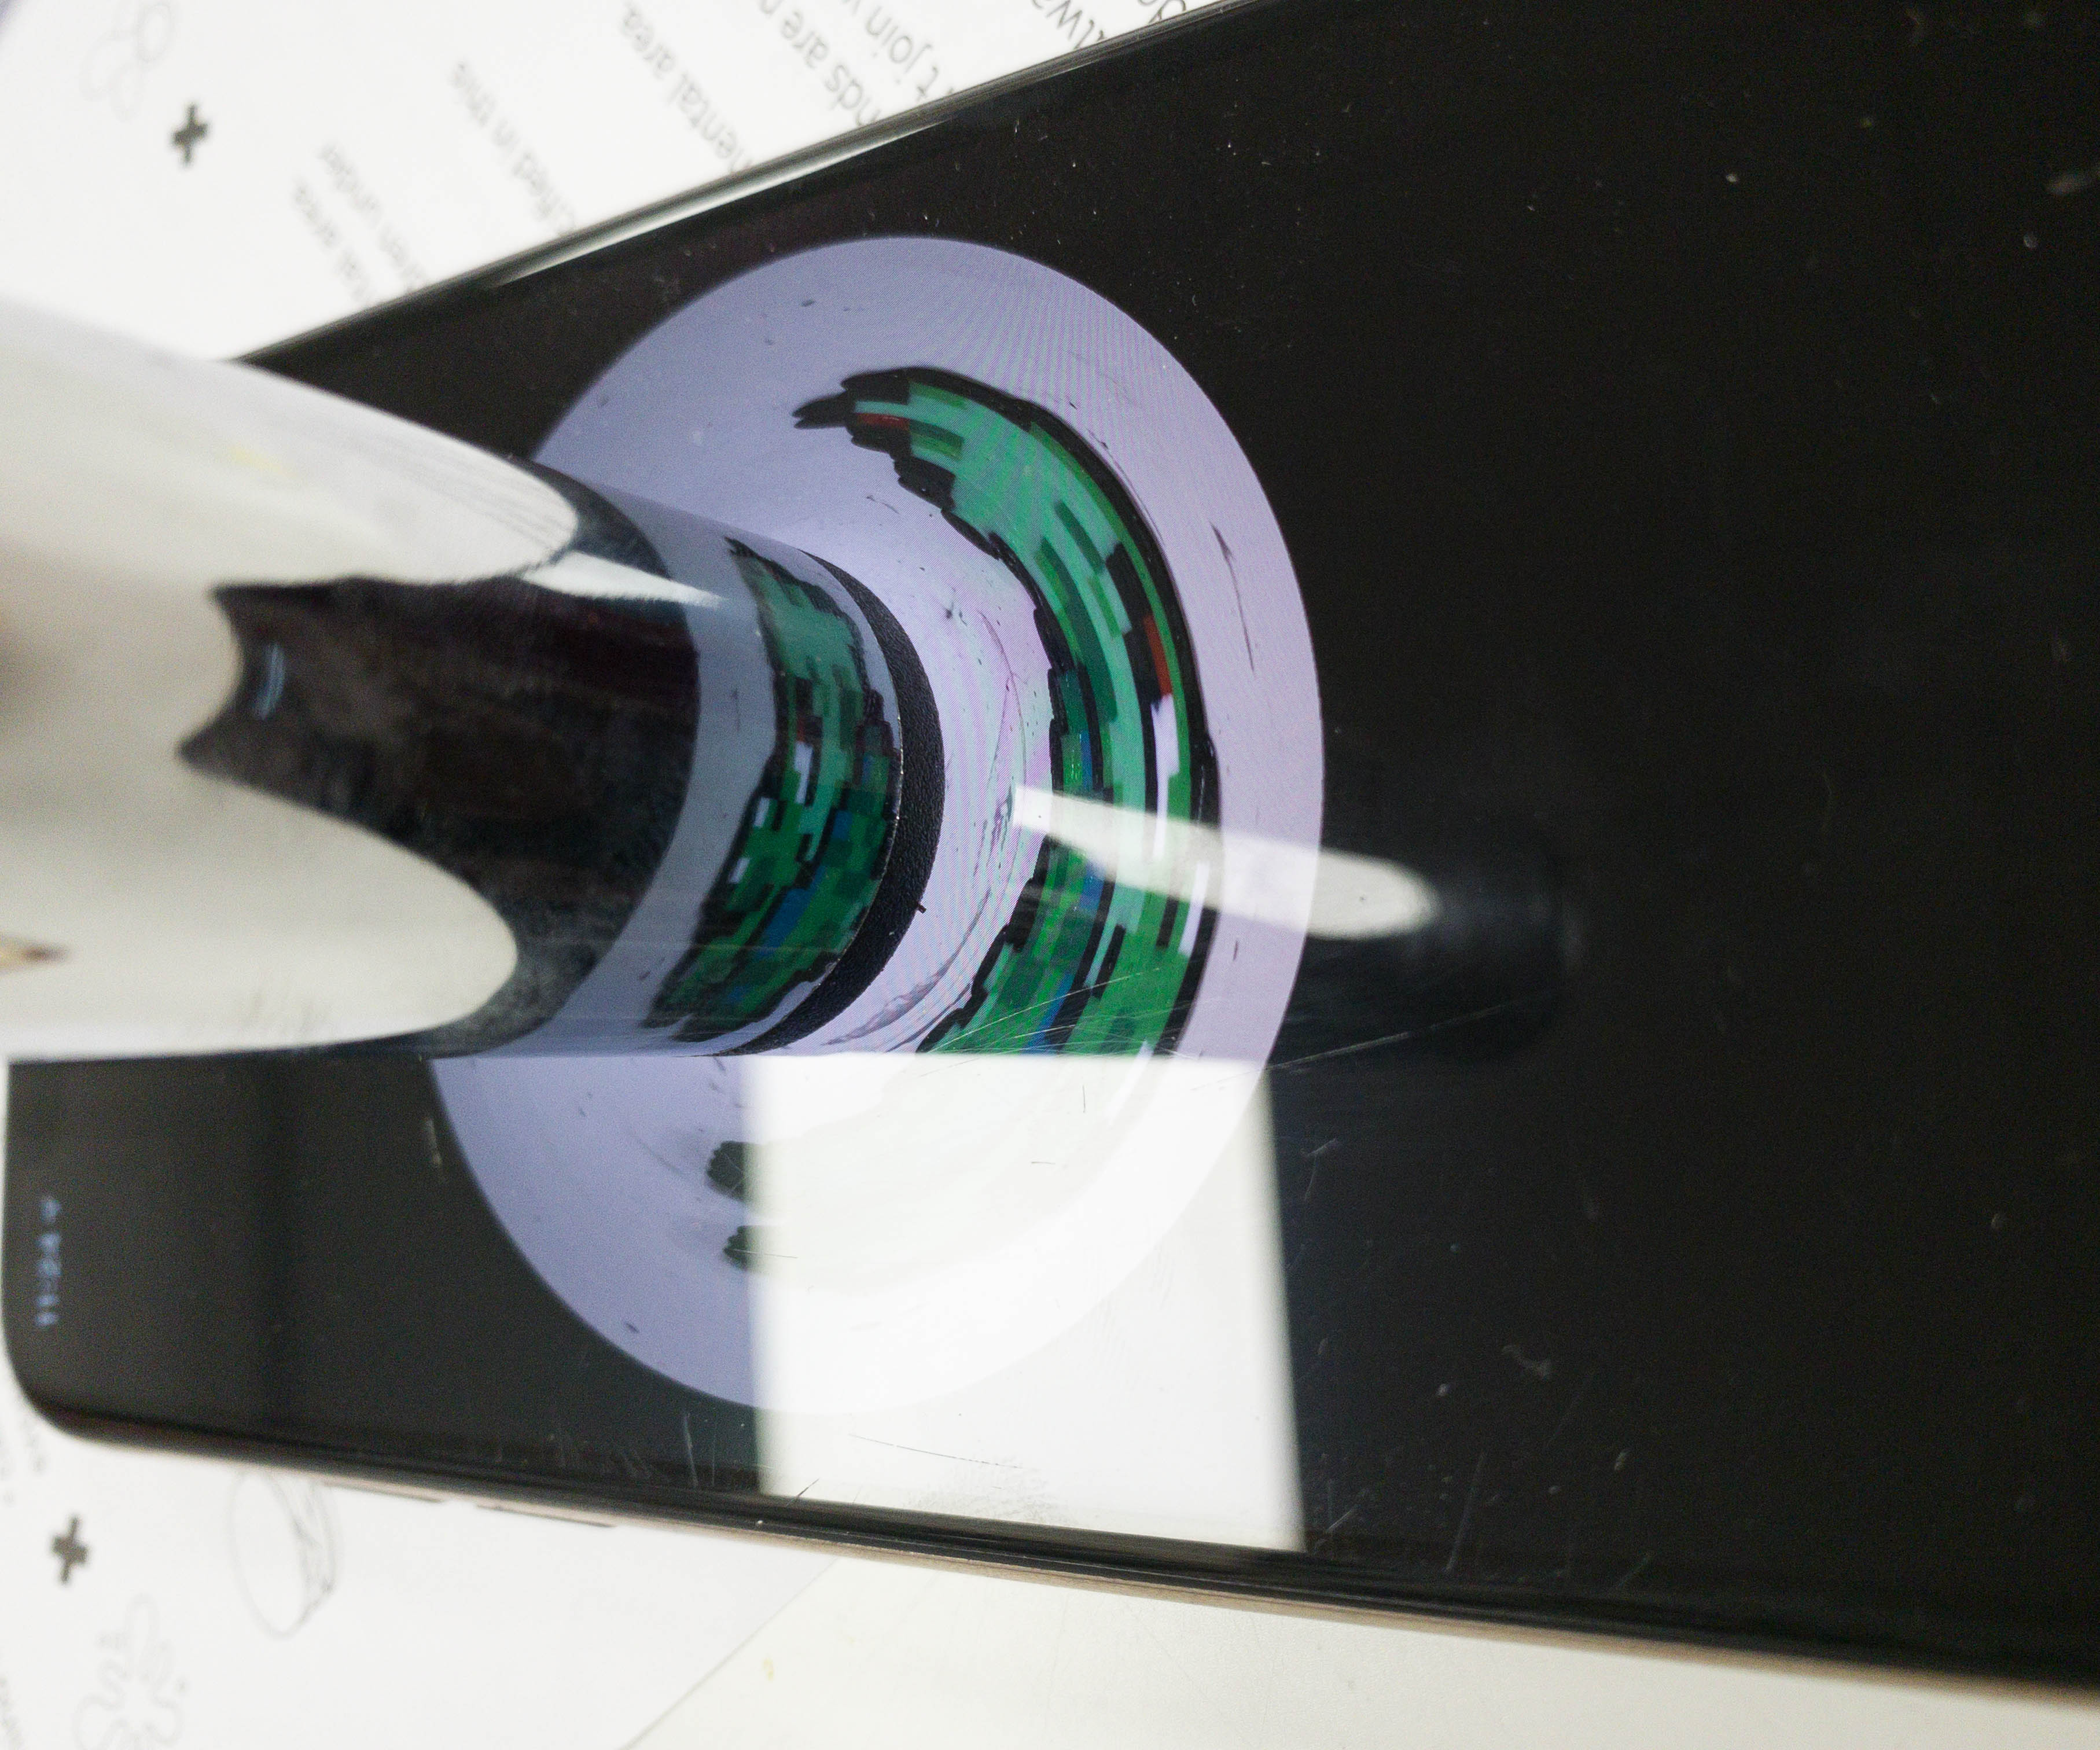
This pixelated image is also included. The effect that the cylindrical mirror produce is like magic!
Here’s a clear view of the last image on the app (they took a photo of one of the crafts they made and this is the exact photo that’s on the app).
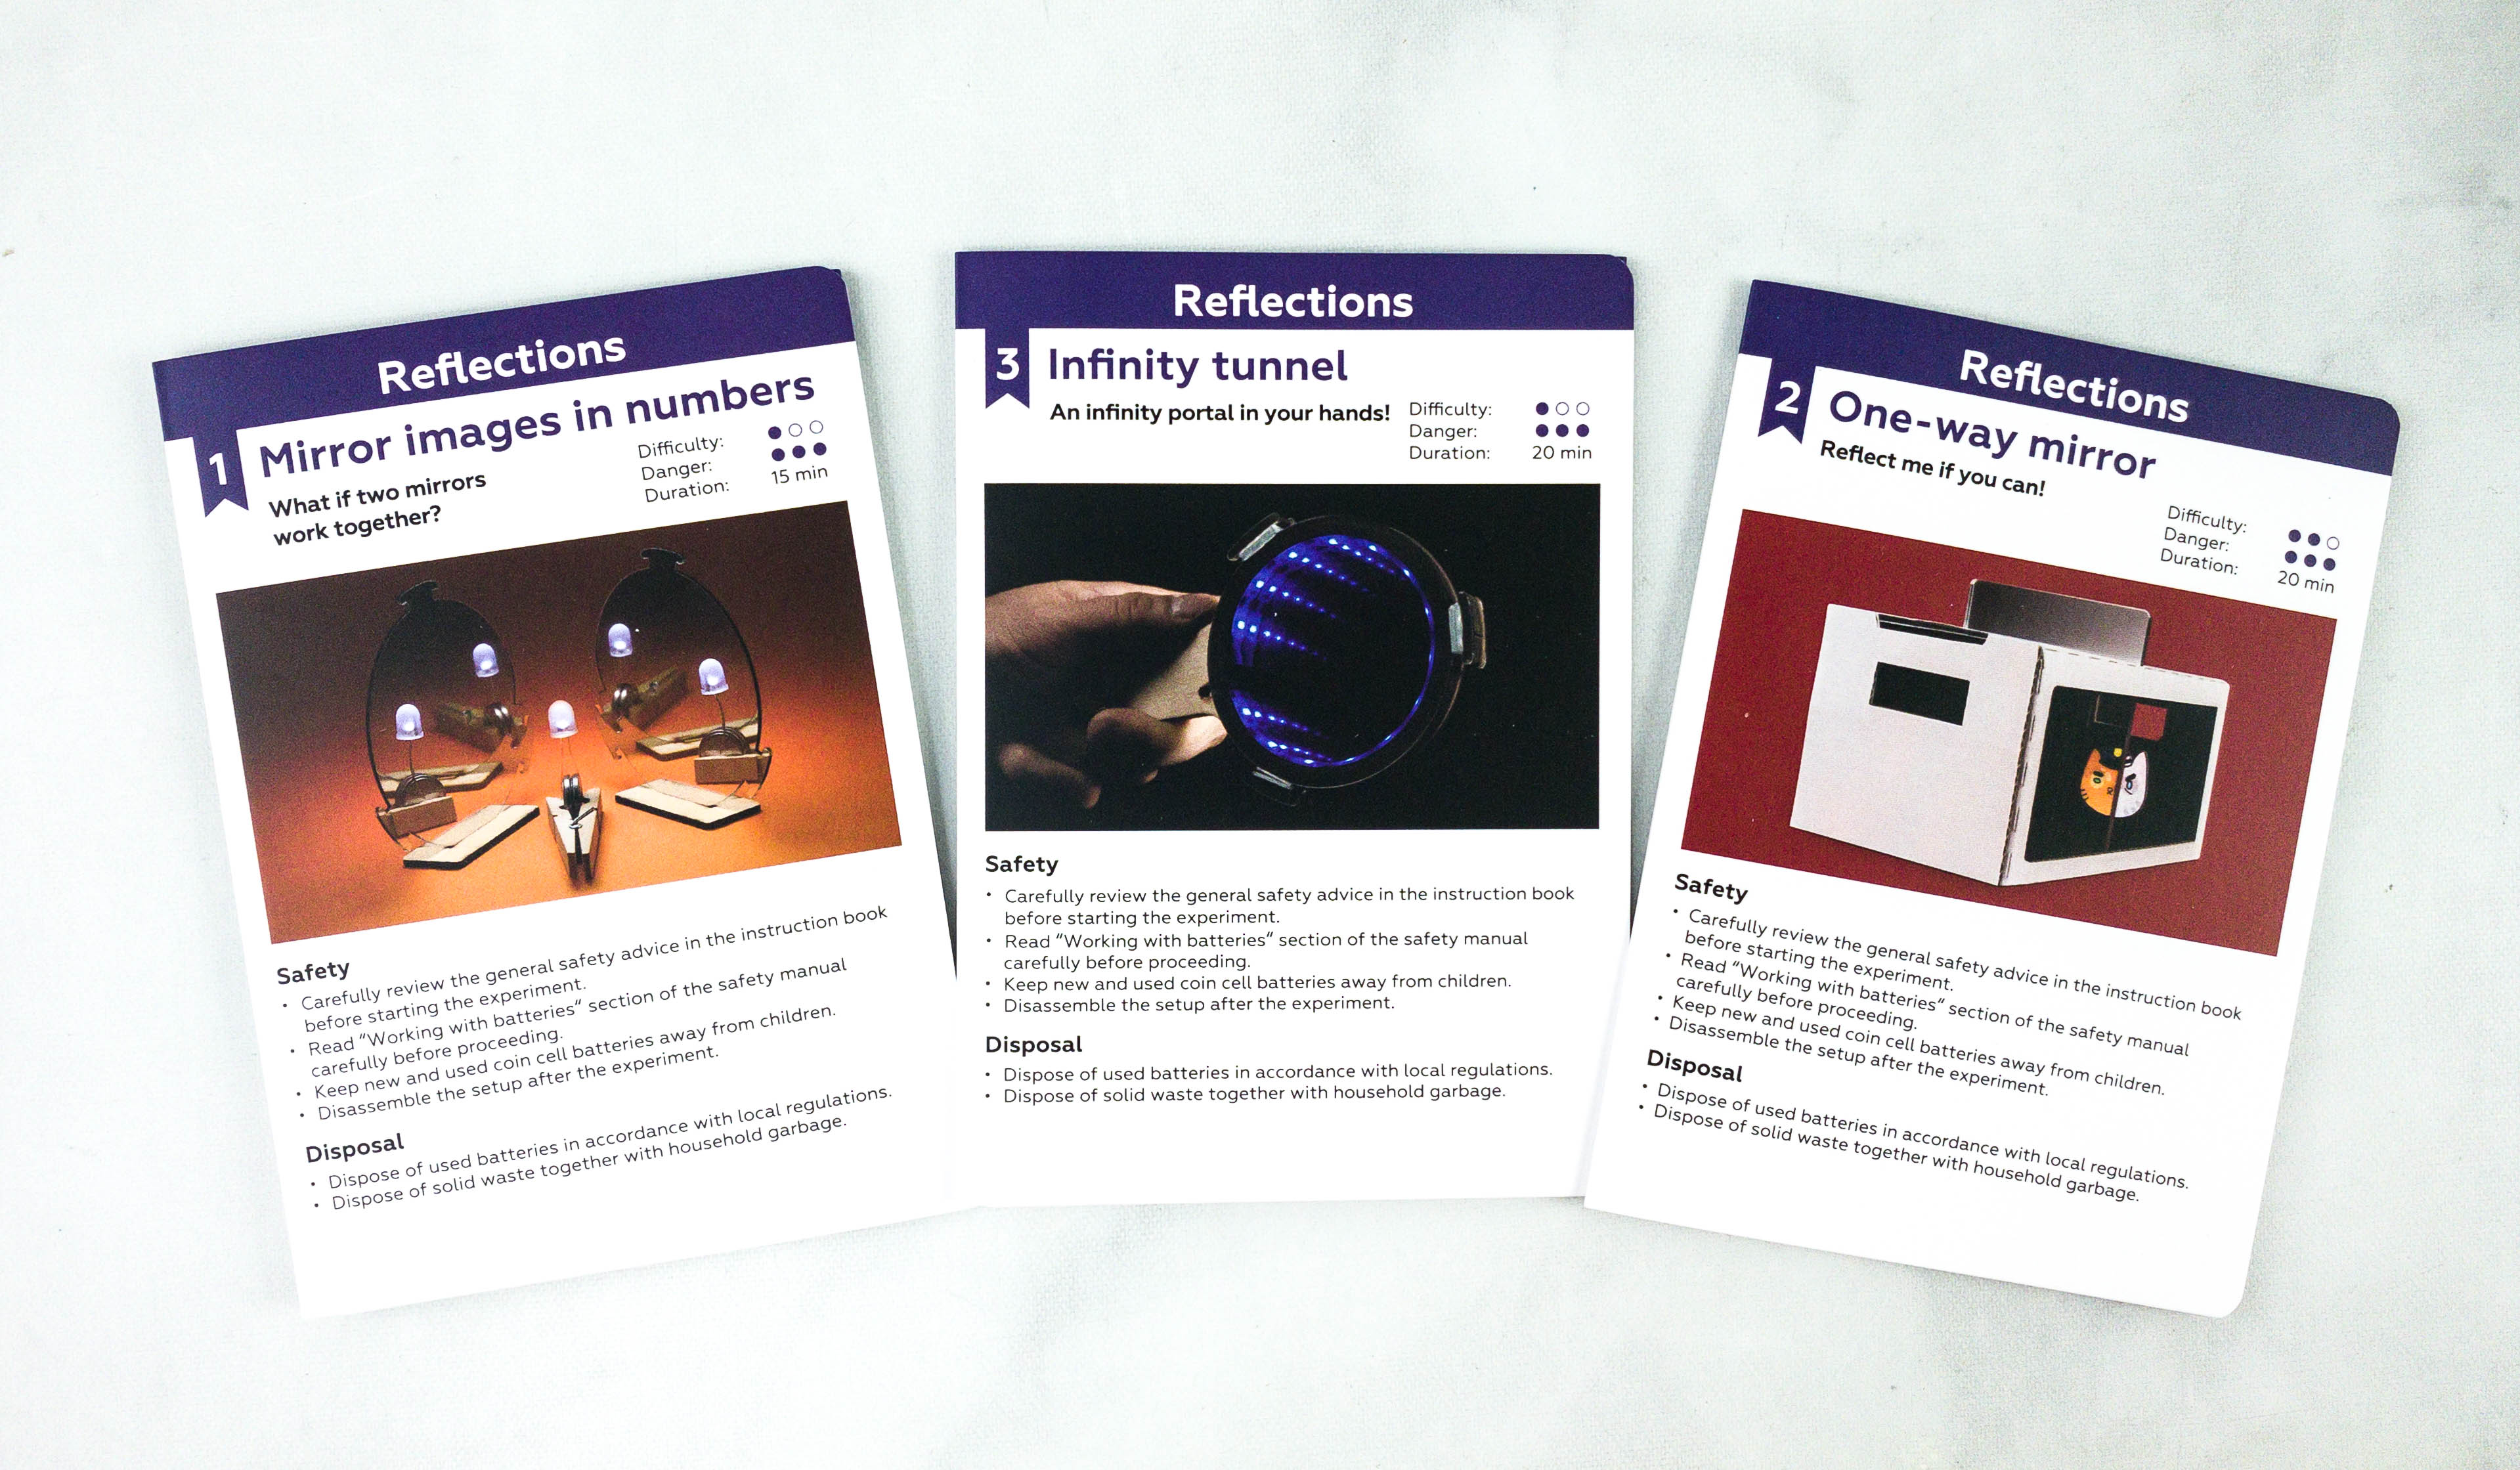
This month’s main activities are Mirror Images in Numbers, Infinity Tunnel and One-way Mirror!
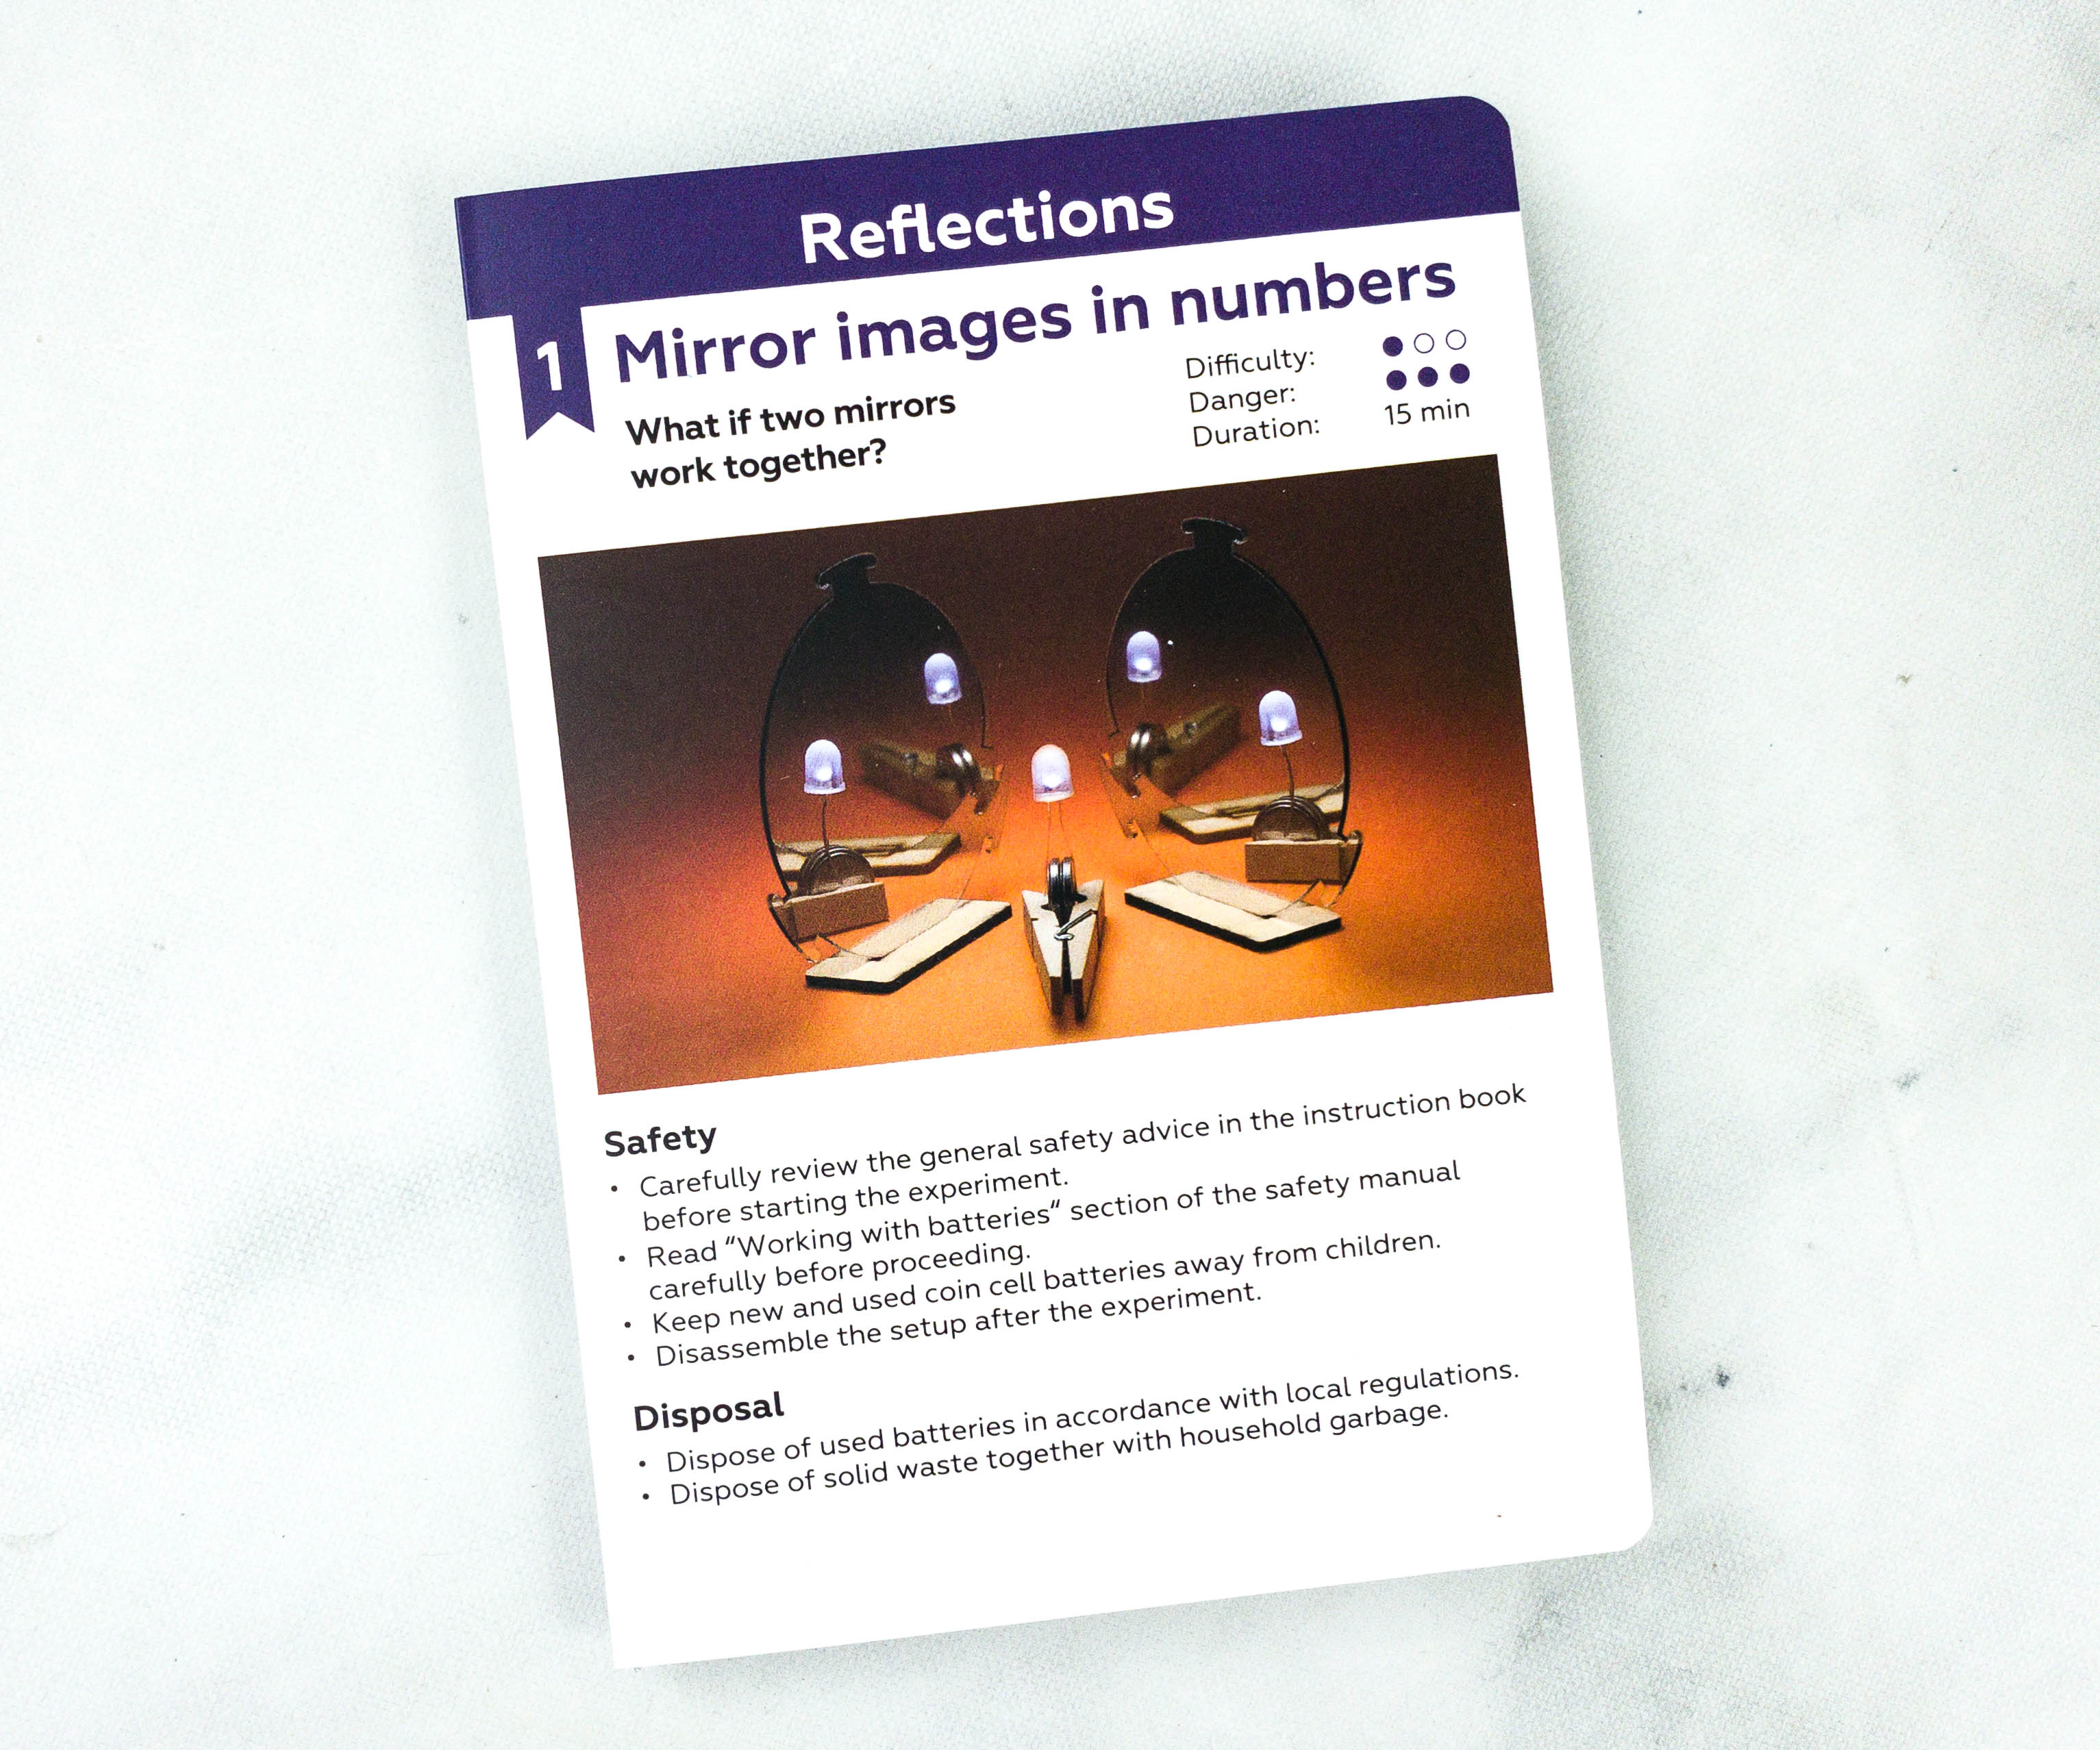
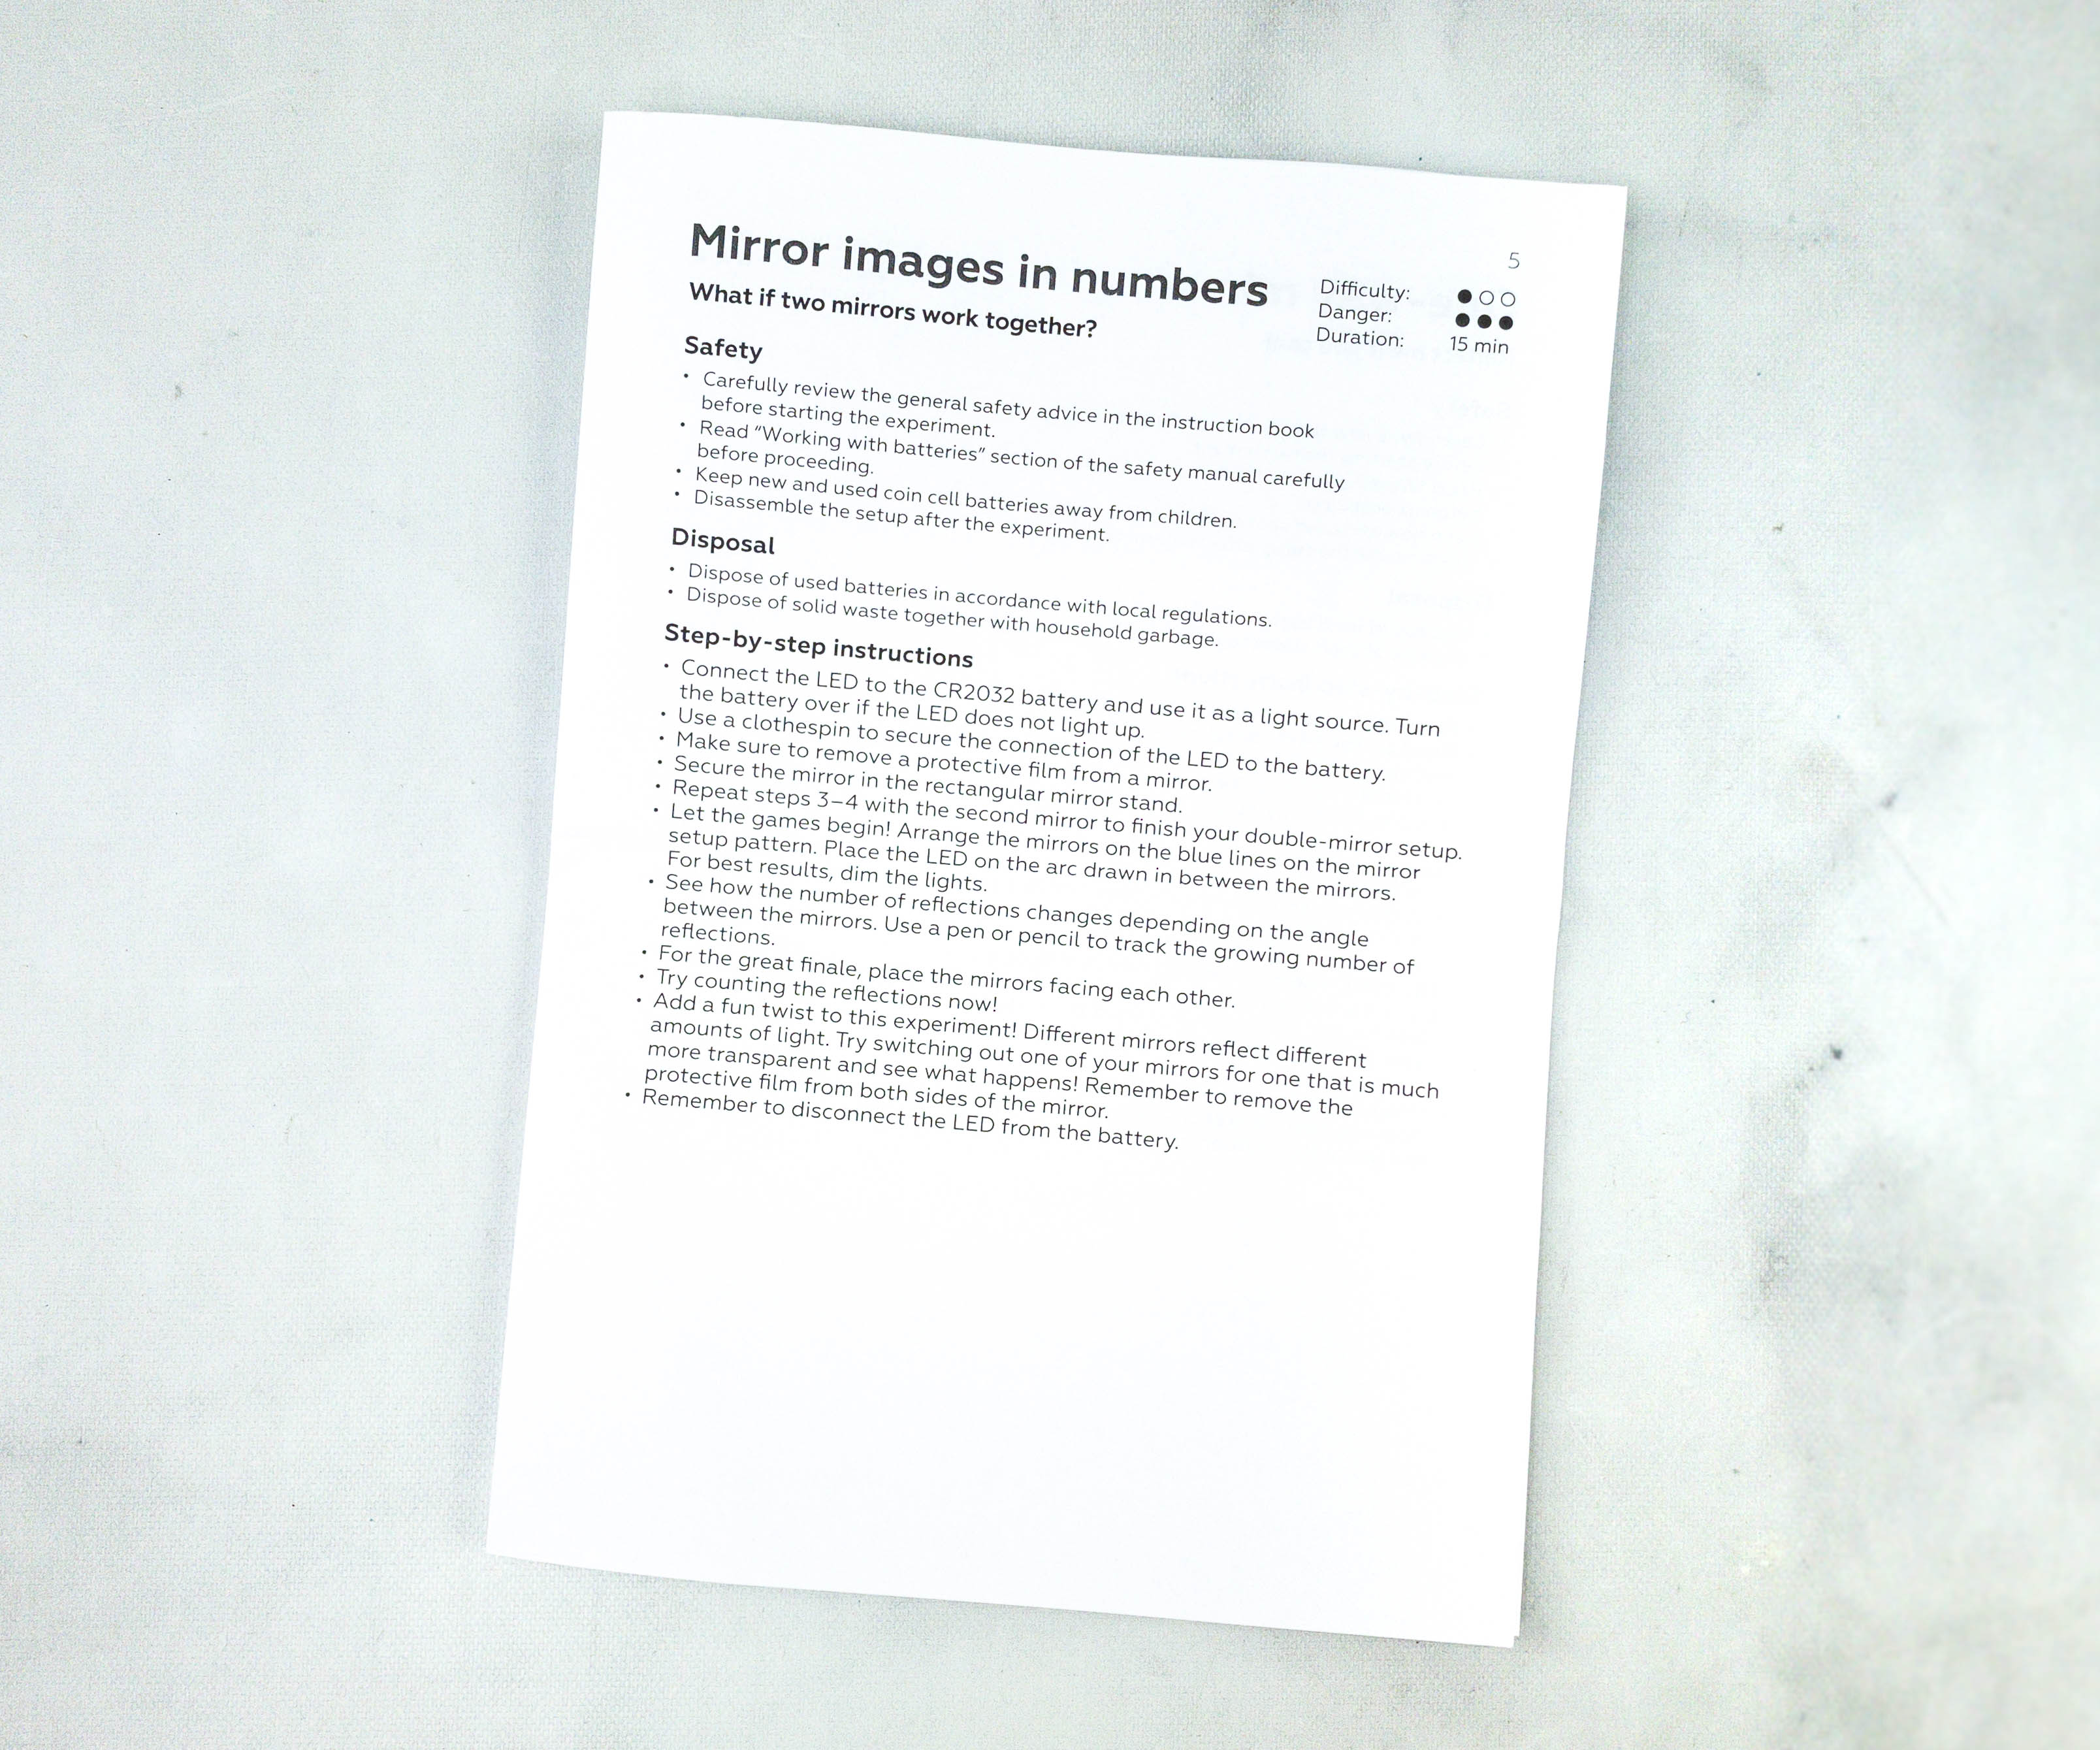
Activity #1: Mirror Images in Numbers. The first activity is about making an optical illusion that creates multiple reflections by using two mirrors.

Here are the materials my kids used for this activity.
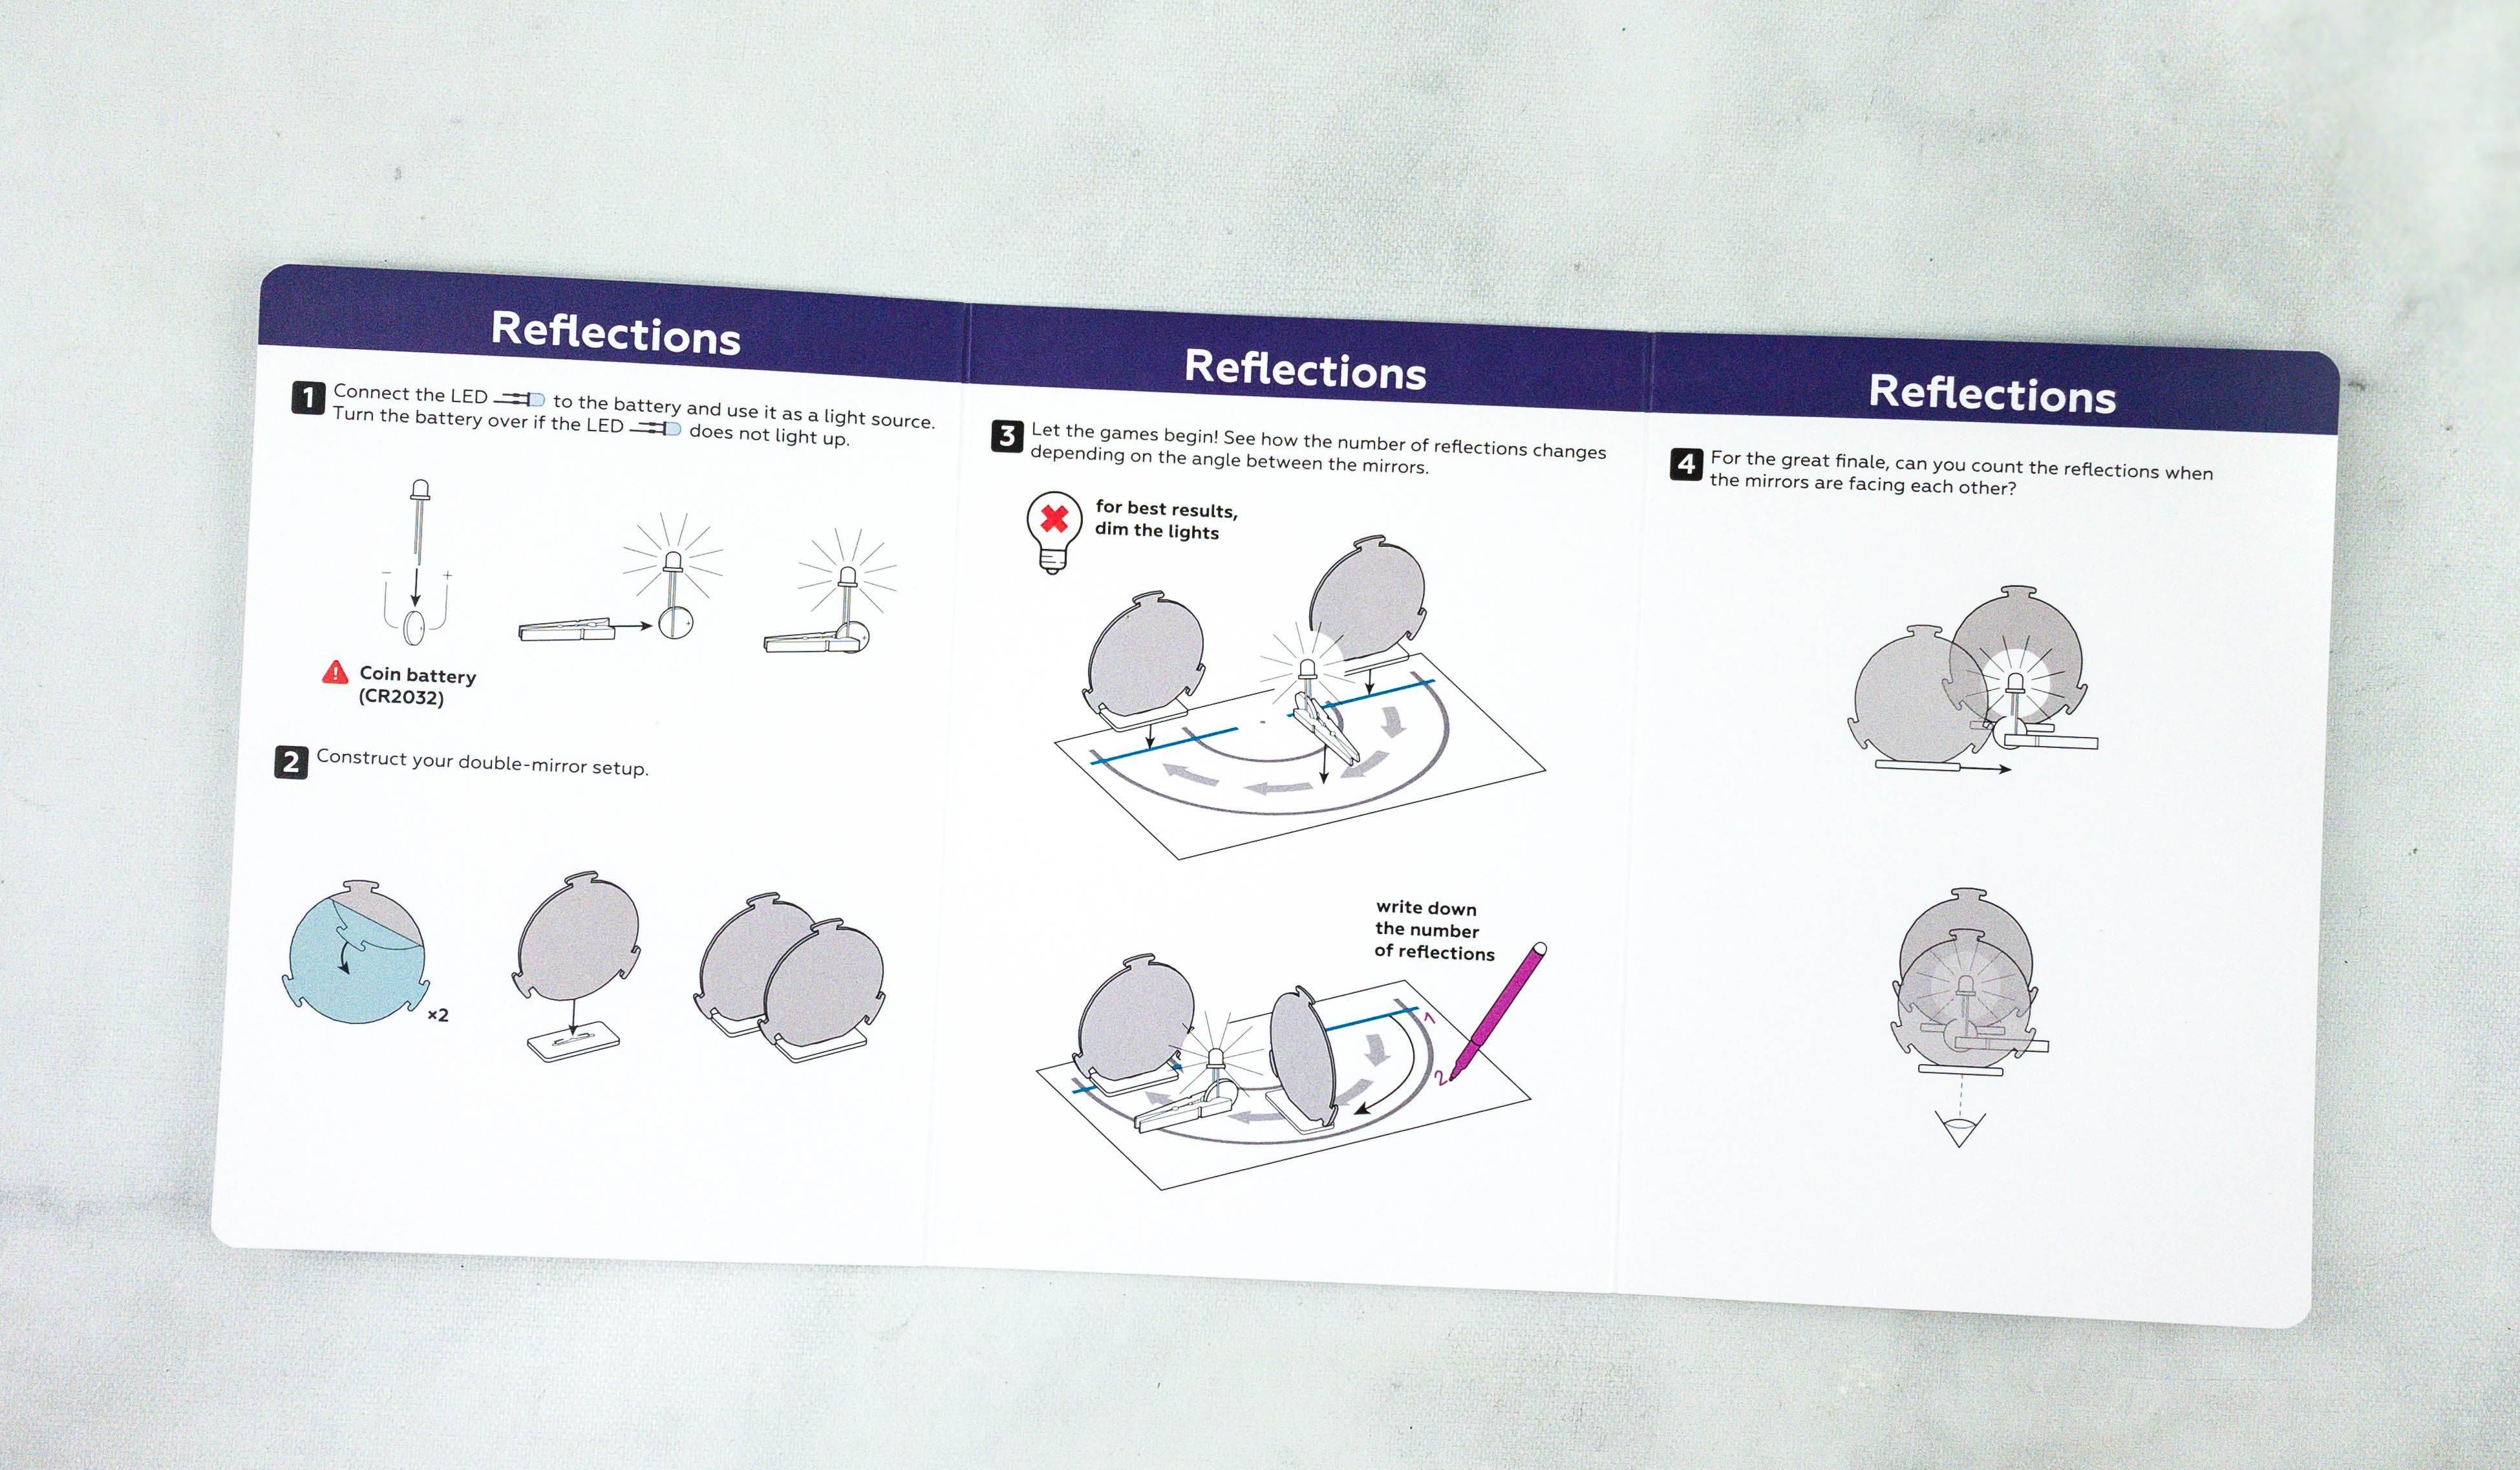
It guide provided clear illustrations that the kids can easily follow and understand.

My younger son connected the LED to the battery coin, which we needed to provide. It was a little odd, but I think there might be shipping/storage issues with the batteries. Anyways, they’re cheap and we had a pack of them. This will be used later as the light source of their project.
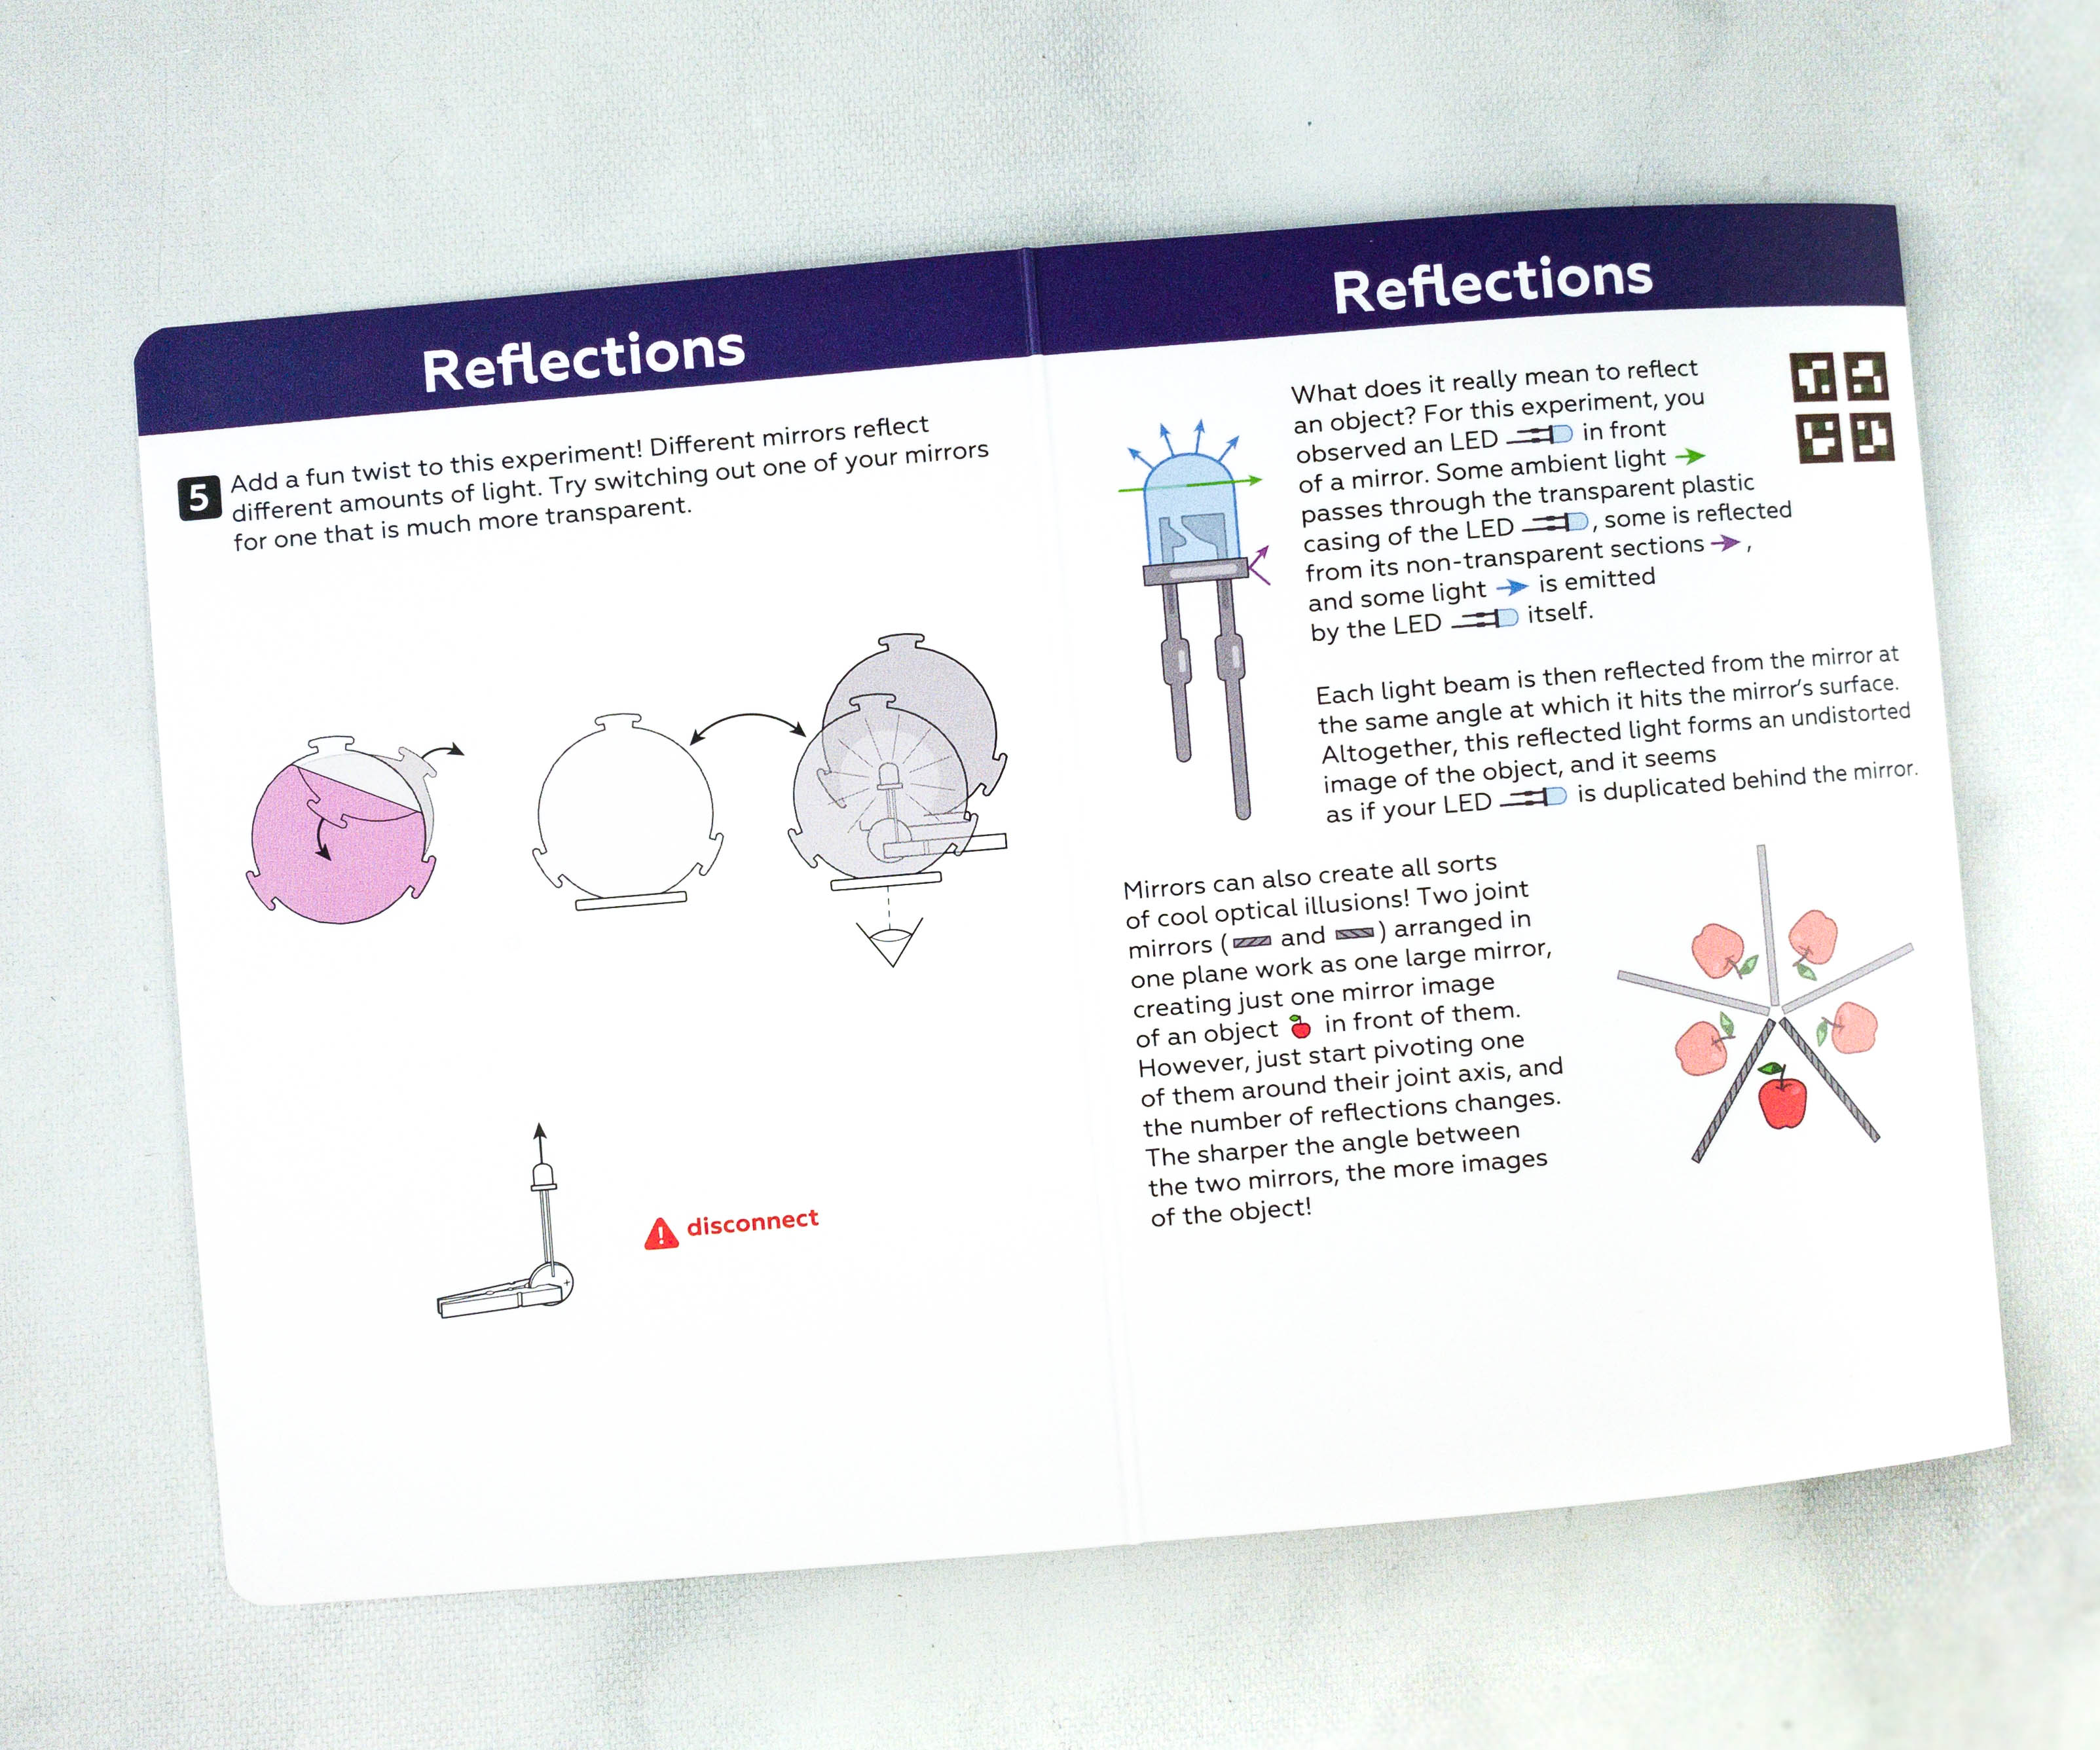
After the instructions, there is a brief explanation of how the activity works.
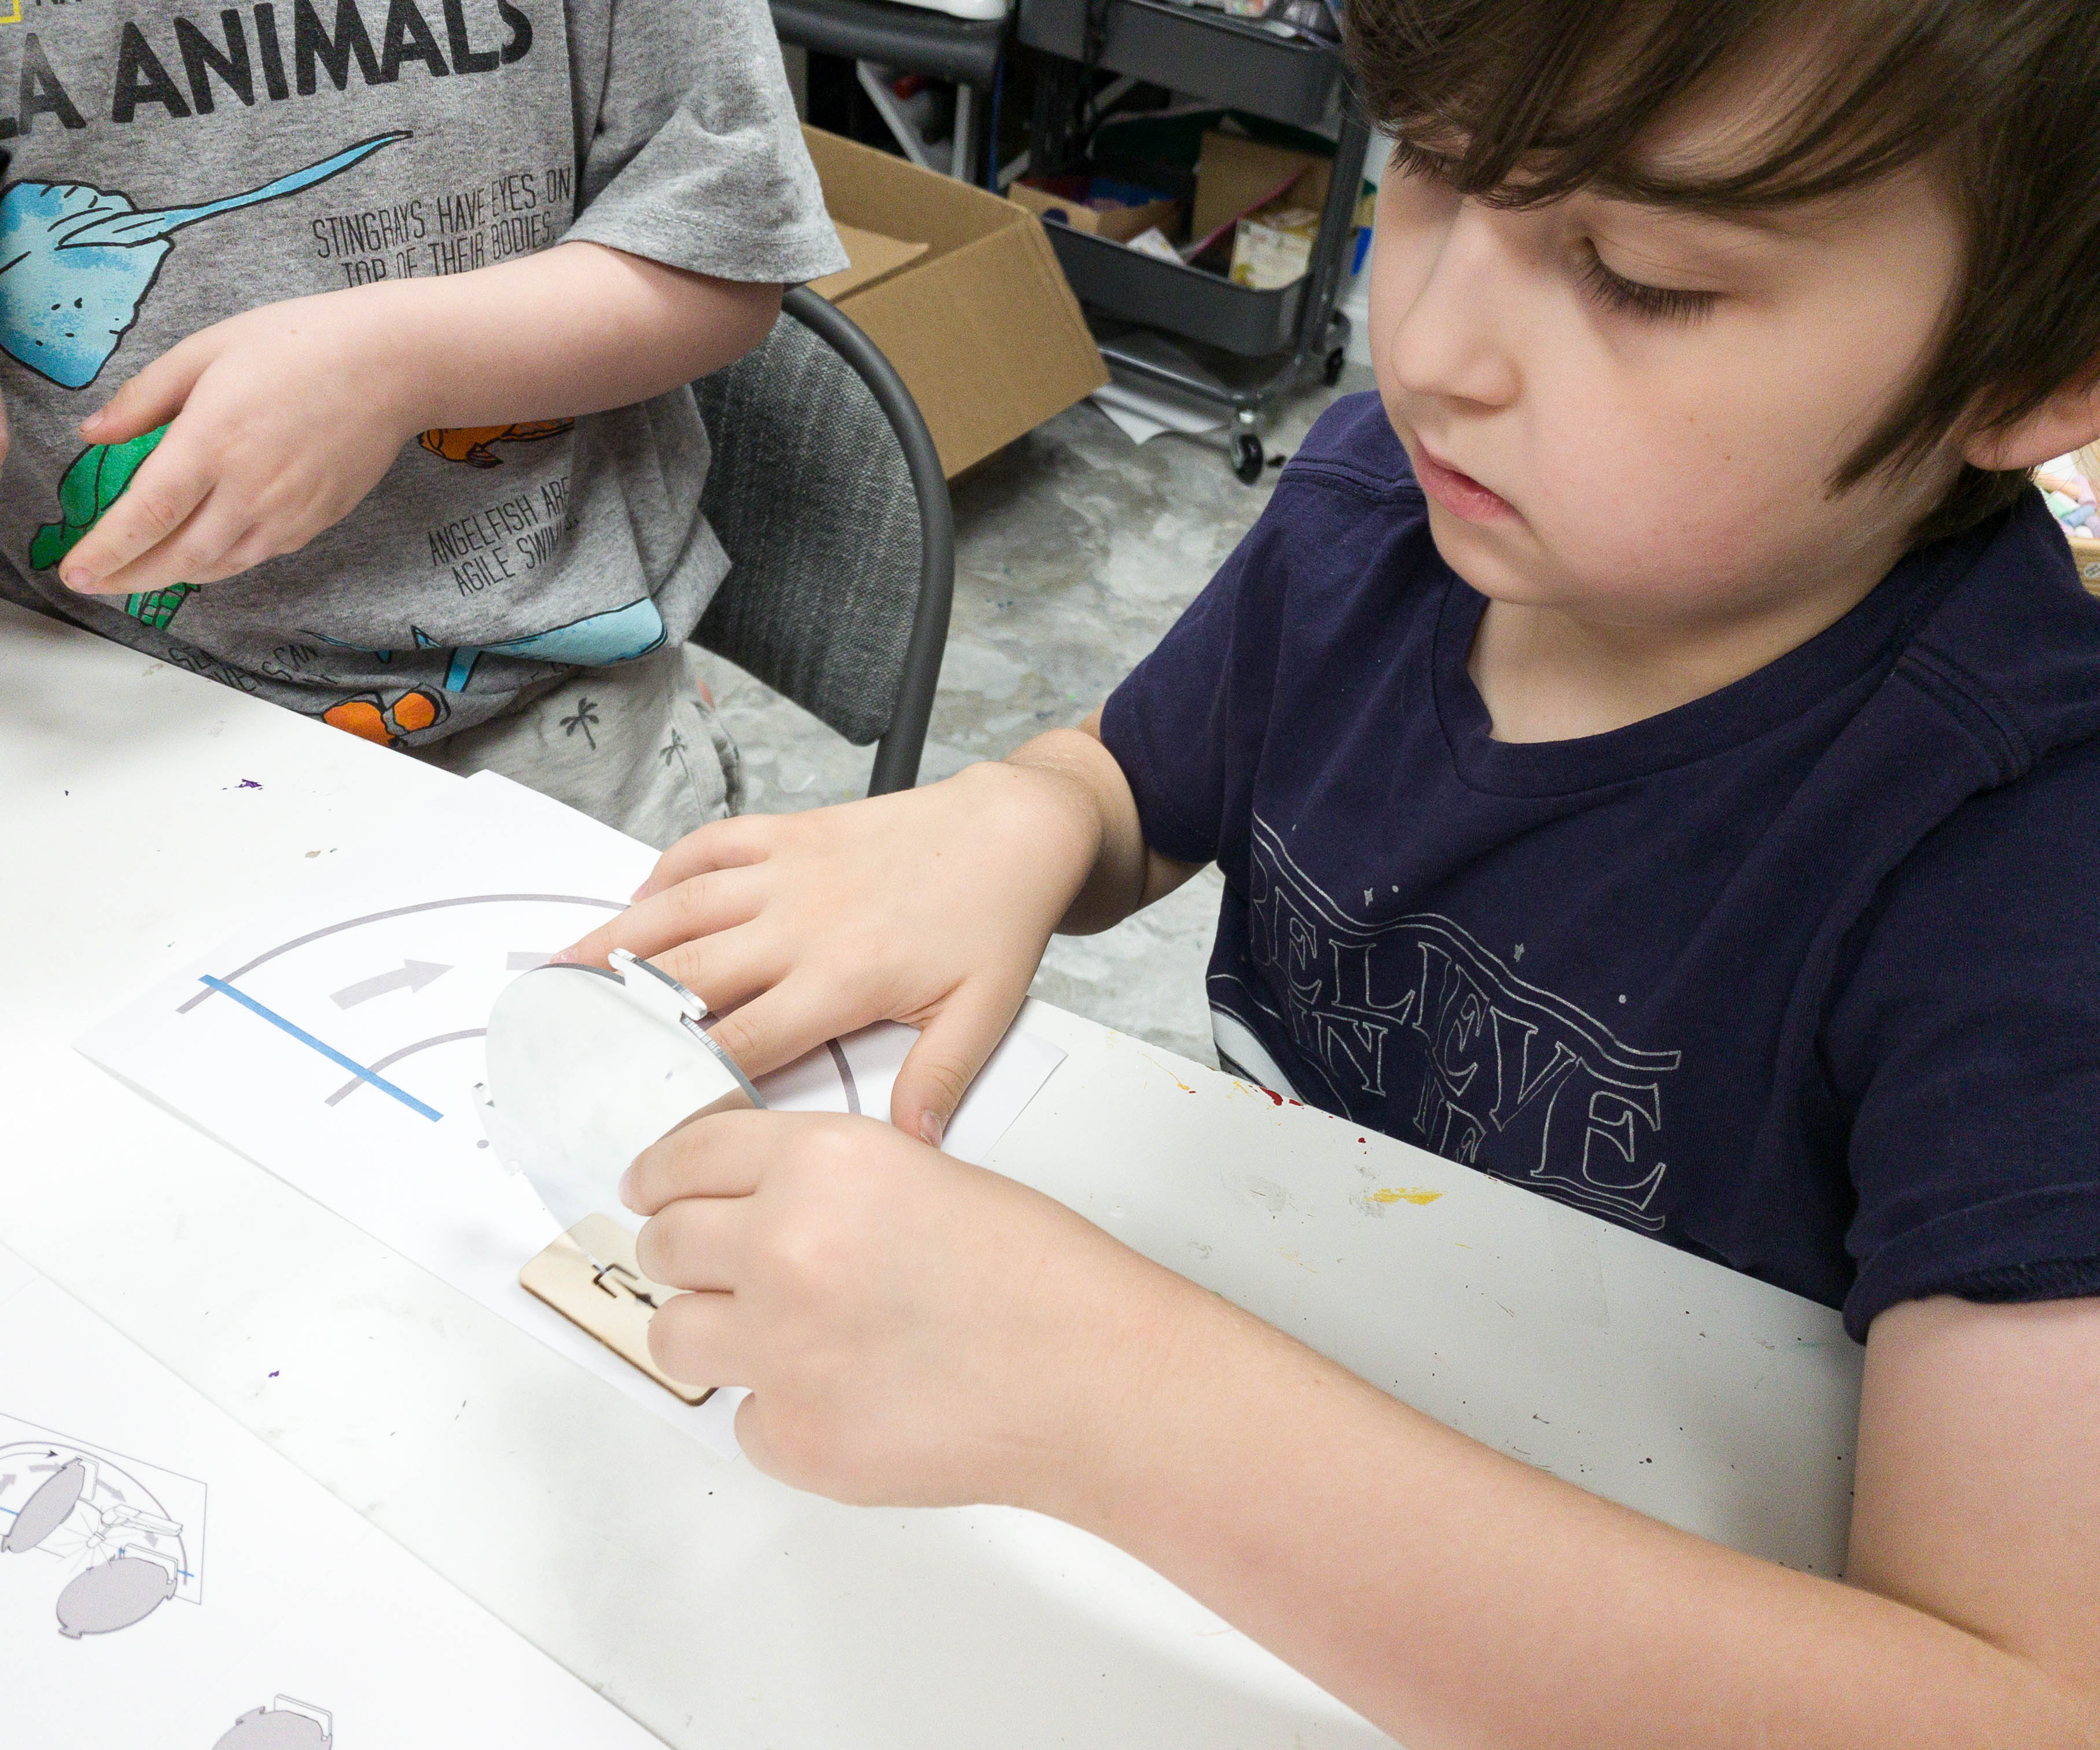
It’s time to construct the double-mirror!
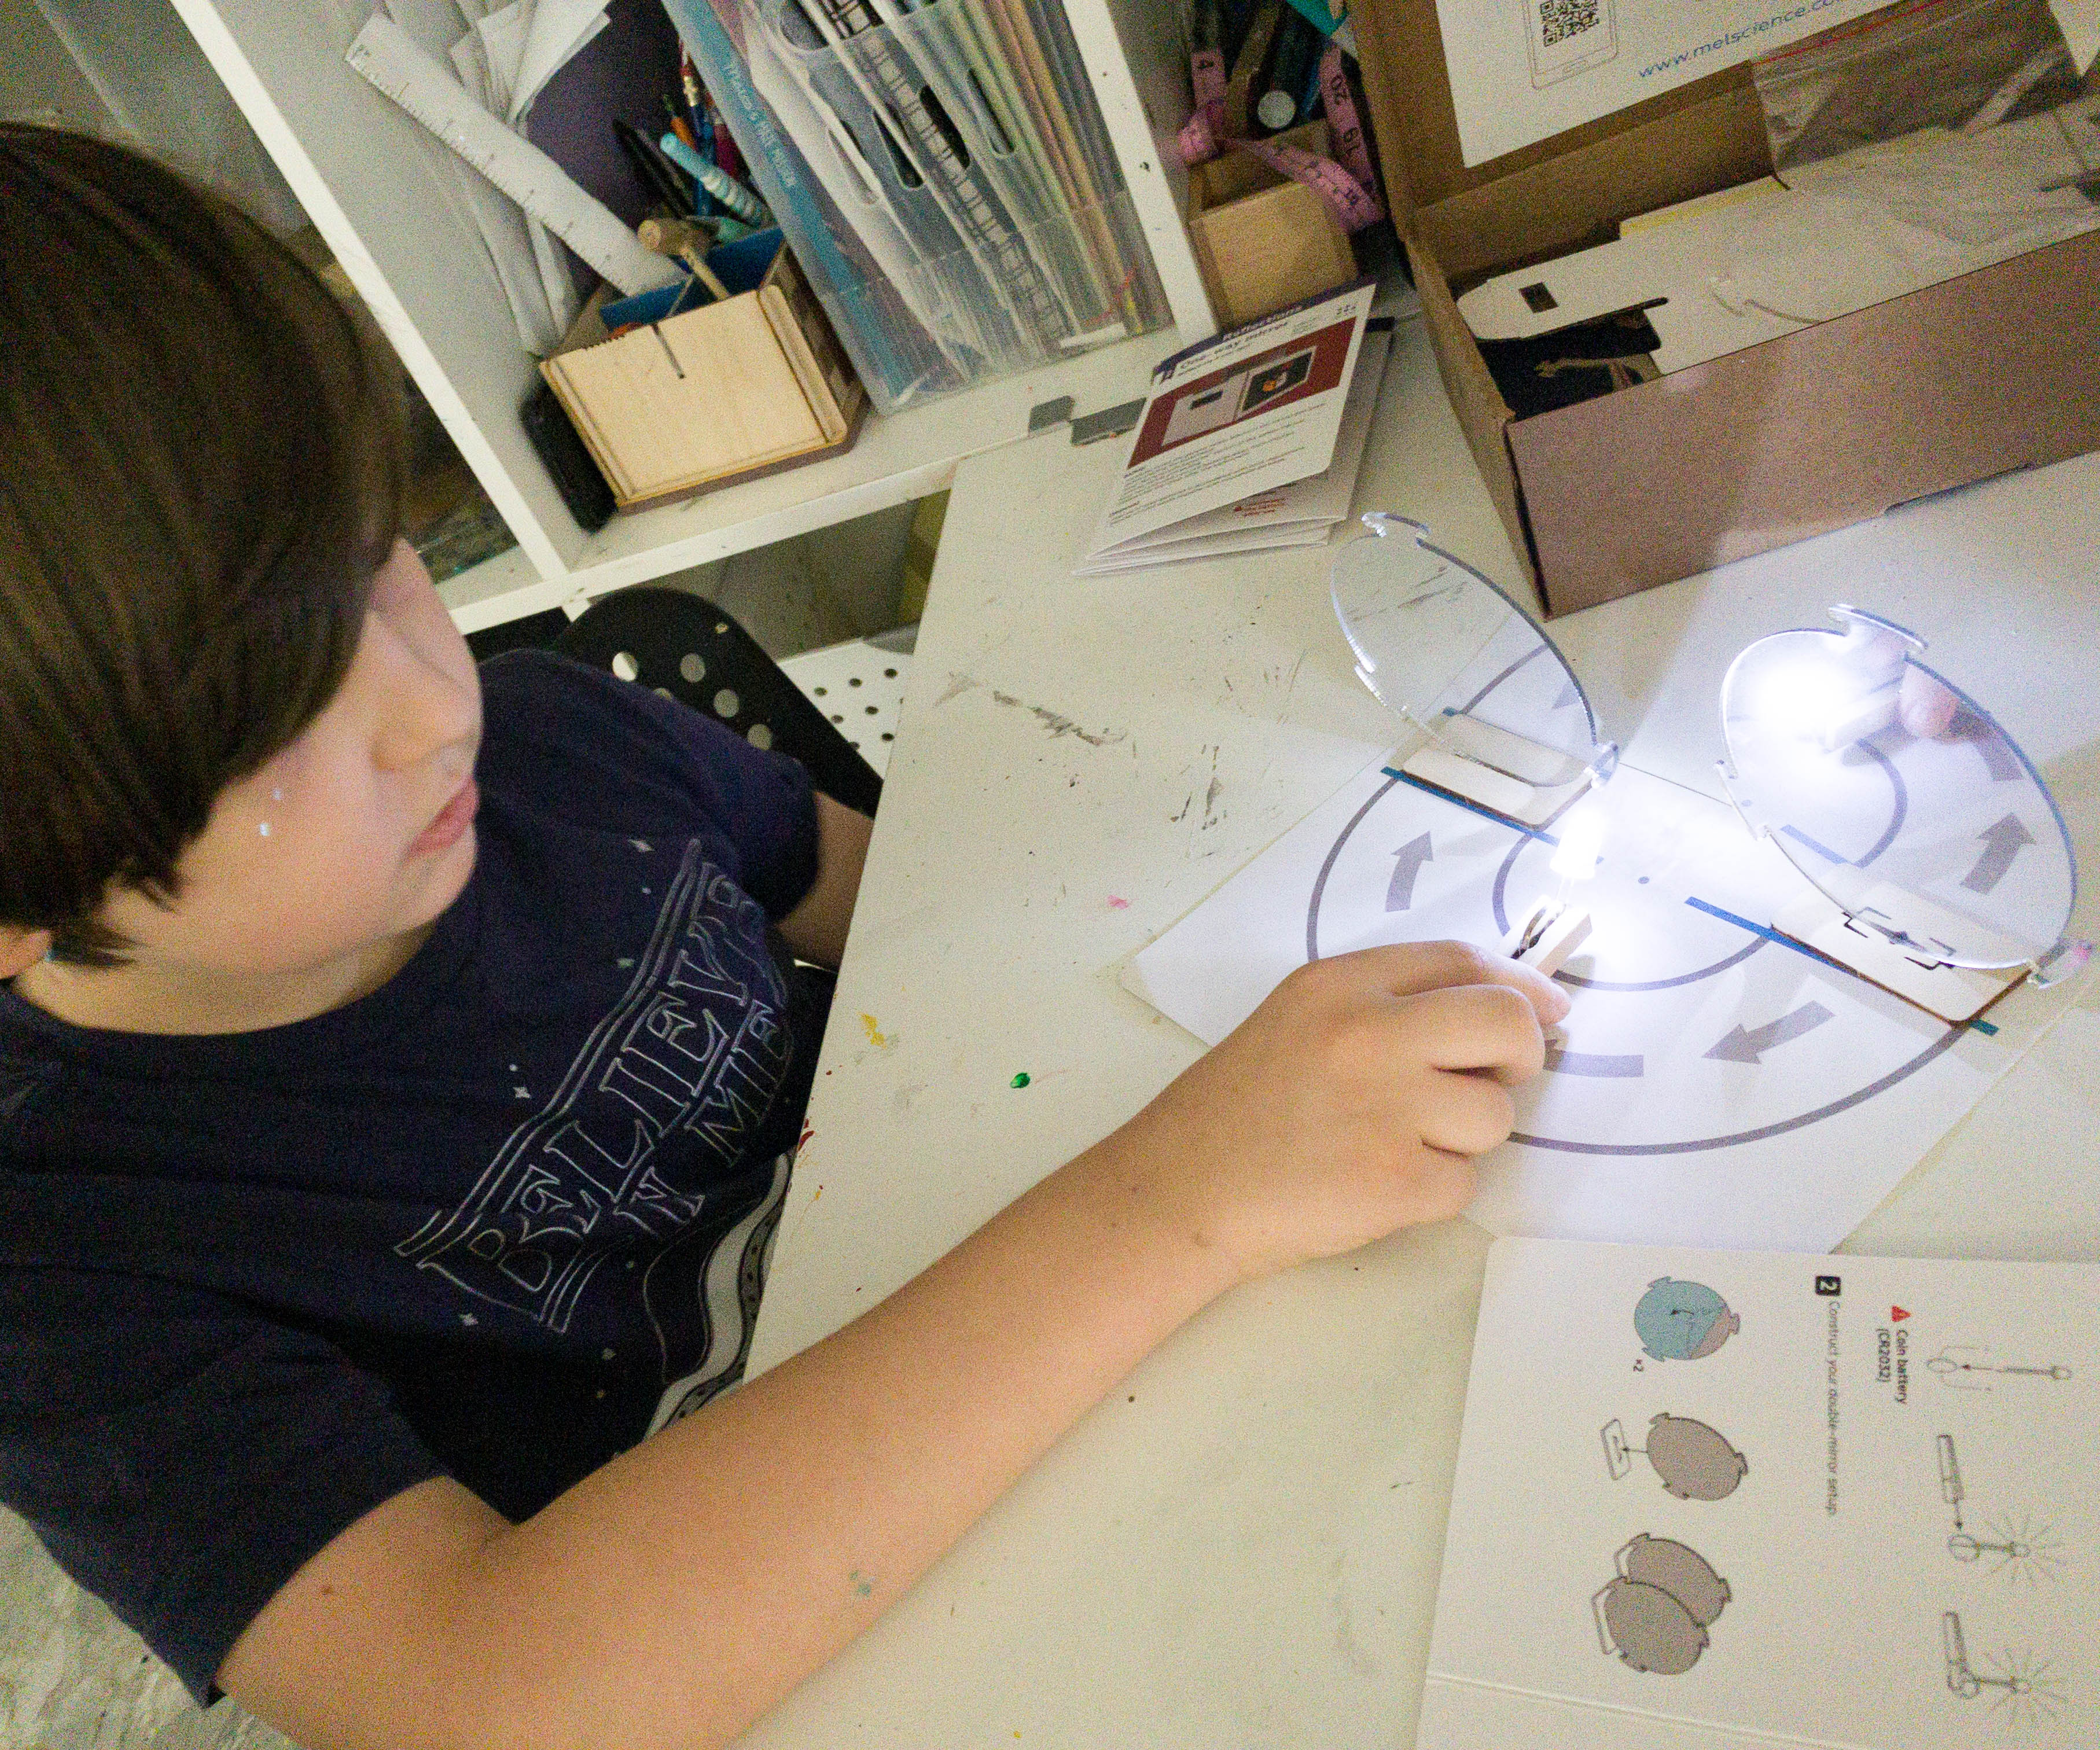
The first position of the mirrors is shown here. There’s actually nothing special when the mirrors are placed side by side.

They moved the mirrors closer together, and it produced a different effect on the images that appeared on the reflection.
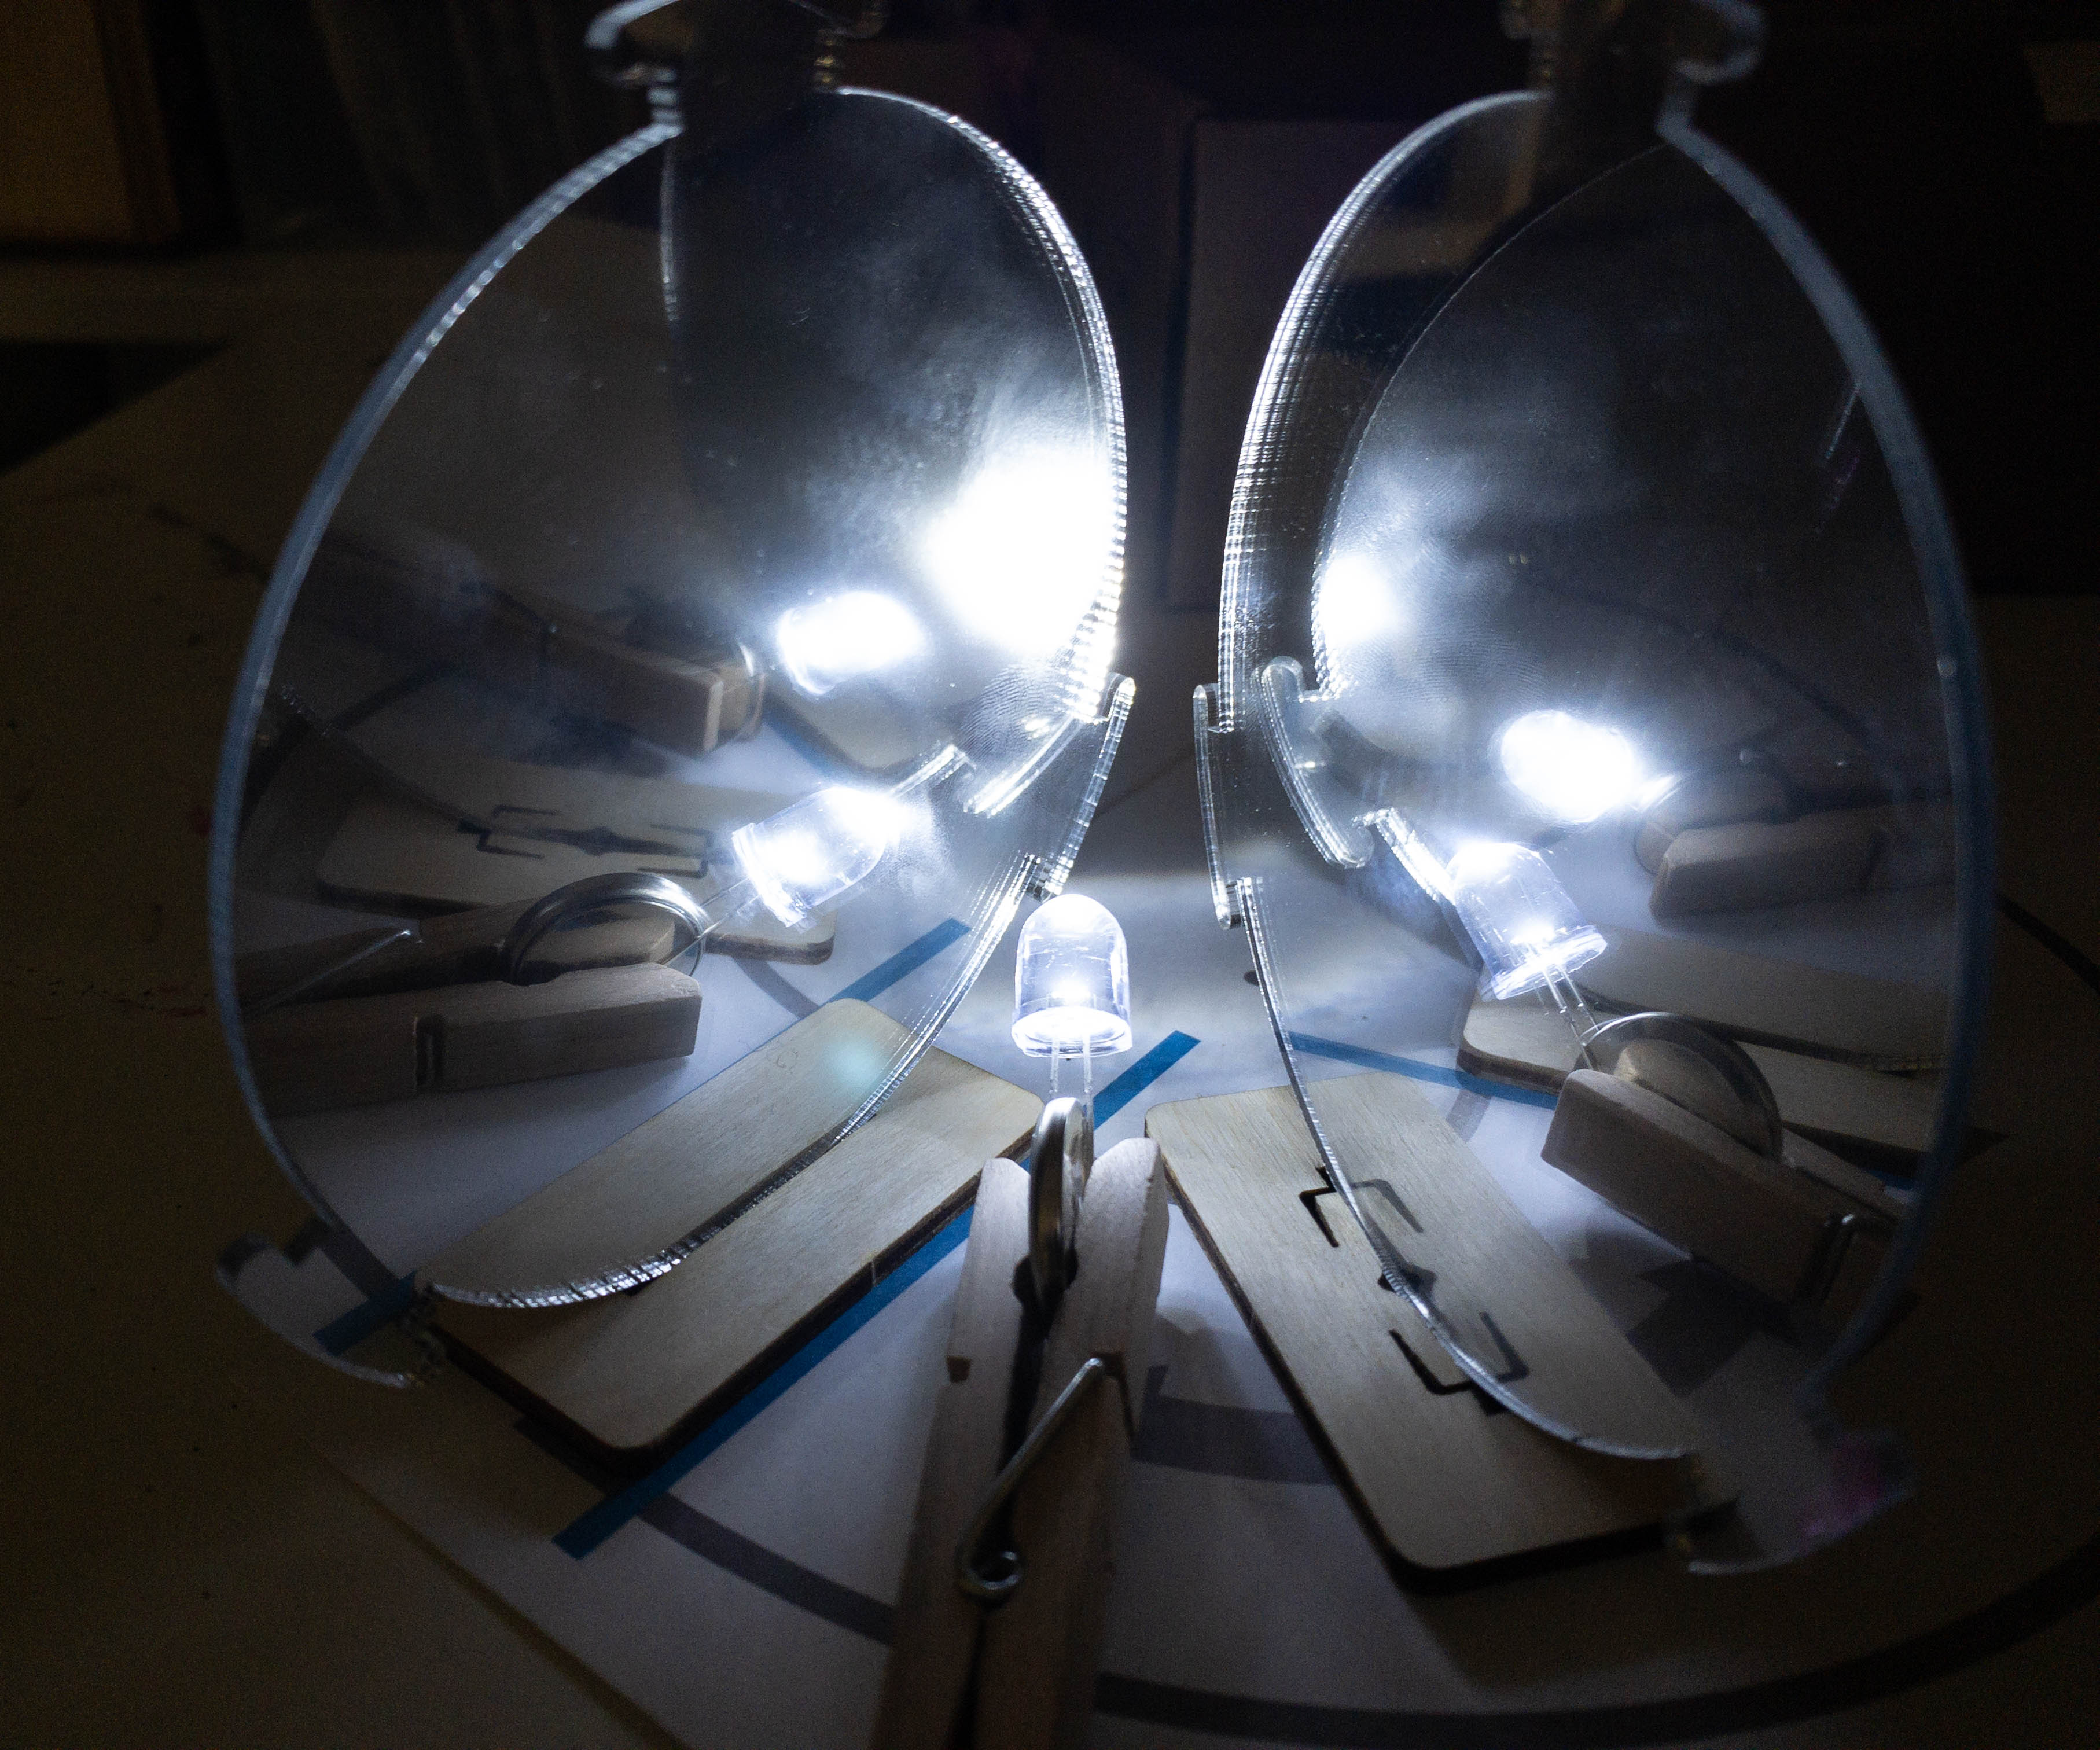
As the mirrors get closer together, more images of the LED appear!
They also tried putting the mirrors face-to-face, and it produced 8 LED images in this position!
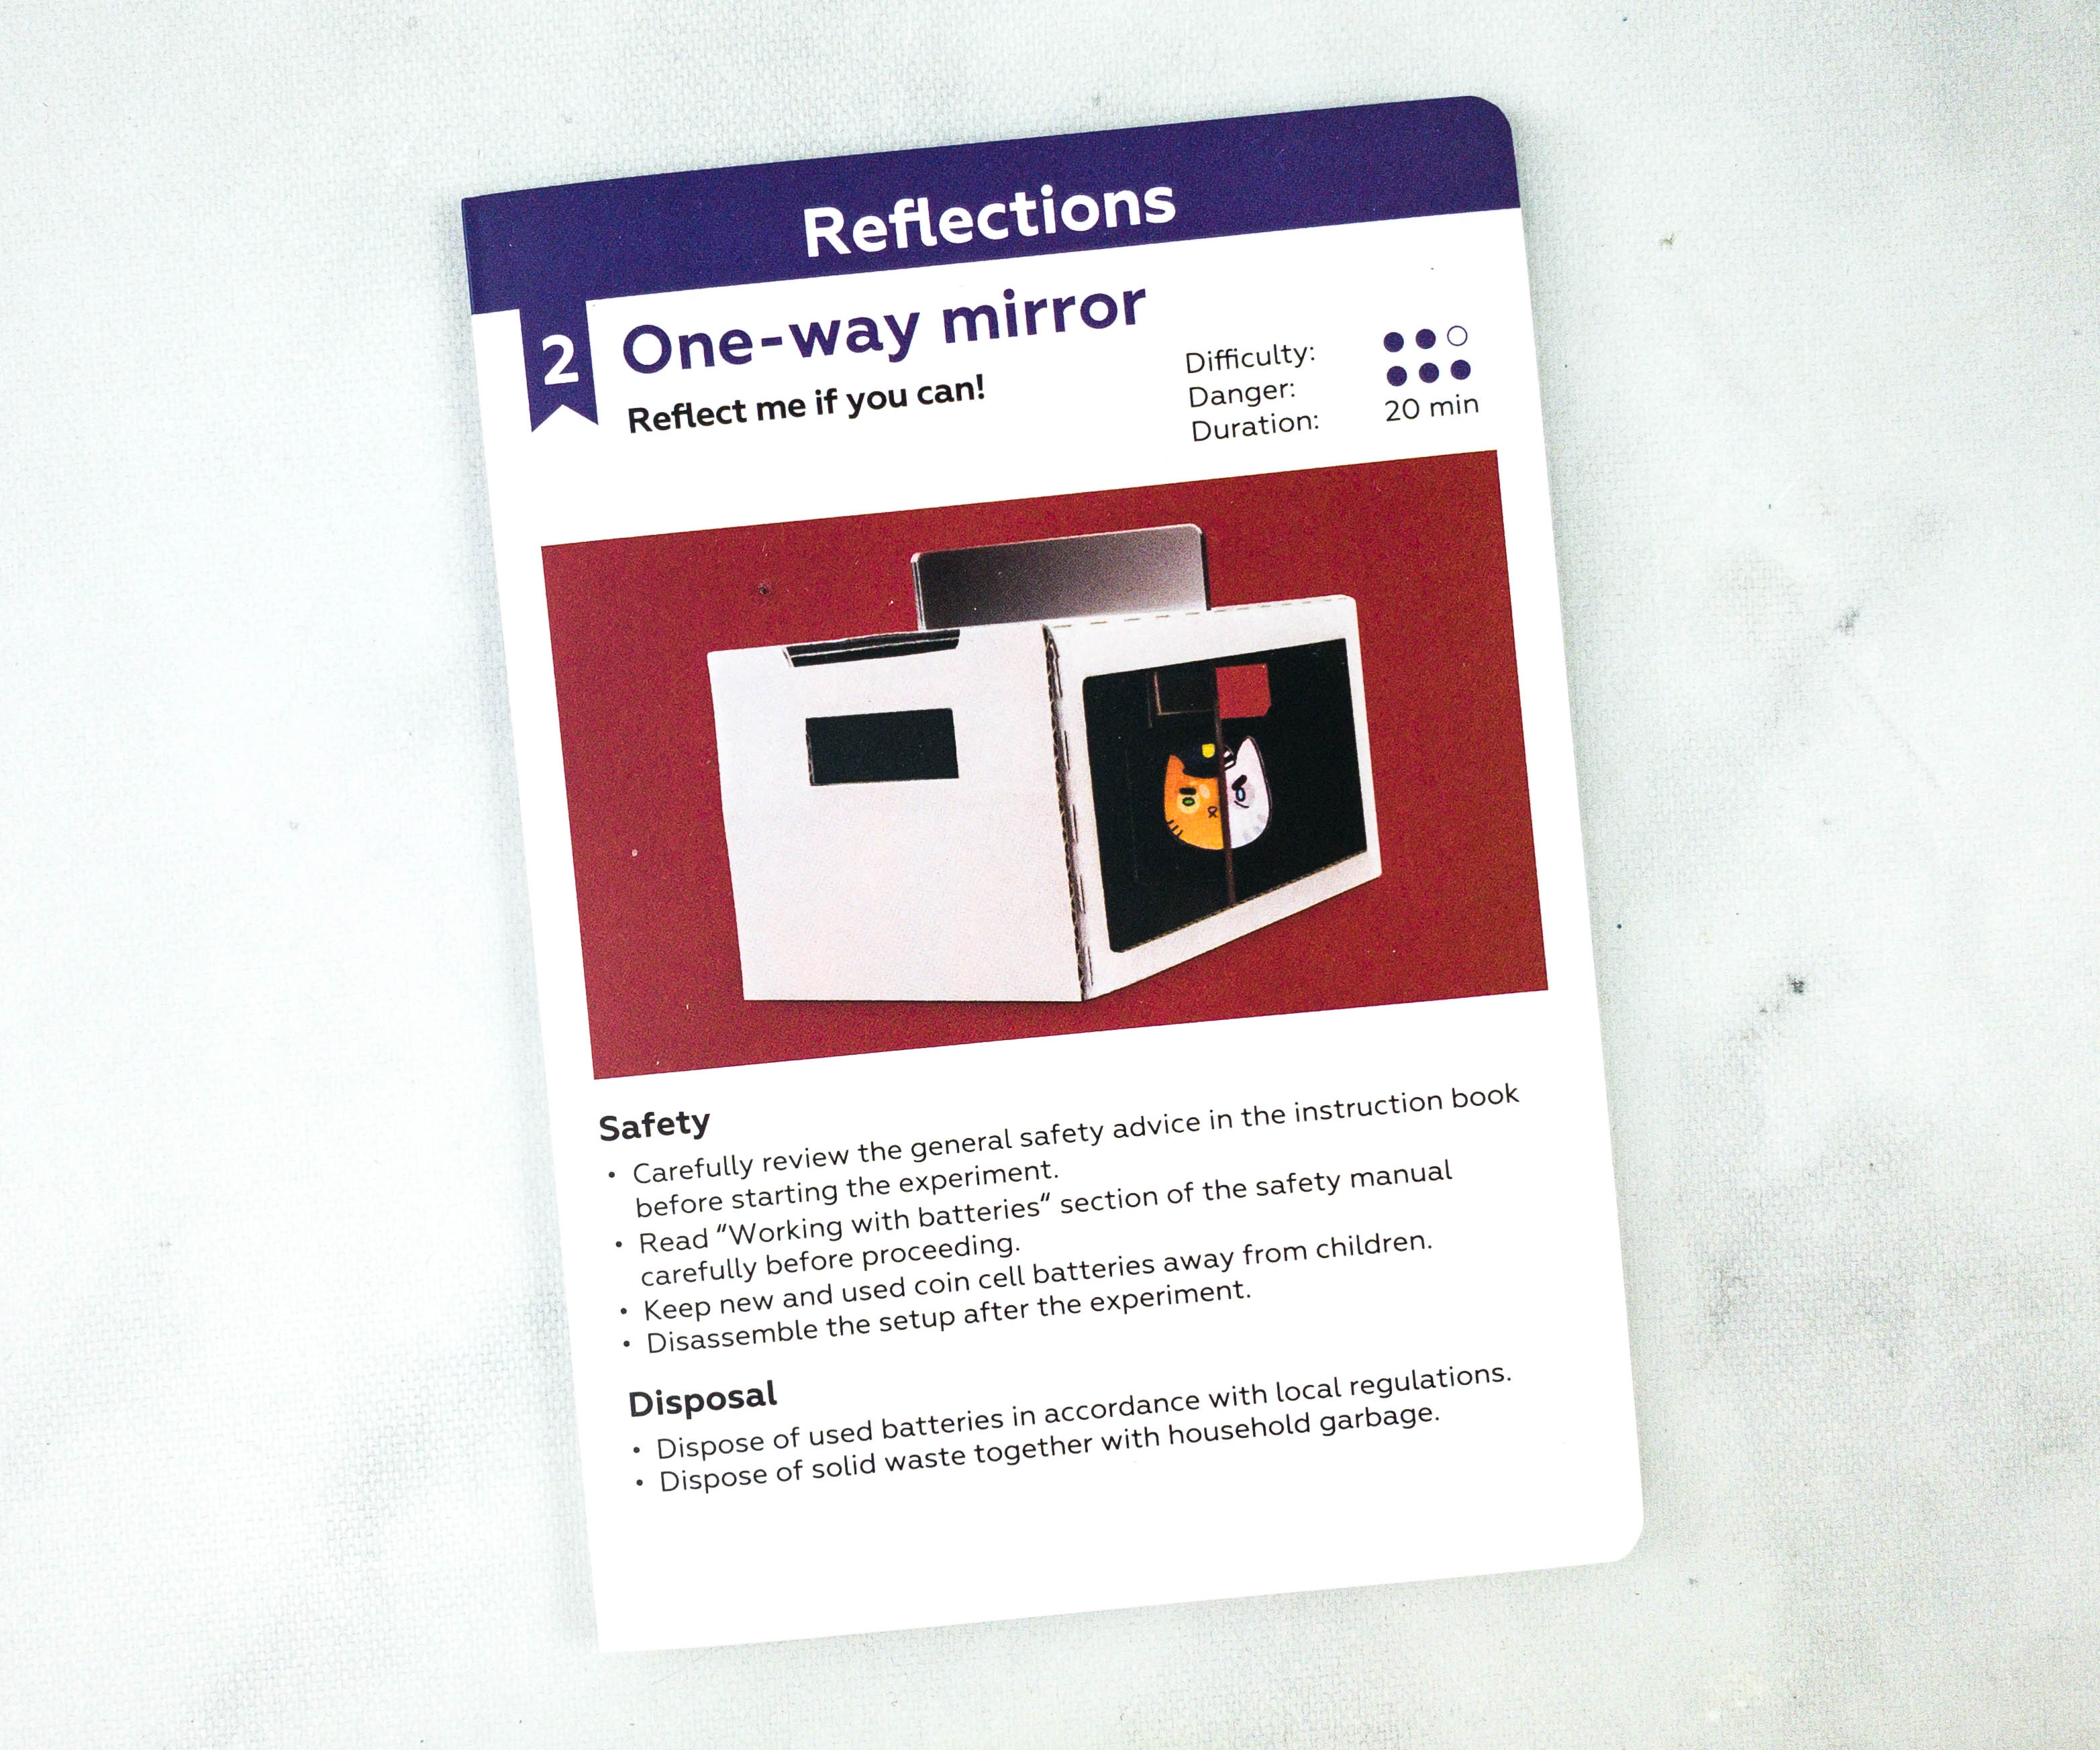
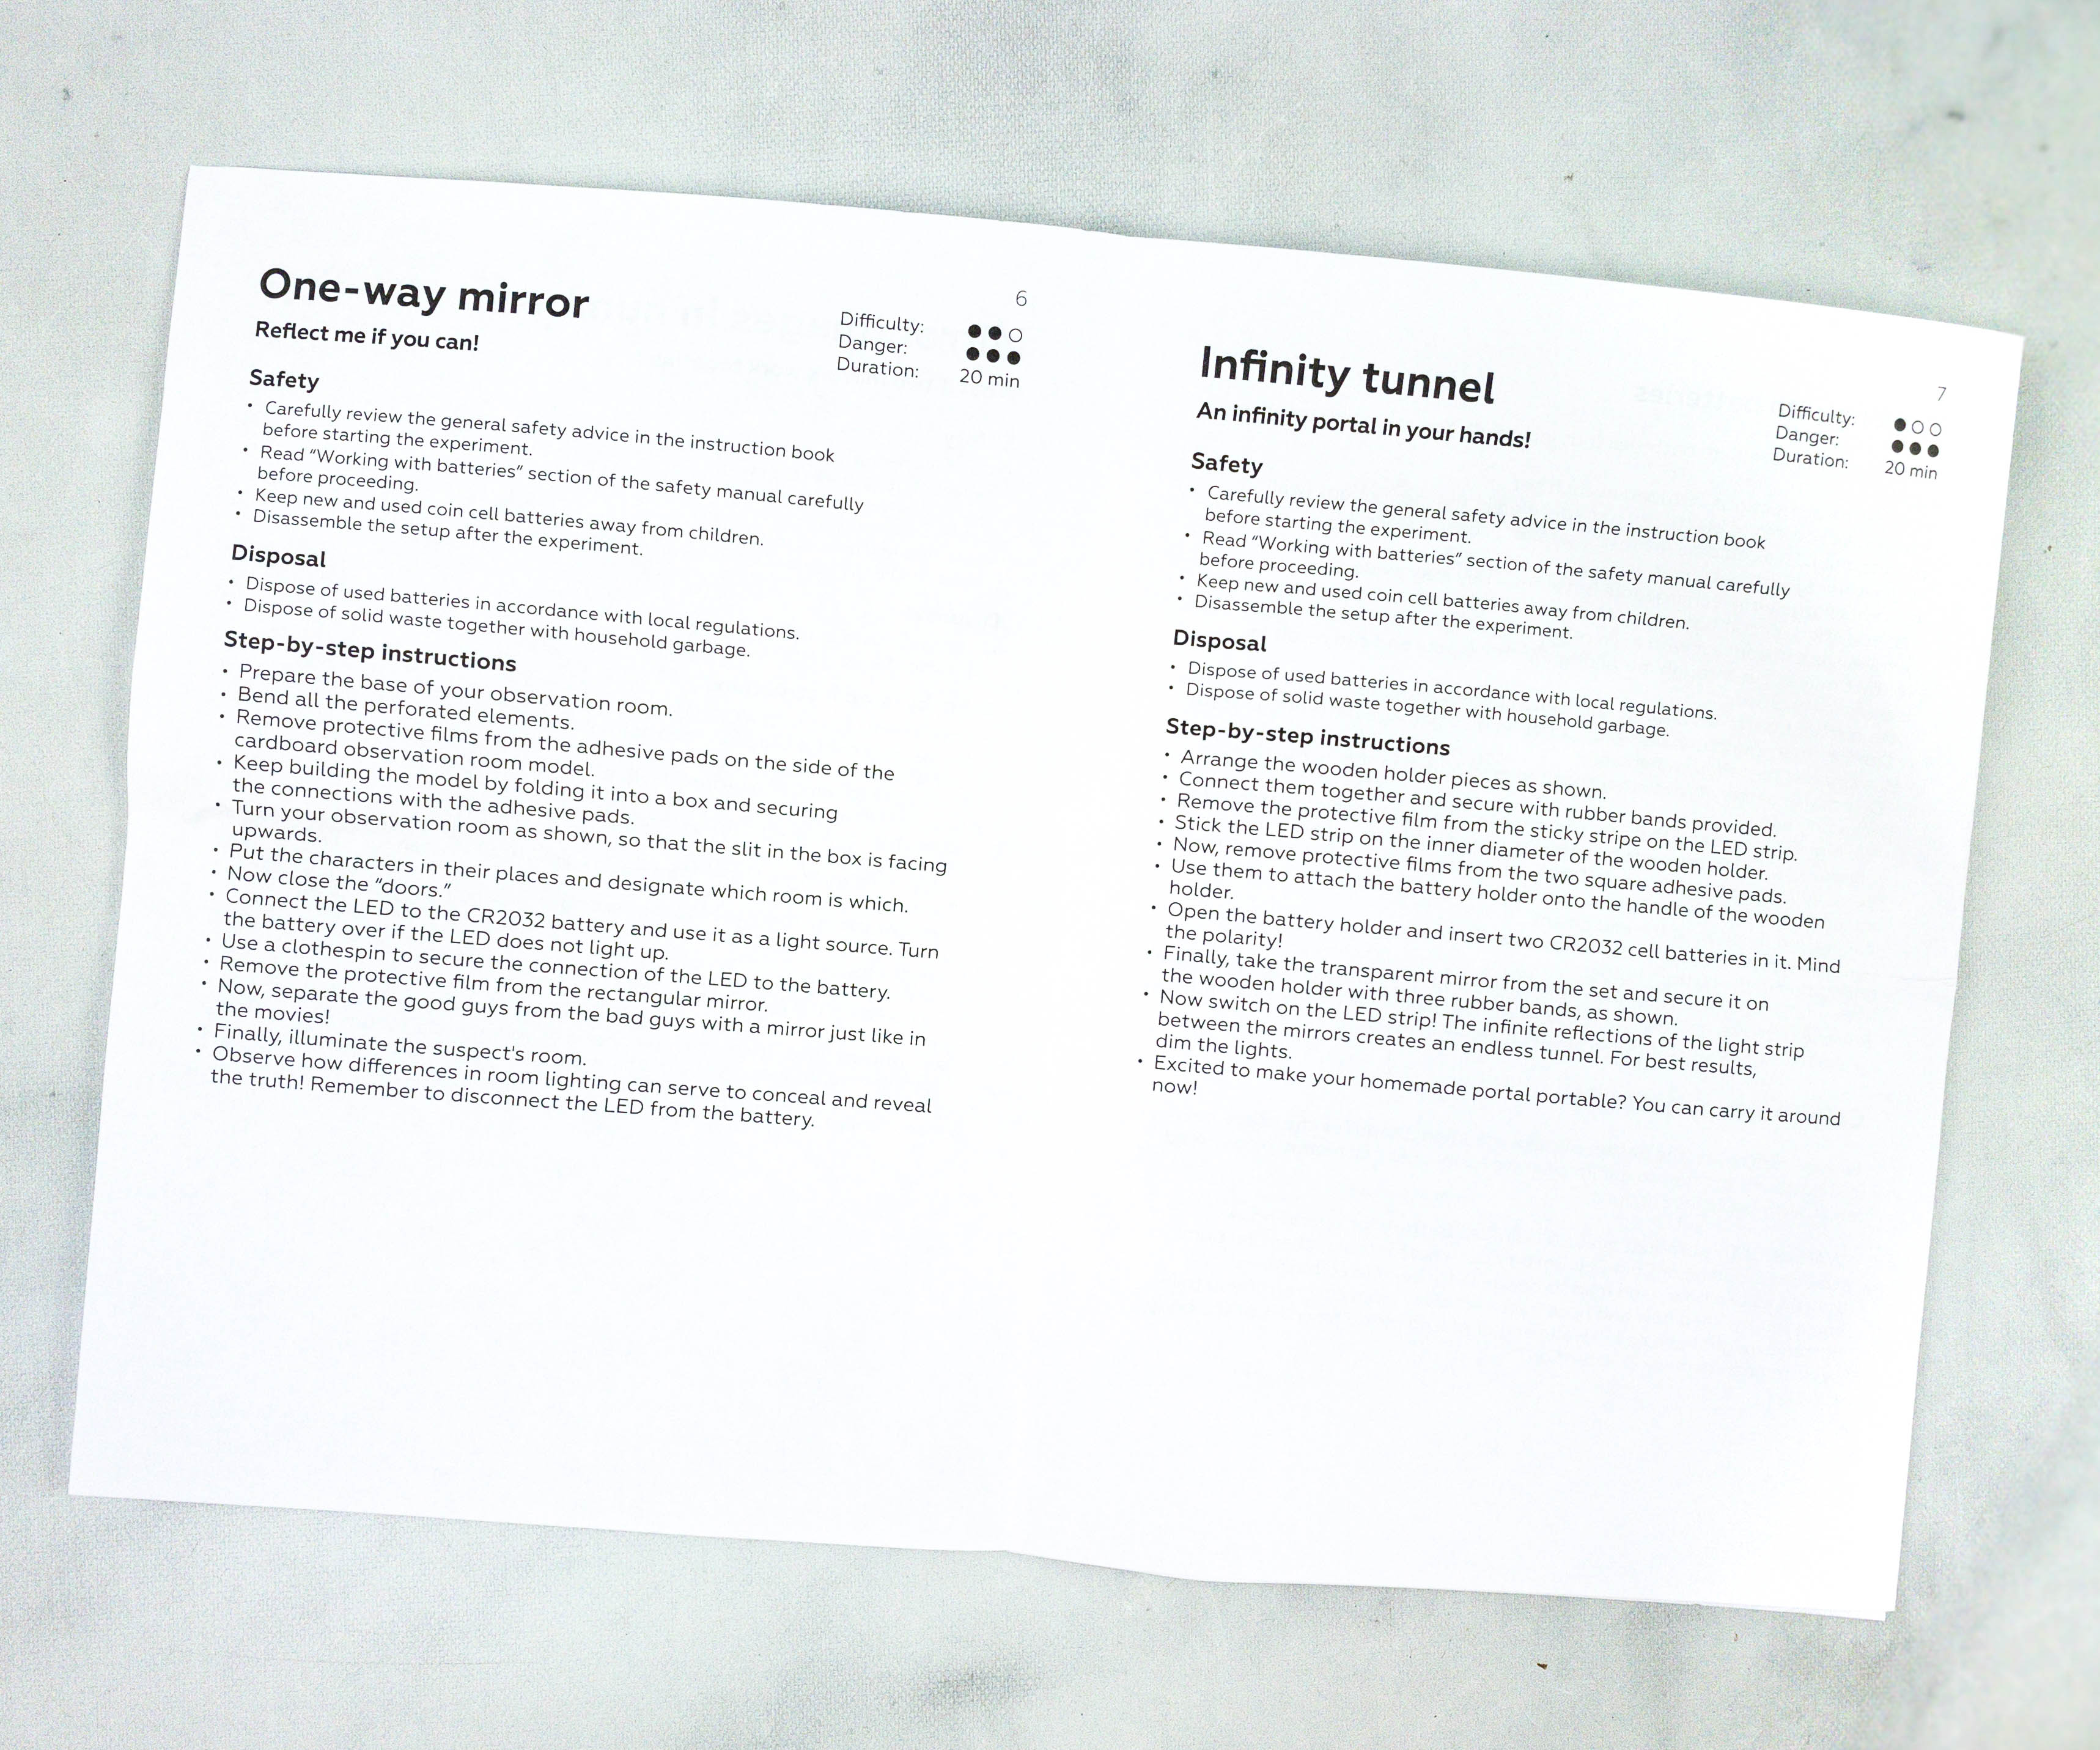
Activity #2: One-way Mirror. The next activity is about how a one-way mirror works!
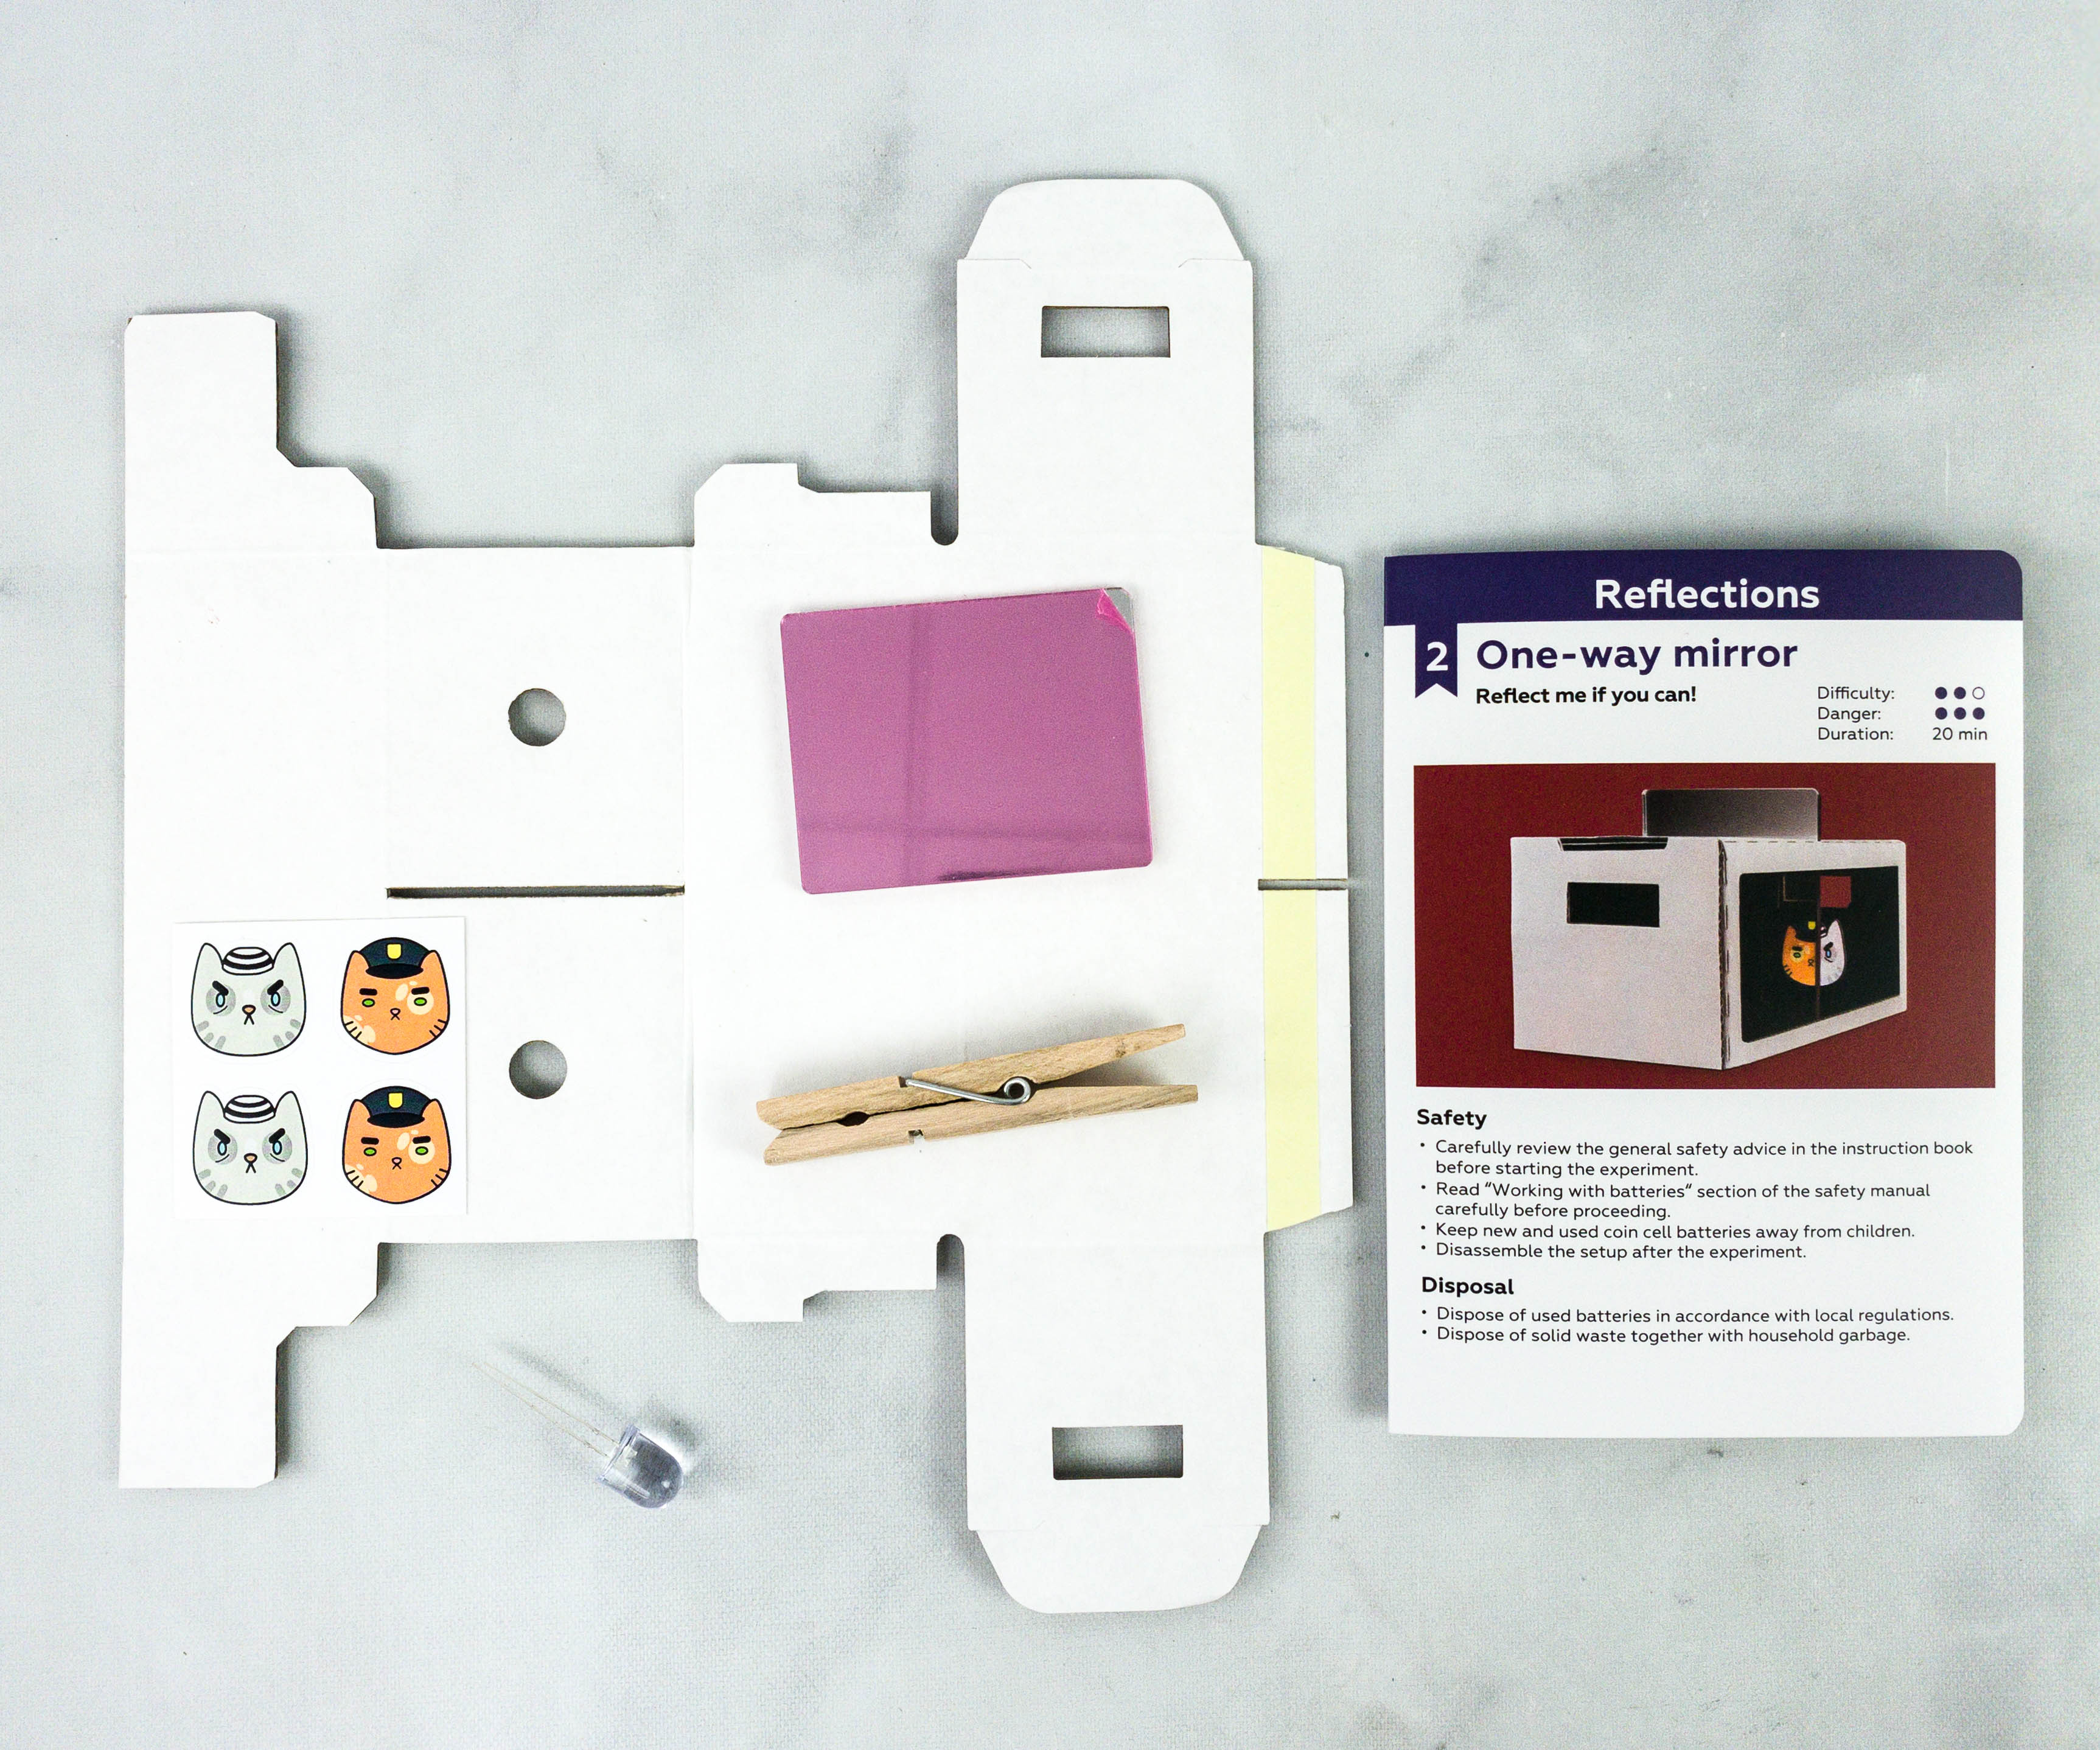
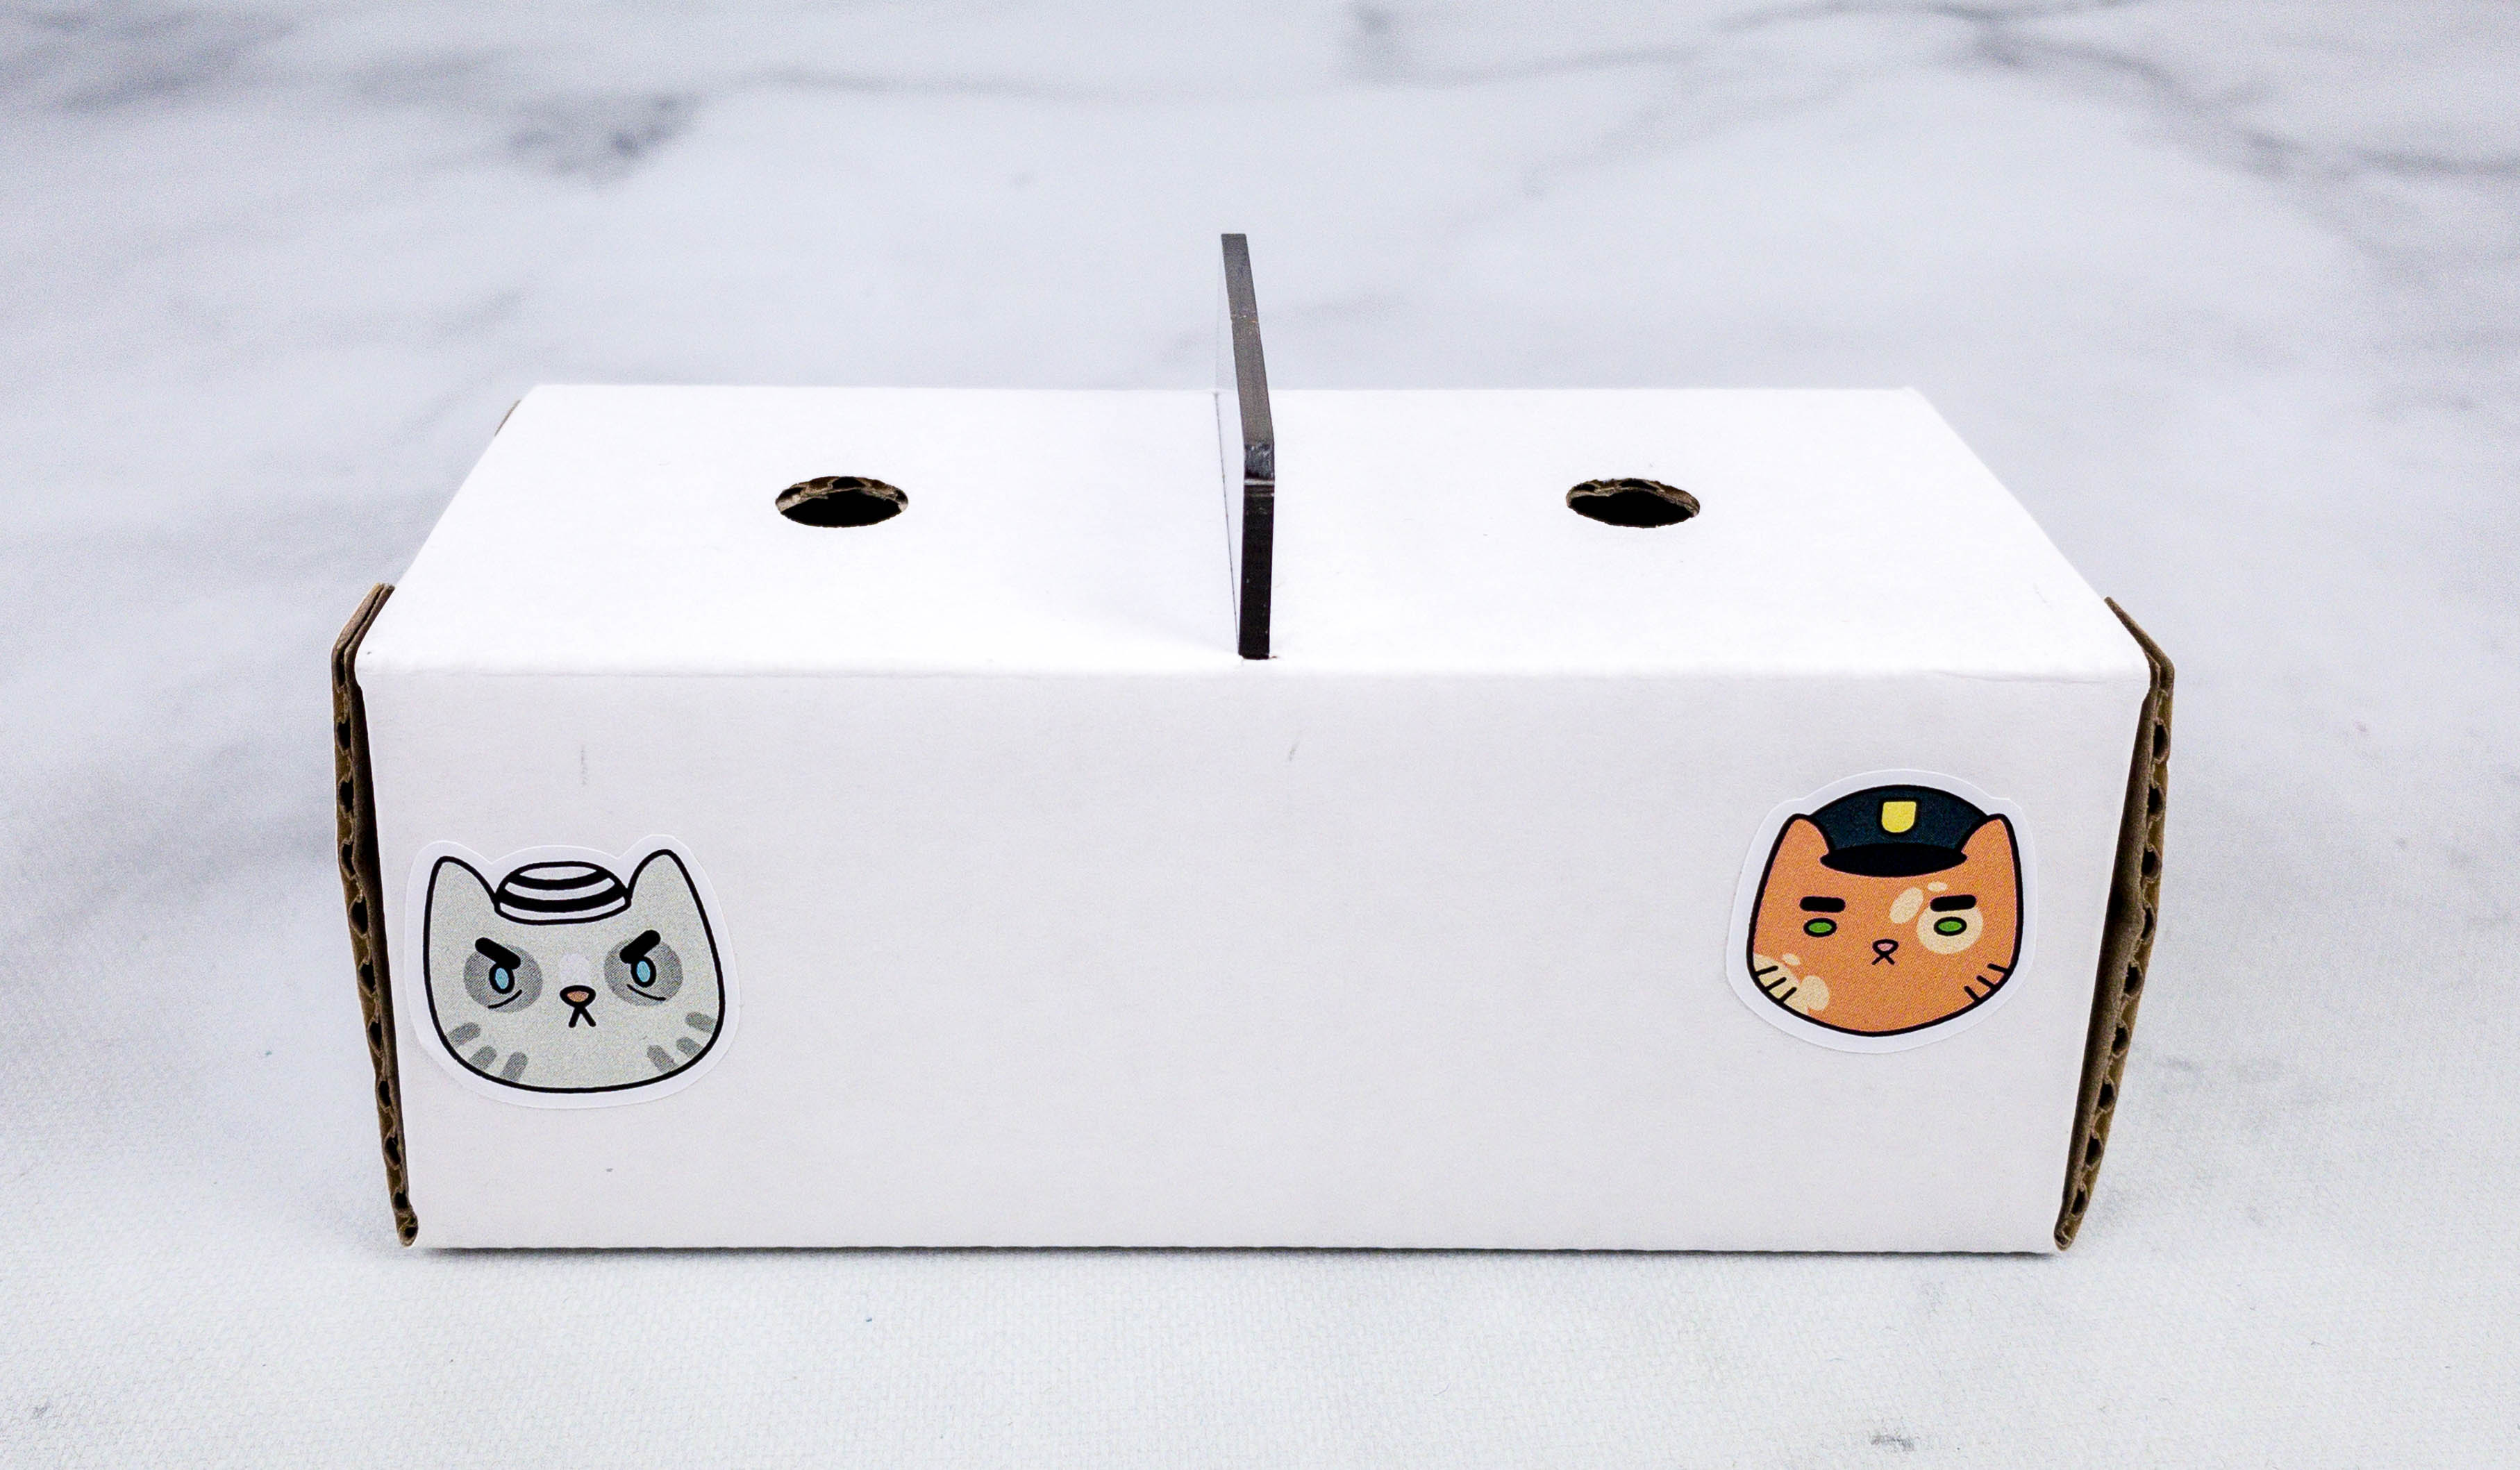
These are the materials that my kids used for the next activity. It even included cute animal images!
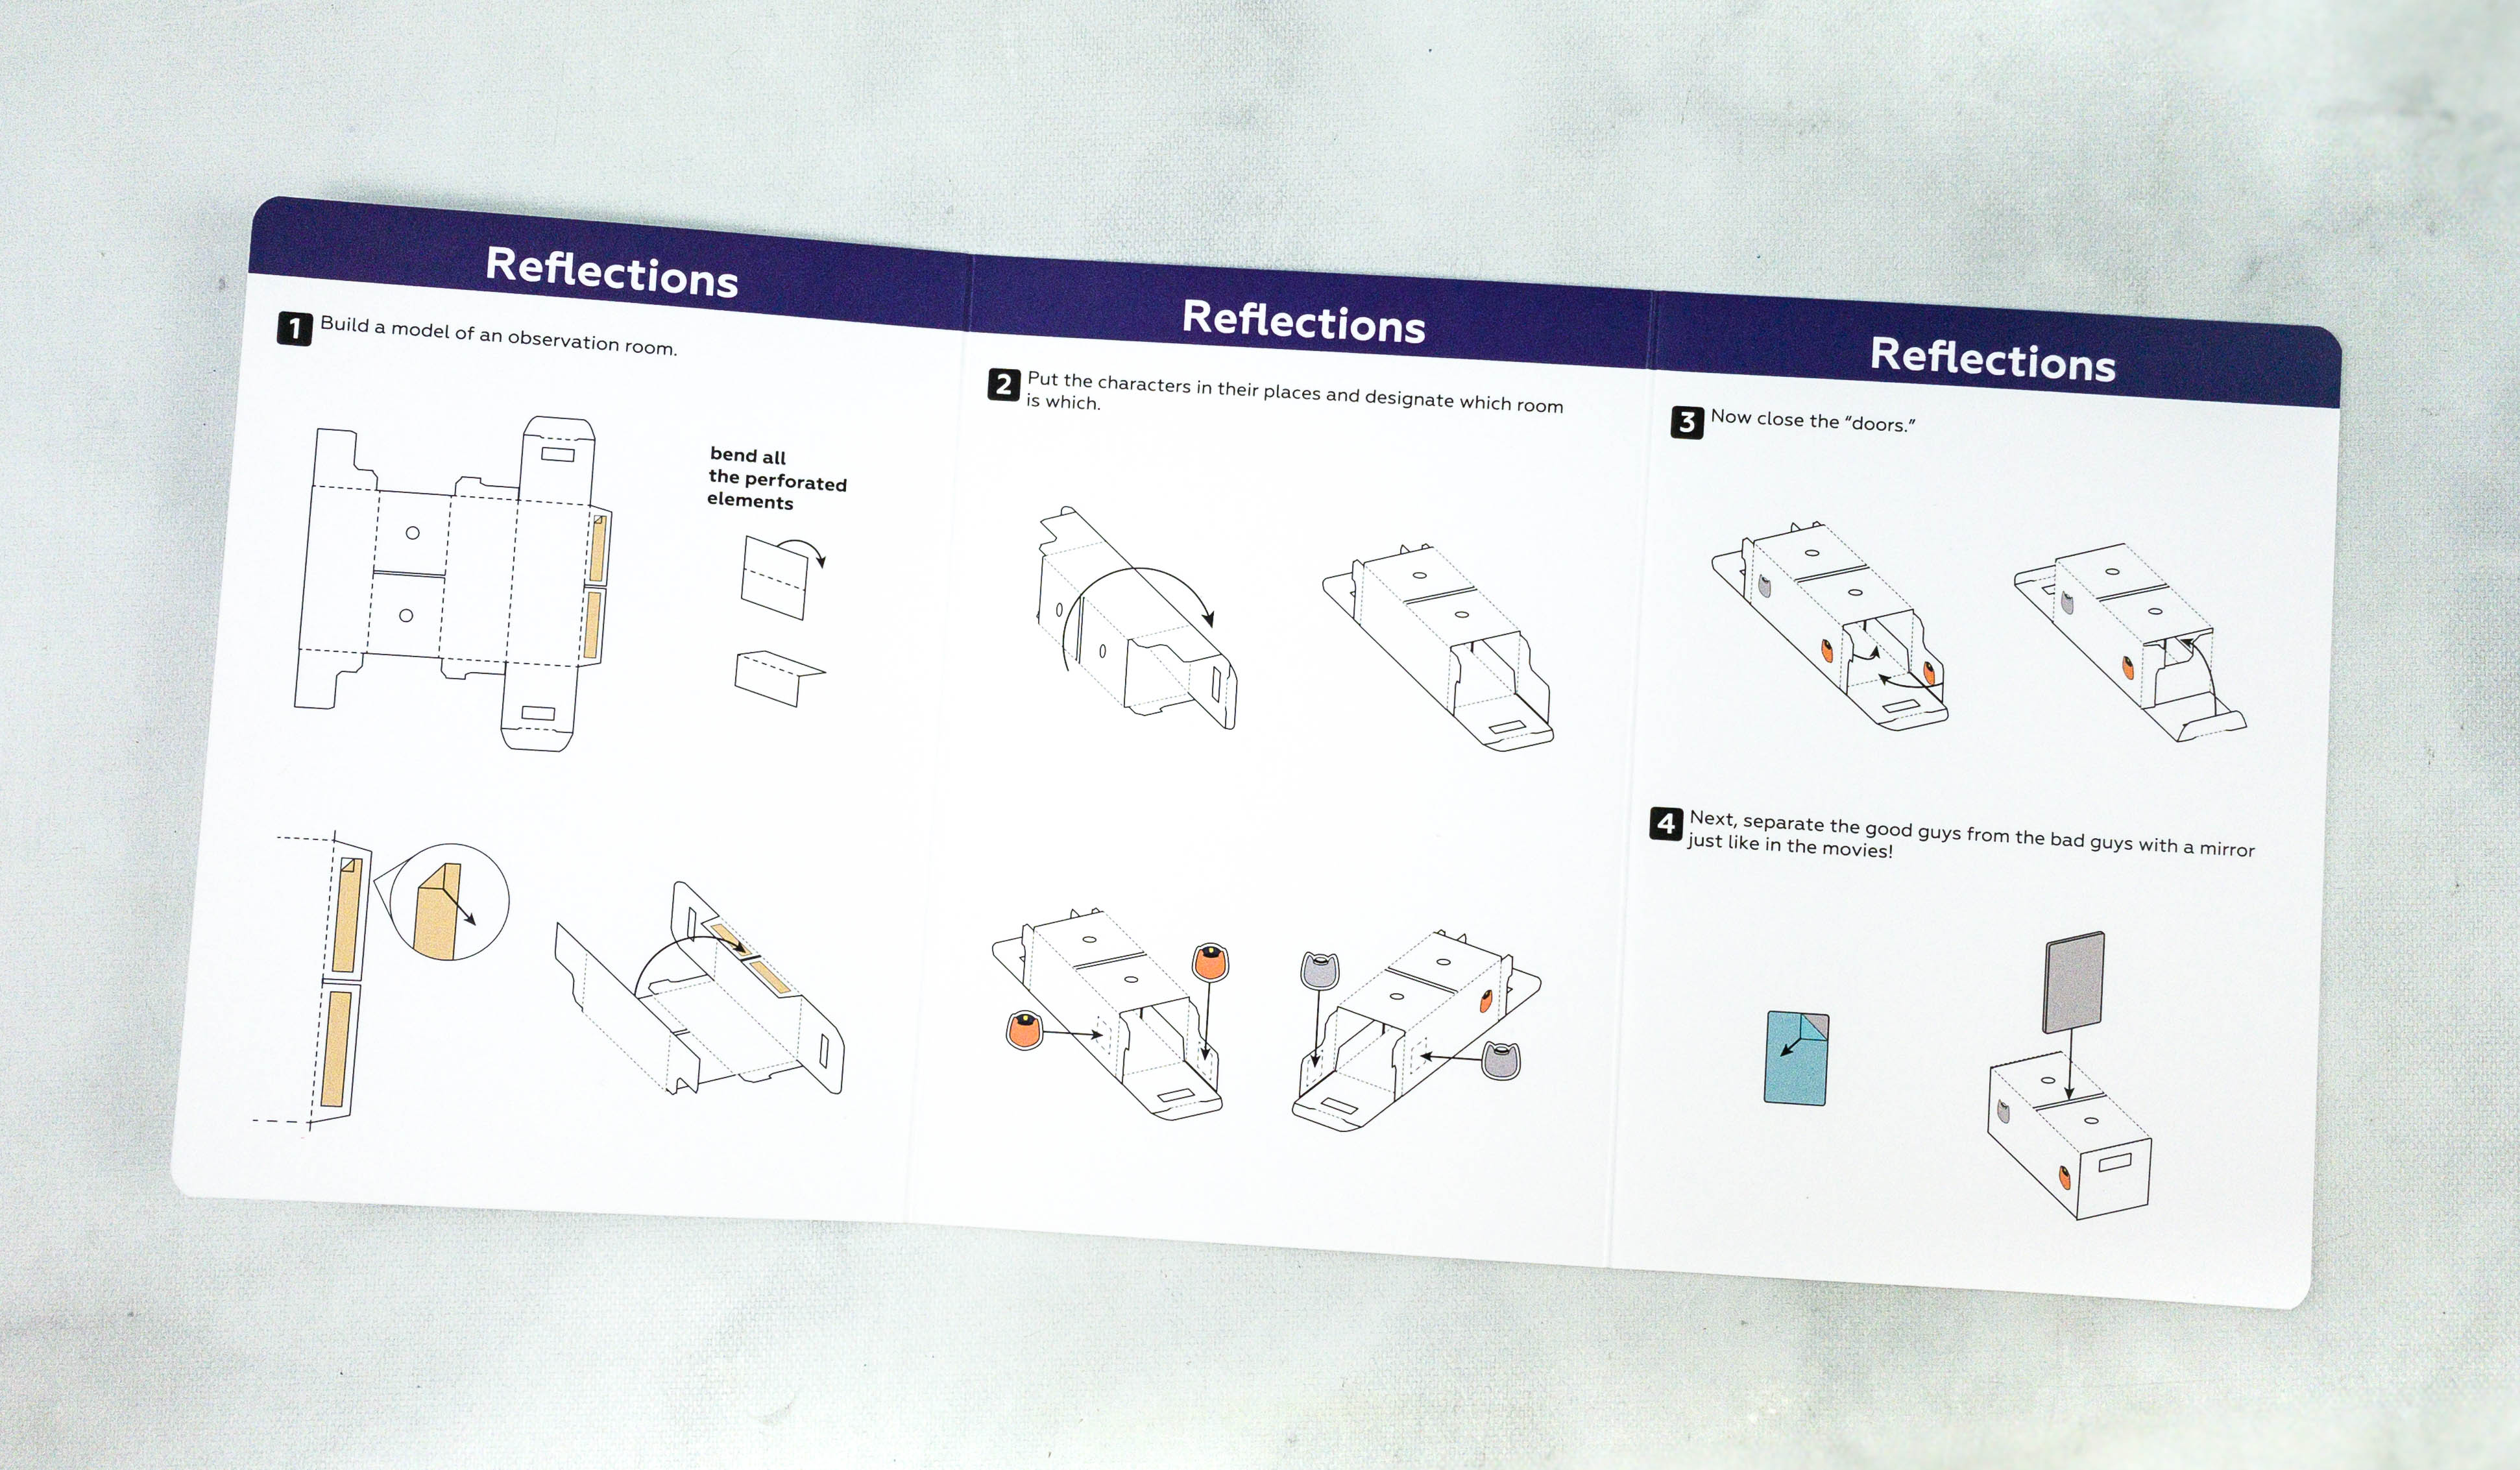
According to the instructions, they are going to build an observation room.
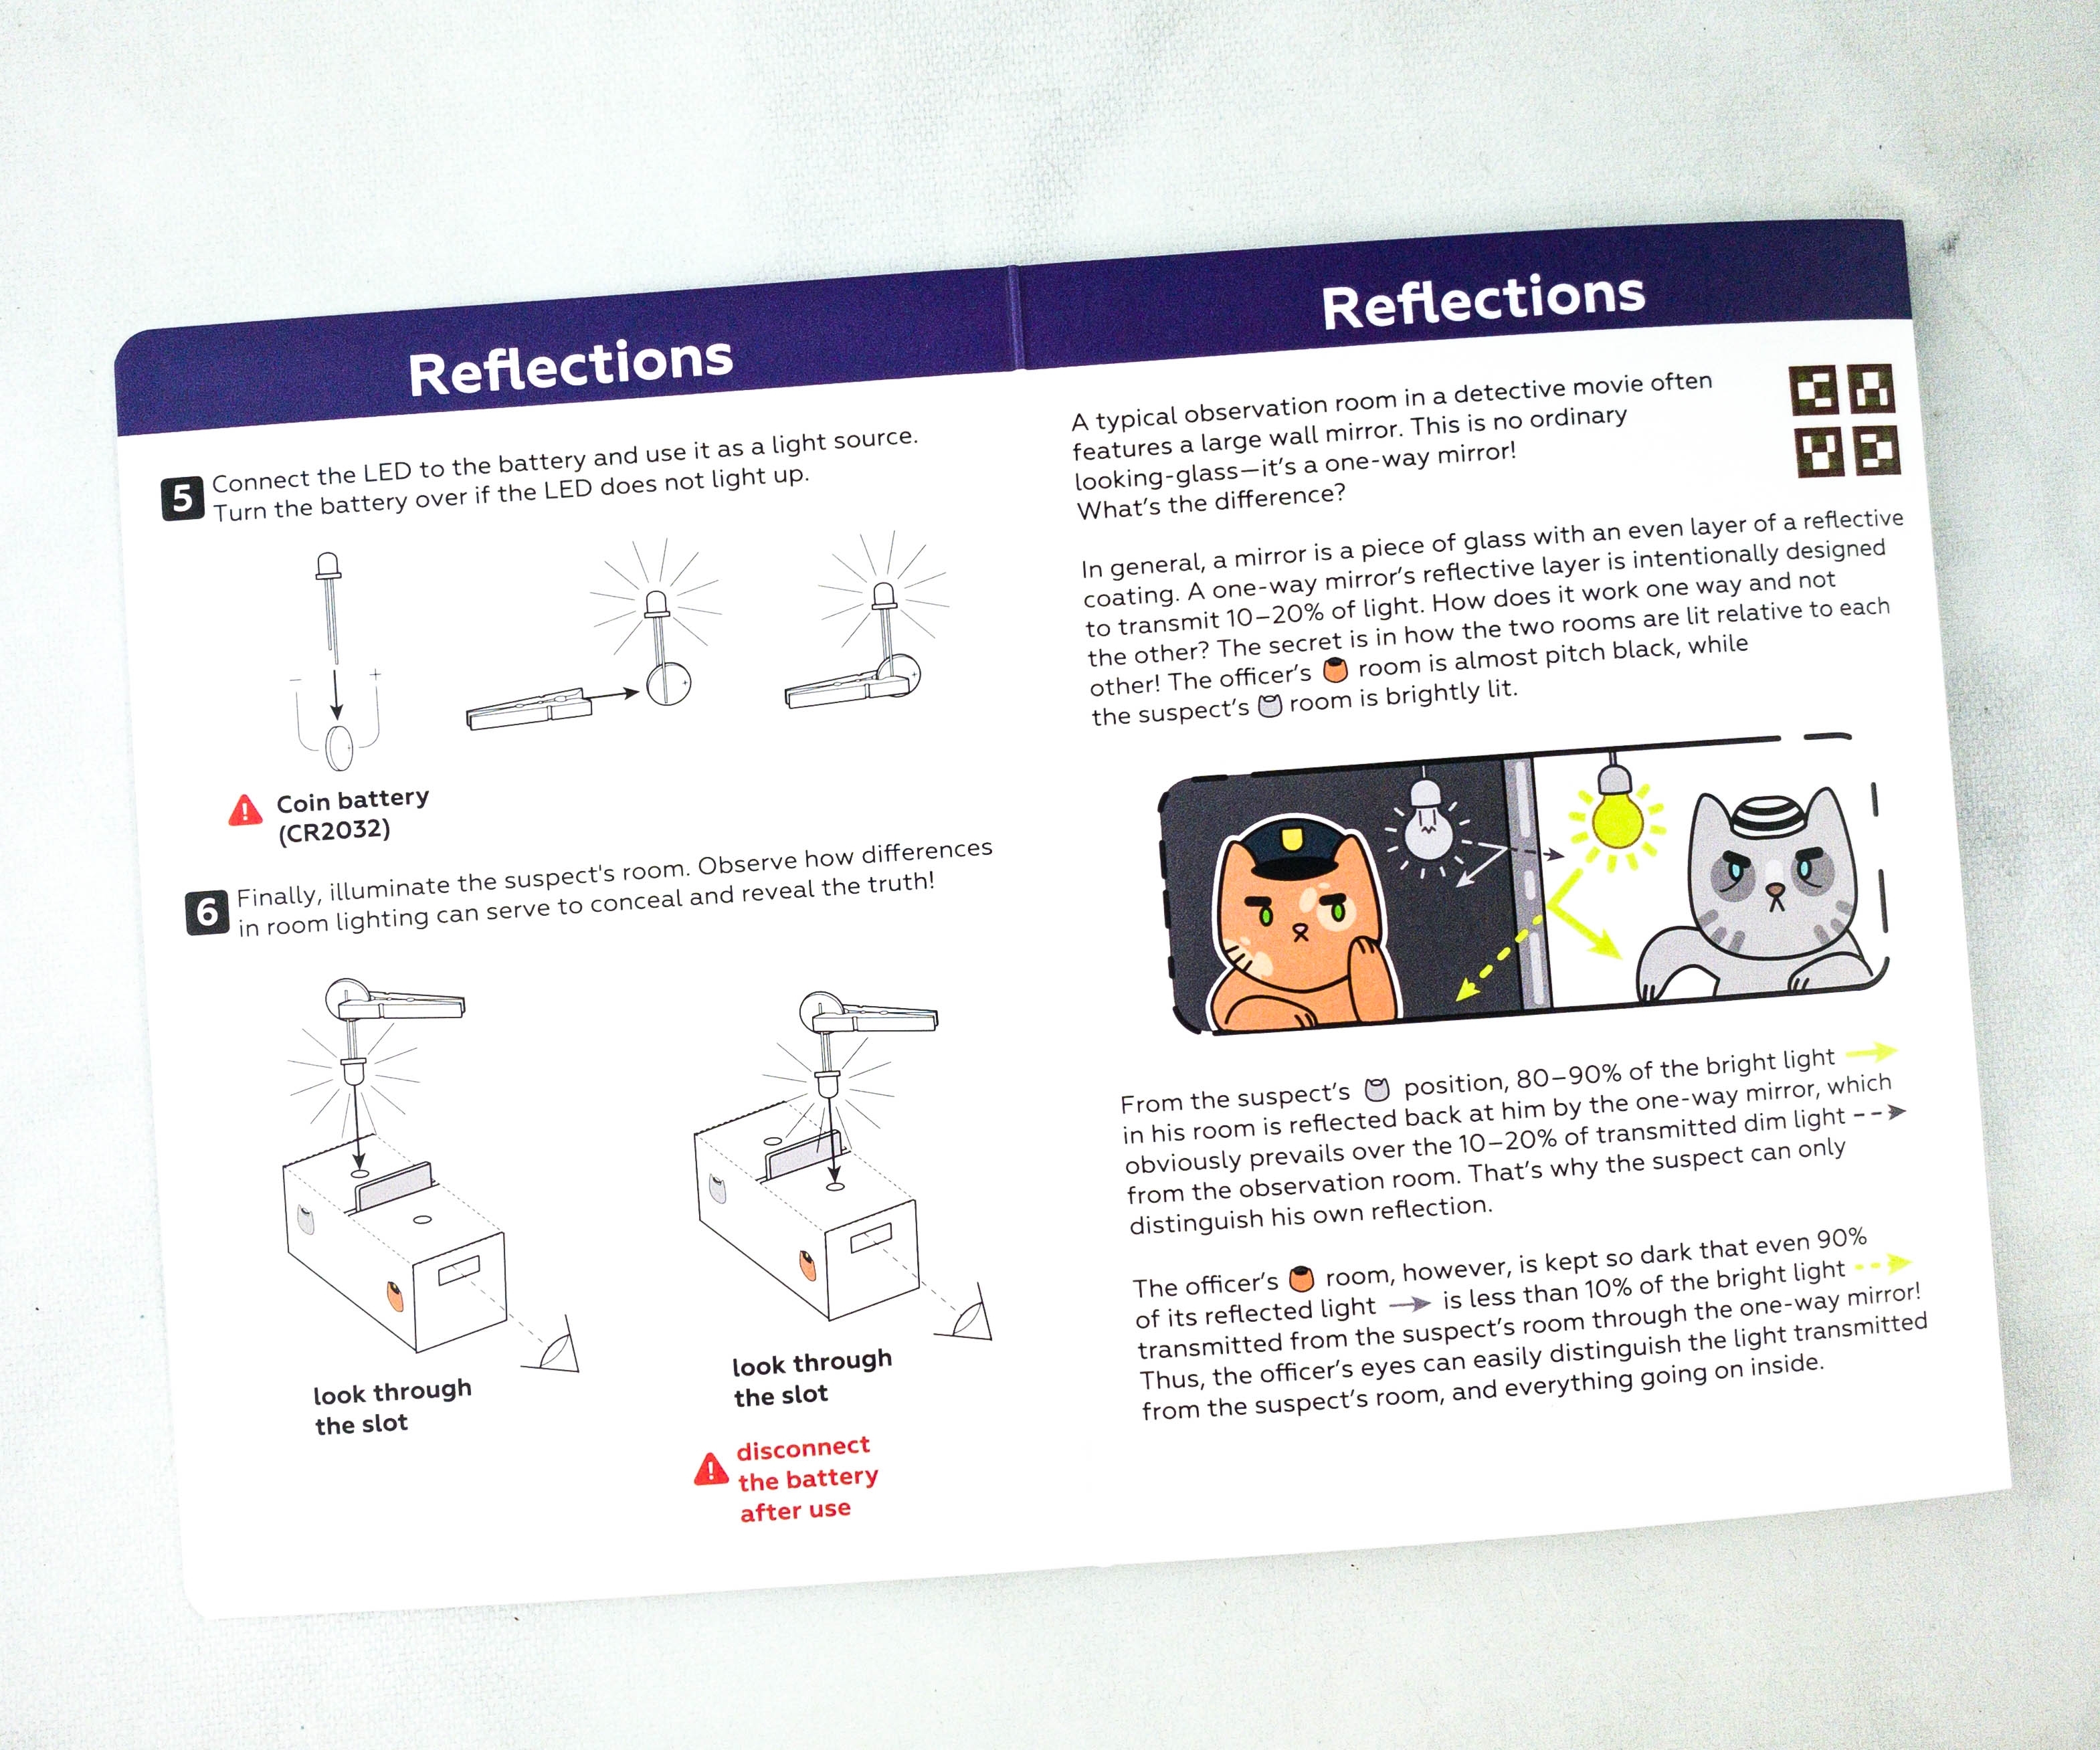
There’s a brief explanation of how one-way mirrors work. The light on opposite sides plays a major role in this mirror effect.

My older son started by constructing the observation room. It’s easy to fold the material because it has perforated parts on it.
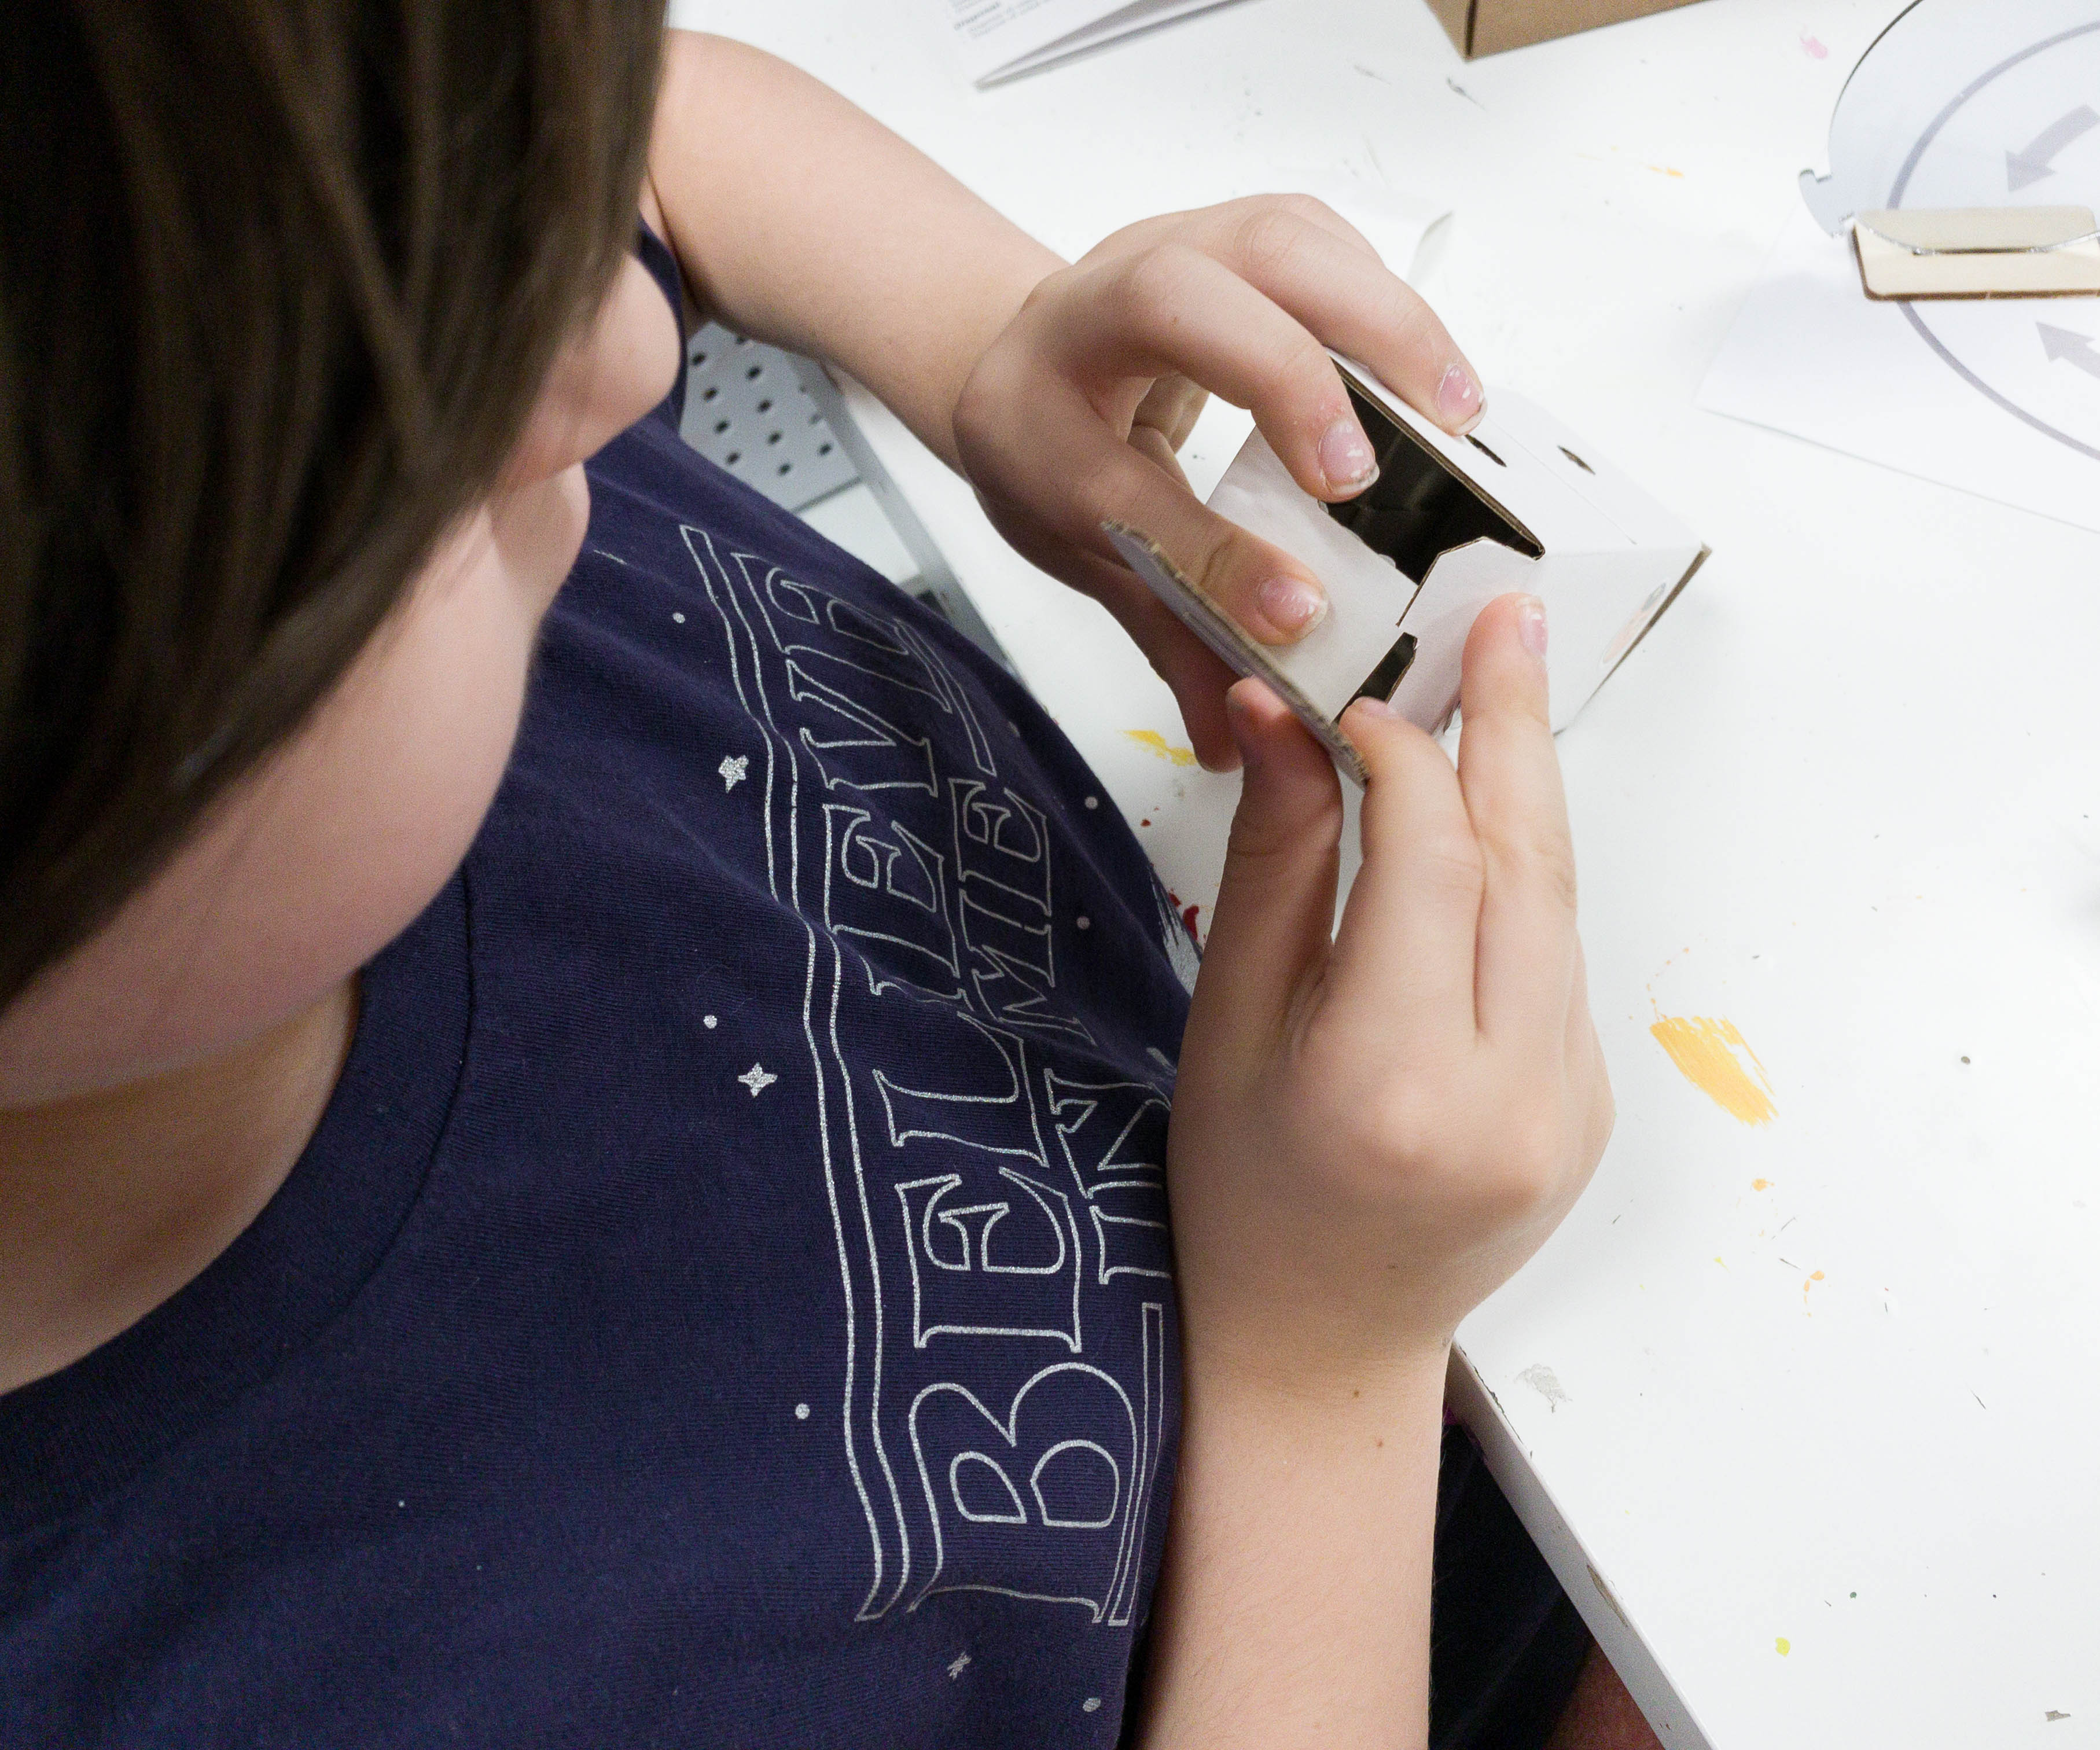
After placing the good and the bad guy, it’s now time to close it on both sides!
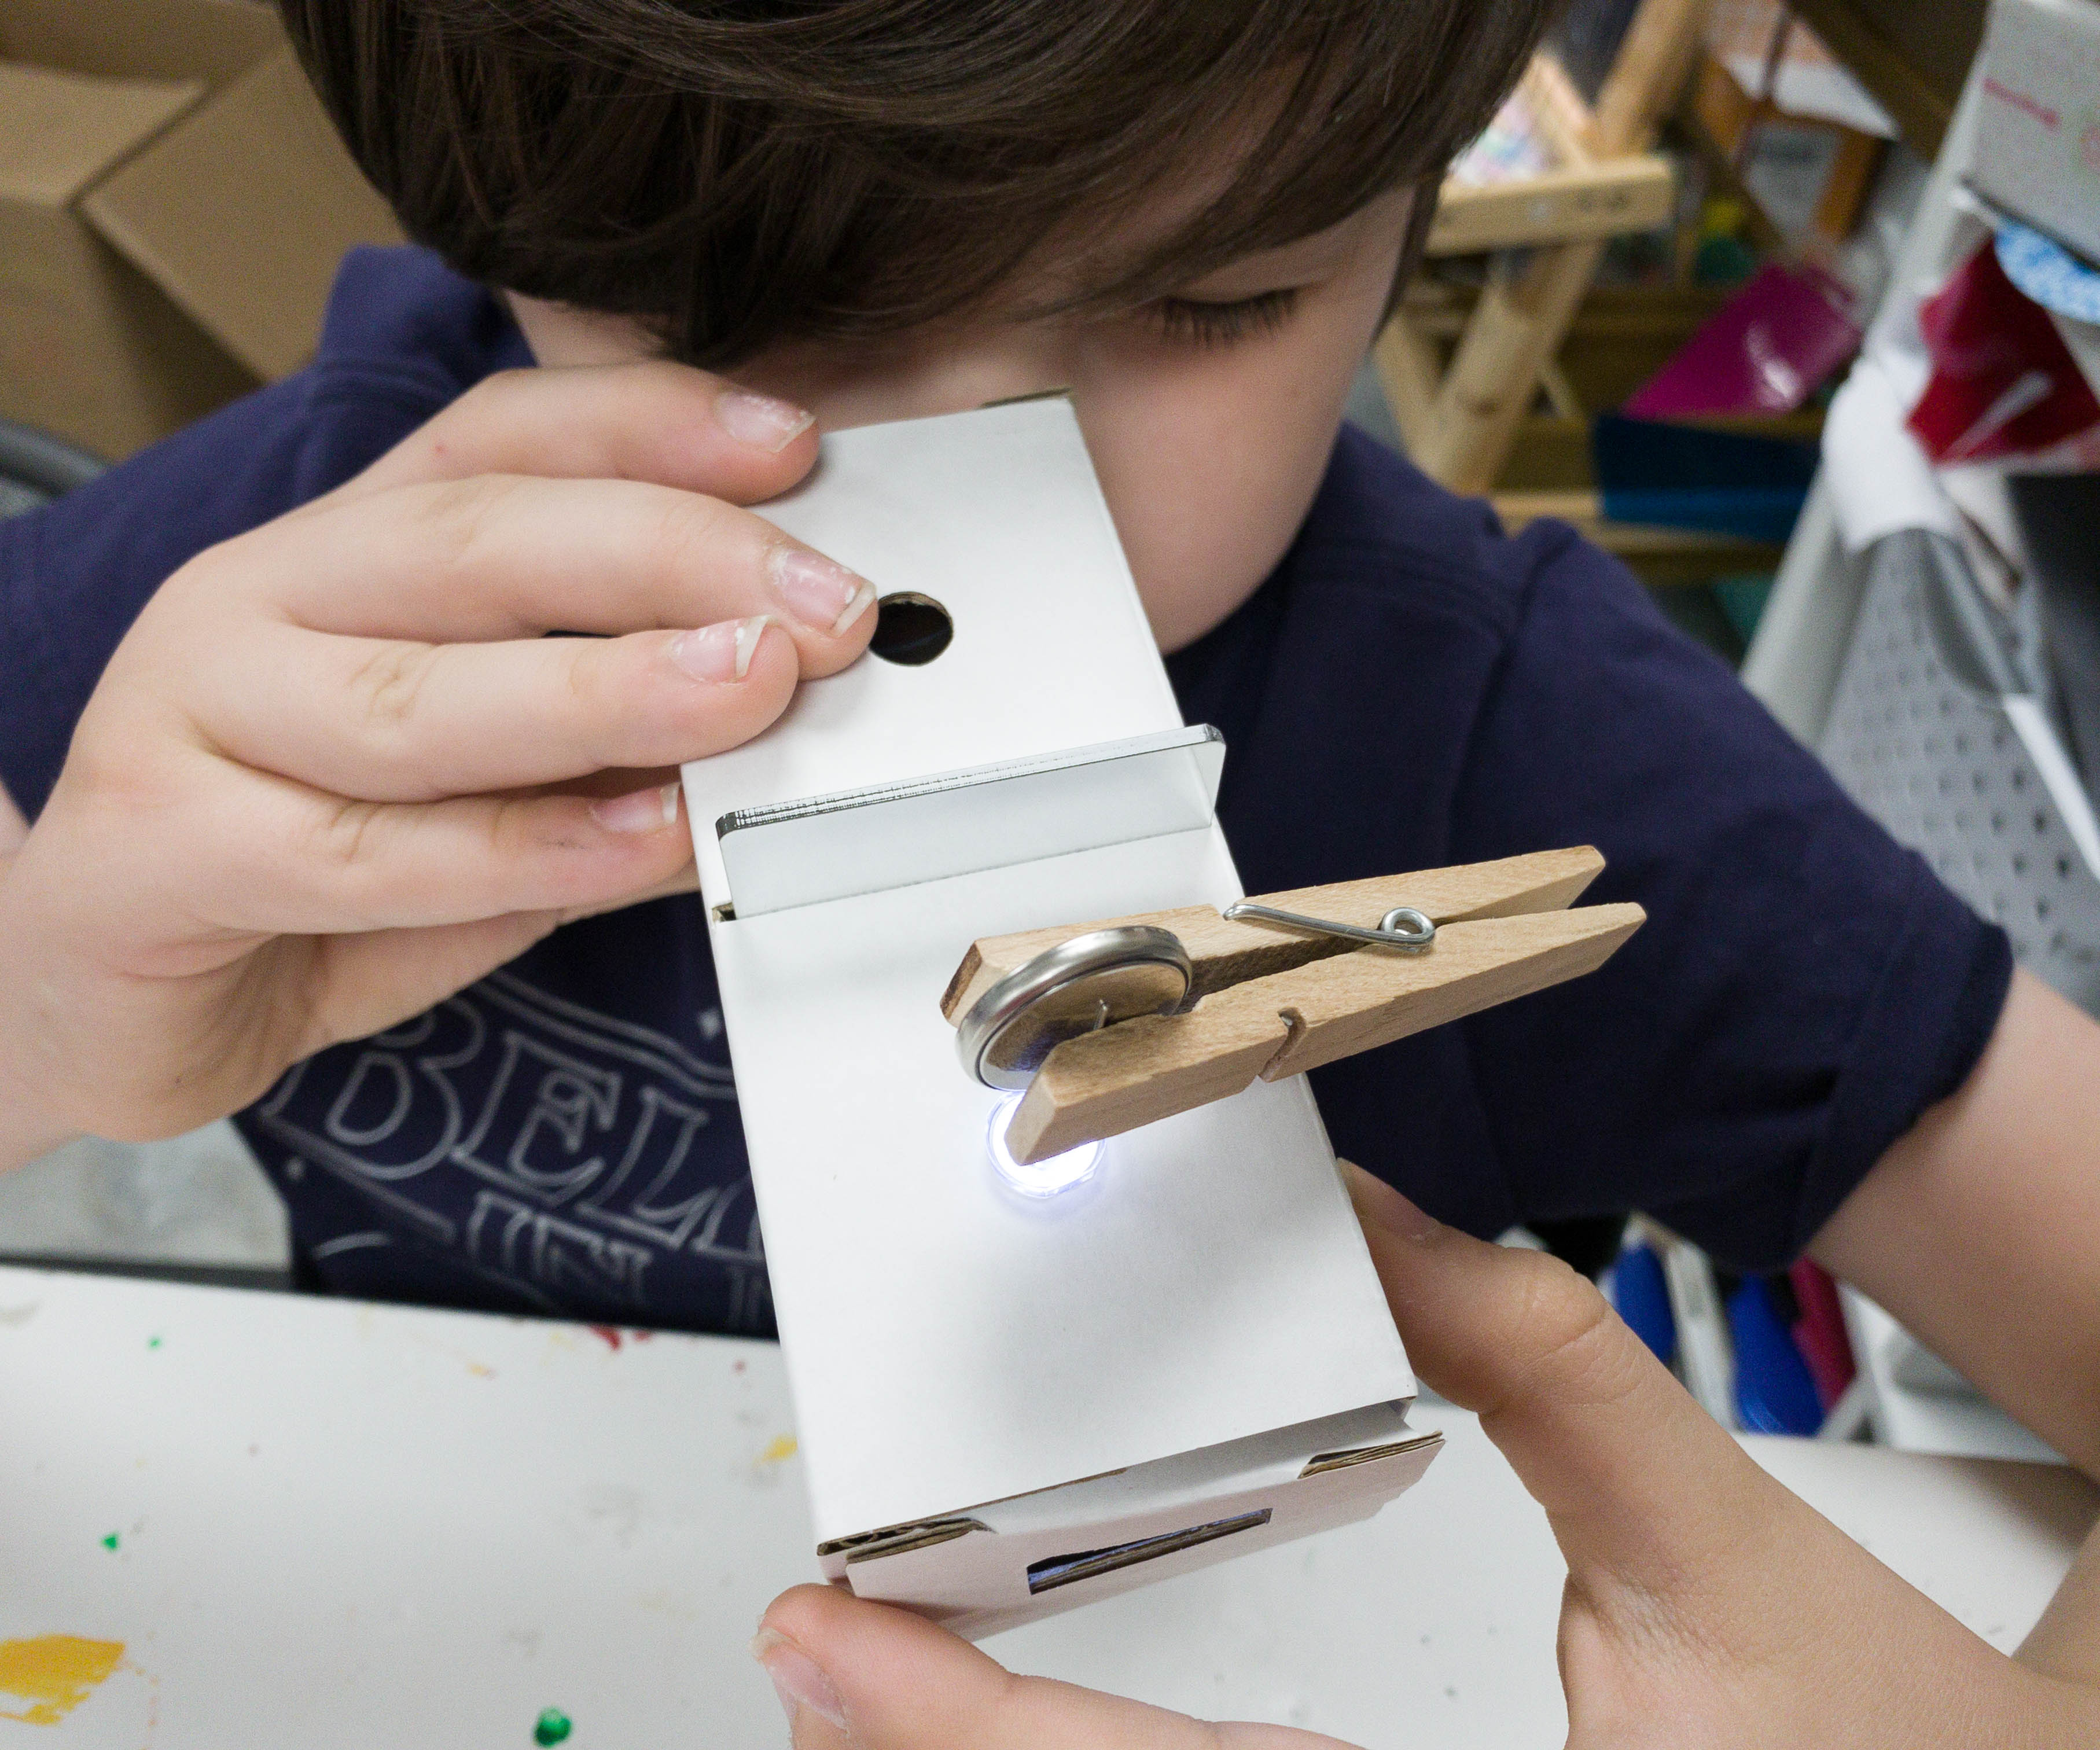
Then, he checked the point of view from the good guy. This part has minimal light on it and he can clearly see the bad guy!
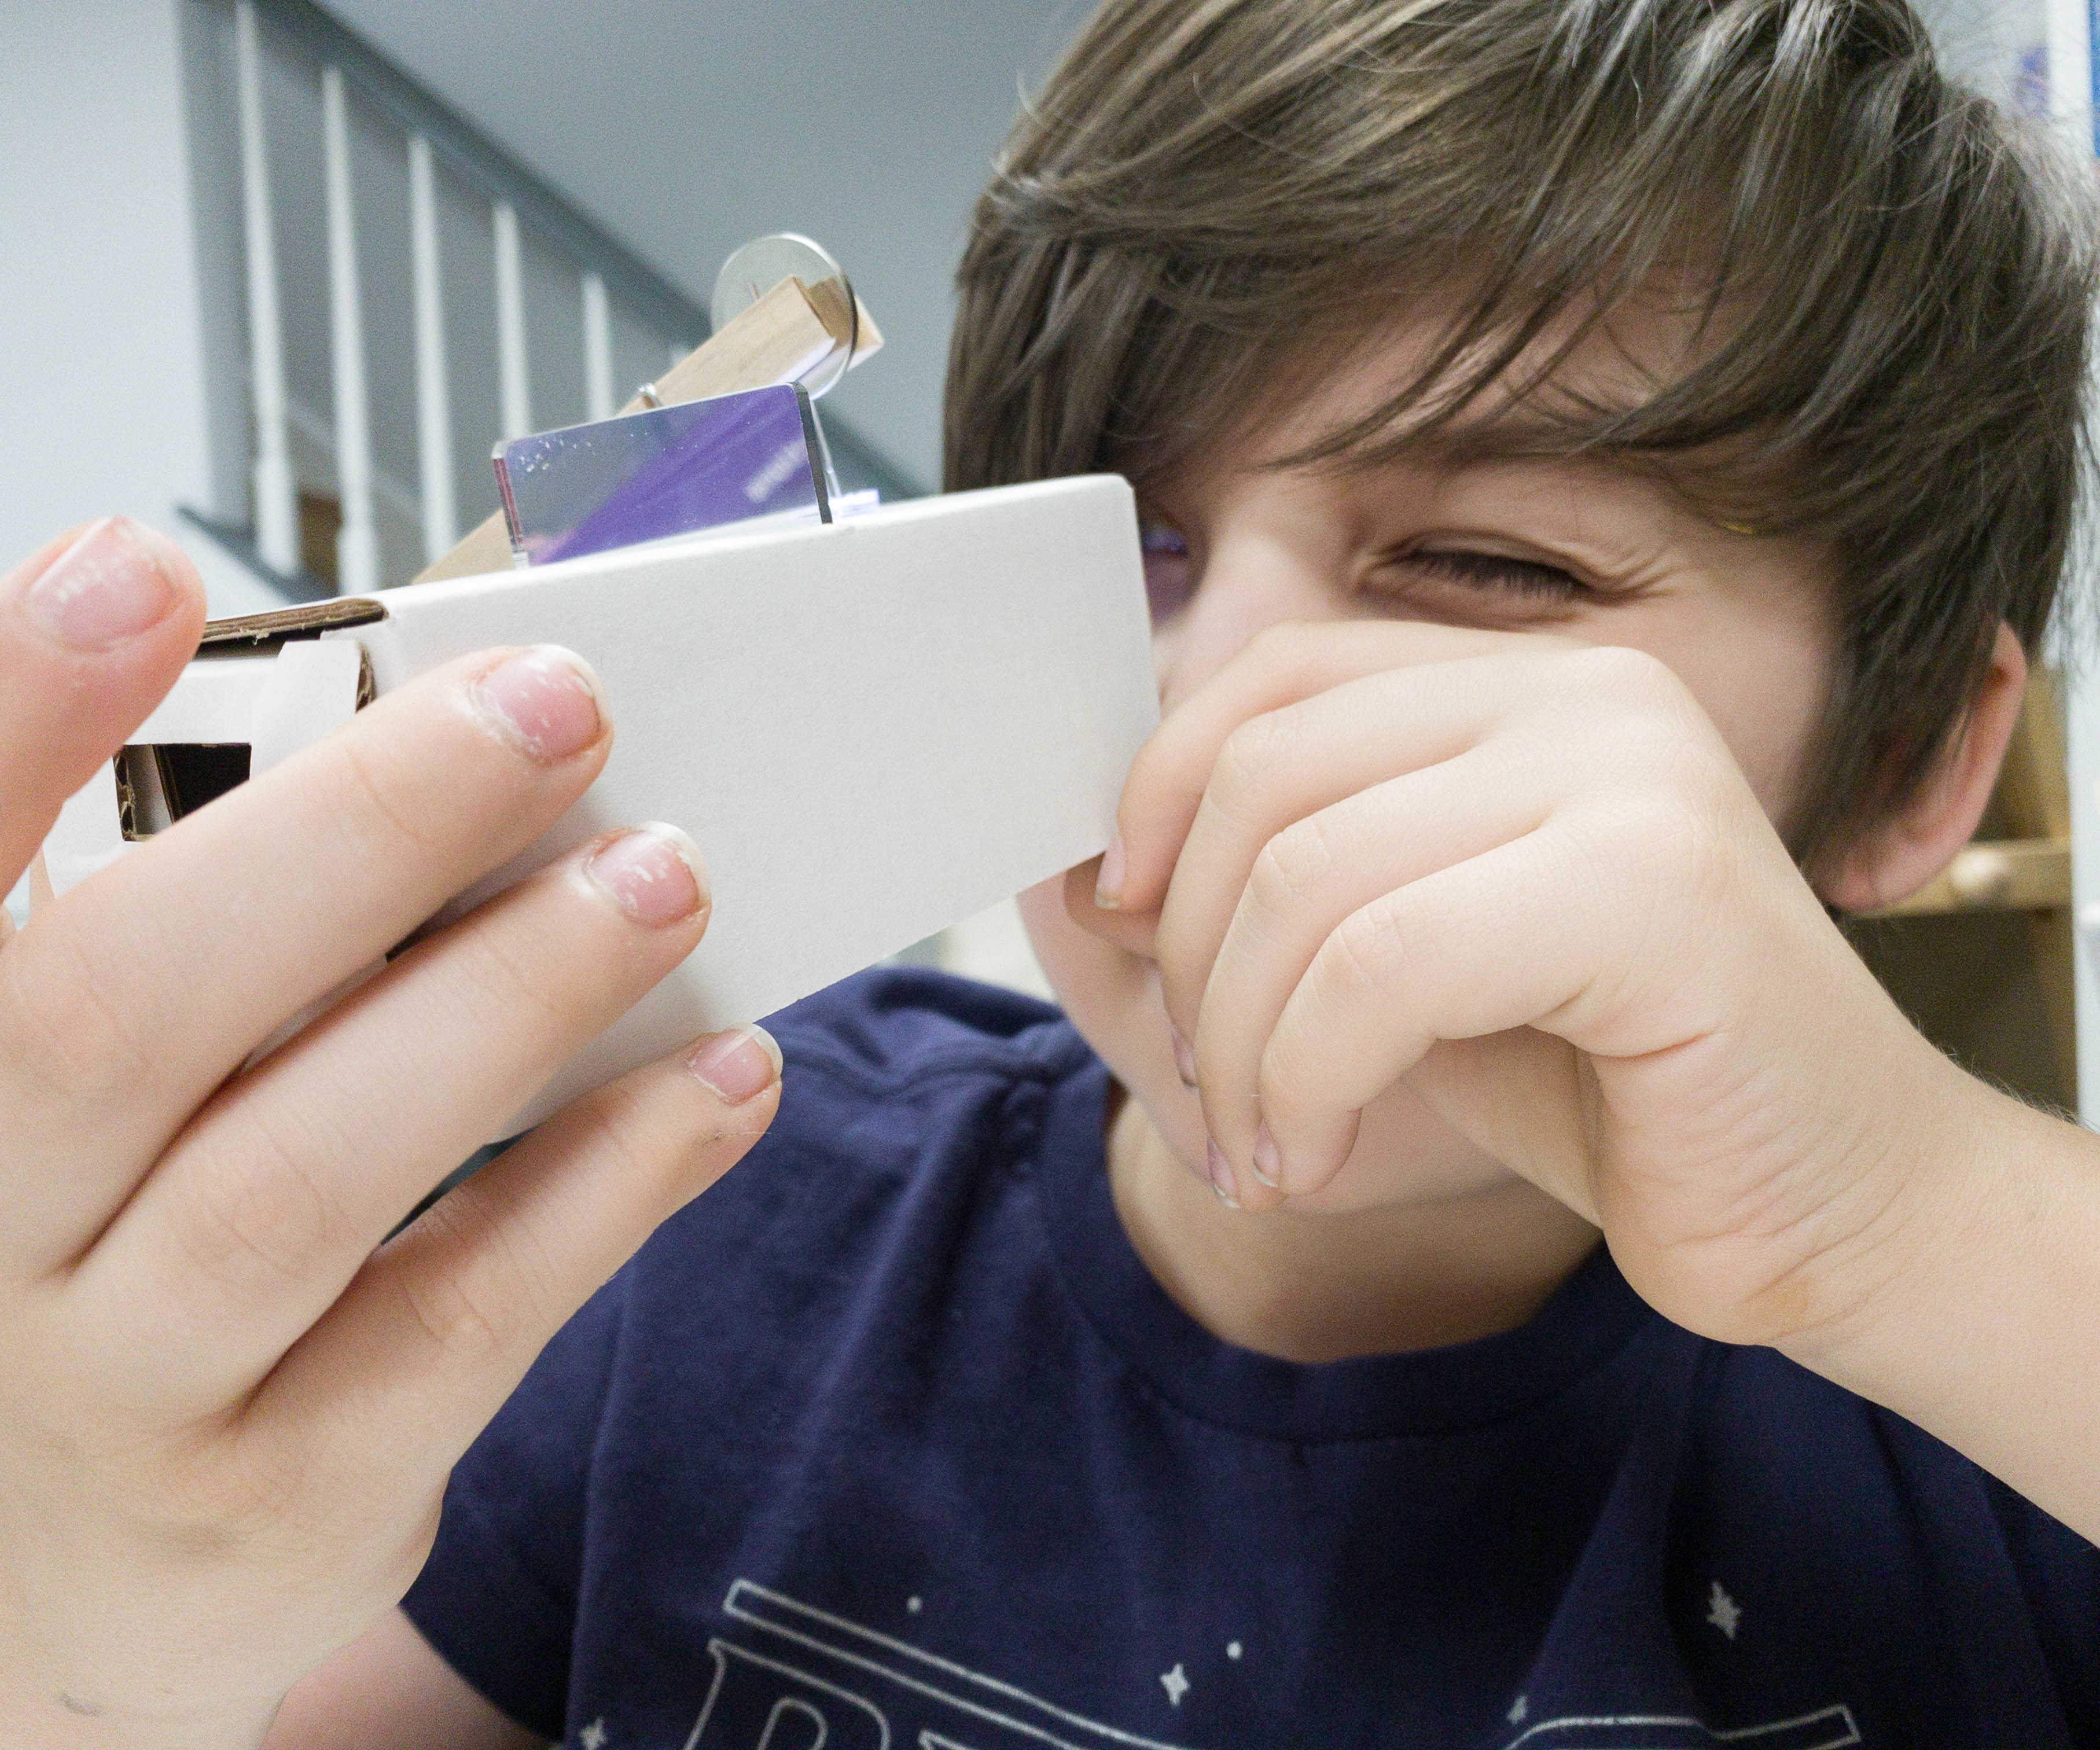
On the other end, he cannot view the good guy. He can only see a bright and empty space.
It’s now time for the younger detective to check on the bad guy!
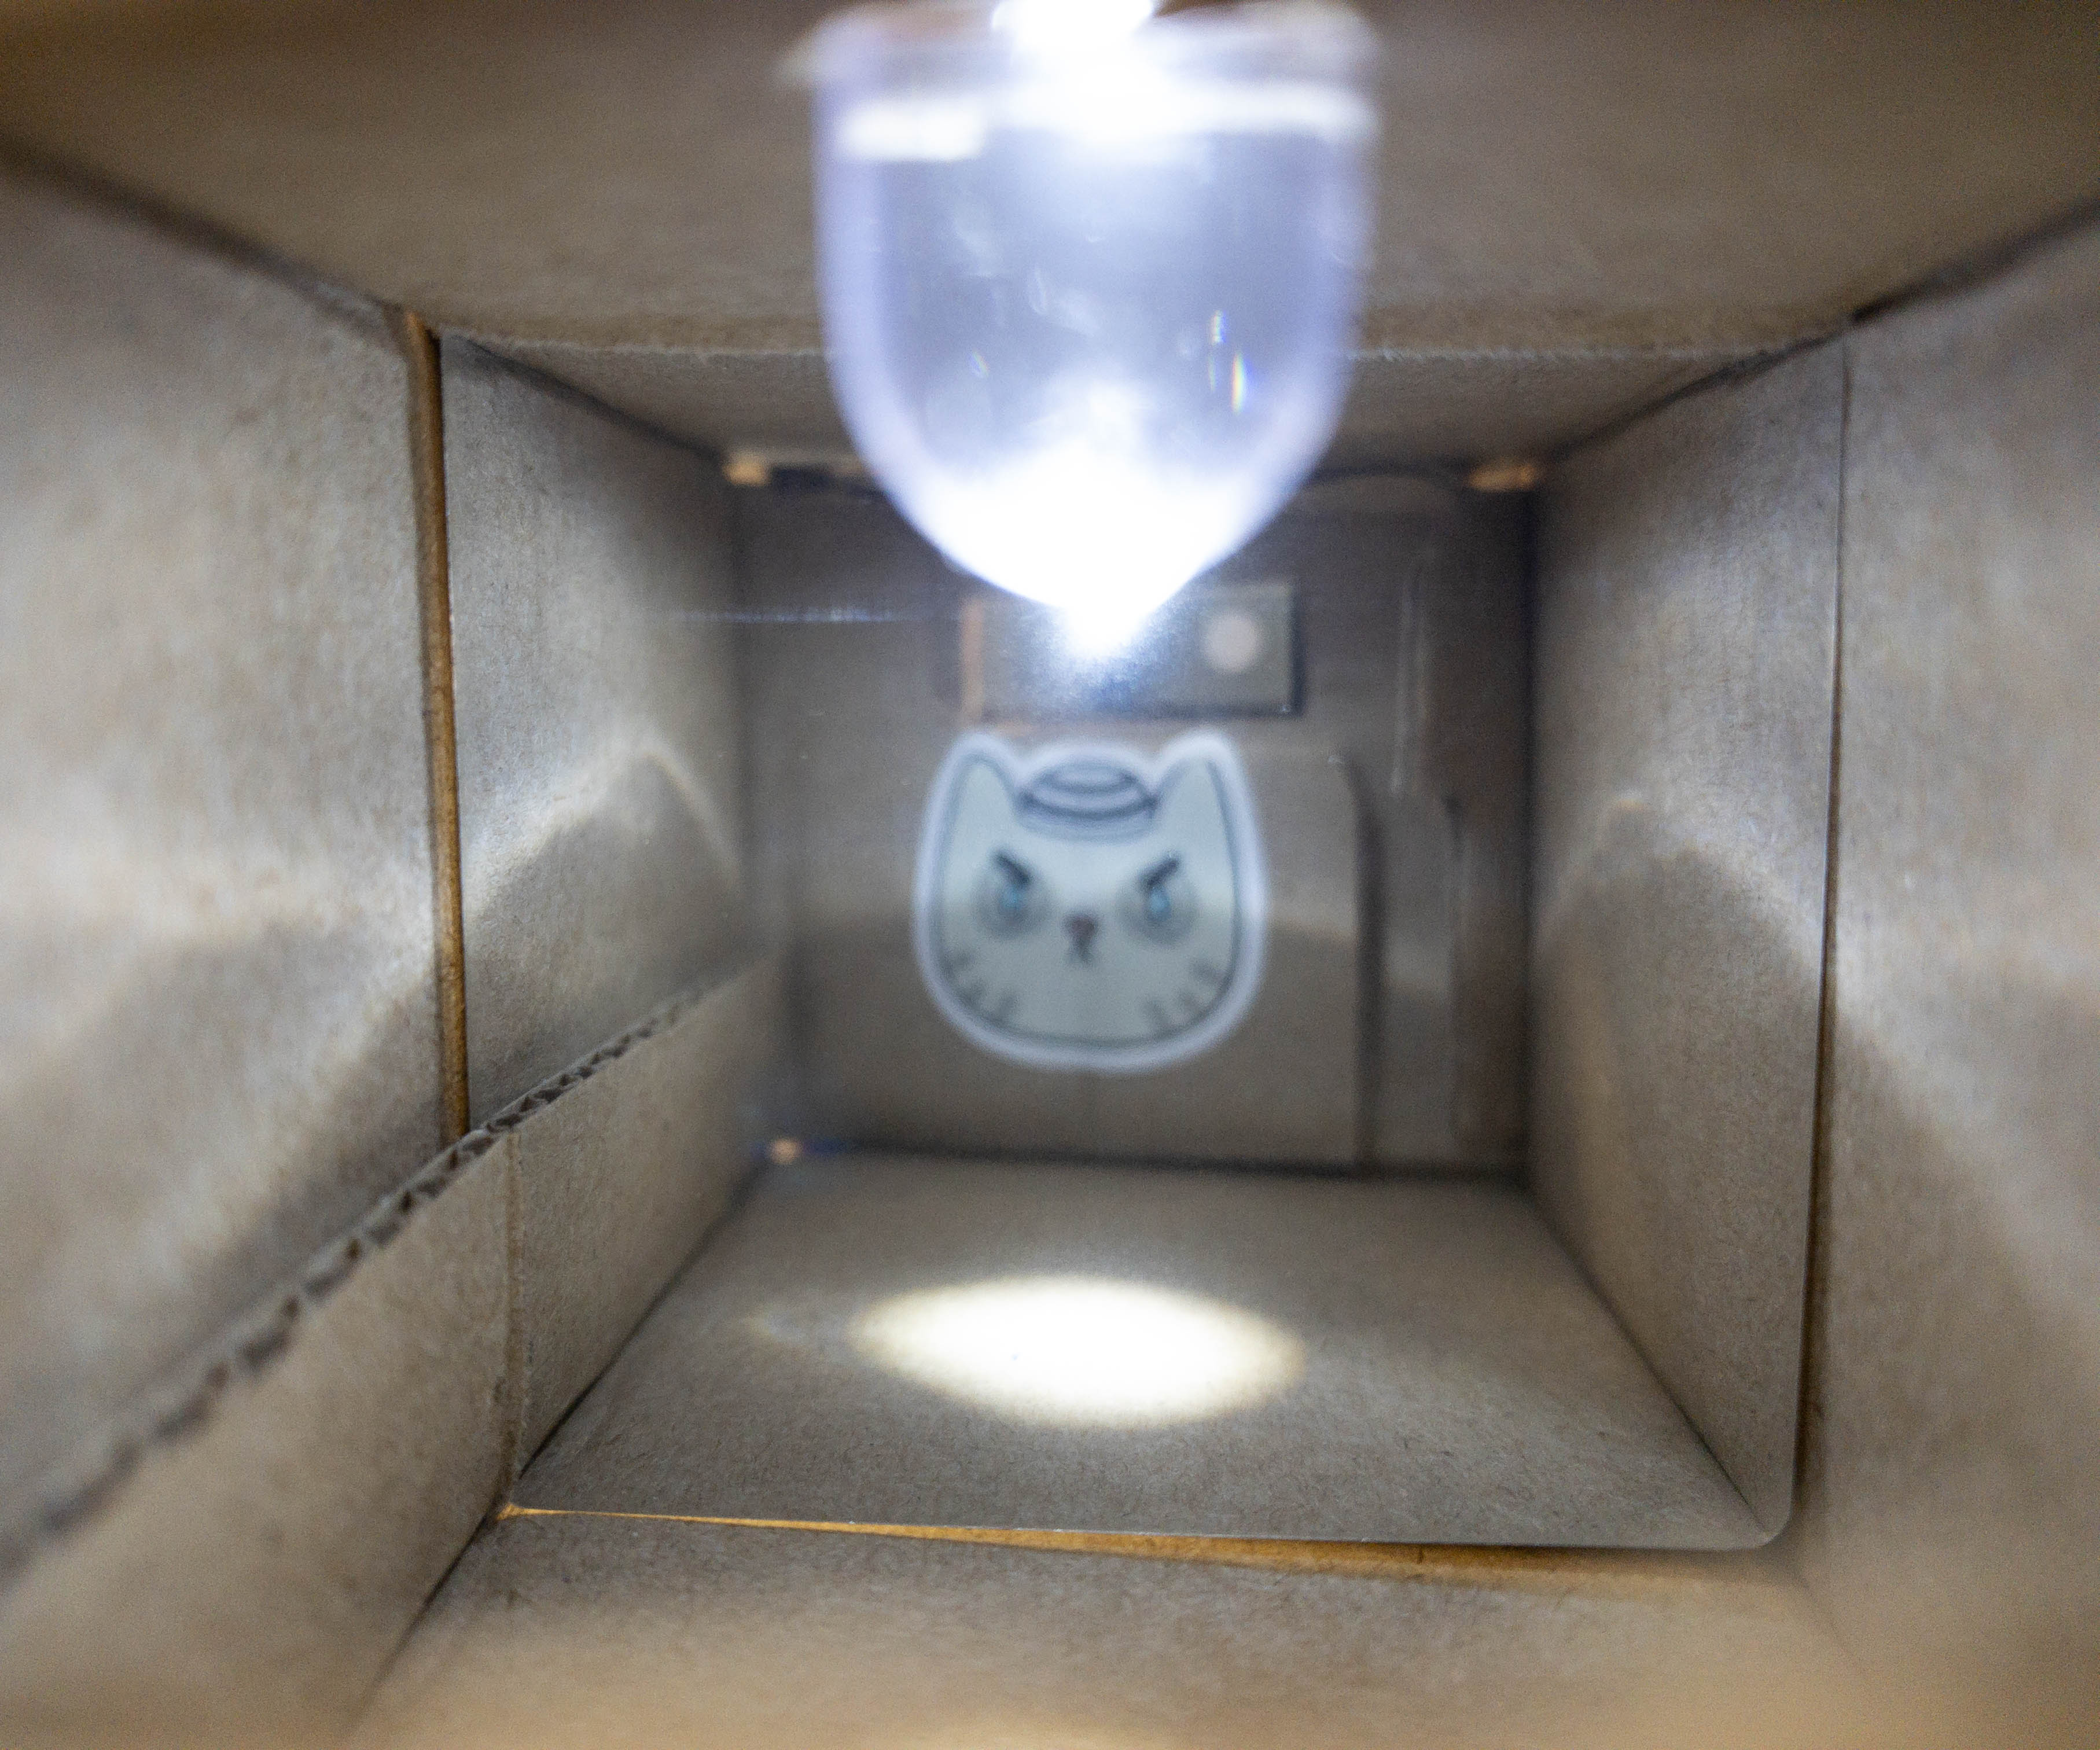
Here’s how it looks inside with the light on the officer’s side.
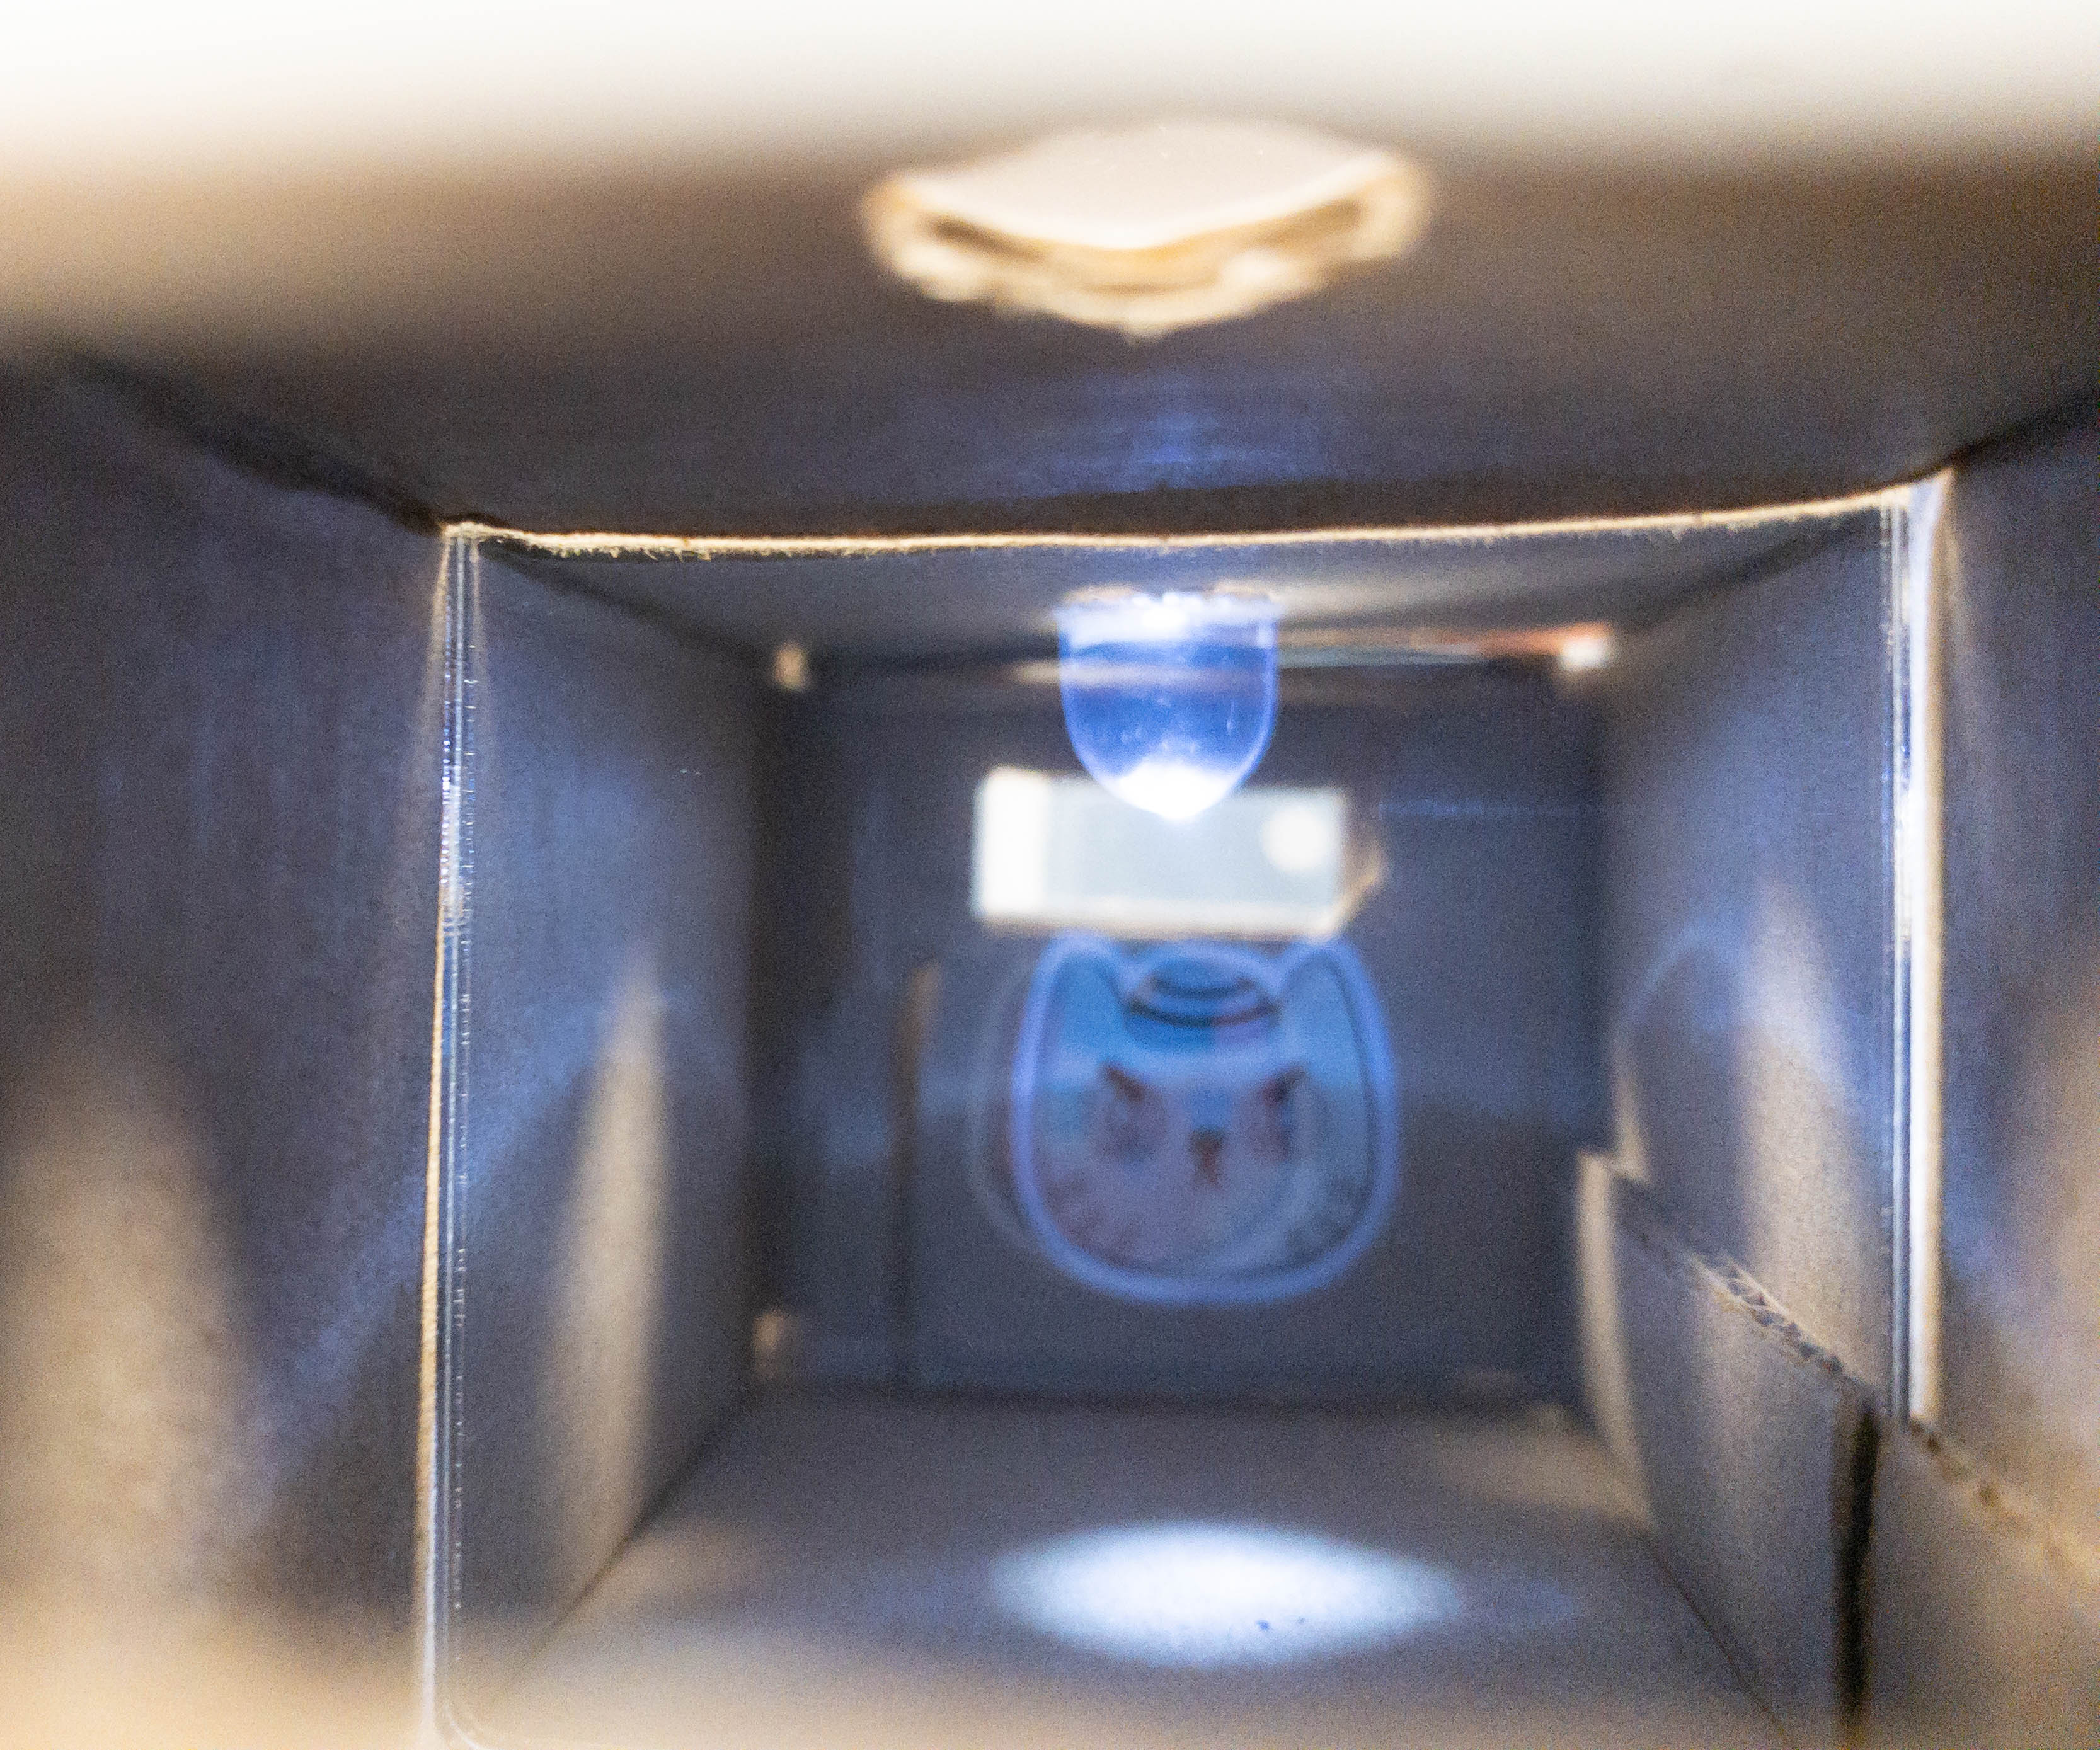
This is how it looks when the light is placed on the bad guy’s side.
With the help of our one side mirror, the kids were able to interrogate the bad guy in this observation room!
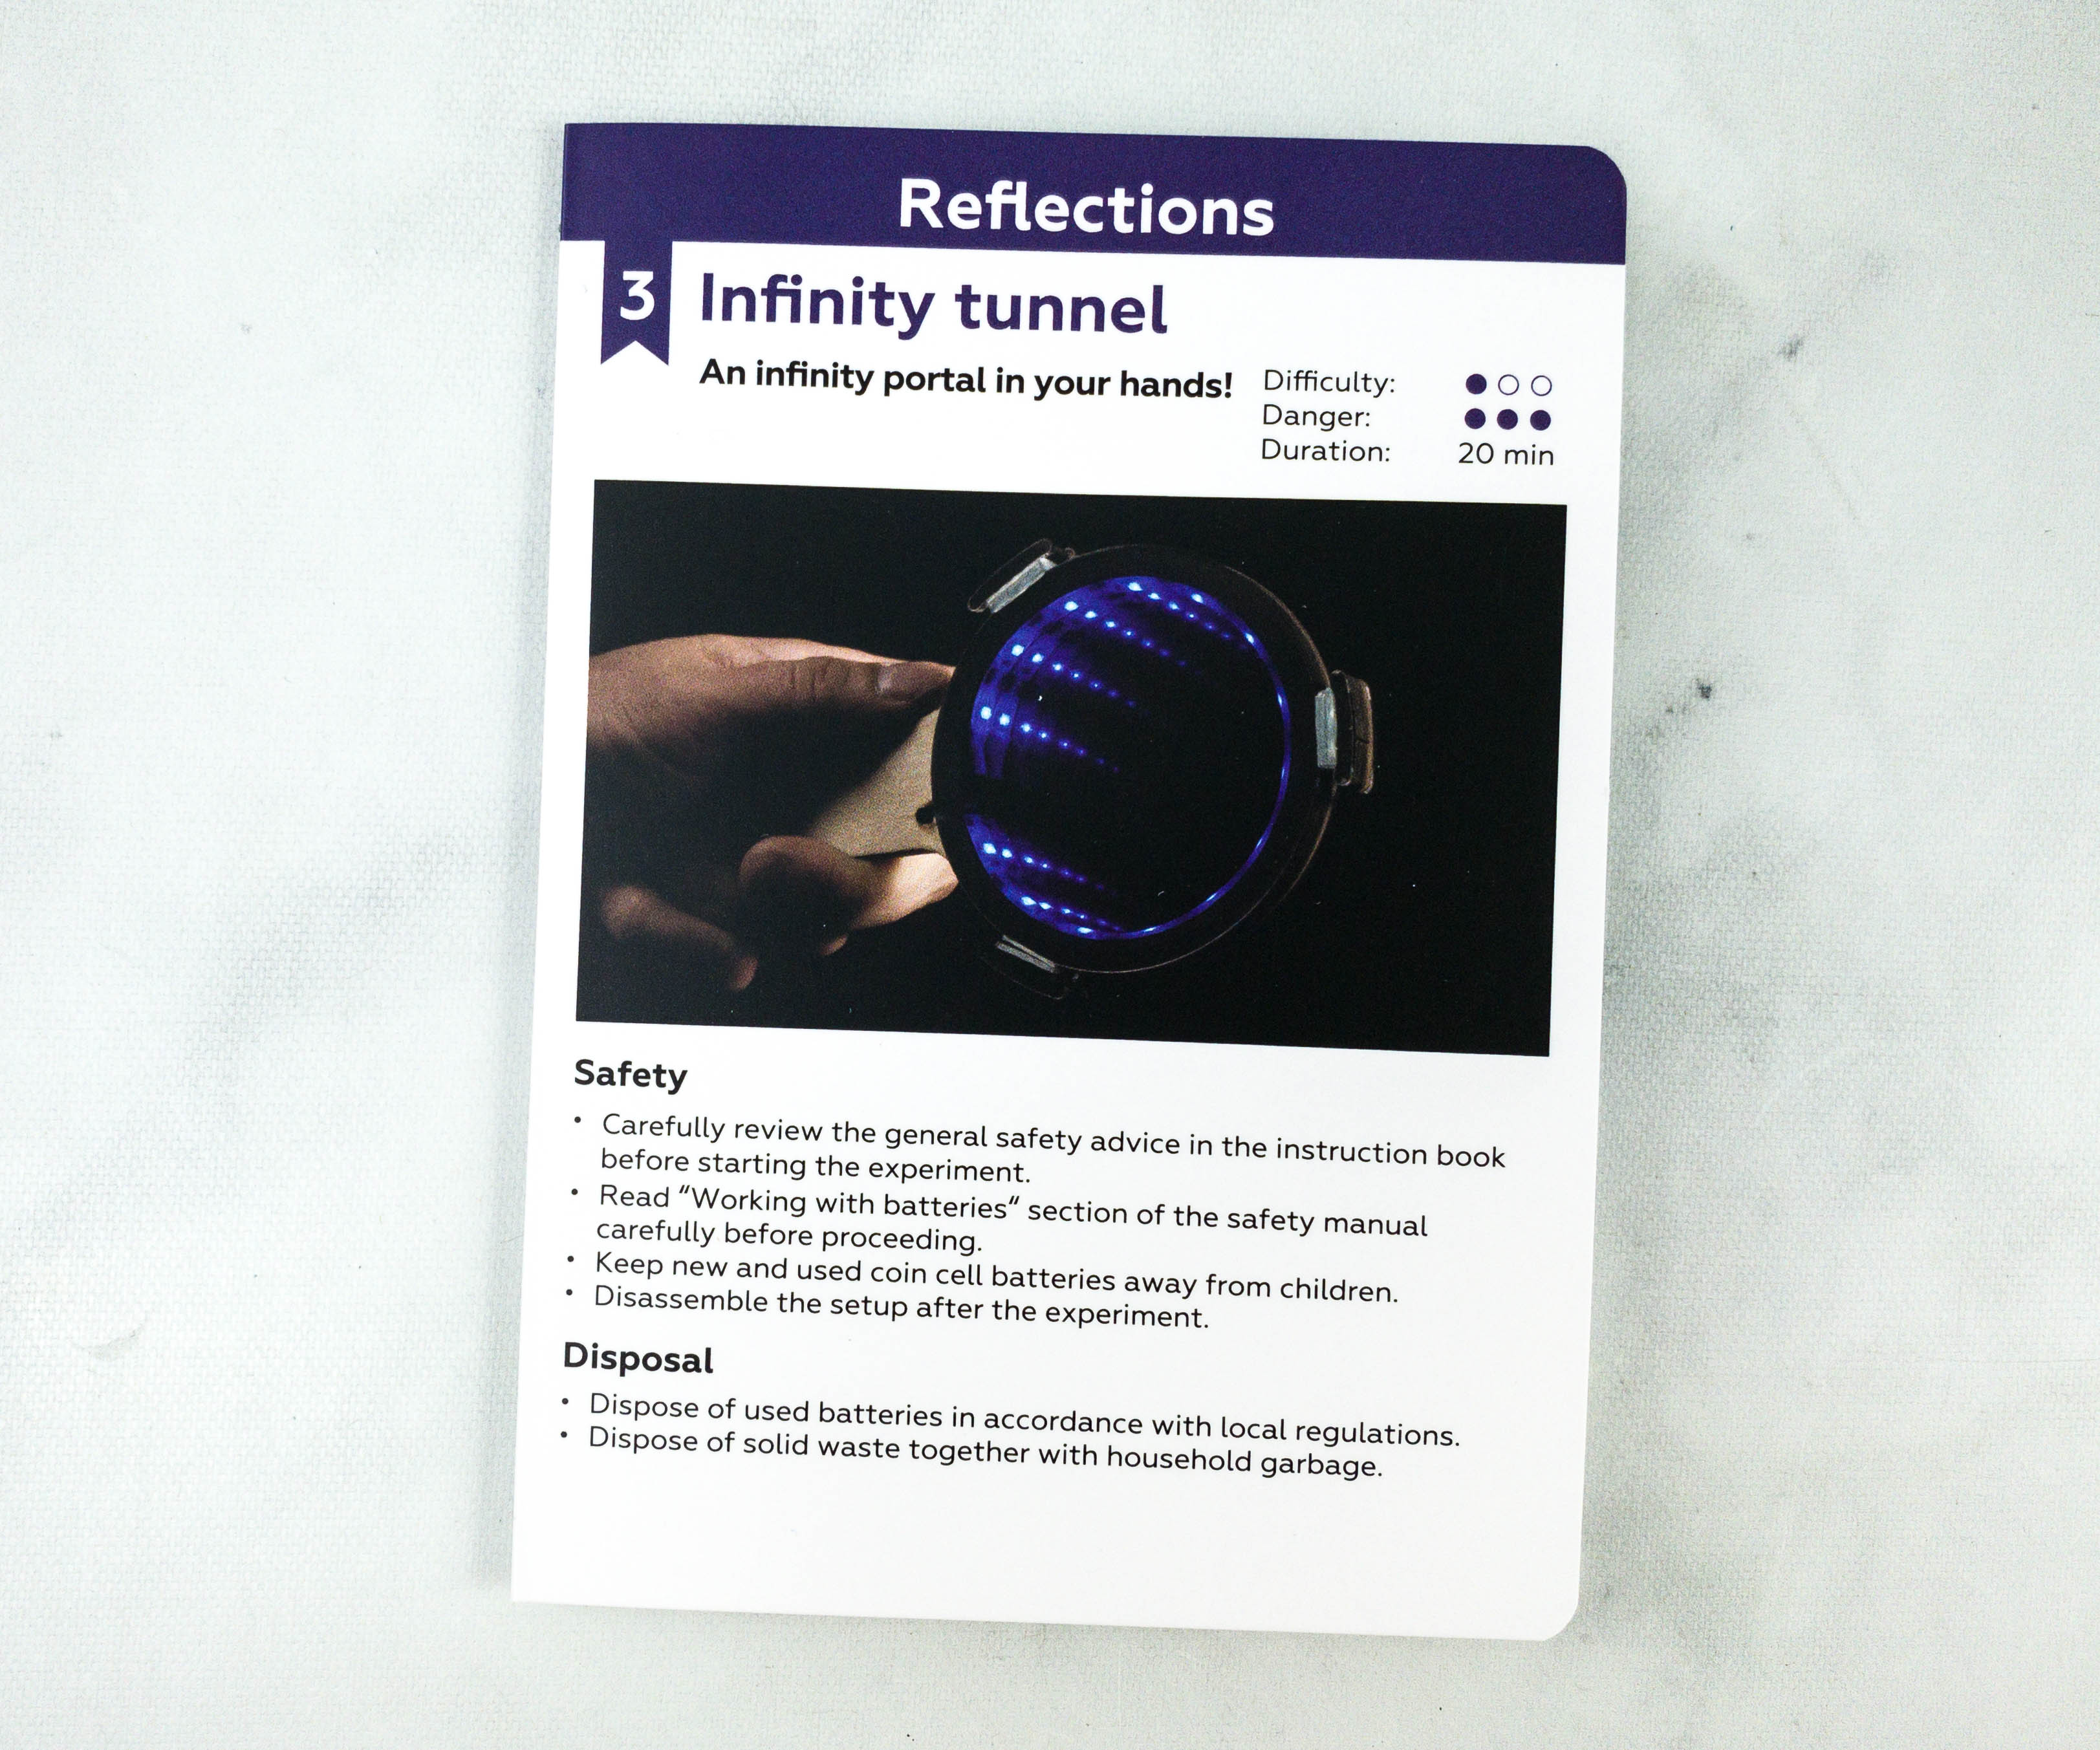
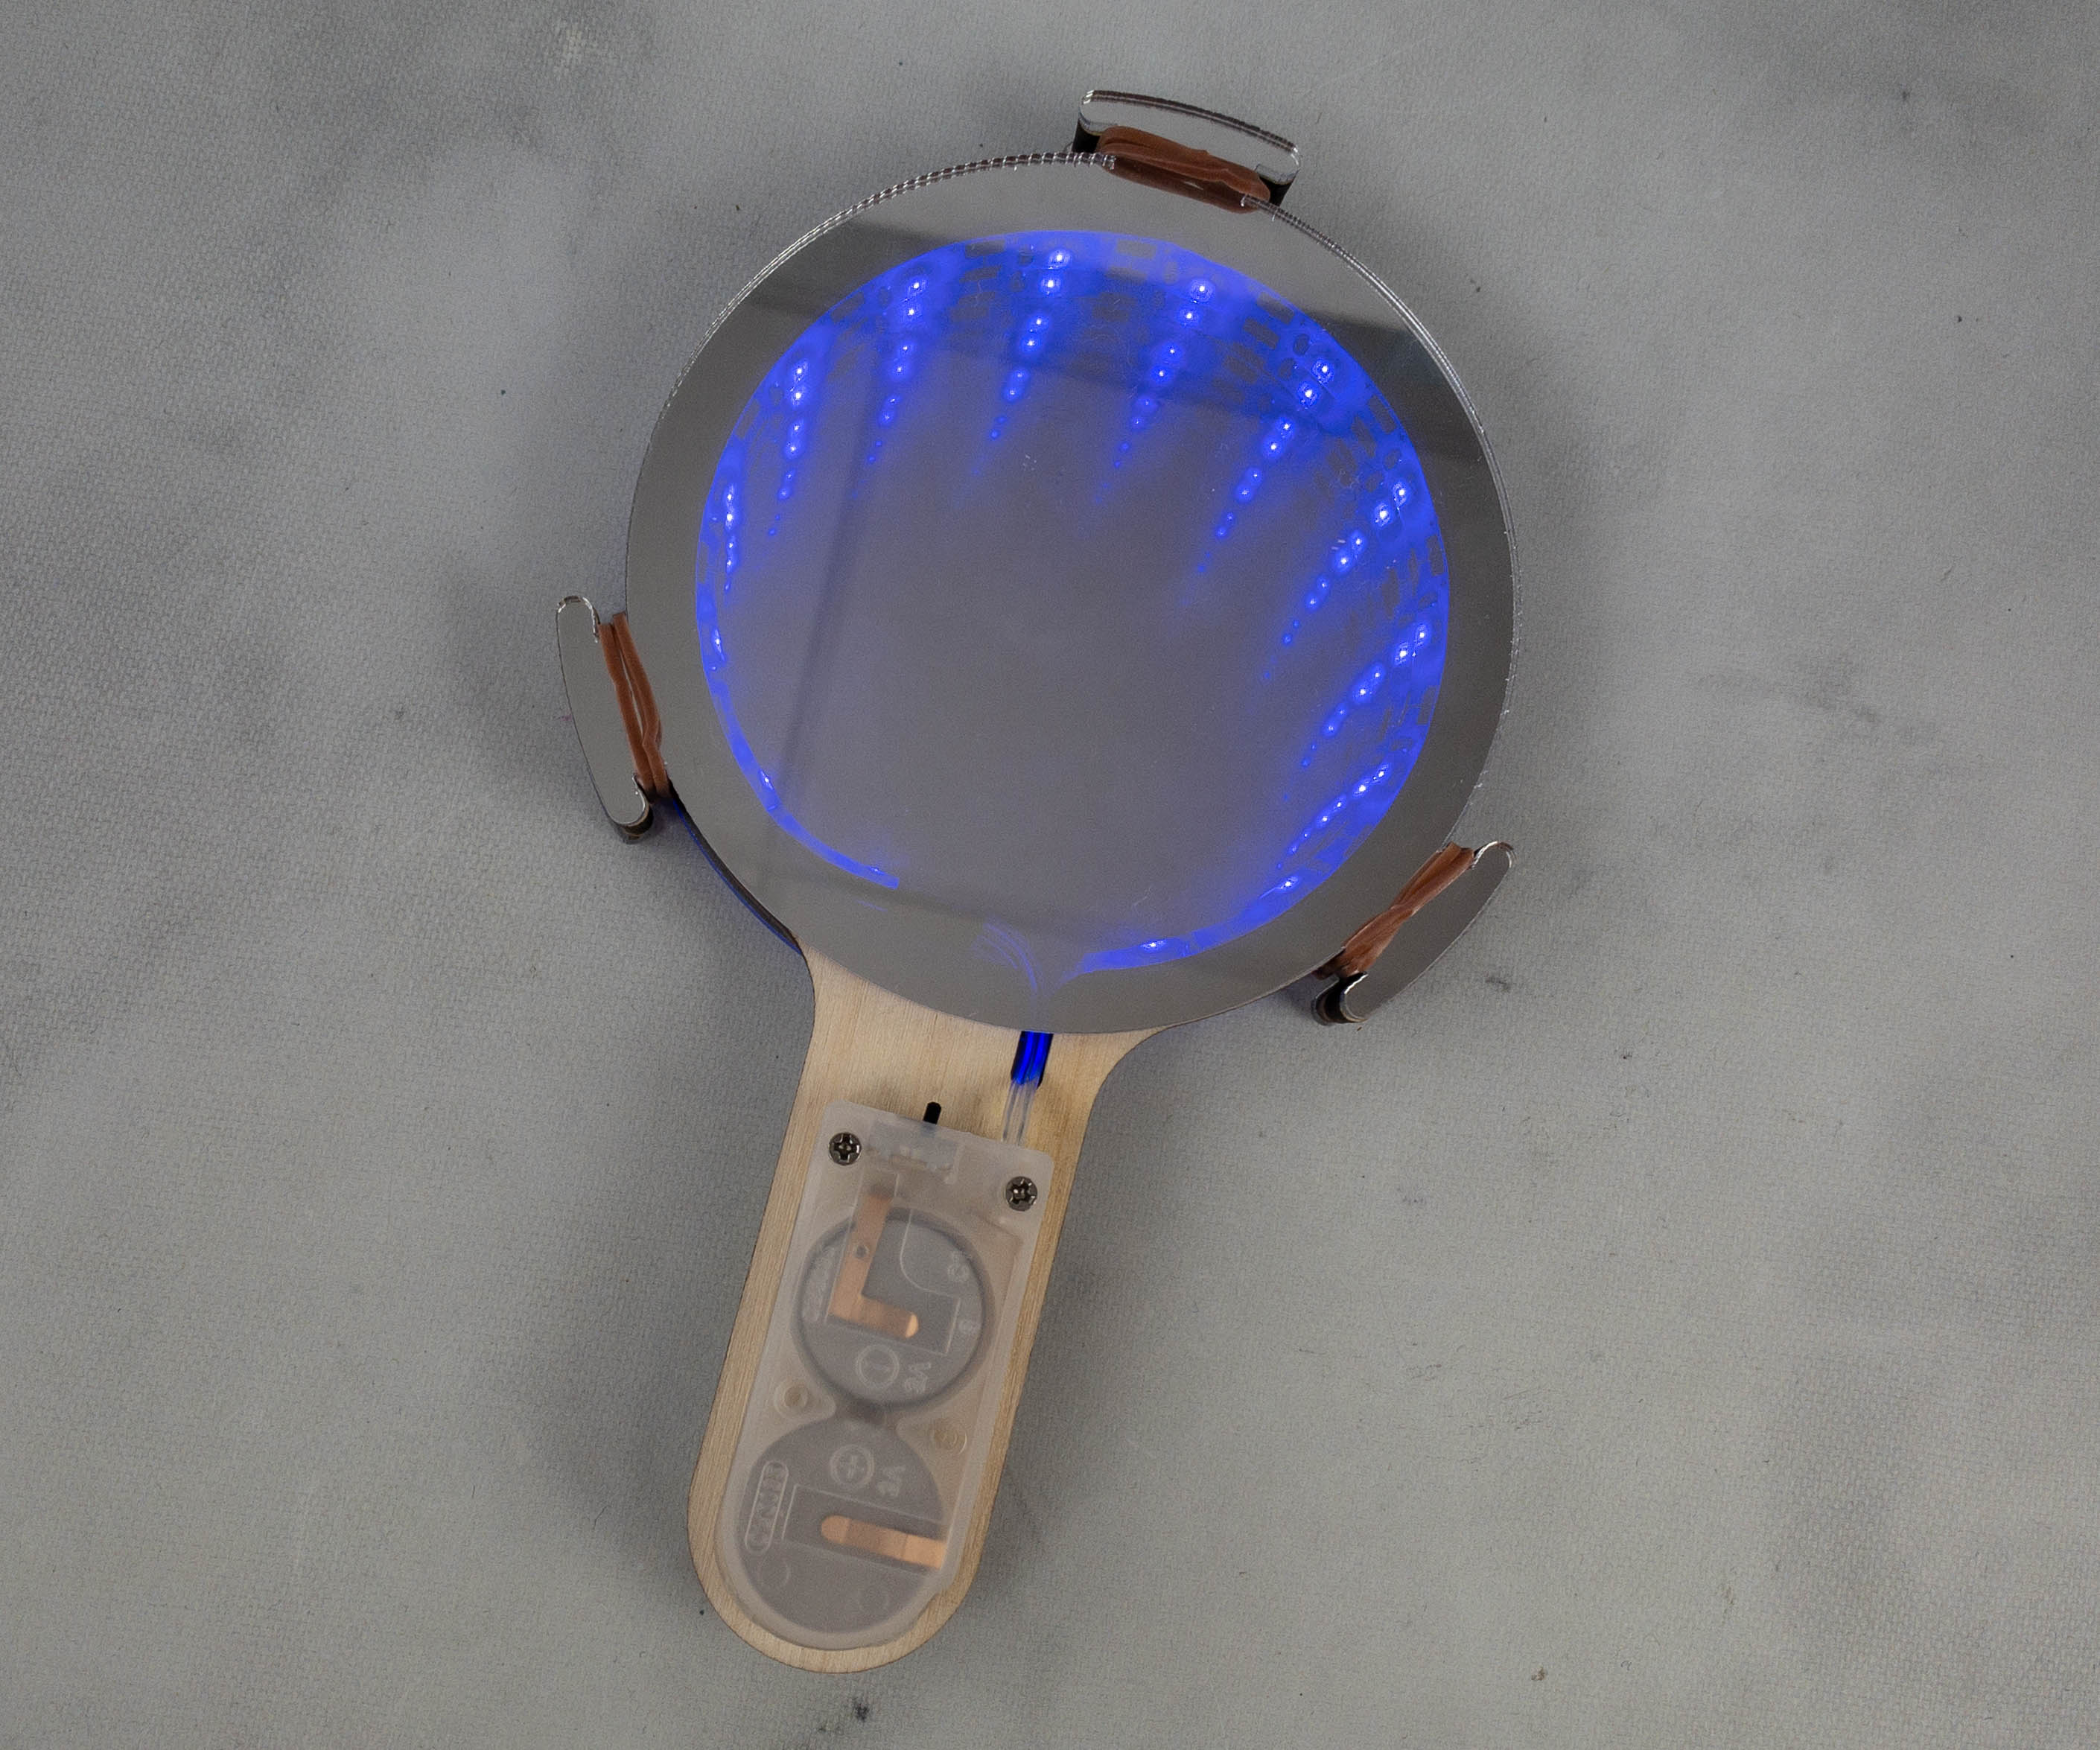
Activity #3: Infinity Tunnel. For the last activity, my kids made an Infinity Tunnel using mirrors.

Here are all the materials my kids used for this activity. We provided the CR2032 coin cell to power up the light source.

The instructions are listed and illustrations are also available for each step.
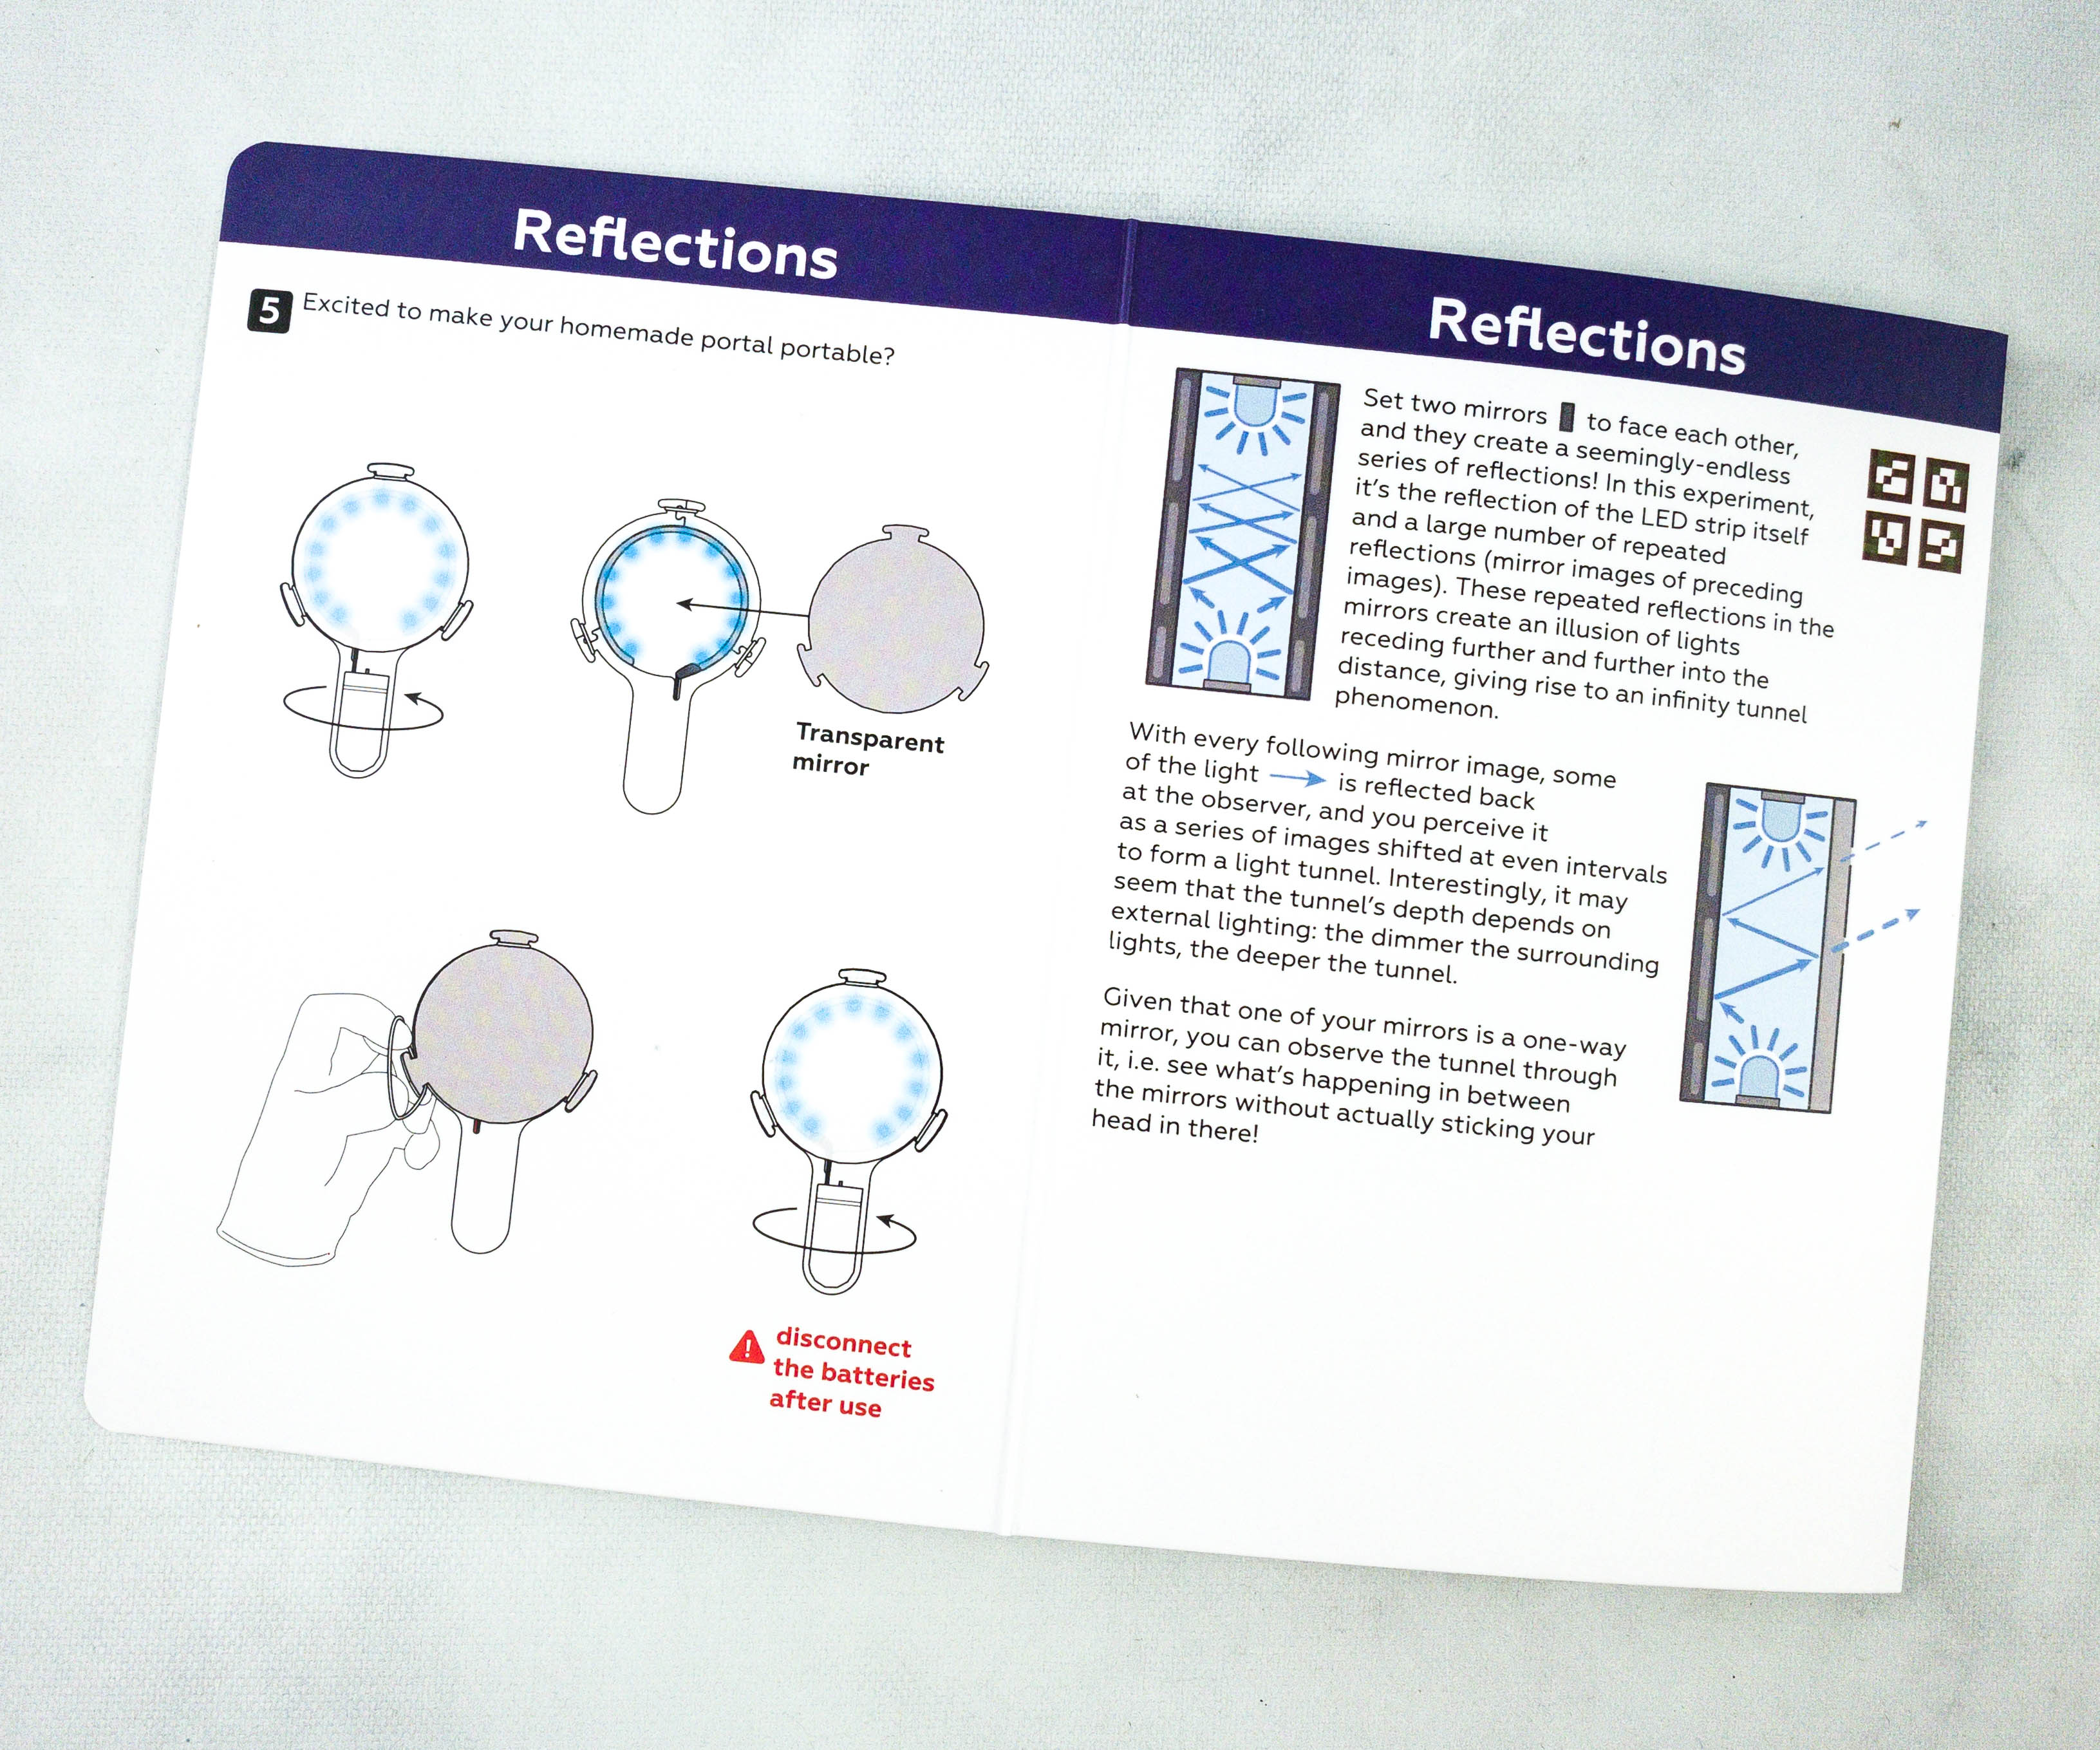
After the instructions, there’s an explanation of how this homemade portal works.
The materials provided are easy to assemble and kid friendly!
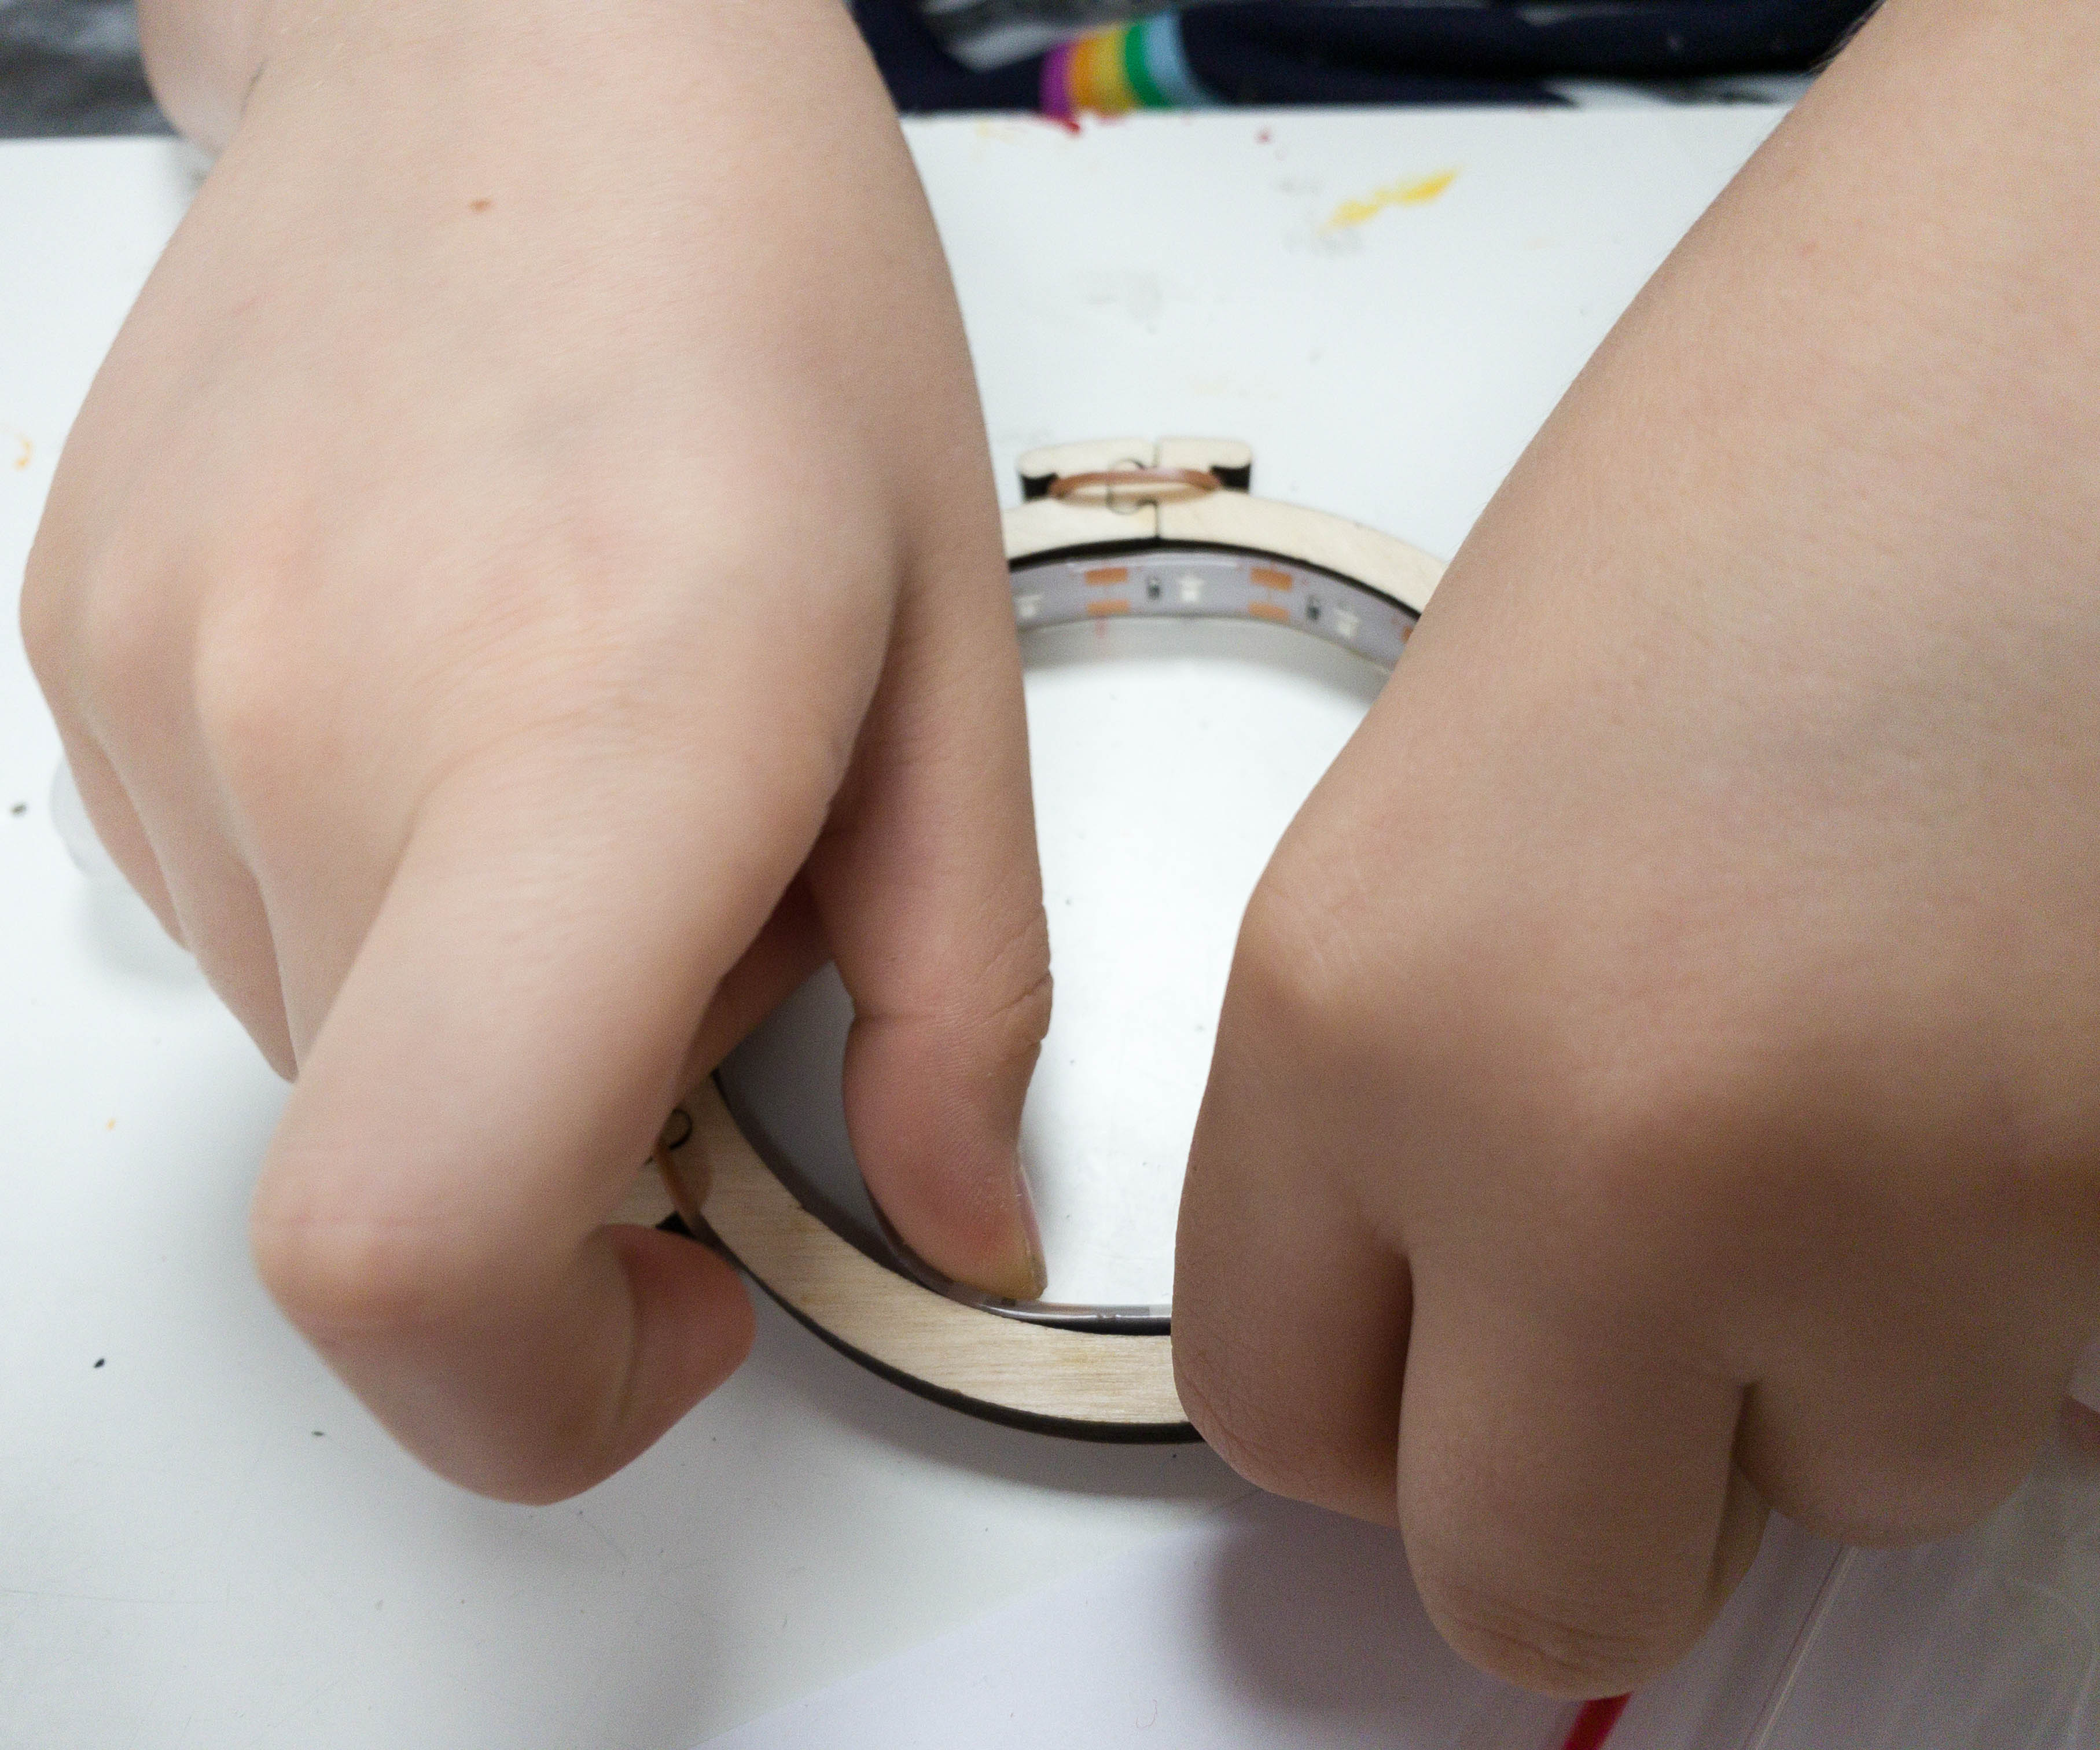
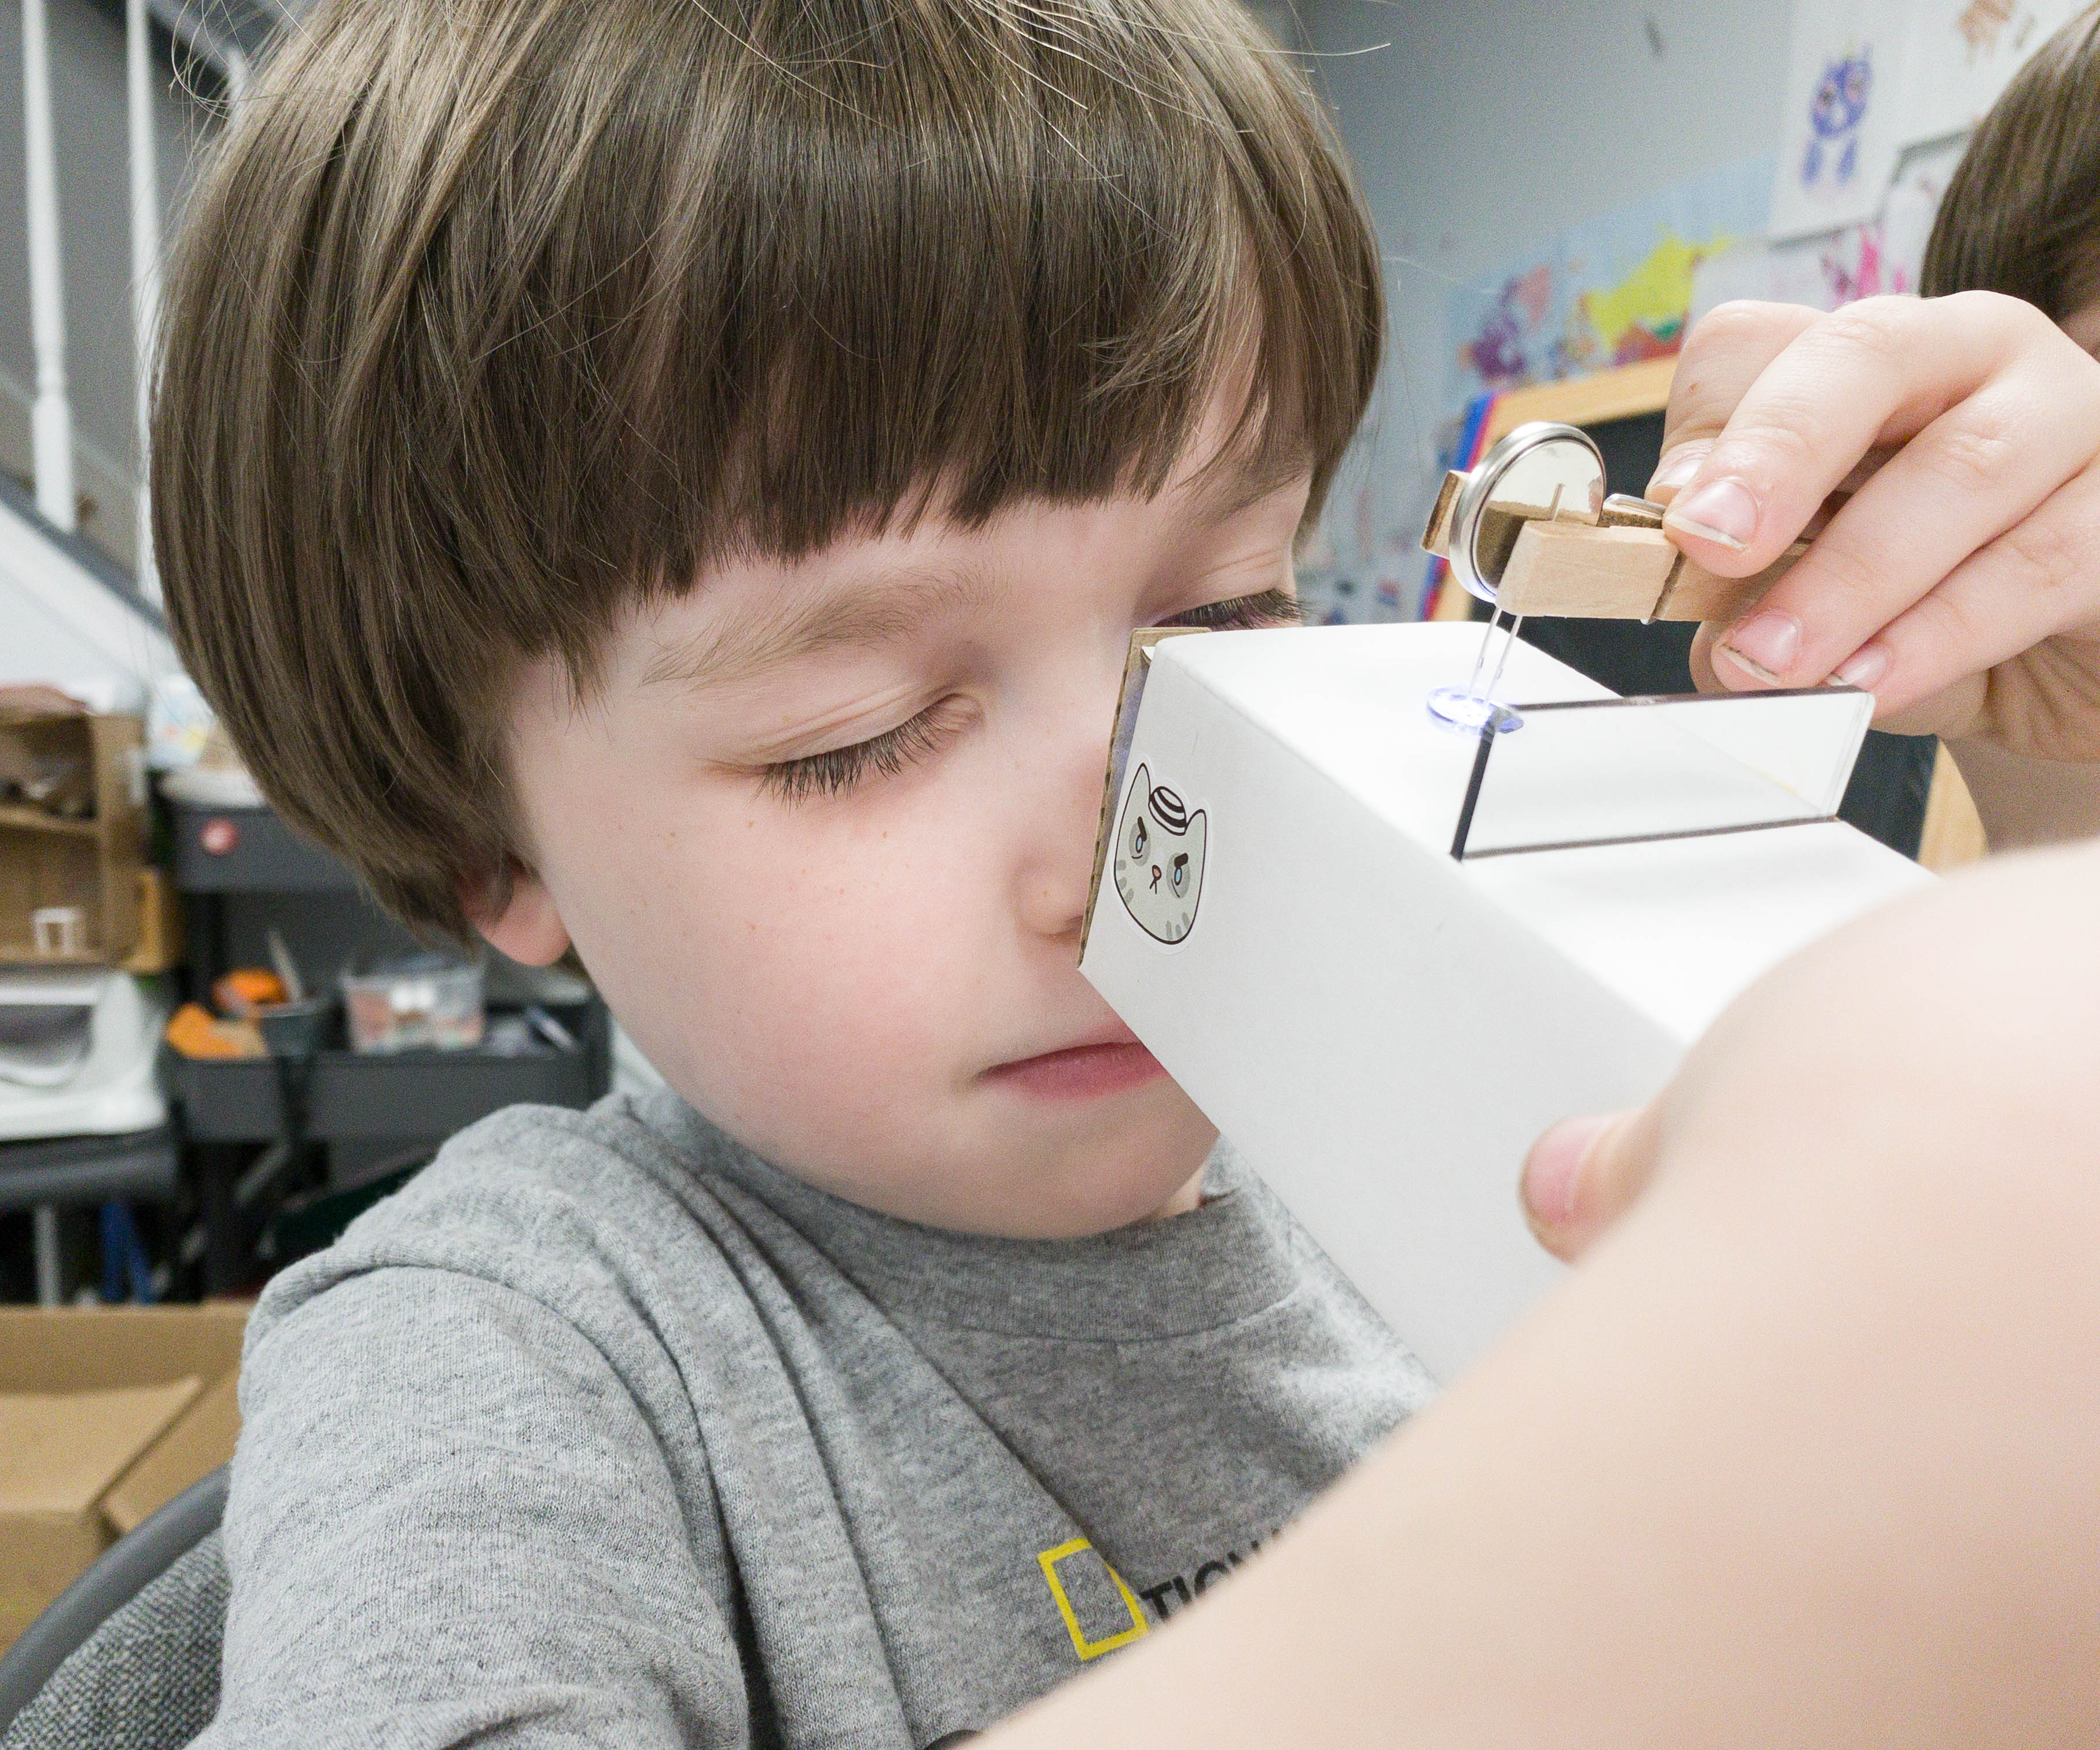
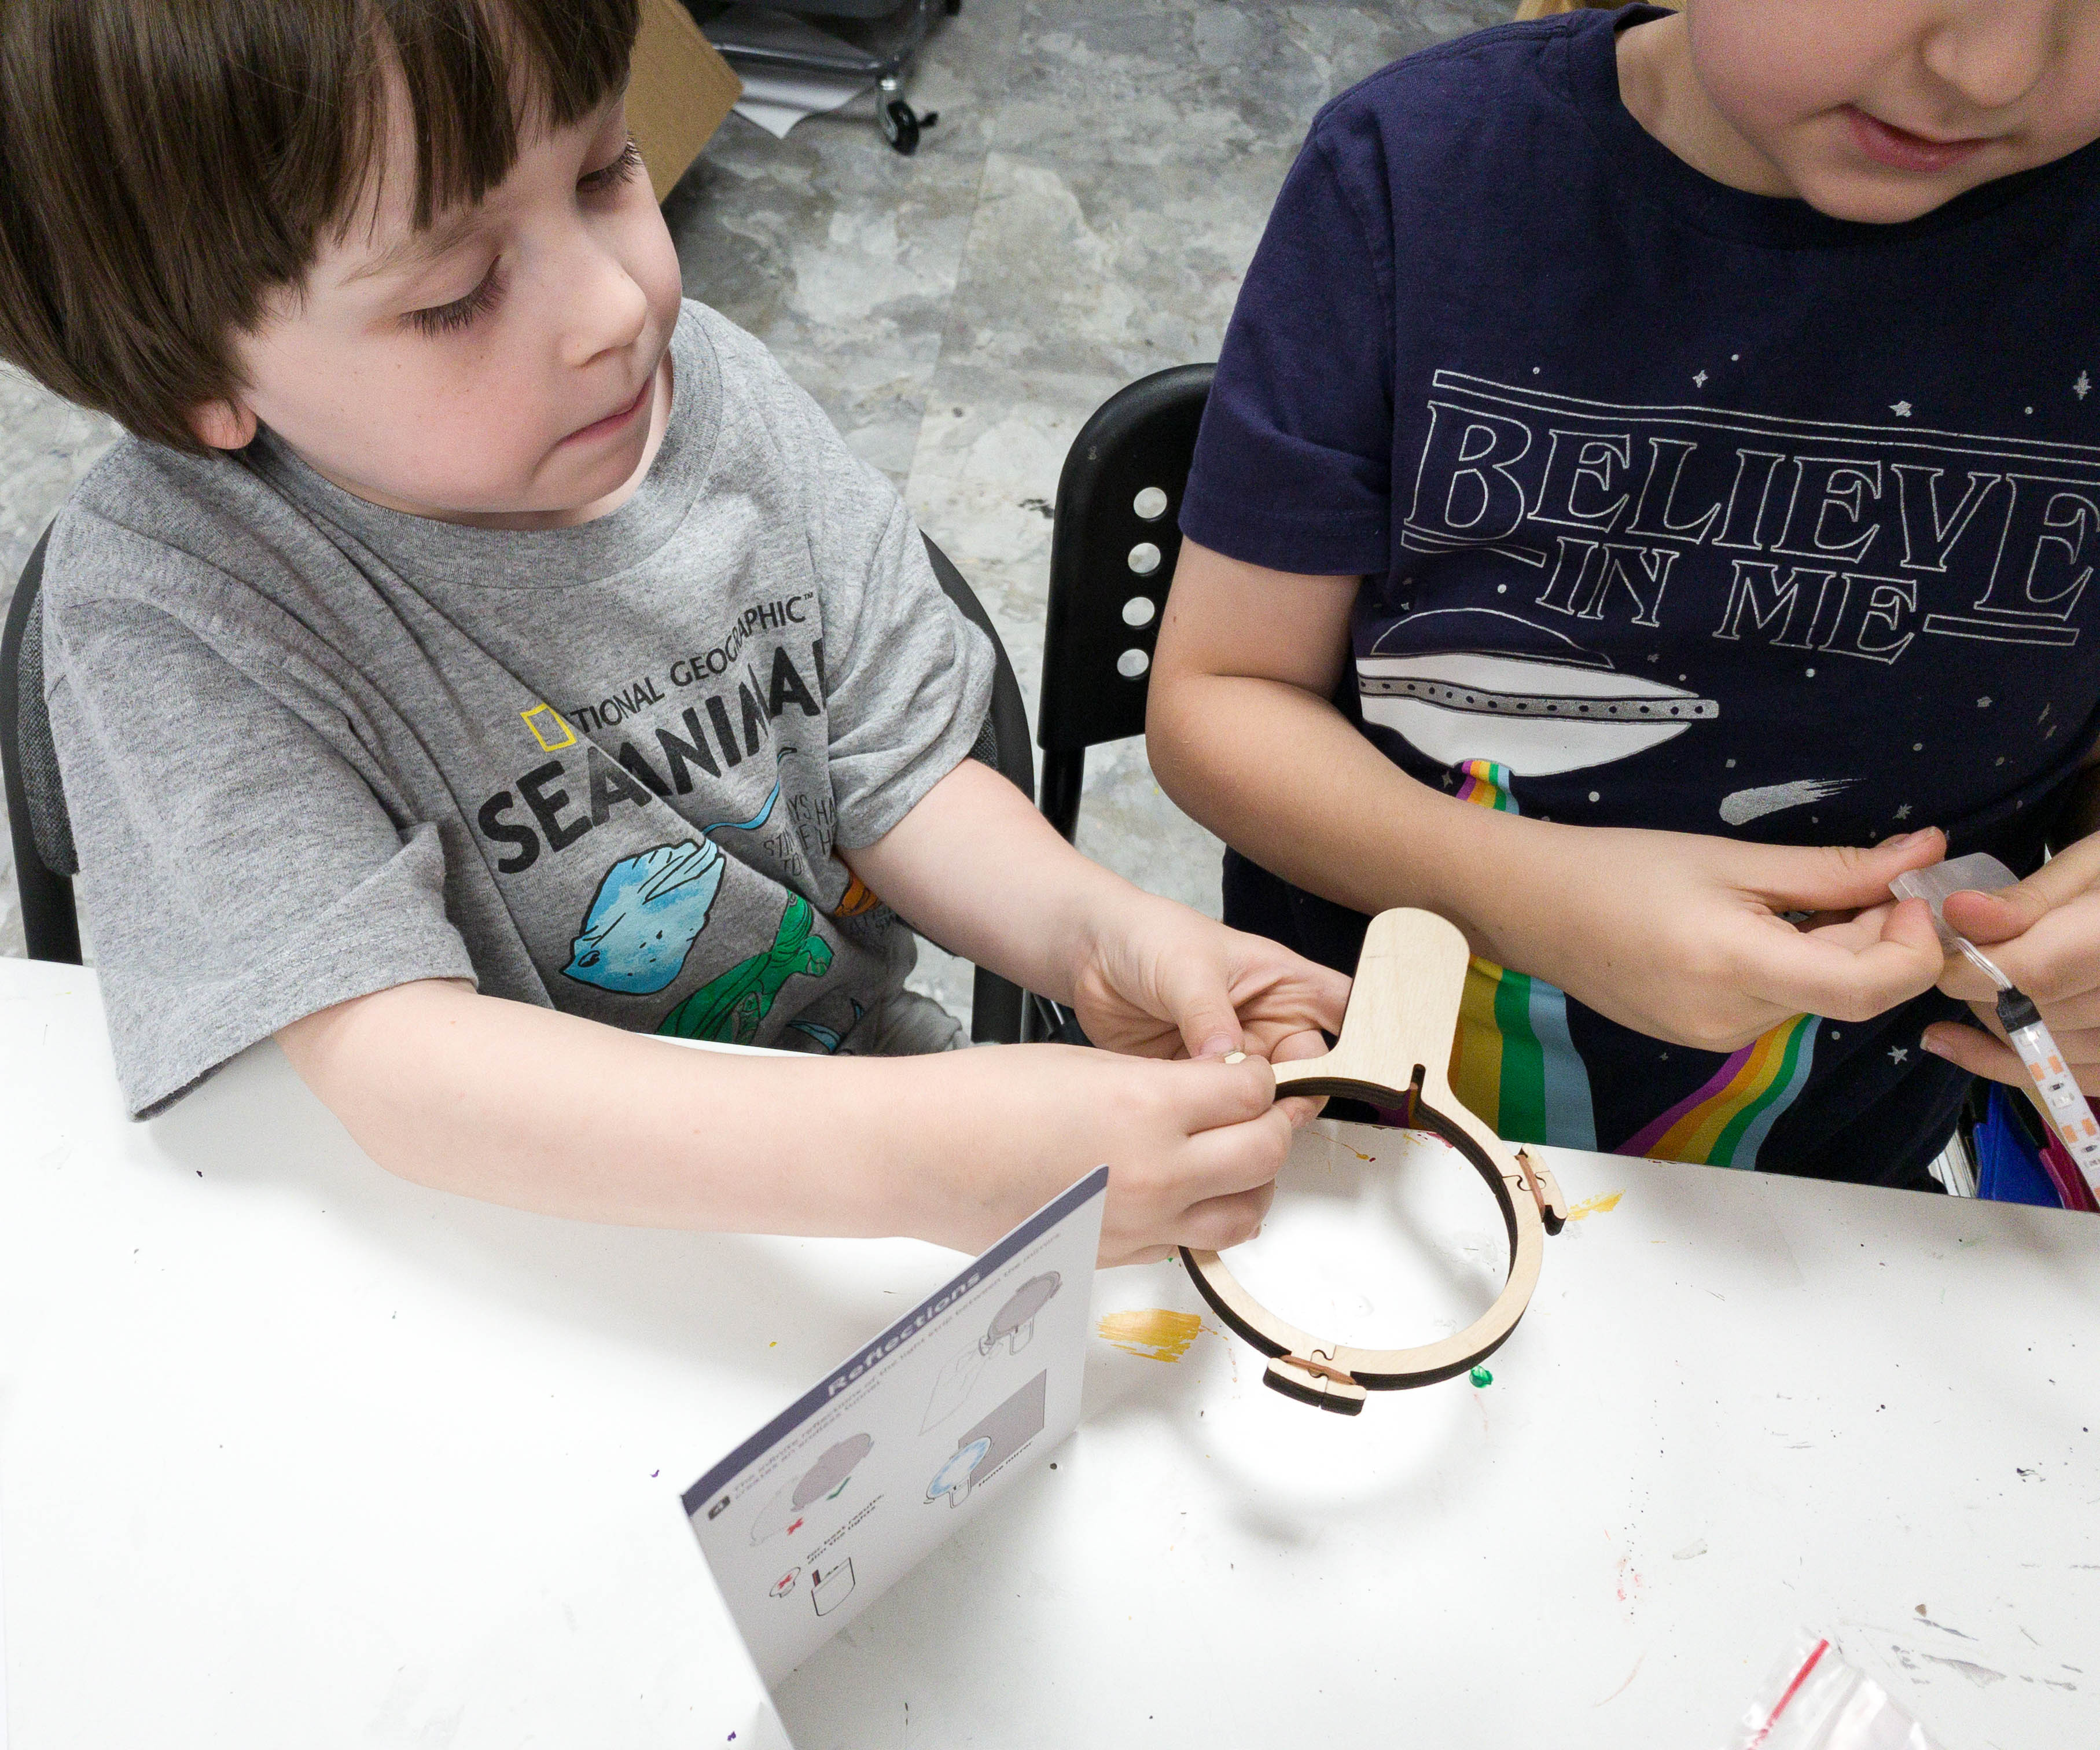
This LED strip will produce the light needed. My son carefully attached it on the inside with the help of adhesives.
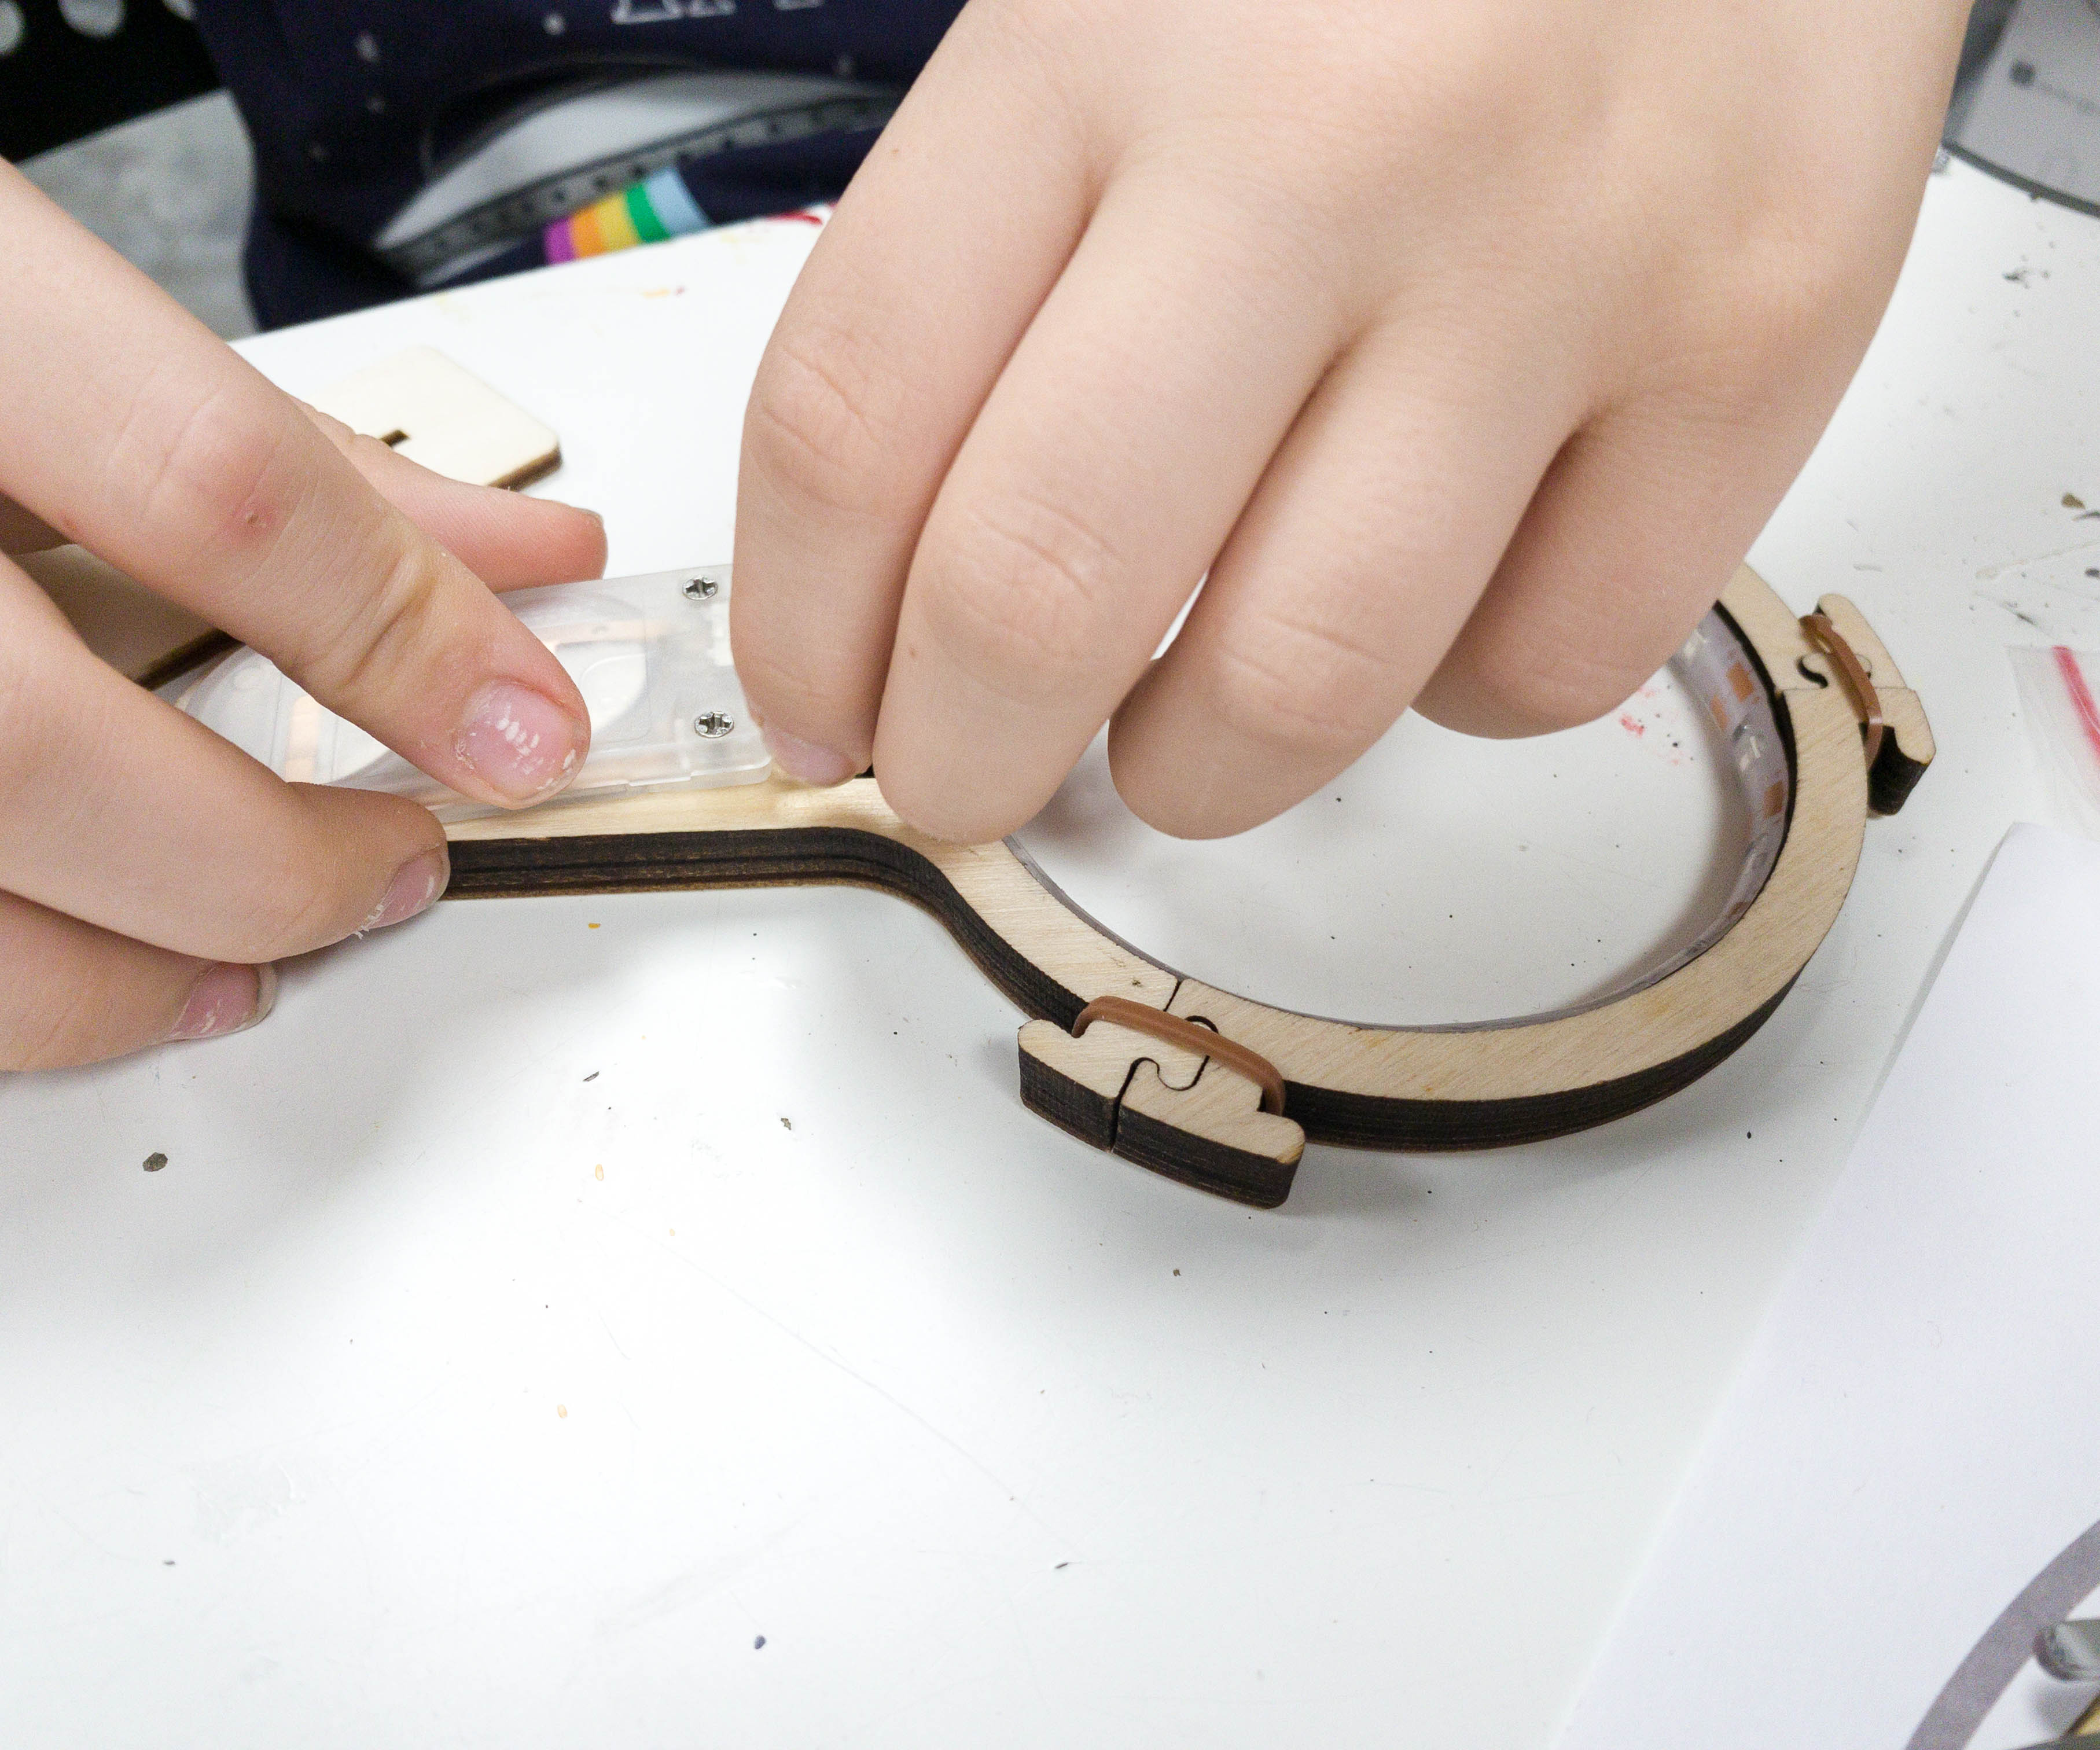
He also secured the battery case on its handle. It’s now time to place the mirrors and see how it works!

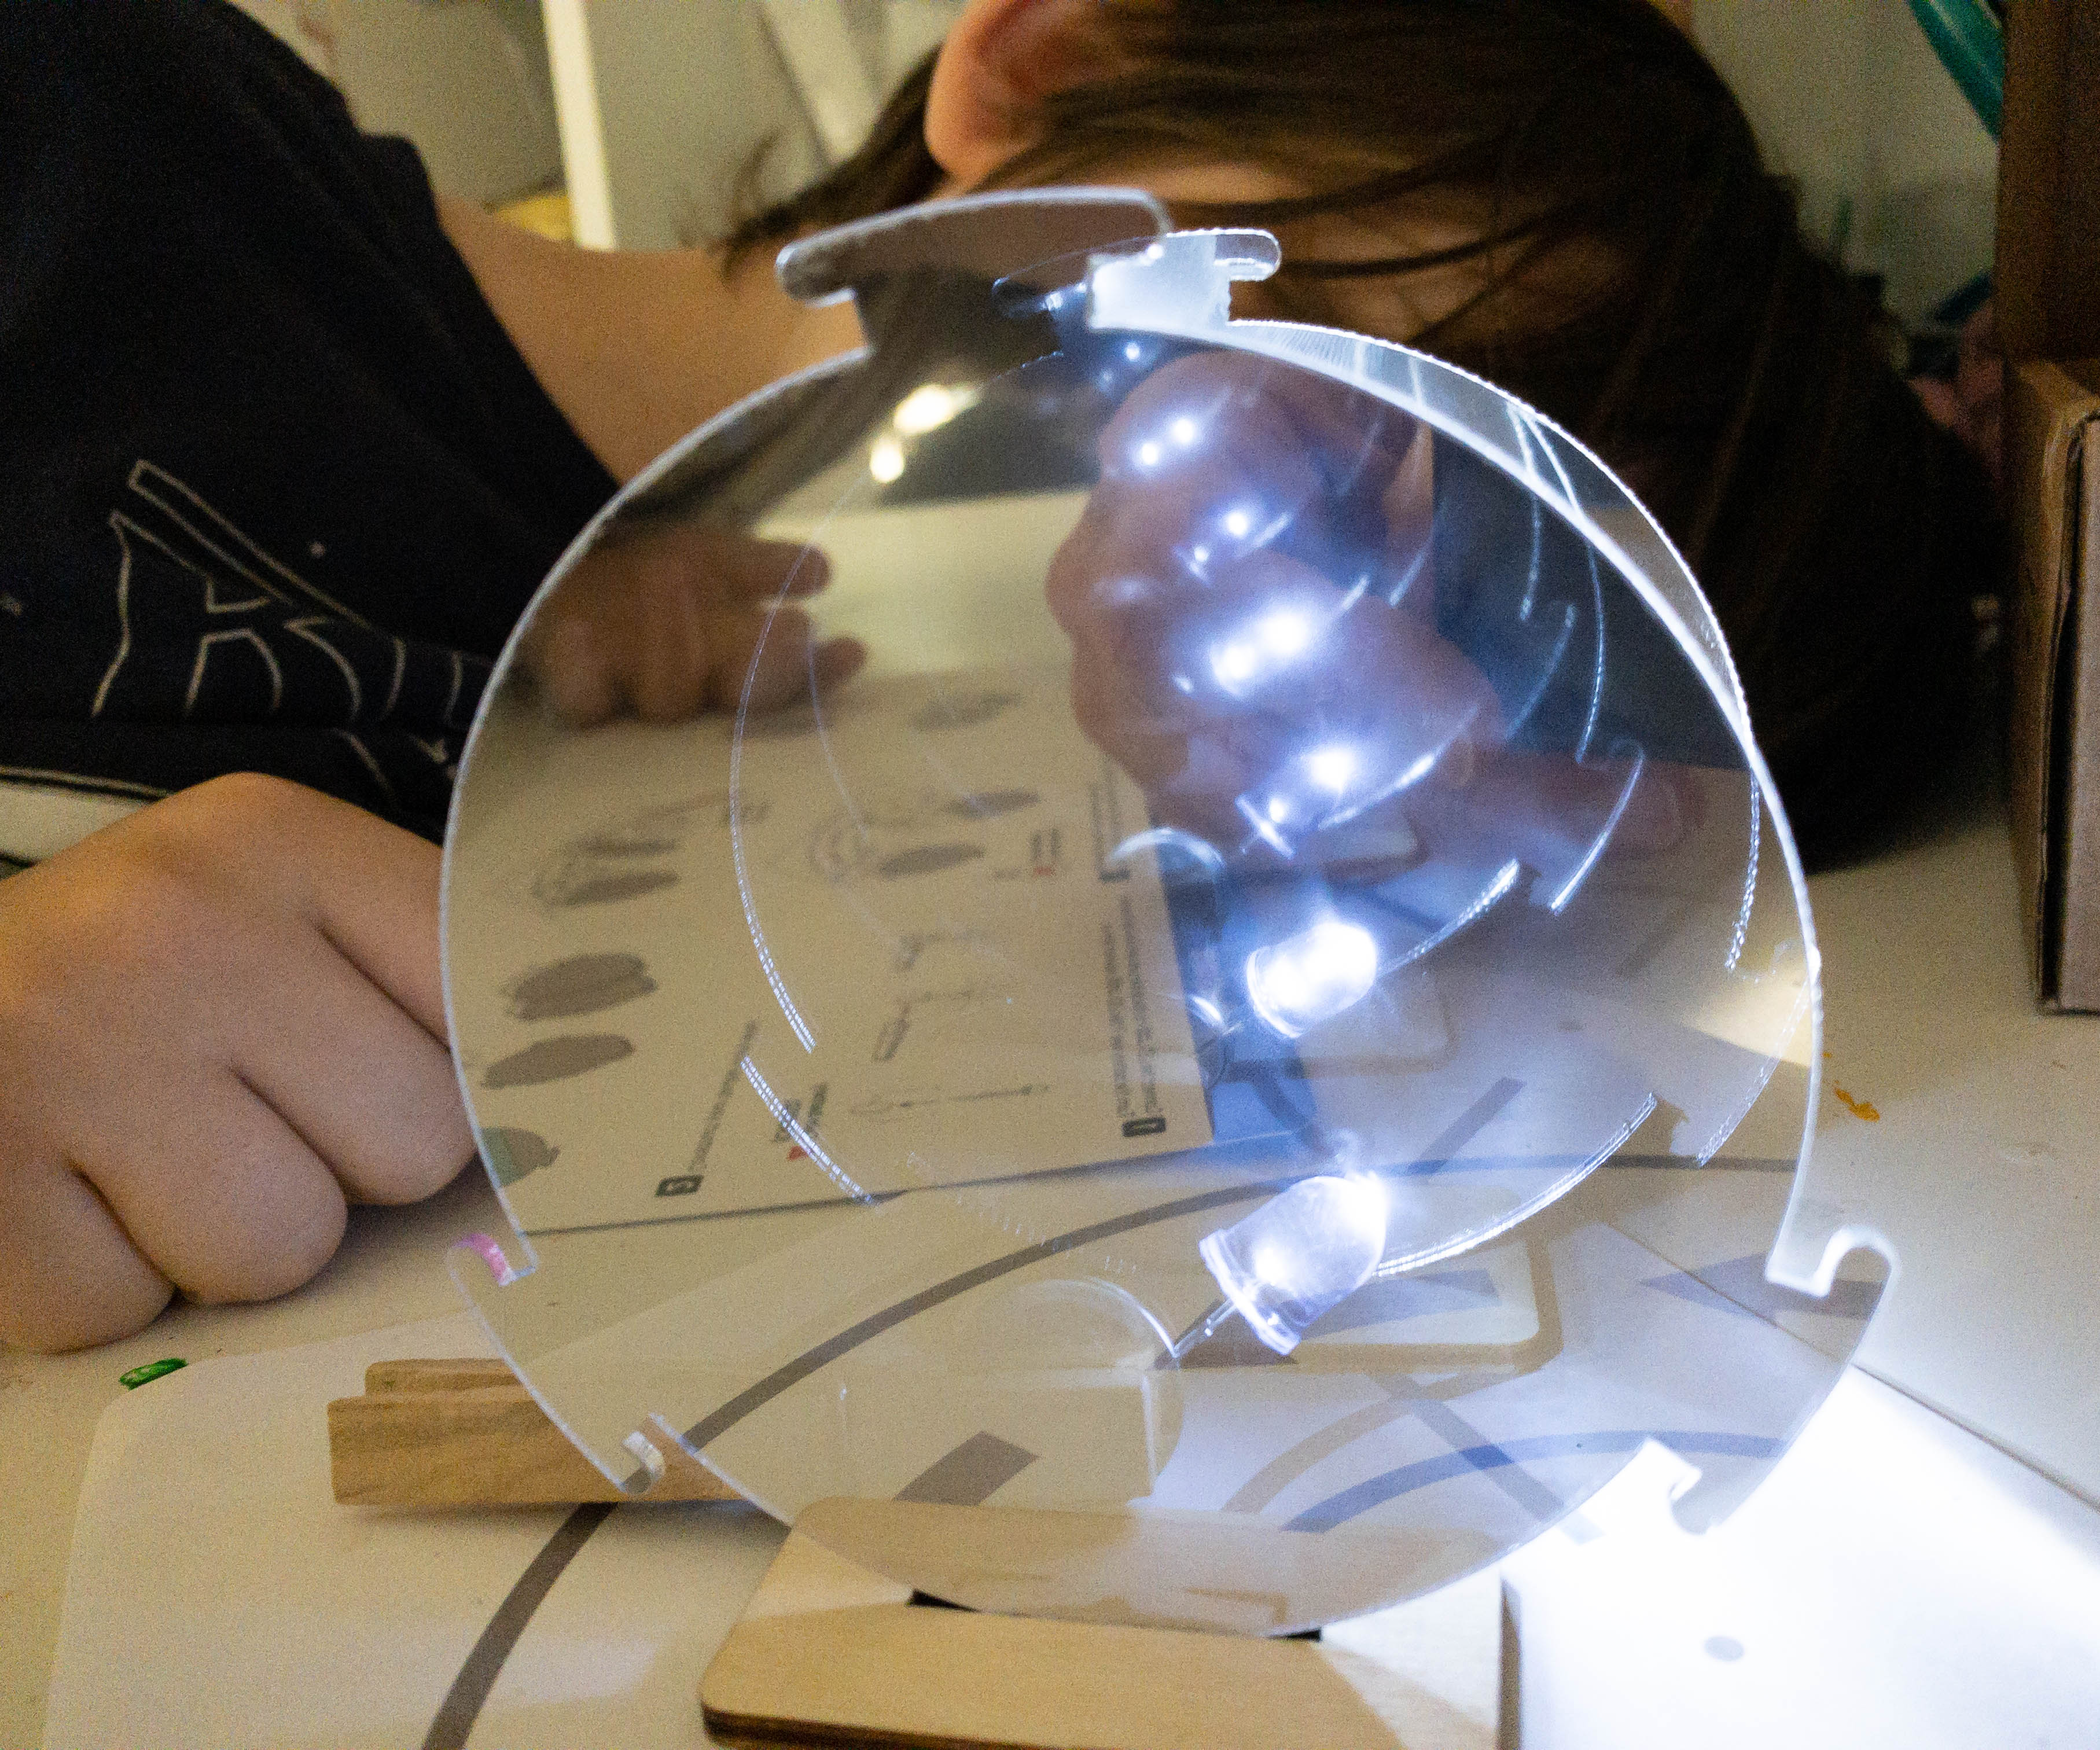
My kids successfully made their infinity tunnel!
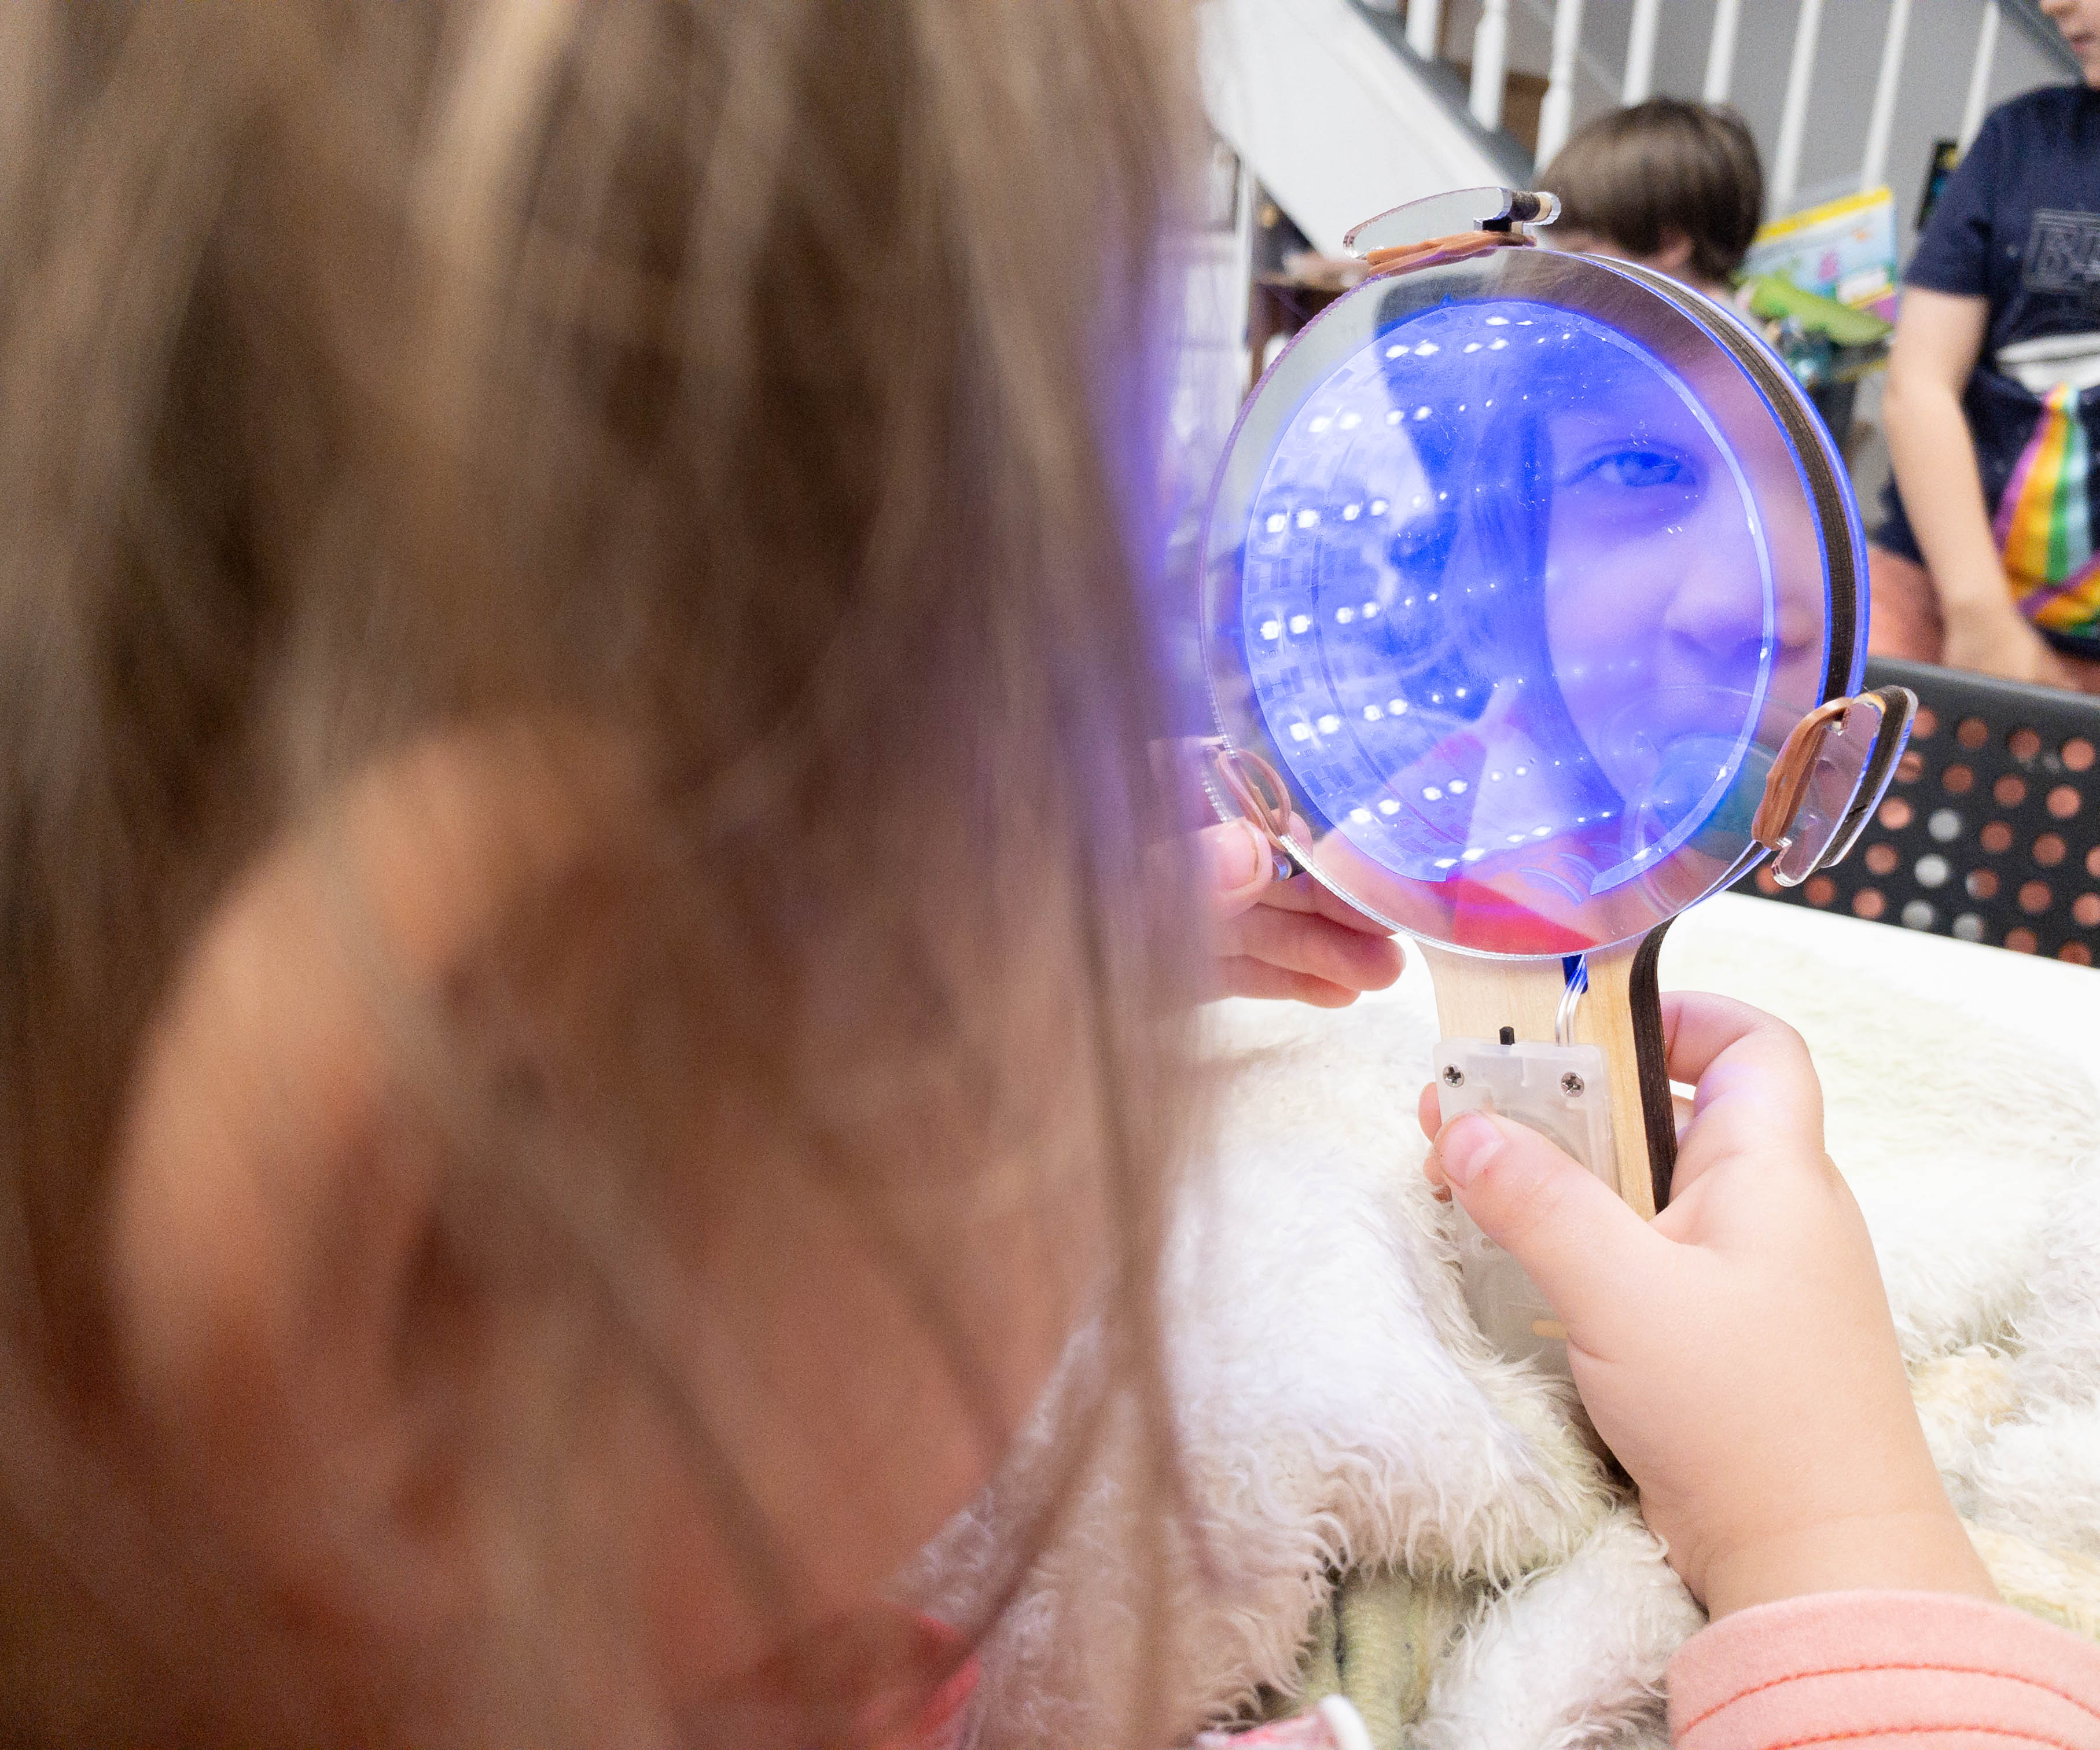
They were amazed at the illusion made by placing a light source in the middle of two mirrors that face each other!

Everyone tried and had the same reaction! This homemade portal is really amazing!
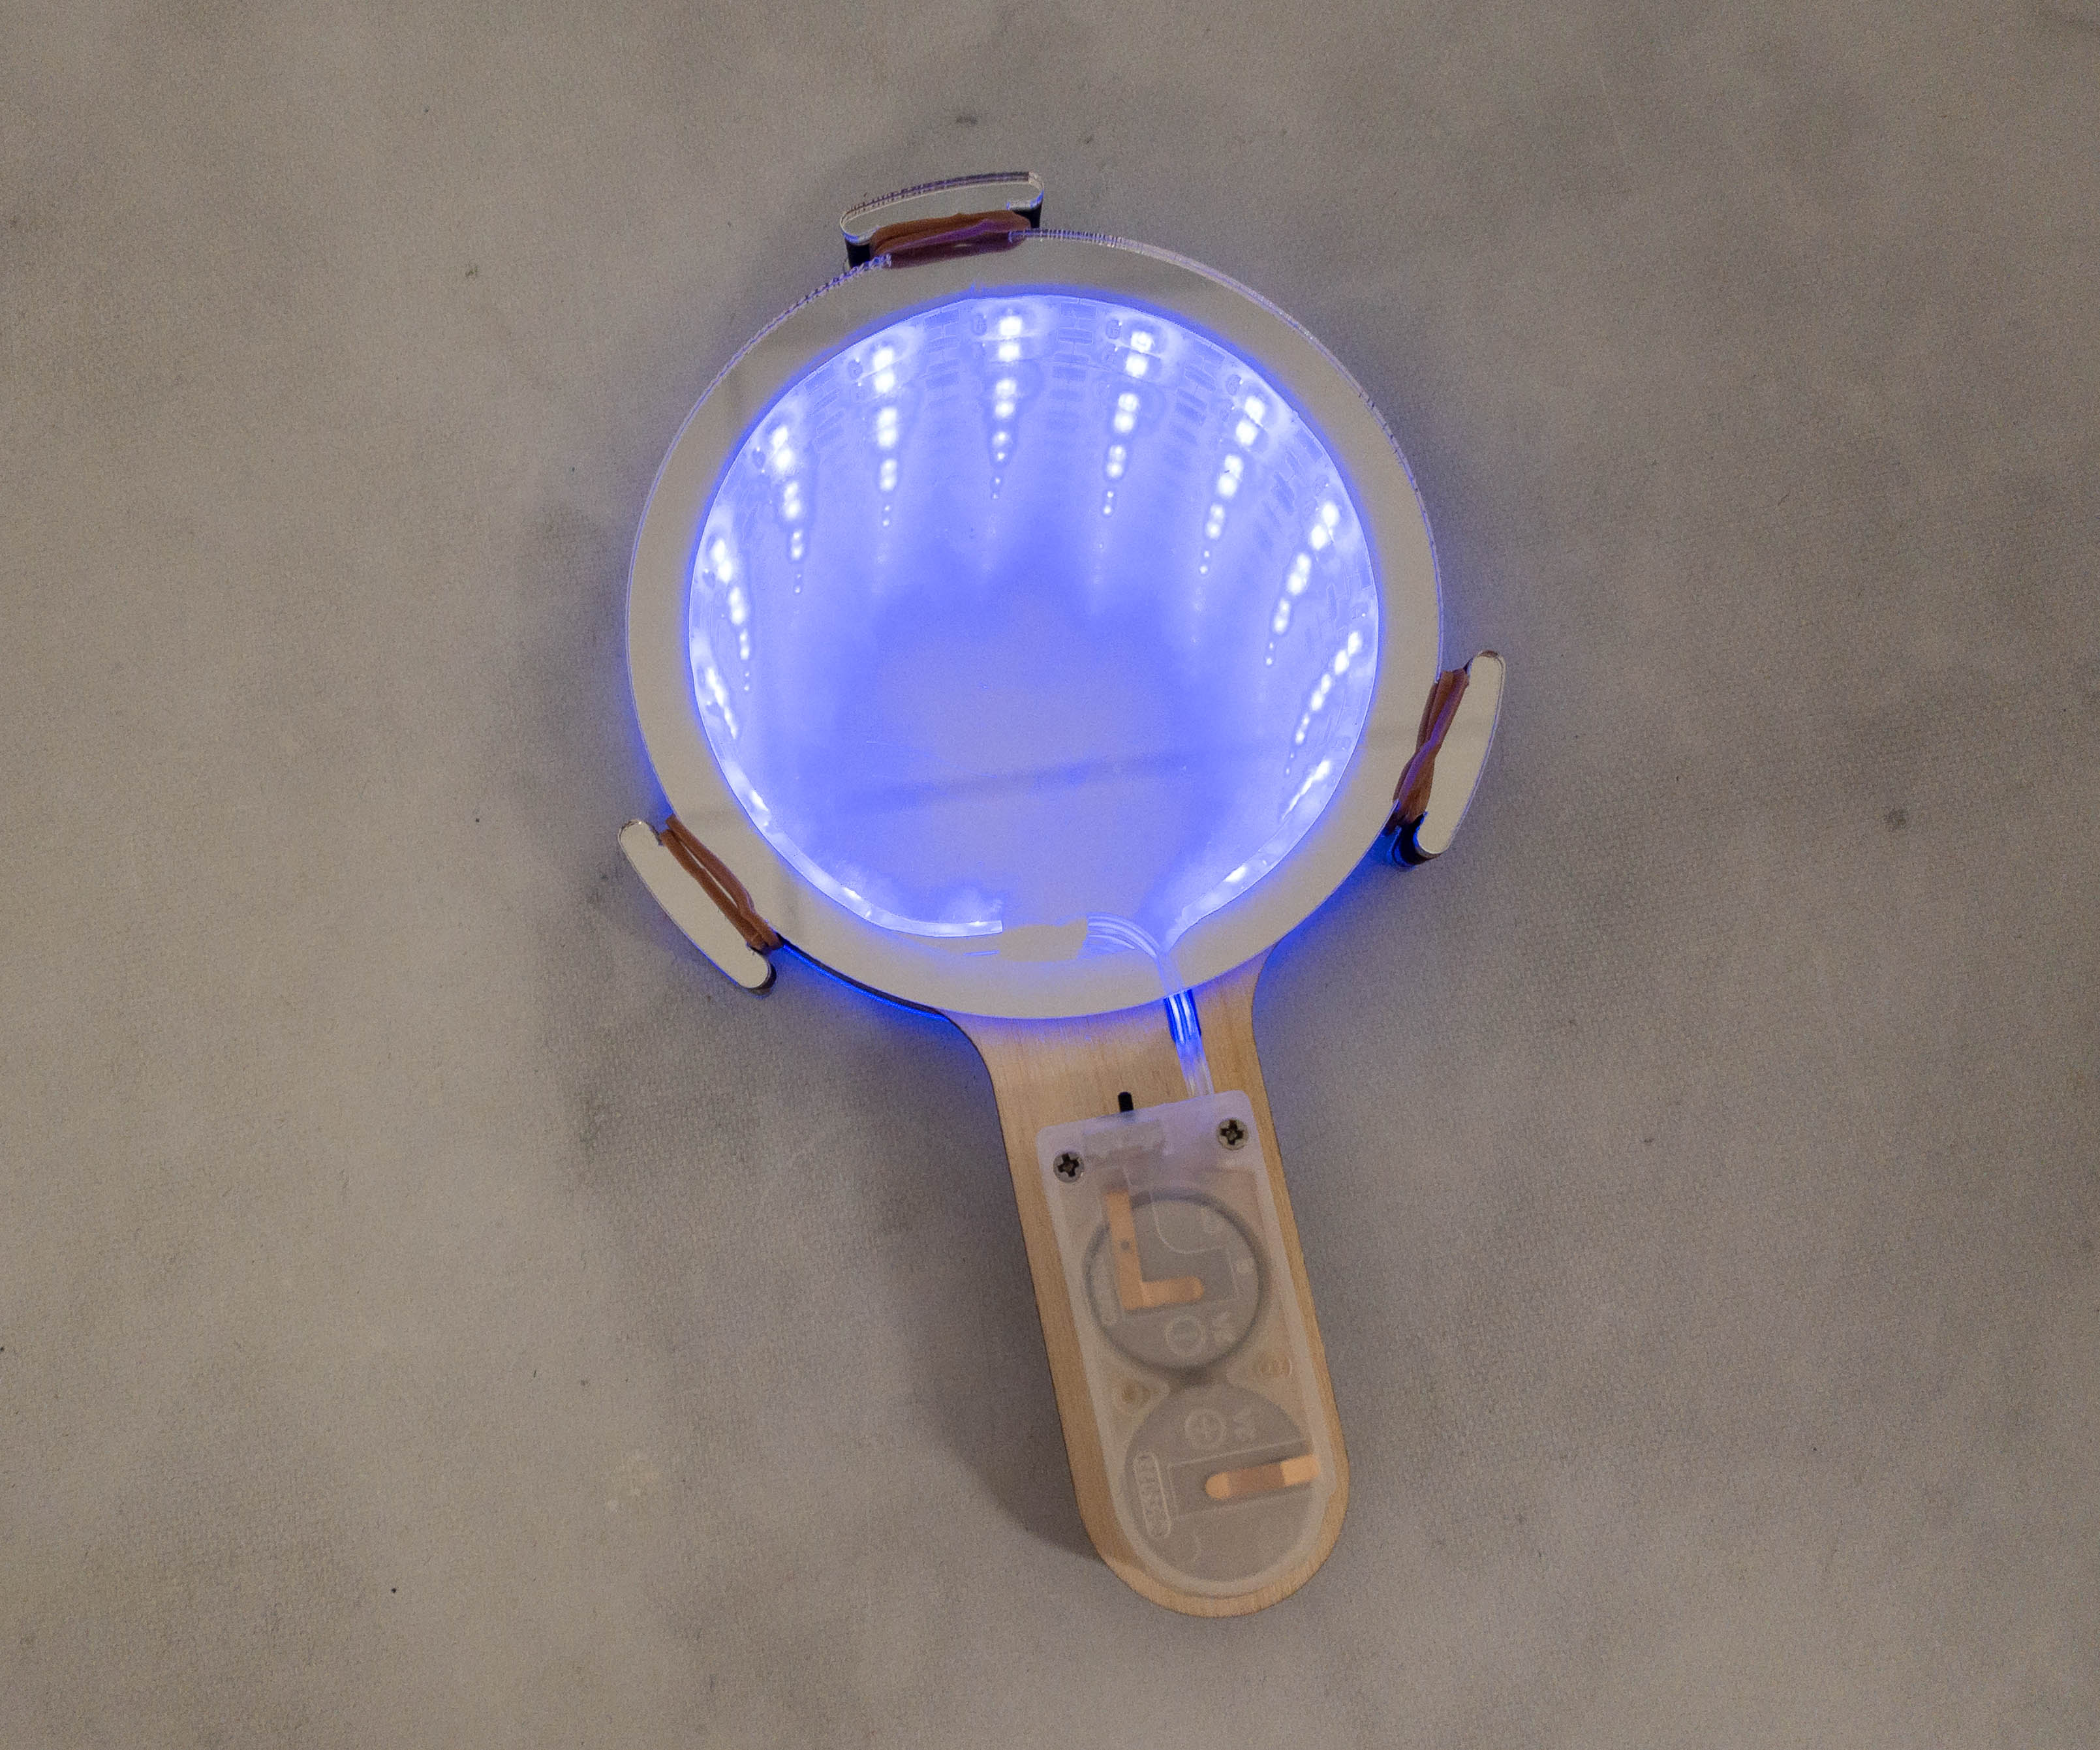
It looks nice and the only problem we have now is when the battery runs out!
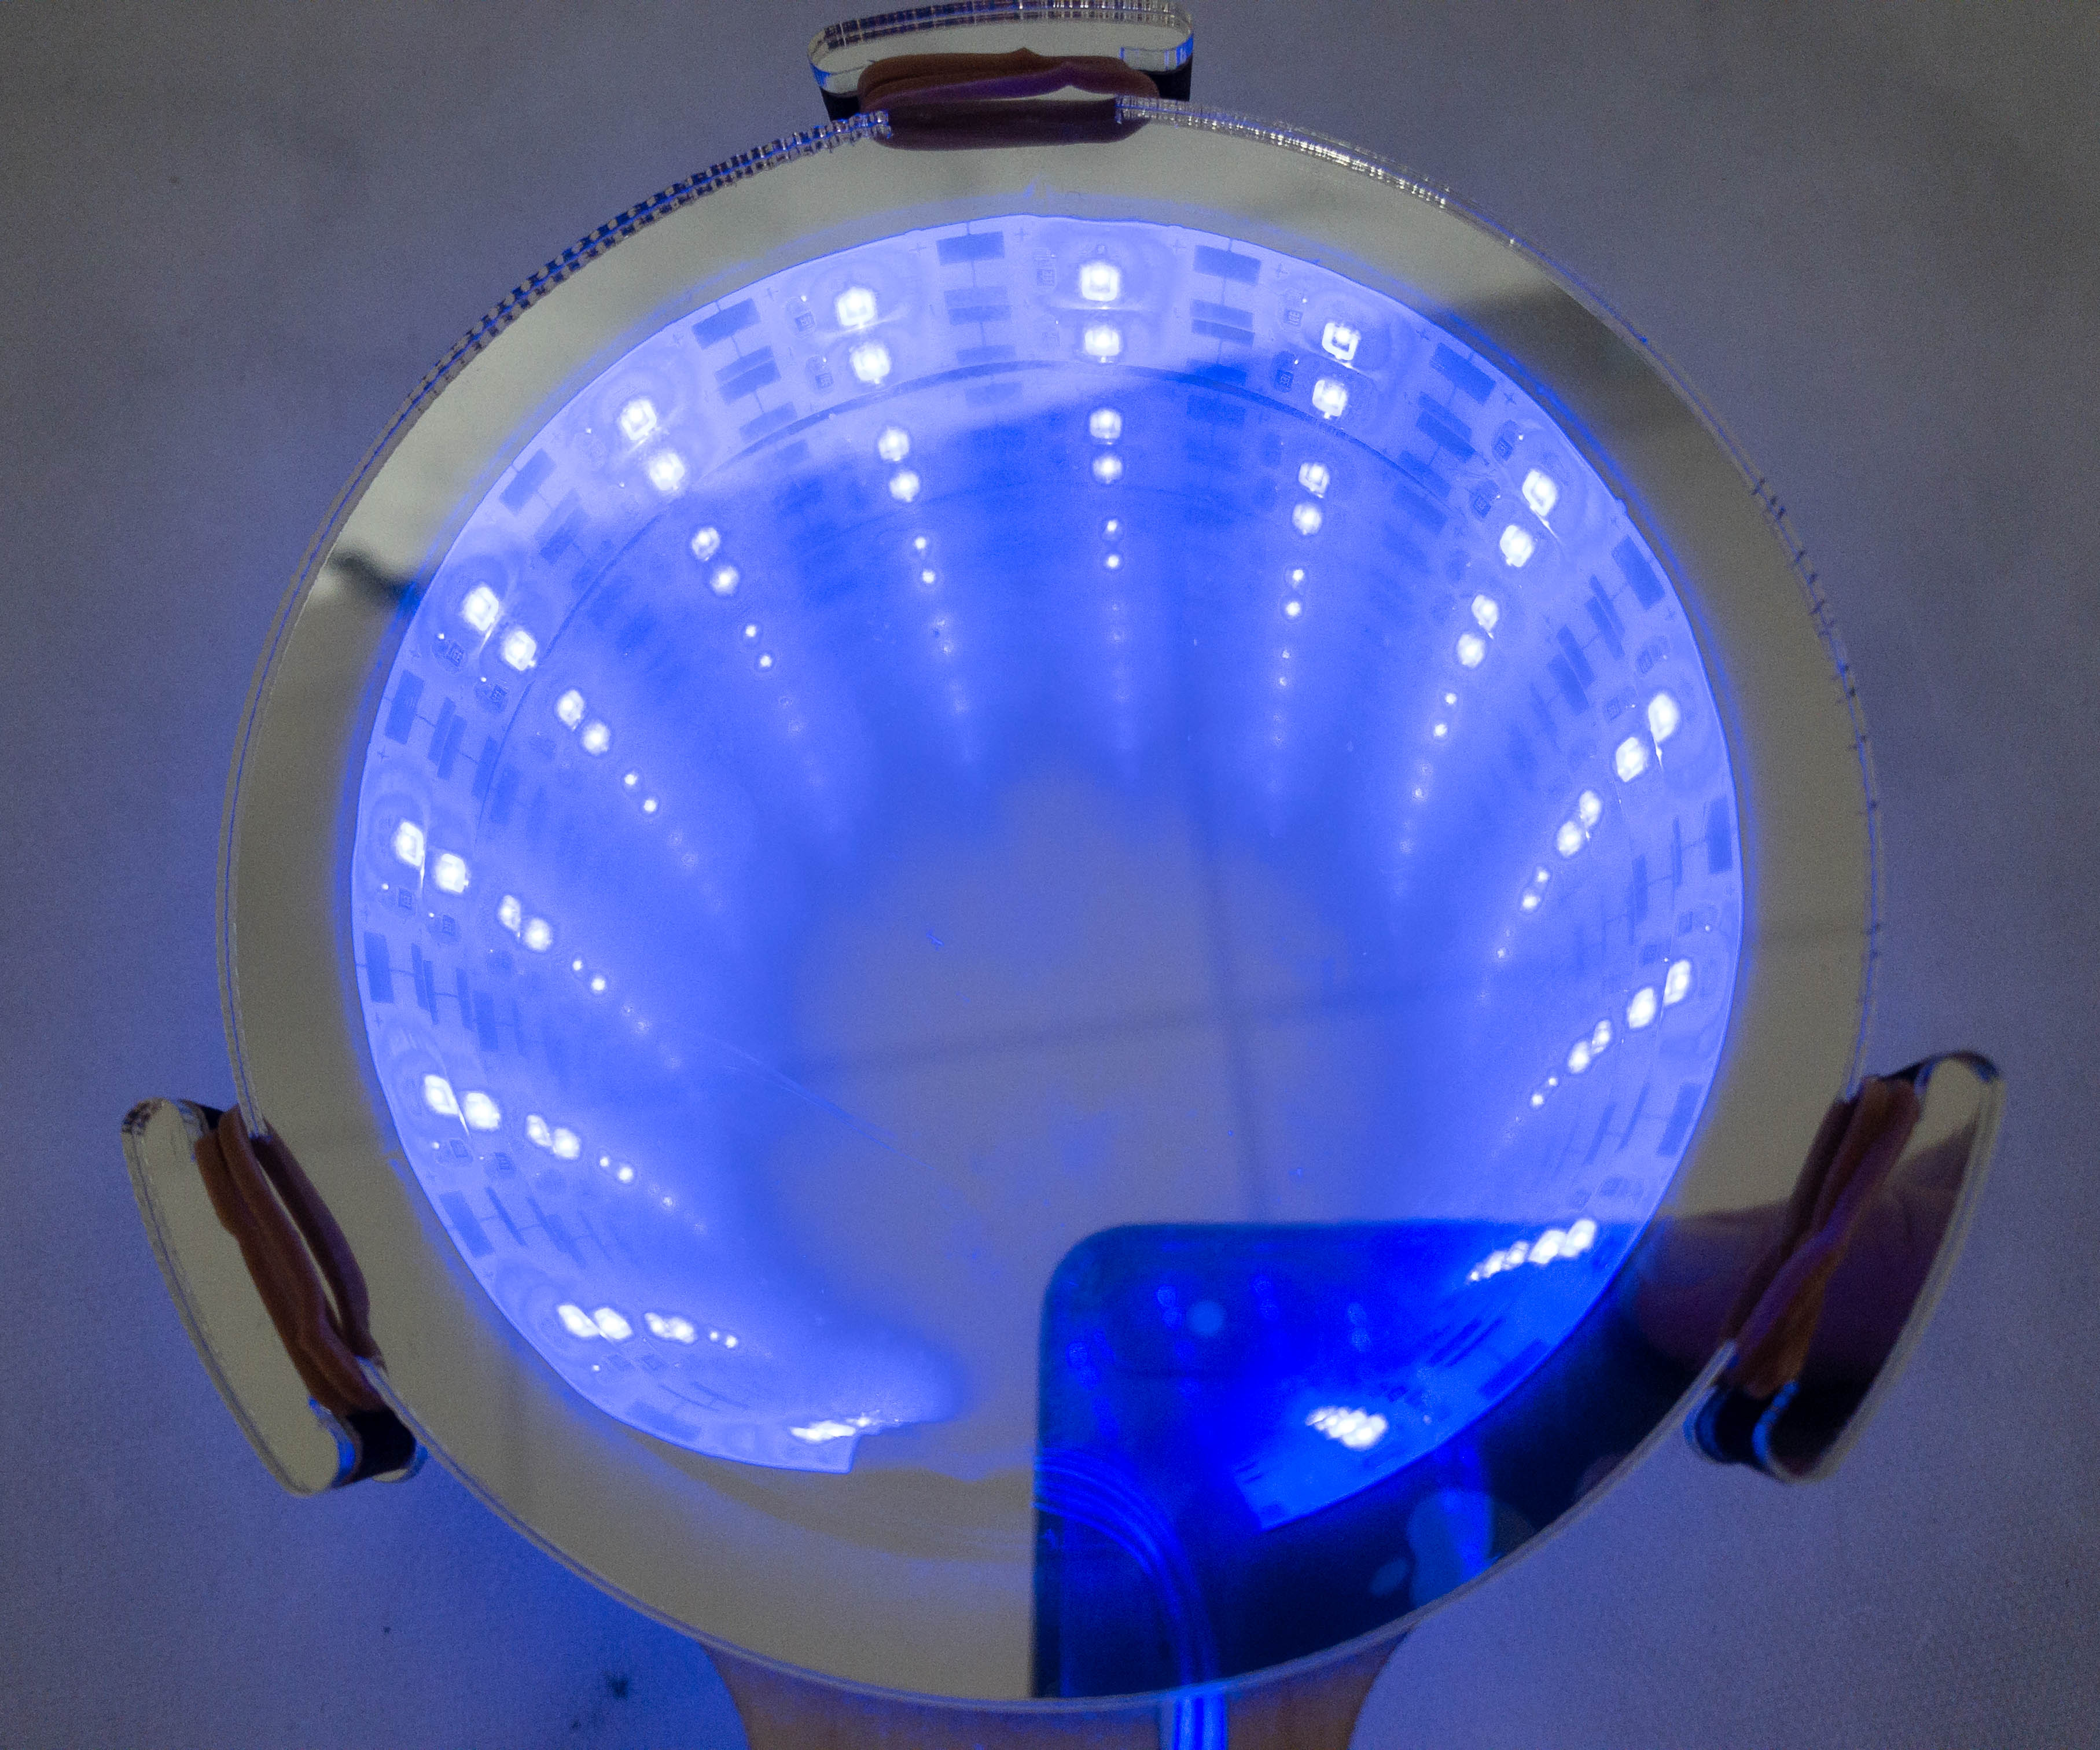
The effect is better with the lights turned off!
The kids did an amazing job on this third activity. They were able to do everything on their own and they had fun doing it!
My kids enjoyed all 3 experiments this month and their reaction to each one is priceless! The parts, instructions, and illustrations are kid-friendly and at the end of every experiment there is an explanation written on the guide to further explain the science behind the activity. The MEL Science App is pretty cool as well! It’s easy to navigate and it makes learning more fun and interactive for the kids. Among the experiments, my kids’ favorite is definitely the Infinity Tunnel. They all had an equal share of using it until there was no battery left to power up the light source. So far, they have enjoyed all of the physics-related experiments from this subscription! It’s perfect for home learning!
What do you think of the MEL Physics by MEL Science box?
Visit MEL Physics by MEL Science to subscribe or find out more!


Comments