Eureka Crate is a monthly STEM and maker subscription box that teaches kids and adults how to apply principles of science and math to make awesome things you will love to use every day – from an articulated desk lamp to an electric pencil sharpener to a wooden ukulele. Every Eureka Crate includes an engineering project, detailed step-by-step instructions, everything you need to complete the project, a Maker’s Guide that explains all the design, process, and engineering behind the design, plus a design challenge to take your project knowledge to the next level!
DEAL: Save 30% on your first month! Just use this link to subscribe, no coupon code required! You can also use the same link to save 30% on the first month of any other KiwiCo crate – just check out this page to discover which box is right for you.
Eureka Crate is KiwiCo’s latest subscription! Eureka Crate is designed for ages 14-104. If you’re ready to graduate from KiwiCo’s other boxes or just can’t get enough (or are just too old for their other subscriptions), you’ll love this box, which is designed to create a hands-on learning experience using everyday items to delve deeply into the science and math principles they embody, along with the design process of the month’s project.
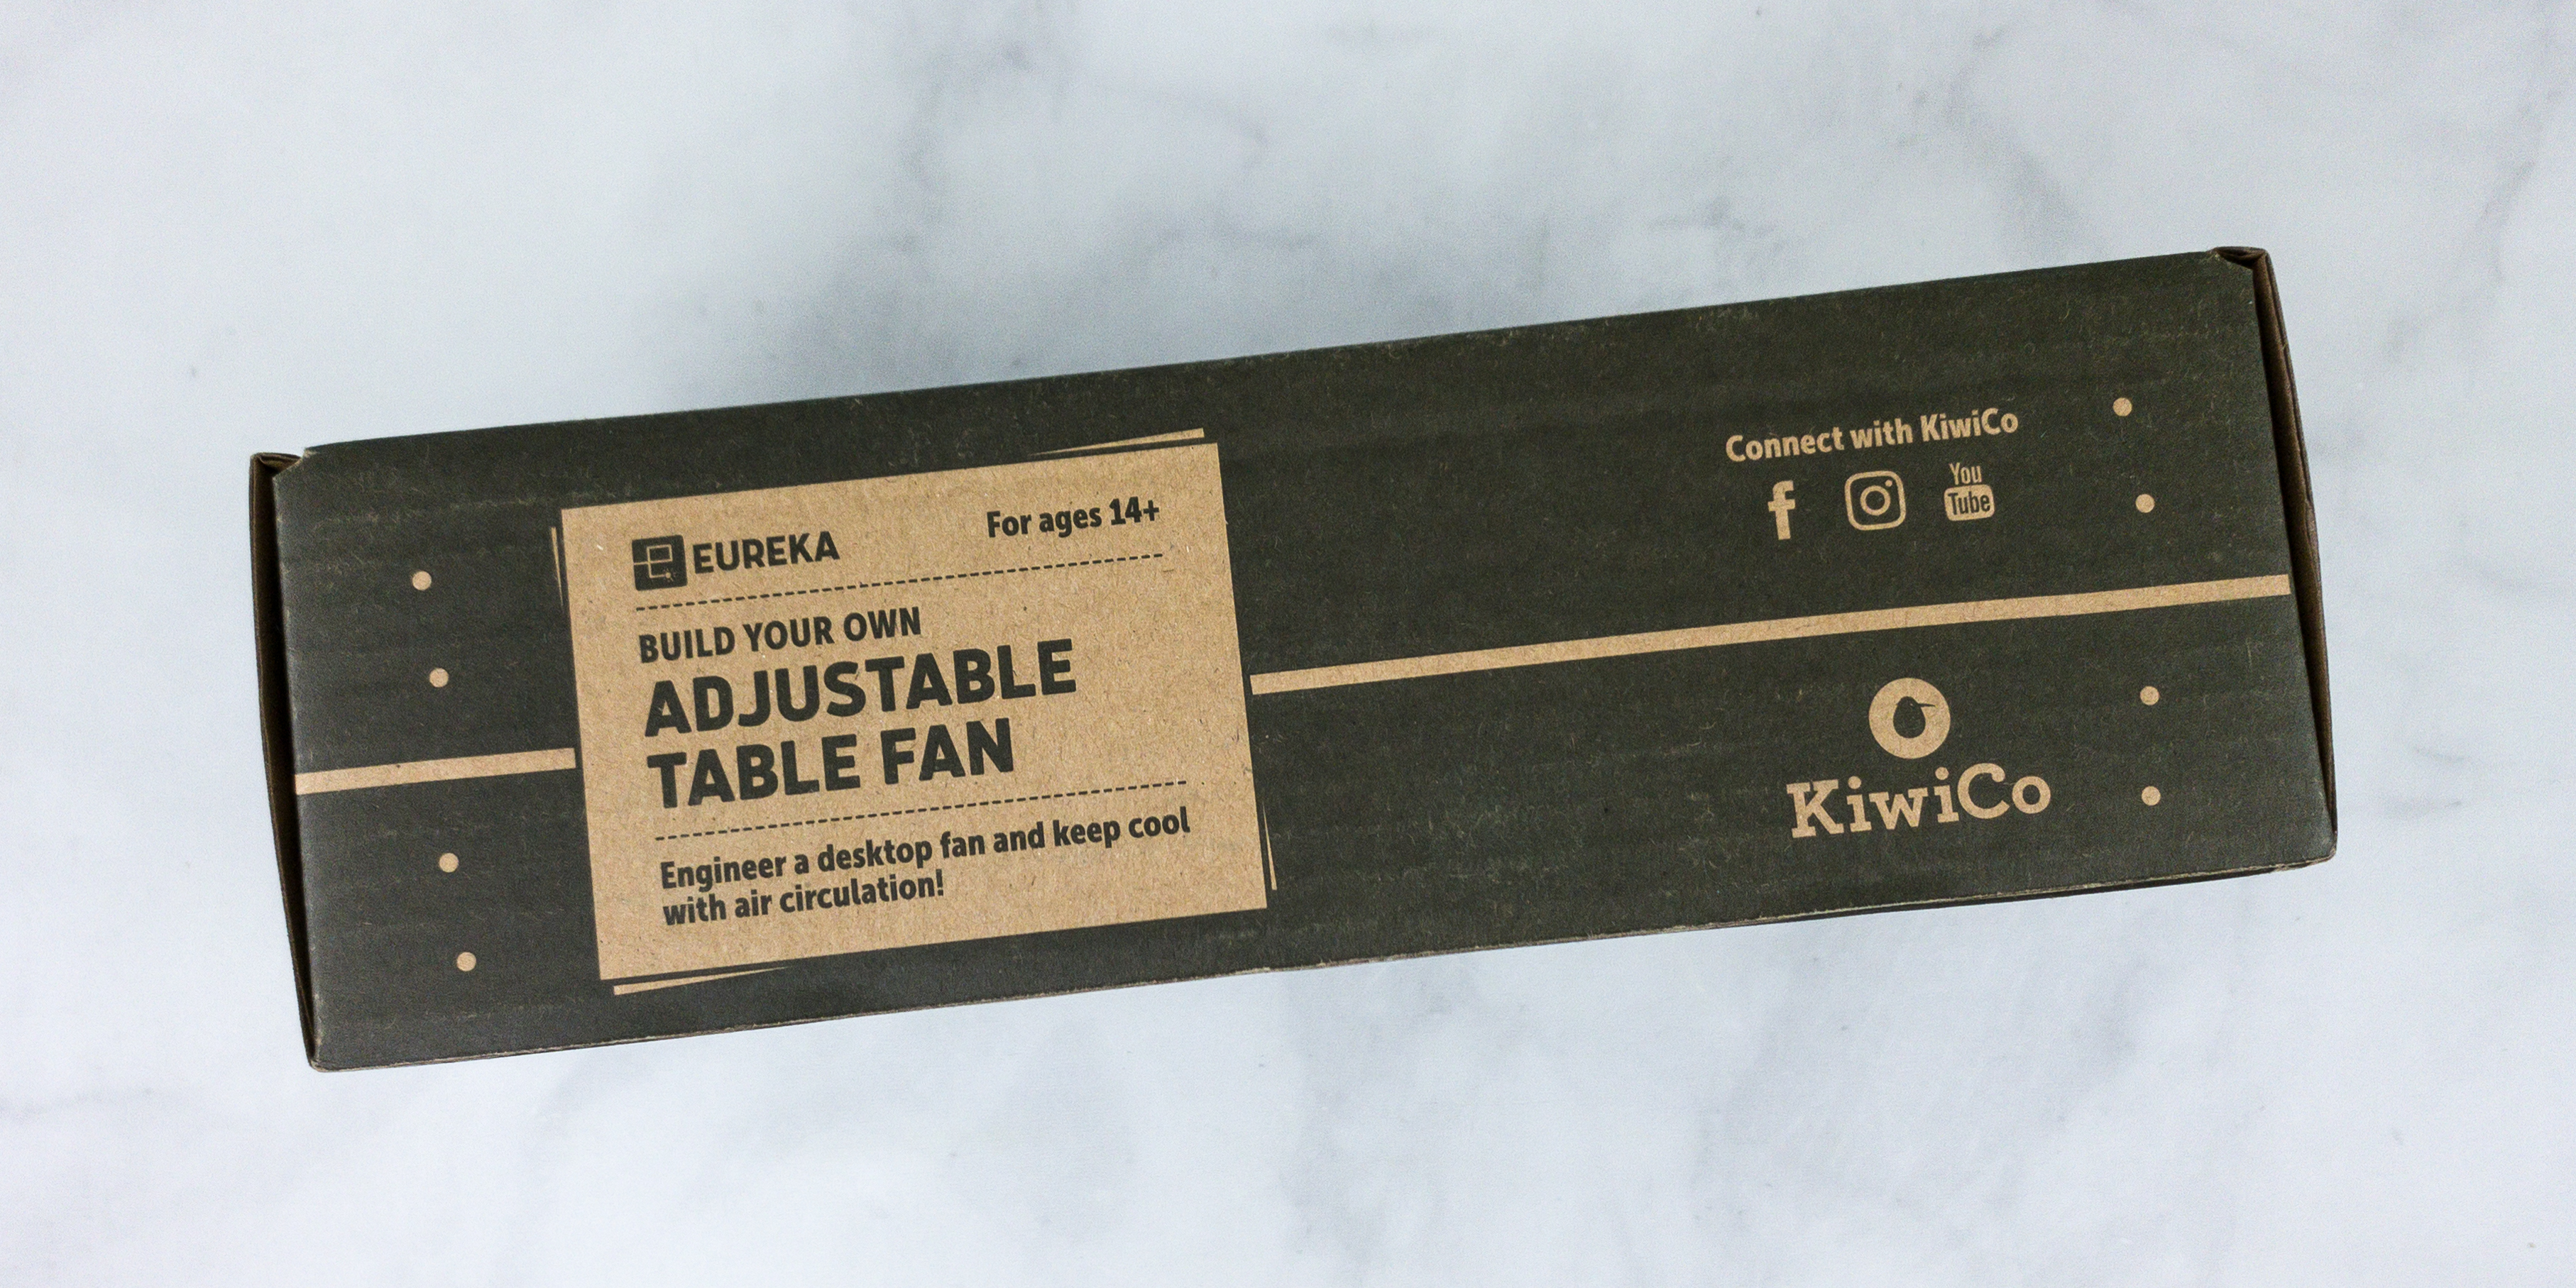
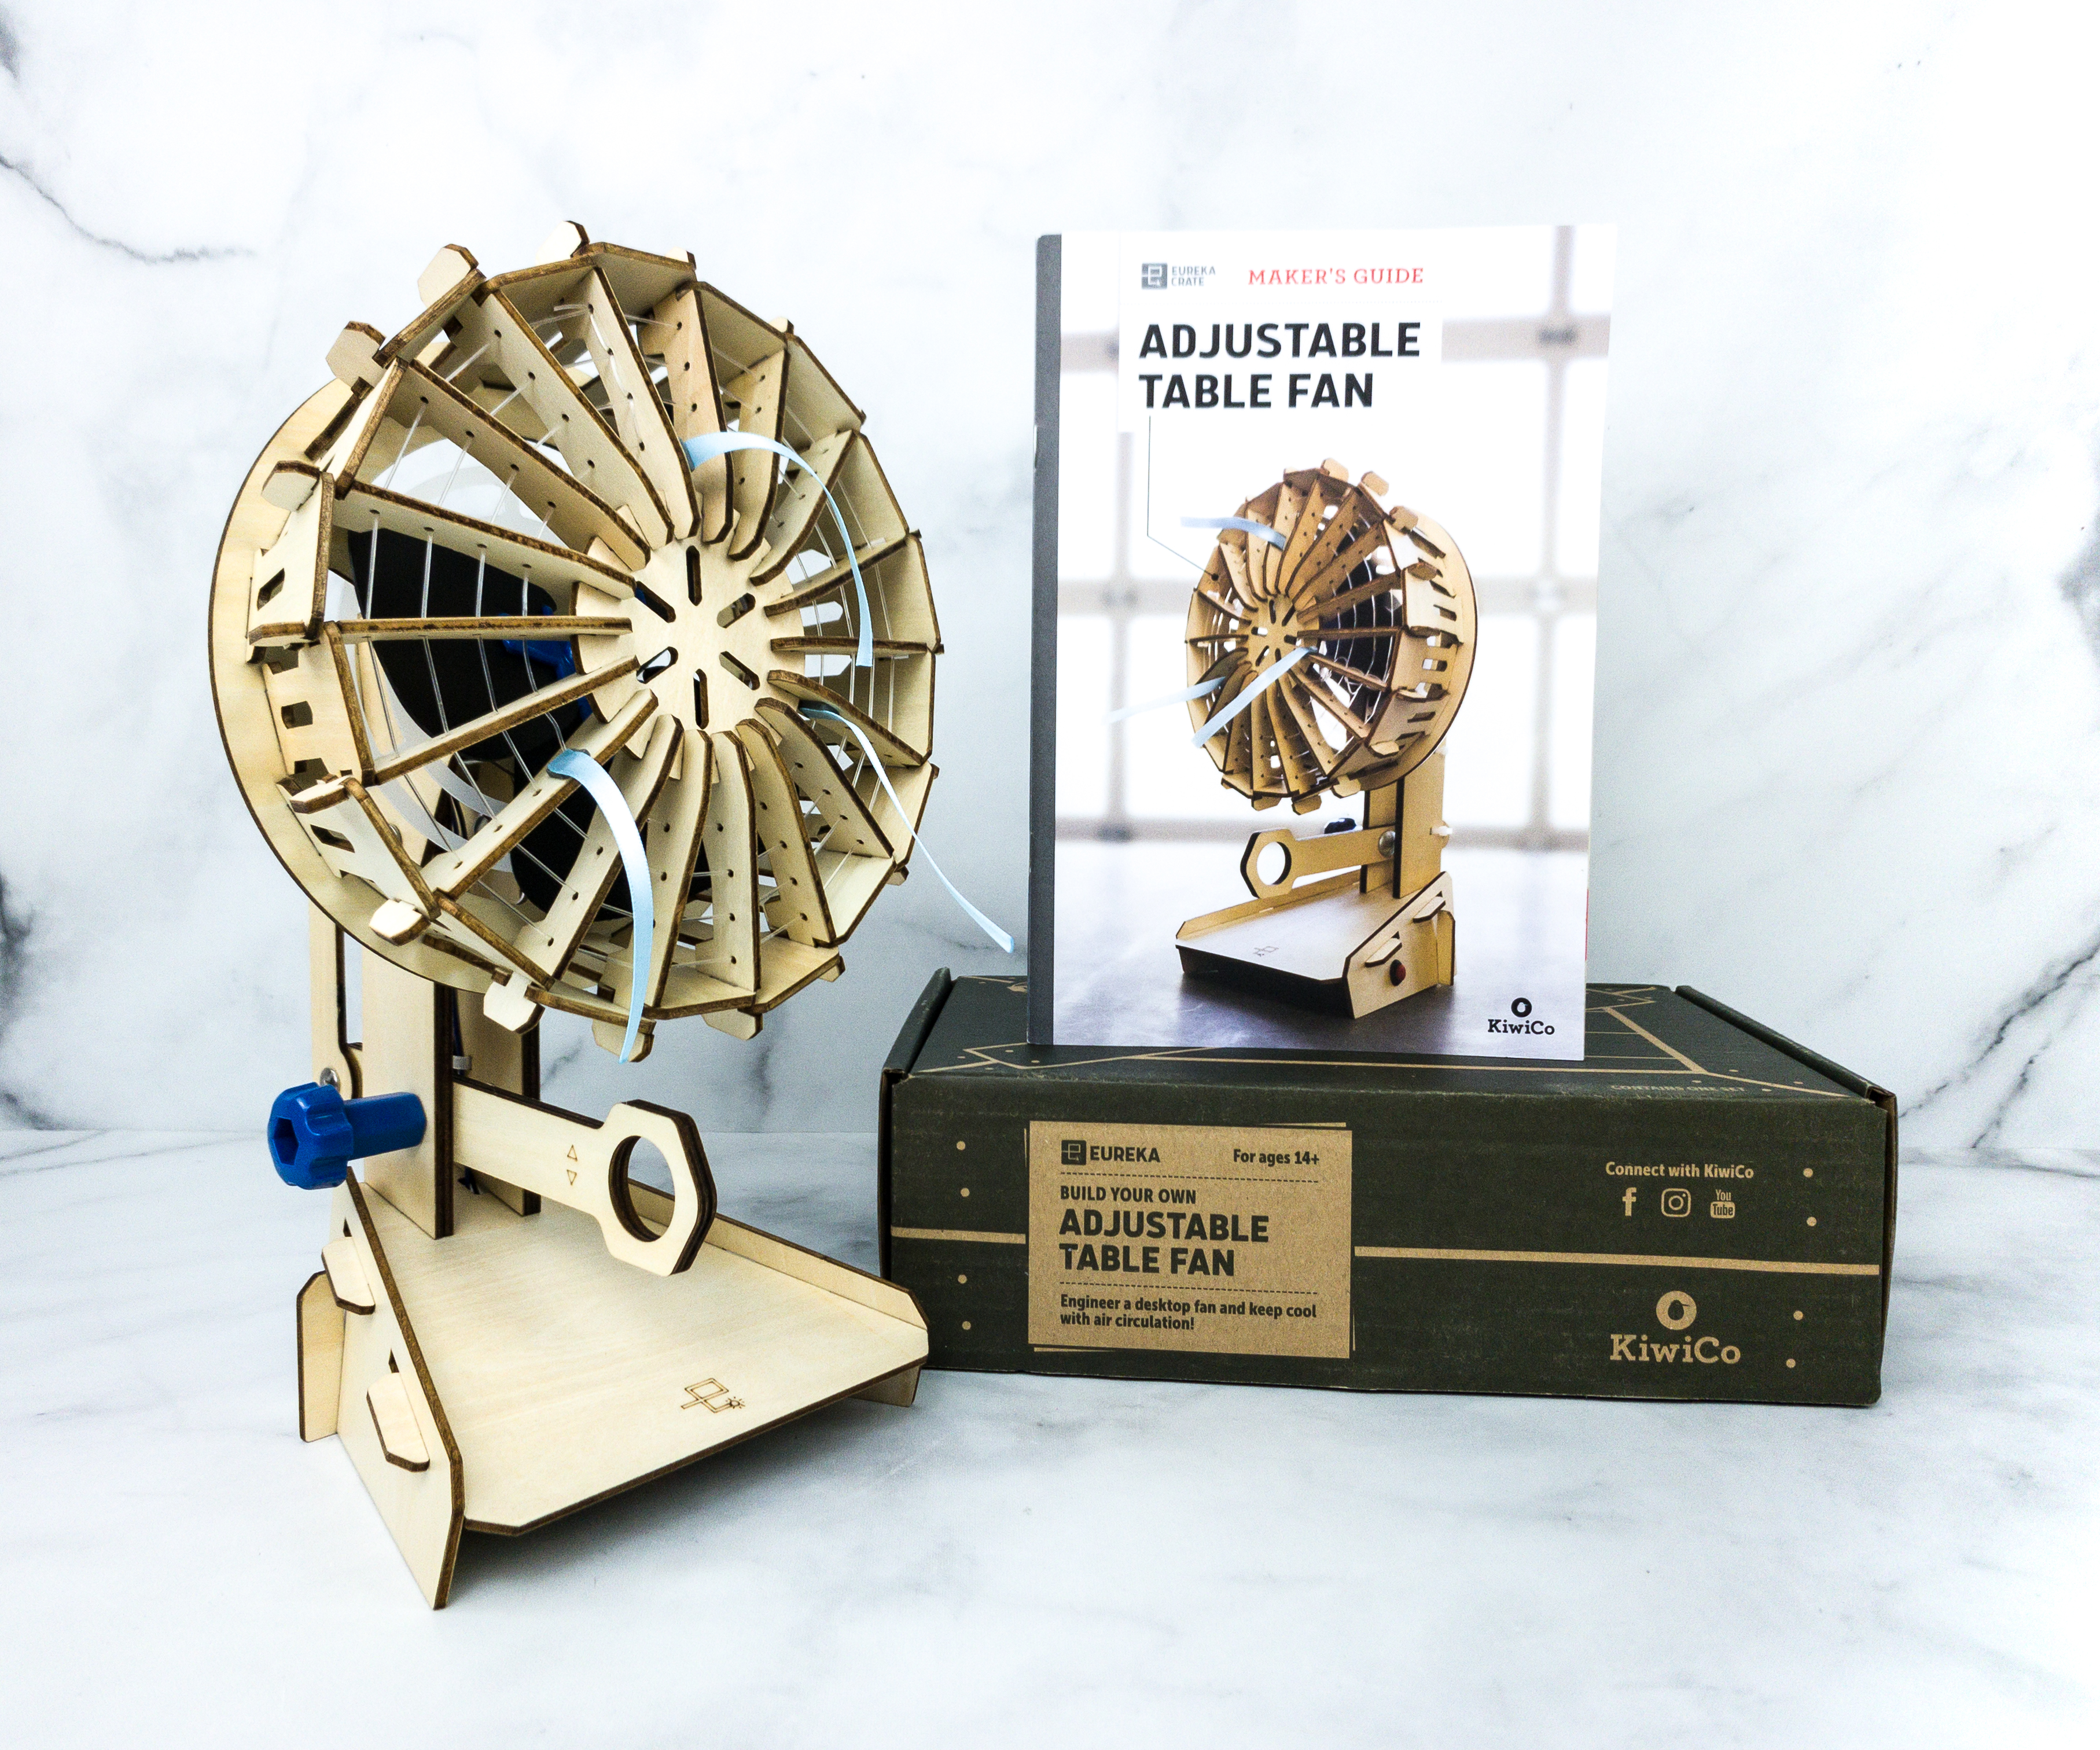
This month, we’re making an Adjustable Table Fan!

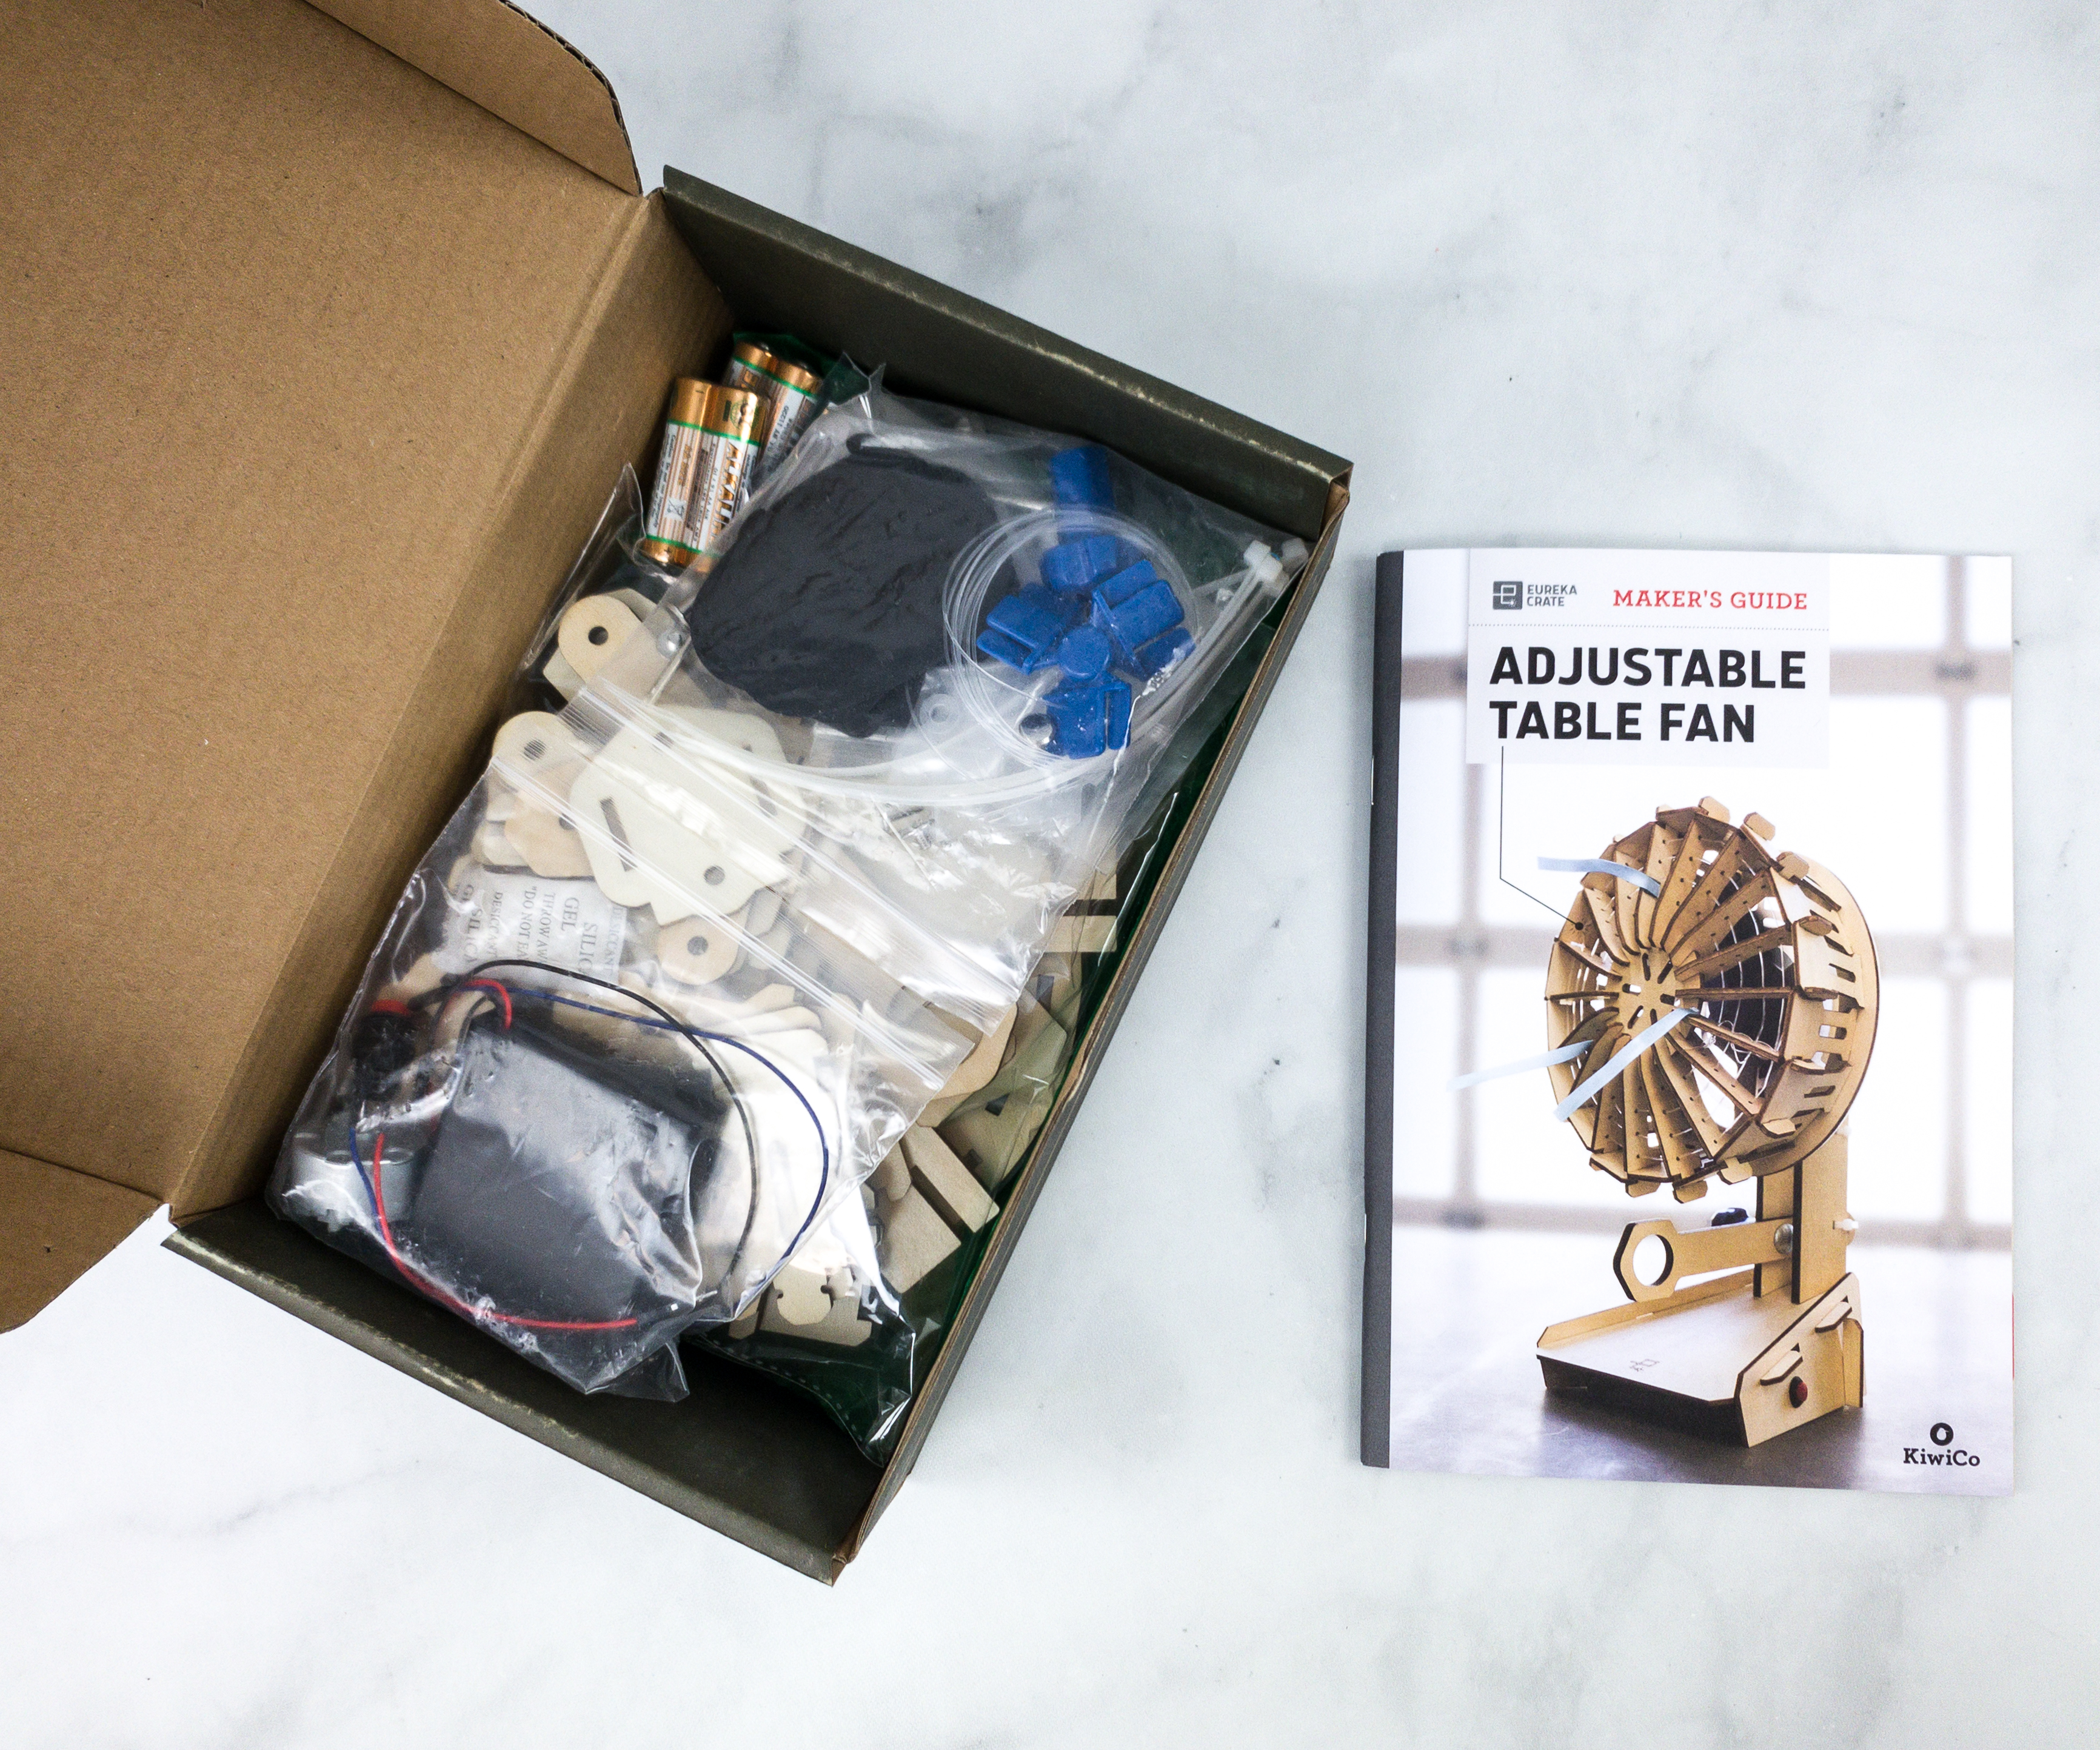
Like the other crates from KiwiCo, Eureka Crate includes a booklet.
One of KiwiCo’s goals is to equip the next generation of innovators with the tools and confidence for creative exploration and problem-solving.

The booklet shares a complete history and details about this month’s project. They also included some fun facts and trivia related to the theme.
The materials were packed separately.
This booklet means business as it jumps right to the activity.
Everything in this month’s box!
Eureka Crate Maker’s Guide
On this part of the booklet is an article that explains air in motion.
When you turn on an electric fan, it blows air at you. The fan isn’t making the air – it’s just moving air around that was already there. Fan blades are shaped and angled to push that air out toward you as they spin.
Air is a gas – made up of molecules that have weight, take up space, and move around. When any kind of object moves through air, the molecules have to shift around to make space for it (just like if you wade through a ball pit — the balls parts around legs).
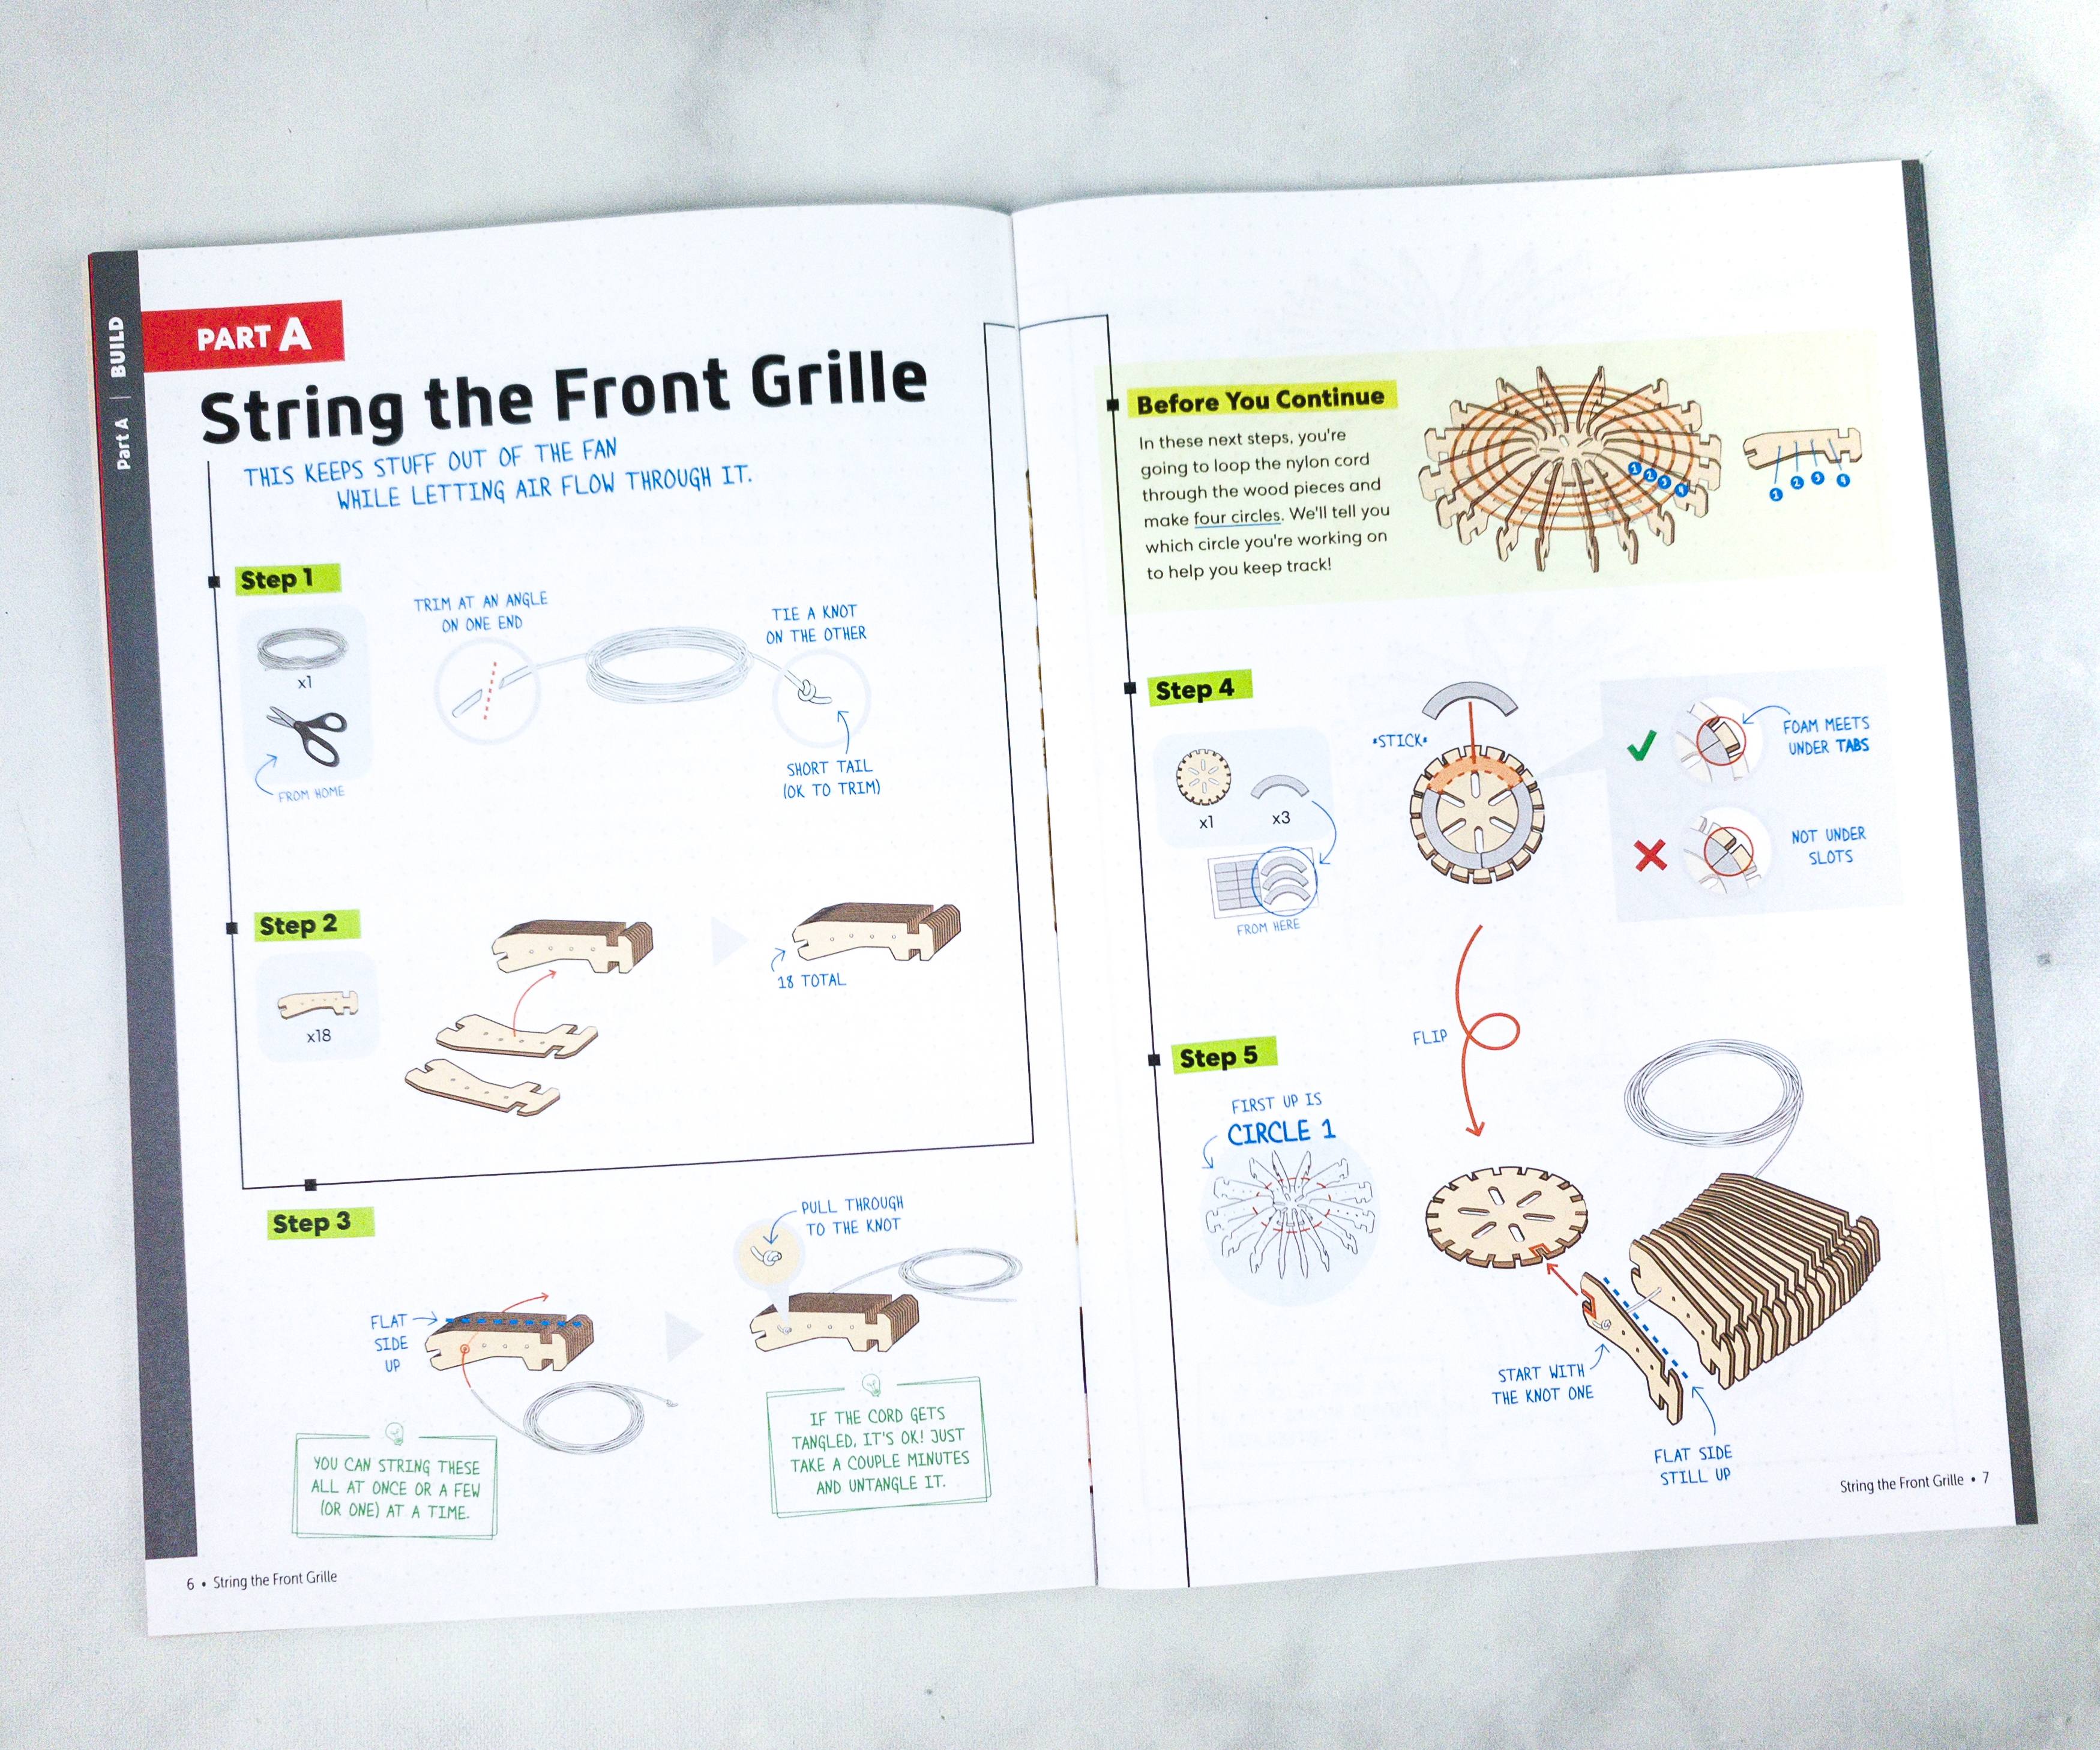
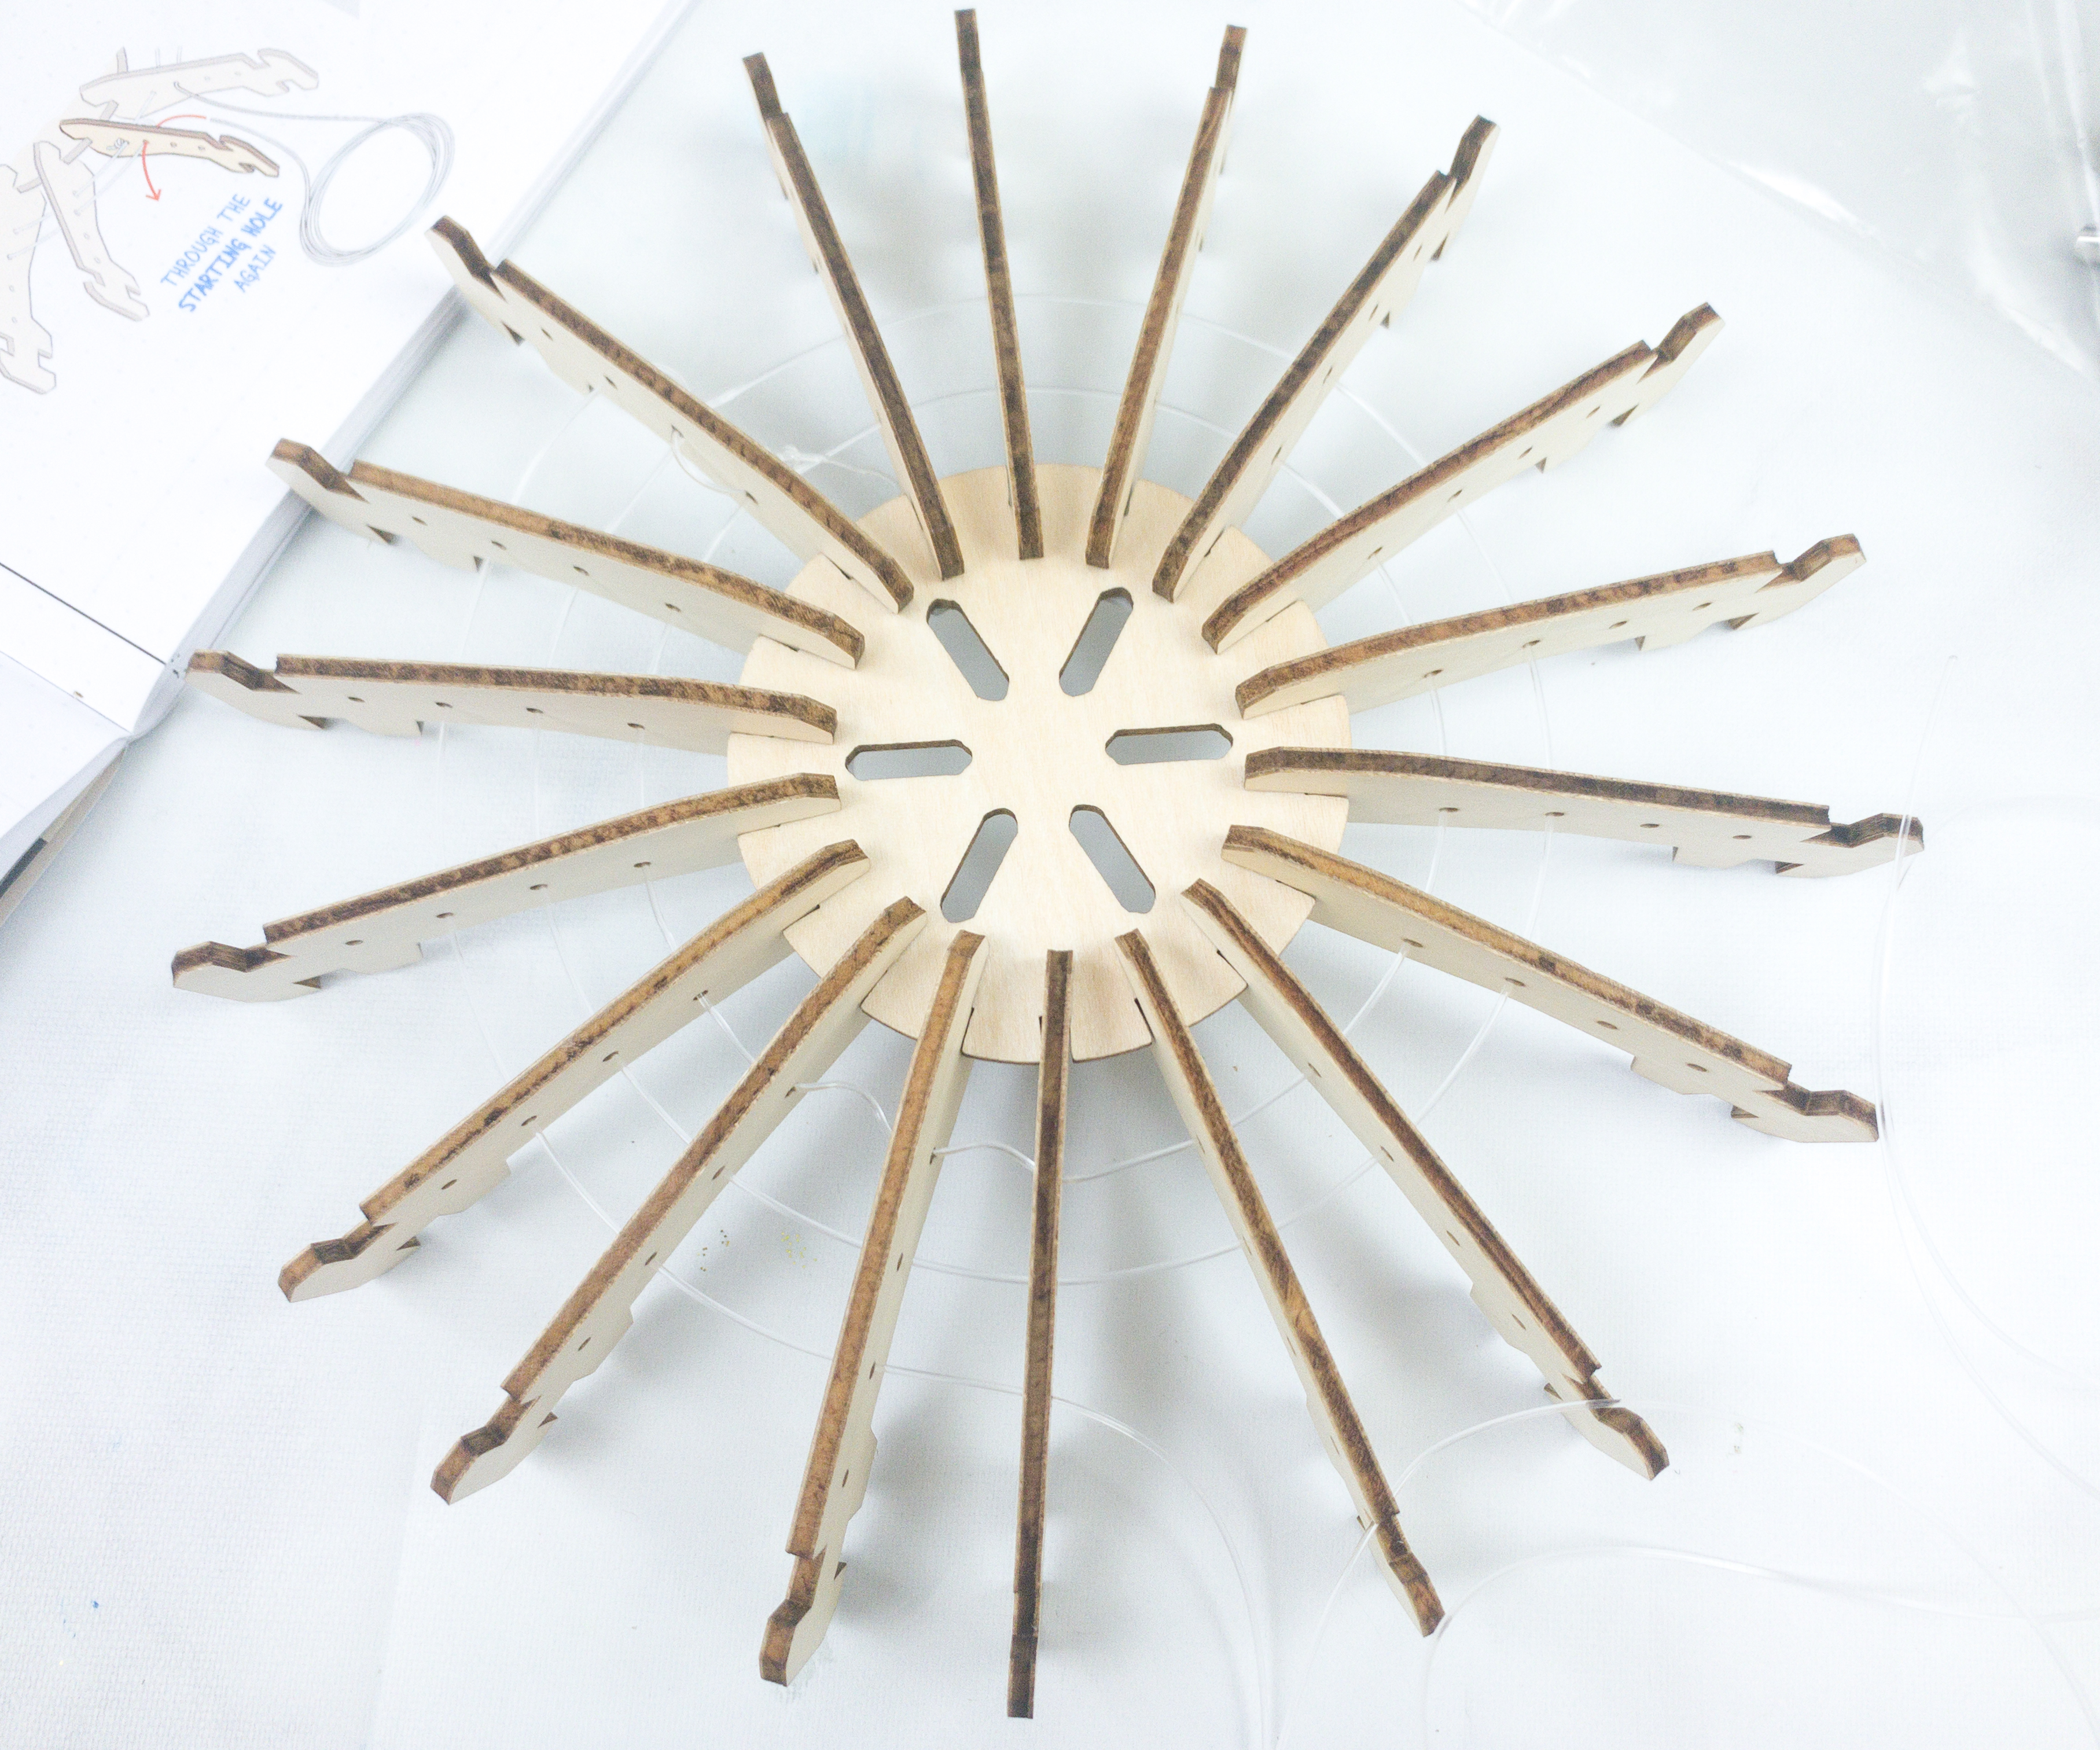
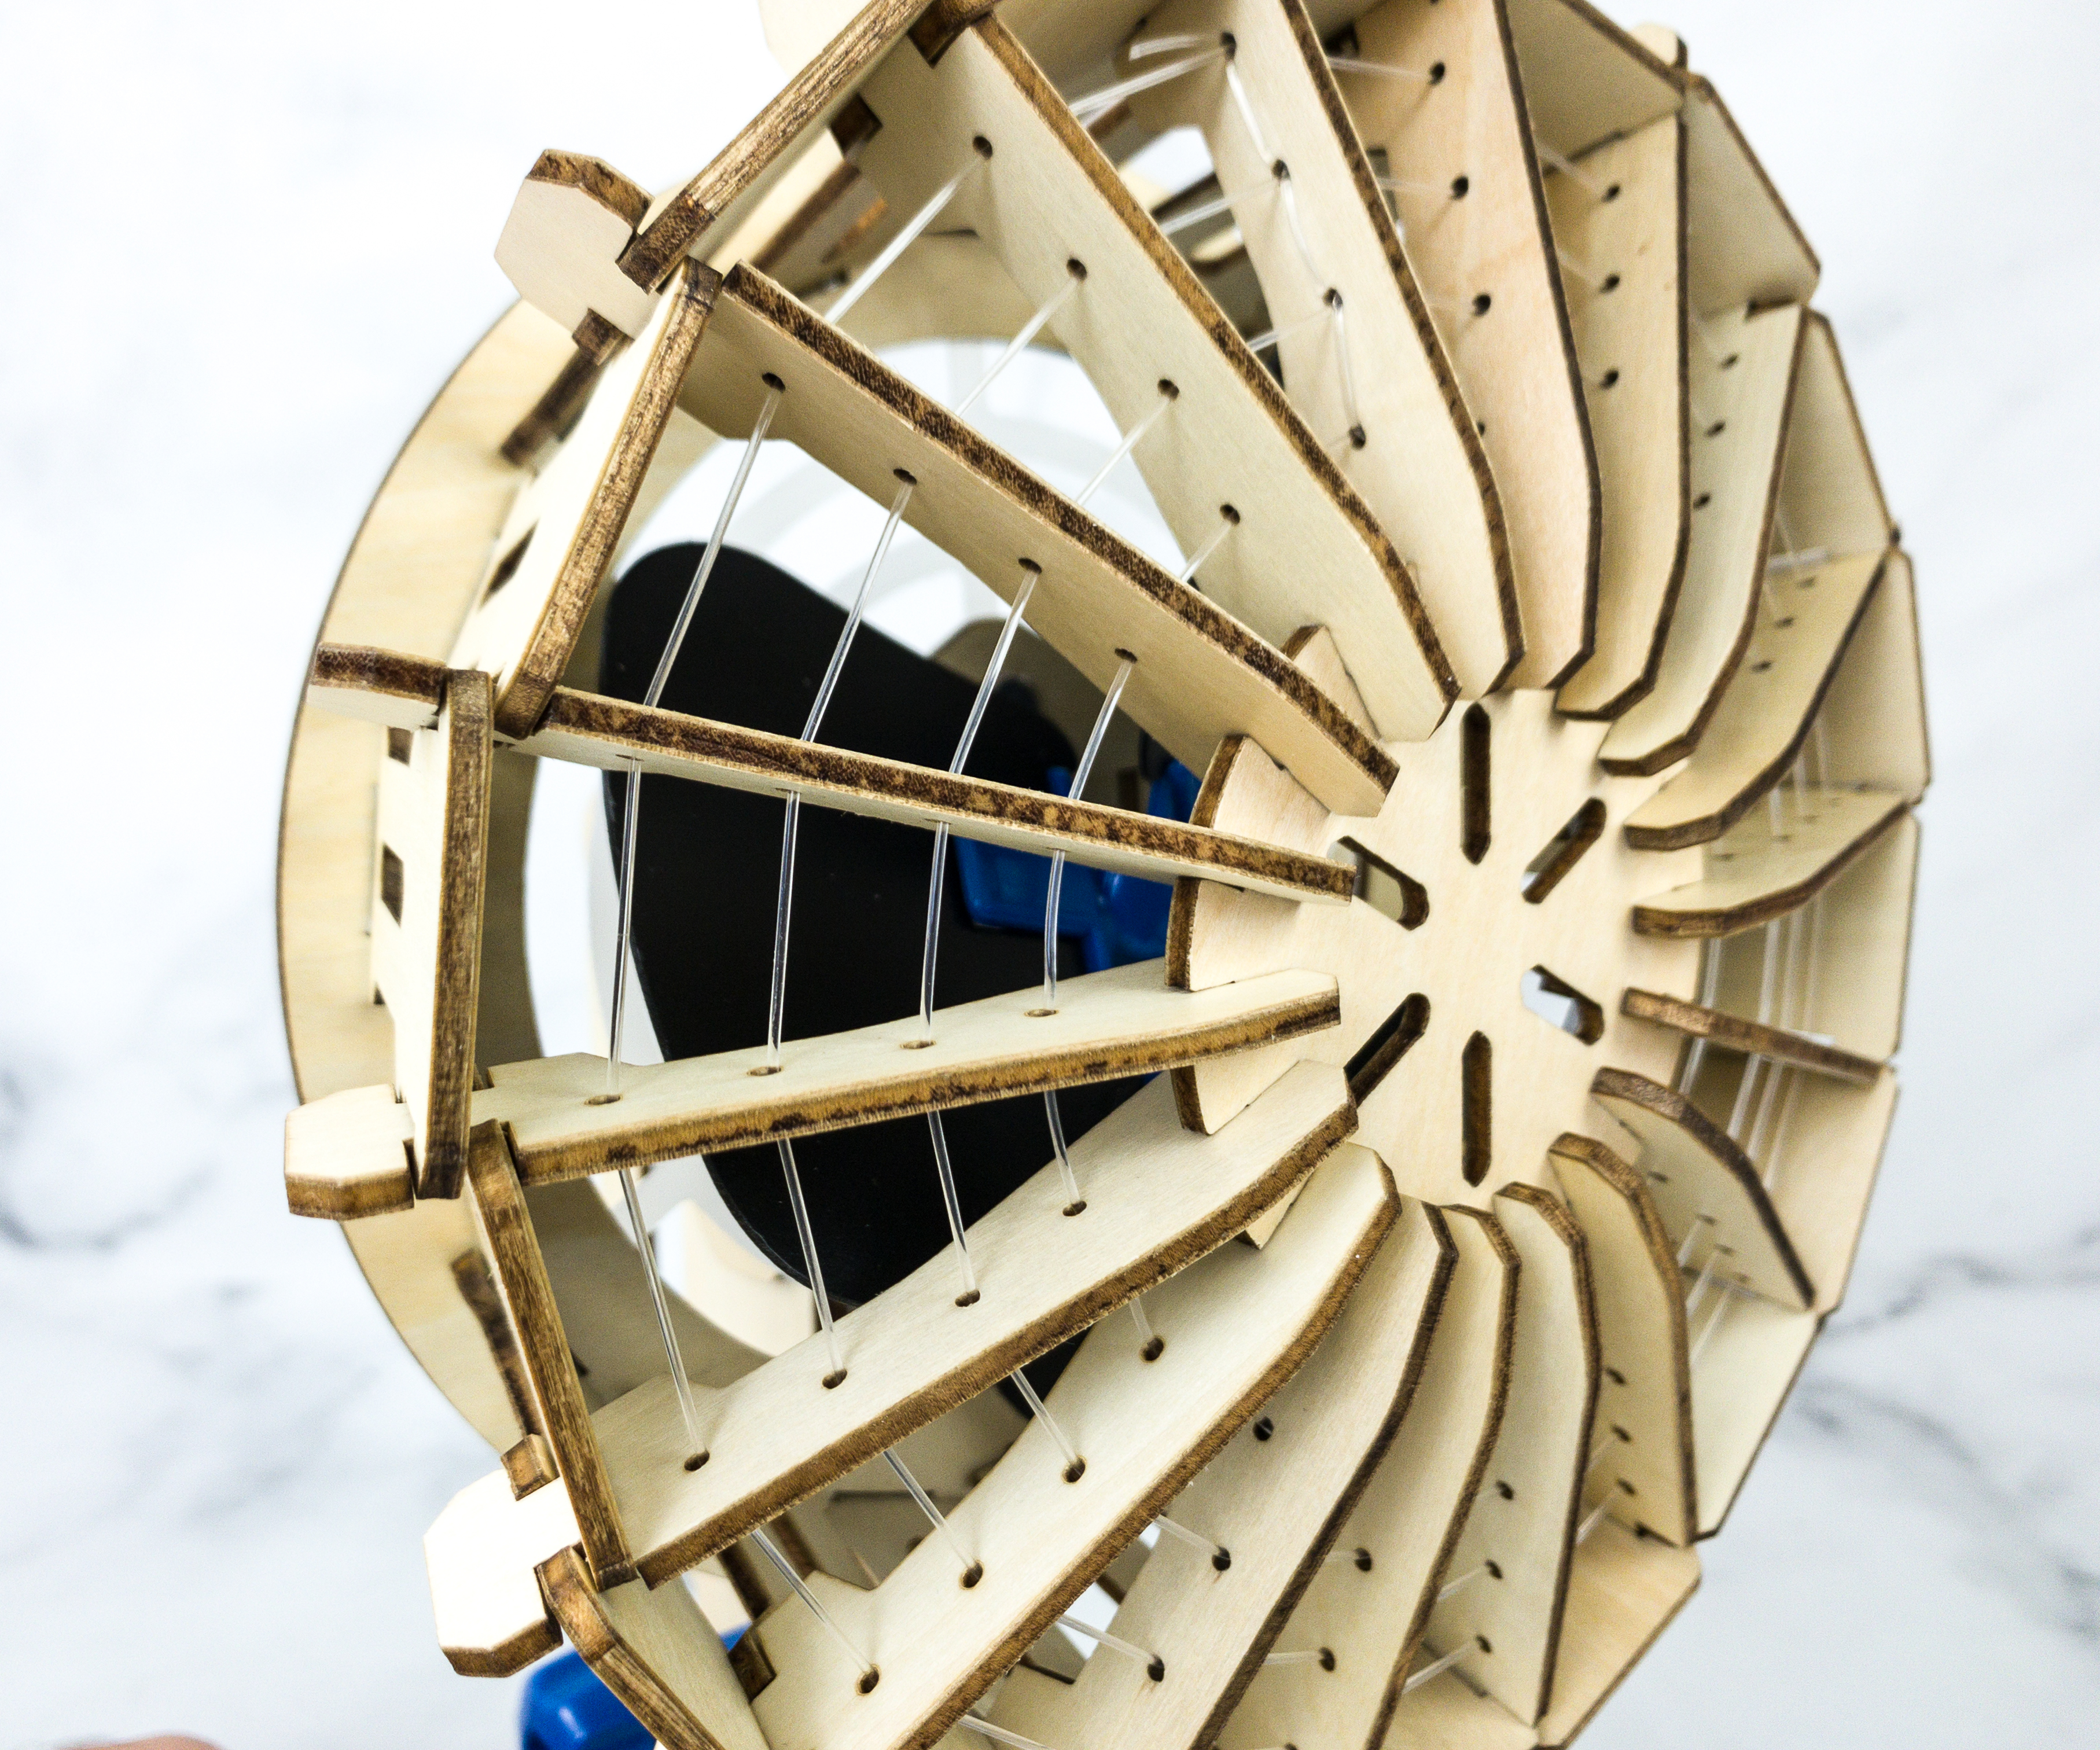
For the first part of the project, we worked on putting a string on the front grille. This procedure will keep stuff out of the fan while letting the air flow through it.
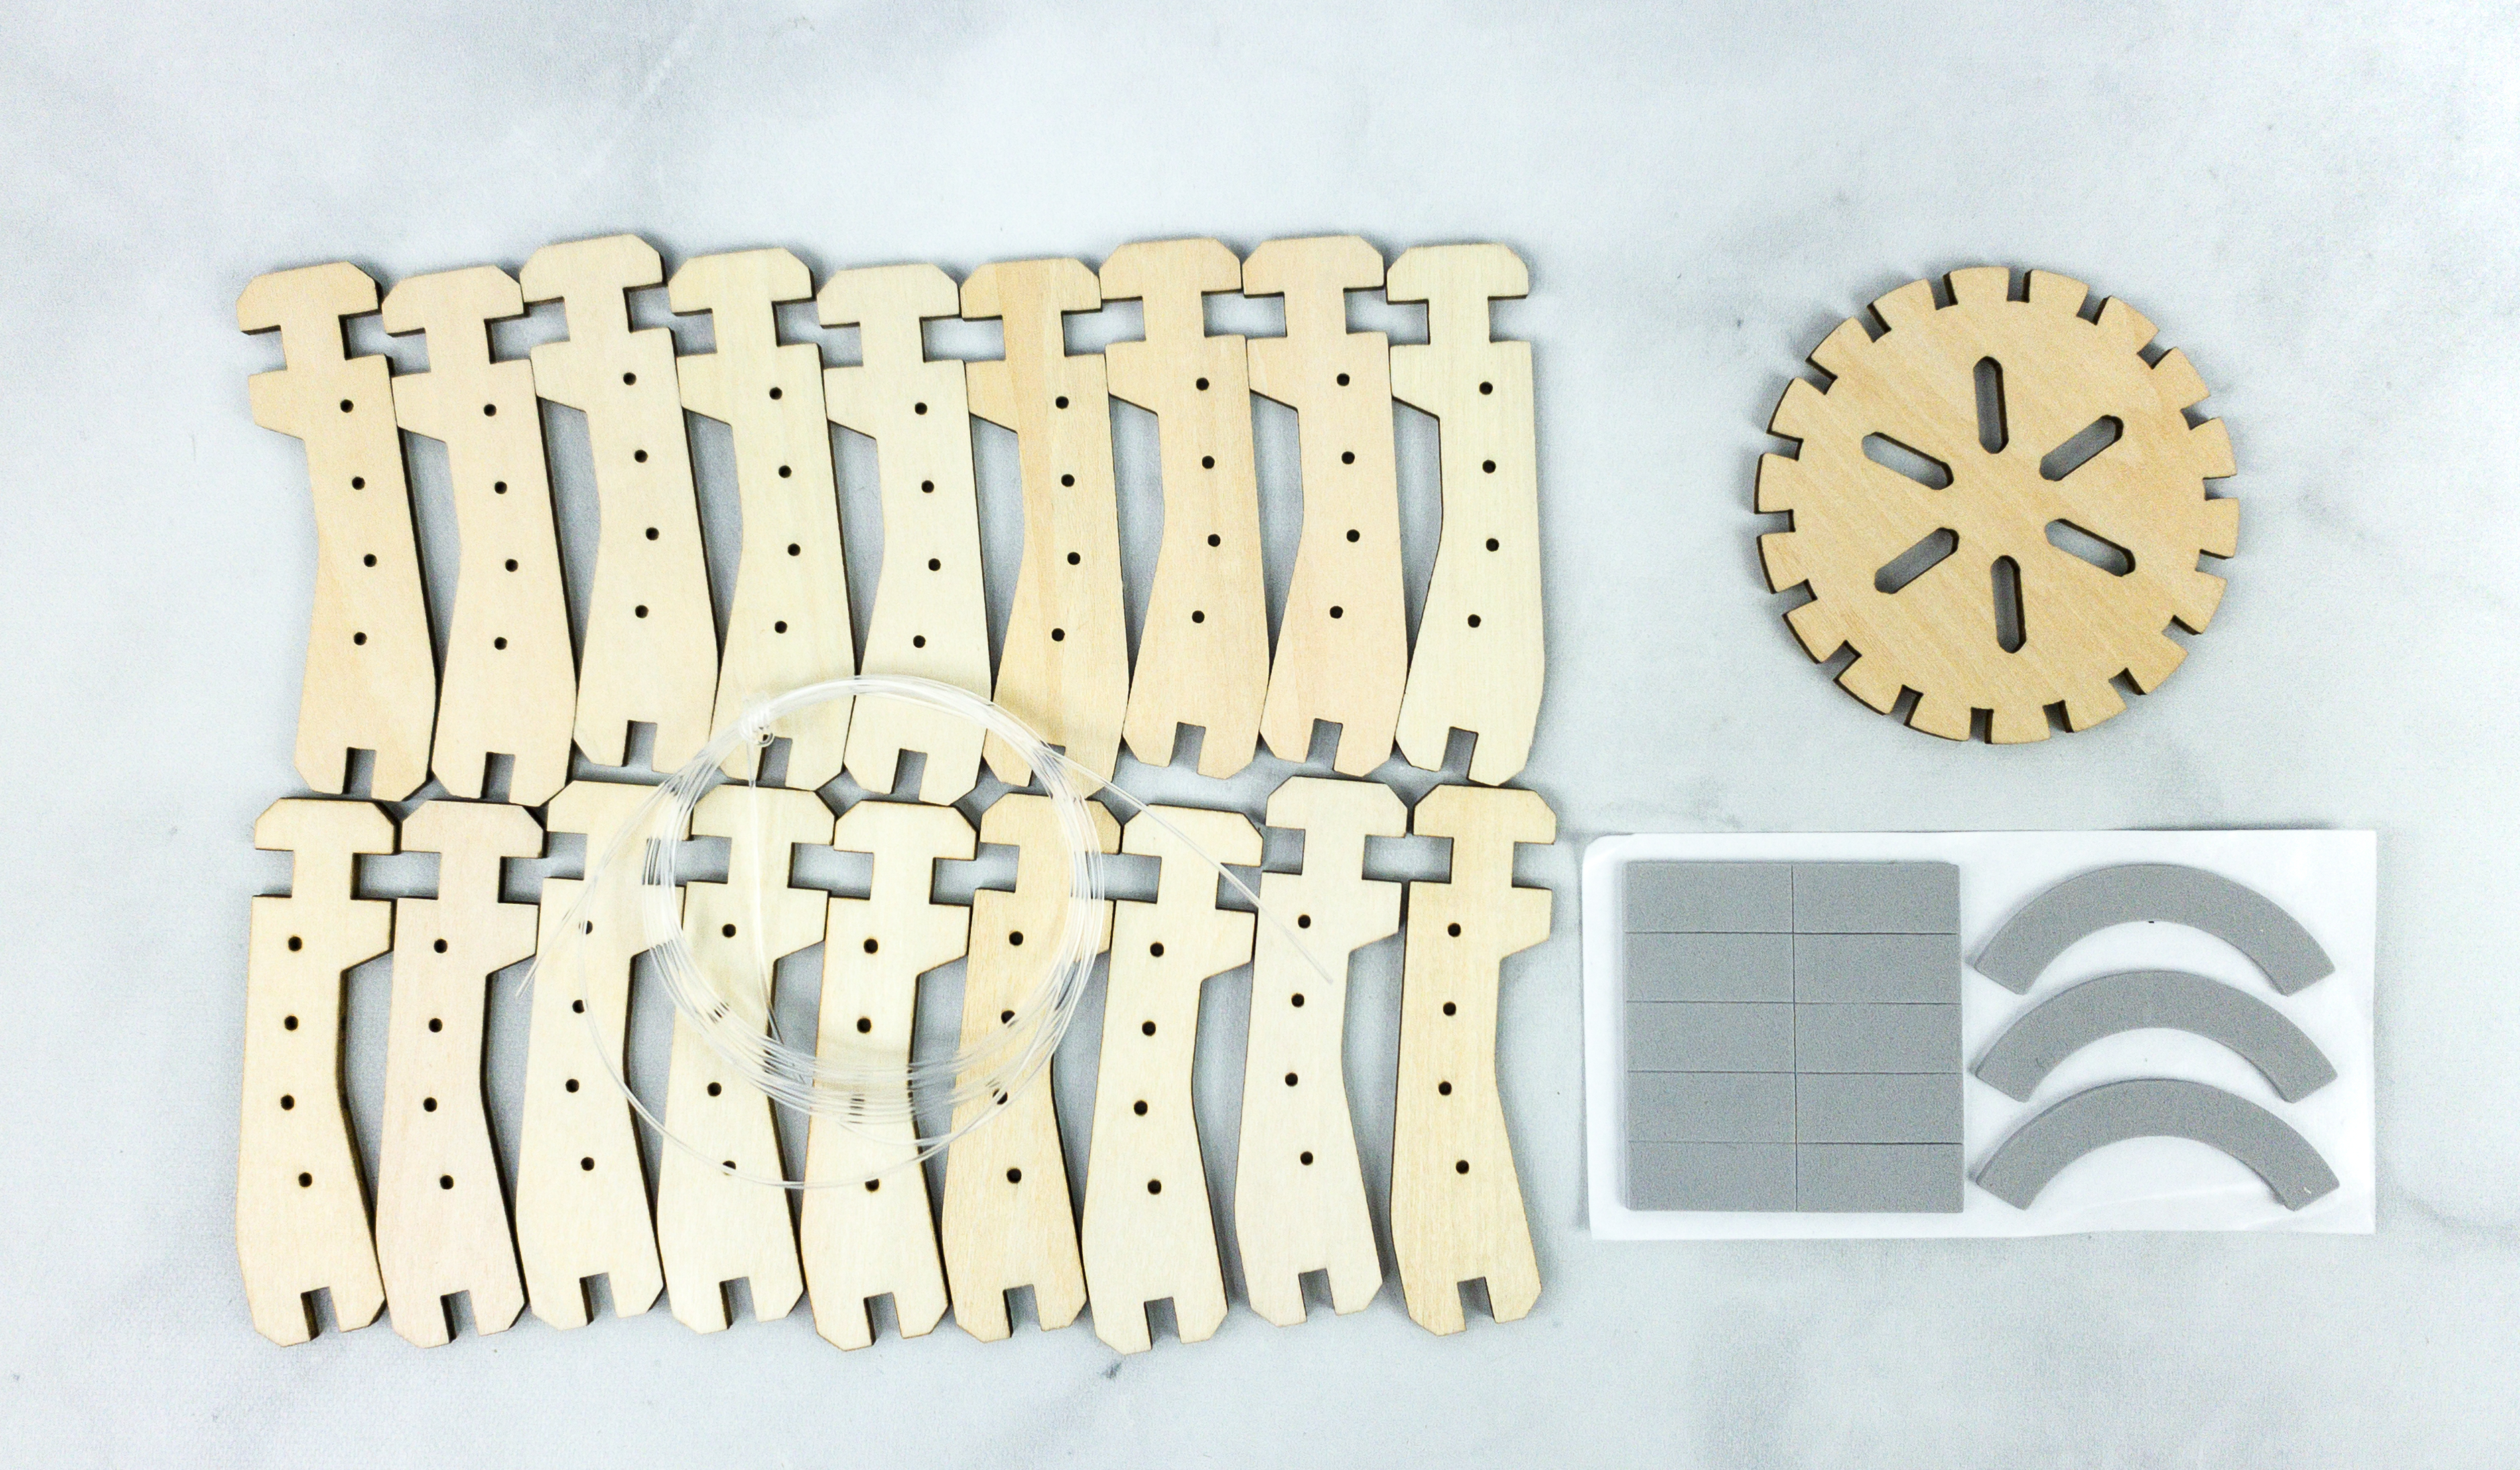
We used the wood set, which is consists of 18 pieces of wooden grille and 1 round-shaped wood gear, a nylon cord, and a sticky foam set.
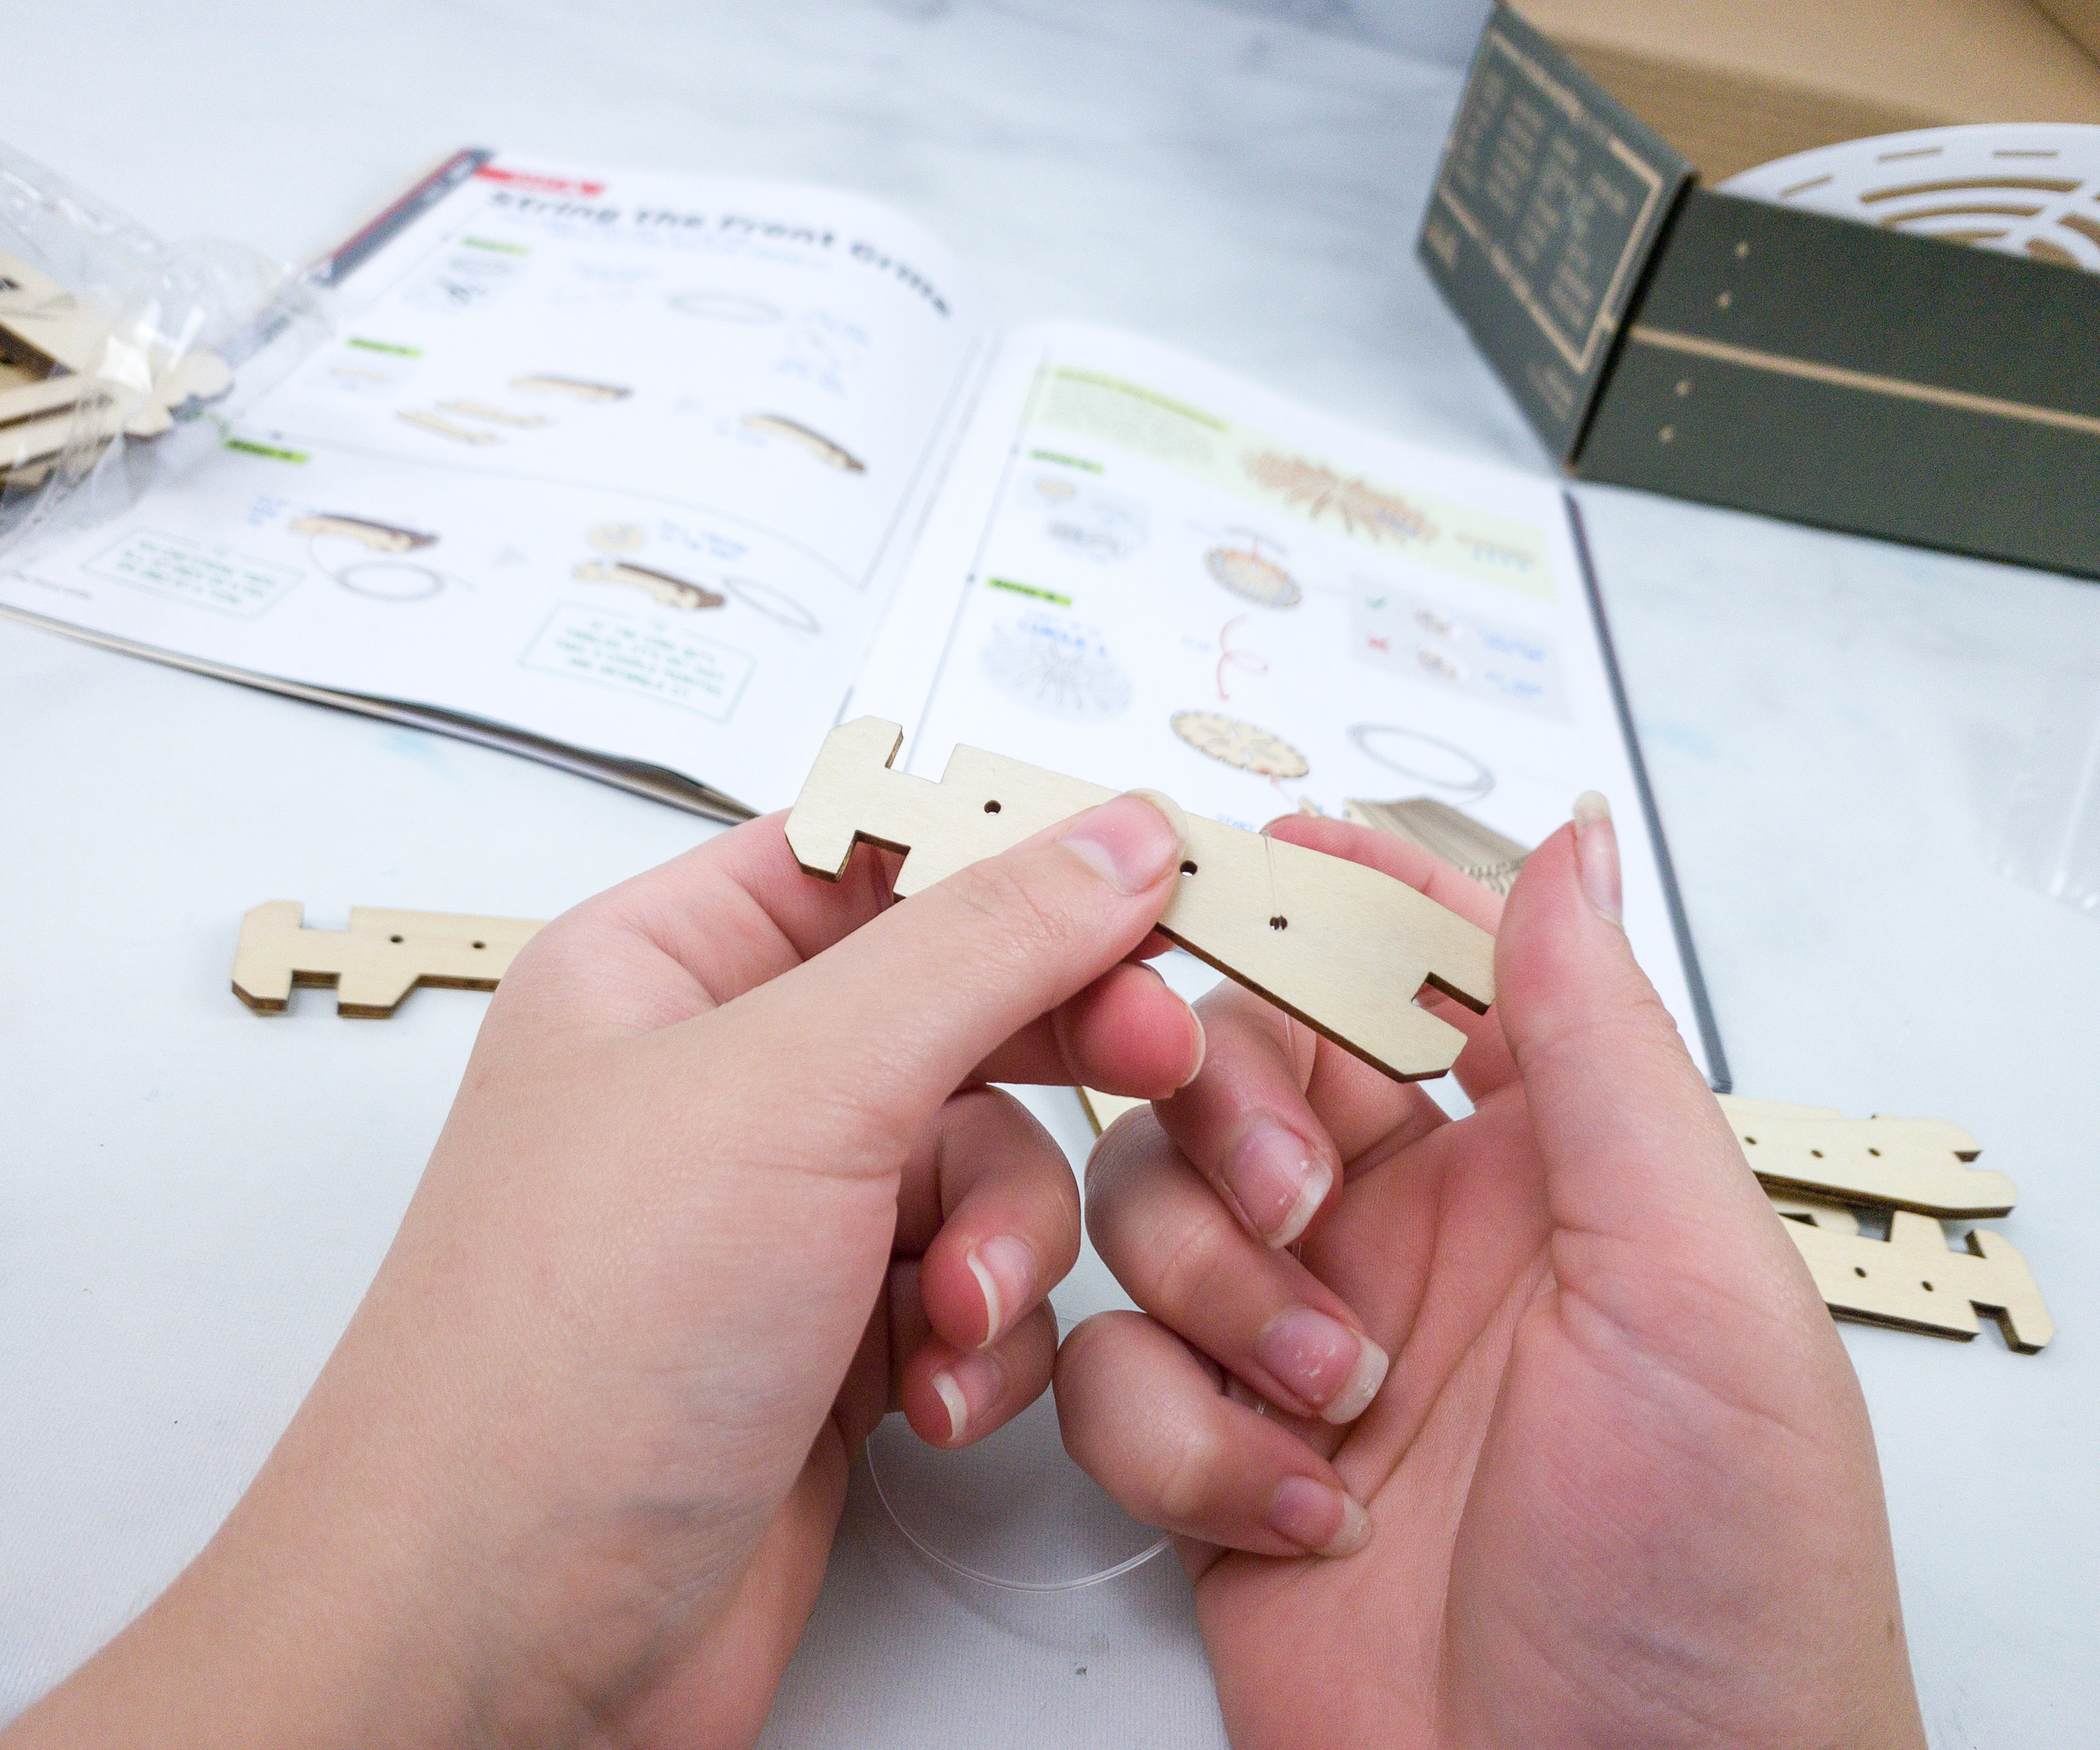
We started the project by putting a knot on one end of the cord and poking it through each of the 18 wooden grilles.

Once we are done with cording the grilles, we took the wooden plate and inserted them one-by-one on each of the spaces in-between.

We put a sticky foam case on the wooden plate to tighten the fit for each grille.
It’s fine if the cord gets entangled for a few times, all you just need to do is stop, restart, and untangle it.
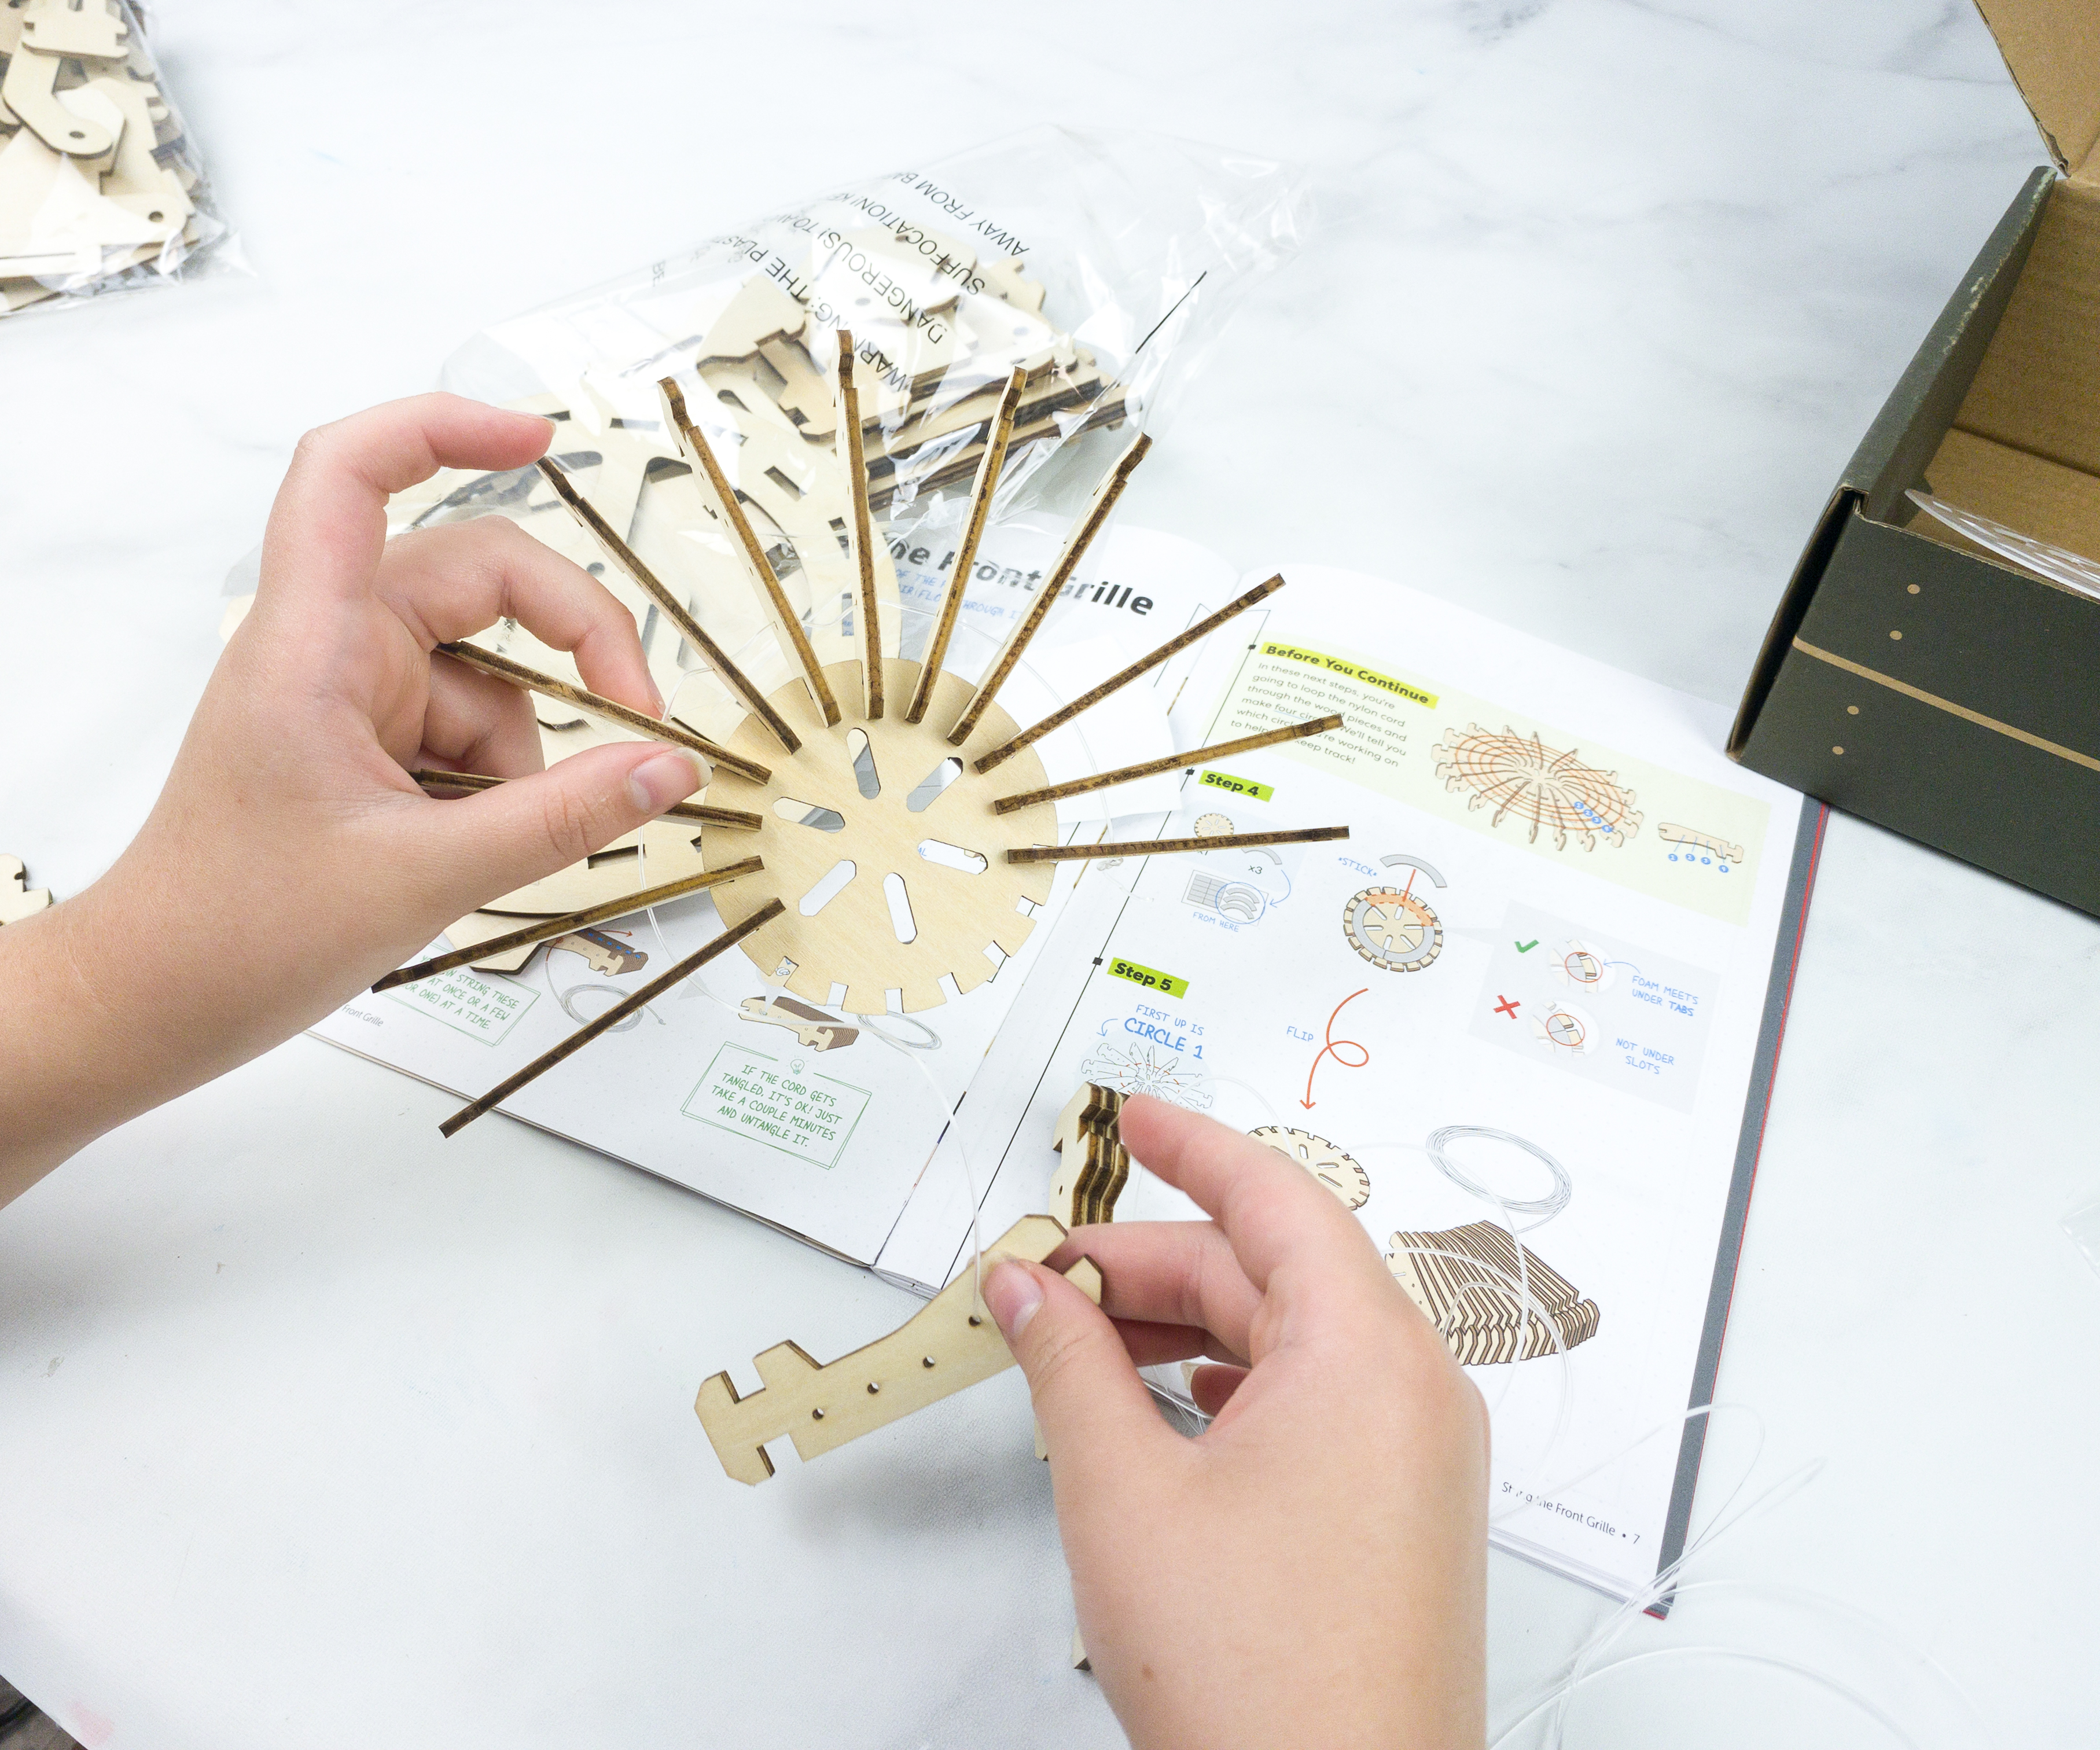
Keep poking the strings on the holes, from the inner to the outer circle and lock it by putting a knot on the other end.
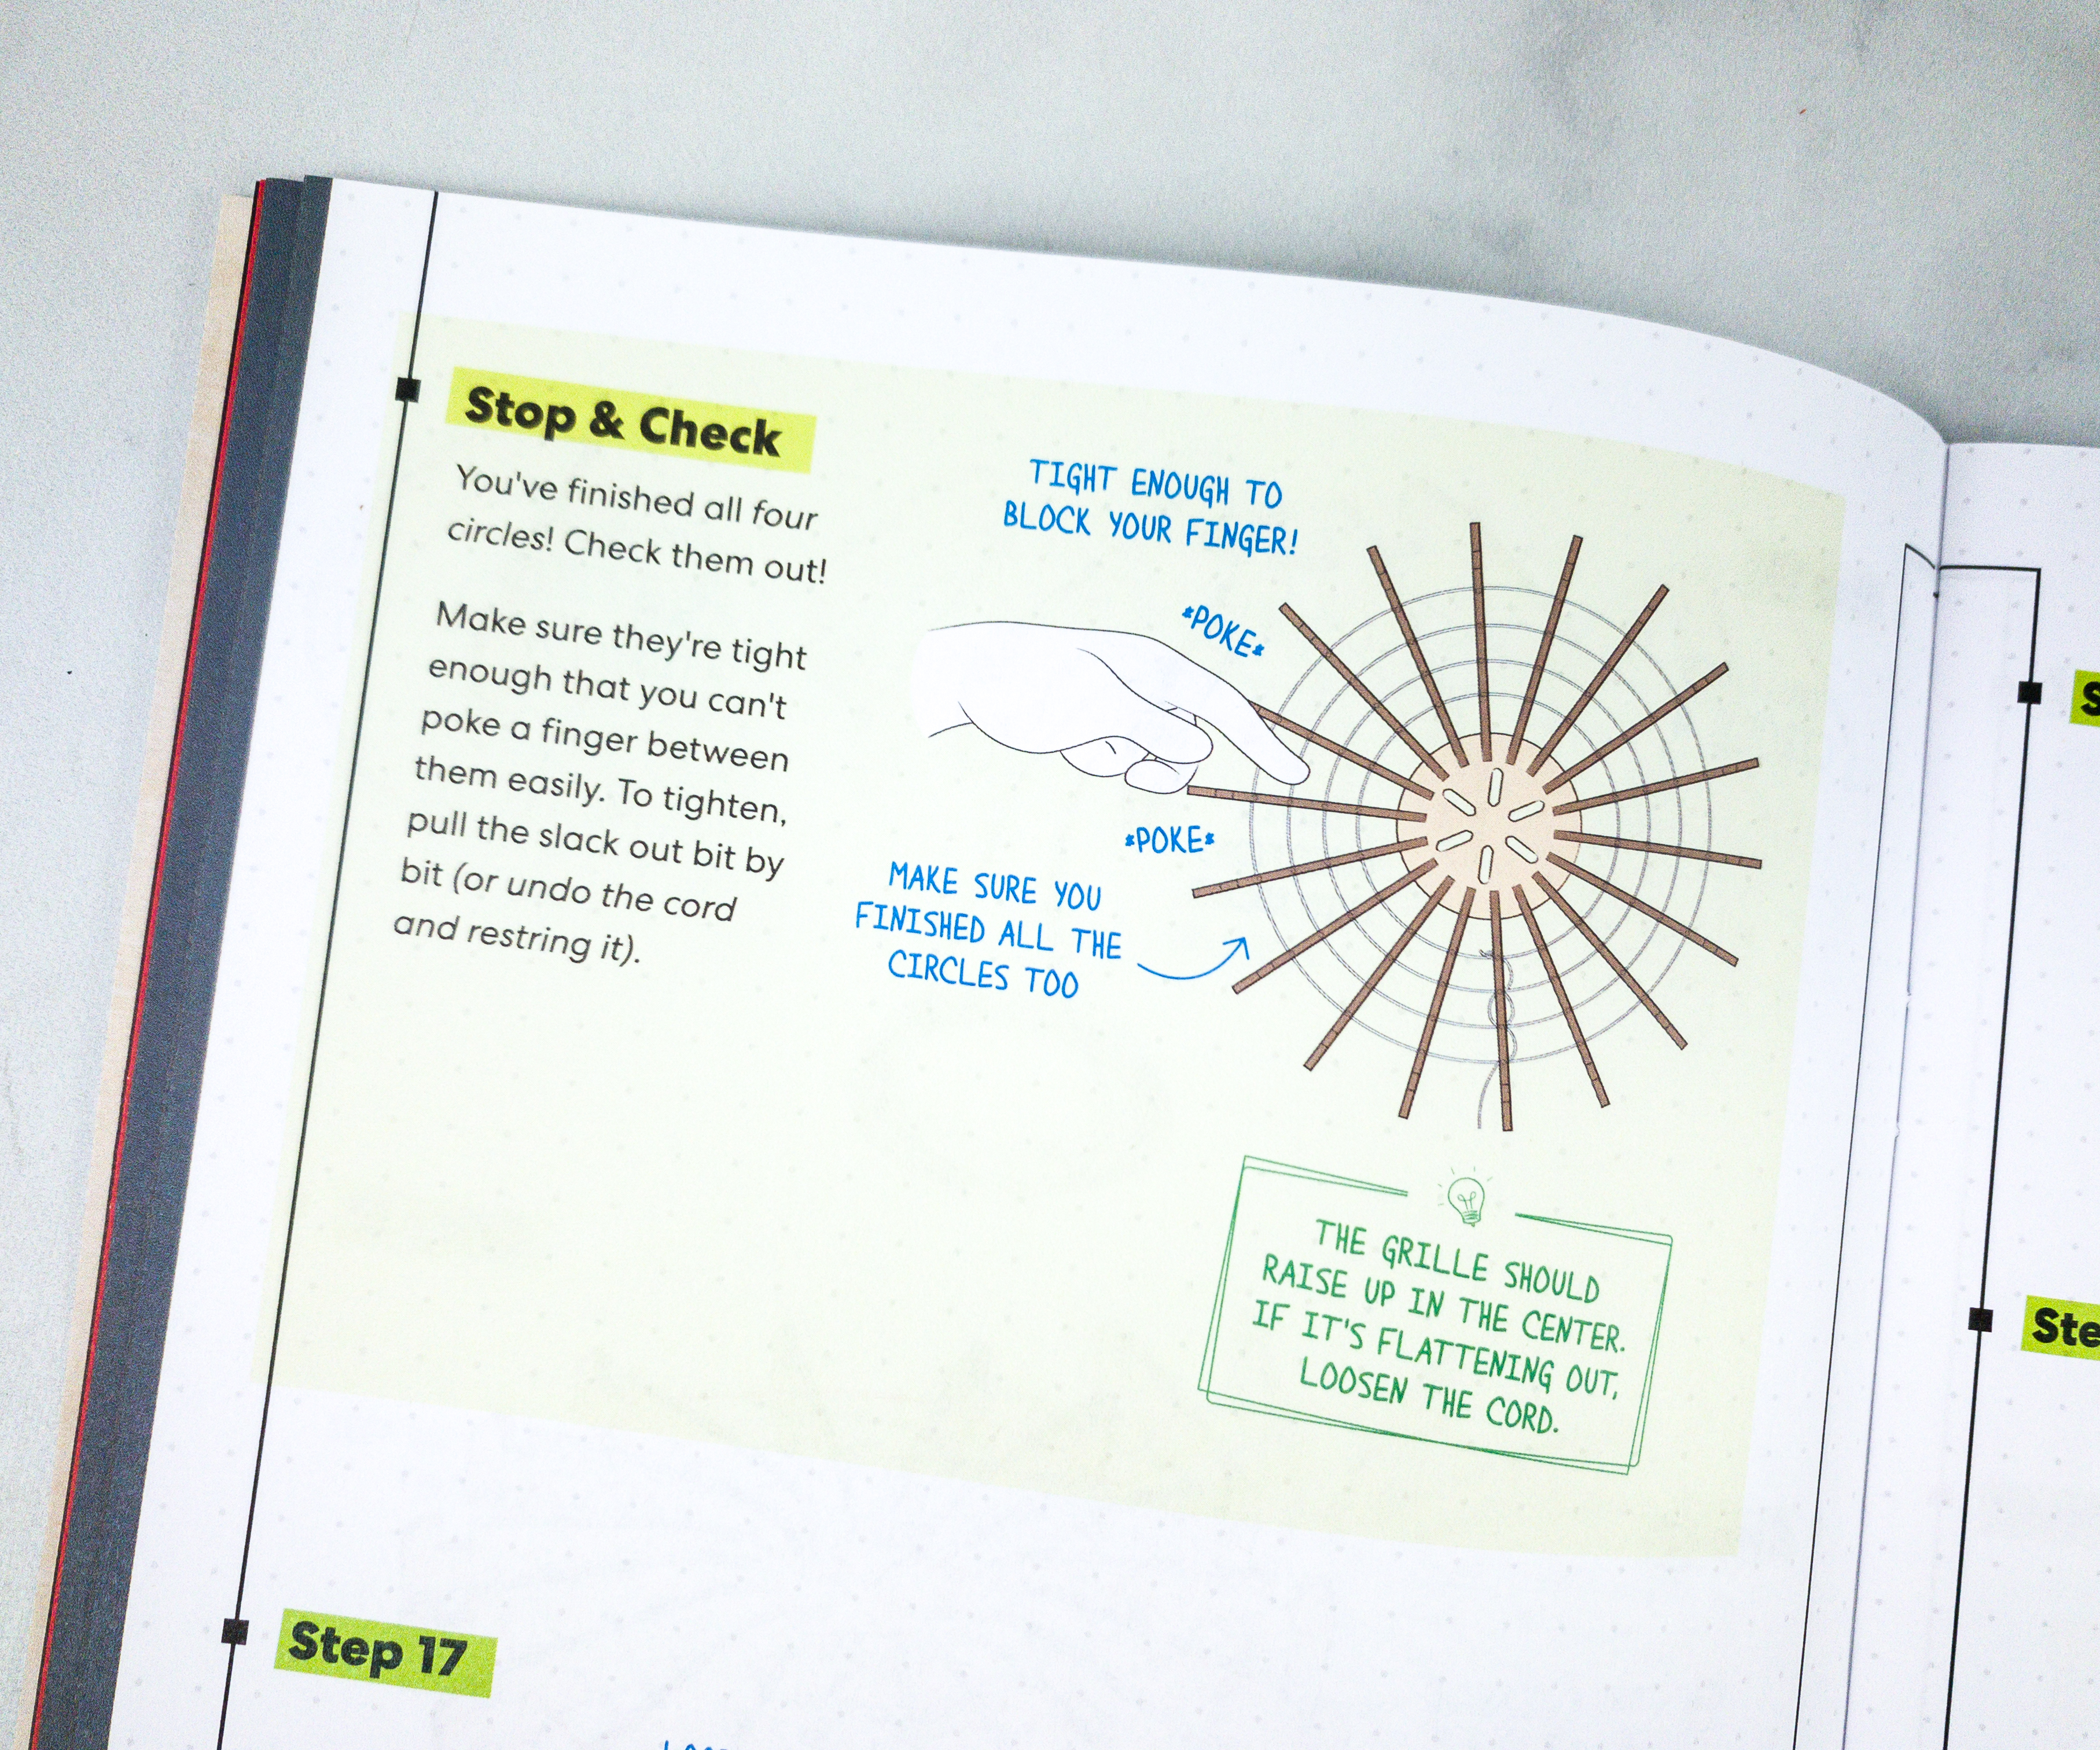
It’s time to Stop & Check! Using your finger, check the tightness of the cord, make sure they’re tight enough that you can’t poke a finger between them easily.

If not tight enough, you can pull the slack out bit by bit to tighten or you can also undo the cord and restring it.

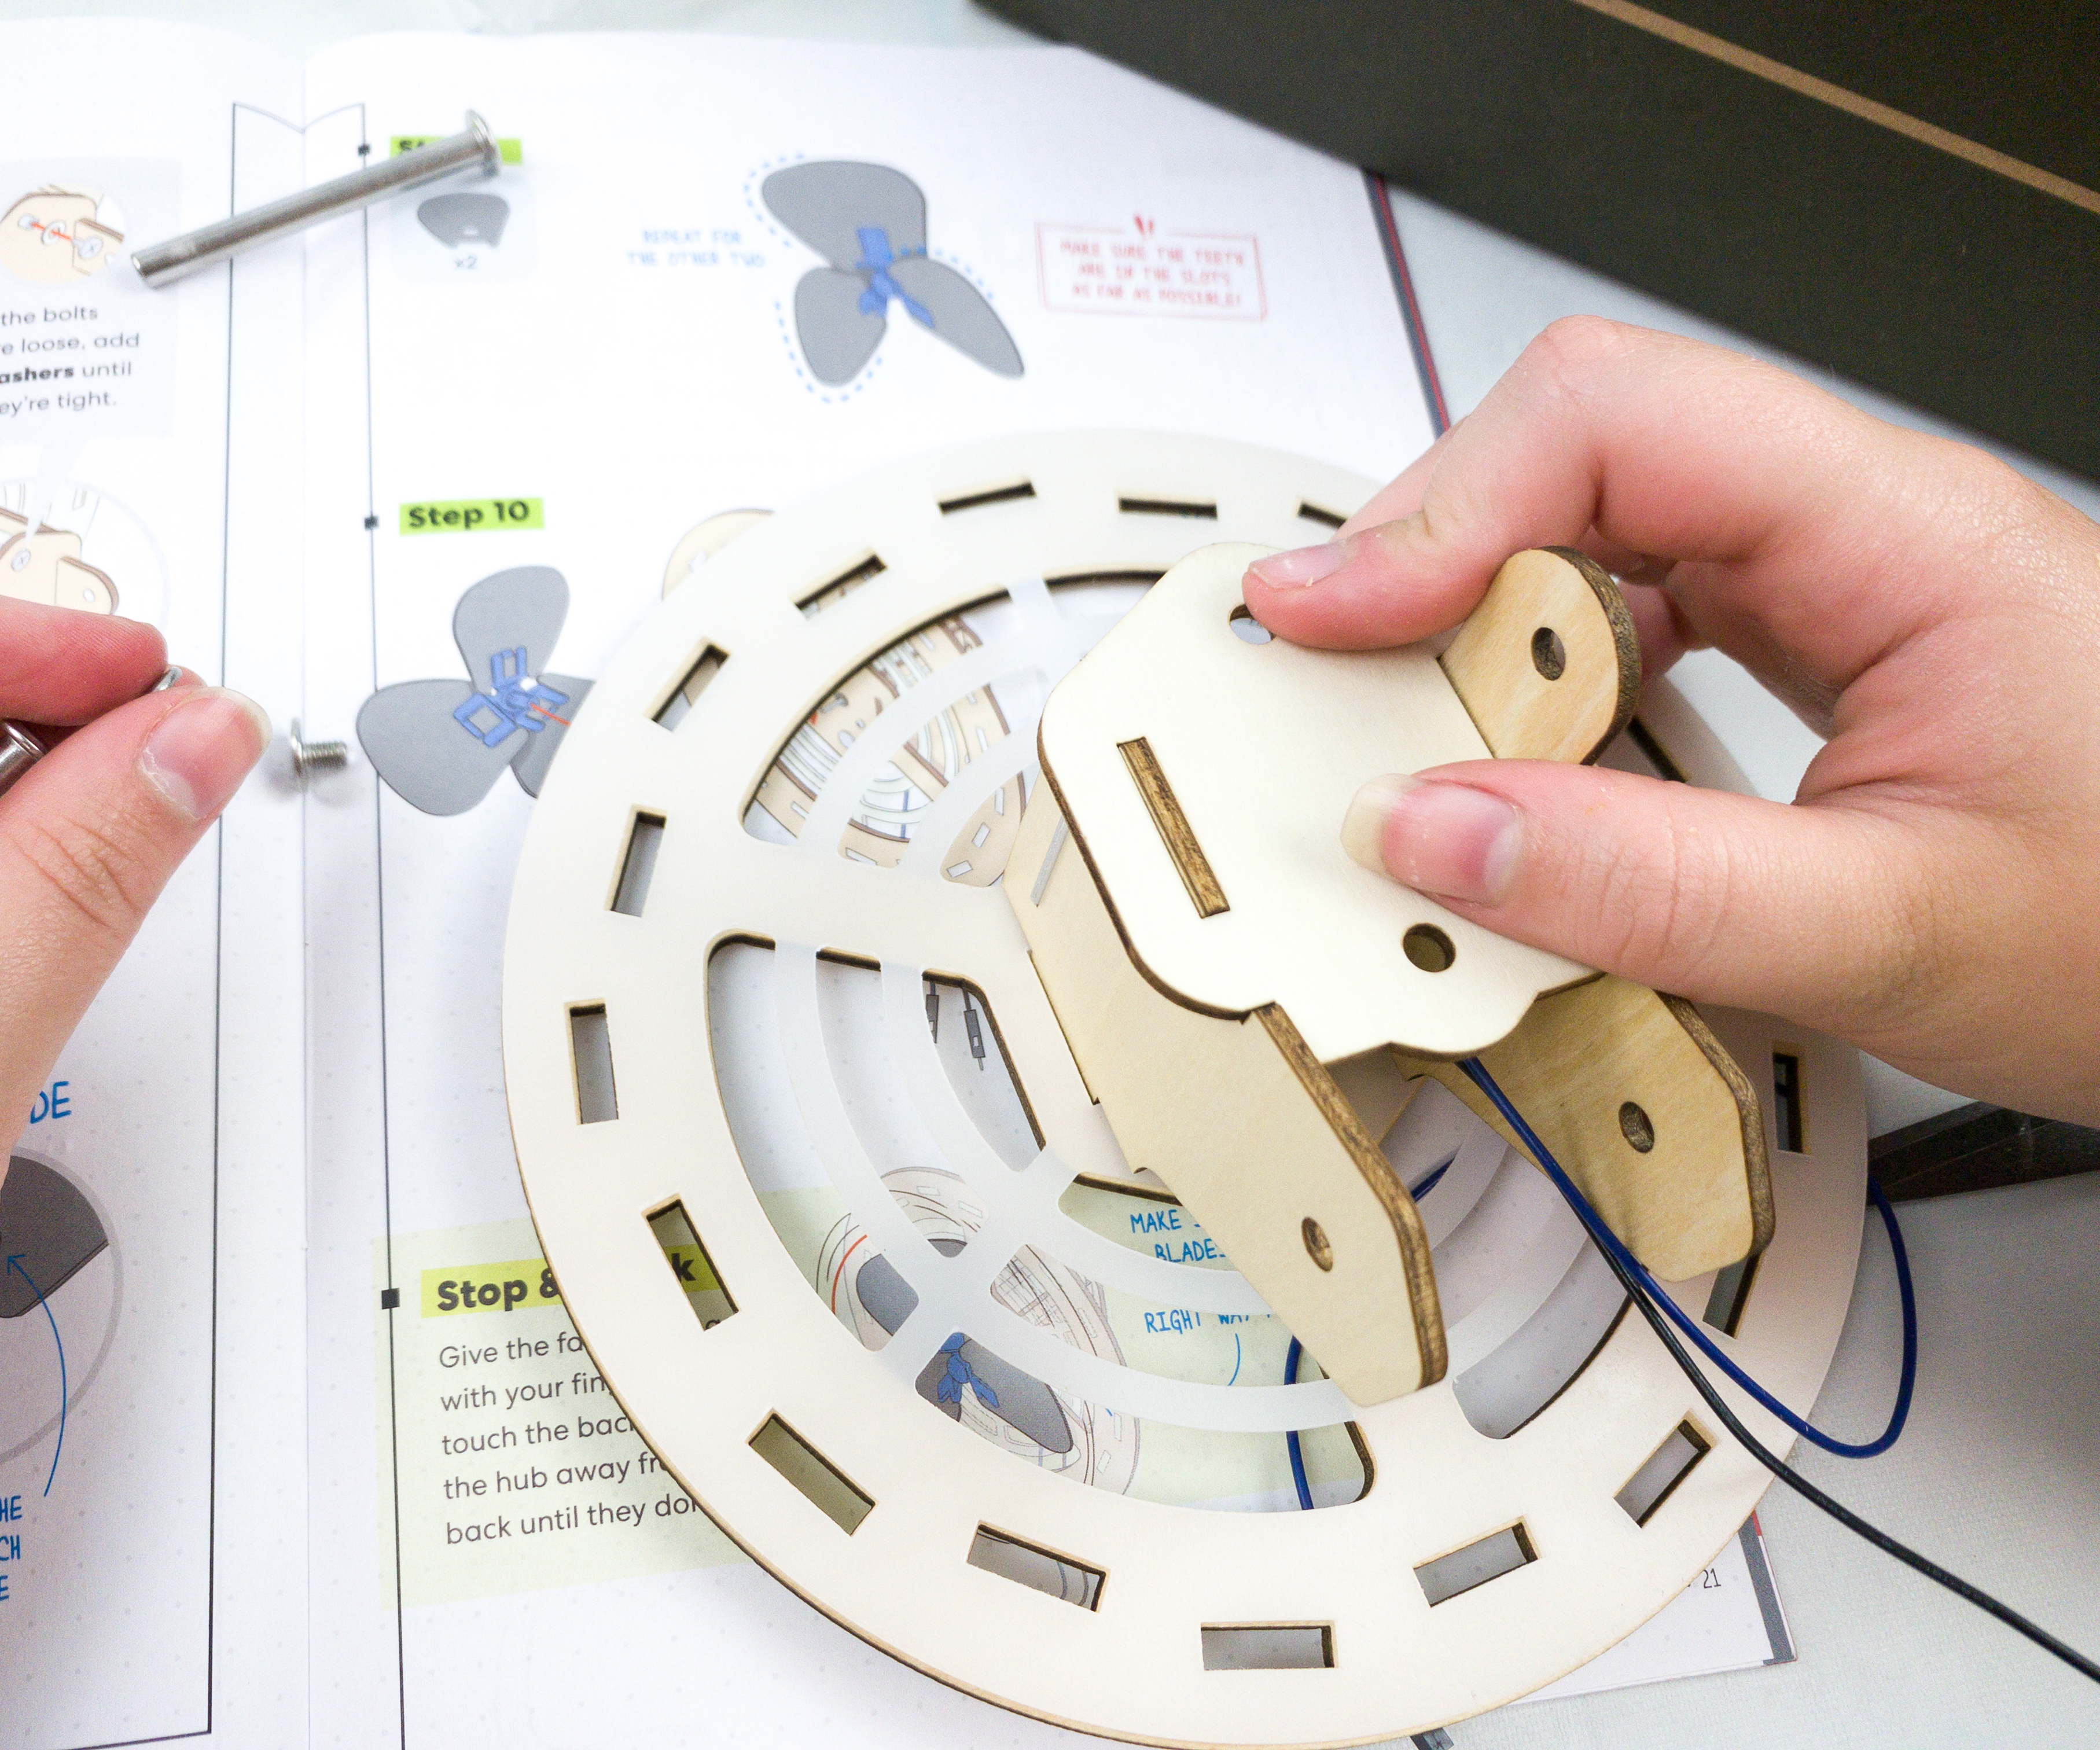
The second part of the project is finishing the grille.
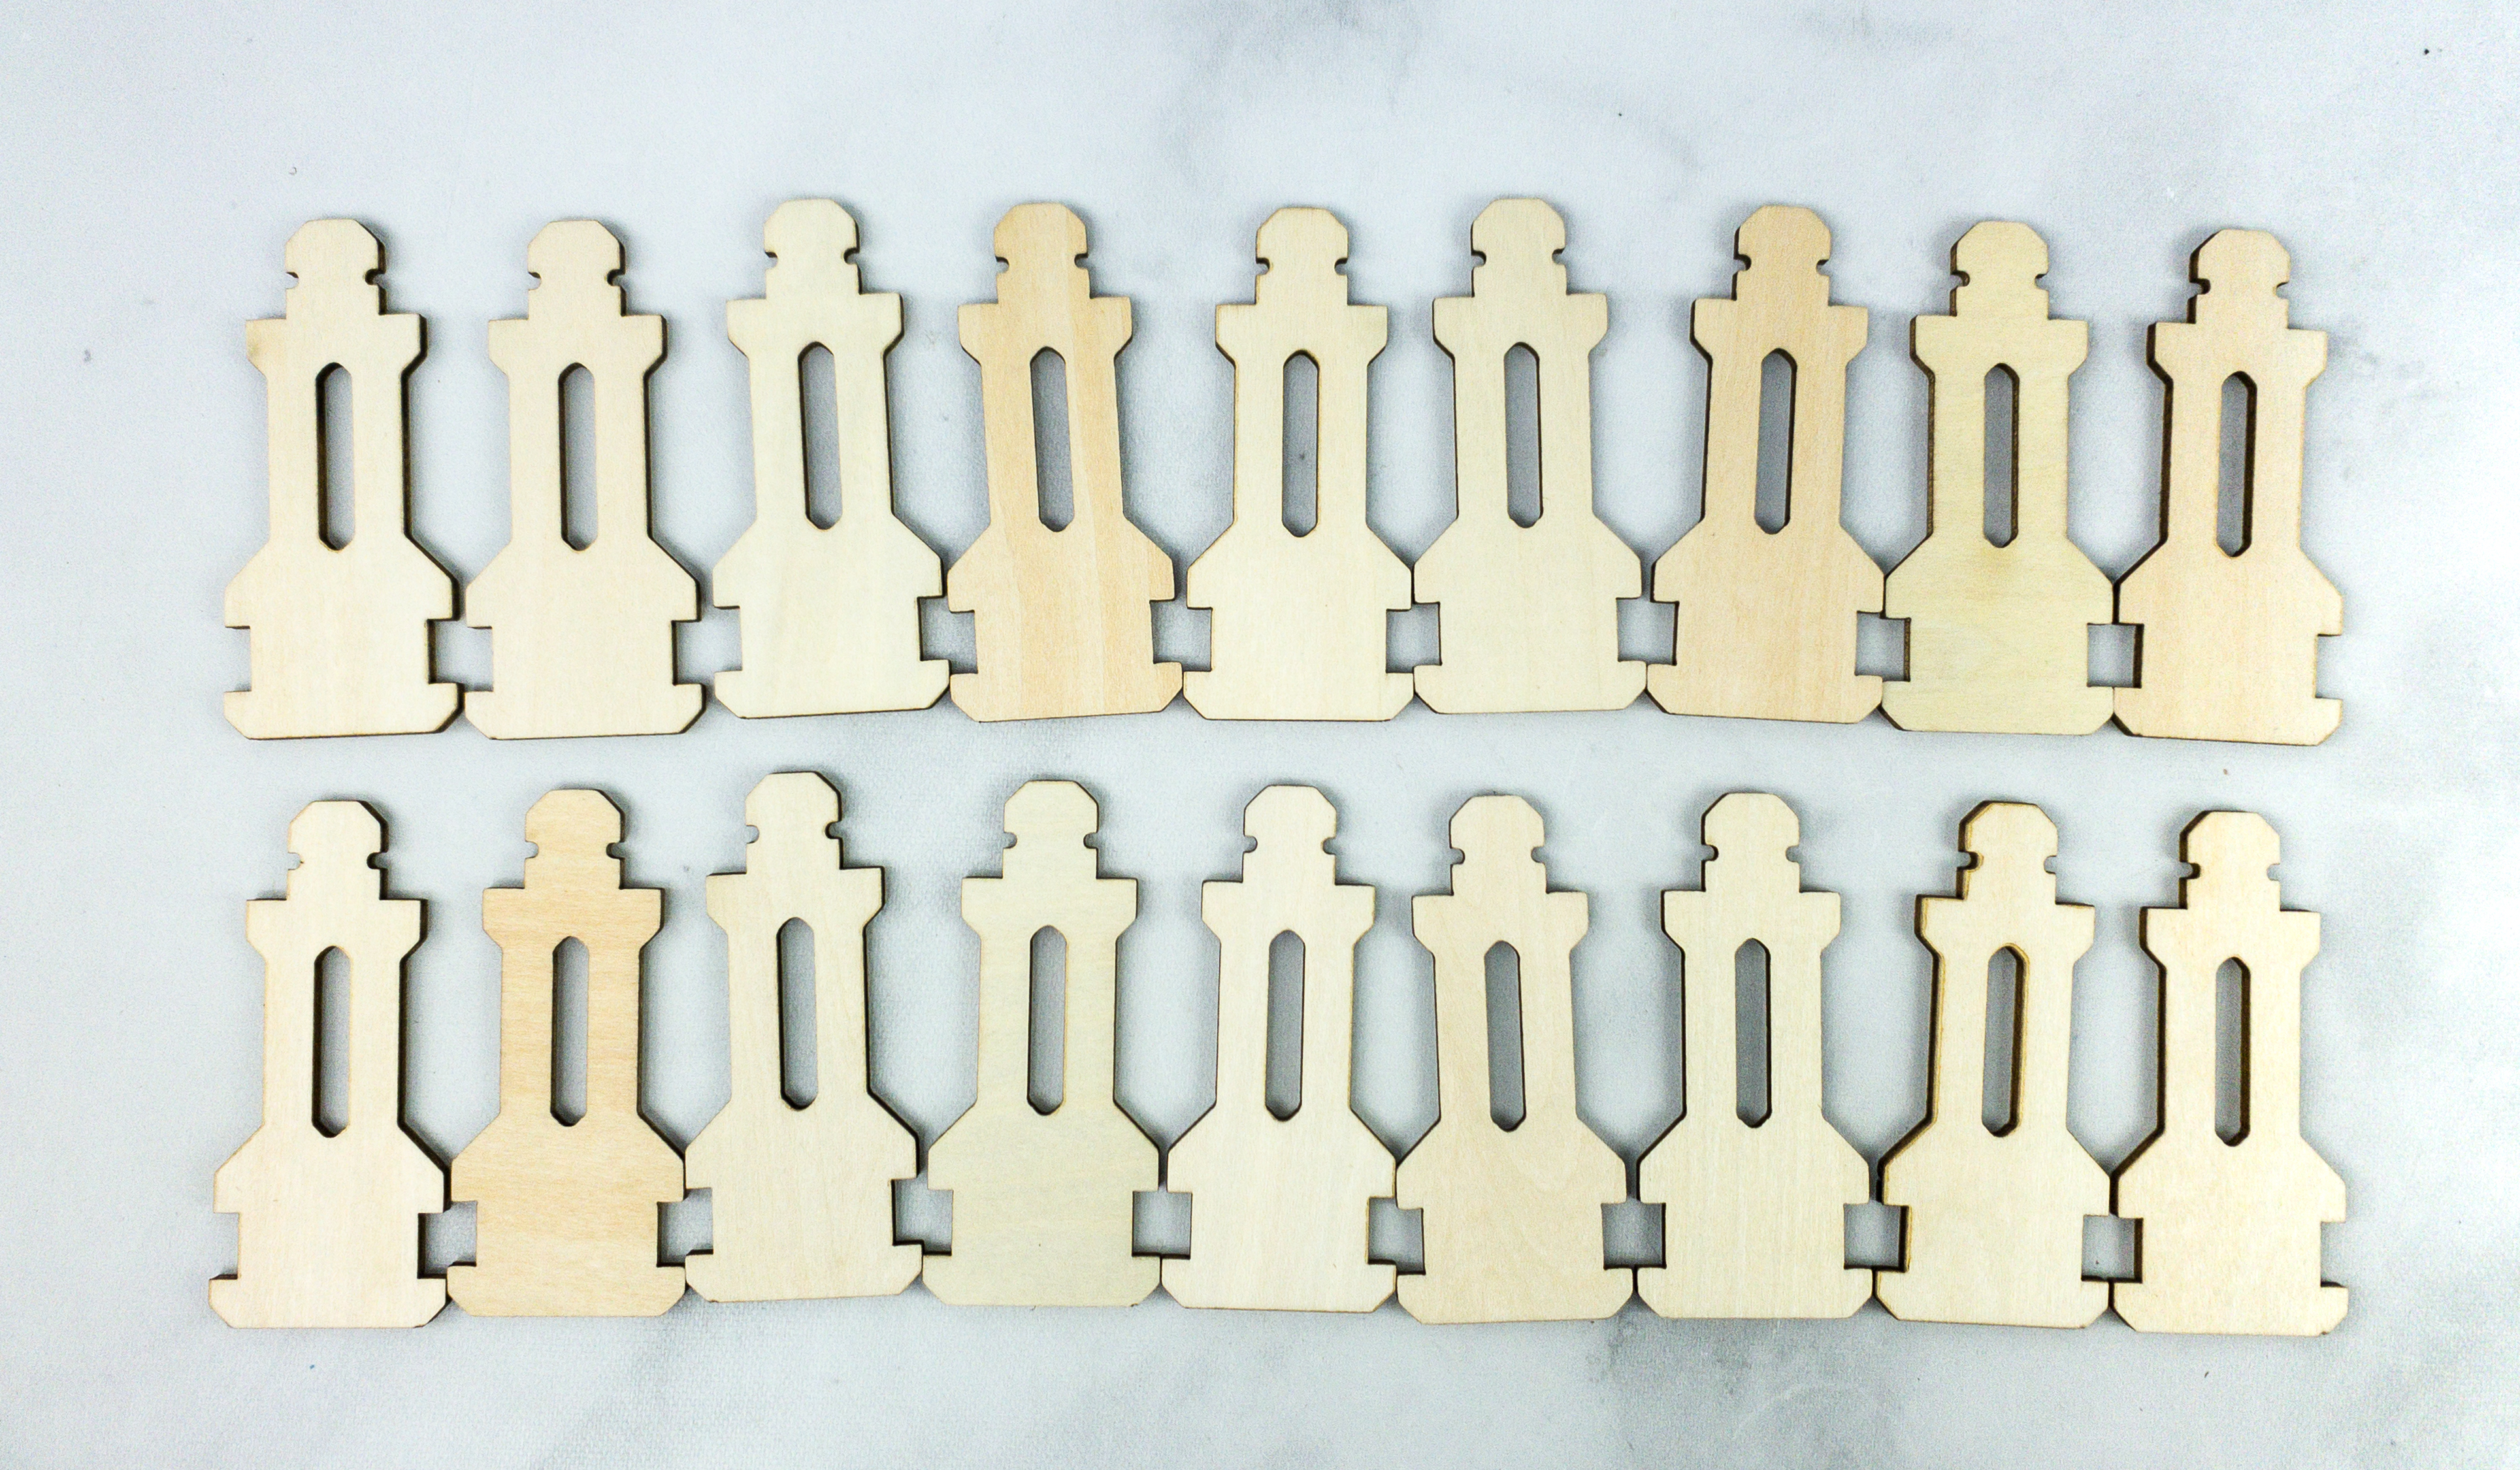
For this part, we used a wood set that consists of 18 pieces of side slats.
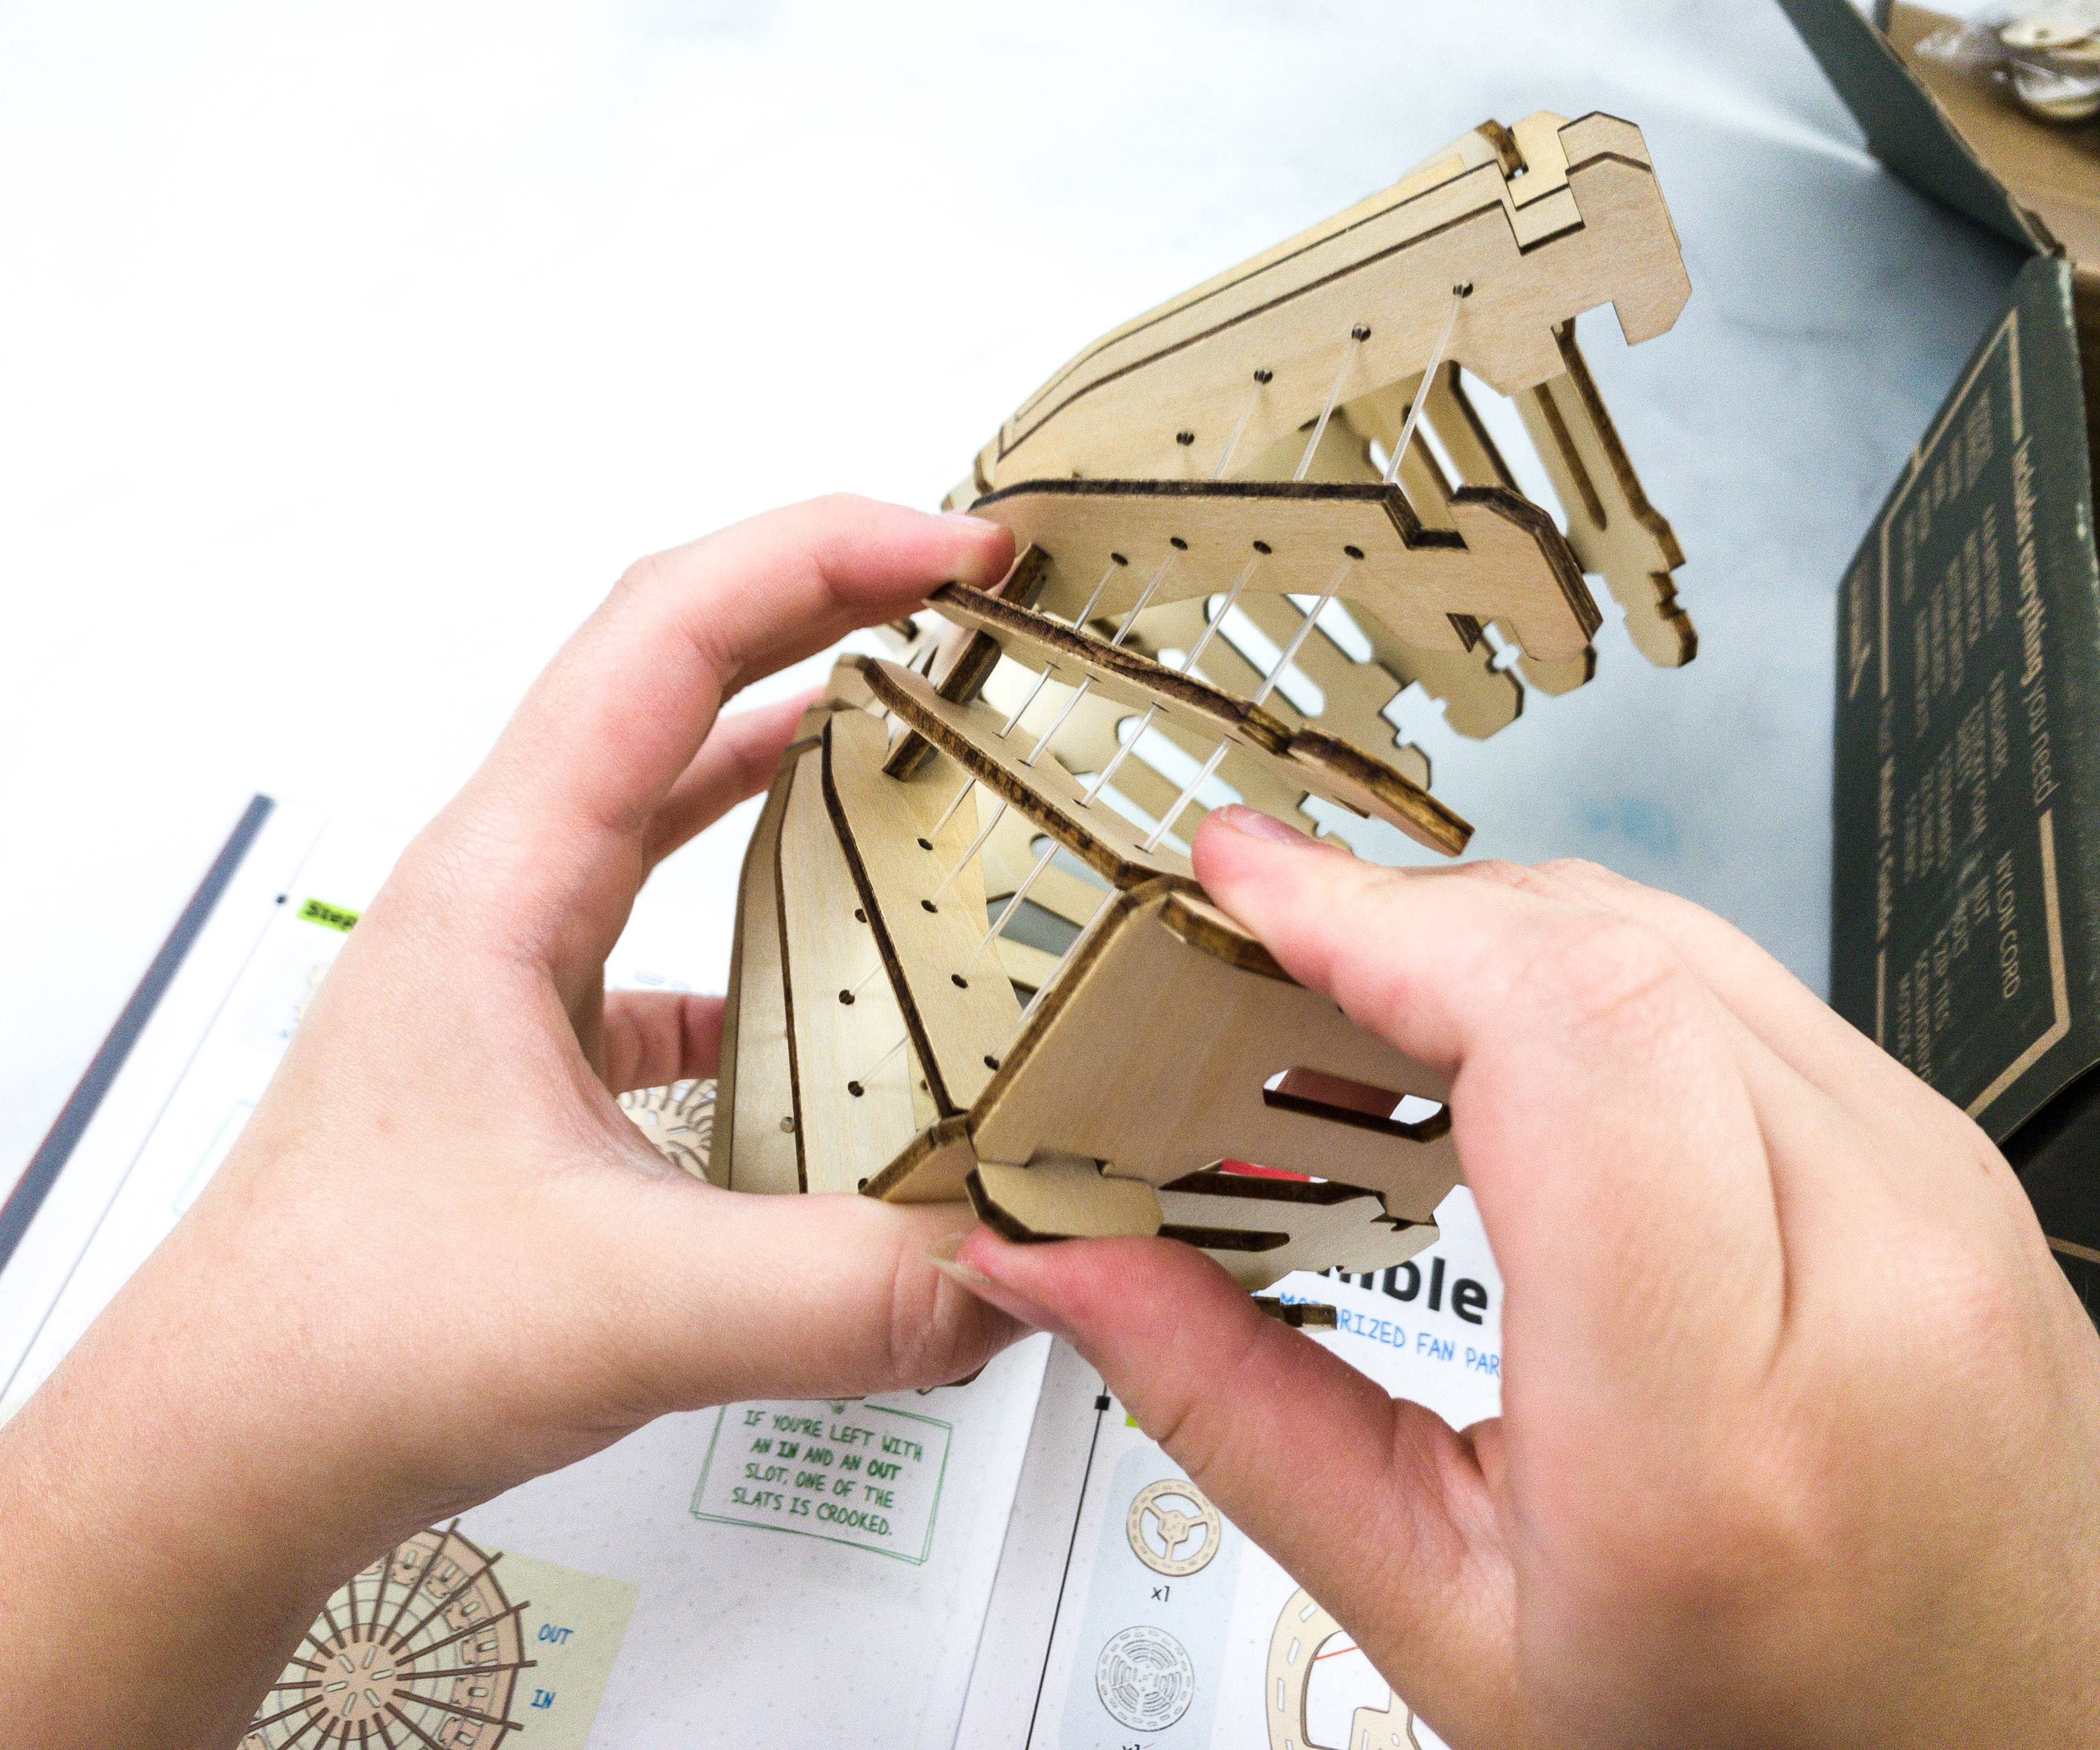
Pick one wooden piece and tuck it in between the grille, make sure to tuck it in alternating position – an in and out pattern.
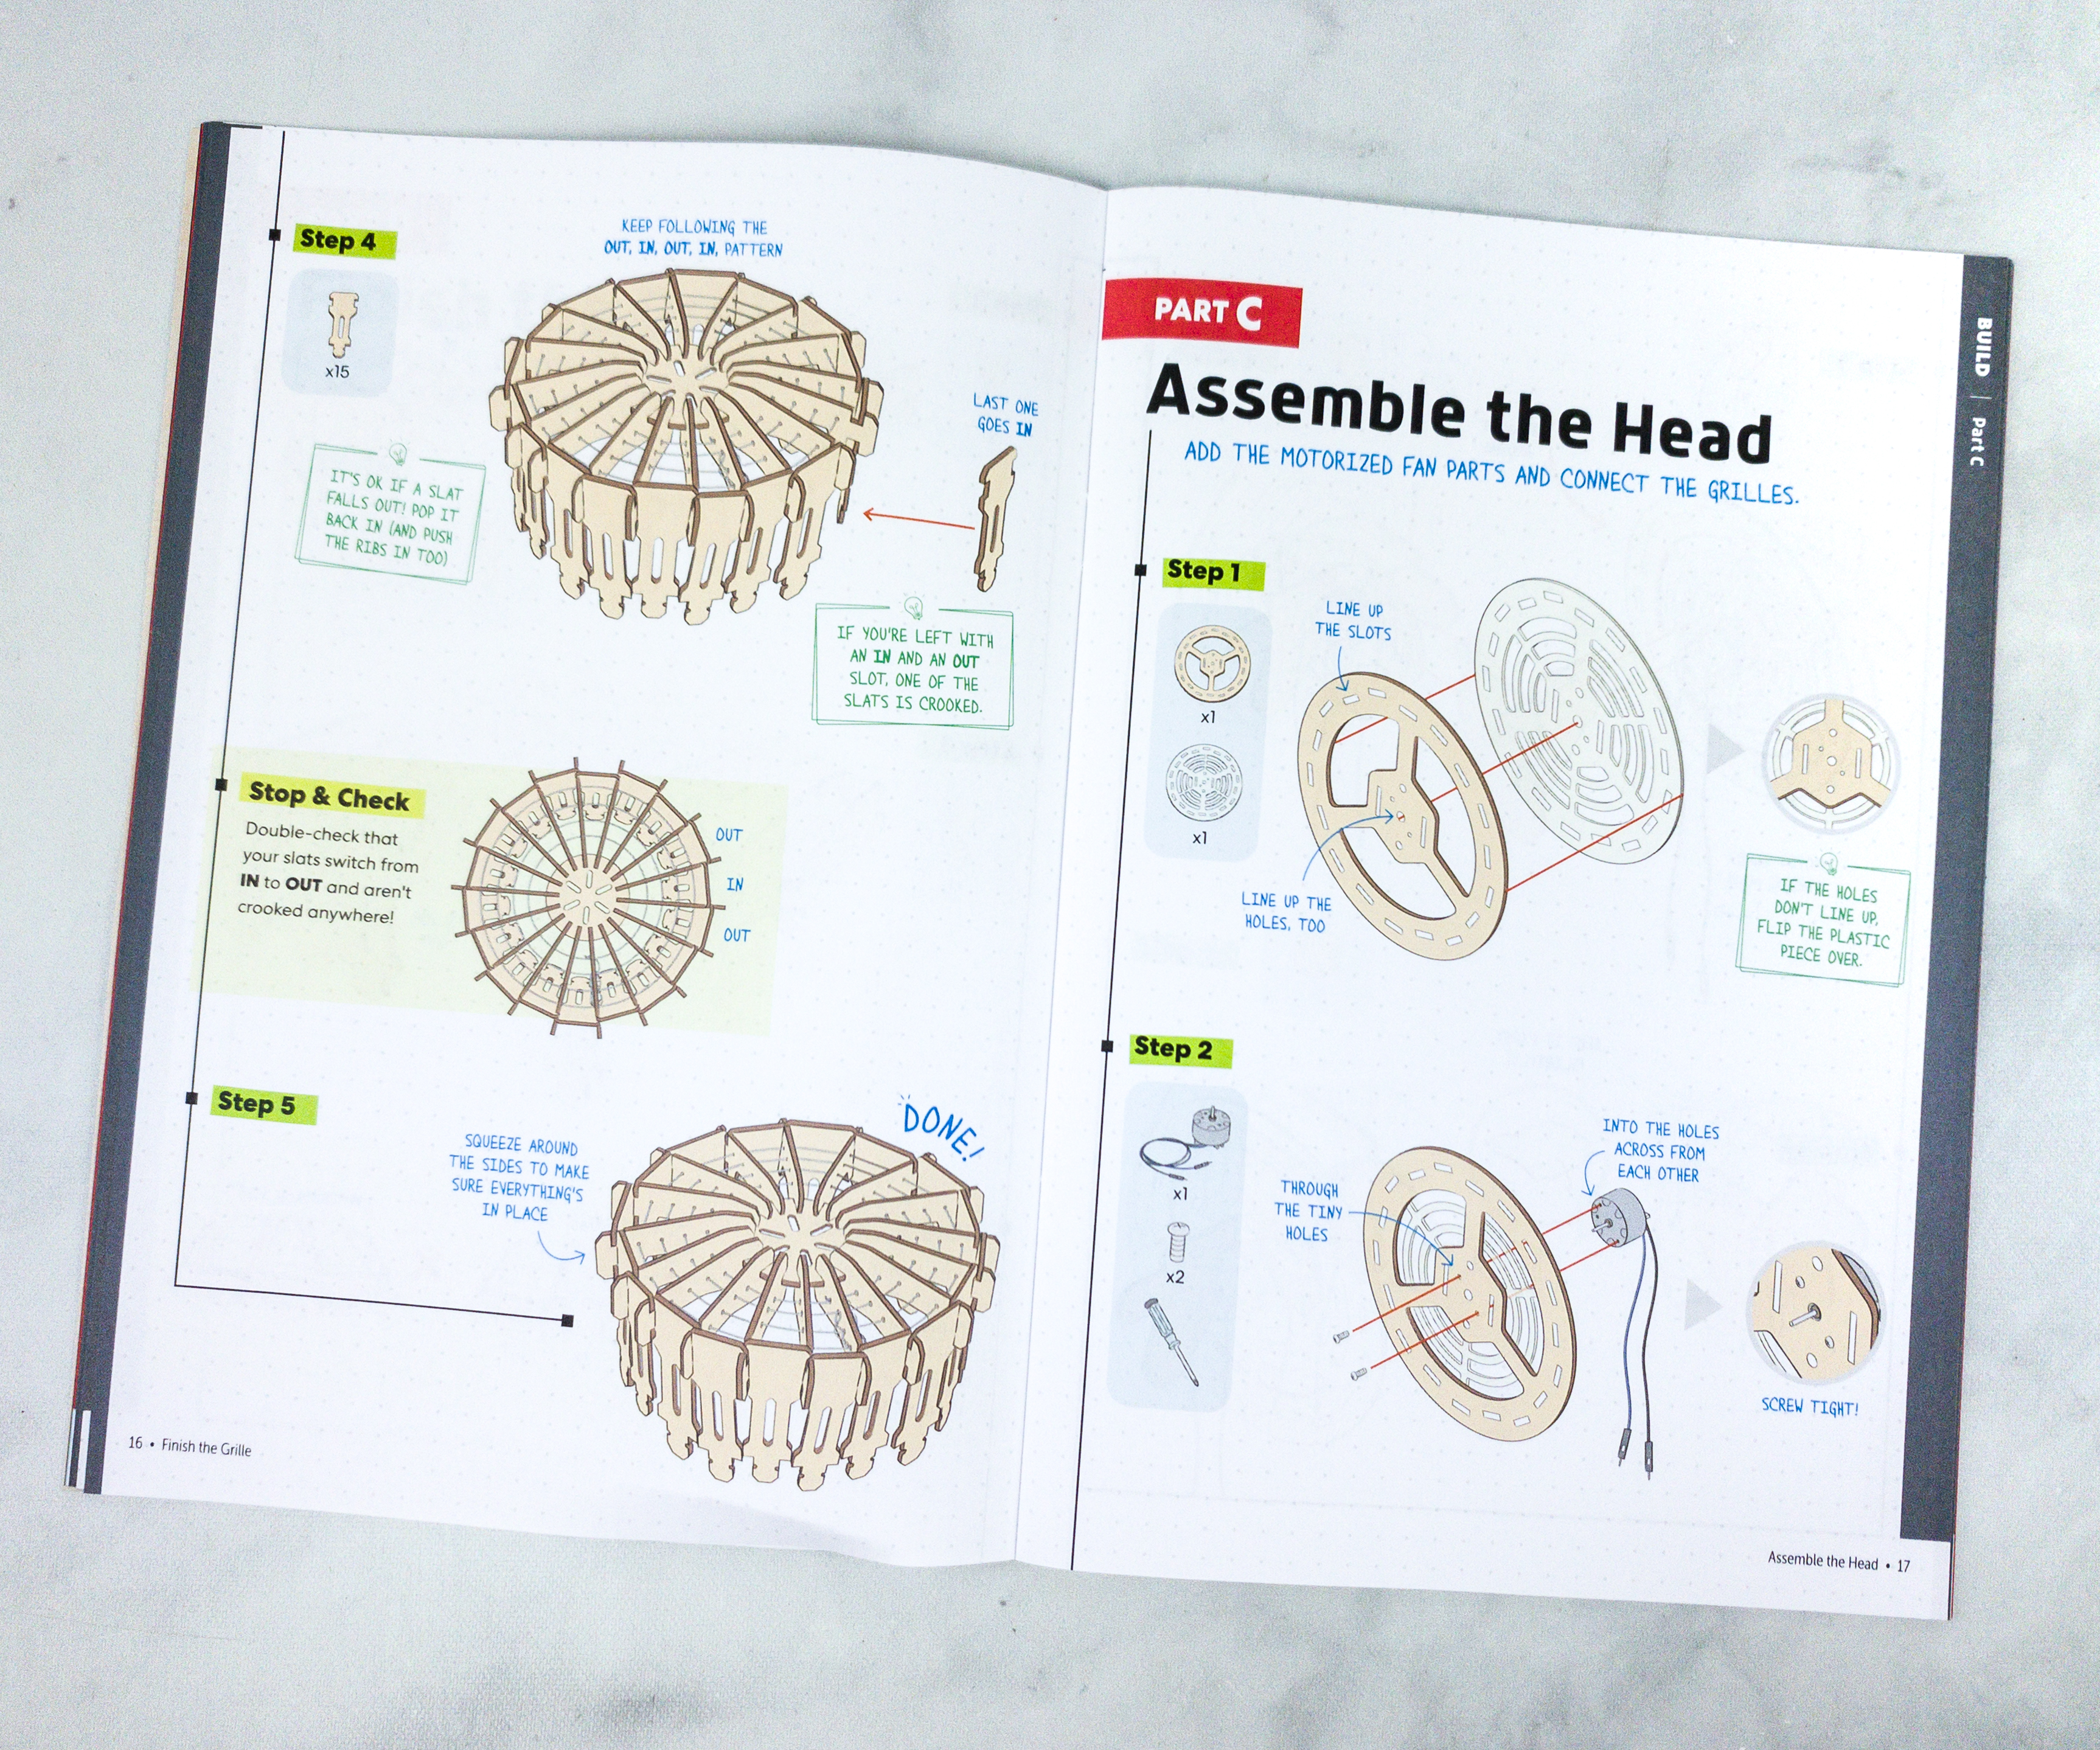
If in your last piece you are left with an in and out slot, then one of the slat must be crooked. Double check where that slat is and then correct it.

The third part of the project is assembling the head of the table fan. It is the portion where we added the motorized part of the fan and connected it to the grilles.
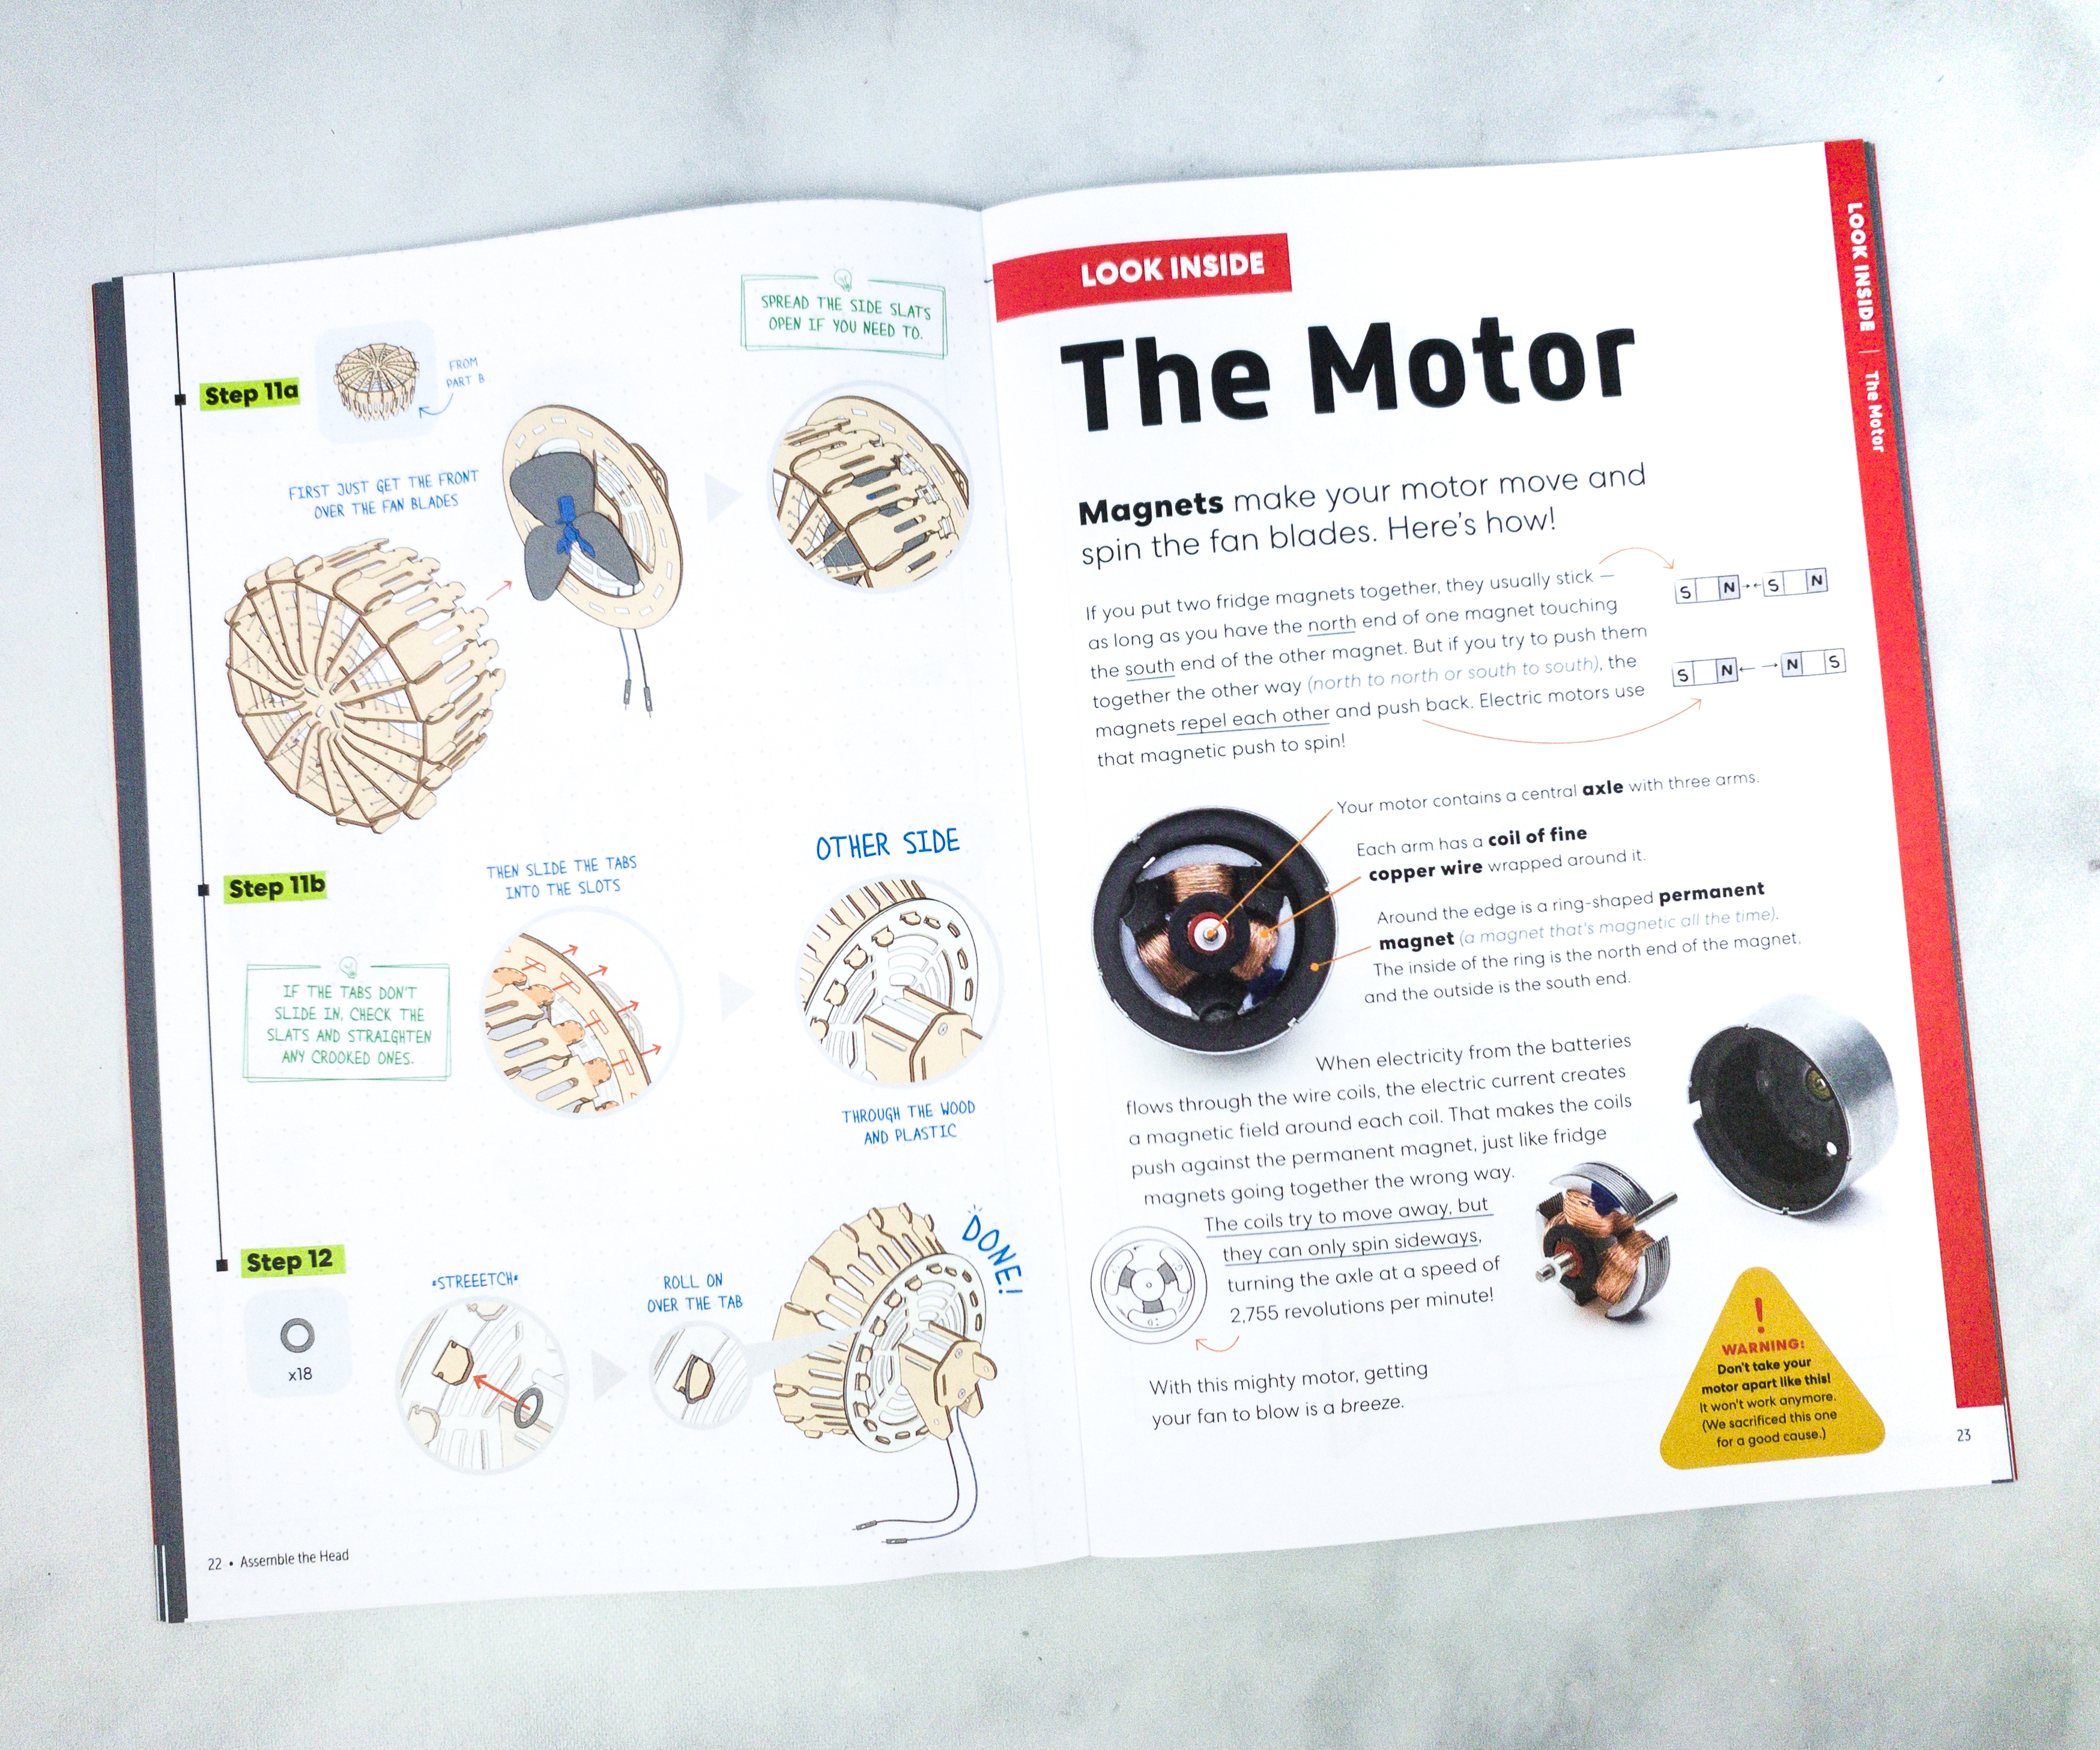
This part of the booklet provides information about the motor and how it works.
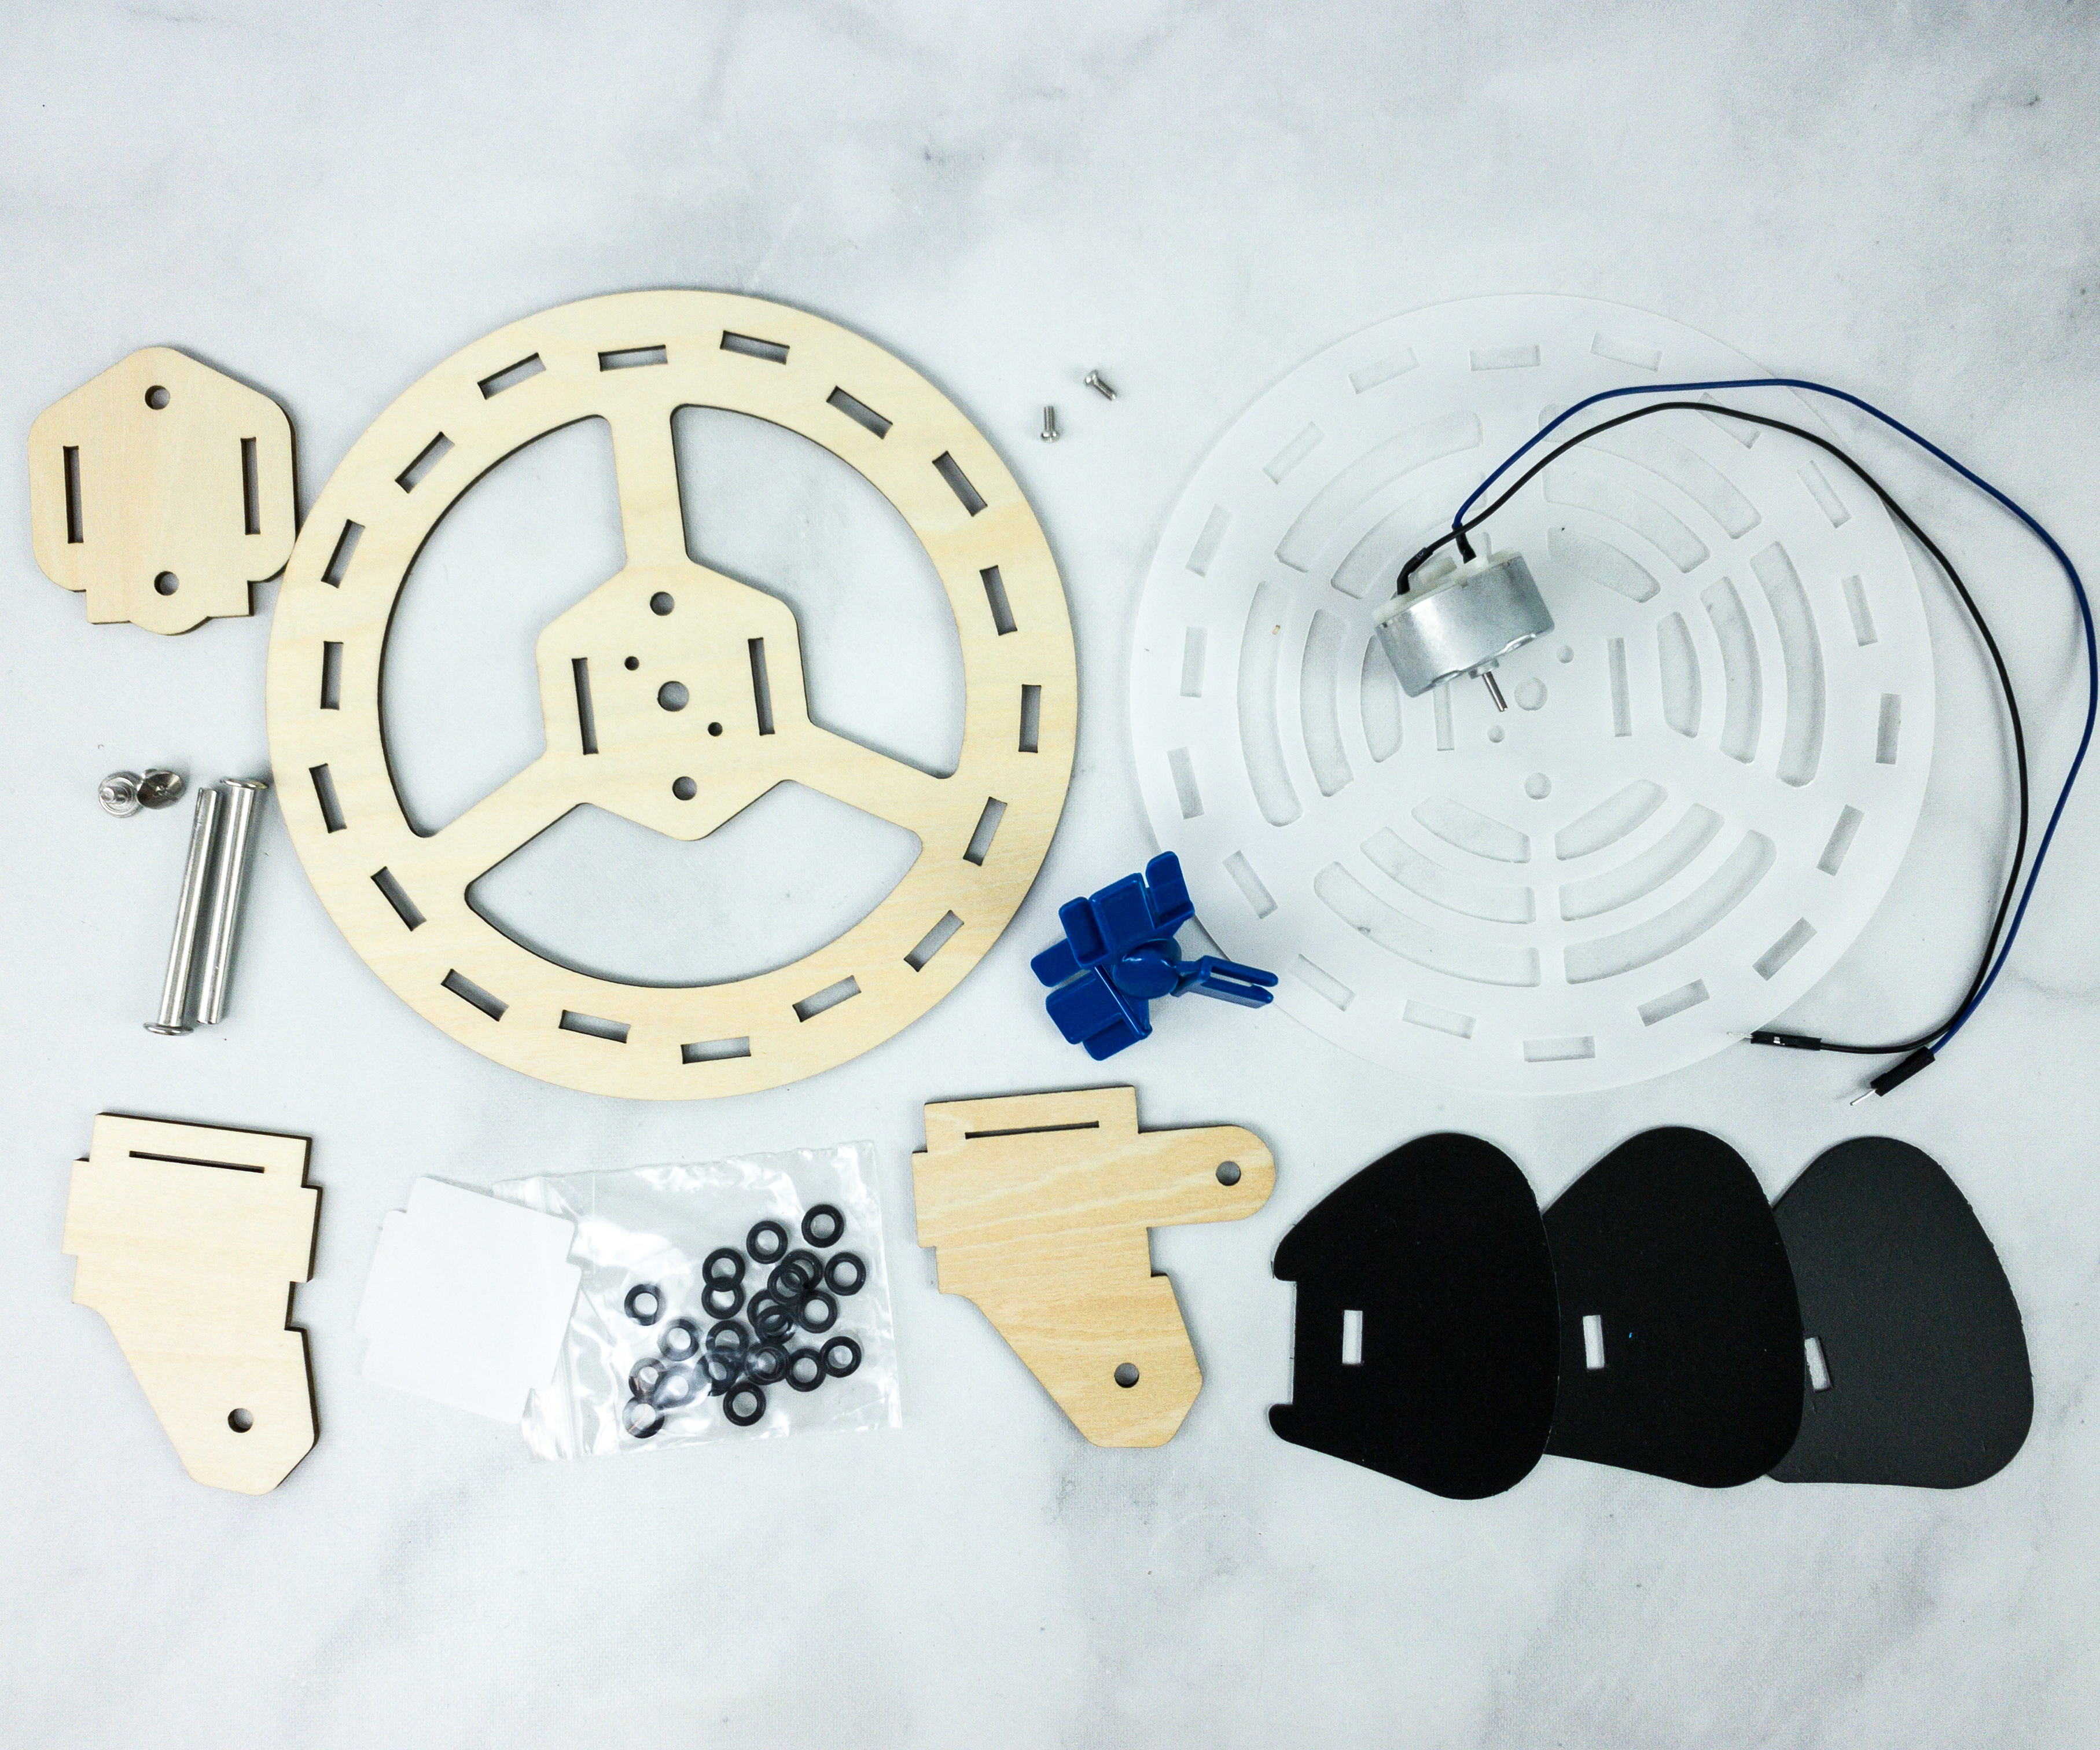
Here are all the items we used for the third part: wooden pieces, fan motor, fan blade, screws, and rubber locks.
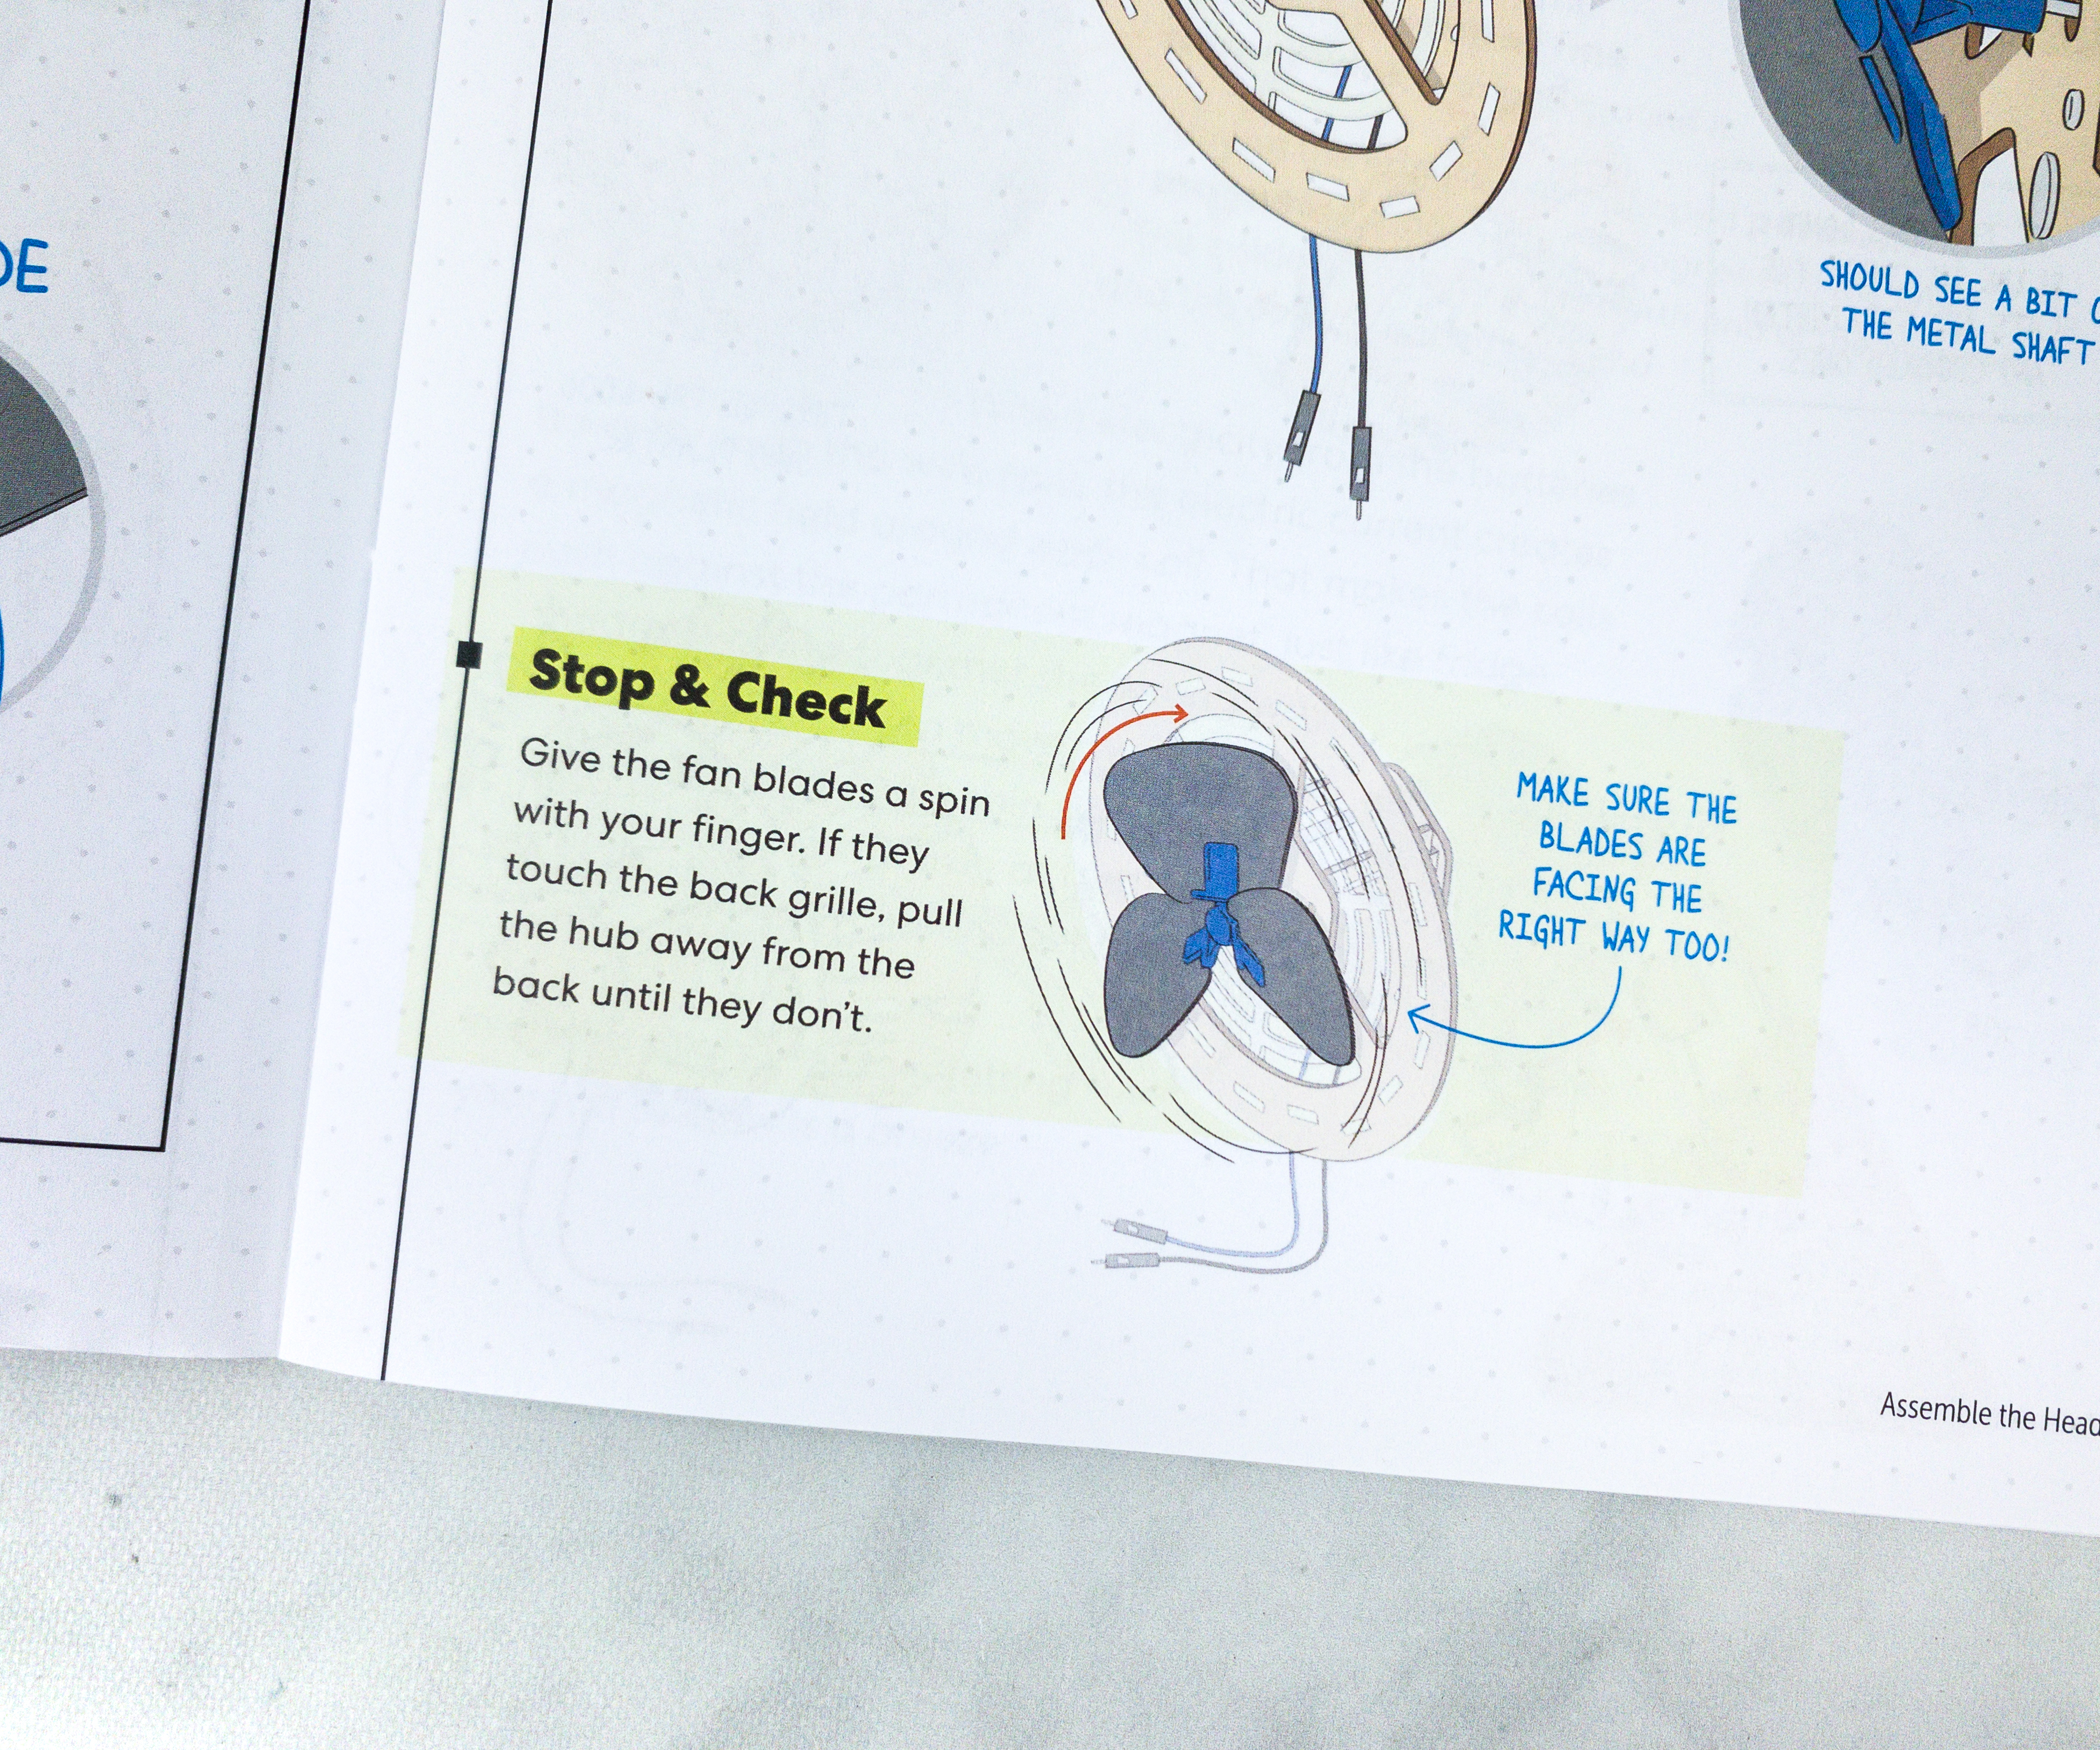
For the stop and check portion, you just need to make sure that the blades are facing the right way, meaning the wind blows forward when you spin it.
Install the motor at the back of the wood and plastic plate, and once it is set in place, lock it out using the wooden set and screw.
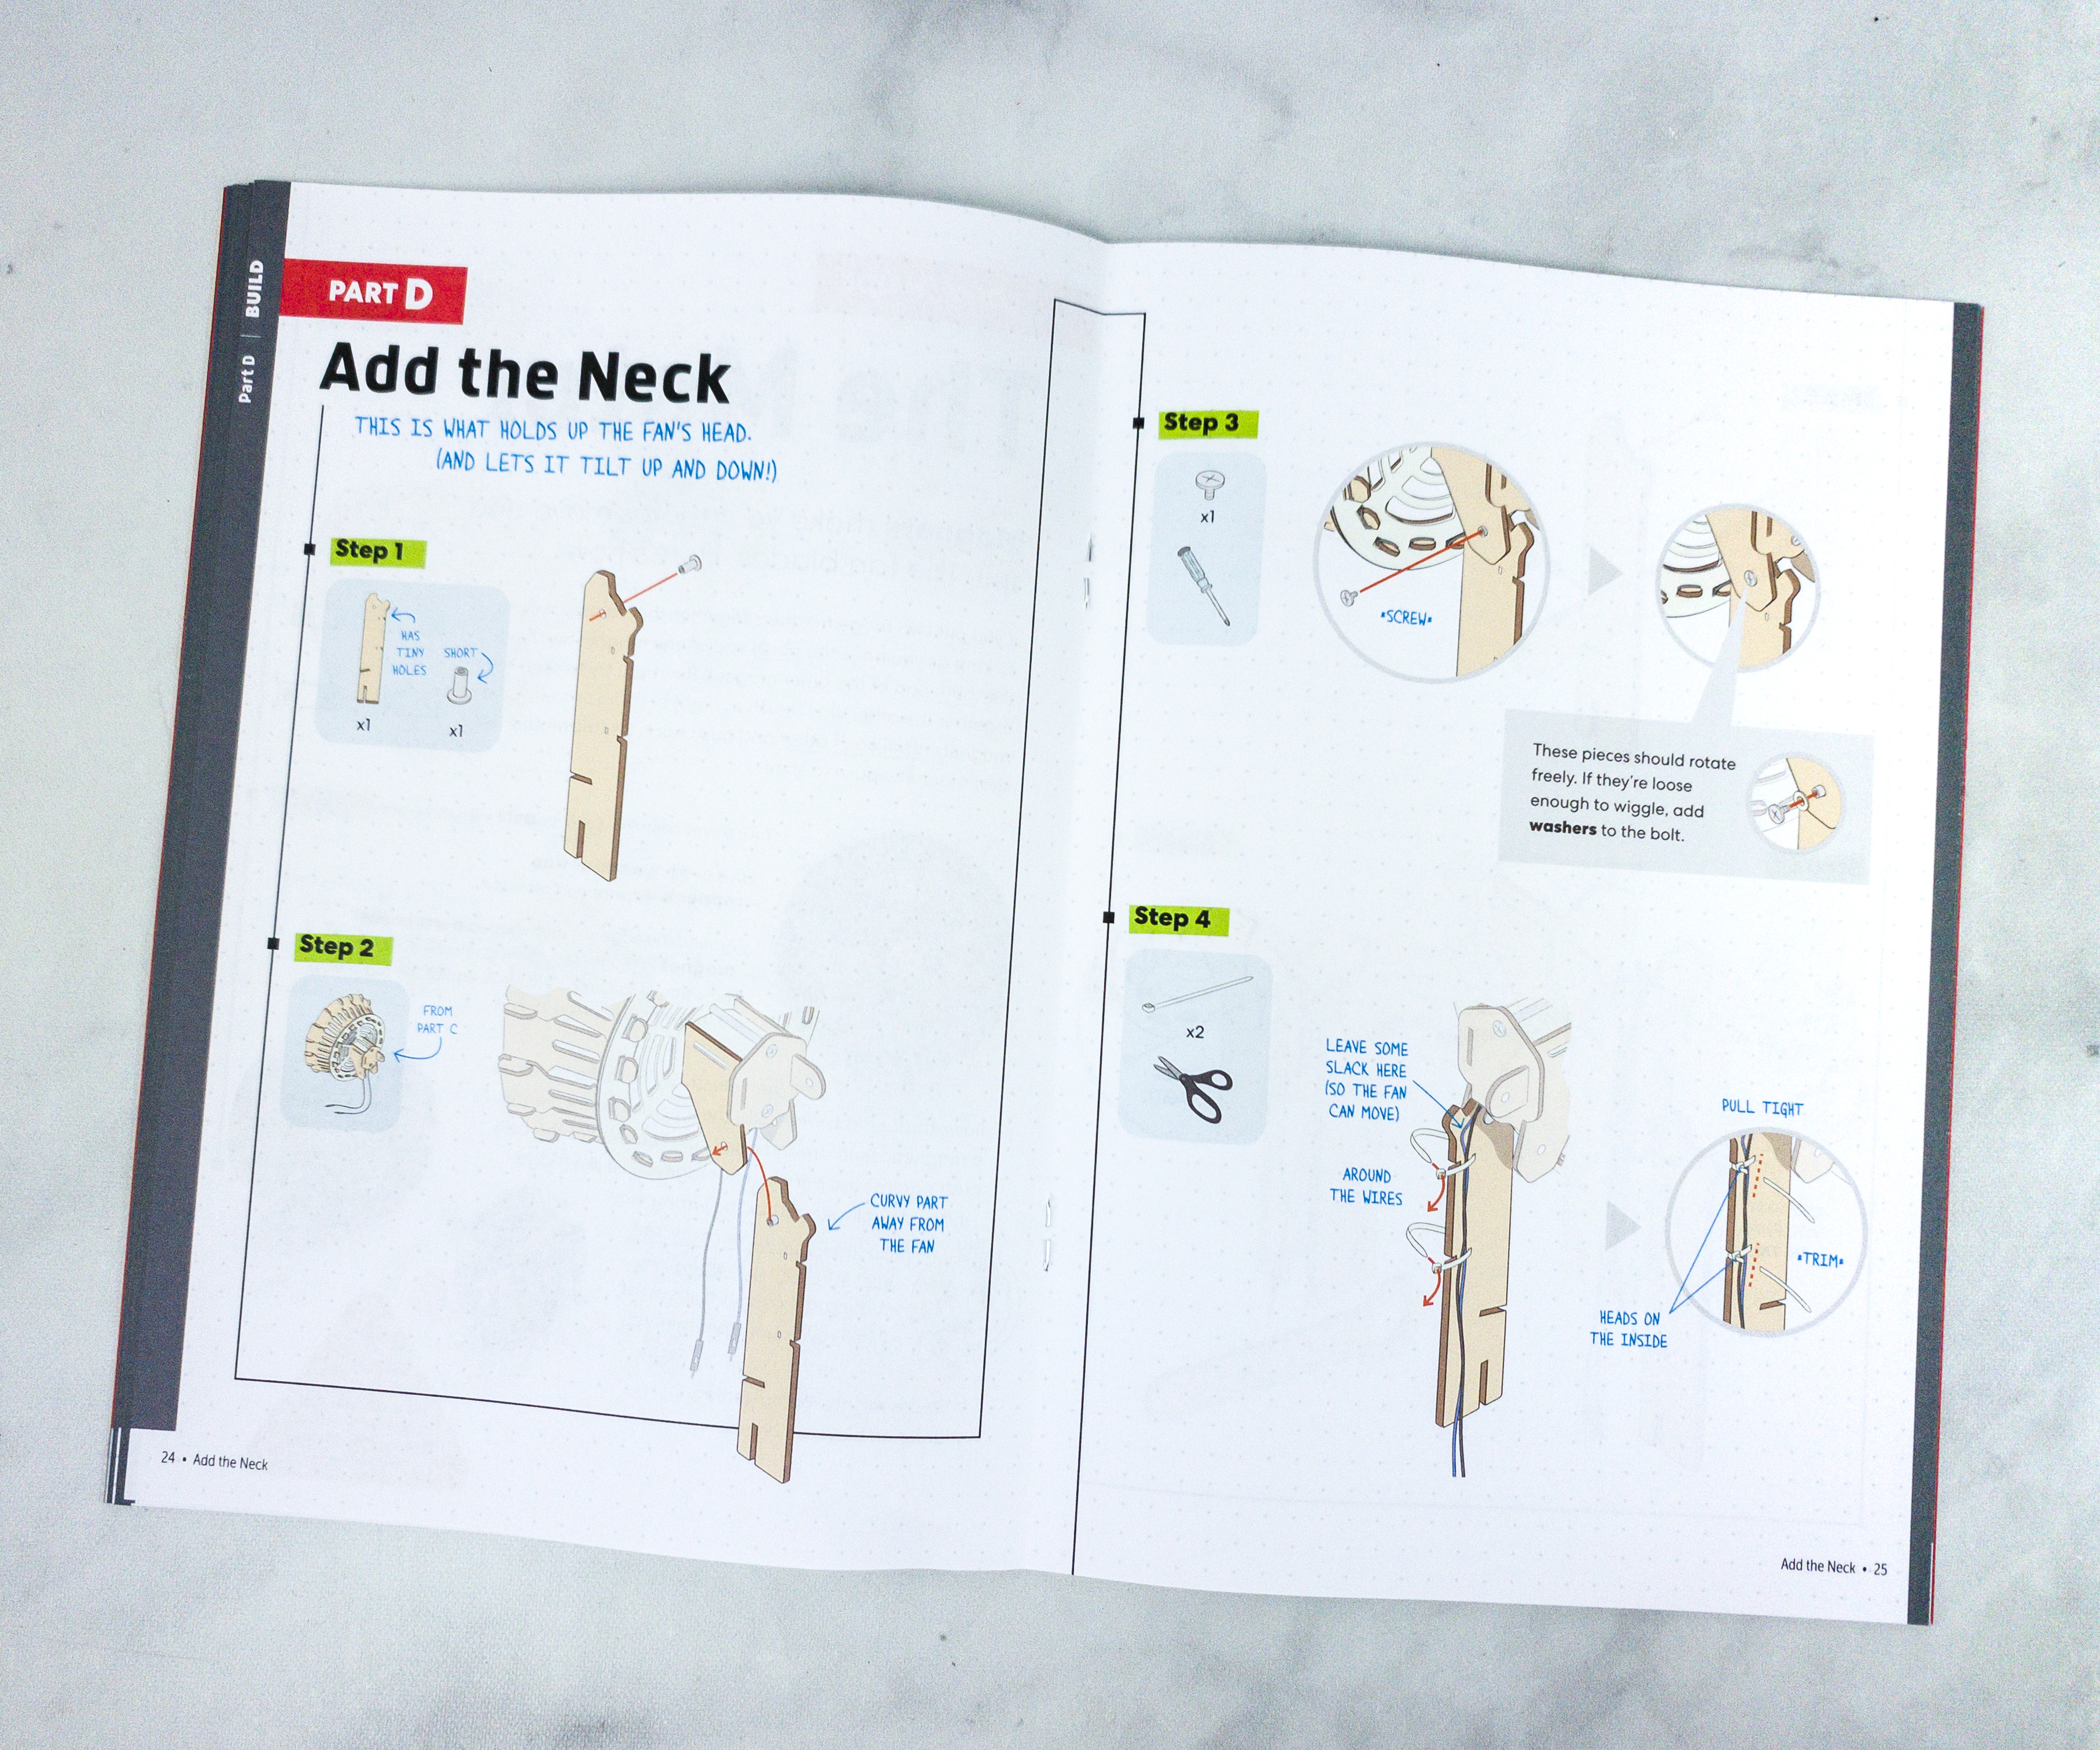
We are done with the head! The next step is adding the neck of the table fan.
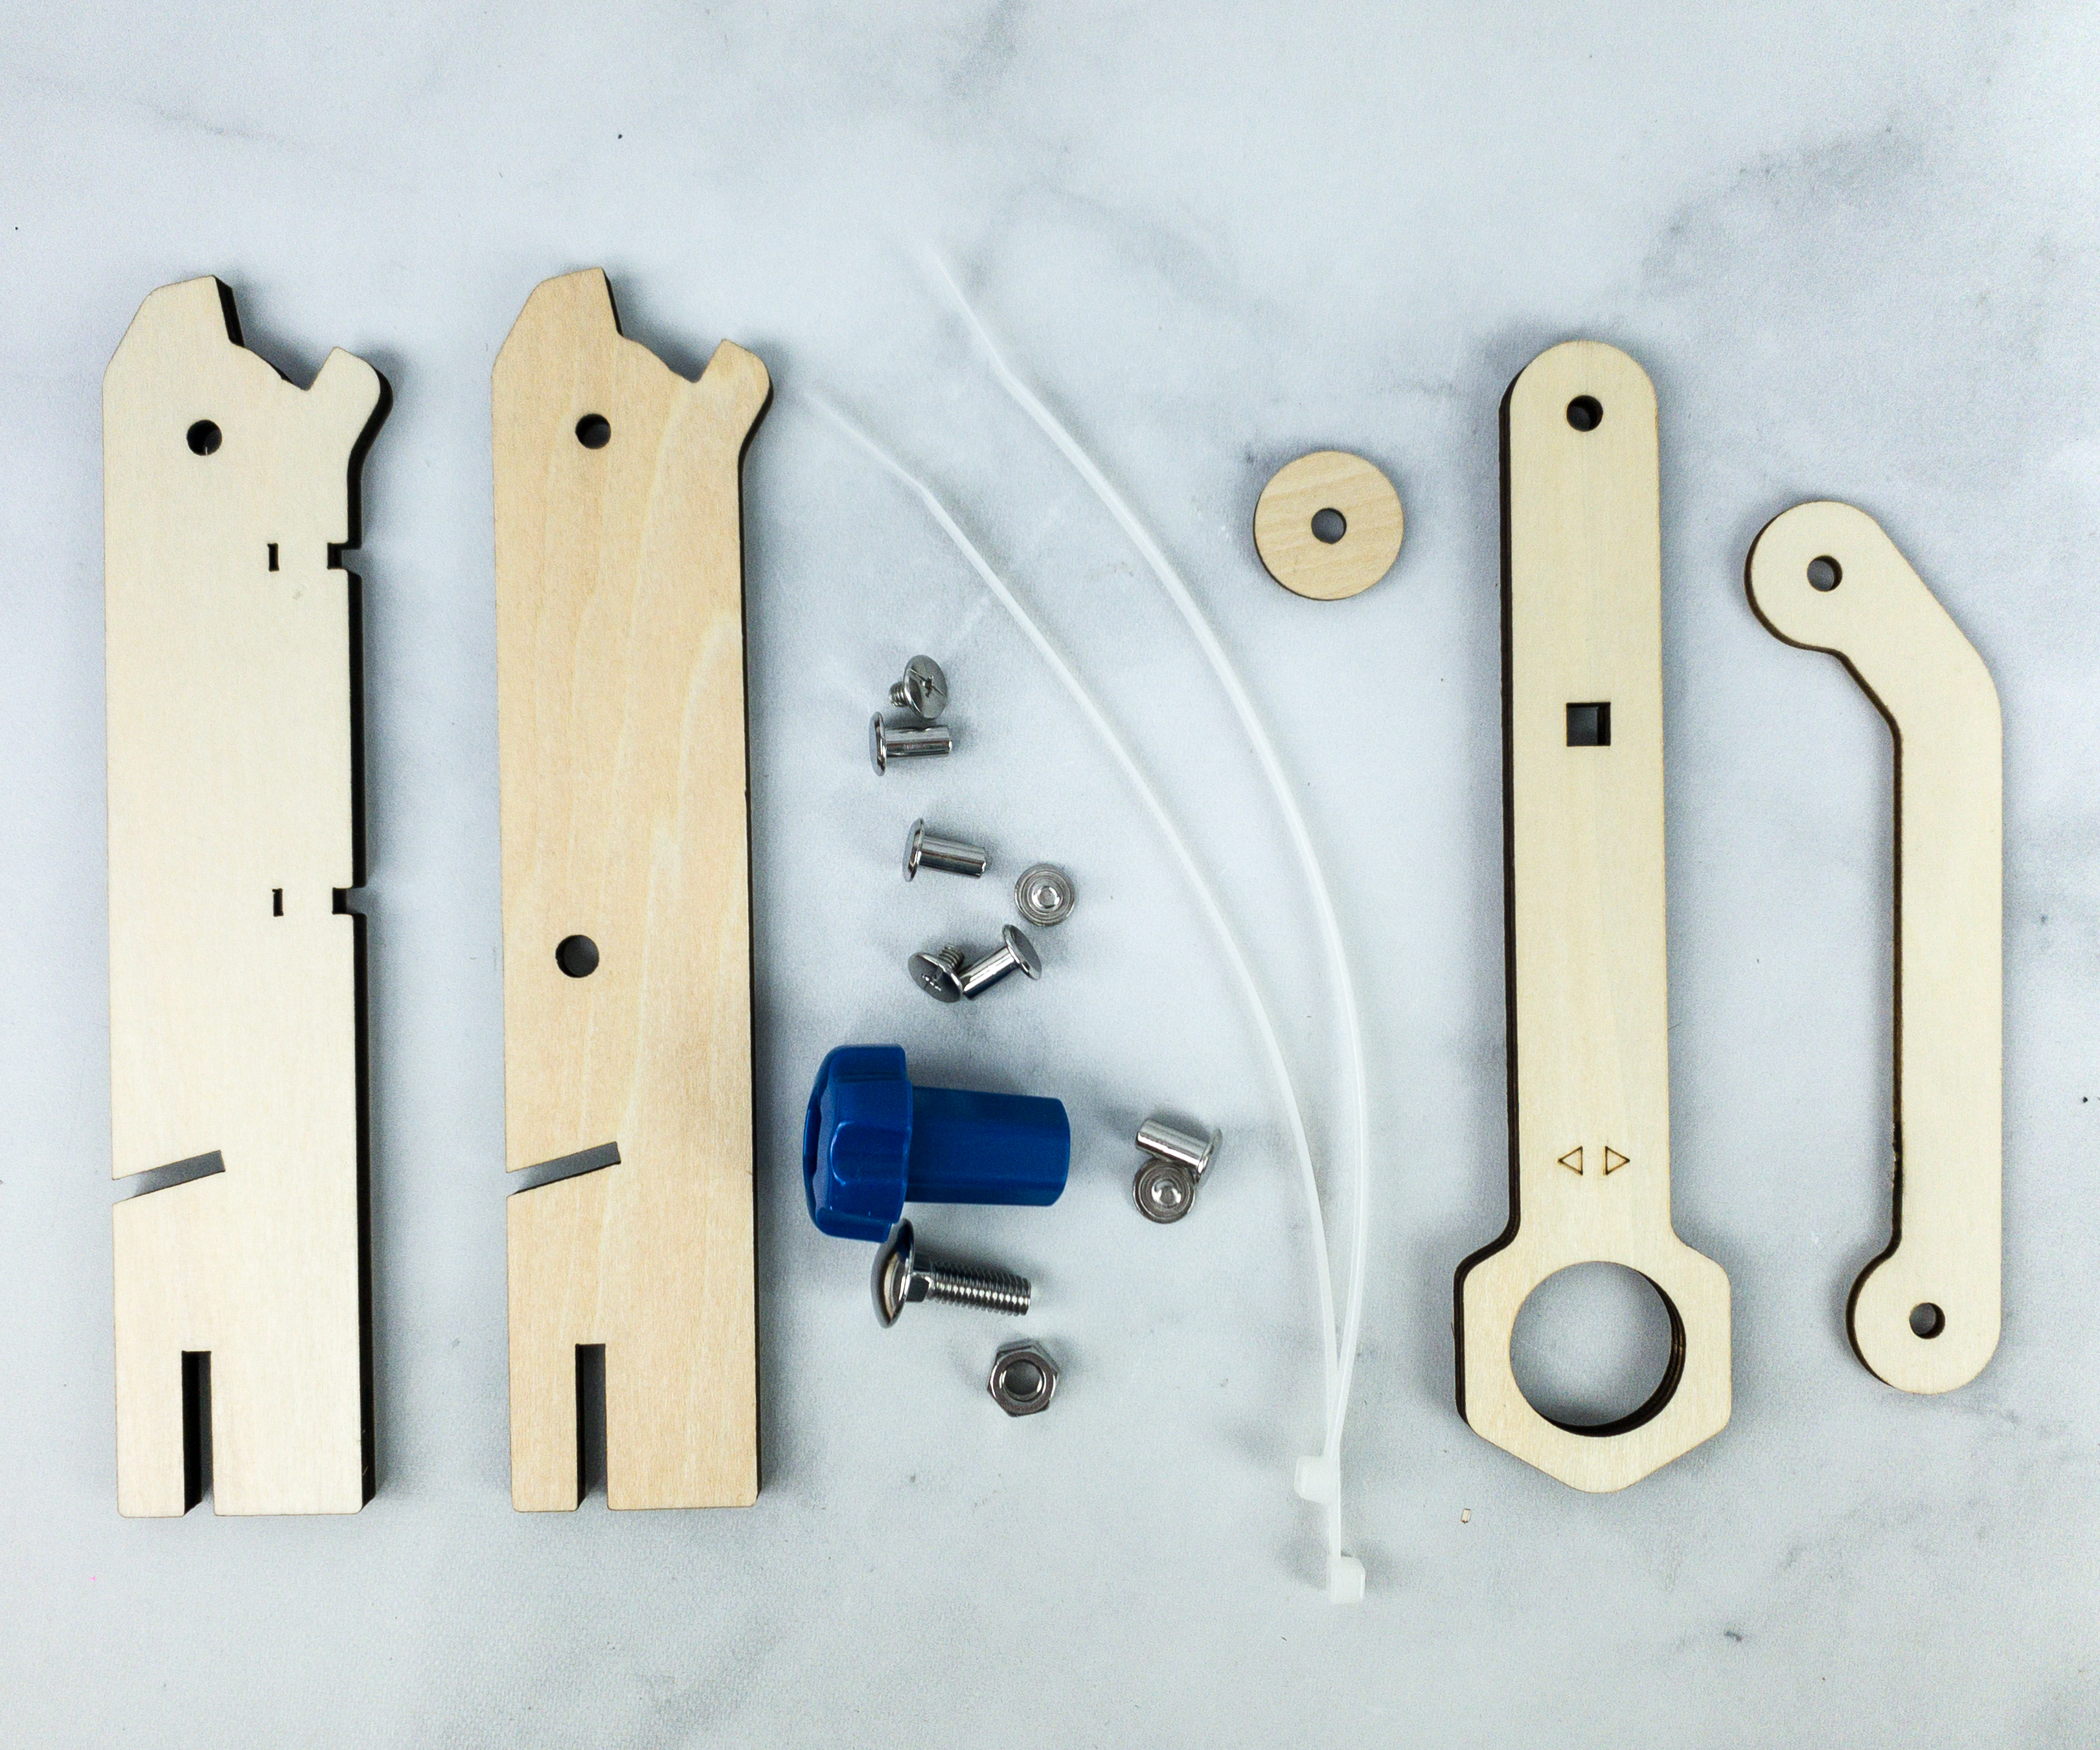
We used long wood pieces, short and long metal screws, washer, plastic screw (for adjustment), and a pair of zip ties.
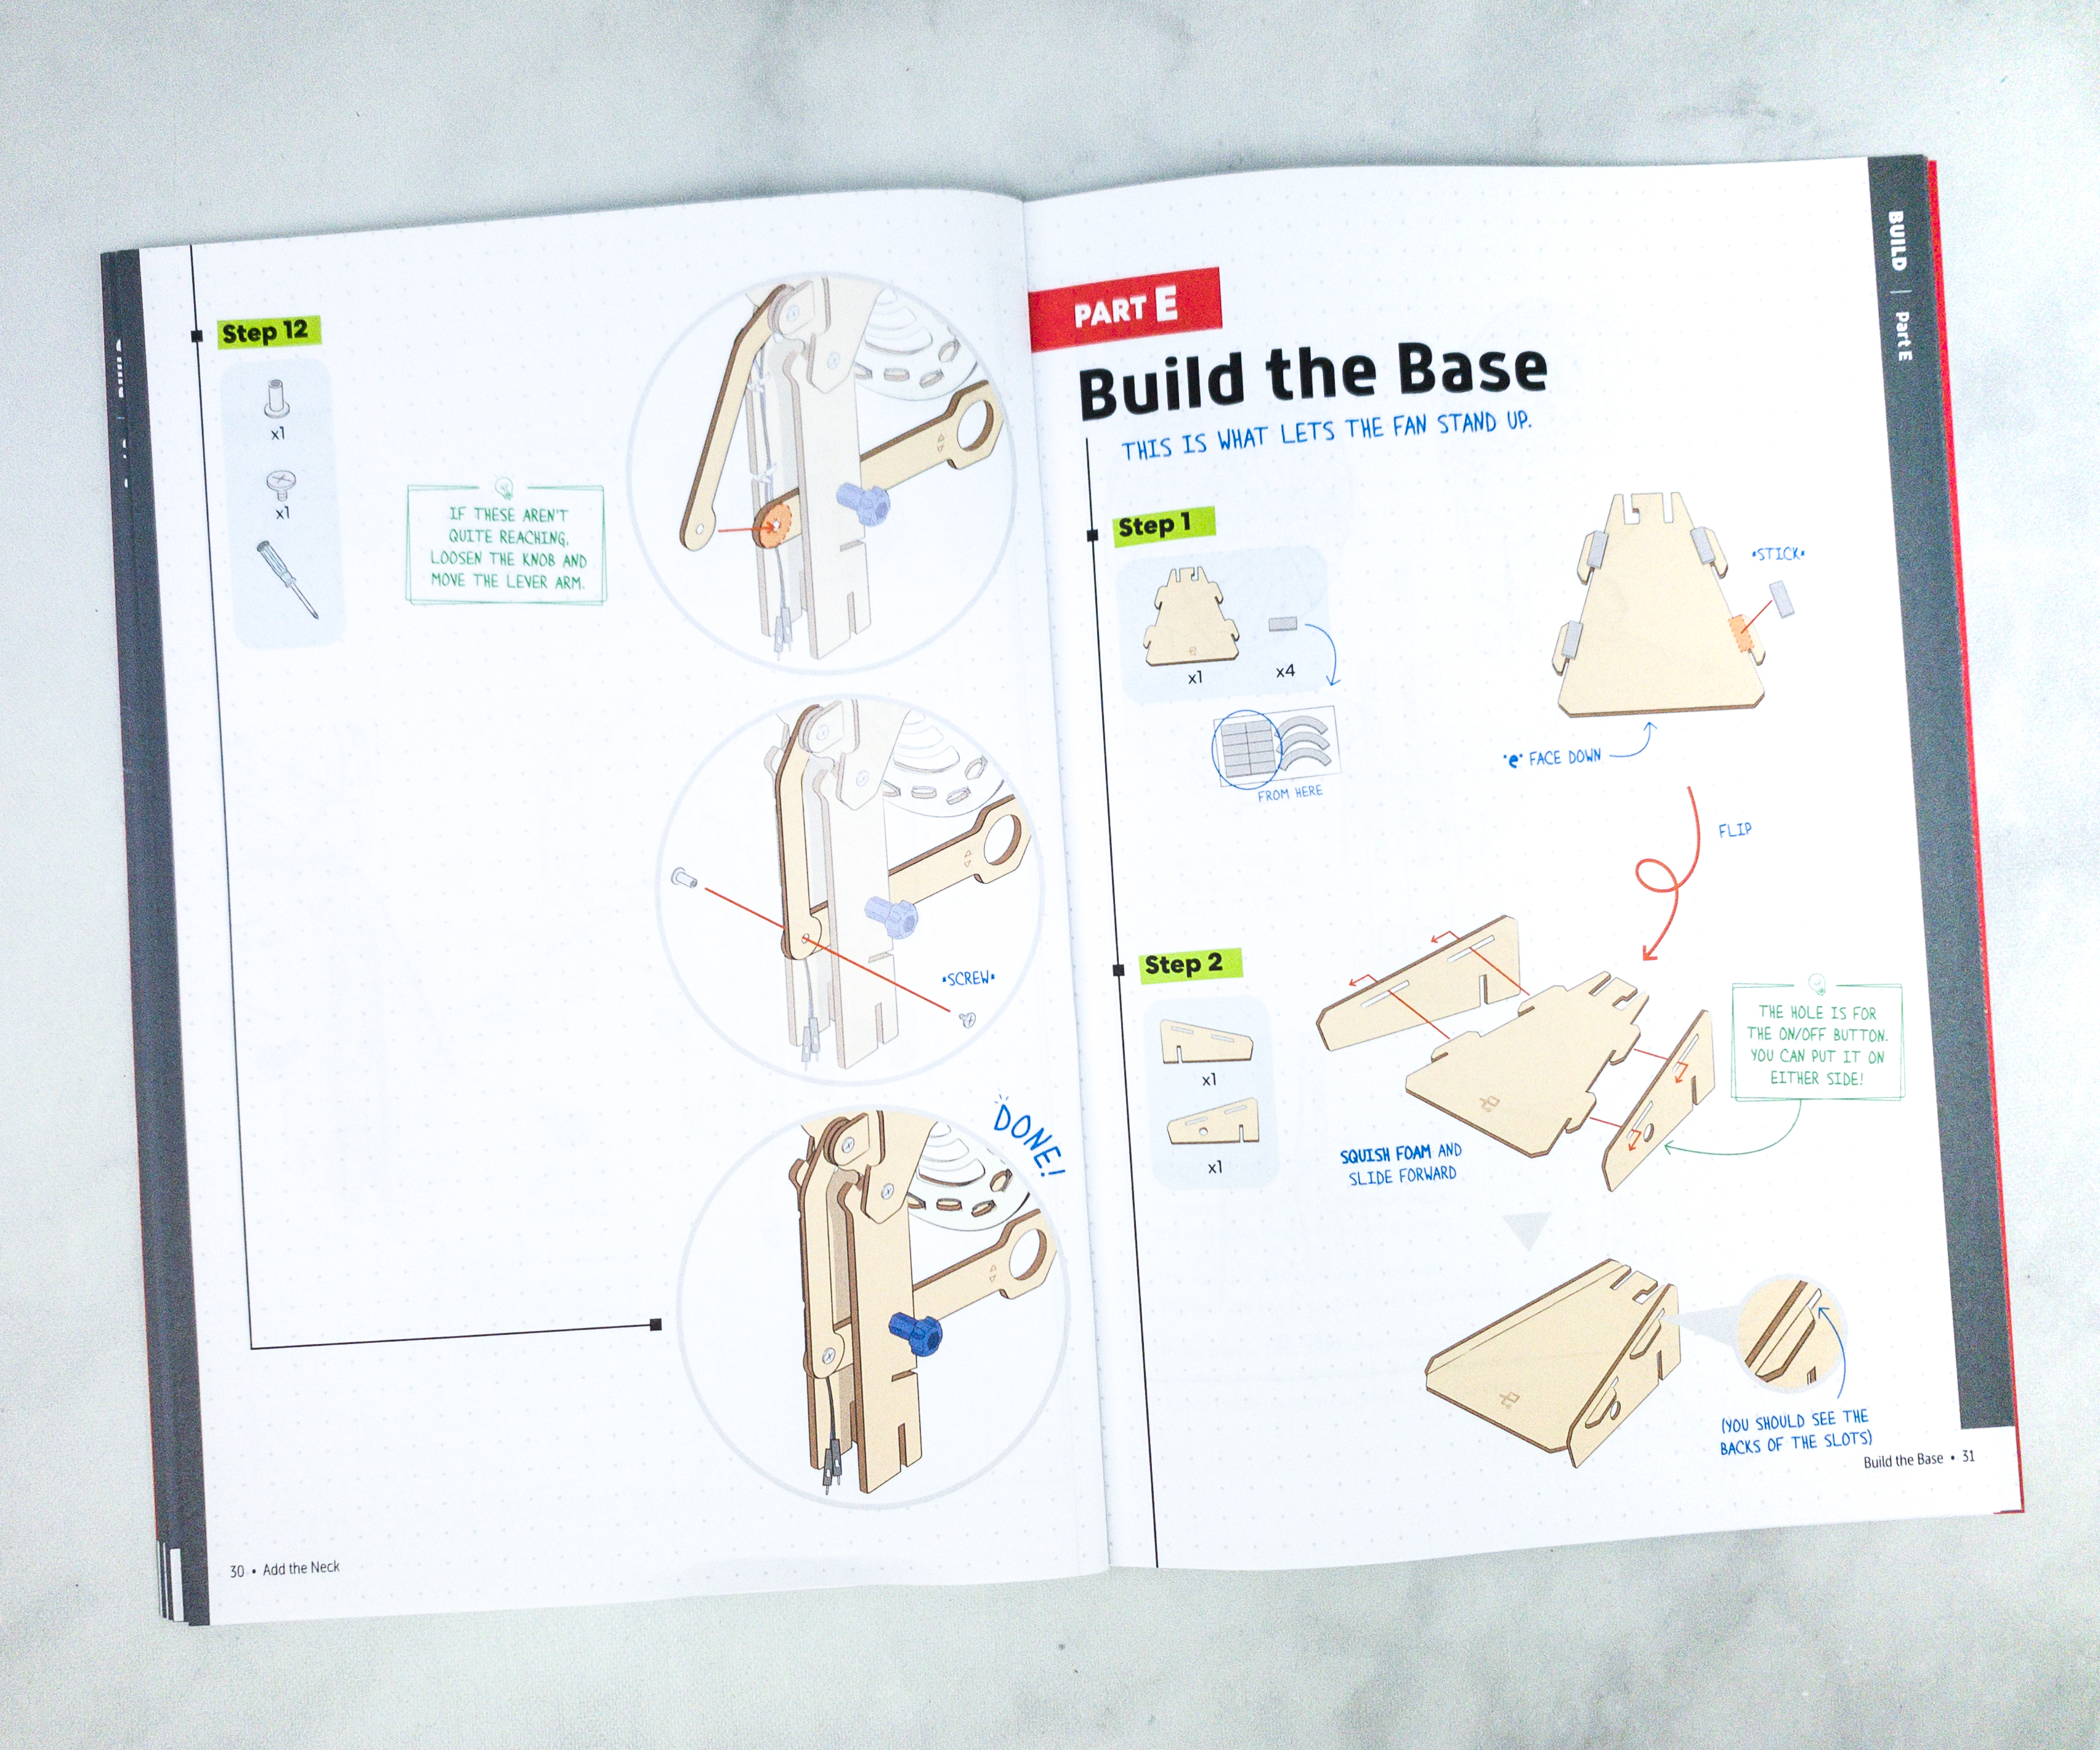
The fifth part is building the base, it’s what makes the fan stand up.
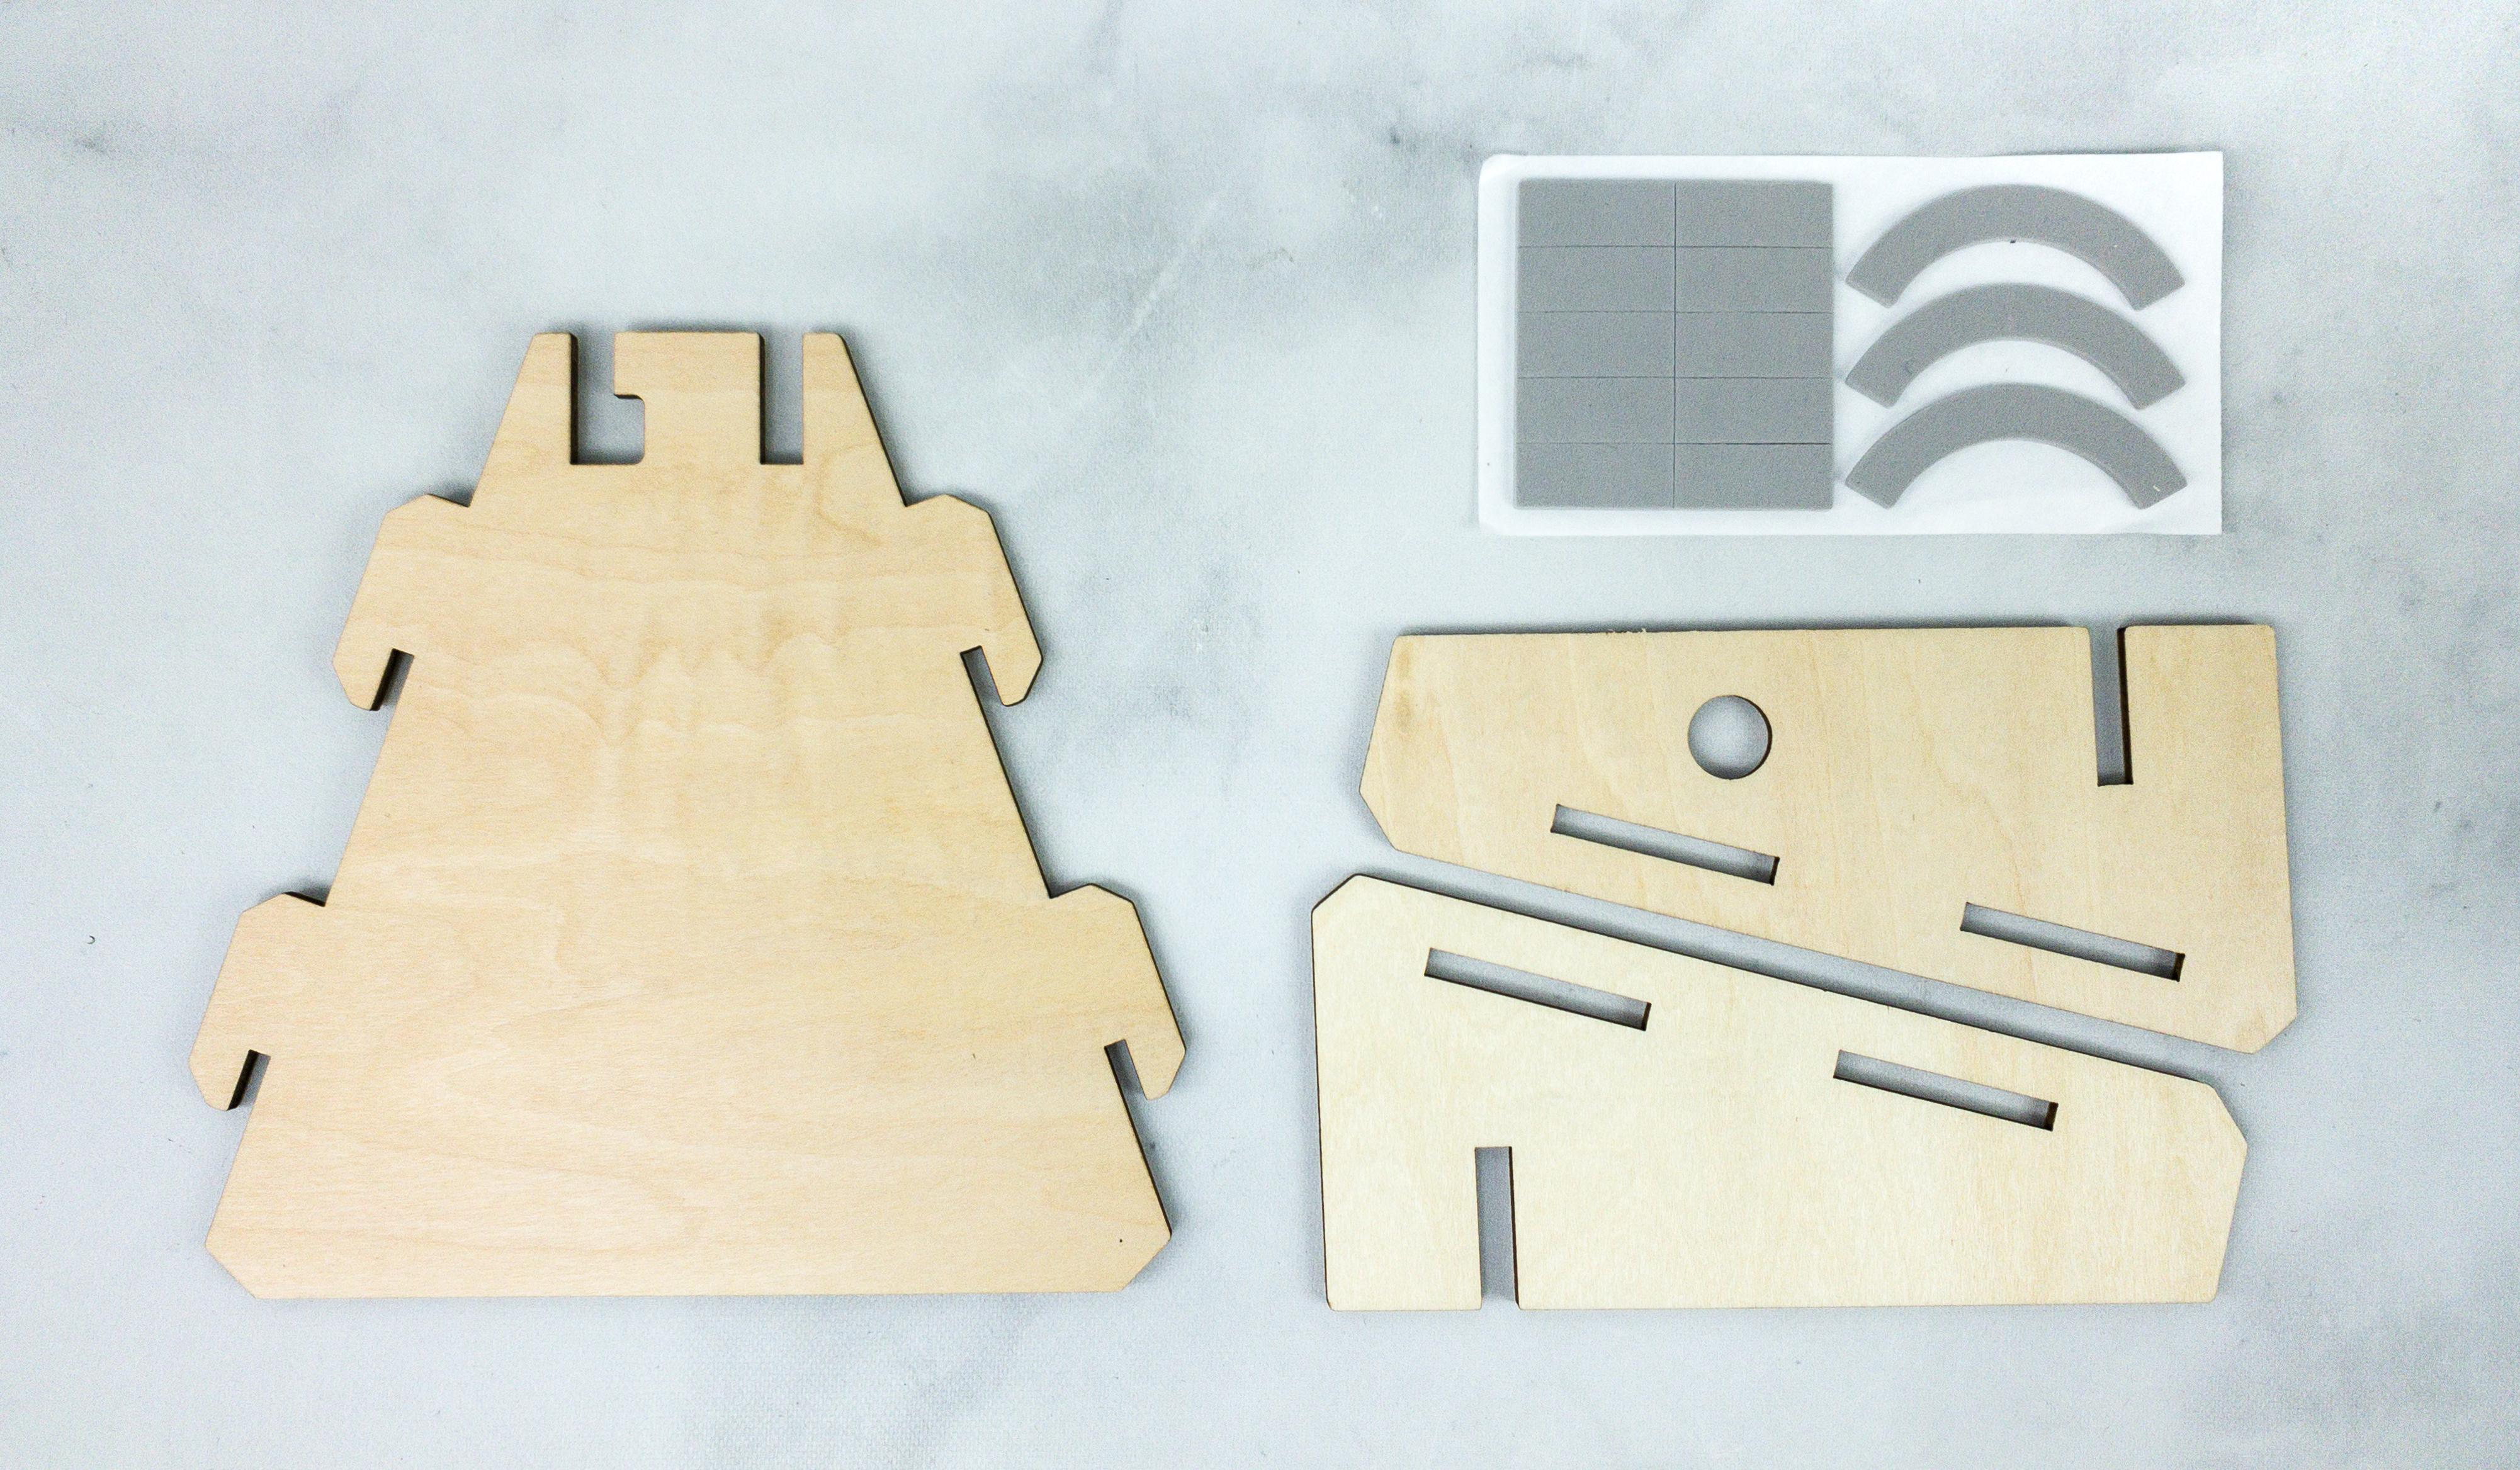
For this part, we needed the wooden base and sticky foam set.
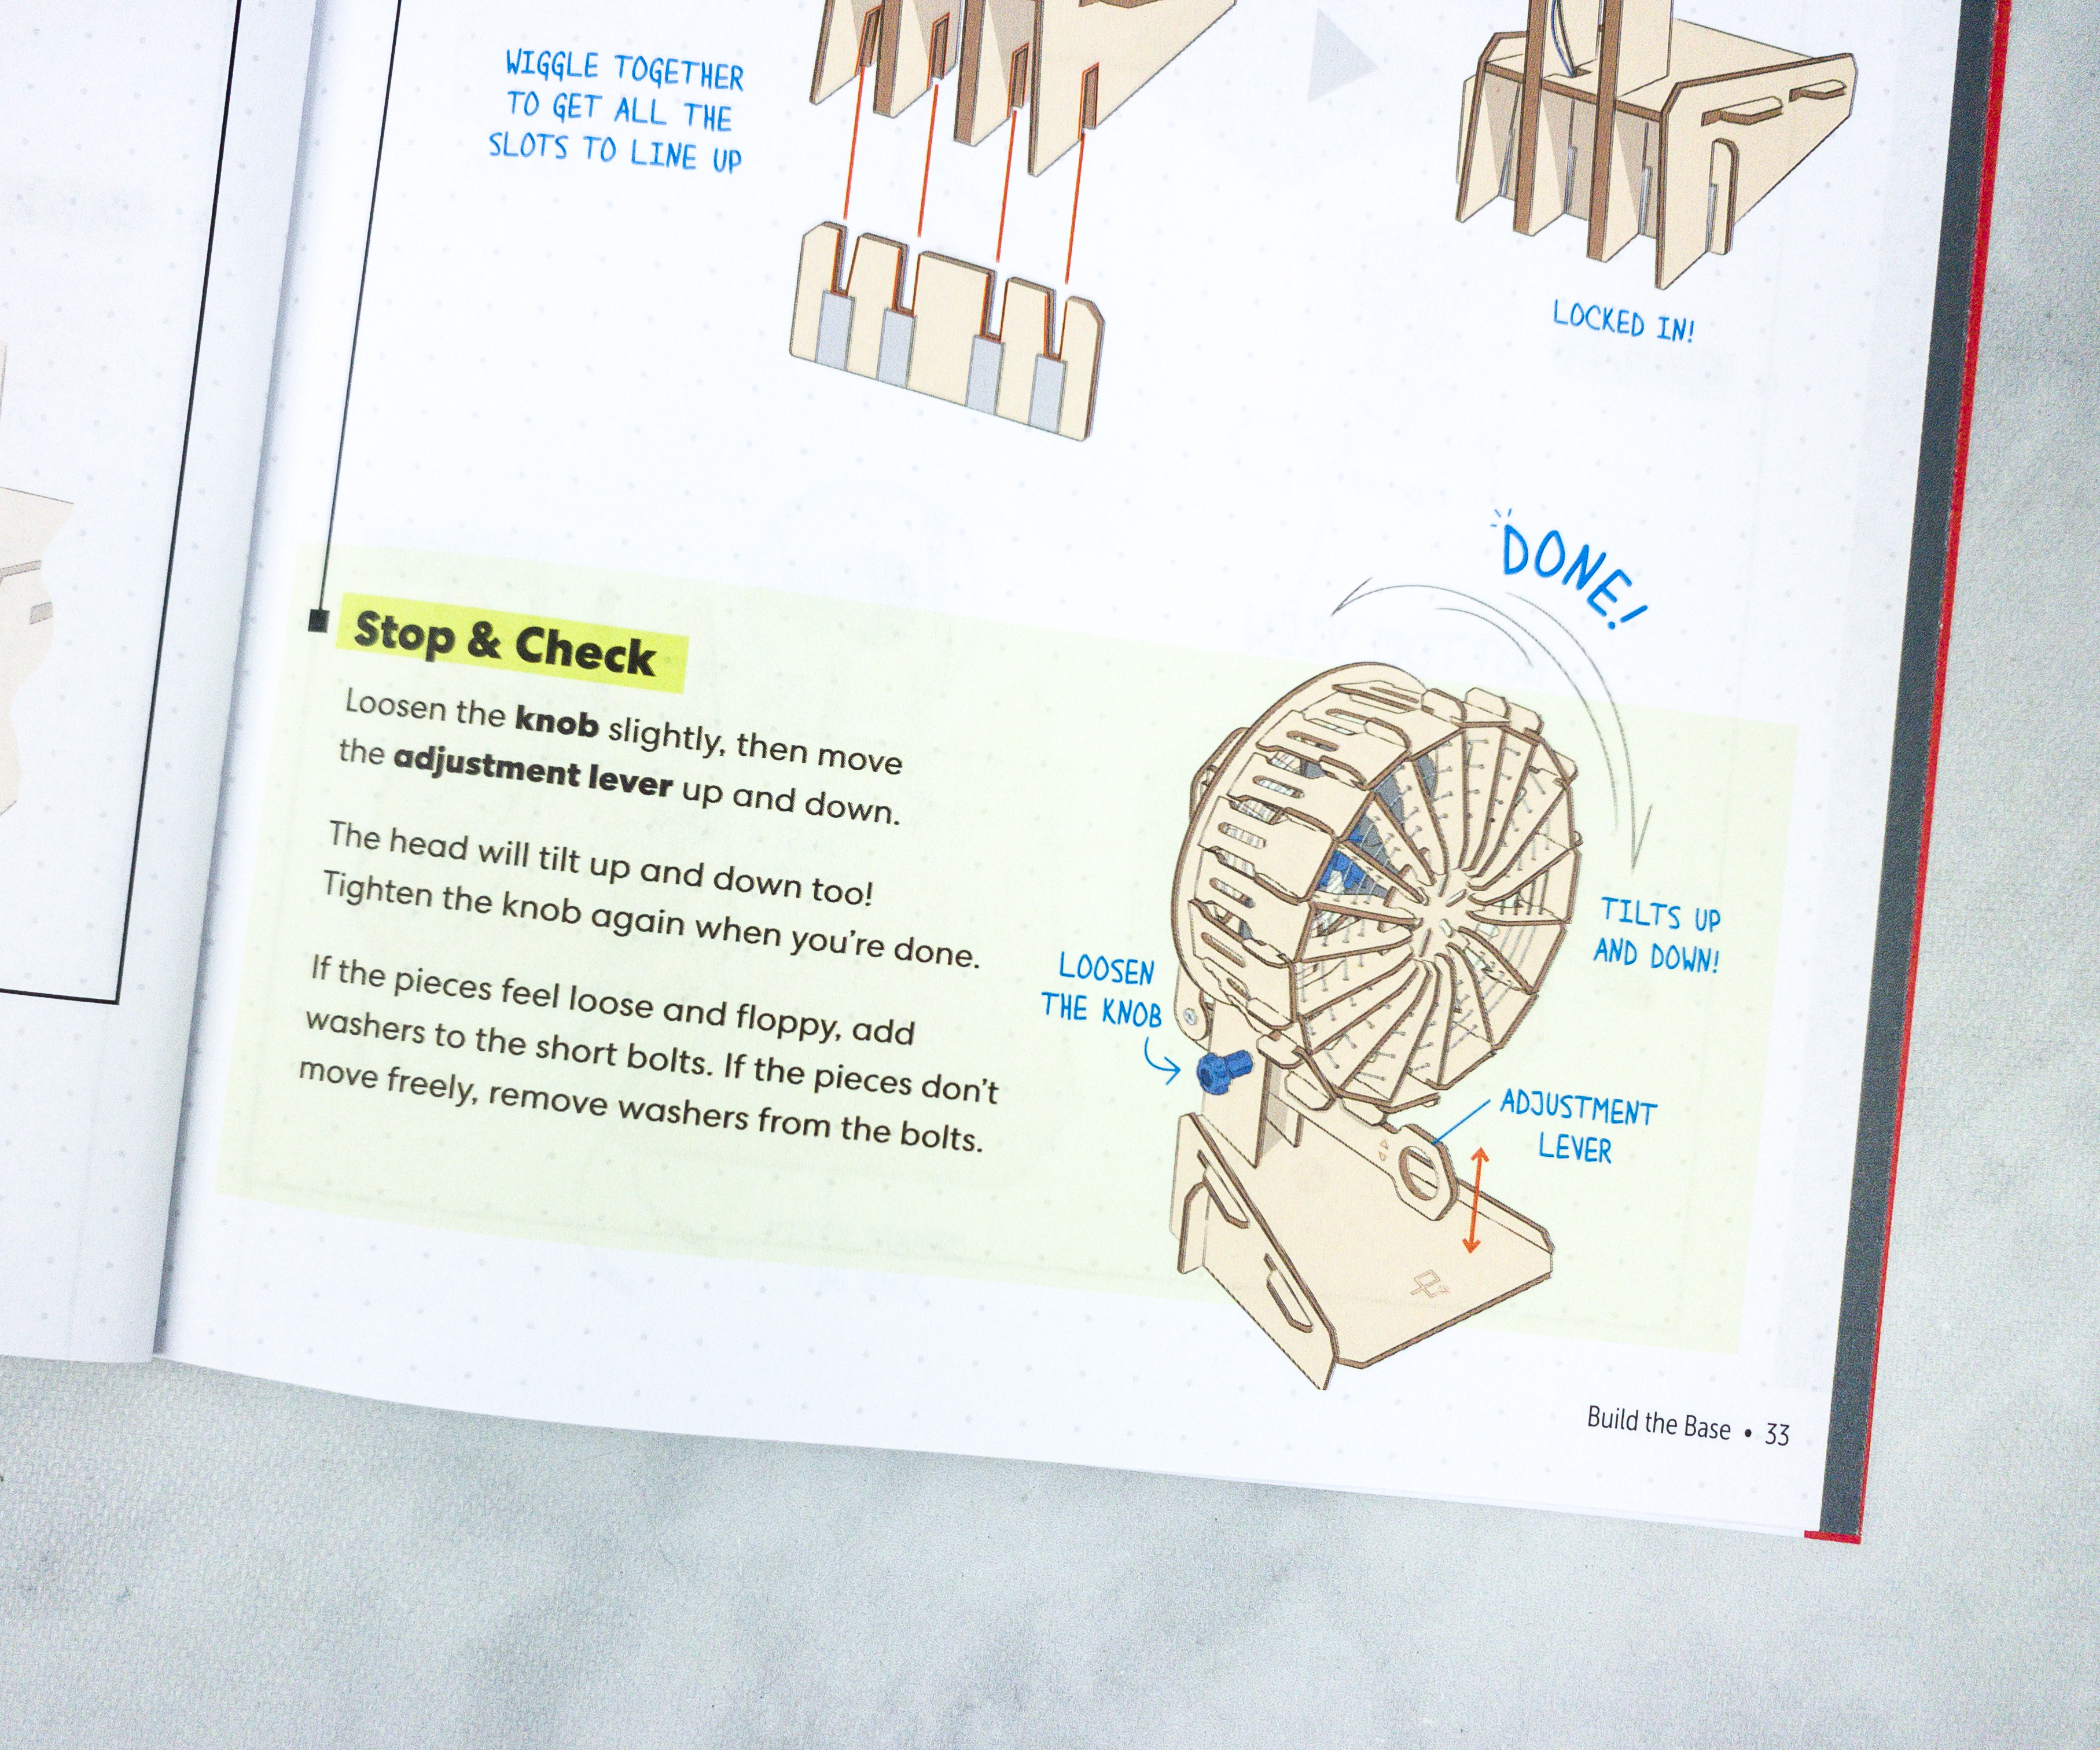
For the stop and check portion, just make sure that the head can tilt up and down, and the lever can be adjusted on the upward and downward motion as well!

The final process is the wiring, it is to provide power and make the fan move!

This kit includes a button wire, battery pack, 4 pieces of AA batteries, sticky foam stickers, and sheets of paper.
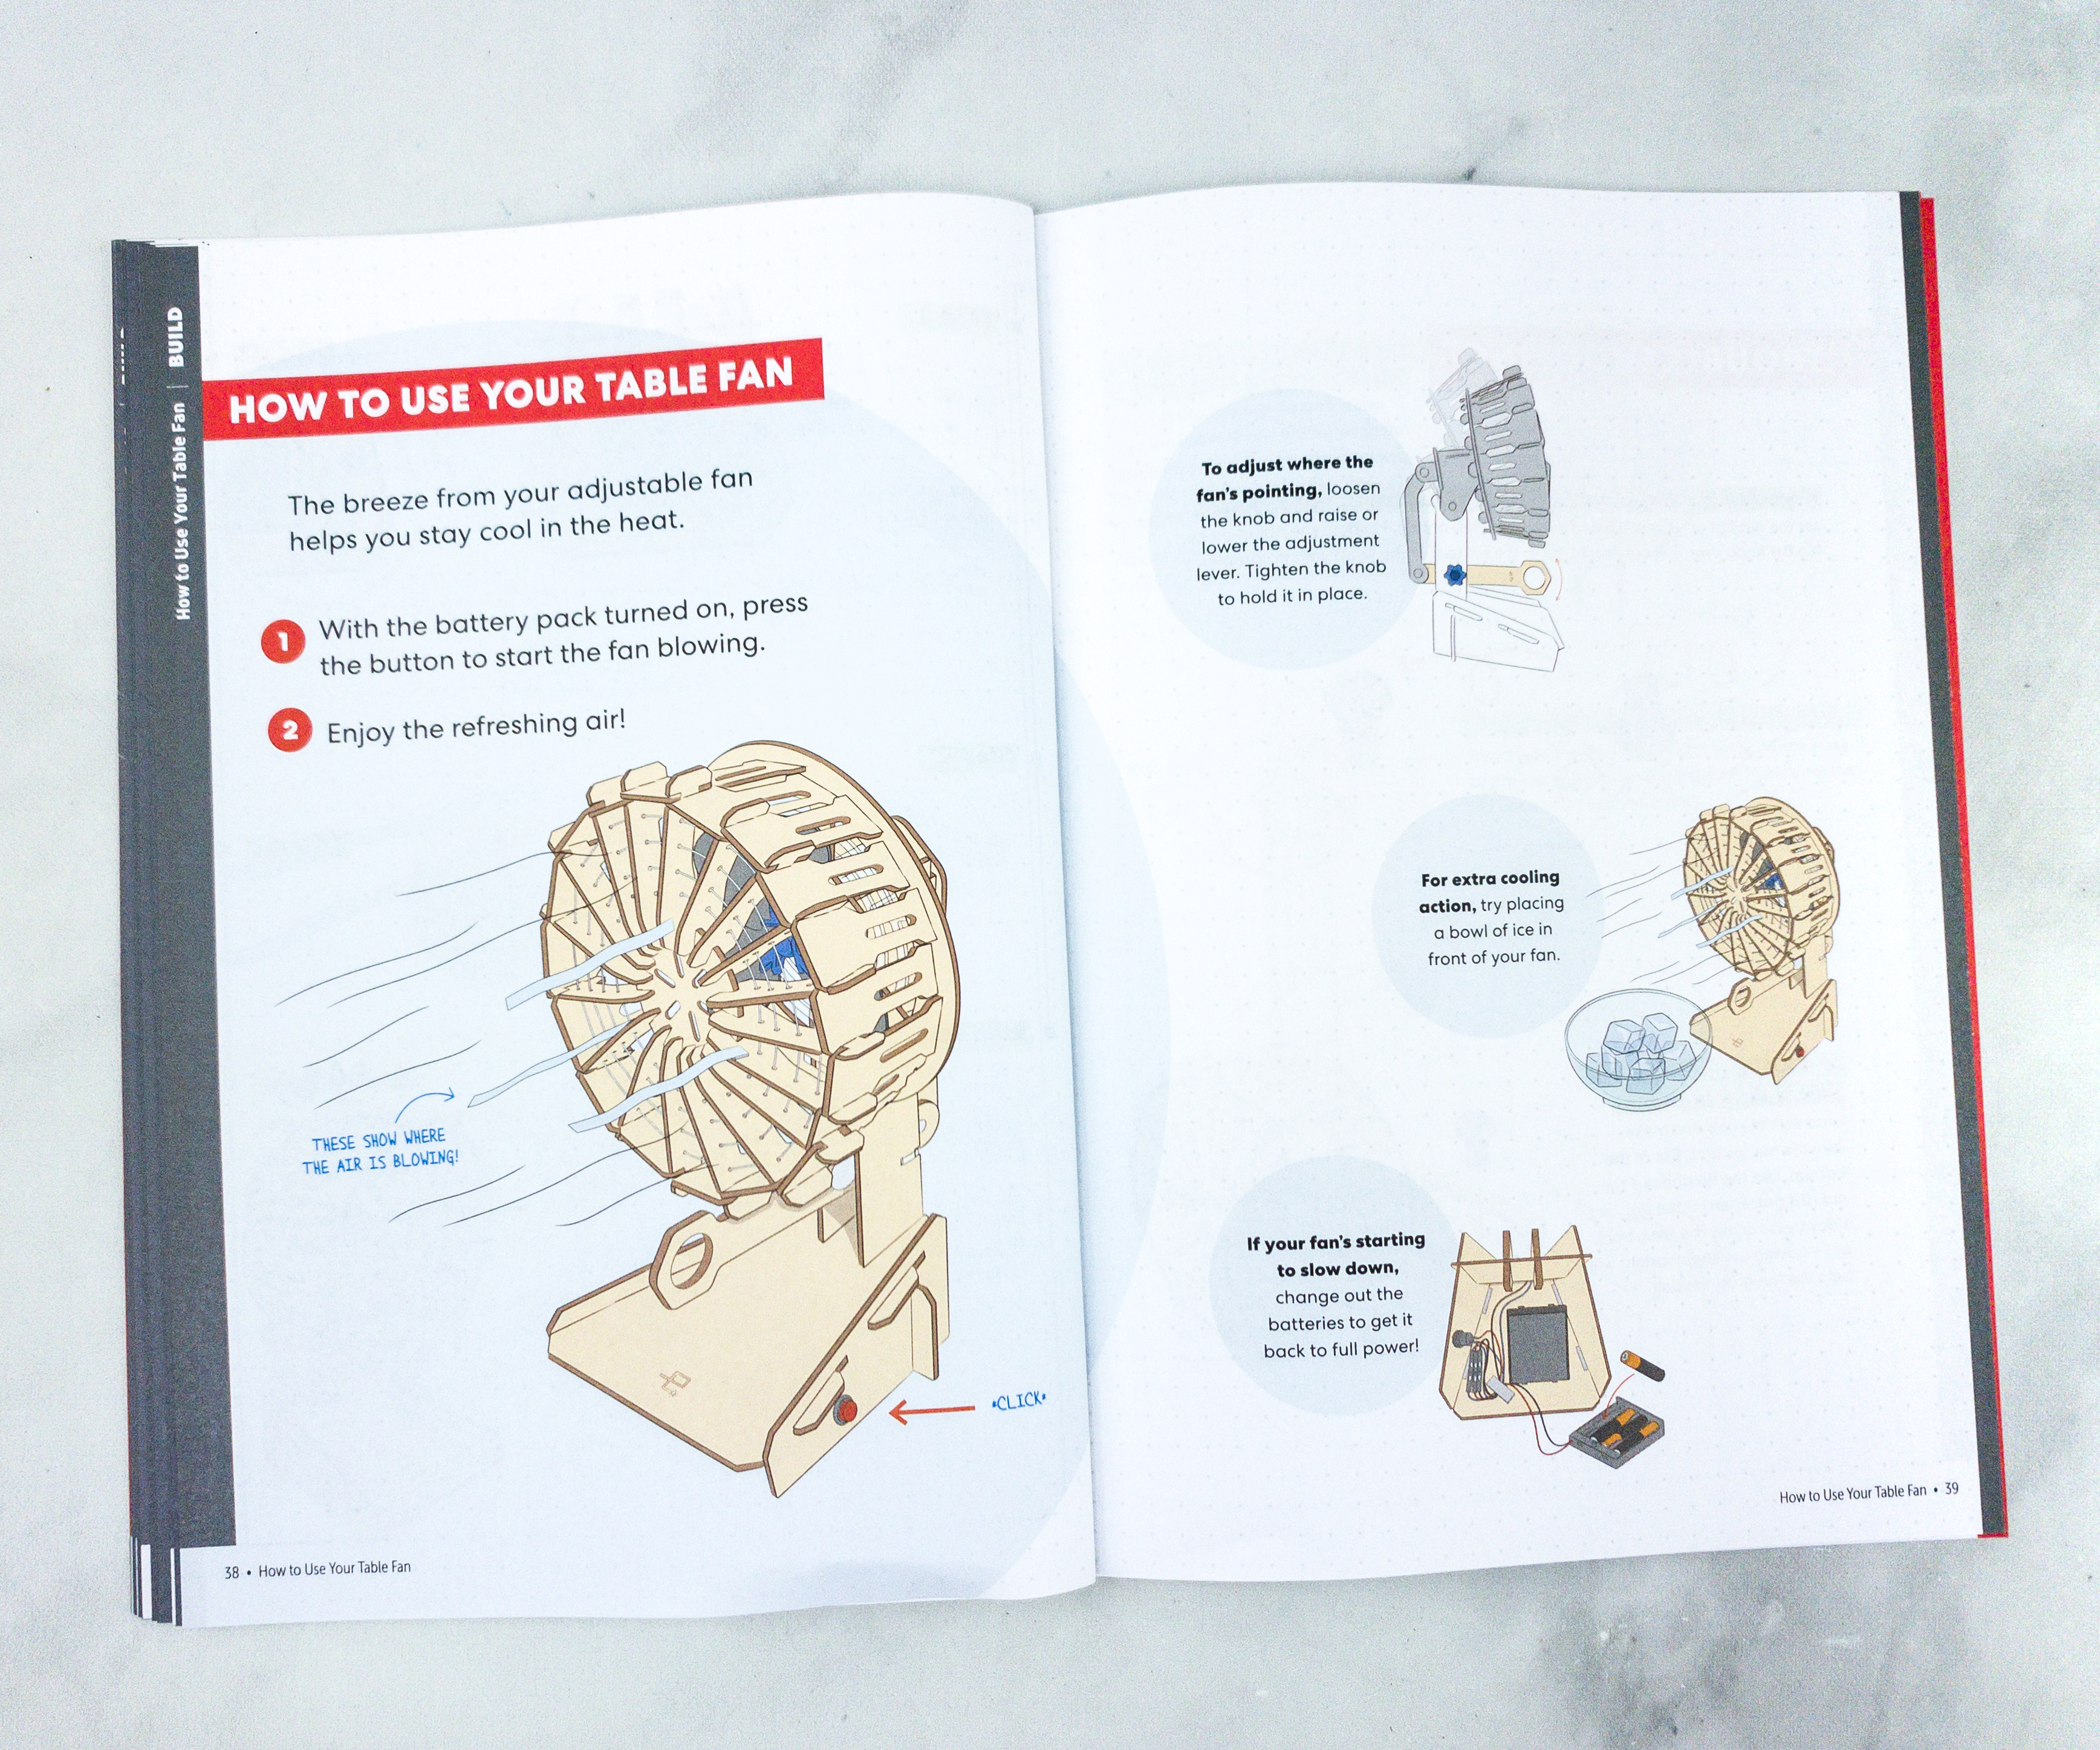
This part of the booklet explains how to use the fan!
The breeze from your adjustable fan helps you stay cool in the heat.
- With the battery pack turned on, press the button to start the fan blowing.
- Enjoy the refreshing air!
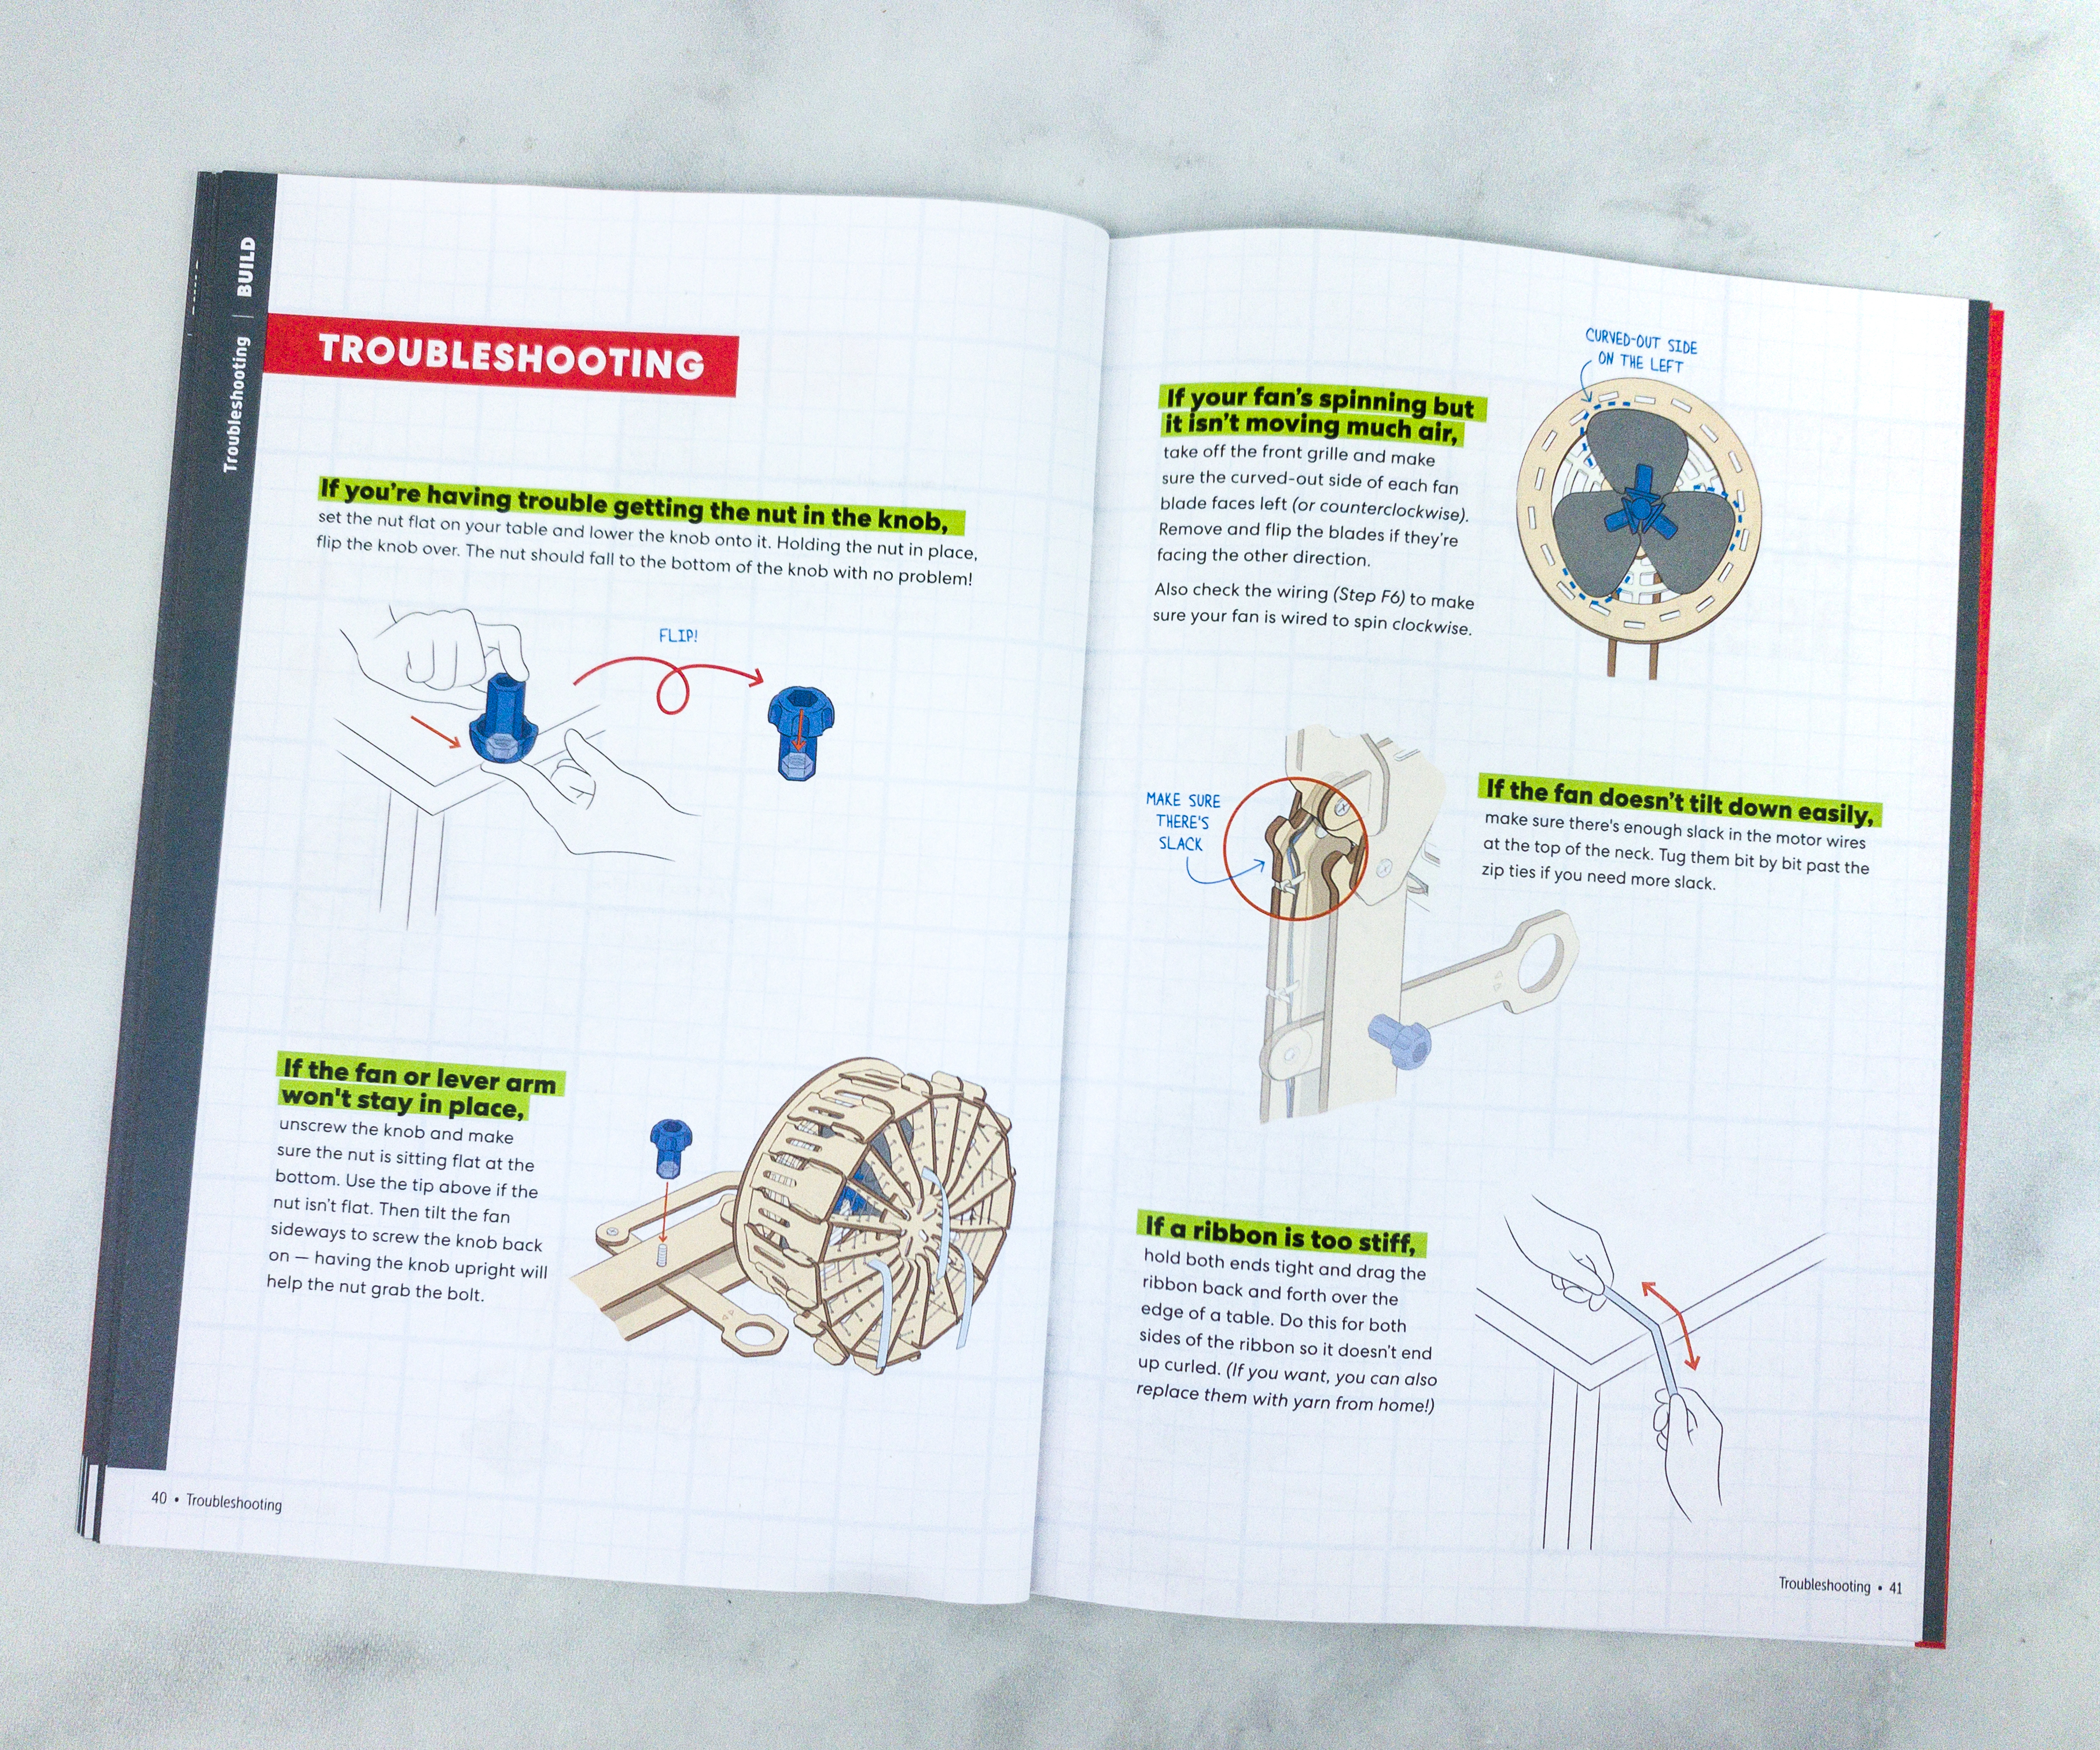
Meanwhile, these pages feature some of the possible problems that you may encounter while working on the project. They also provided ways to troubleshoot them.
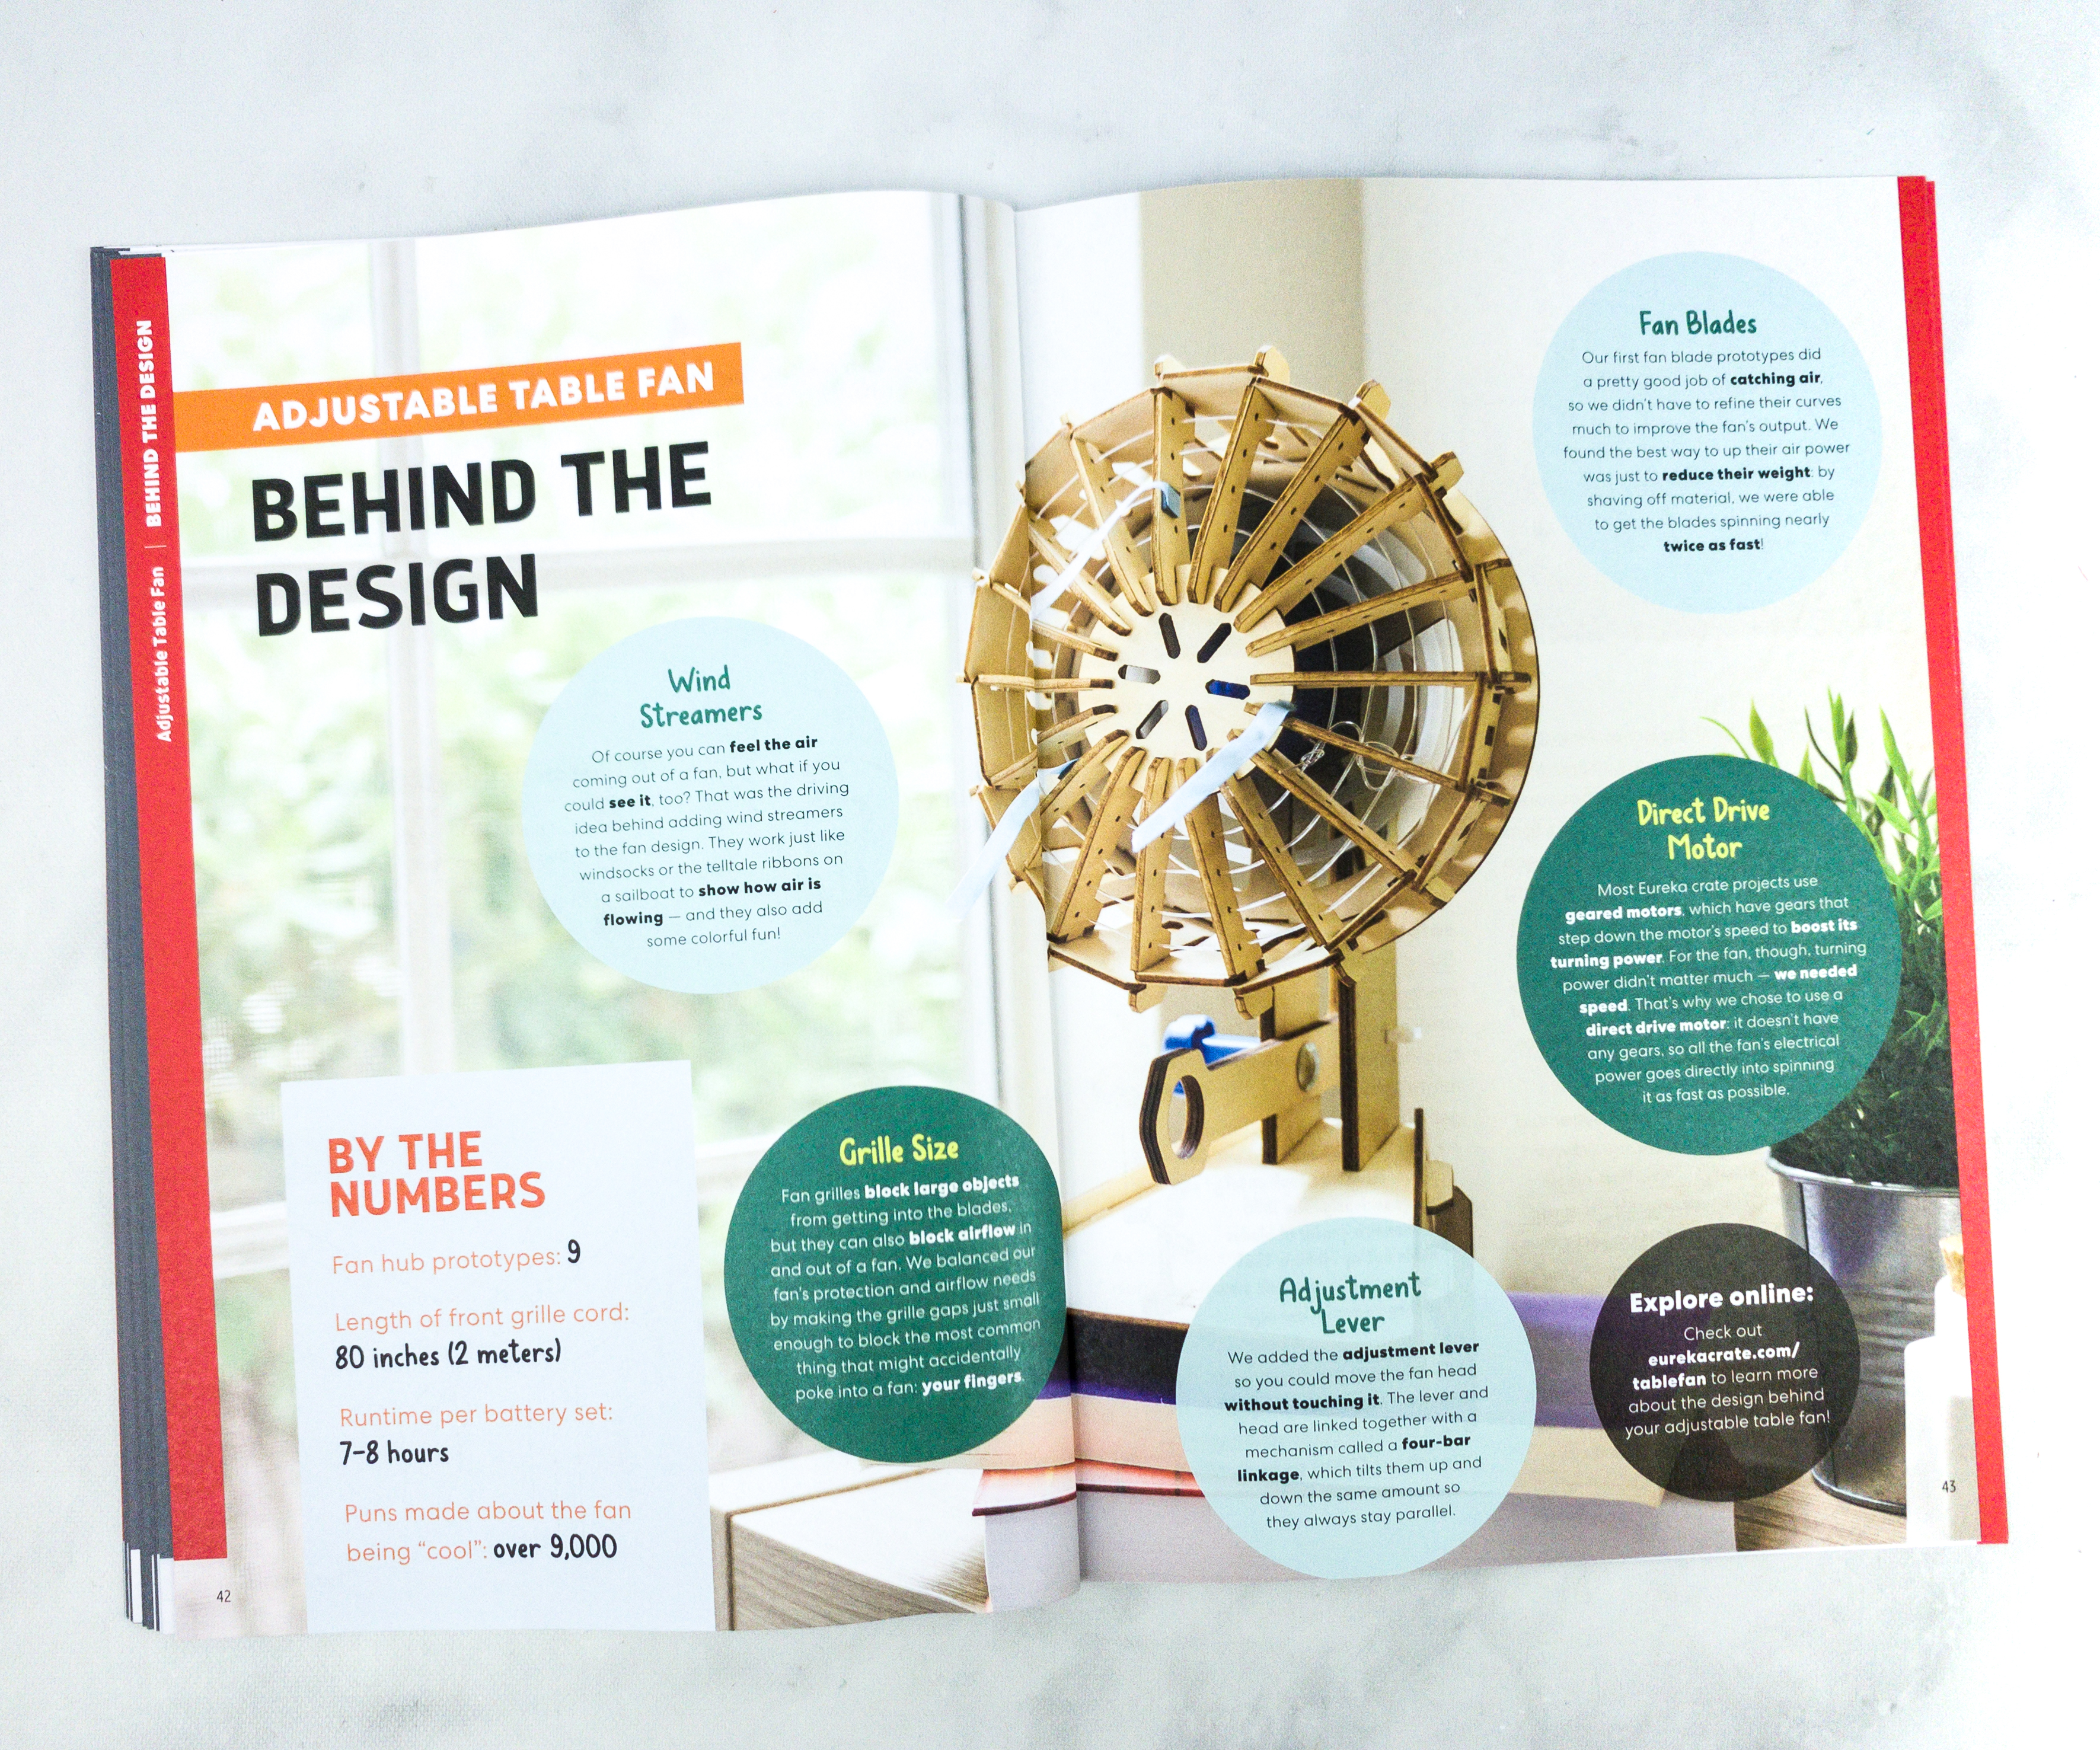
As always, they shared the history behind the fan design, focusing on the streamers, grille size, adjustment lever, and direct drive motor.
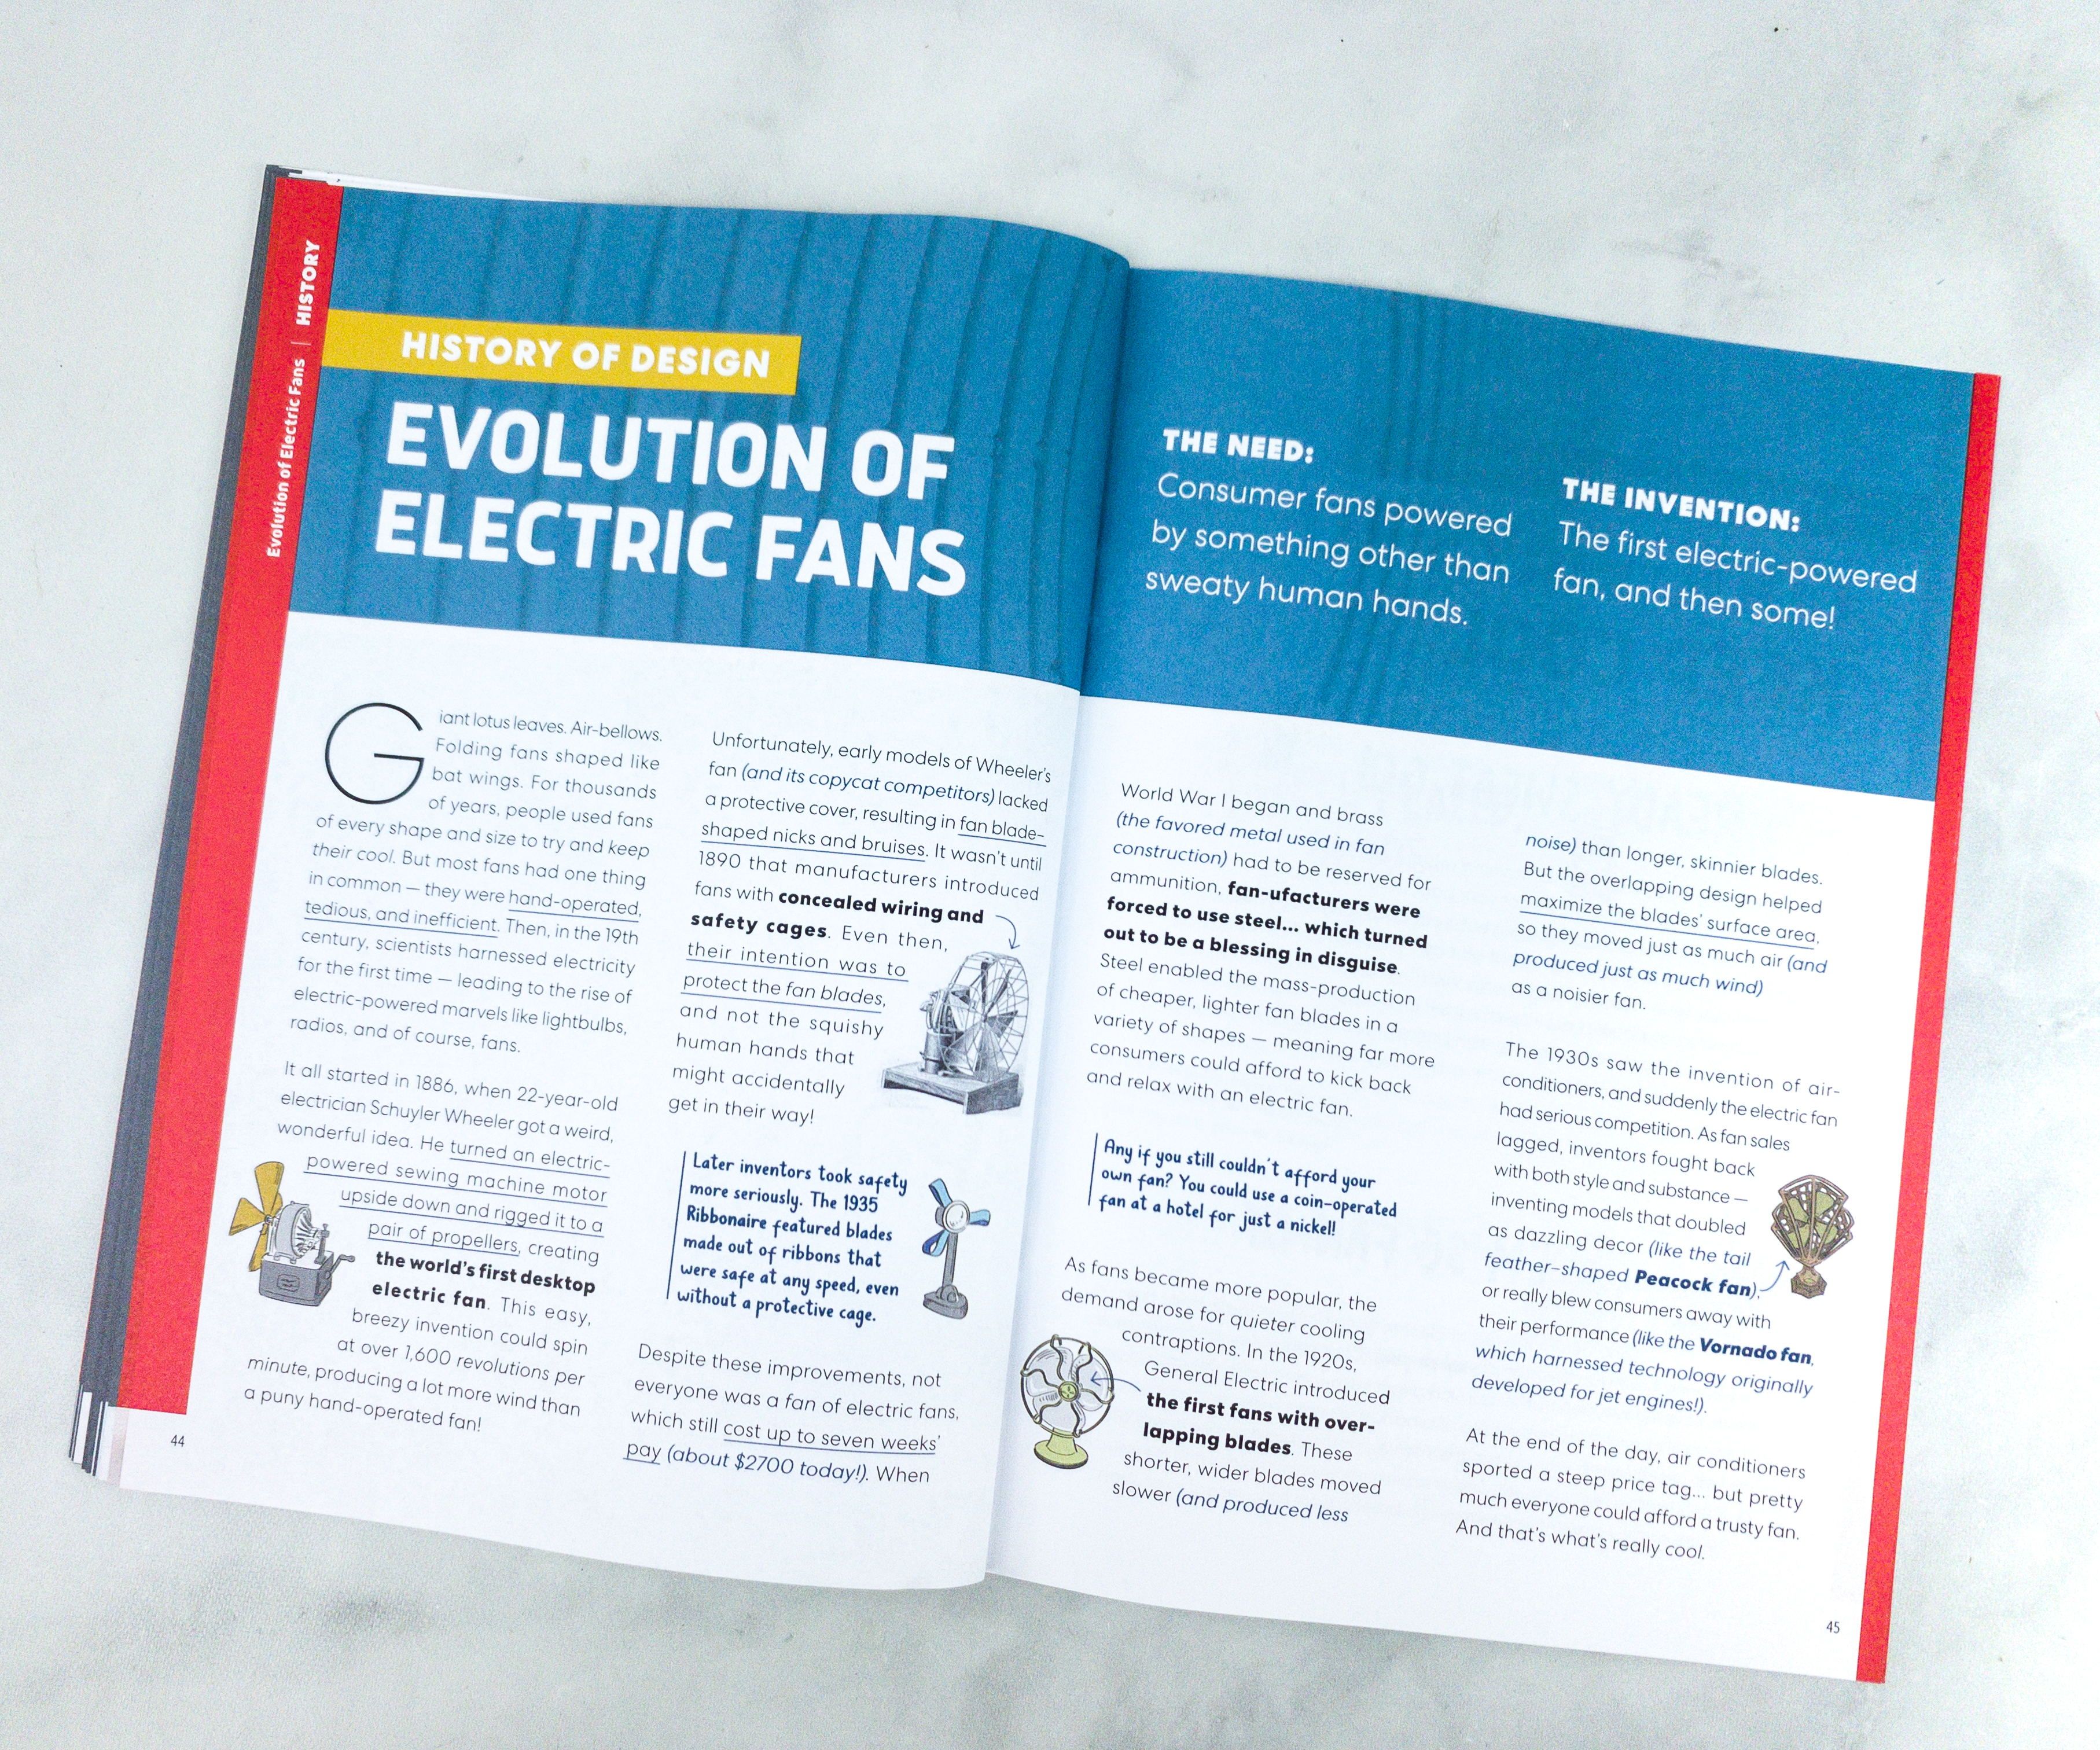
We even learned about the evolution of electric fans. Apparently, the world’s first desktop electric fan was made in 1886 by 22-year-old electrician Schuyler Wheeler!
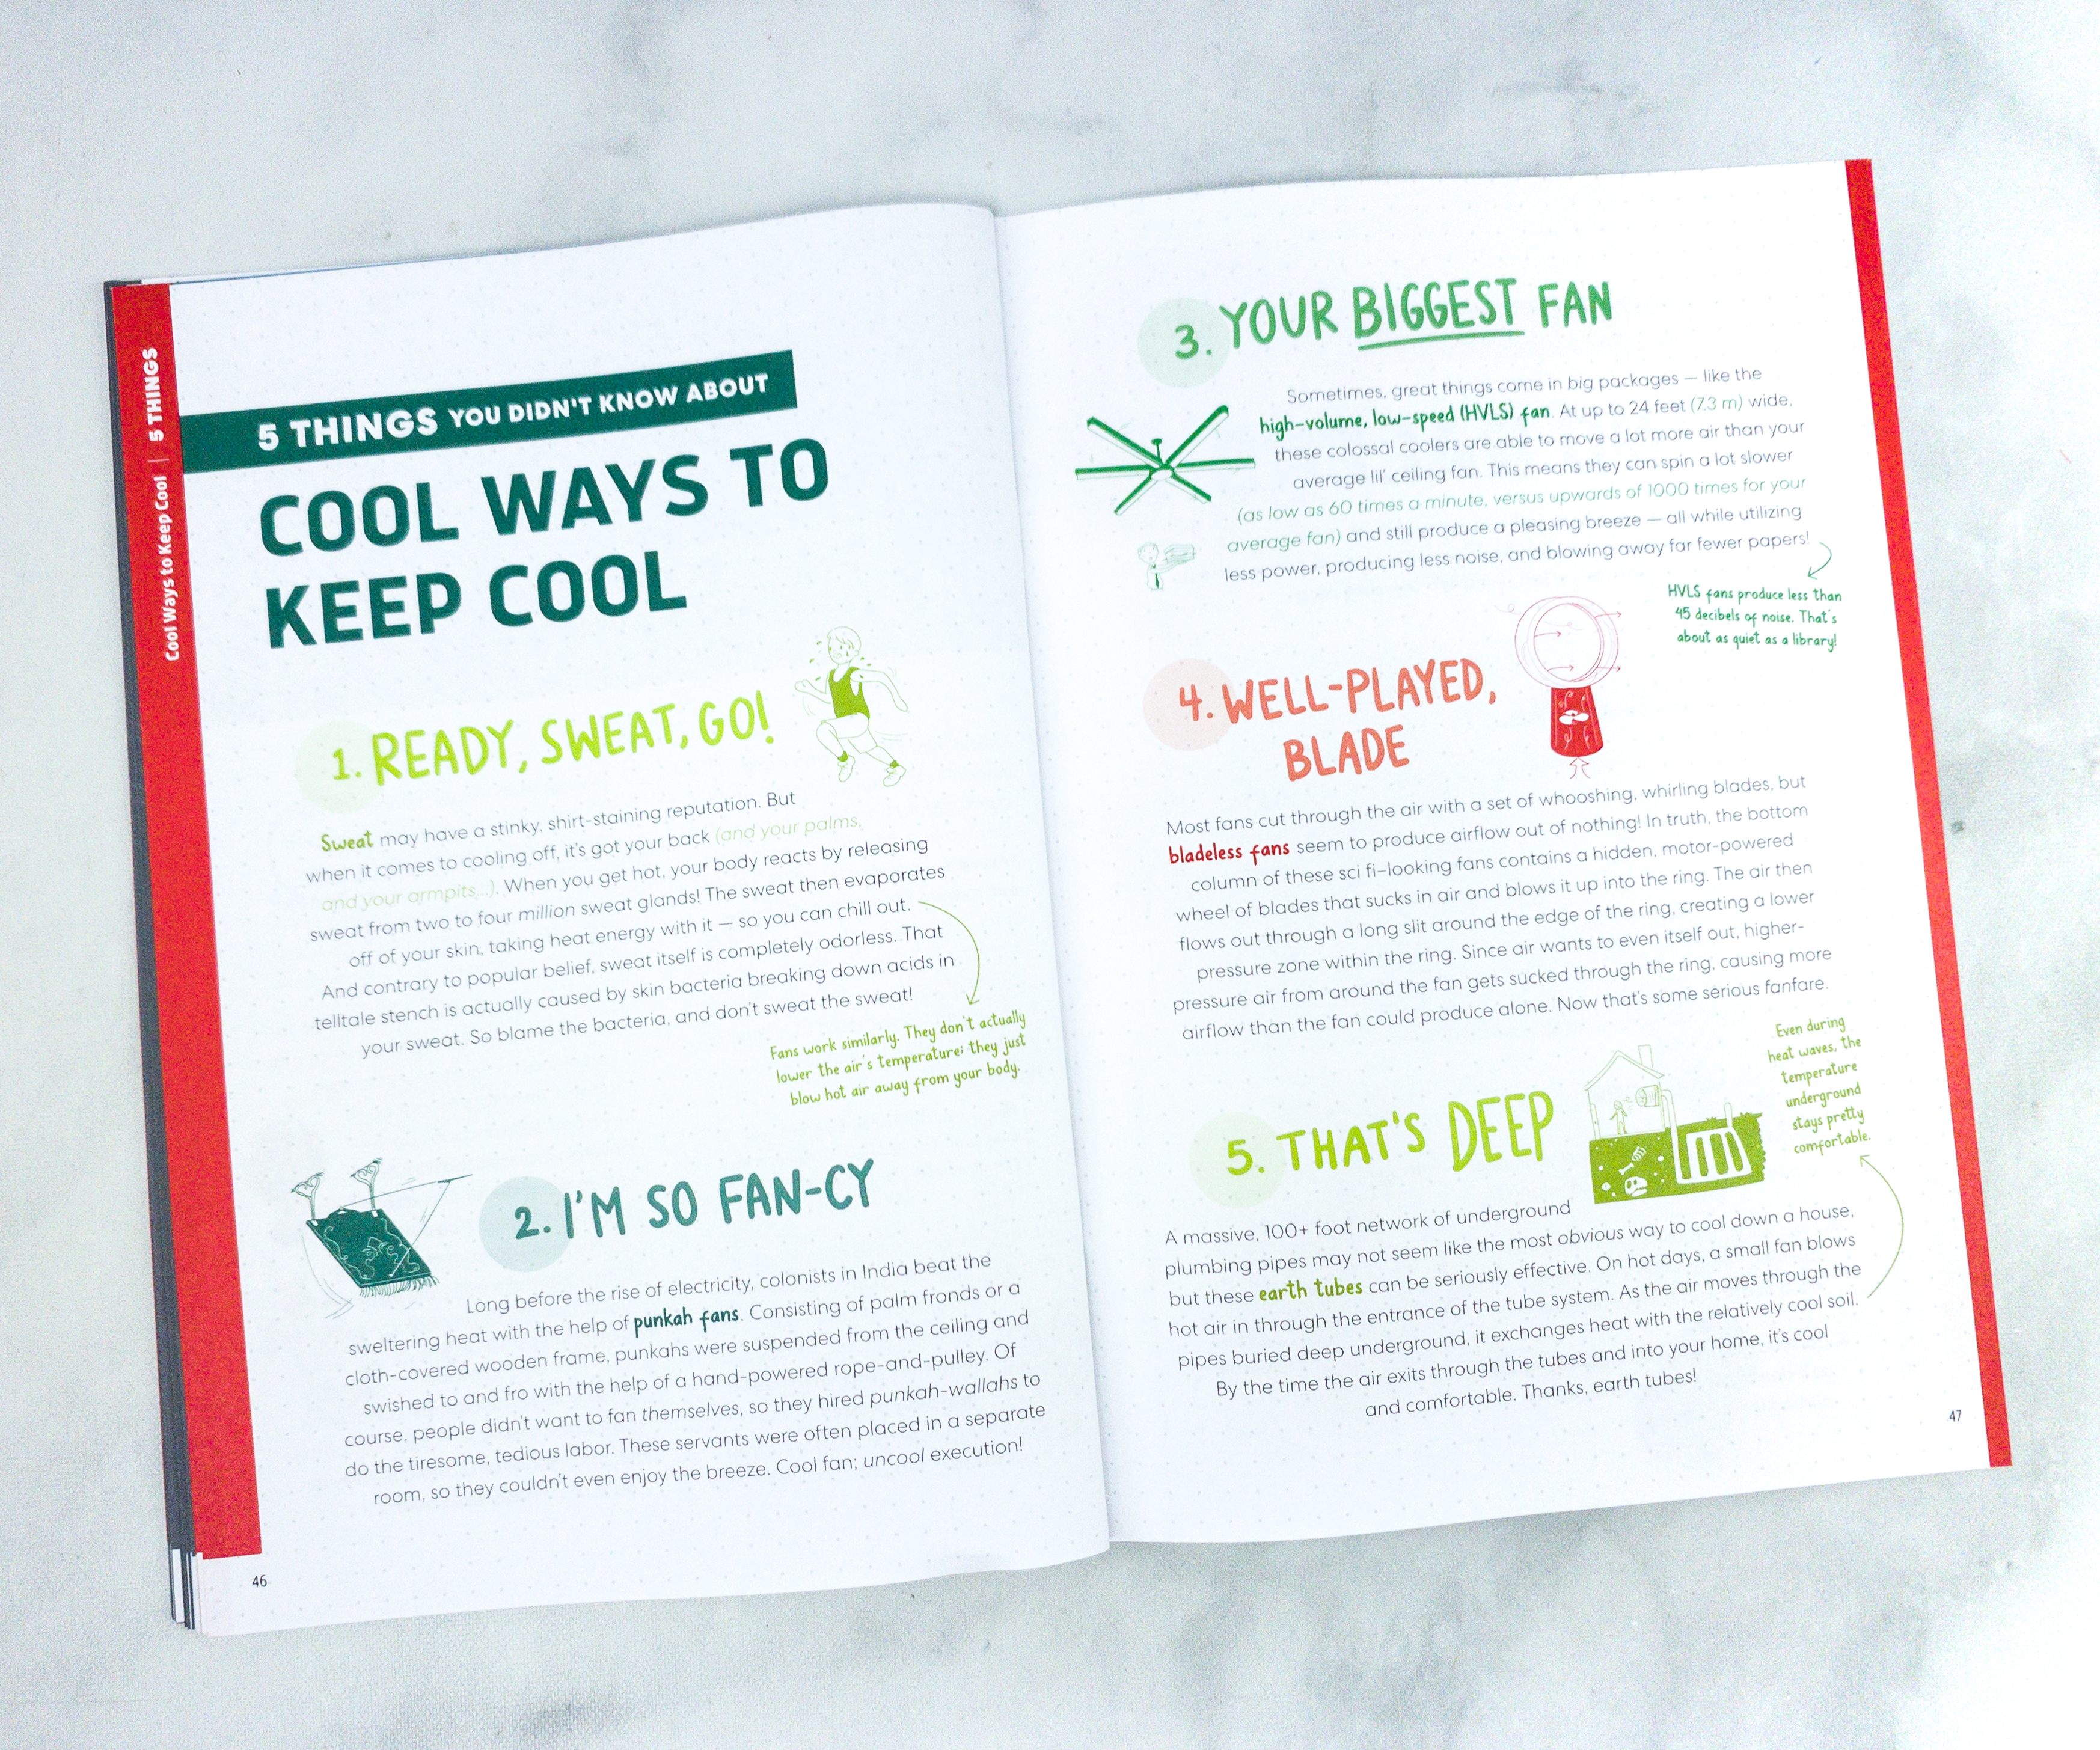
Another feature is all about different ways to keep cool!
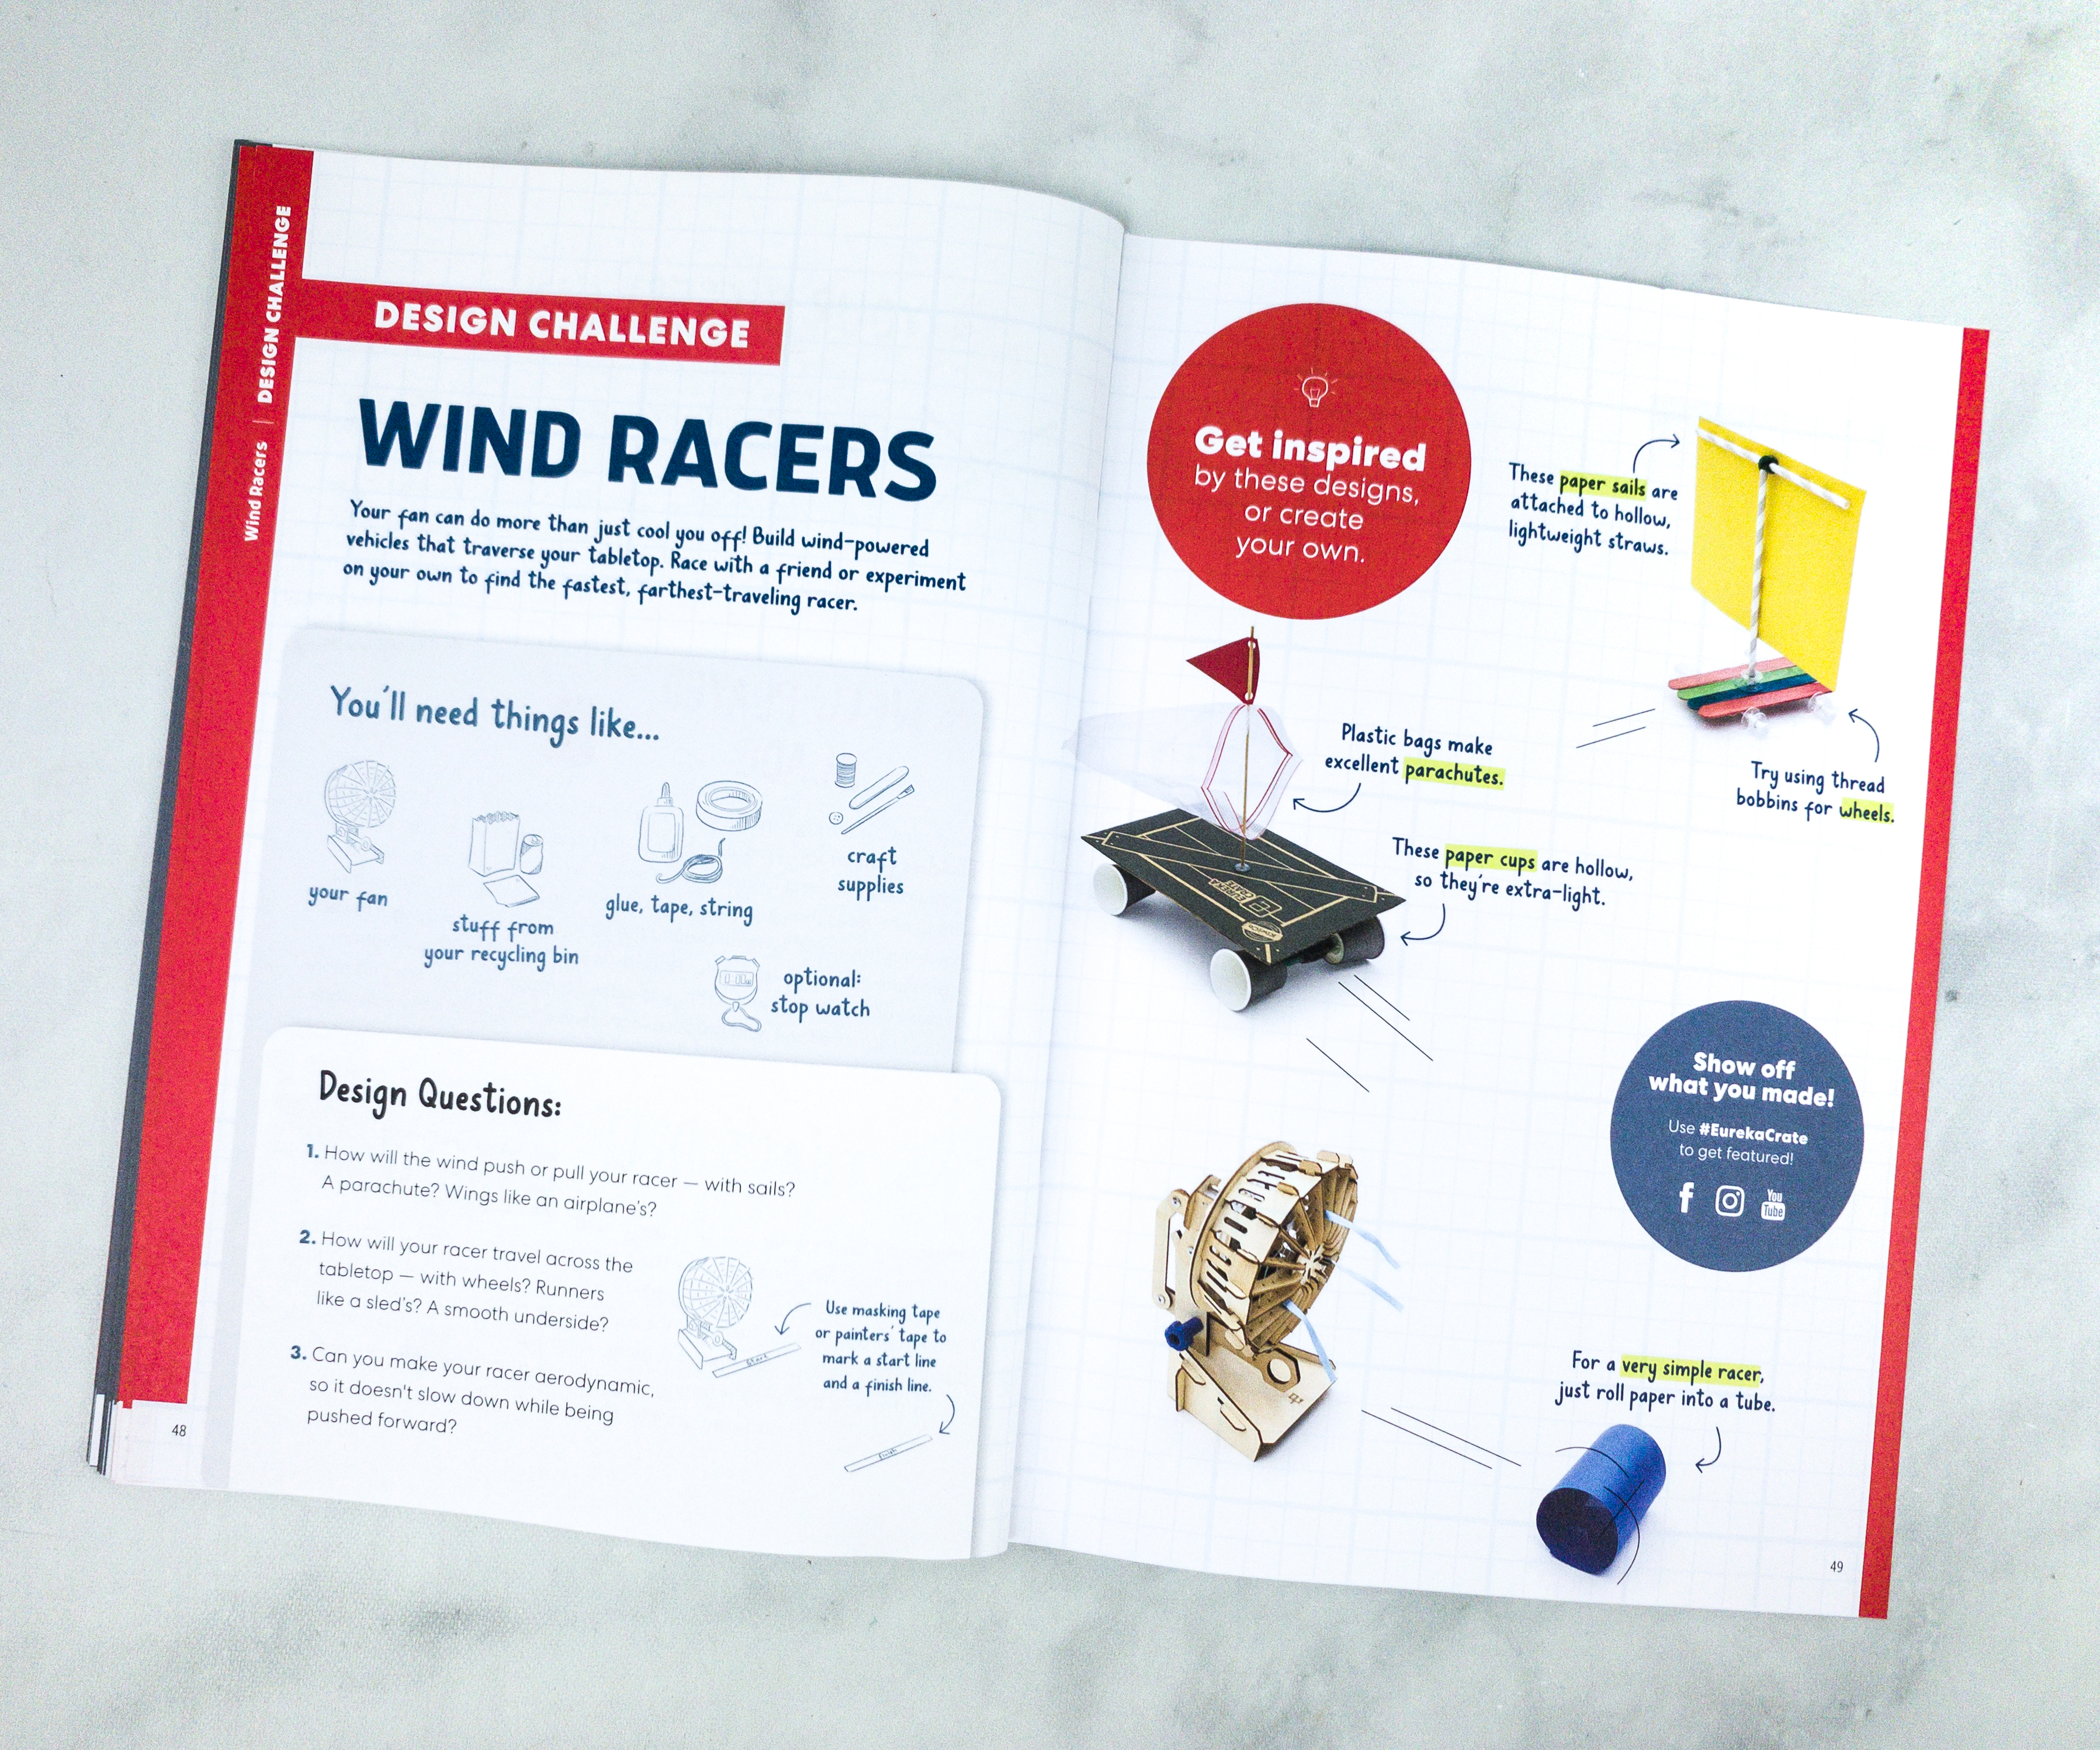
For the design challenge, they encourage us to work on wind-powered vehicles. They even provided some designs that we can try. My kids are thinking of doing the second one, a vehicle with a plastic parachute!
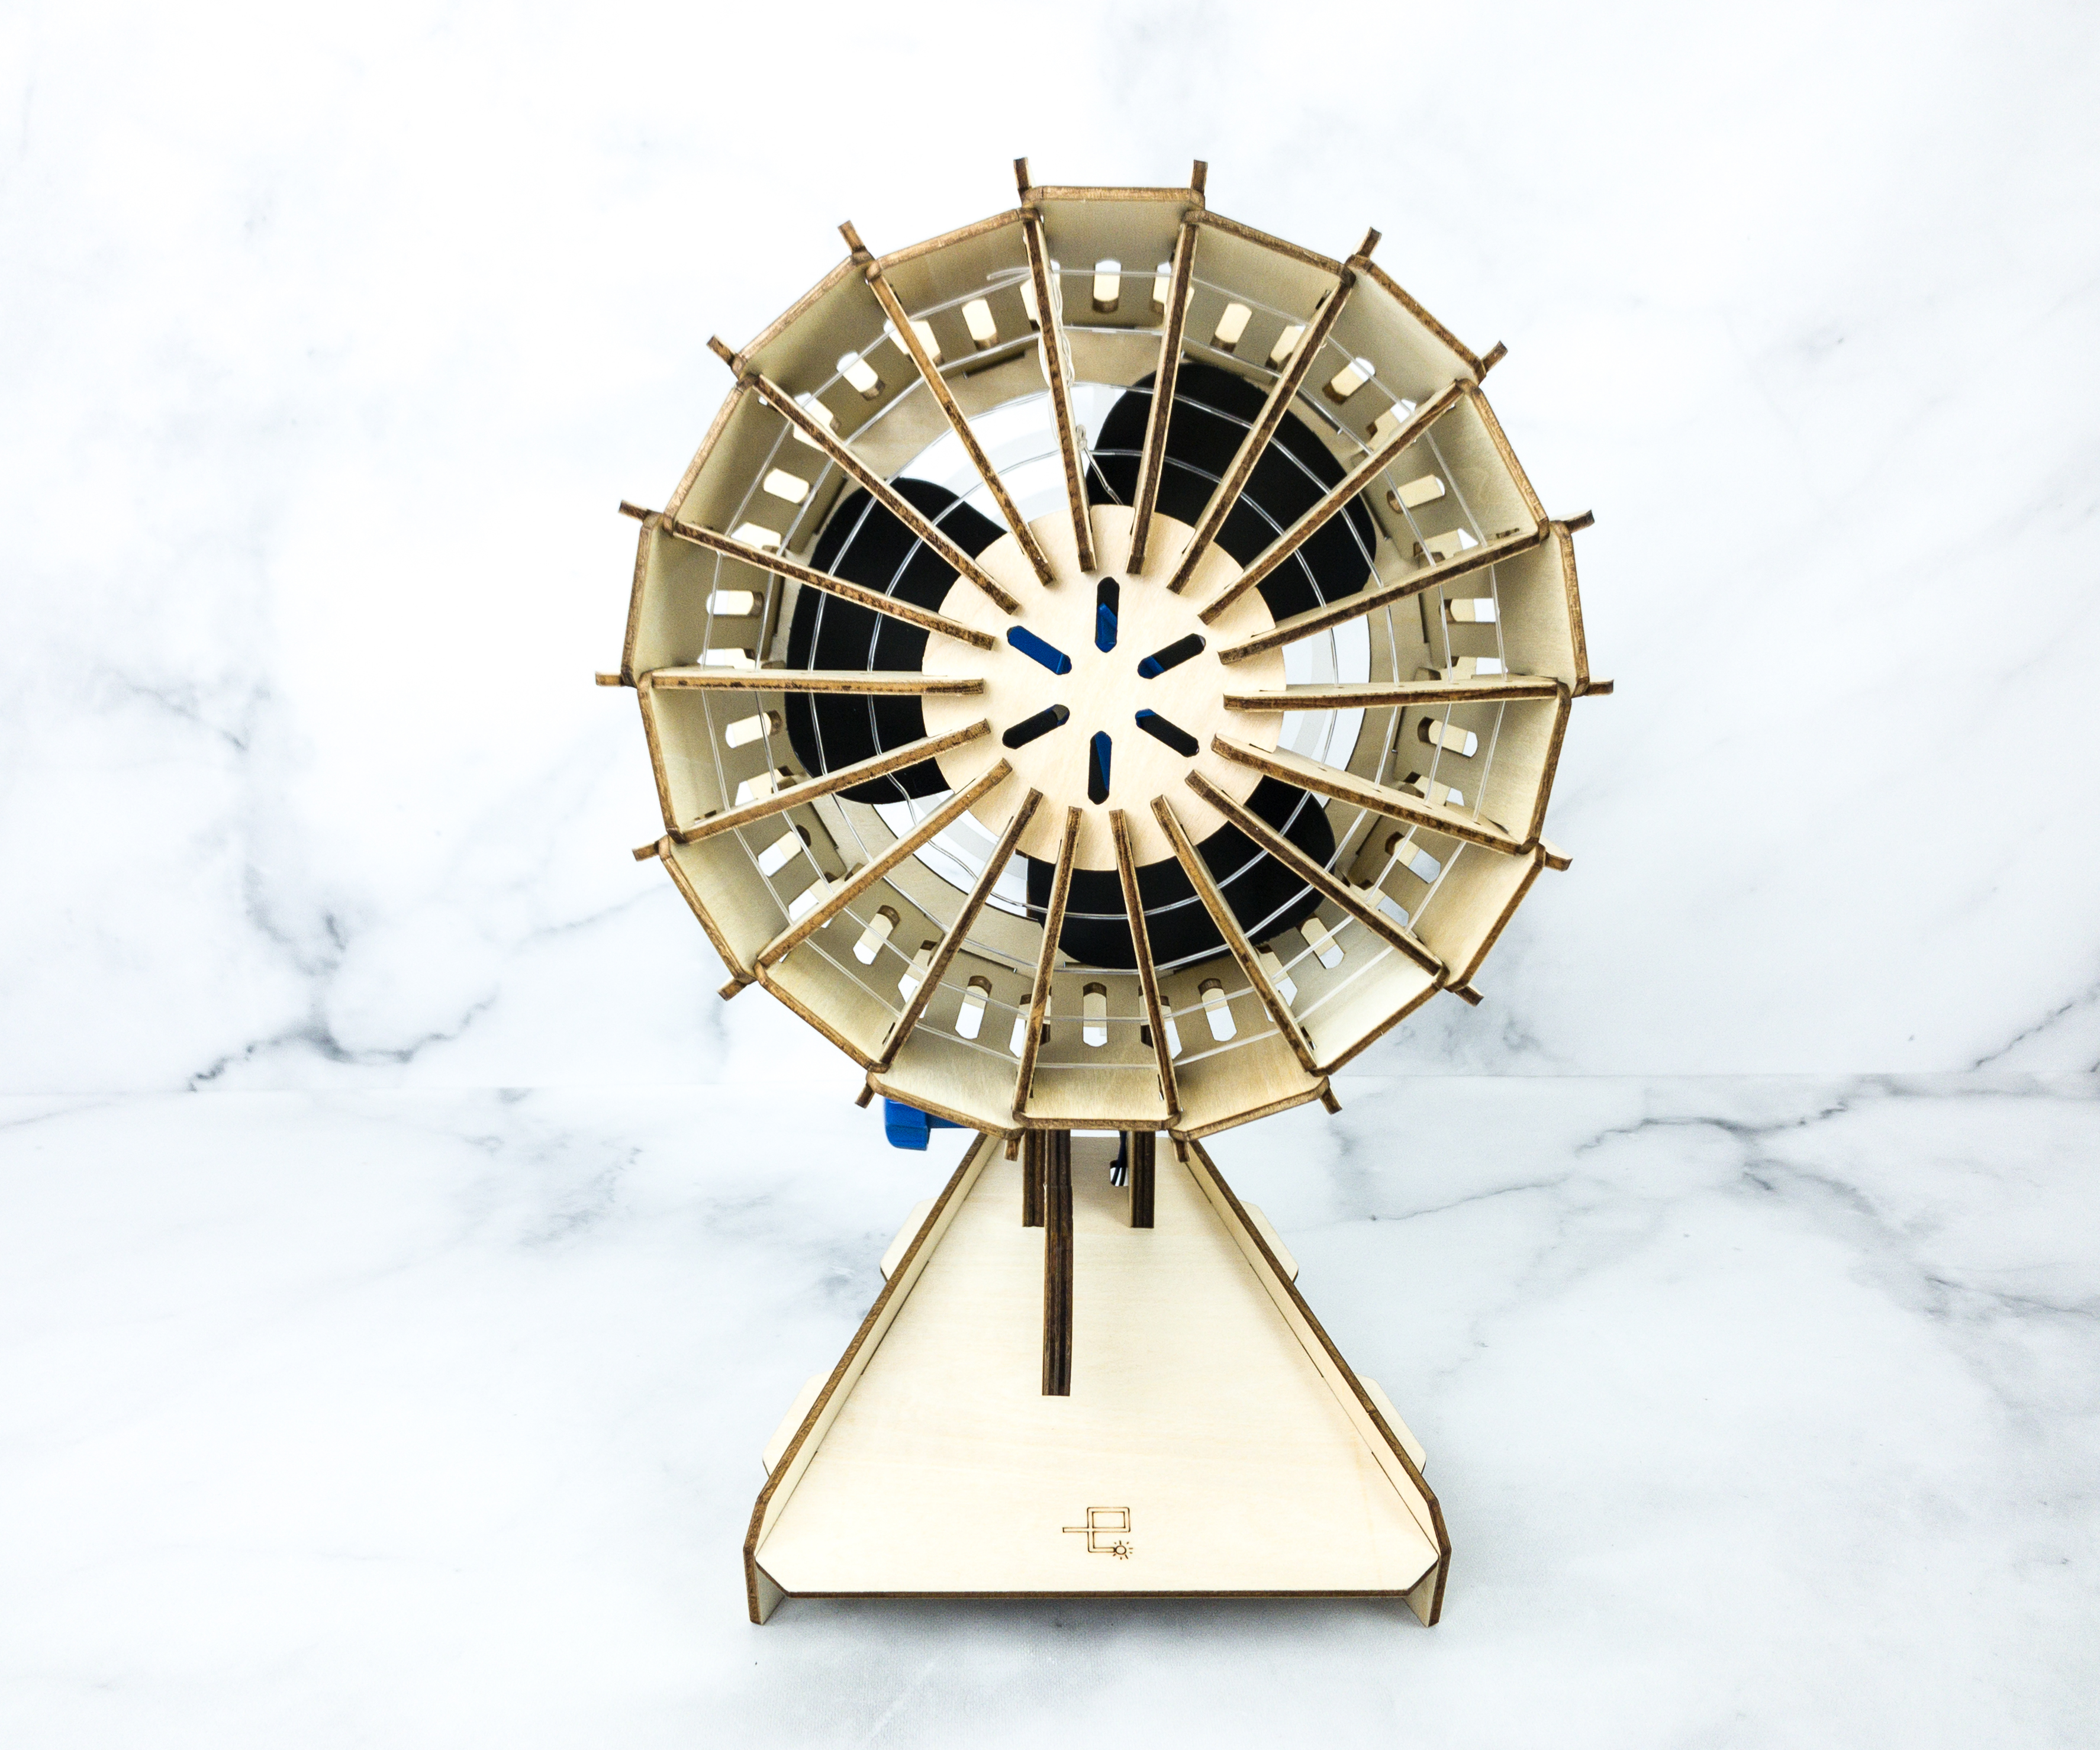
This is how the adjustable table fan should look like once done.
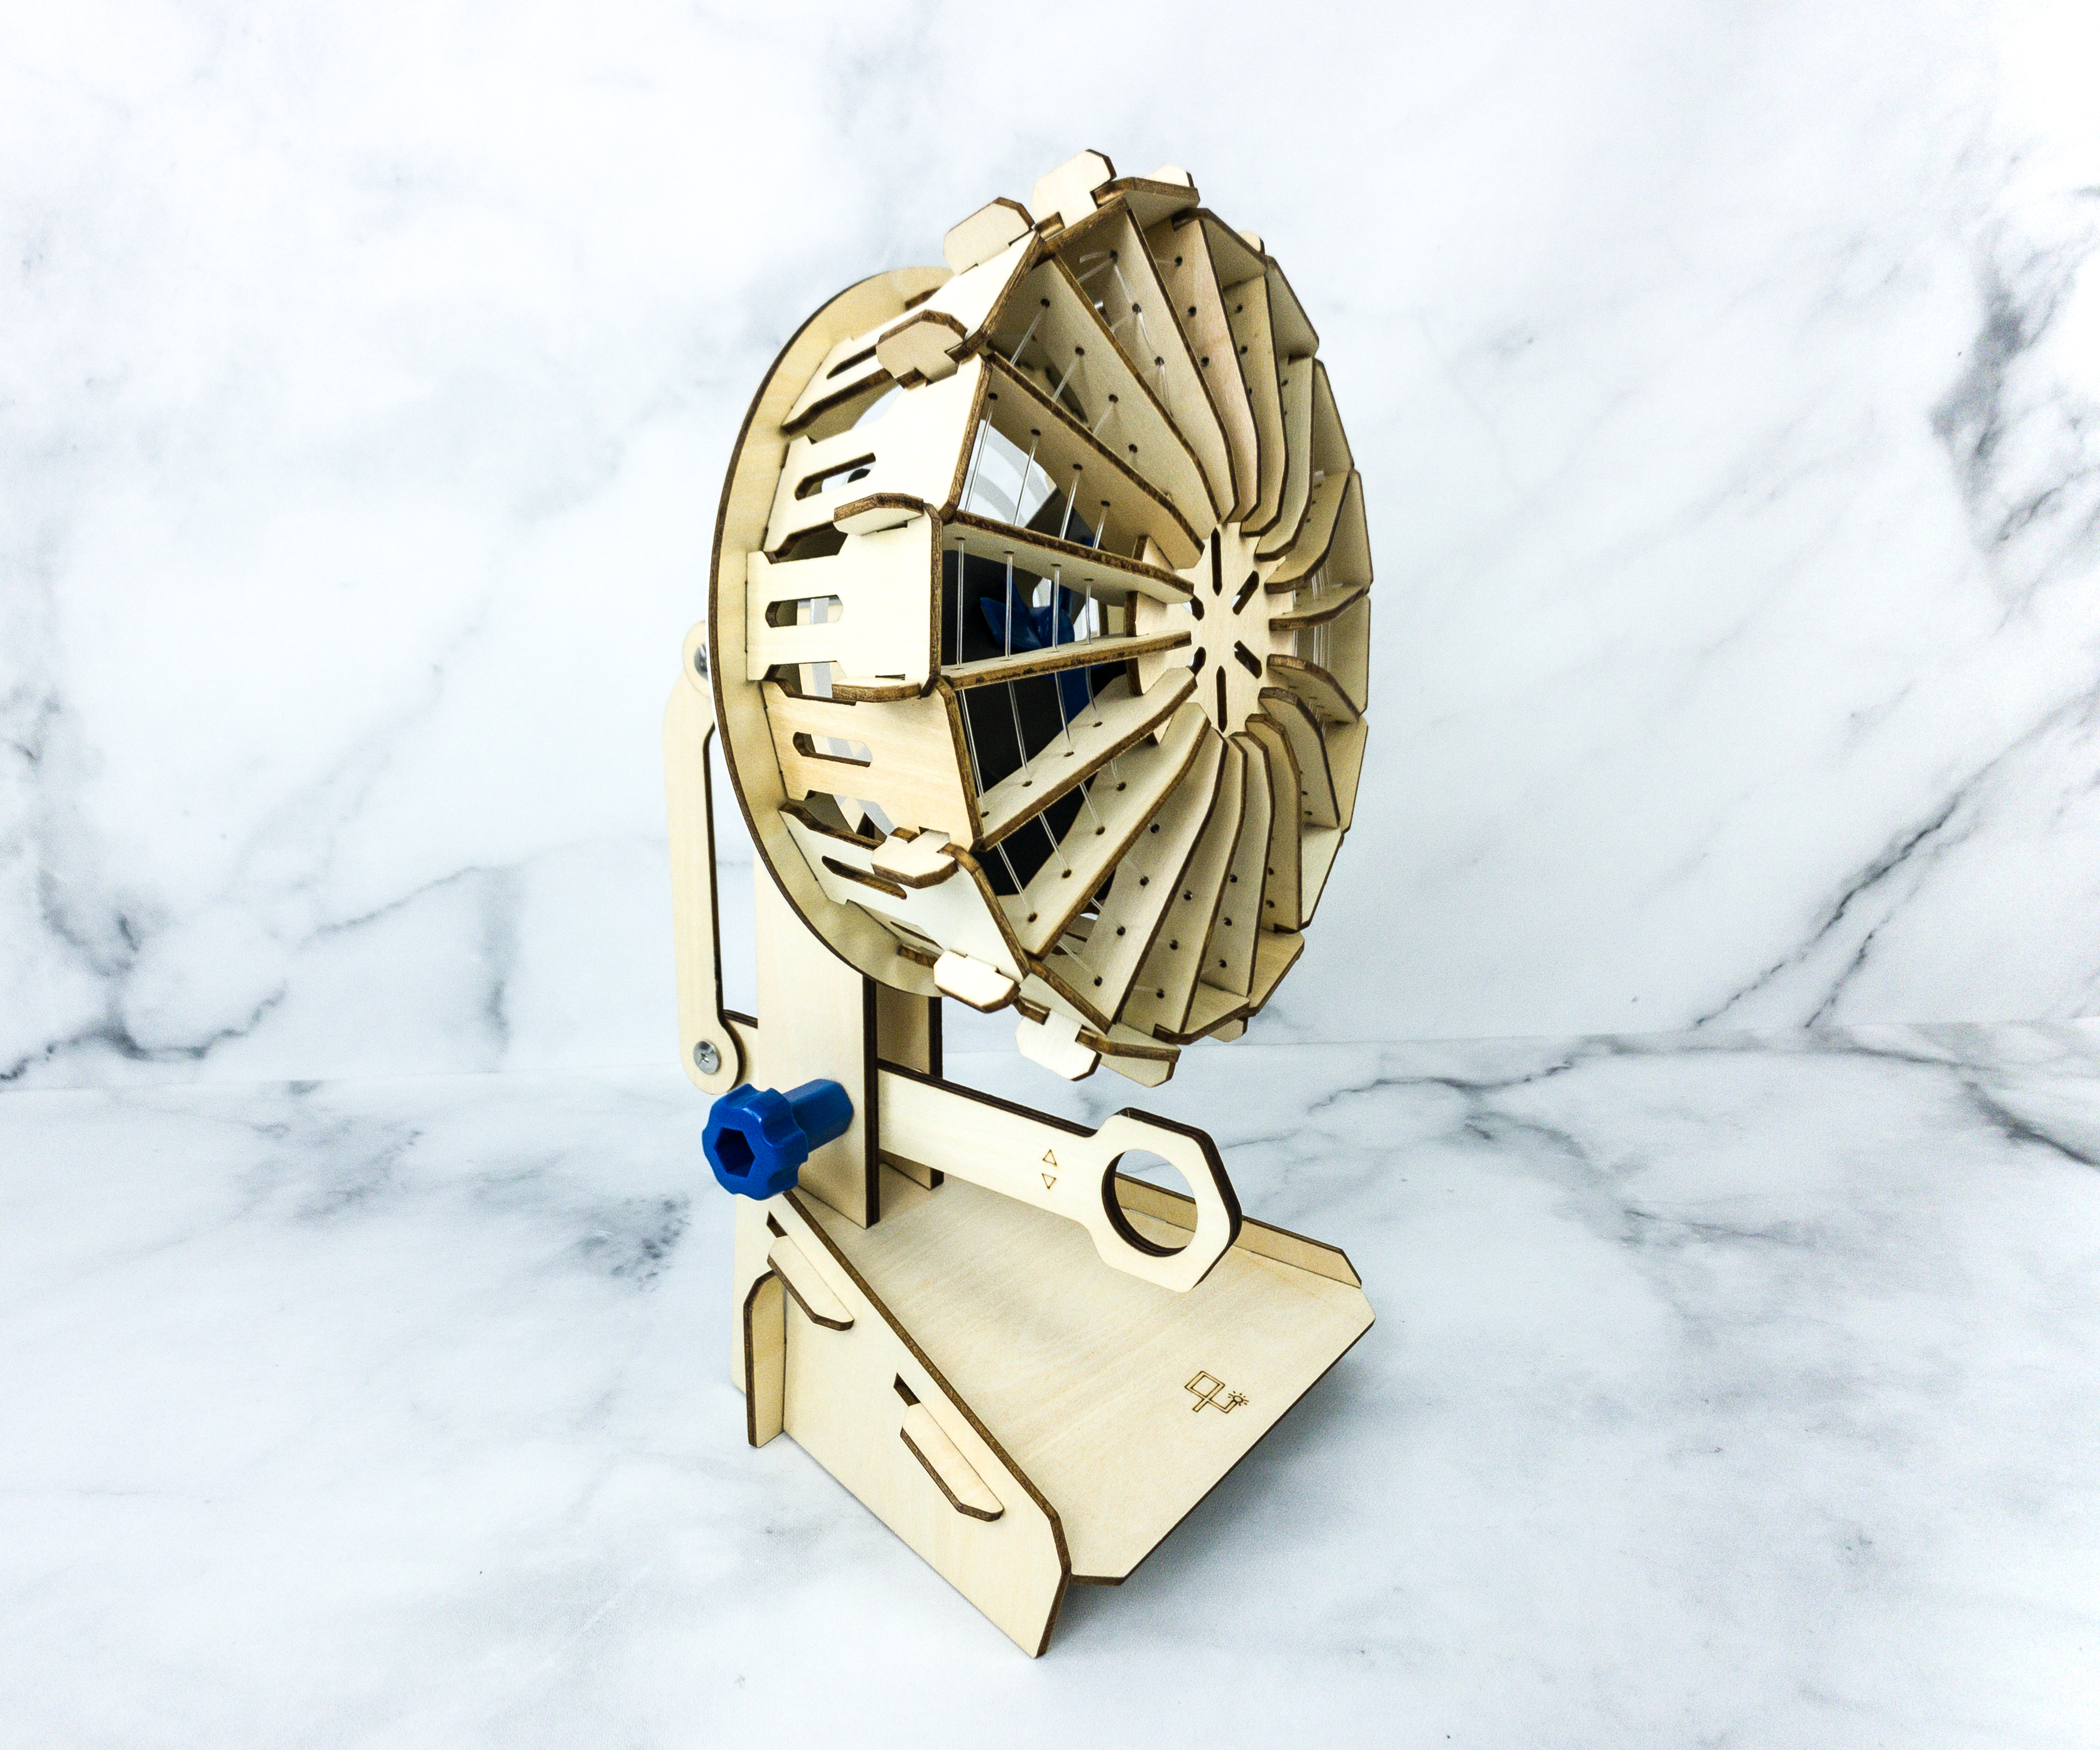
You can turn the head up and down by simply loosening the big blue bolt and pulling or pushing the wood handle.
This one looks pretty much like a real table fan.
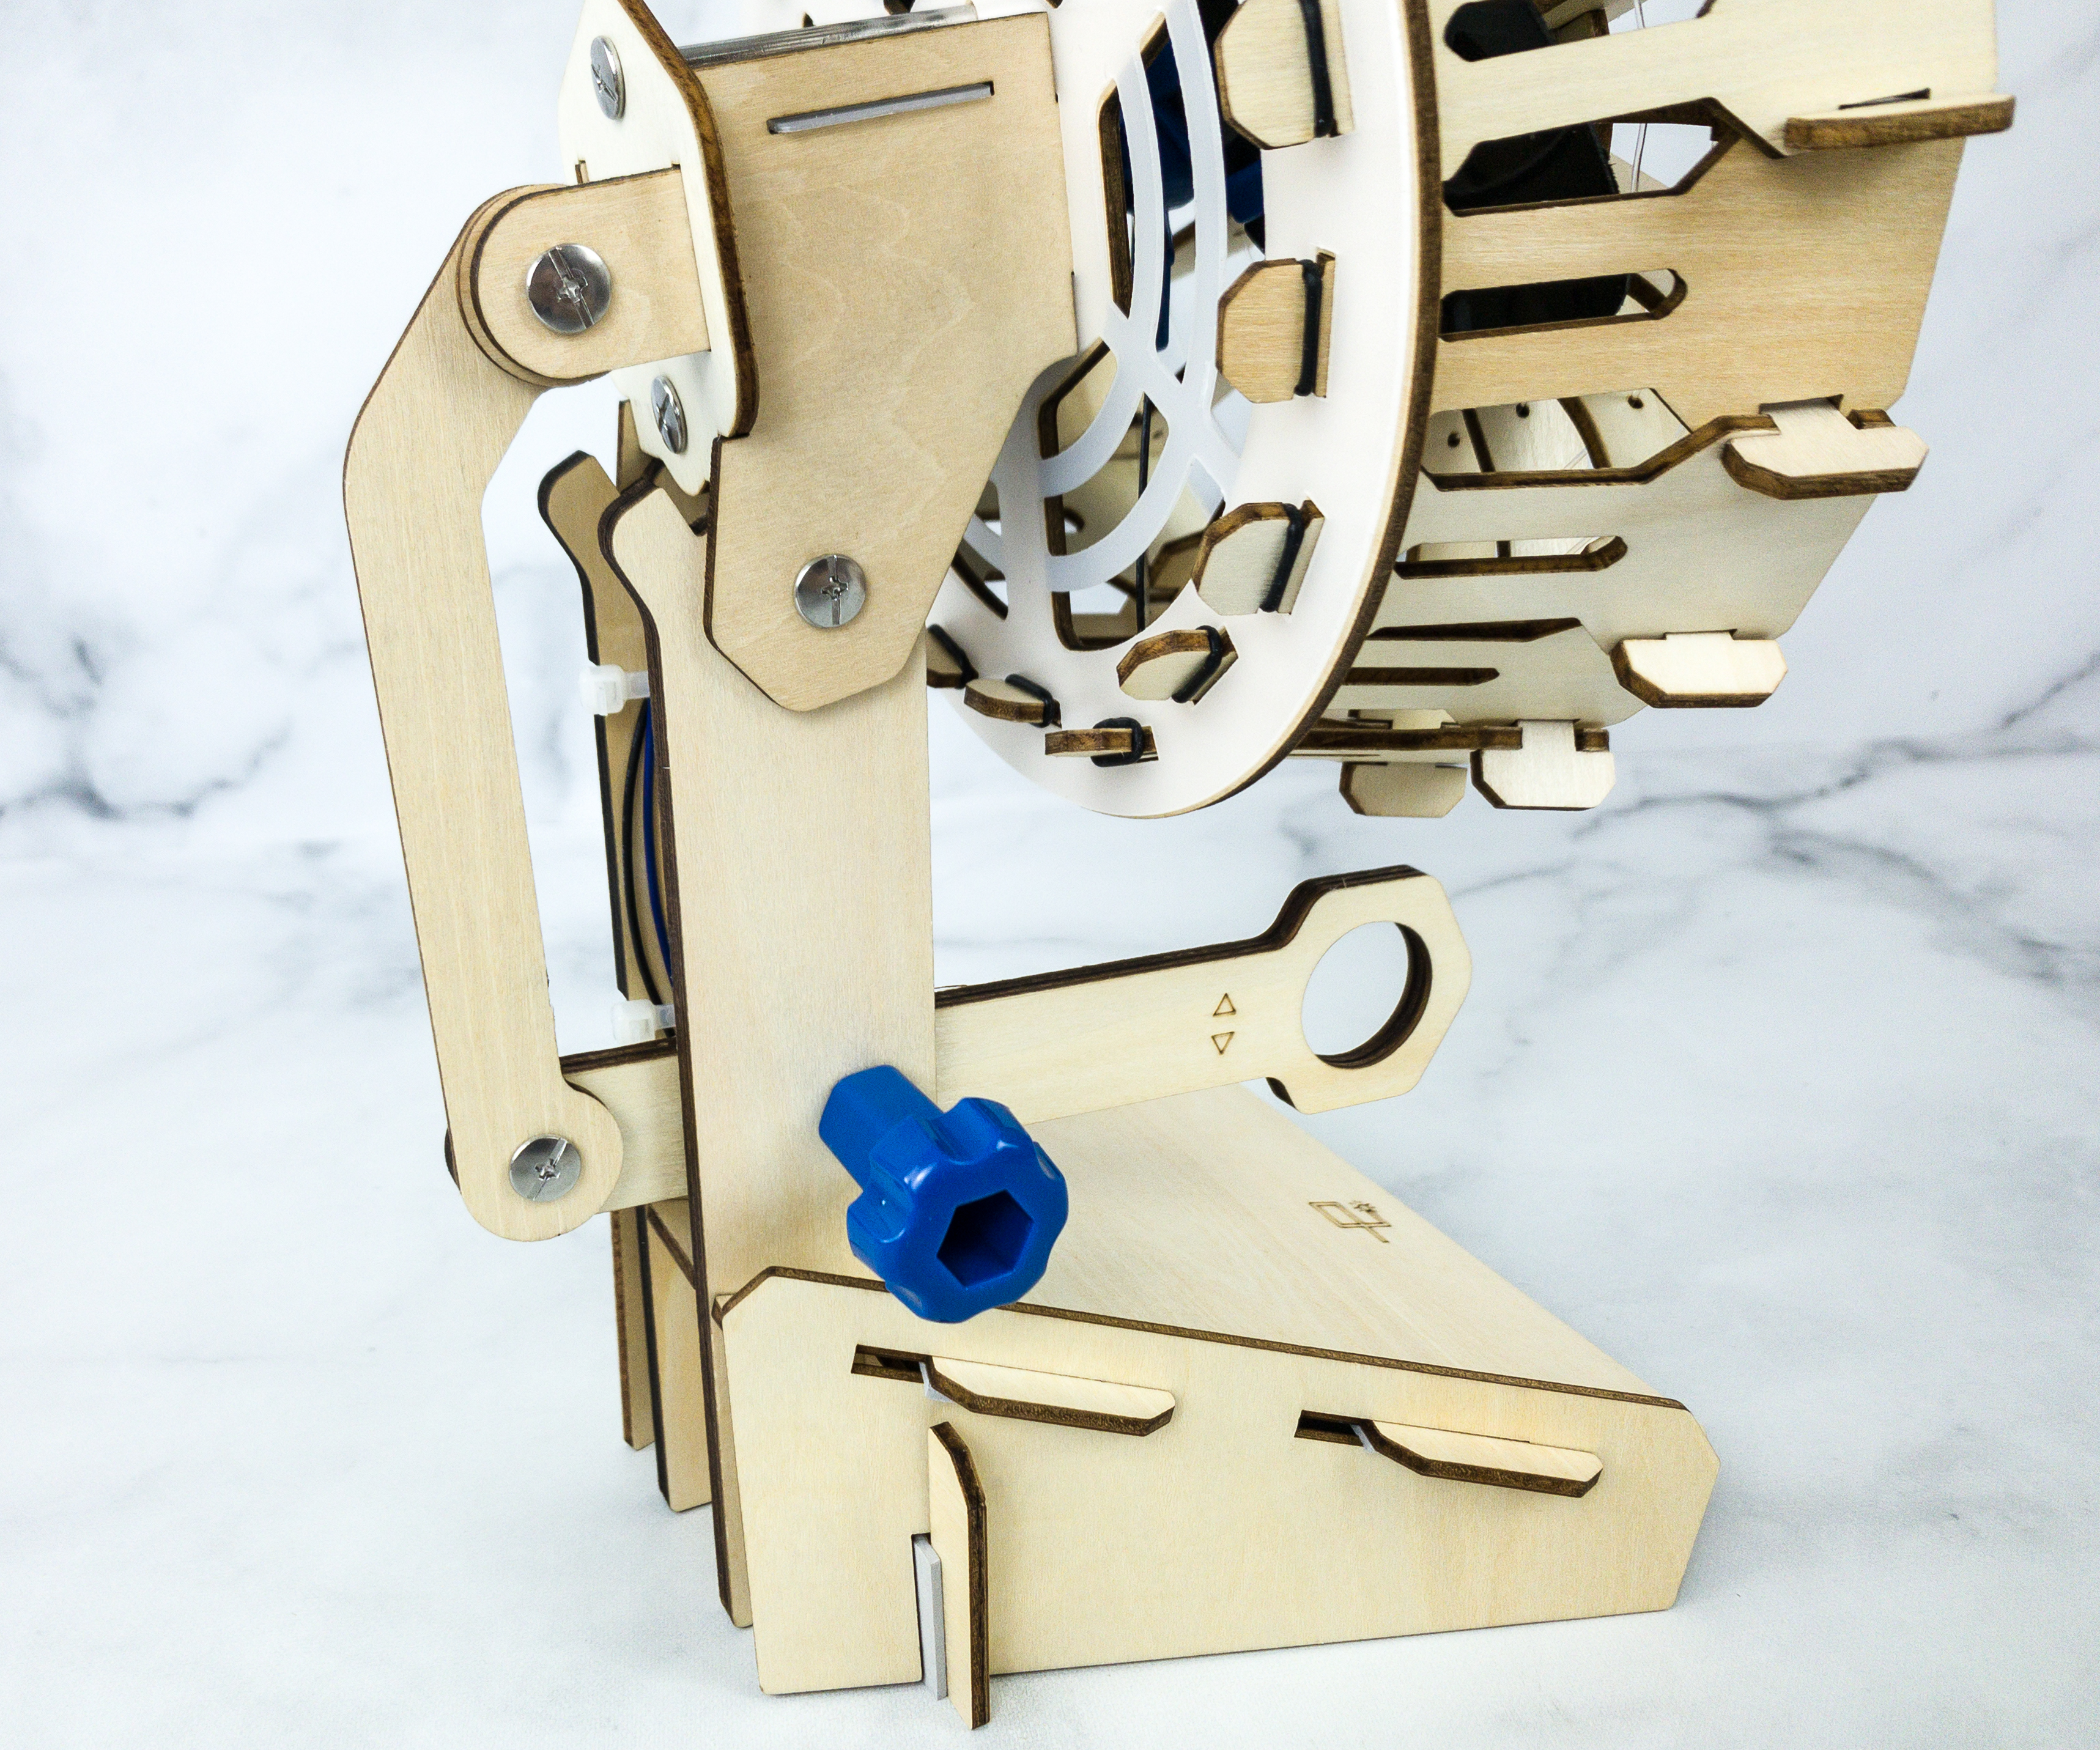
For some loose part, you can use the excess sticker foams to make it tighter, just like what we did on the base of the fan.
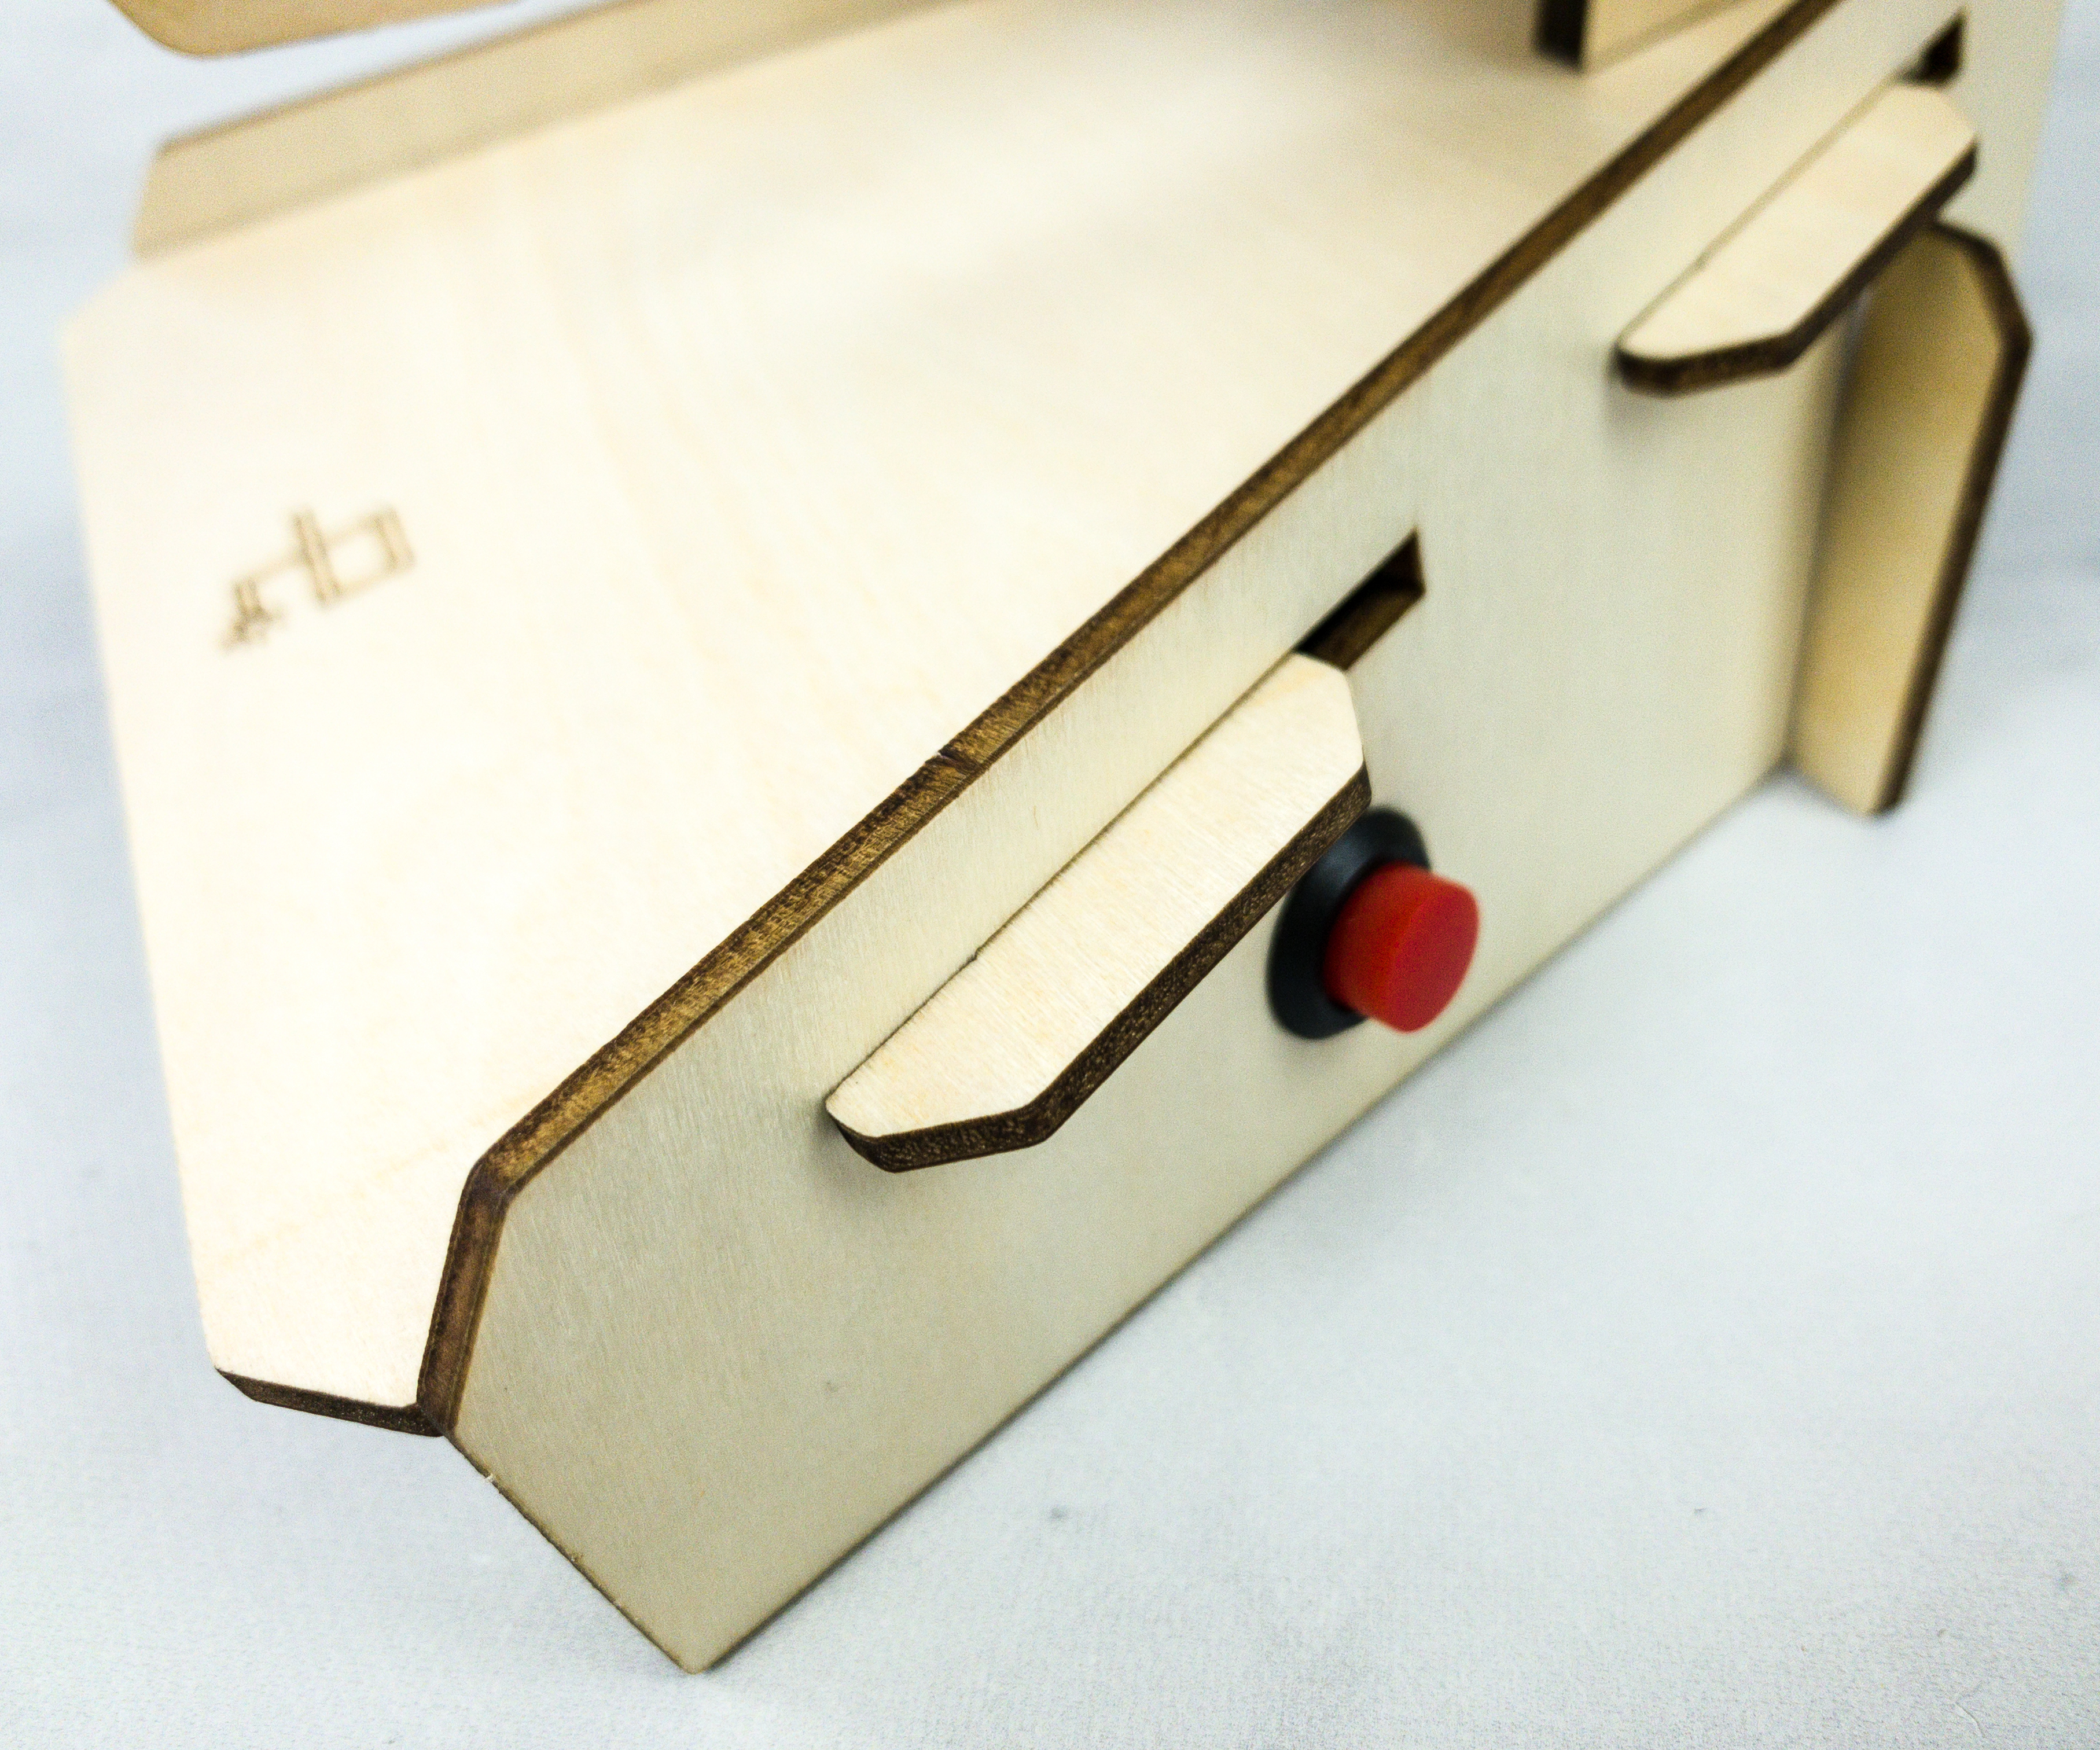
Featured on this side of the fan is the switch. Push the button and let the FAN begin!
Tt blows a pretty good amount of air.
It’s strong enough to have the ribbon flying!
Eureka Crate always comes up with fun projects that make useful end products! This month, they provided all the materials and instructions for making a desktop fan. It was a bit challenging, but since everything we need is already provided and there are troubleshooting guidelines in the booklet, we were able to finish the project successfully! We were so thrilled when we tested our fan and it worked! We even learned about the fan’s history and design, as well as the science behind it. This is a well-thought-out activity box for teens and adults, and so far, my family has loved every single crate we’ve received! We recommend it if you’re looking for great science-related projects to do at home! This one turned out to be a breeze! 😉
What do you think of this month’s Eureka Crate?


Comments