Eureka Crate is a monthly STEM and maker subscription box that teaches kids and adults how to apply principles of science and math to make awesome things you will love to use every day – from an articulated desk lamp to an electric pencil sharpener to a wooden ukulele. Every Eureka Crate includes an engineering project, detailed step-by-step instructions, everything you need to complete the project, a Maker’s Guide that explains all the design, process, and engineering behind the design, plus a design challenge to take your project knowledge to the next level!
DEAL: Save 30% on your first month! Just use this link to subscribe, no coupon code required! You can also use the same link to save 30% on the first month of any other KiwiCo crate – just check out this page to discover which box is right for you.
Eureka Crate is KiwiCo’s latest subscription! Eureka Crate is designed for ages 14-104. If you’re ready to graduate from KiwiCo’s other boxes or just can’t get enough (or are just too old for their other subscriptions), you’ll love this box, which is designed to create a hands-on learning experience using everyday items to delve deeply into the science and math principles they embody, along with the design process of the month’s project.

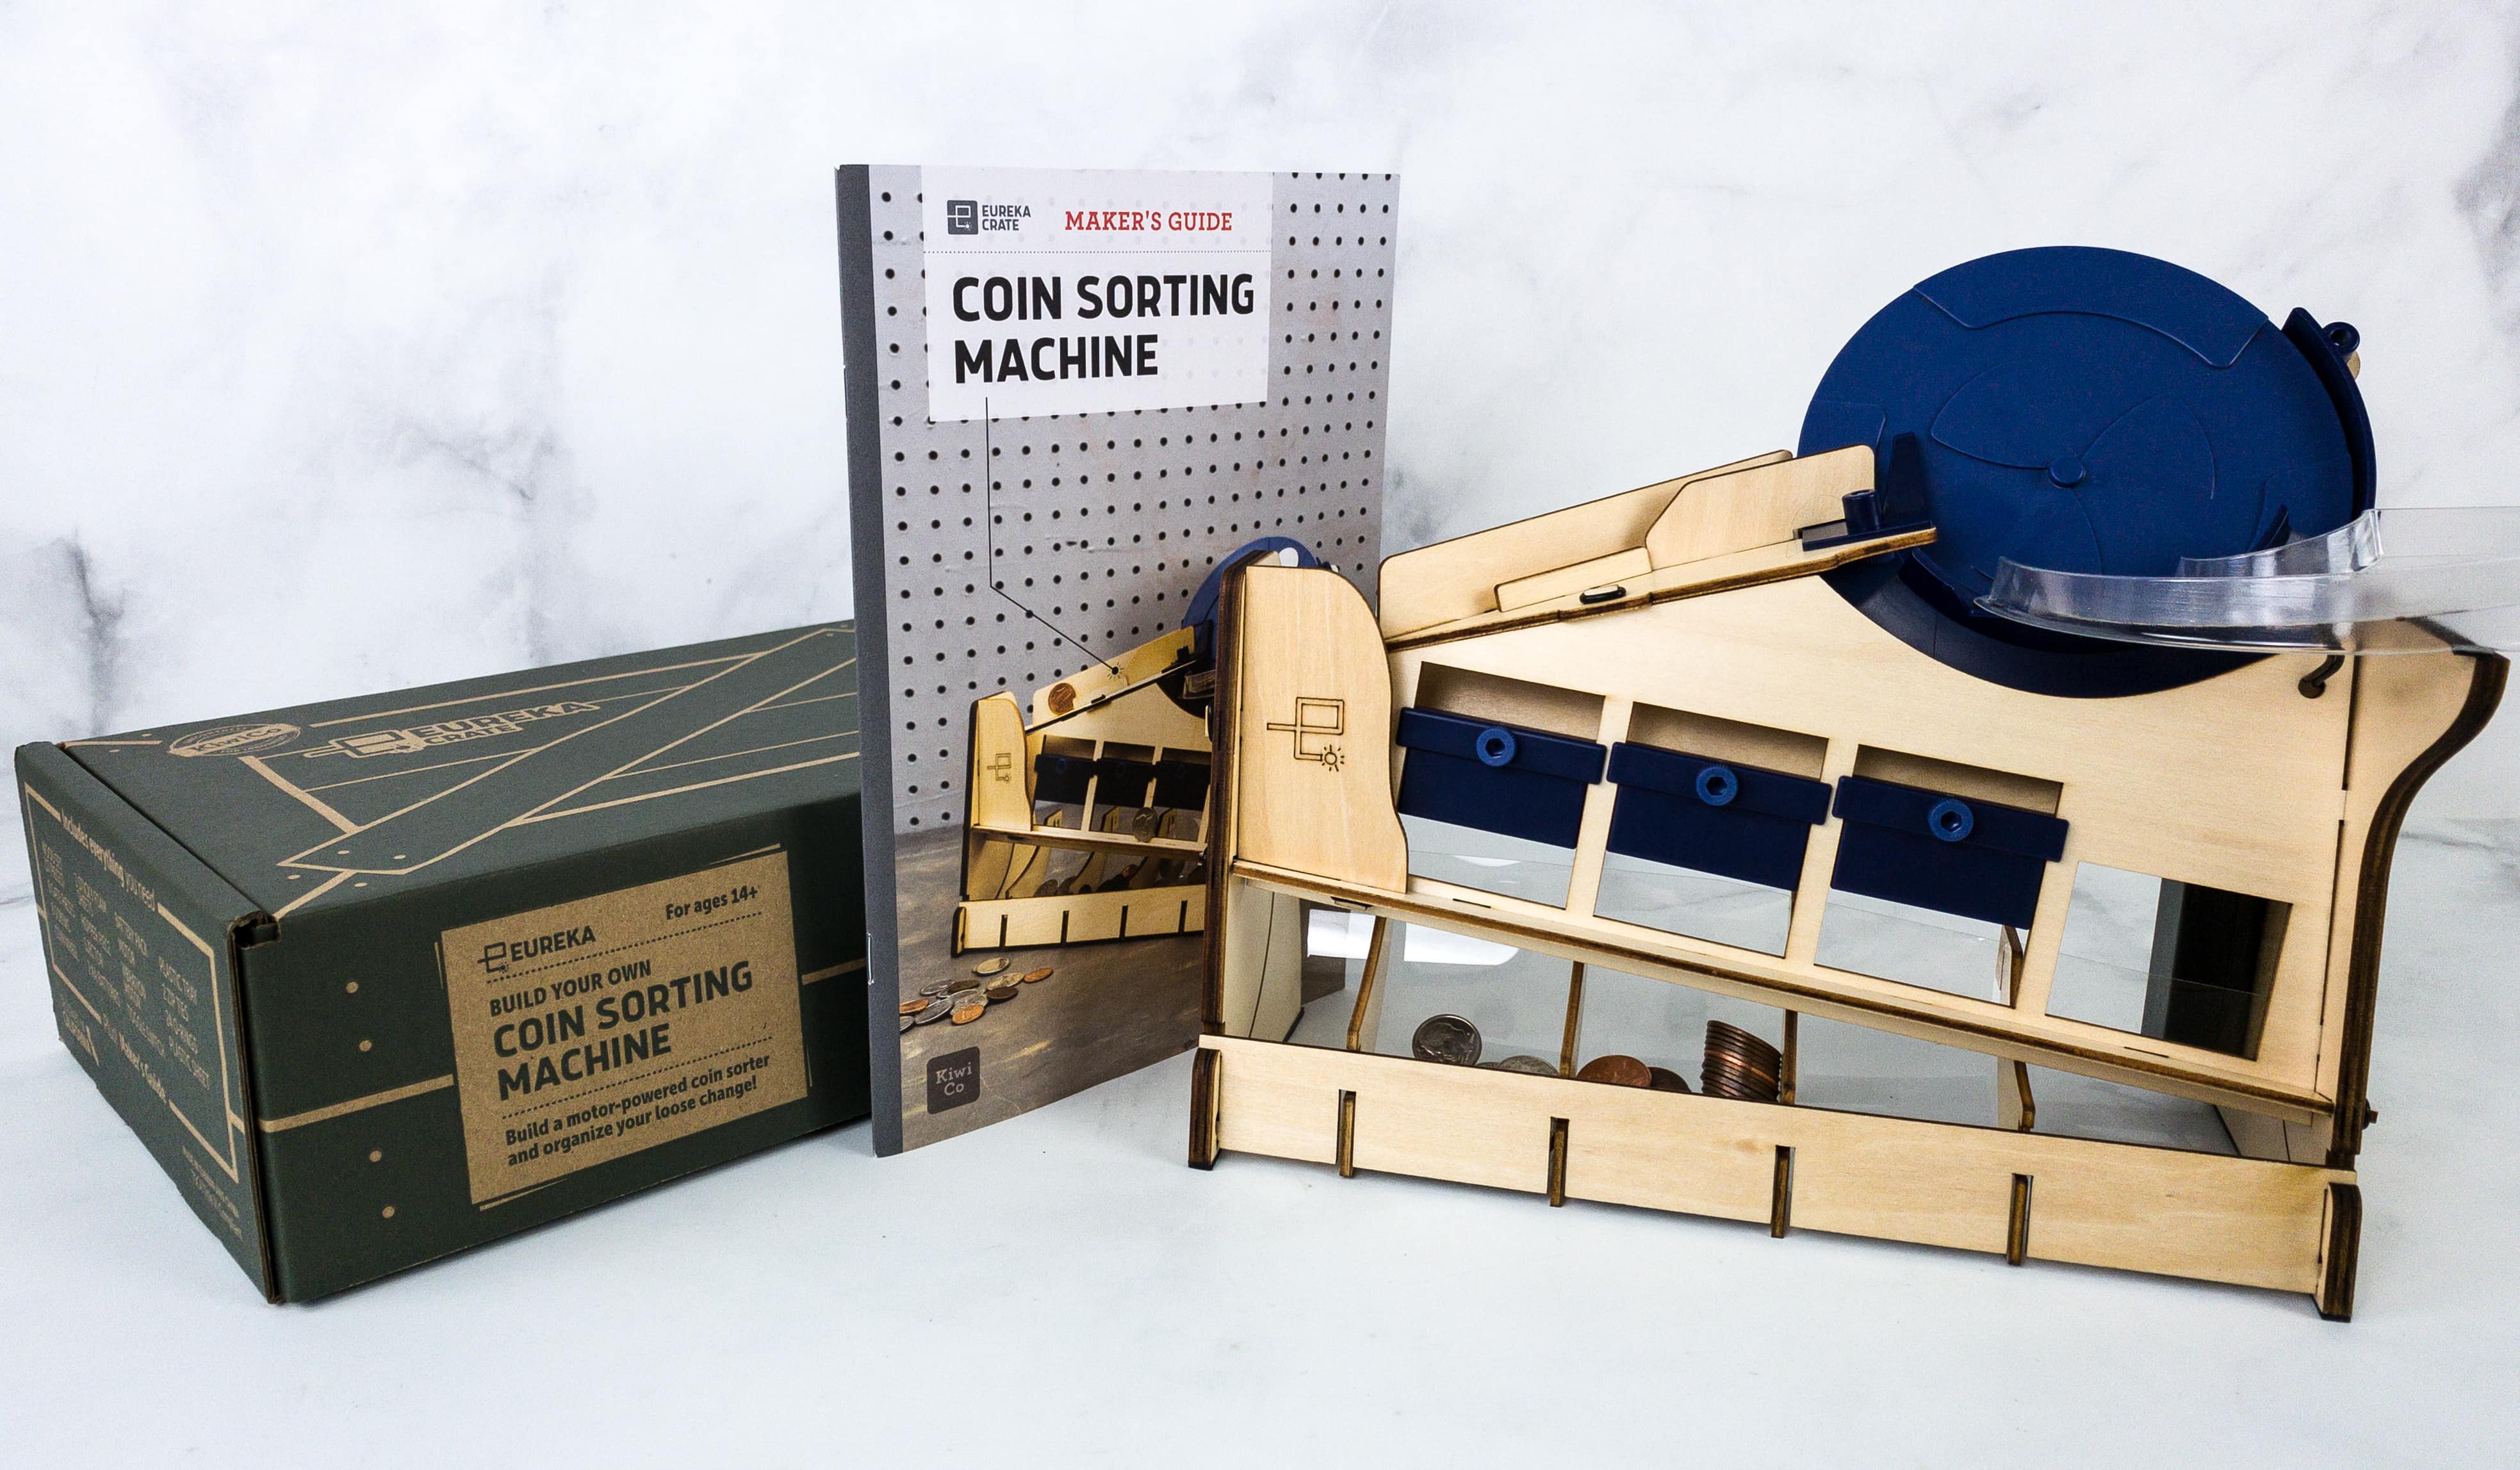
This month, we’re making a Coin Sorting Machine!
Everything in this month’s box!
Eureka Crate Maker’s Guide
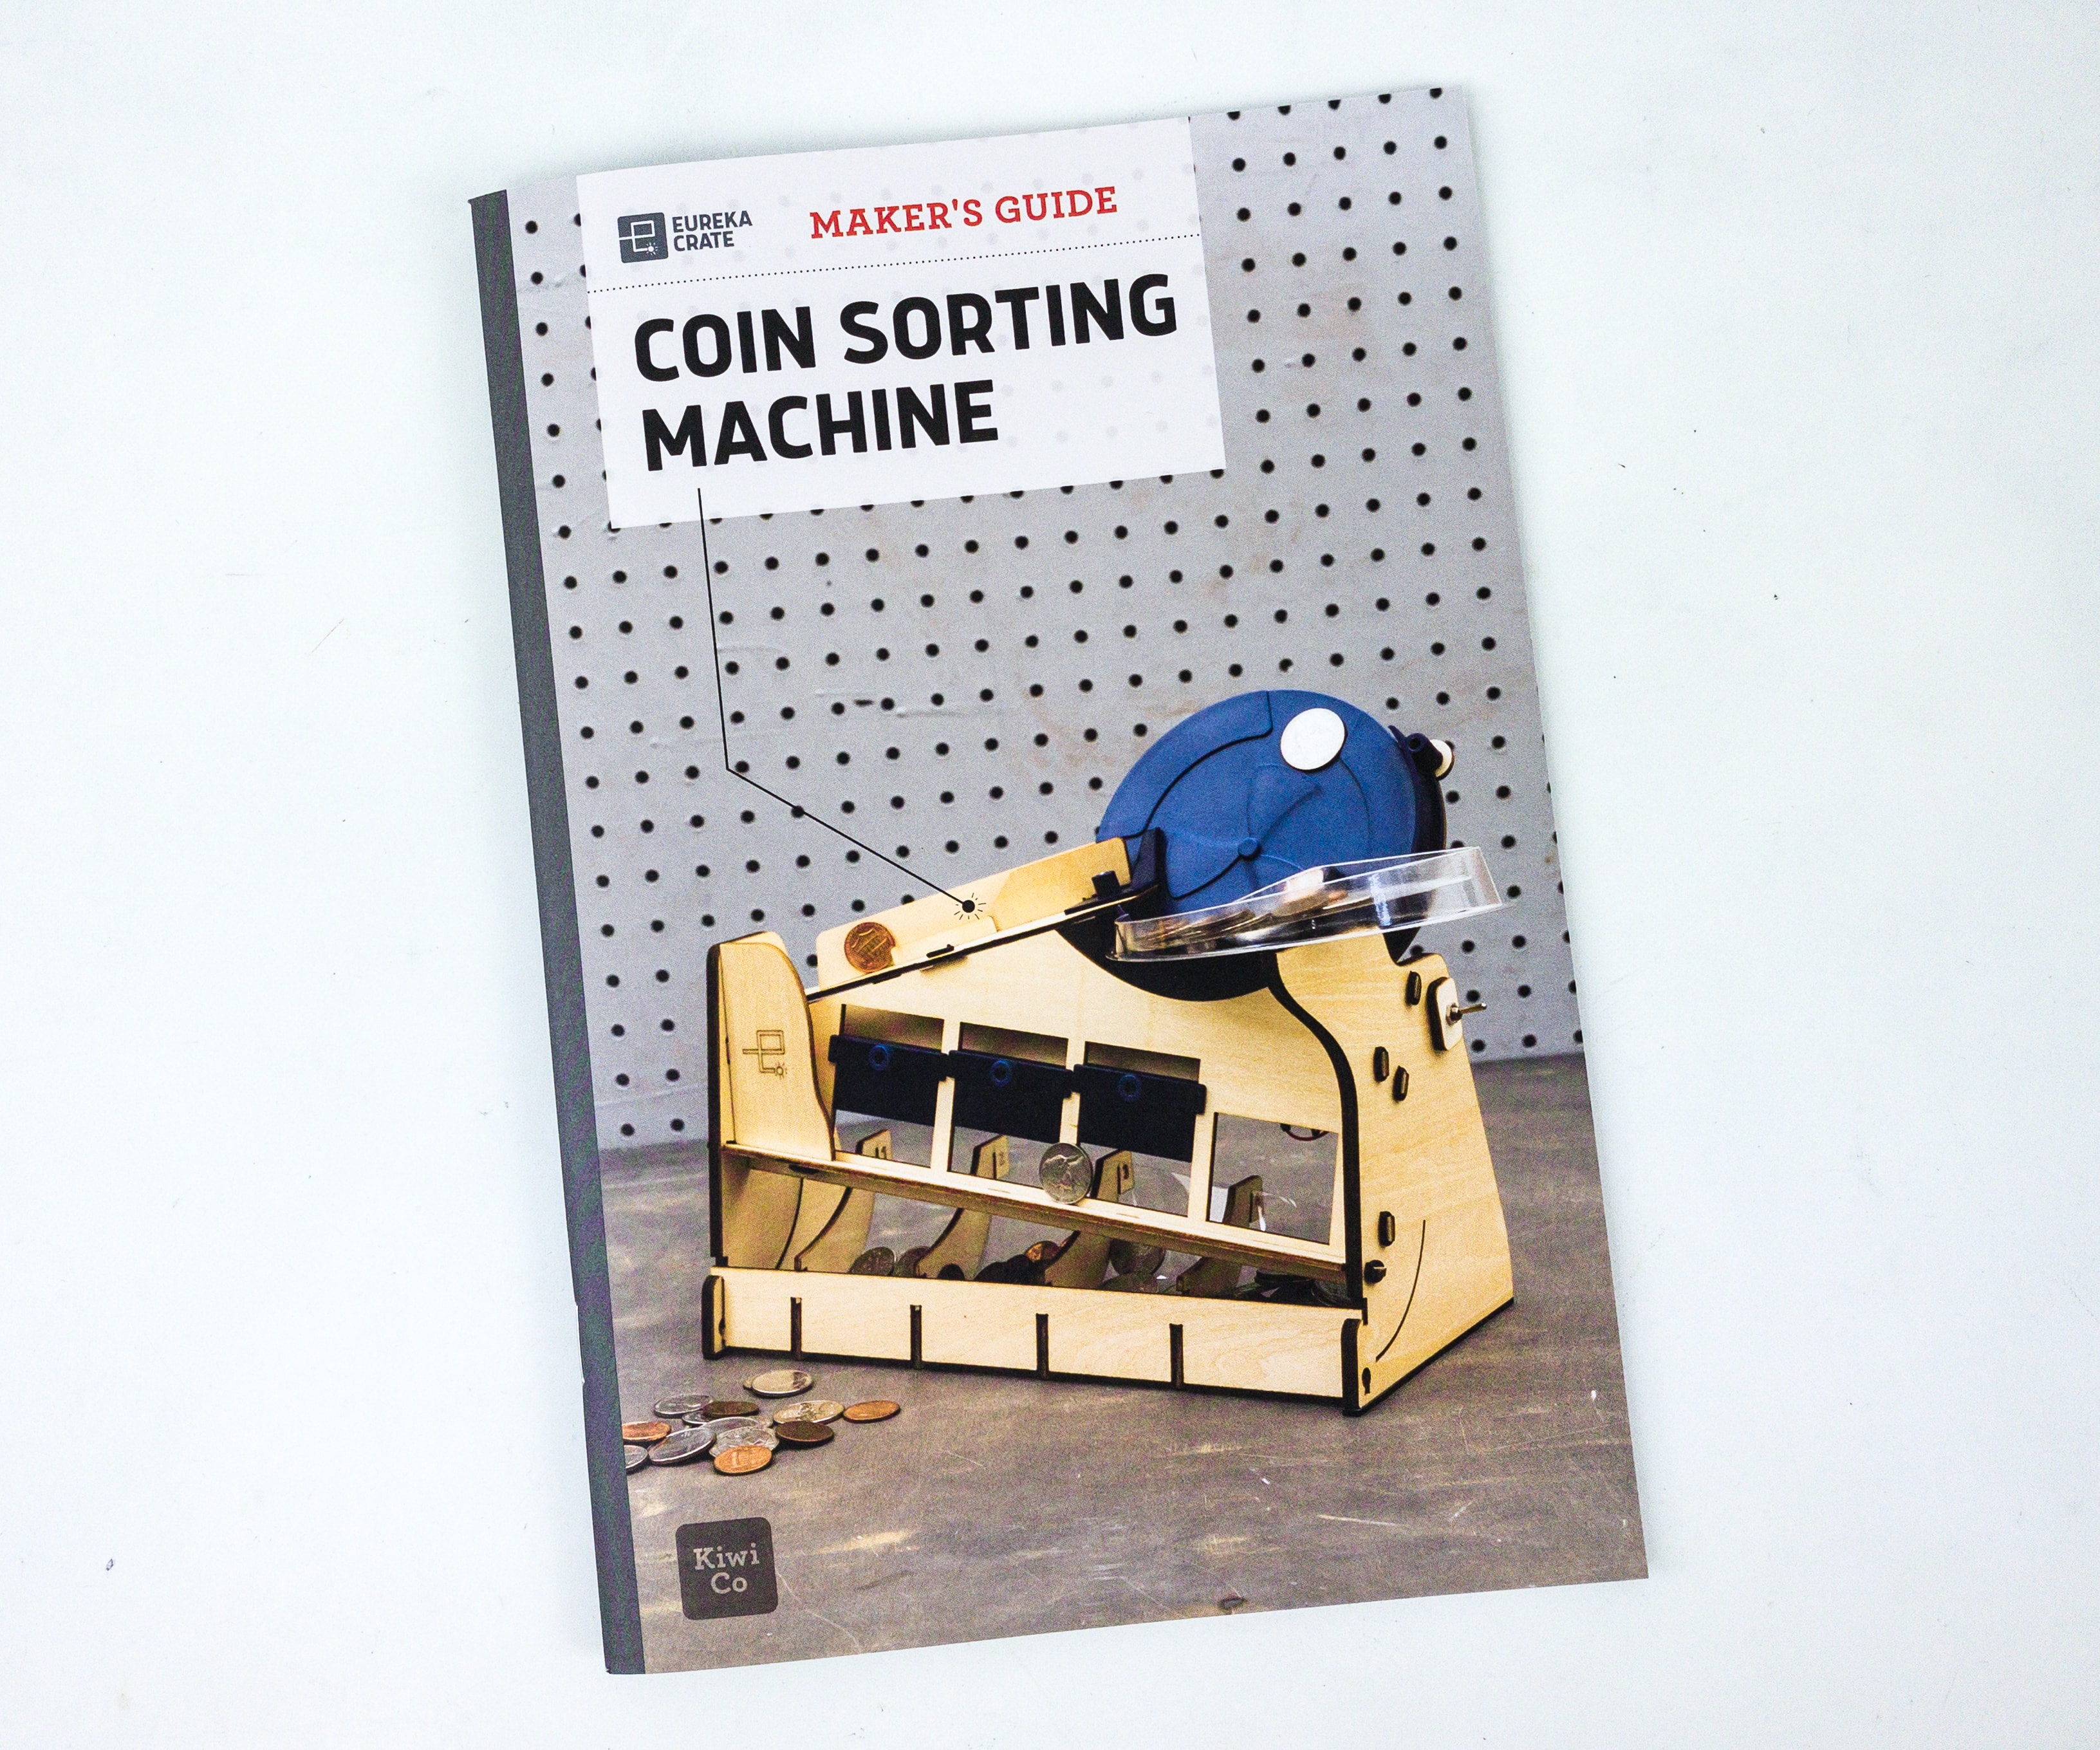
Like the other crates from KiwiCo, Eureka Crate includes a booklet.
One of KiwiCo’s goals is to equip the next generation of innovators with the tools and confidence for creative exploration and problem-solving.
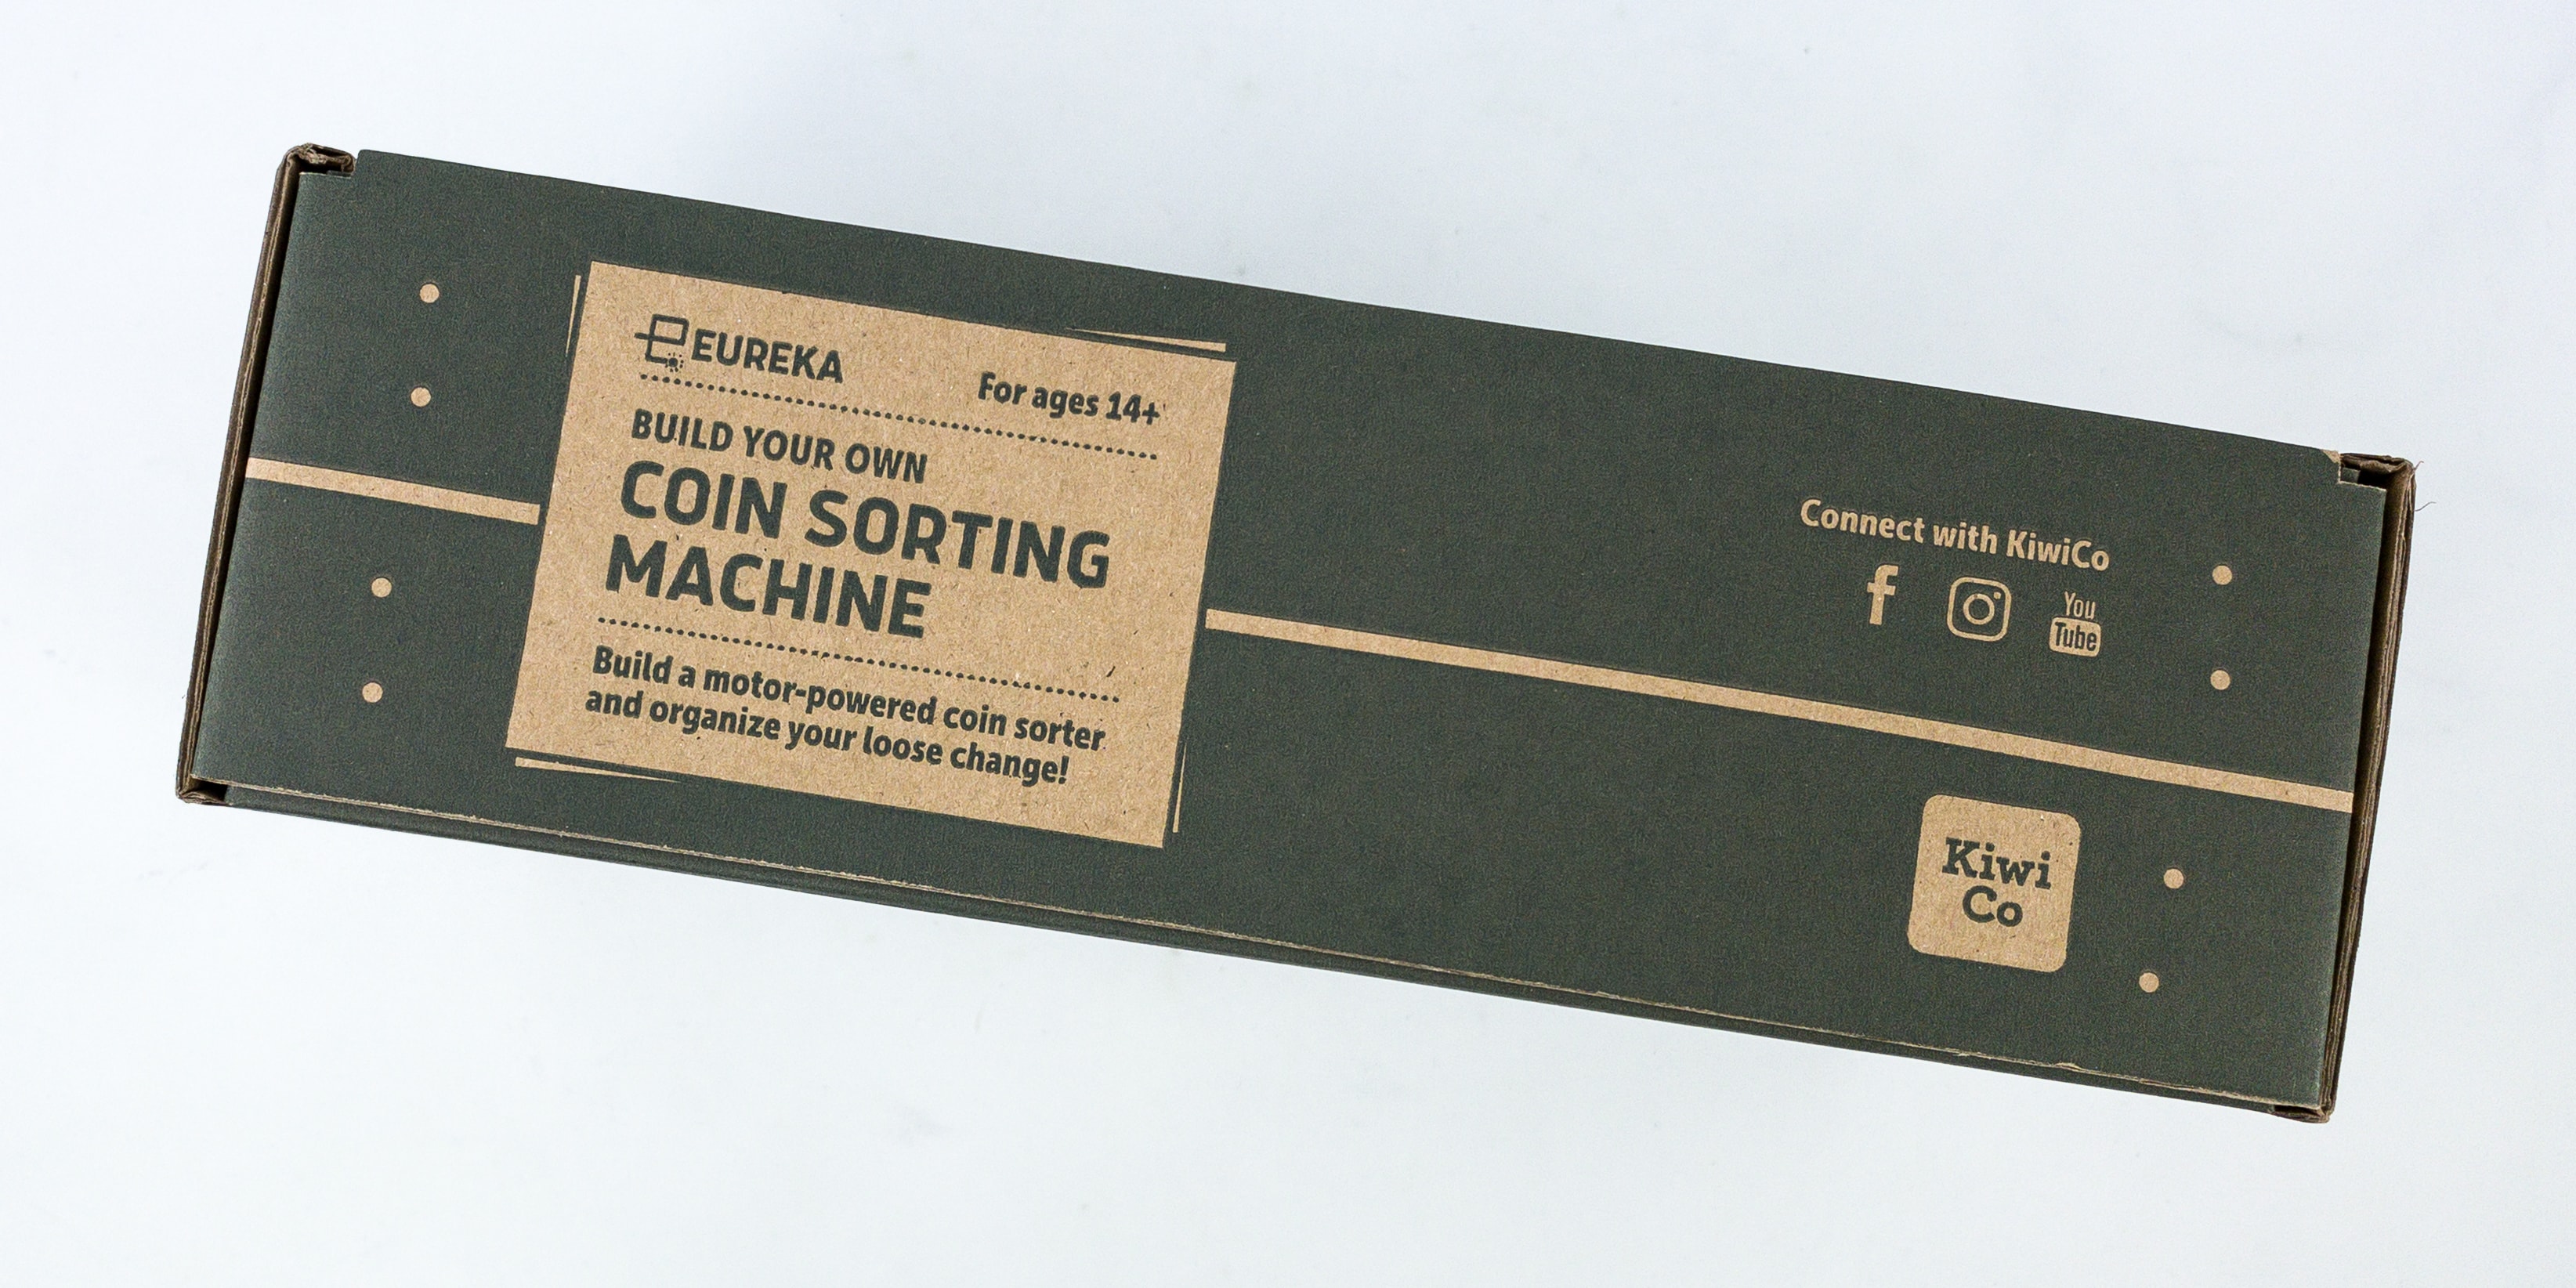
COIN SORTING MACHINE
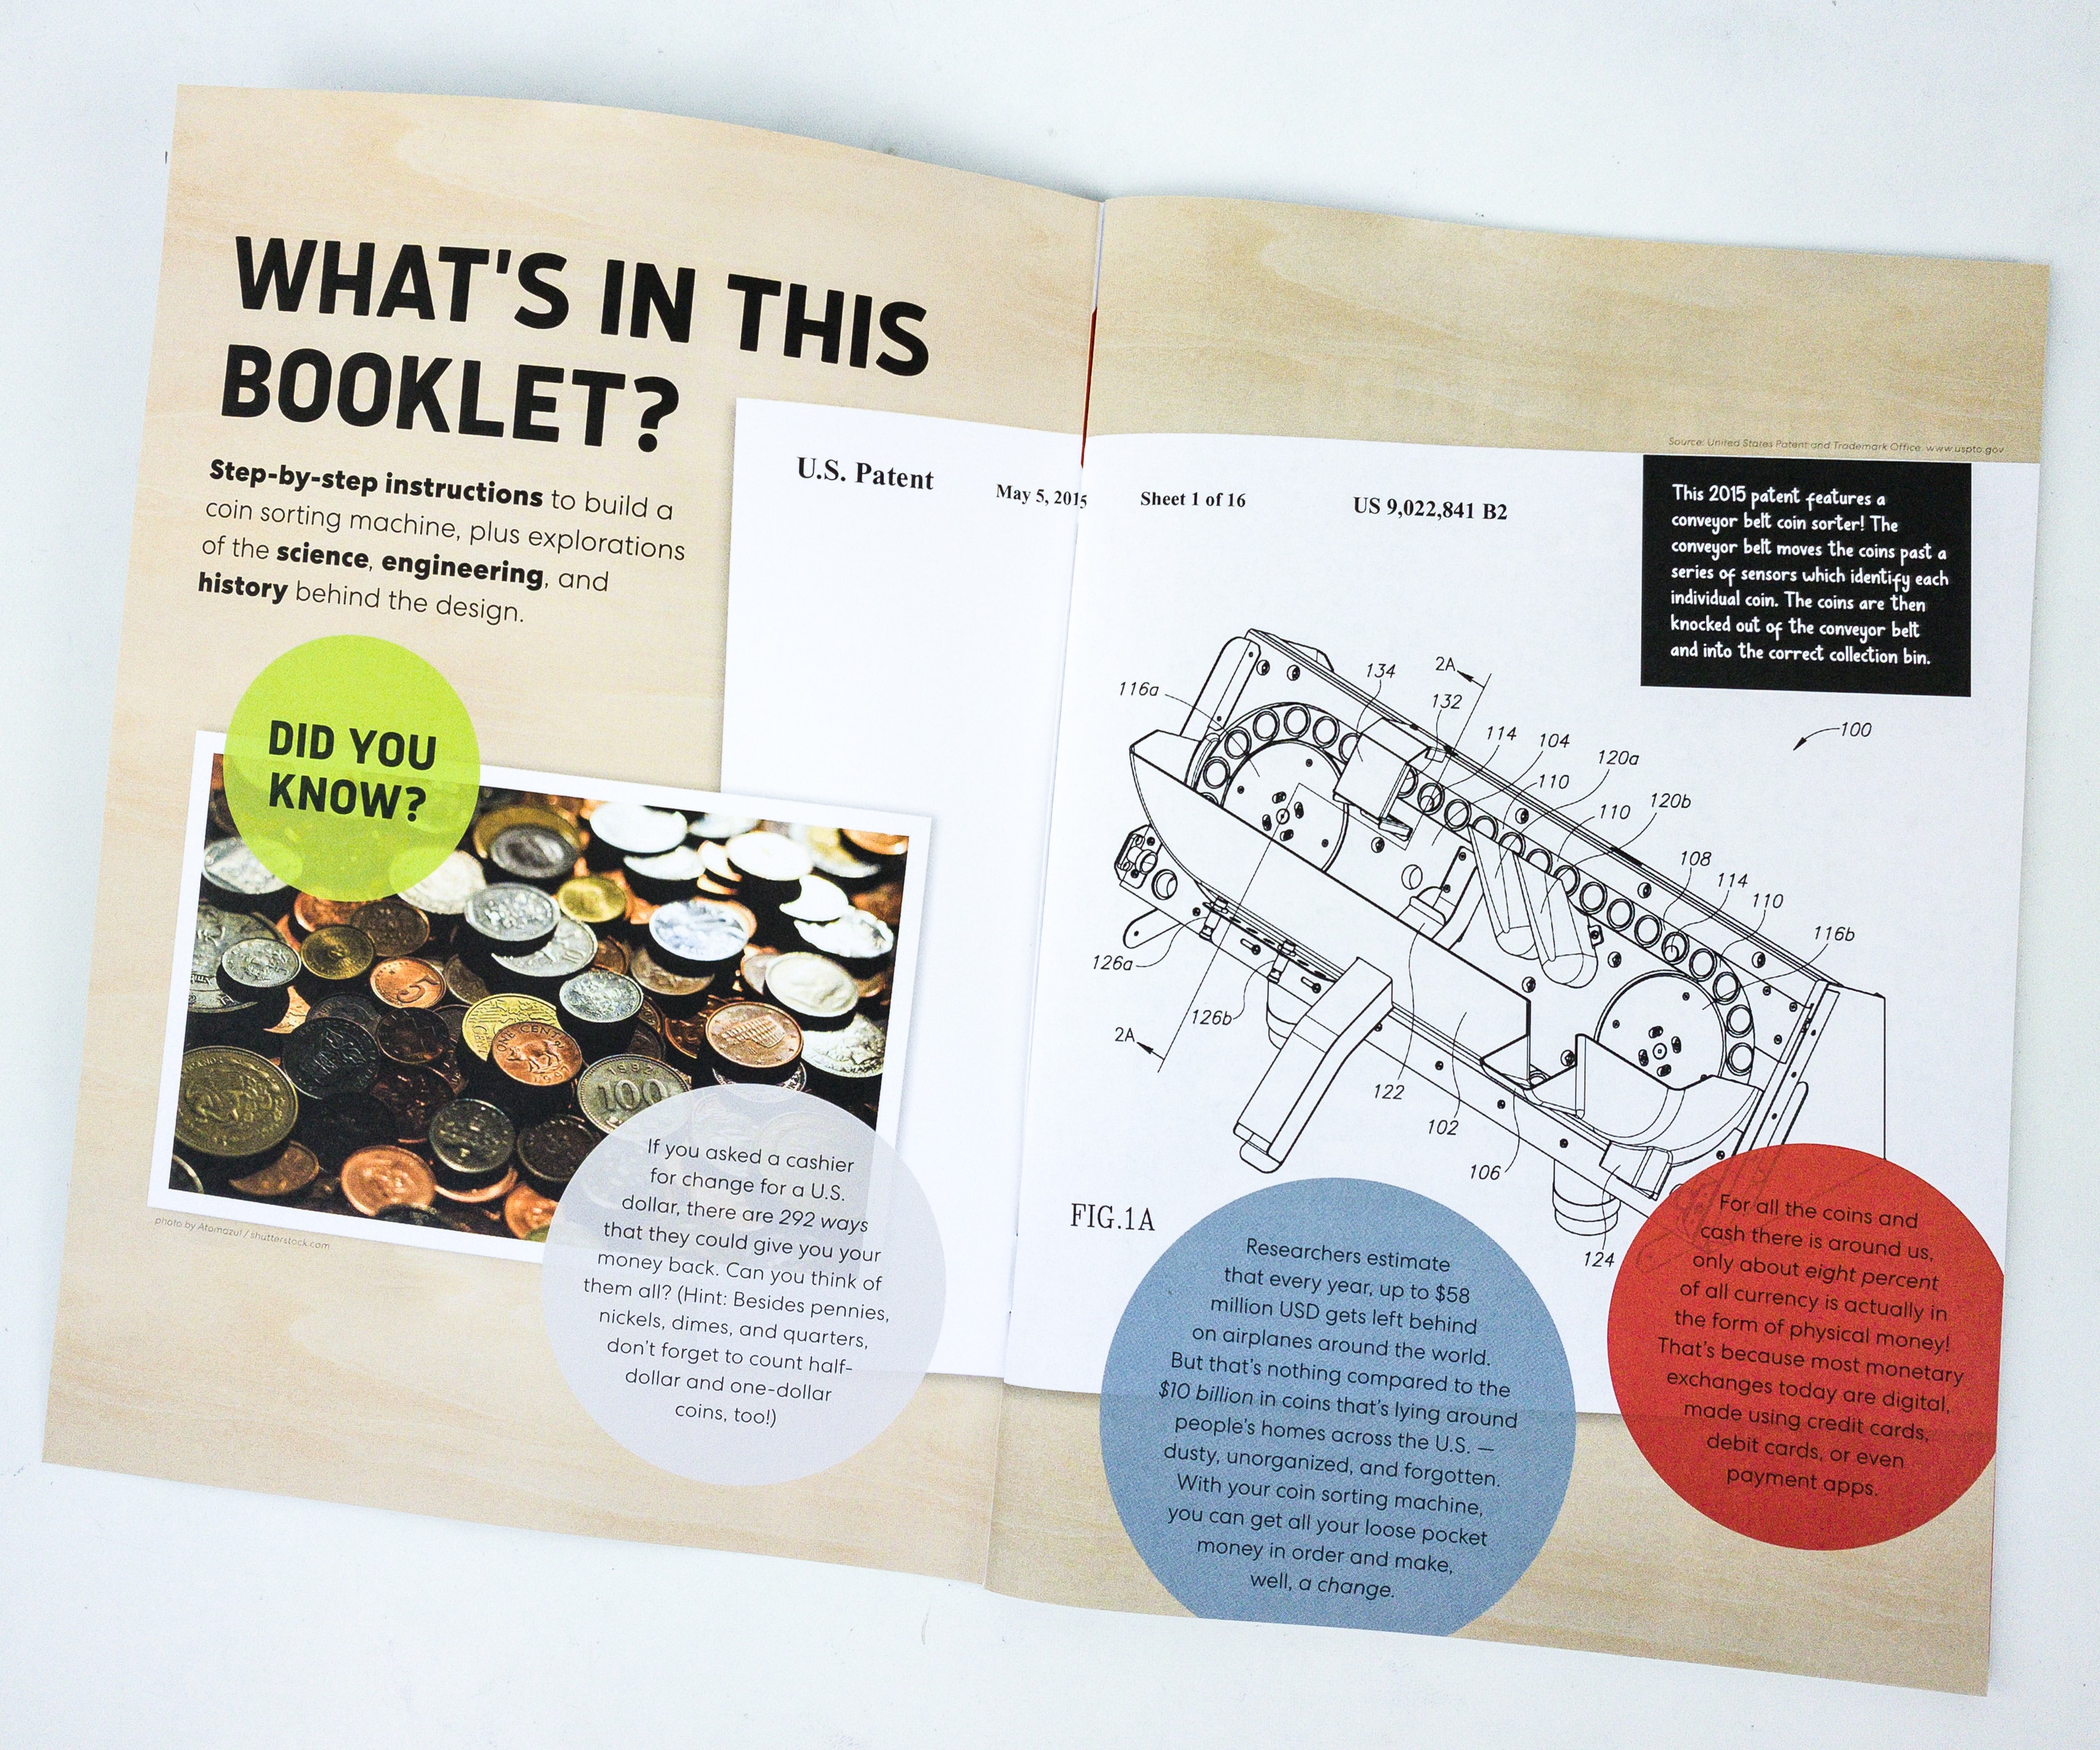
The booklet gives a complete history and details about this month’s project. They also included some fun facts and trivia related to the theme.
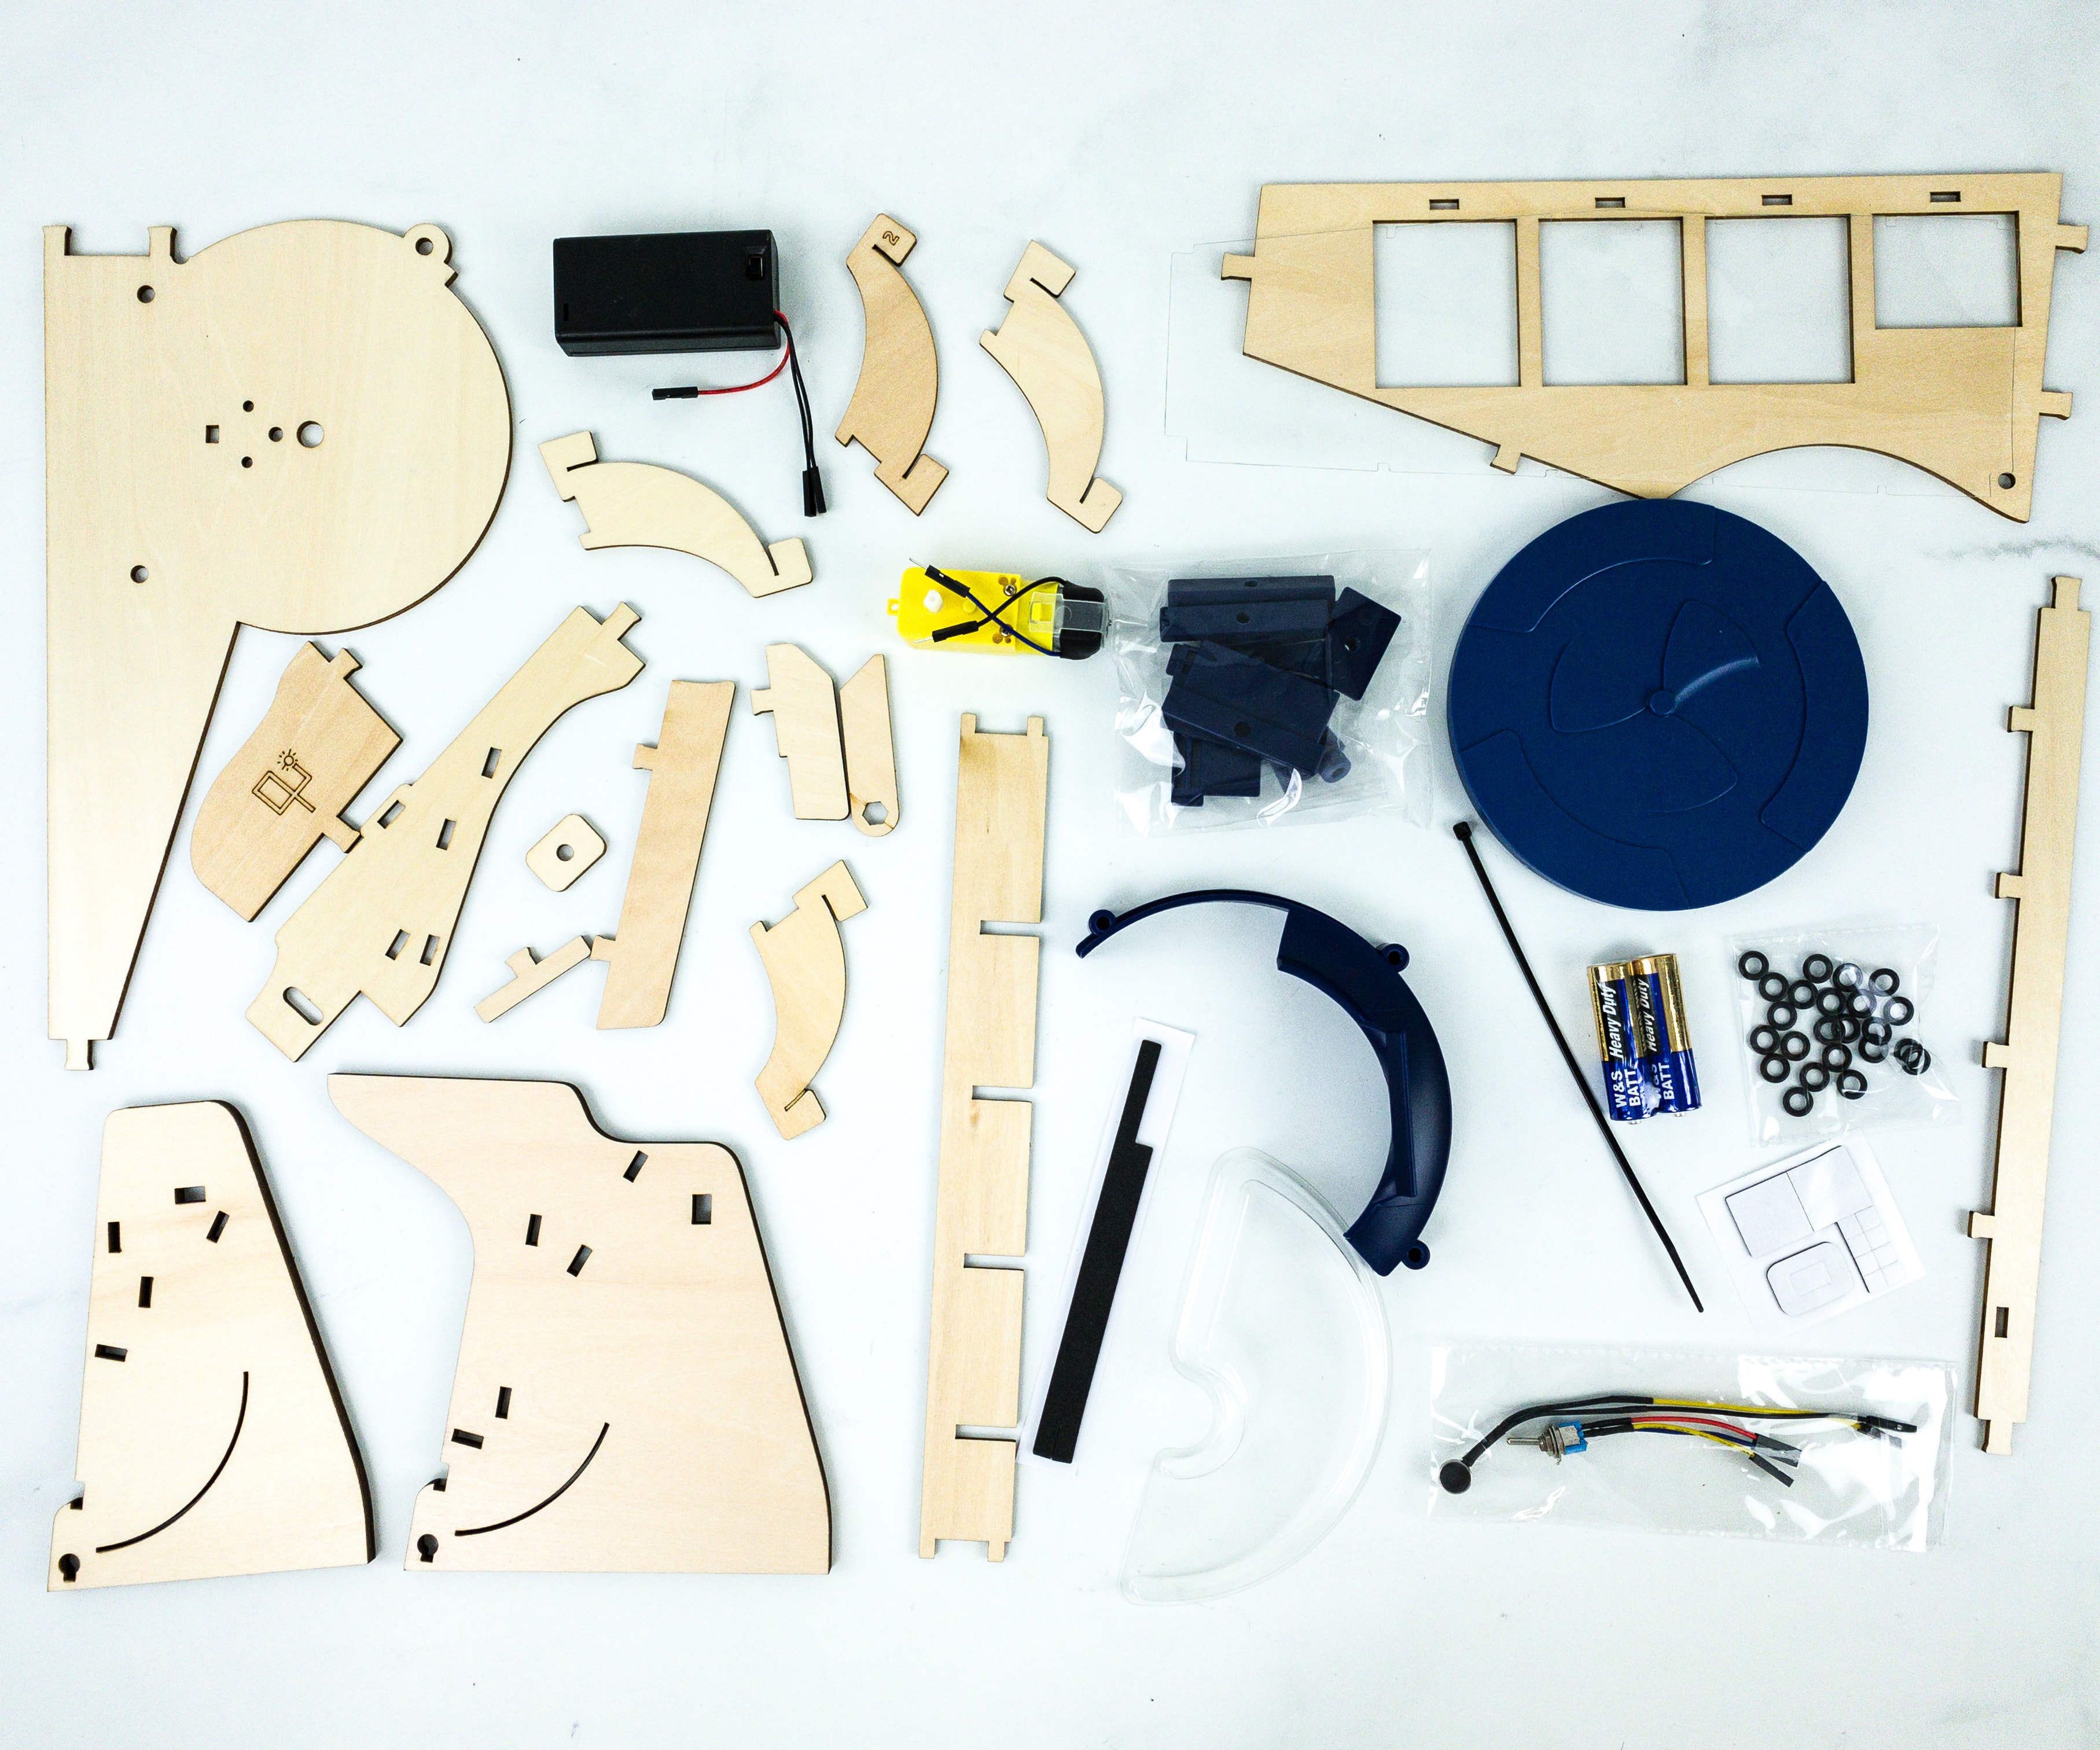
Eureka Crate Materials
This booklet means business as it jumps right to the activity.
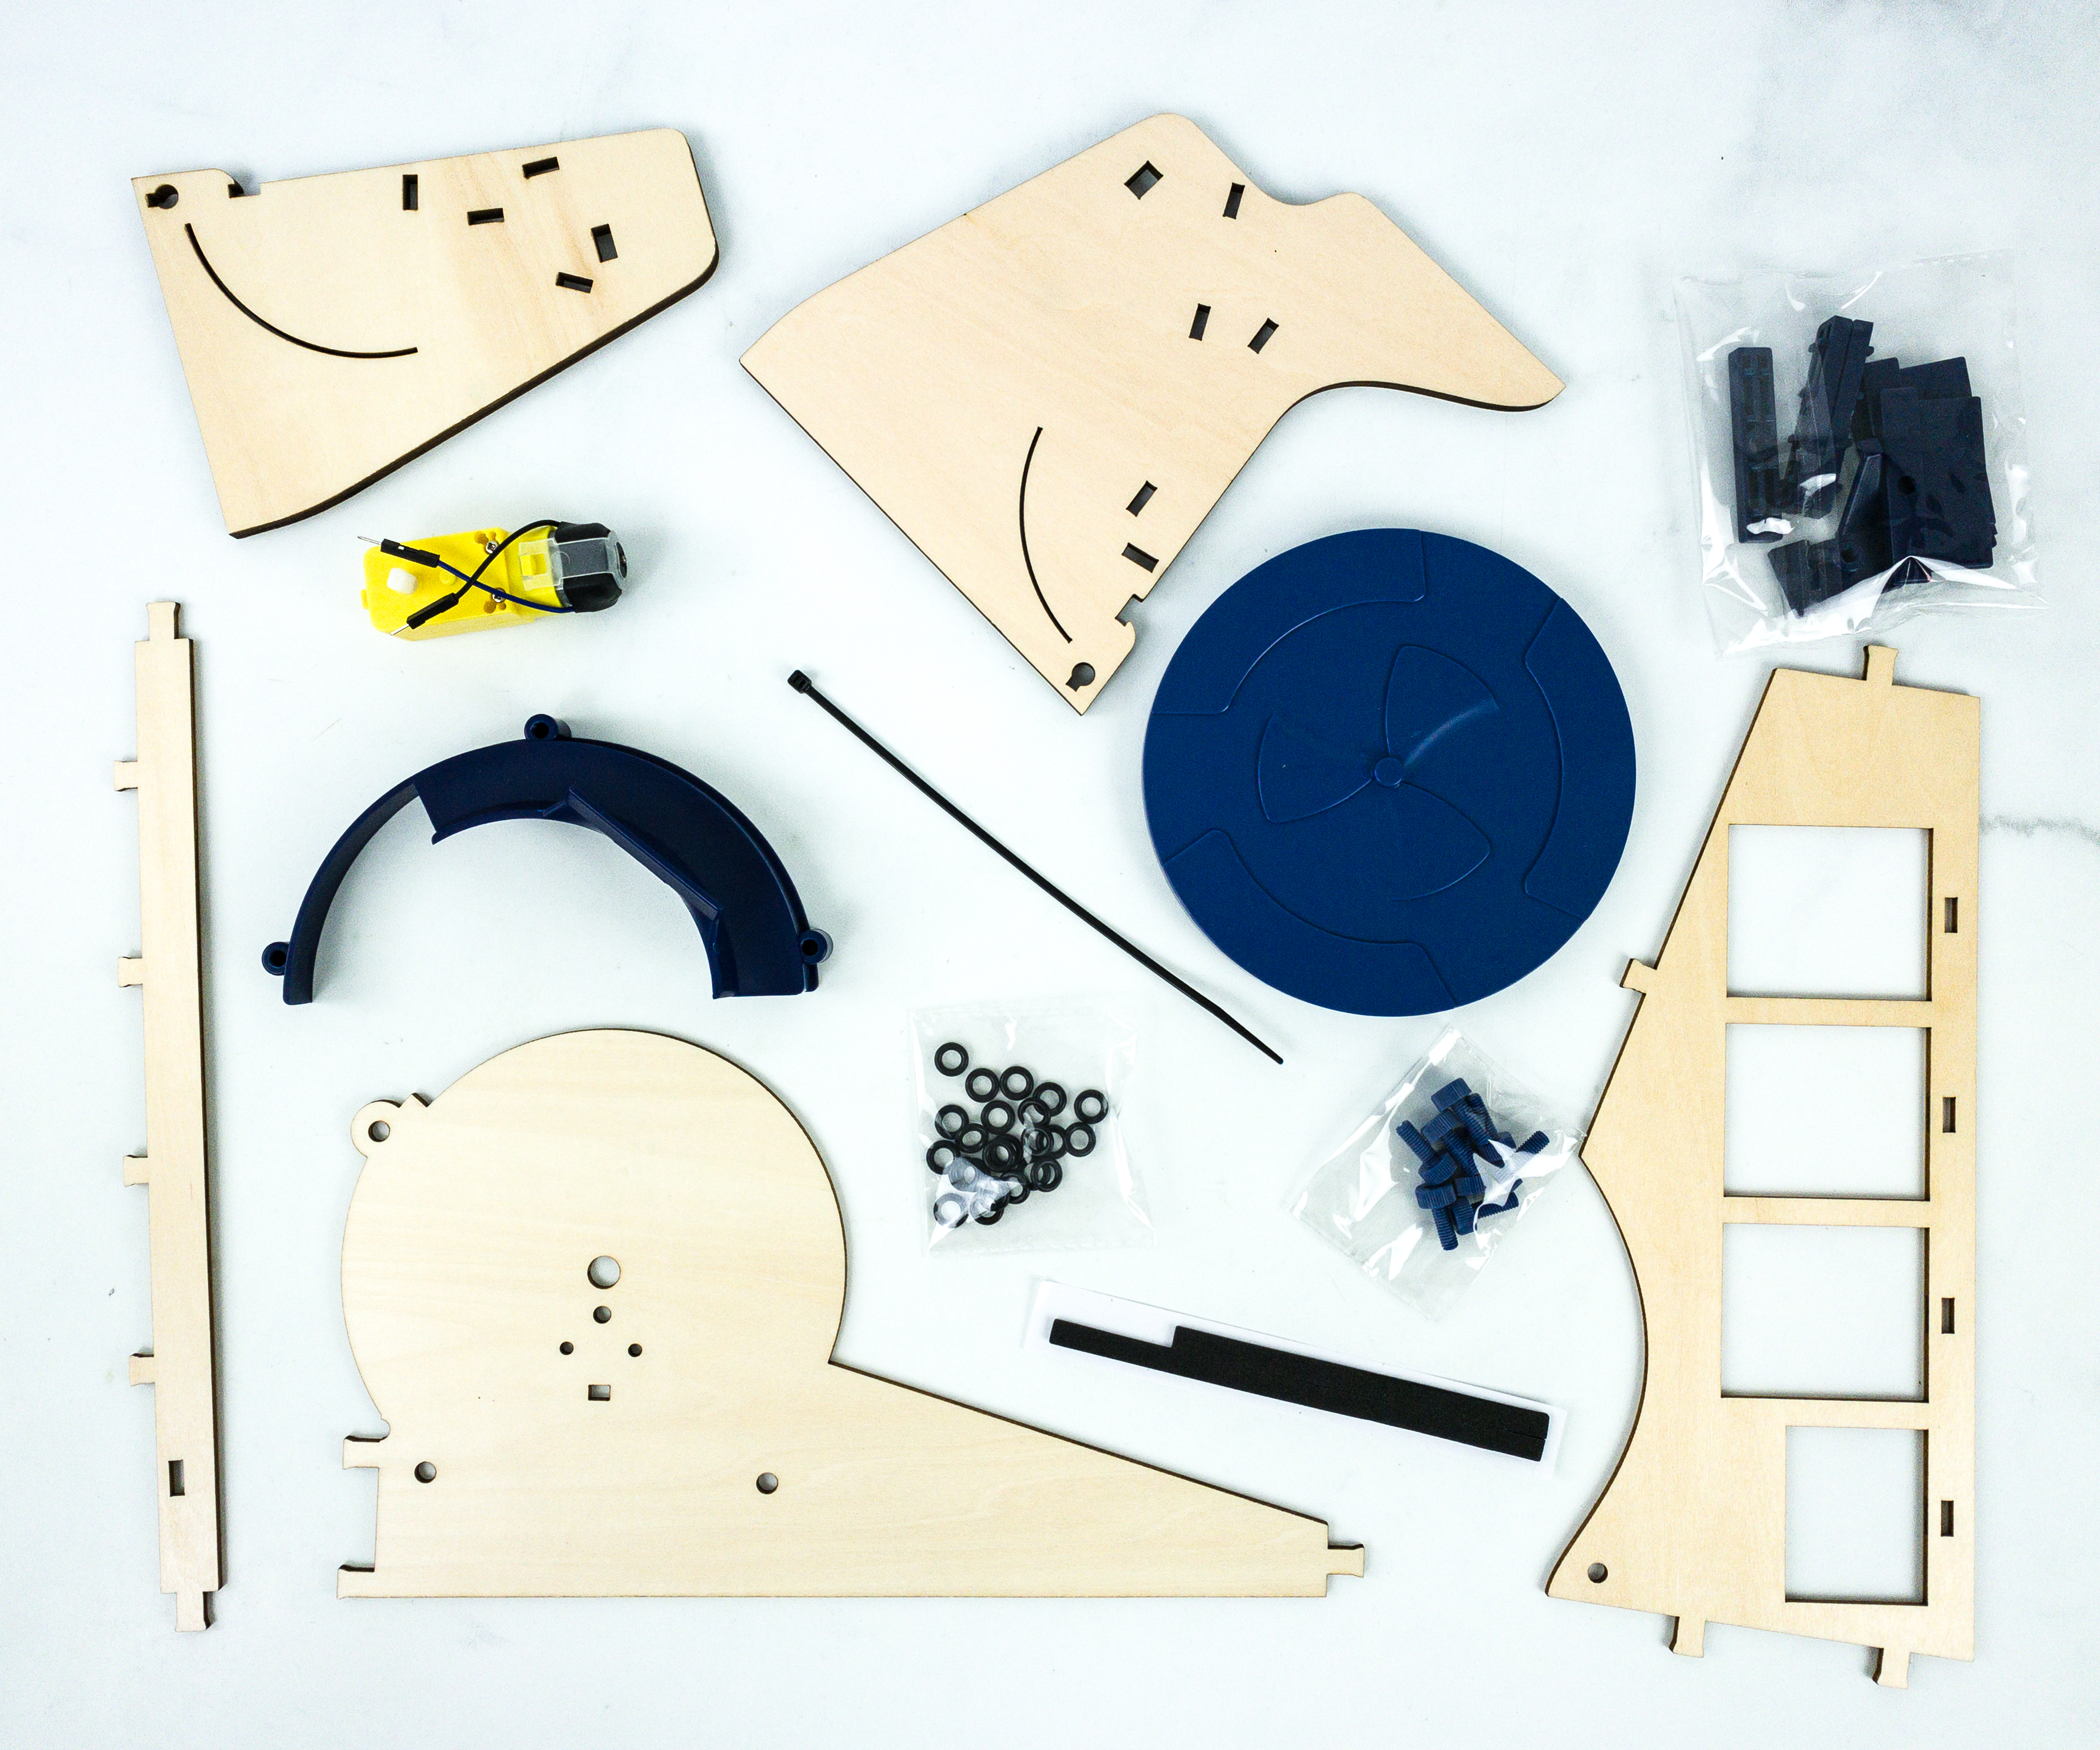
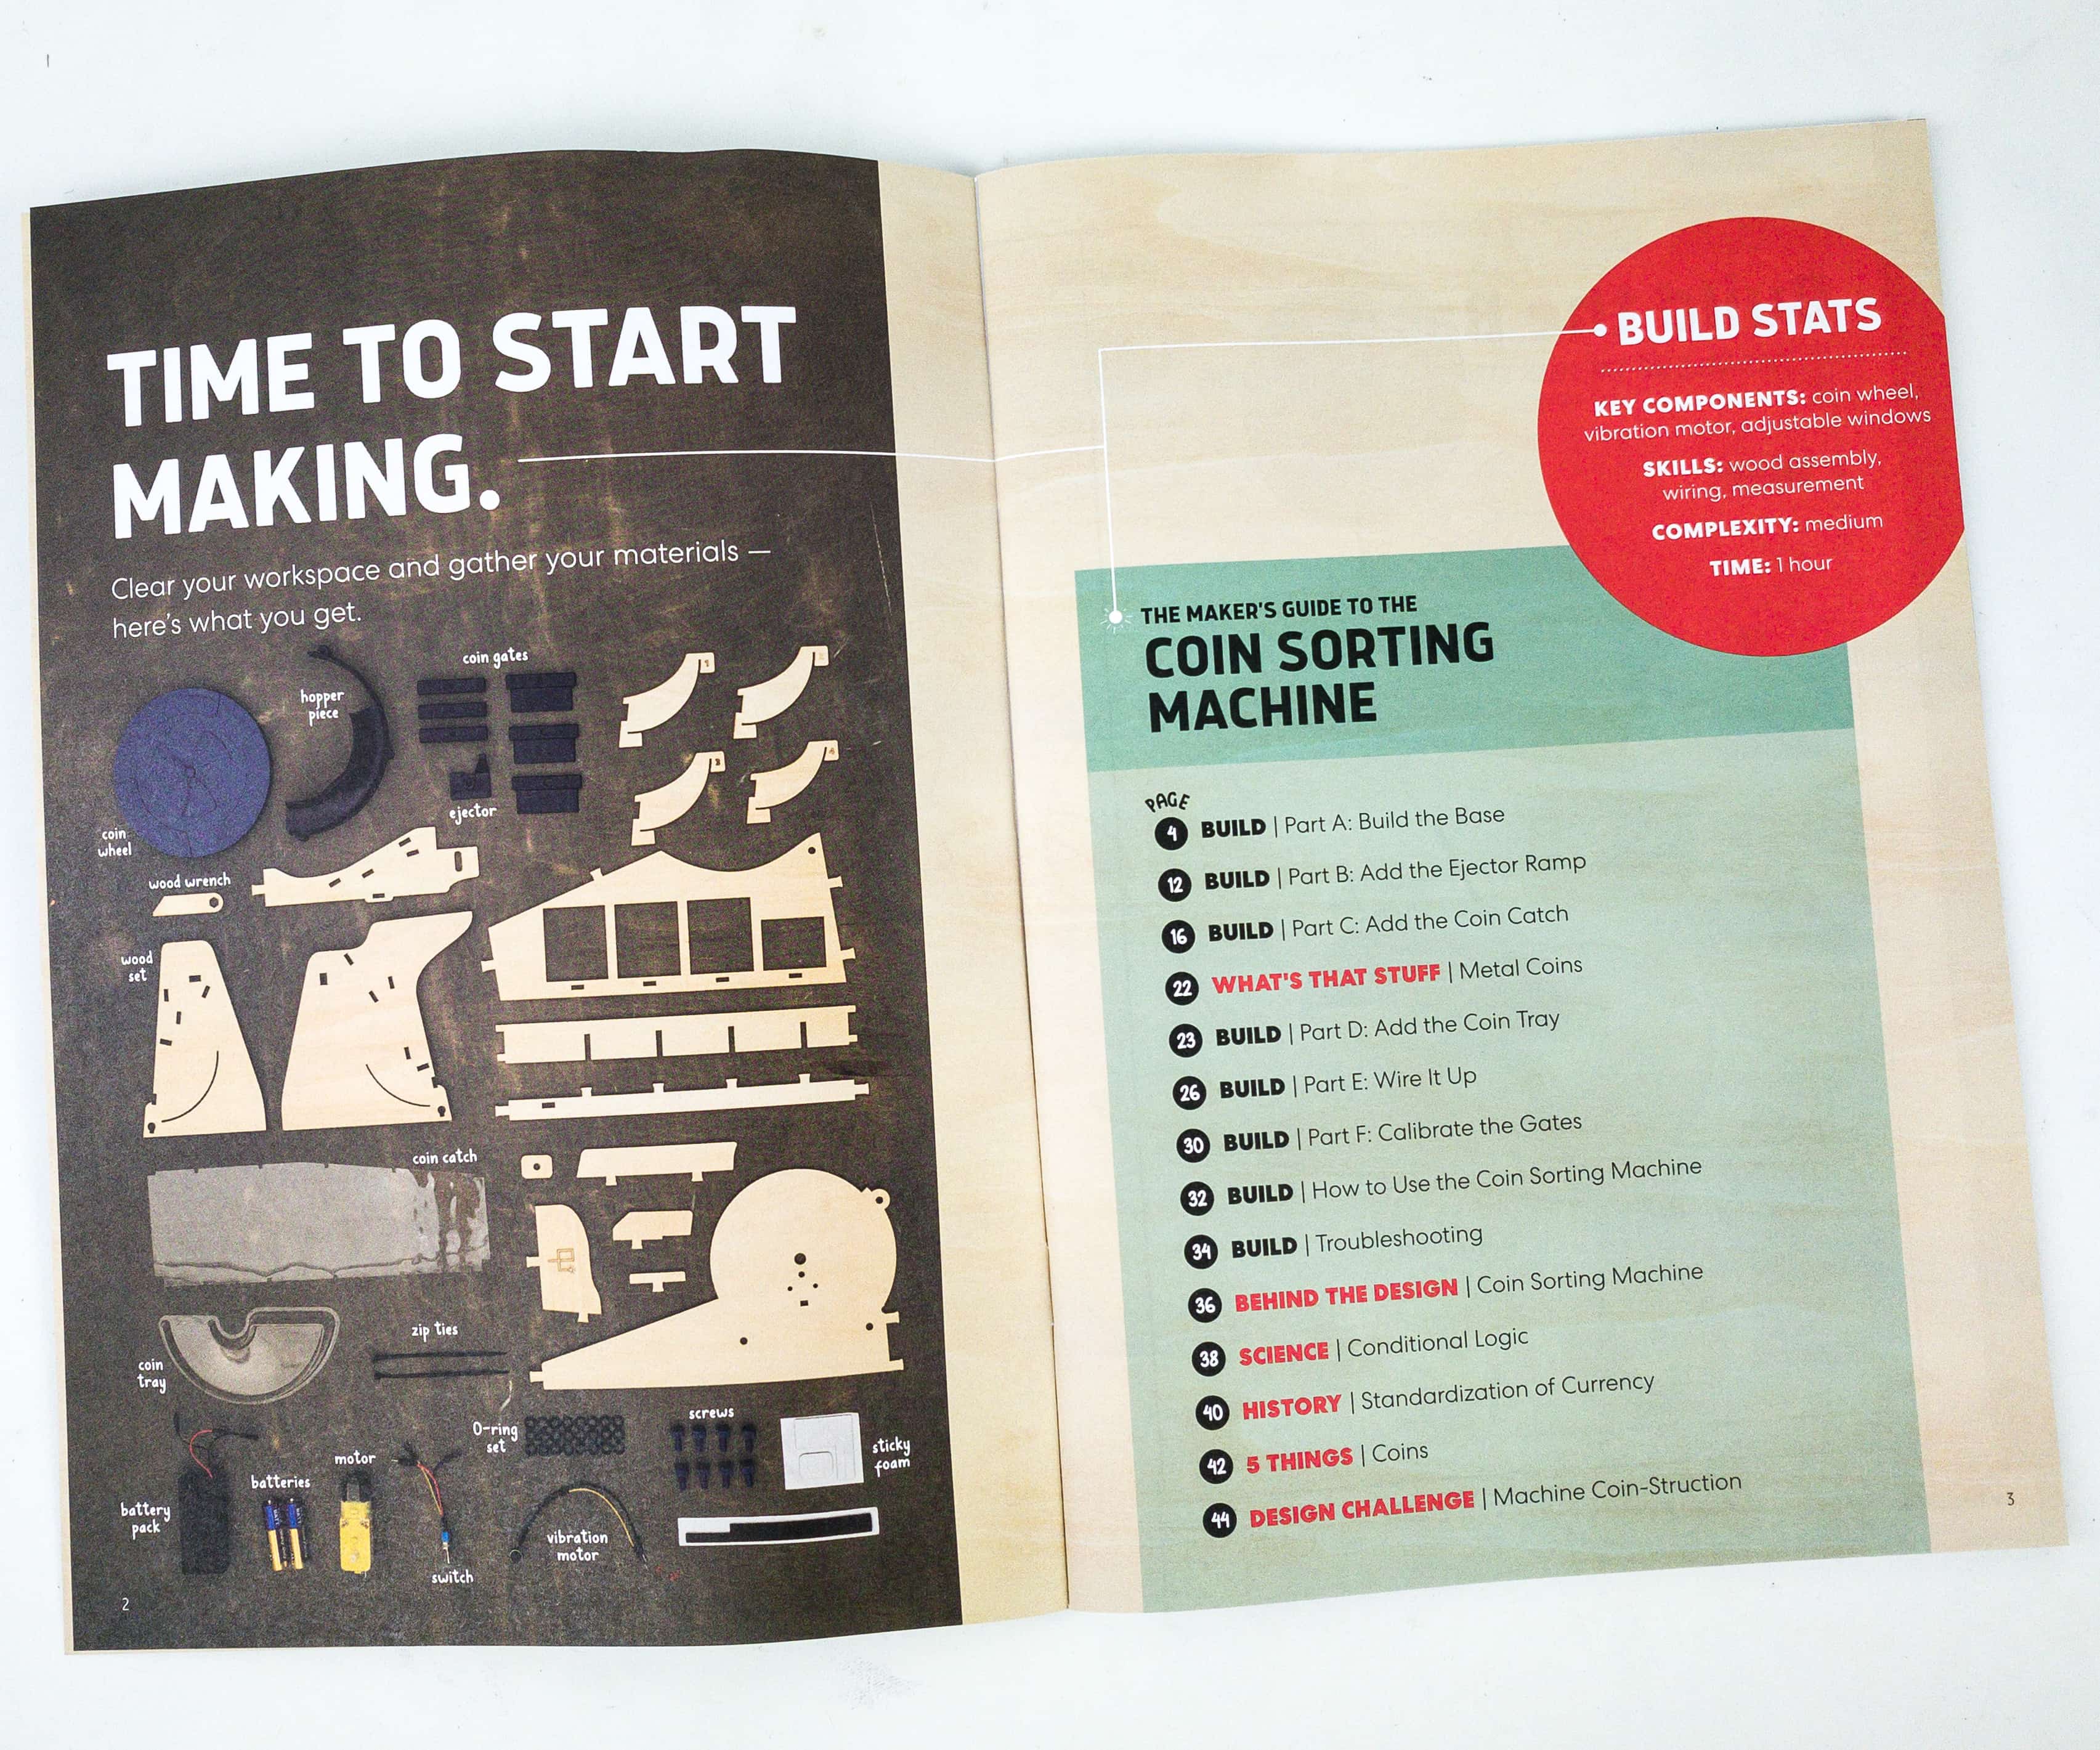
Here are some of the materials! You may check if you have the complete parts by comparing it to the picture in the booklet.
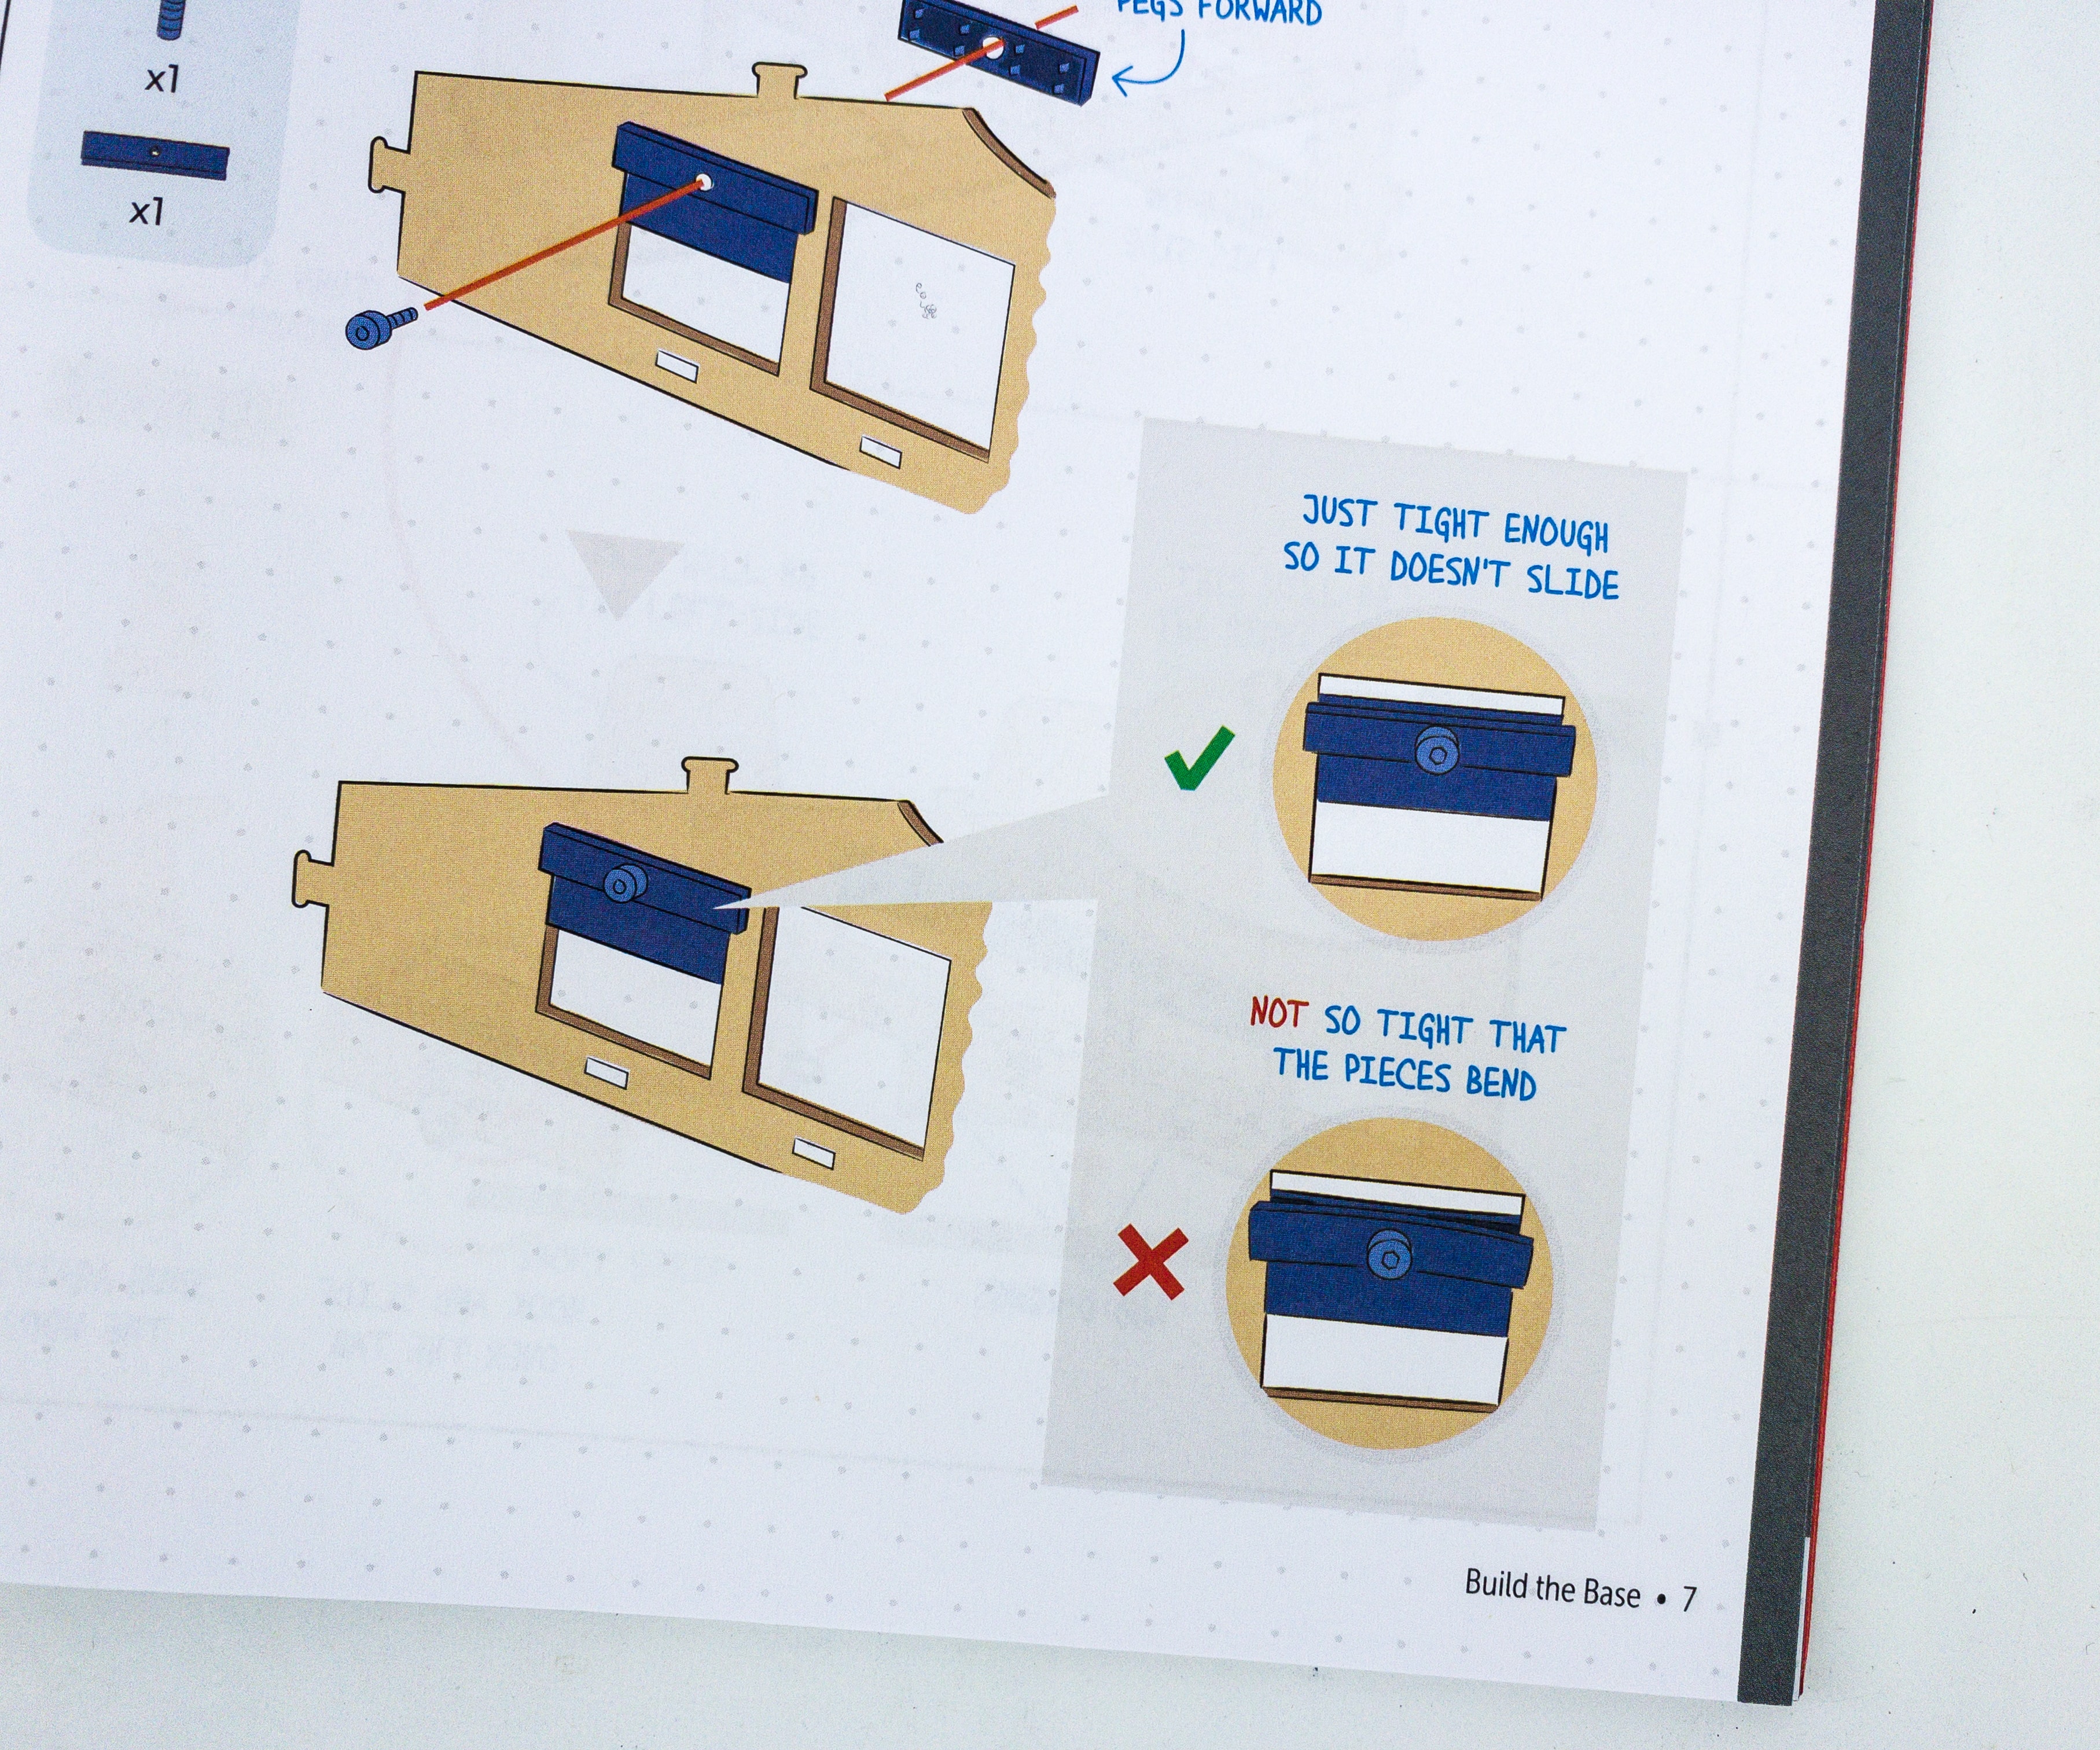
The first part of the project is building the base.
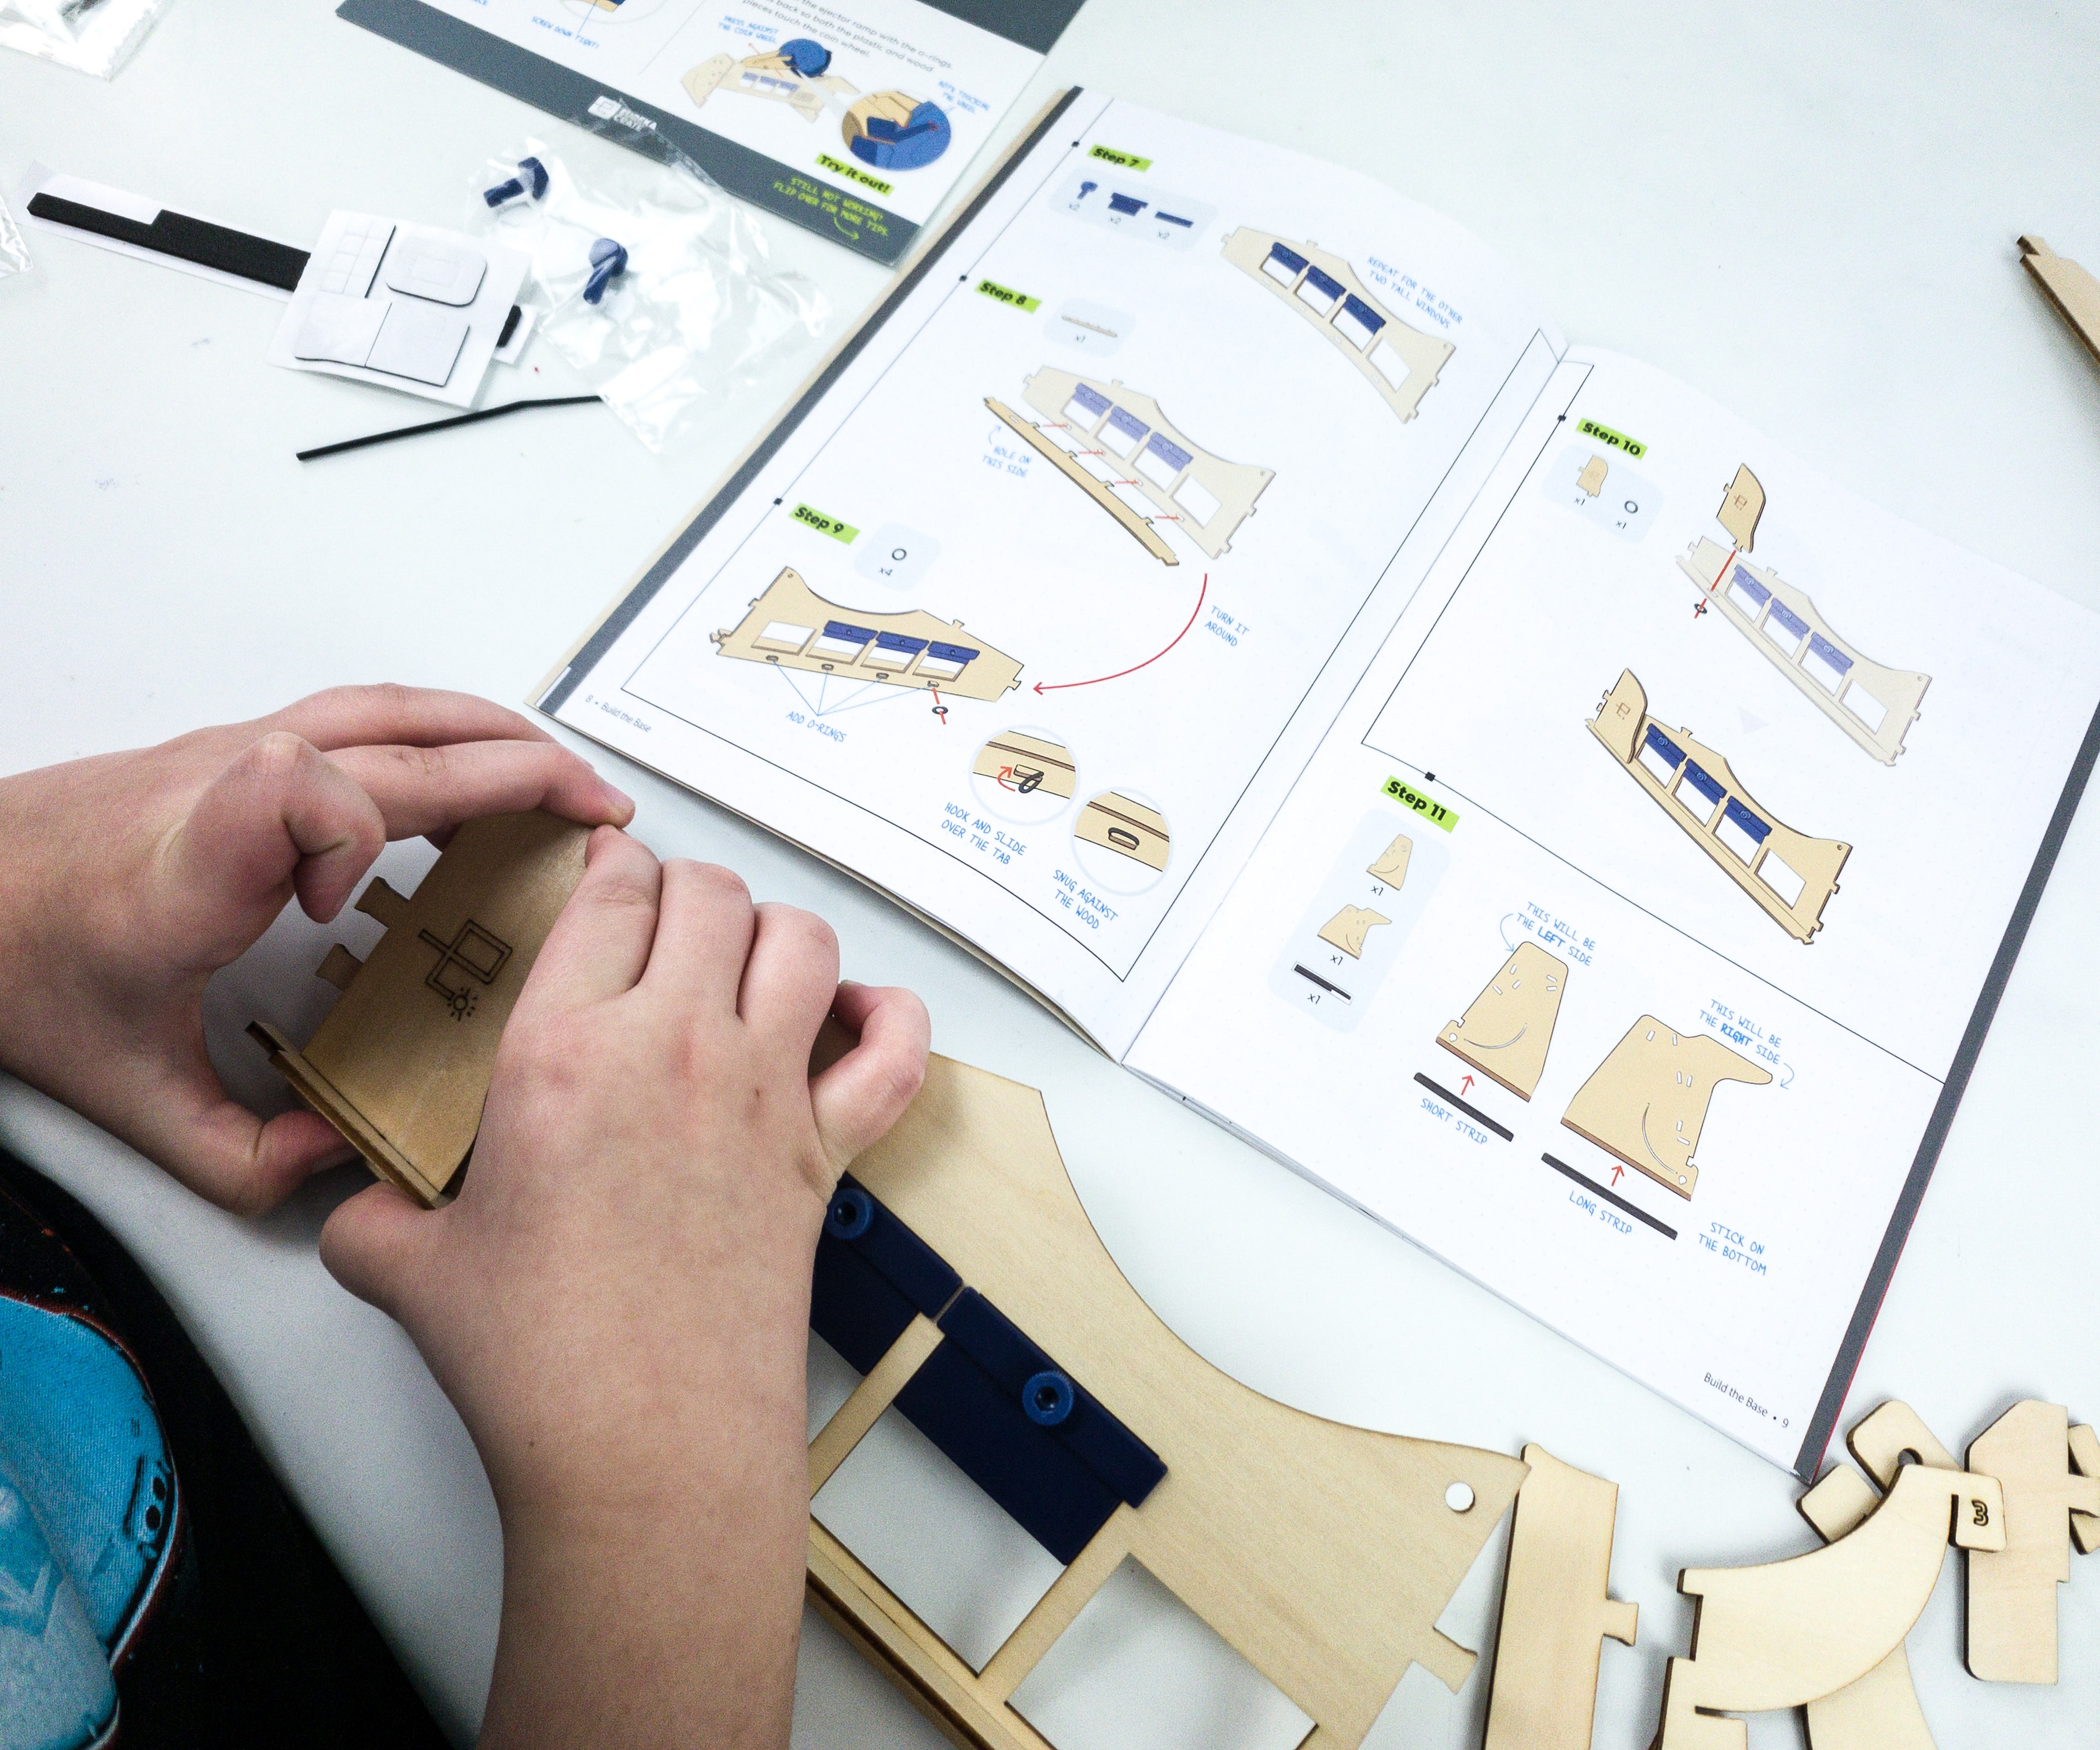
In building the base, we used the wood set.
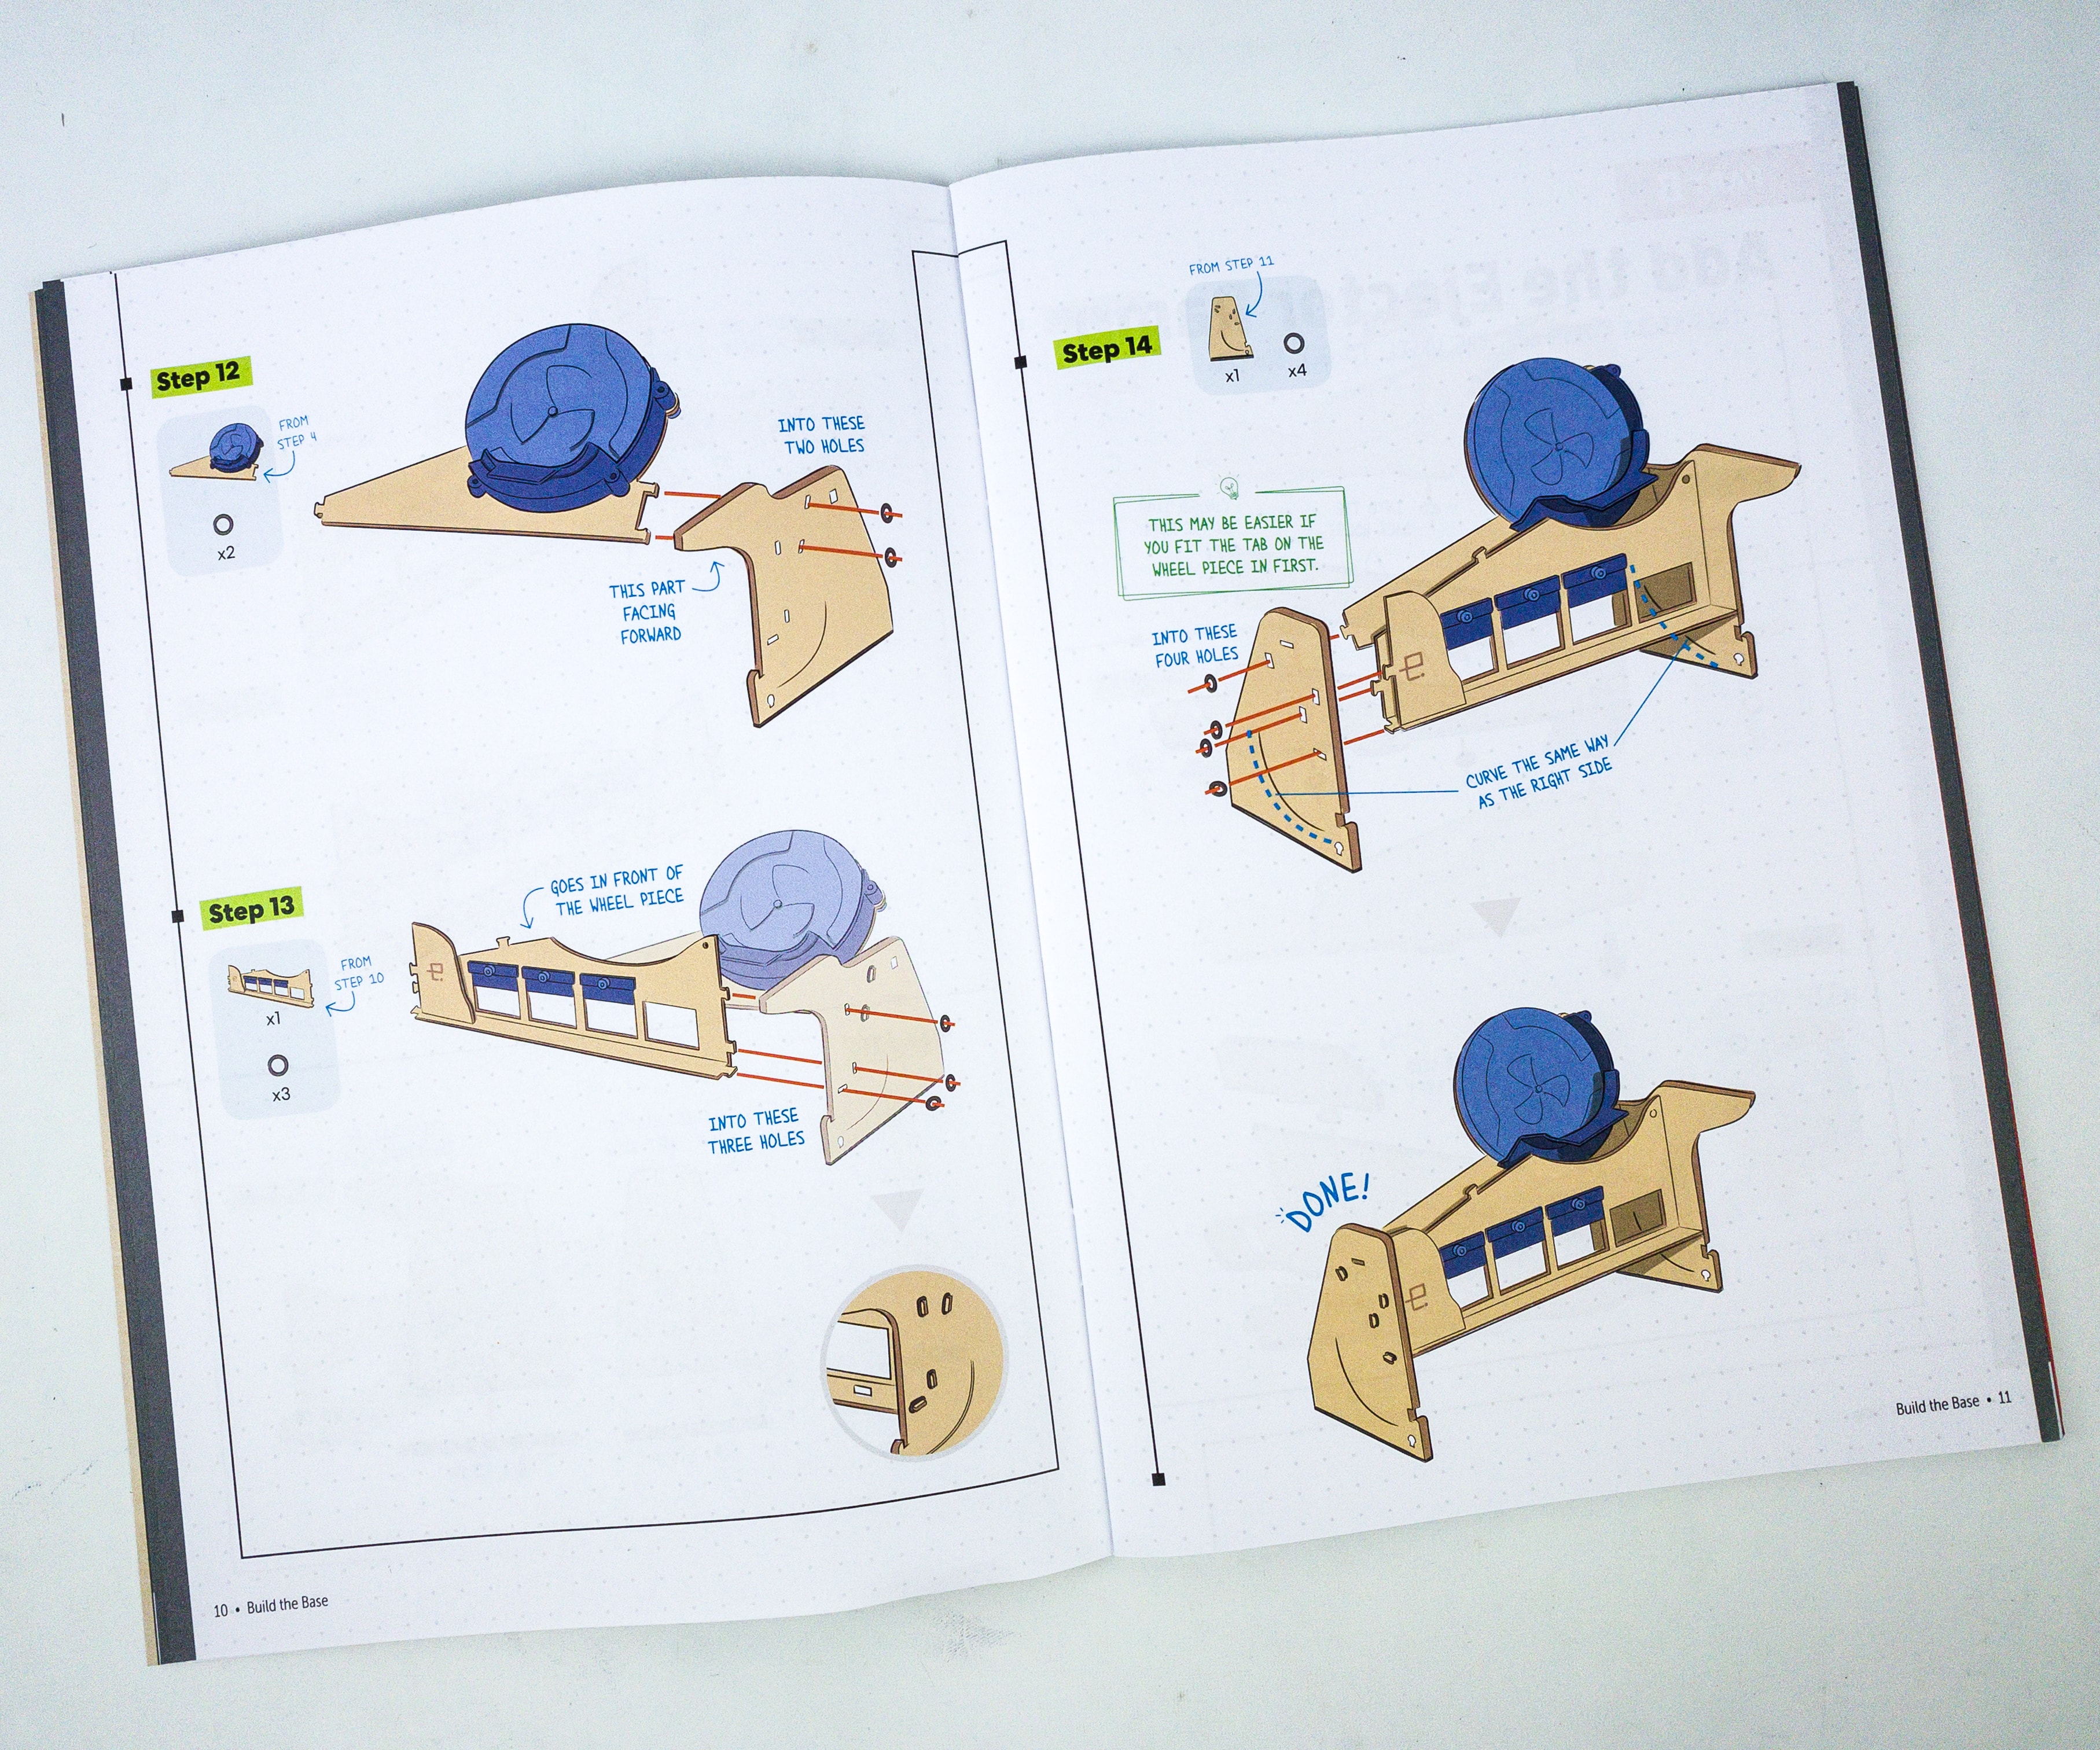
This part actually consists of 14 steps, where the last step is completing the base with the coin wheel.
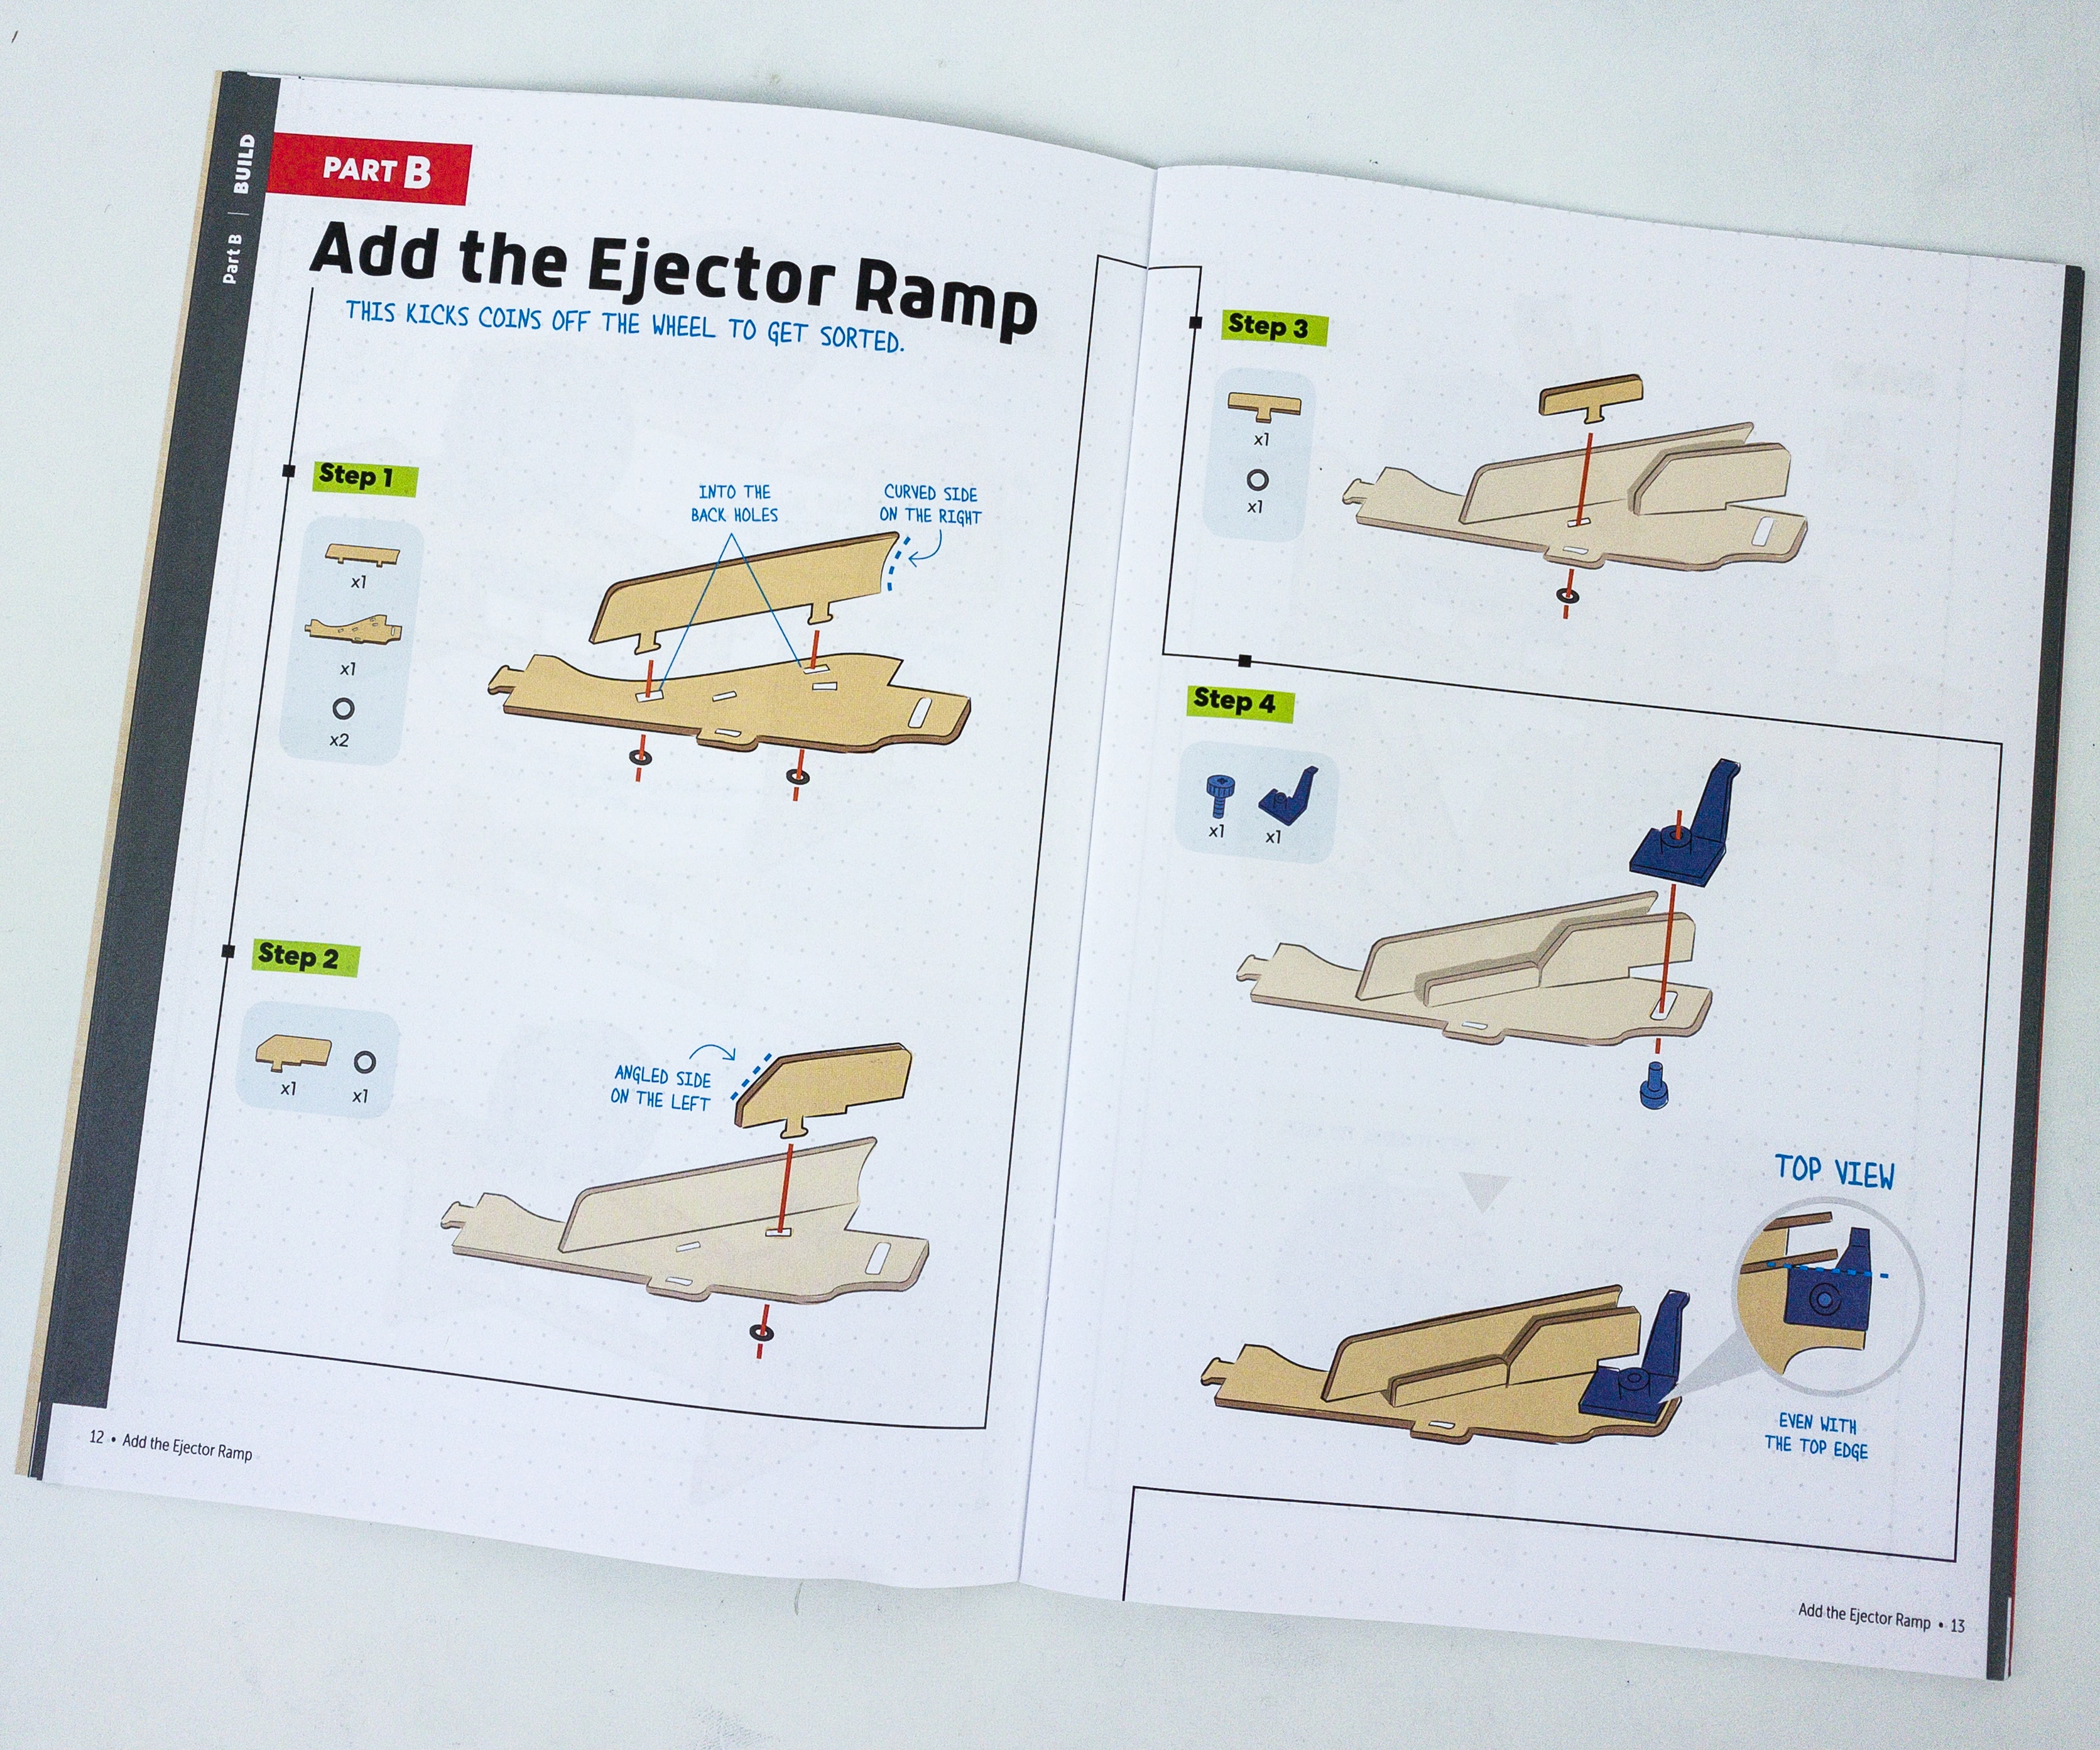
Part B is adding the ejector ramp, which will kick the coins off the wheel to get sorted.
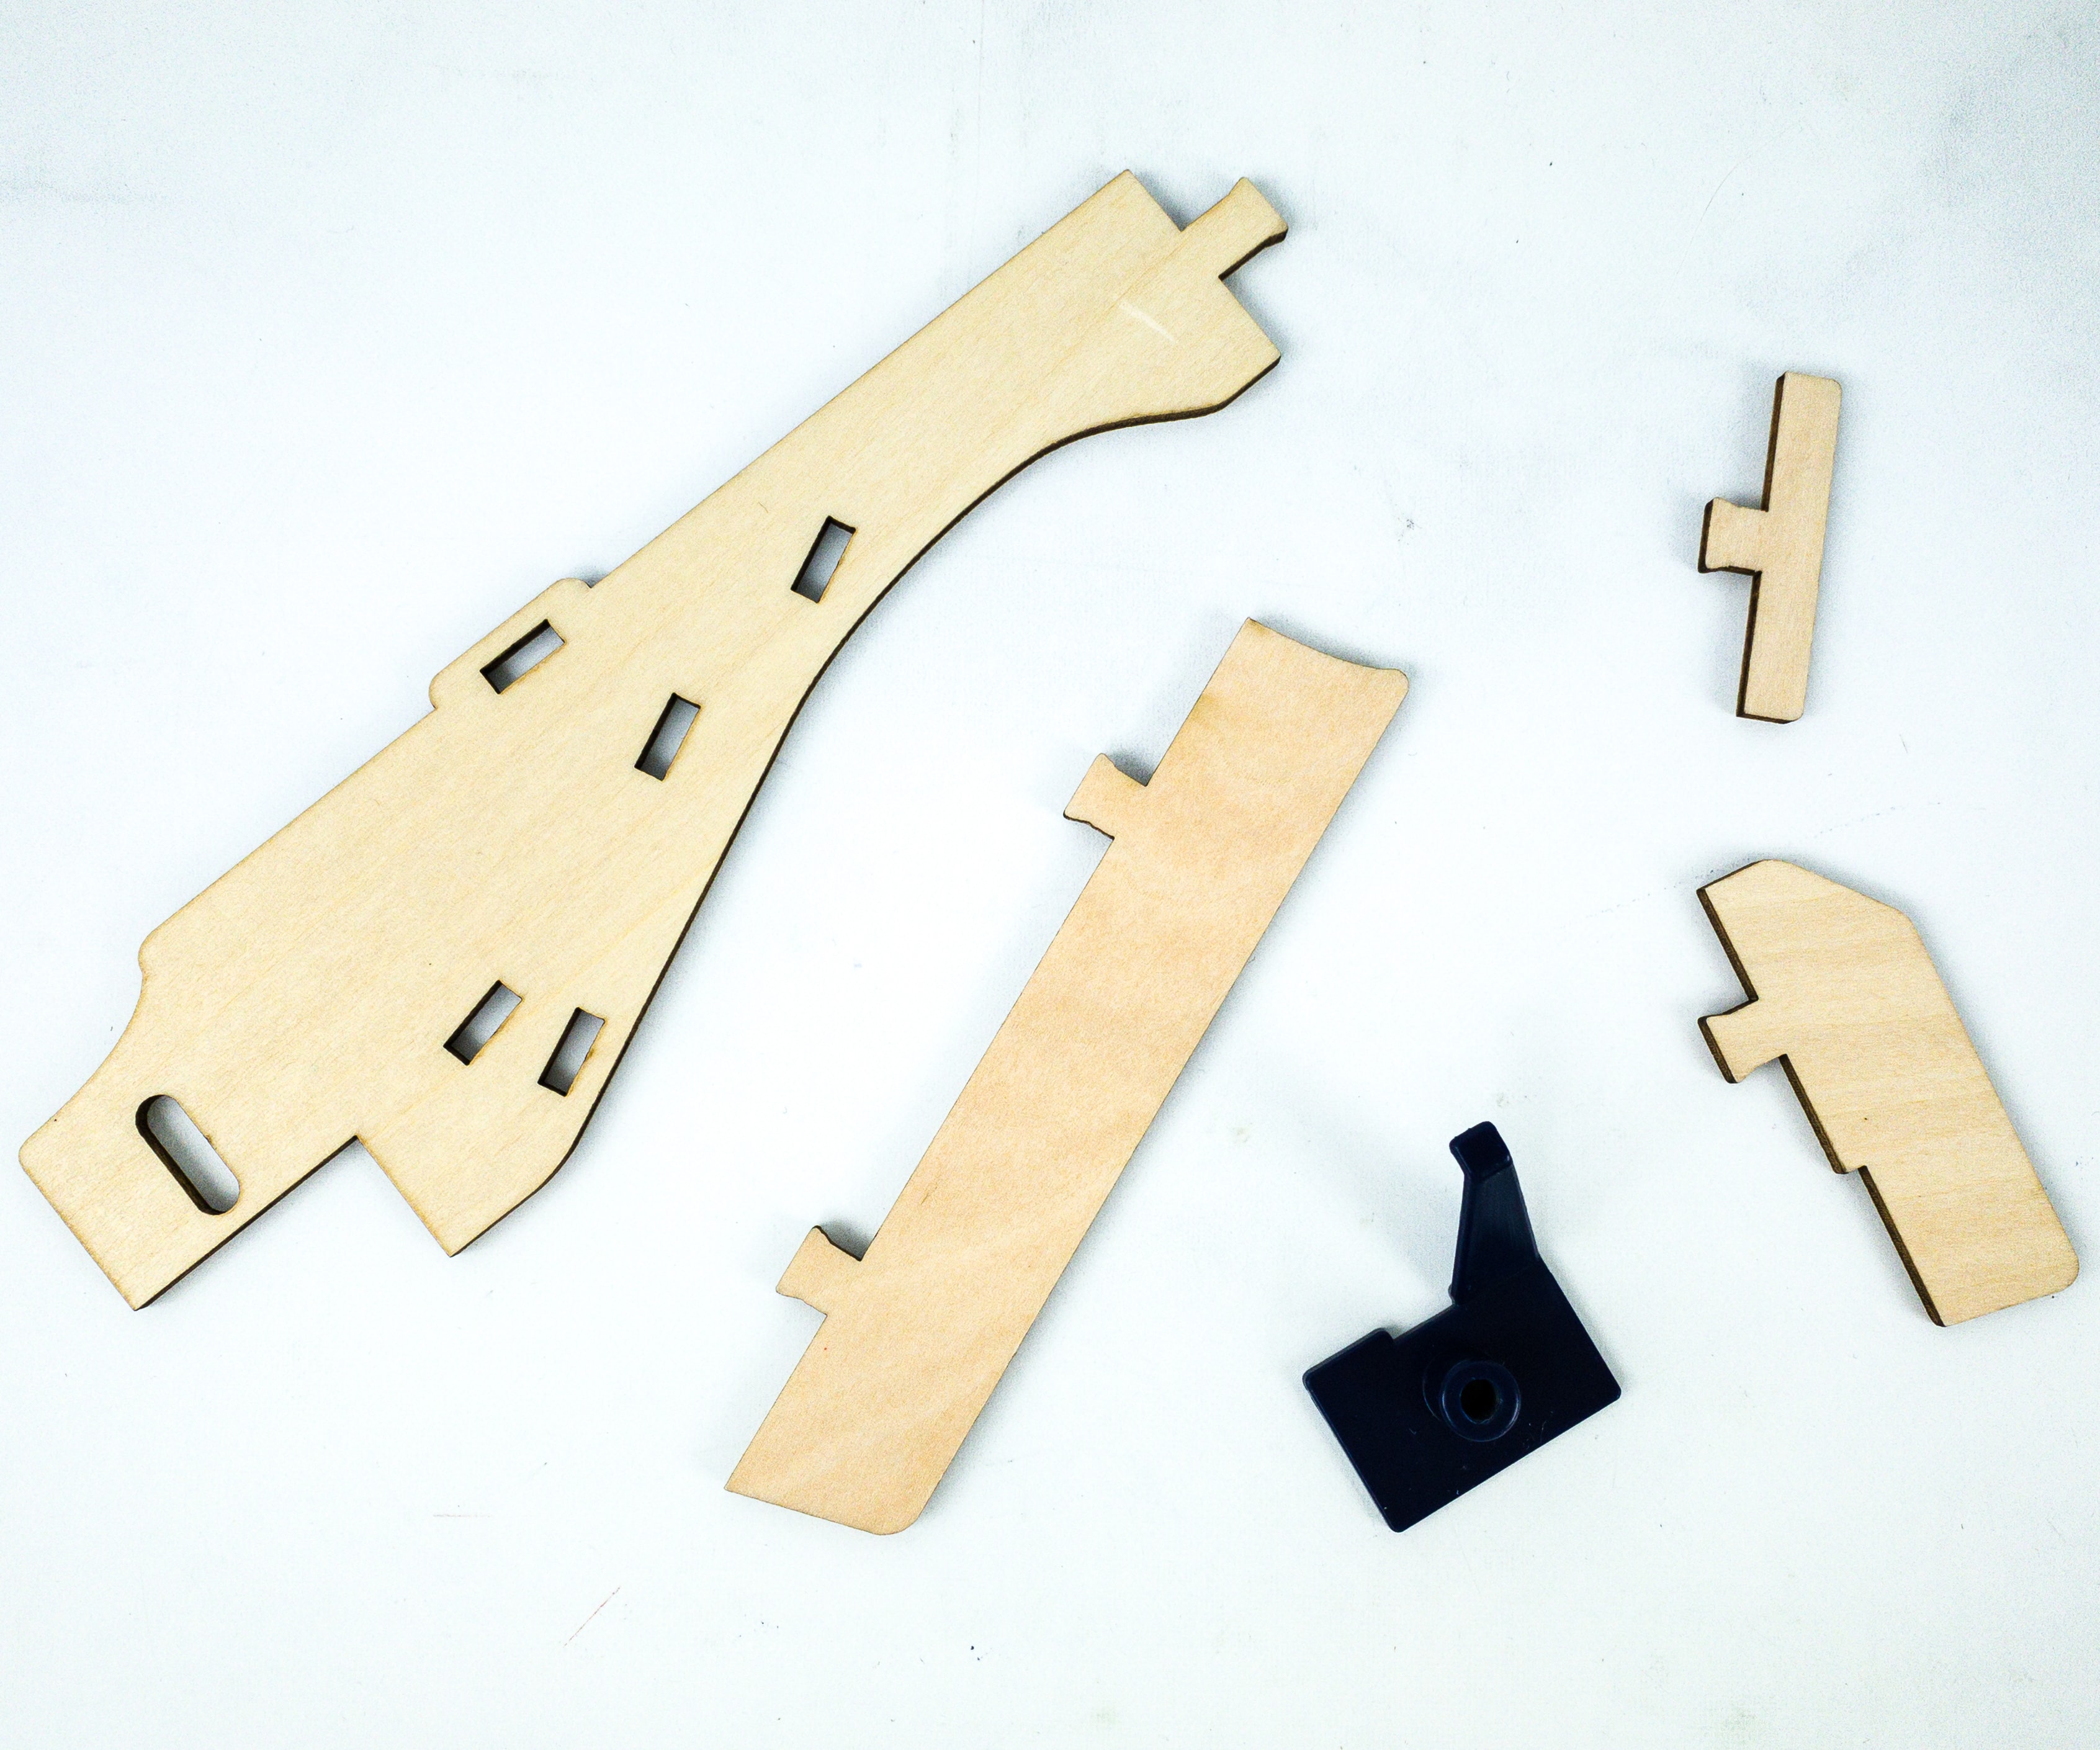
For this part, we’ll need some of the wood pieces, and the ejector.
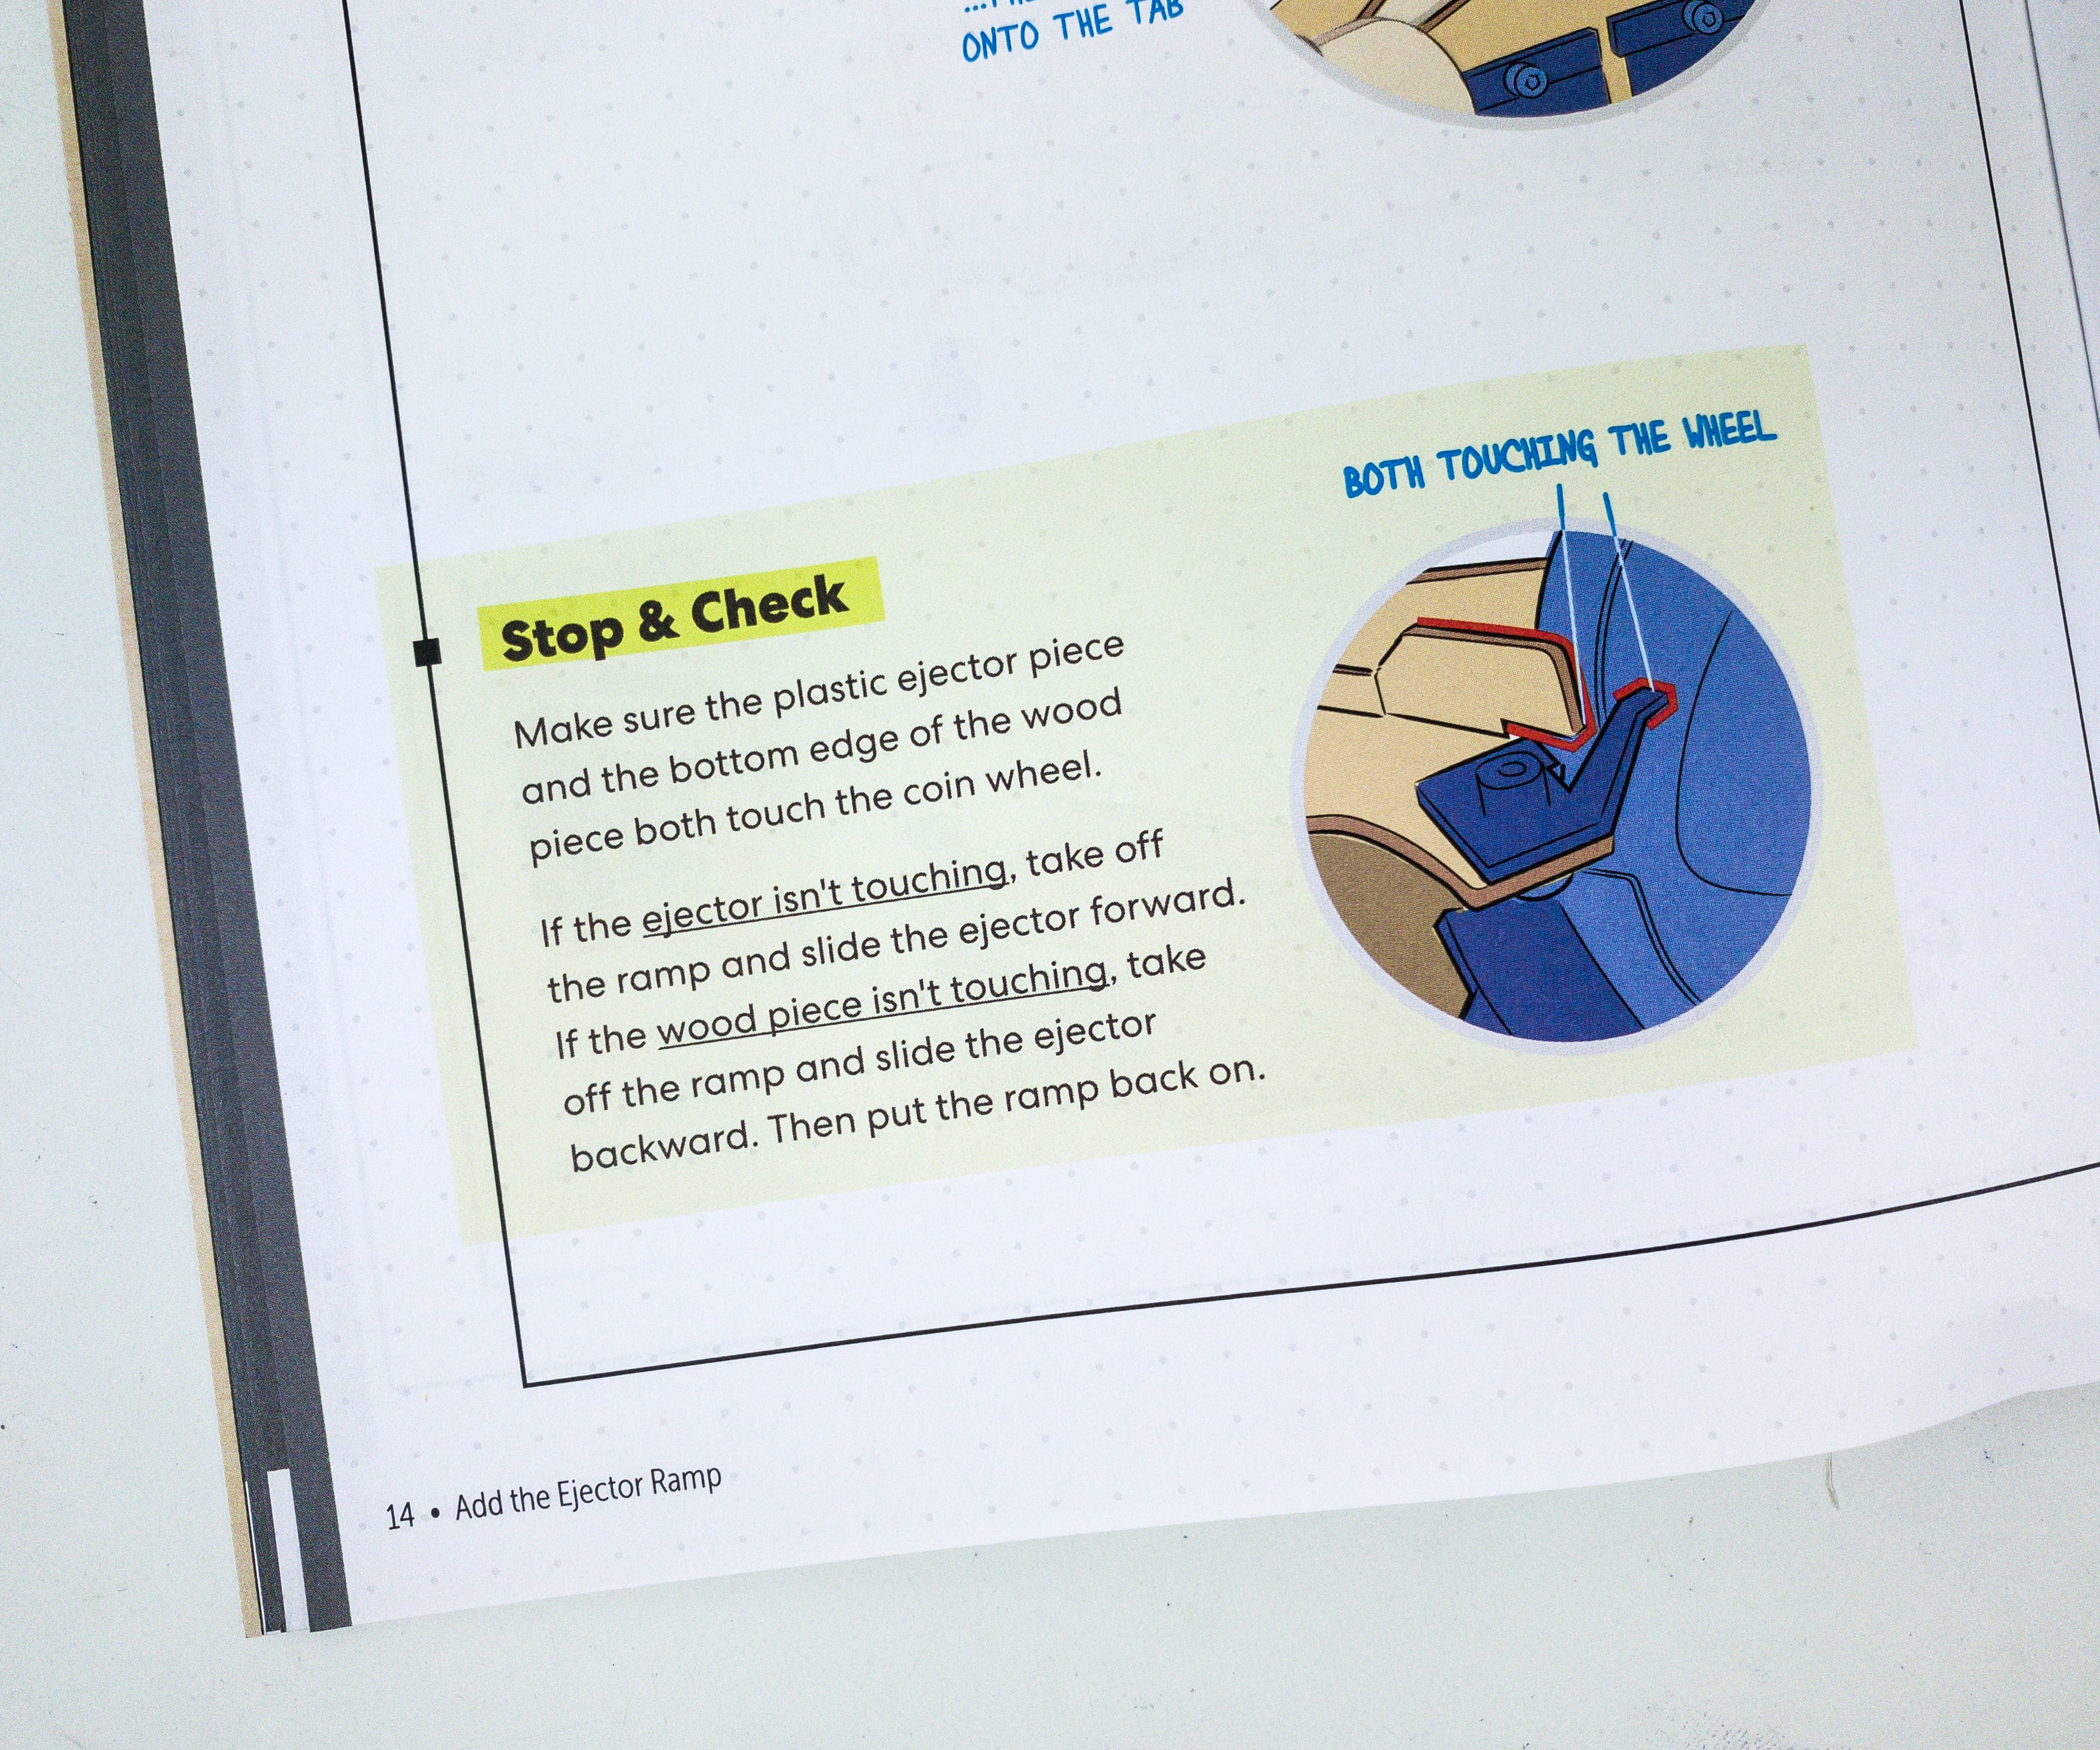
It’s important that as you complete some steps, you’ll also stop to check if what you’re doing is right, or if it works. It will save you some time and you don’t have to go back steps, and do it all over again!
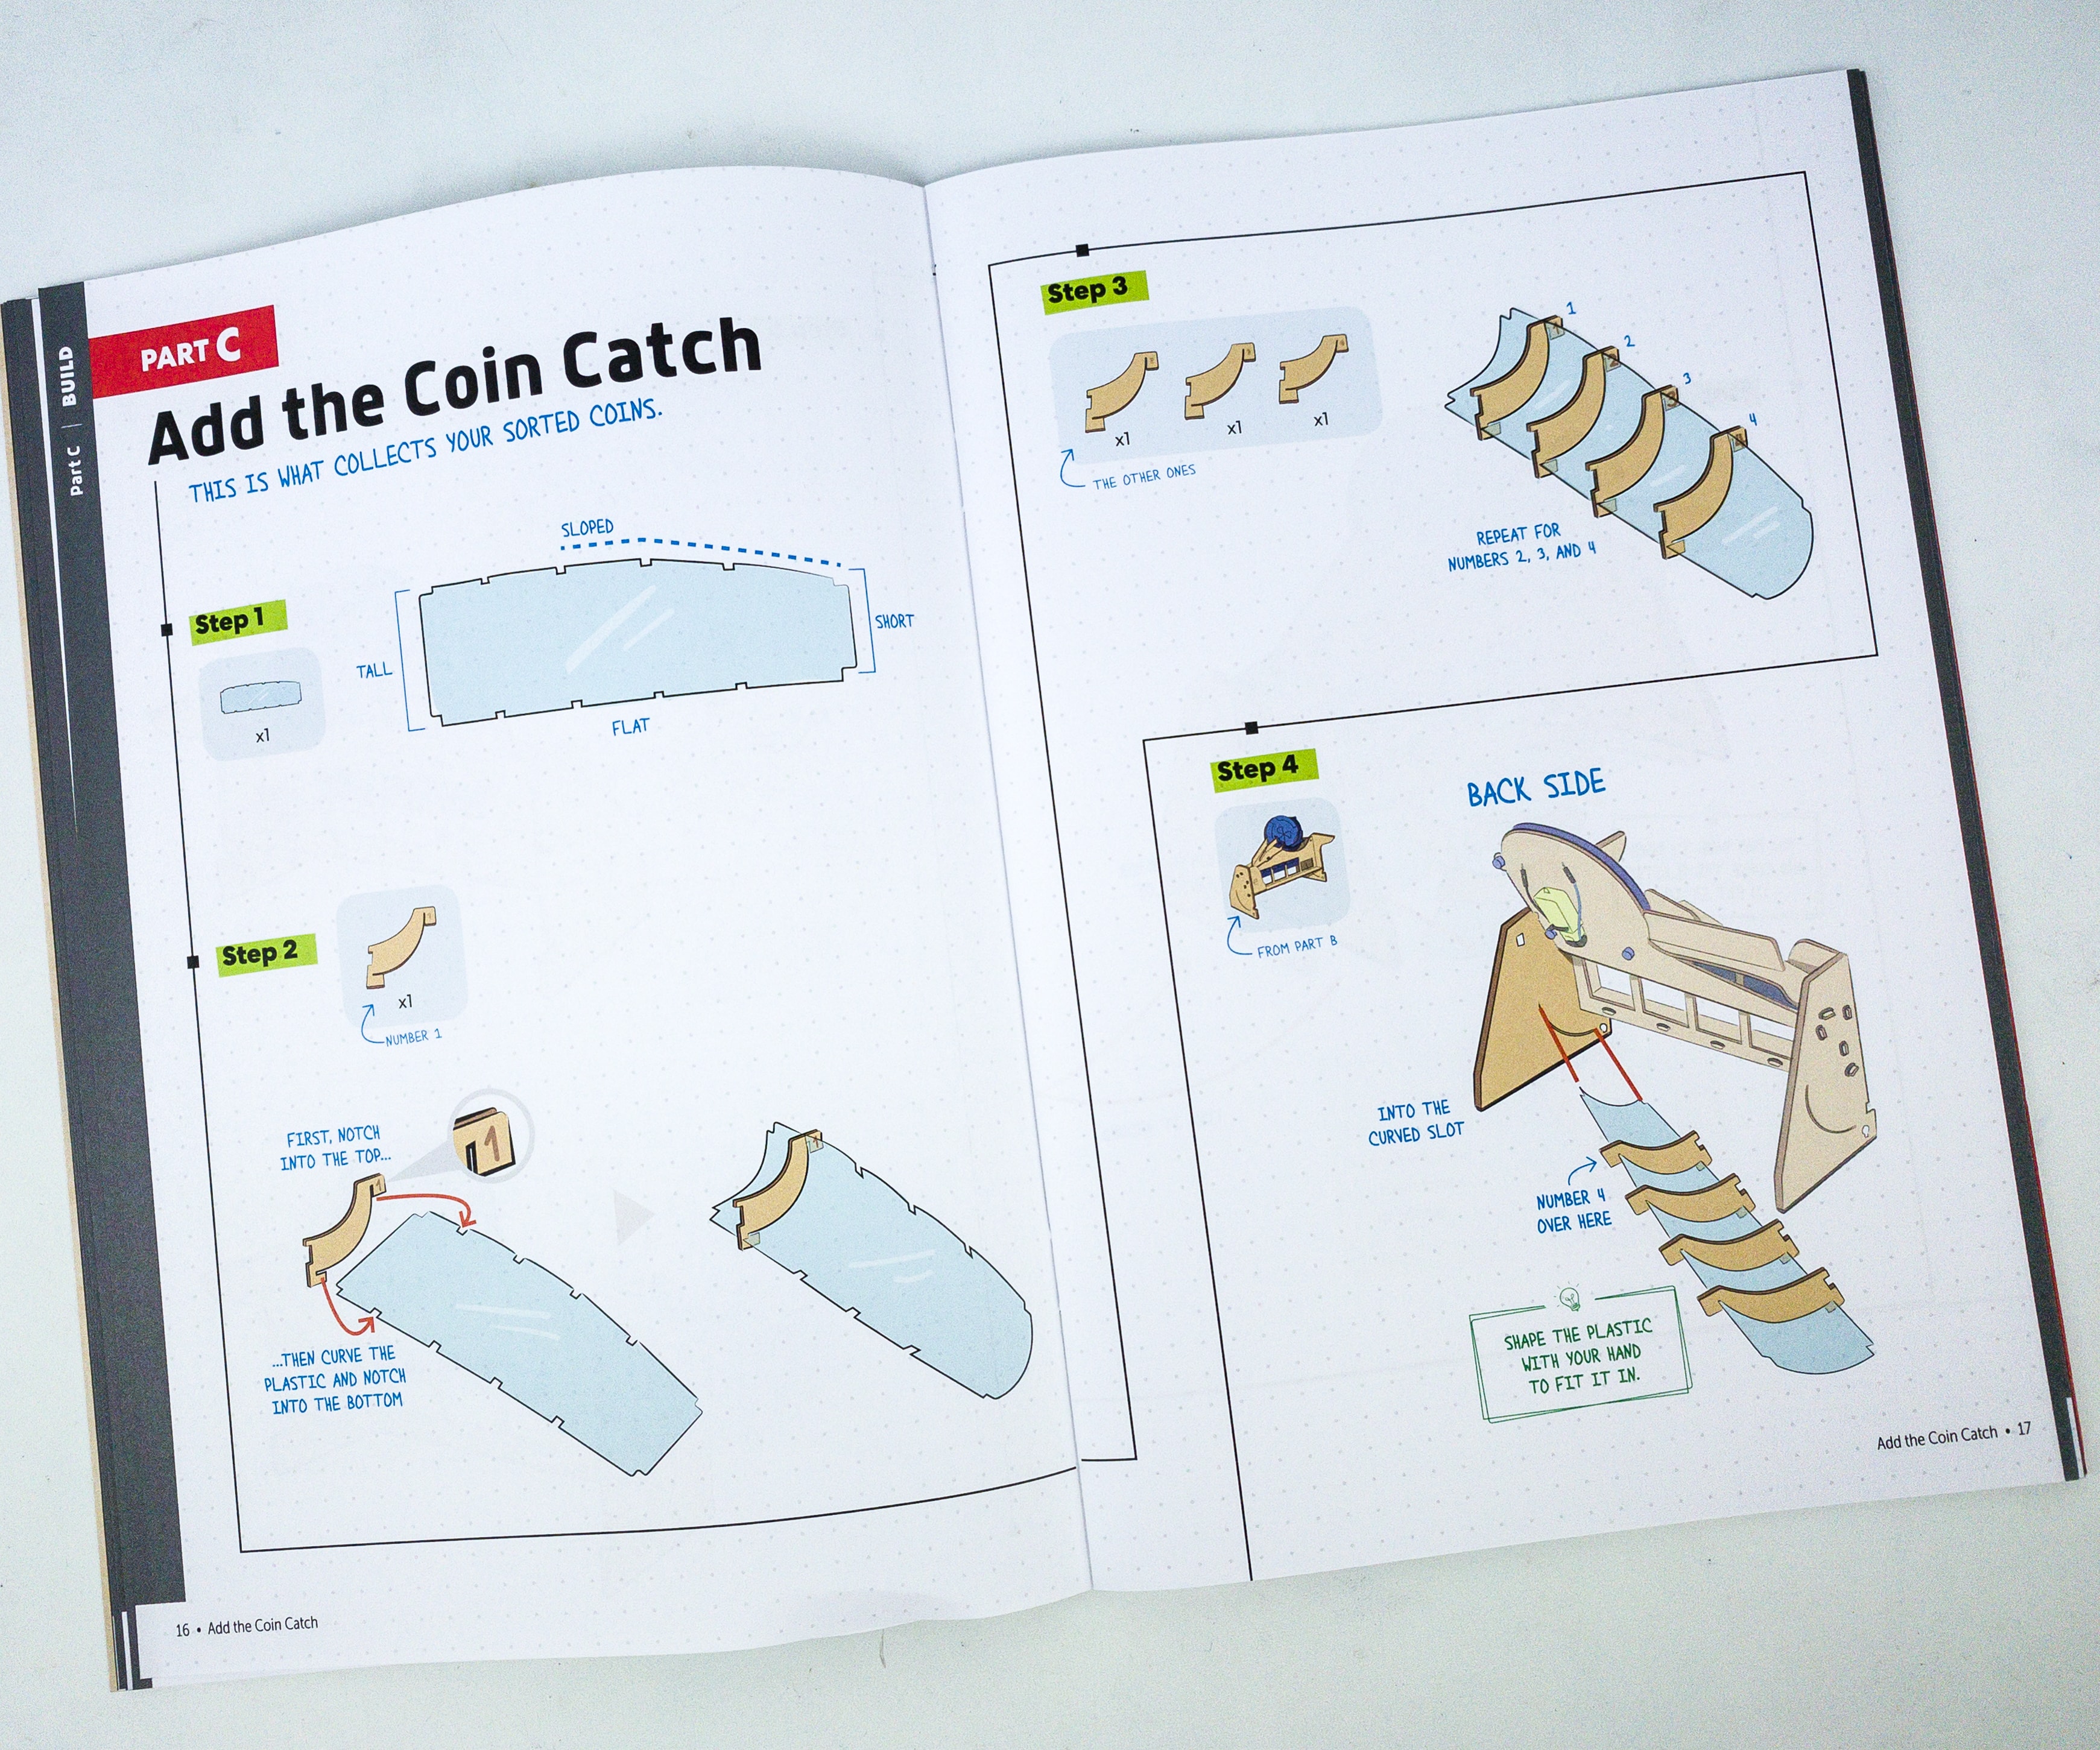
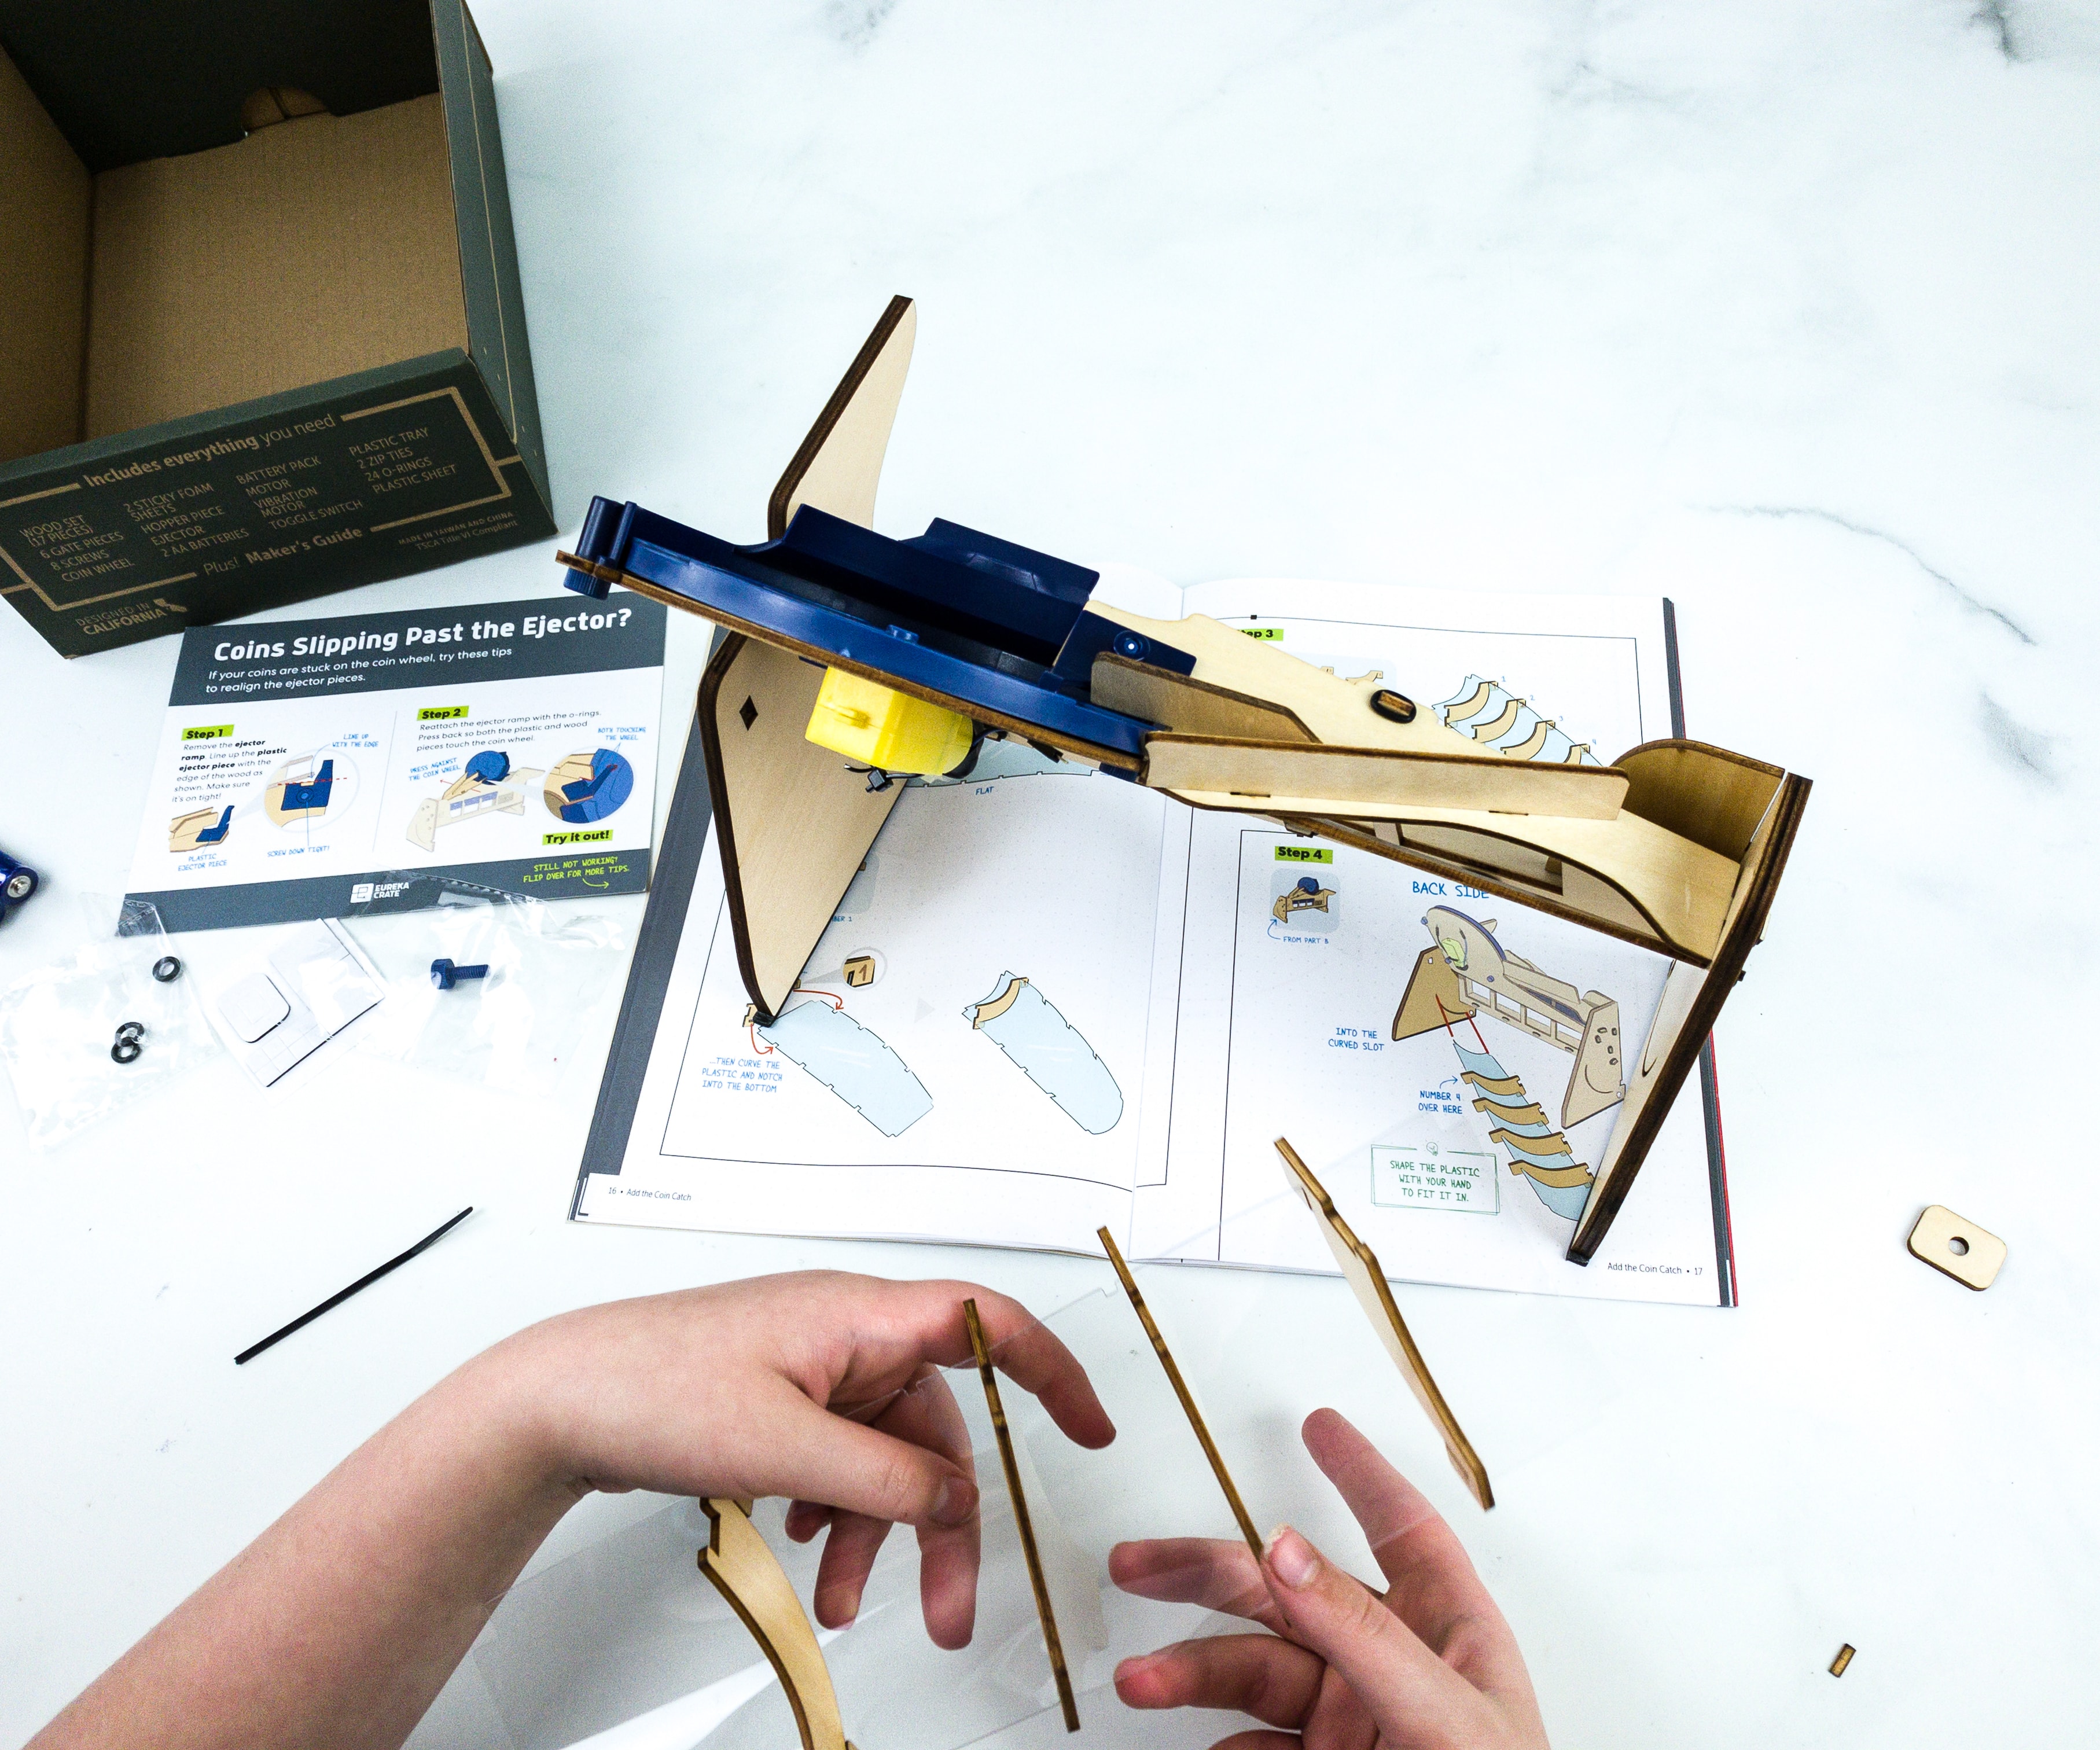
For part C, it’s time to assemble the coin catch. This will serve as the vessel for the coins after they’re sorted.
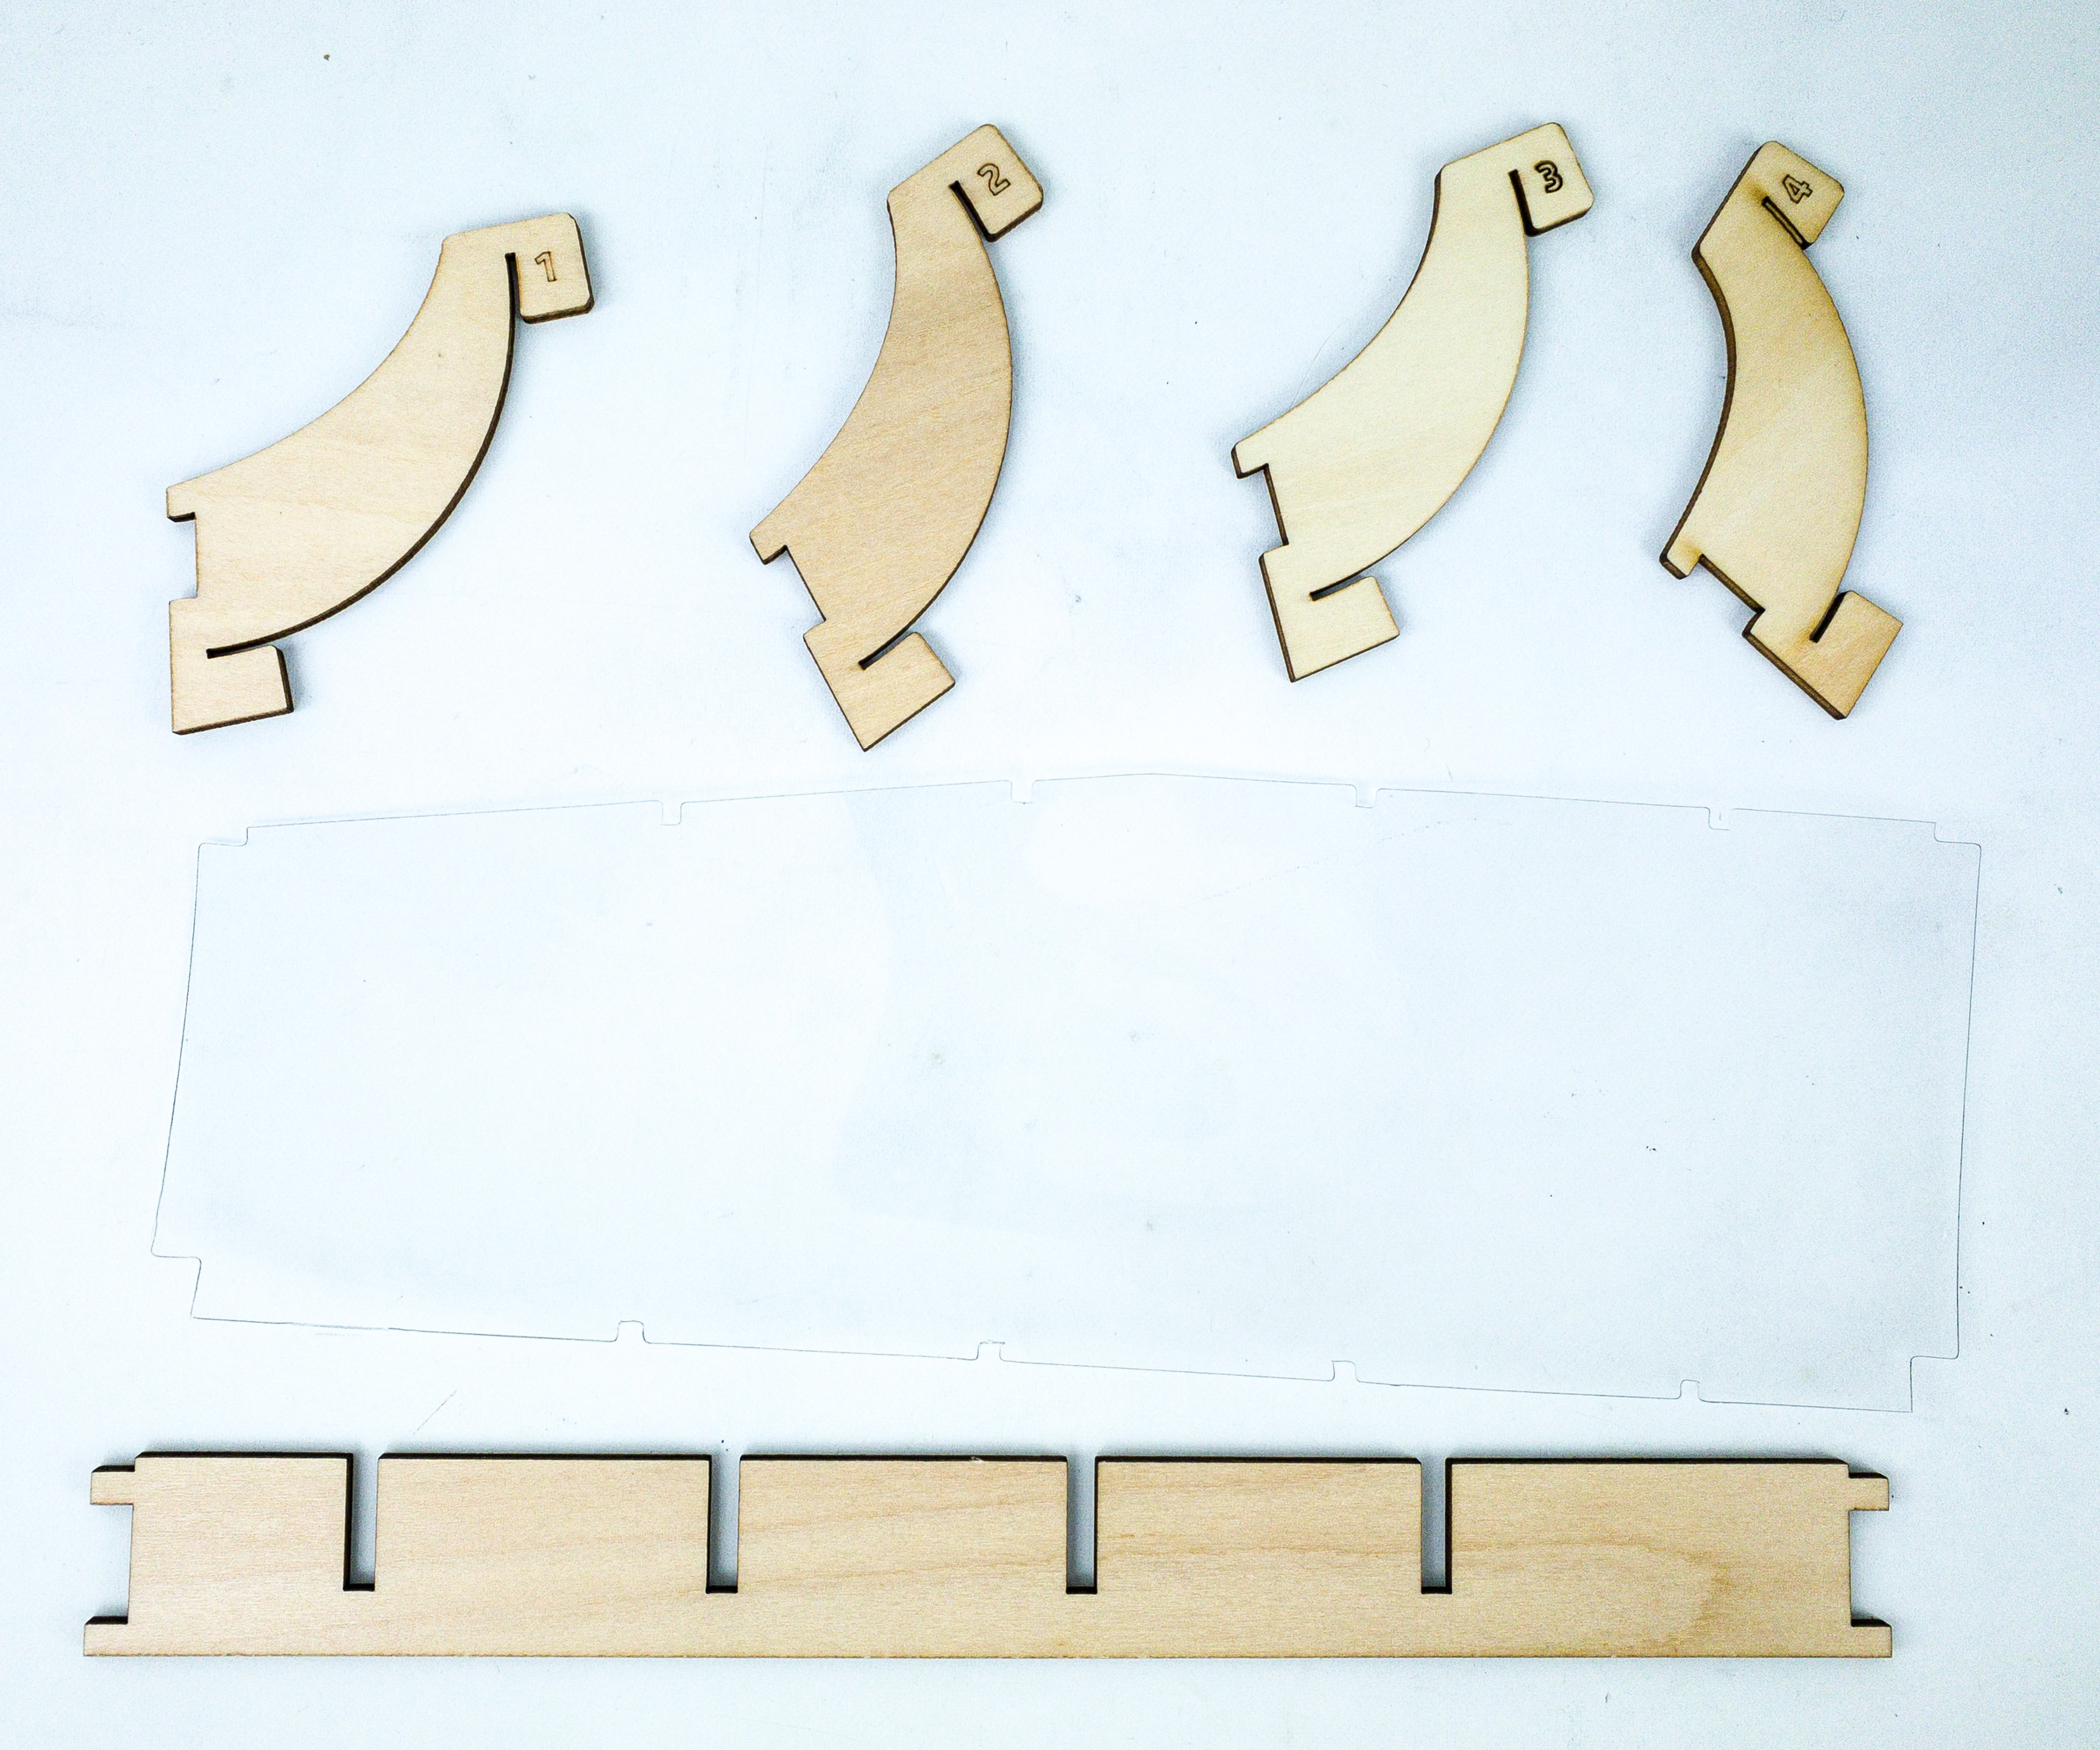
The wood pieces will serve as partitions.
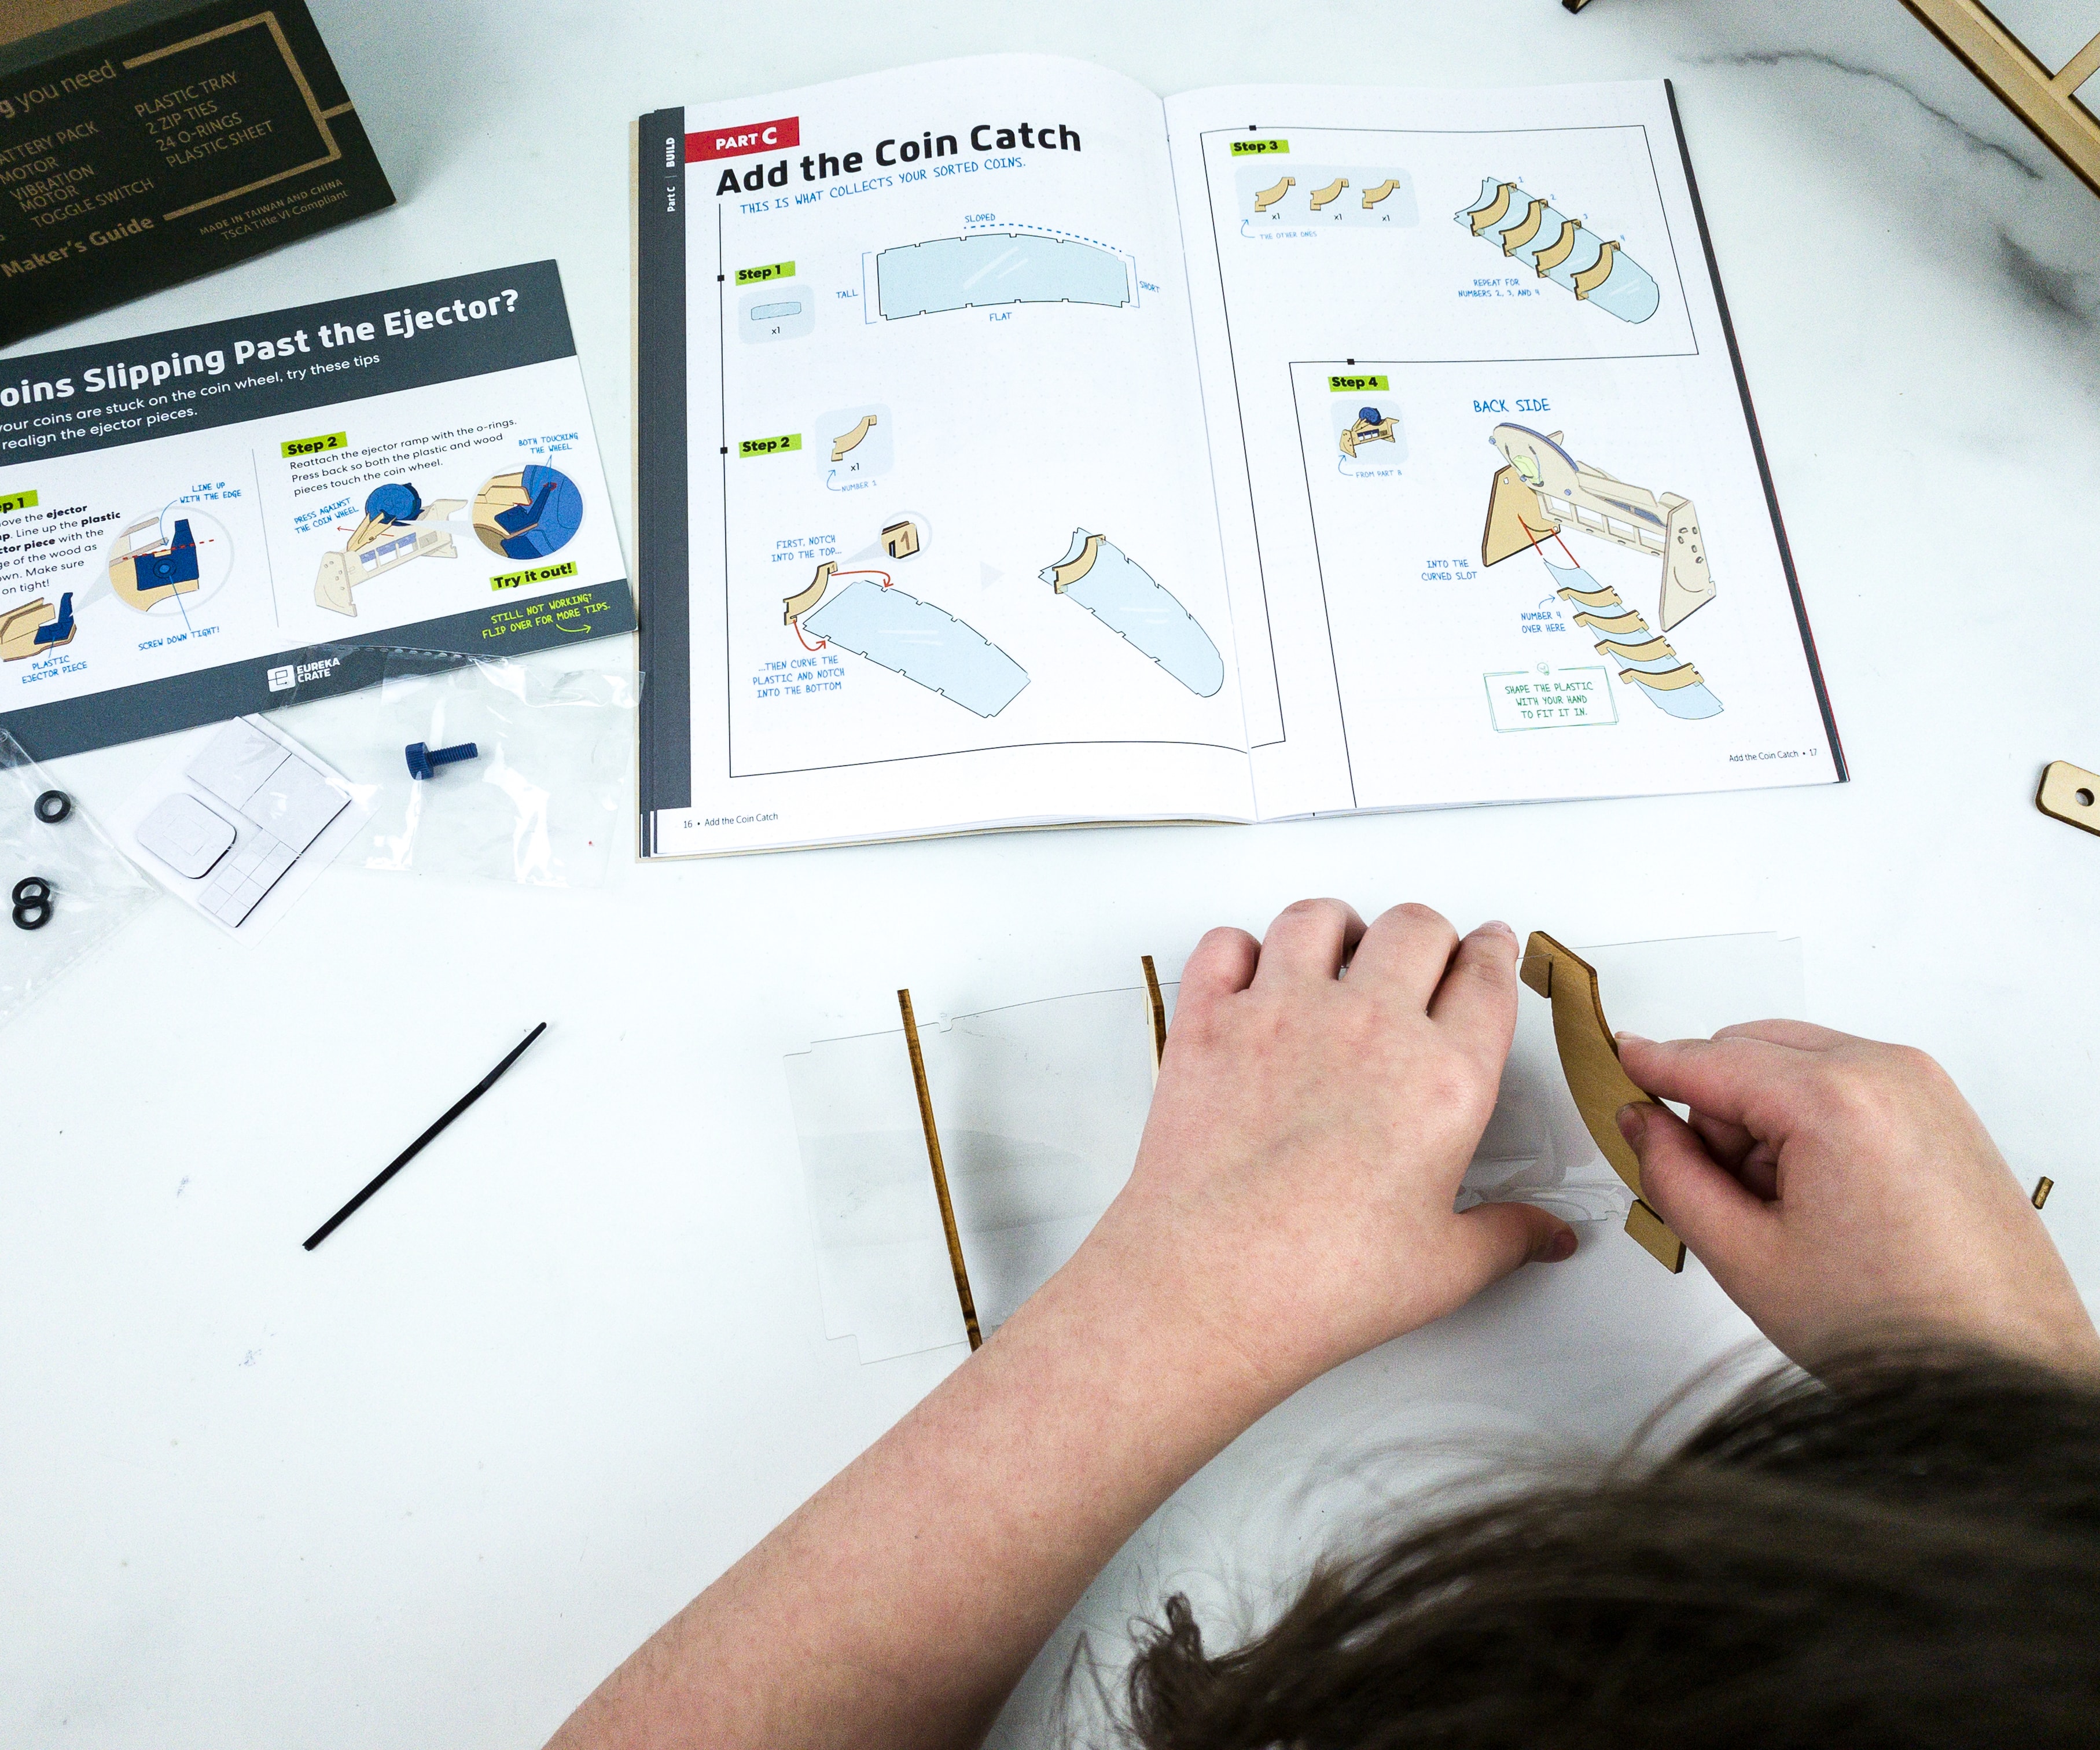
It’s like we’re completing a puzzle! It’s a good thing that the pieces and parts fit perfectly!
After completing the coin catch, it’s time to attach it to the base!
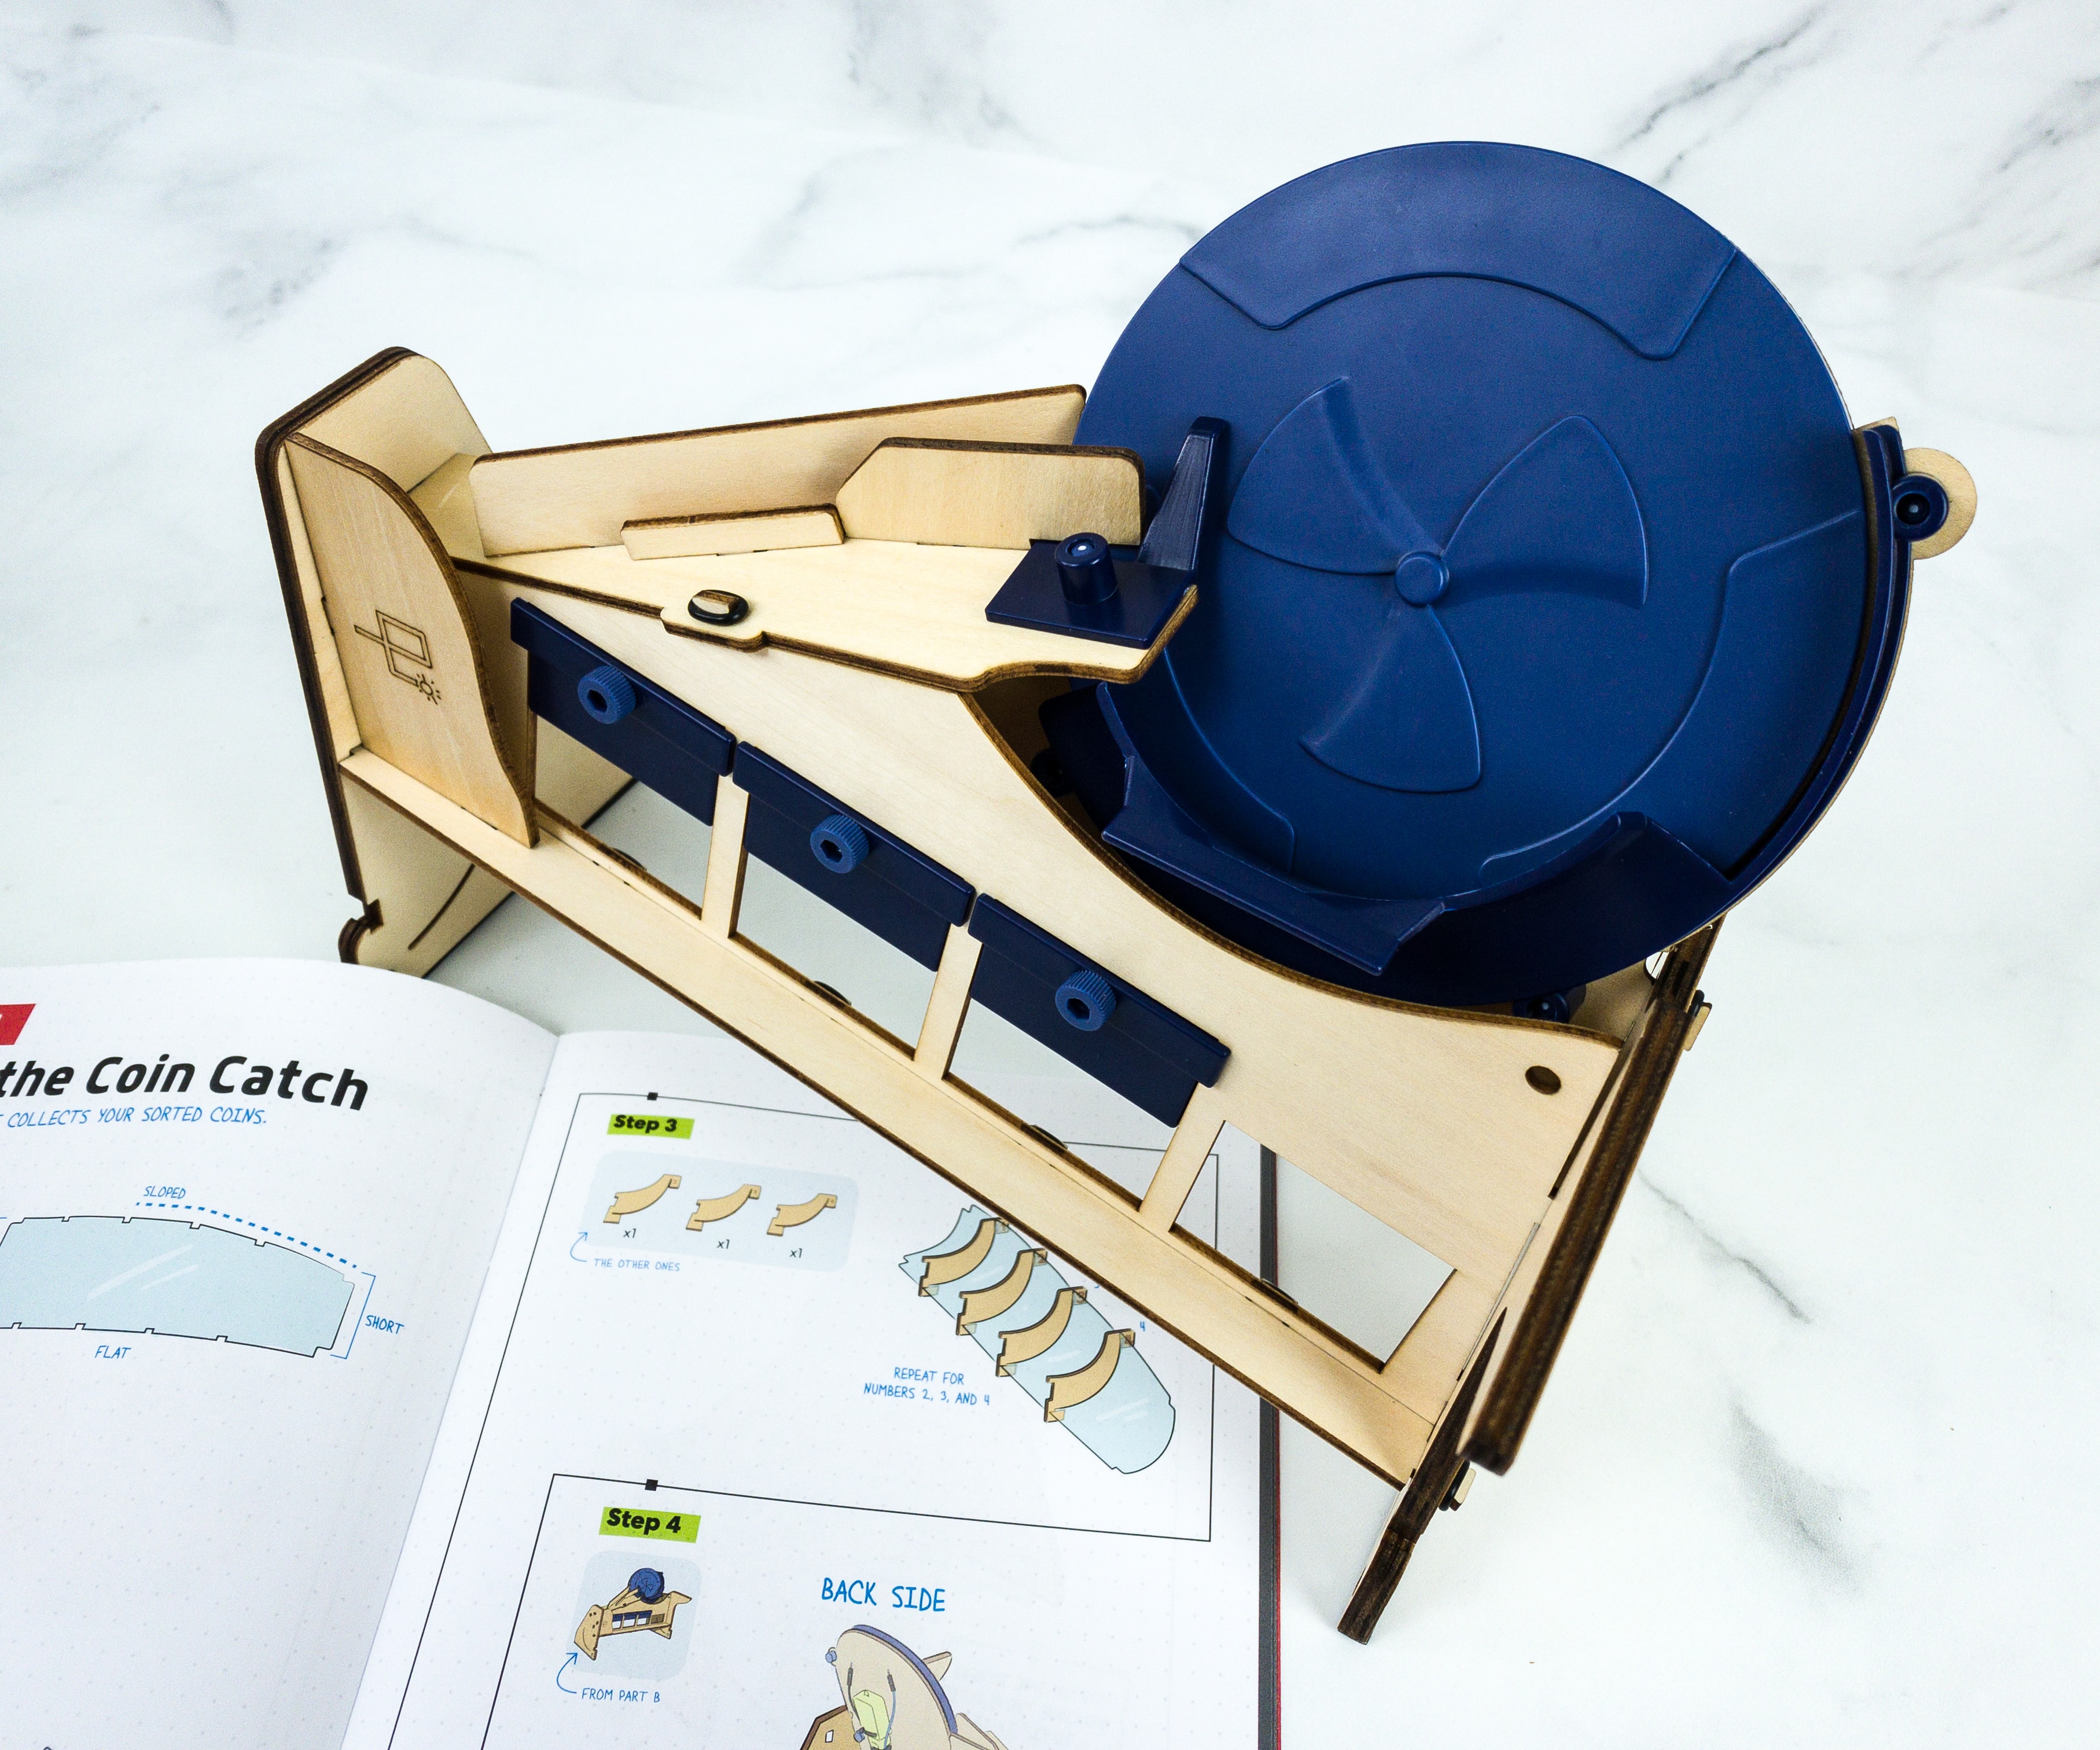
Here’s the part that we had finished for part B. This is where the coin catch will be attached to.
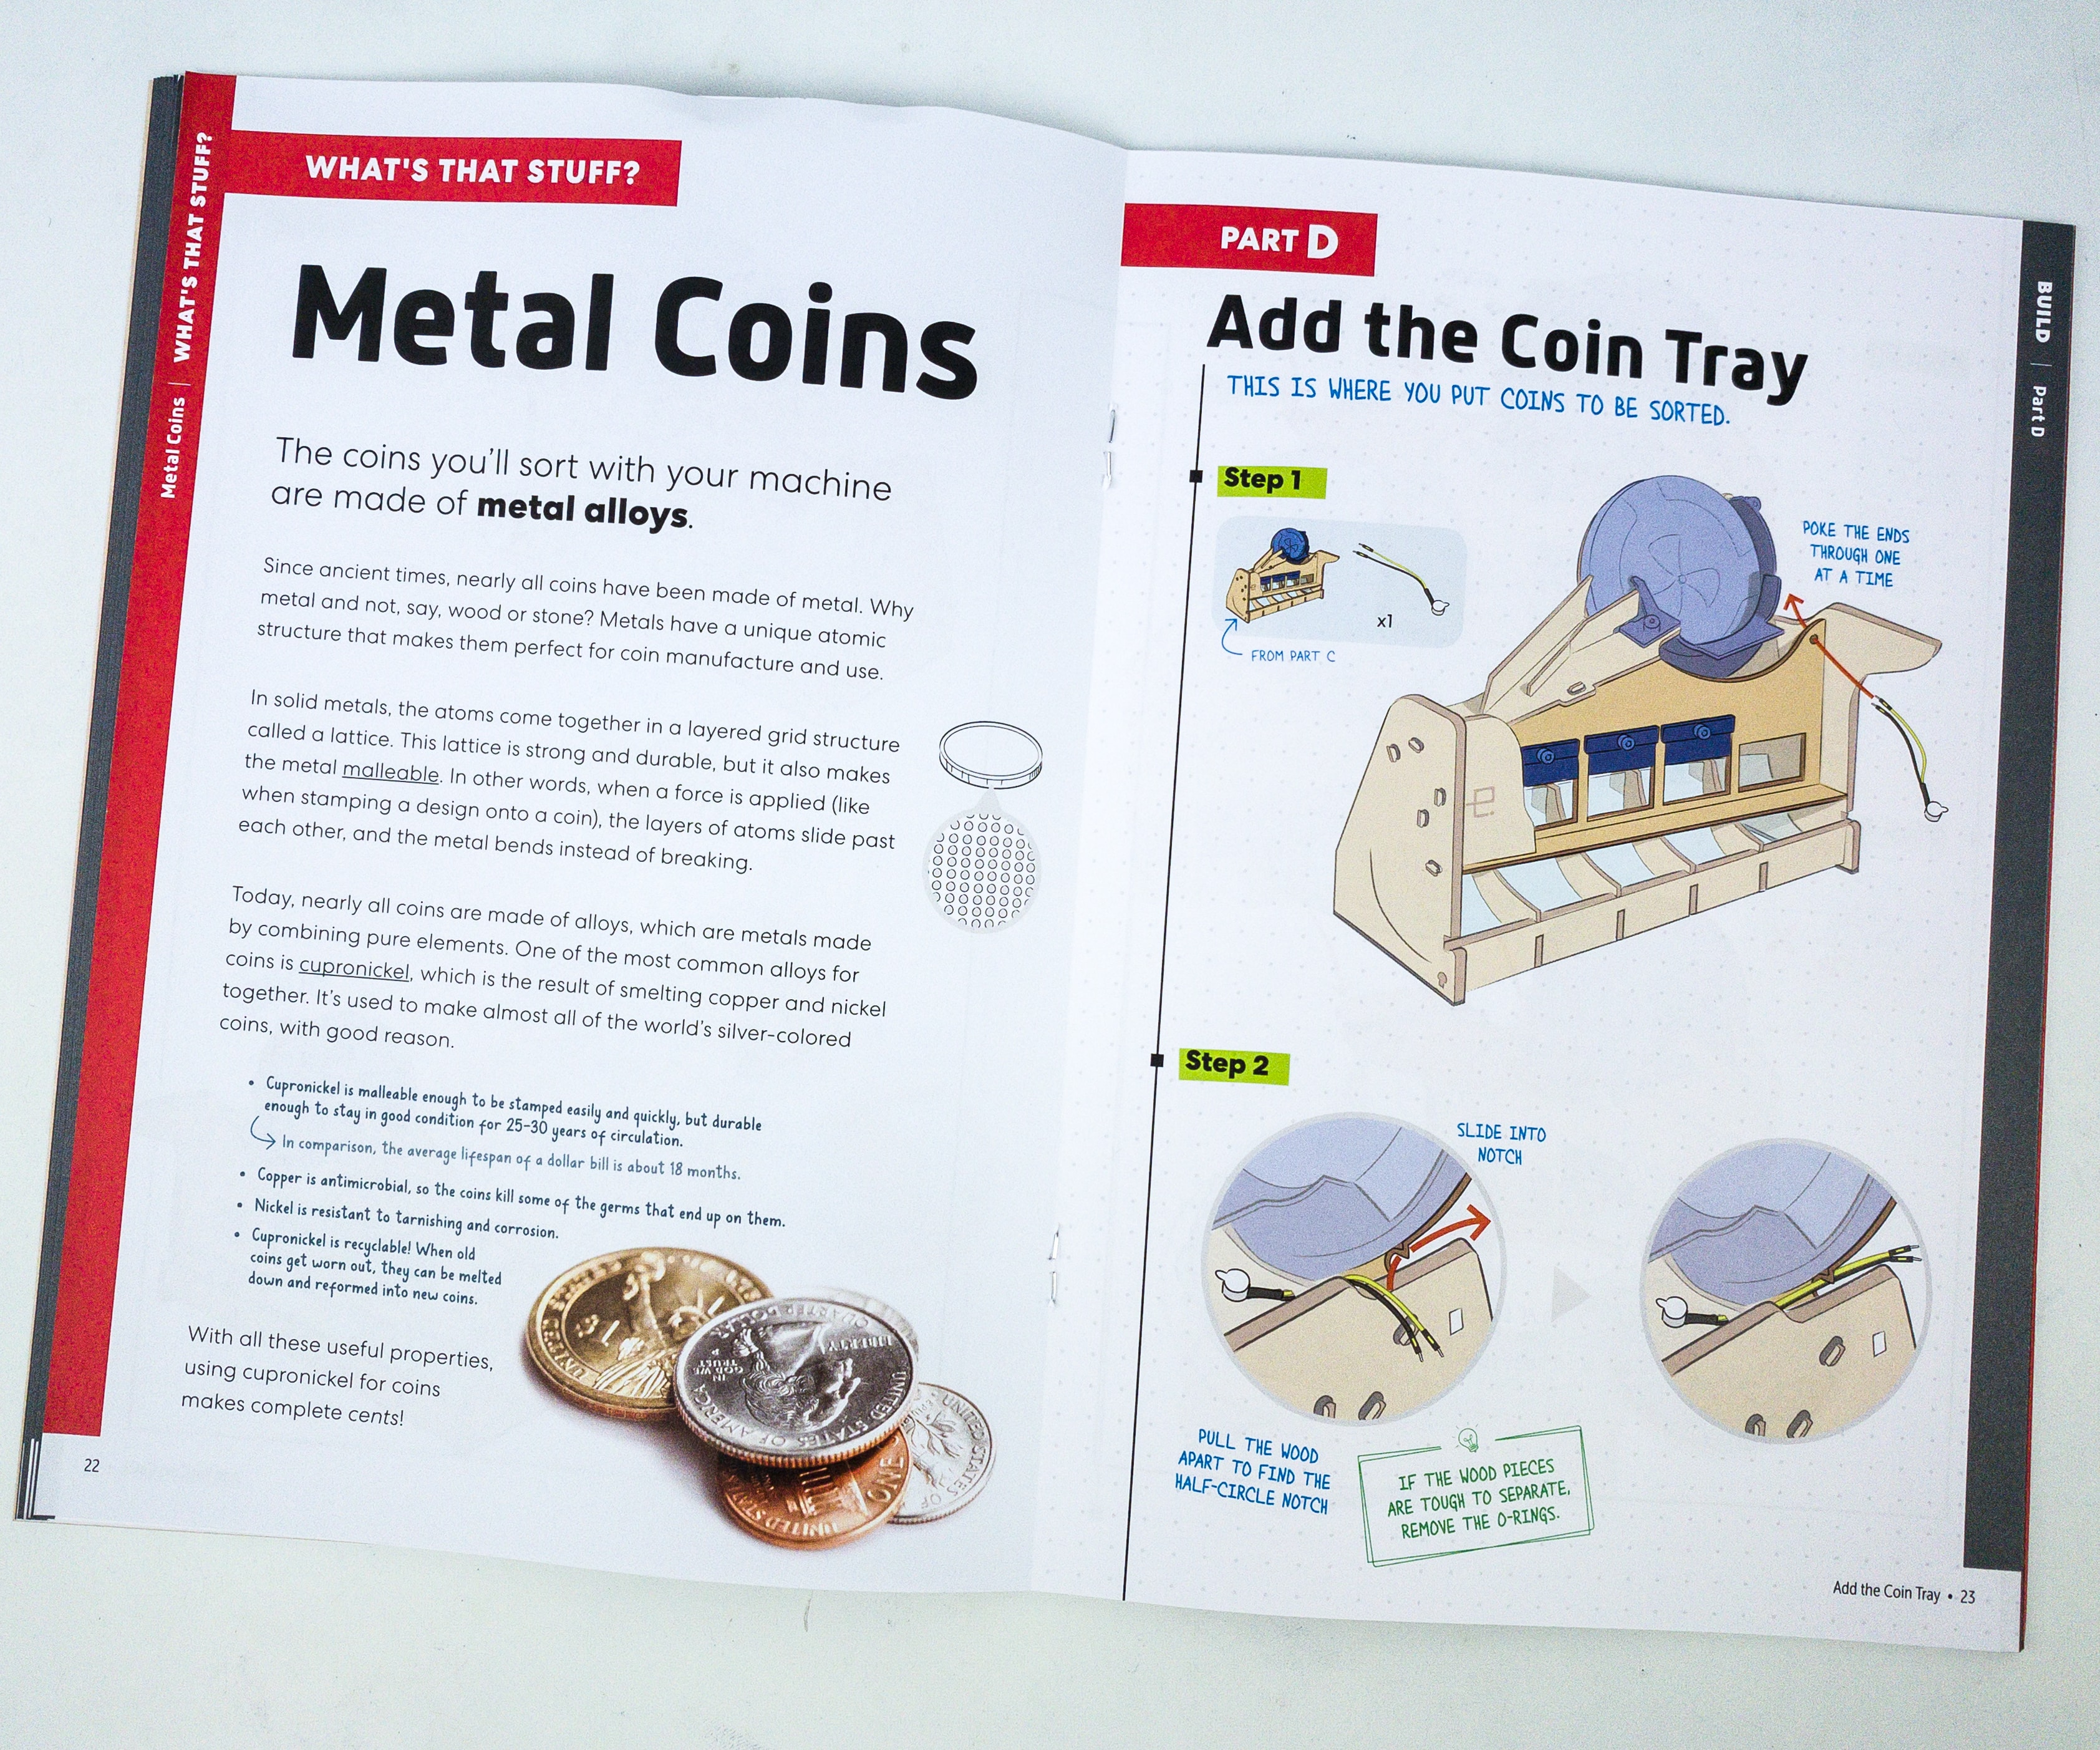
There’s a feature article about metal coins, and it explains that the coins that will be sorted in the machine are made of metal alloys.
For part D, it’s time to add the tray, which is the part of the machine where you will put the coins to be sorted.
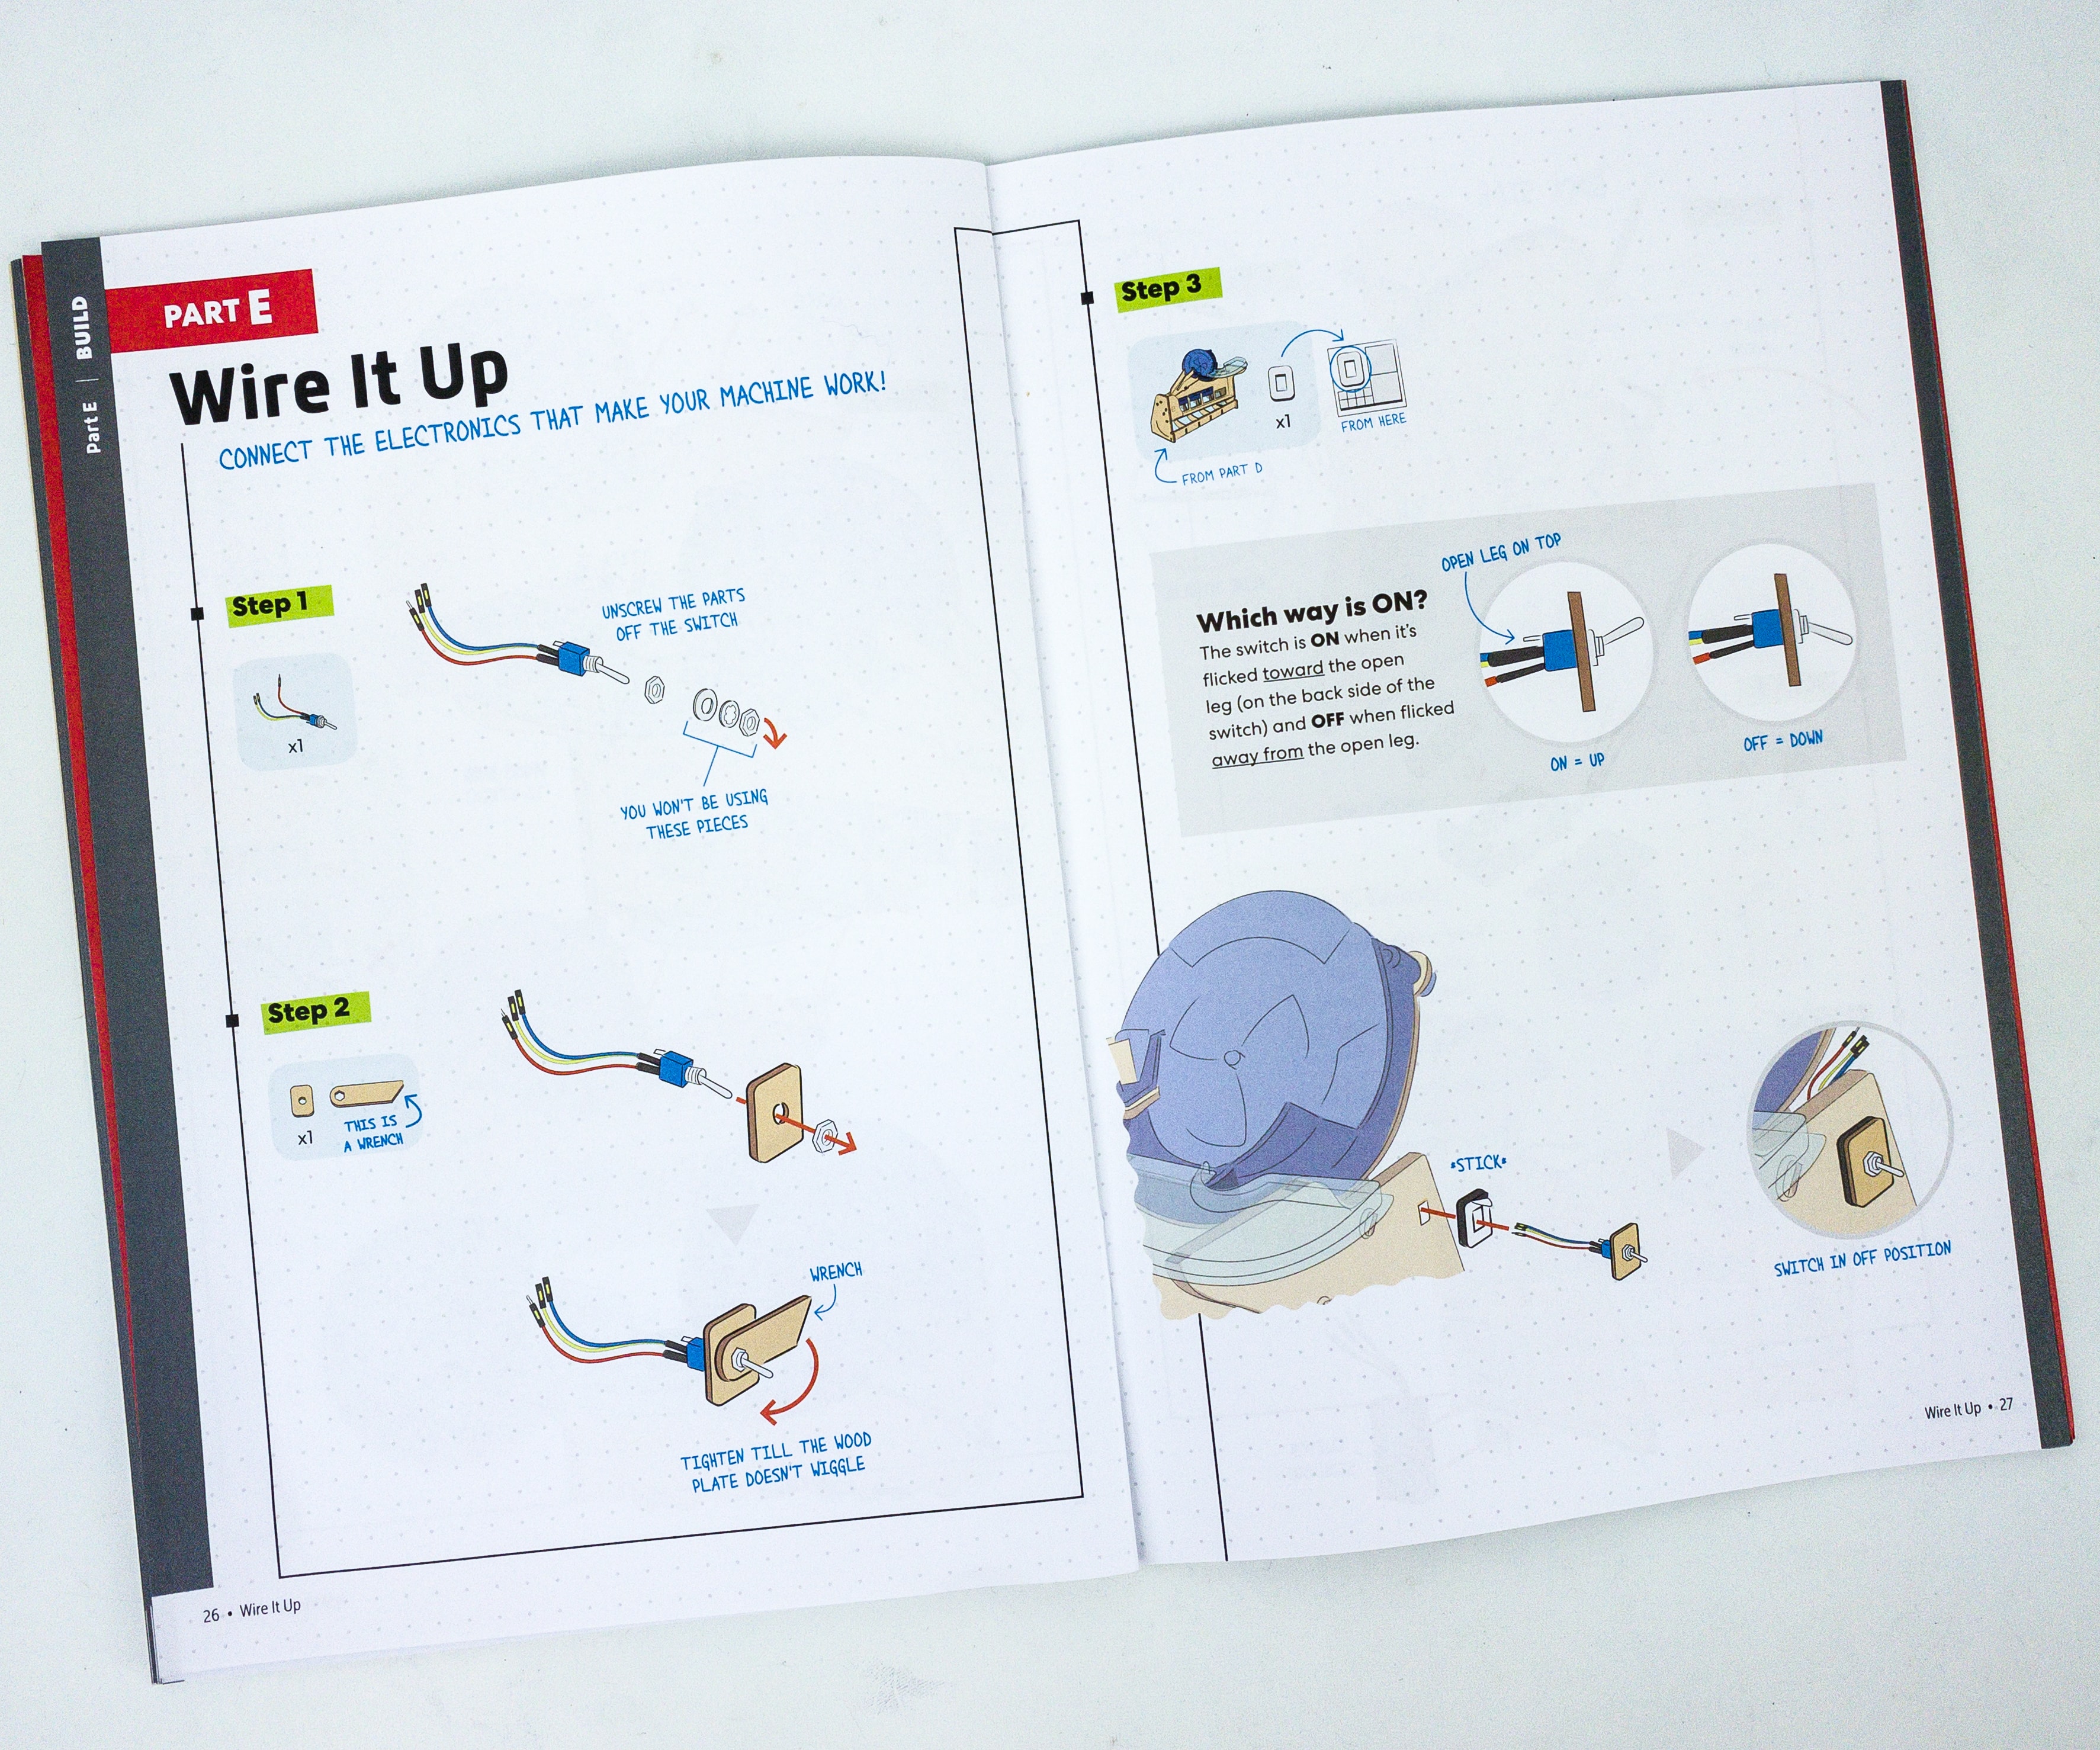
For part E, we’ll be working on the electronics to make the machine work!
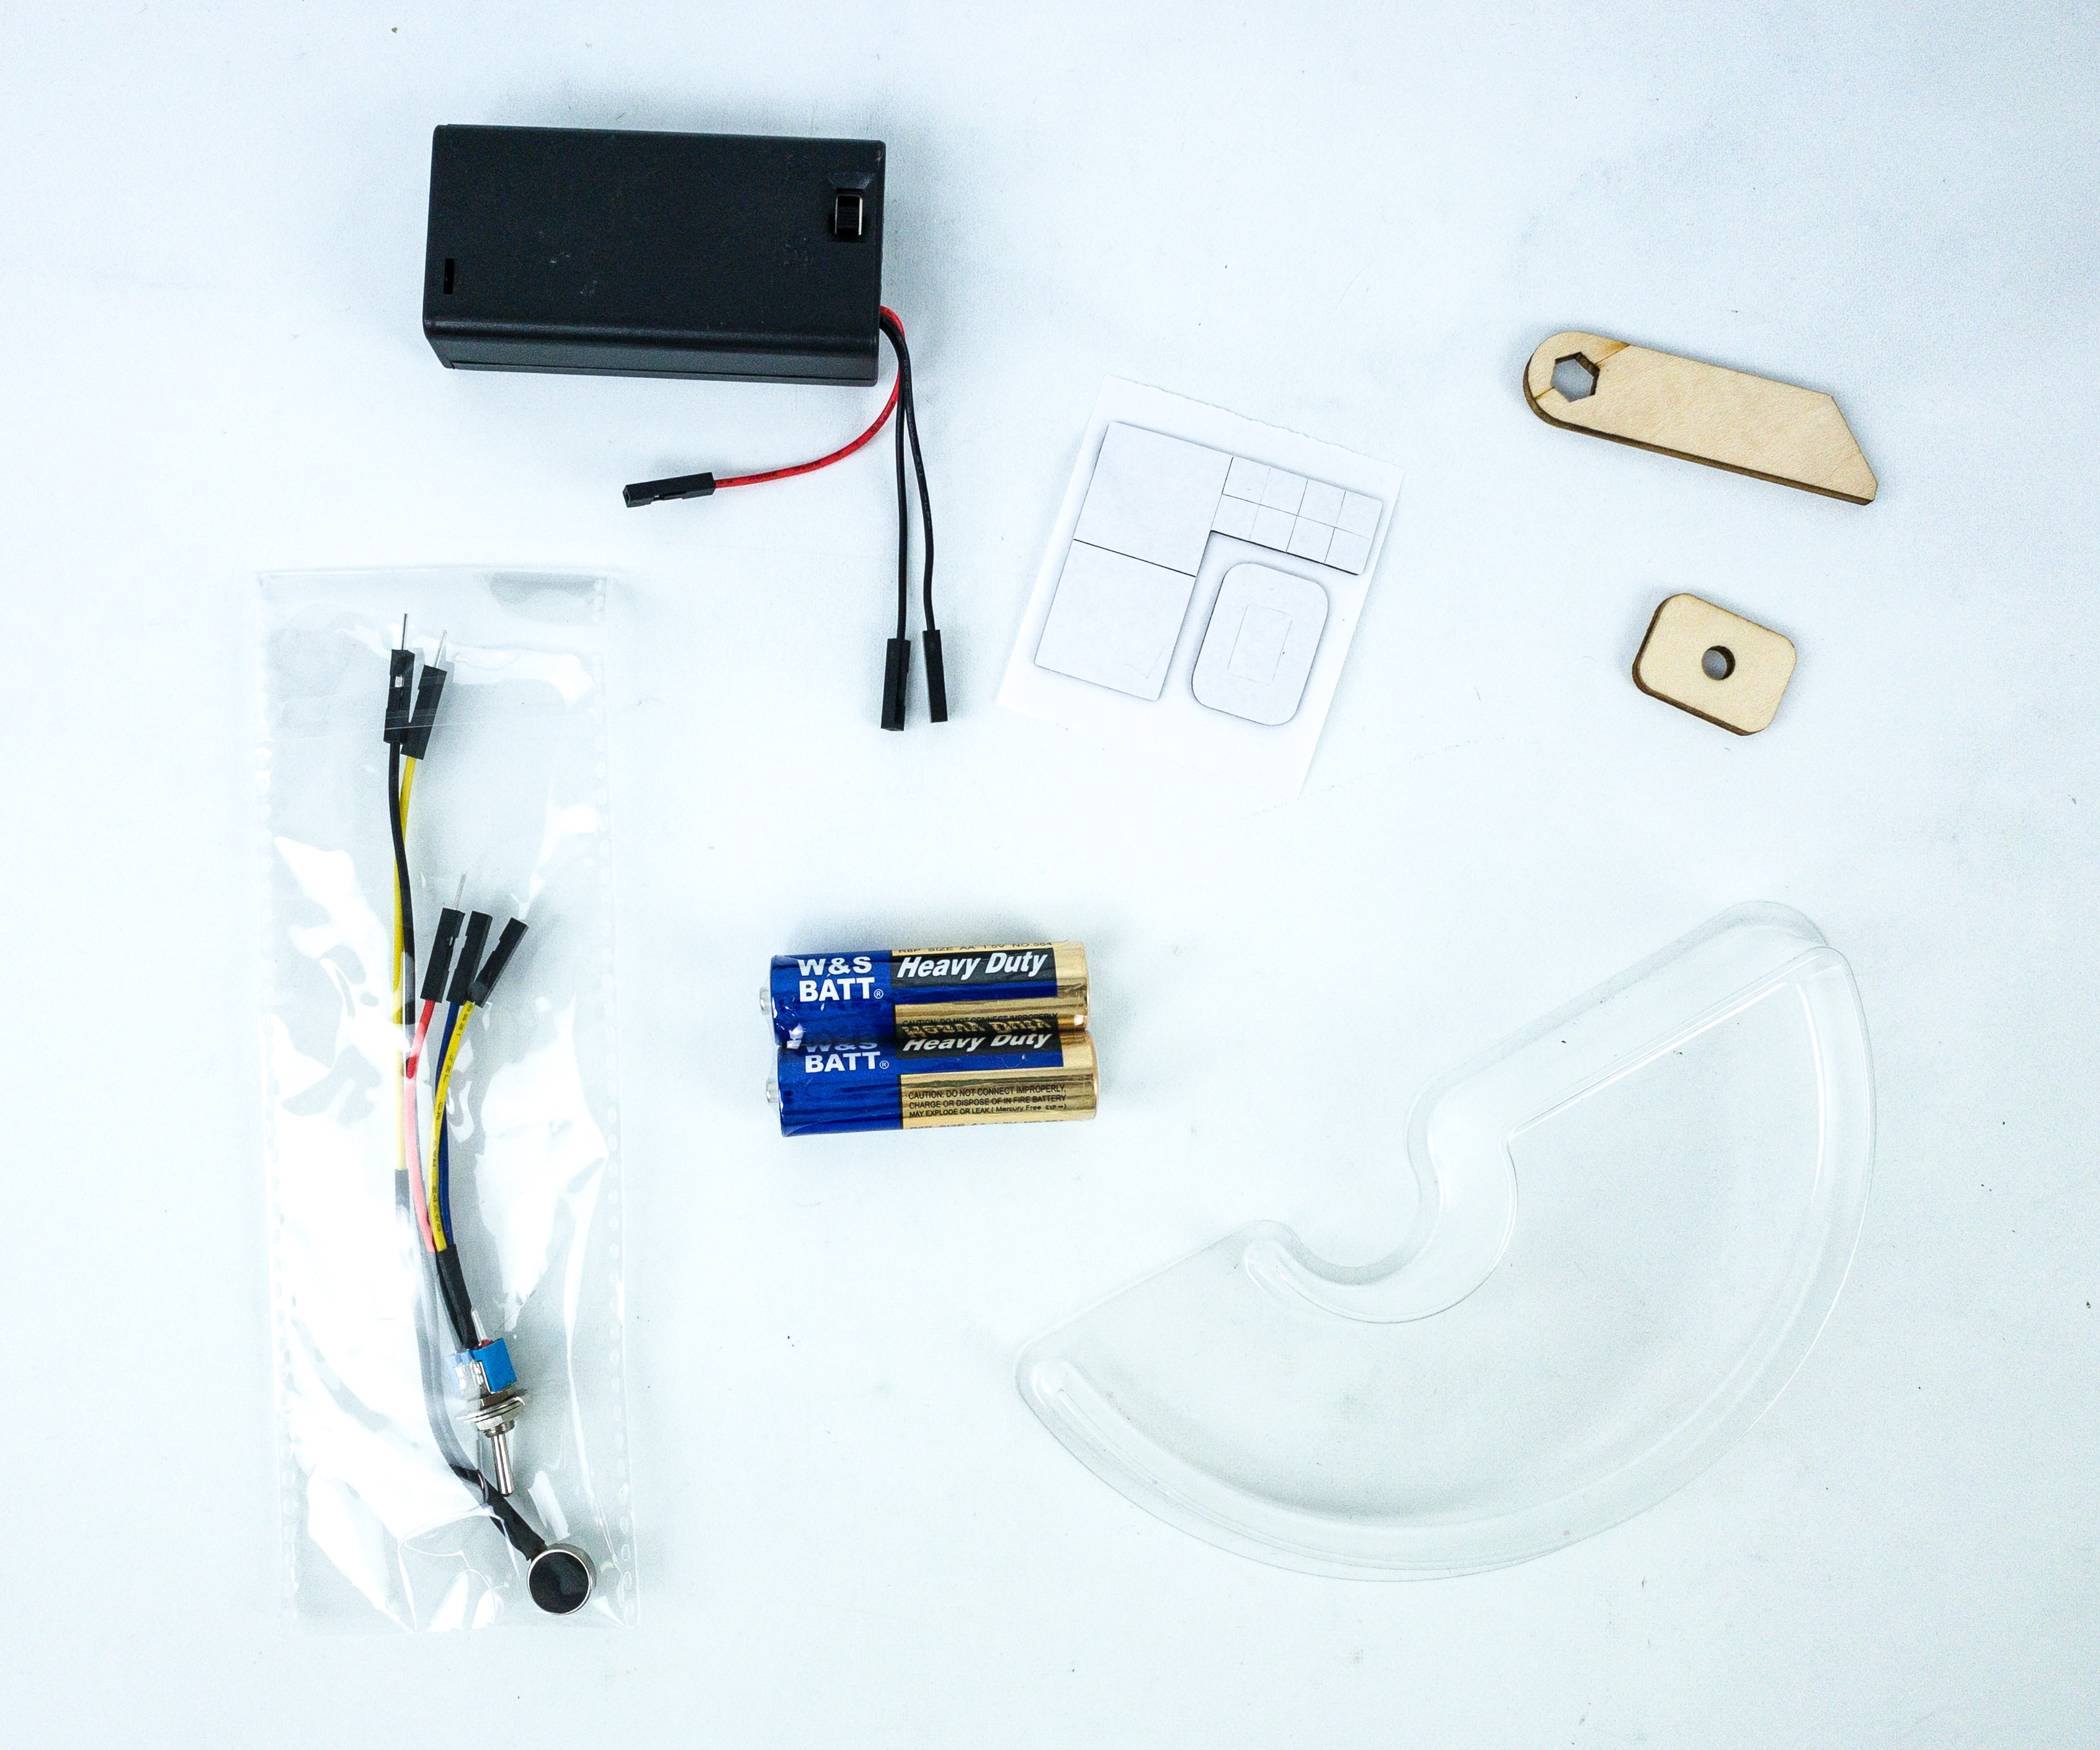
Here’s everything that we need to make the machine work.
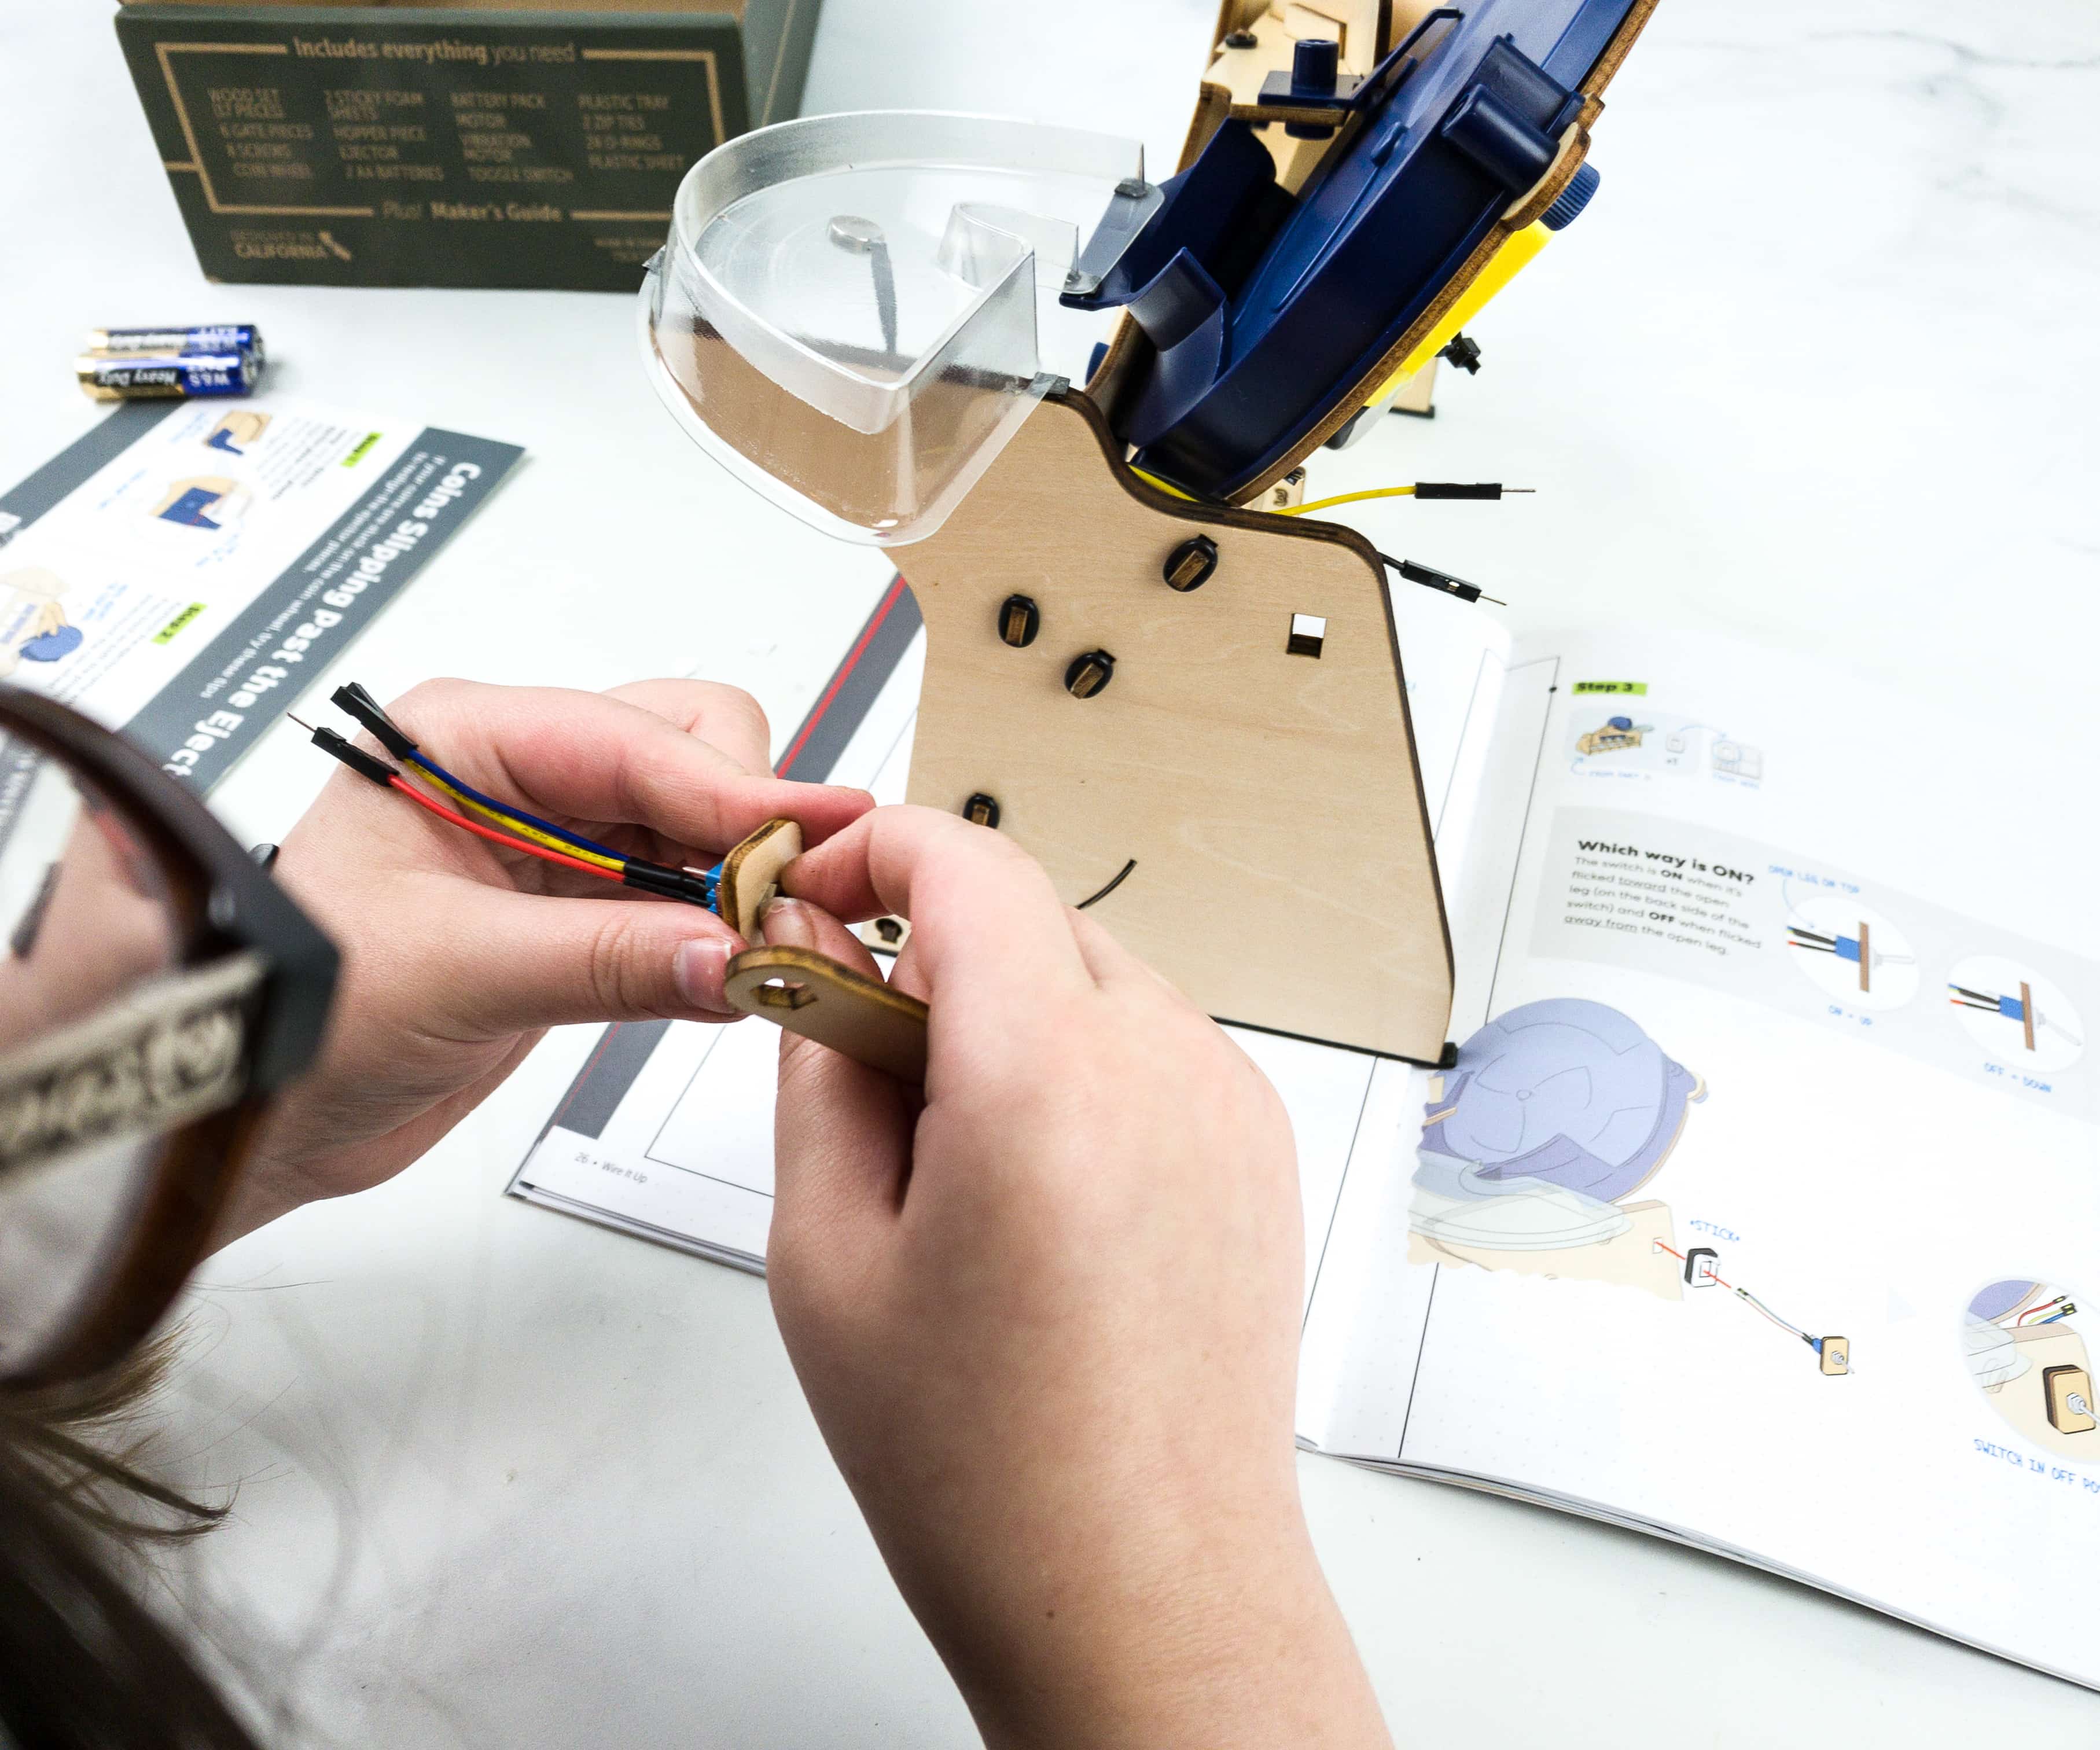
We just need to correctly wire them all up and attach the electronics part to the machine.
You should thoroughly check if the wirings are correct to save time.
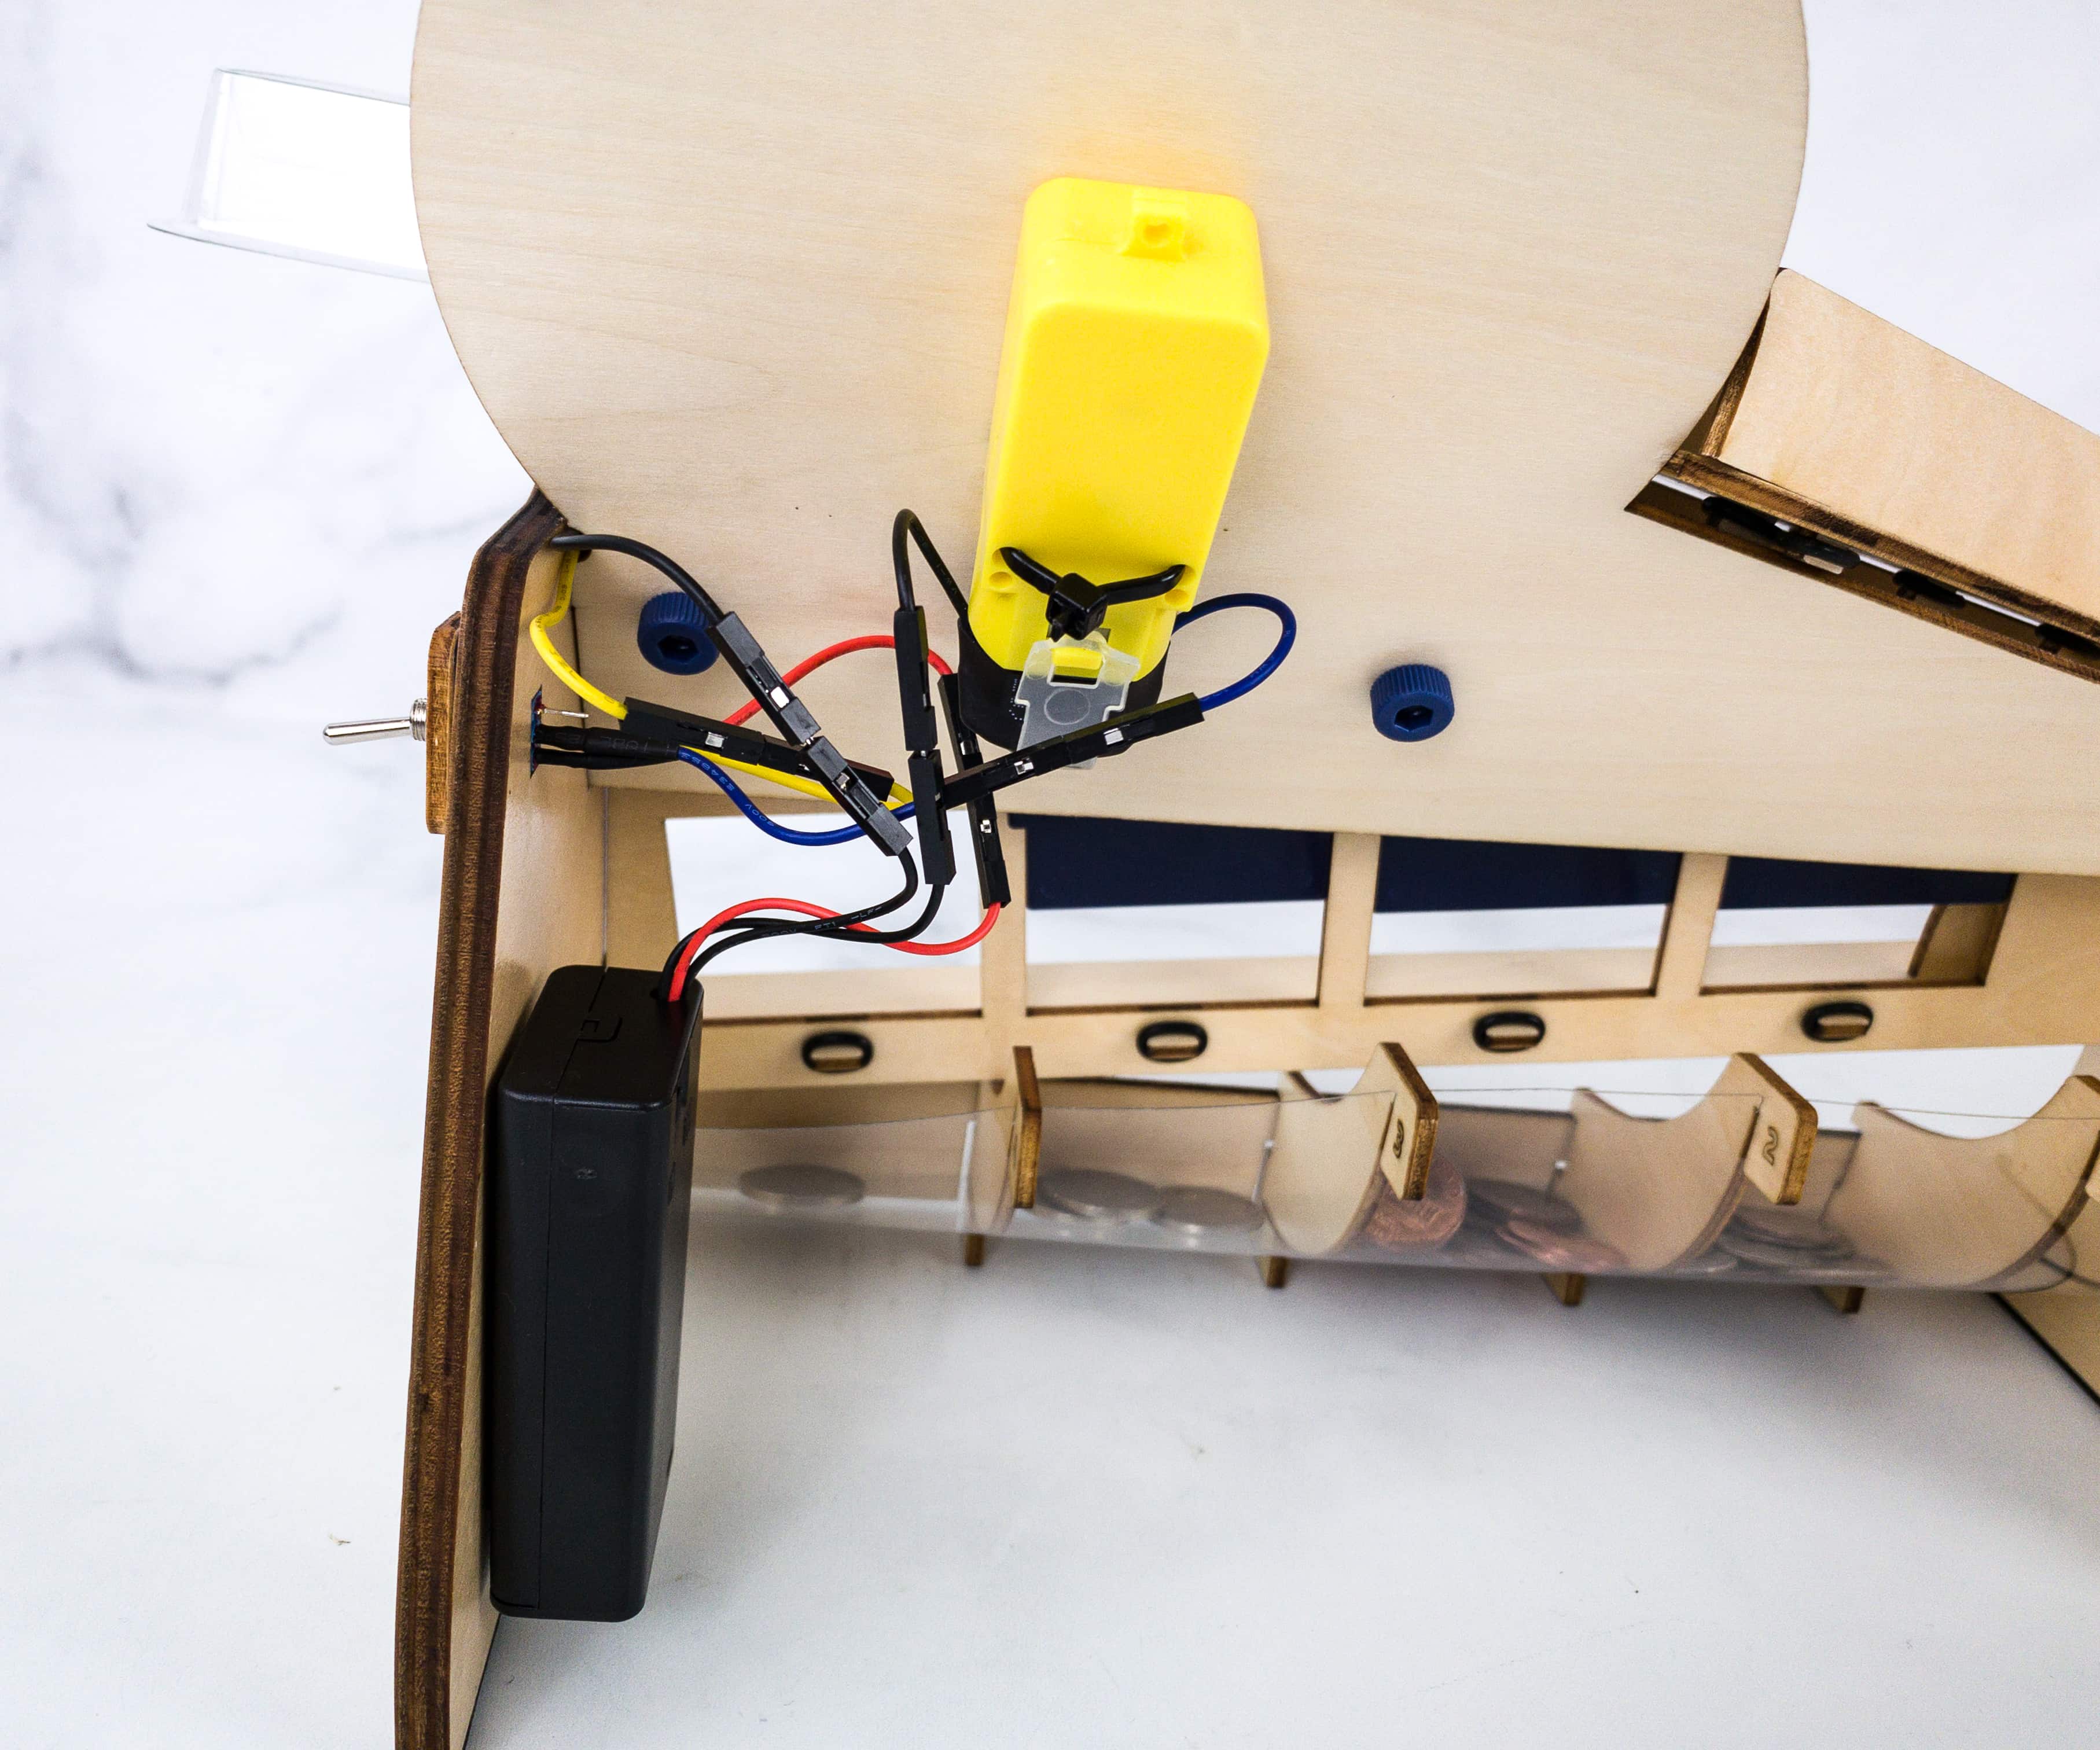
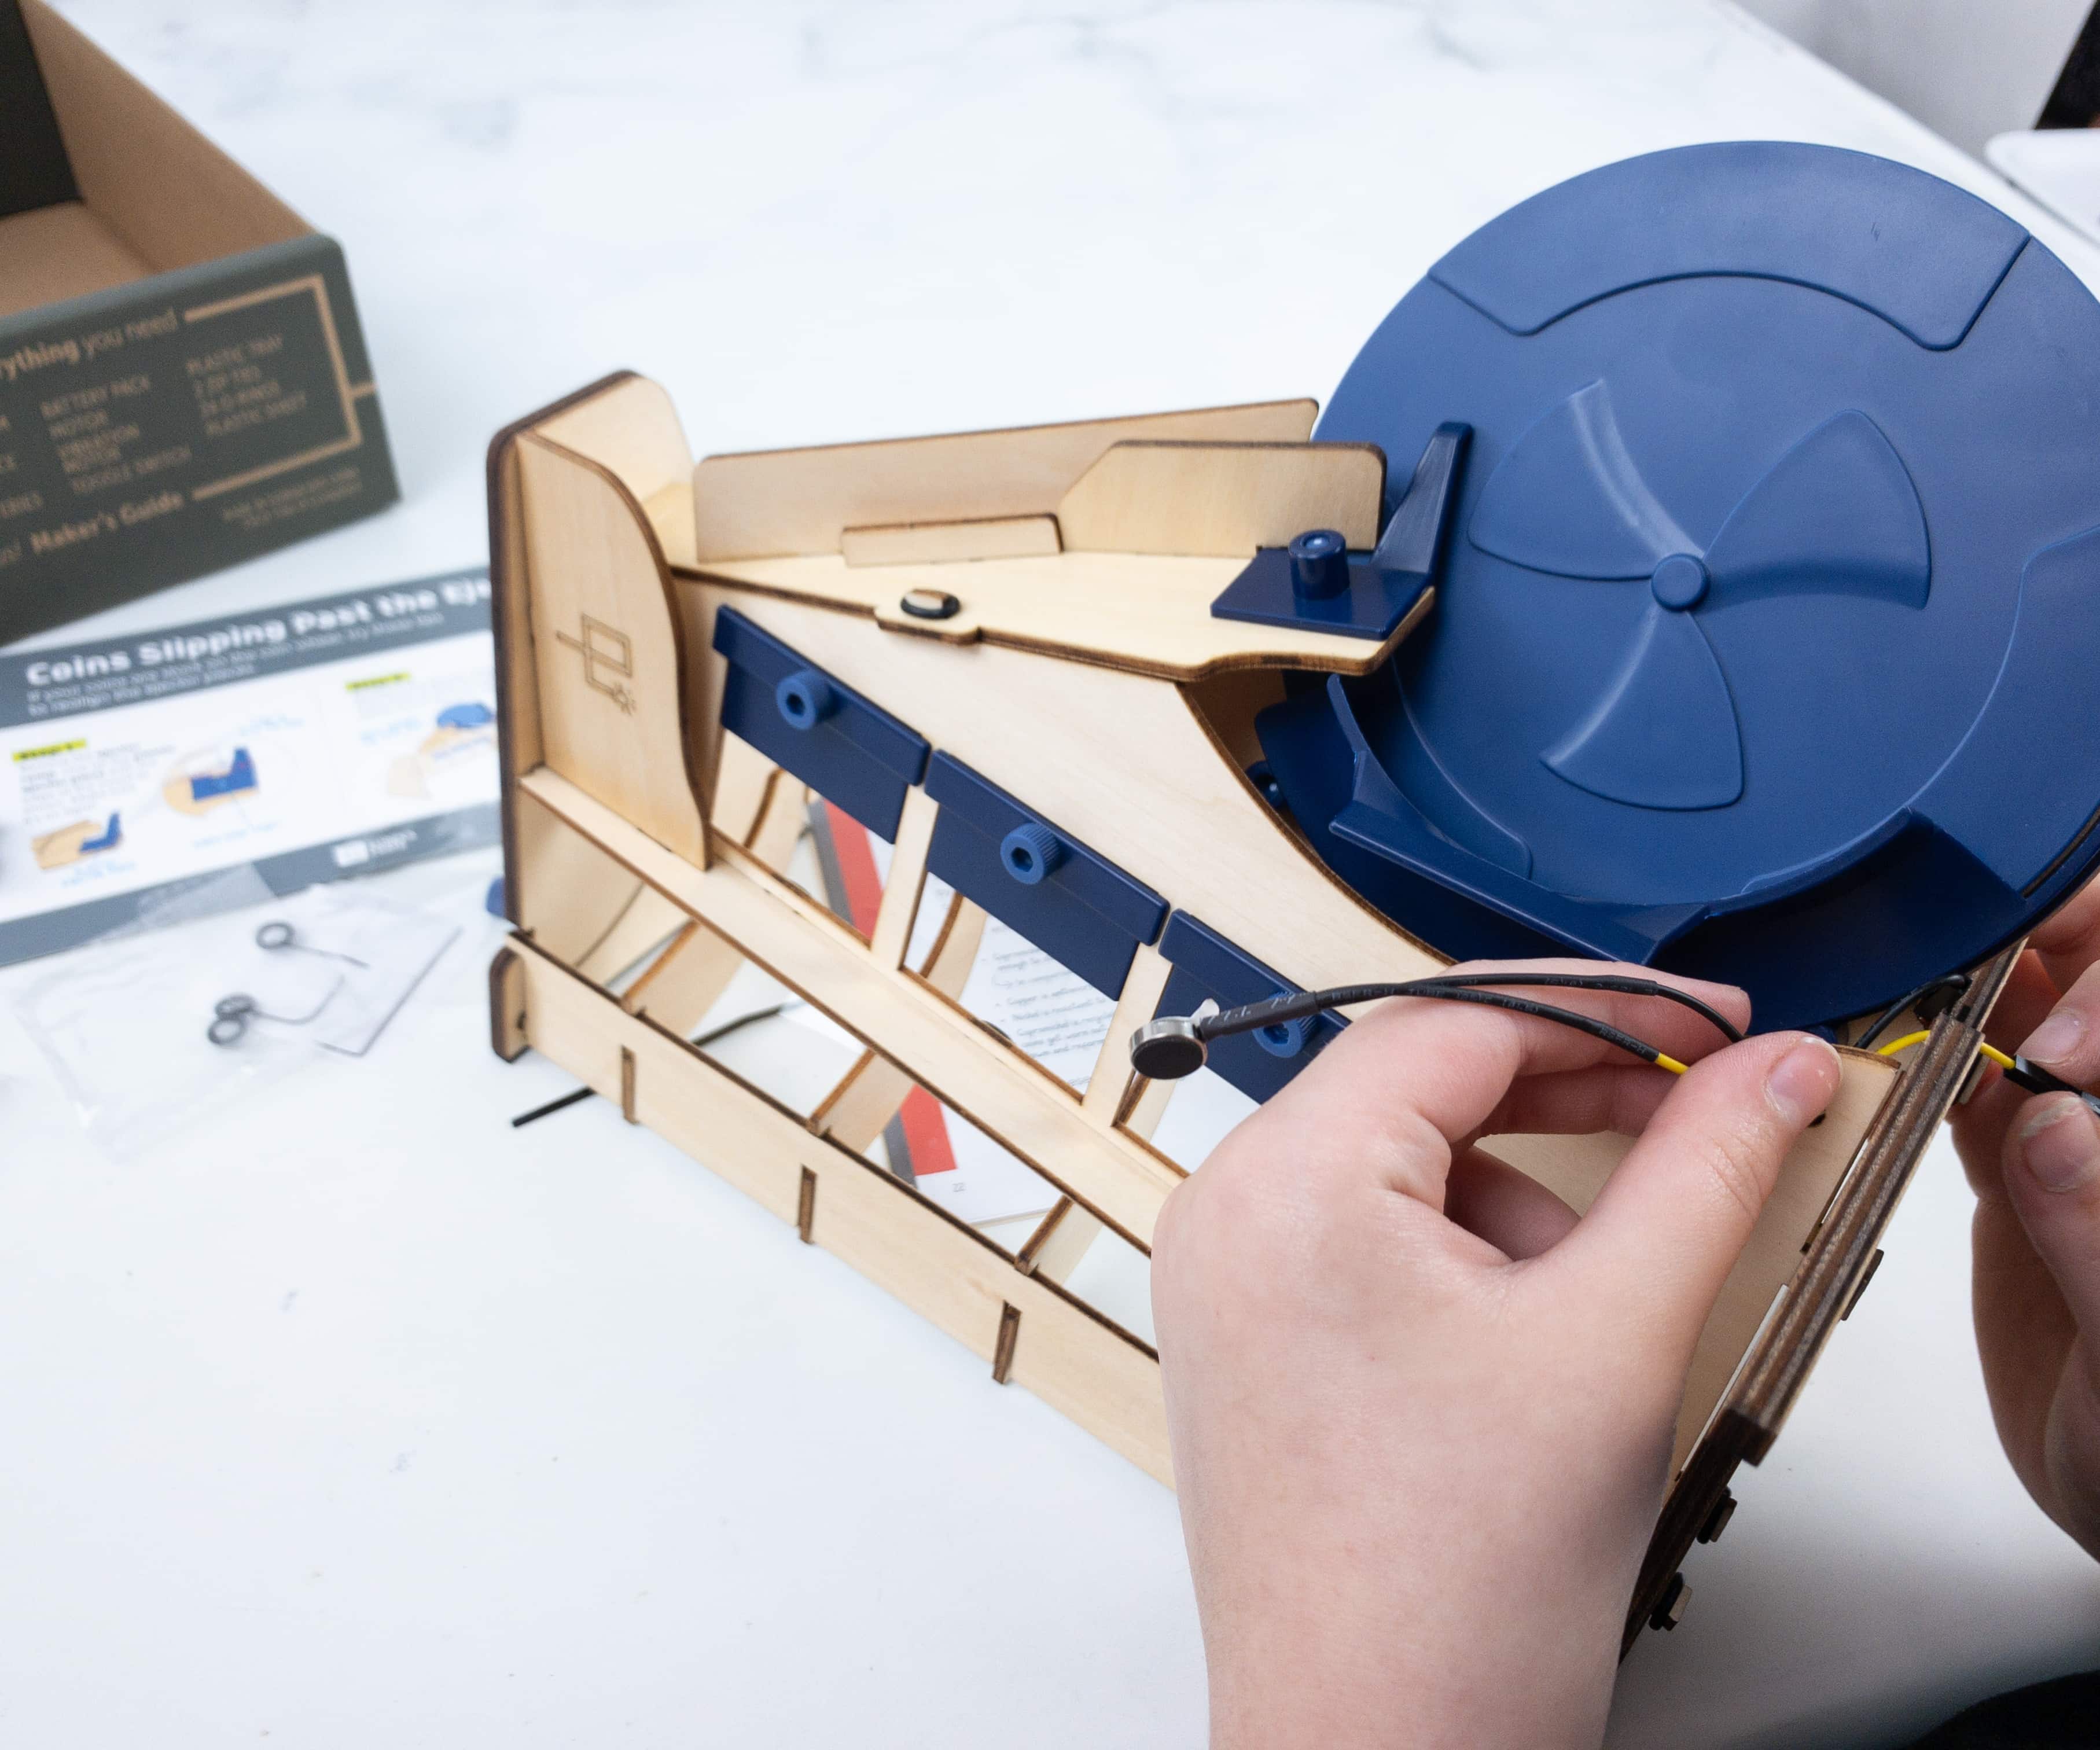
The battery pack is placed just behind the coin catcher, on one of the sides of the base.
Here’s how it looks from the top.
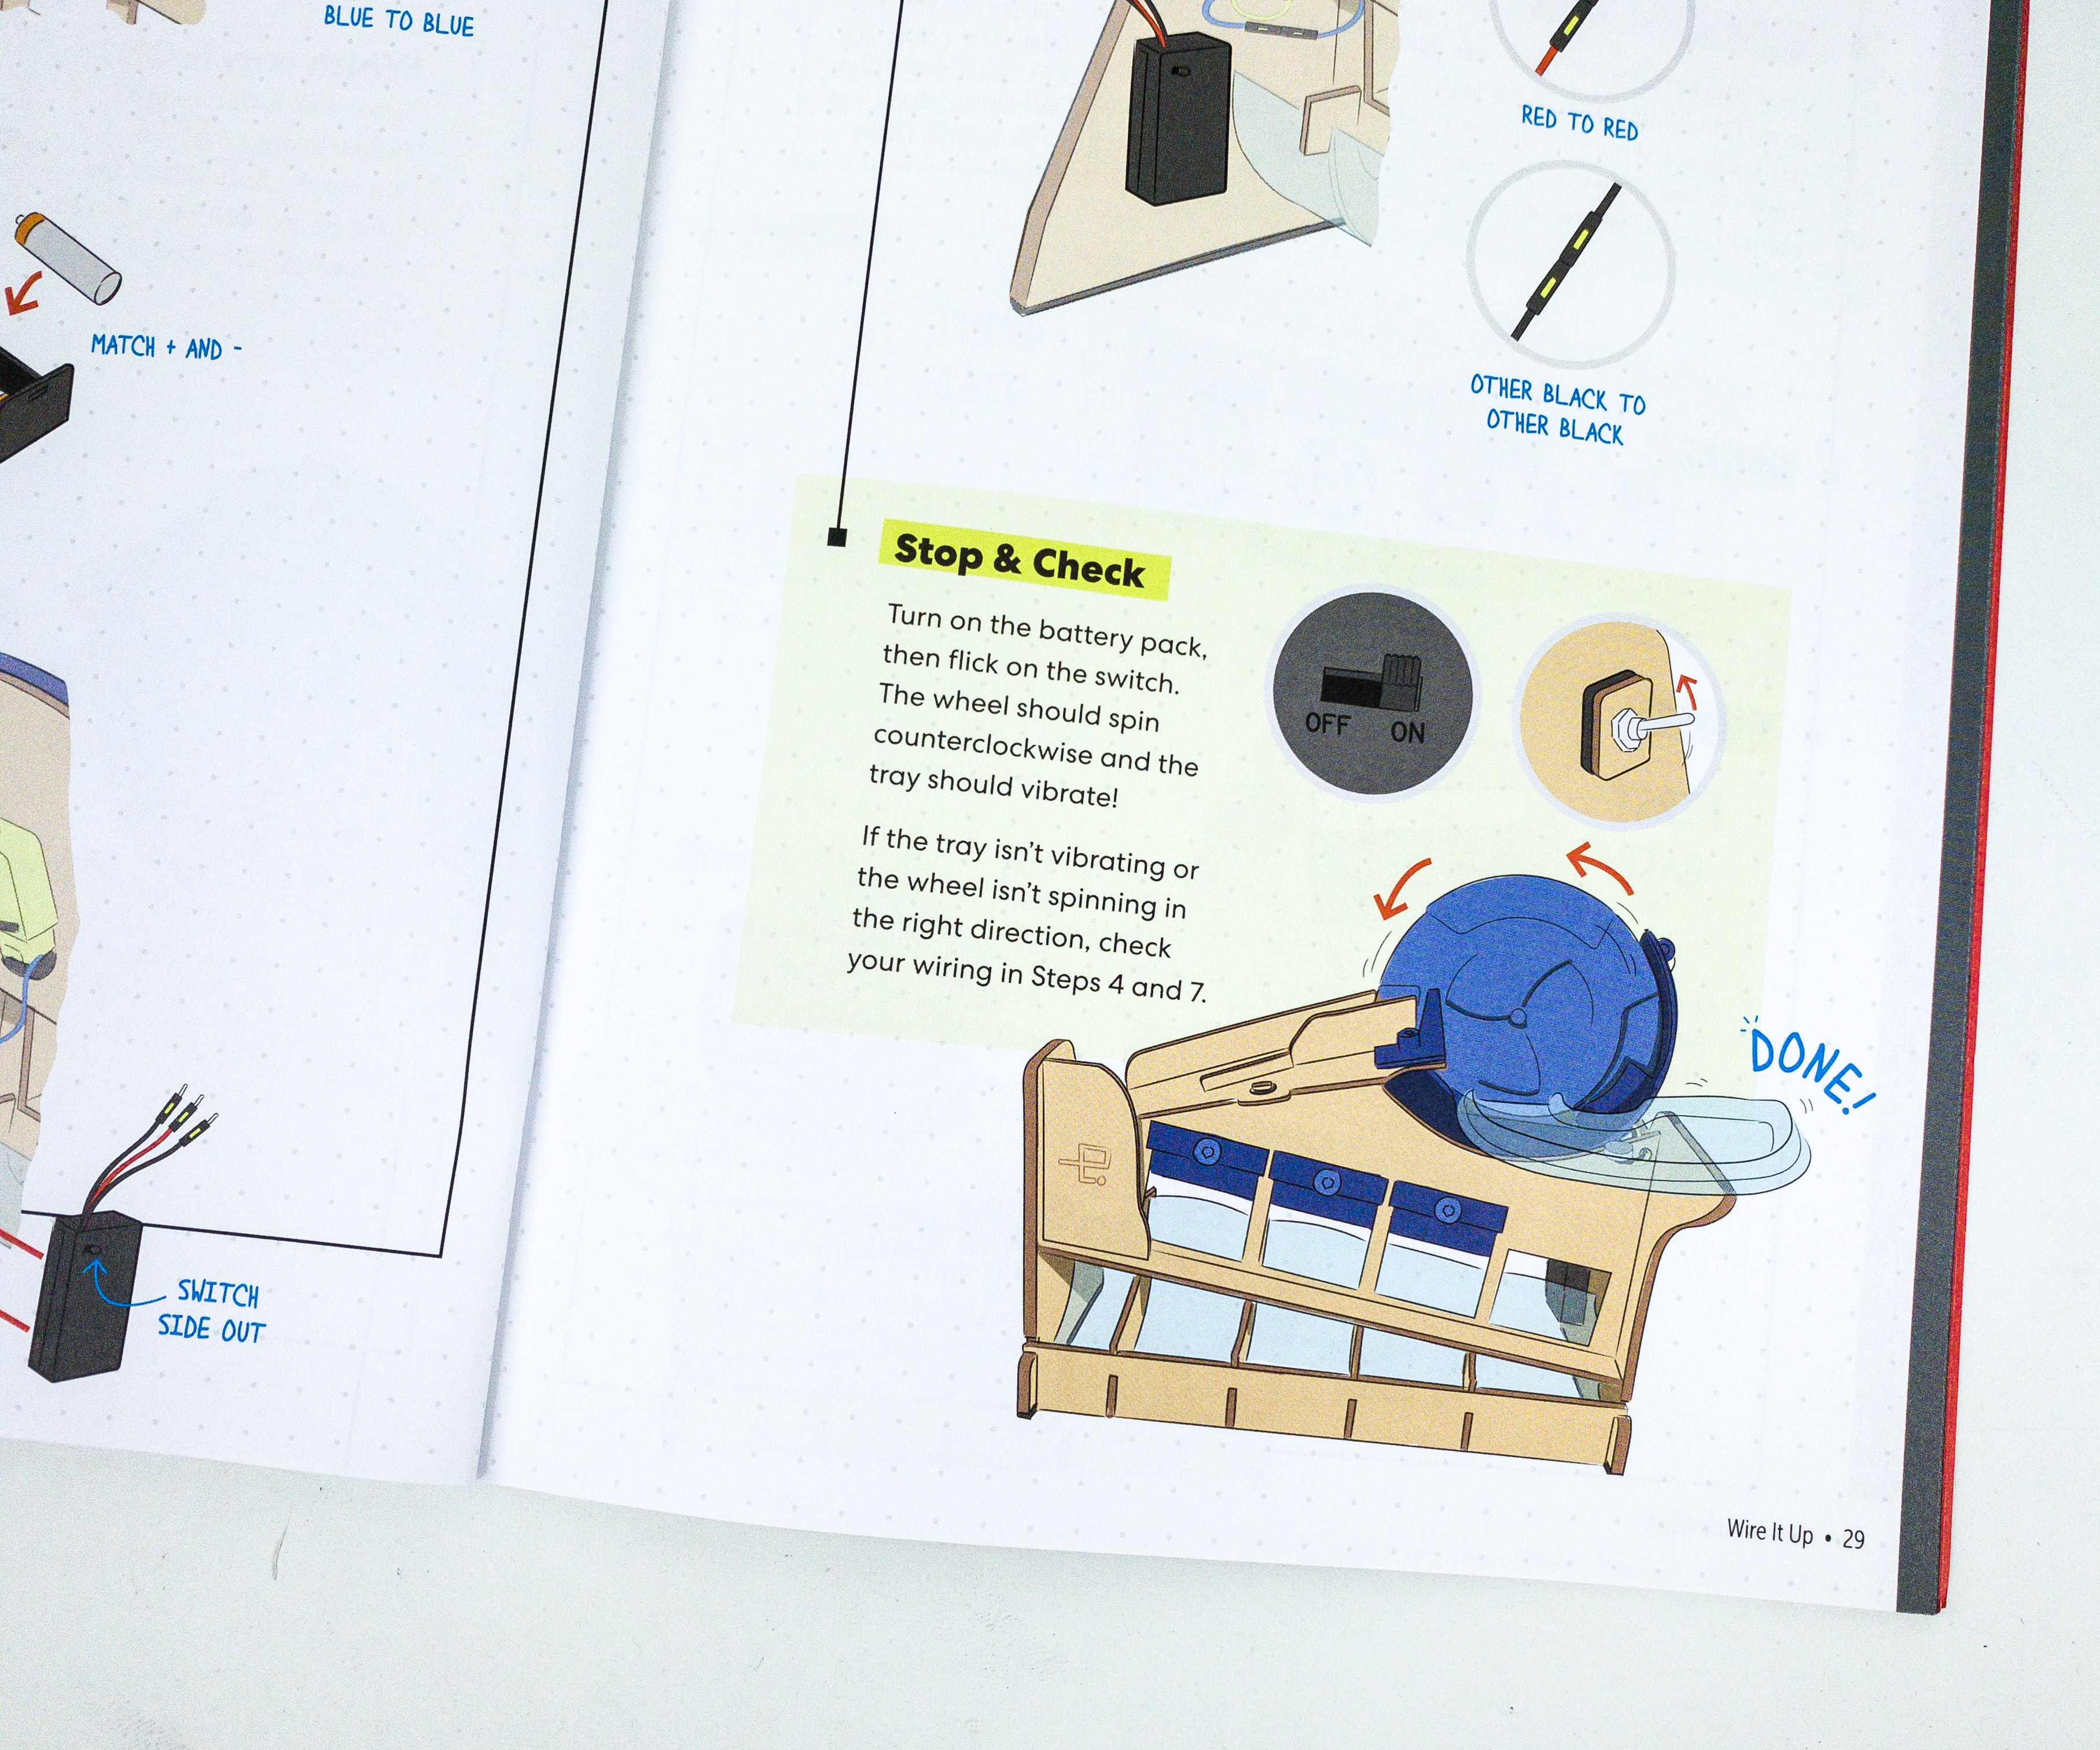
Again, we should check if it works correctly by turning on the battery pack, and flitching the switch on. The wheel should spin counterclockwise, and the tray should vibrate.
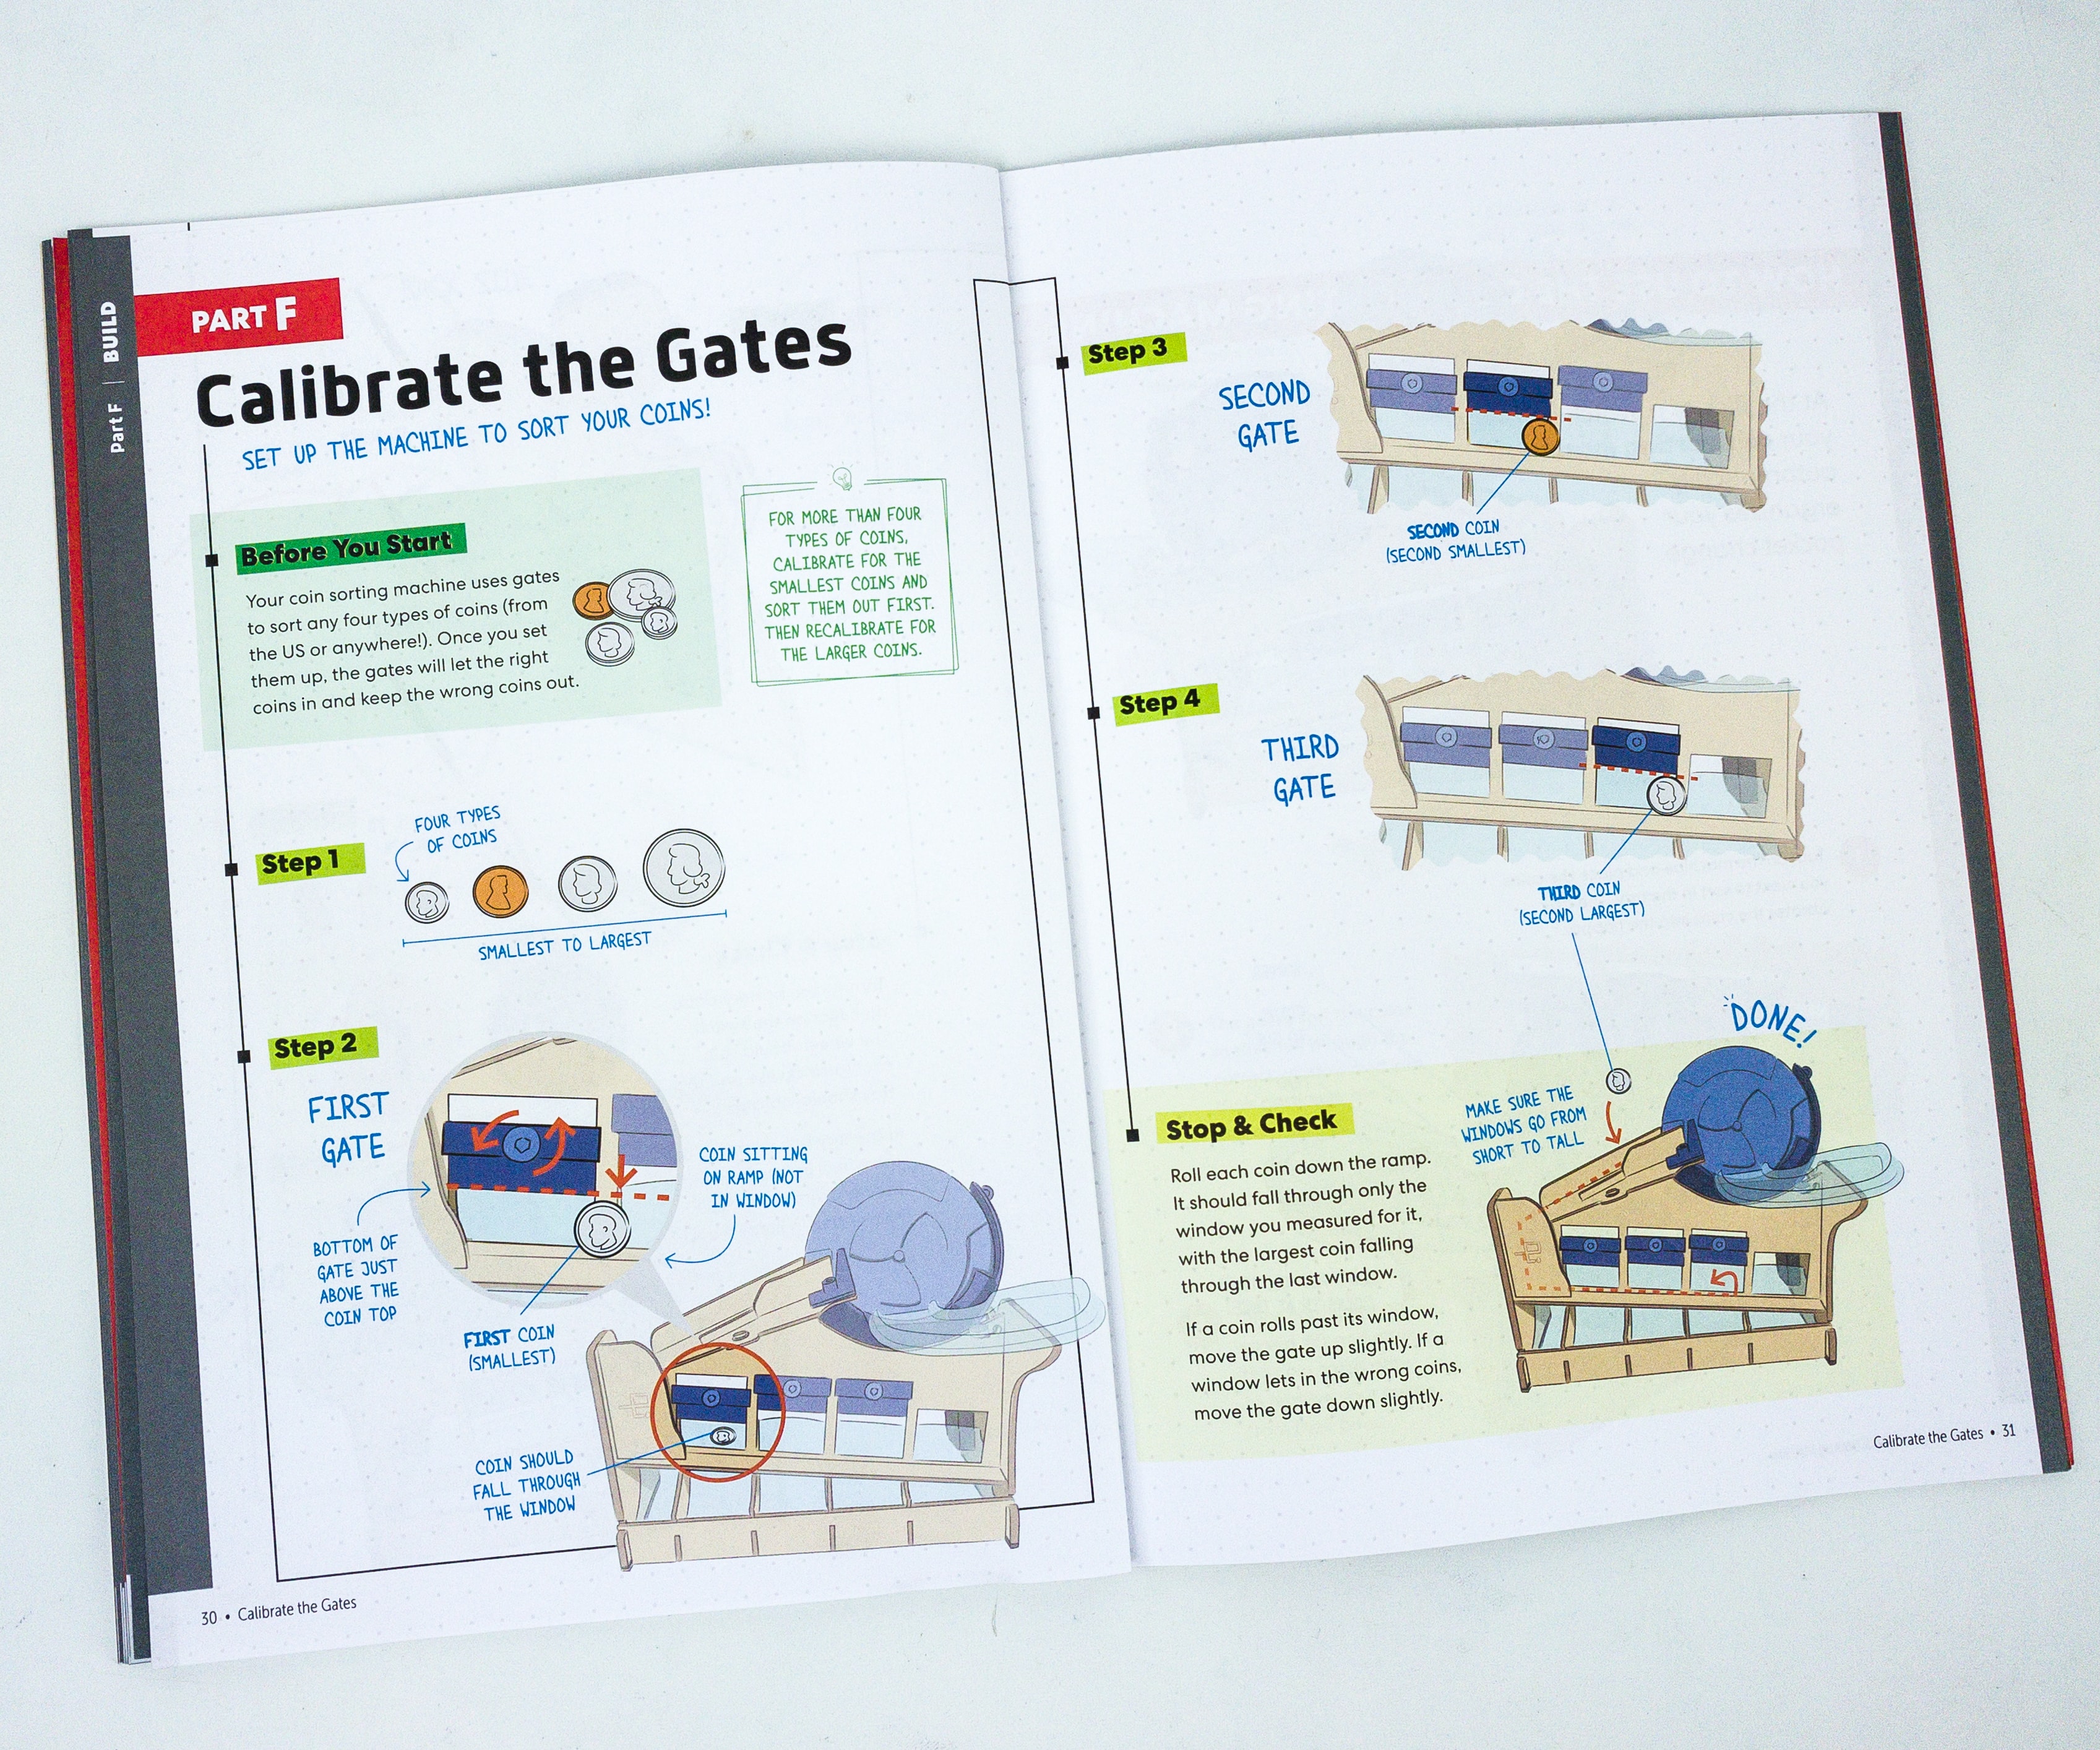
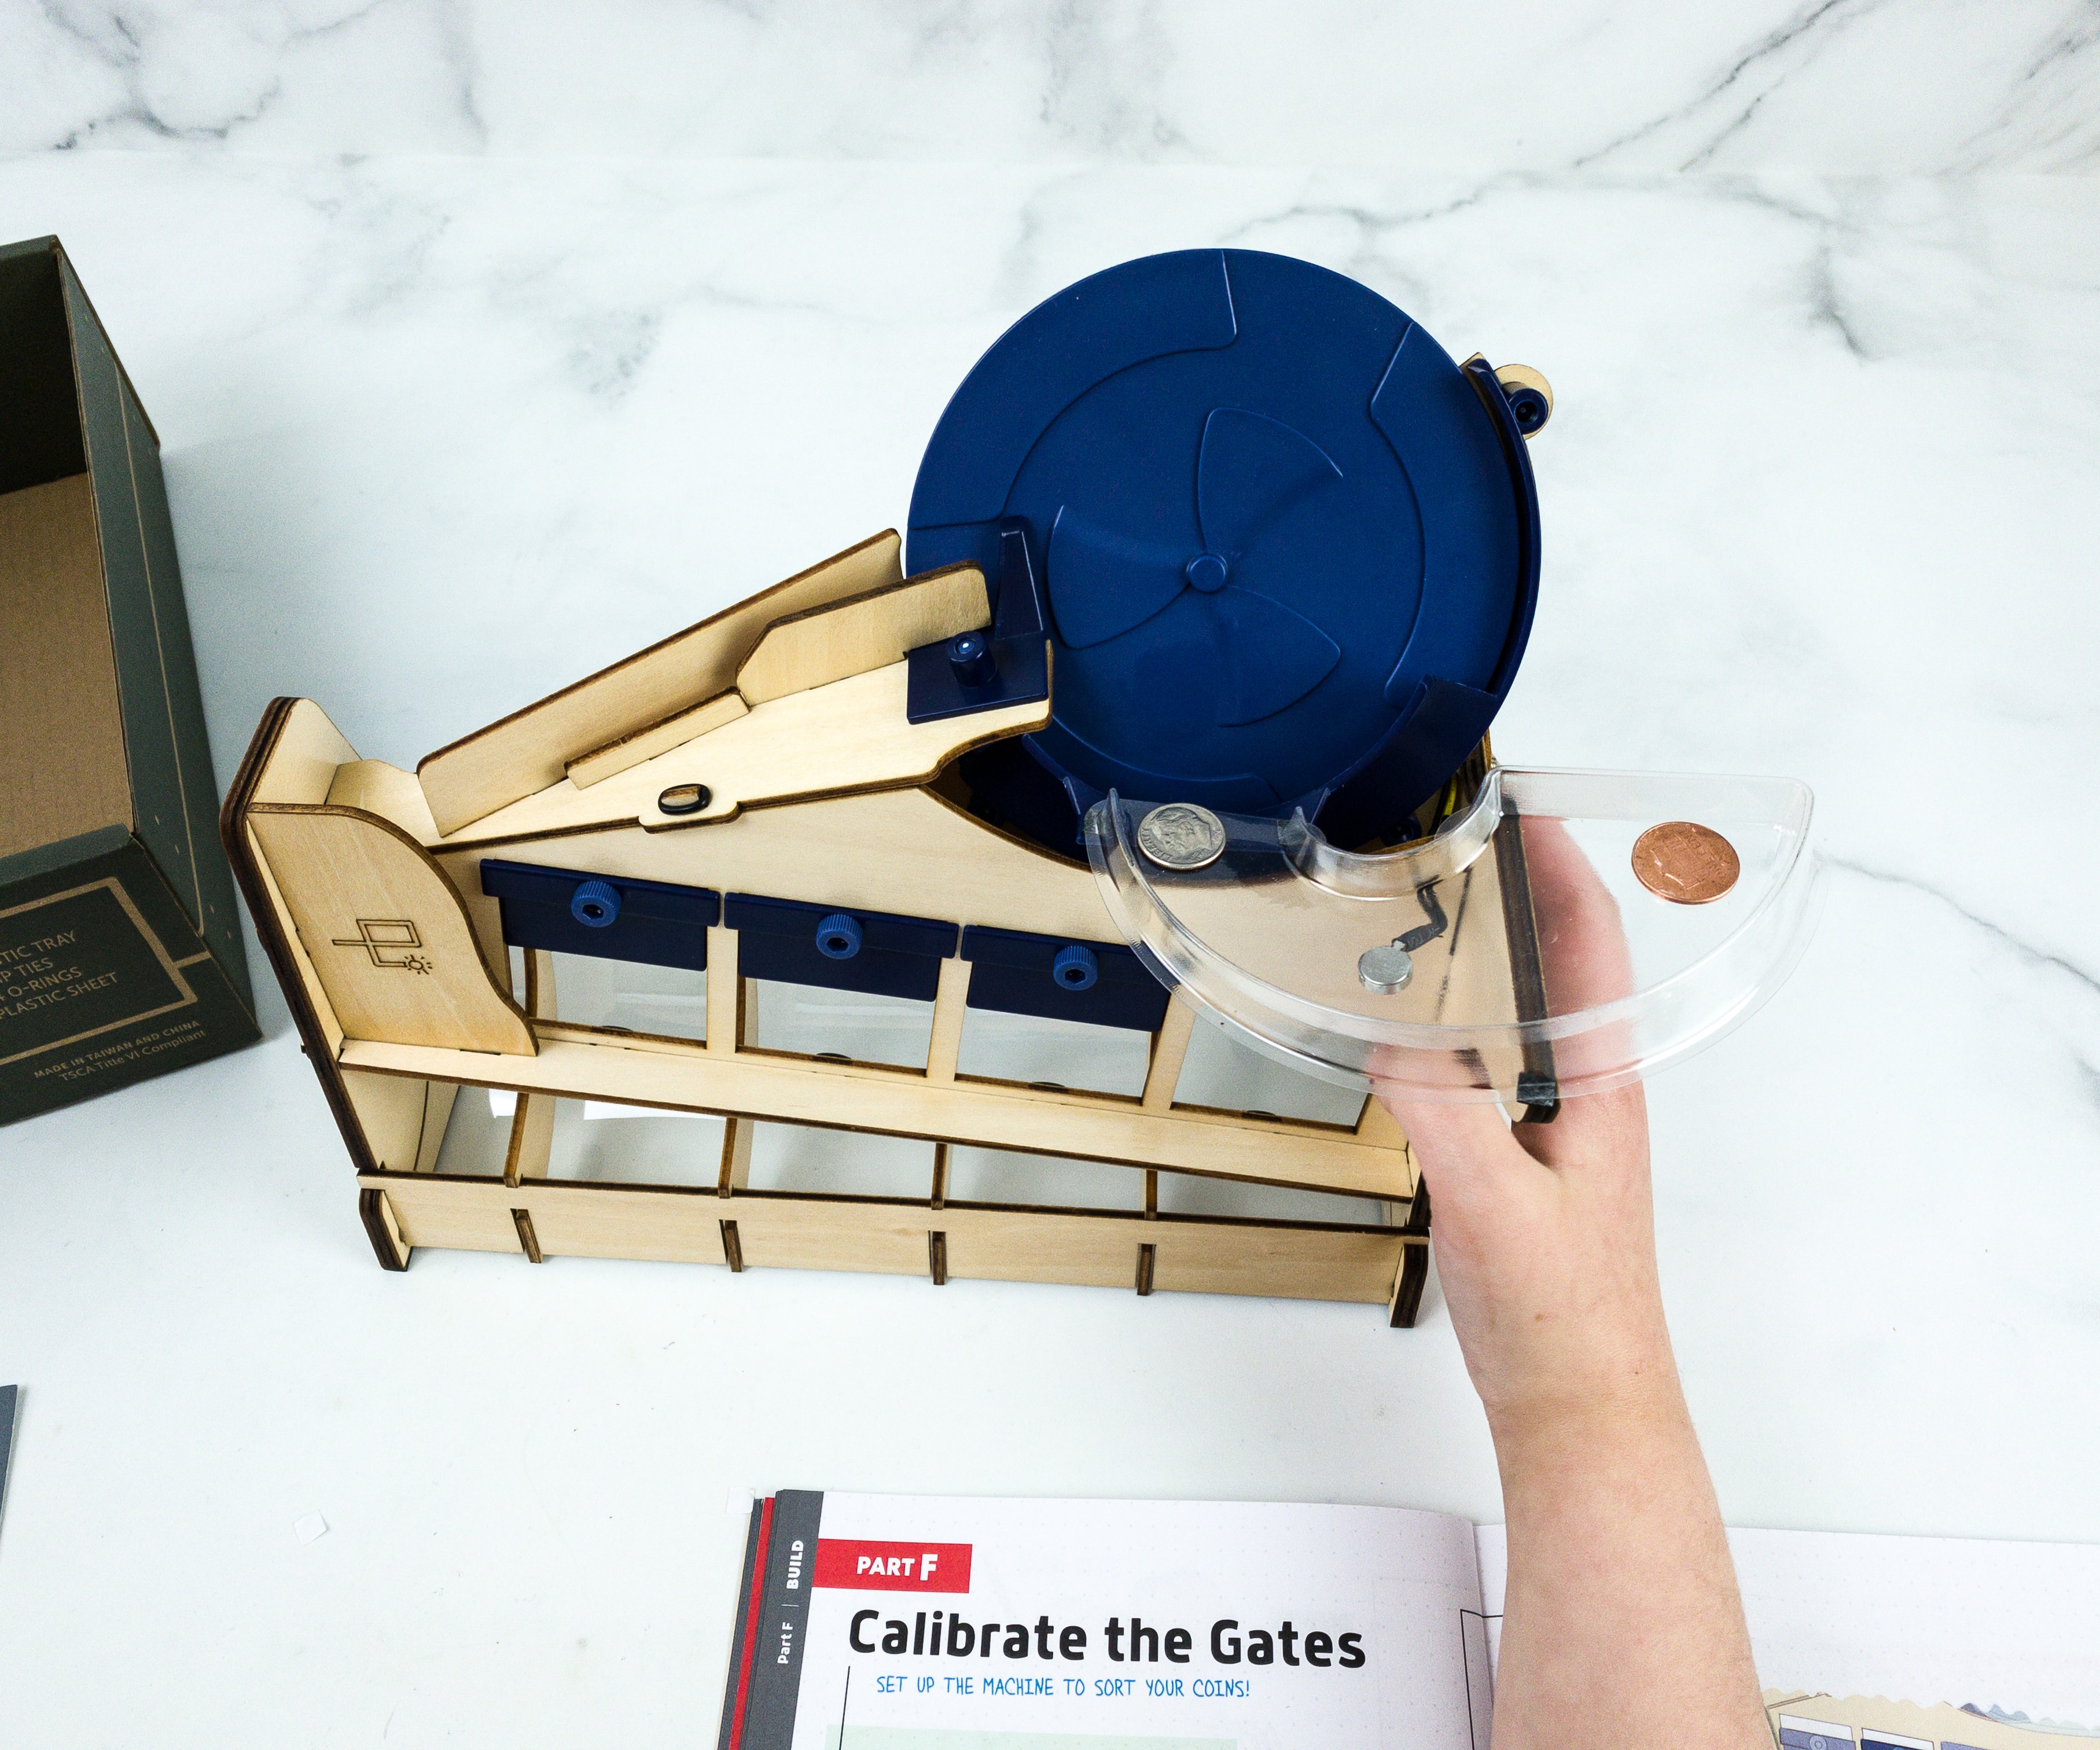
We also need to calibrate the gates so the machine could properly sort the coins. We’ll be sorting 4 types of coins, so they should go to the right areas, from the smallest to the largest coin.
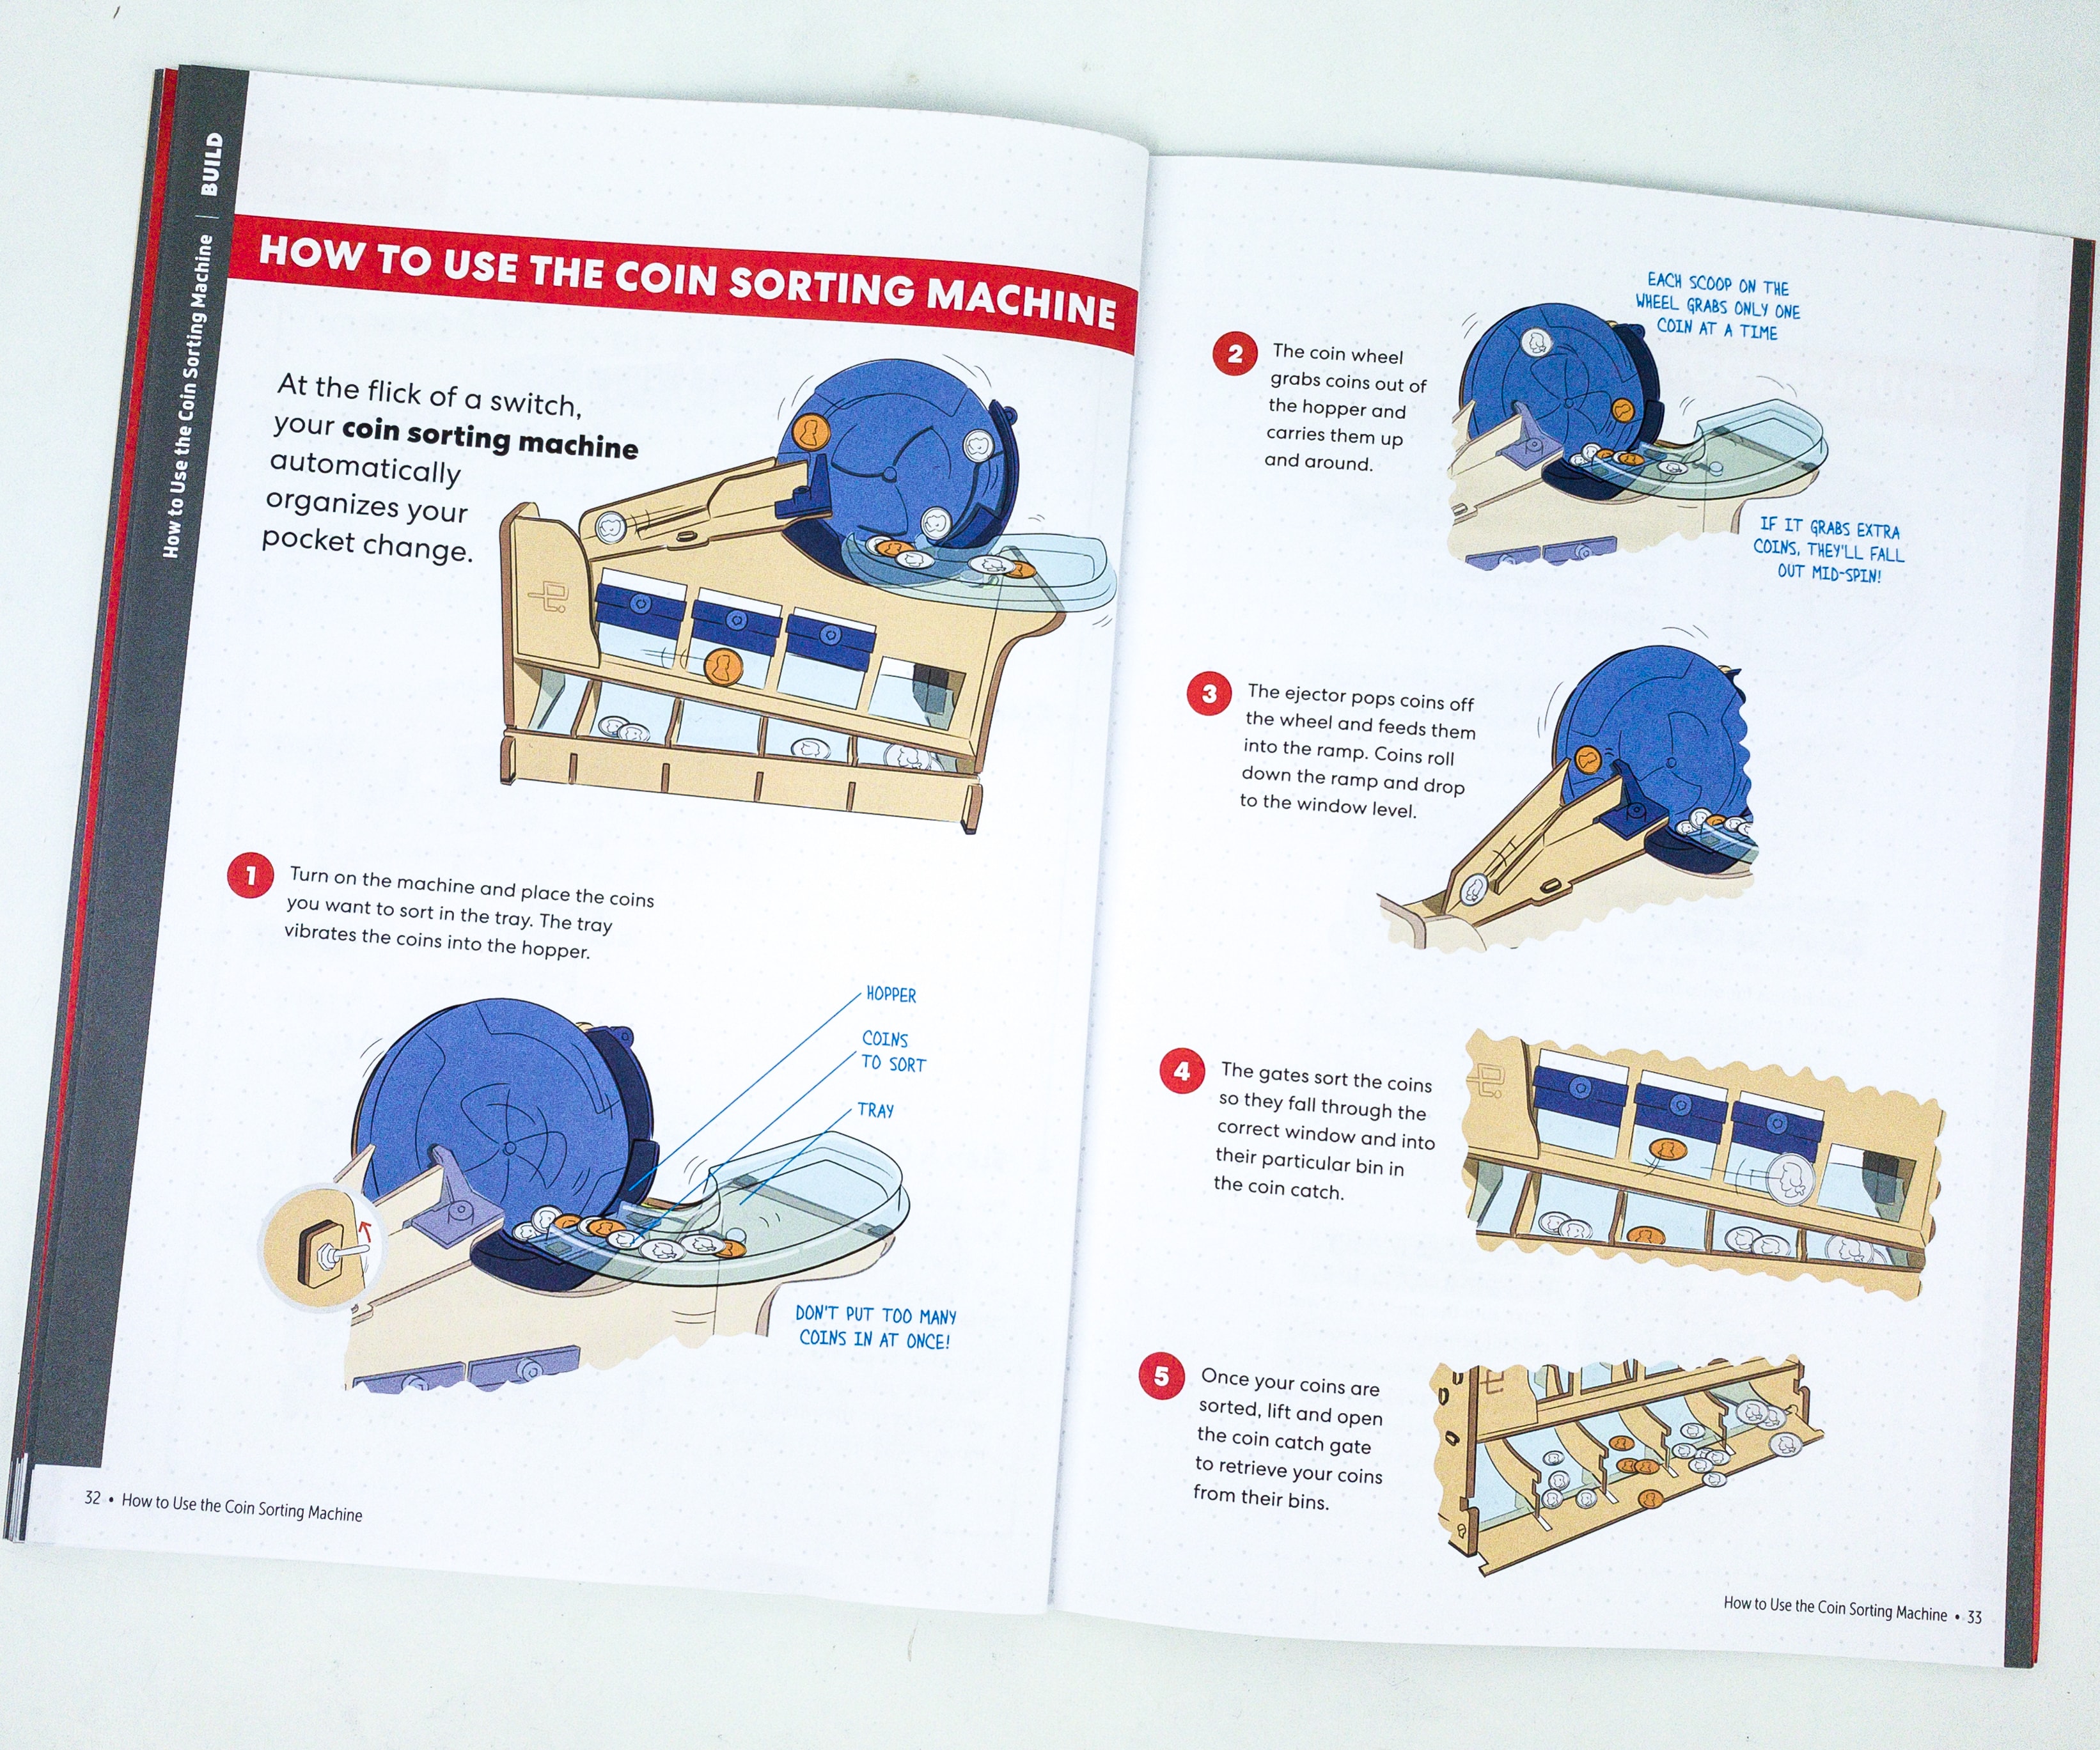
The booklet also included step-by-step directions on how to effectively use the coin sorting machine.
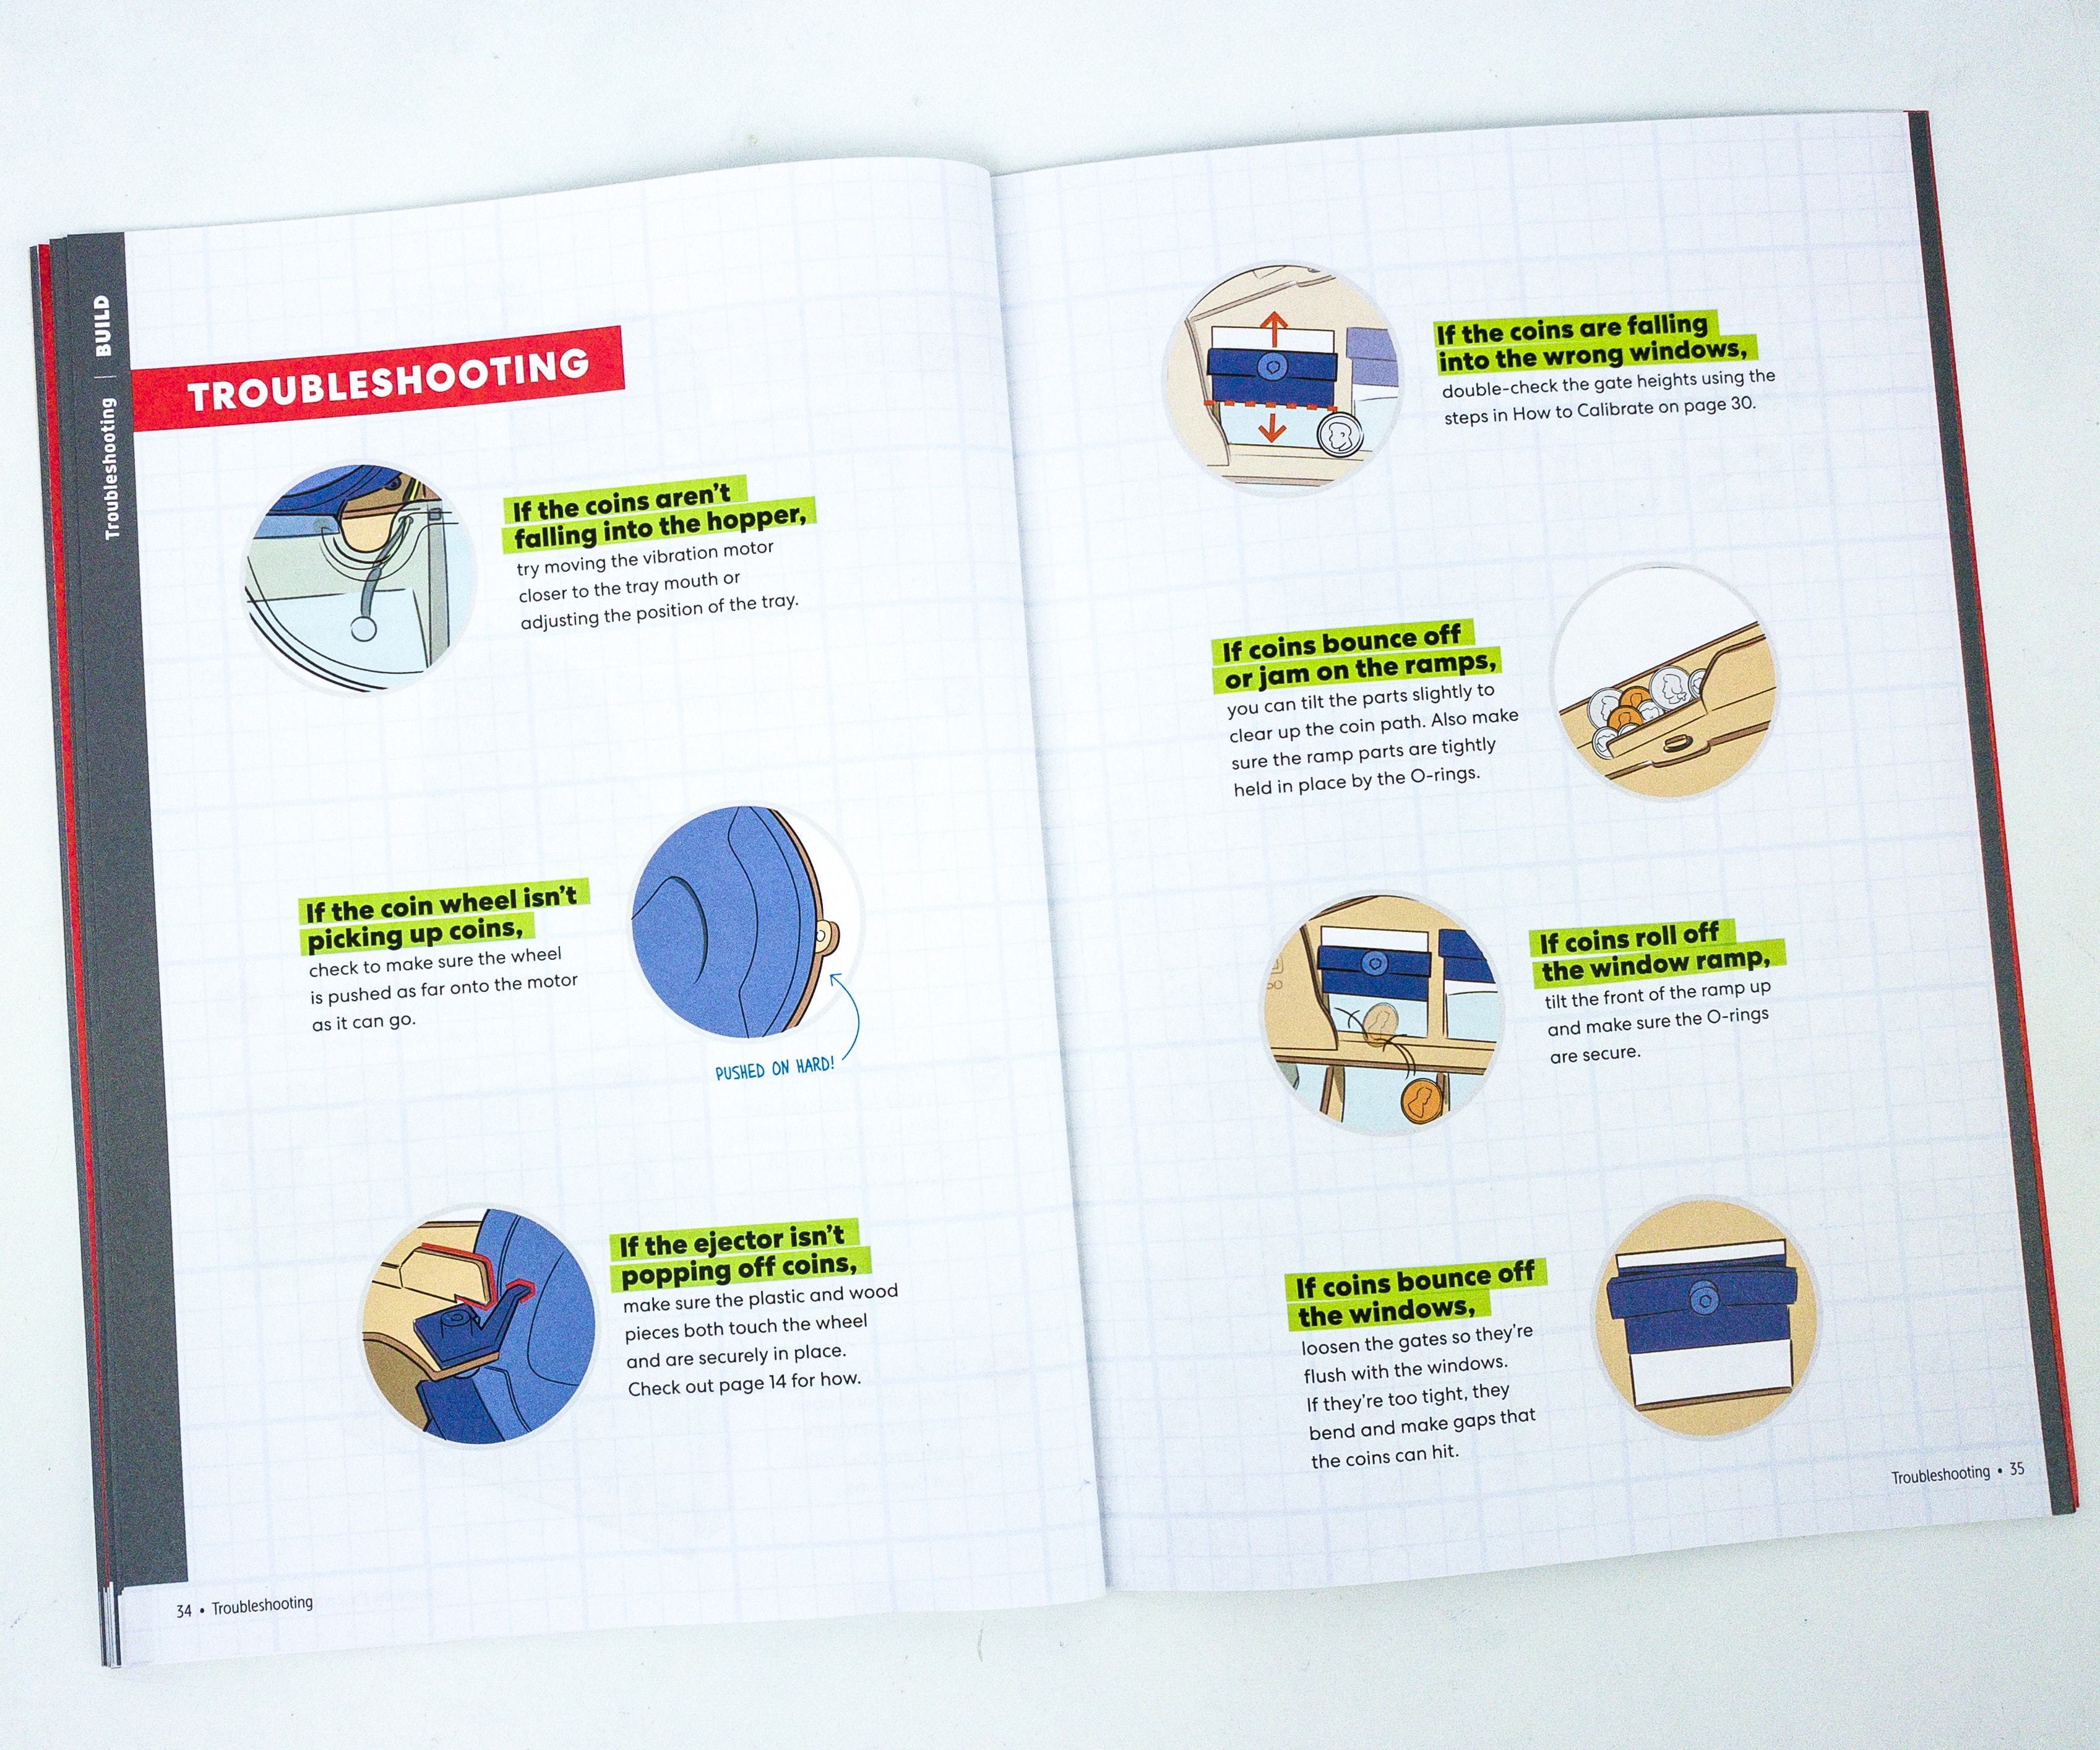
In case you encounter some problems with the coin sorting machine, the booklet also included troubleshooting of some common problems encountered when using it.
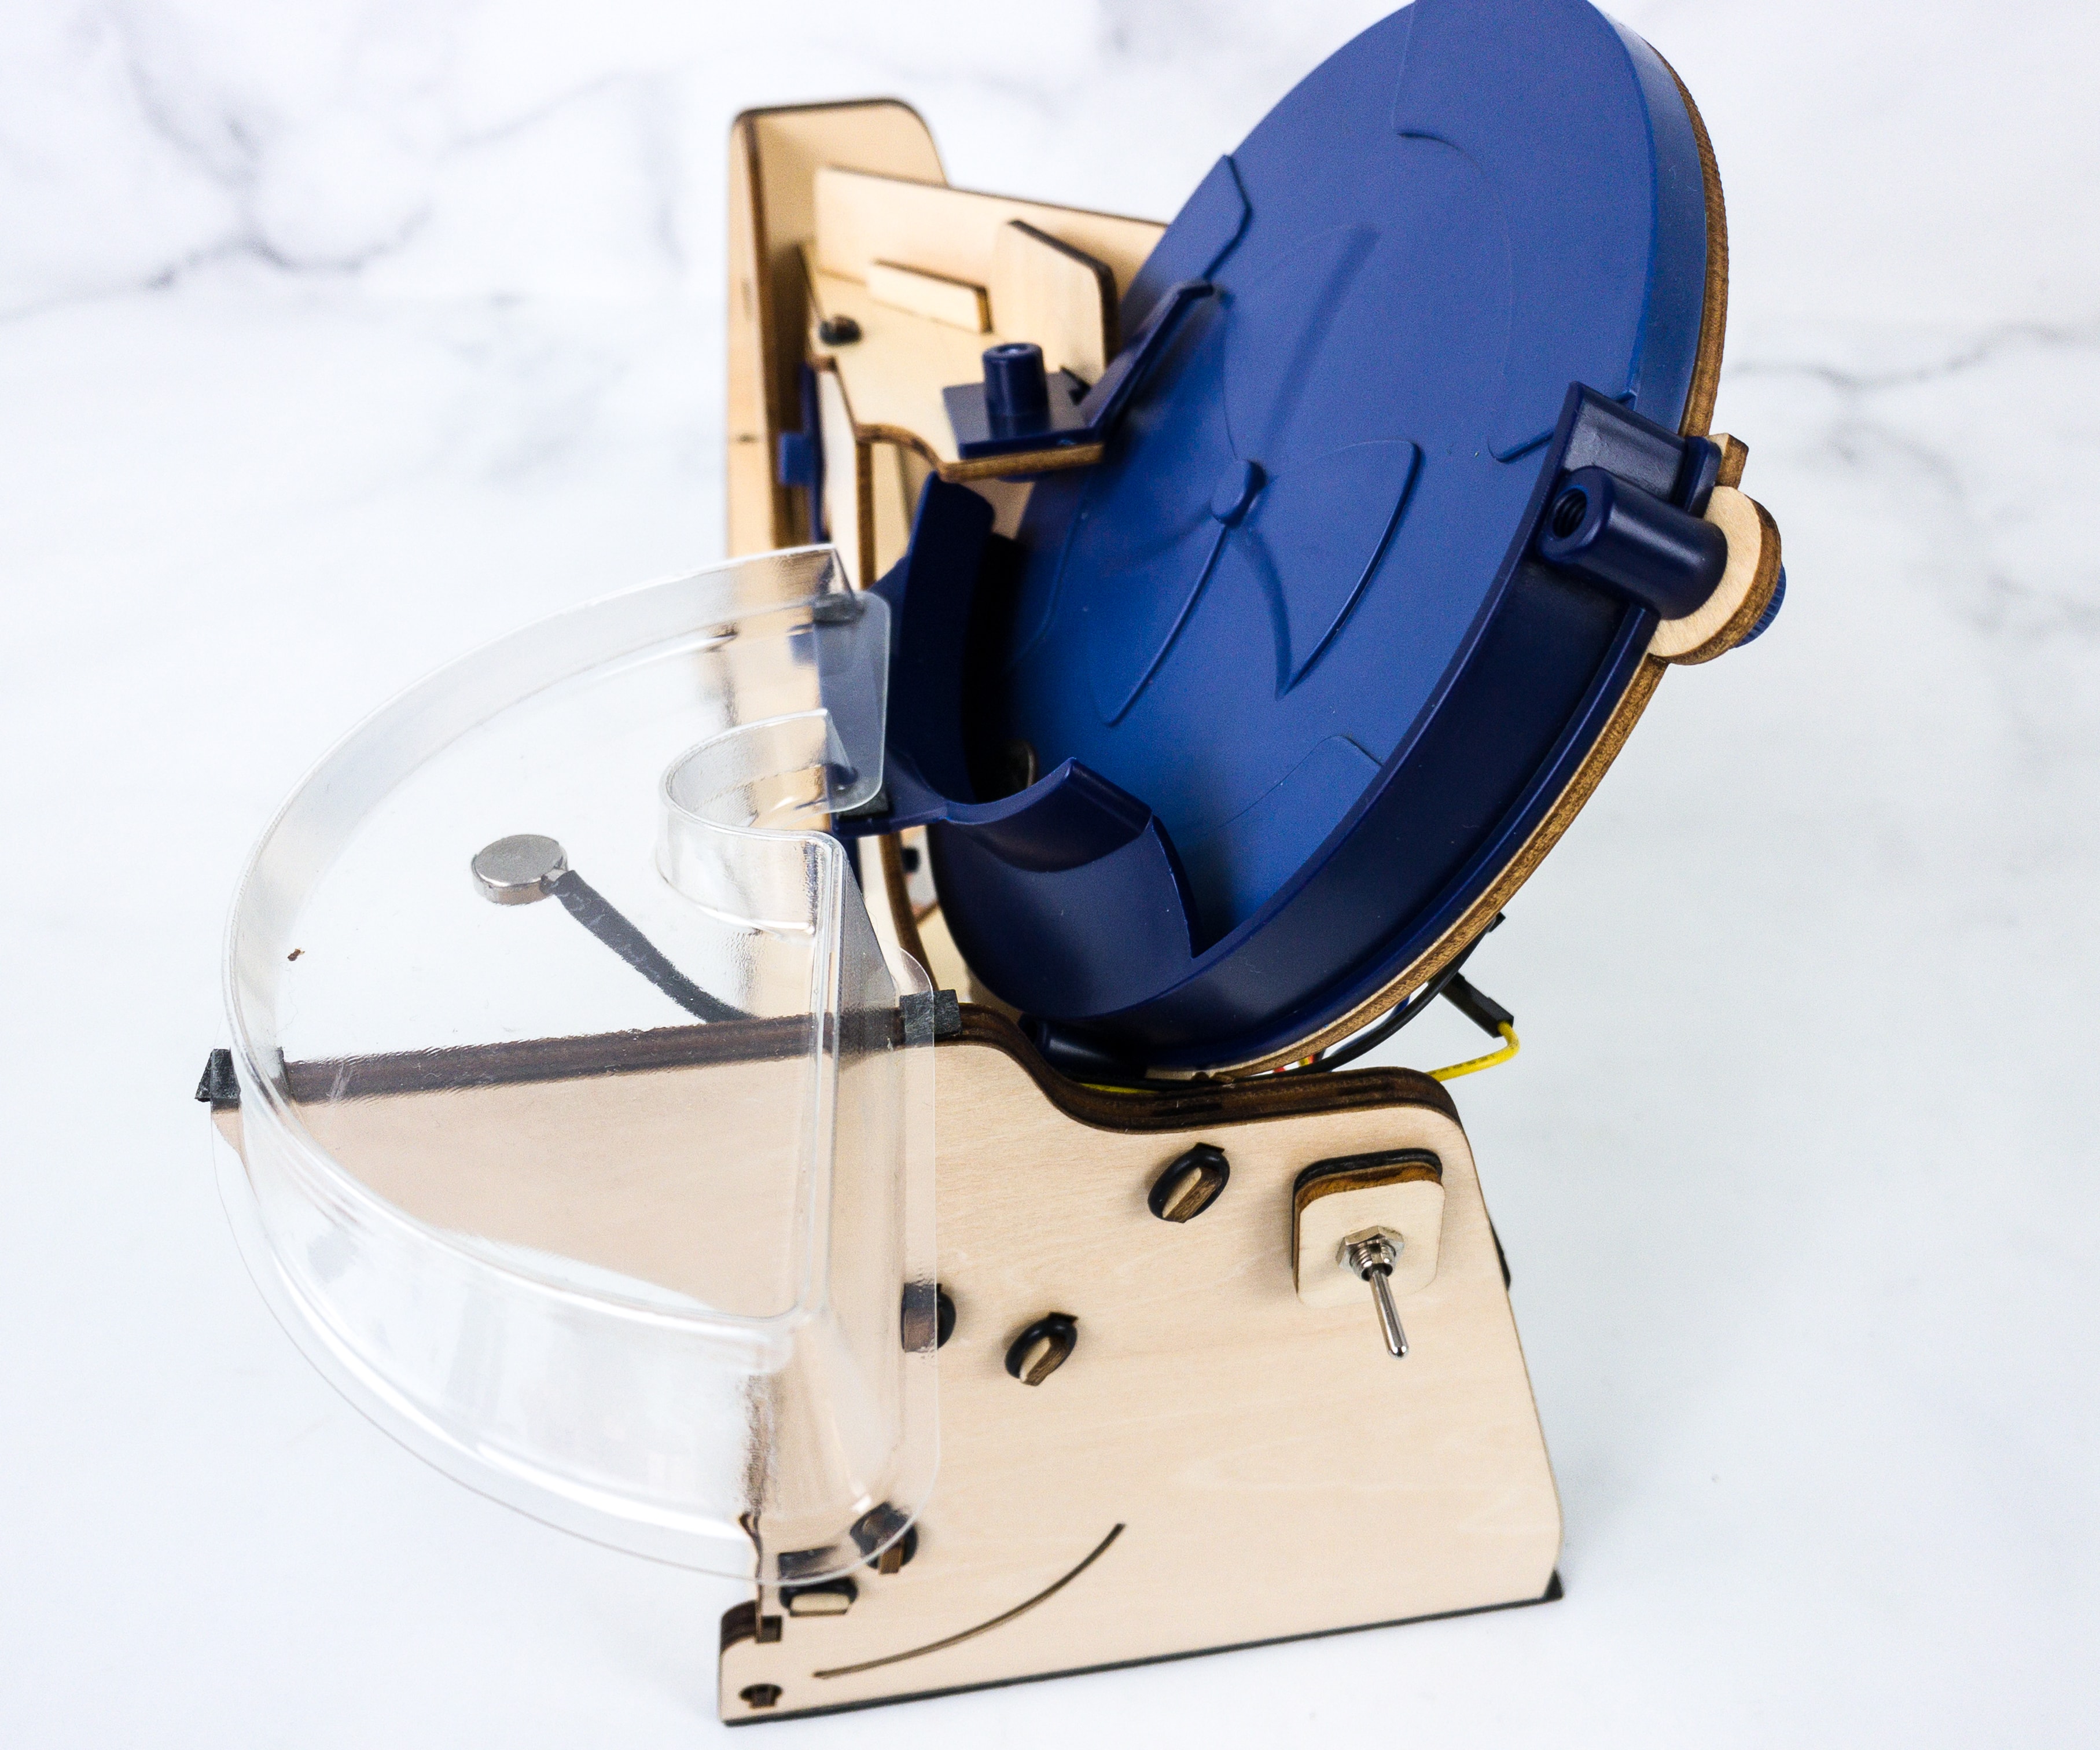
It’s time to try and sort the coins! We tried if the tray is vibrating and the wheel spins counterclockwise. We also checked if the coins go to their designated places according to their size. It works perfectly (and is hours of fun!).
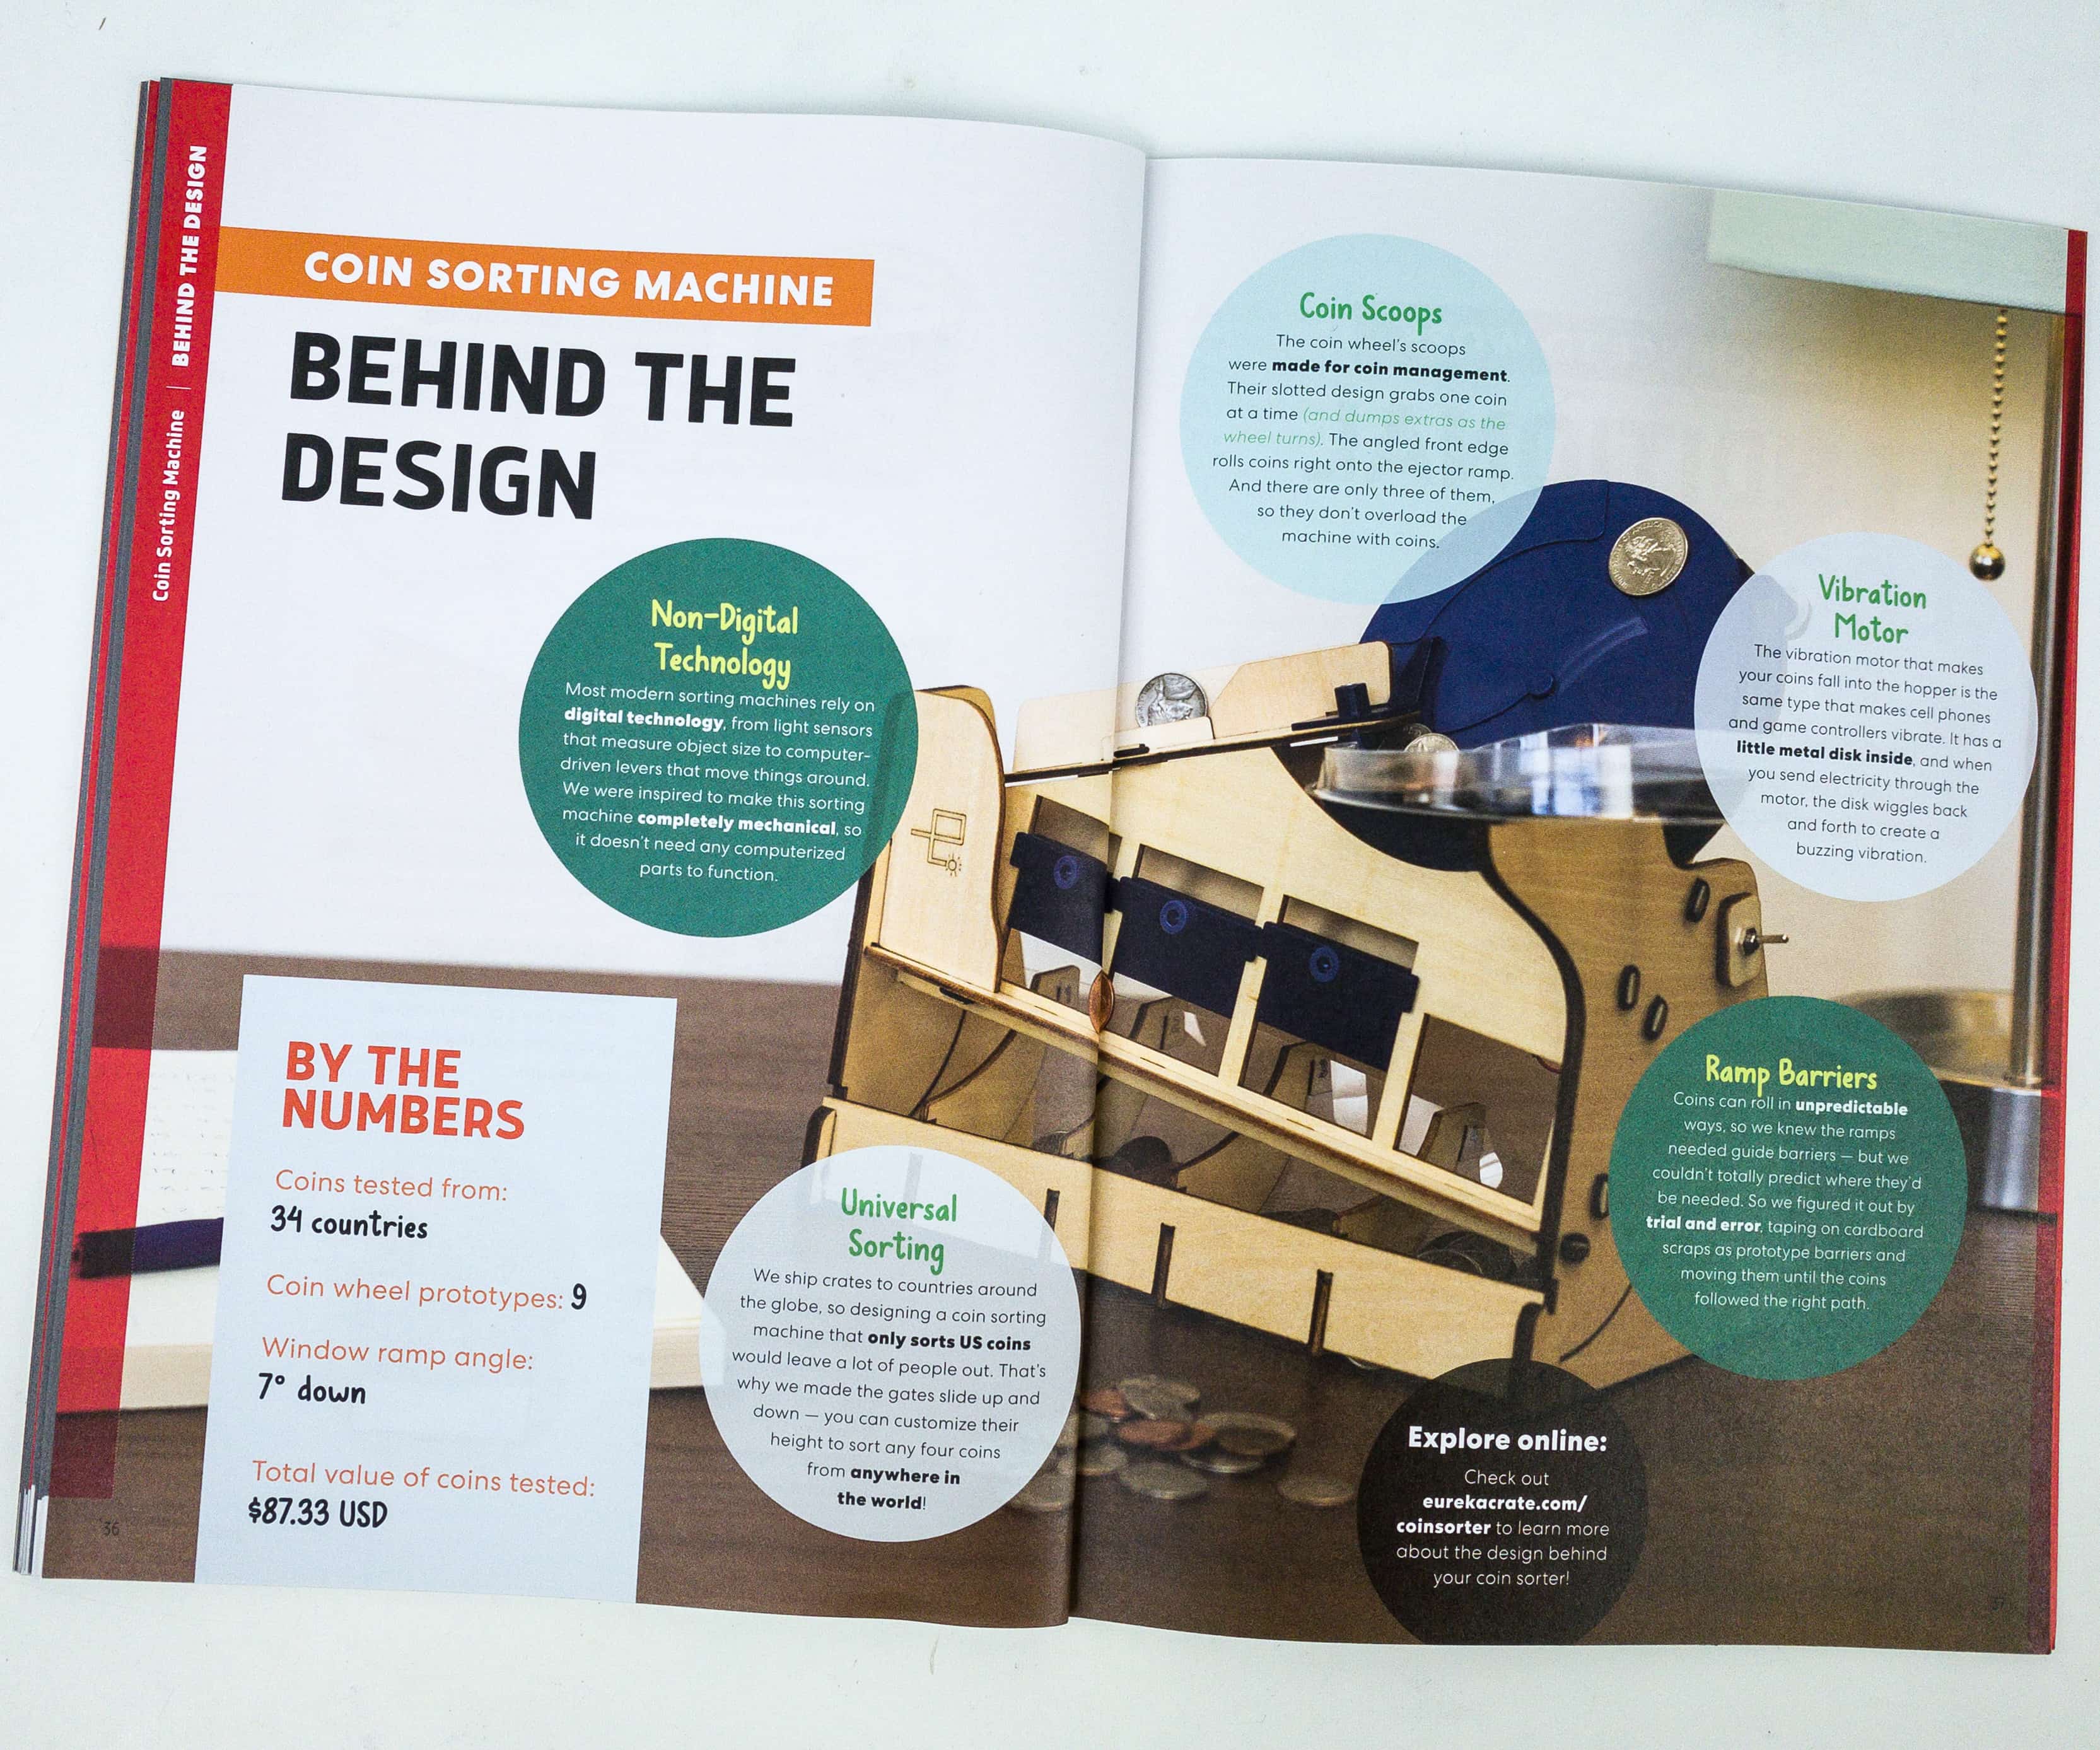
The booklet also provided us more information about this amazing project, and also lets us know more behind the design.
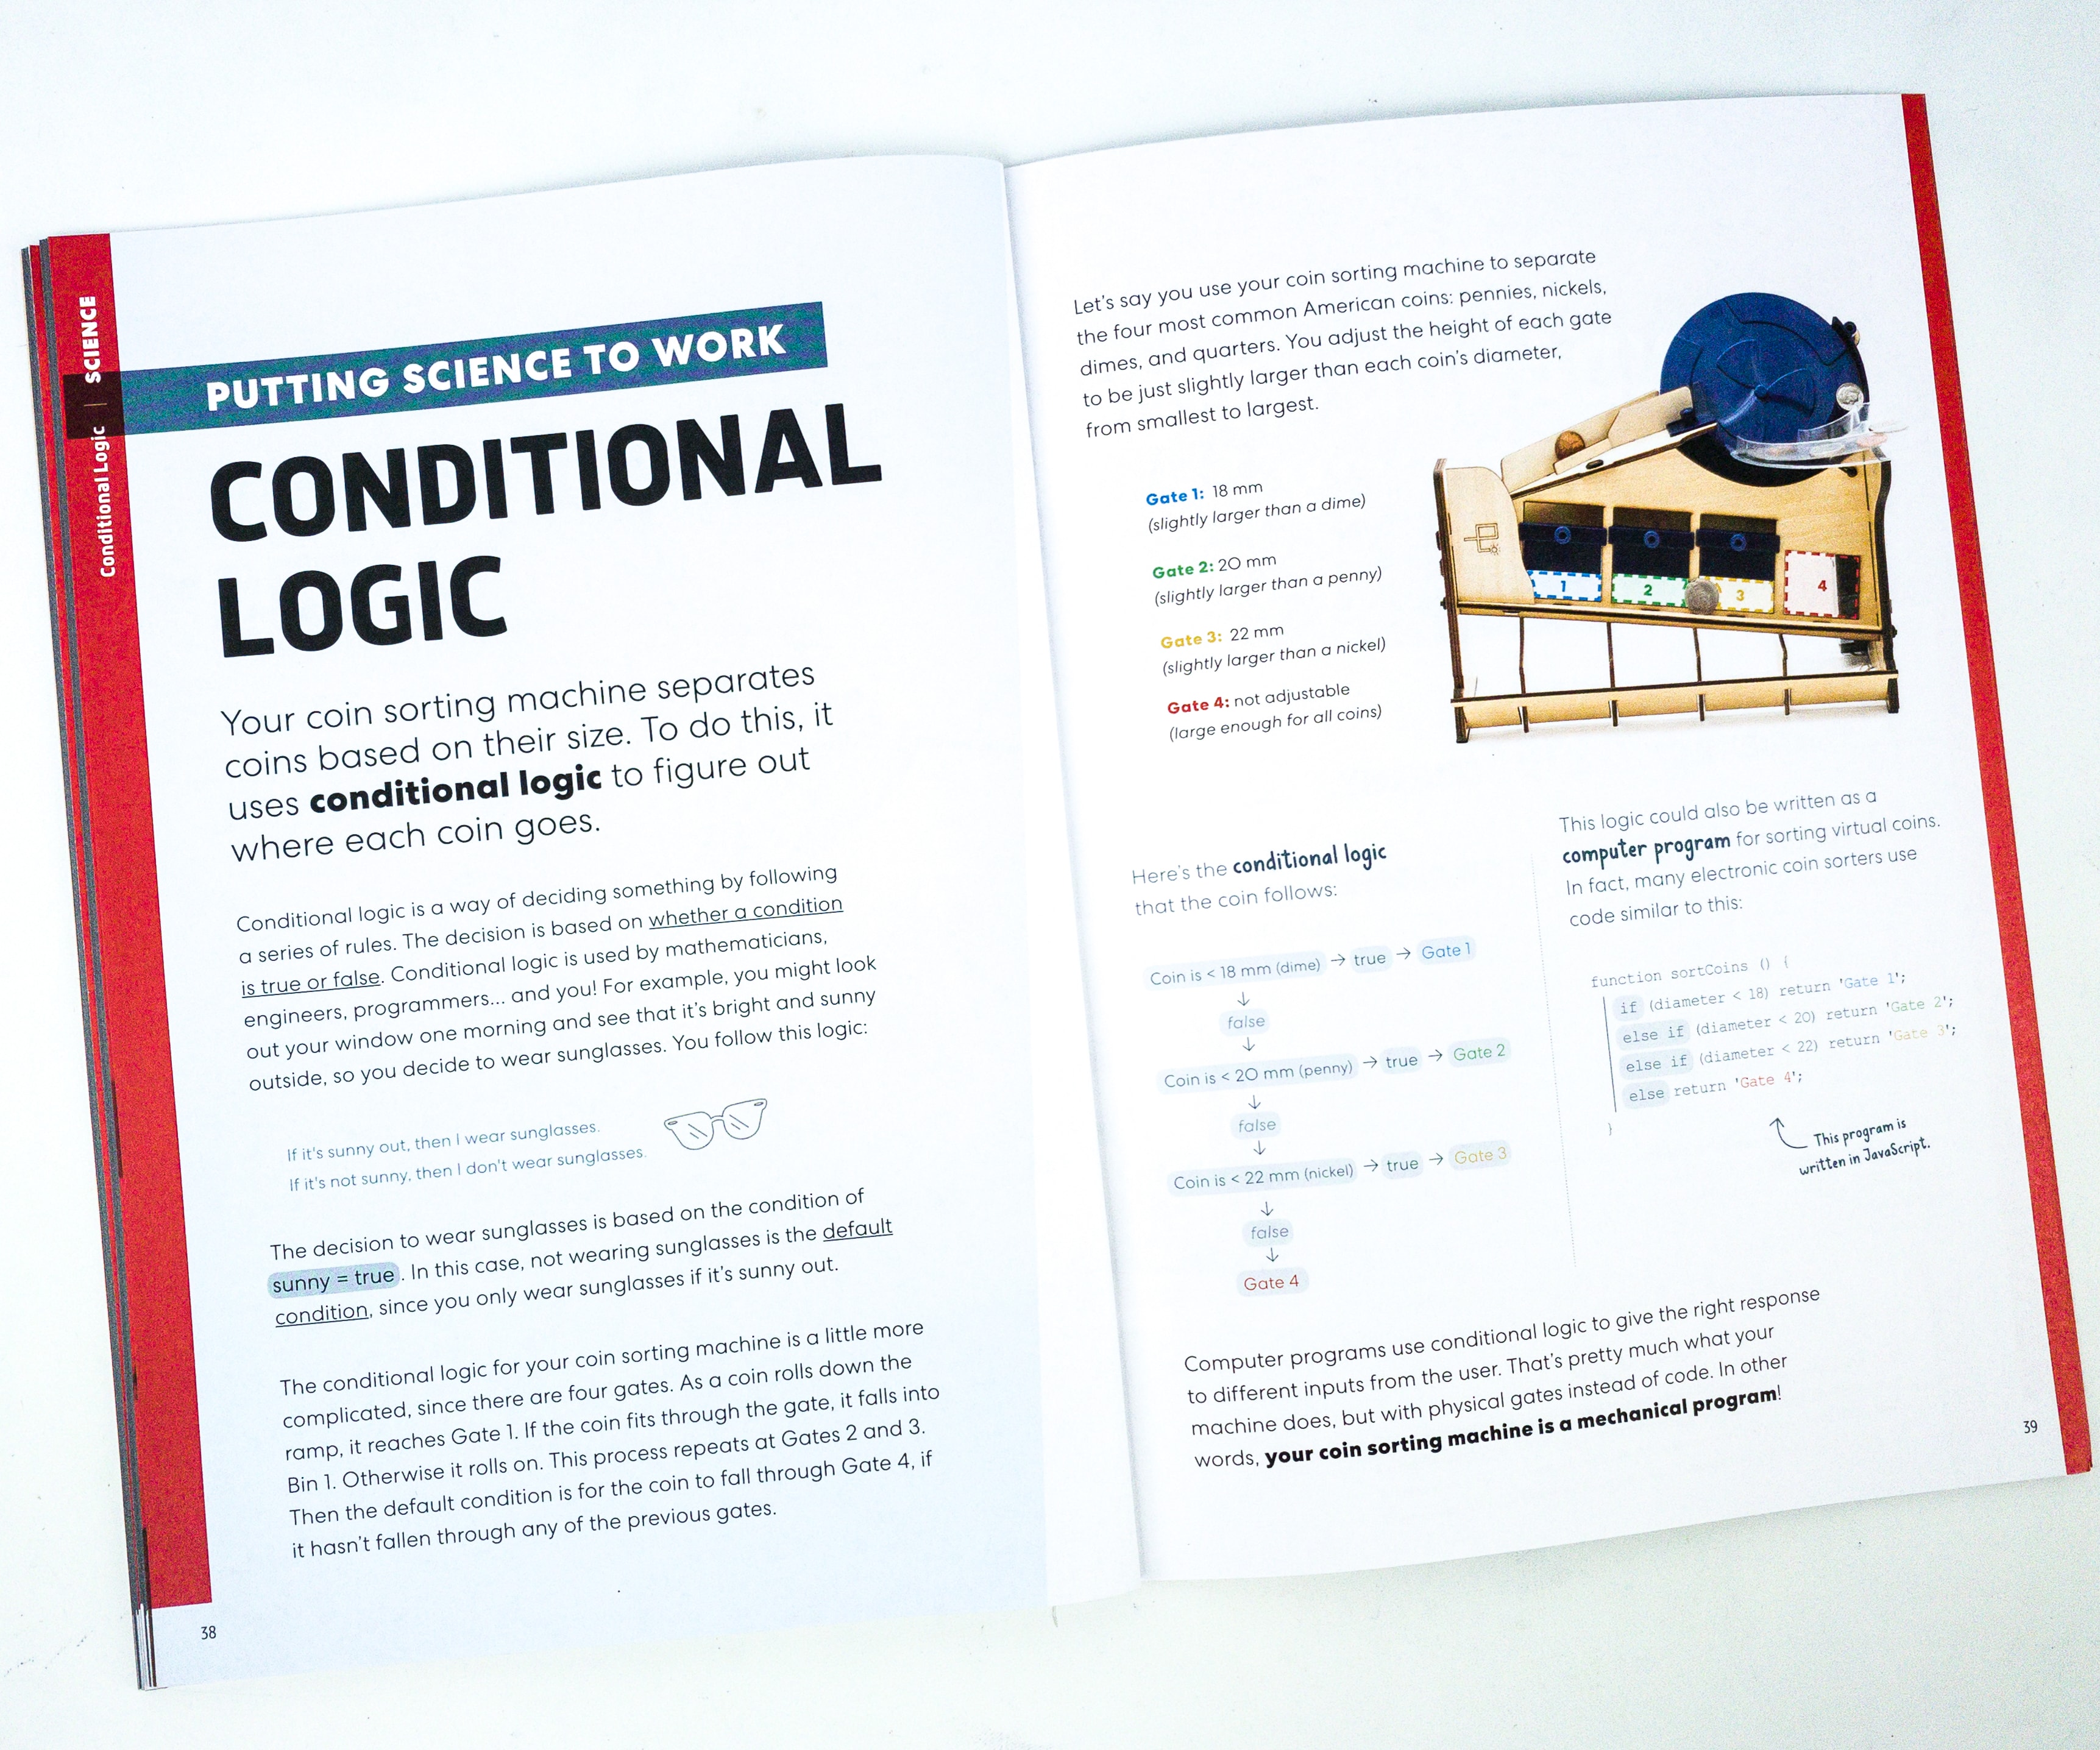
There’s a full article on the phenomena behind this month’s project, which is Conditional Logic.
Your coin sorting machine separates coins based on their size. To do this, it uses conditional logic to figure out where each coin goes.
Conditional logic is a way of deciding something by following a series of rules. The decision is based on whether a condition is true or false. Conditional logic is used by mathematicians, engineers, programmers… and you! For example, you might look out your window one morning and see that it’s bright and sunny outside, you decide to wear sunglasses. You follow this logic:
If it’s sunny out, then I wear sunglasses.
If it’s not sunny, then I don’t wear sunglasses.
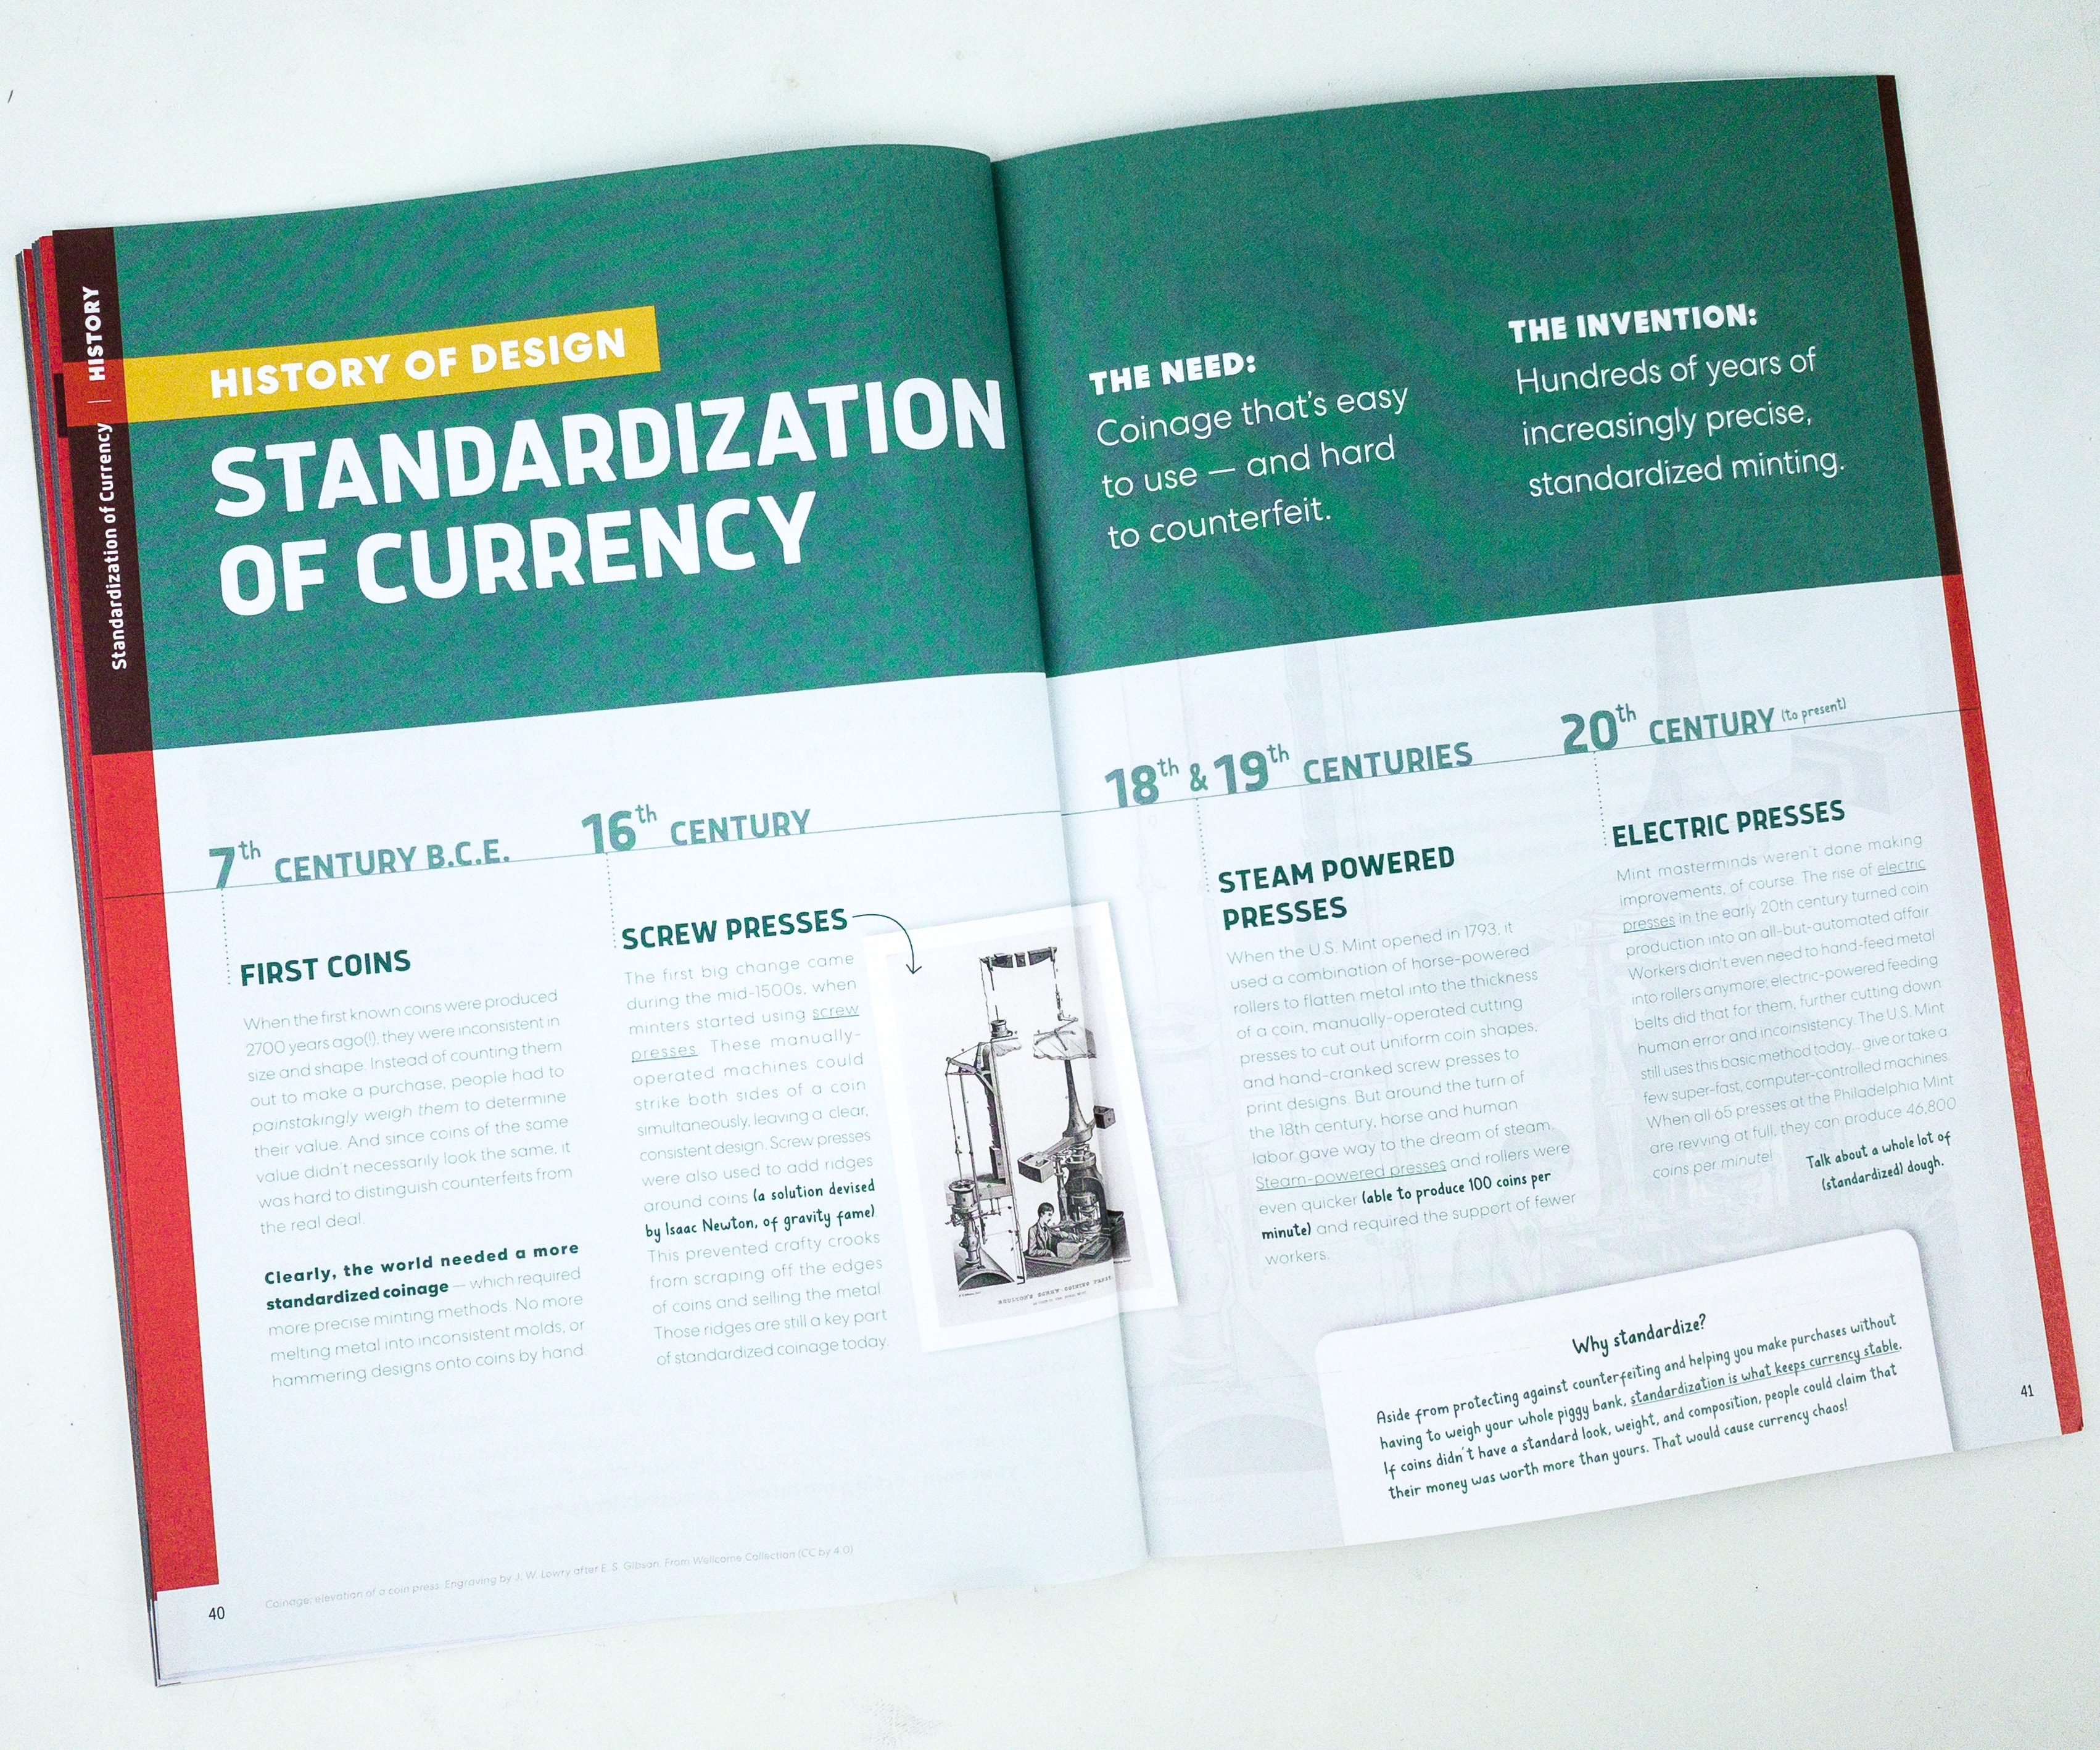
They also included the history of standardization of currency!
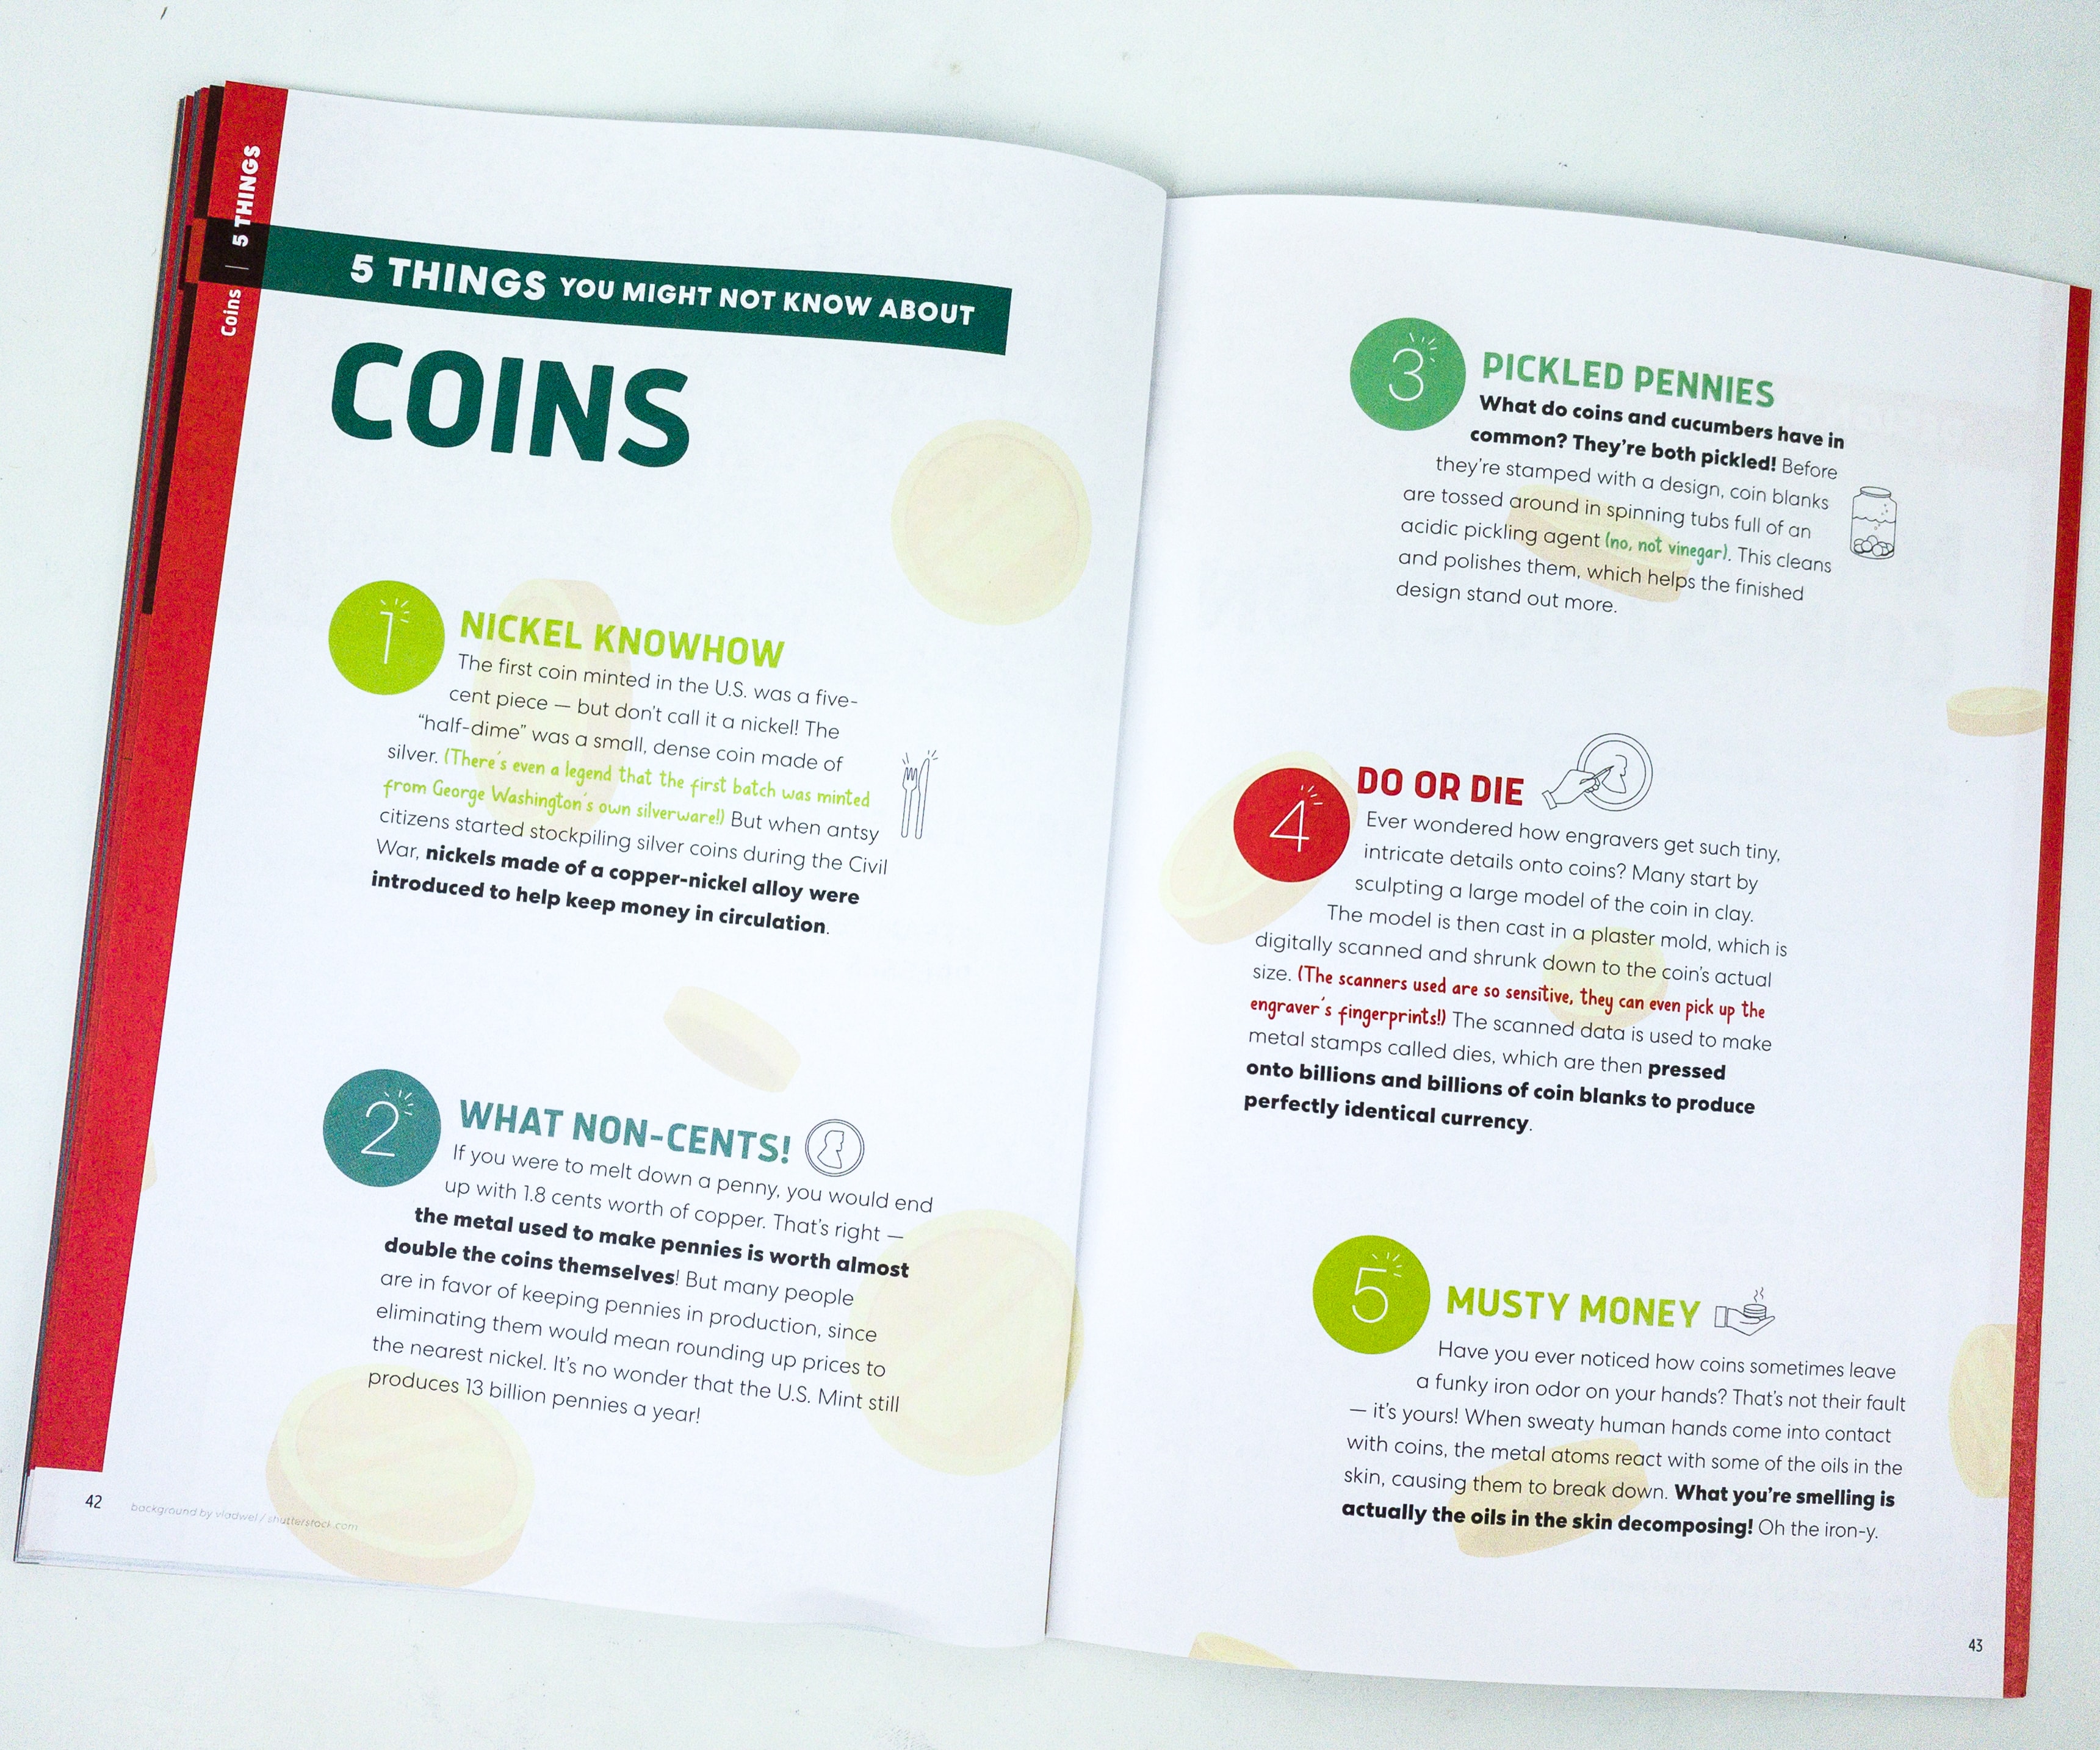
We learned a lot about coins through this article!
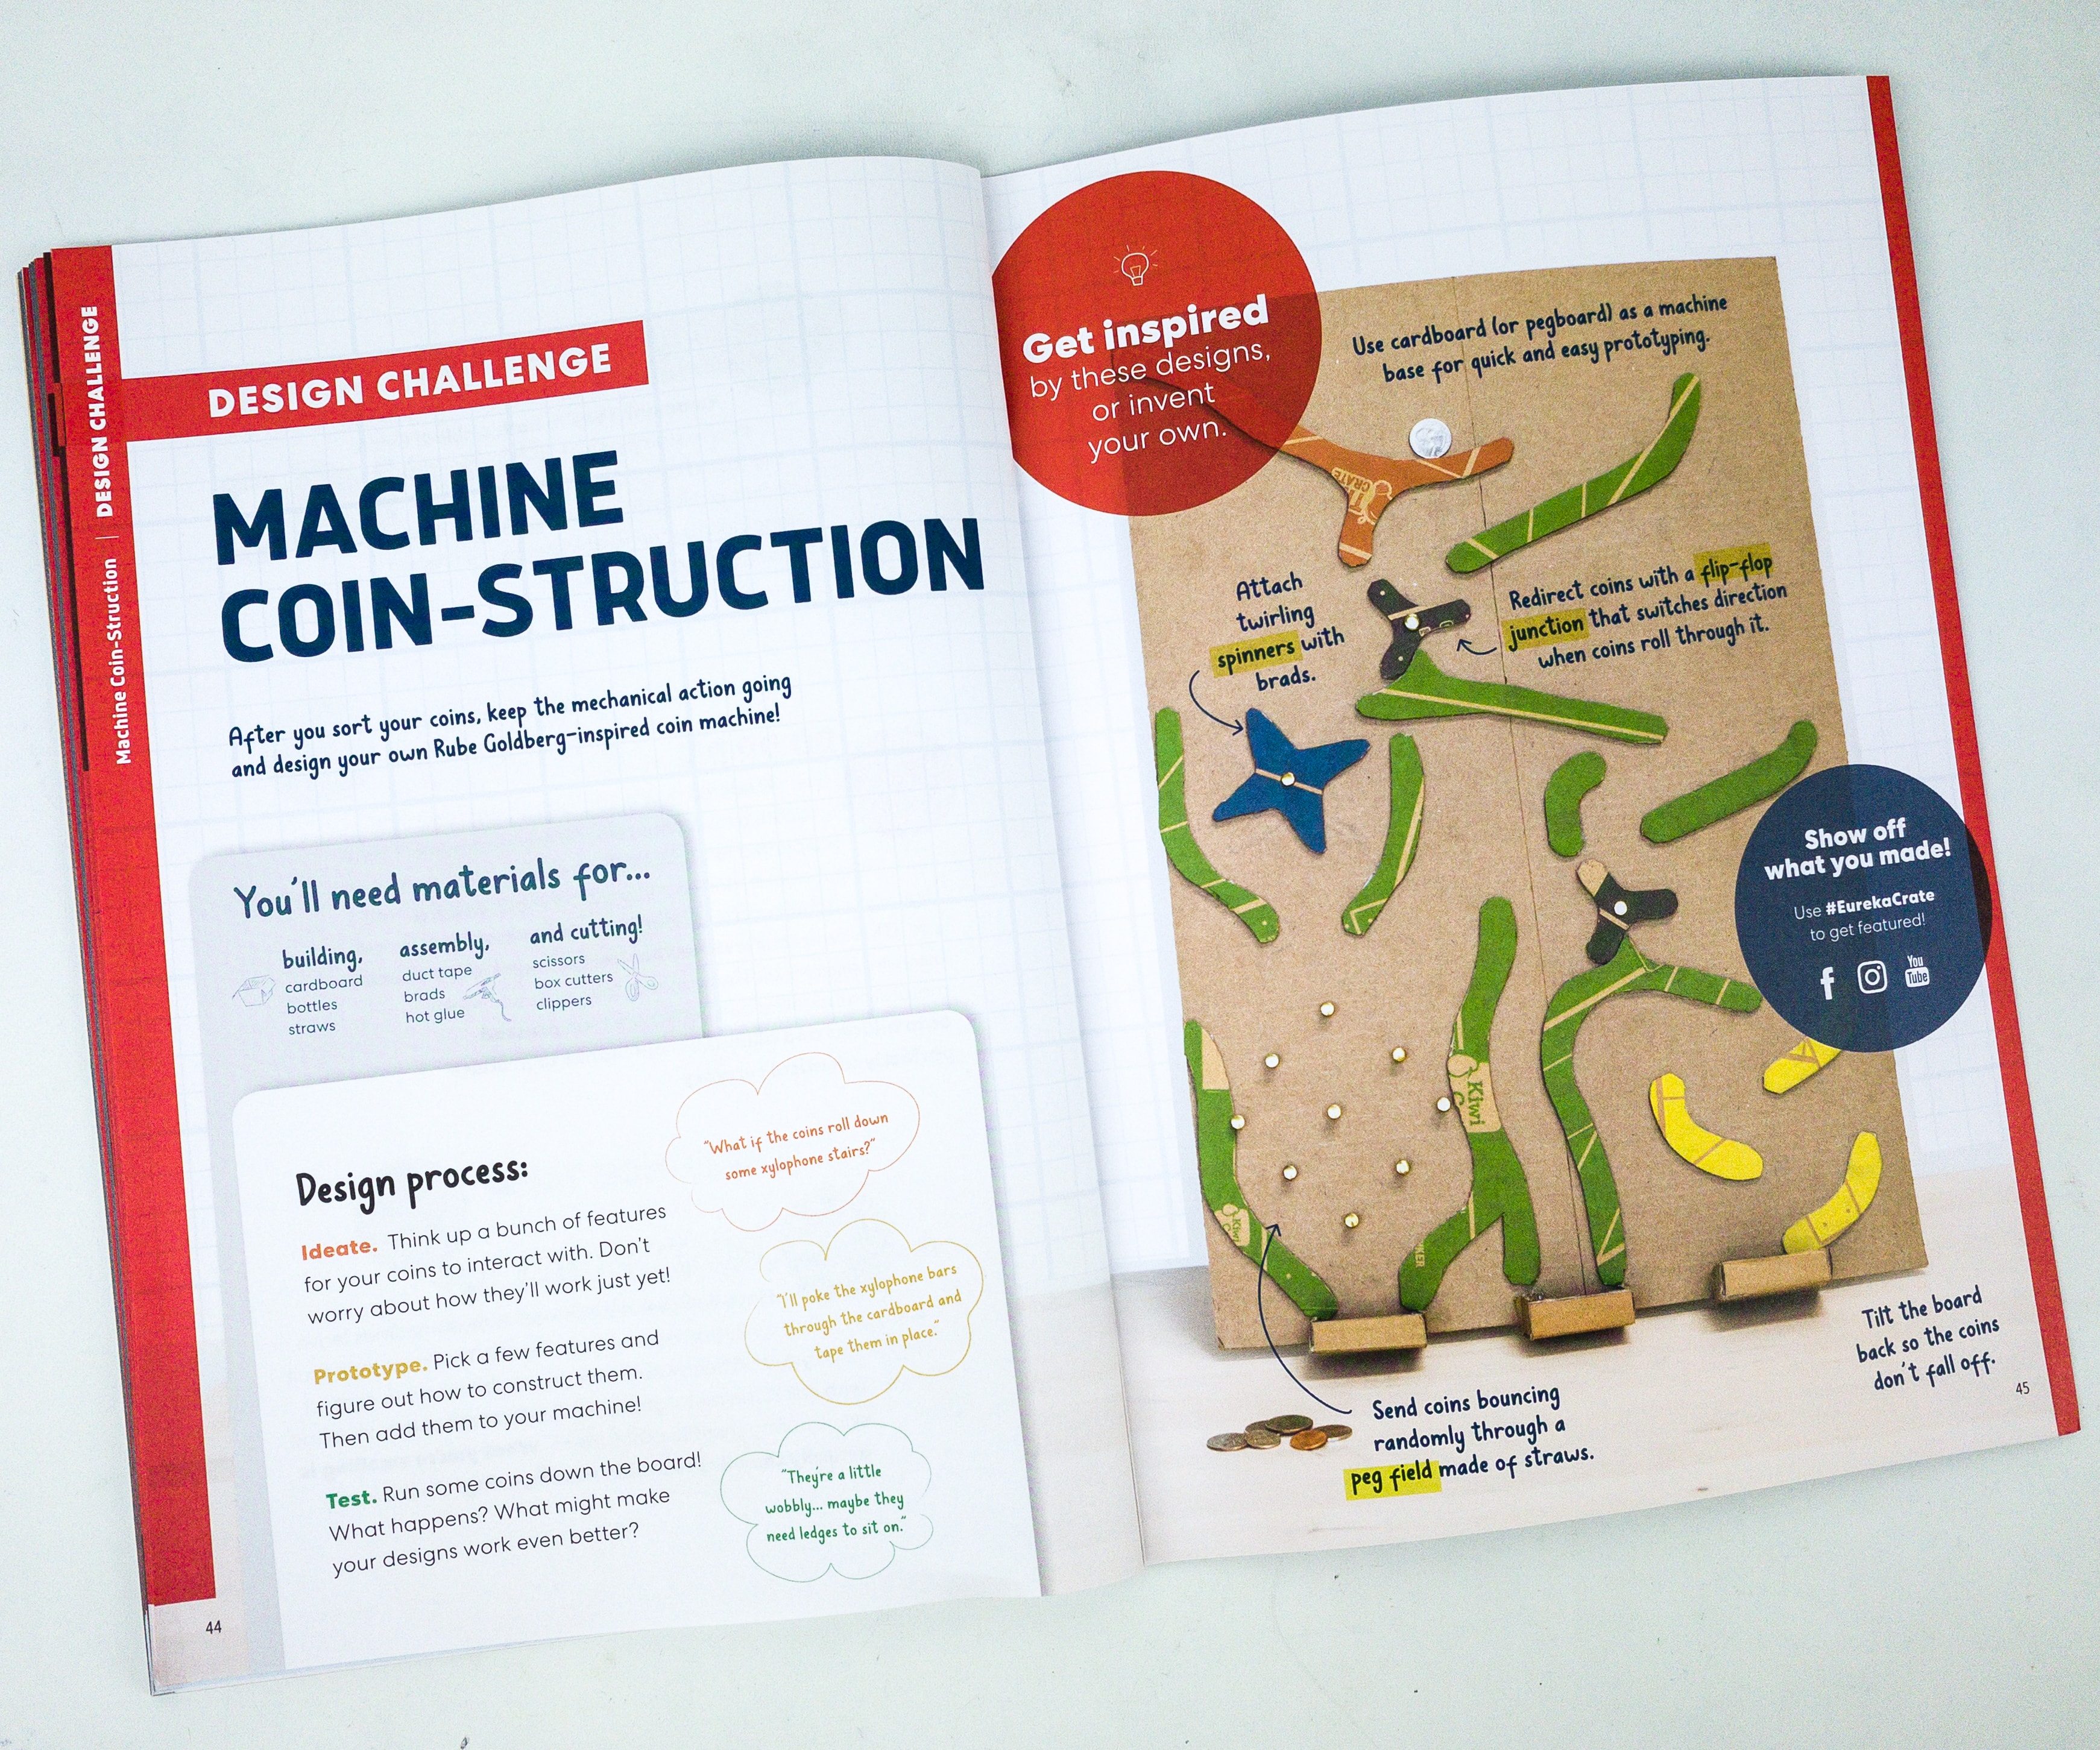
For the Design Challenge, they’re encouraging us to do some machine coin-struction. They also included some design inspirations.
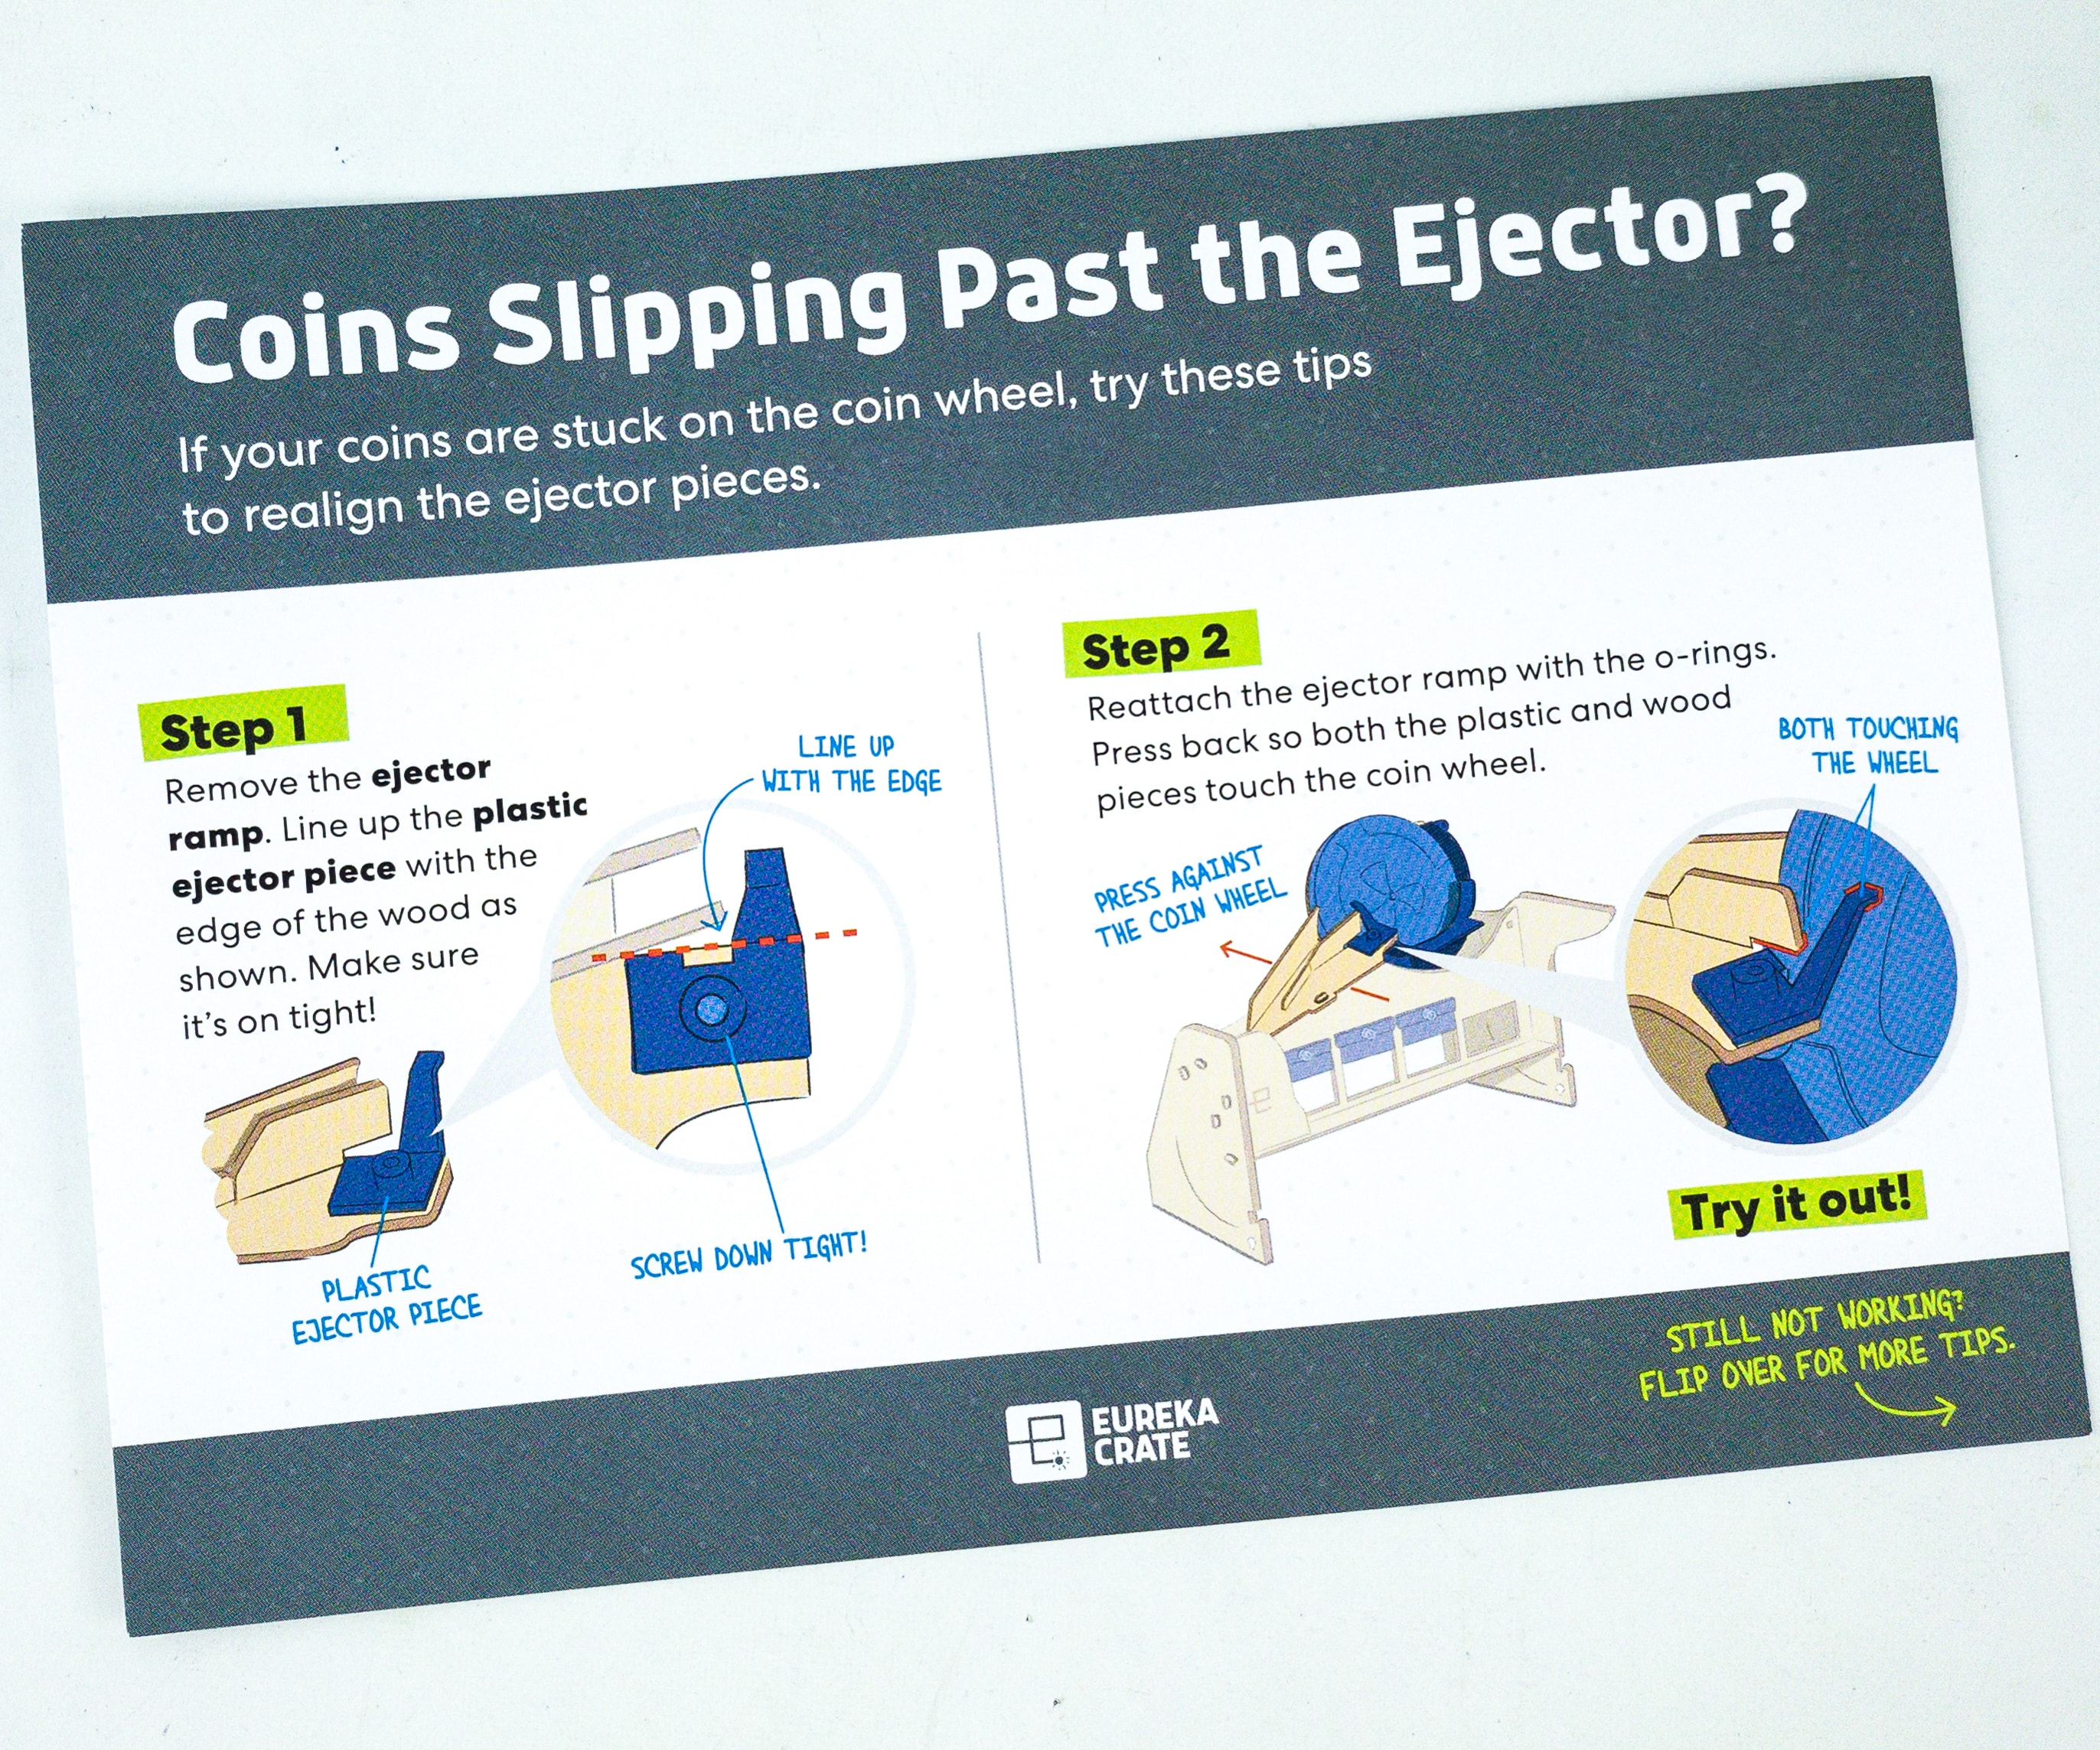
They also included some tips if the coins slip past the ejector.

There are tips that you can follow if the coin is slipping past the ejector or the wood piece.
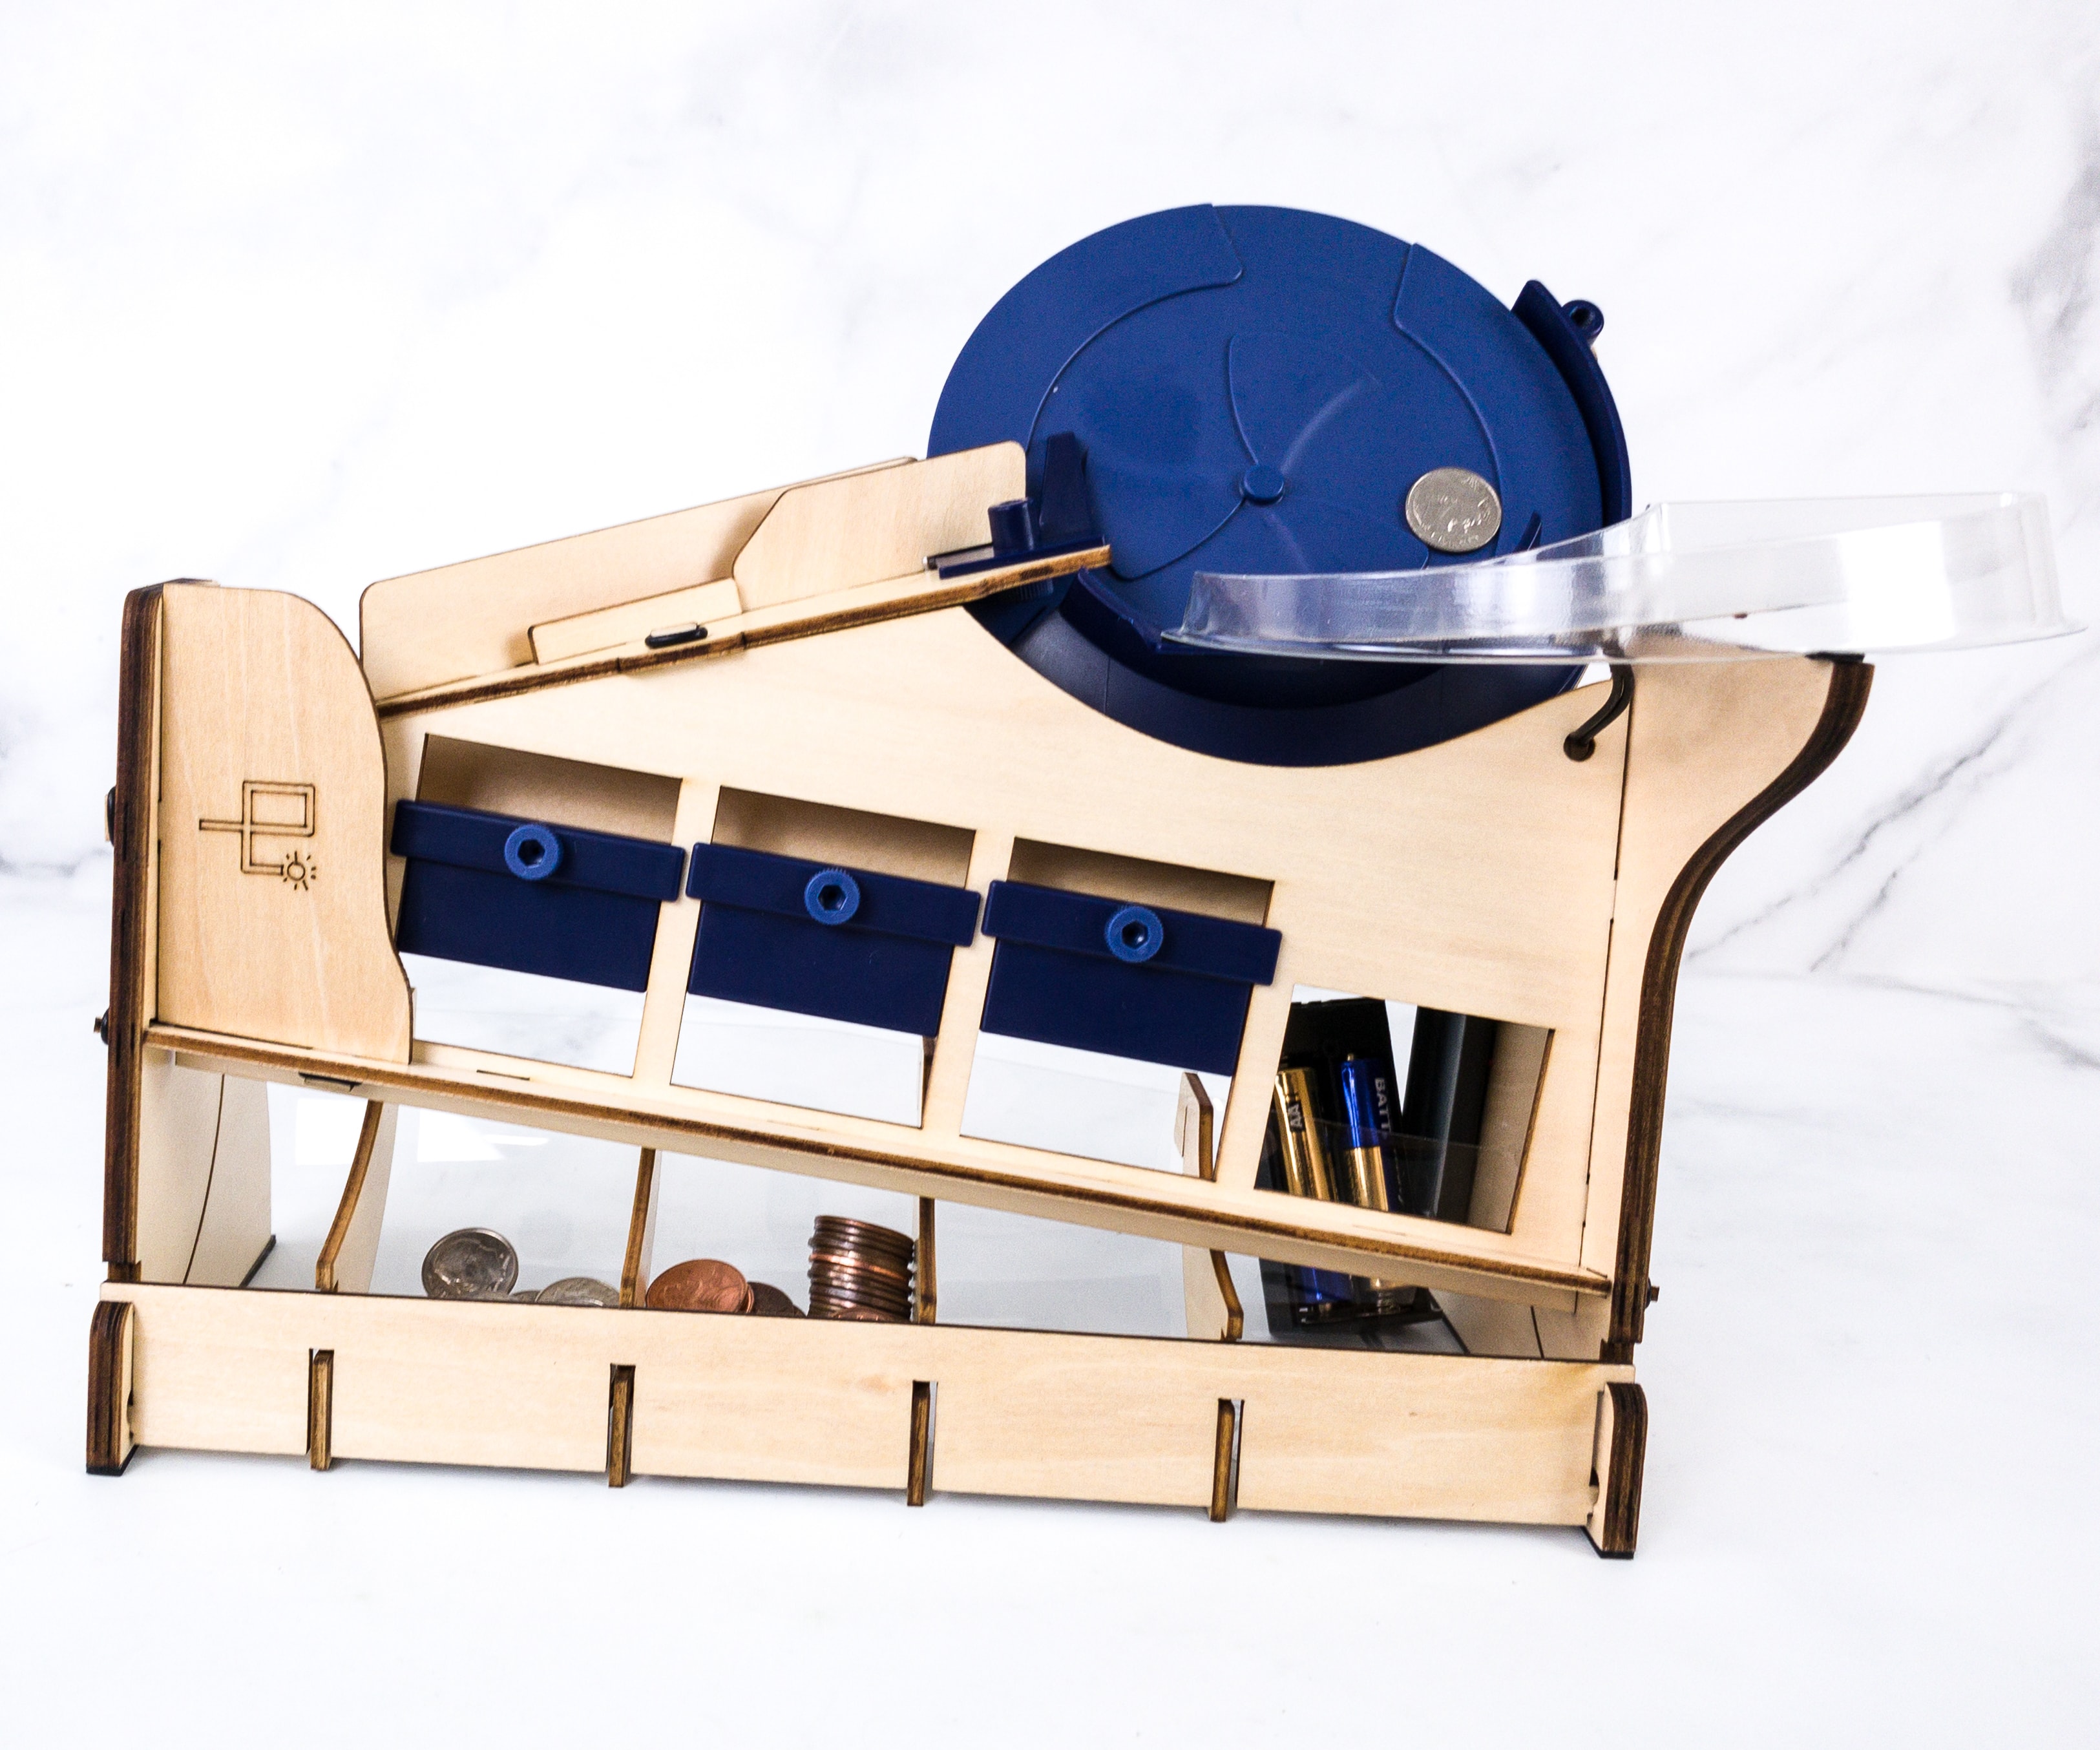
We tried to sort our spare change and it worked really well!
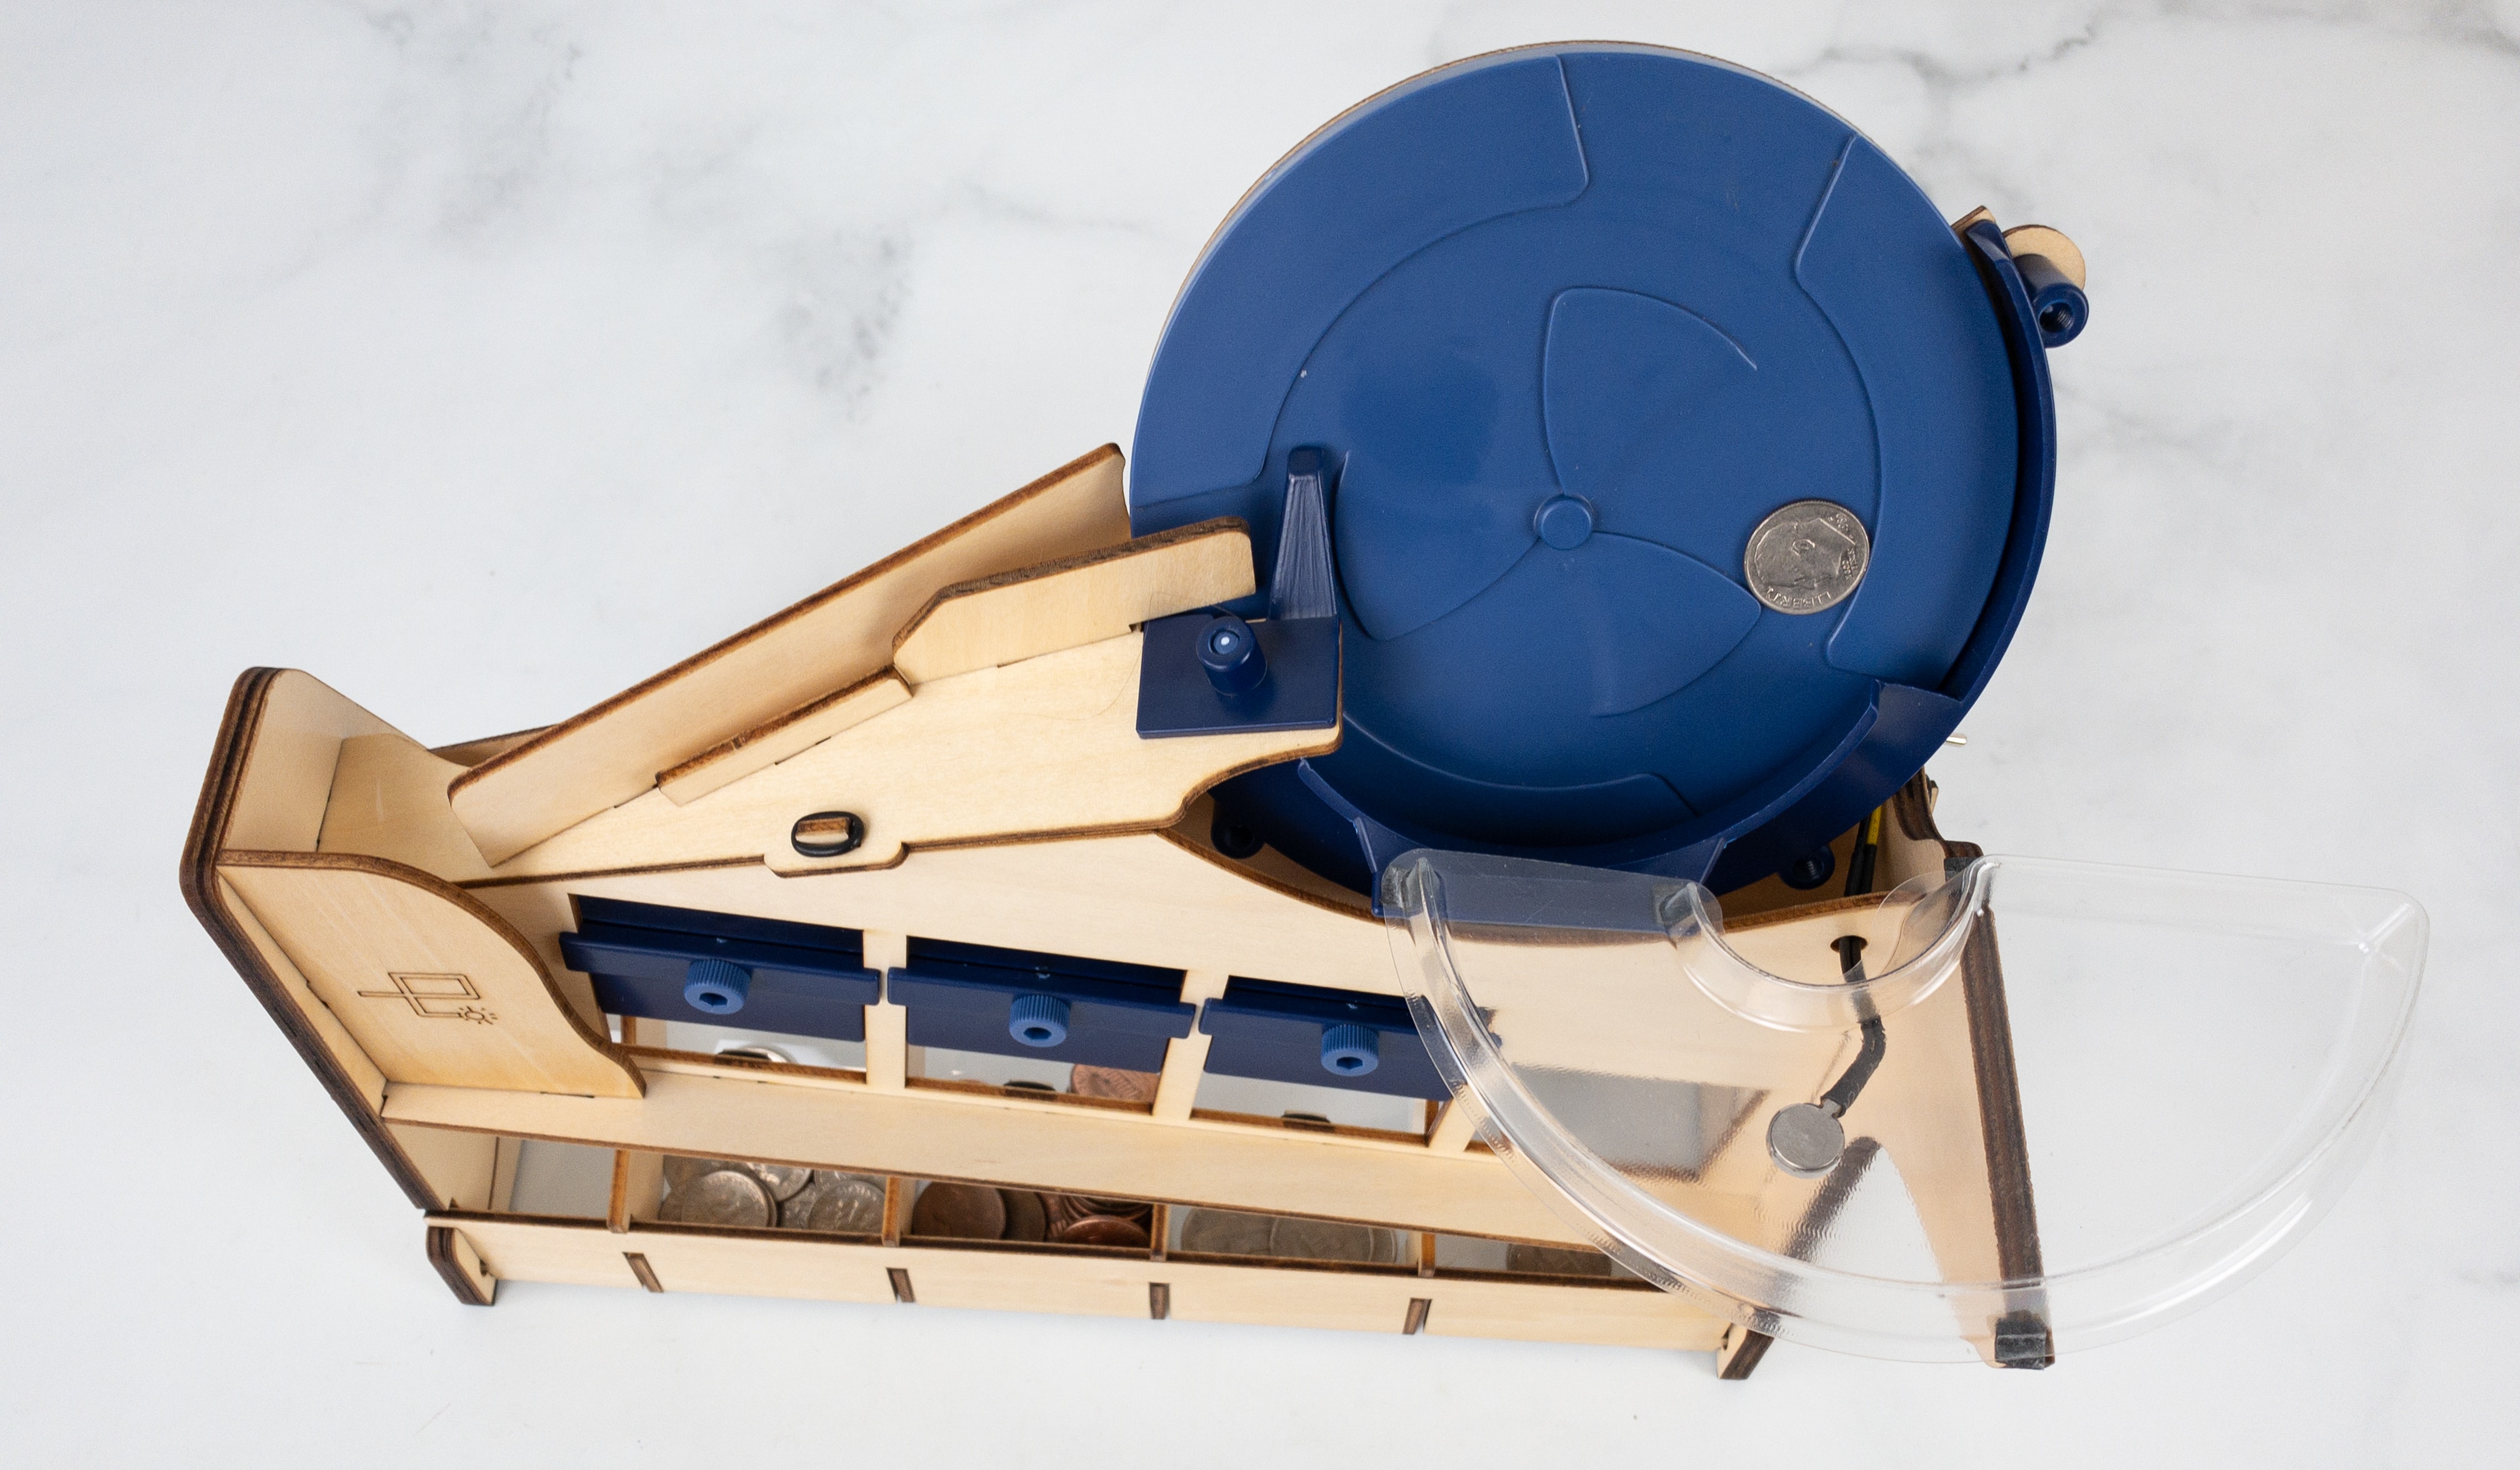
We can see from this angle that the machine was able to sort the coins according to their size, or denomination.
Here’s our coin sorting machine in action!
It’s really fun to assemble this machine, and it’s fun to use as we see how it effectively separates and arranges the coins according to their denomination in the catcher!
This project doesn’t just teach us about making and completing a great machine, but it also made us realize the real value of money. We learned a lot about the metal coins, what they’re made up of, and even their history. Learning about some electronics is fun too with the wiring-up part. The included booklet is really a helpful companion, as it contains fun and amazing facts that are related to the project. We enjoy the design challenges as well! Our whole family surely enjoyed this crate and we’re all looking forward to the next project!
What do you think of this month’s Eureka Crate?


Comments