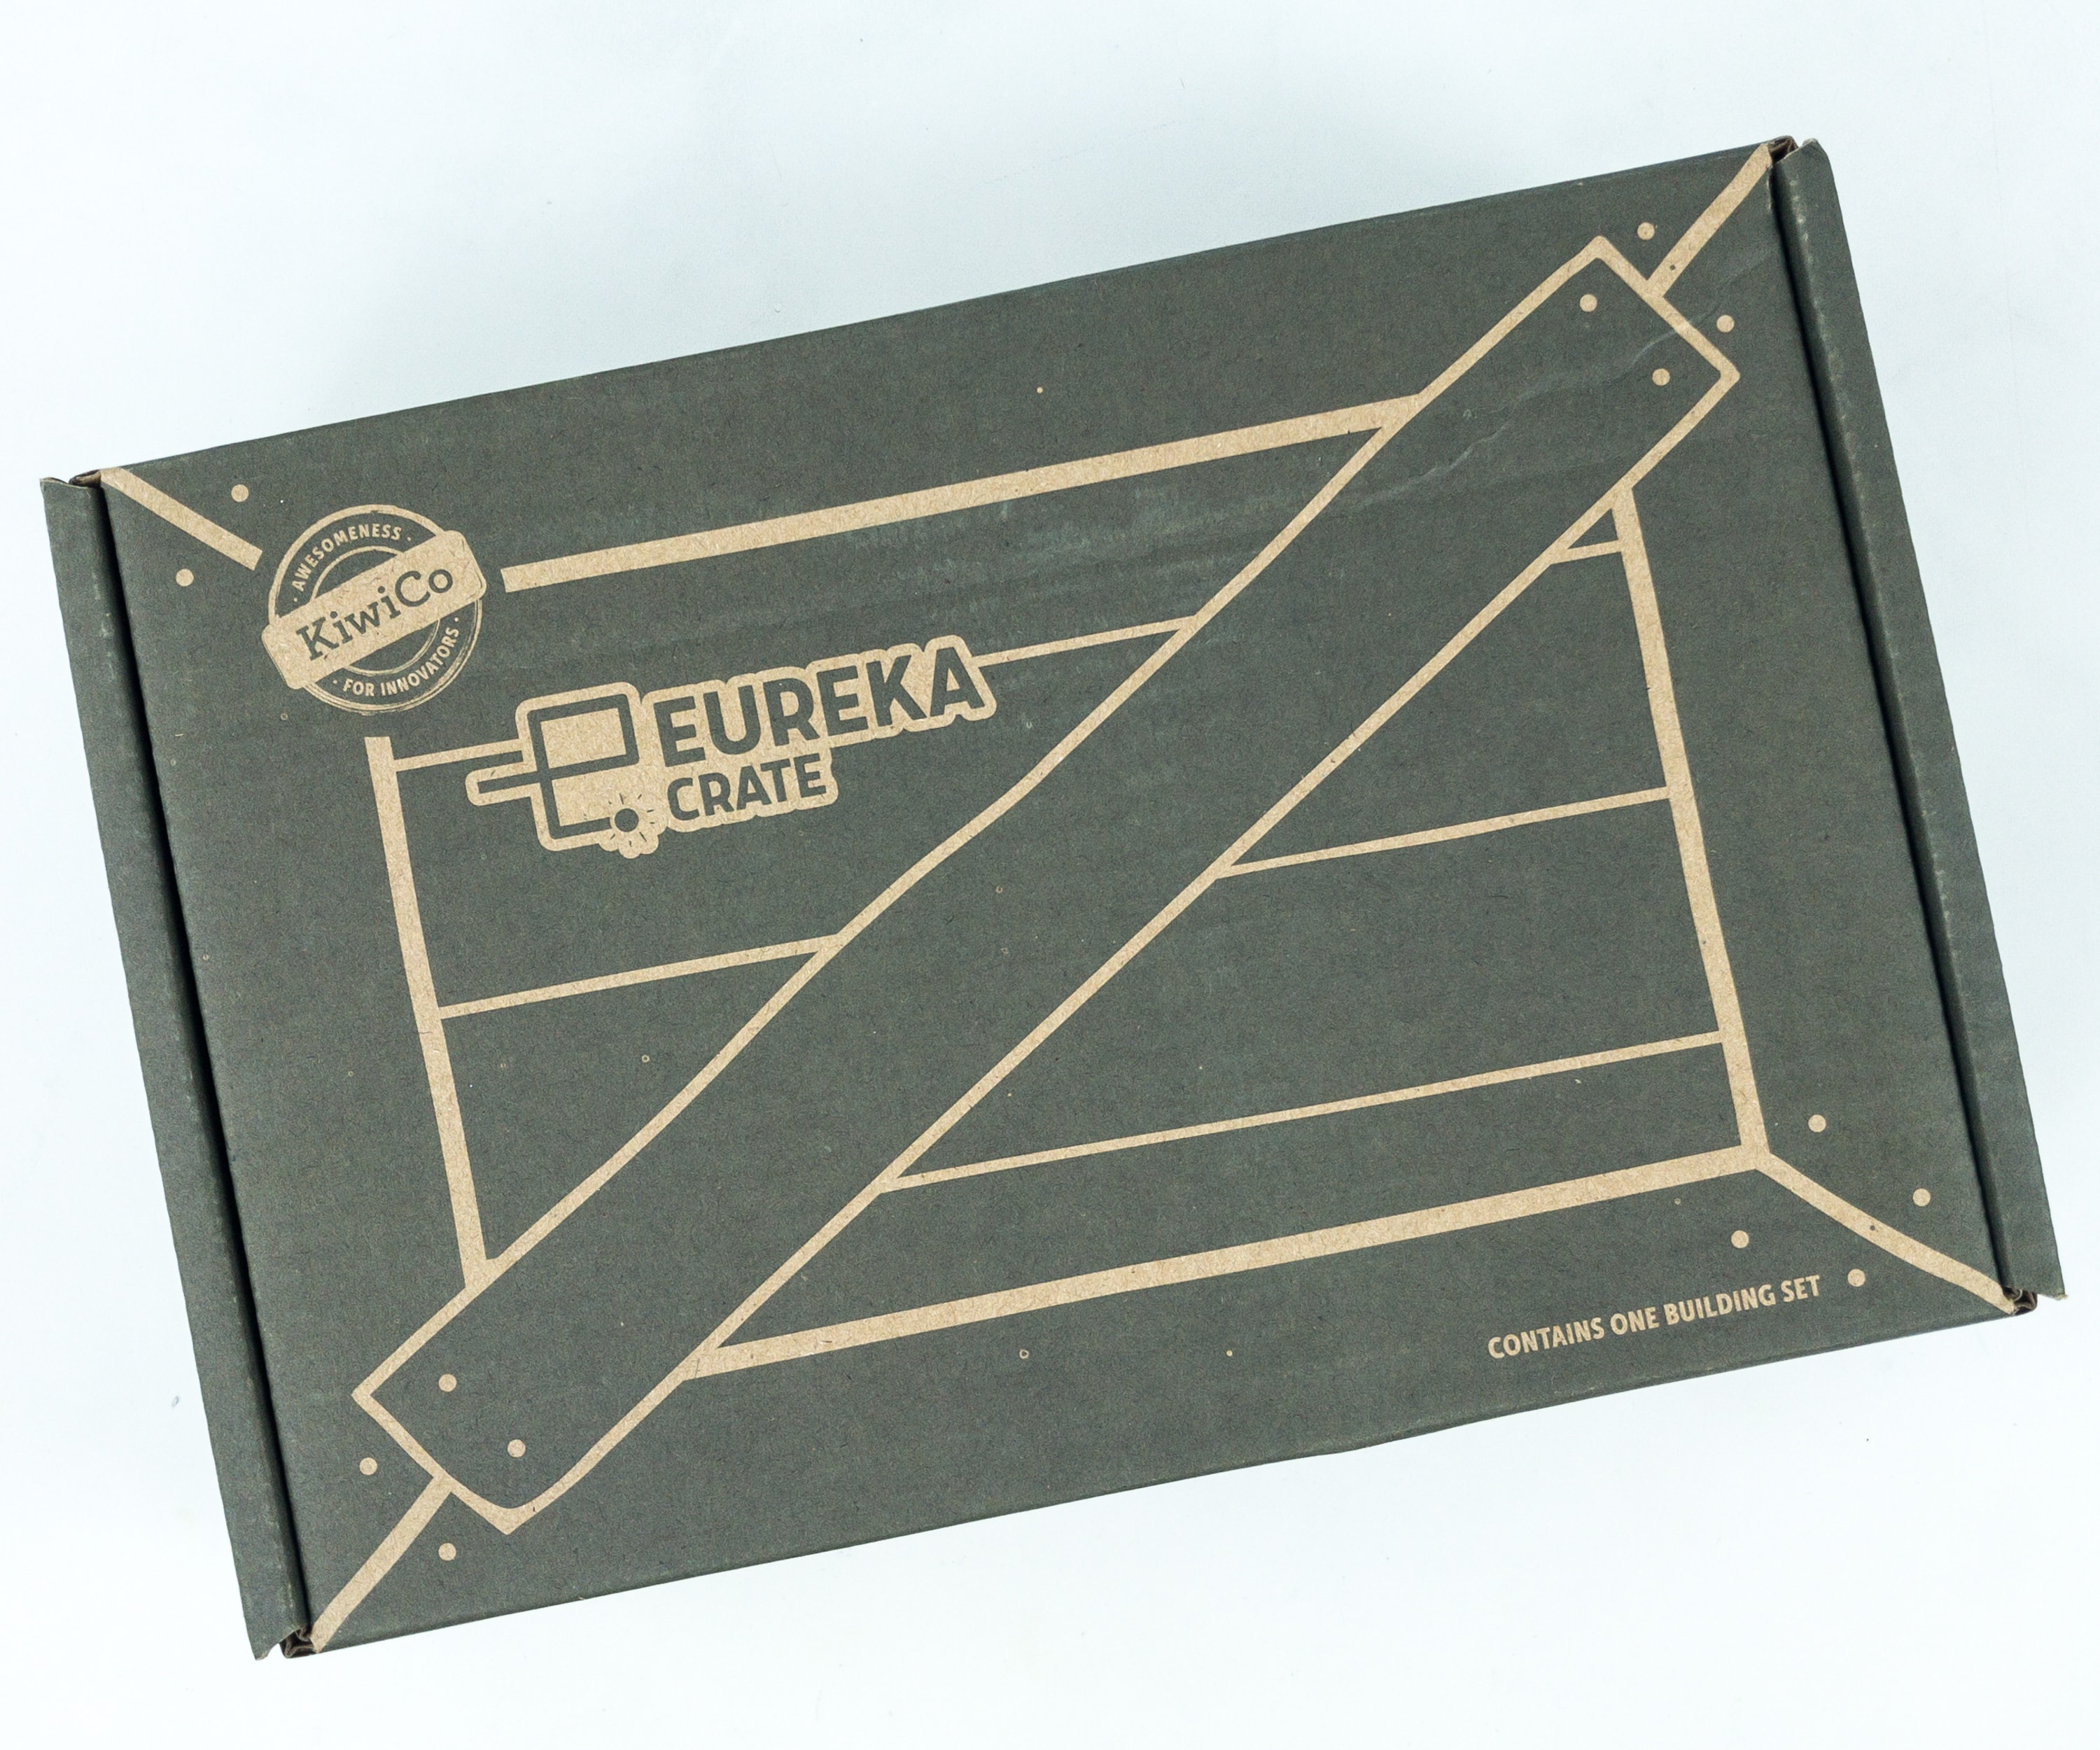
Eureka Crate is a monthly STEM and maker subscription box that teaches kids and adults how to apply principles of science and math to make awesome things you will love to use every day – from an articulated desk lamp to an electric pencil sharpener to a wooden ukulele. Every Eureka Crate includes an engineering project, detailed step-by-step instructions, everything you need to complete the project, a Maker’s Guide that explains all the design, process, and engineering behind the design, plus a design challenge to take your project knowledge to the next level!
DEAL: Save 30% on your first month! Just use this link to subscribe, no coupon code required! You can also use the same link to save 30% on the first month of any other KiwiCo crate – just check out this page to discover which box is right for you.
Eureka Crate is KiwiCo’s latest subscription! Eureka Crate is designed for ages 14-104. If you’re ready to graduate from KiwiCo’s other boxes or just can’t get enough (or are just too old for their other subscriptions), you’ll love this box, which is designed to create a hands-on learning experience using everyday items to delve deeply into the science and math principles they embody, along with the design process of the month’s project.
We’re so excited to make this project!
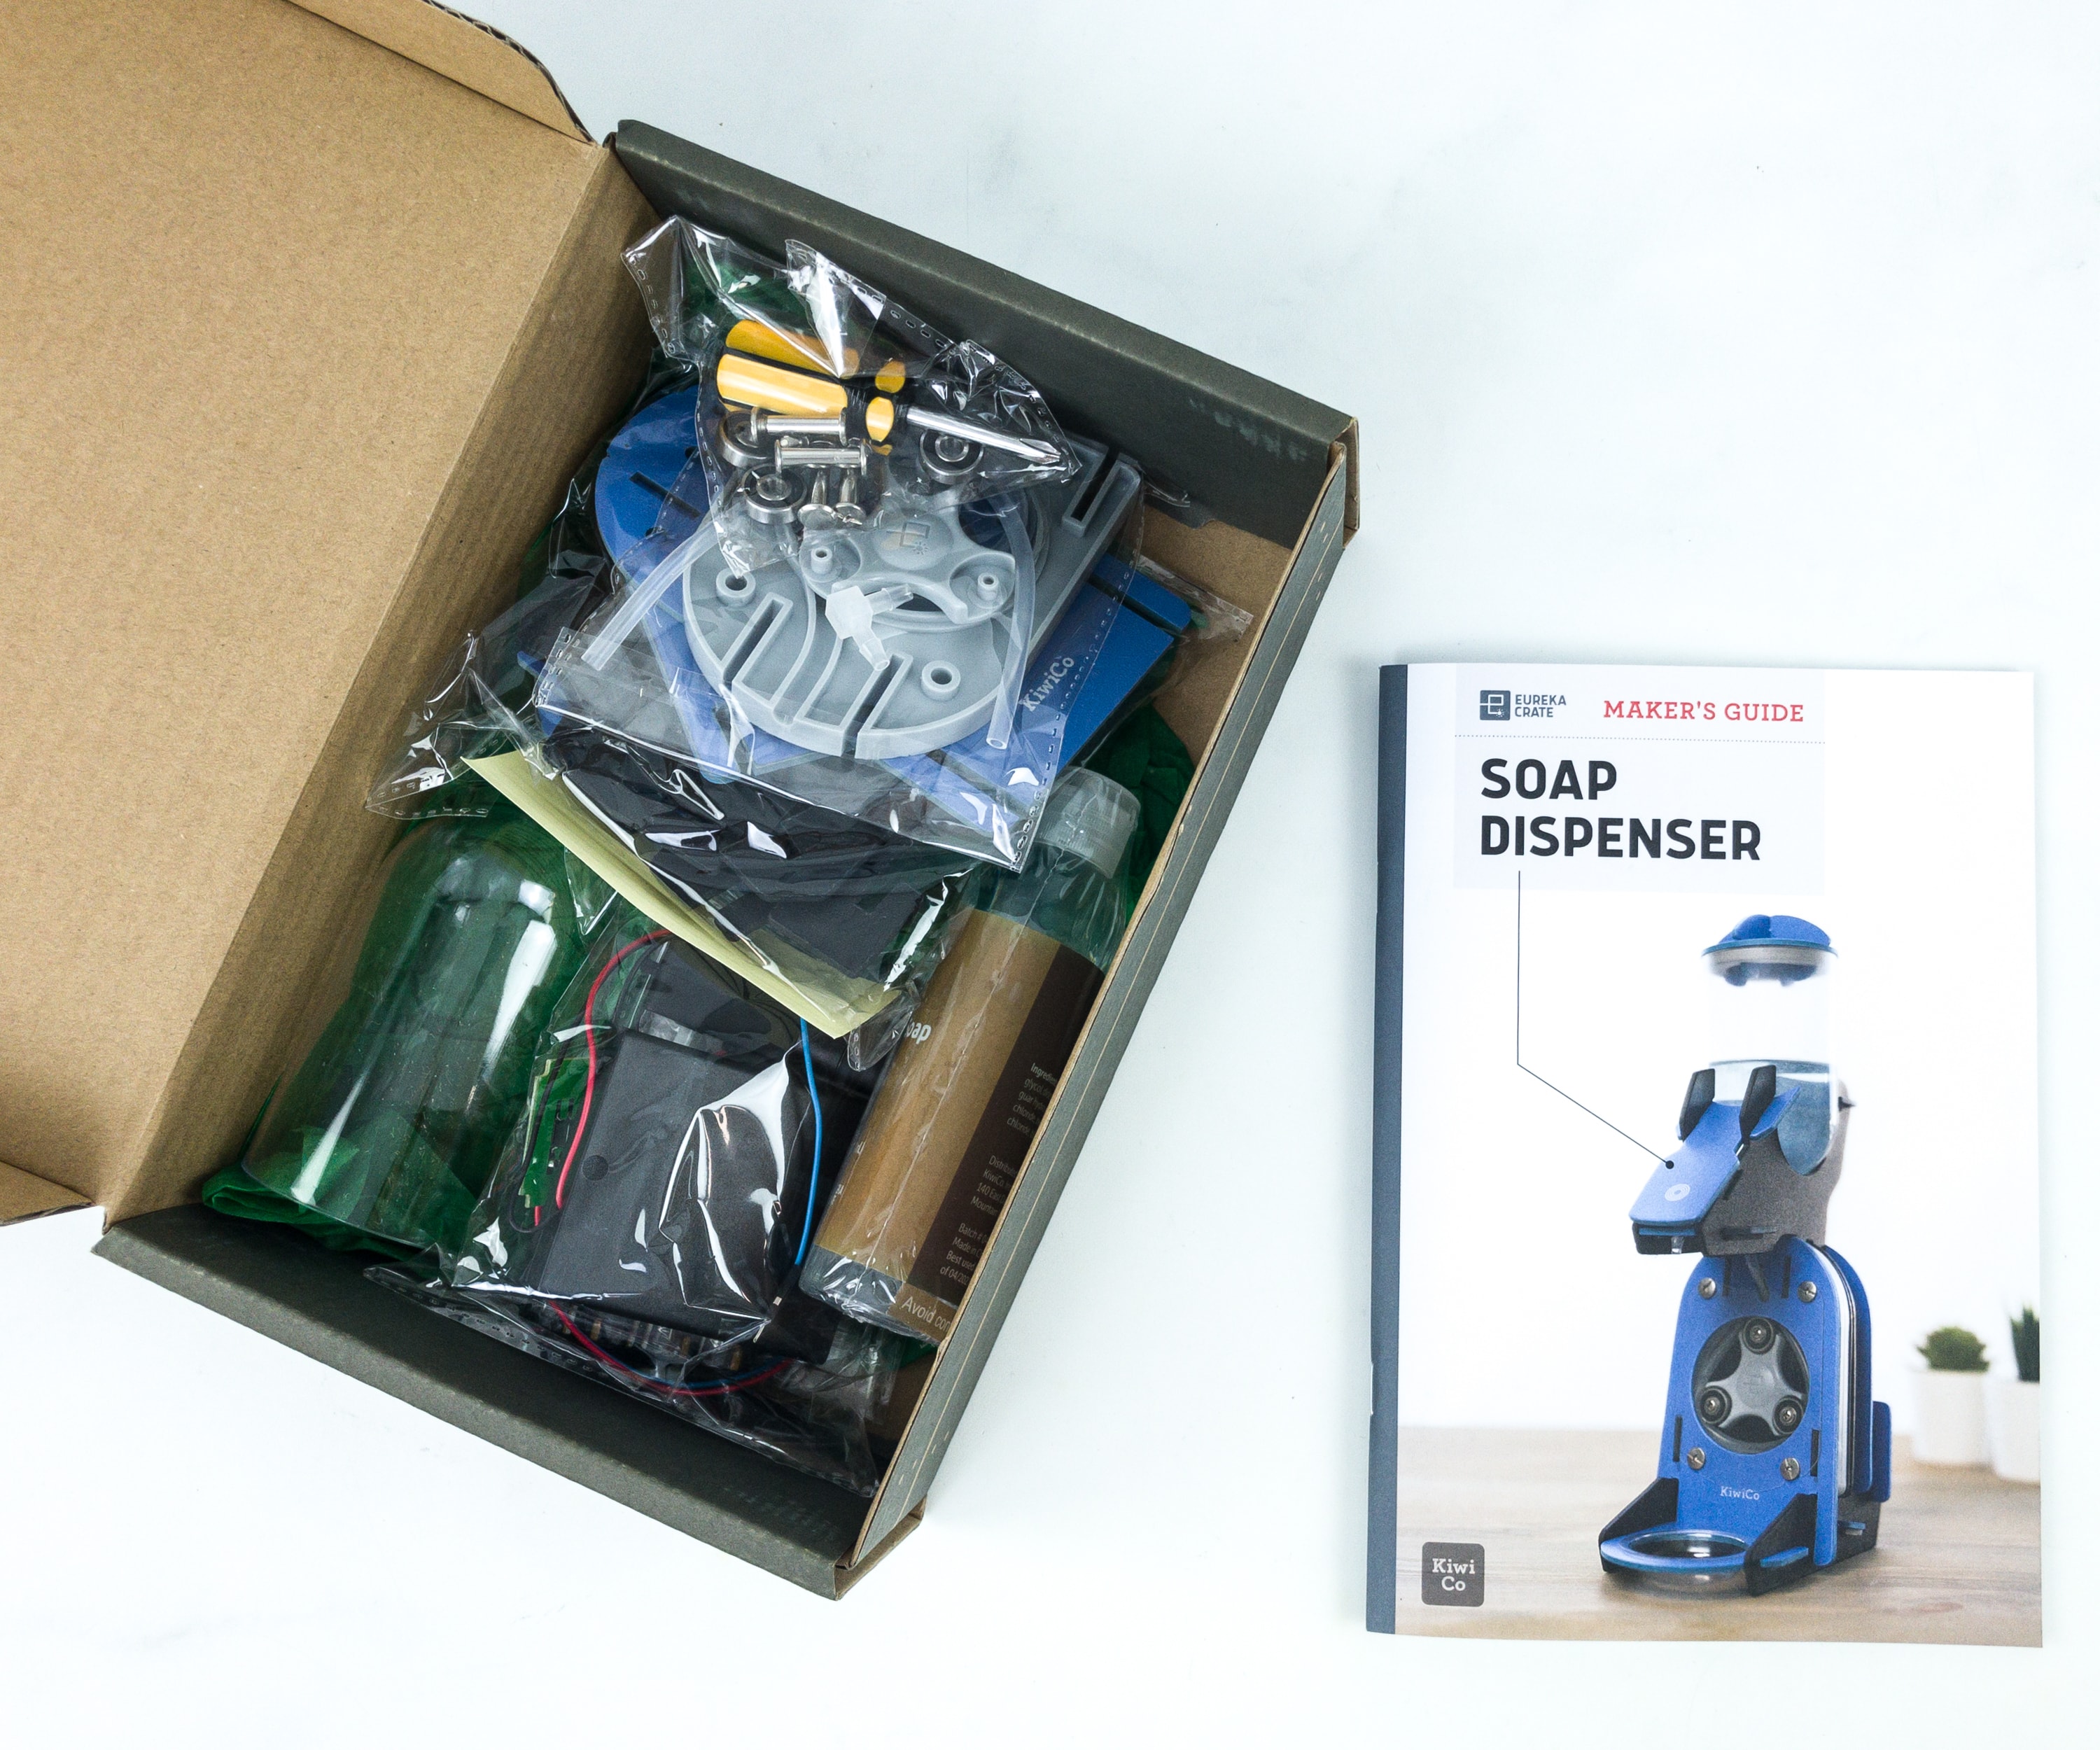
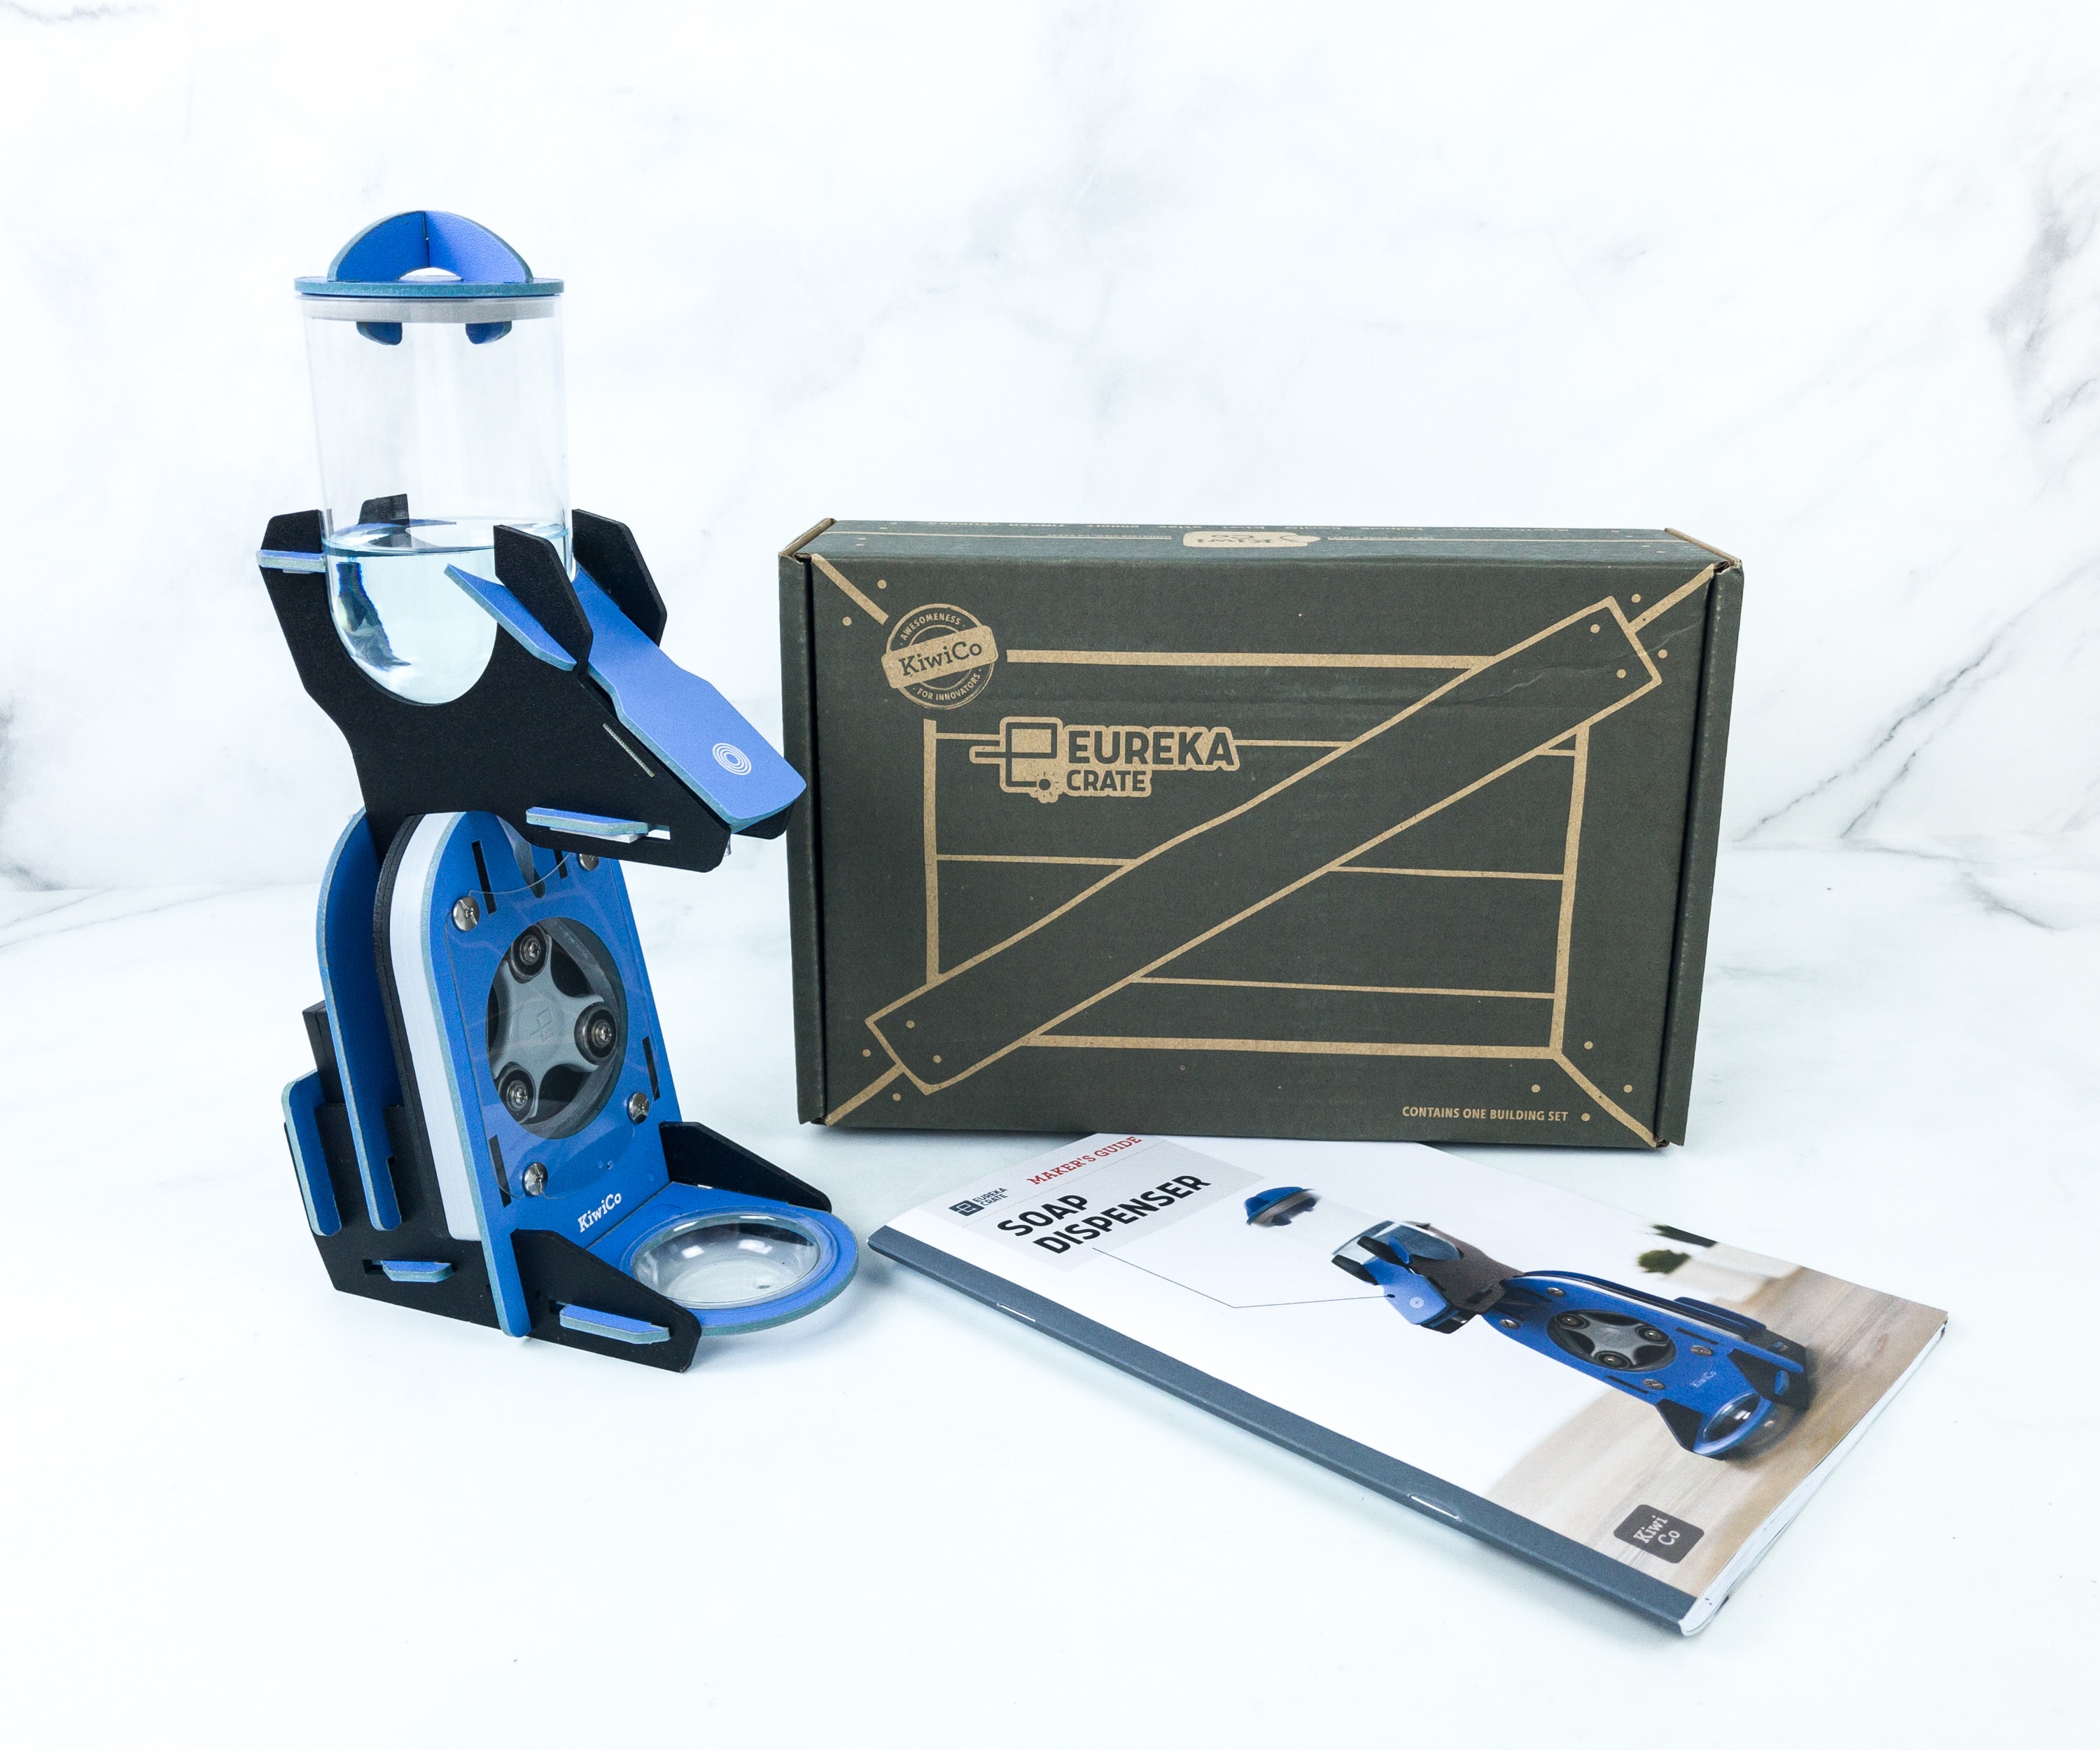
Everything in this month’s box!
Eureka Crate Maker’s Guide
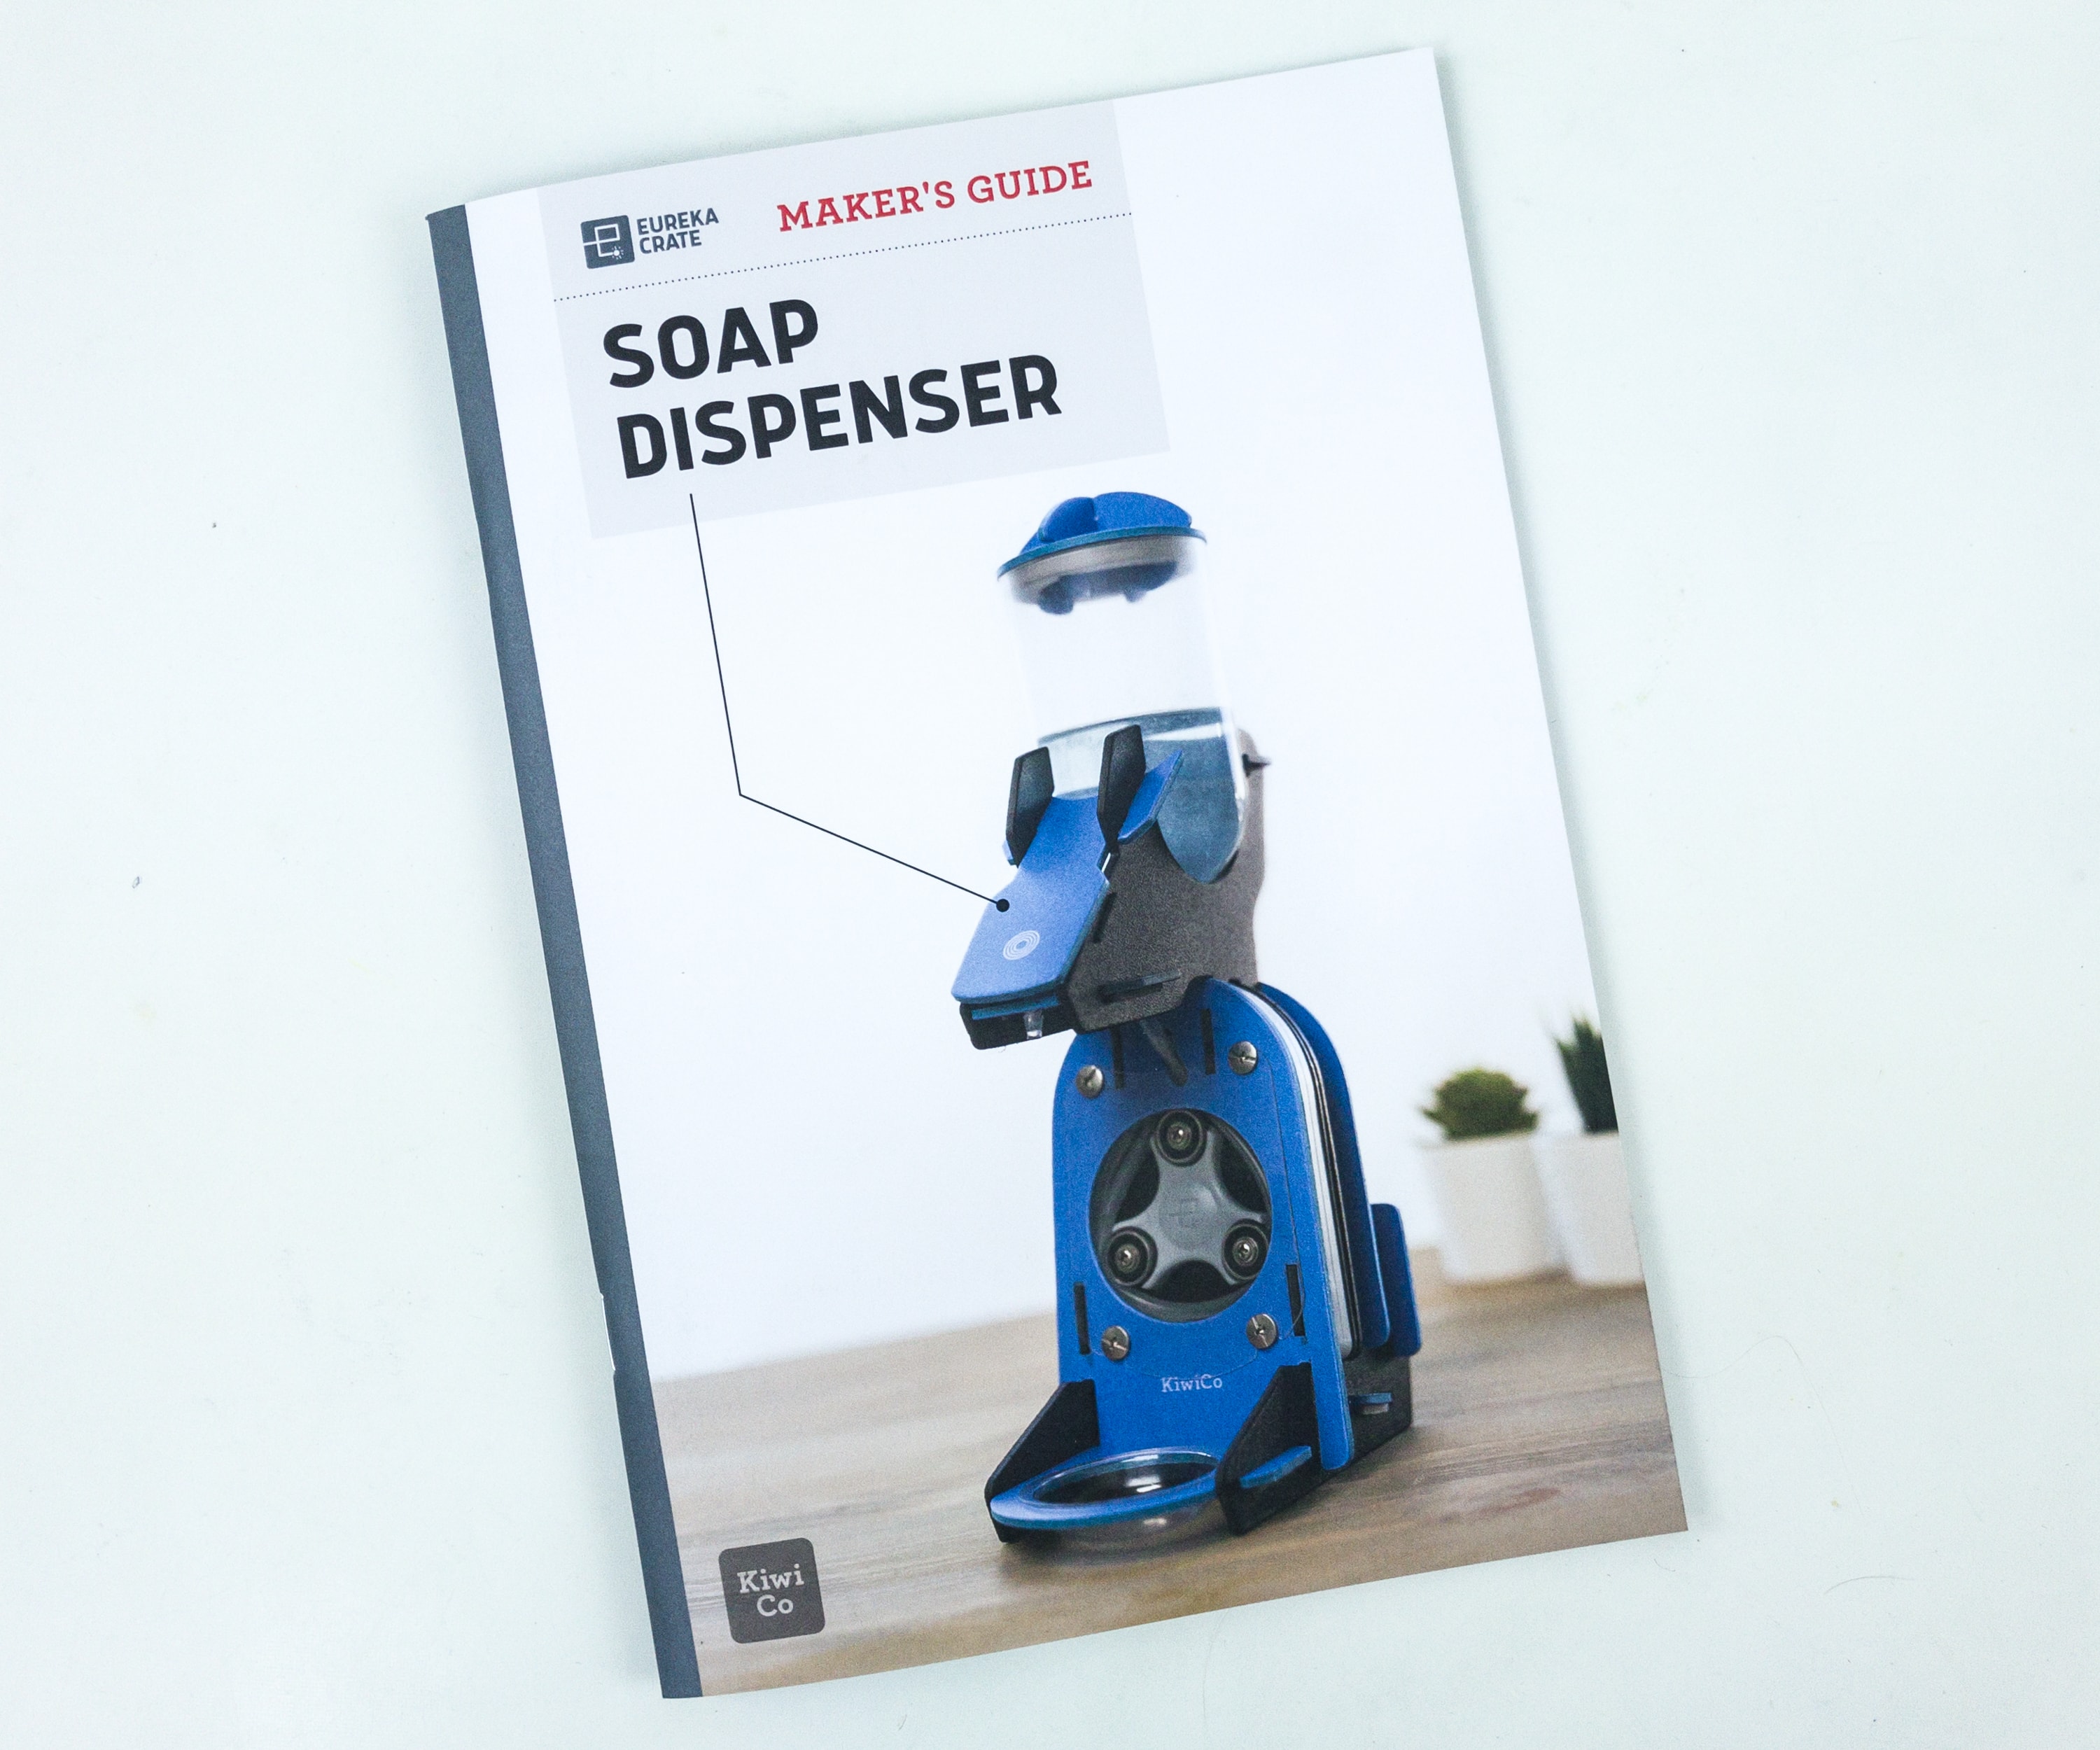
Like the other crates from KiwiCo, Eureka Crate includes a booklet.
One of KiwiCo’s goals is to equip the next generation of innovators with the tools and confidence for creative exploration and problem-solving.
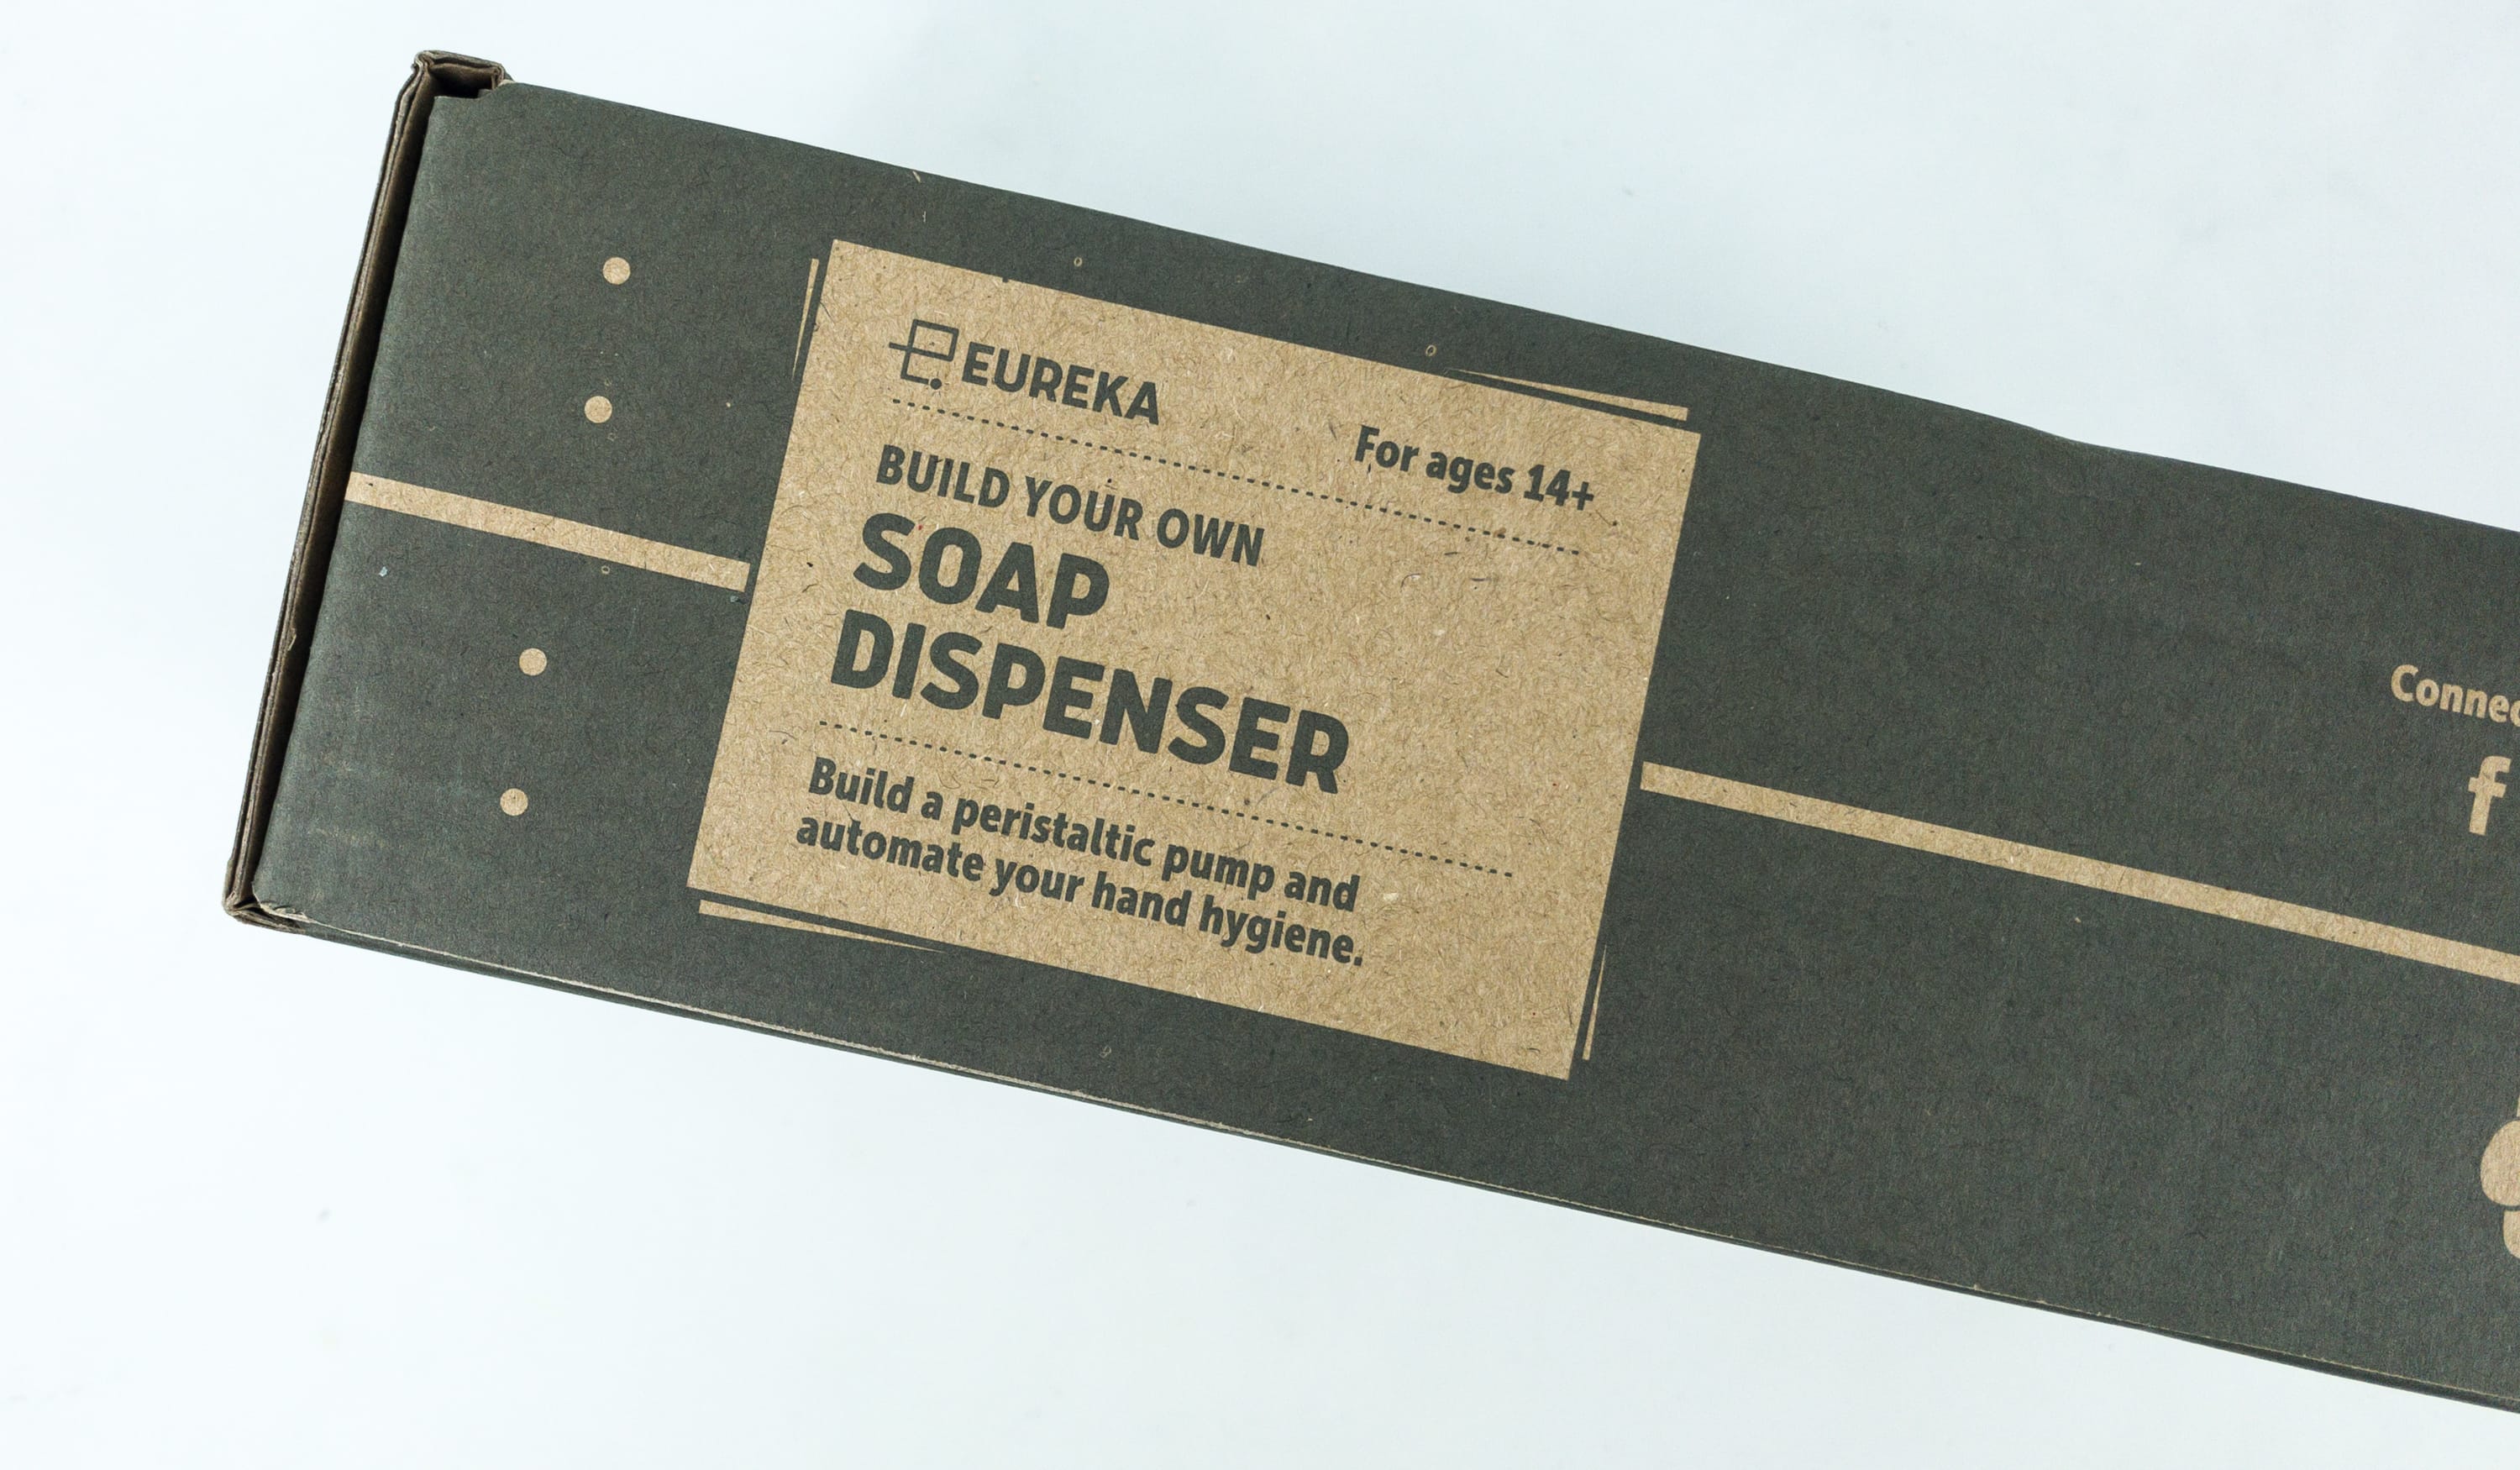
SOAP DISPENSER
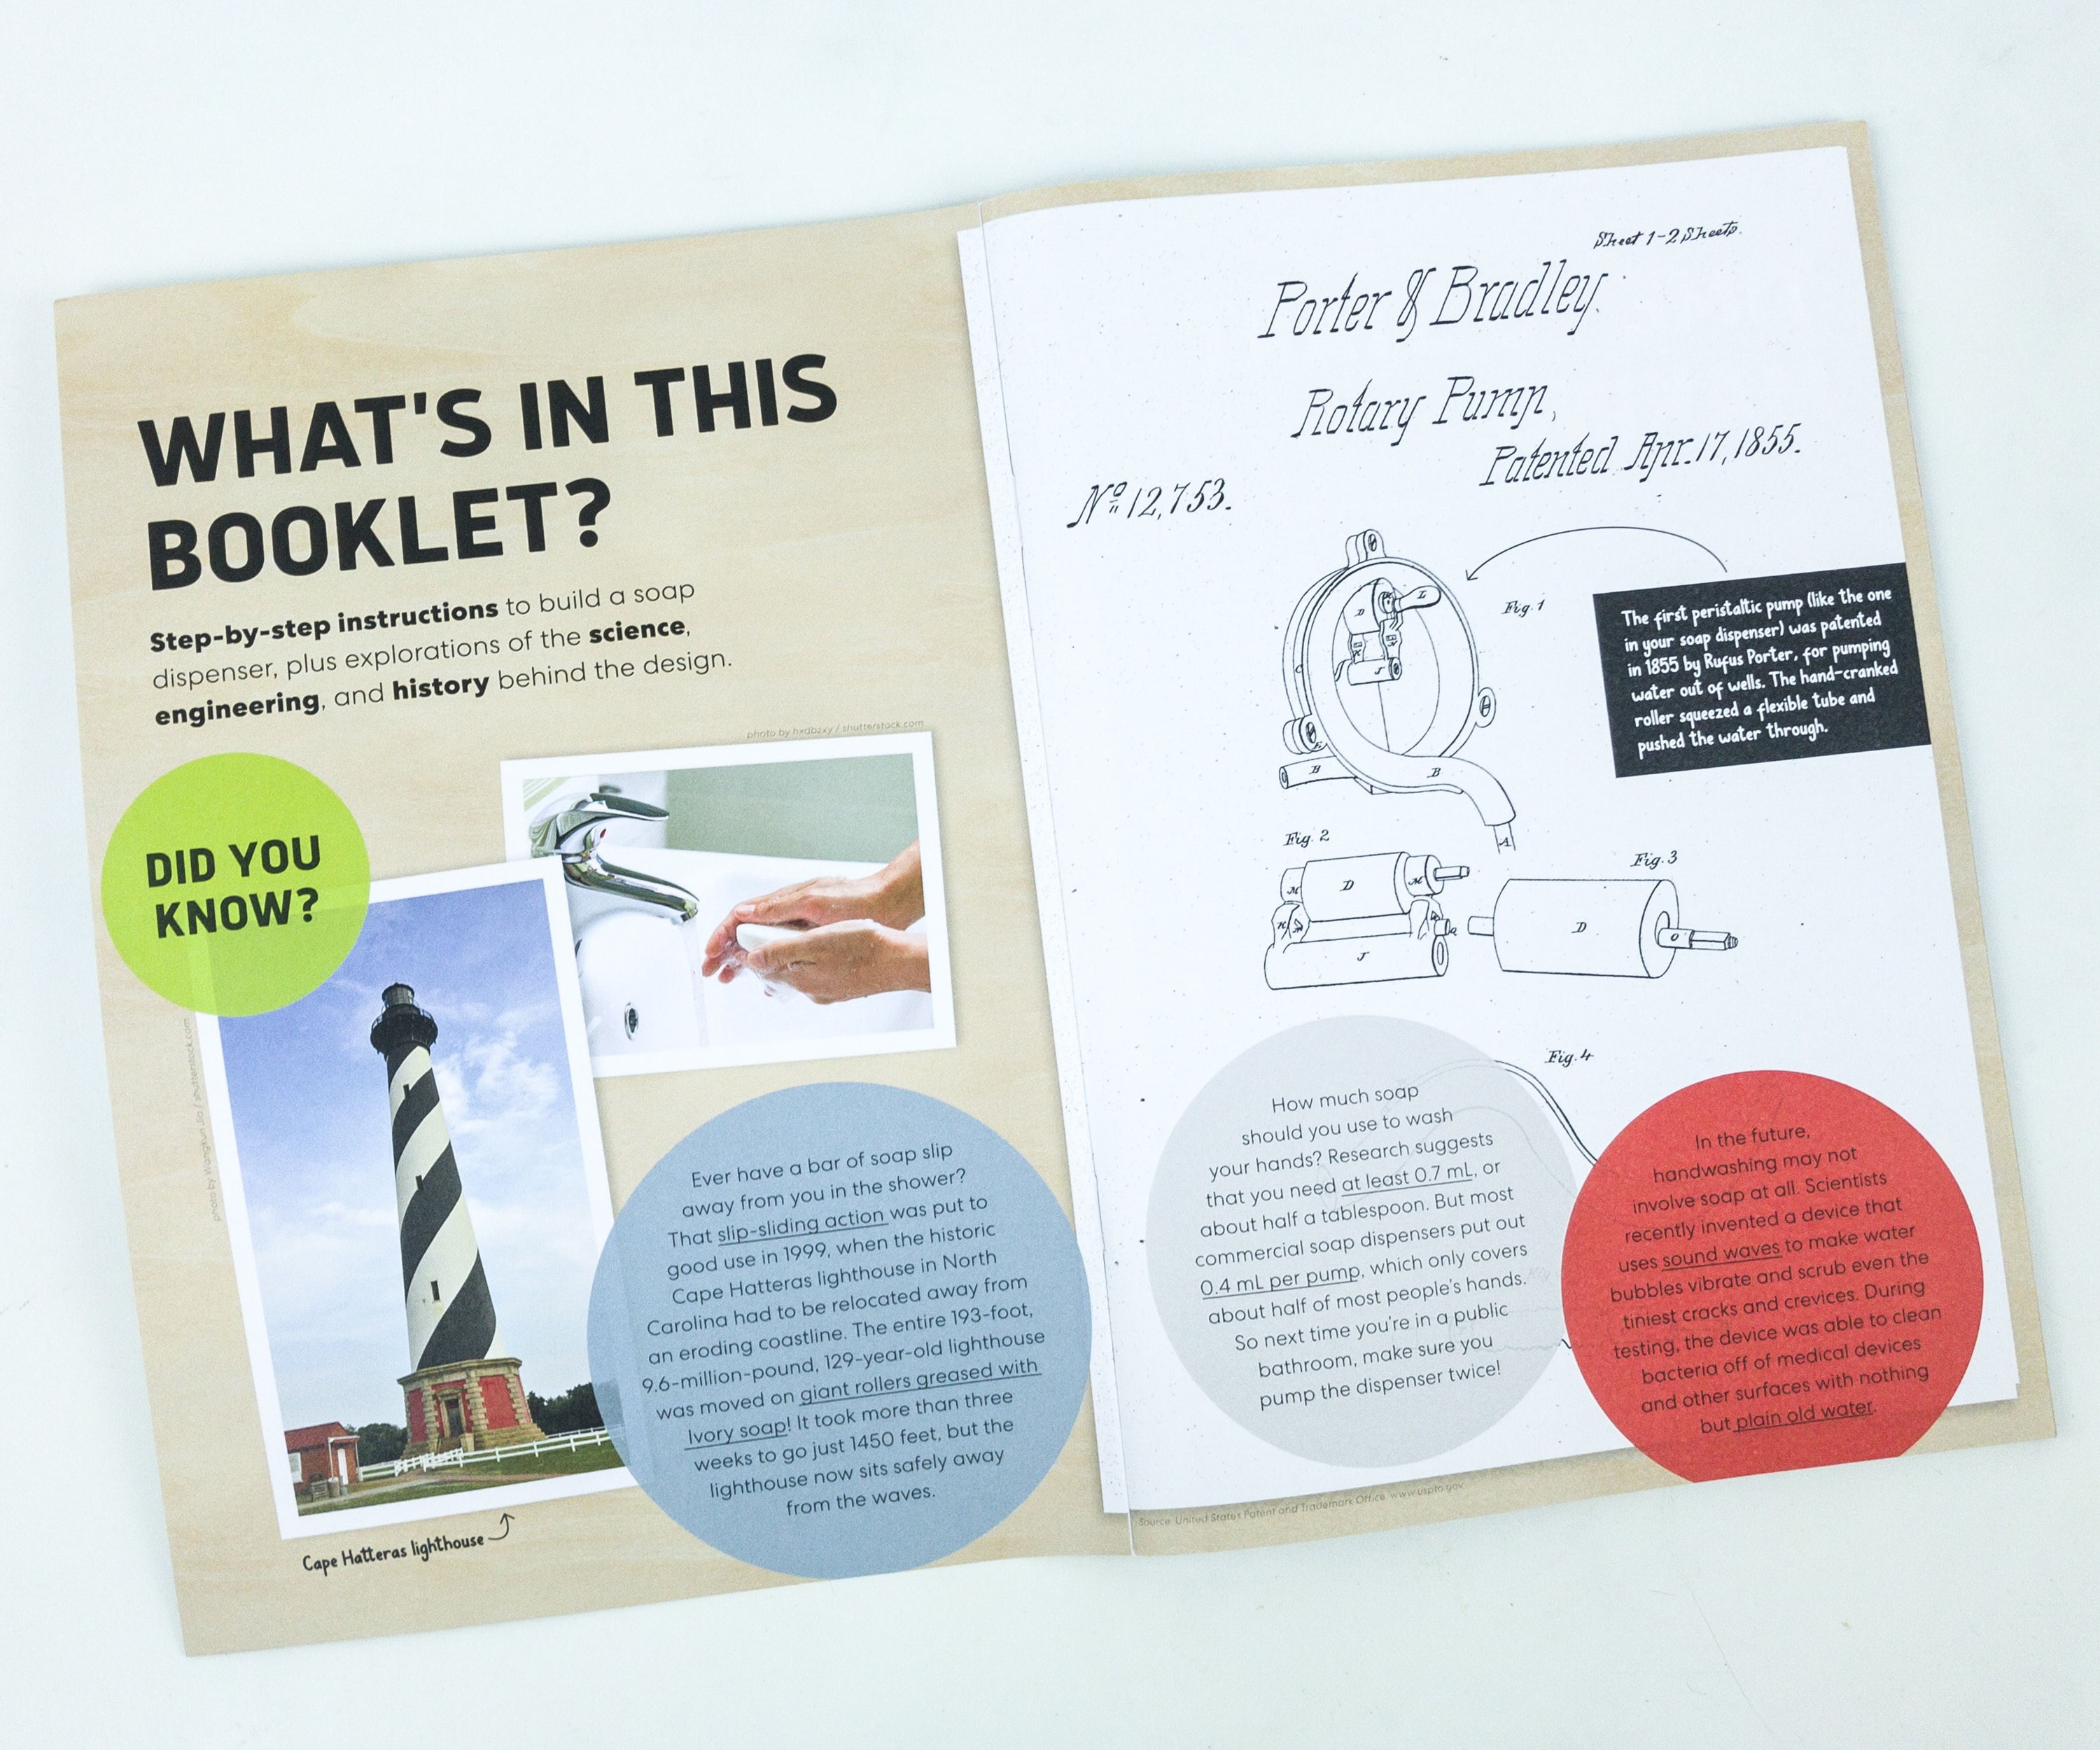
The booklet gives a complete history and details about this month’s project. They also included some fun facts and trivia related to the theme.
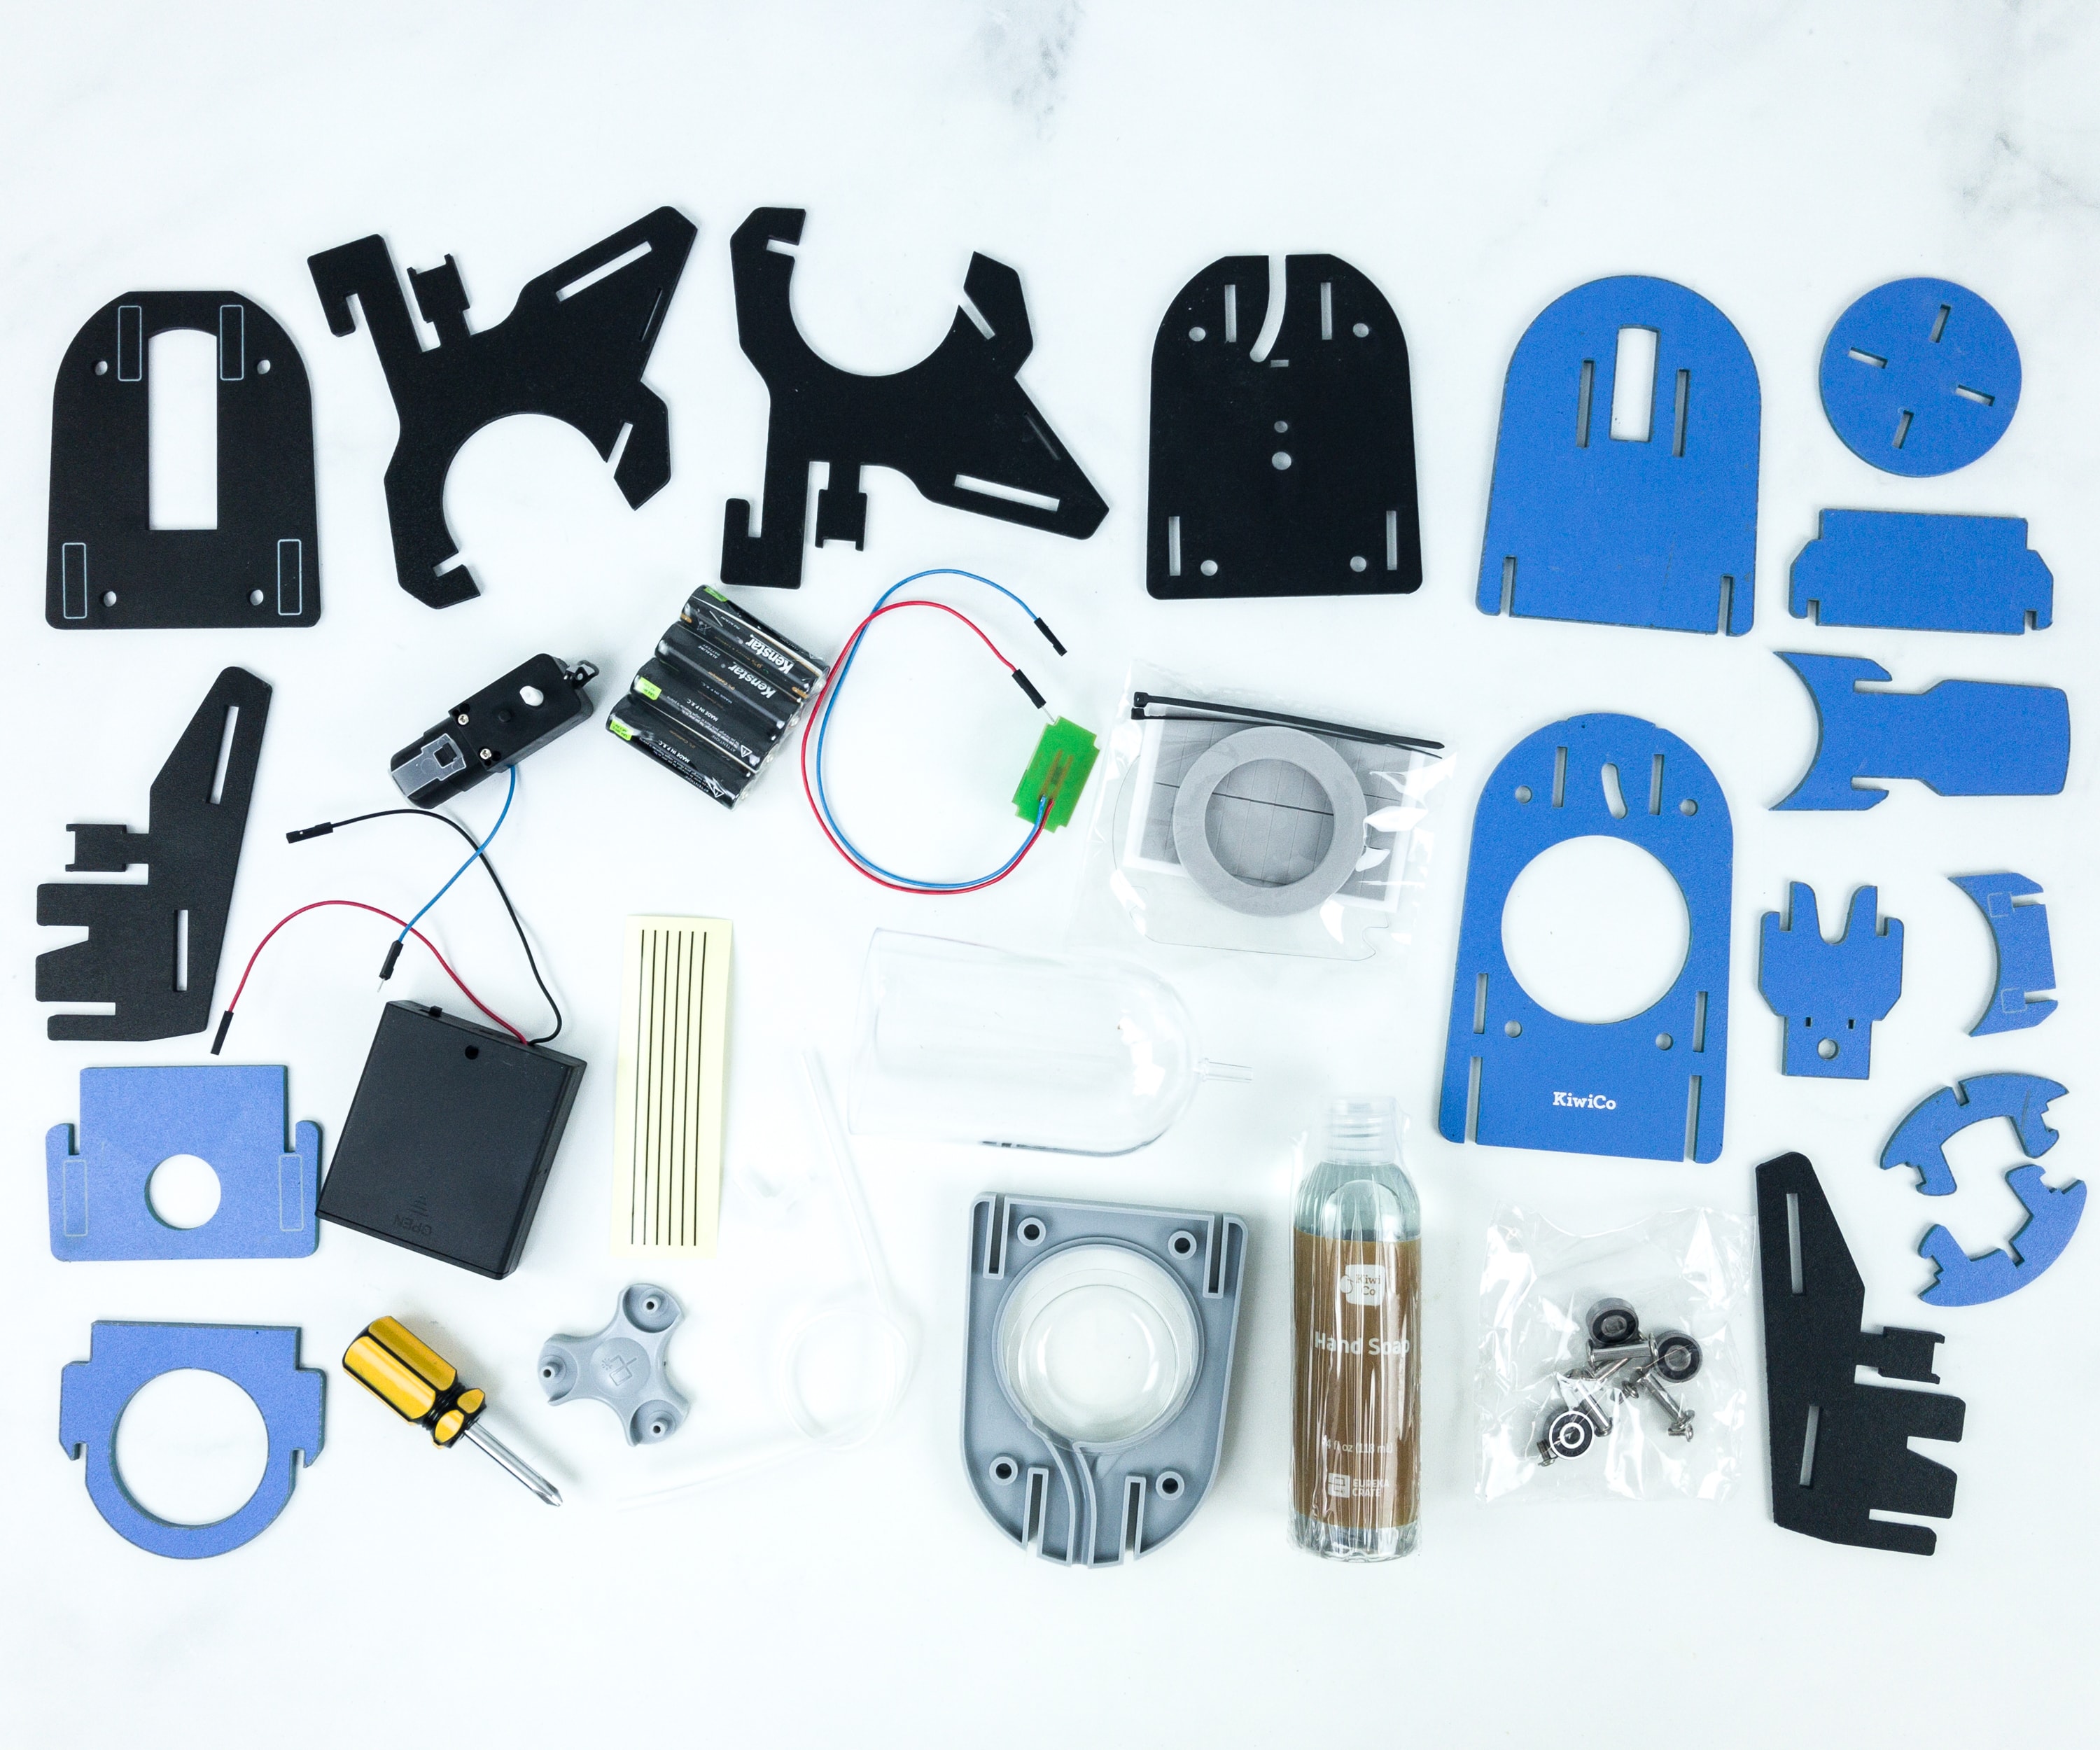
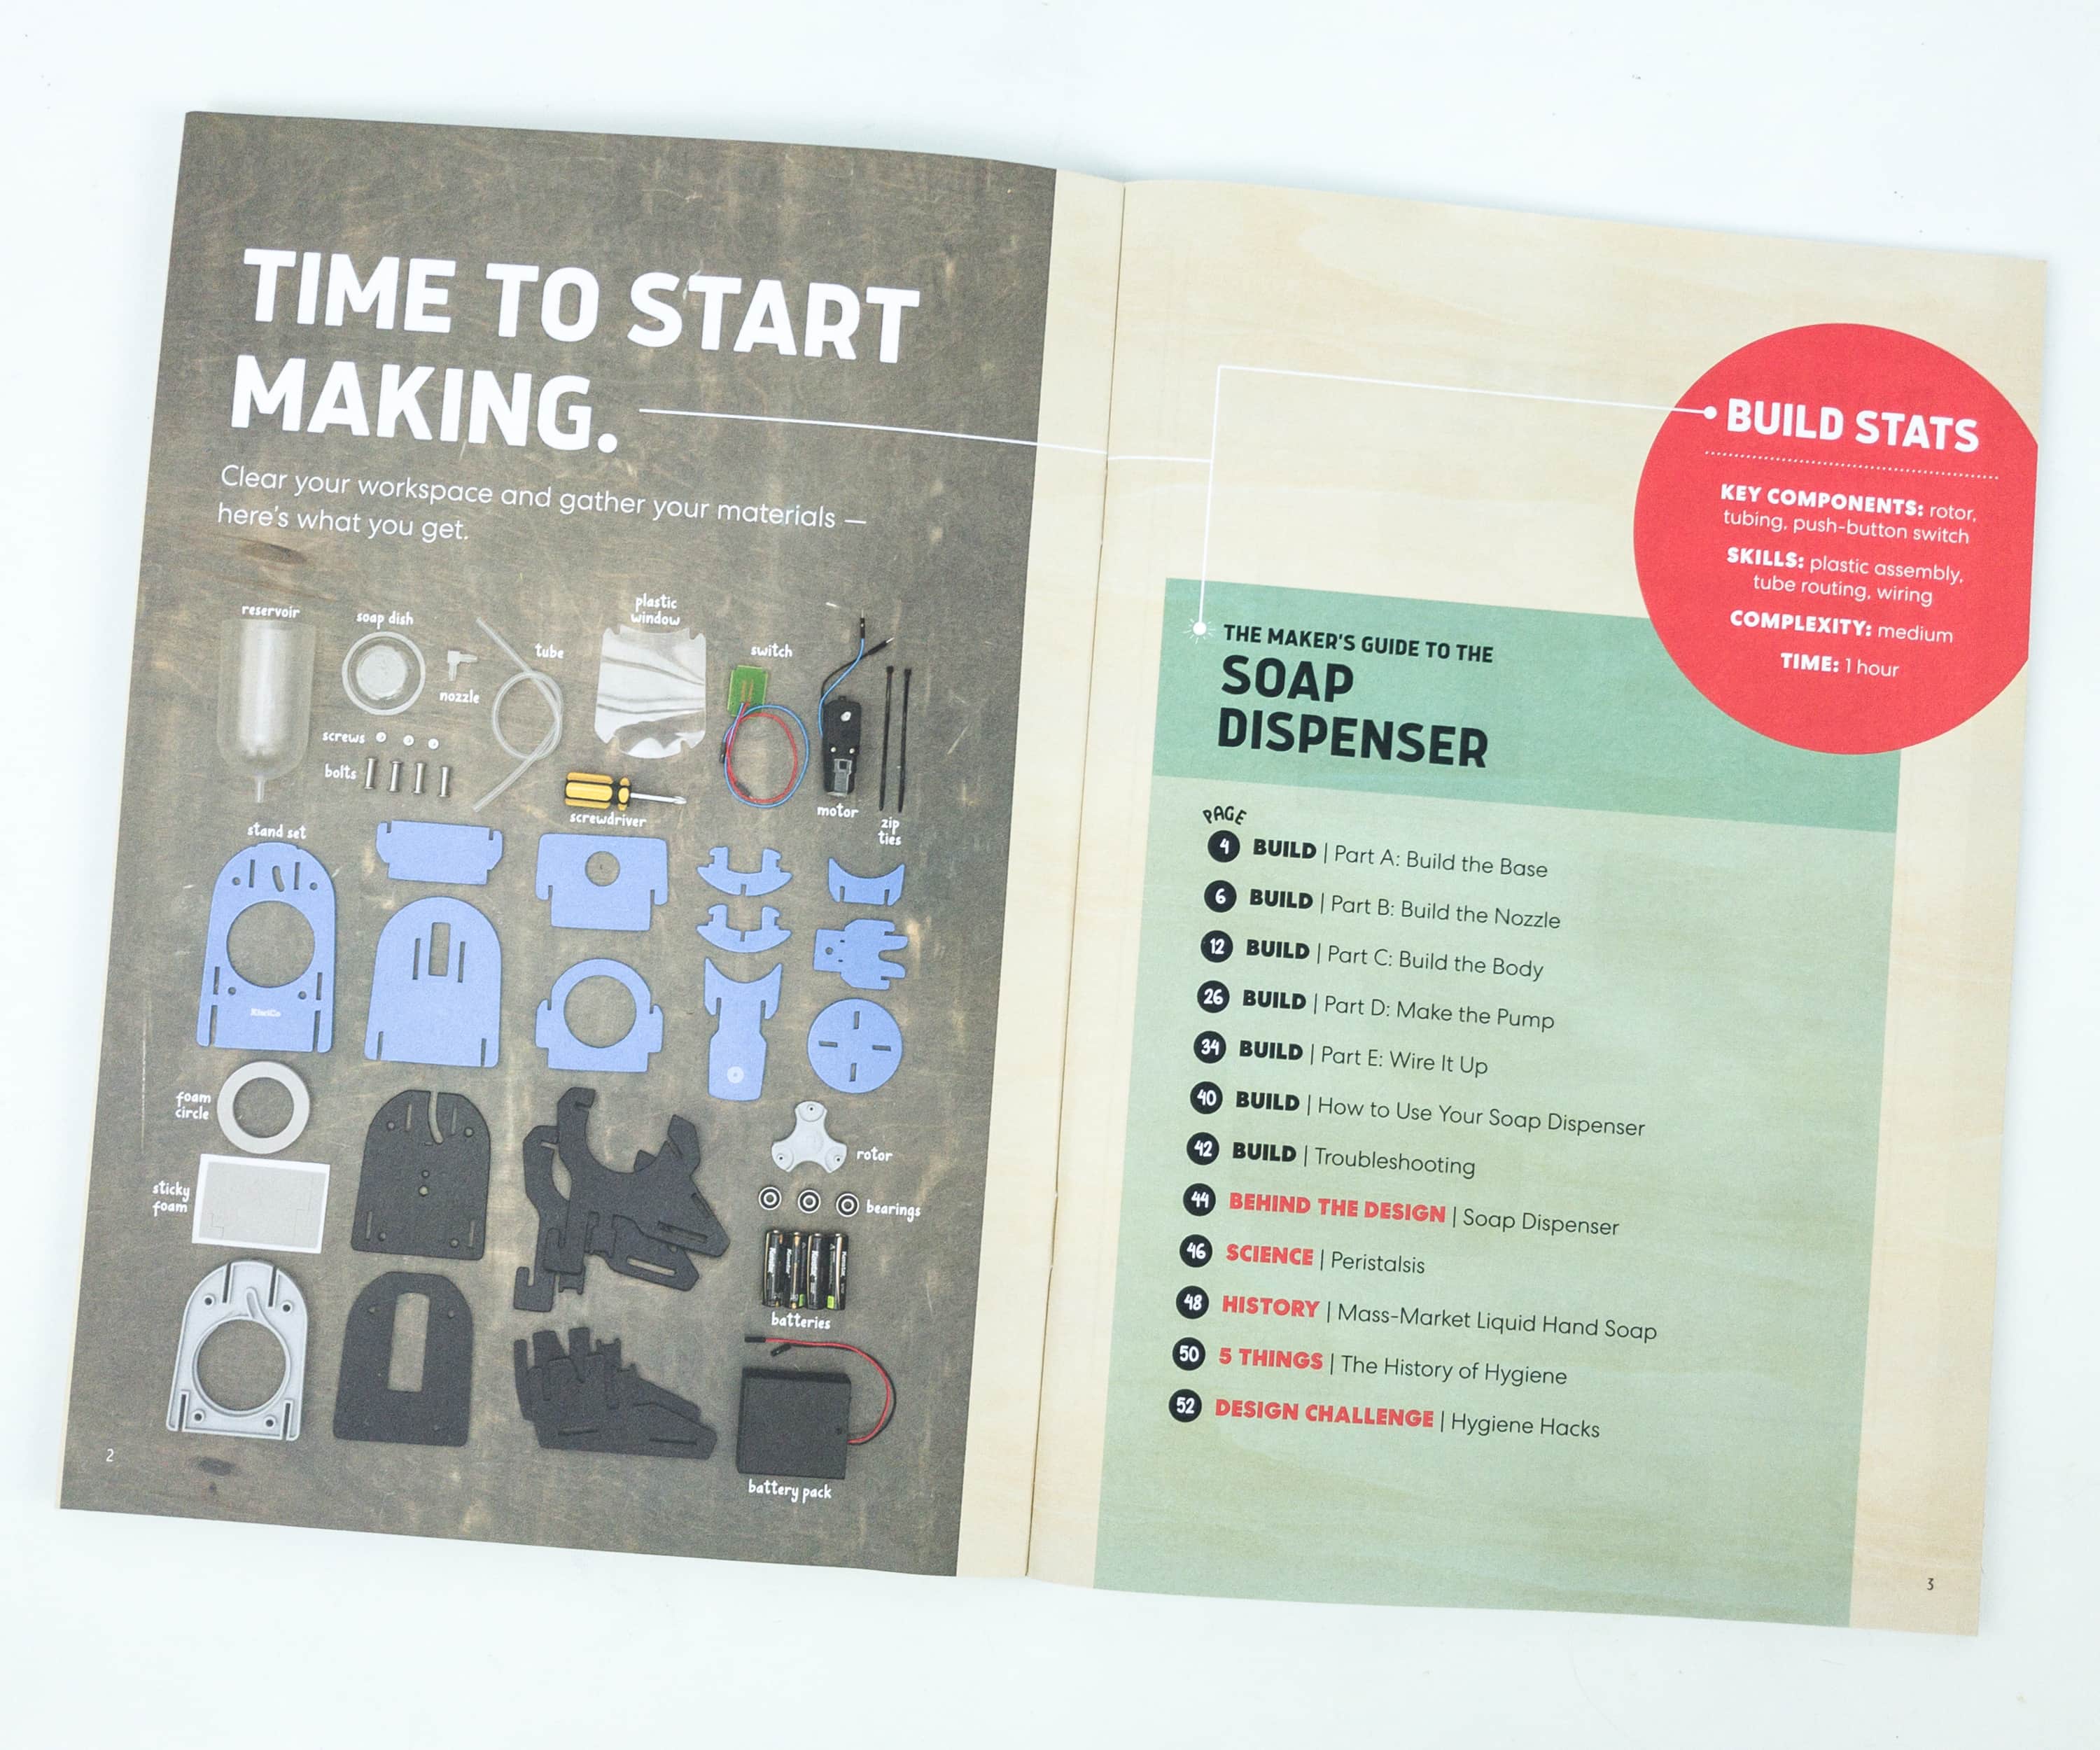
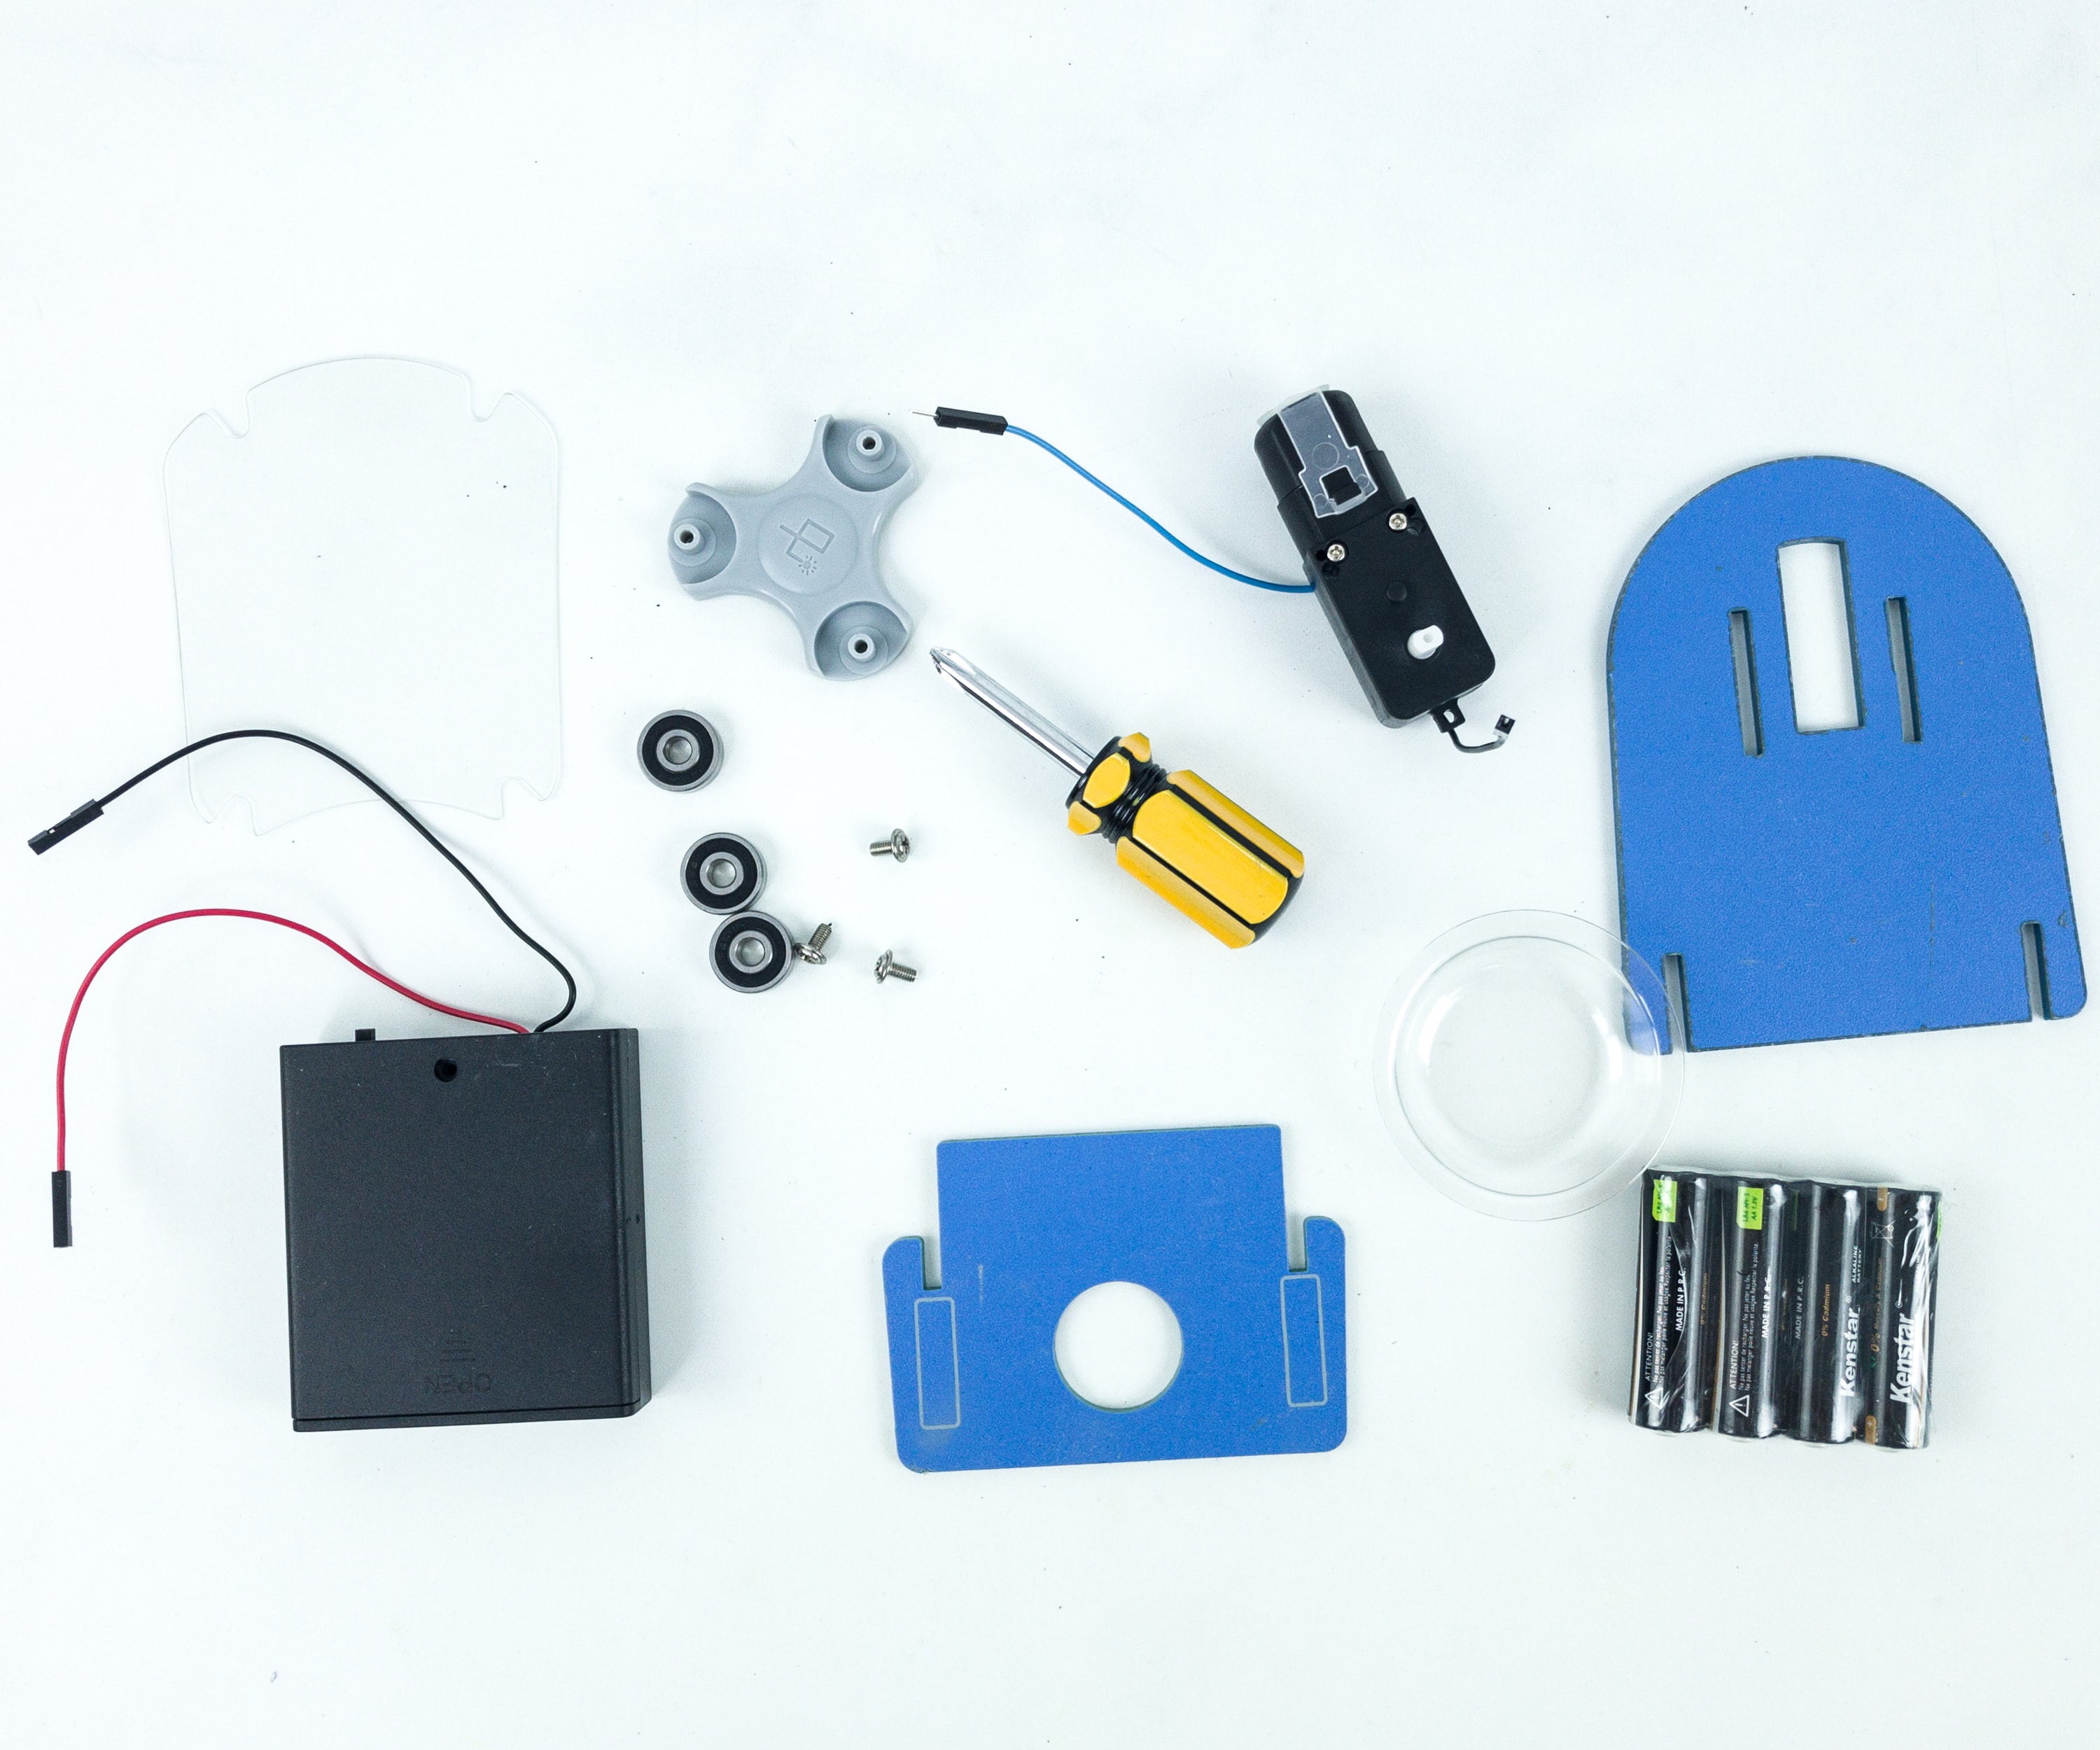
Eureka Crate Materials
This booklet means business as it jumps right to the activity.
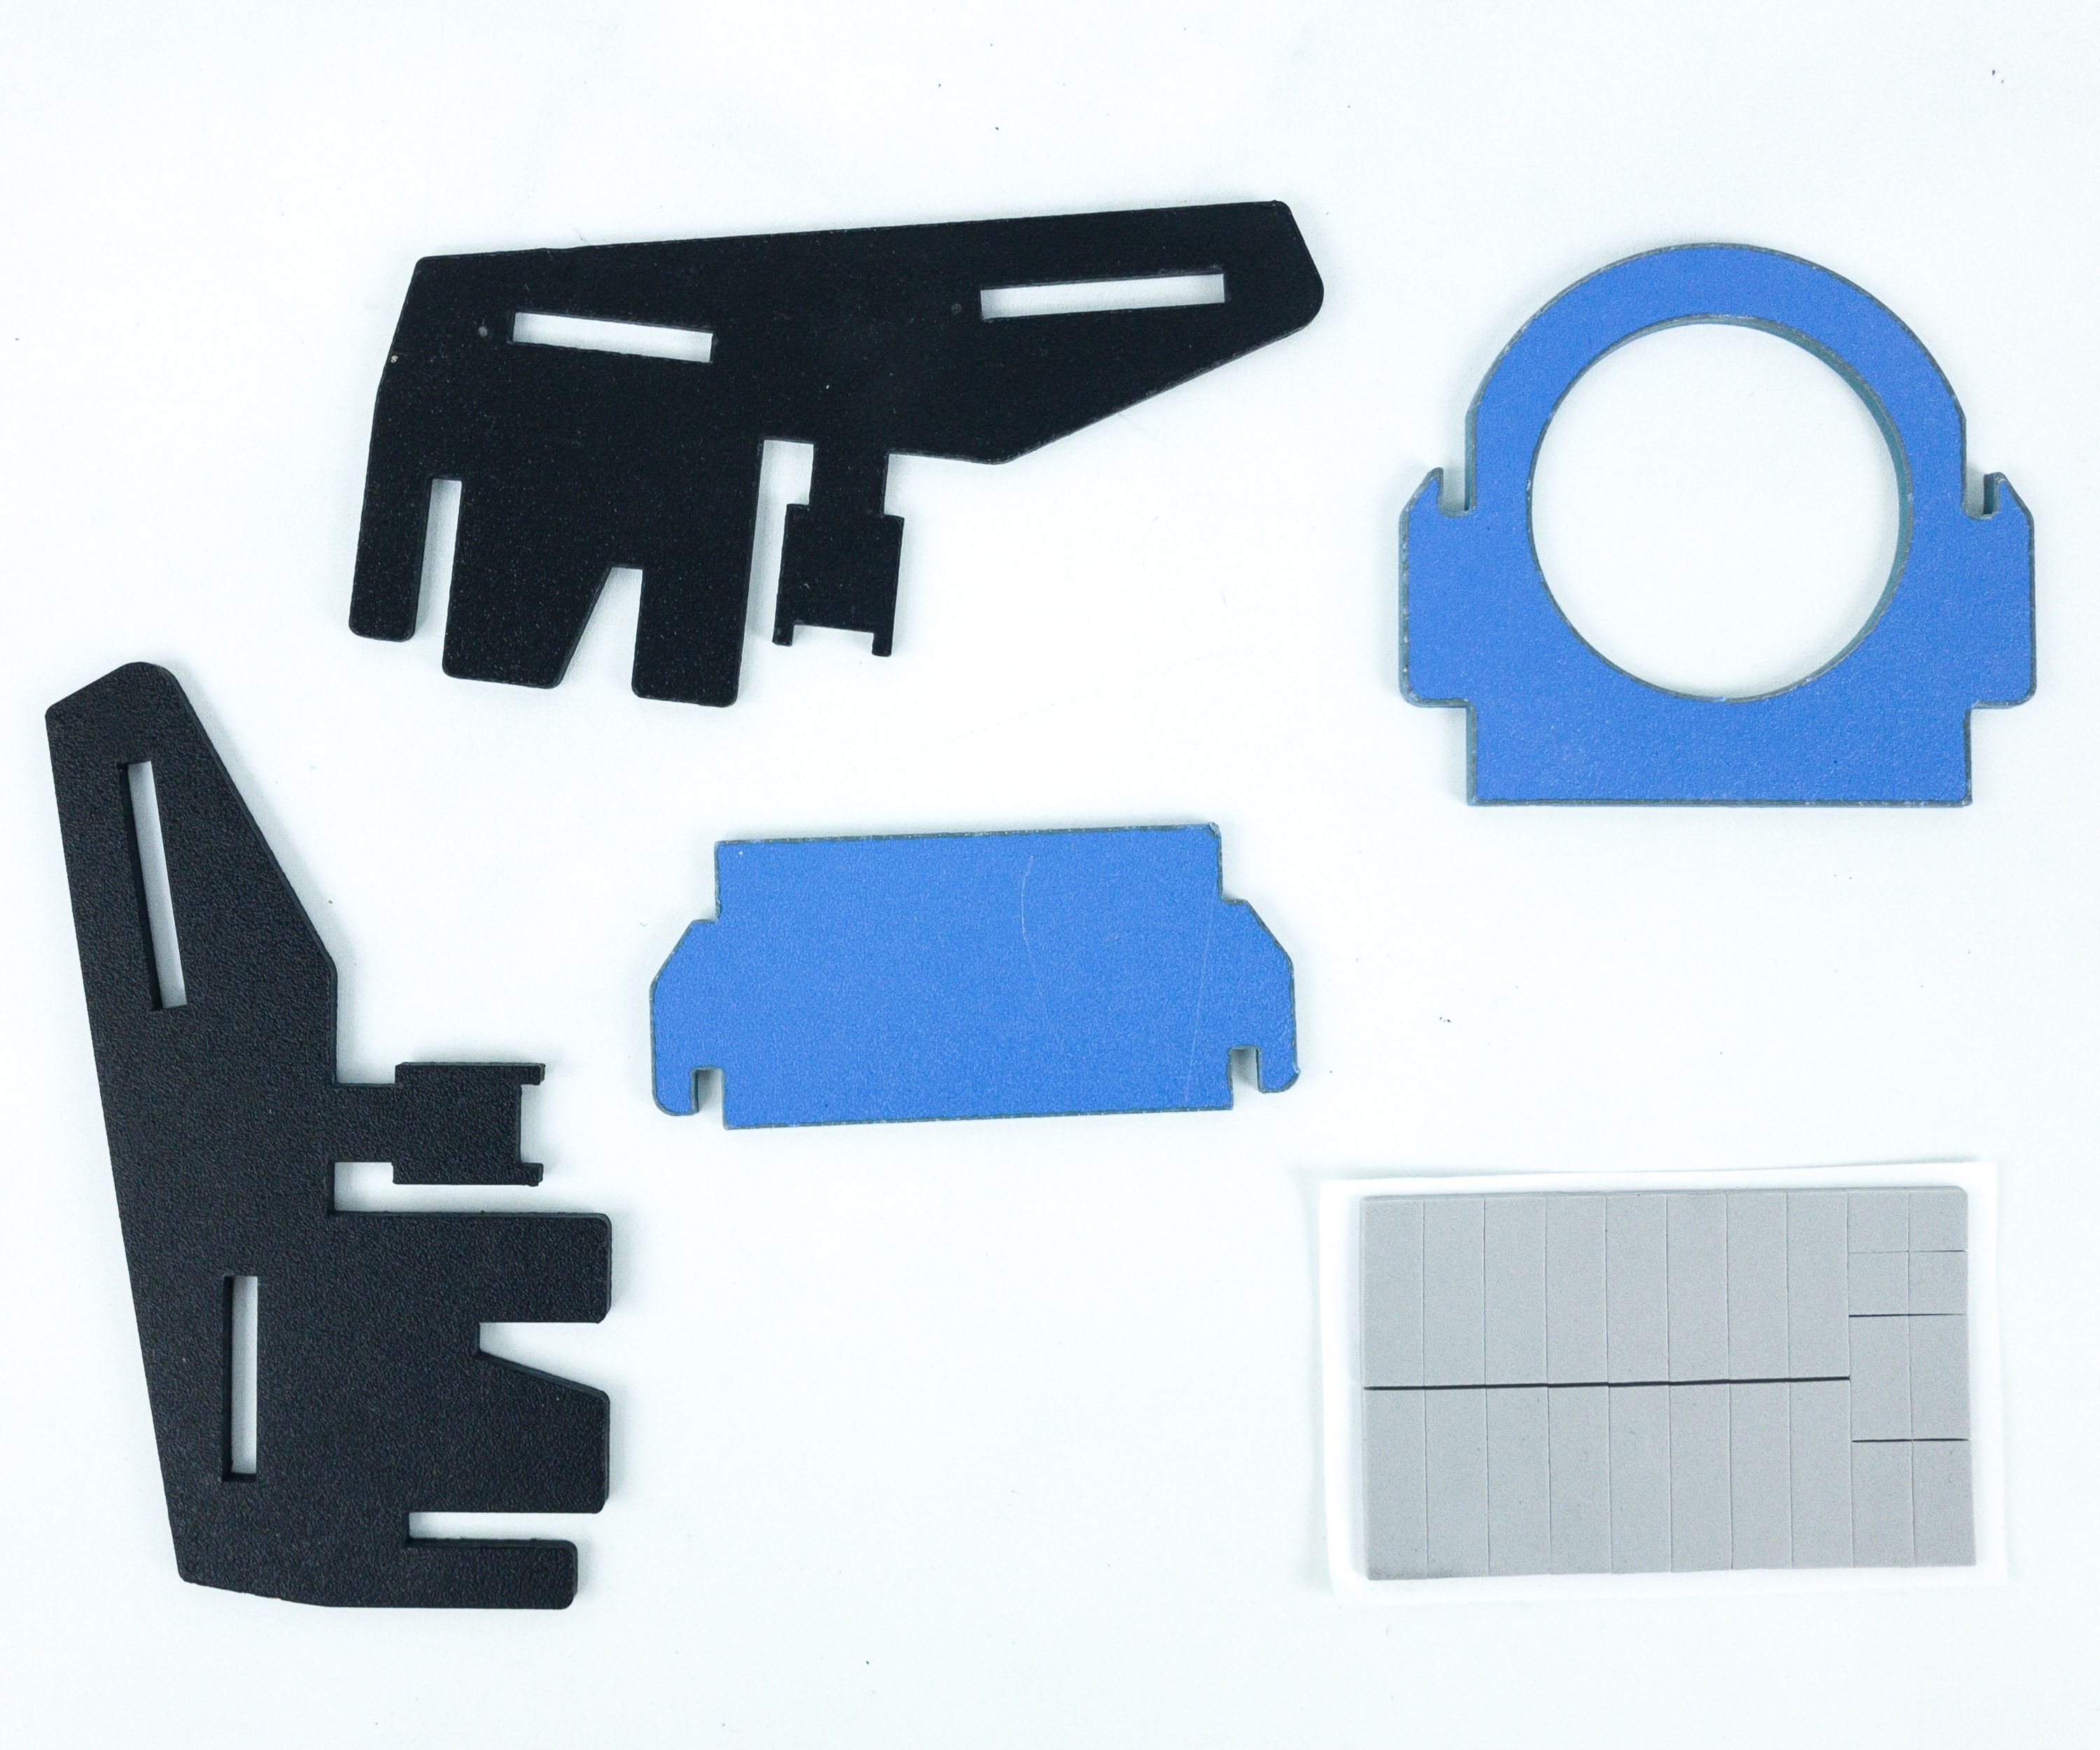
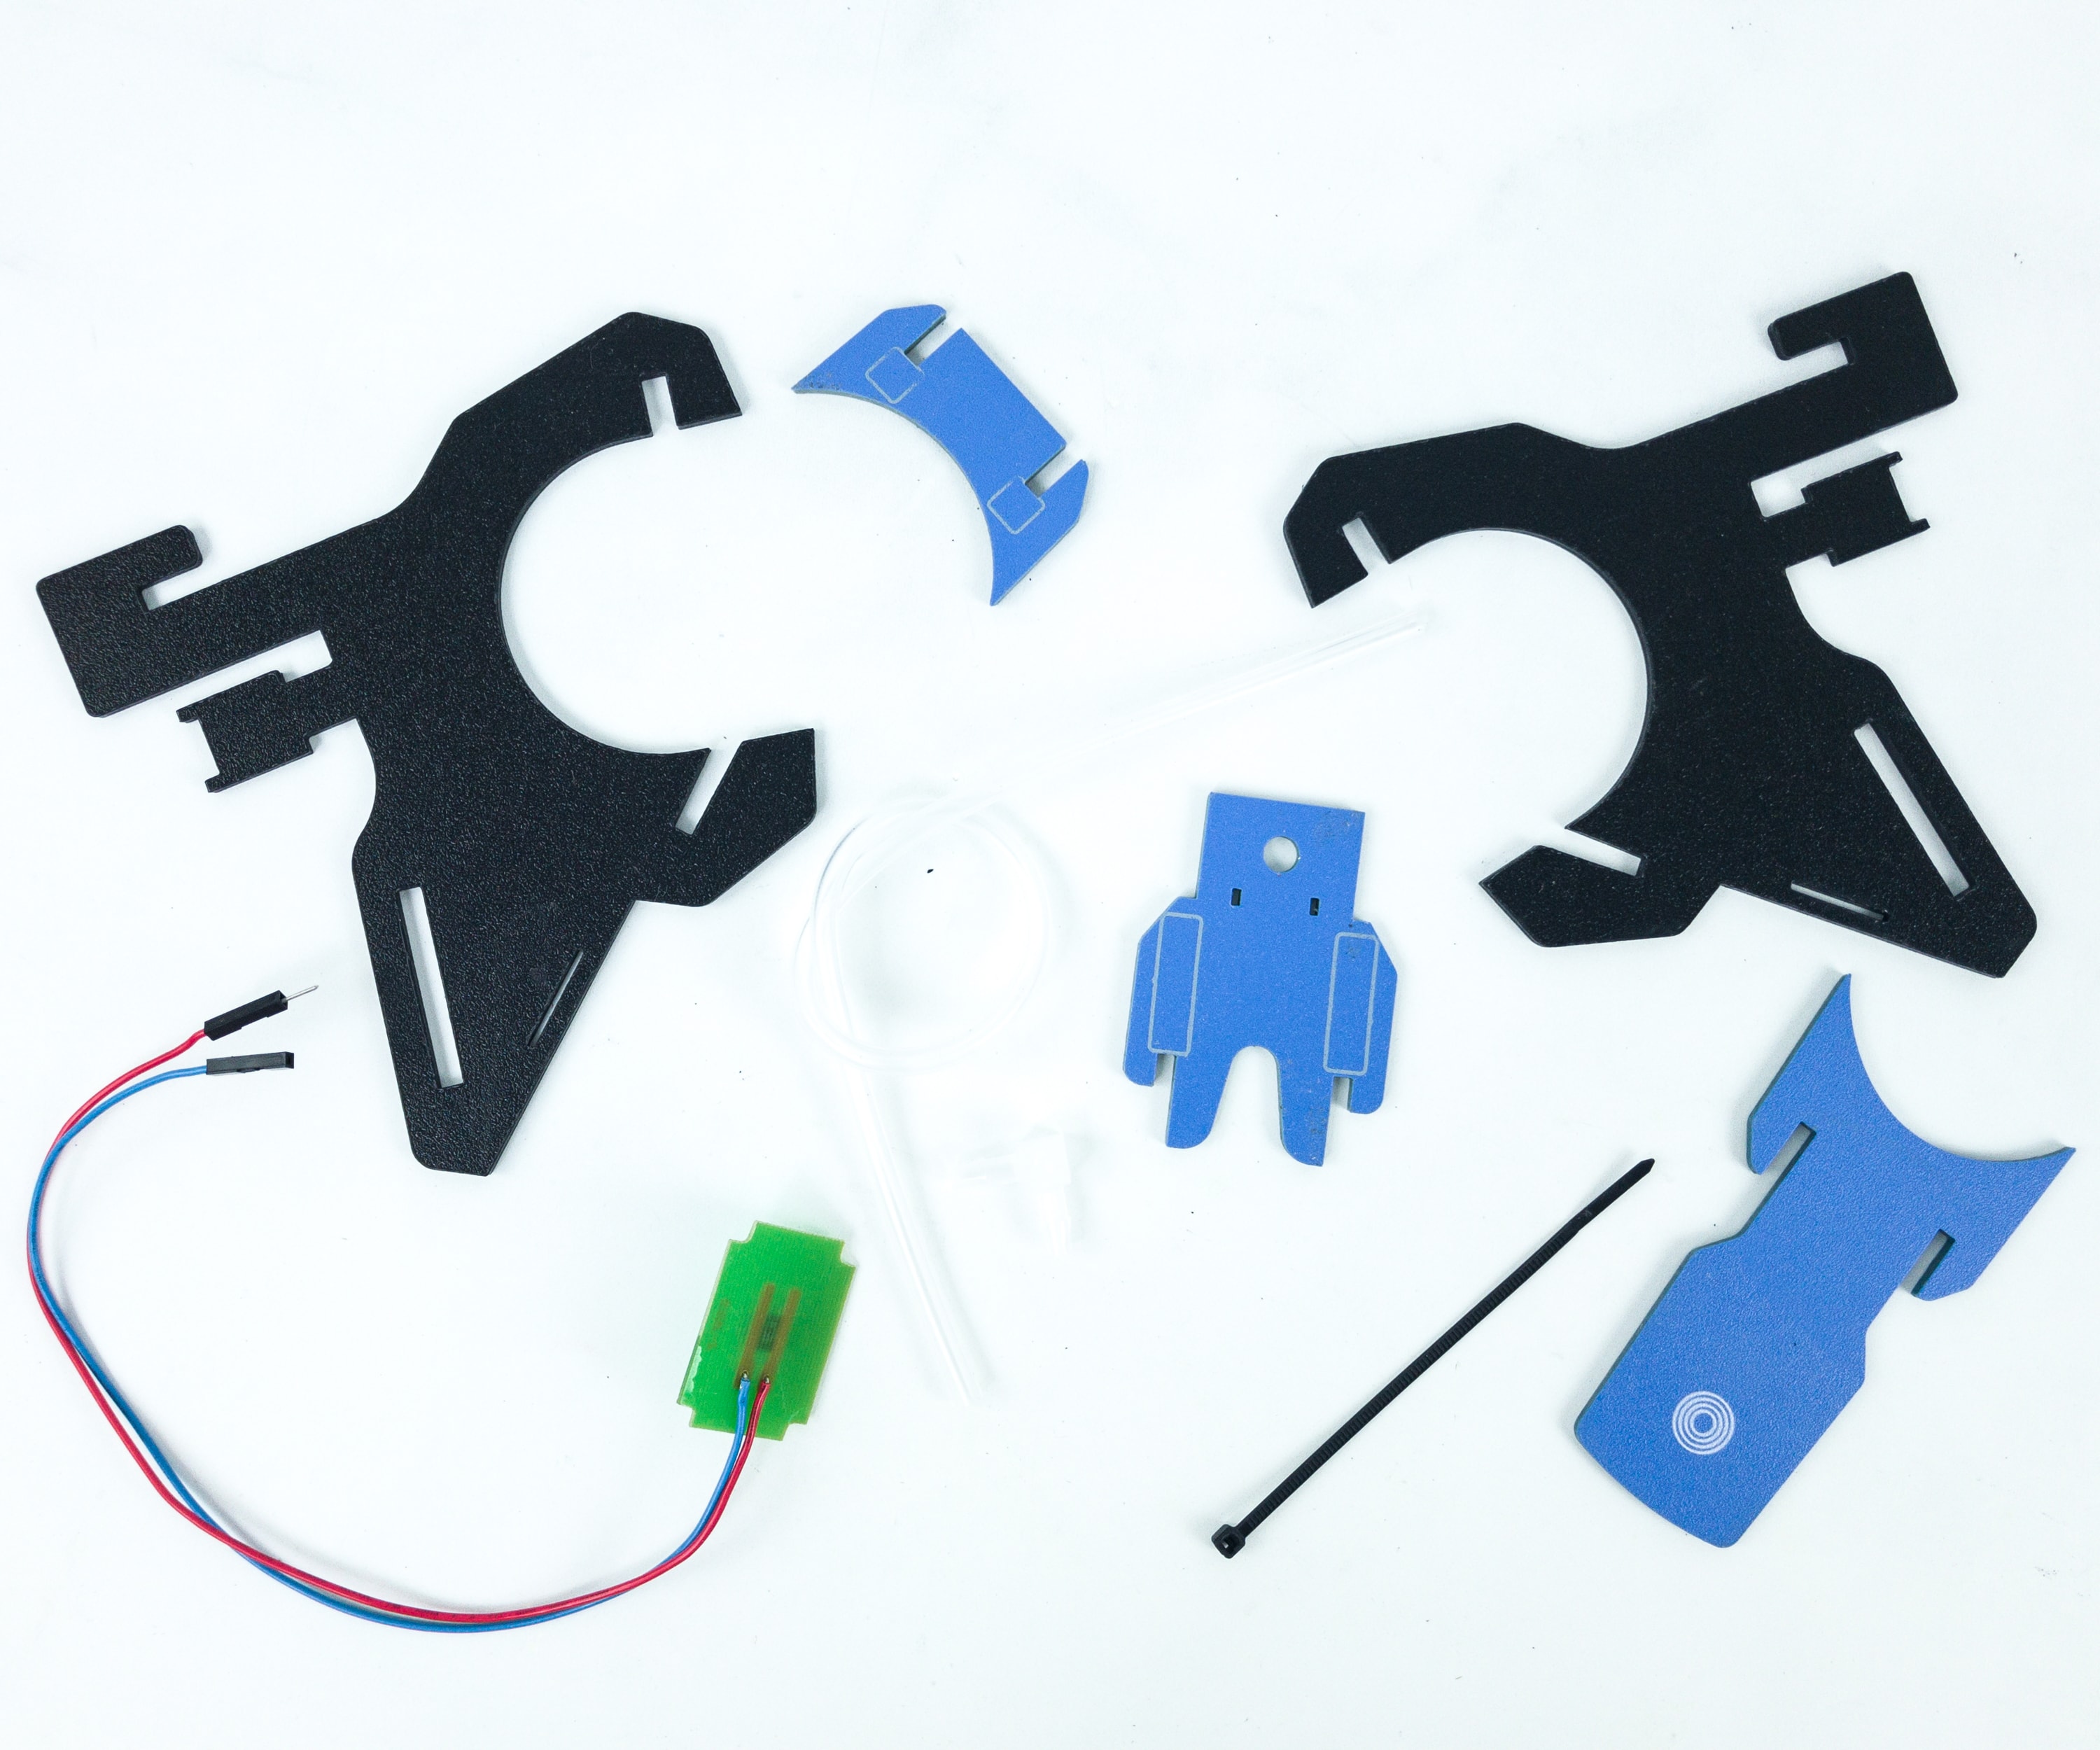
Here are some of the materials! You may check if you have the complete parts by comparing it to the picture in the booklet.
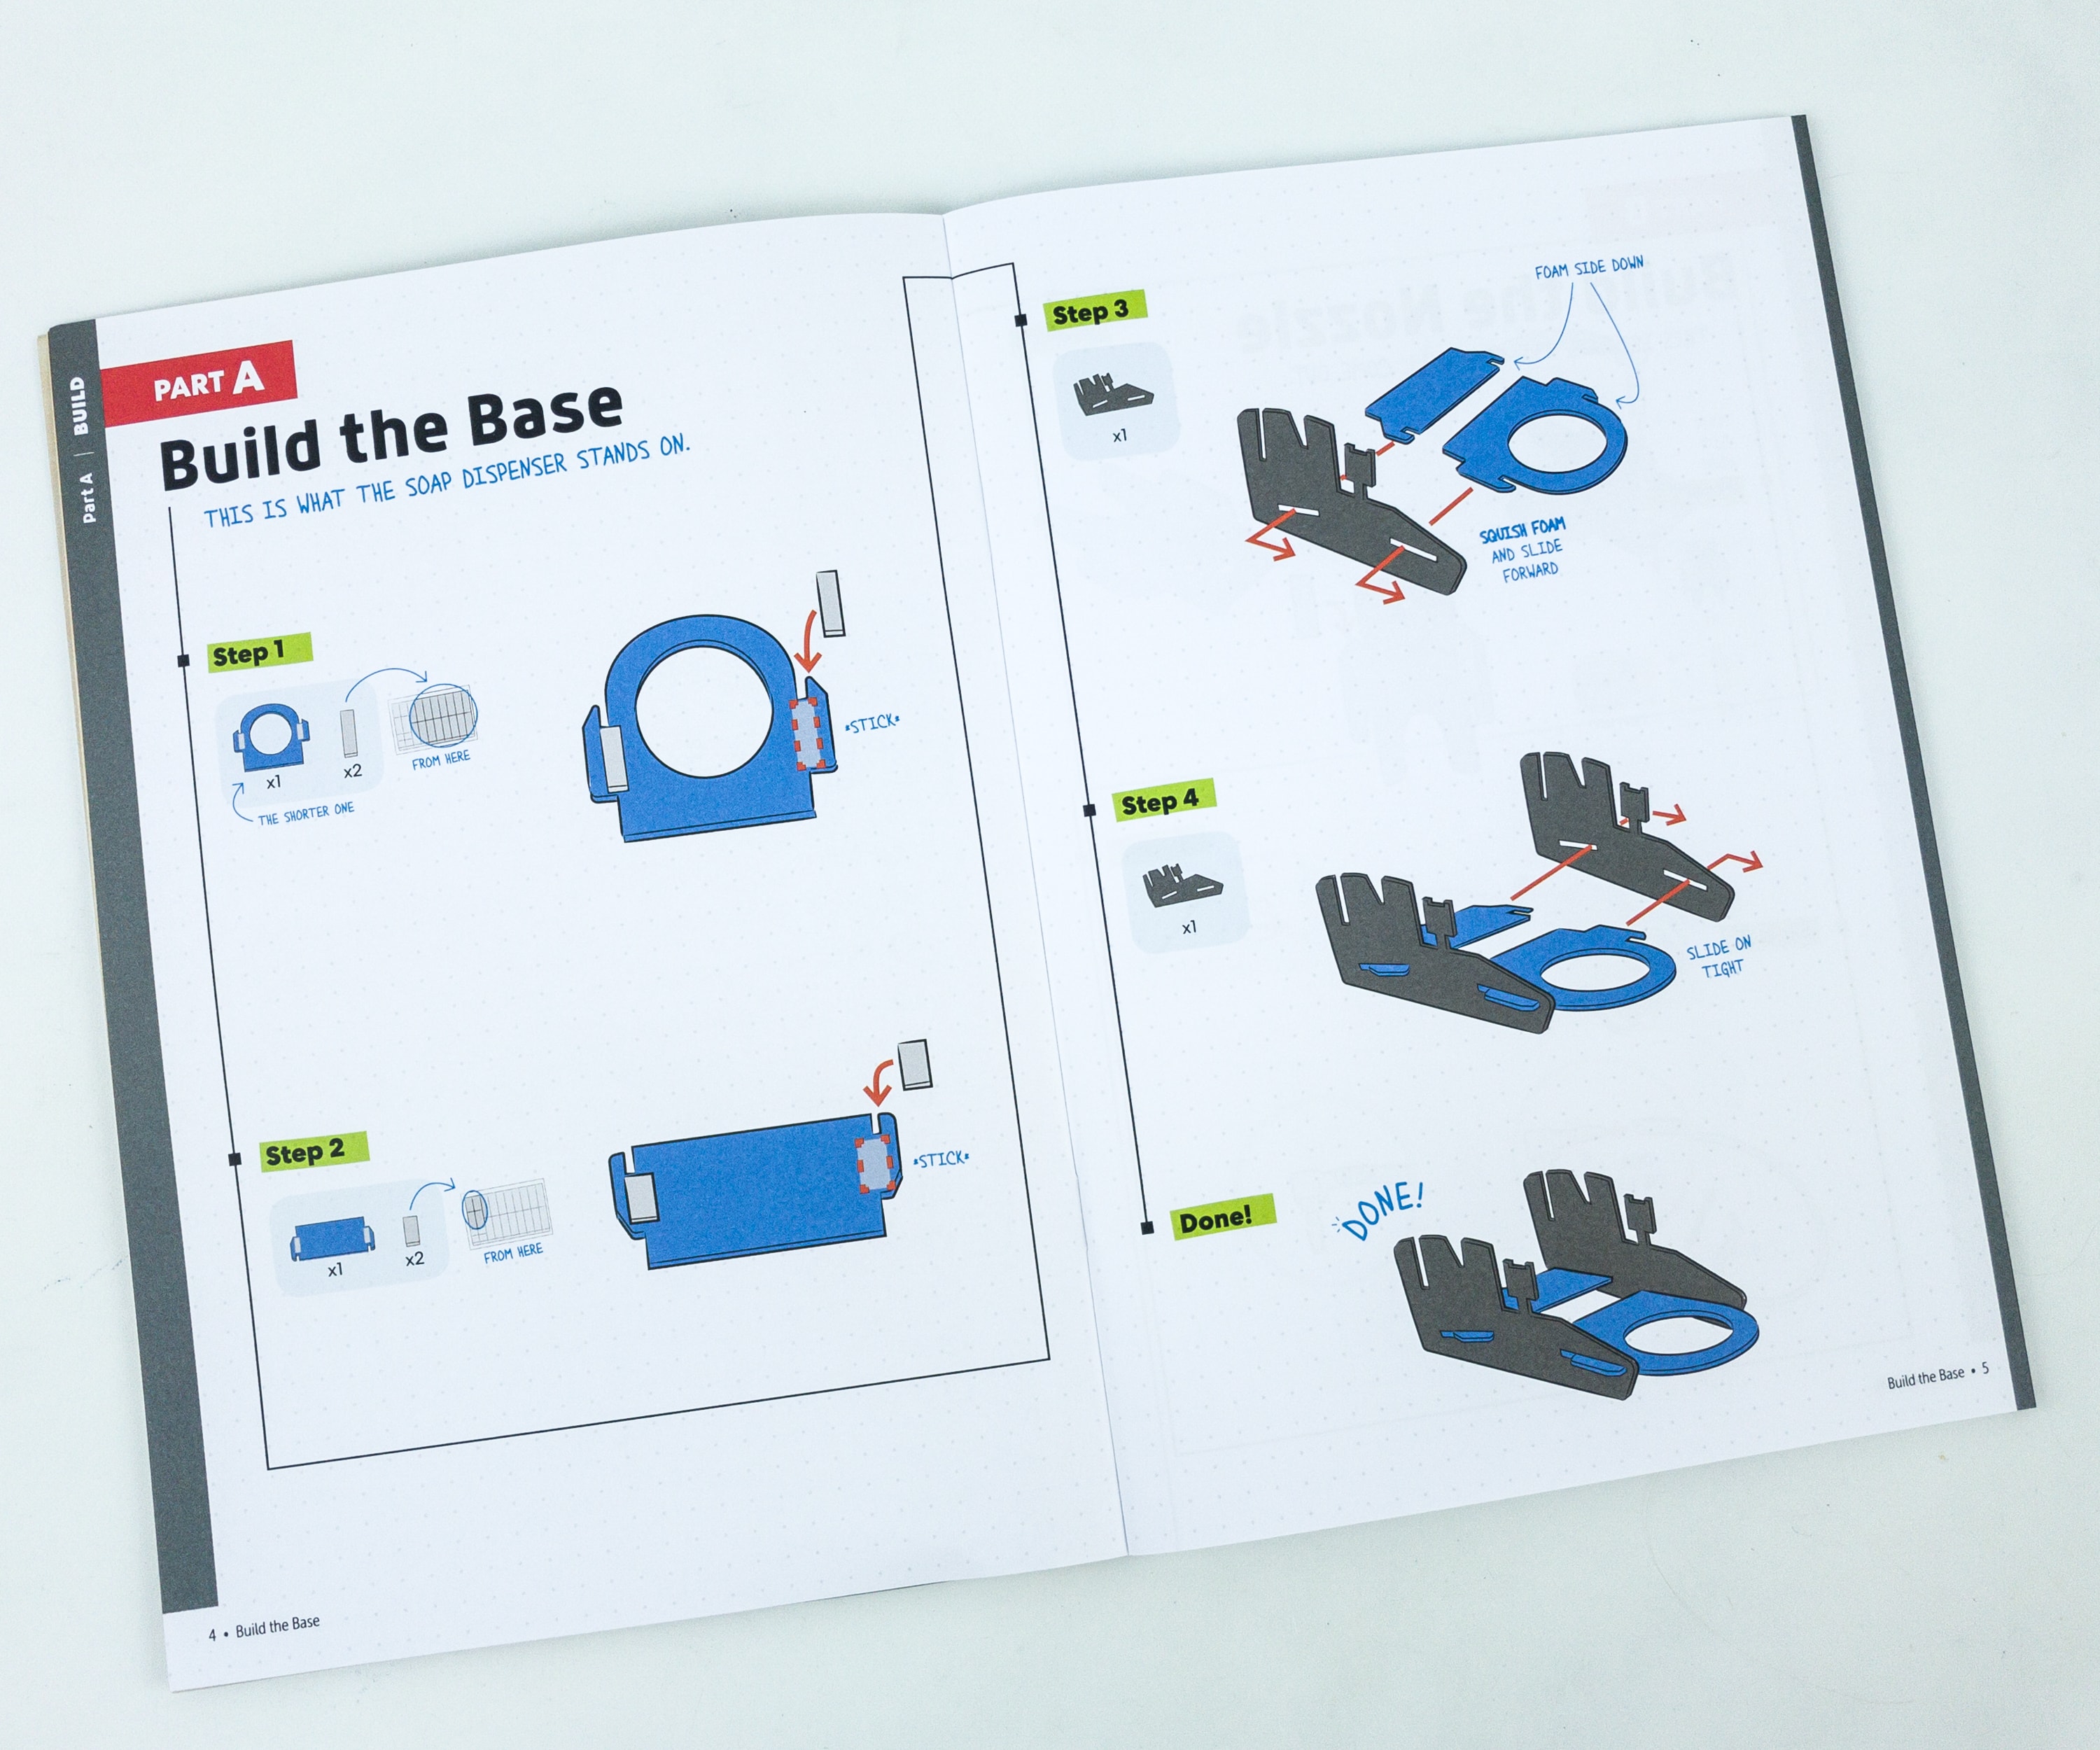
There are several parts to this project. We started off with part A, which is to build the base. The instructions kept the continuous flow of the activity easy to understand, while the drawings were very detailed too.
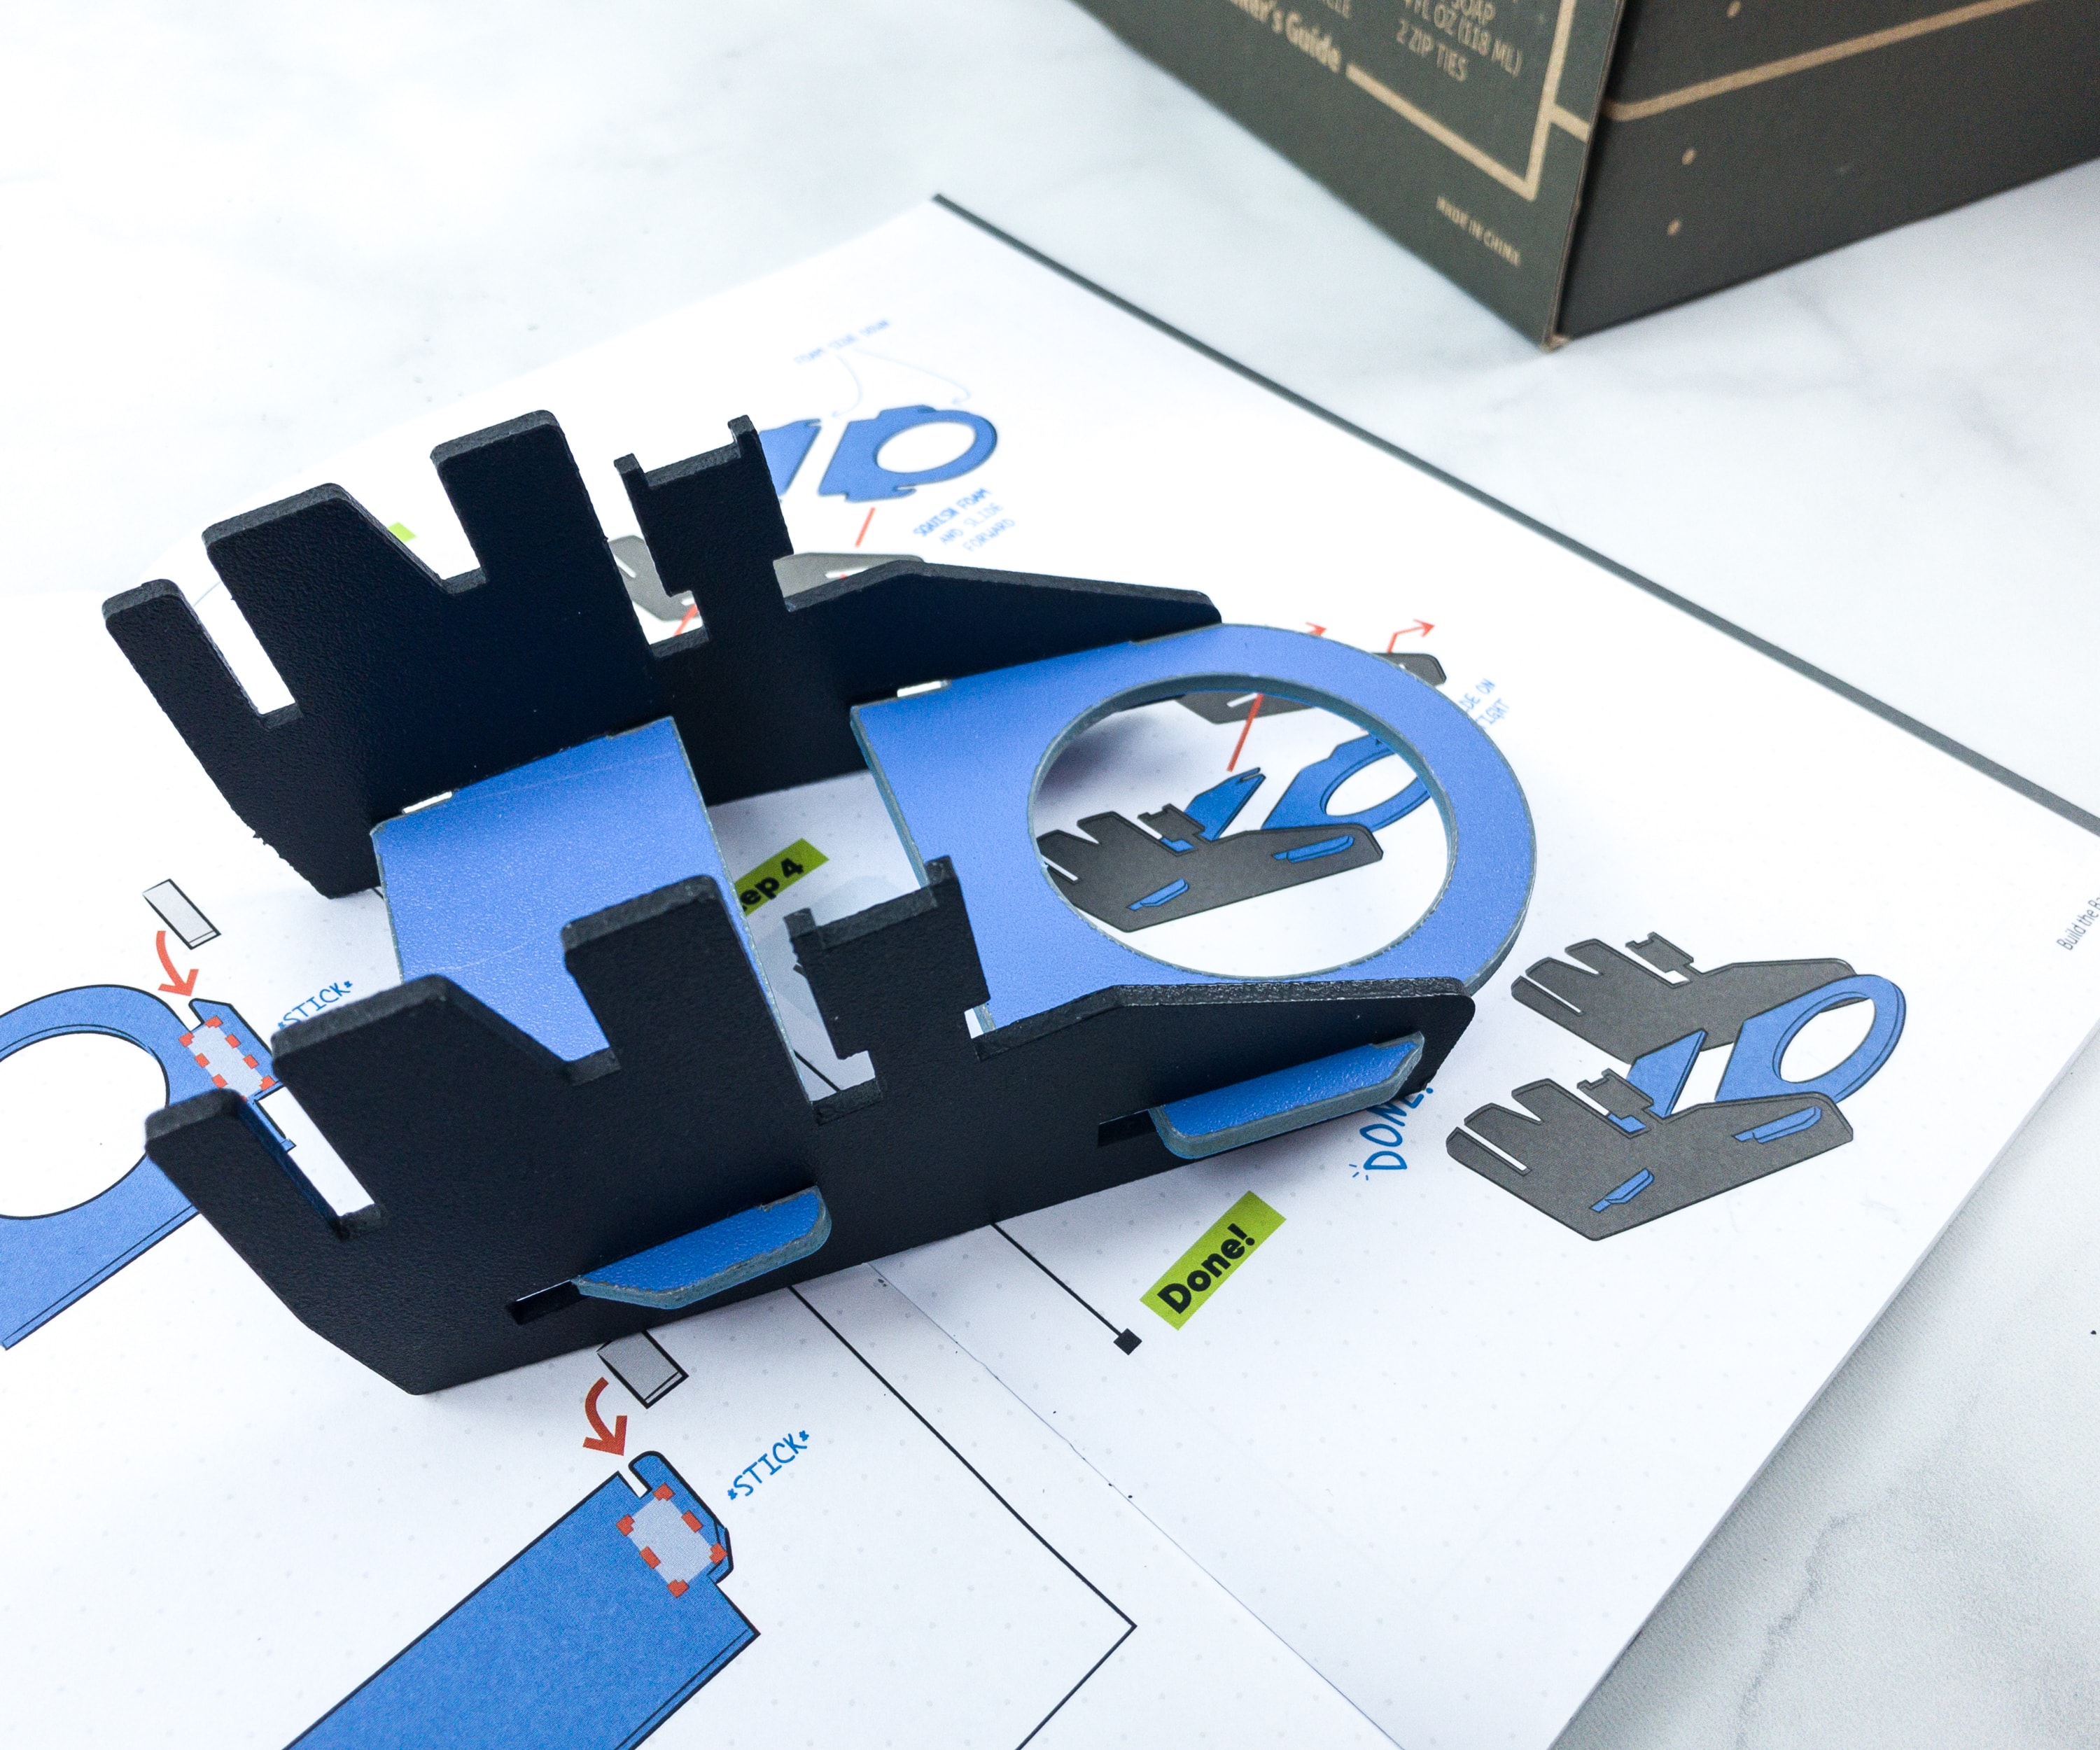
It’s actually looking great after we finished building the base!
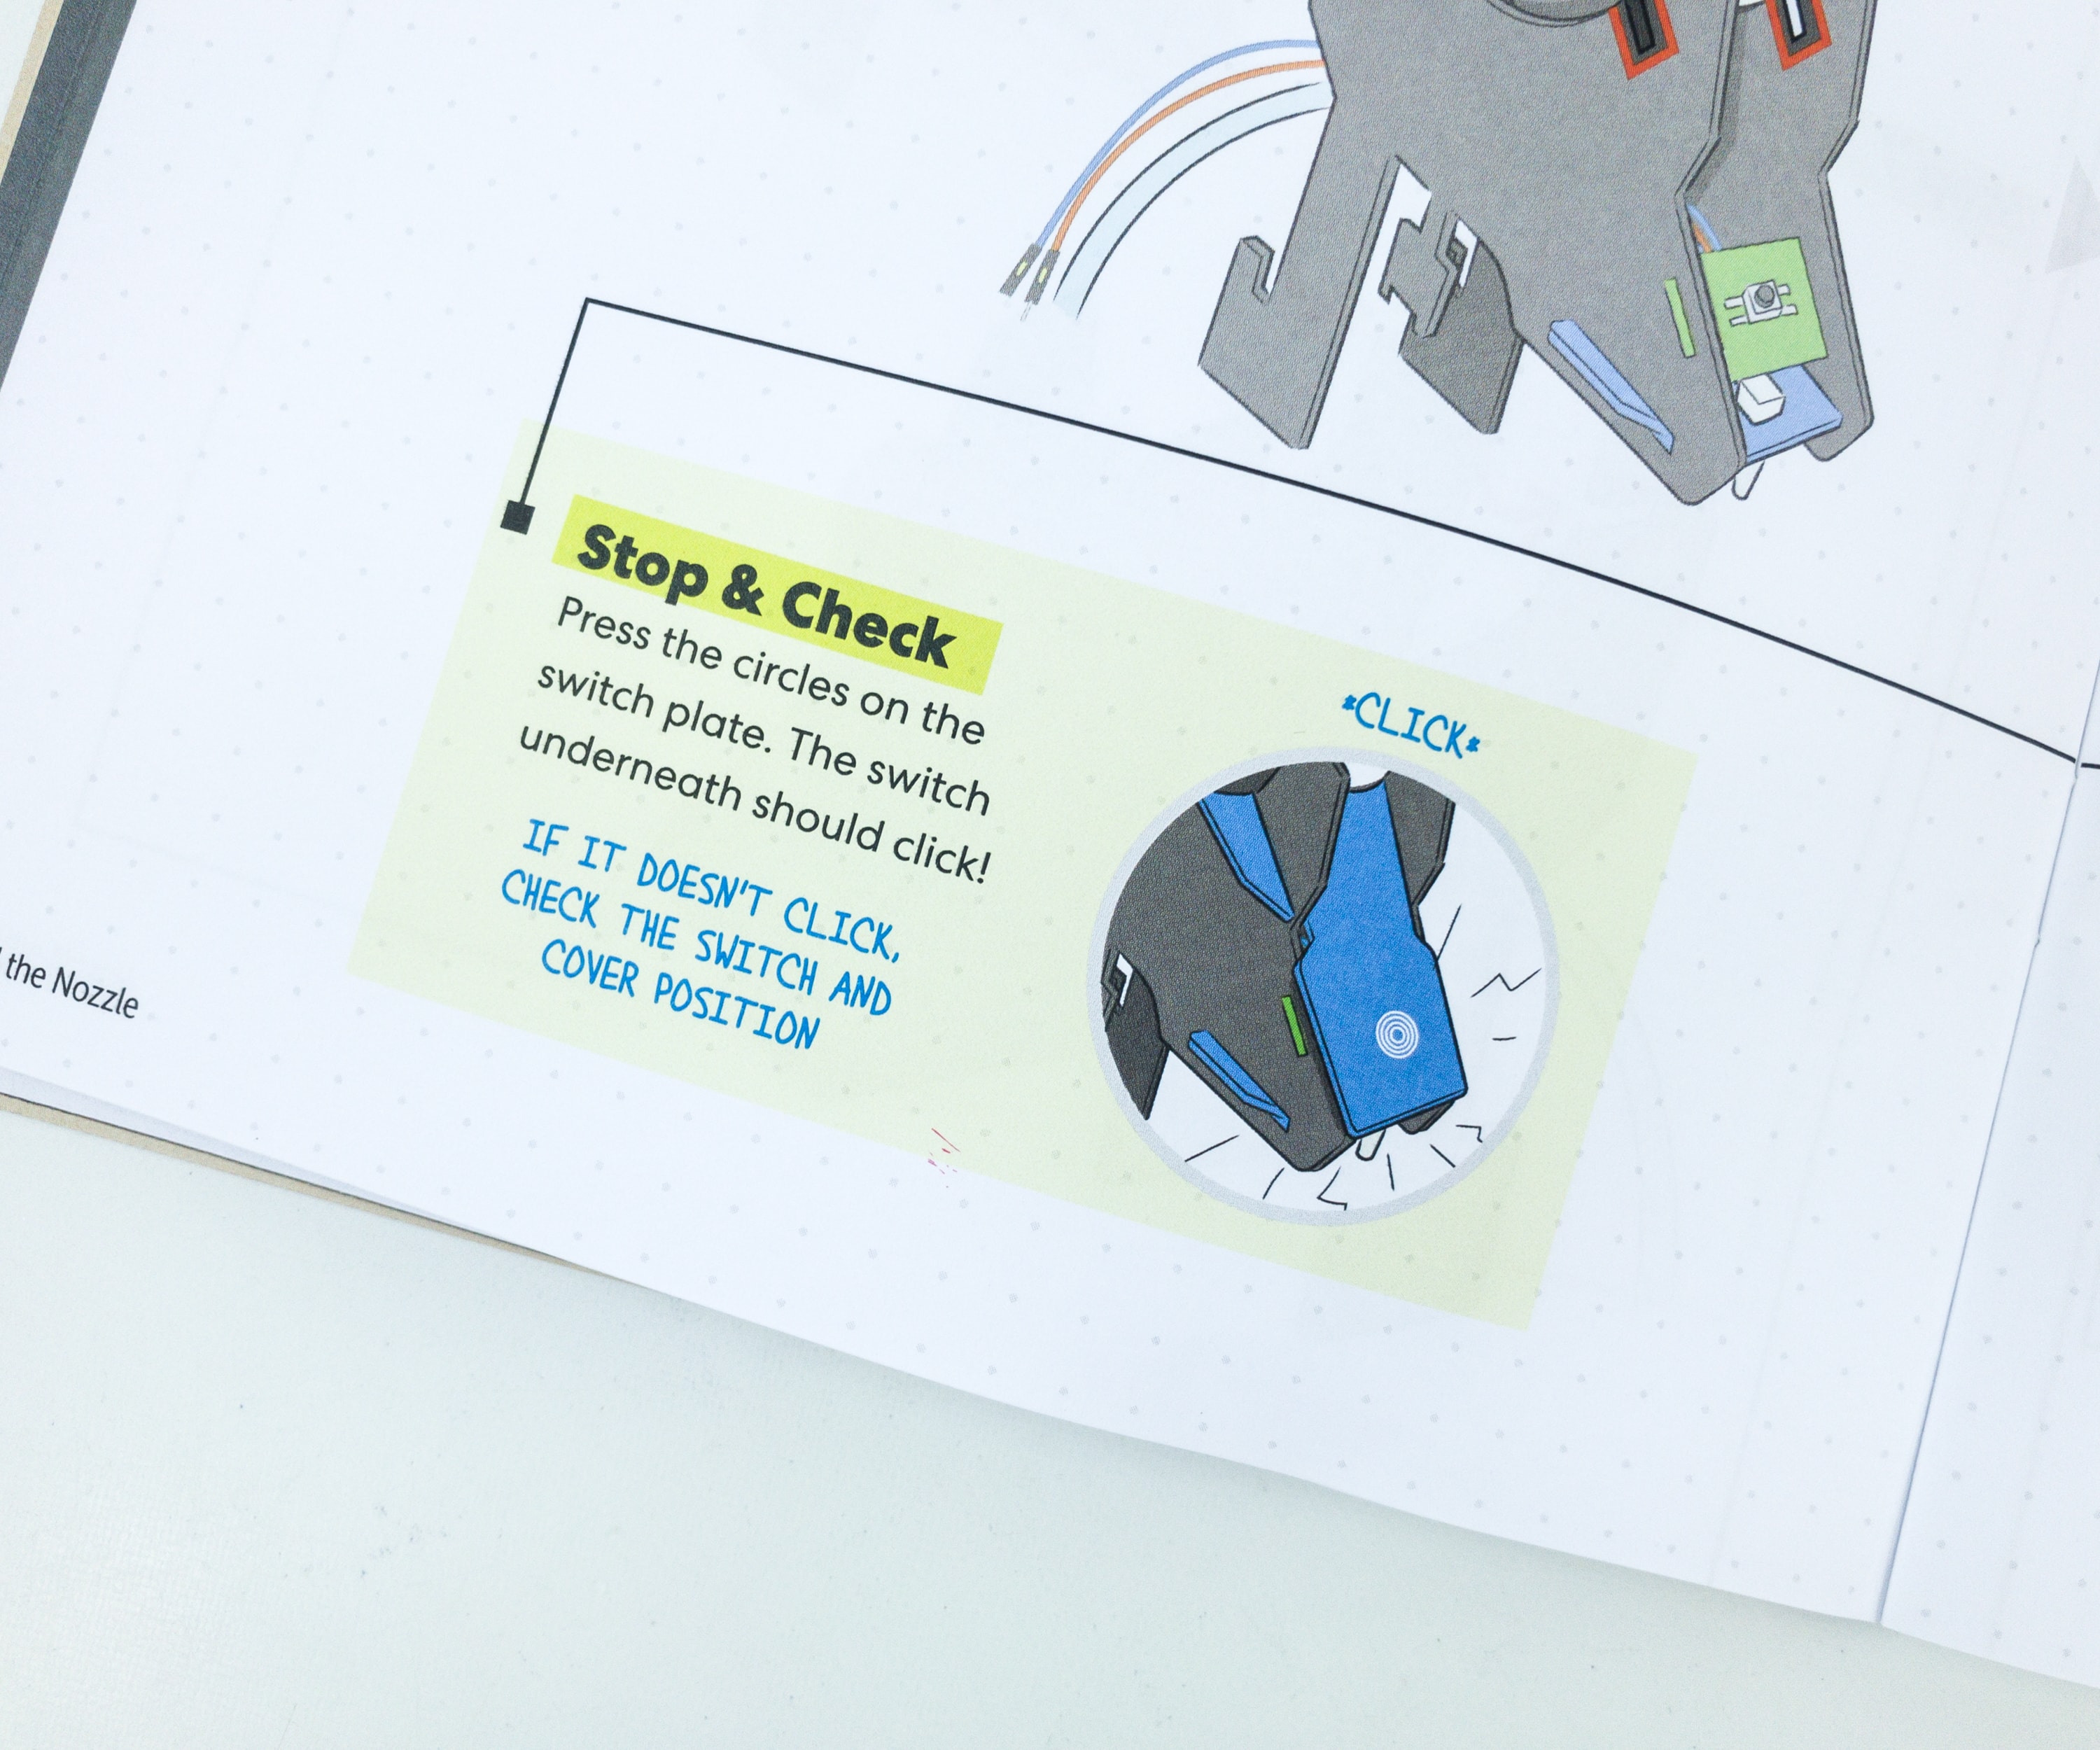
As you go along, there are steps where you need to stop and check, just to be sure that what you’re doing is right. It also minimizes worries or troubleshooting as you continue.
For part B, here are some of the materials that we used!
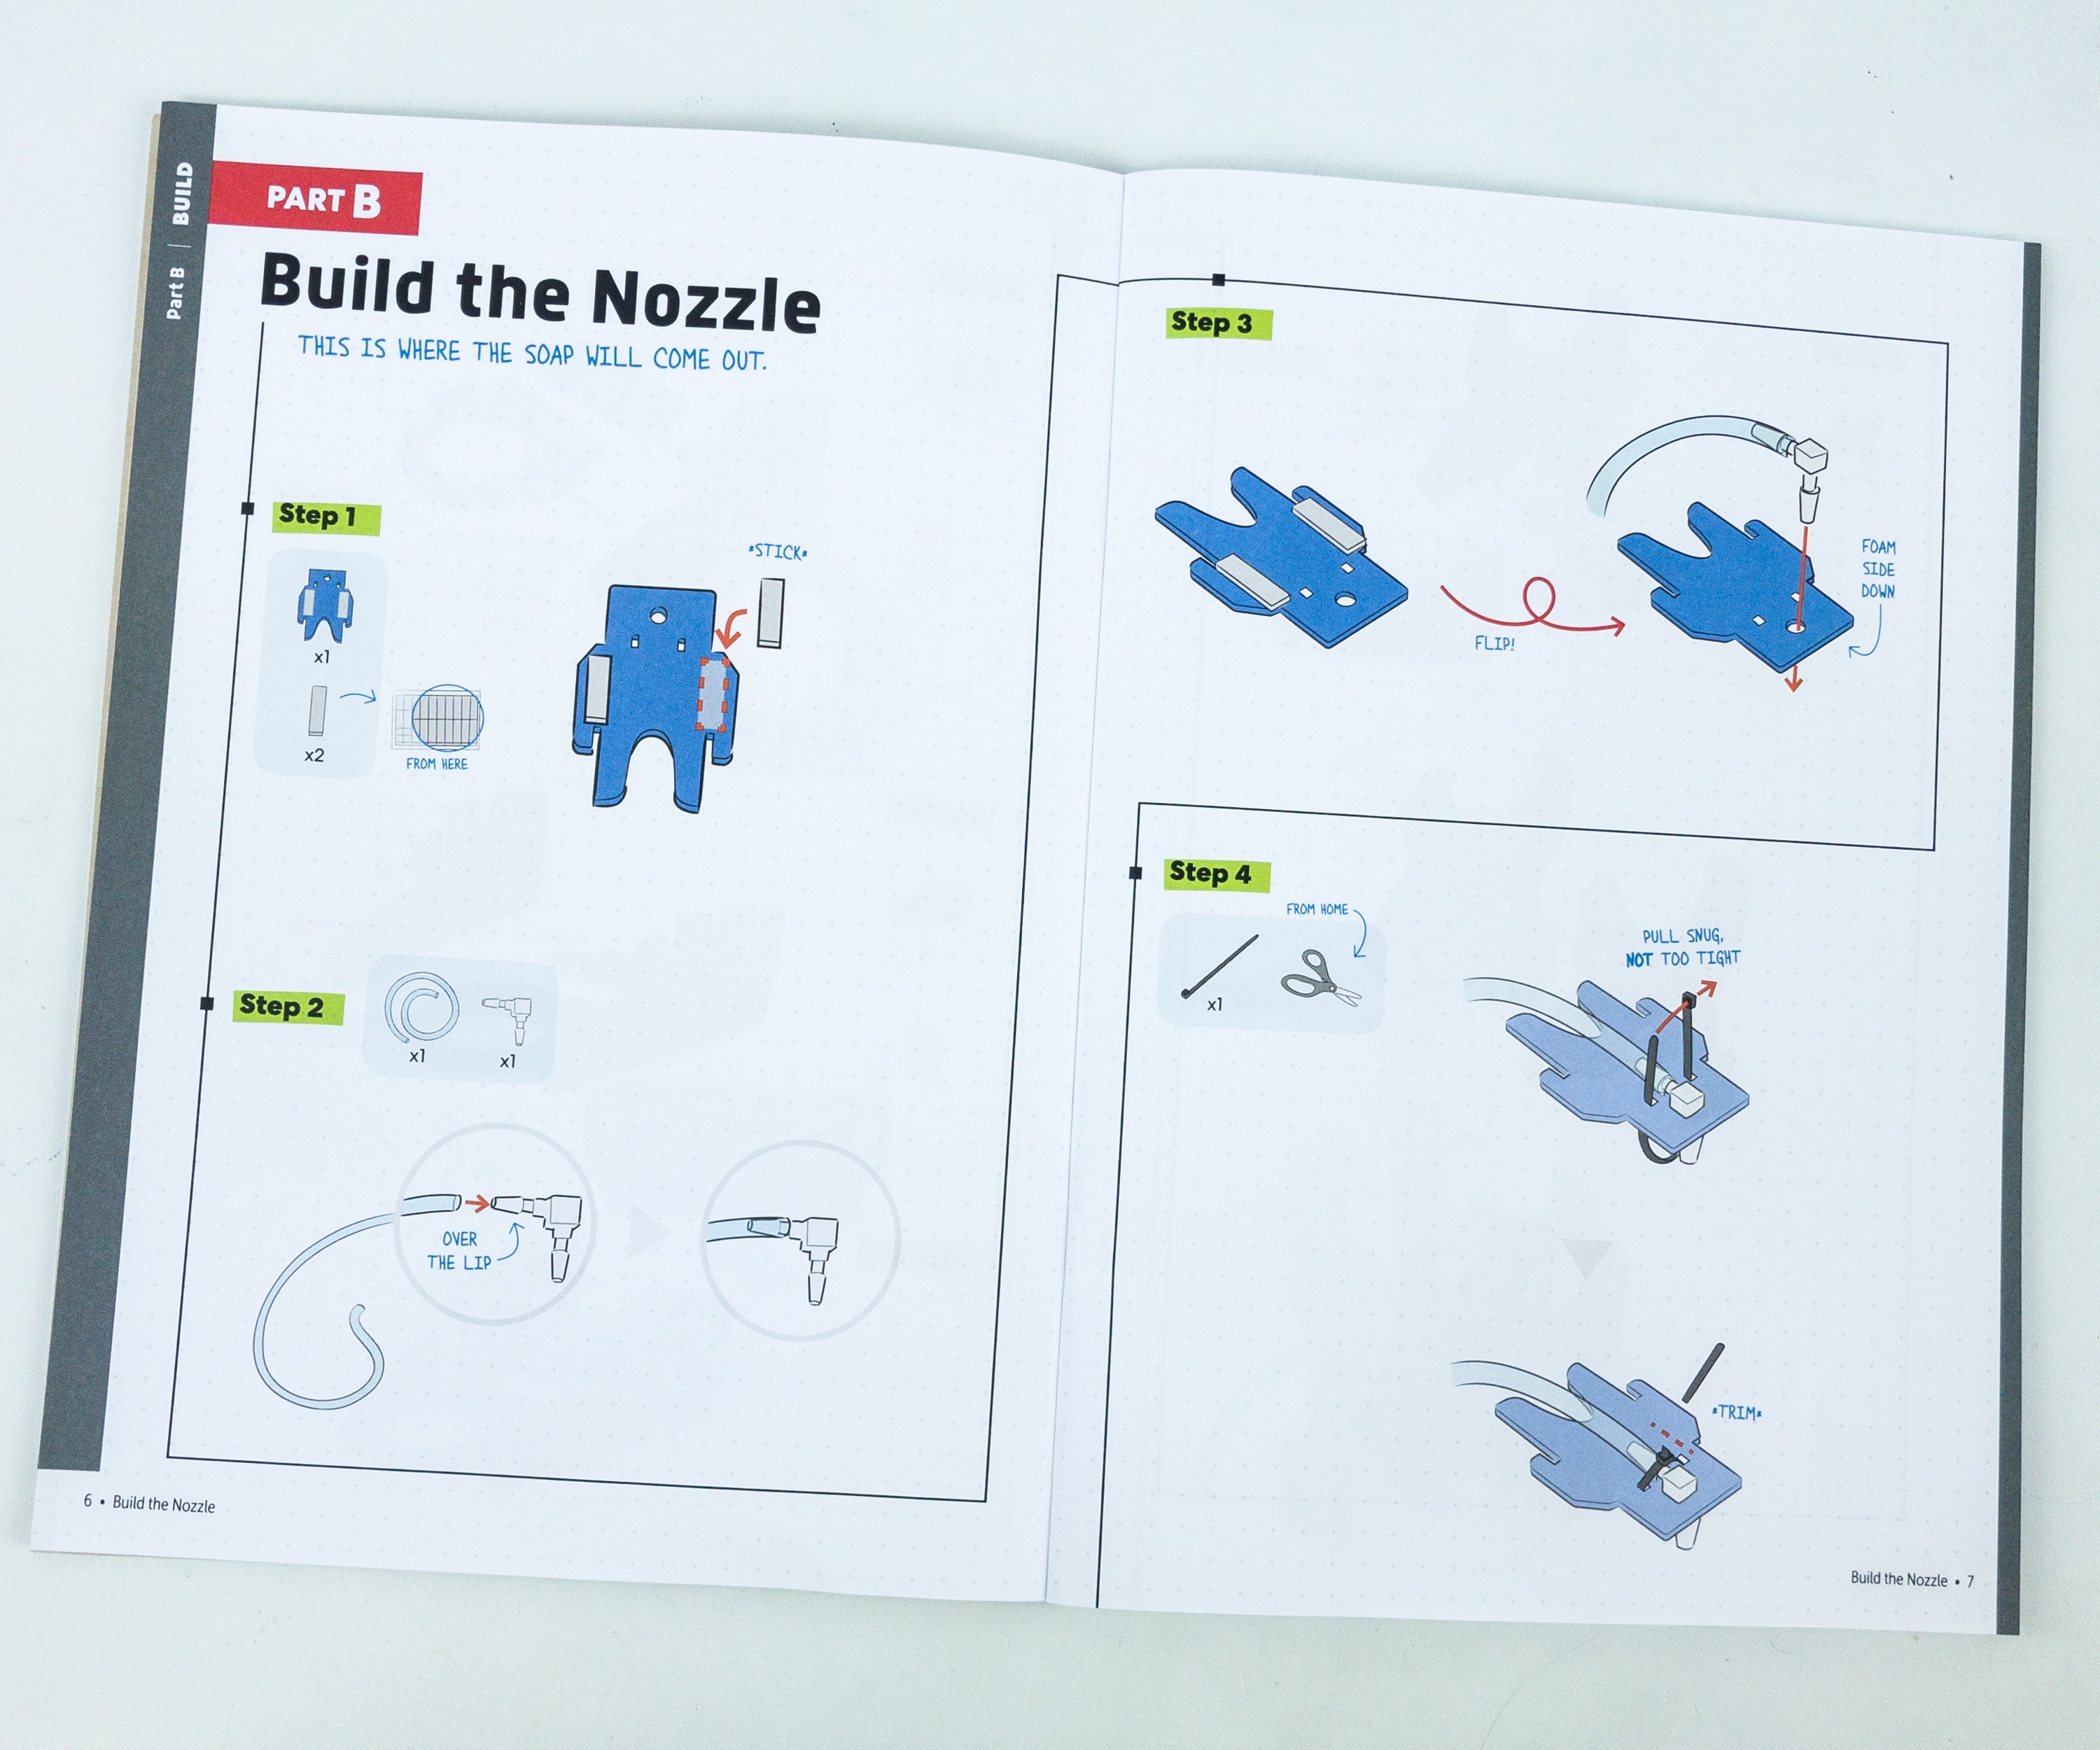
After building the base, it’s time to move on and work on the nozzle. This part is quite easier, thanks to the detailed and illustrated instructions.
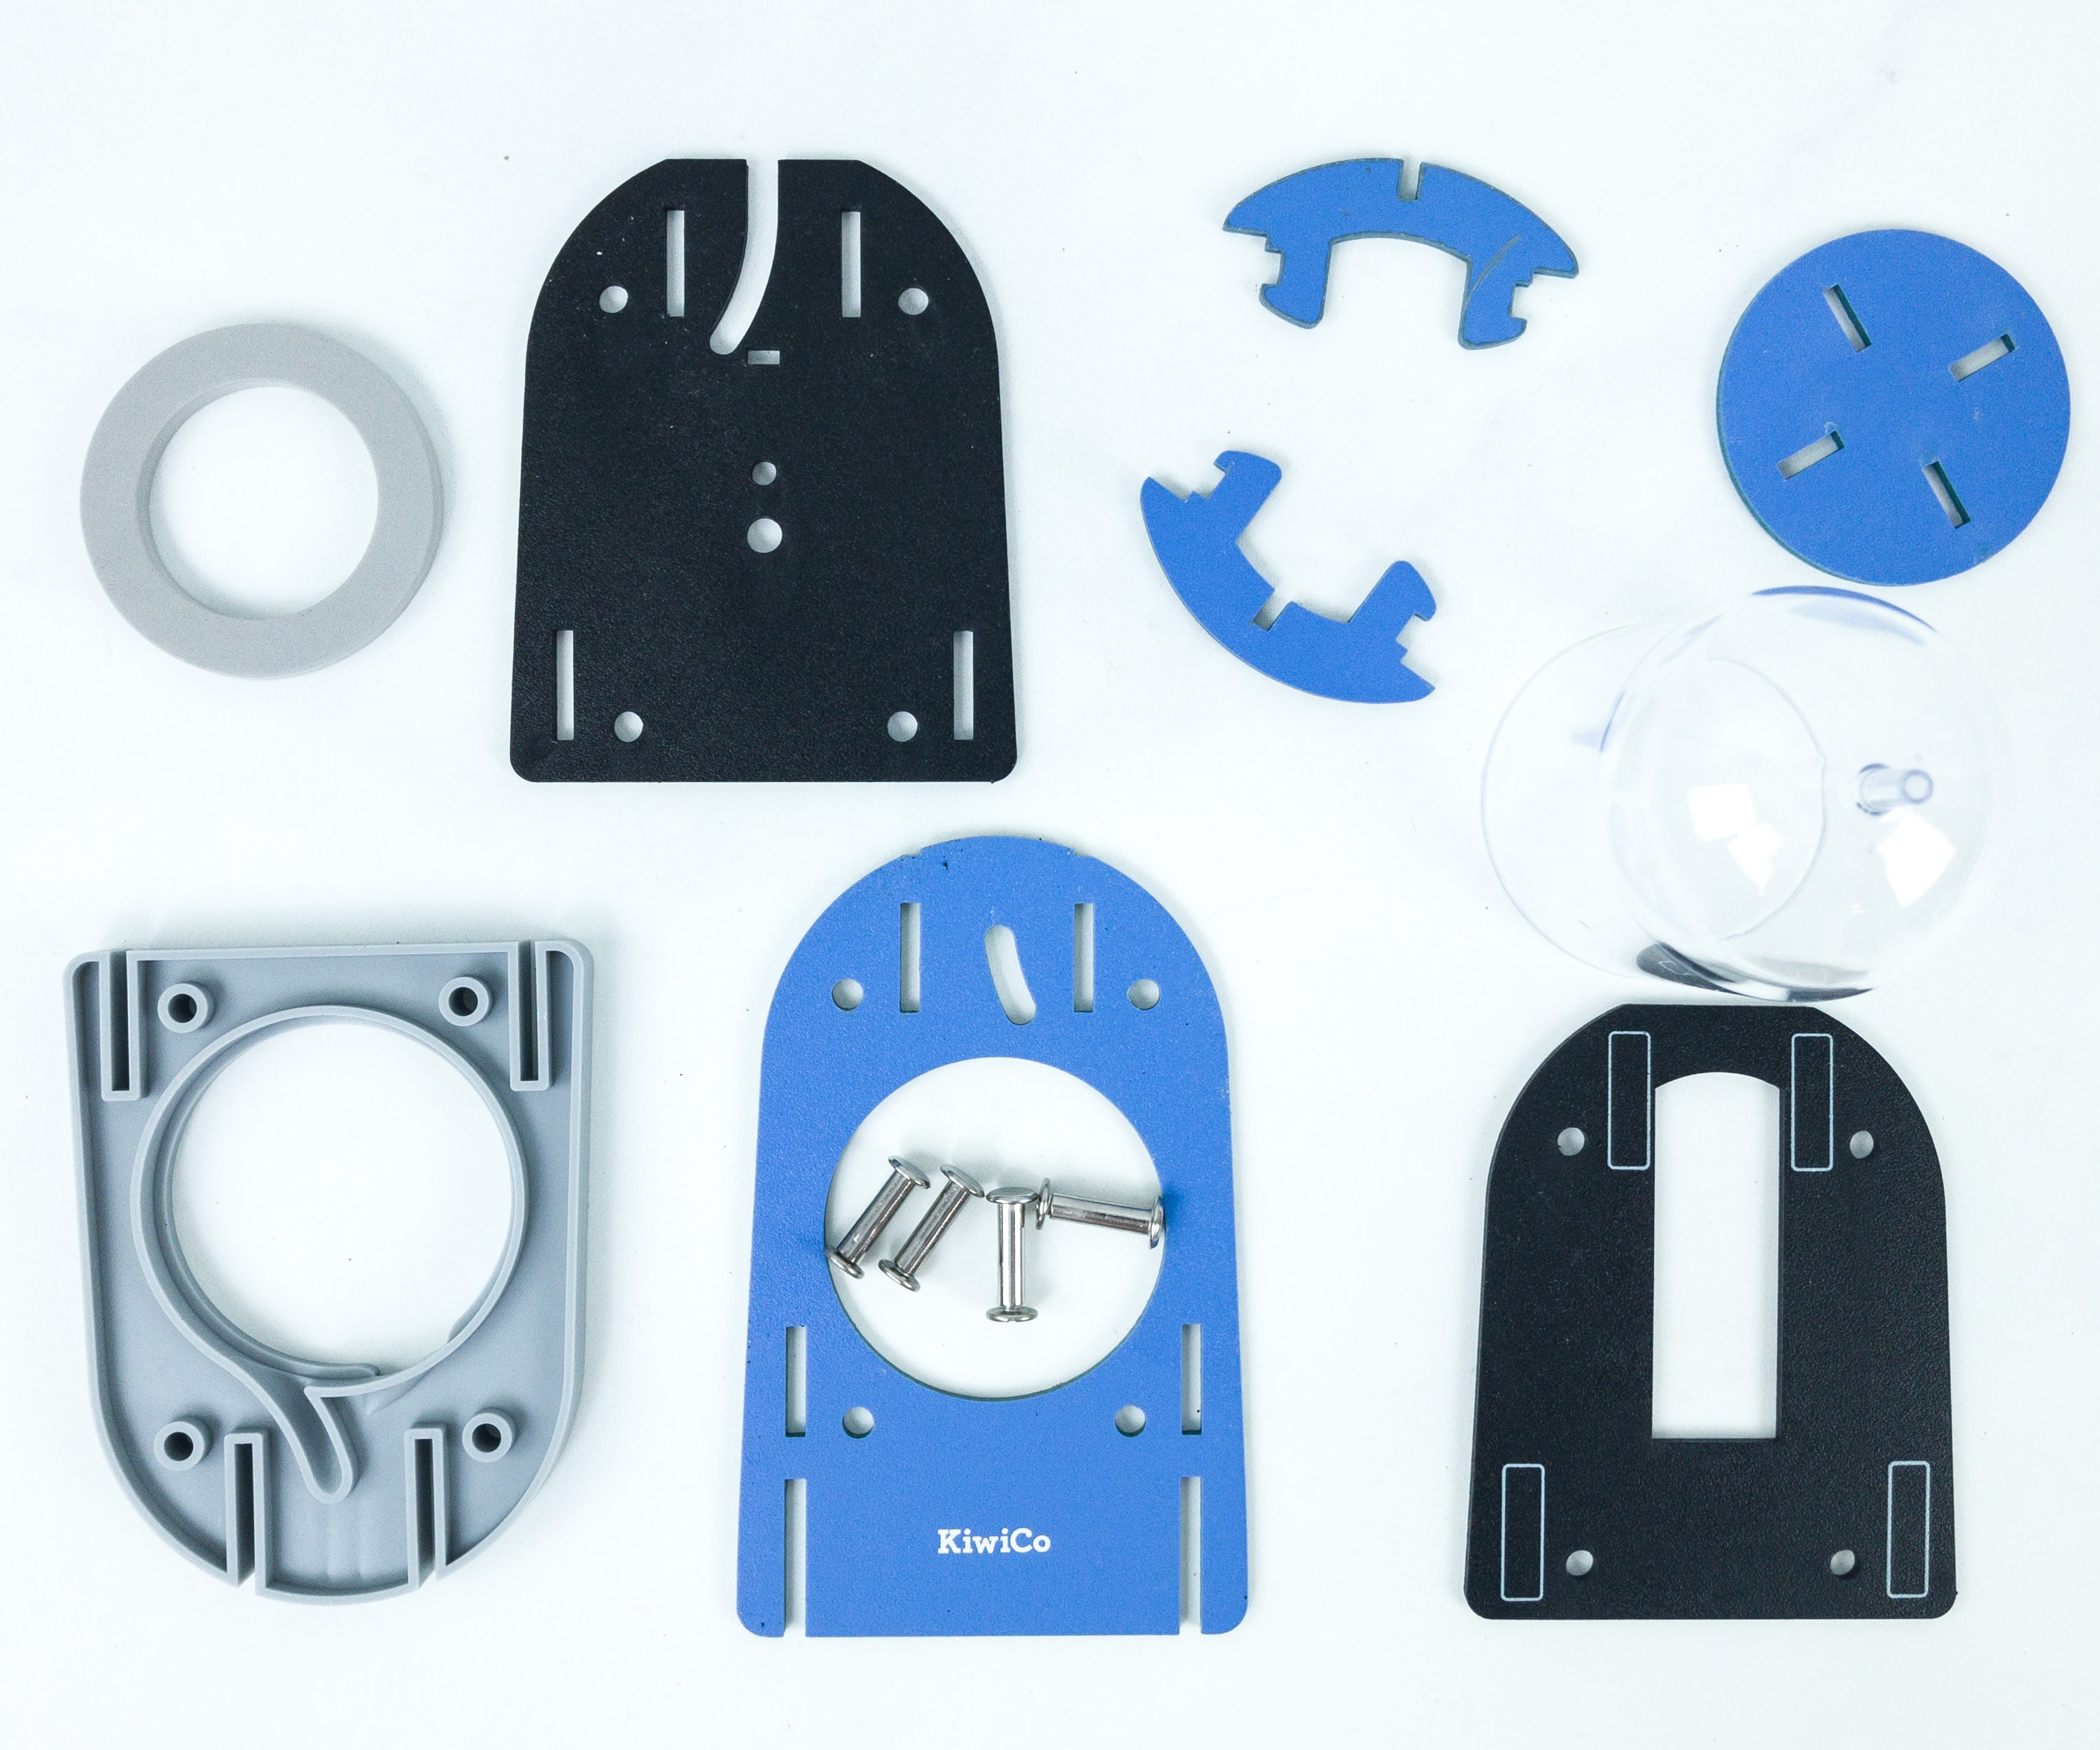
Here are the materials needed to complete the body of the soap dispenser.
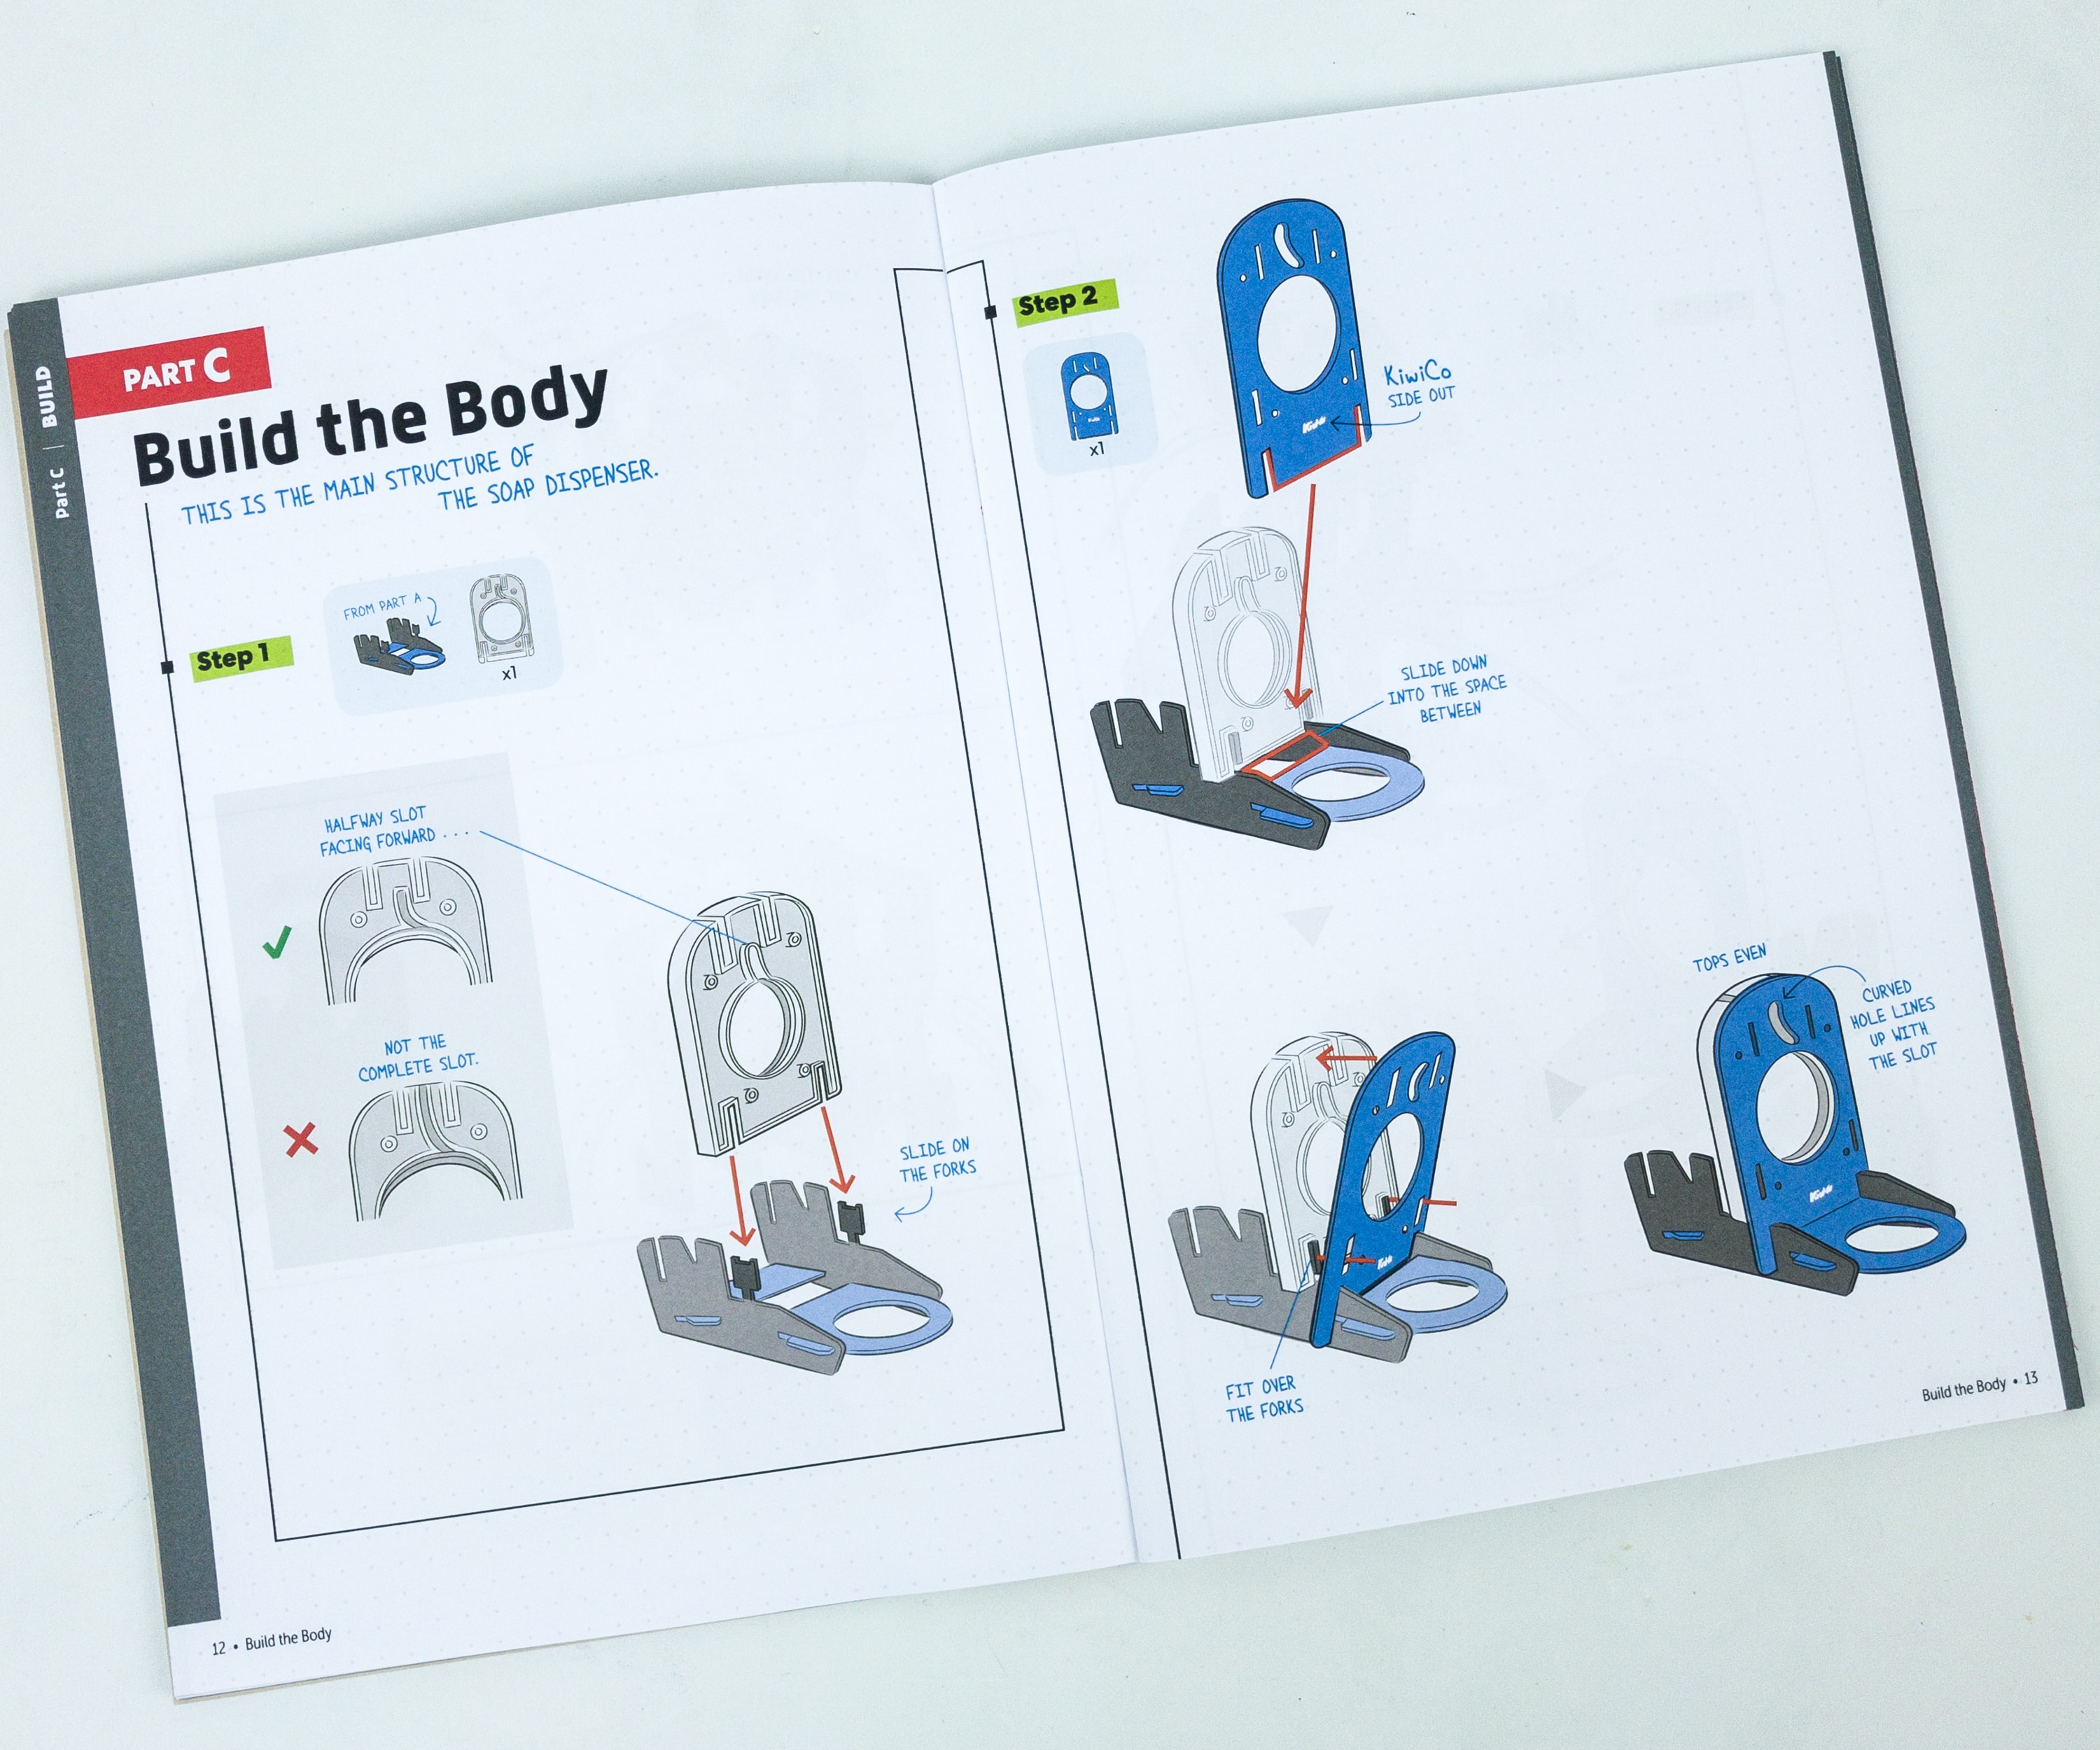
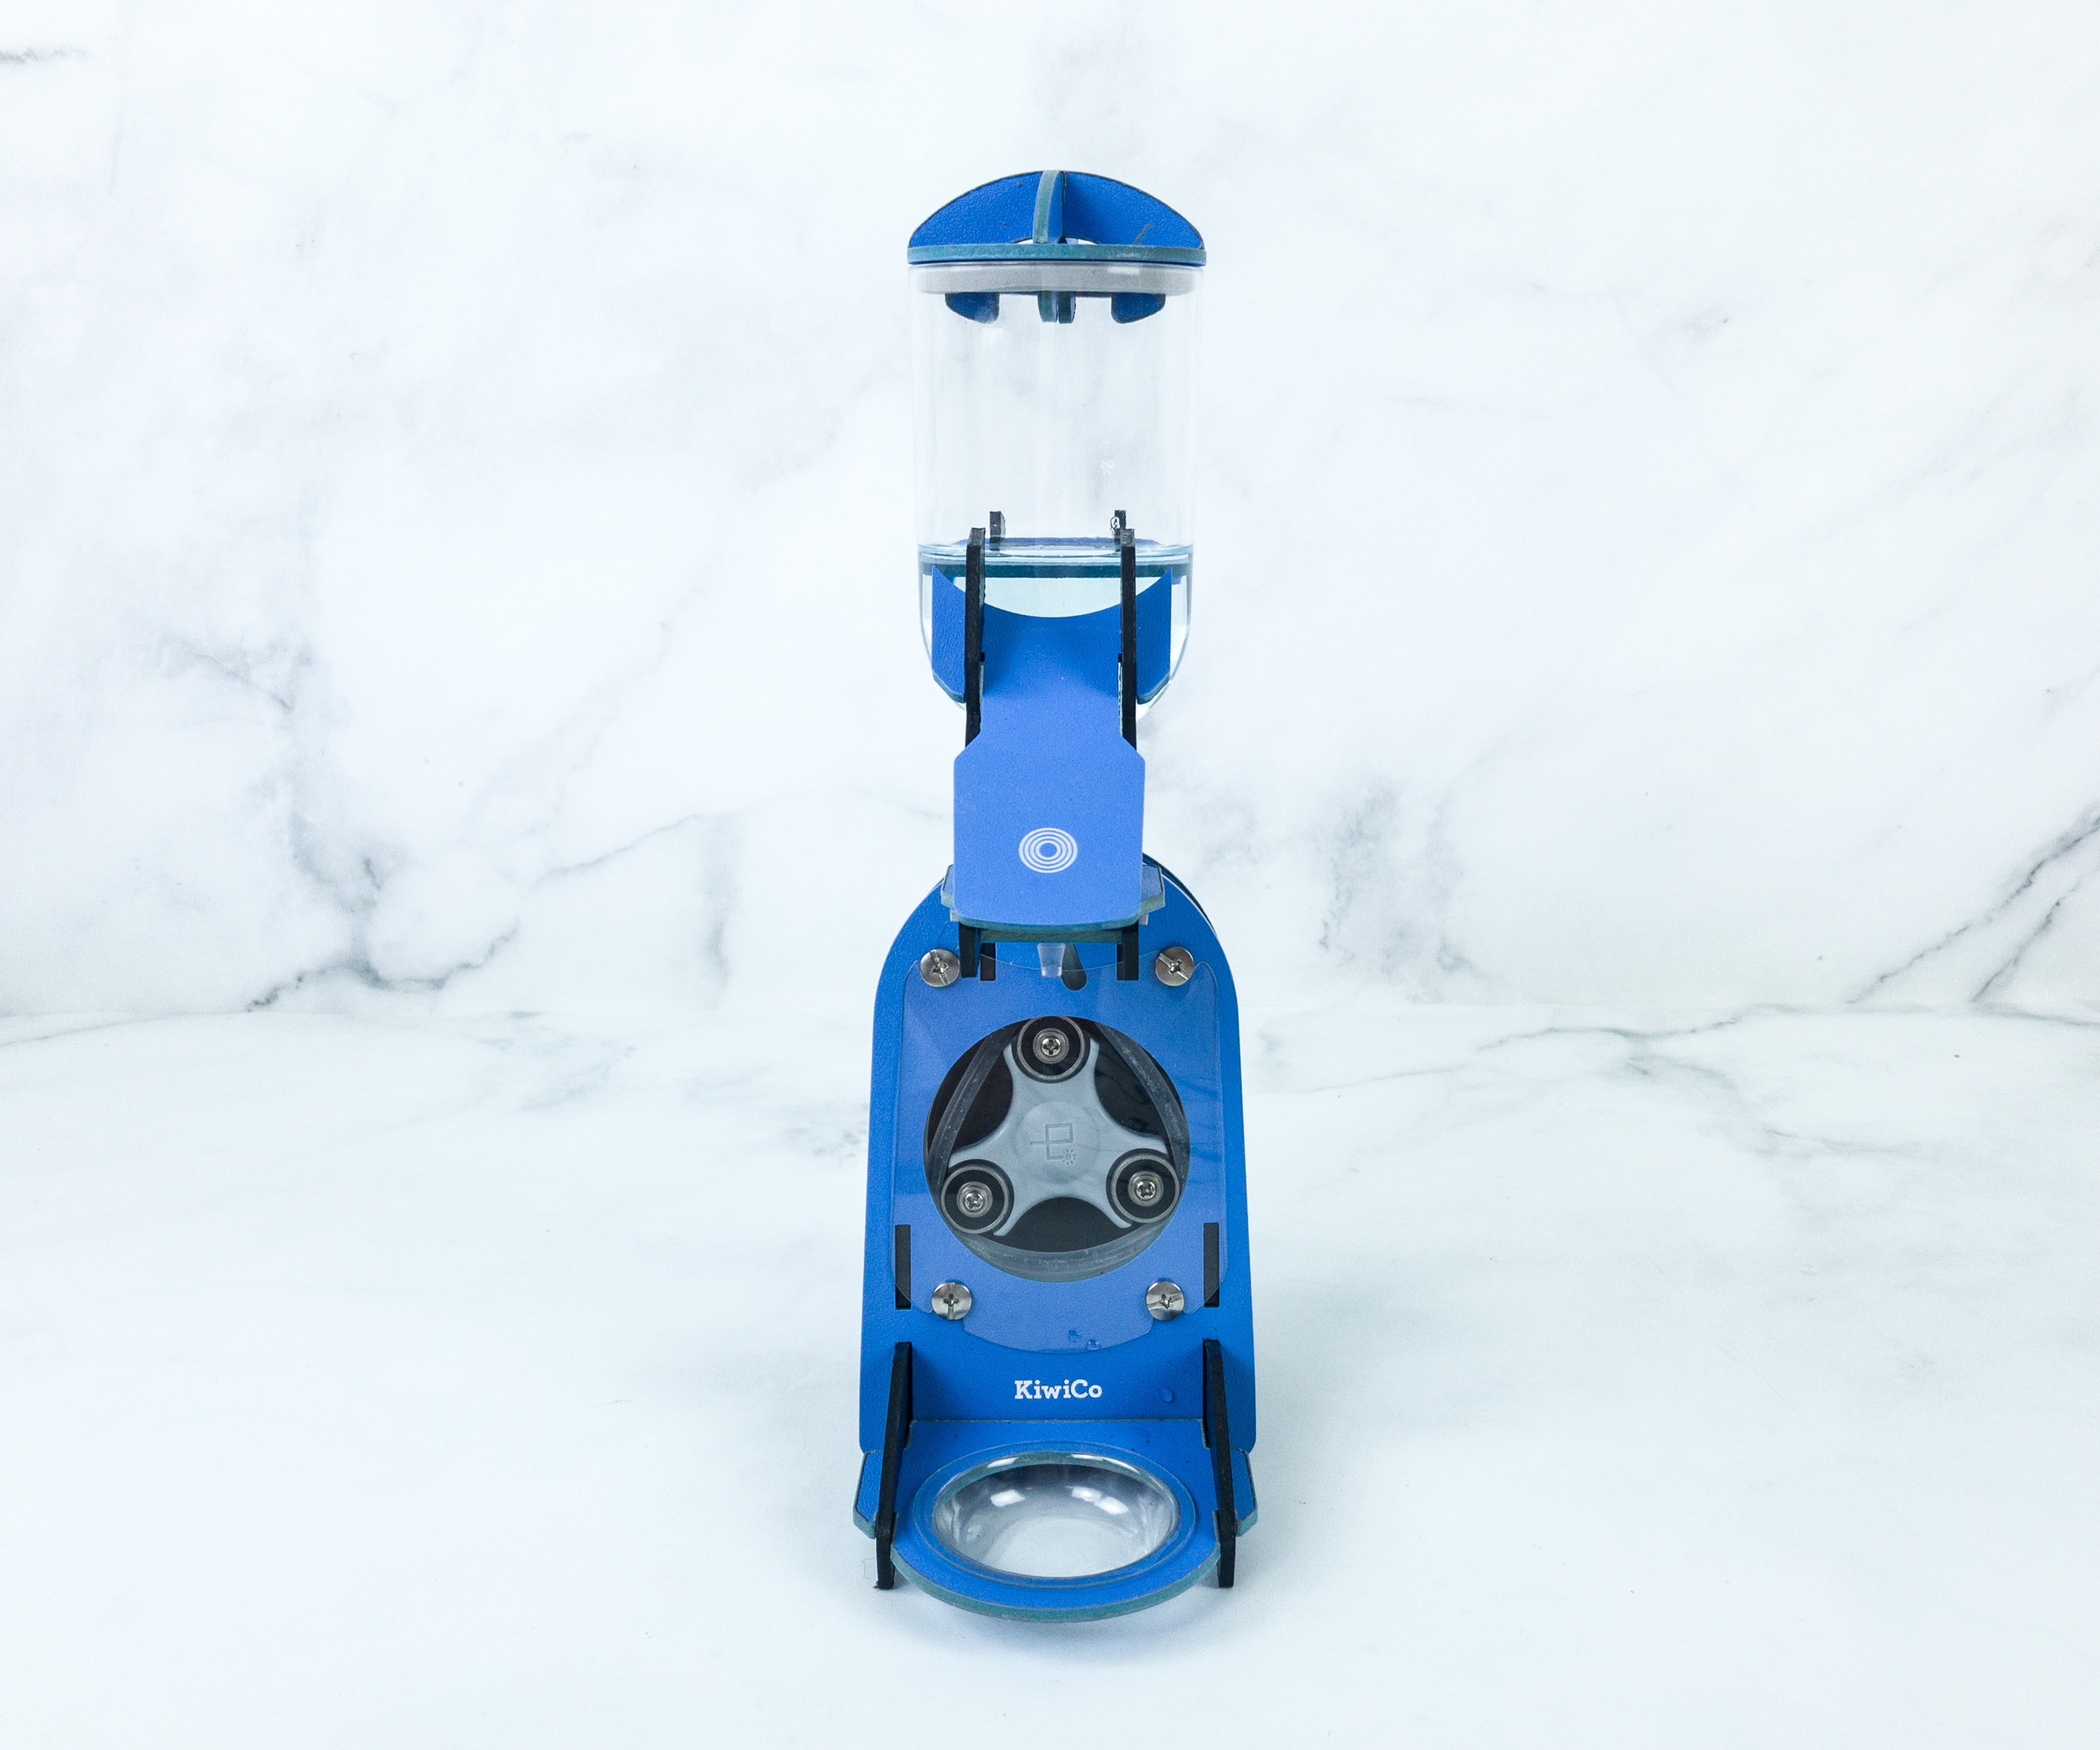
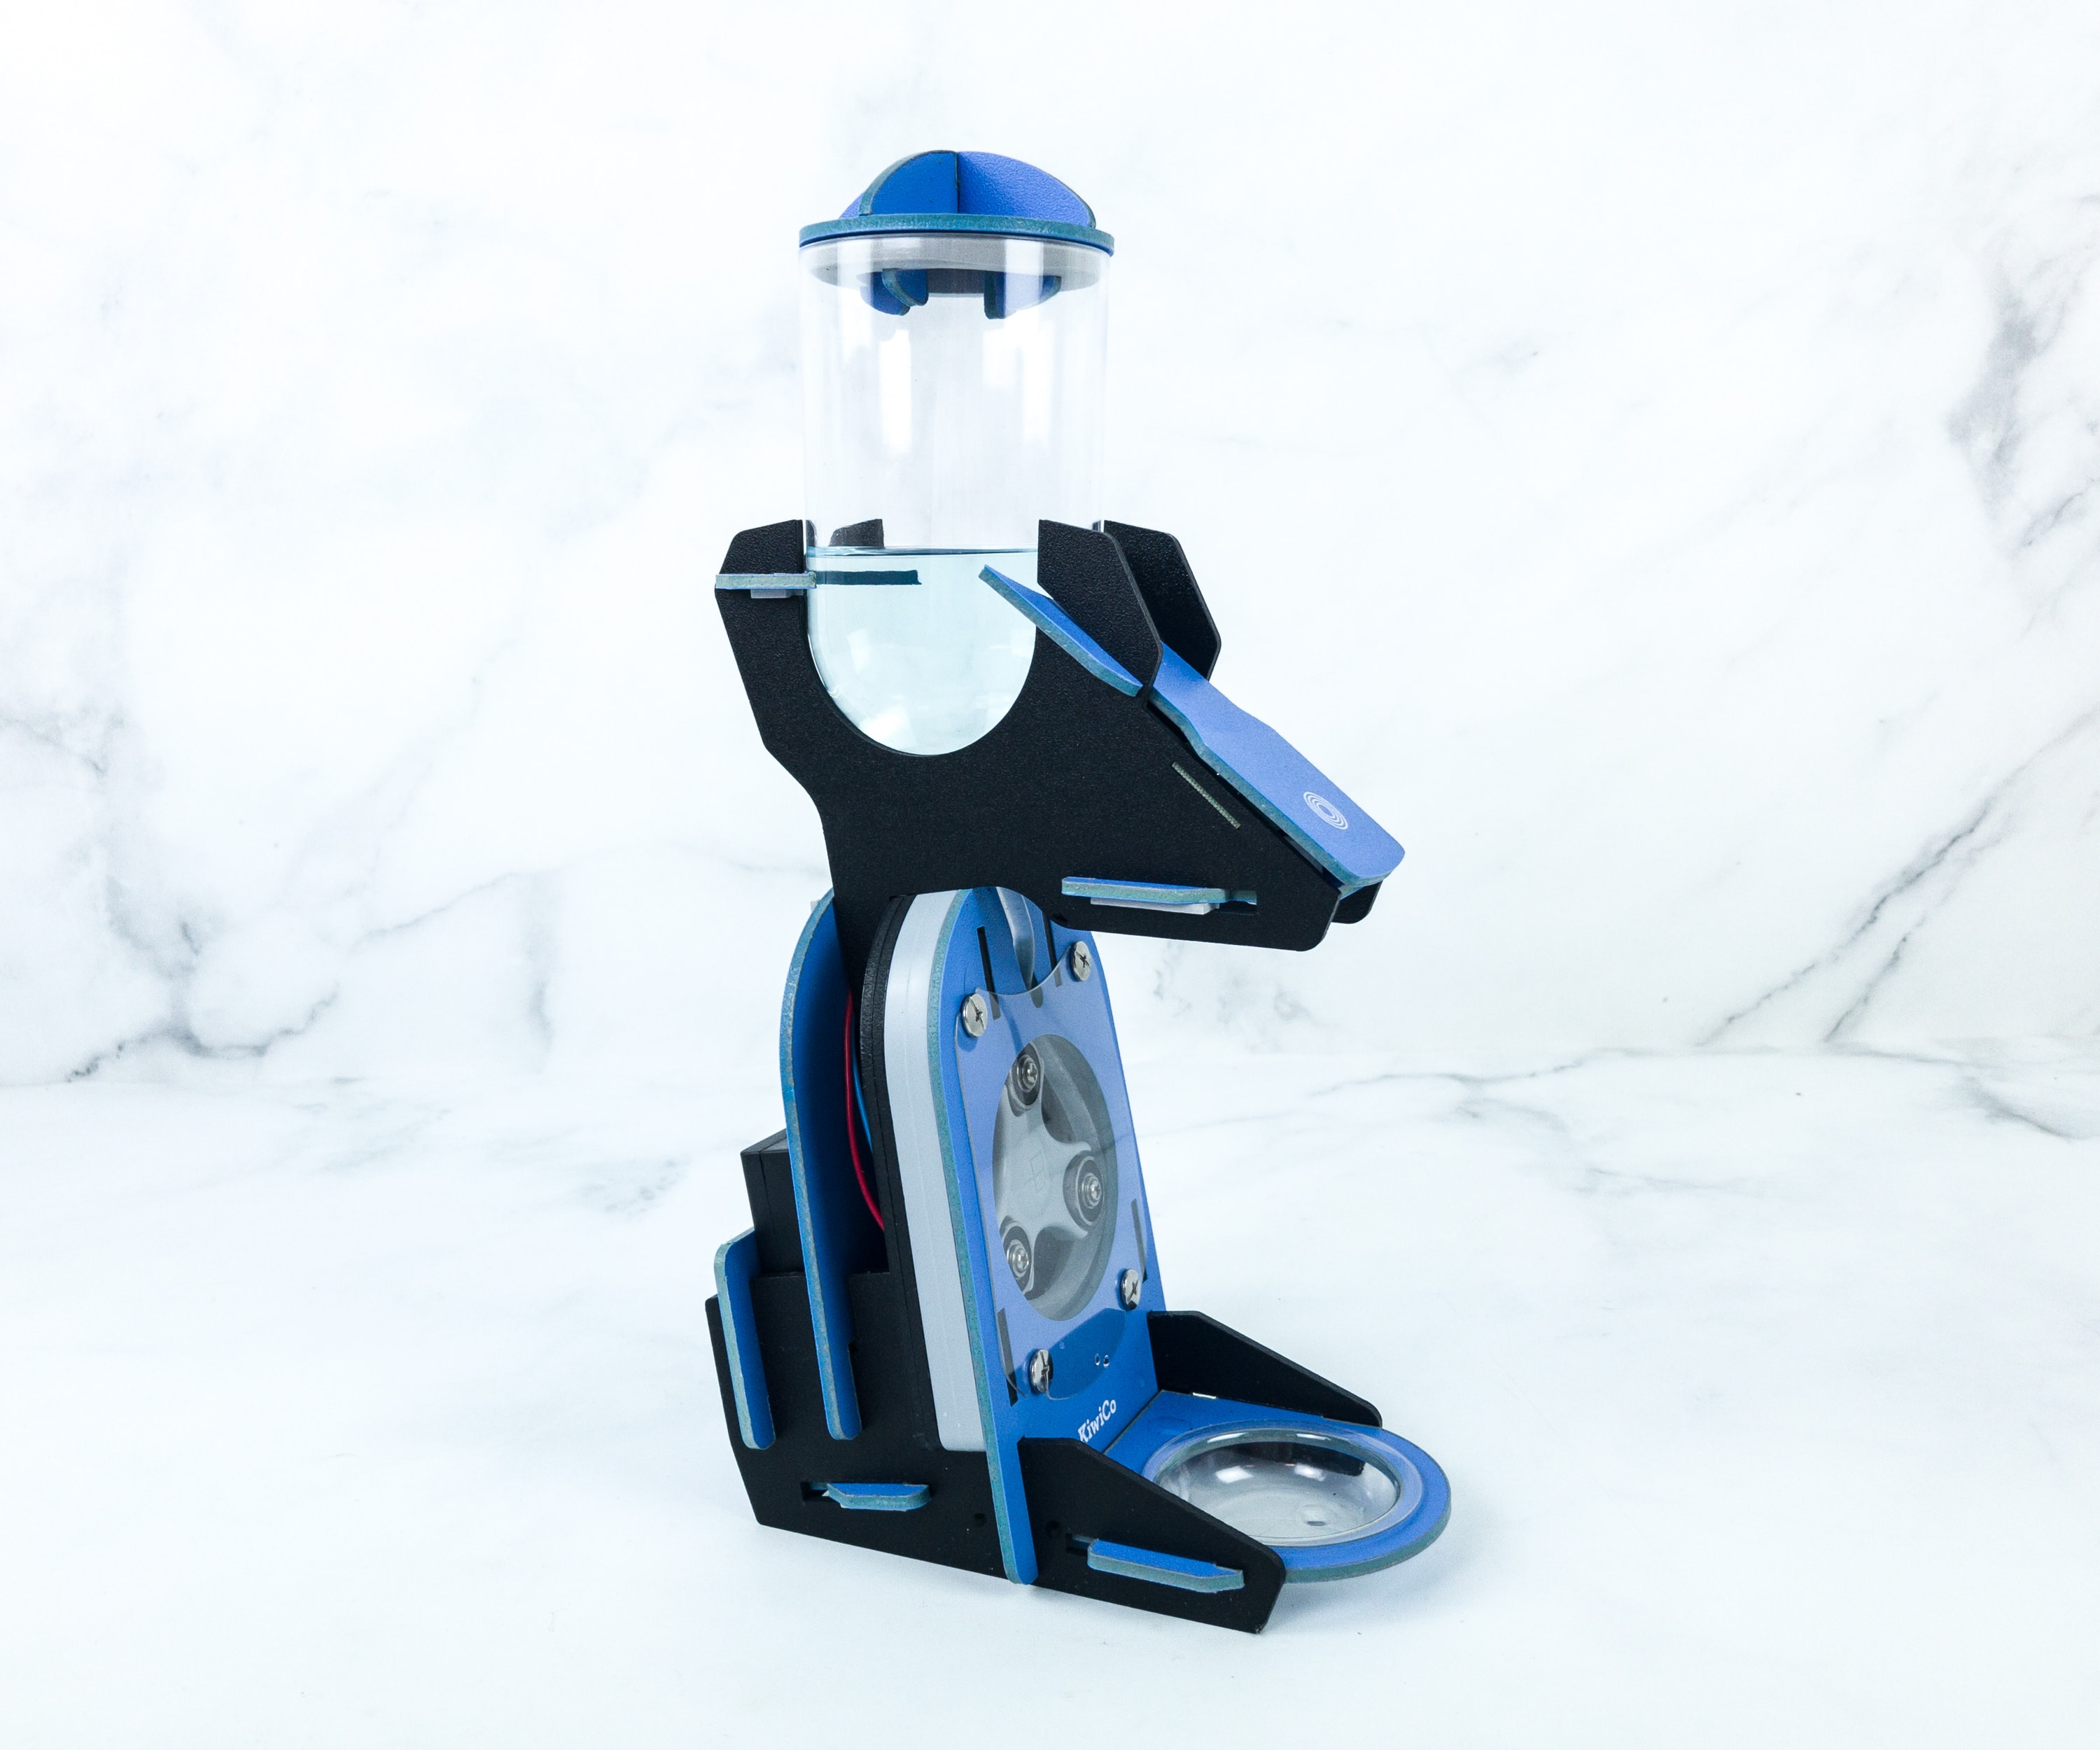
Part C in the booklet shows how the main structure of the soap dispenser should look like.
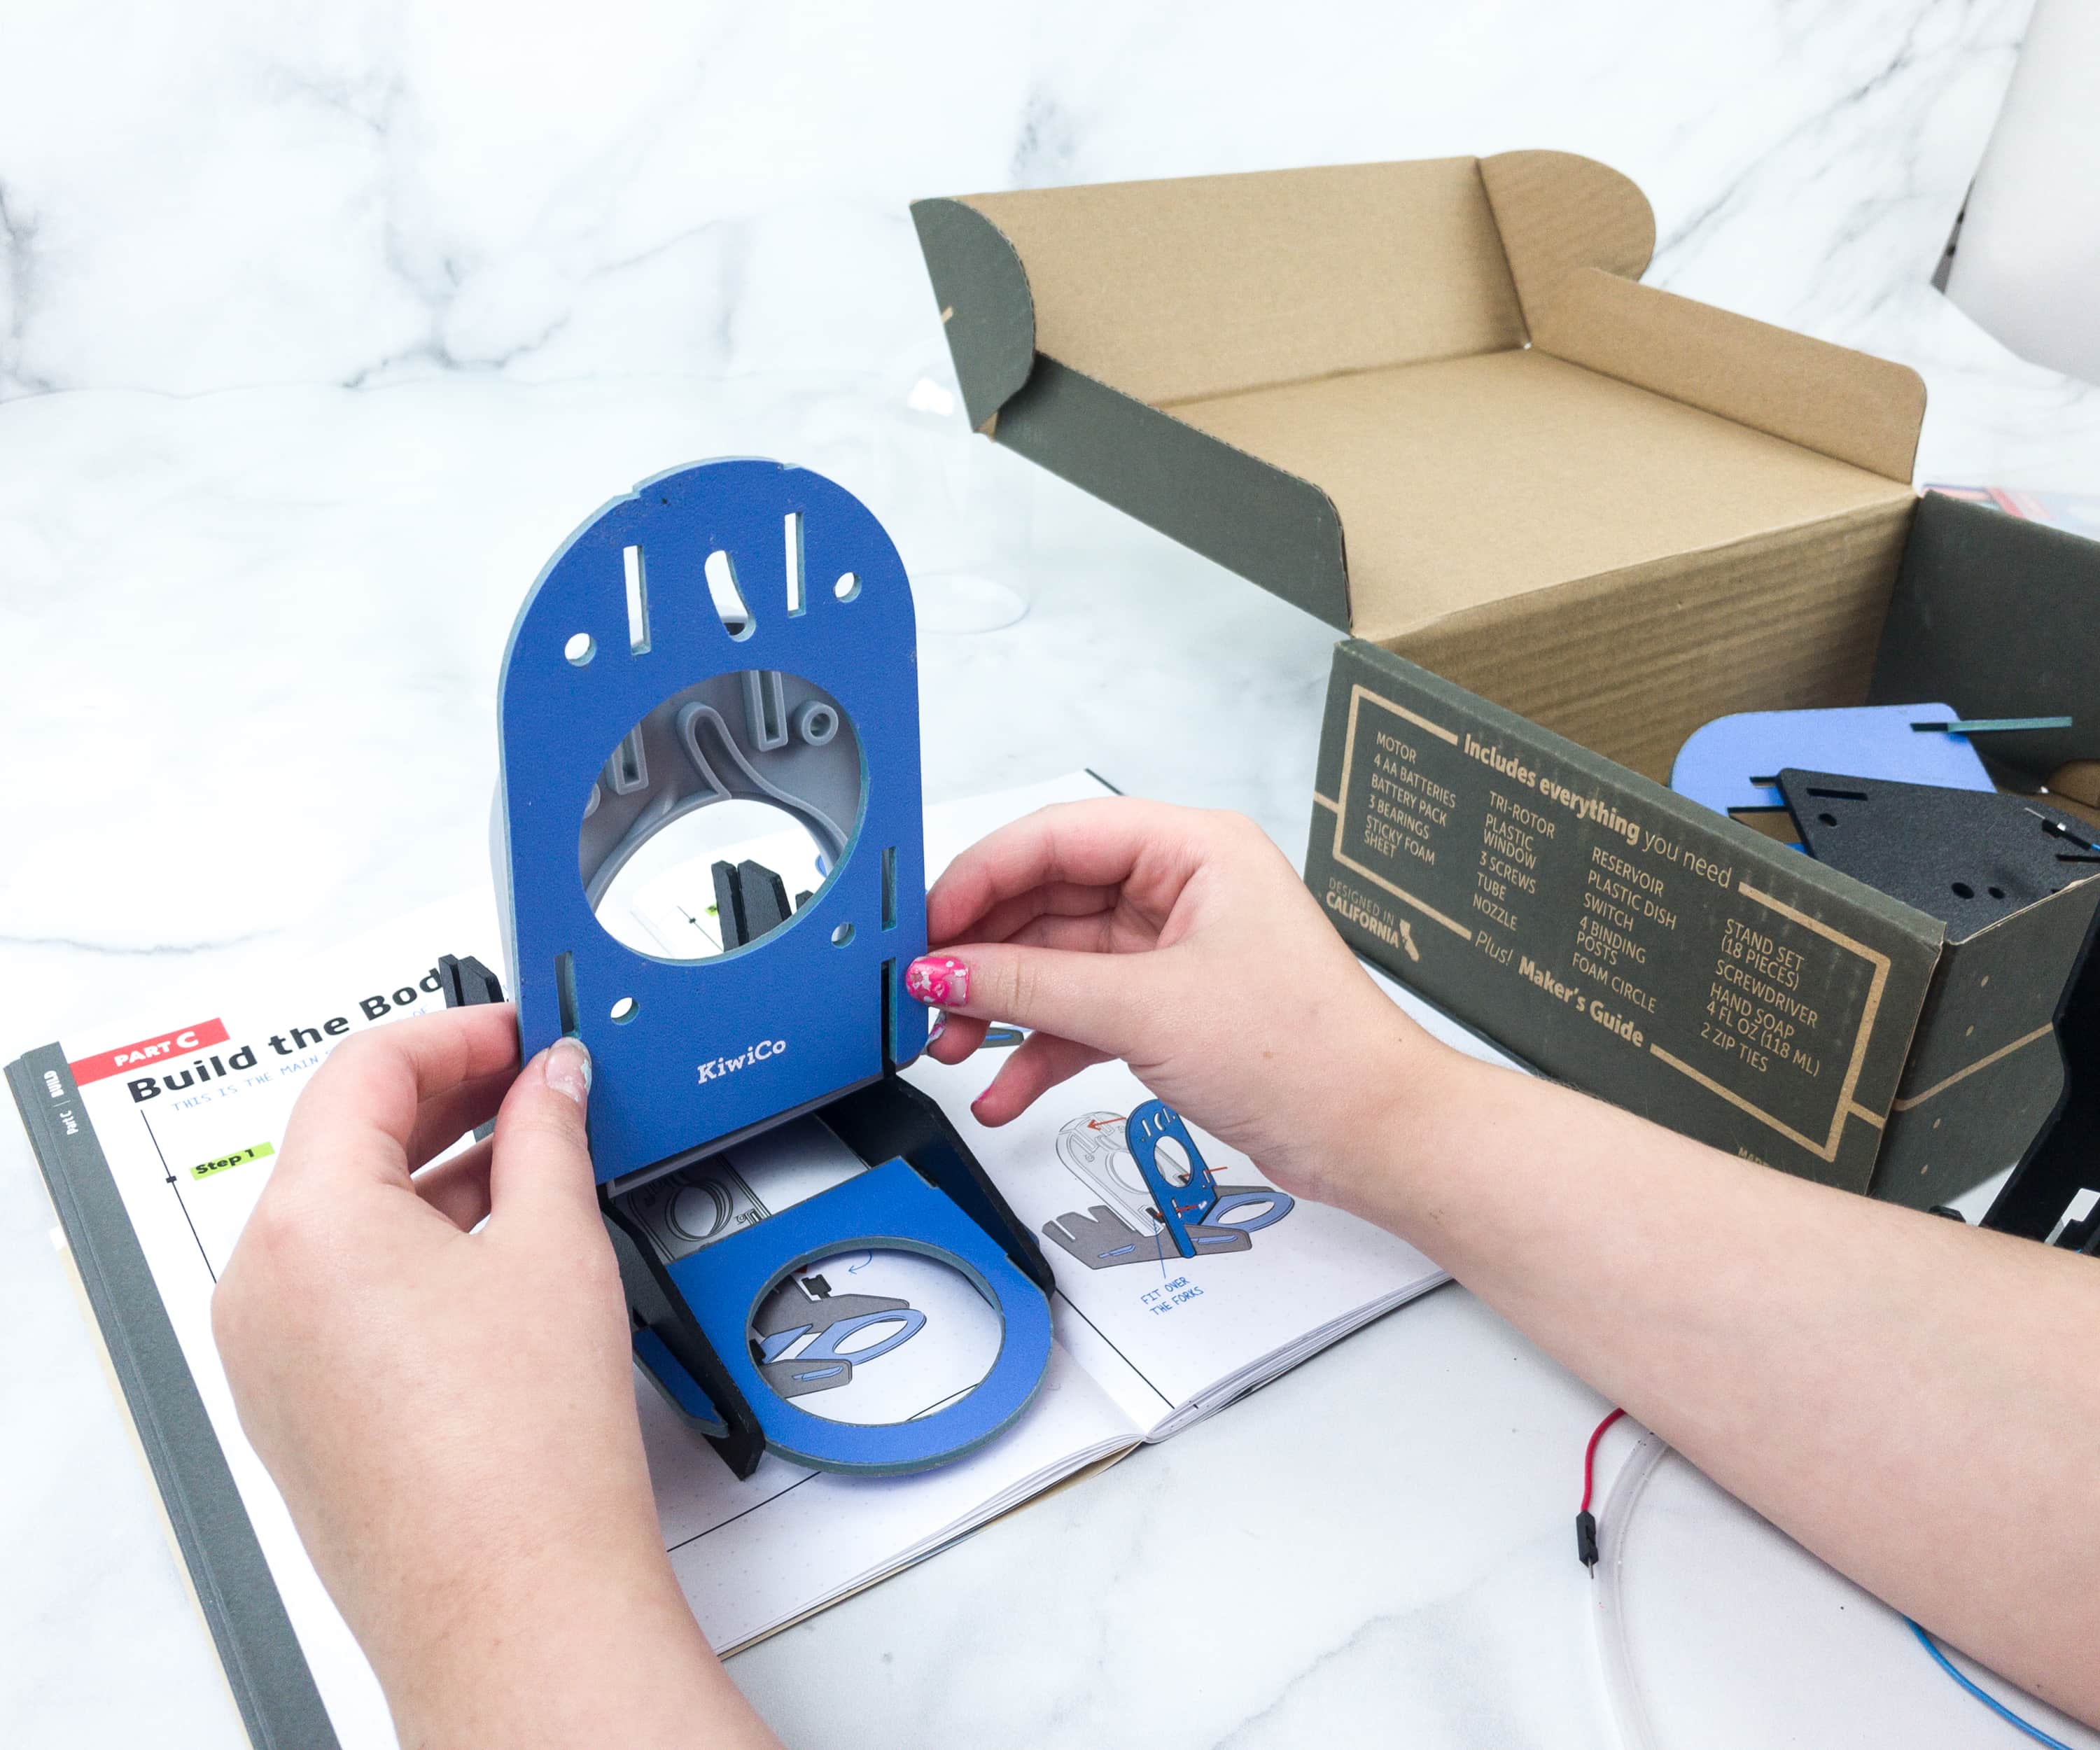
And now, it’s time to build the body. The whole project is like a puzzle that we need to solve!
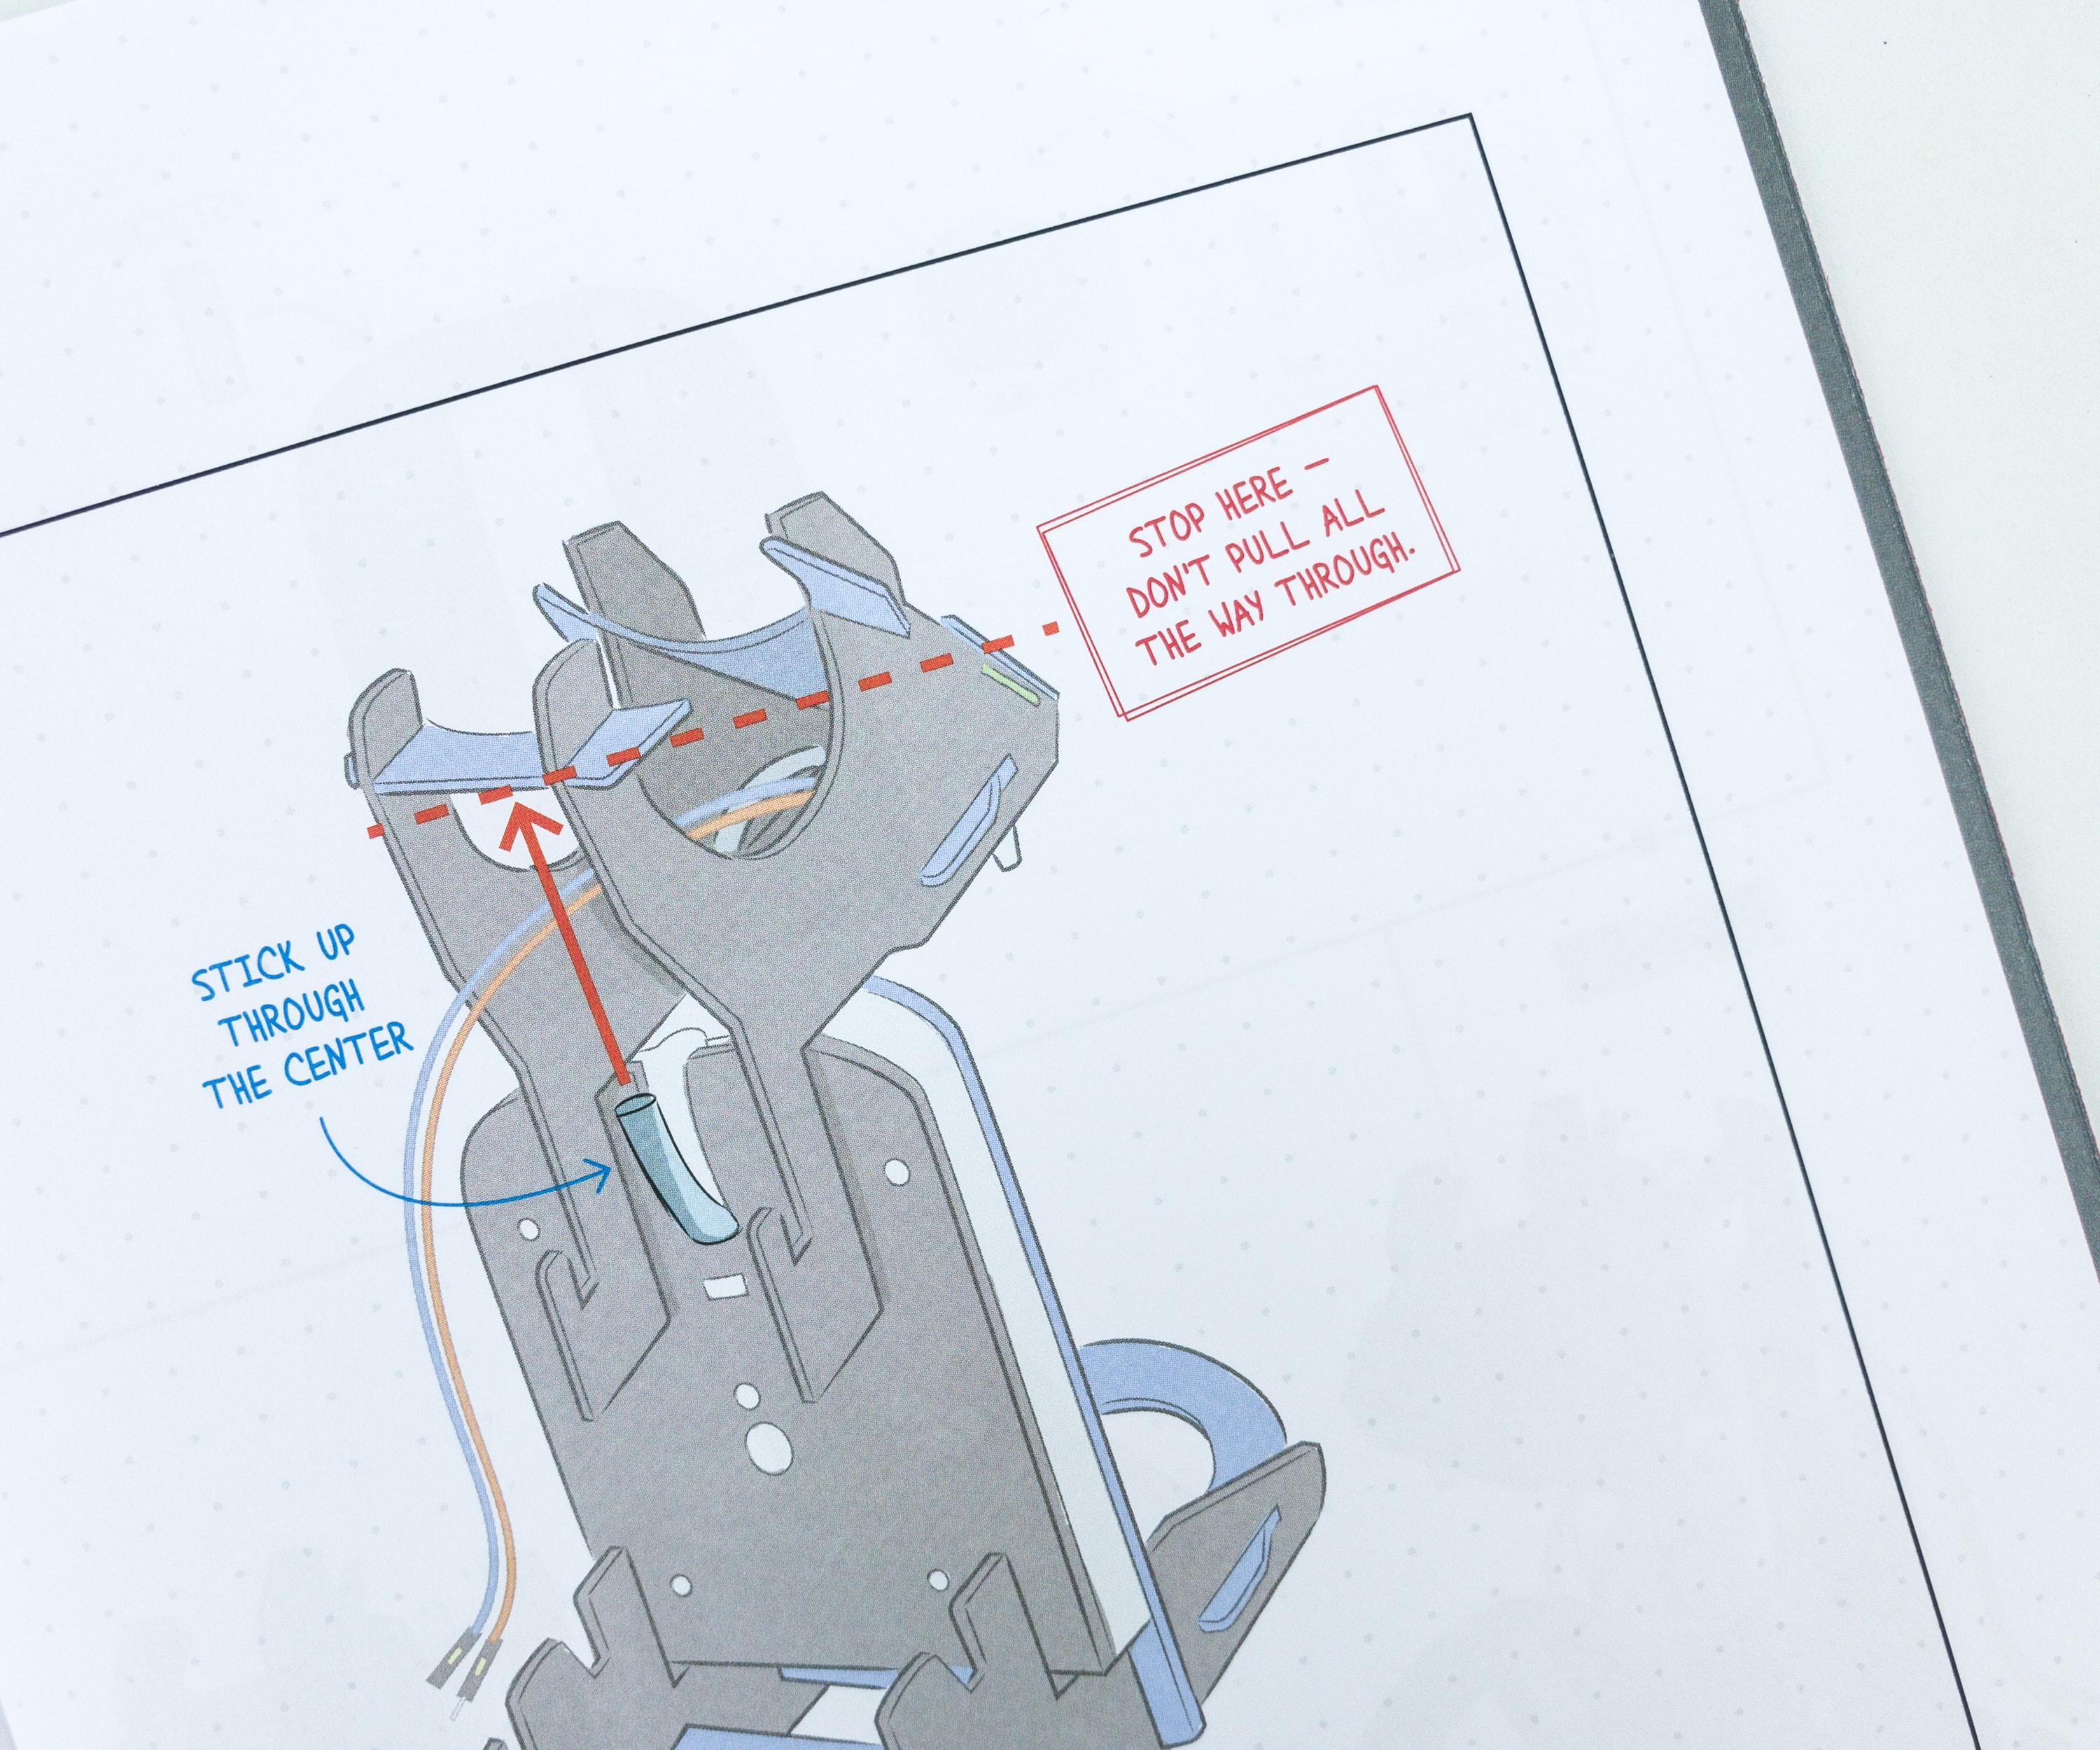
There are also important parts and tips on some steps. Follow this thoroughly and your project will be more efficient.
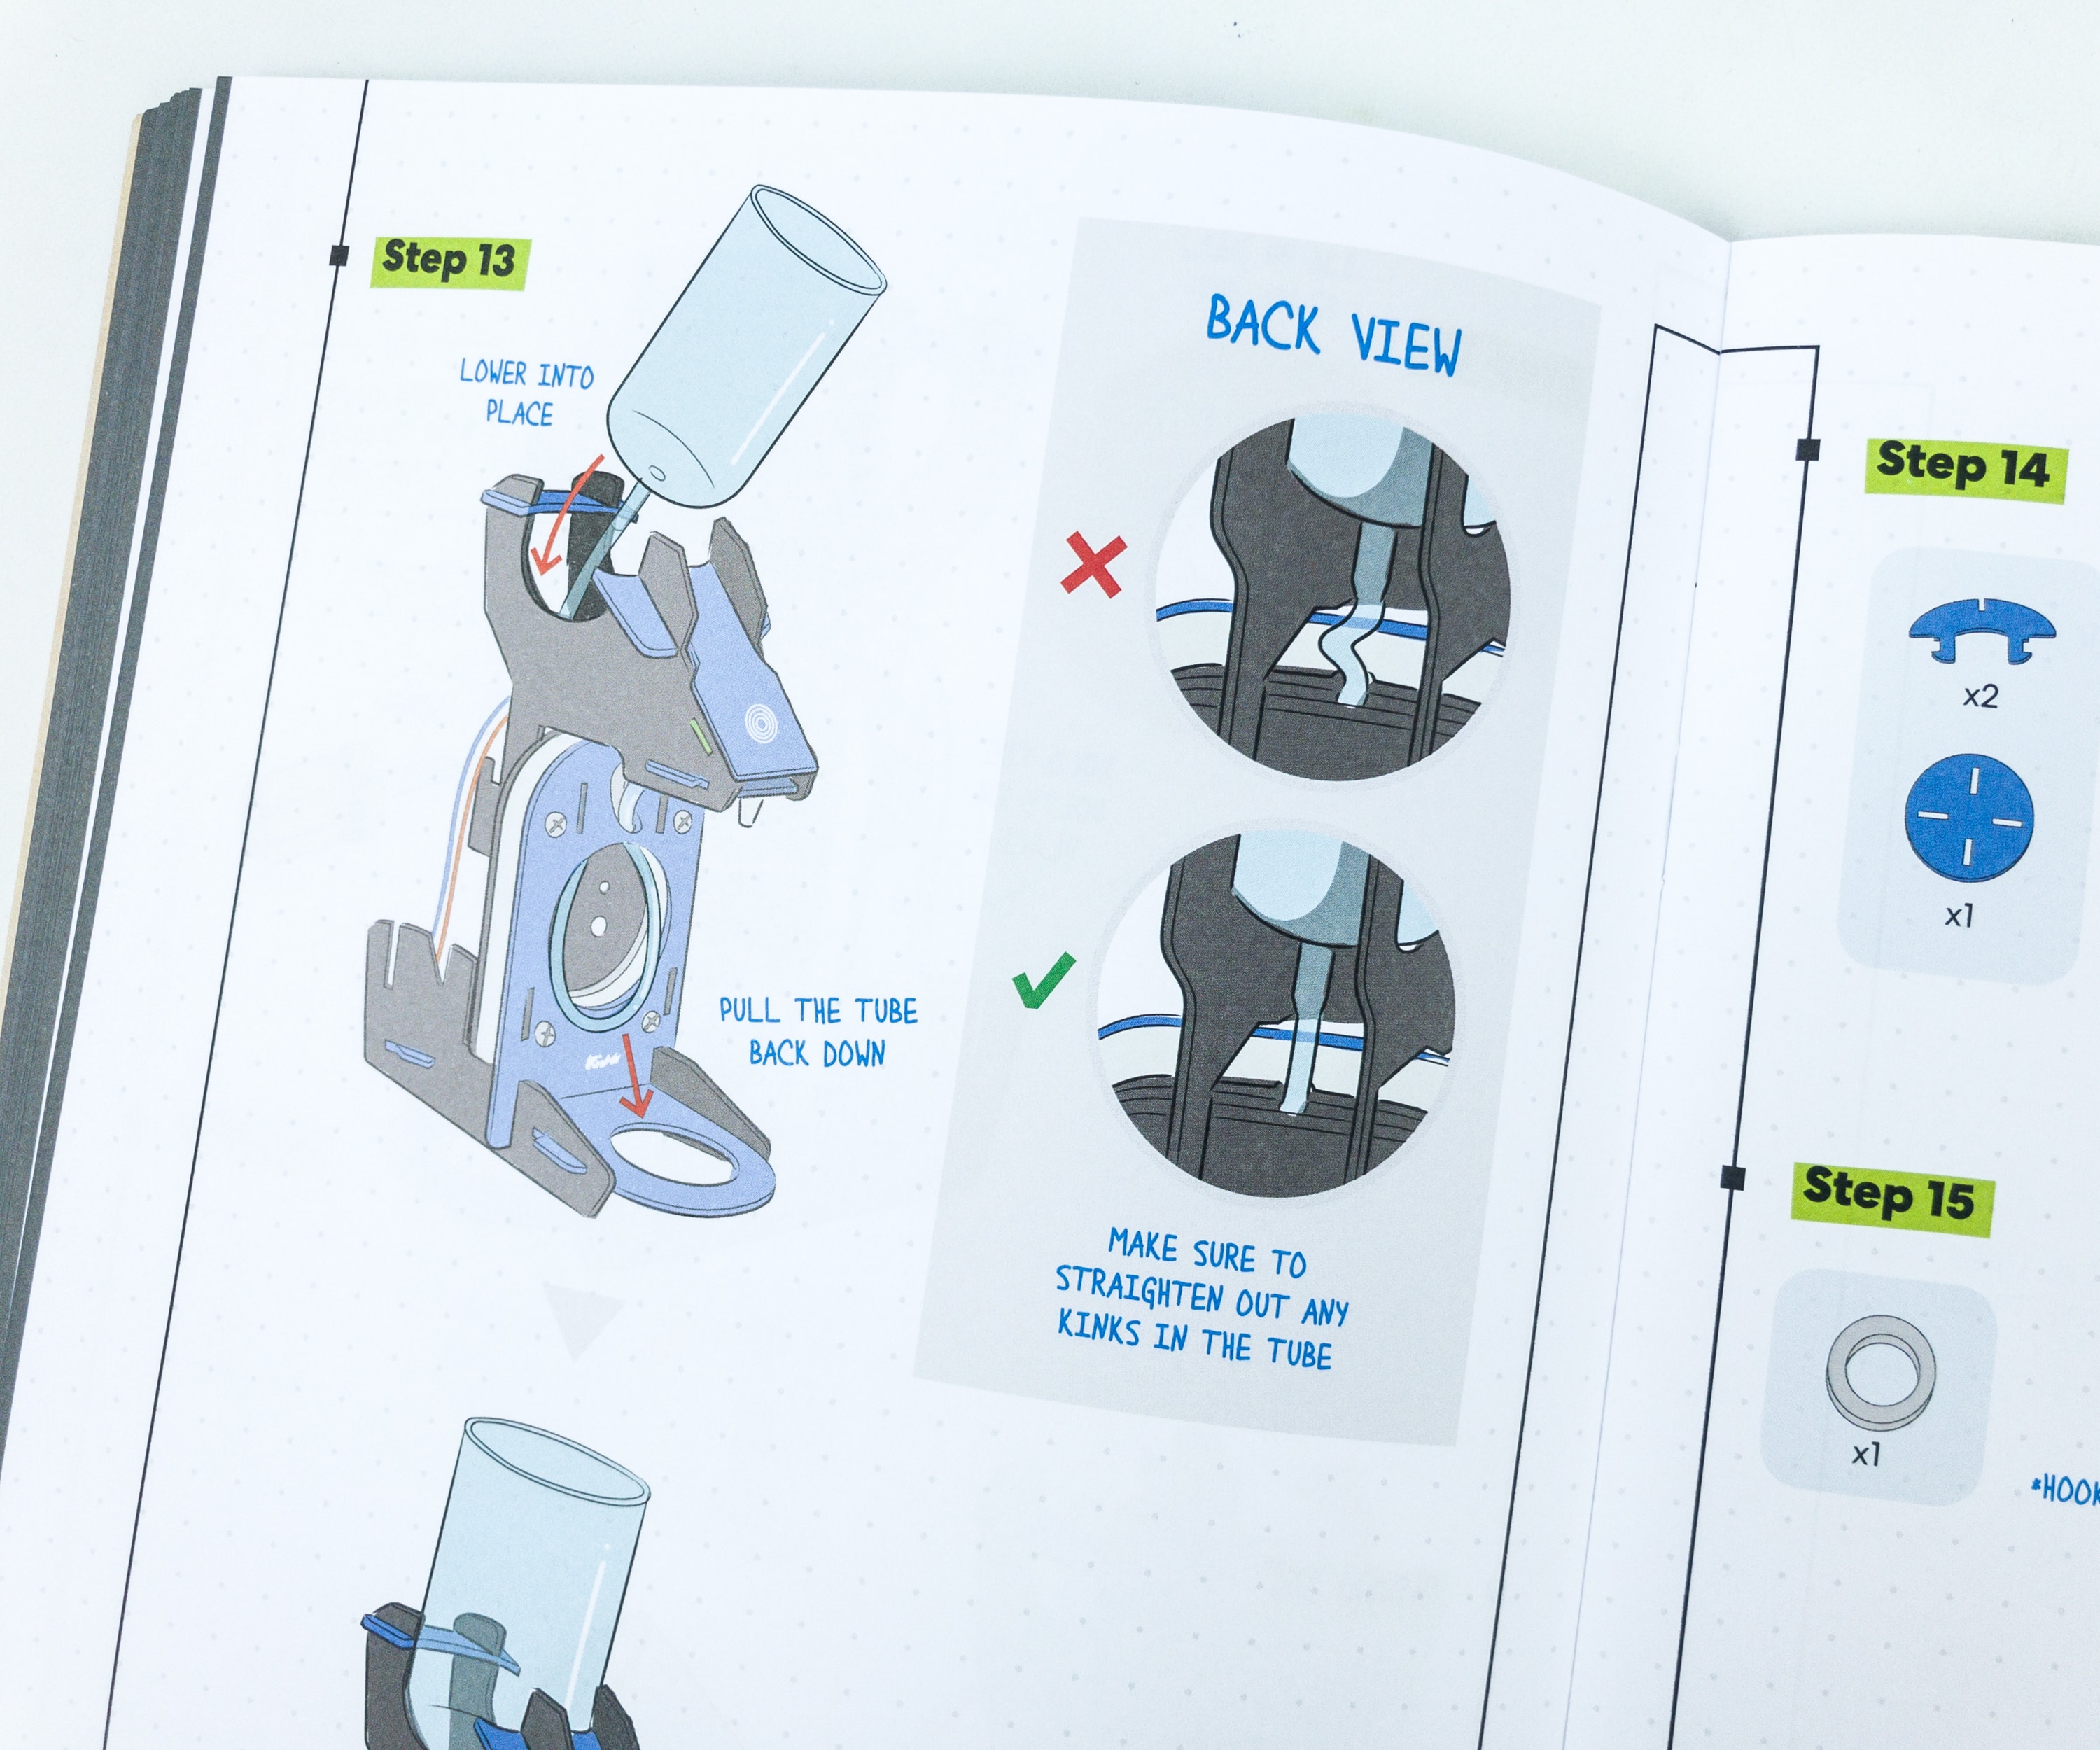
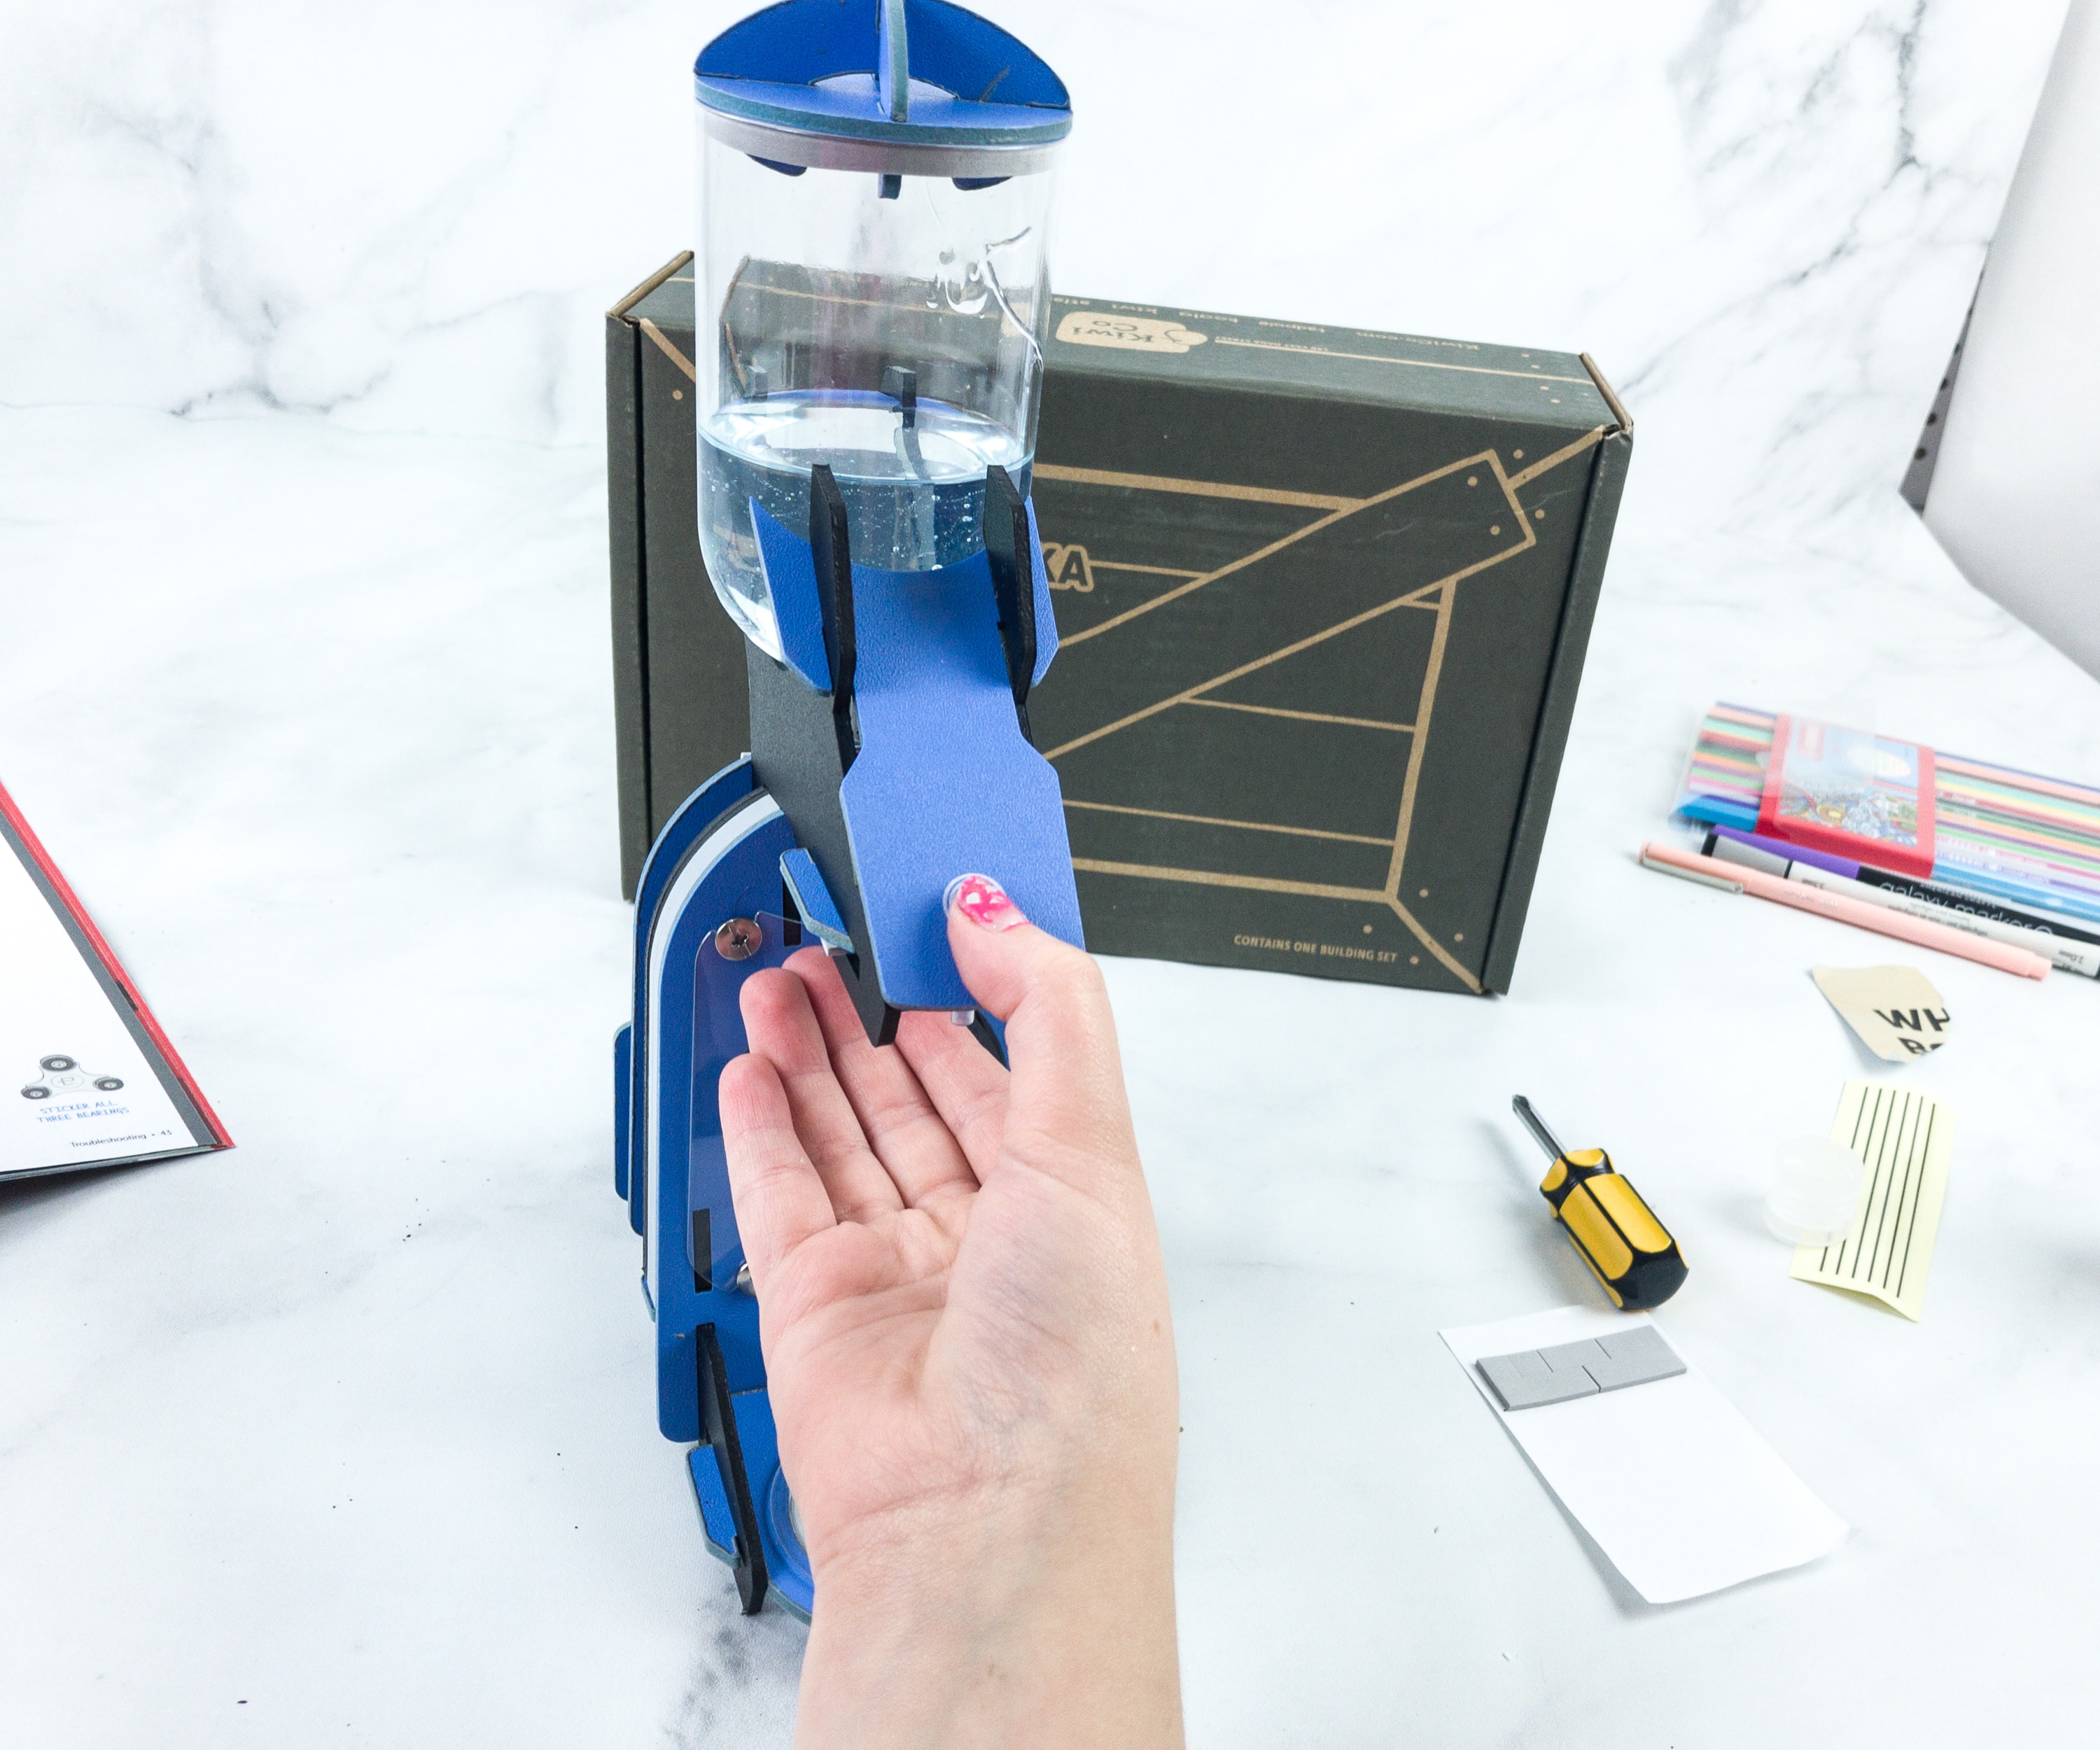
They also showed us how to put the reservoir properly through the illustrations. It’s important to straighten out any kinks in the tube so that the liquid soap can pass through it.

We made sure that everything’s on place, and screwed some parts really tight!
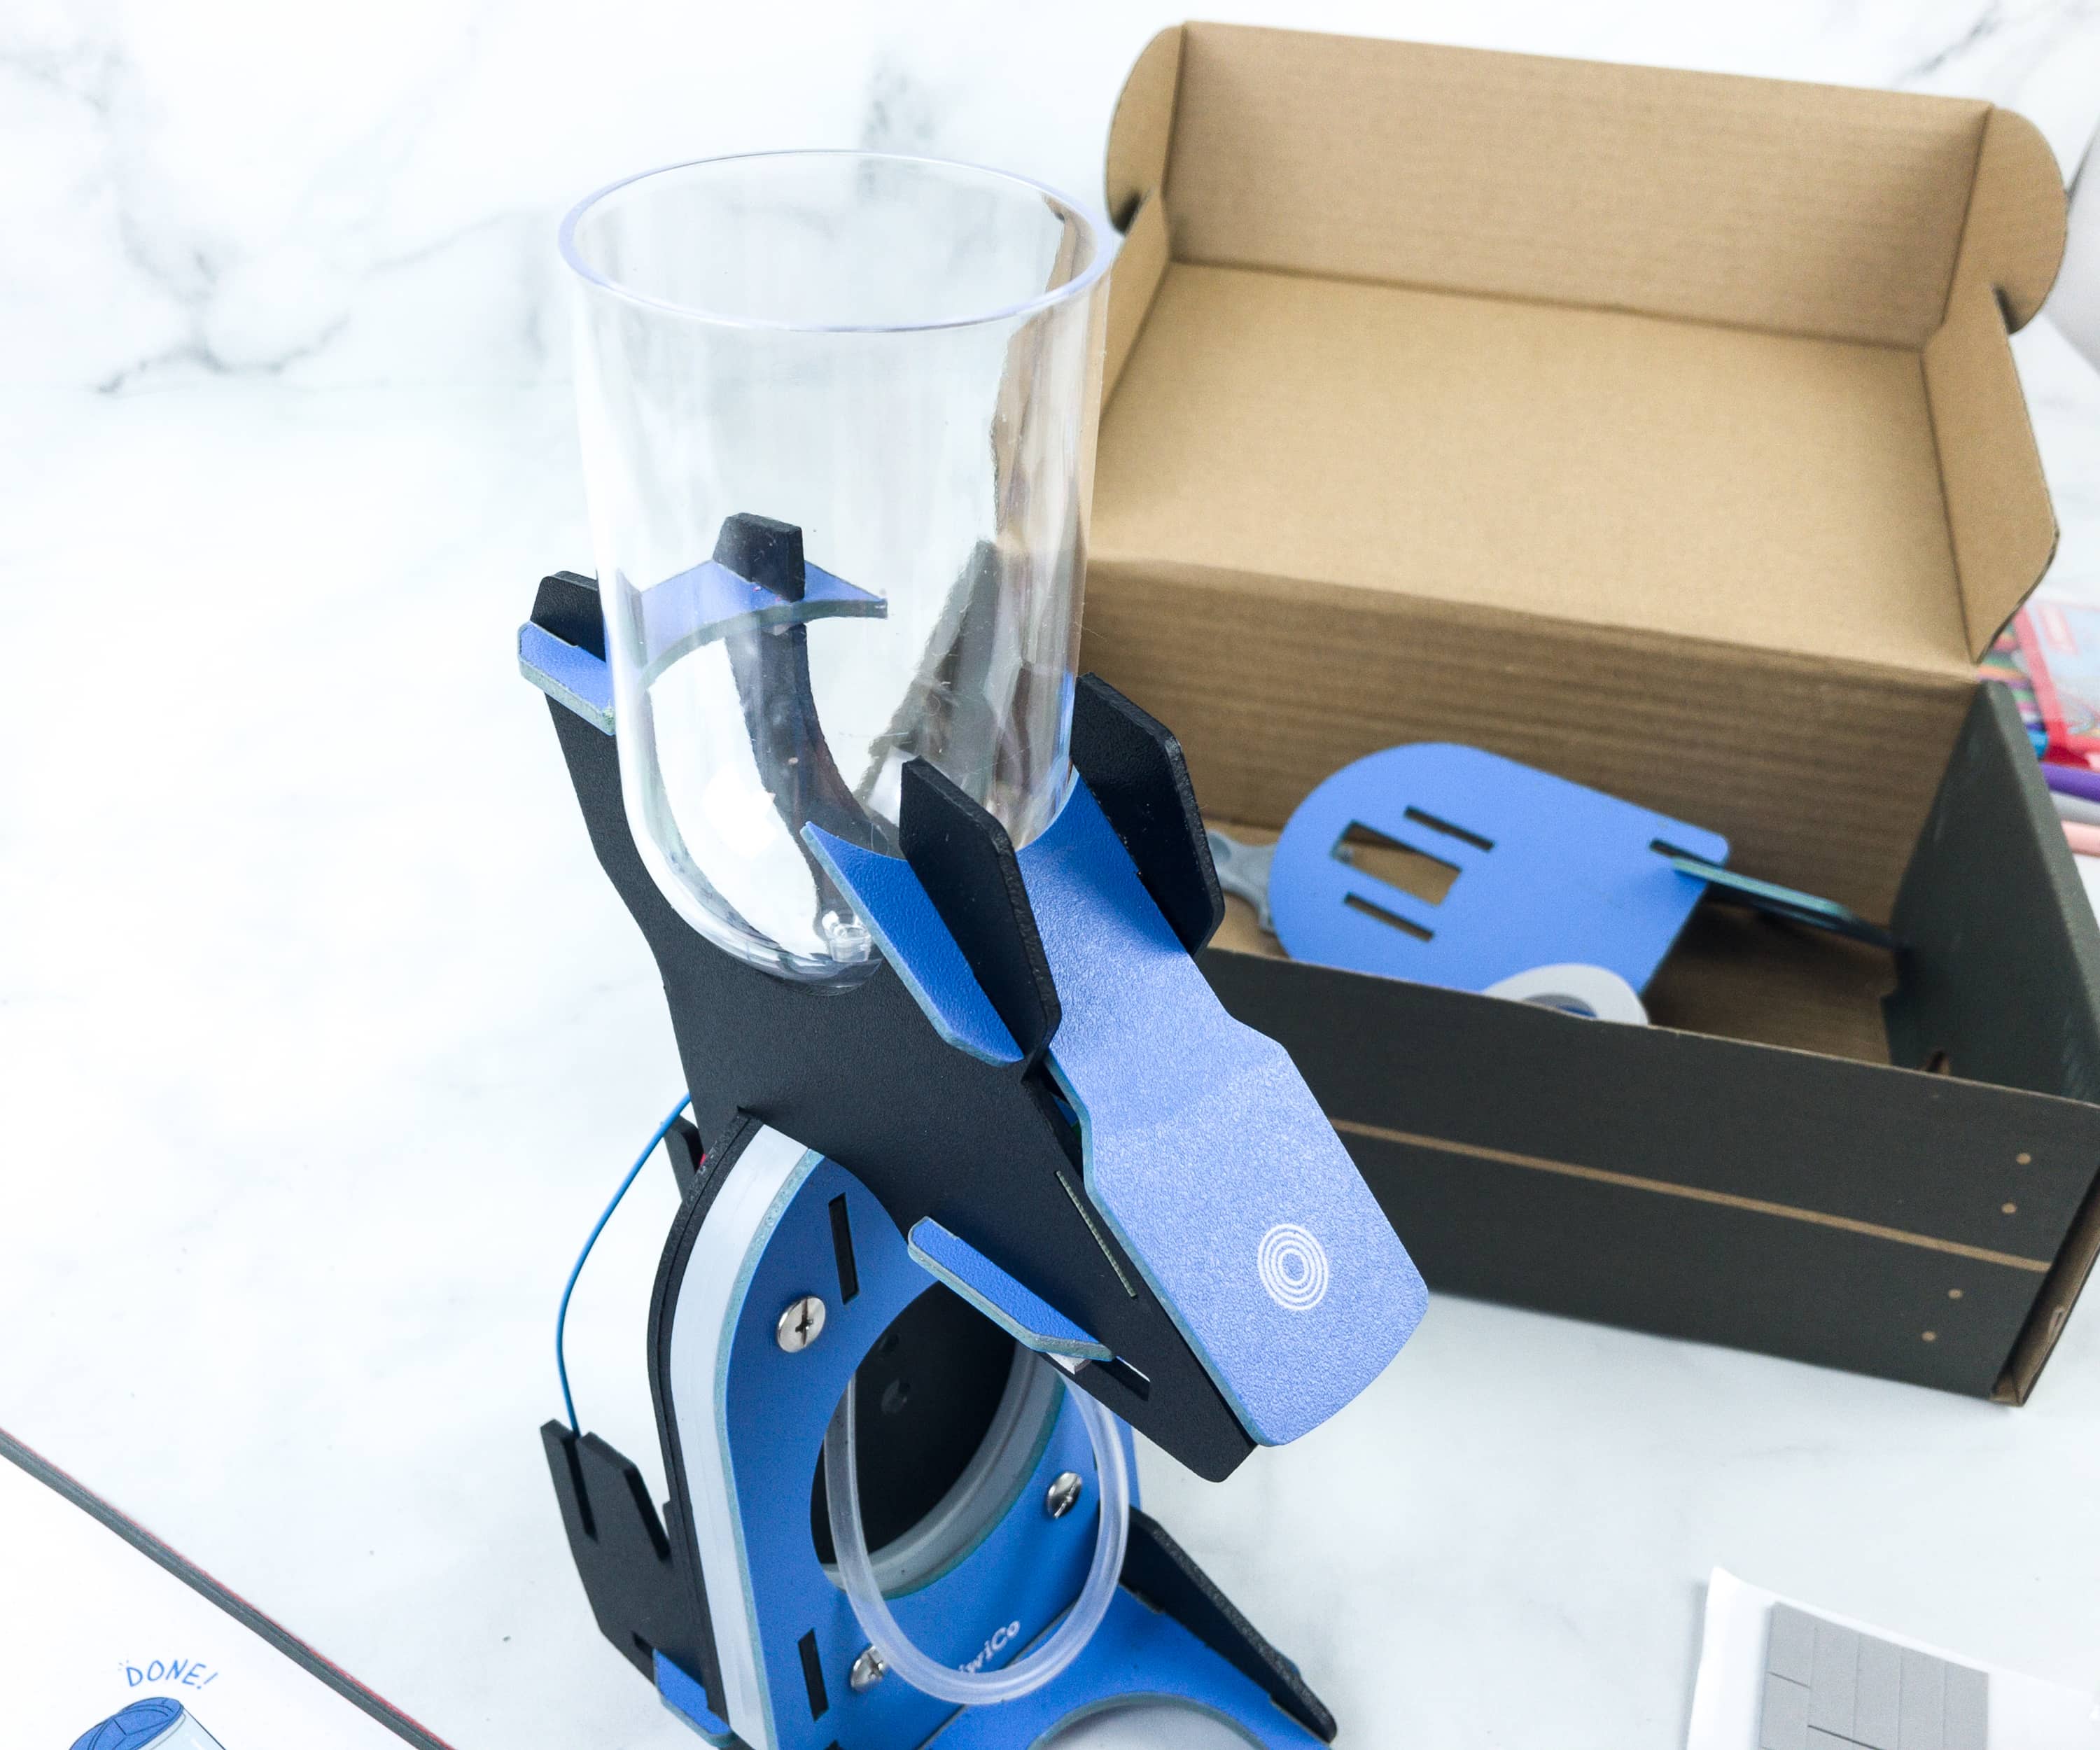
The reservoir’s on its place as well! We are now more excited to see how this whole project will turn out!
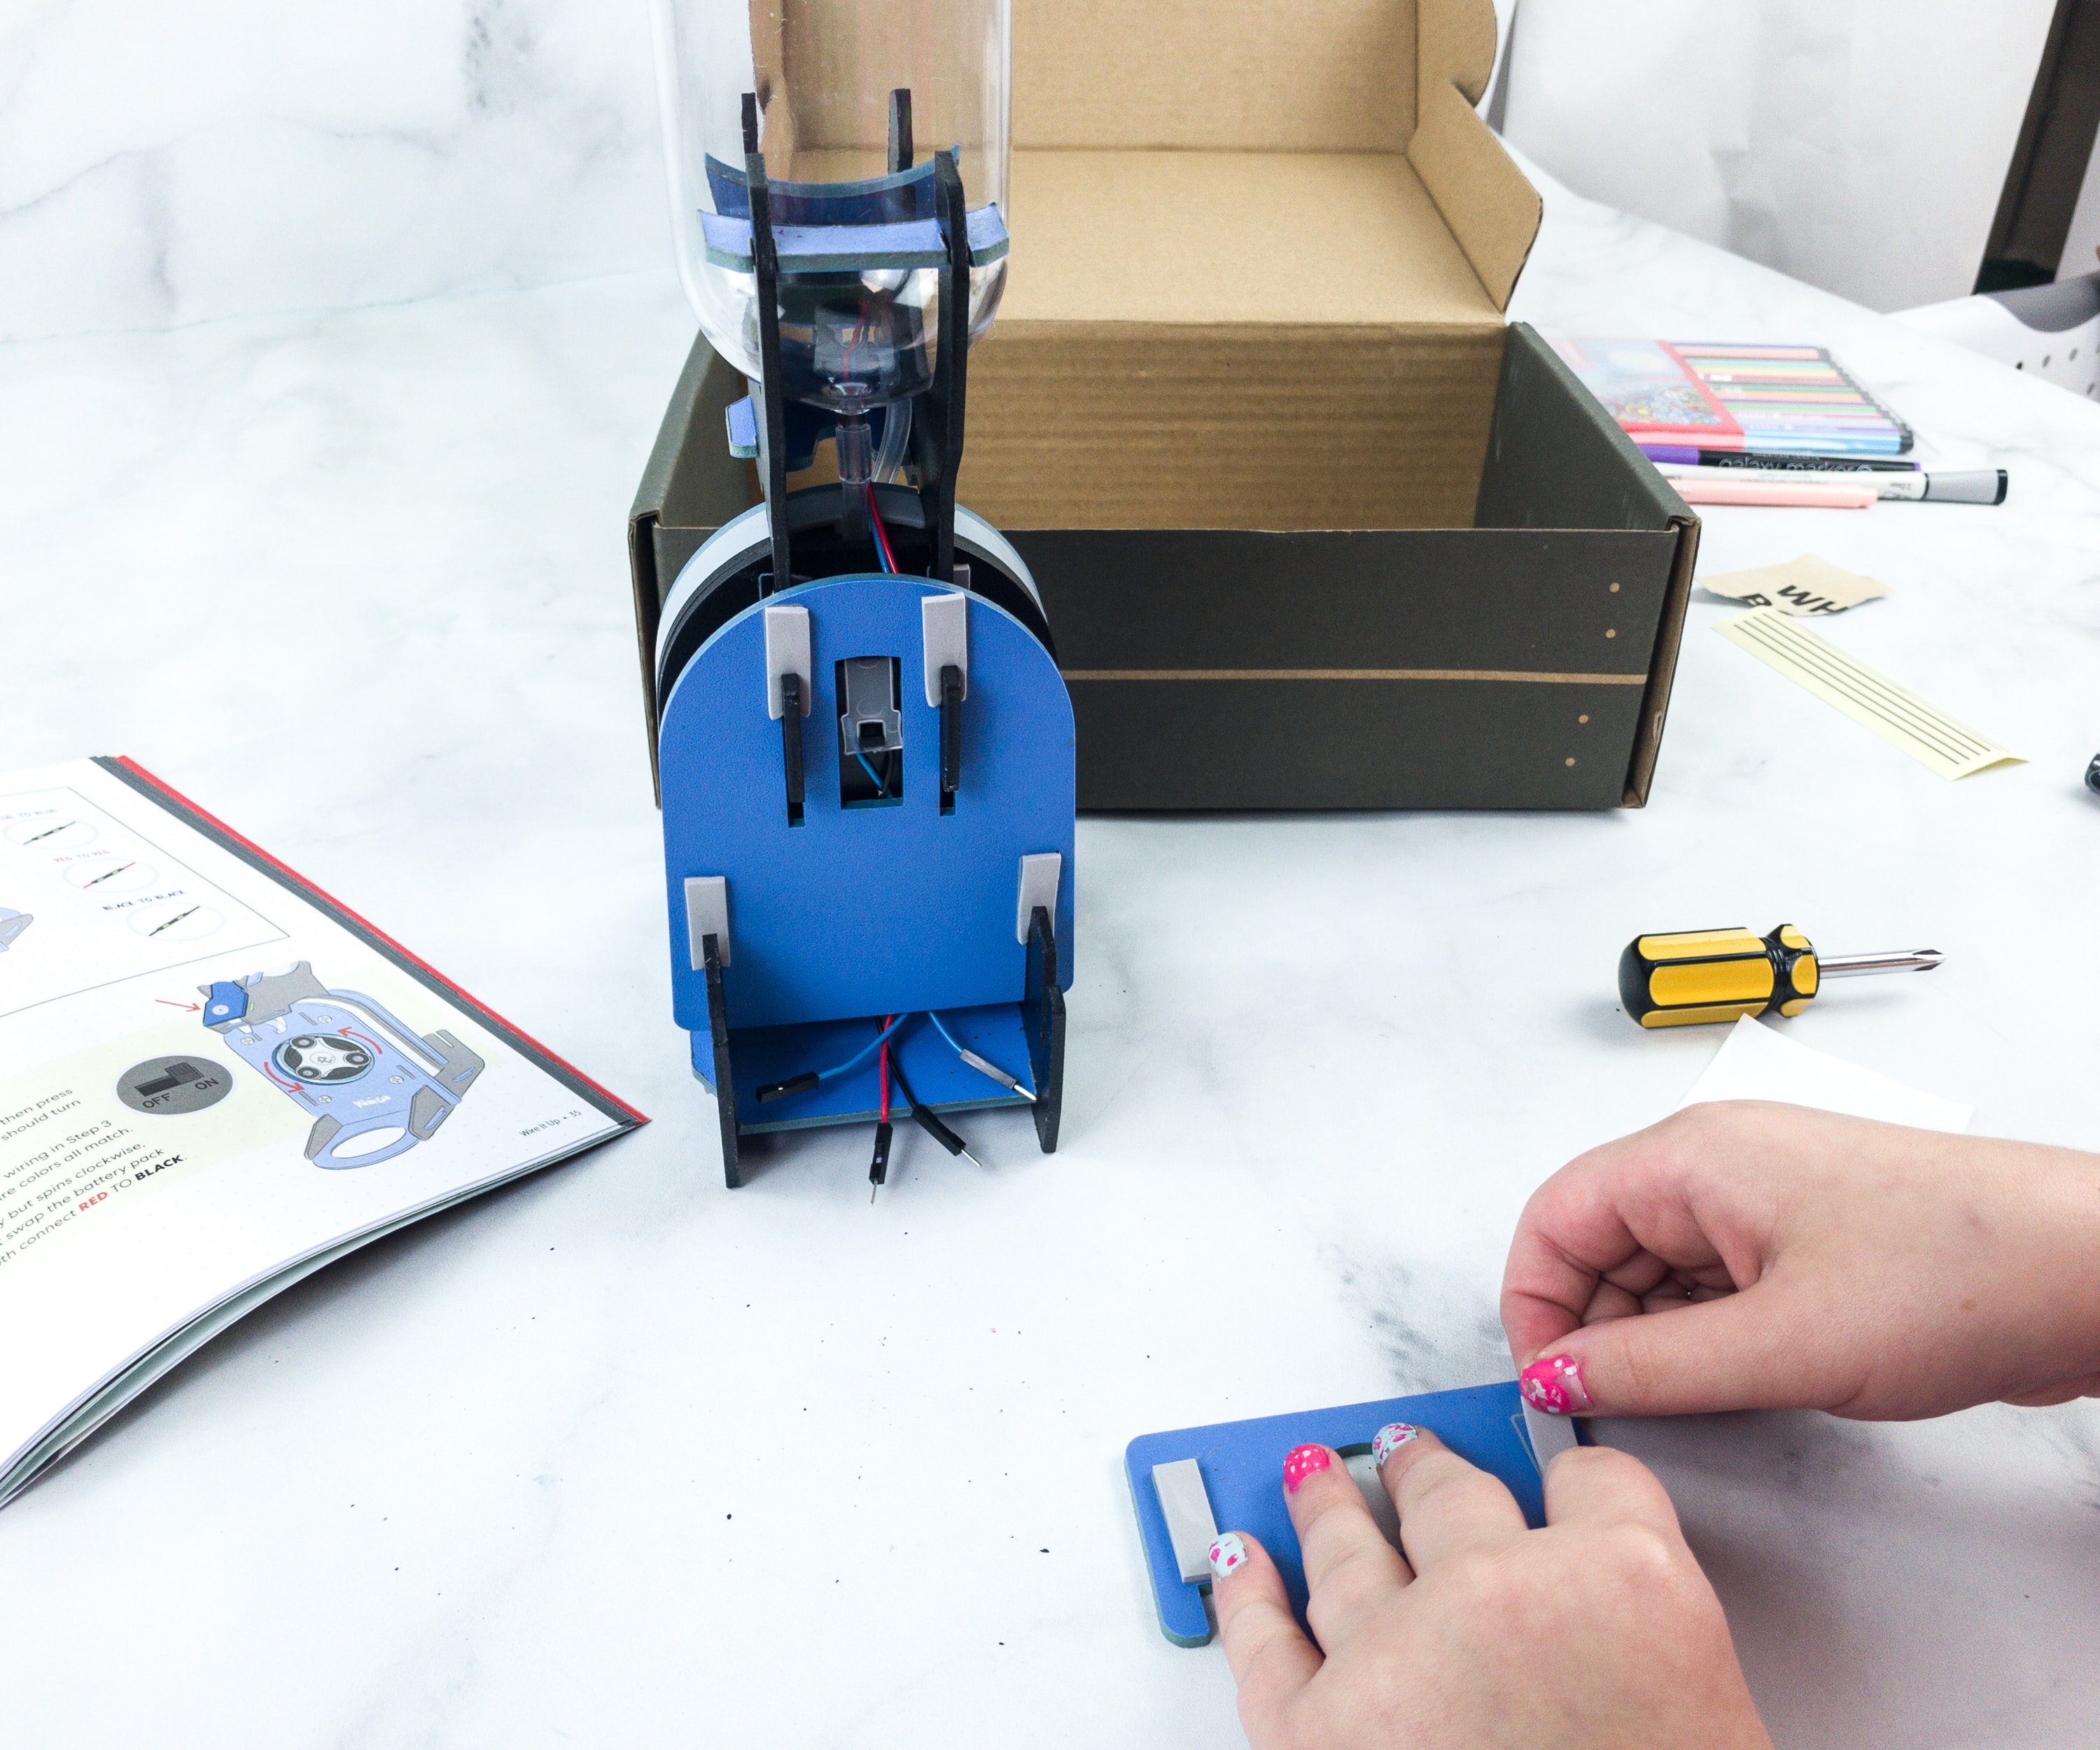
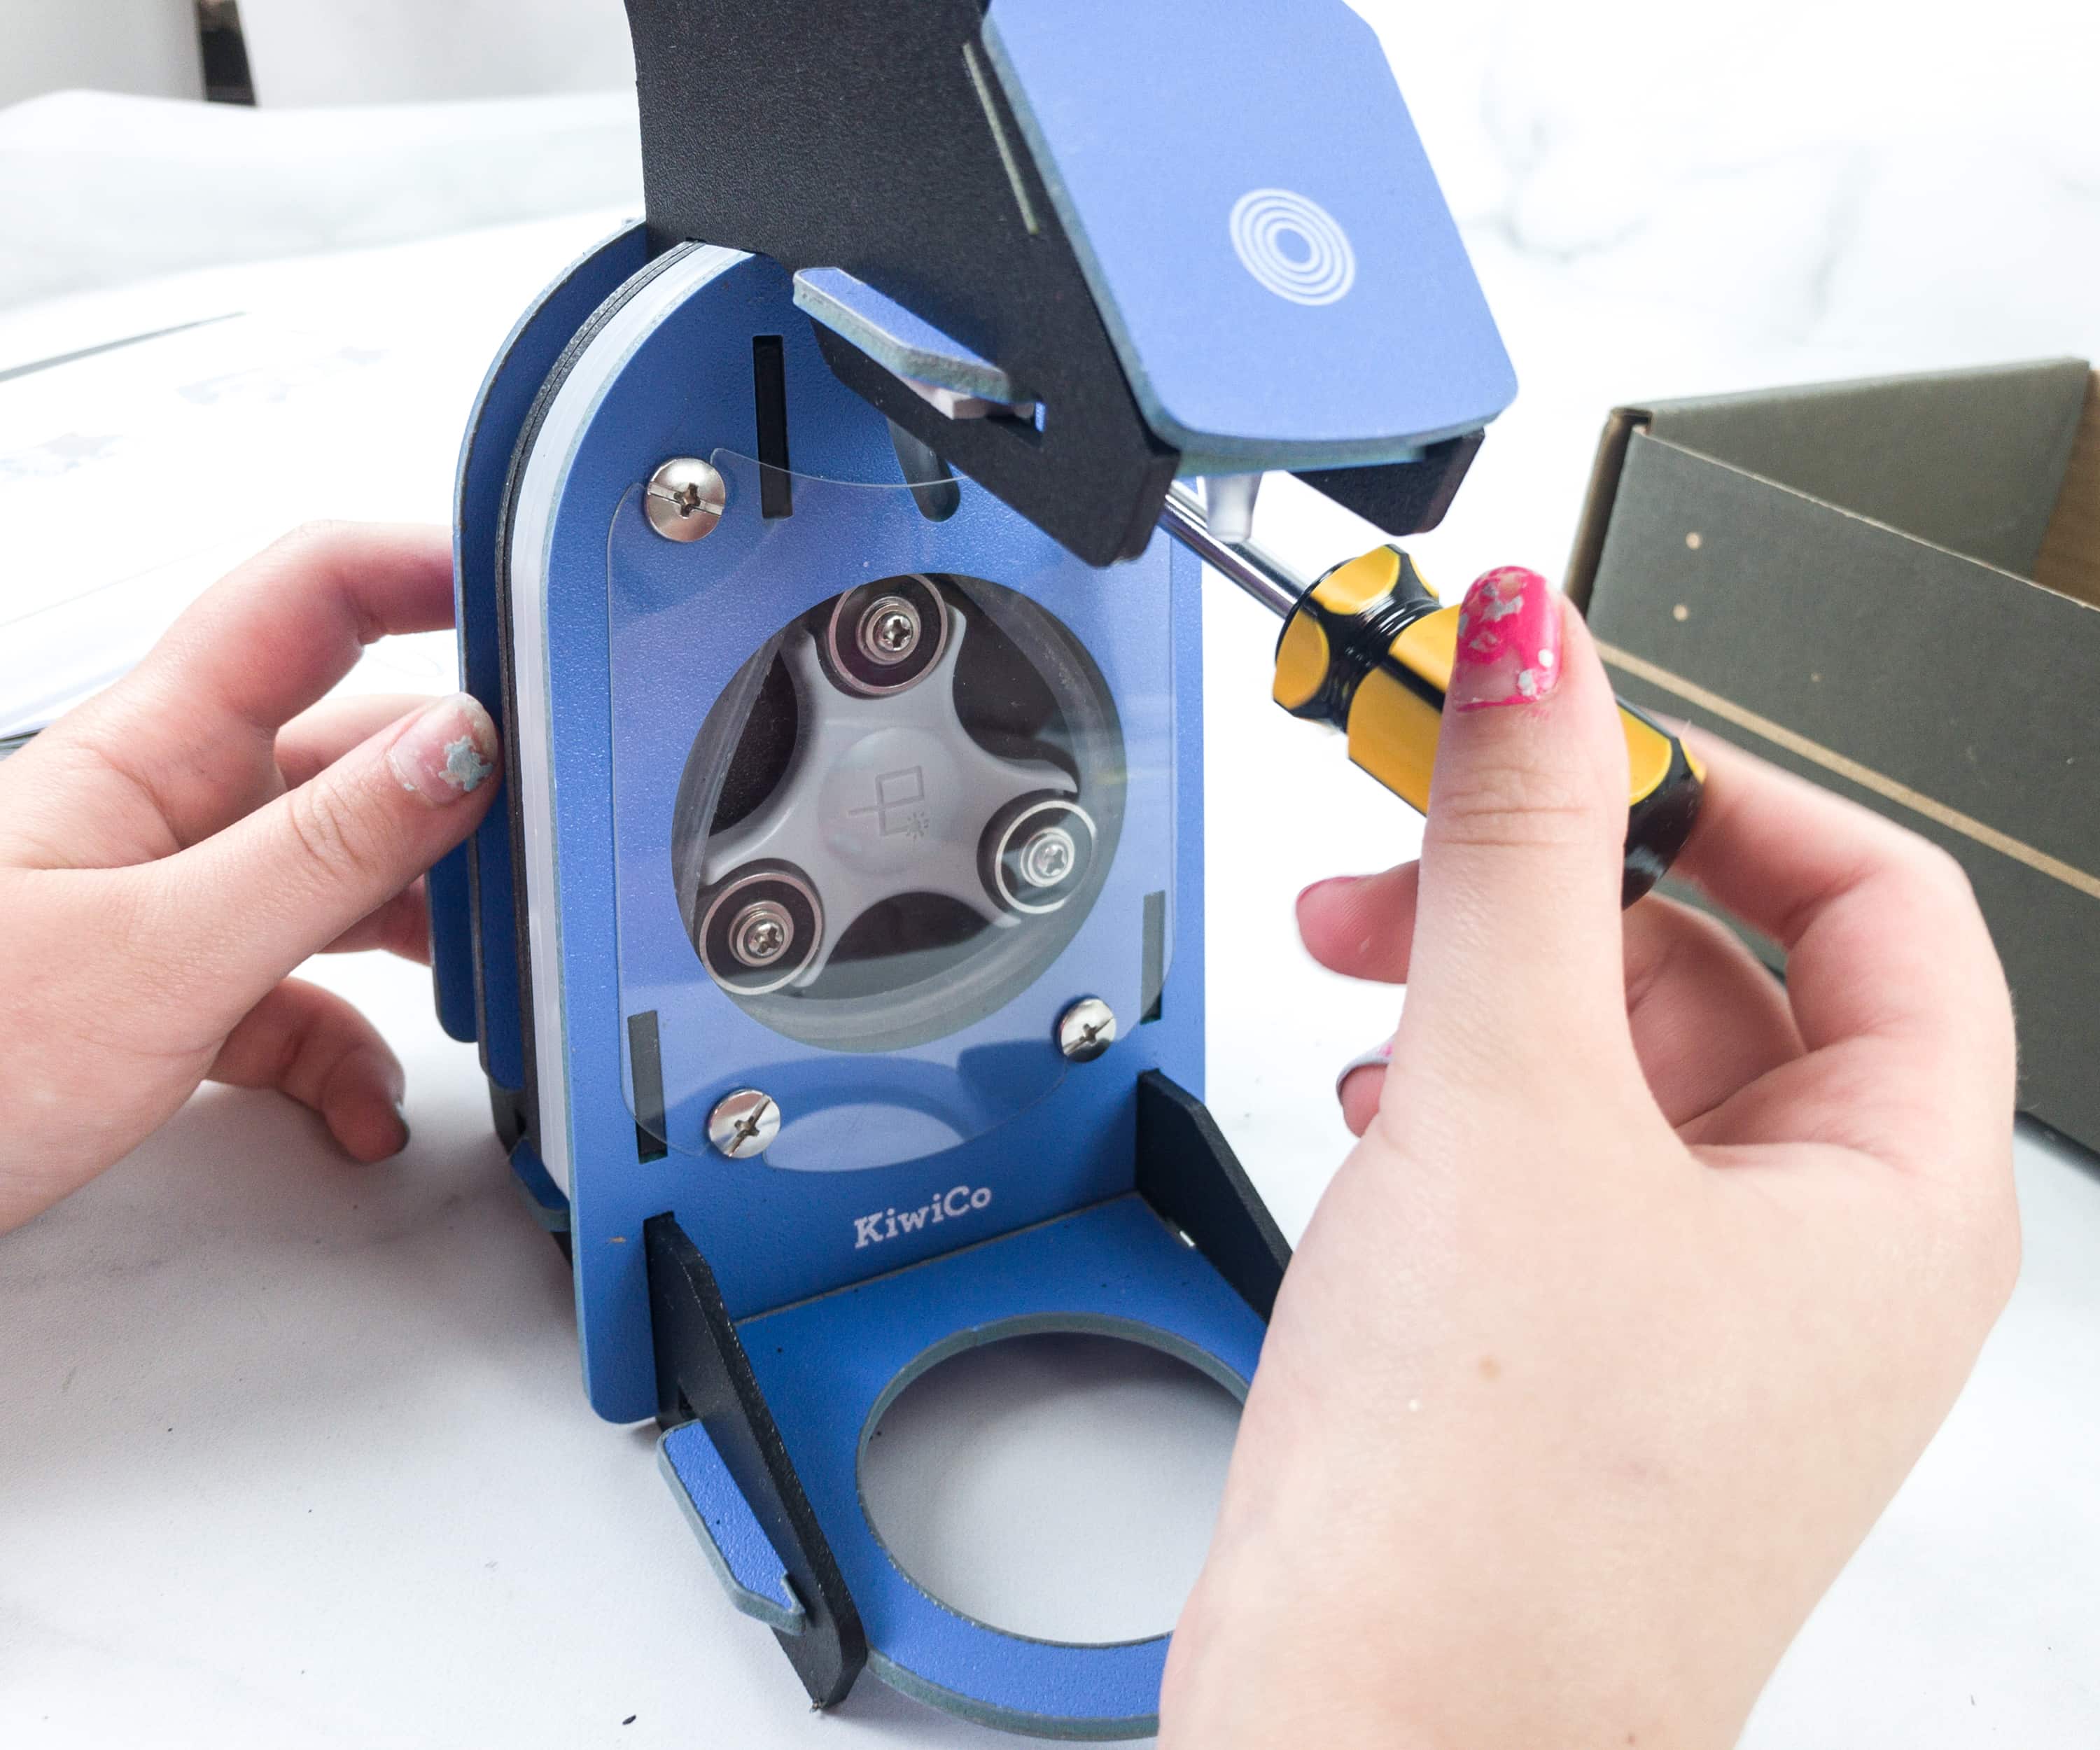
Part D is the most interesting part! It’s time to assemble the pump!
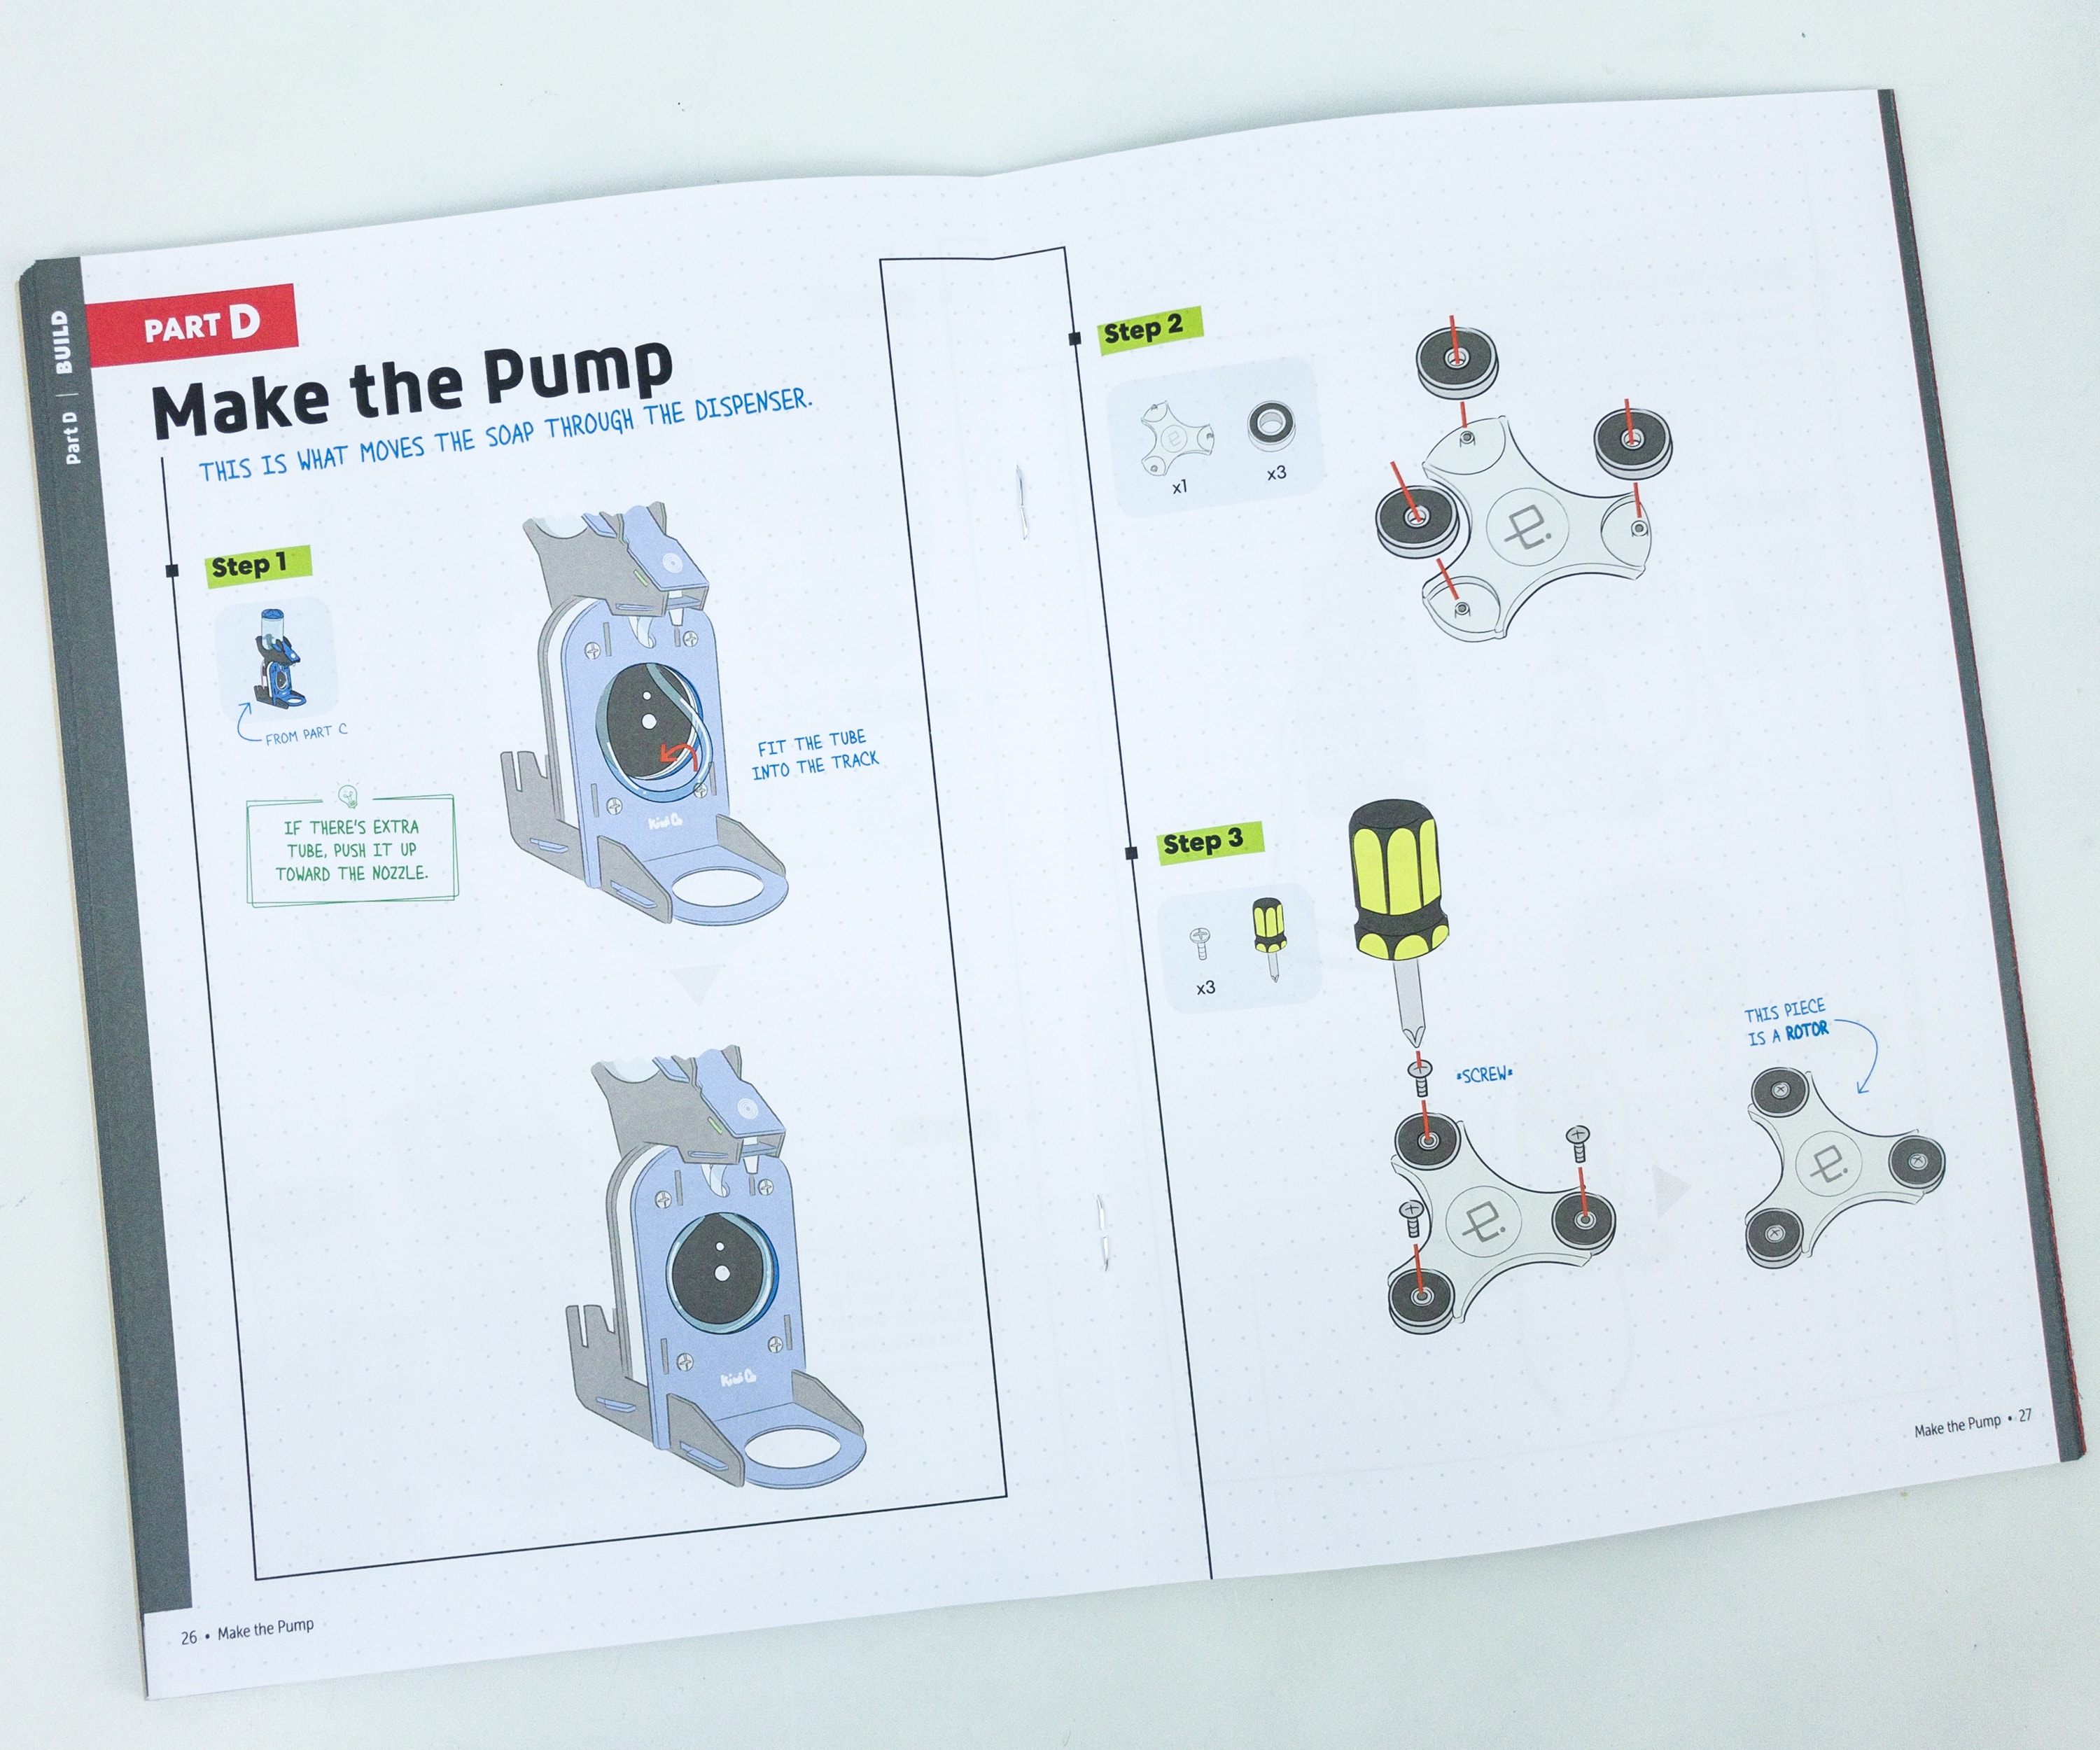
The pump moves the soap through the dispenser, so we can say that it’s the most important part of this project, and the most exciting too!
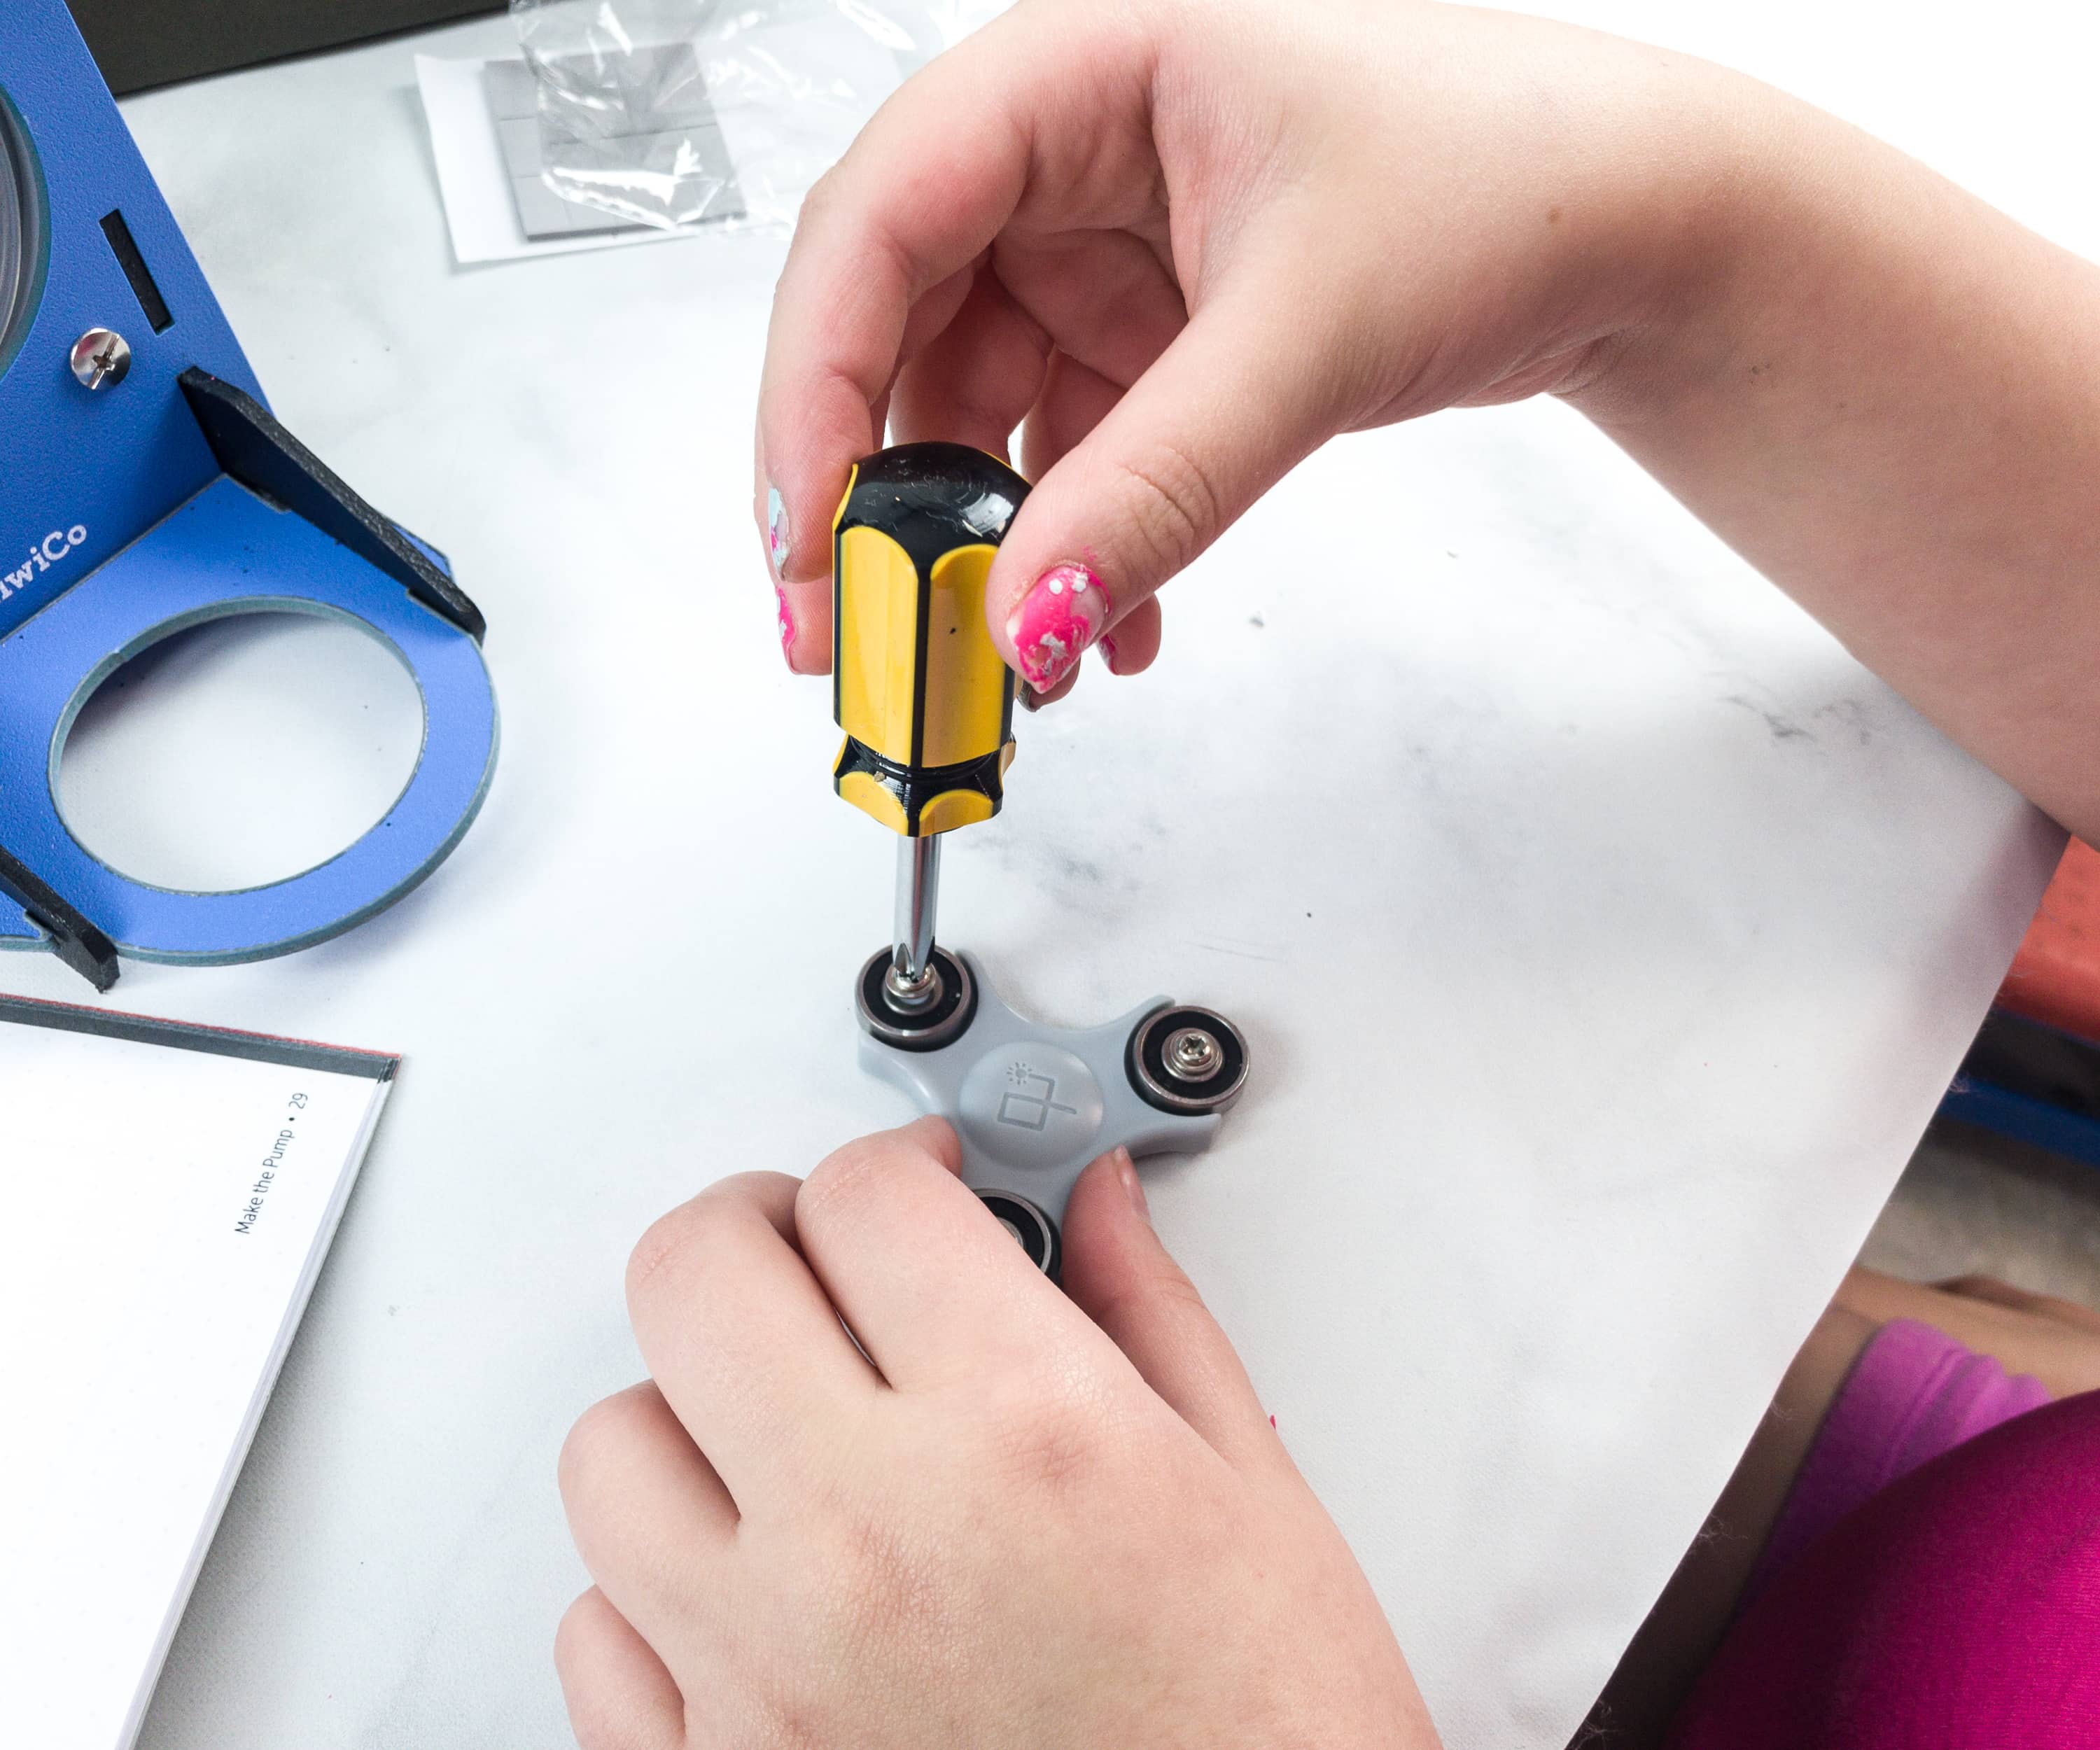
In building the pump, more screws are placed on their proper location, and of course, they’re turned and locked in place tightly.
This will need a thorough inspection as you assemble it.
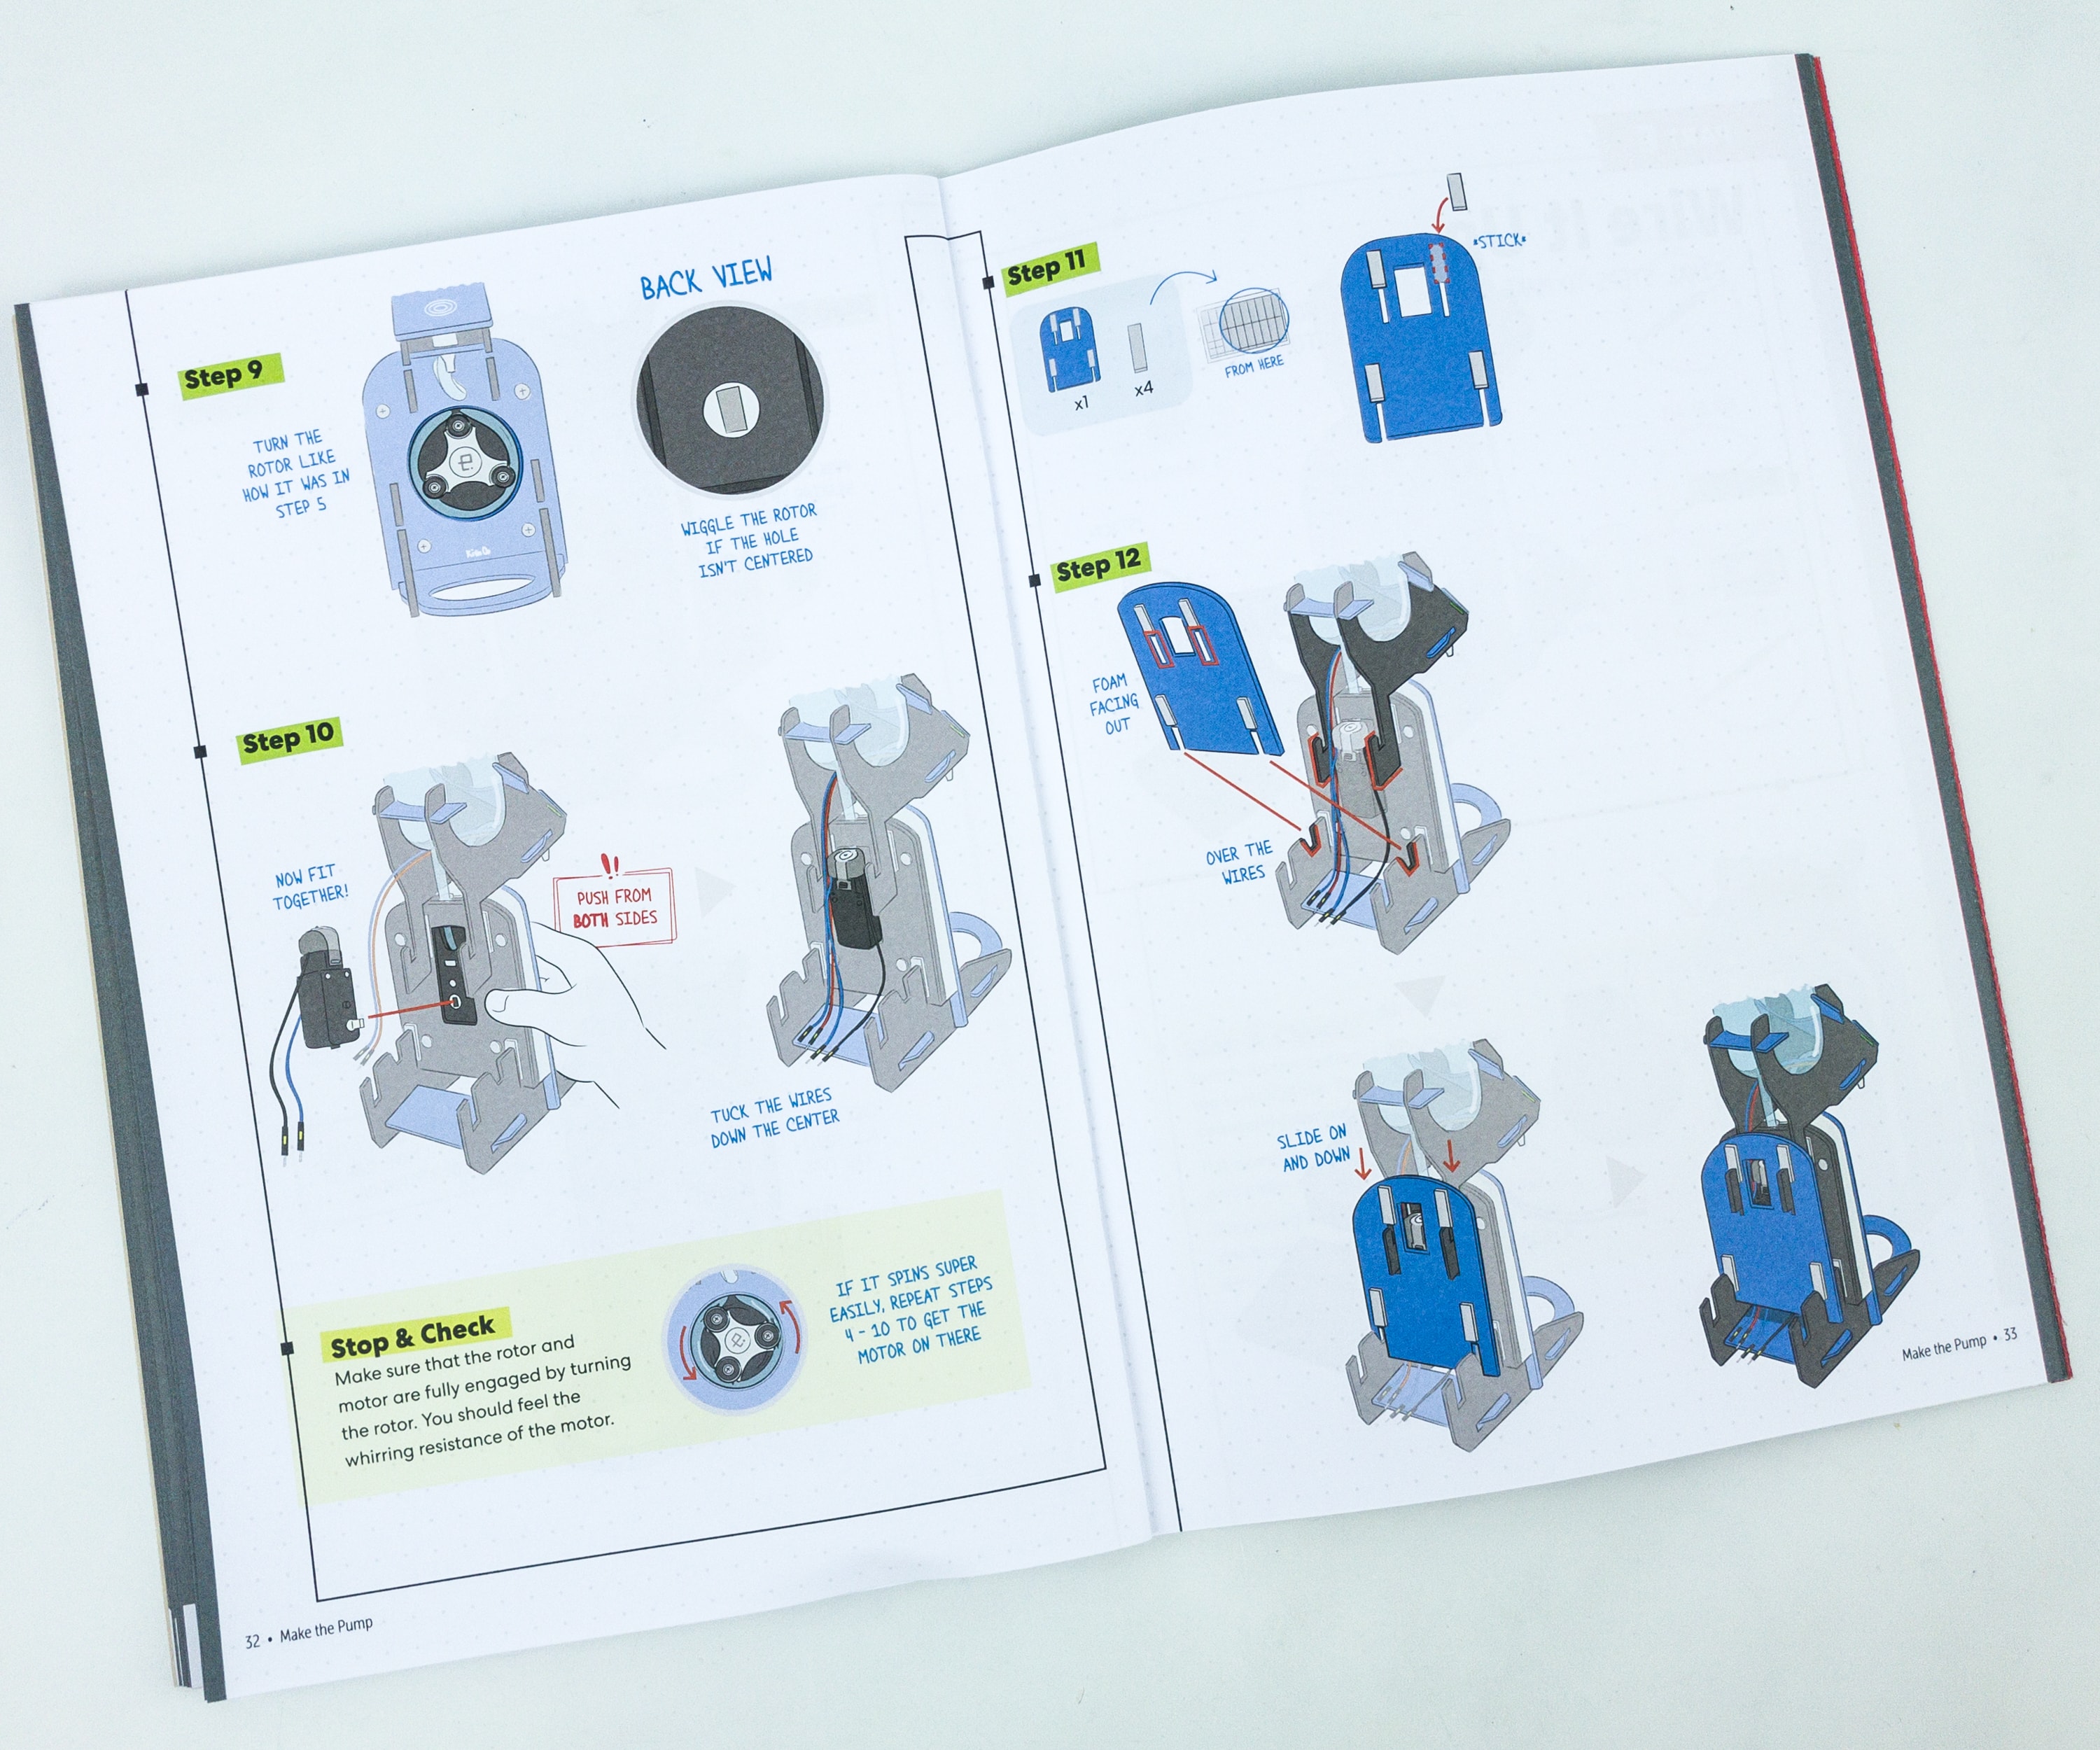
Building the pump definitely took a while, so we need to stop and check if it really works. Just be sure to check that the rotor and motor are fully engaged by turning the rotor, and there should be a whirring resistance of the motor to make sure it works!
After ensuring that the pump is running, it’s time to screw the other parts in place. We love how this soap dispenser is turning out!
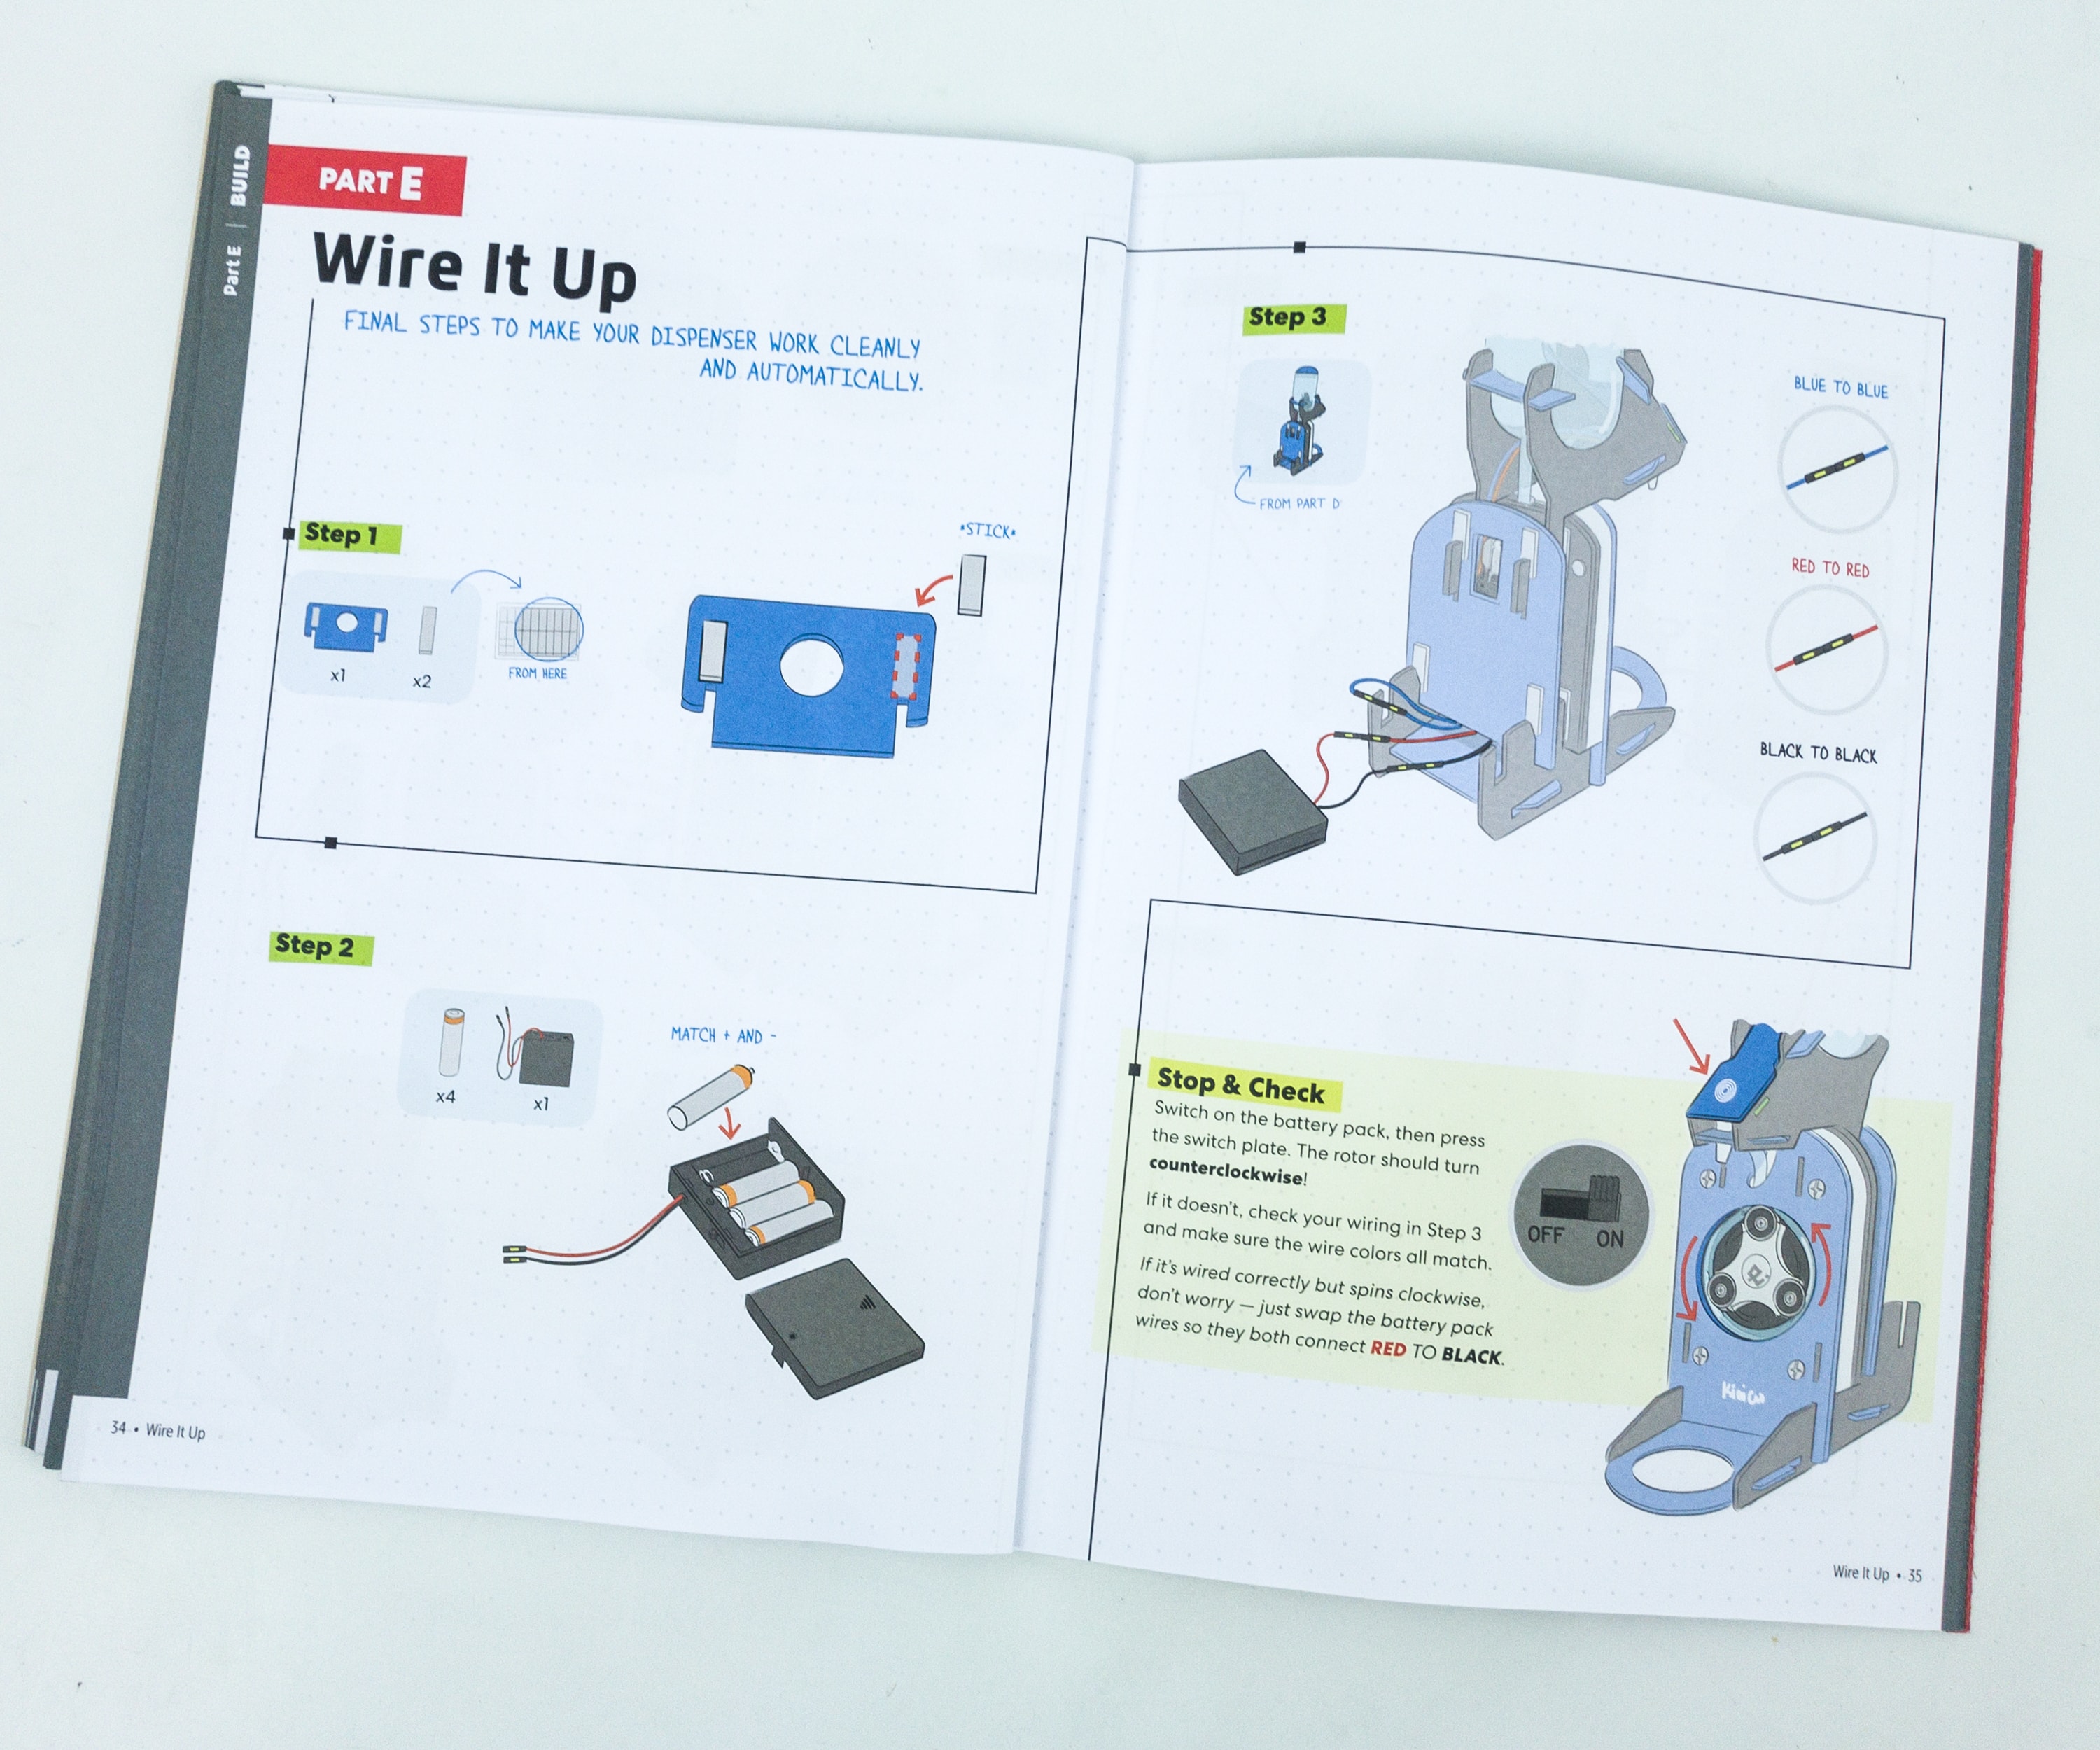
Part E is wiring it up. Now, we have to install some batteries!
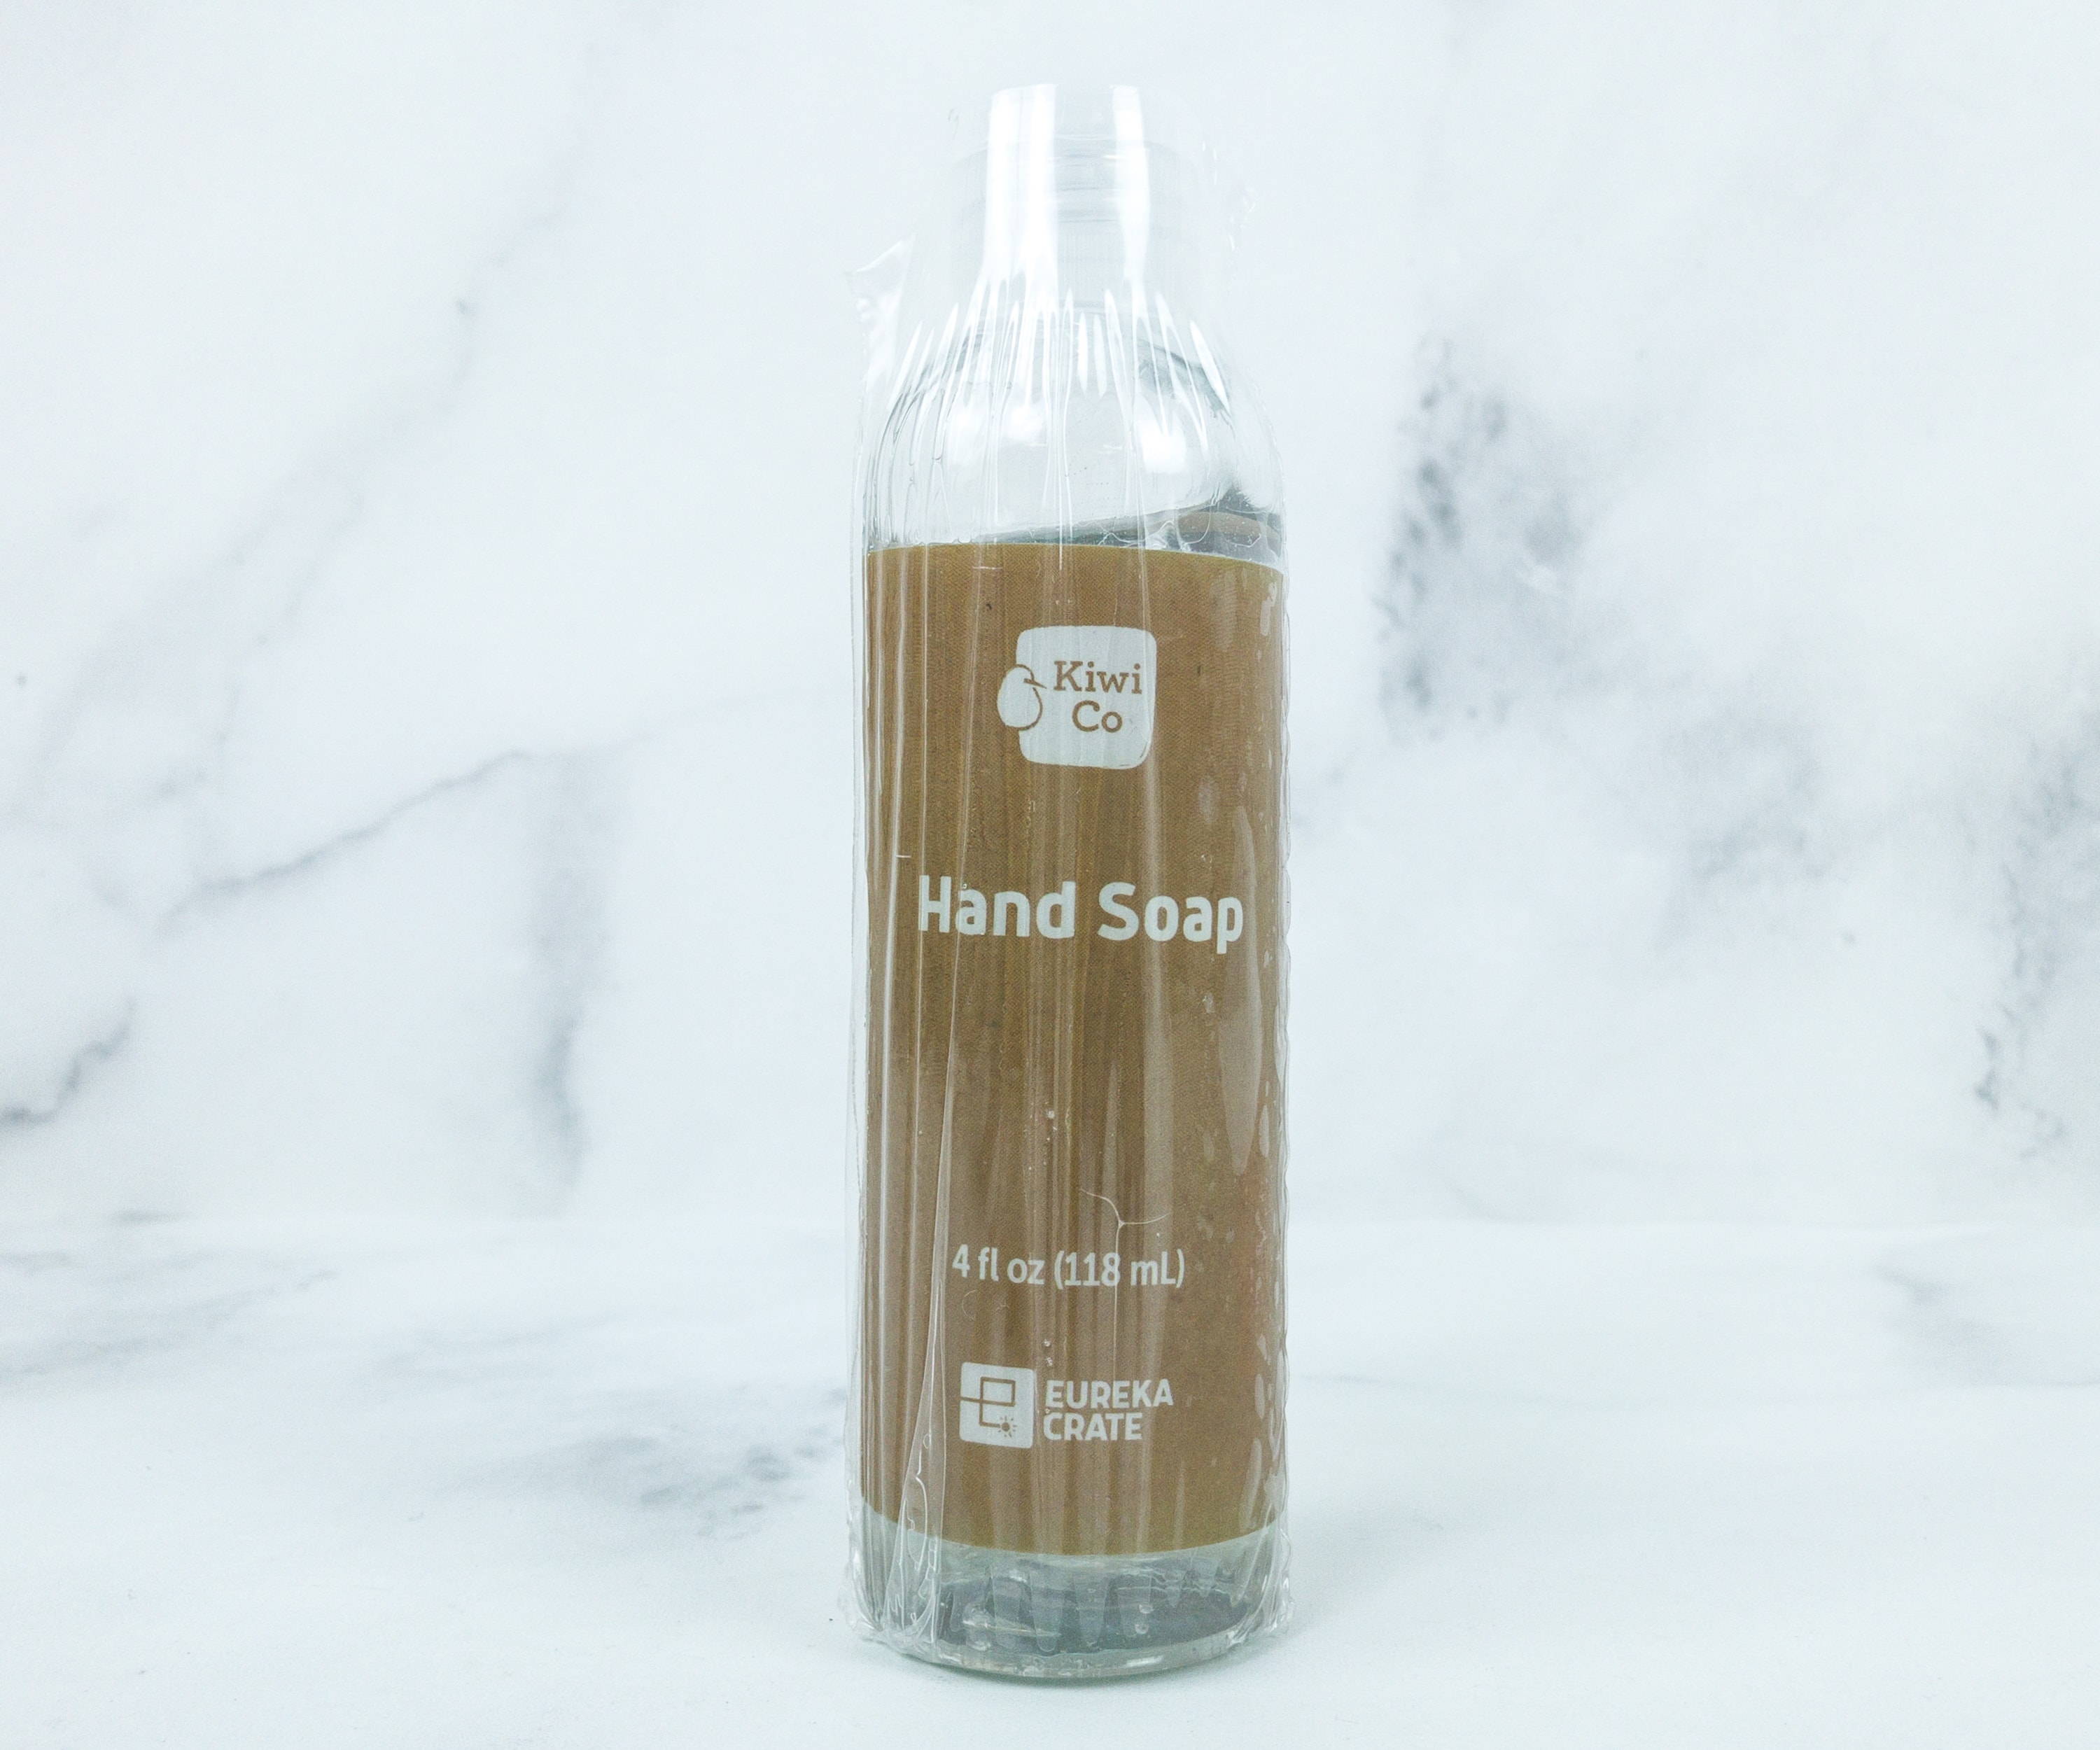
The crate also included a bottle (118ml) of liquid soap! We just need to load this up on the finished dispenser and try it out!
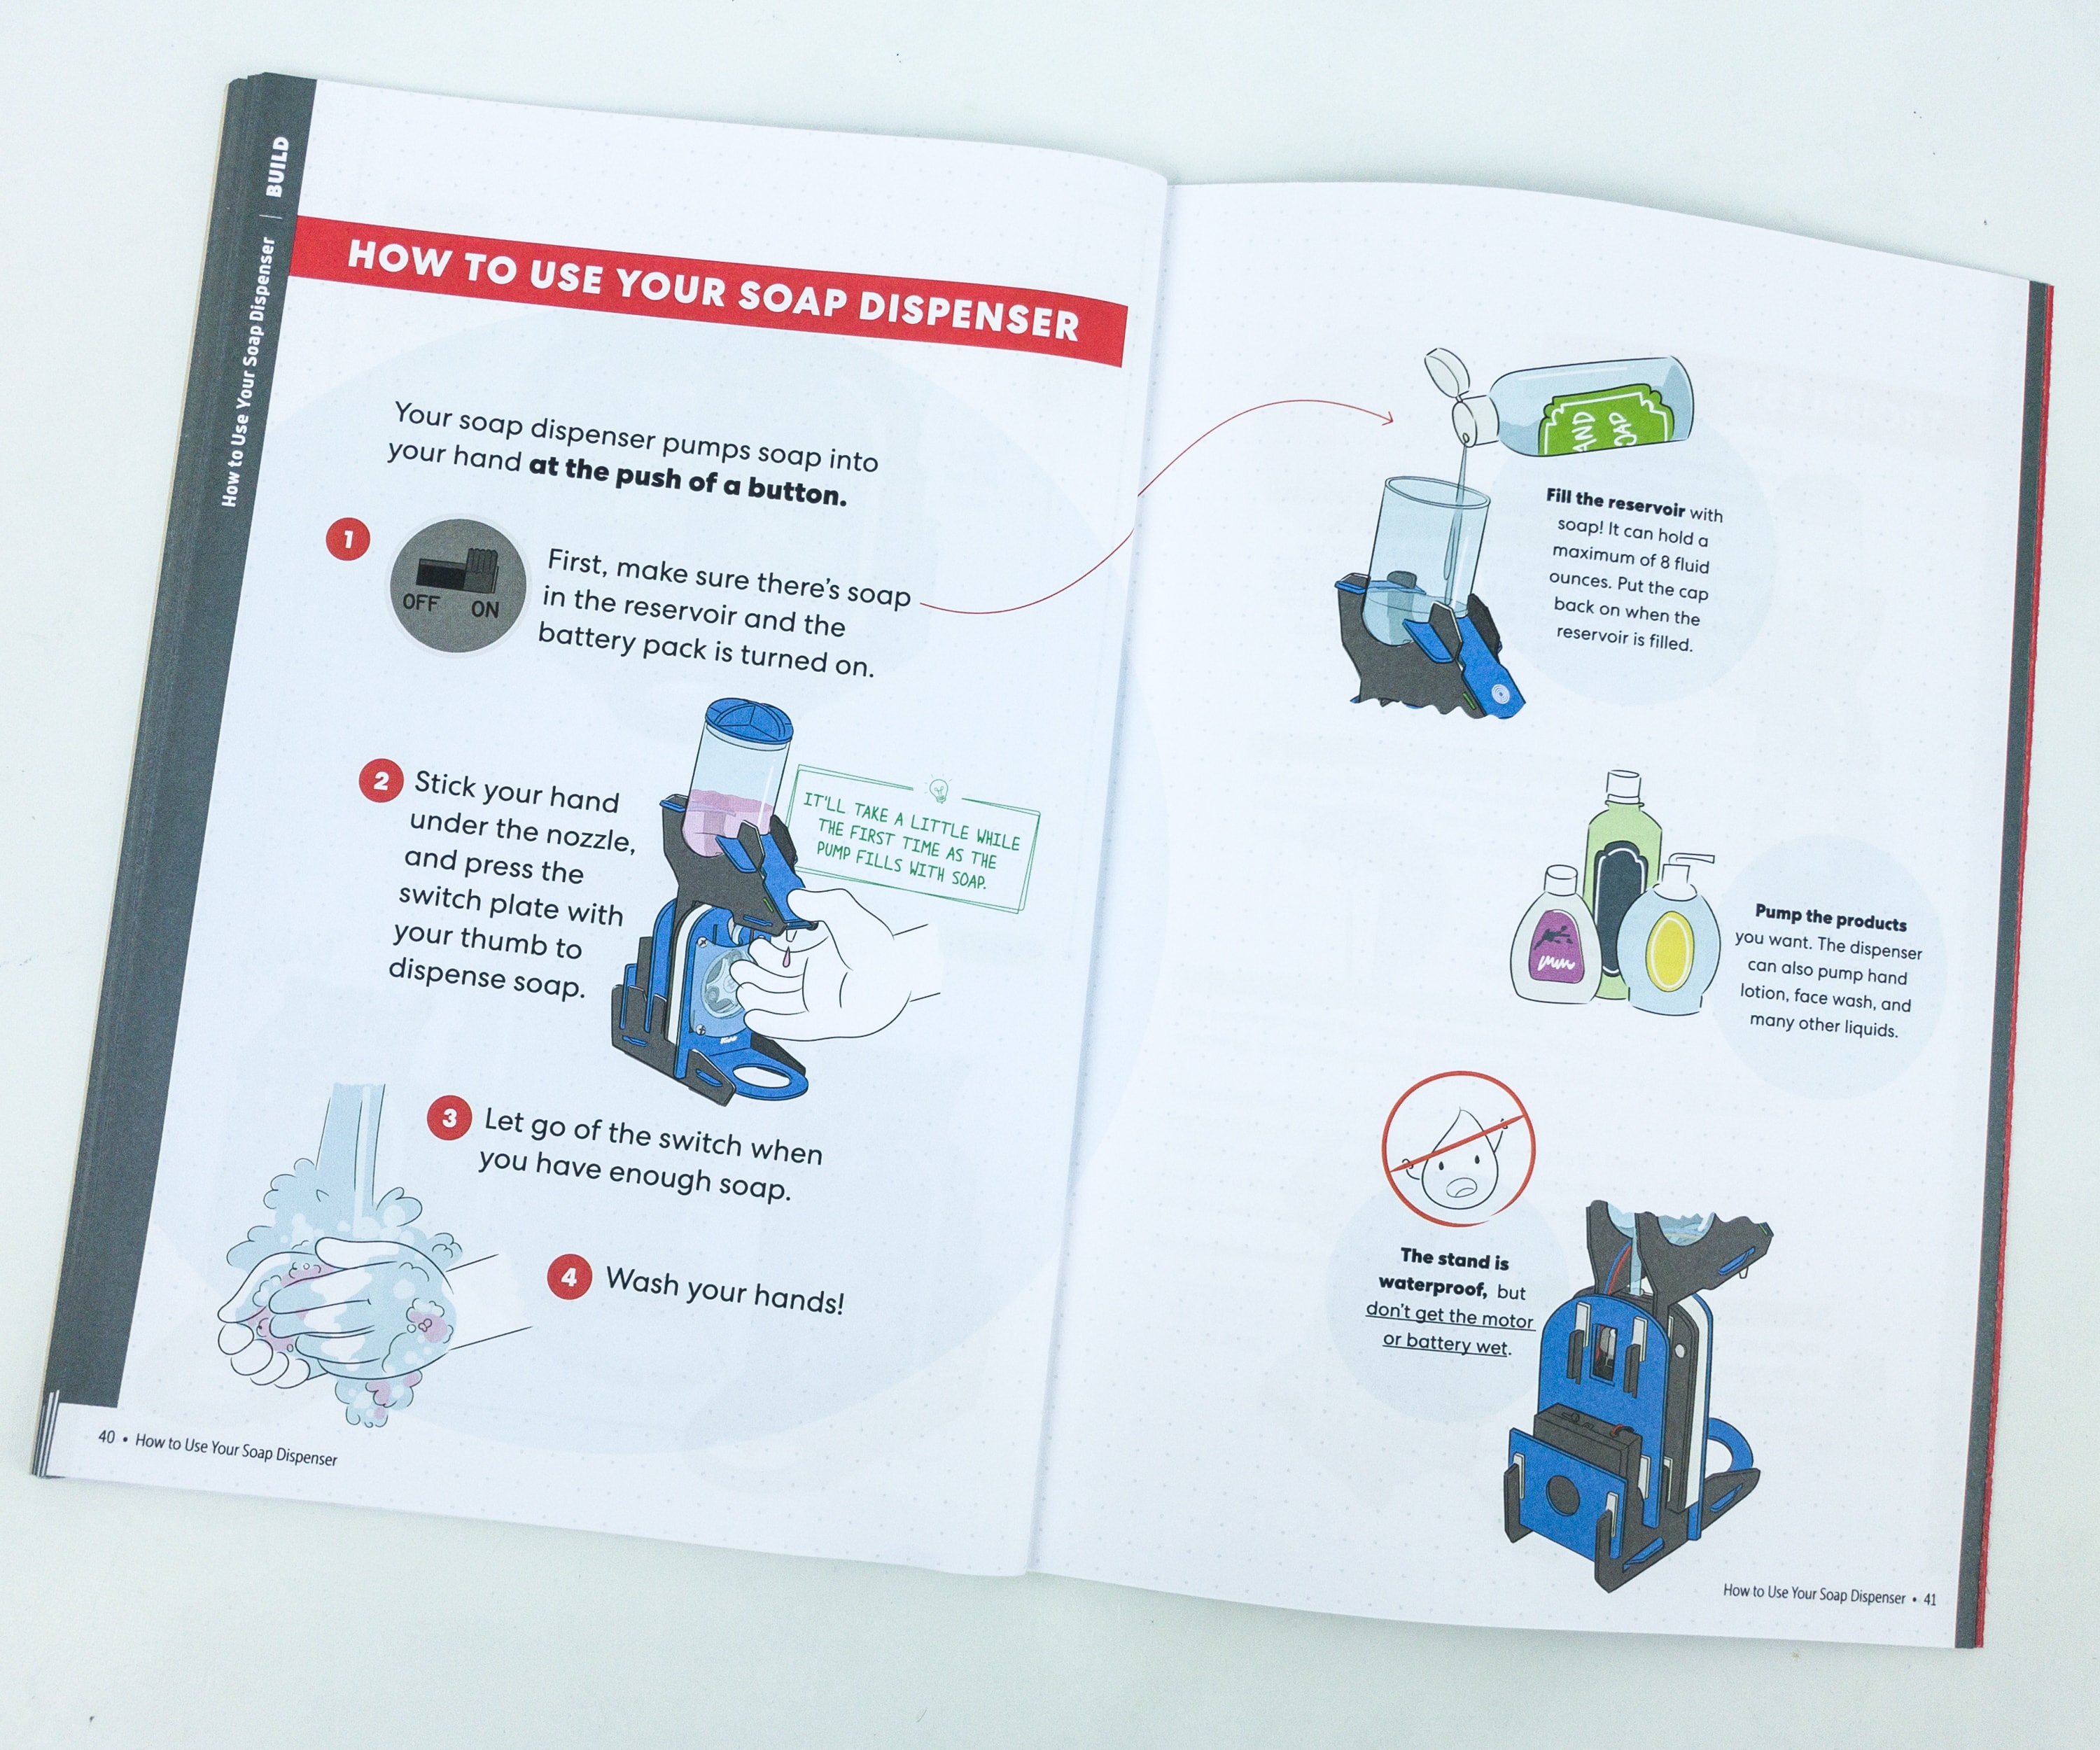
Of course, the booklet included step-by-step directions on how to use the soap dispenser when everything’s already set up.
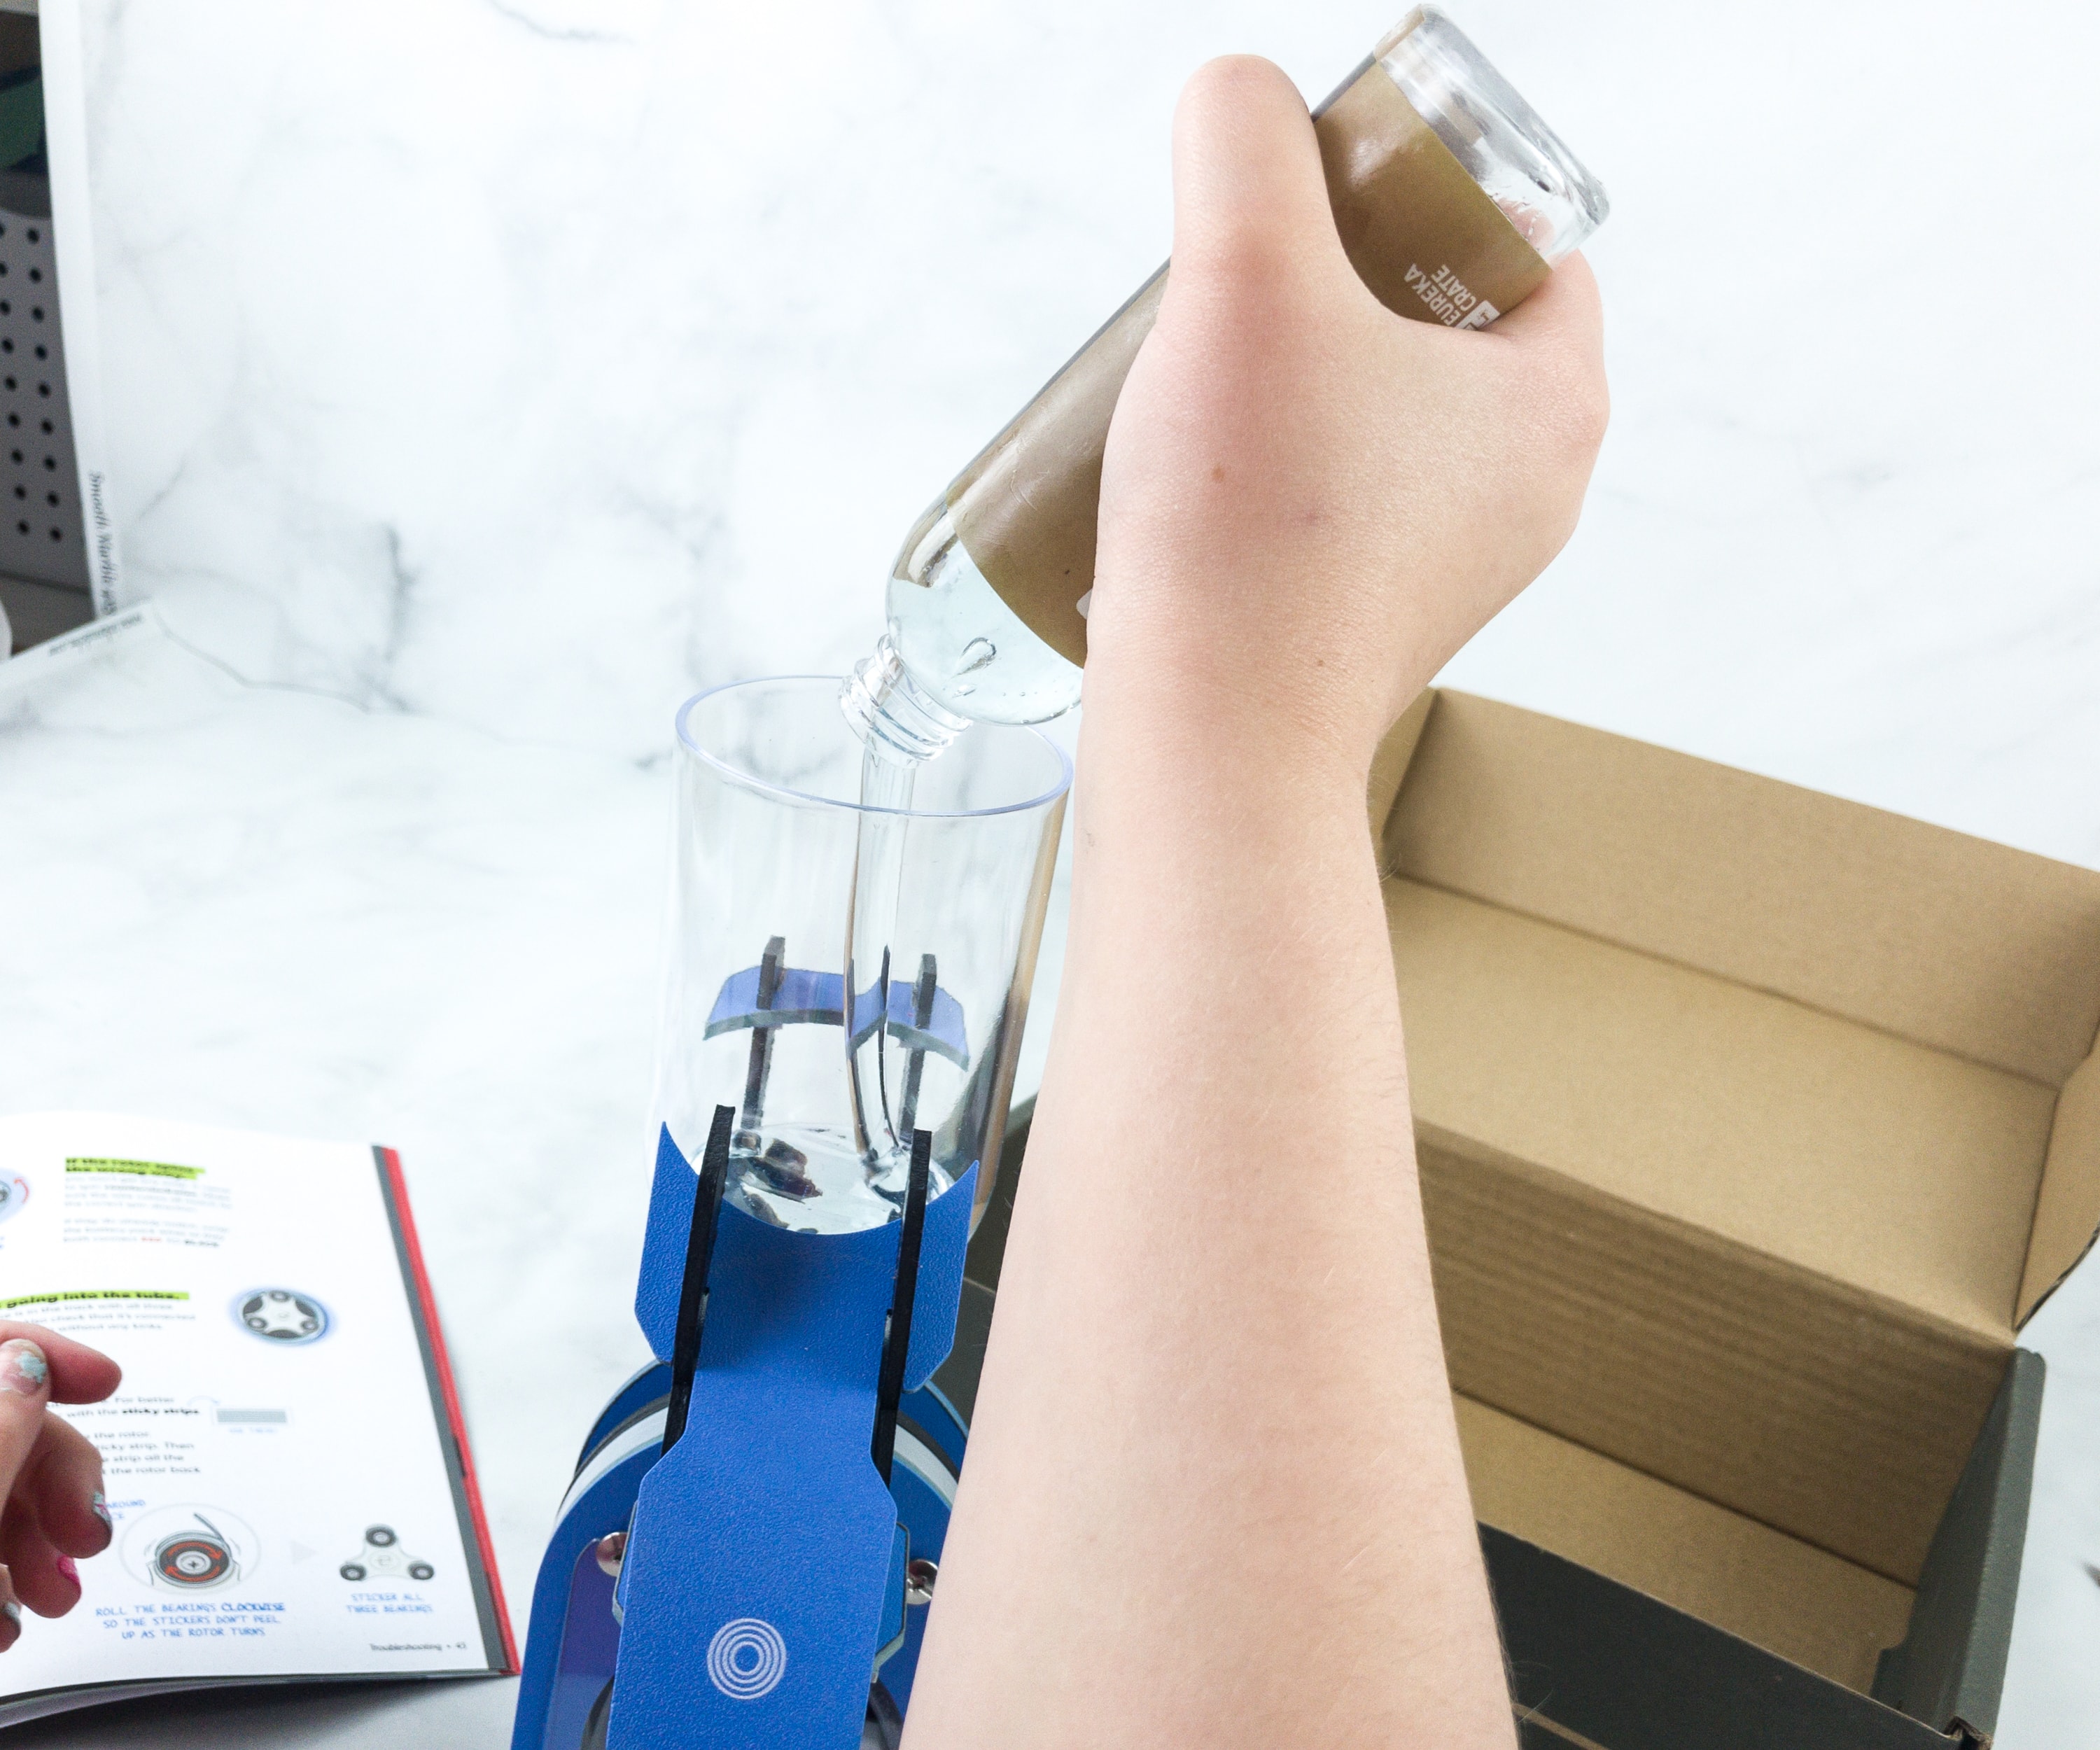
We pour some of the included liquid soap in the reservoir.
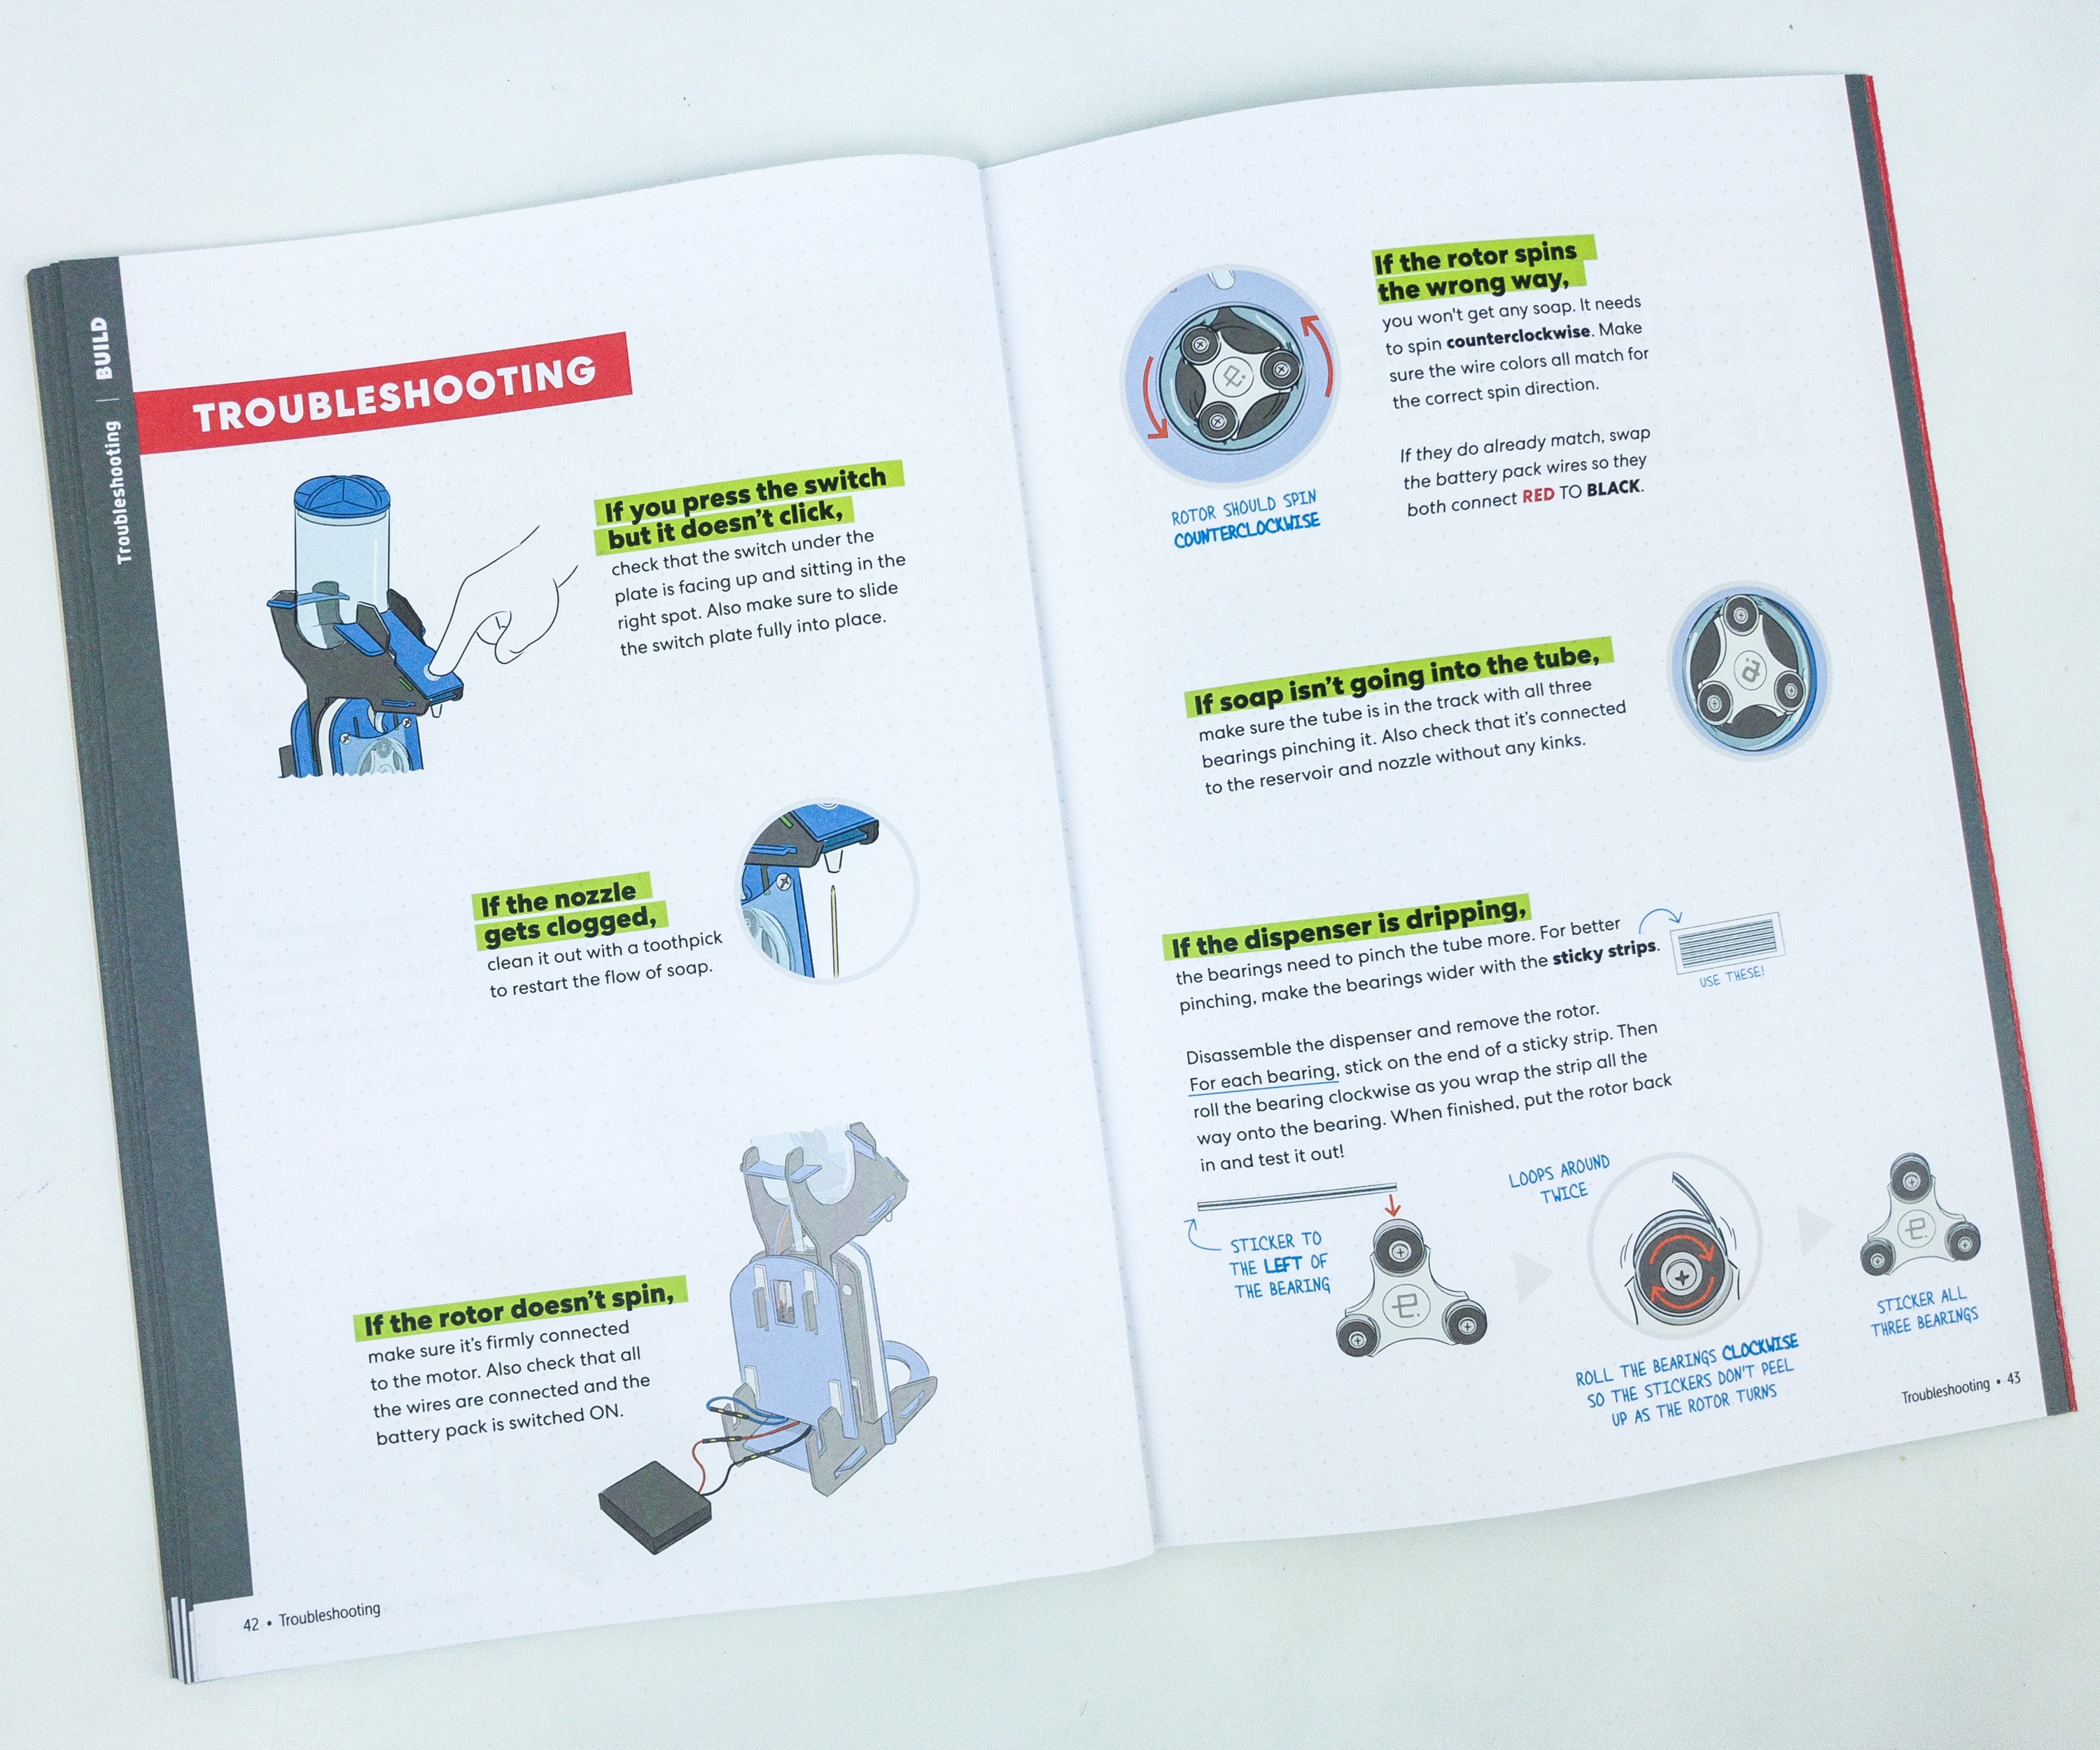
In case you encounter some problems with the dispenser, the booklet also included troubleshooting of some common problems encountered when using it.
And we’re ready to test it out! The soap came out of the dispenser, so we can call this a success!
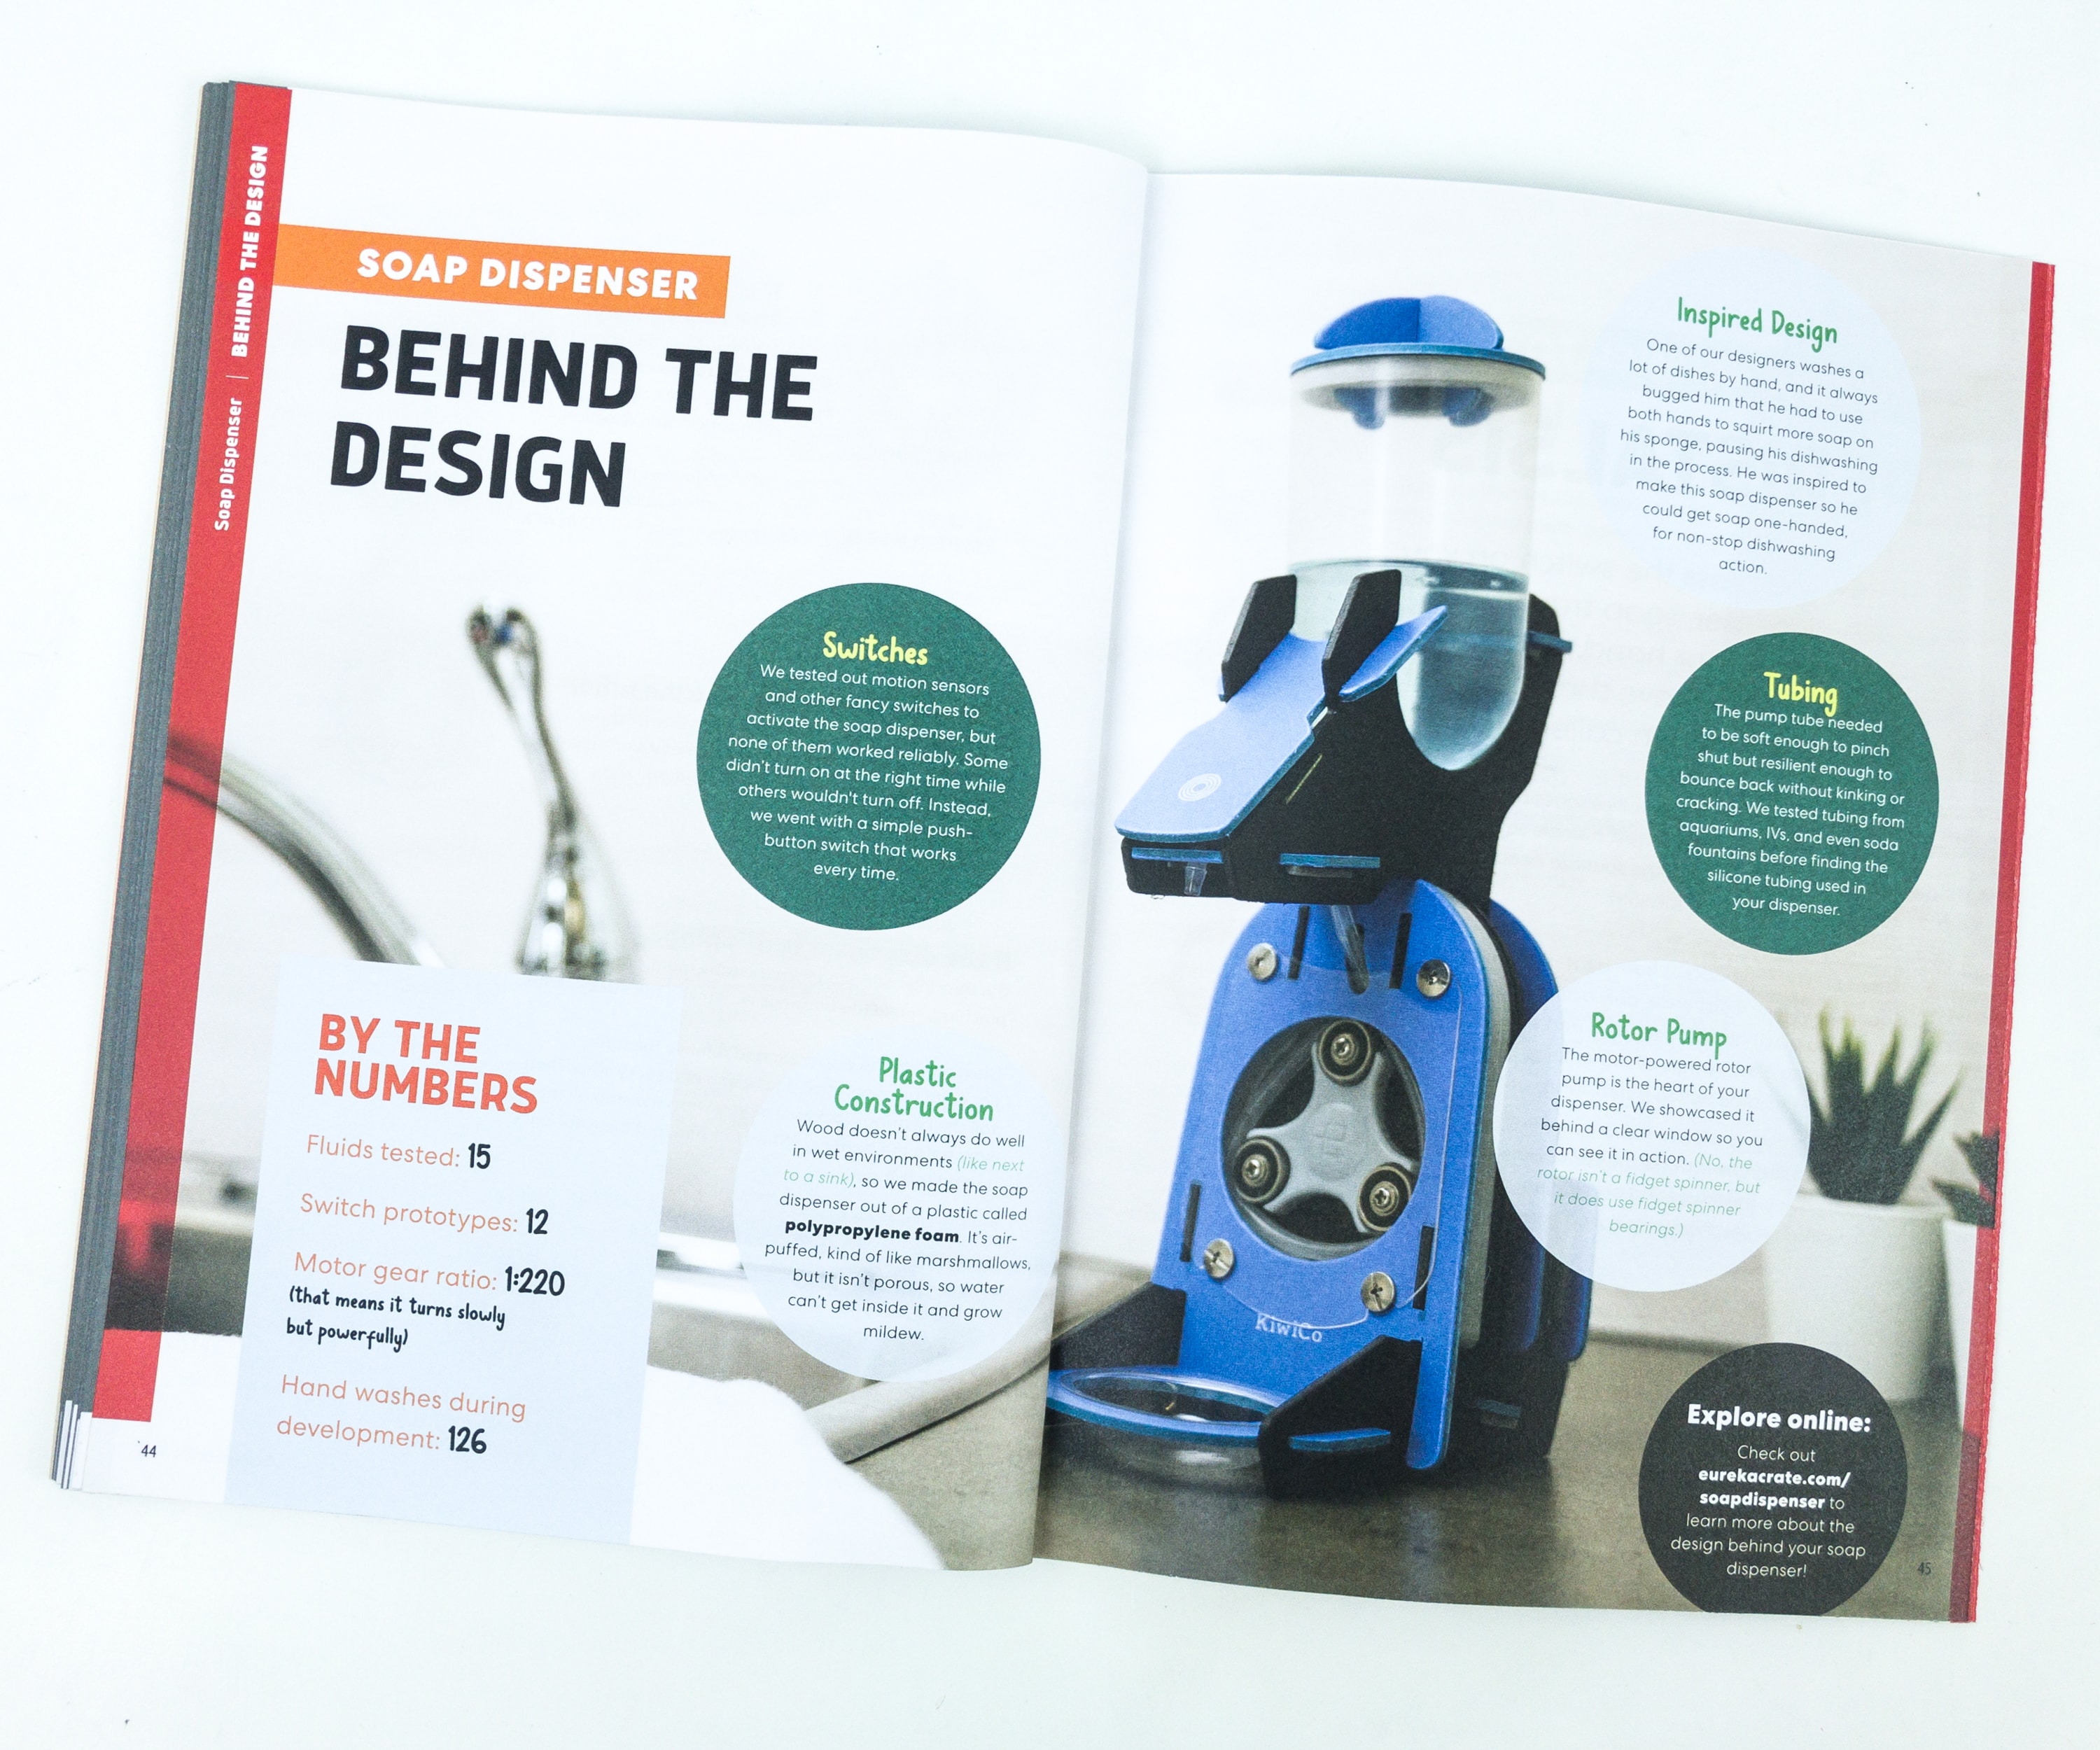
The booklet also provided us more information about the soap dispenser, and also lets us know more behind the design.
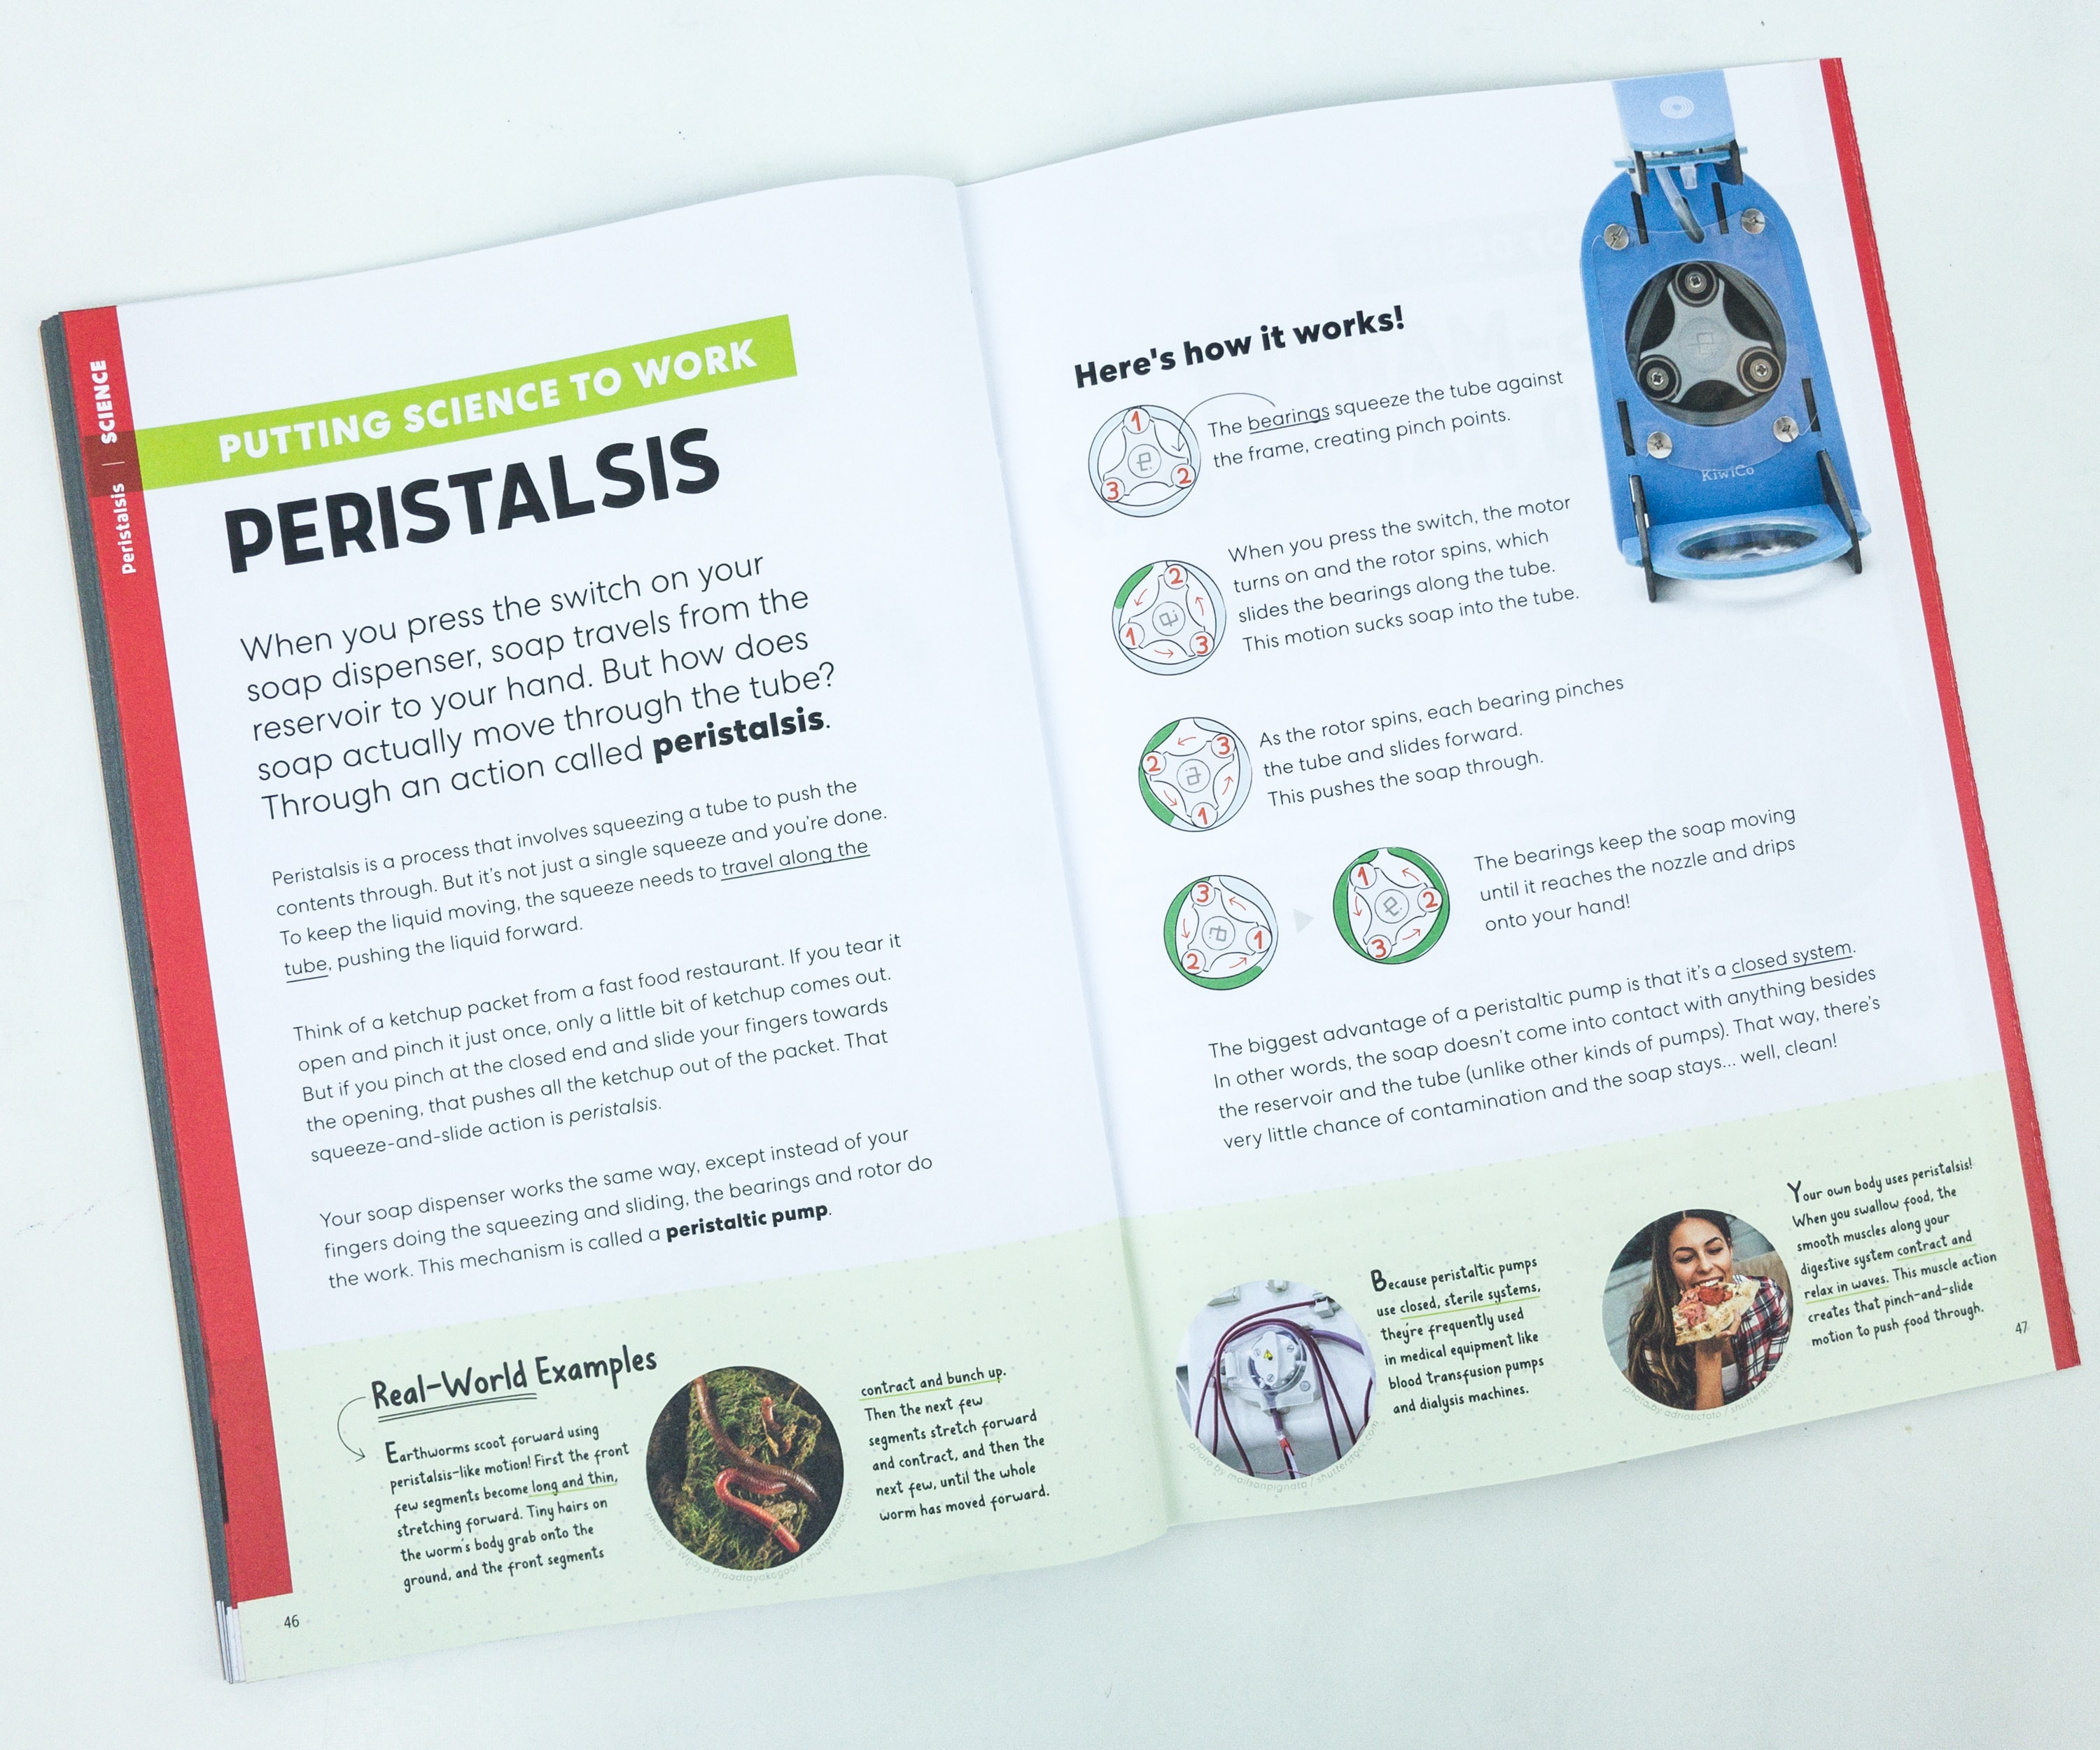
There’s a full article on the phenomena behind how the dispenser works, and it is through peristalsis.
Peristalsis is a process that involves squeezing a tube to push the content through. But it’s not just a single squeeze and you’re done. To keep the liquid moving, the squeeze needs to travel along the tube, pushing the liquid forward.
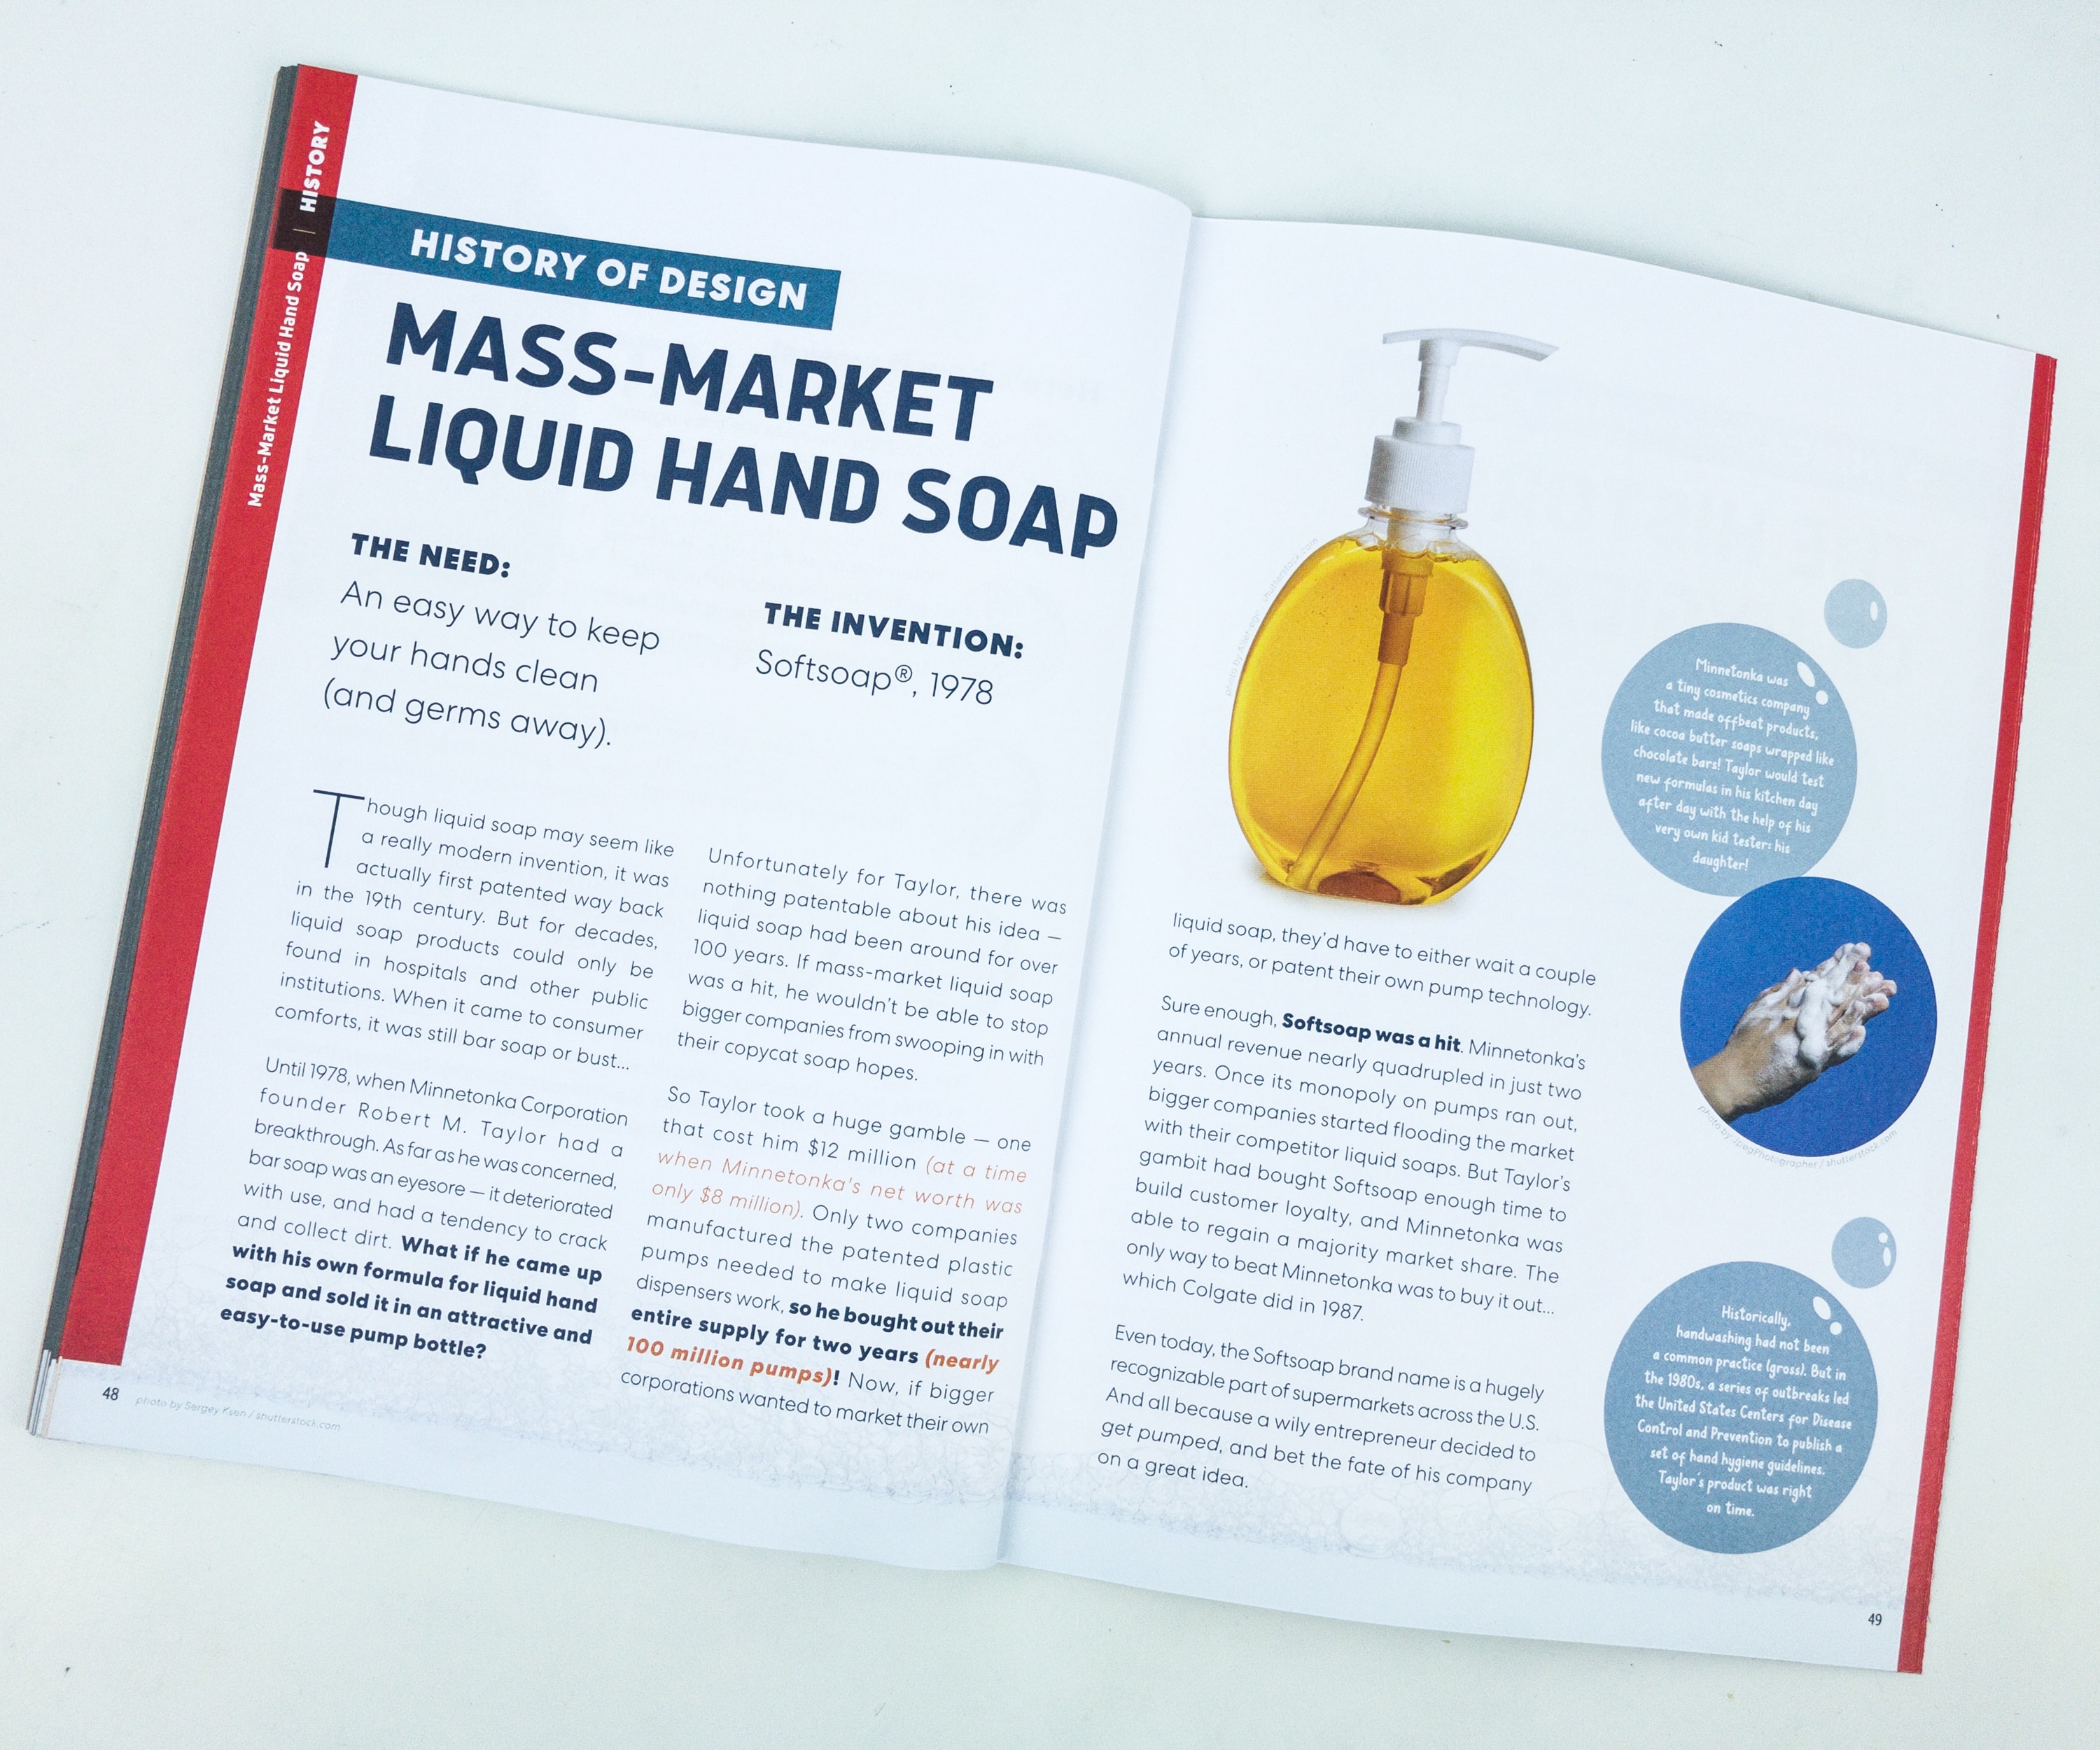
Also included in the history of the project’s design is an article that talks about liquid hand soap! Liquid hand soap is an easier way to keep the hands clean and keep the germs away. The first one, Softsoap, was invented way back in 1978!
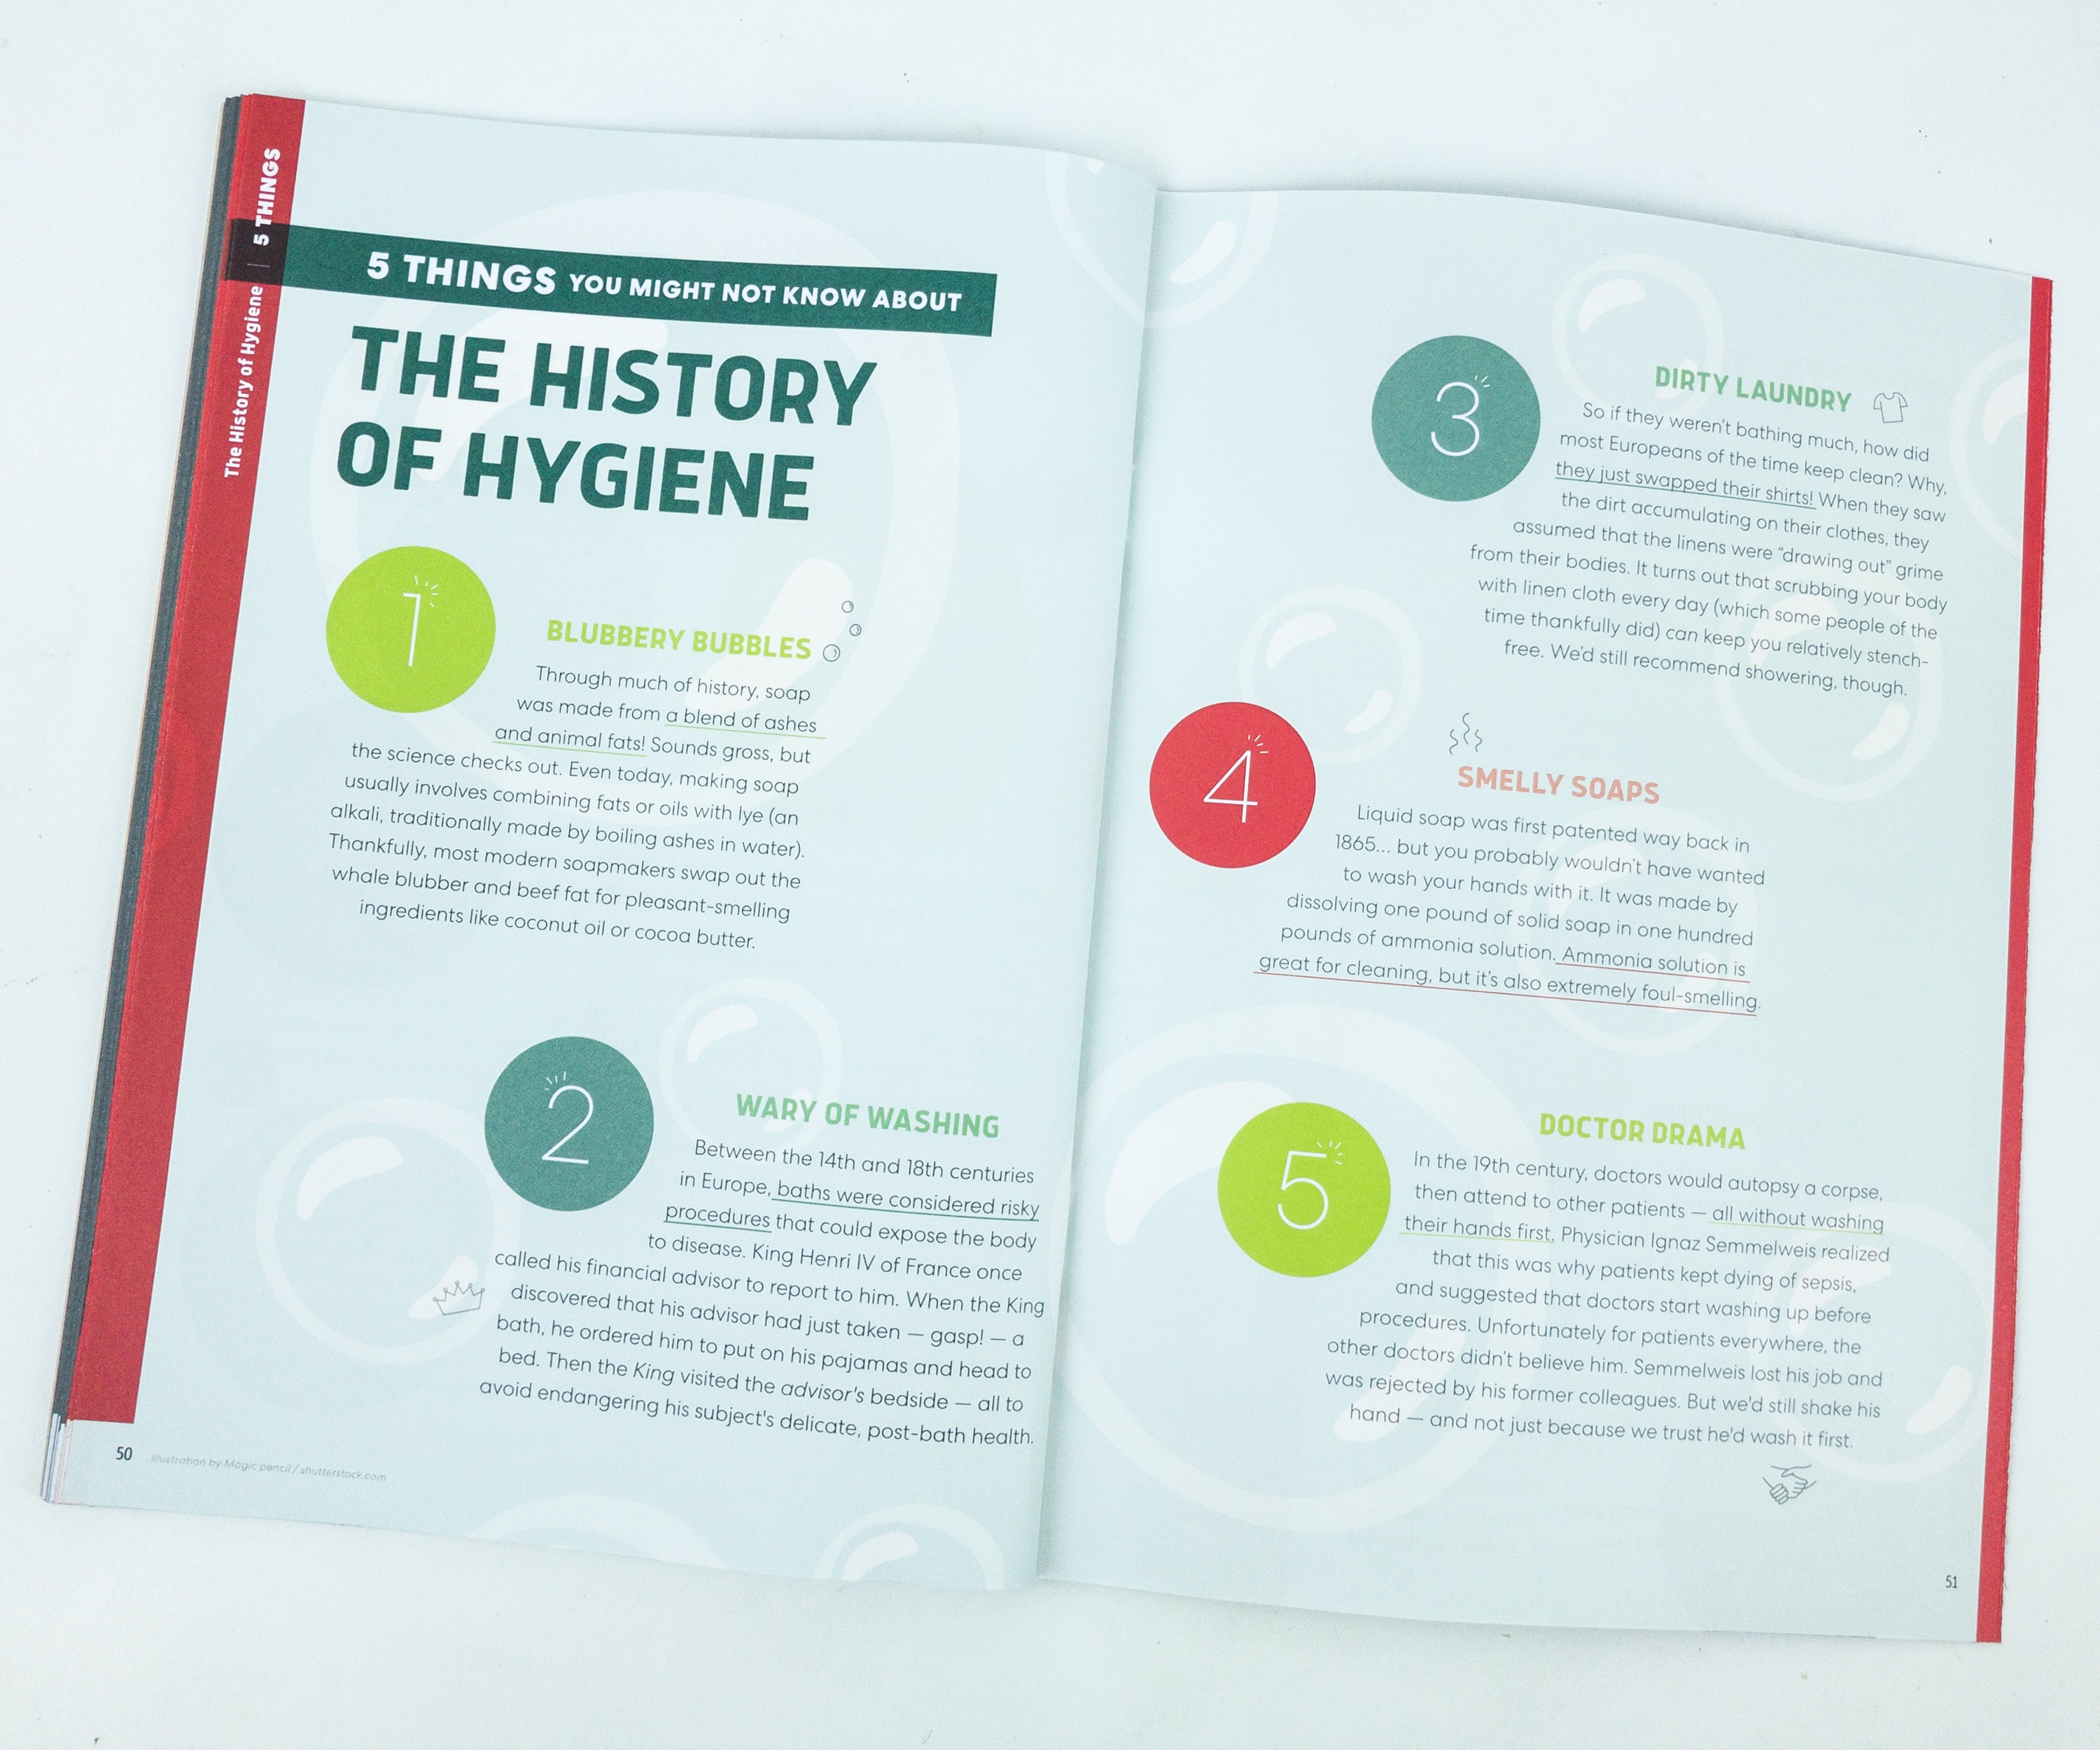
They even listed out the 5 things that we might not know about the history of hygiene!
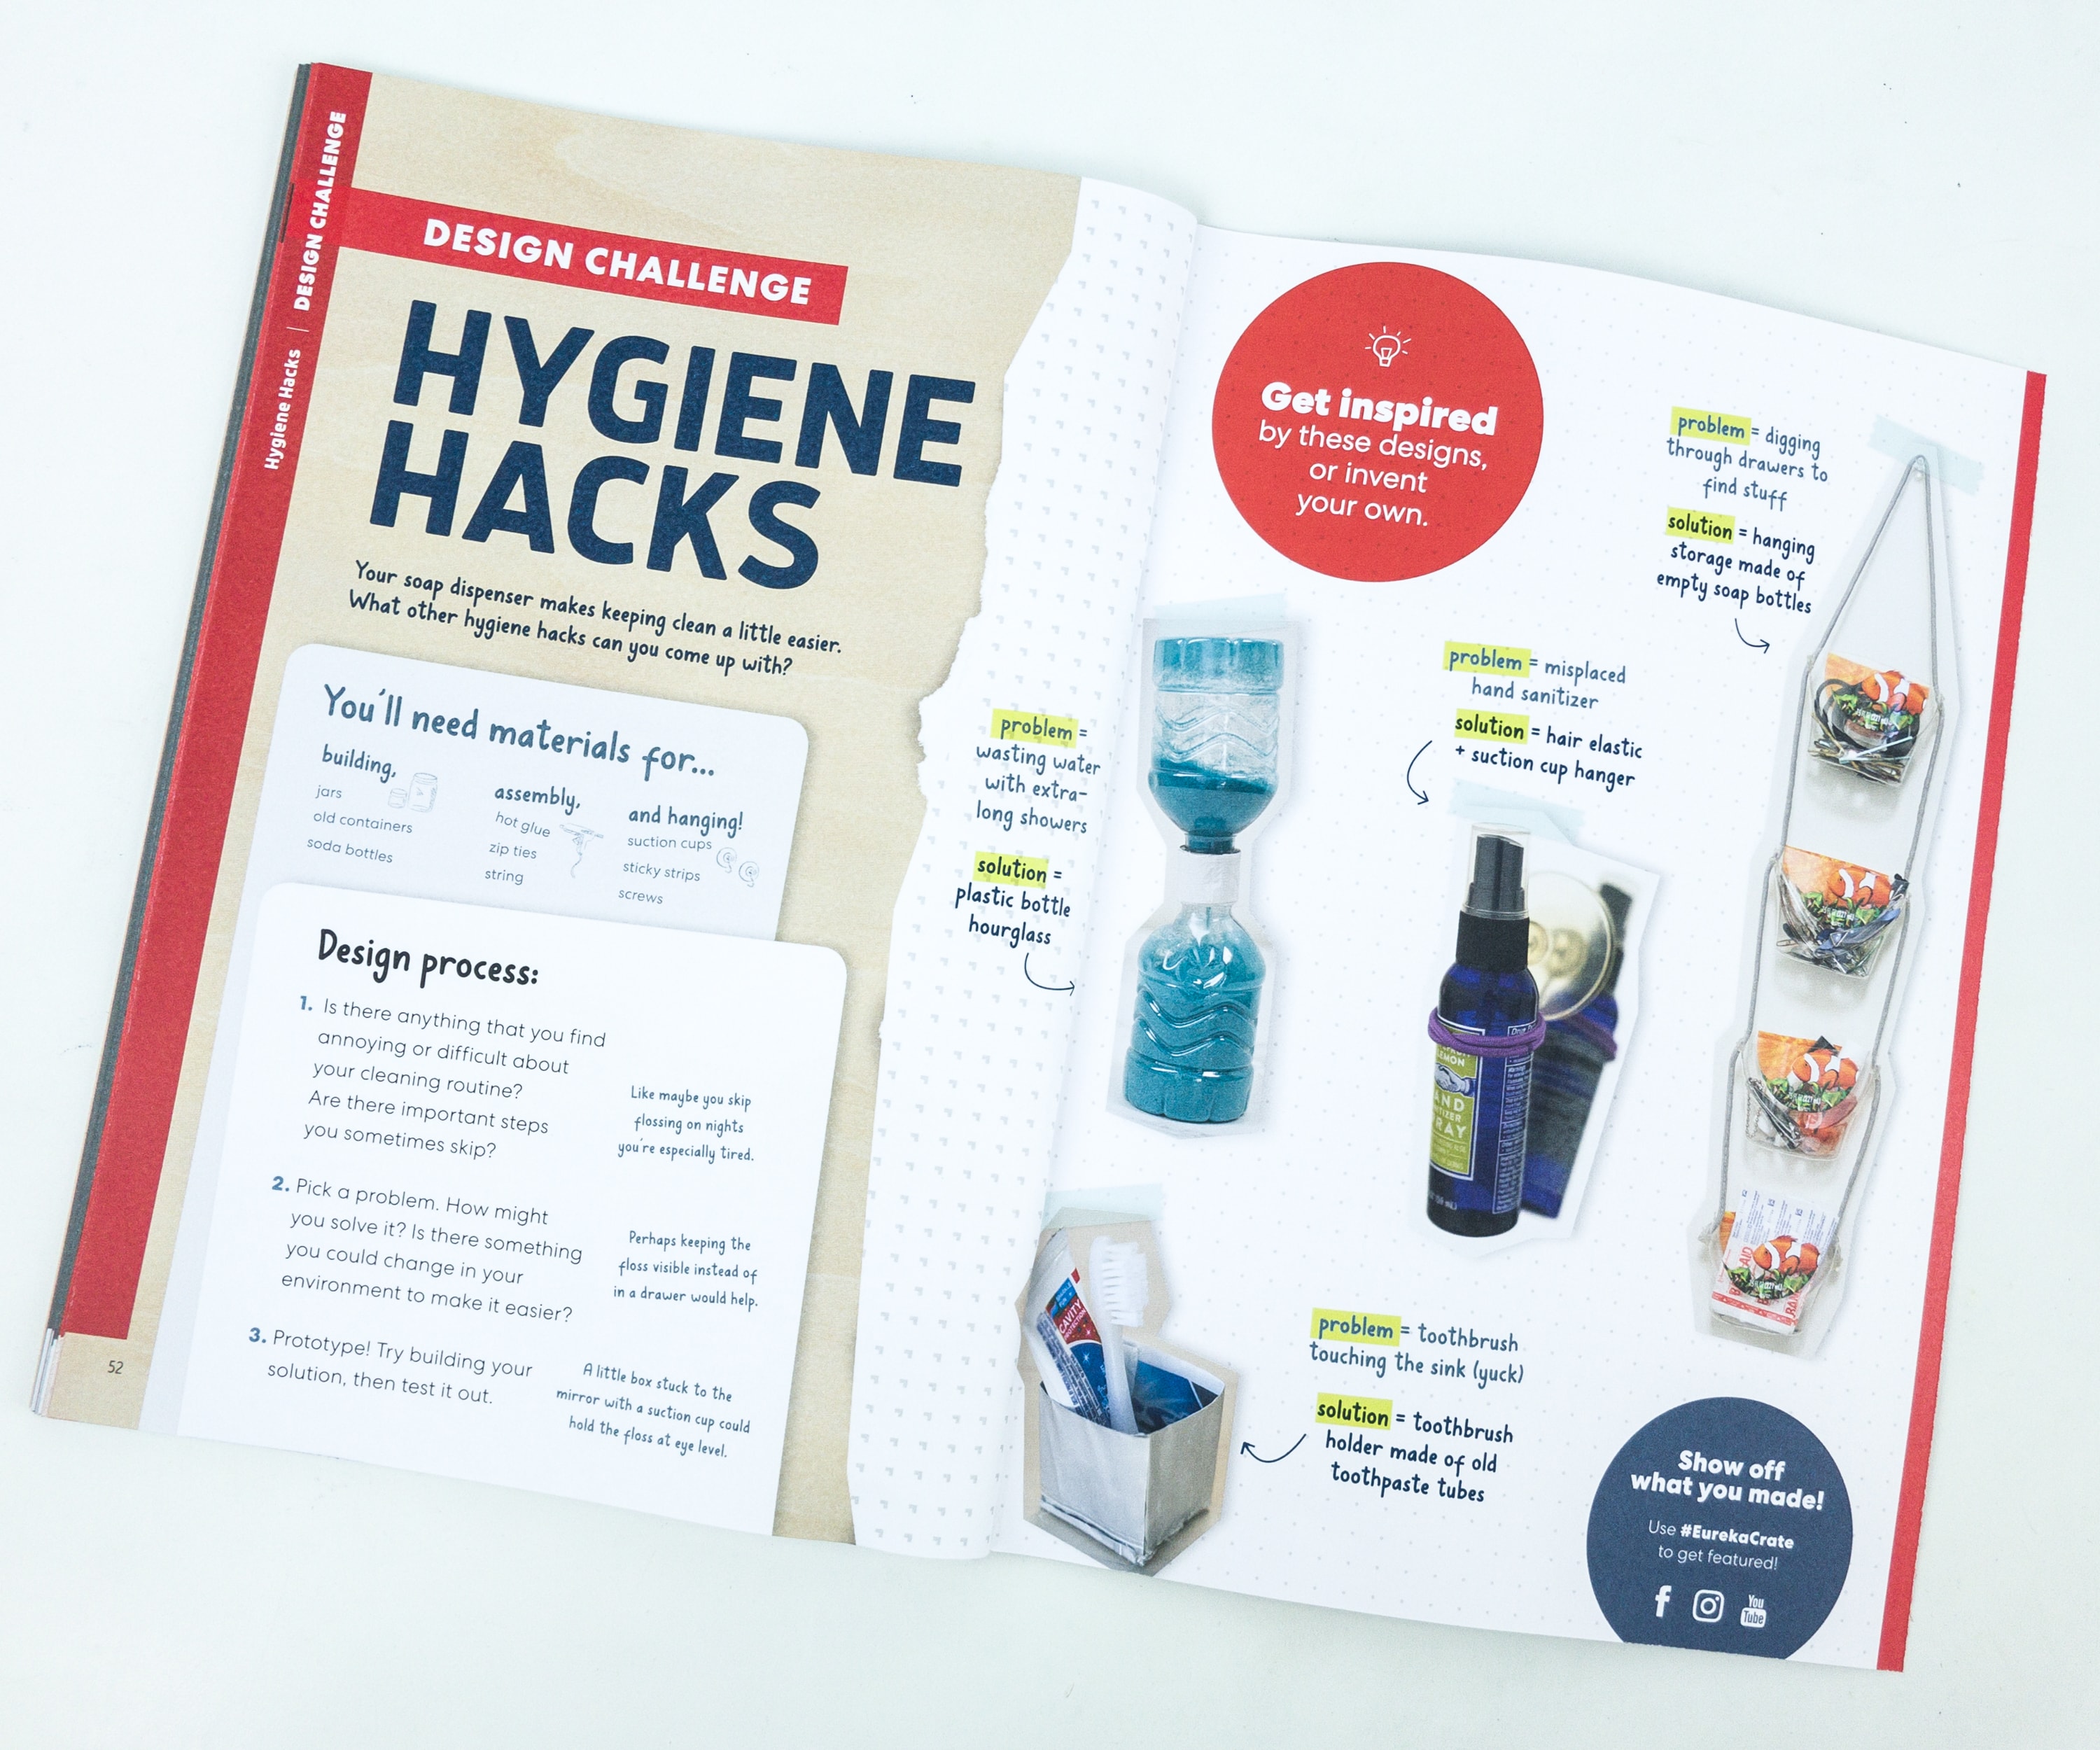
For the Design Challenge, they’re encouraging us to do some hygiene hacks!
Here’s the completed look at our soap dispenser! the design is really smart!
The dispenser is a nice addition on the side of the sink. It is more effective than using soap bars, and it’s easier too.
This is really a fun and useful project, plus the design of this machine looks perfect on any tinkerer’s sink!
We’ve made all sorts of useful items through Eureka Crate in the past months, and it’s so satisfying because we get to learn about science and create something we can actually use at the same time. This month, it’s a soap dispenser! We totally need it to keep our hands clean and to avoid germs and diseases. They even included the liquid soap that we can load in the dispenser after completing it. Another thing we love about this crate is the booklet! It’s always loaded with information, from instructions to the history of the project’s design and even design challenges. Those who are looking for hands-on subscriptions would find this one awesome. The good thing is that it’s ideal for kids and adults alike!
What do you think of this month’s Eureka Crate?


Comments
We are struggling hard with getting the part in that looks like a fidget spinner. Nearly impossible to get it to stay in place, spin, and not pop out at the top.
Hi Constance – I can’t be of super much help because my kids built this one, but KiwiCo offers excellent assistance through their portal. Did you try asking for help? They may have tips for you or a video. Sorry I don’t have a super great answer for you today! -Brandy