KiwiCo Family is currently offering single STEAM crates, featuring creative projects that fuse science and art! These KiwiCo STEAM Projects are ideal for kids ages 9 and above, the same age range as Doodle Crate and Tinker Crate subscriptions. All the materials are included, as well as easy-to-follow, step-by-step instructions plus clear illustrations. They even provide a series of explanations to illuminate how everything works.
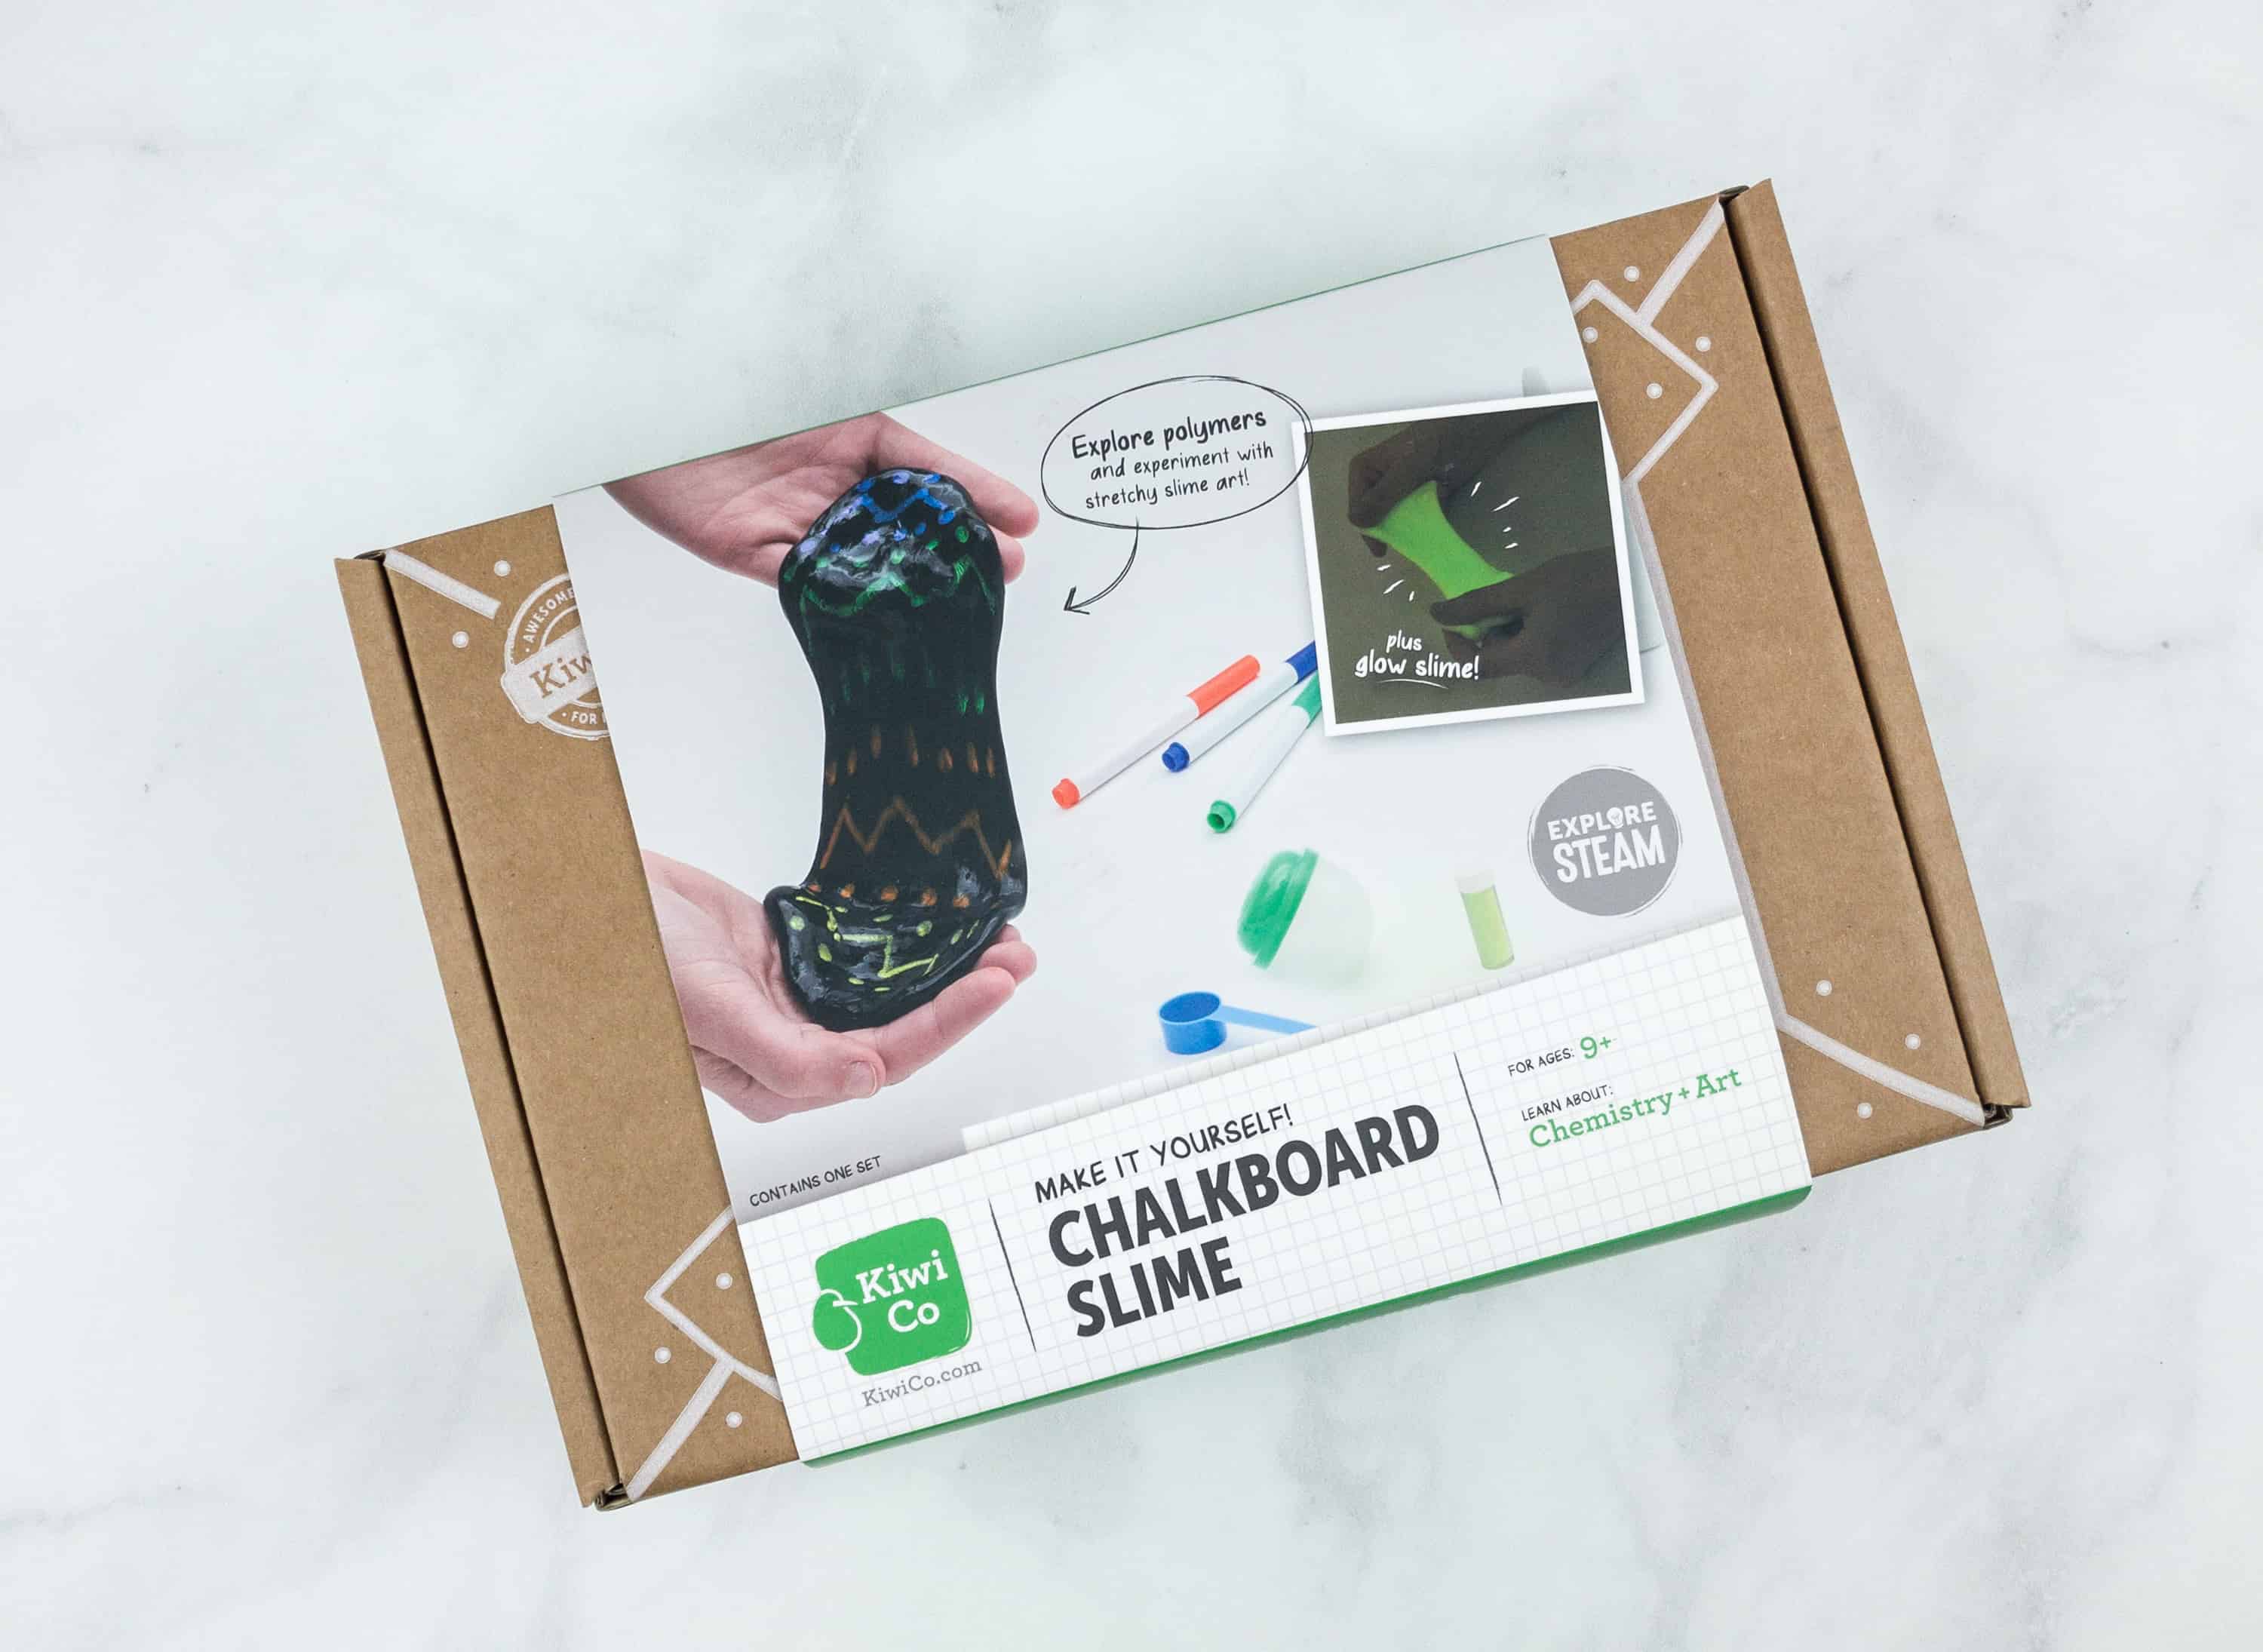
This is the review of Chalkboard & Glow Slime, one of the new KiwiCo STEAM Projects available. It costs $22.95. The other projects are Light-Up Wire and Constellation Messenger Bag. You can get all three projects at once for $74.95 + free shipping.

Stretch your chemistry and doodling muscles by creating two kinds of slime with this hands-on kit. Create jet-black chalkboard slime and doodle on it with the included chalkboard markers. Make another batch with the included glow powder to create slime that glows eerily in the dark.
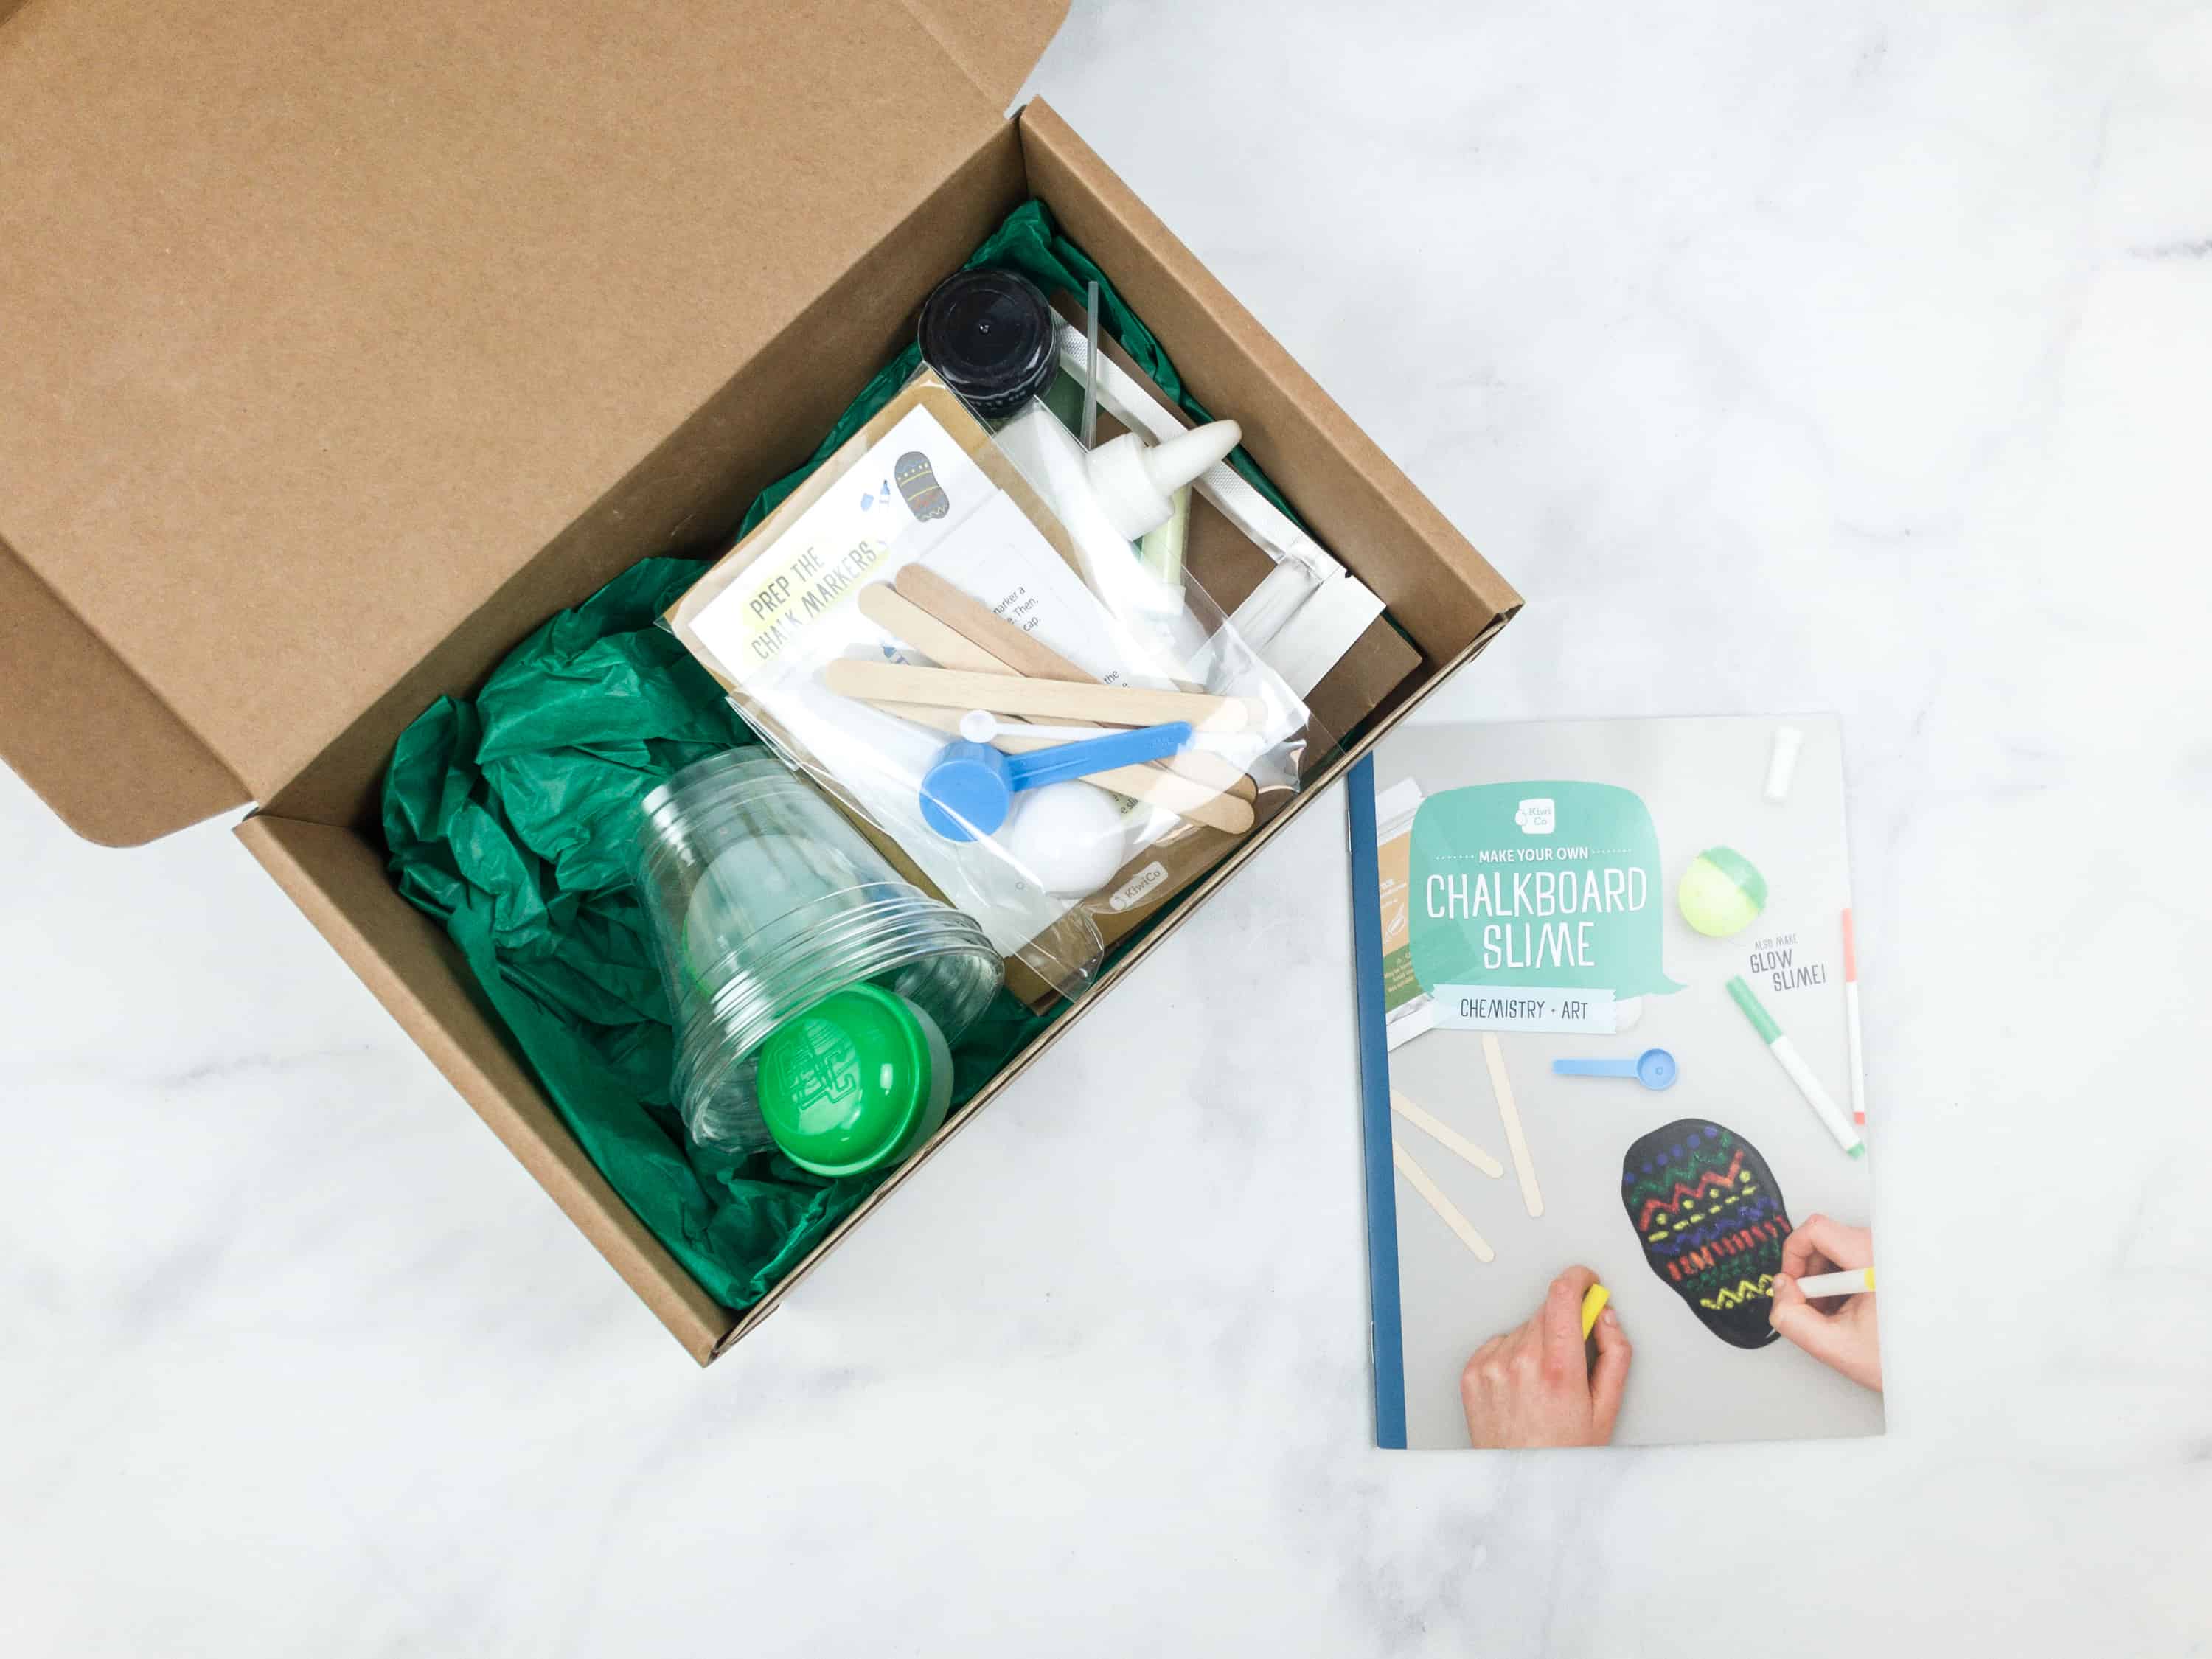
All of the craft supplies from the Crate. You really need very little from home to do the crafts.
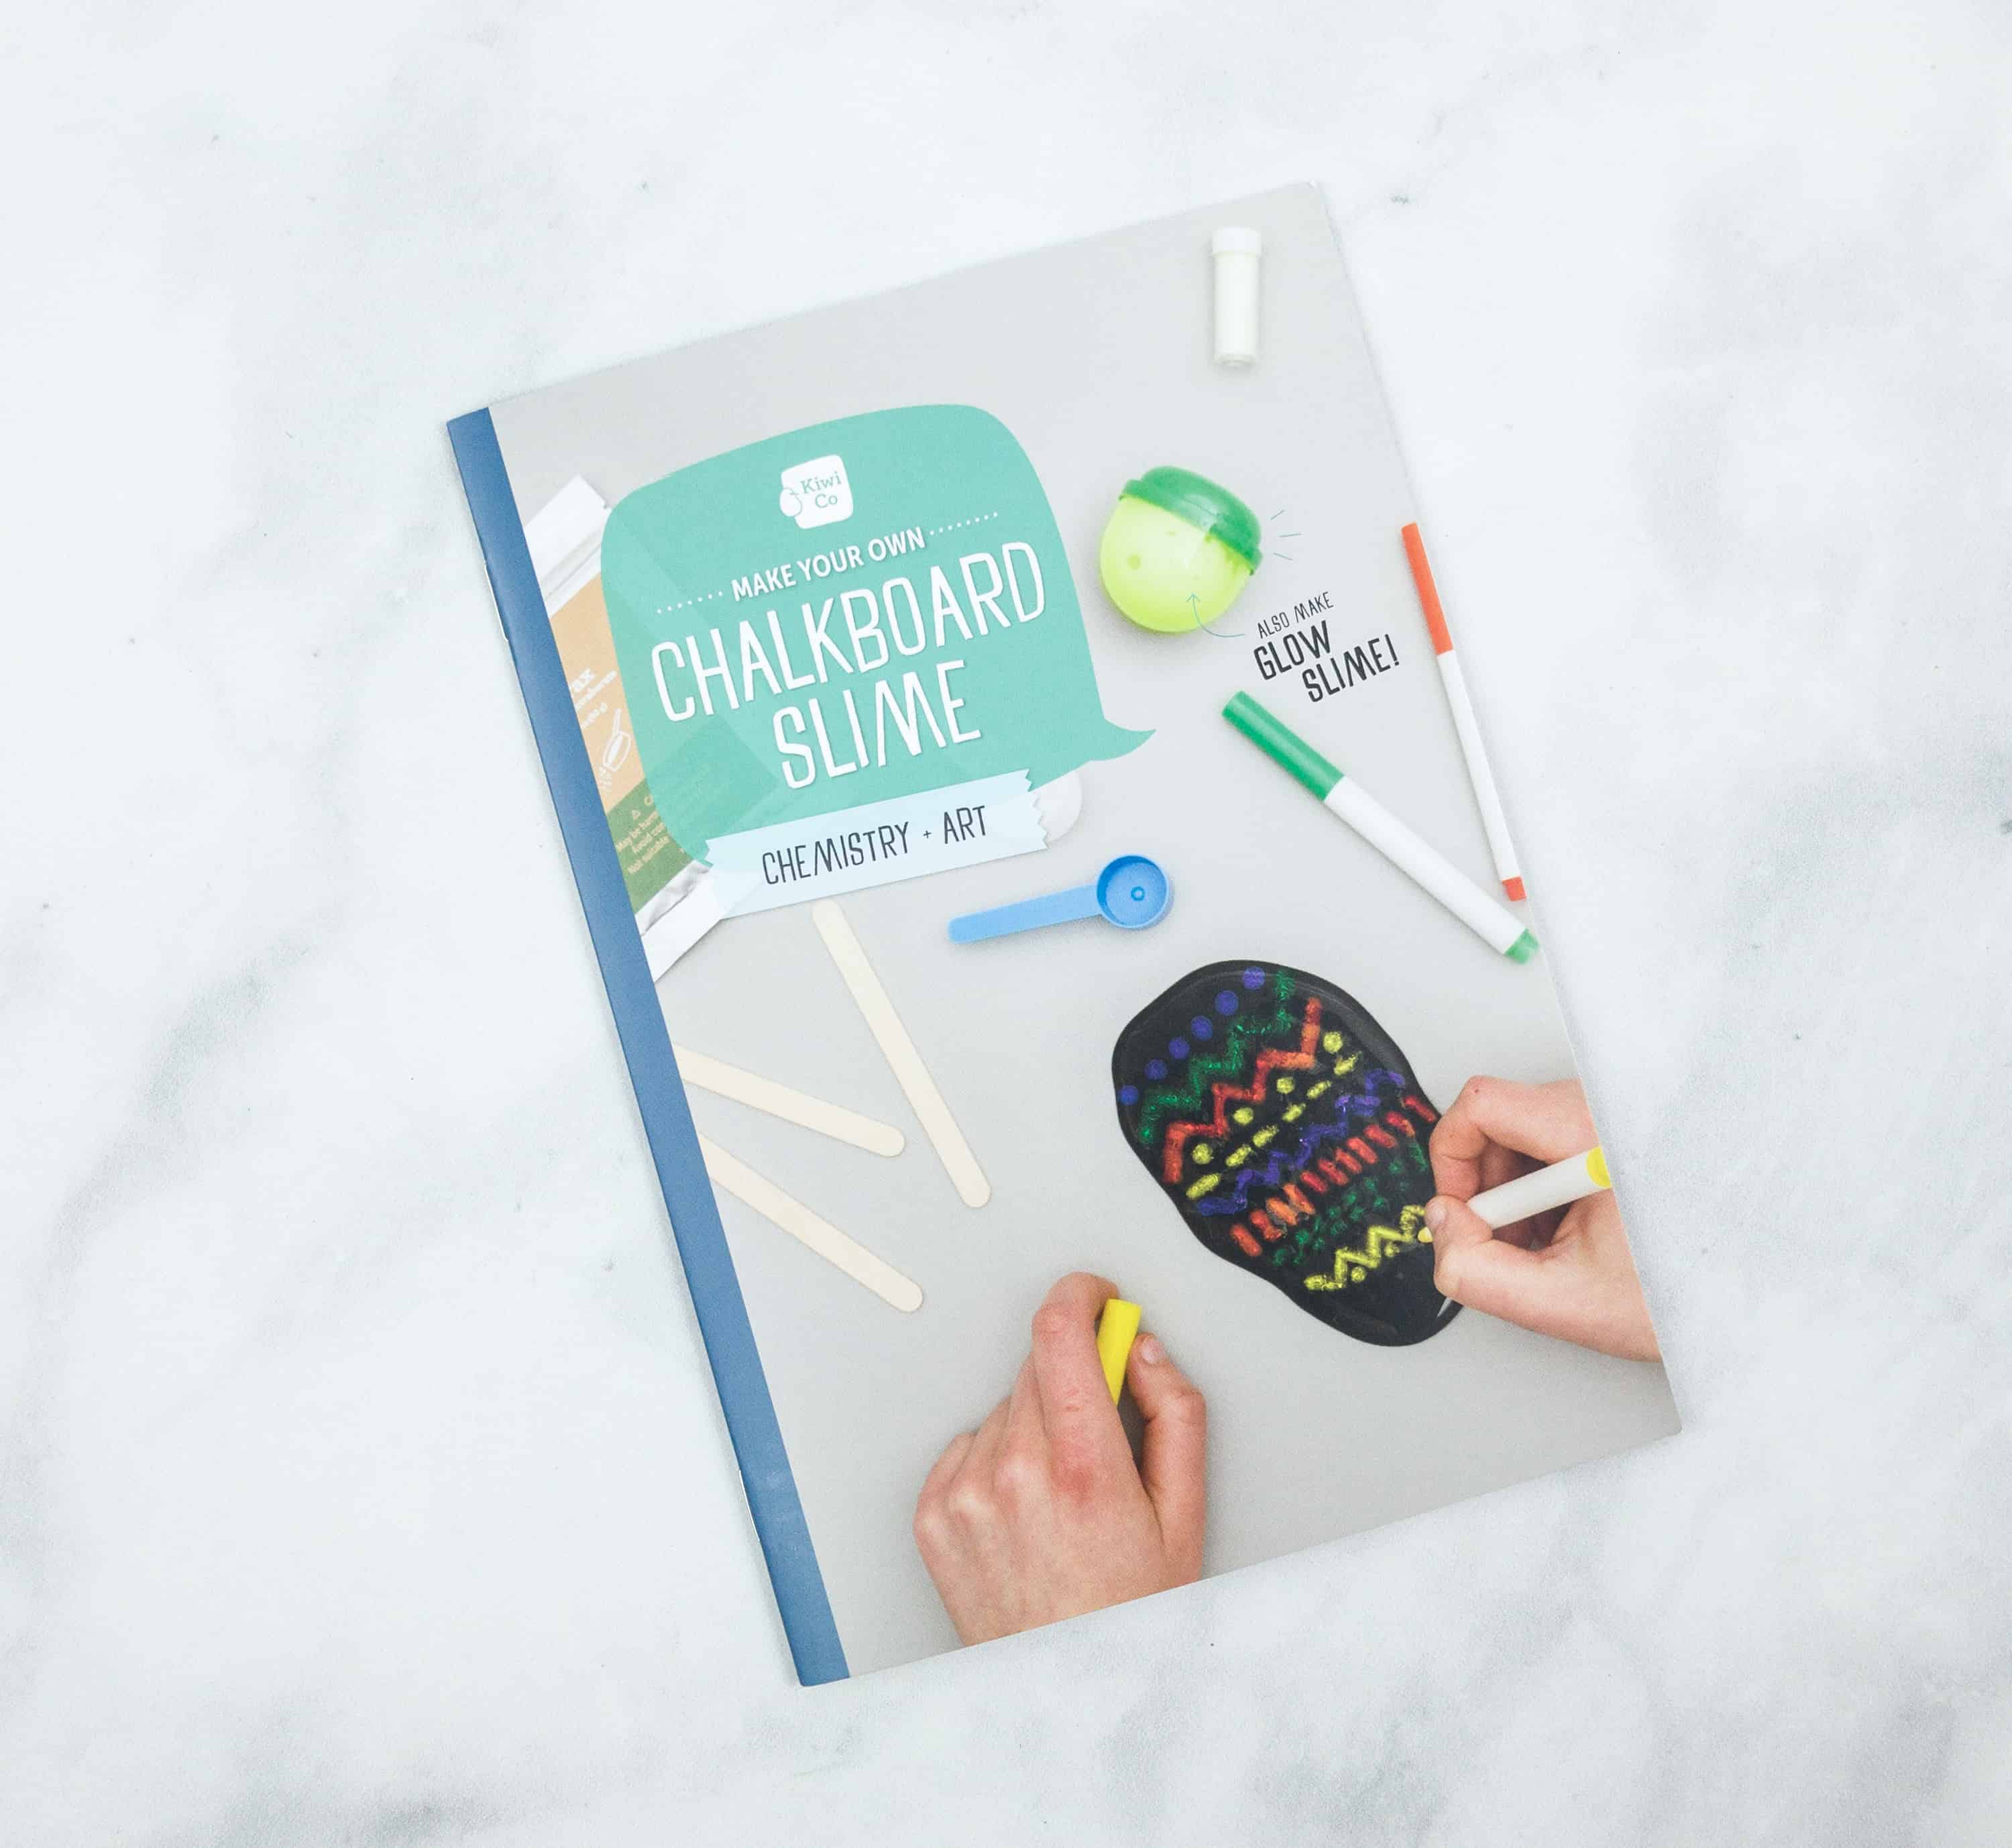
The booklet is the actual instruction booklet for the project.
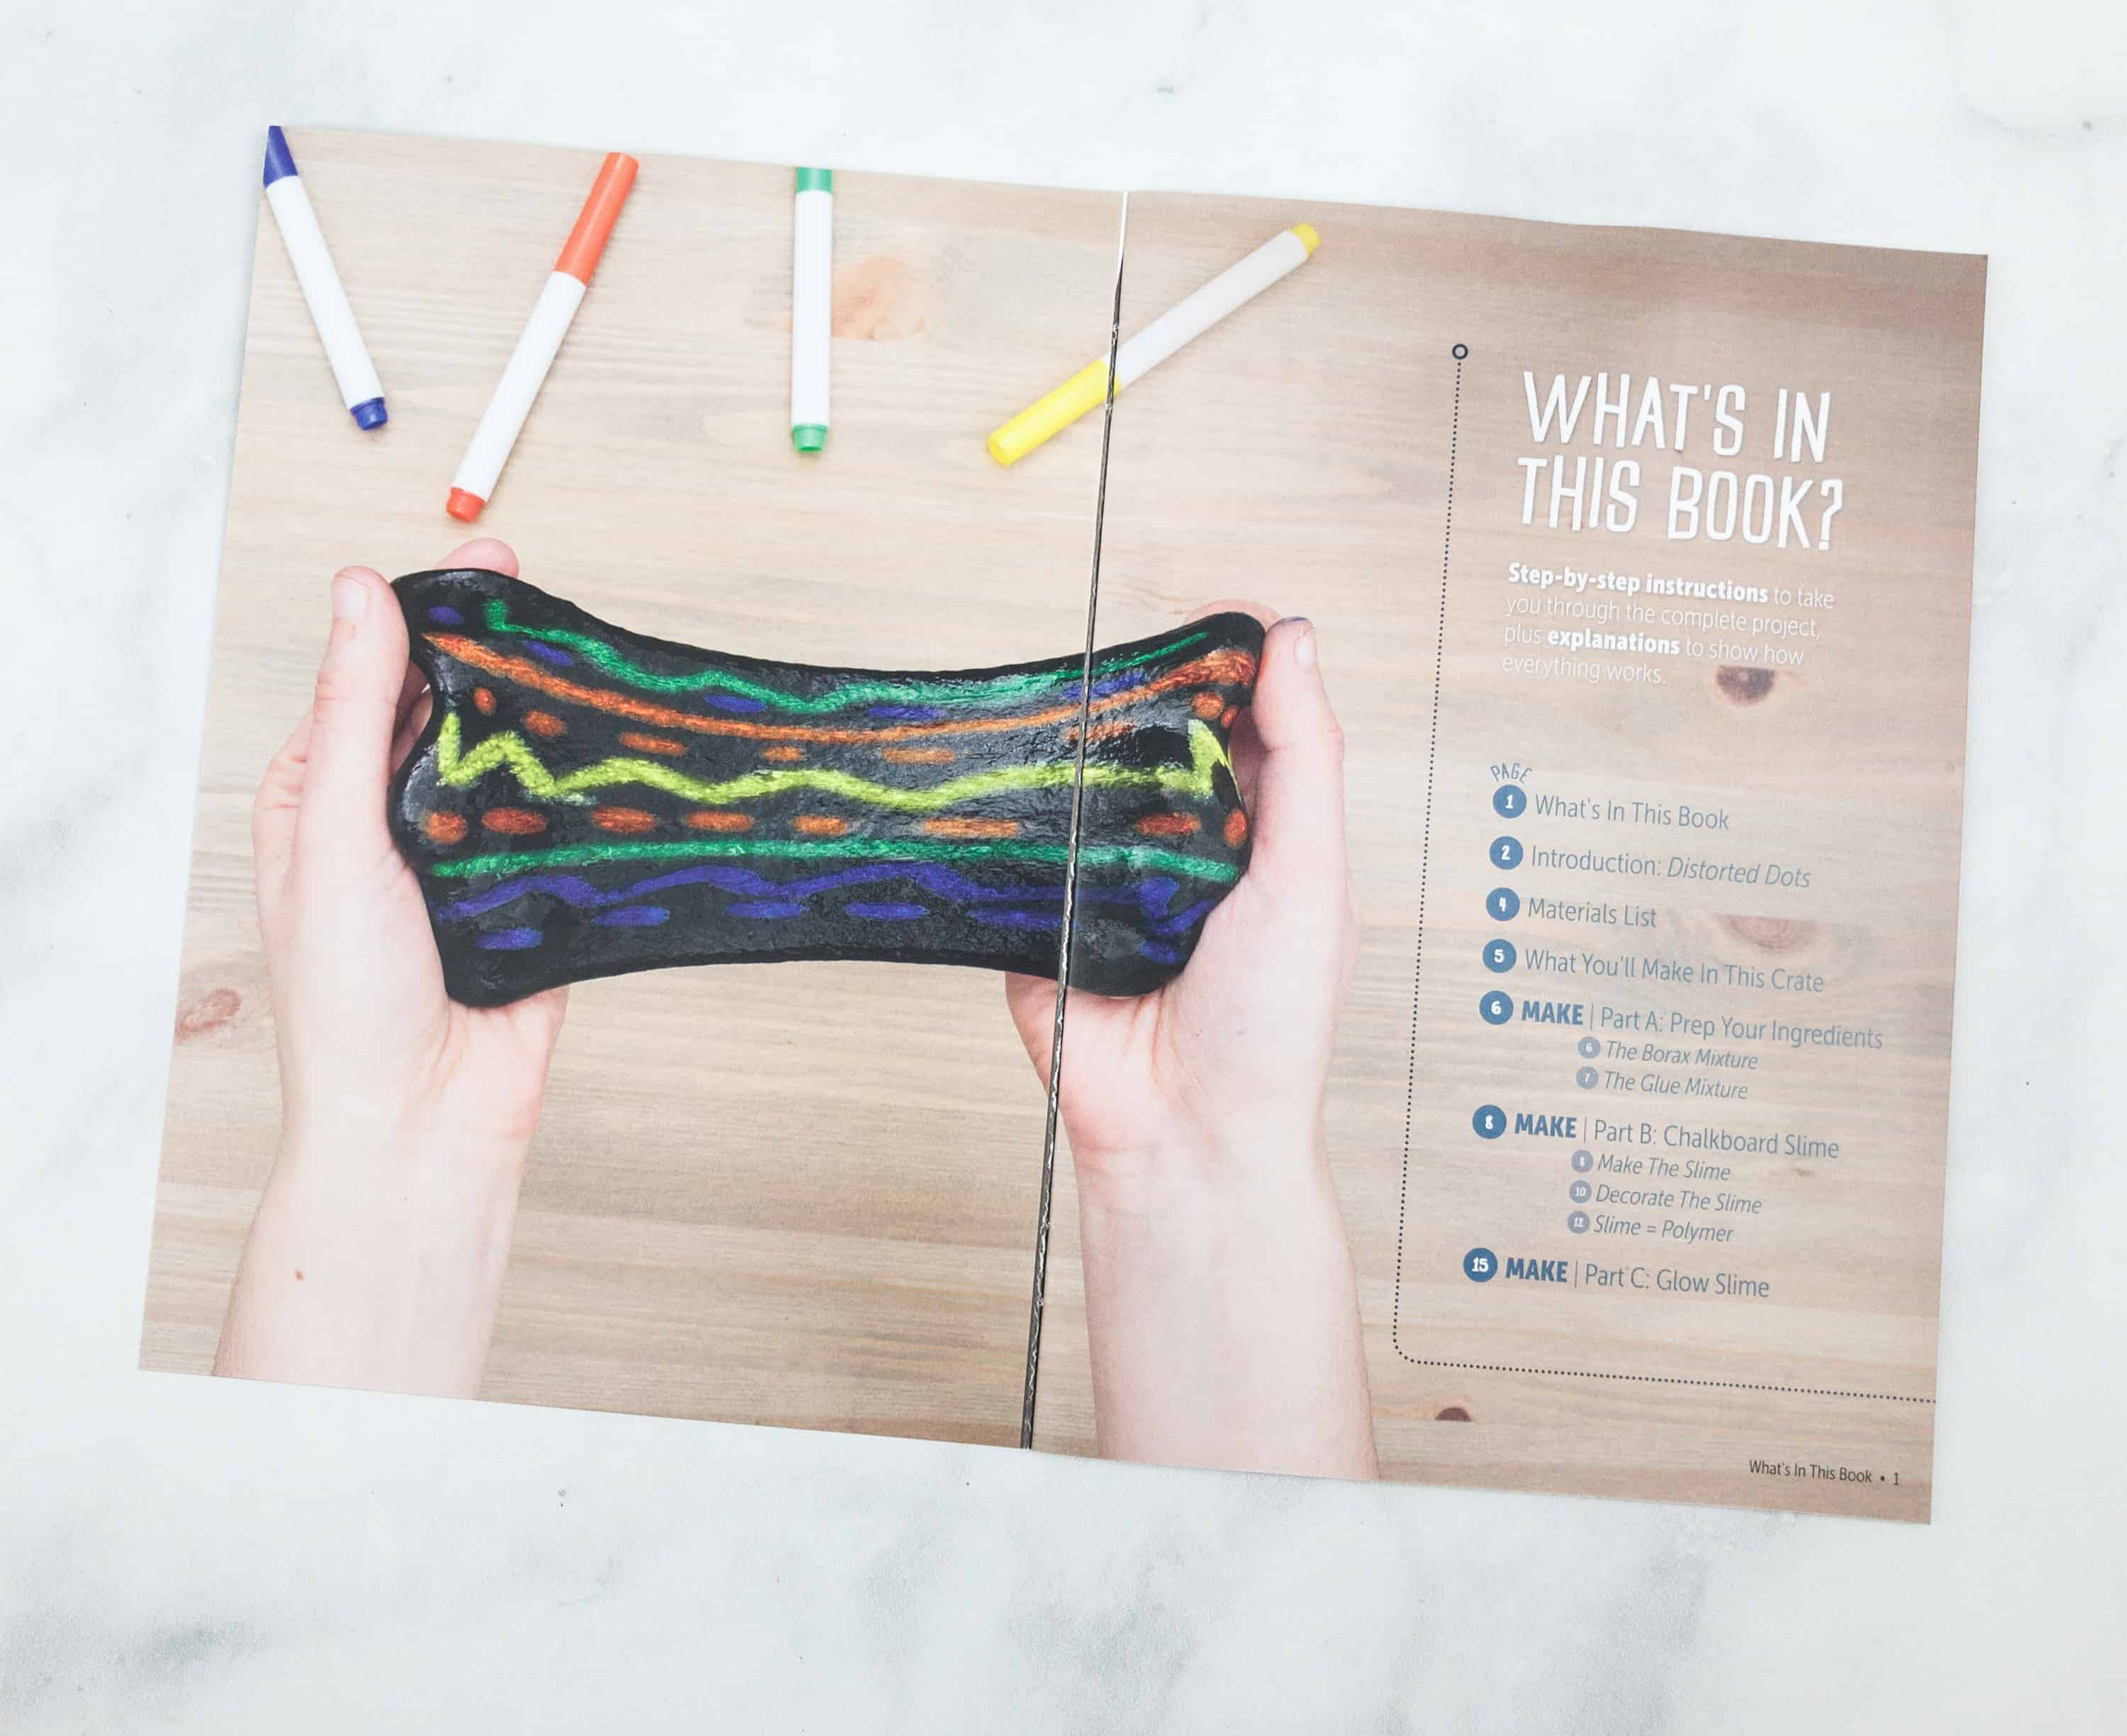
This book contains step by step instructions to make your own chalkboard slime. There are also explanations and diagrams on how everything in this project work!
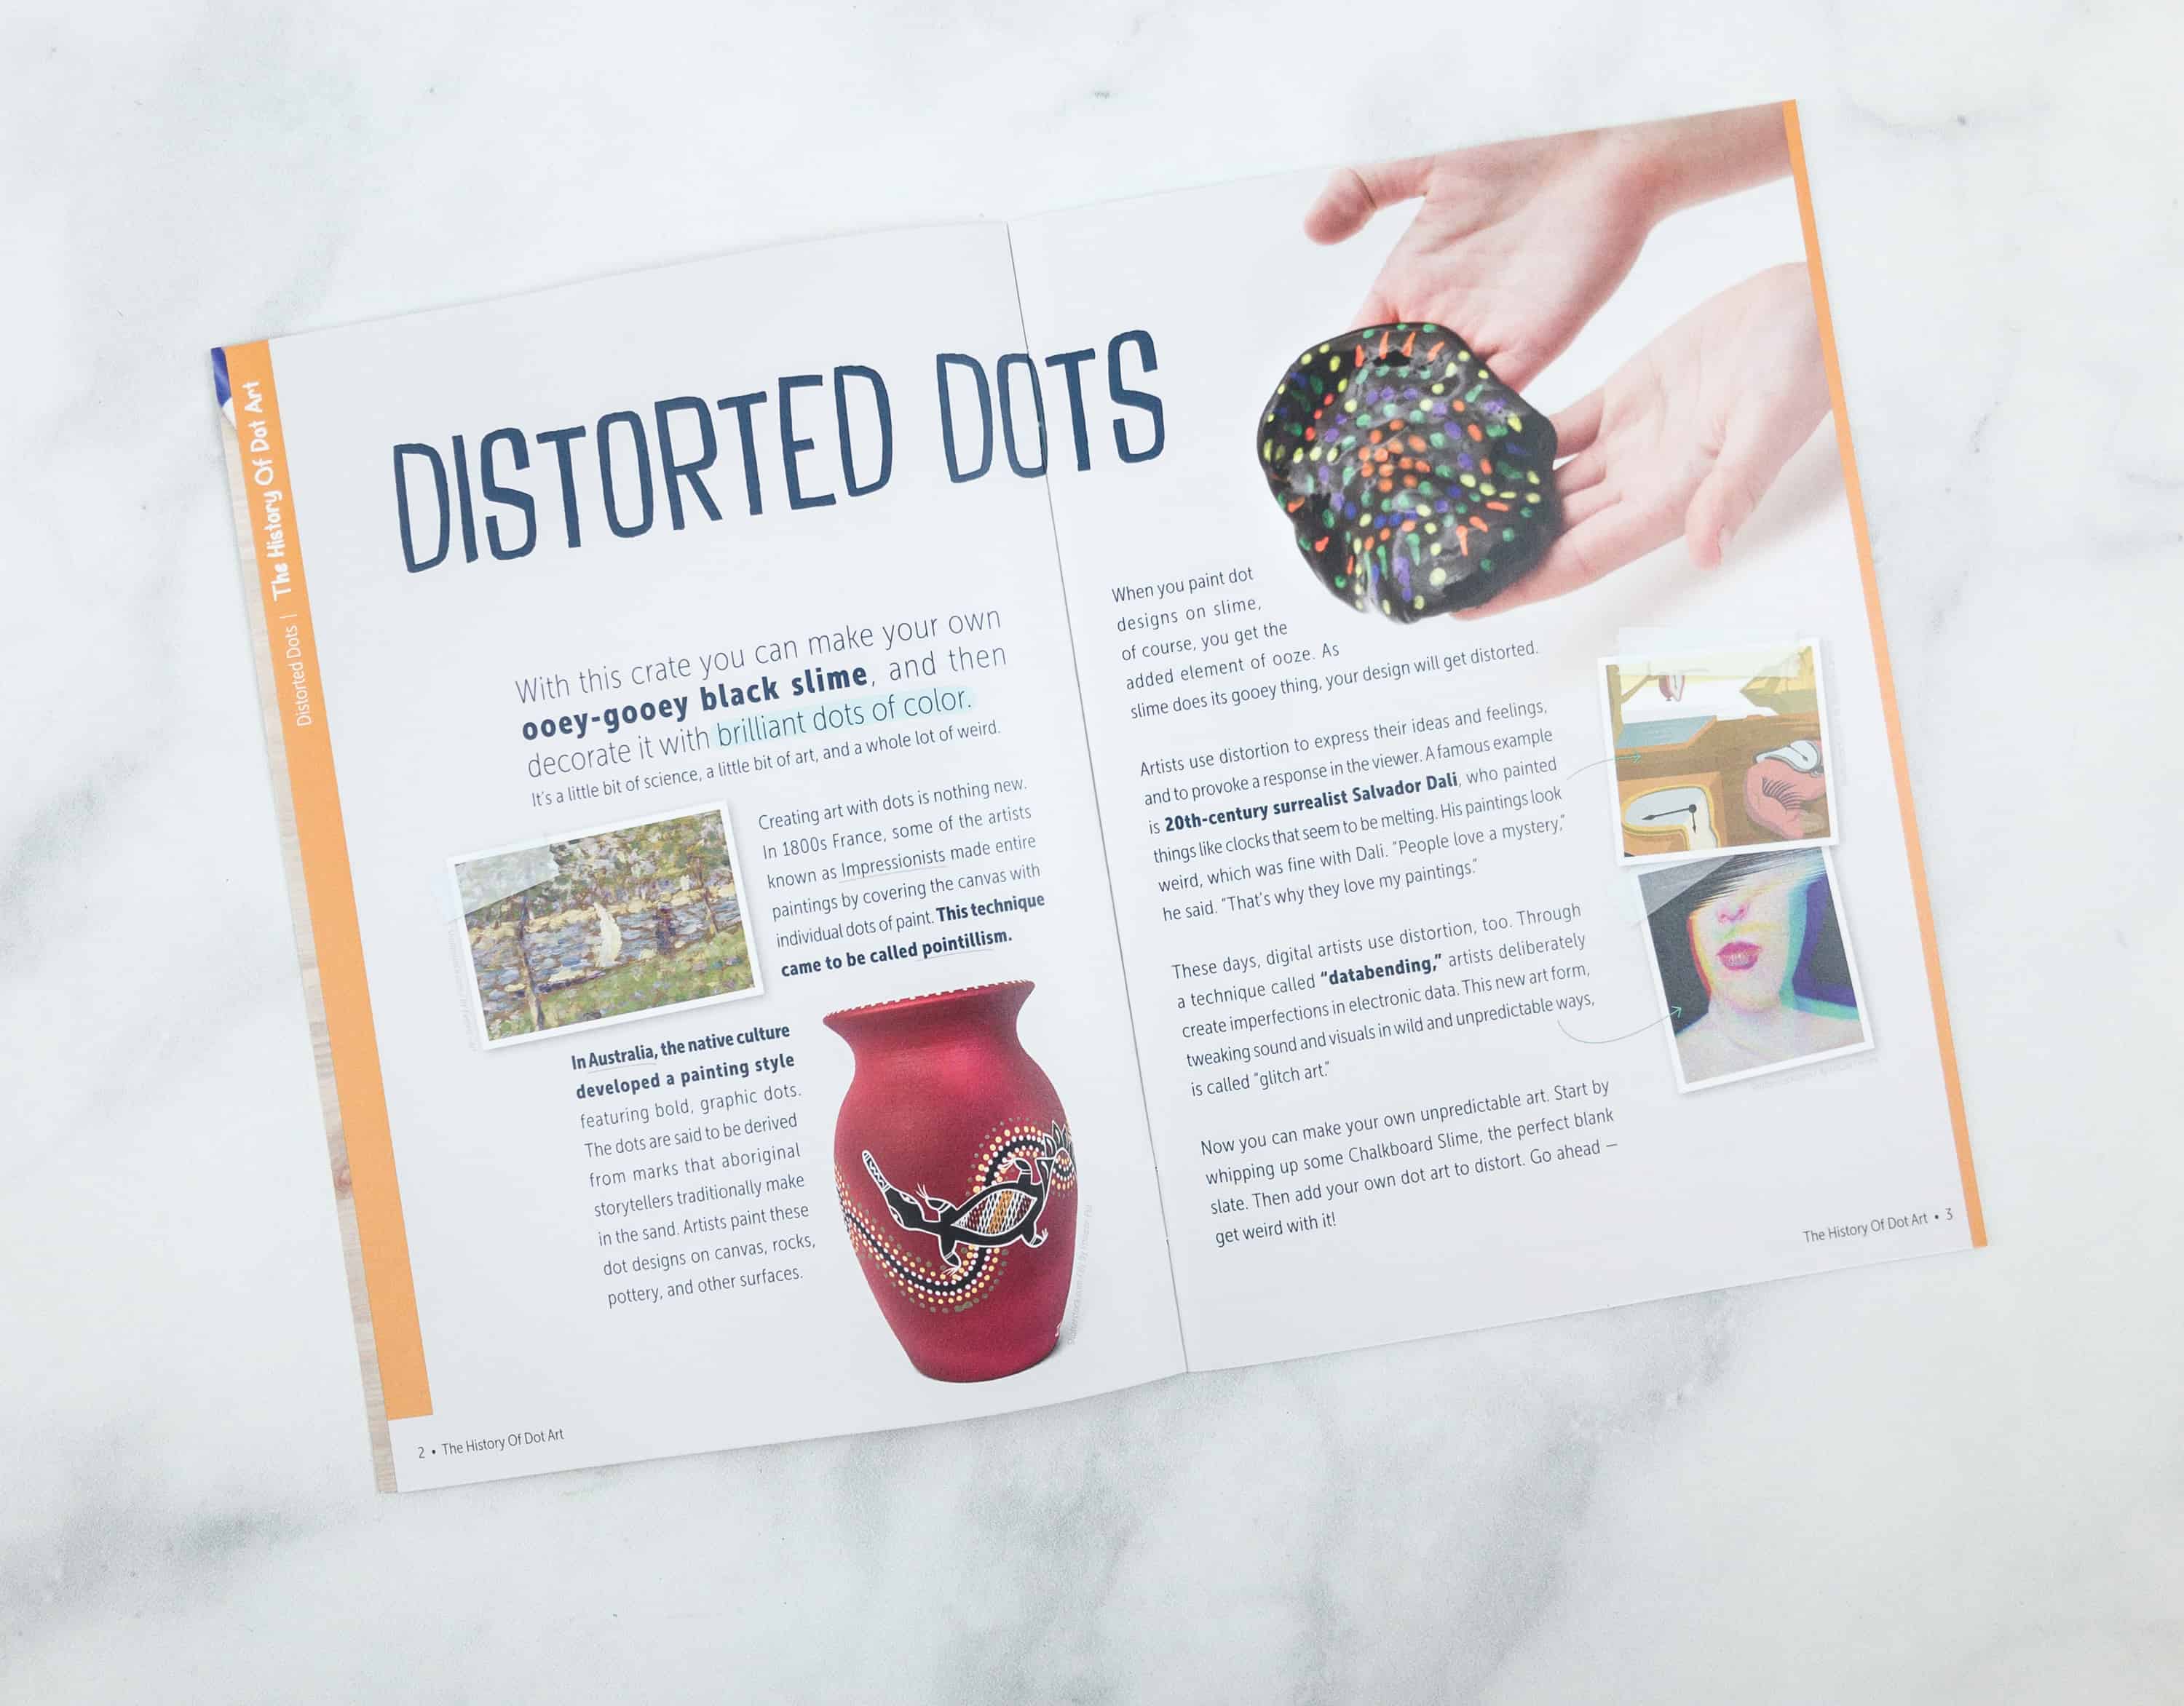
Of course, they won’t give us an activity without a reference. This page goes into more detail about some of the art you might create with your chalkboard slime!
The kids live for this! They want to experience the fun of playing with the gooey slime! Kiwi Crate pamphlet incorporated small images of what was described in the captions and instructions to make it easier to identify and do them.

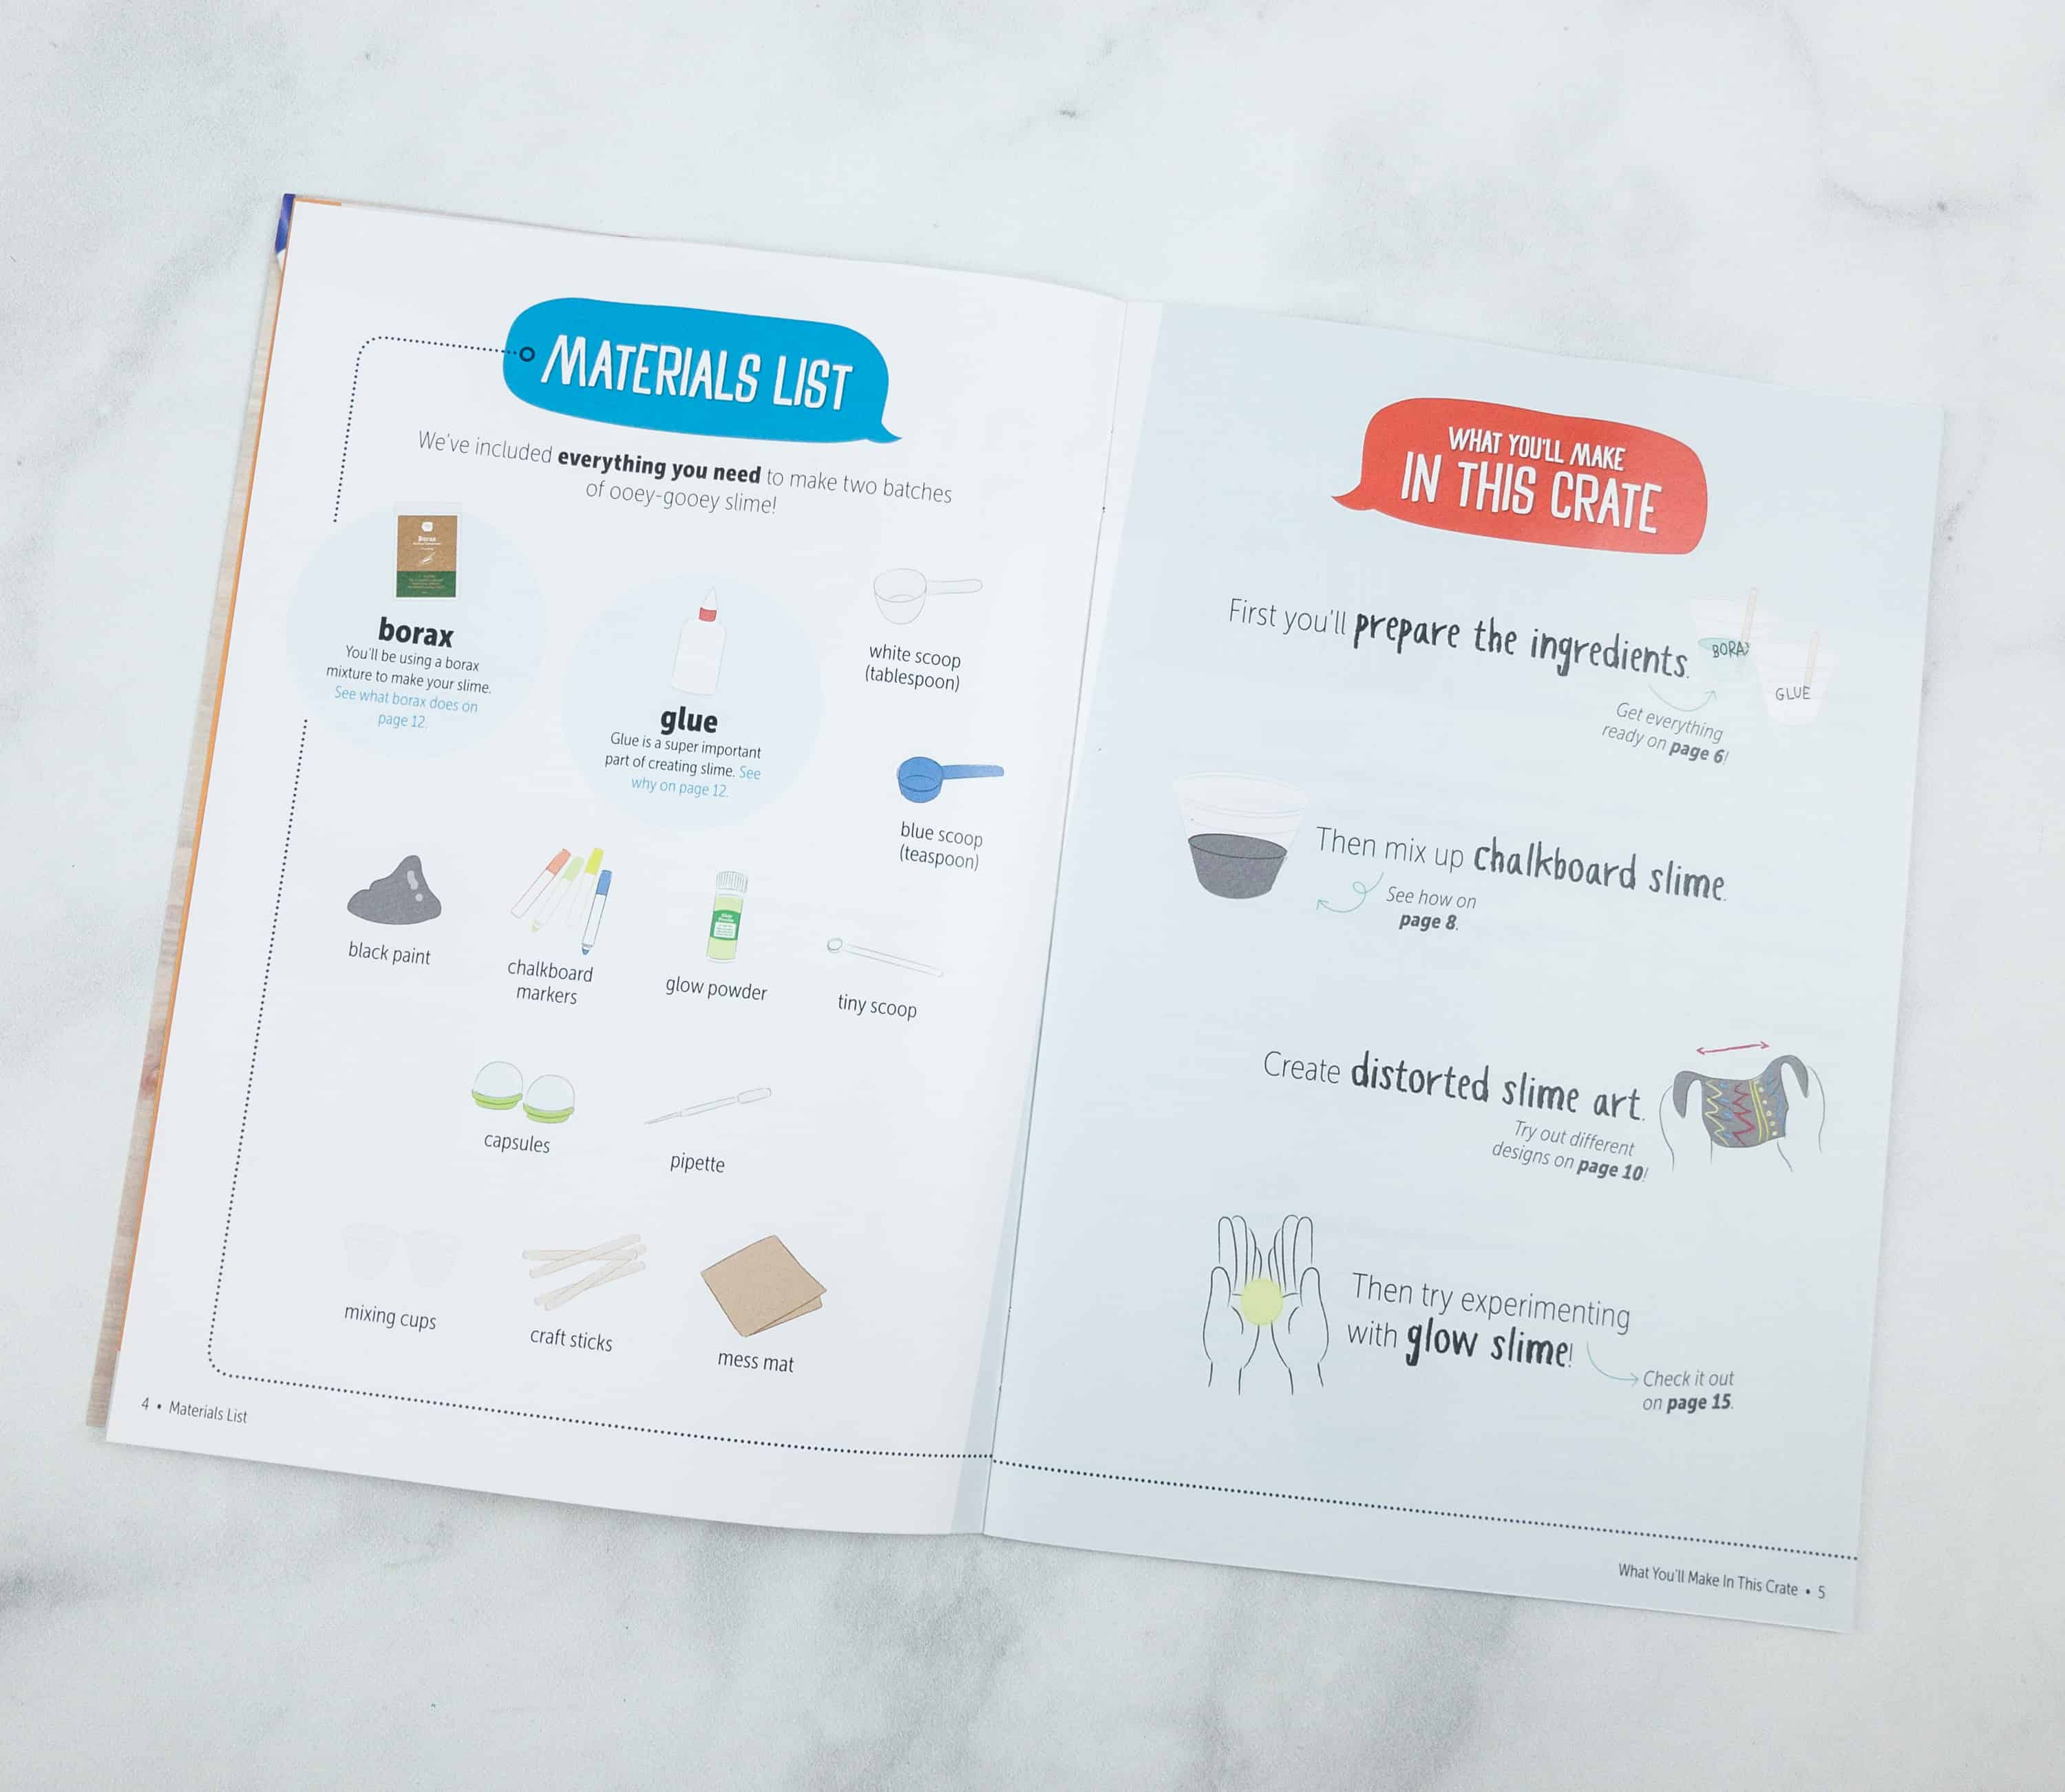
These are all the materials needed for the activity.
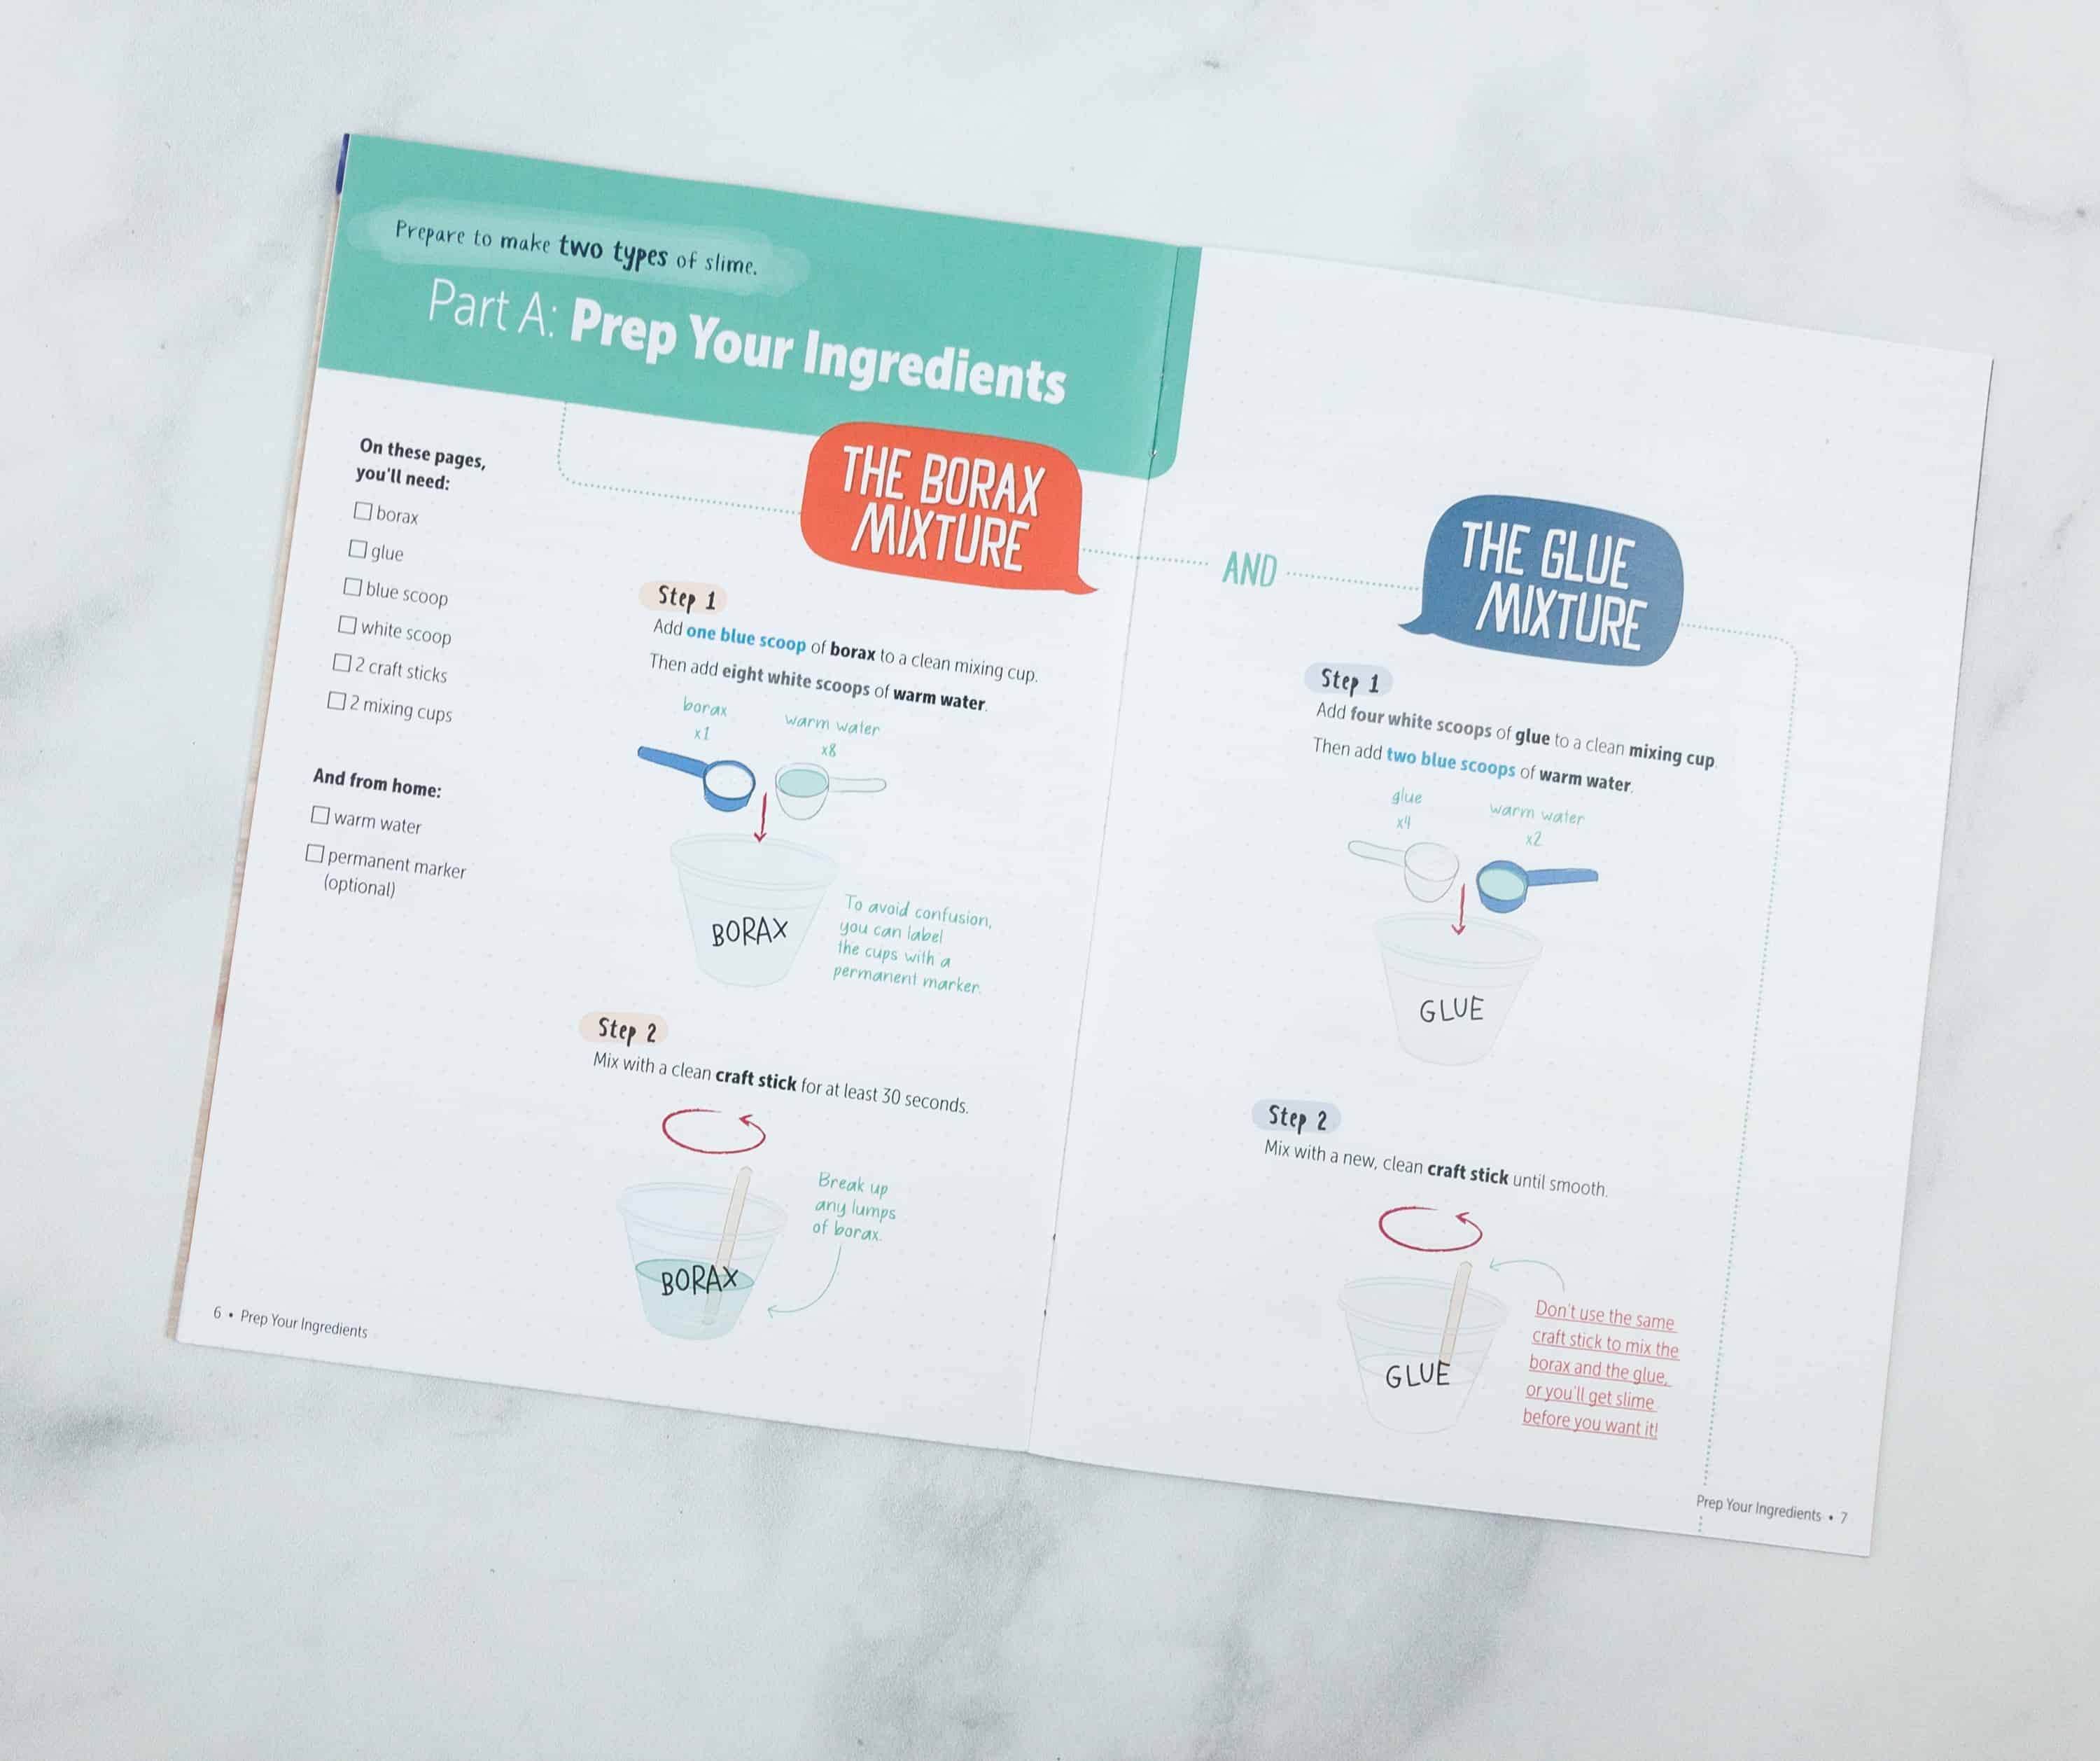
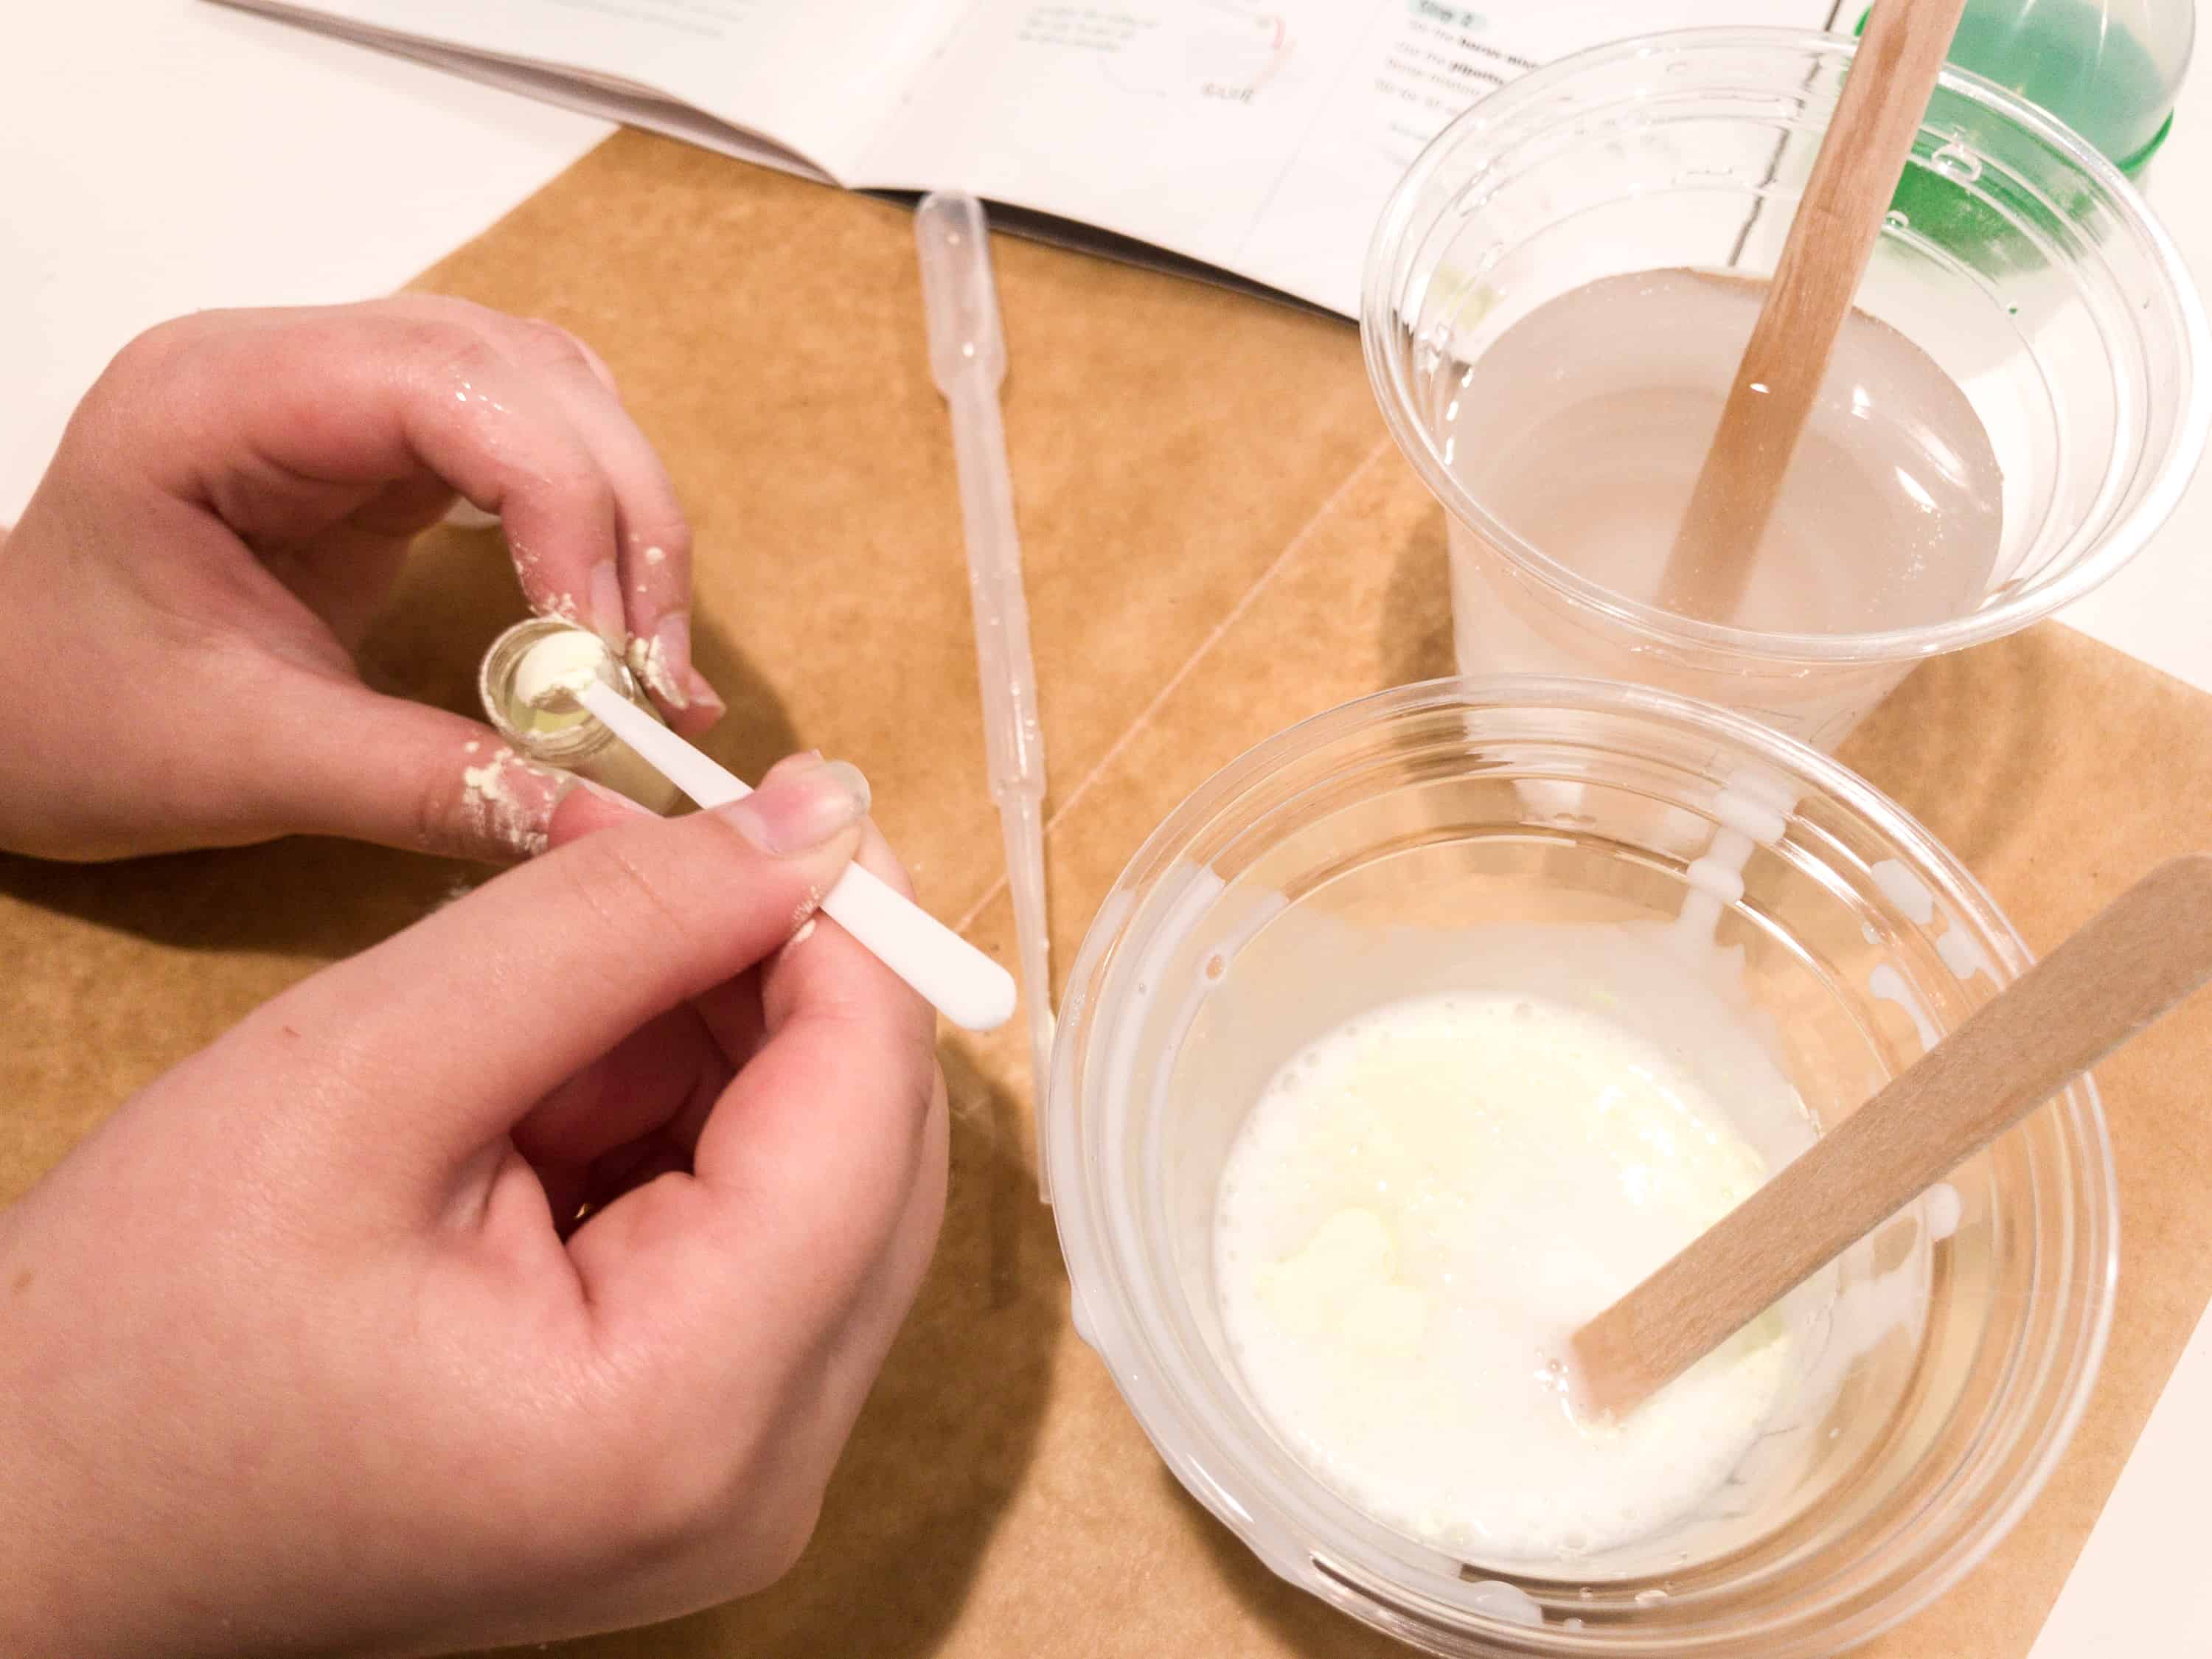
There’s a checklist at the left side, which you can tick as you use them. Part A is all about preparing the ingredients.
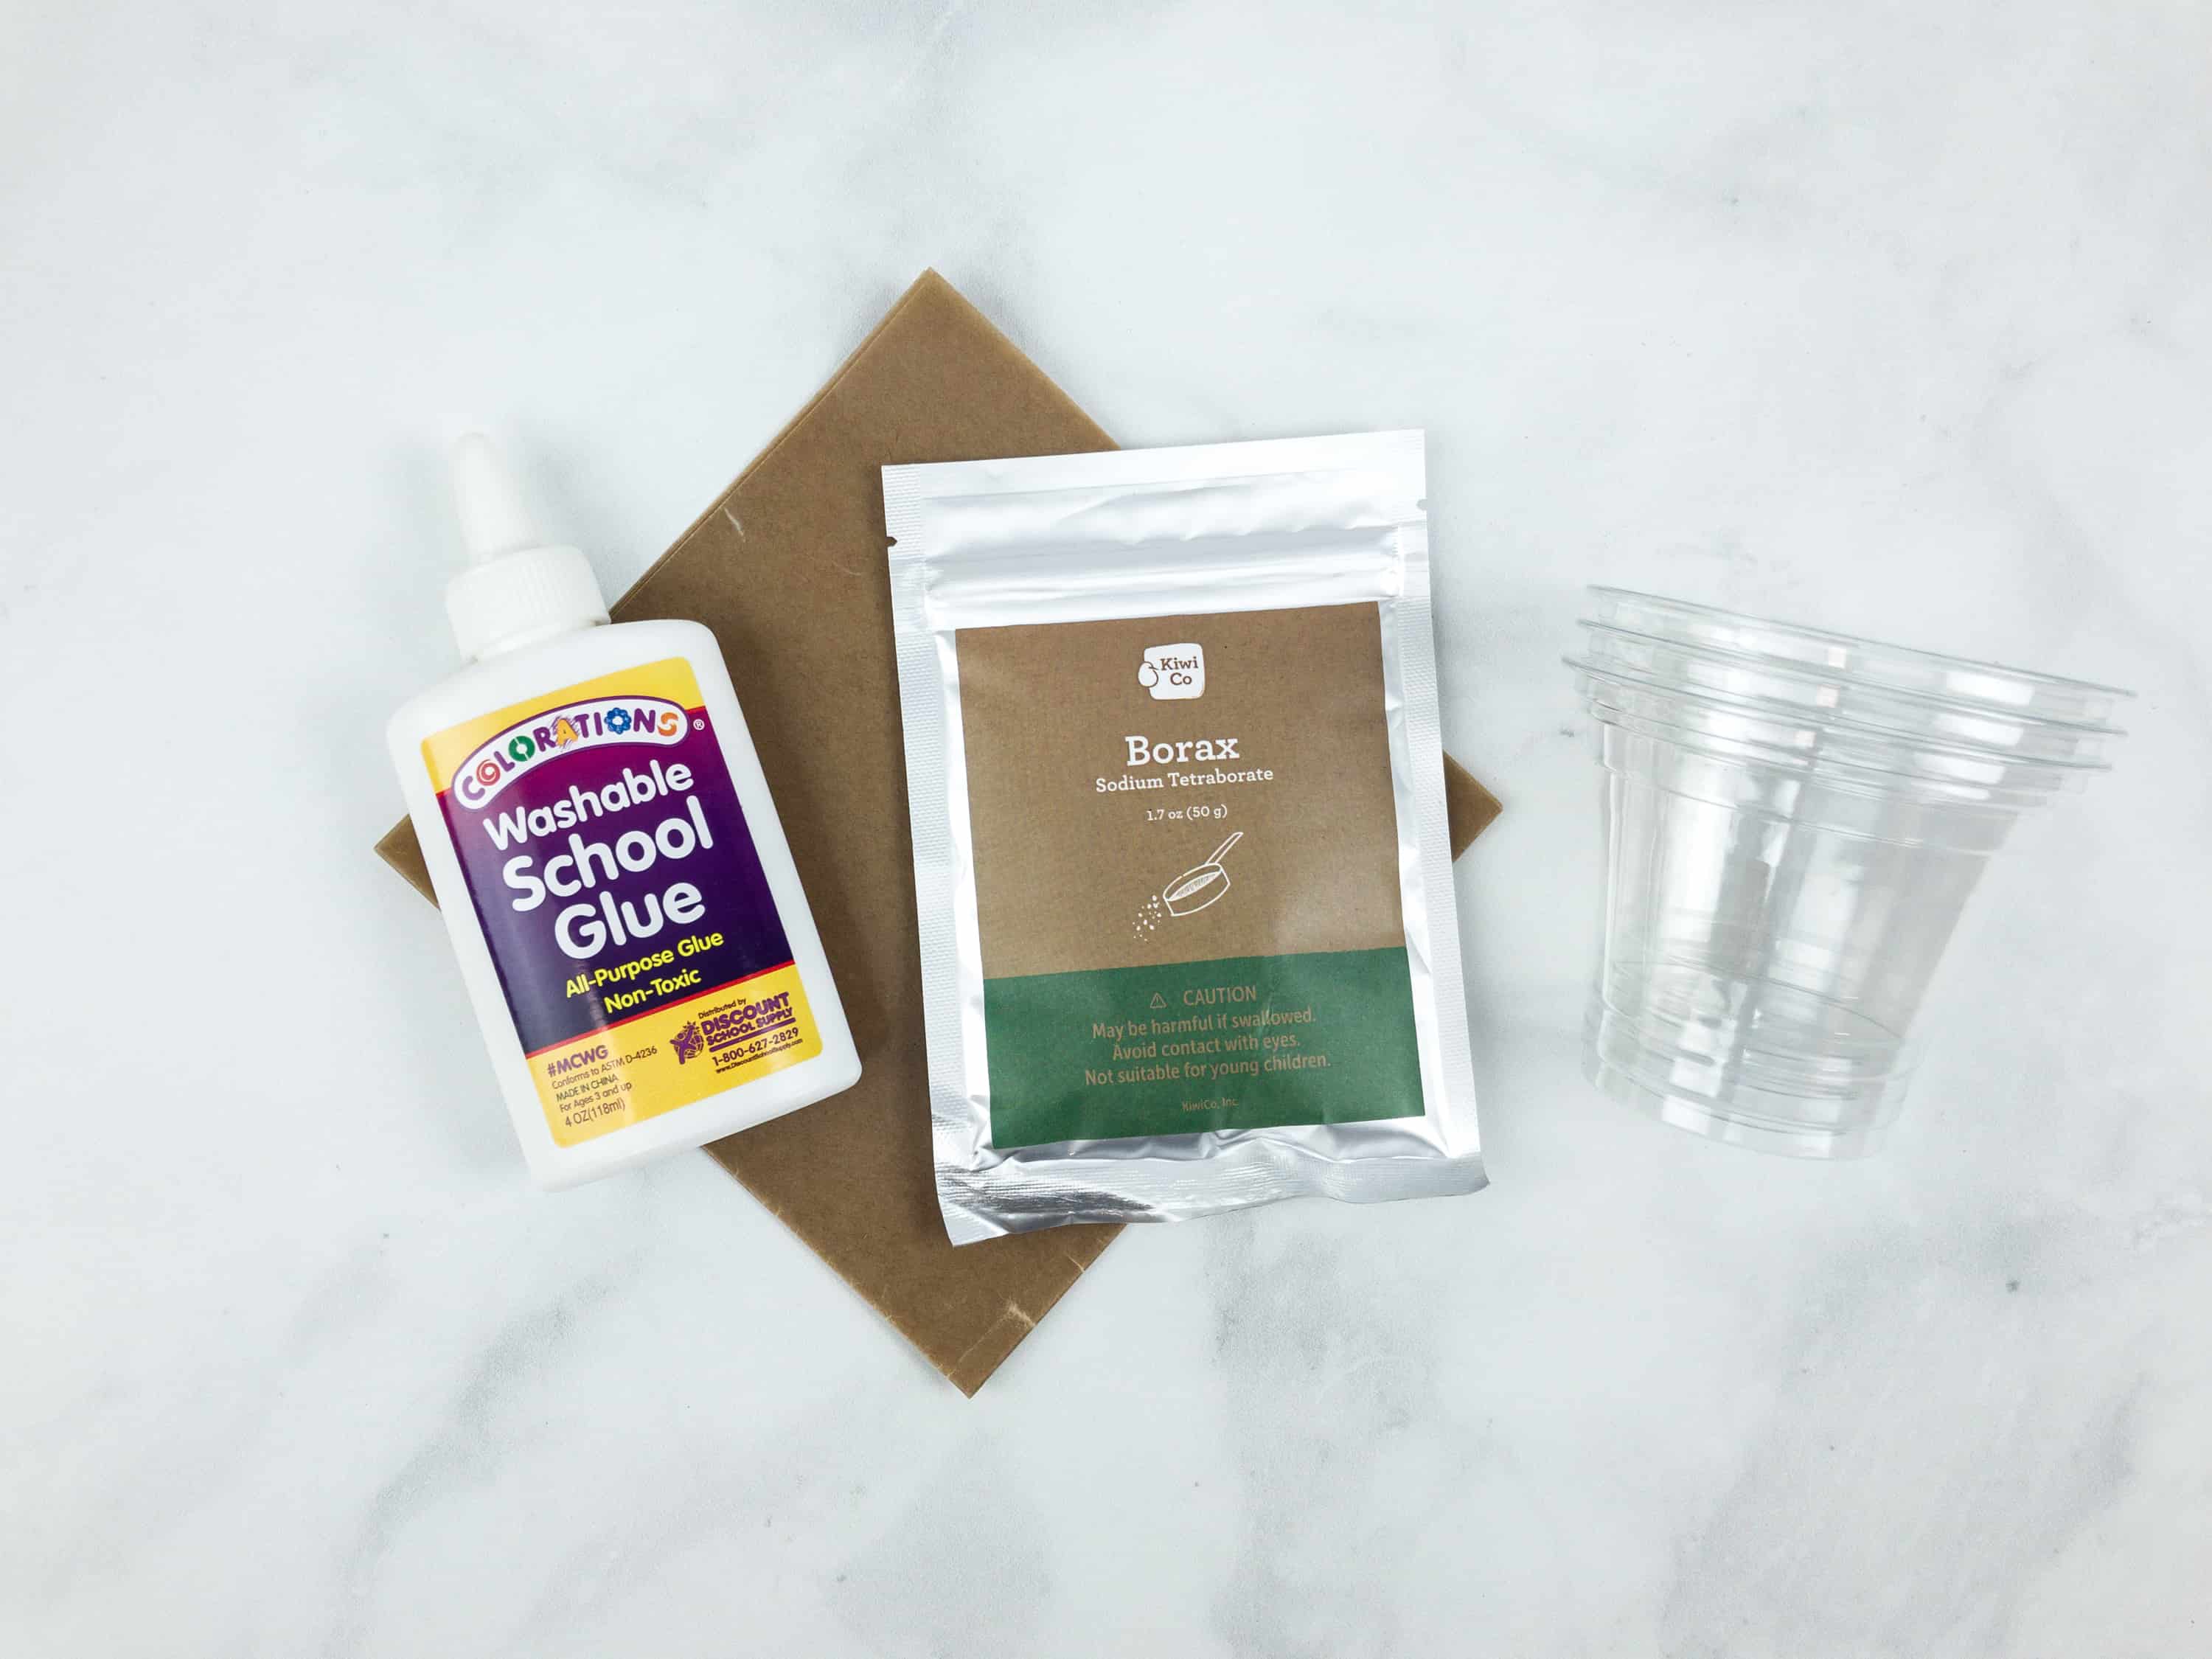
By the looks of that small bottle of black paint, borax, washable glue and these 3 mixing cups things can get messy. We set up the mess mat before starting the activity.
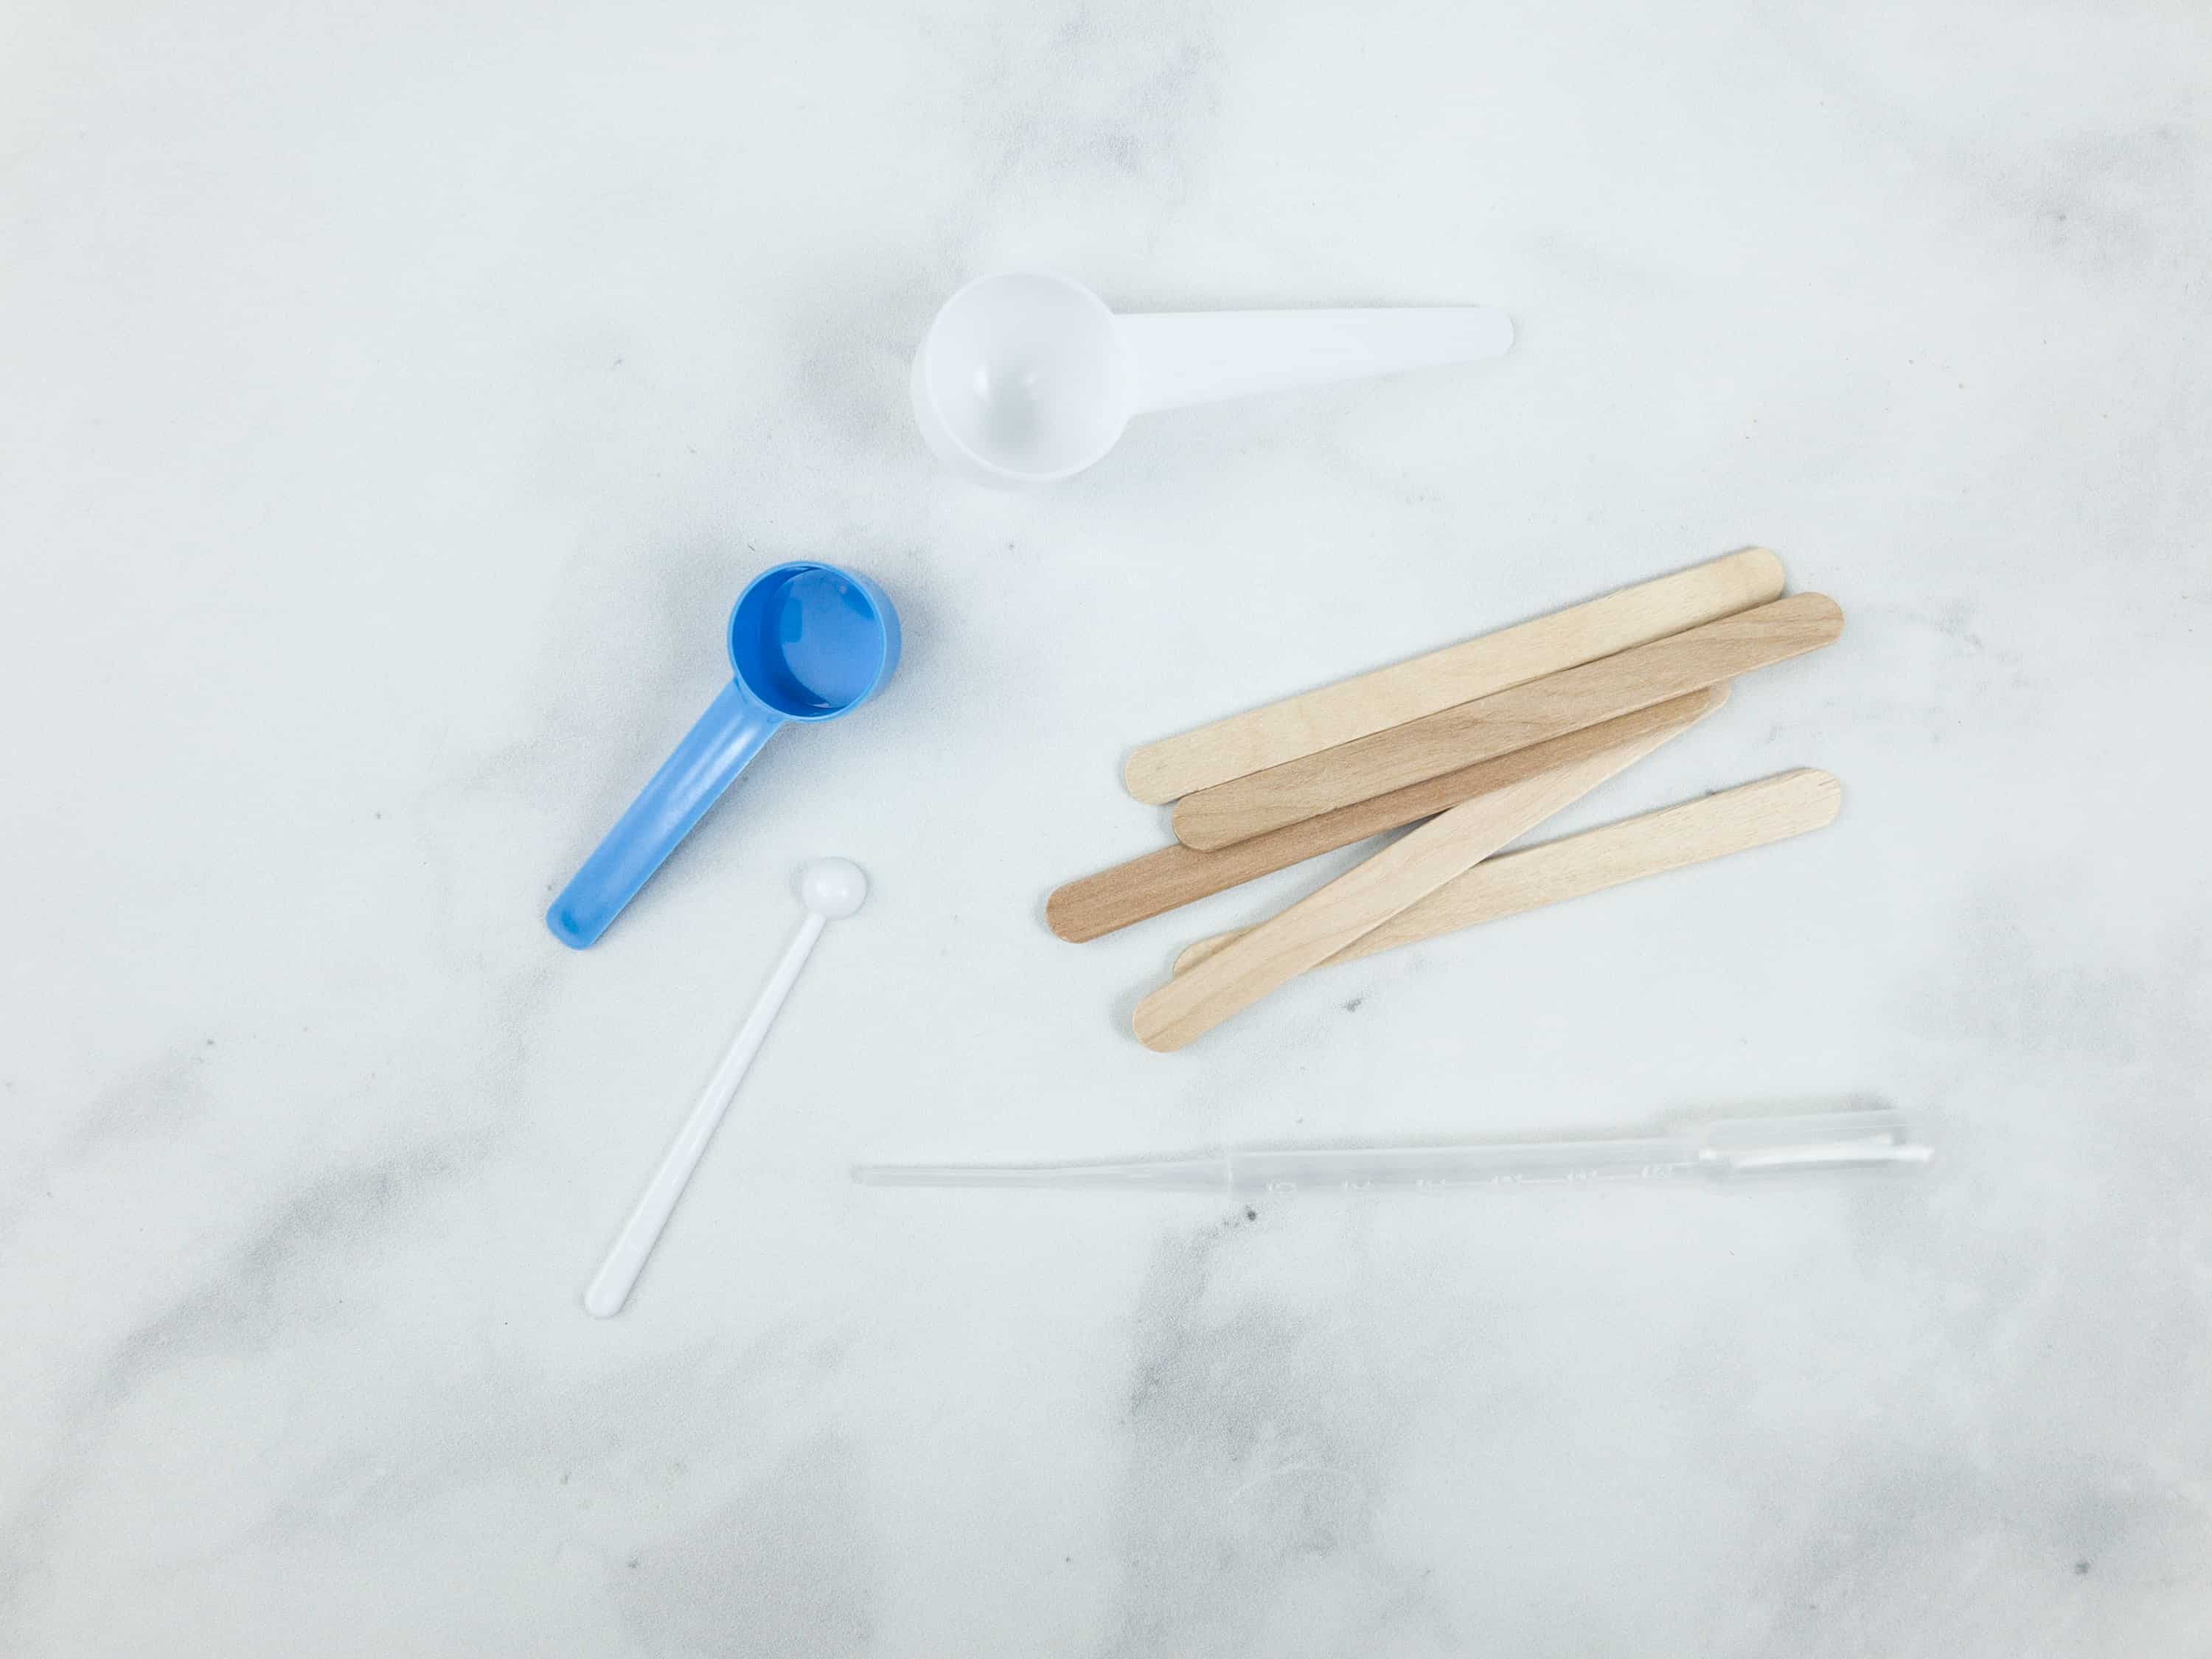
We have 3 different scoops with different sizes, popsicle sticks for mixing, and a pipette.
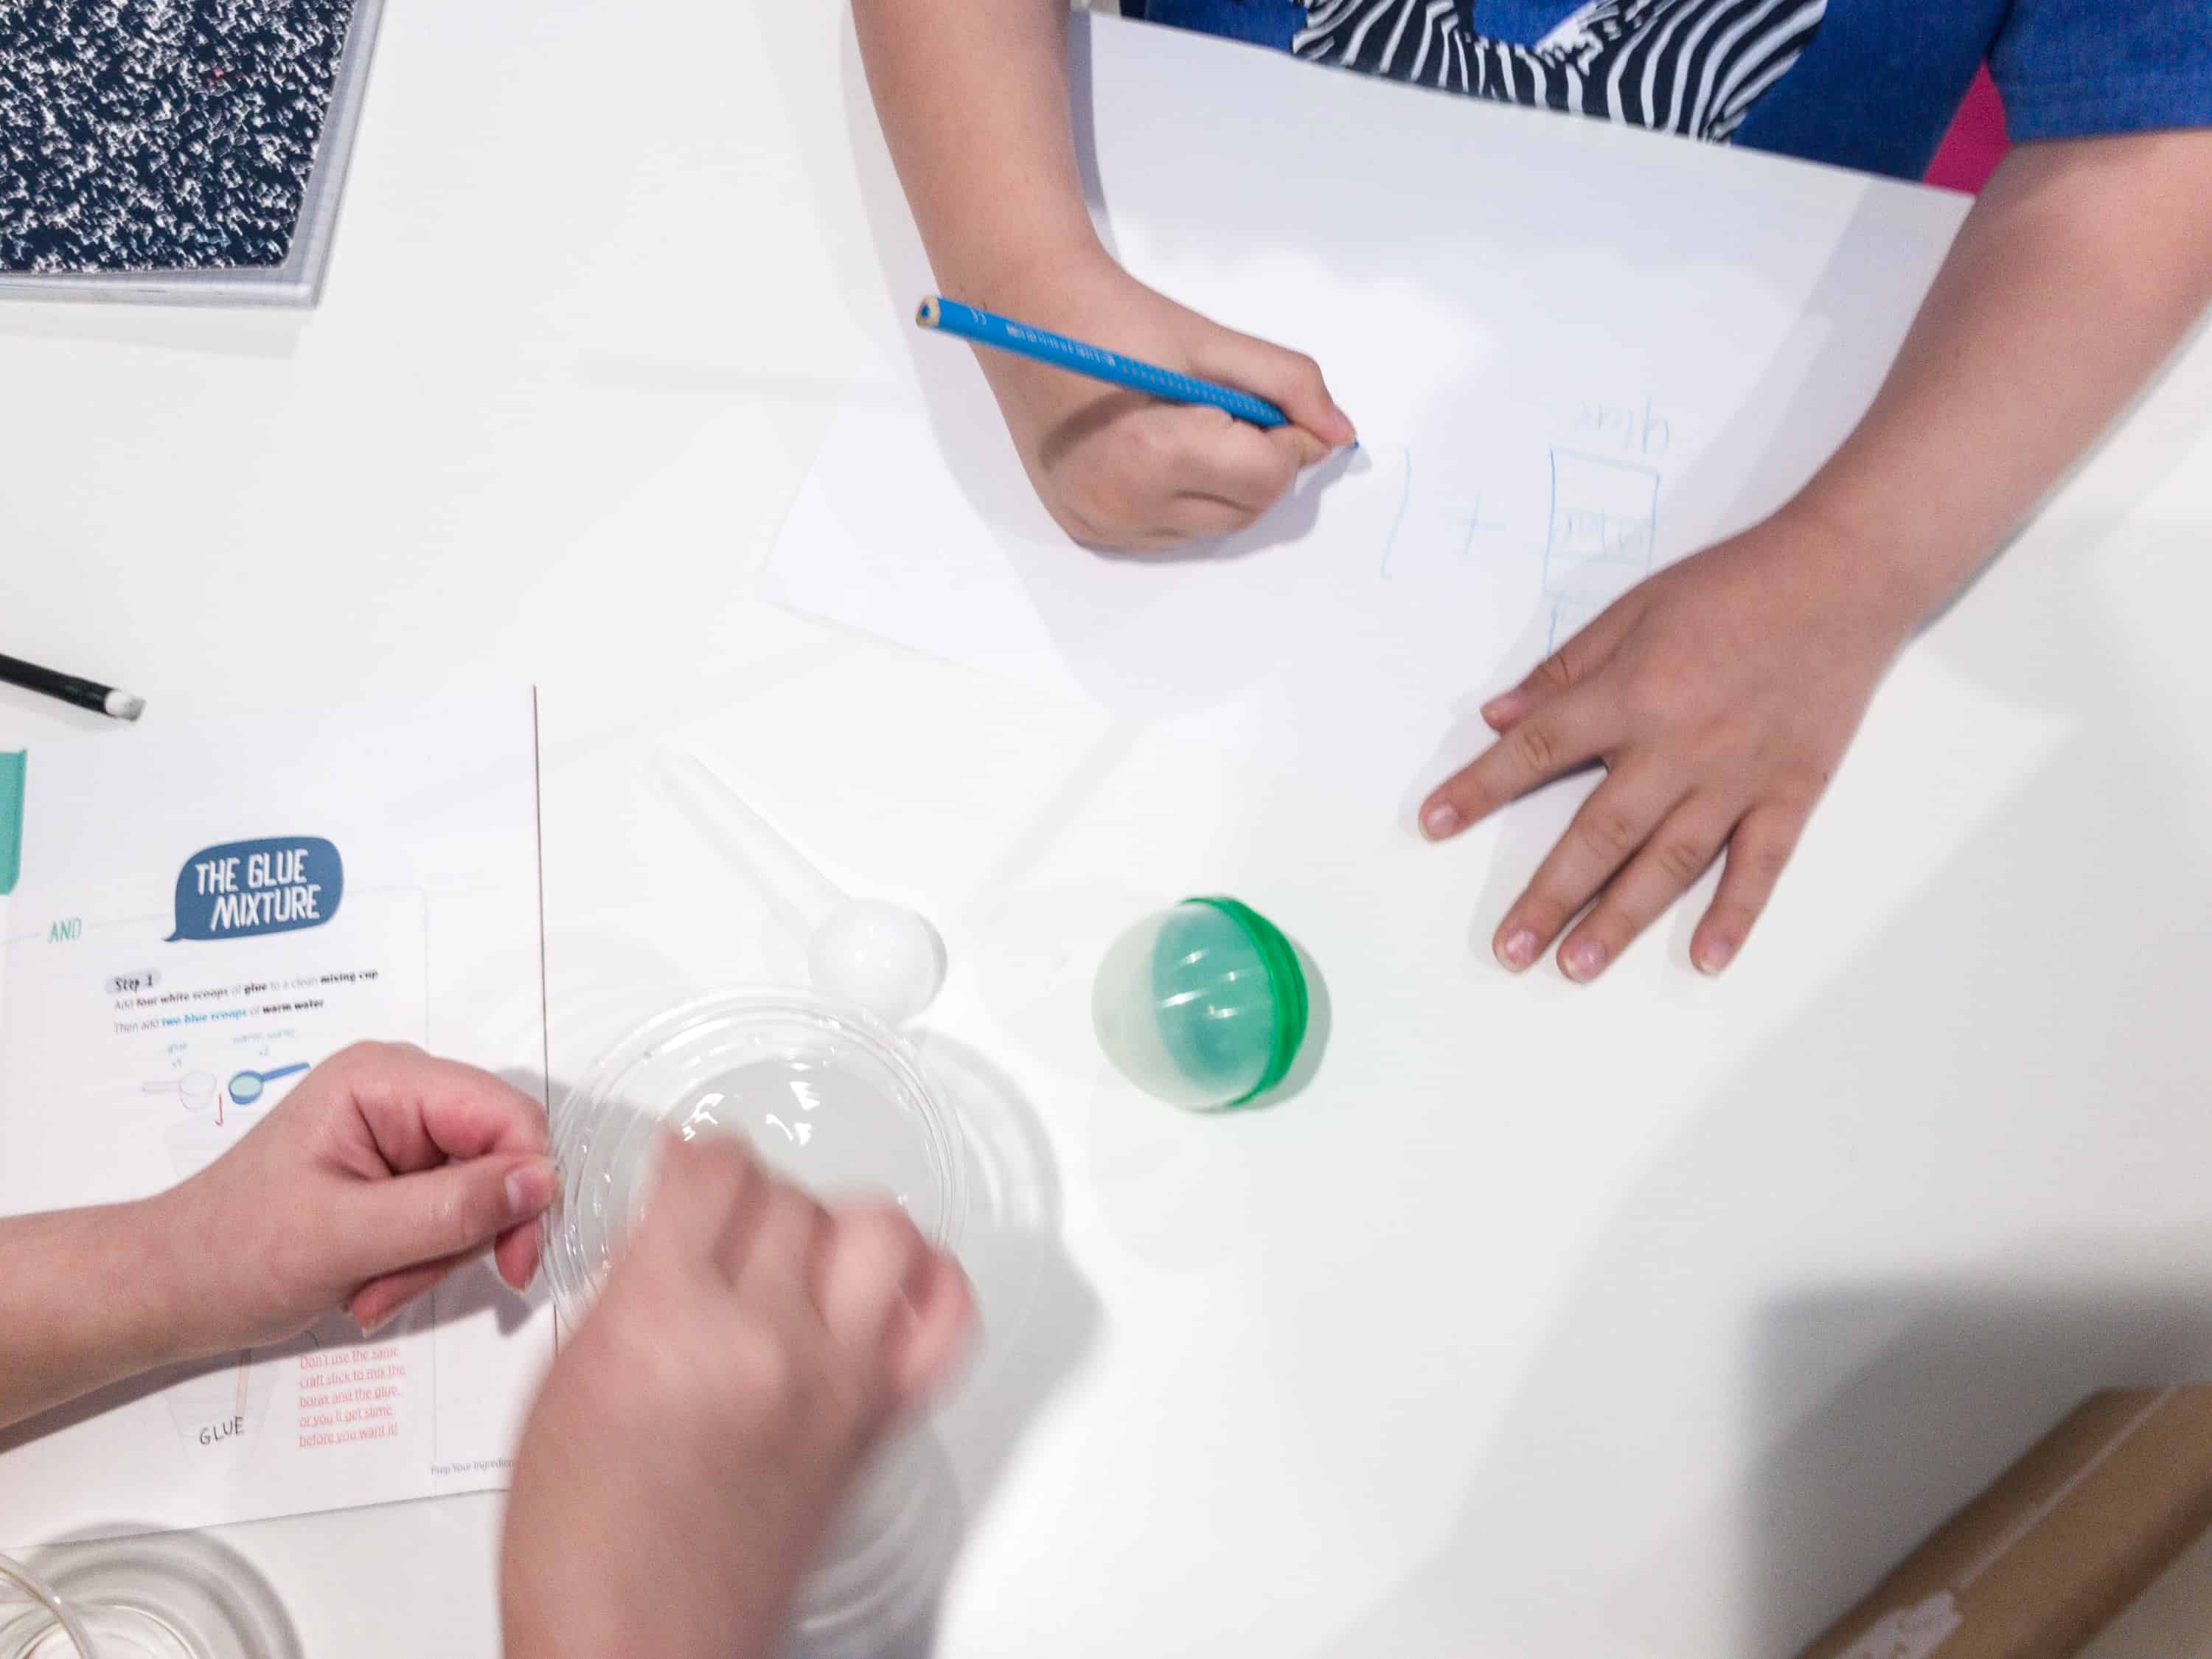
I let the kids do their own thing. My daughter was starting to get the mixture going as she already had warm water in the cup, while my son is doodling away – he was writing down what my daughter was using and illustrating it!
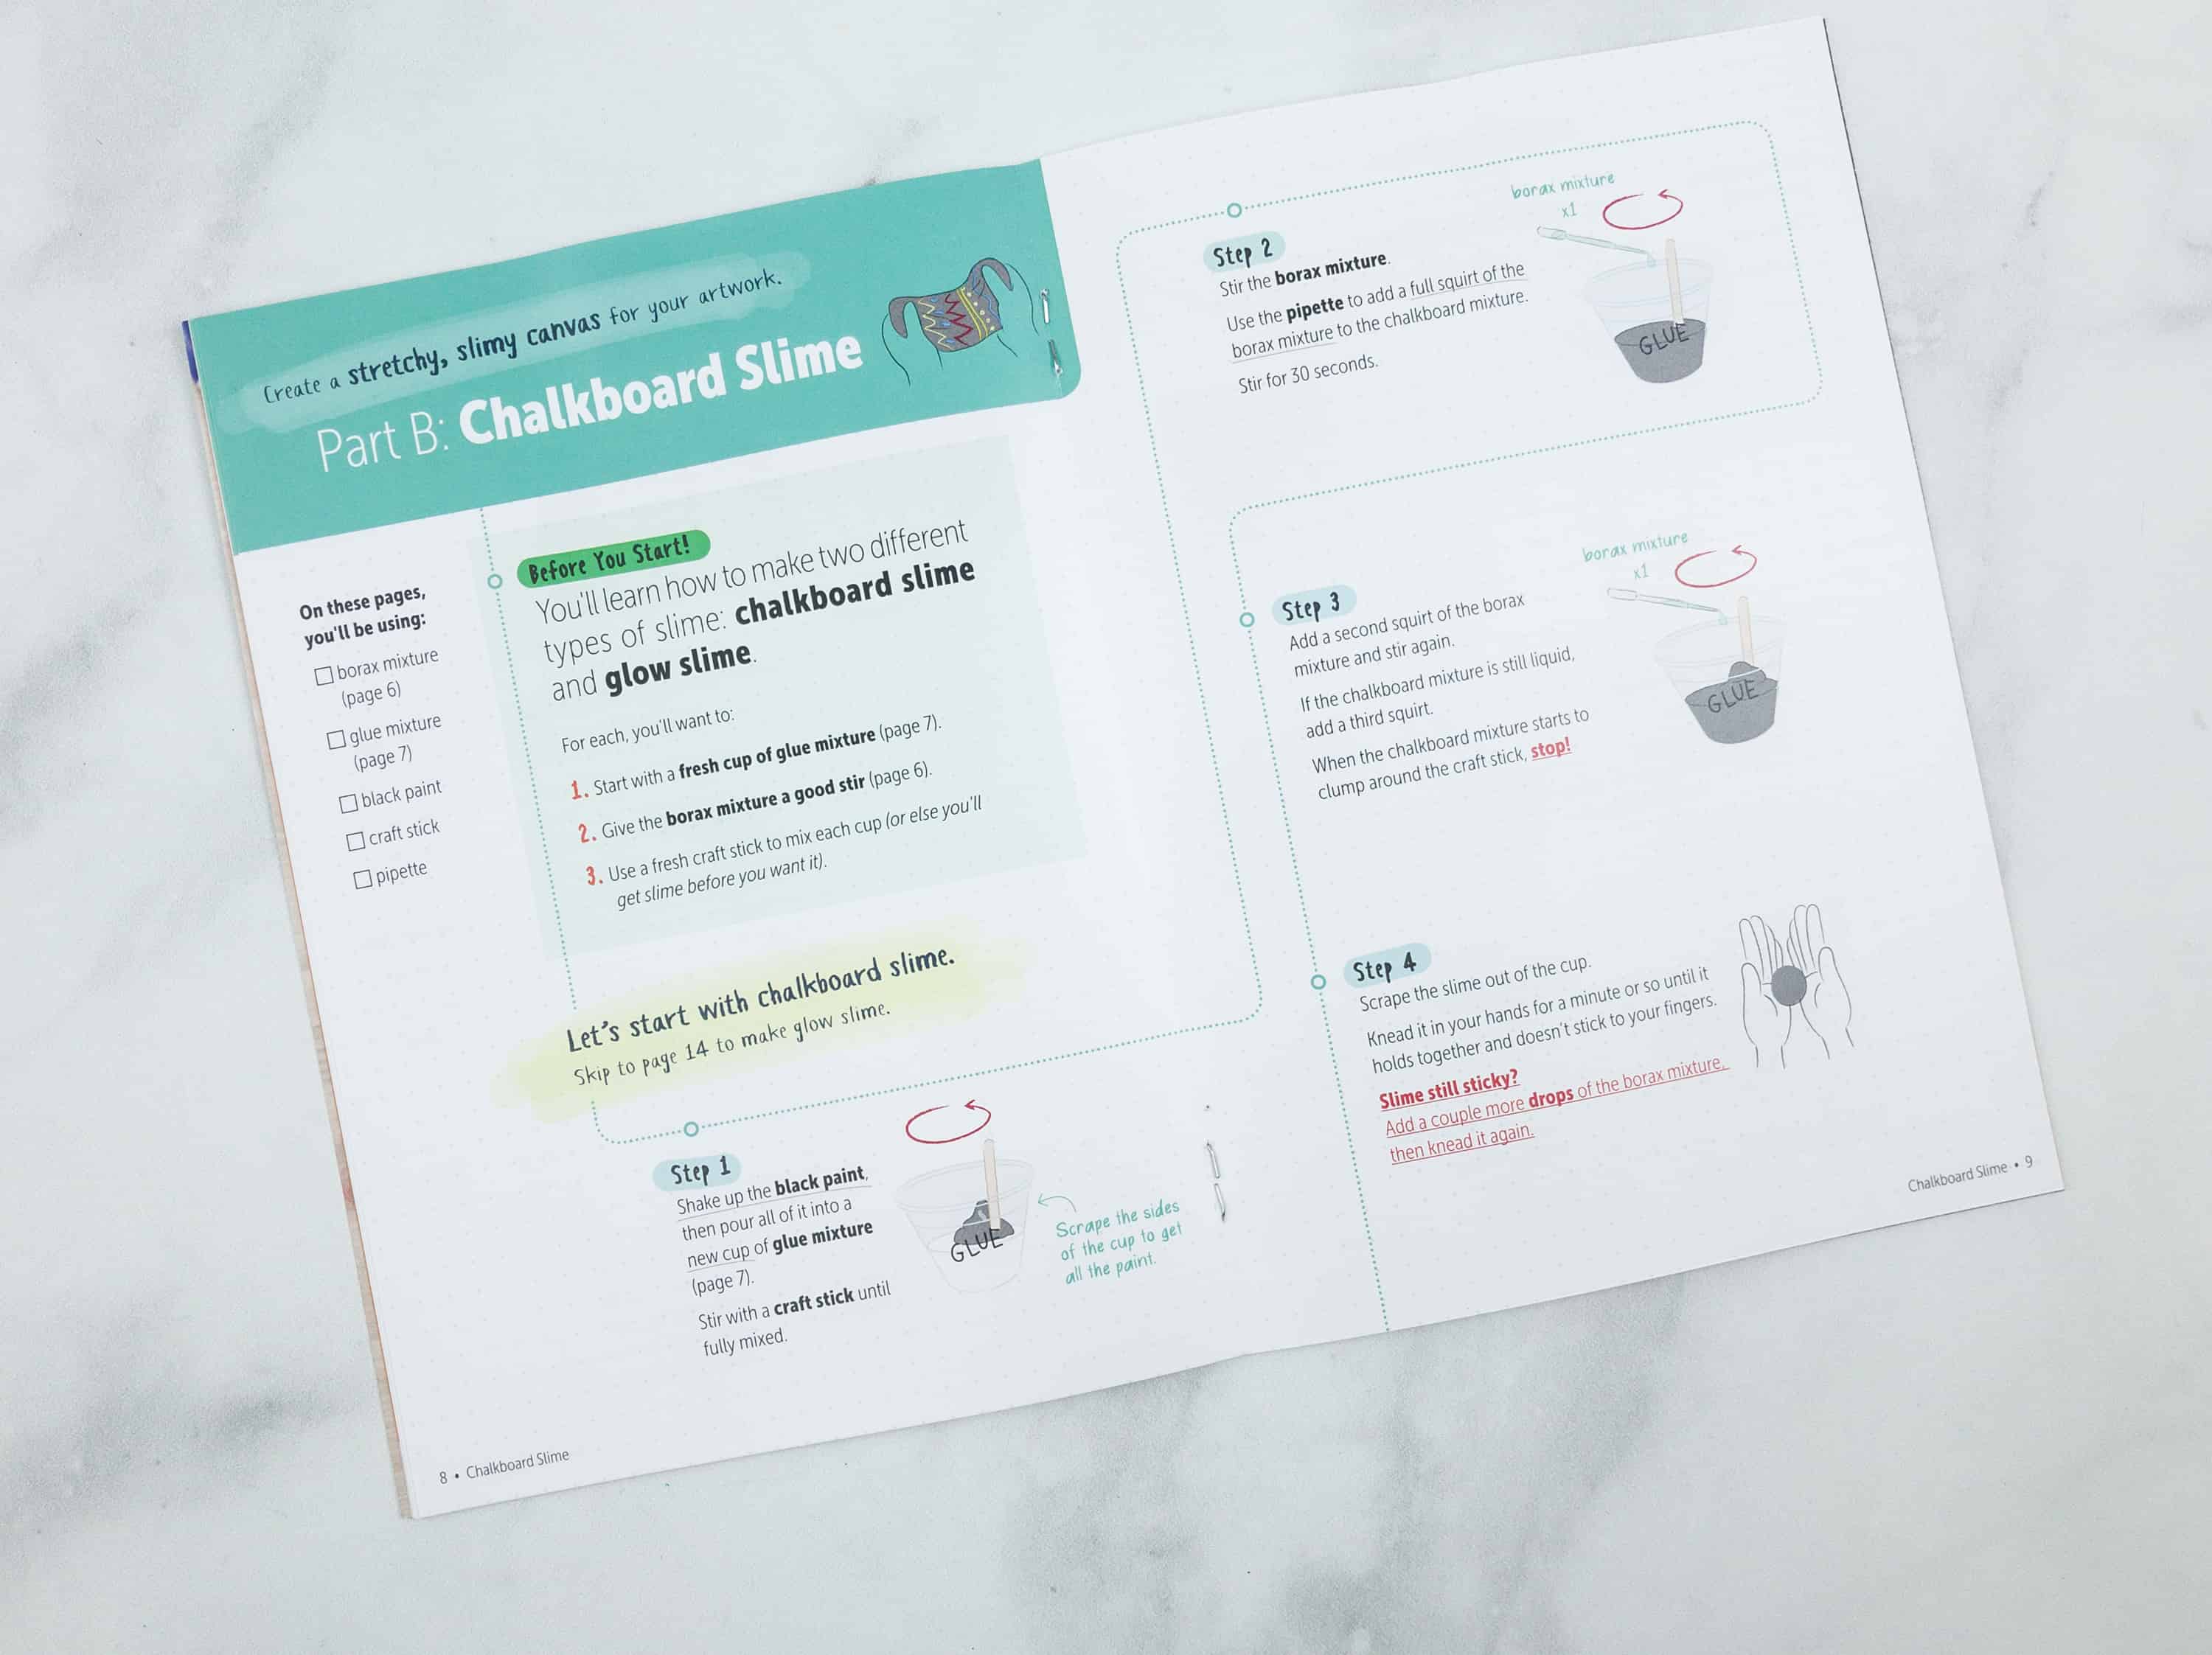
Part B is about making a chalkboard slime.
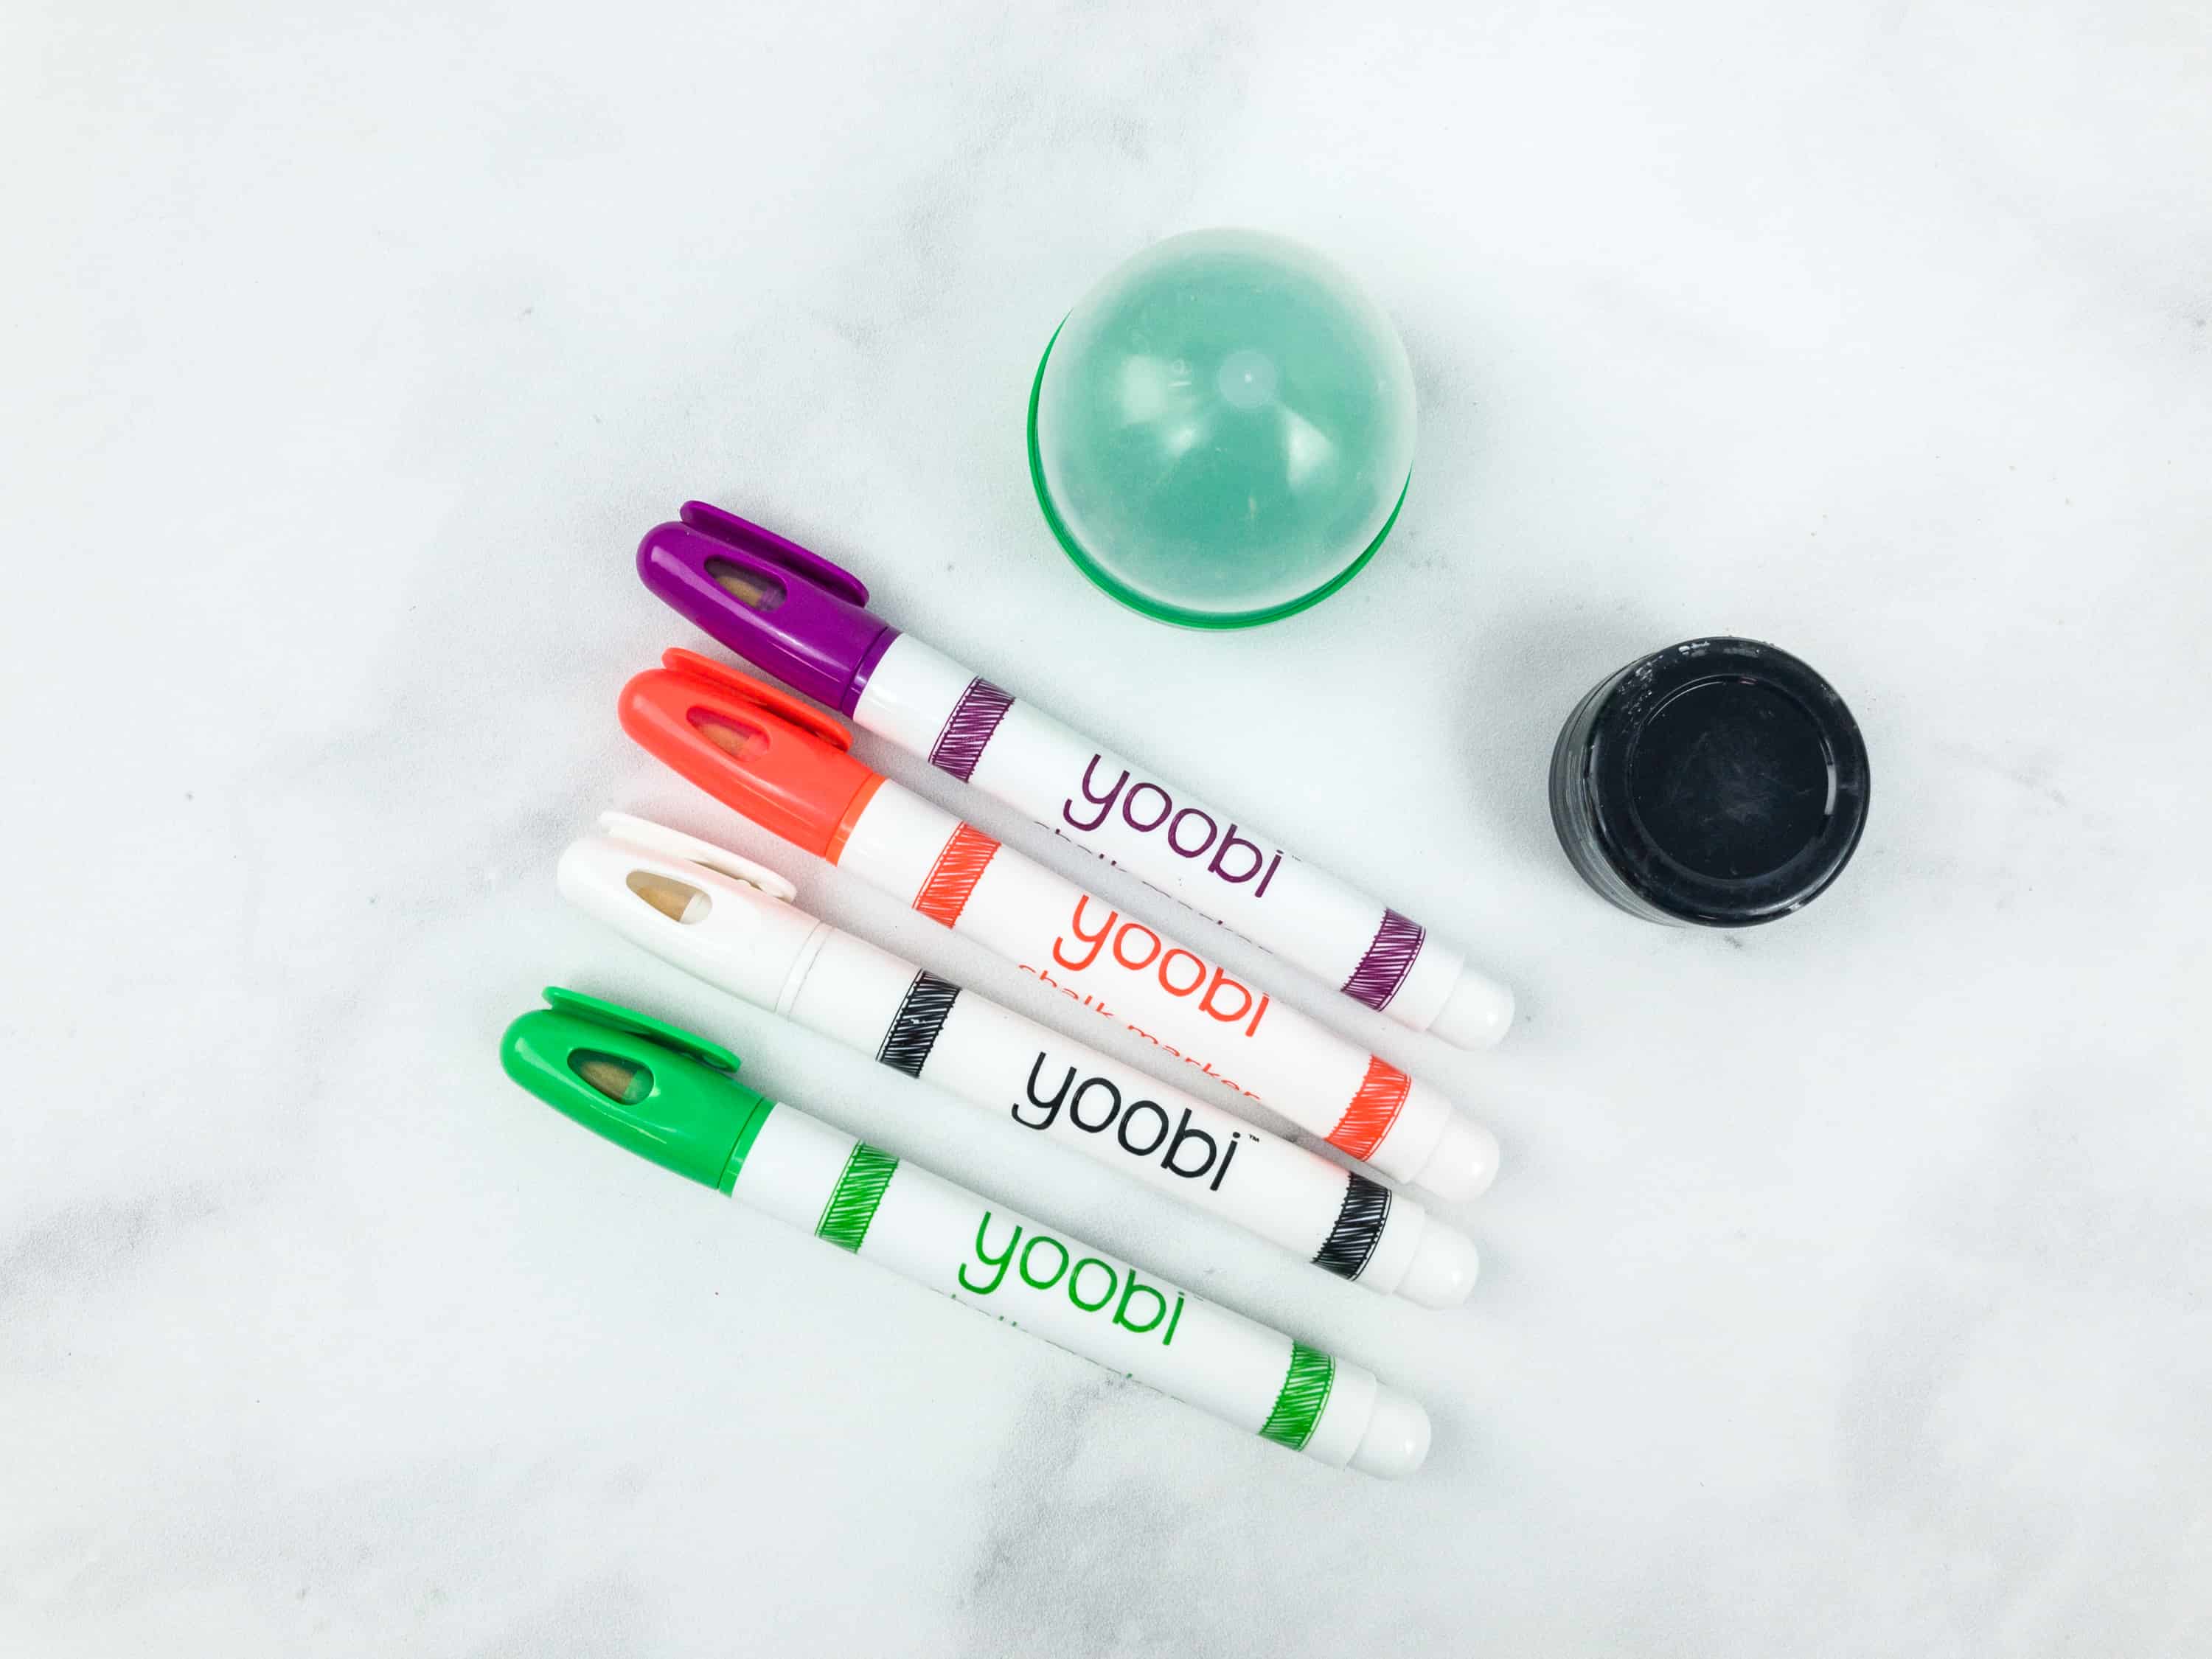
They gave us markers in four colors to design our black painted chalkboard slime. There’s also a capsule for storage of our slimes, it will keep them from drying out.
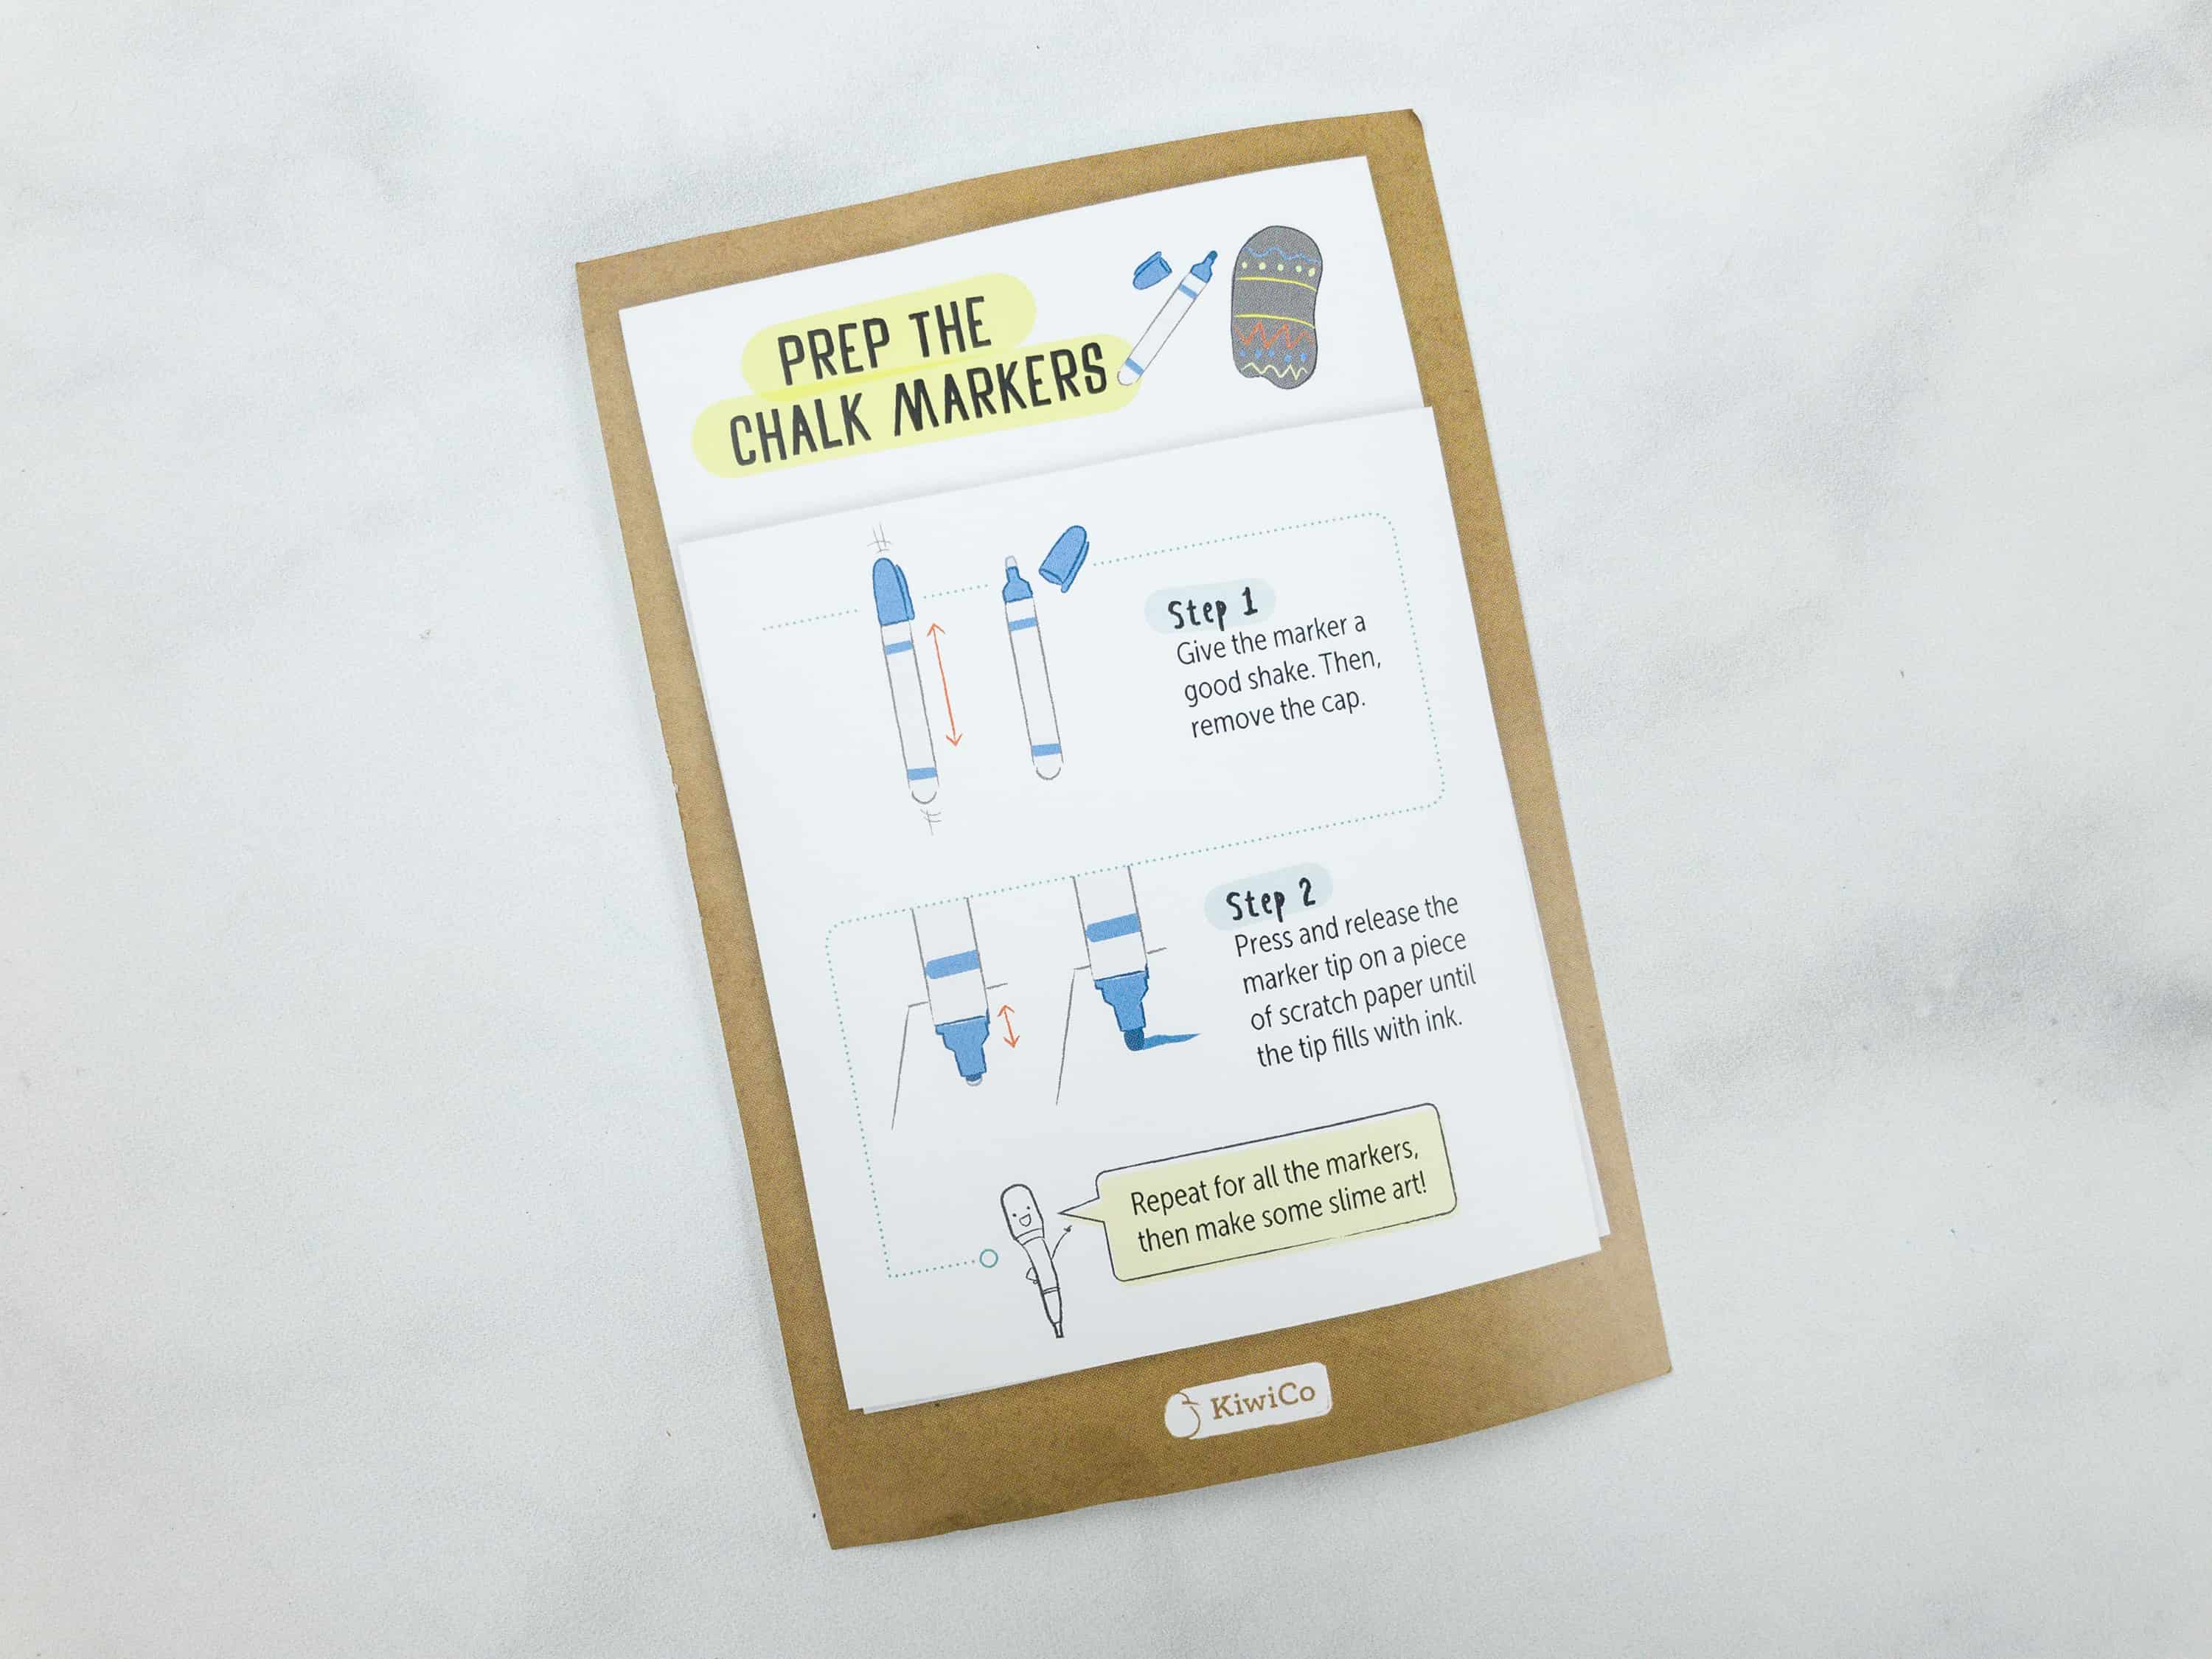
The chalk markers are new and needed to be primed. This page shows us what to do before we can effectively use them.
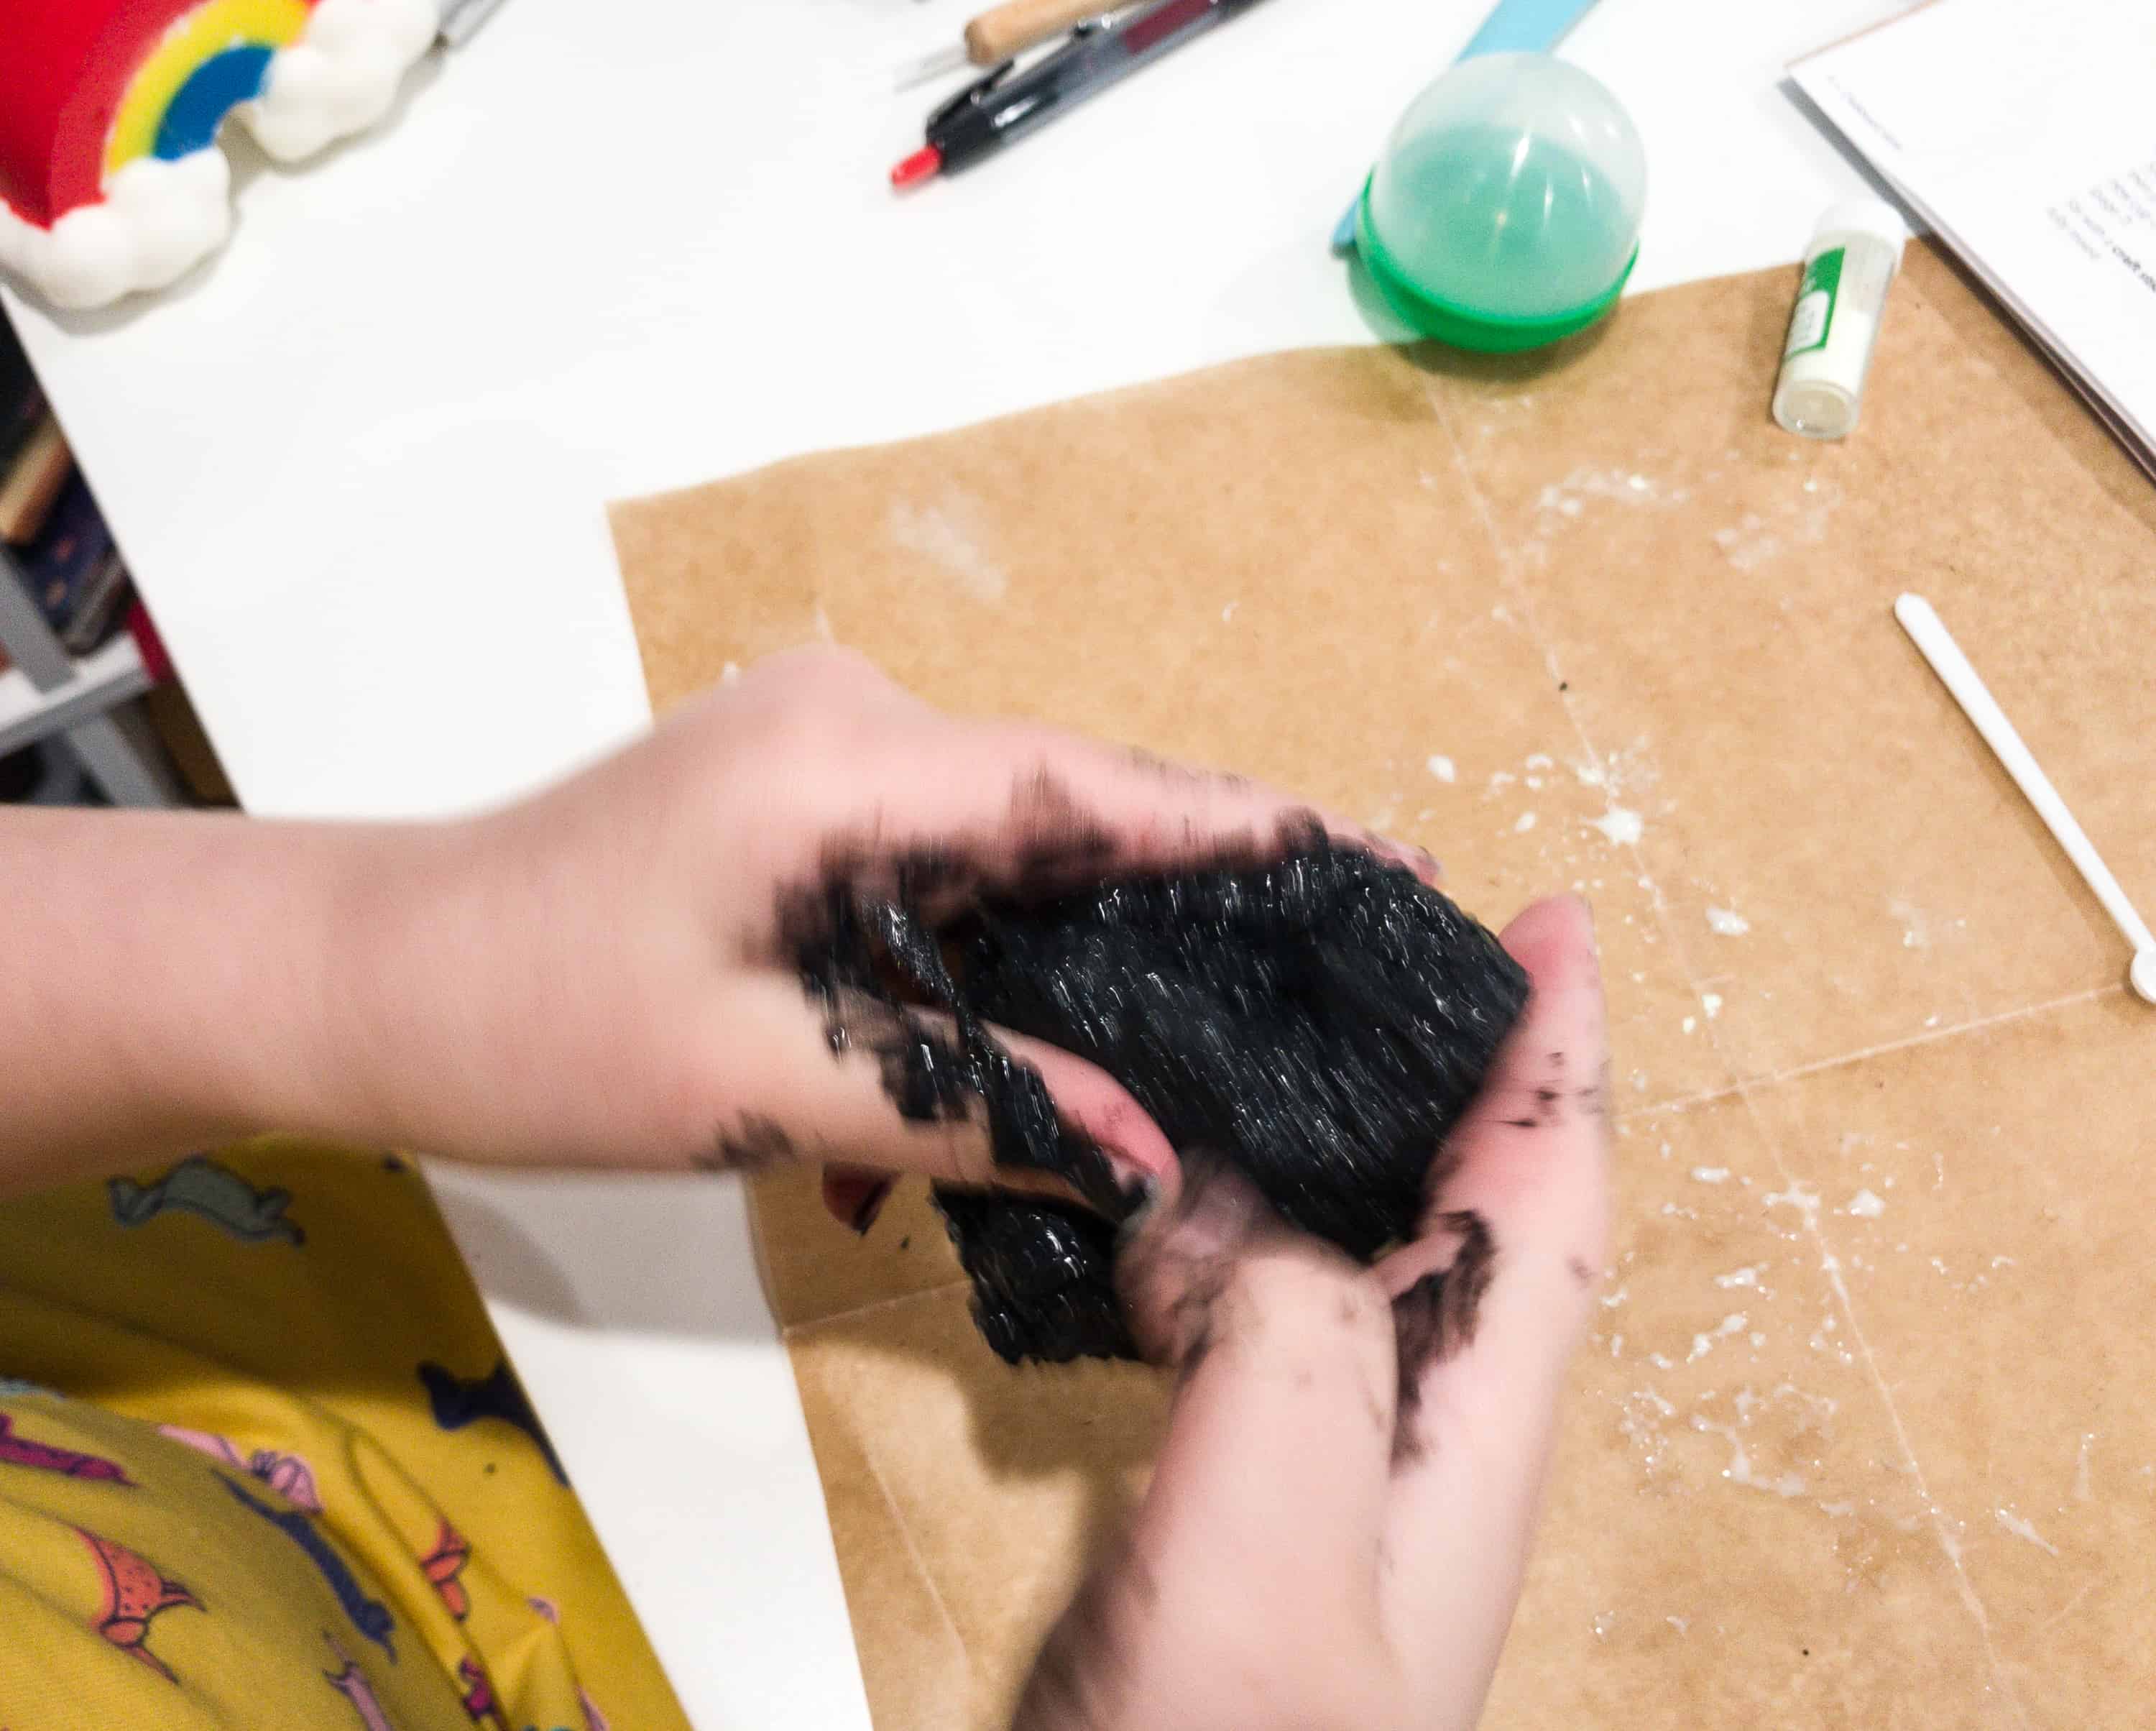
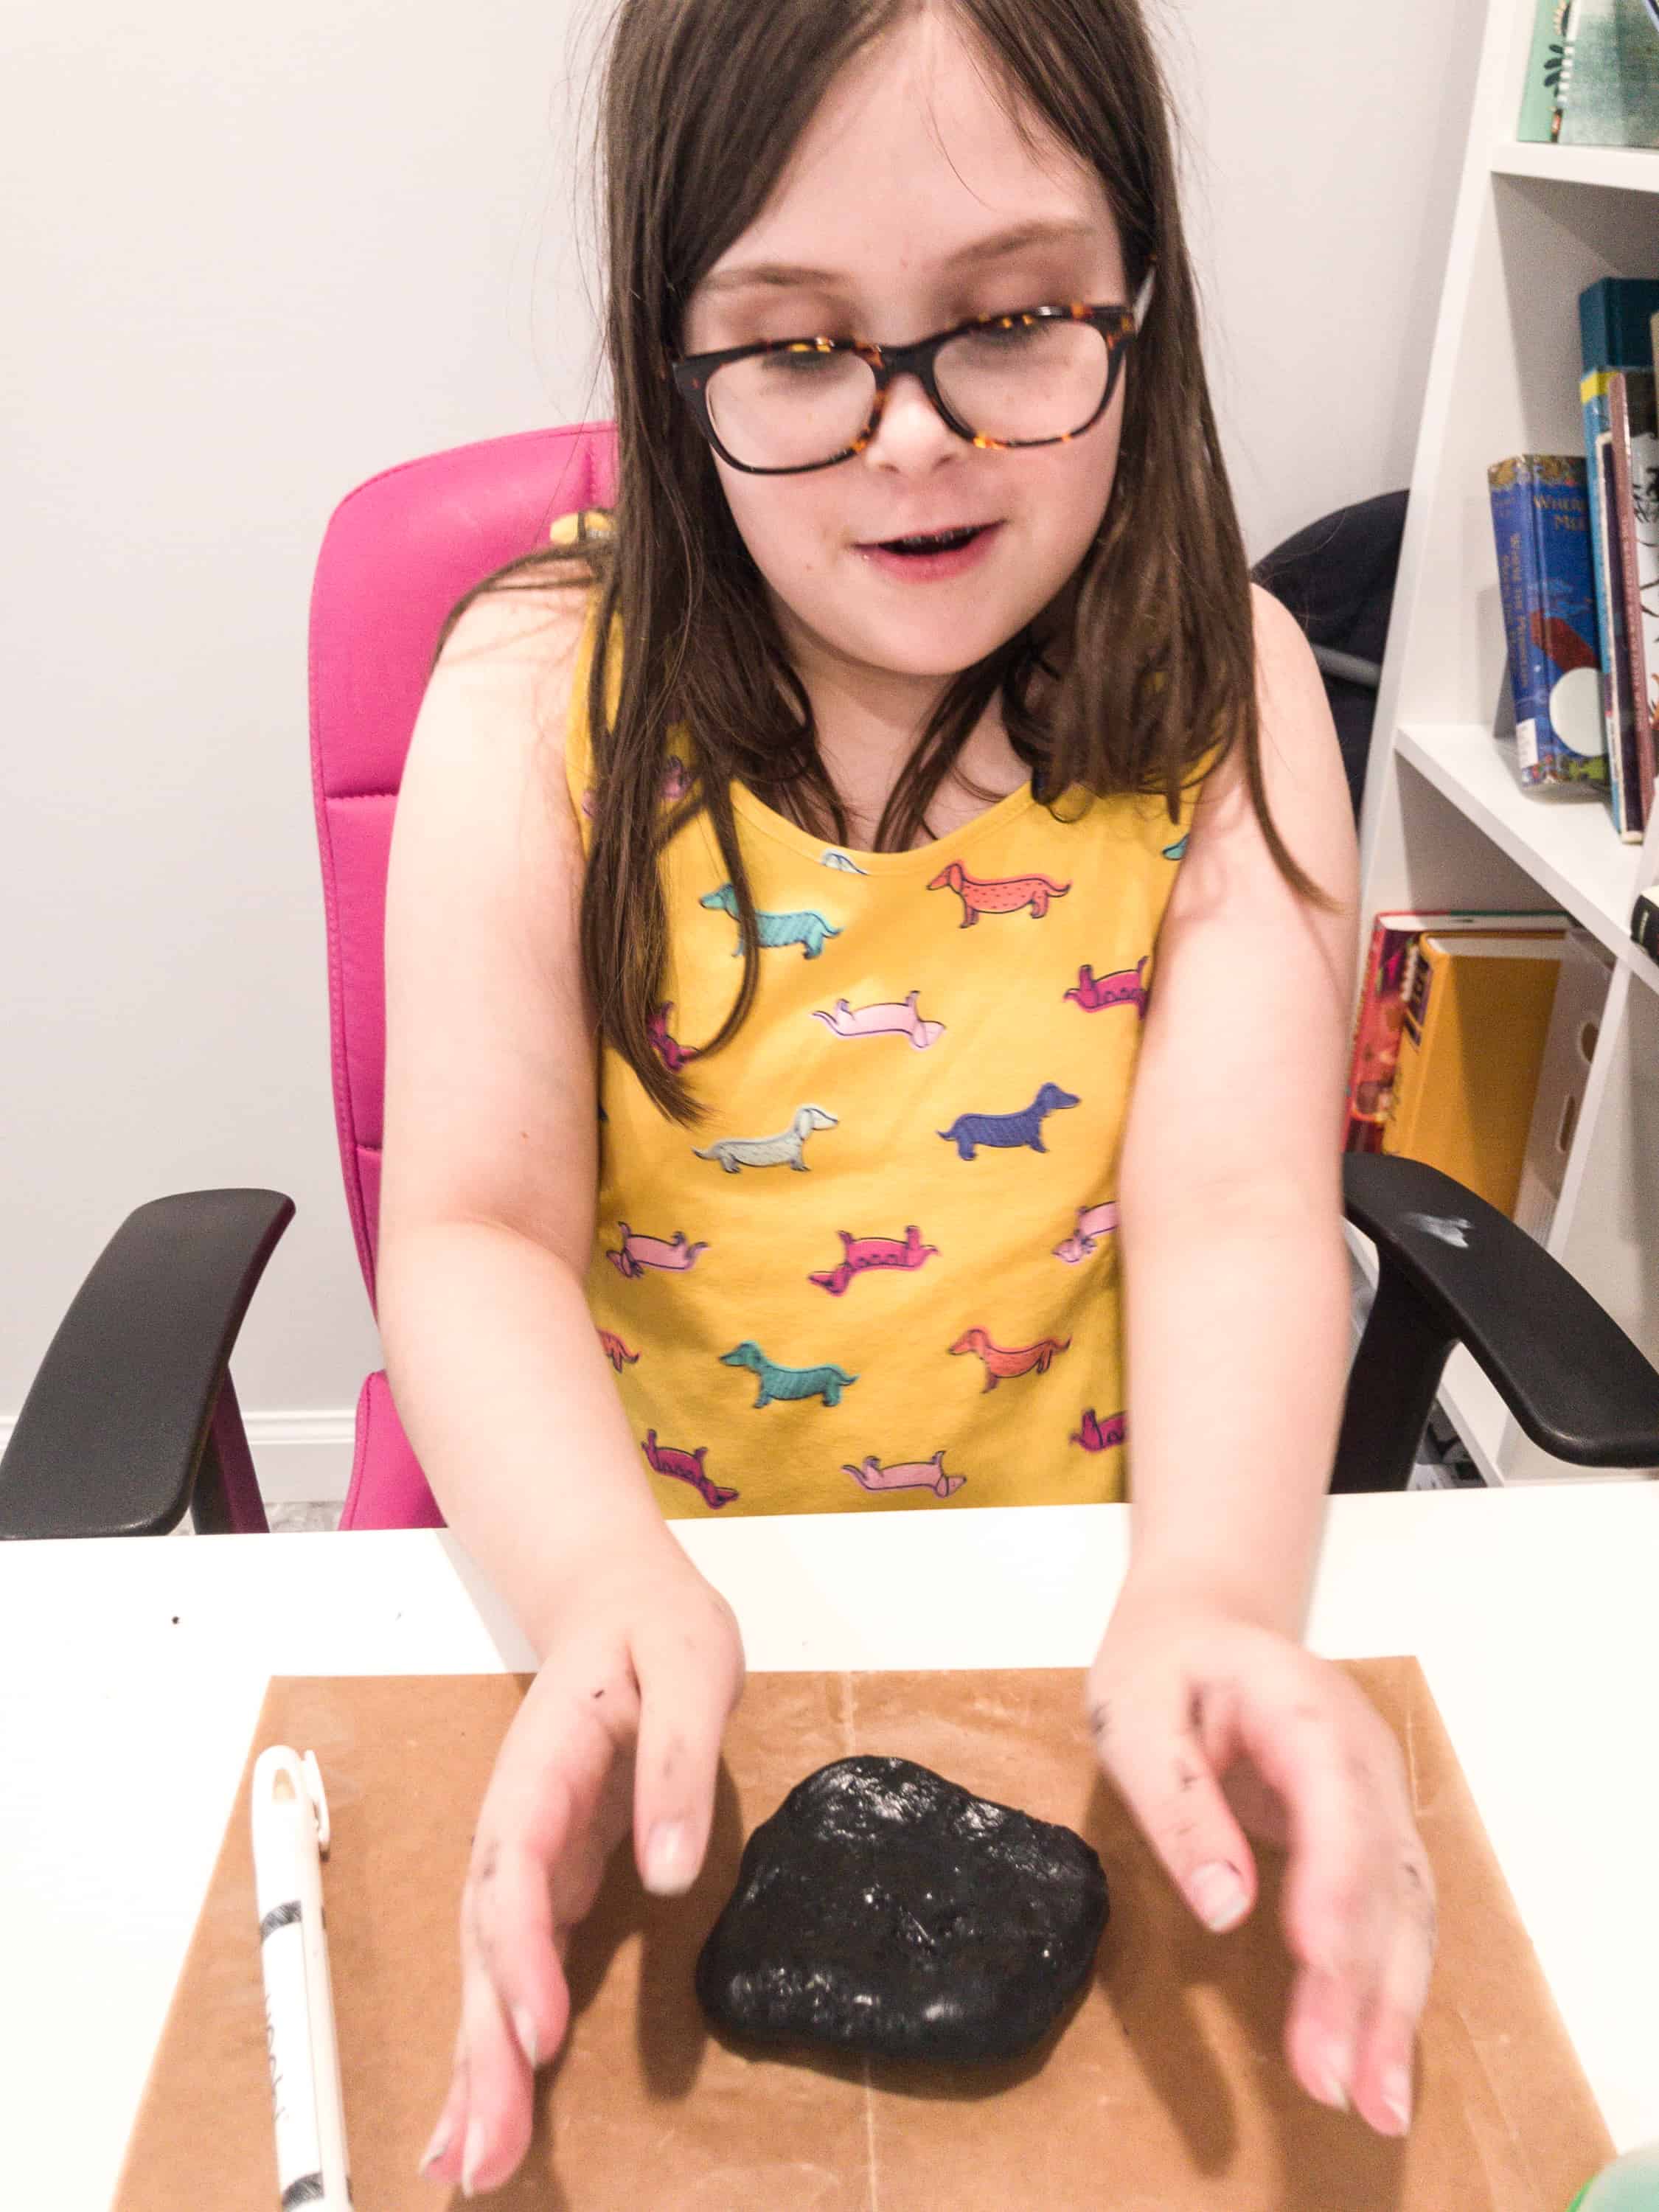
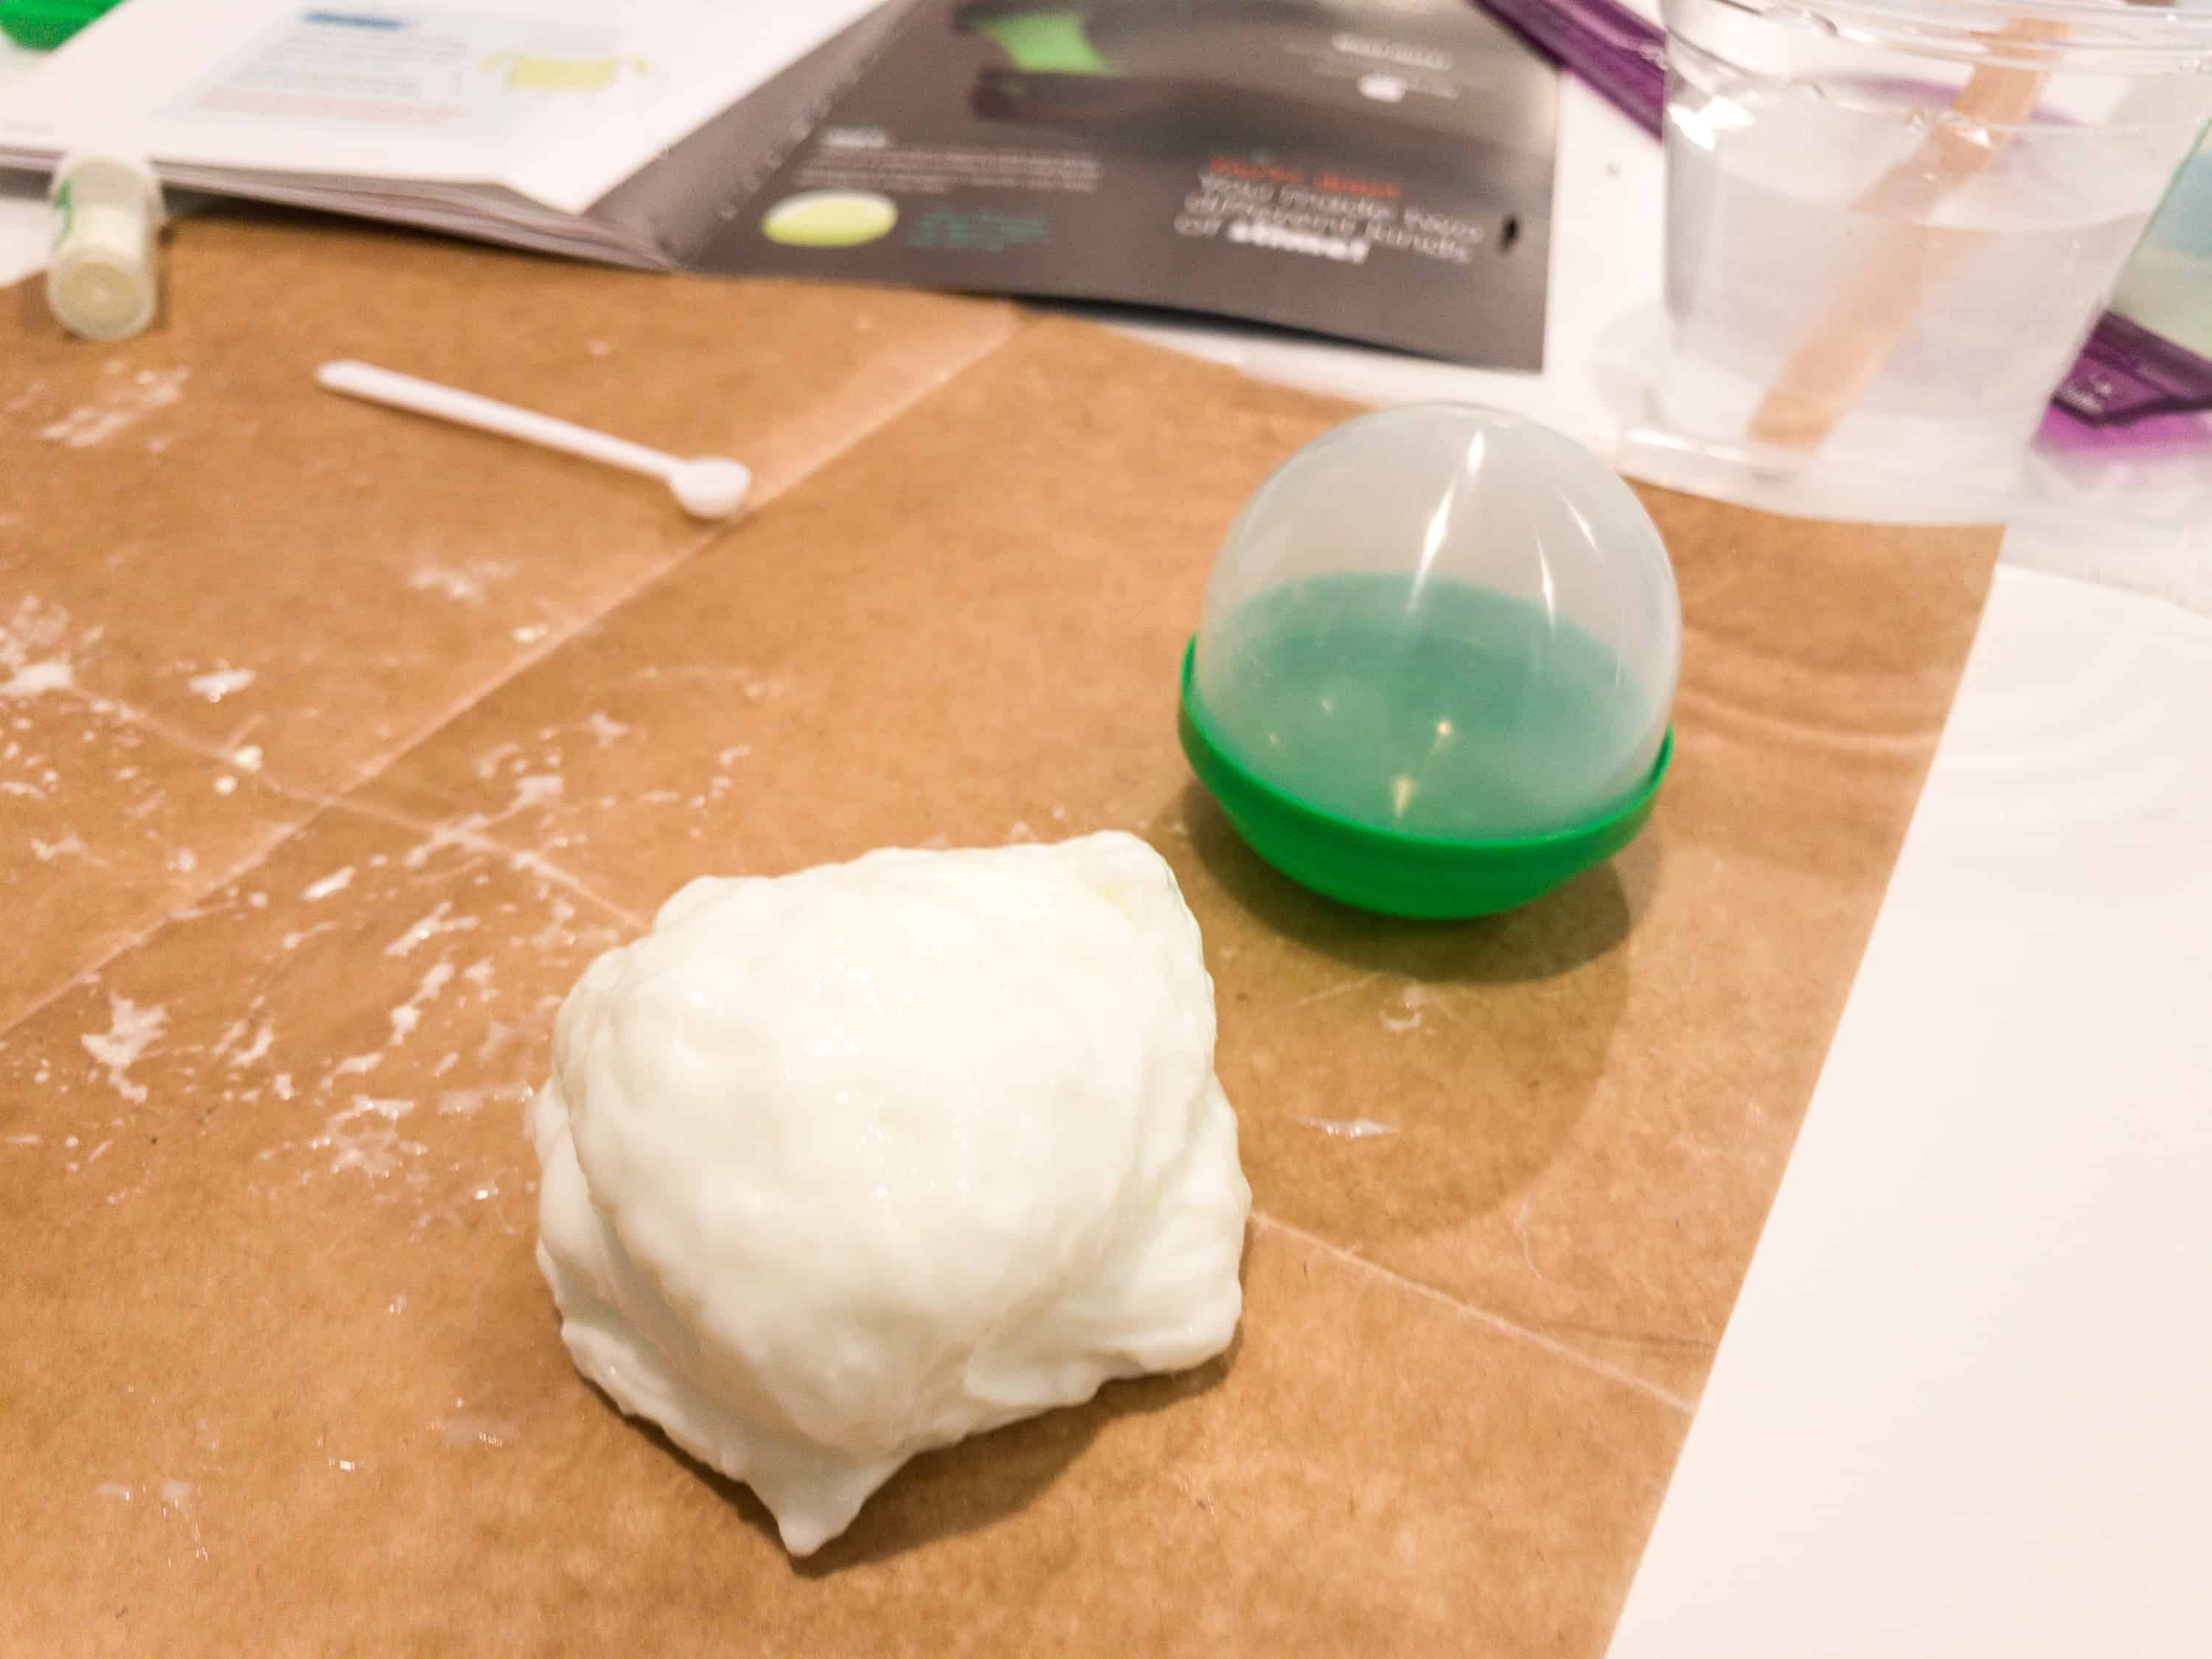
The black paint really made the slime shiny and it was sticky at first. Some of it sticks to skin as my daughter kneads it. It is advised that if it remains sticky we can add a couple drops more of borax mixture before we start on kneading again to make the consistency more stable.
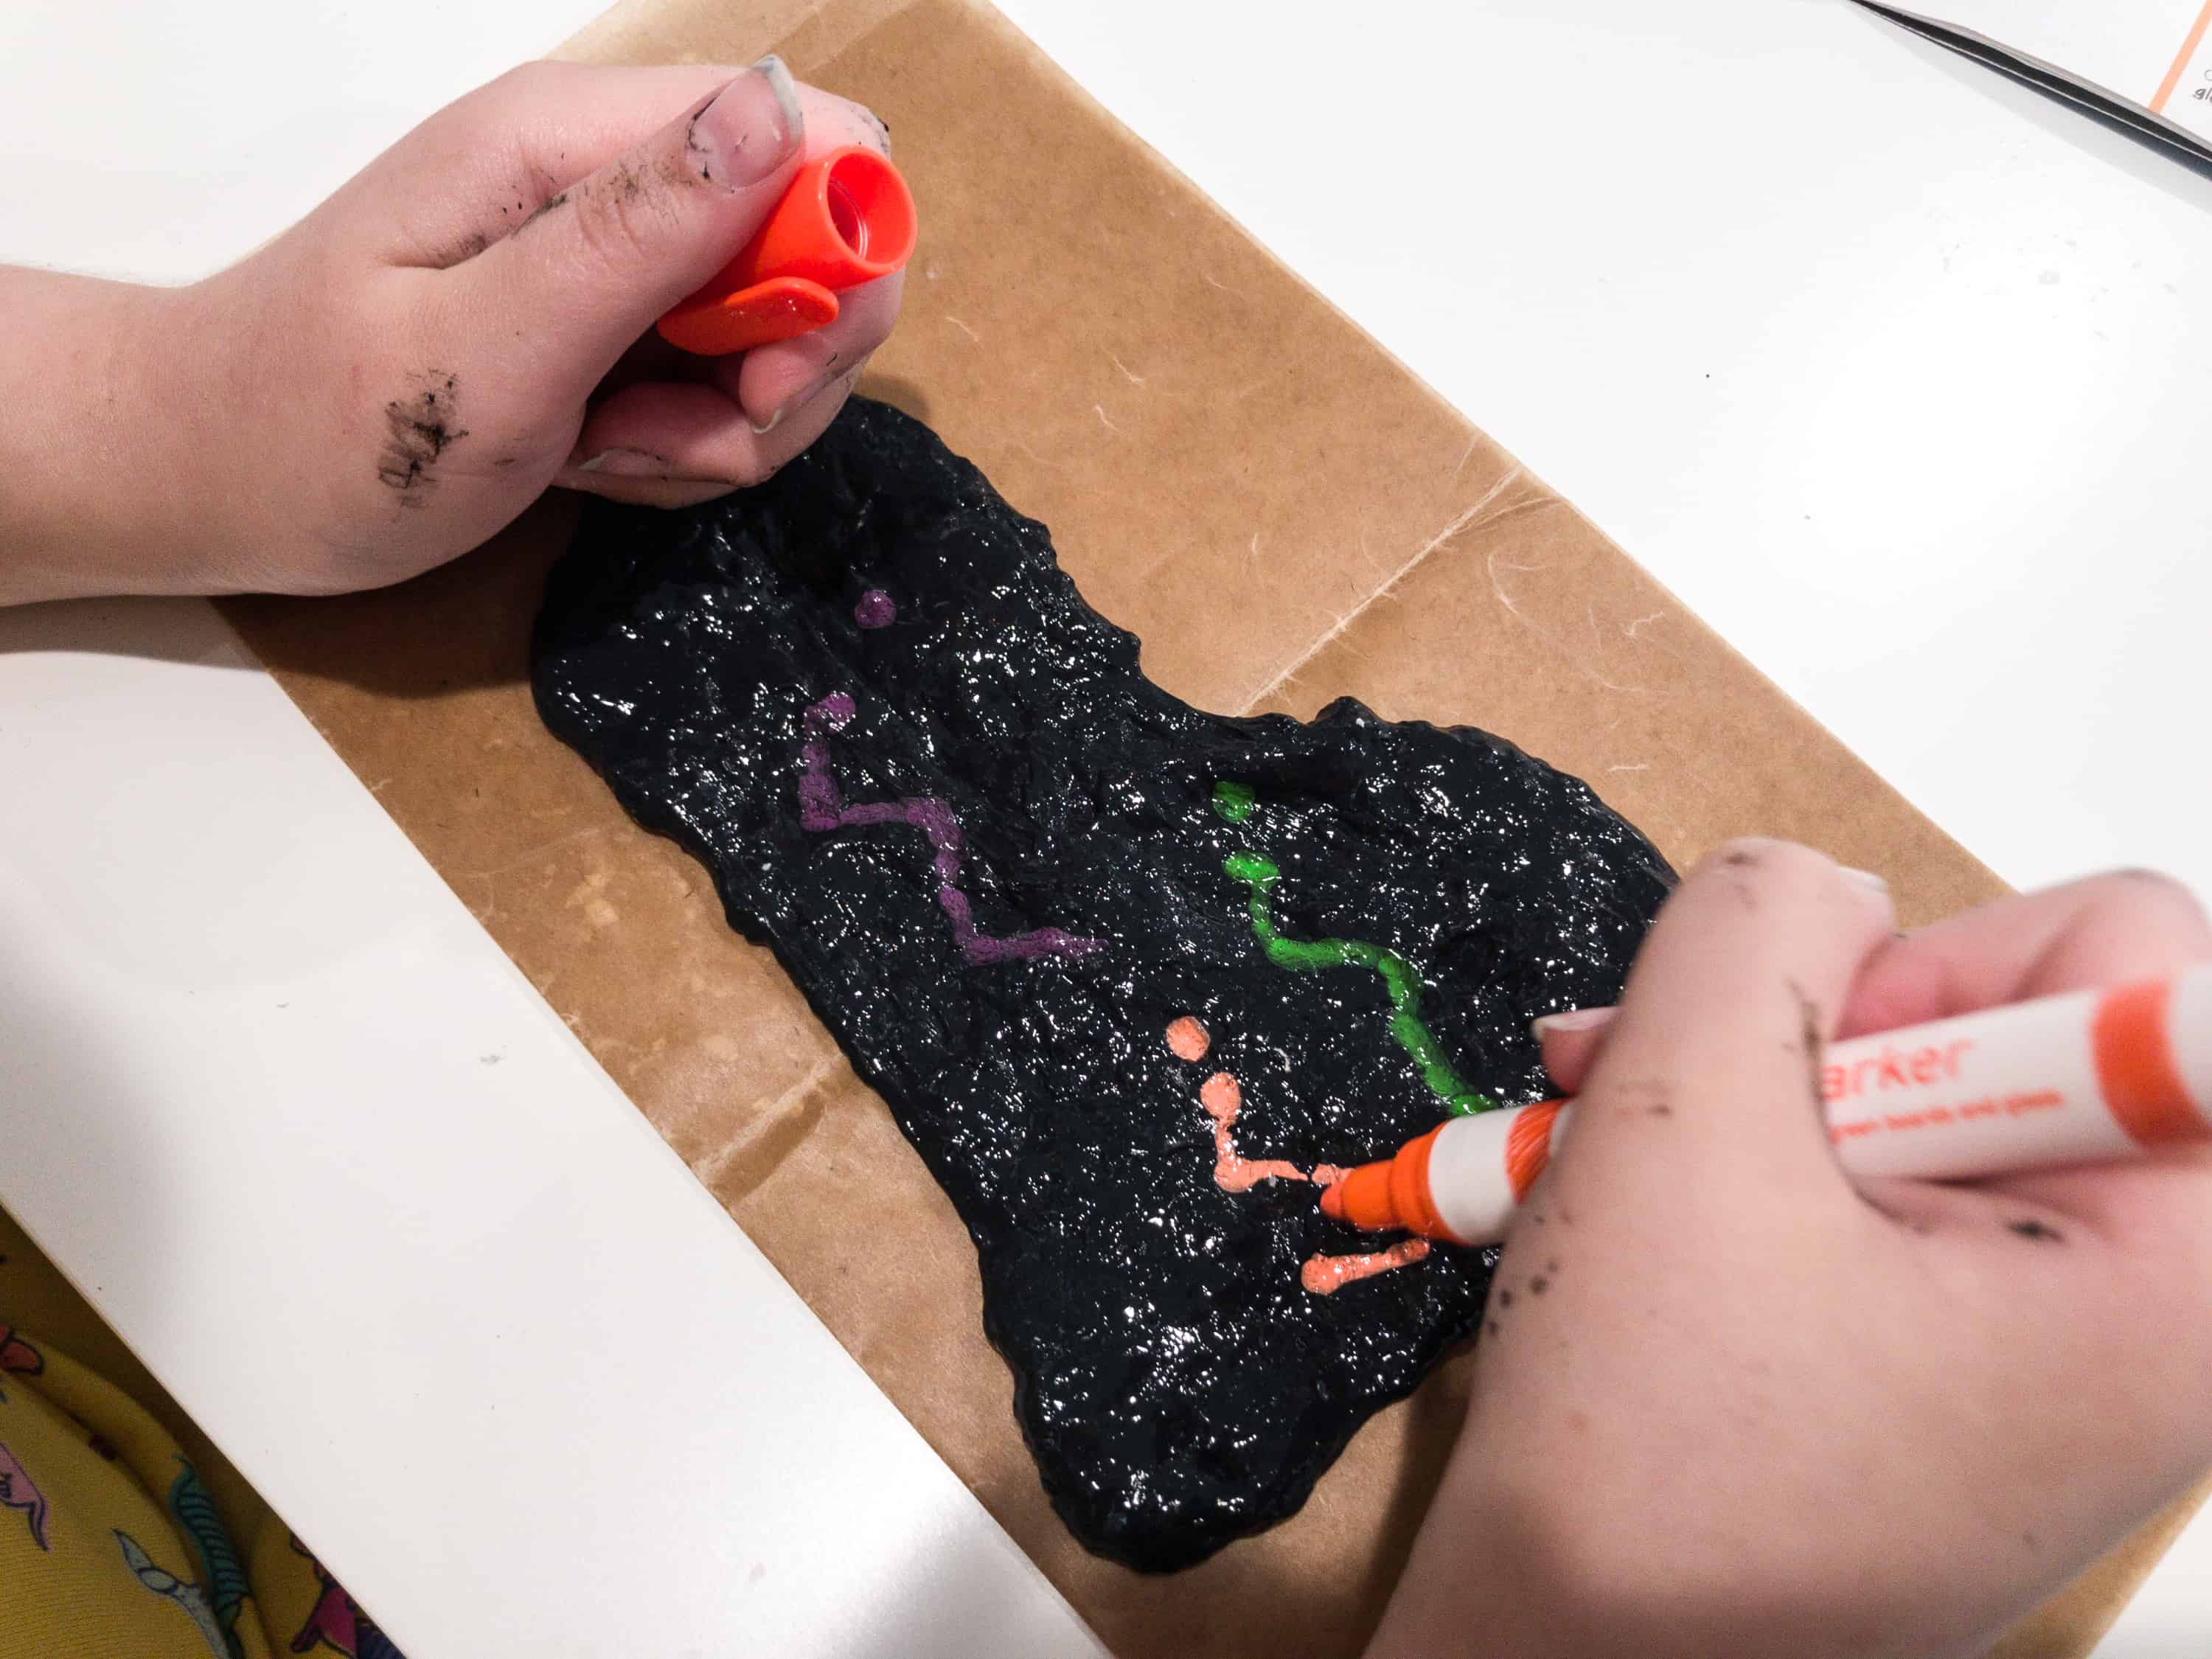
When the slime became stable, my daughter started designing it.

She stretched it and voila! The drawing she made became distorted as expected.
She wasn’t contented with the first artwork she made so she kneaded it again into a smaller condensed slime. The whole thing worked great and you couldn’t see the previous paint.
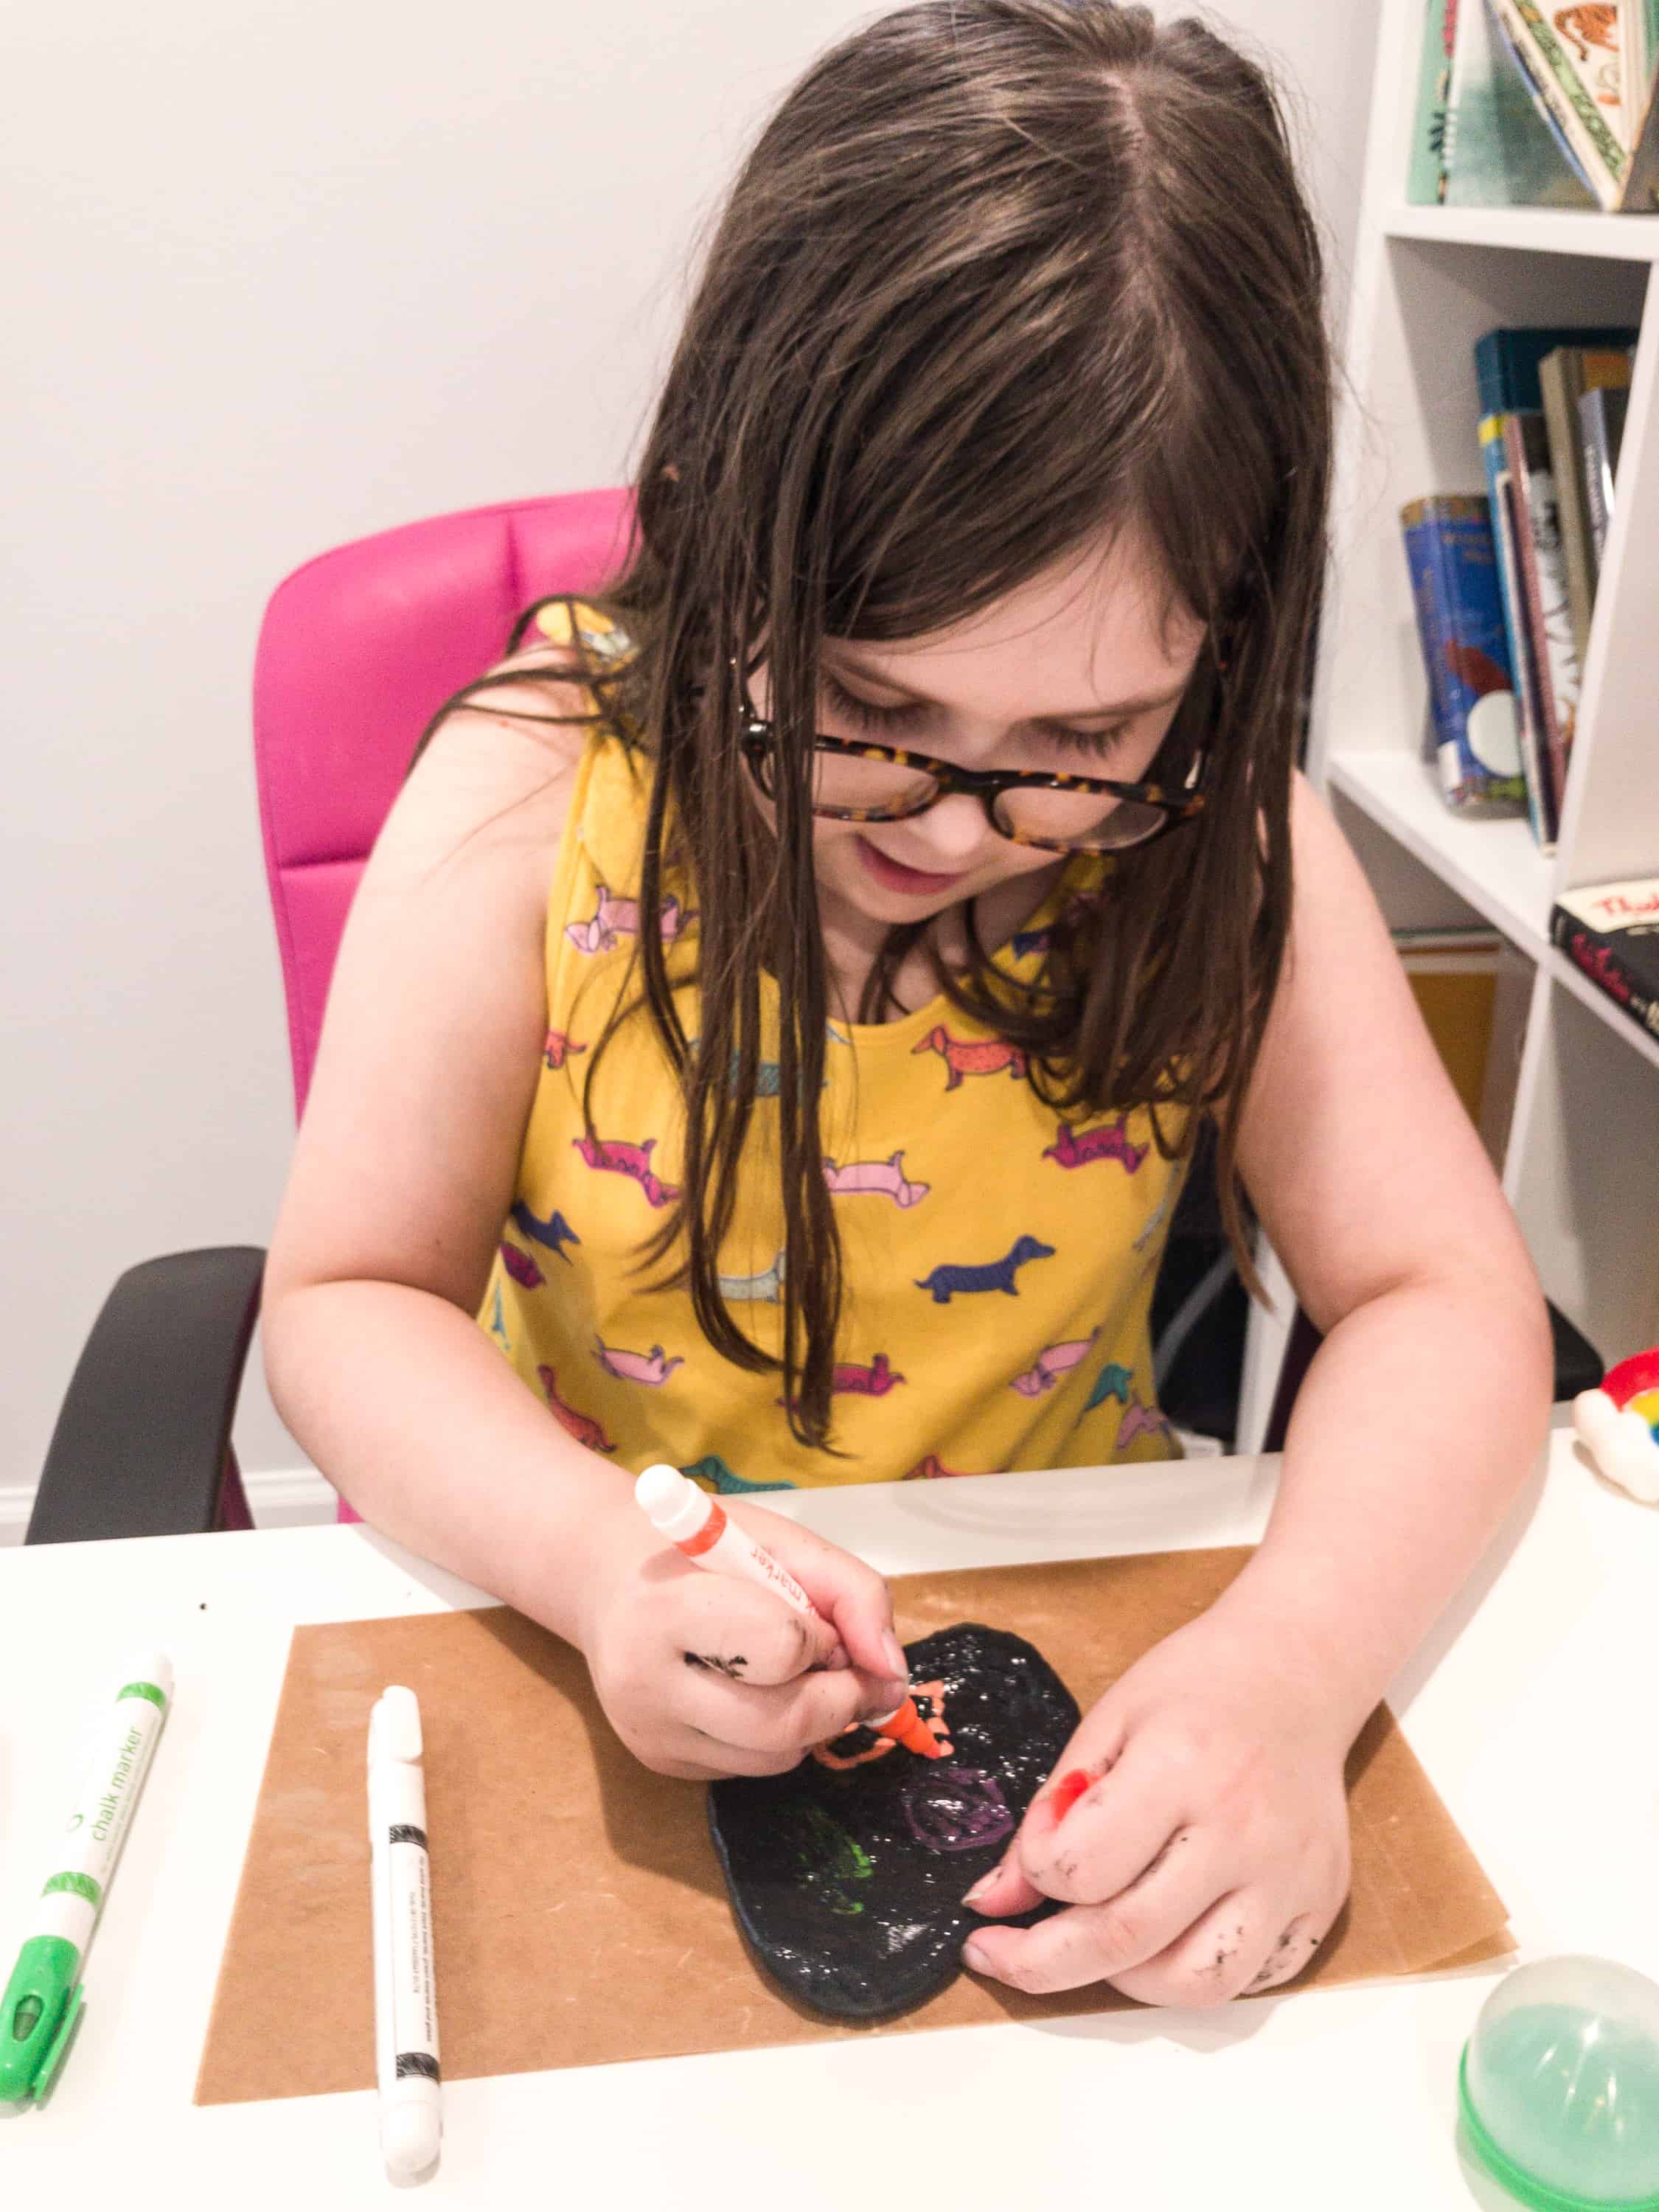
She started drawing on it again with the colored chalk markers.
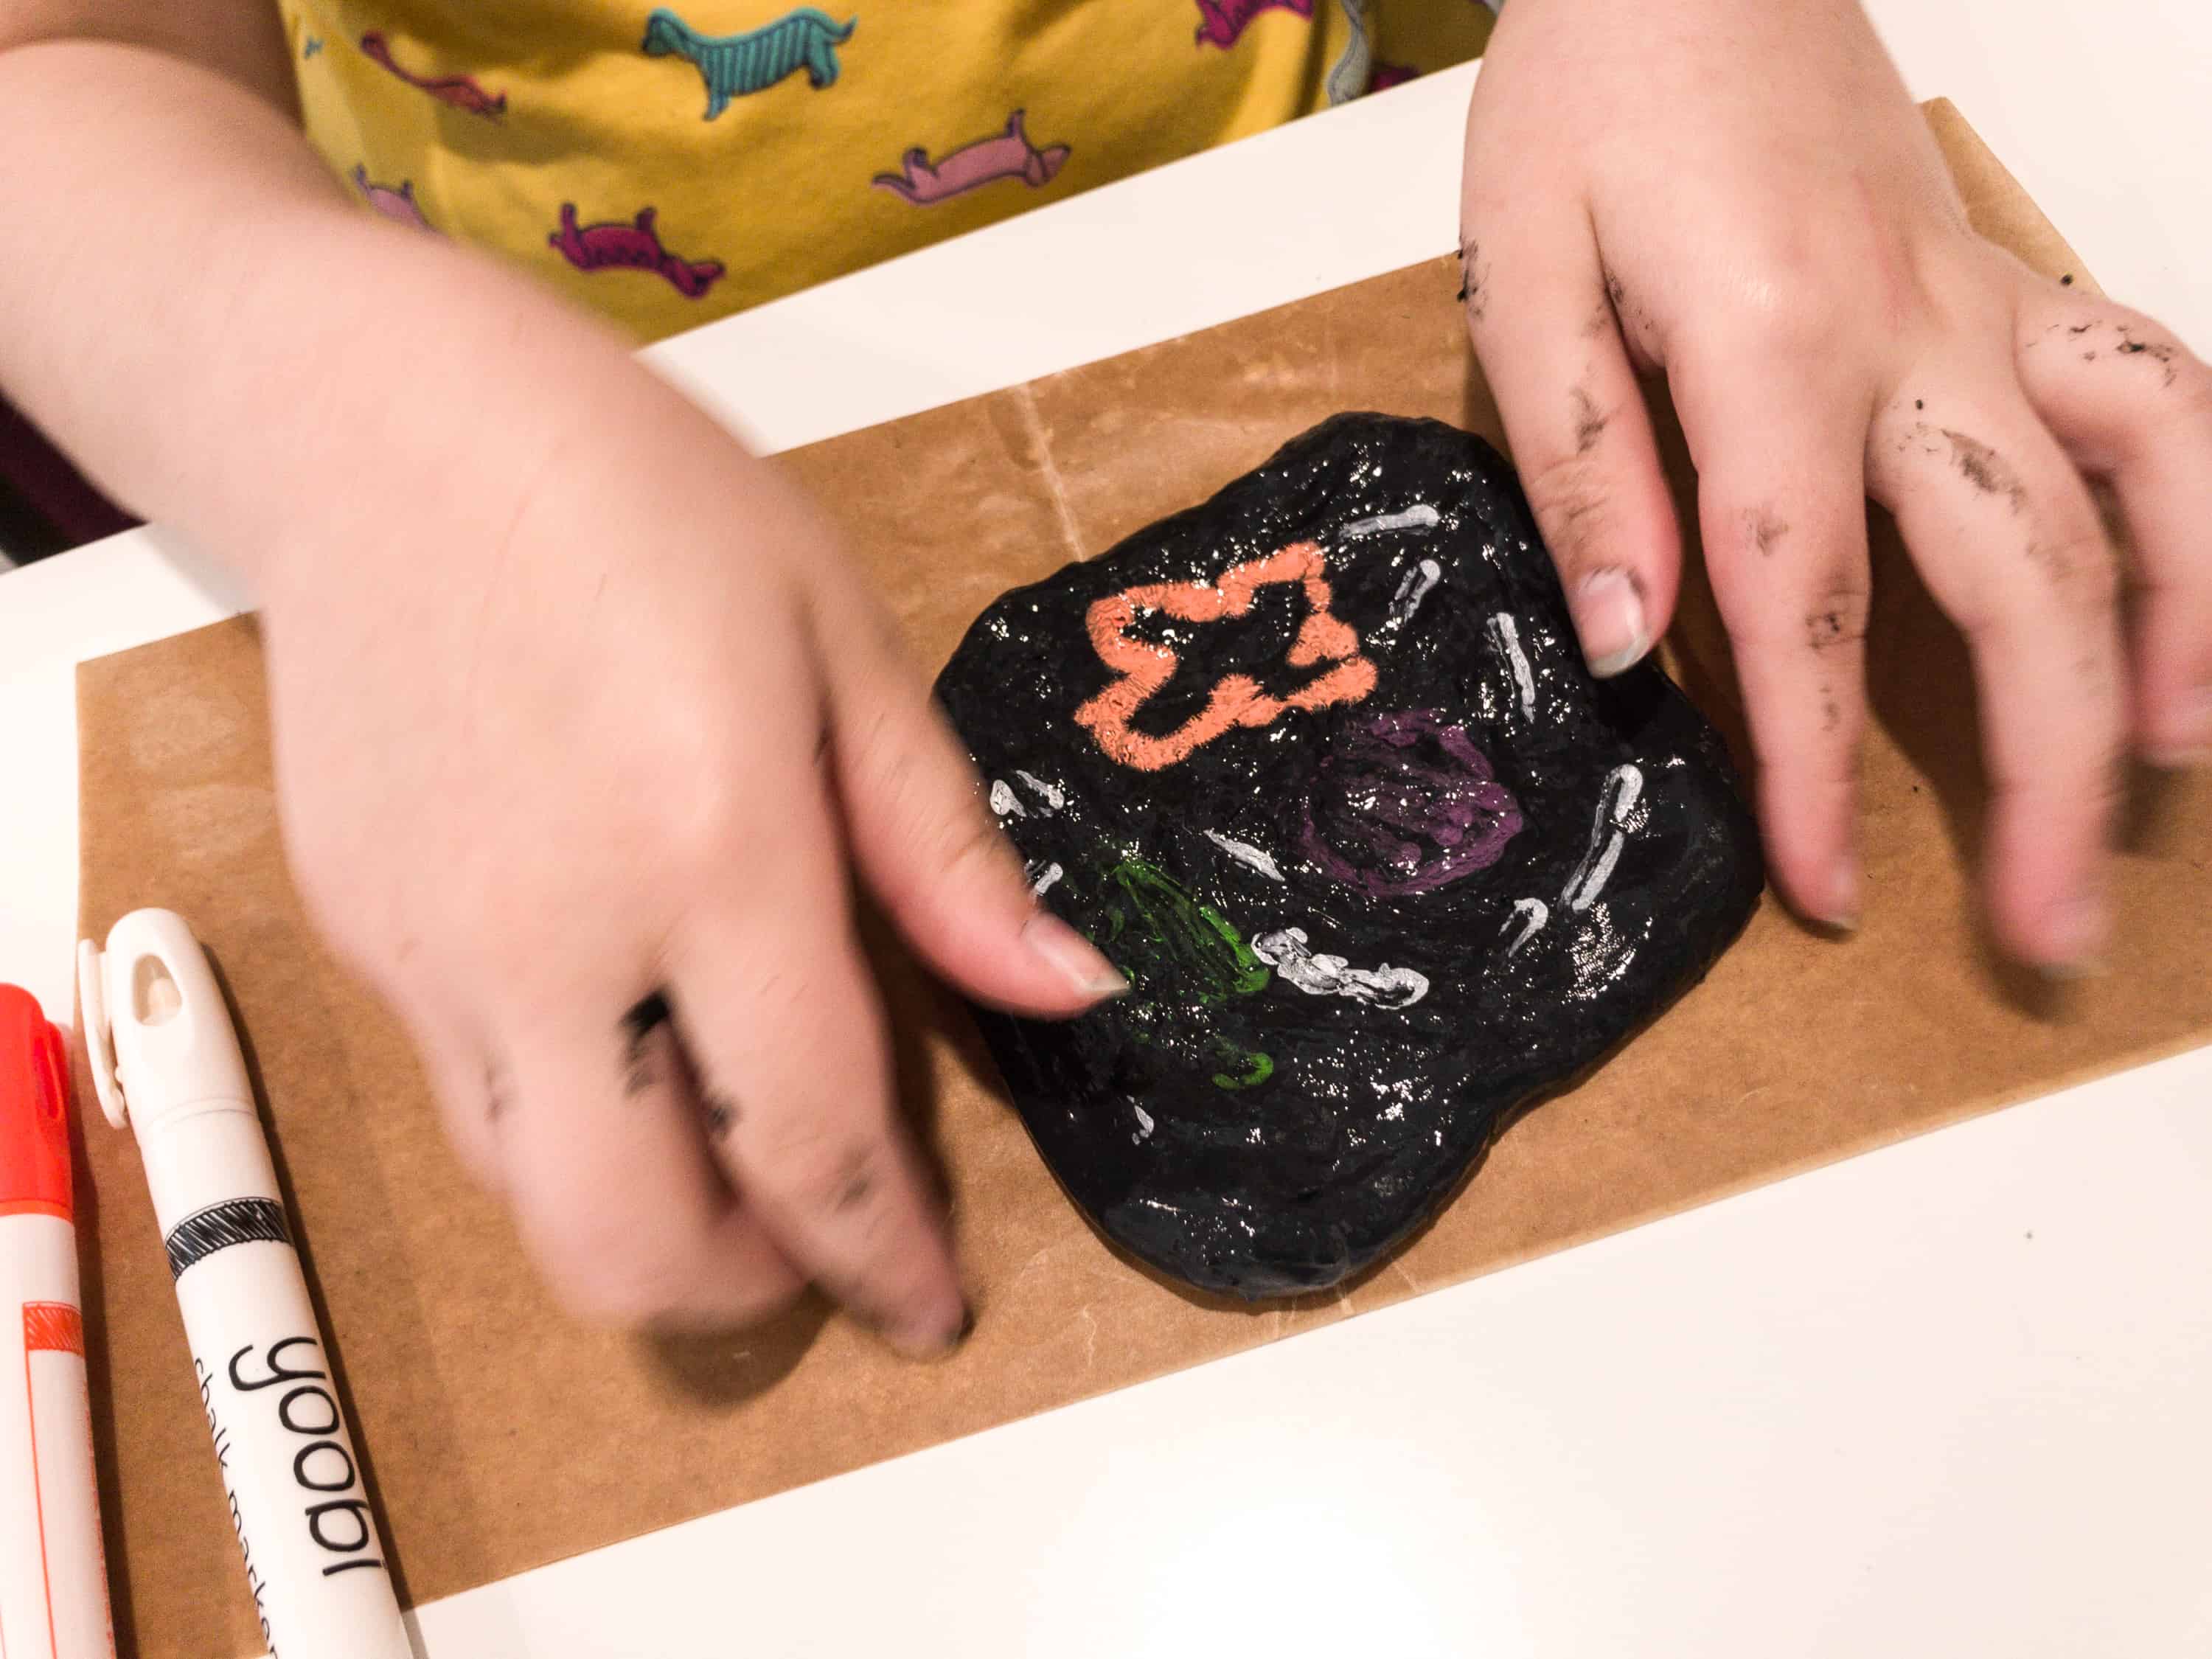
This time she made a pizza!

Then, she made it into a snake and drew some lines and eyes as accents.
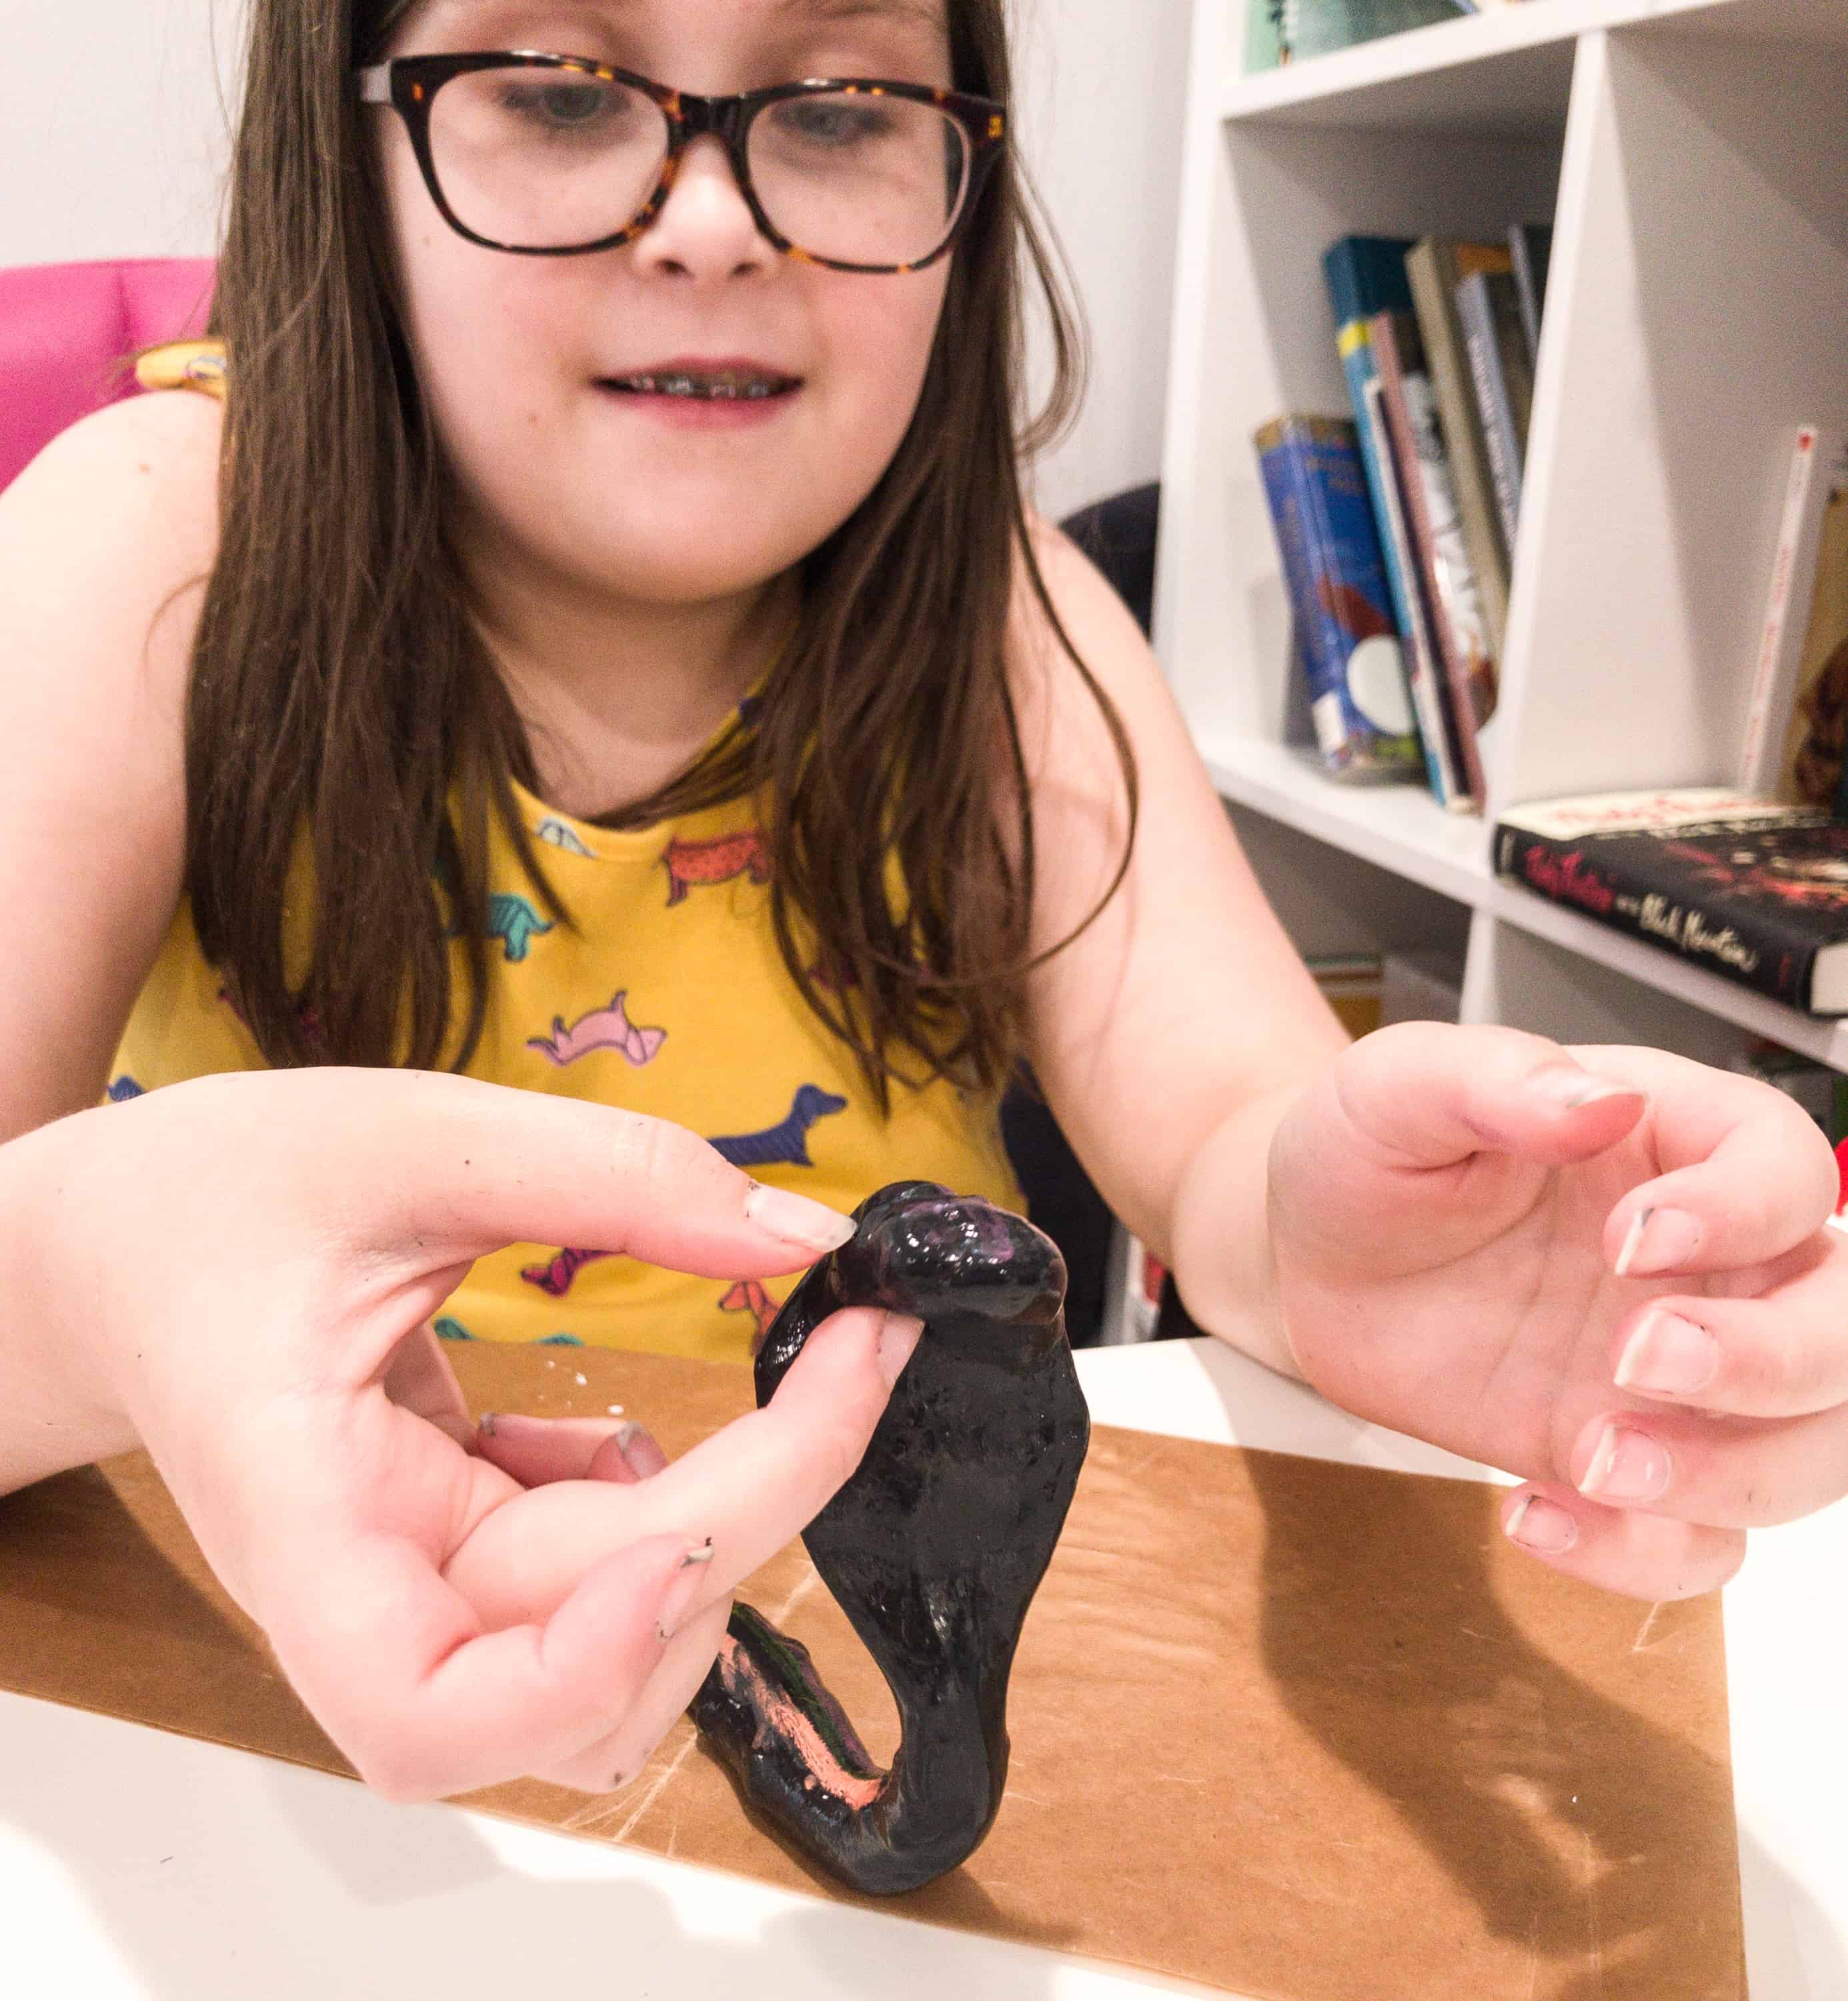
Look, she even made it into a cobra! A lot of shapes can be made with this homemade slime!
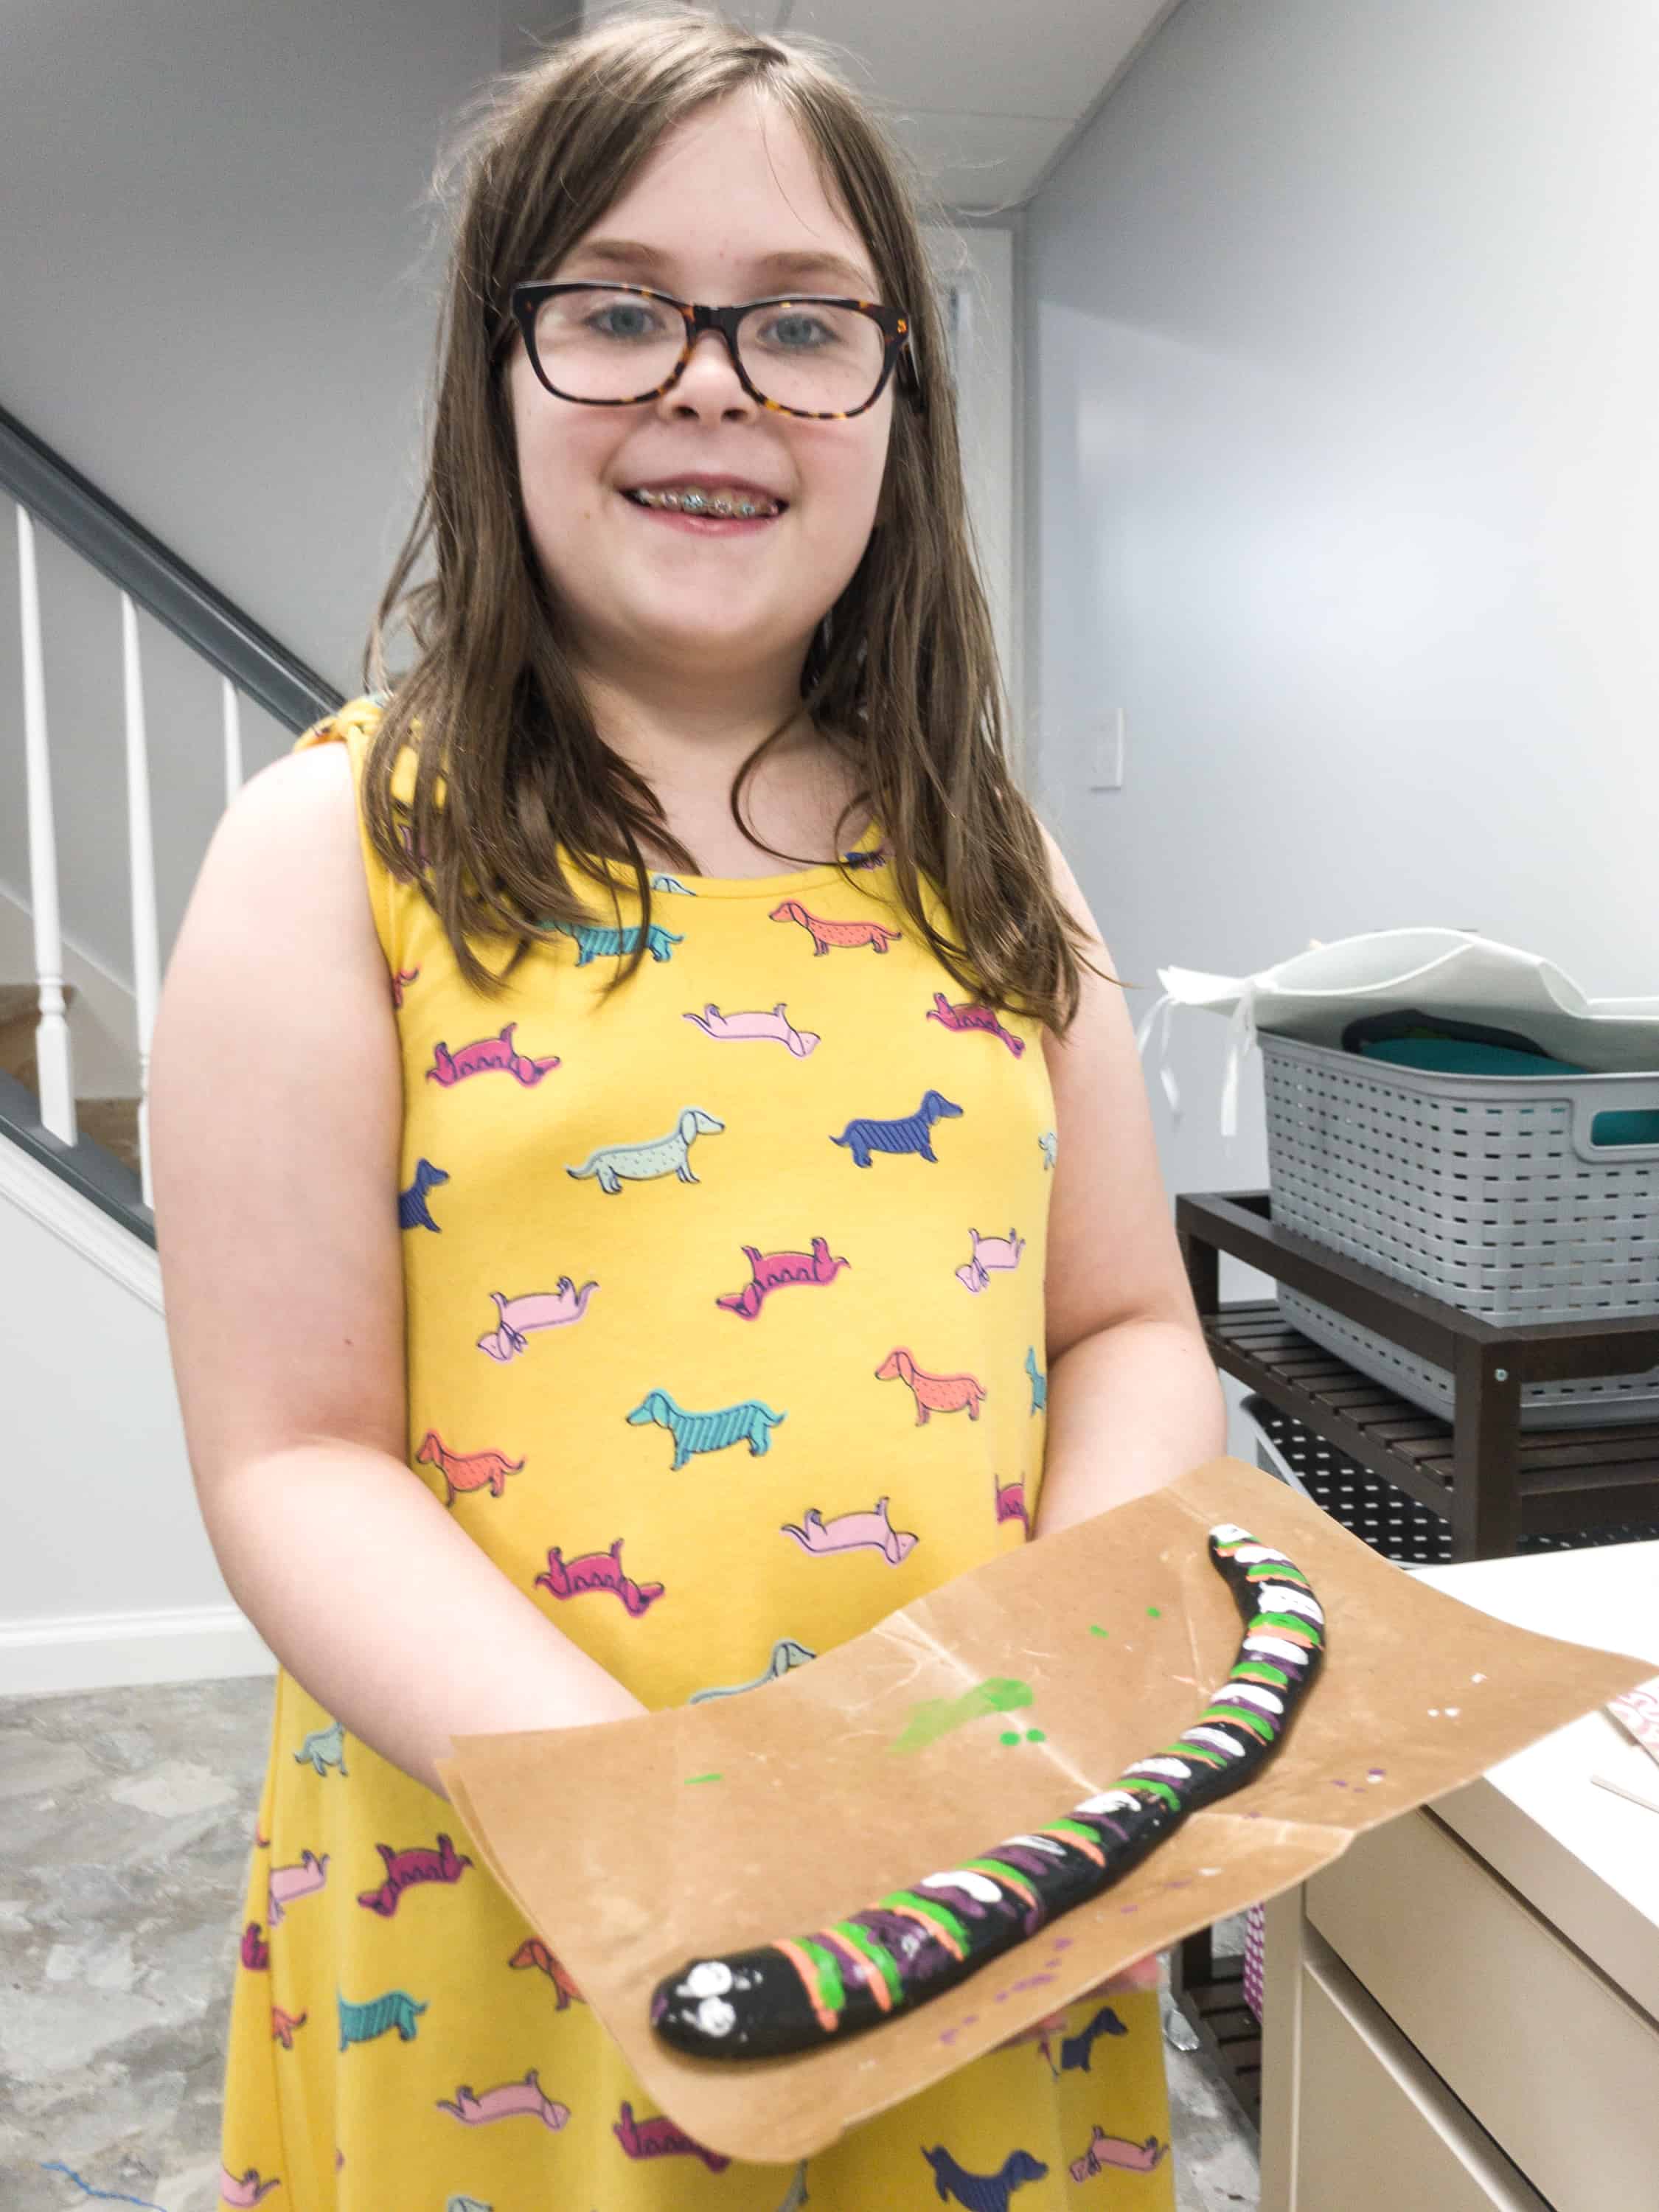
She kneaded it again into a more convincing shape of a snake making it longer and the head bigger than its body. She drew lines in different colors in a consecutive and repetitive pattern to easily distinguish that it is the body of the snake. Then she drew those googly white eyes on its head and violet dot for its mouth.
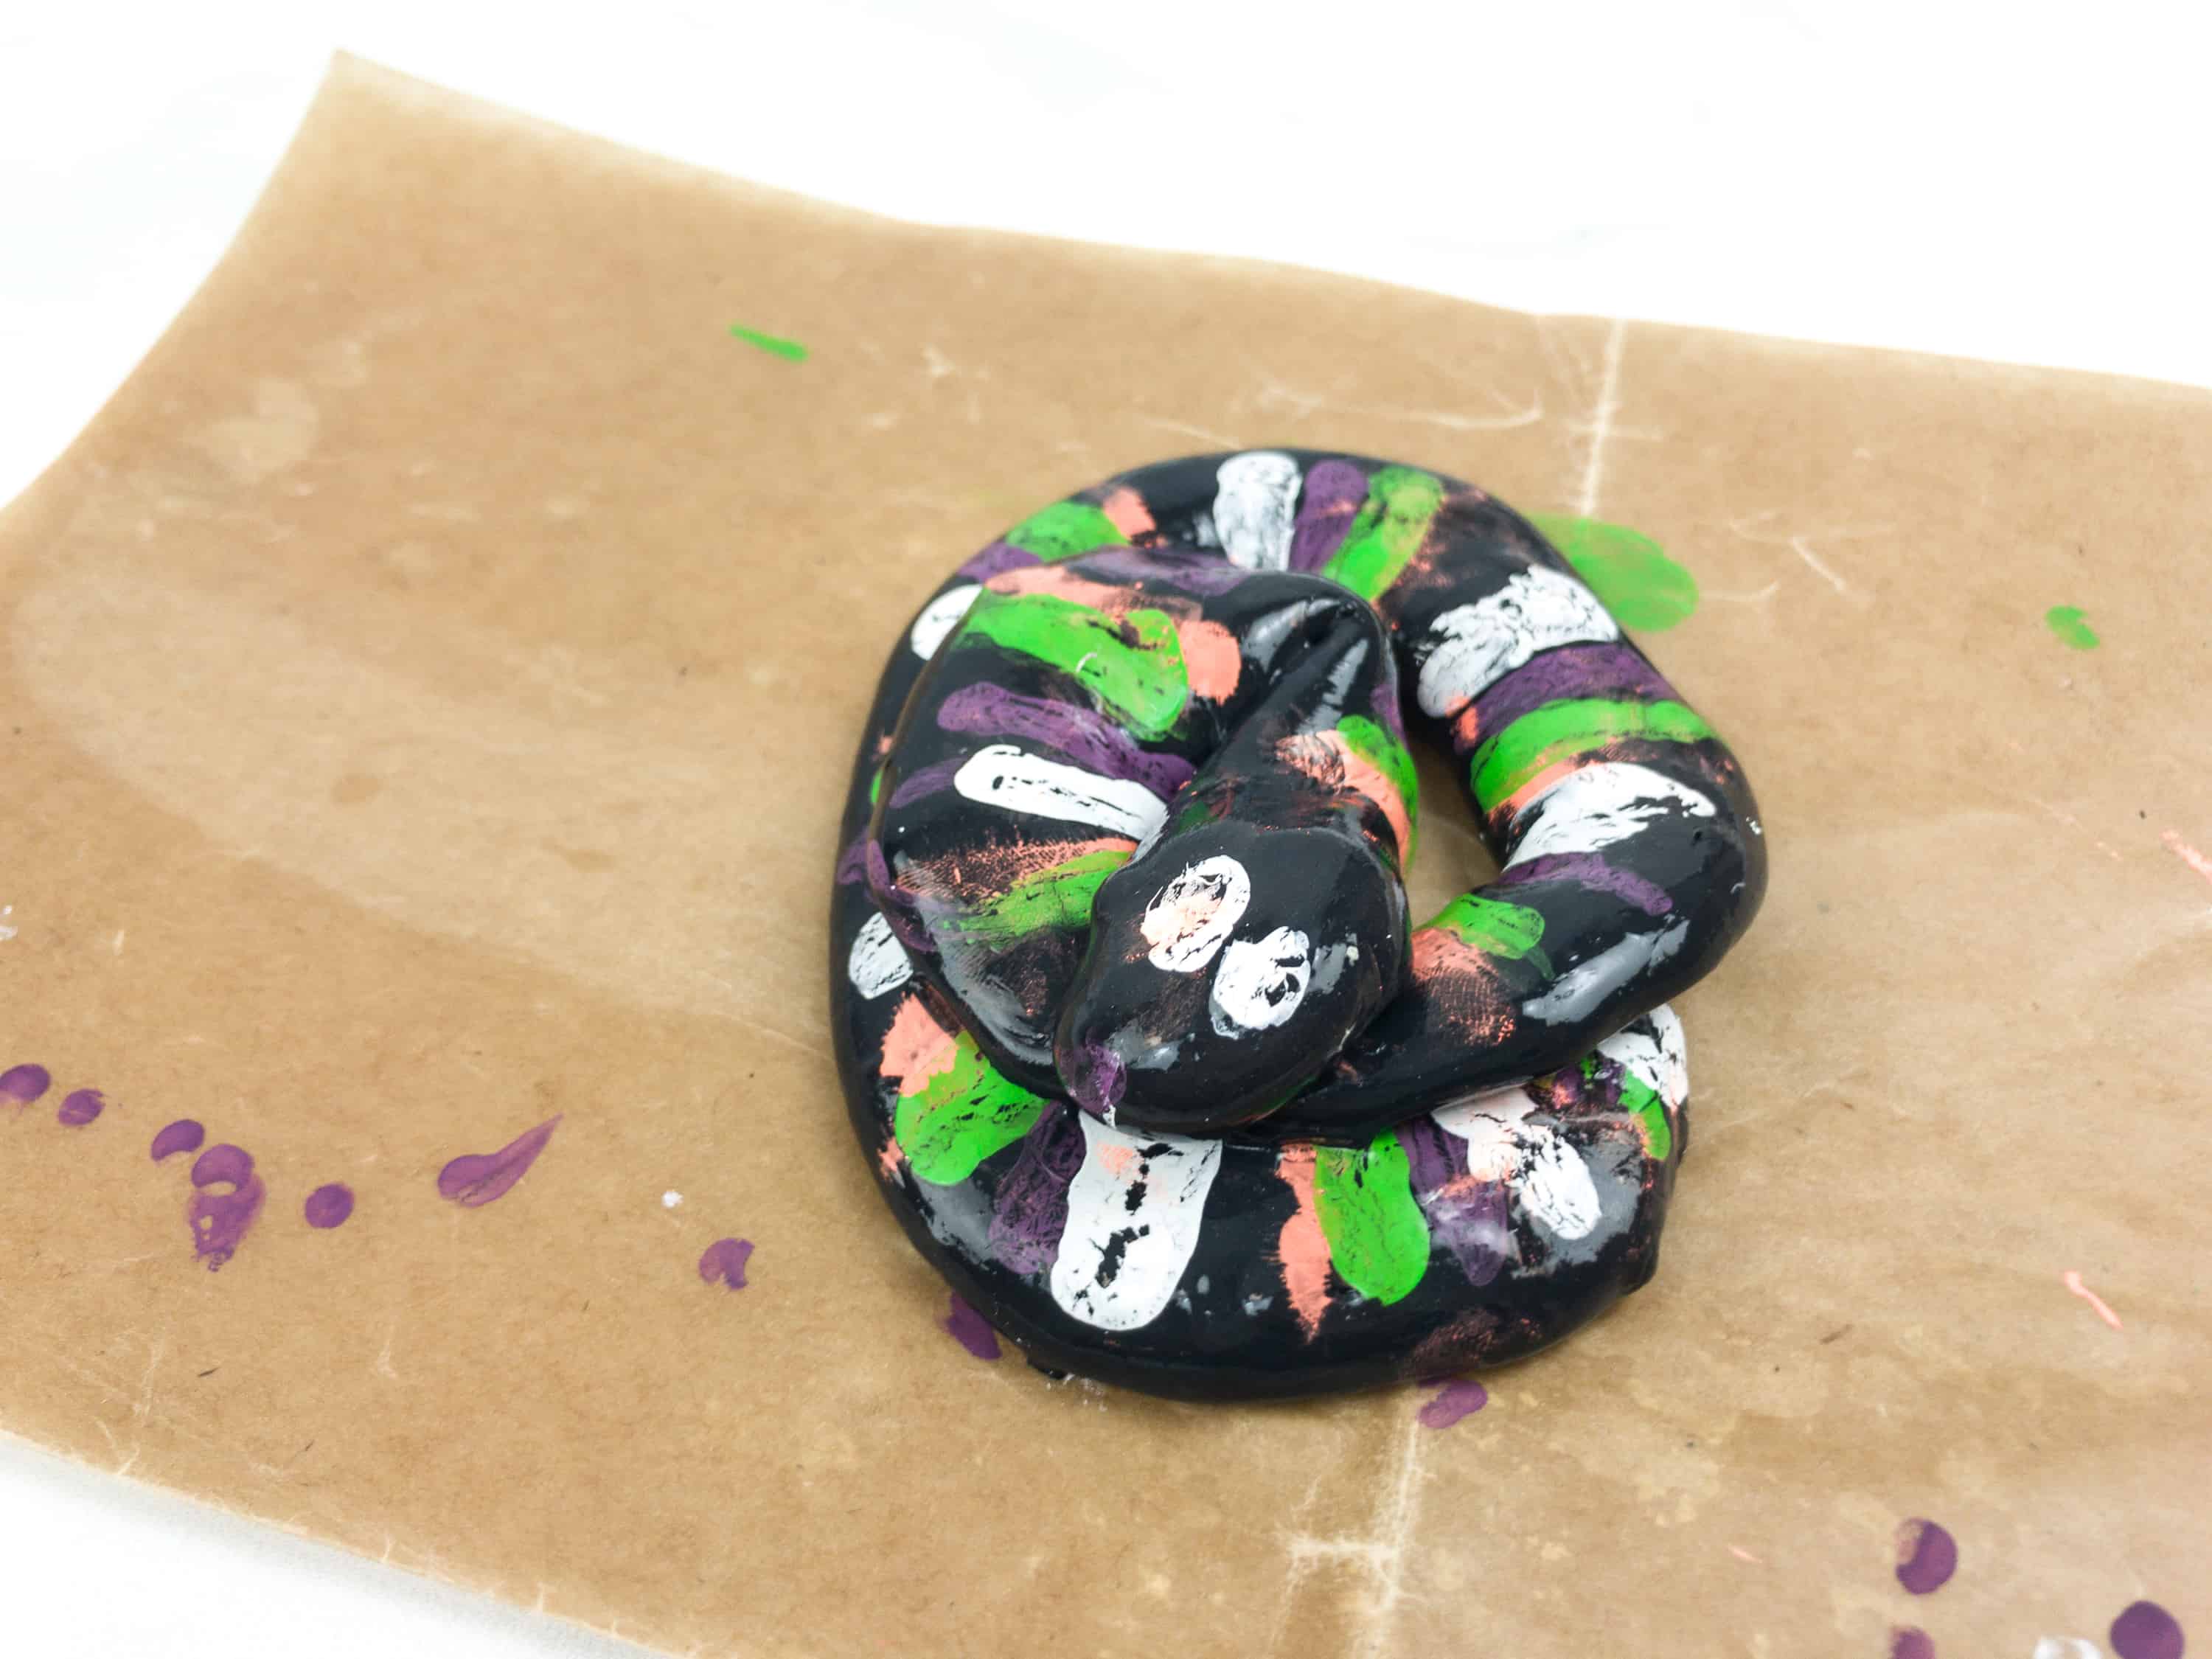
We took the flexibility of the slime further by putting it into a coil, like the snake is just asleep or waiting for a chance to pounce. It looks awesome!
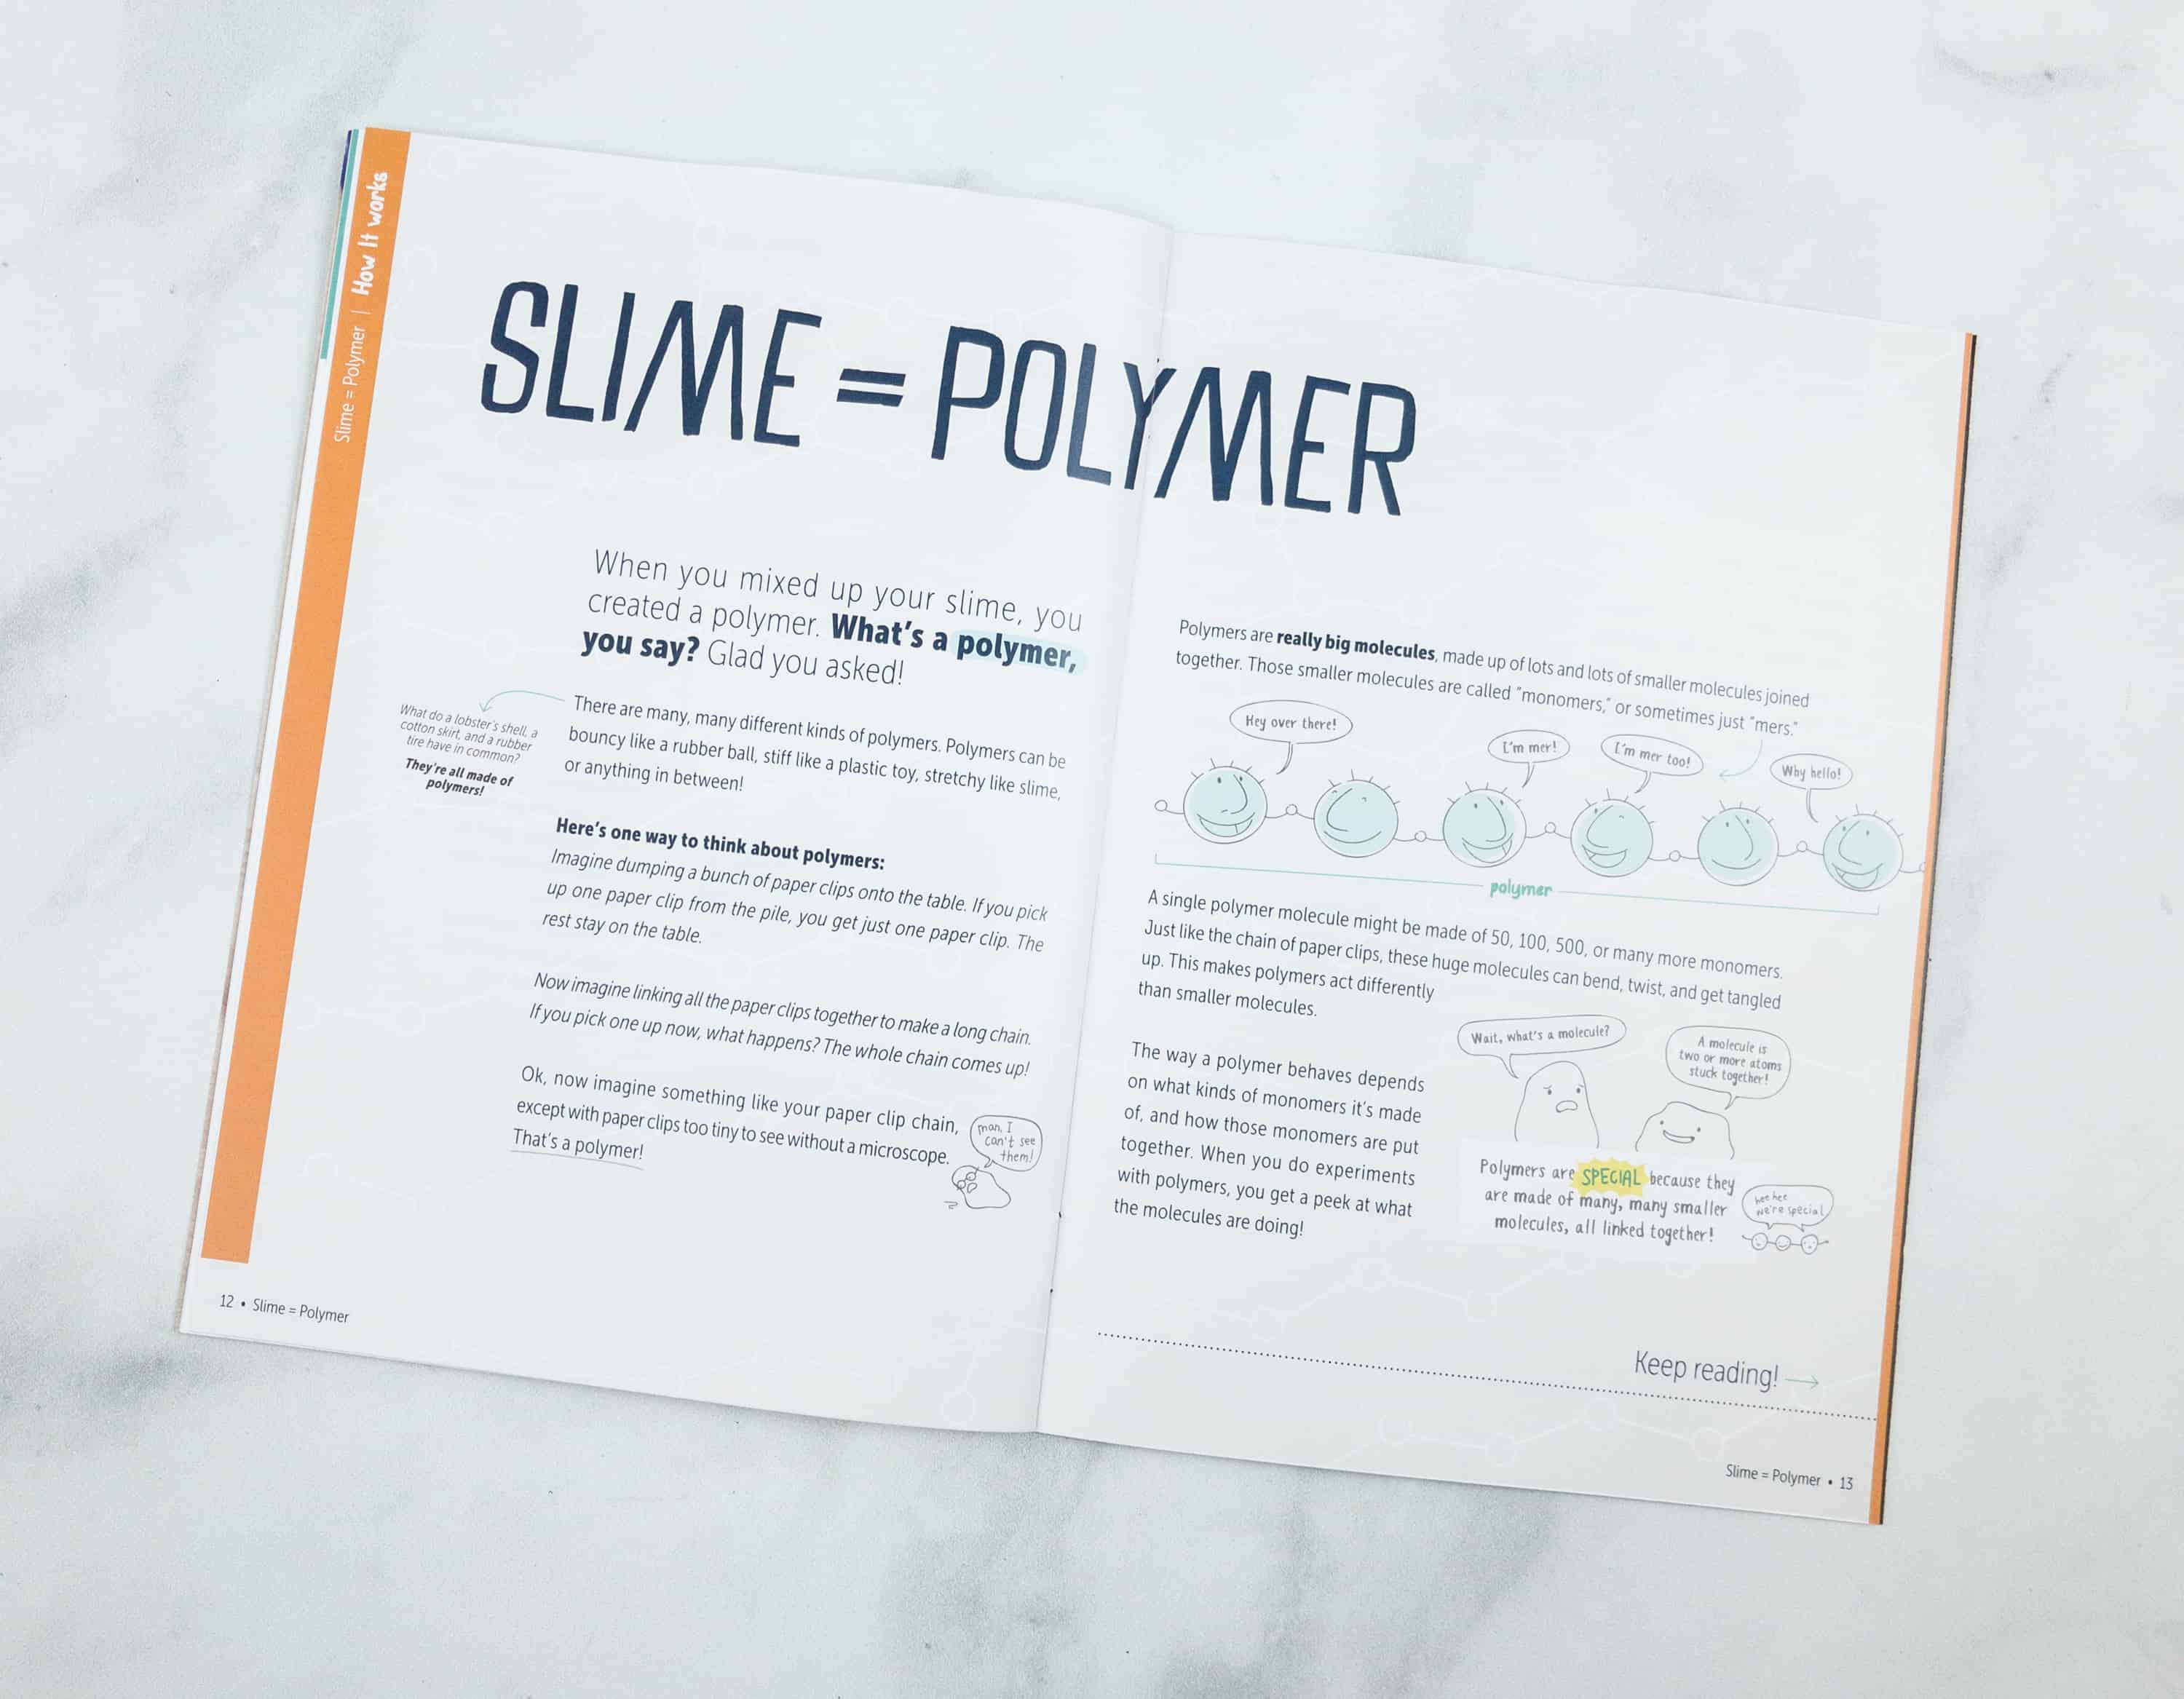
They explained a scientific fact by relating it to paper clips. This teaching technique makes it relatable and easier for the kids to imagine.
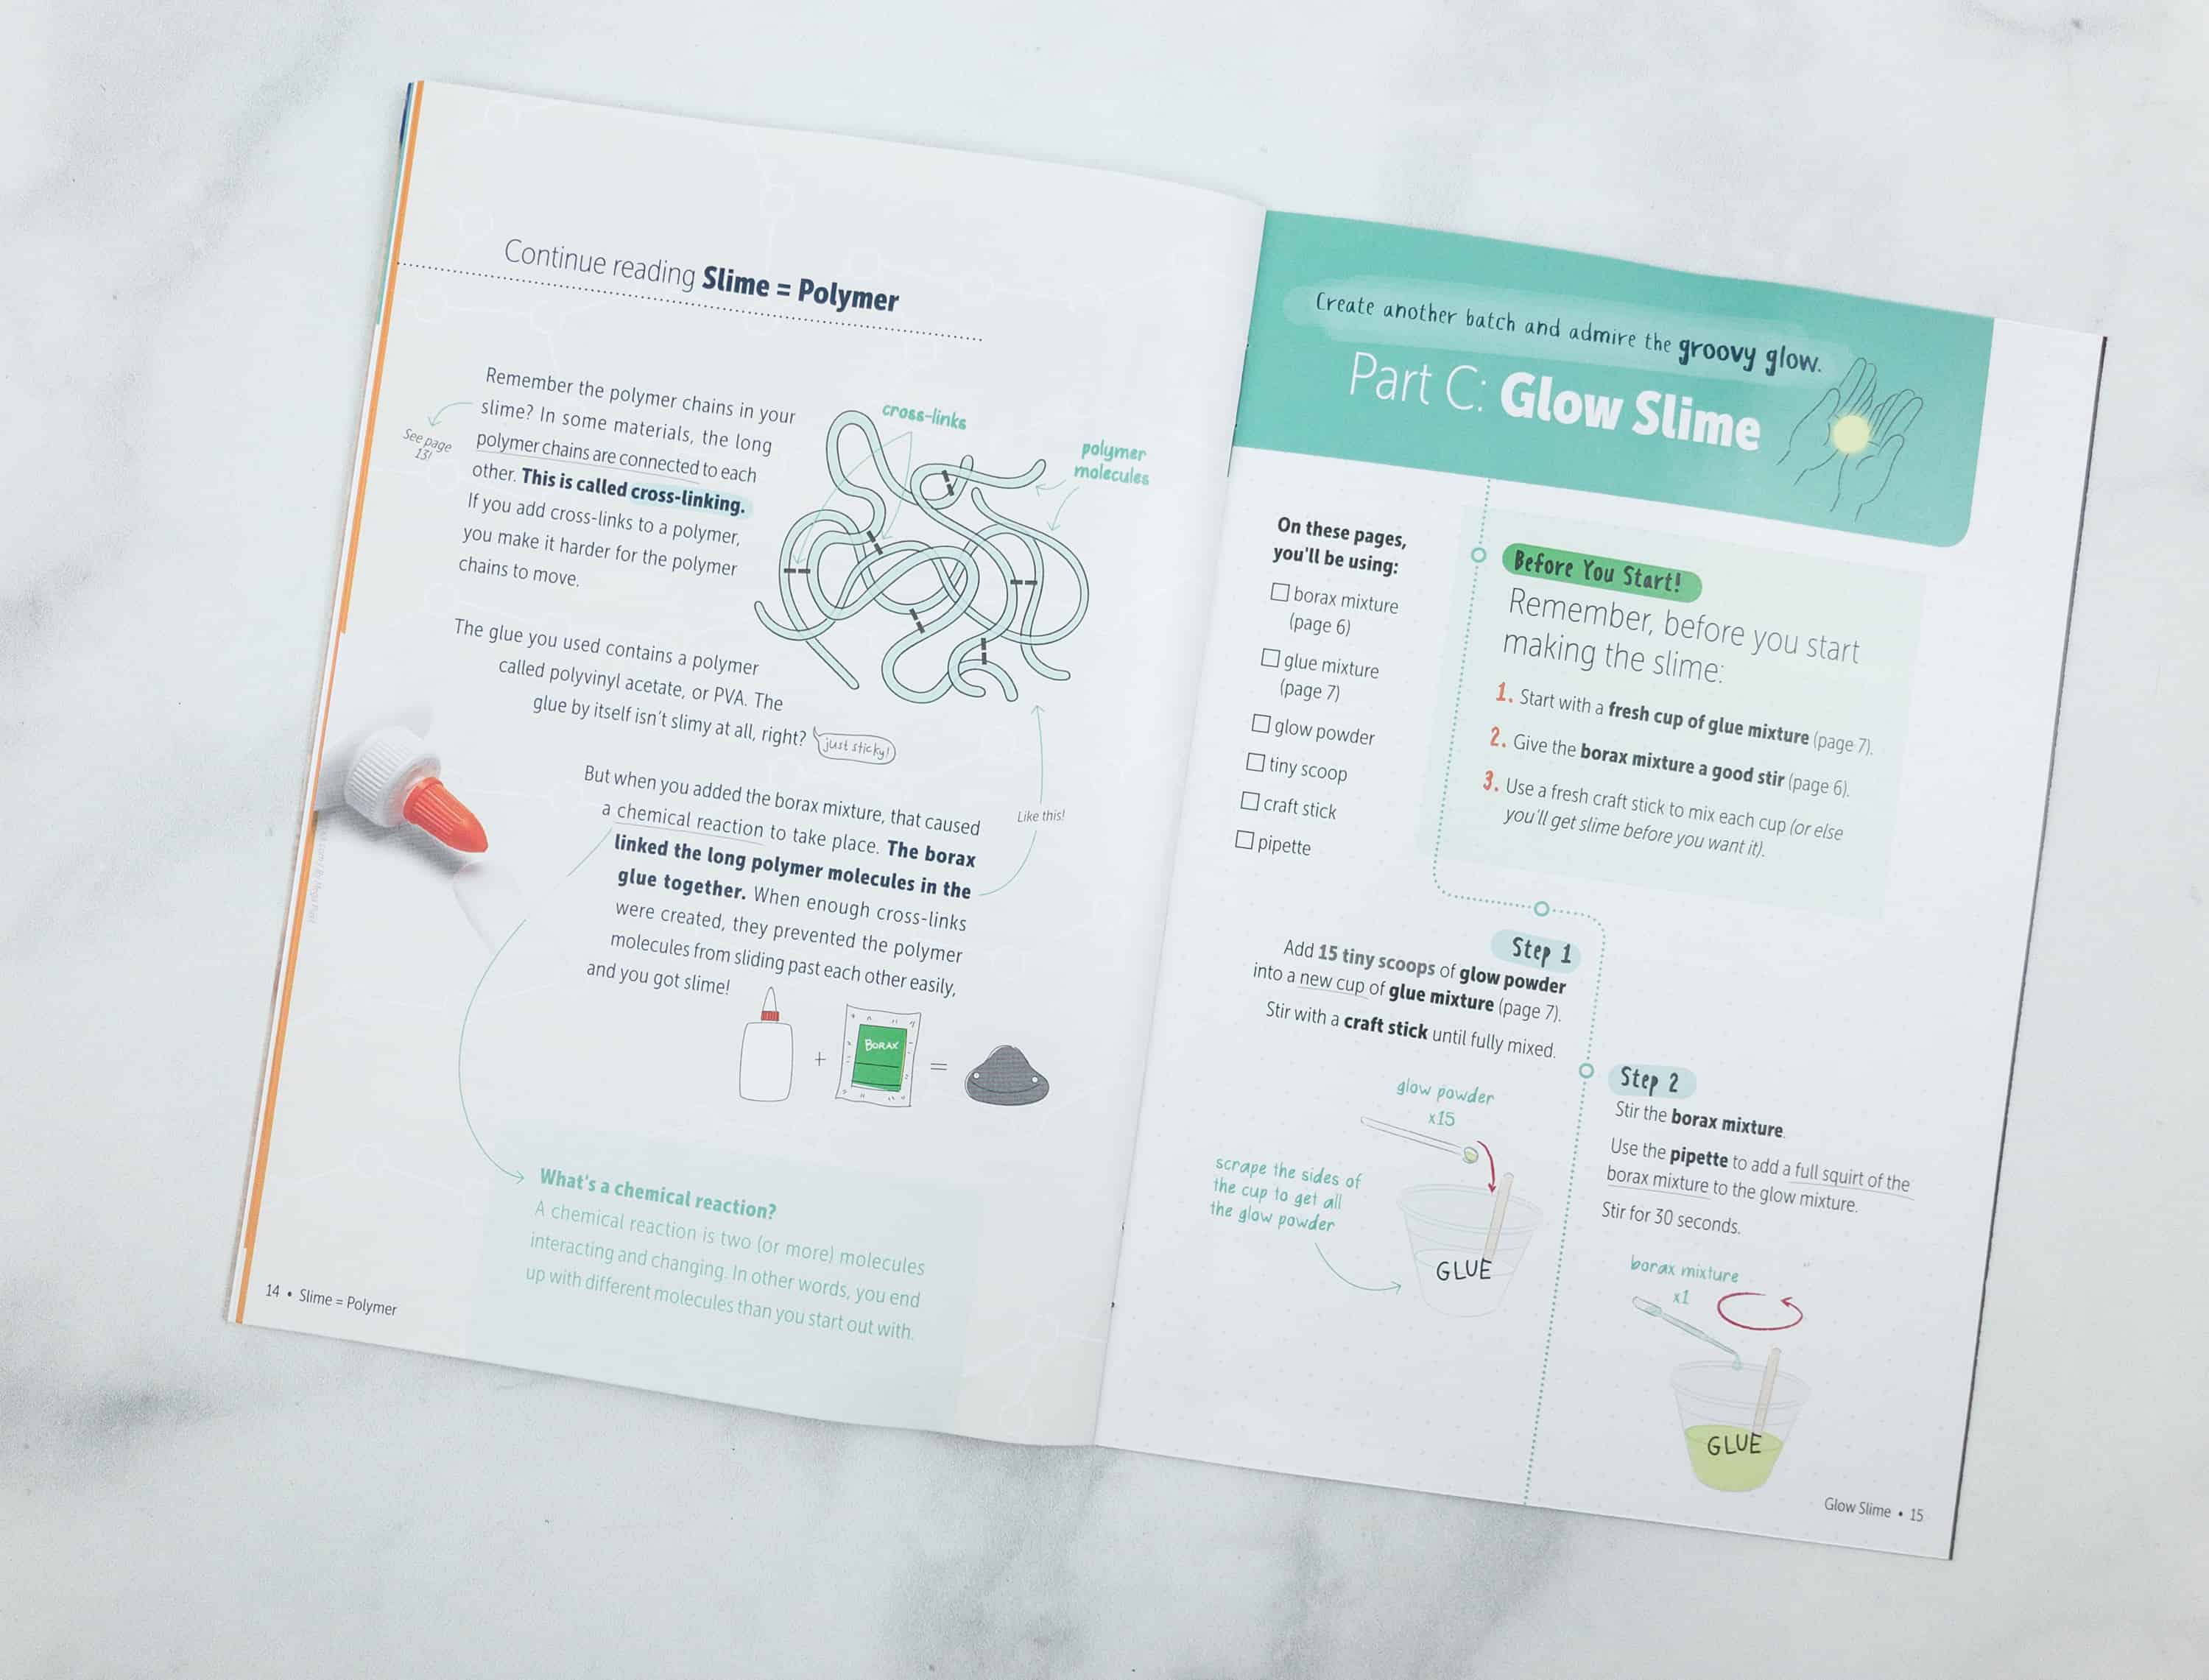
Another good teaching technique I noticed is that they insert the learning facts in between the activities, to take advantage of the kids’ attention and so that they are still hyped to read the facts because there’s still an activity to look forward to. If they cluster together the activities upfront, the tendency is not to read the rest of the pages.
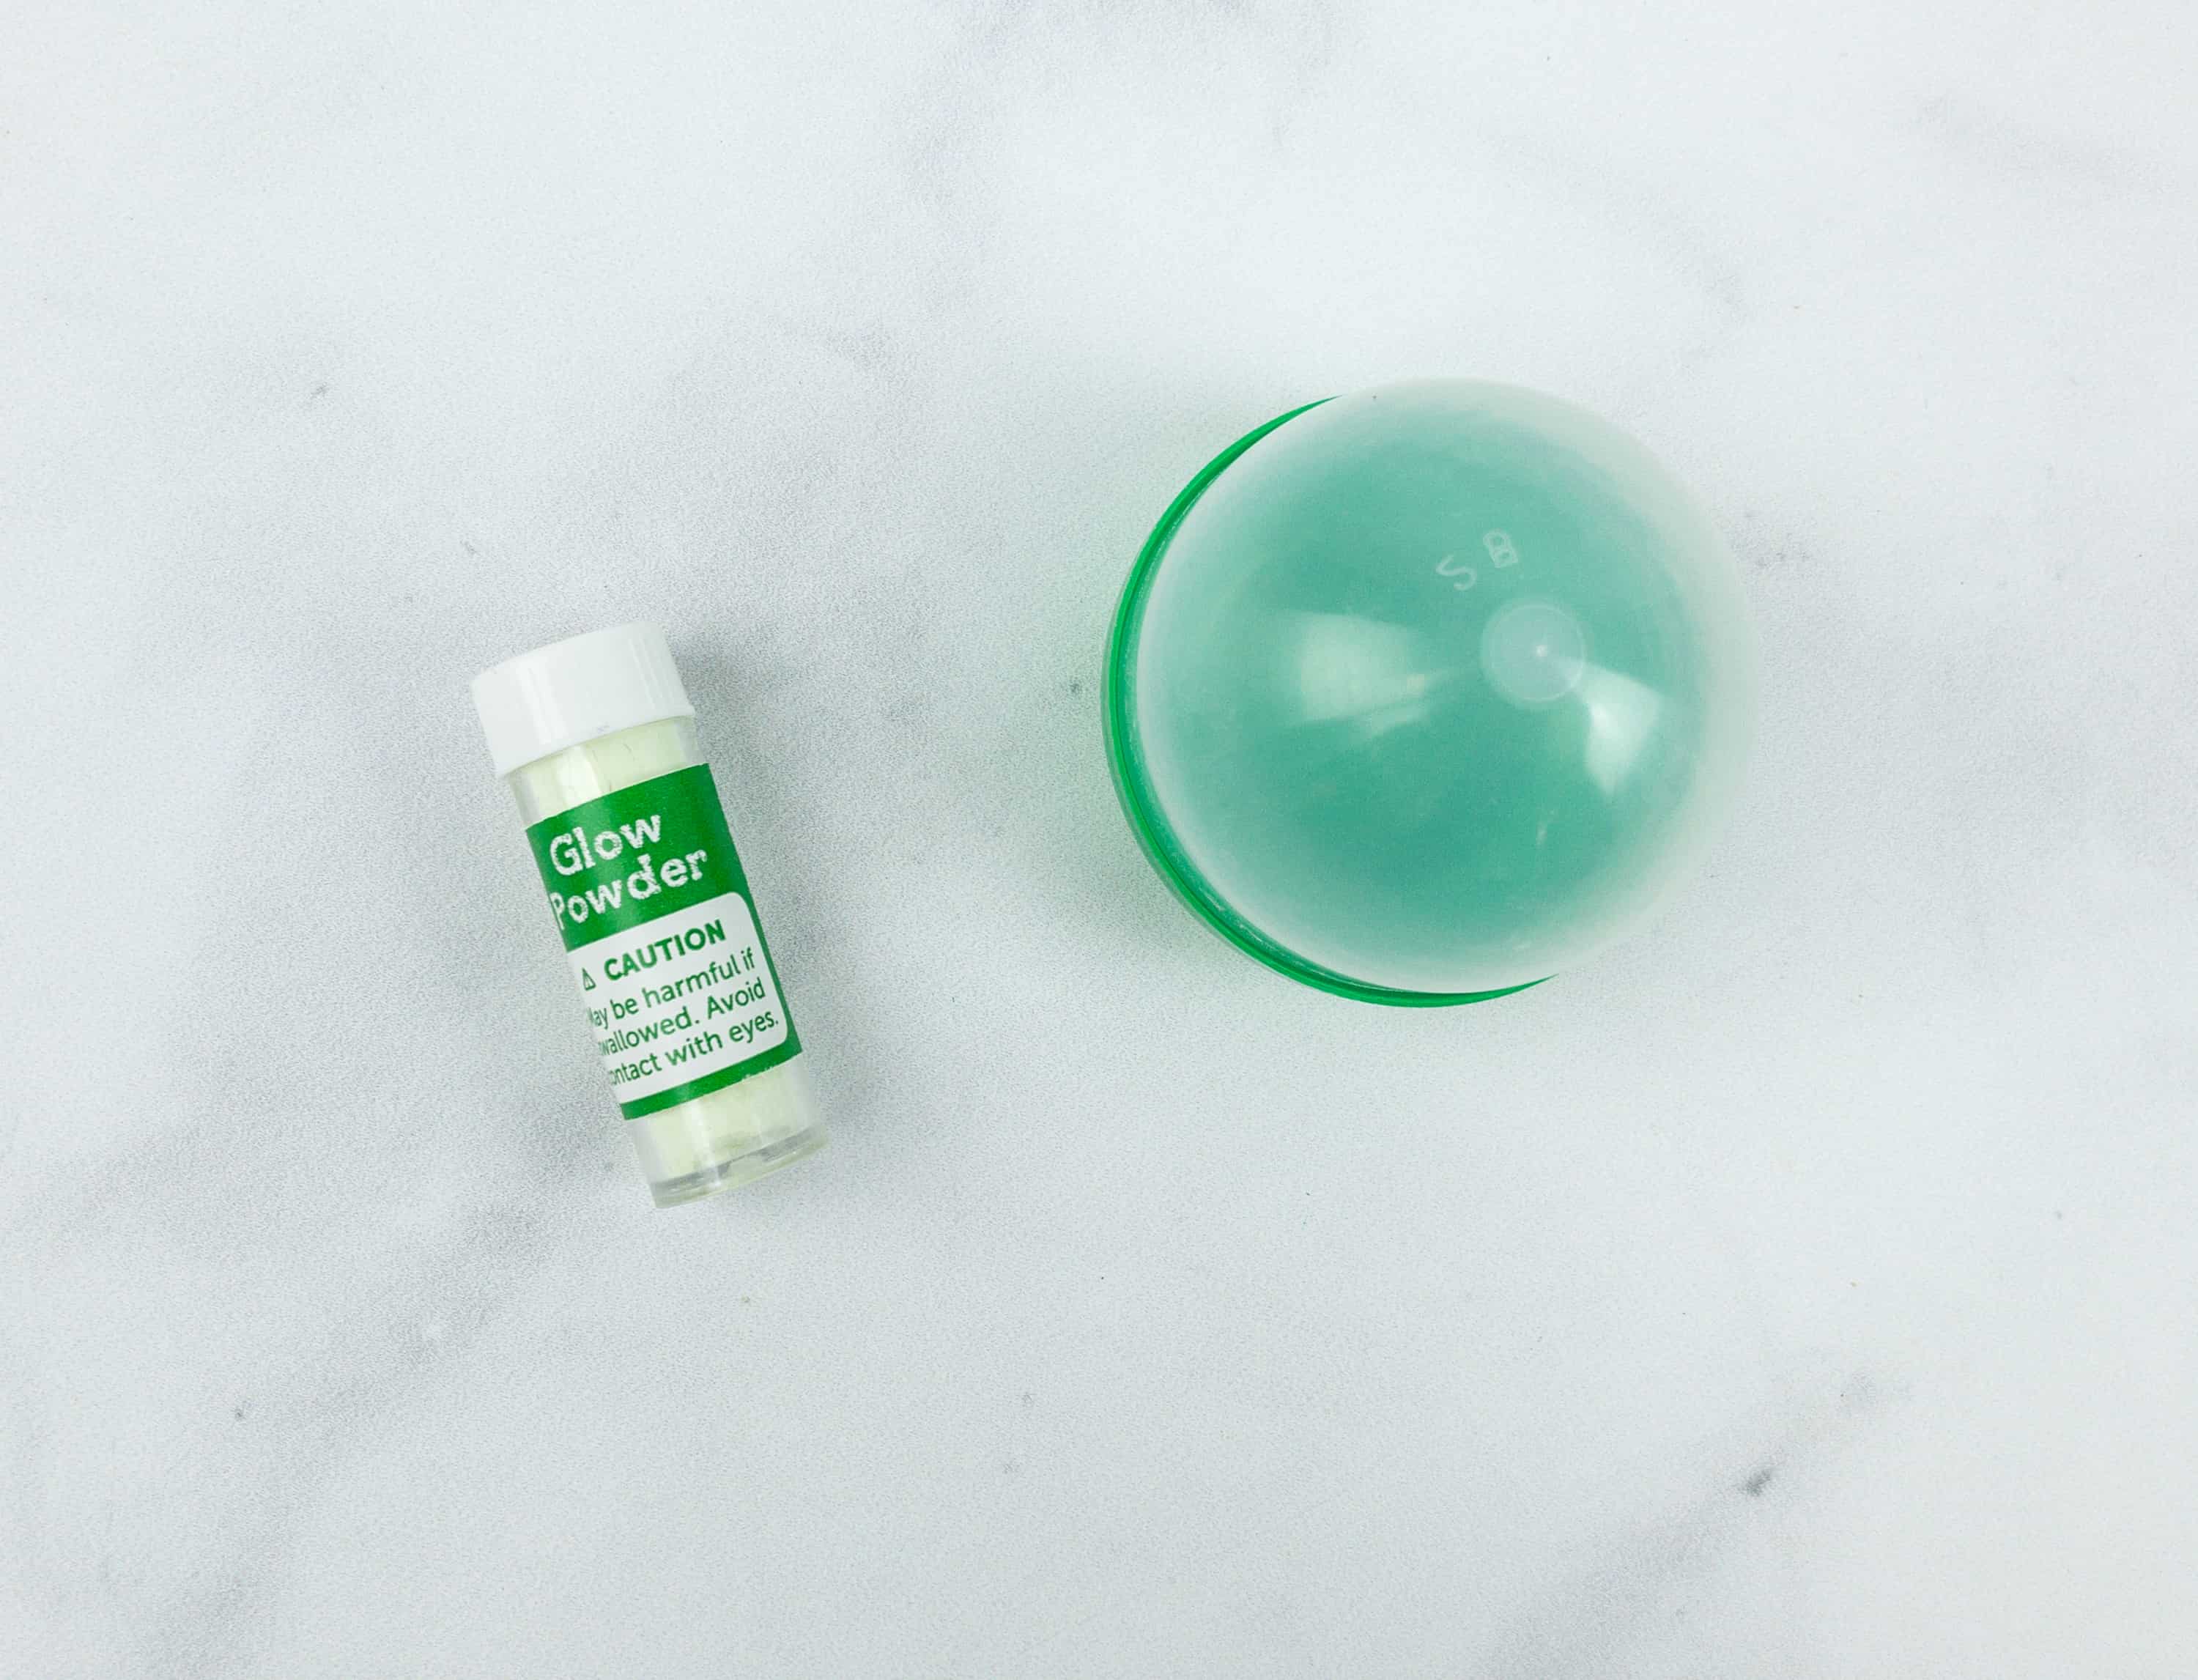
For this activity, this is where the glow powder and the capsule comes in.
We move to Part C, which indicates how to make the Glow Slime. By now, my daughter was able to utilize all the materials. She used the little scoop for the glow powder and mixed it with the glue mixture.
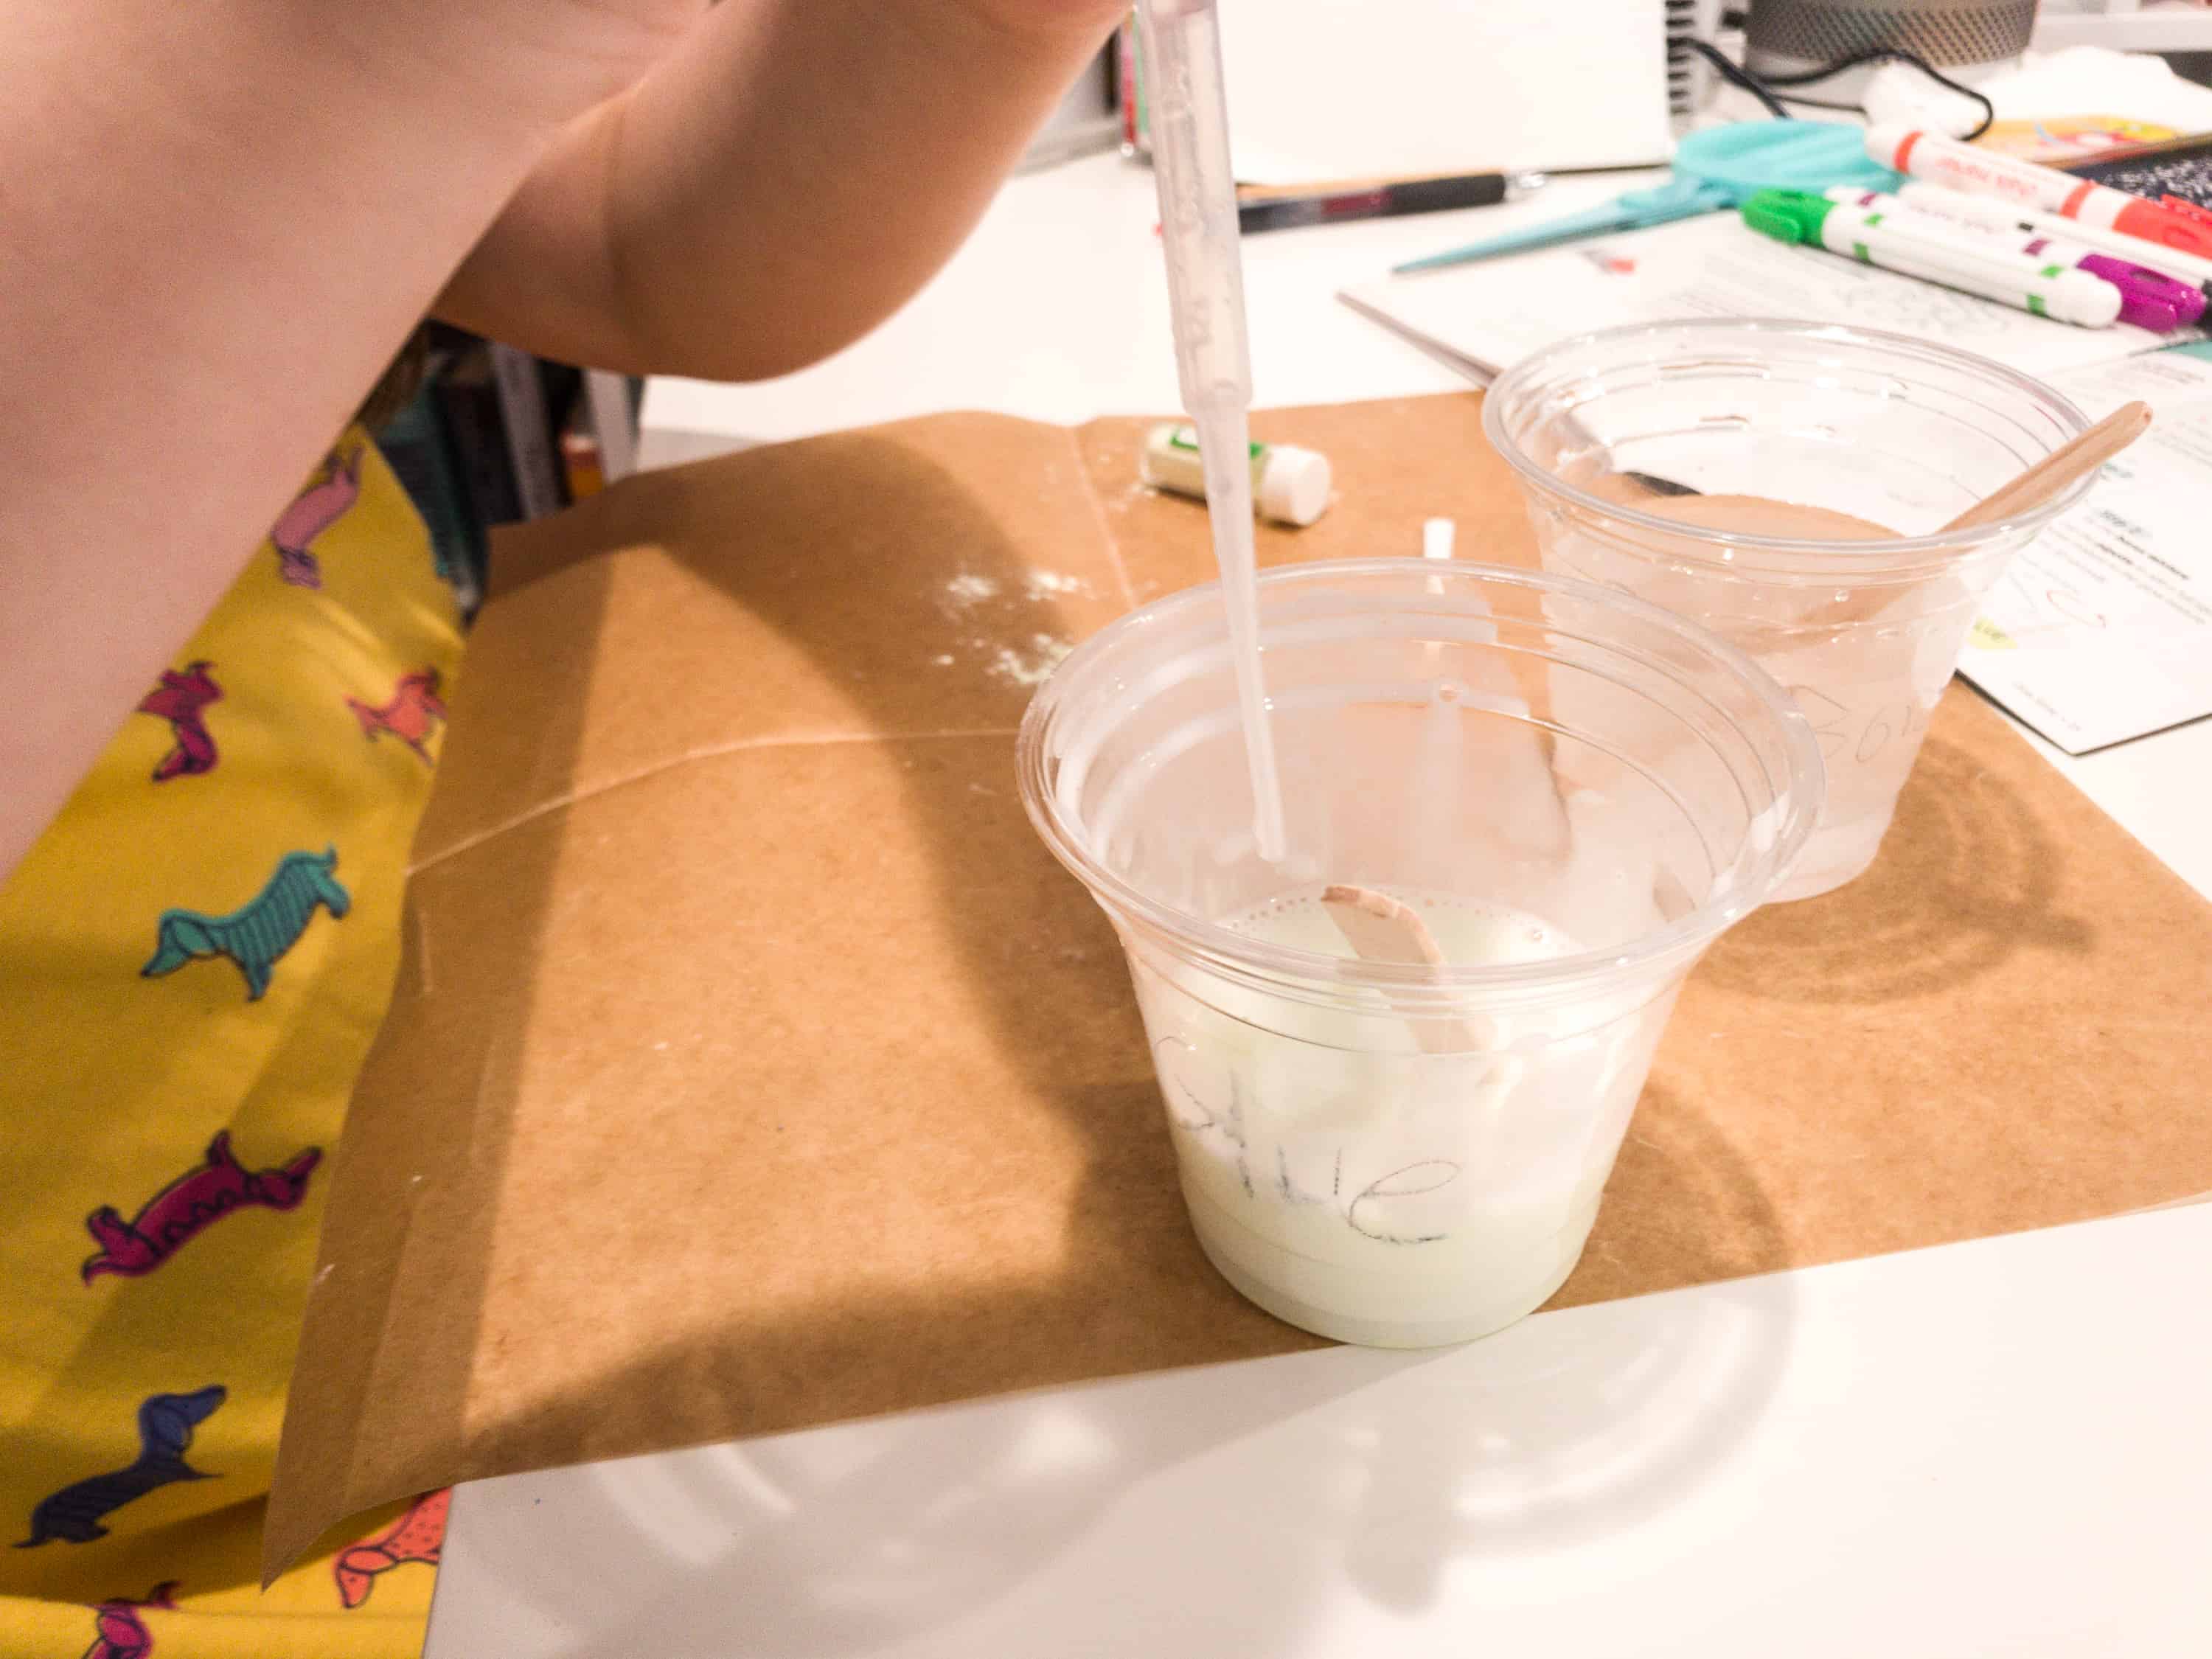
She also used the pipette to get a squirt out of the newly mixed borax mixture and mixed it with the glue mixture (with glow powder).

These pages show what the glow slime should look like in the dark. There are also tips to make it glow brightly.
It looks like a yummy dough! We placed it under the light for a few minutes to make it glow brightly in the dark.
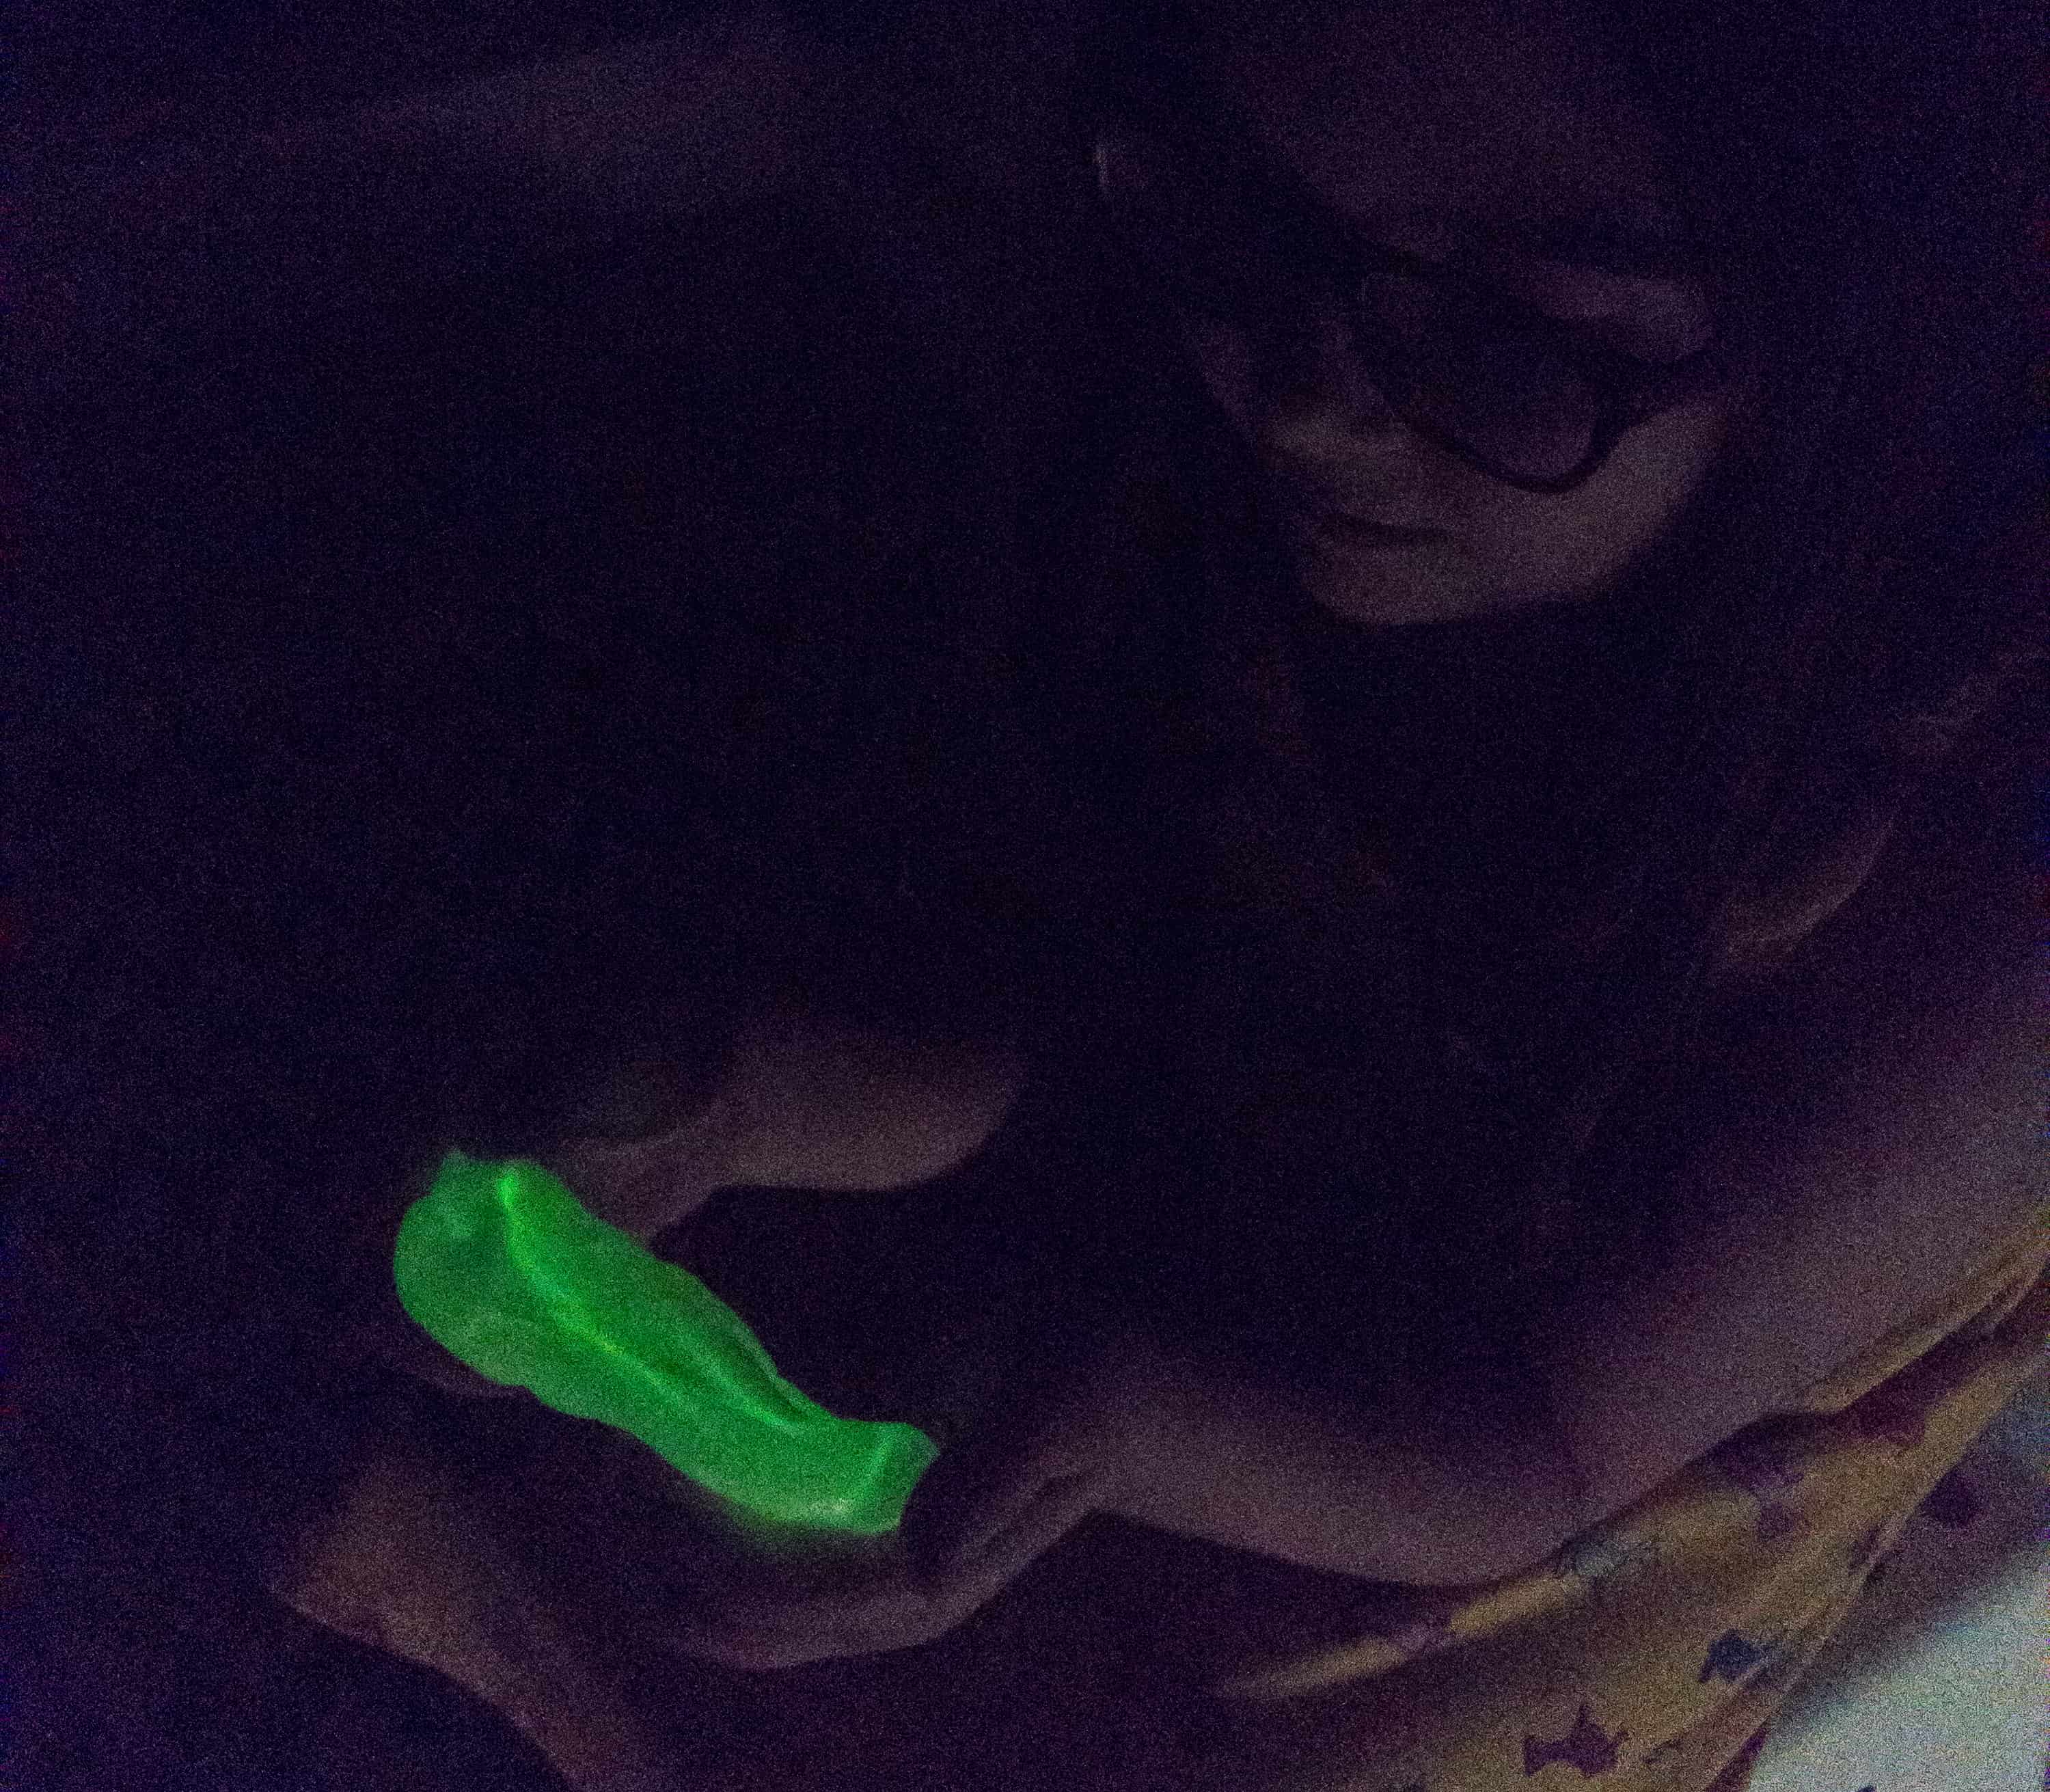
It worked! It shined brightly in green (like what was shown in the pamphlet) as she molded and kneaded it.
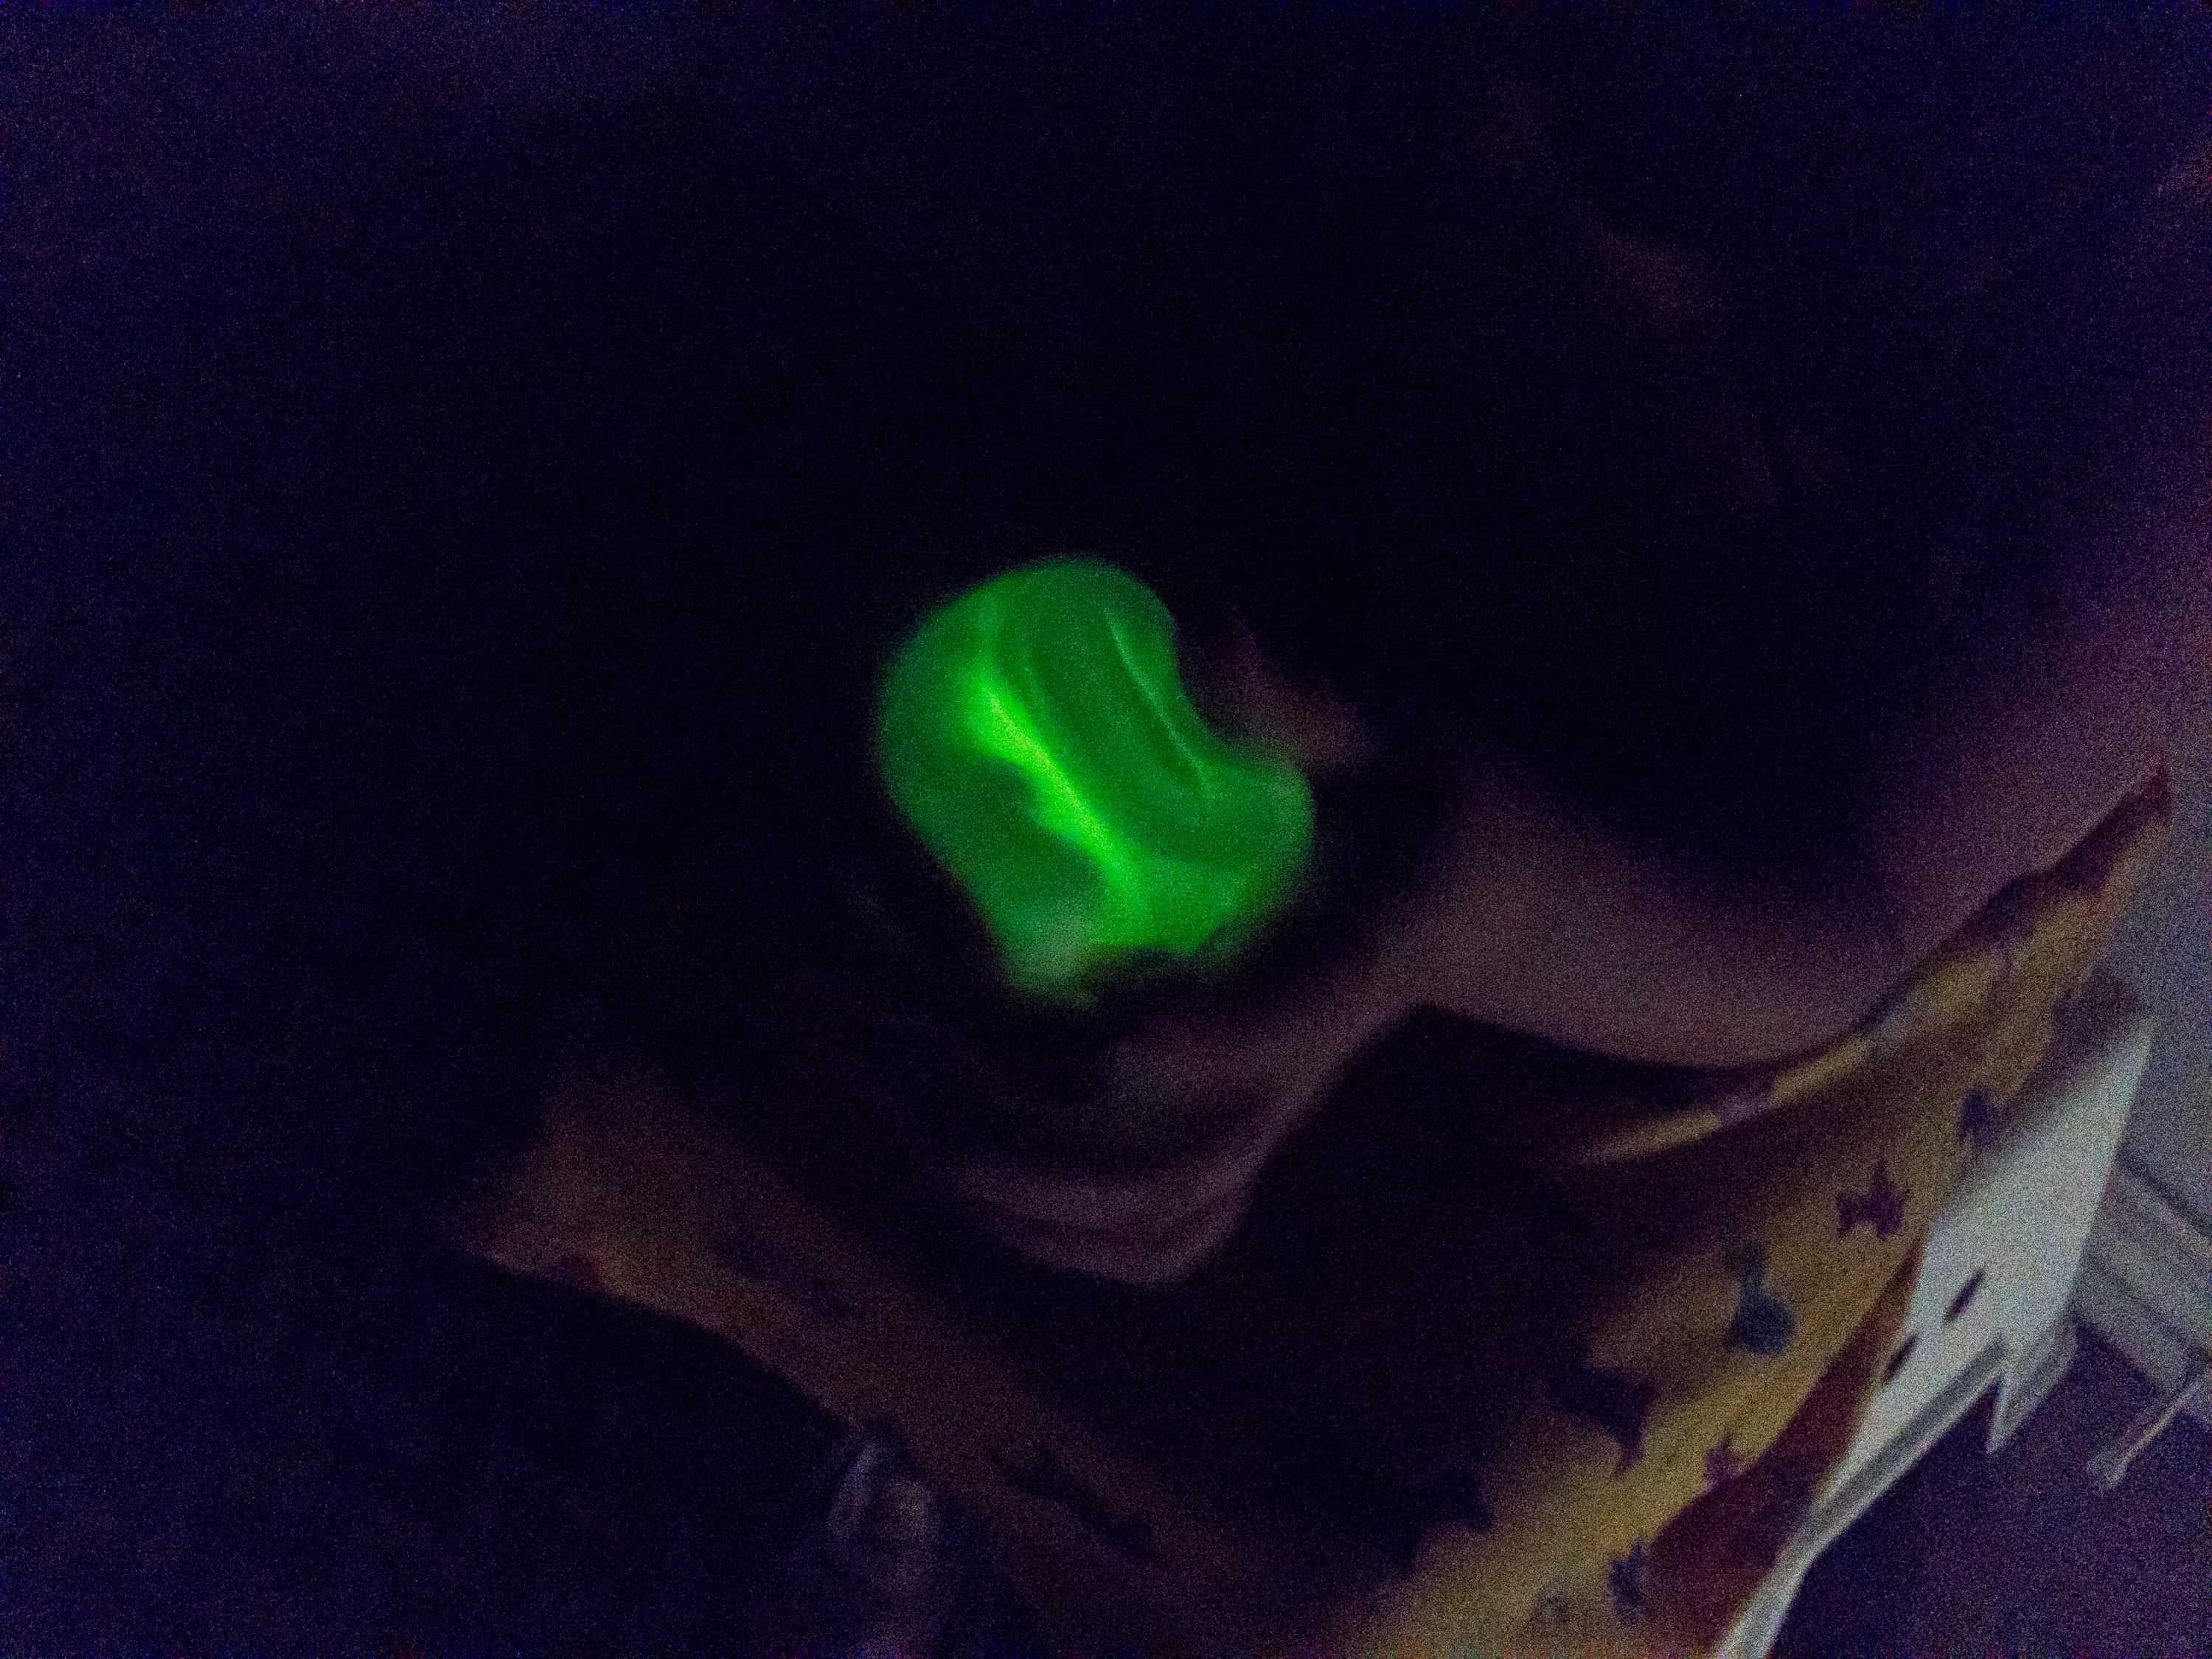
She had fun playing with it! As advised, we stored it in the capsule afterward to keep it from drying out.
The kids, especially my daughter, enjoyed this crate! She got her hands dirty for the chalkboard slime but she enjoyed it because she was able to get creative with the designs. The glow in the dark slime was a fun addition to the crate too. She was able to follow all the instructions easily and she was able to read the pamphlet cover to cover without getting bored. The pamphlet was more focused on play and activity, with the backup factual information about it in between. The facts weren’t overwhelming for the kids to read and instead became a good teaching reinforcement. I hope they will keep on making KiwiCo STEAM projects as exciting as this one.
What do you think of the KiwiCo STEAM Chalkboard Slime project? You can pick up this project here. If you want more, use this link to save 30% on your first box of Tinker Crate or Doodle Crate!


Comments