Raddish is a monthly kids’ activity box centering around food and cooking! Designed for kids 4 to 14+, each themed box will include 3 illustrated recipe guides, 3 culinary skill cards, a creative kitchen project, kid-friendly tools and collectibles such as Table Talk cards, a culinary tool, and an iron-on Raddish patch. Themes range from Seasonal Spotlights to Global Cuisine and Creative Cookery to Holiday Celebrations. Although the ingredients are not included, they email you a shopping list for each month’s recipes before your kit is shipped. Raddish made the list in our 2020 and 2021 readers’ choice picks of best subscription boxes for kids!
DEALS:
- Get $15 off when you sign up for a 6 month subscription! Just use this link and use the coupon code ATHOME at checkout.
- Get $20 off when you sign up for a 12 month subscription! Just use this link and use the coupon code CHEF20 at checkout.
- PLUS Get a FREE apron with your first box when you sign up for a 6+ month subscription!
This kids cooking club offers a monthly membership for $24/month, a 6-month membership for an upfront payment of $132 ($22/month), and a 12-month membership for an upfront payment of $240 ($20/month). For those who are getting the 6 and 12-month memberships, expect a free apron in your box.
The box came in perfect condition!

Featured on the inner part of the box’s flap are Raddish Kids’ social media handles where you can share your cooking experience.
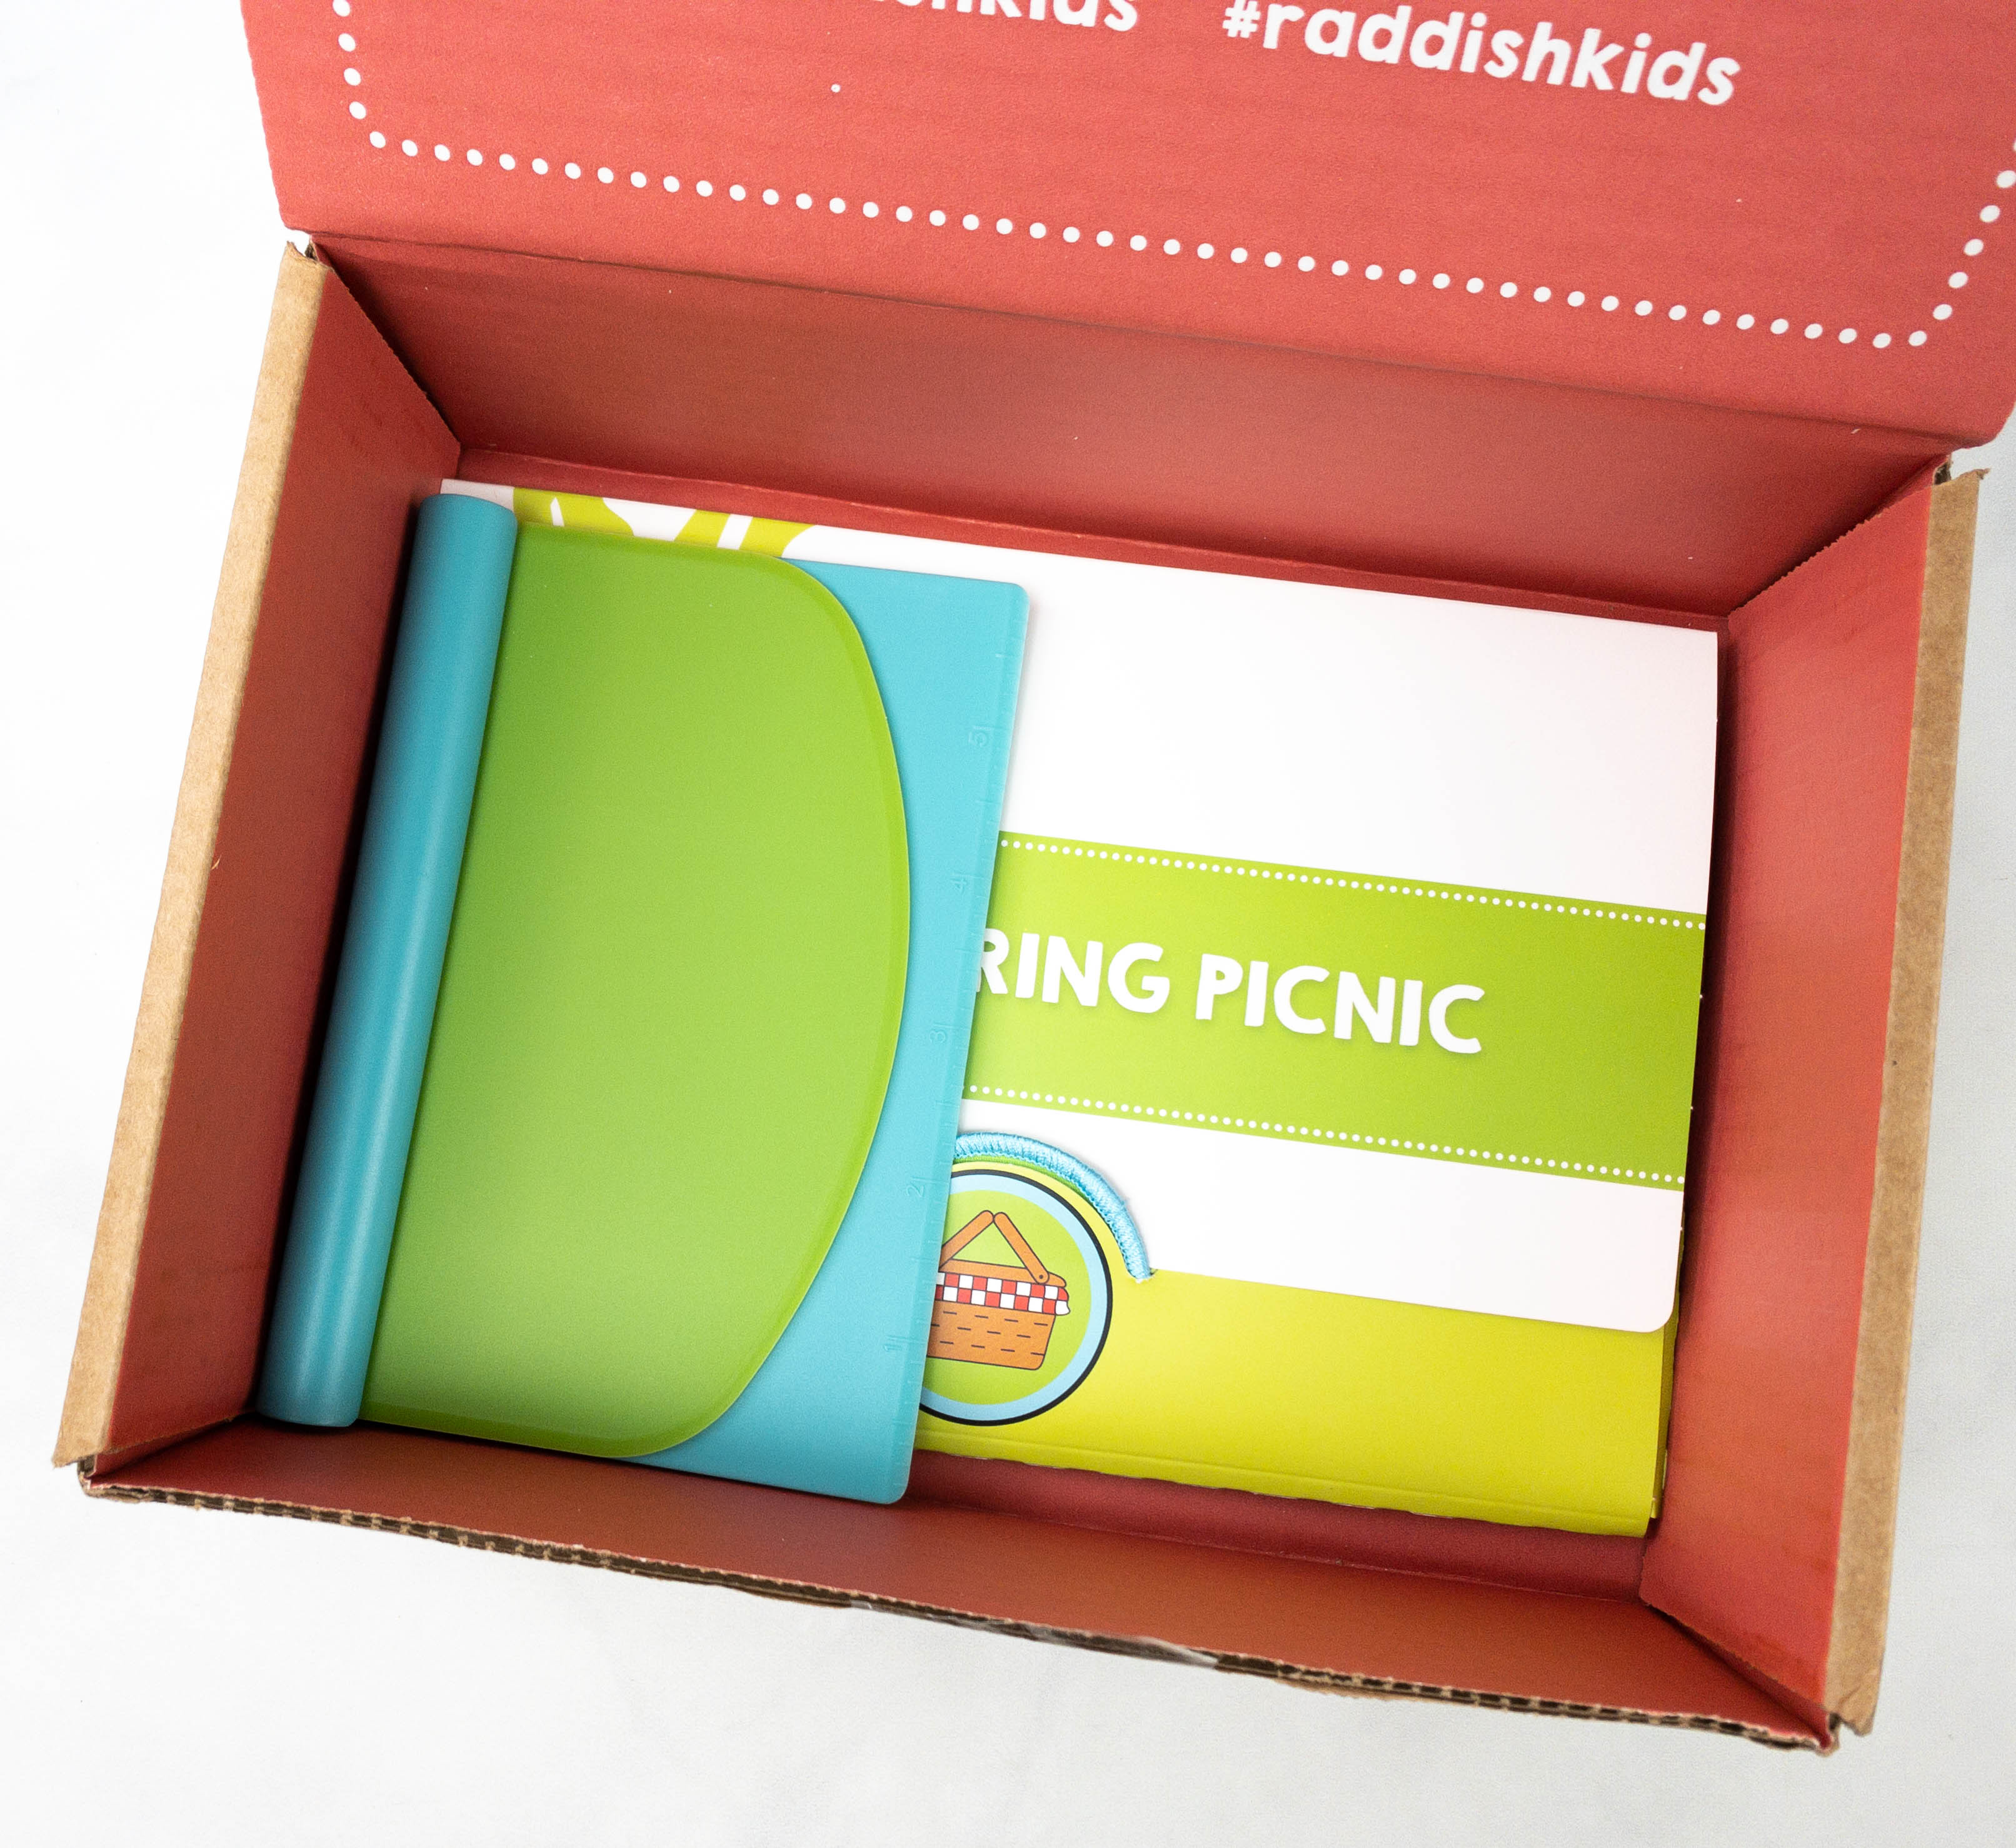
All the items were neatly packed inside the box.
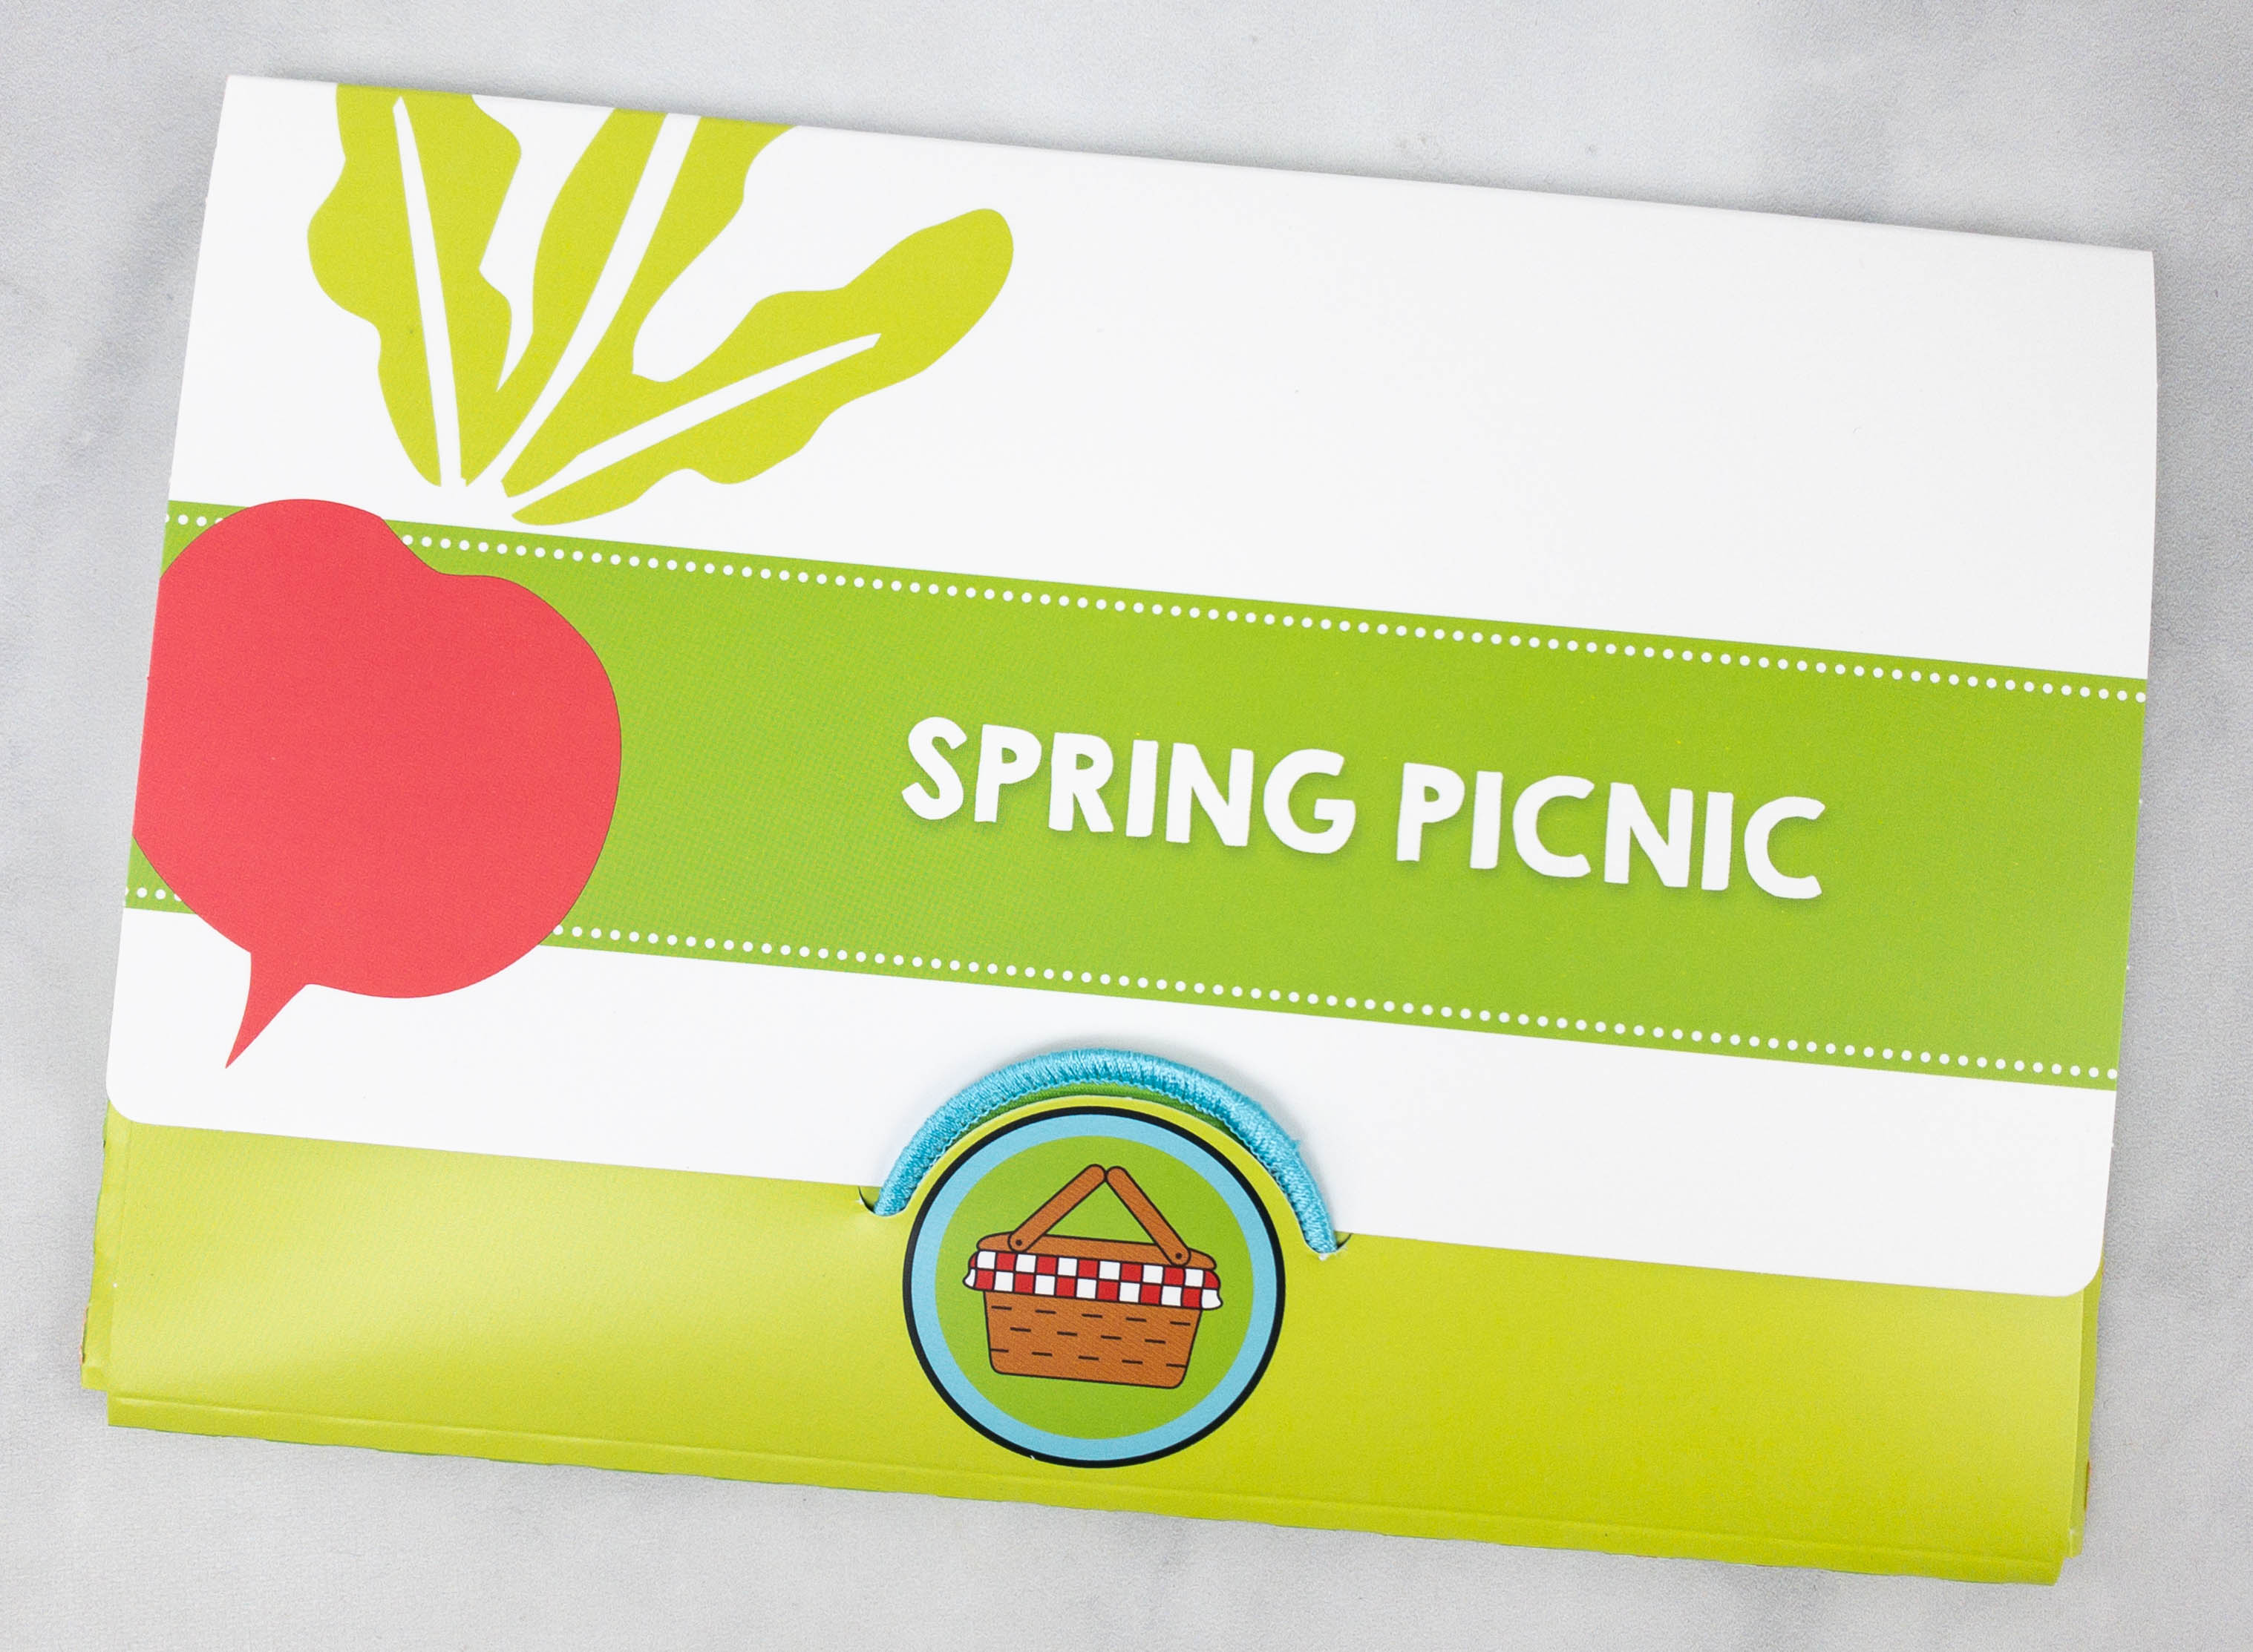
This month’s theme is SPRING PICNIC! Inside the envelope are small cards containing some culinary skill lessons, guides with fun and exciting activities.
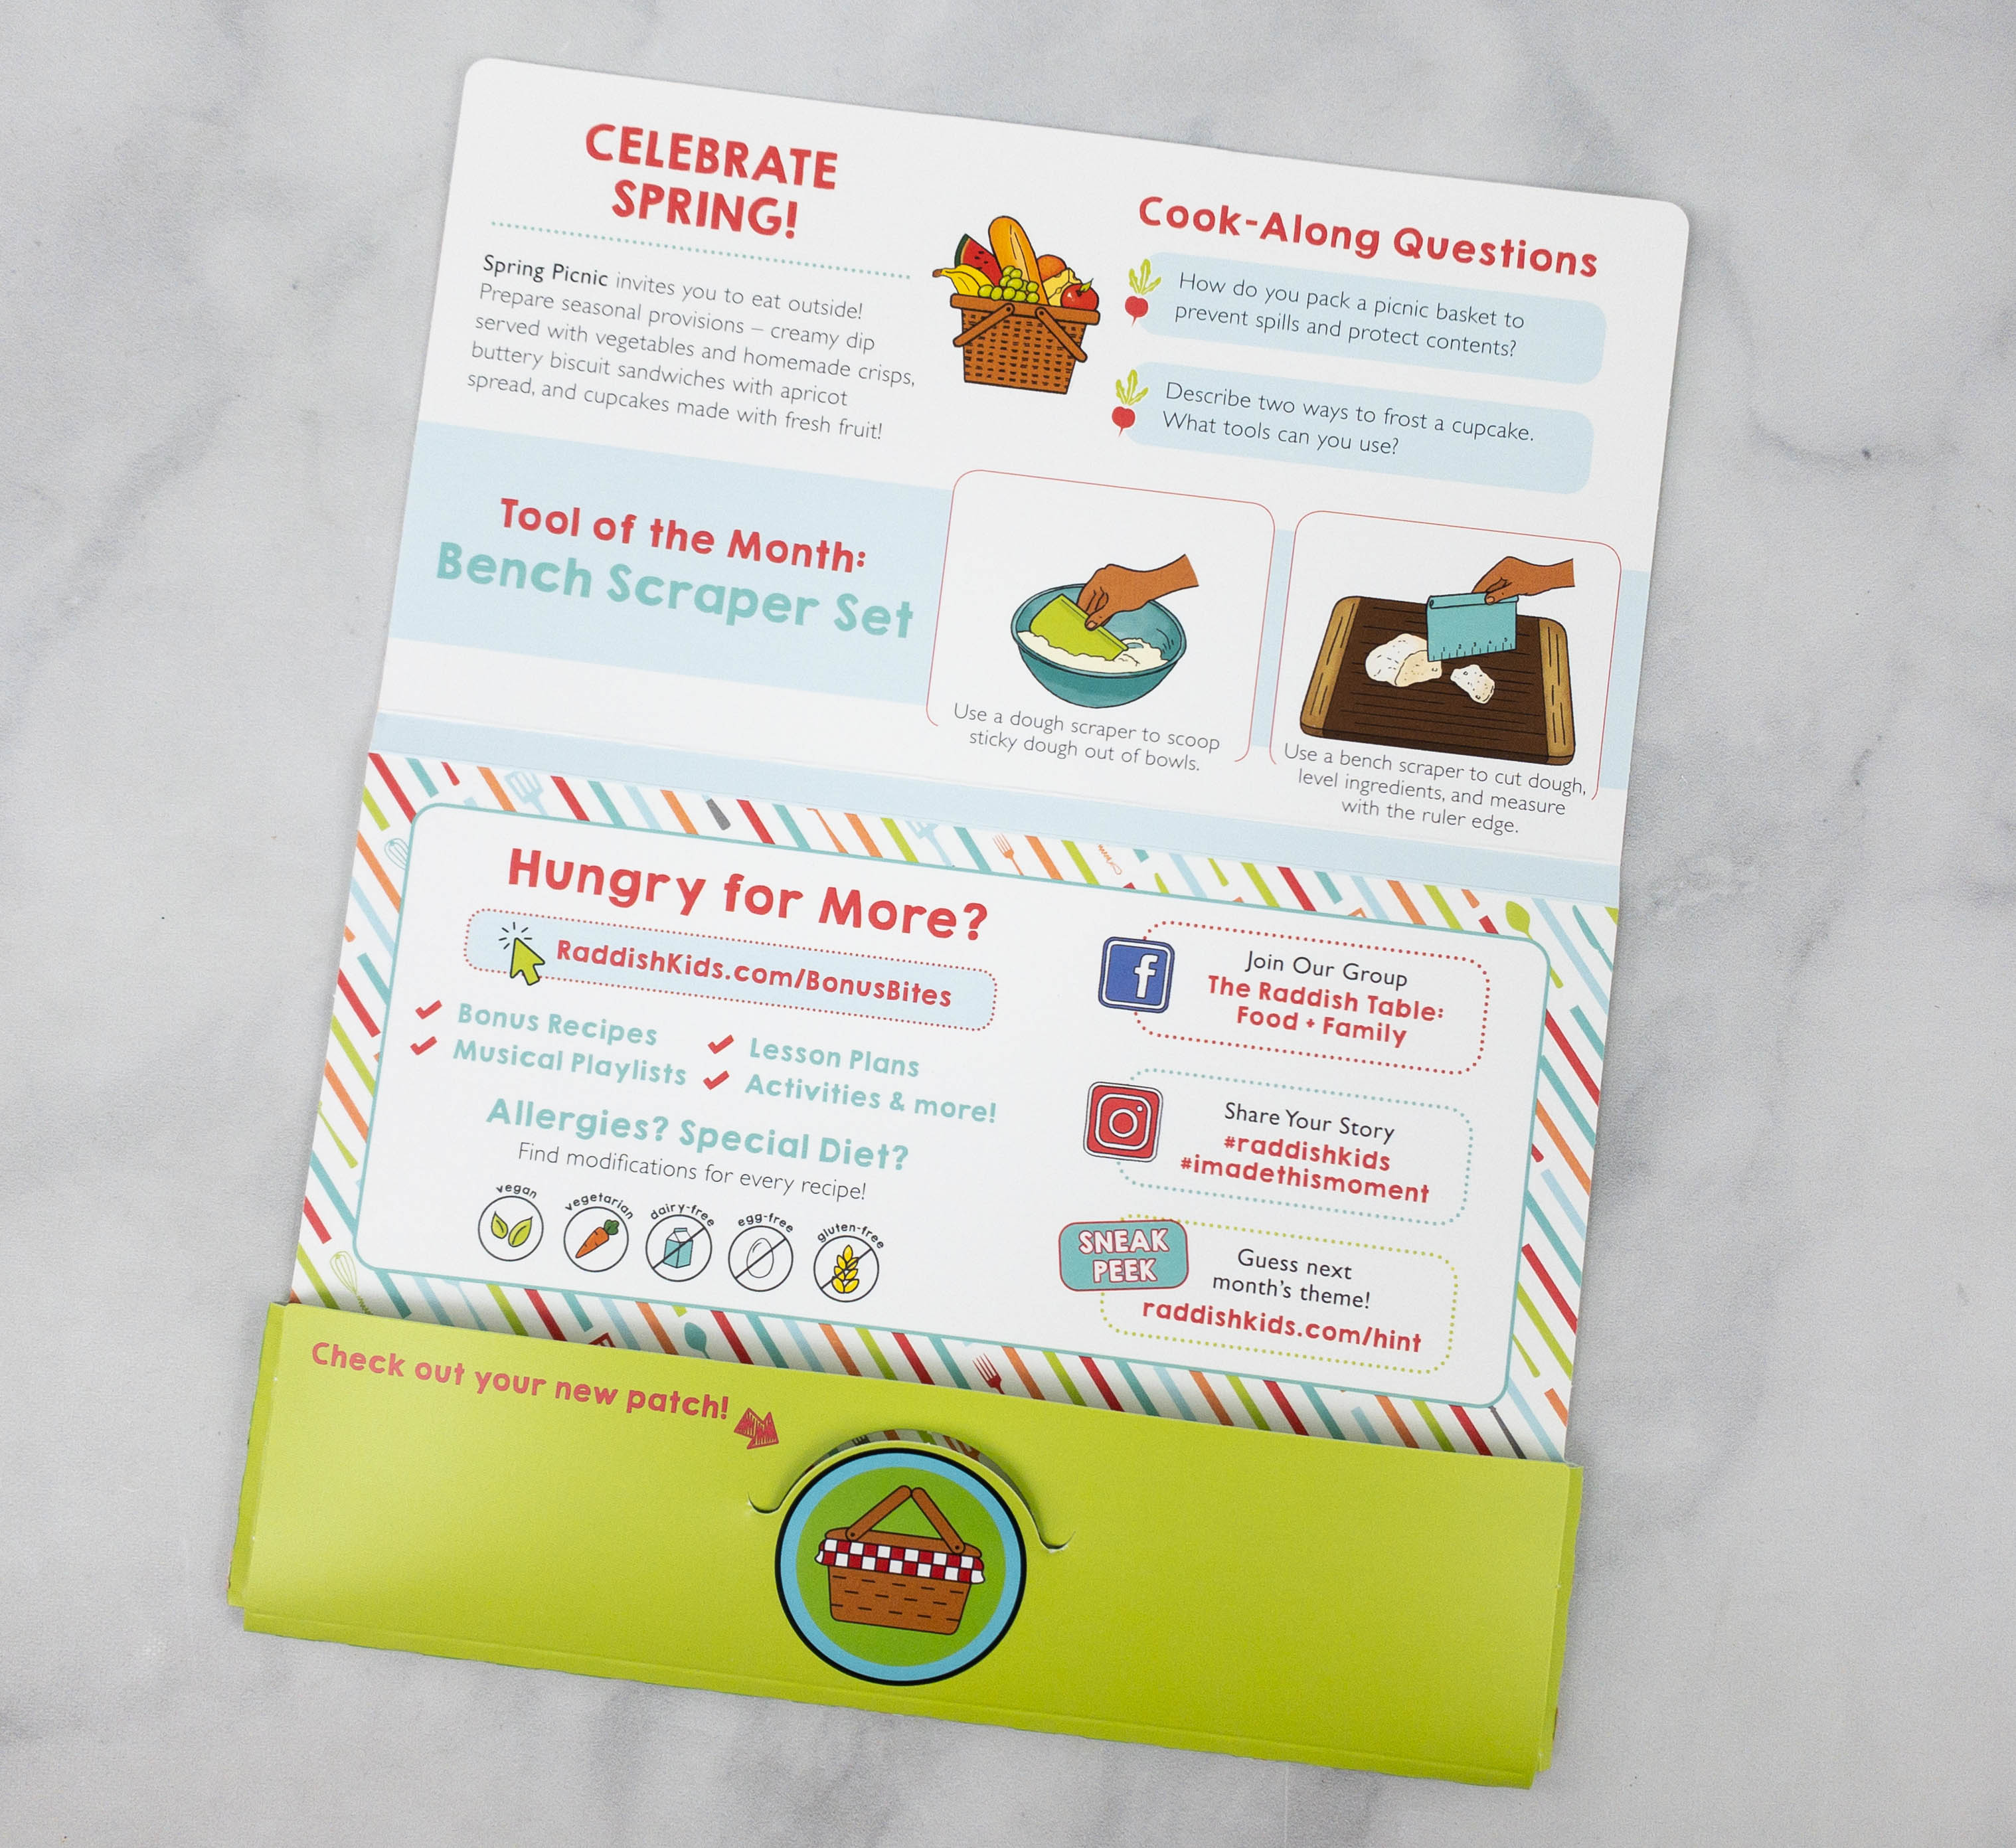
They also have bonus content on their website, called Bonus Bites, which includes a Spotify playlist that the kids can listen to while cooking, dietary modifications for the recipes in the box, and even lesson plans to accompany the kit.
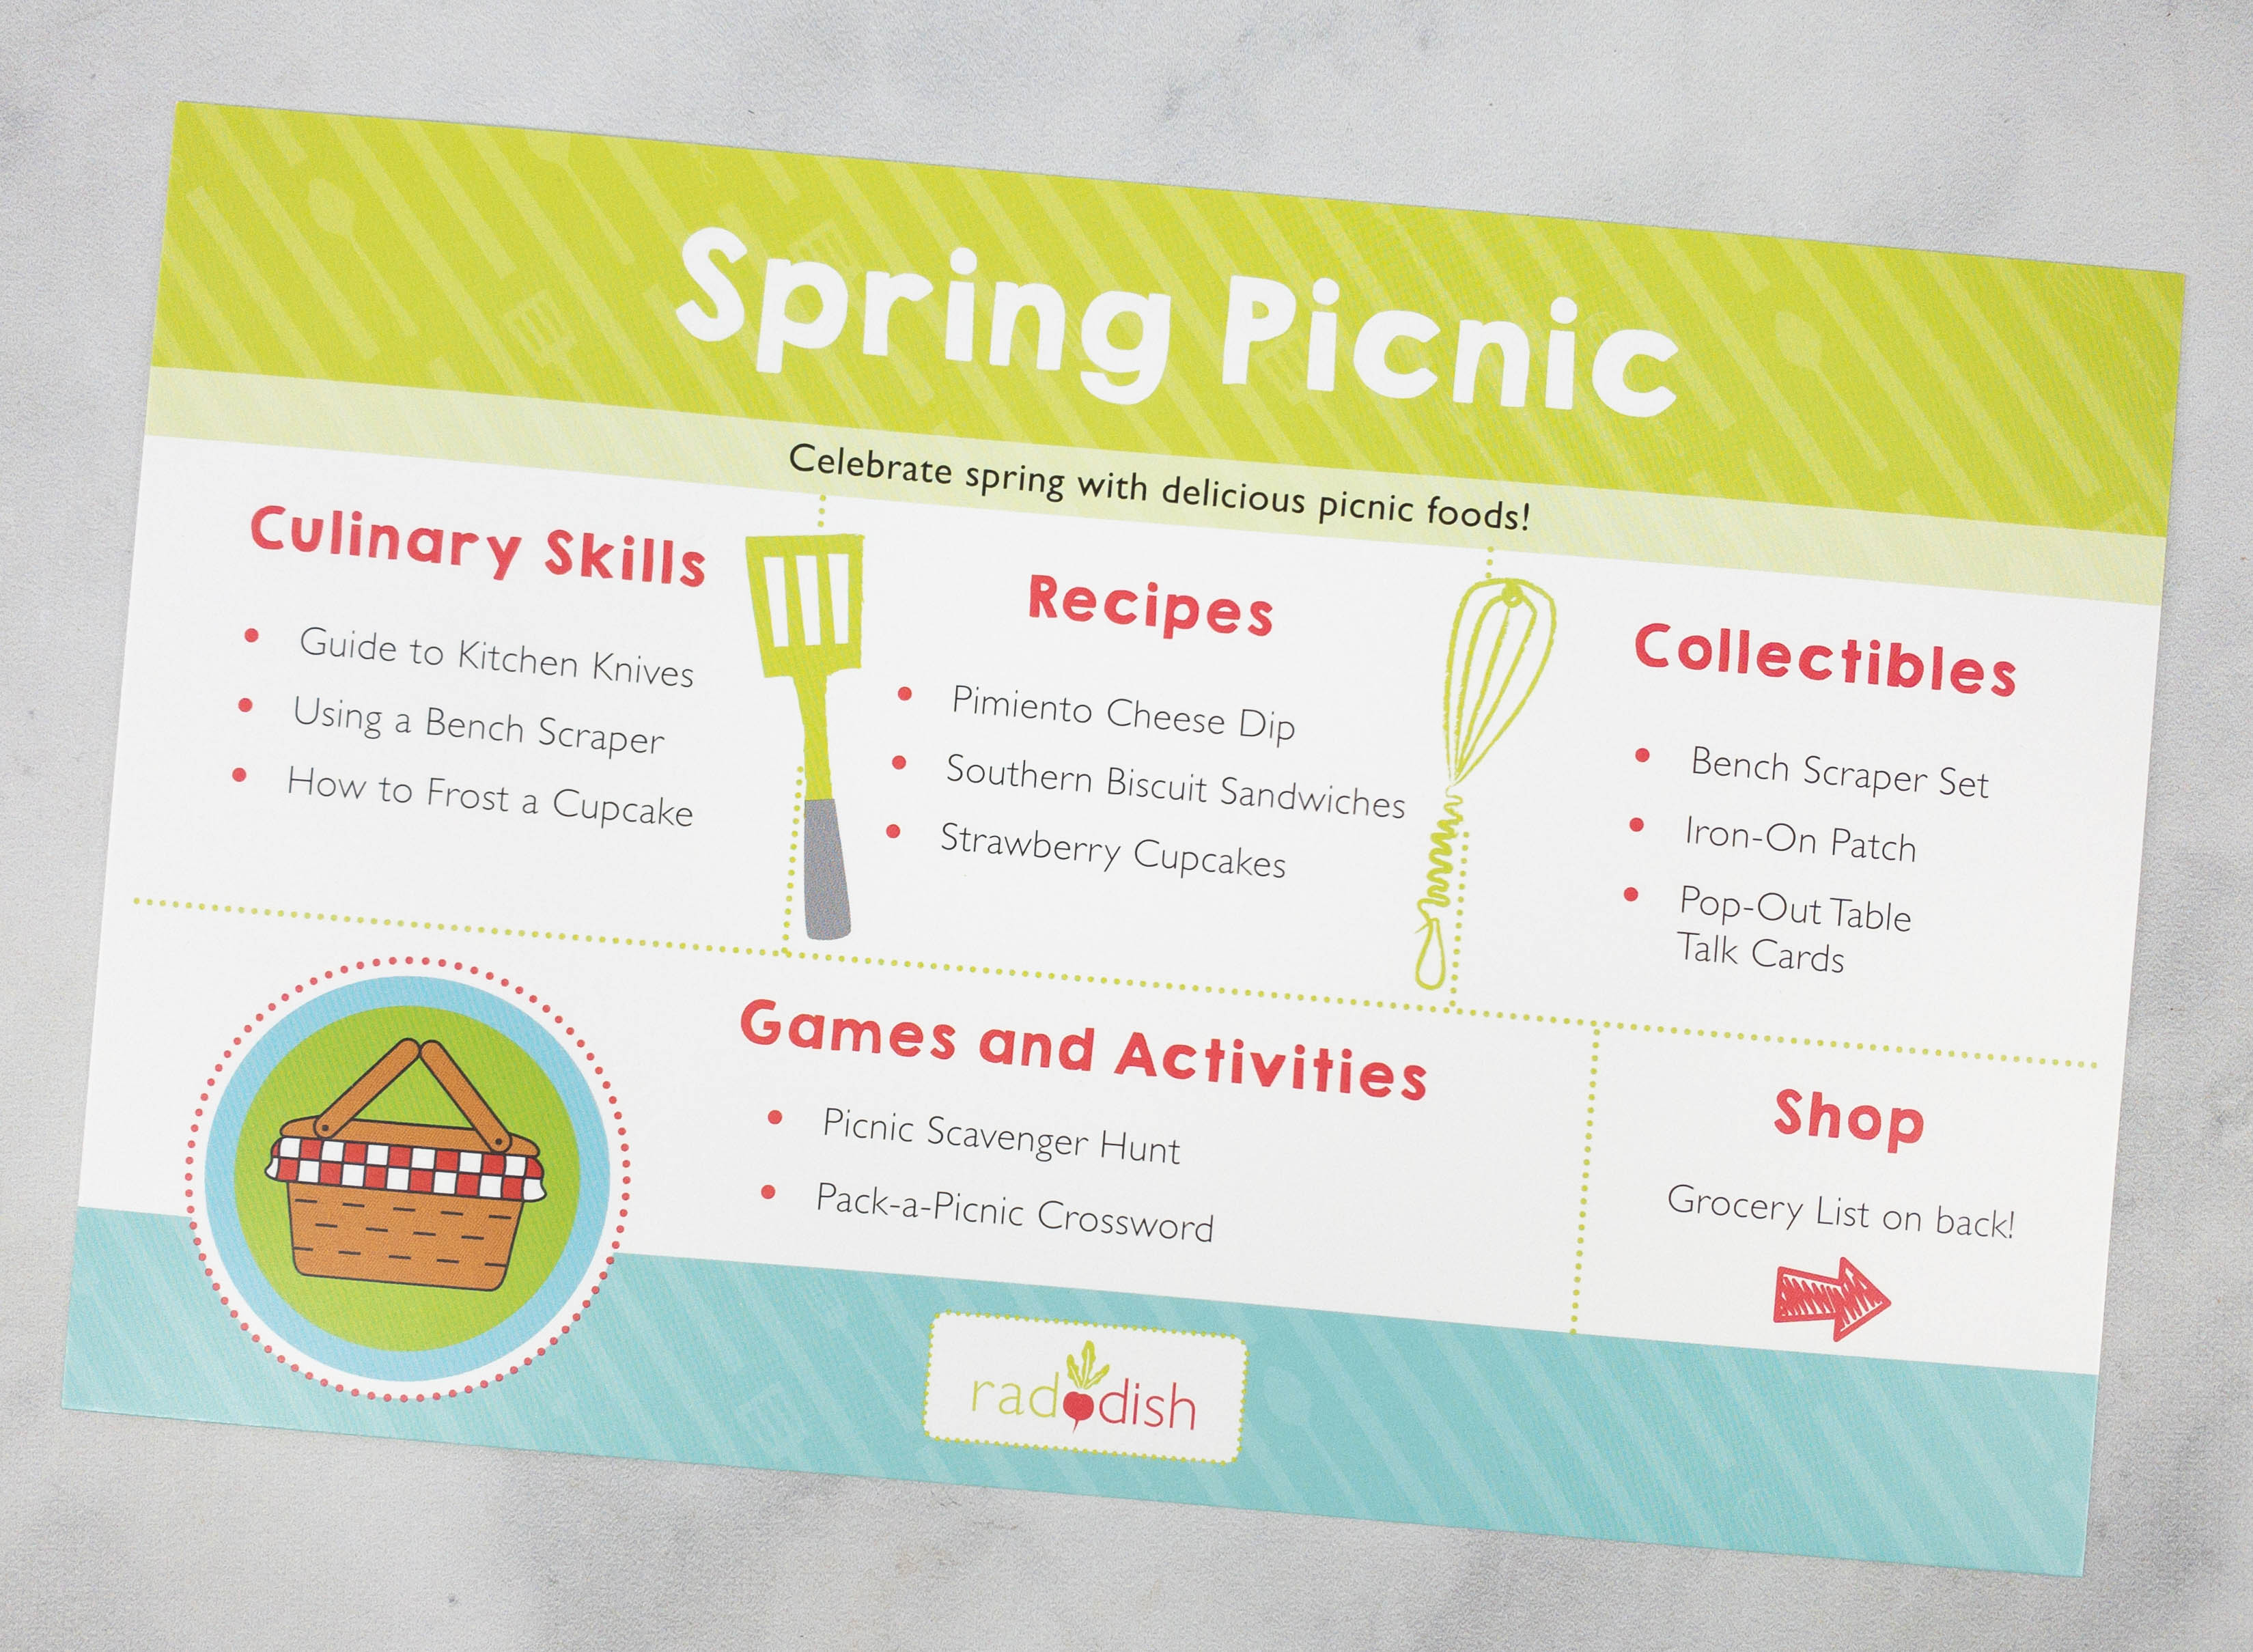
This card contains all the information you need to know about this month’s box. It lists all the culinary skills your kids will be acquiring, the recipe names, collectibles, and other games and activities.
The back of the card provides a complete grocery list for all the featured recipes this month. The recipes are Pimiento Cheese Dip, Southern Biscuit Sandwiches, and Strawberry Cupcakes.
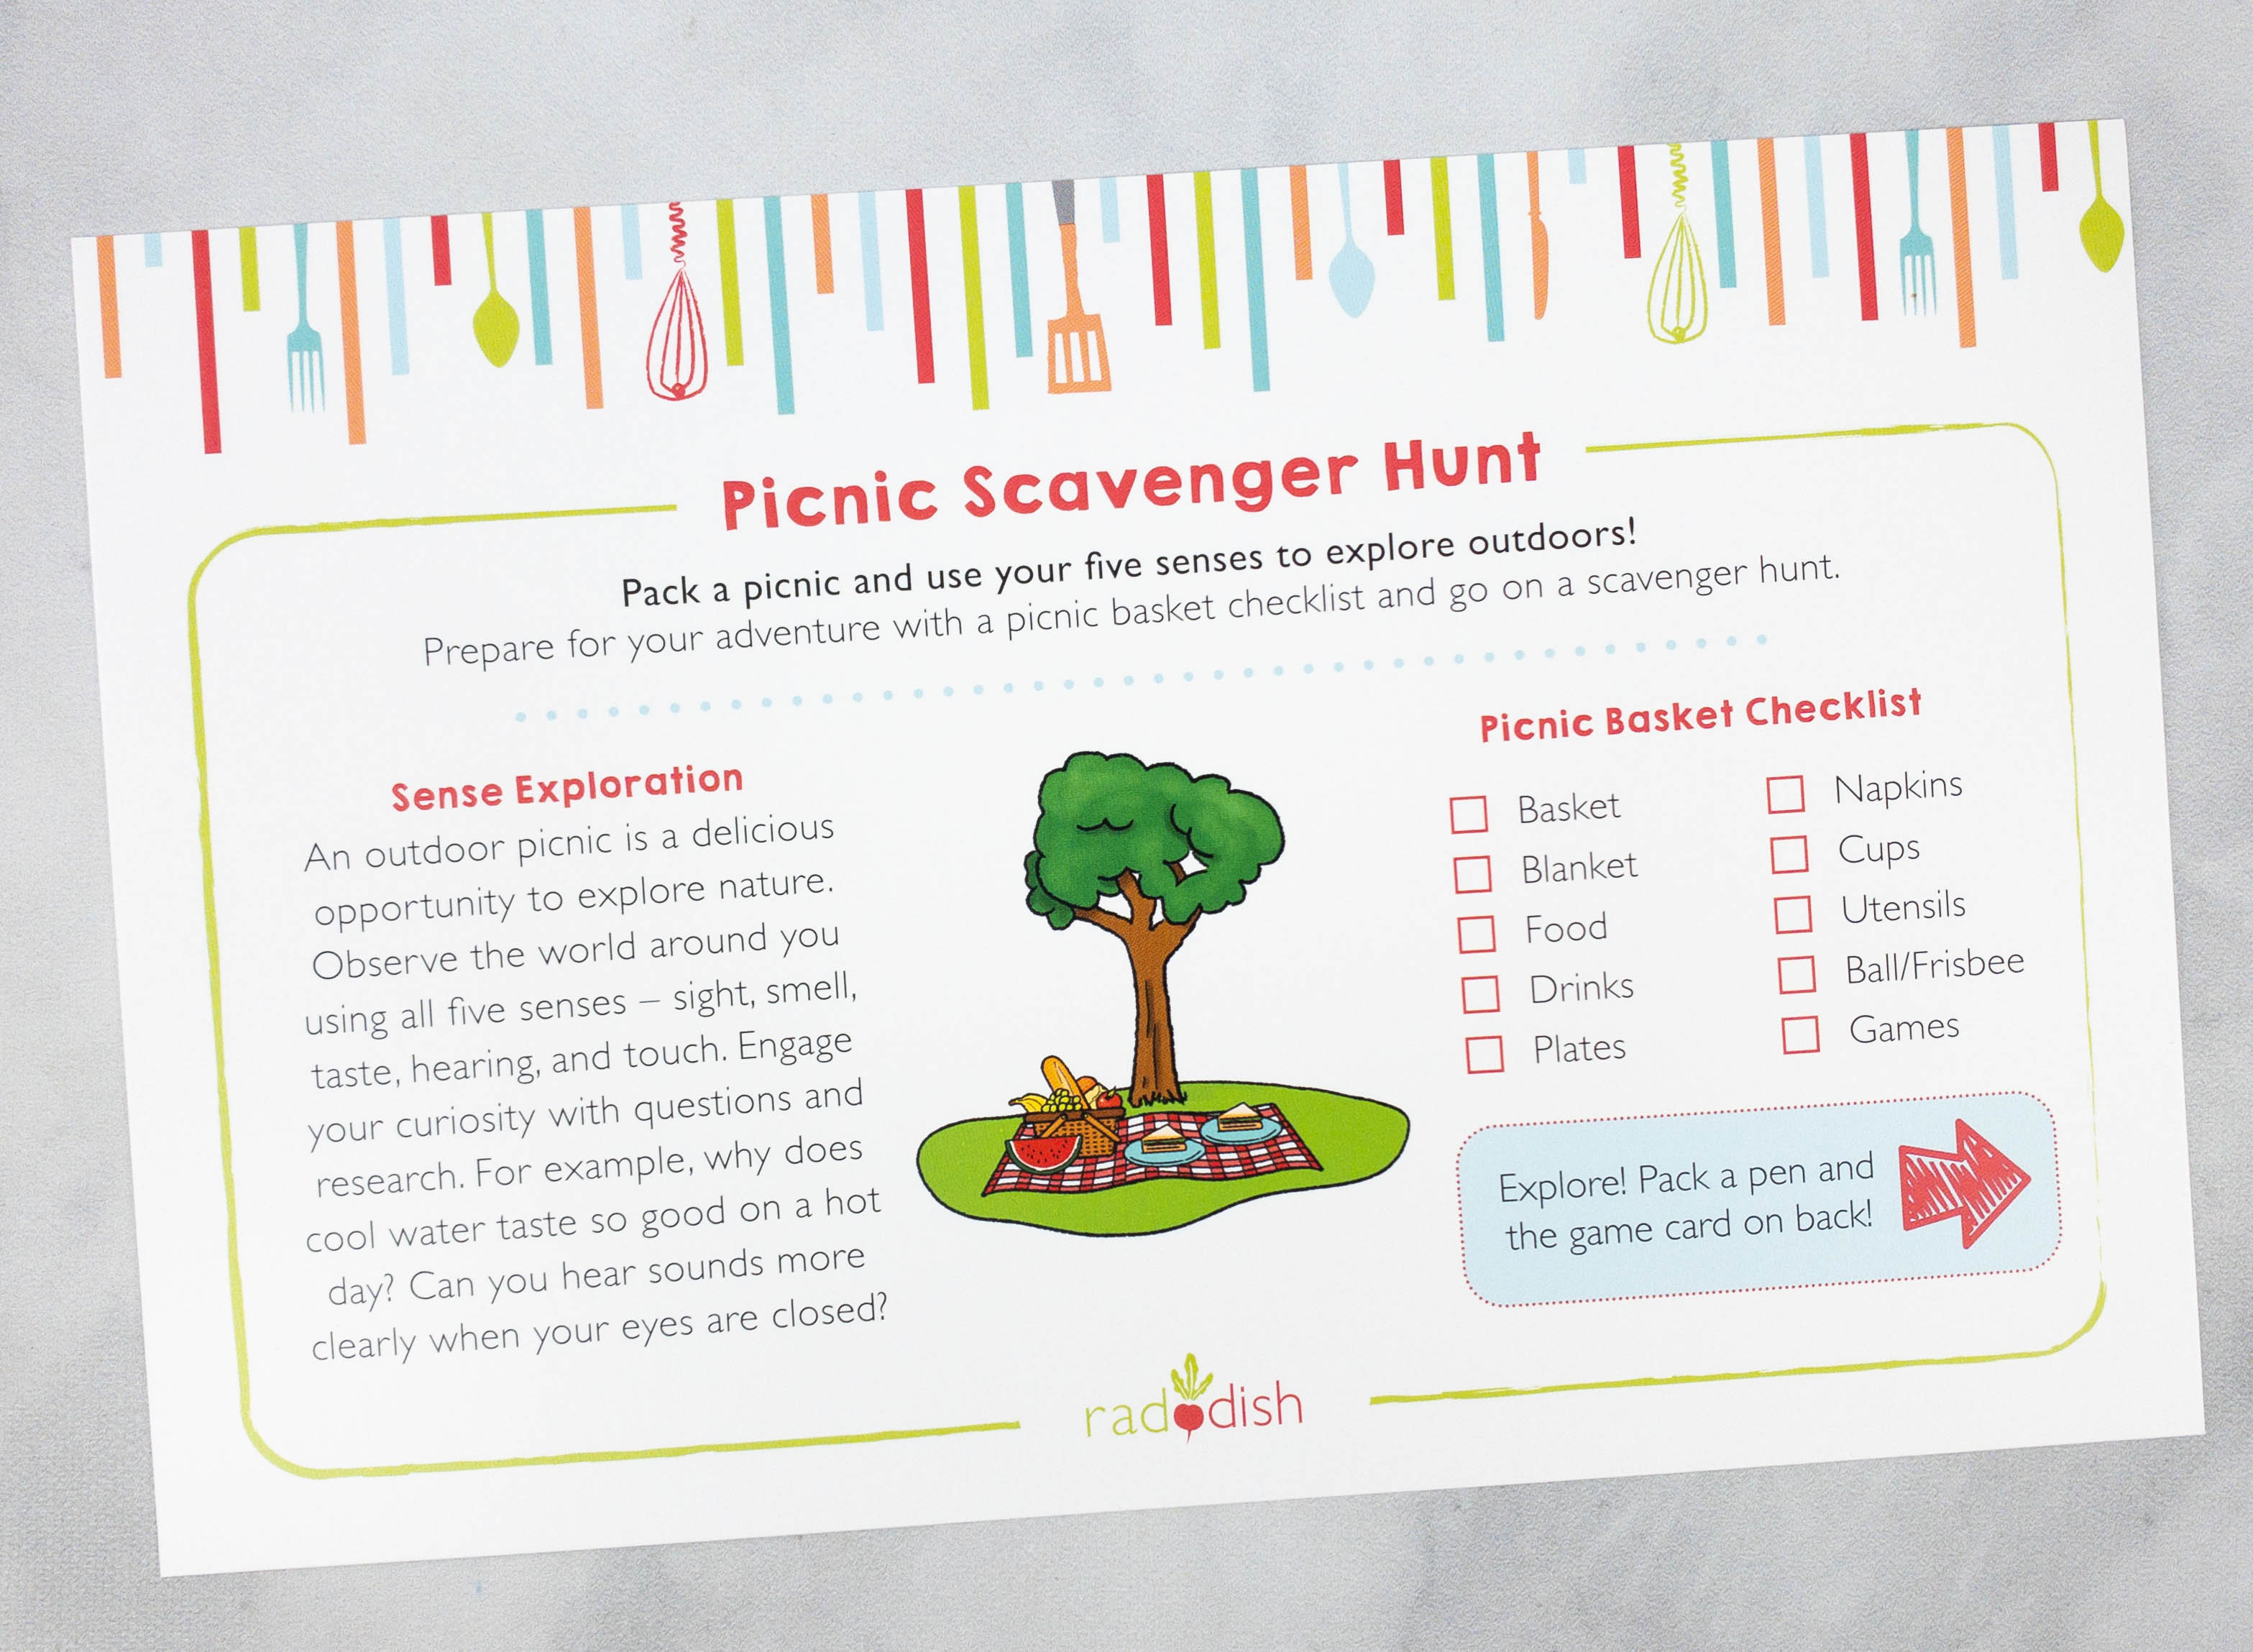
There’s also a card that features instructions on how to do a Picnic Scavenger Hunt!
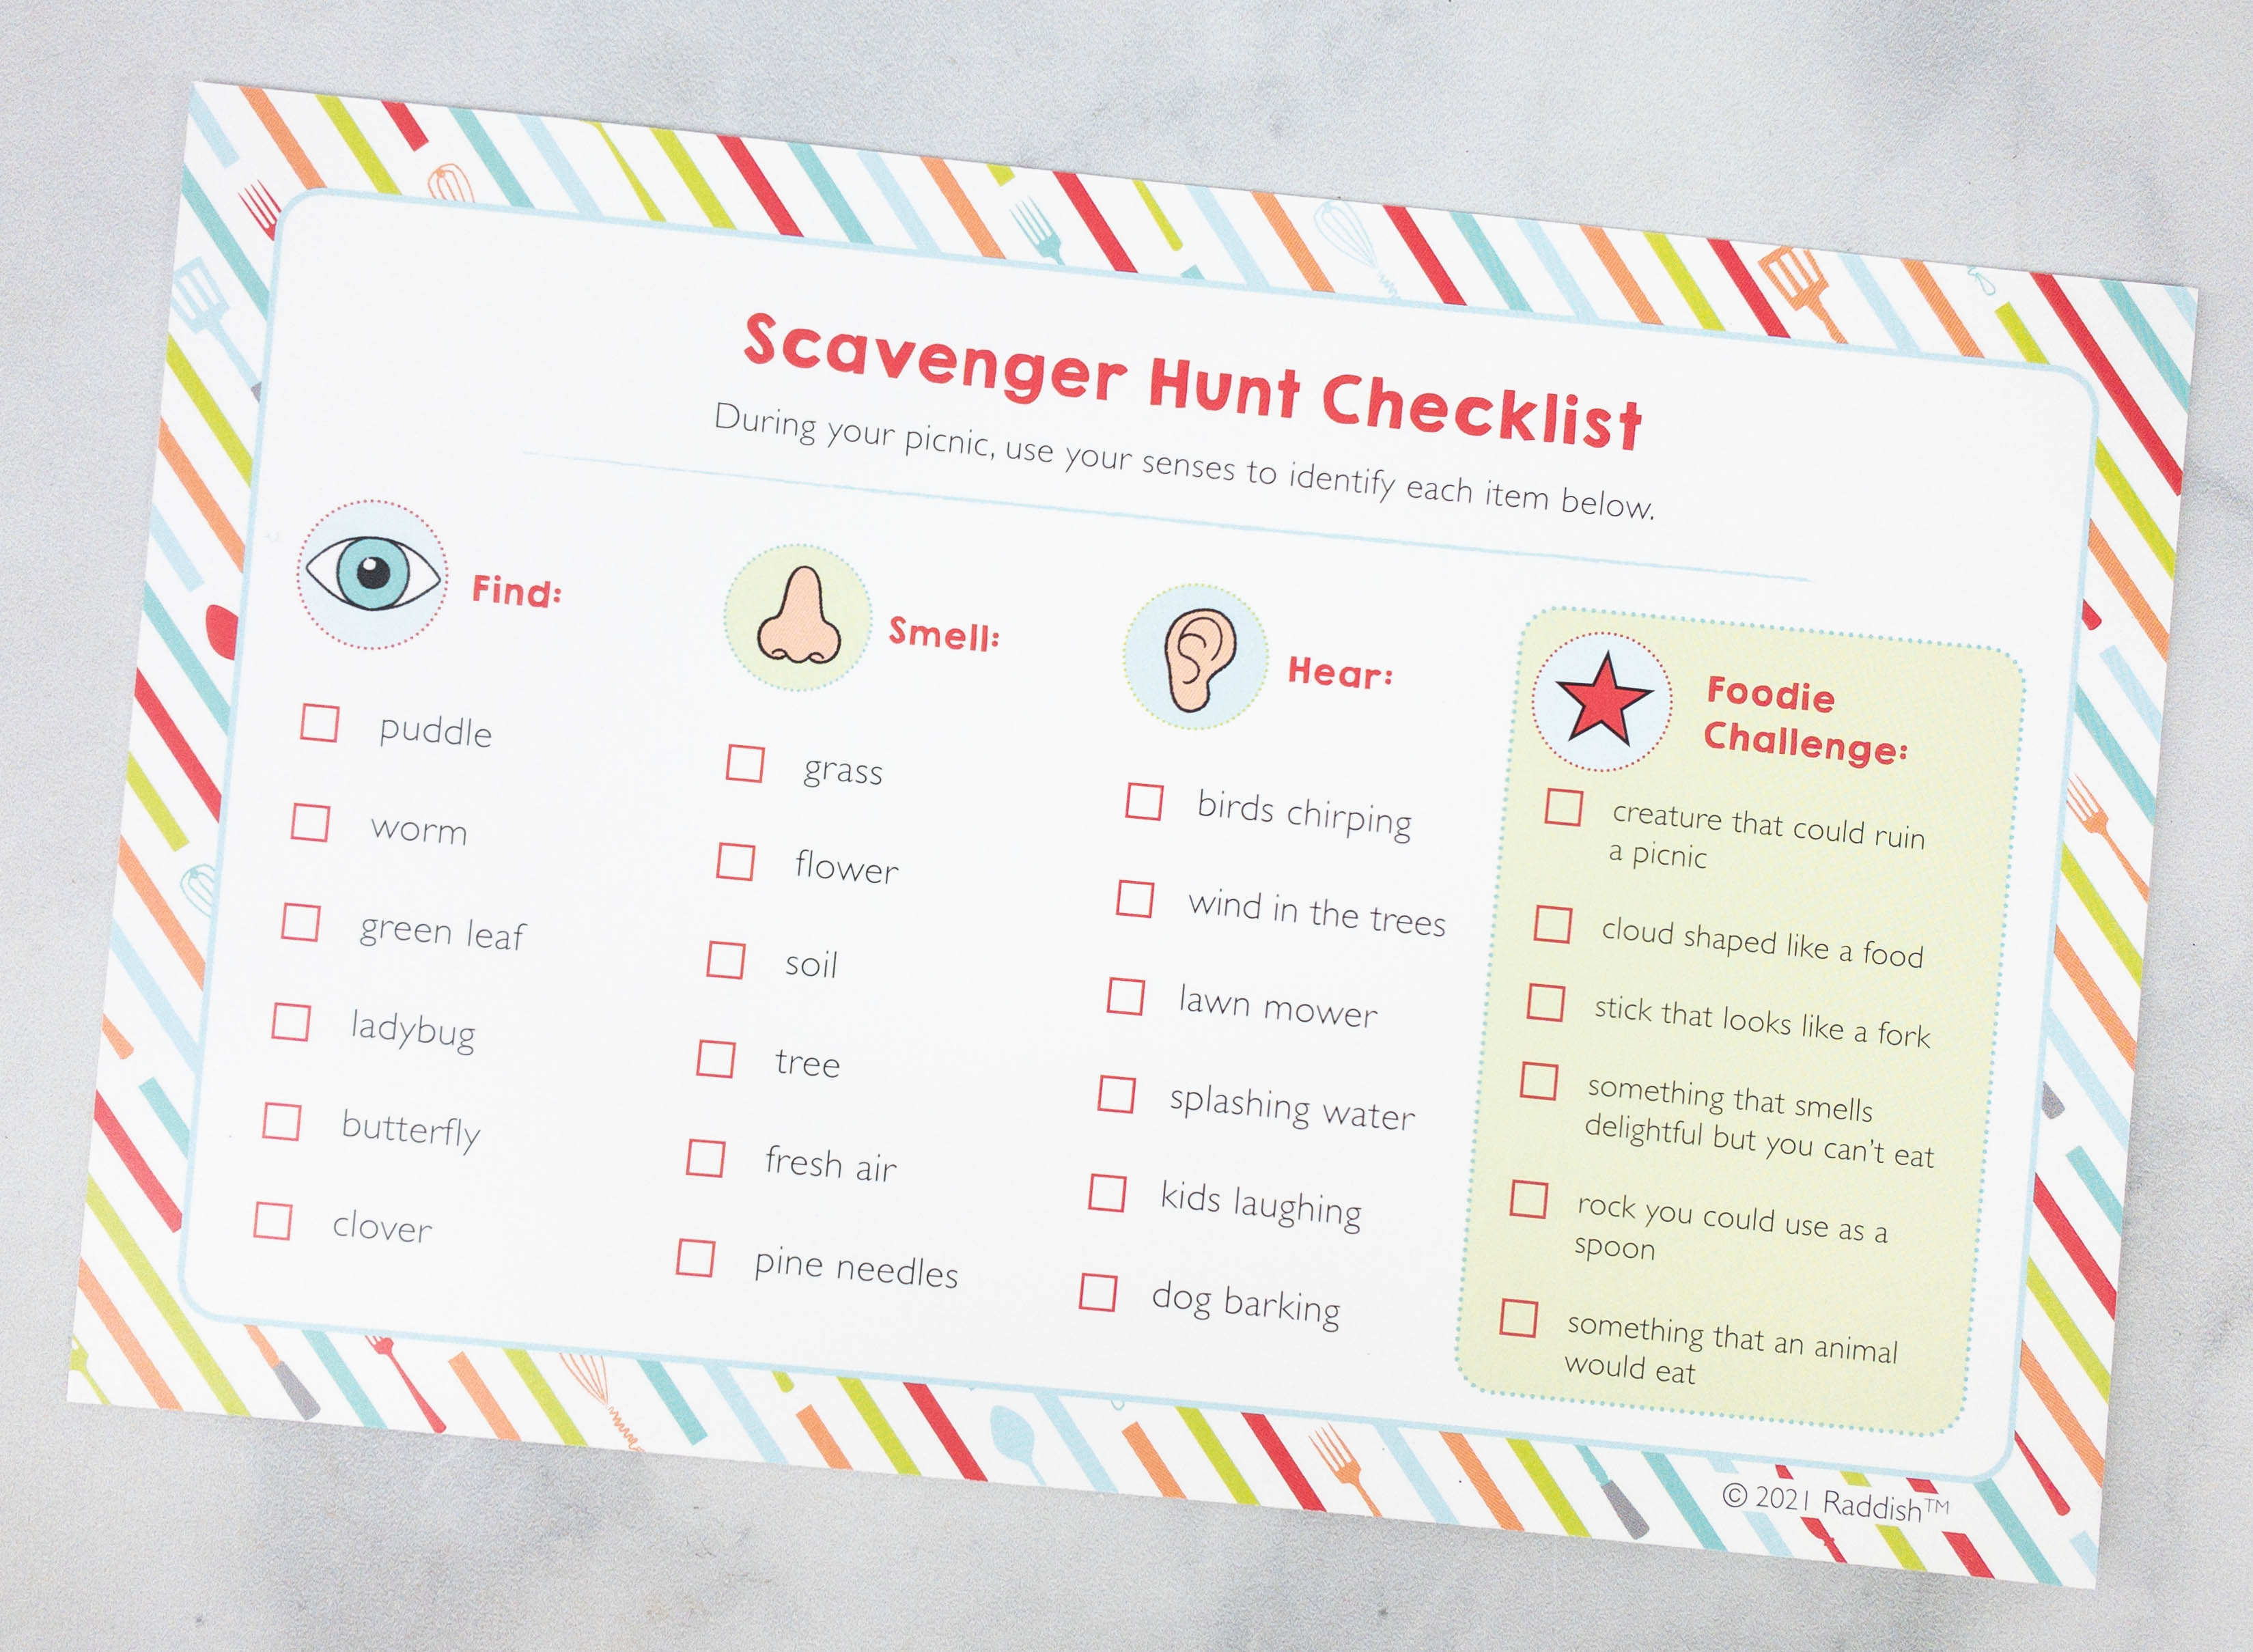
The flipside has a Scavenger Hunt Checklist.
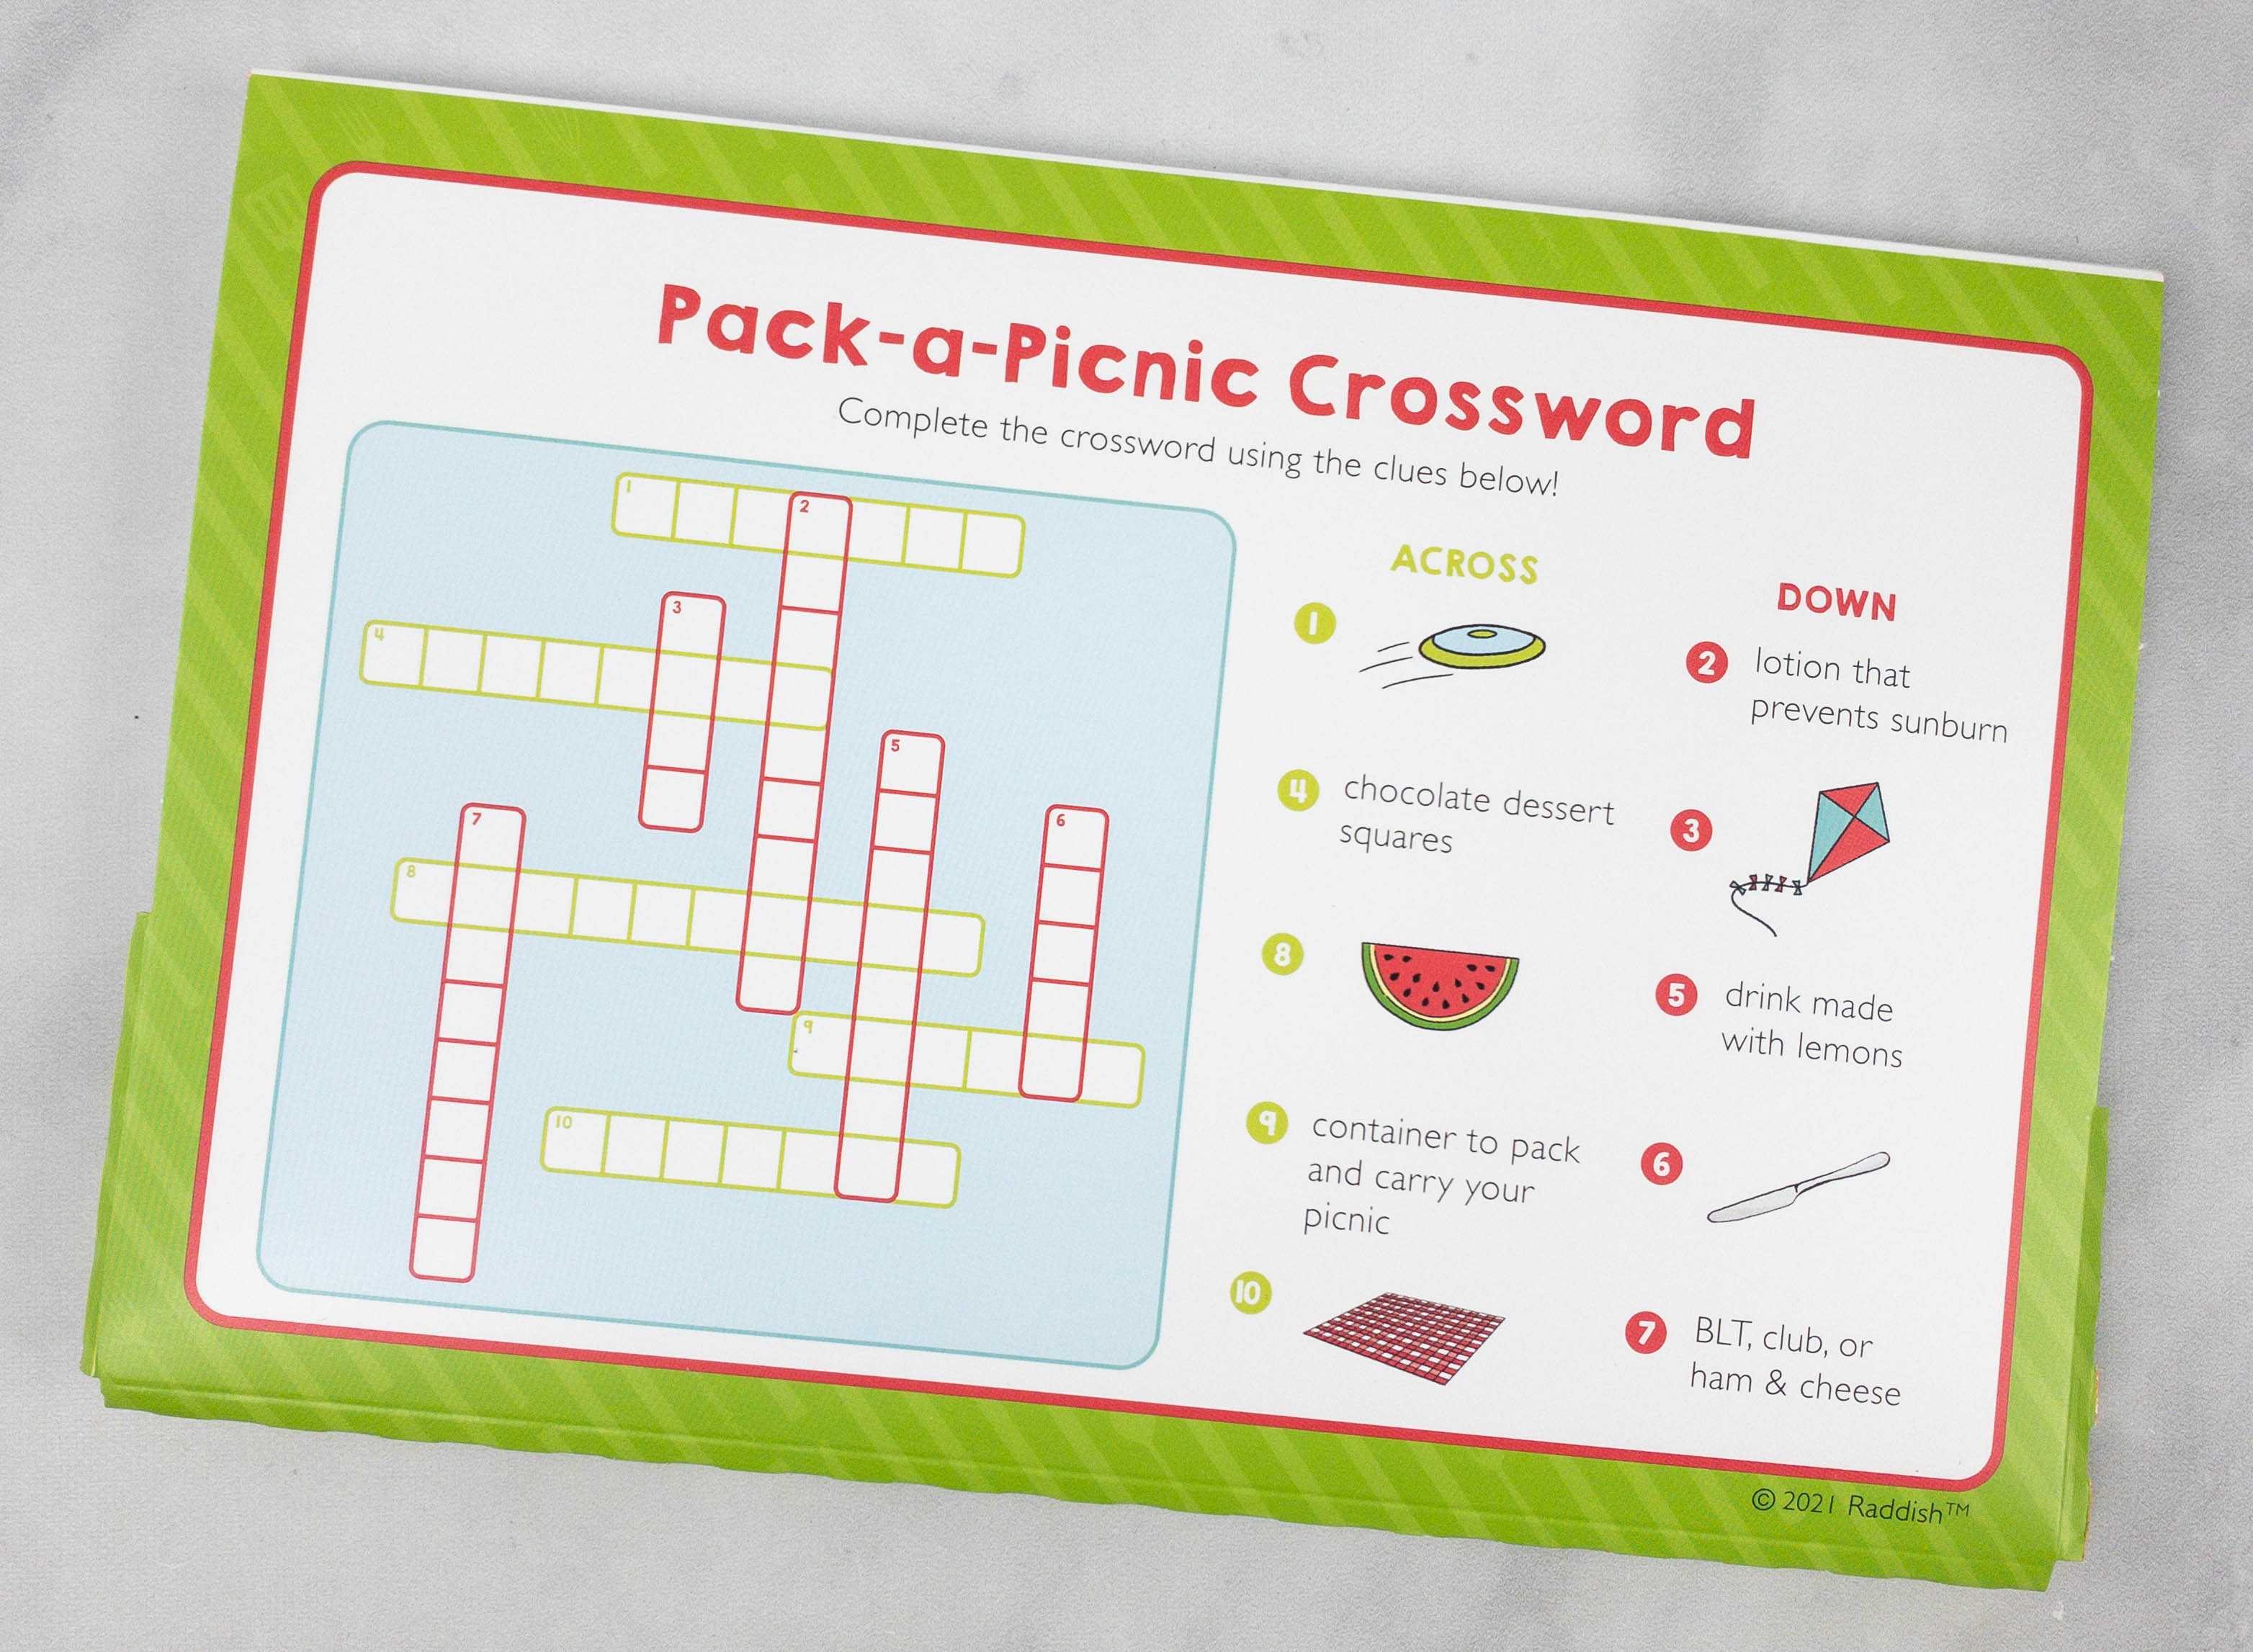
Here’s another exciting game for the kids, the Pack-a-Picnic Crossword!
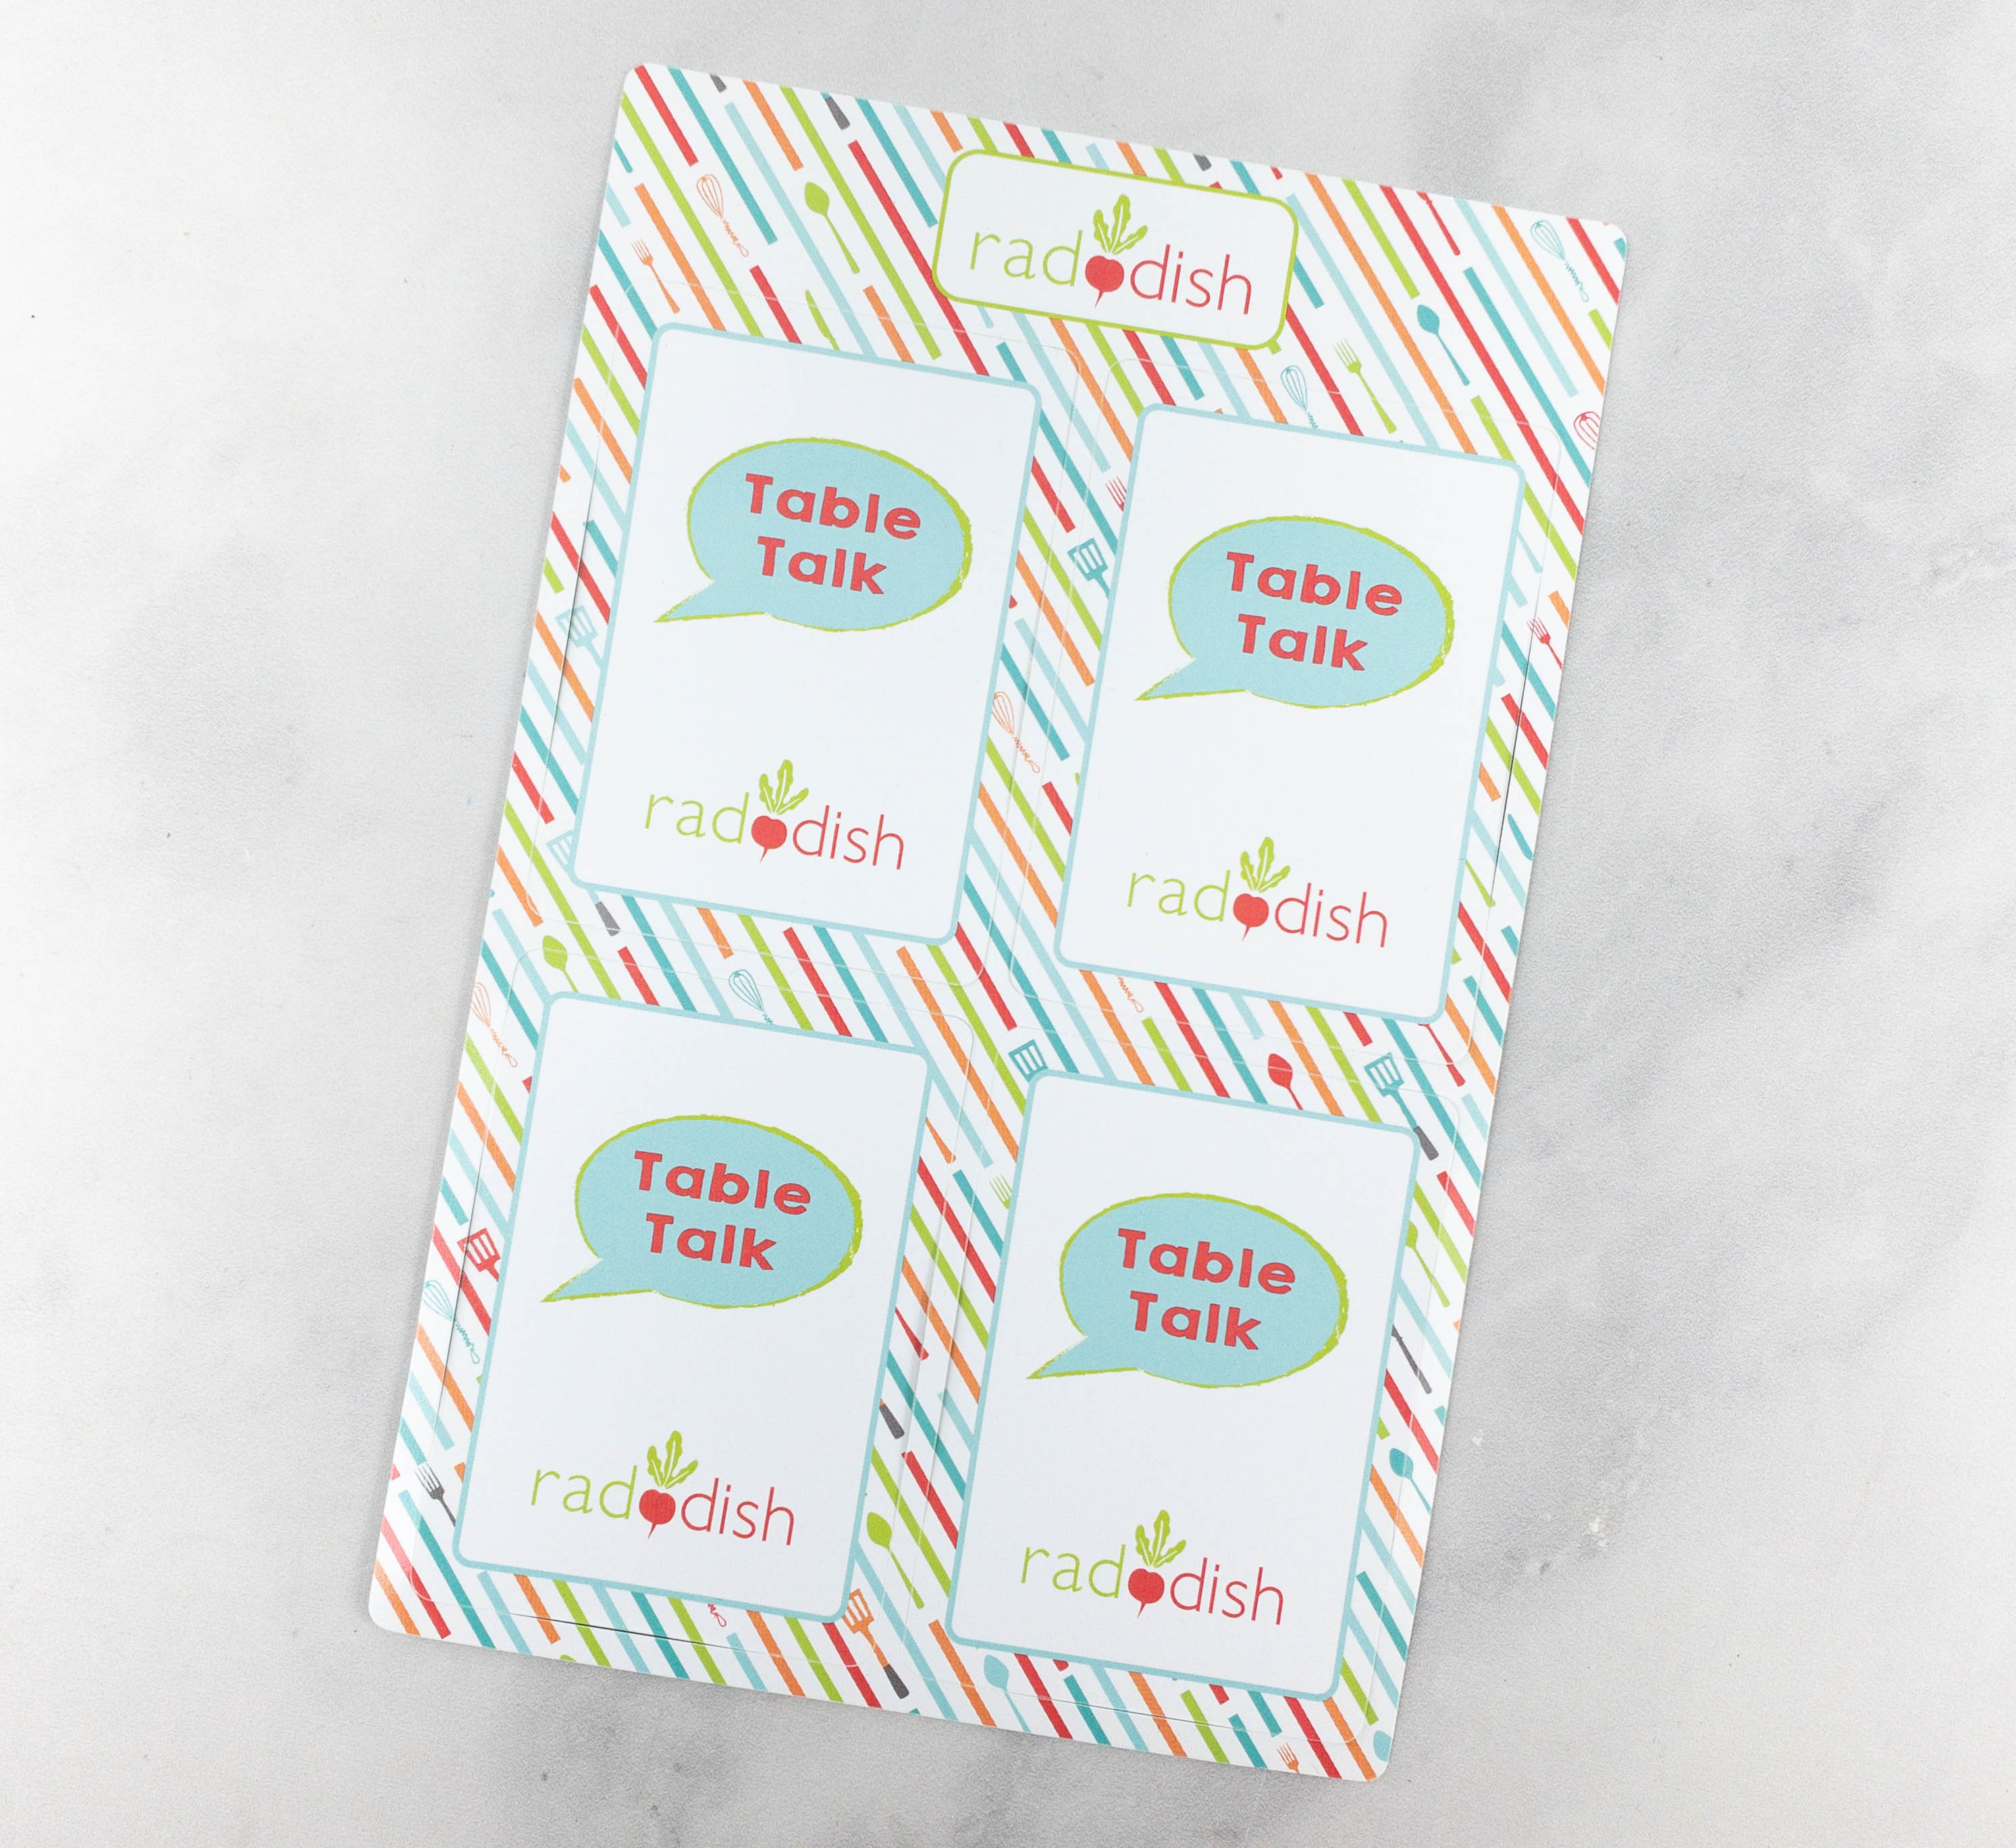
Each box also includes exclusive Table Talk conversation starter cards.
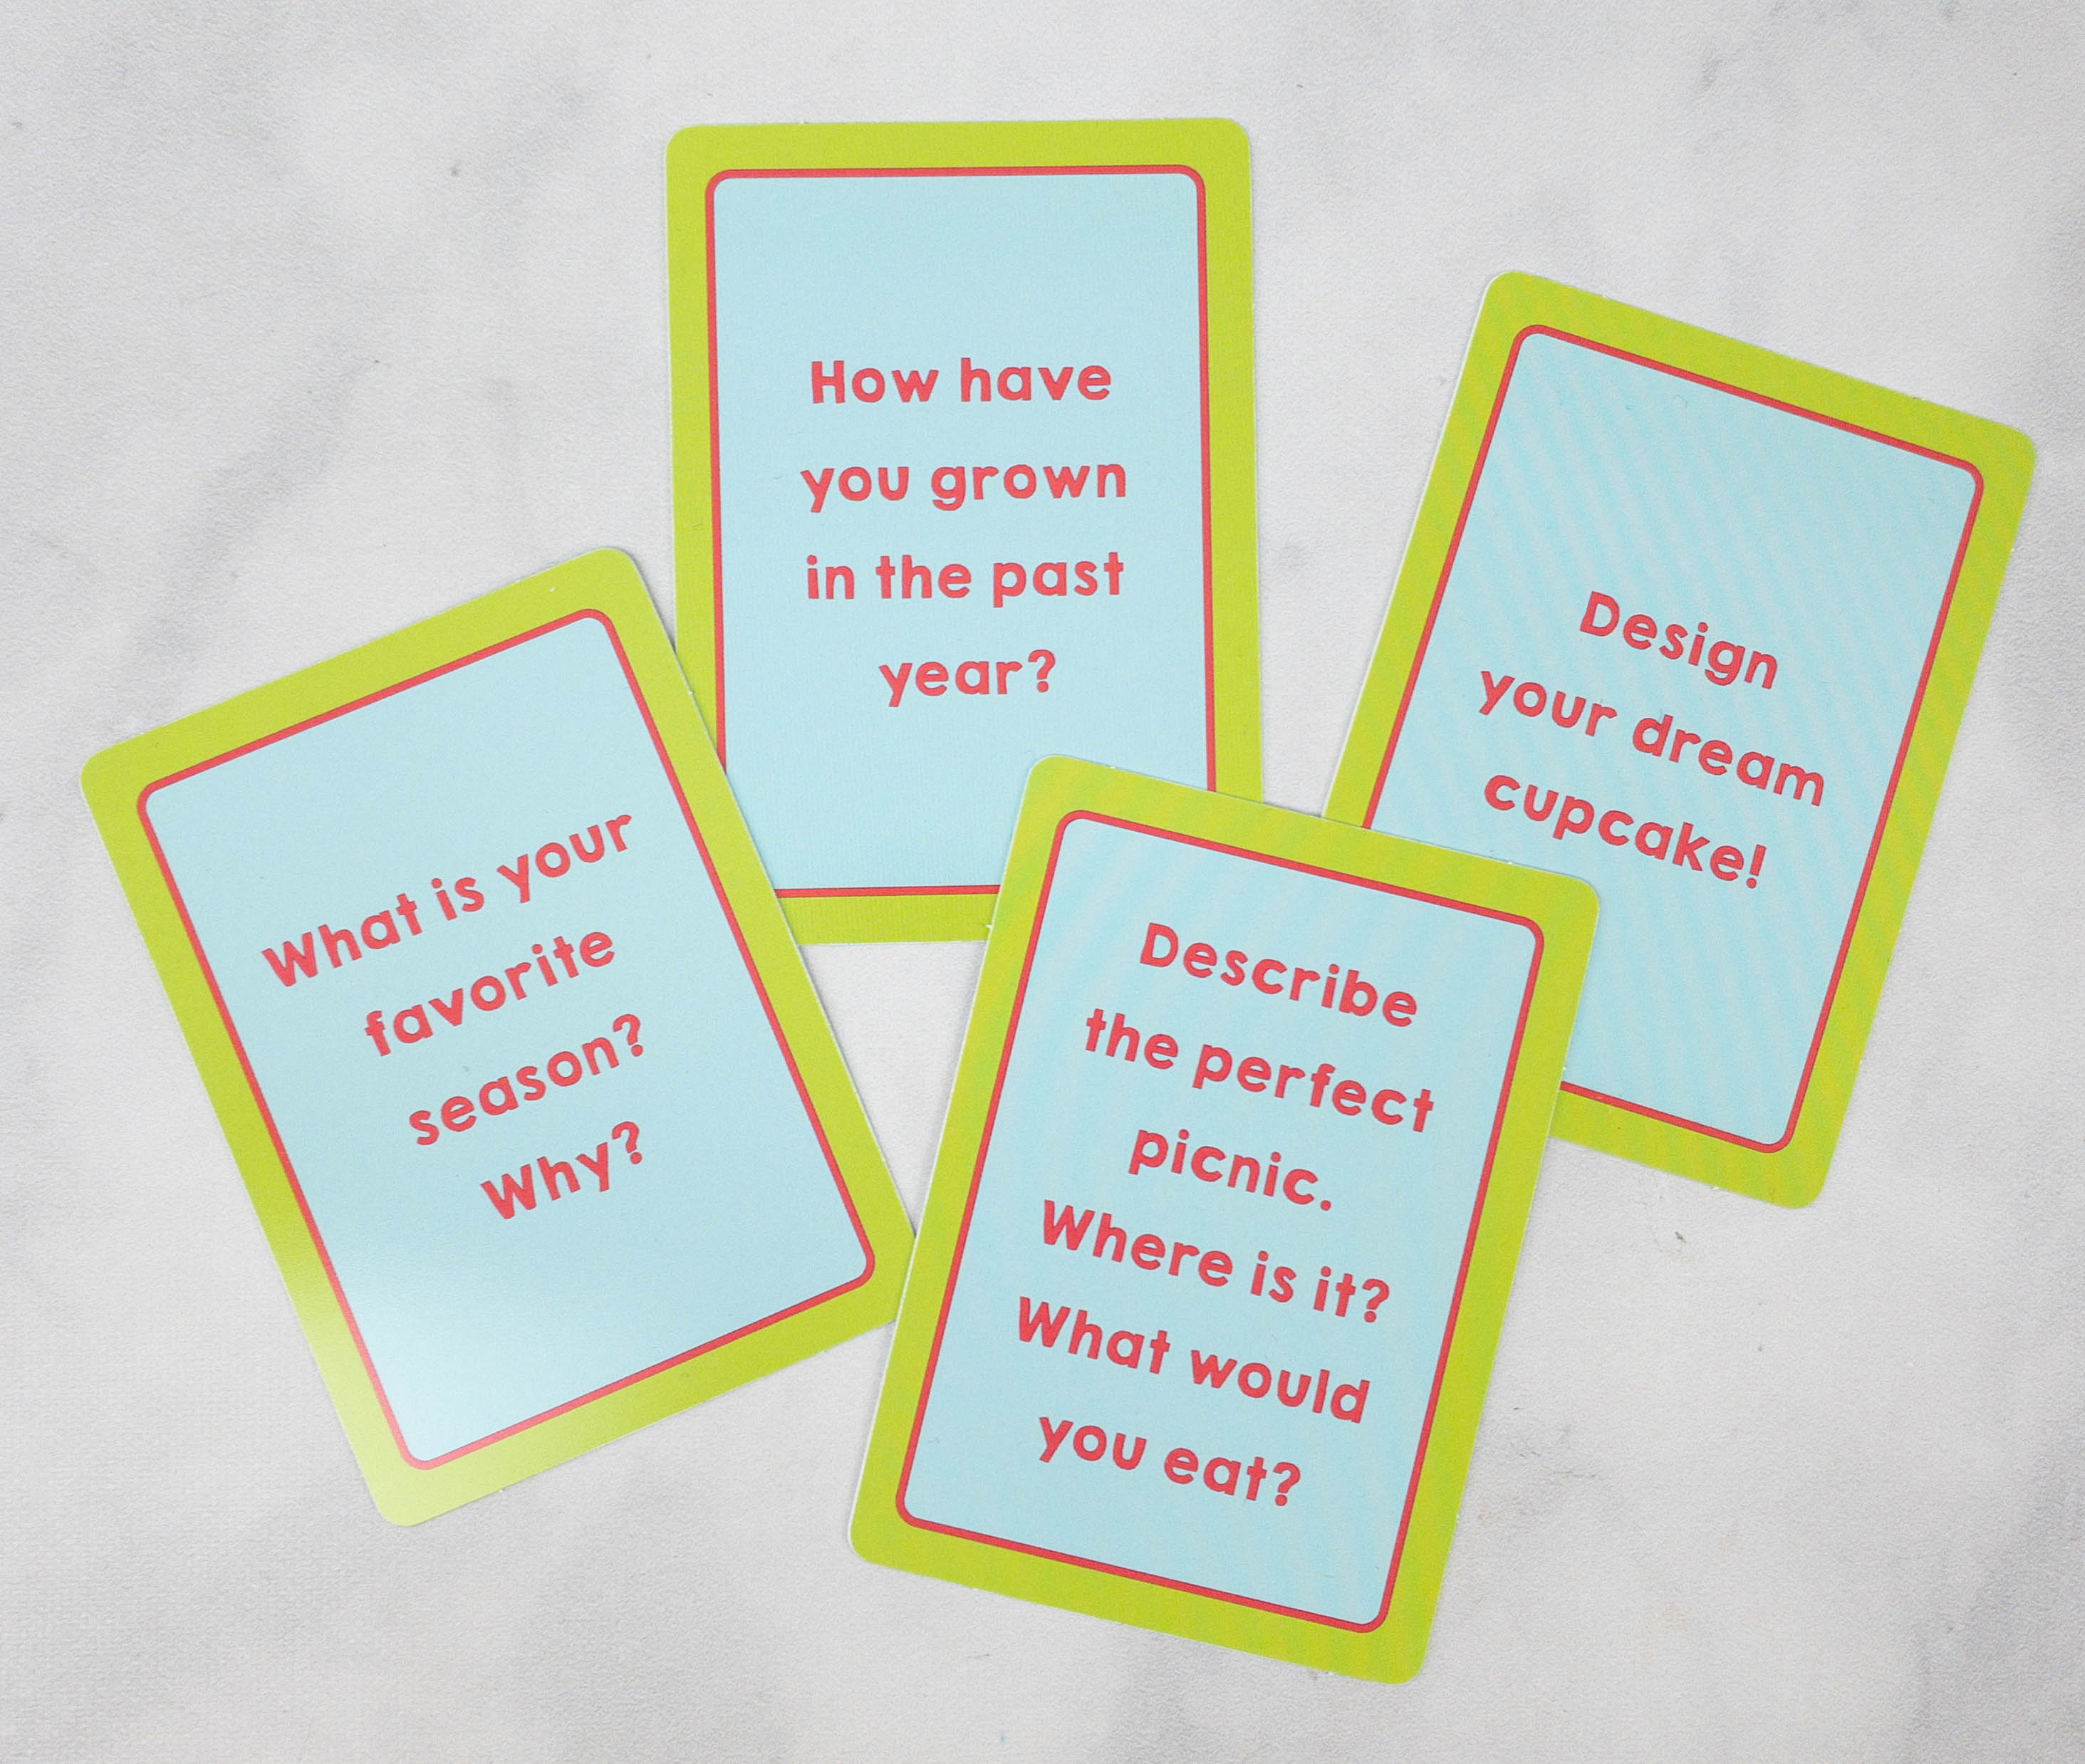
The cards contain questions for a great table talk conversation. They come in a sheet and you can easily tear them down.

Everything in my April 2021 box!
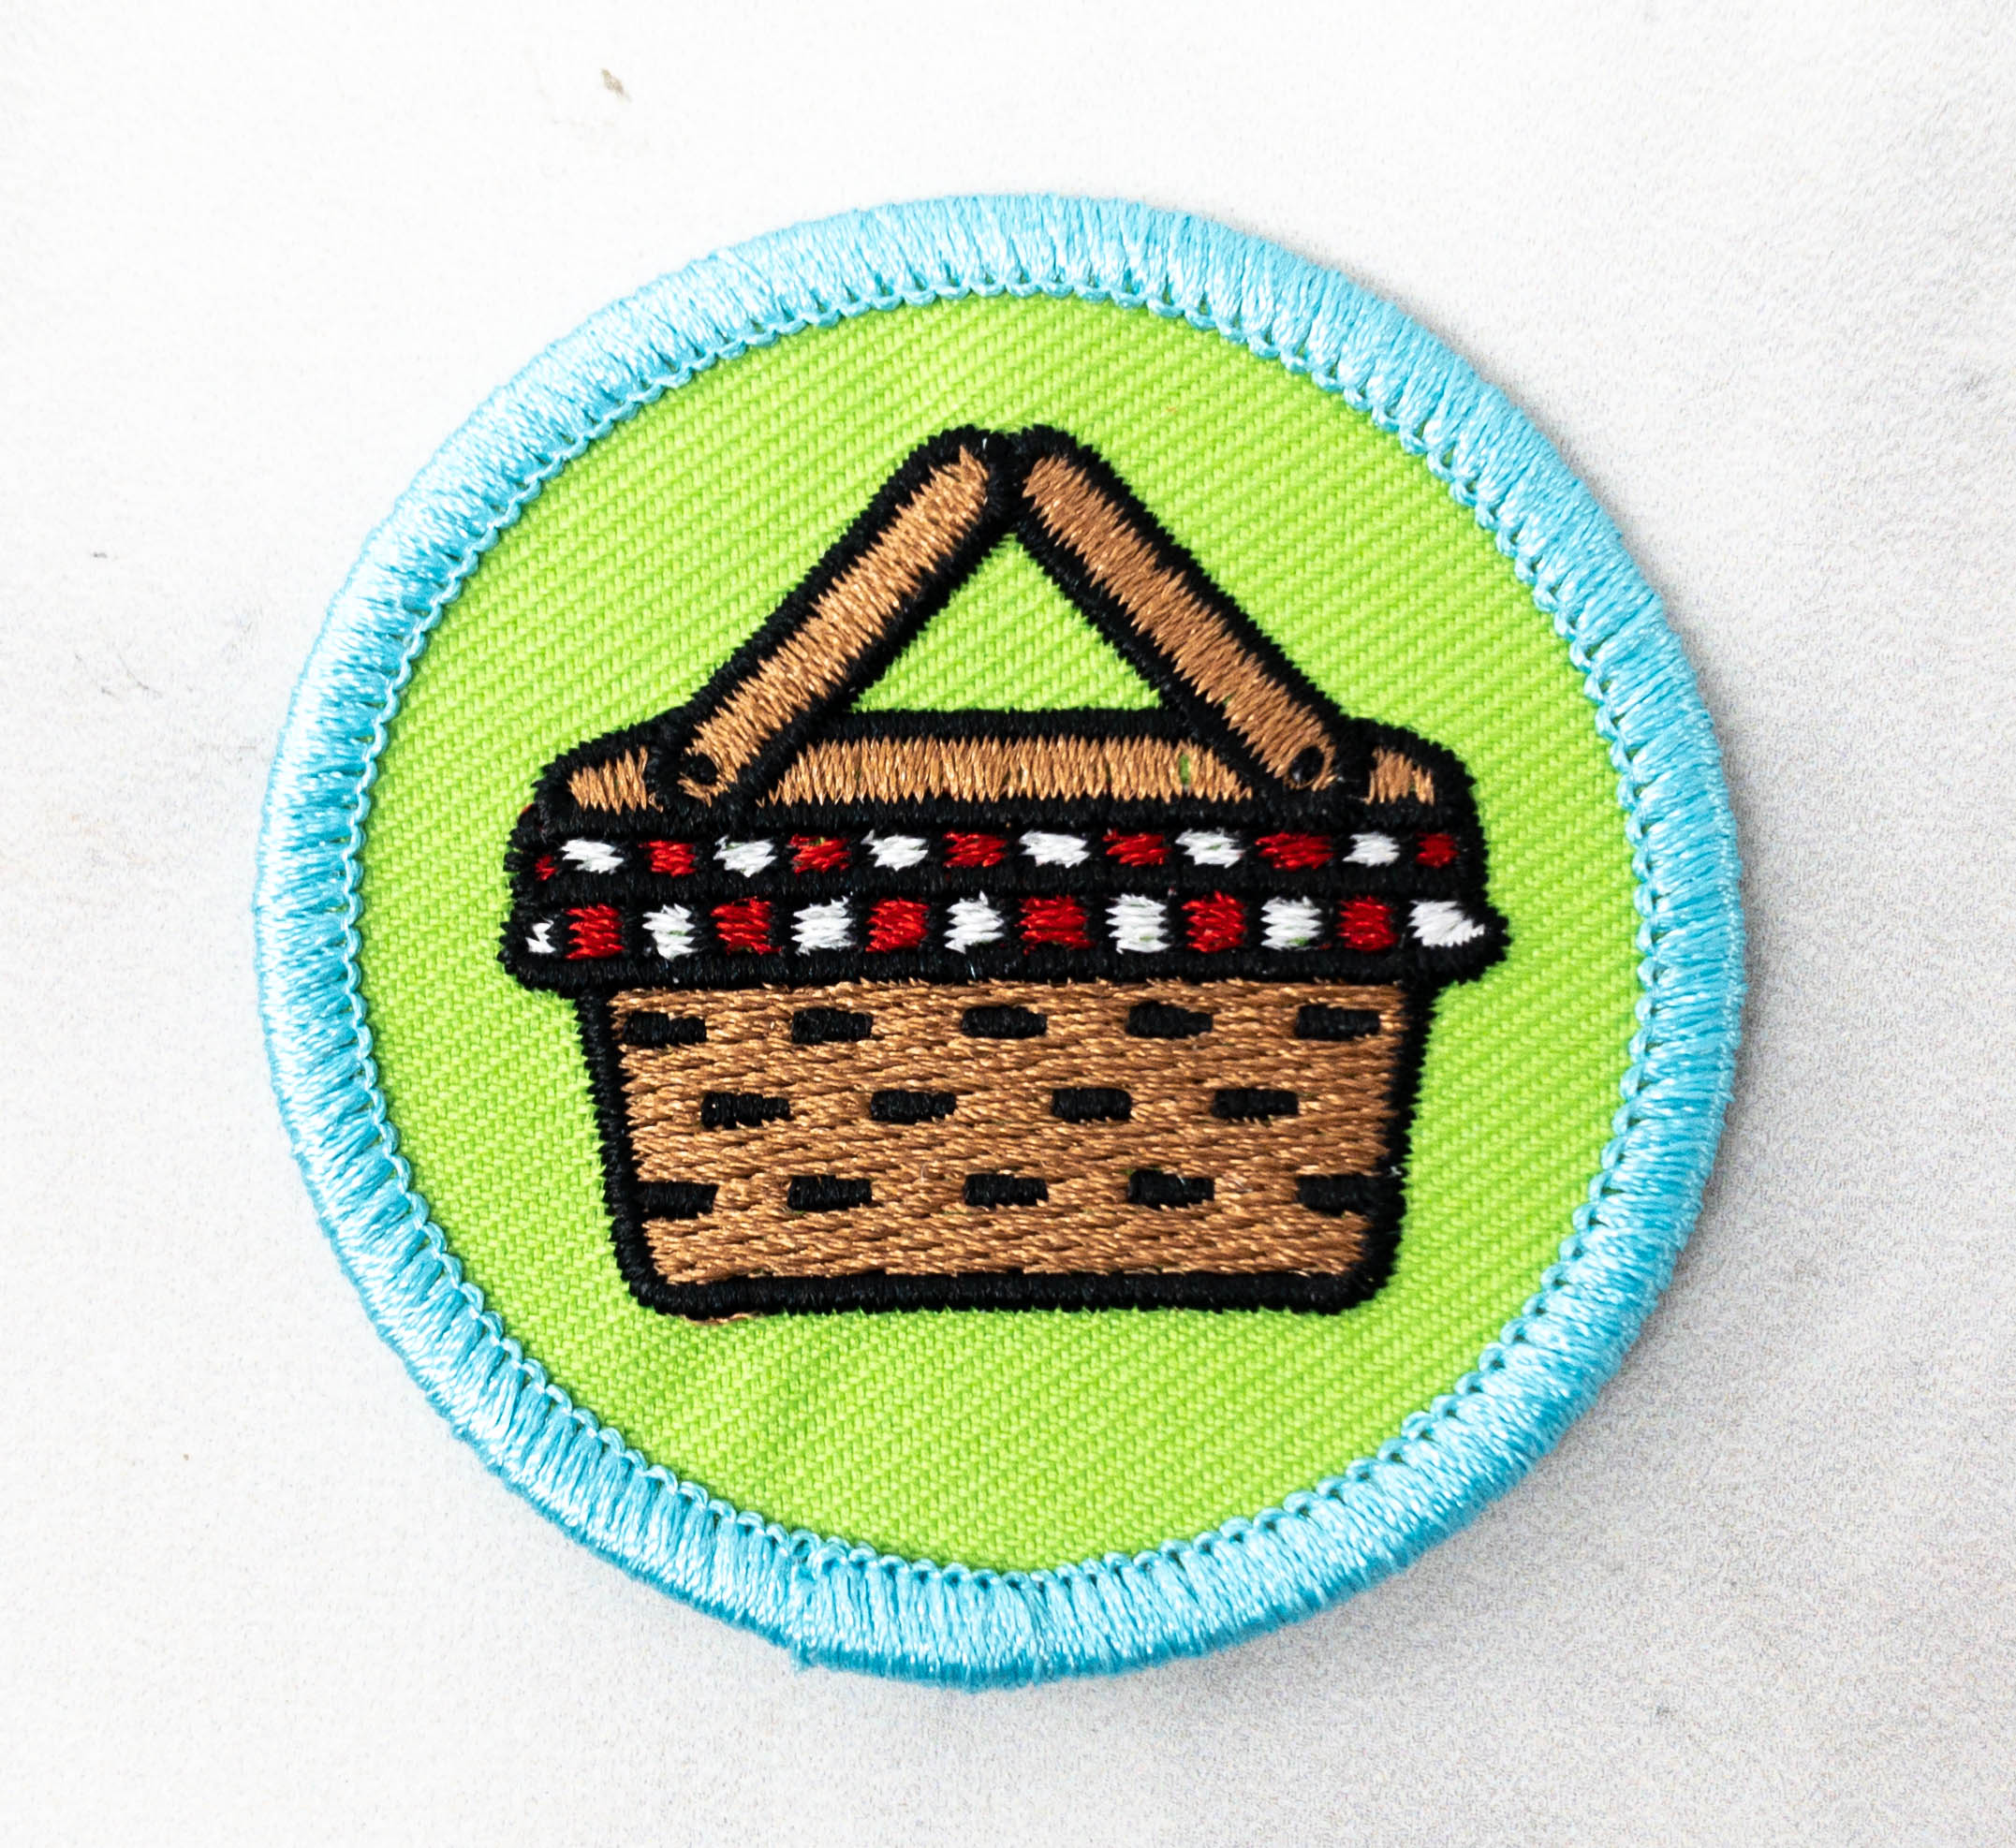
The patch represents this month’s theme! It features a picnic basket on a green background.
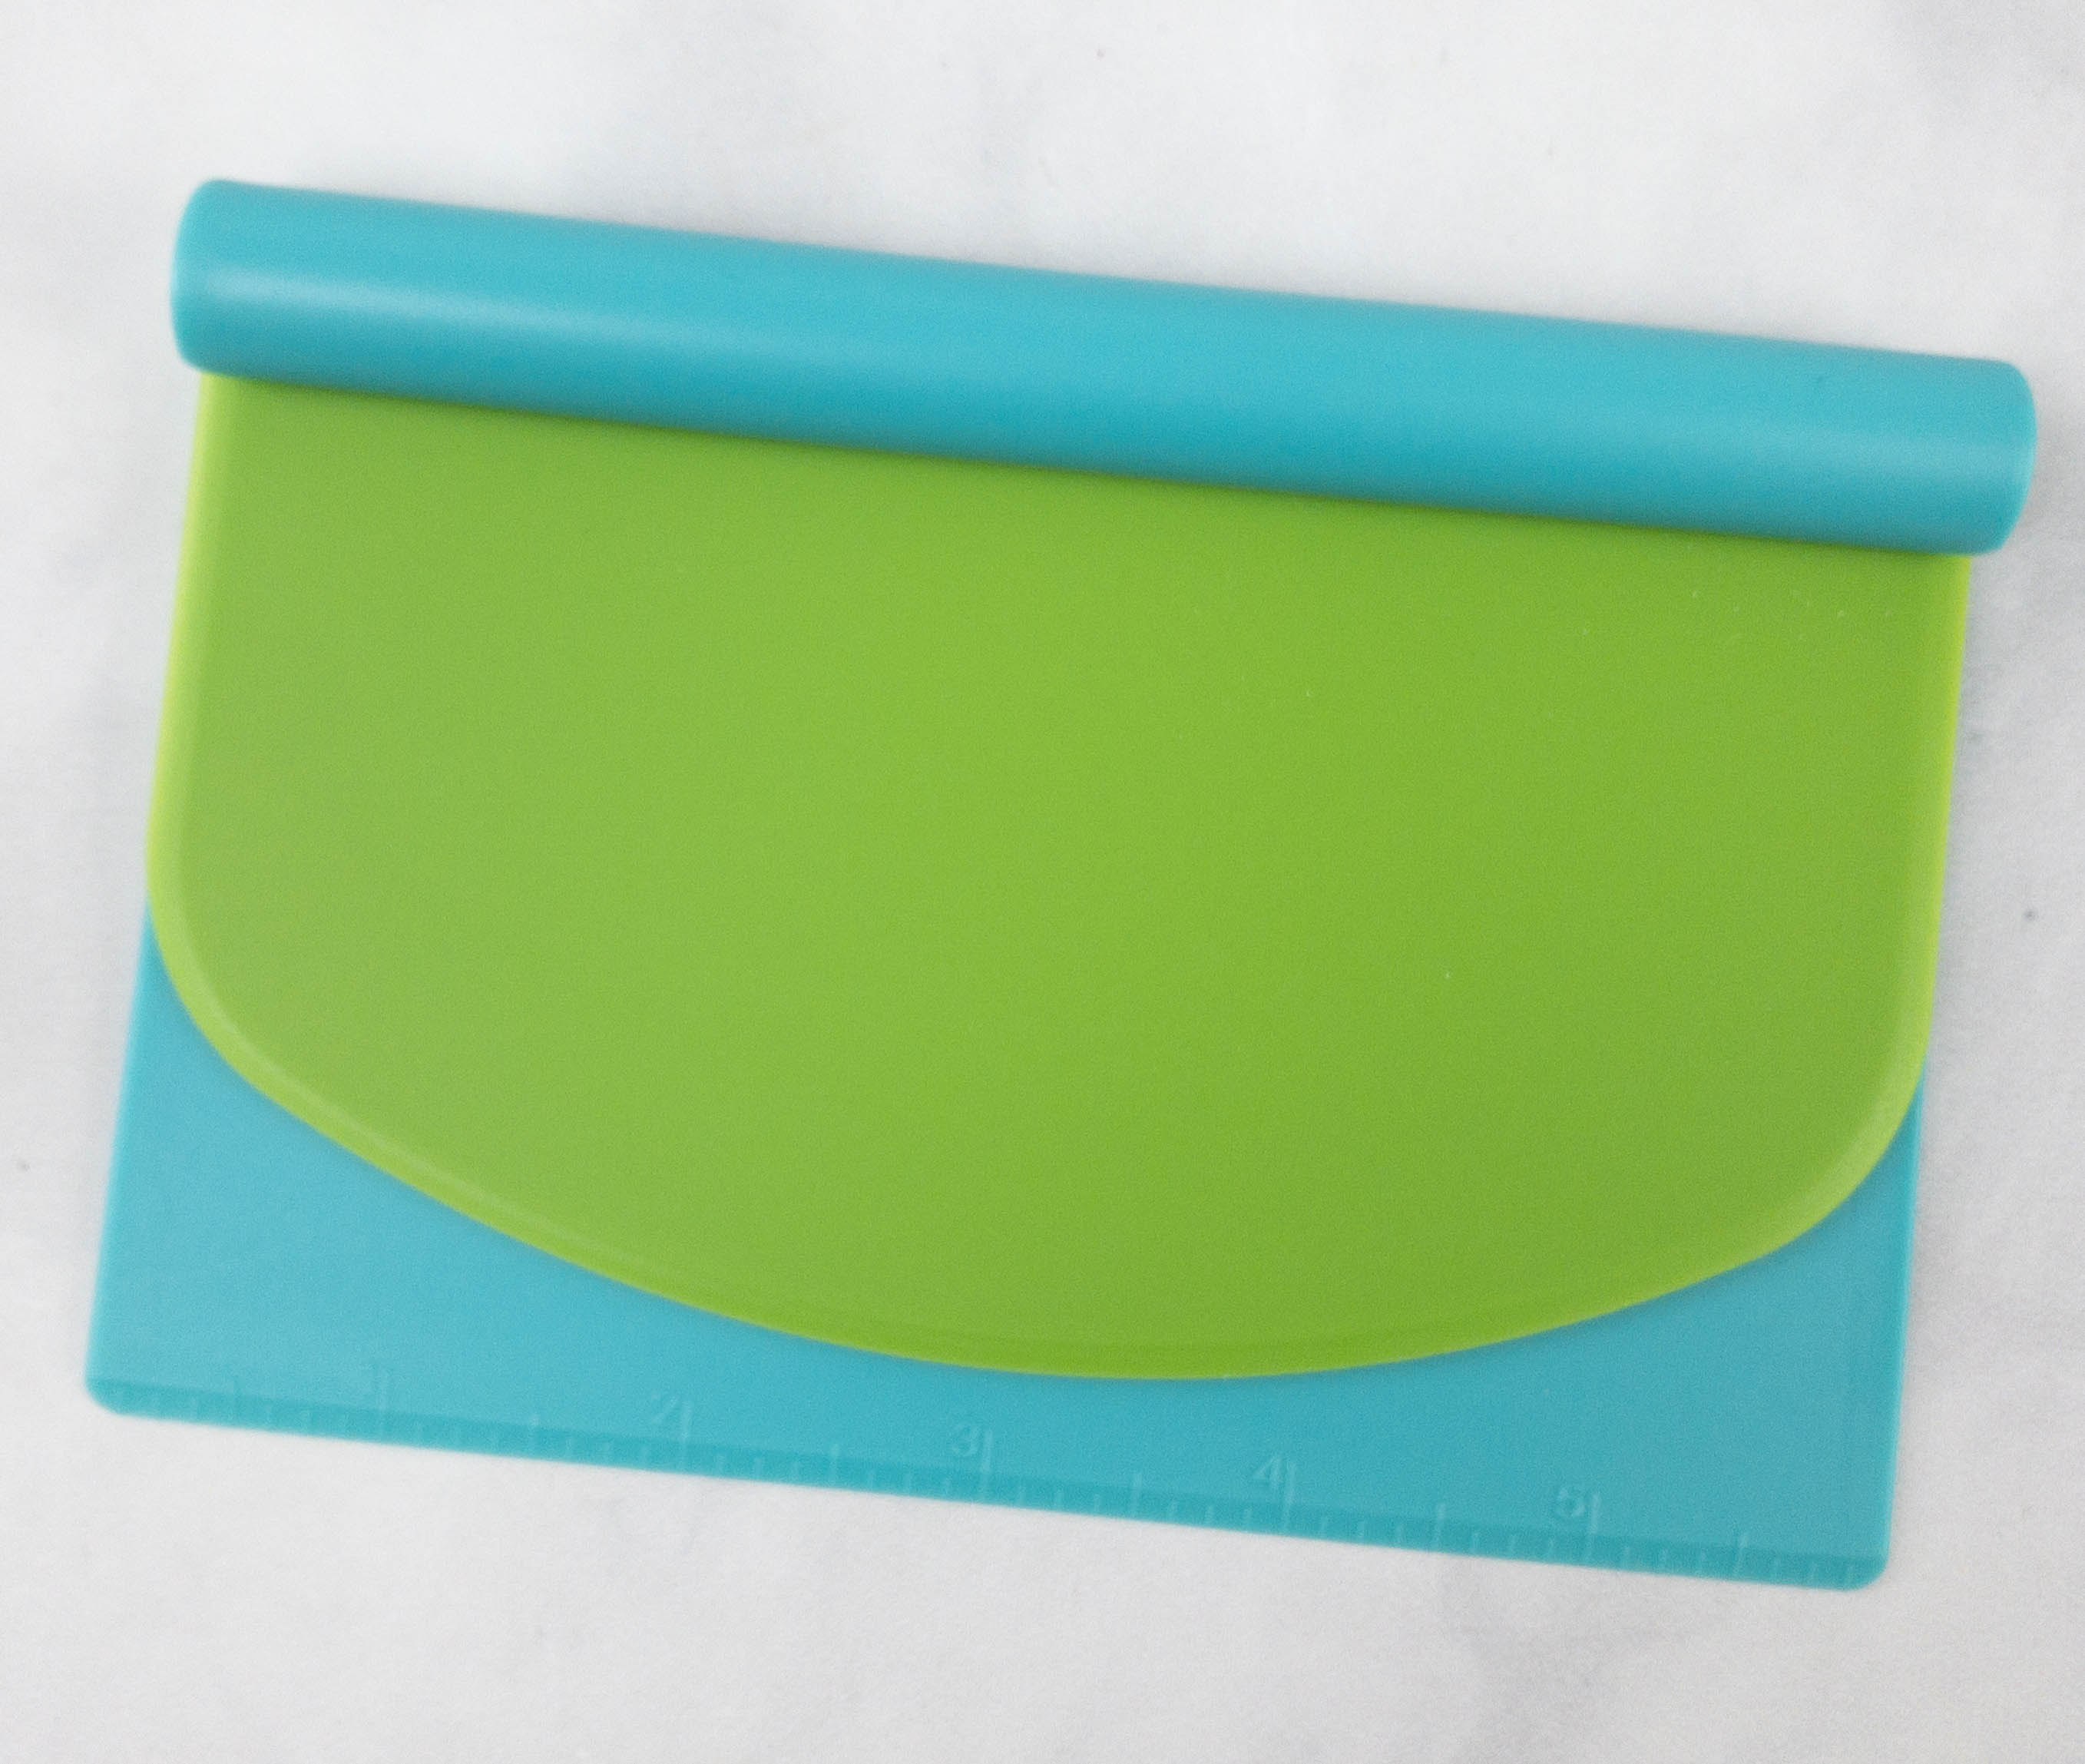
This month’s featured tool is a bench scraper.
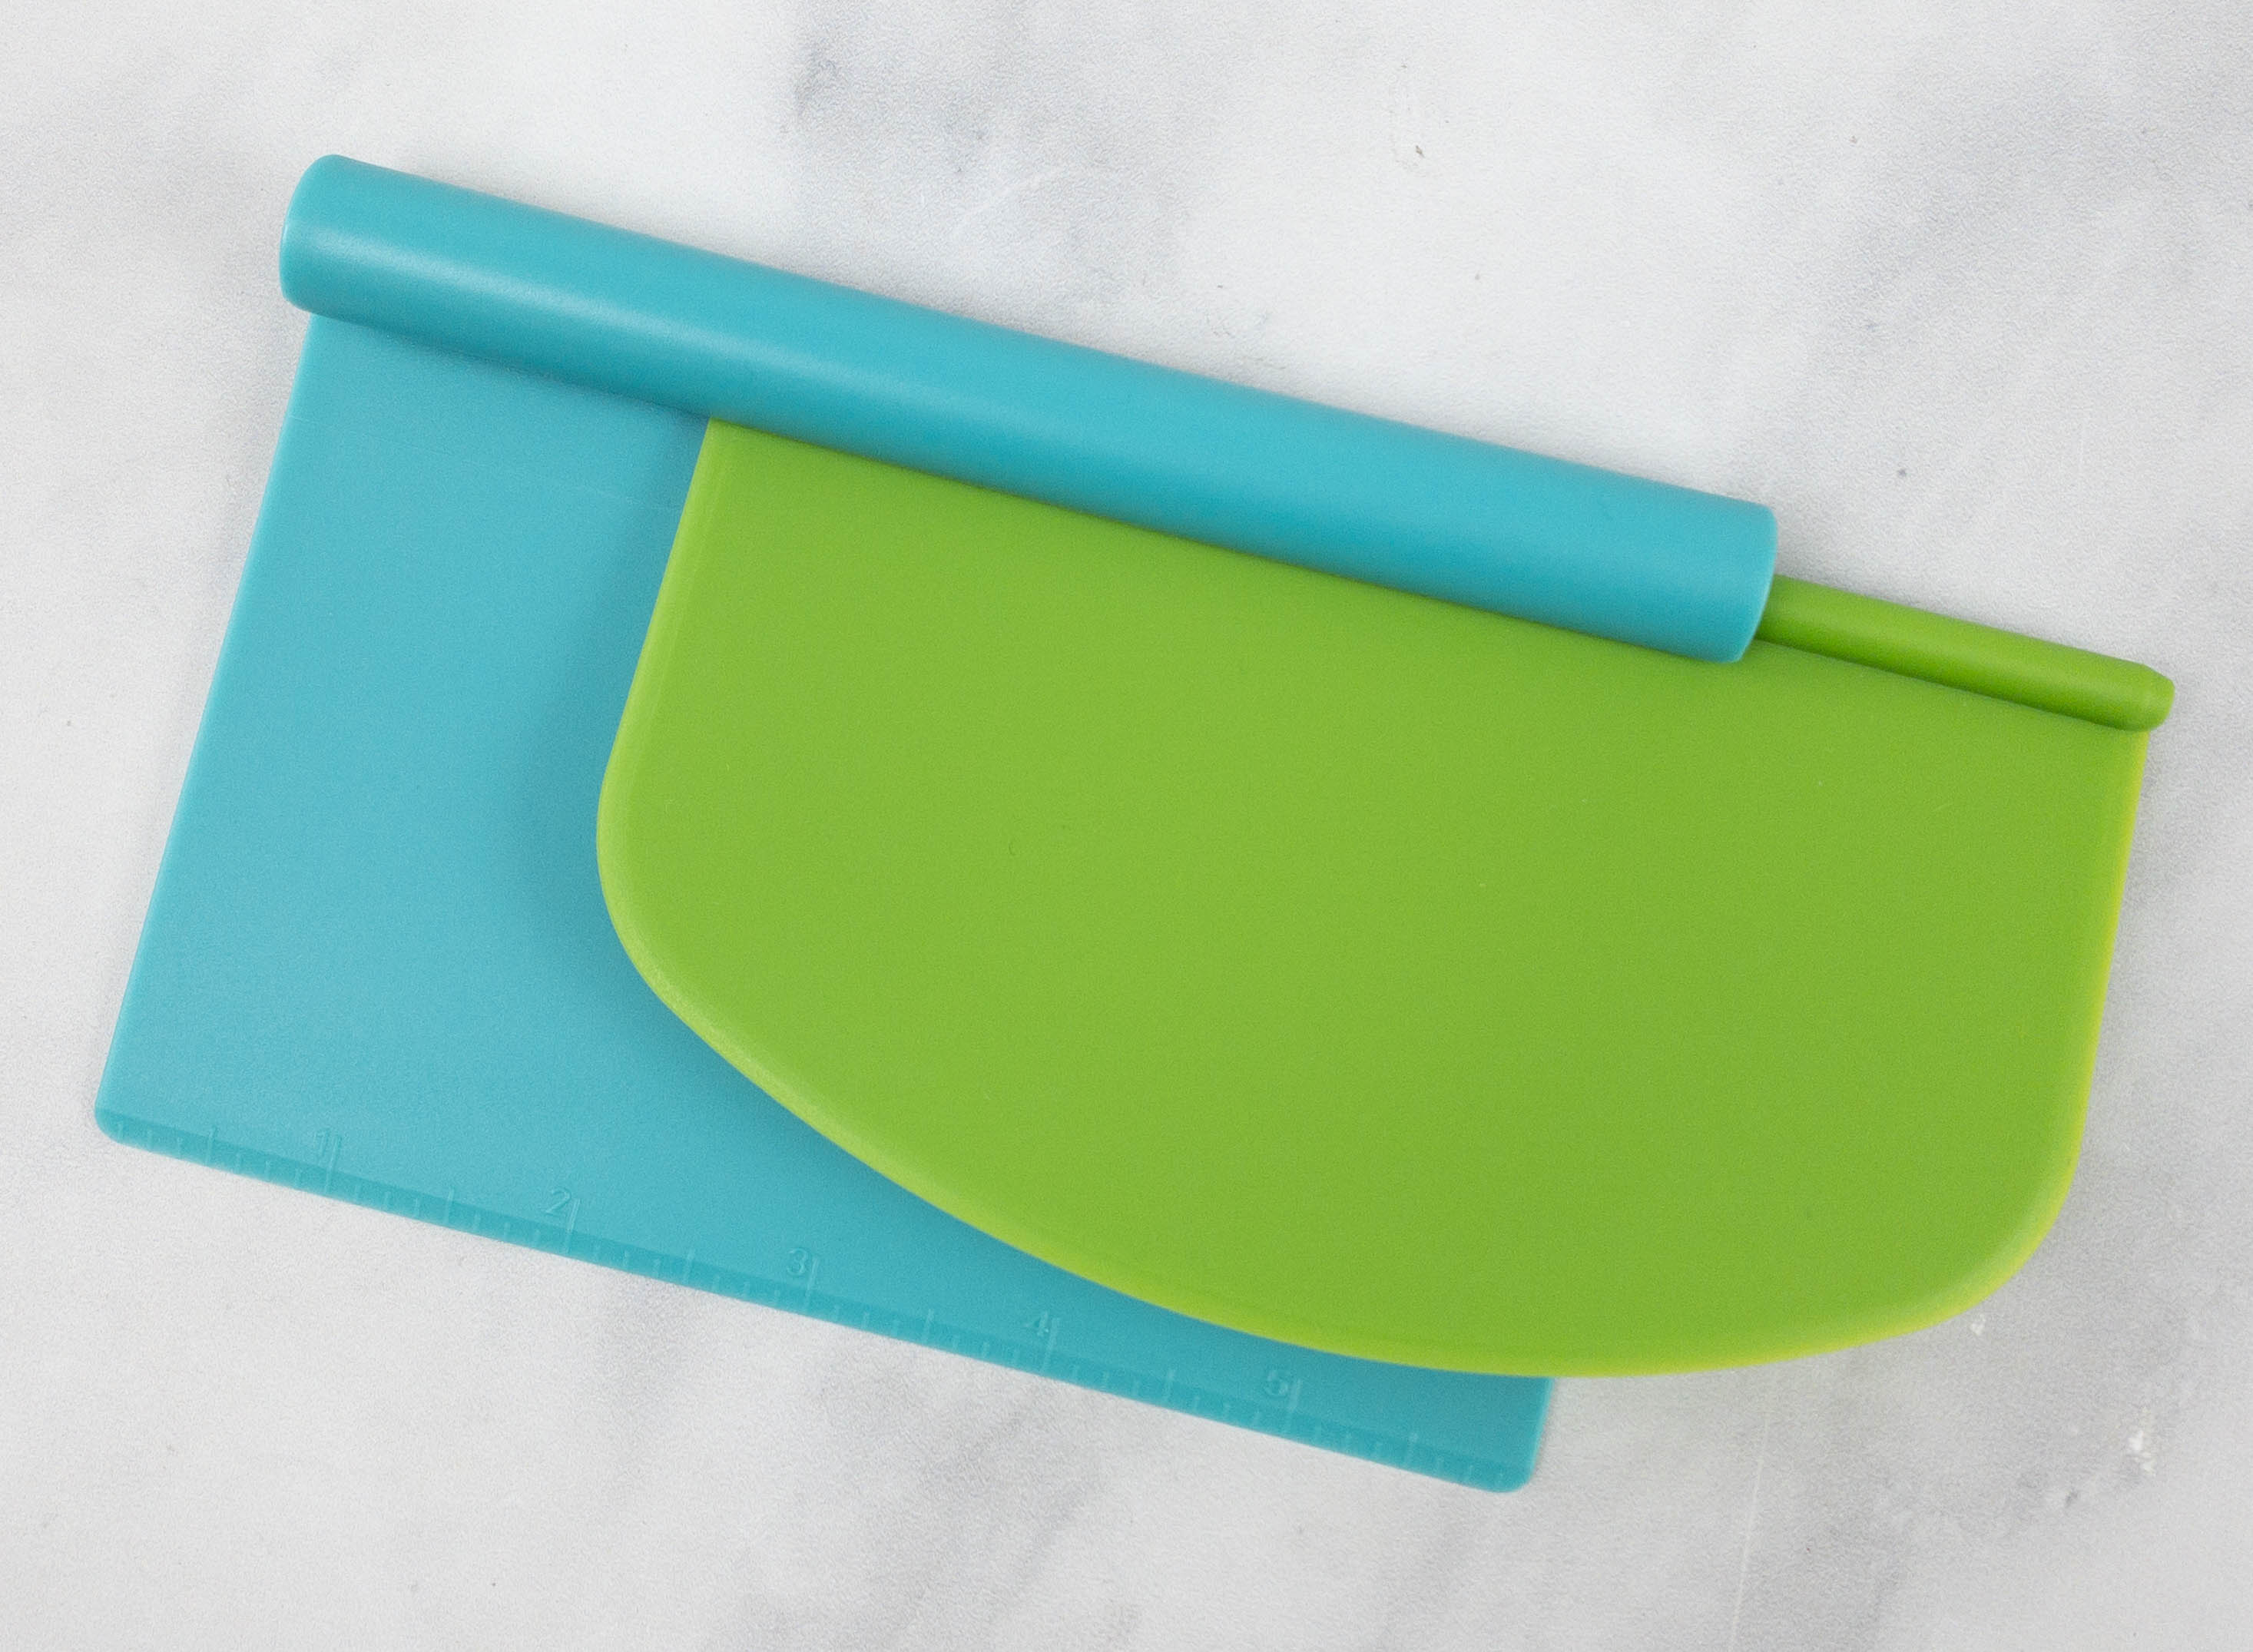
It came in a set of two, one has a round edge while the other is the usual rectangular shape.
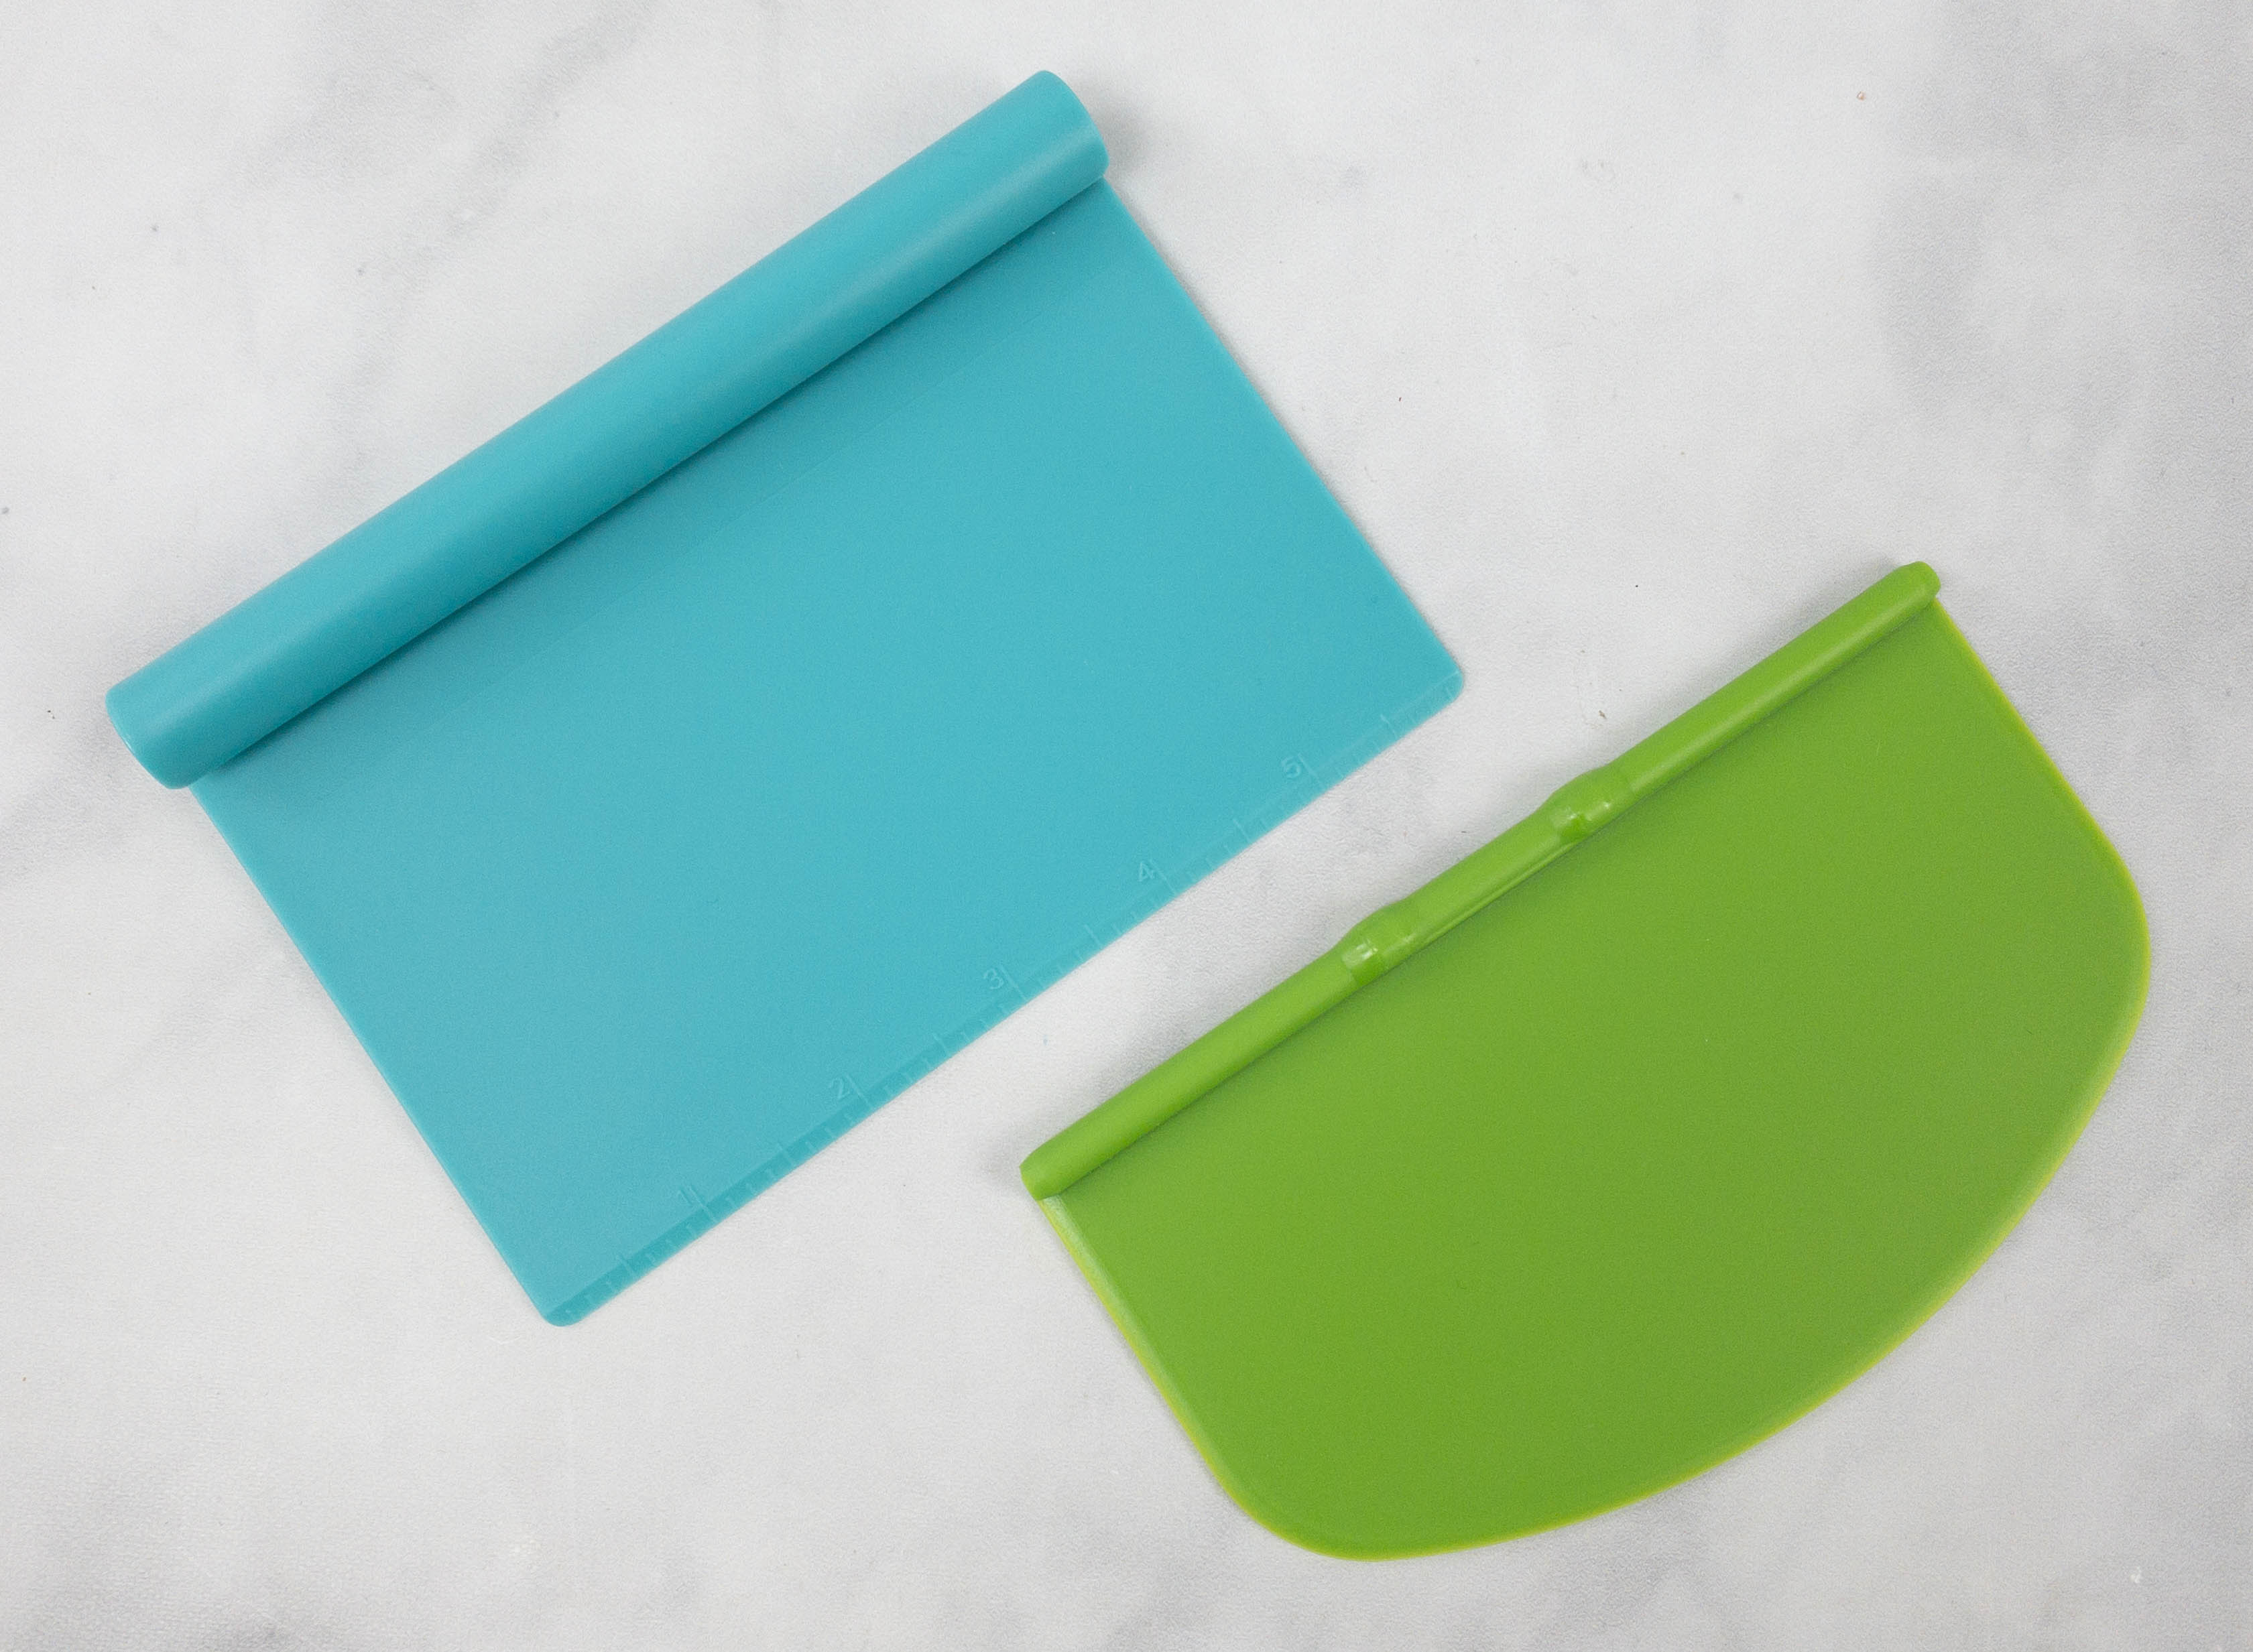
A bench scraper is a handy tool in the kitchen especially when baking as it can help divide, portion, scoop, and transfer hunks of dough from one place to another.
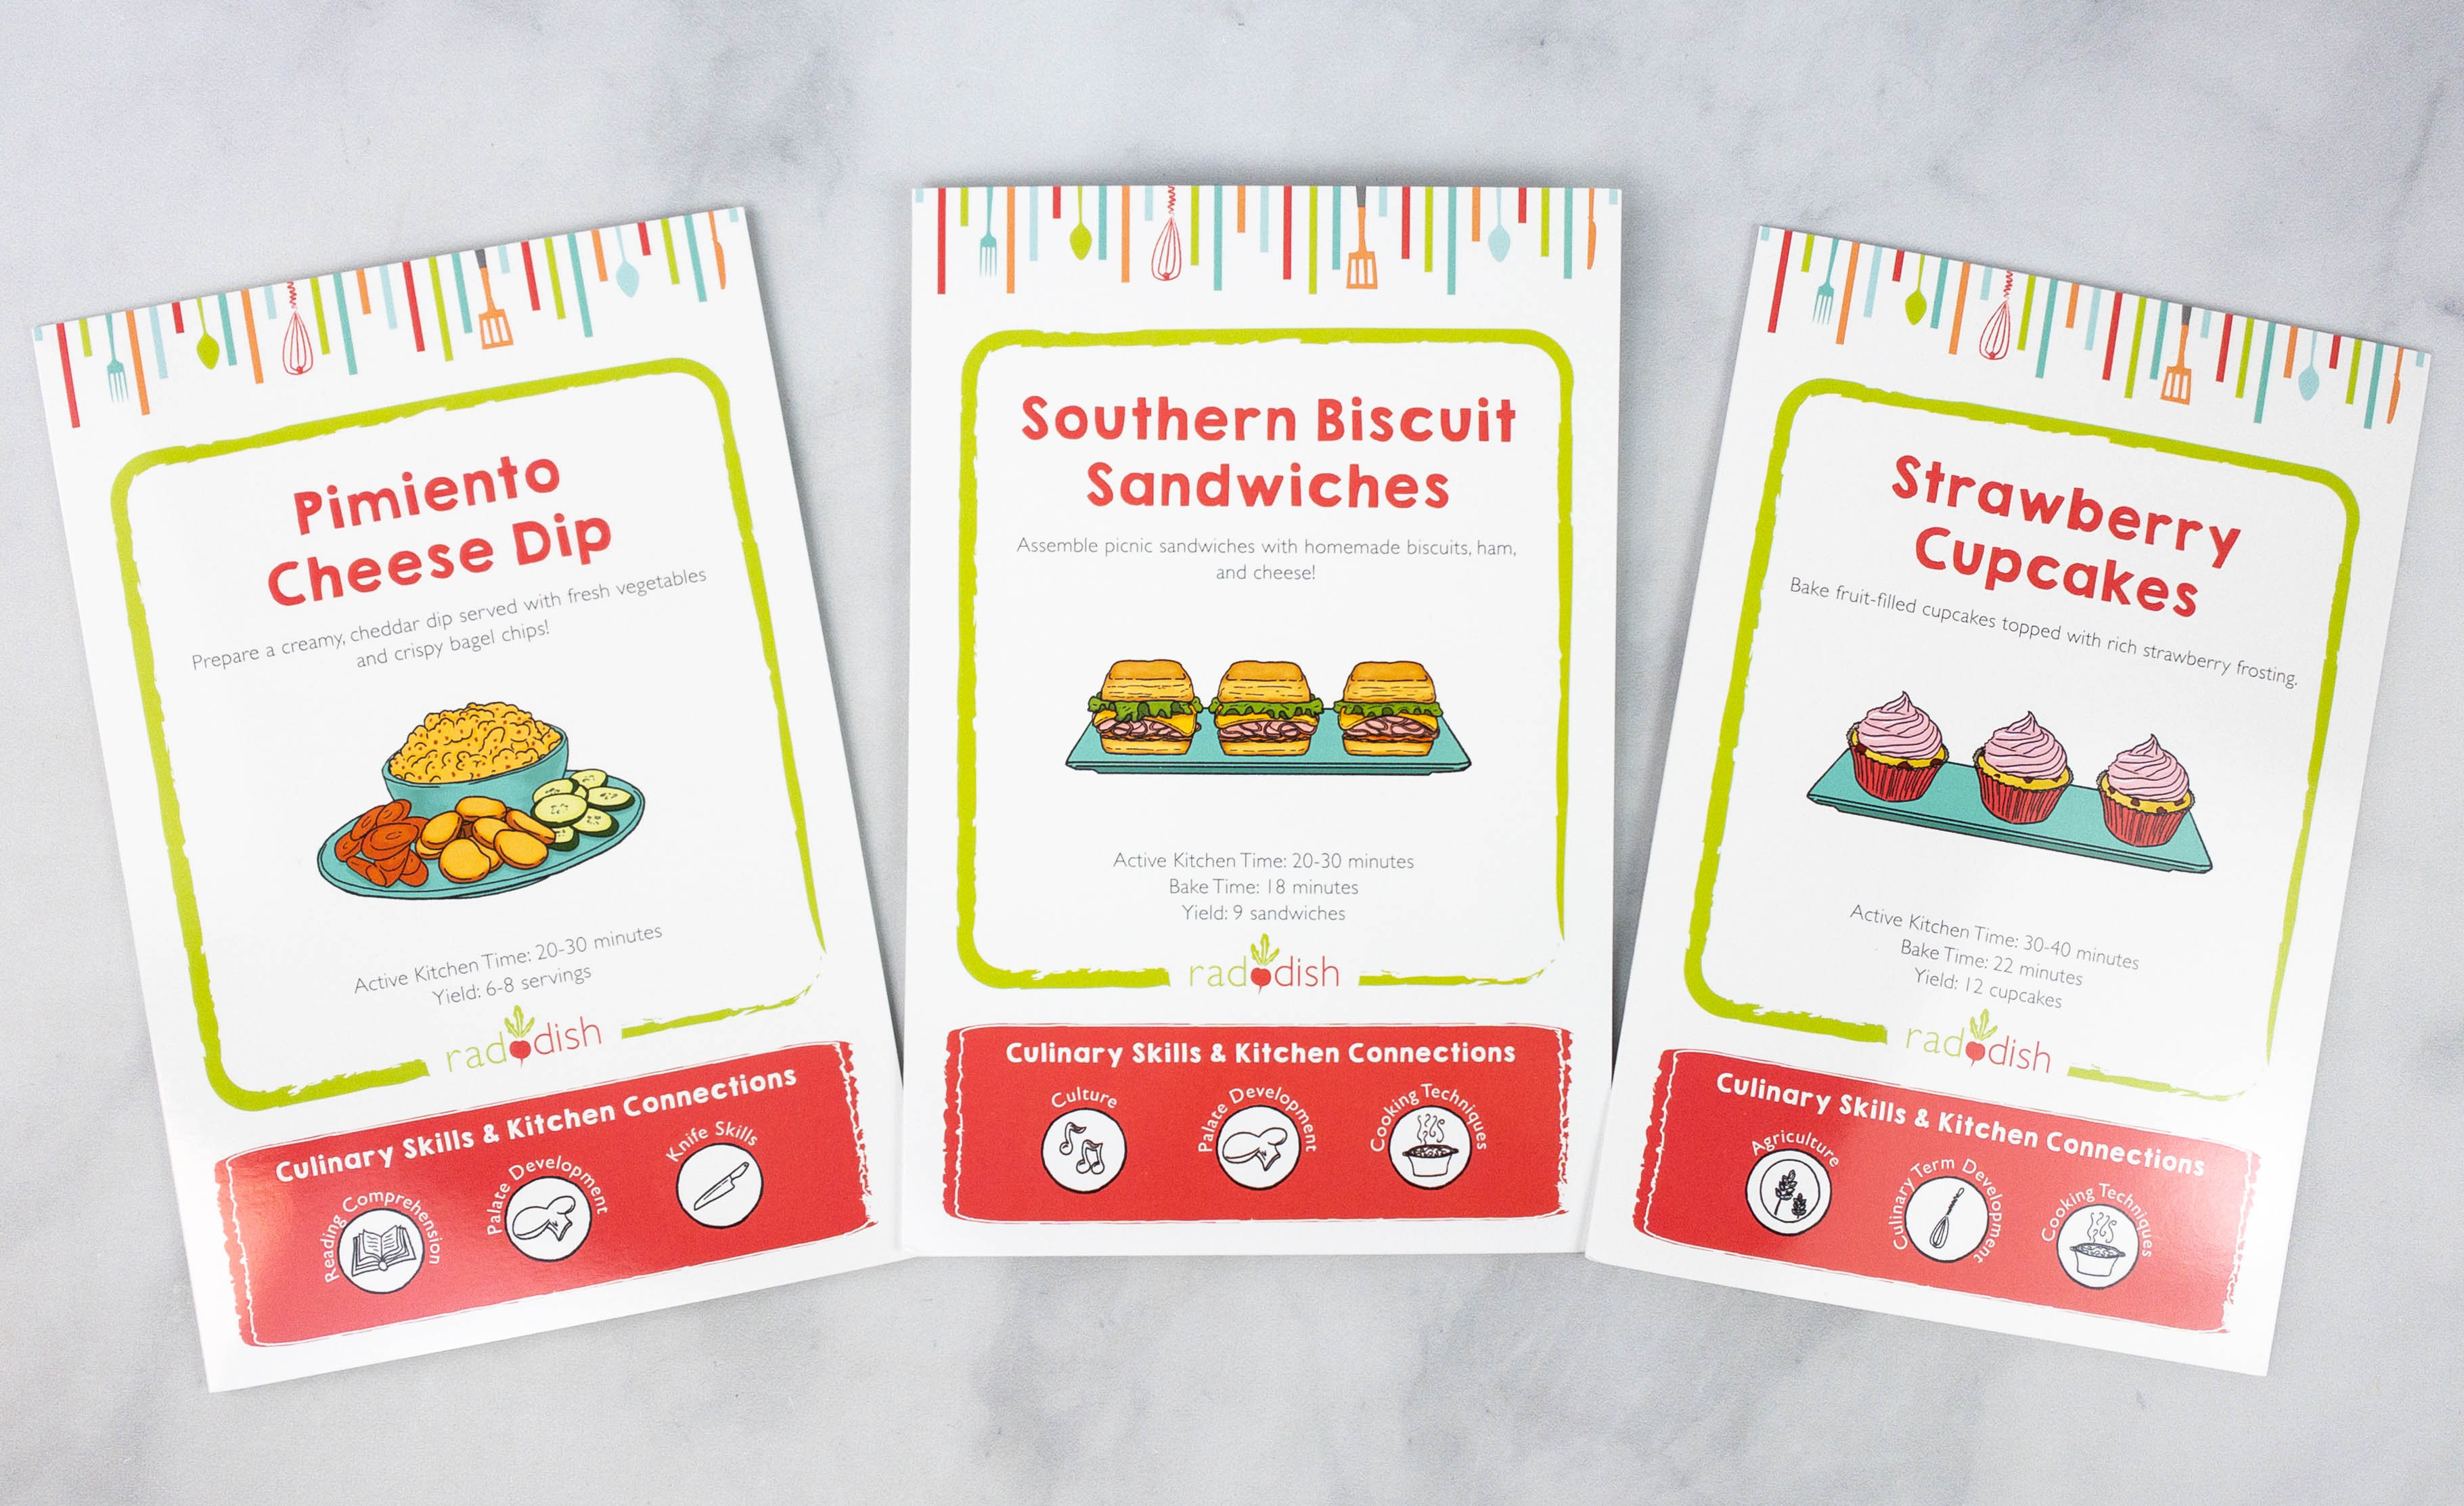
Here are this month’s recipe guides!
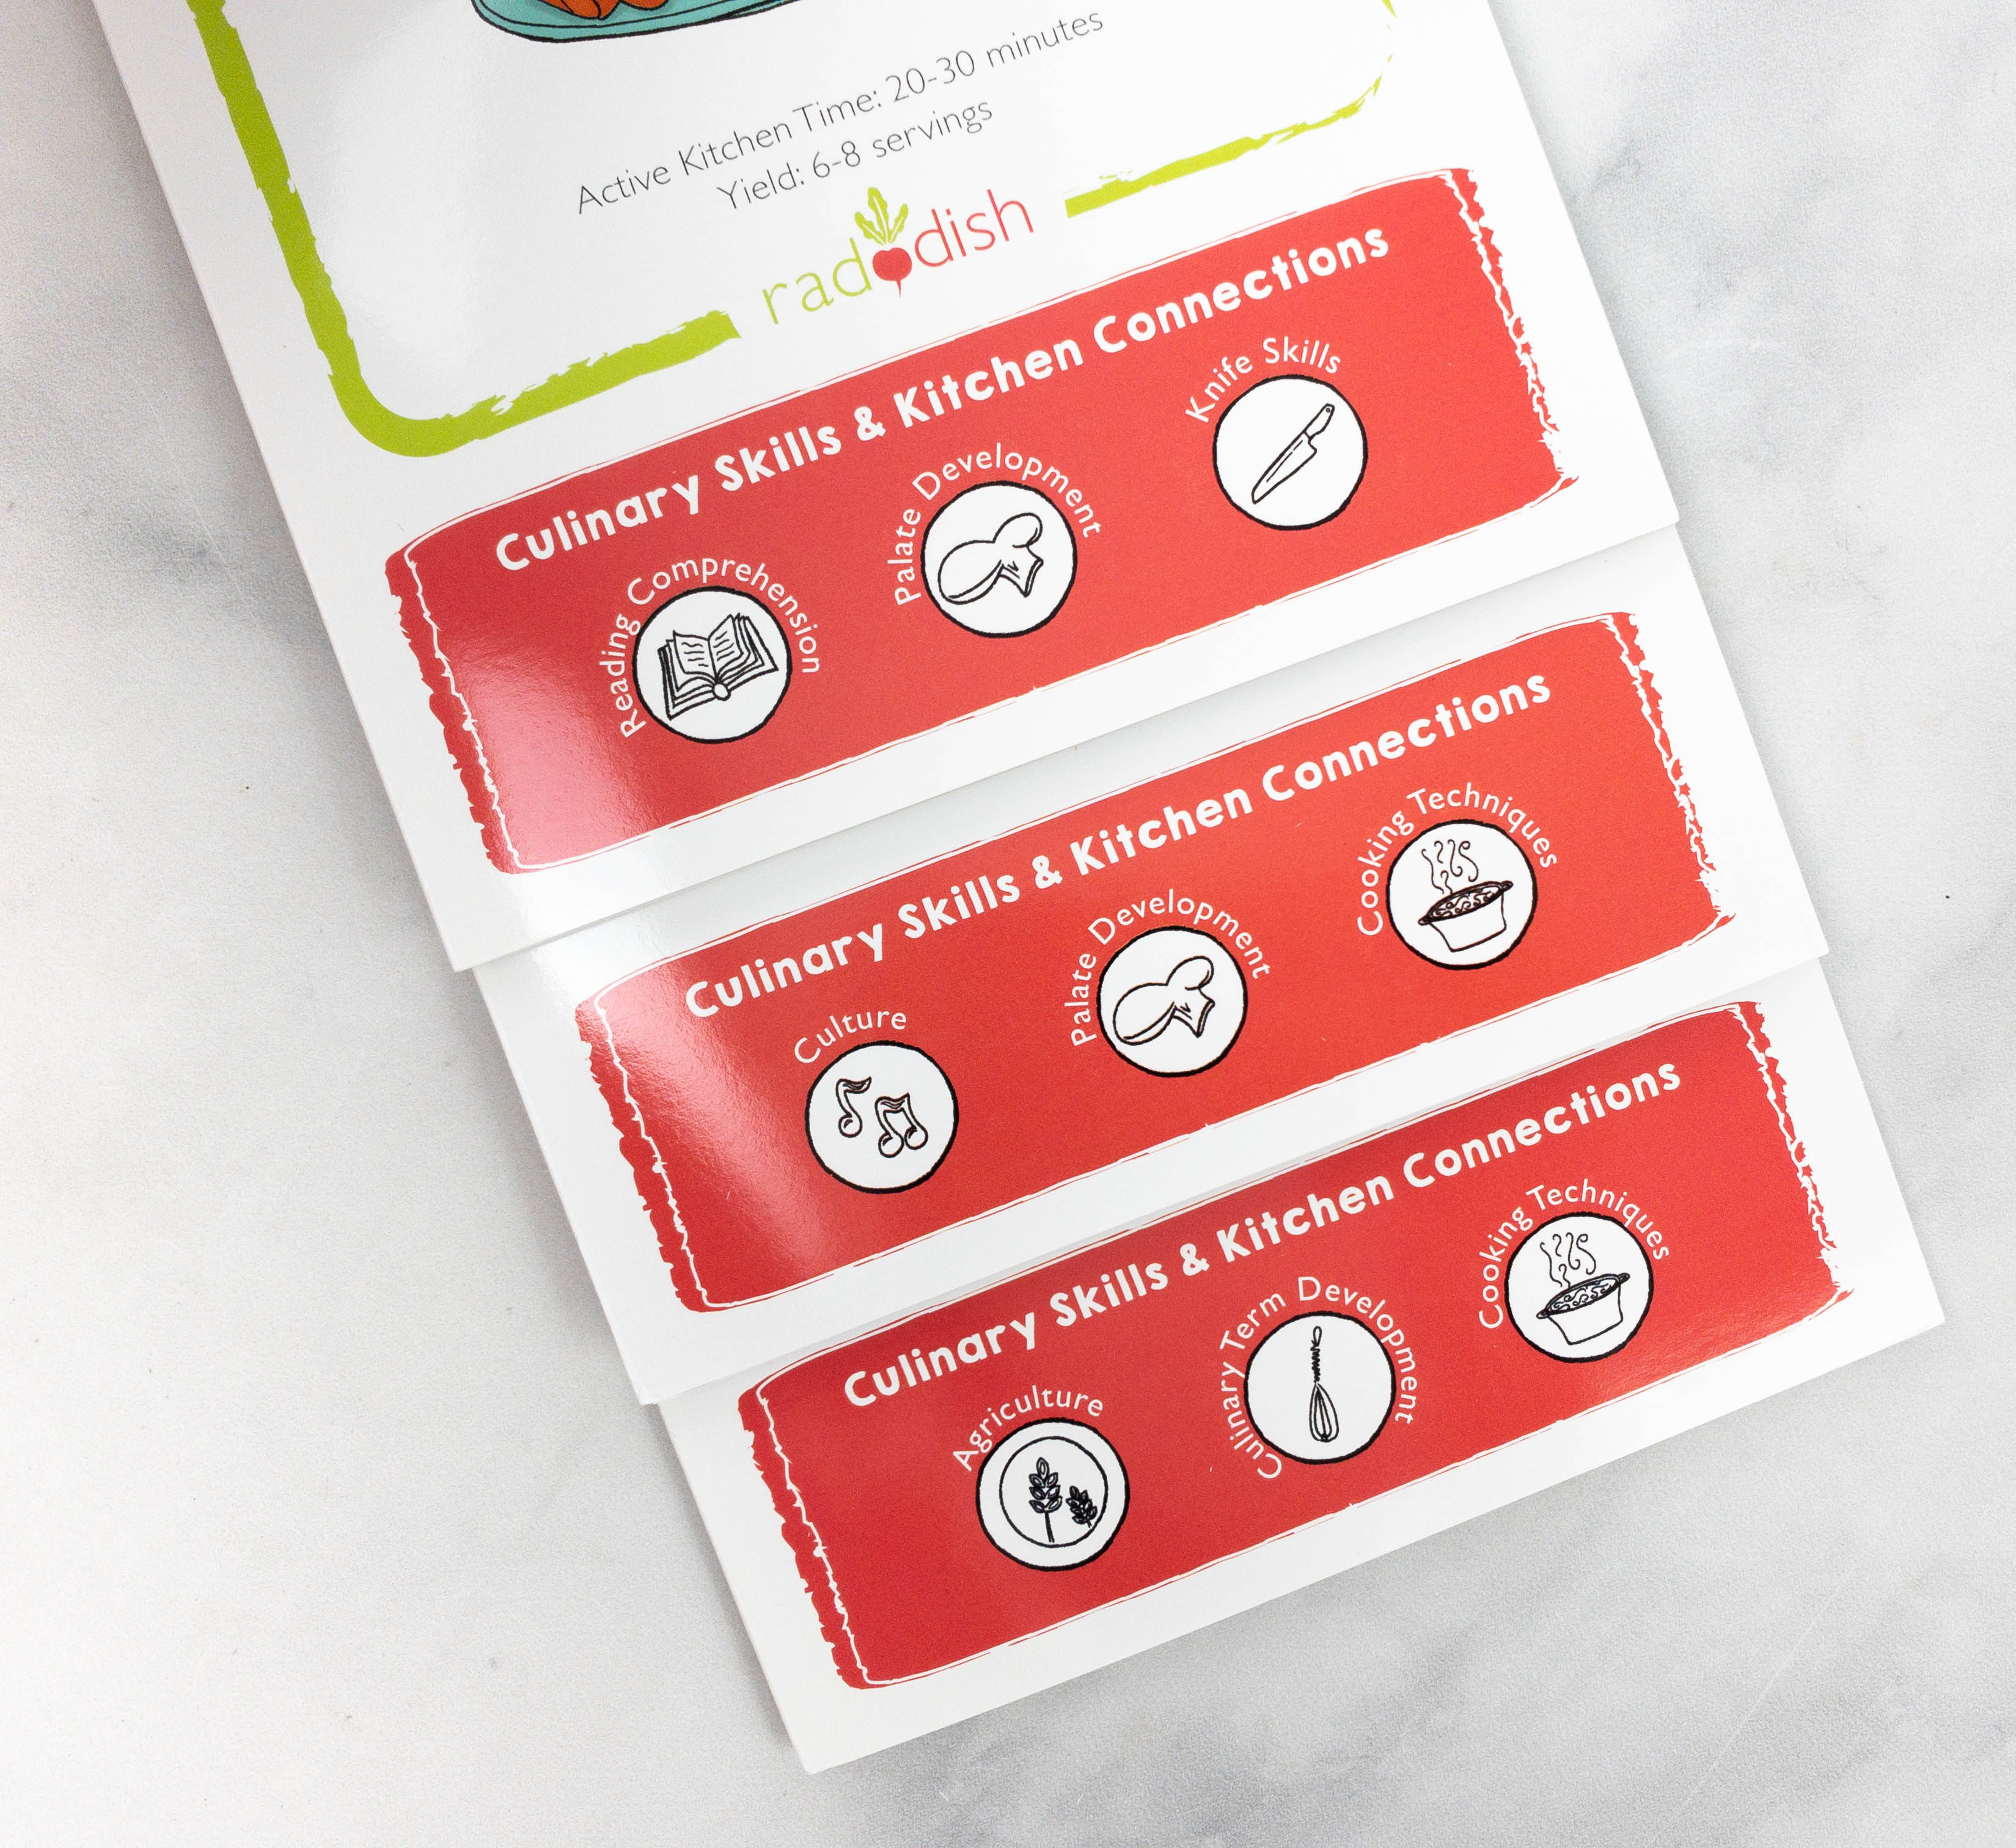
Each recipe has corresponding culinary skills and kitchen connections.
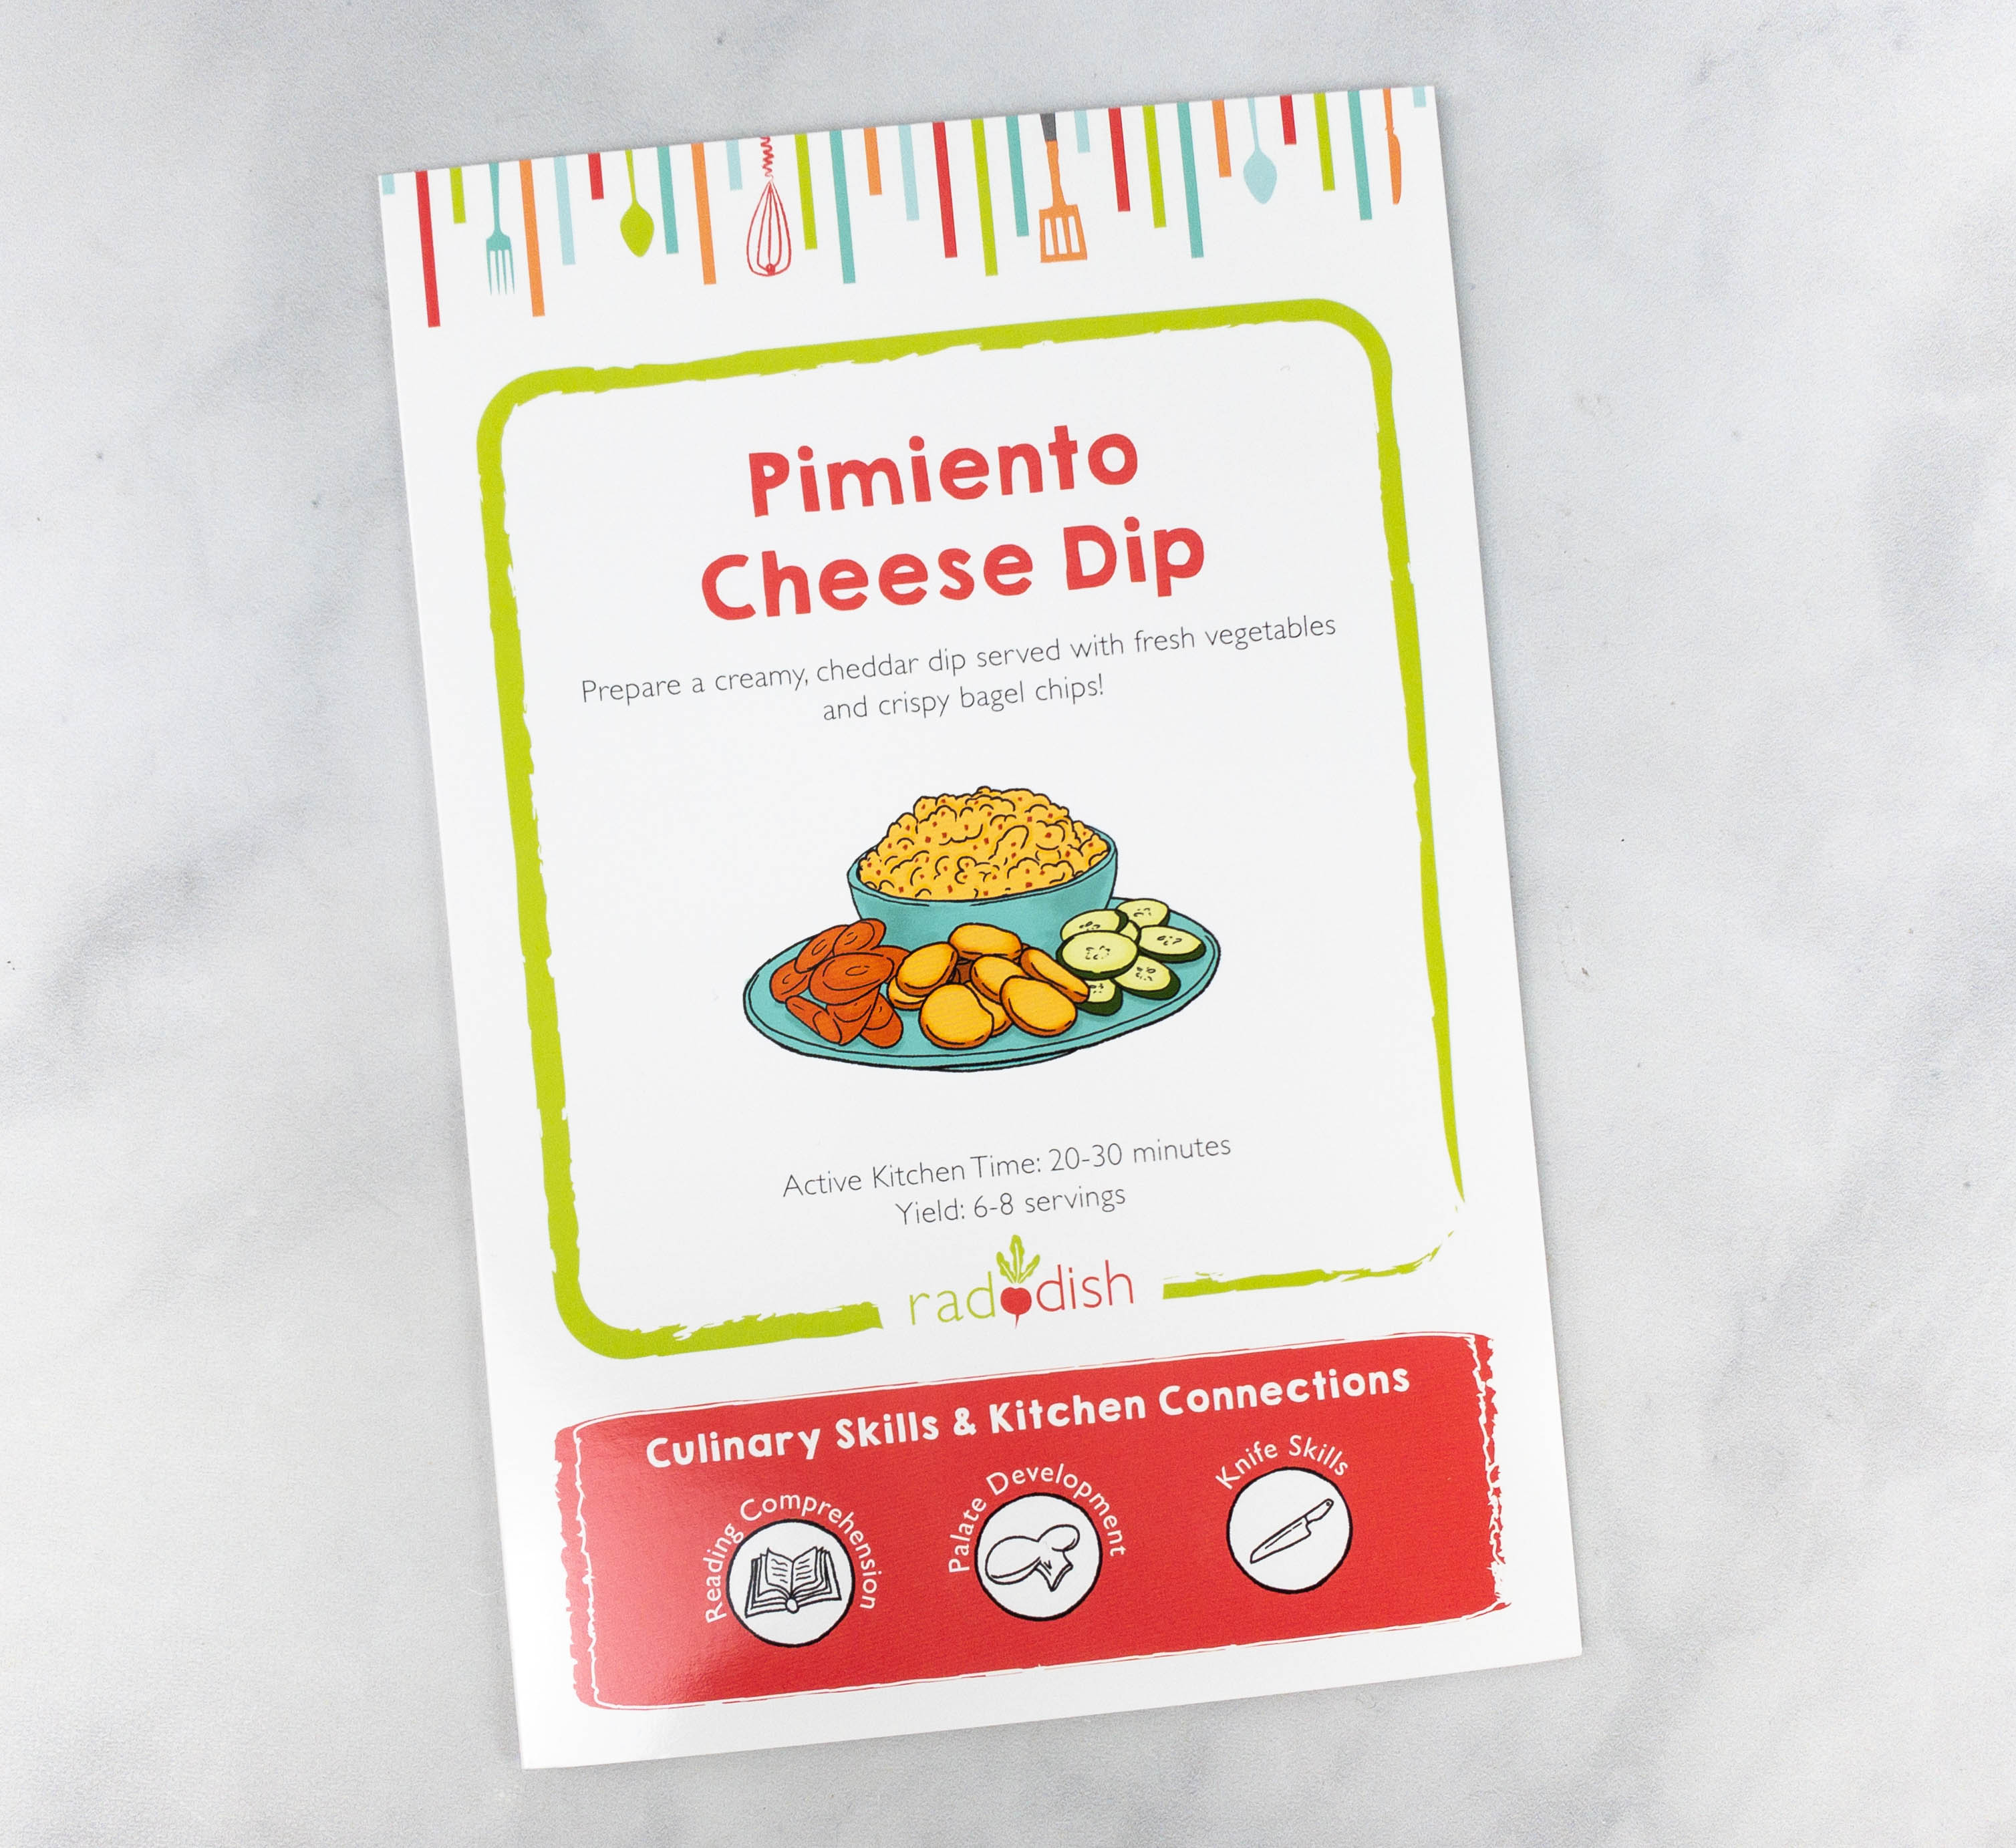
Pimiento Cheese Dip. The first recipe is for a creamy cheddar dip. It goes well with vegetables and chips!
Active Kitchen Time: 20-30 minutes
Yield: 6-8 servings

In this recipe, kids will learn how to identify kitchen knives and how to use them properly. The booklet also provided knife safety tips.
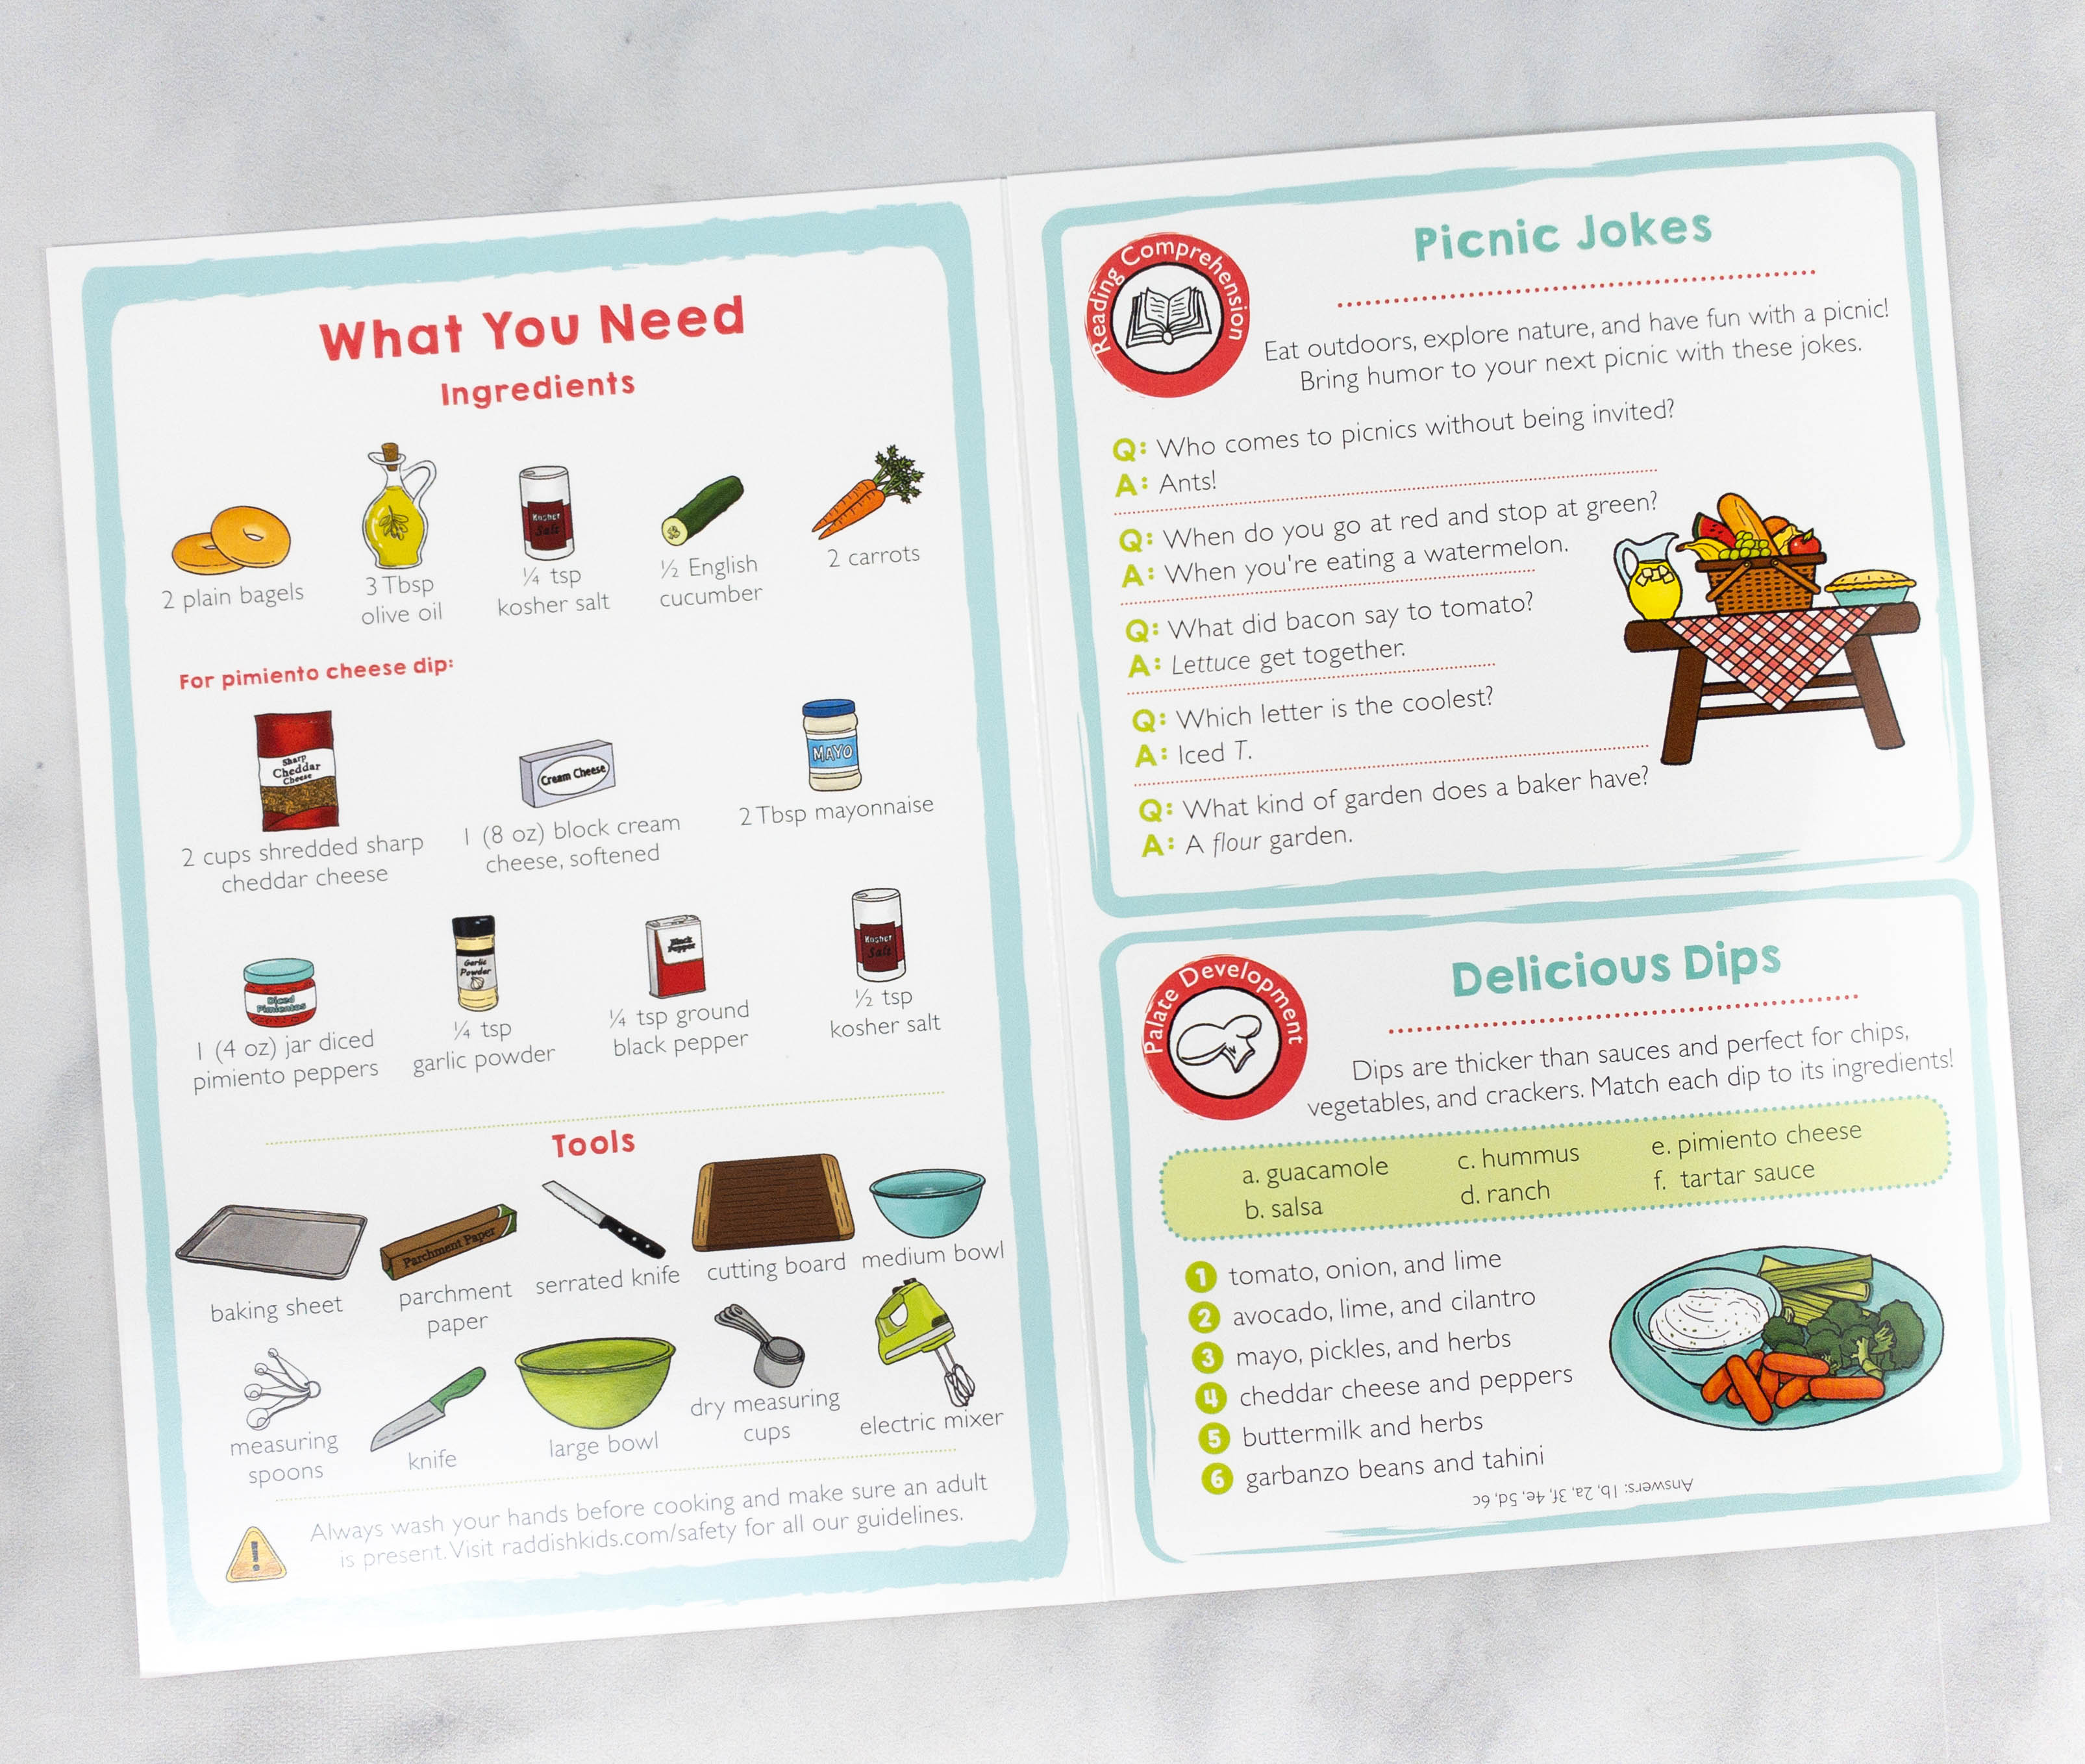
Inside the guide is a list of the ingredients and the needed tools. They even included some picnic jokes that the kids can share with the family for a good laugh, plus a matching activity!
The ingredients include plain bagels, olive oil, kosher salt, English cucumber, and carrots. For the pimiento cheese dip, you will need shredded sharp cheddar cheese, a block of cream cheese, mayonnaise, diced pimiento peppers, garlic powder, ground black pepper, and kosher salt.
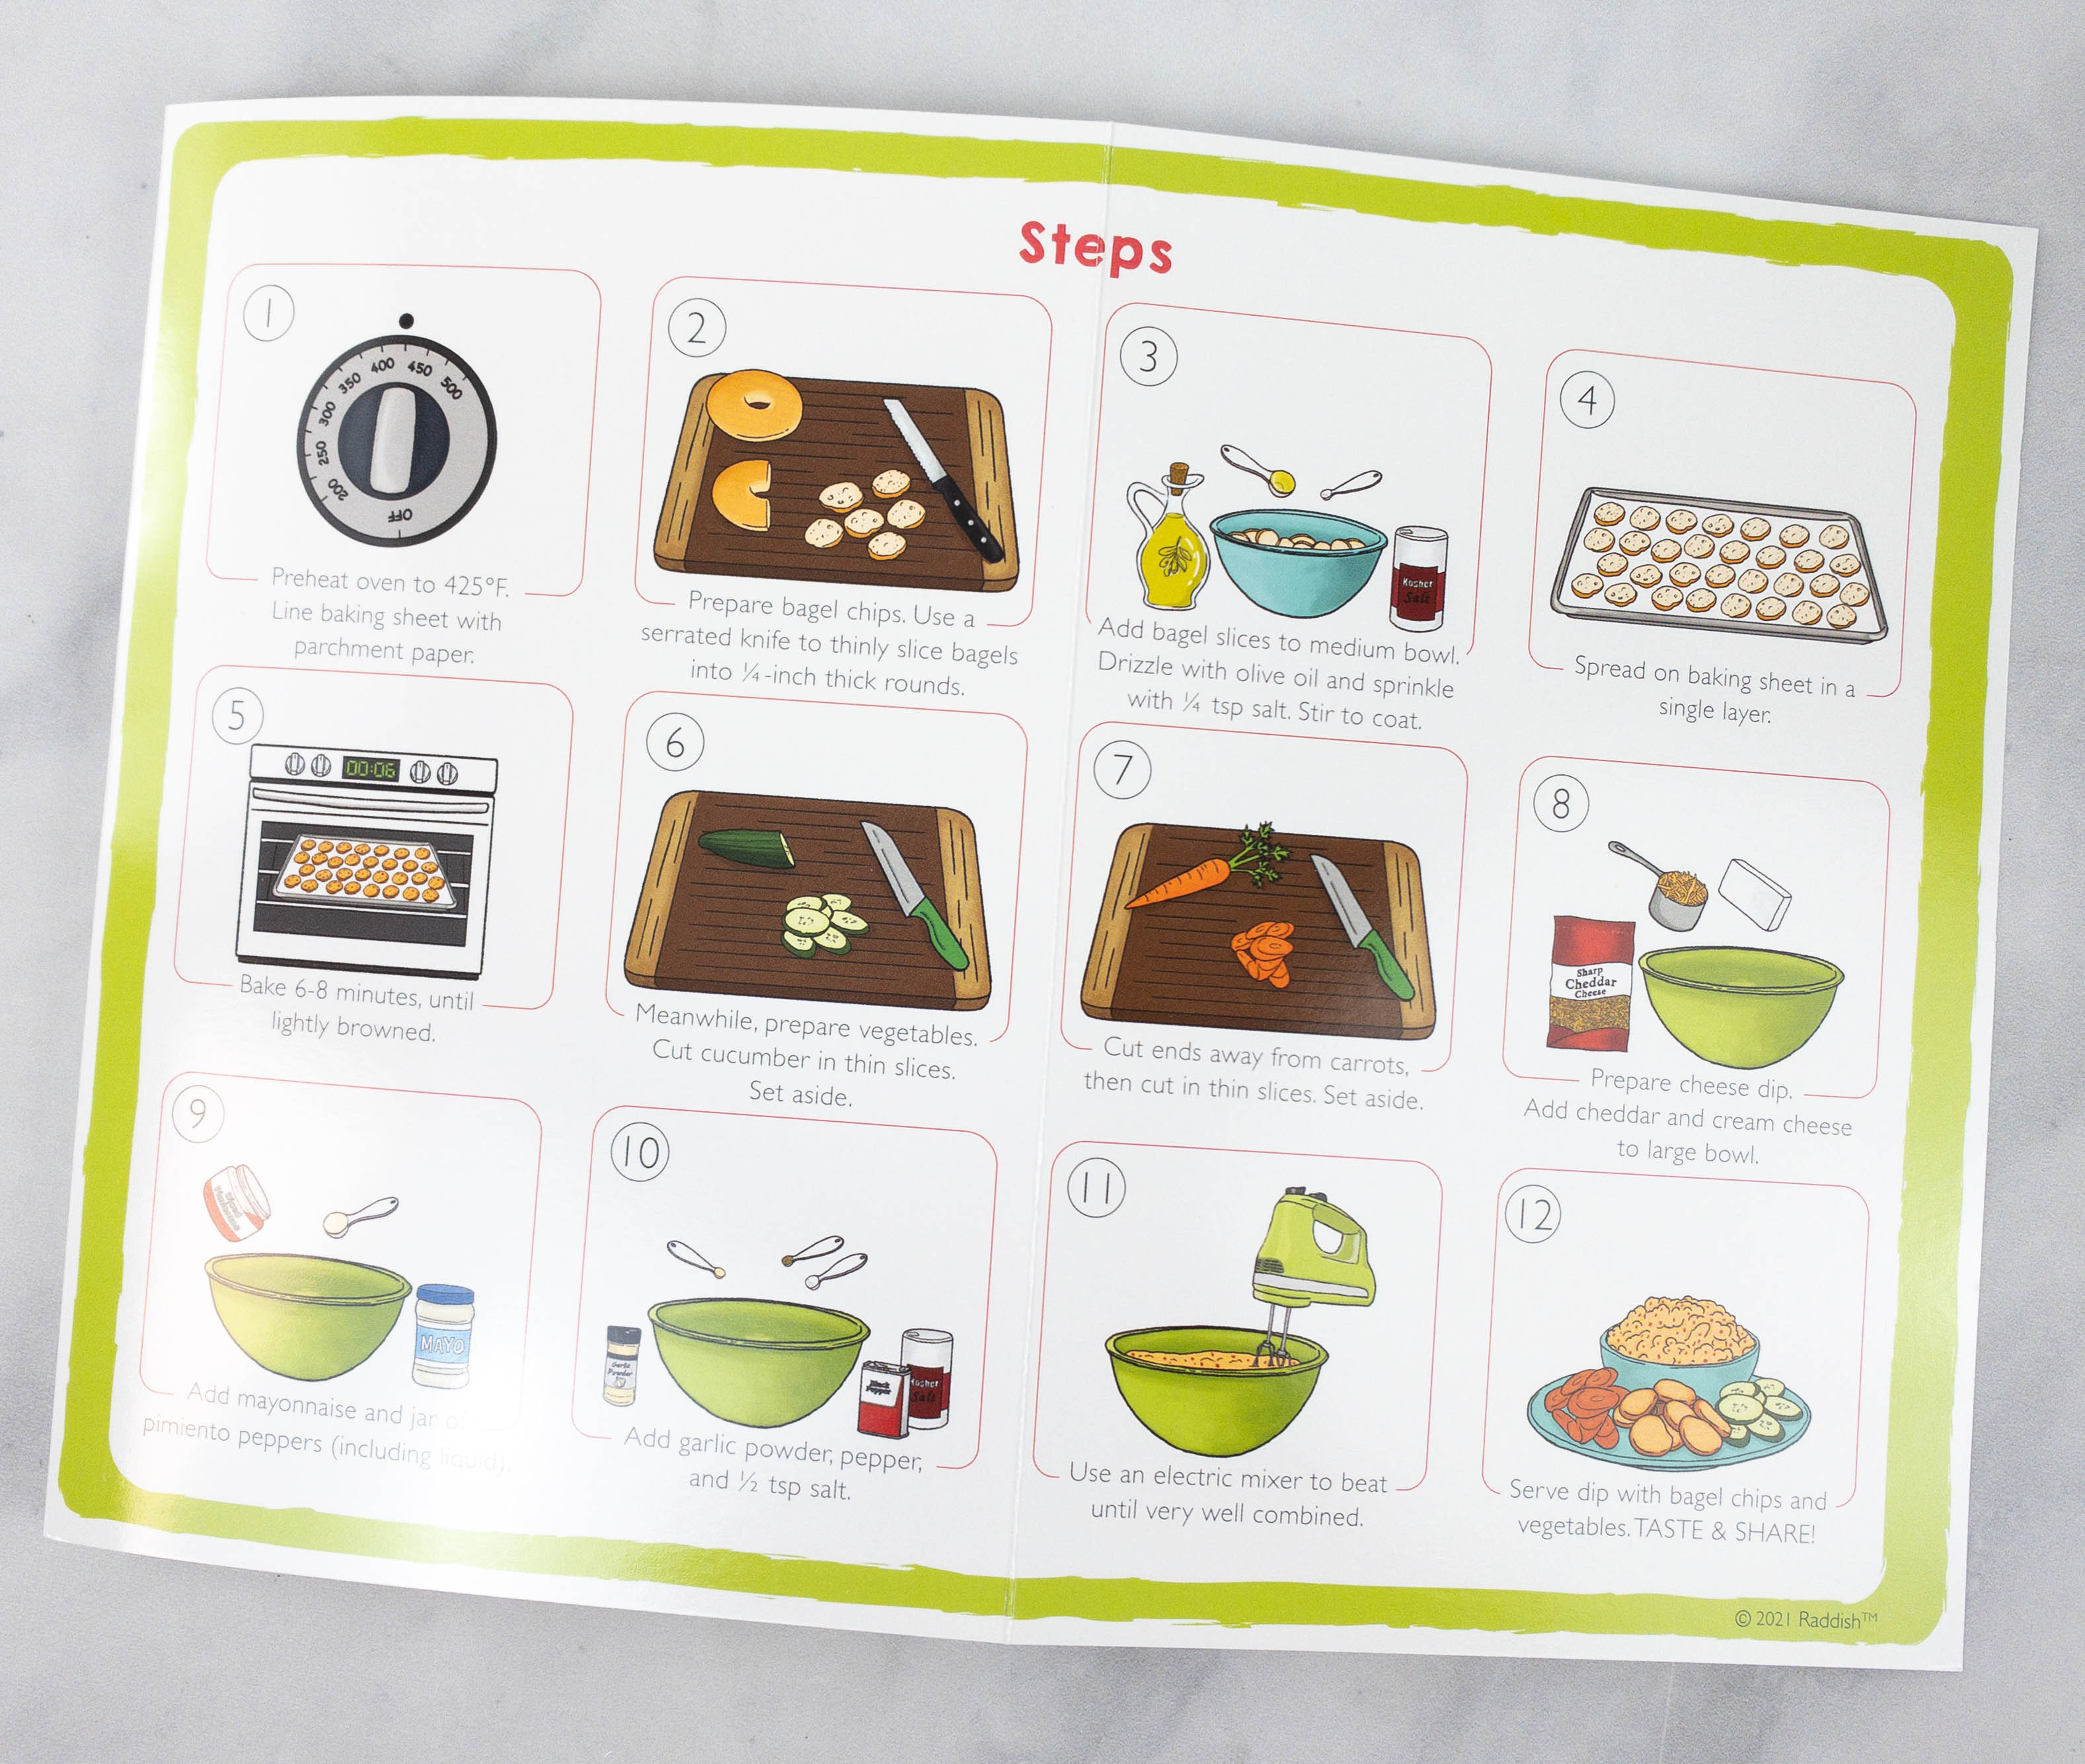
Each step in the recipe guide is accompanied by an illustration!
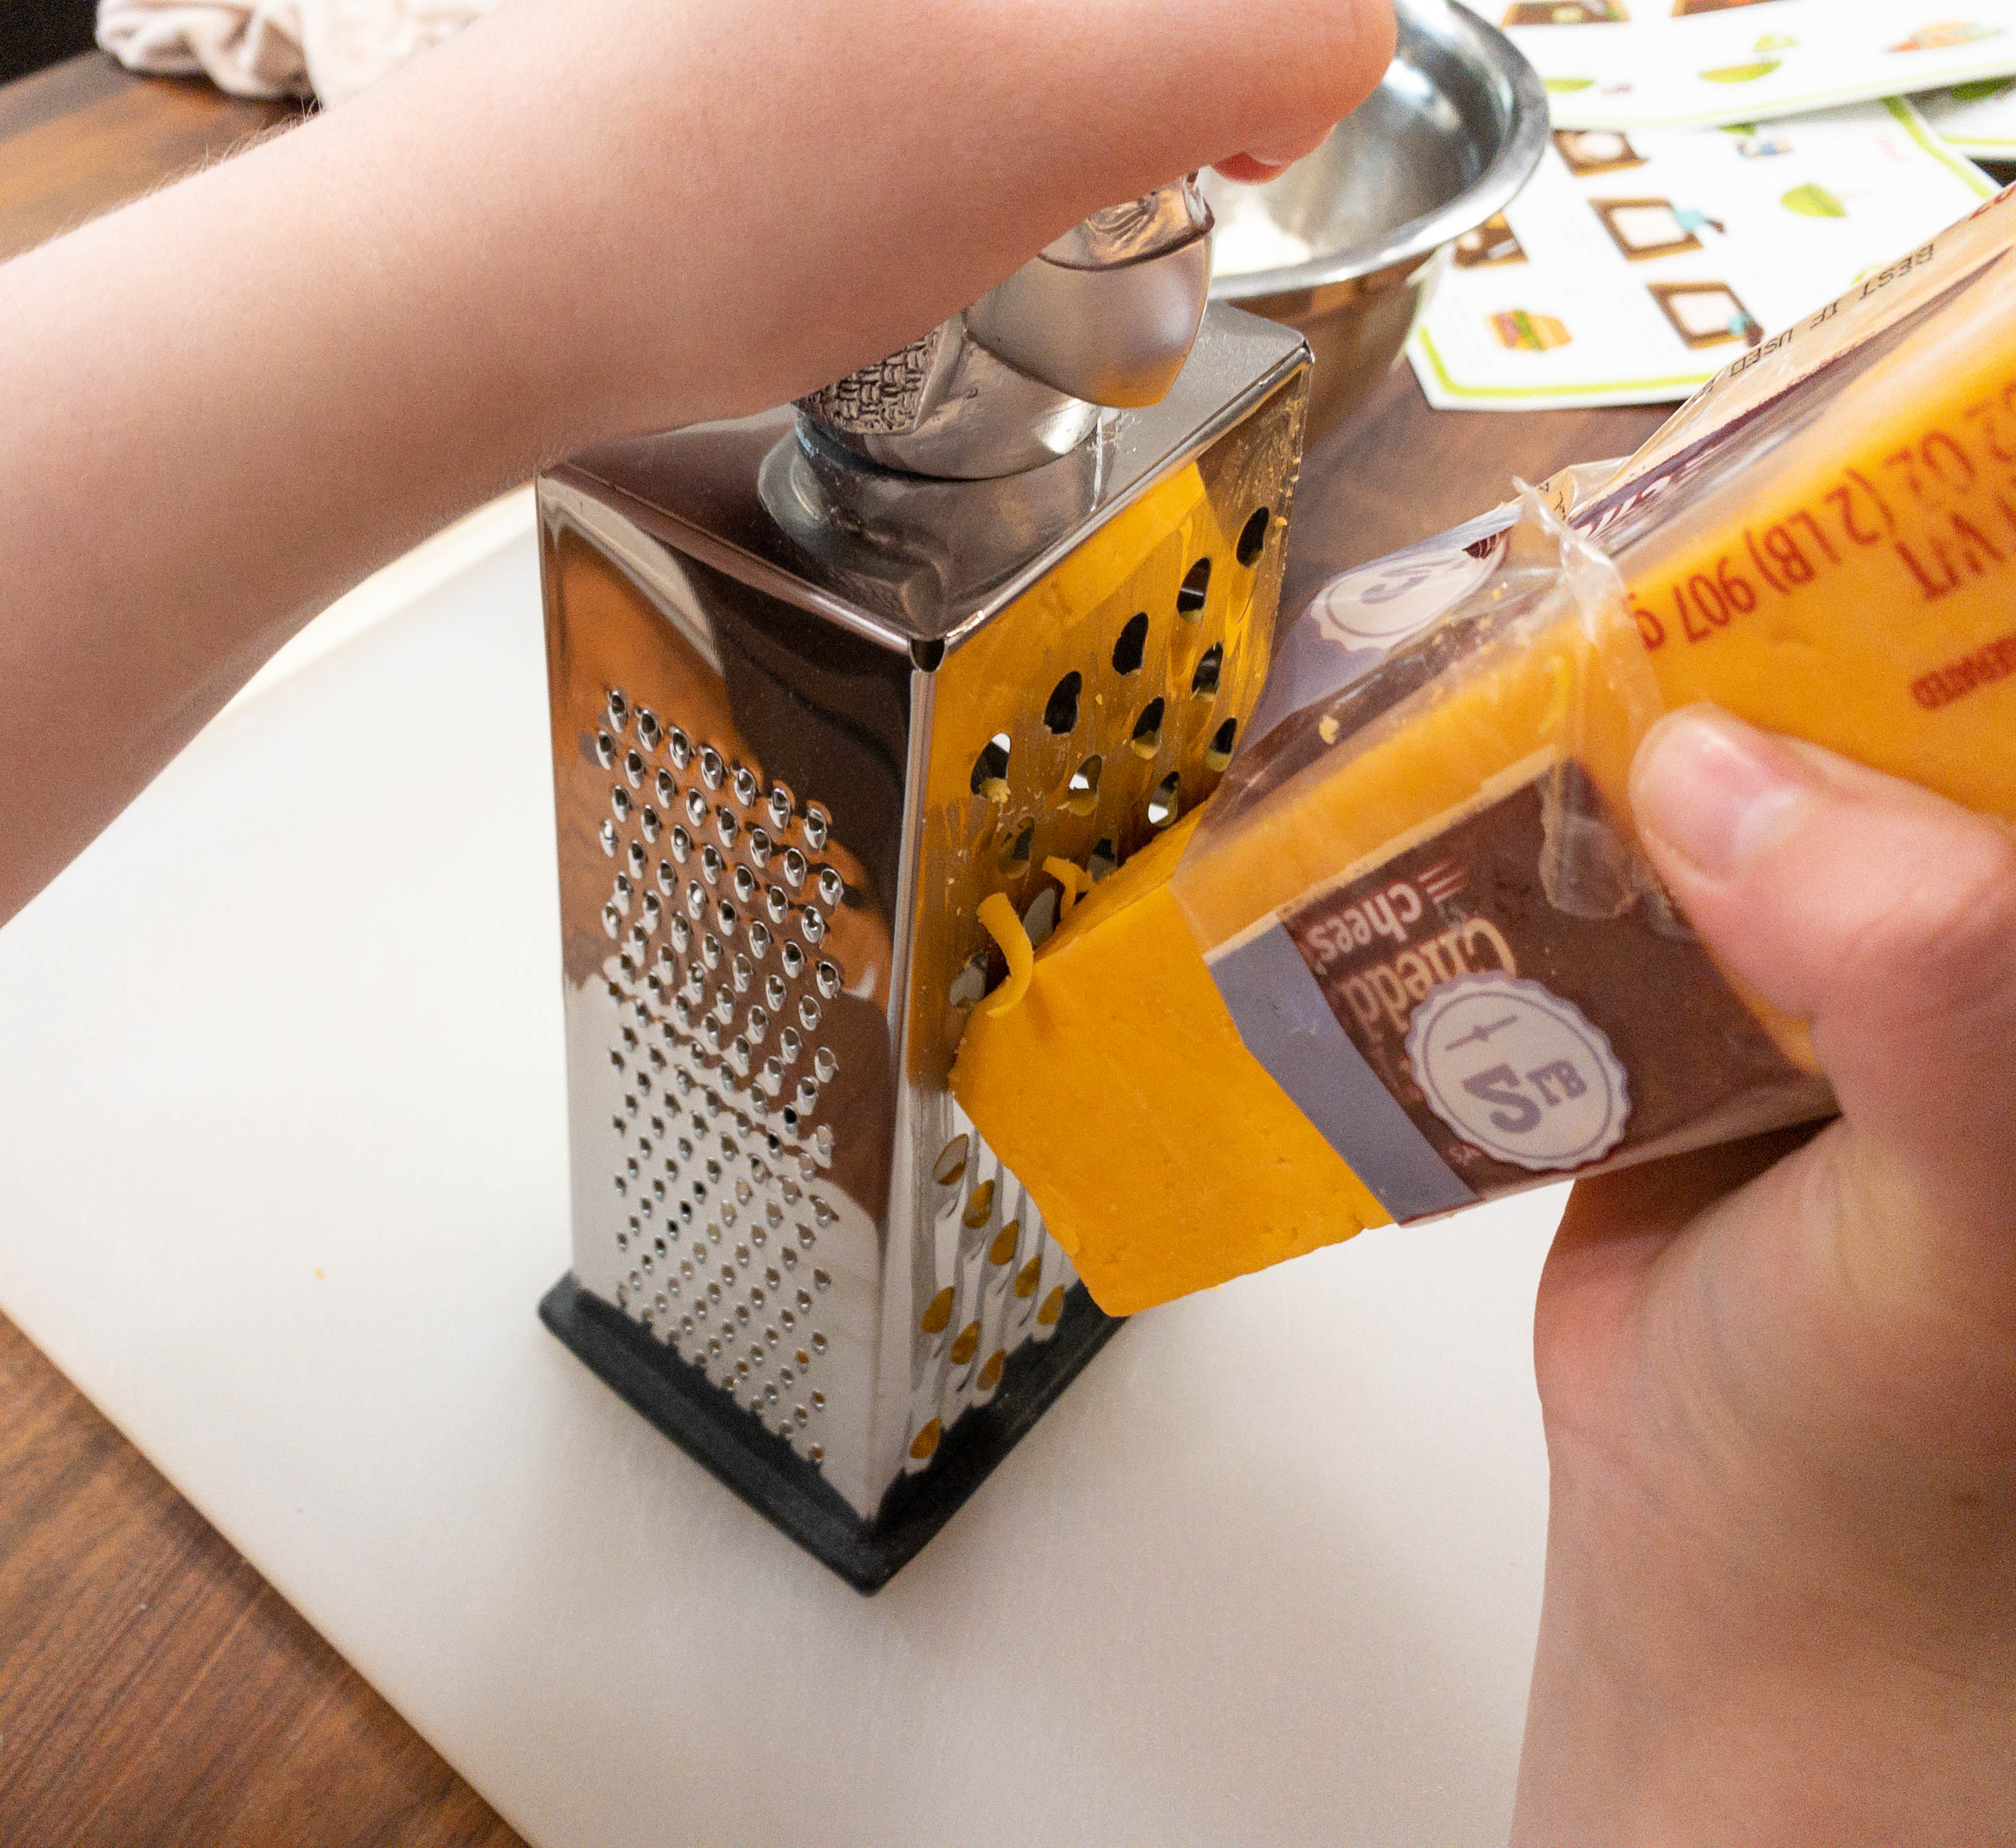
My kids started by shredding the block of sharp cheddar cheese.
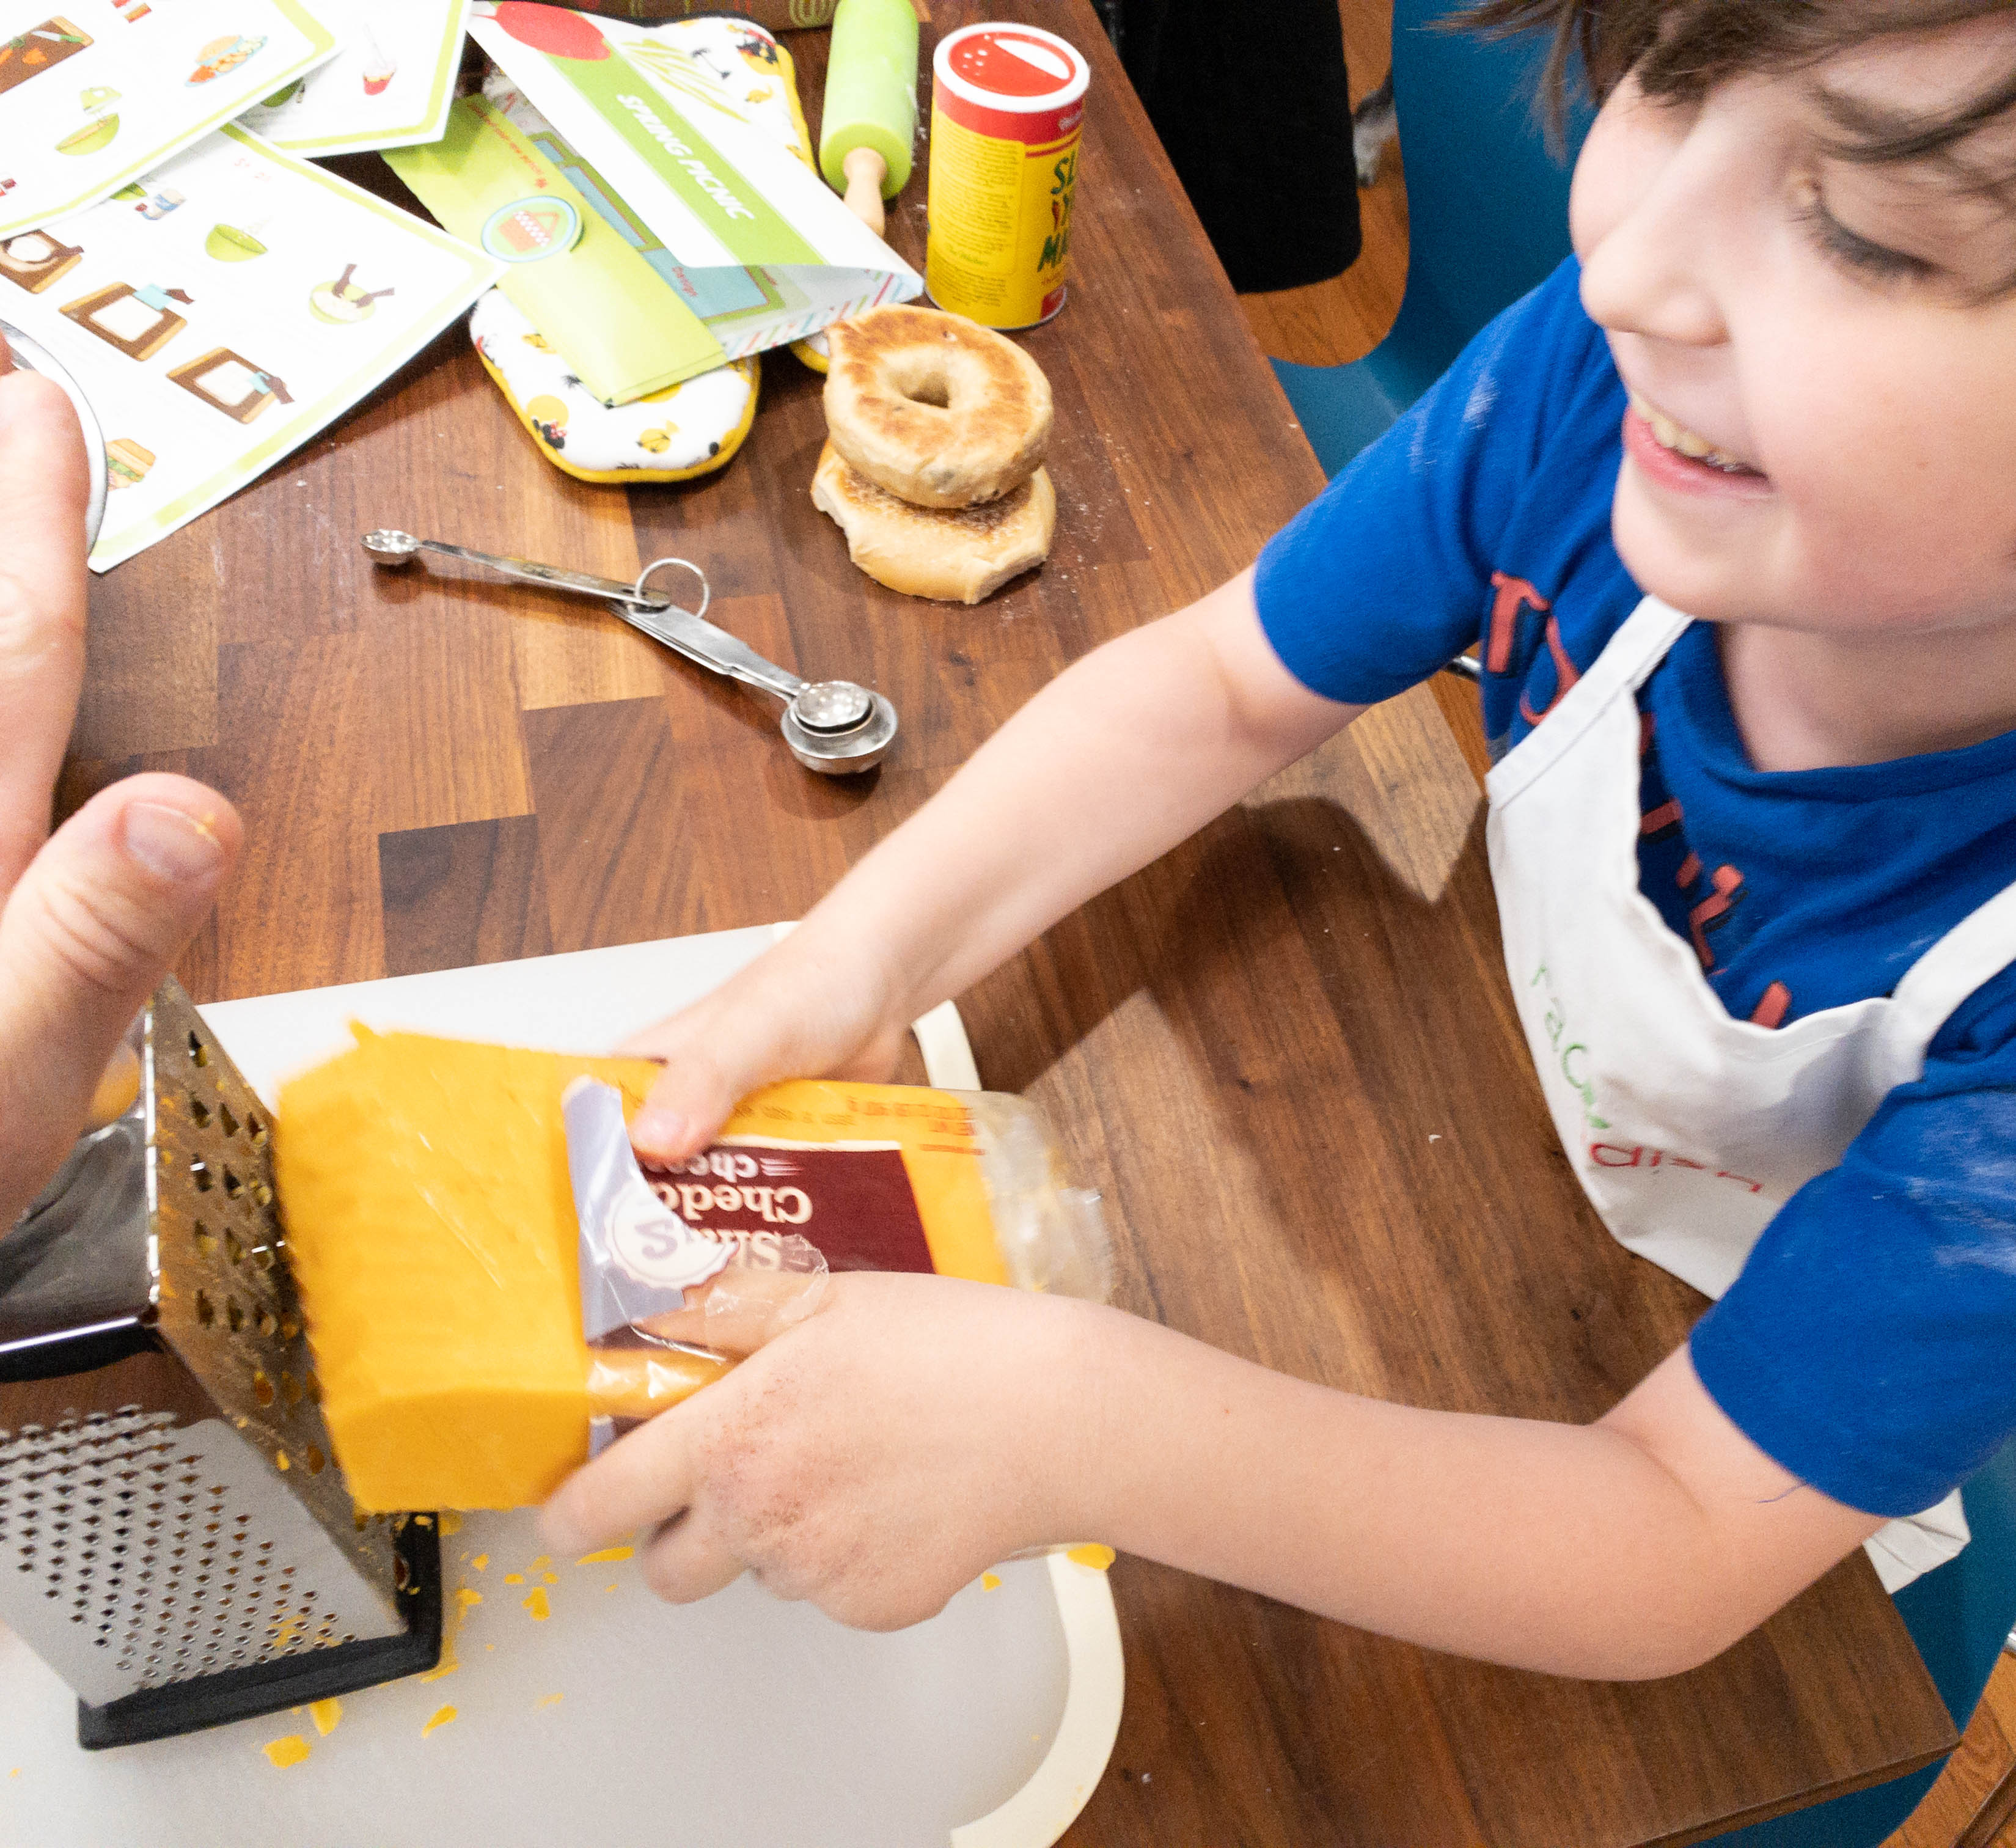
We have a big block of cheese so it was a bit challenging, but my son had fun! The next step is to prepare the bagel chips by tossing them in olive oil and adding some salt. Then, pop them in a preheated oven for about 6-8 minutes until they are slightly browned. Next, slice the cucumbers and carrots thinly and set them aside.
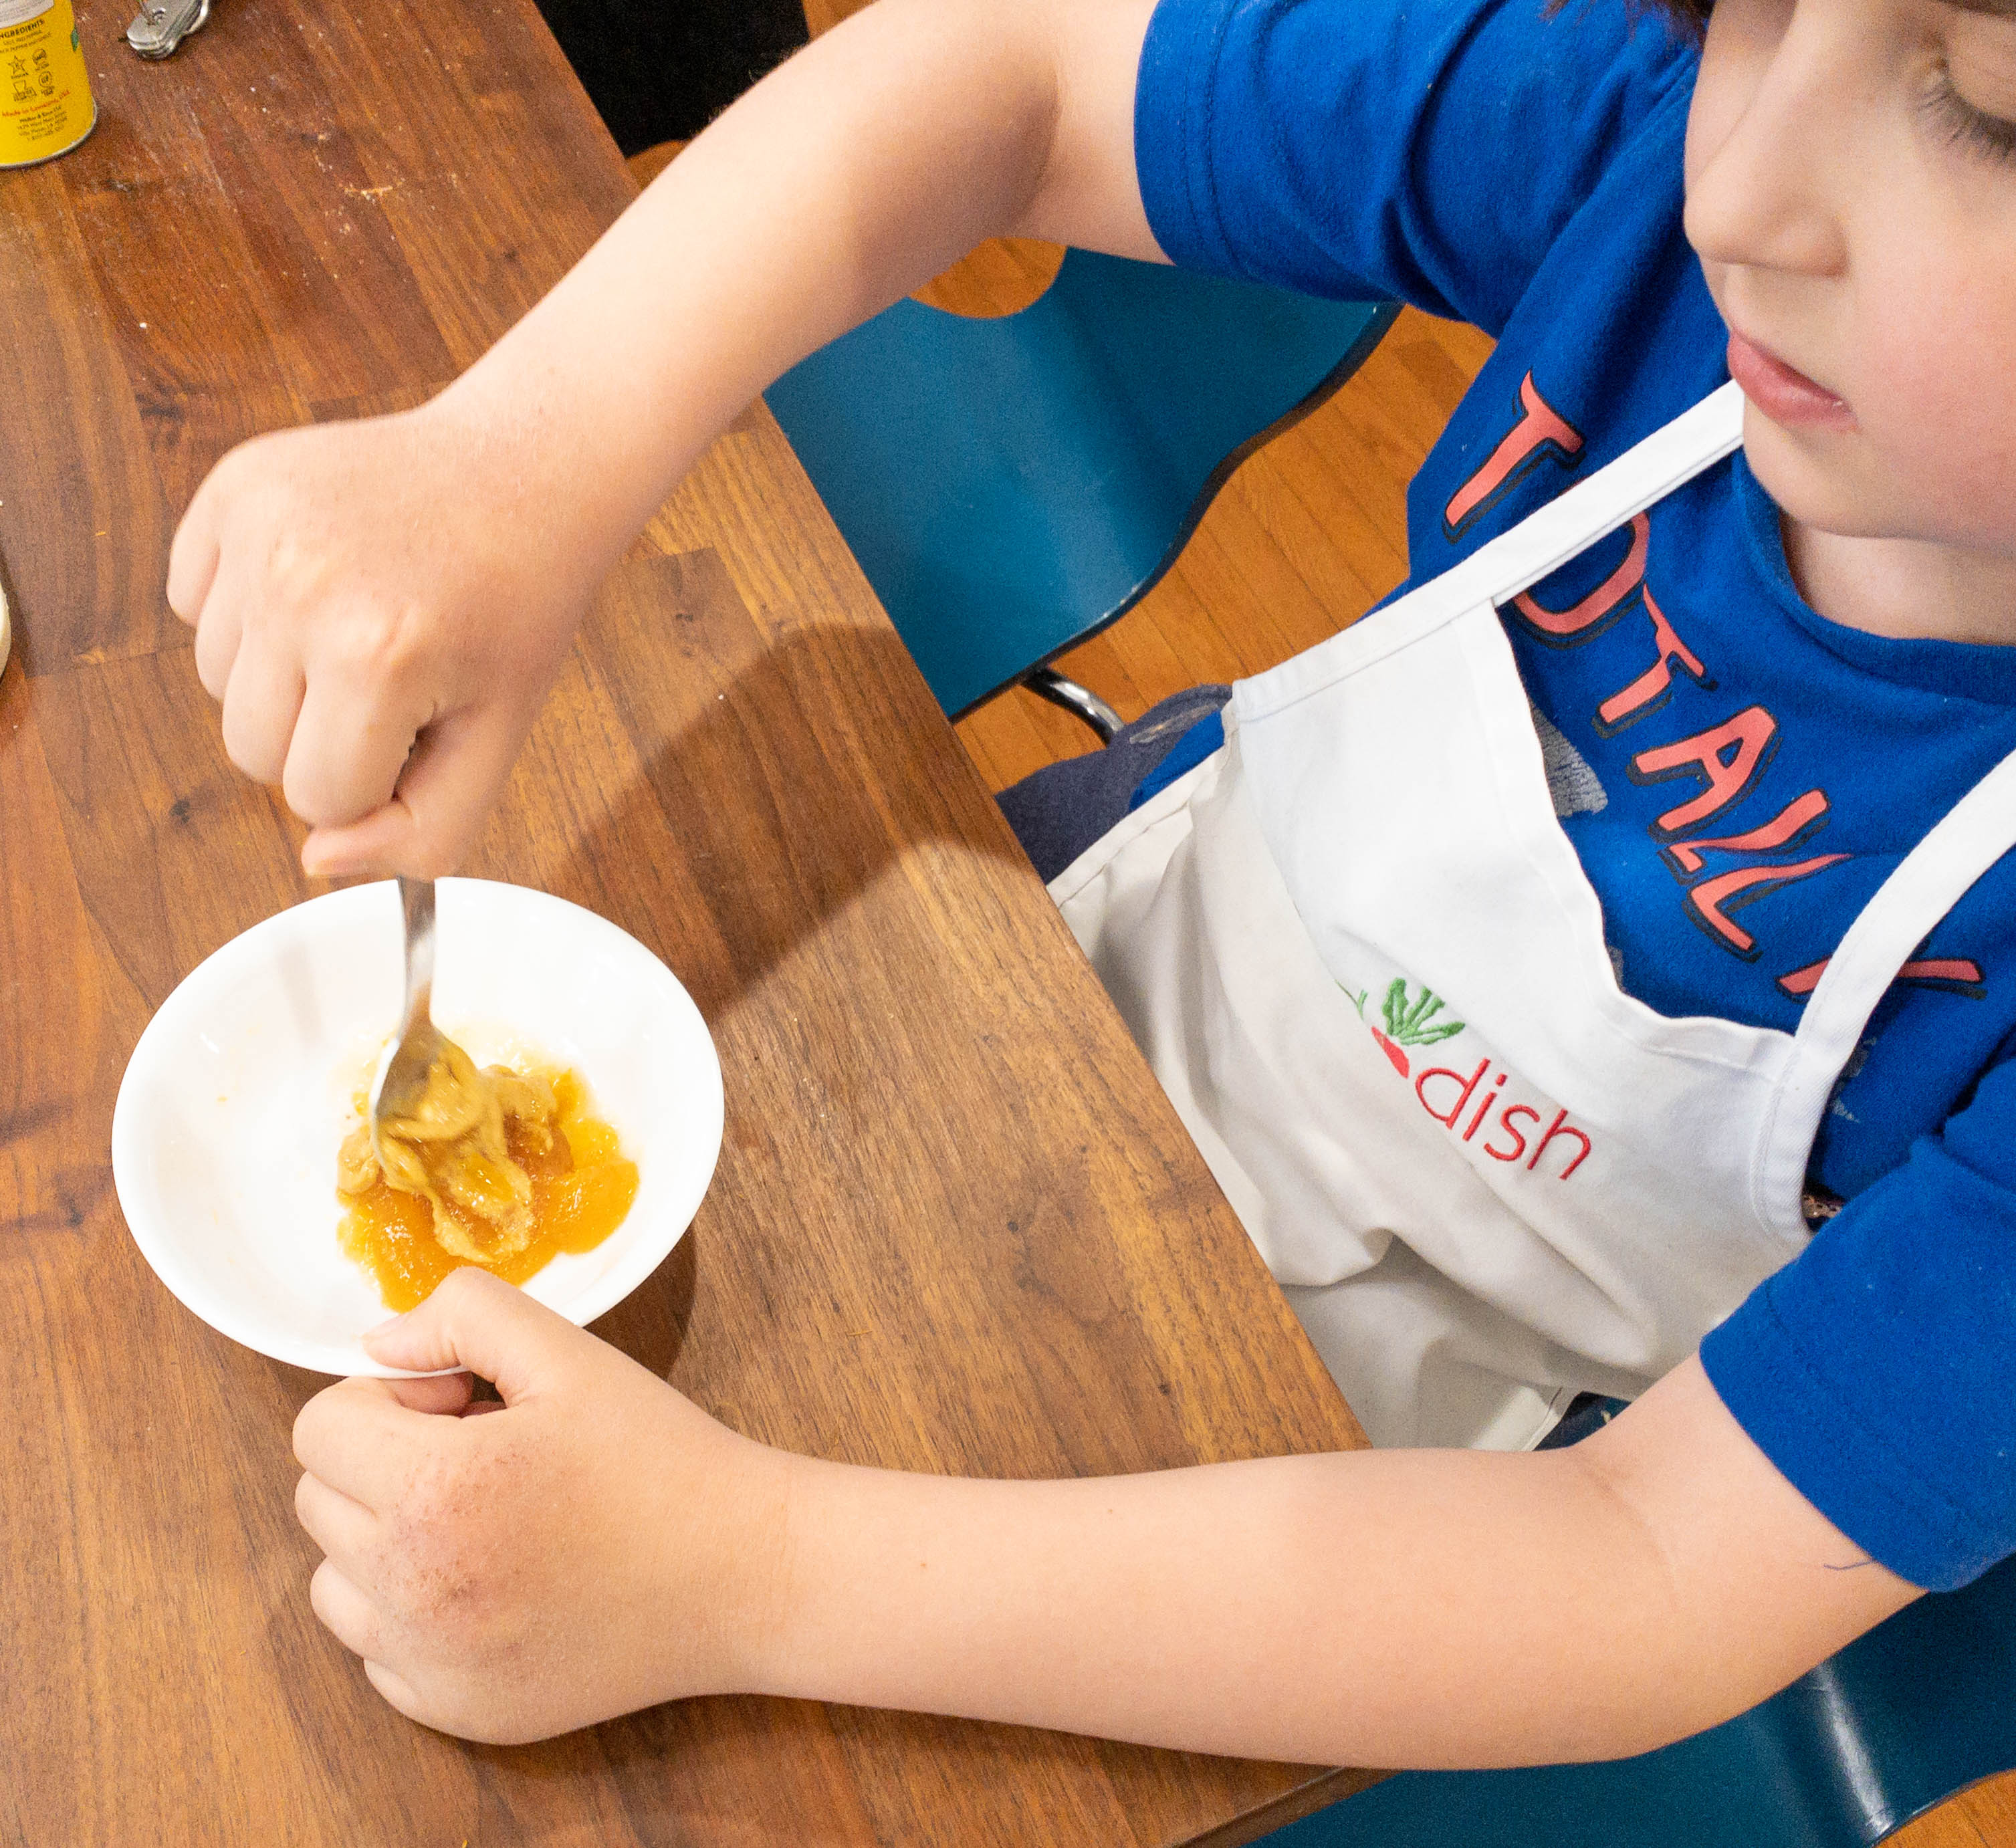
When everything is ready, combine the shredded cheddar cheese, cream cheese, mayonnaise, diced pimiento peppers, salt, pepper, and garlic powder in one container and mix well. You can use an electric mixer to make sure everything is fully combined.
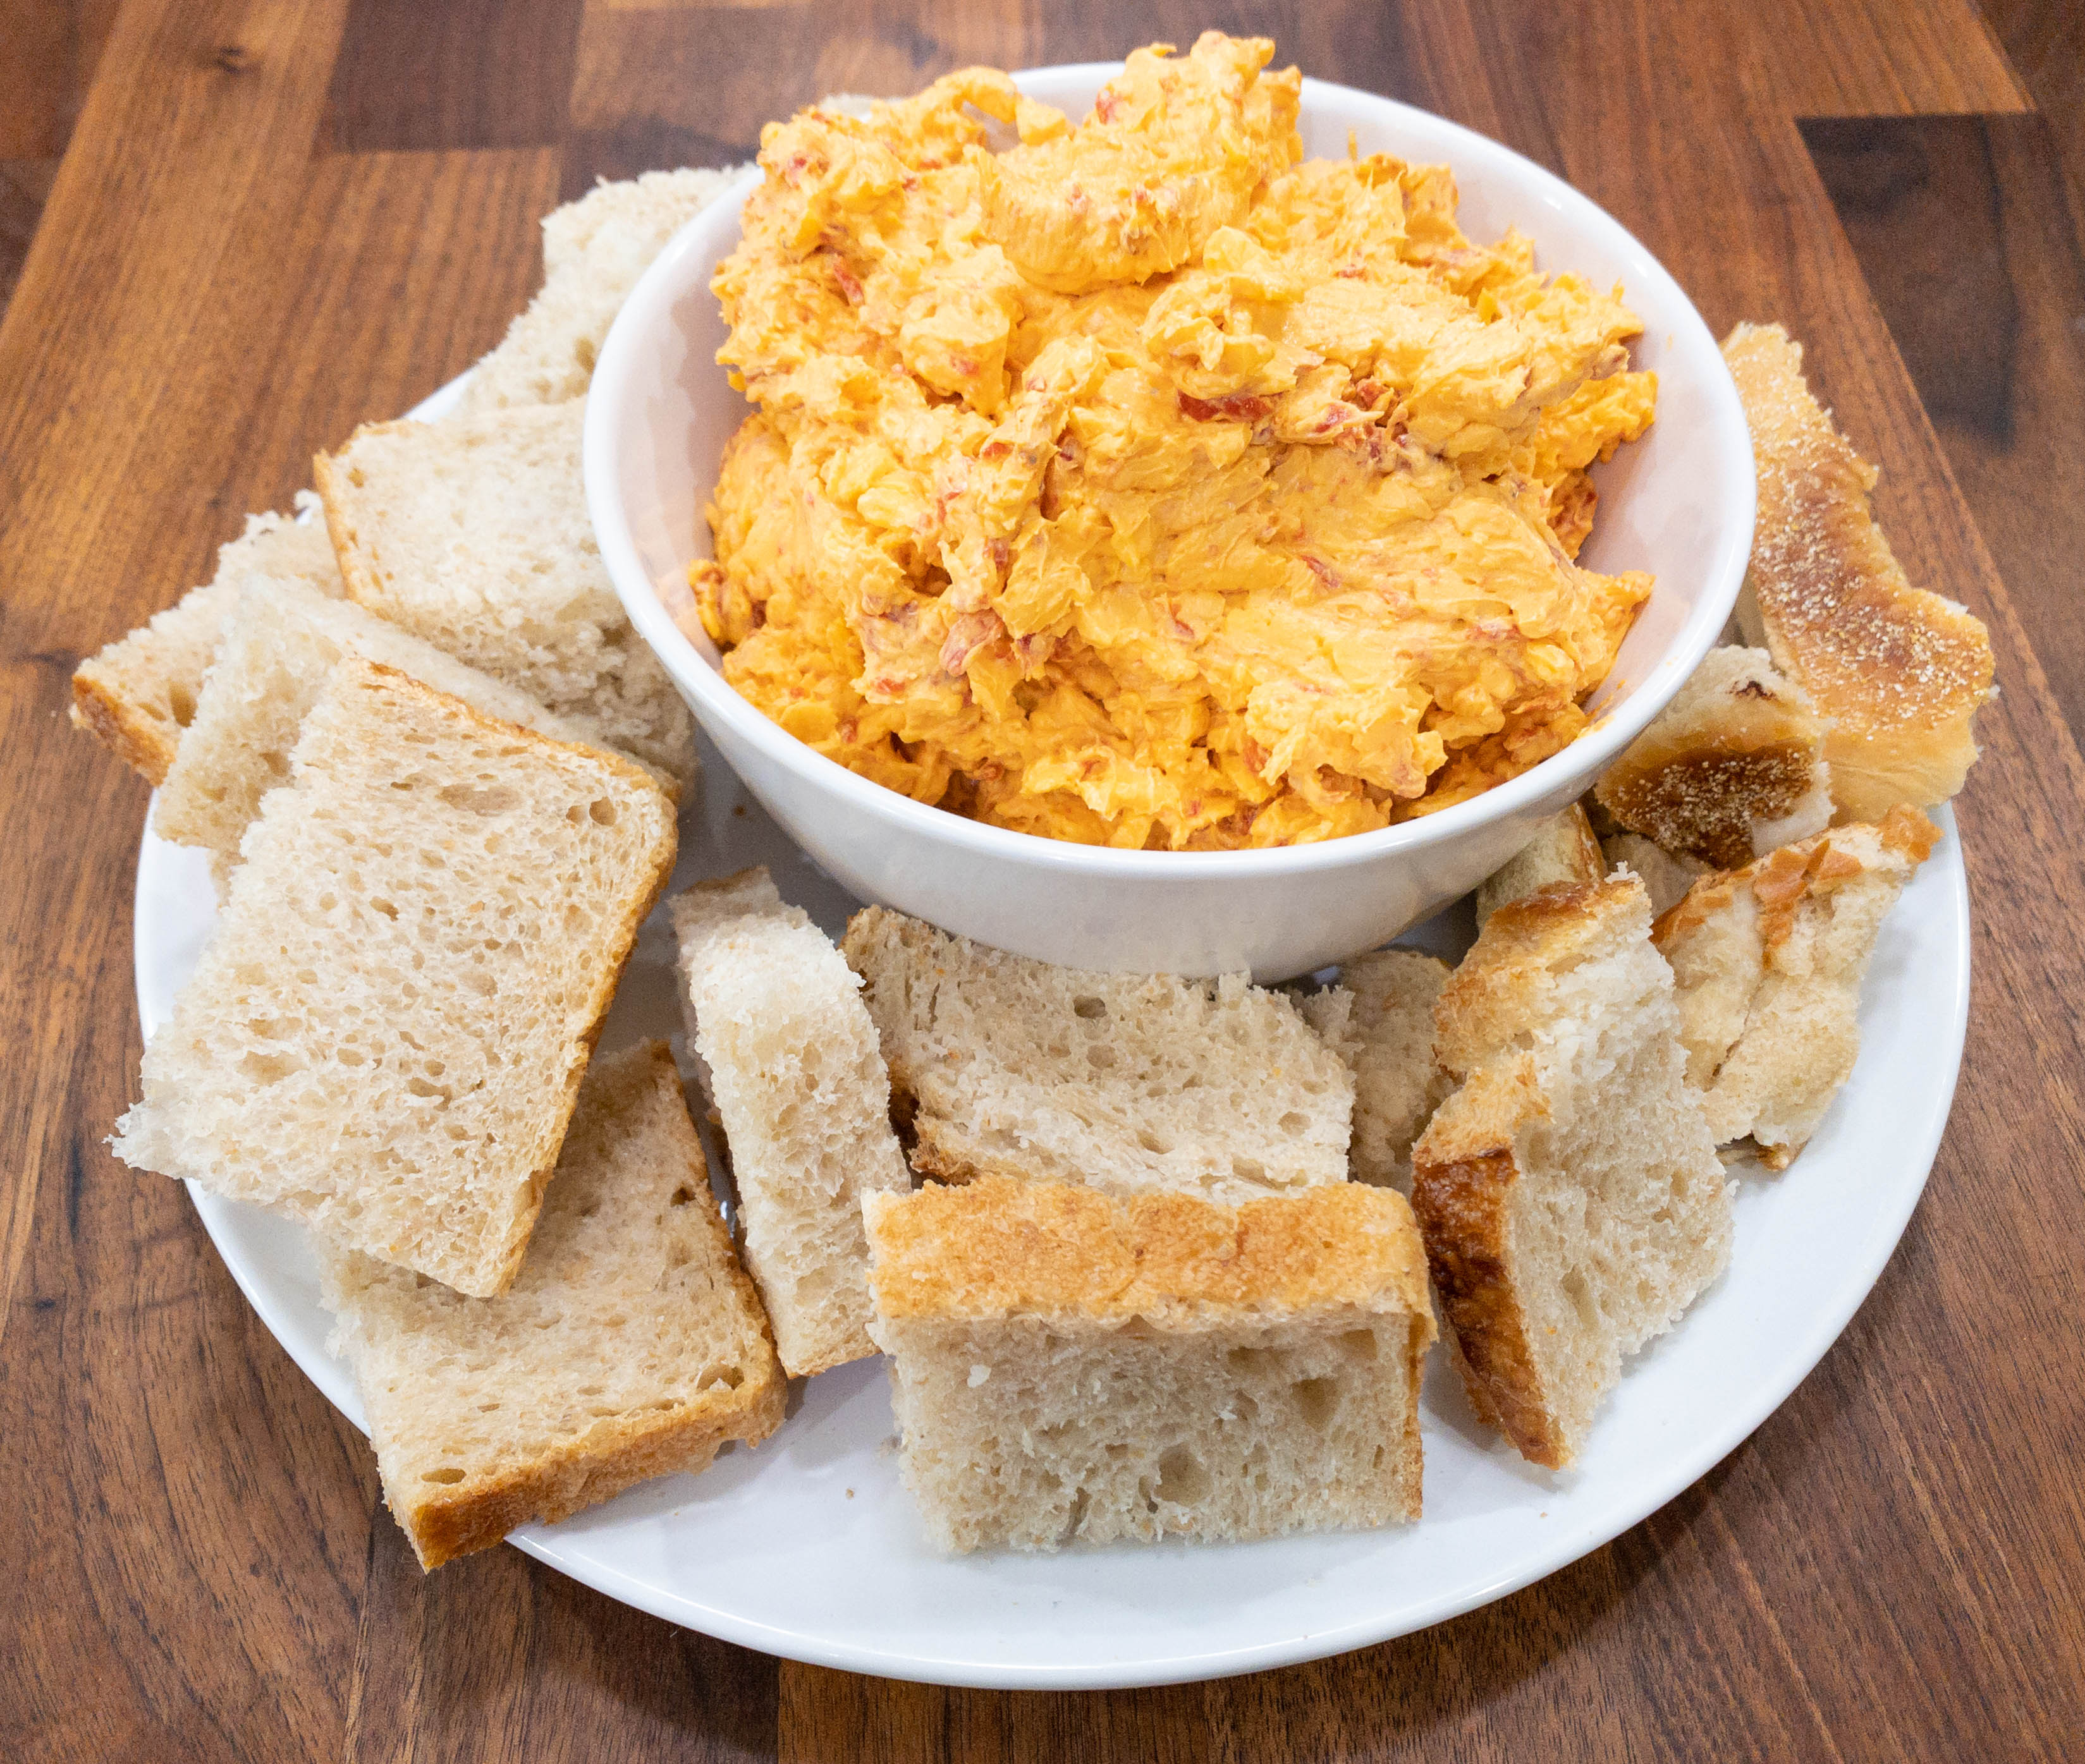
Here’s the finished cheese dip! It’s good, so it was an instant hit with the whole family. We’ve already made this recipe twice!
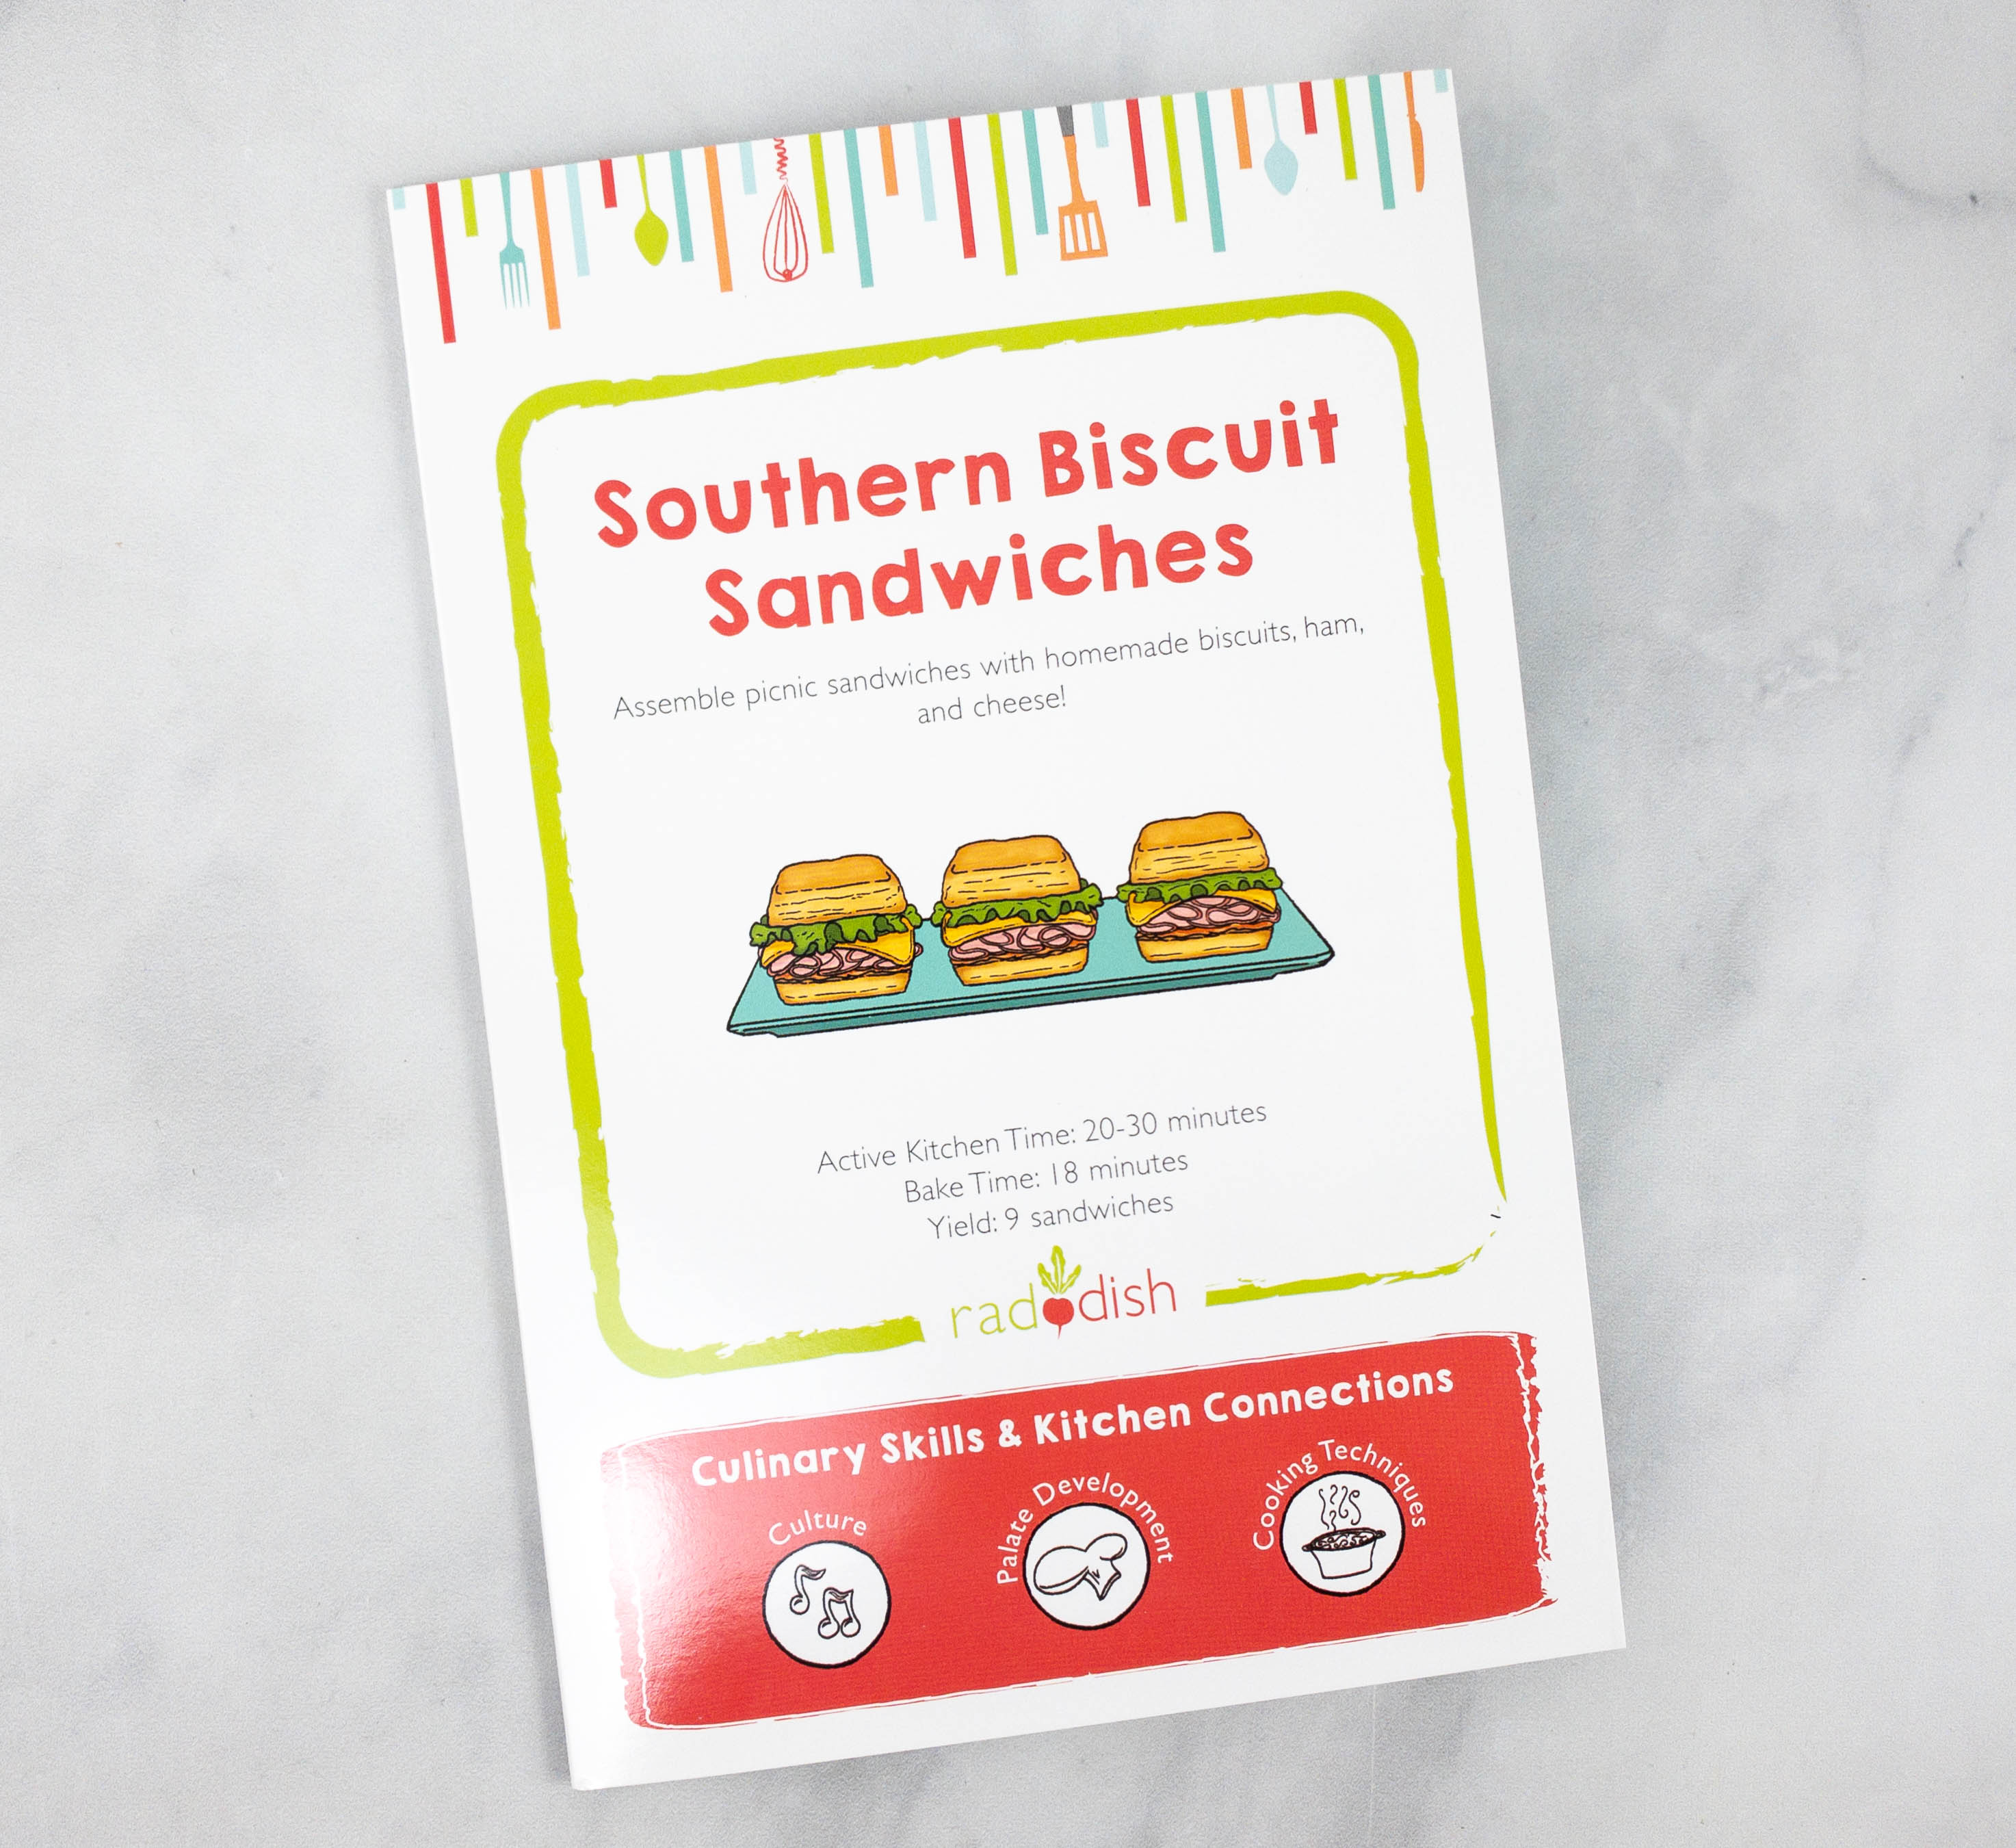
Southern Biscuit Sandwiches. The next recipe involves baking, so my kids were pretty excited!
Active Kitchen Time: 20-30 minutes
Bake Time: 18 minutes
Yield: 9 sandwiches
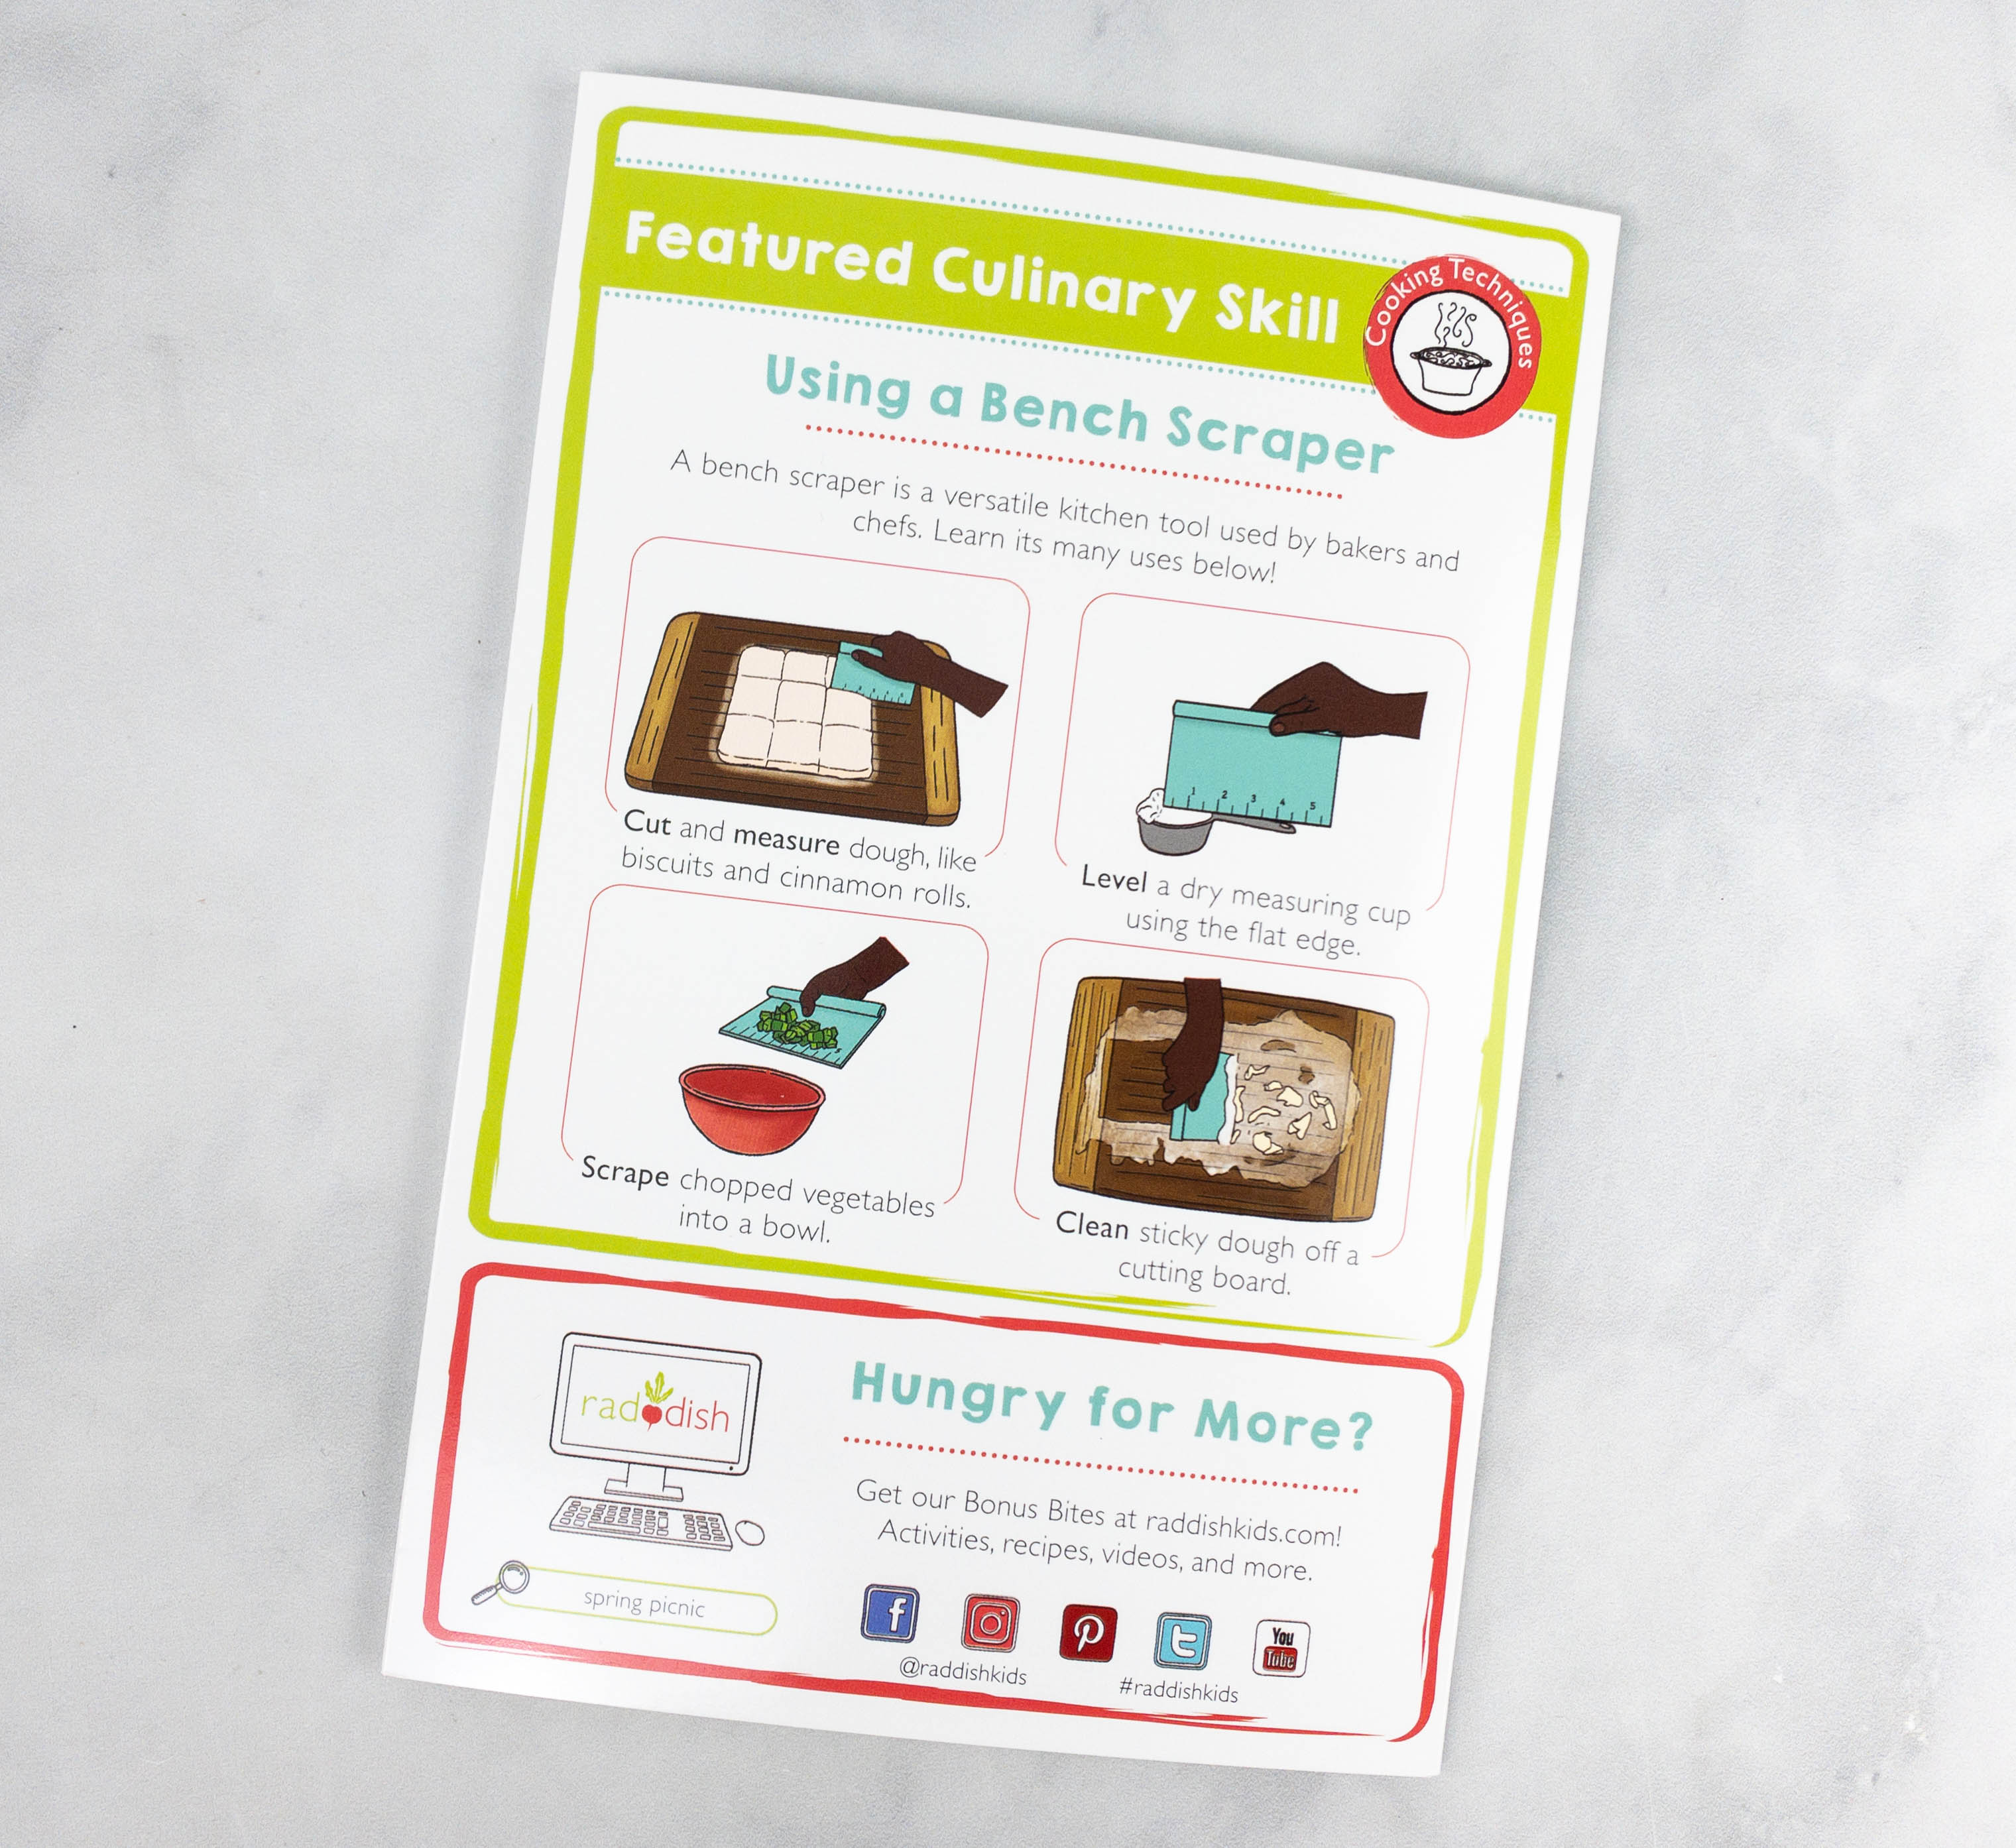
The featured culinary skill for this recipe is using the bench scraper.
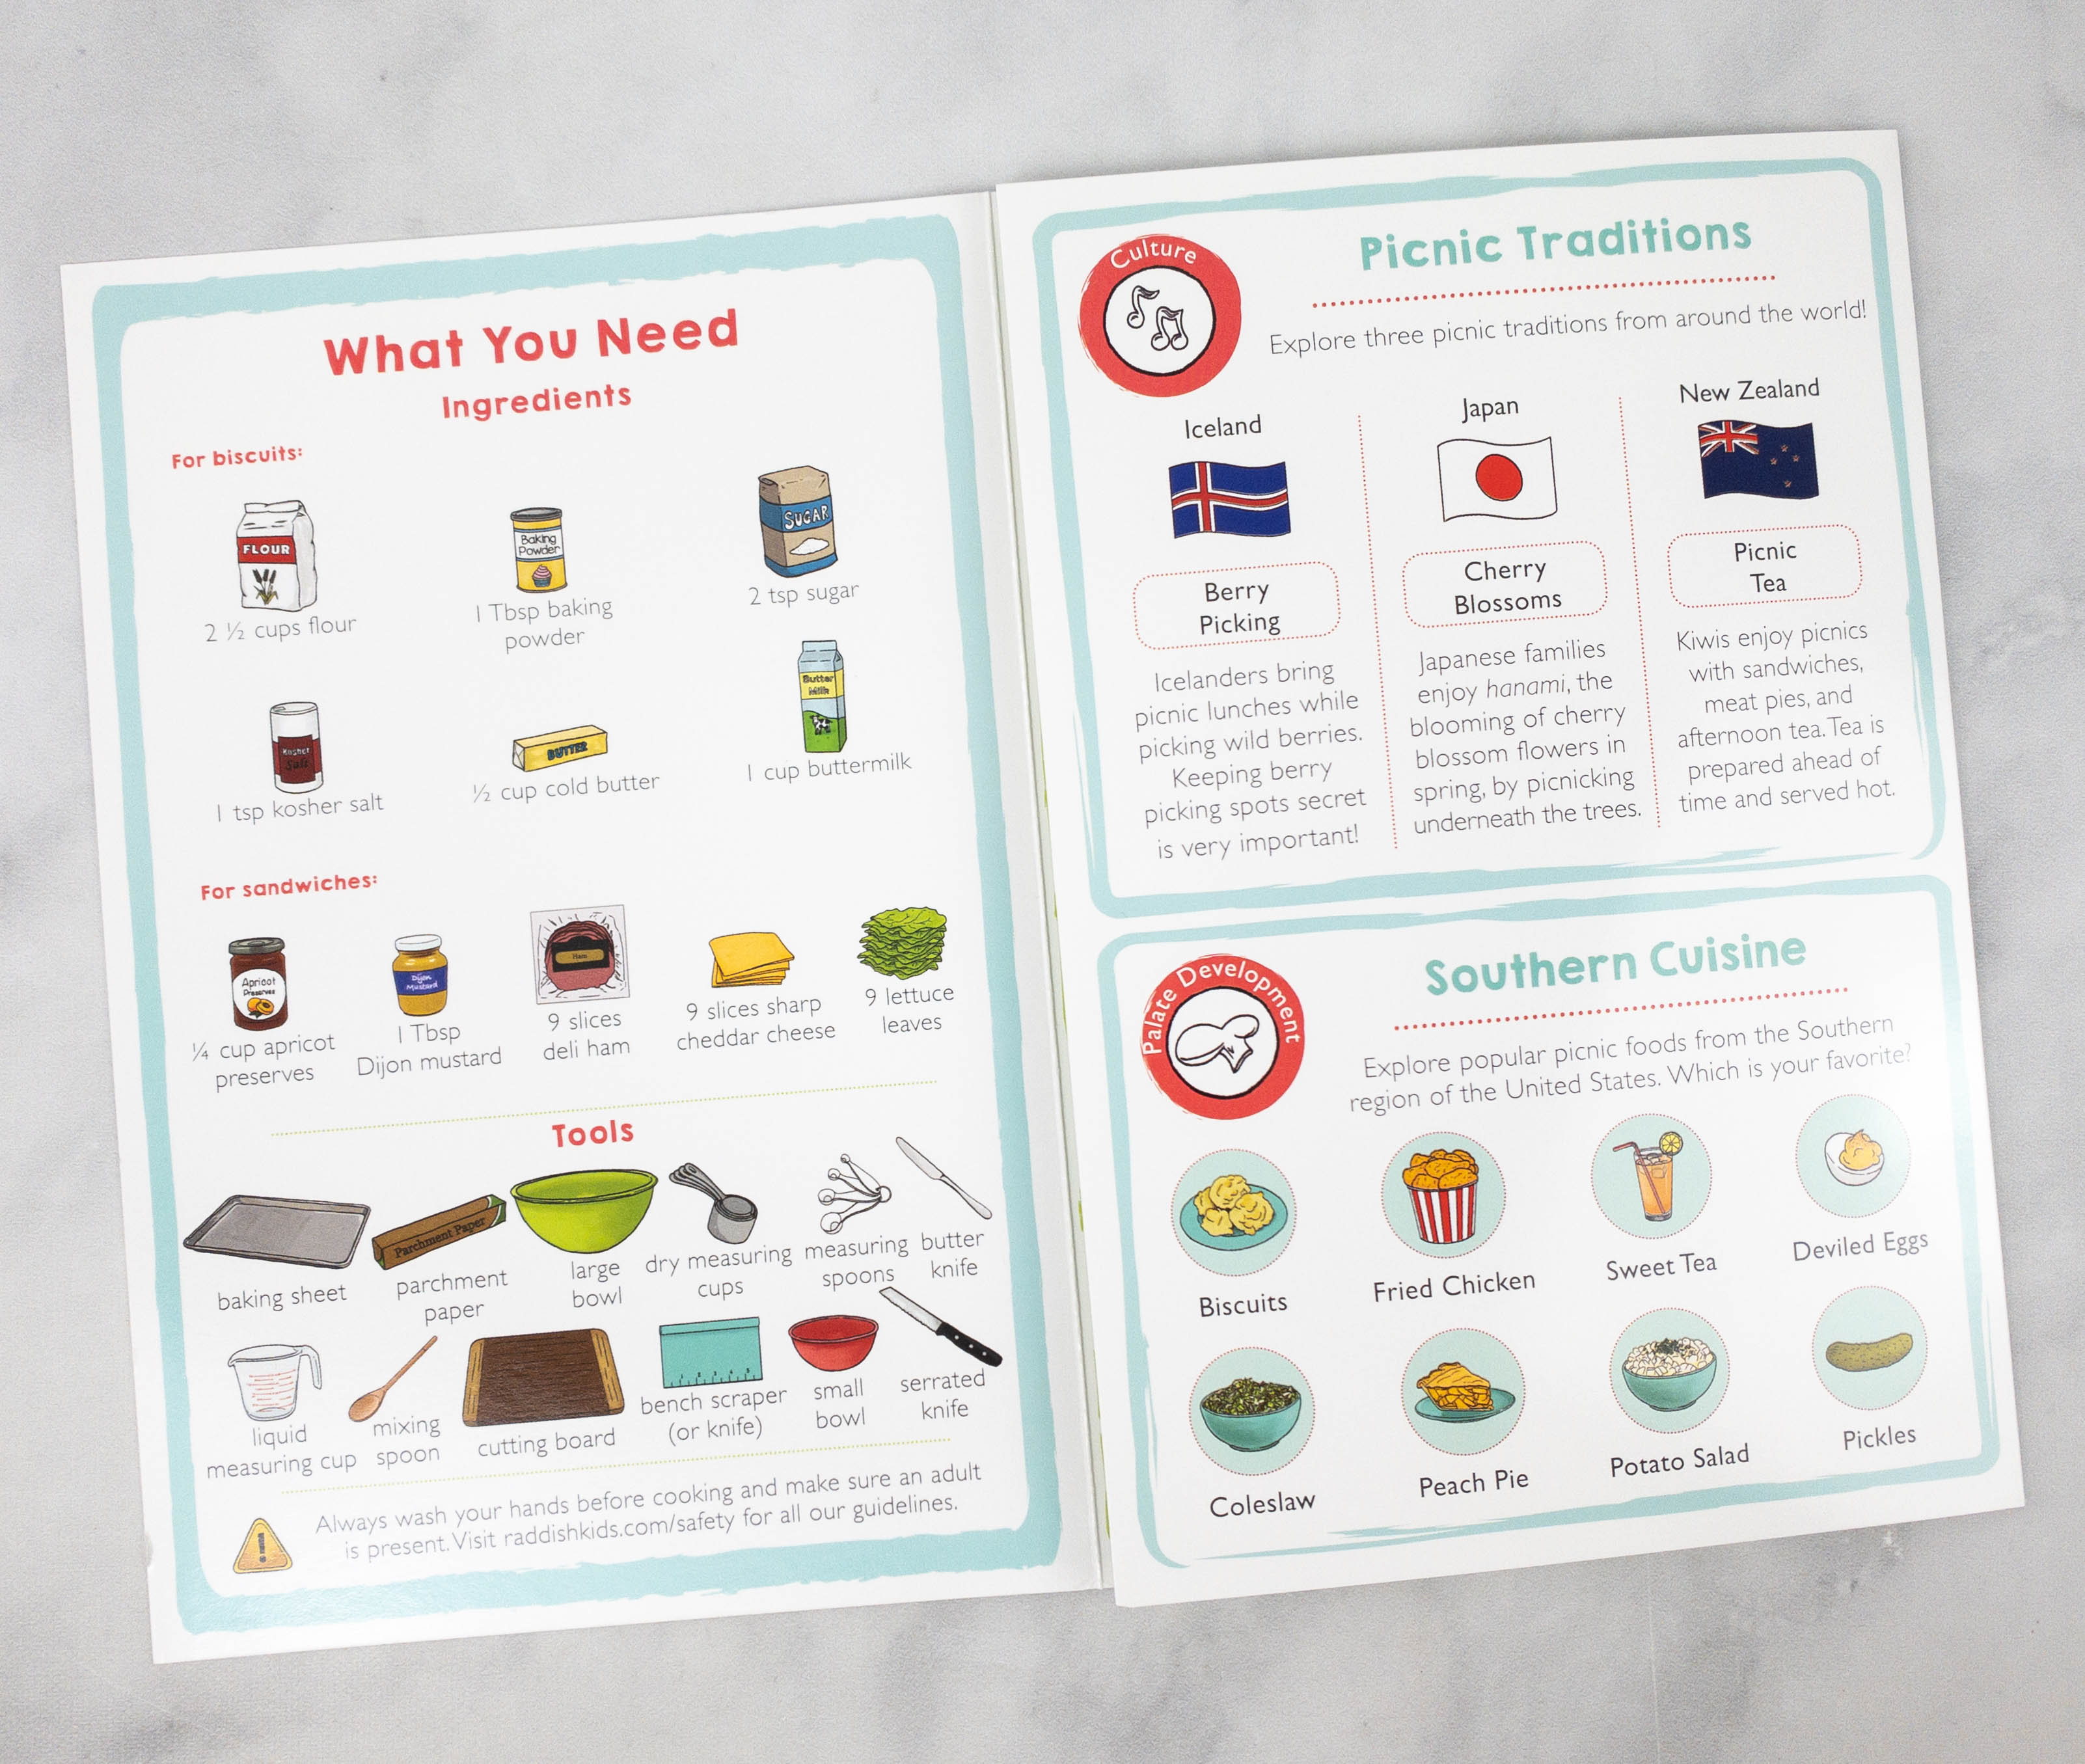
As always, the booklet provided the recipe’s ingredients and needed tools. They also featured picnic traditions from other countries as well as an insight to popular picnic food items in the Southern region of the US.
Ingredients for this recipe include flour, baking powder, sugar, kosher salt, cold butter, and buttermilk. For the sandwiches, you will need apricot preserves, Dijon mustard, deli ham, cheddar cheese, and lettuce leaves.
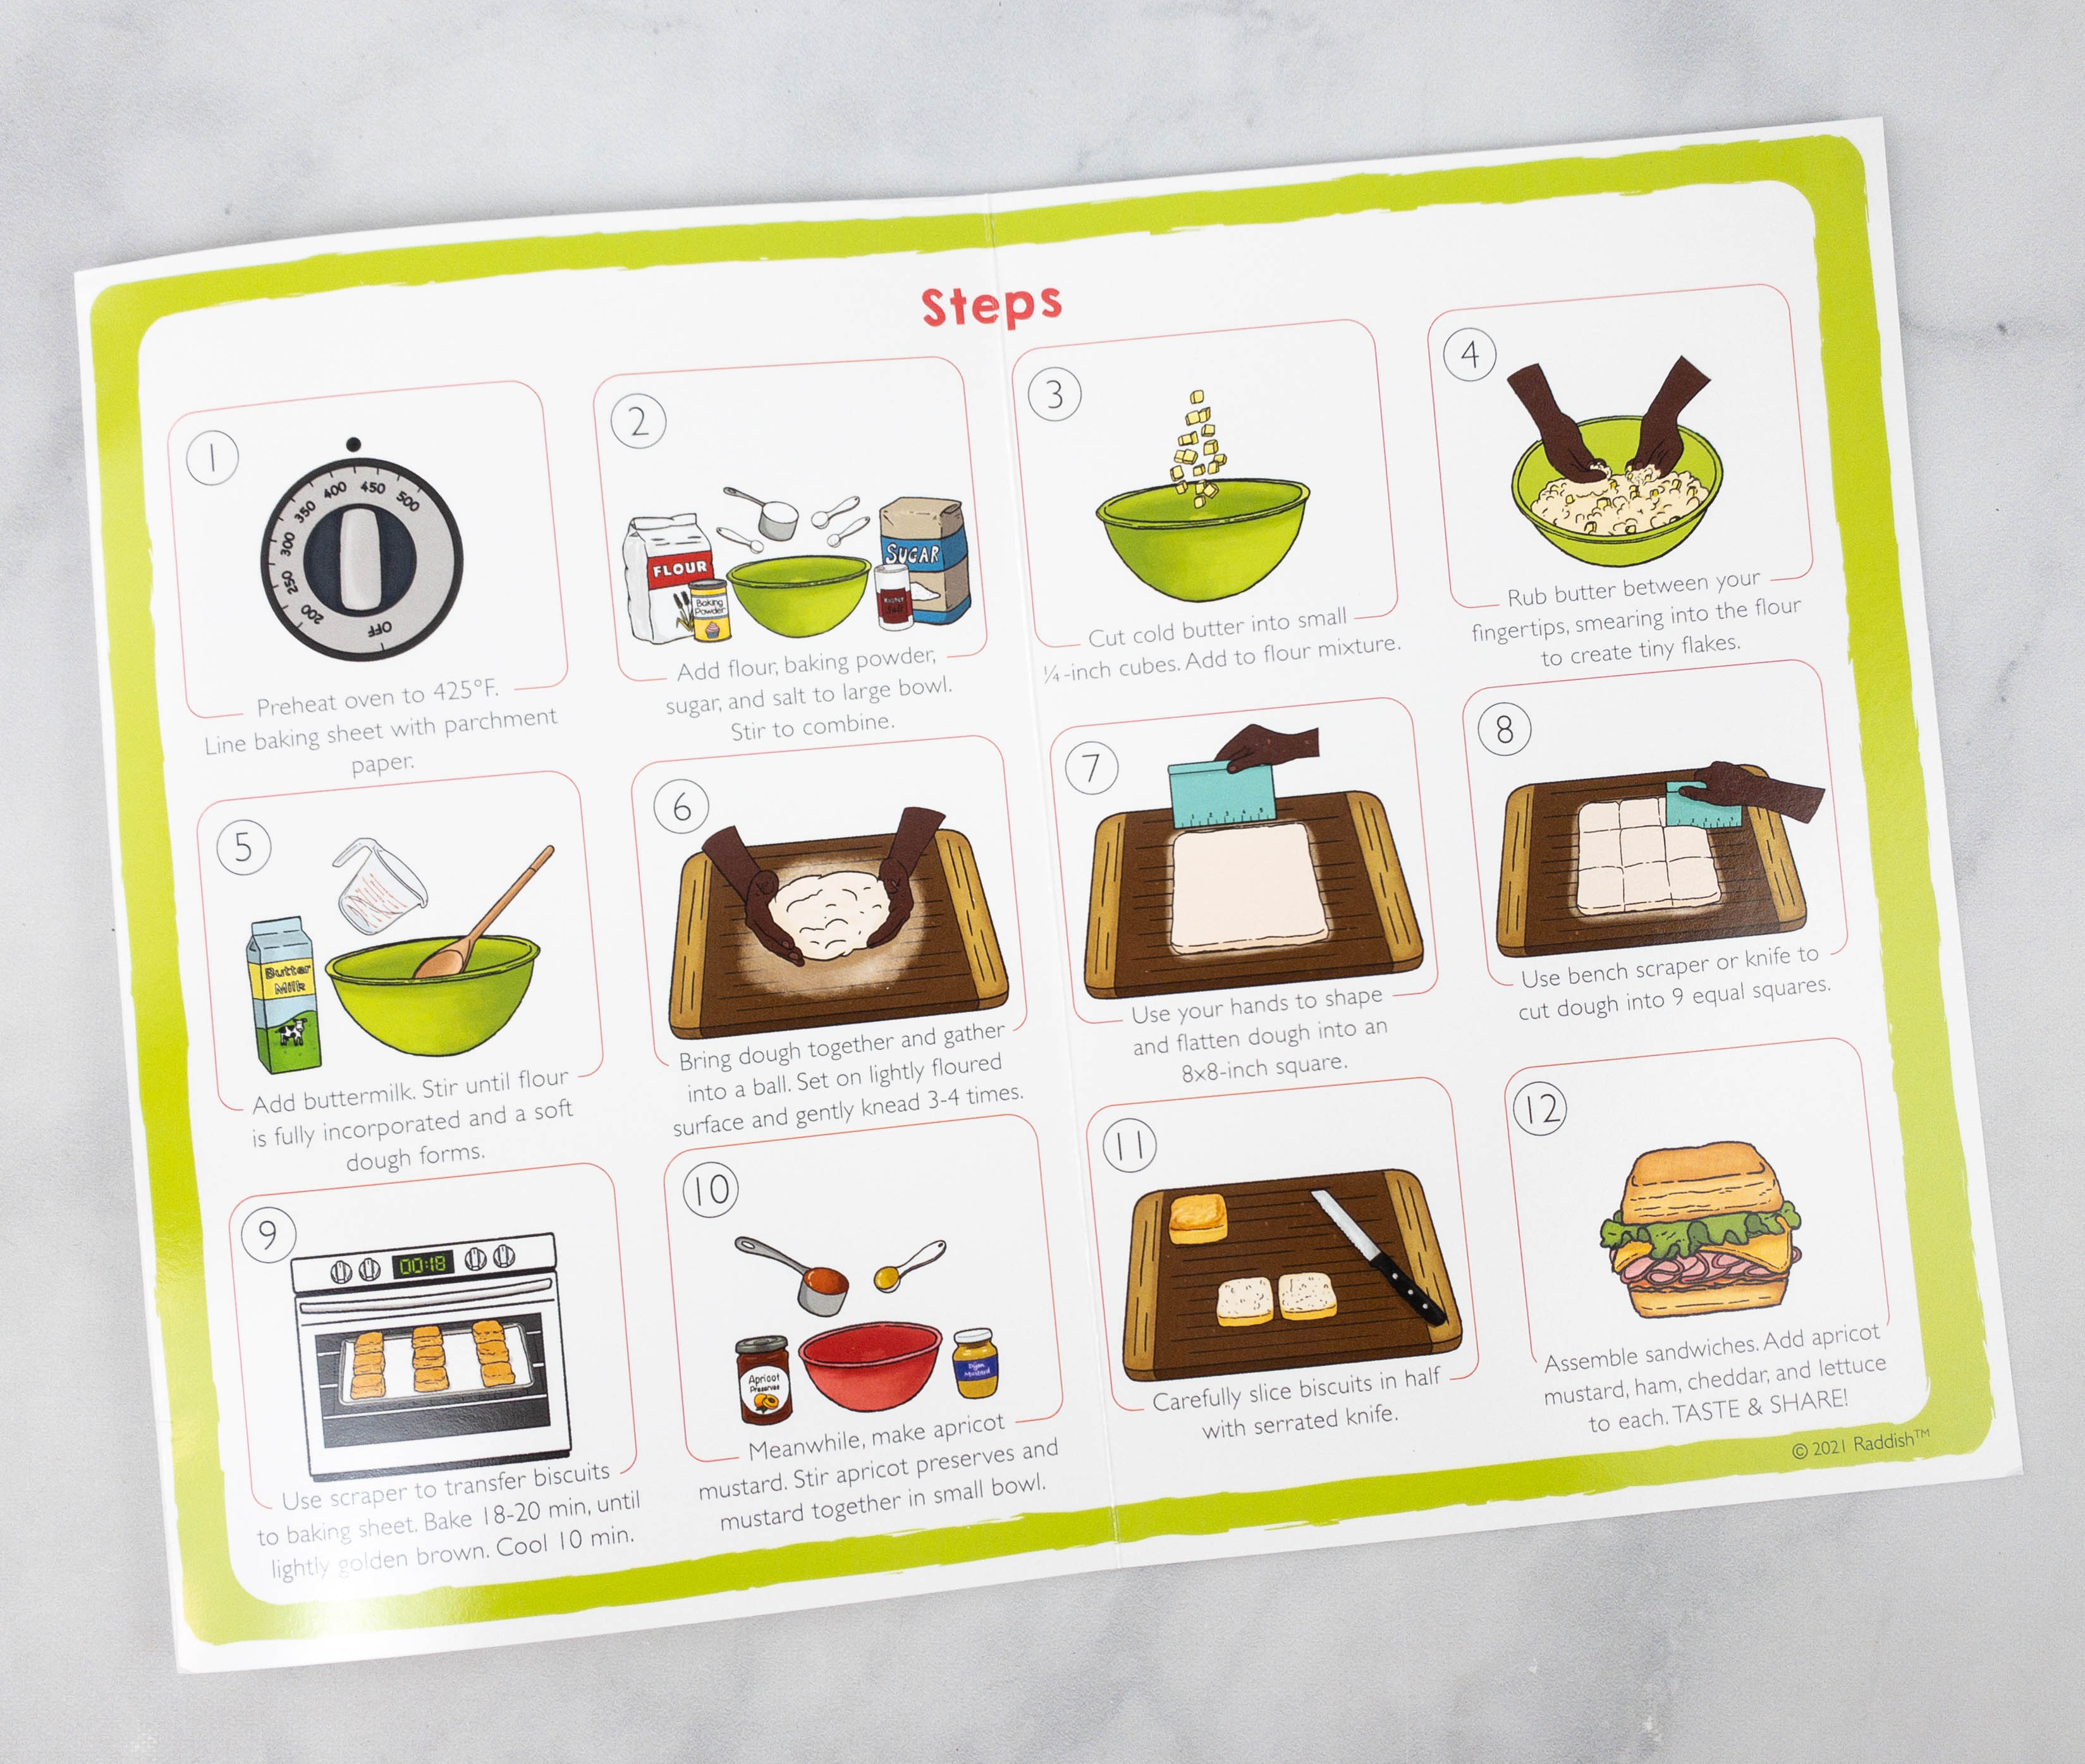
The first thing to do is to prepare the dough mixture.

My daughter put the flour inside a big bowl.
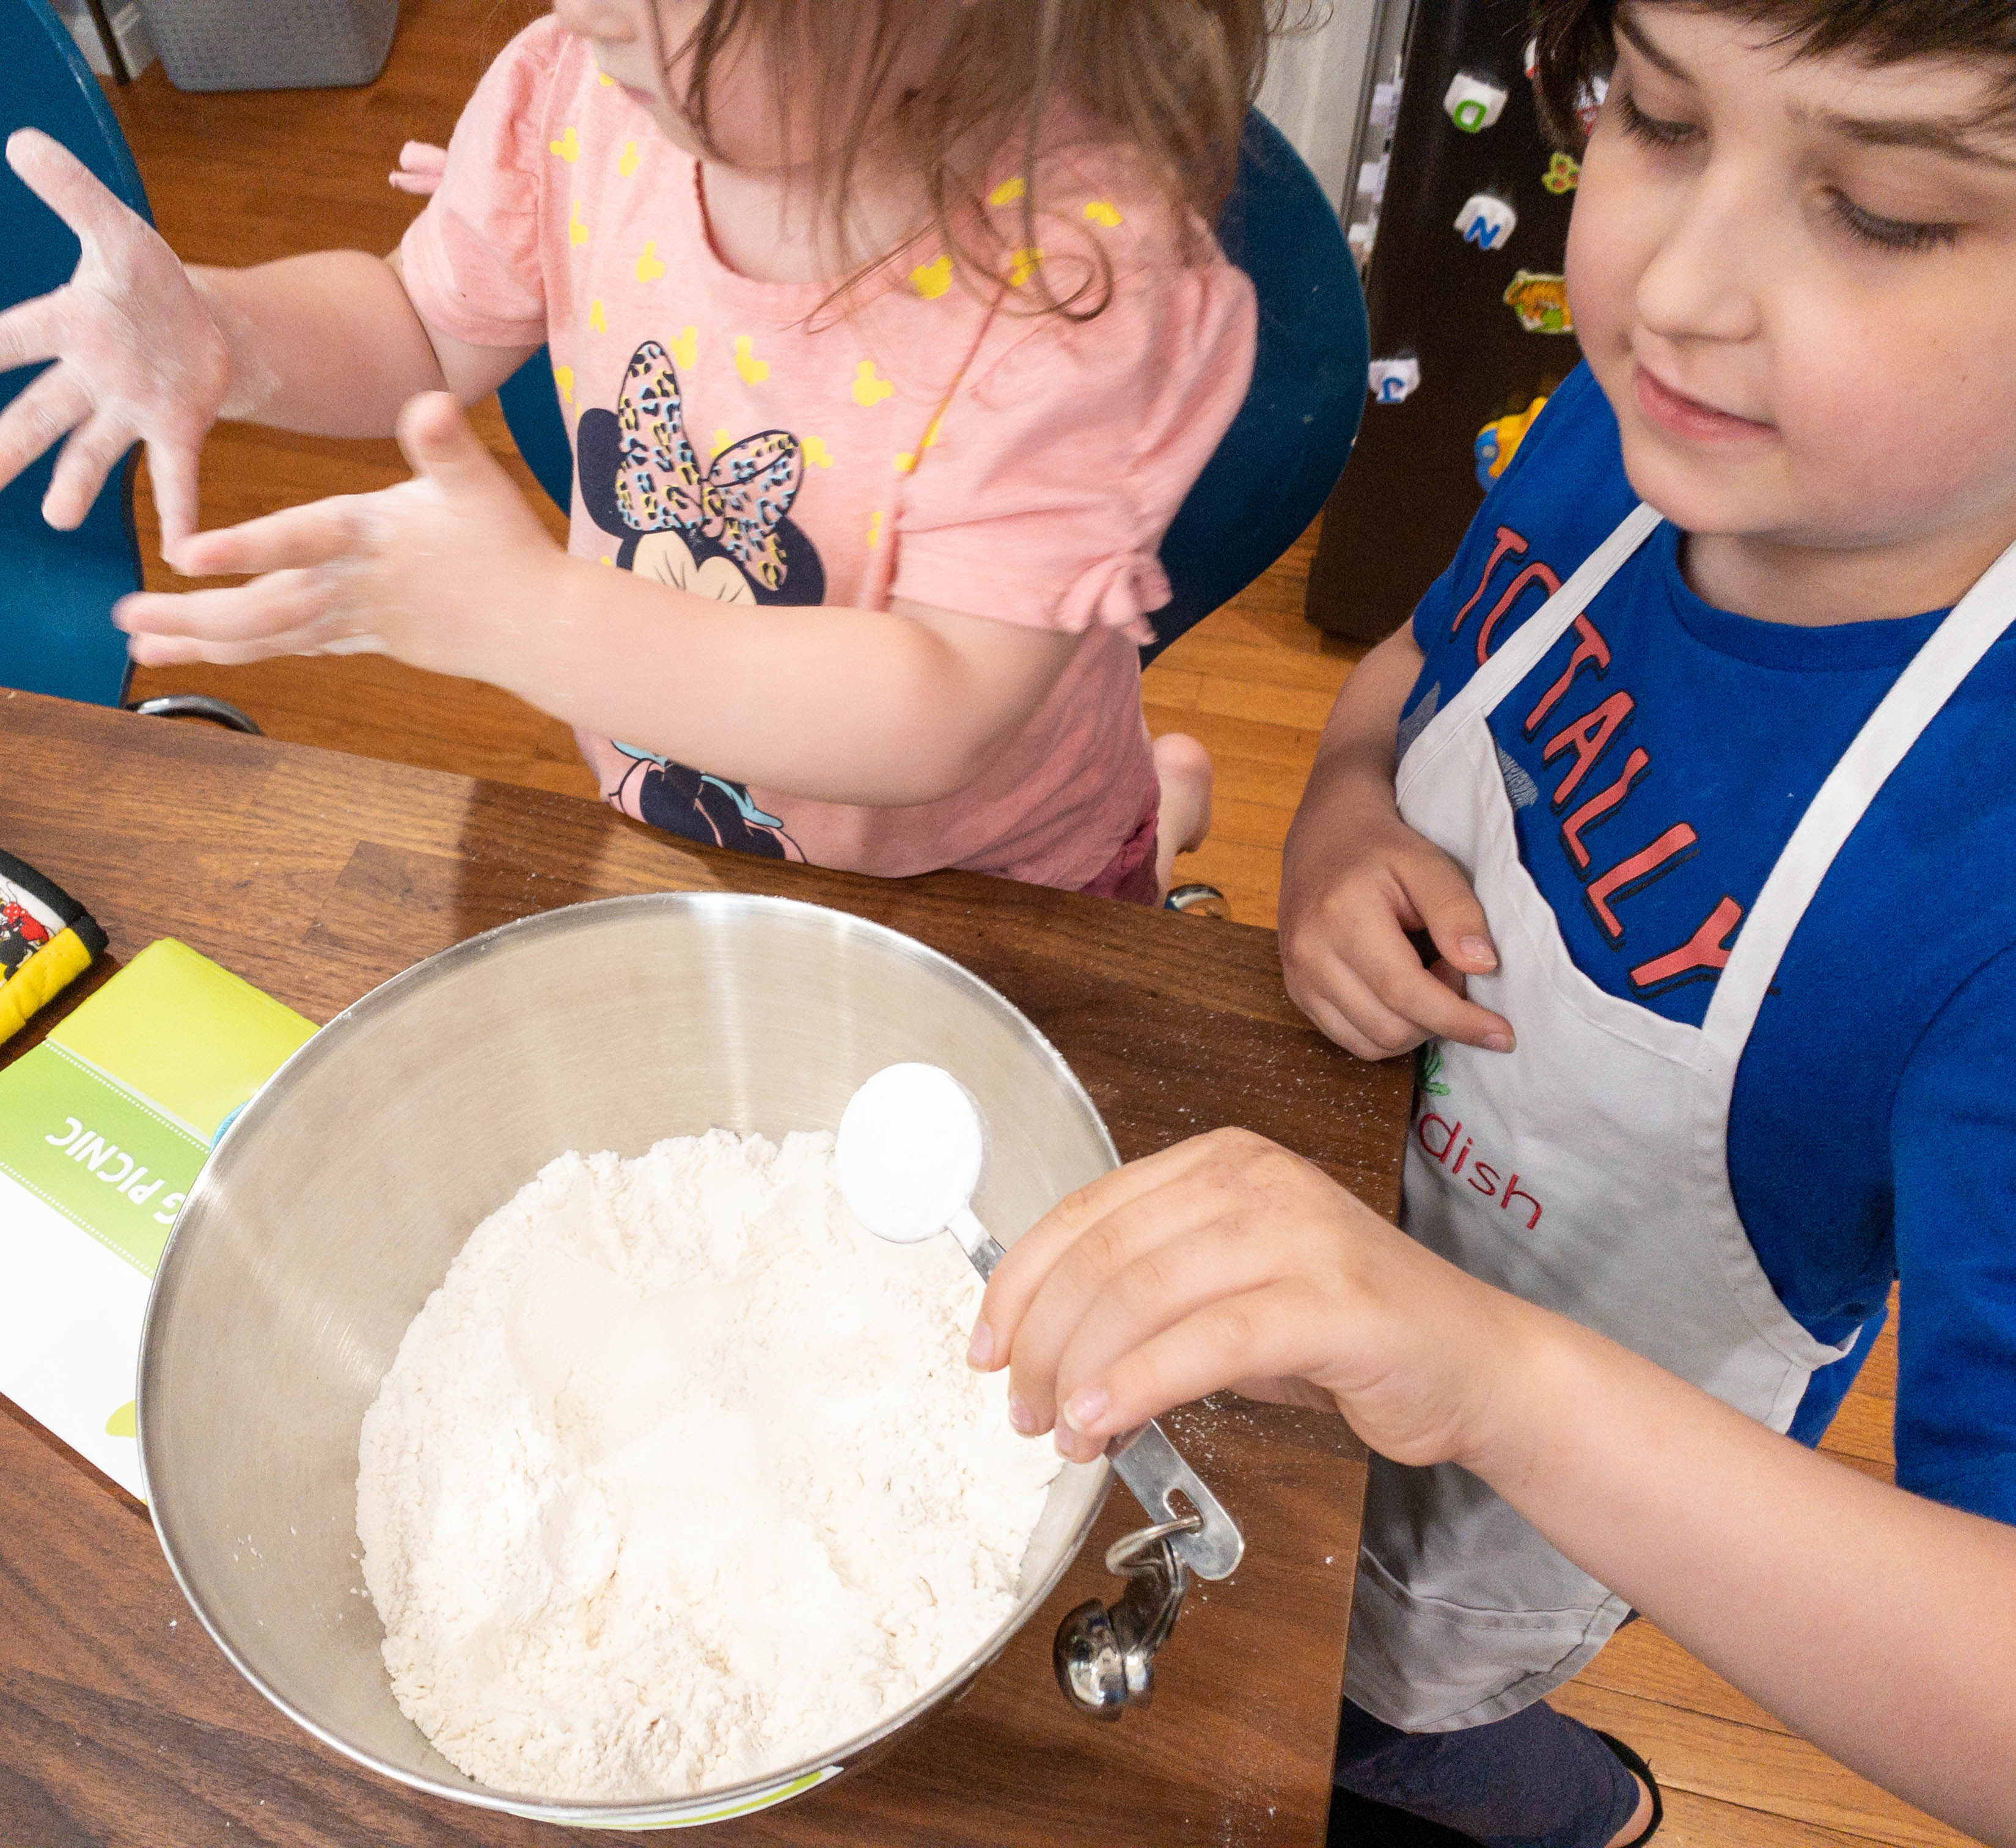
Here’s my son adding in the baking powder. He made sure it was leveled and the measurements are correct!
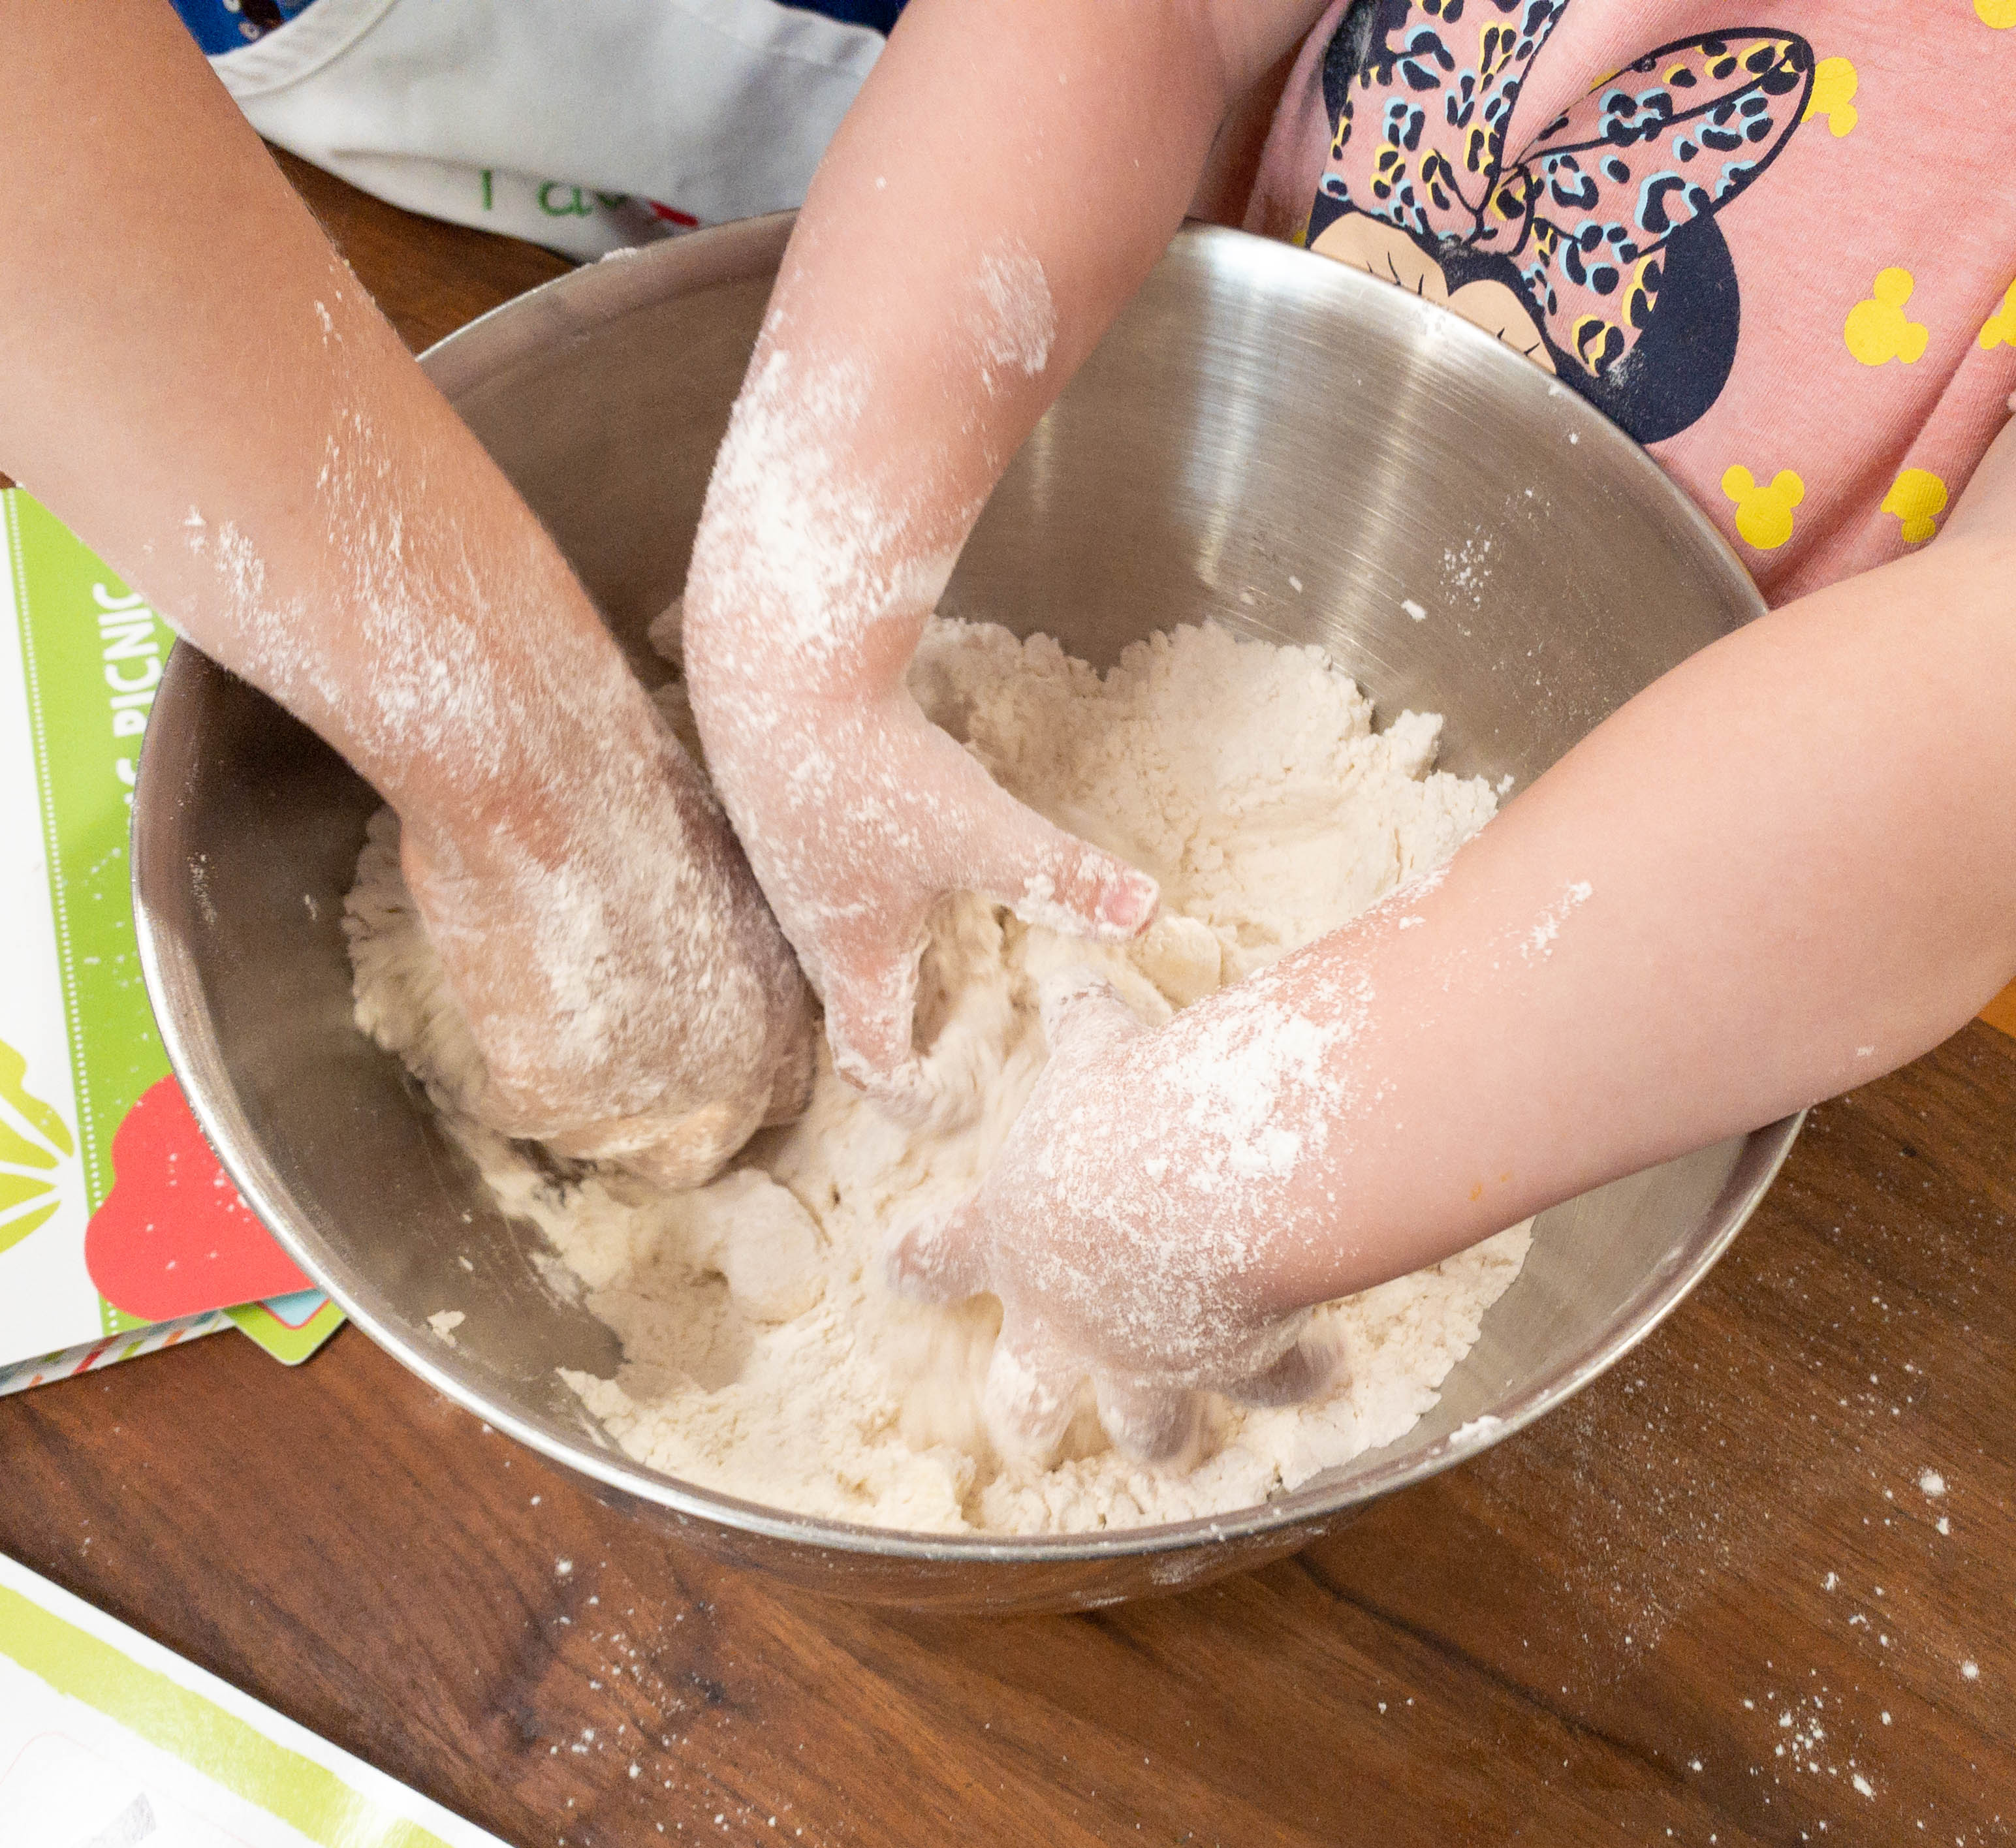
After adding sugar and salt, they rubbed the butter until it smeared down into tiny flakes on the flour. Once that’s done, they added the buttermilk and stirred until a dough formed.
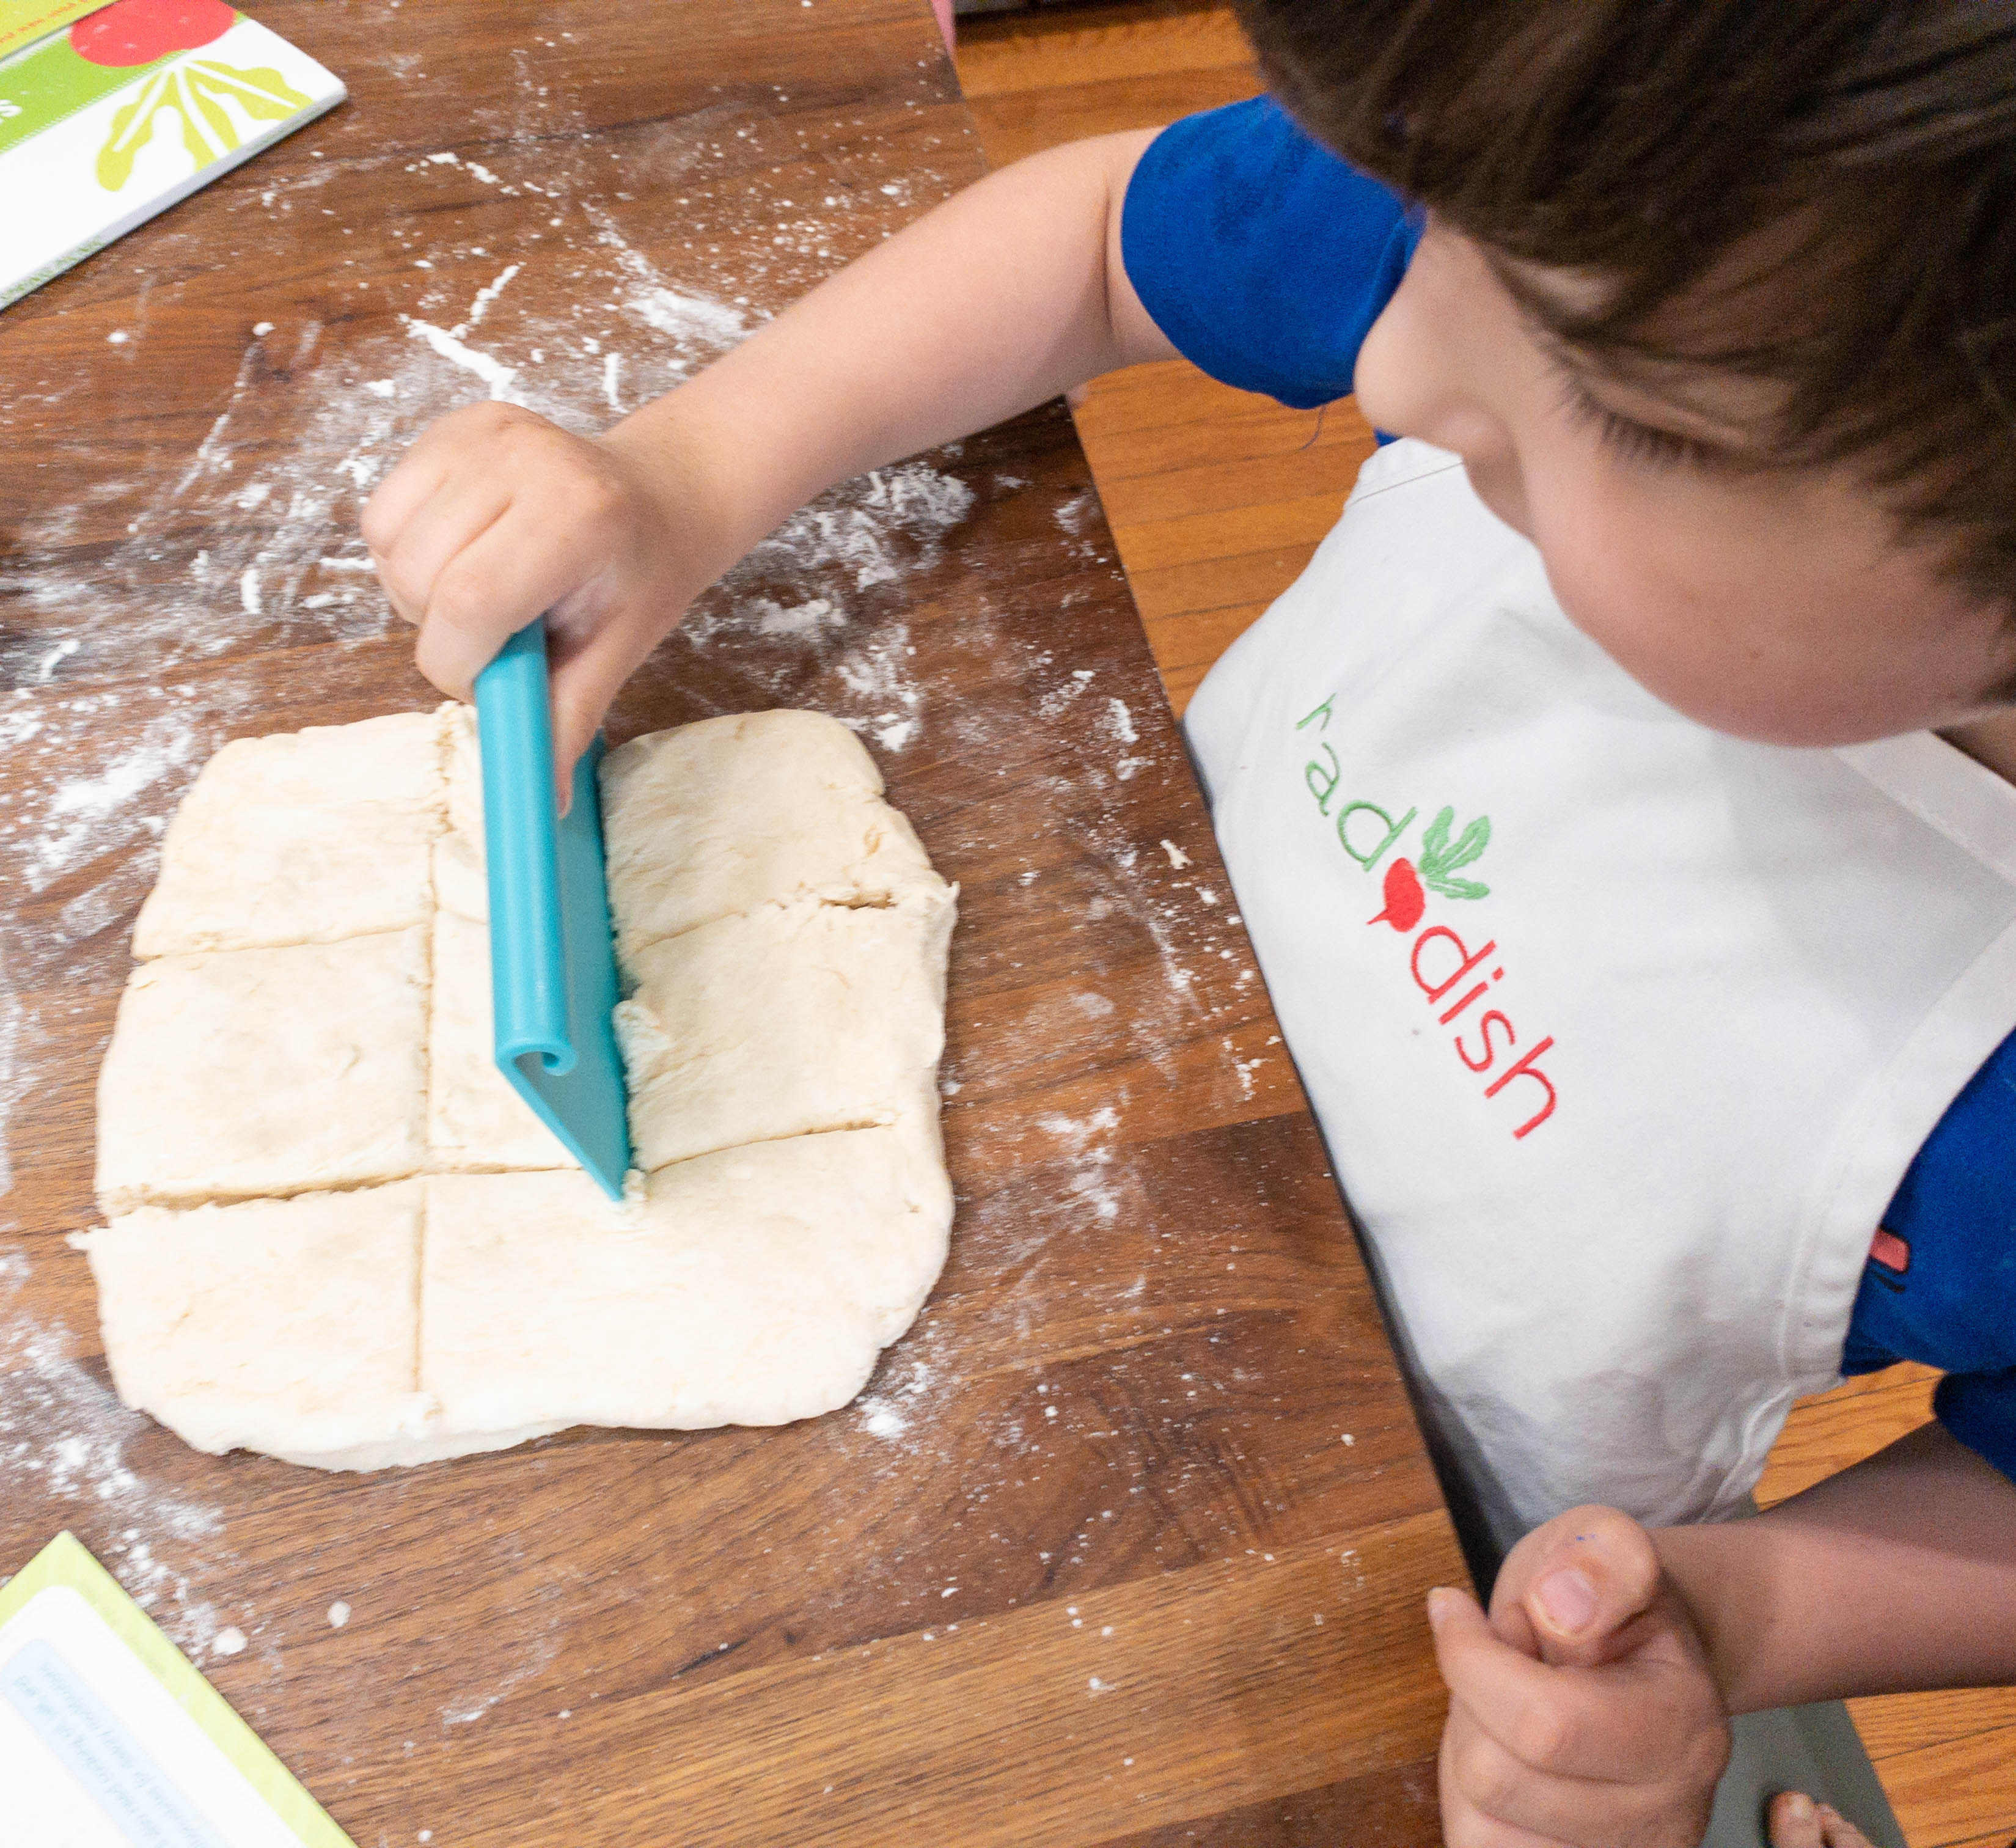
My kids slathered some flour on our table and then gathered the dough into a big ball. Then, they set it in place and gently kneaded for about 3-4 times before forming it into 8×8 inch squares. My son used the bench scraper to cut the dough into 9 equal squares. He also used the scraper to transfer the dough into the baking tray so he could pop them in the oven.

After baking the biscuits for 18-20 minutes, let them cool for about 10 more minutes. My kids also sliced each biscuit in half with a serrated knife so they can start assembling the sandwiches!
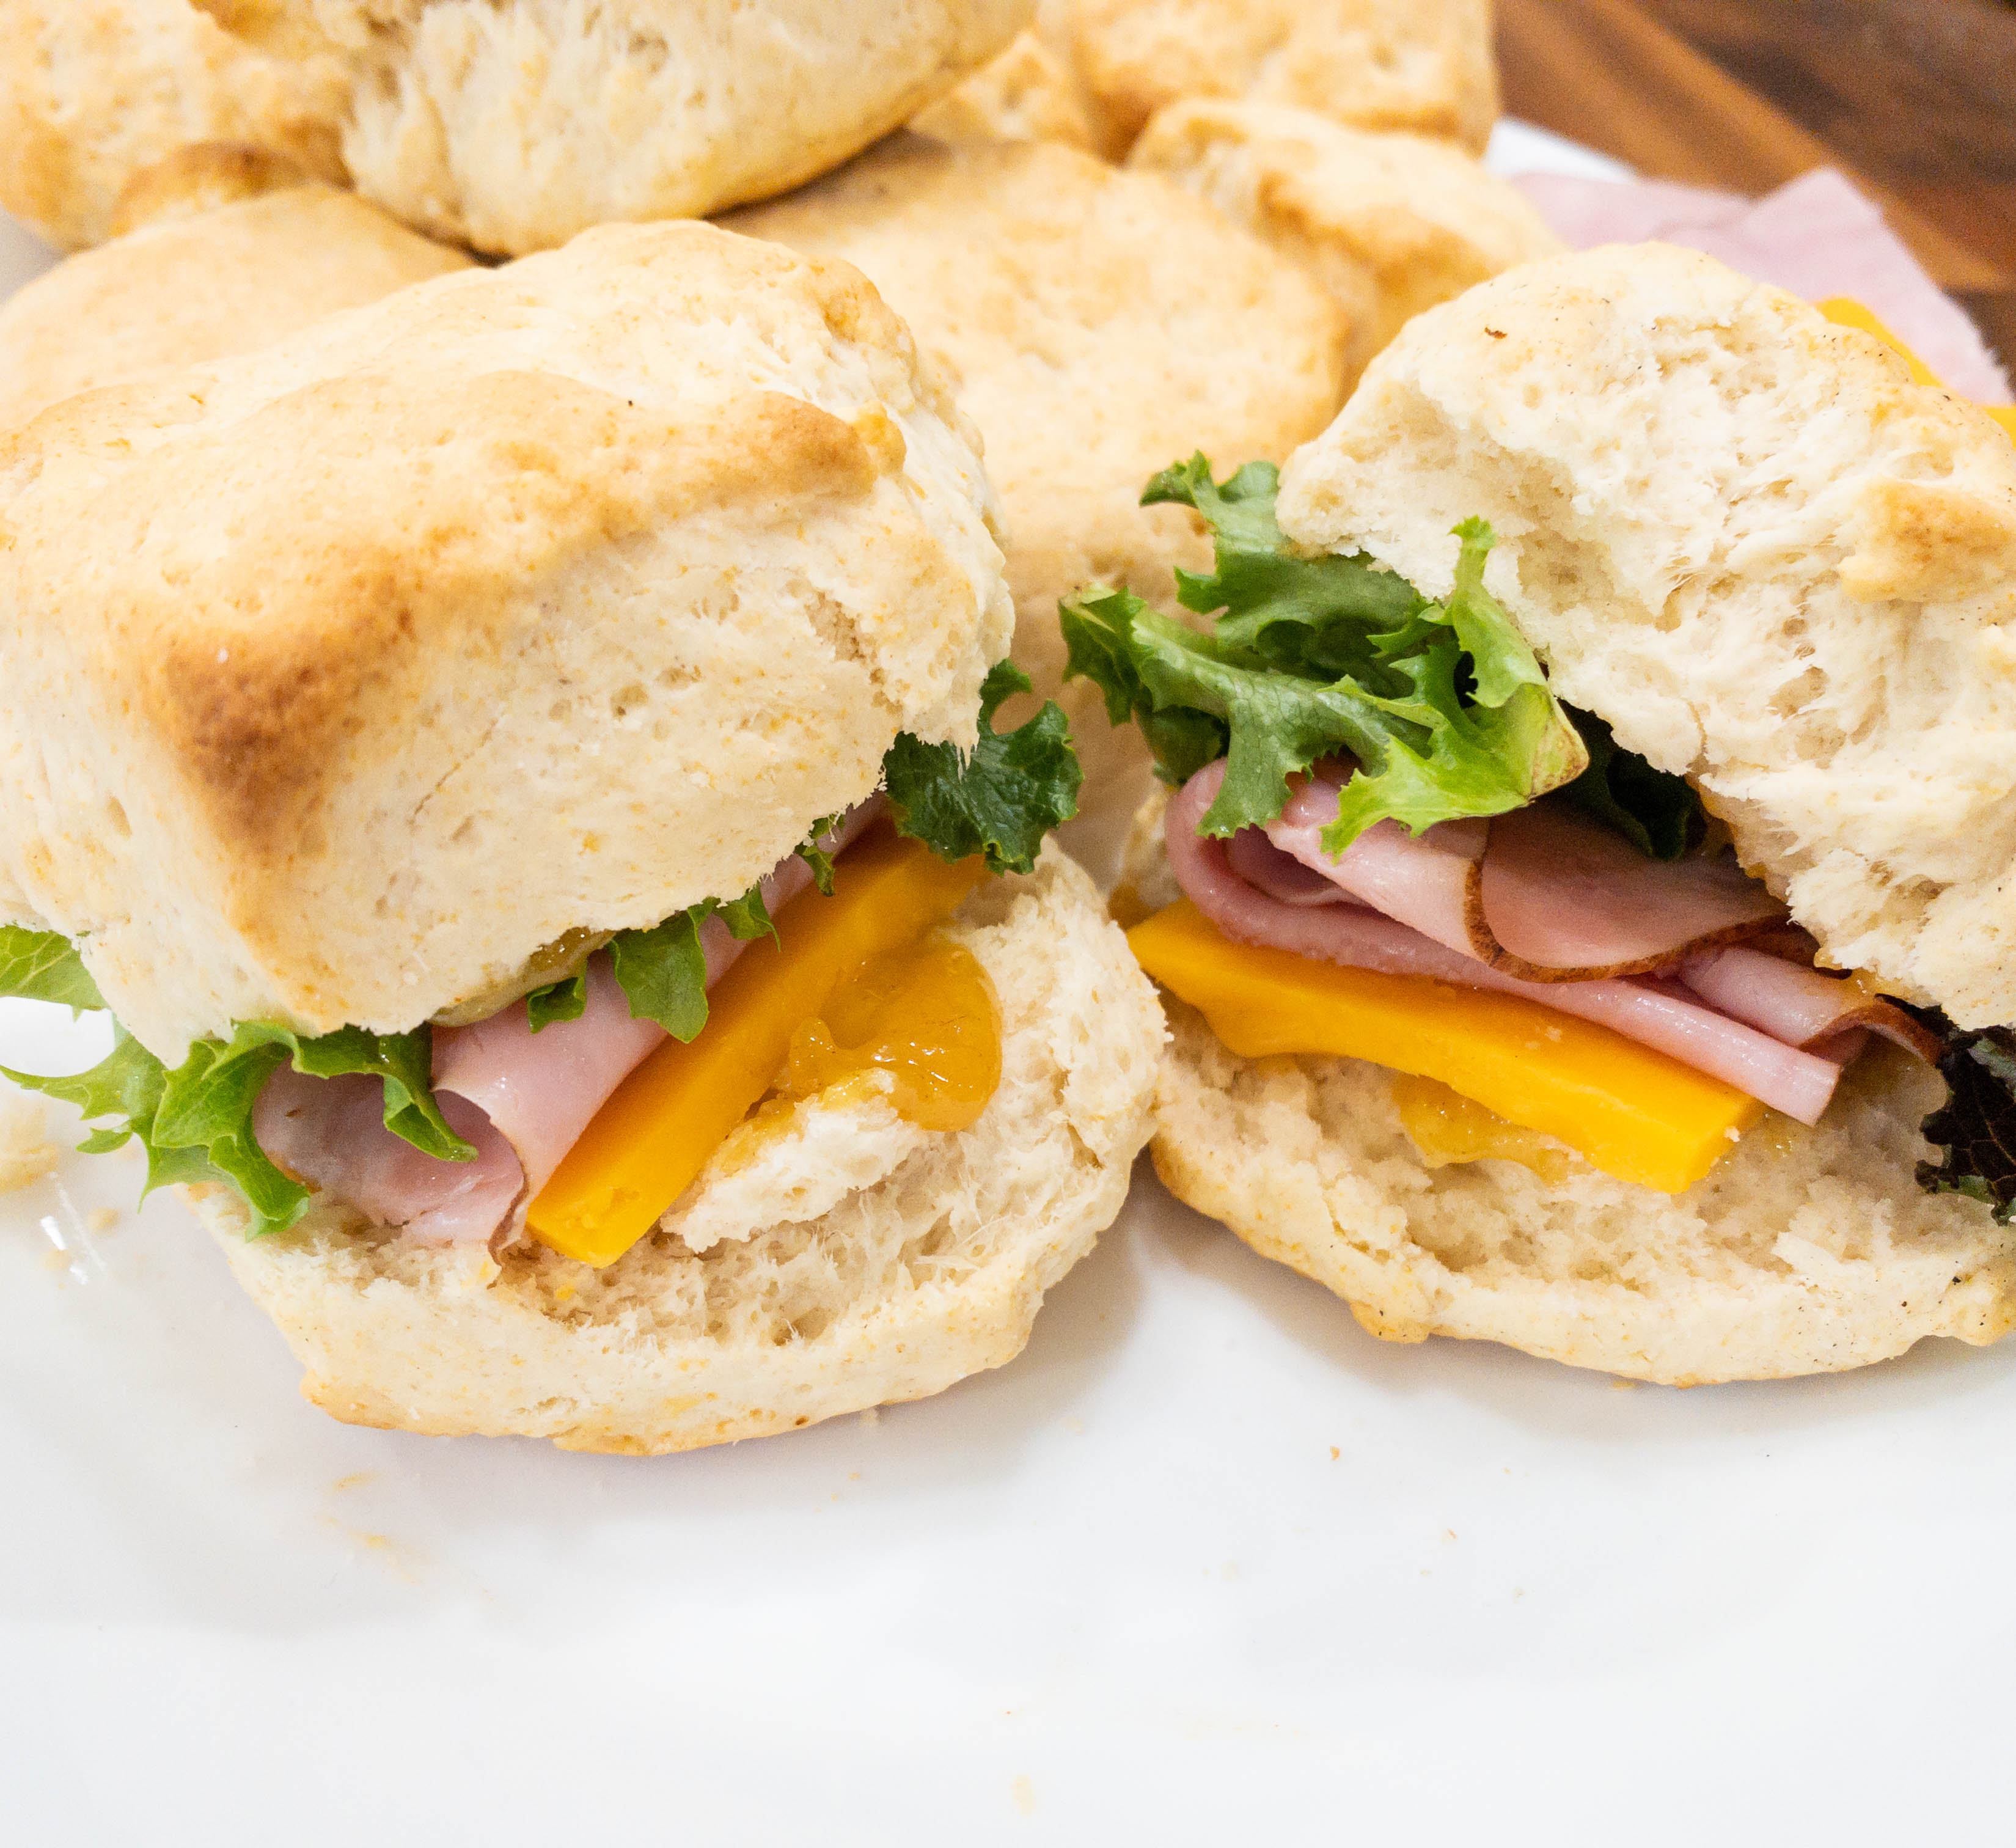
Here’s our take on the Southern sandwiches. The biscuits alone smell amazing!
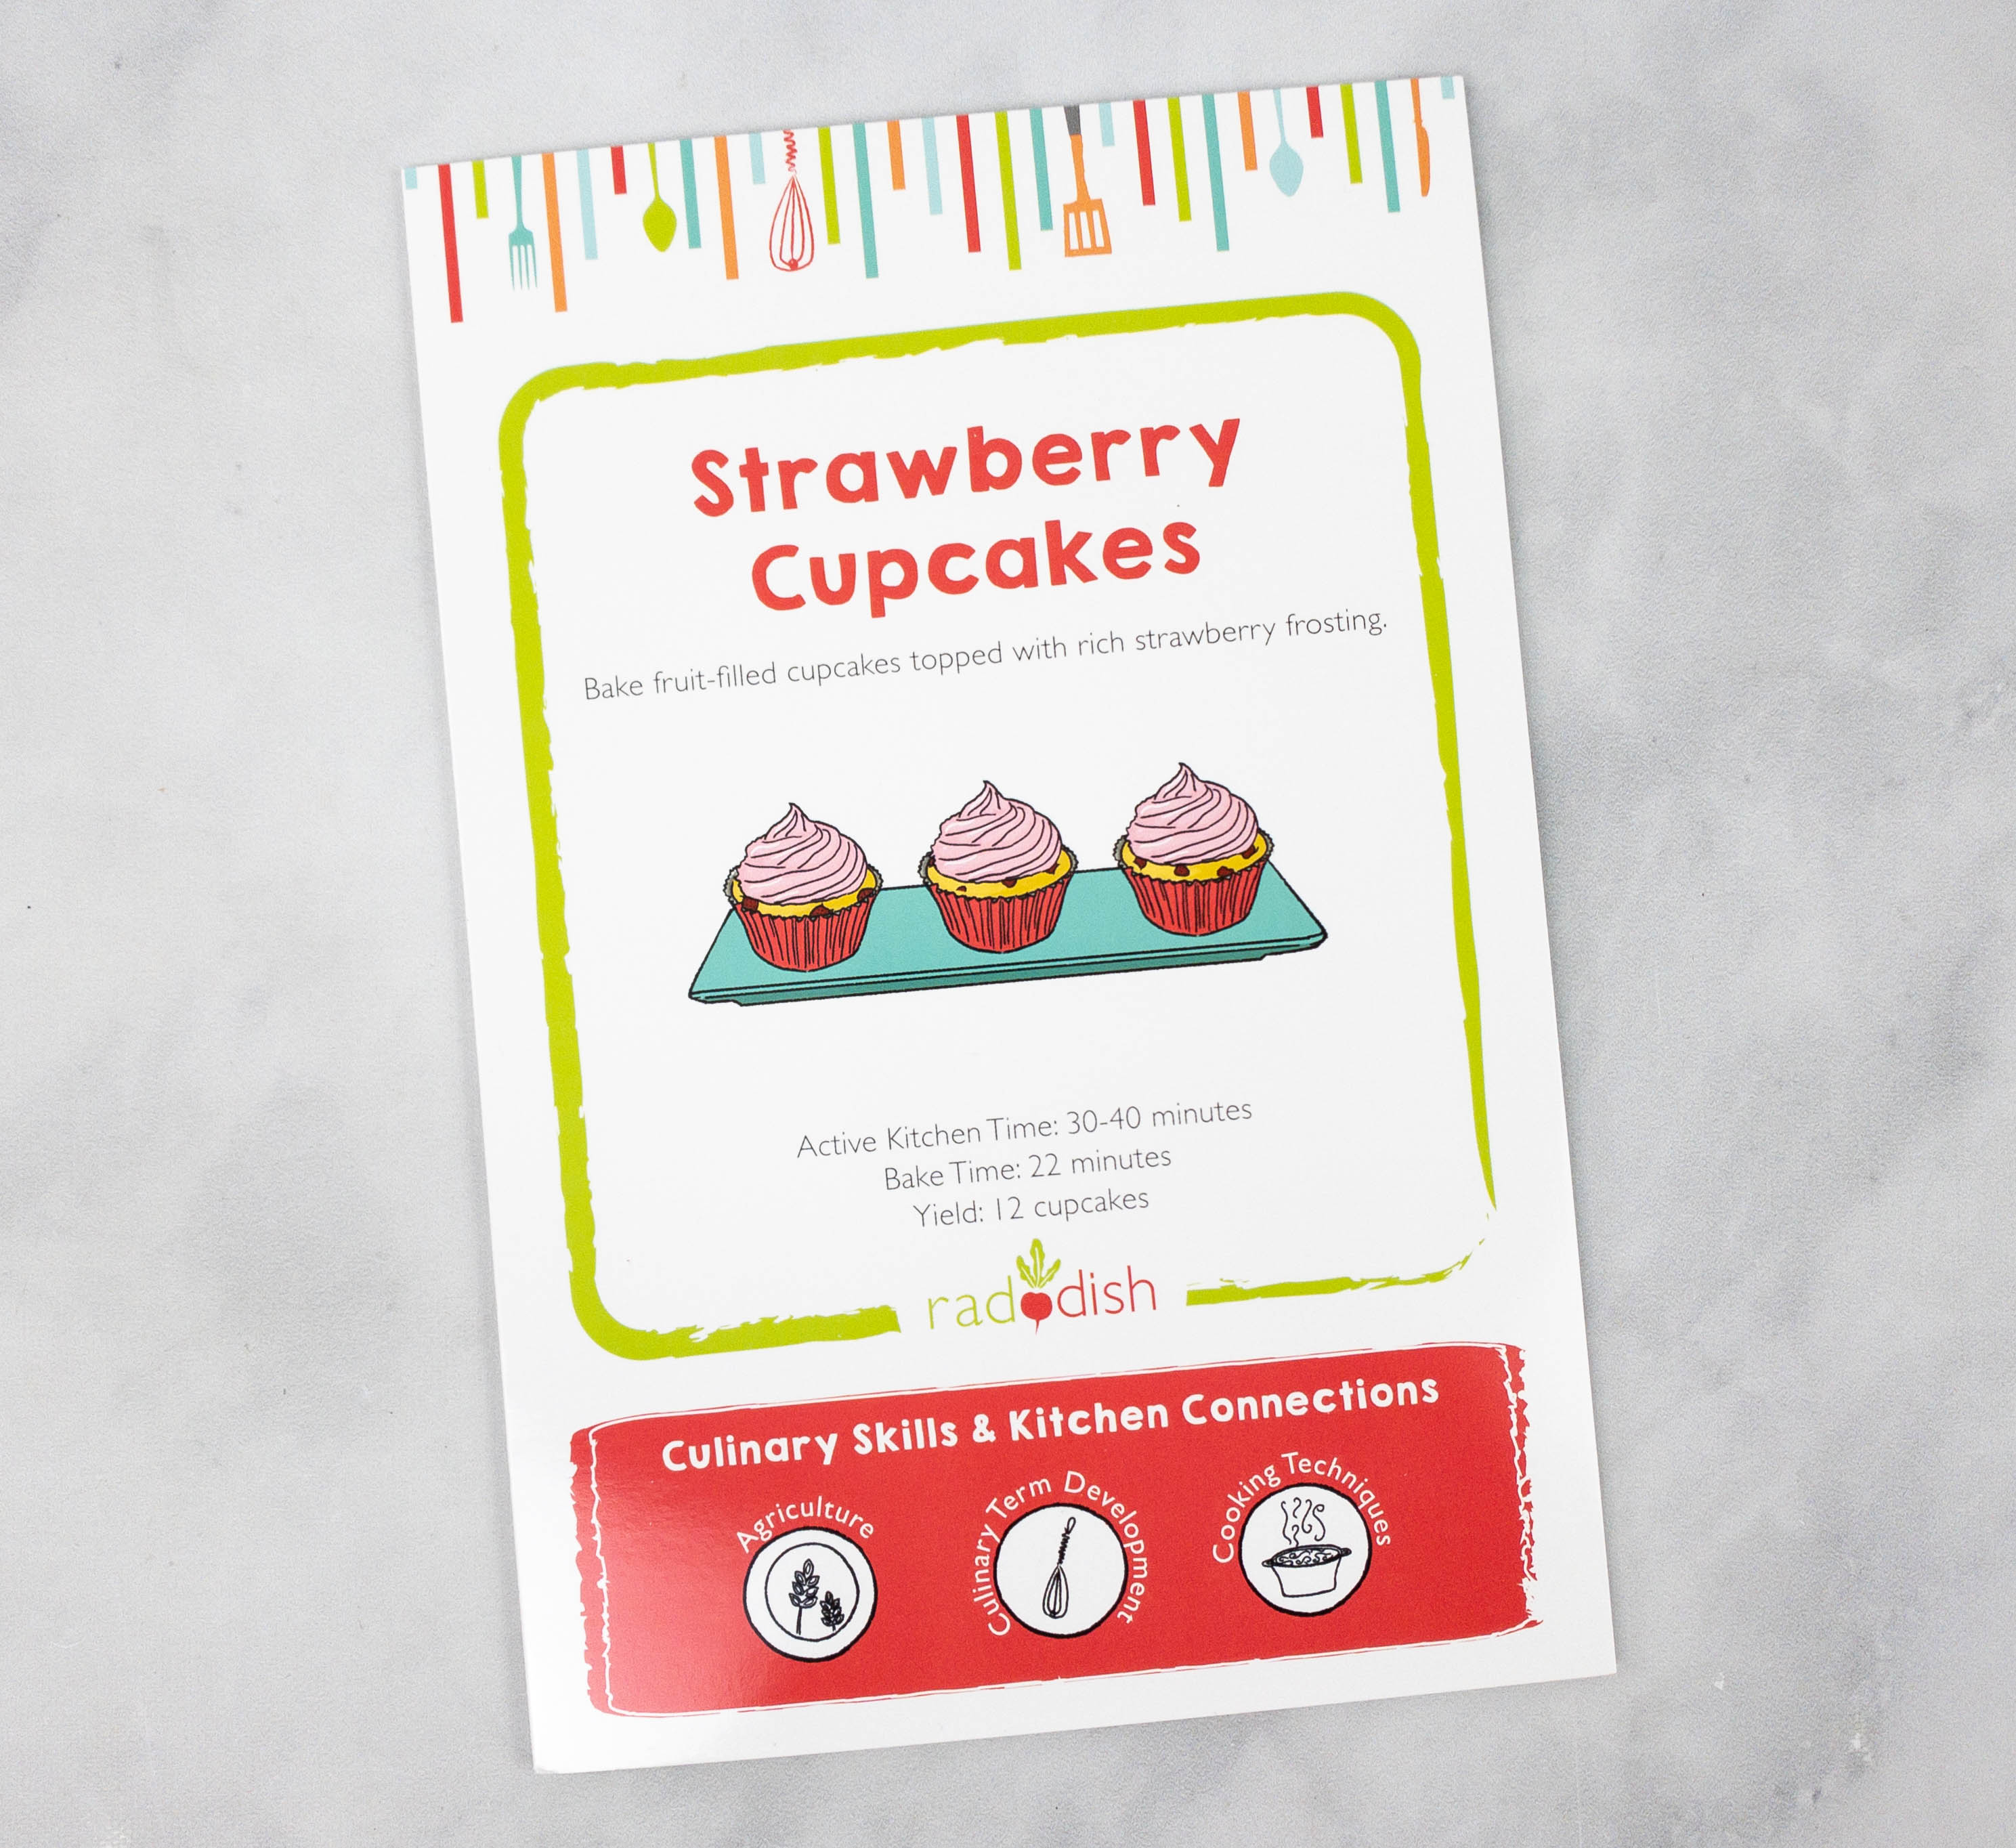
Strawberry Cupcakes. The last recipe is perfect for dessert!
Active Kitchen Time: 30-40 minutes
Bake Time: 22 minutes
Yield: 12 cupcakes
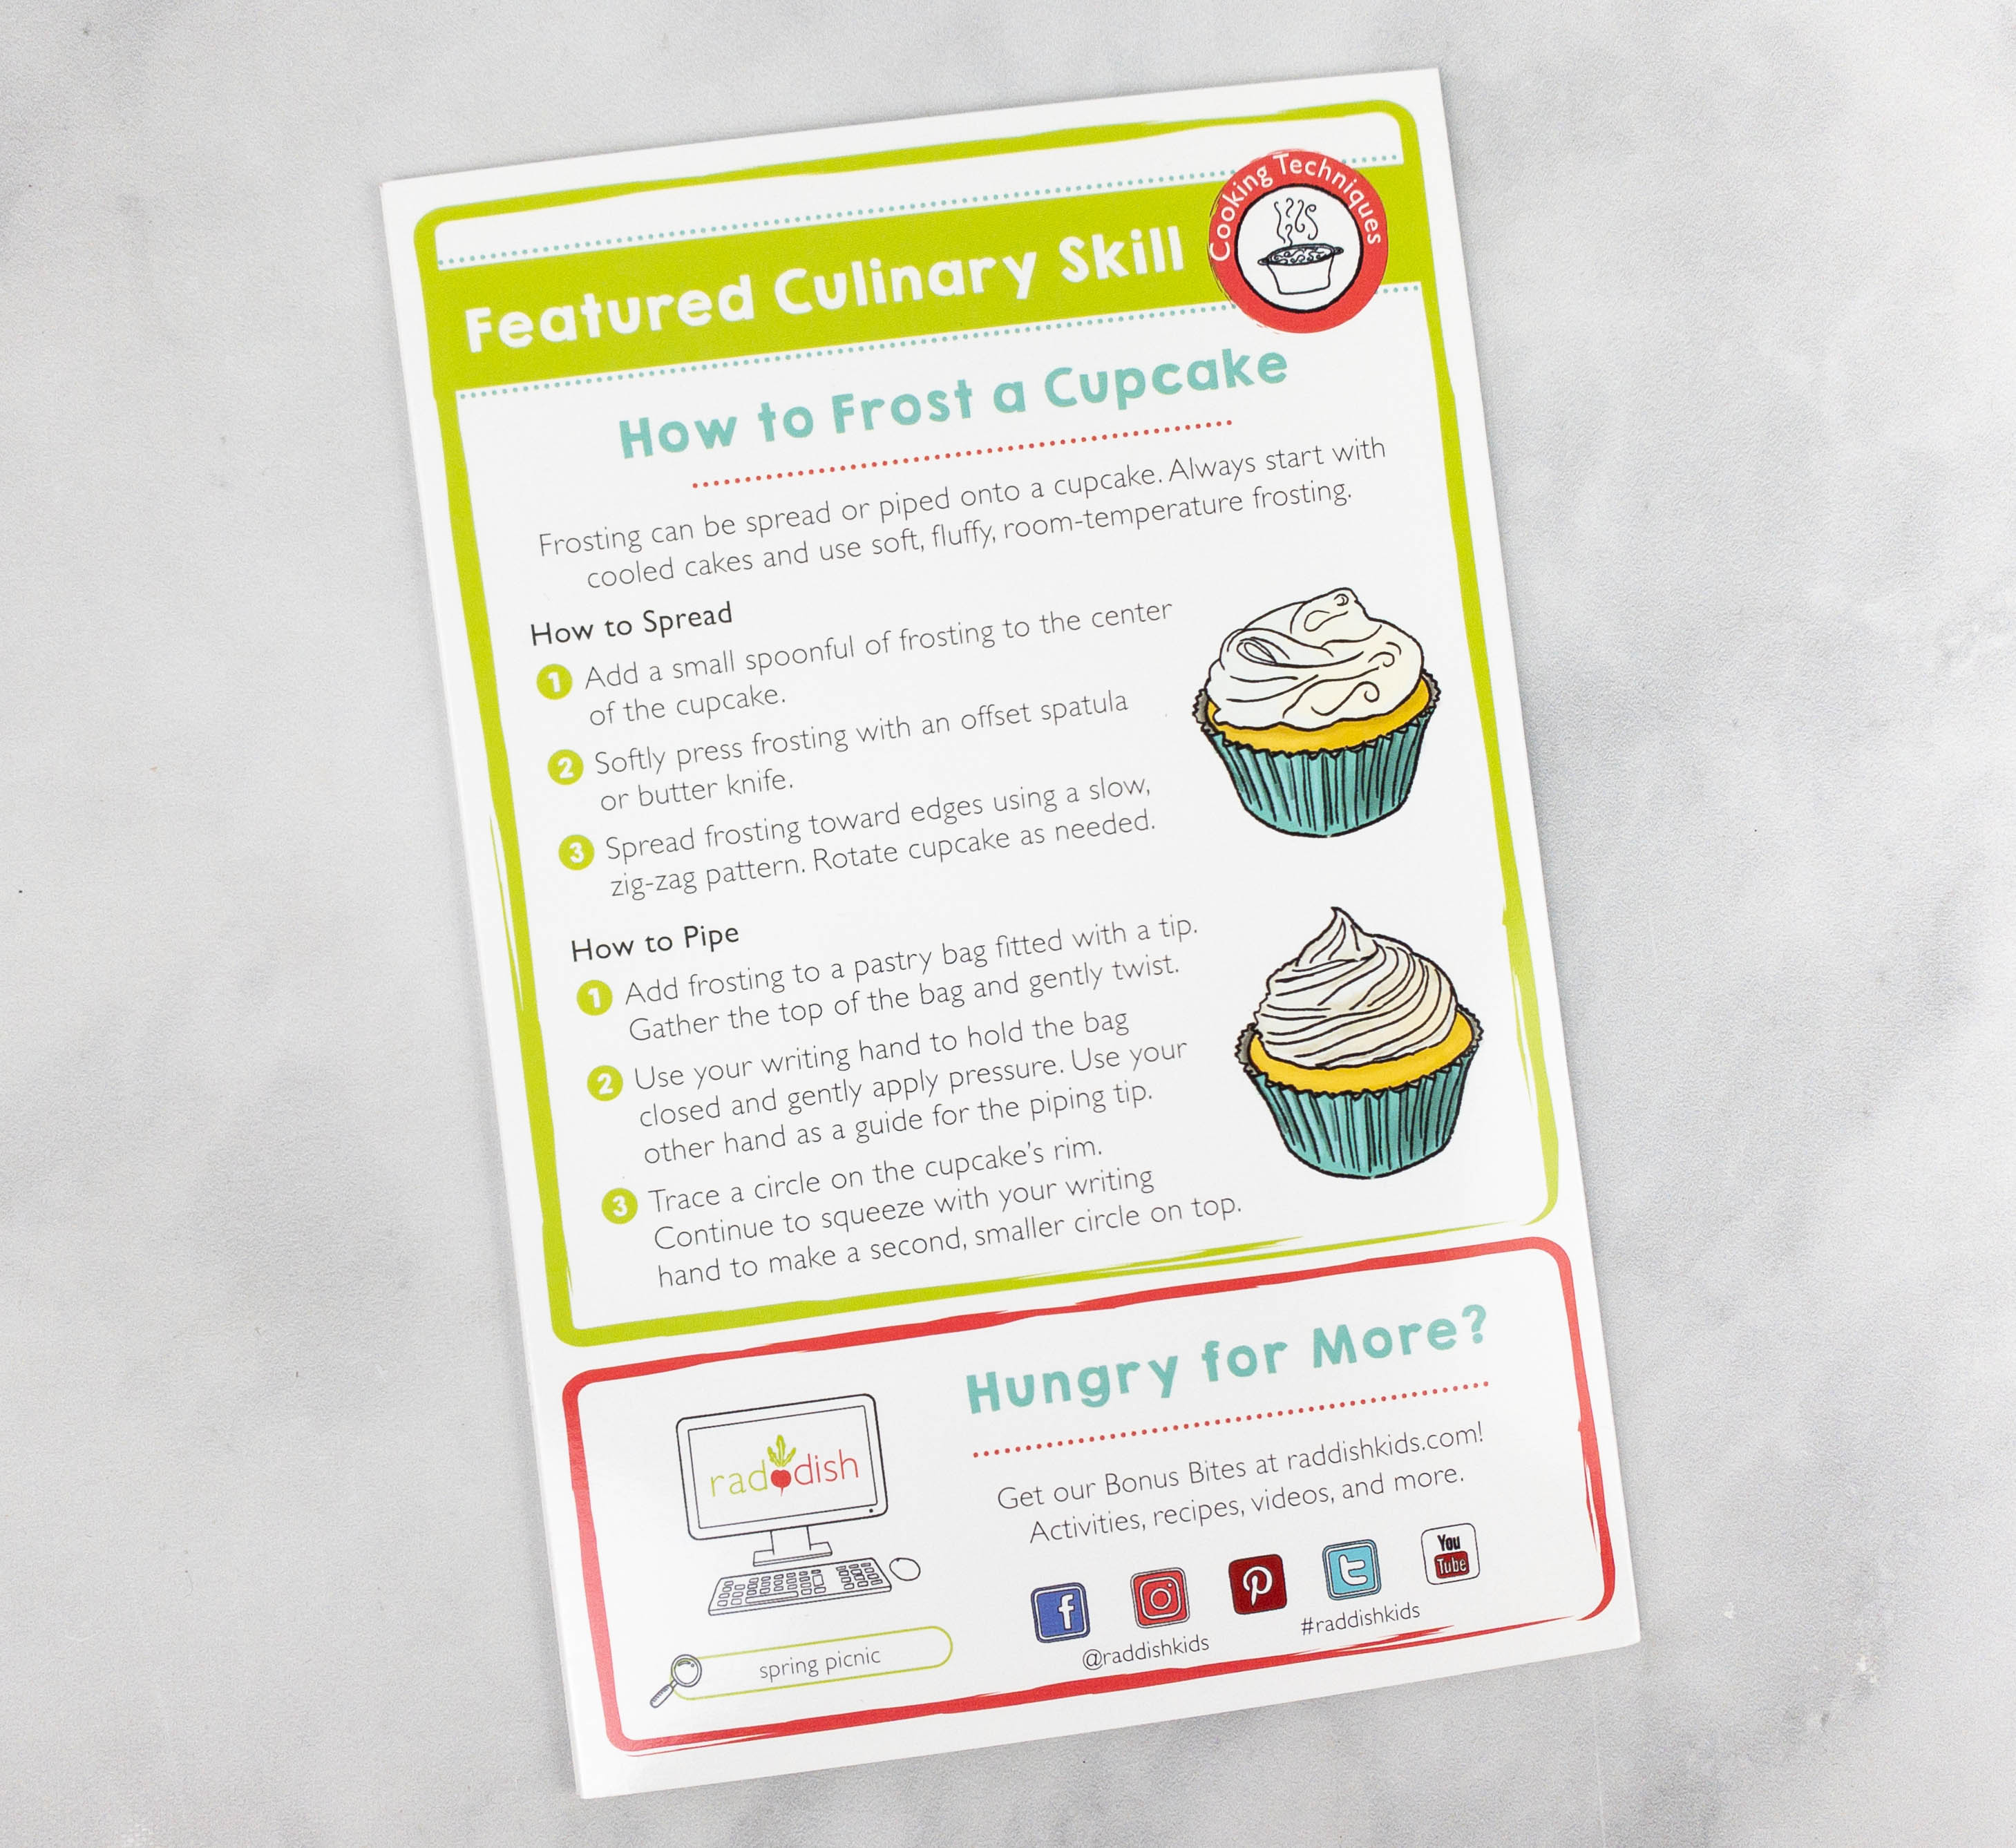
In this recipe, kids get to learn about frosting a cupcake!
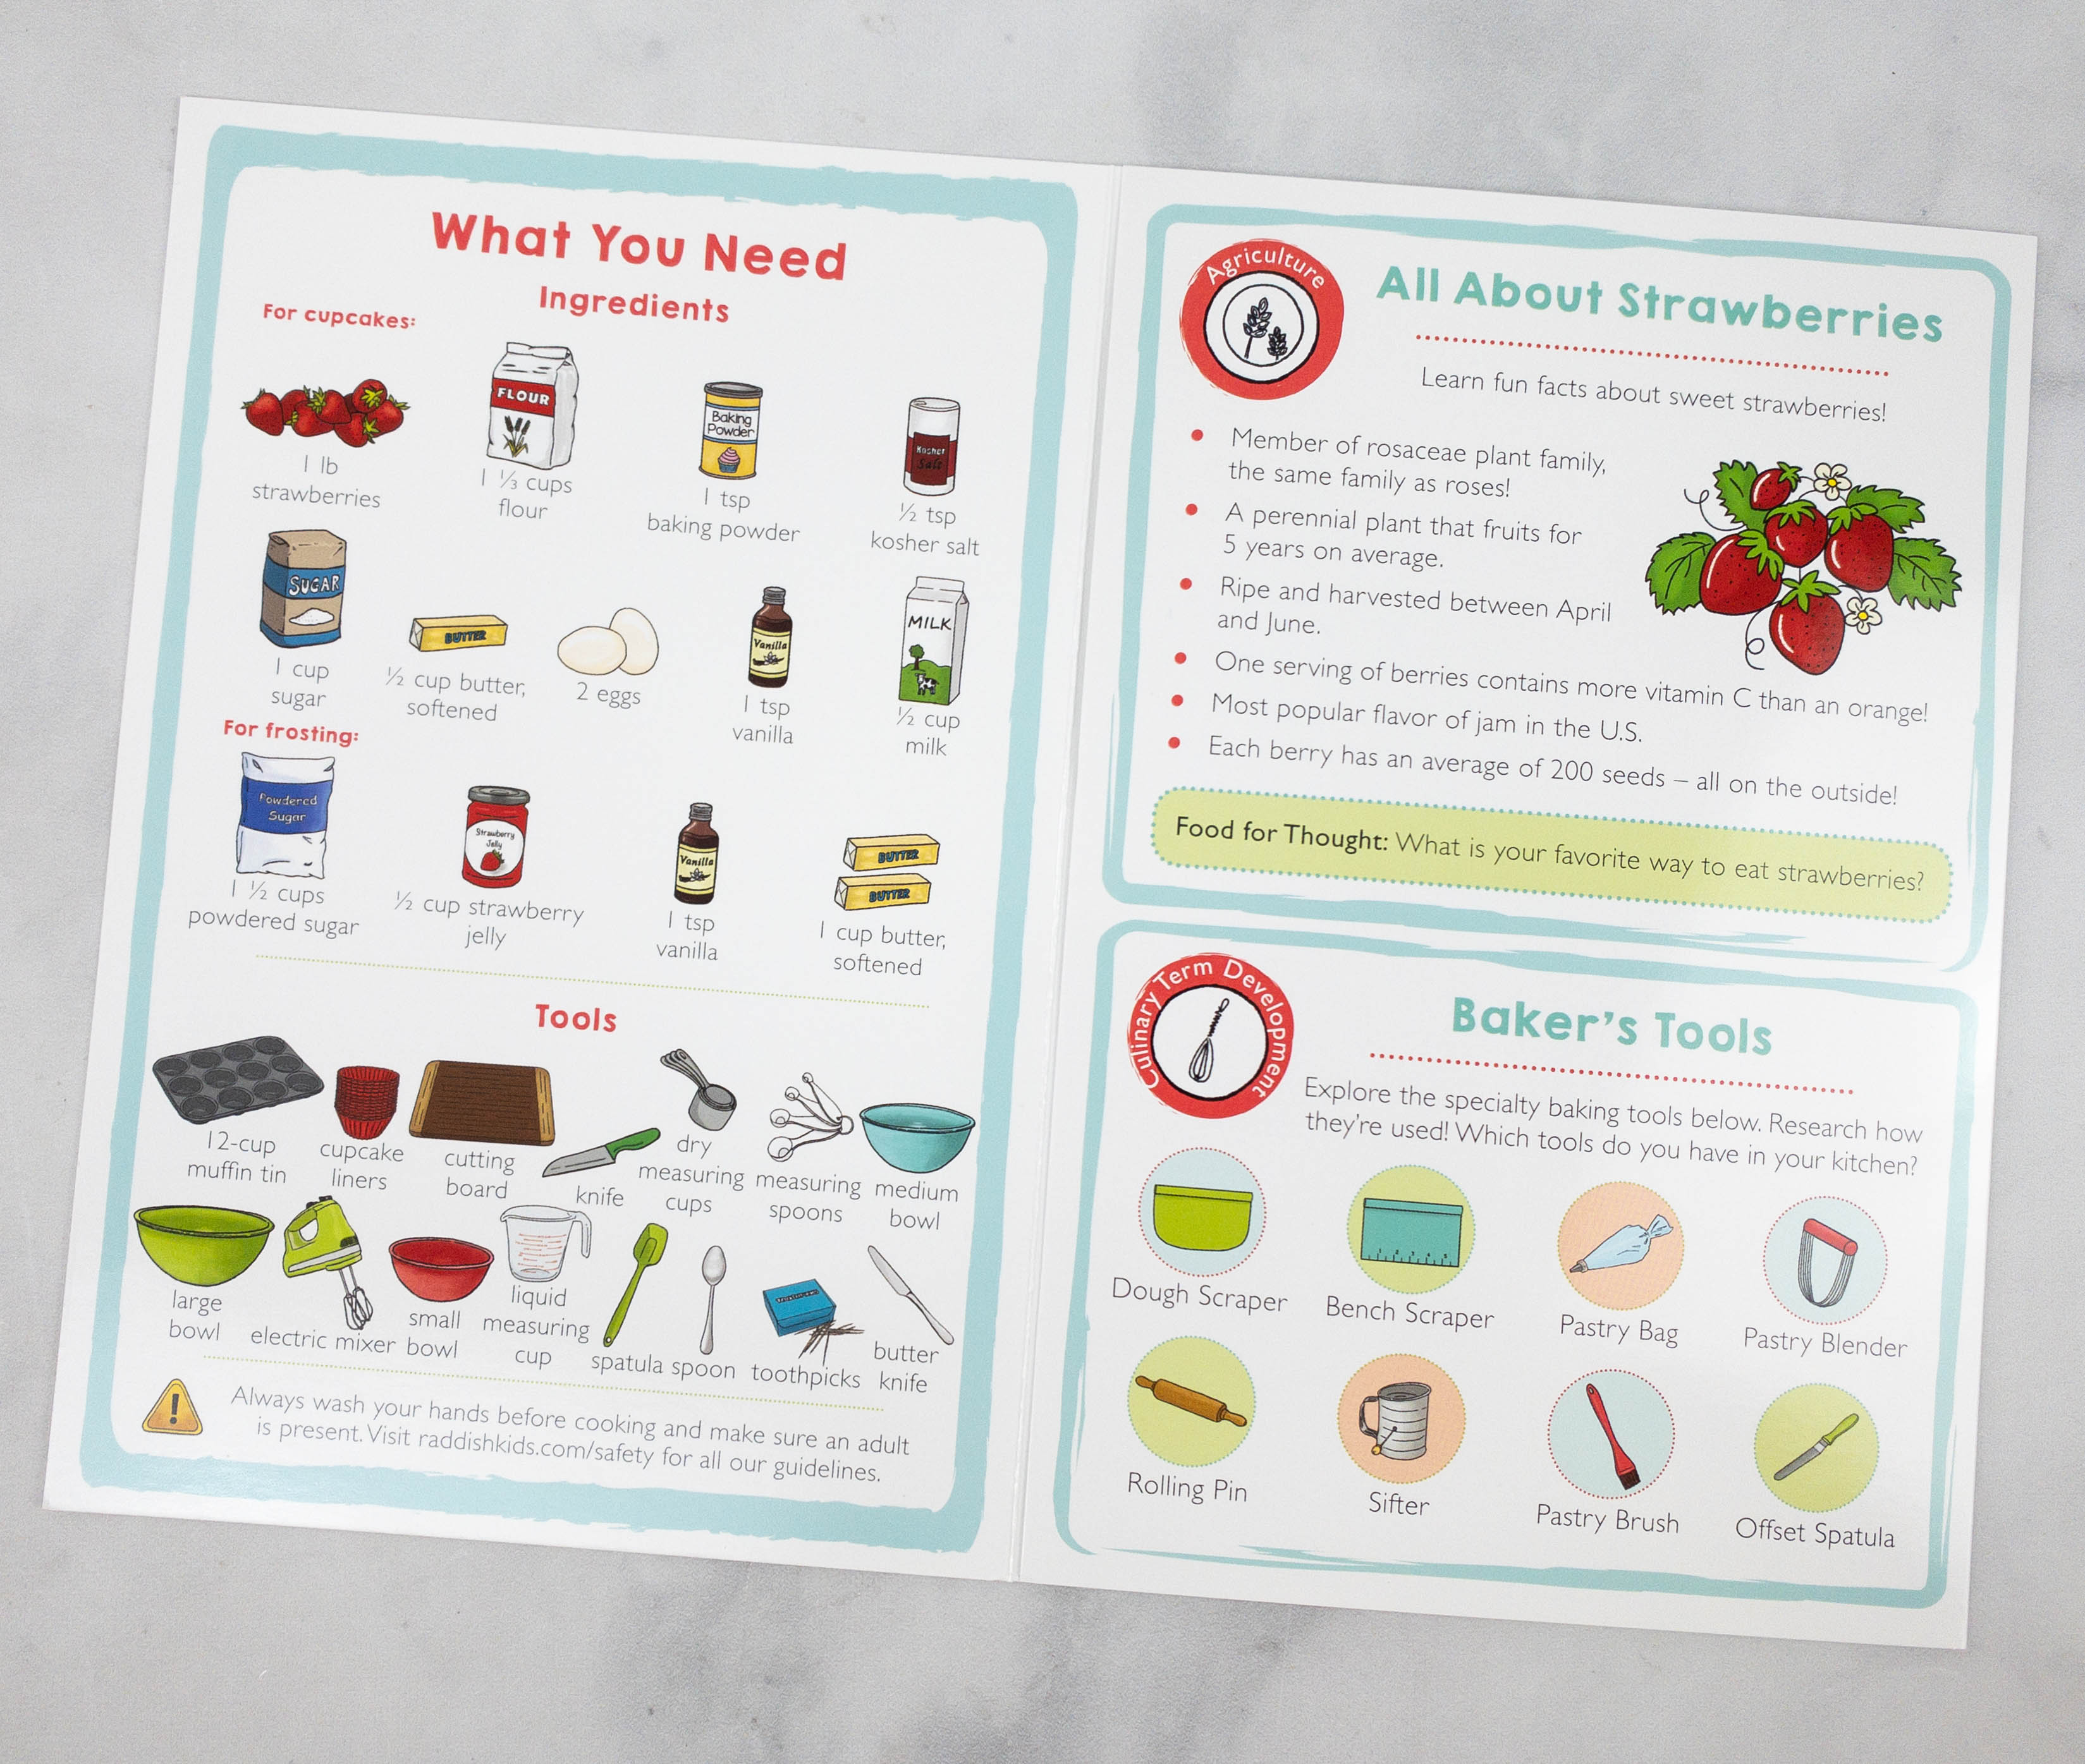
Aside from the ingredients and tools needed for the recipe, there’s also a feature on baker’s tools as well as more information about strawberries!
Aside from strawberries, the ingredients needed for this recipe are flour, baking powder, kosher salt, sugar, butter, egg, vanilla, milk, powdered sugar, and strawberry jelly.
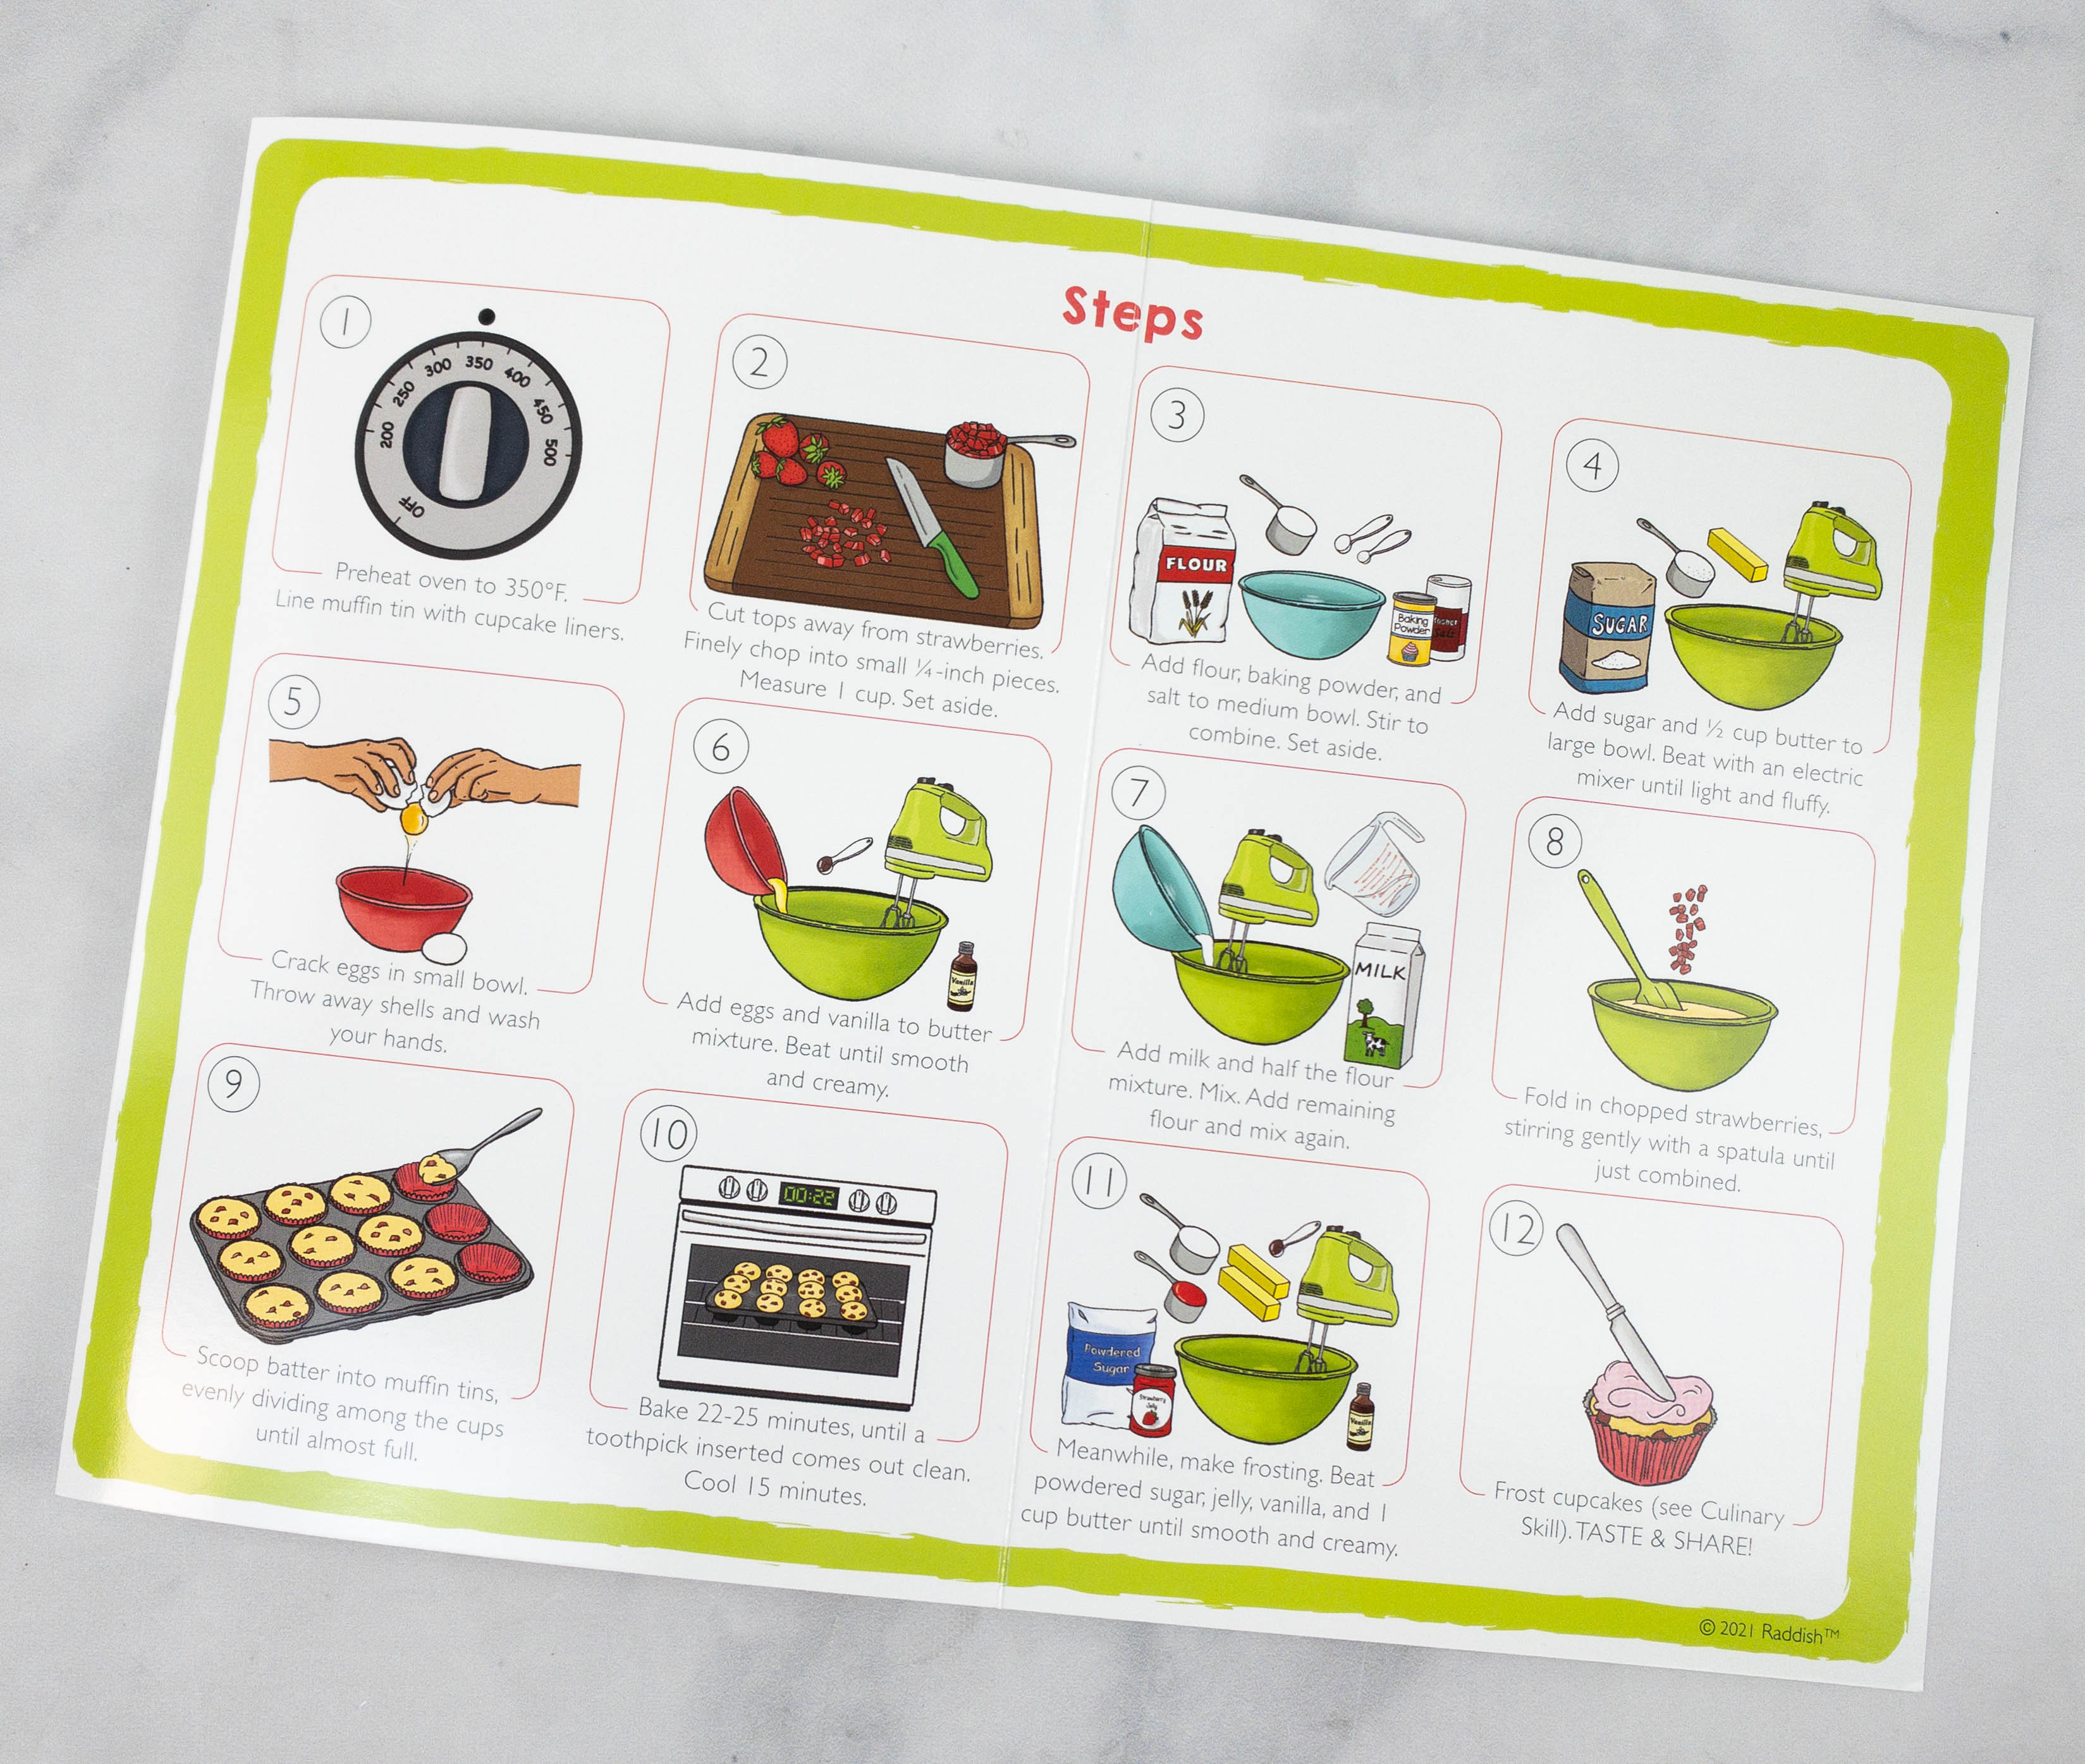
Here are the steps in making the cupcakes! My kids started by preheating the oven and chopping the strawberries into small pieces.
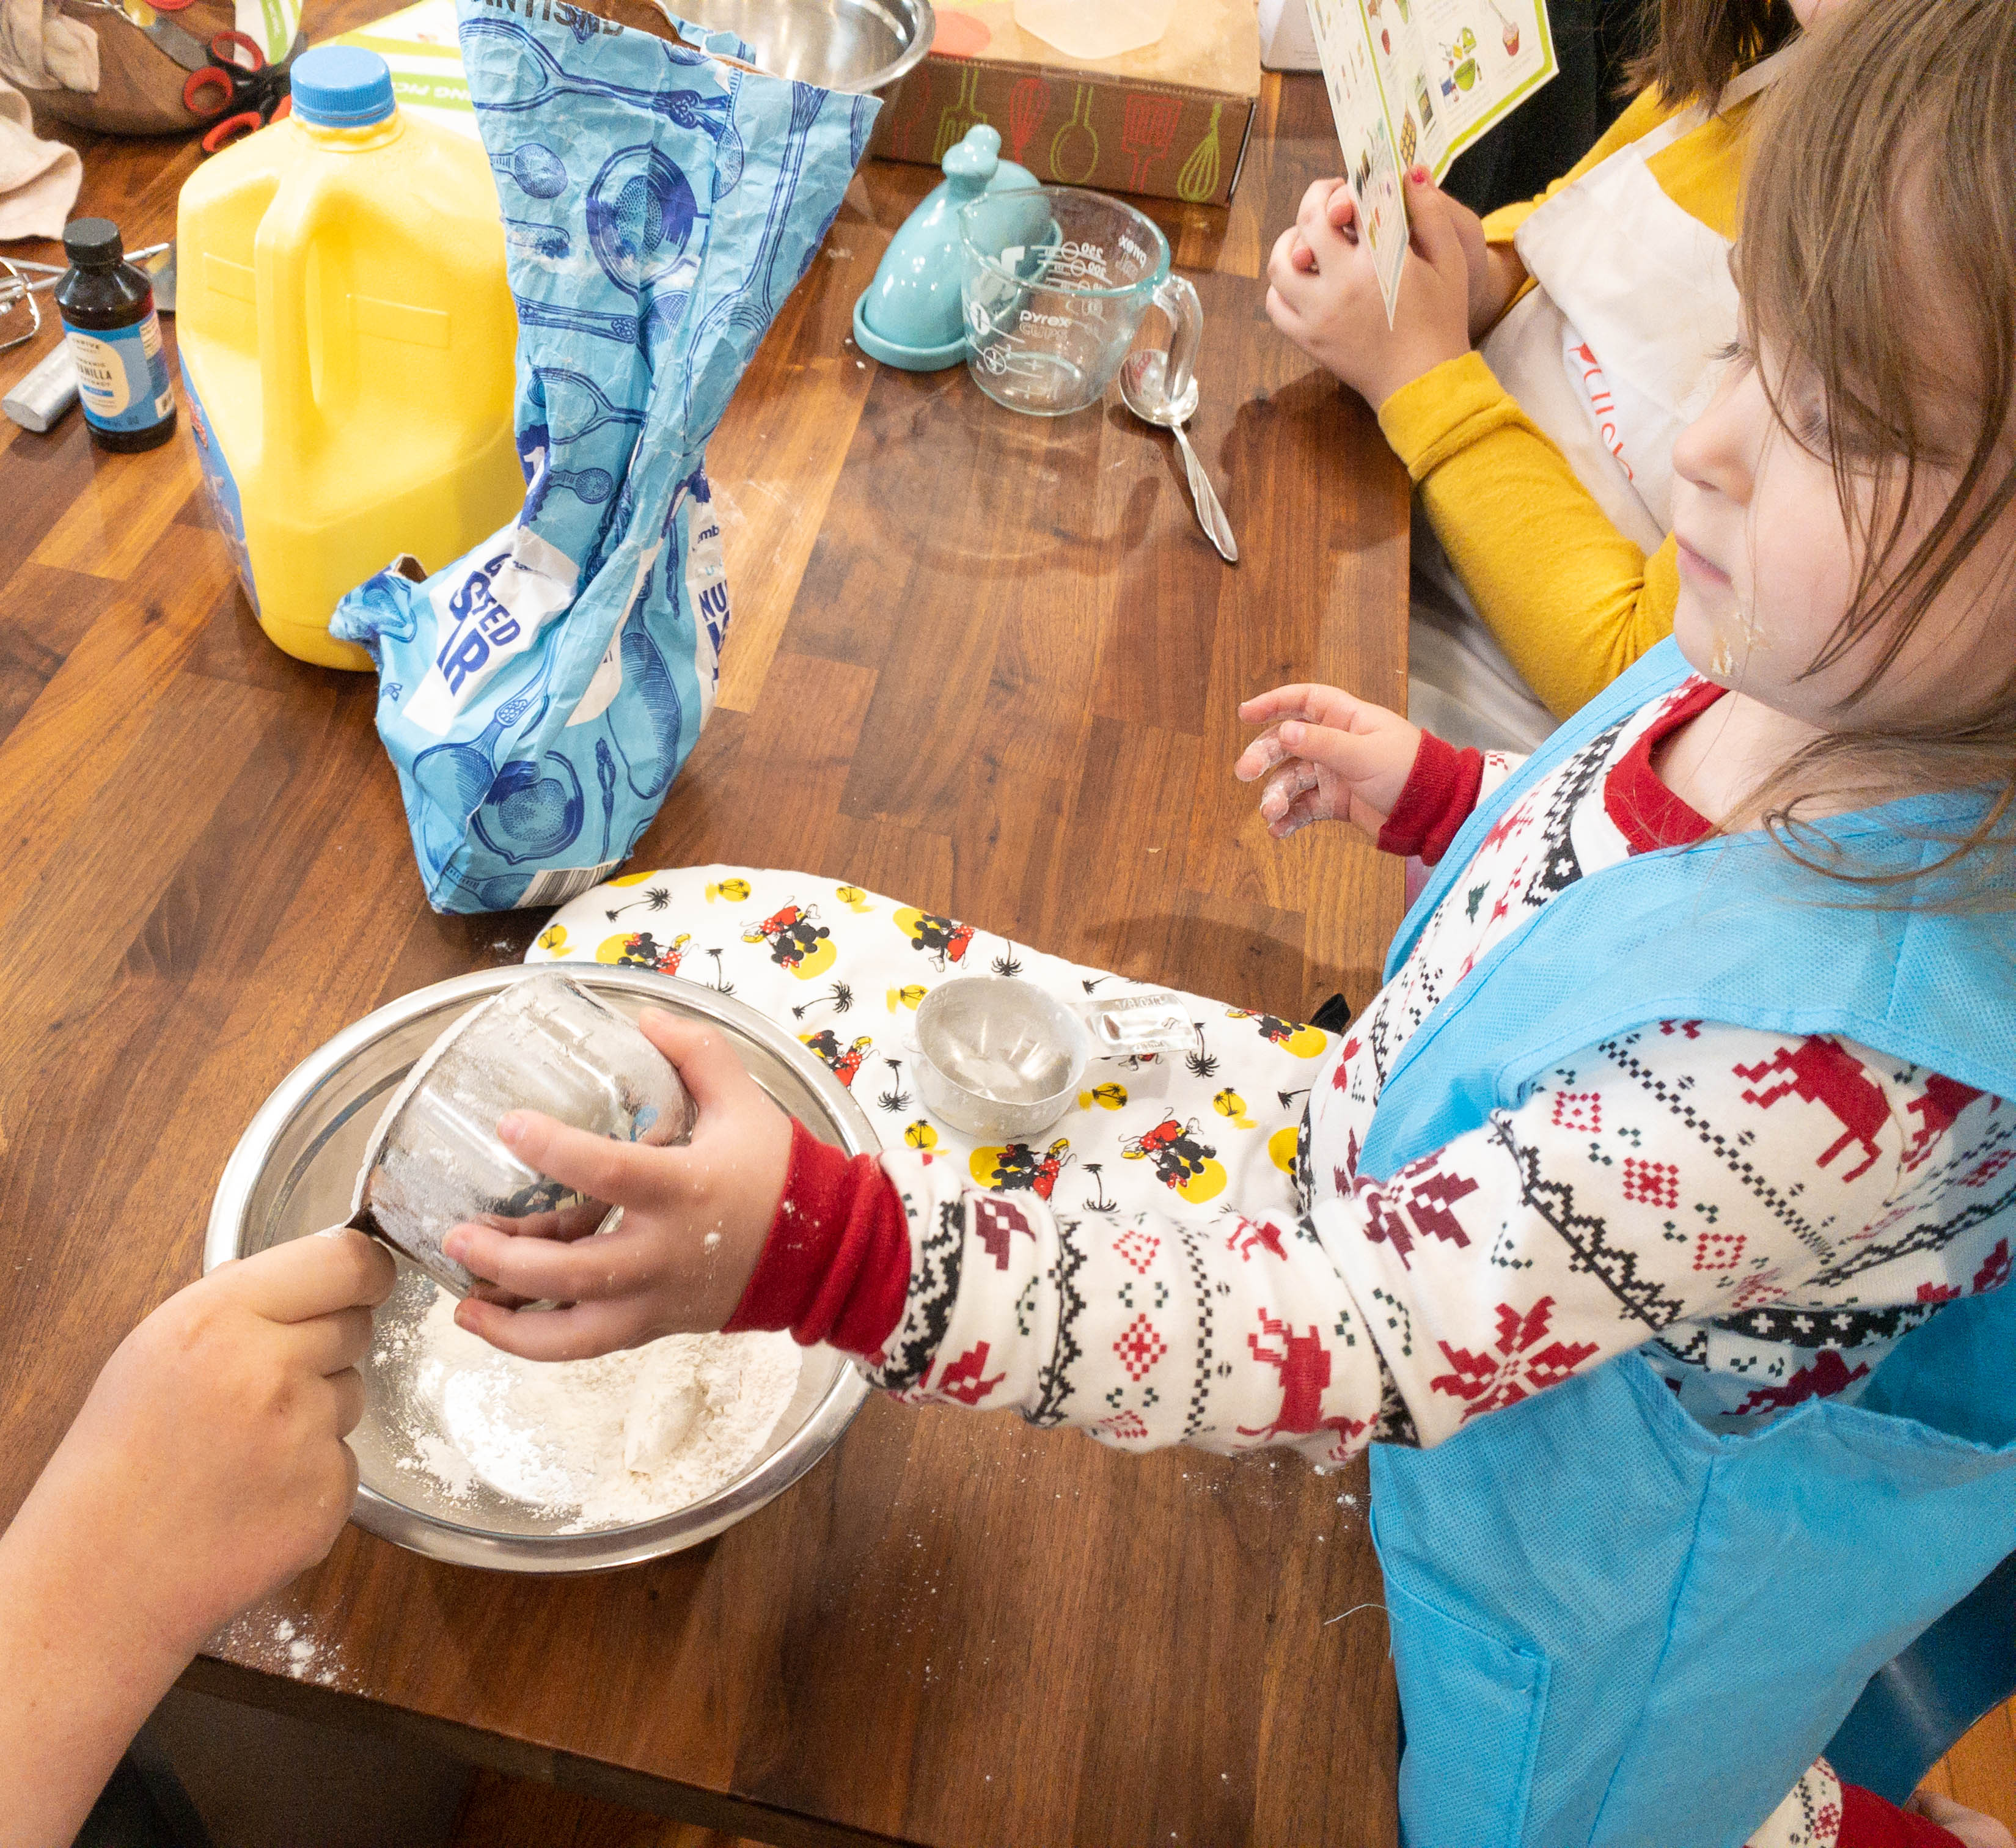
Then, in a large bowl, my kids combined sugar and butter. They beat the mixture with an electric mixer until it was light and fluffy. Then, they cracked the eggs in a small bowl to make sure there will be no shells before pouring it along with the vanilla in the large bowl. In another bowl, my daughter added flour, baking powder, and salt.
Once that’s all done, it’s time to add half the flour mixture along with the milk and beat until its fully incorporated before adding the rest of the flour mixture. Continue beating until everything is well combined.
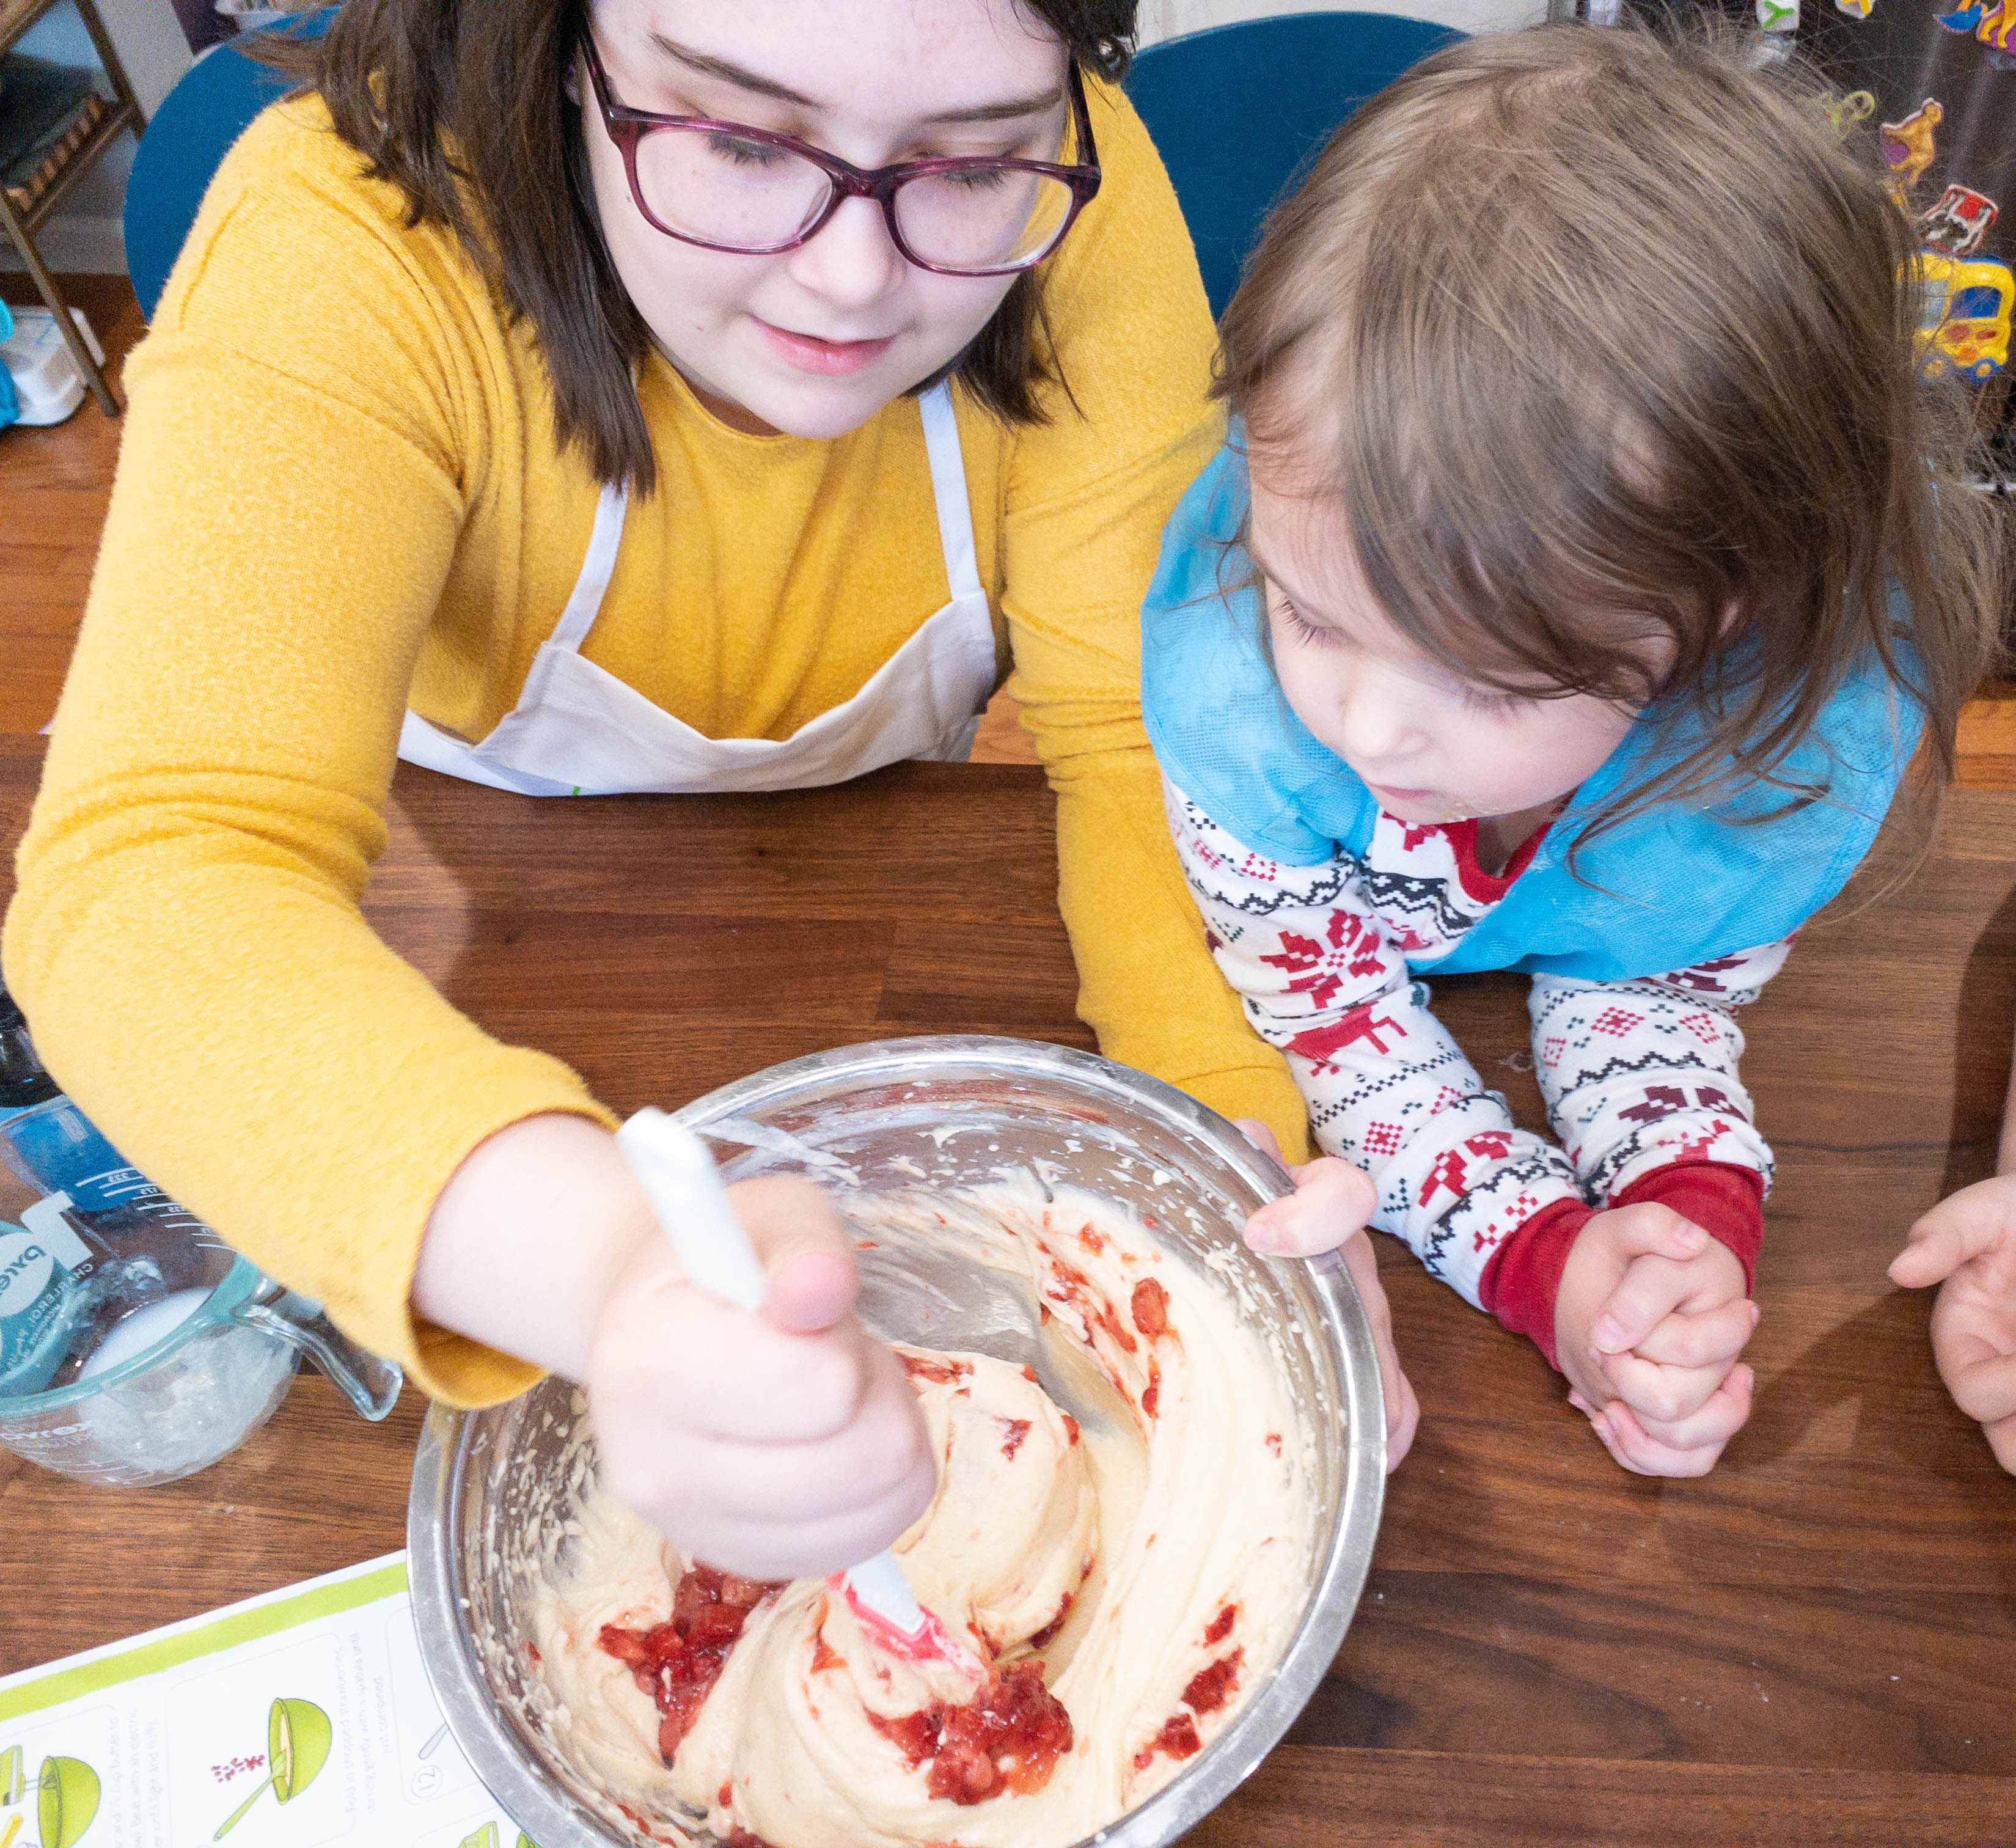
Next, add the chopped strawberries and using a spatula, fold them into the mixture.
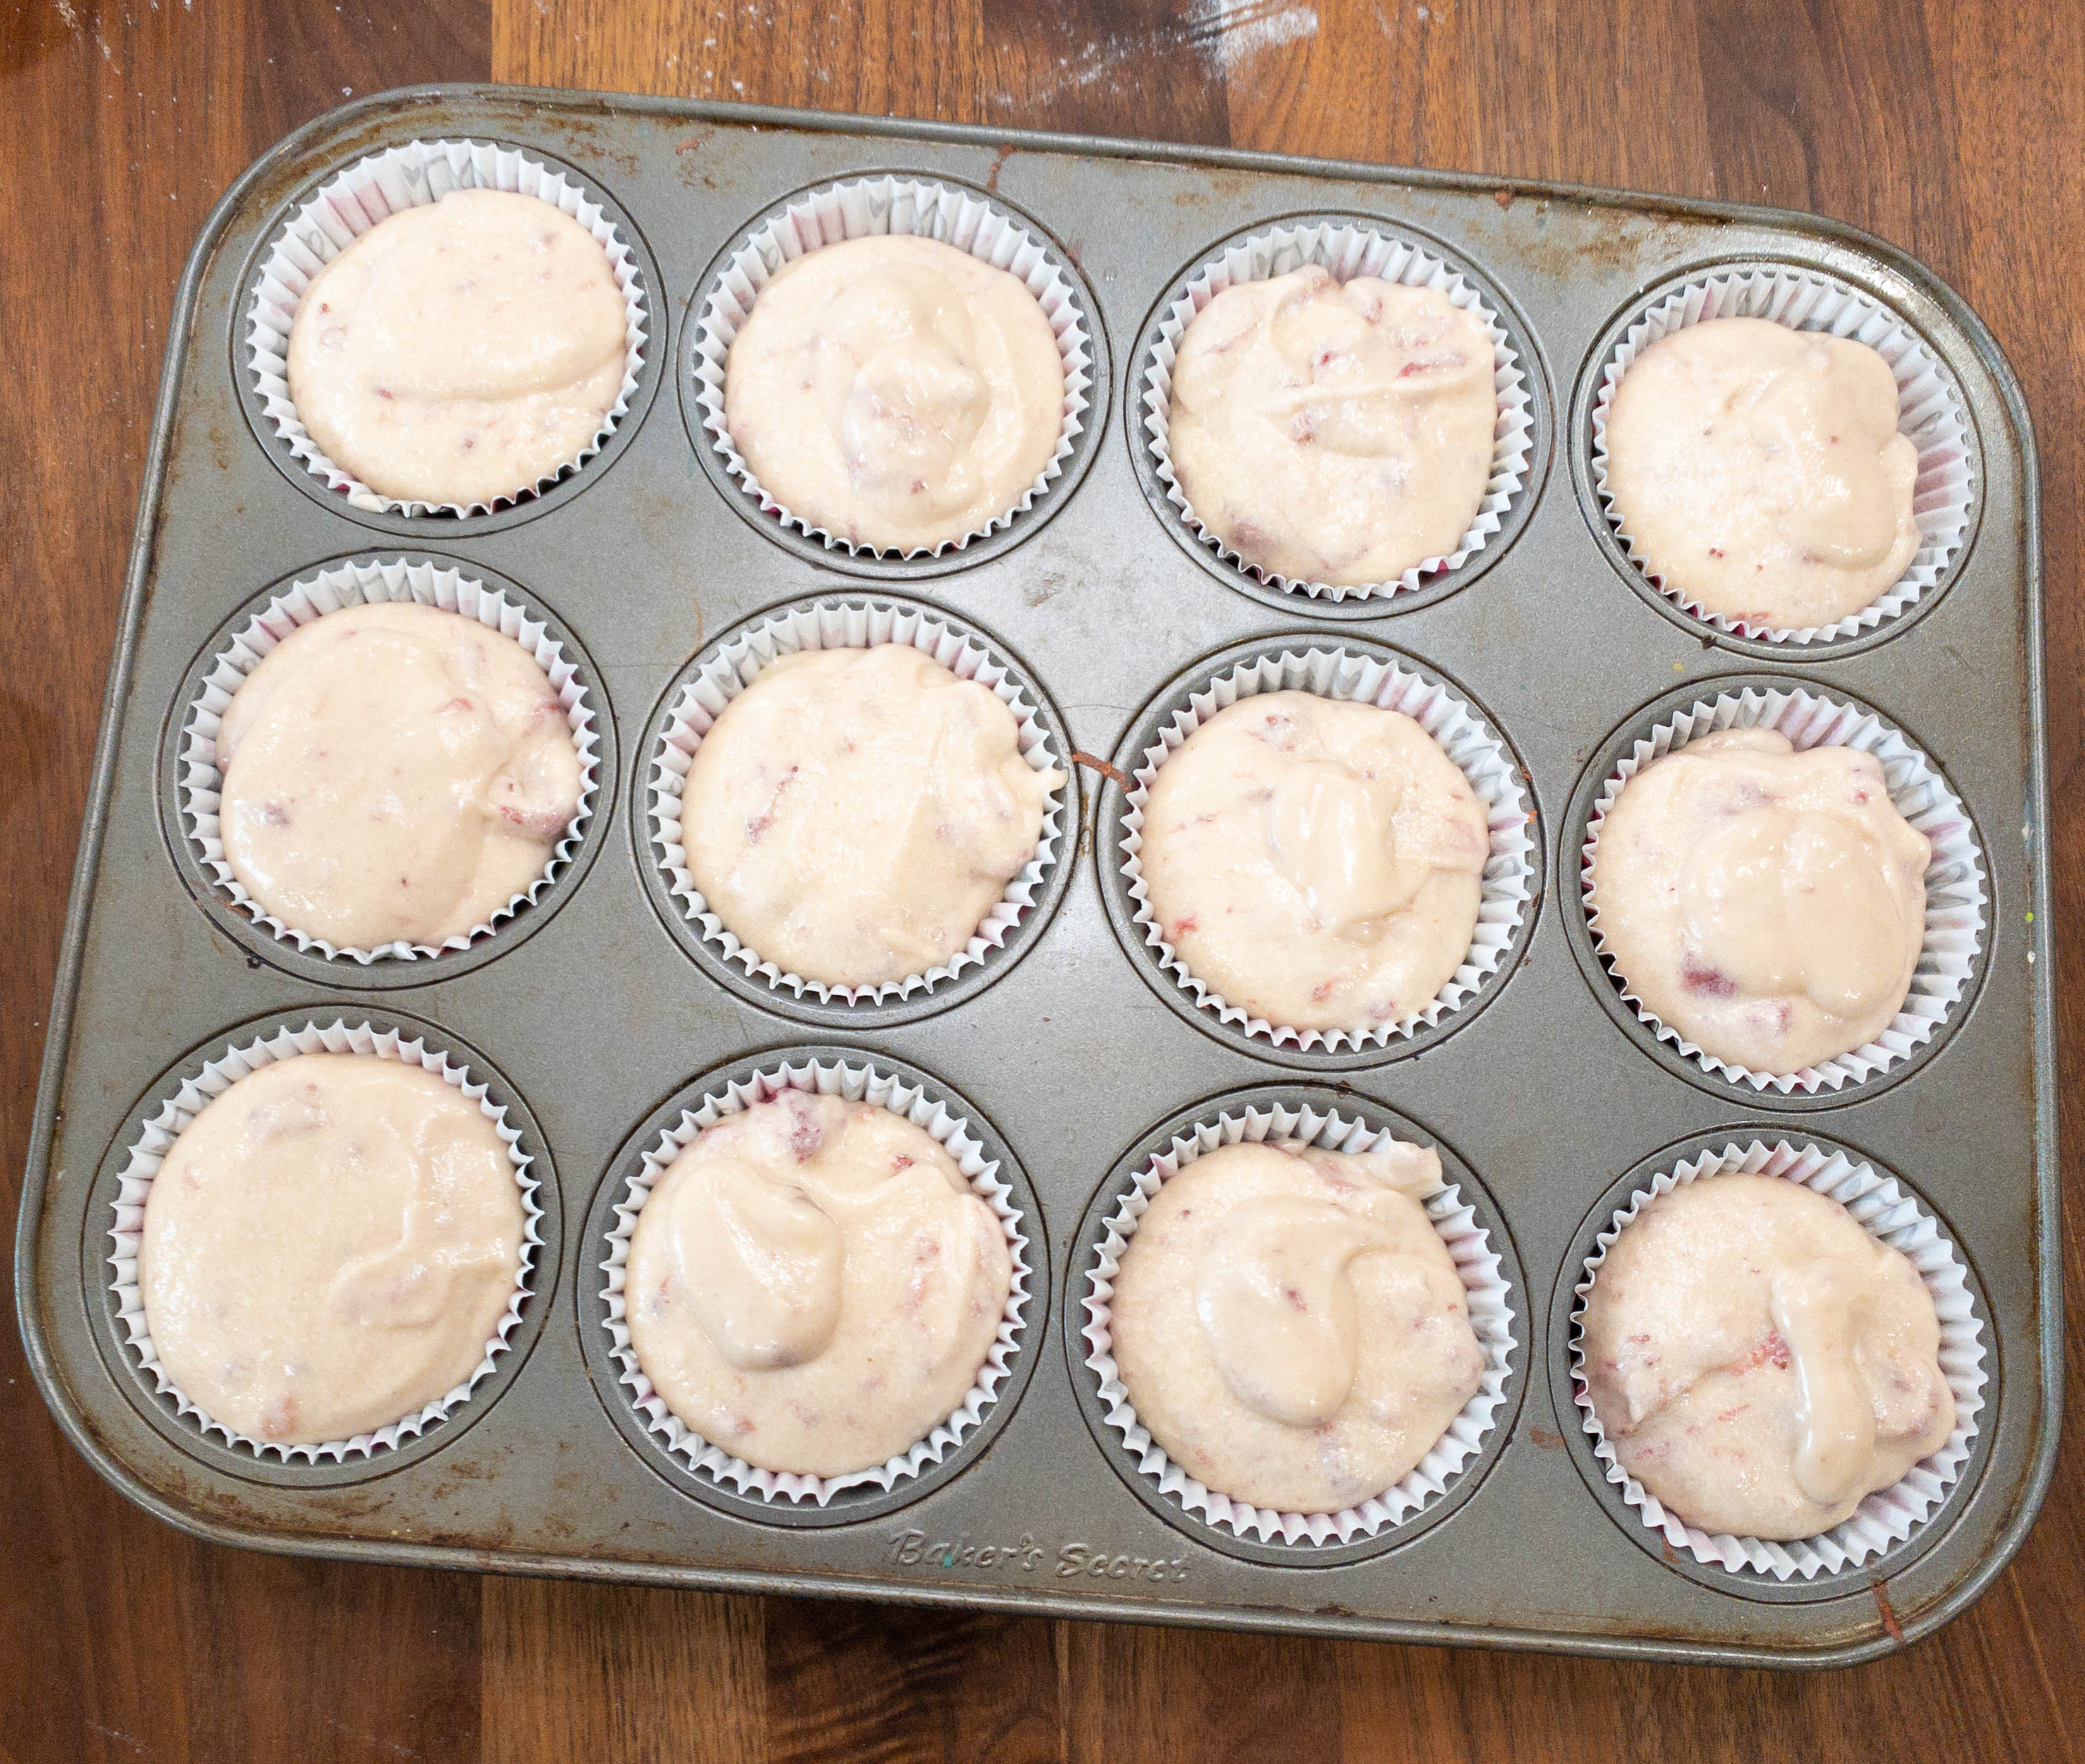
Line your muffin tins with cupcake liners then scoop the mixture in, dividing evenly among the cups until it’s almost full. Once that’s done, pop it in the oven for about 20-25 minutes. While waiting, my kids also prepared the frosting by combining powdered sugar, jelly, vanilla, and a cup of butter. They mixed it using a hand mixer until it’s smooth and creamy.
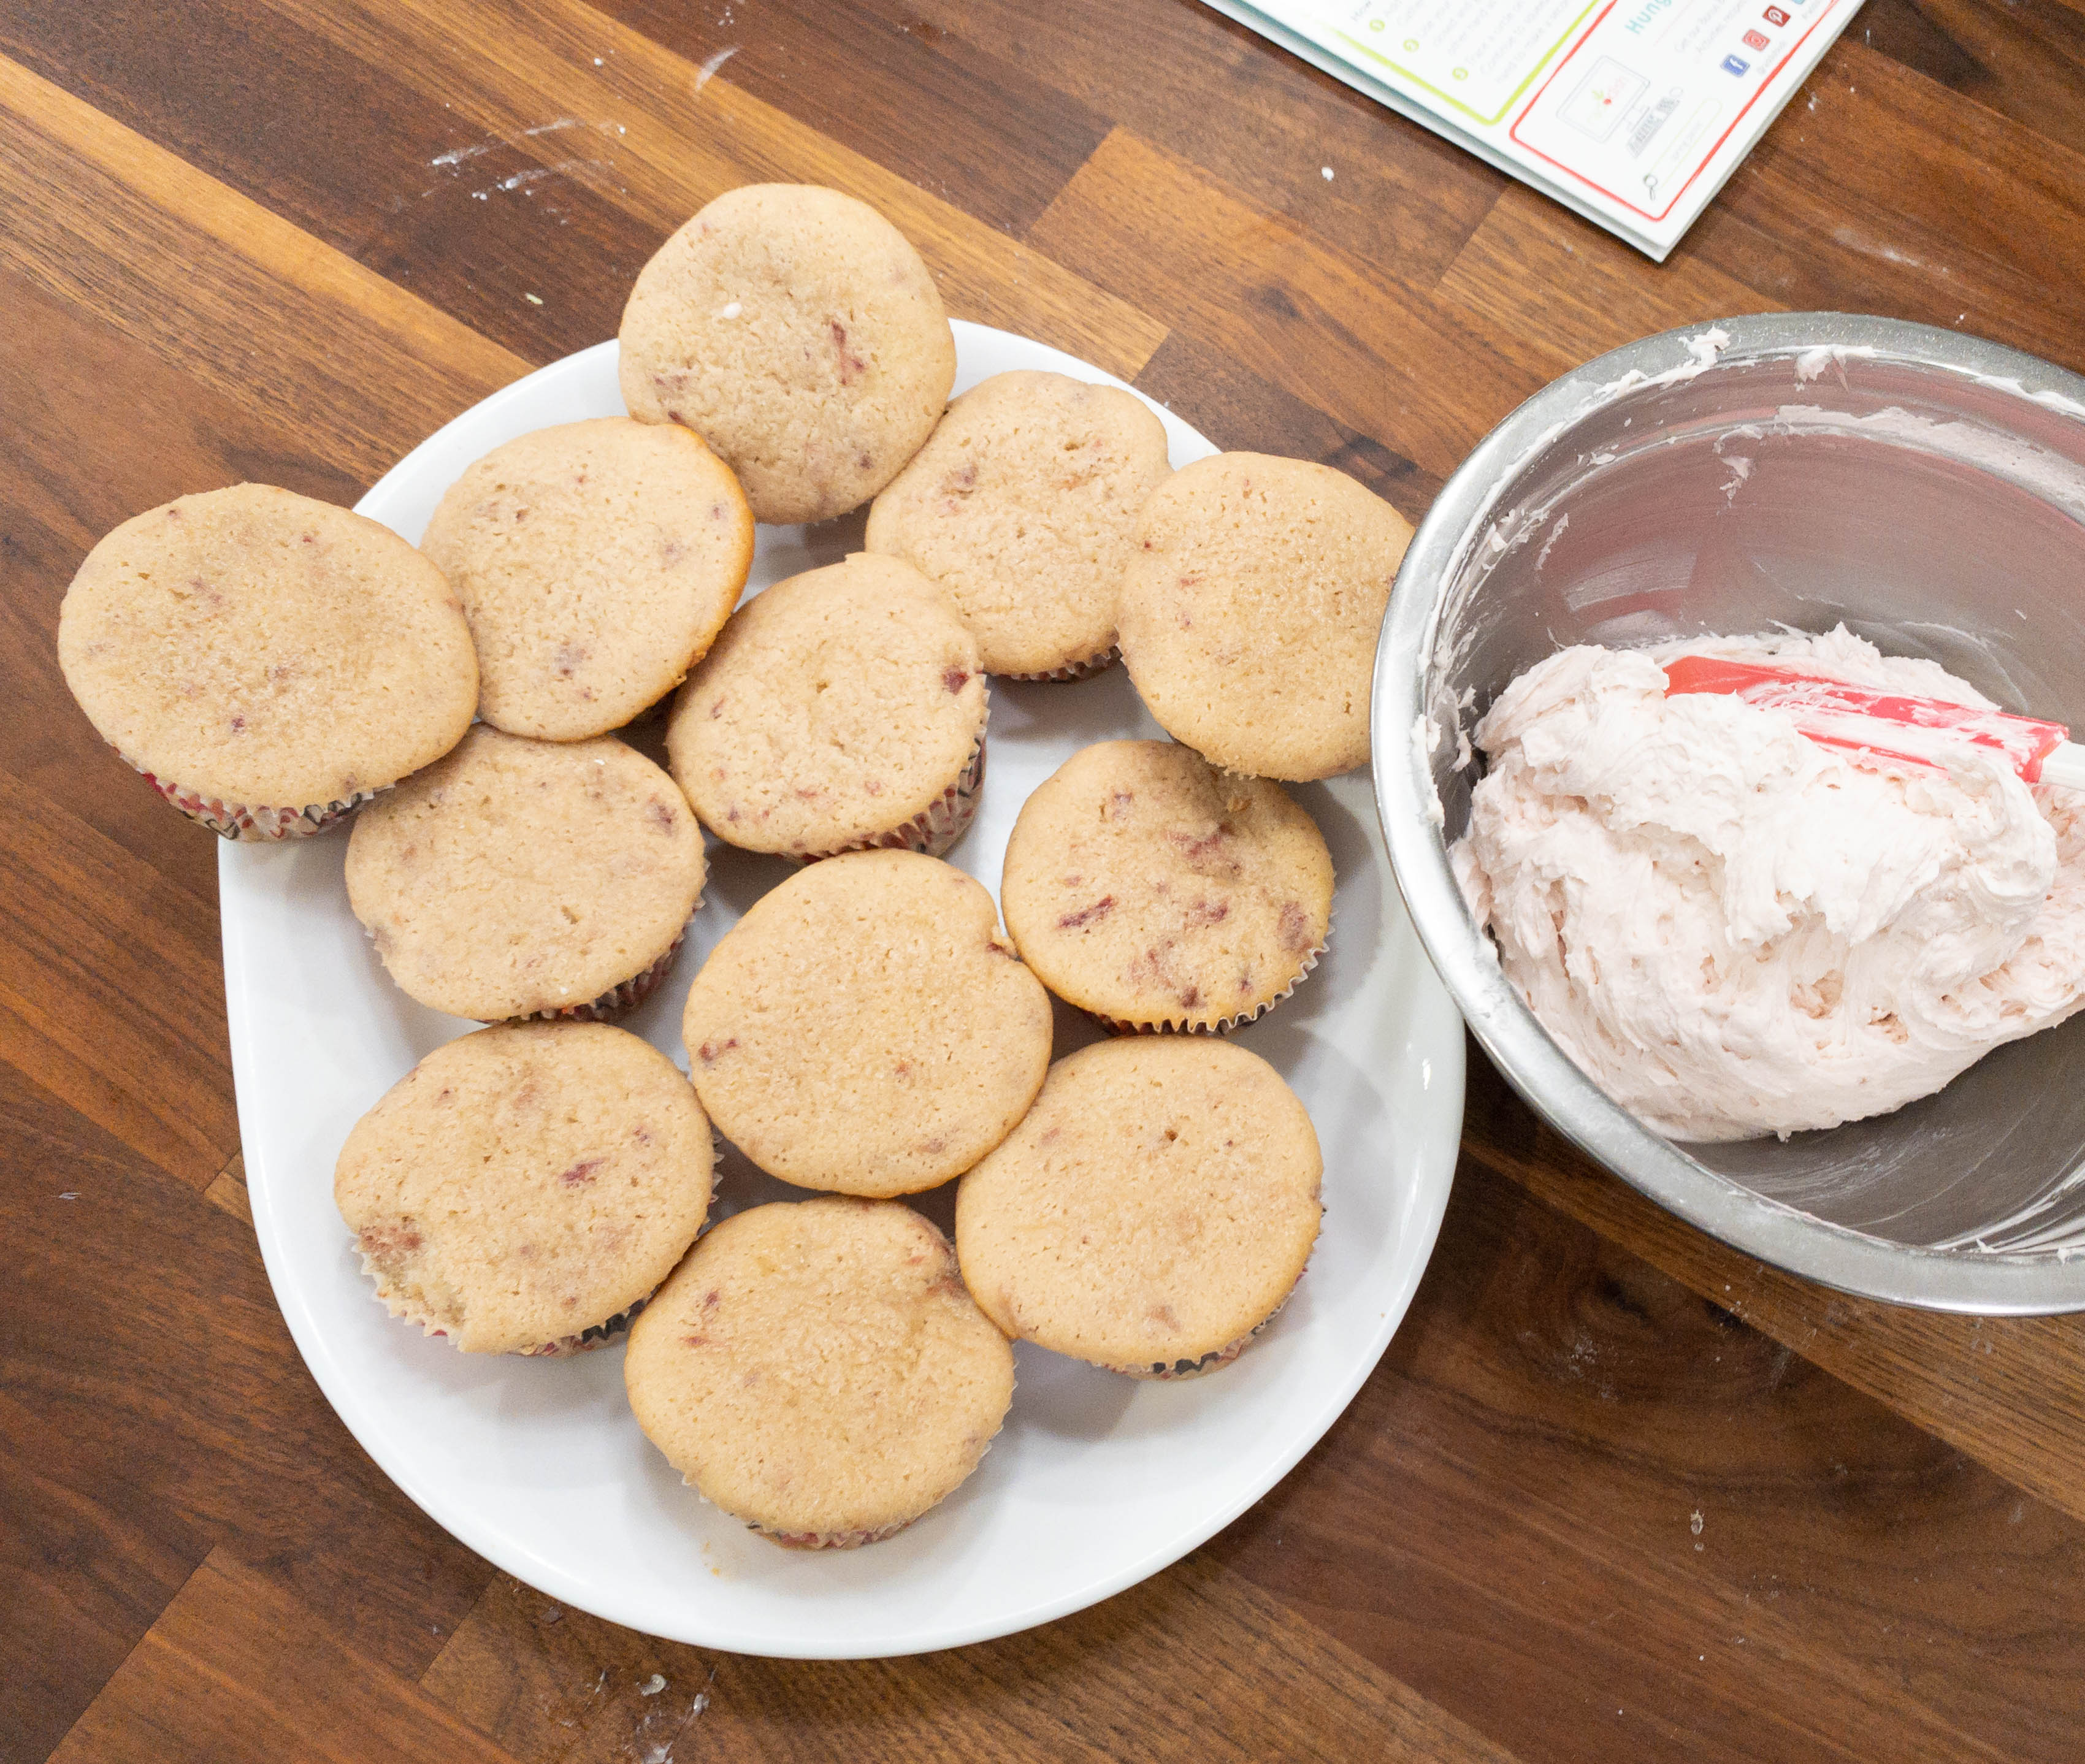
Once the cupcakes are done, they should look like this. Let them cool for a little bit so they’ll be ready to be decorated with frosting. My kids were so excited about this!
My kids took a small plastic bag, placed some of the frosting inside, and nipped one end off. They used this to decorate the cupcake!
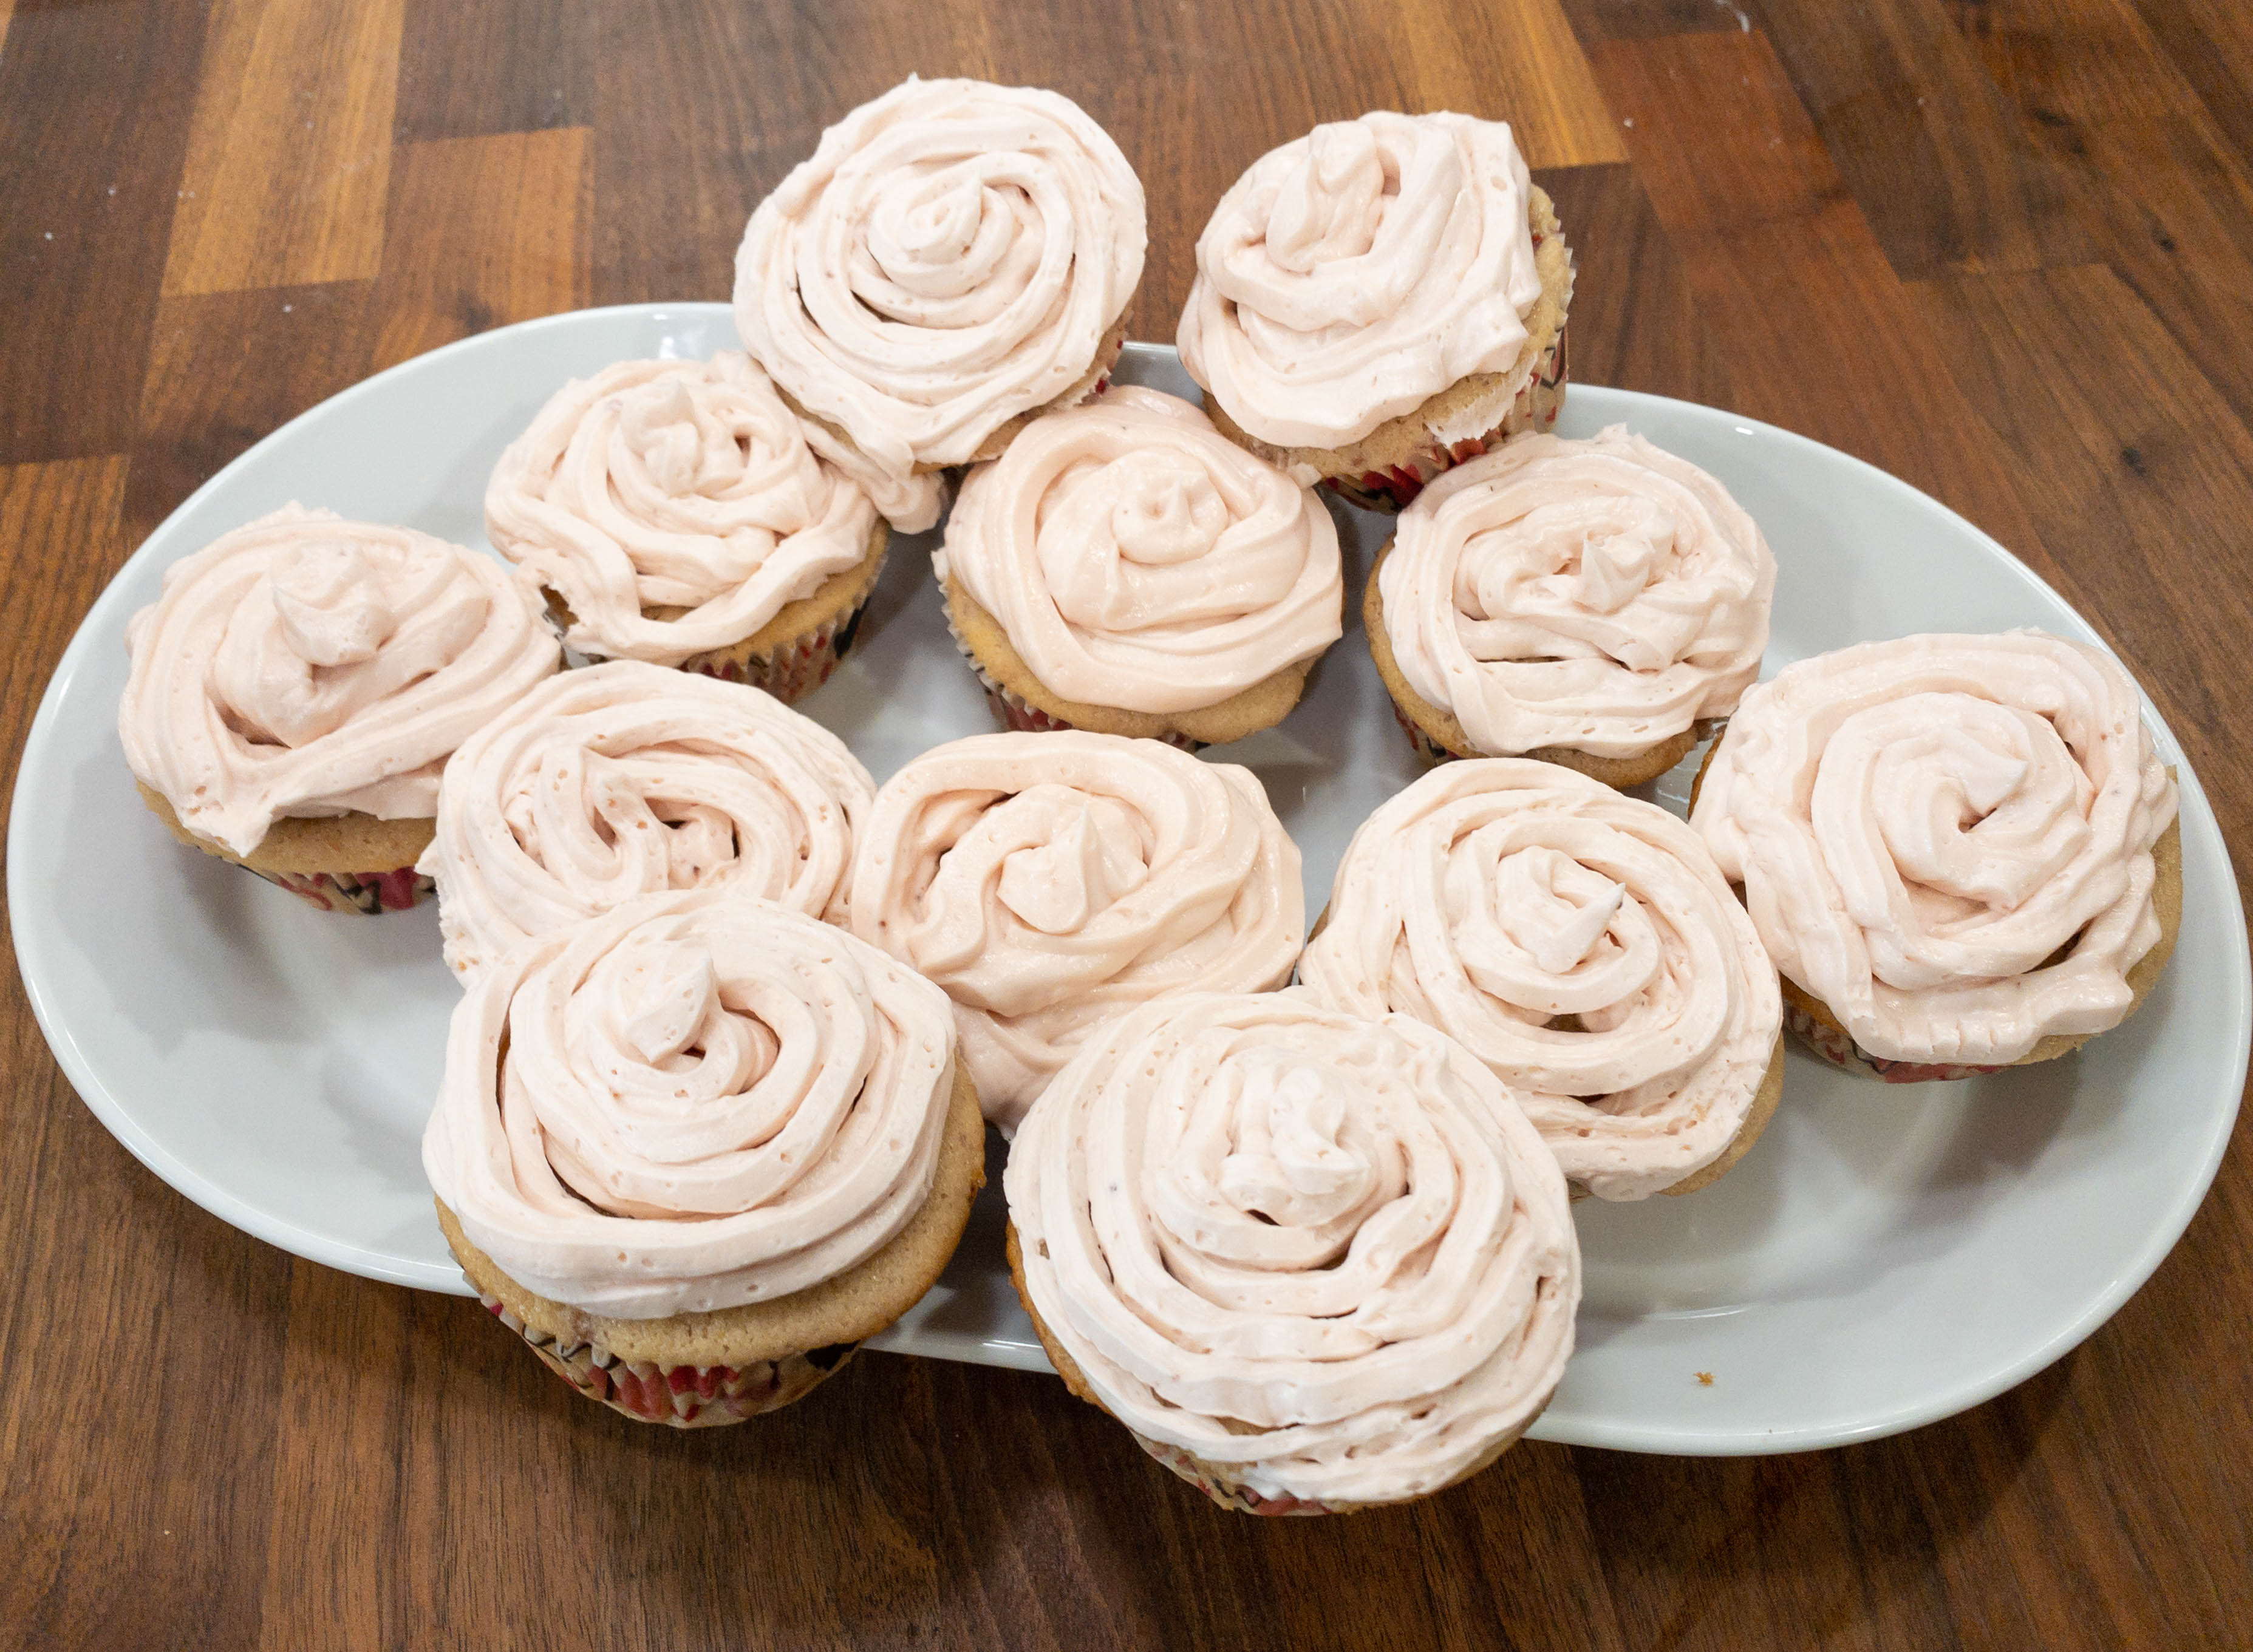
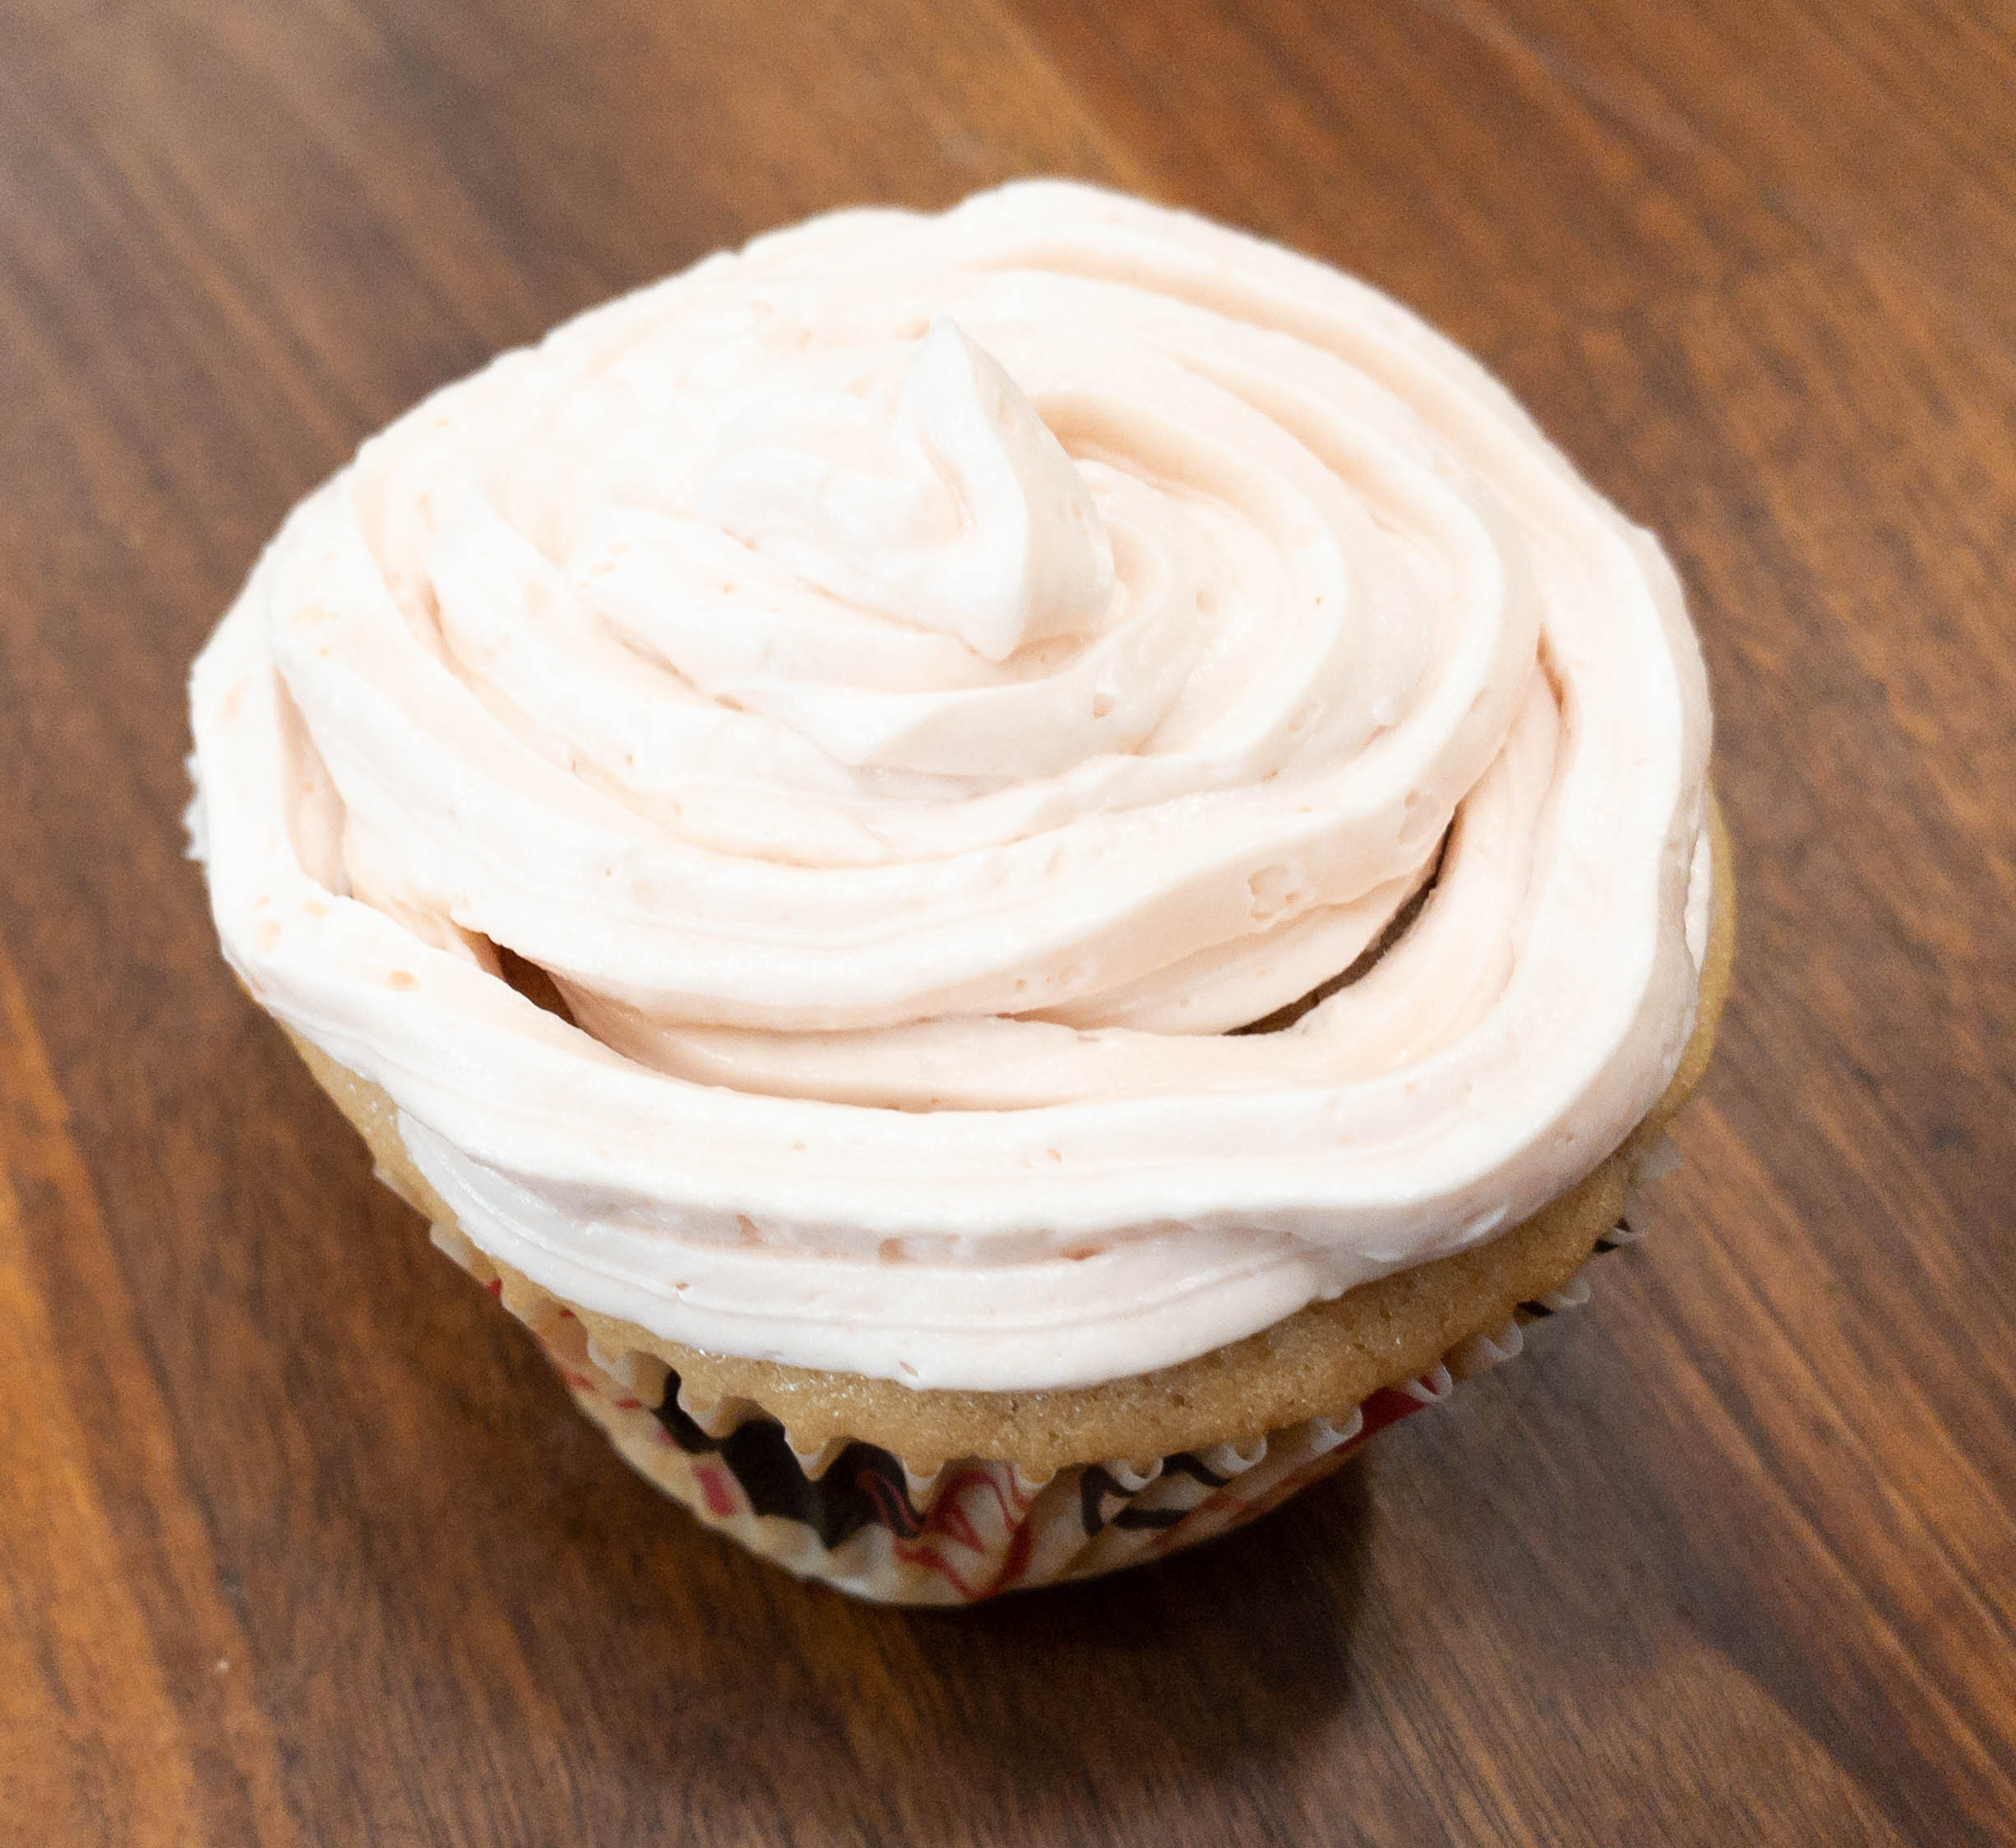
Here’s a look at the finished product! Yum!
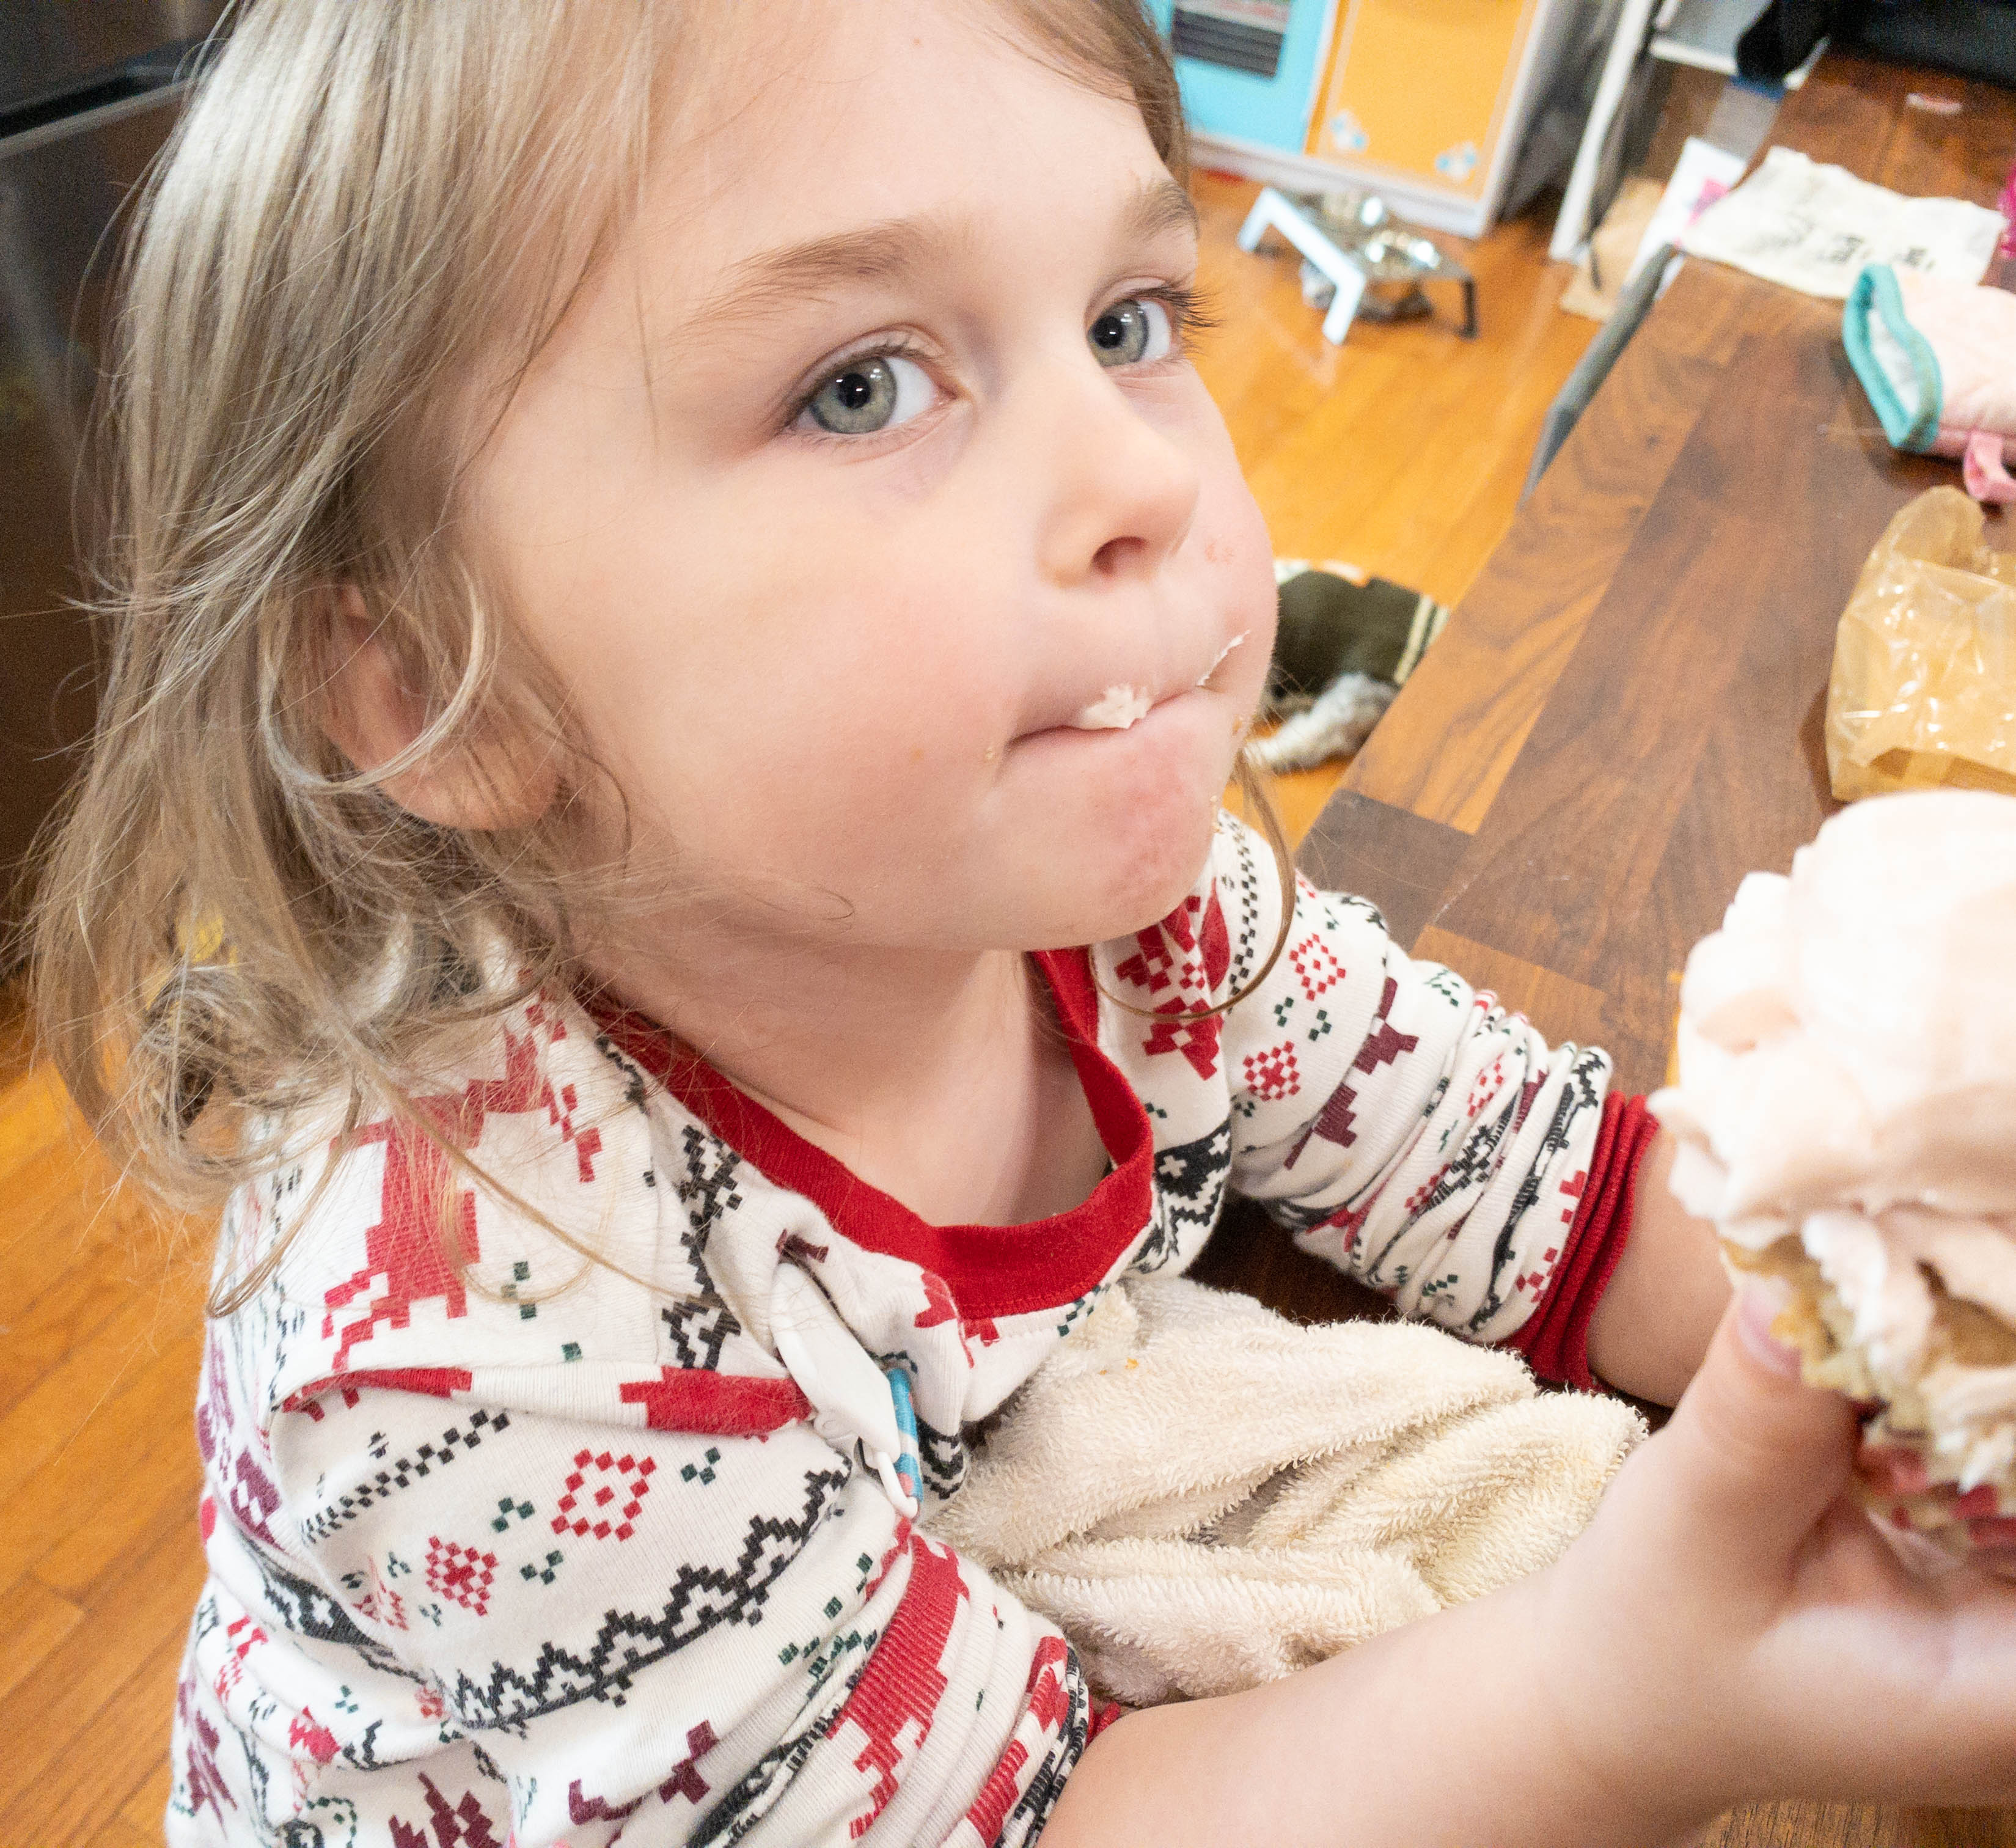
My daughter loved the cupcakes so much!

She loved both the cupcake and the frosting because they’re fruity and not too sweet.
My kids had a blast with this month’s Raddish Kids box! All three recipes are fun and easy, plus my kids learned new culinary skills so it’s really a win. My kids’ favorite is definitely the cupcakes. They loved the whole process of baking the cupcakes and then topping them with frosting. After putting everything together, my kids also had fun snacking on the finished products. The cheese dip and the sandwiches also turned out really tasty! Overall, this box is really a good way to introduce kids to what goes on in the kitchen. It also makes a great bonding experience for siblings. So far, my kids have enjoyed all the recipes from this subscription and they really like those recipes that involve using their brand new kitchen tools!
What do you think of this month’s Raddish Kids box?


Comments