Eureka Crate is a monthly STEM and maker subscription box that teaches kids and adults how to apply principles of science and math to make awesome things you will love to use every day – from an articulated desk lamp to an electric pencil sharpener to a wooden ukulele. Every Eureka Crate includes an engineering project, detailed step-by-step instructions, everything you need to complete the project, a Maker’s Guide that explains all the design, process, and engineering behind the design, plus a design challenge to take your project knowledge to the next level!
DEAL: Save 30% on your first month! Just use this link to subscribe, no coupon code required! You can also use the same link to save 30% on the first month of any other KiwiCo crate – just check out this page to discover which box is right for you.
Eureka Crate is KiwiCo’s latest subscription! Eureka Crate is designed for ages 14-104. If you’re ready to graduate from KiwiCo’s other boxes or just can’t get enough (or are just too old for their other subscriptions), you’ll love this box, which is designed to create a hands-on learning experience using everyday items to delve deeply into the science and math principles they embody, along with the design process of the month’s project.
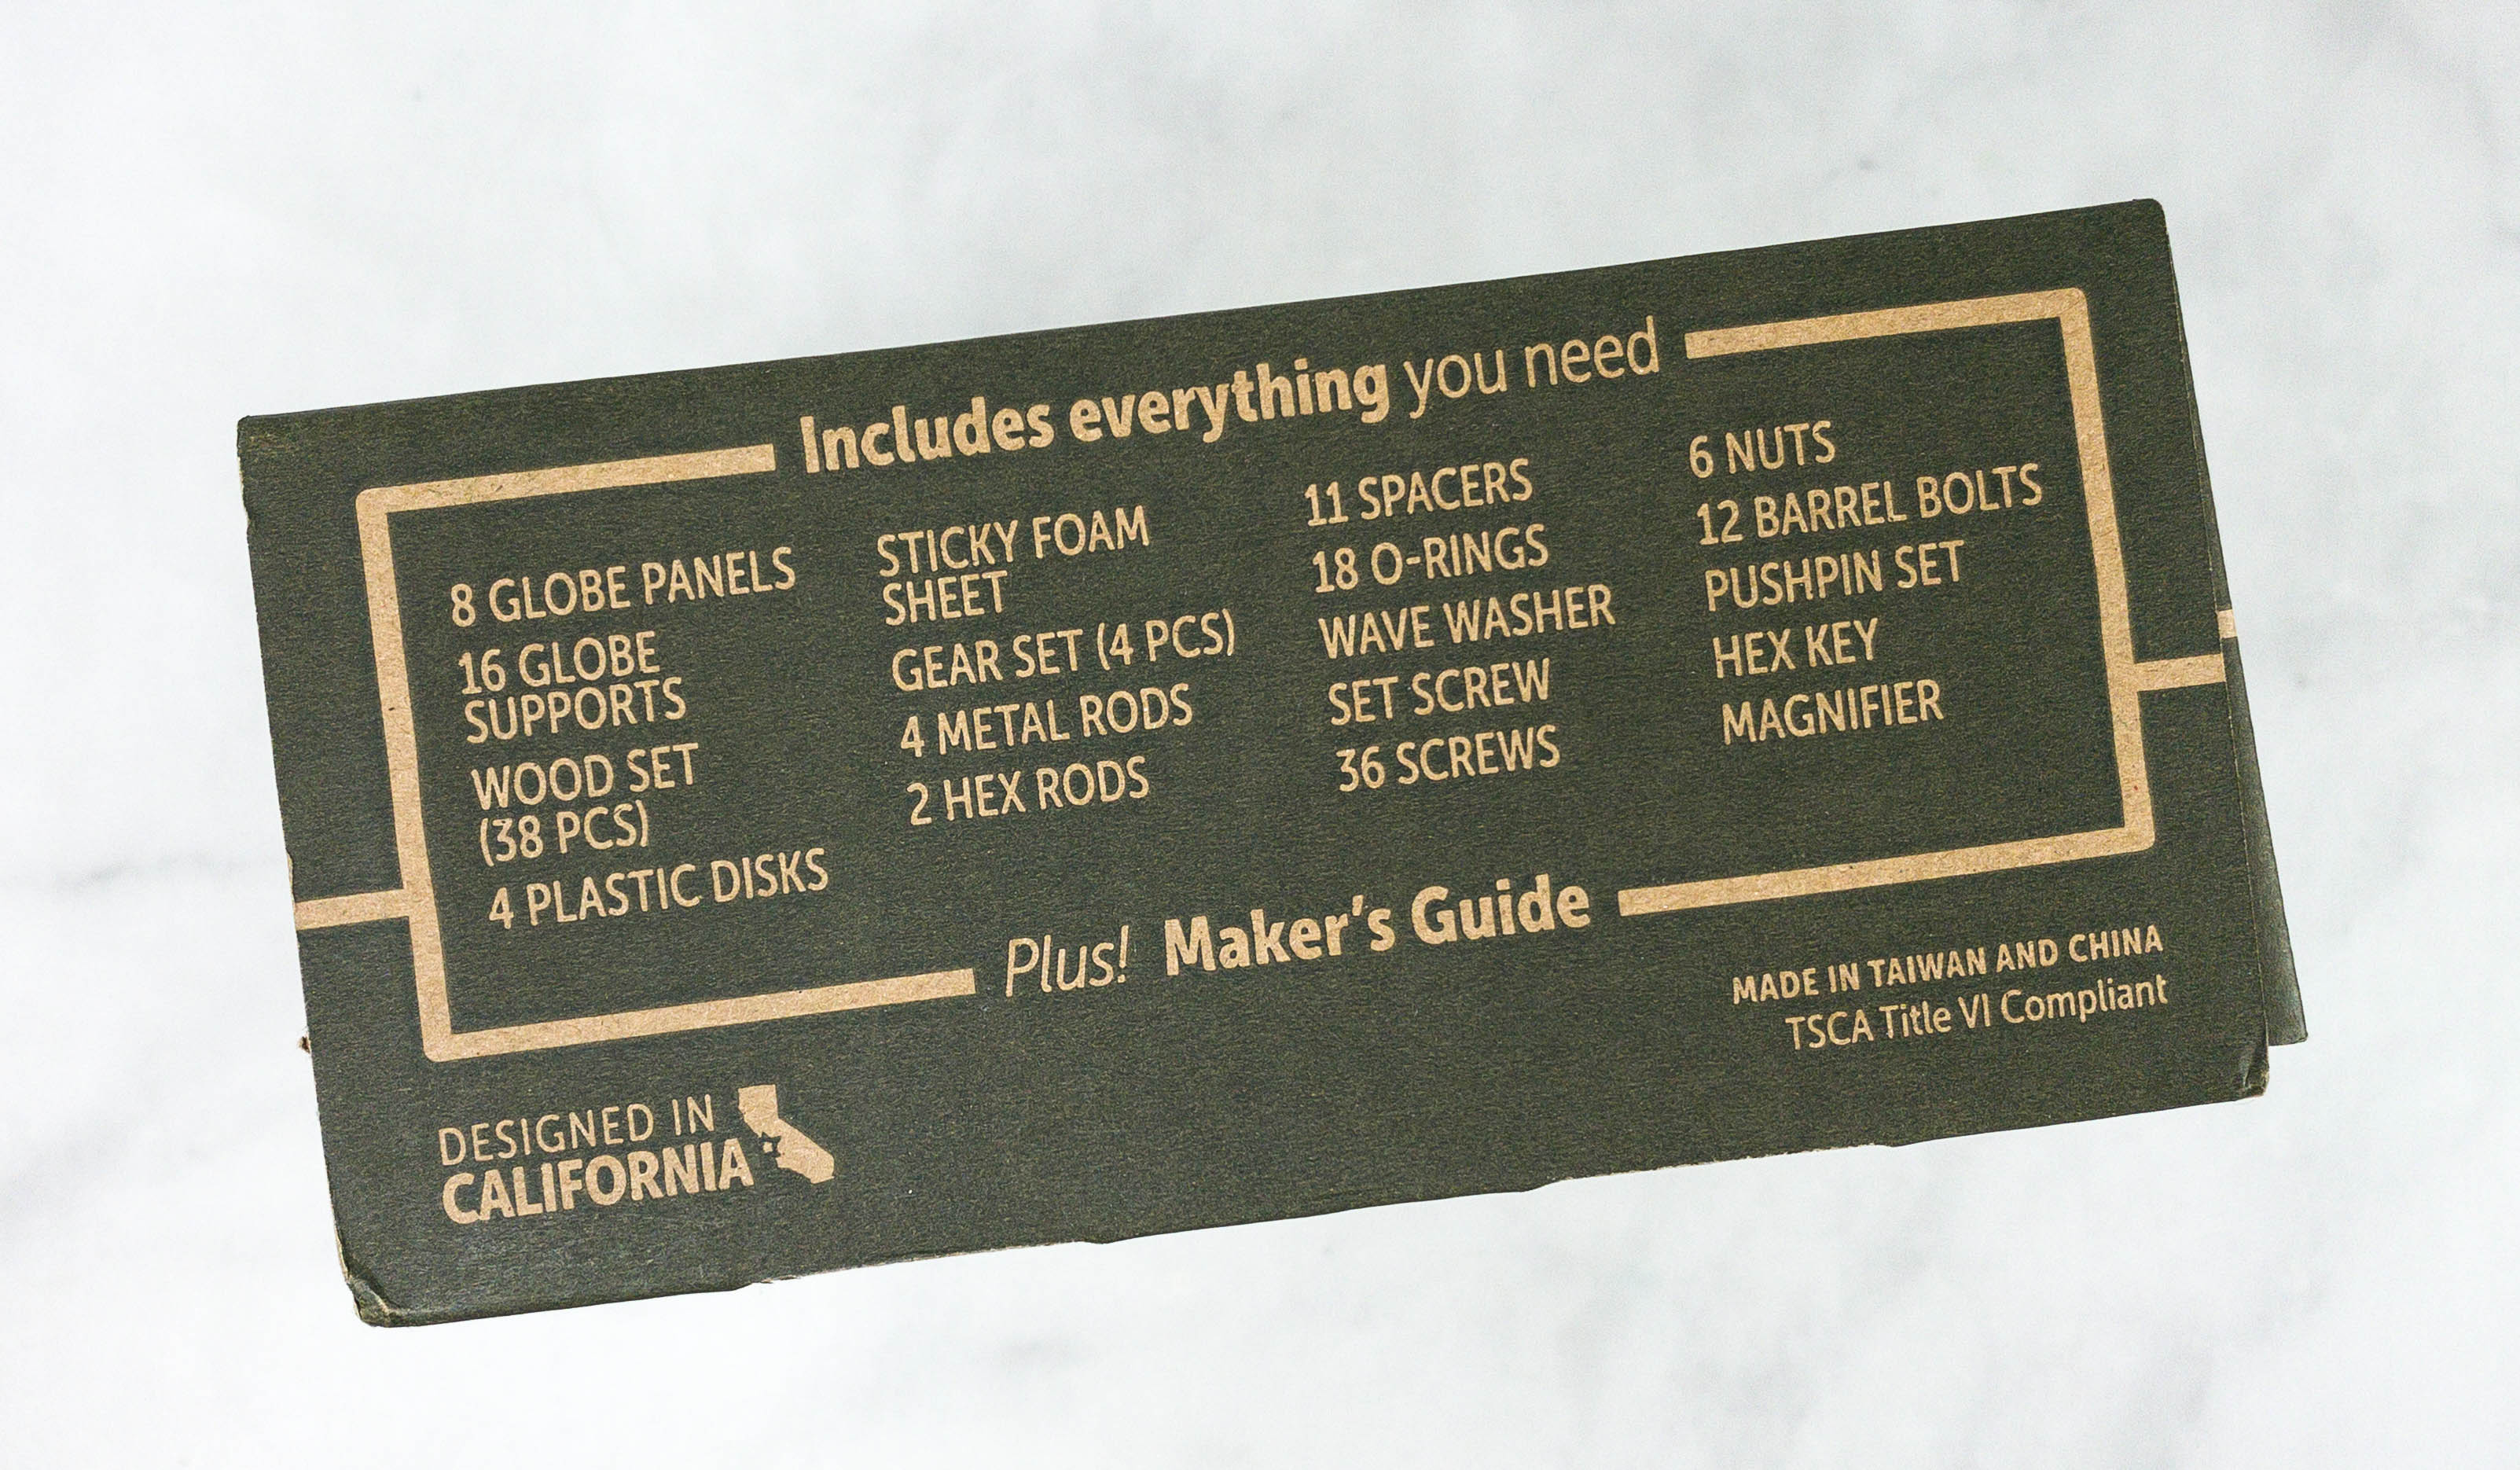
This part of the box features a list of all the materials inside!
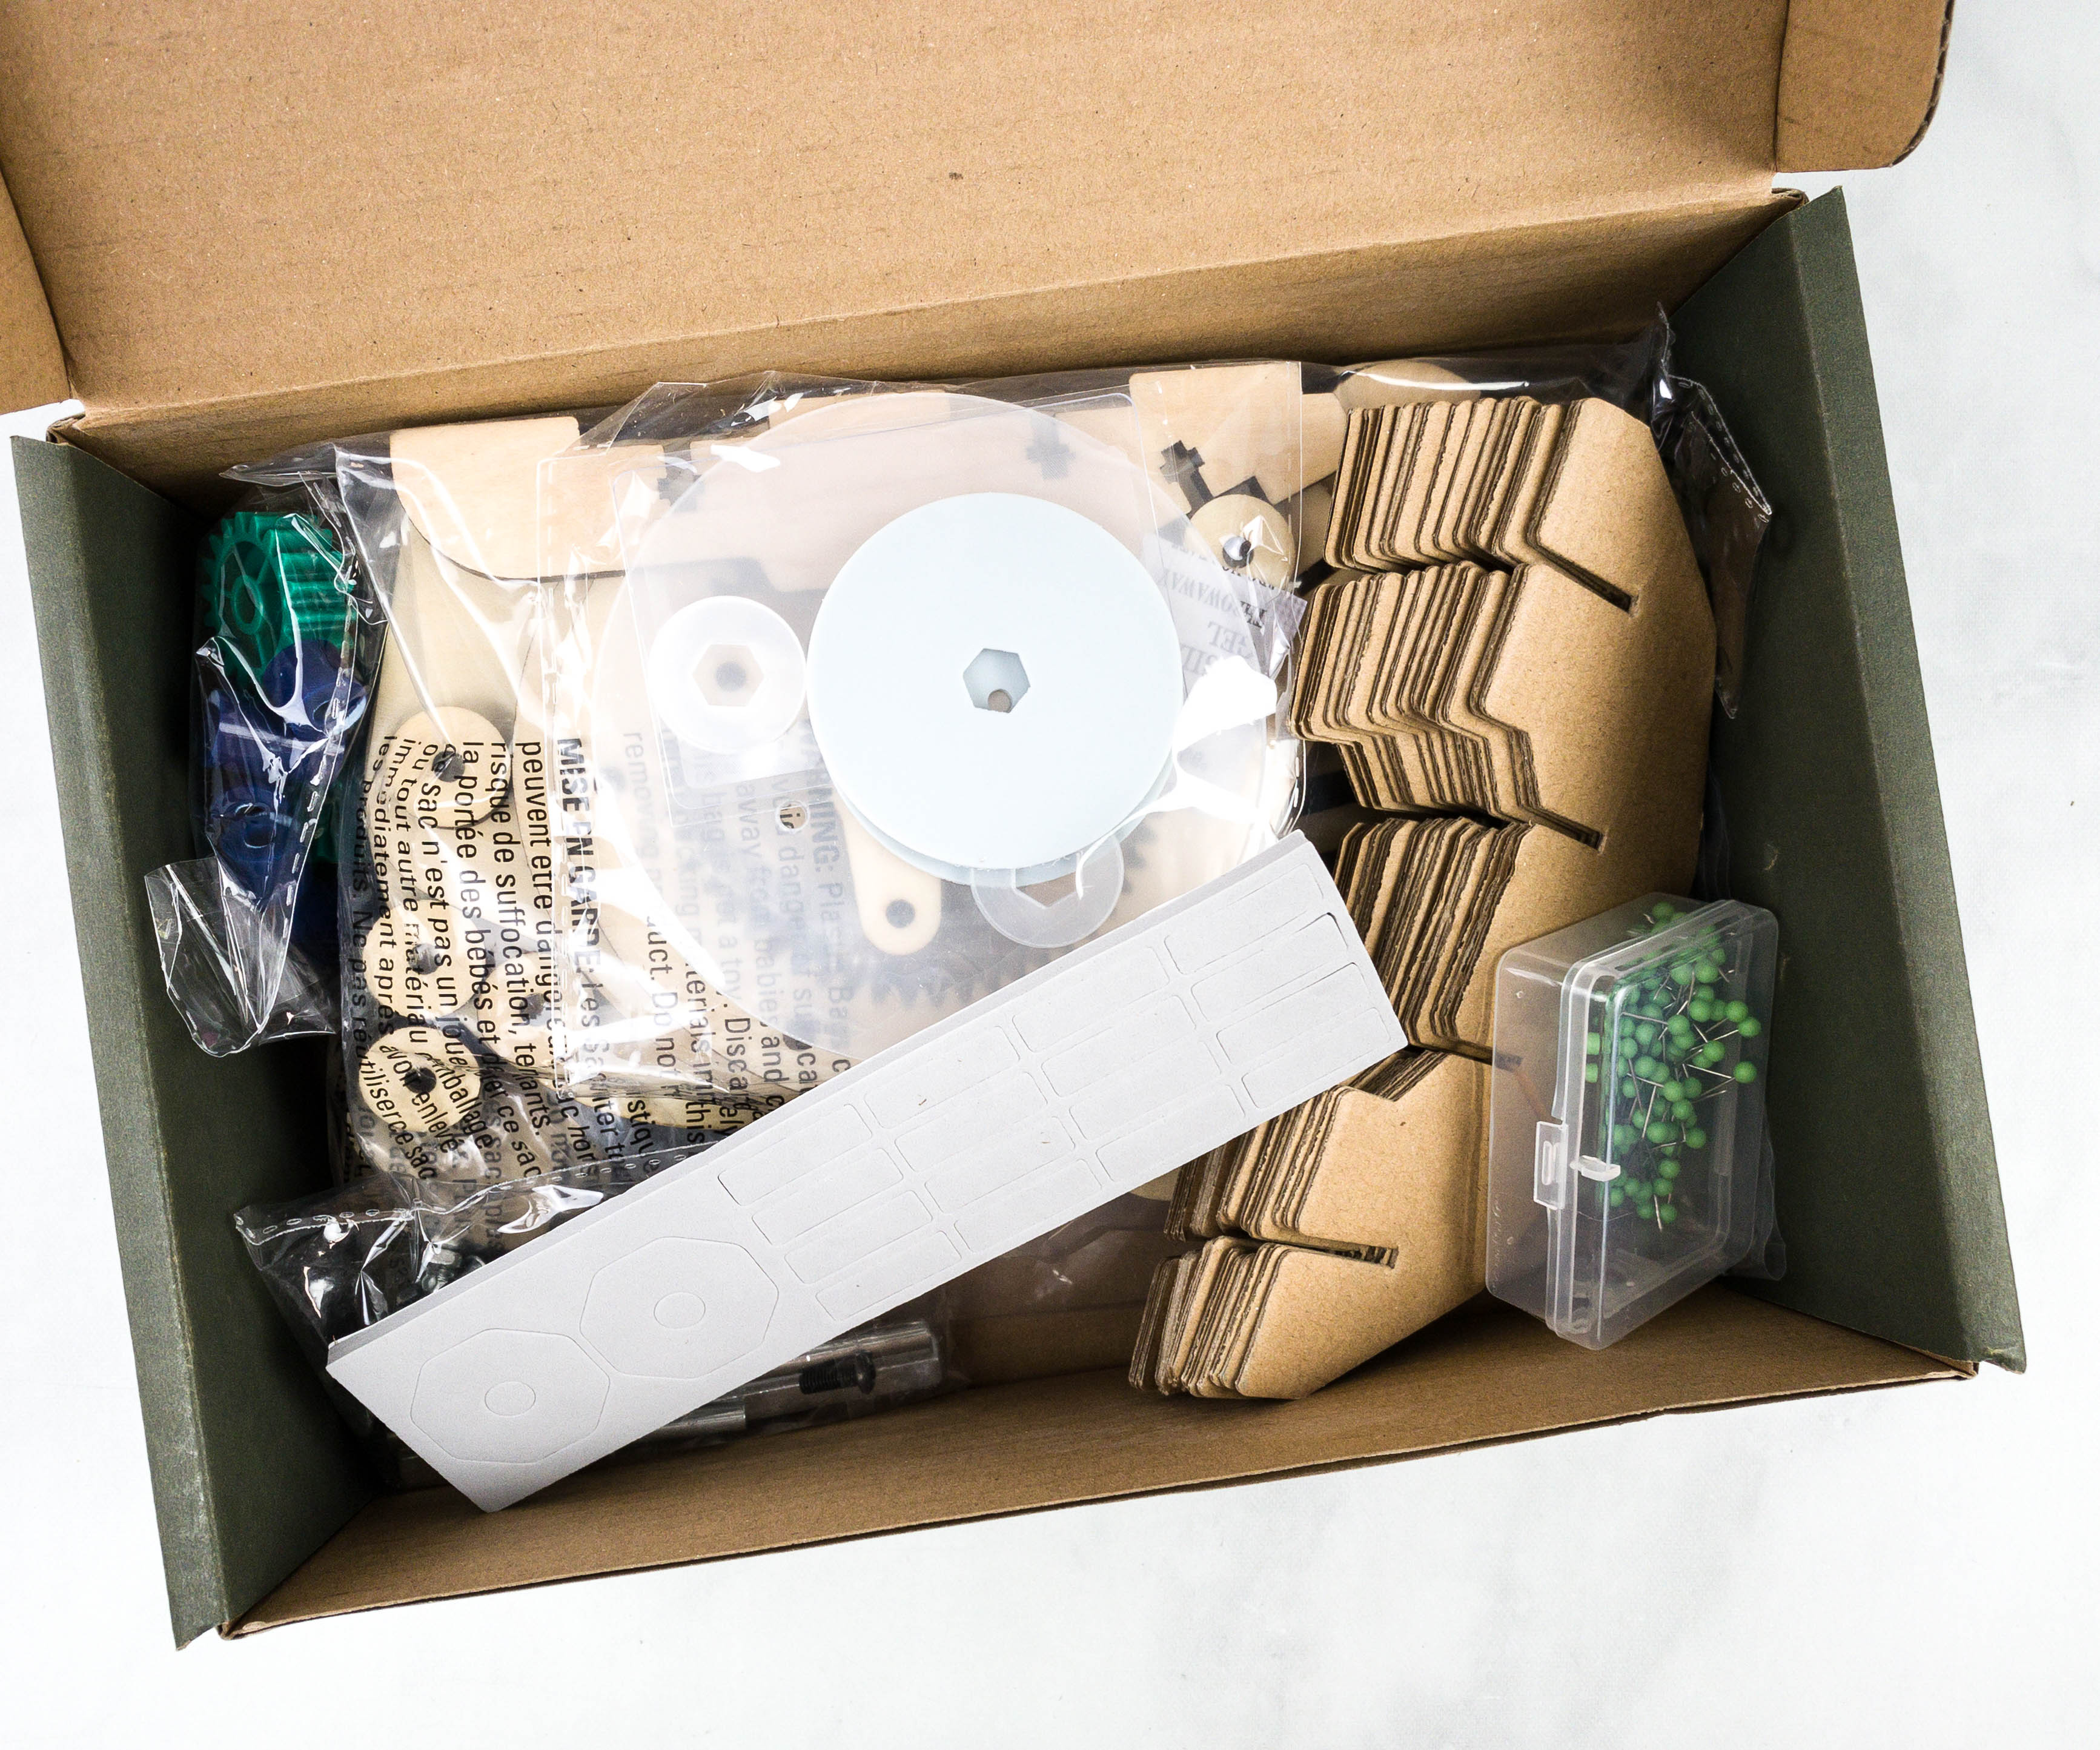
All the items were neatly packed inside the box.
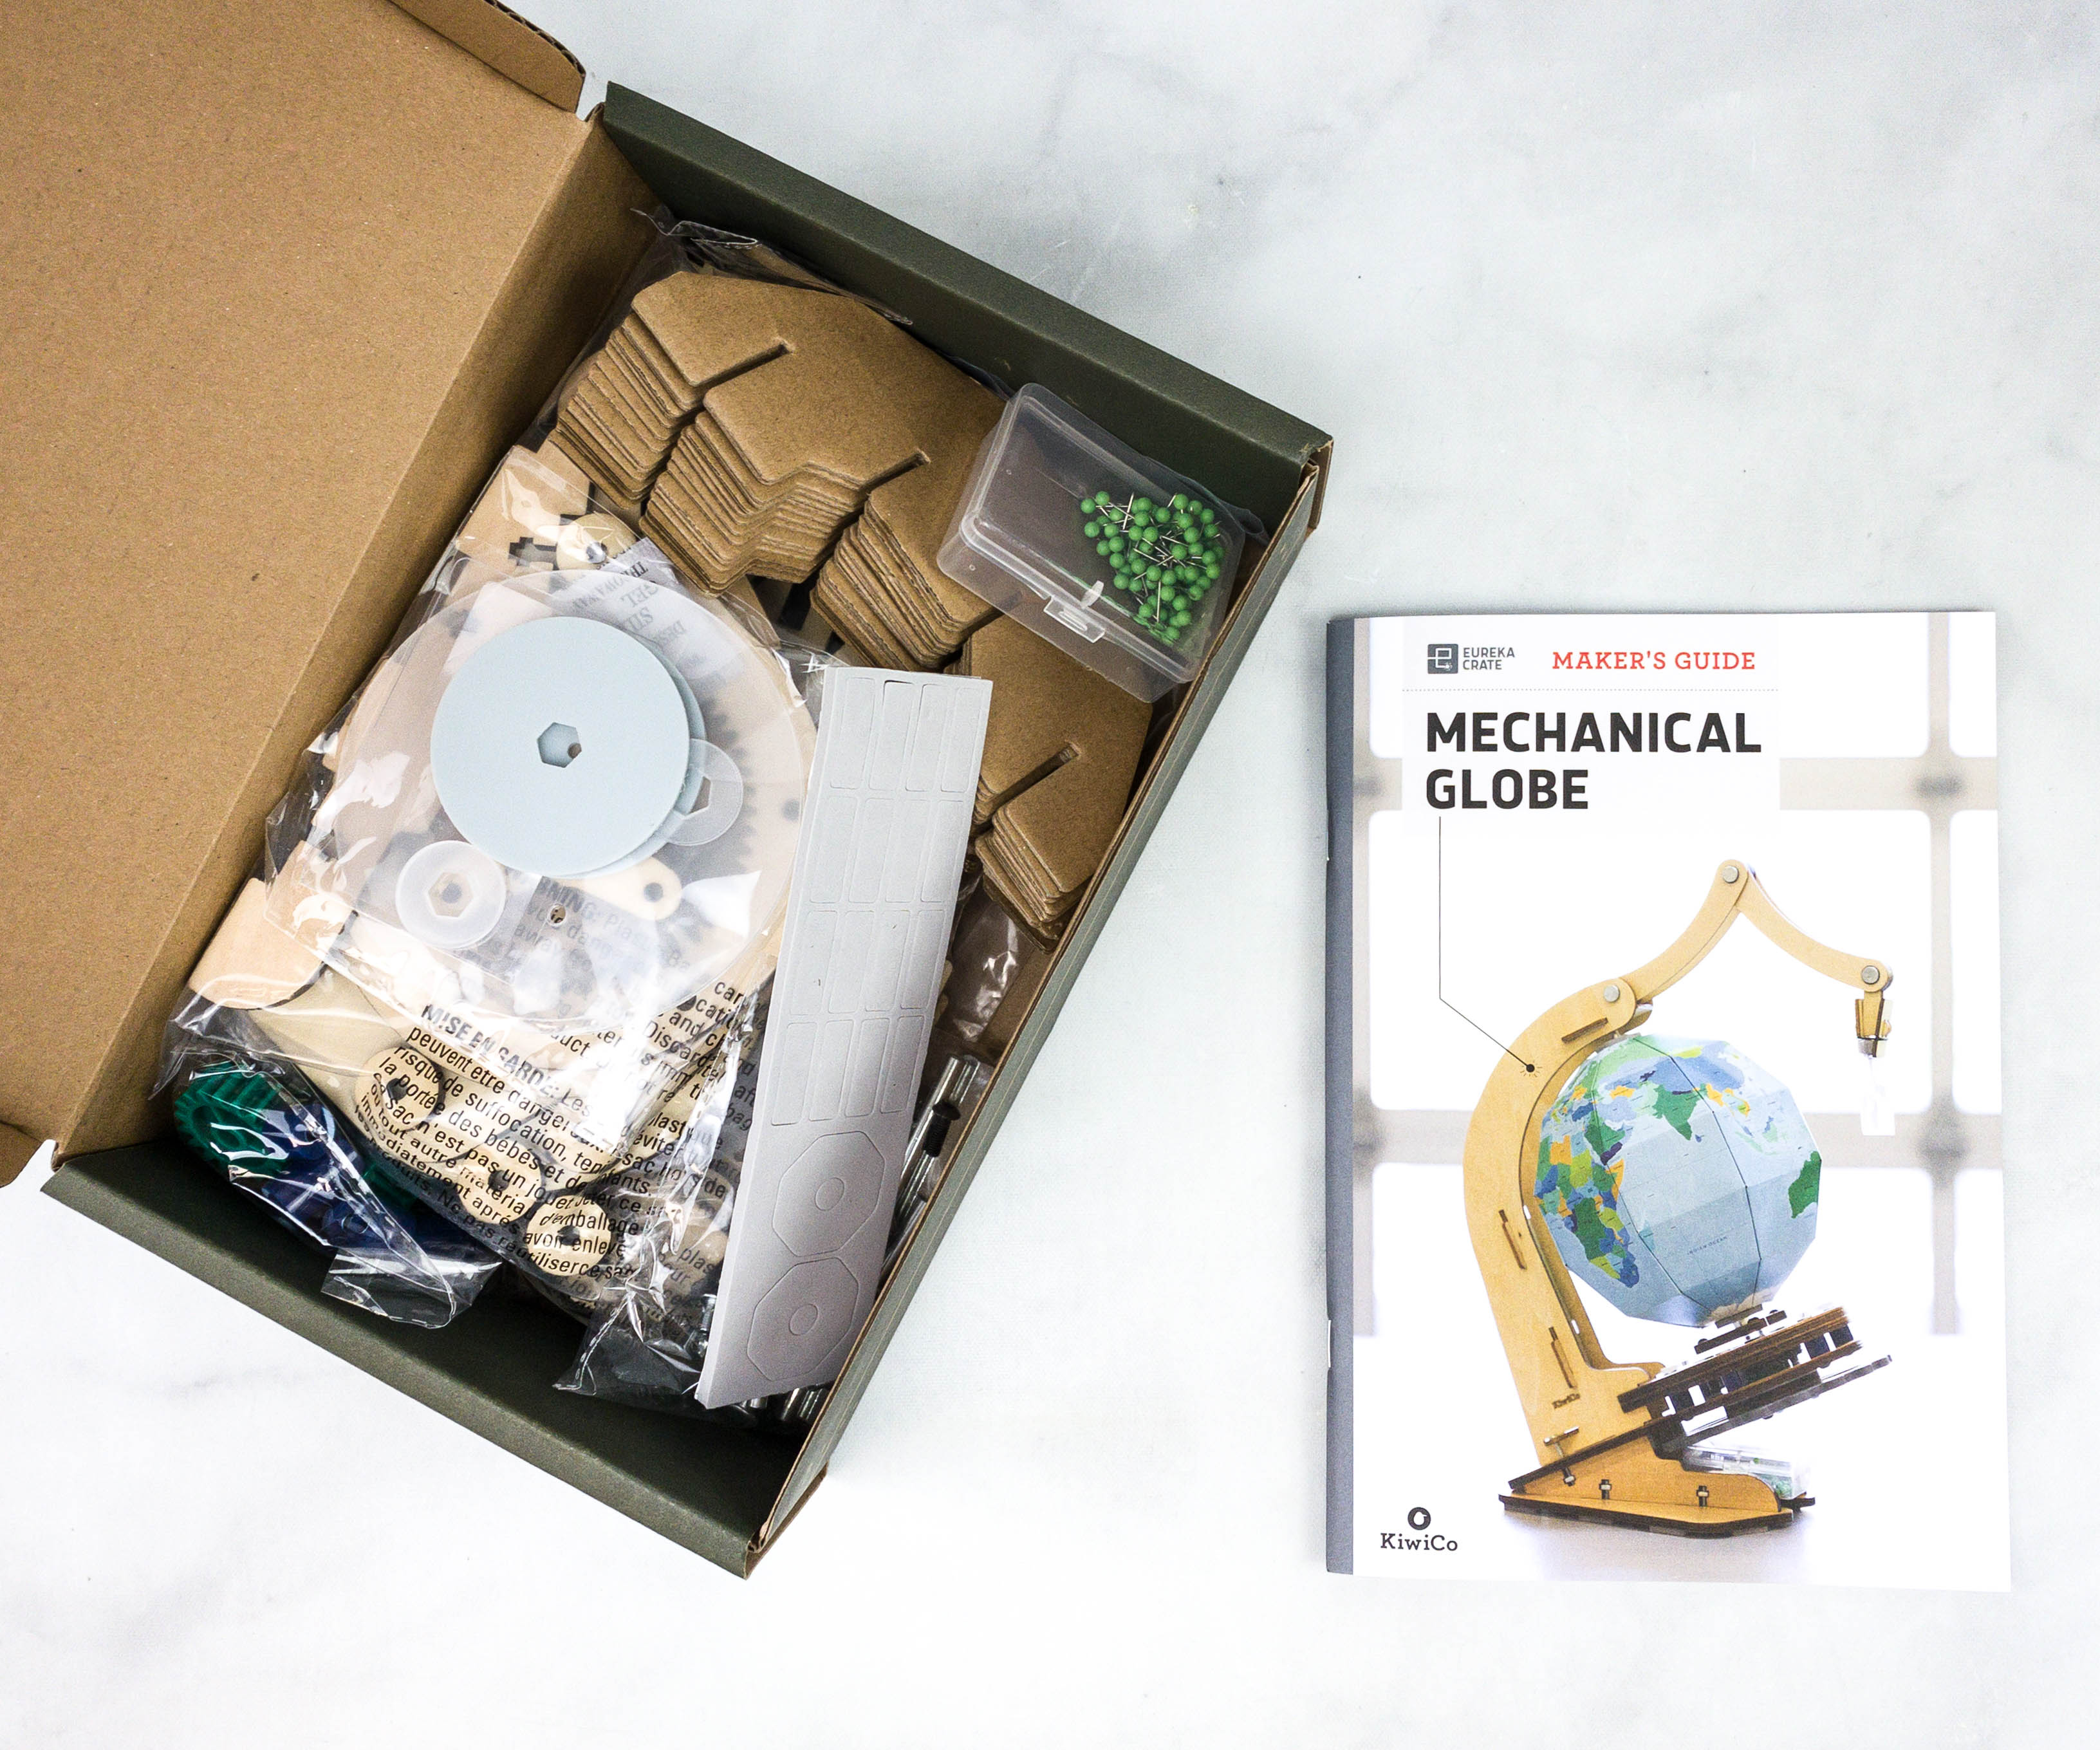
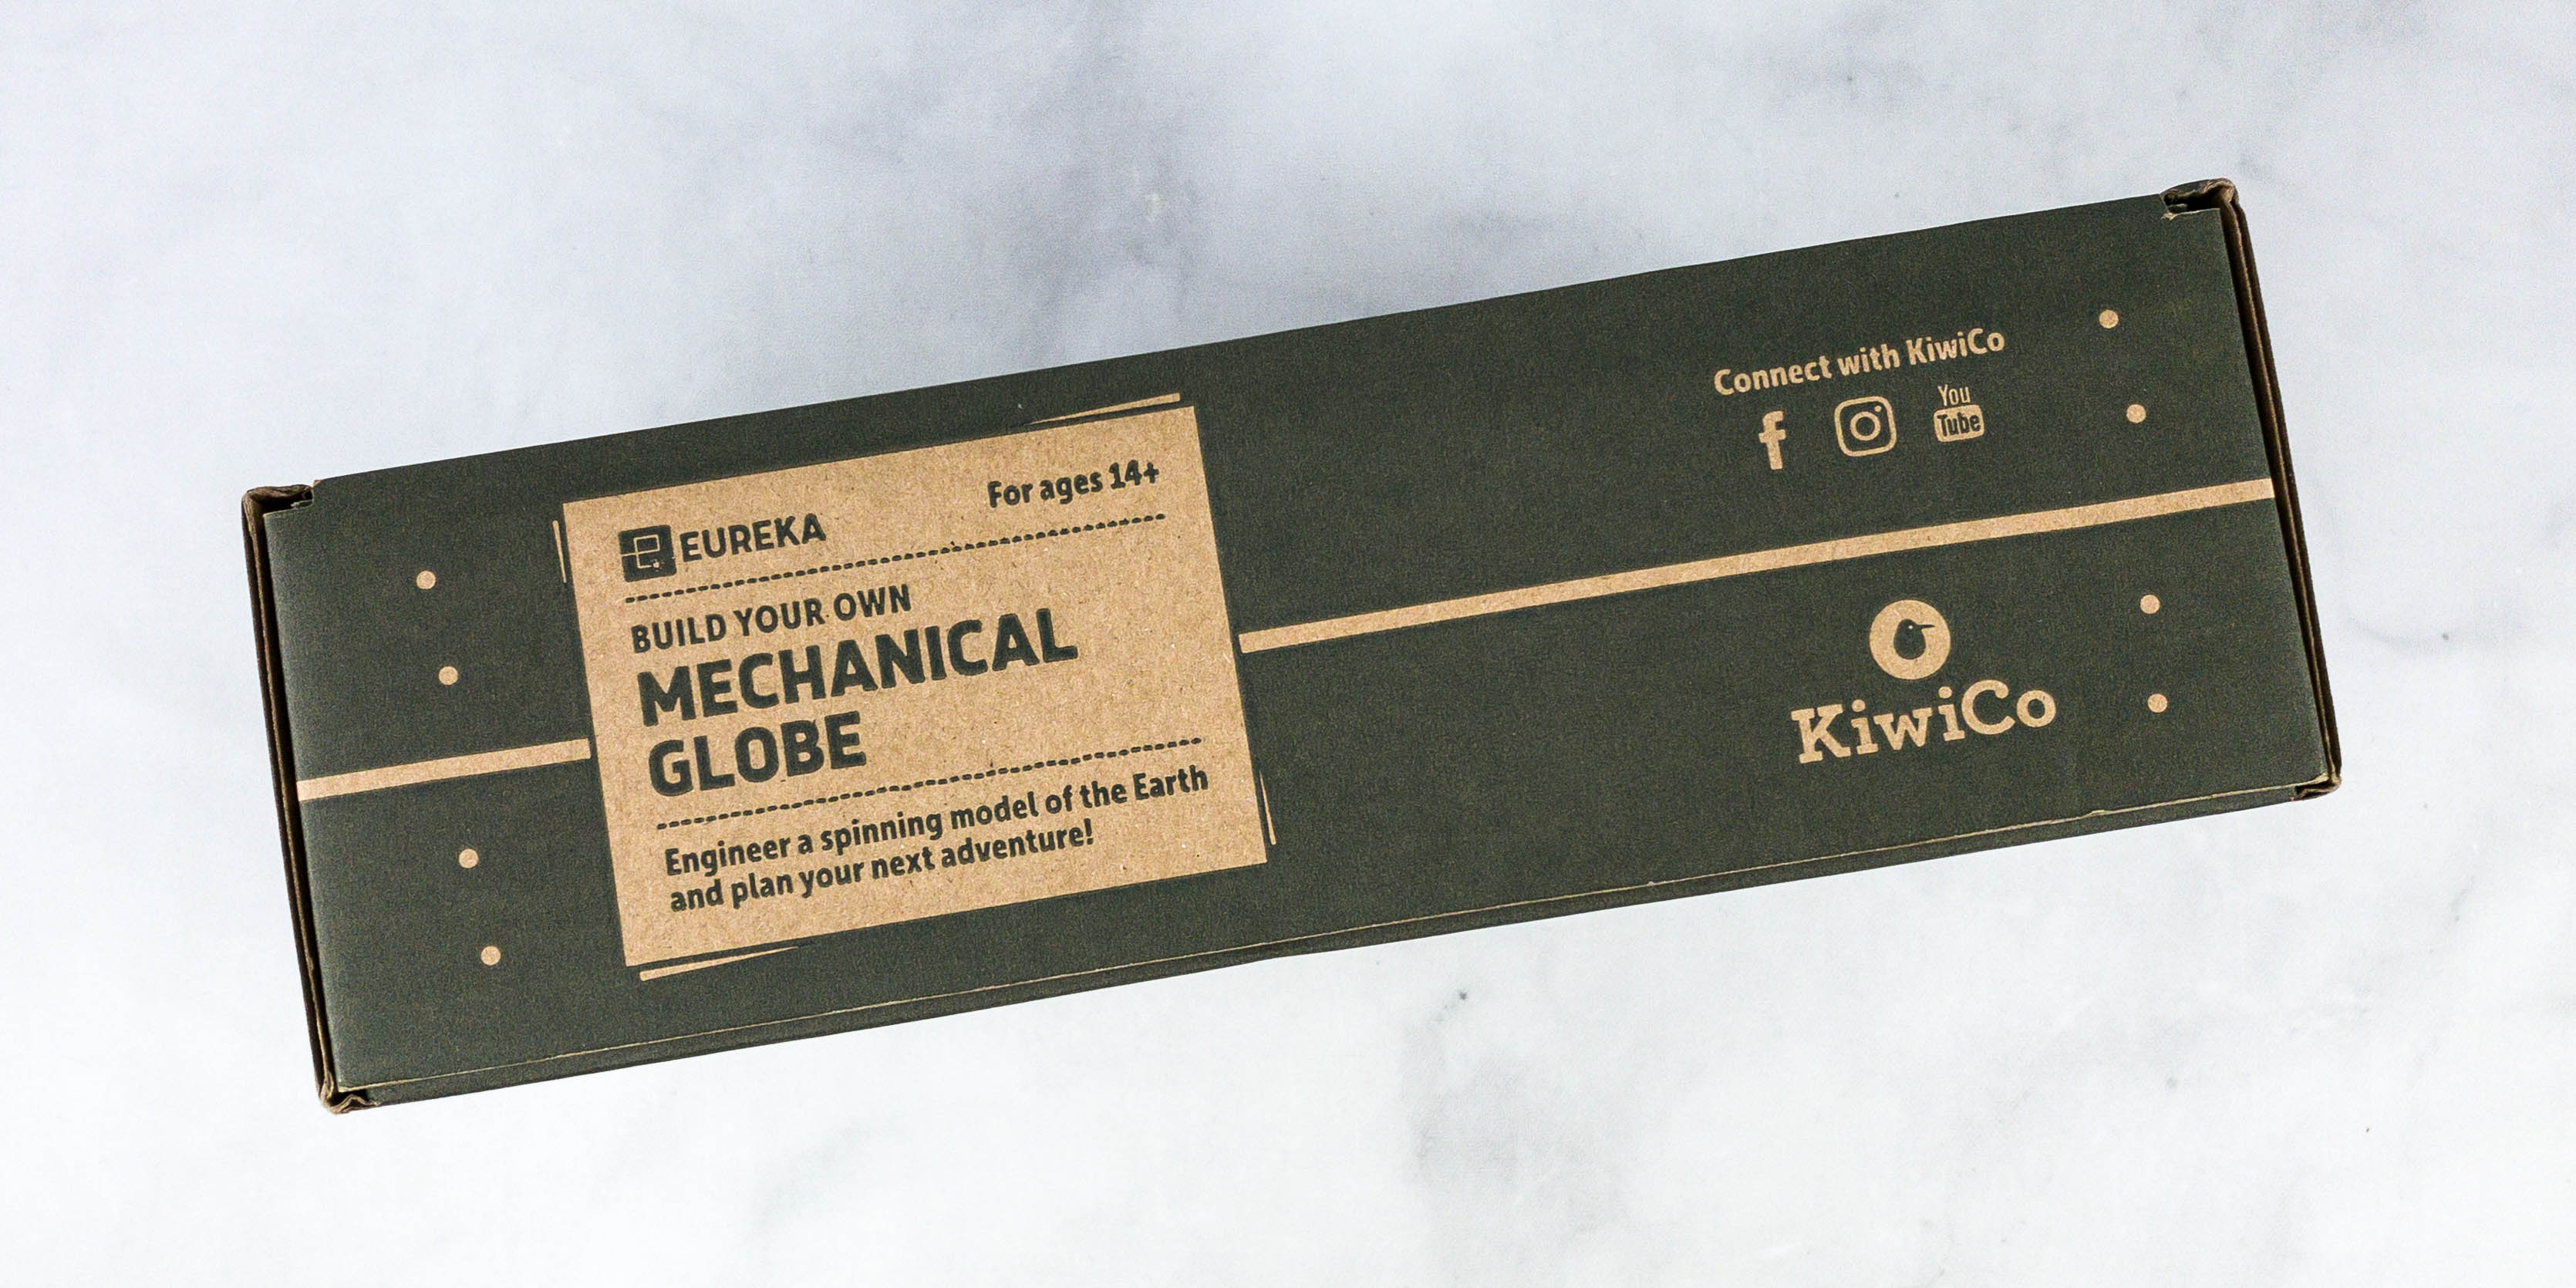
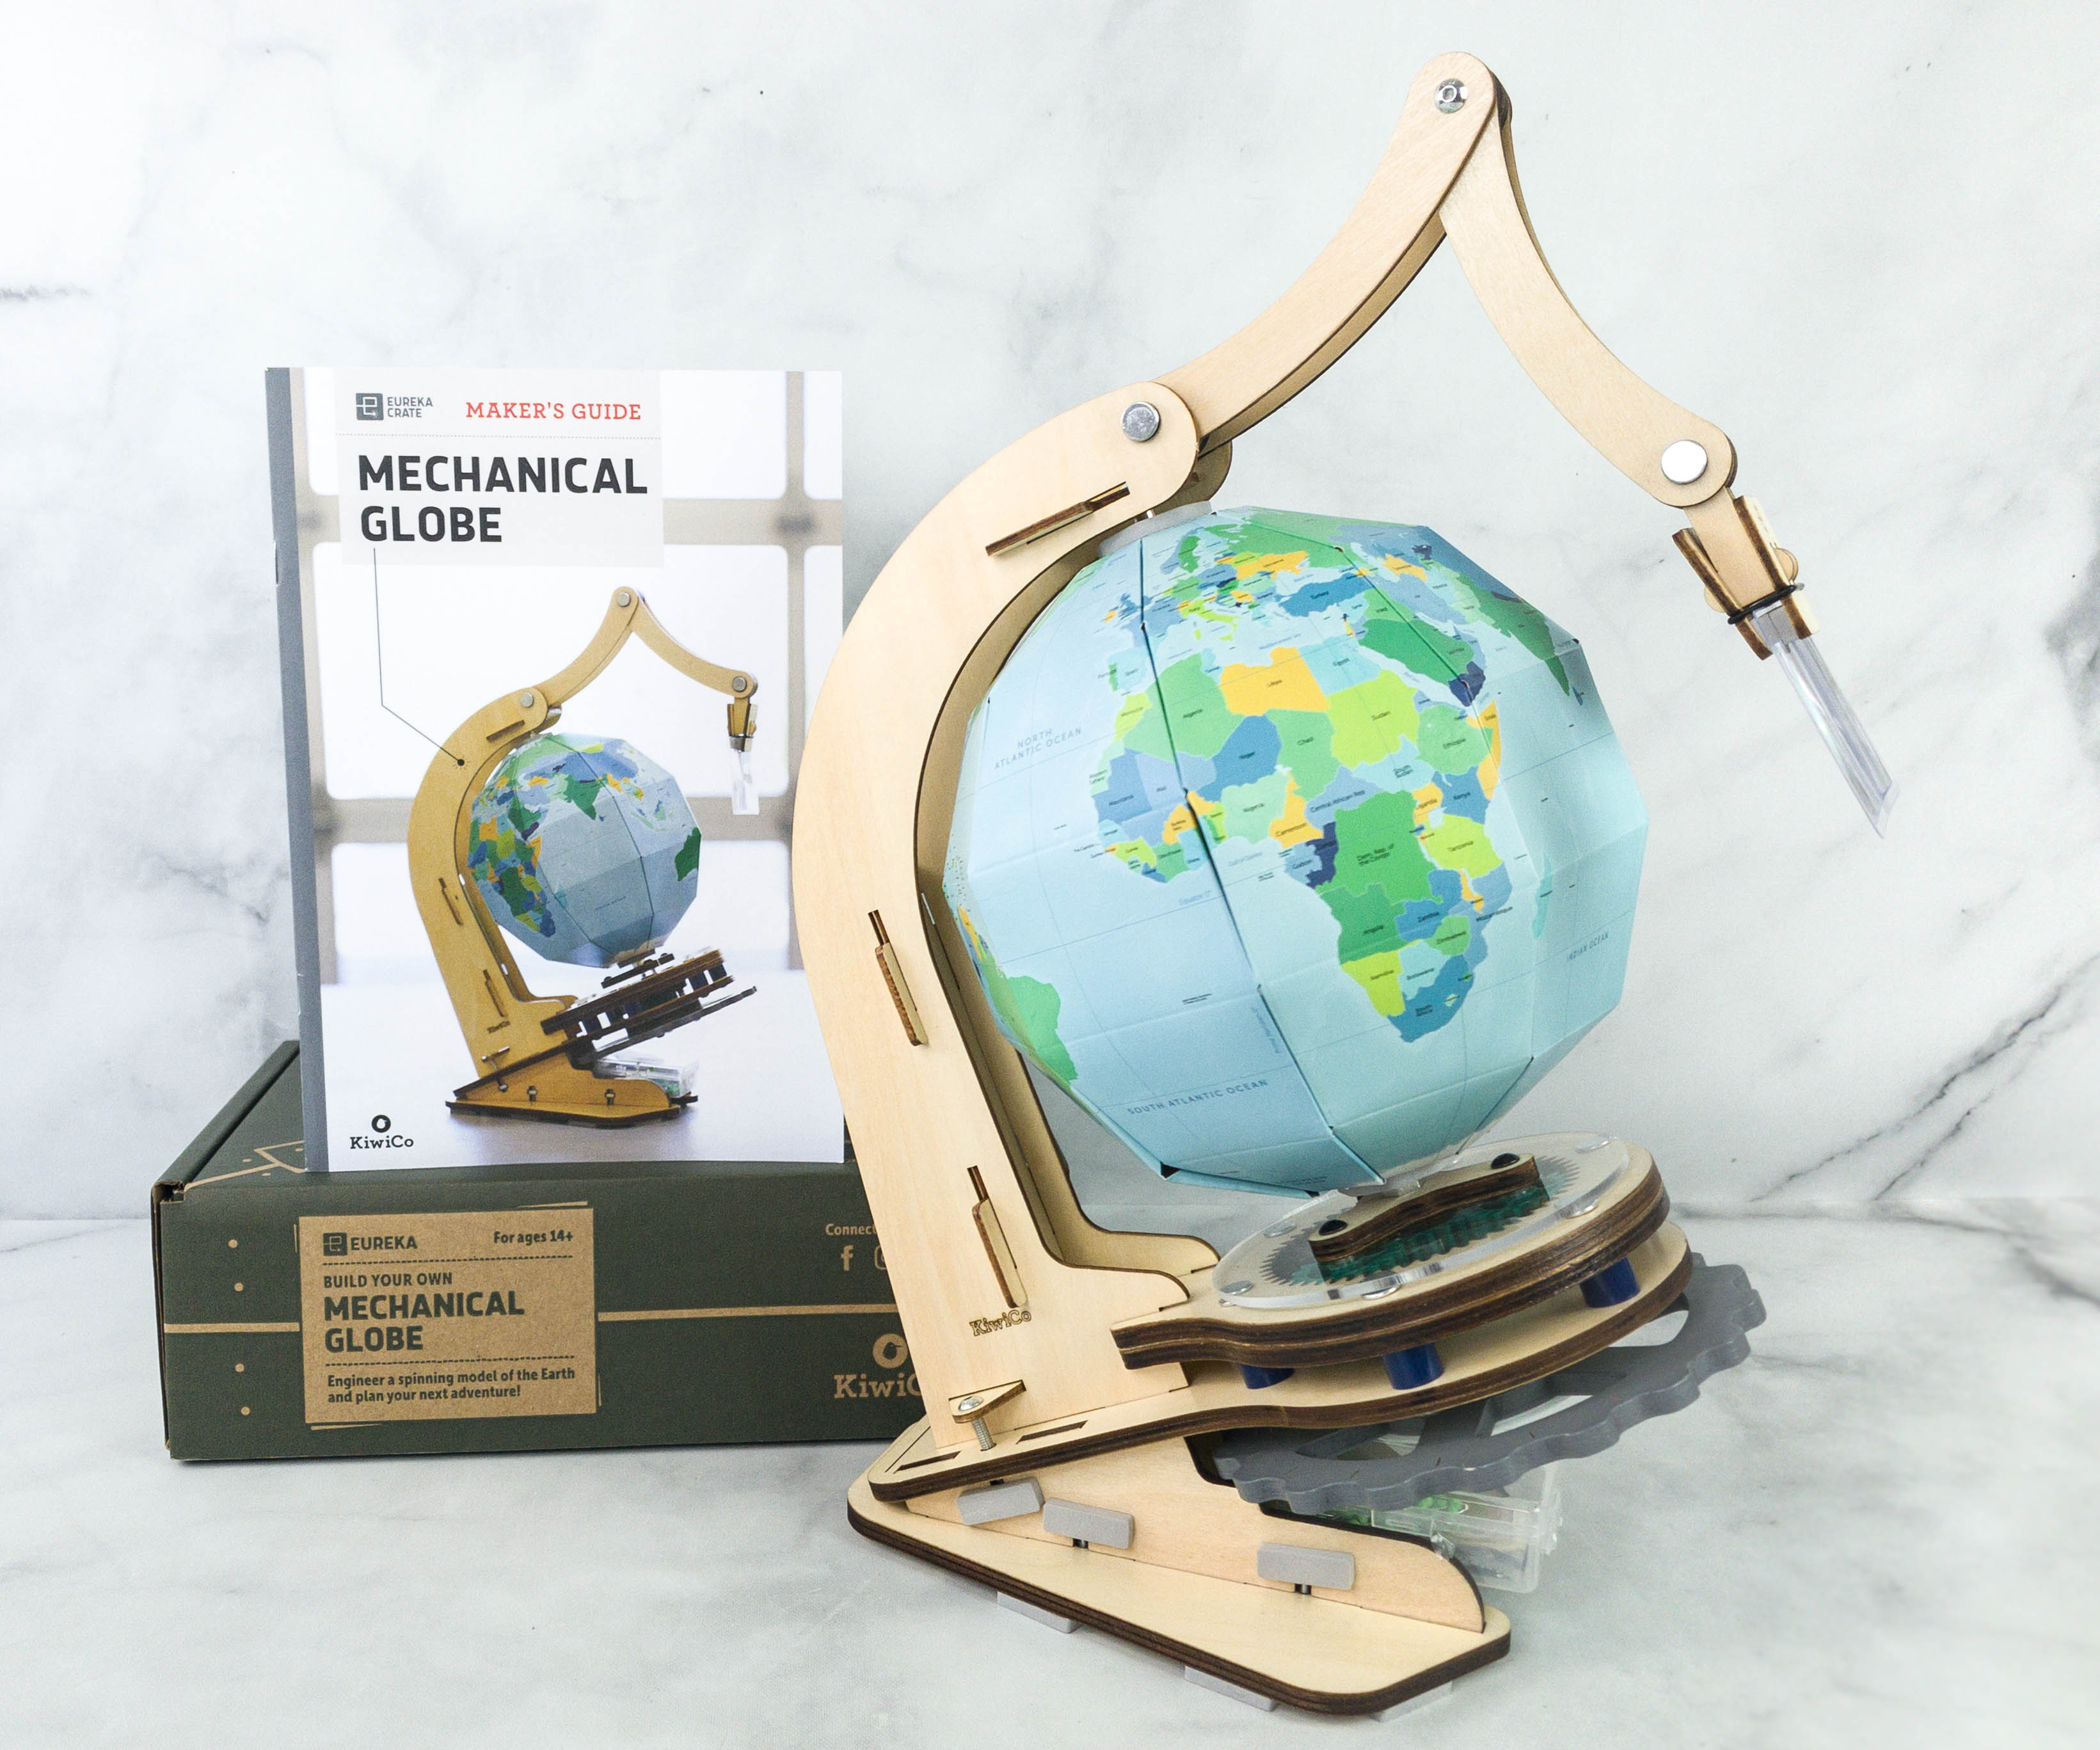
This month, we’re making a Mechanical Globe!
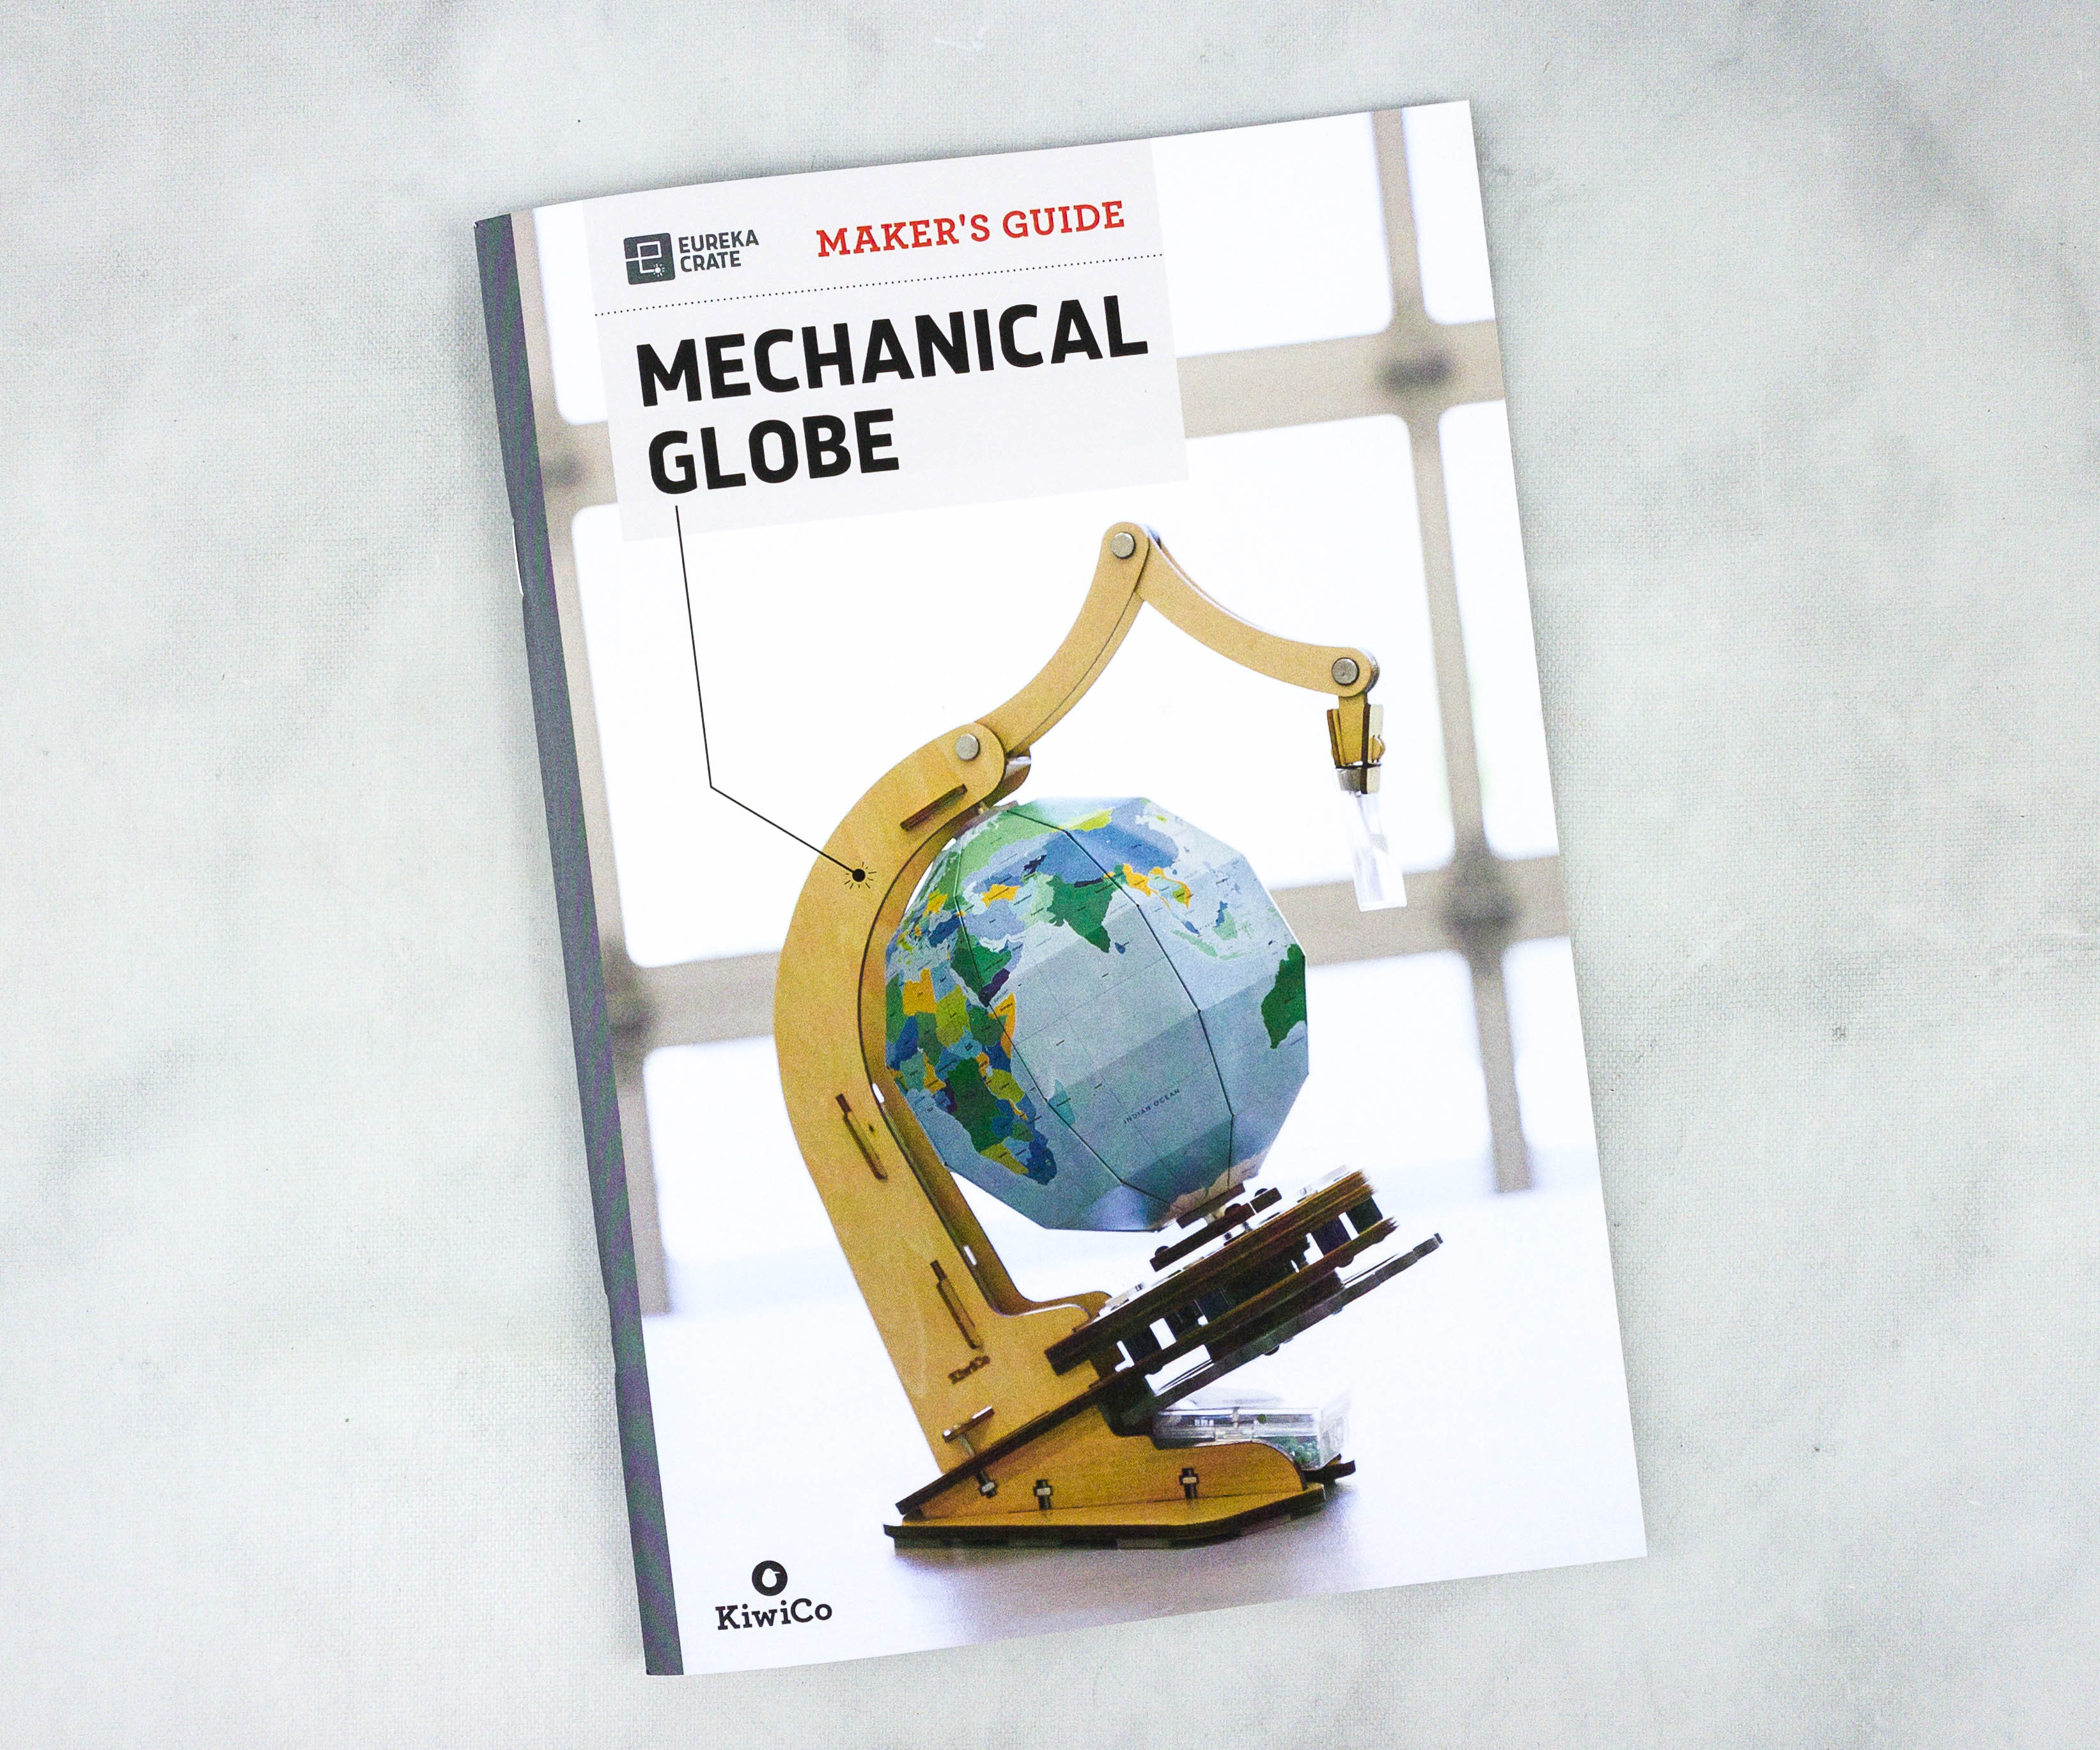
Like the other crates from KiwiCo, Eureka Crate includes a booklet.

One of KiwiCo’s goals is to equip the next generation of innovators with the tools and confidence for creative exploration and problem-solving.
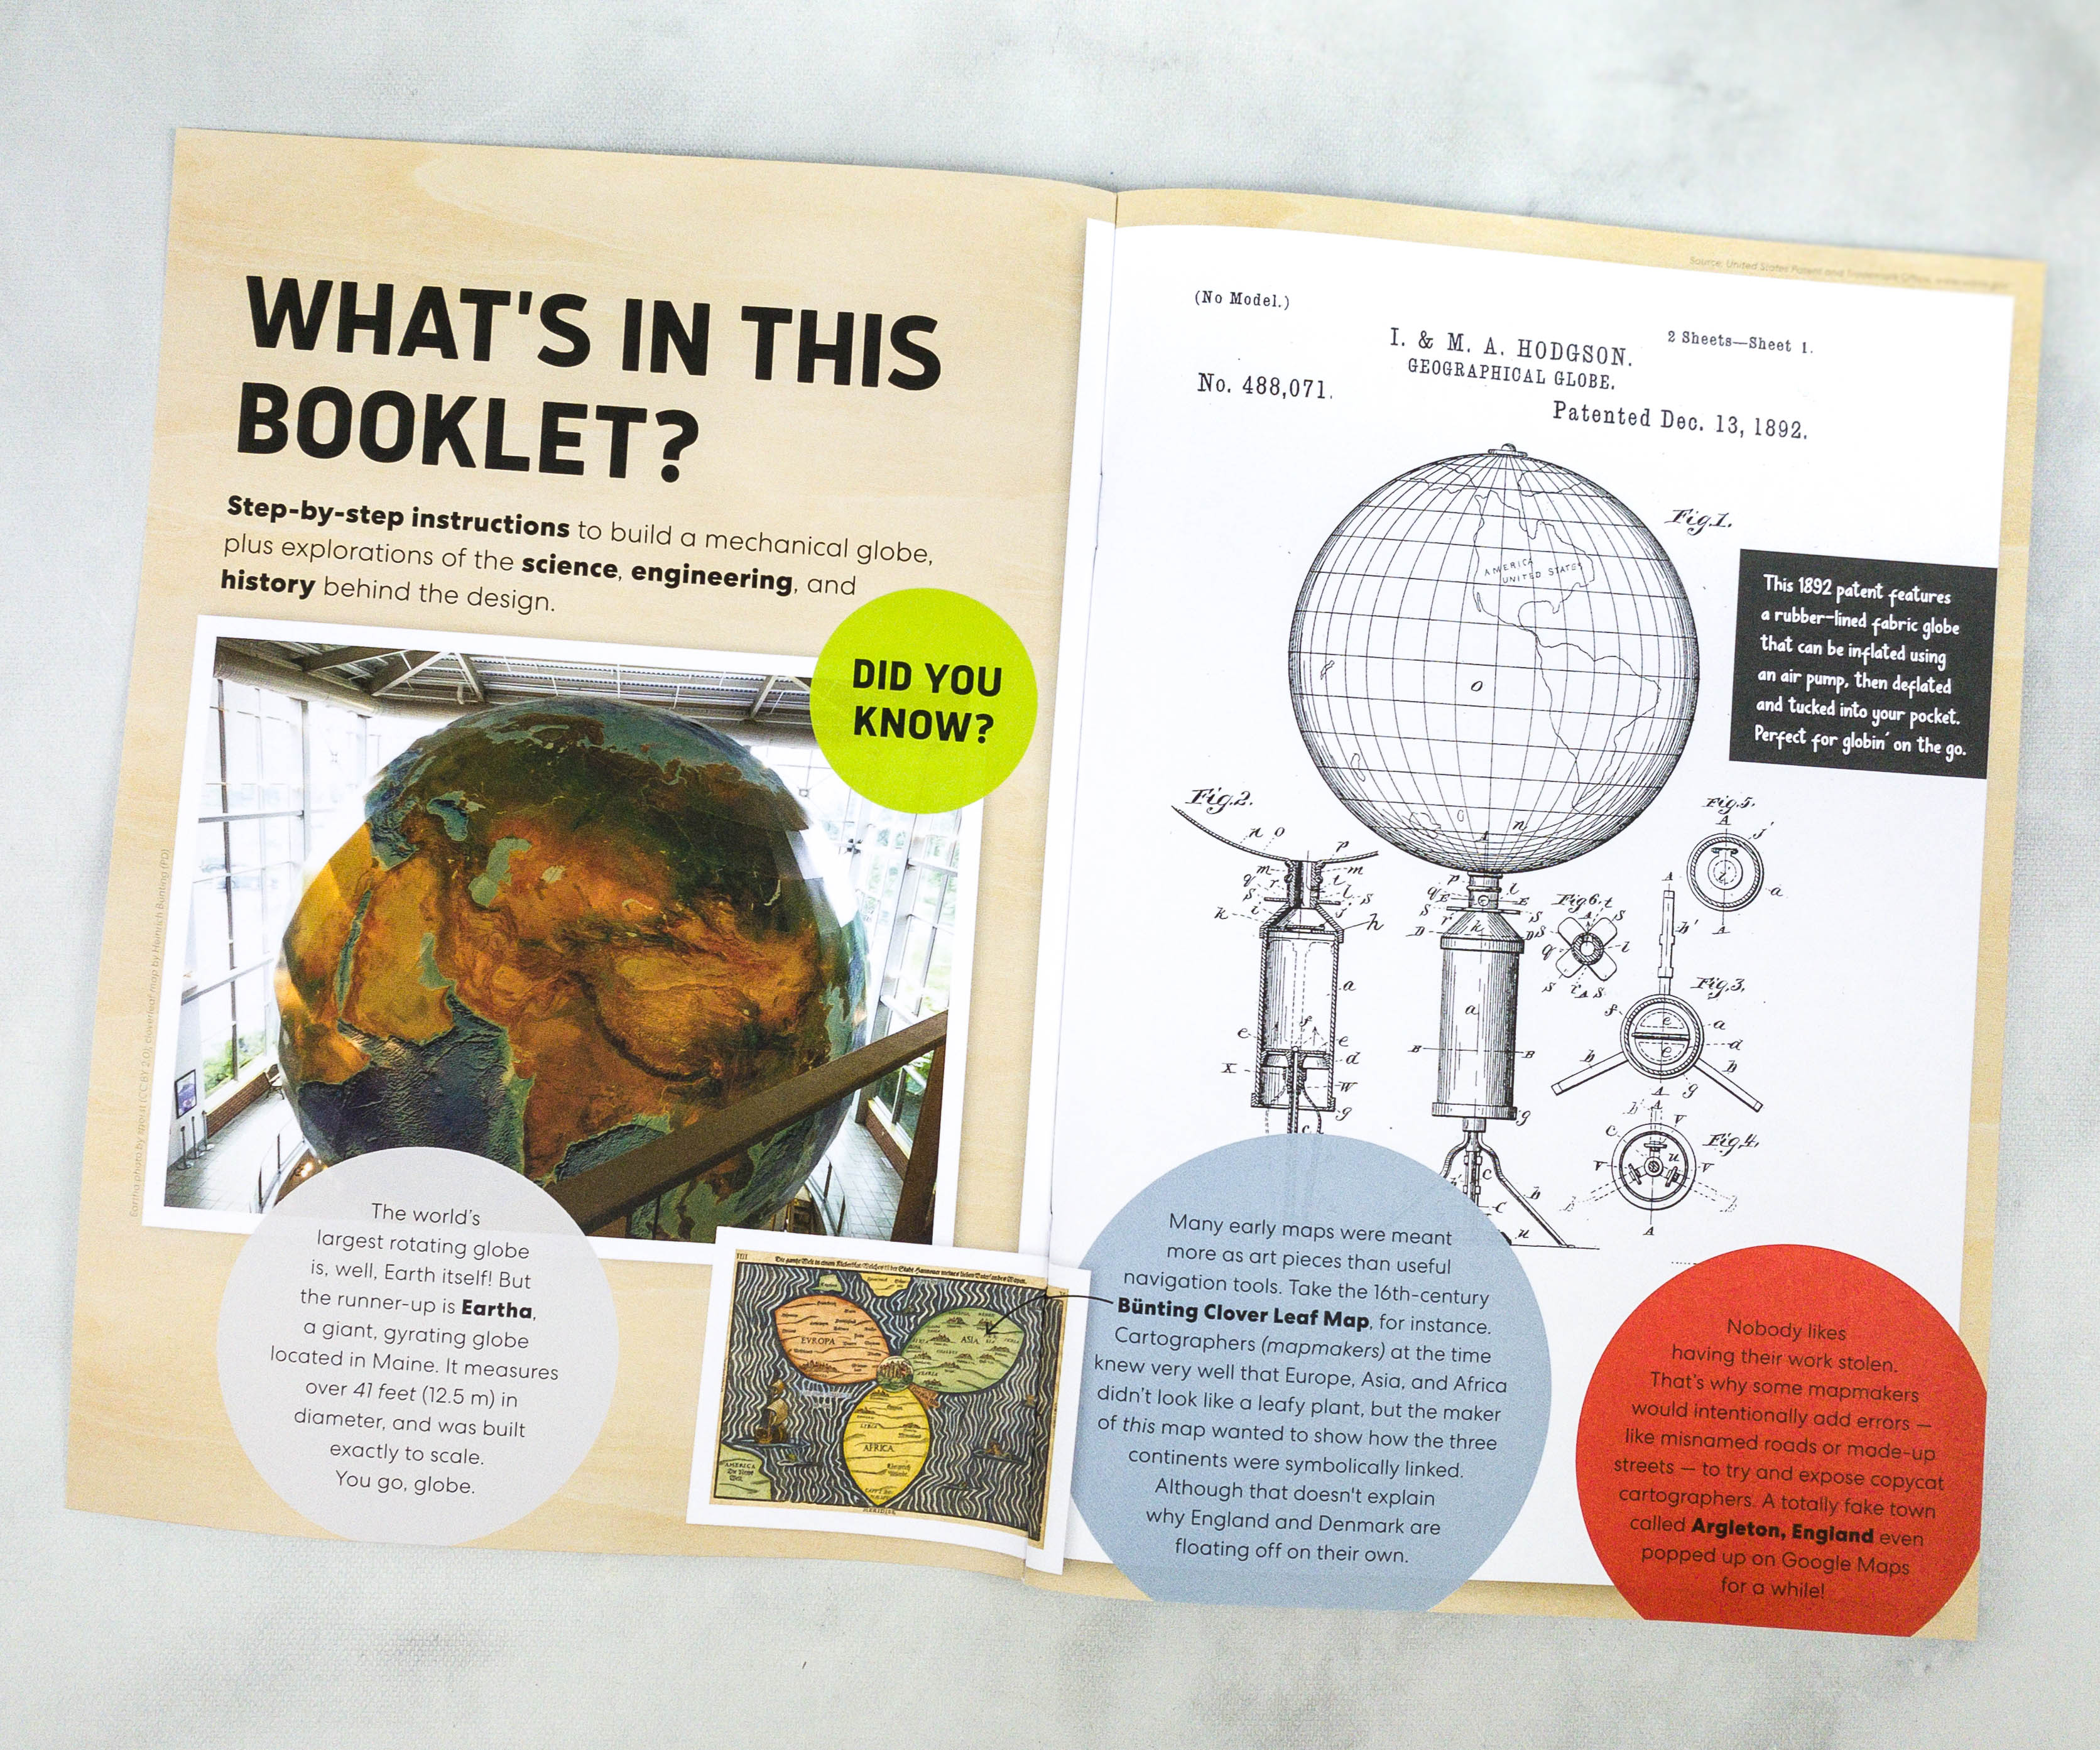
The booklet shares a complete history and details about this month’s project. They also included some fun facts and trivia related to the theme.
This booklet means business as it jumps right to the activity.
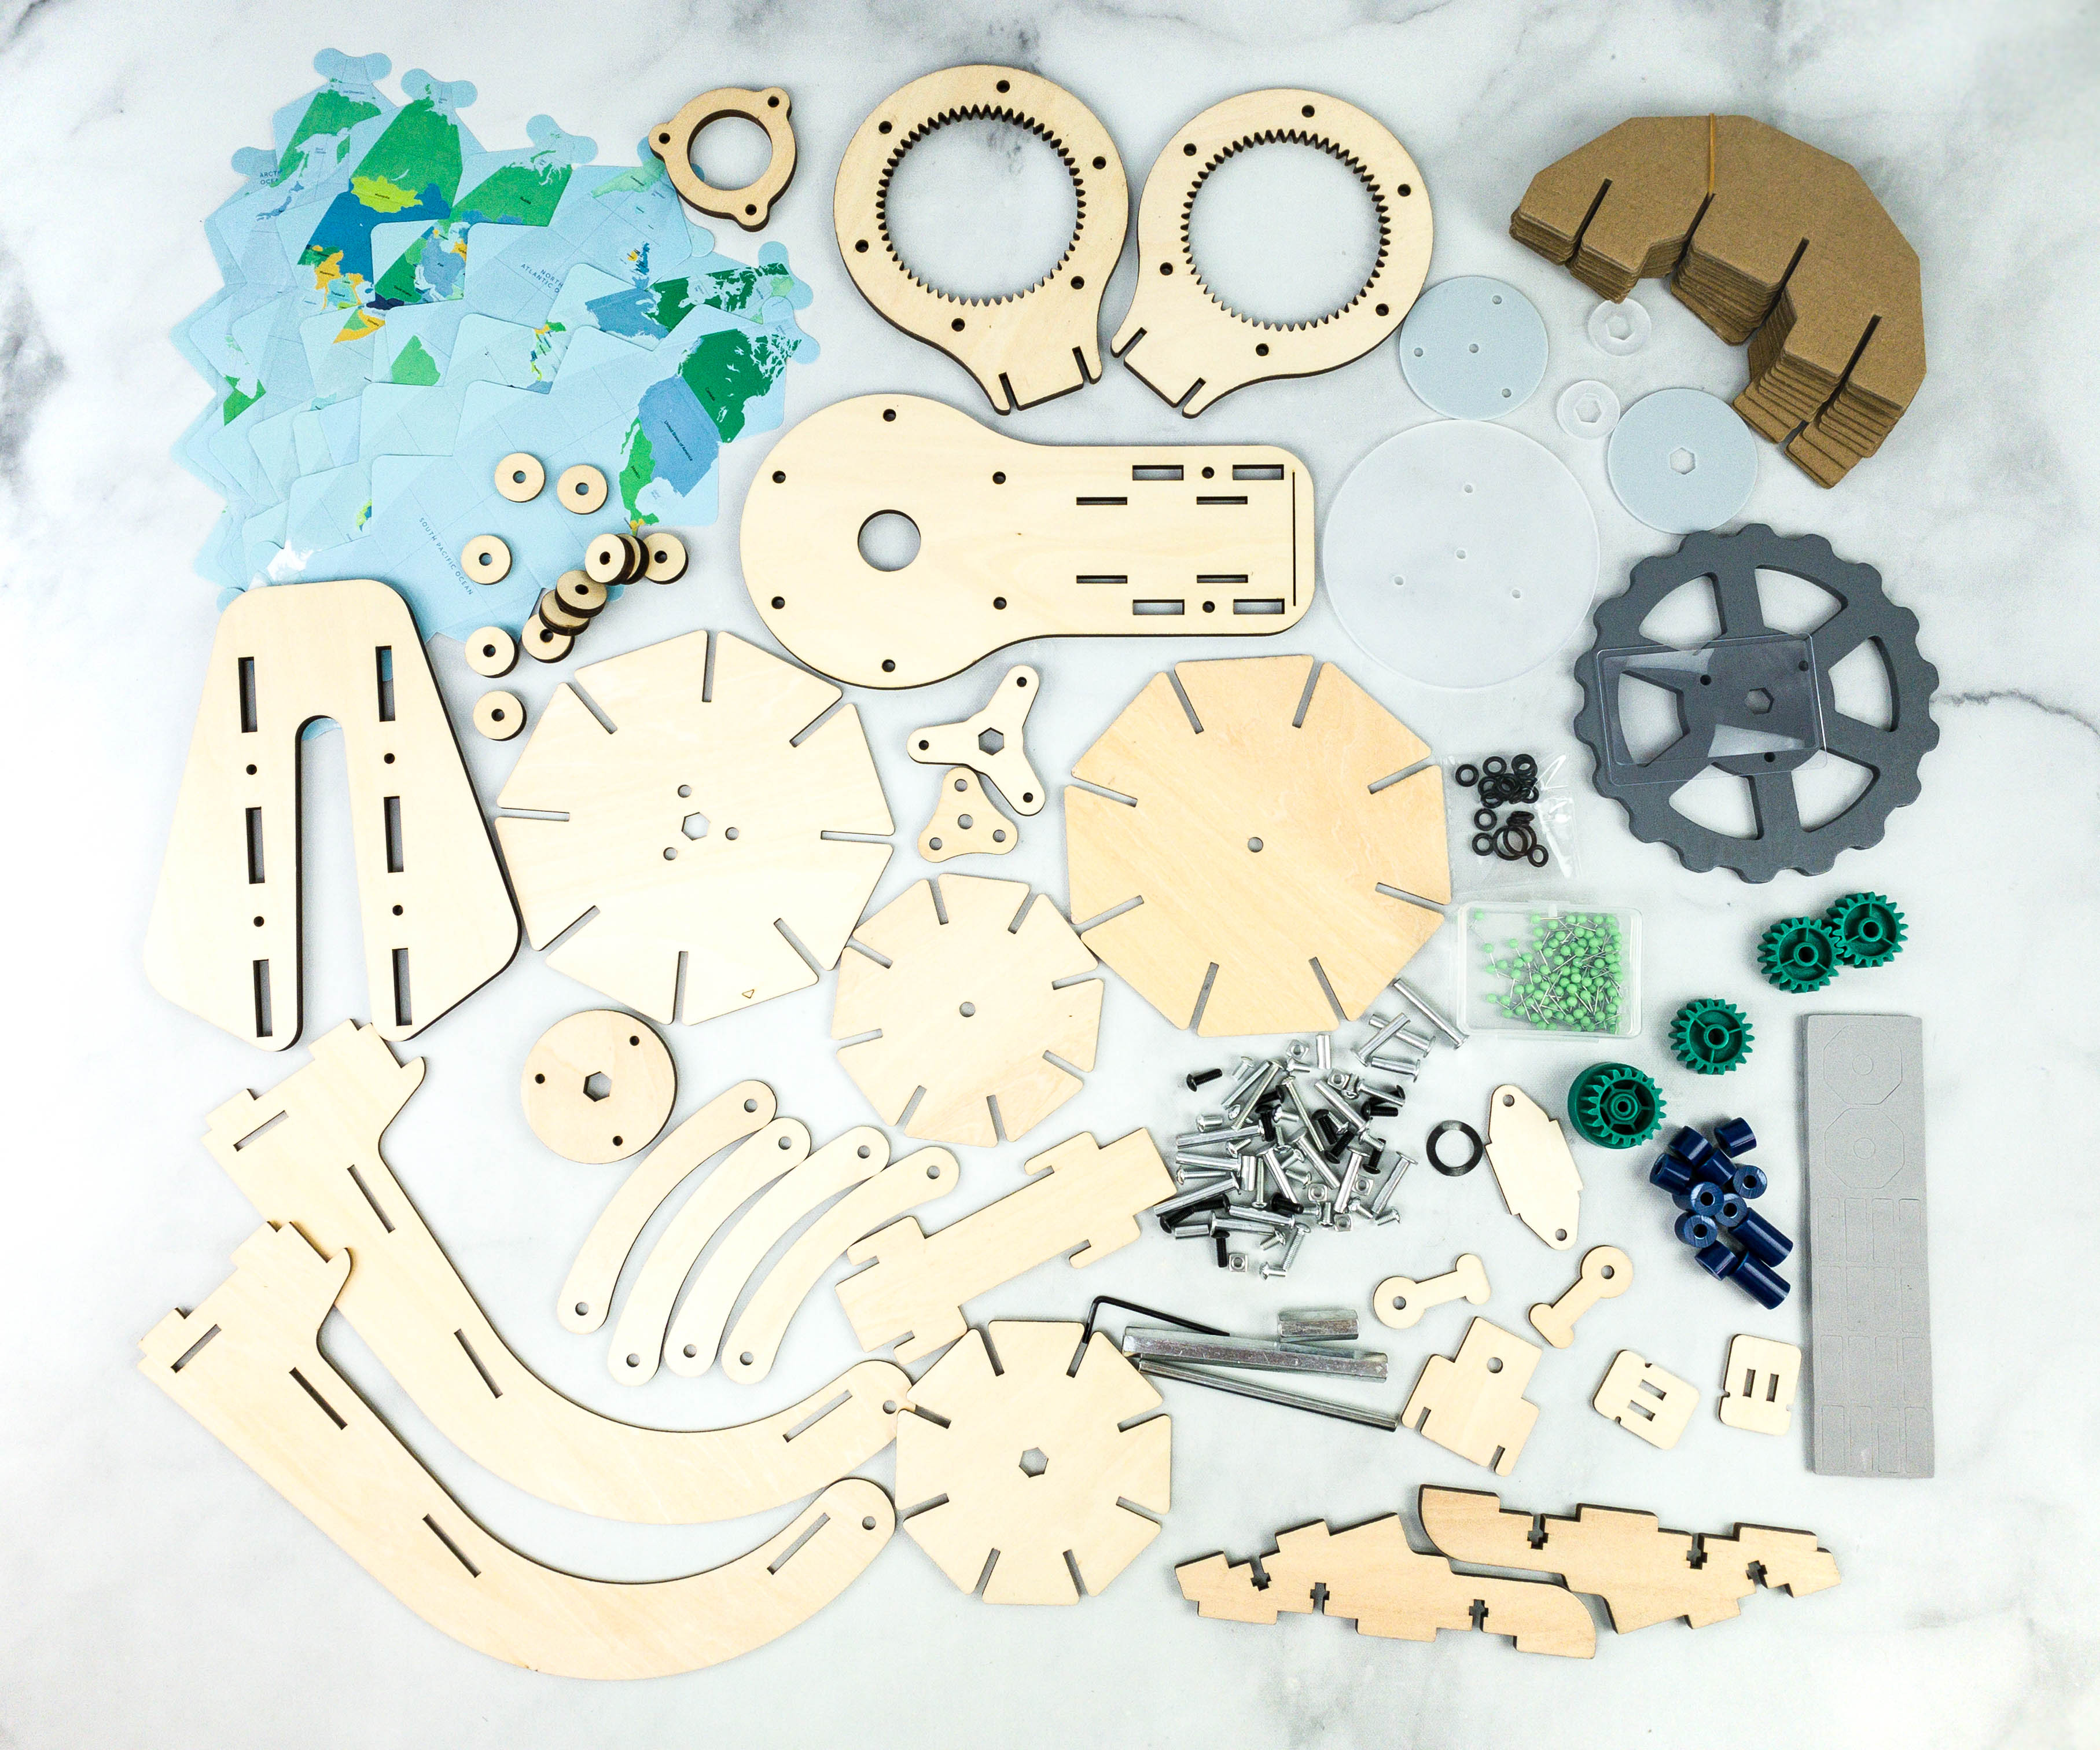
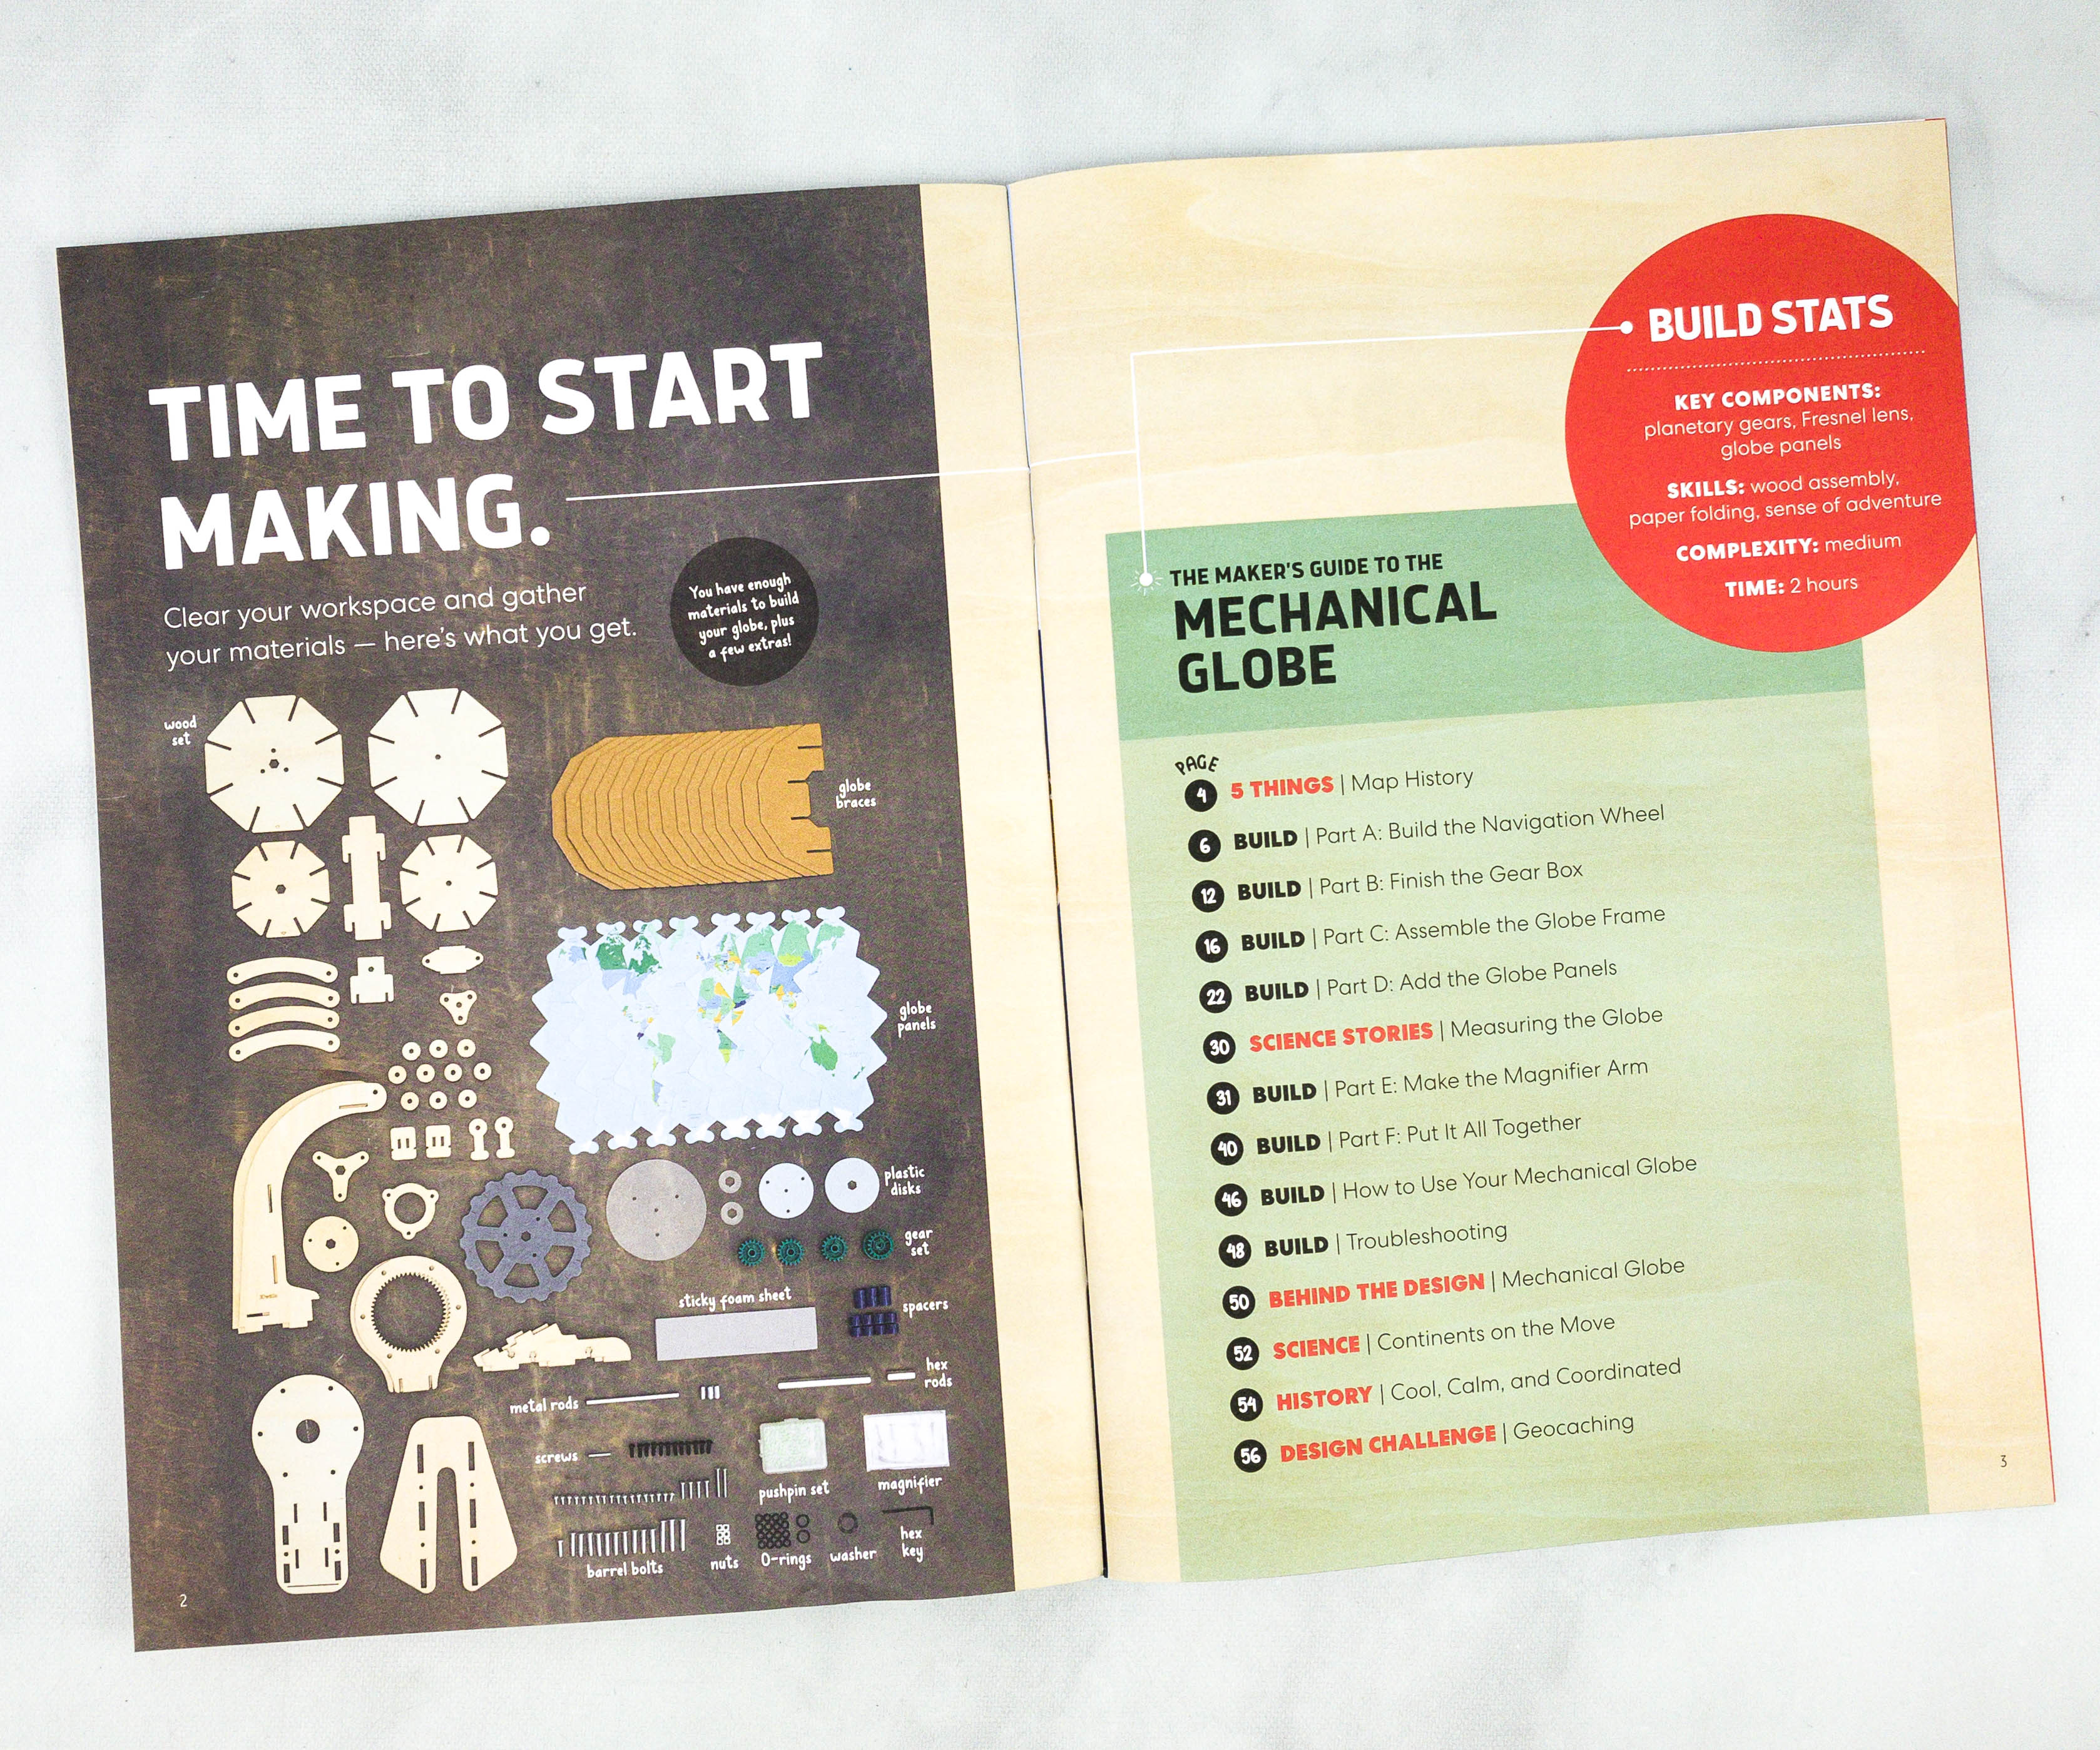
Everything in this month’s box!
Eureka Crate Maker’s Guide
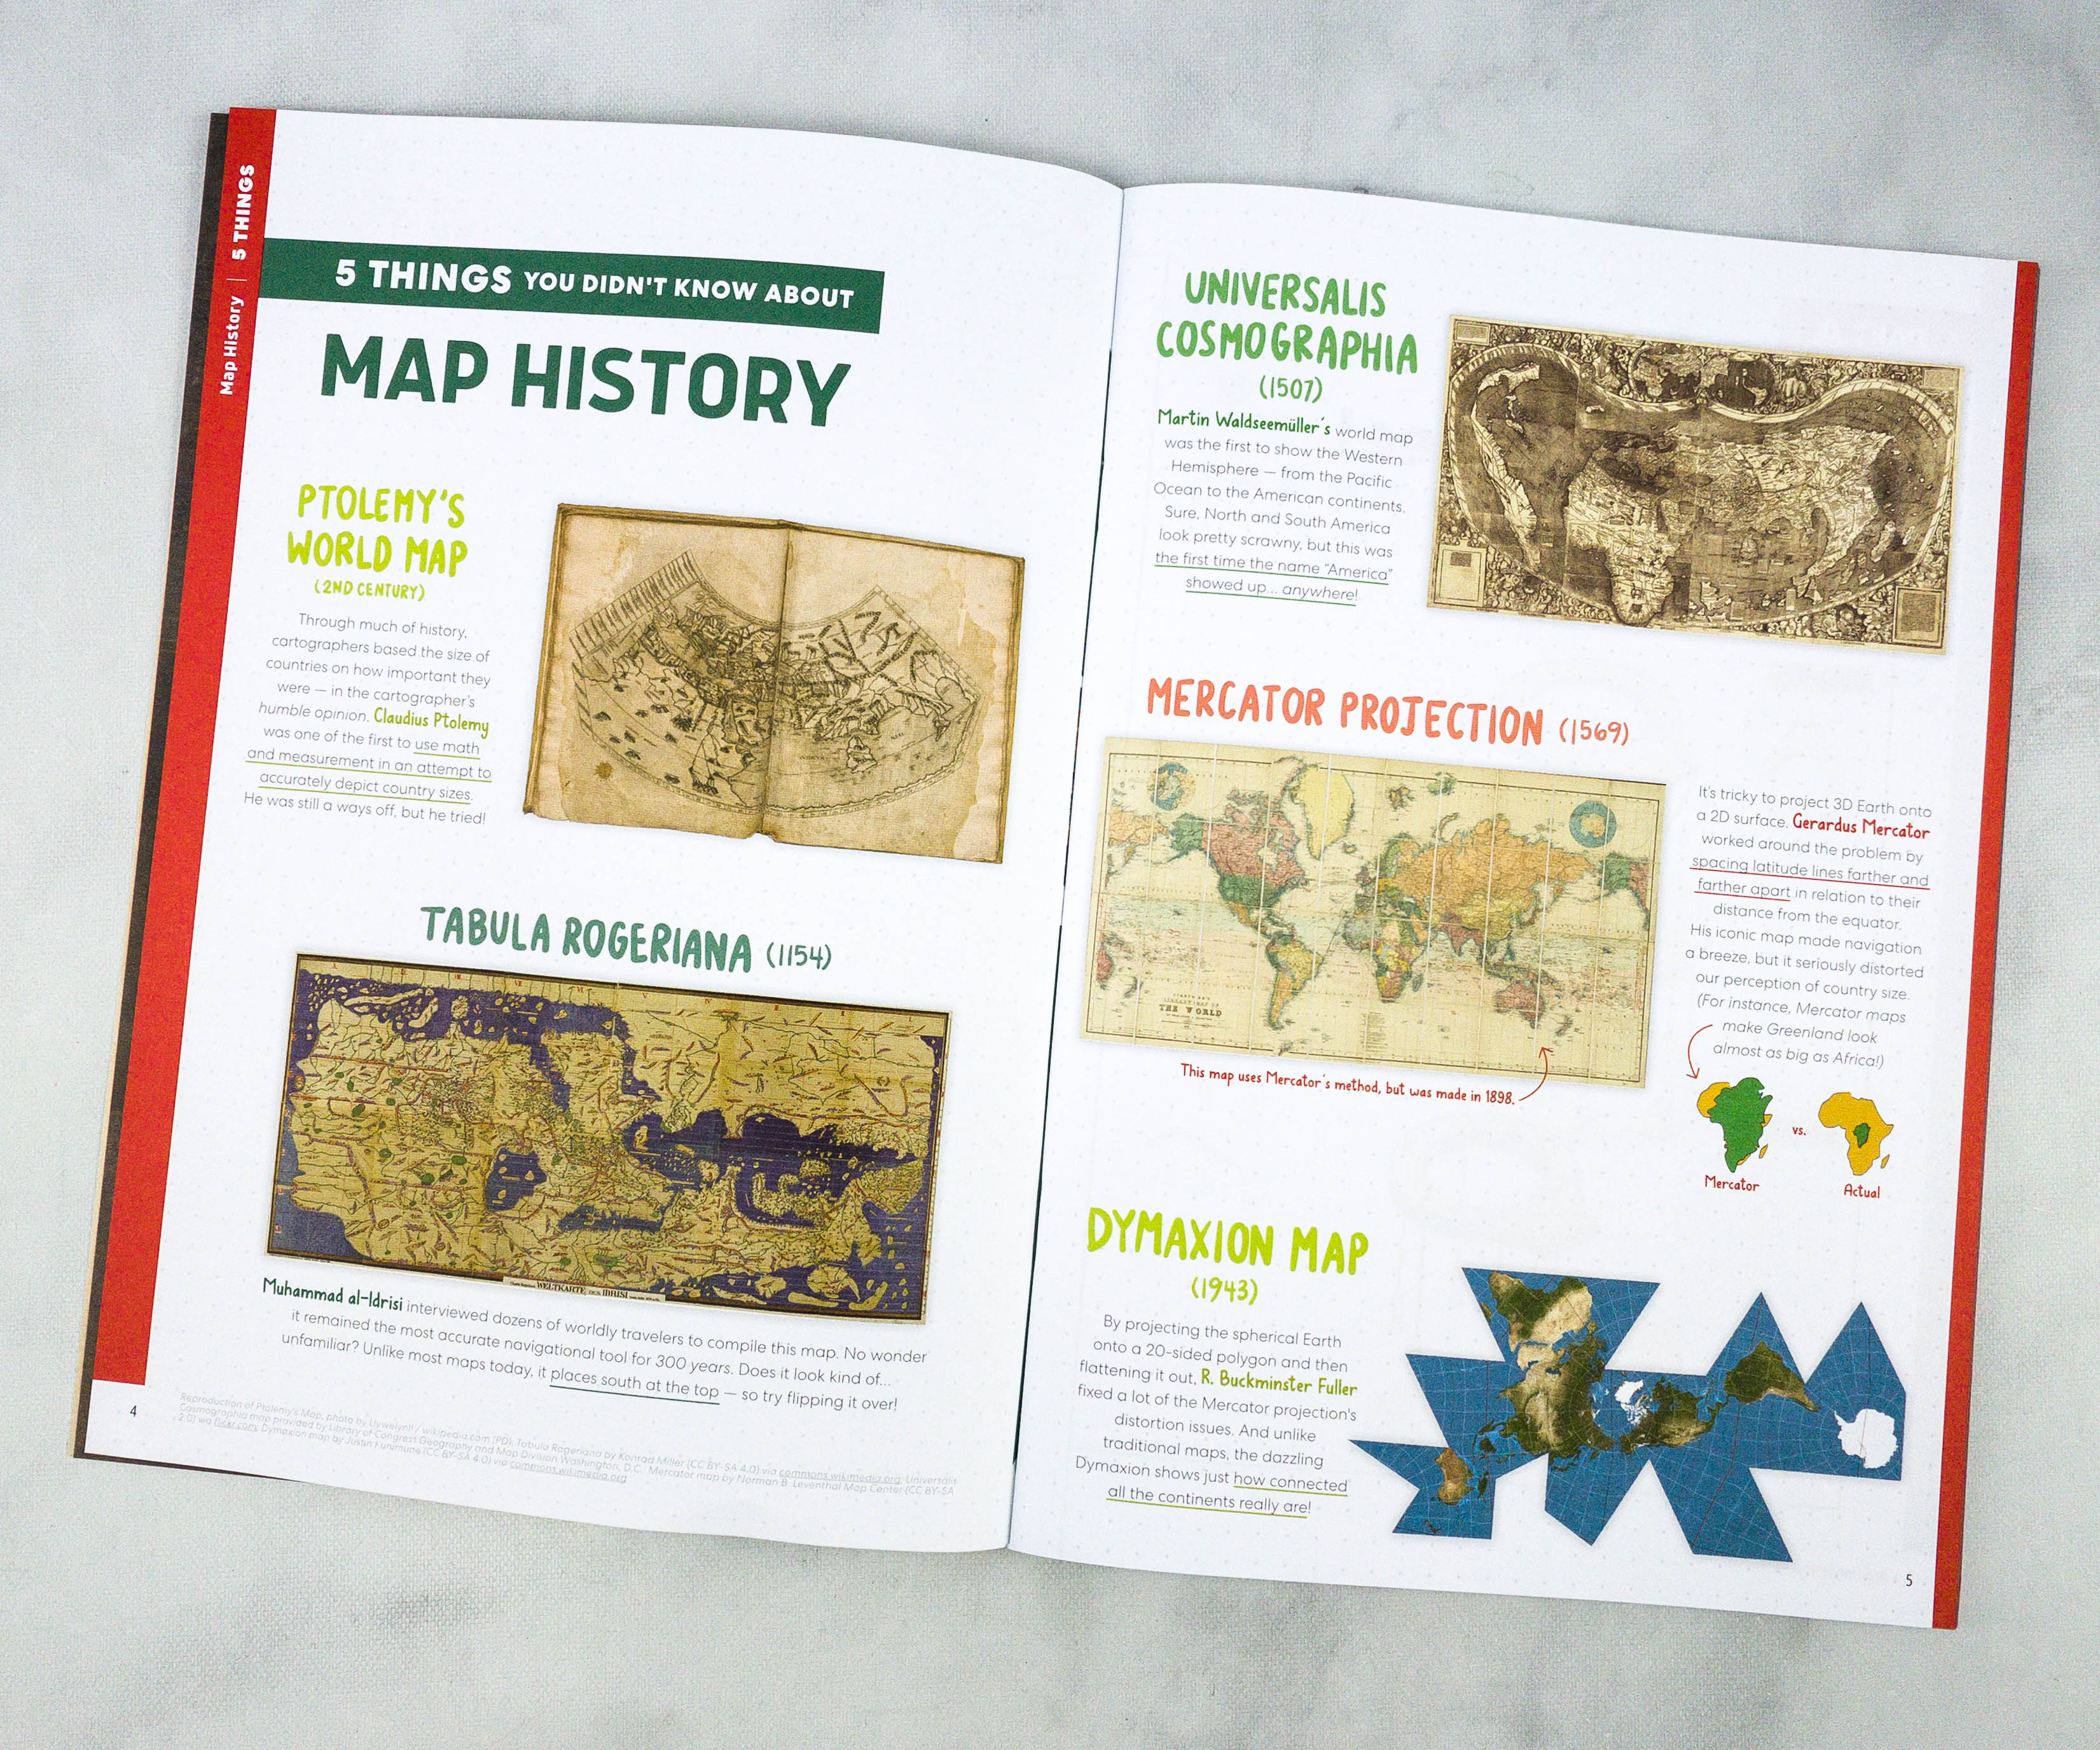
This part of the booklet provides a list of 5 things to know about Map History!
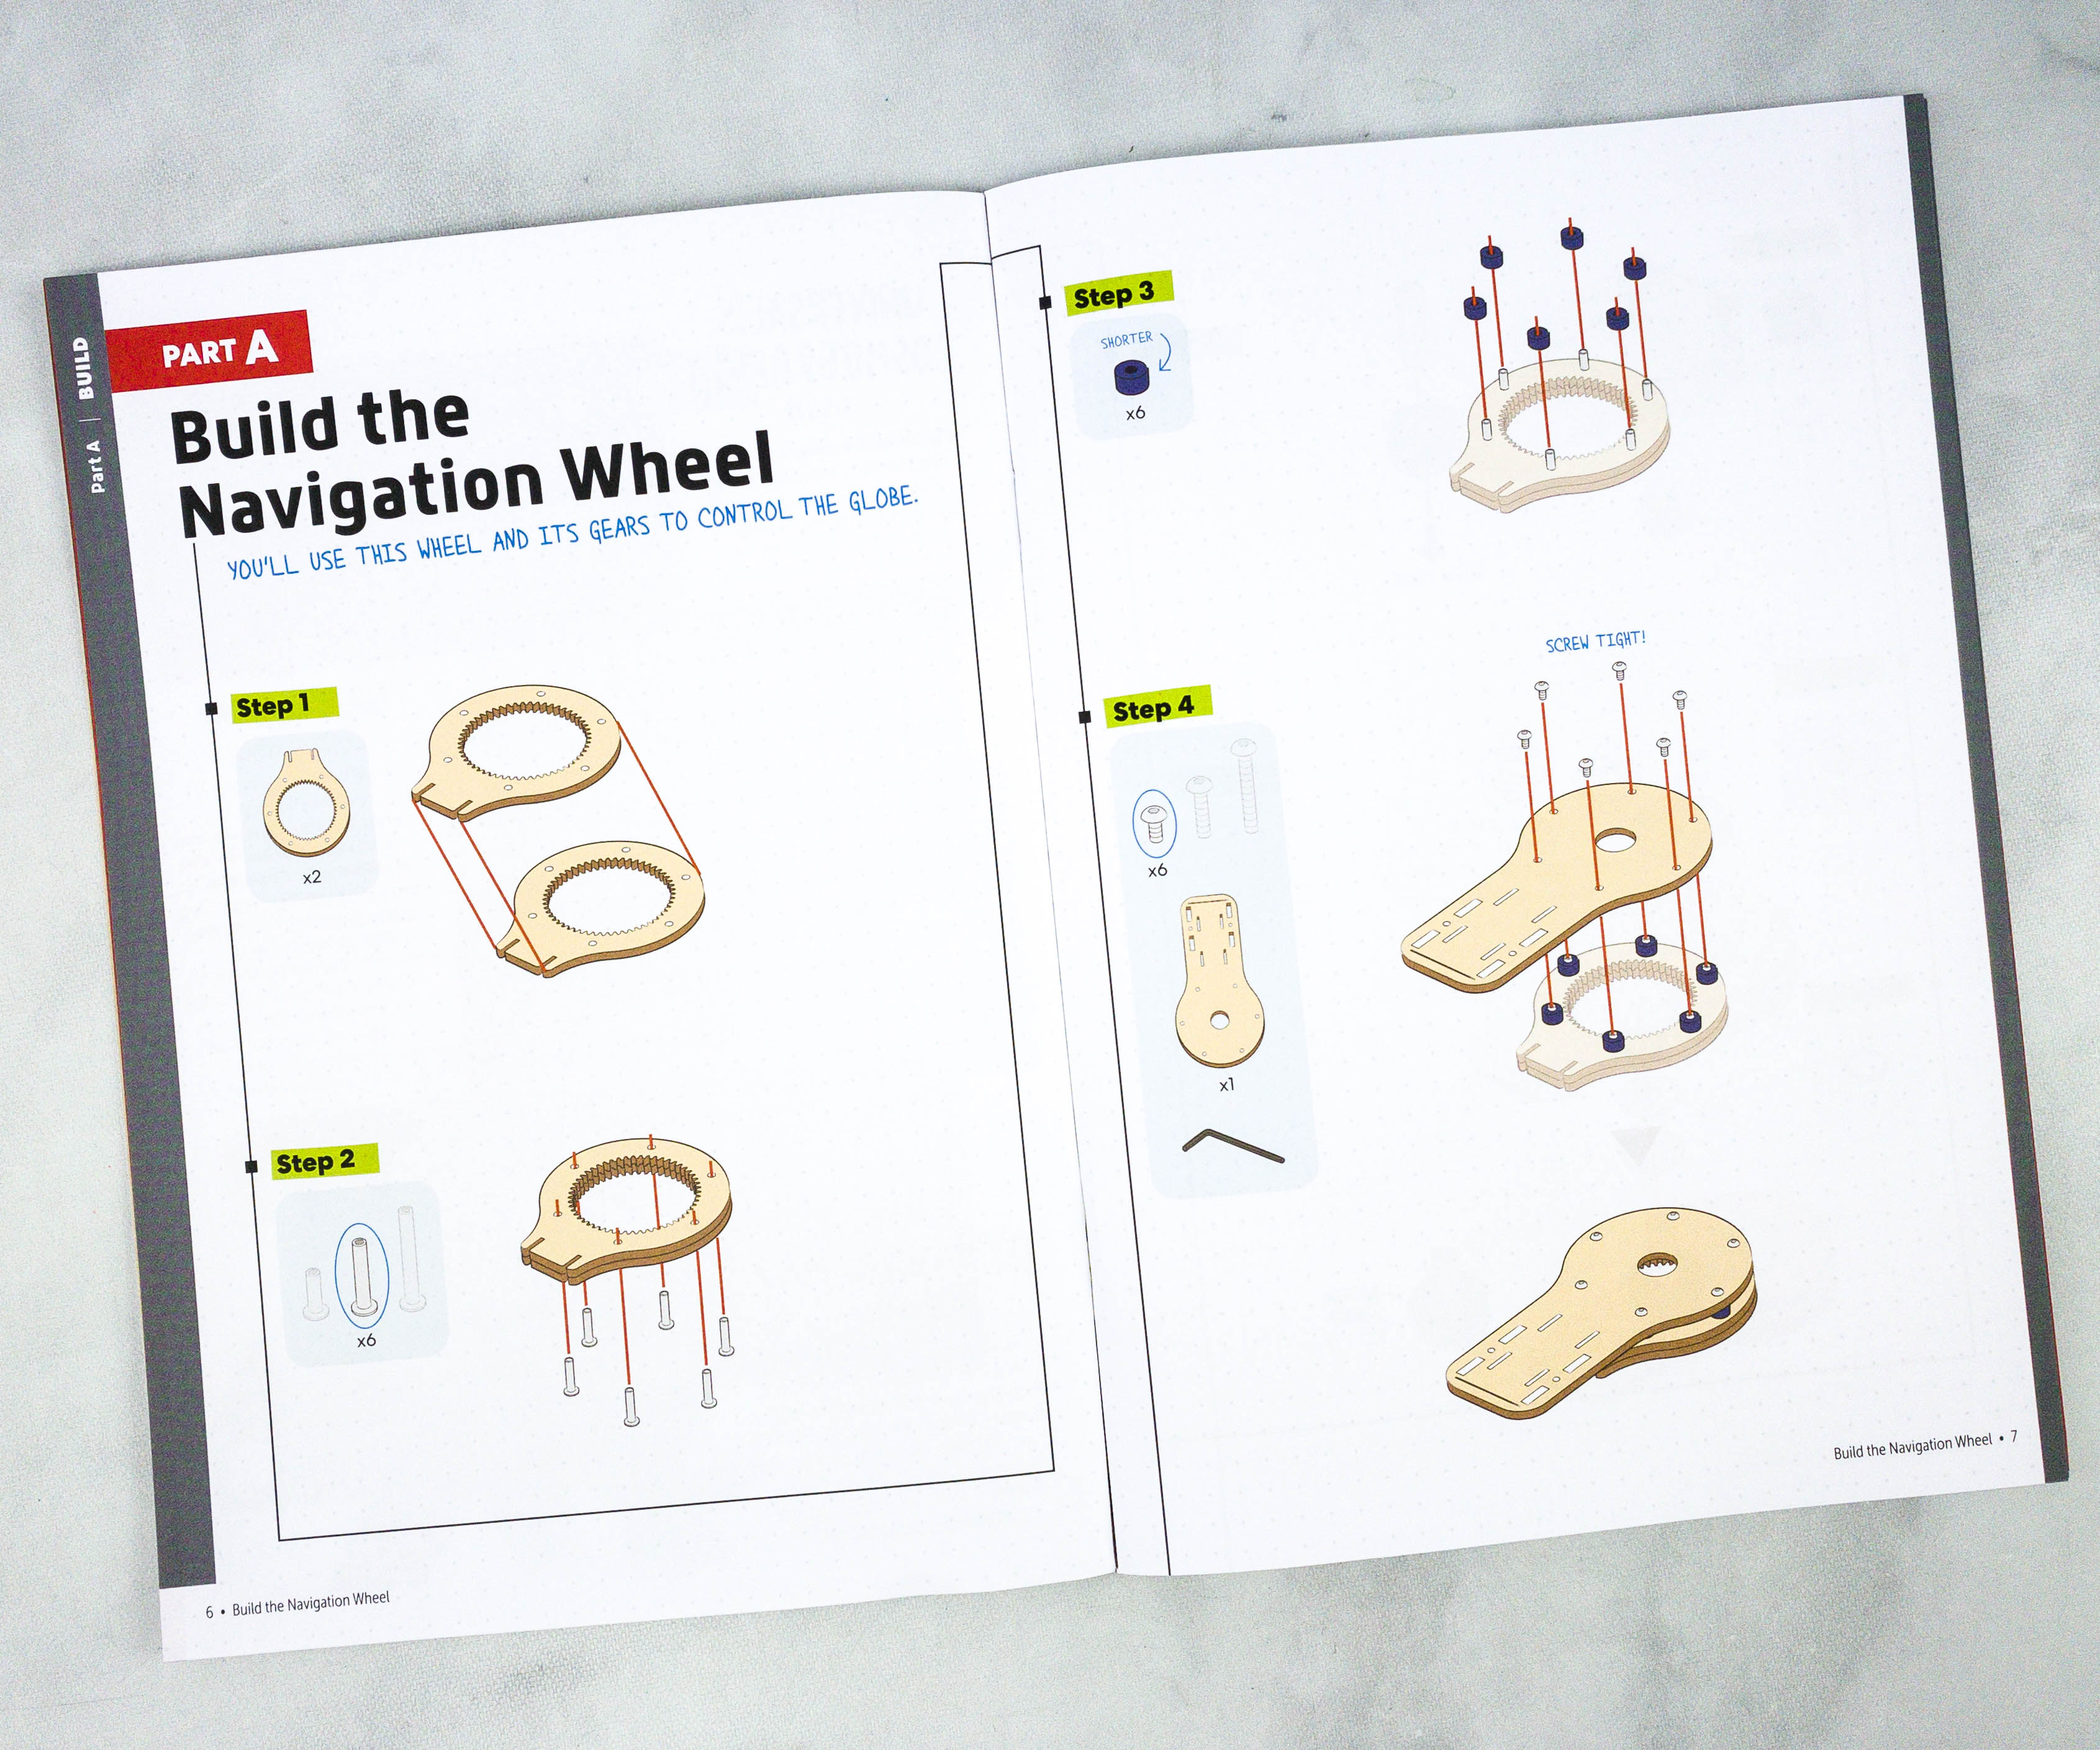
The first part of the project is building the navigation wheel. It’s the one that controls the globe.
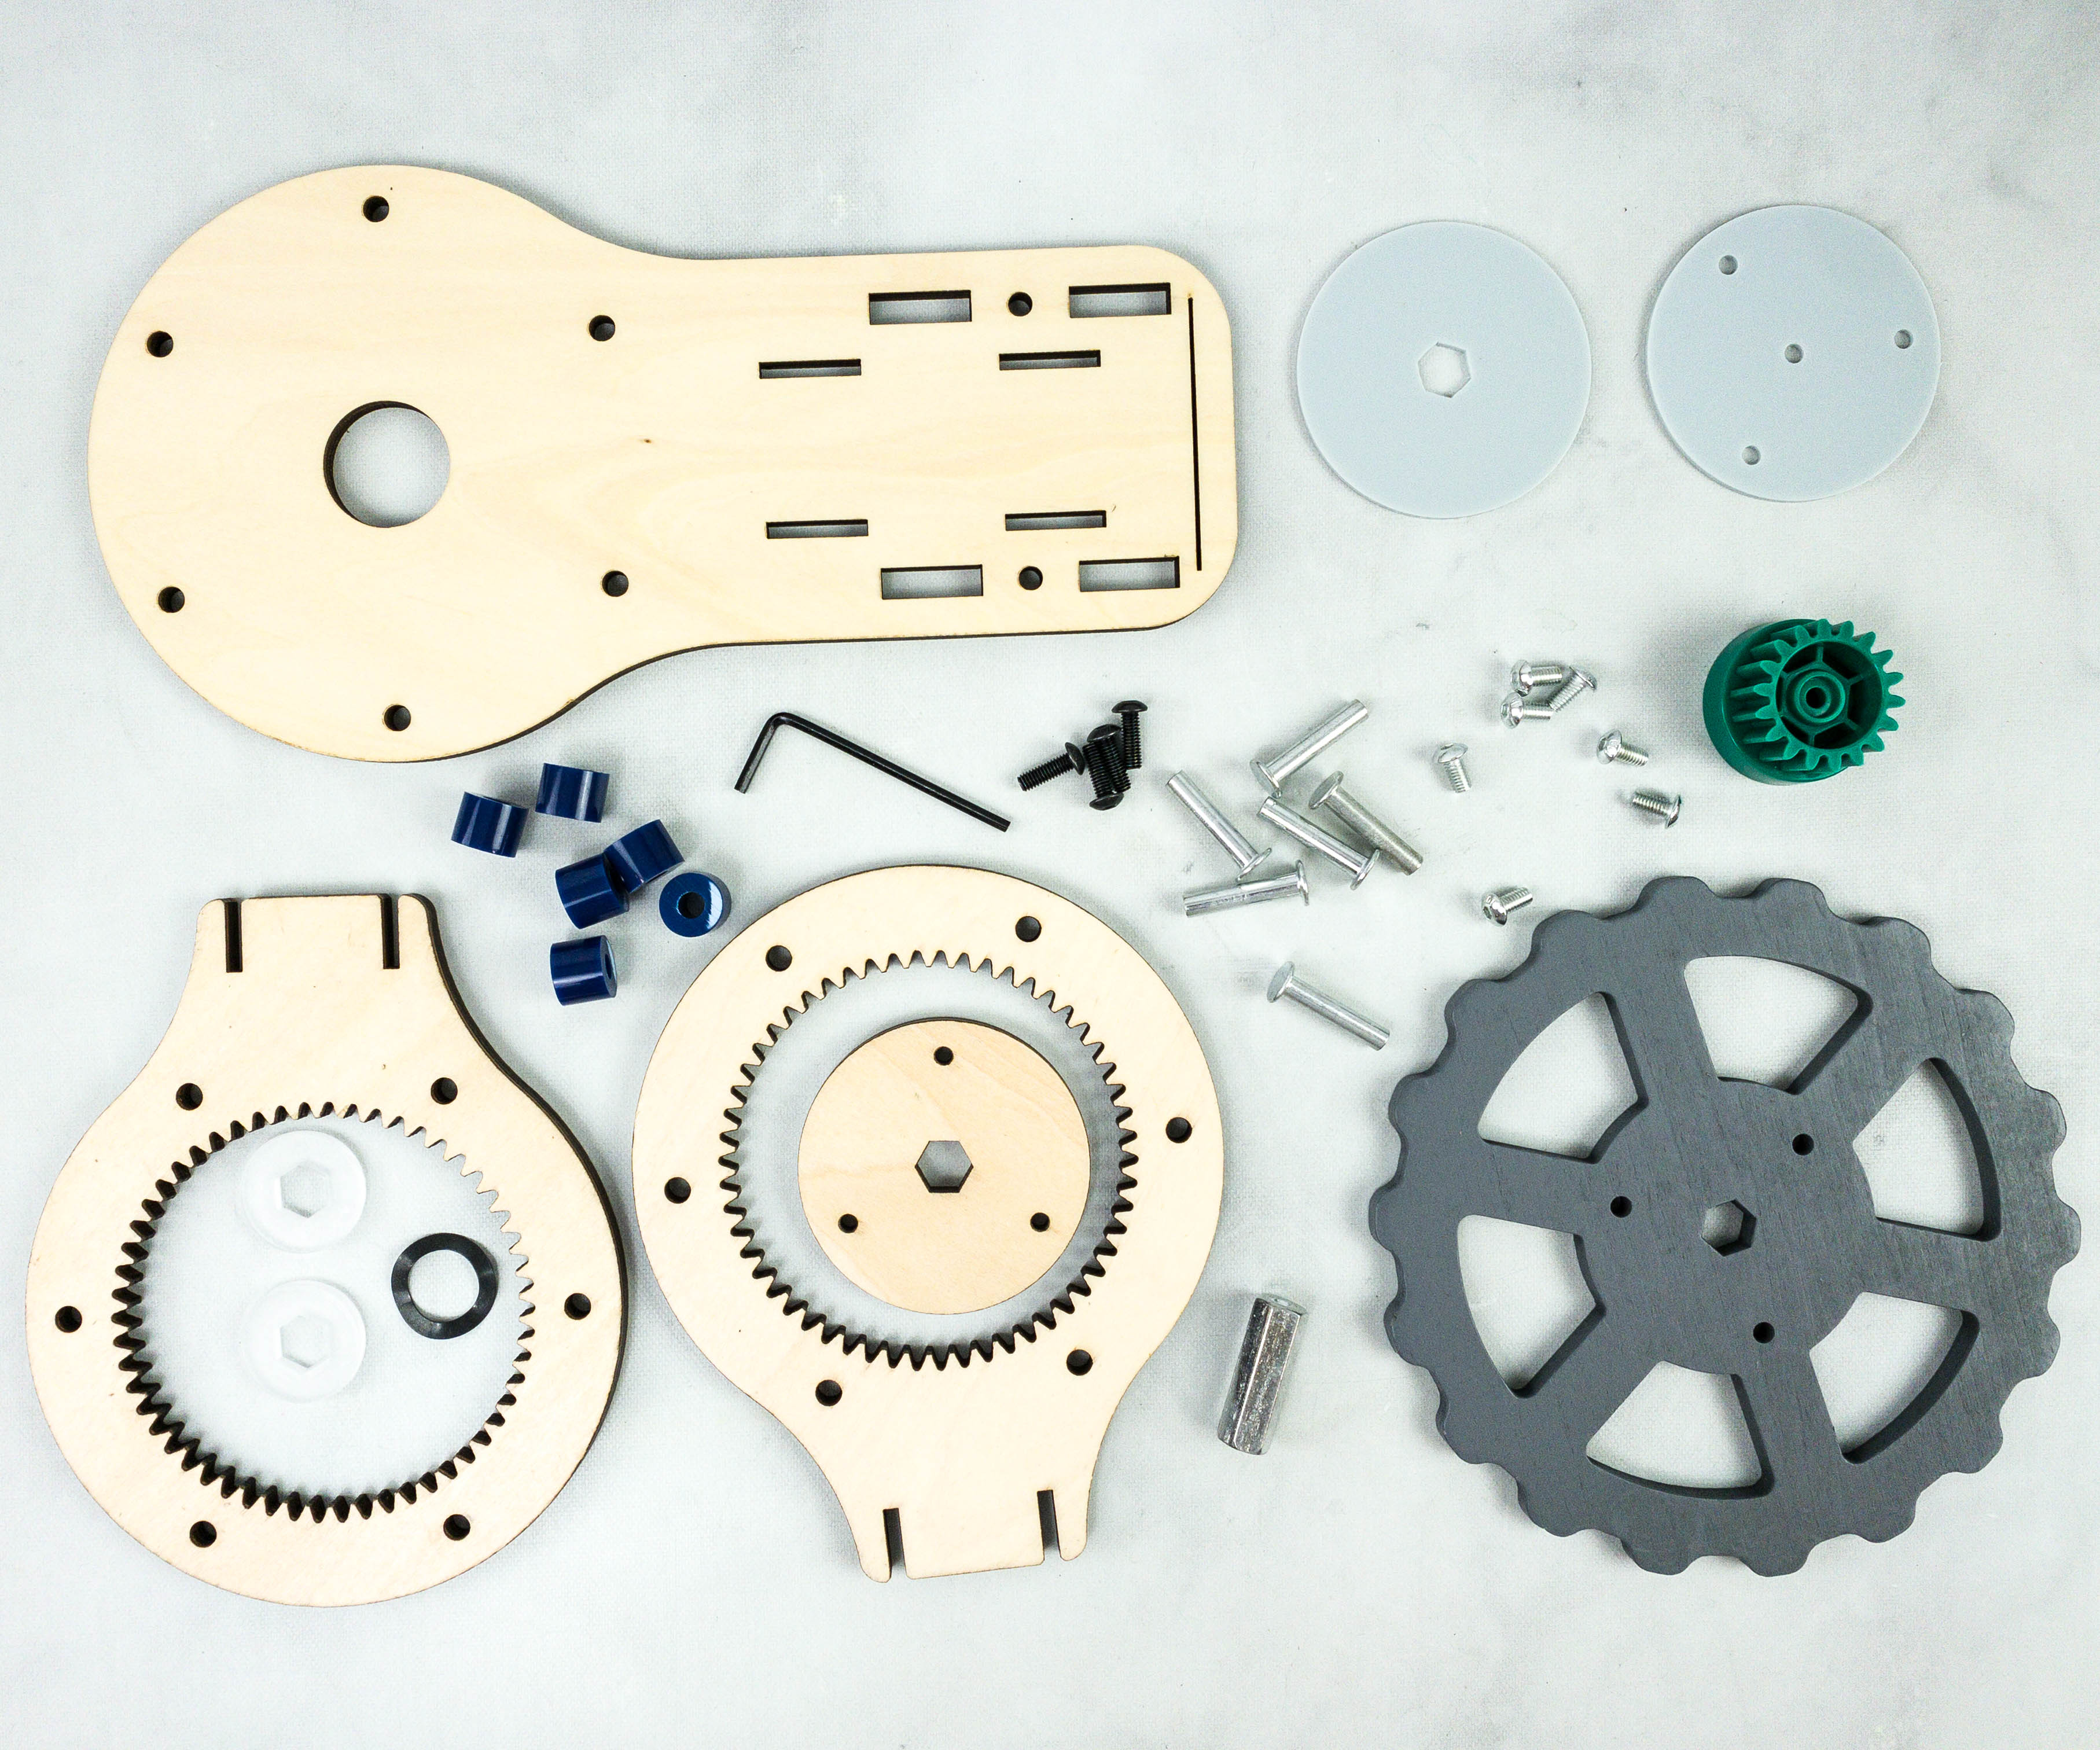
We used the large wooden set gears, hex key, barrel bolts, spacers, gear set, screws, metal rod, and plastic discs.

First, put the wooden ring together, insert the barrel bolts on the holes, and slide one washer each. Then, put the wooden ring on top of the base and lock it by screwing it tightly.
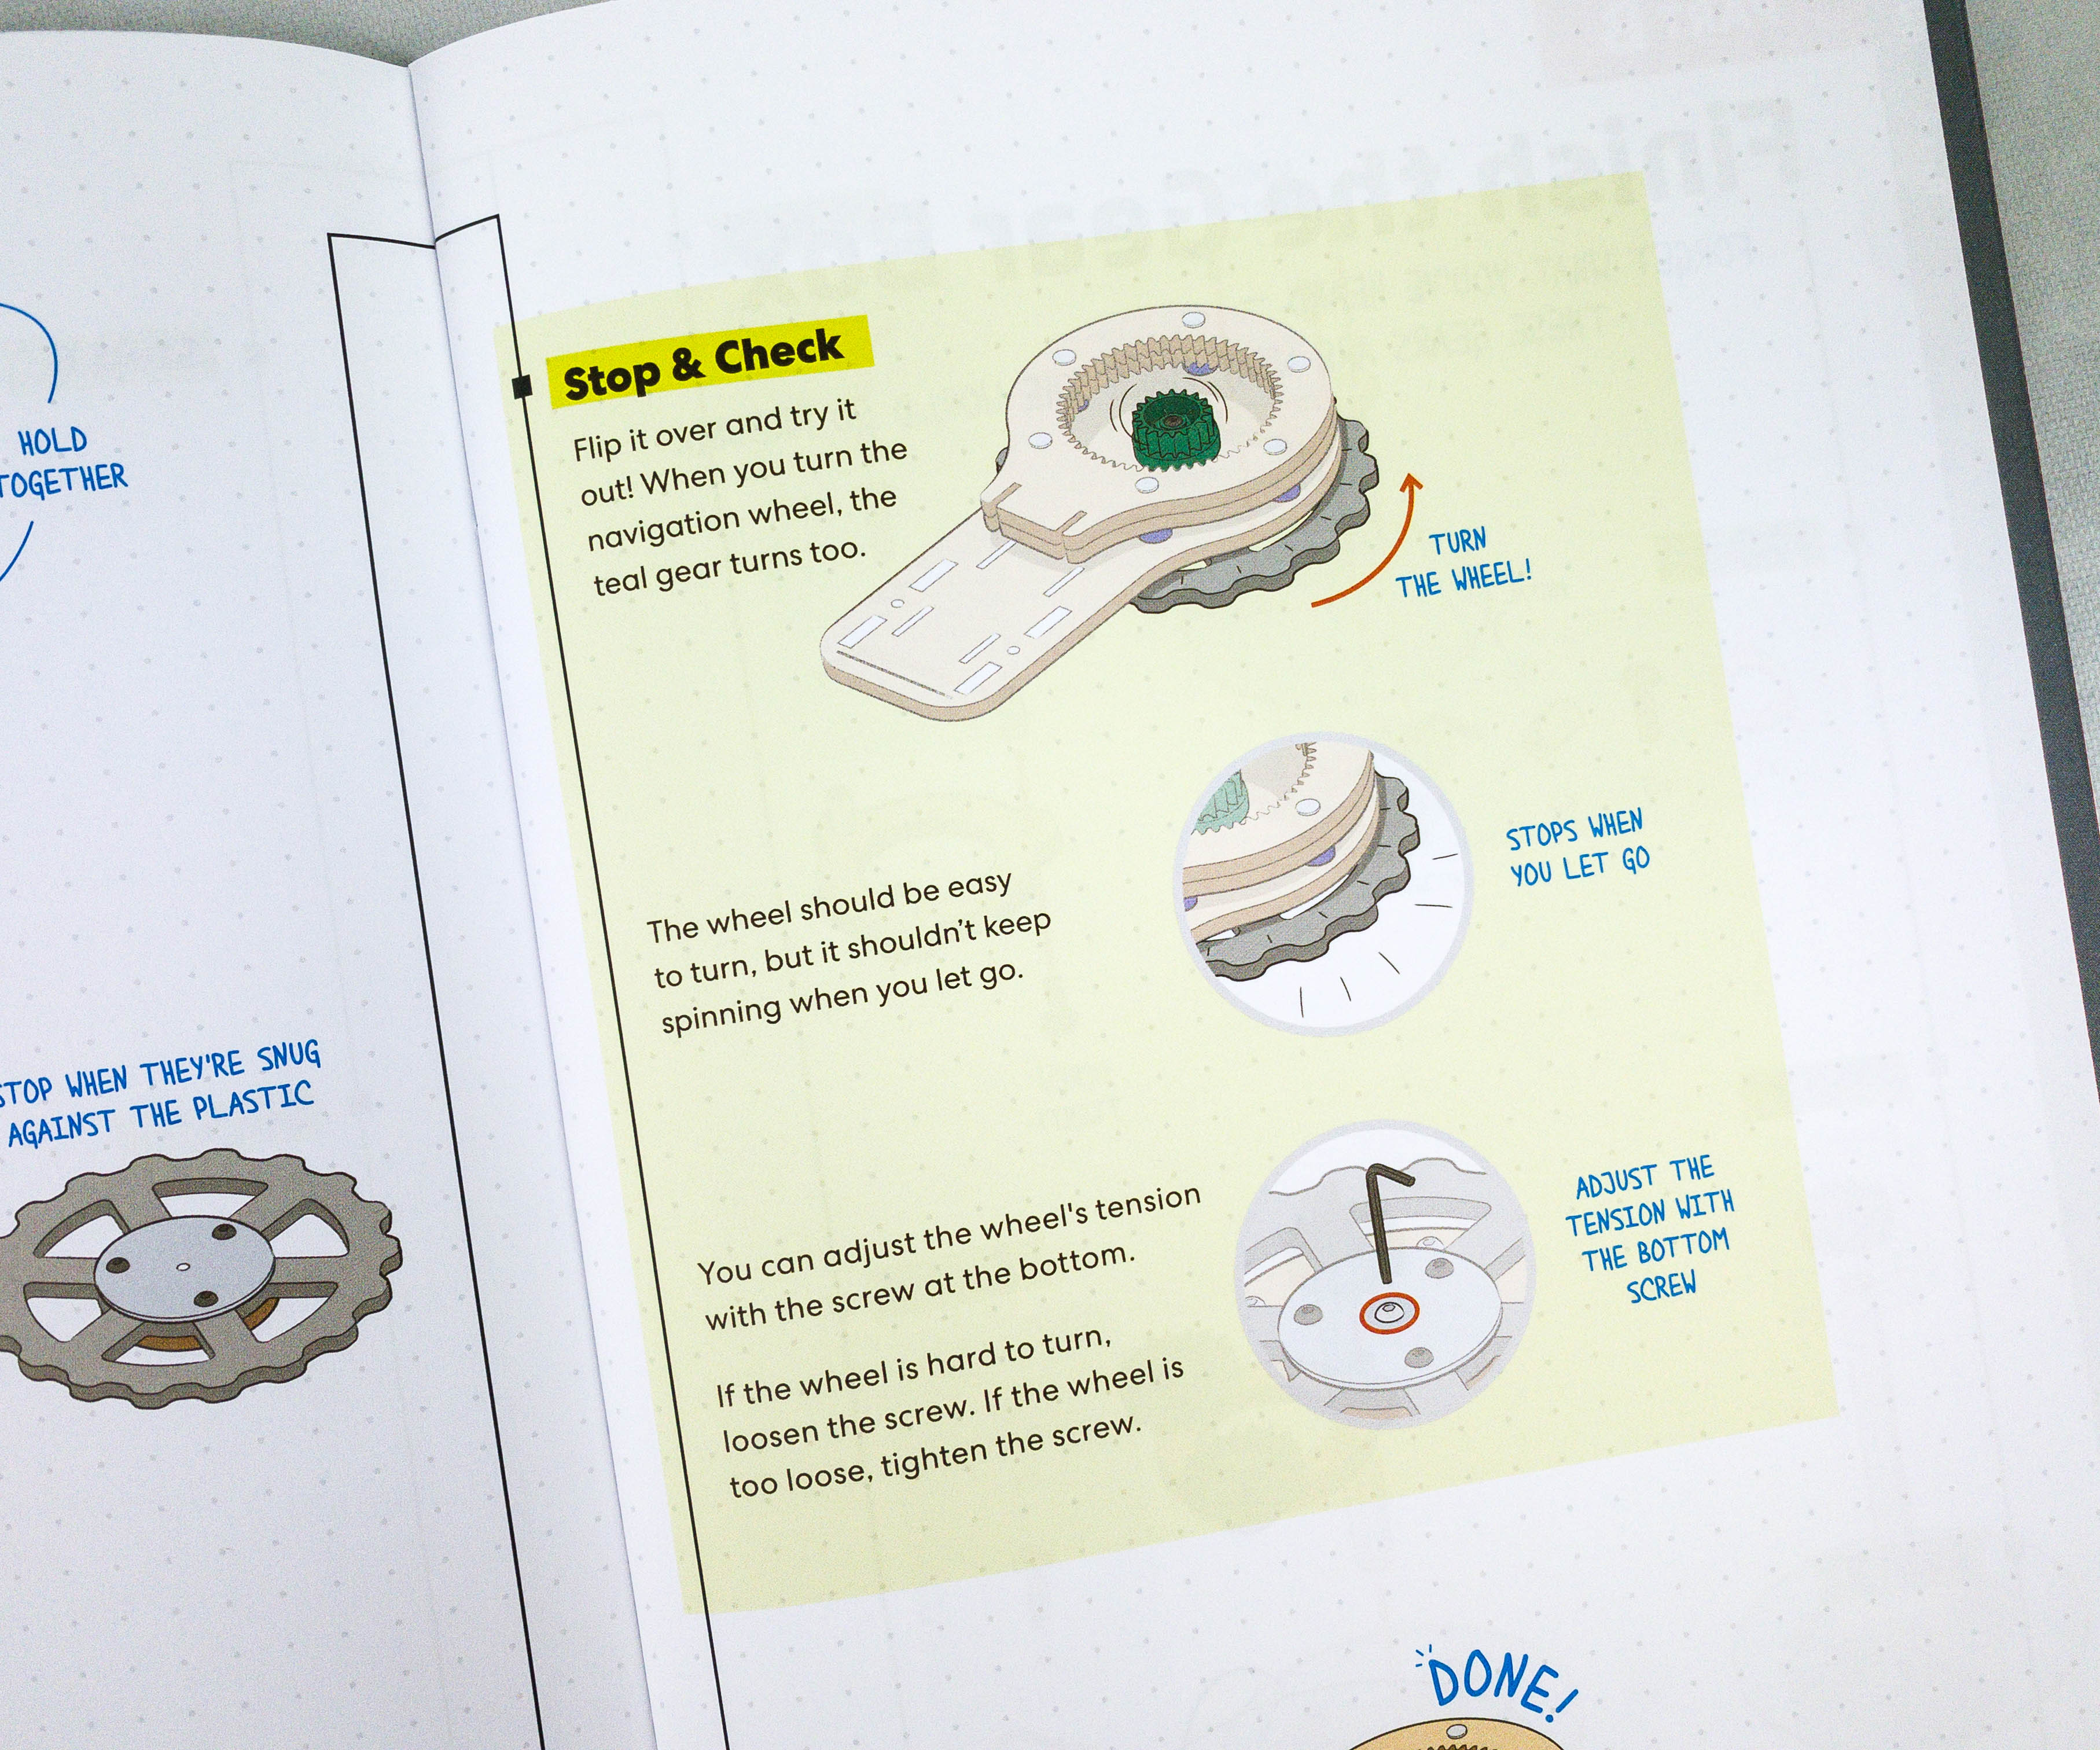
According to the stop and check section, the wheel should be easy to turn, and it should stop moving when not handled.

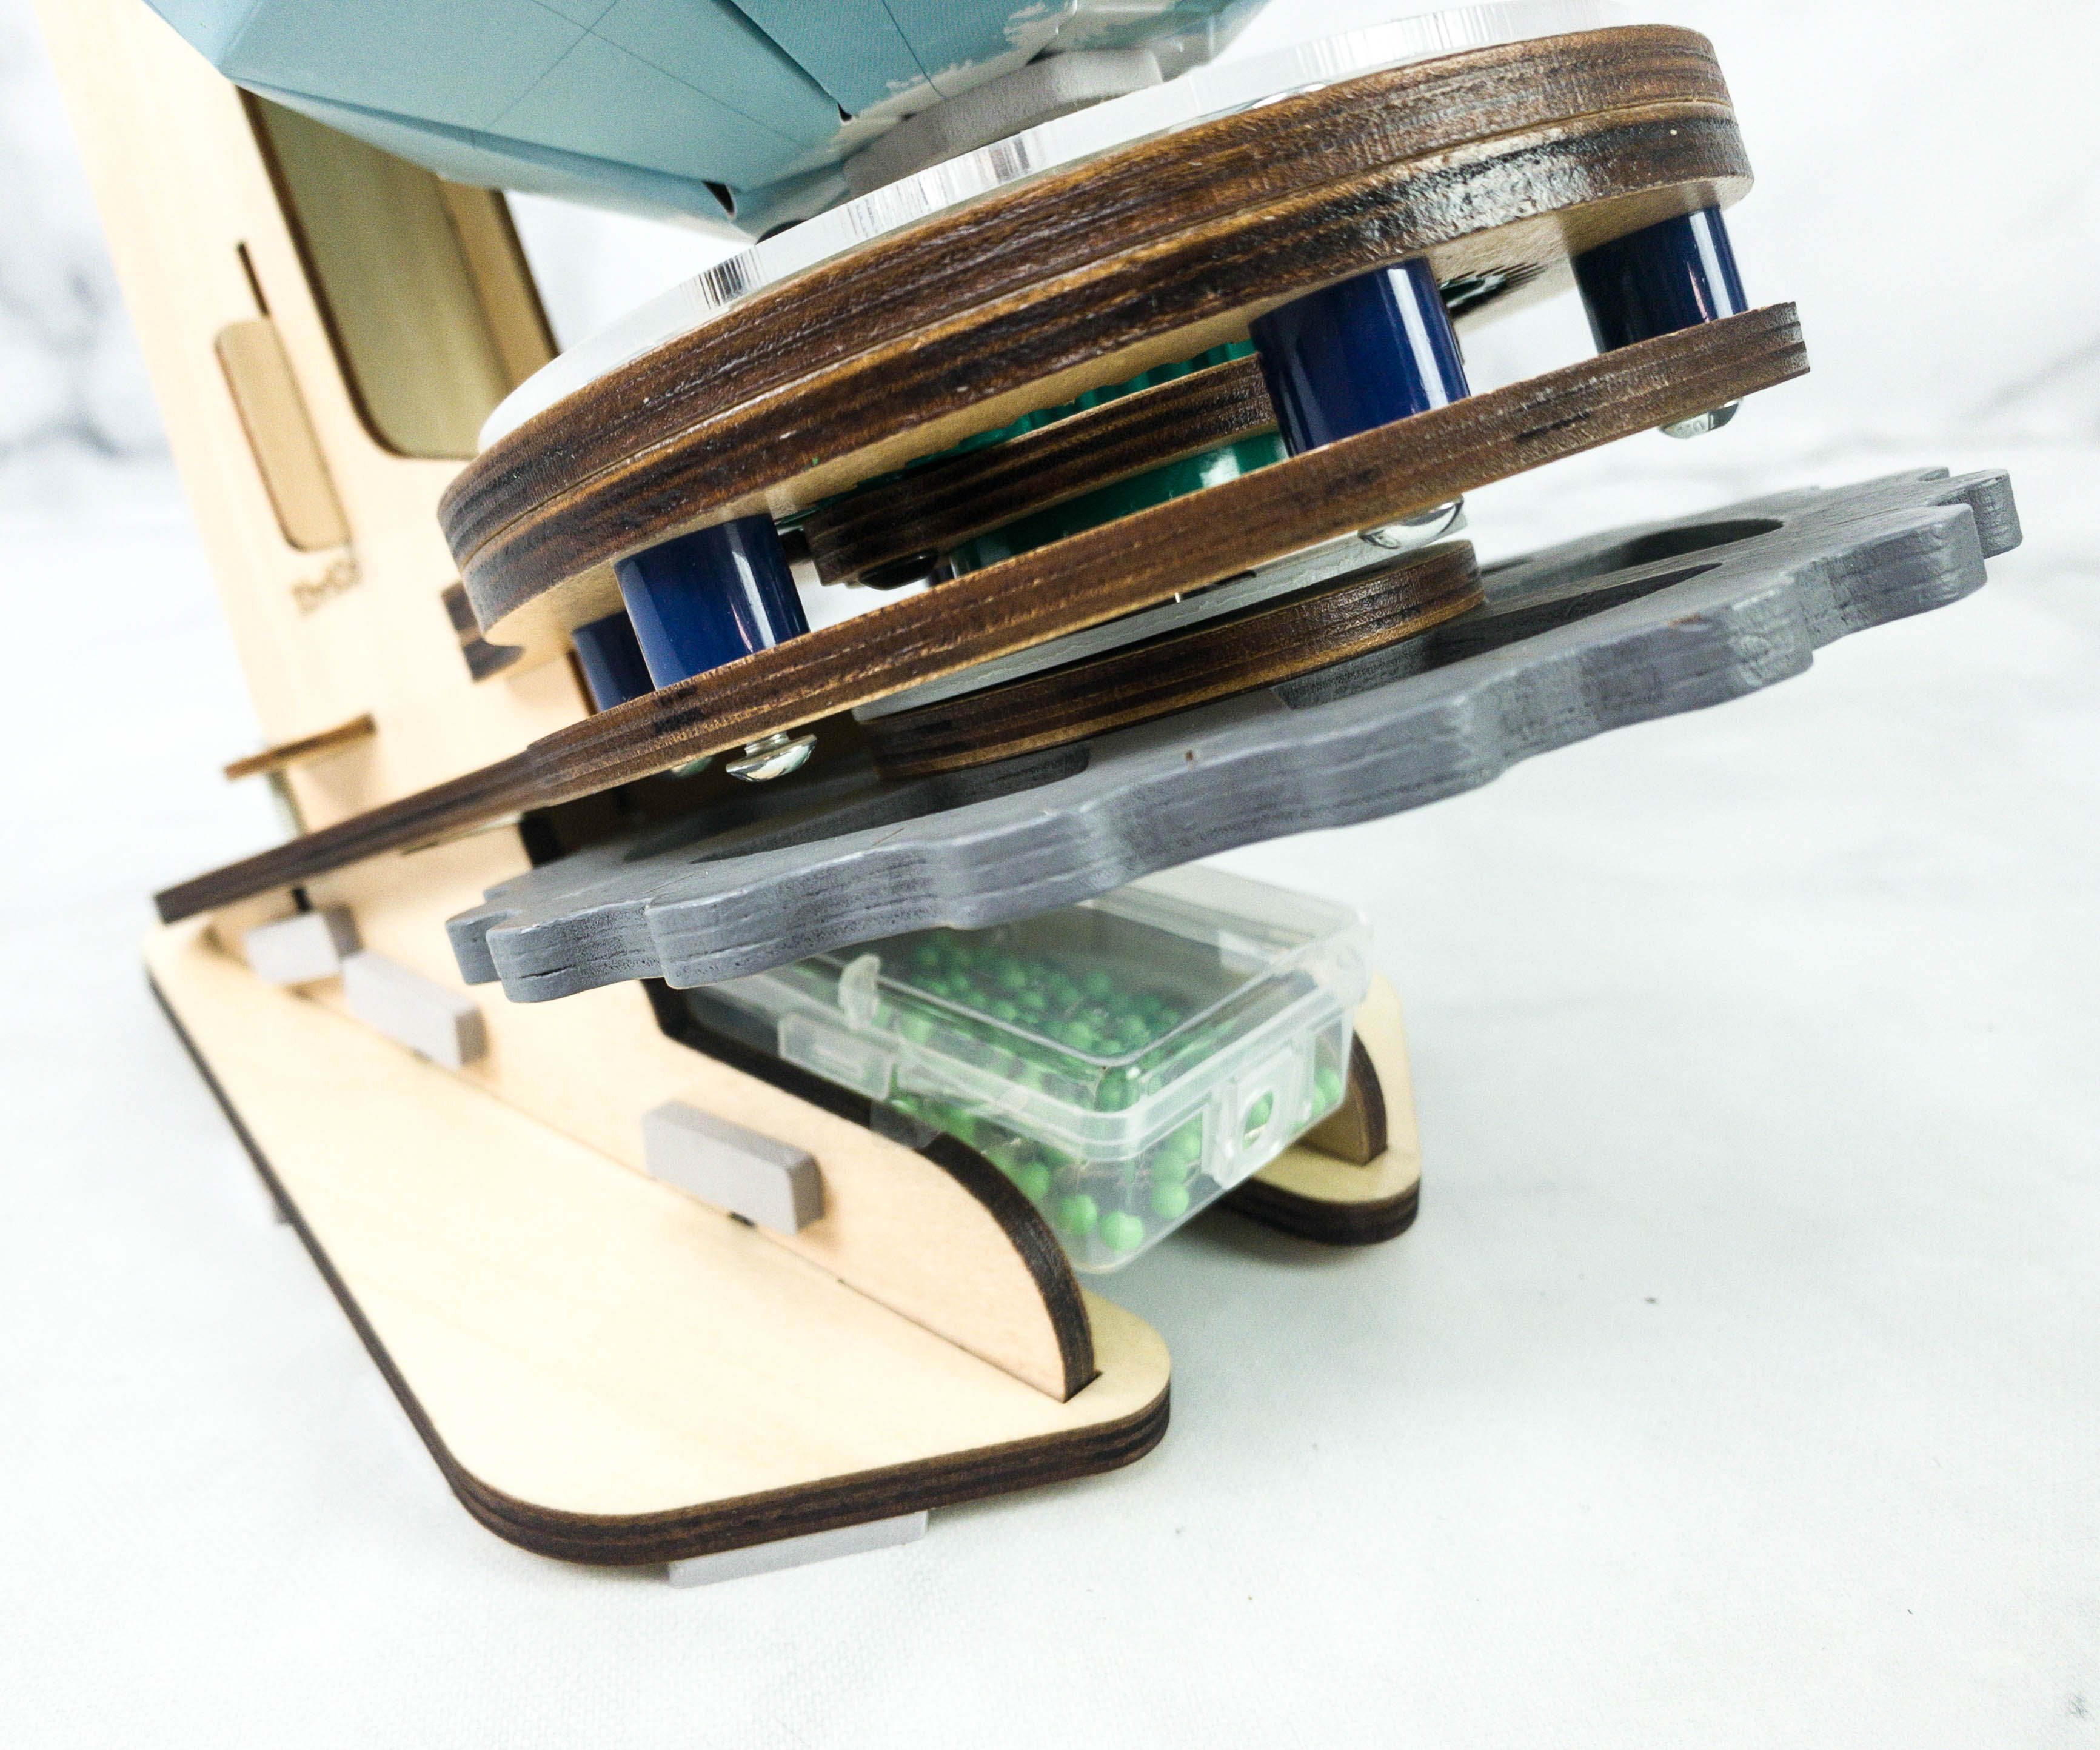
Next is finishing the gearbox. These gears are what makes the globe spin.
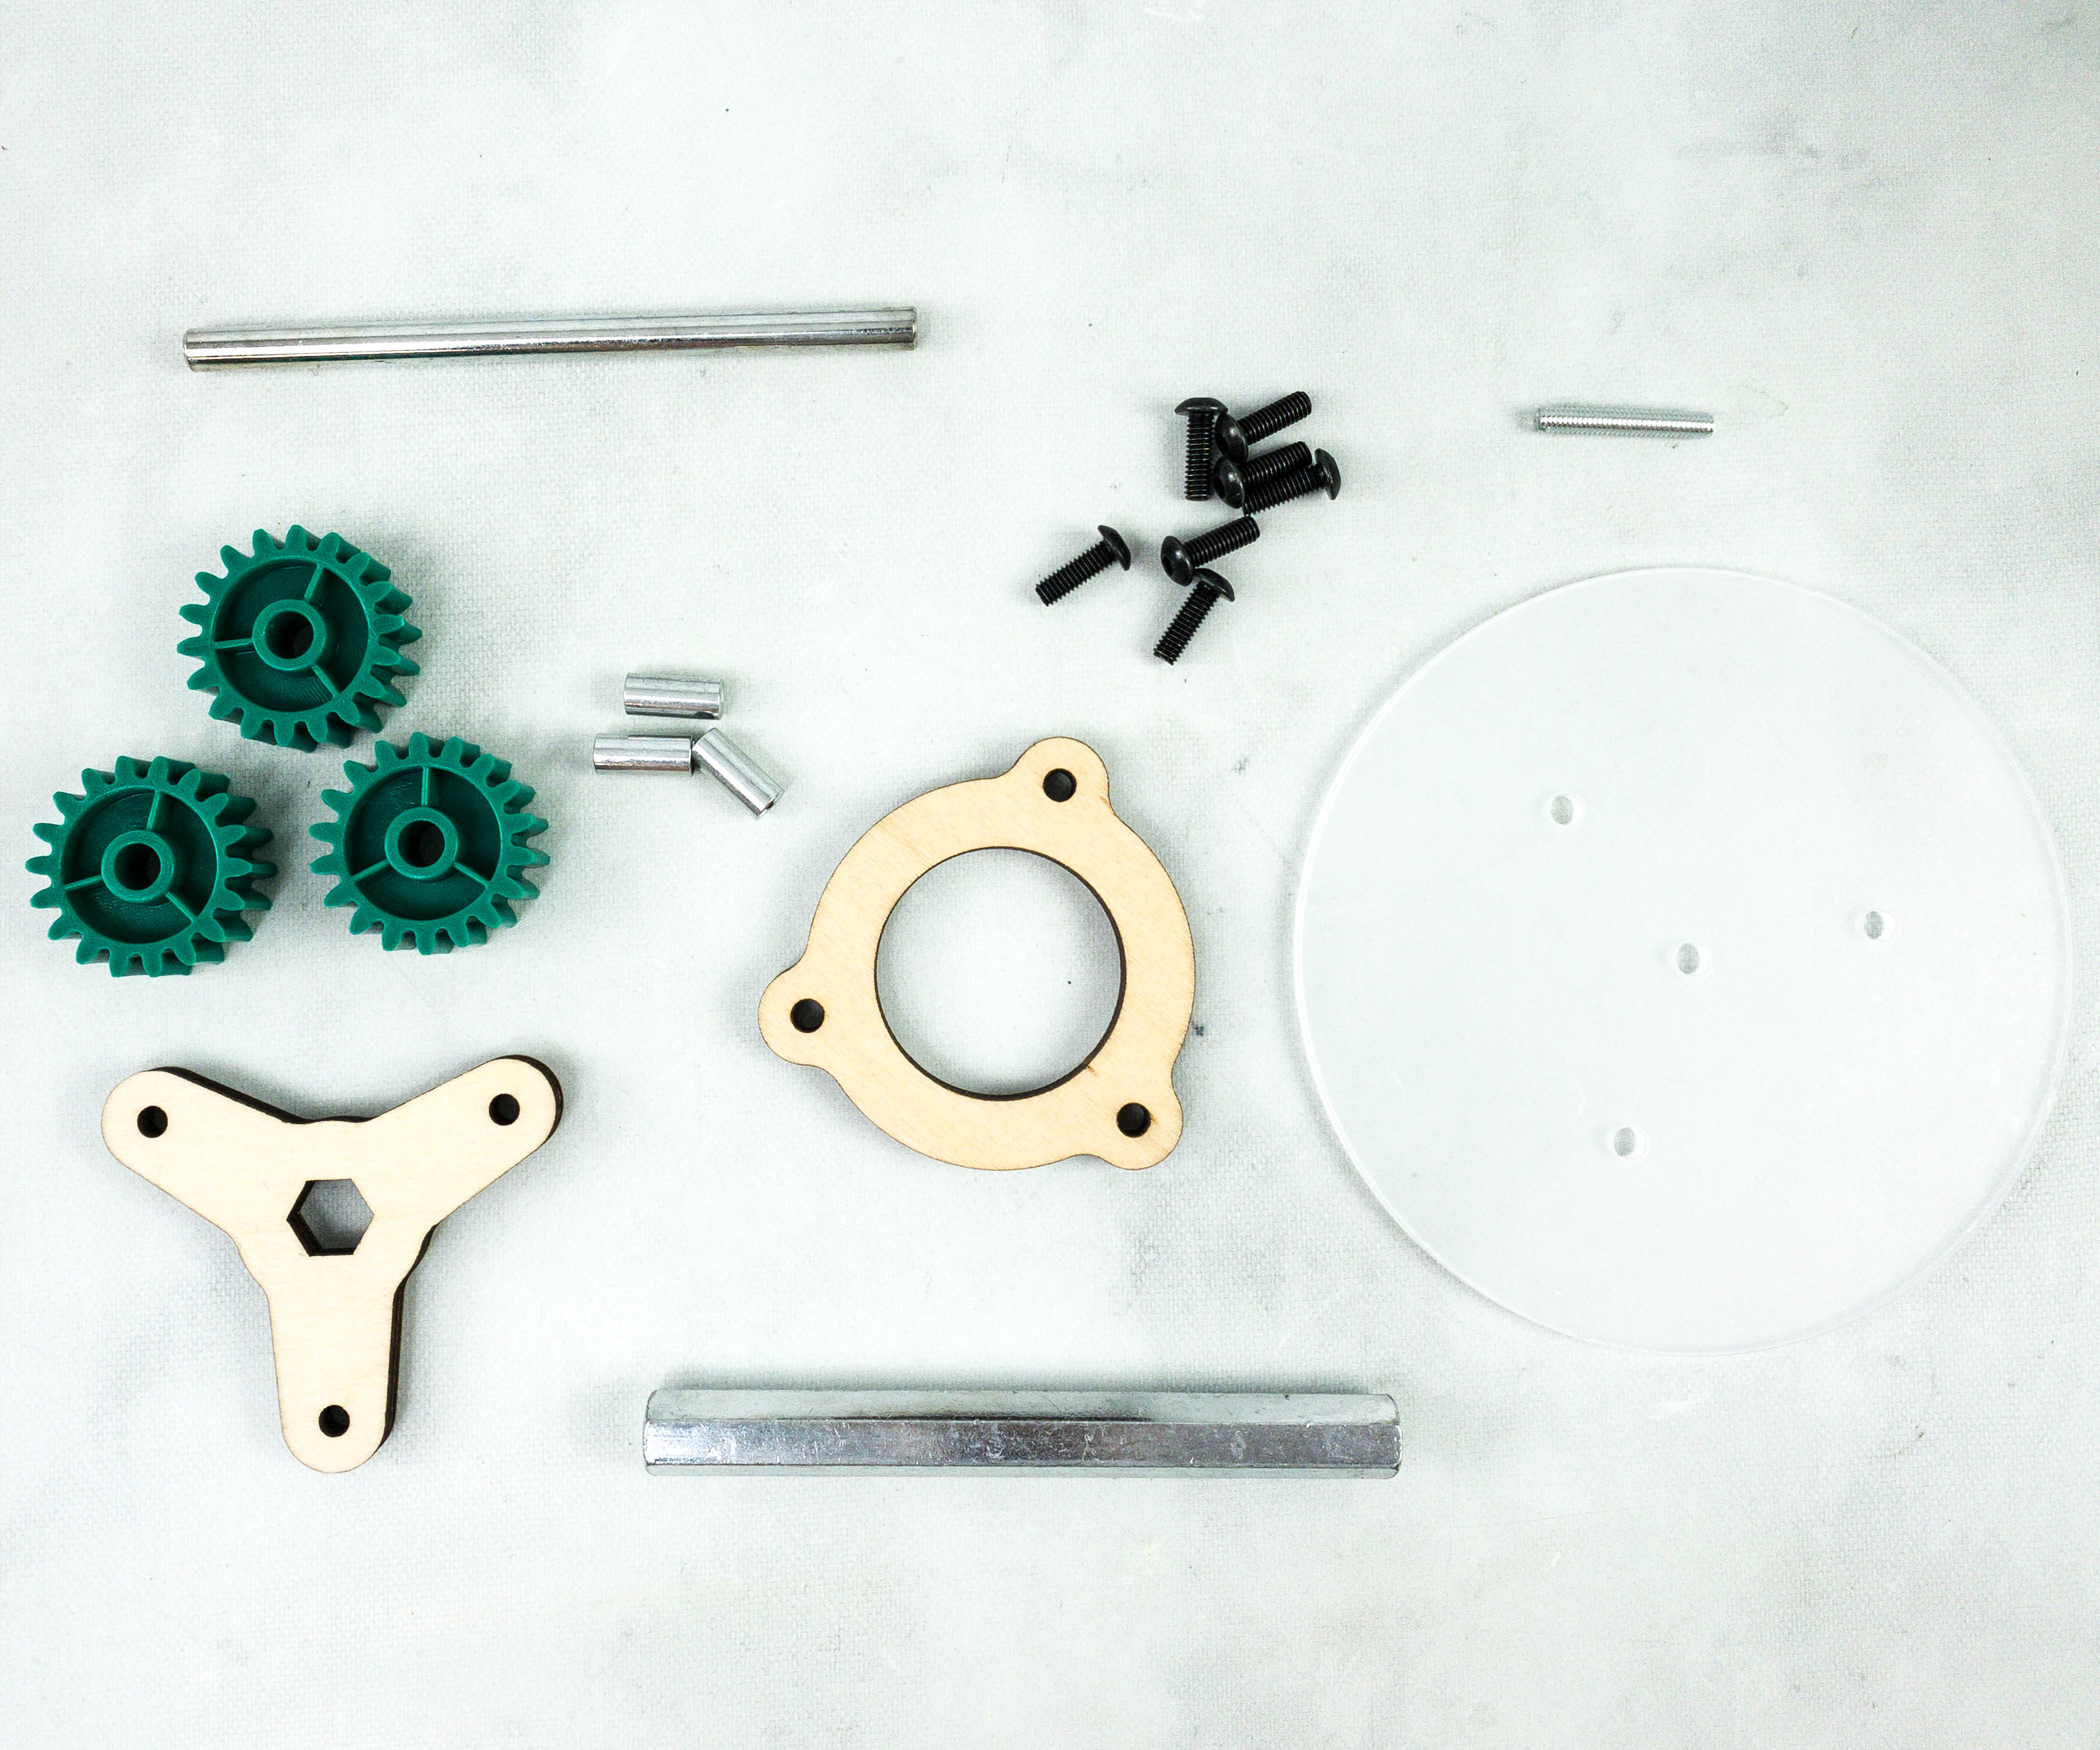
For the second part, we used long and short metal rods, gear set, screws, hex rods, plastic disc, and the wooden set.
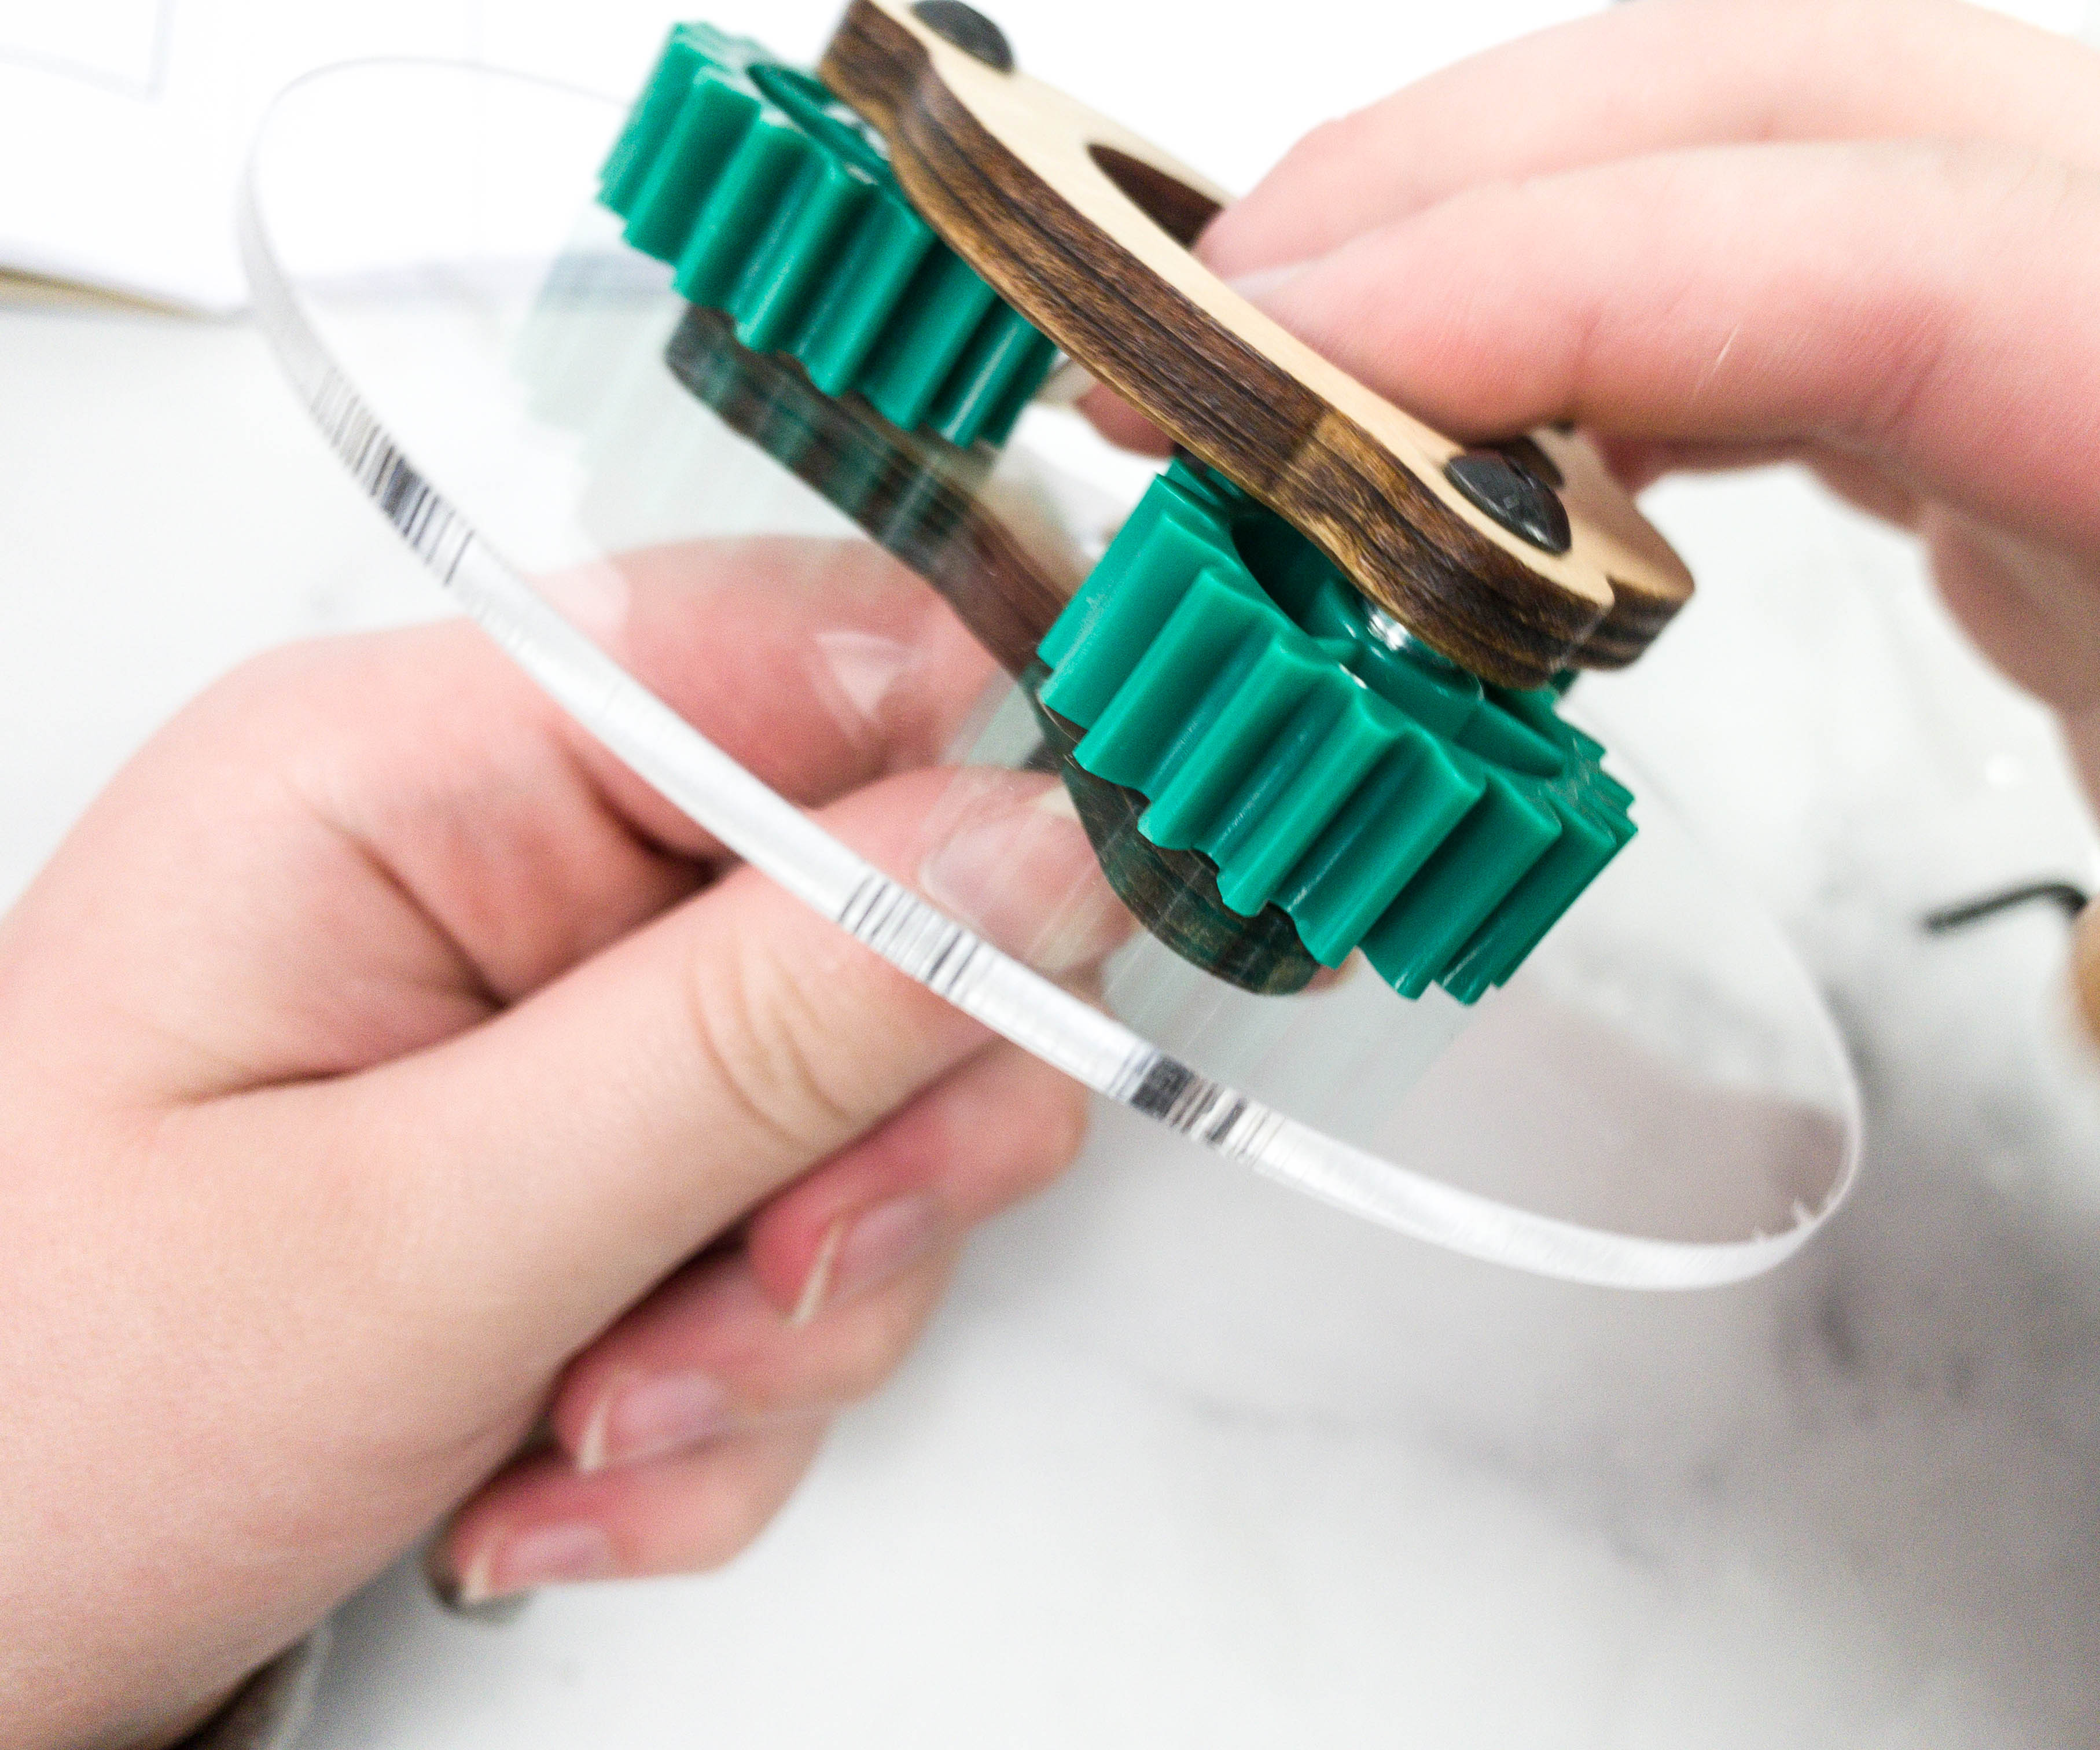
Just poke the short metal through the hole on the round wooden plate and slide the plastic gear on it. Then, peel off the sticker on both sides of the plastic disc and stick it on top of the gears, put the triangular-shaped wood on top, and screw them all together.
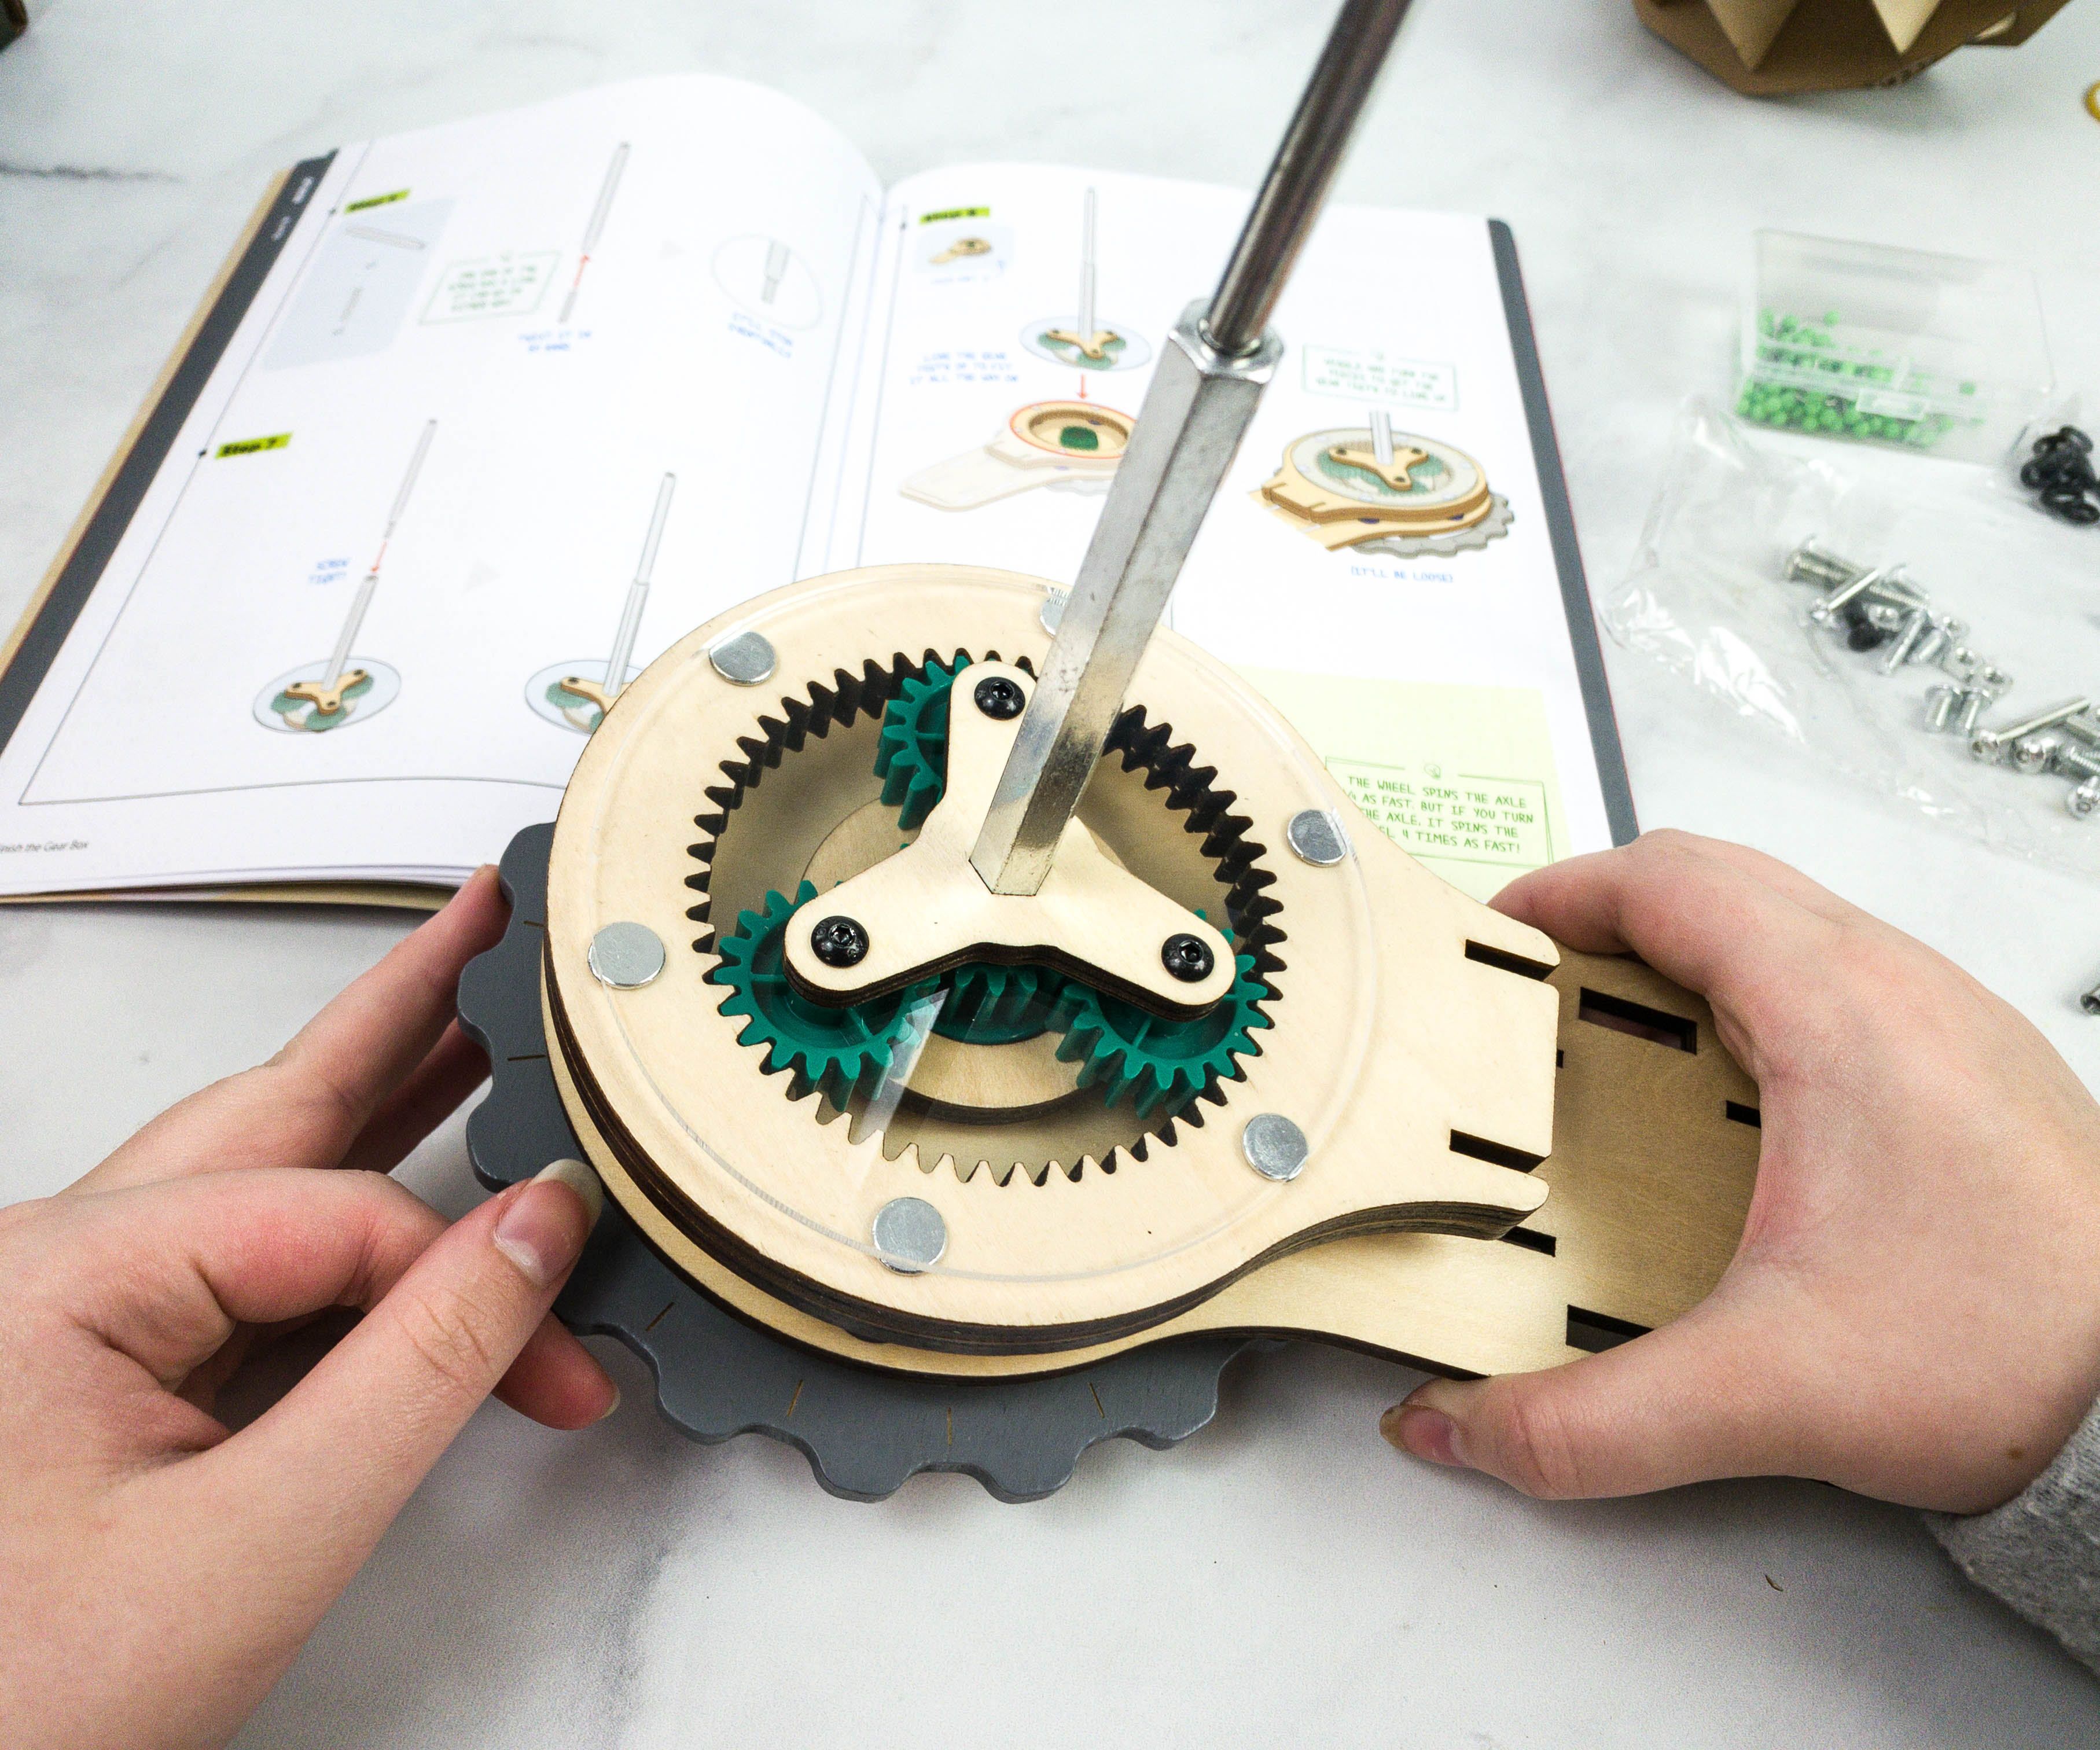
Once secured, insert the hex rod on the hole in the middle, and slide the long rod through it. This one serves as the globe’s axis!
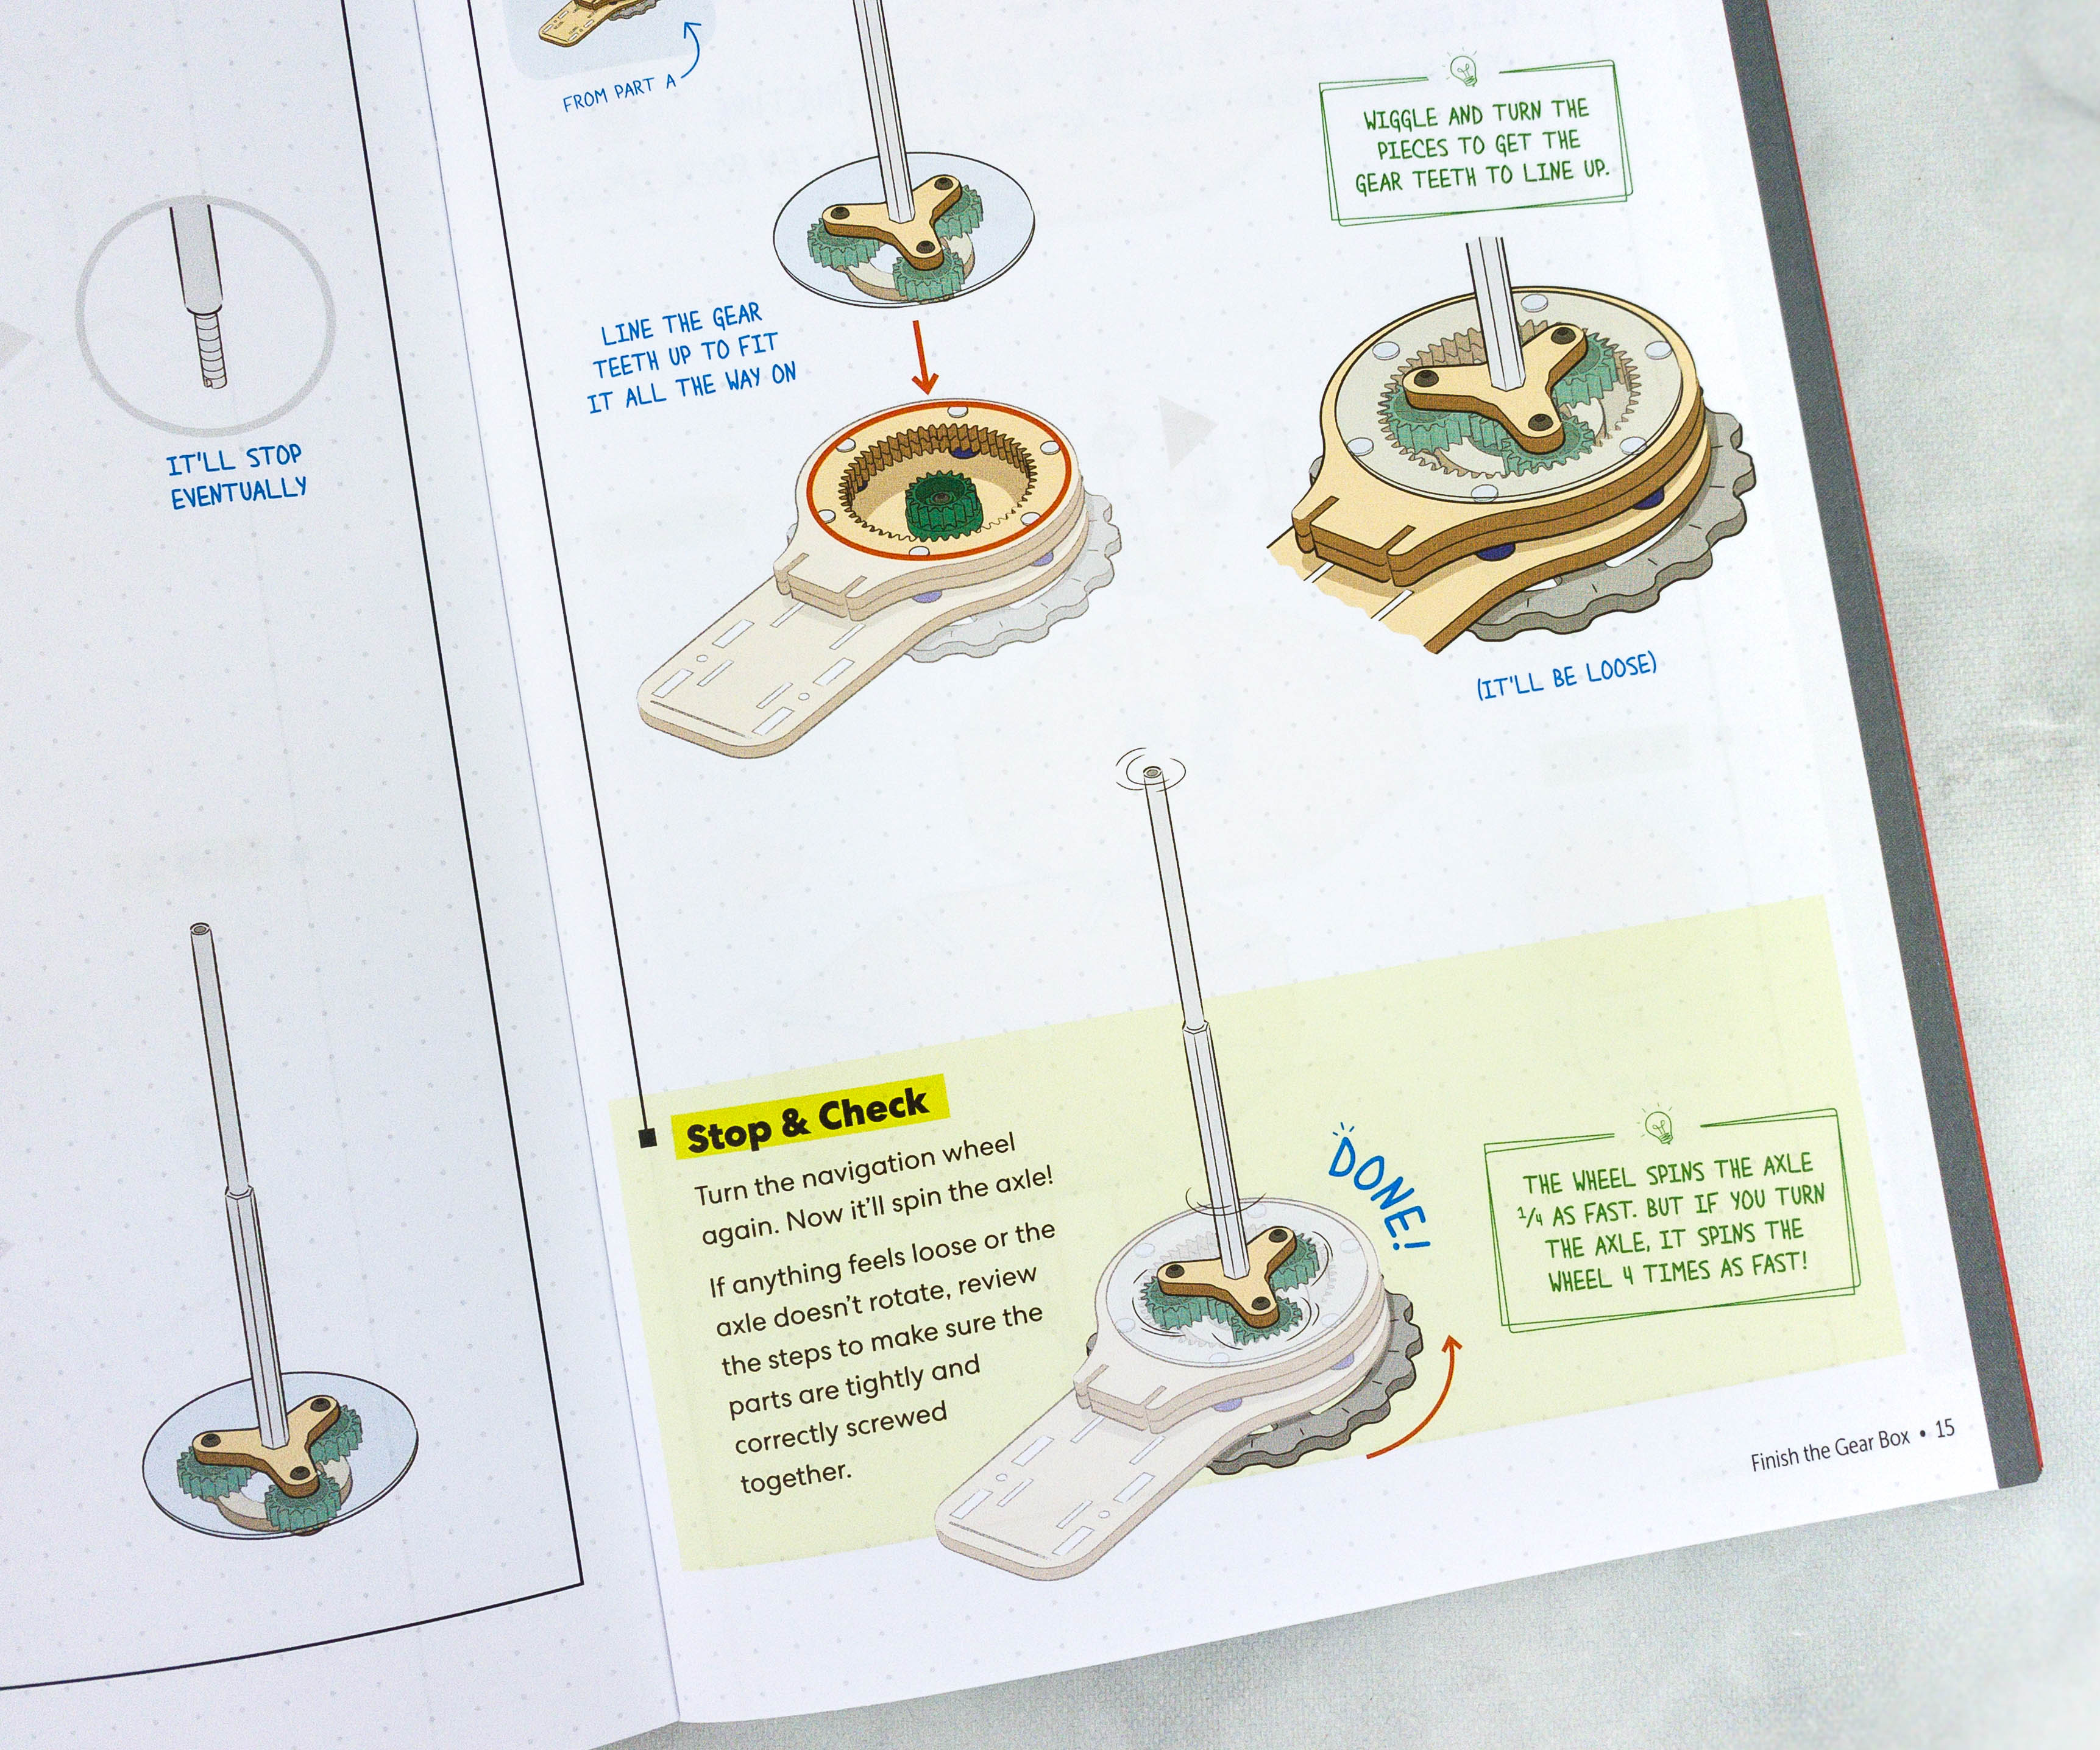
Make sure that the parts are tightly screwed together. The wheel spins the axle 1/4 as fast, but once you turn the axle, then it should spin the wheel 4 times faster.
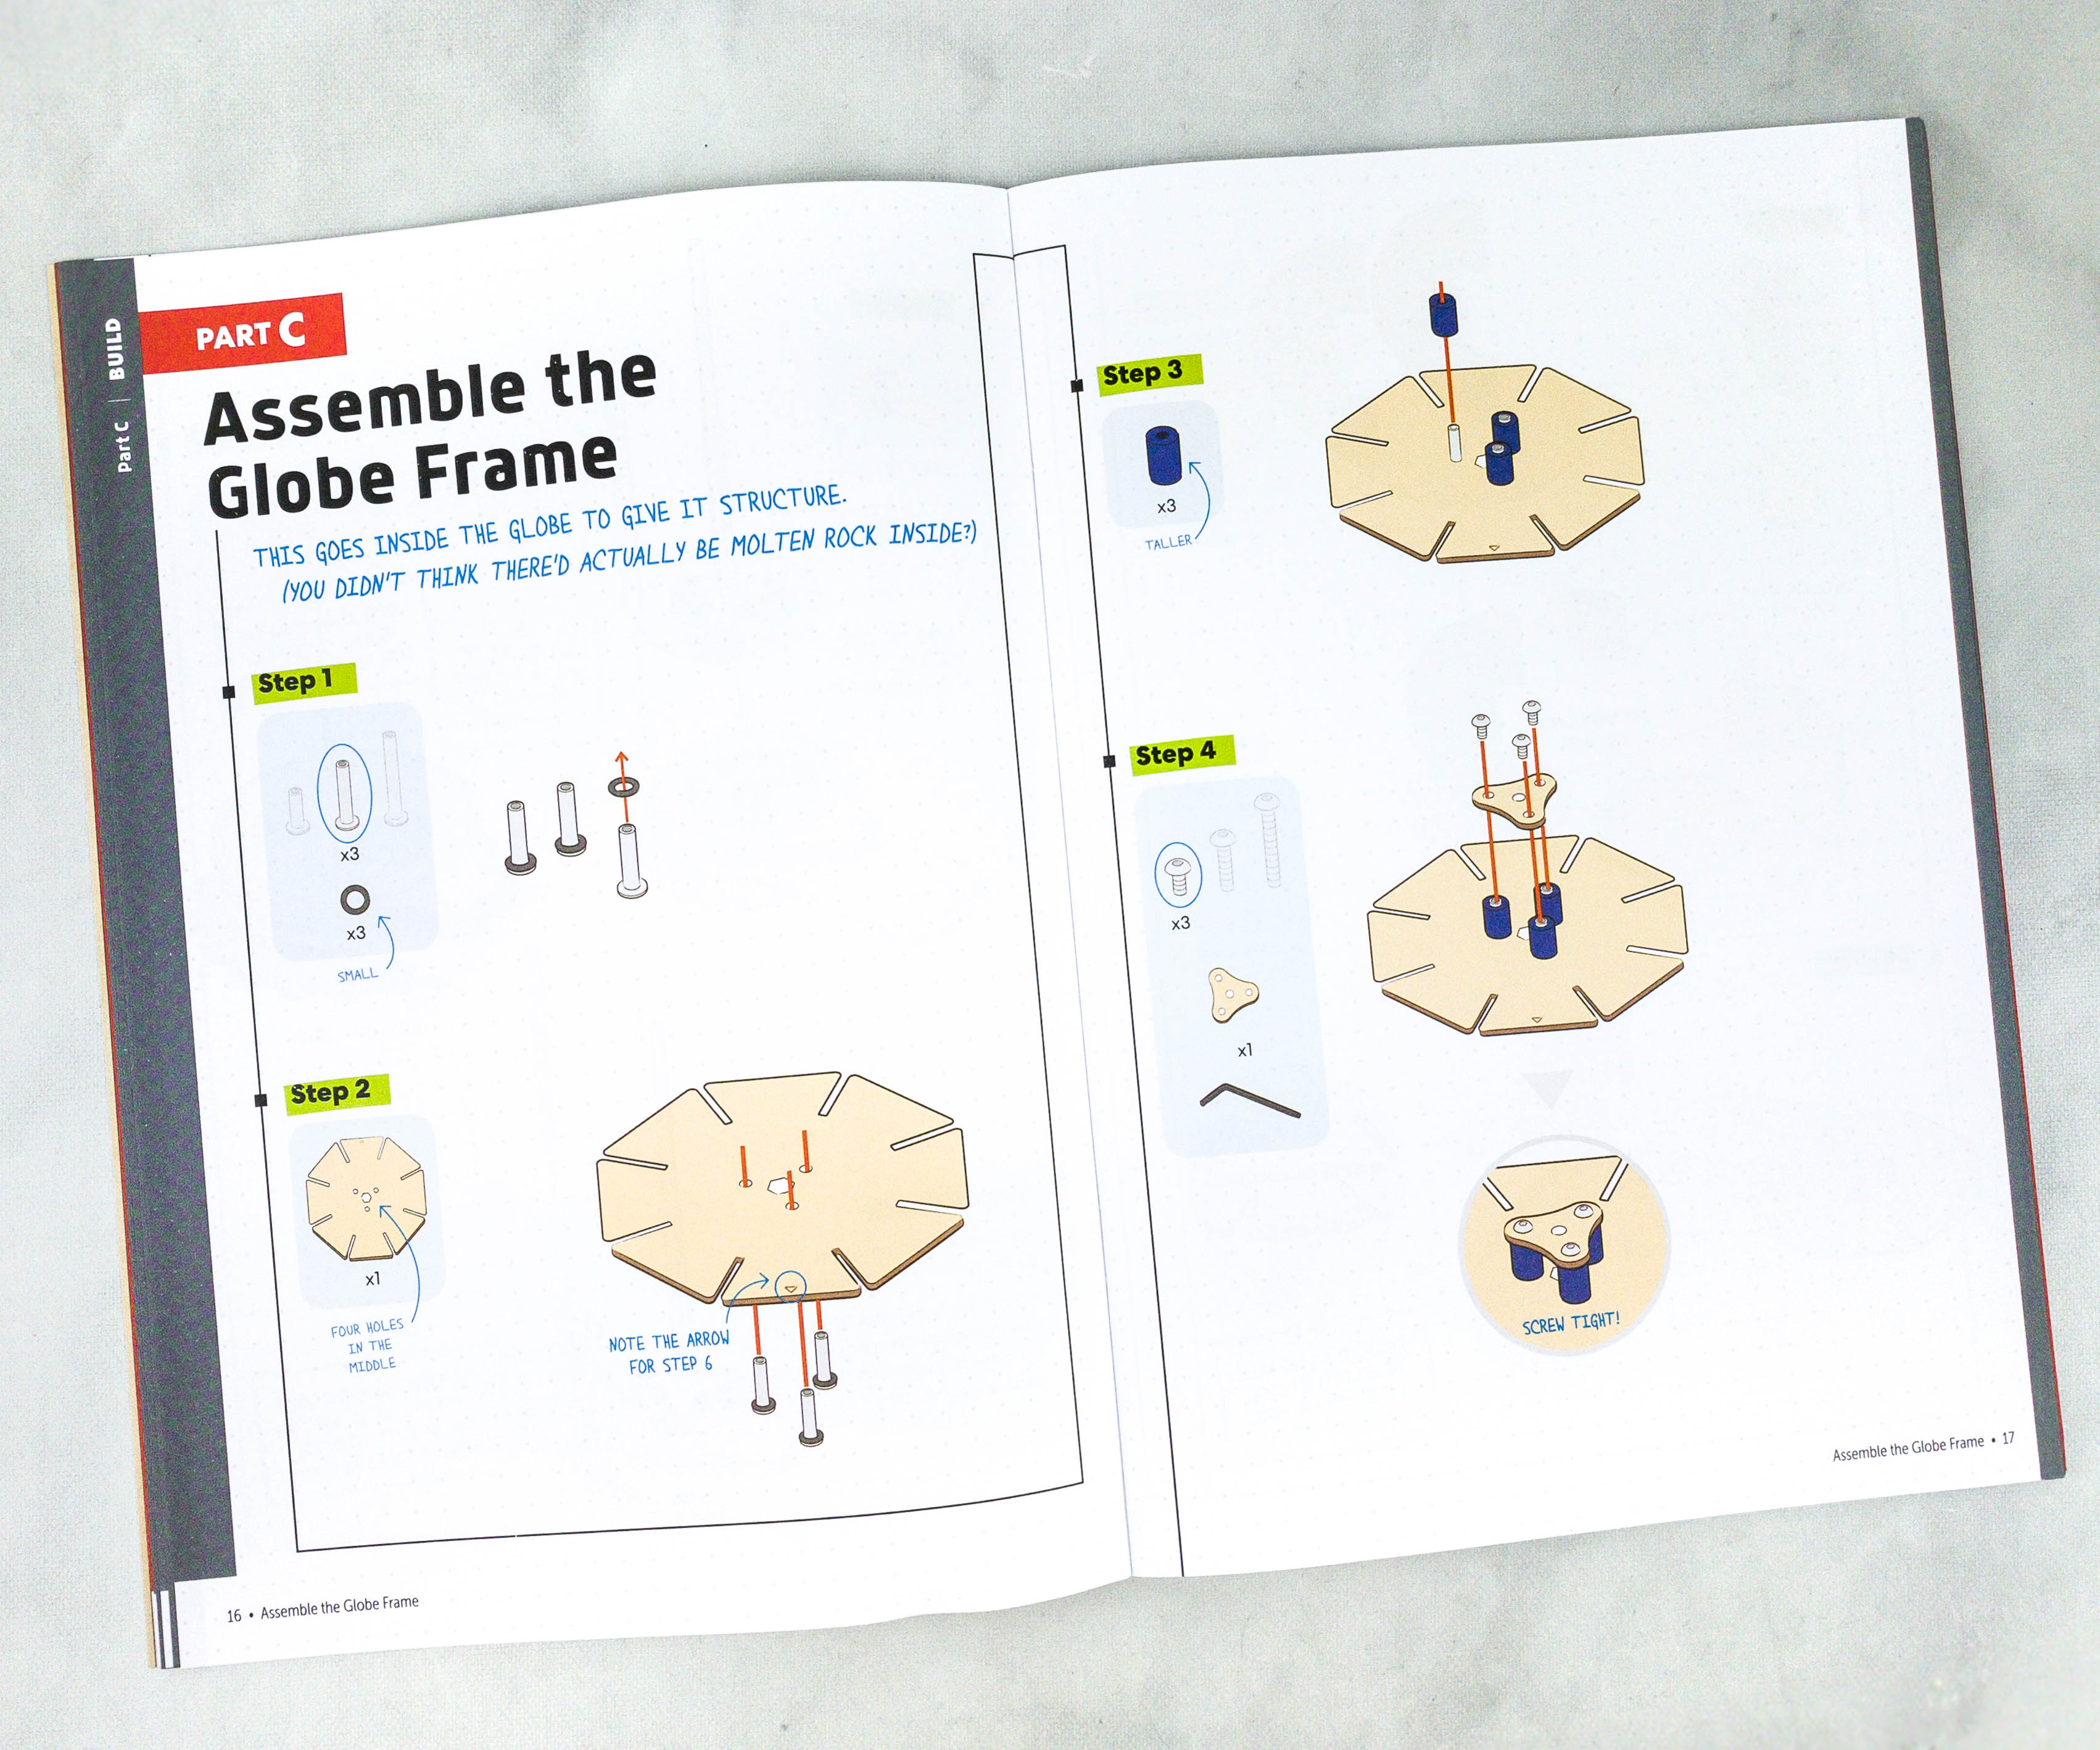
The third part of the project is assembling the globe’s frame.
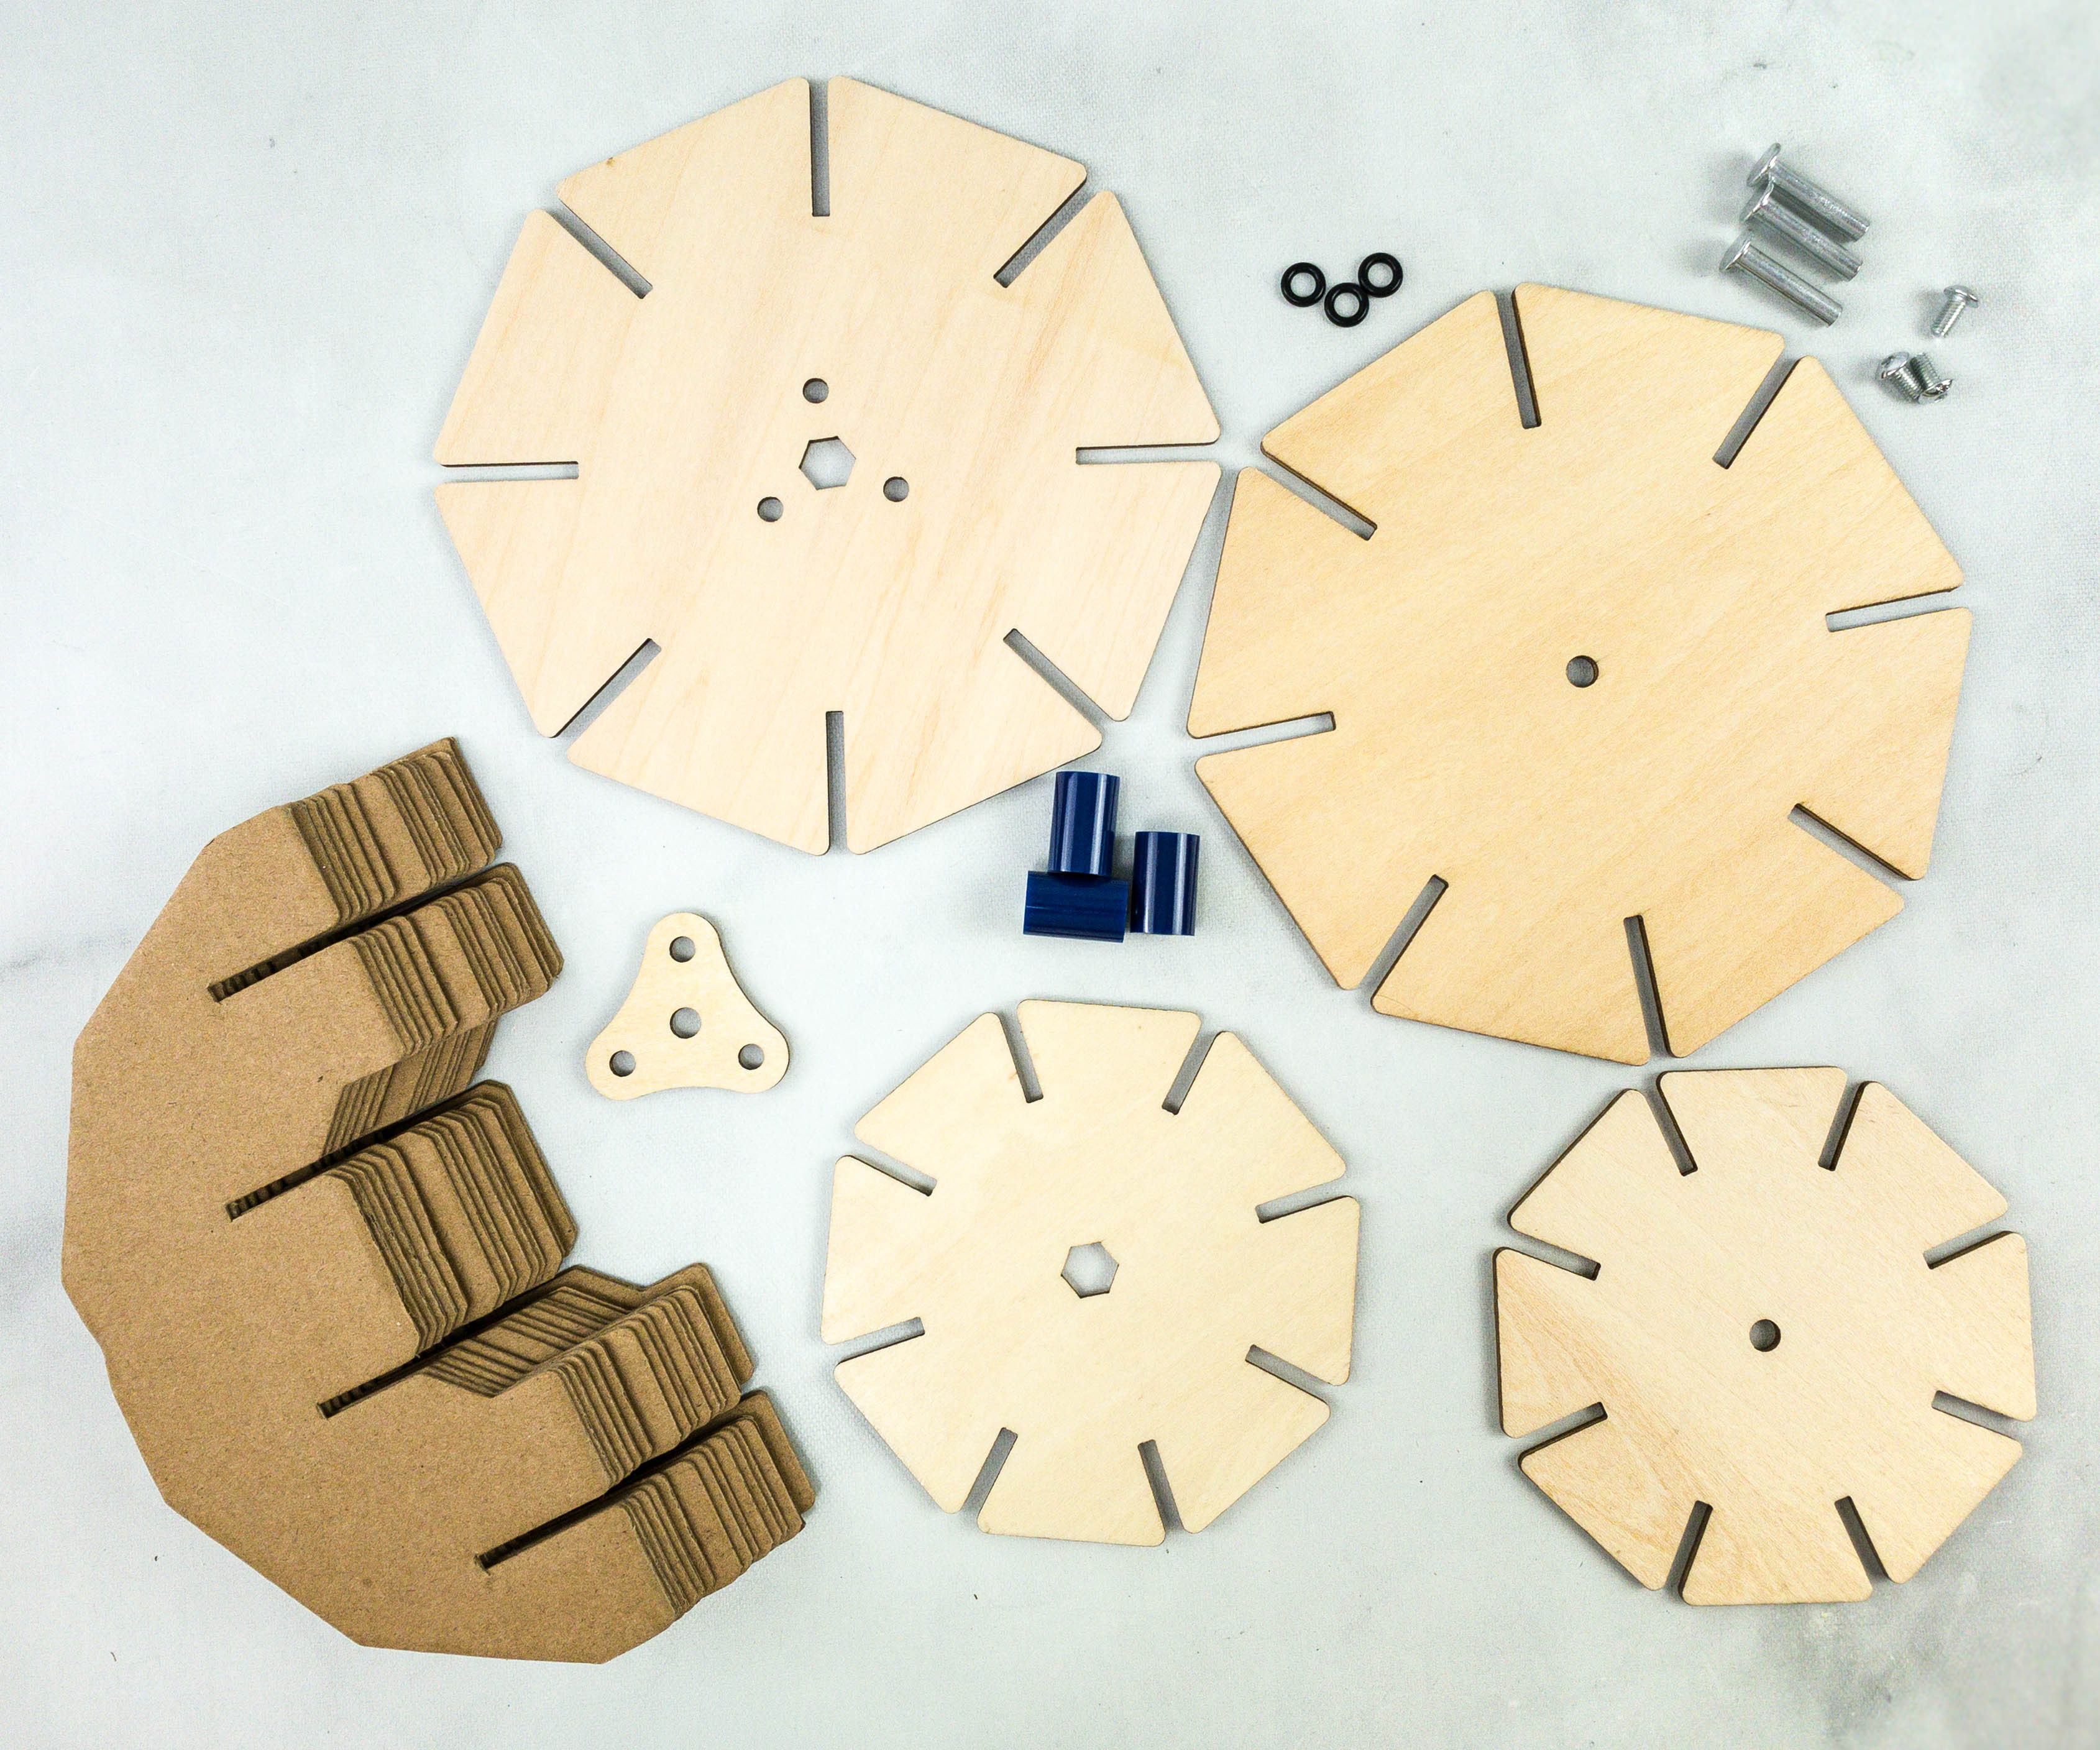
For this part, we used the globe braces, globe wood set, spacers, O-rings, barrel bolts, and screws.
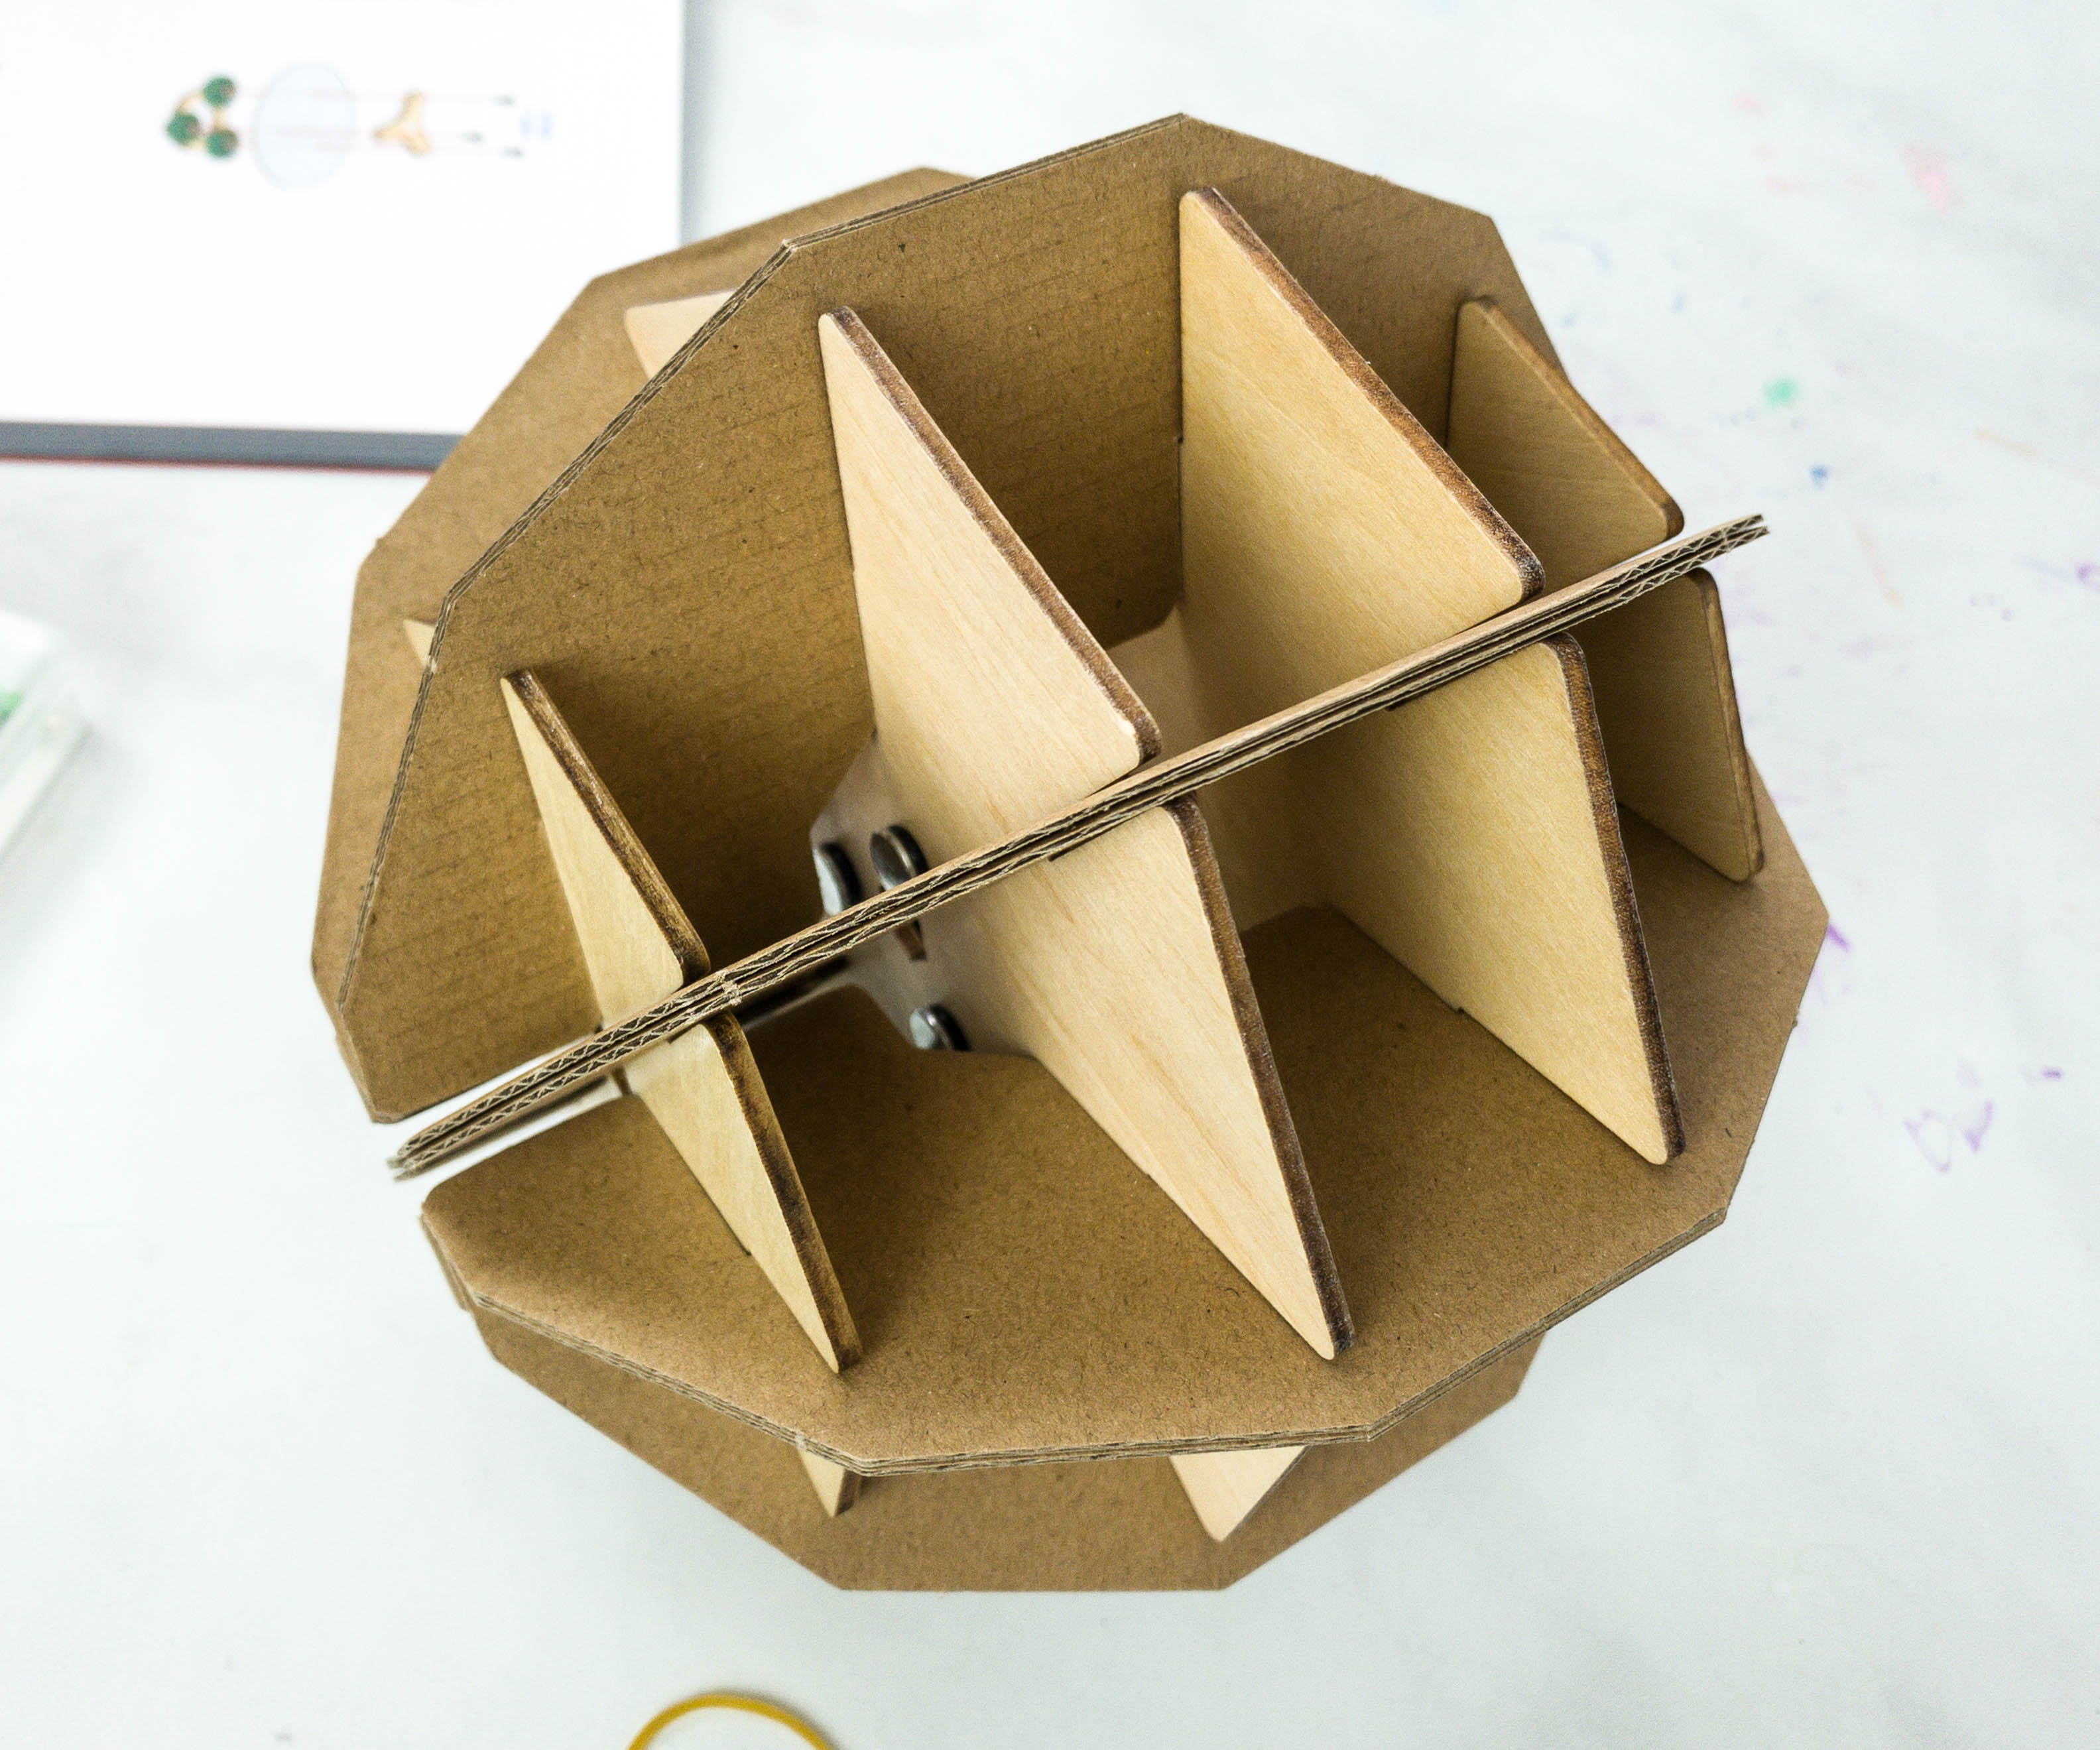
Building the frame might look a bit complicated, but it is actually not. Here’s how the frame looks like once done!
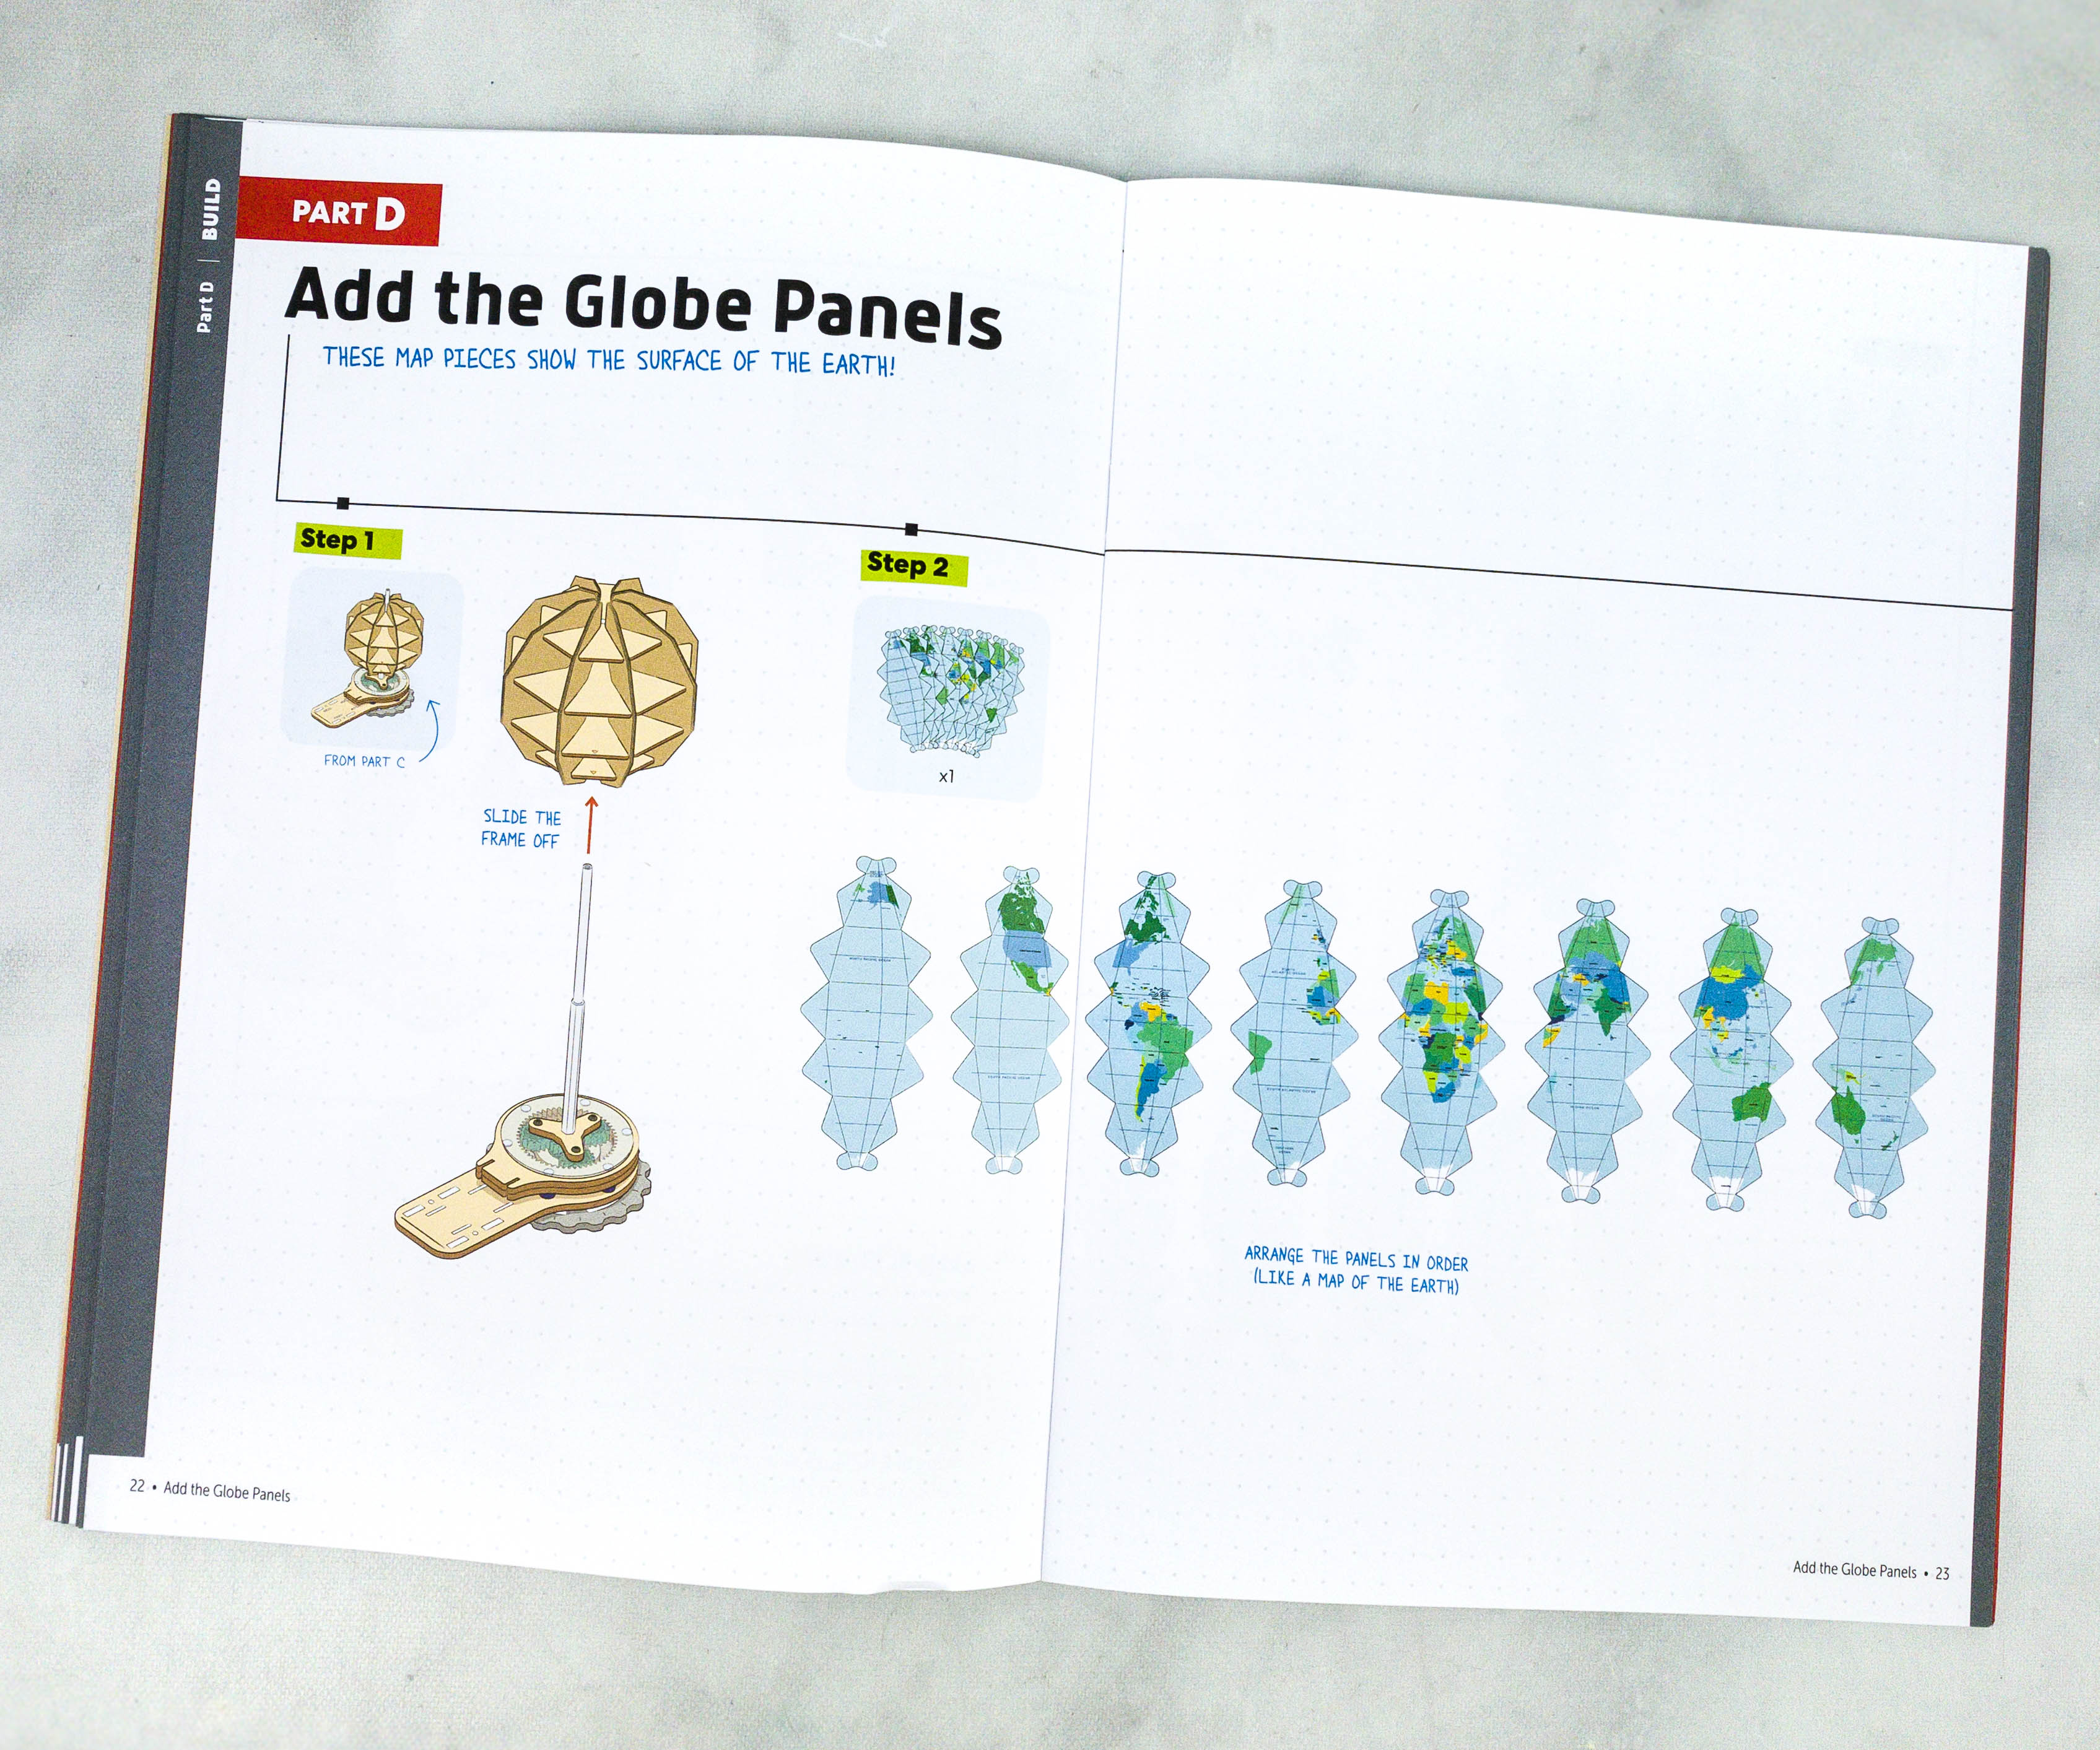
It’s time to combine the globe frame with the navigation wheel and add the globe panels.
For this, we used the wheel and the frame from the first and second section, globe panels, and sticky foam sheet!
Put the navigation wheel on a flat surface and insert the globe frame through the metal rod.
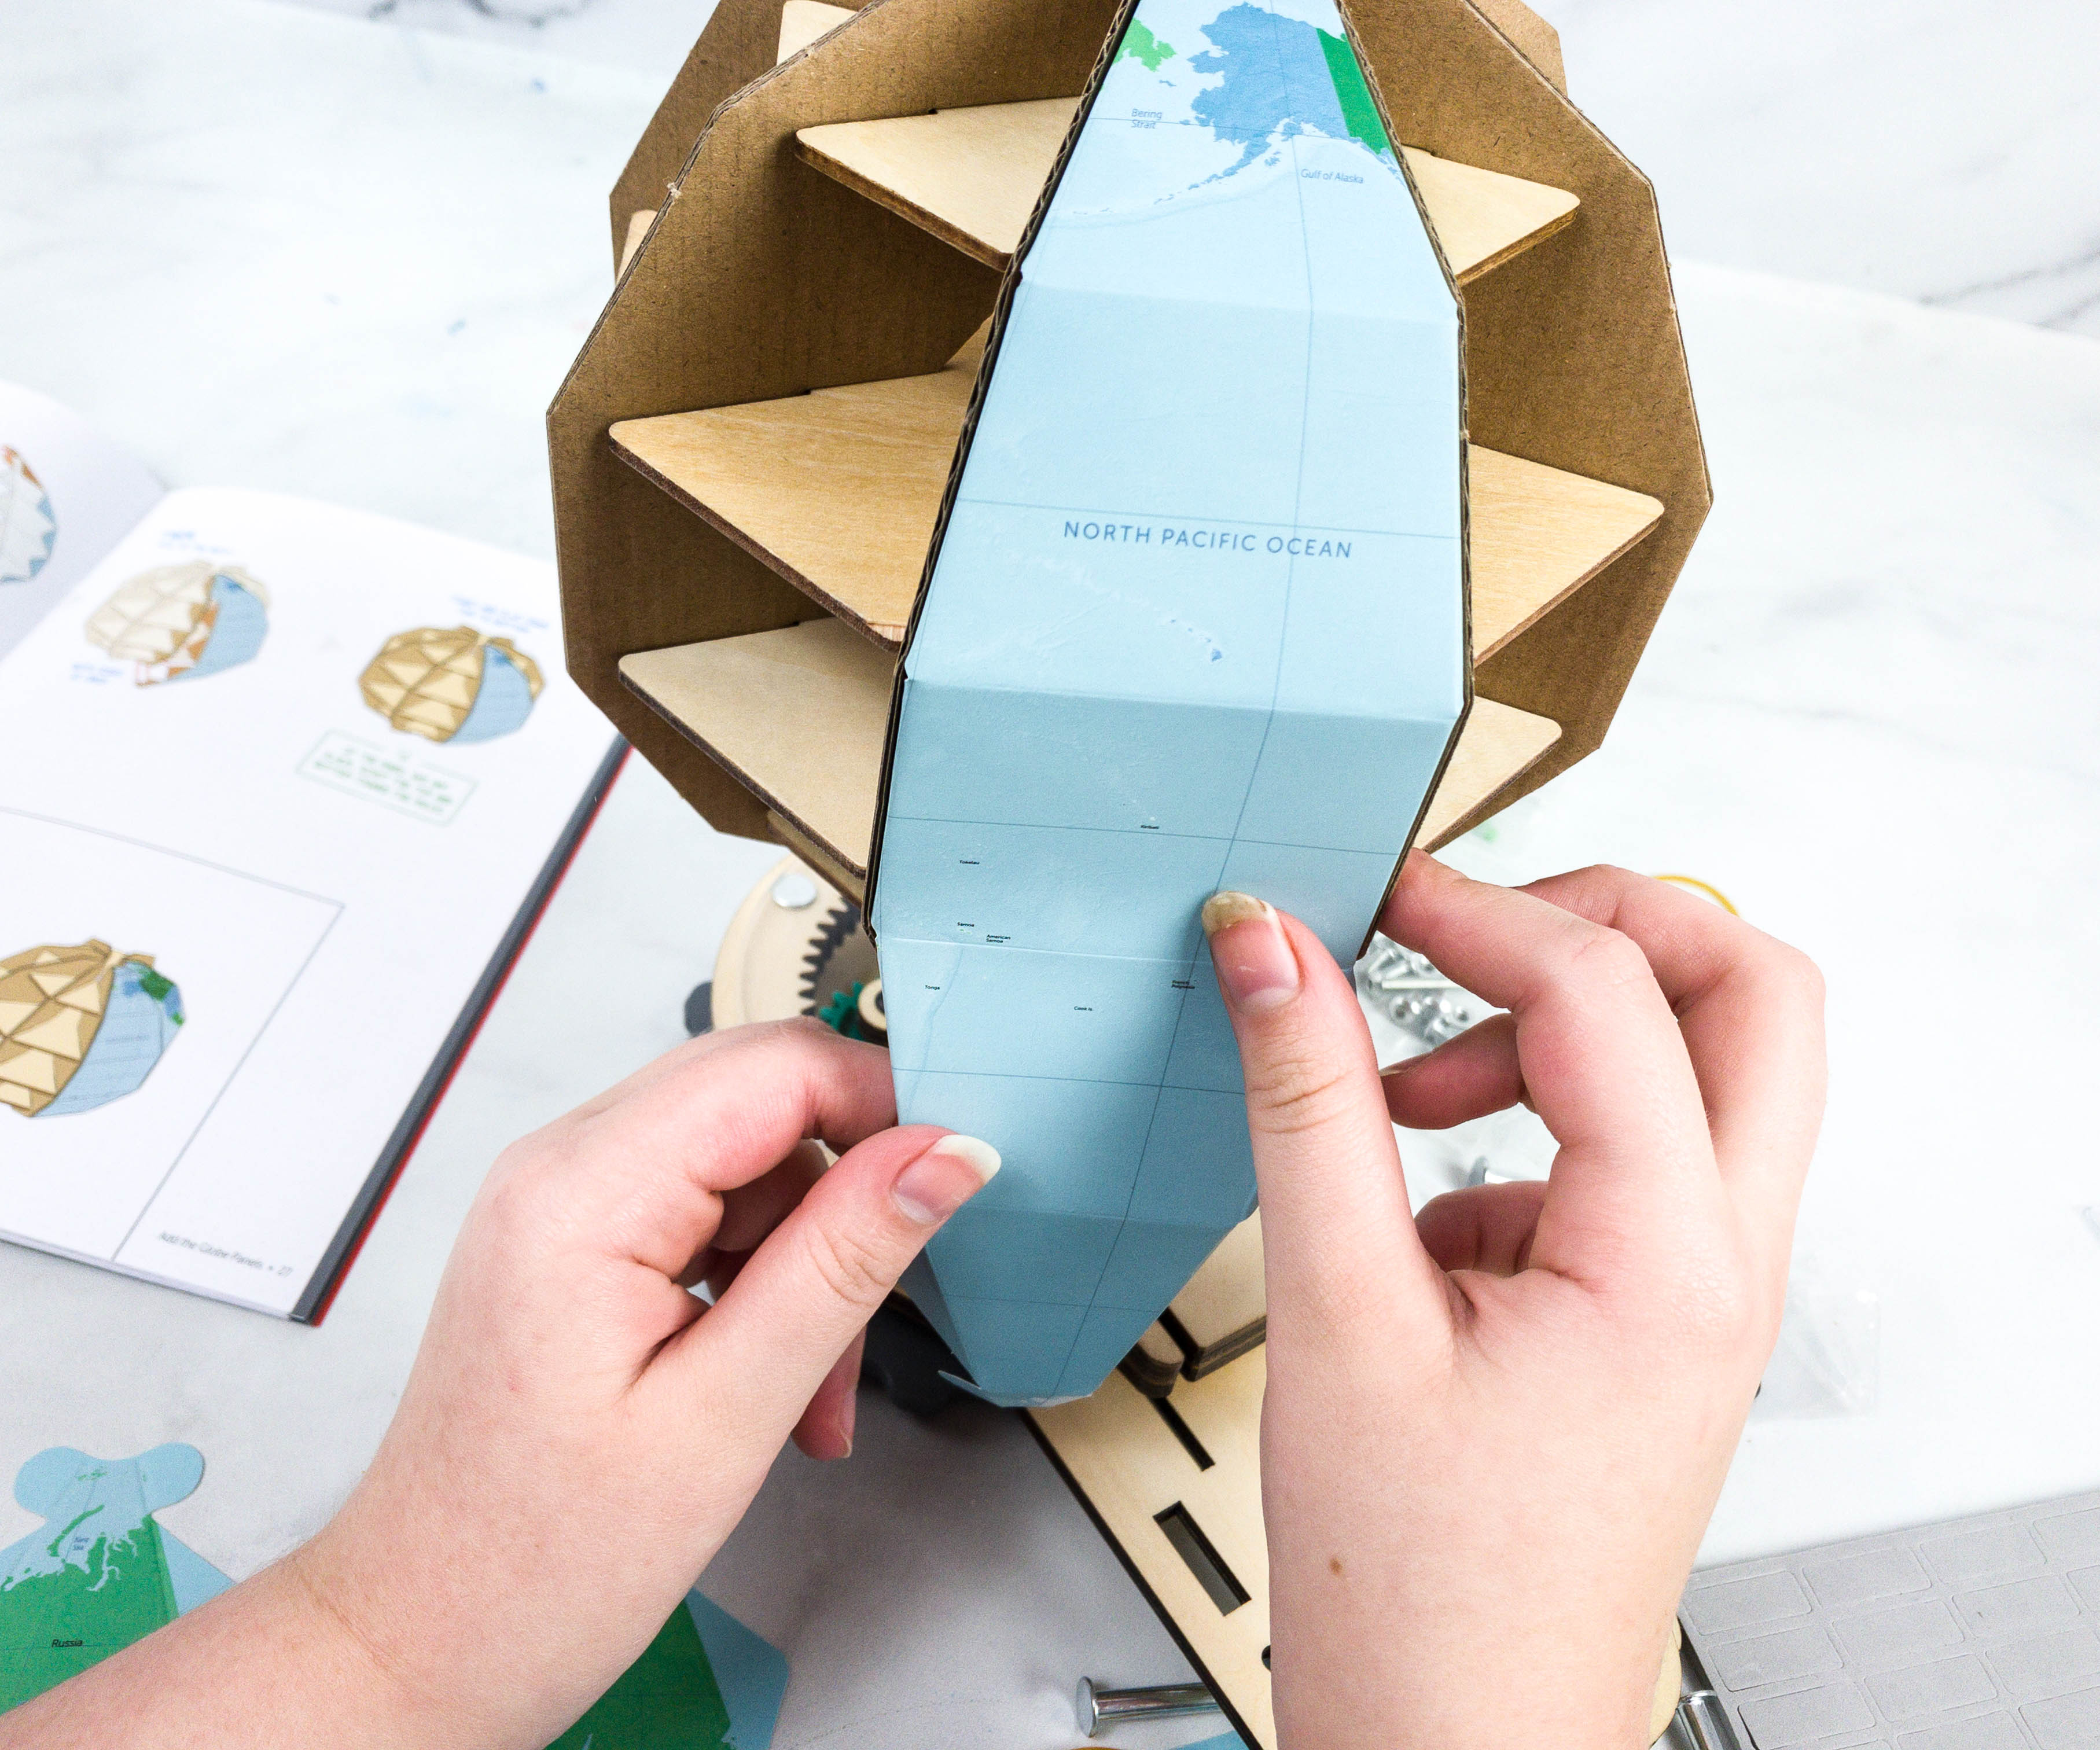
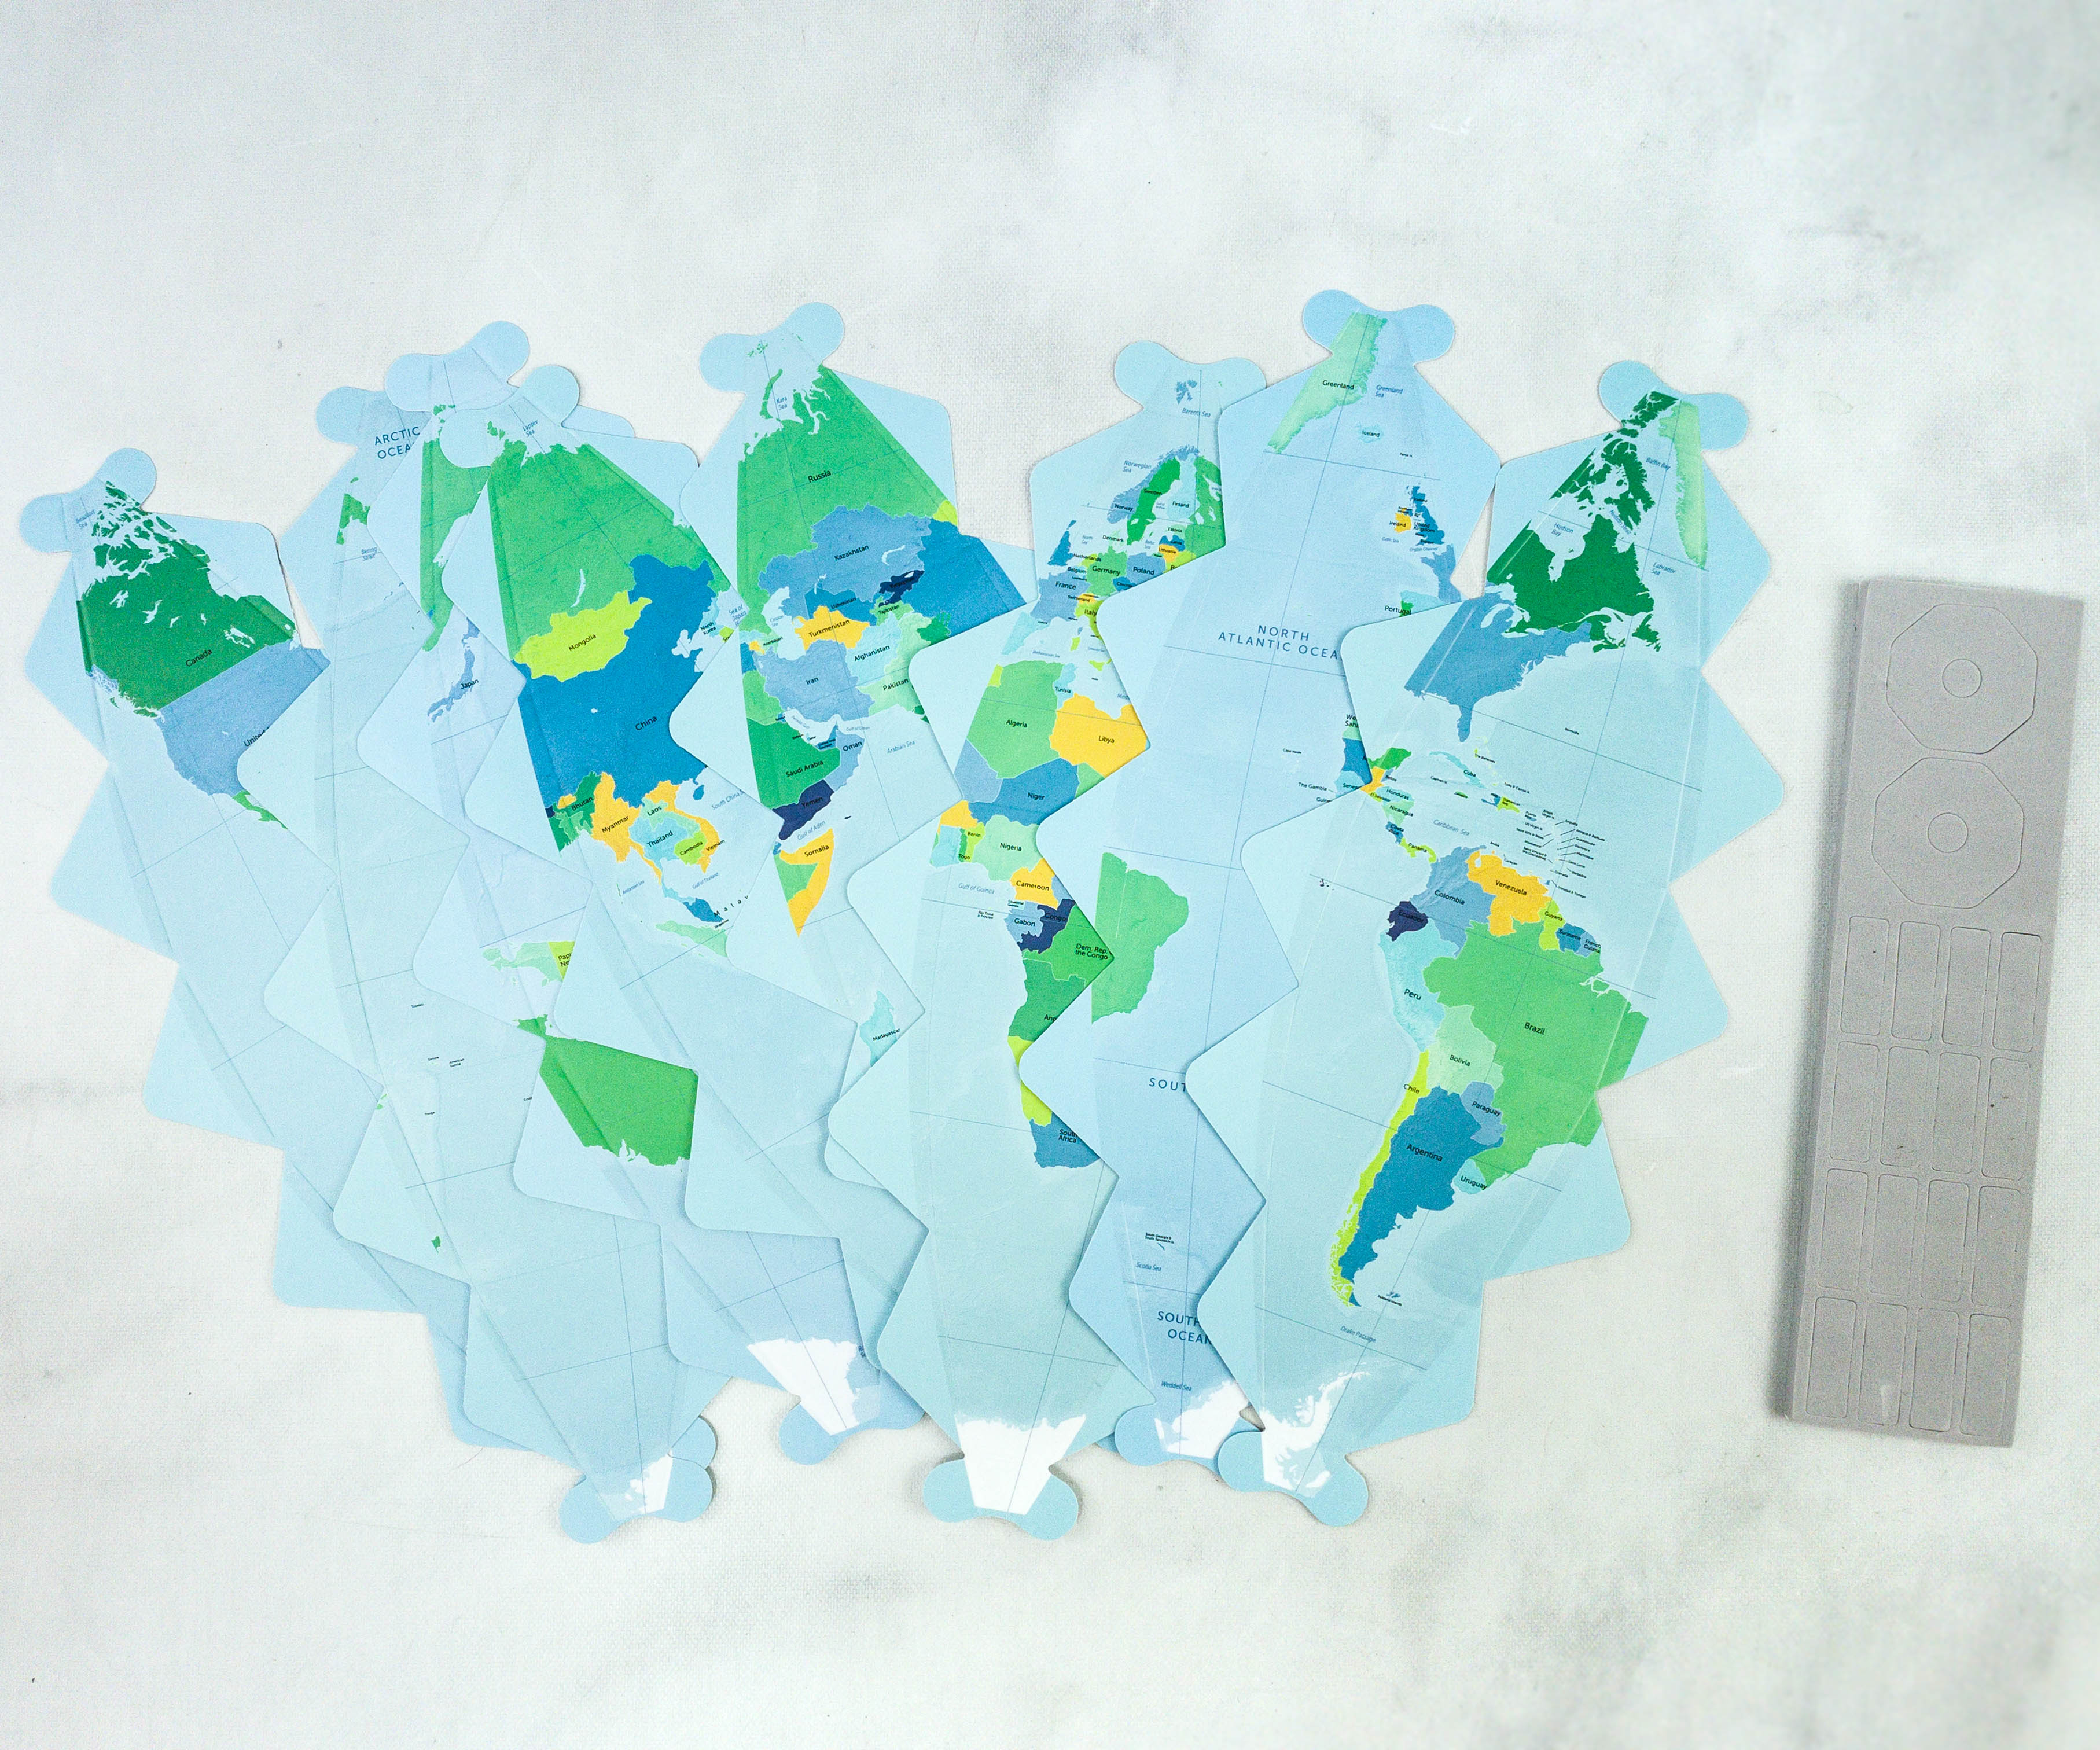
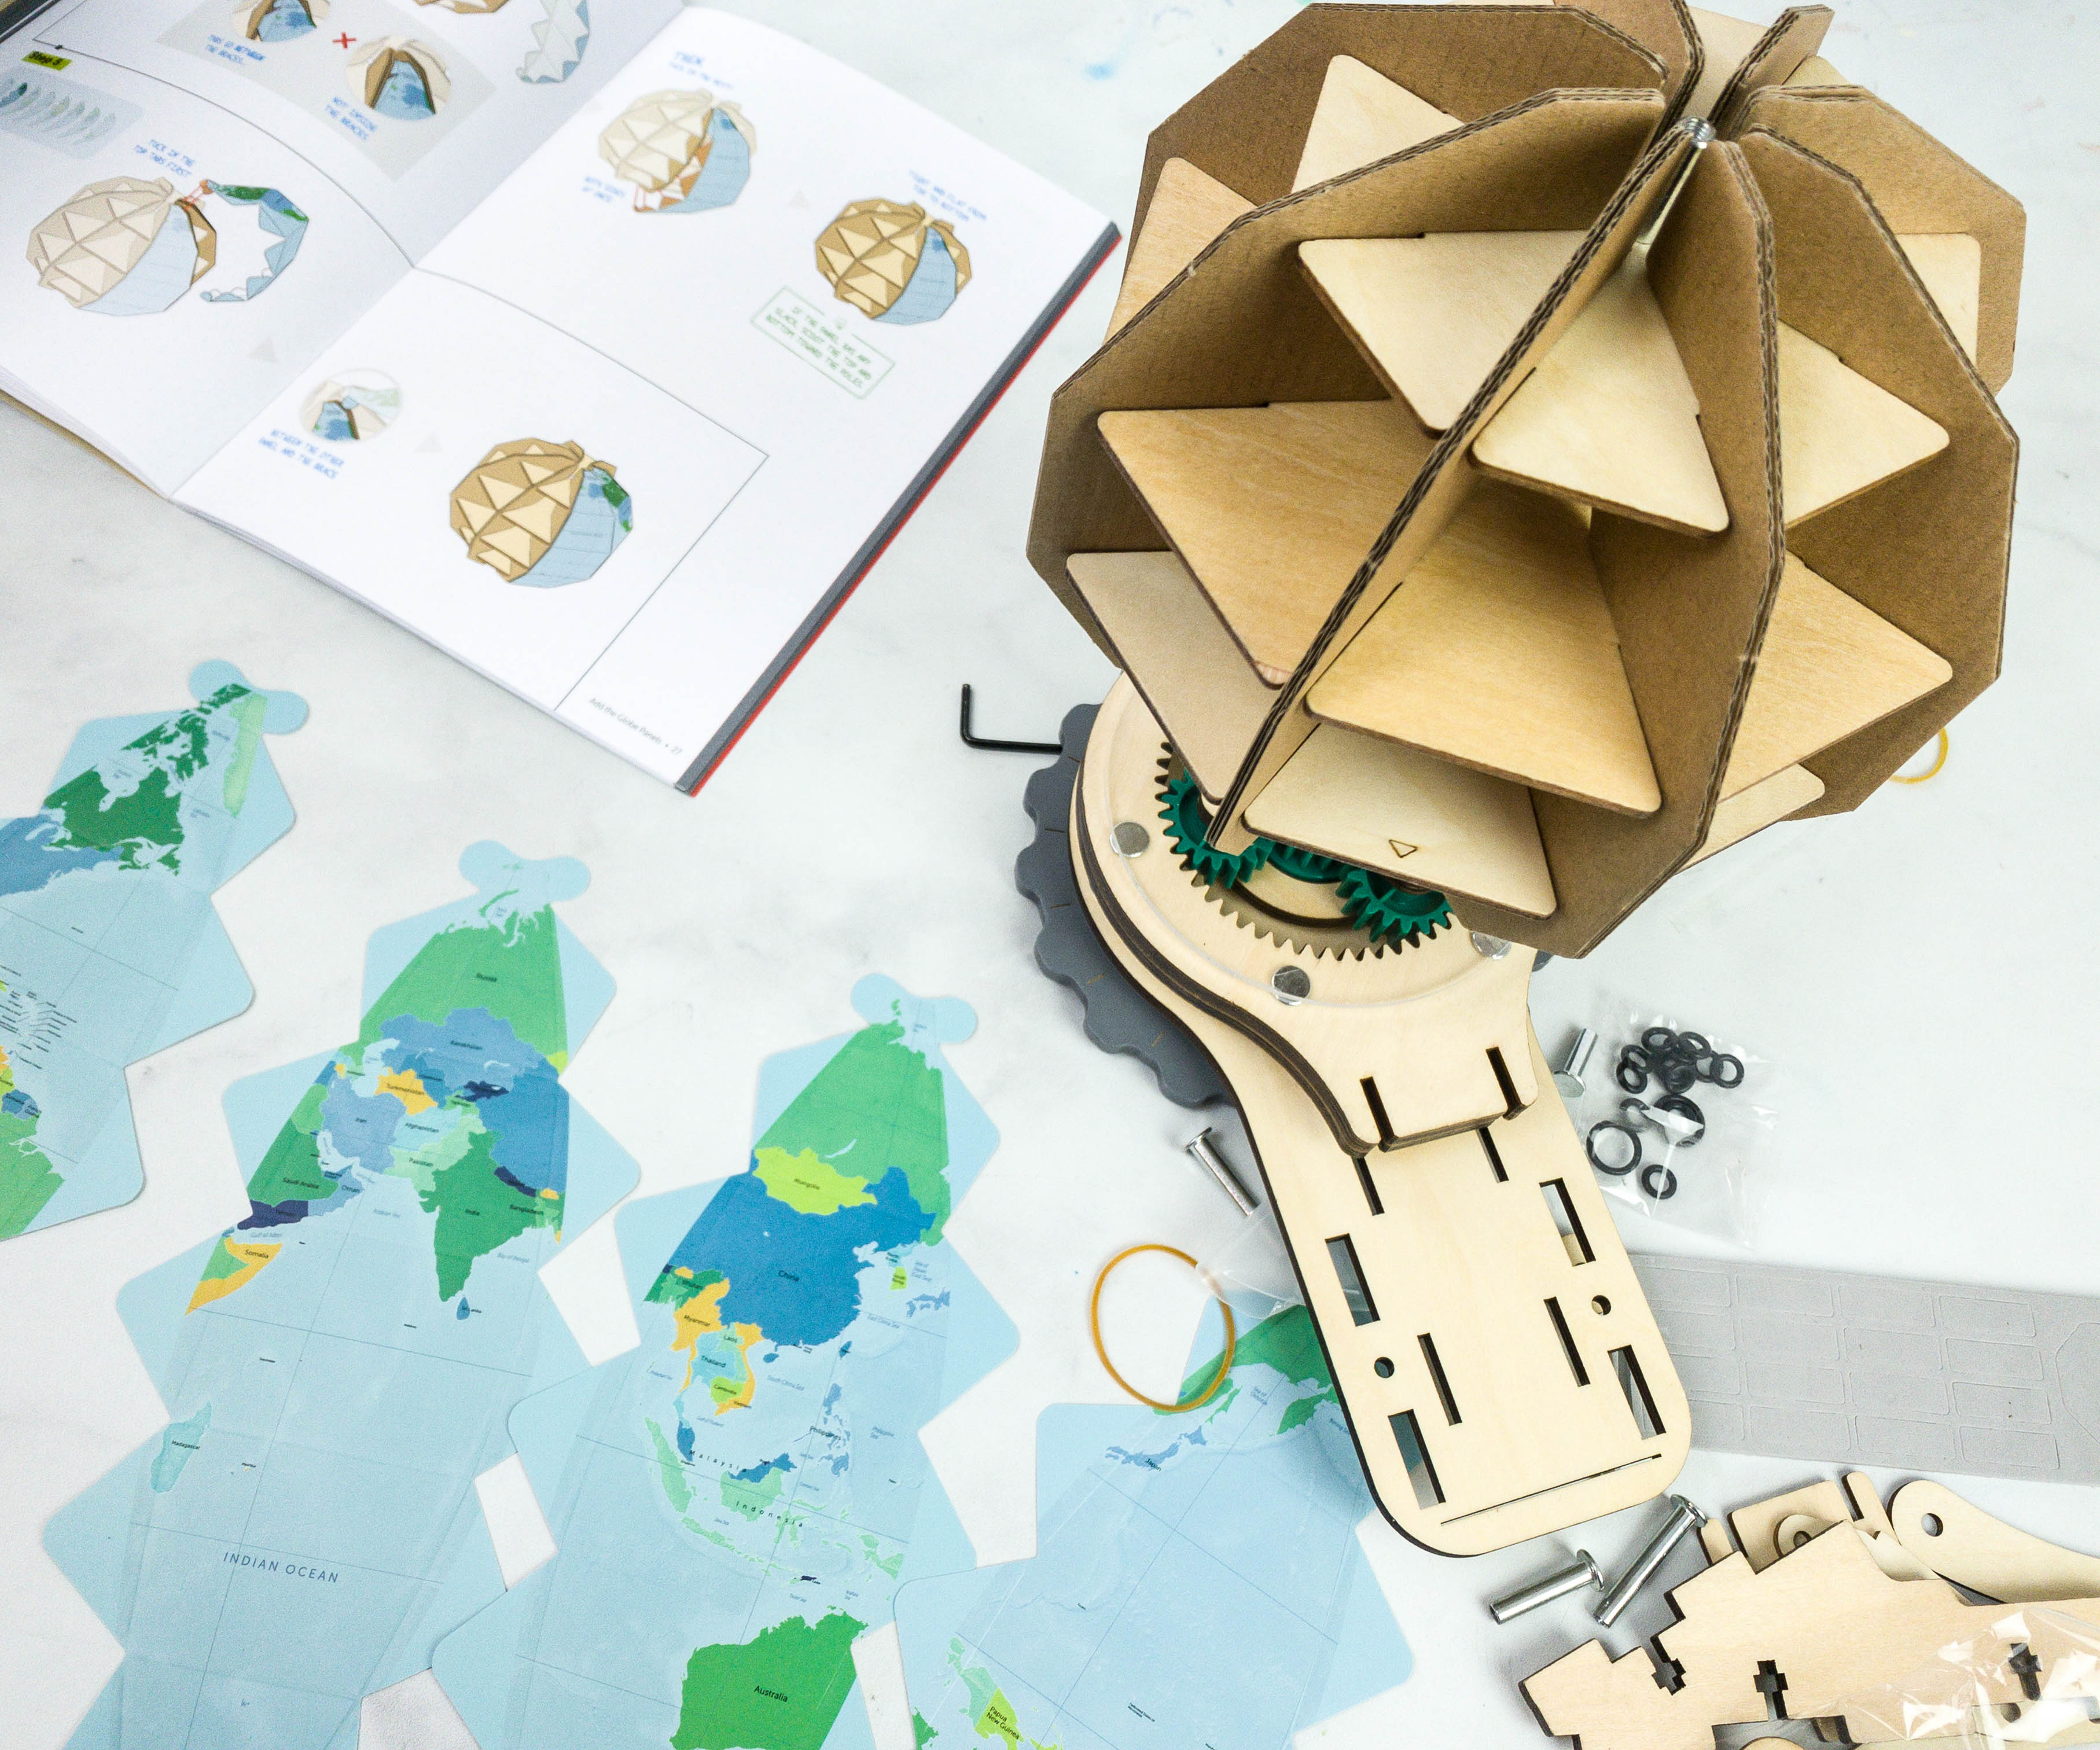
Lay the globe panel on the table and arrange it in proper order. Once done, pick a piece of globe panel and stick it on one part of the frame.
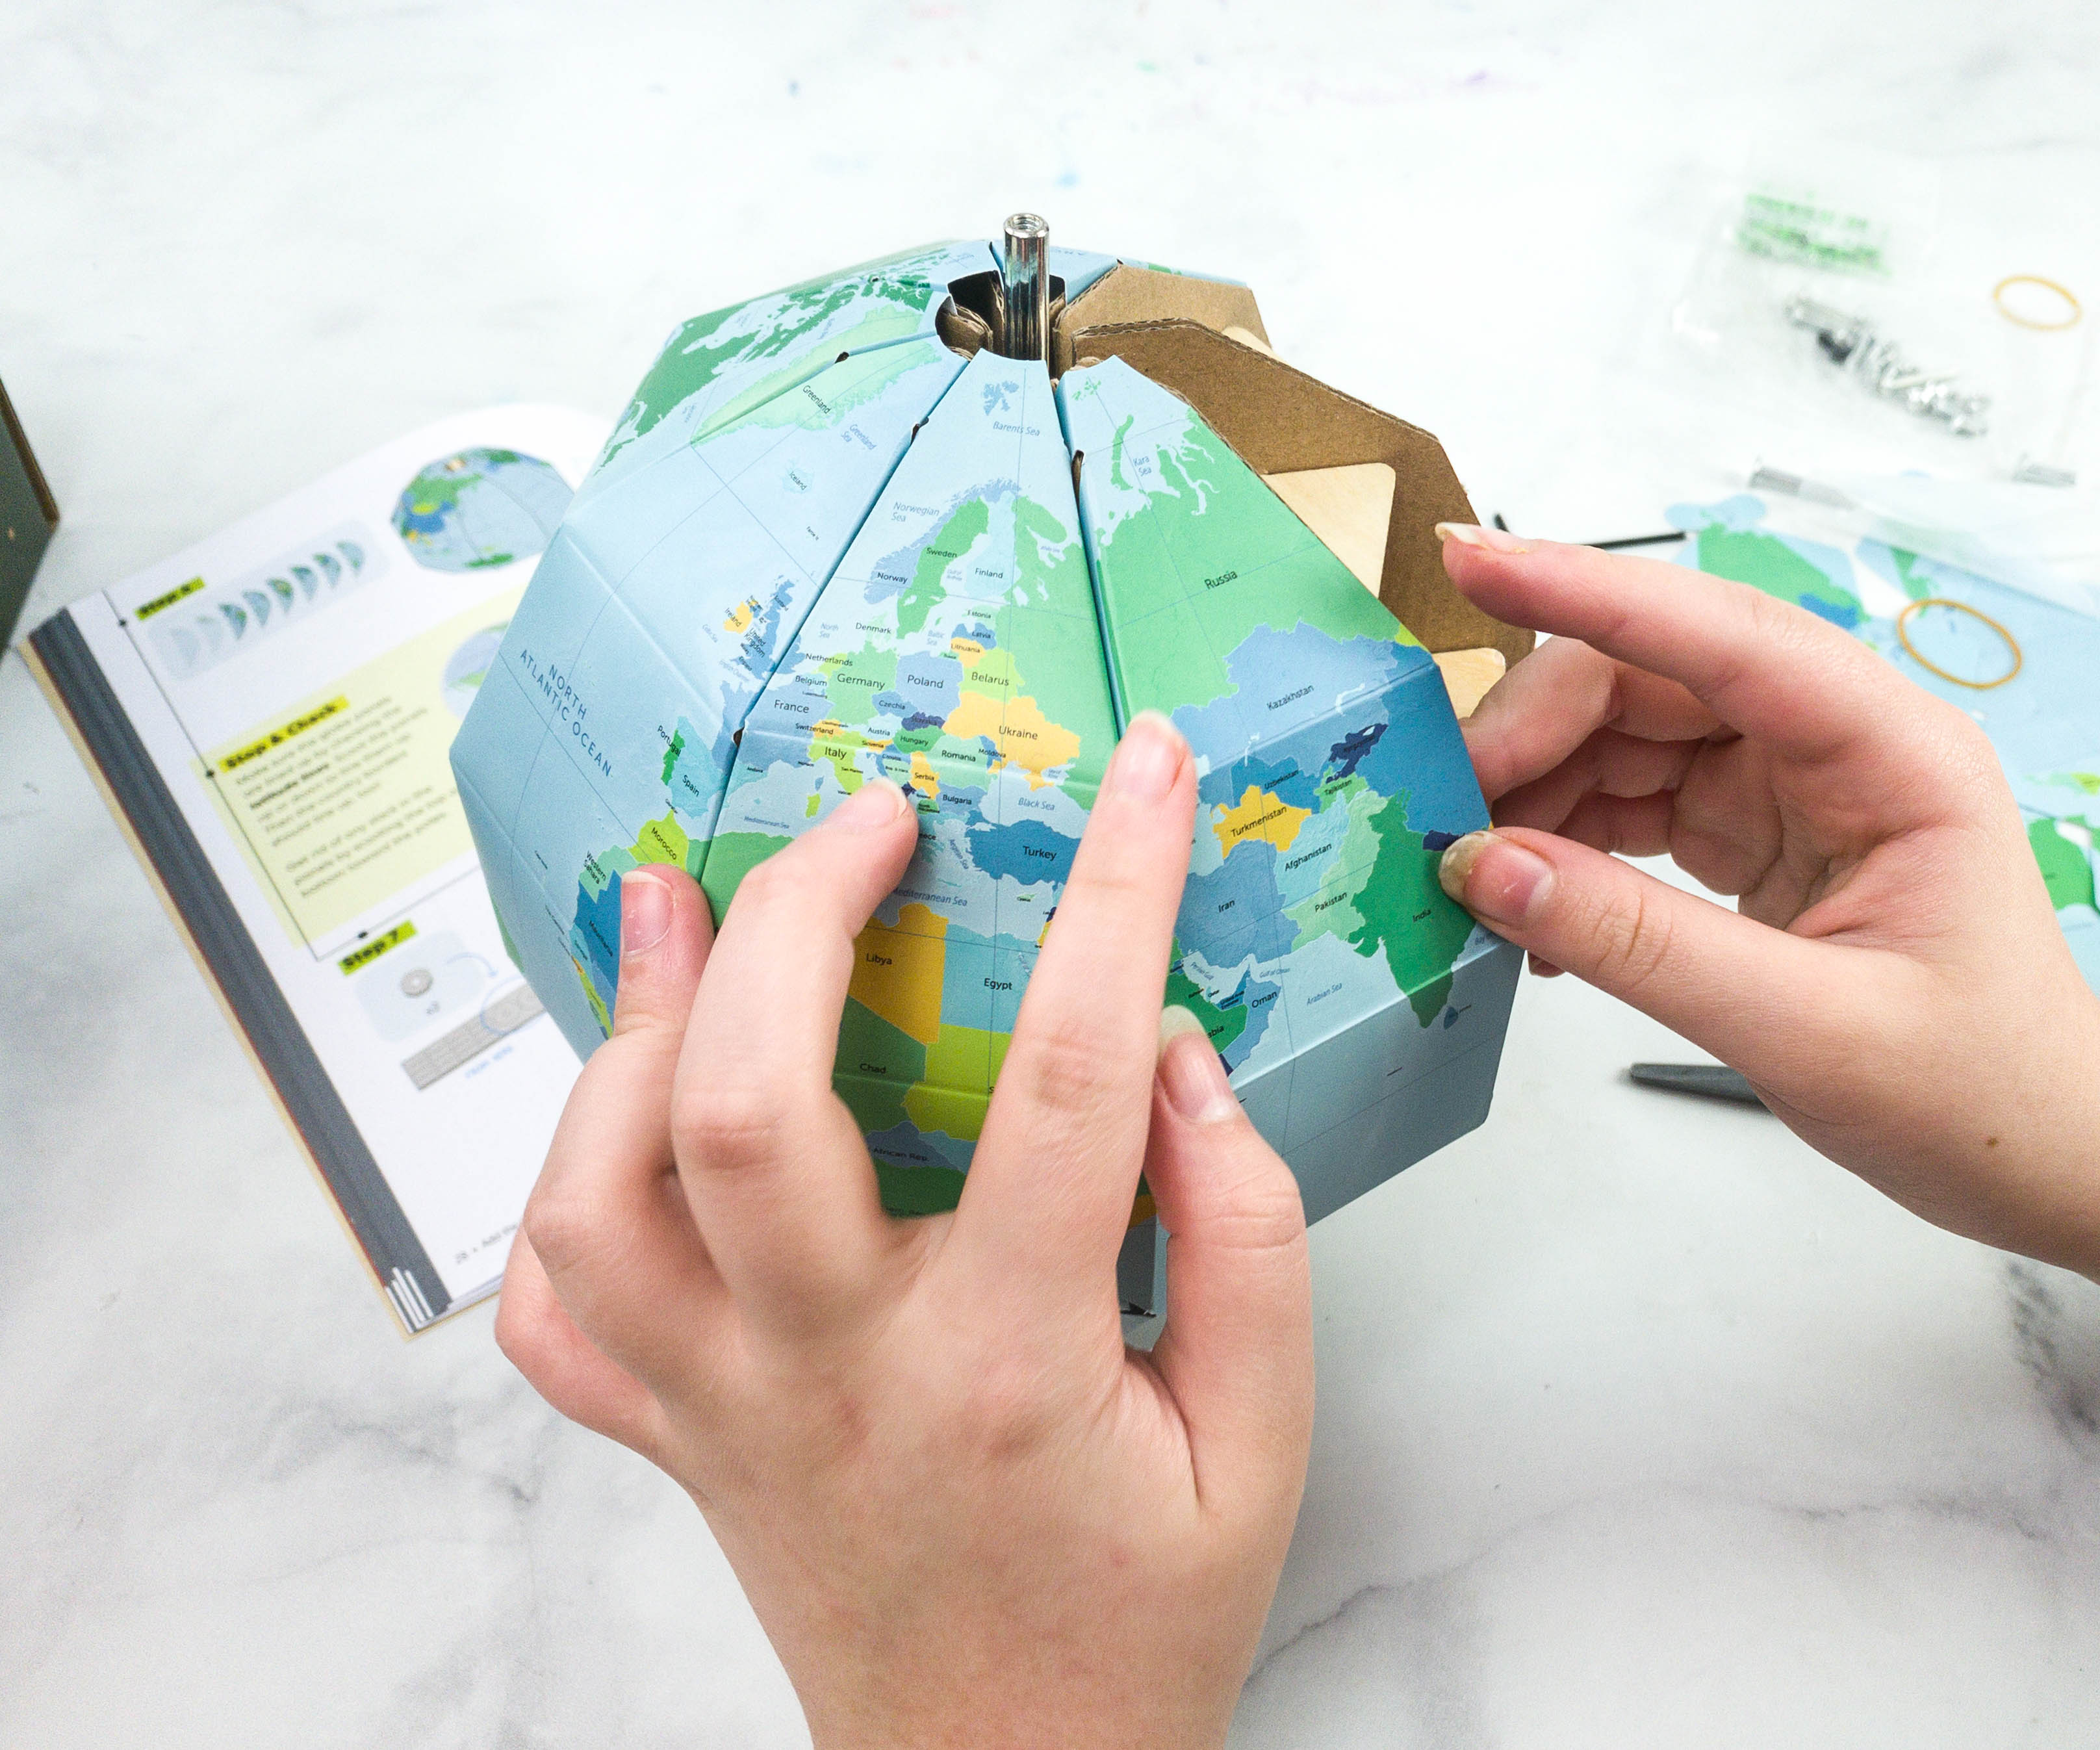
Continue the process until the surface of the frame is fully covered!
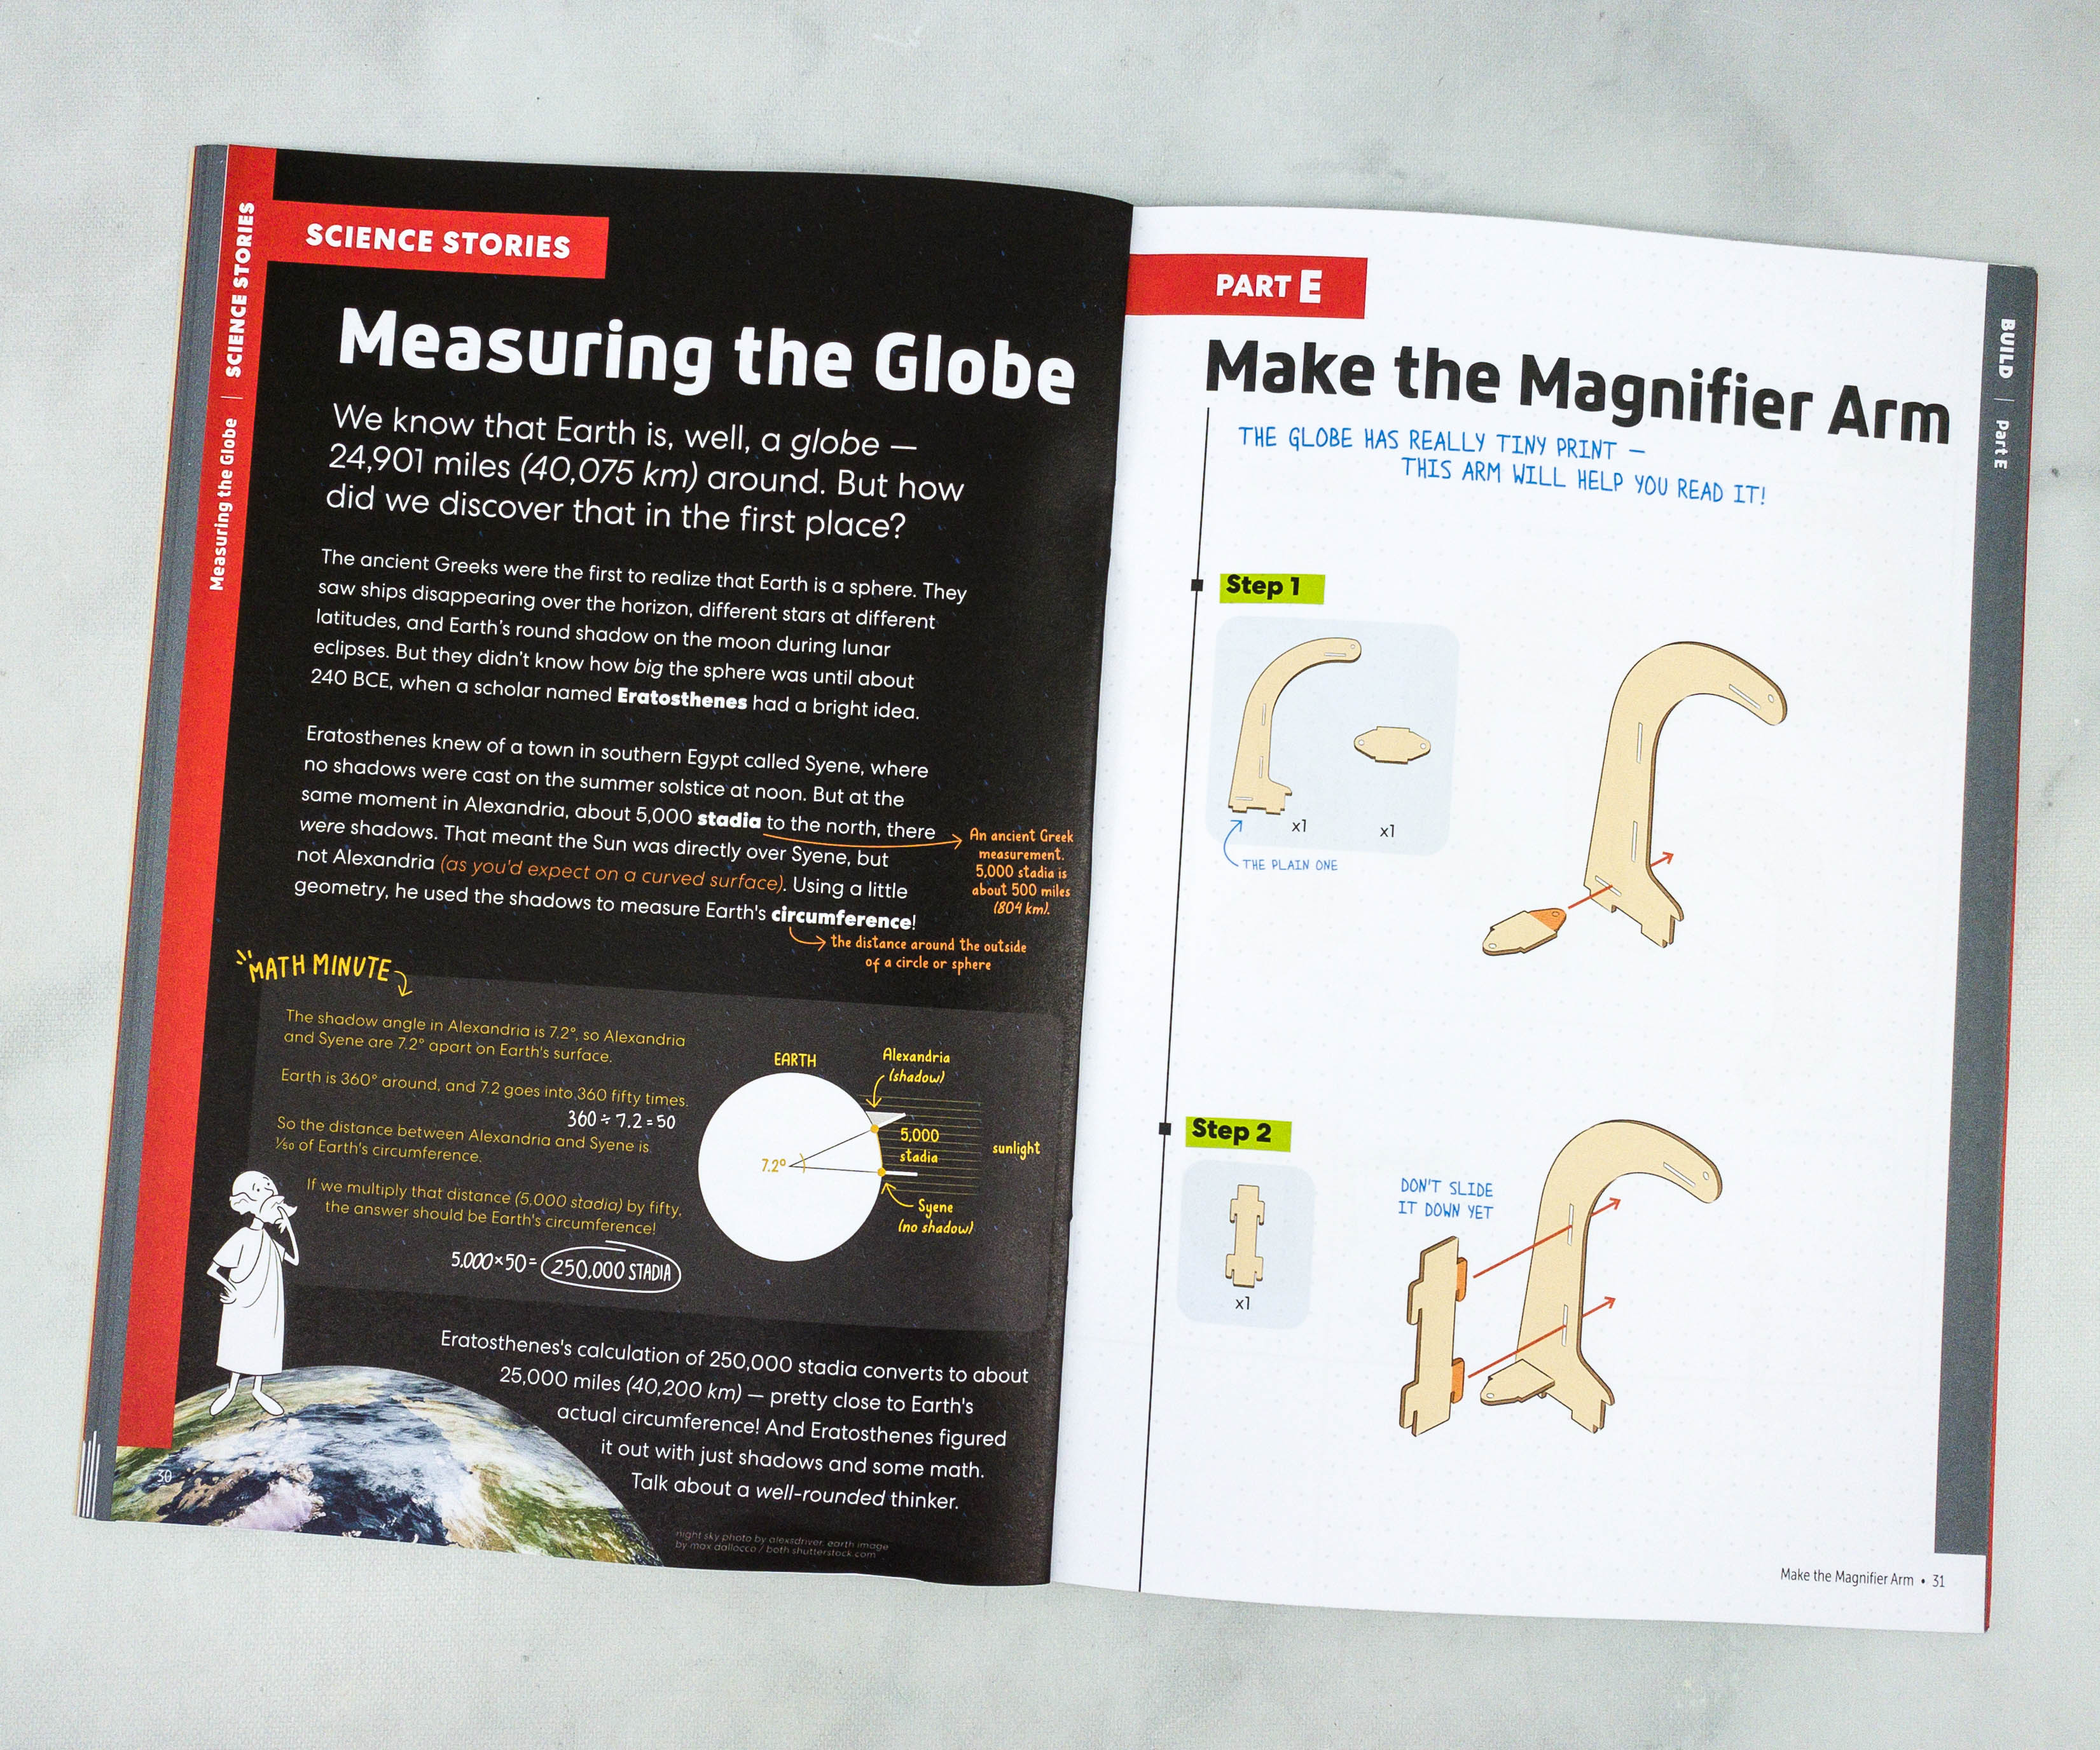
We’re done with the globe, but we can’t read the words printed on it yet. It’s time to make a magnifier arm!

For this part, we used small and large wood pieces, washers, O-rings, barrel bolts, and screws.
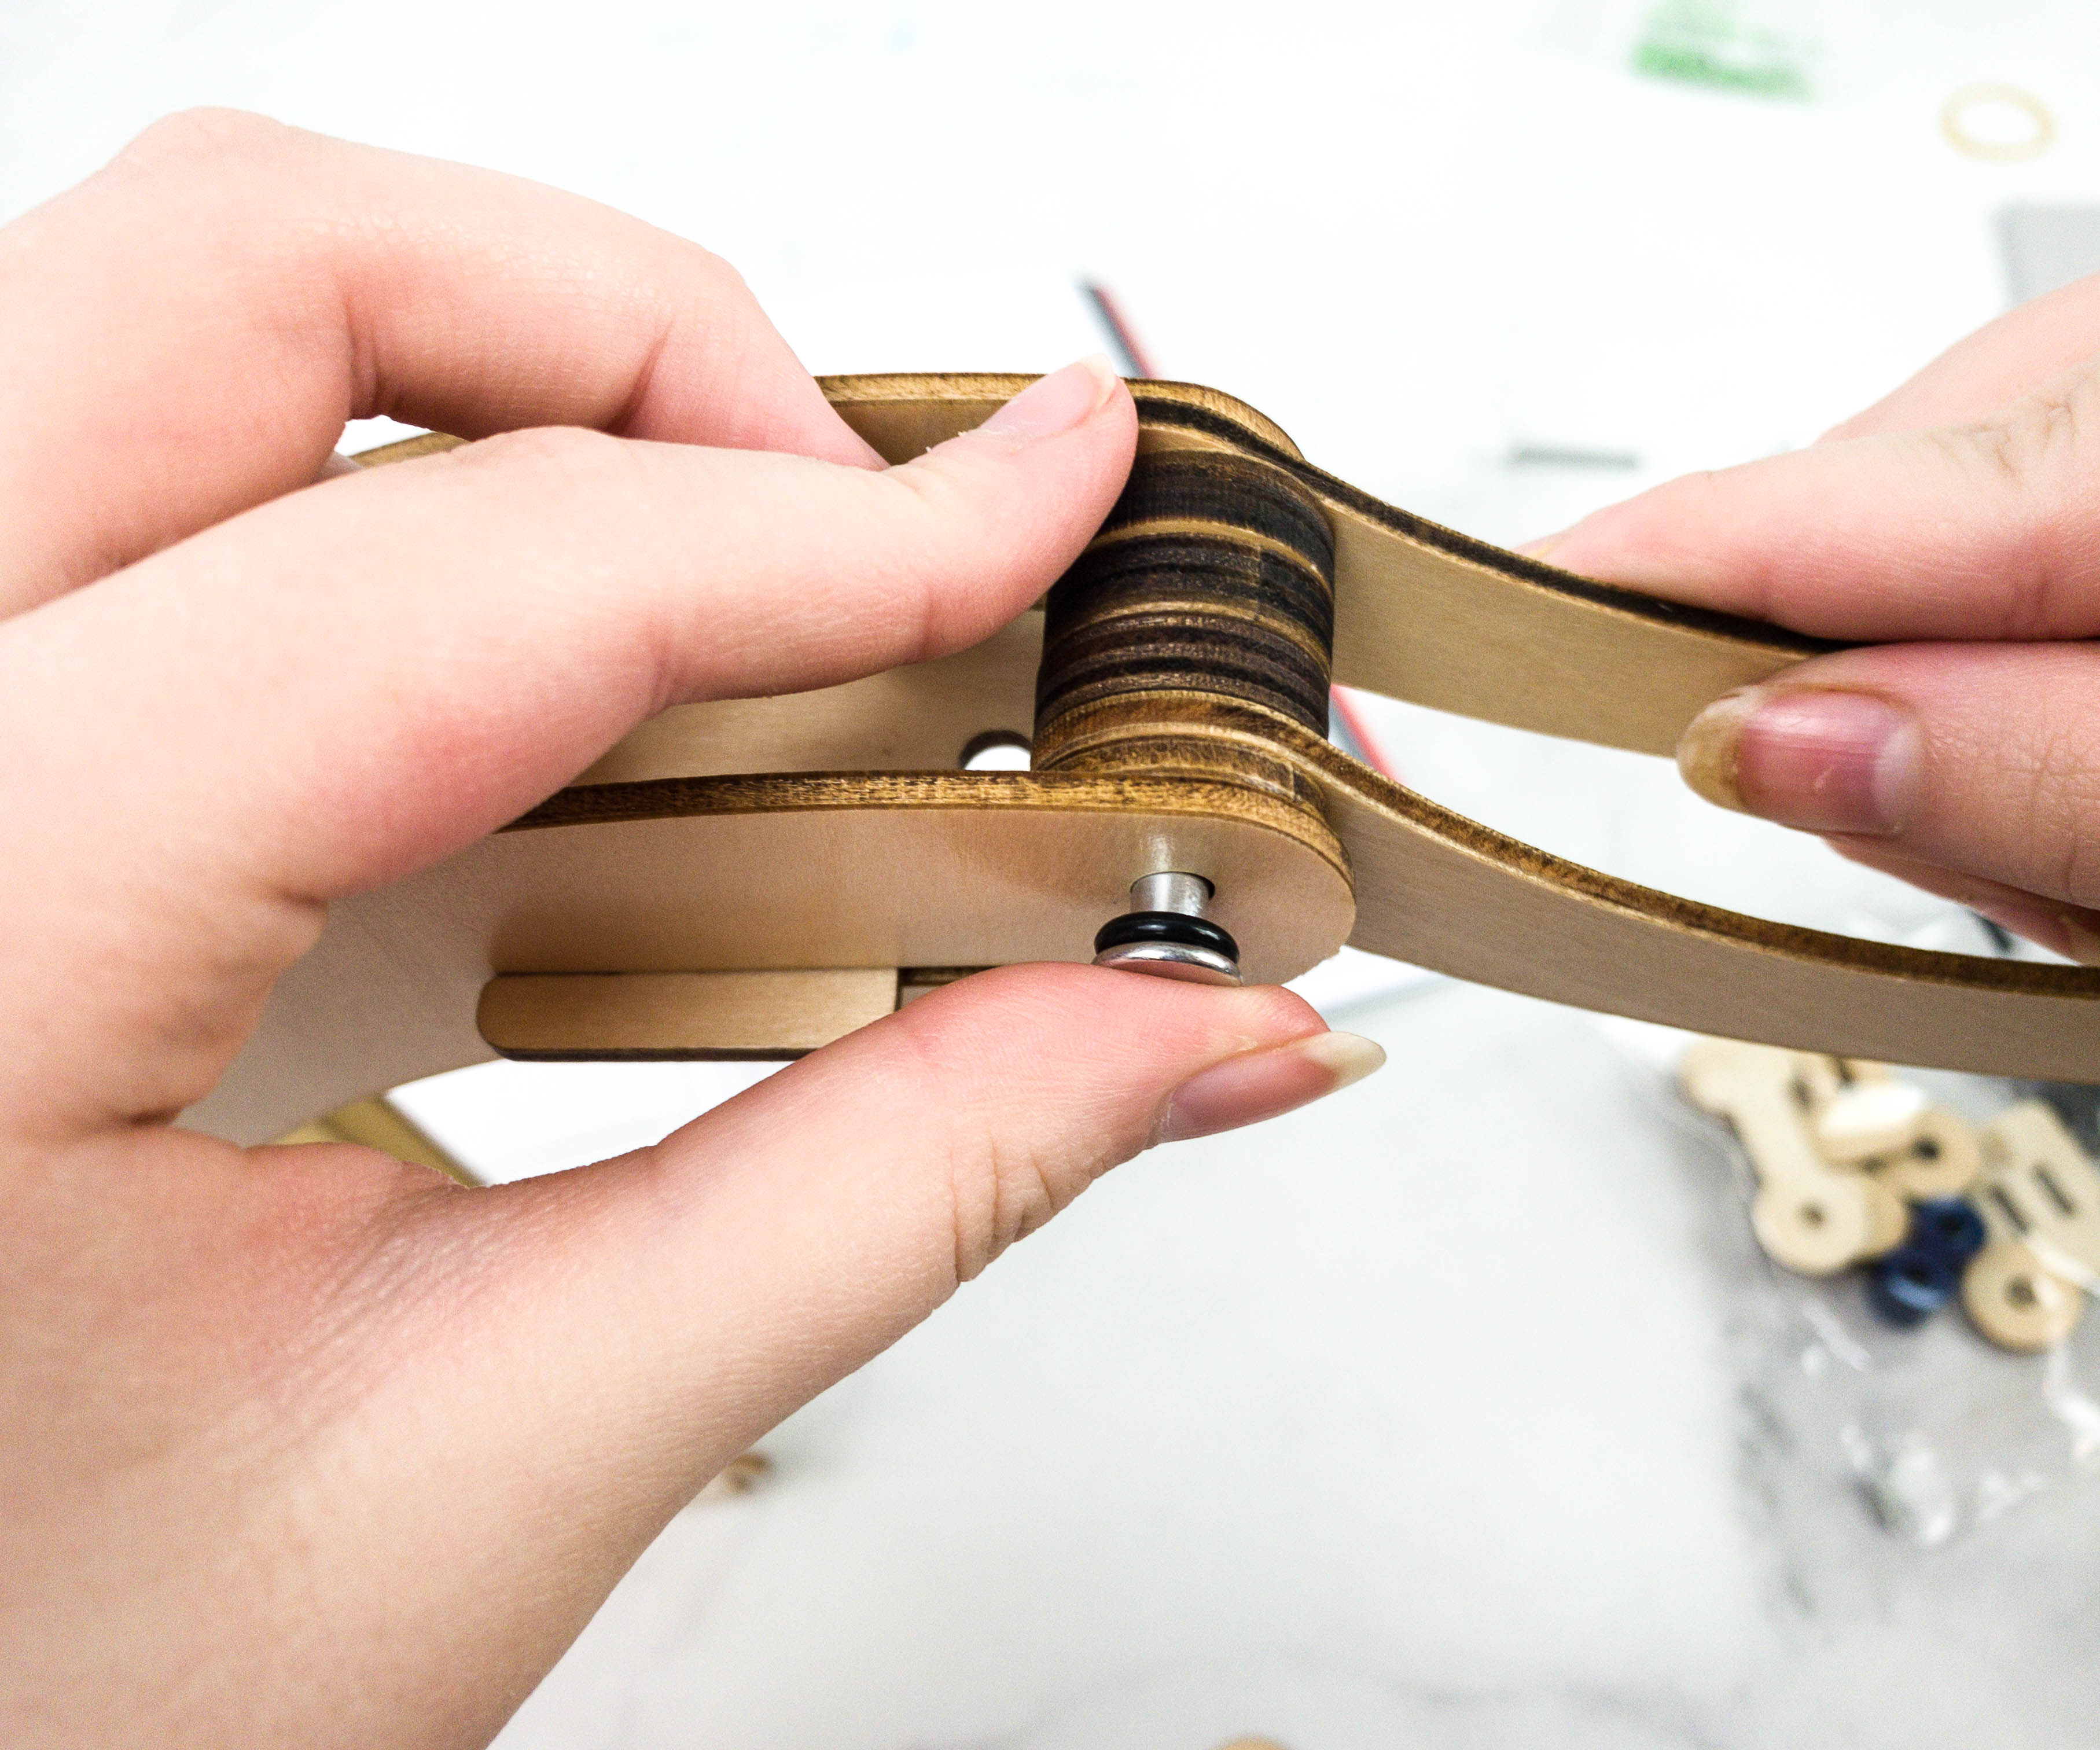
For this, just pile up the small circle-shaped wooden piece, place it in between the arm pieces, and lock it by sliding the barrel bolts and screw.

Here’s the completed wooden magnifier arm!
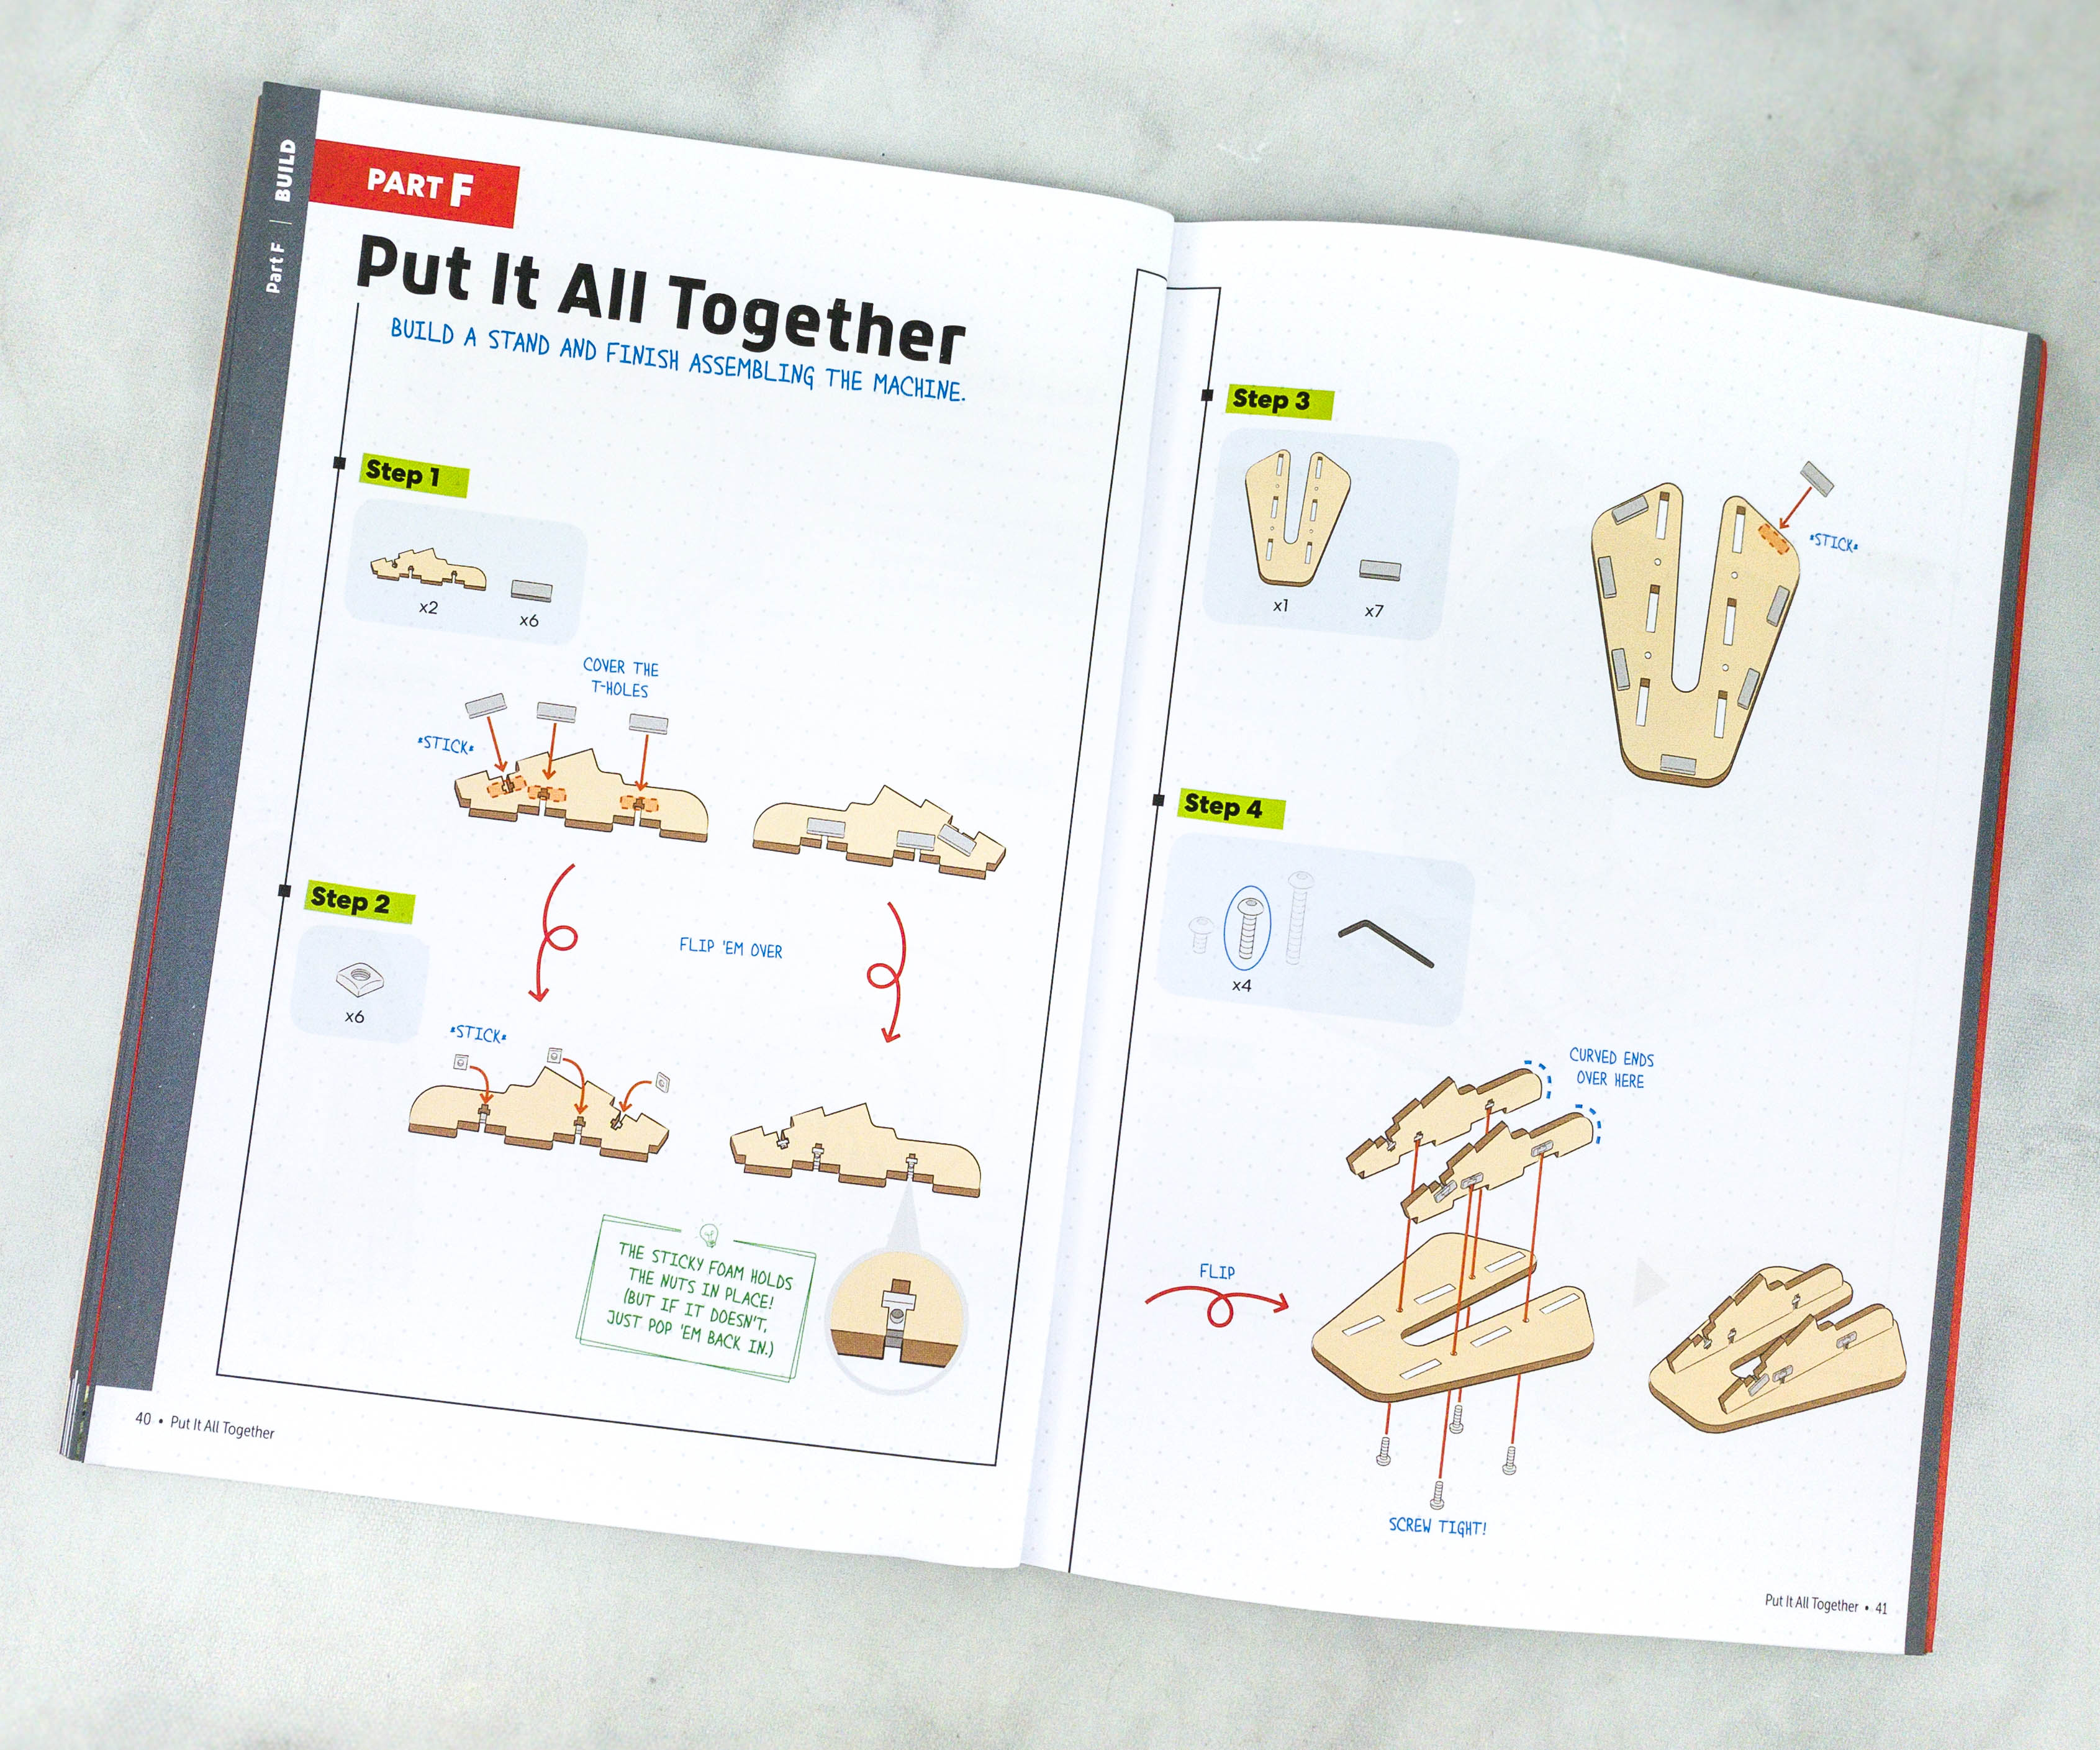
The final part of the project is to put them all together, and for that we need a sturdy base!
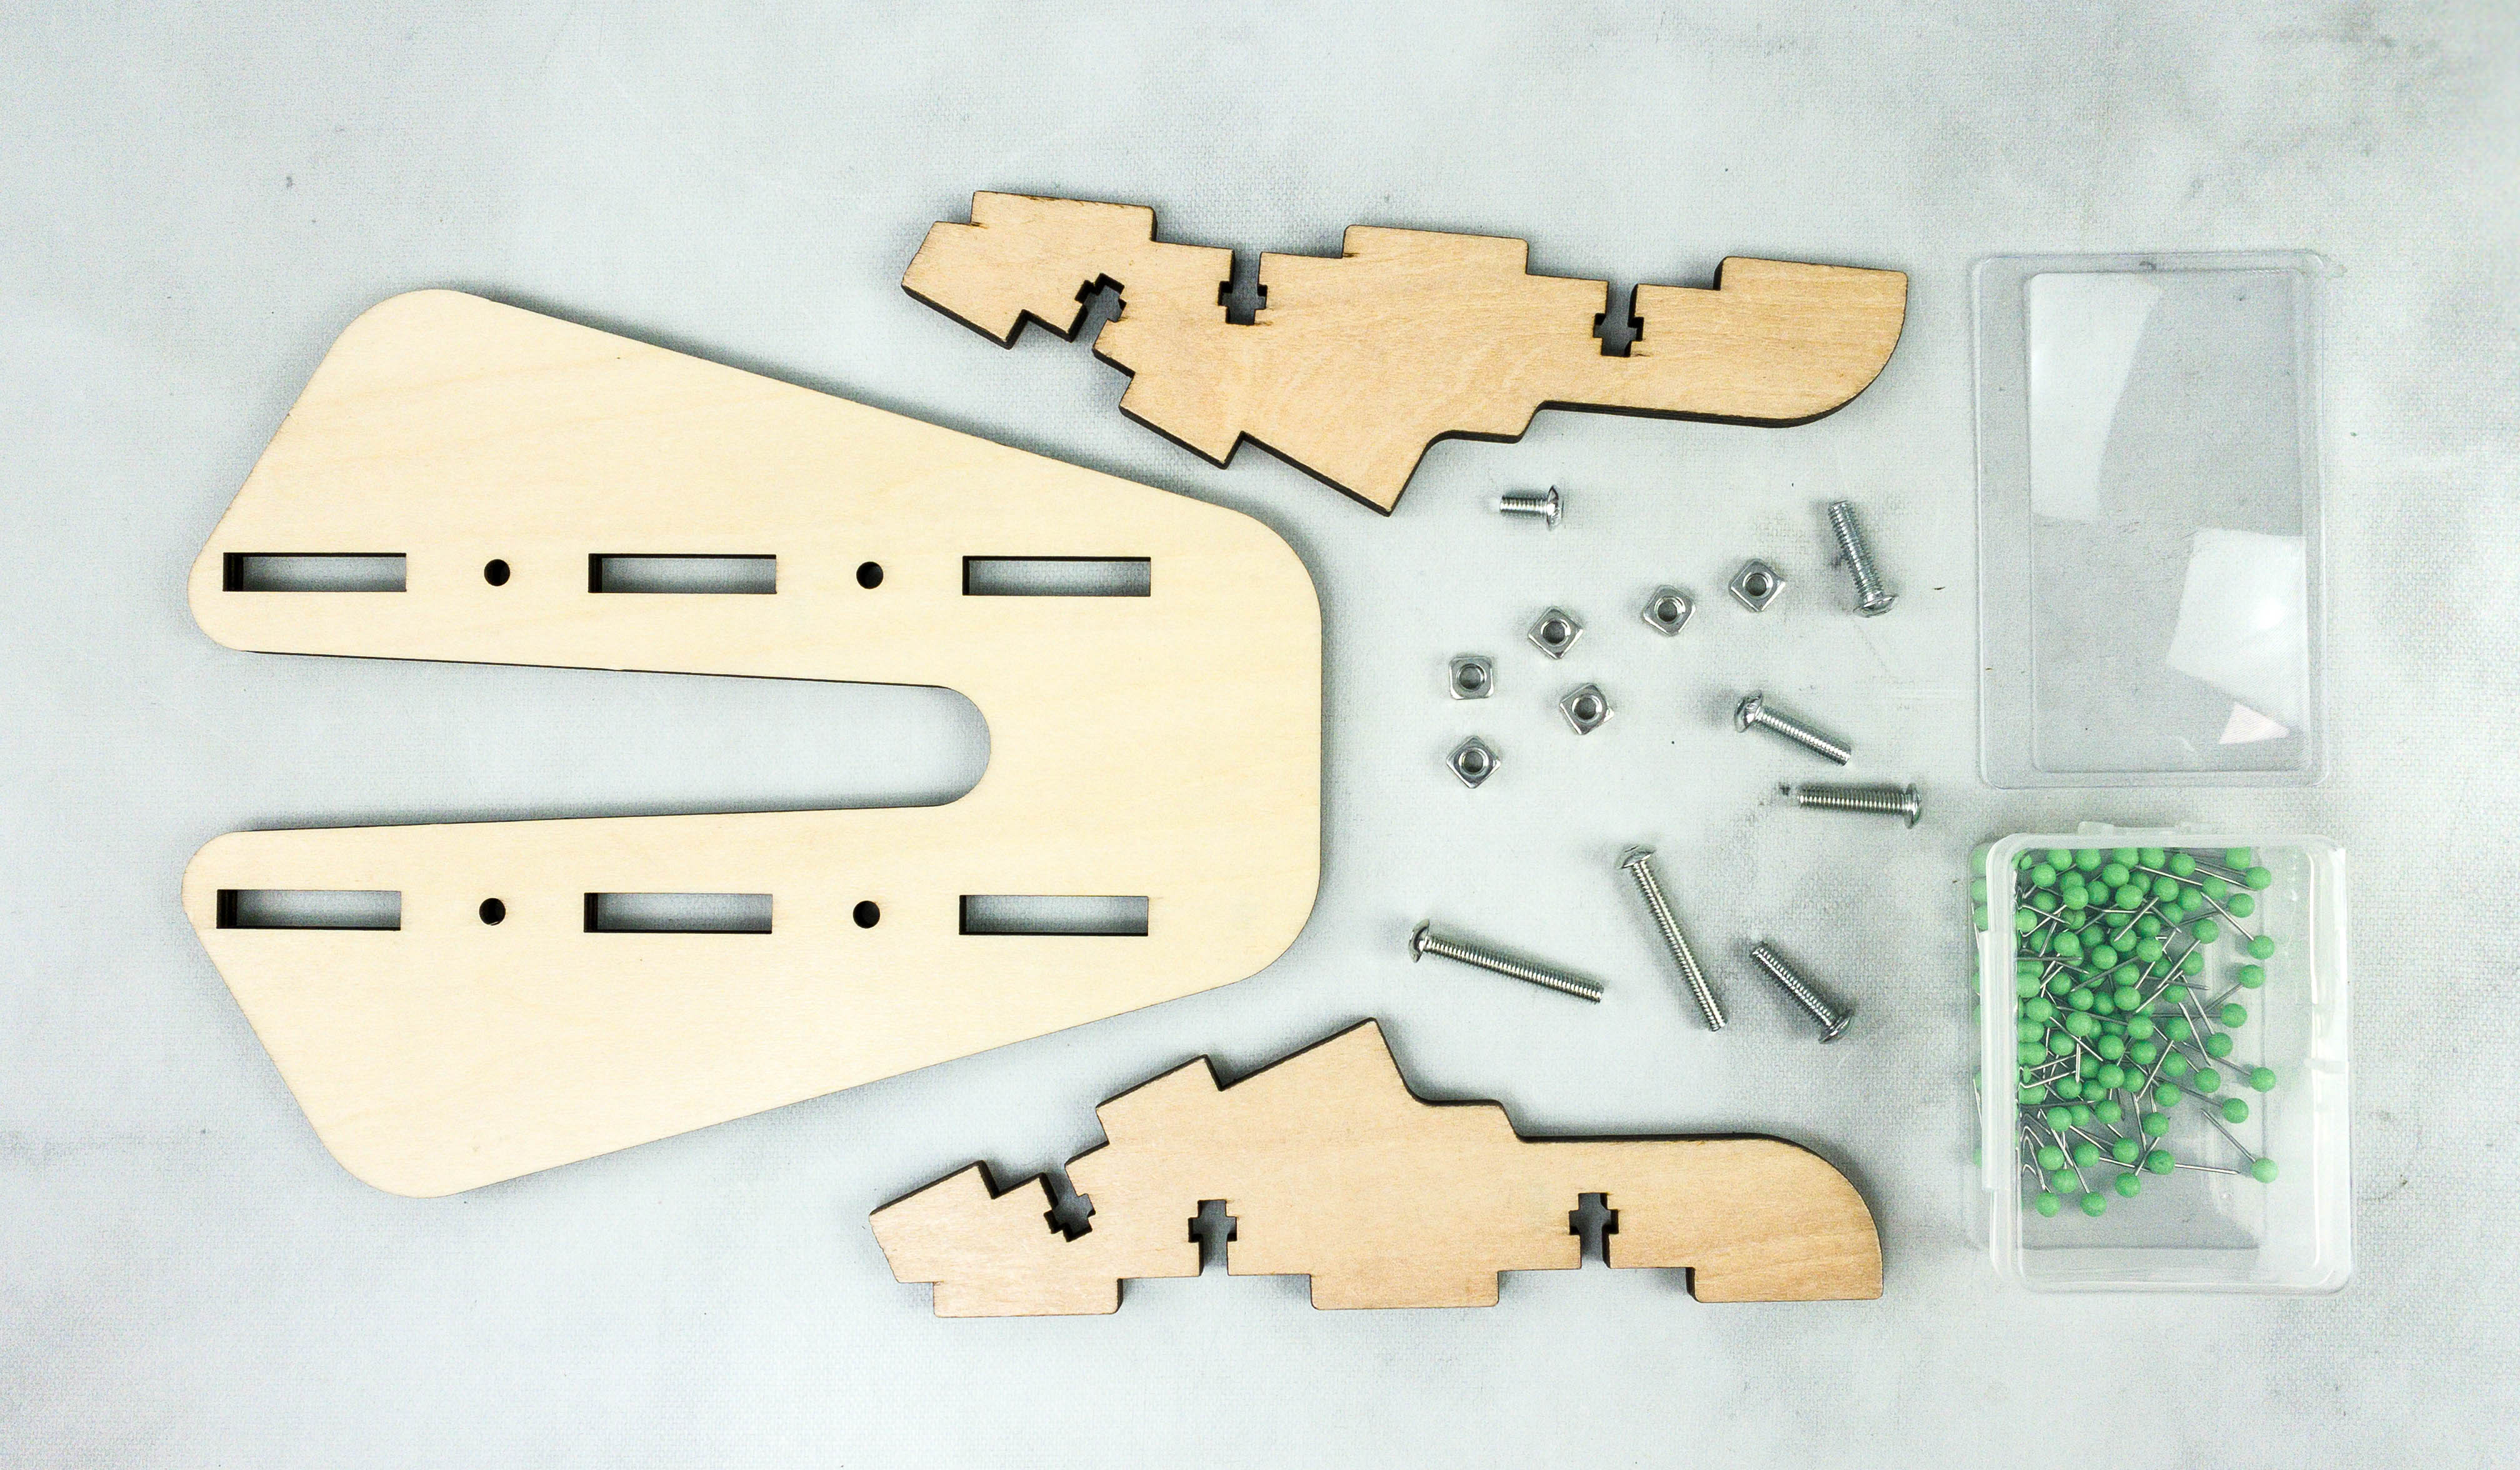
To create a base, we used the base wood pieces, screws, long barrel bolts, magnifying glass, and marking pin.
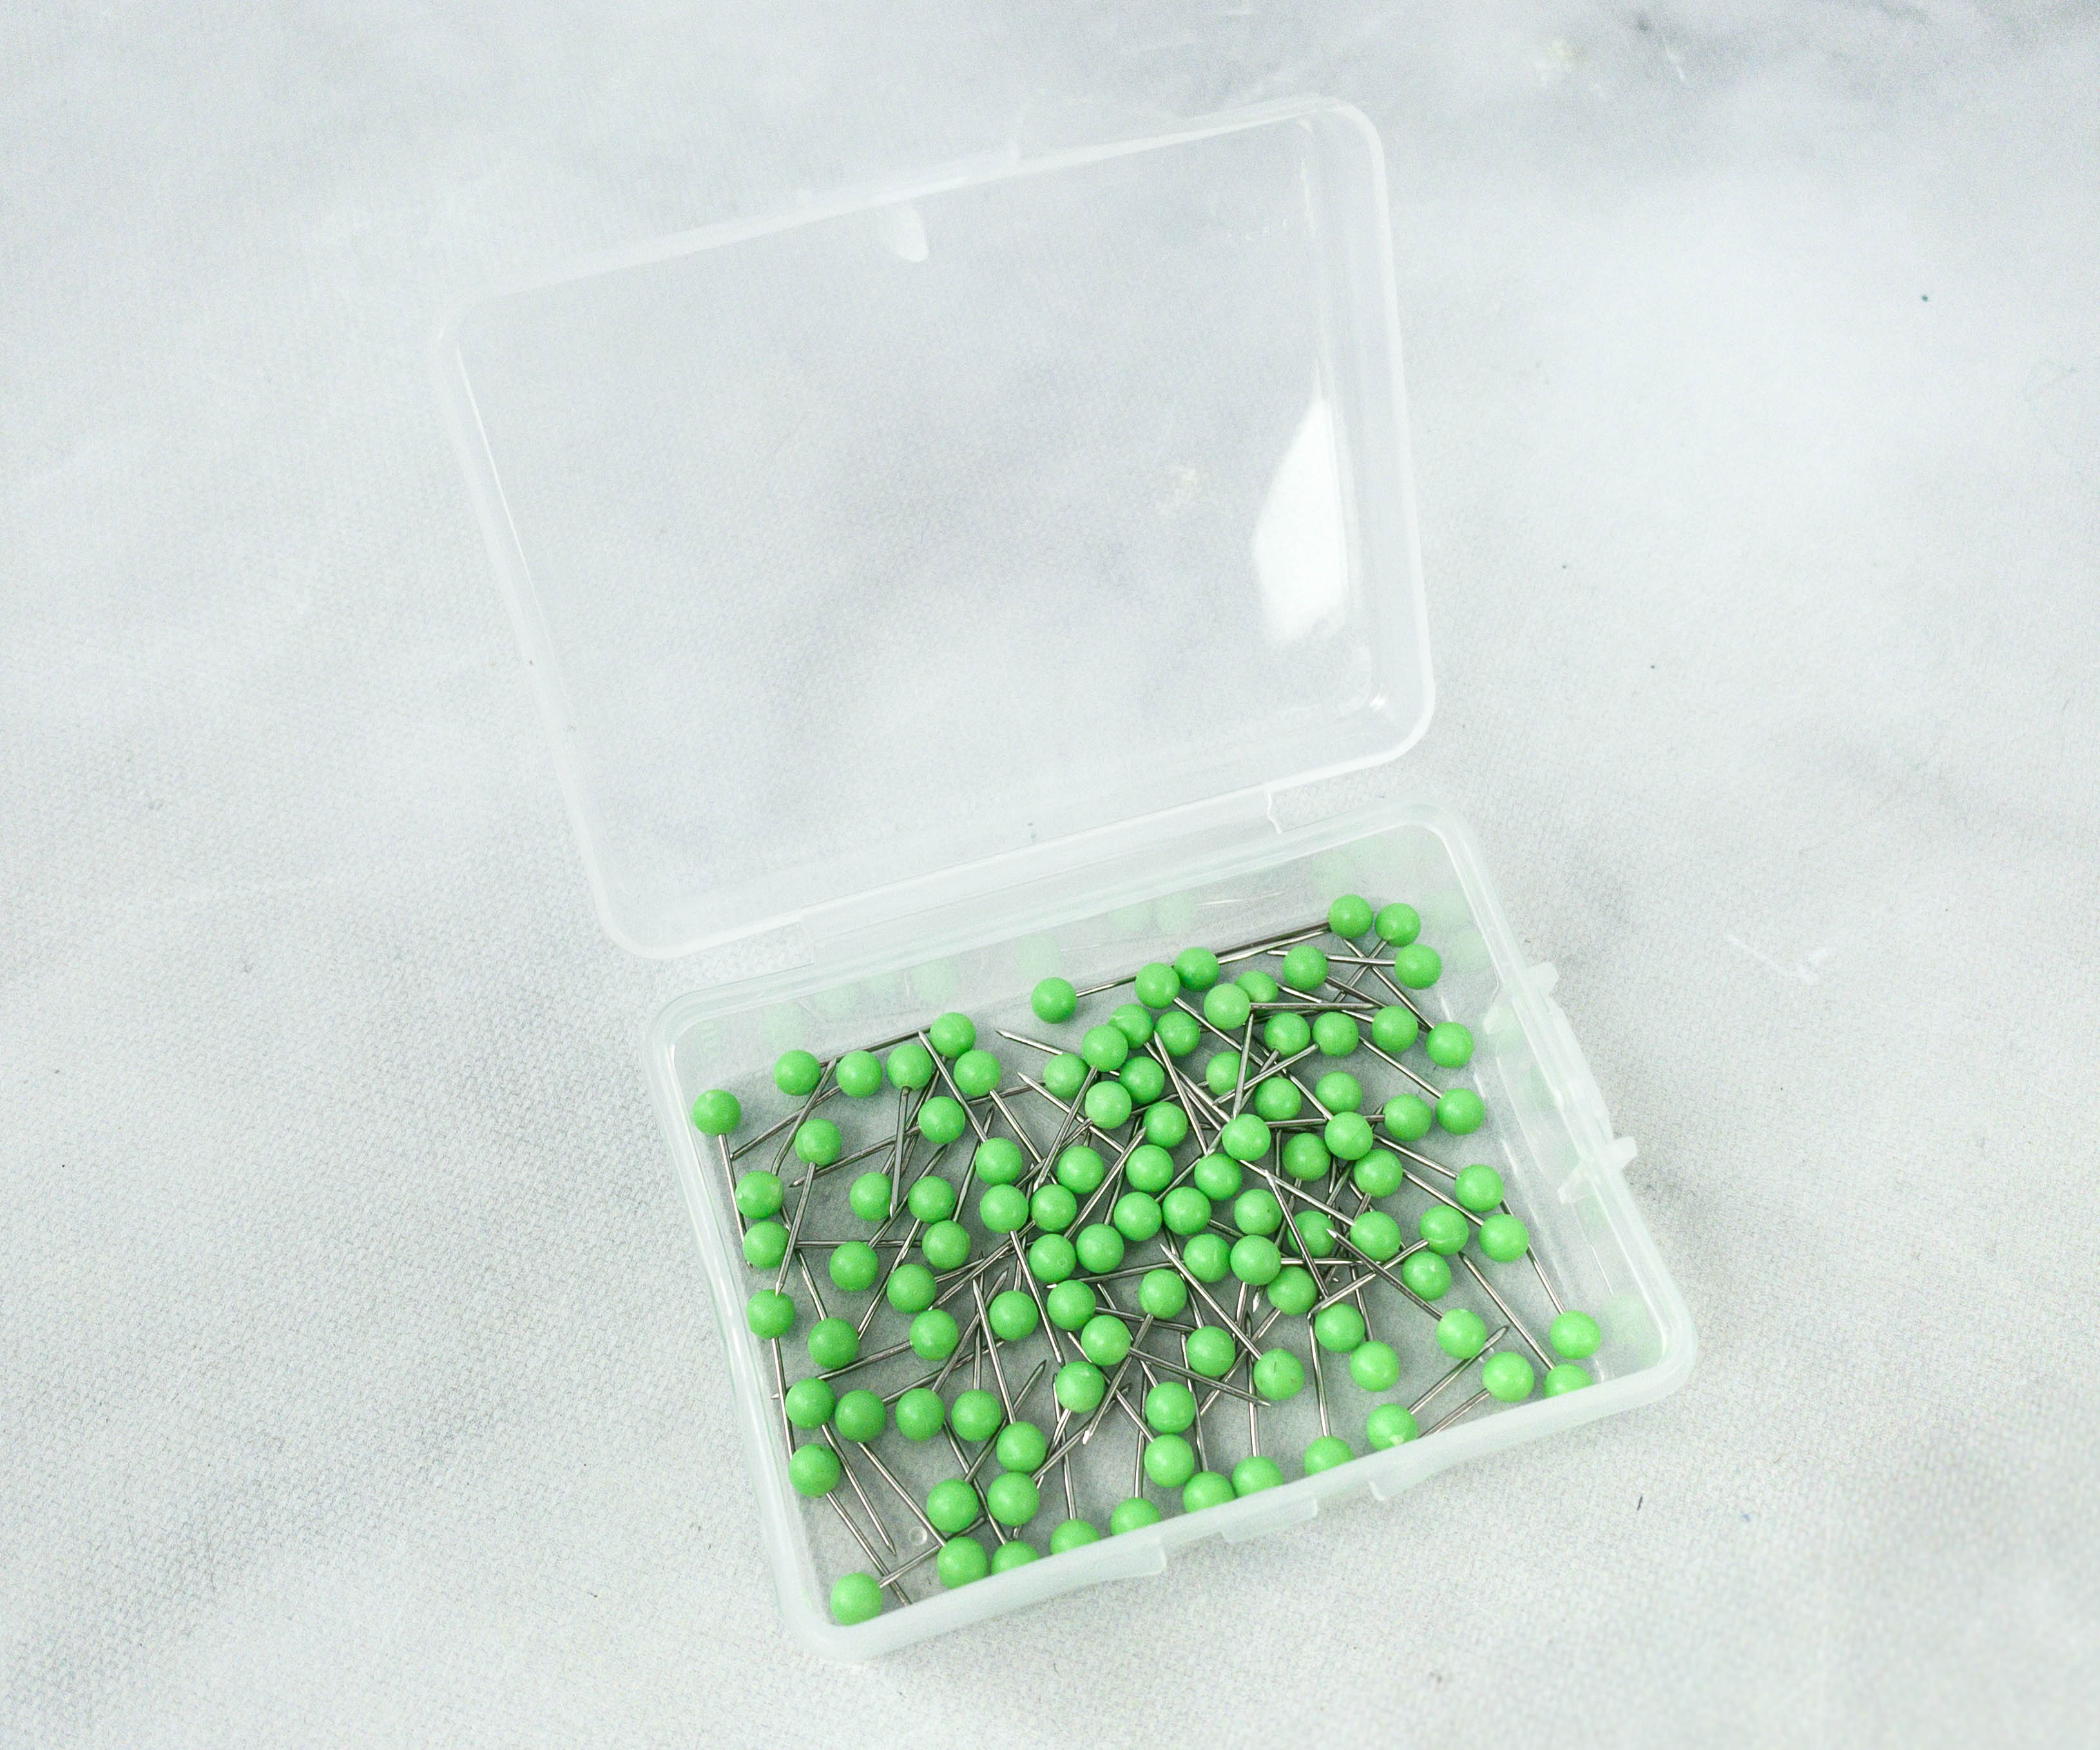
These safety pins will be used to mark the places we will be looking for.
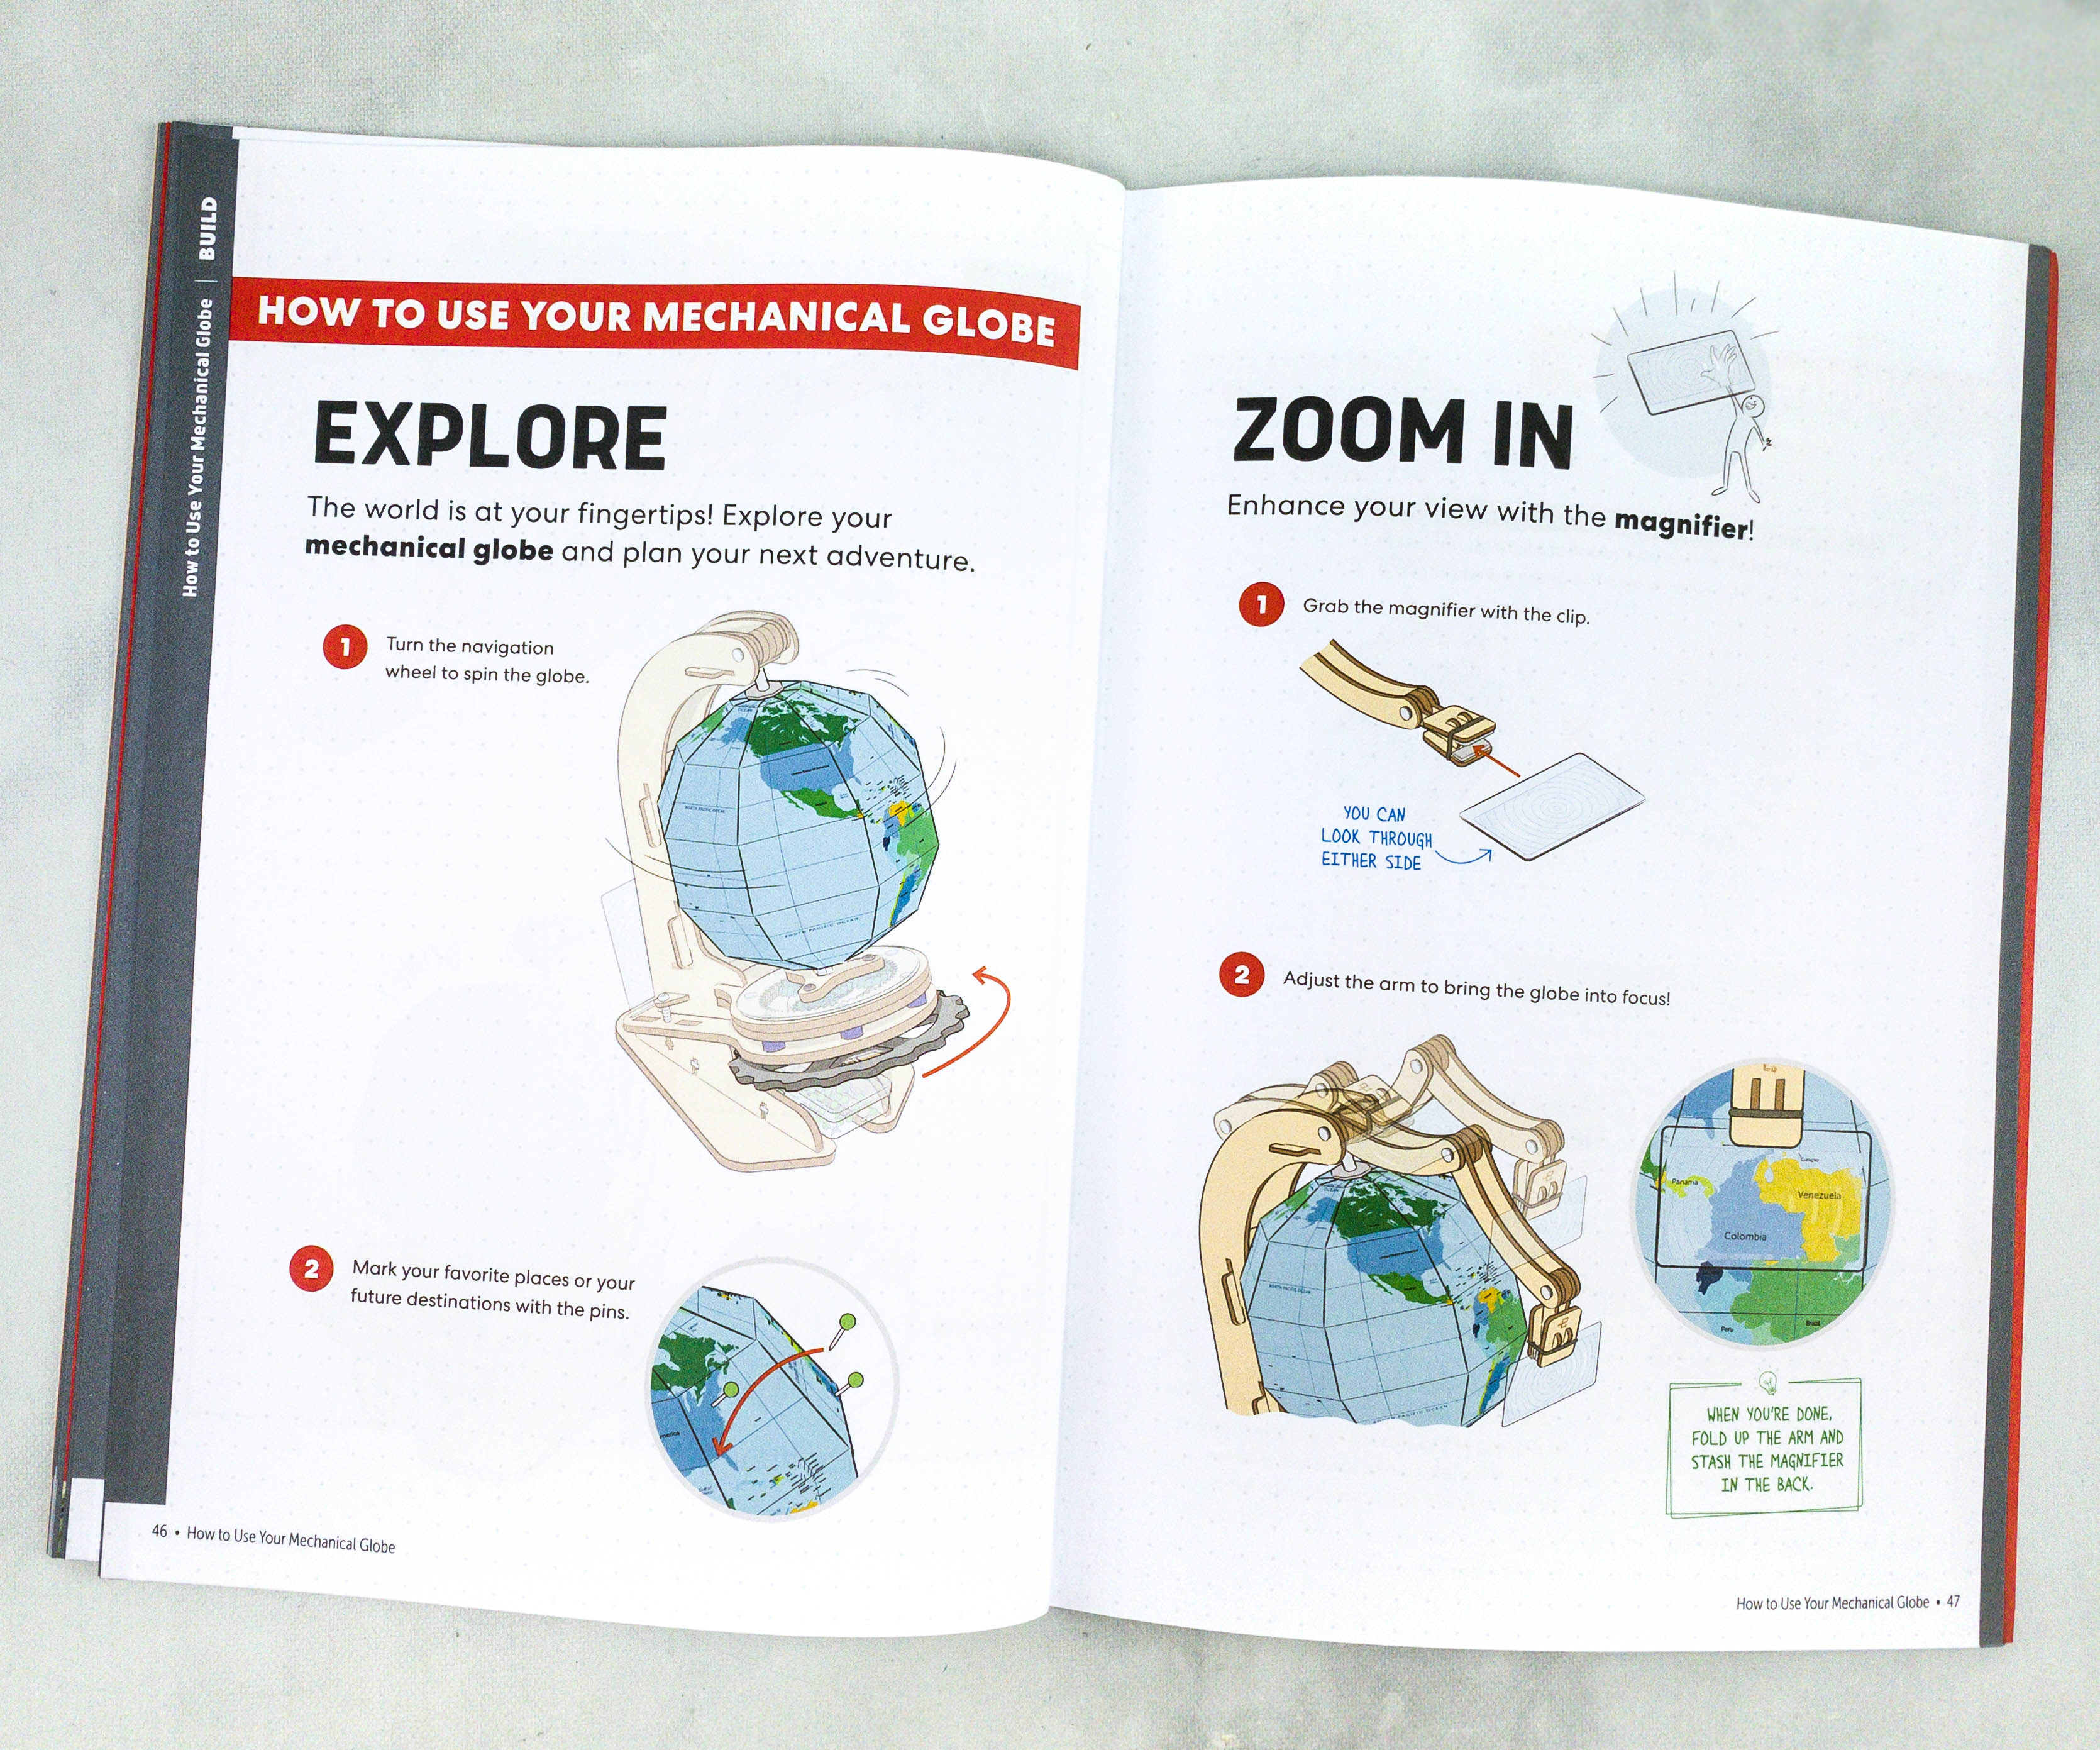
This part of the booklet demonstrates how to properly use the mechanical globe.
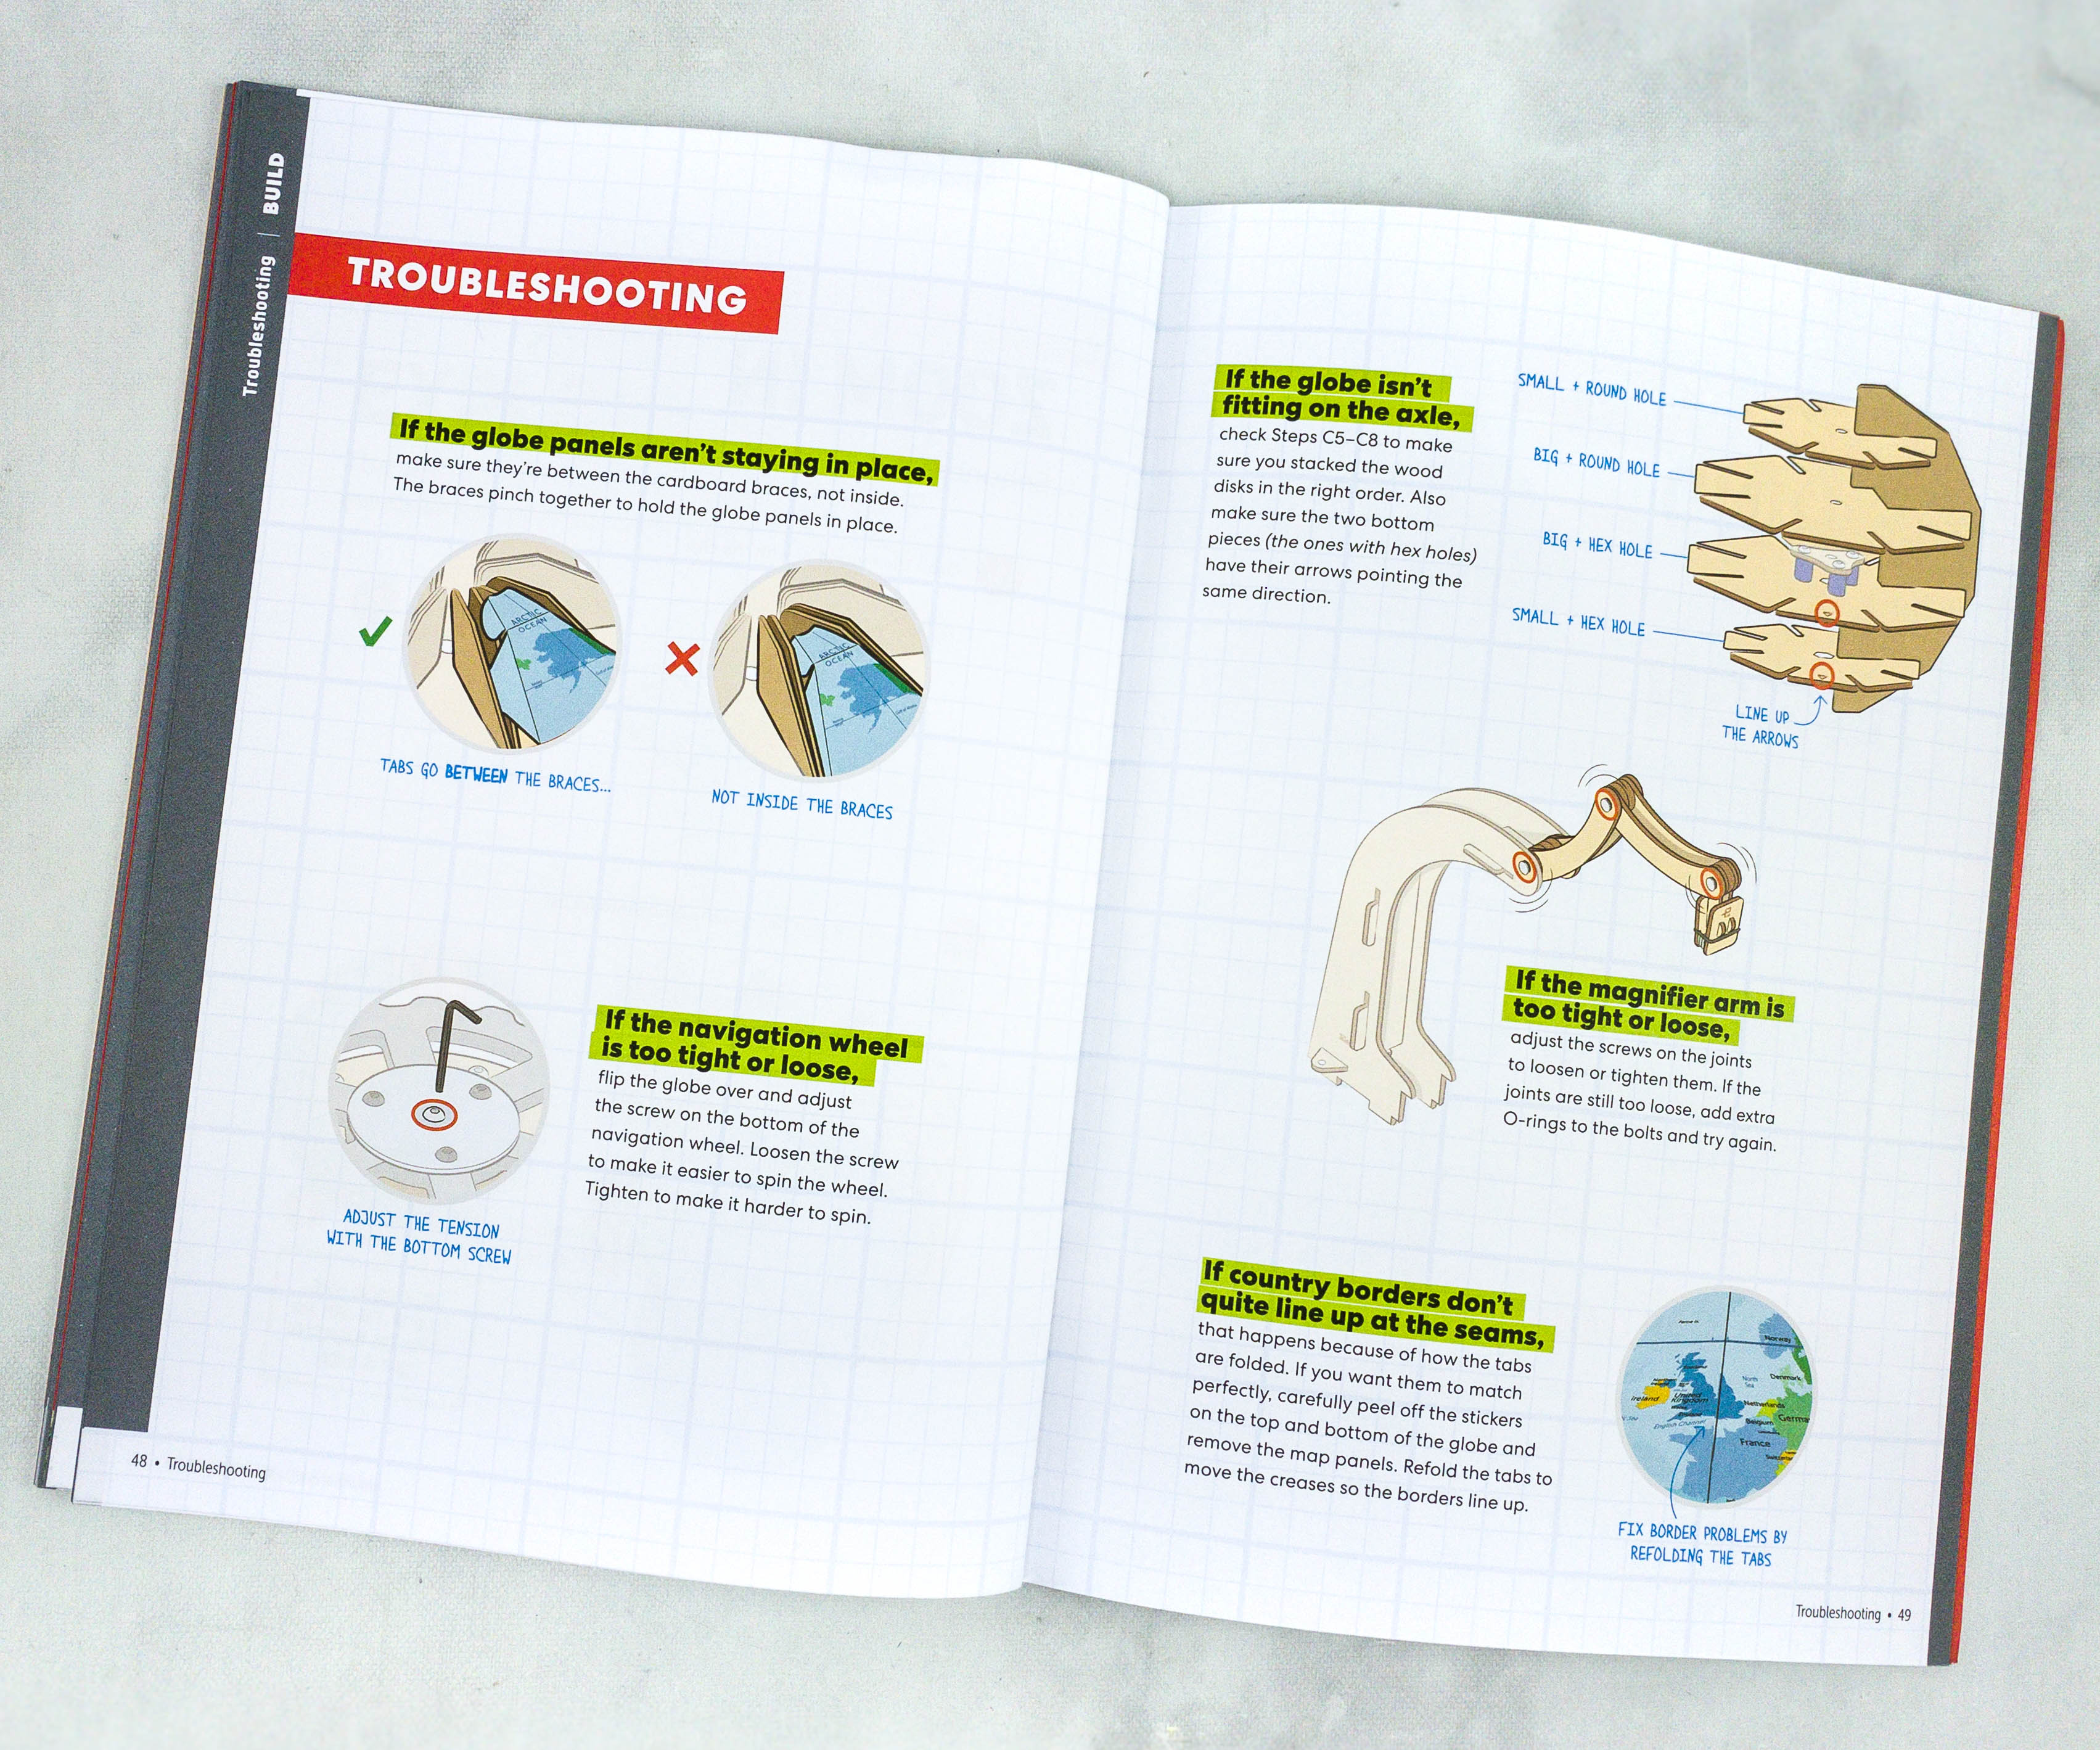
The booklet also included some troubleshooting tips like when the globe panels are not staying in place, the navigation wheel is too tight or loose, the globe isn’t fitting on the axle, the magnifier arm is too tight or loose, or the country borders don’t quite line-up at the seams.
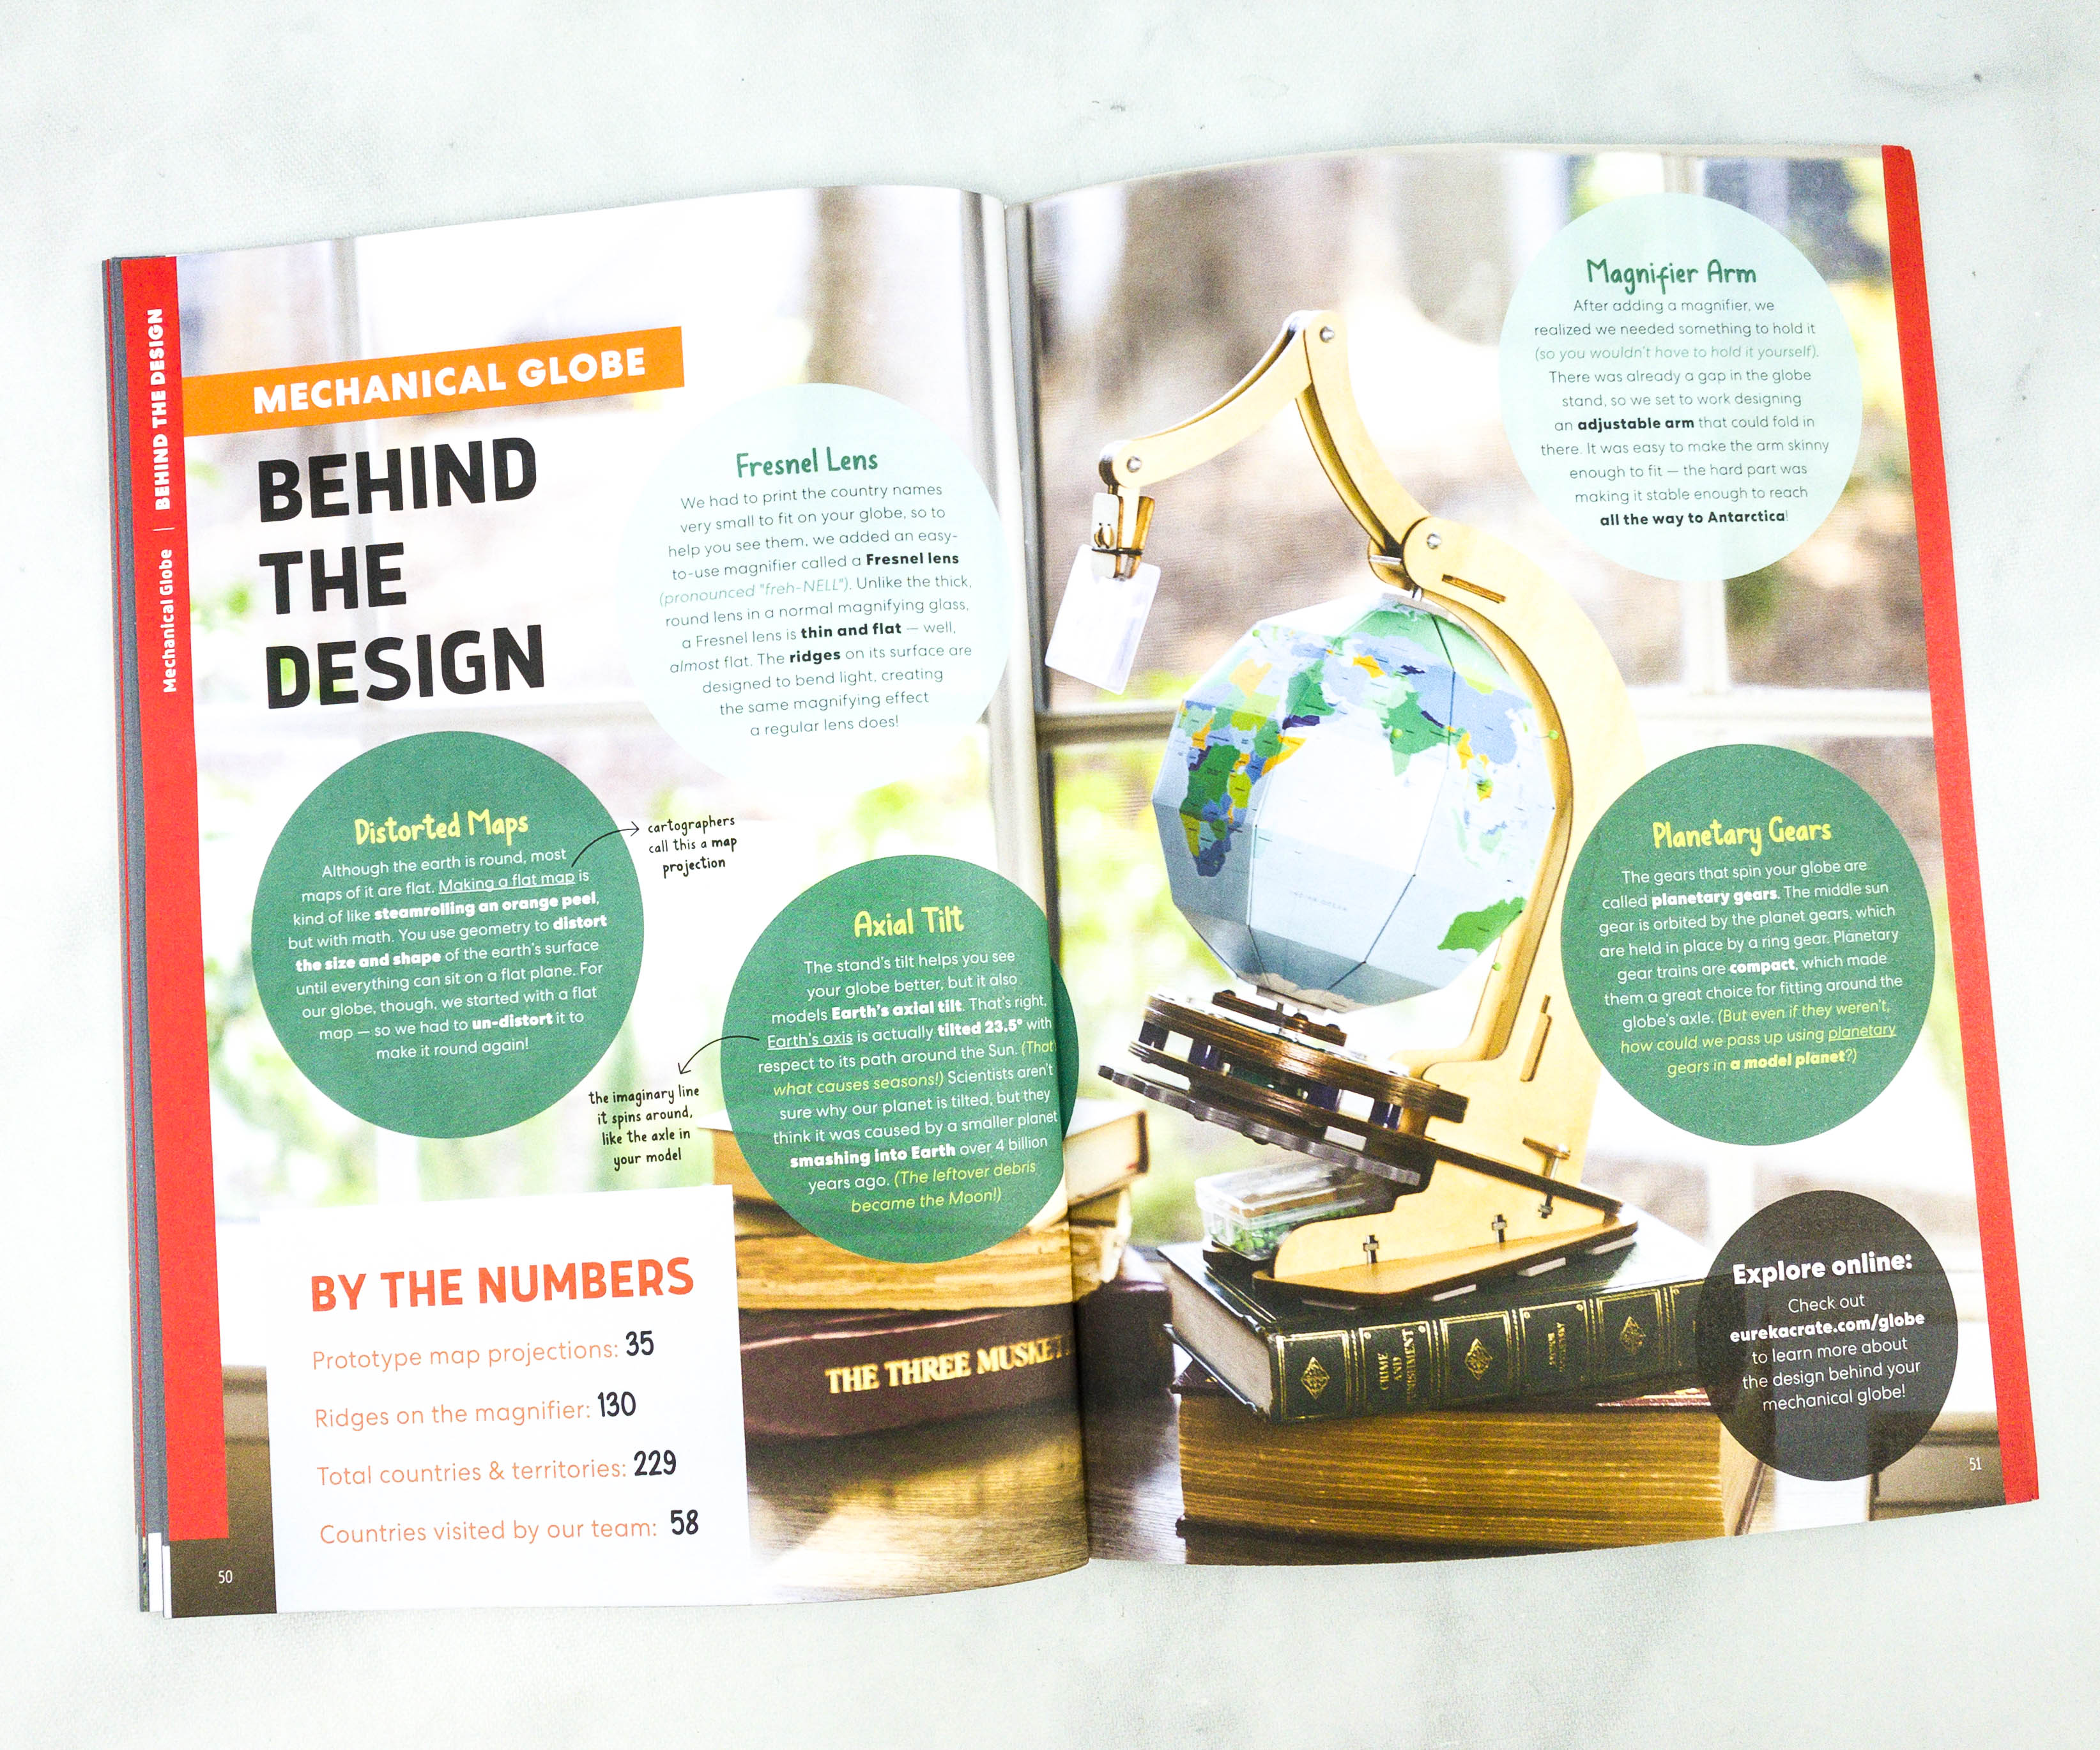
This booklet even listed the importance of each component of the mechanical globe, including the distorted maps, axial tilt, magnifier arm, and planetary gears.
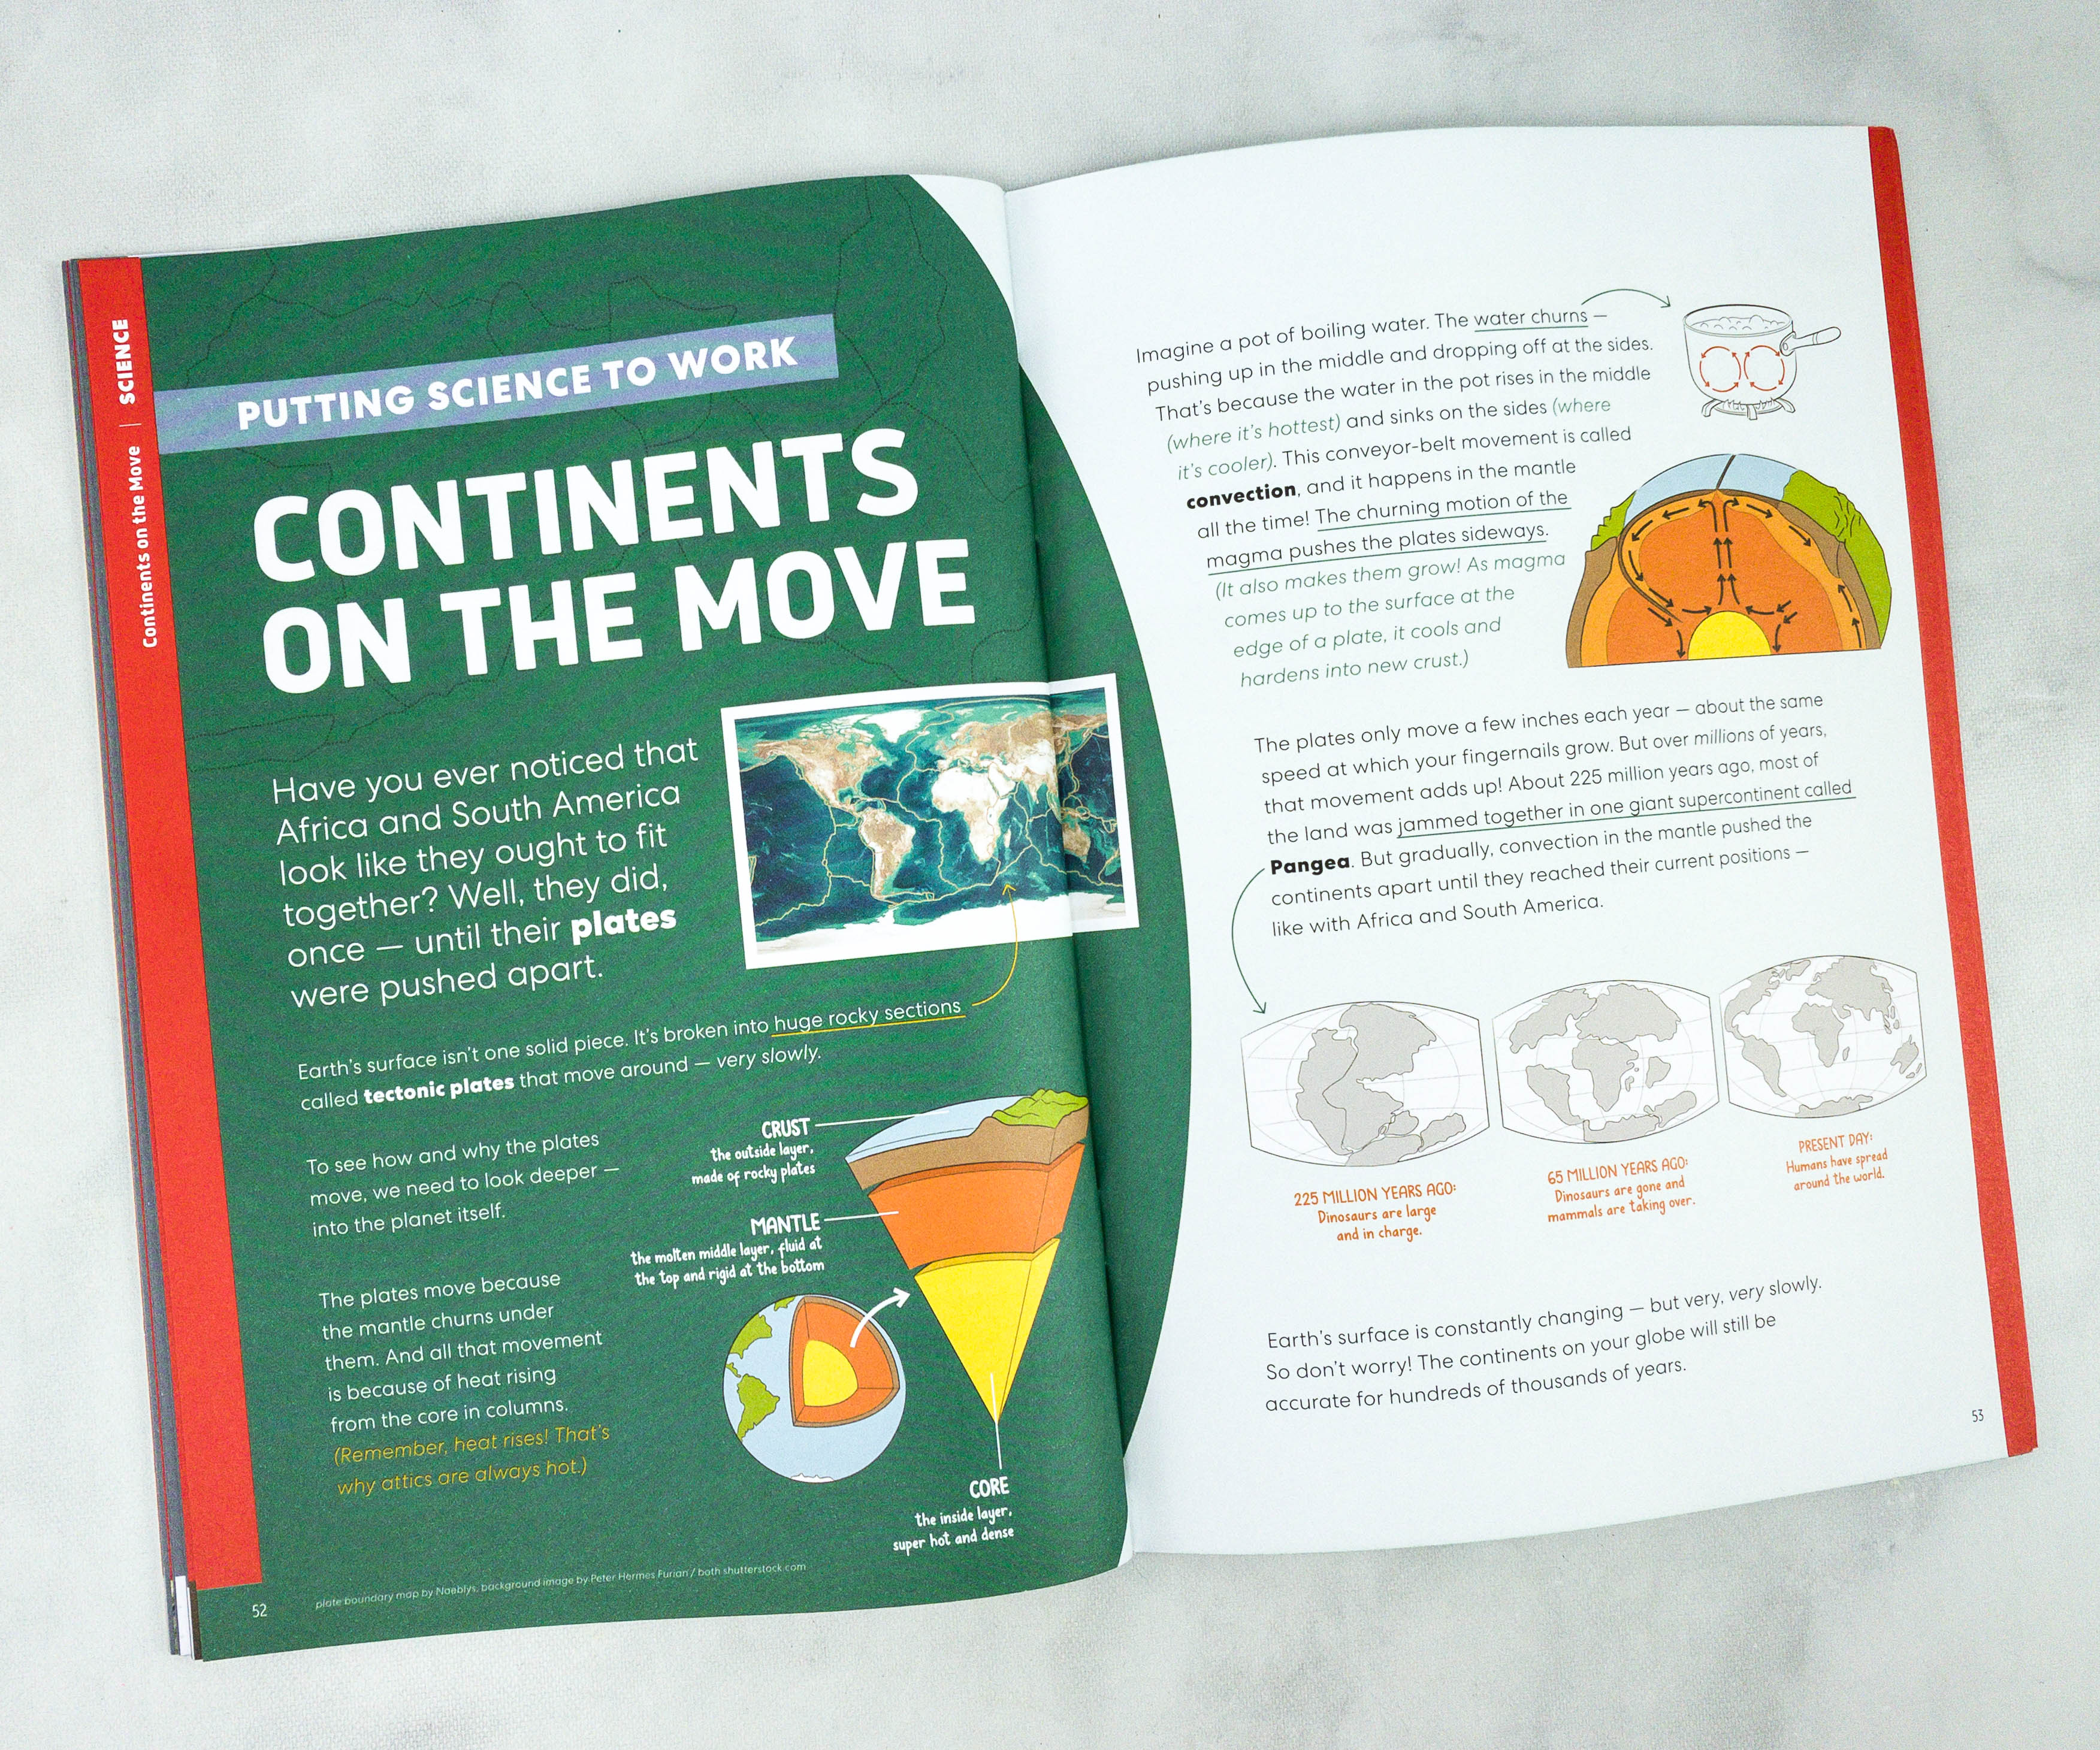
This article explains the why’s and how’s of the continent movements. They even provided illustrations on how the Earth looked like 225 million years ago, 65 million years ago, and on the present day!
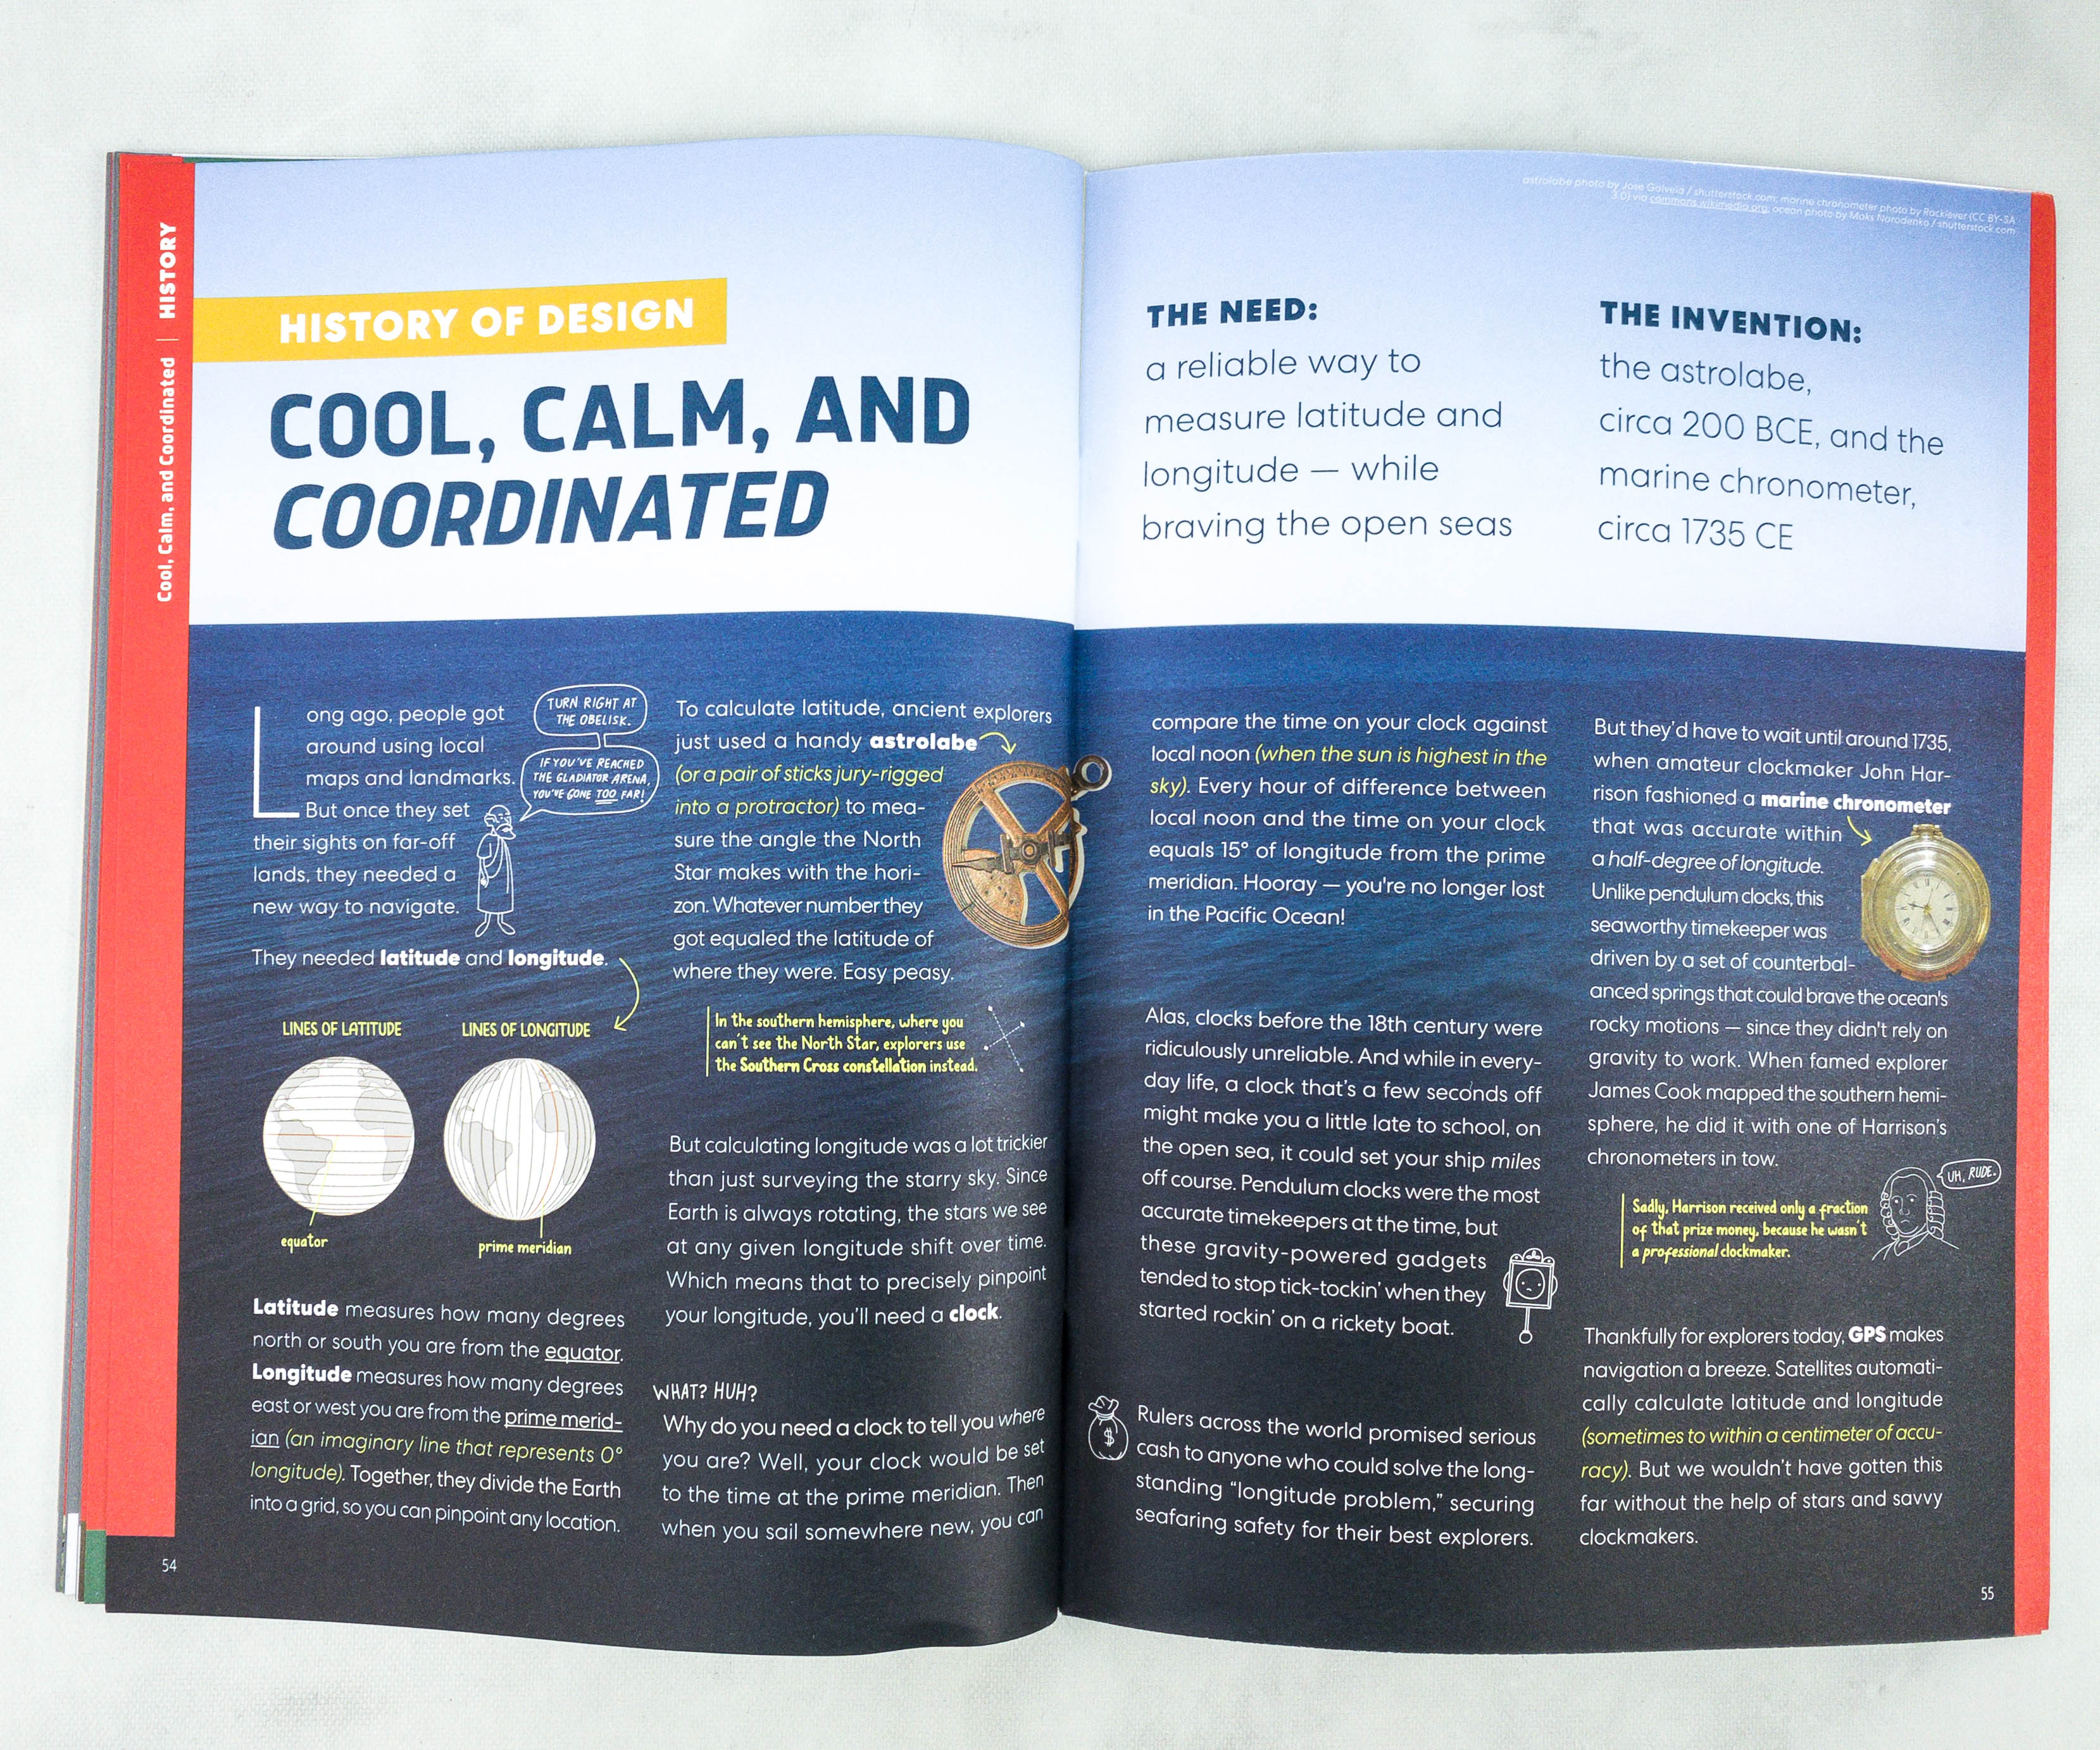
As always, the booklet provided the history behind the design. Here’s two full pages about discovery navigation!
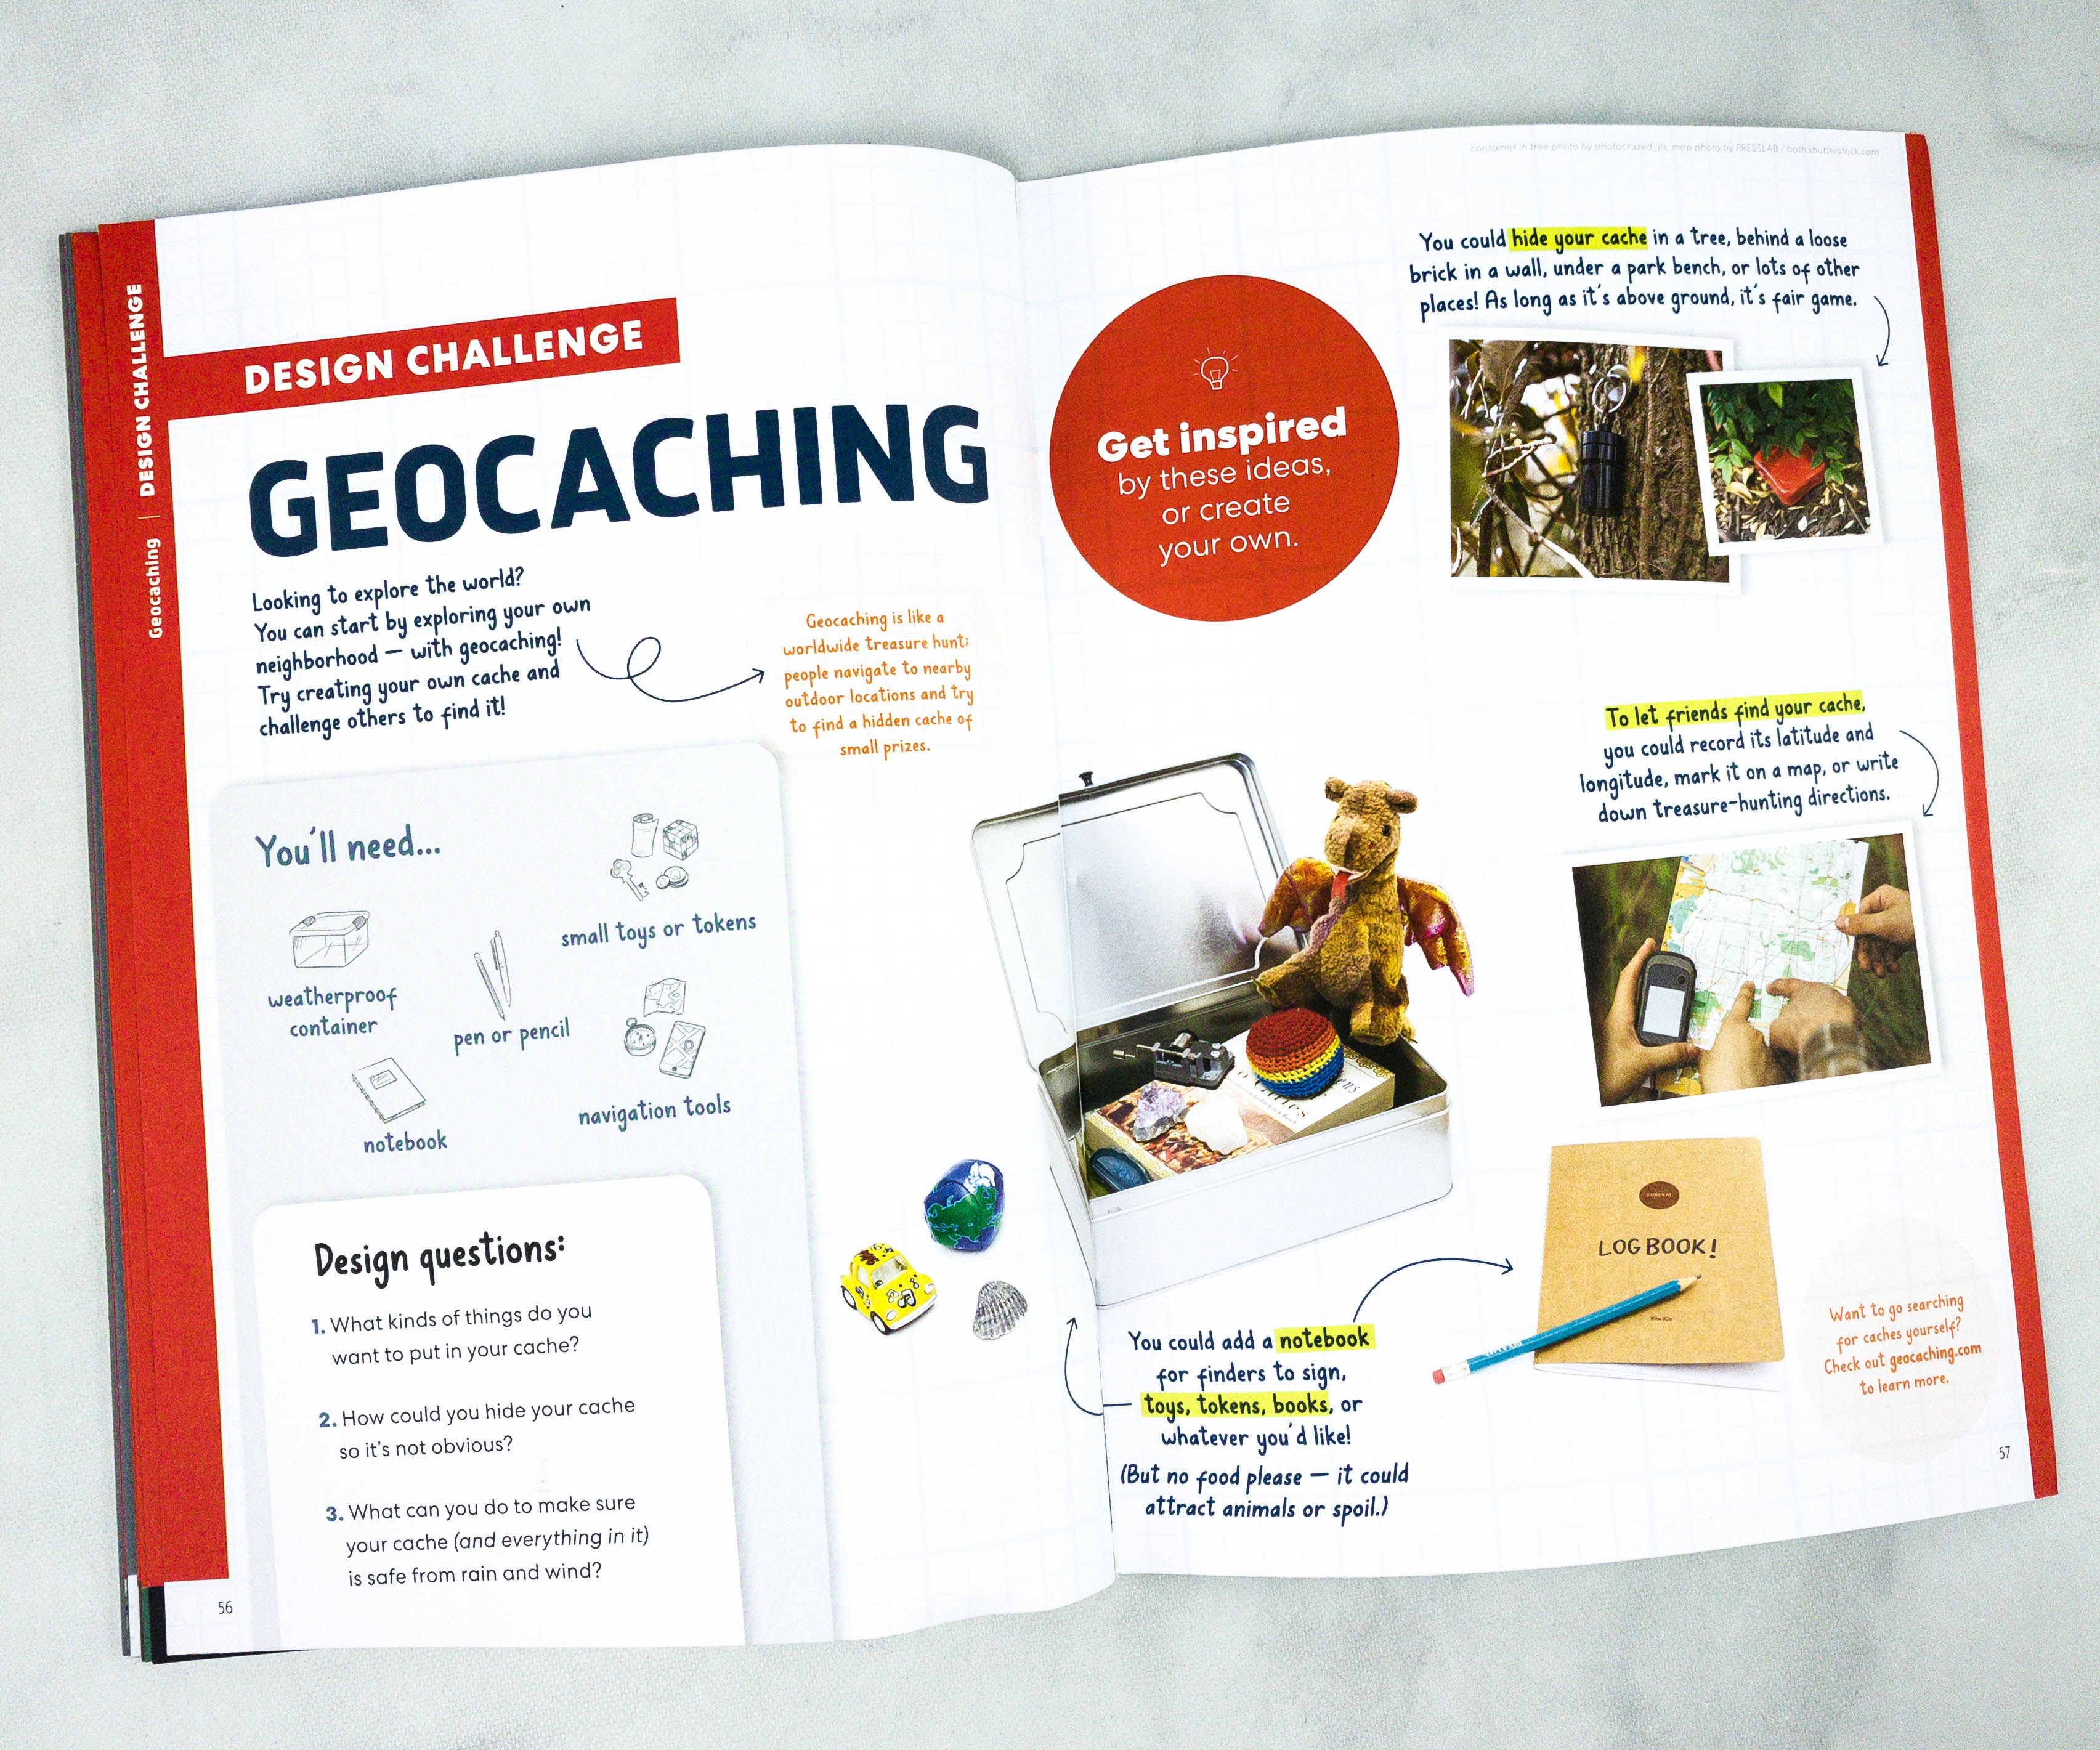
For the design challenge, they encourage us to work on Geocaching. It’s like a treasure hunting activity that involves navigating nearby outdoor locations and looking for a hidden cache of small prizes!
Once again, we made sure that all the parts are screwed tight enough so they will function properly.
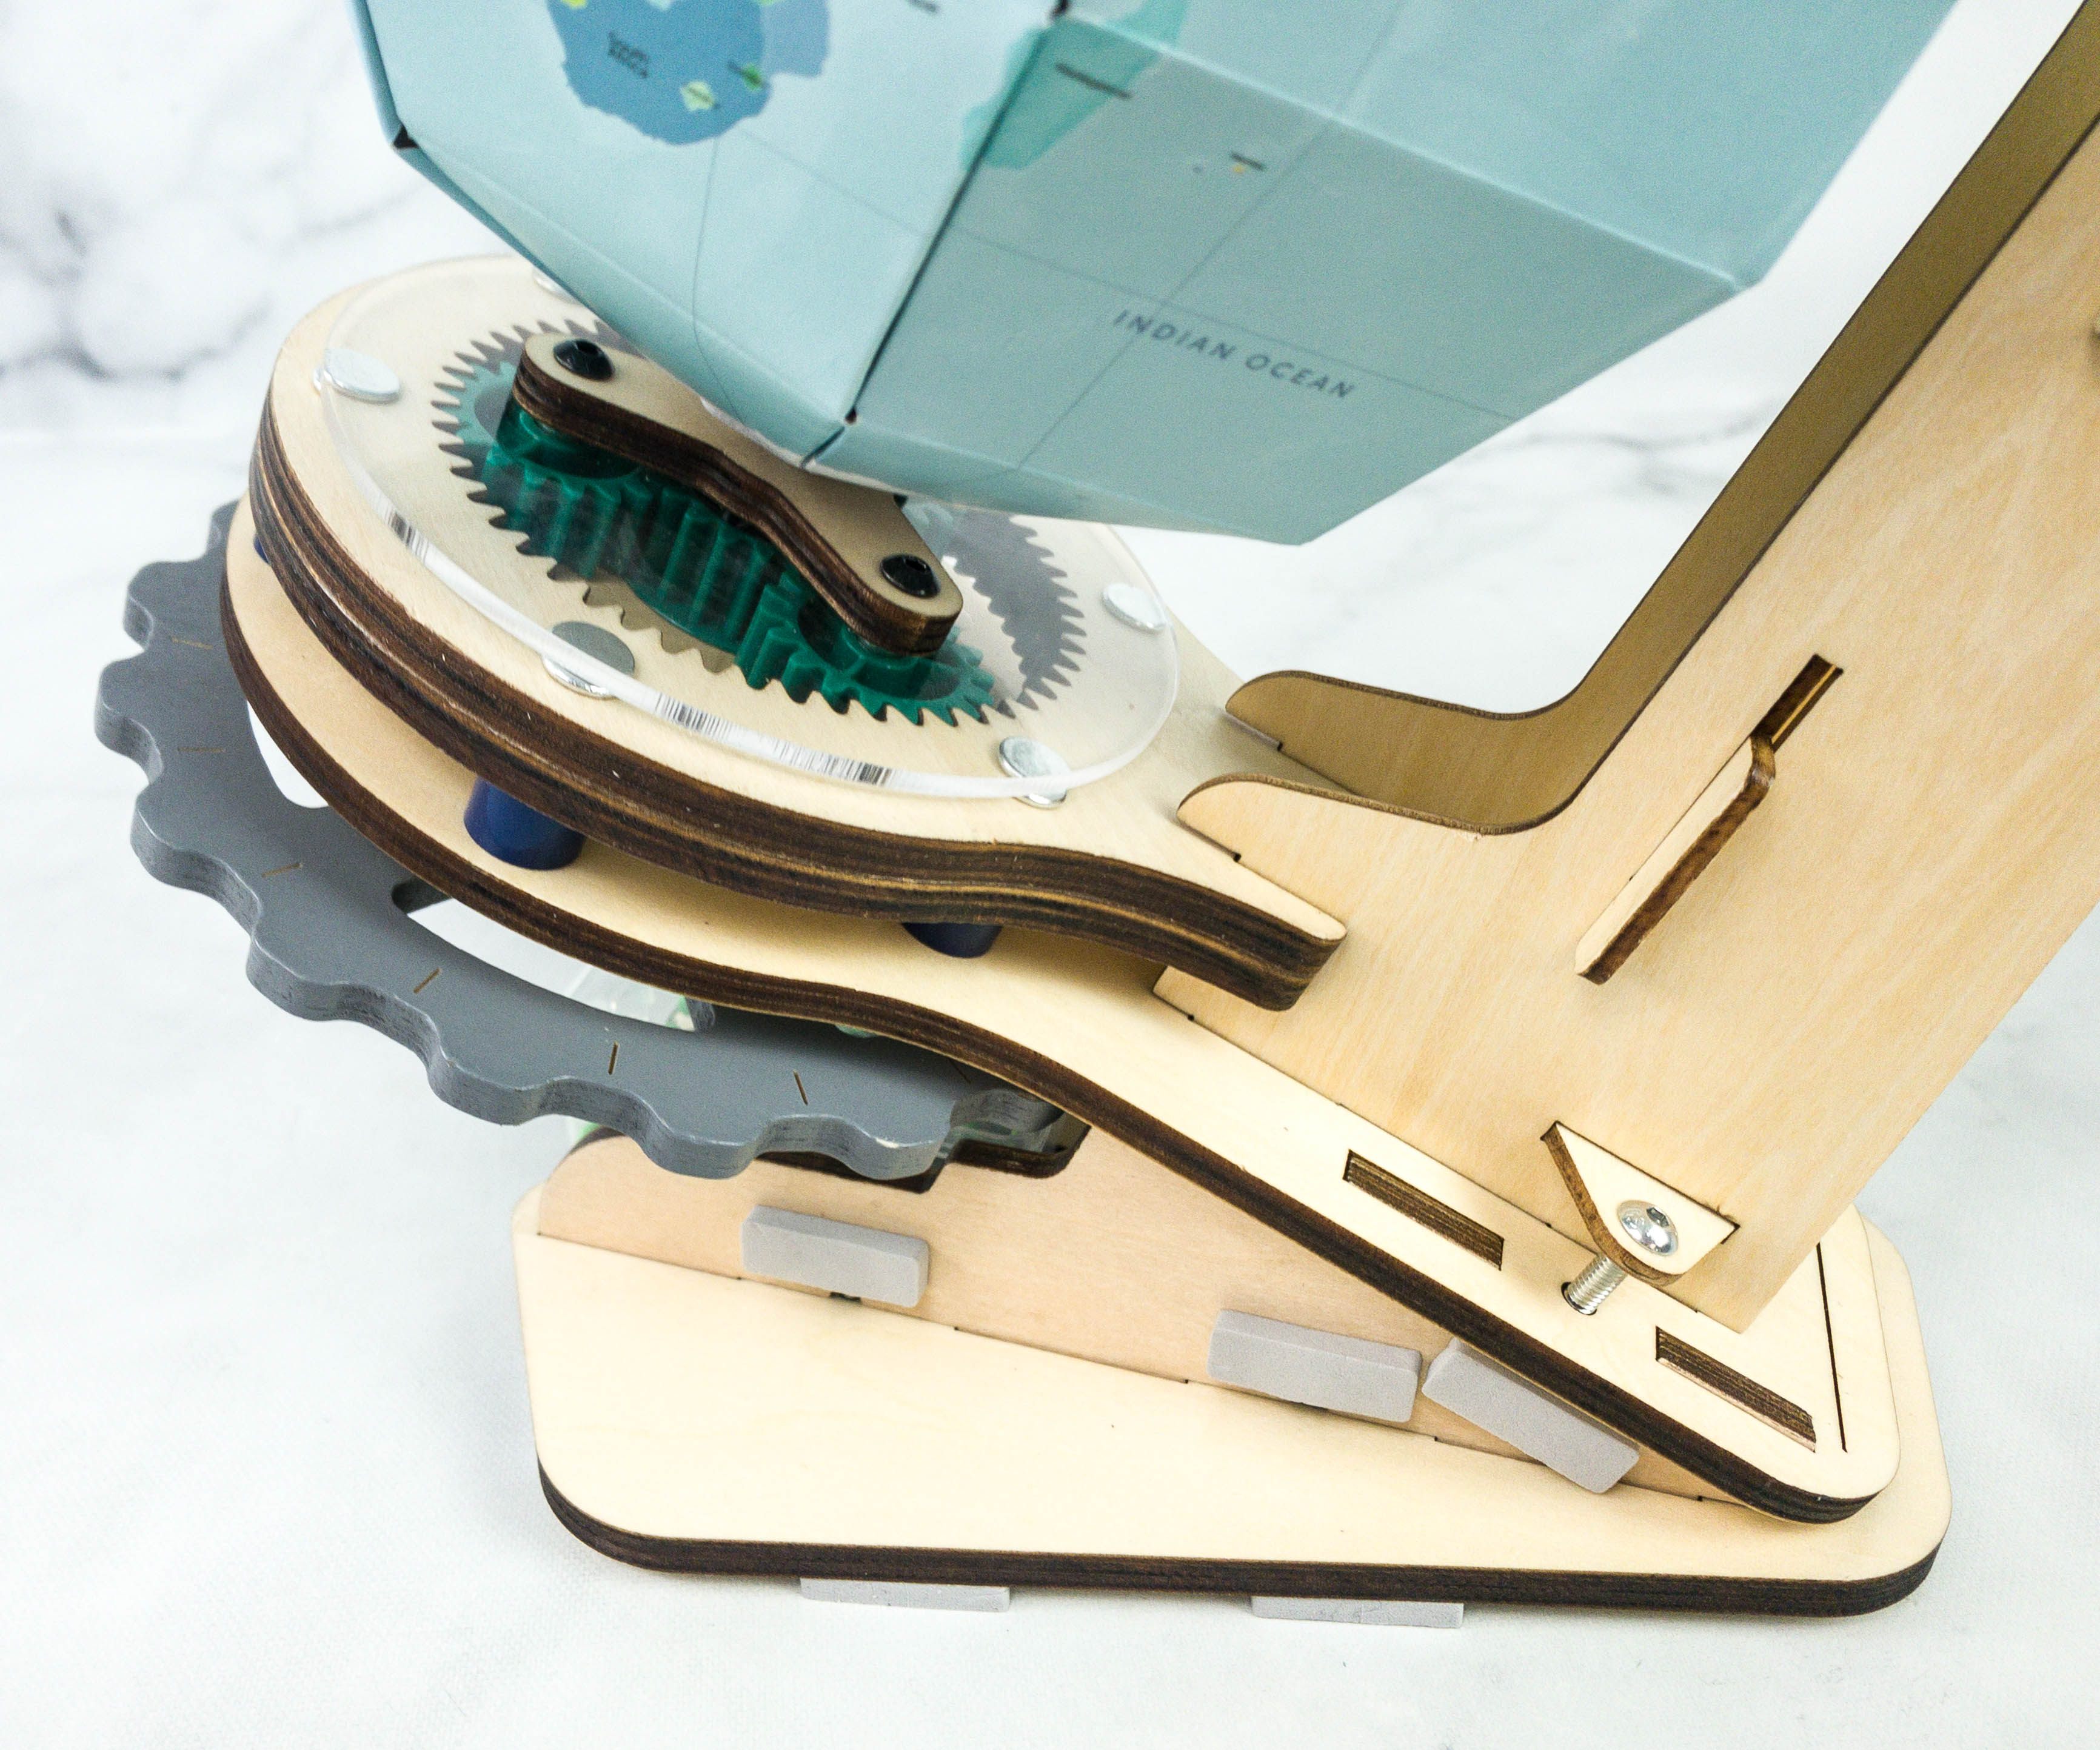
You can rotate it using the gray gear located at the bottom part of the globe.
With this, you can now explore any part of the world at your fingertips!
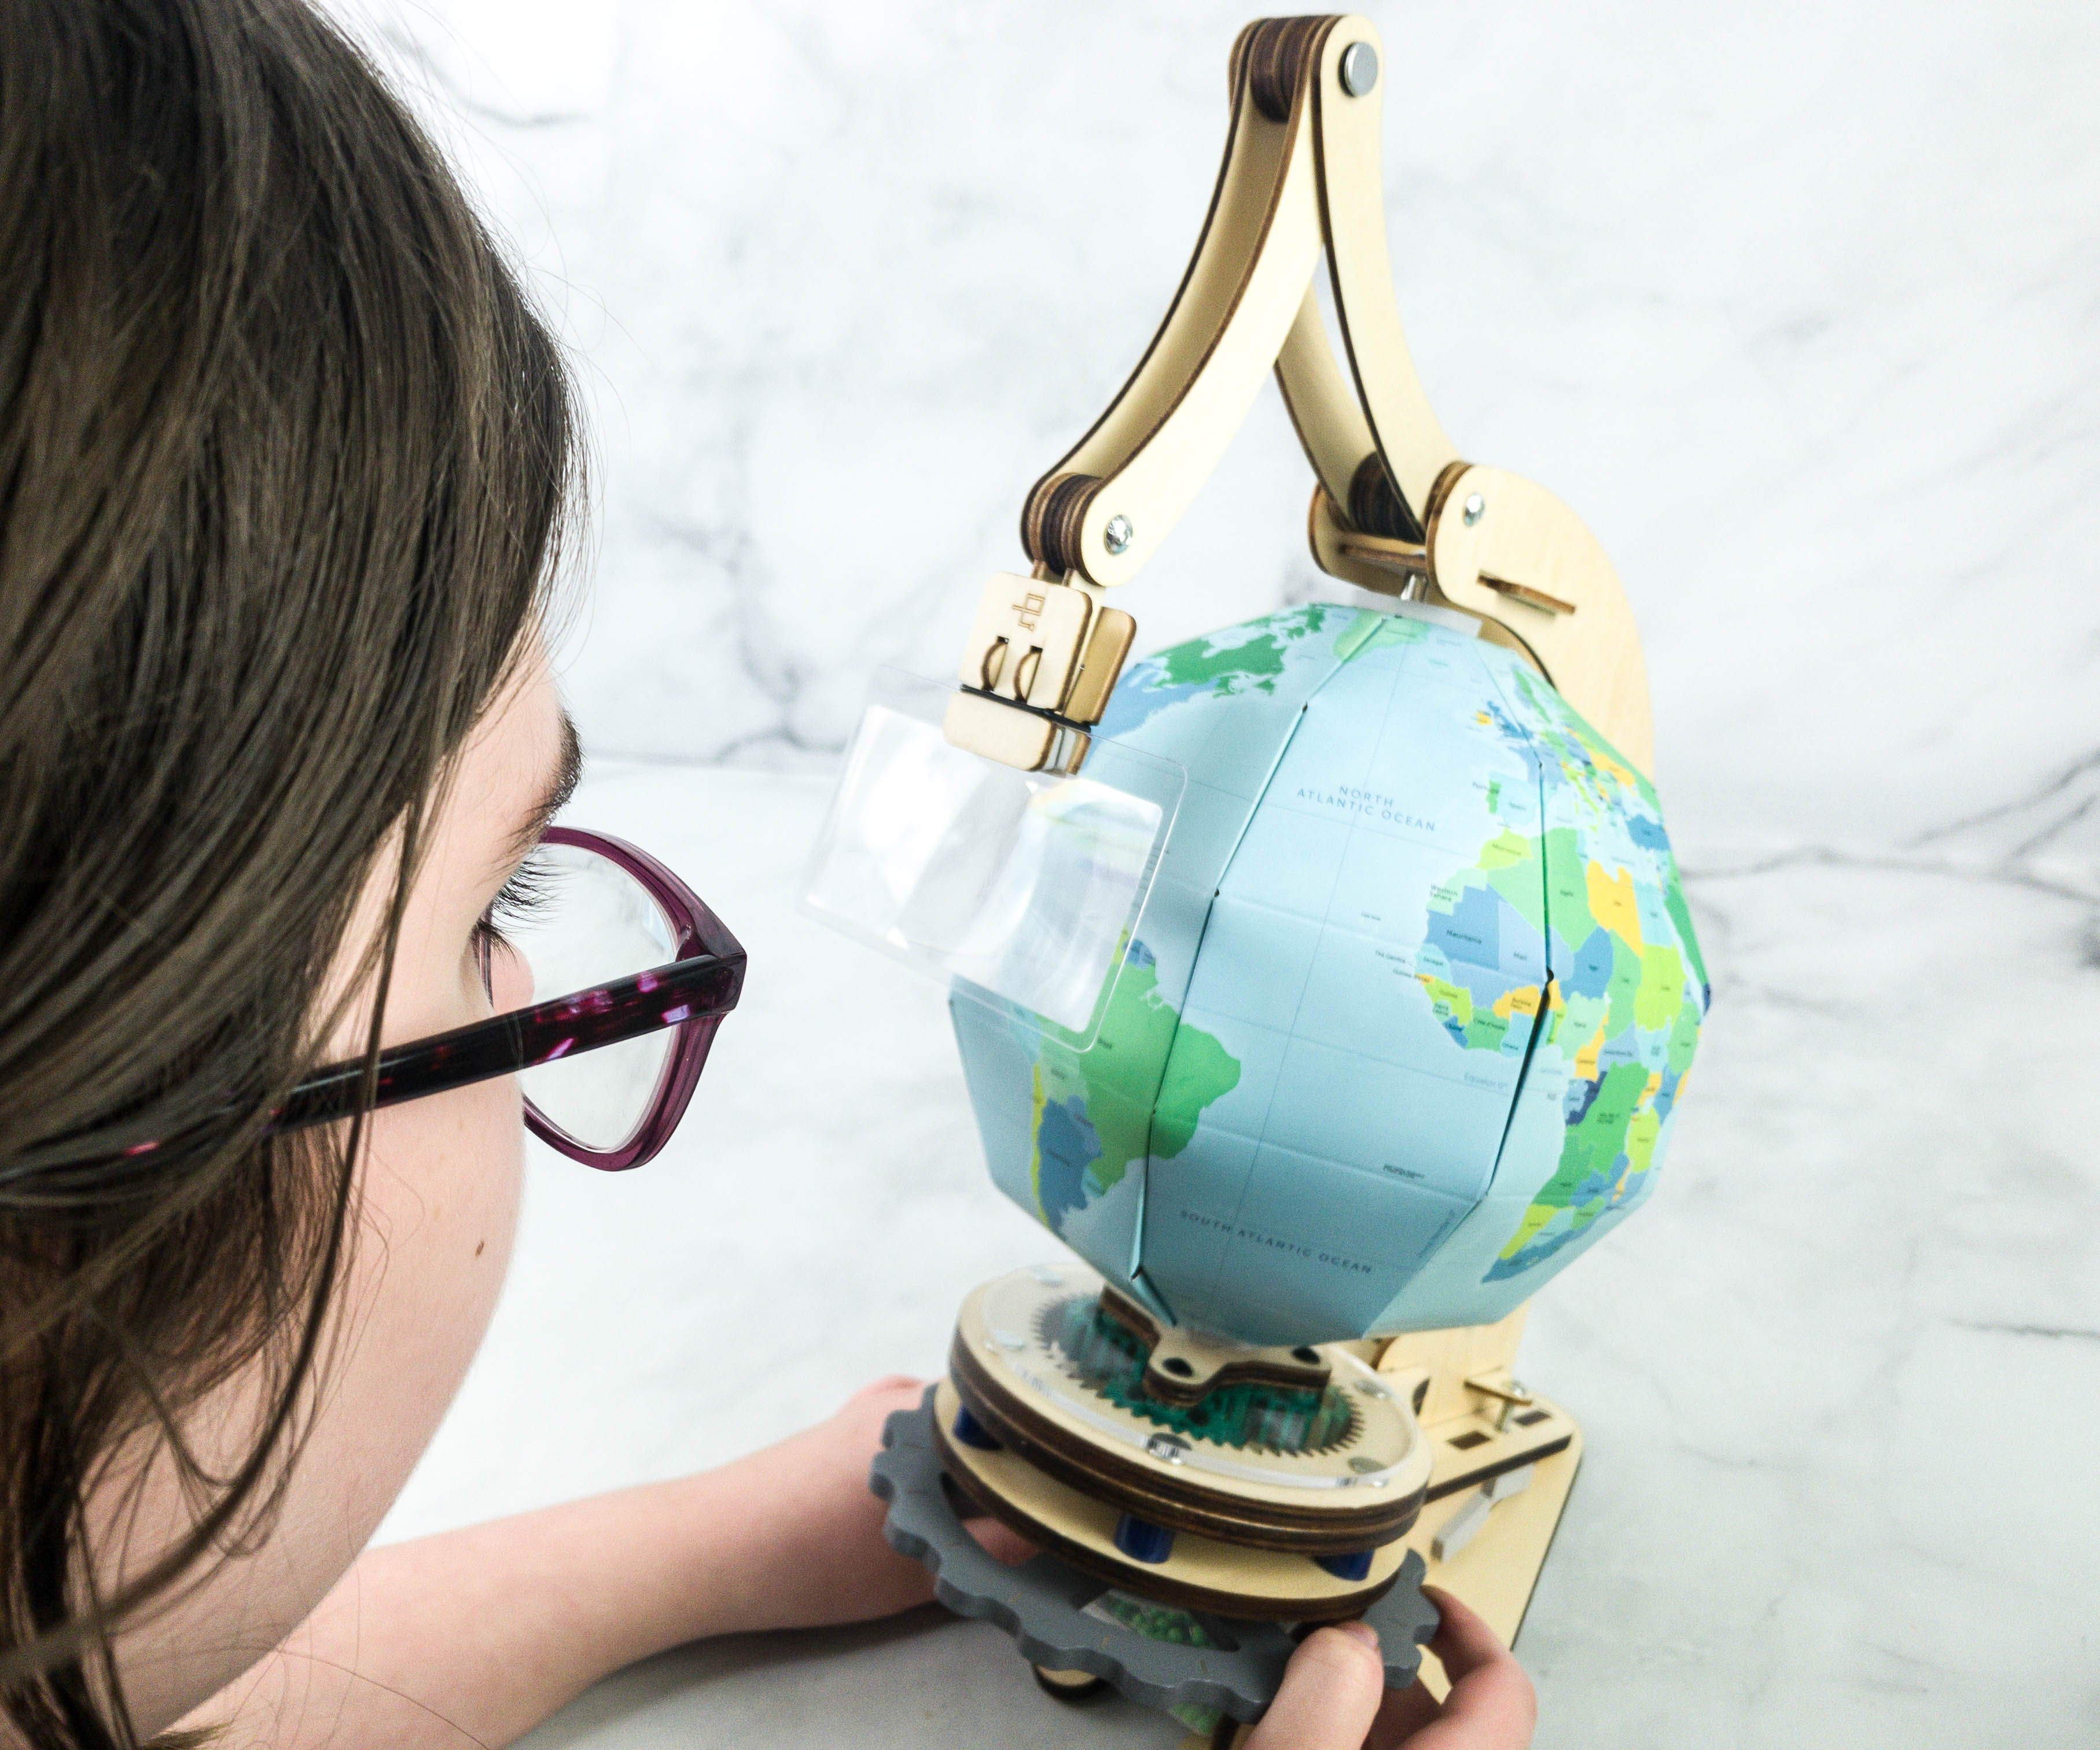
My daughter is currently looking at South America.

Can you guess what countries are in this part of the globe?
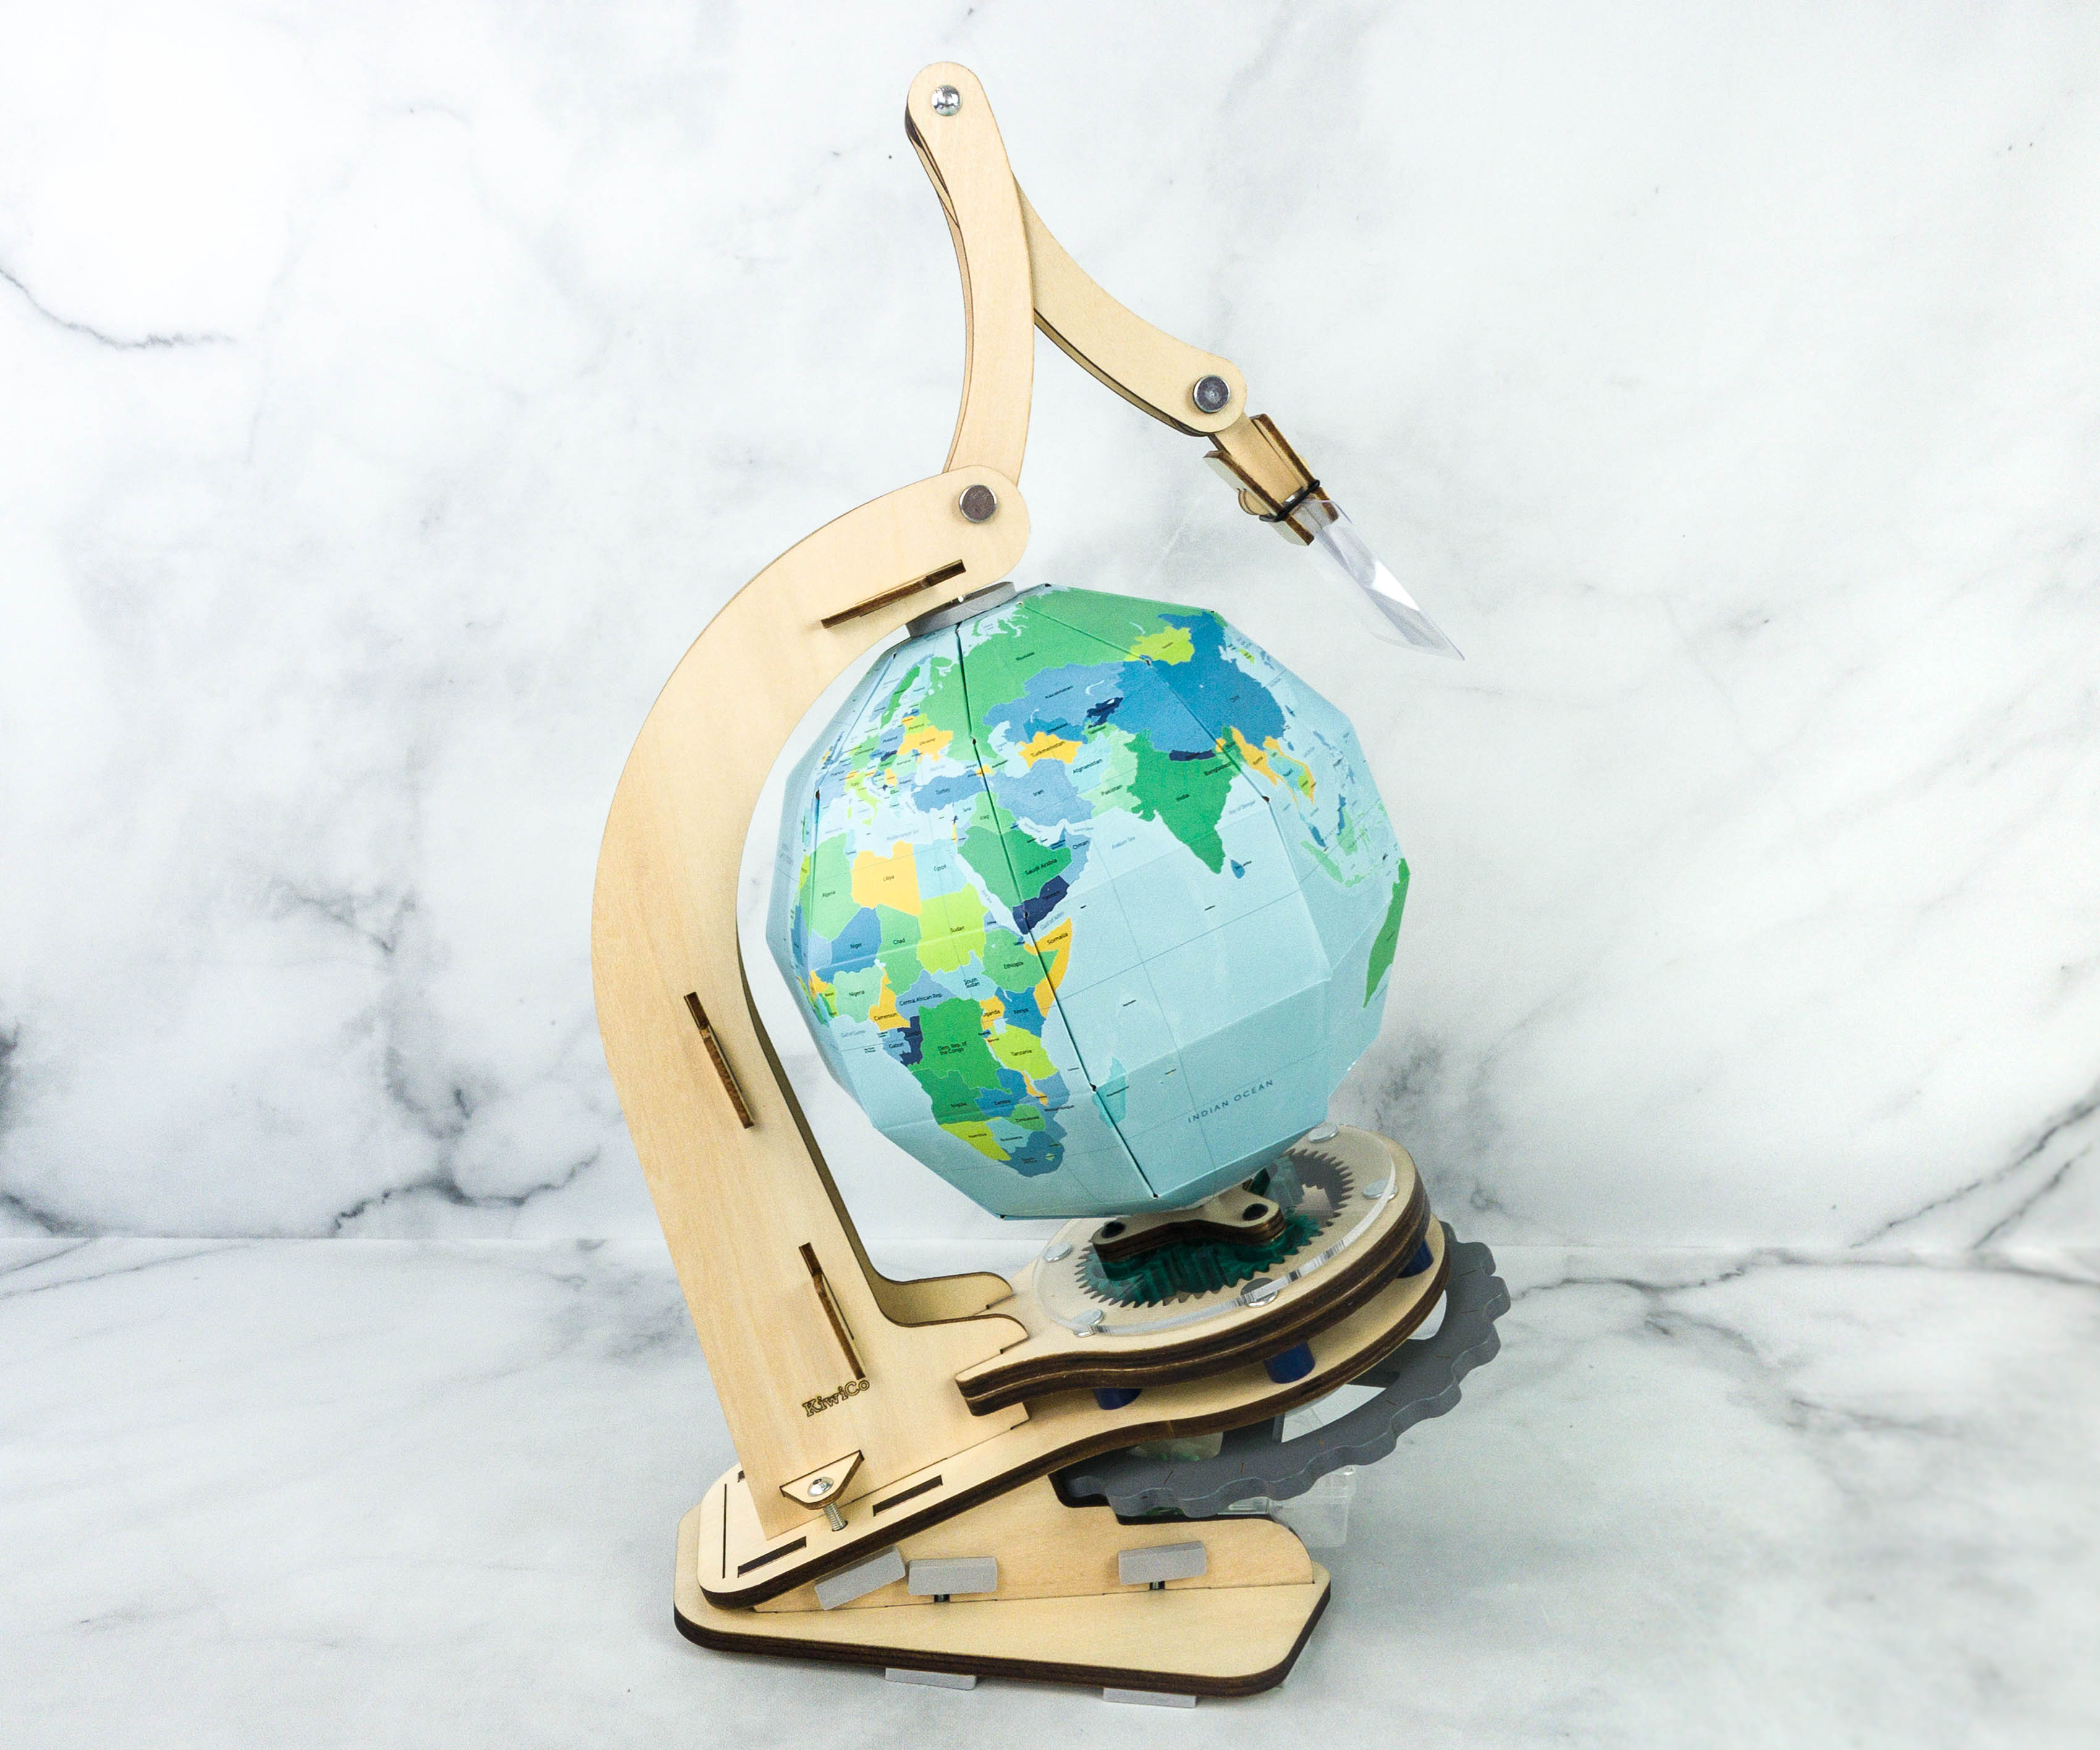
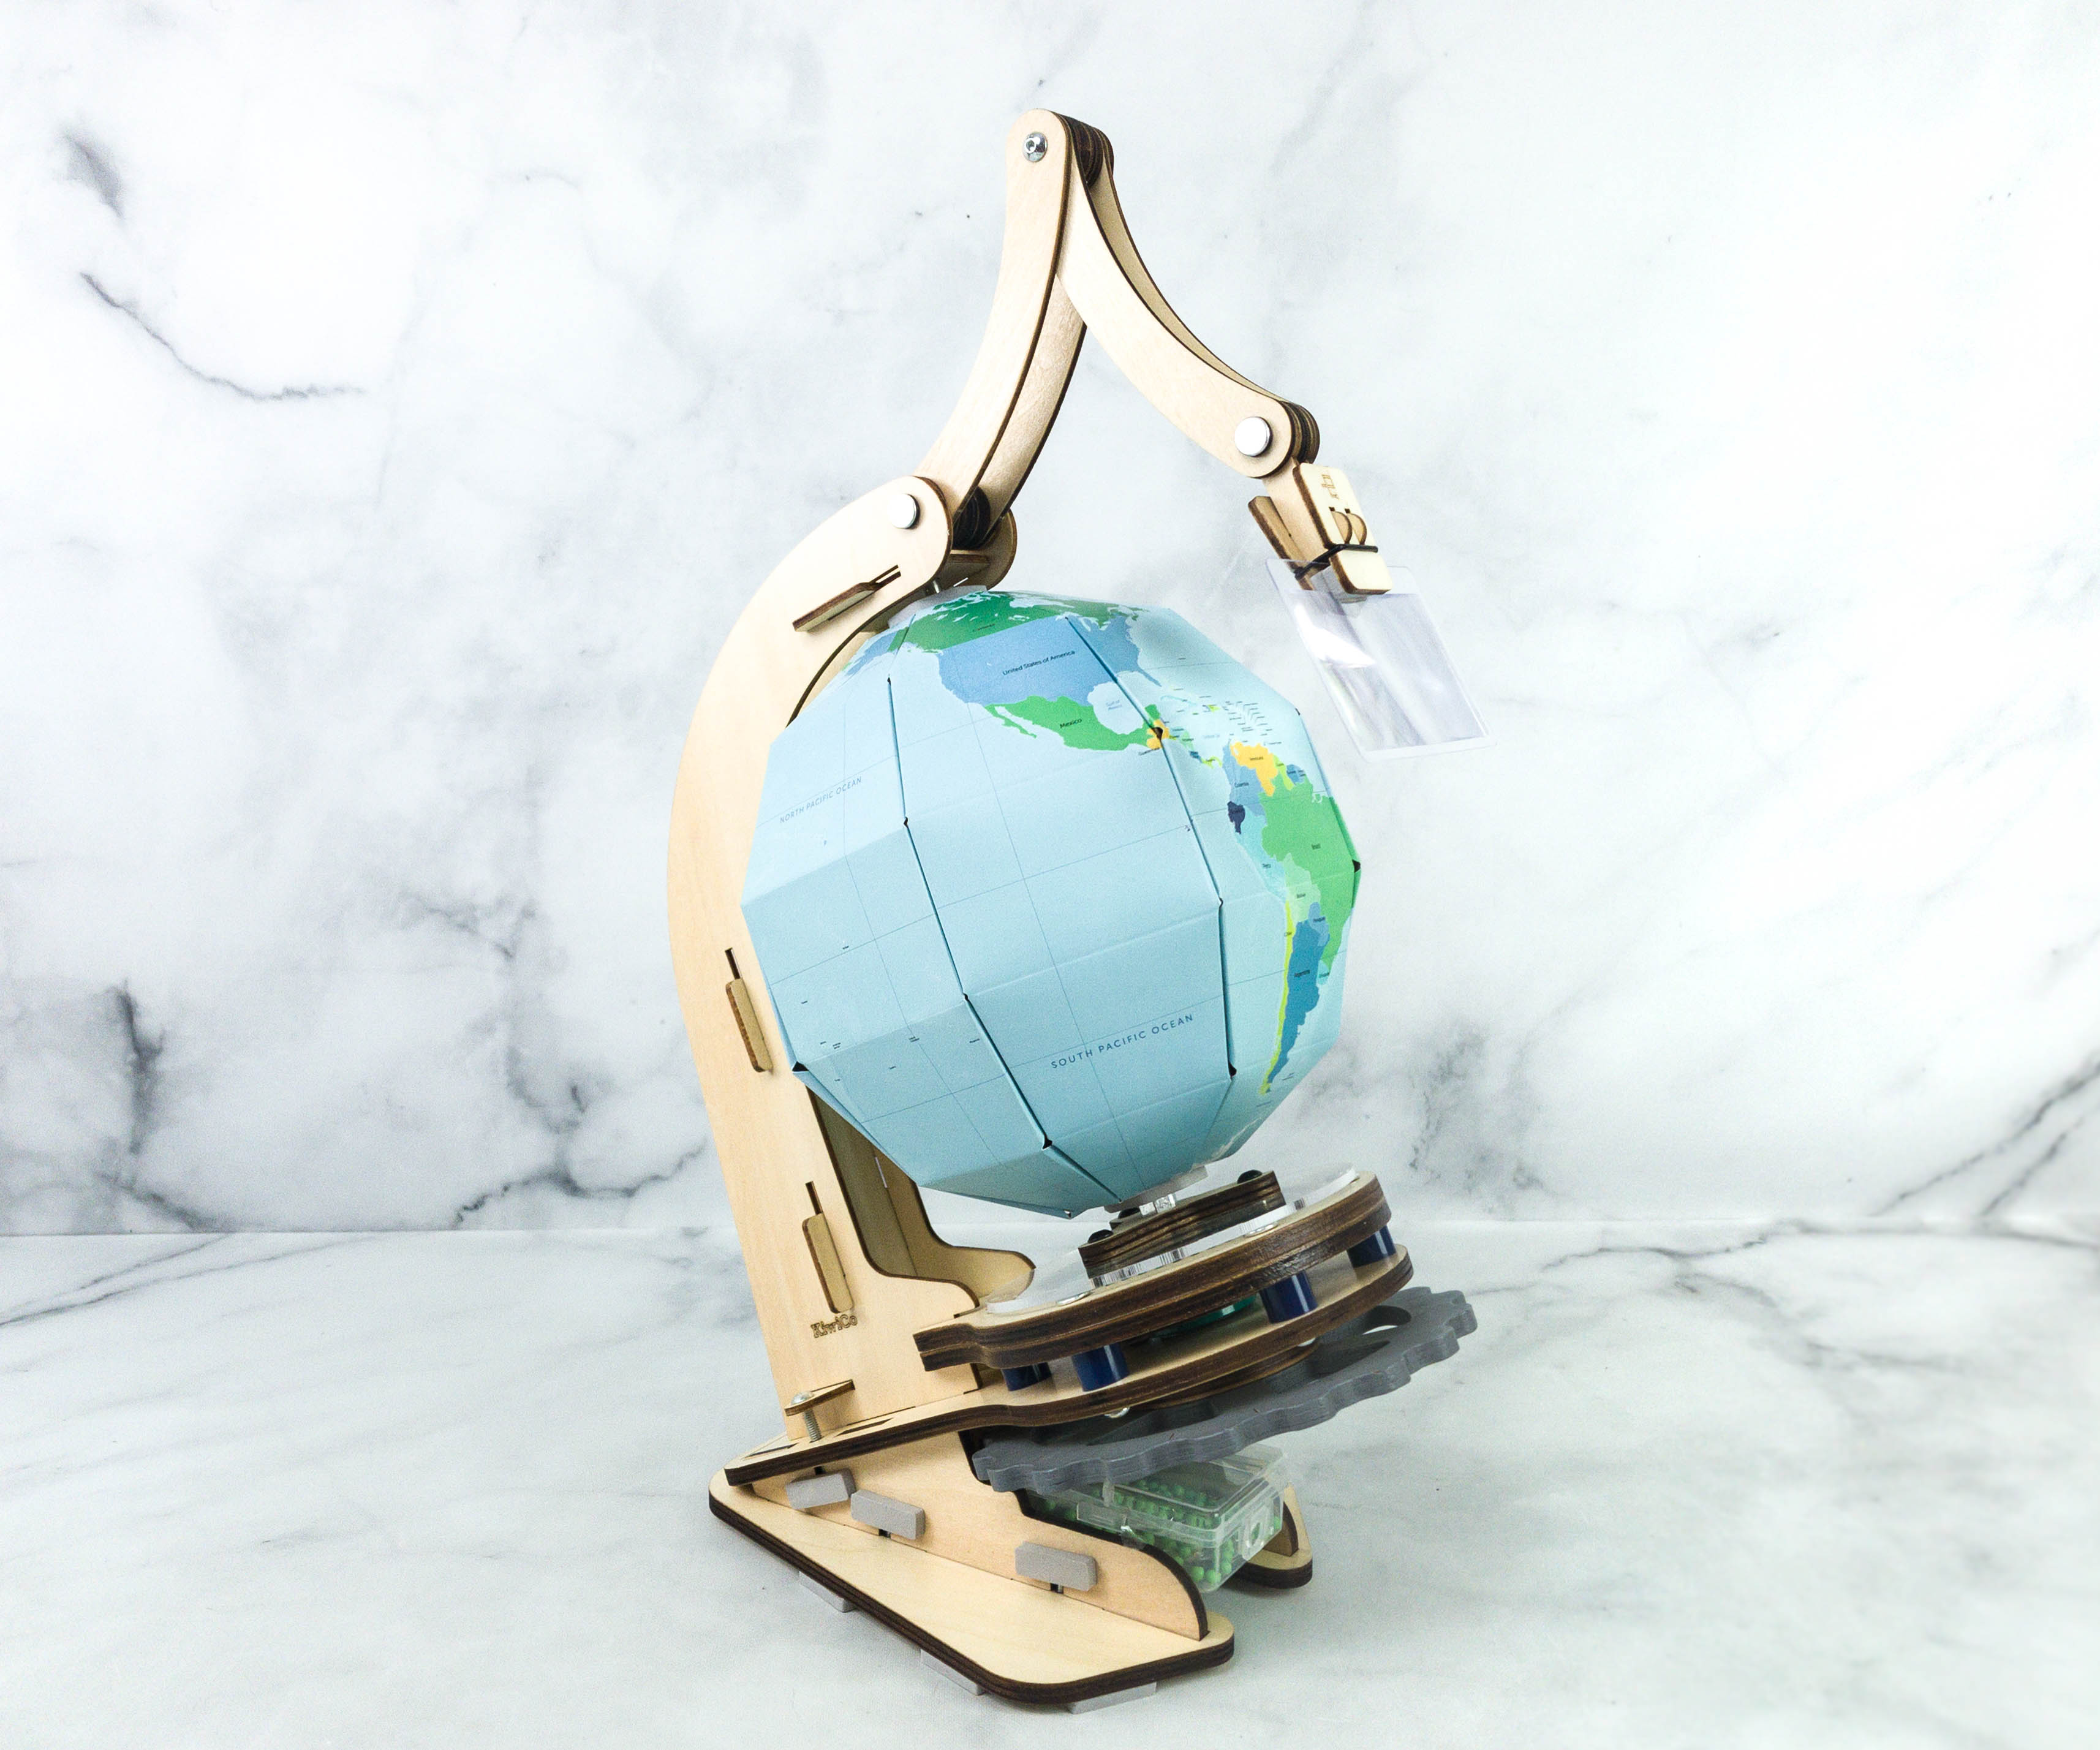
Here’s another look at the finished Mechanical Globe!
Eureka Crate always comes up with engaging and exciting projects that are ideal for teens and adults. Each box contains everything you’ll need to build the project plus a booklet filled with information, facts, and a detailed step-by-step procedure. My daughter really had a great time working on the mechanical globe this month. It was challenging and time-consuming but the result is totally worth it! So far, we’ve had a lot of fun bonding over the projects from the crate, and this one is not an exception! We love Eureka Crate and we highly recommend this box, especially if you’re looking for awesome science and math-related projects to work on at home!
What do you think of this month’s Eureka Crate?


Comments
Be very careful with Kiwico. If you create a subscription, they will take the next charge with no warning and no confirmation. The only way that I noticed it was by looking at my credit card statement. When I contacted them to complain and ask for a refund, a customer service rep named Diego was extremely rude and said “we’re unable to cancel a termed subscription mid-term”.
This company is unethical and borderline fraudulent. Do not buy any of their subscription items unless you want to be dealing with a credit card dispute a few months later. I am deeply disappointed in the way that they have behaved and I will never use them again.