Annie’s Creative Girls Club sends craft activities for girls ages 7-12! Each package ships every 6 weeks or so, and it contains 2 project kits with easy-to-follow instructions and all the materials needed to get crafting with minimal adult supervision. Young girls will learn fun skills from this subscription, such as painting, beading, stitching, paper crafting, and more! The subscription costs $19.99 and shipping is $5.95 ($6.95 in Canada).
DEAL: Save0% off your first month! Just use this link to subscribe.
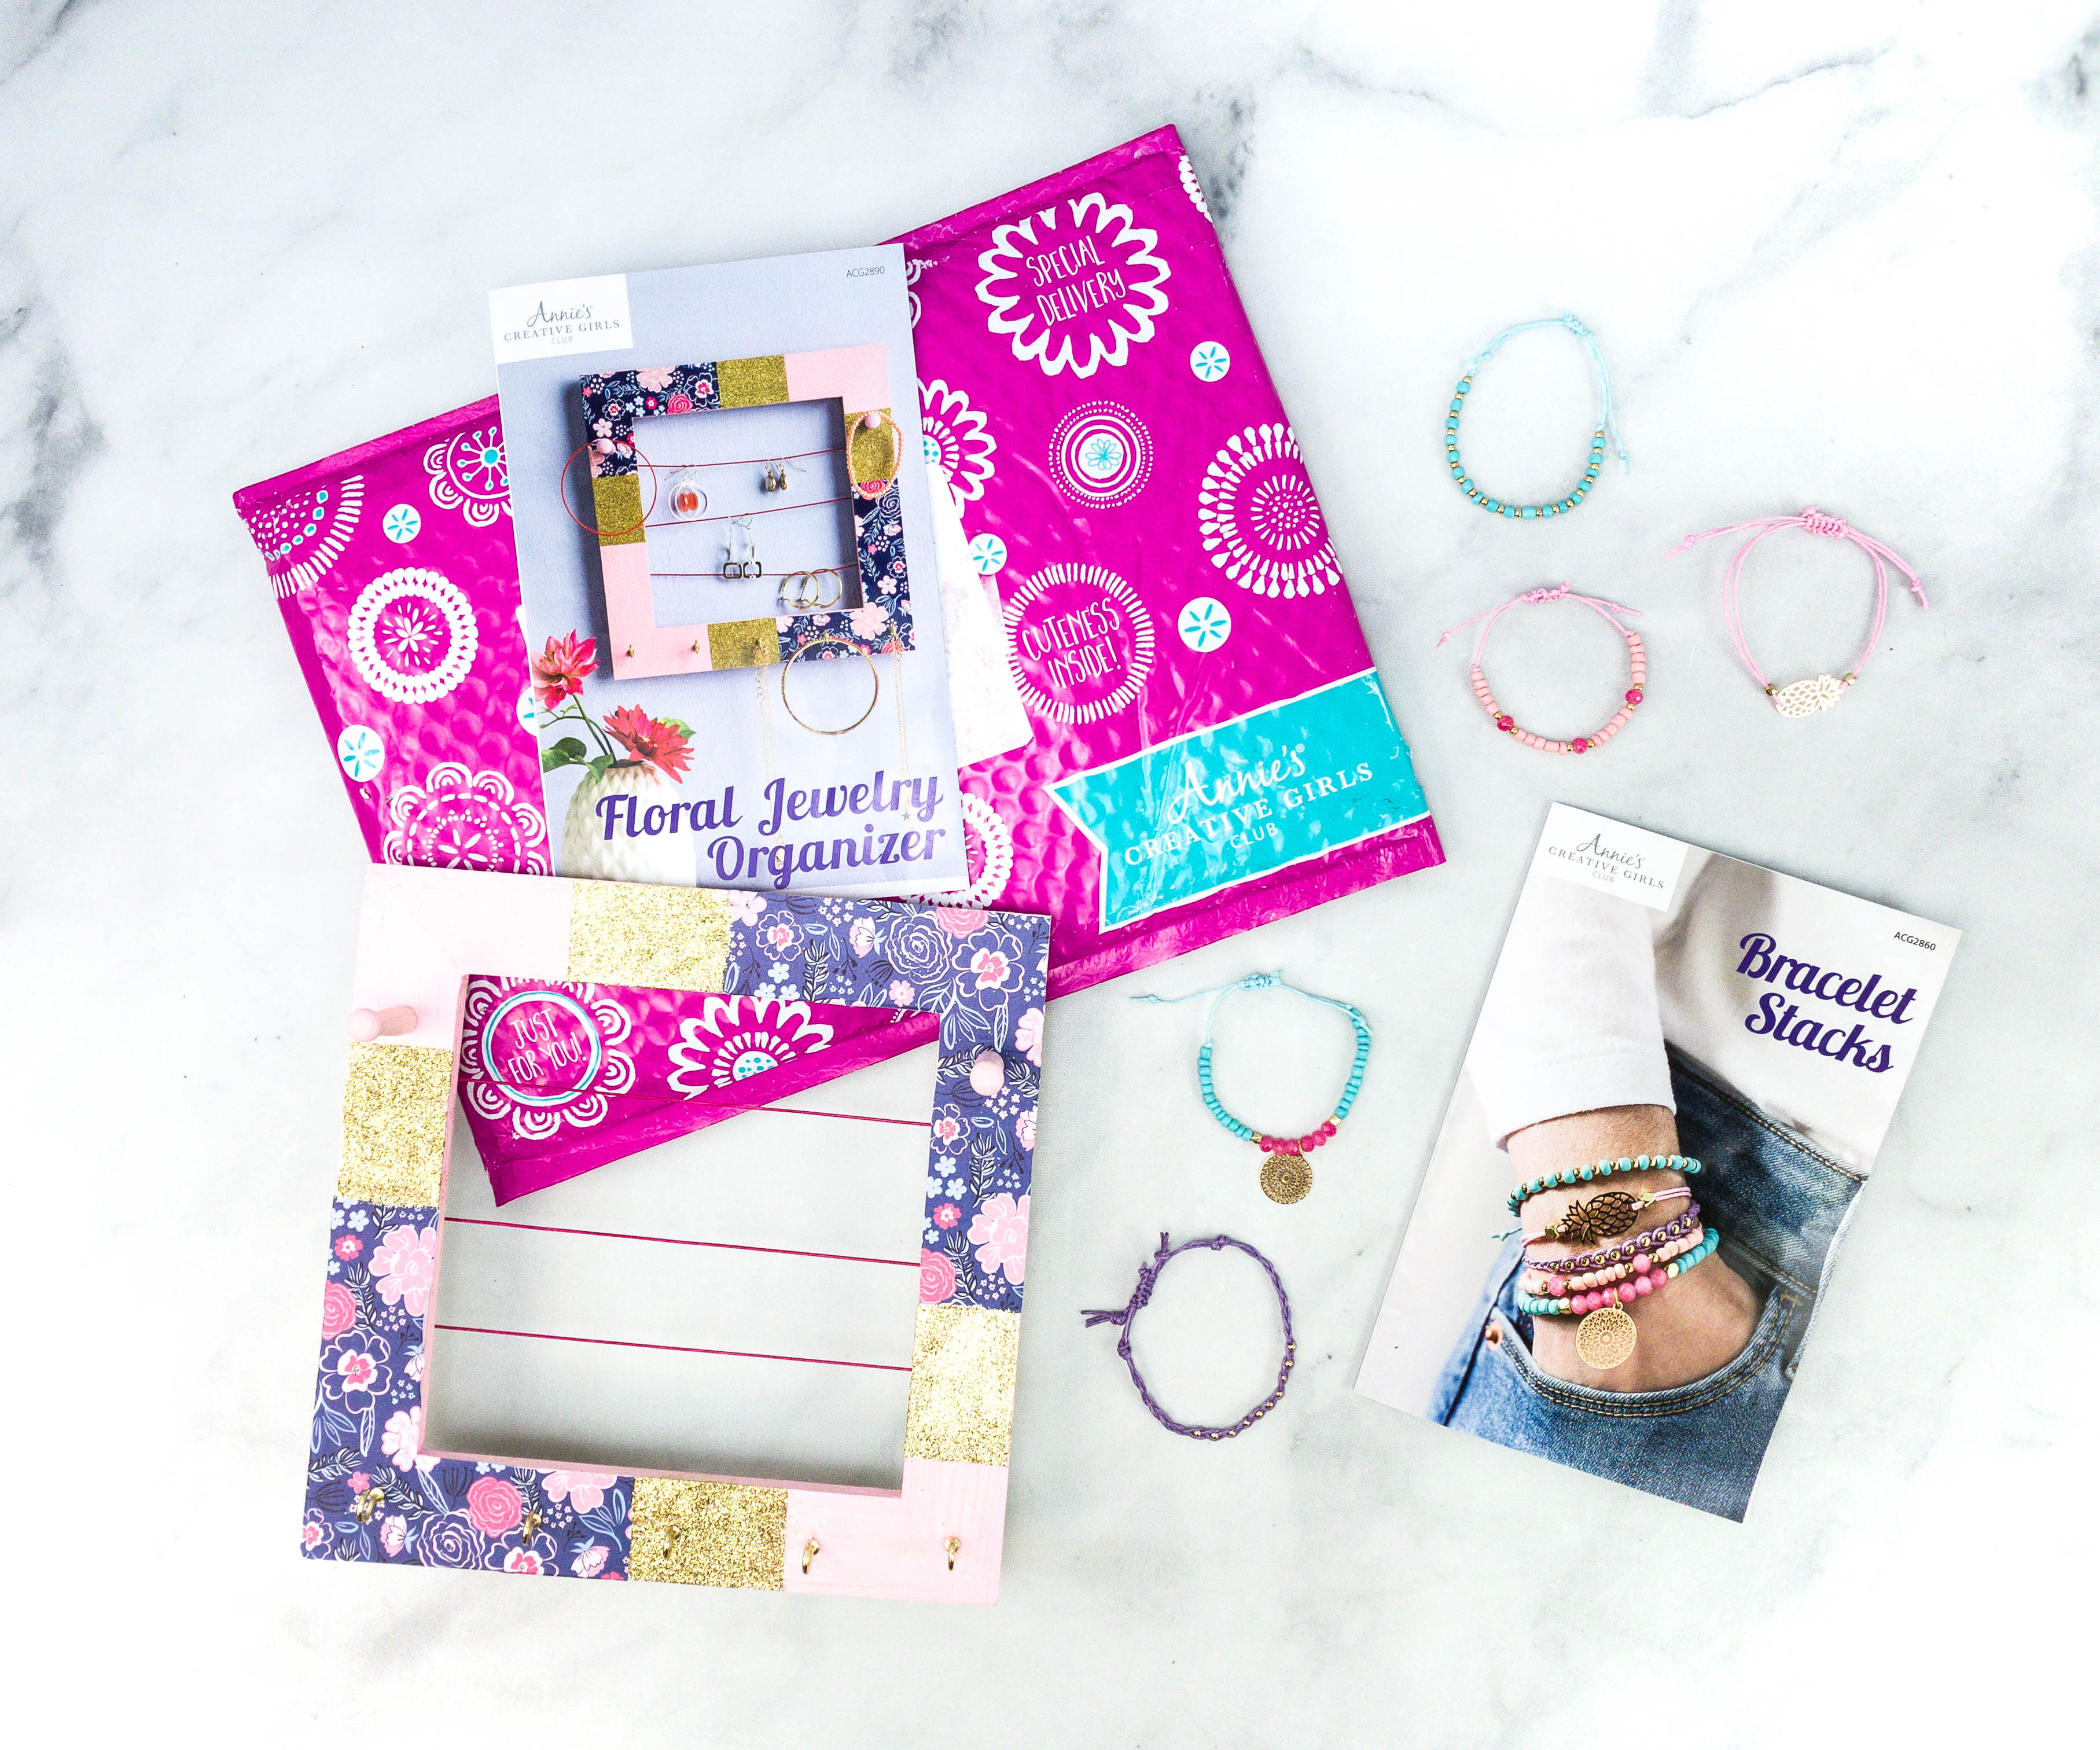
The items came in a pink padded mailer.
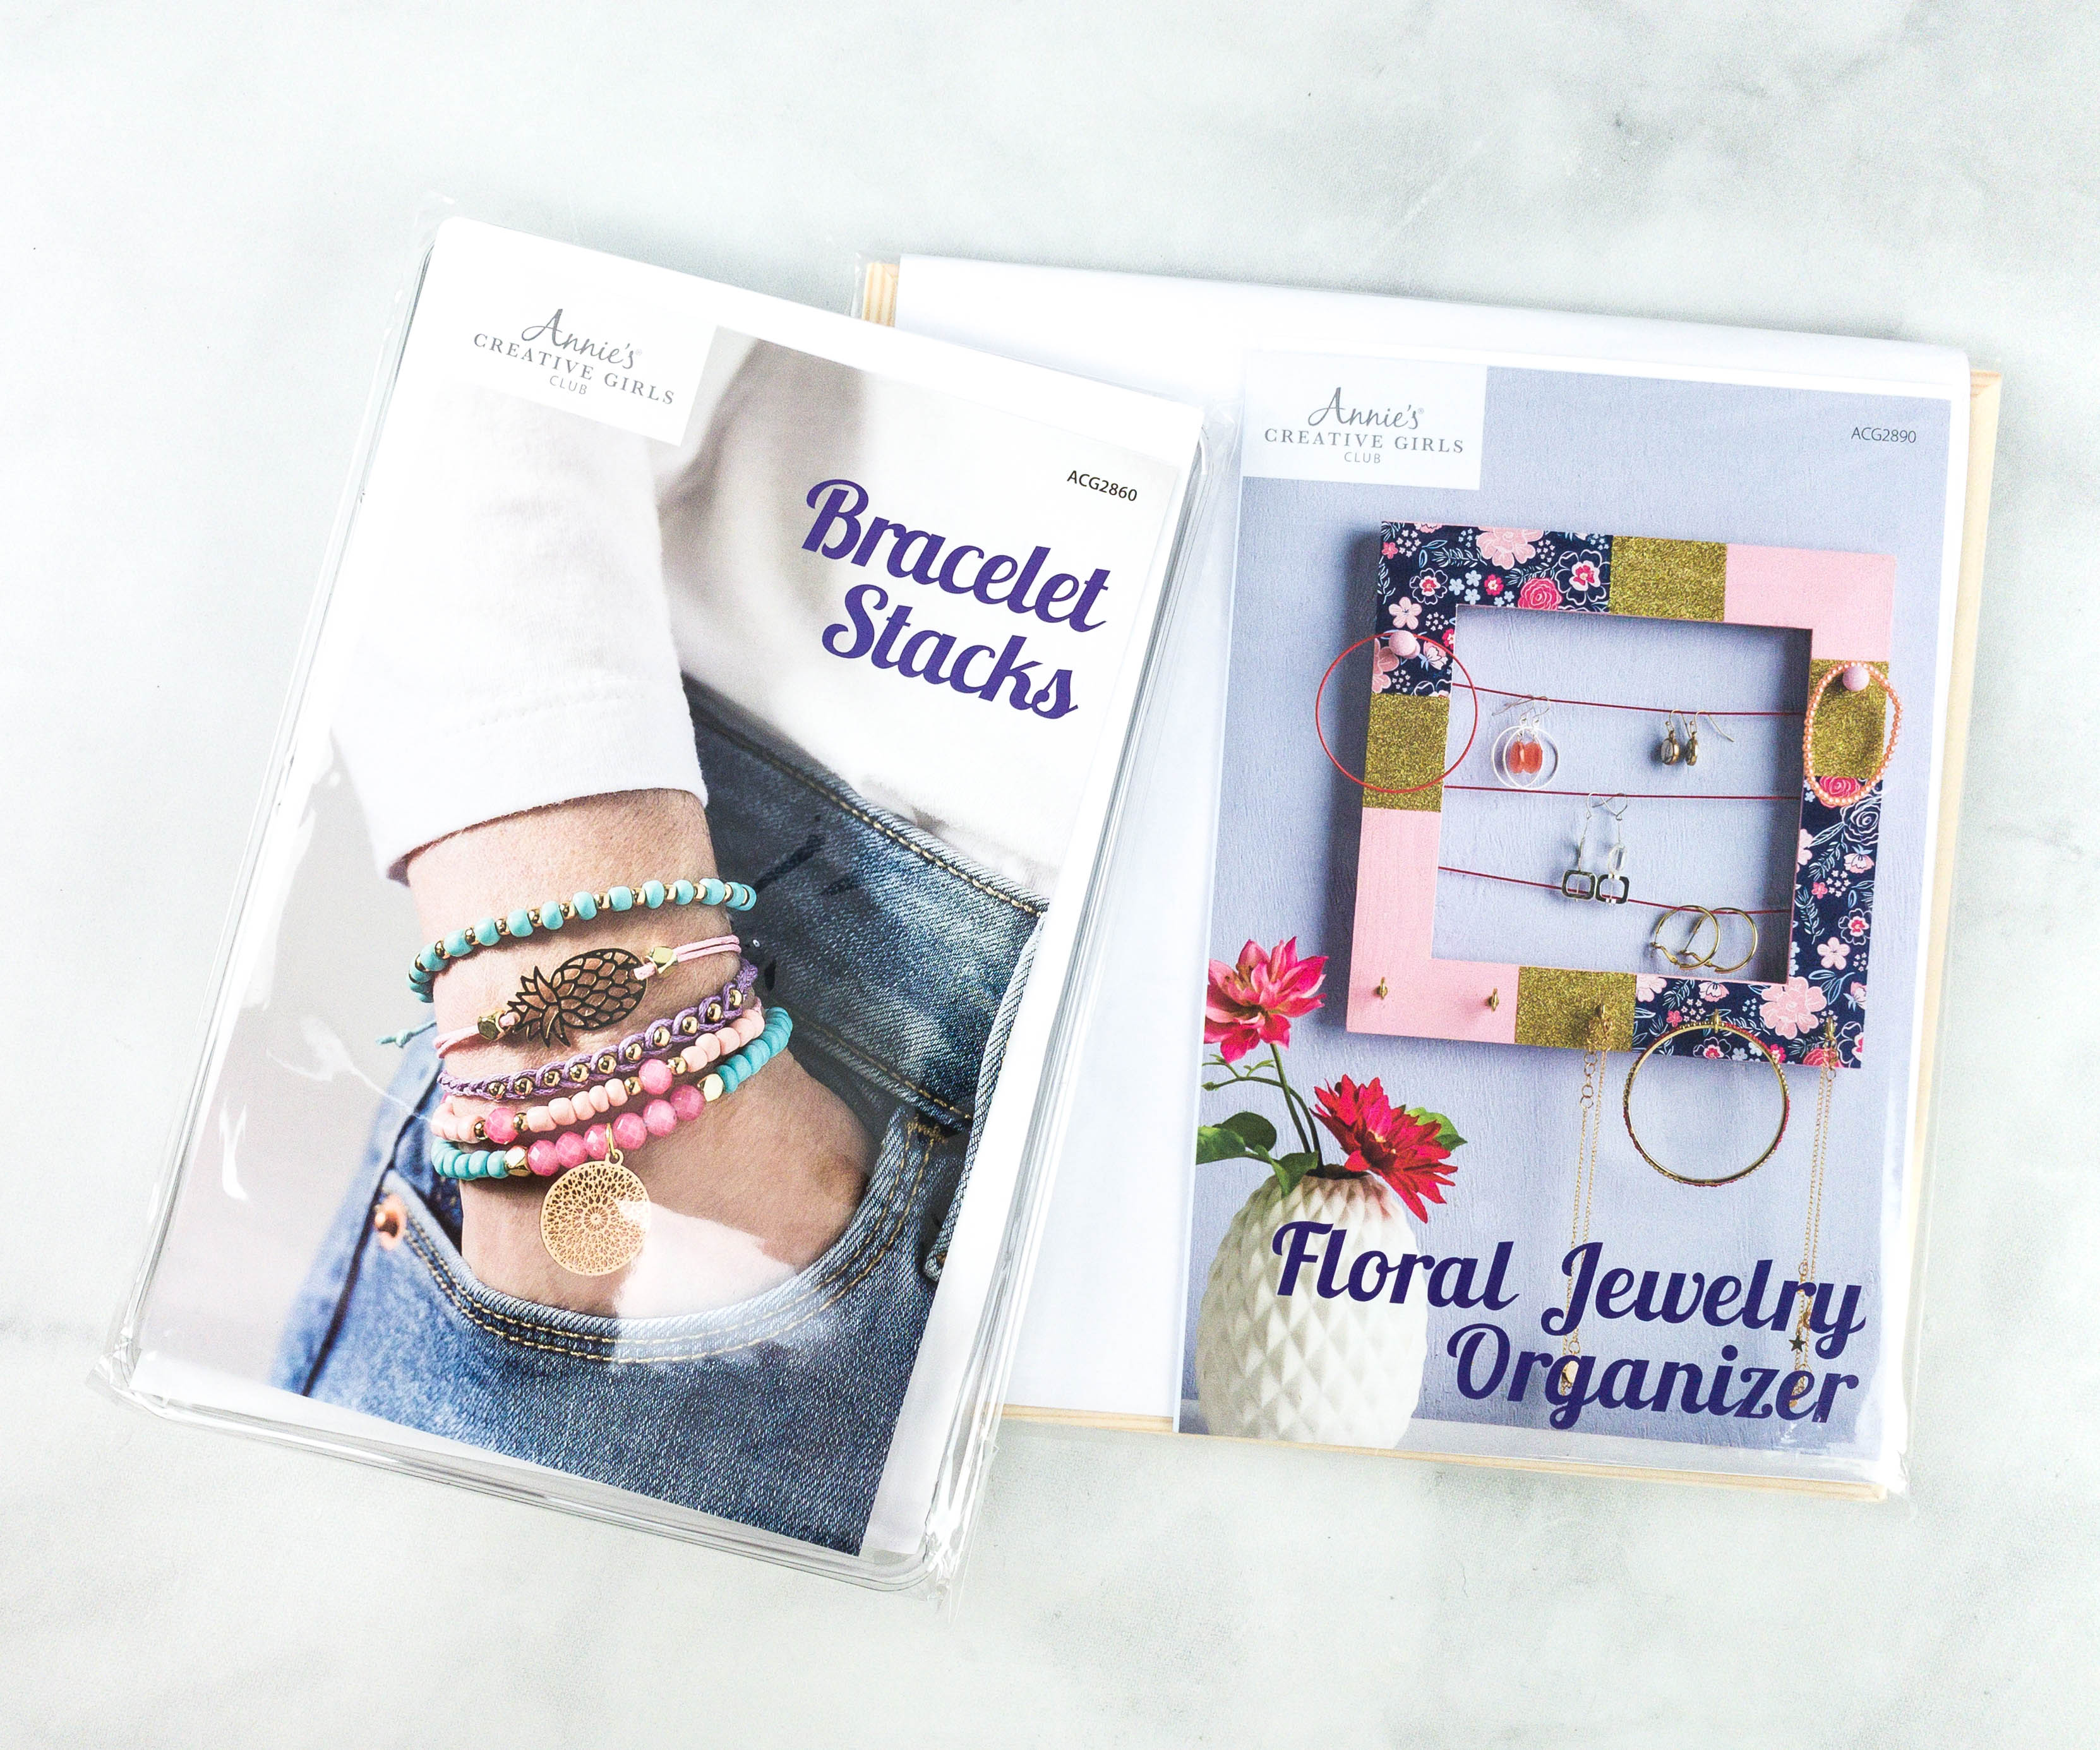
We received two projects in this box: Bracelets Stack and Floral Jewelry Organizer! I’m so excited to make them with my daughter!

Everything in the package!
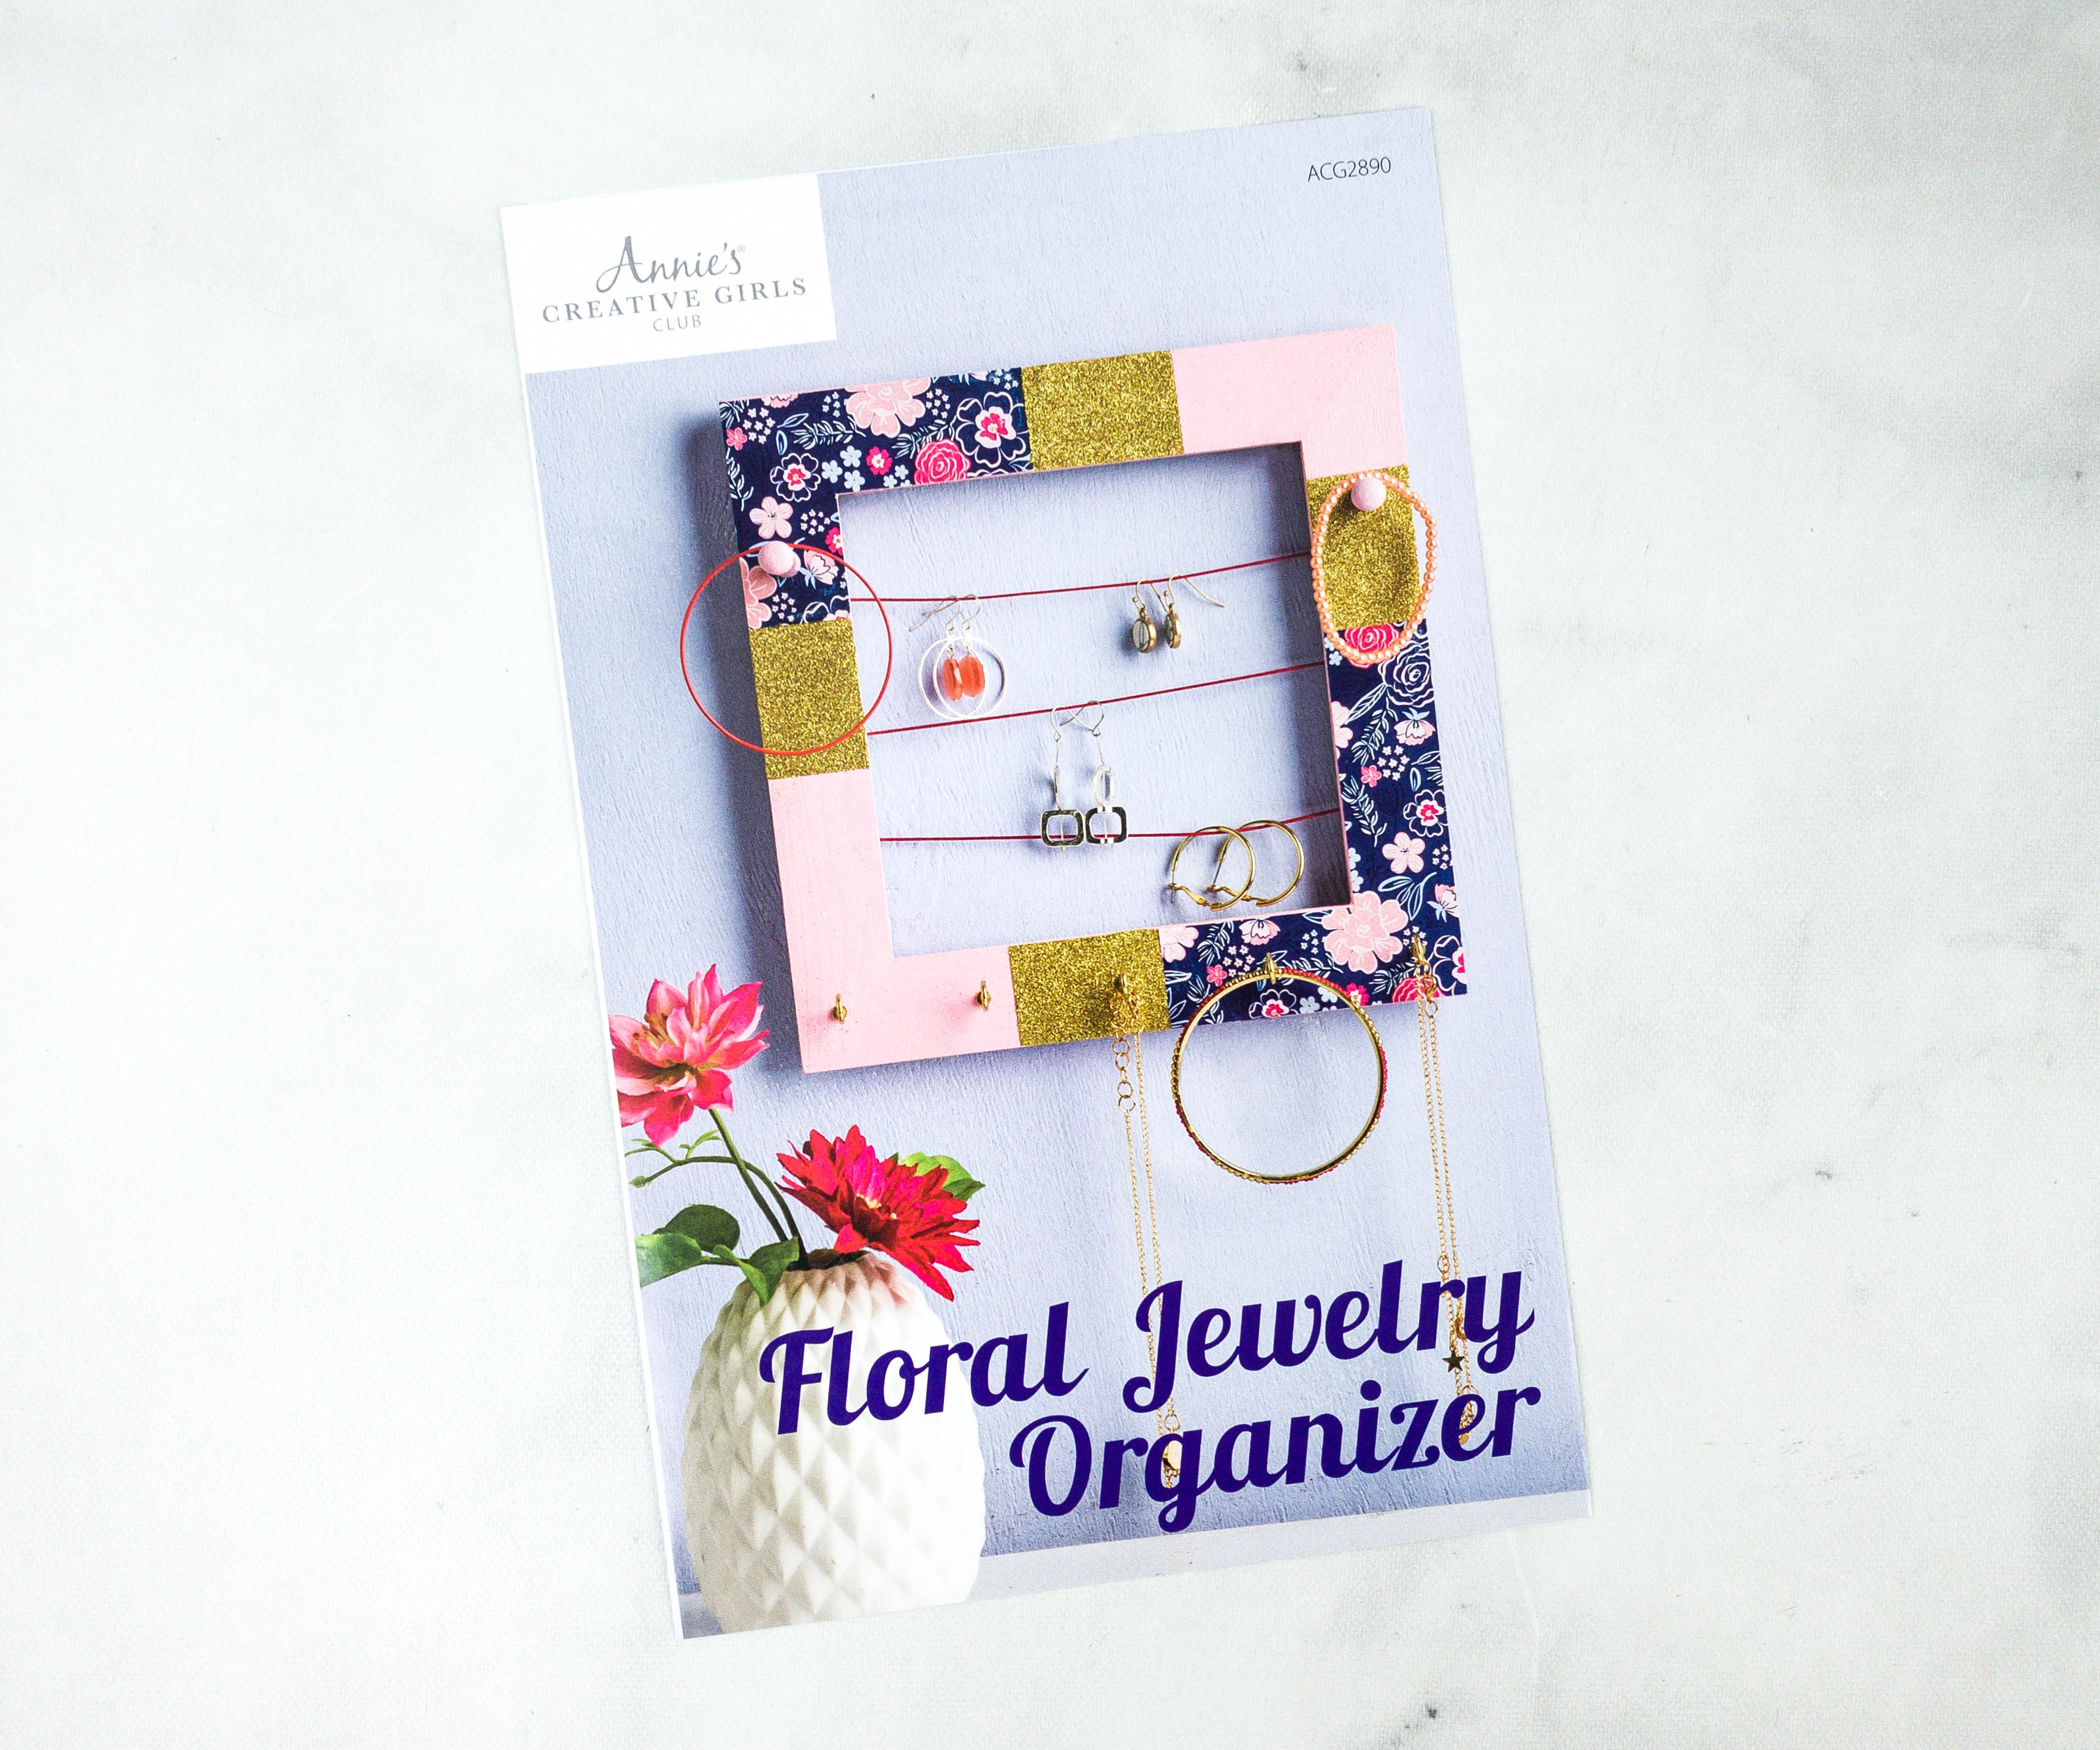
First up is the Floral Jewelry Organizer!

It came with a mini booklet which shows us what the finished product is supposed to look like.
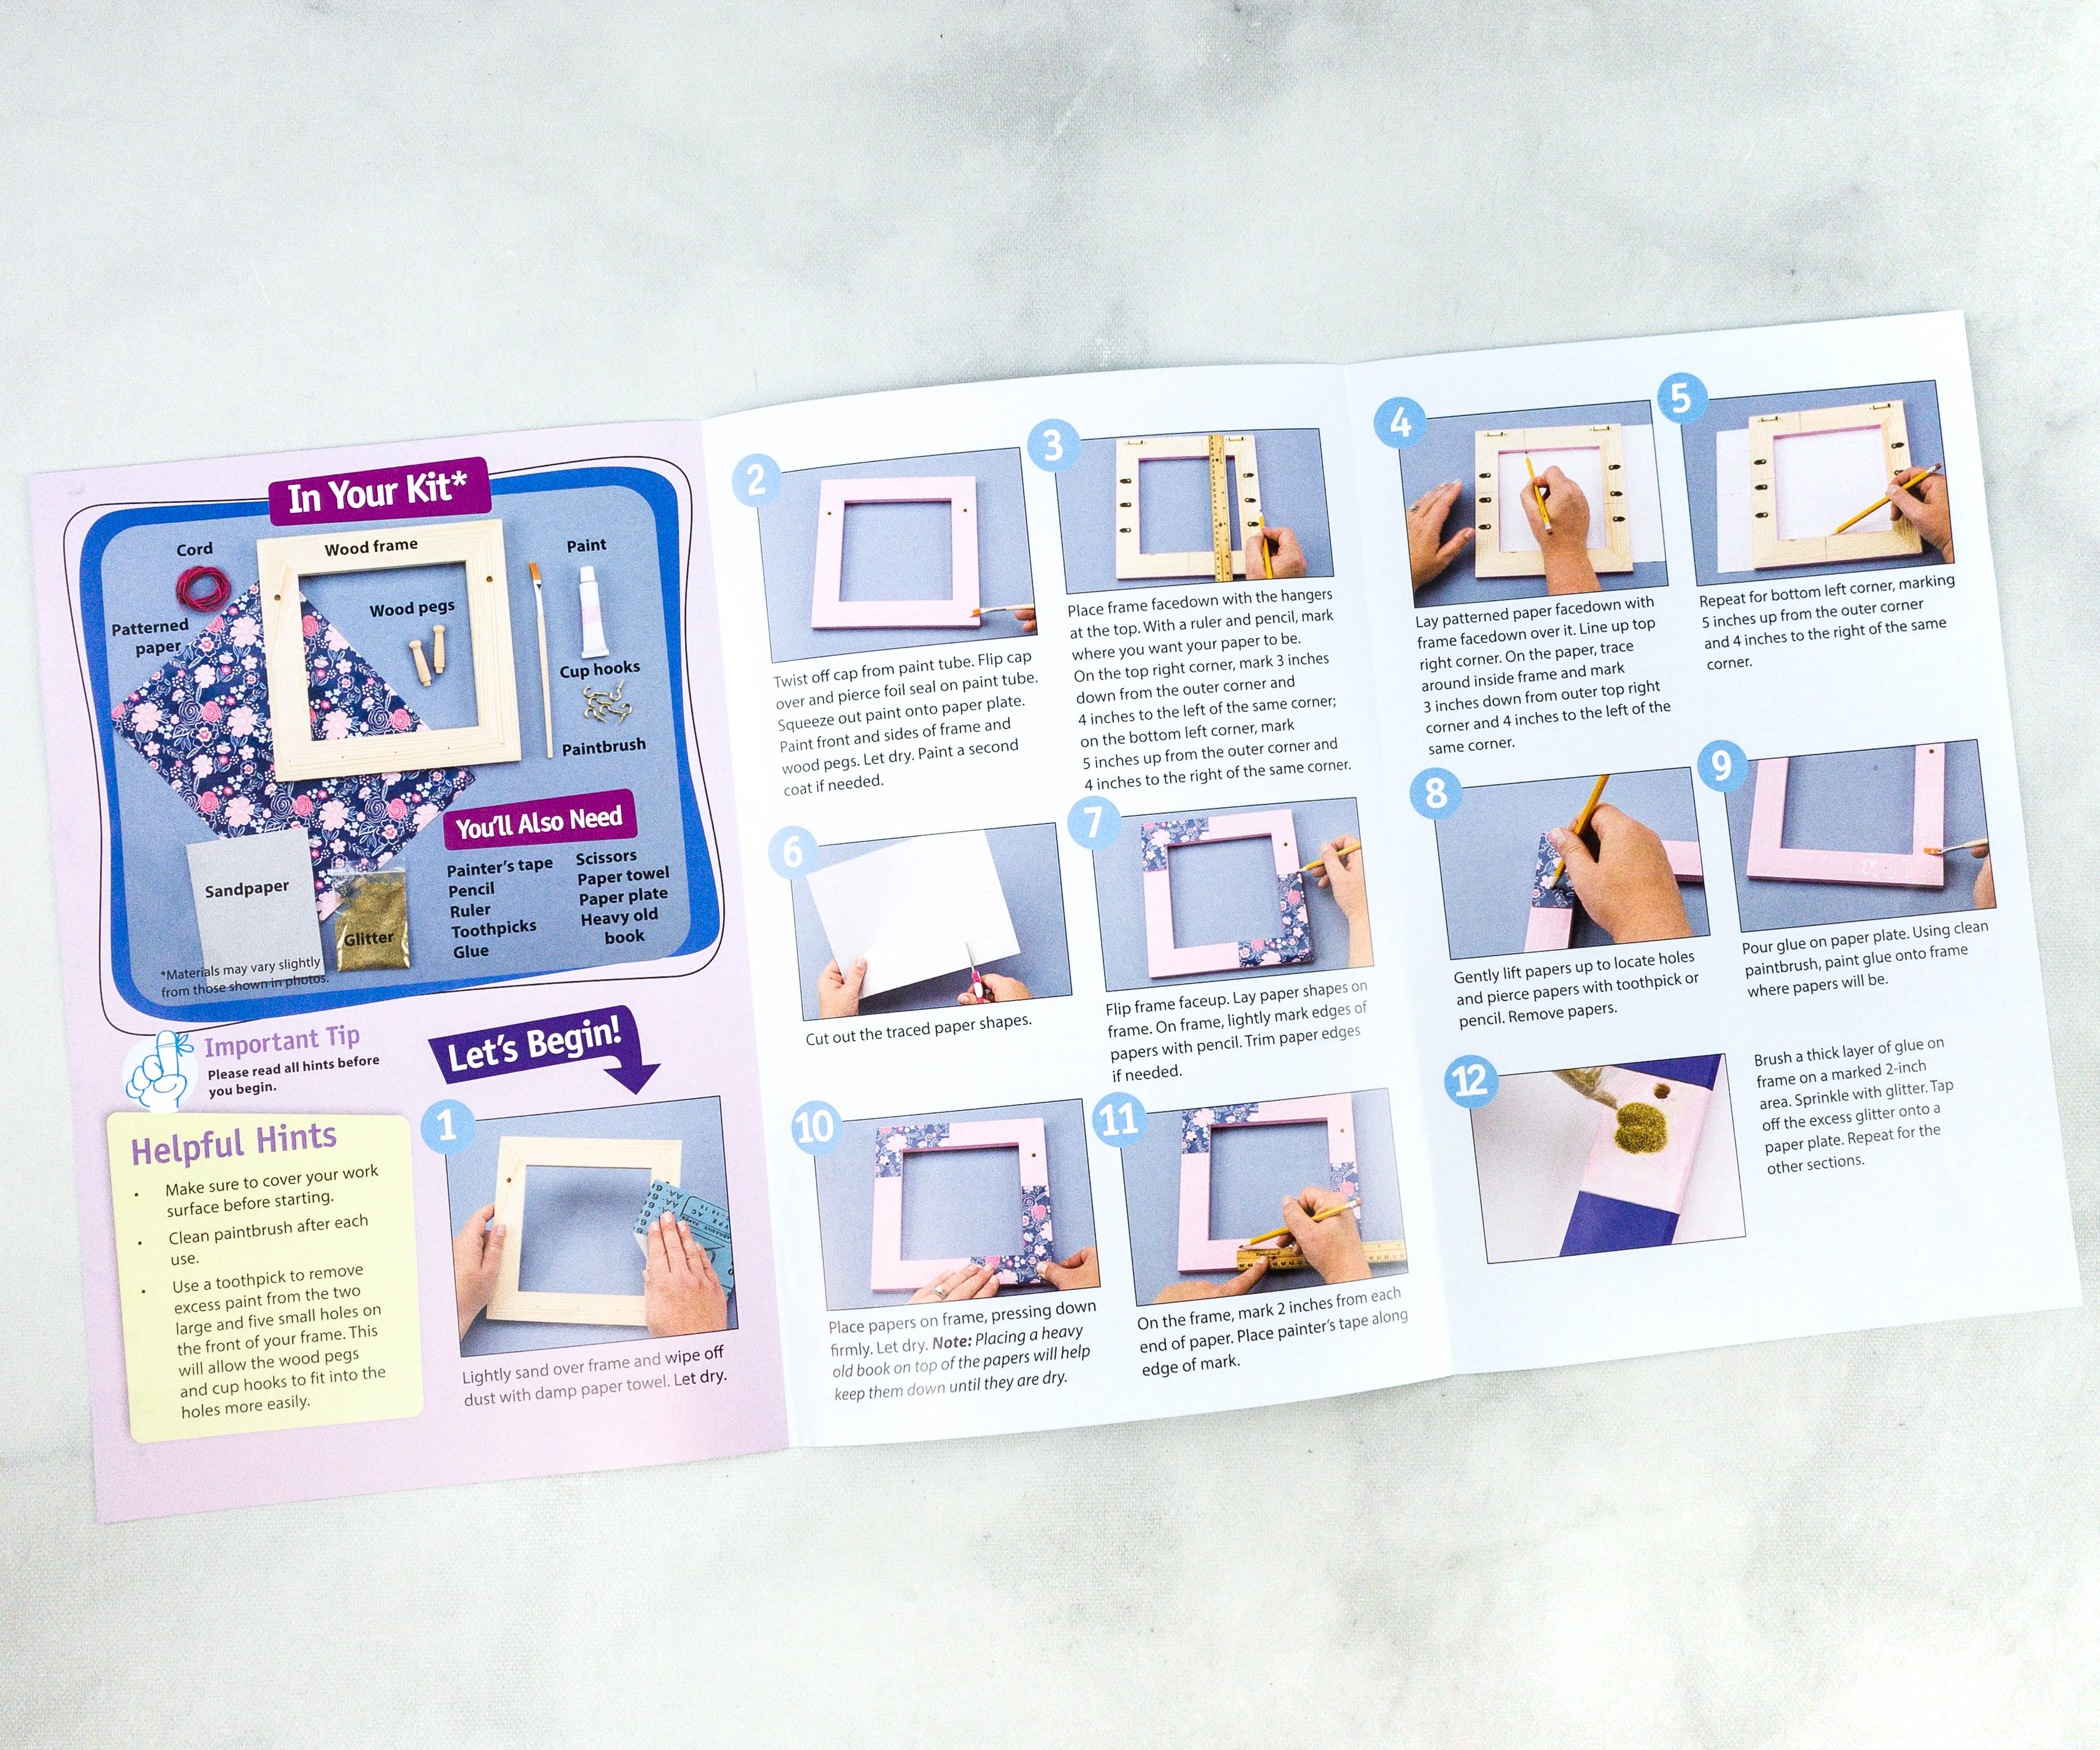
Inside is a list of the items we need as well as a detailed step-by-step procedure that will help us build this organizer!
I like that each step is accompanied by a picture so the procedure is easier to follow!
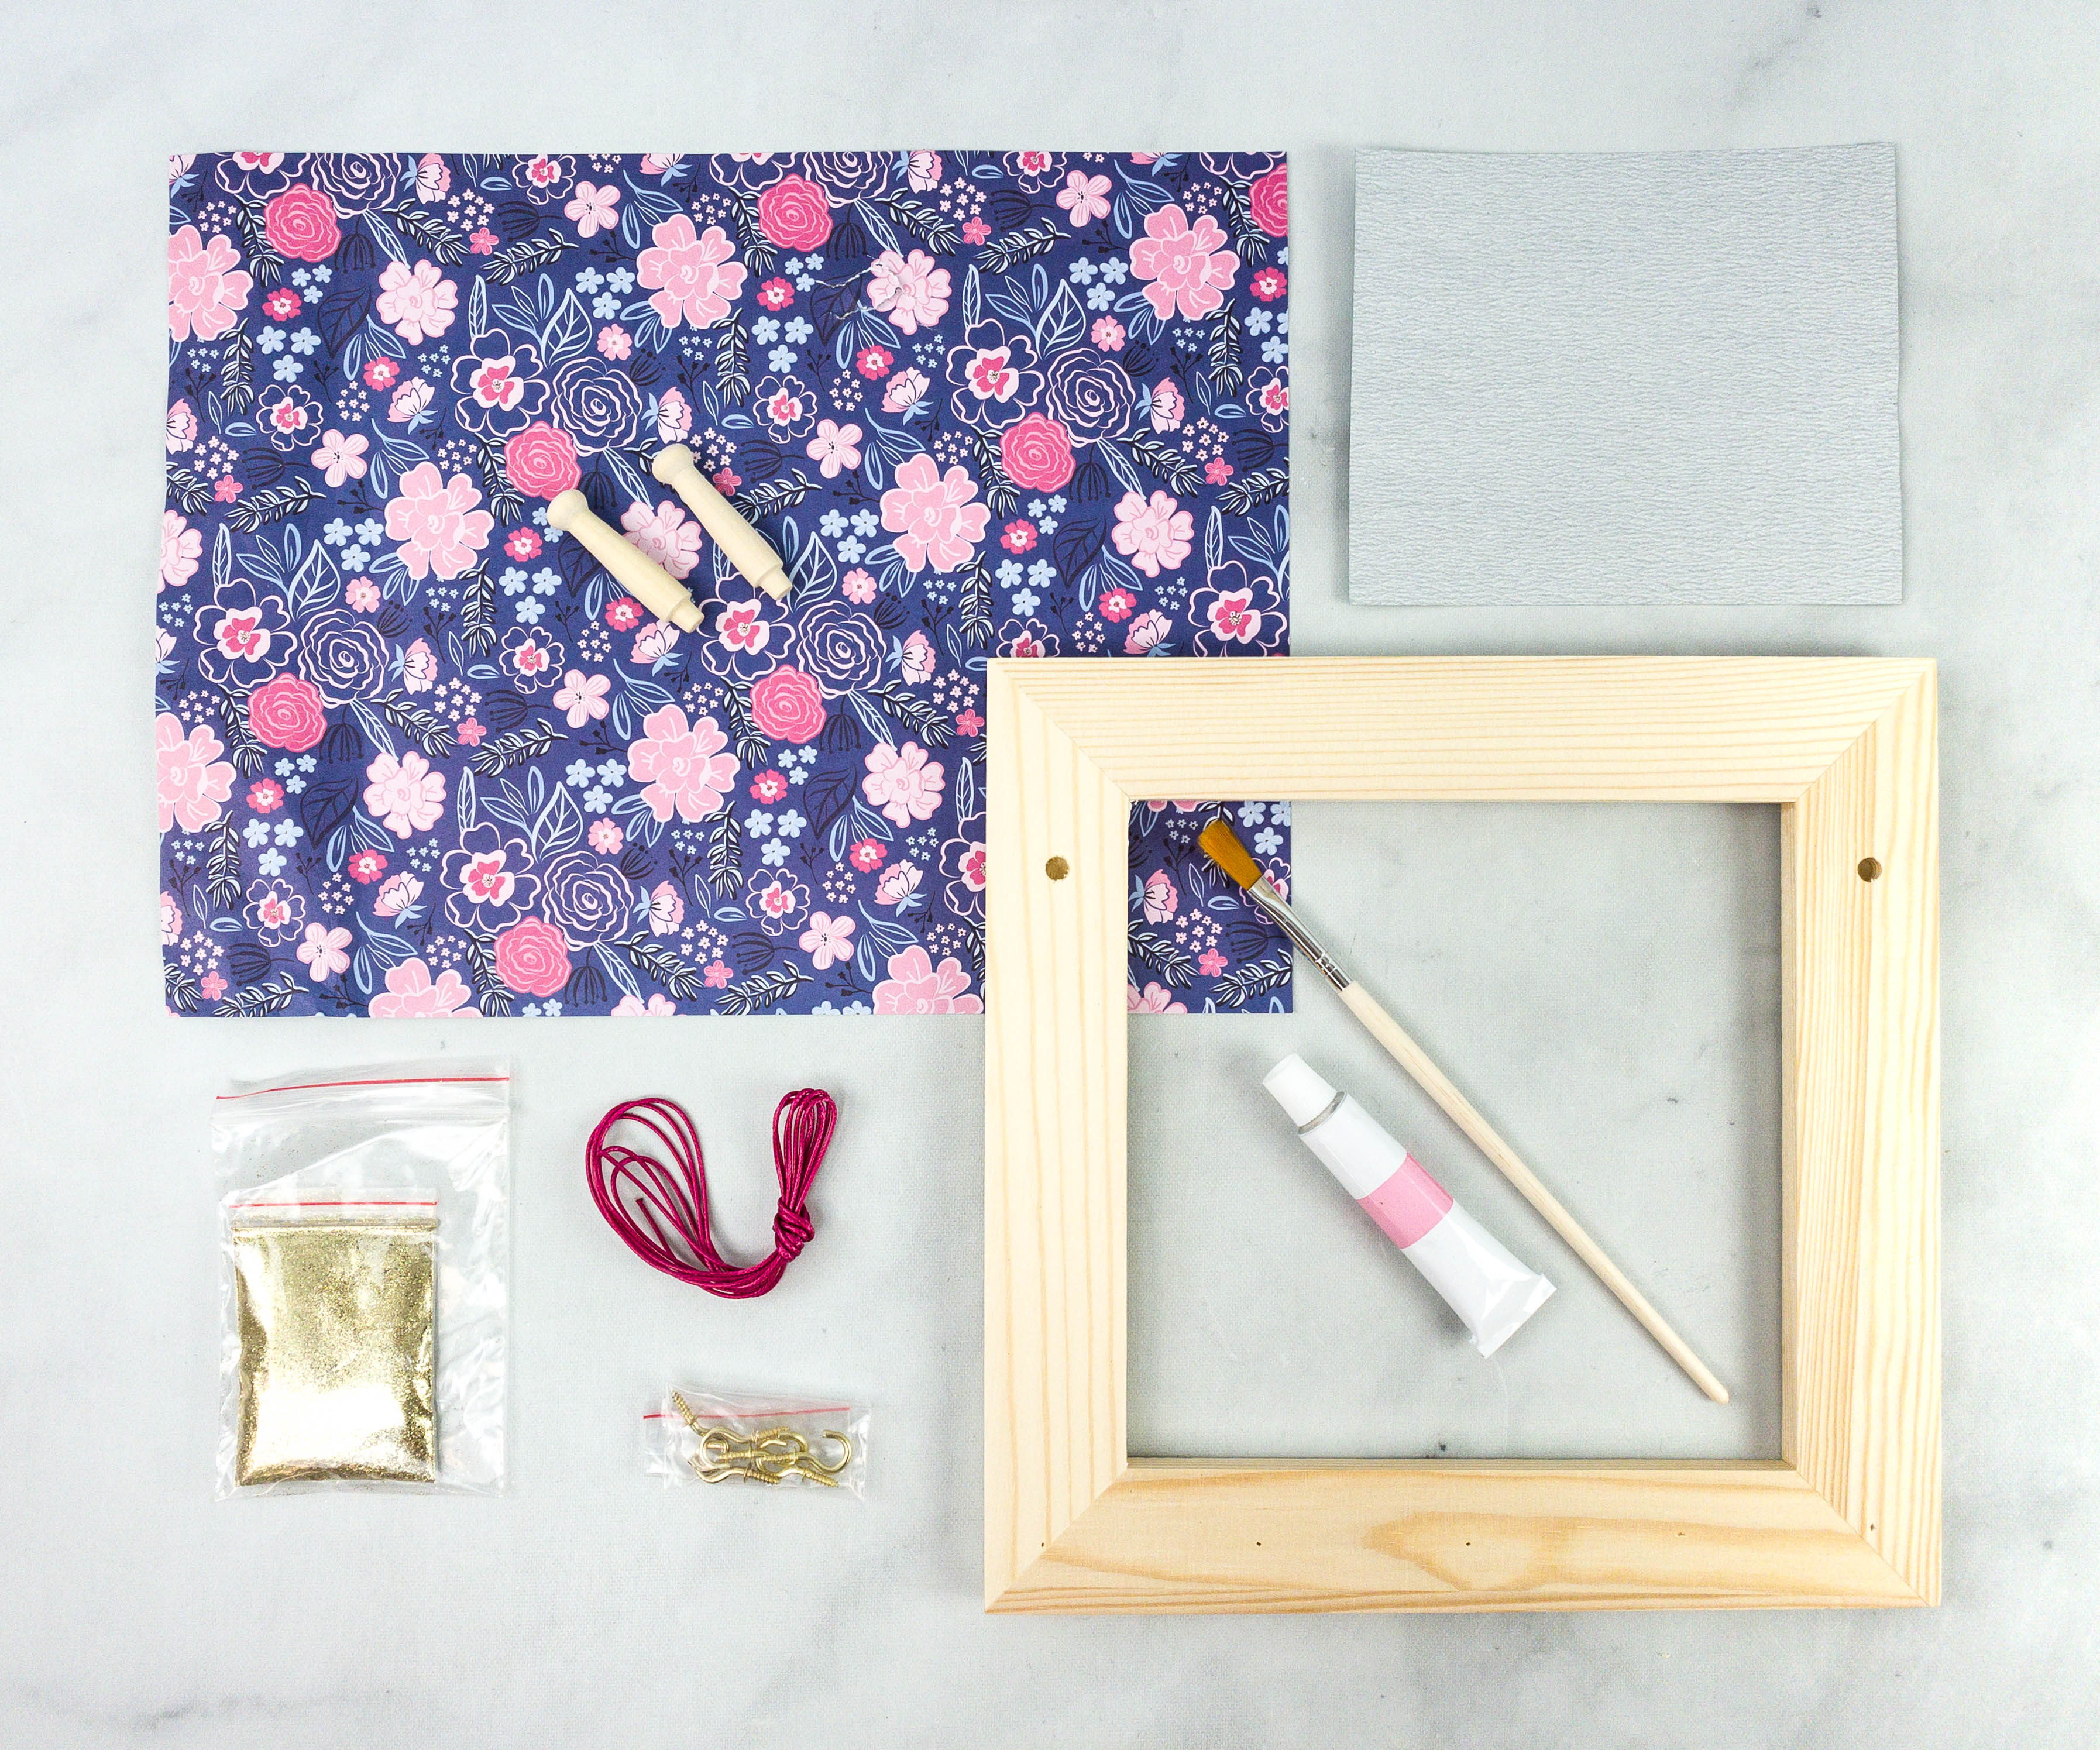
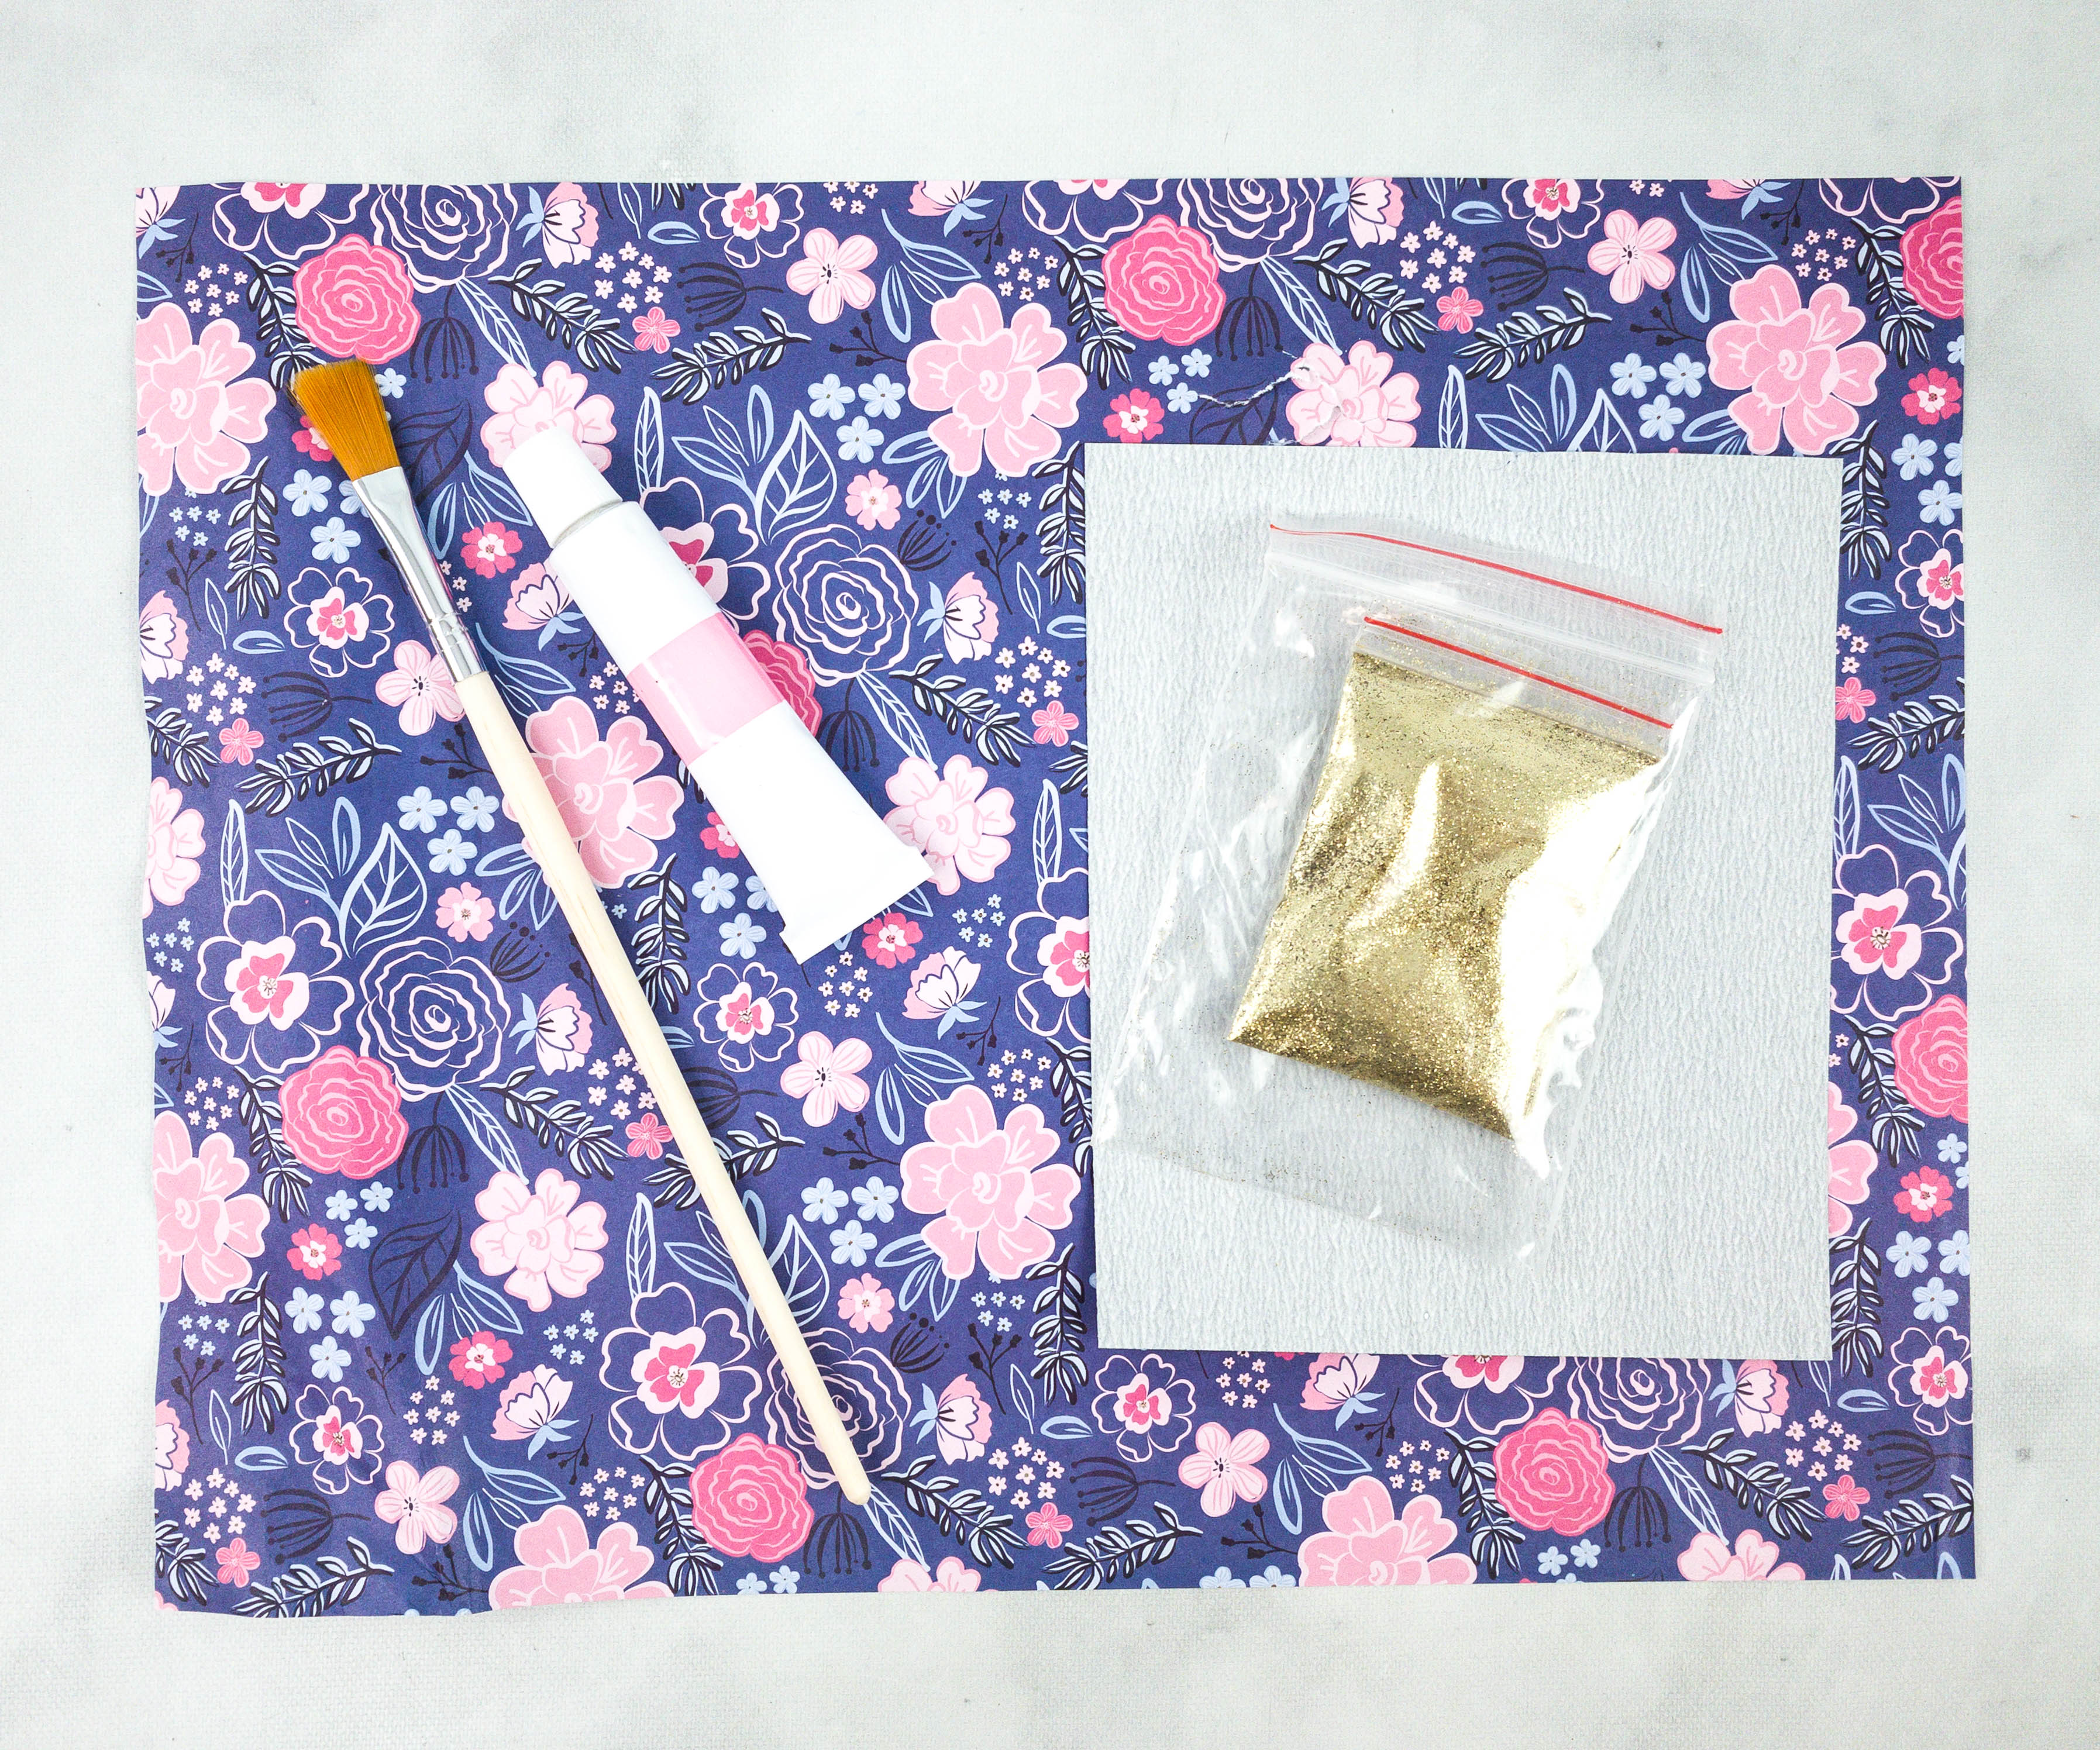
Here are the materials they provided for the project: cord, patterned paper, wood frame, wood pegs, paint, cup hooks, paintbrush, sandpaper, and glitters. From home, we needed painter’s tape, pencil, ruler, toothpicks, glue, scissors, paper towel, paper plate, and a heavy old book.

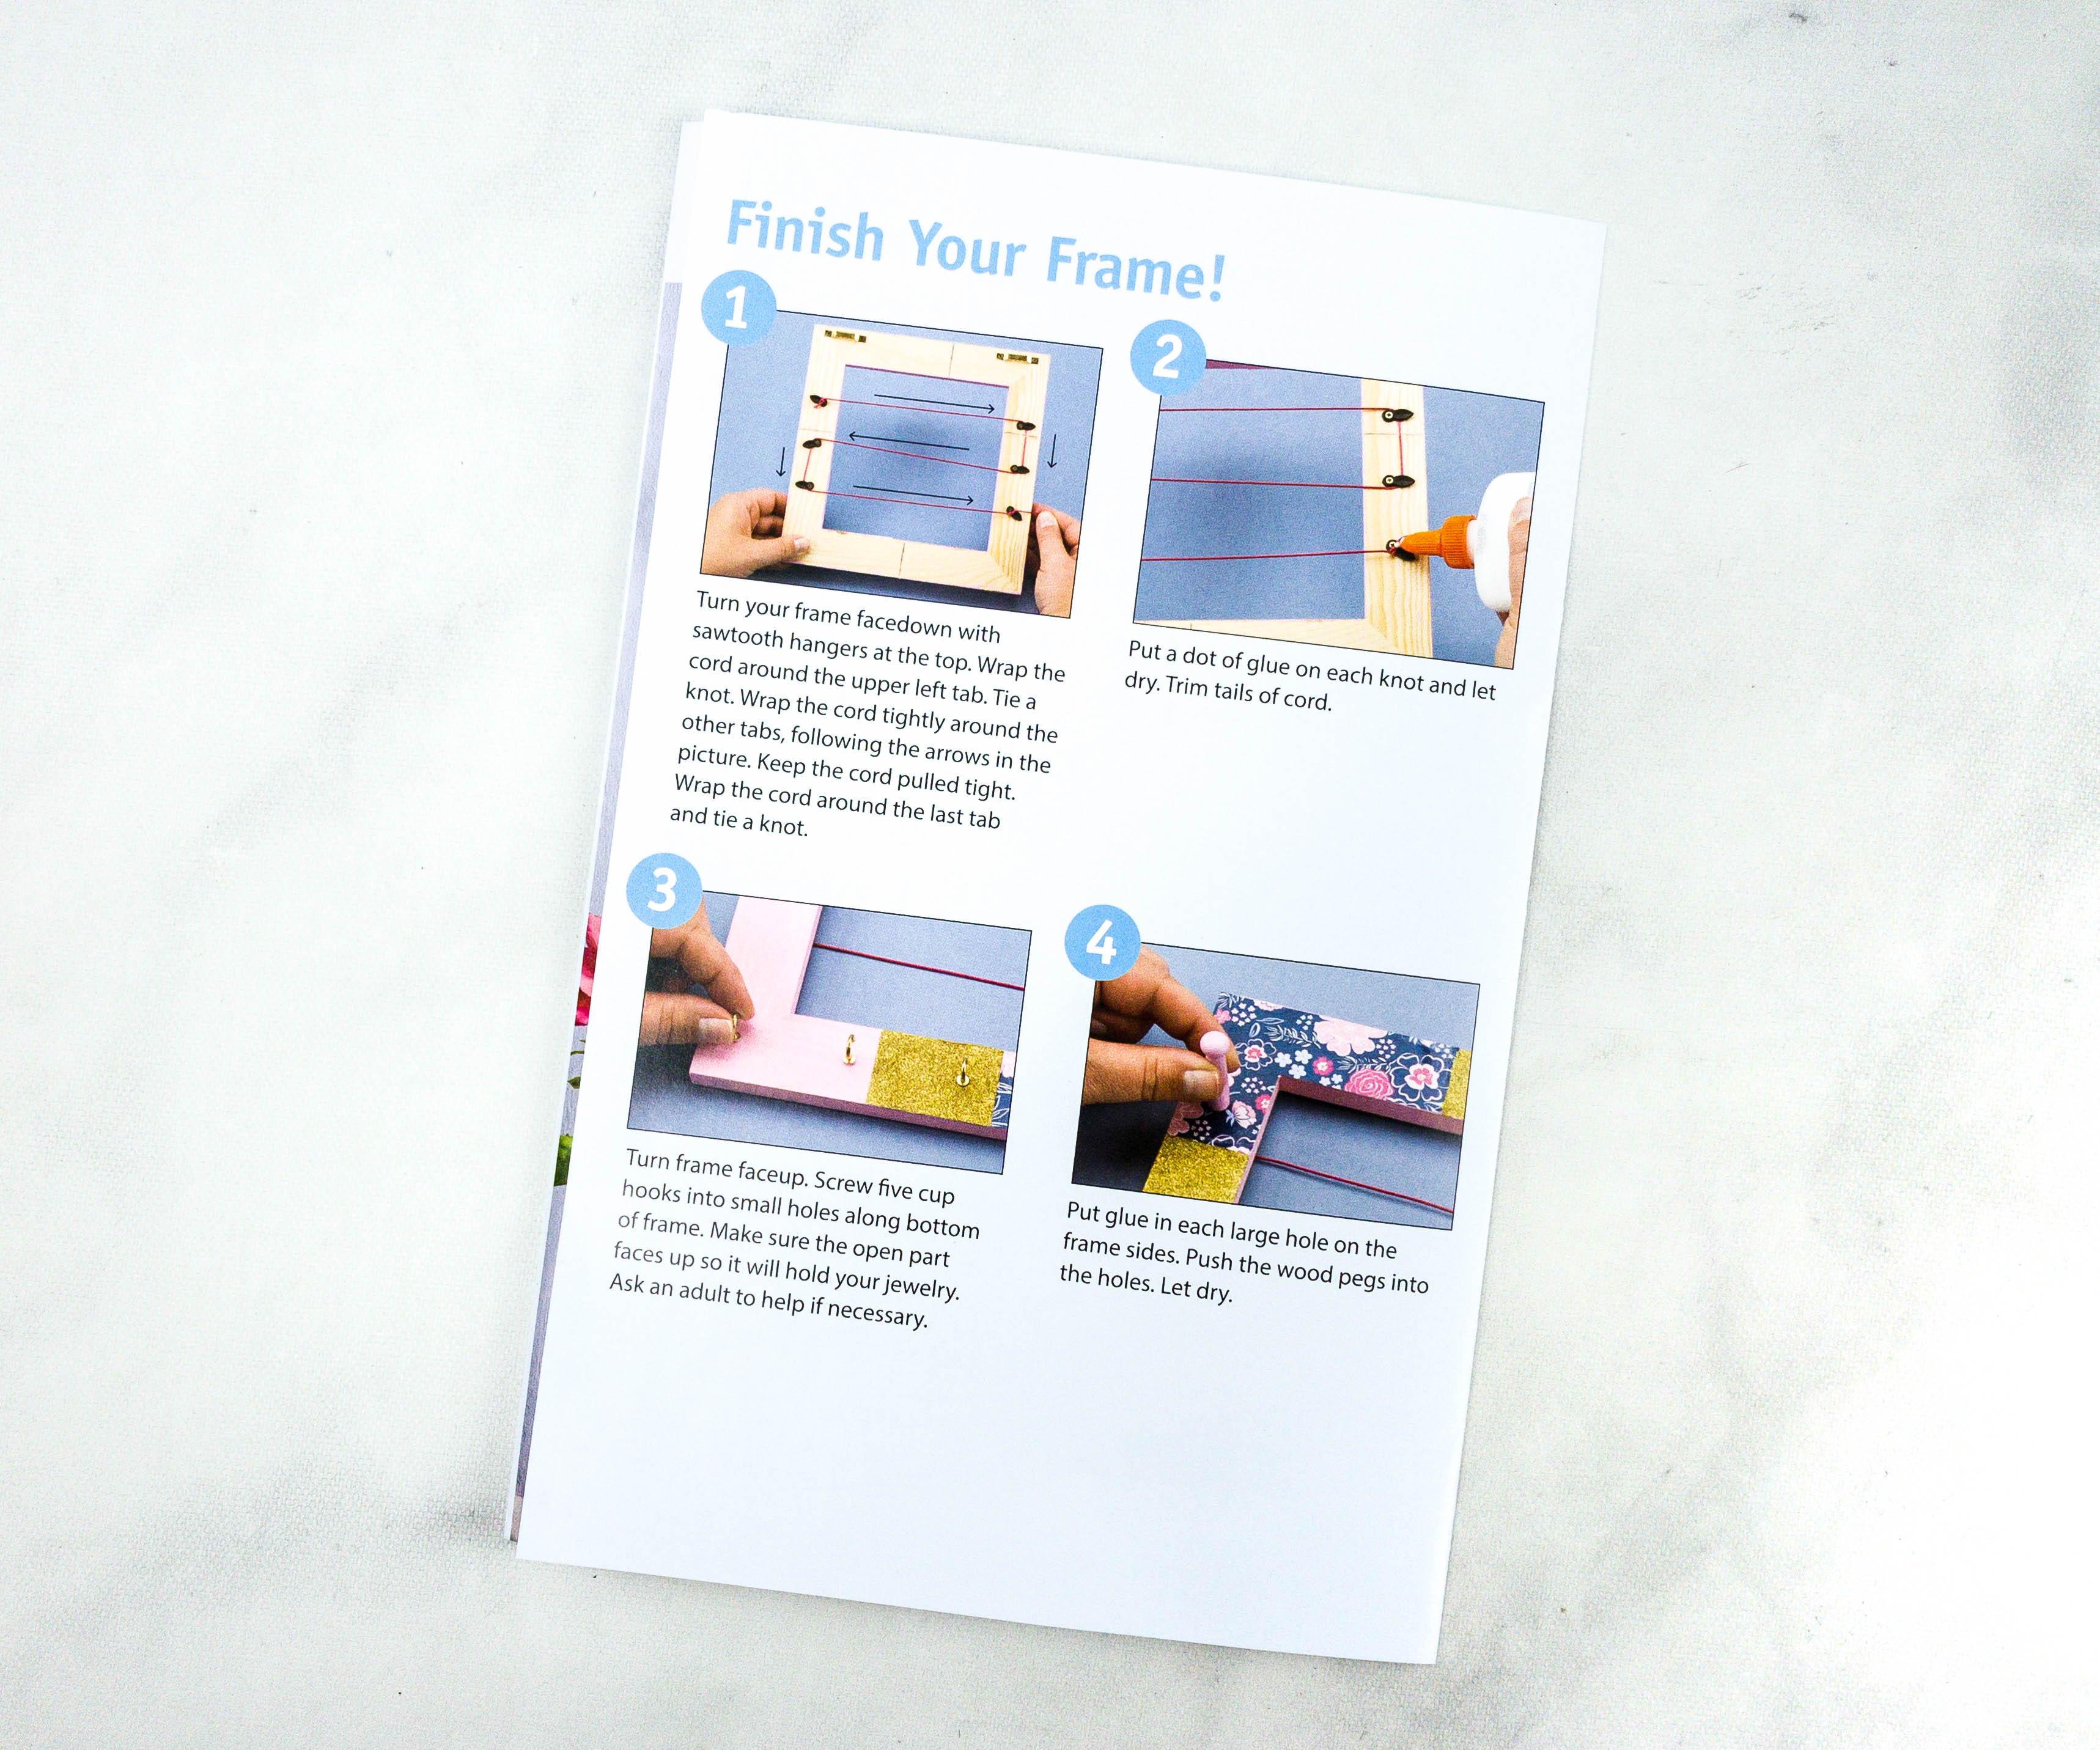
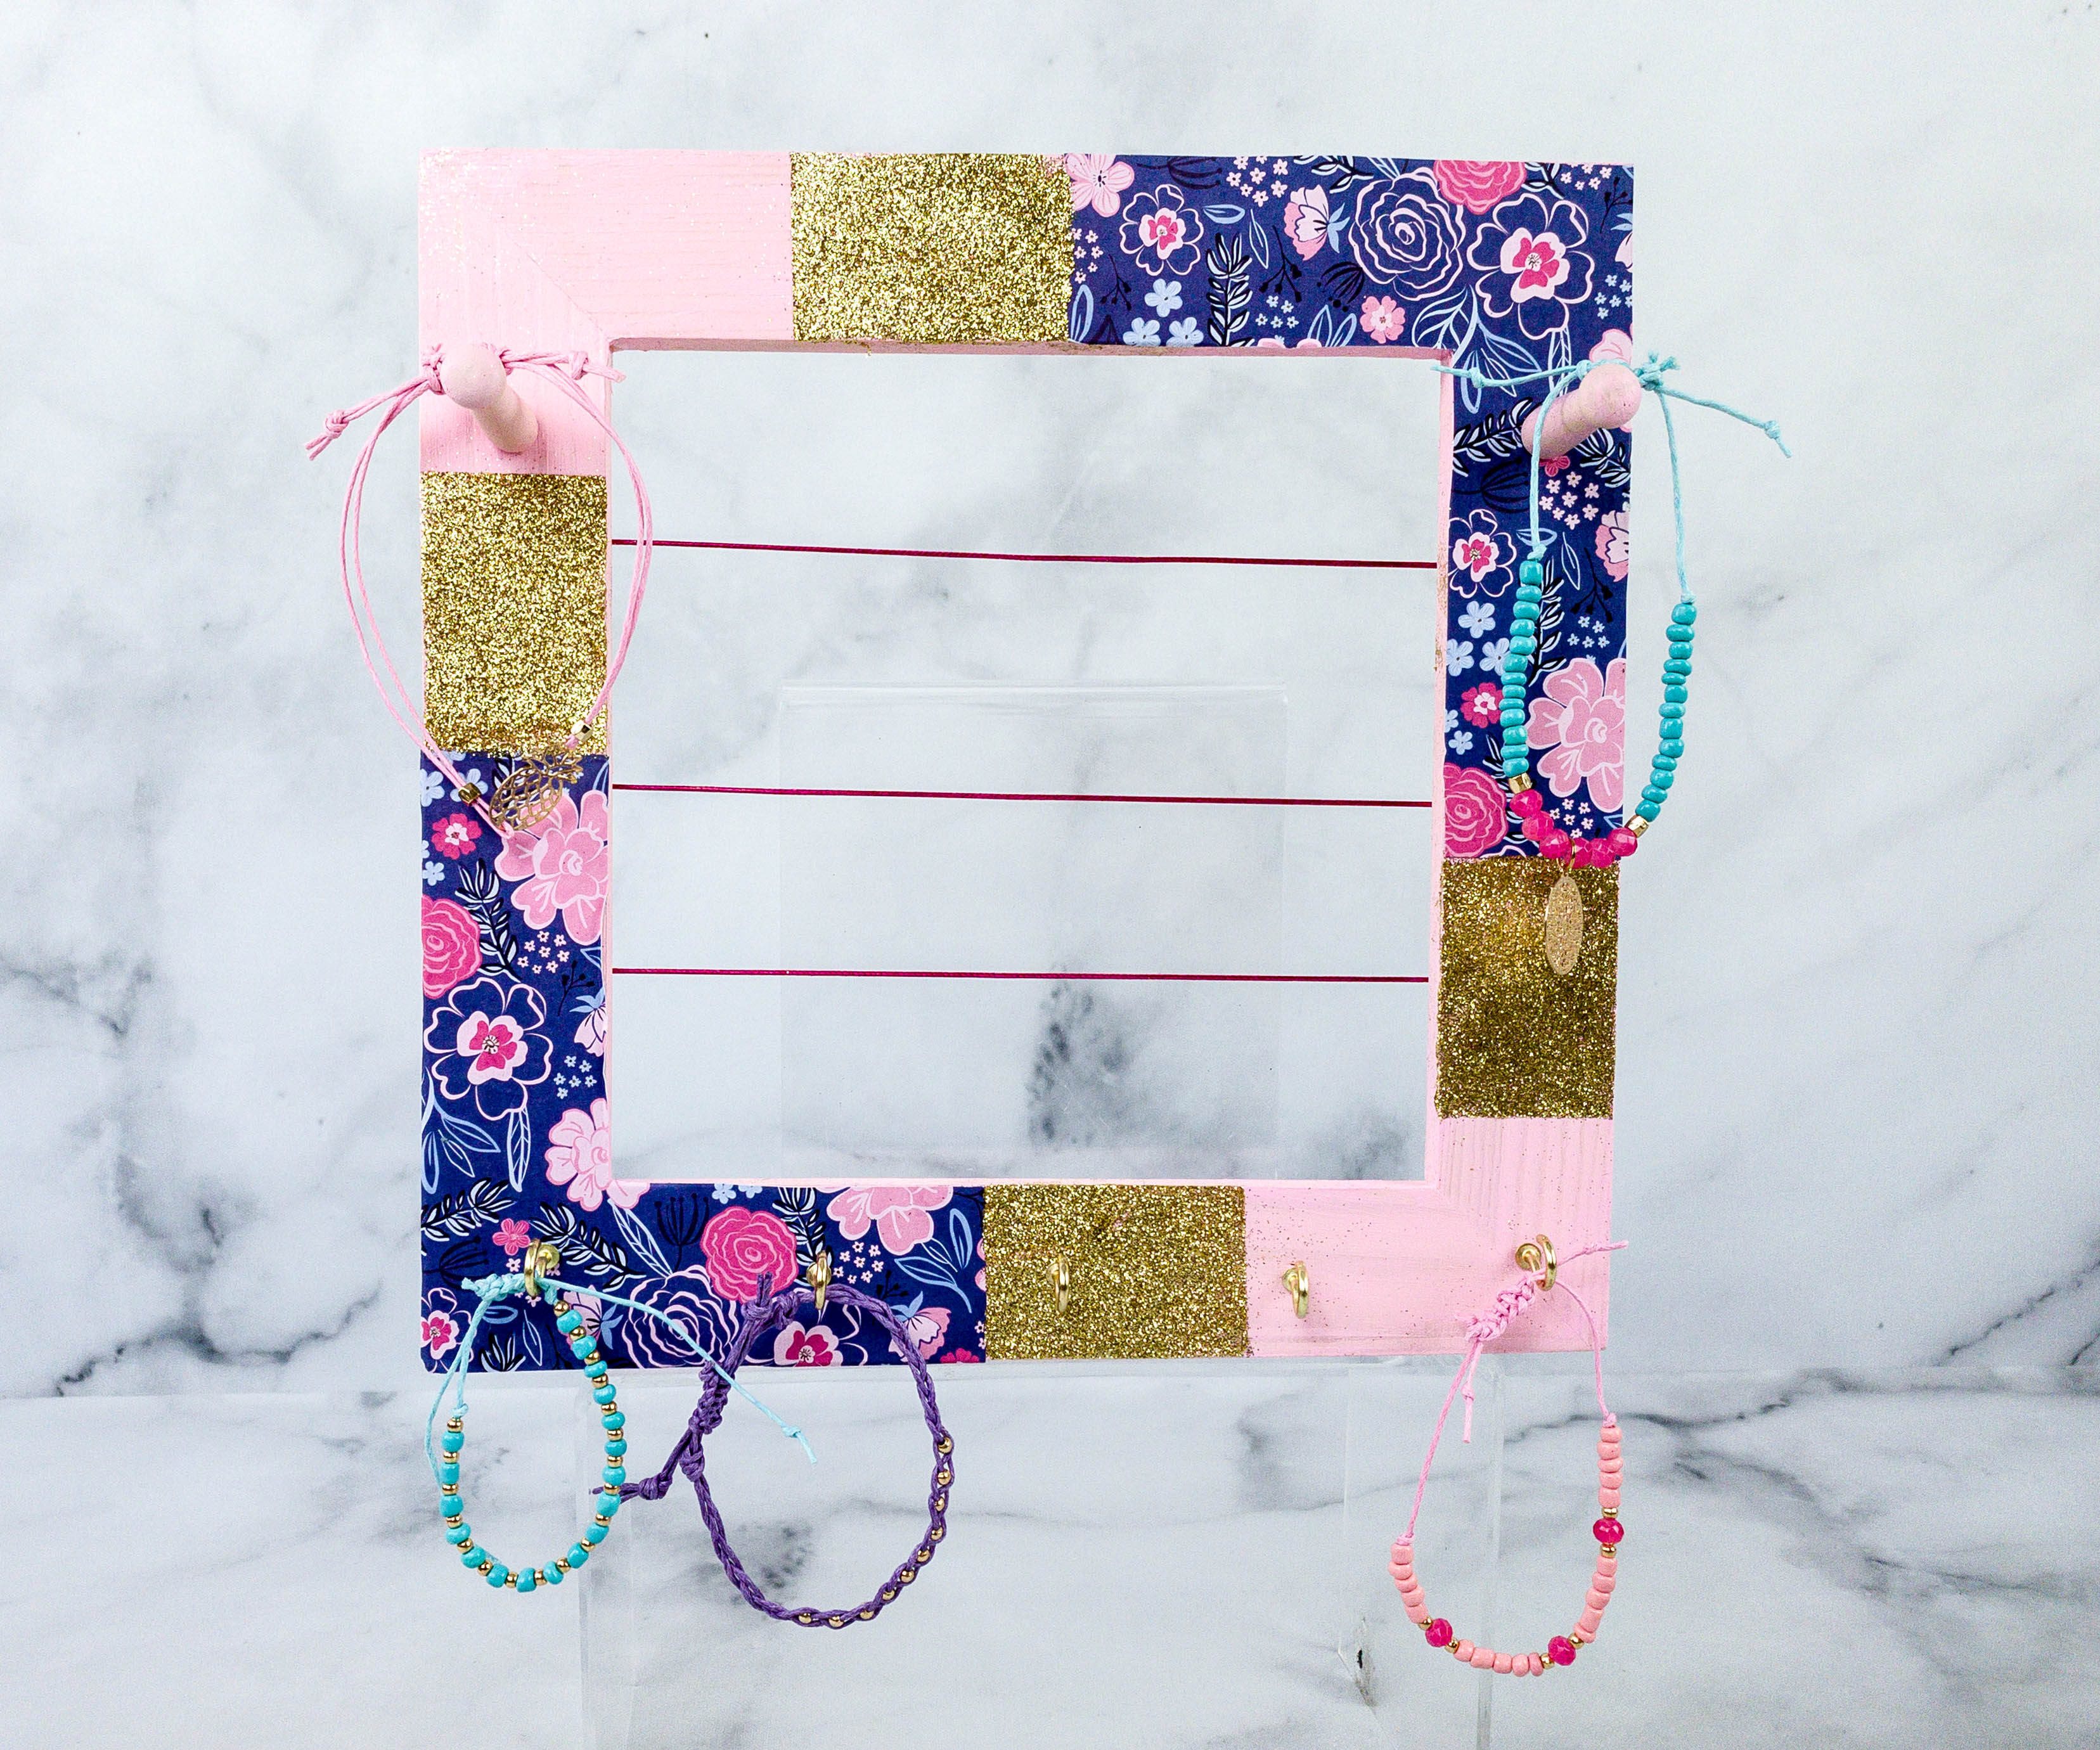
The back is where we will need to wrap the red cord around from left to right to create horizontal lines that will help hold some earrings in place when we put this jewelry organizer to use!
I love the floral pattern on the provided fabric!
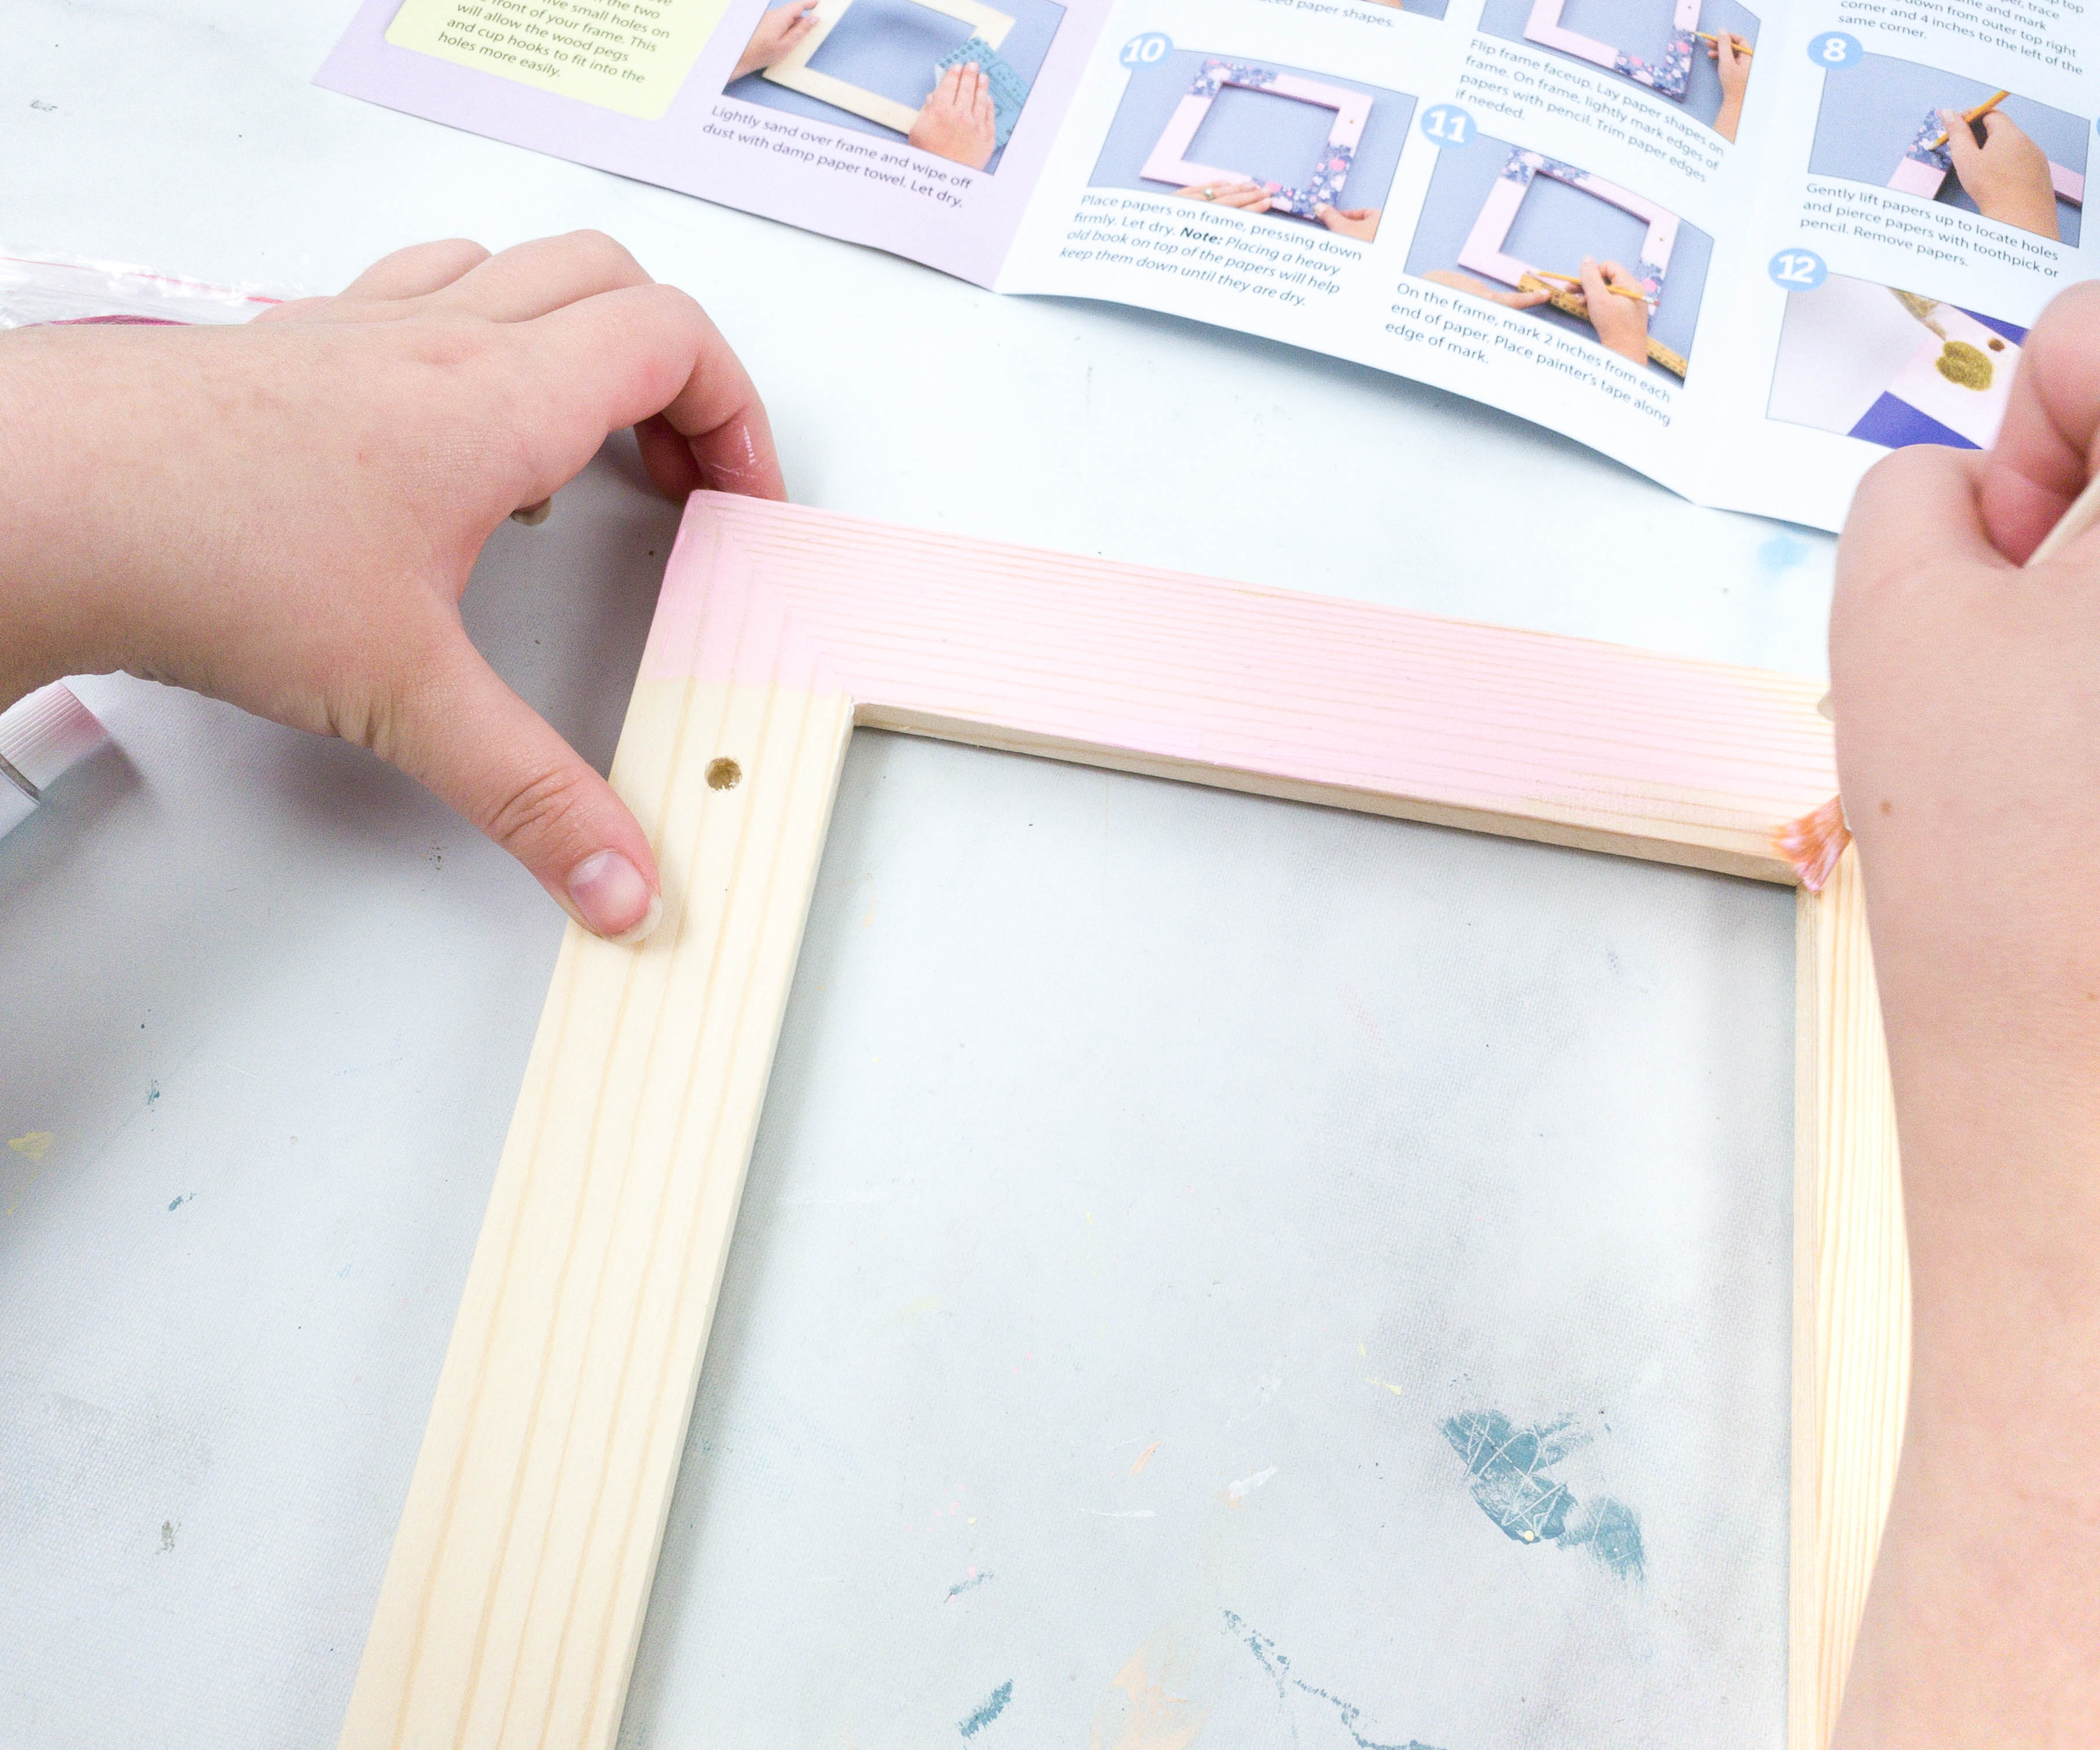
To start, my daughter painted the wood with a baby pink color!
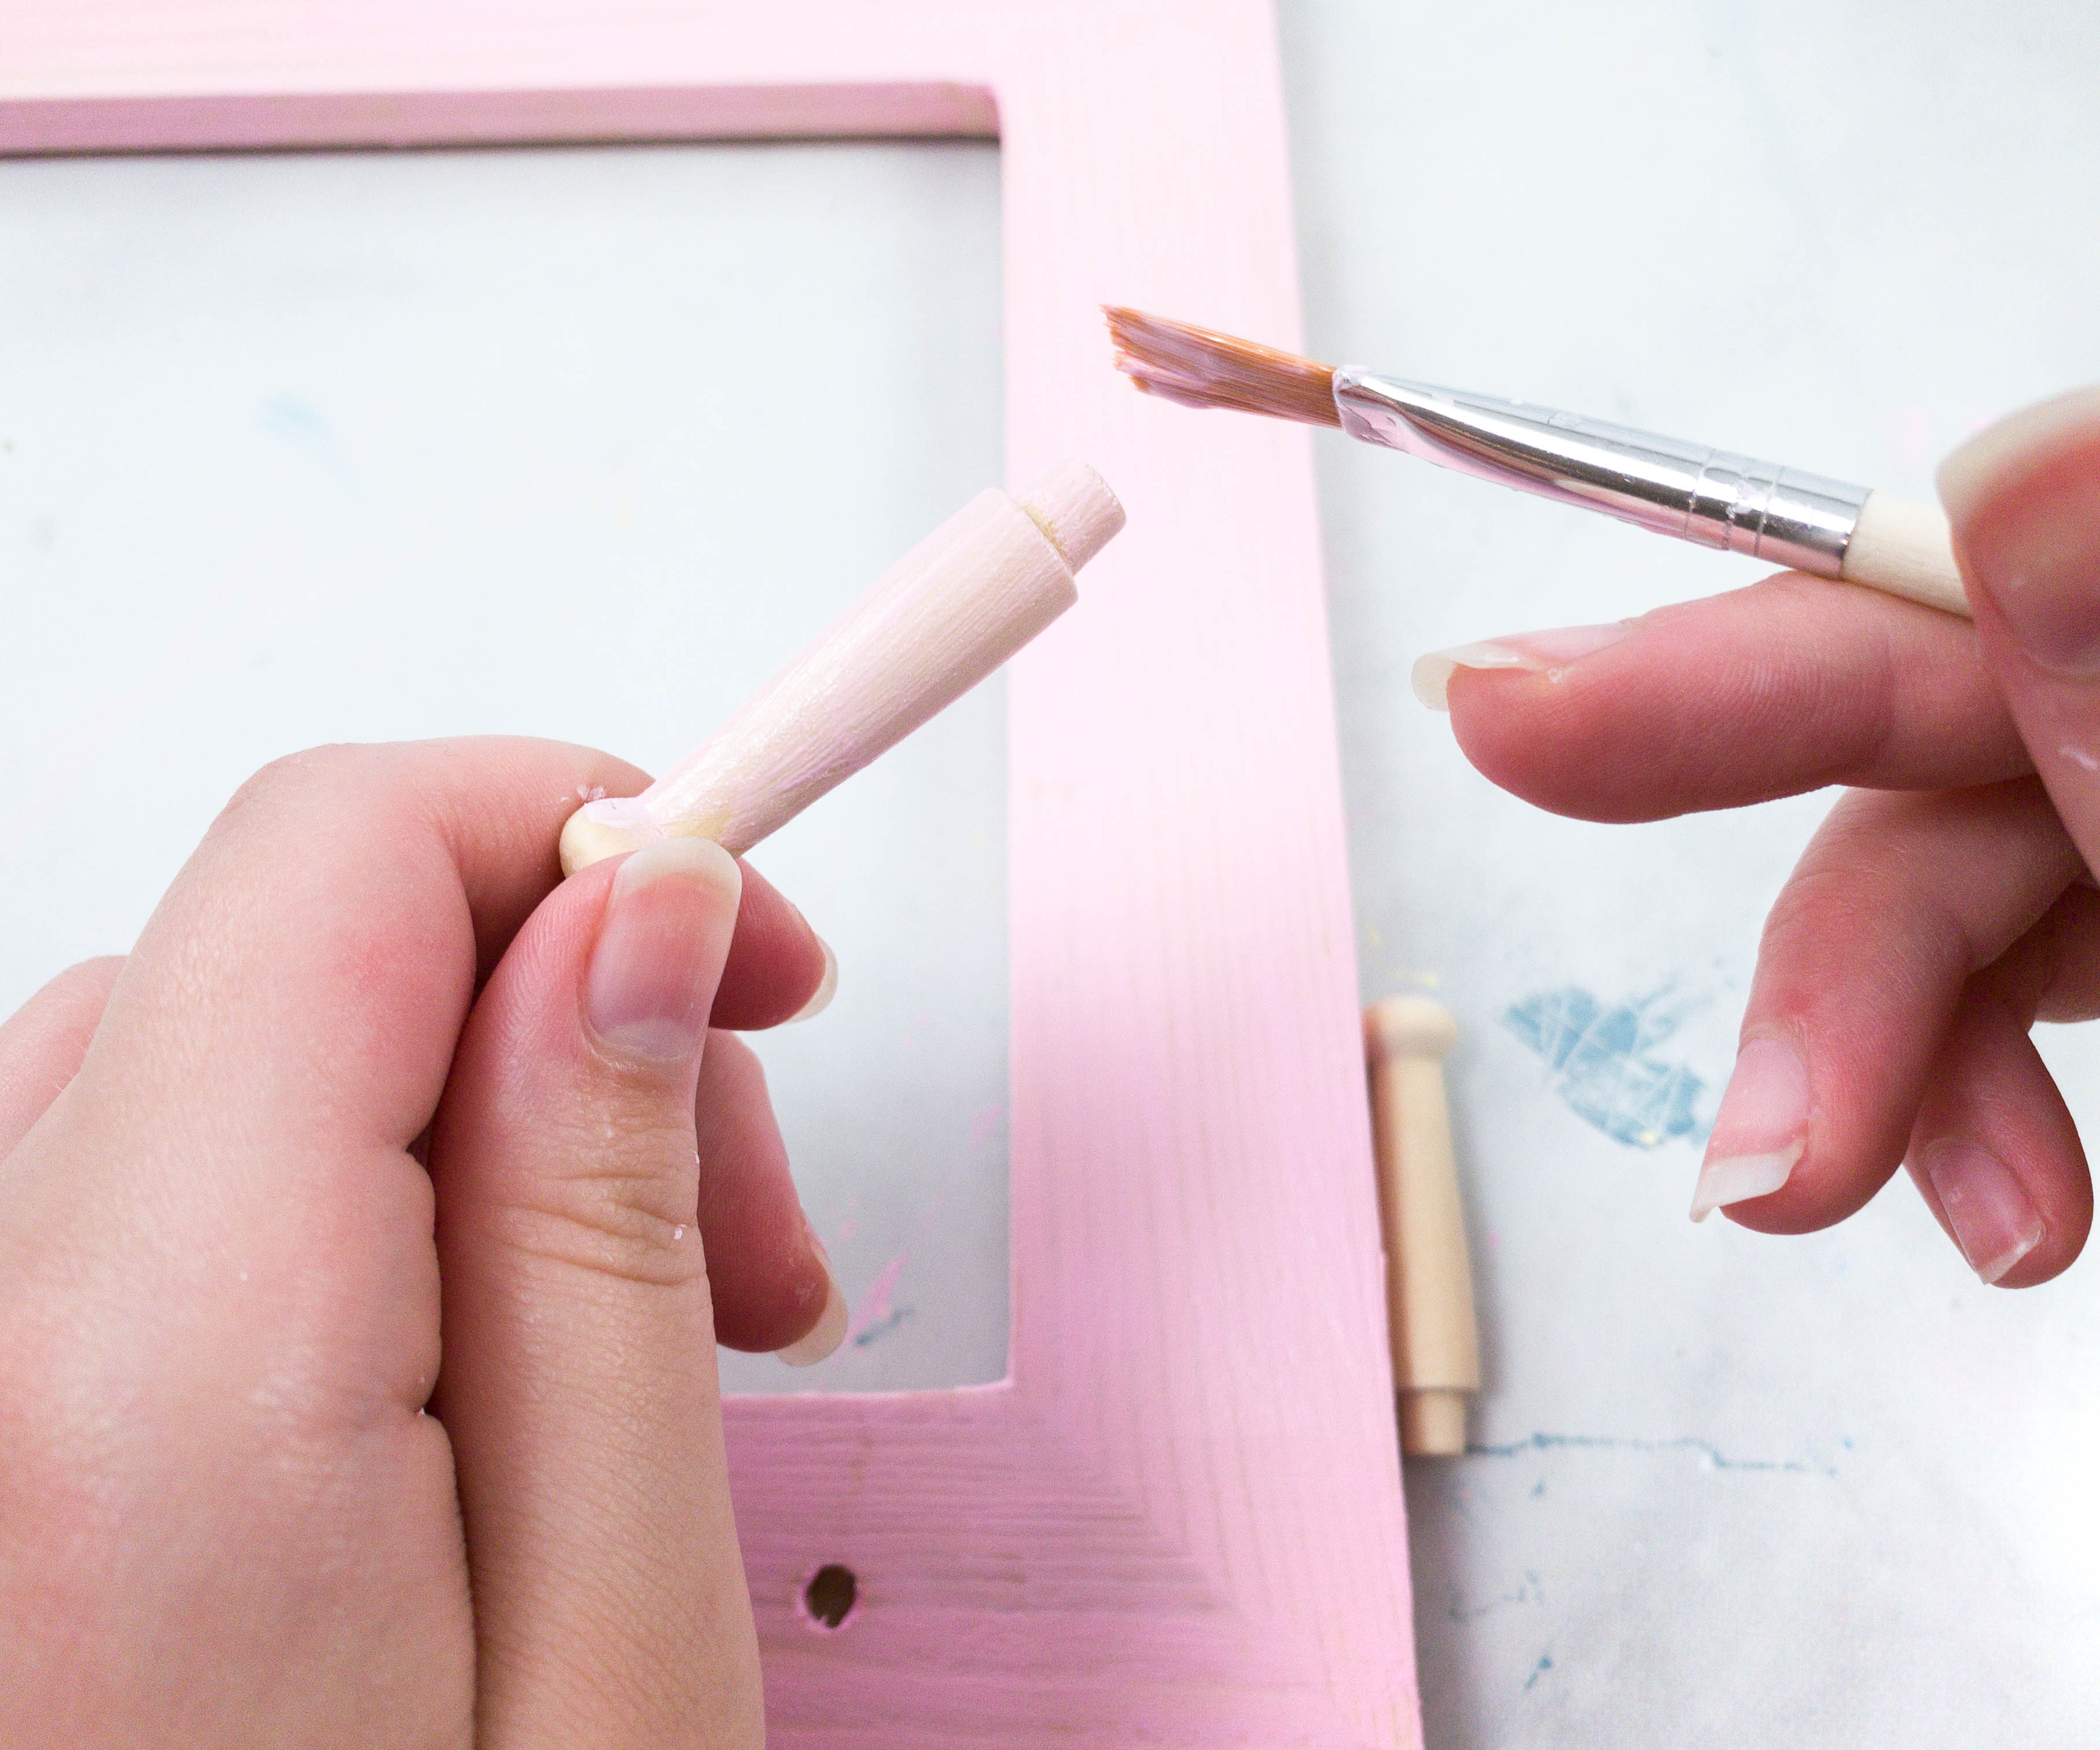
She also painted the pegs with the same pink shade and made sure that everything is covered.
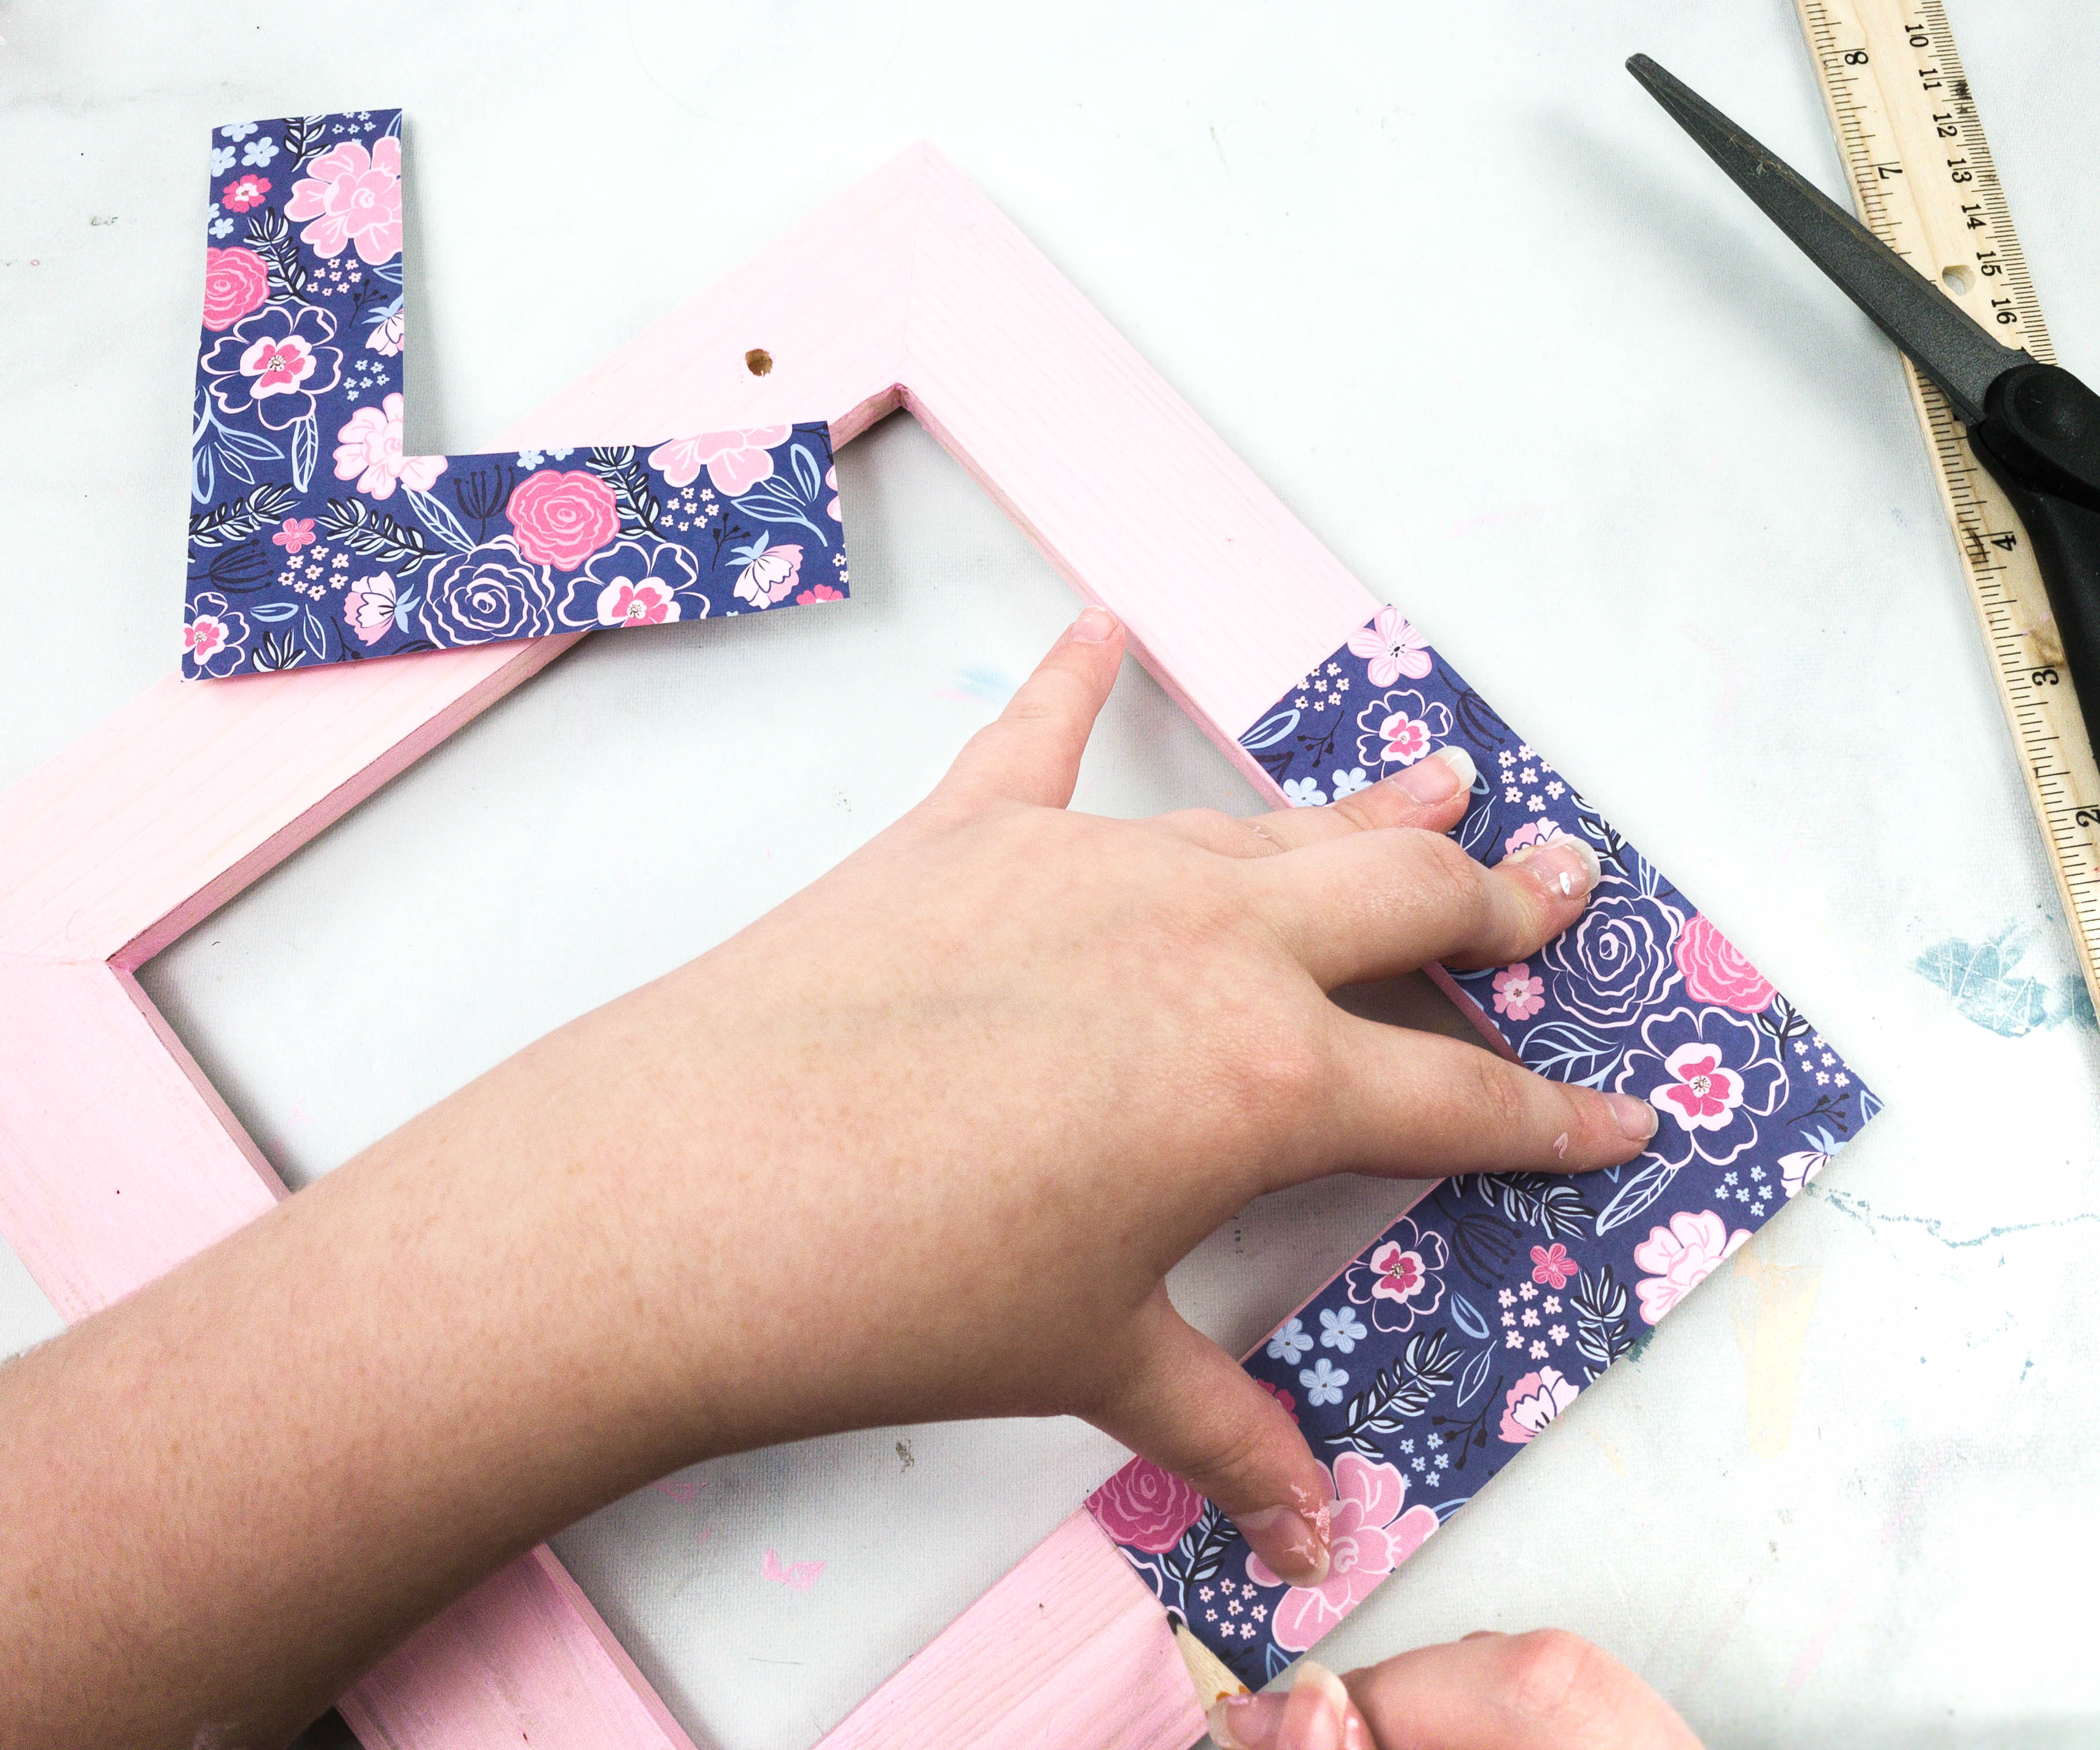
Then, she proceeded to trace the wooden frame on the fabric and cut up some pieces.
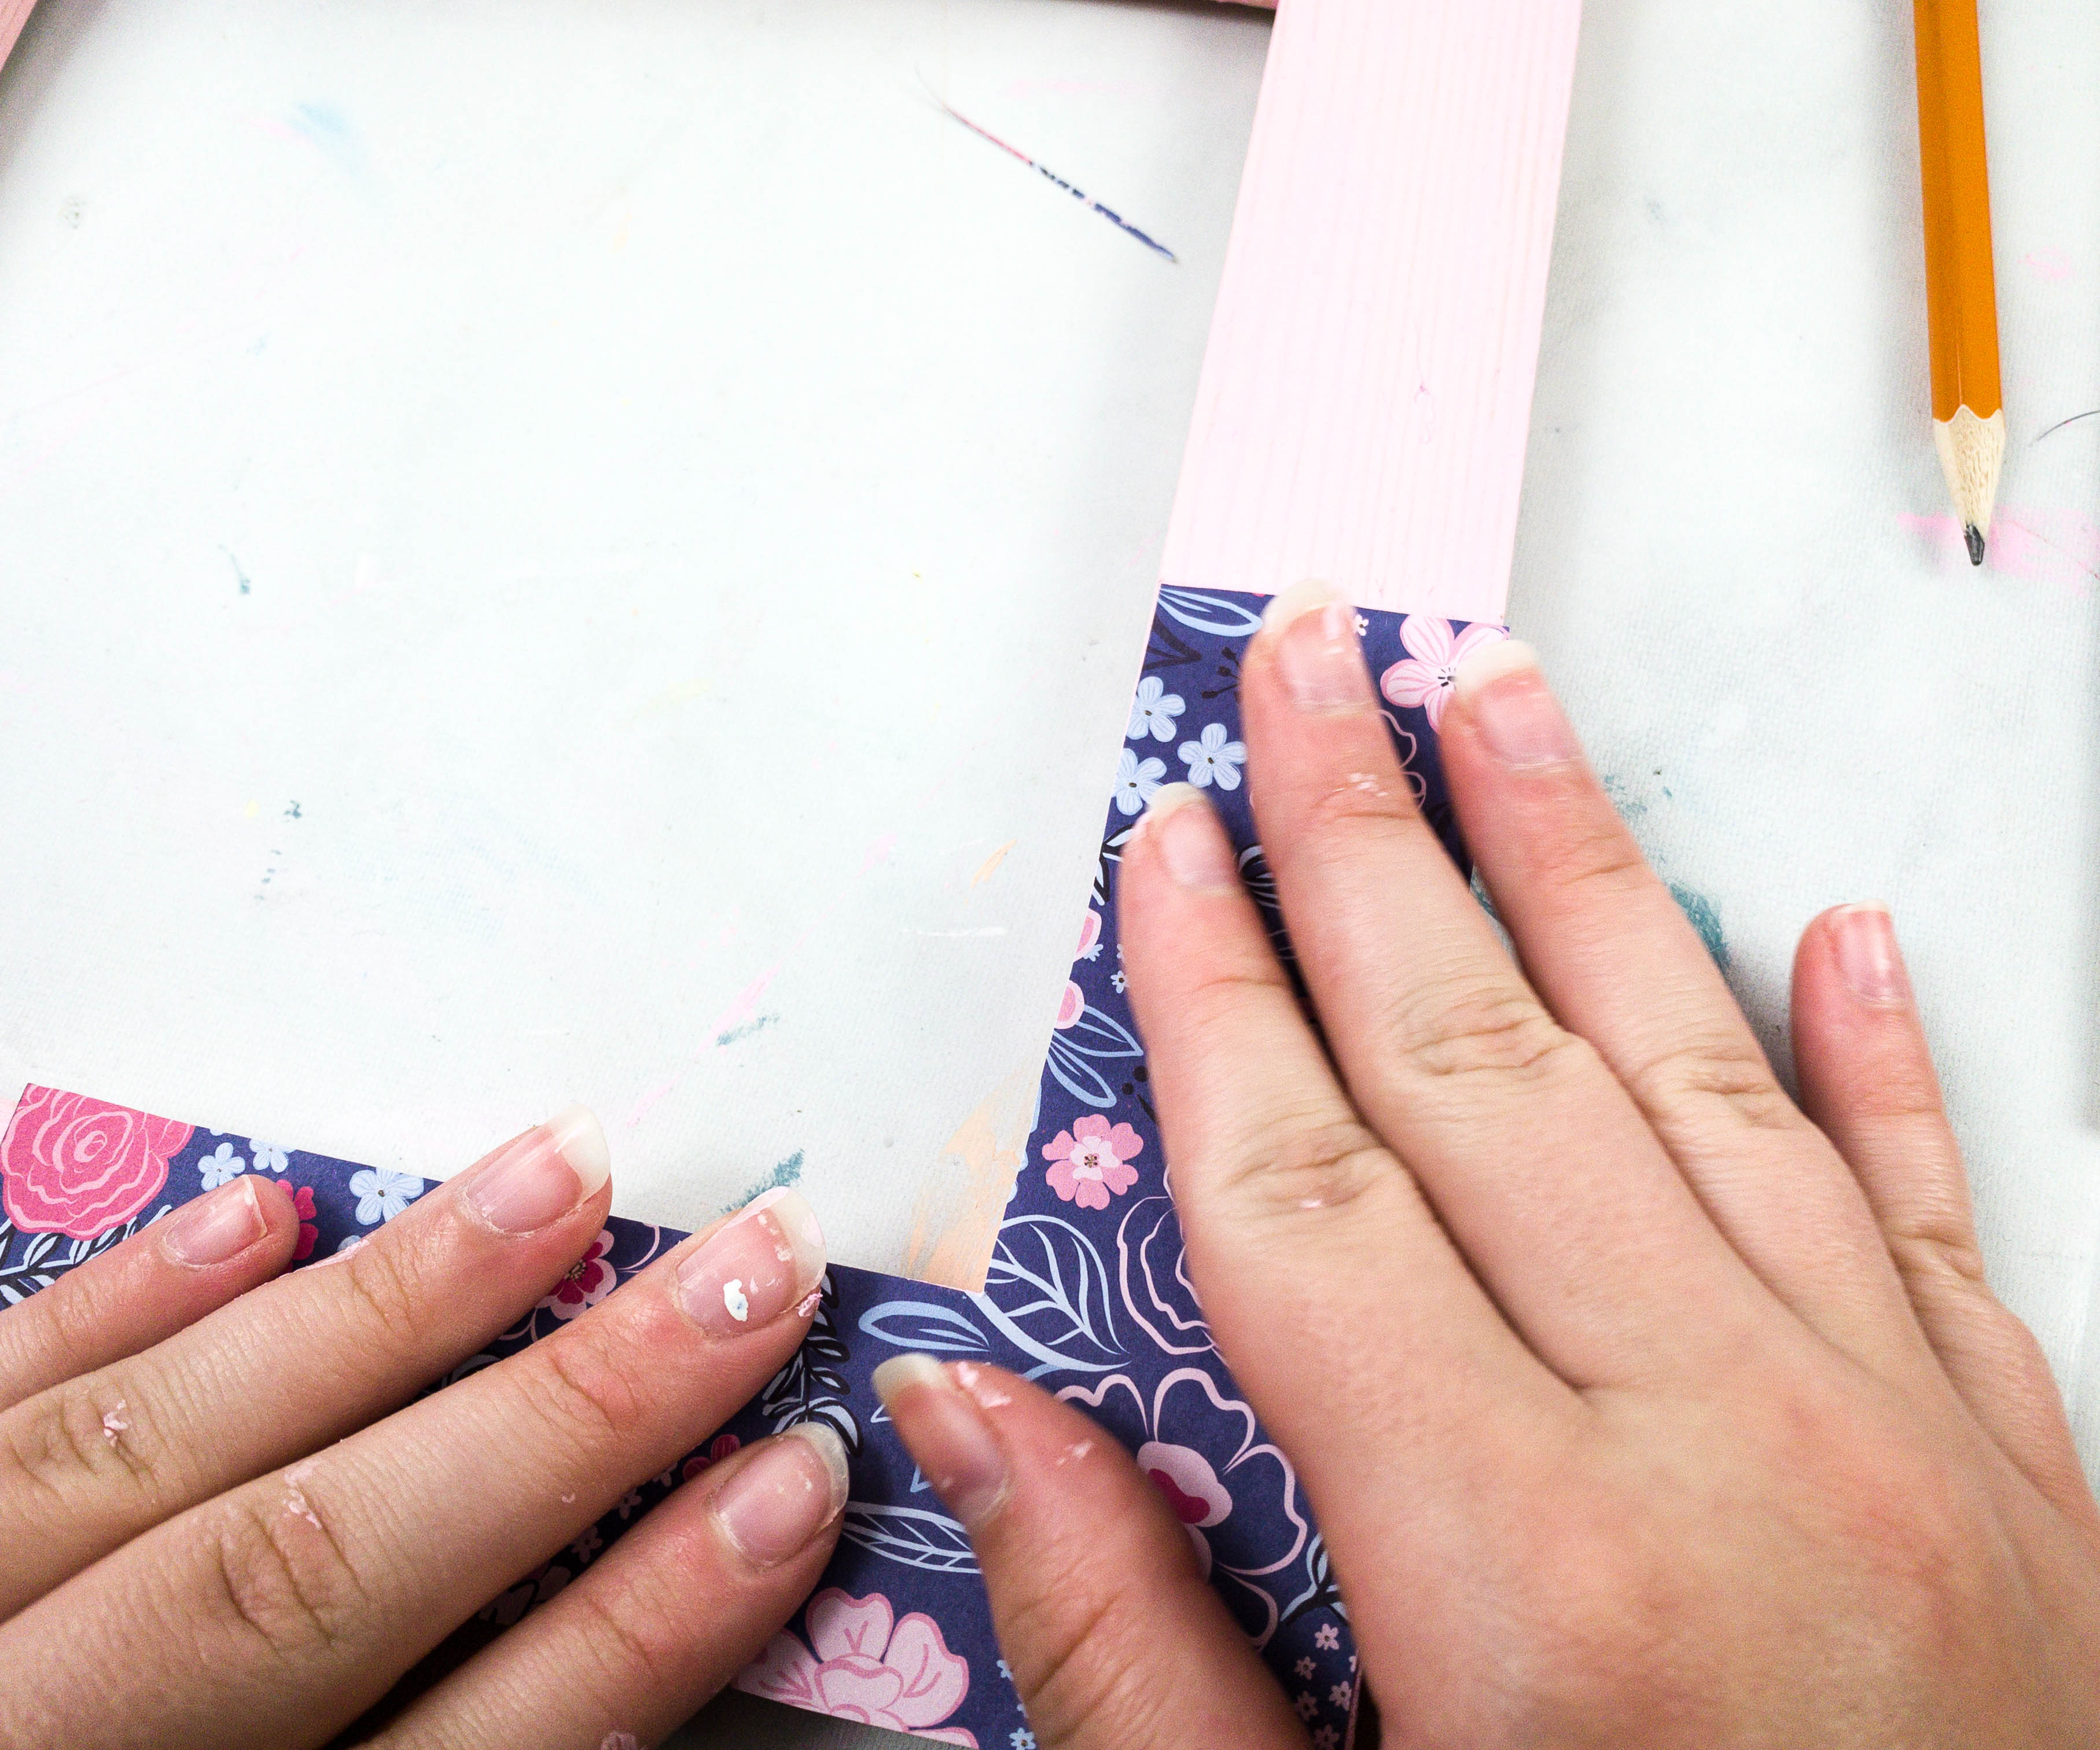
Using the glue, we stuck the fabric into the frame, forming an L shape on opposite corners.
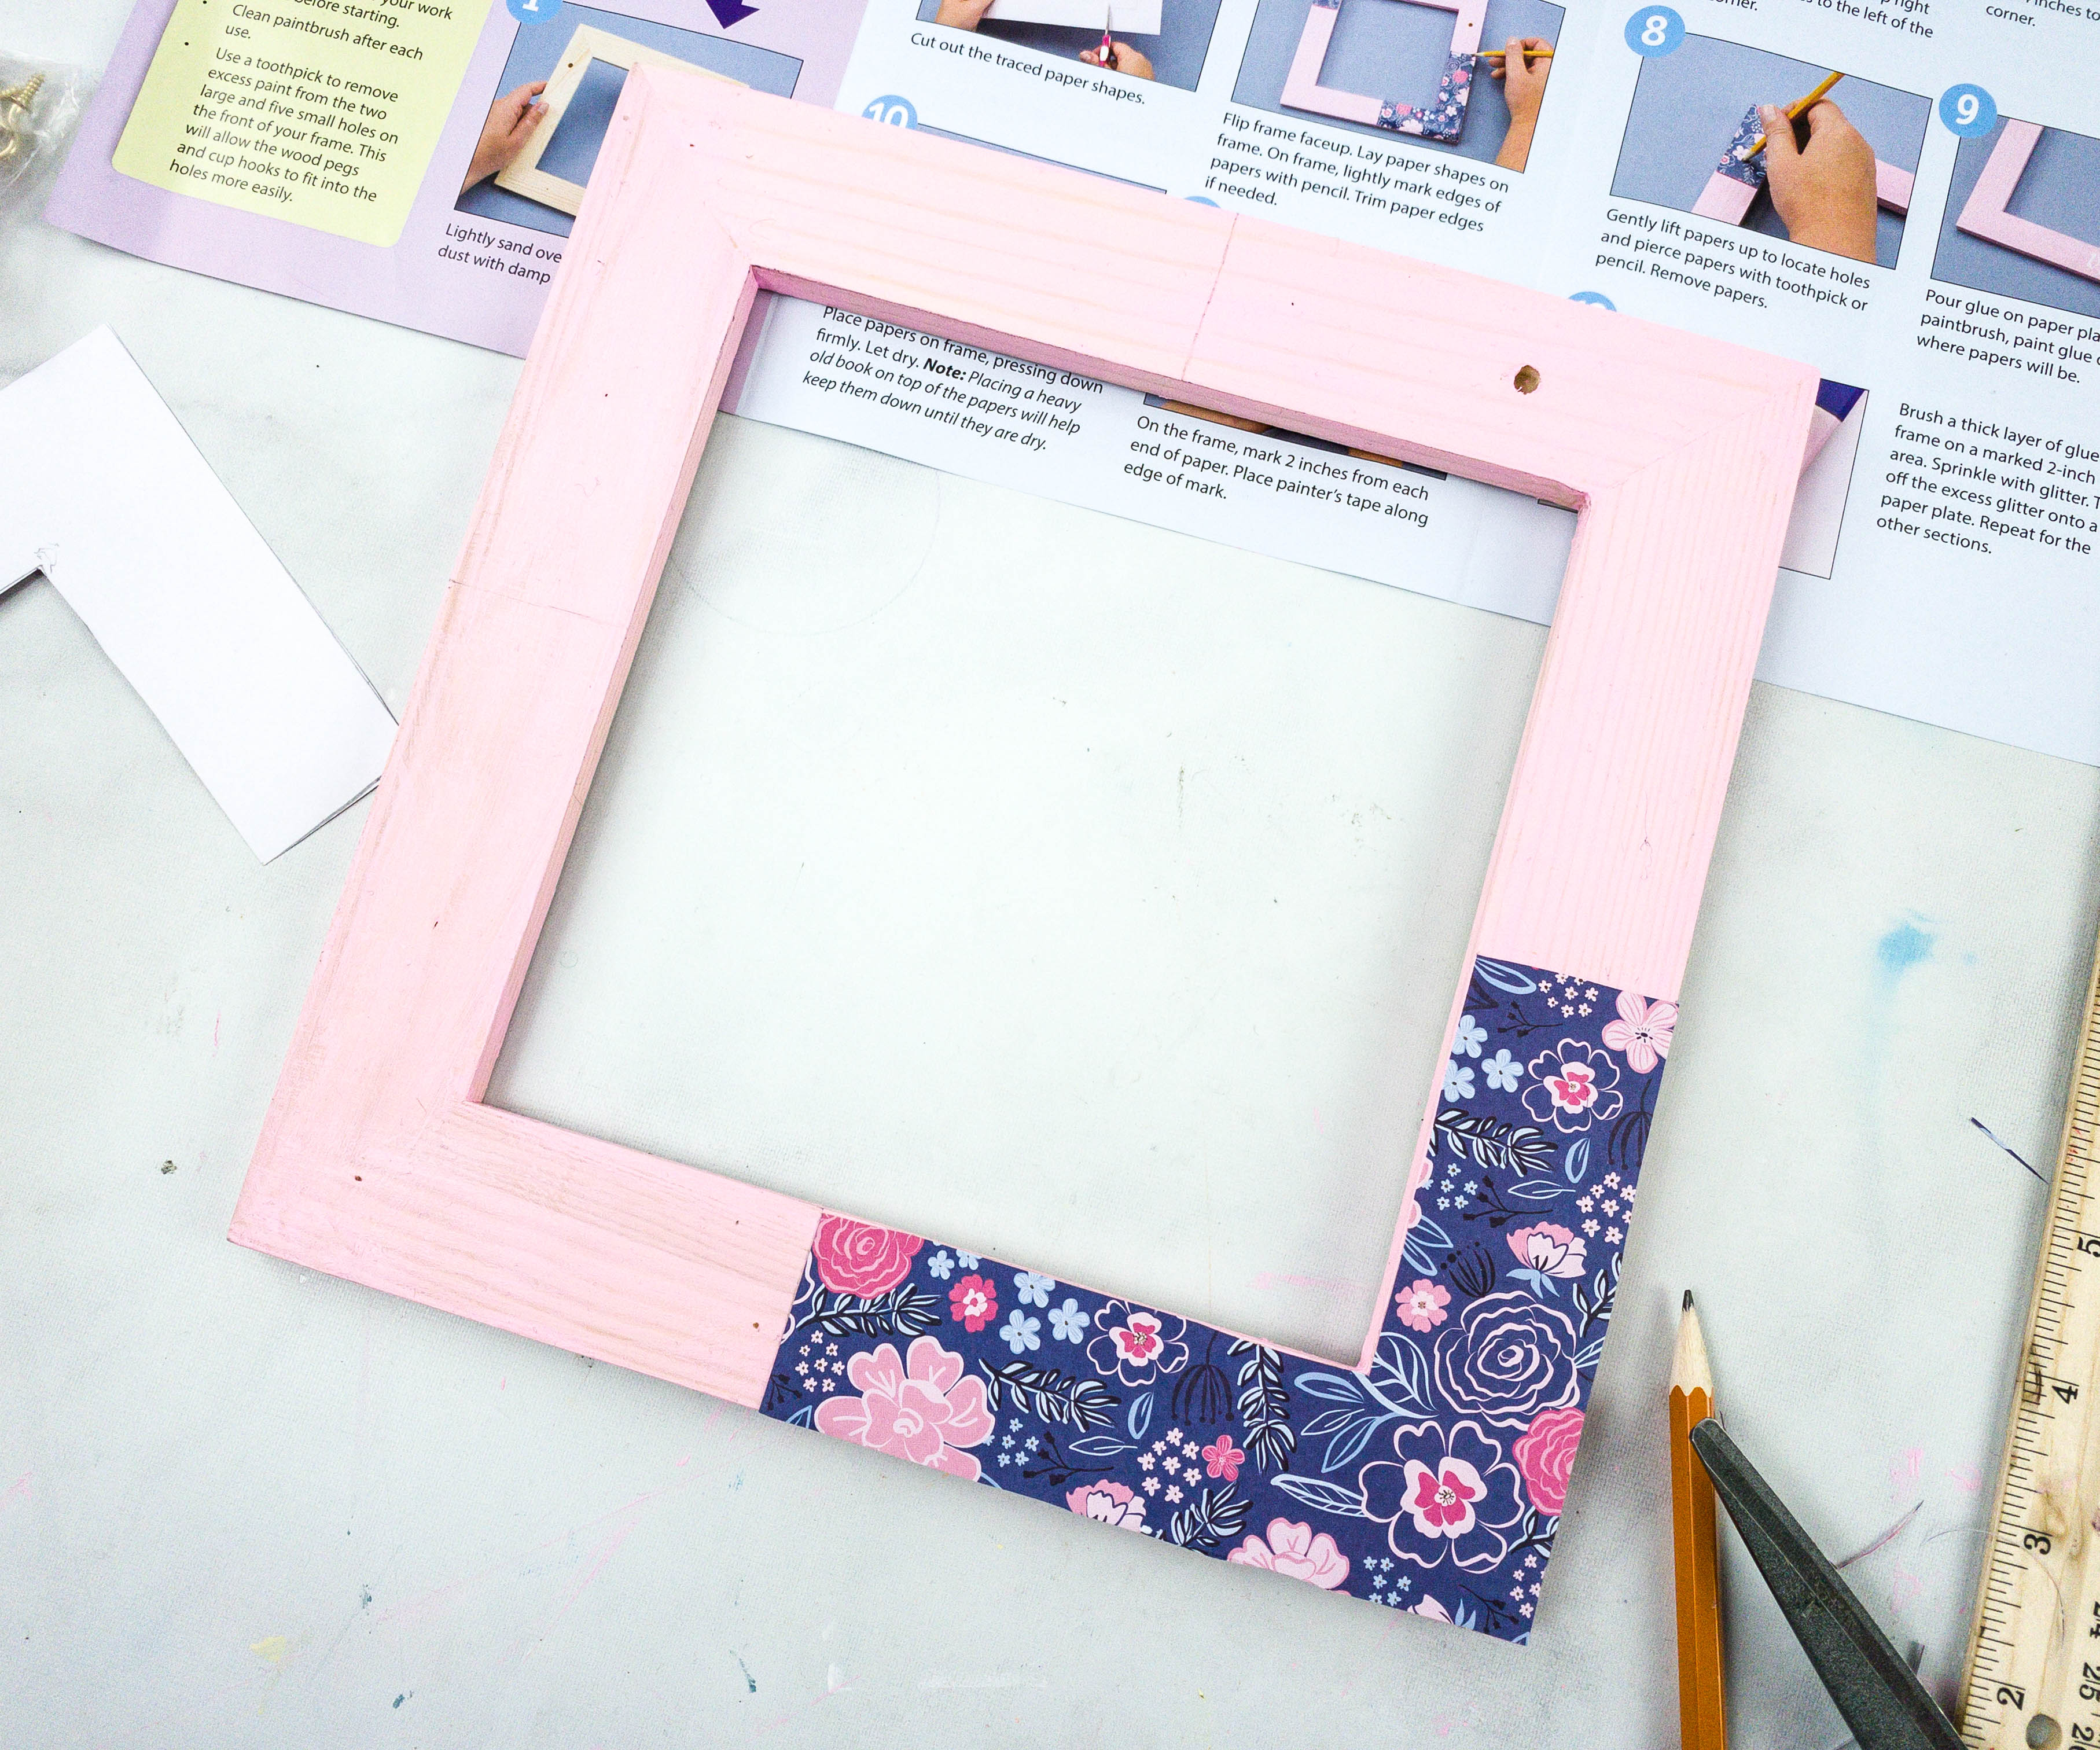
We also painted each side of the L a nice glittery gold color to enhance the look!
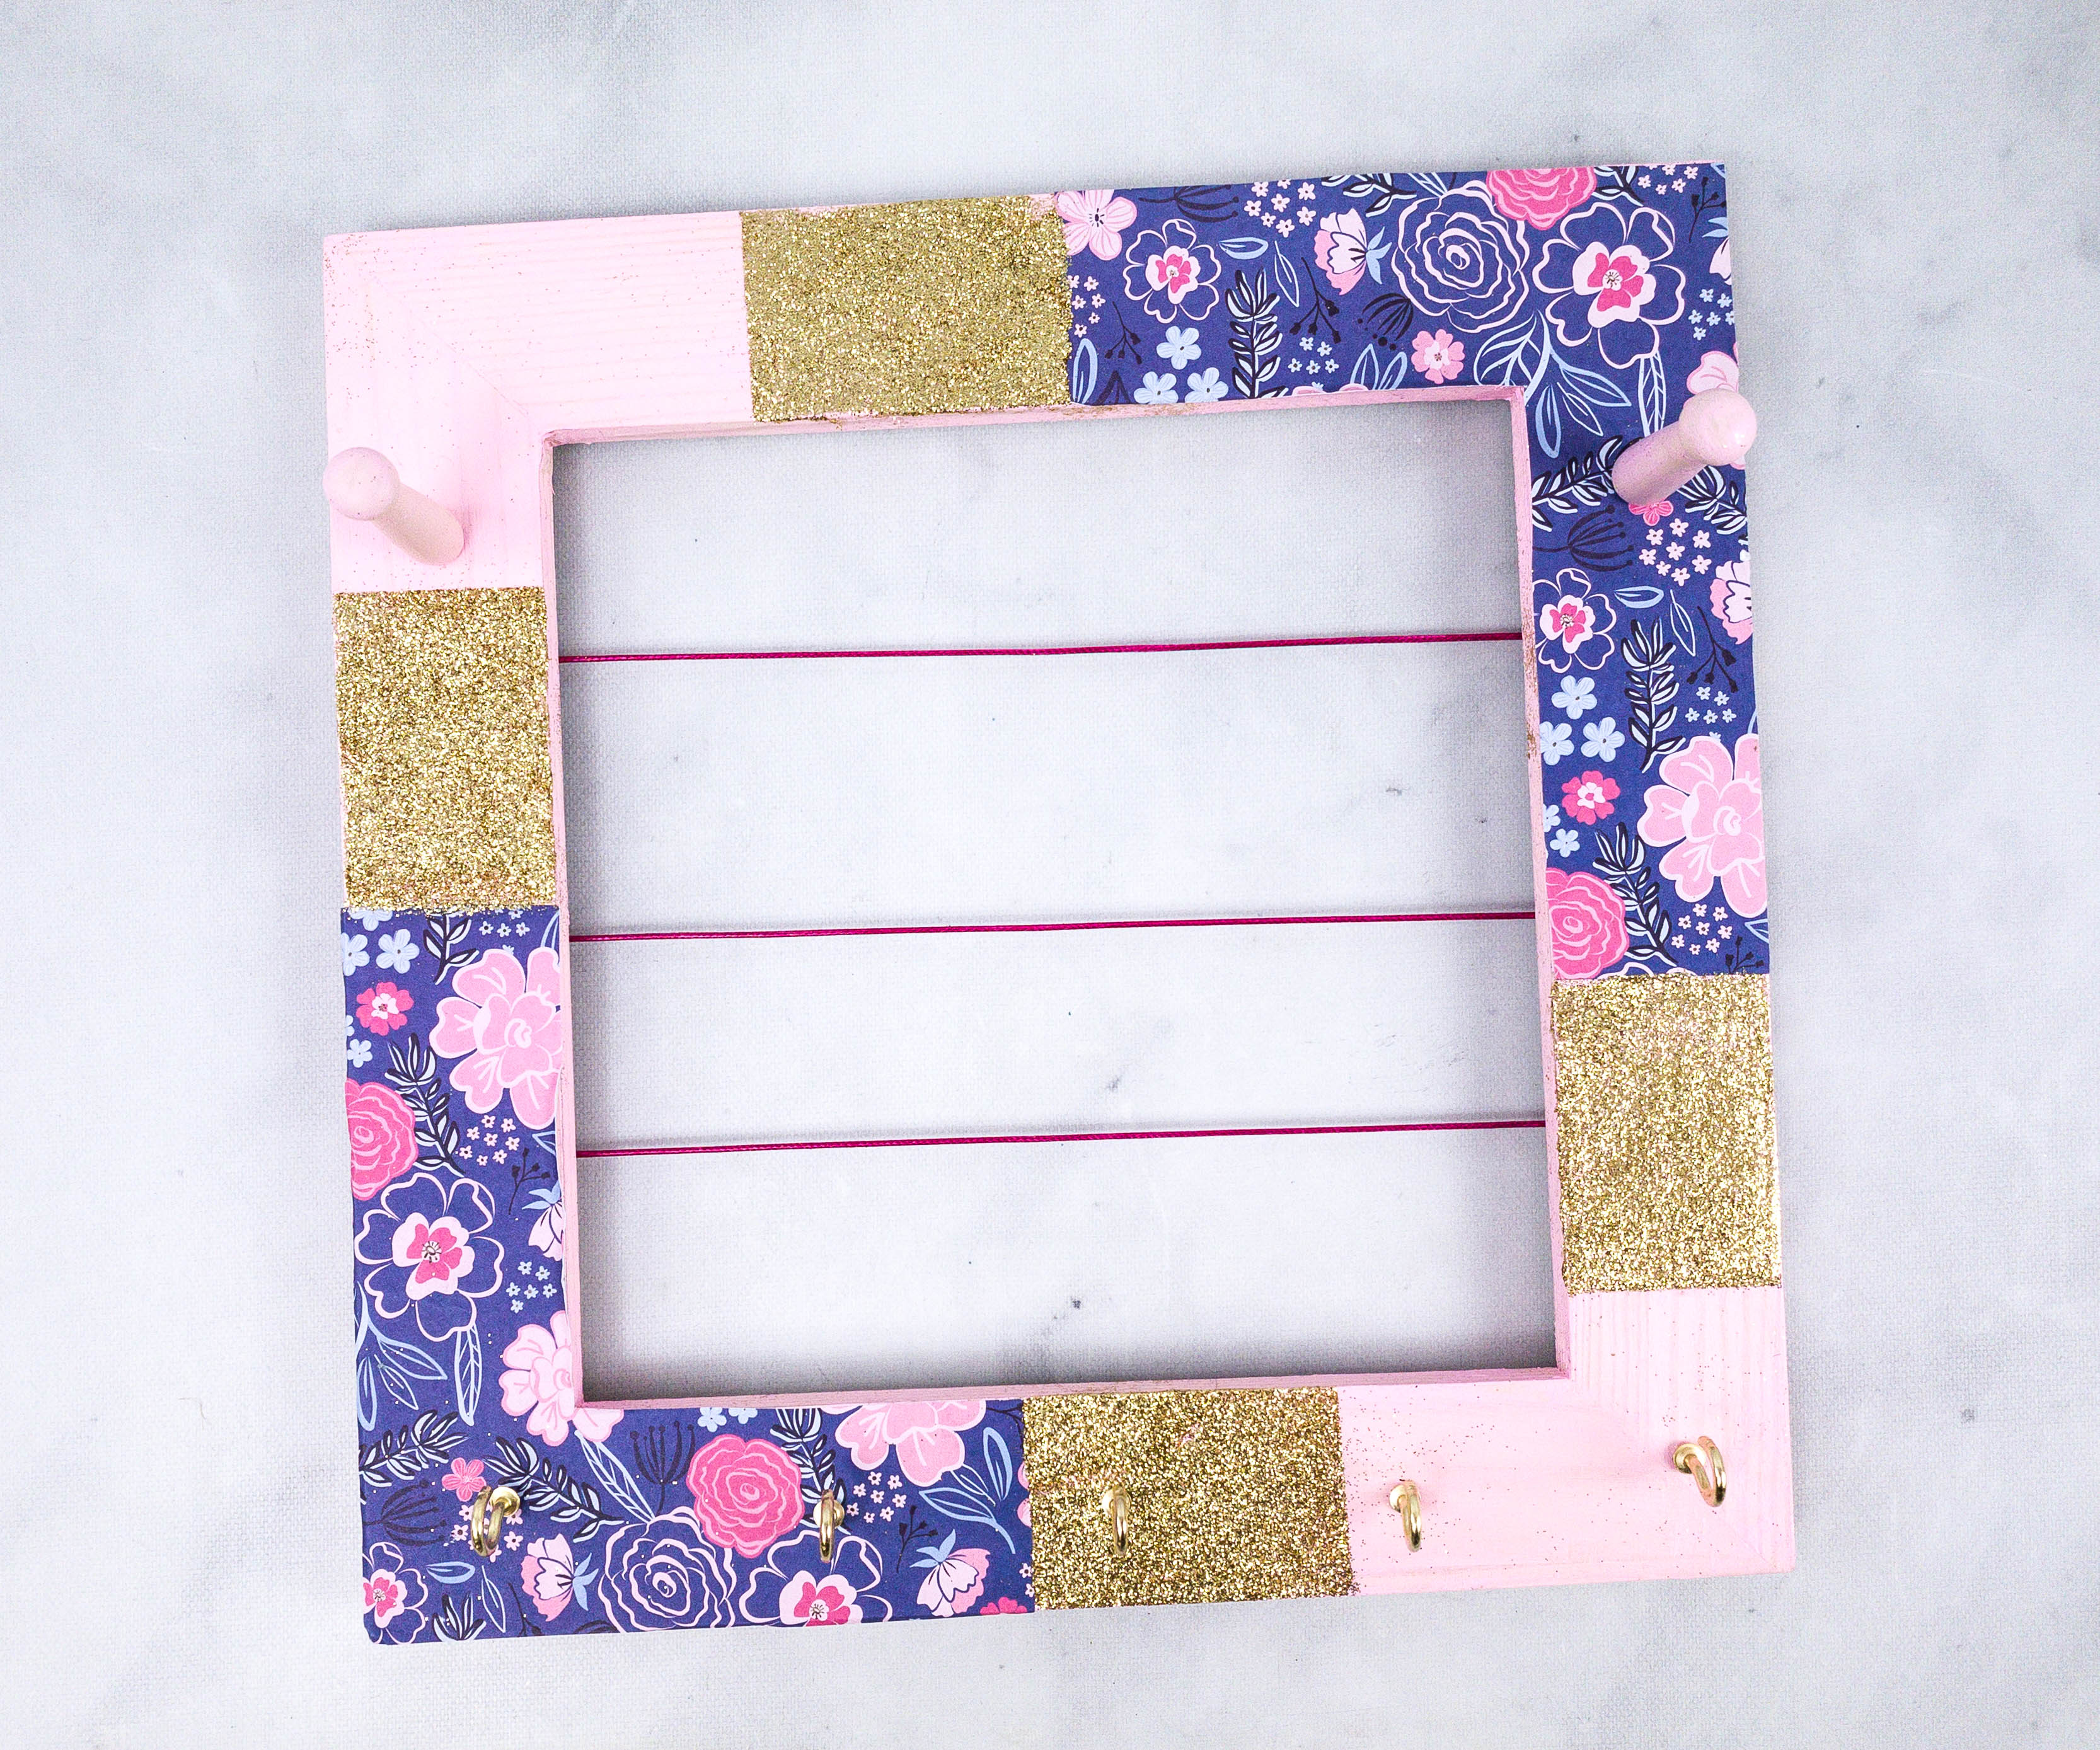
Once the paint has dried, it’s time to attach the red string on the back and put in the pegs. We also have some gold plated hooks from the kit, so we placed that in as well for more space to hold our jewelry!
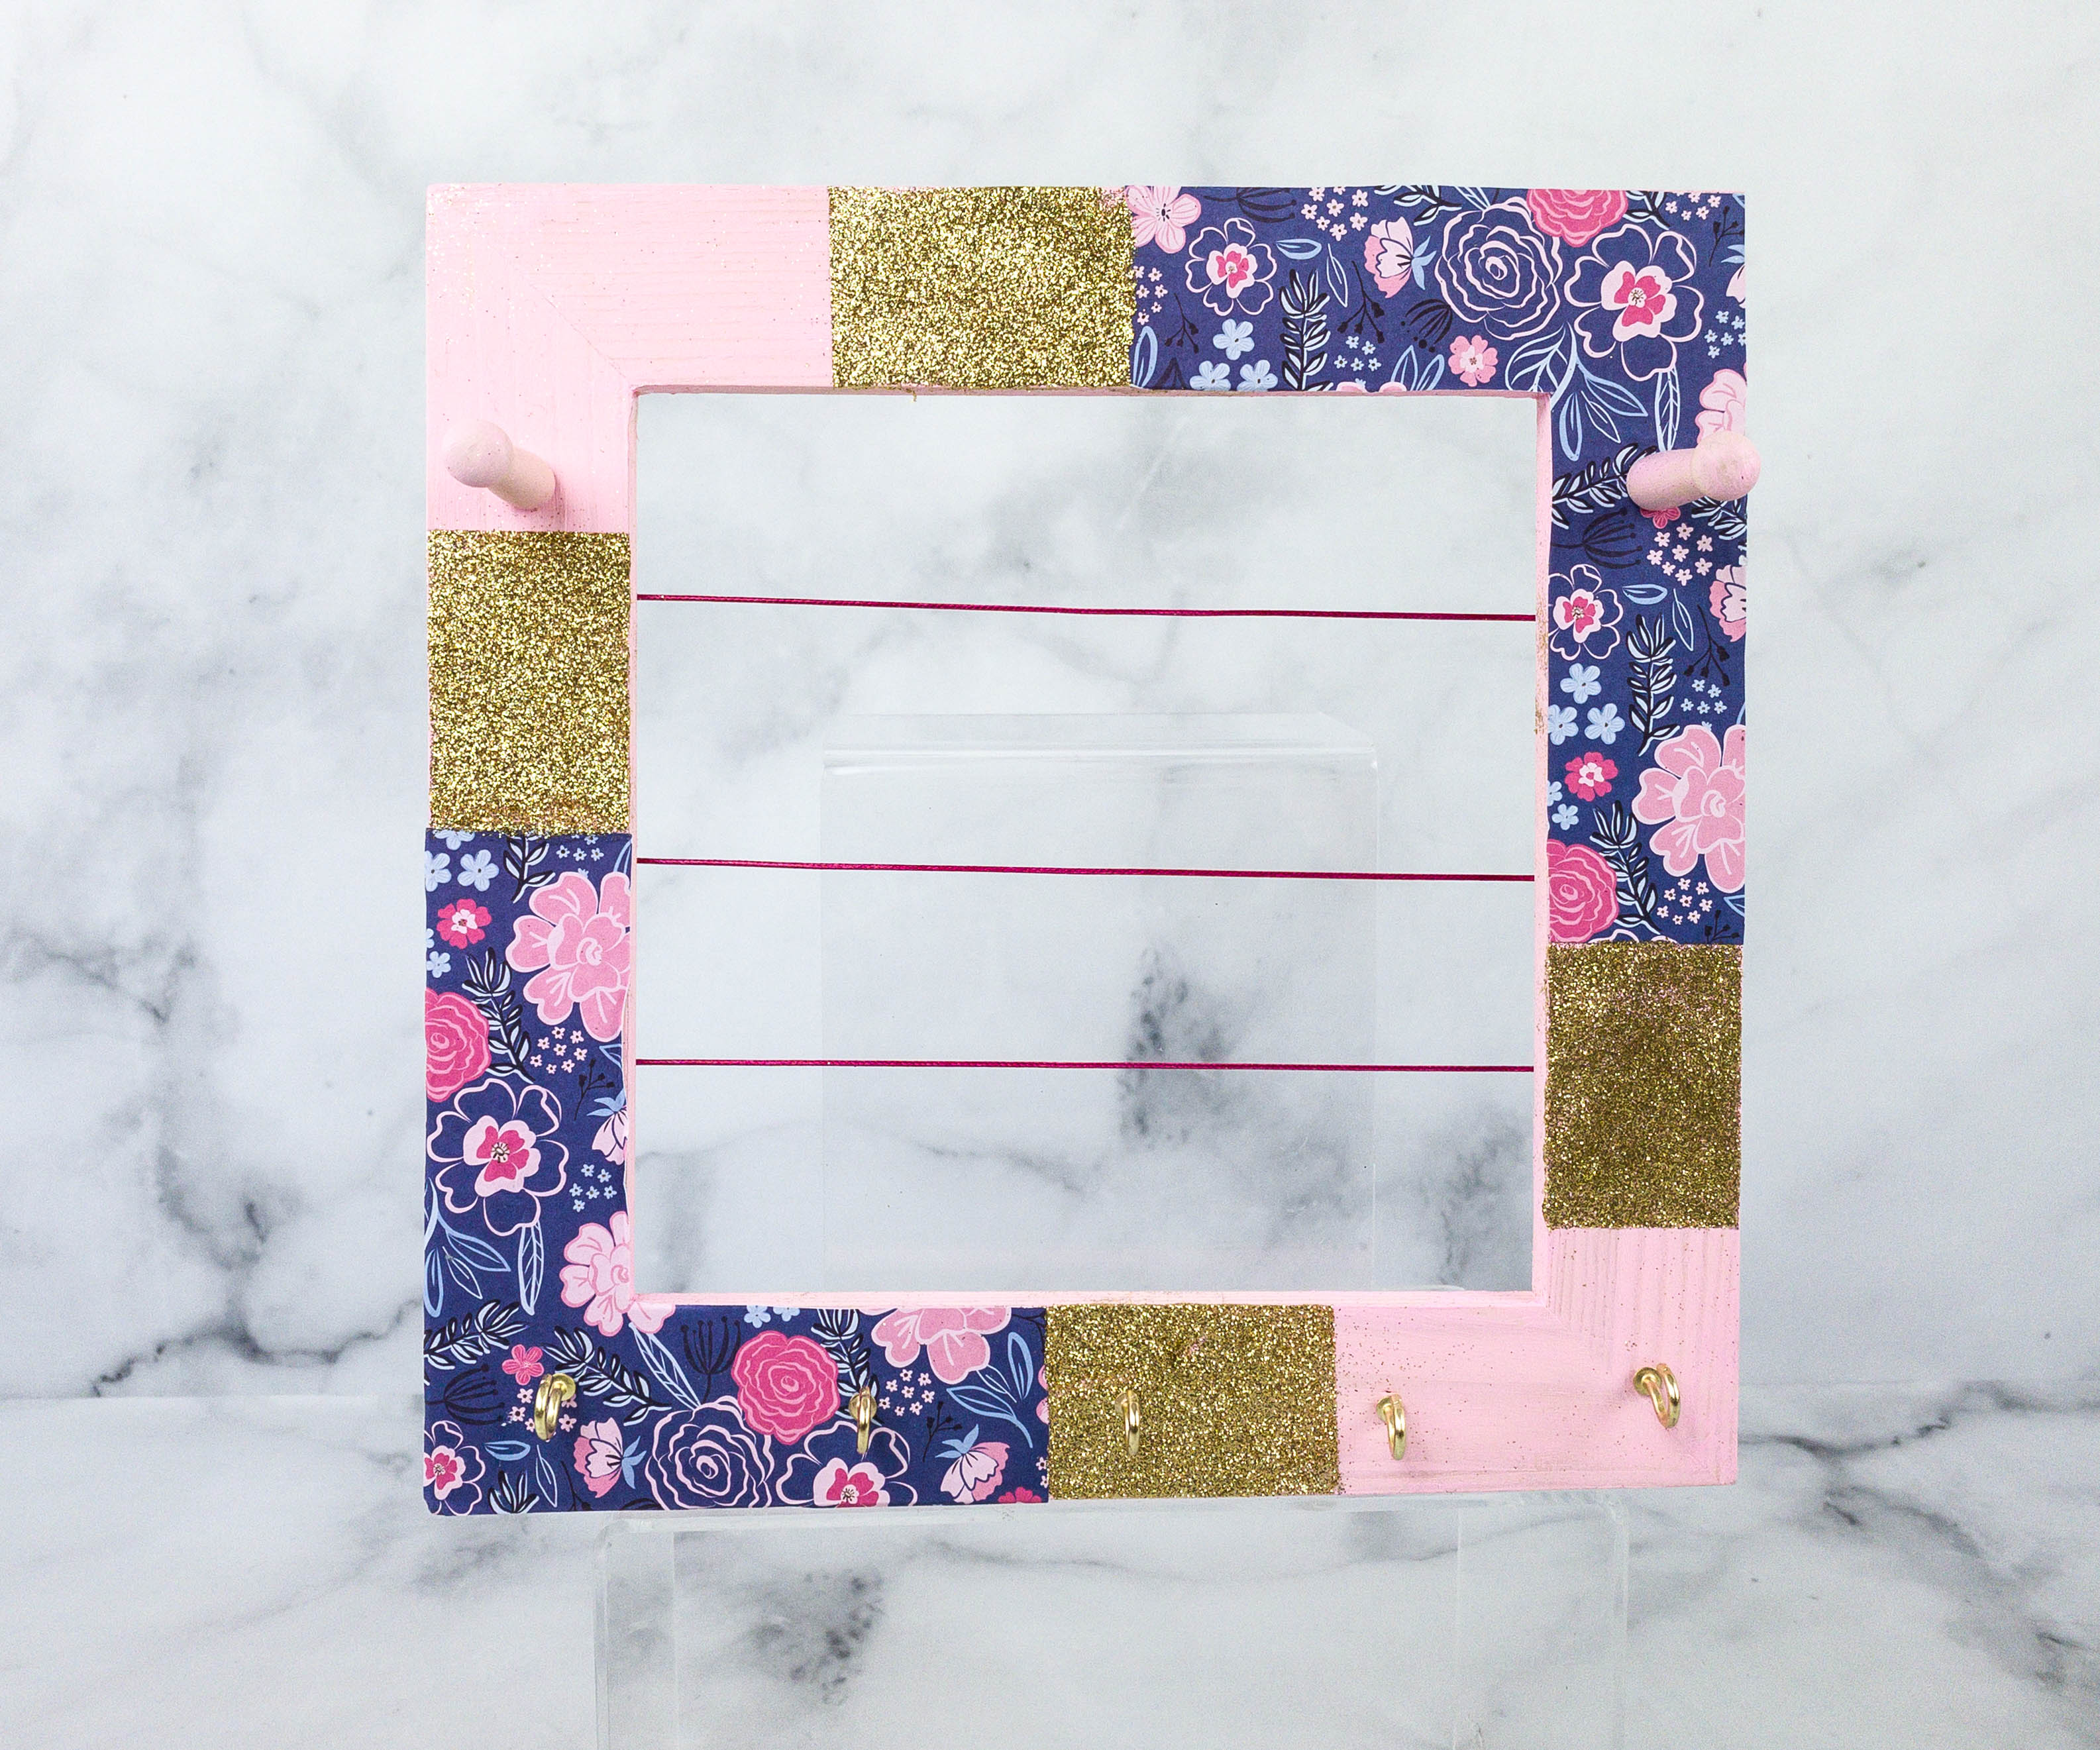
Here’s the finished product! You can either hang this on a wall or even let it stand on your desk. Either way, it will showcase your jewelry collection beautifully.
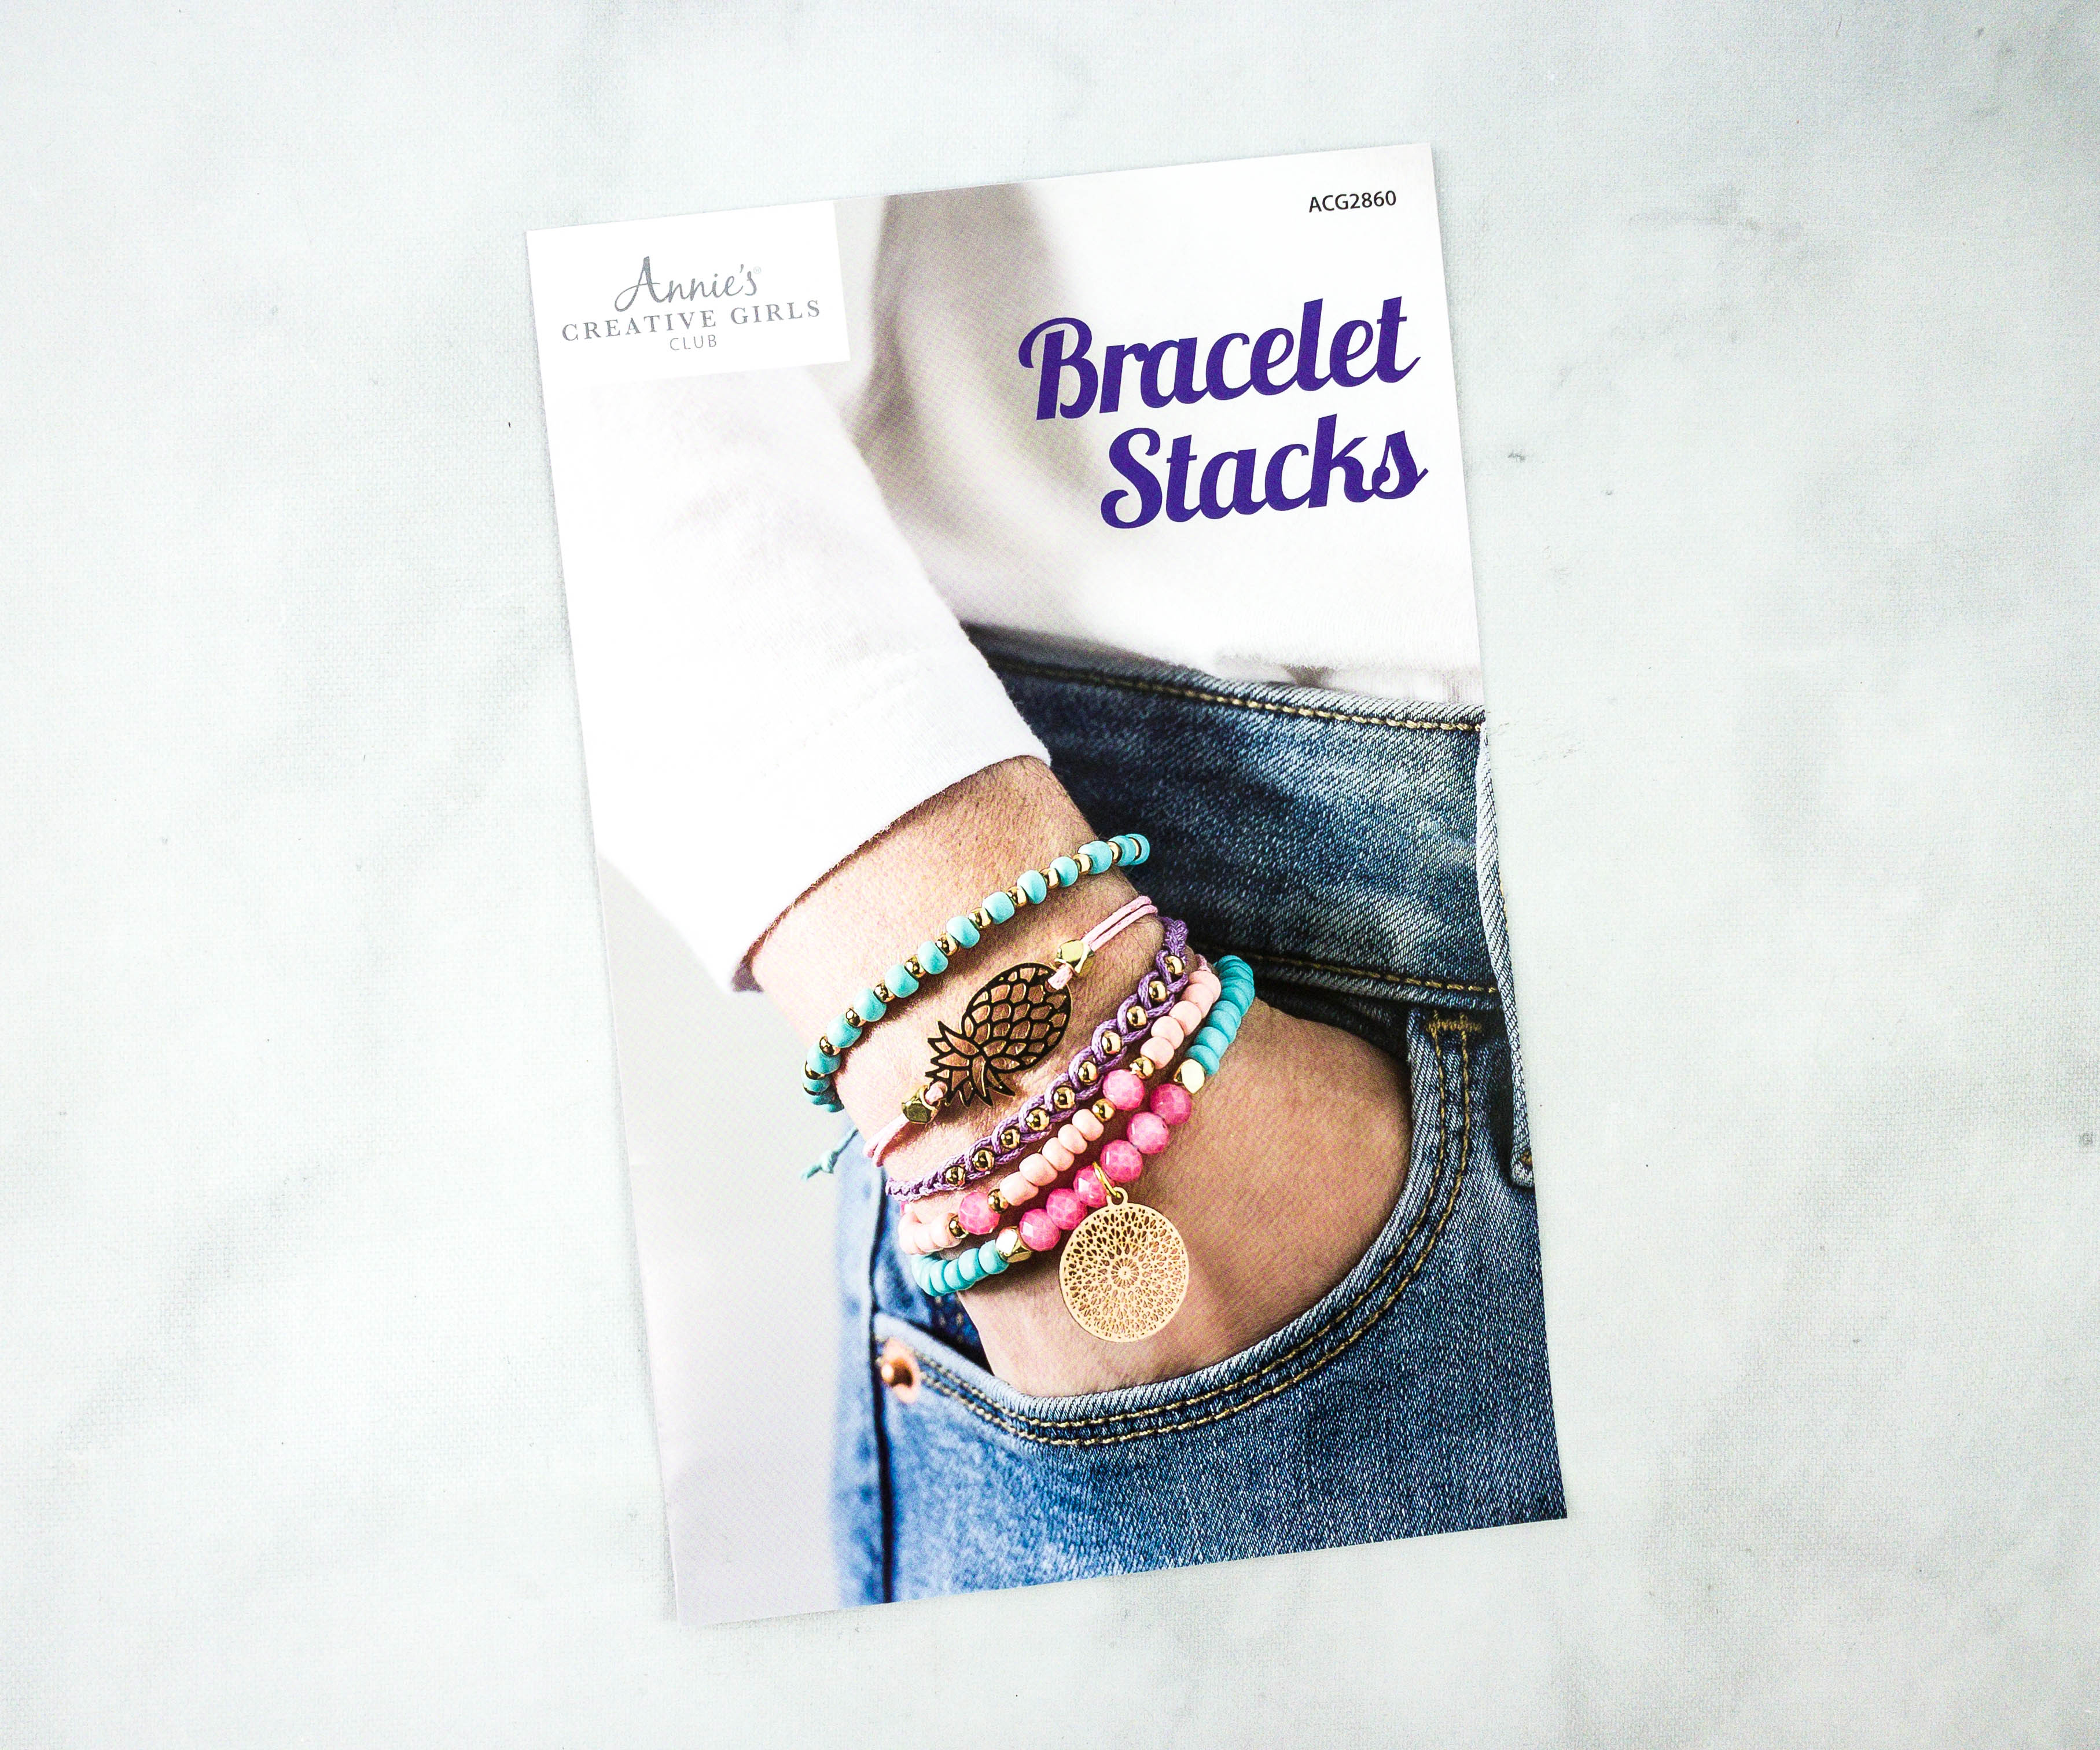
The next project is about making bracelets!
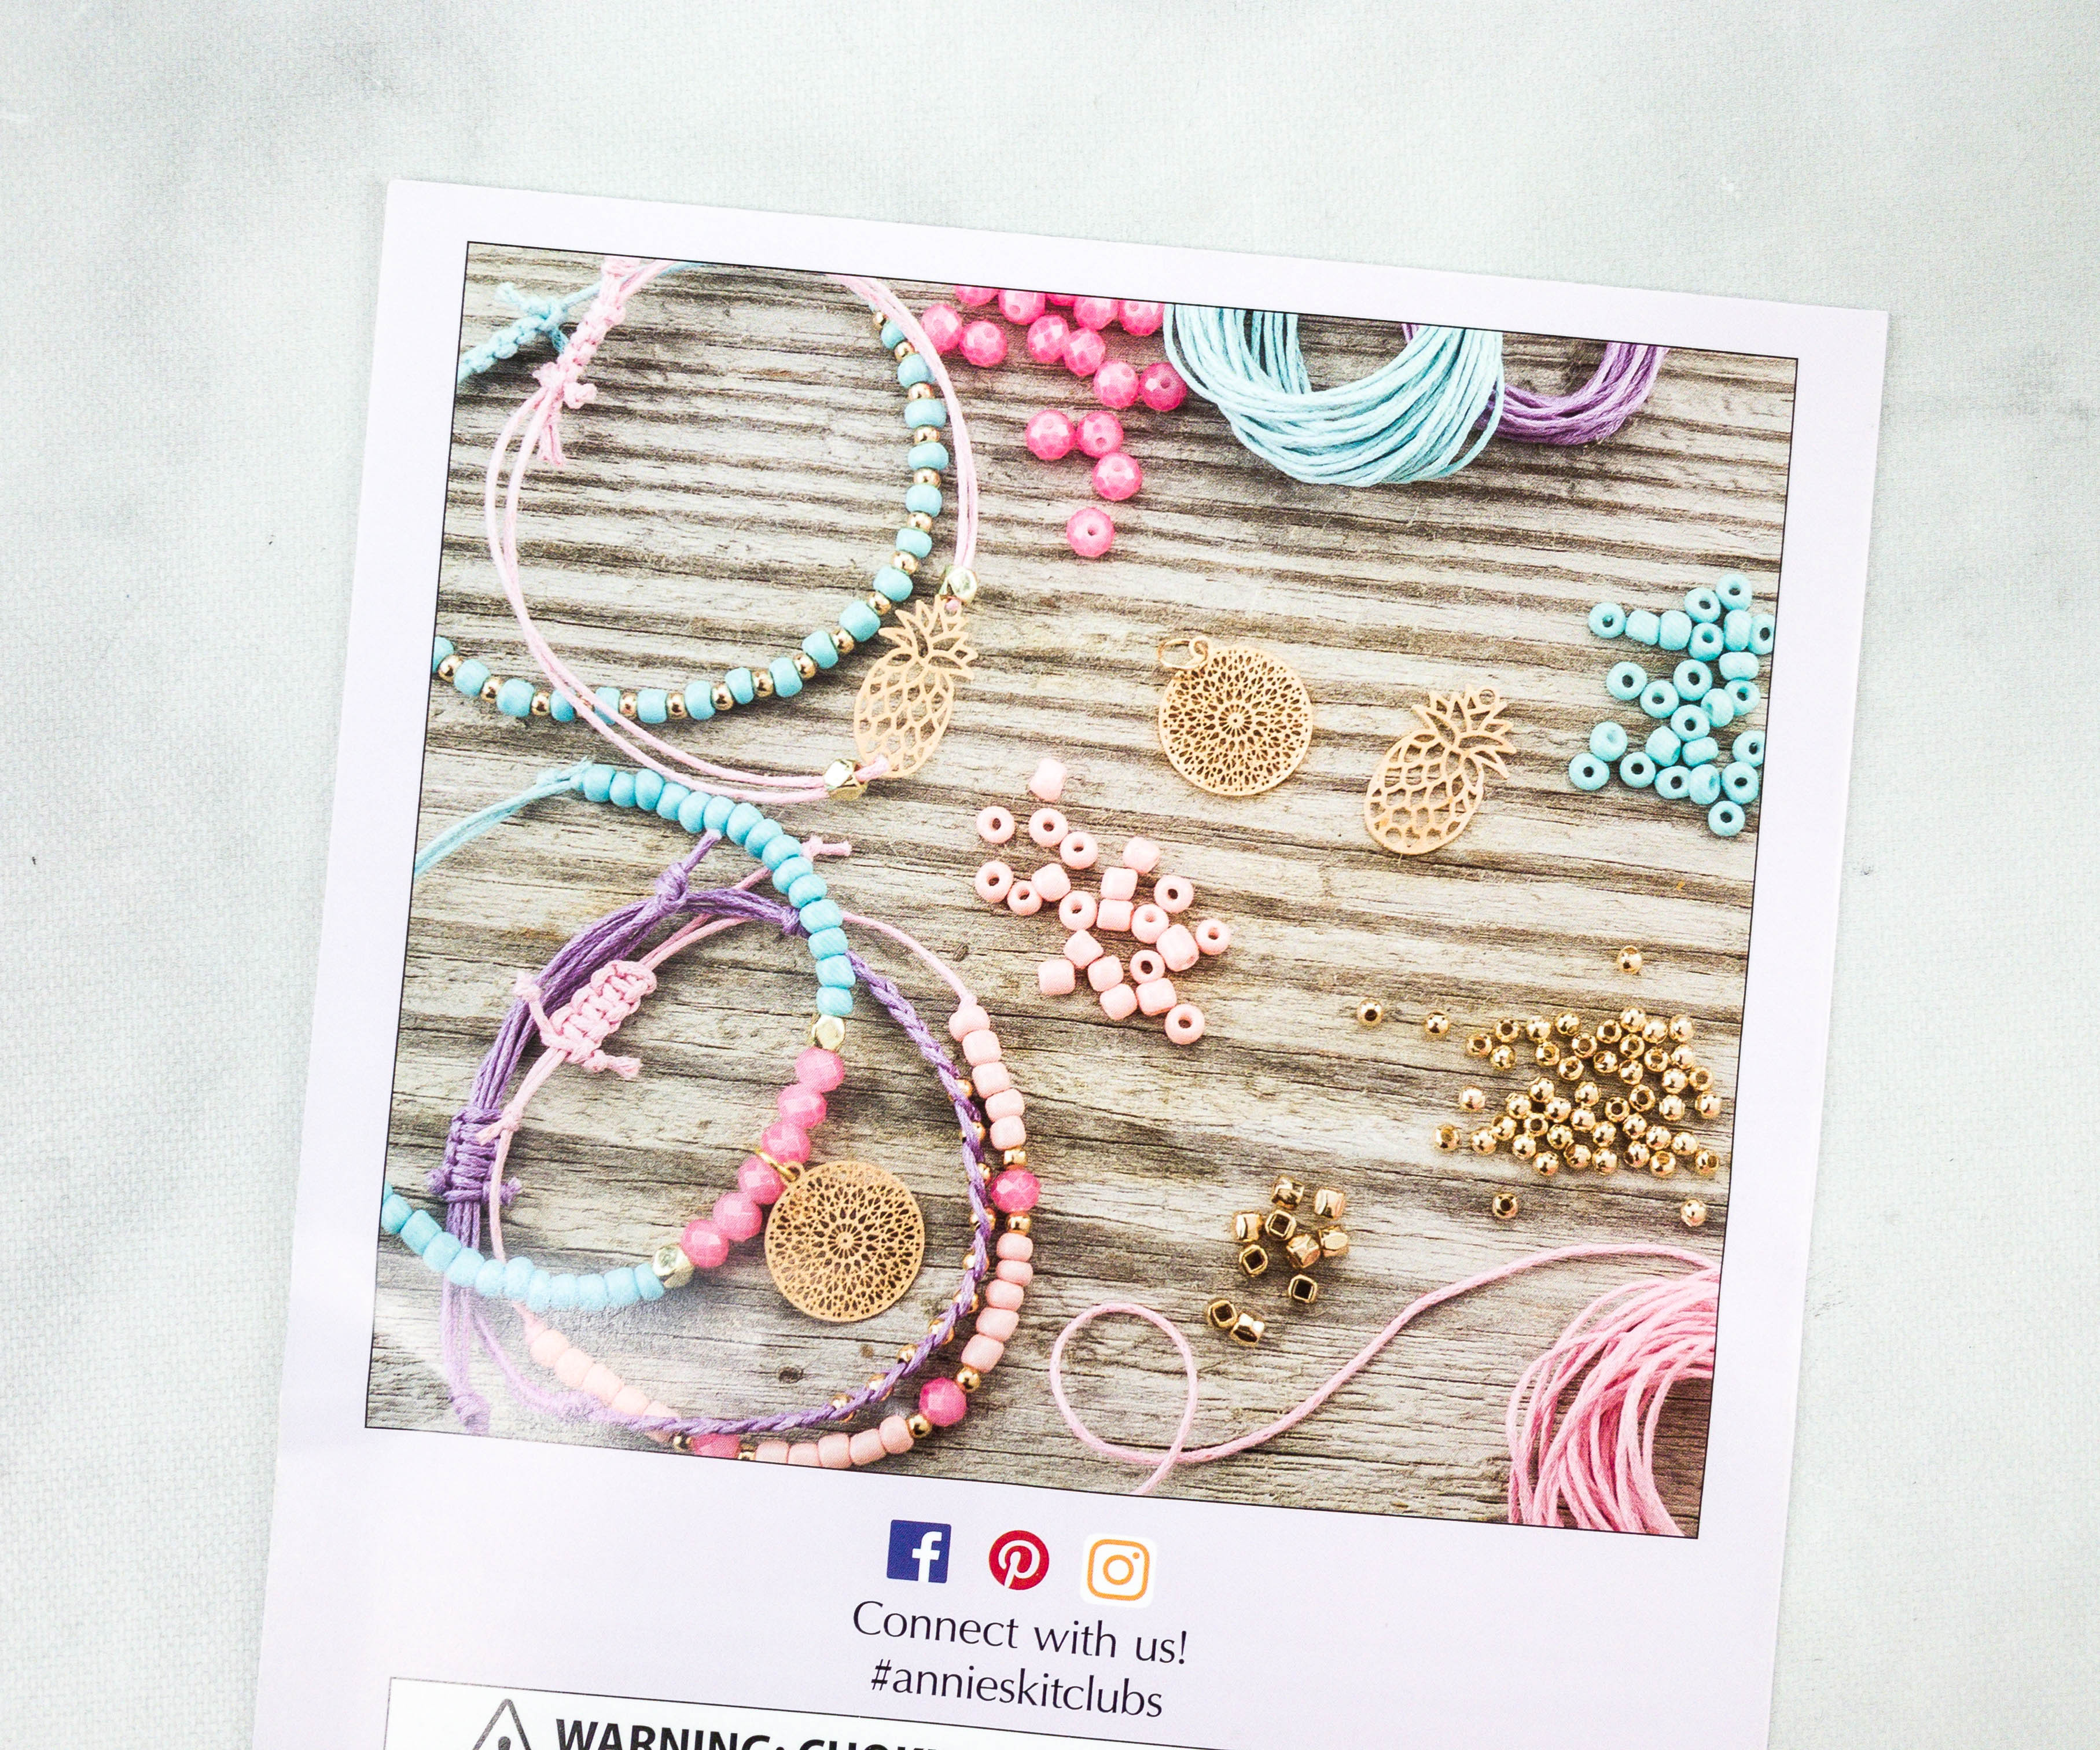
They also included a mini booklet, with a photo of the sample finished items at the back.
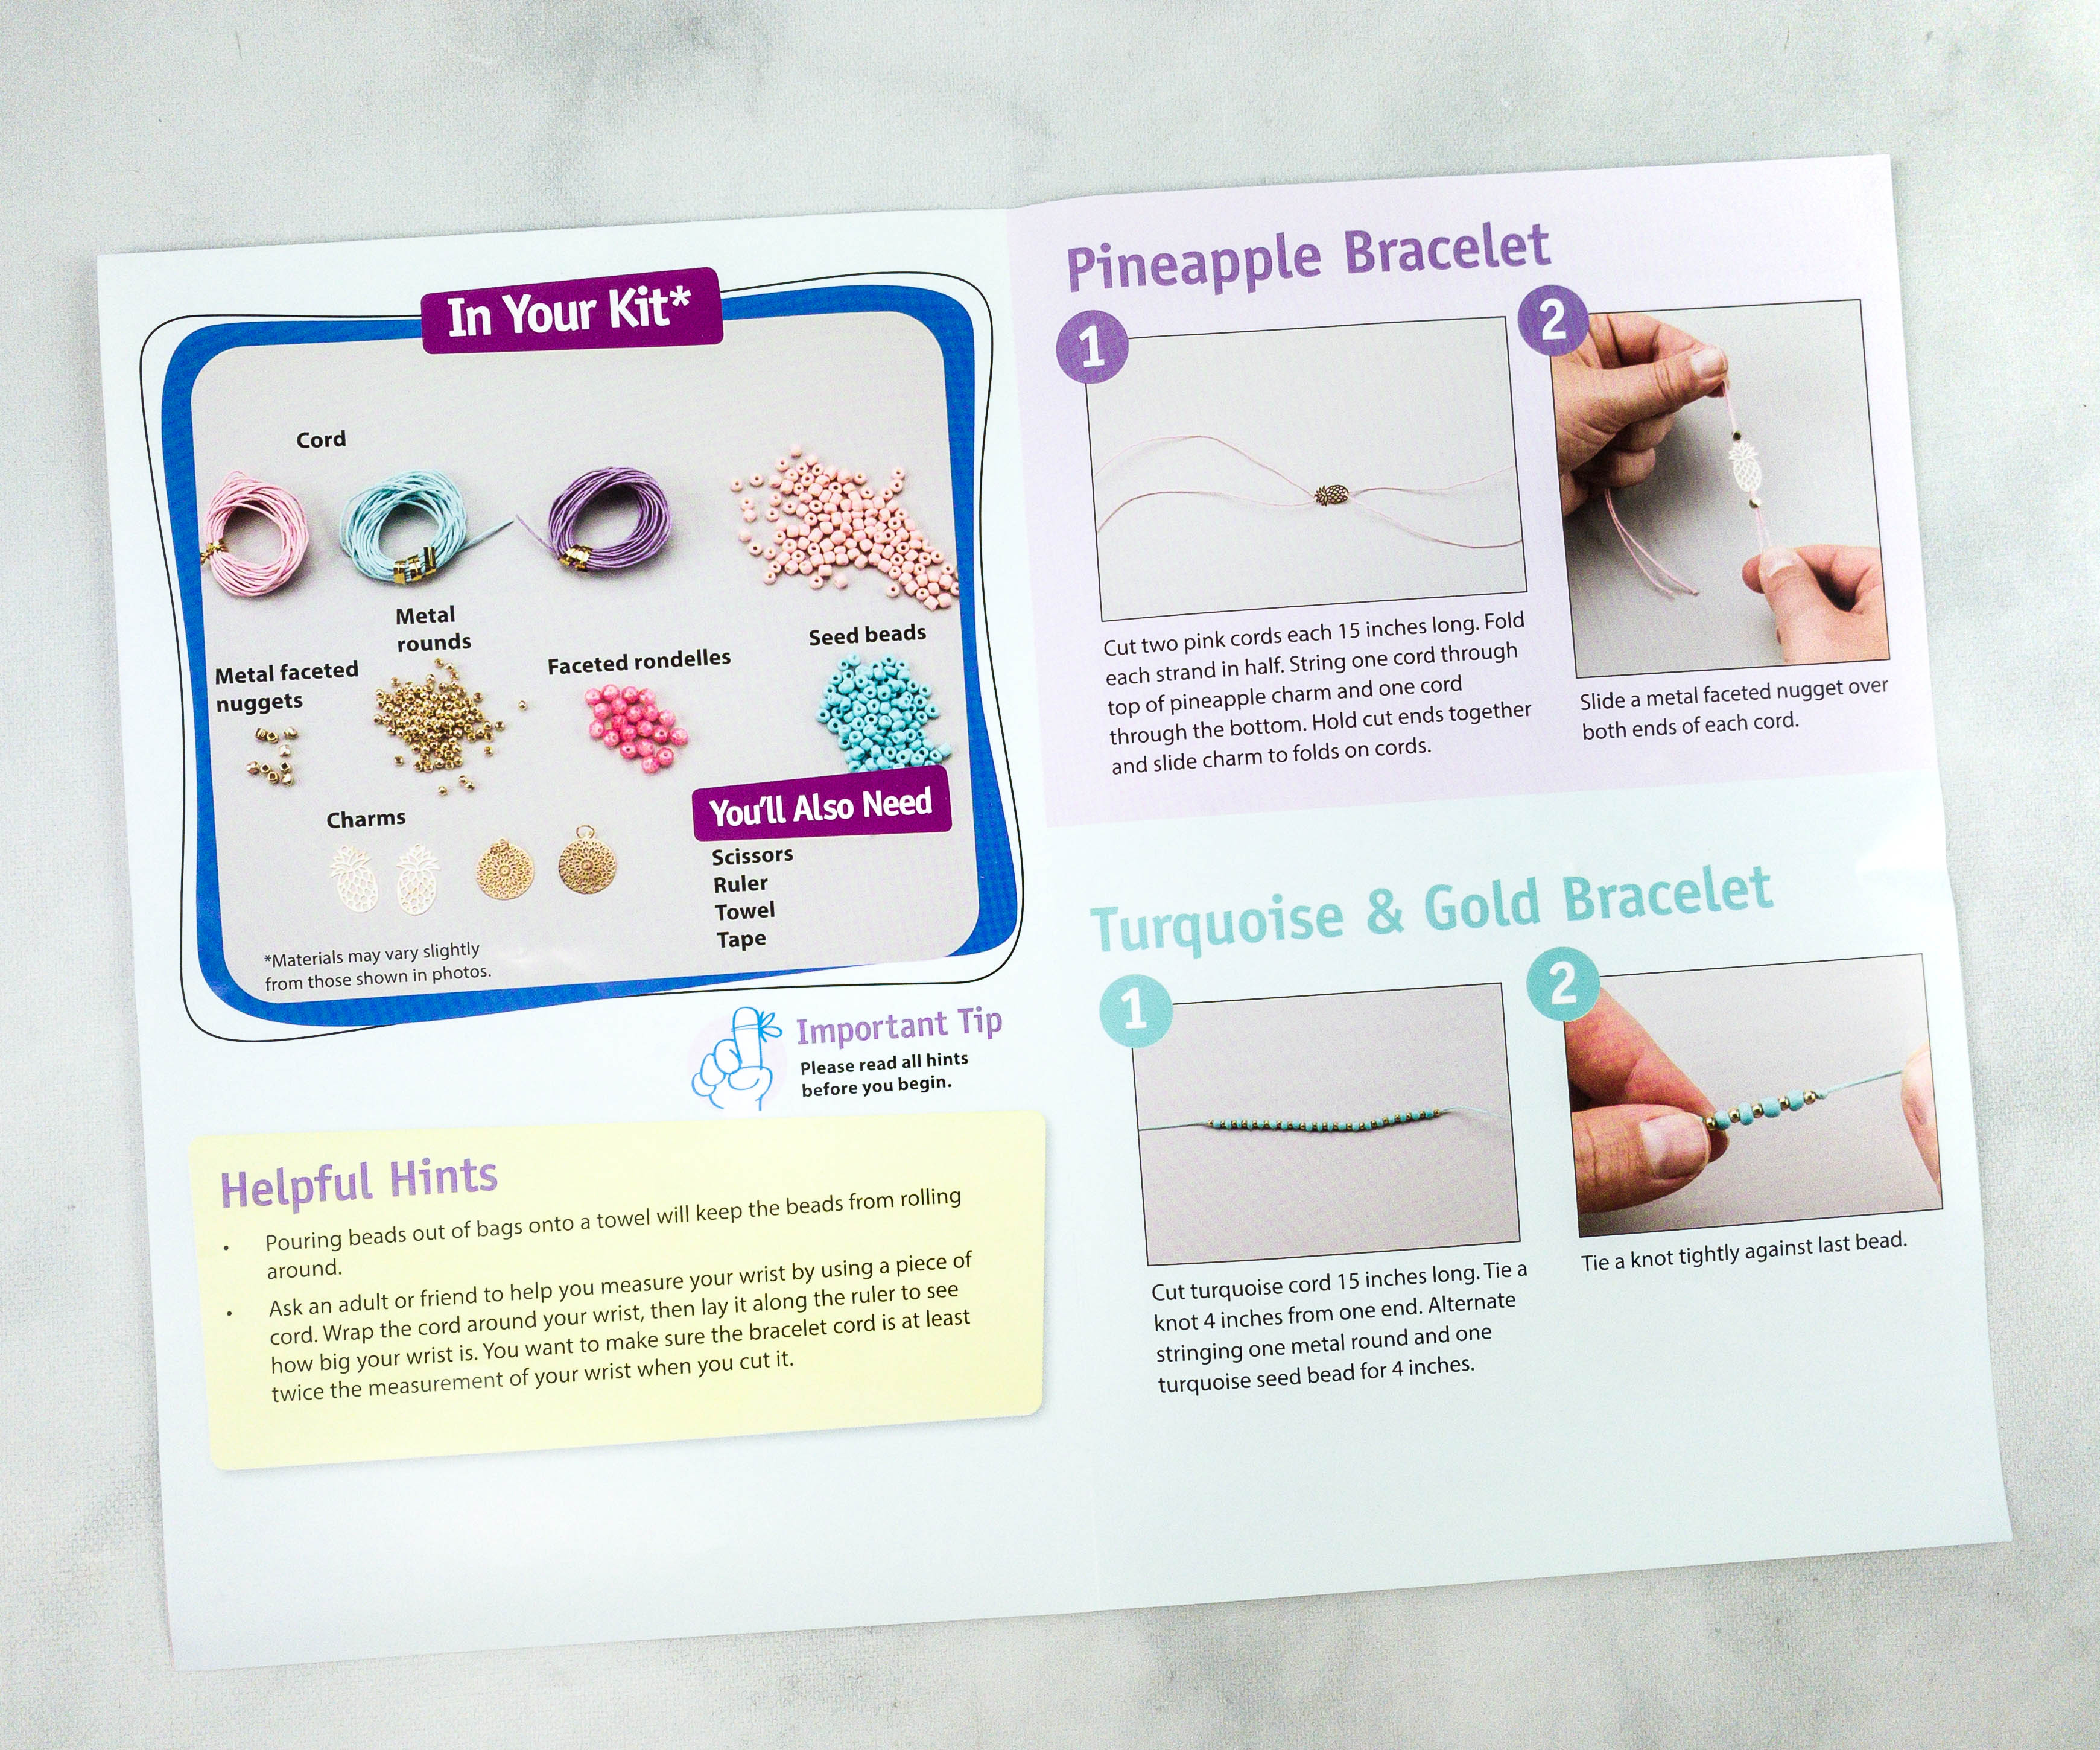
They listed all the necessary materials we need to complete the bracelets, most of which are already included in the box.
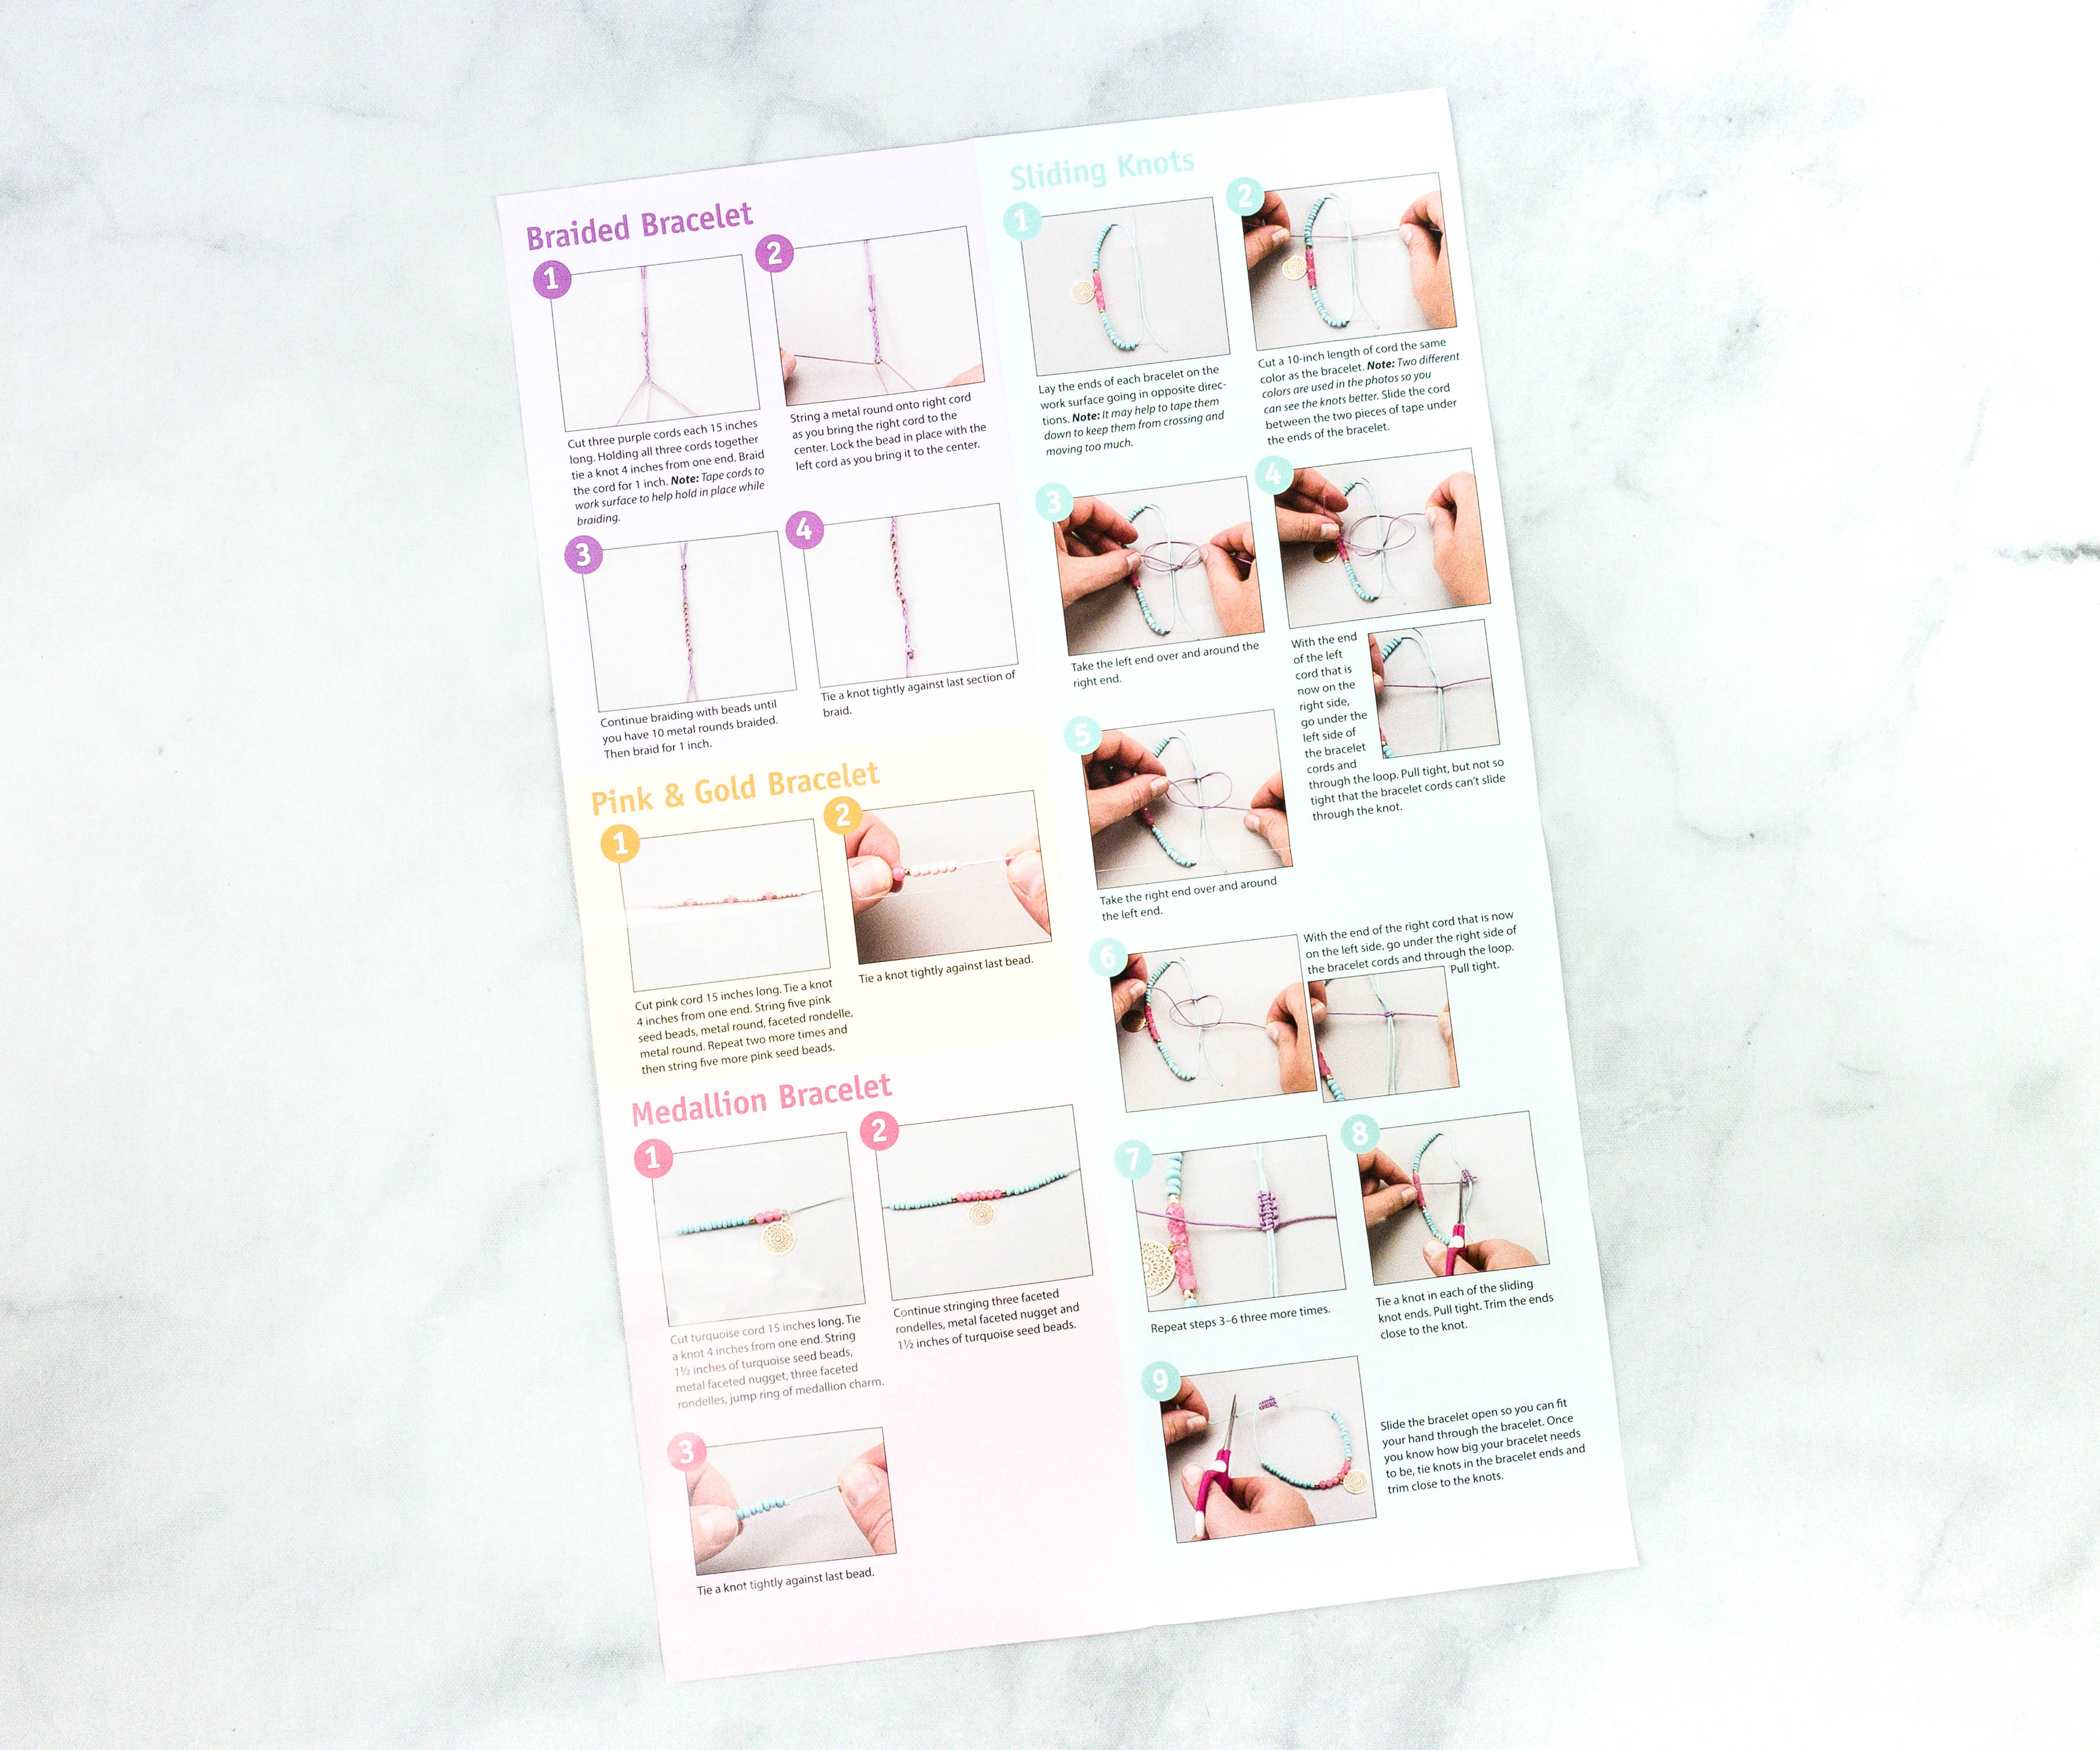
There are different kinds of bracelets that we can make with this kit. They have instructions for each type inside the booklet!
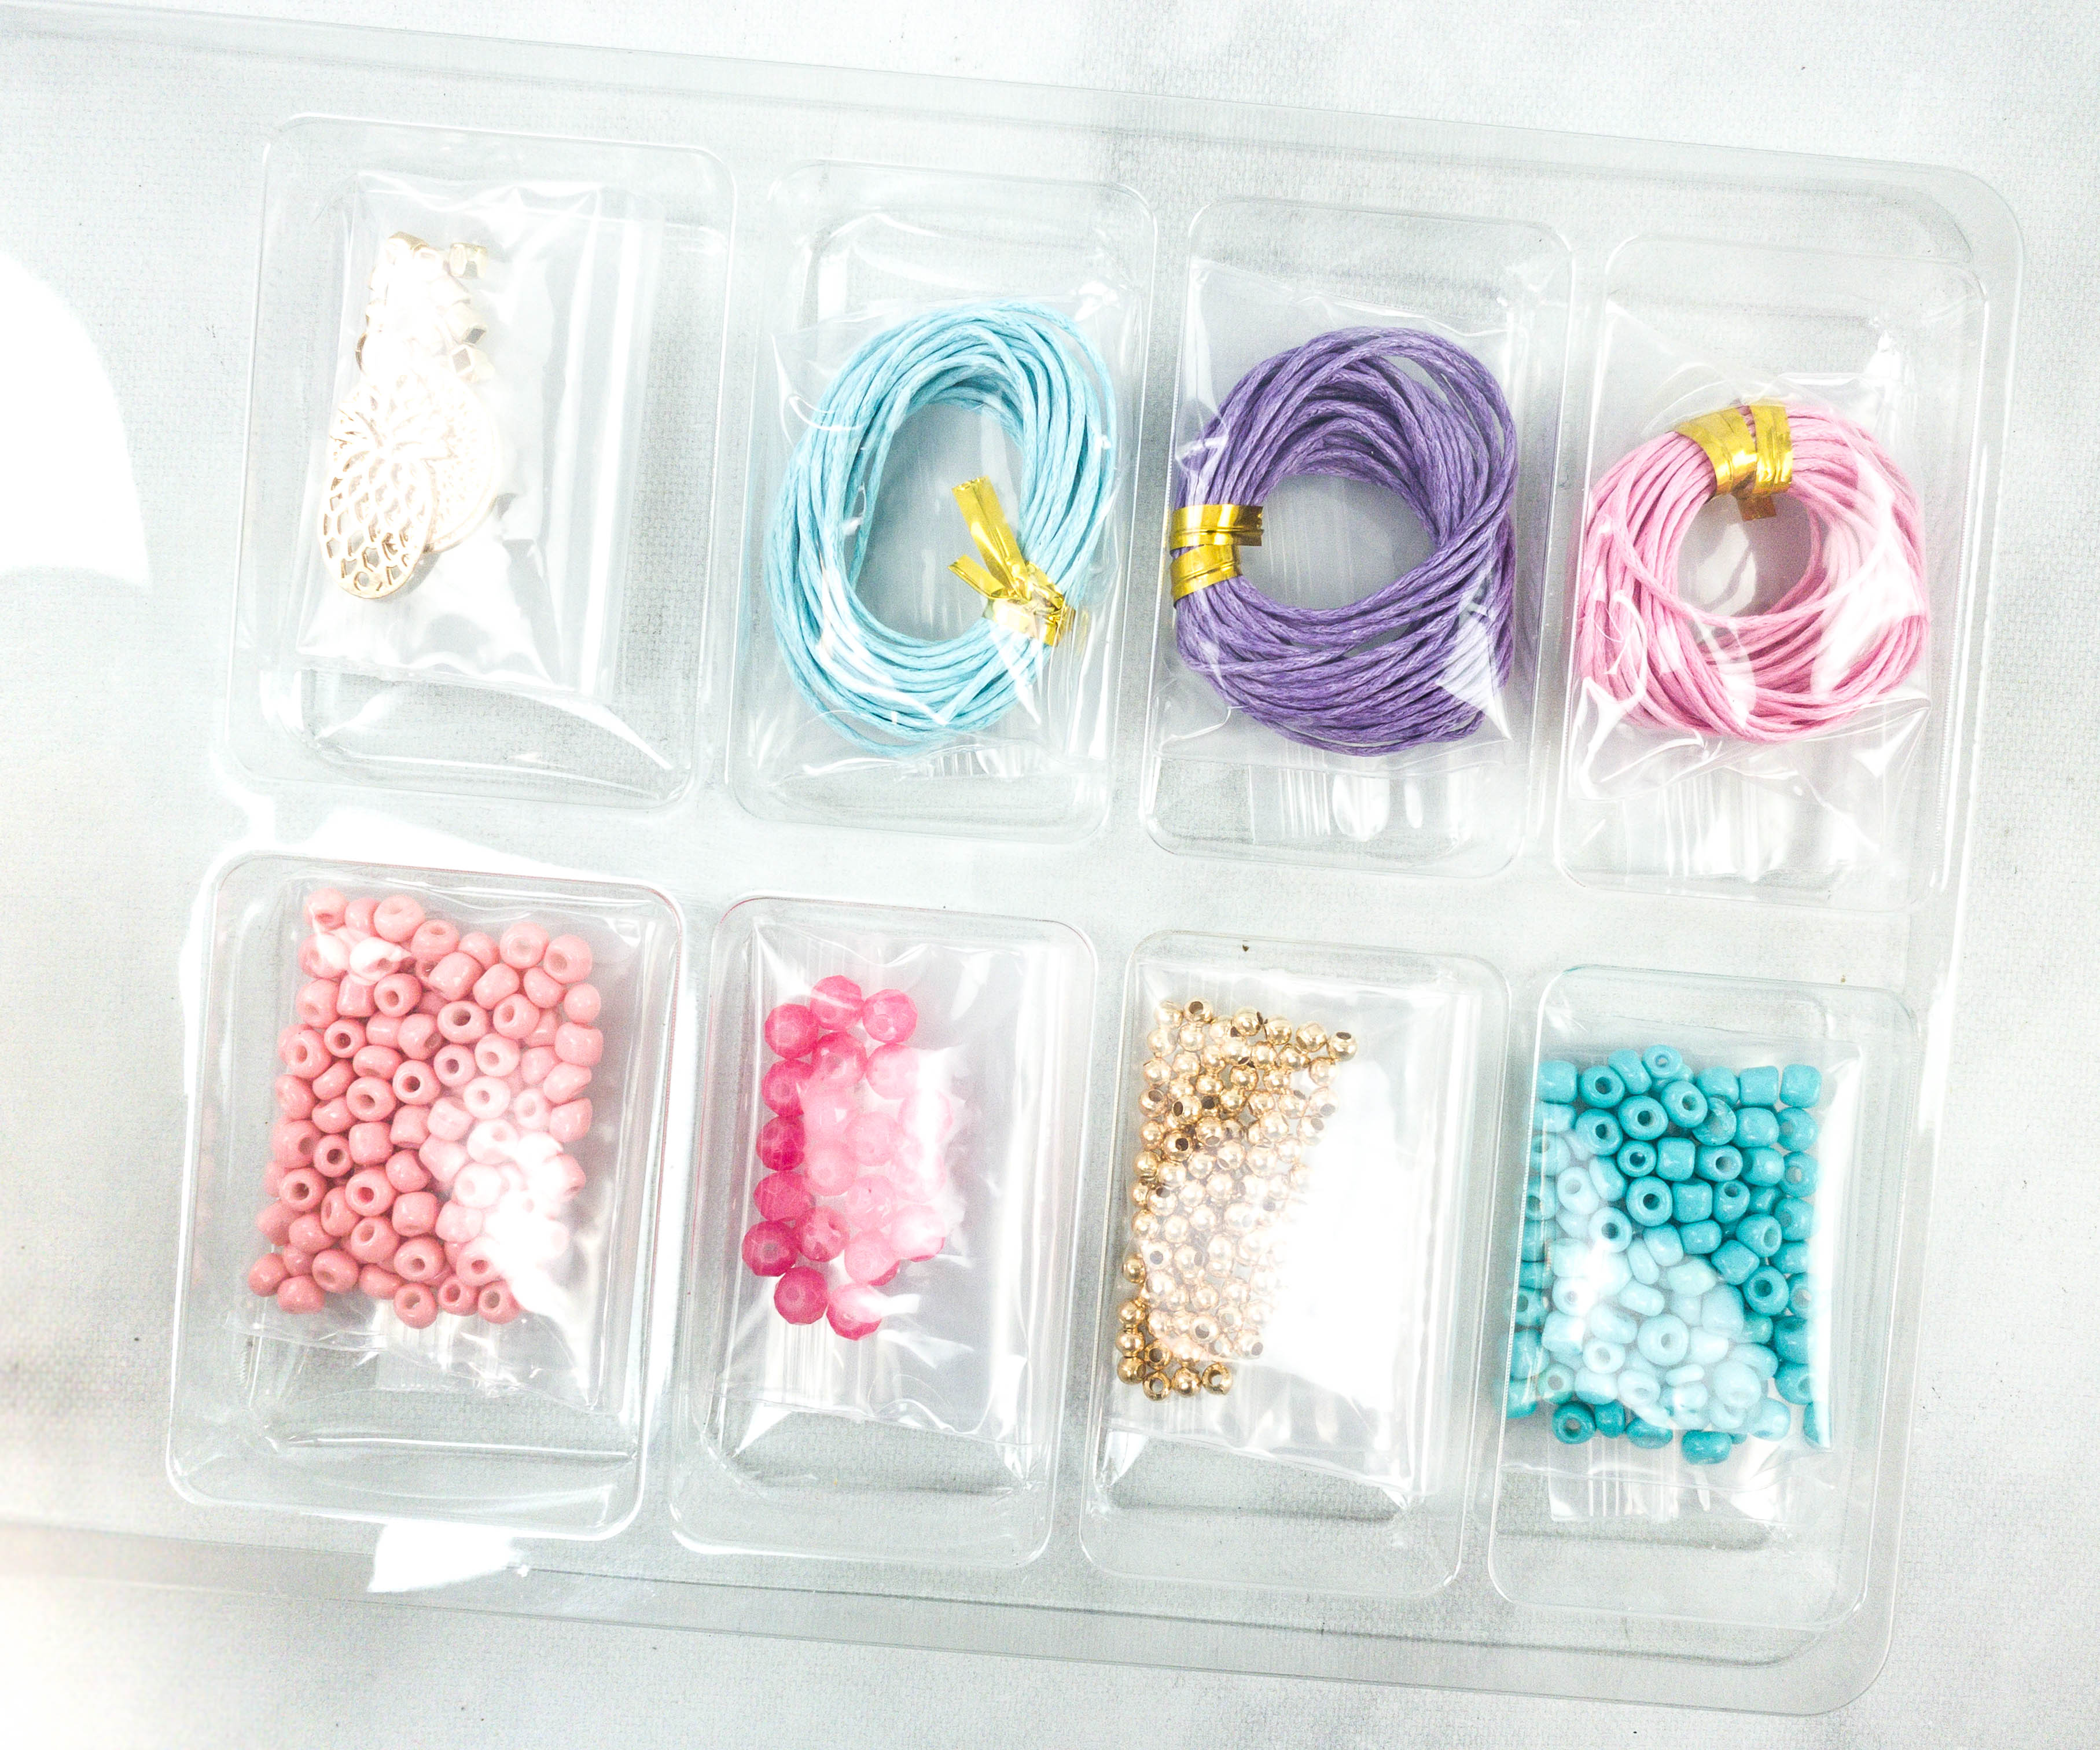
I love that the materials came in this plastic tray. We can use it so help keep the beads in place while making our craft!
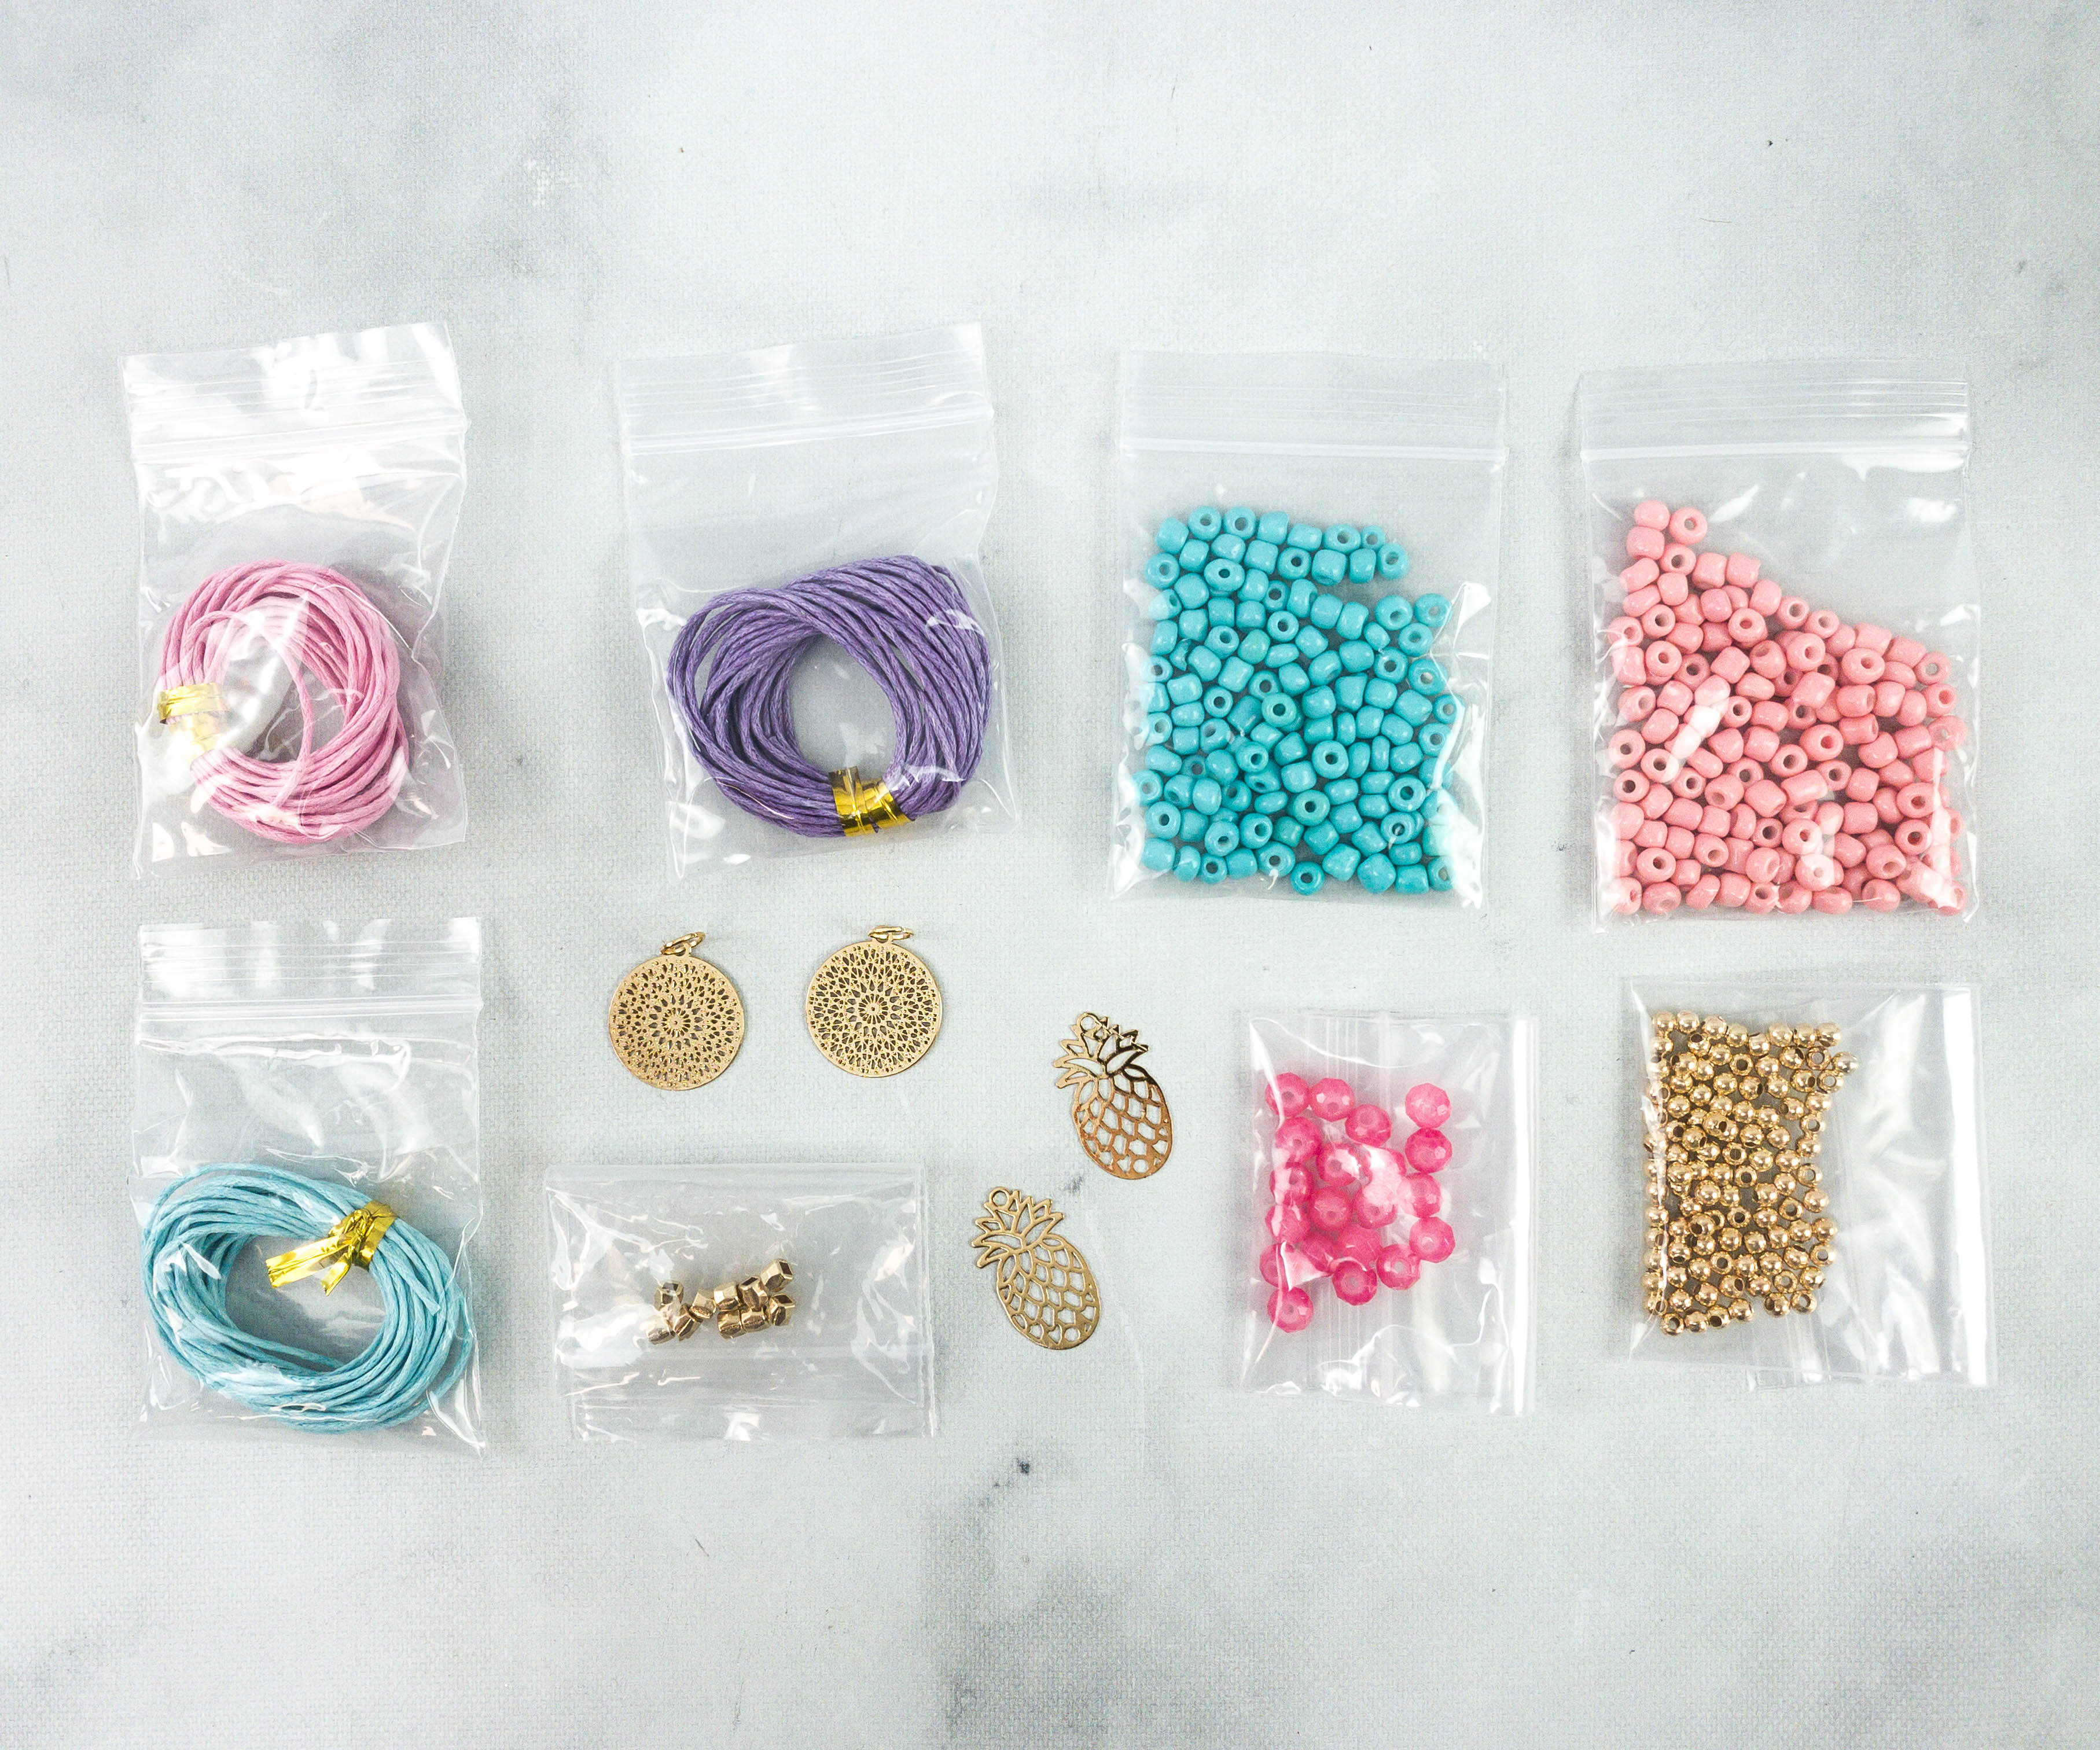
Here is everything from the bracelet kit: cords, metal faceted nuggets, metal rounds, faceted rondelles, seed beads, and charms.
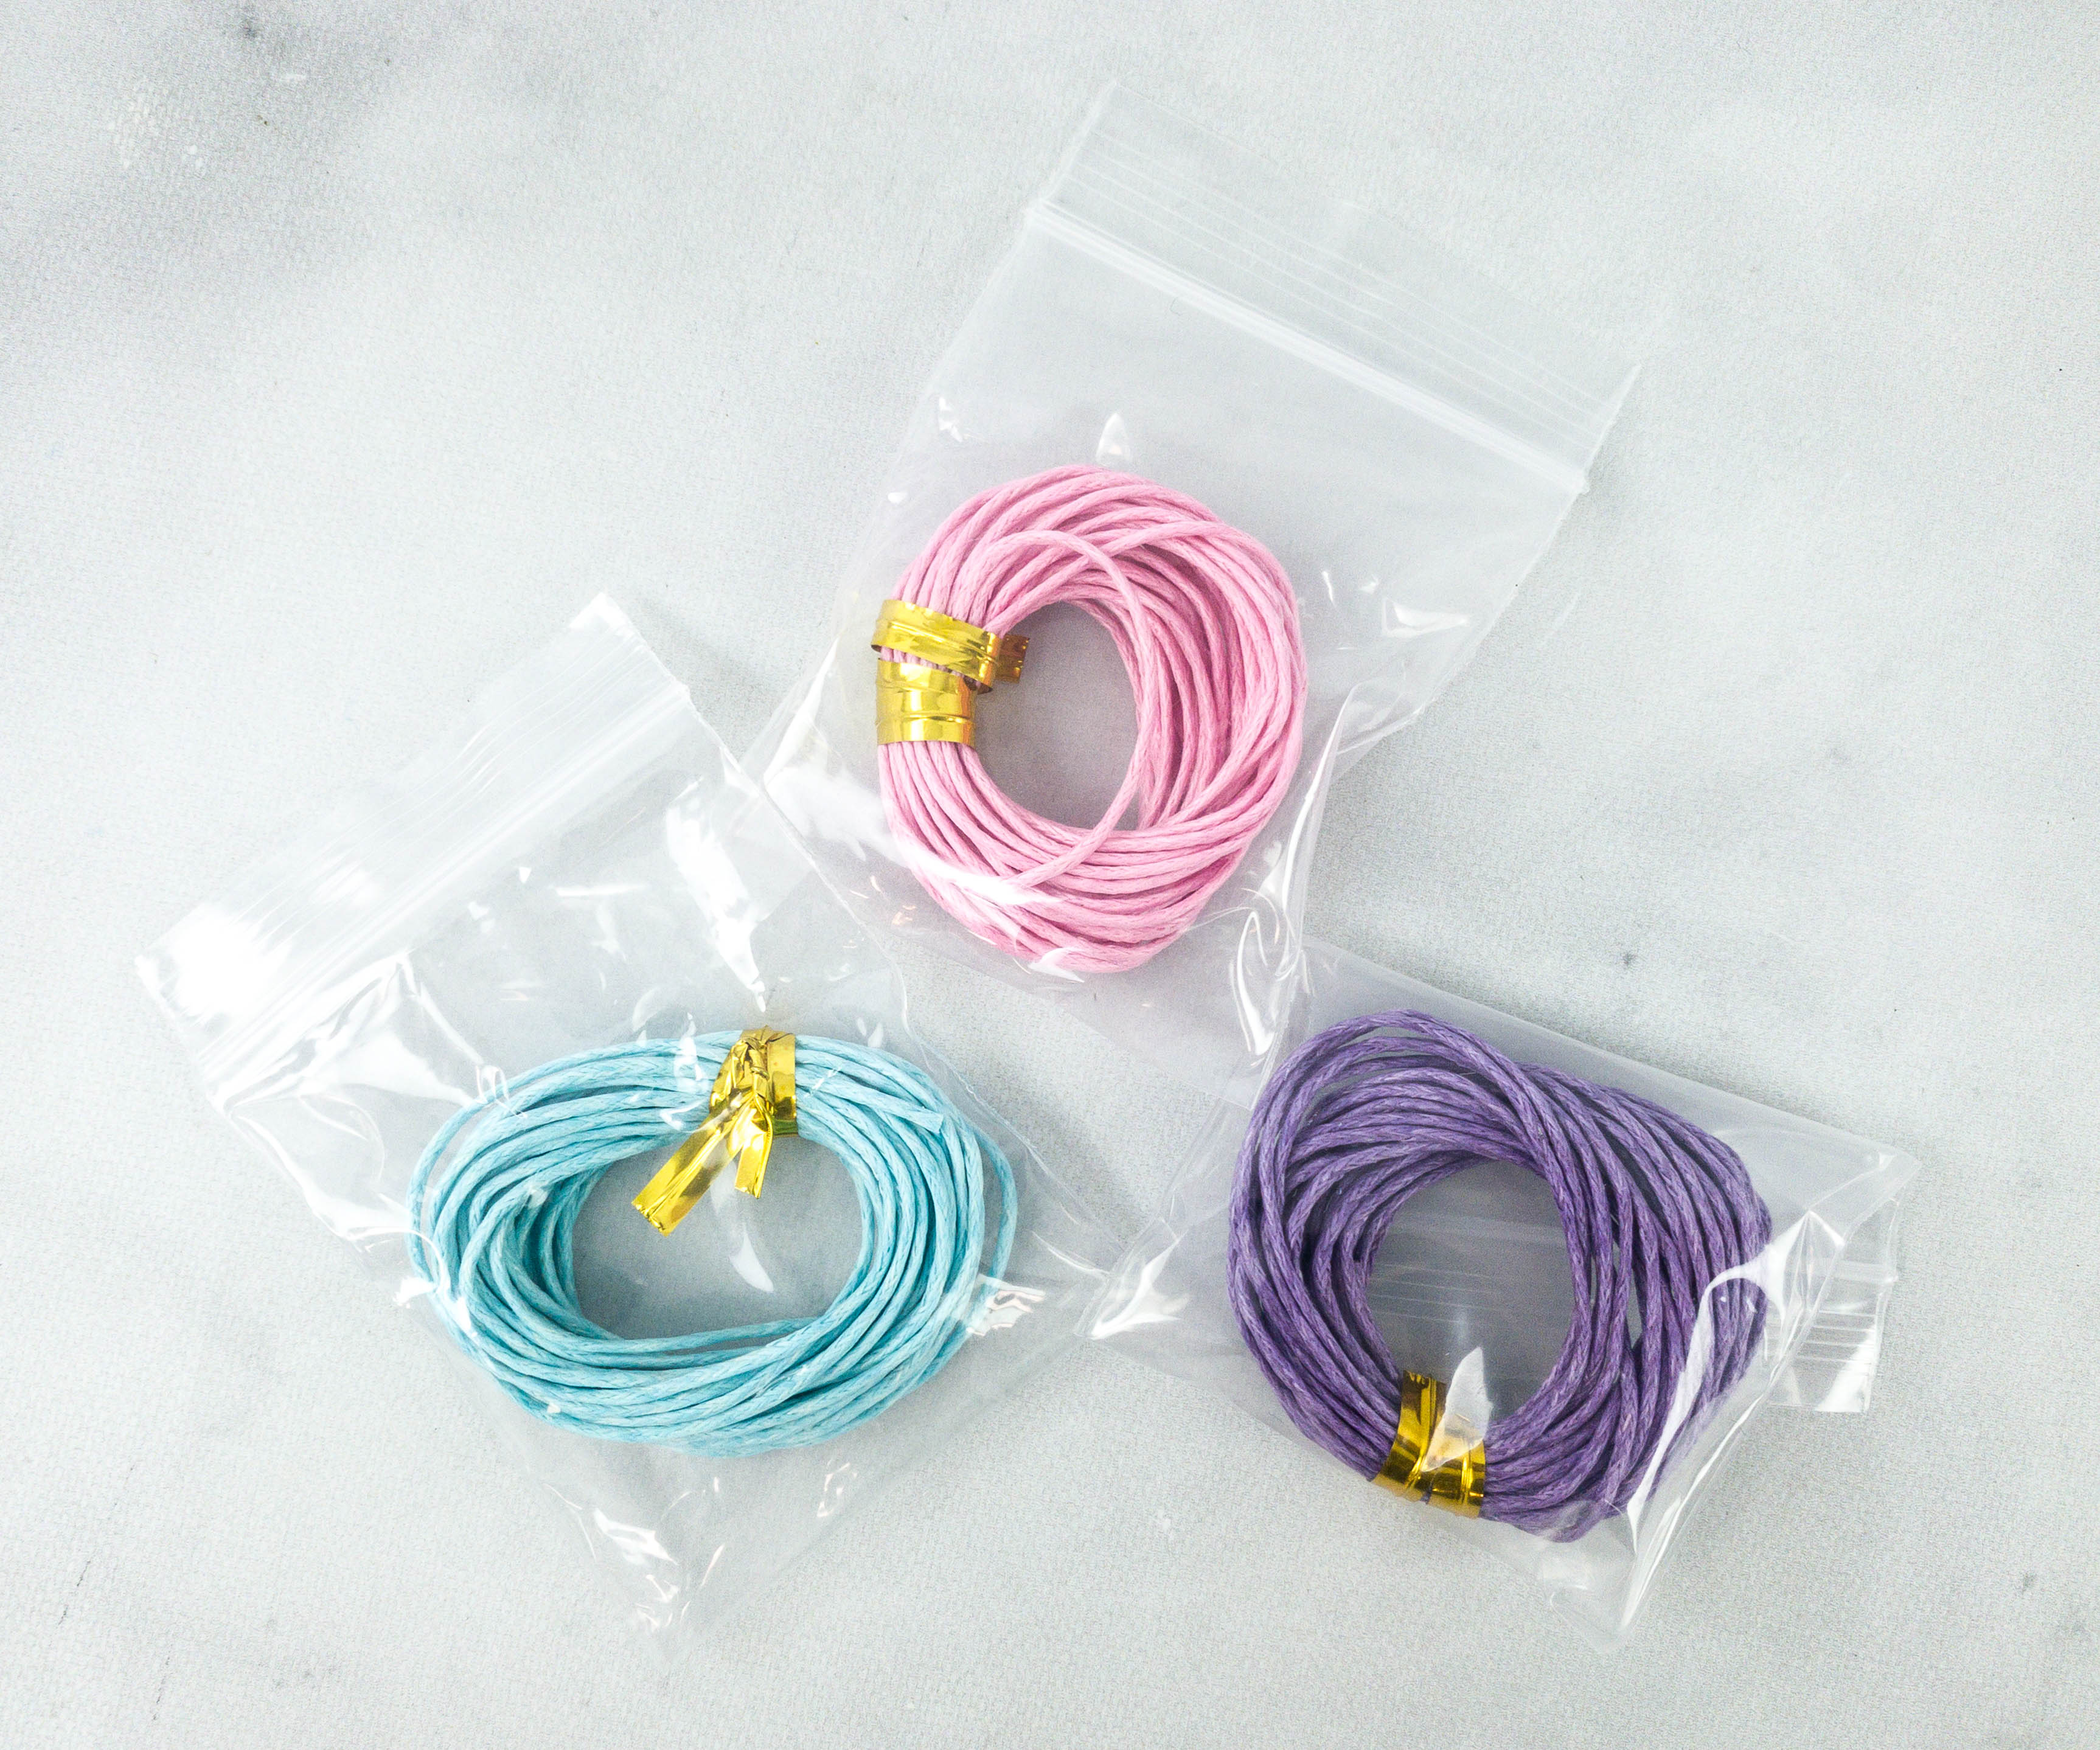
They included three different colors of cords so we can mix and match!
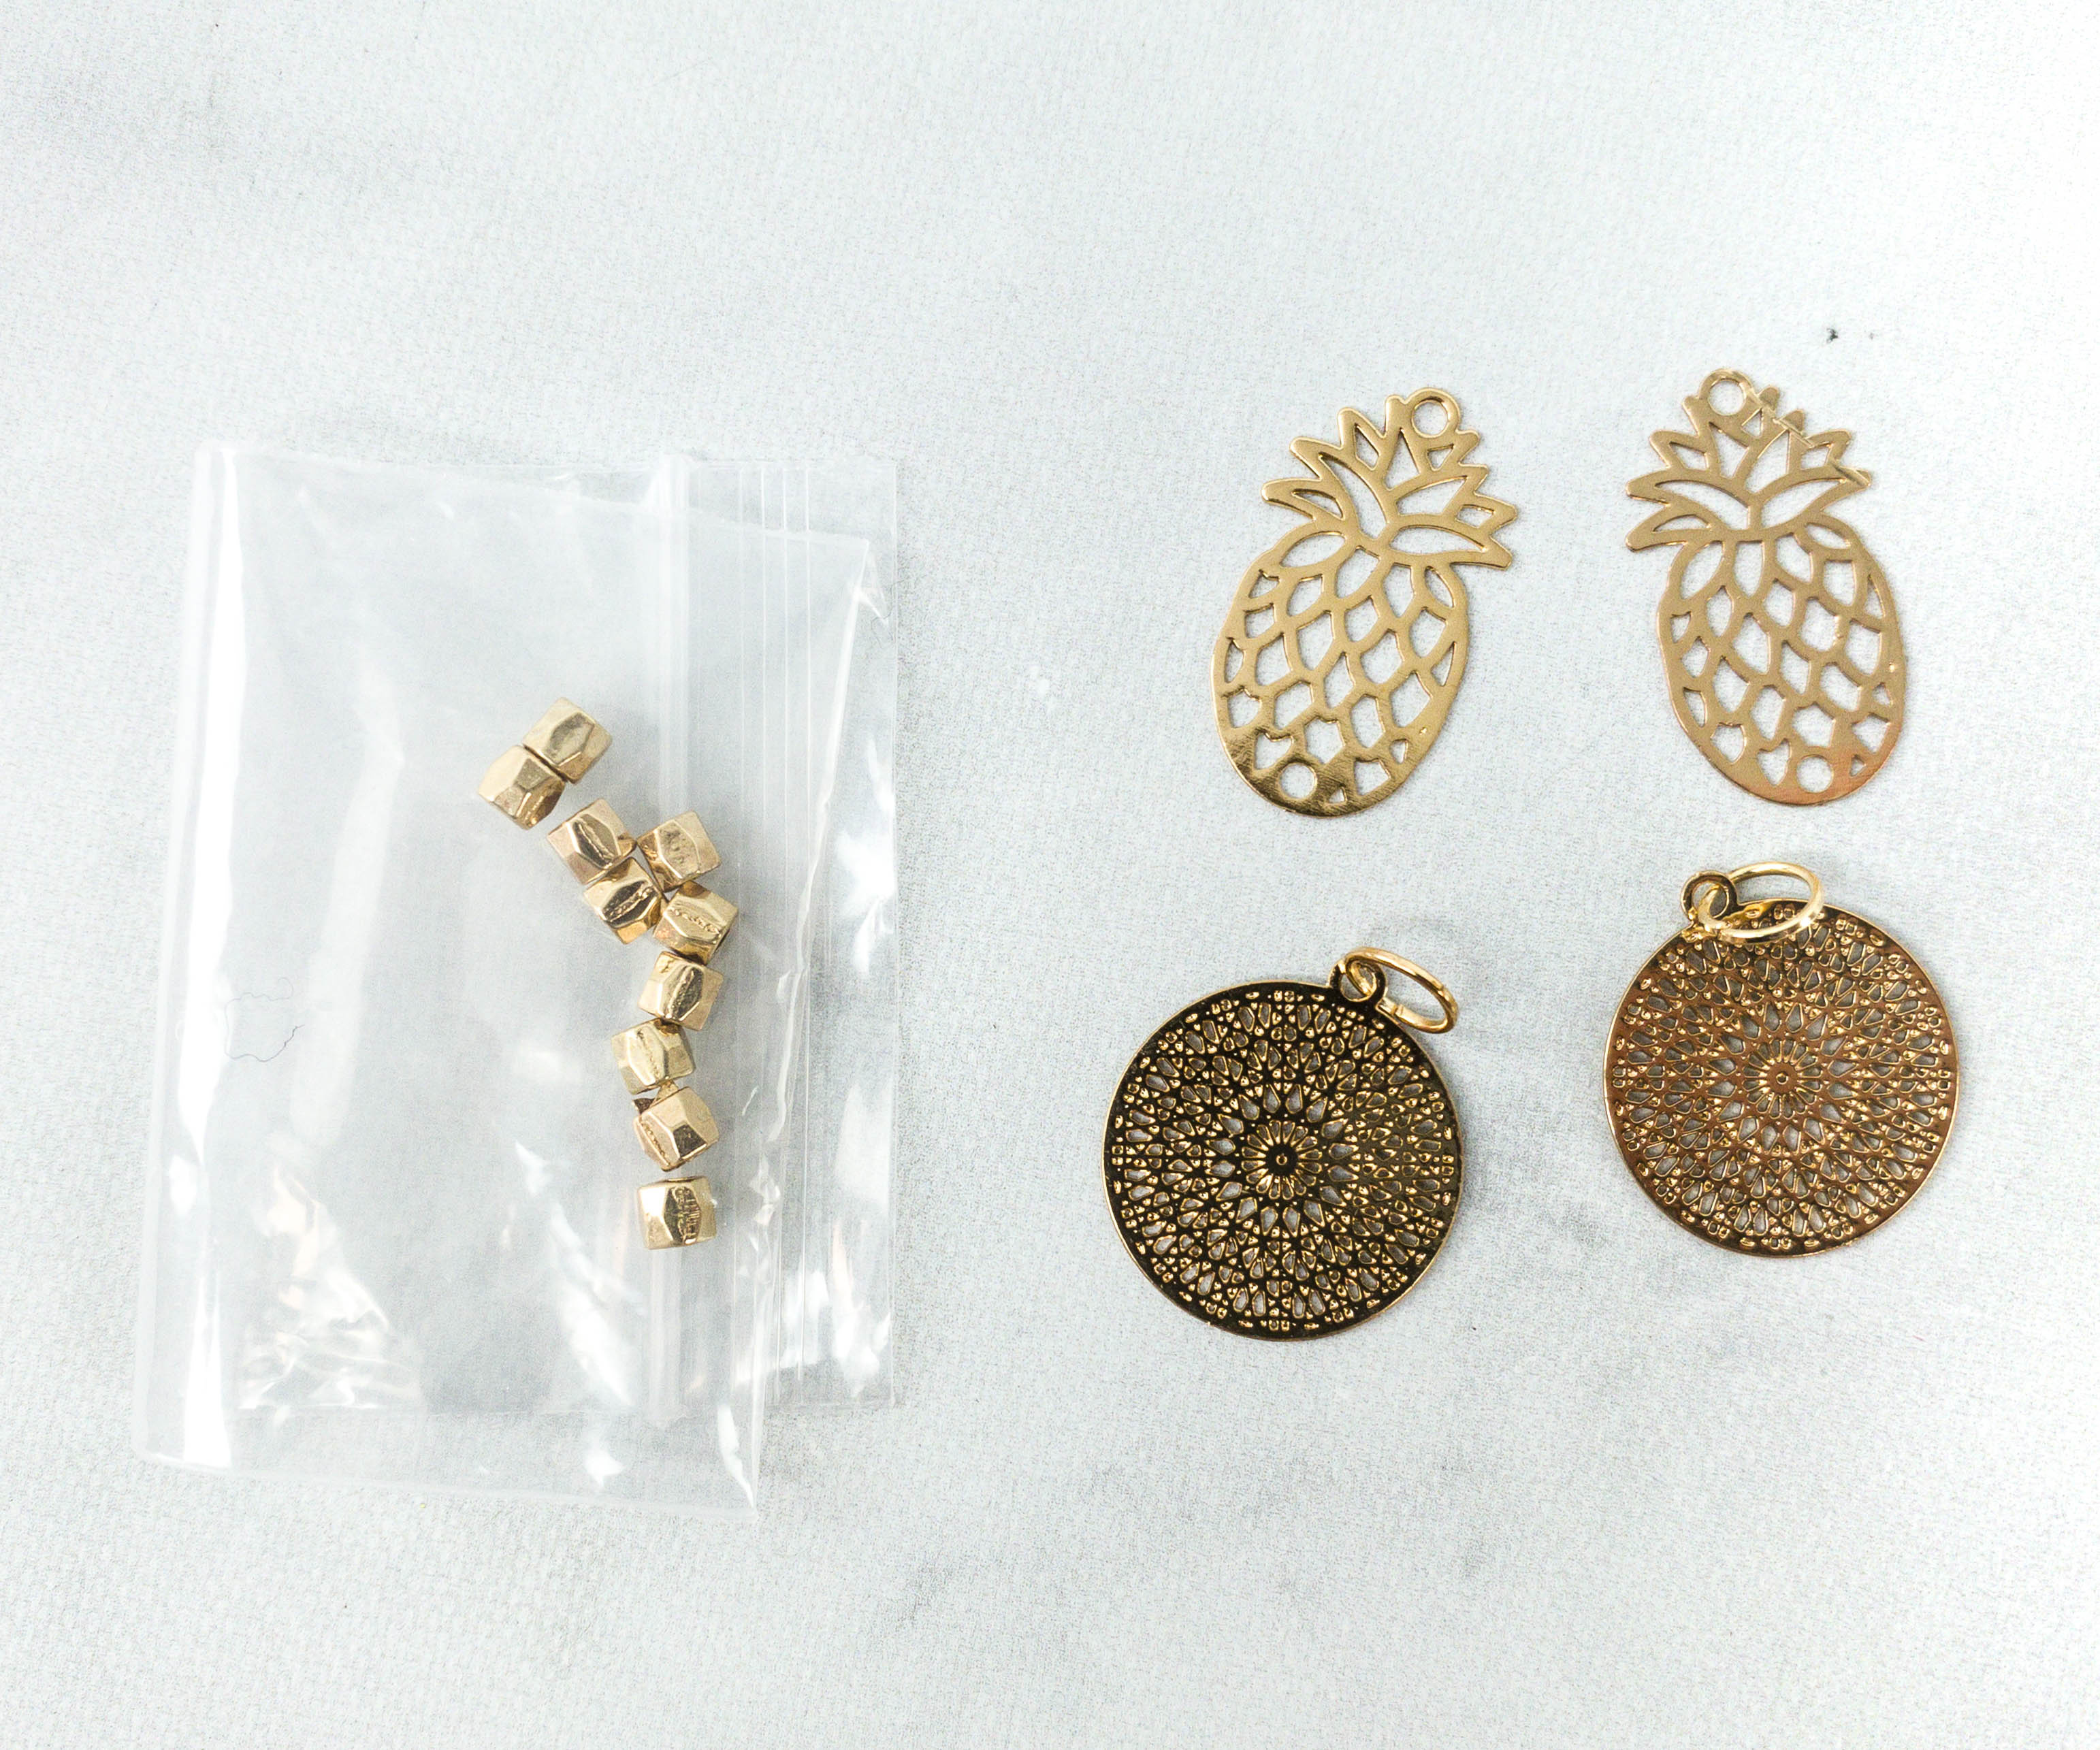
Here’s a closer look at the gold-colored charms and metal faceted nuggets!
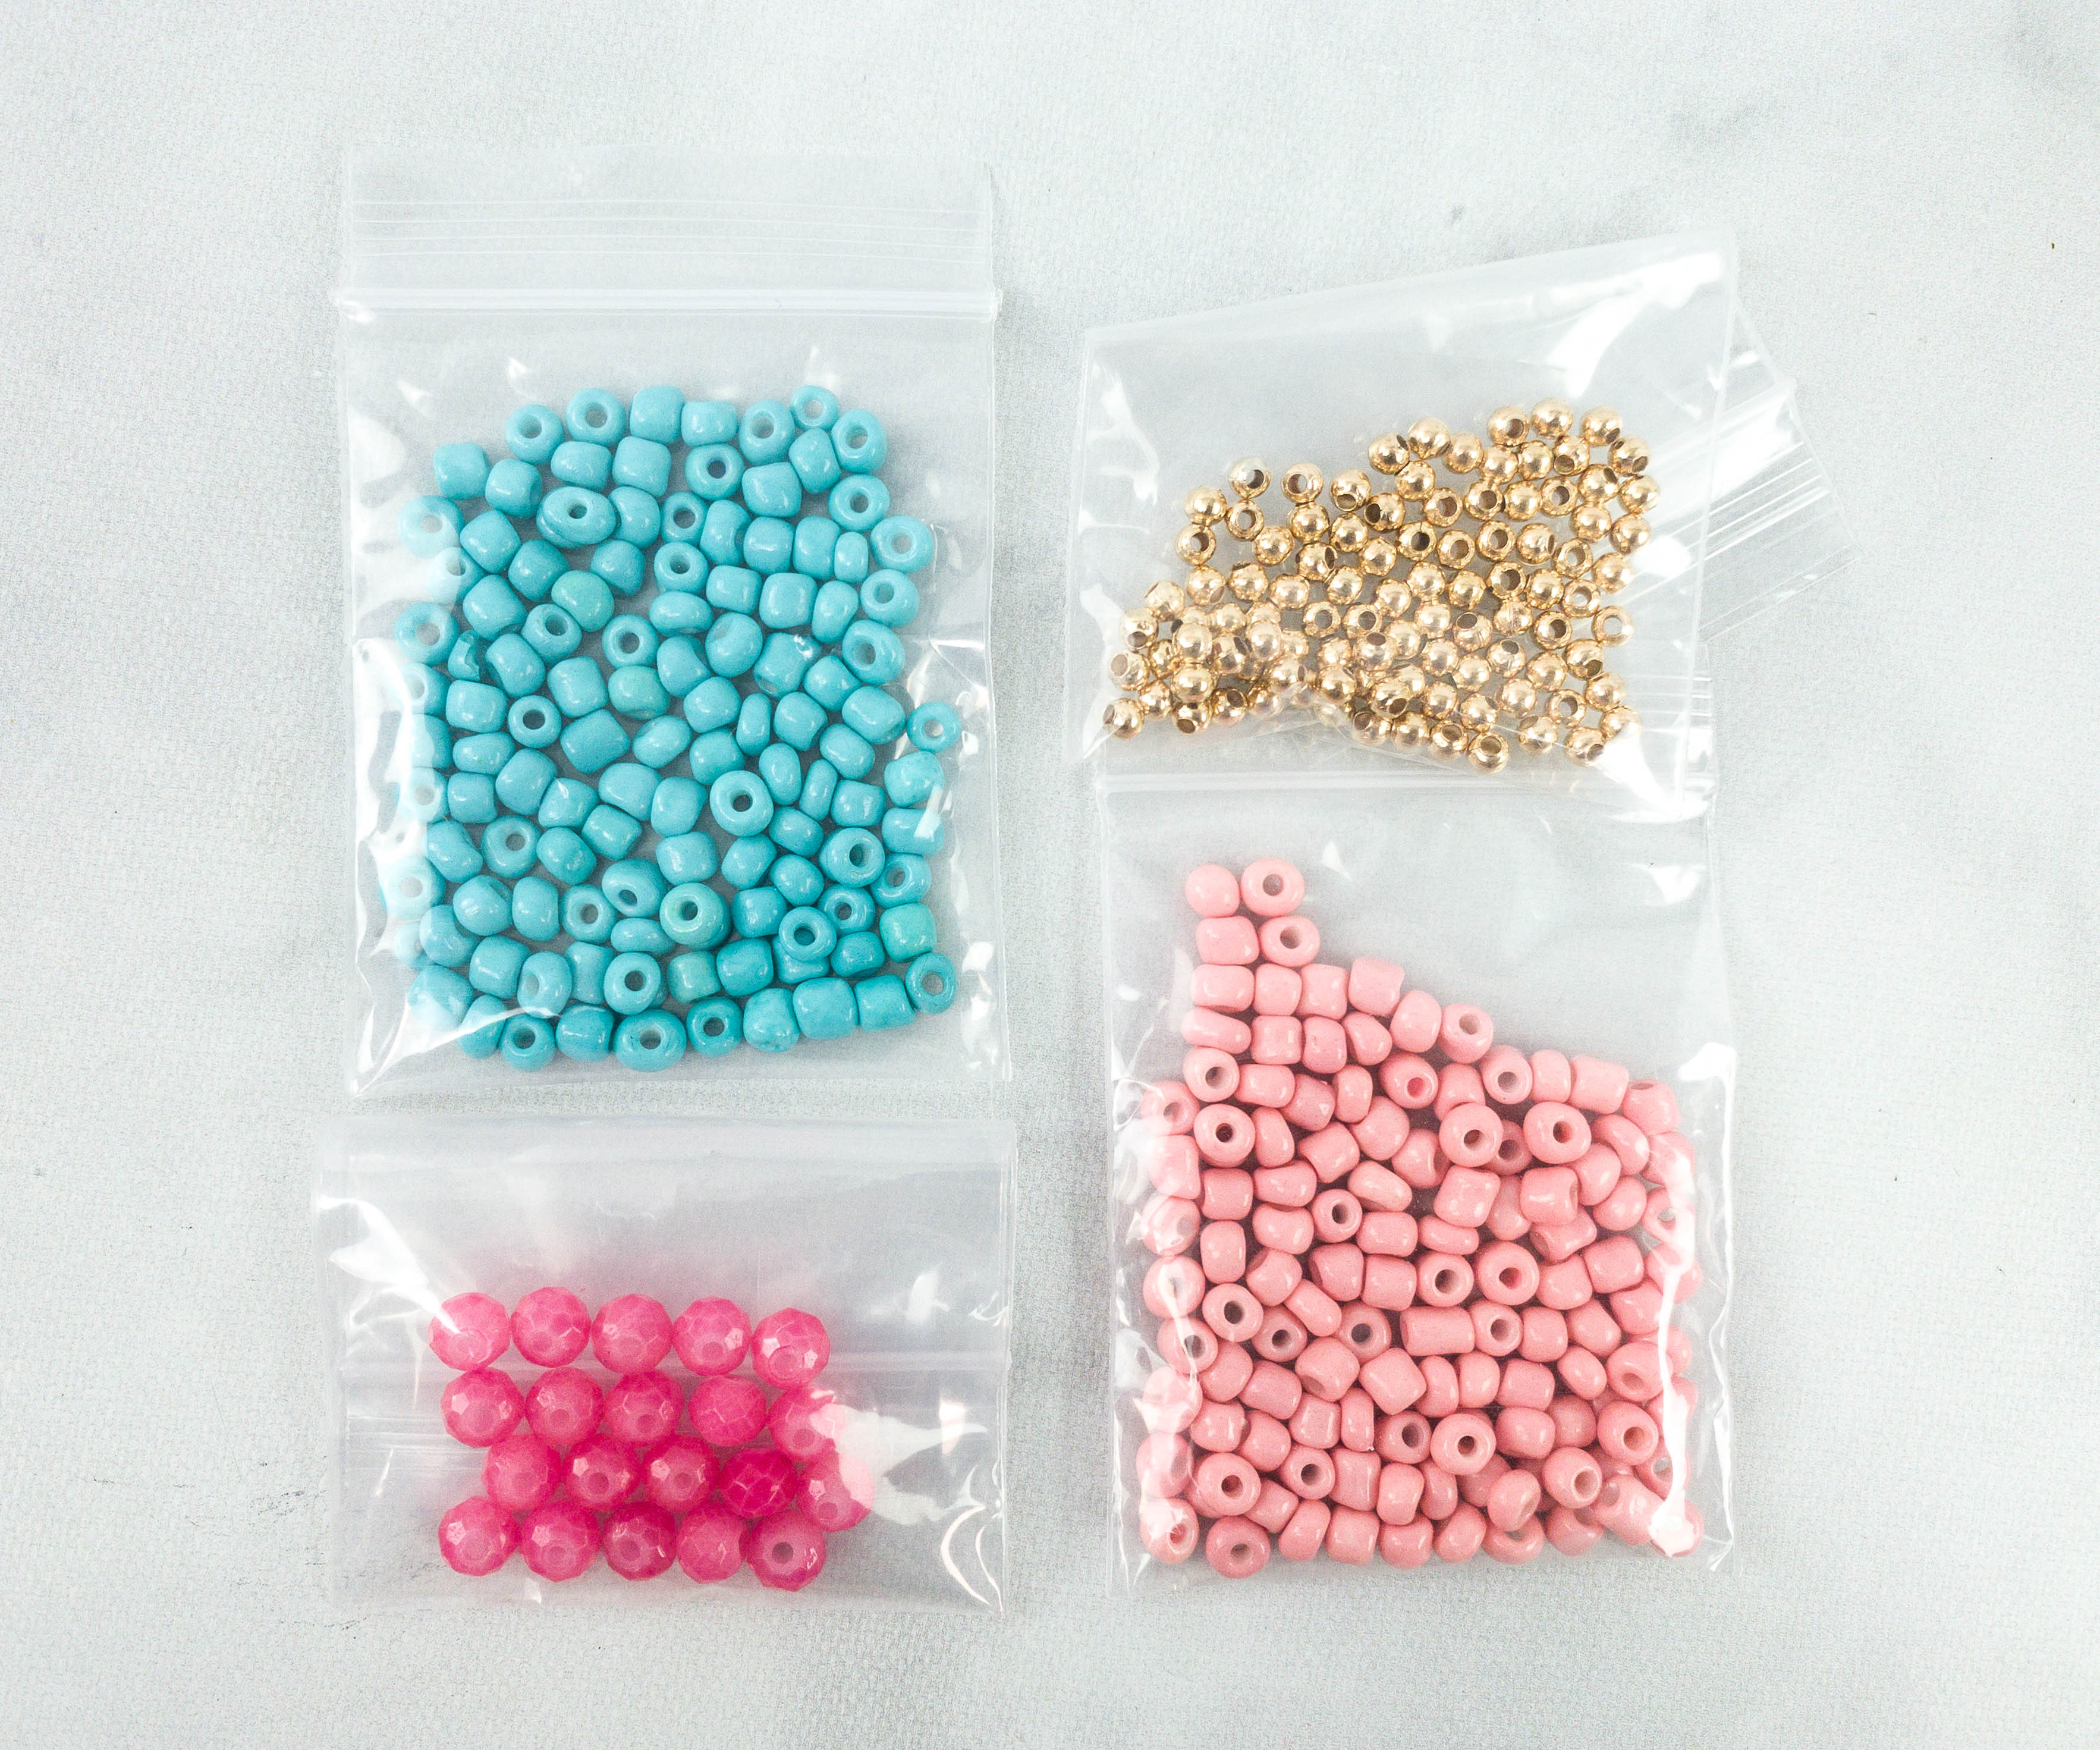
The beads are colorful!
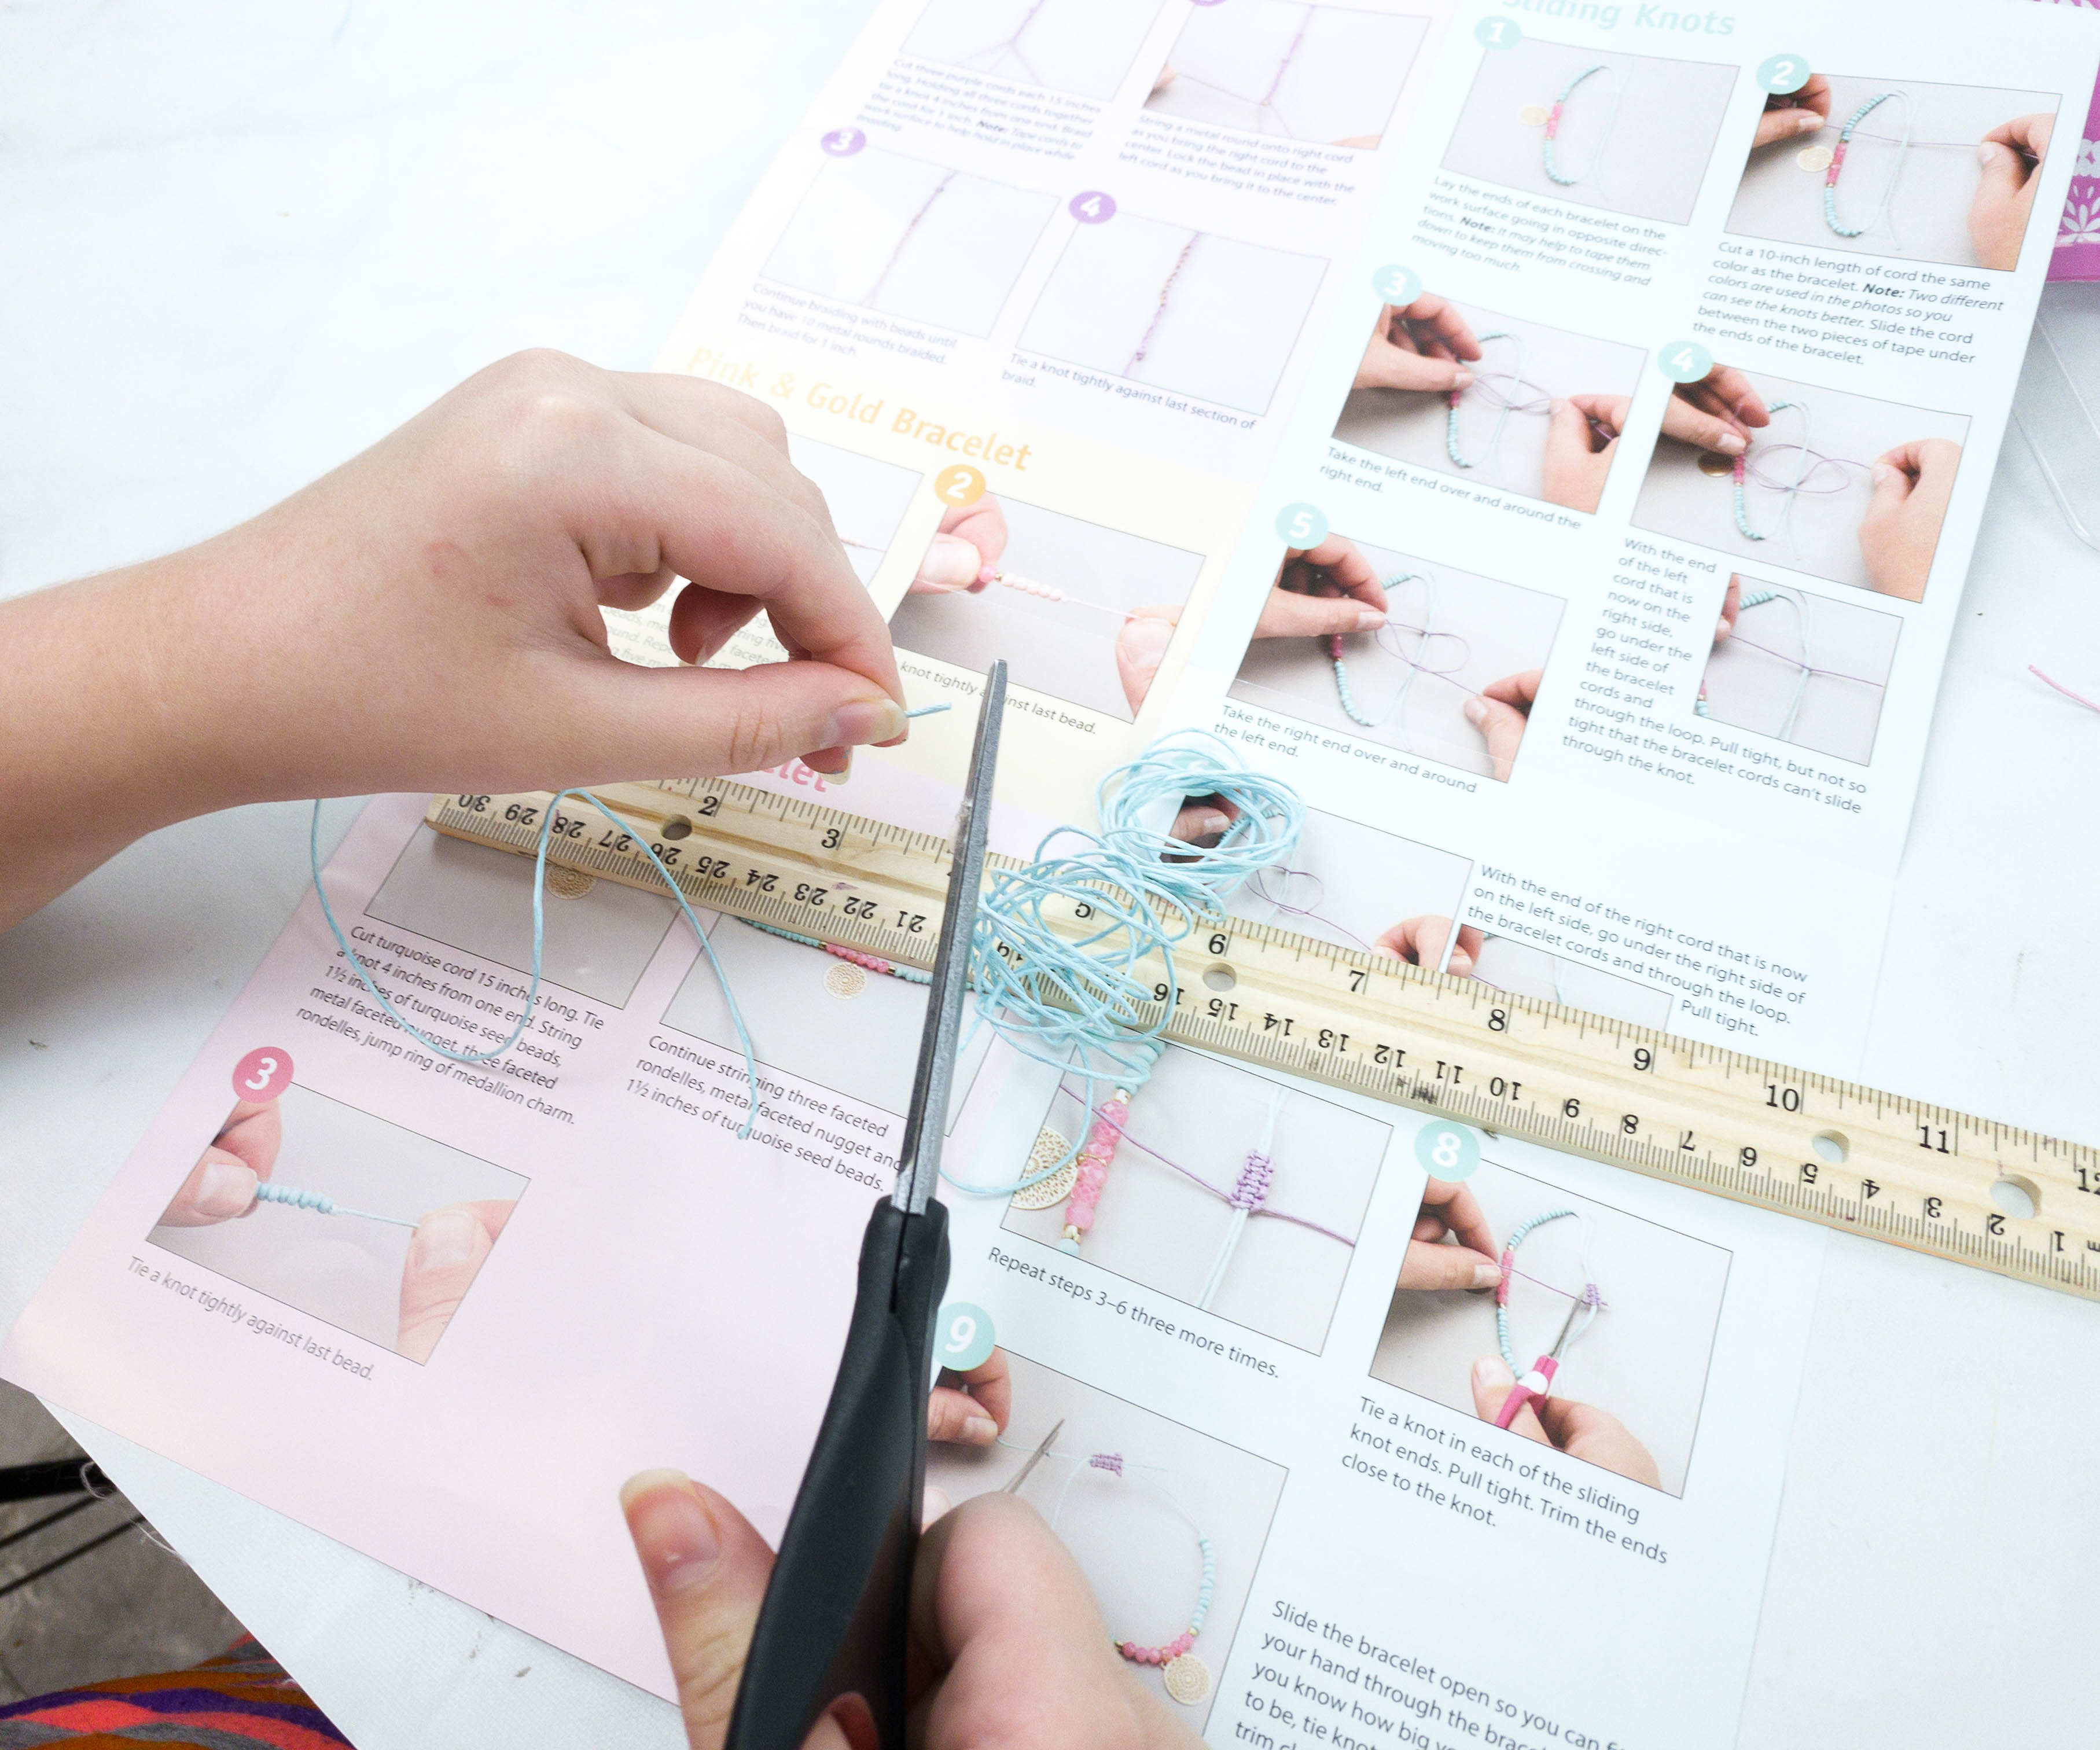
My daughter made different kinds of bracelets per color of the cord. We started off by measuring the length we need and cutting the cord to our desired size.
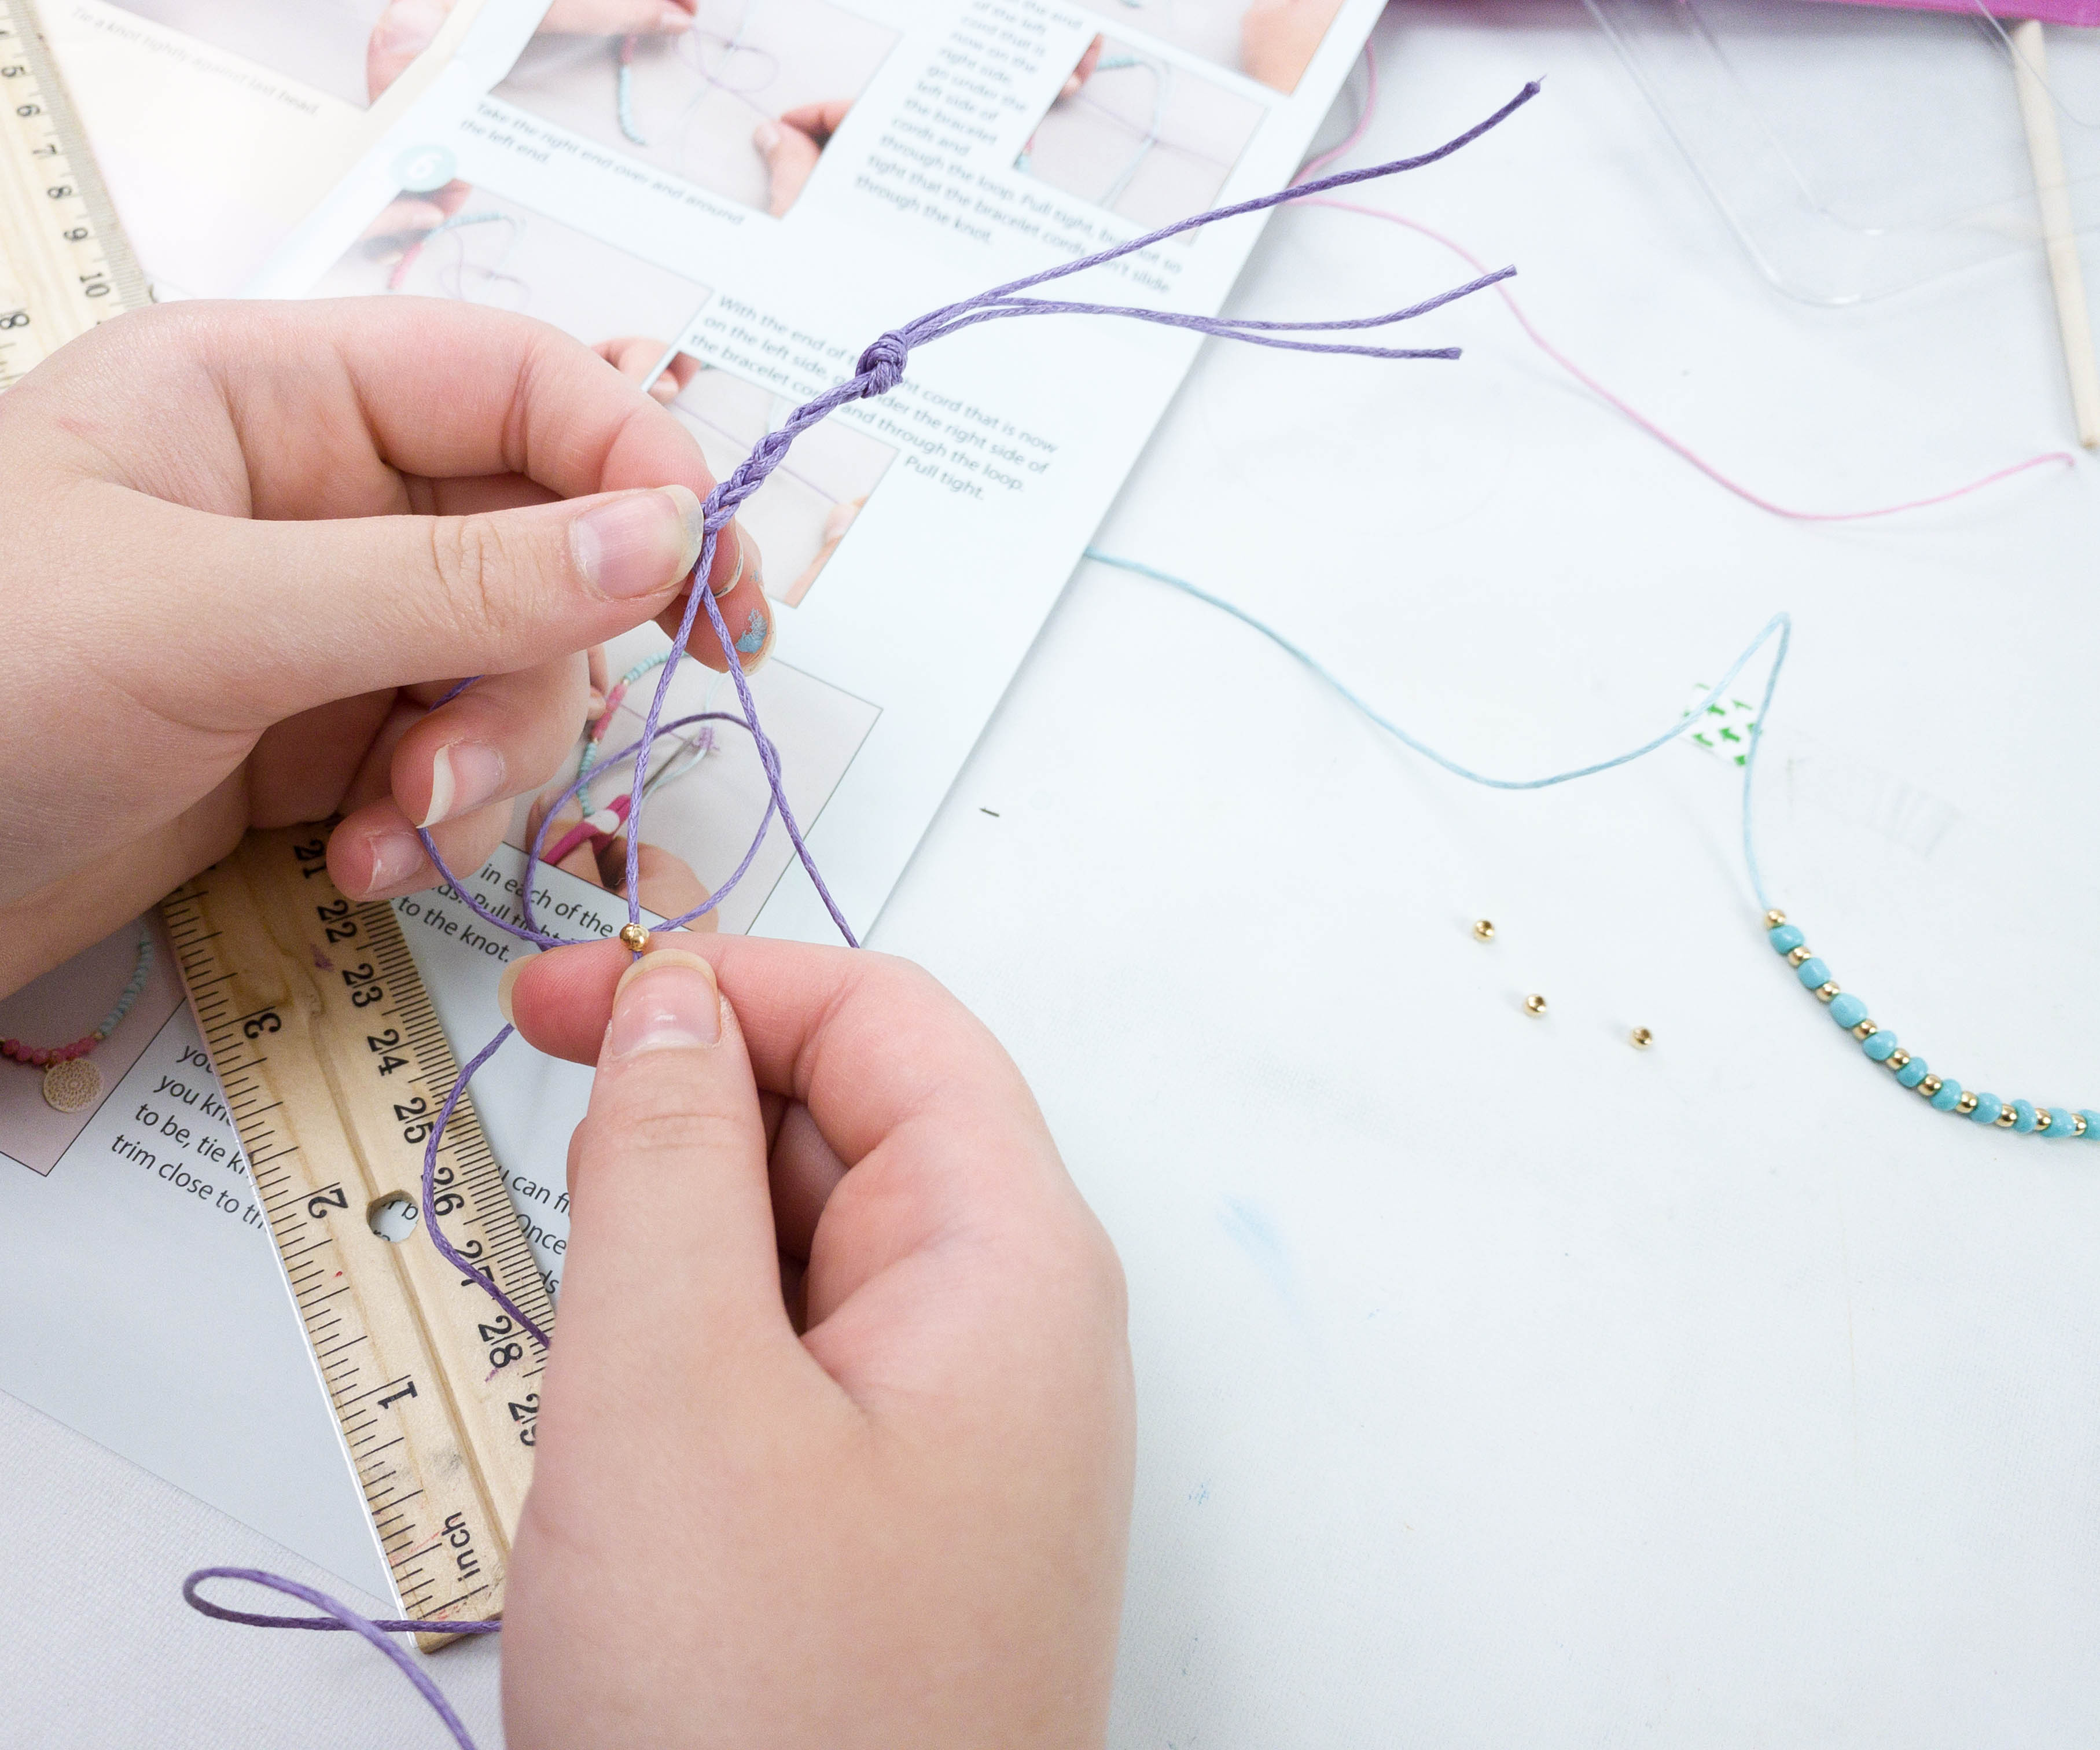
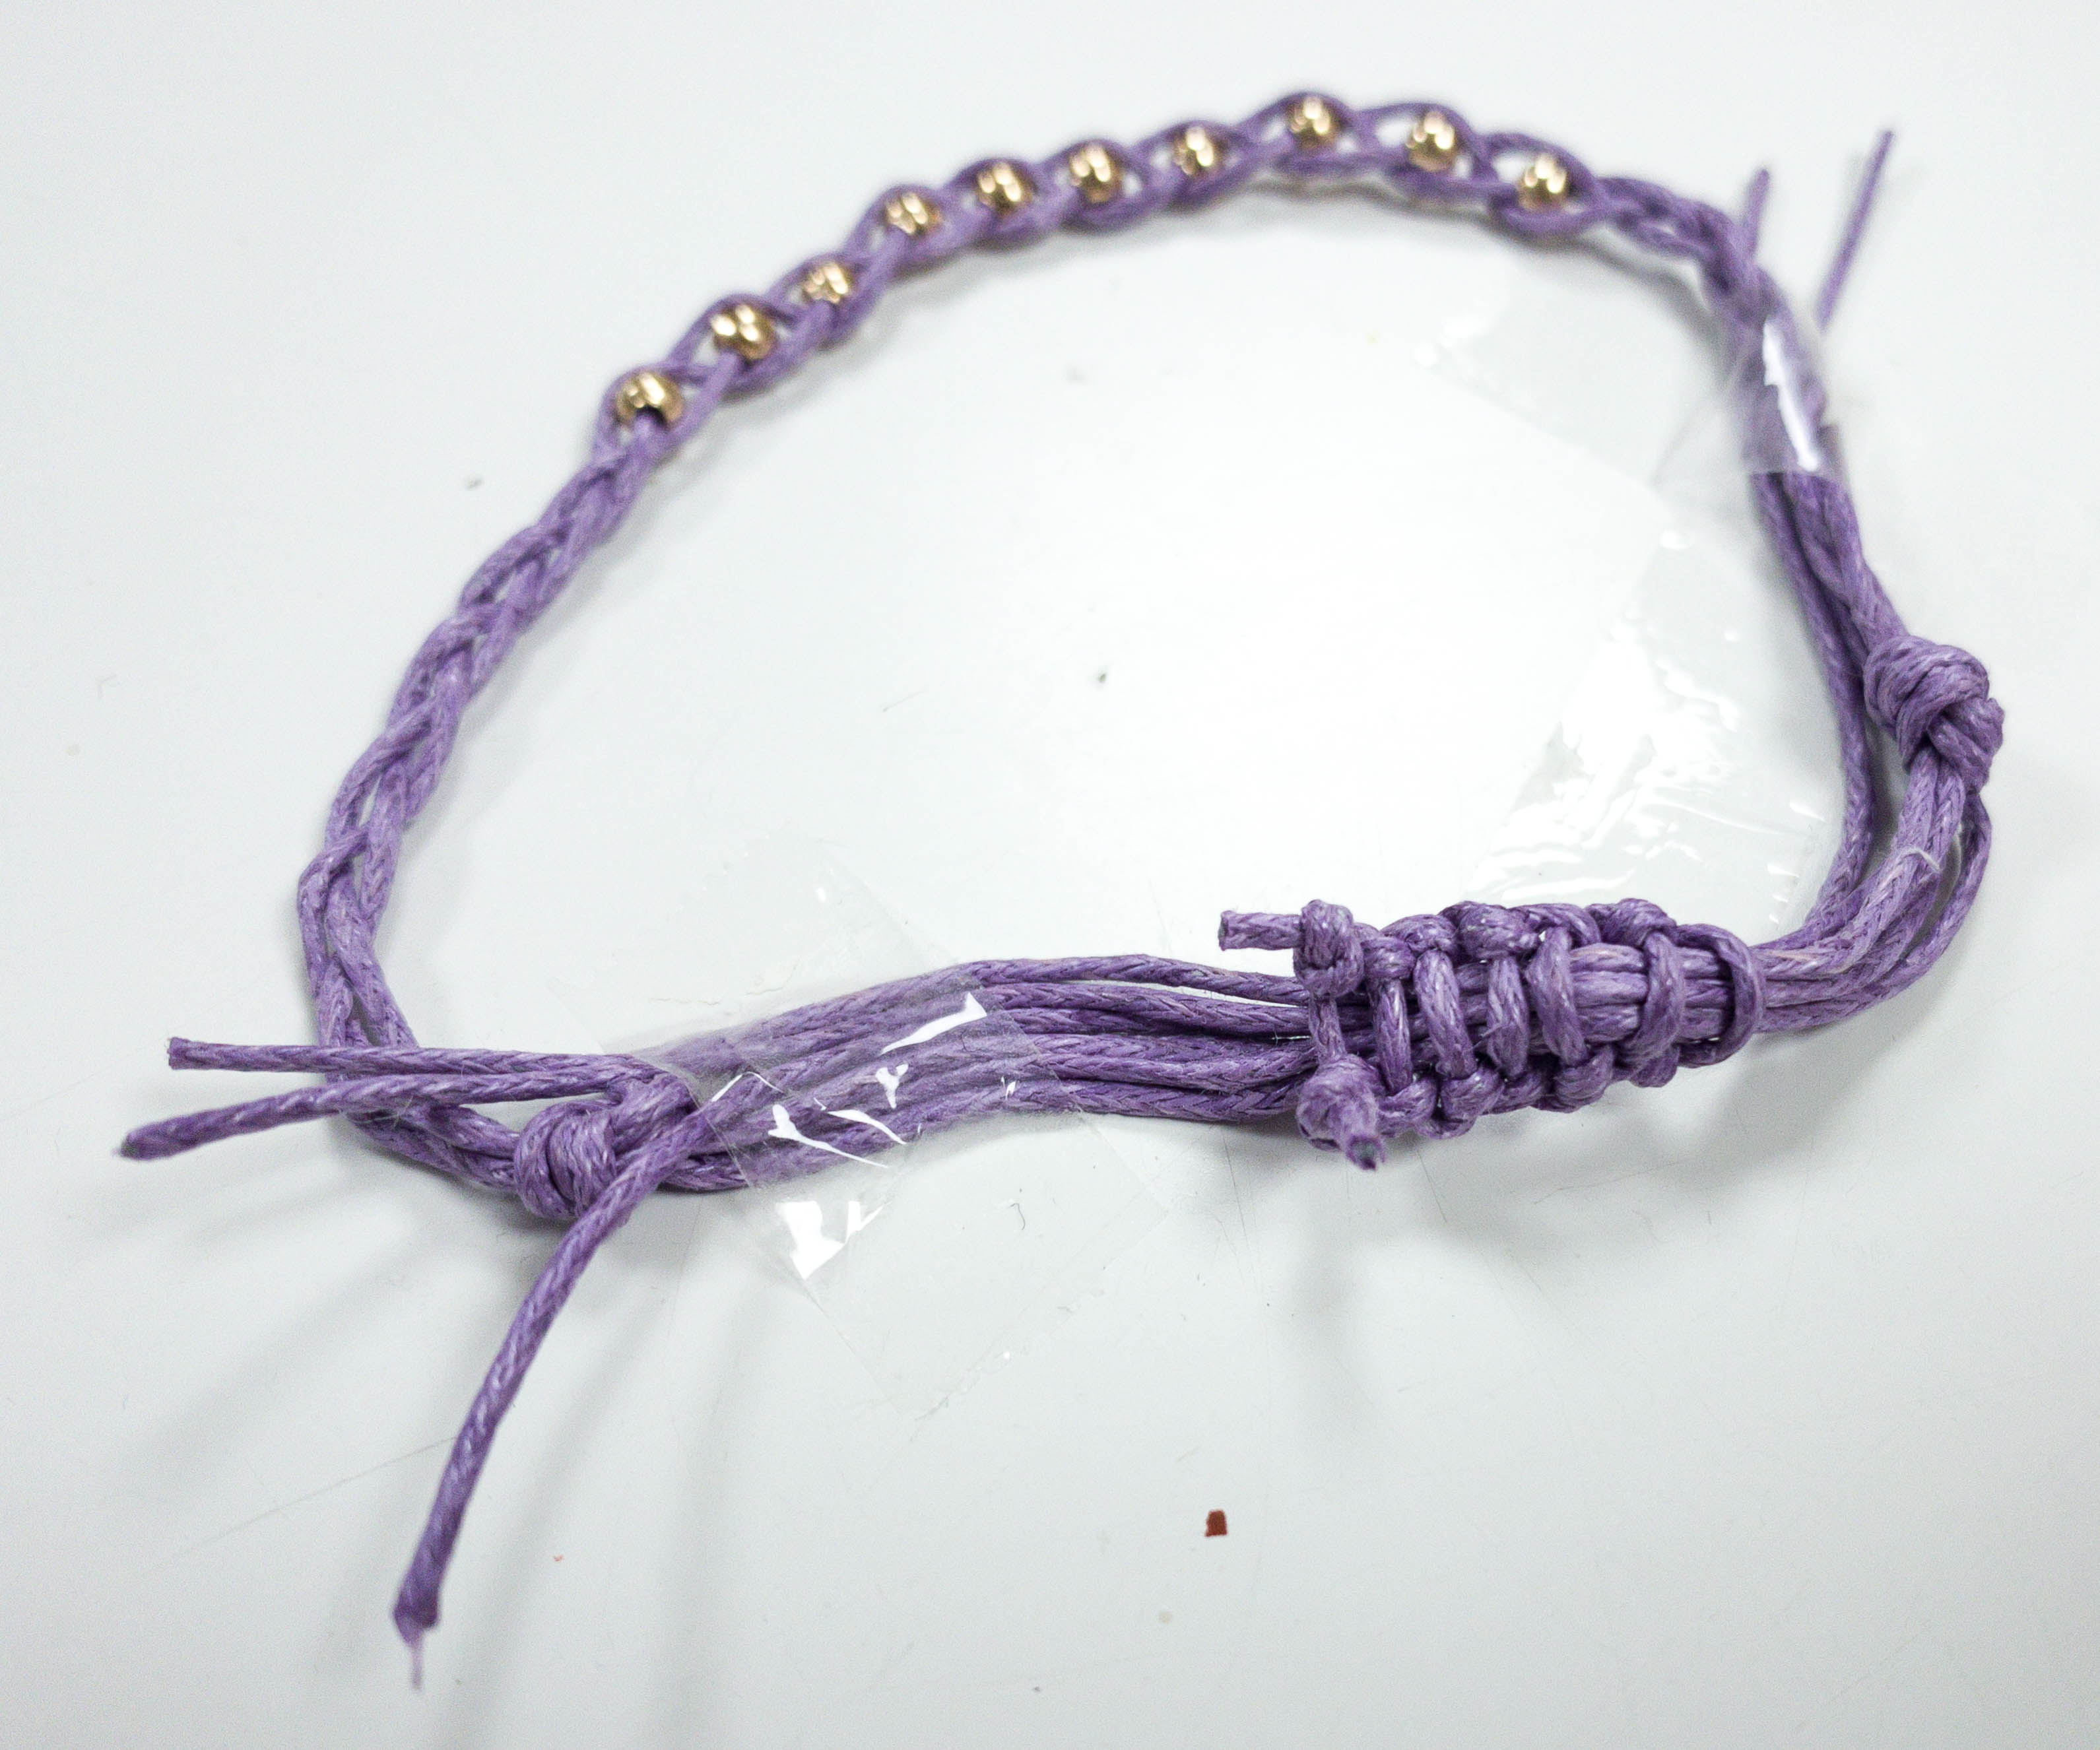
For this one, she braided the purple cord before adding beads.
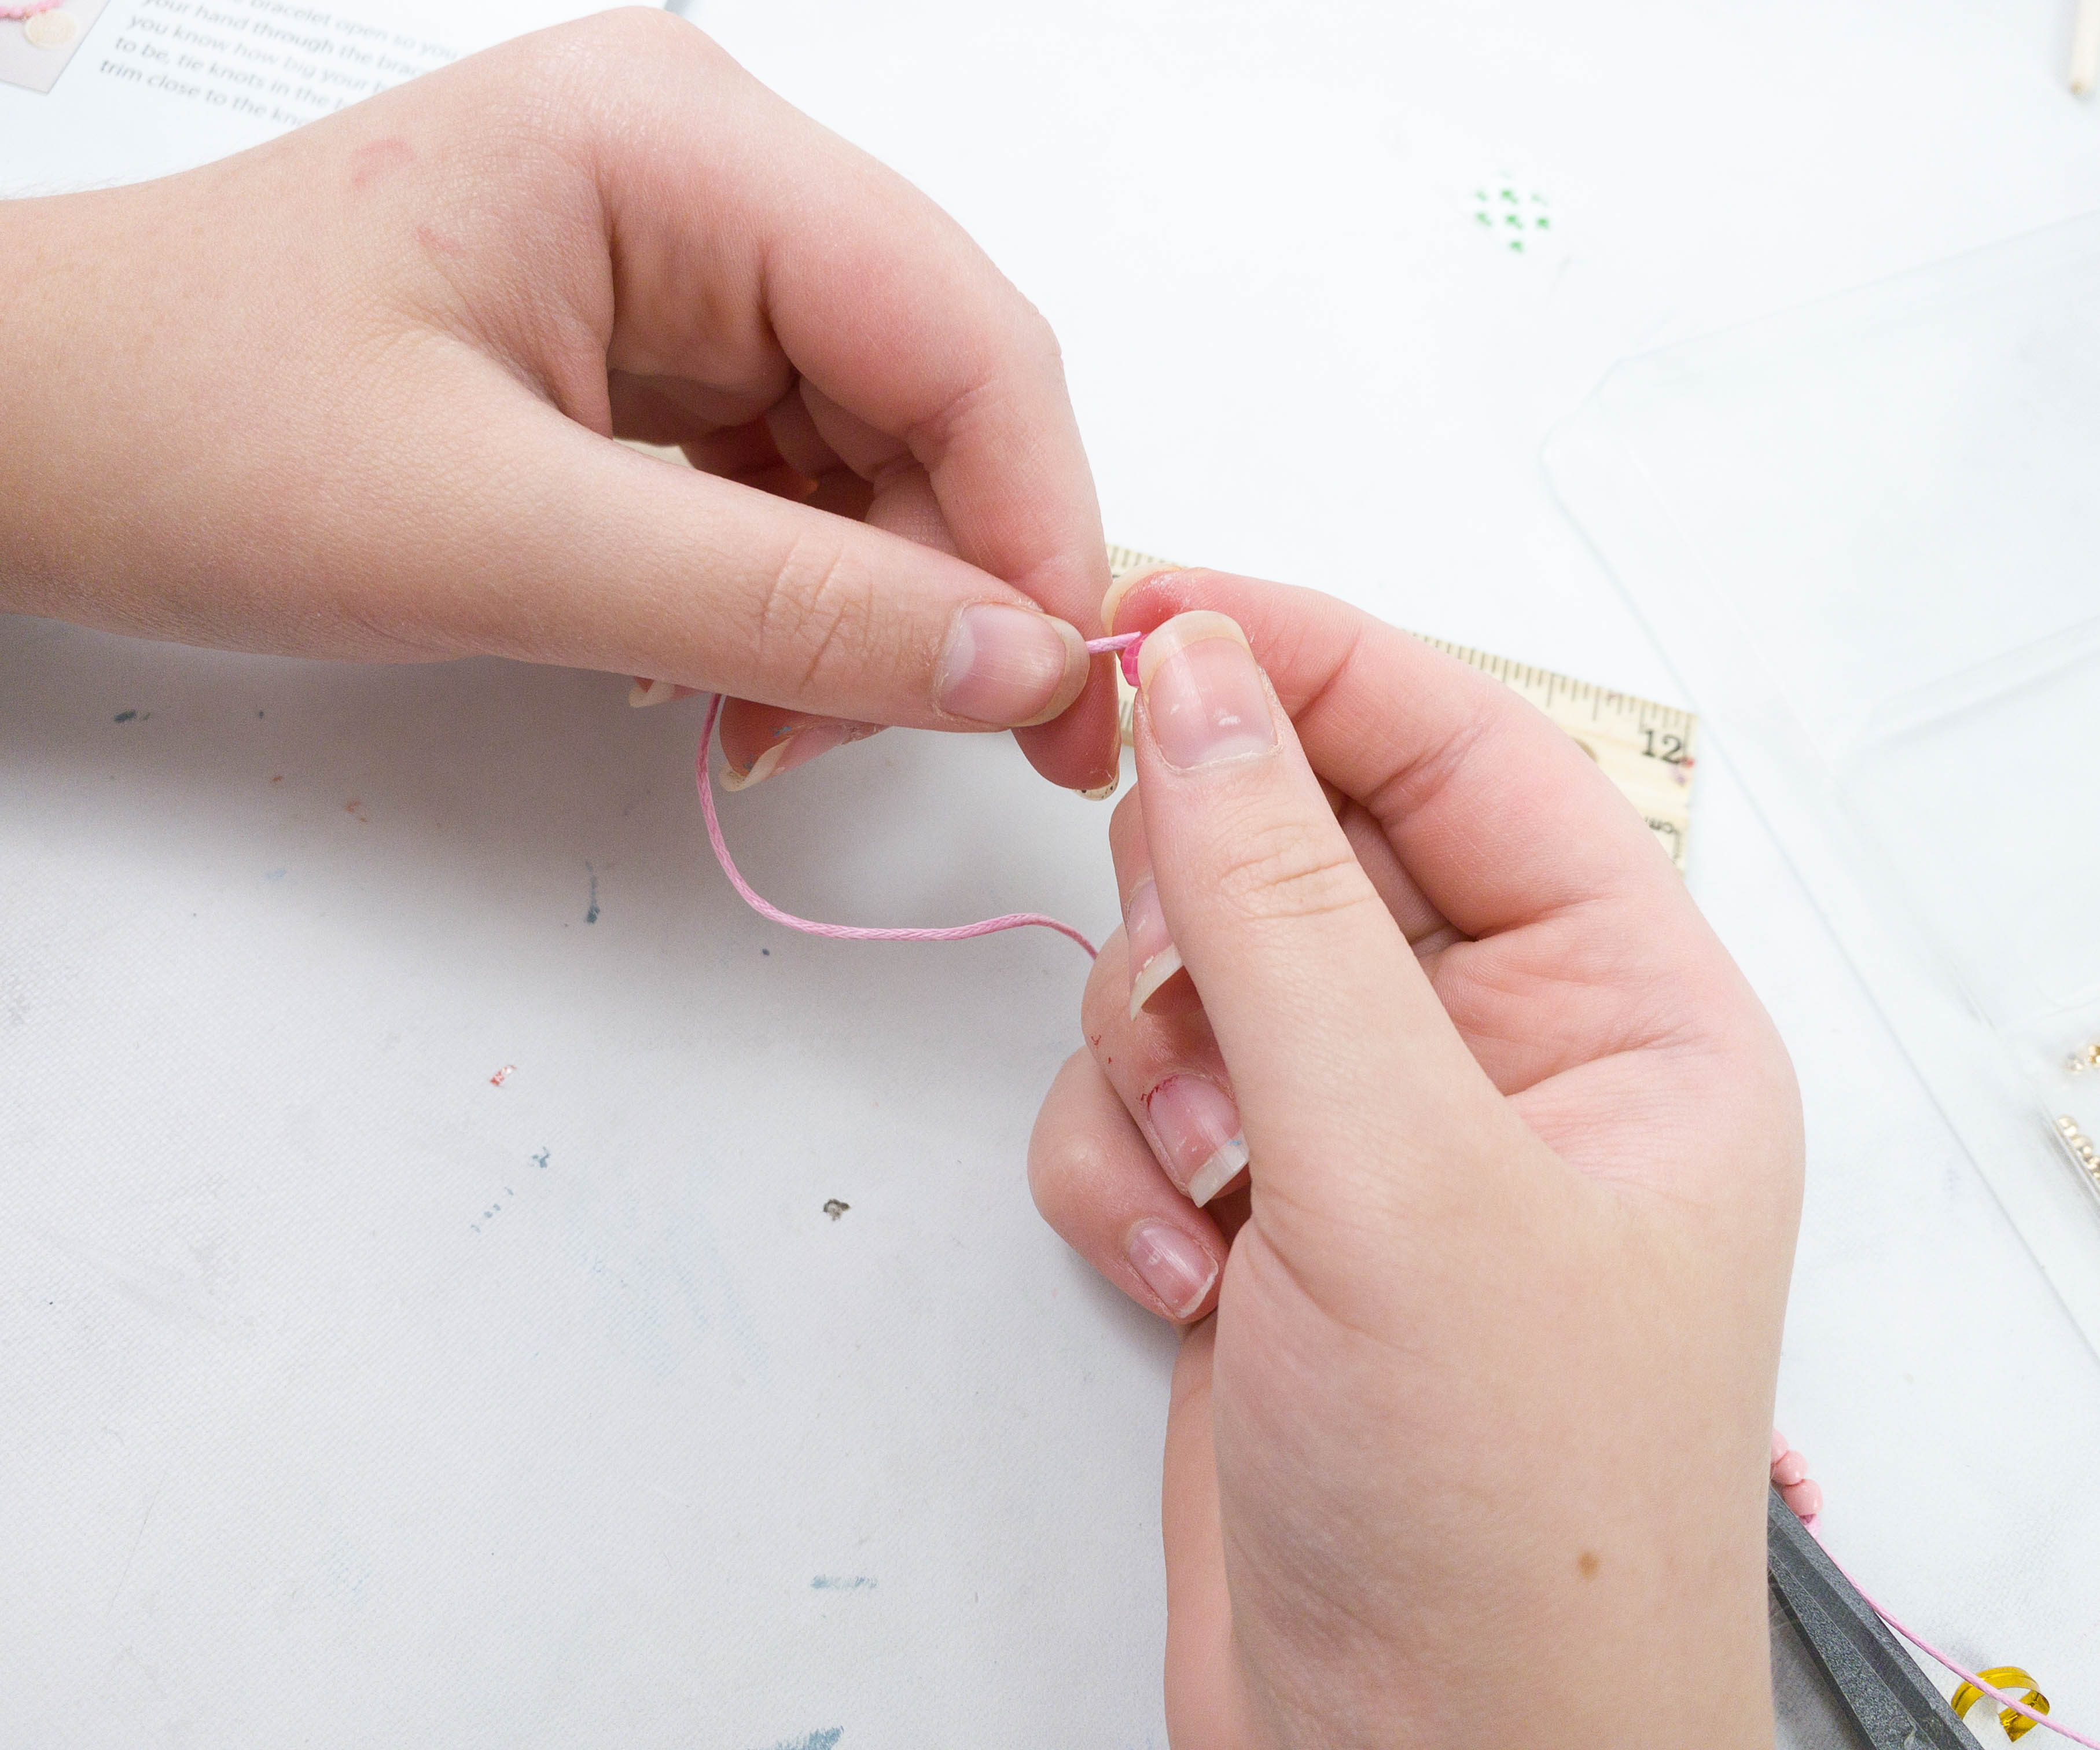
I love this pink colored cord and my daughters seem to agree with me!
Once done with the design, we put some tape first to secure everything before finalizing the enclosure.
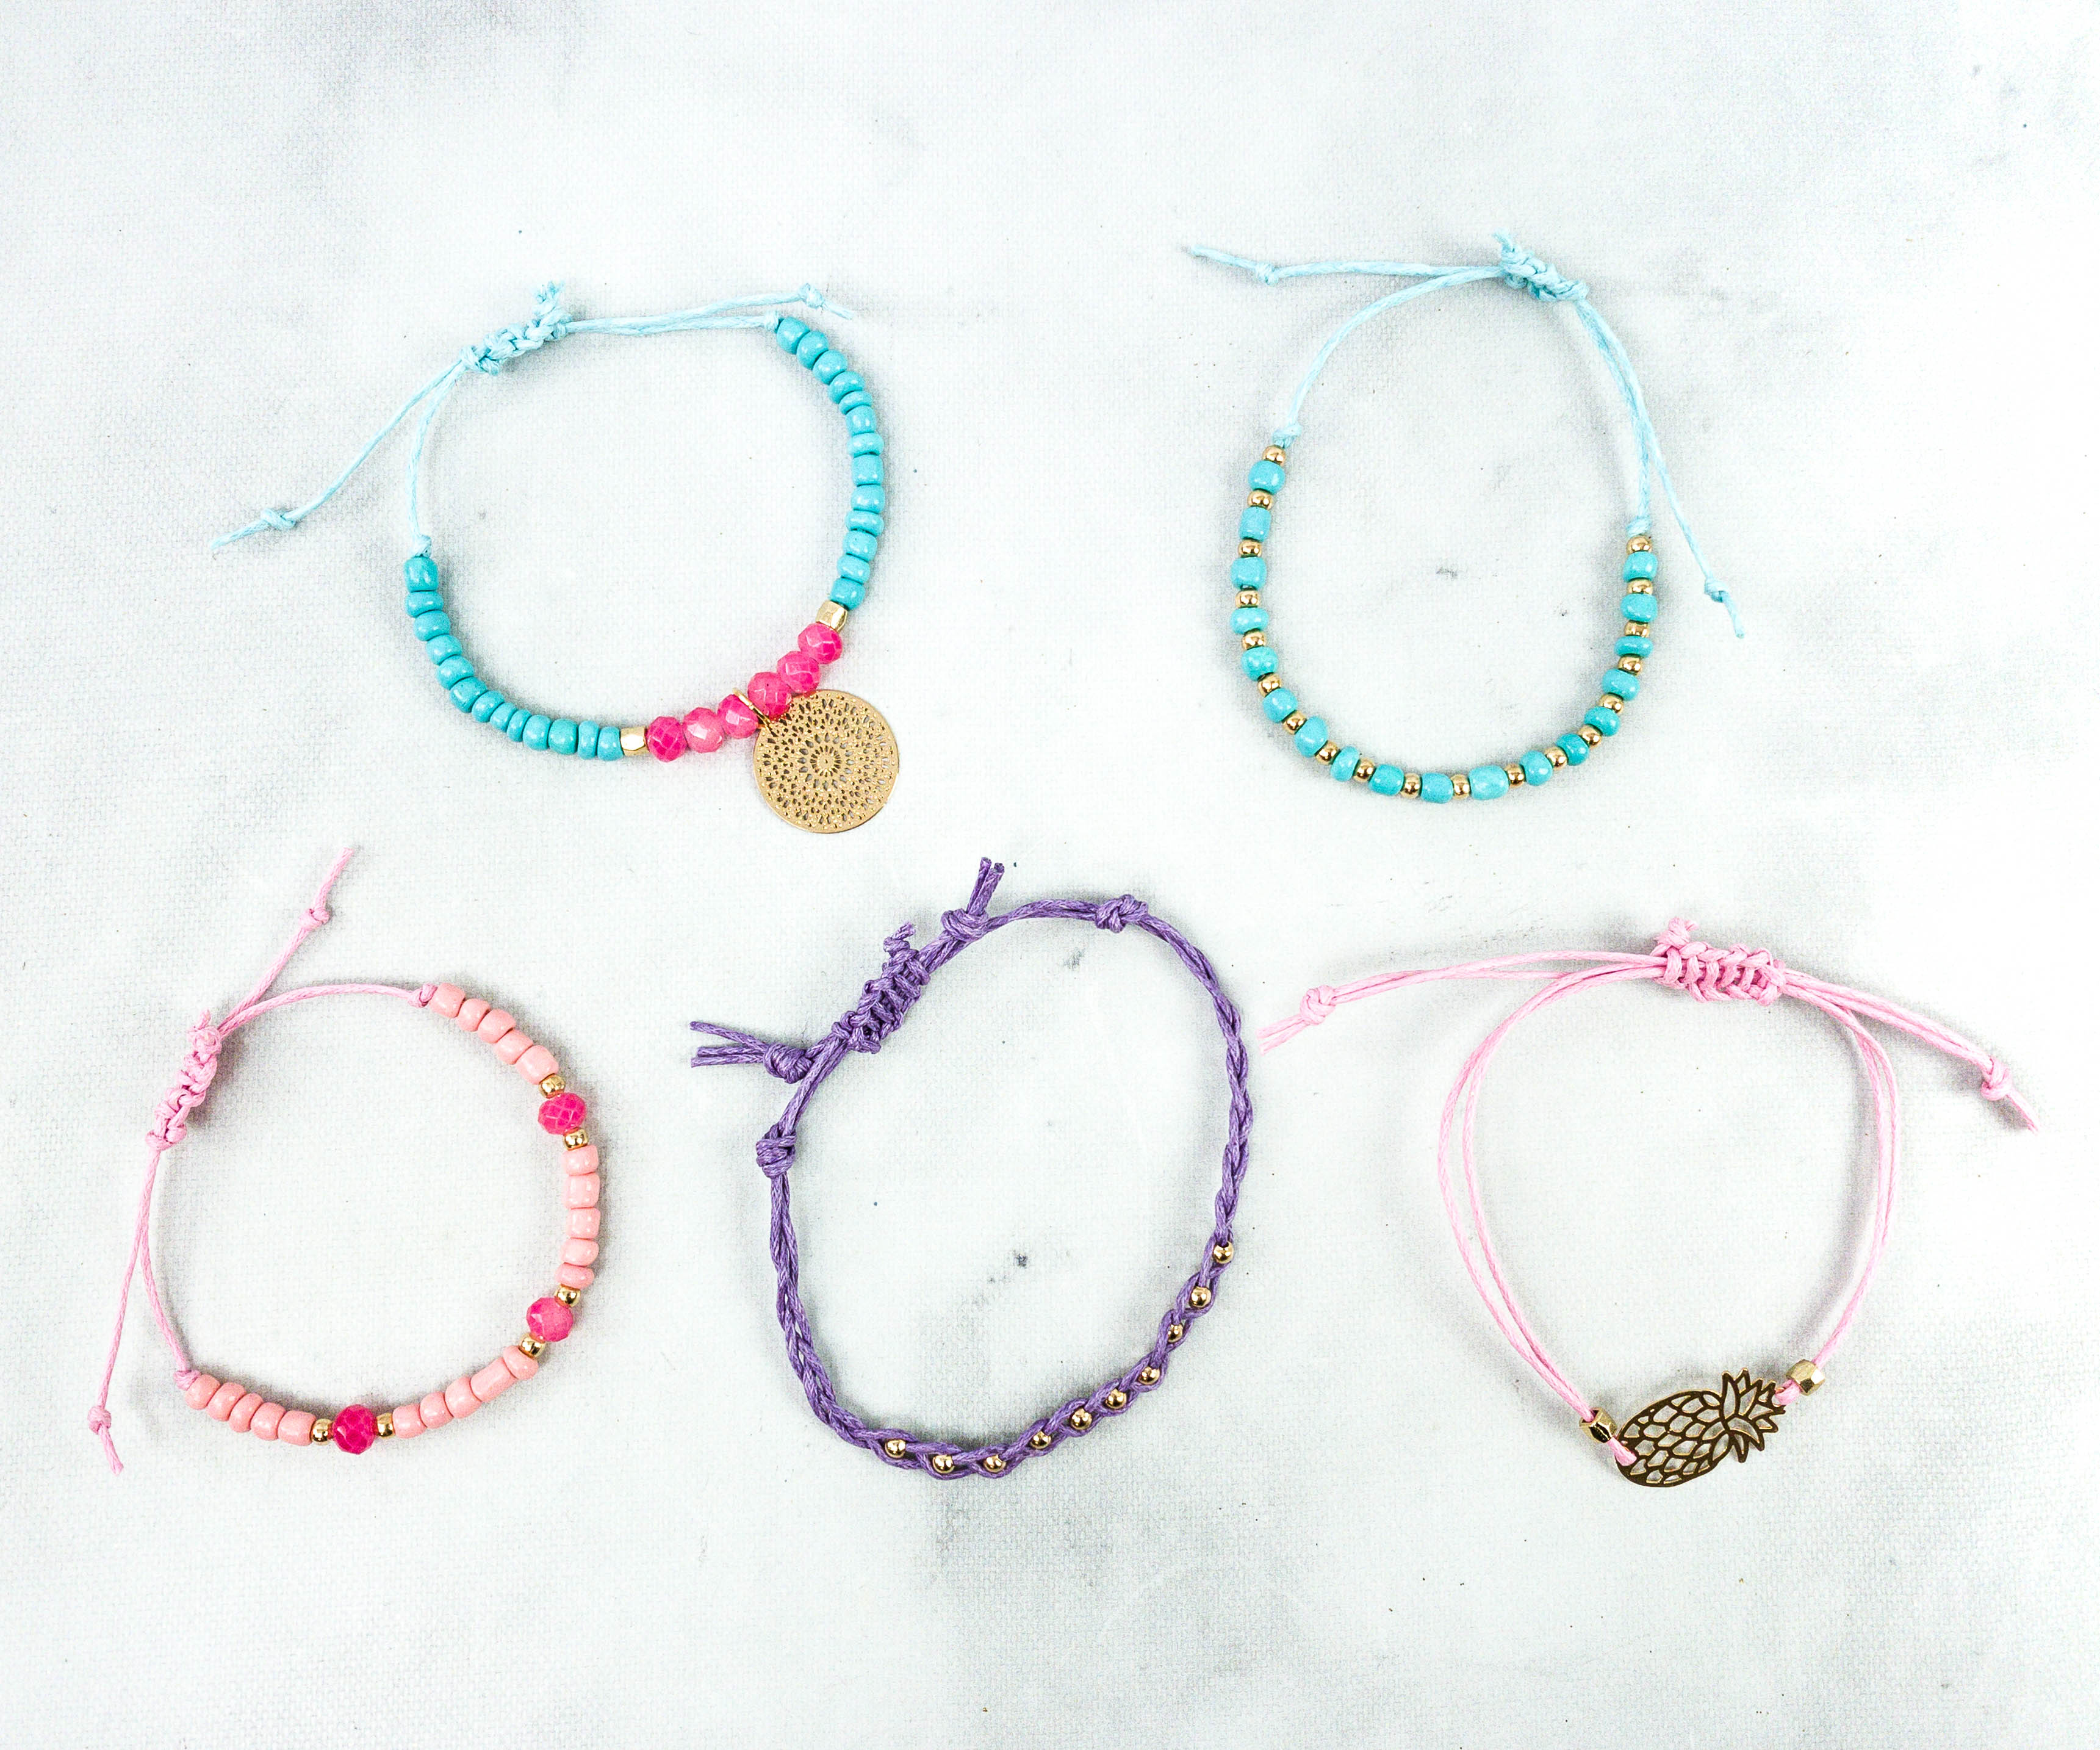
We actually made quite a lot of bracelets from this set and I’m so happy!
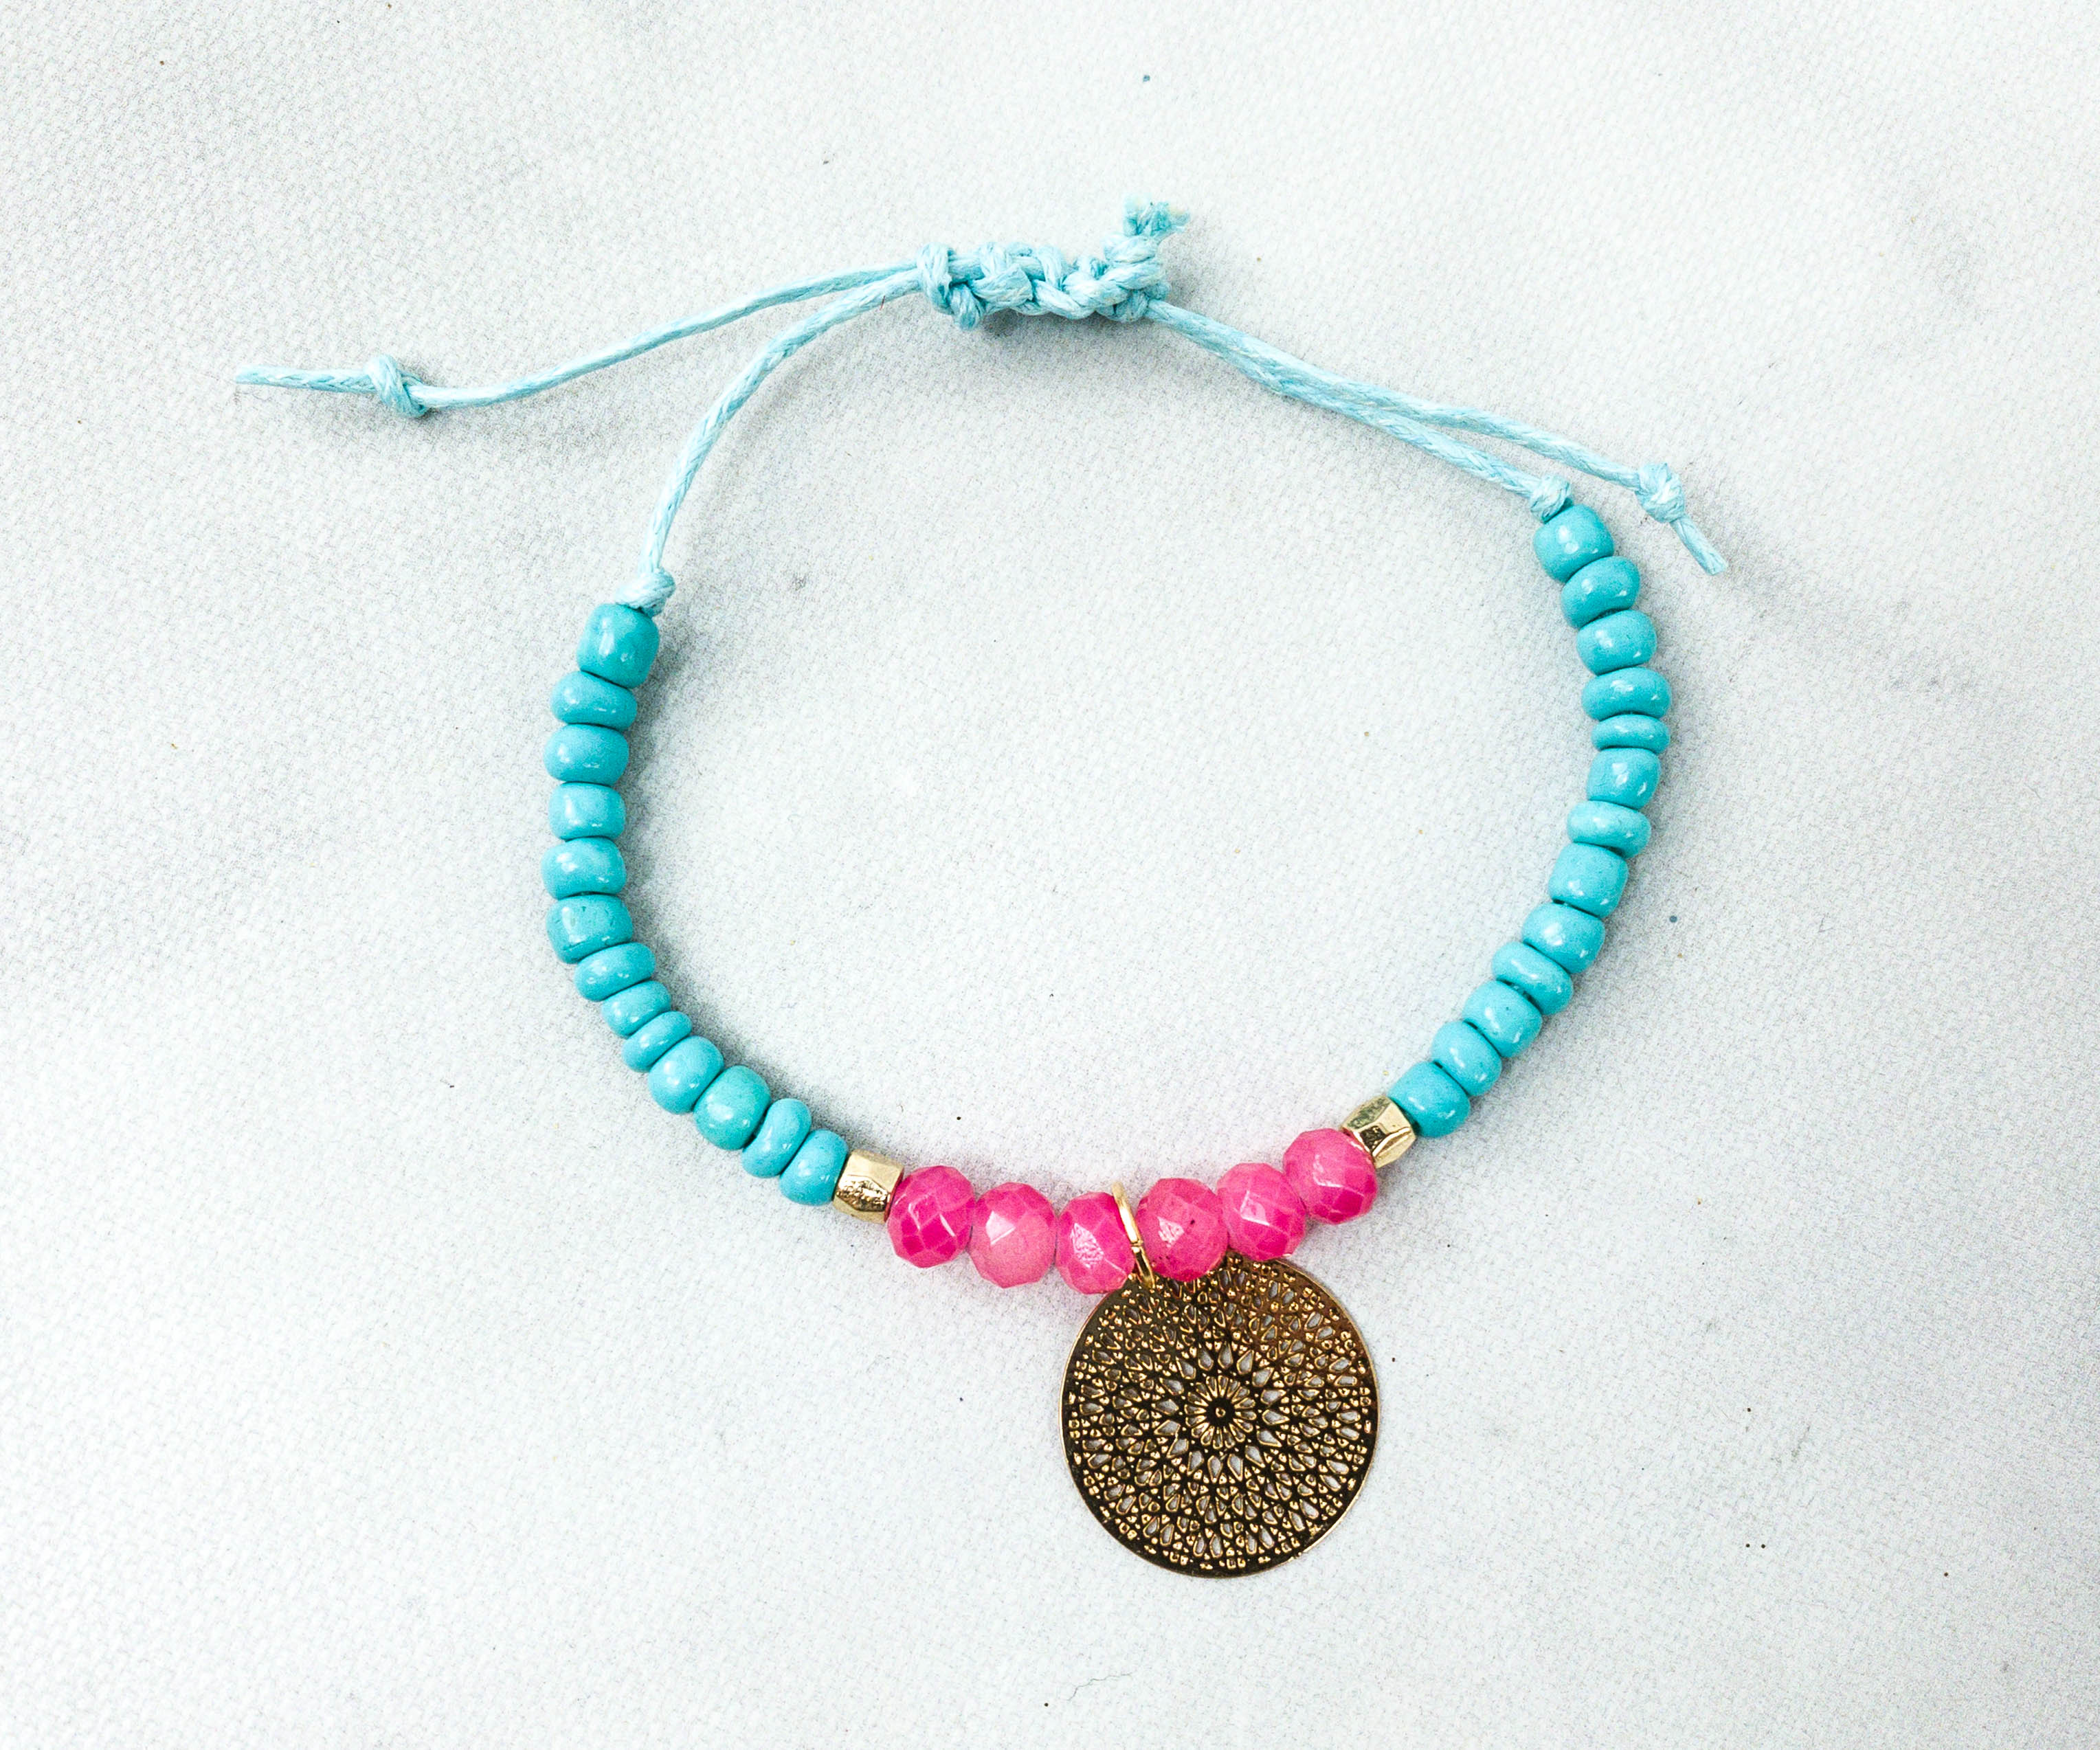
For this one, we used a single blue cord then put in the turquoise beads. My daughter used a gold nugget as a separator before putting the pink beads in then she put the circular gold plated charm in the center. This looks really pretty and it has that boho vibe going!
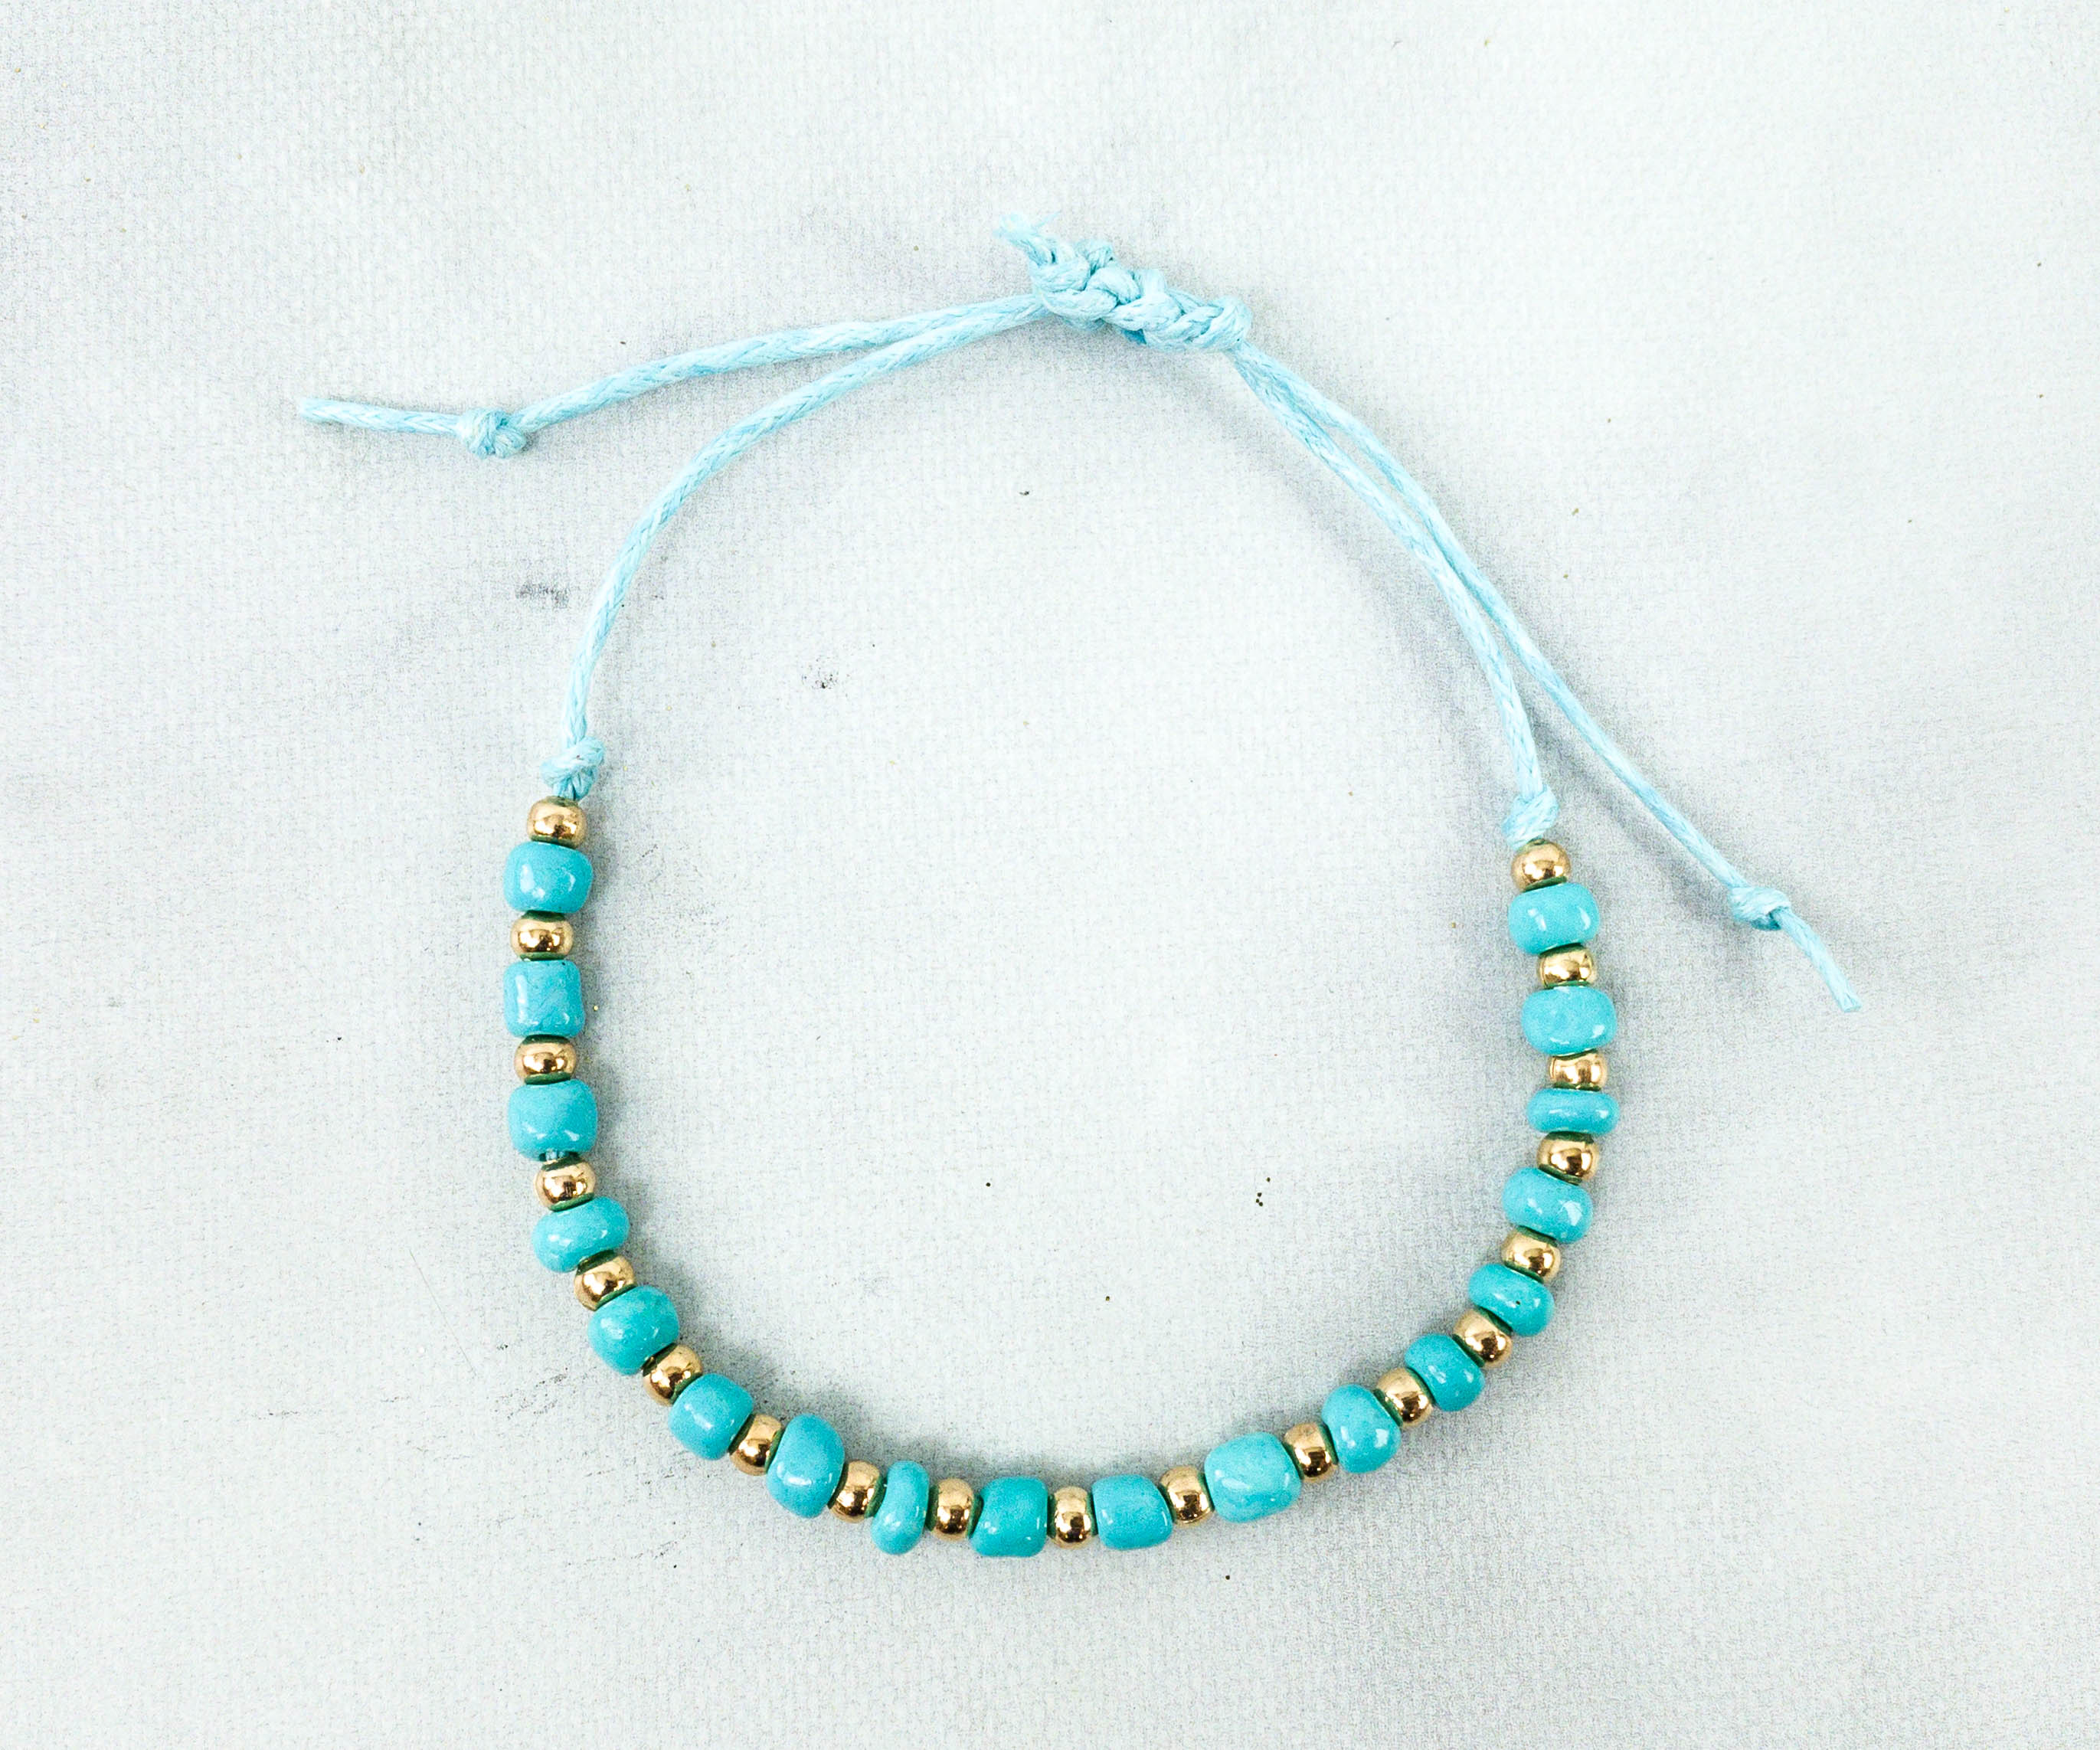
The next bracelet design by my daughter reminds me of the beach. I love the combination of the turquoise blue and gold beads!

My daughter had a great time creating this masterpiece by mixing up two shades of pink and separating them with the gold beads.
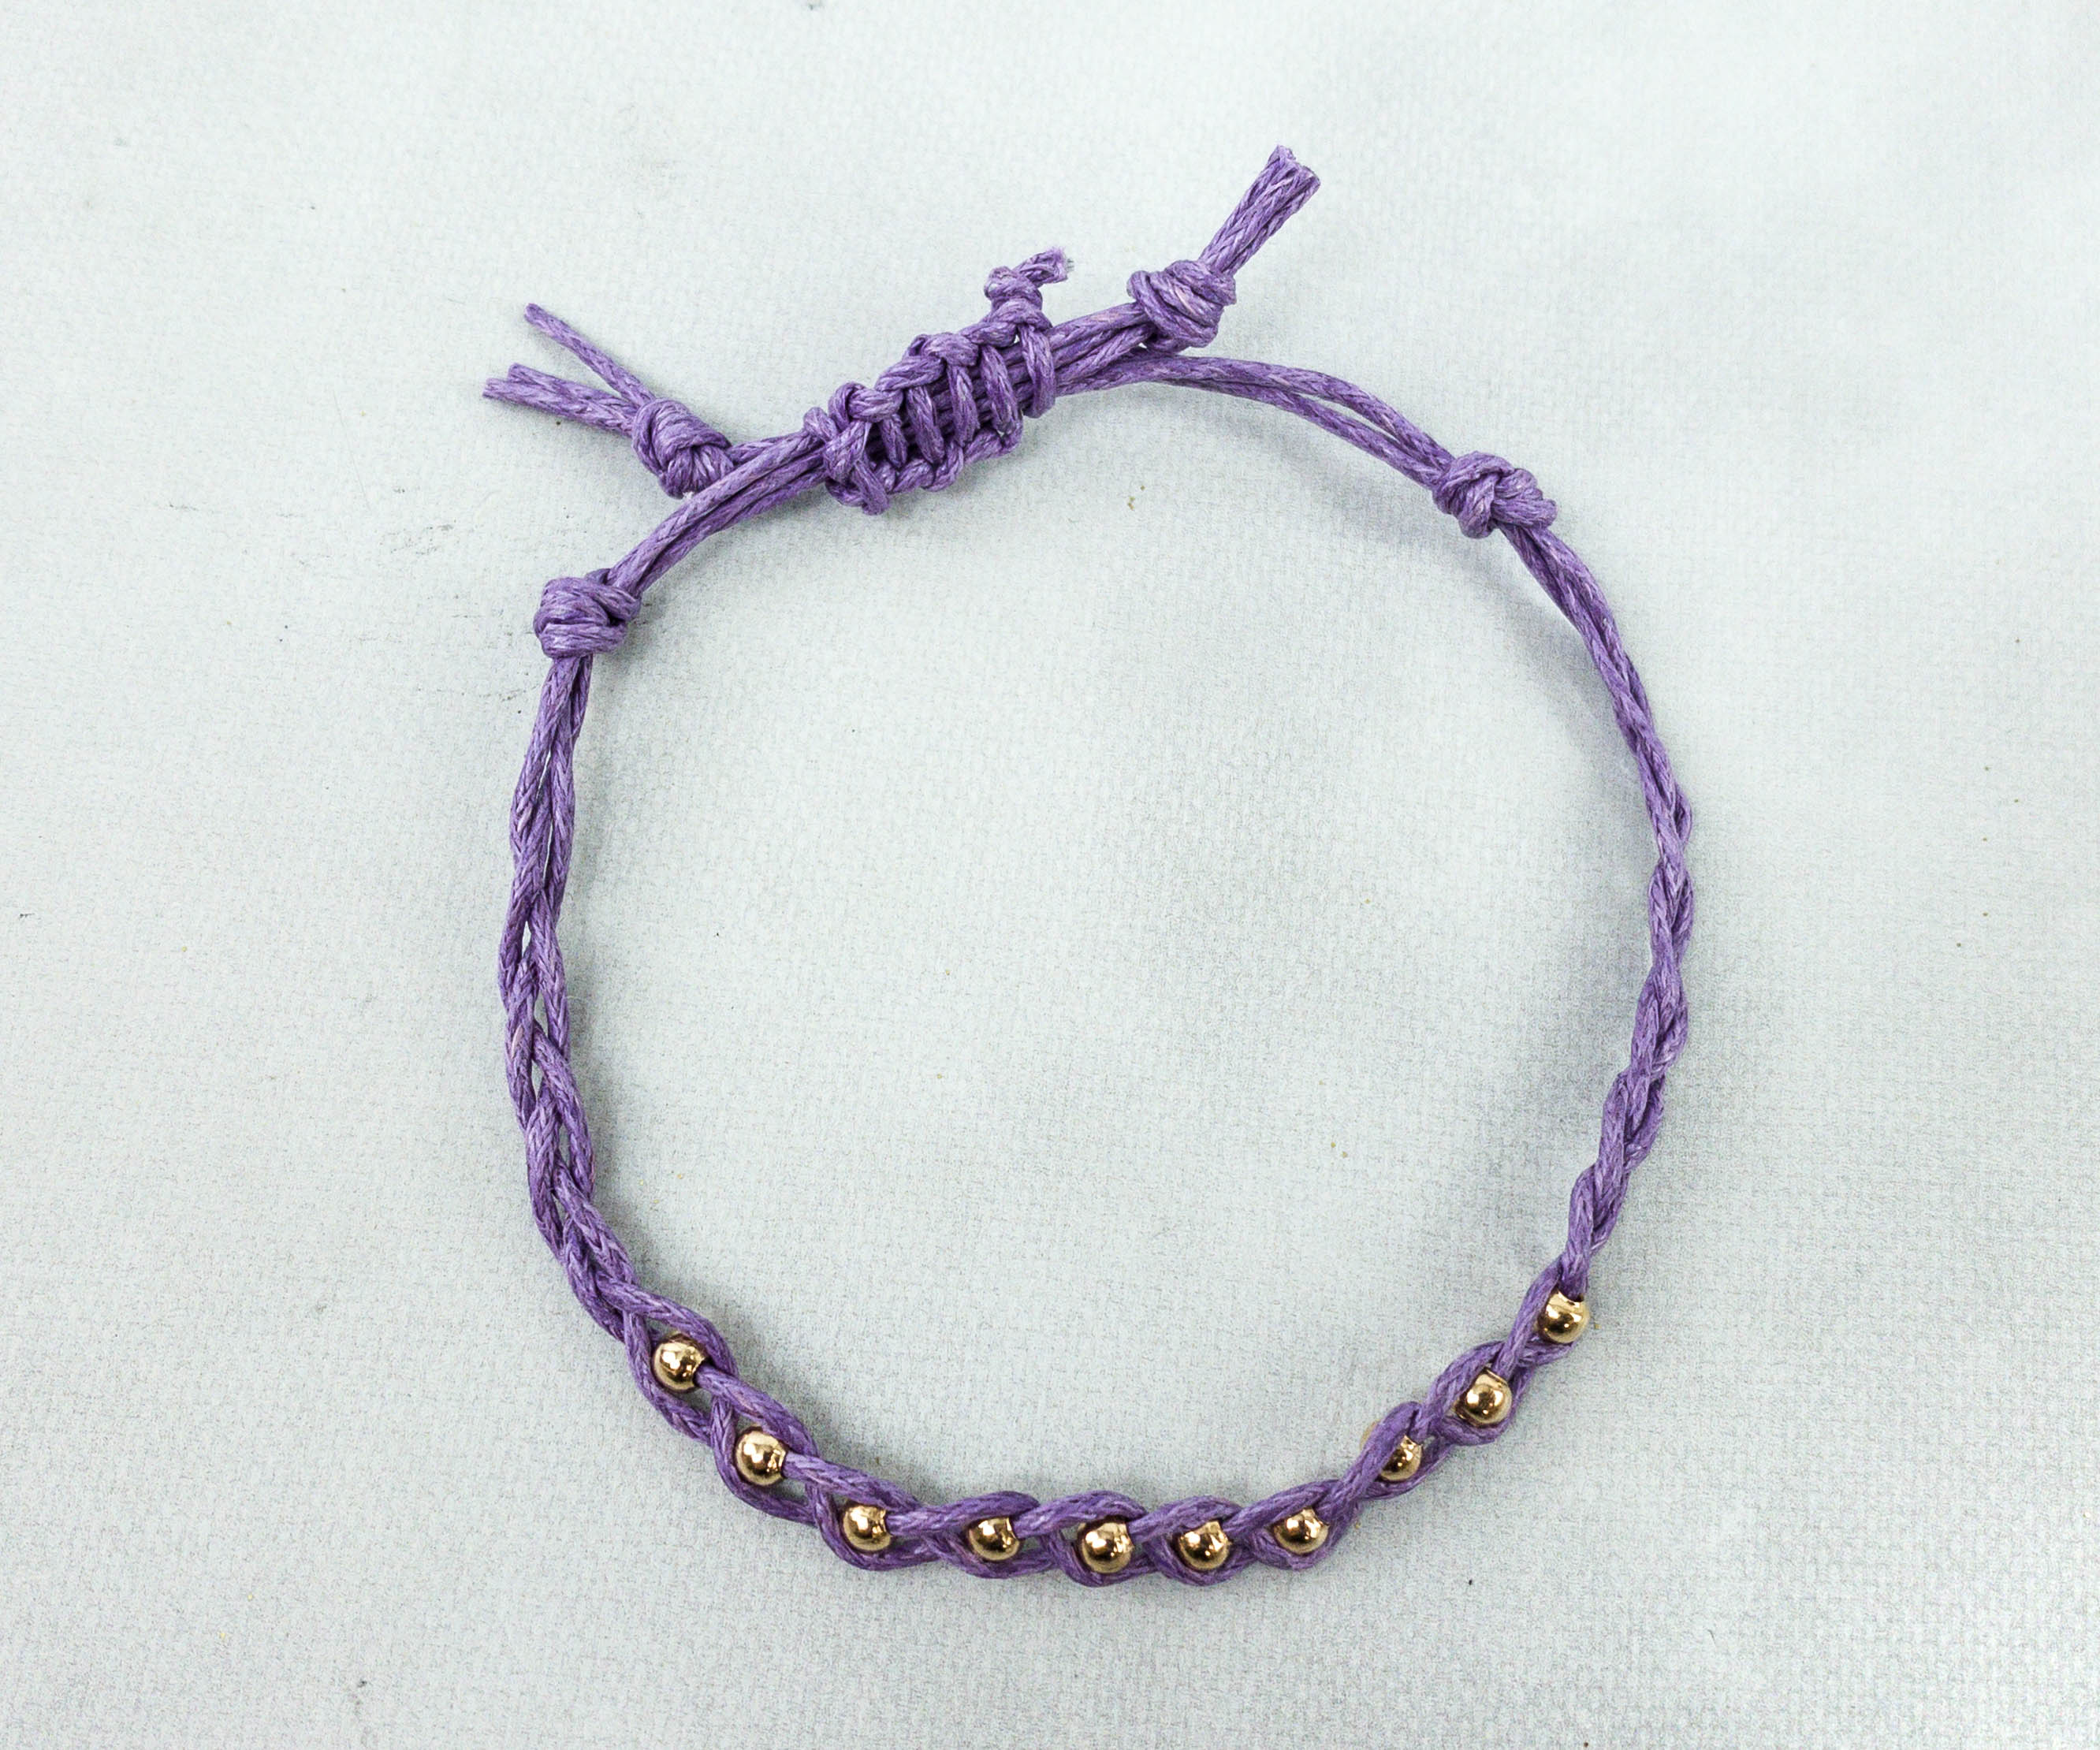
The next design is intricate and stunning. The gold beads are nestled under the purple waves. It’s simple yet it just looks really gorgeous!

The last bracelet is a double cord bracelet that houses an adorable gold plated pineapple charm in the middle! It’s super cute and dainty!
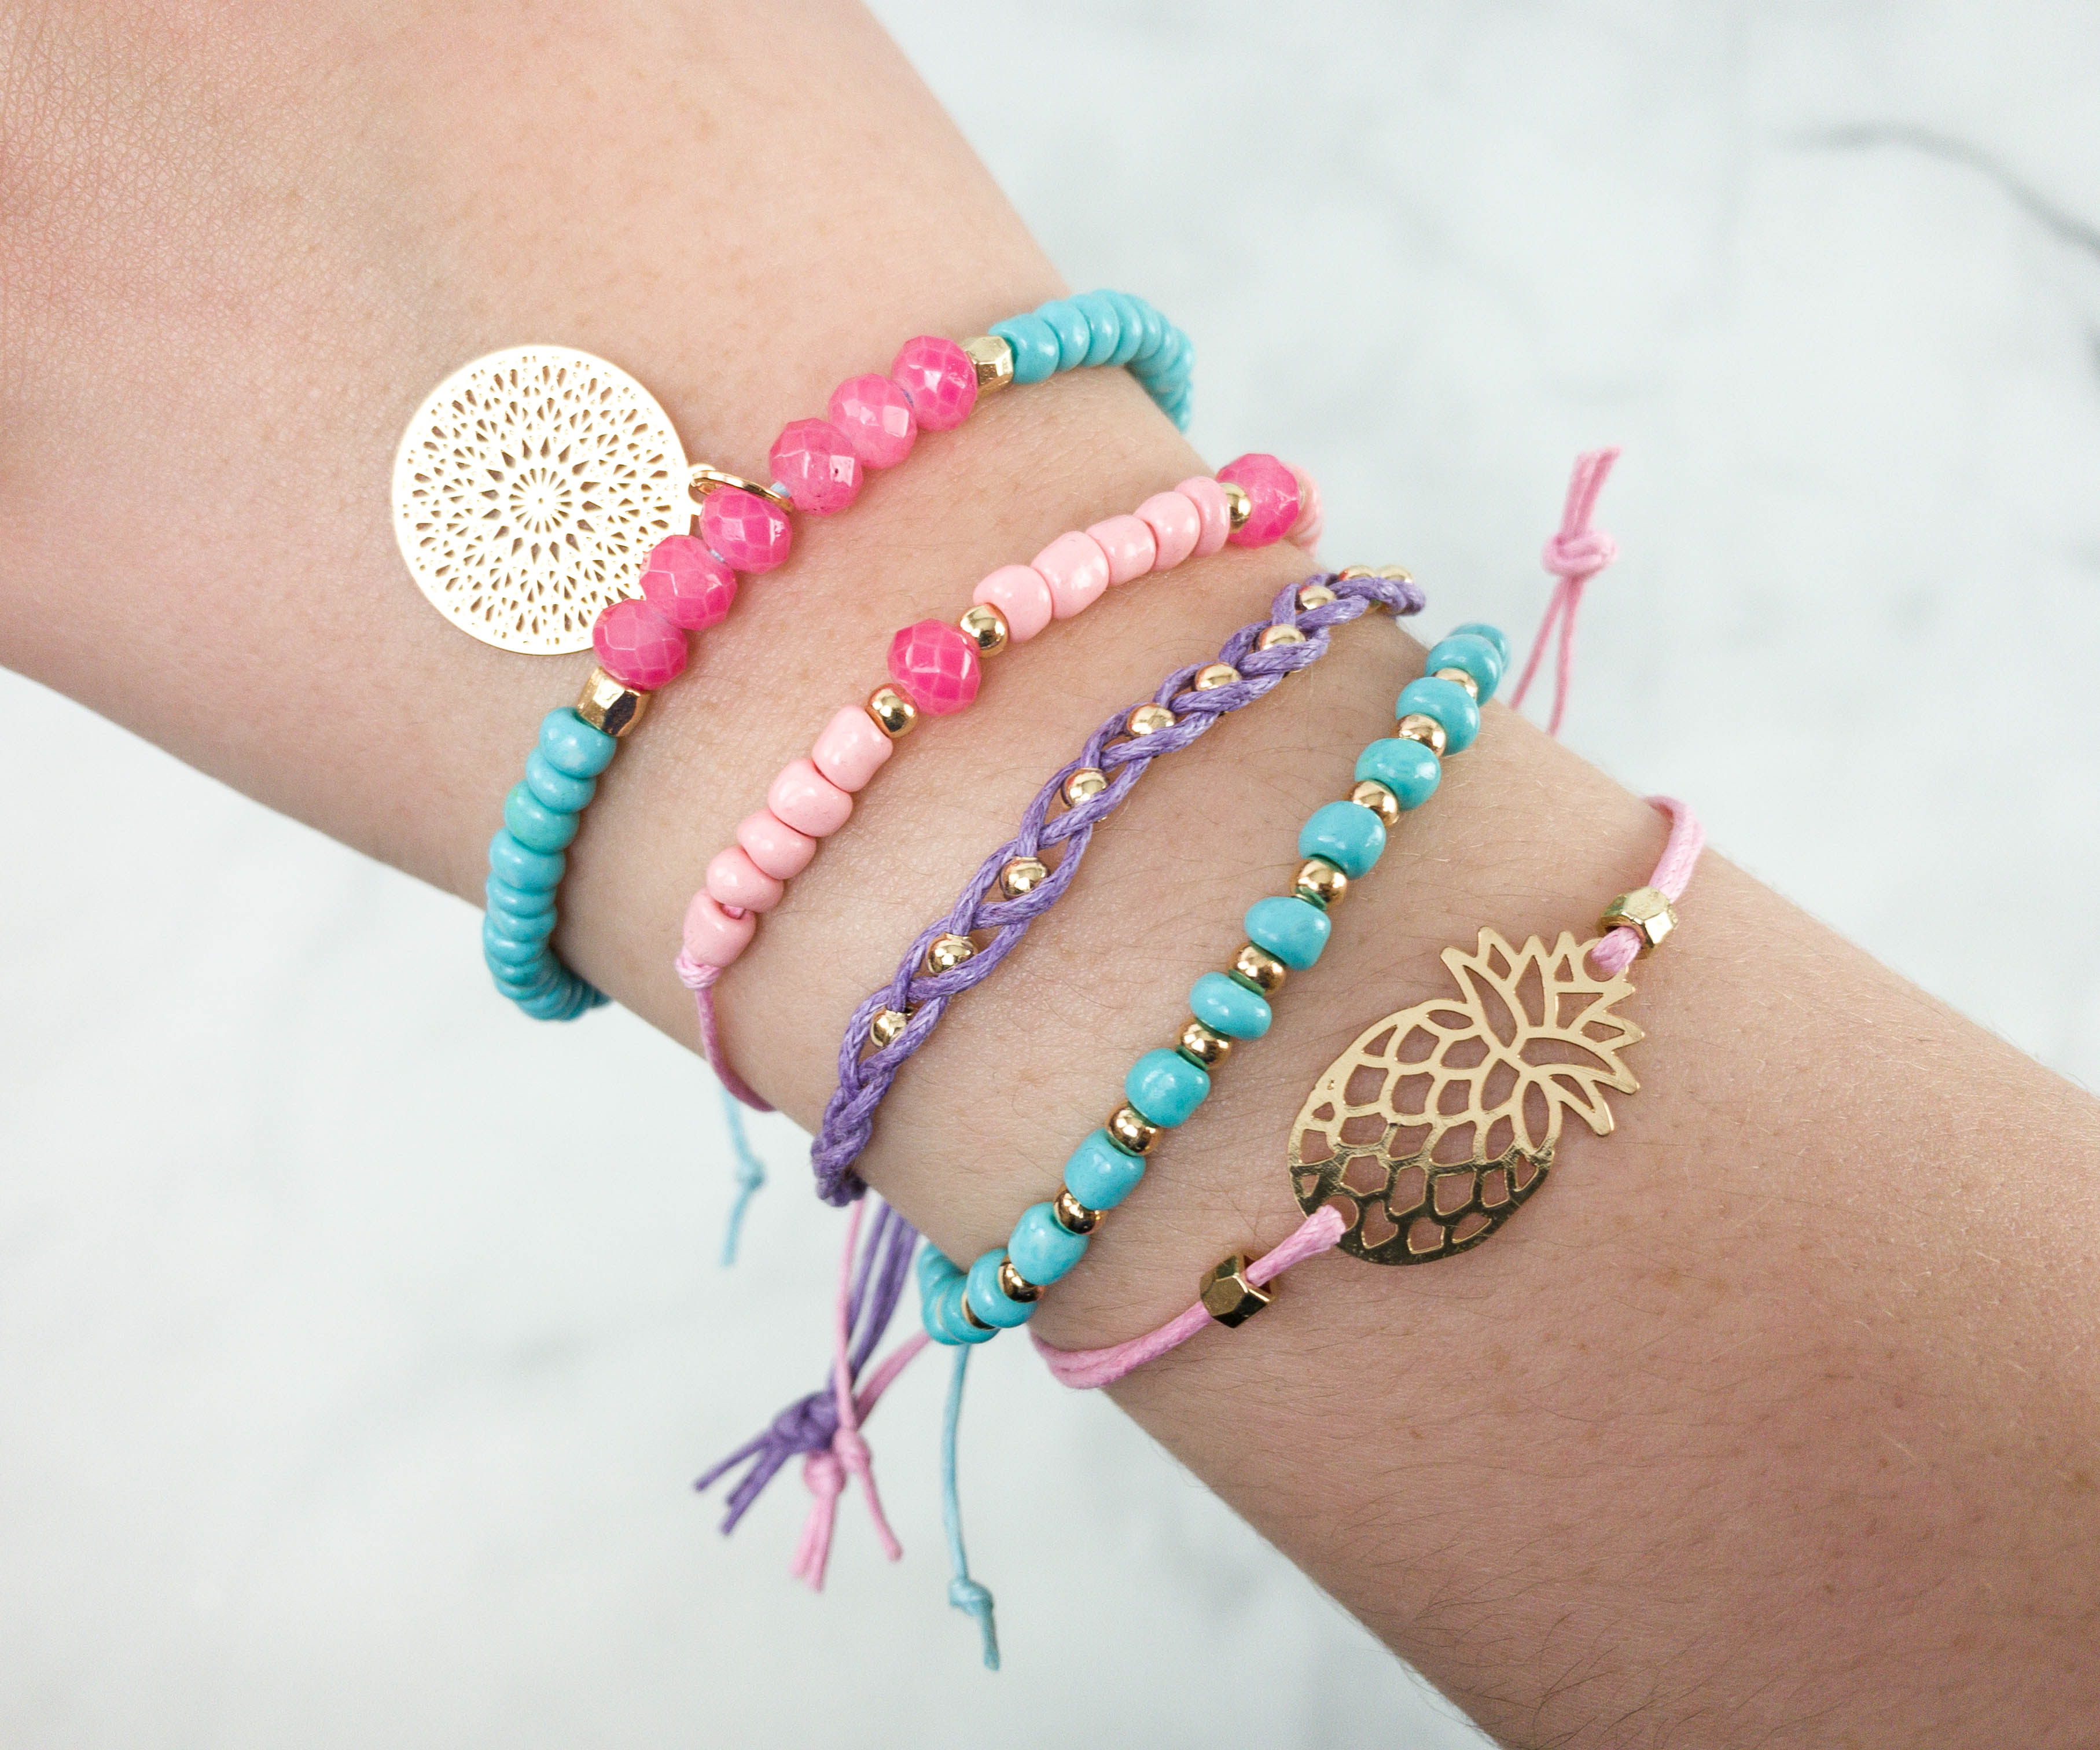
My daughter is happy with these bracelets! They look great when stacked!
Now, we can start putting our jewelry organizer to good use!
We love both projects this month!
Annie’s Creative Girls Club sends fun craft projects monthly! My daughter can do mostly everything on her own and only needs little supervision. The end products are always useful, like this month’s jewelry organizer where she can showcase her favorite bracelets and earrings. Of course, we also love the bracelet kit! They provided enough materials for 5 bracelets and they all turned out pretty. My daughter loves stacking them on her wrist. With this subscription, it’s easy to stay productive even we’re just at home!
What do you think of Annie’s Creative Girls Club review? Let us know your thoughts!
Visit Annie’s Creative Girls Club to subscribe or find out more!


Comments