Doodle Crate is a member of the KiwiCo family geared toward kids 9+. It inspires young makers to learn new skills and gain creative confidence through craft and art projects by teaching them basic and intermediate techniques of a new artistic medium each month. The sky is the limit, and crafts made from the same kit can be kept simple, or they can be made as intricate as the artist desires.
Though geared toward kids, Doodle Crate is gender neutral and also excellent for anyone (even adults) wanting a craft subscription. In our experience, this is the best “arts and crafts” box for older kids, tweens, teens, and adults – the end result is nearly always something you will want to save!
DEAL: Use this link to save 30% on your first month of Doodle Crate! (or Kiwi Crate and the KiwiCo family subscriptions Tinker Crate, Eureka Crate, and Maker Crate).
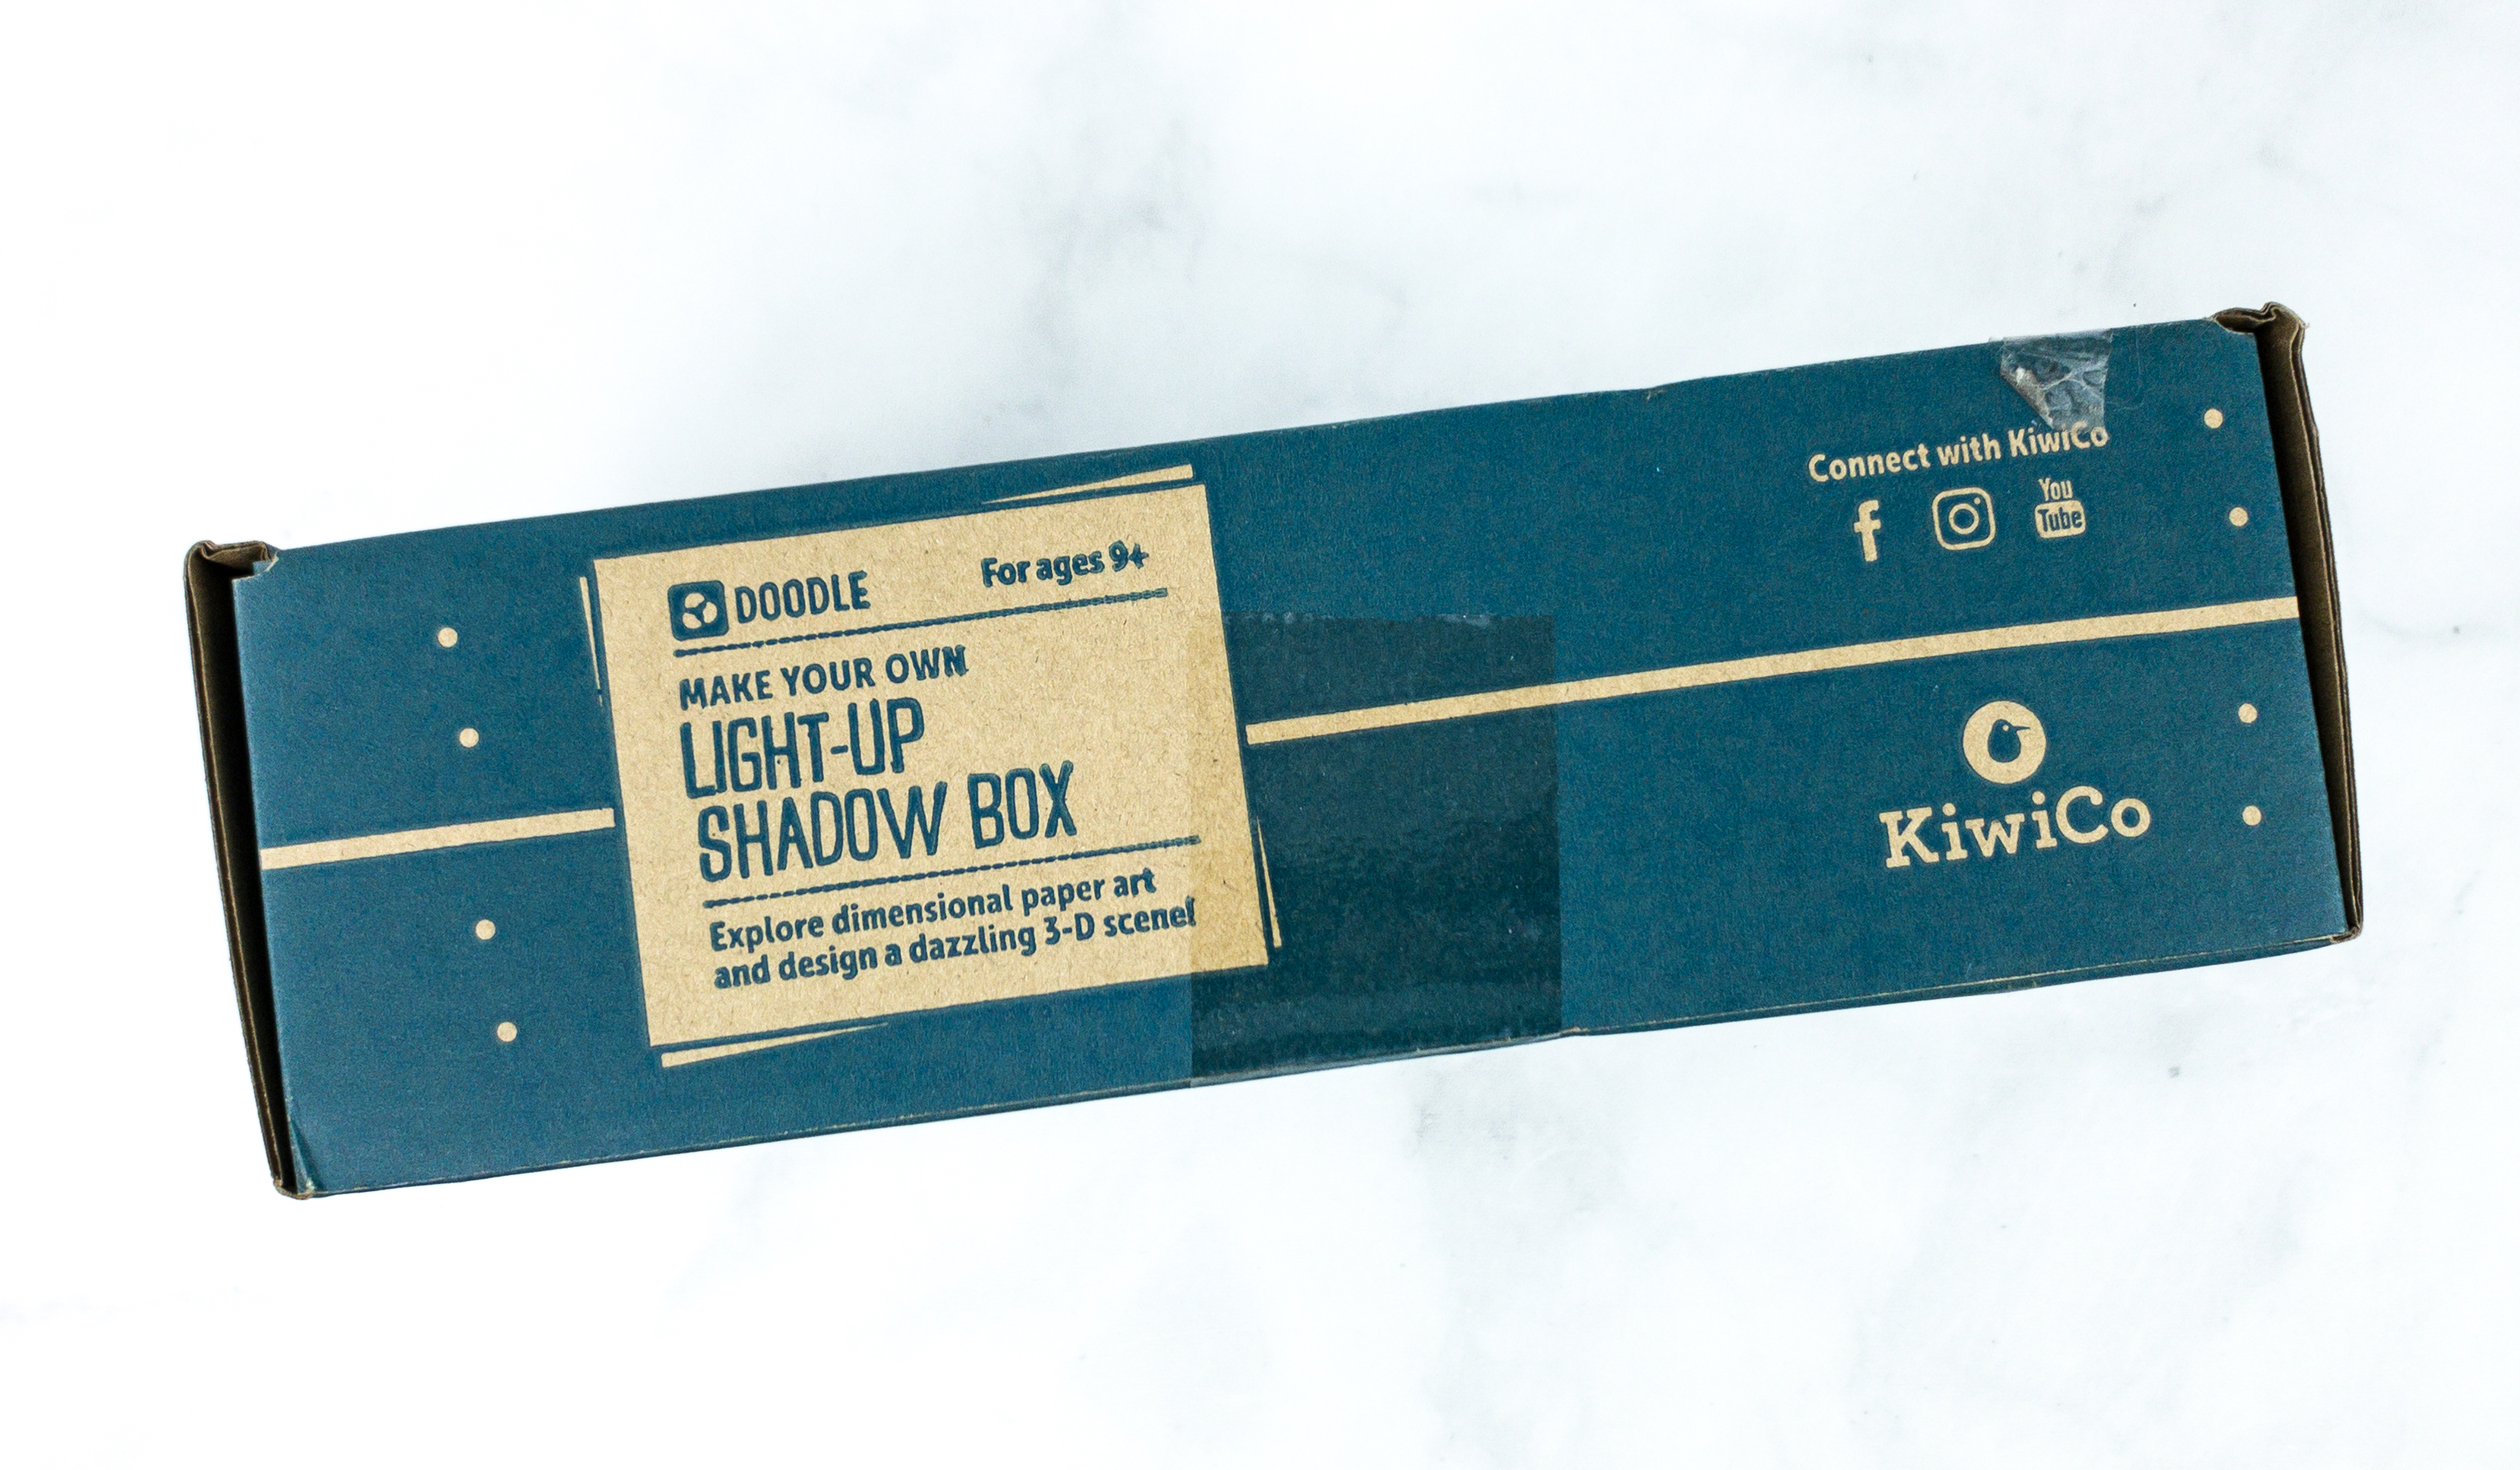
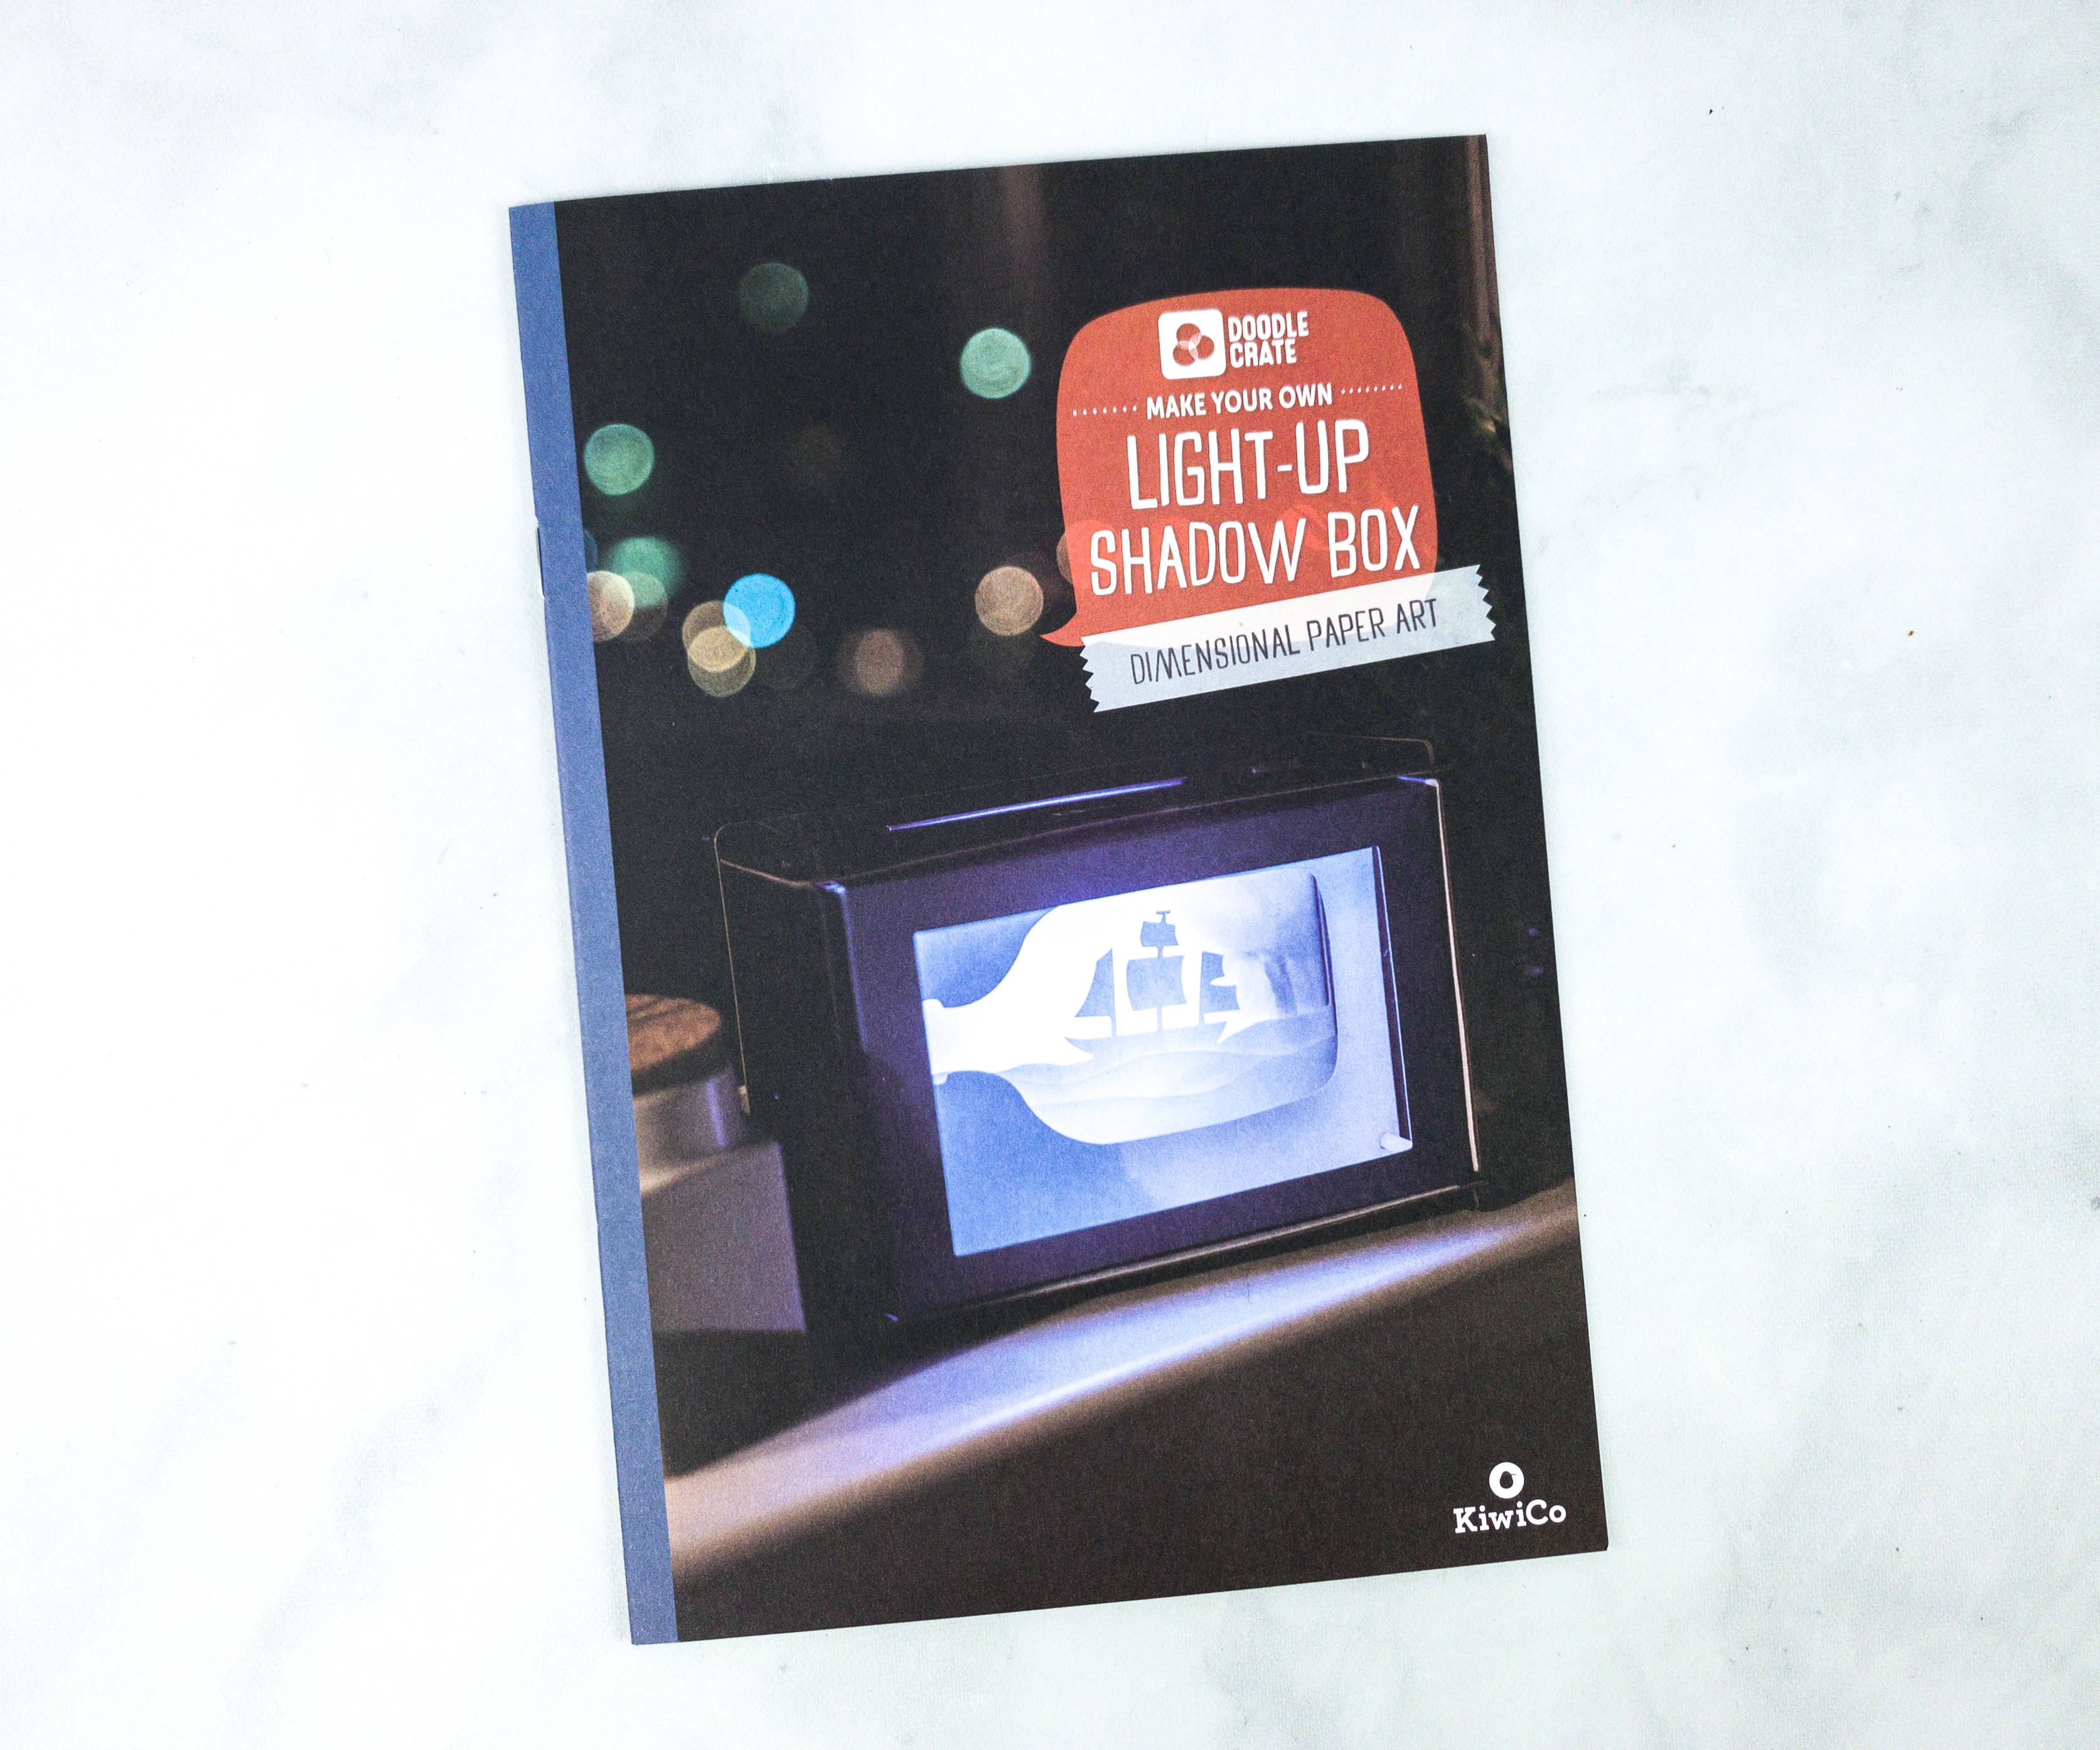
This month’s project: LIGHT-UP SHADOW BOX!
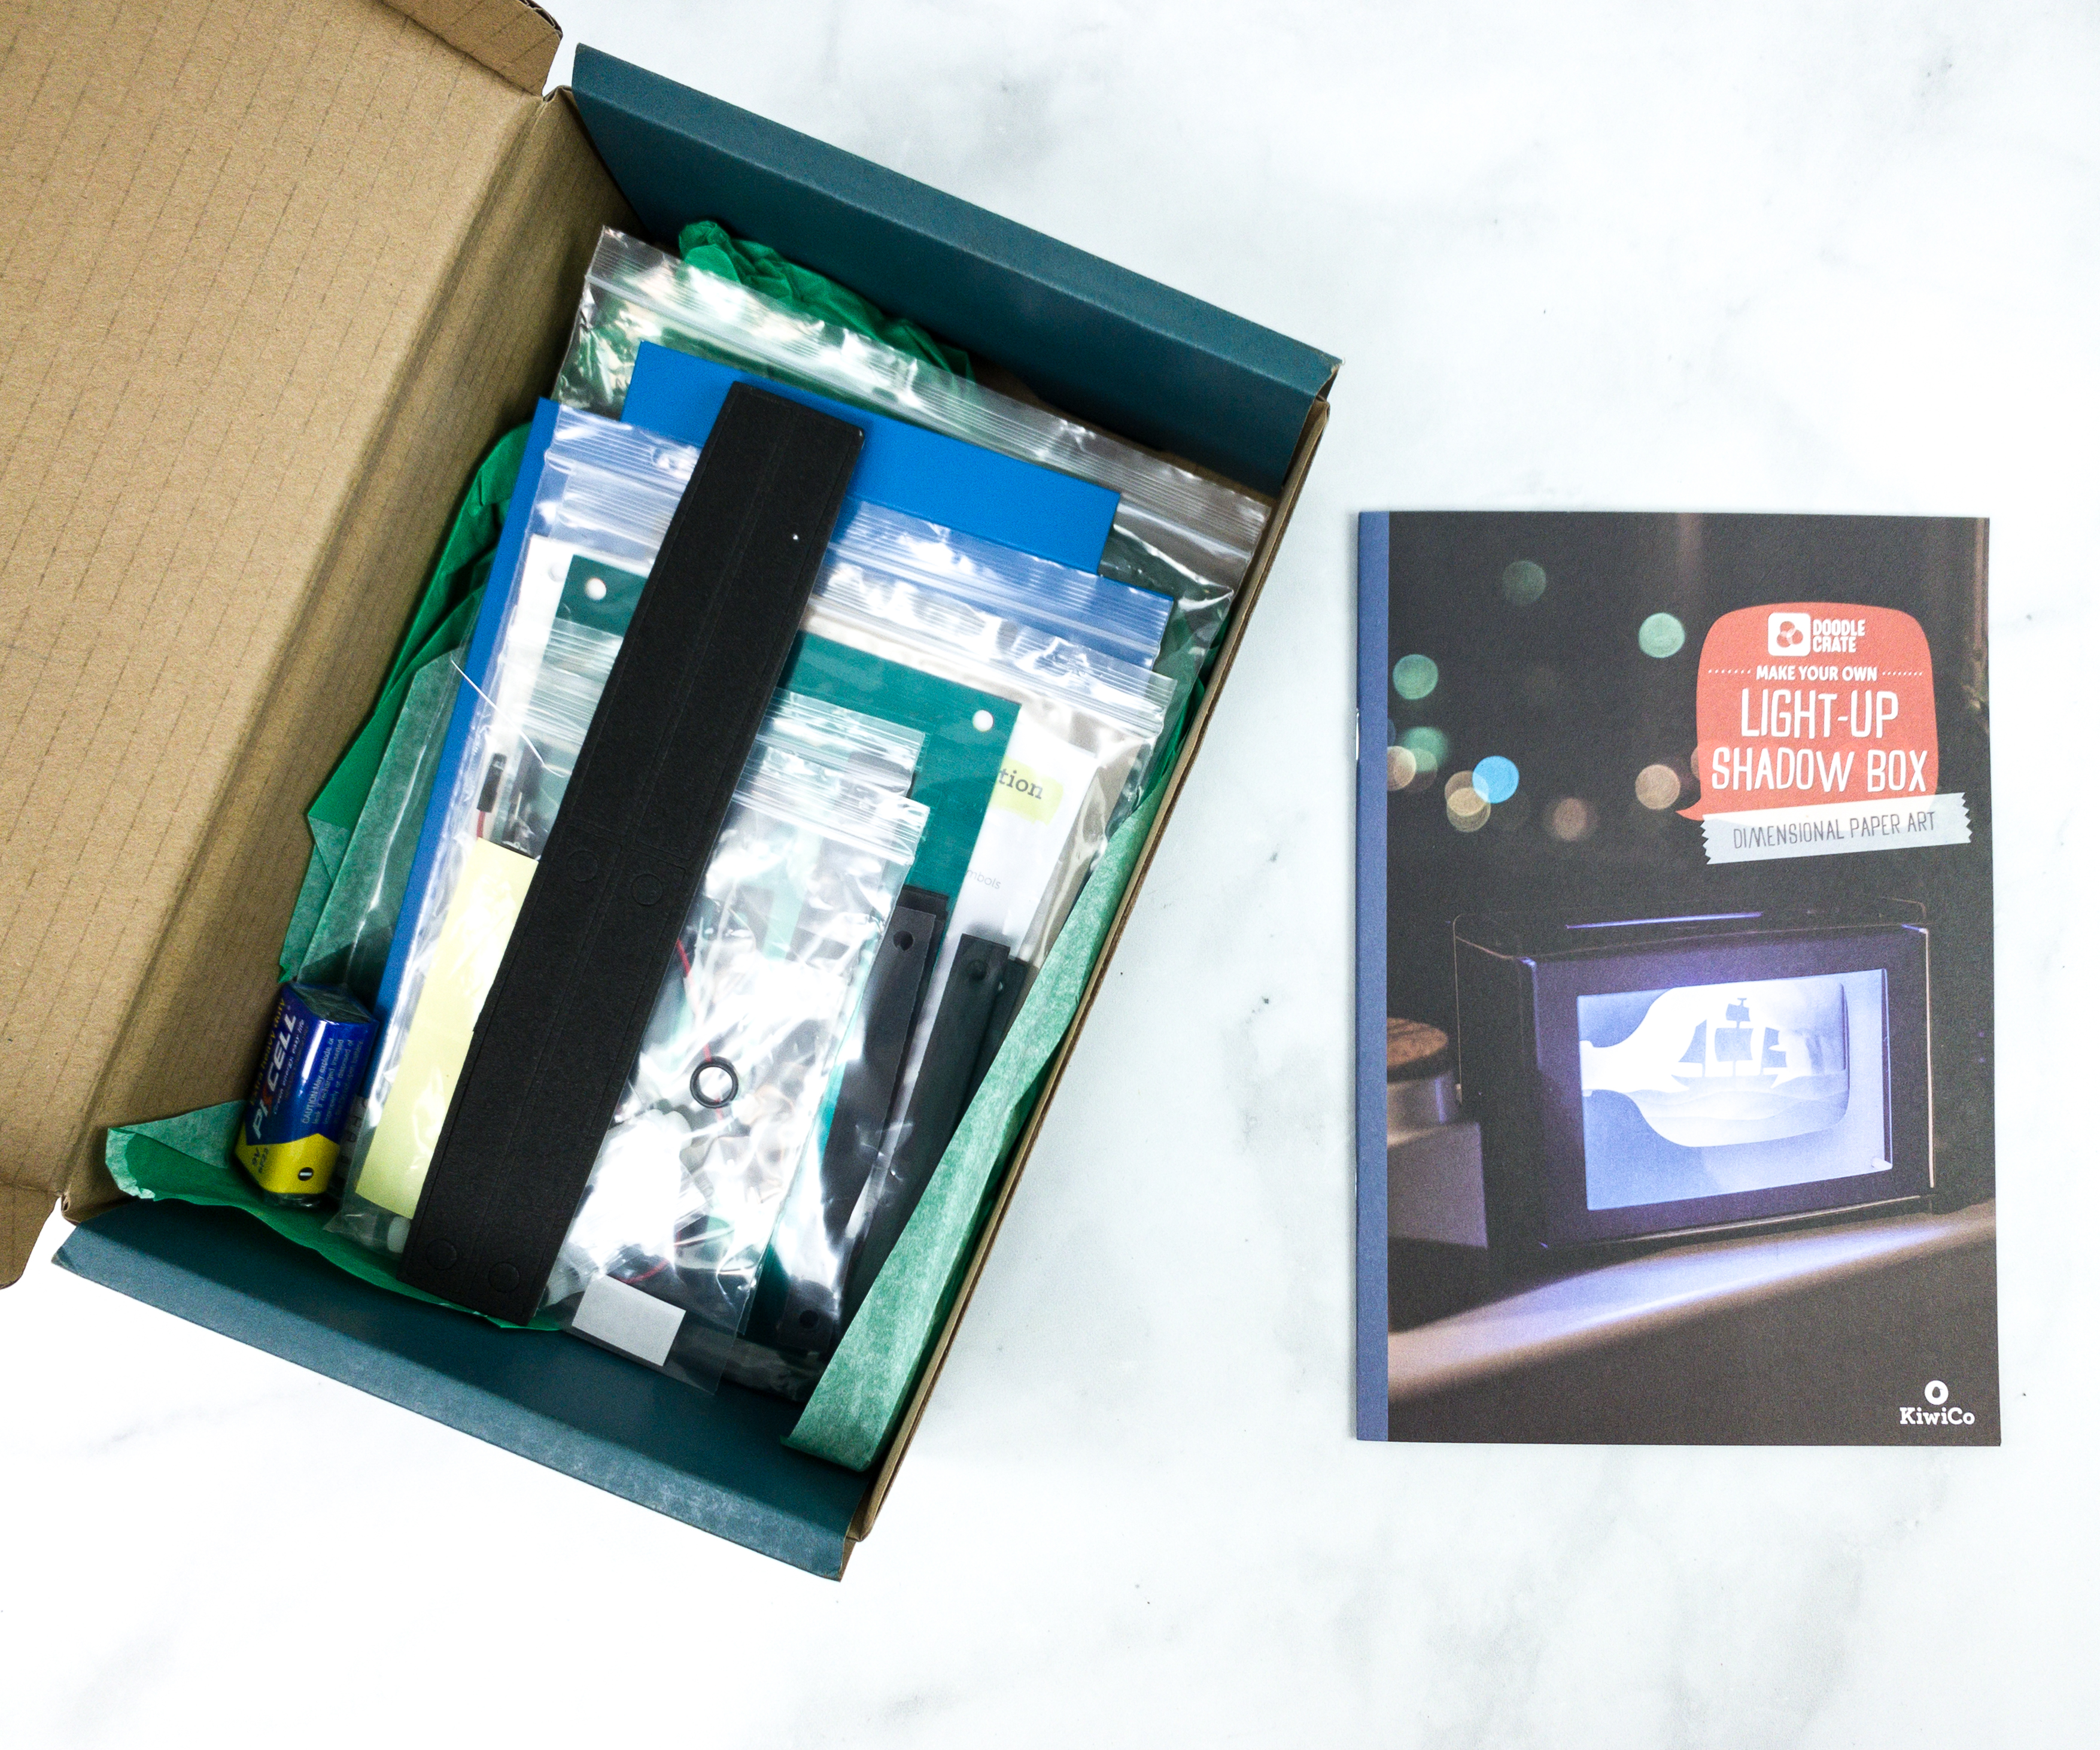
All the items arrived in great condition!
The materials were also separately packed in resealable plastic pouches.
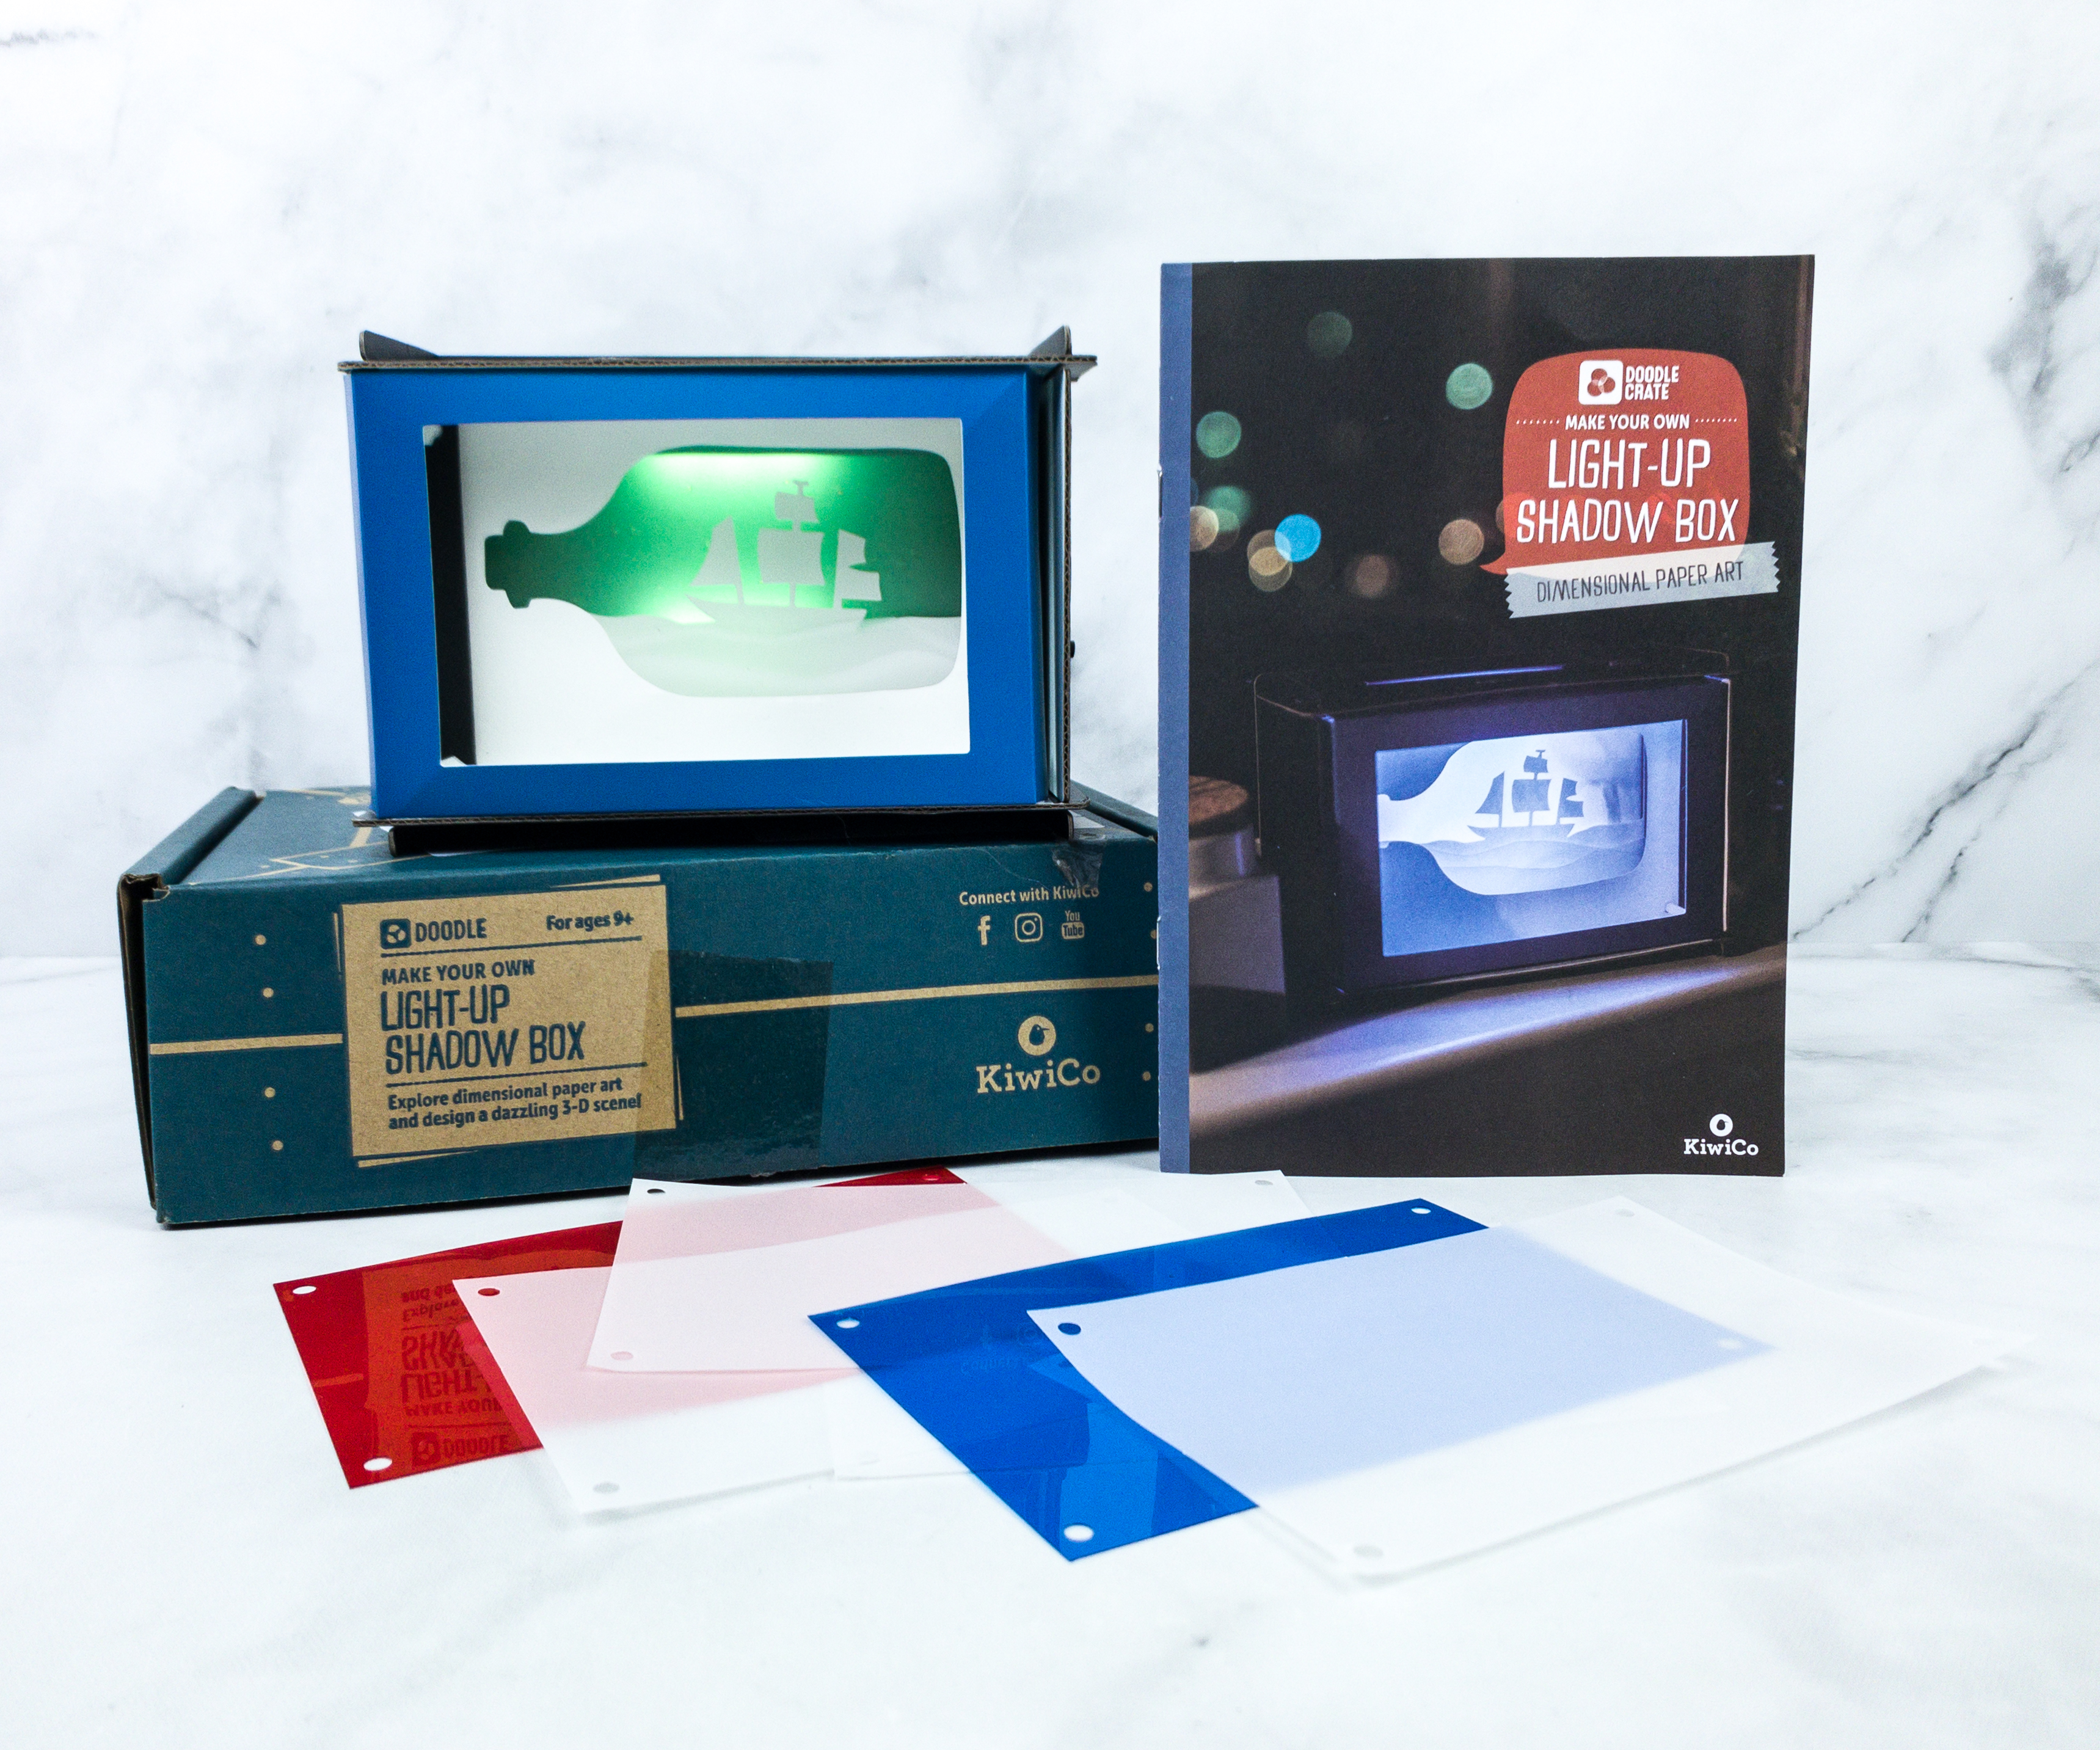
Doodle Crate Instruction Book
Doodle Crate is inclined to focus on a single craft and contains only what you’ll be needing for the project.
One of KiwiCo’s goals is to inspire young innovators with fun and enriching hands-on experiences.
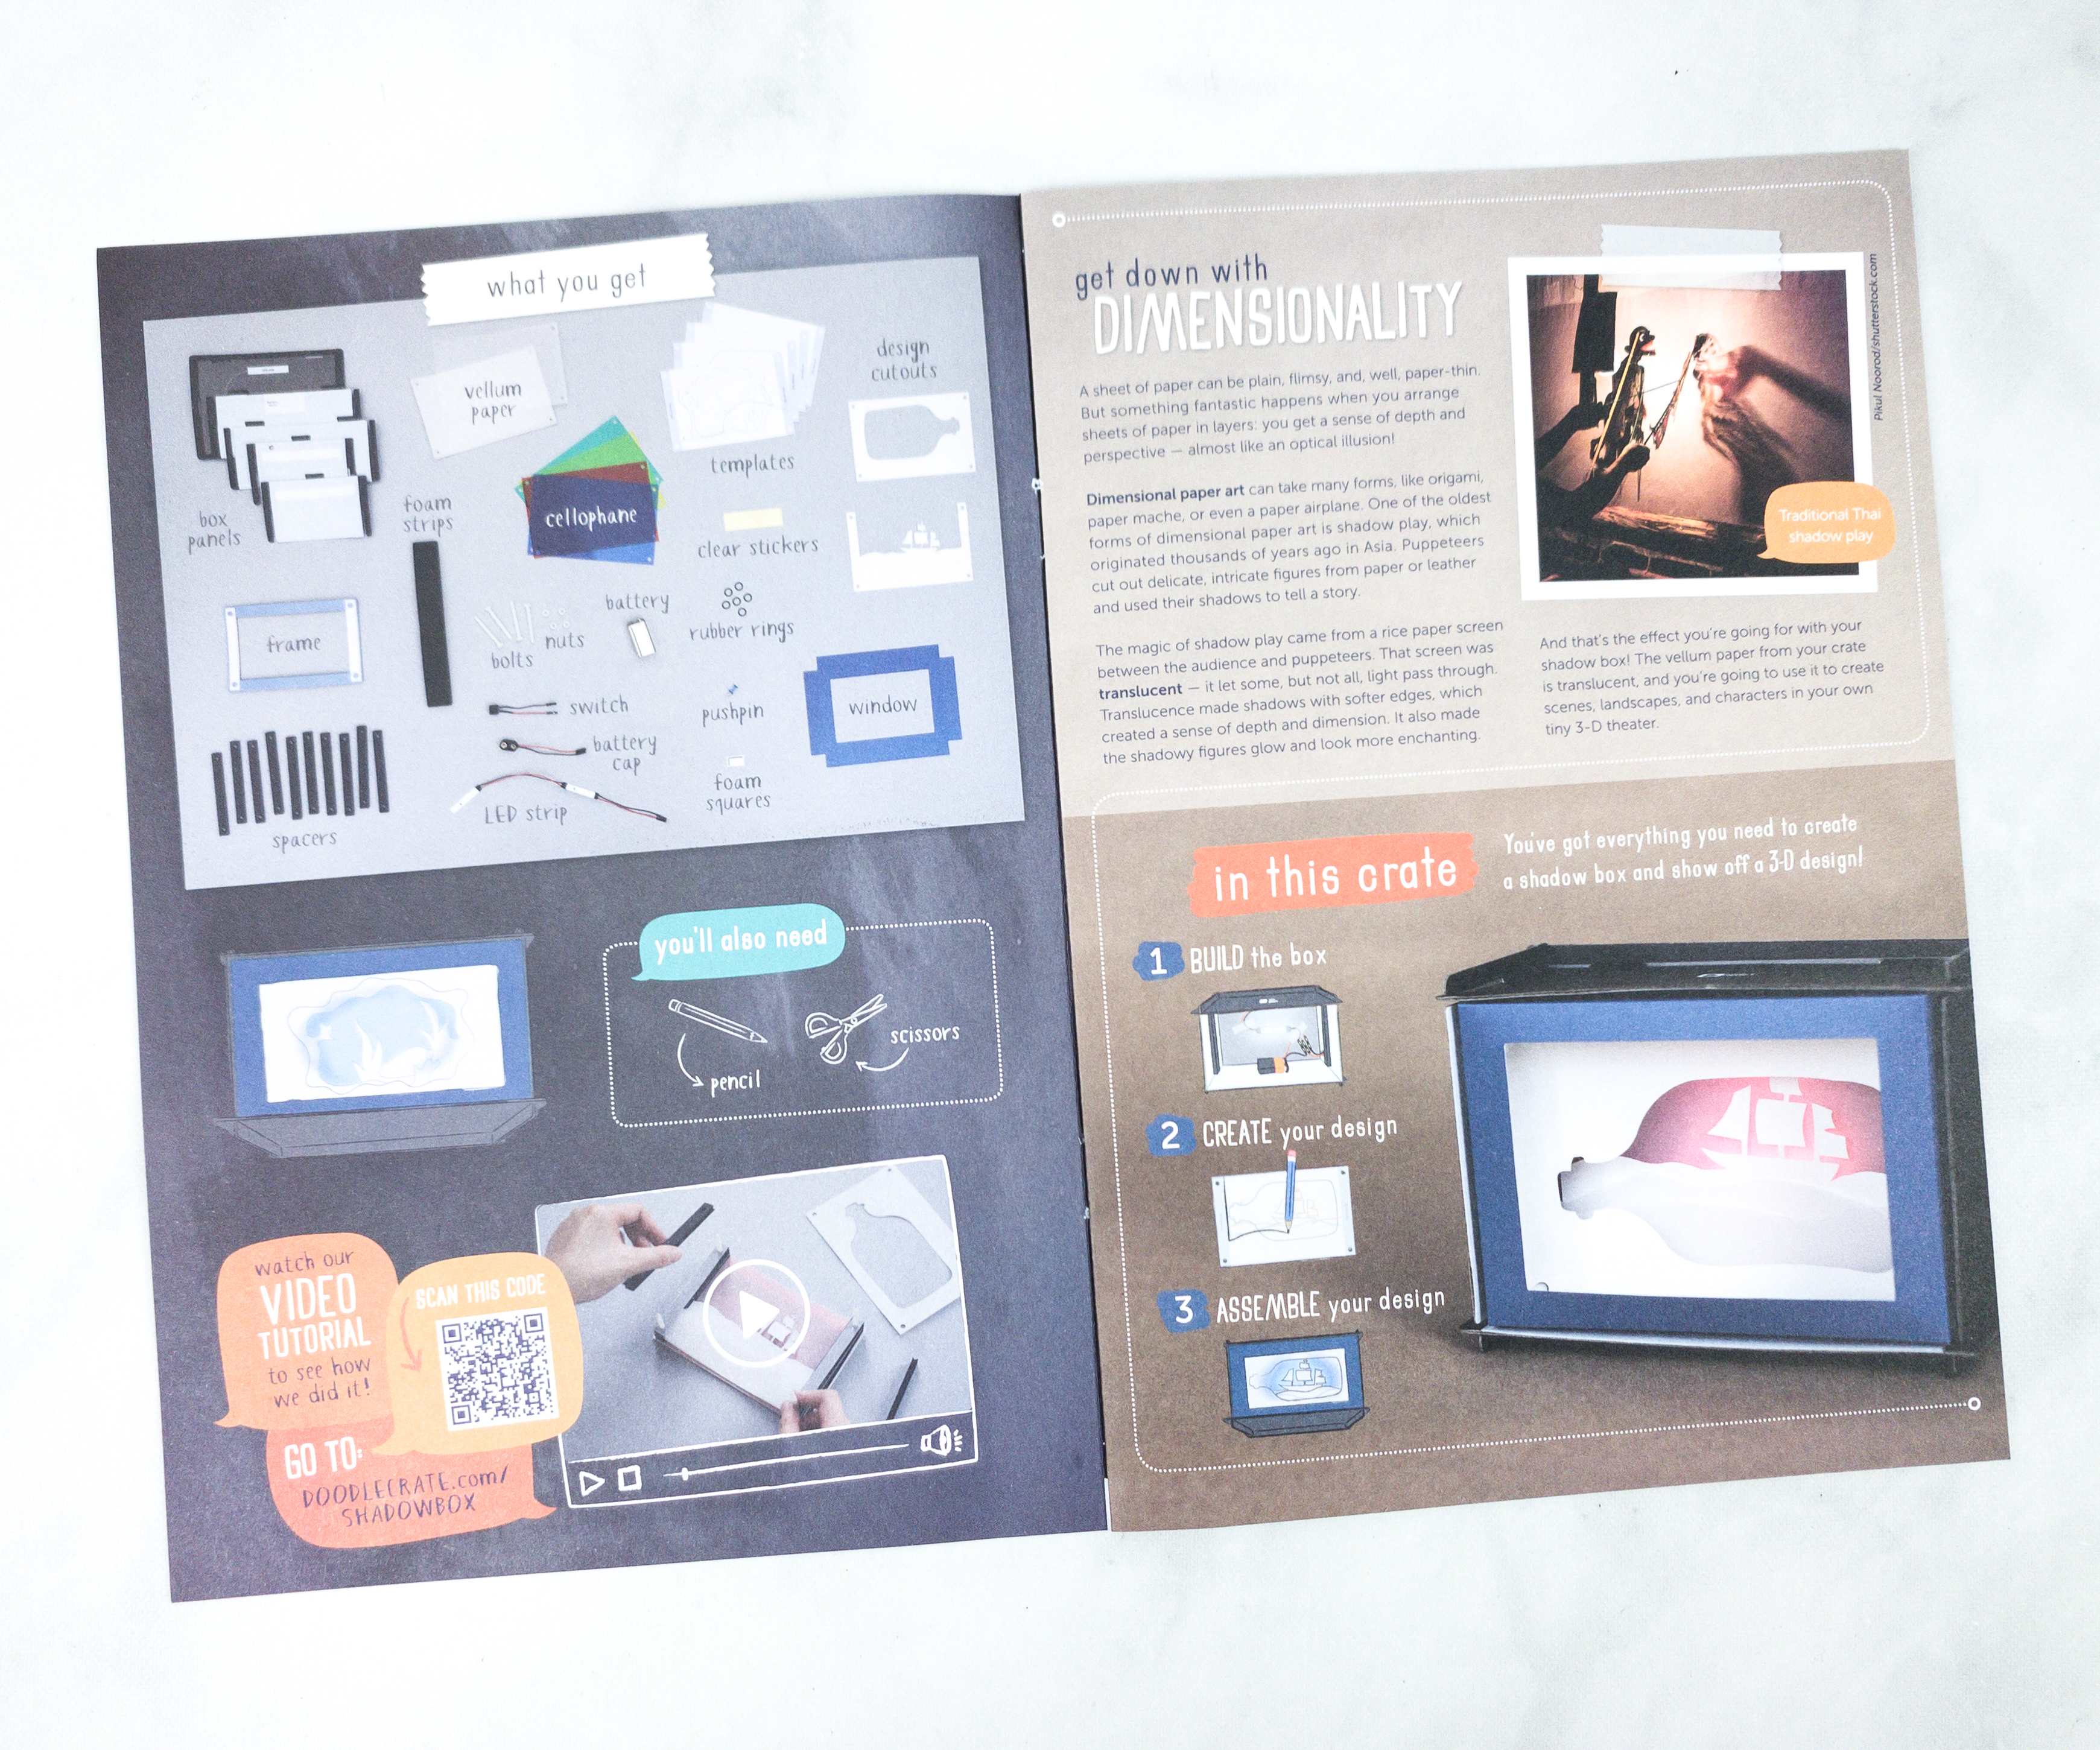
The booklet has an excellent textbook quality background on the subject matter of the project. Every Crate is a project and a lesson in technique – when you are finished, you should have a usable handcrafted item and a new skill.
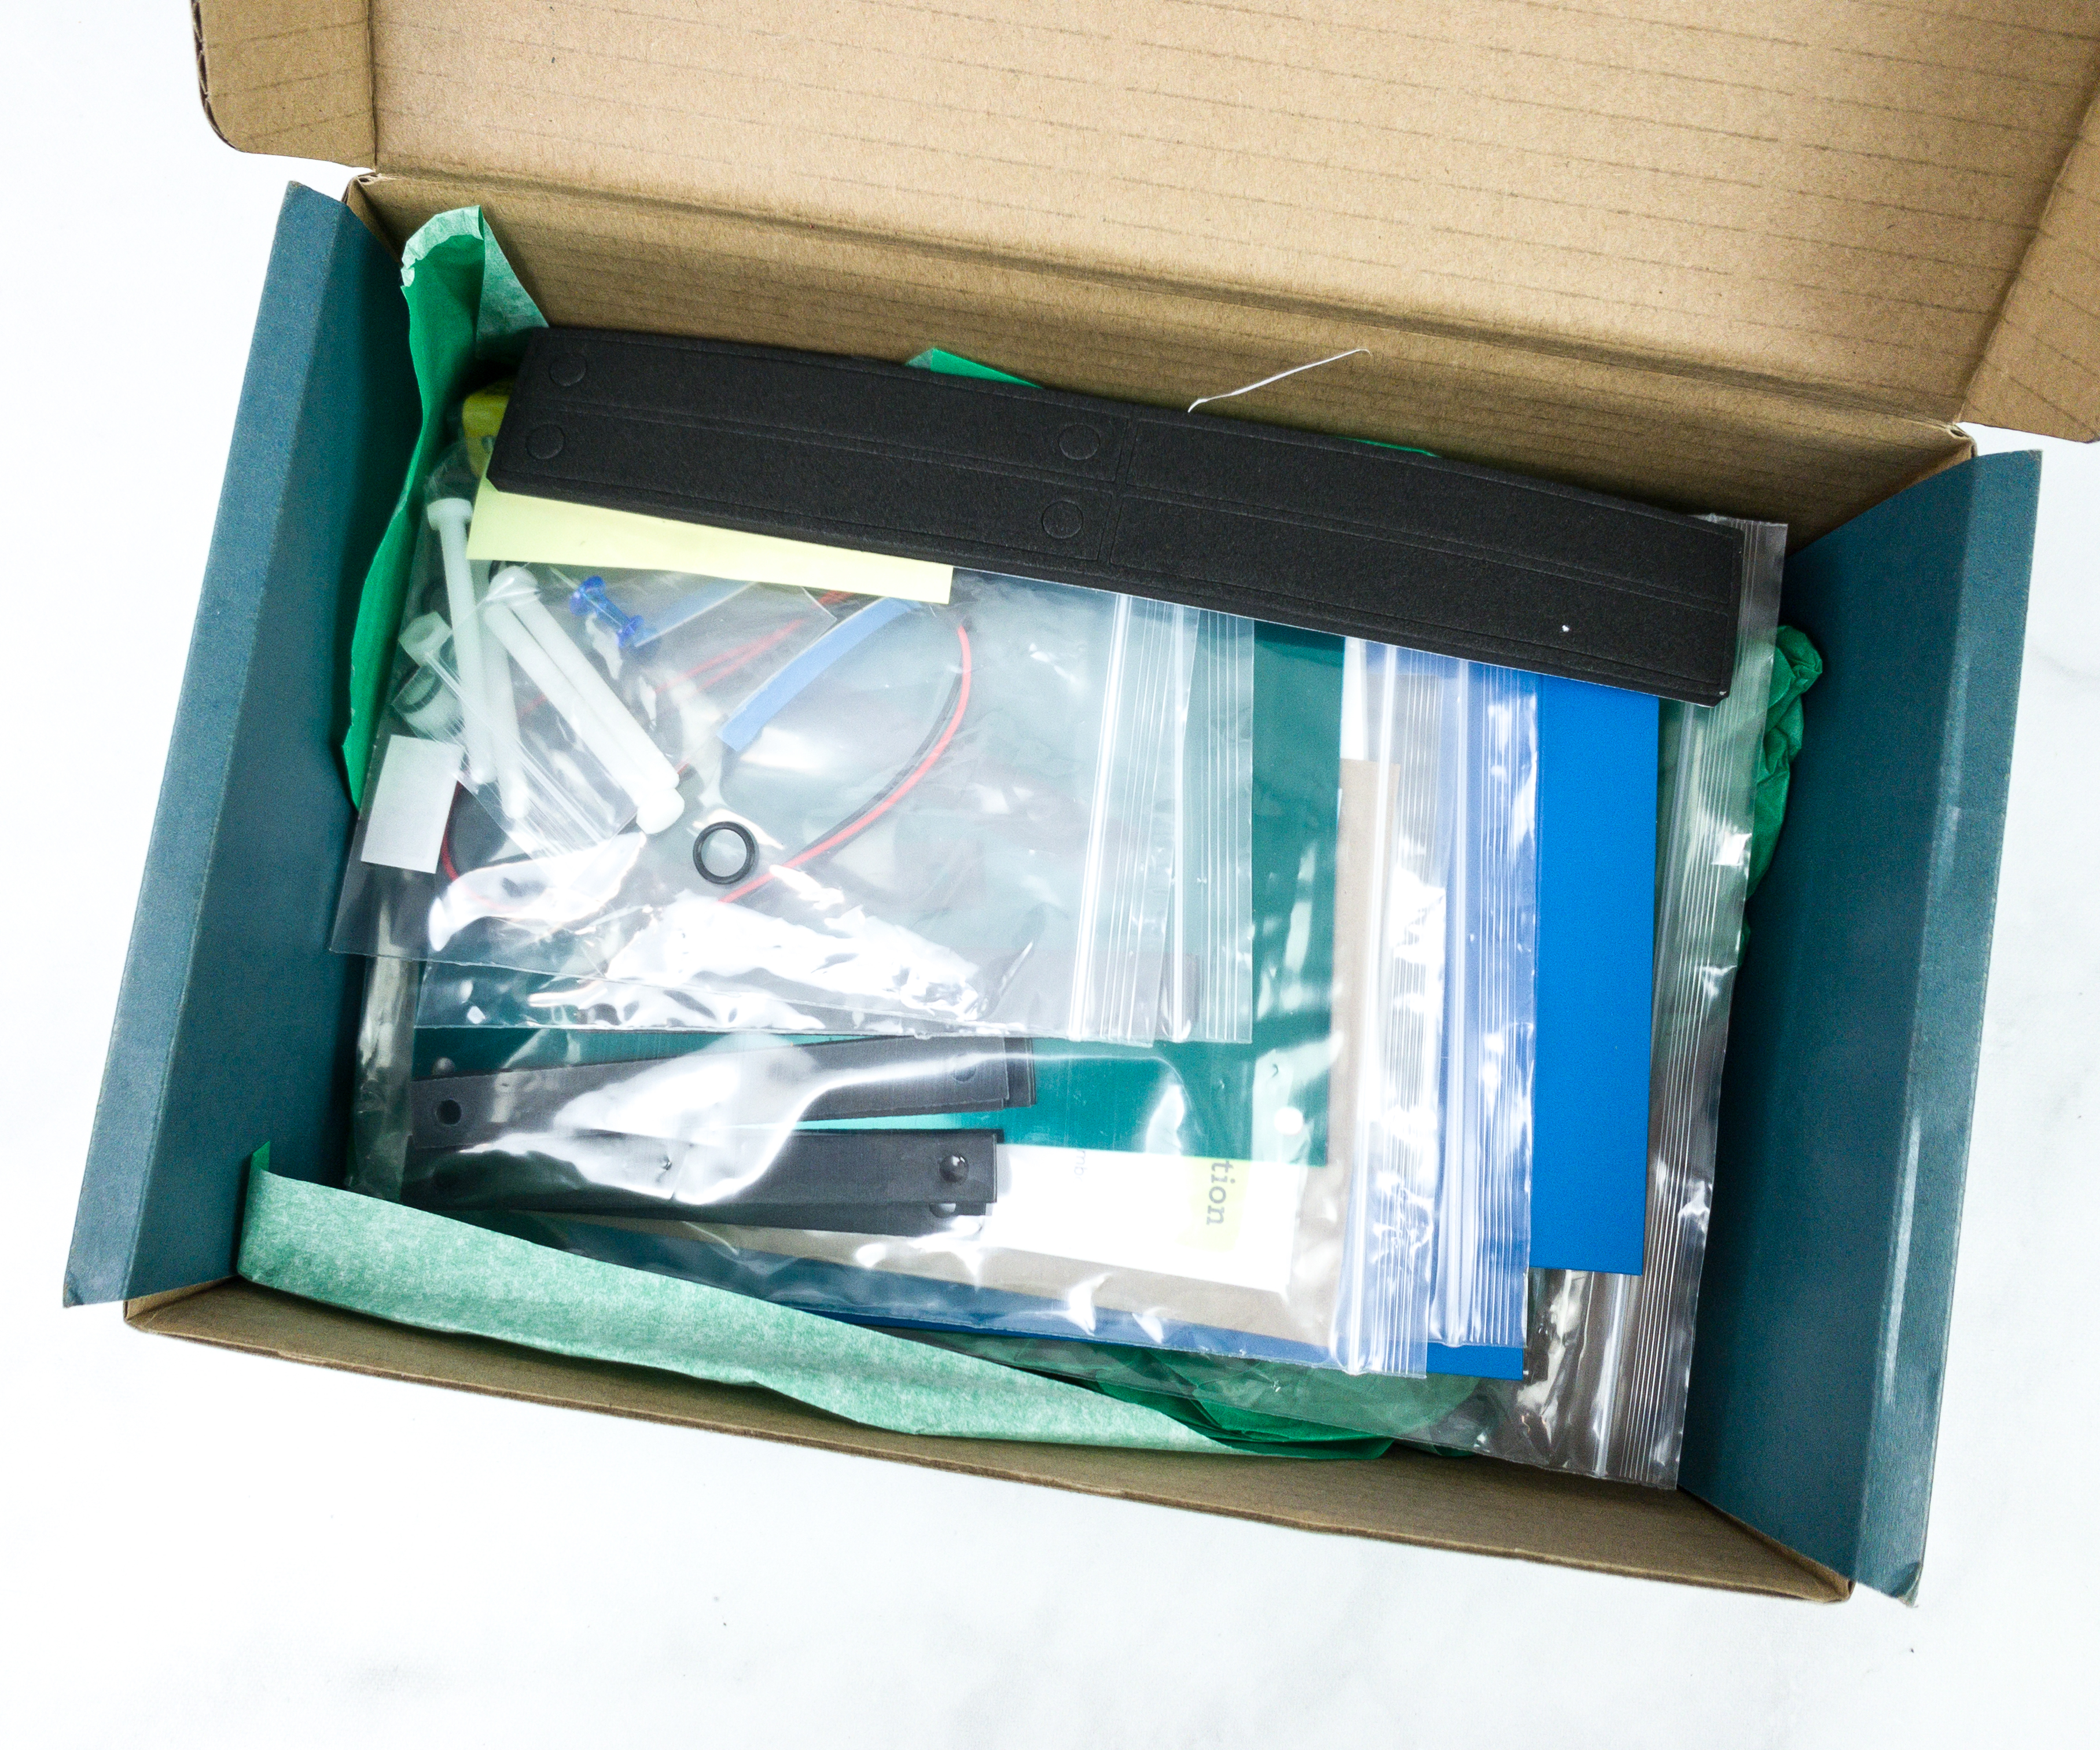
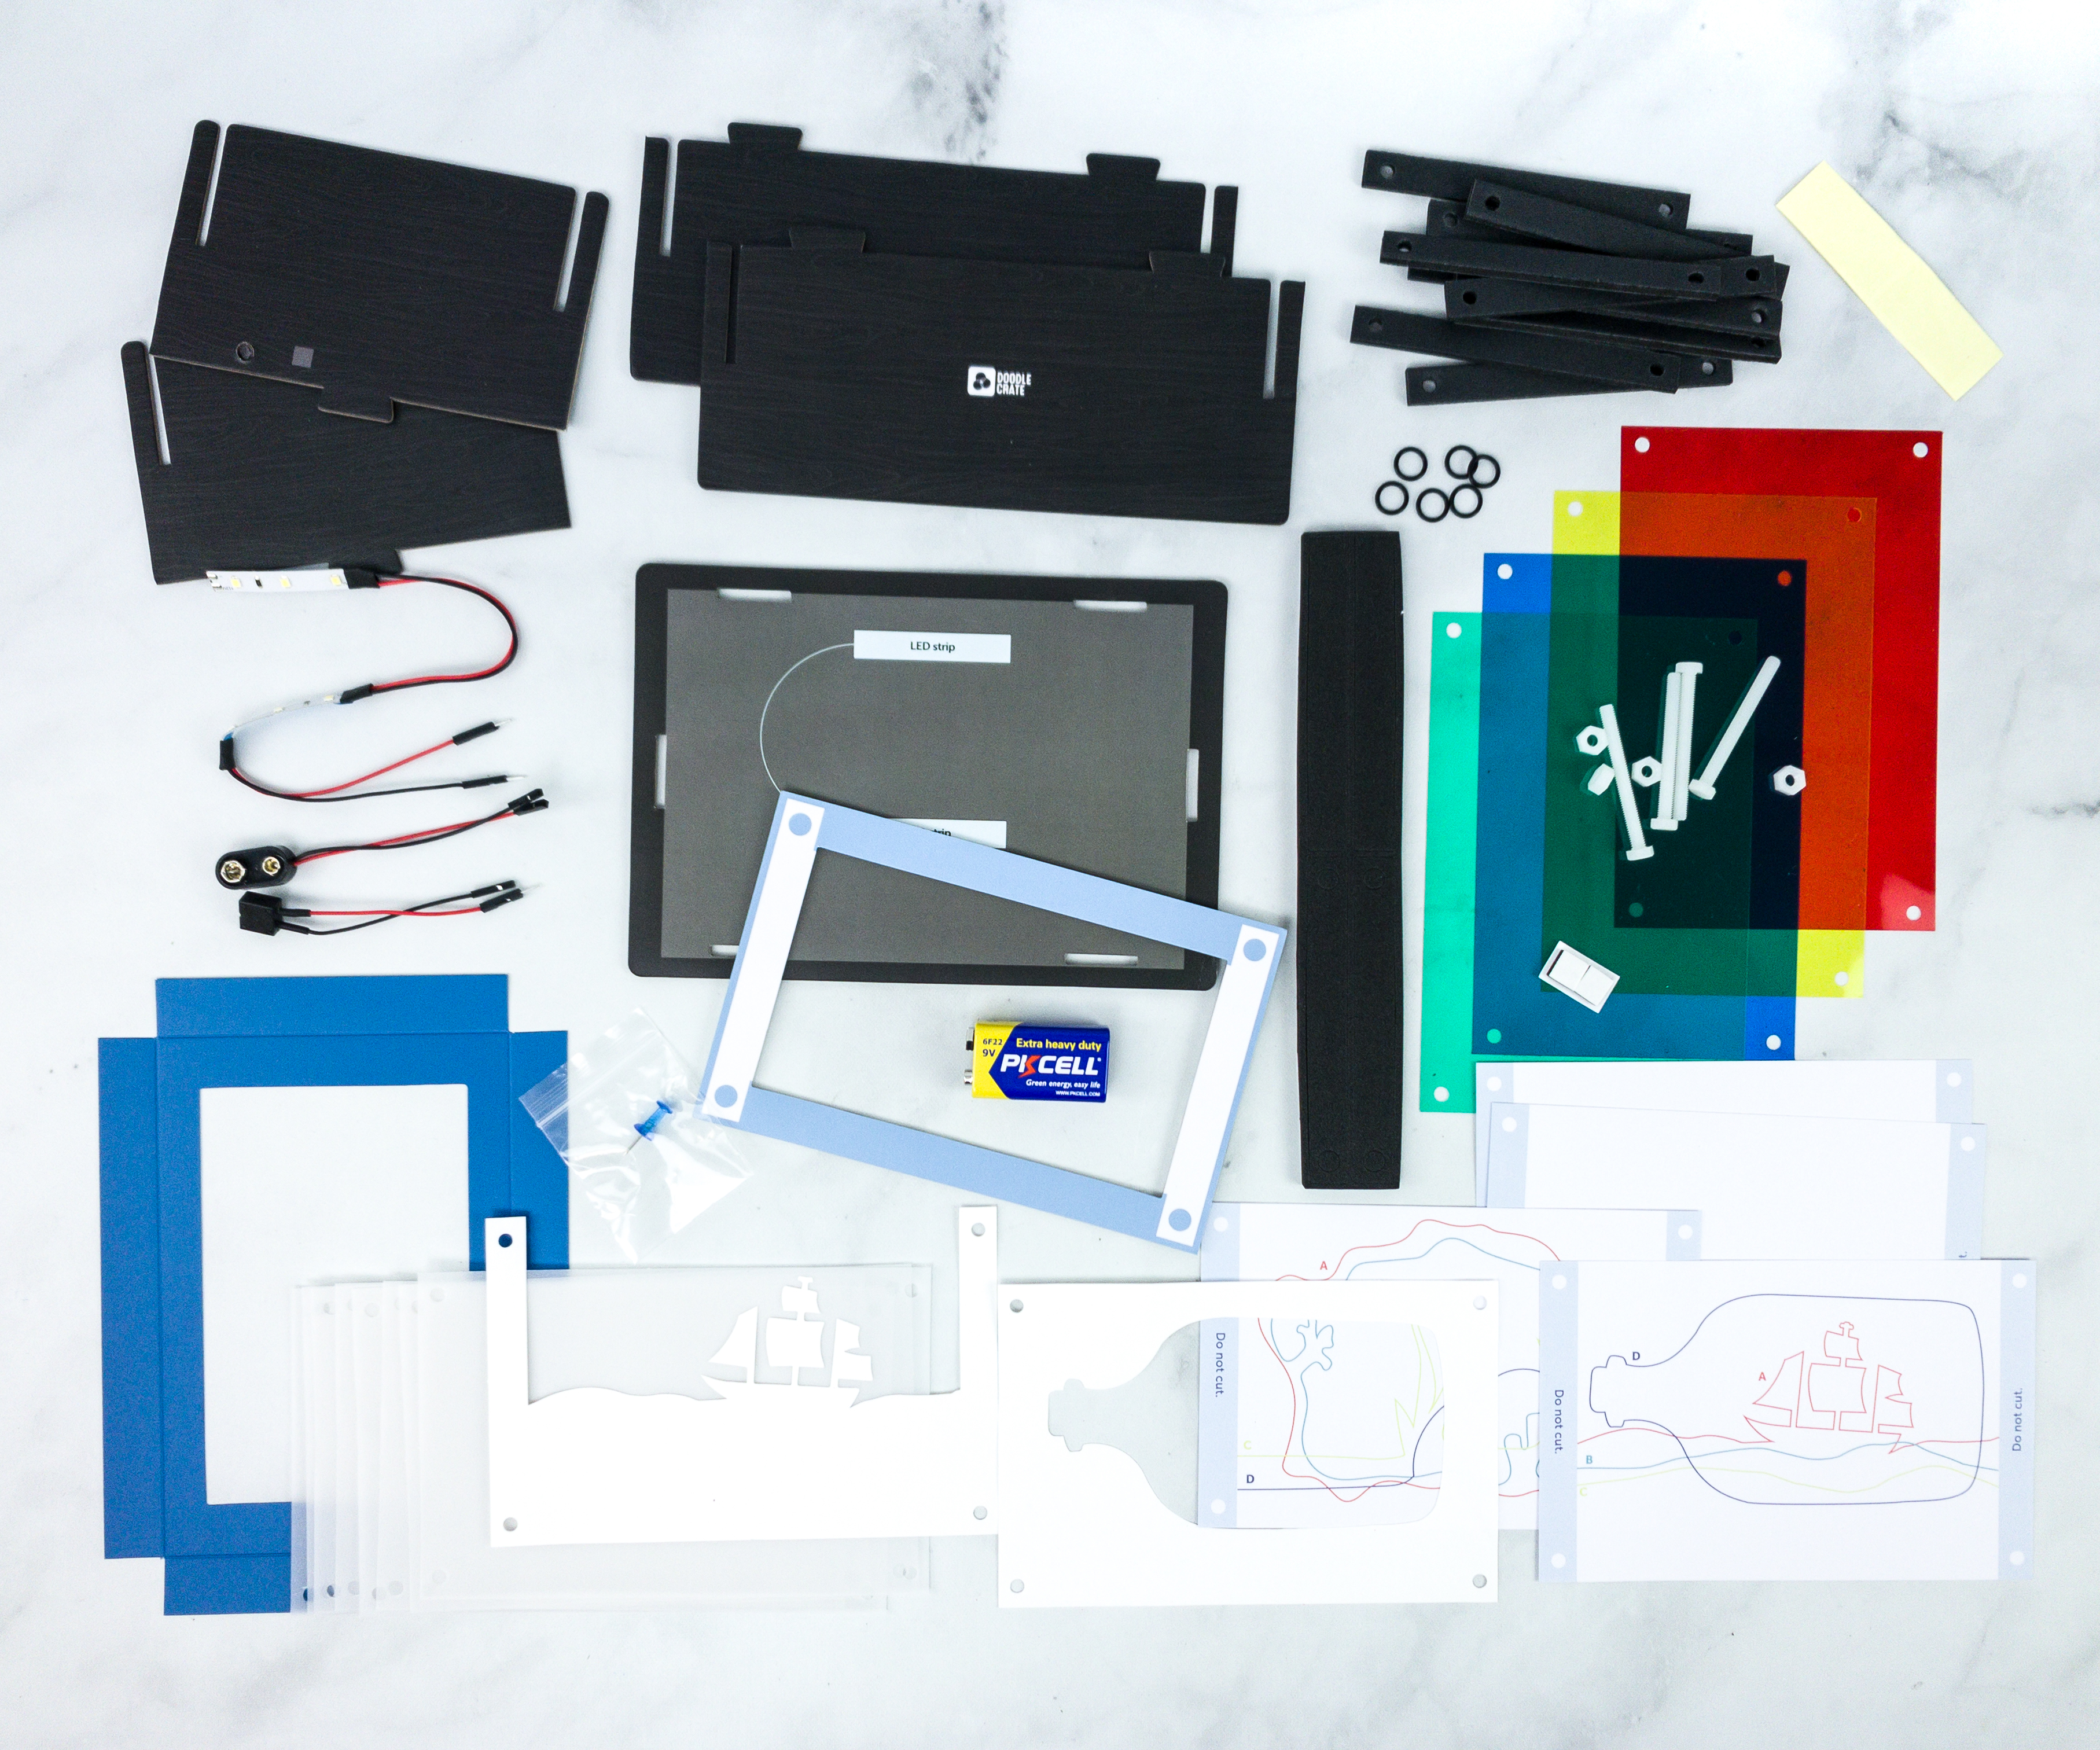
Doodle Crate Materials
Every crate comes with almost everything you need to complete the project (except for a few basic items from your home), as well as a booklet.
Doodle Crate Activity
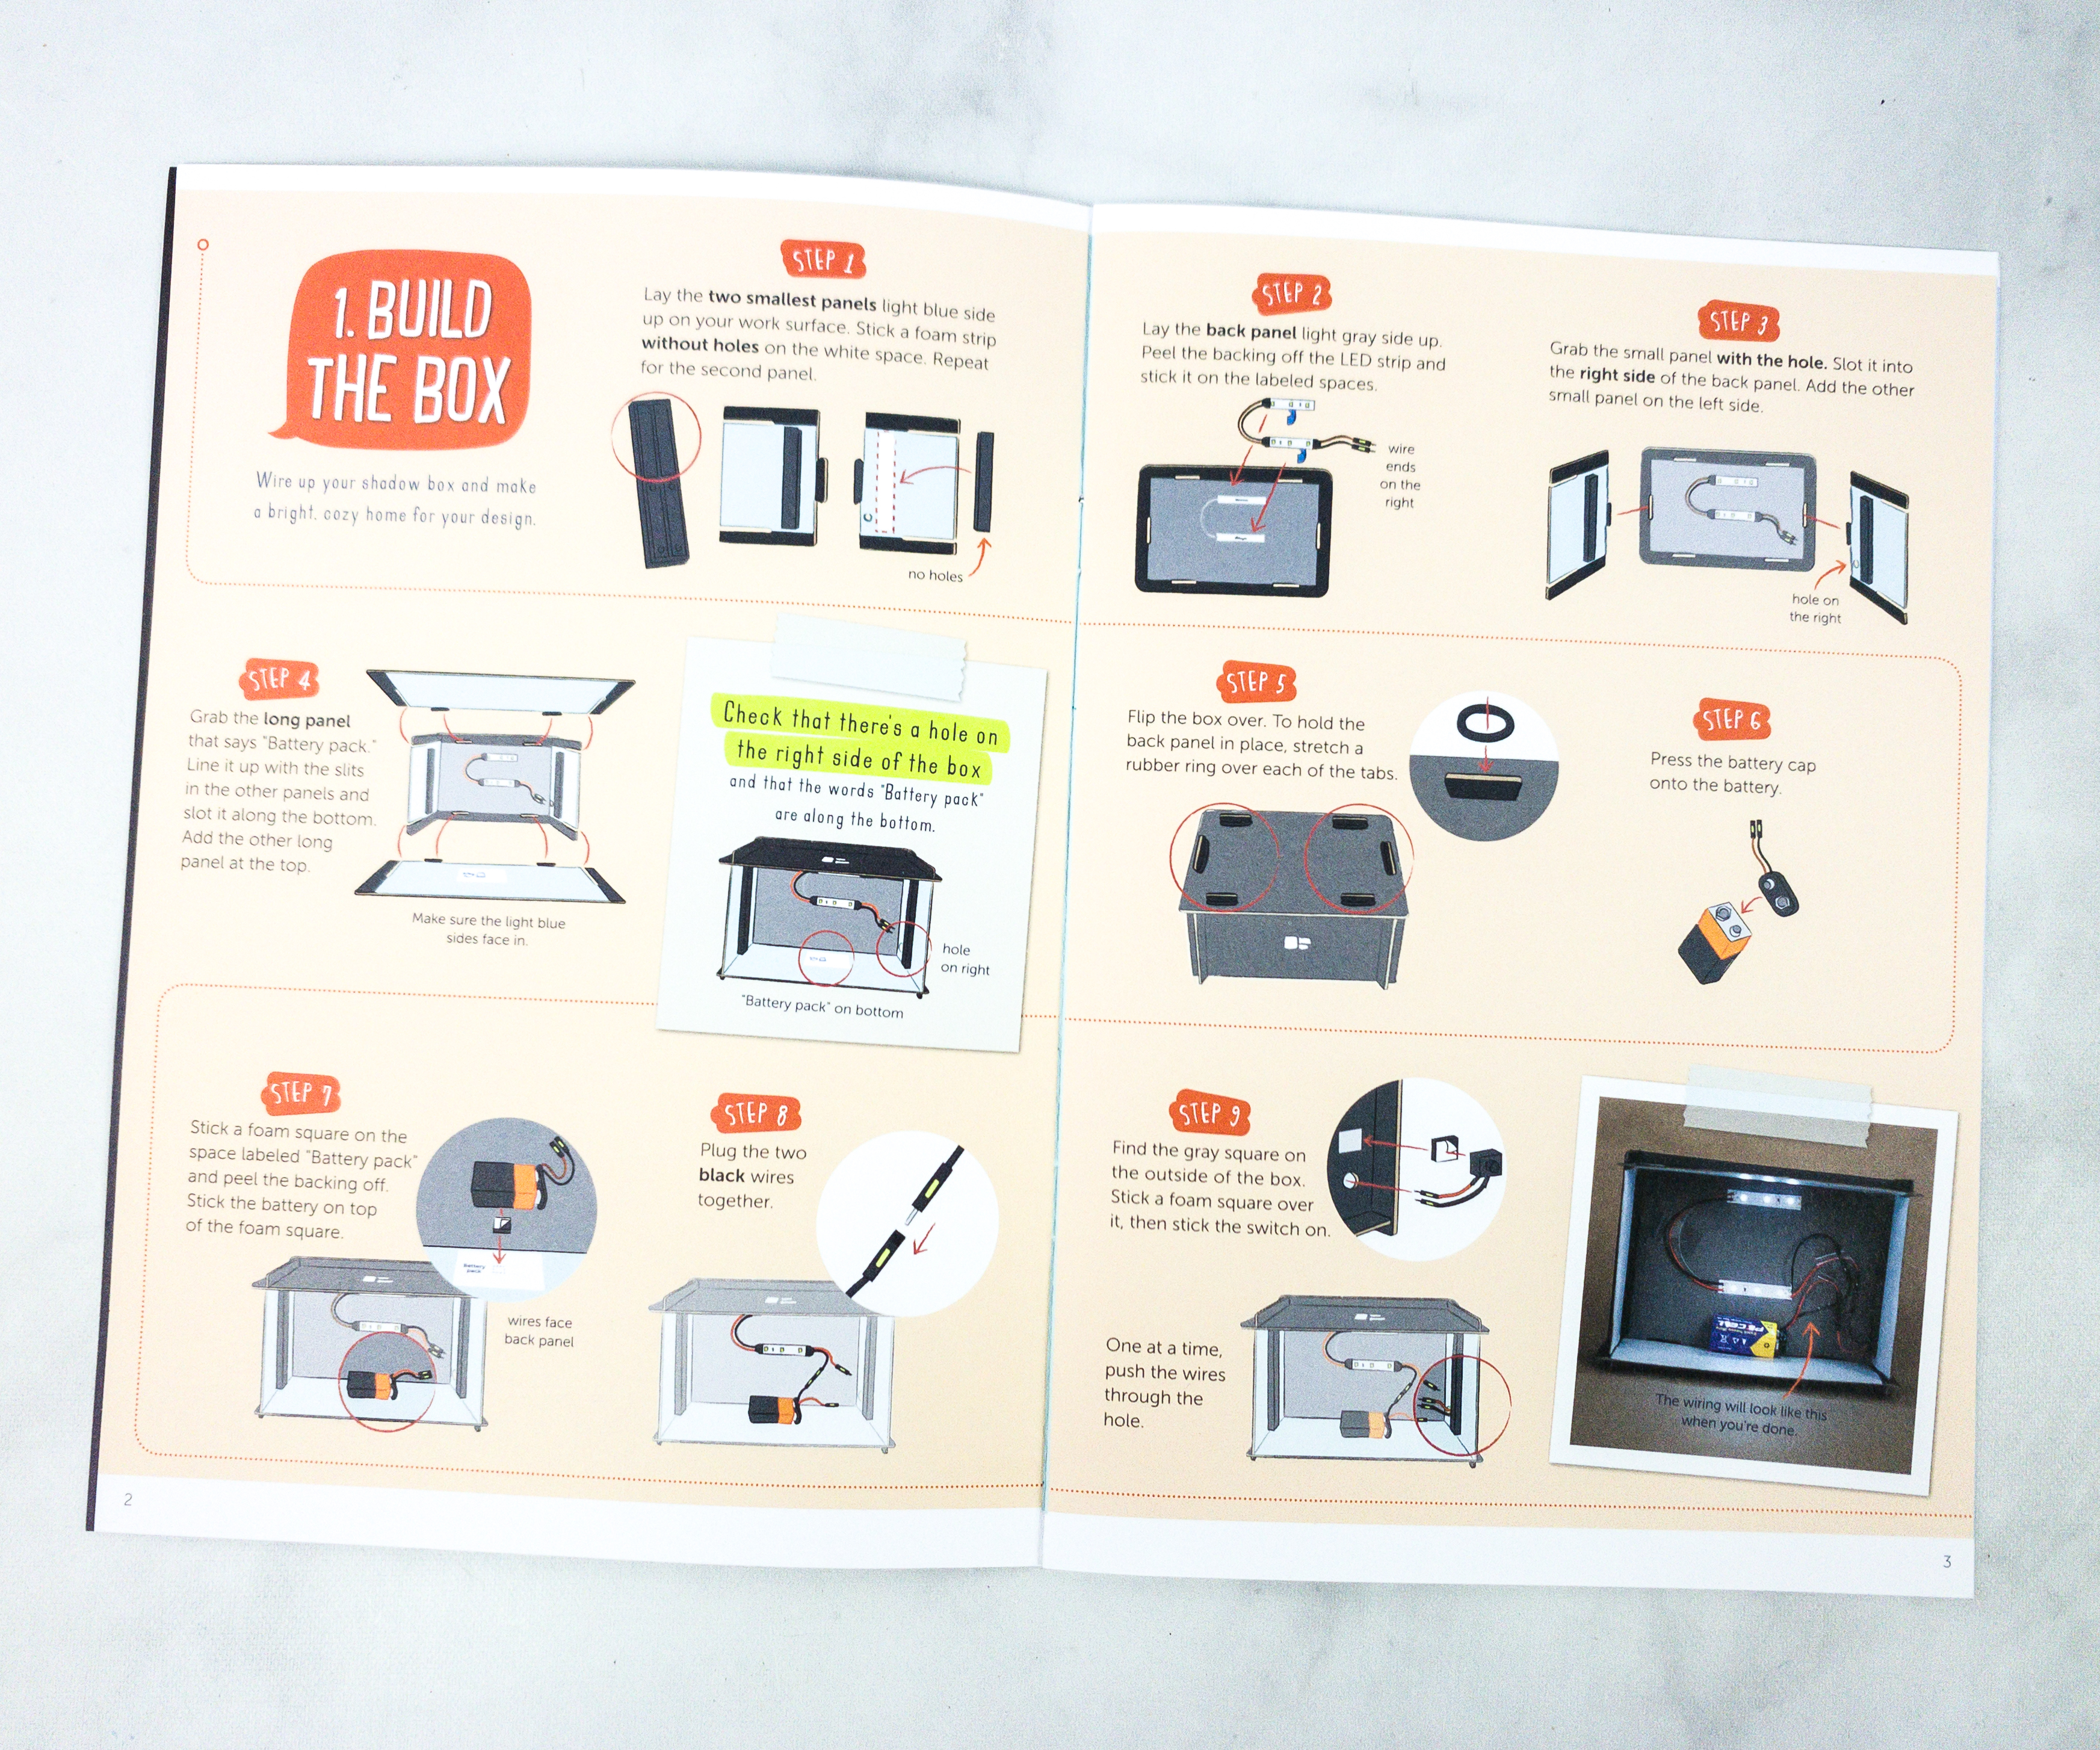
This booklet is loaded with high-quality pictures and illustrations to provide you ideas and help you along at the same time. They also produce a video tutorial for each project, too. It also provides a step-by-step procedure, from start to finish, with detailed guidance the whole way. The numerous diagrams explain every step clearly and make it practically impossible to go off track.
Doodle Crate Materials
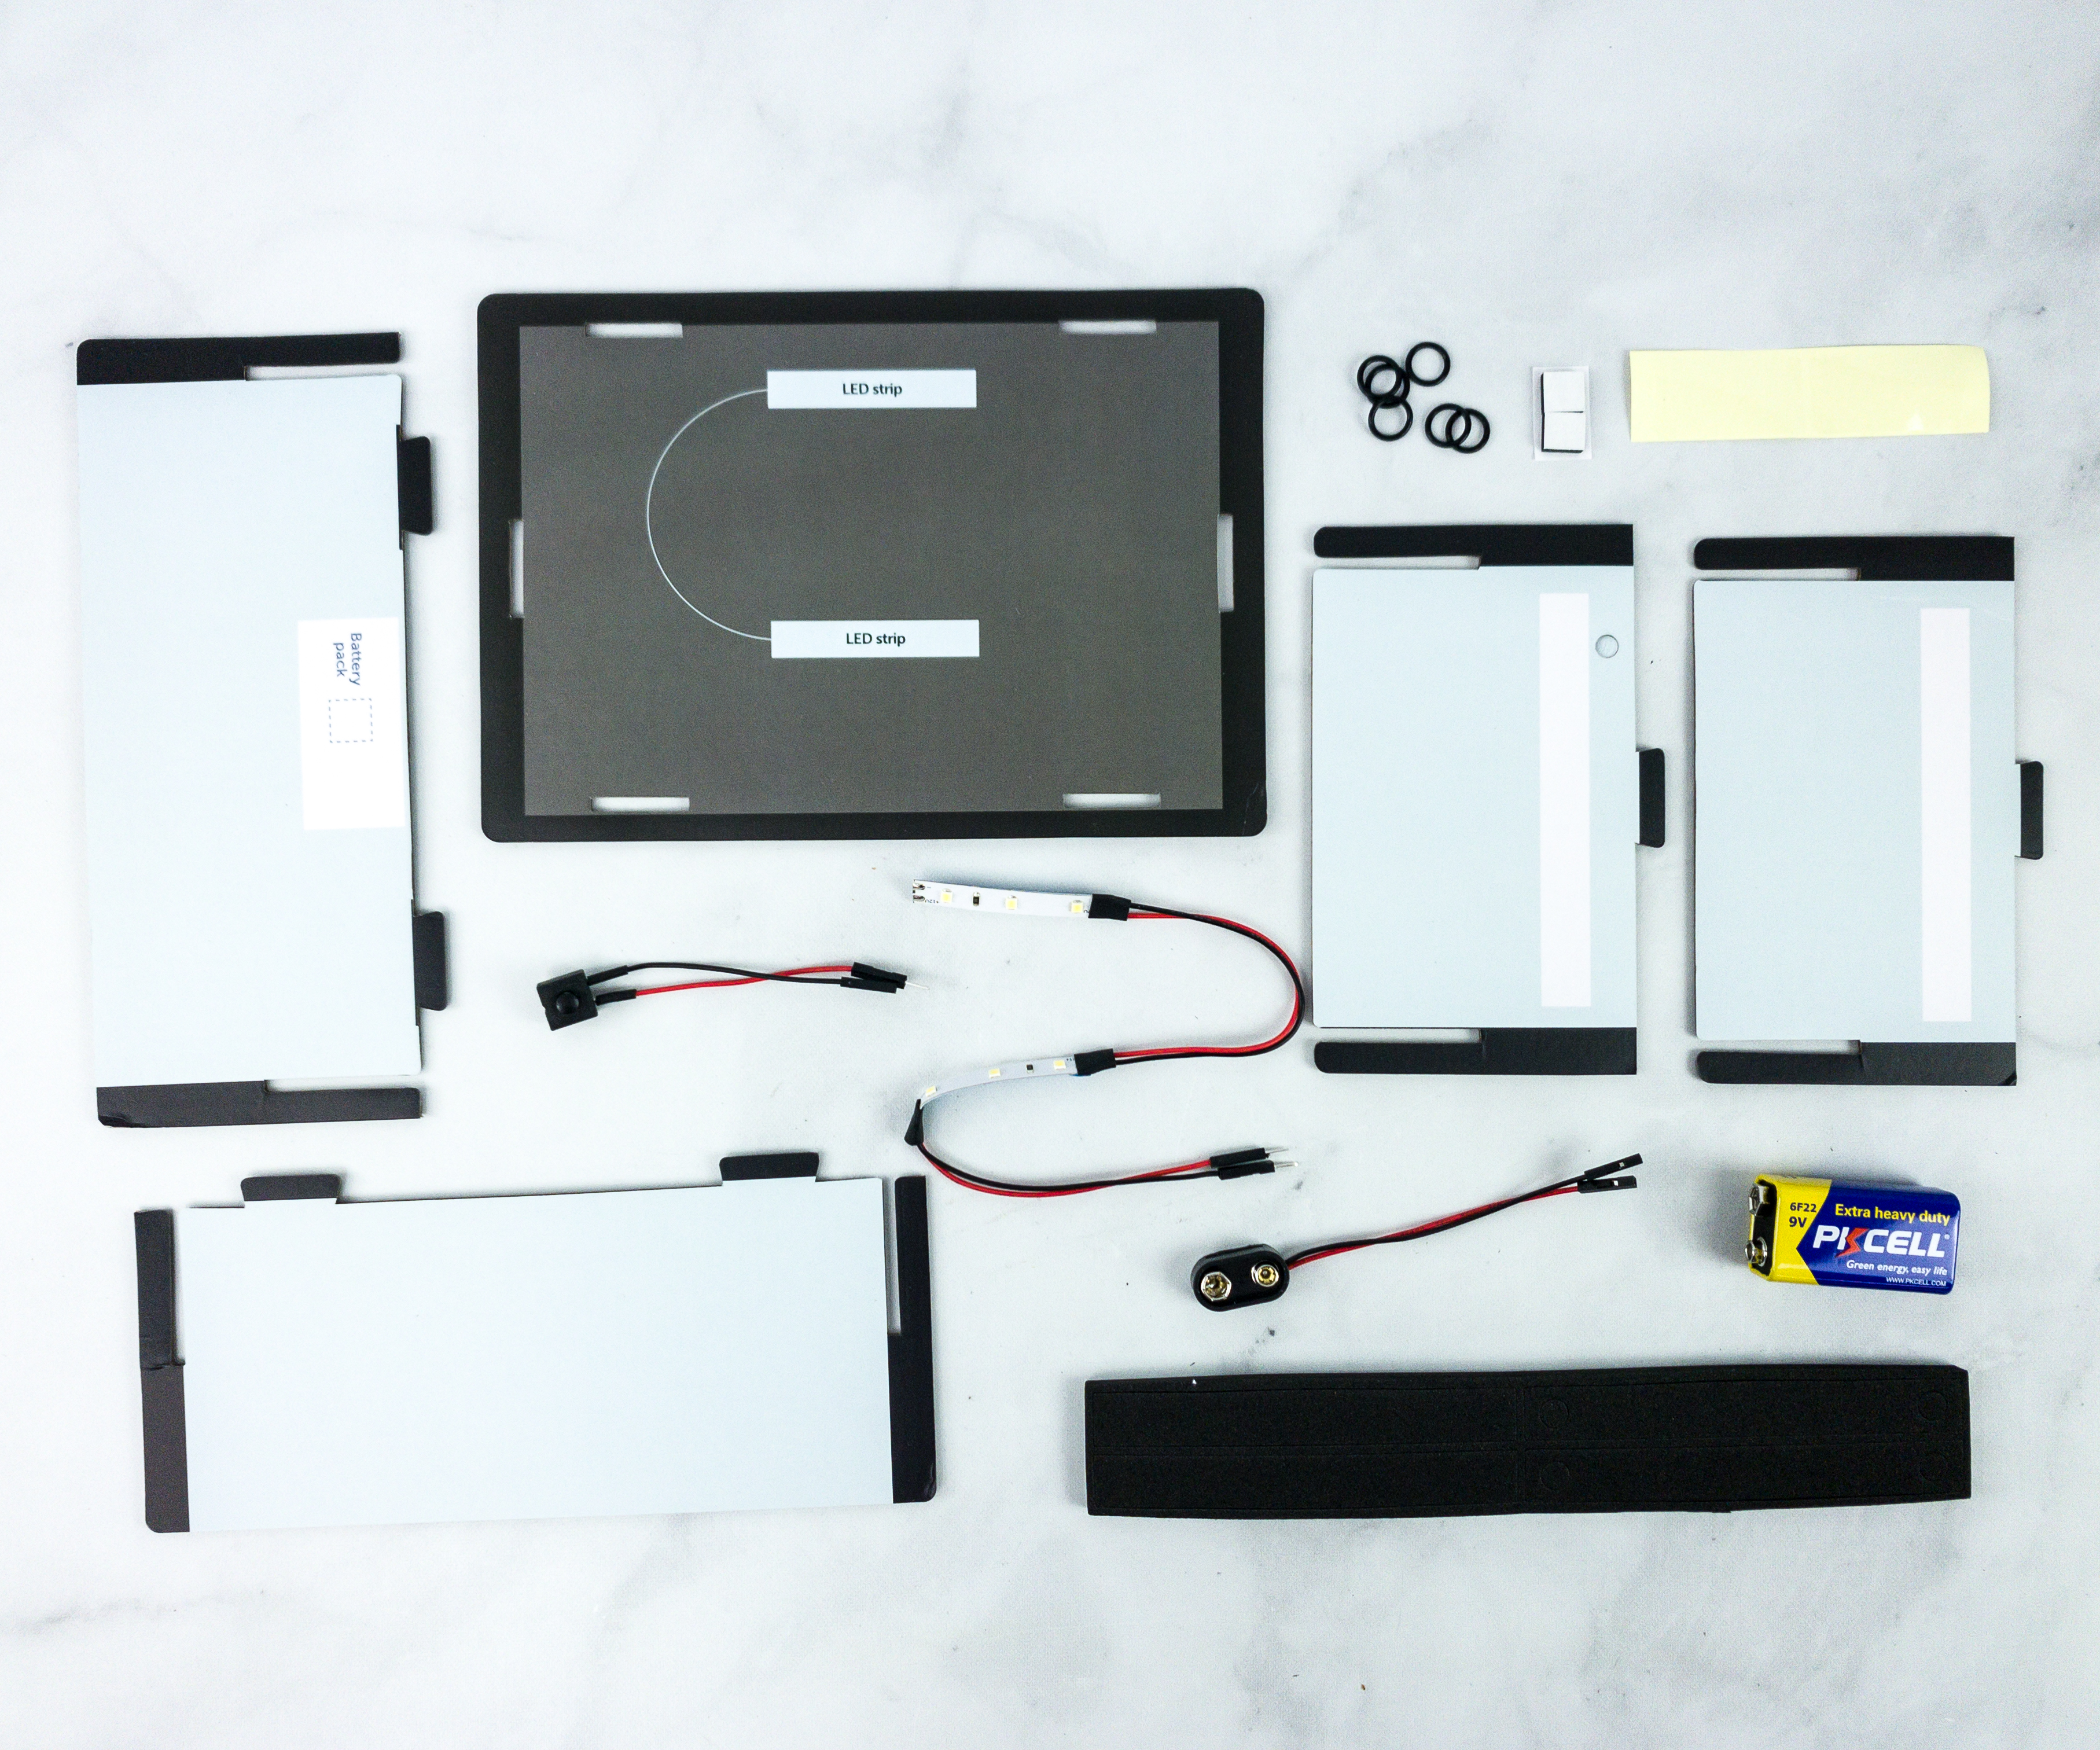
For the first part of the project, my kids used box panels, dubber rings, clear stickers, battery, switch, battery cap, and LED strip.
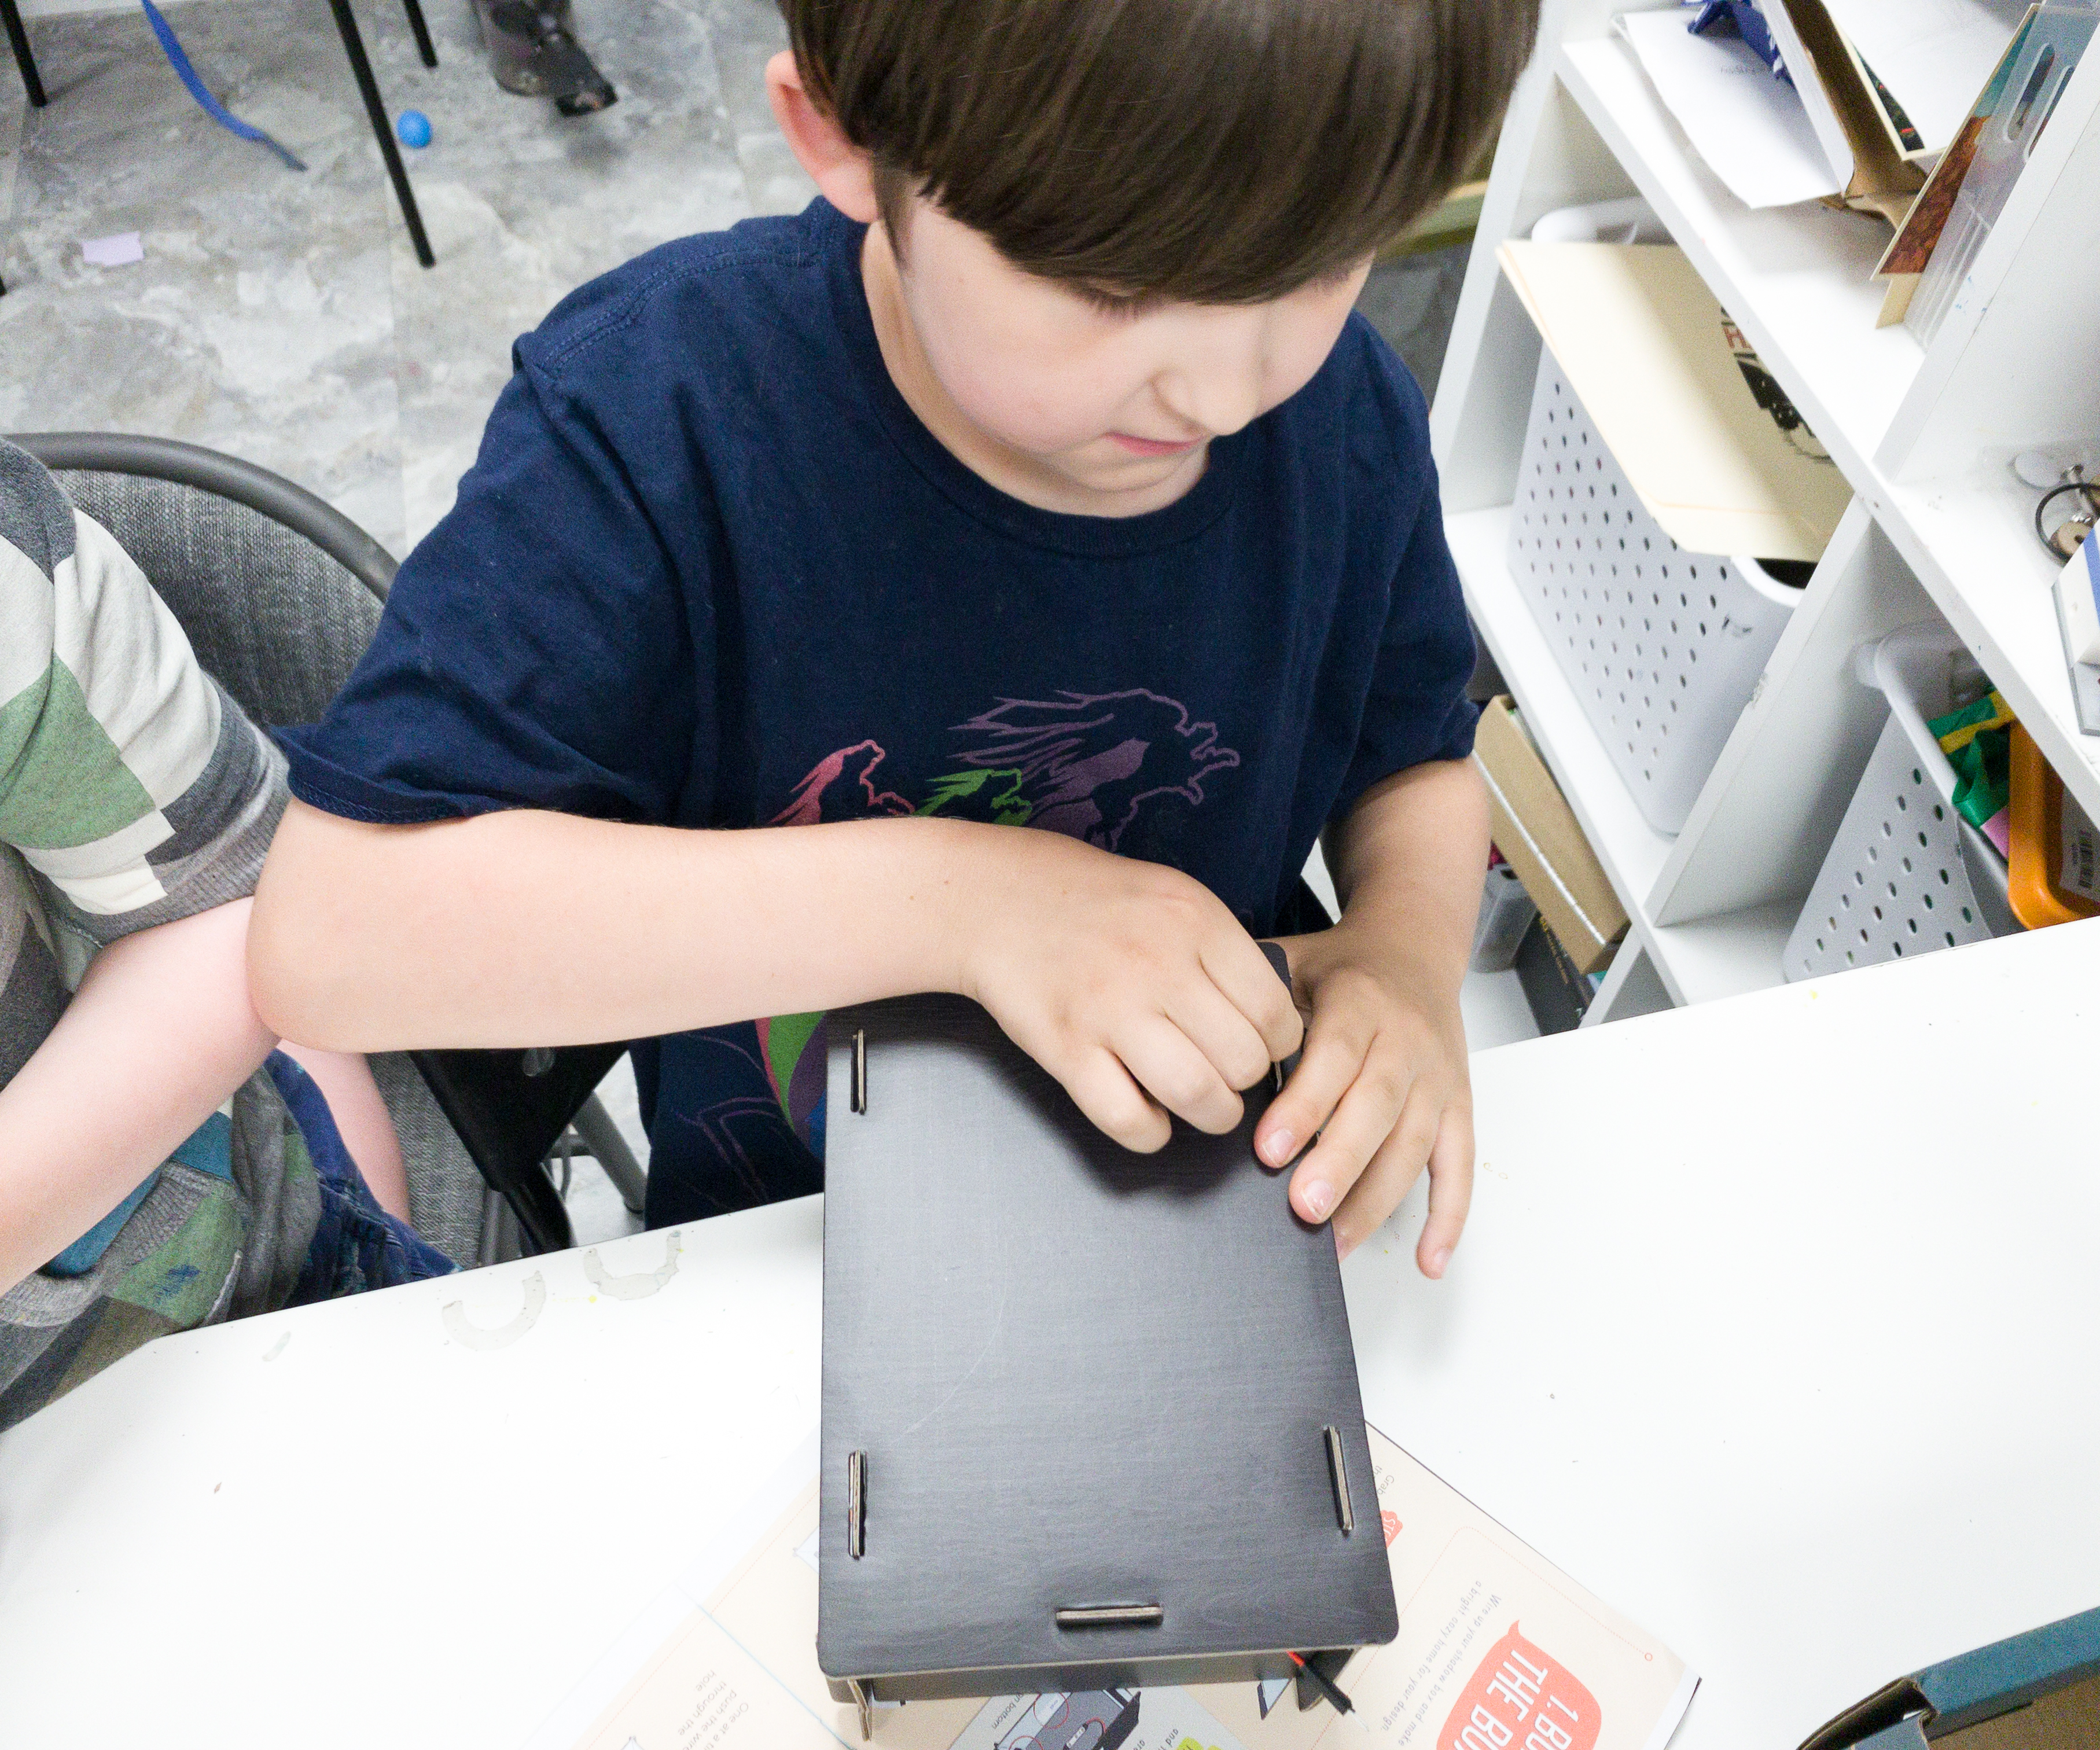
My older son formed a wall using the panels and then locked it by inserting the panels through each hole. He also secured it by putting a rubber ring over each of the tabs.
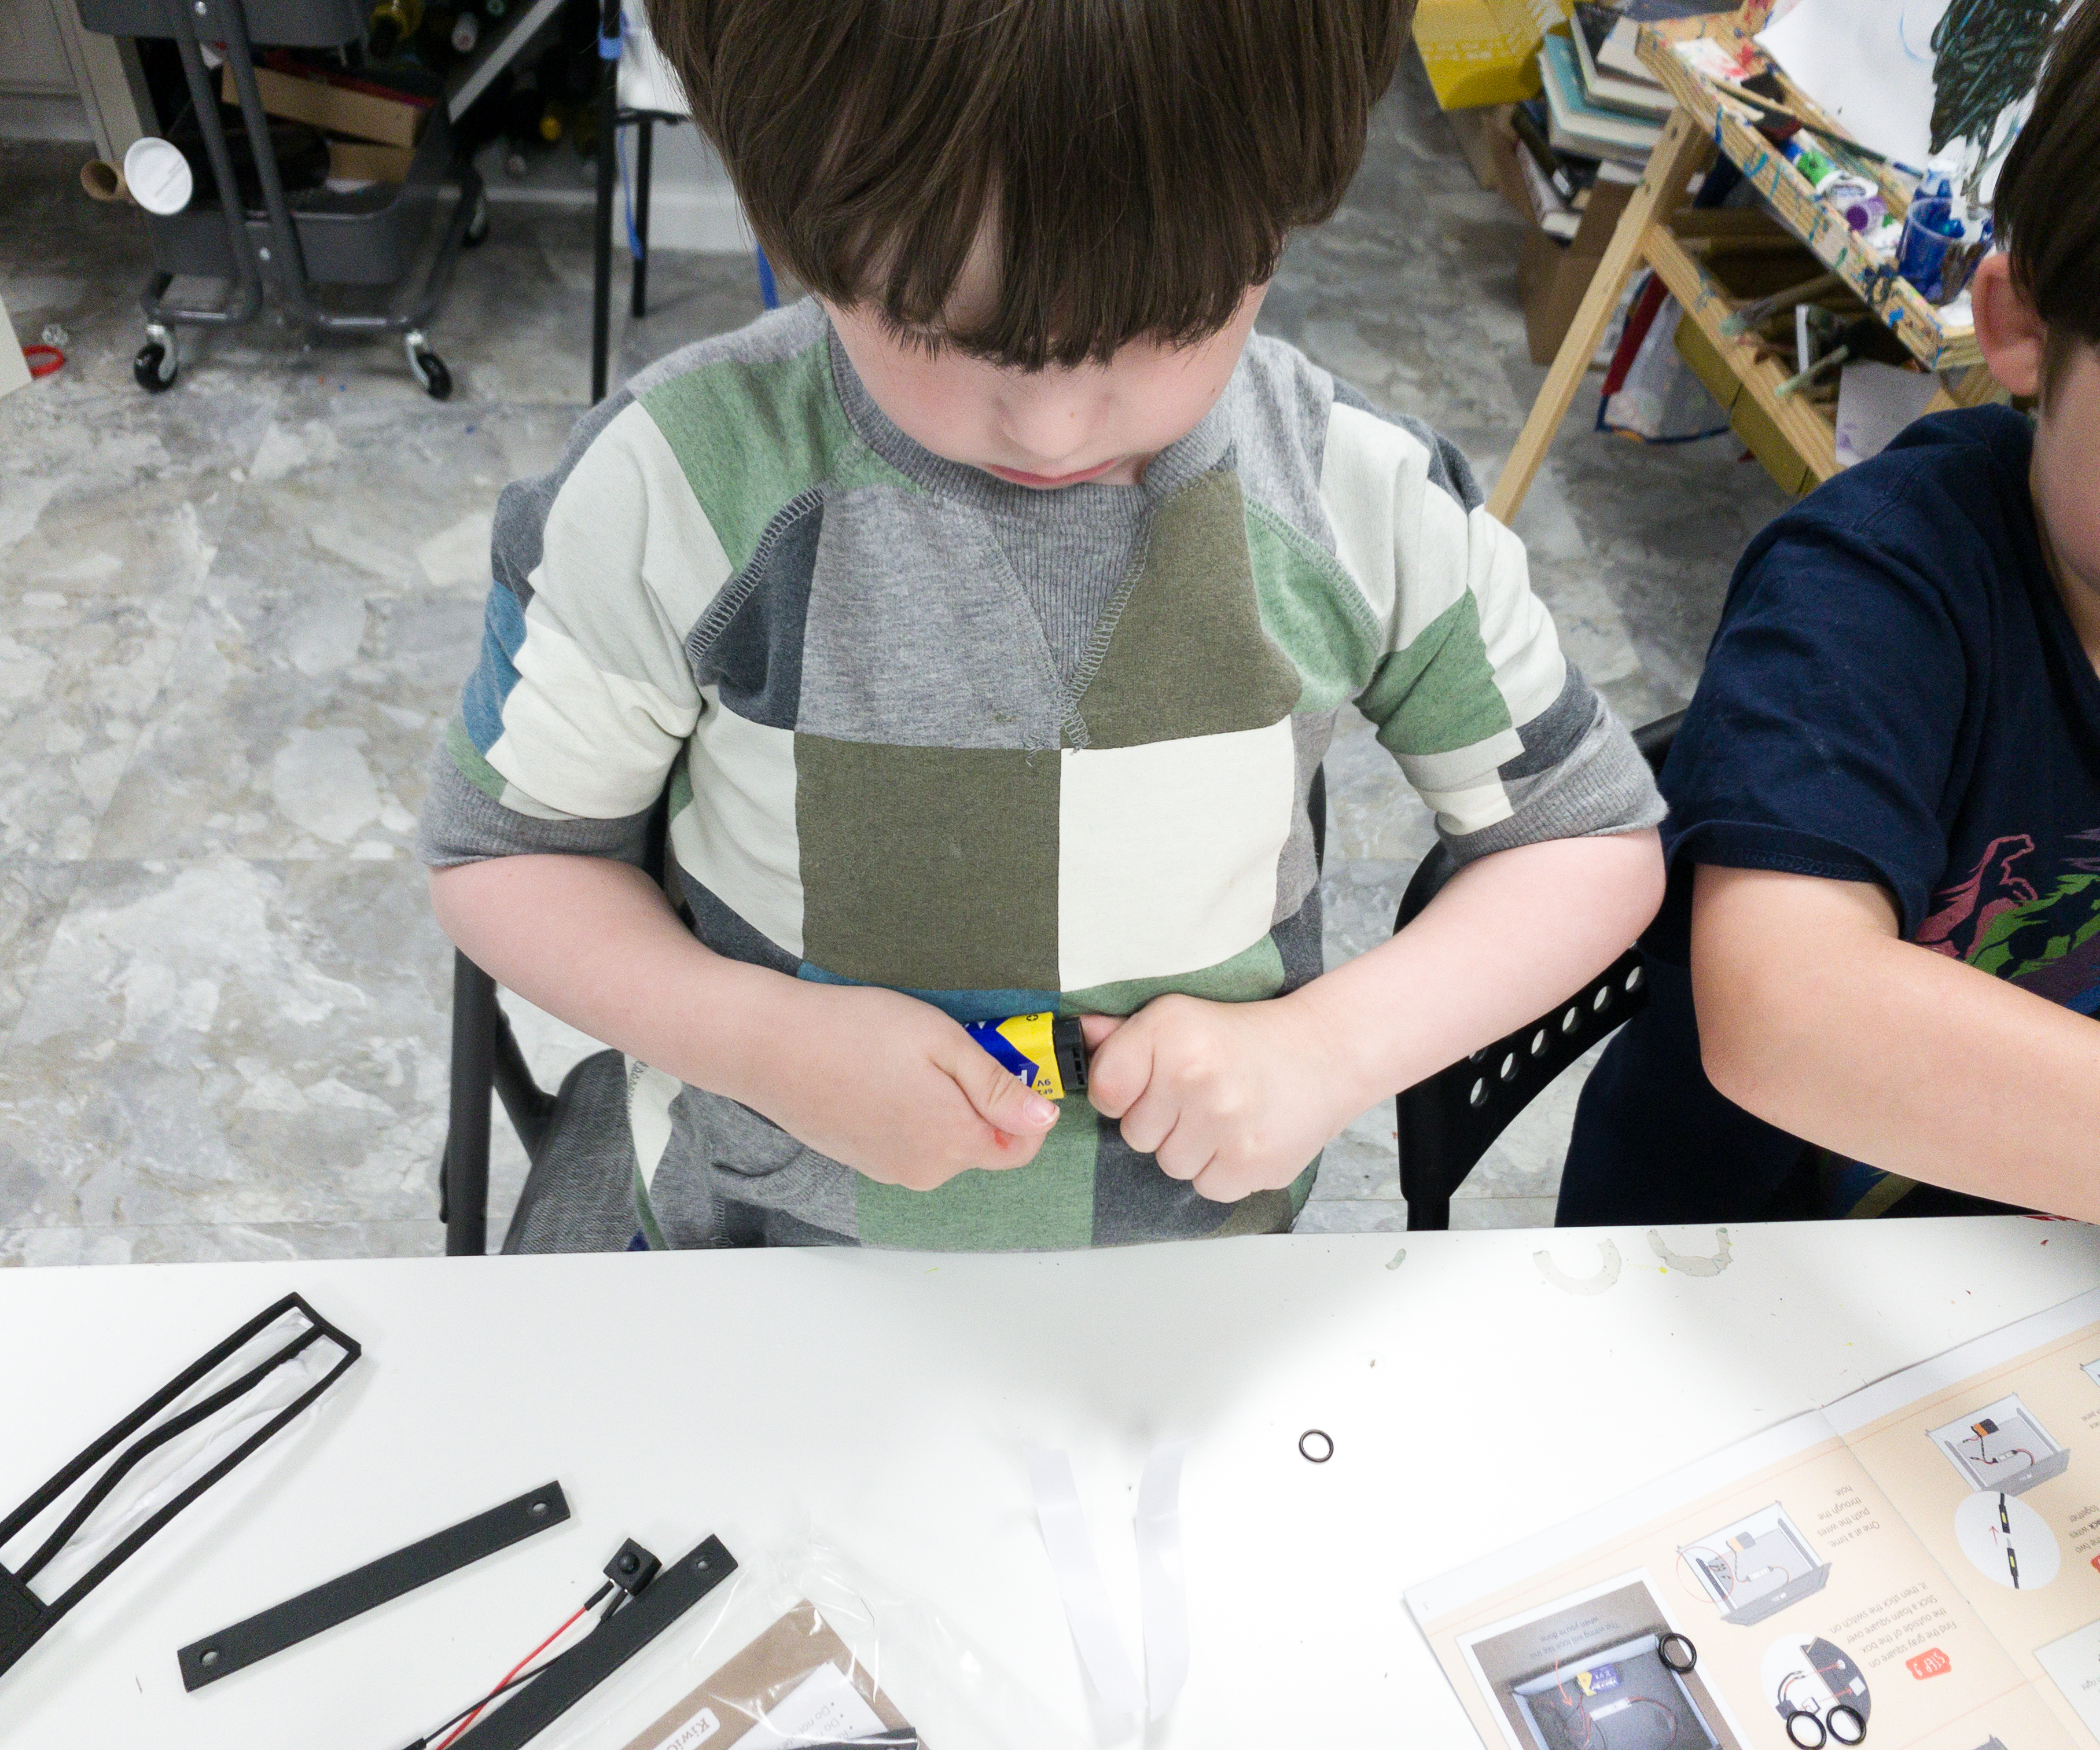
My younger son also started to set-up the battery pack by sticking the battery onto the battery cap.
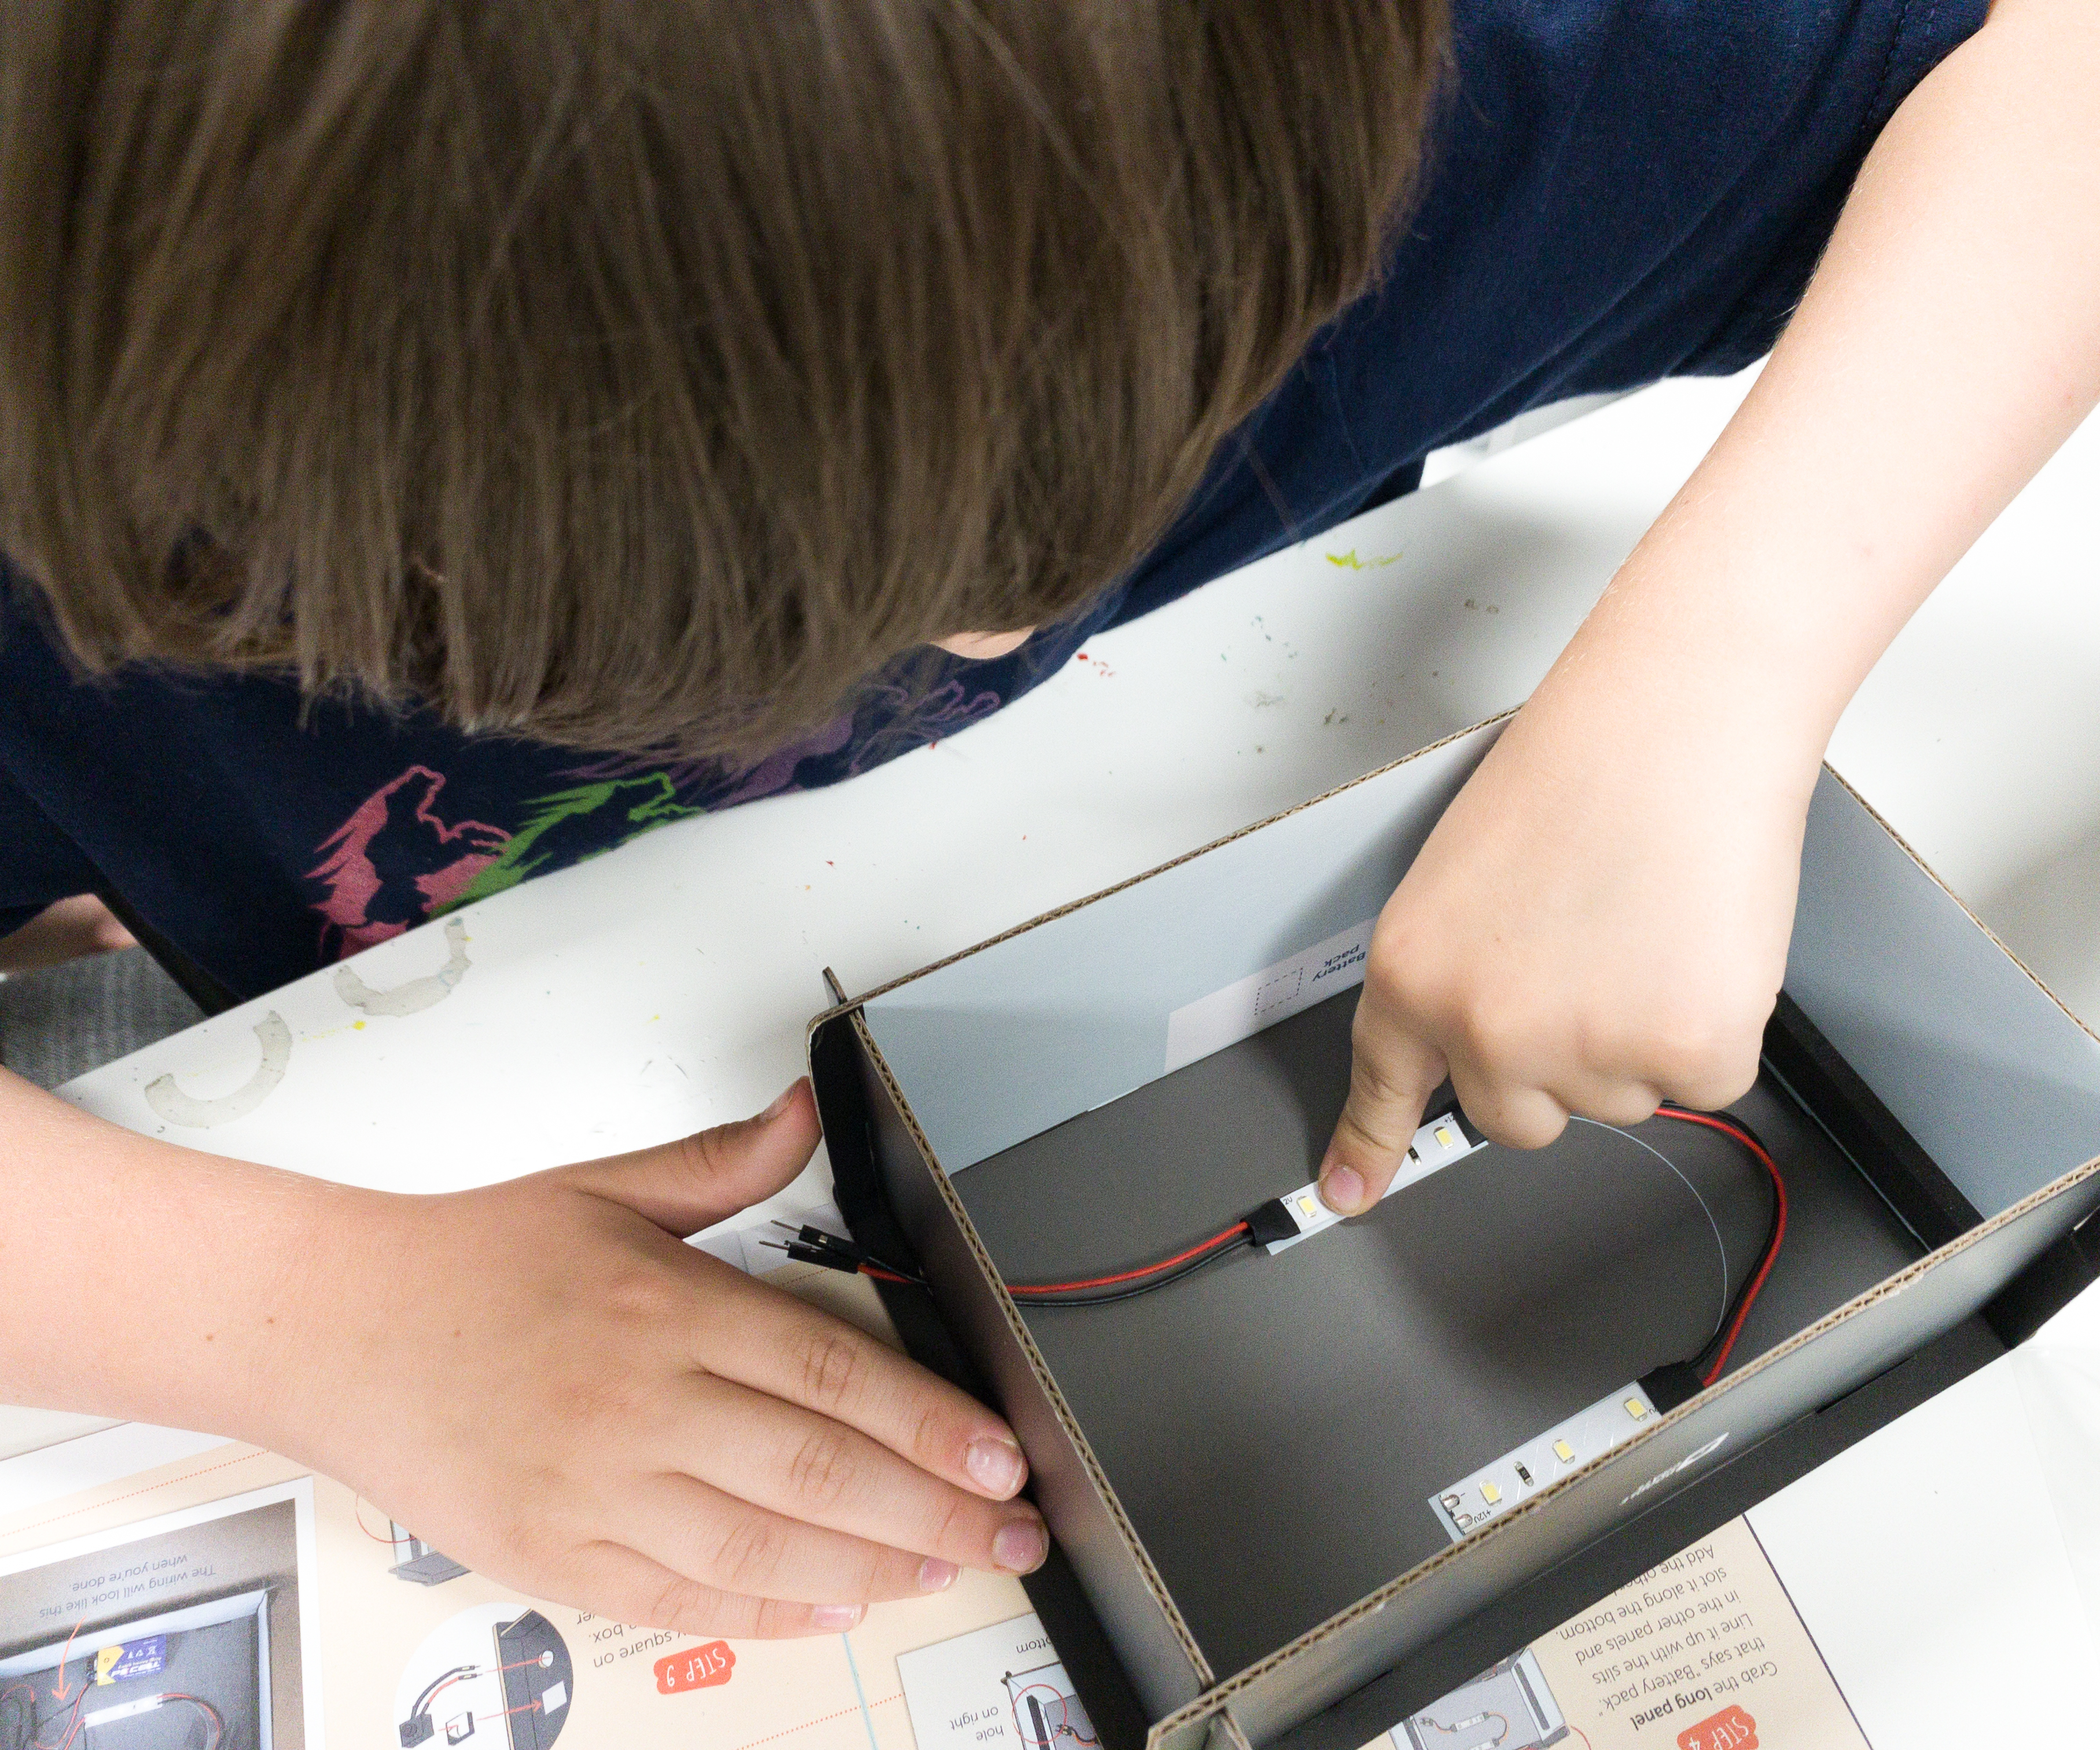
For the next step, just peel the back of the LED strip and then stick it on the labeled spaces, grab the small panel with the hole, and slot it into the right side of the back panel.
Once the wires are properly placed, secure it by putting a clear sticker over the wires.

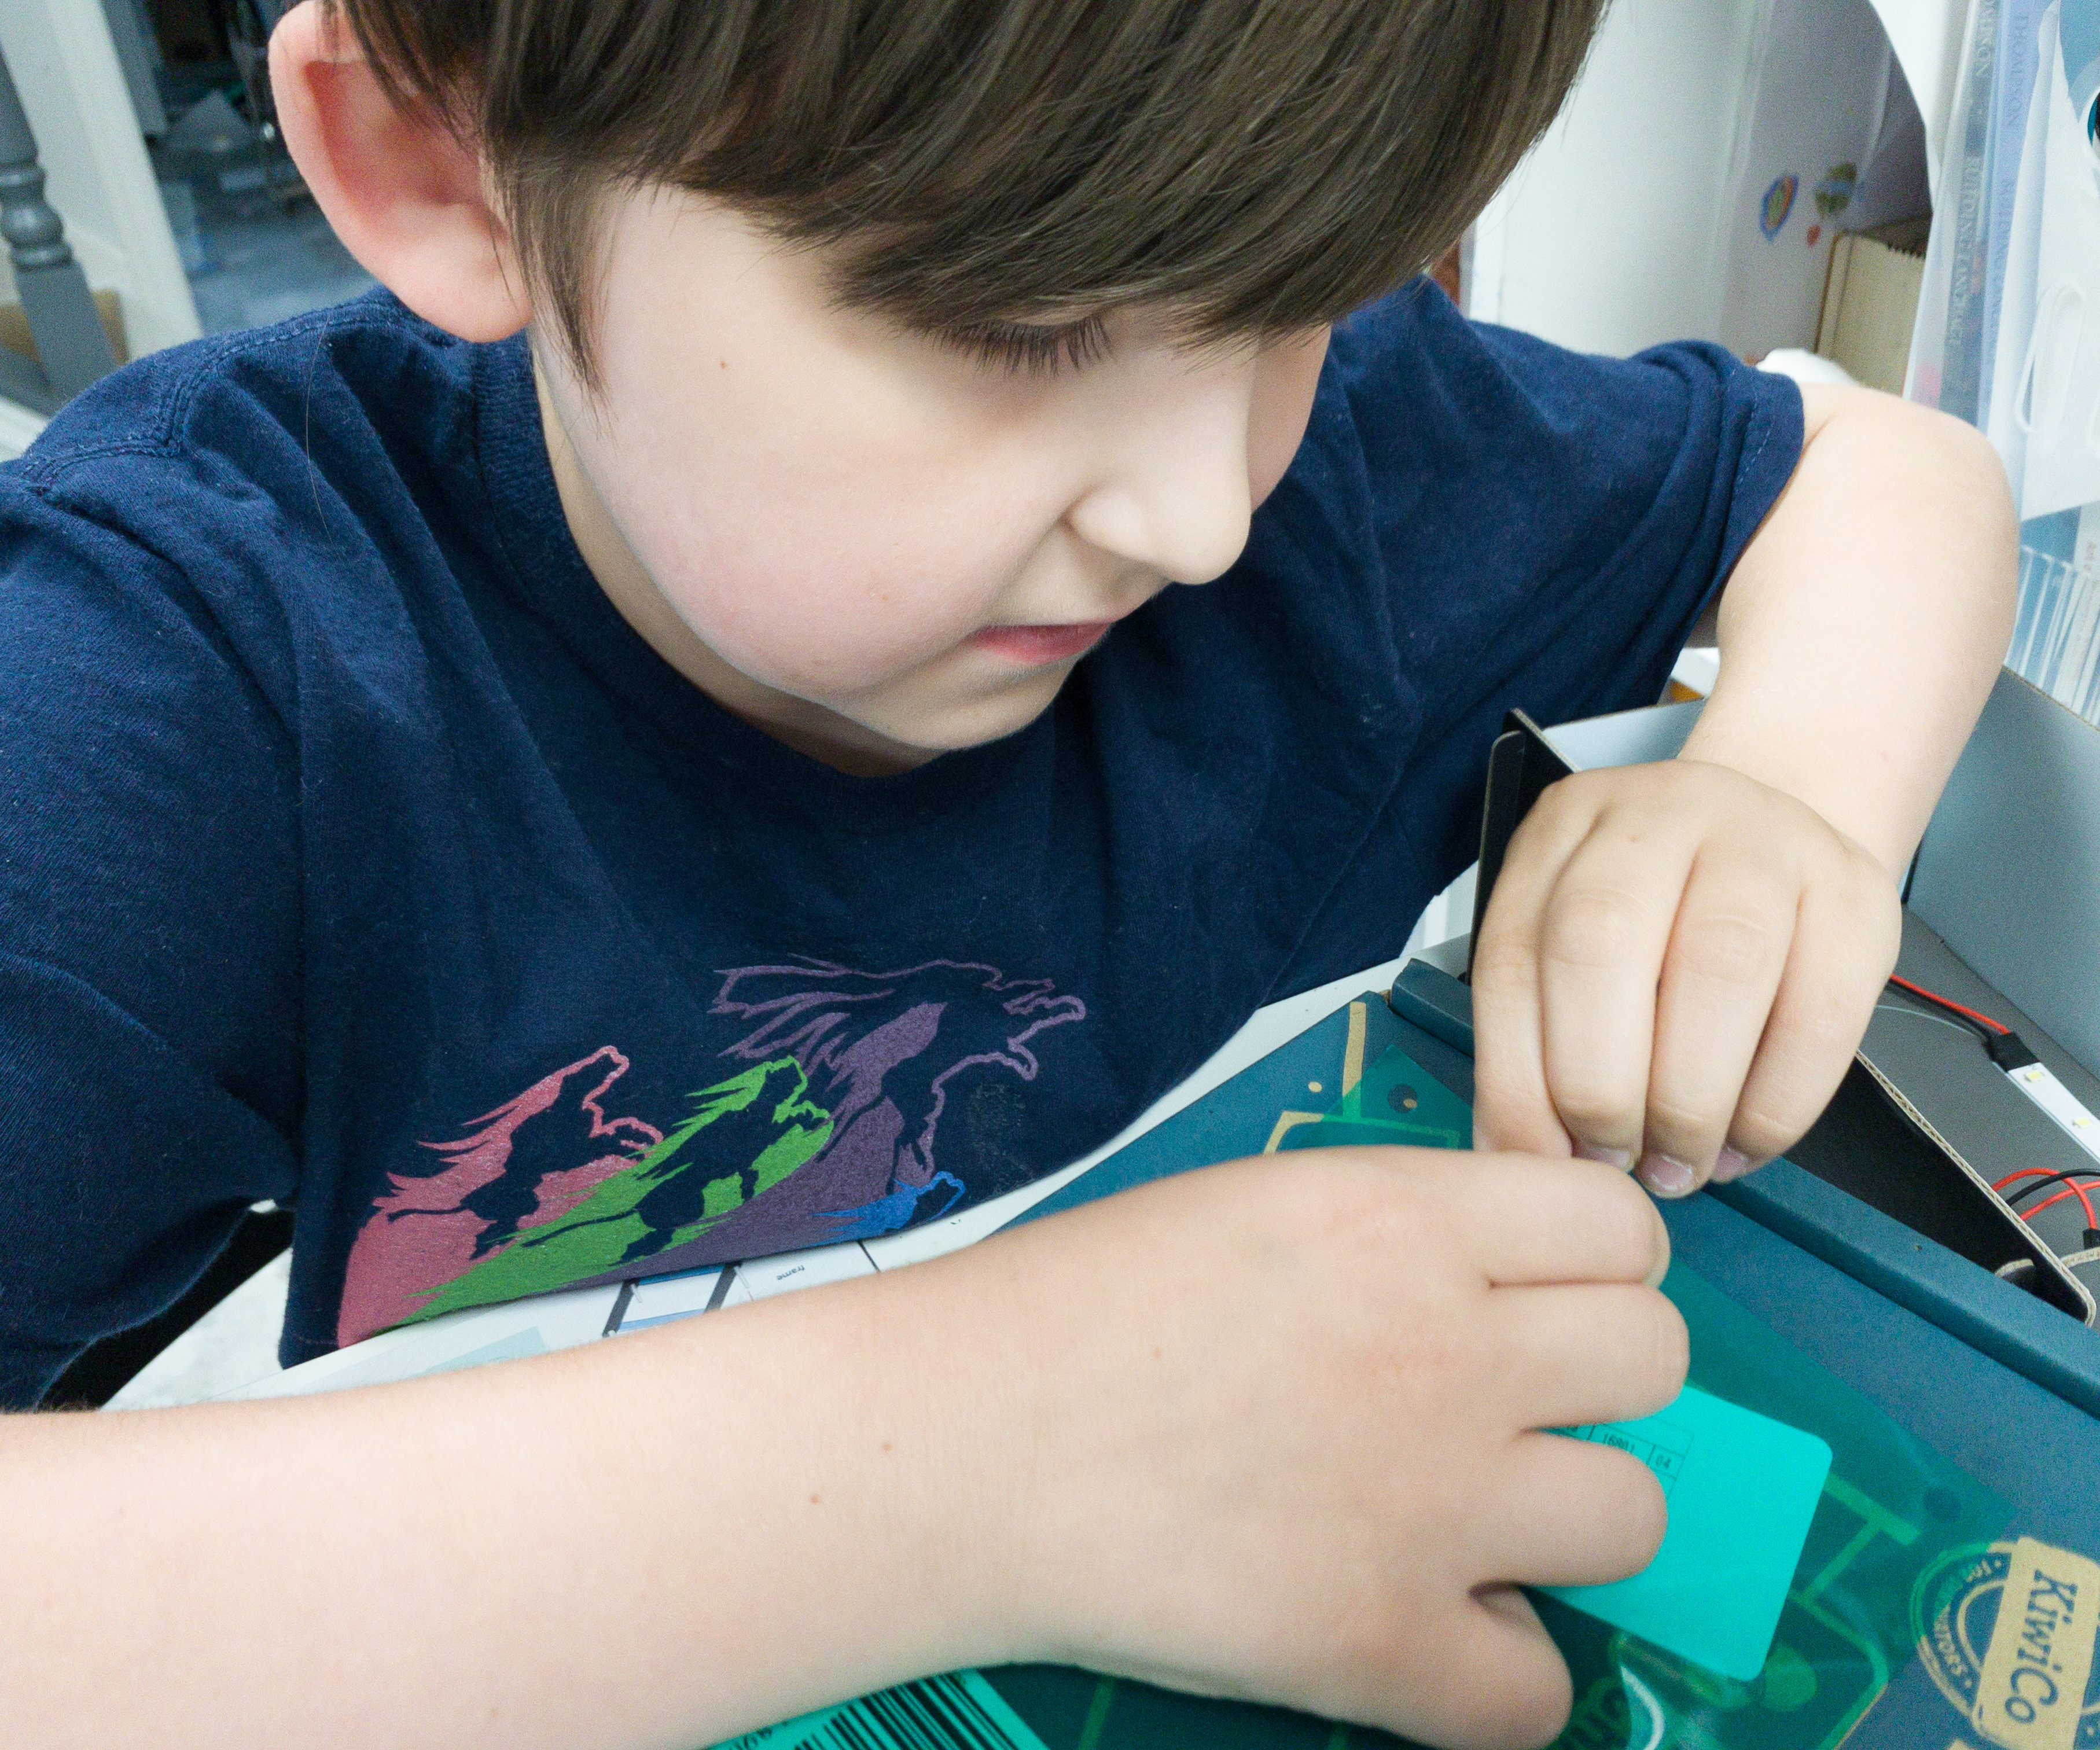
The second part of the project is creating our own design.
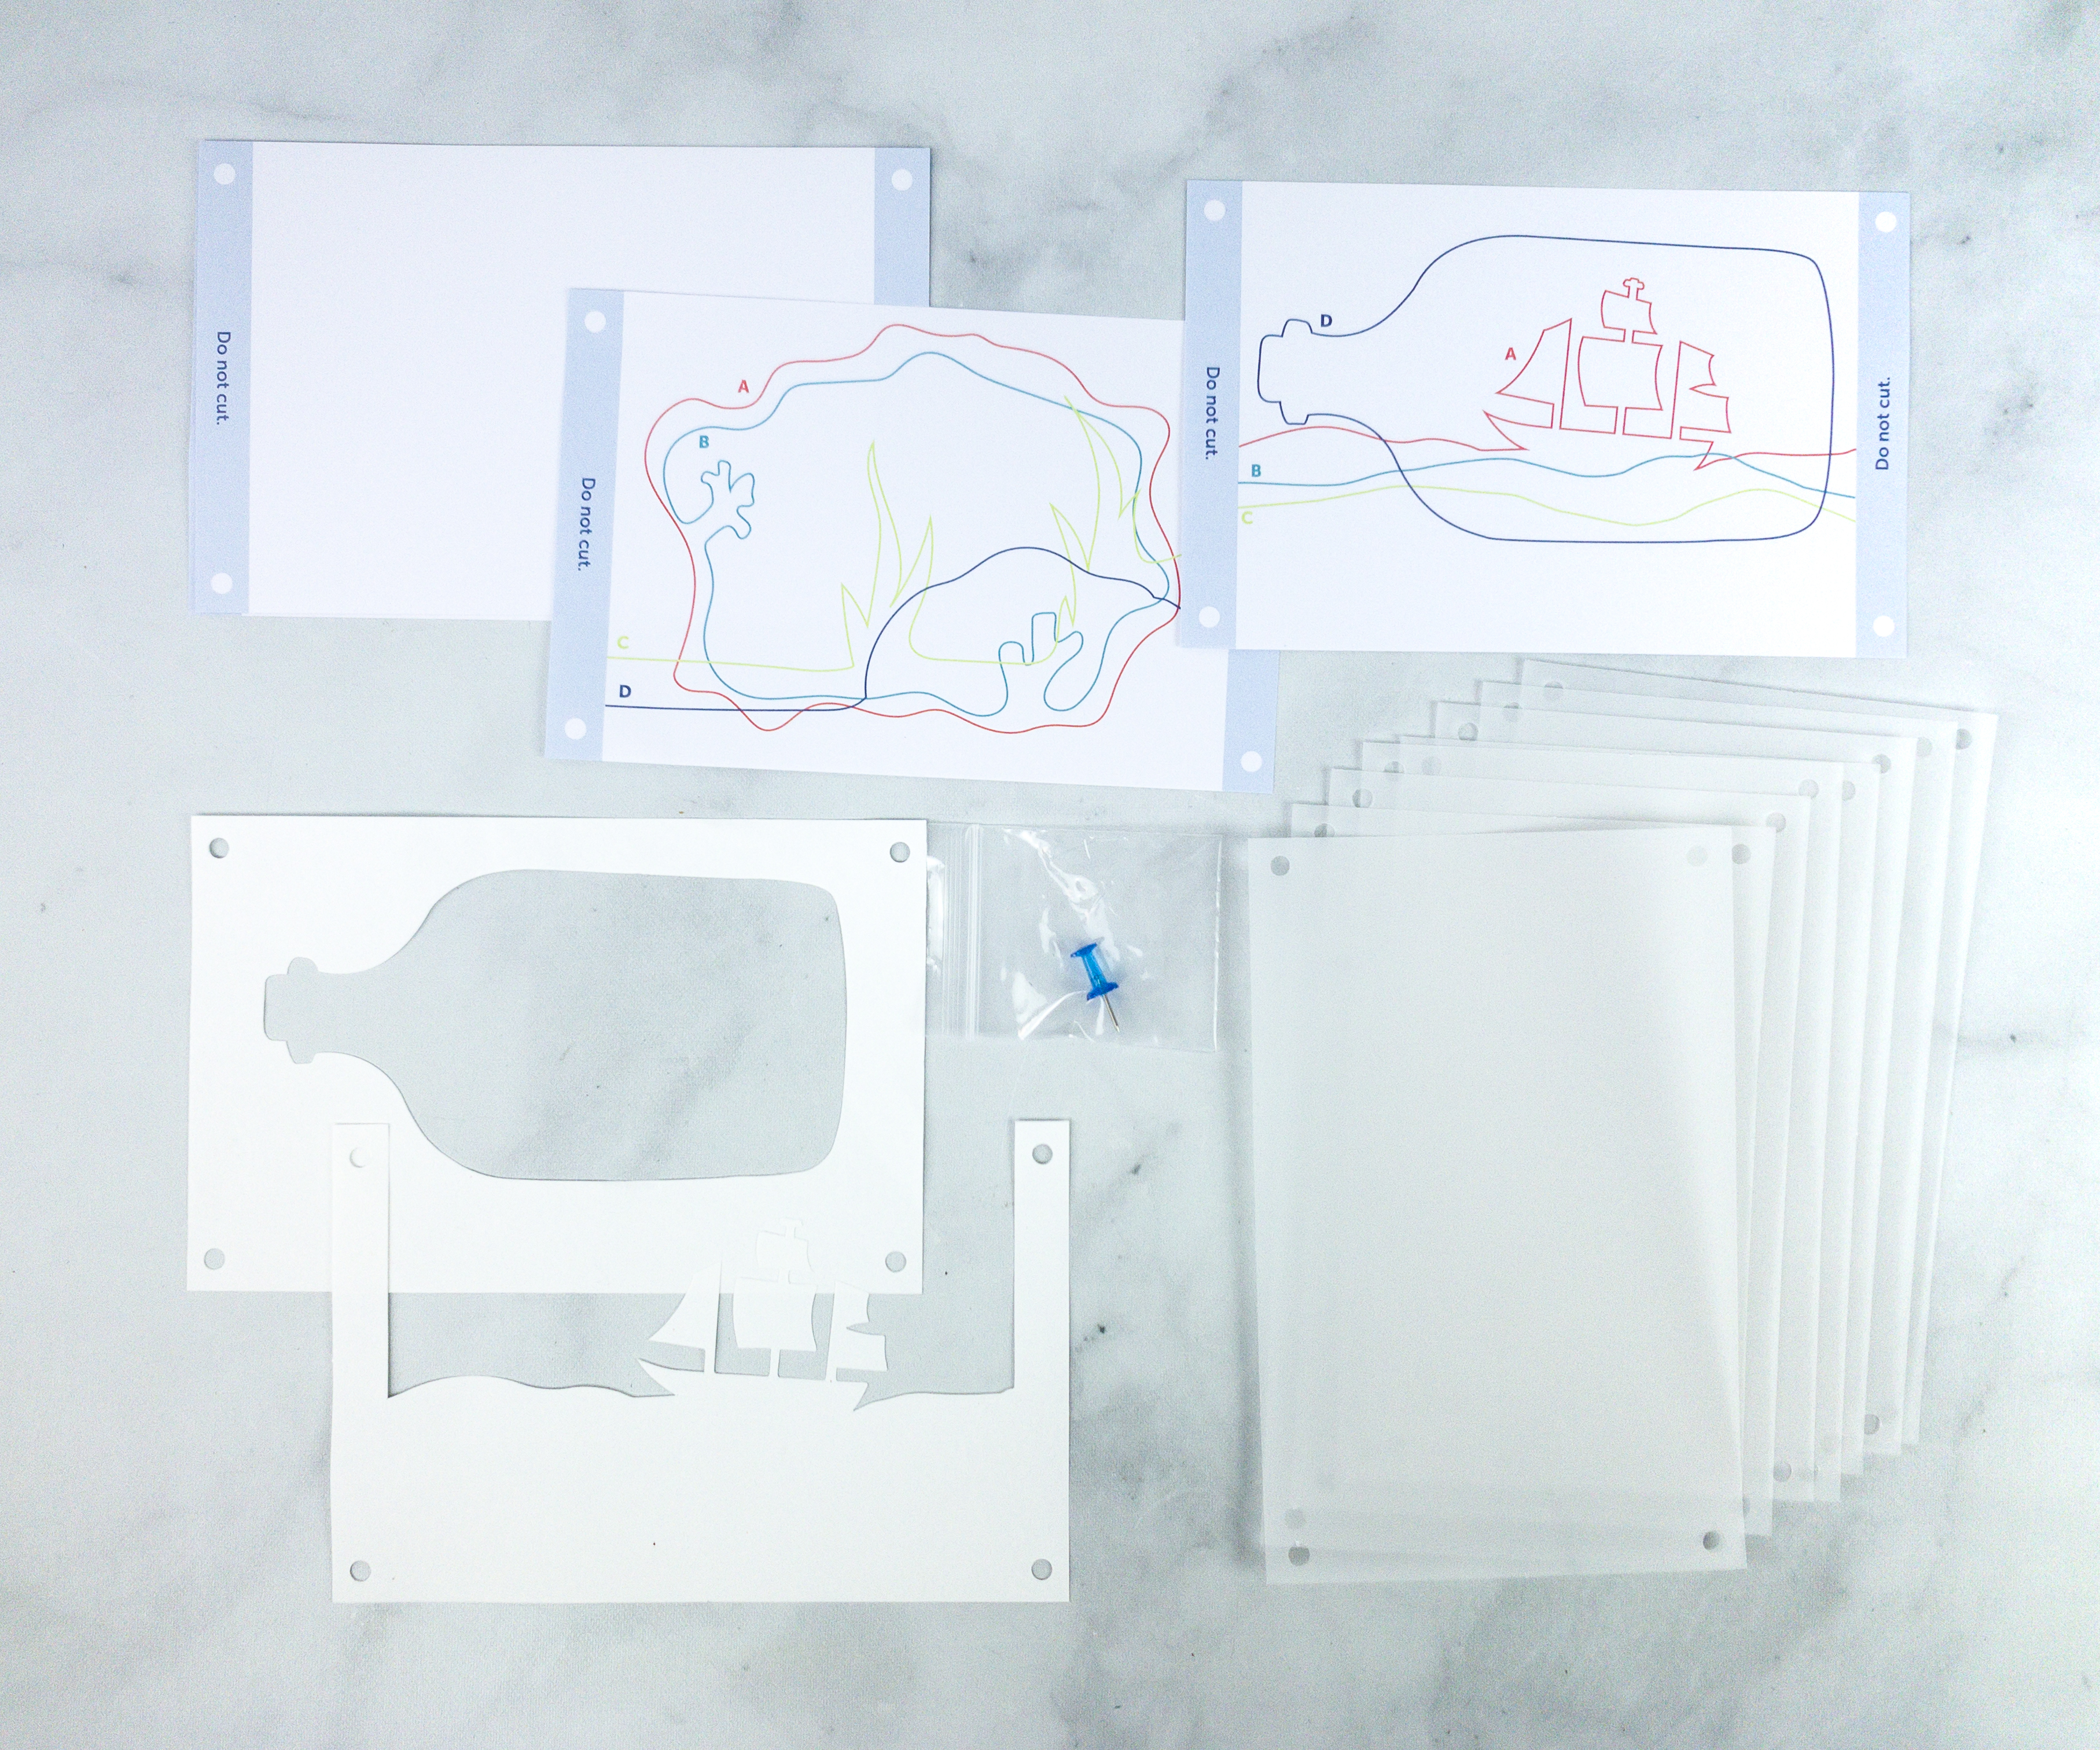
We used design cutouts, templates, pushpin, and vellum papers for this portion of the project.
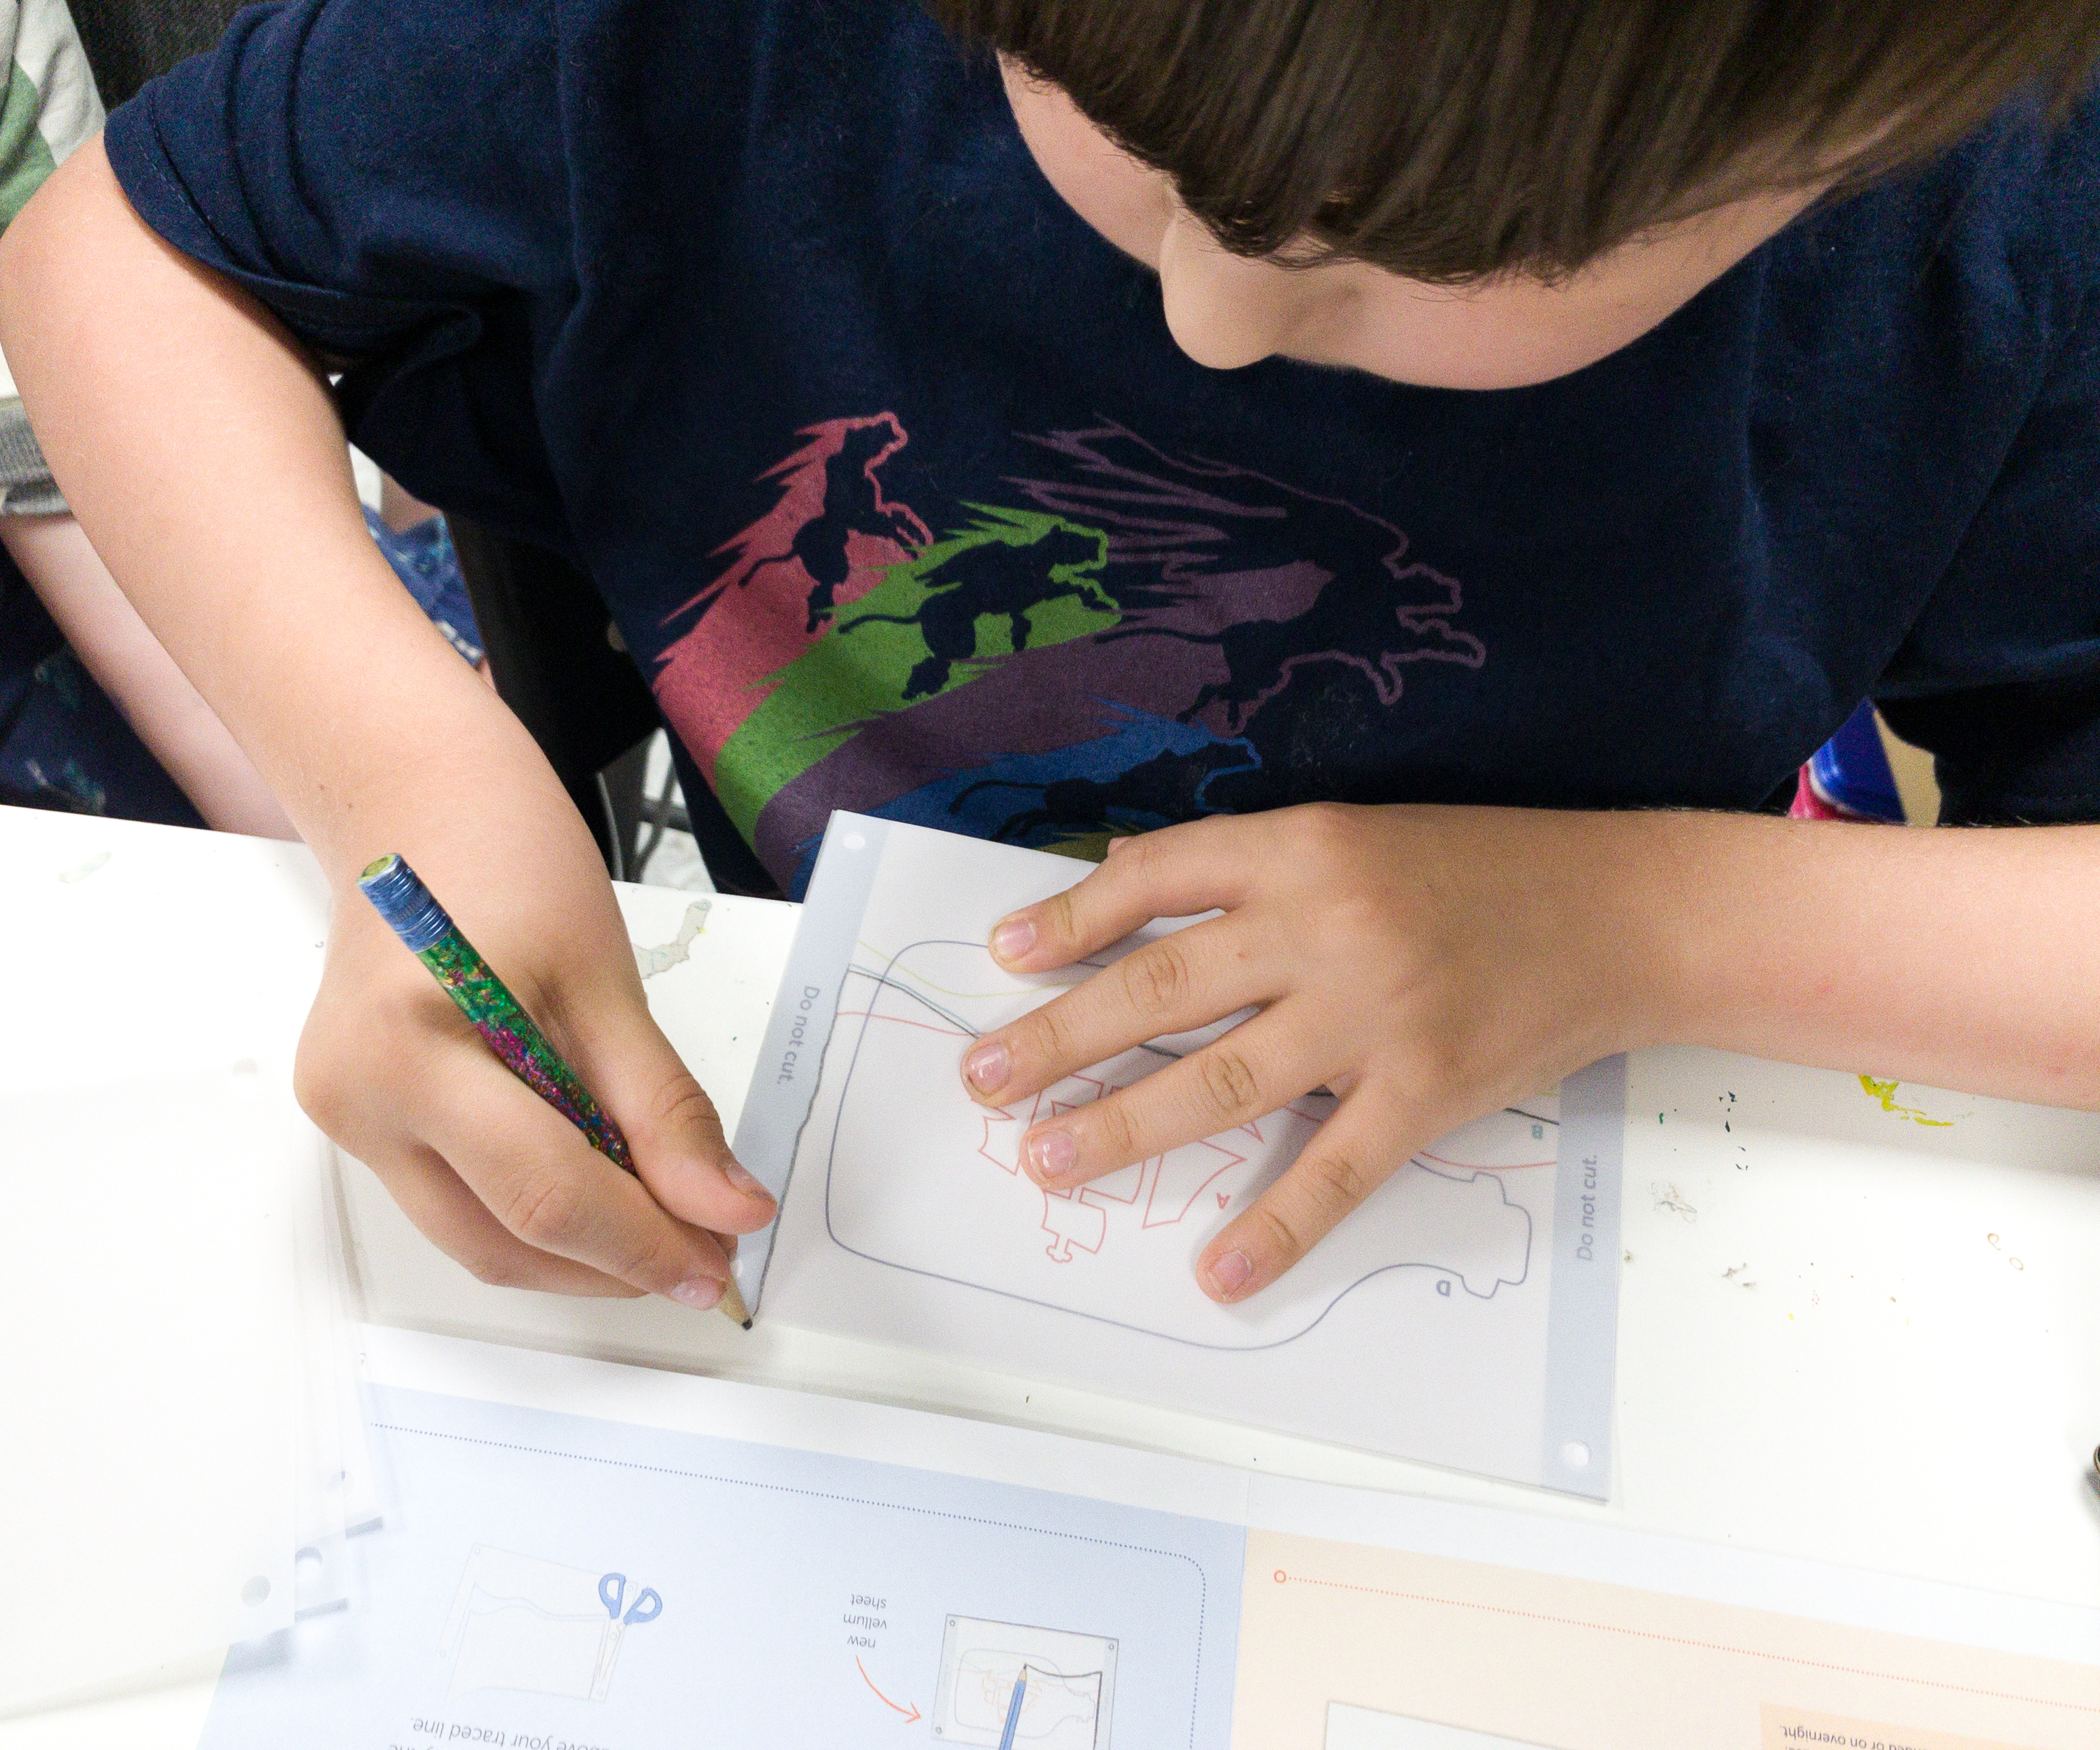
My son grabbed the ship-in-a-bottle template, and using his pencil, he traced the template onto the vellum paper.
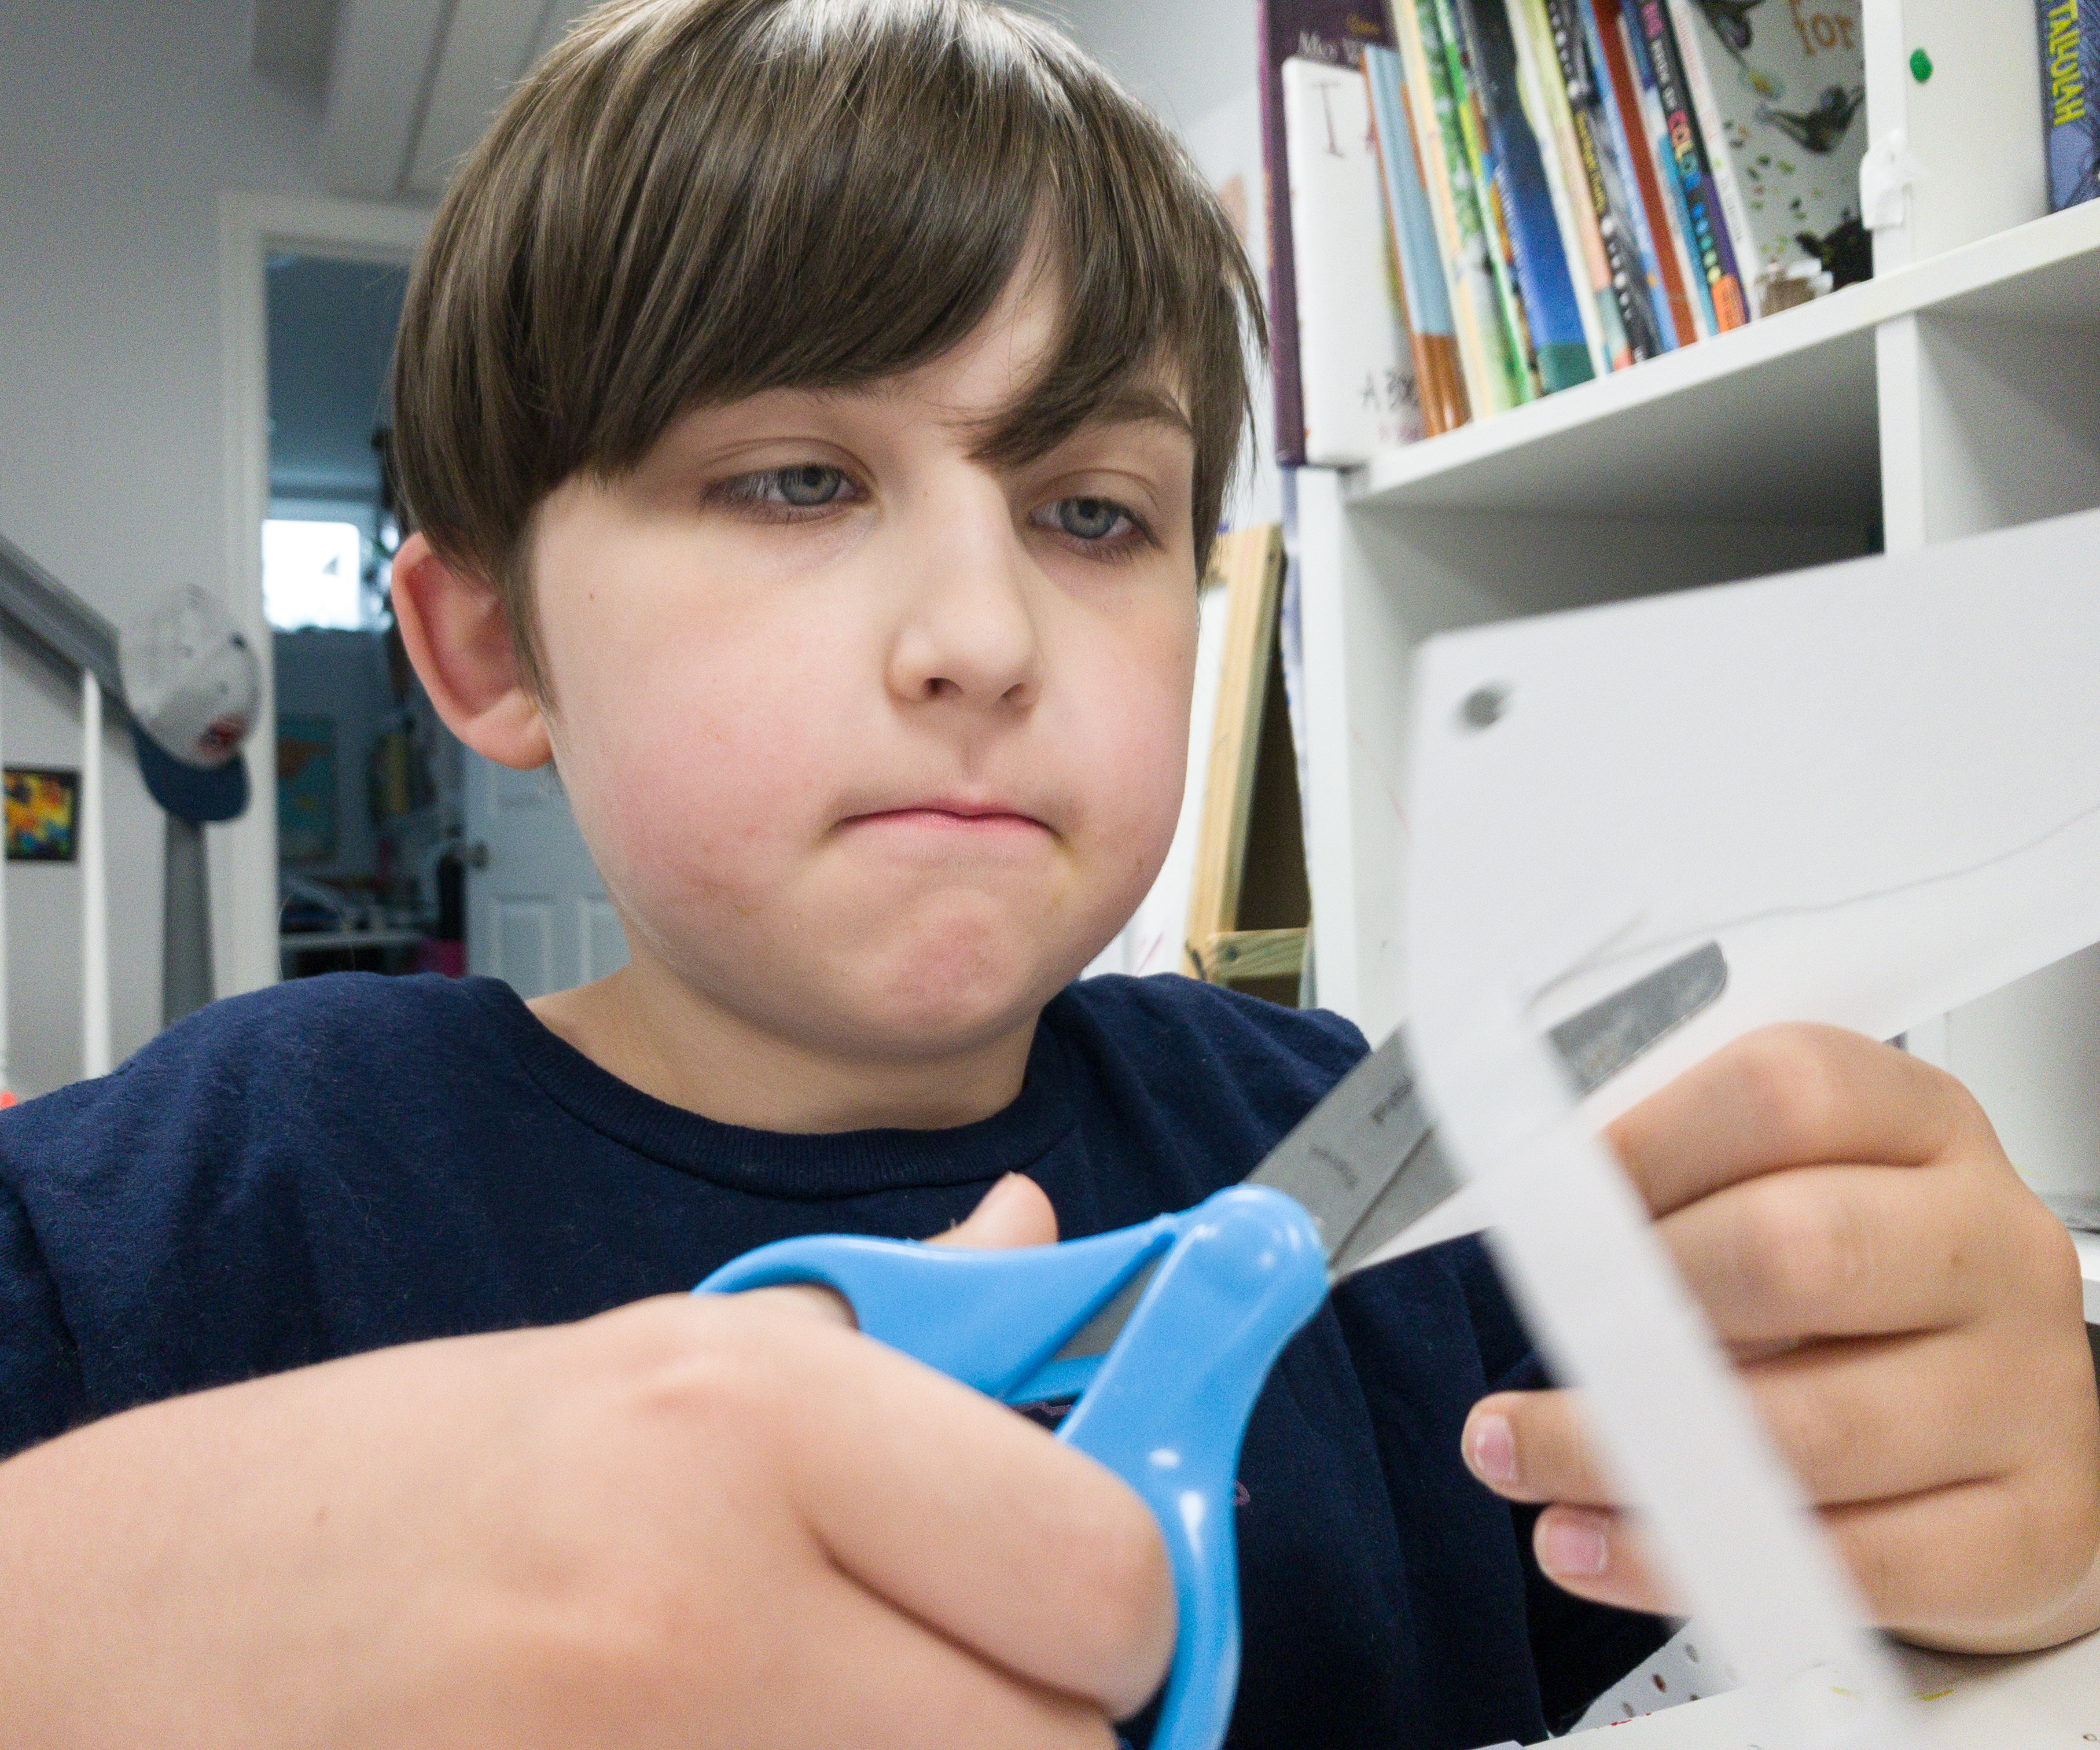
He then carefully cut out the area above the traced line. Repeat the procedure for the other templates.
Once done with all the cutouts, you can now start assembling the design.
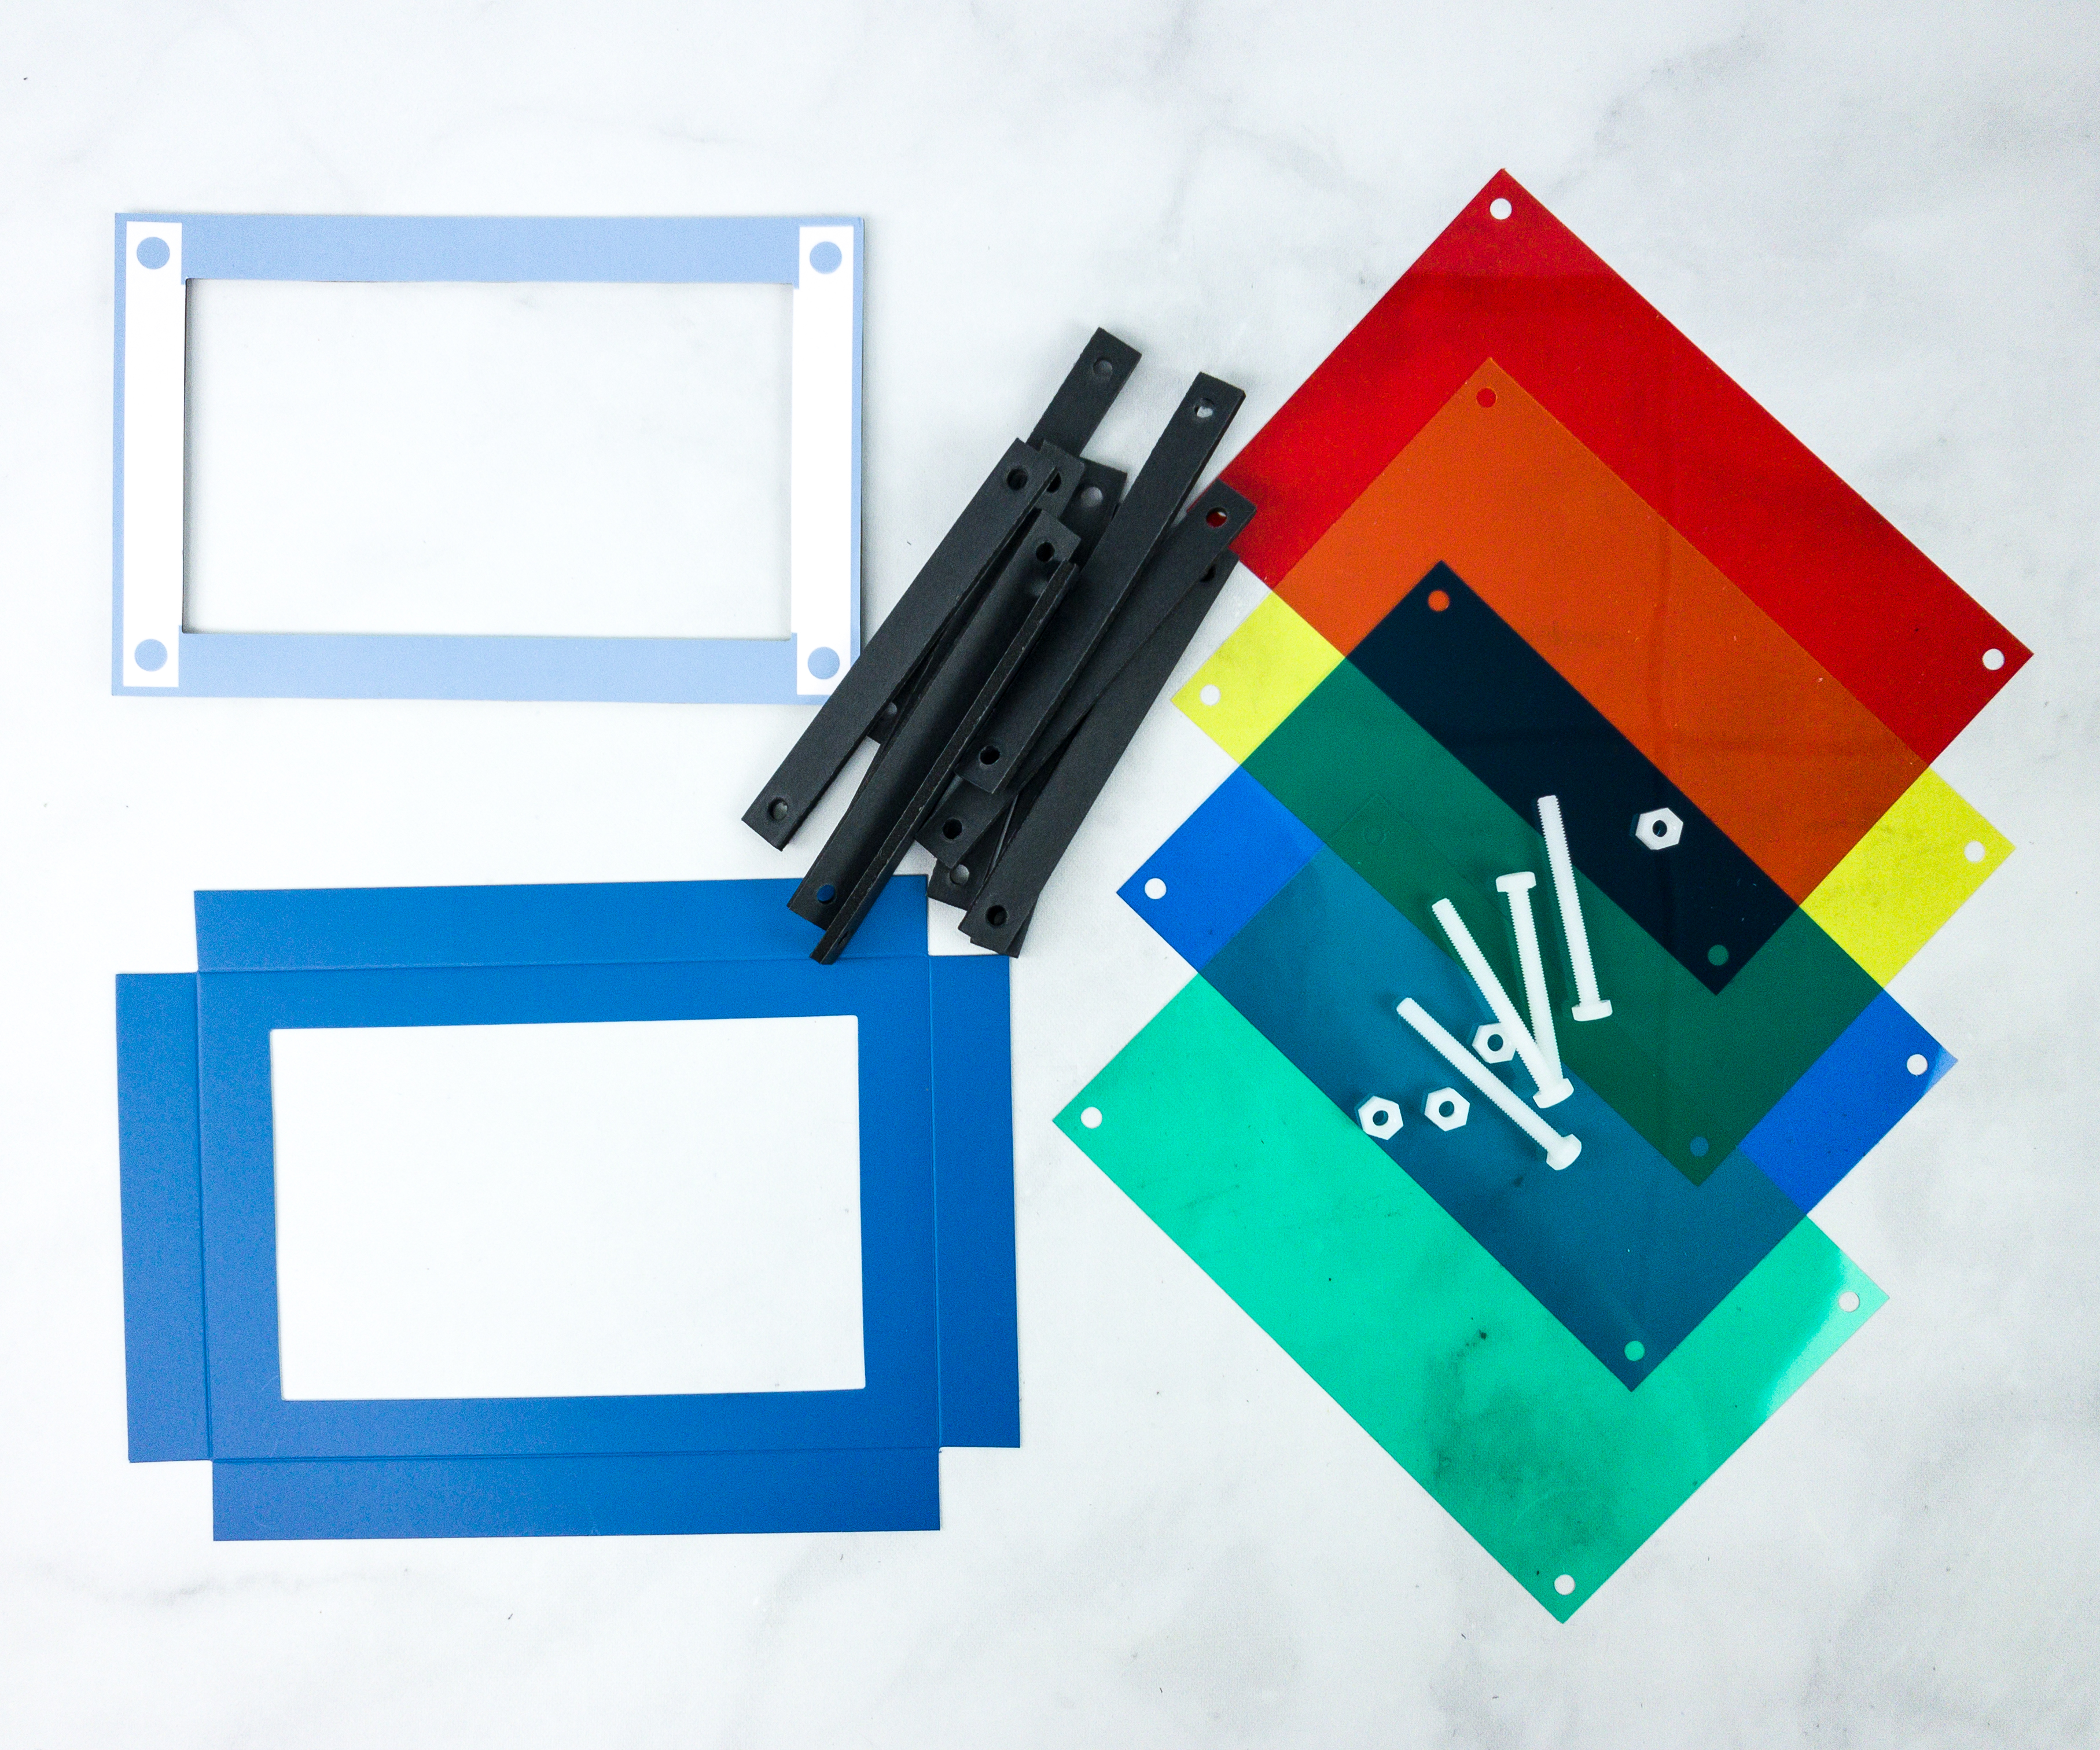
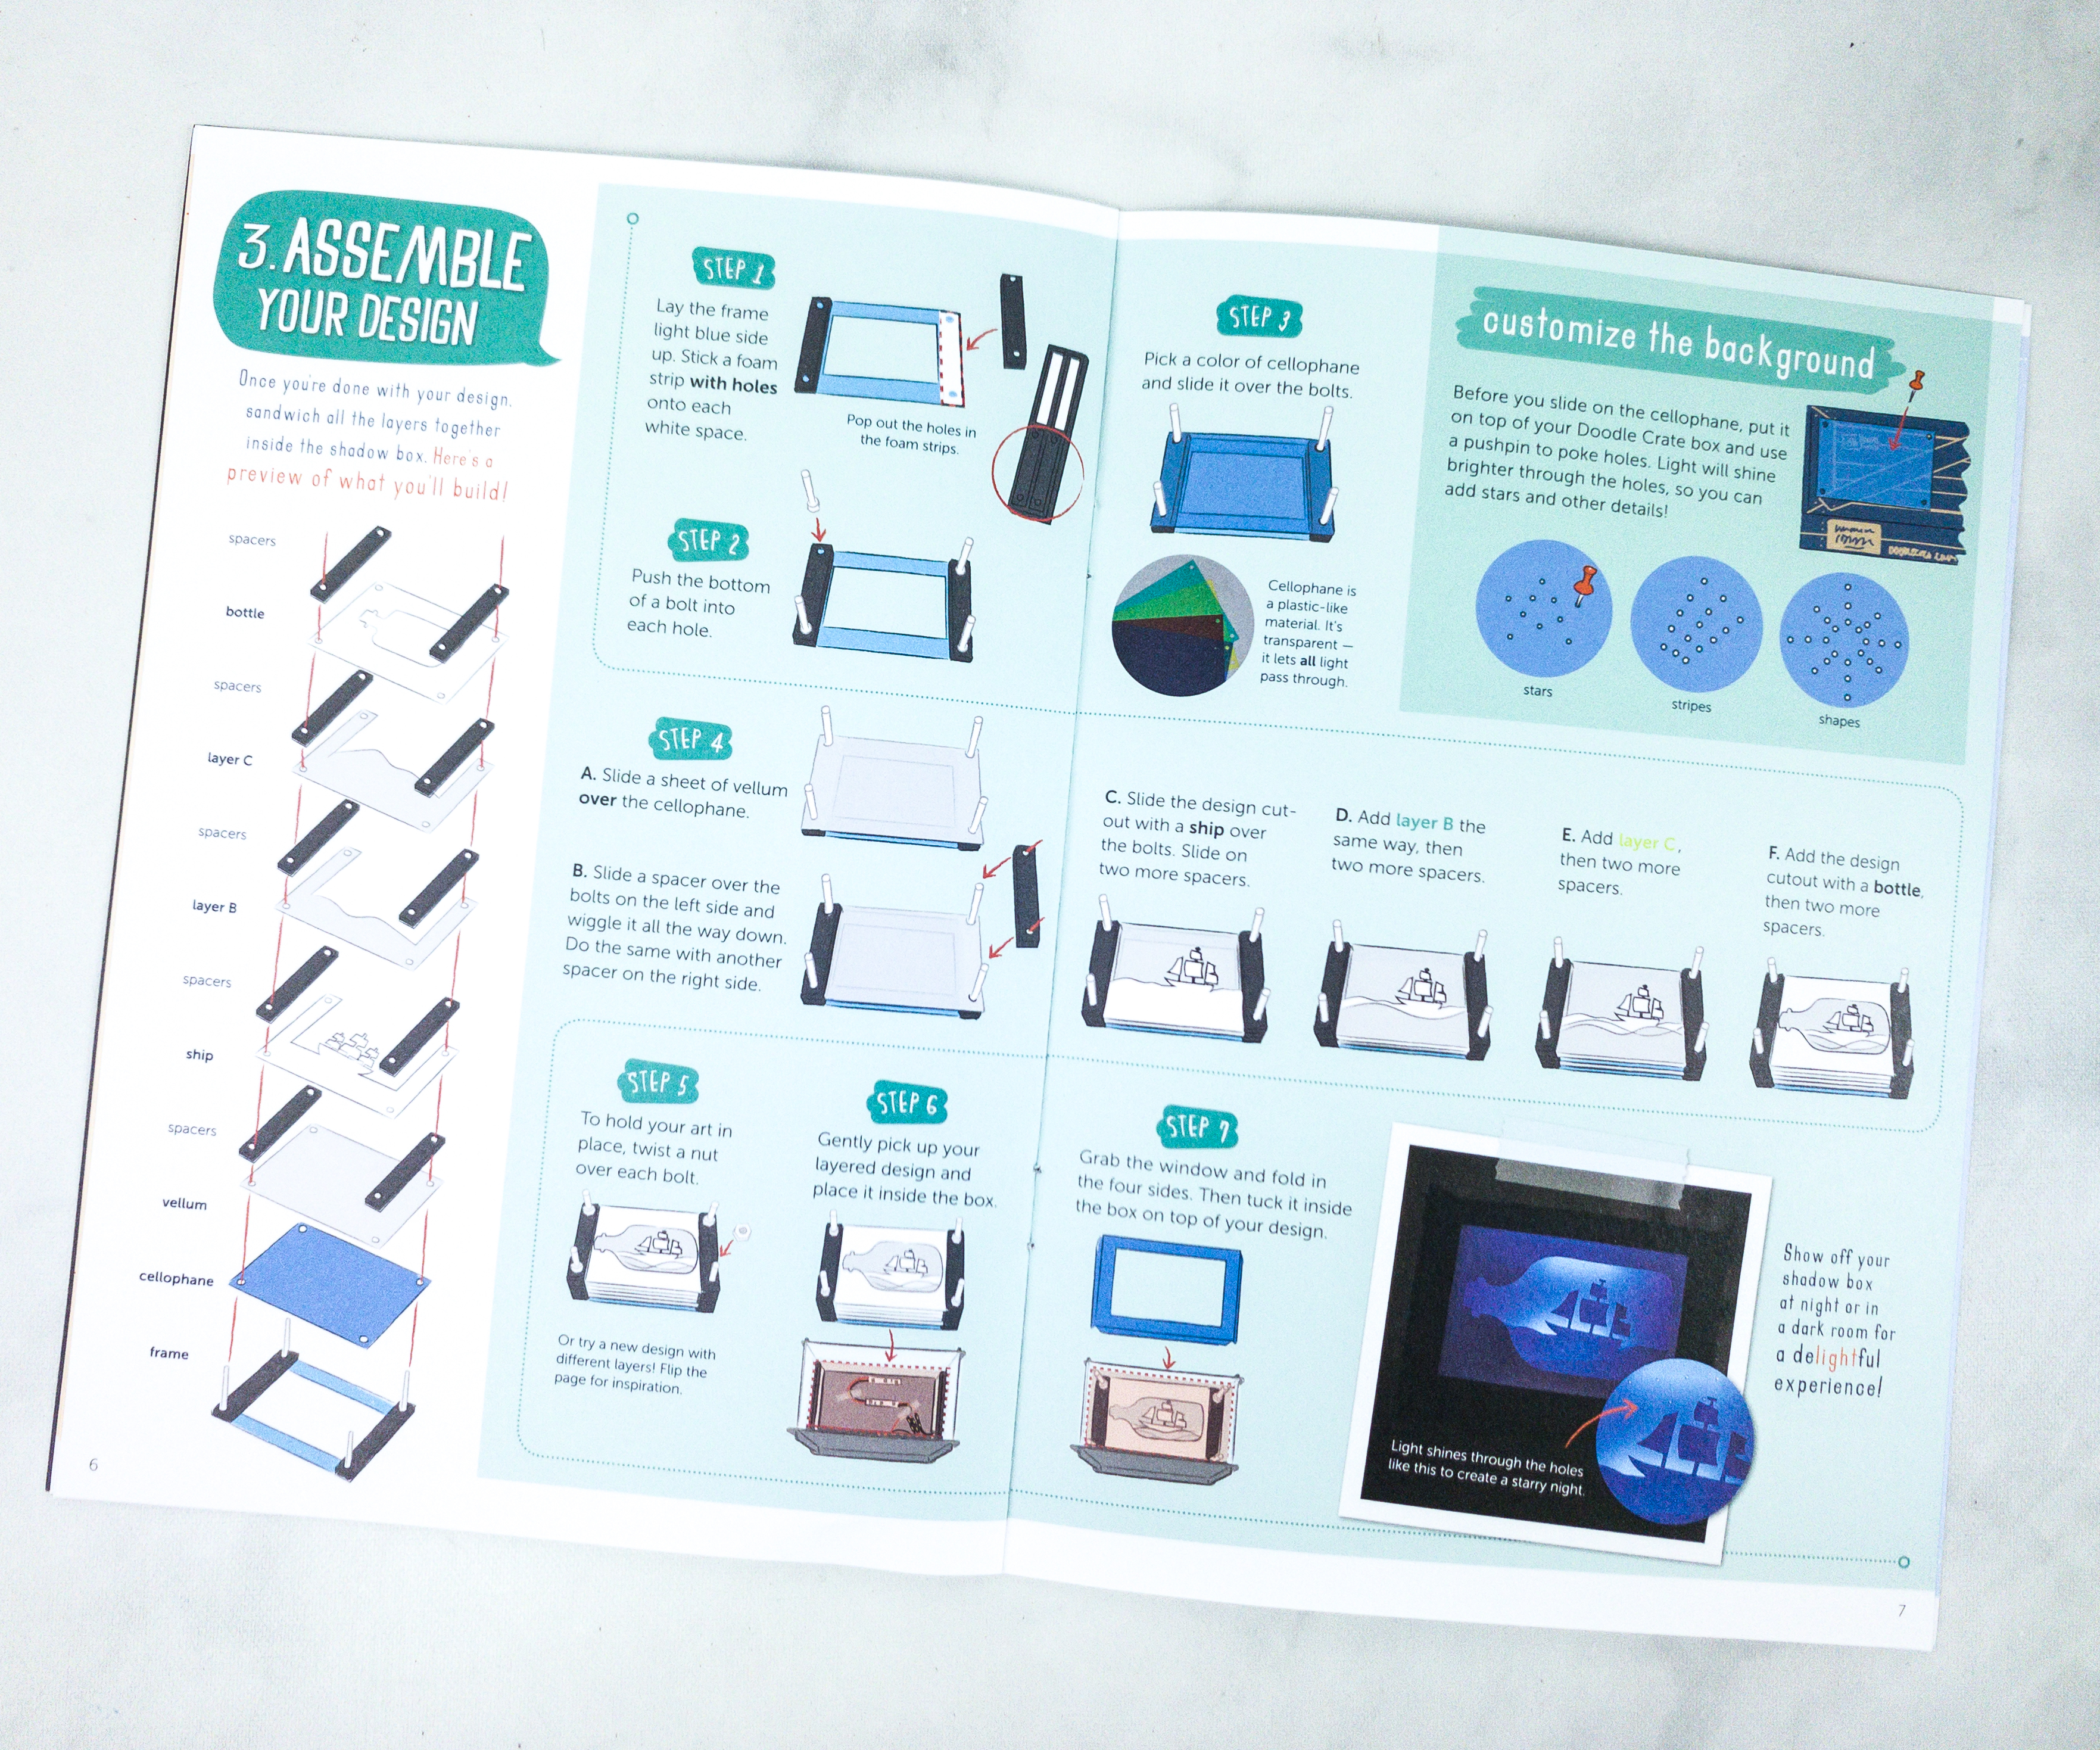
For this section, we used the frame, cellophane, spacers, bolts and nuts, and the window.
First, you need to lay the frame with the light blue side up and stick the foam strips with holes onto the white spaces. This is how it should look like once properly executed.
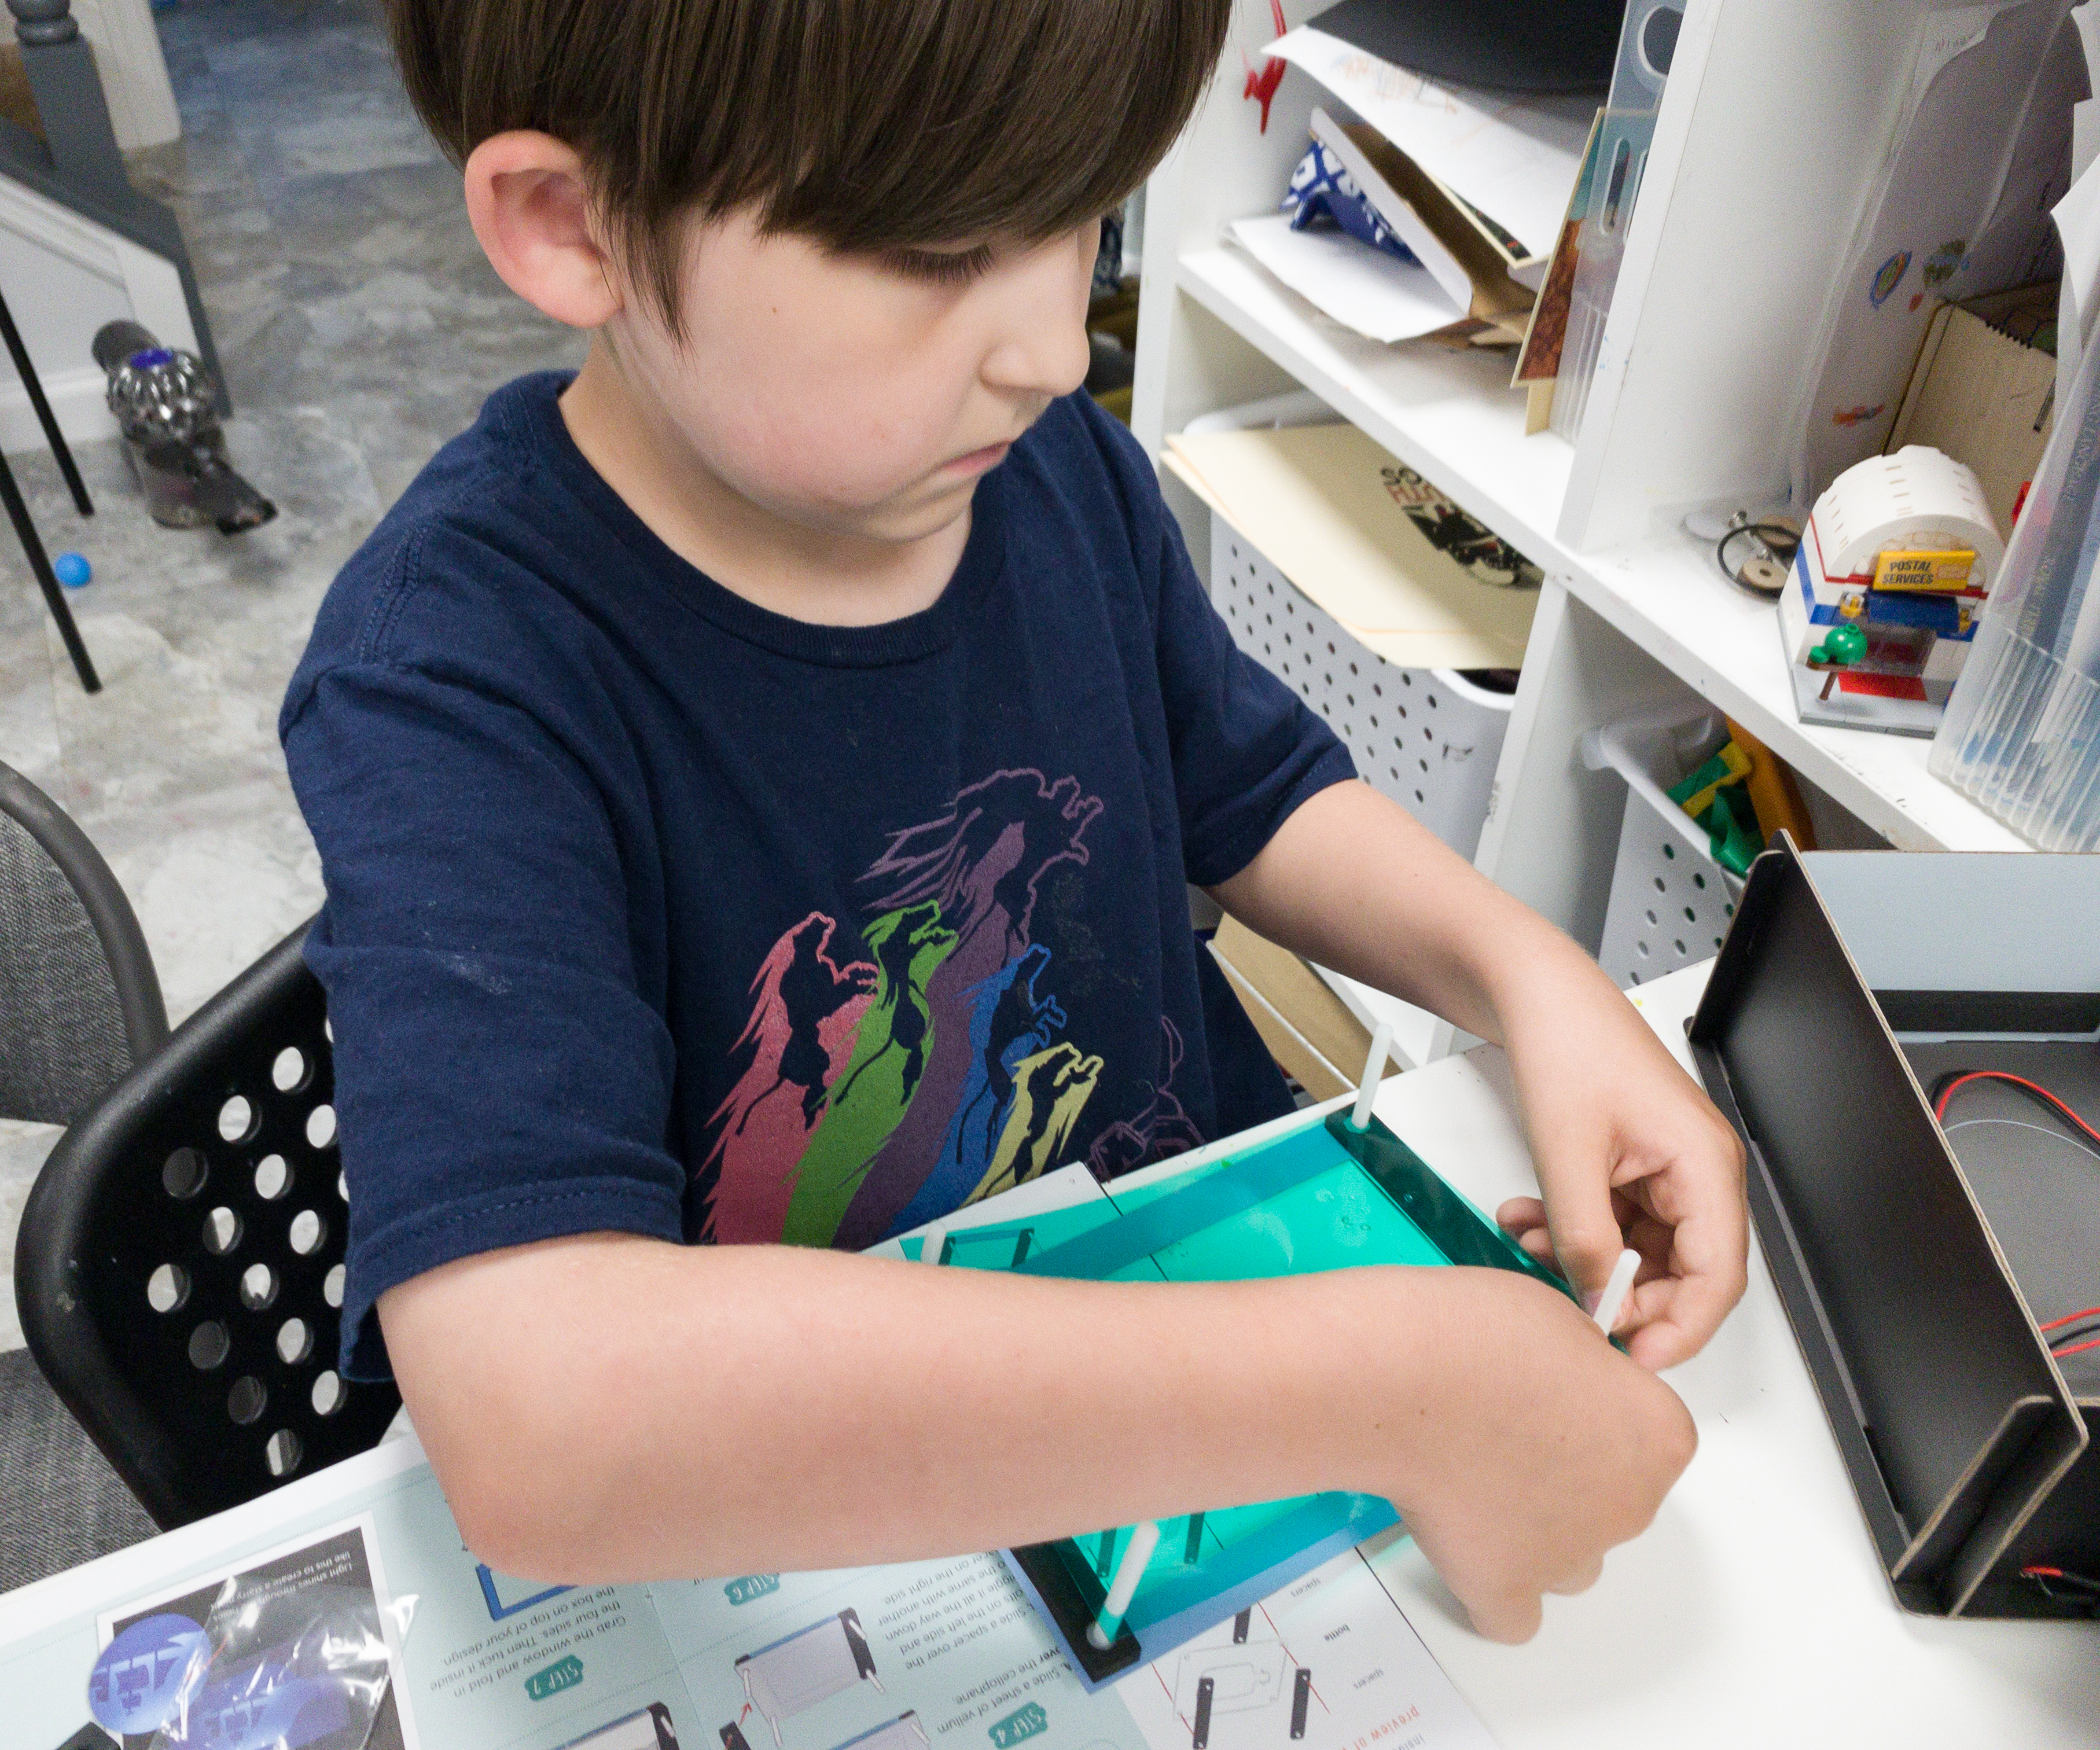
Now, it’s time to push the bolt through each hole, place the cellophane of your choice, and slide it over the bolts. Put on the vellum, ship, layers B and C, bottle, spacers in between each template, and lock it using the nuts.
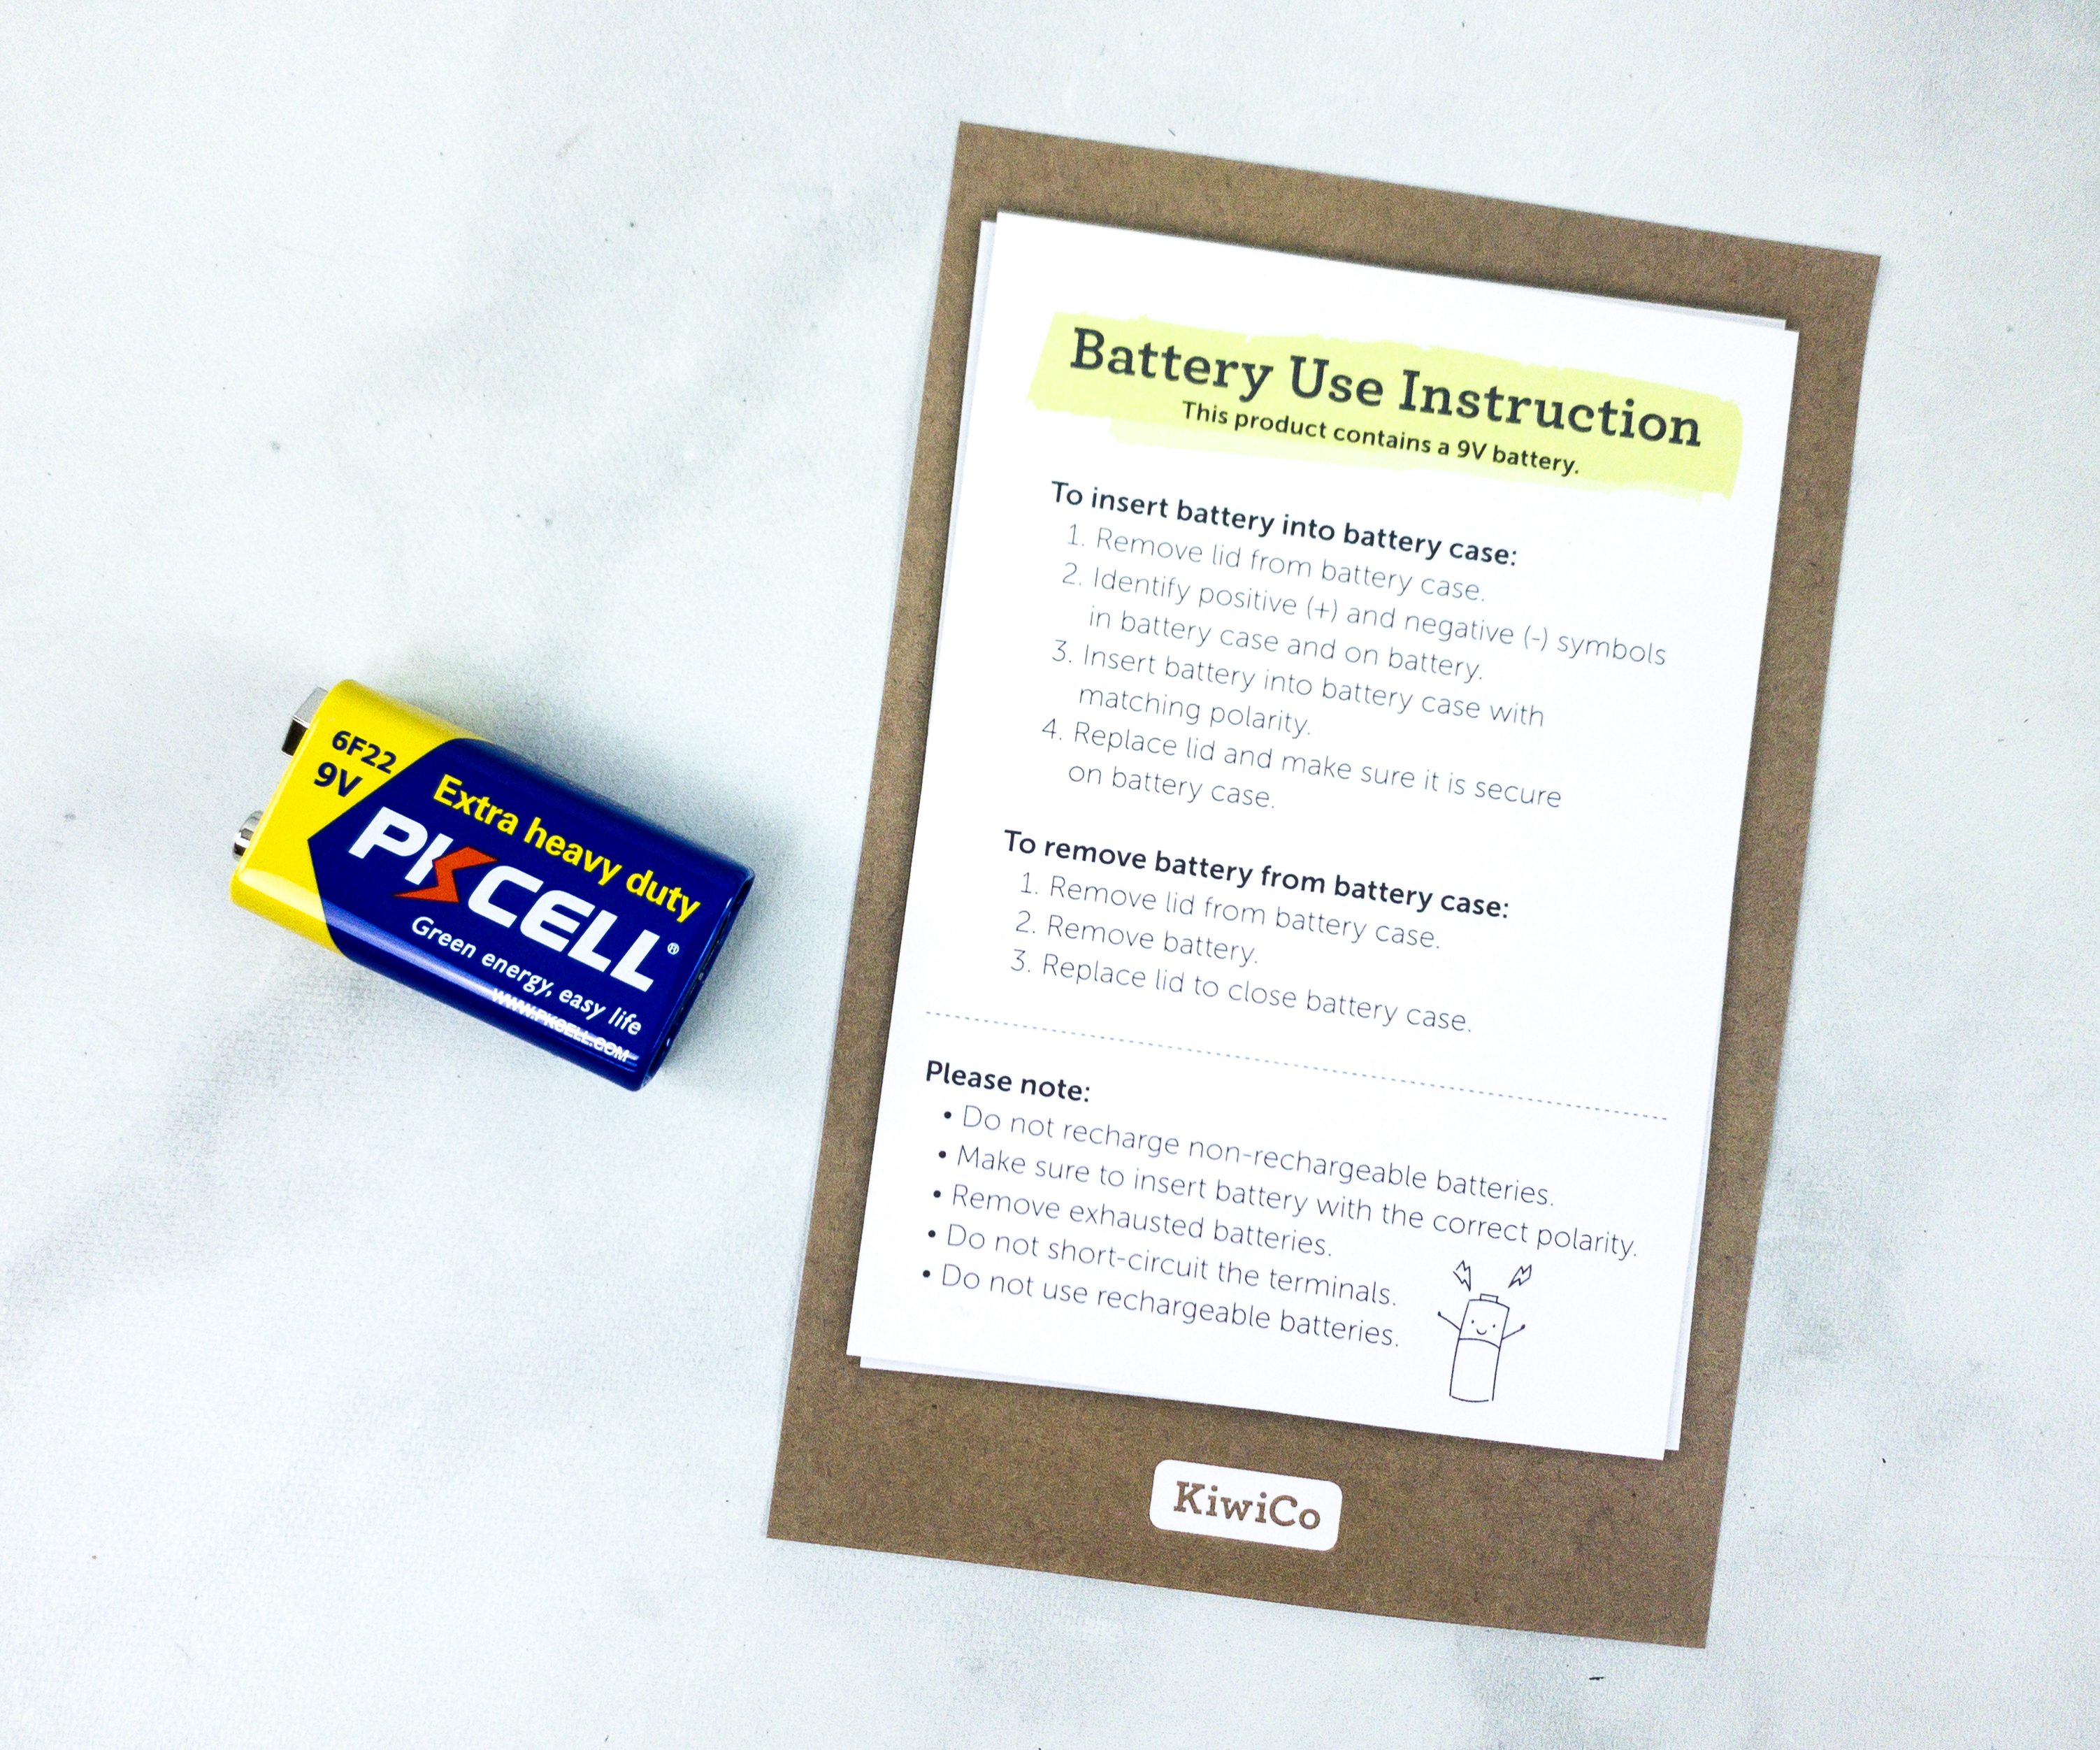
This crate even provided a sheet with a battery instruction manual. According to this, you have to make sure to insert the battery with the correct polarity for it to work.
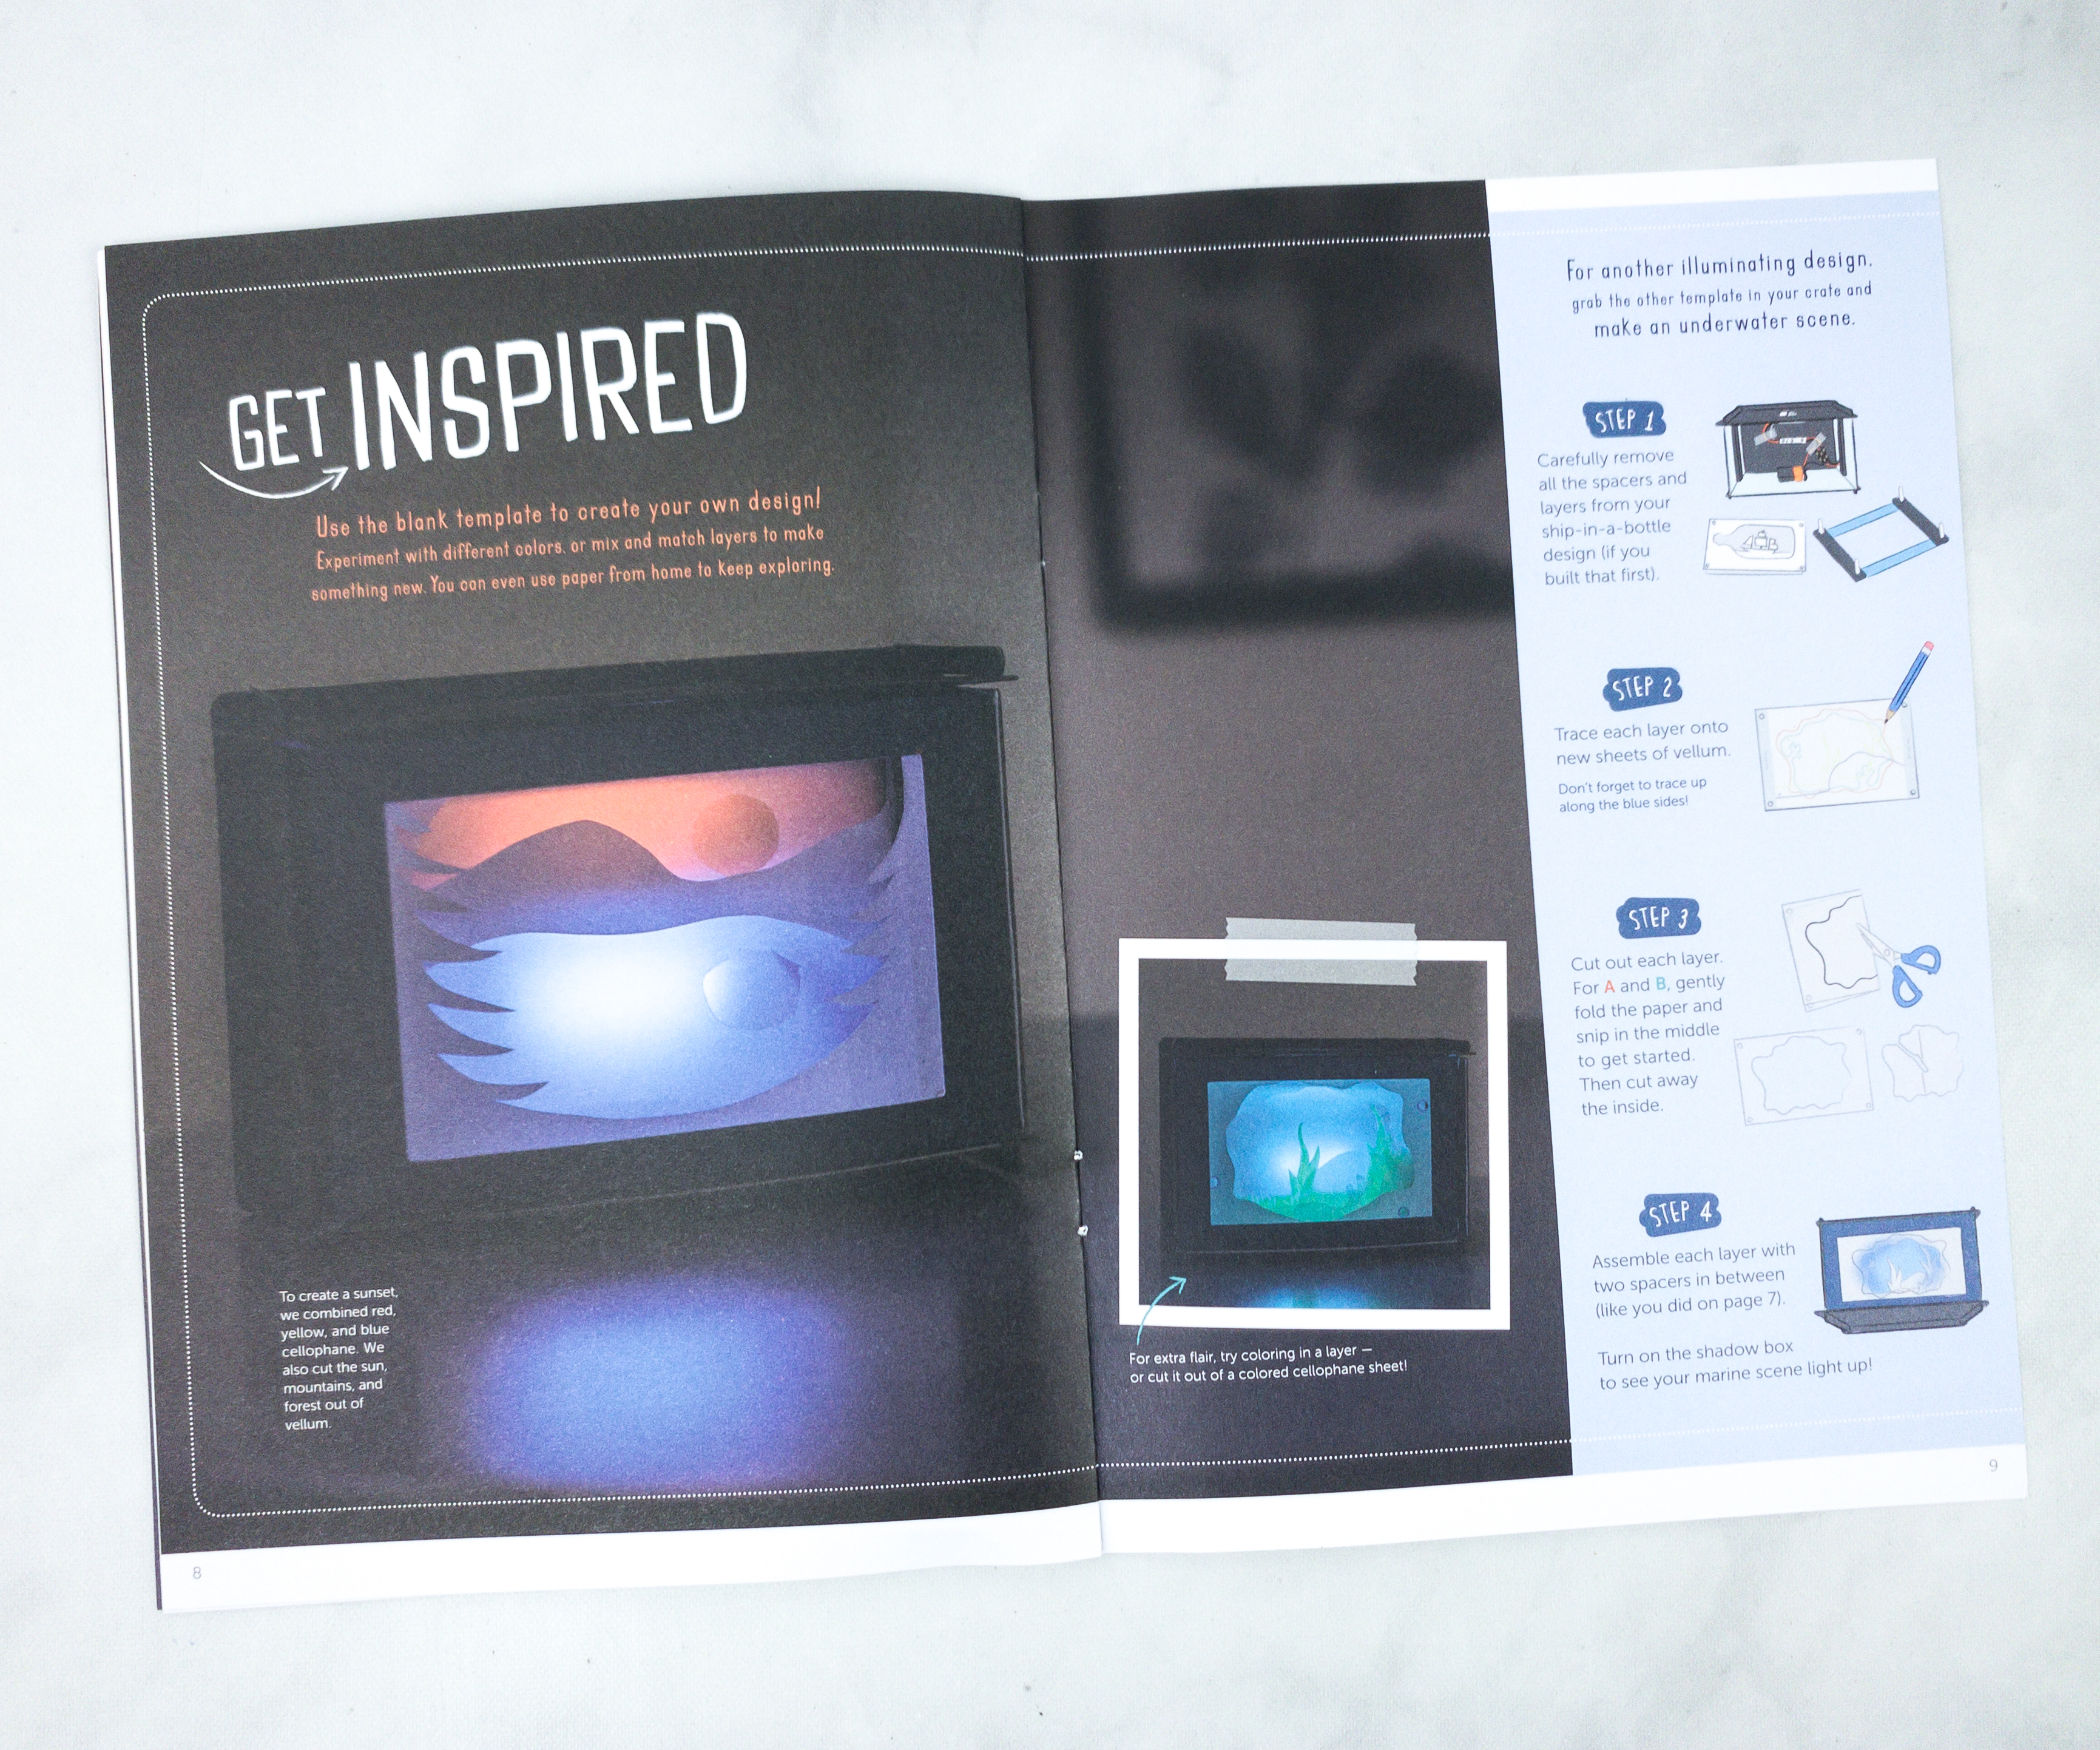
According to this section of the booklet, you can create your own design and experiment with different colors or mix and match layers to make something new. You can even use your papers from home to keep exploring.
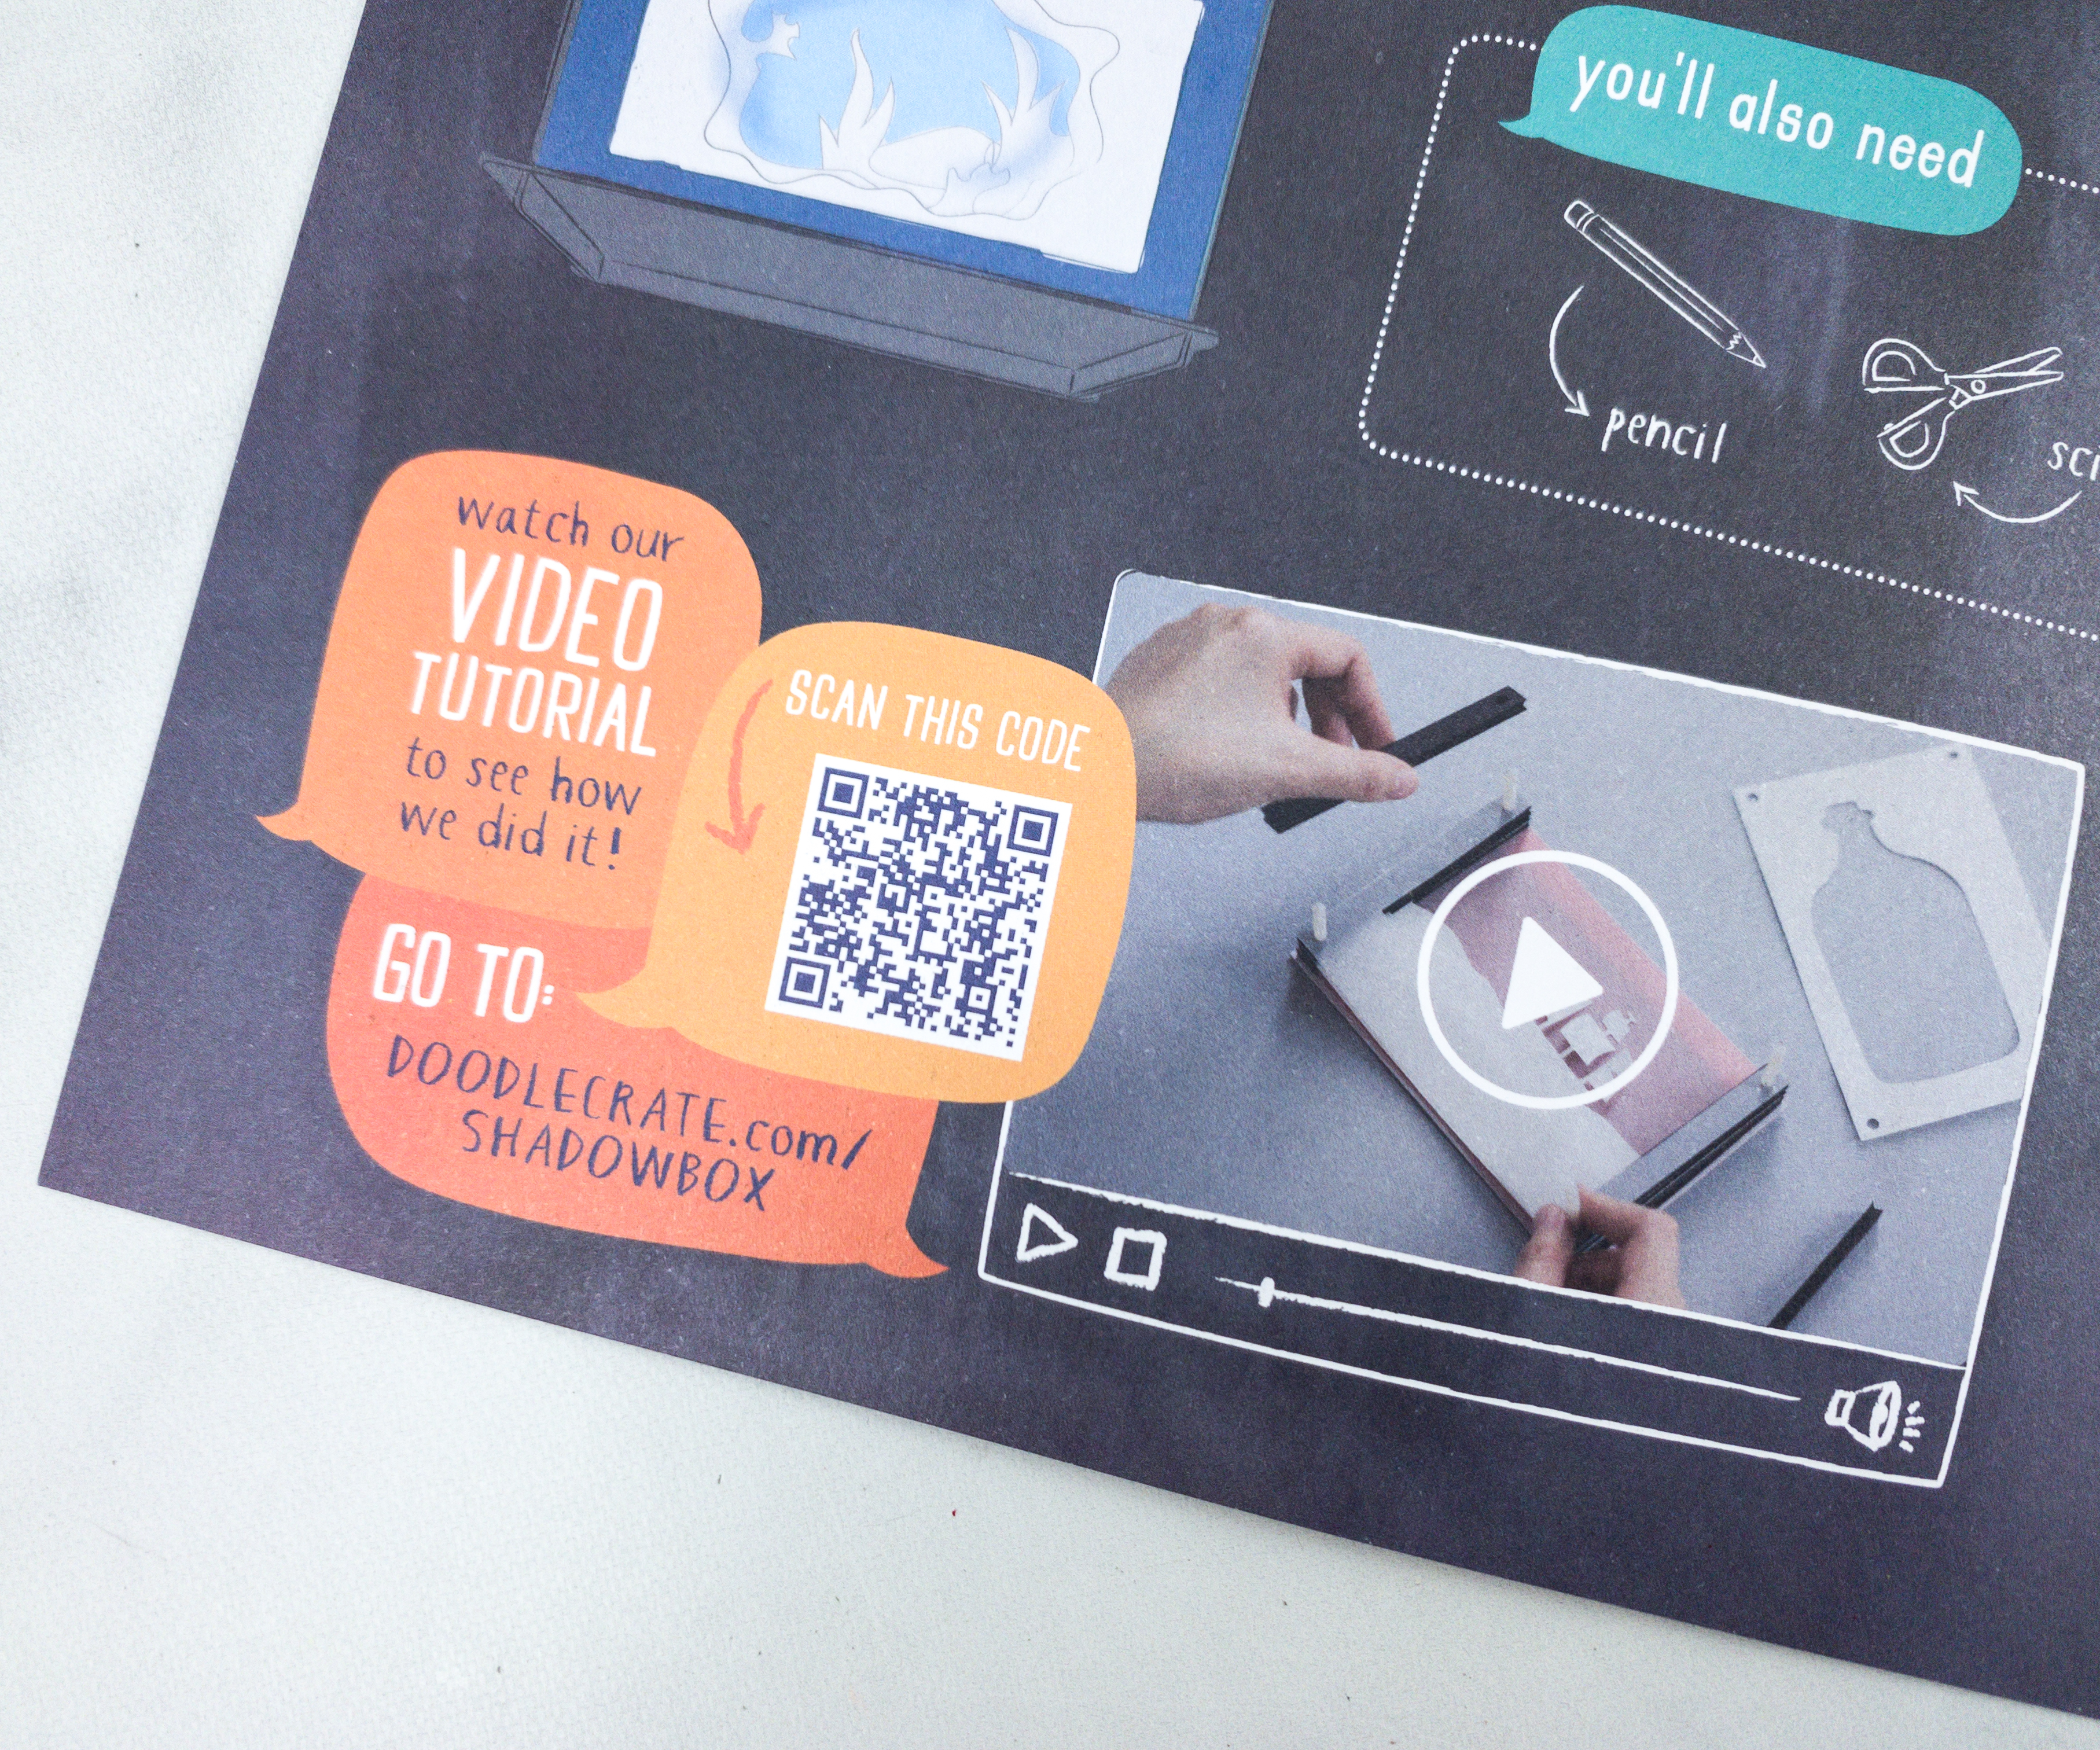
For more information, you can also watch the video tutorials on their website.
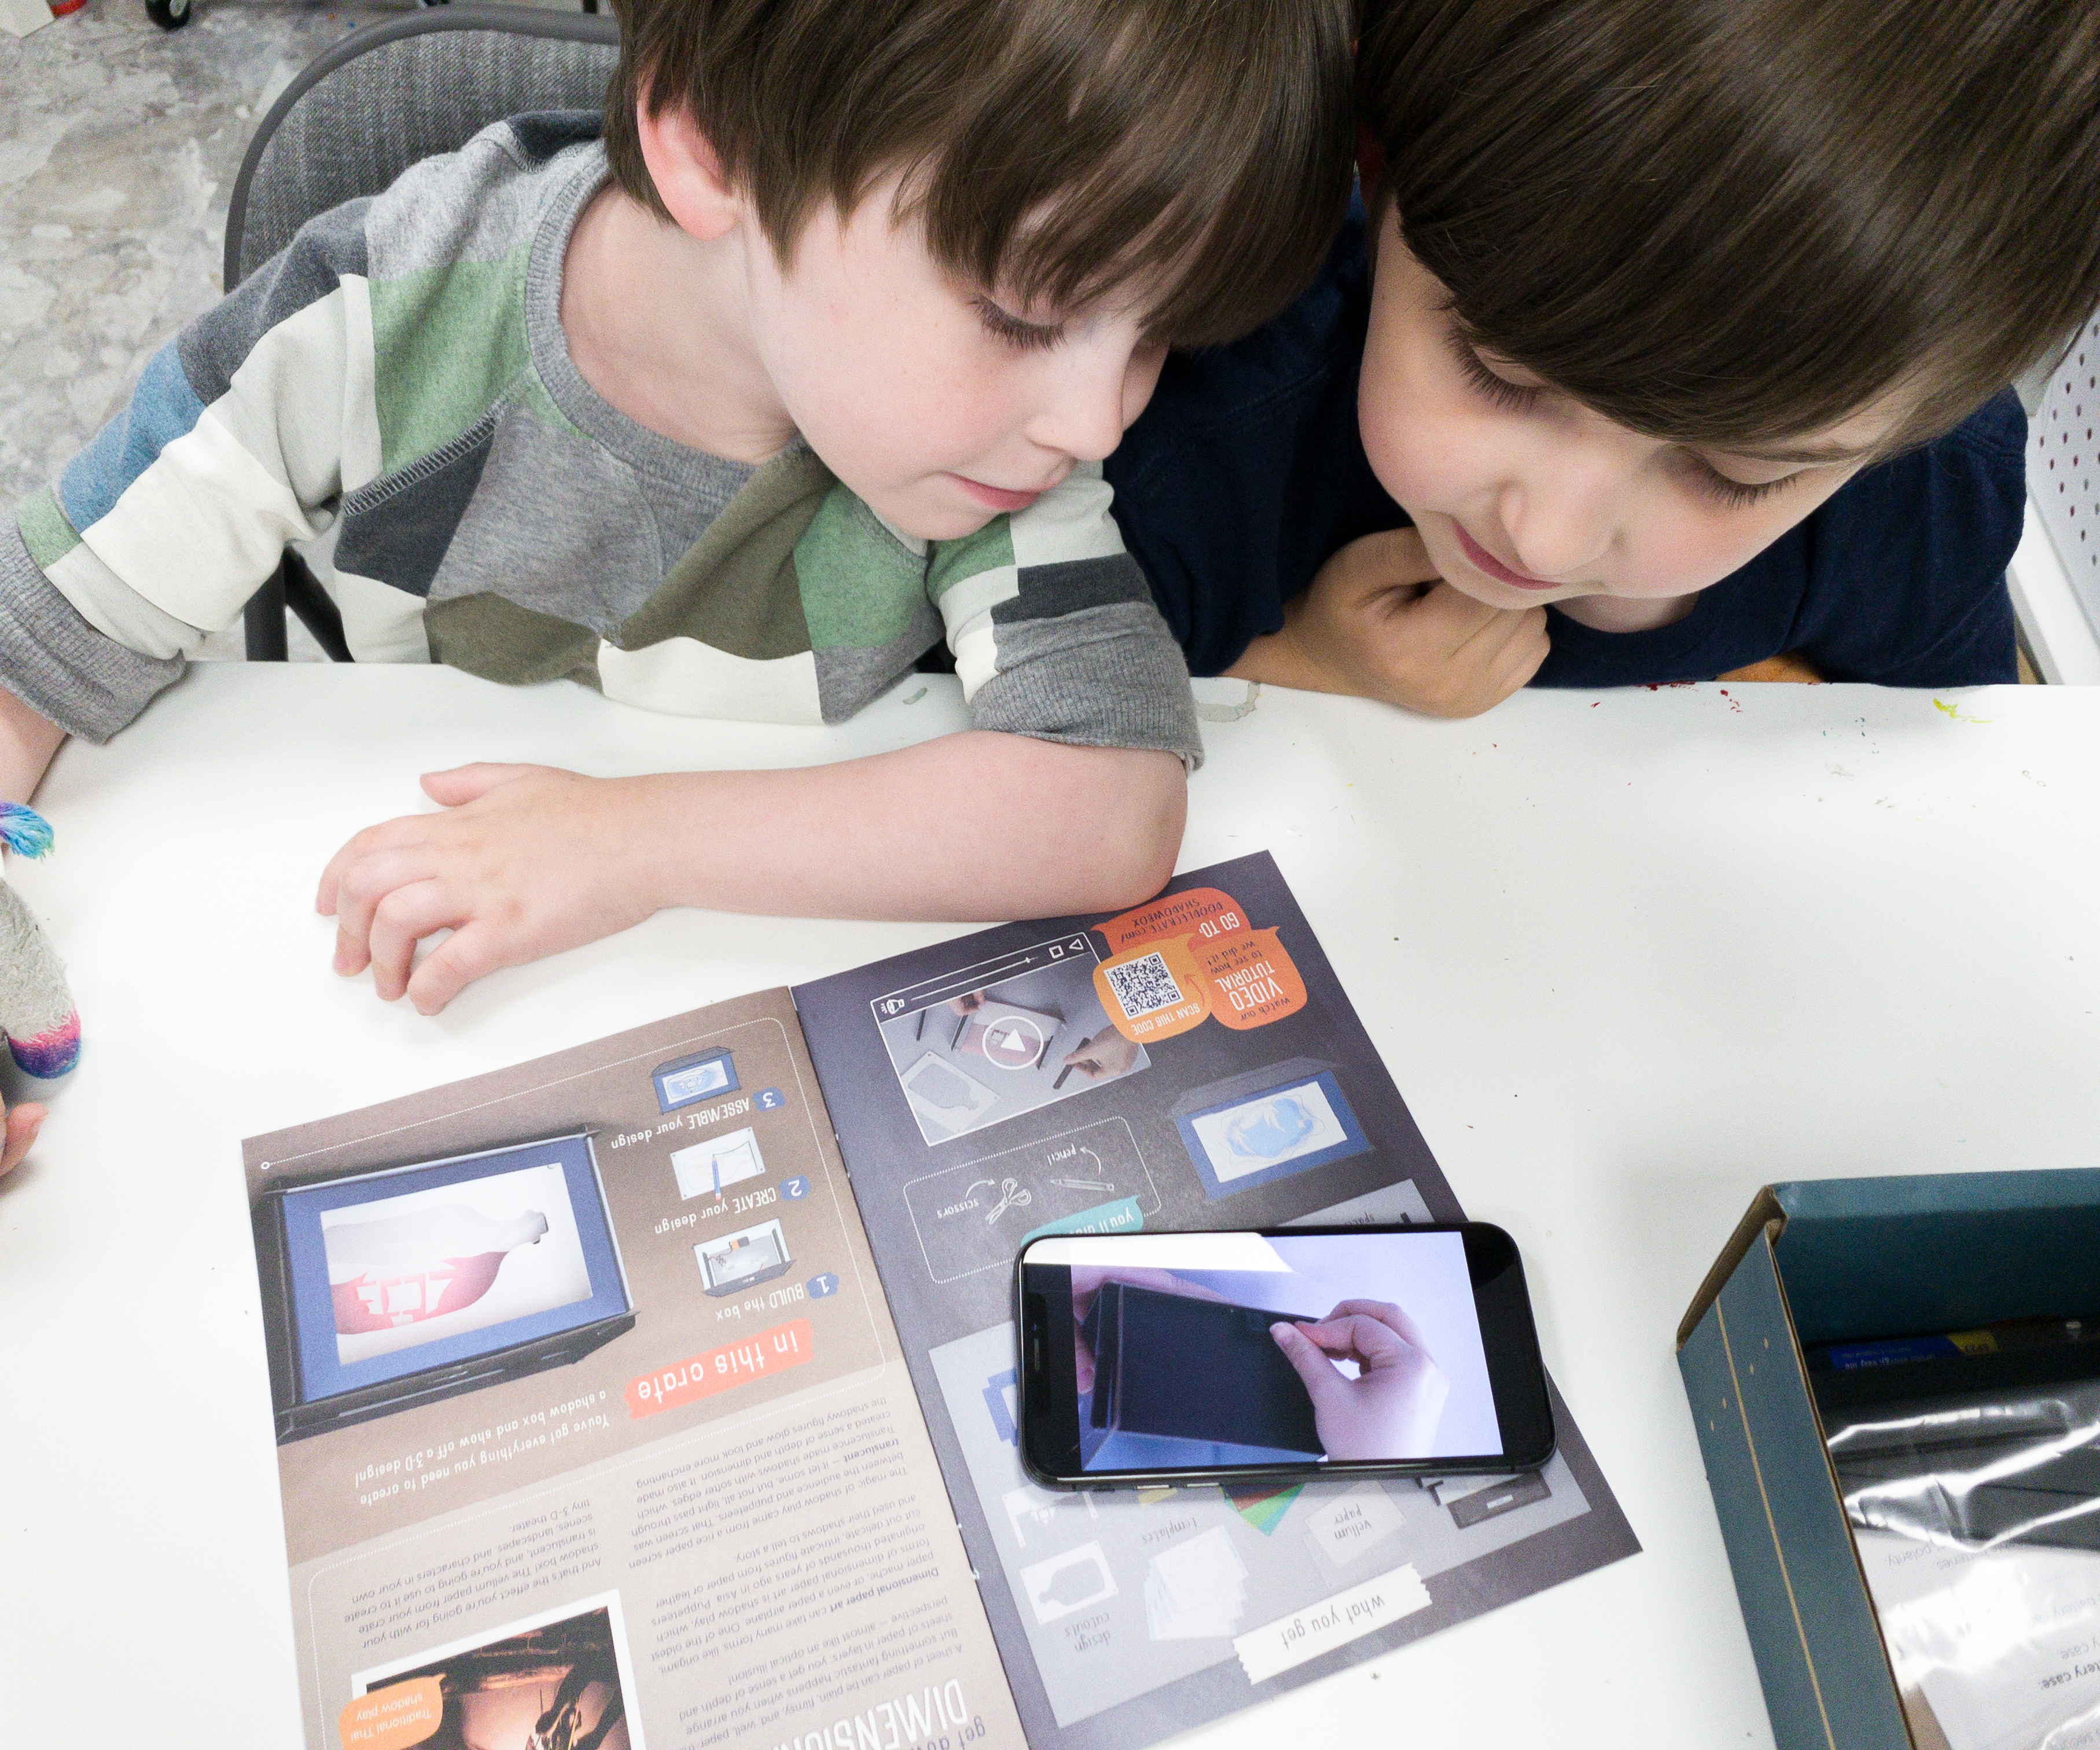
My kids watched the video and they found it very helpful.
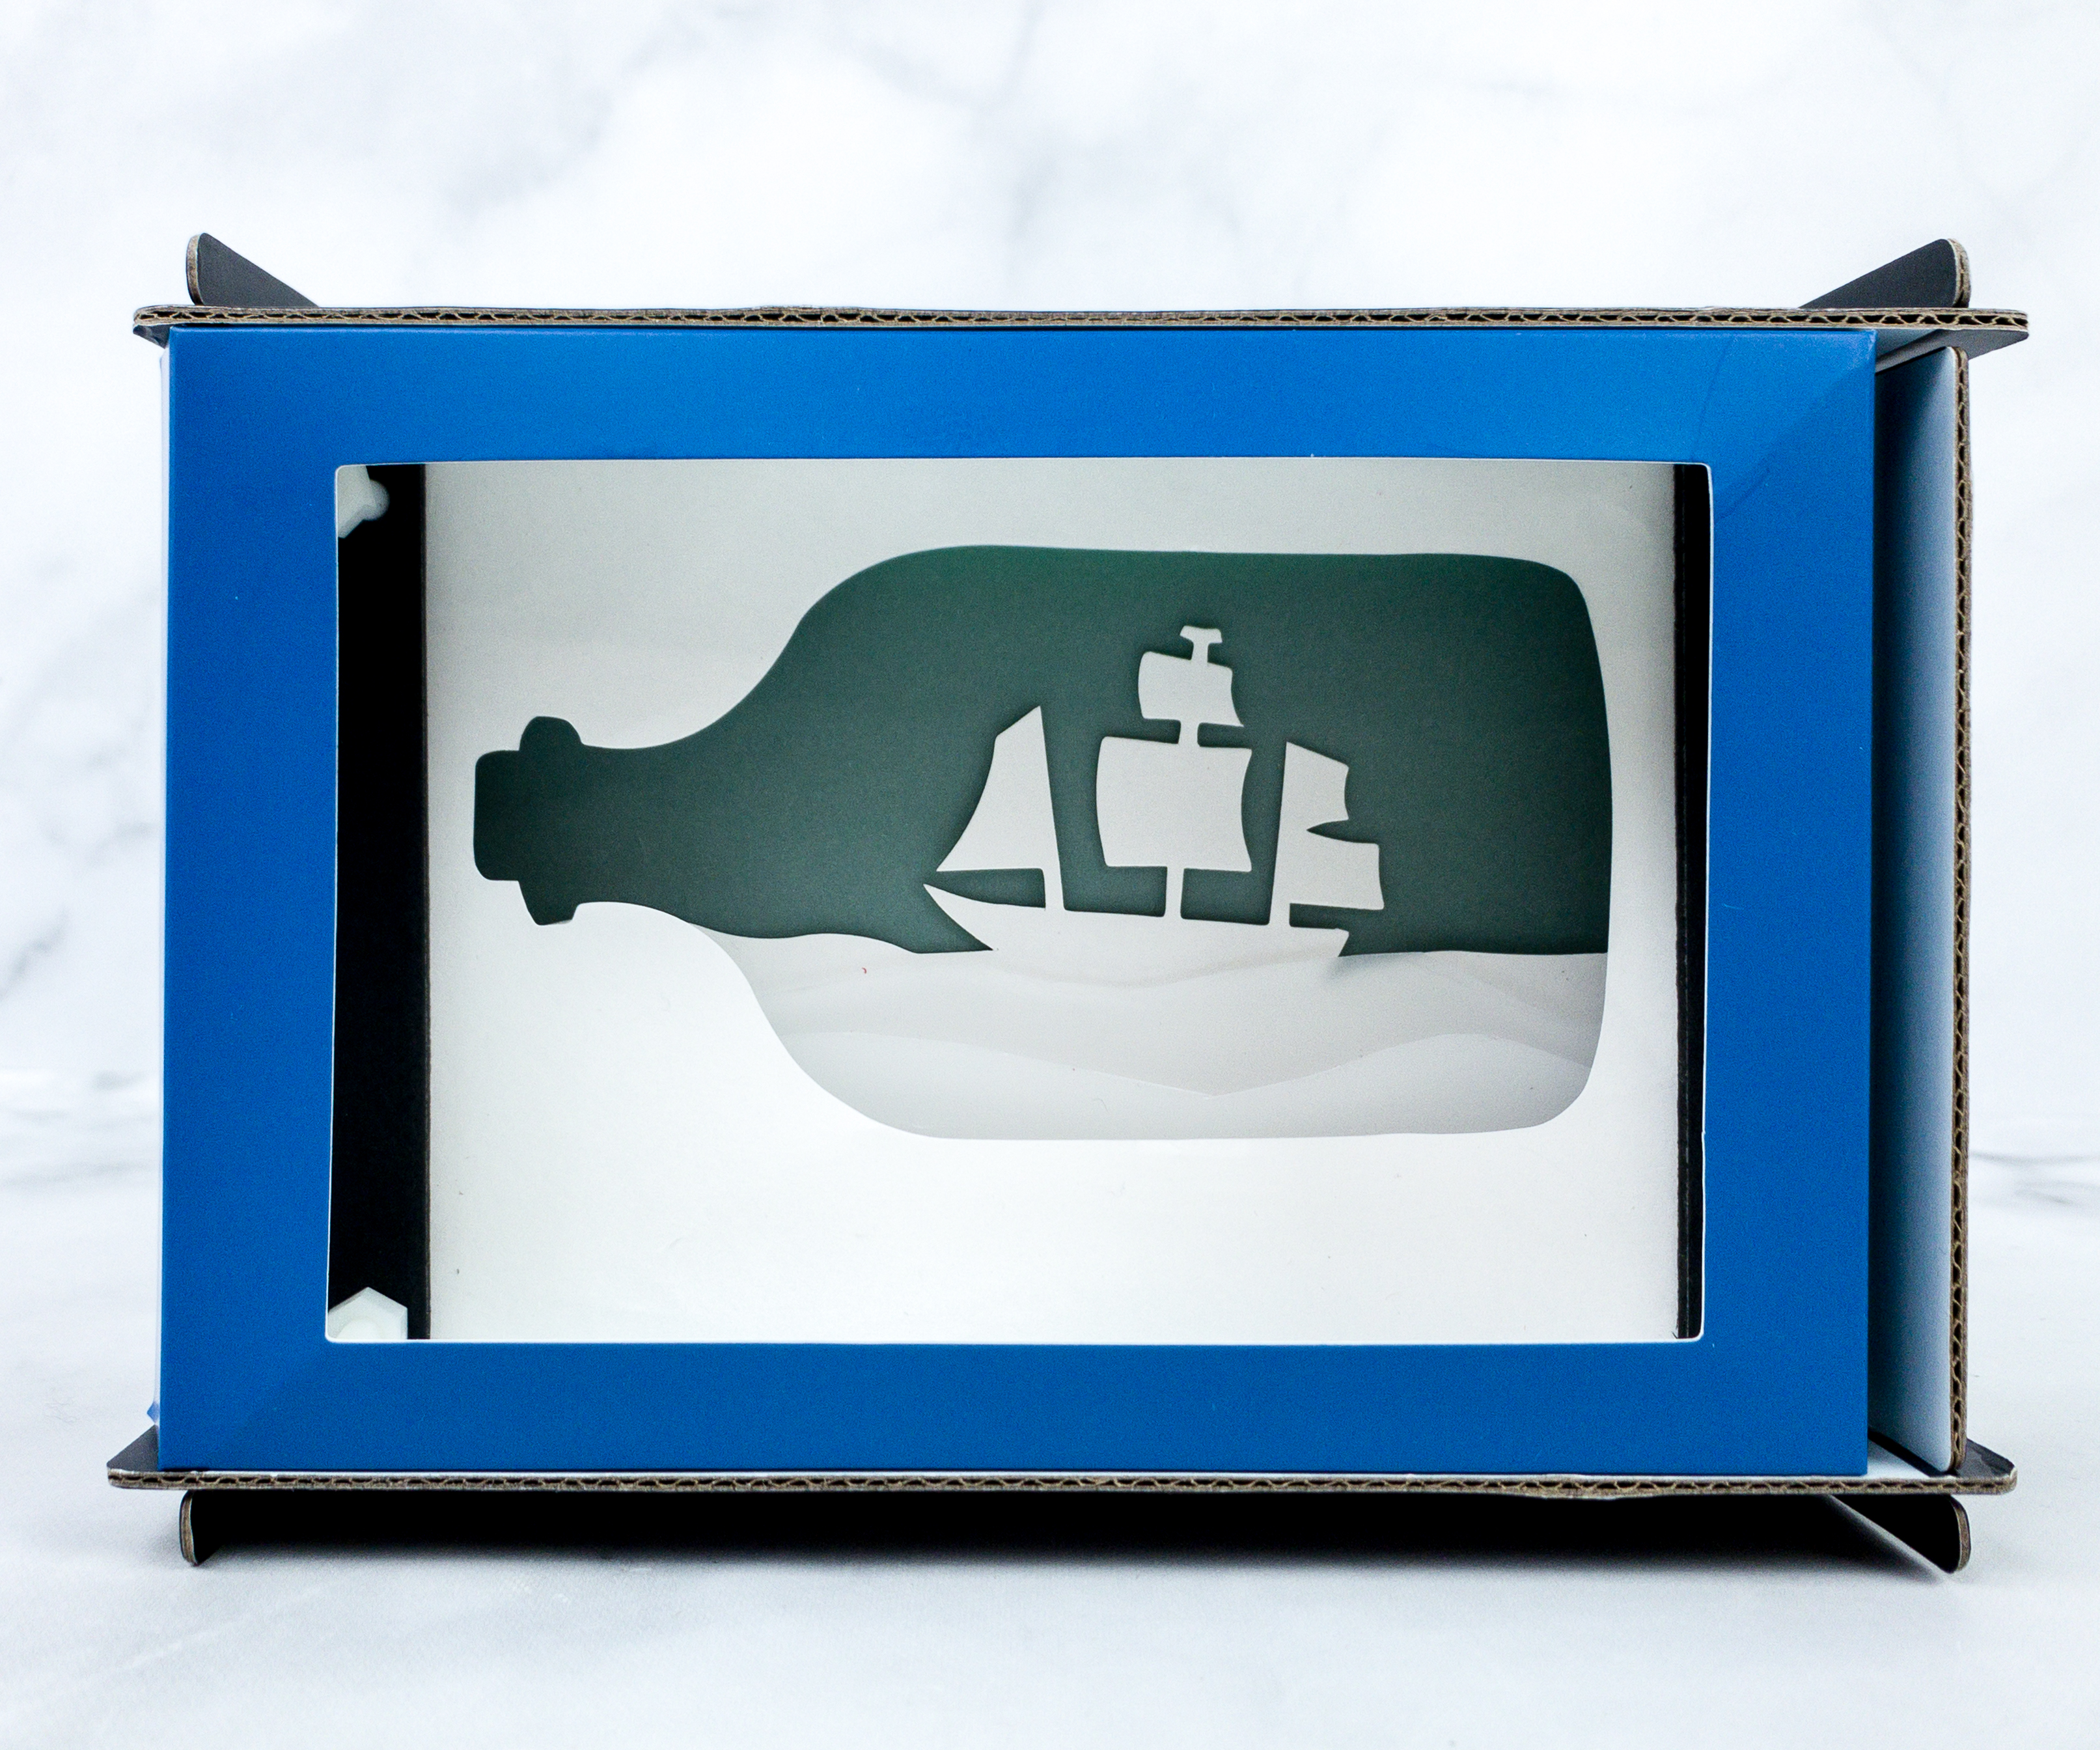
This is how the Light-up shadow box should look like once done!
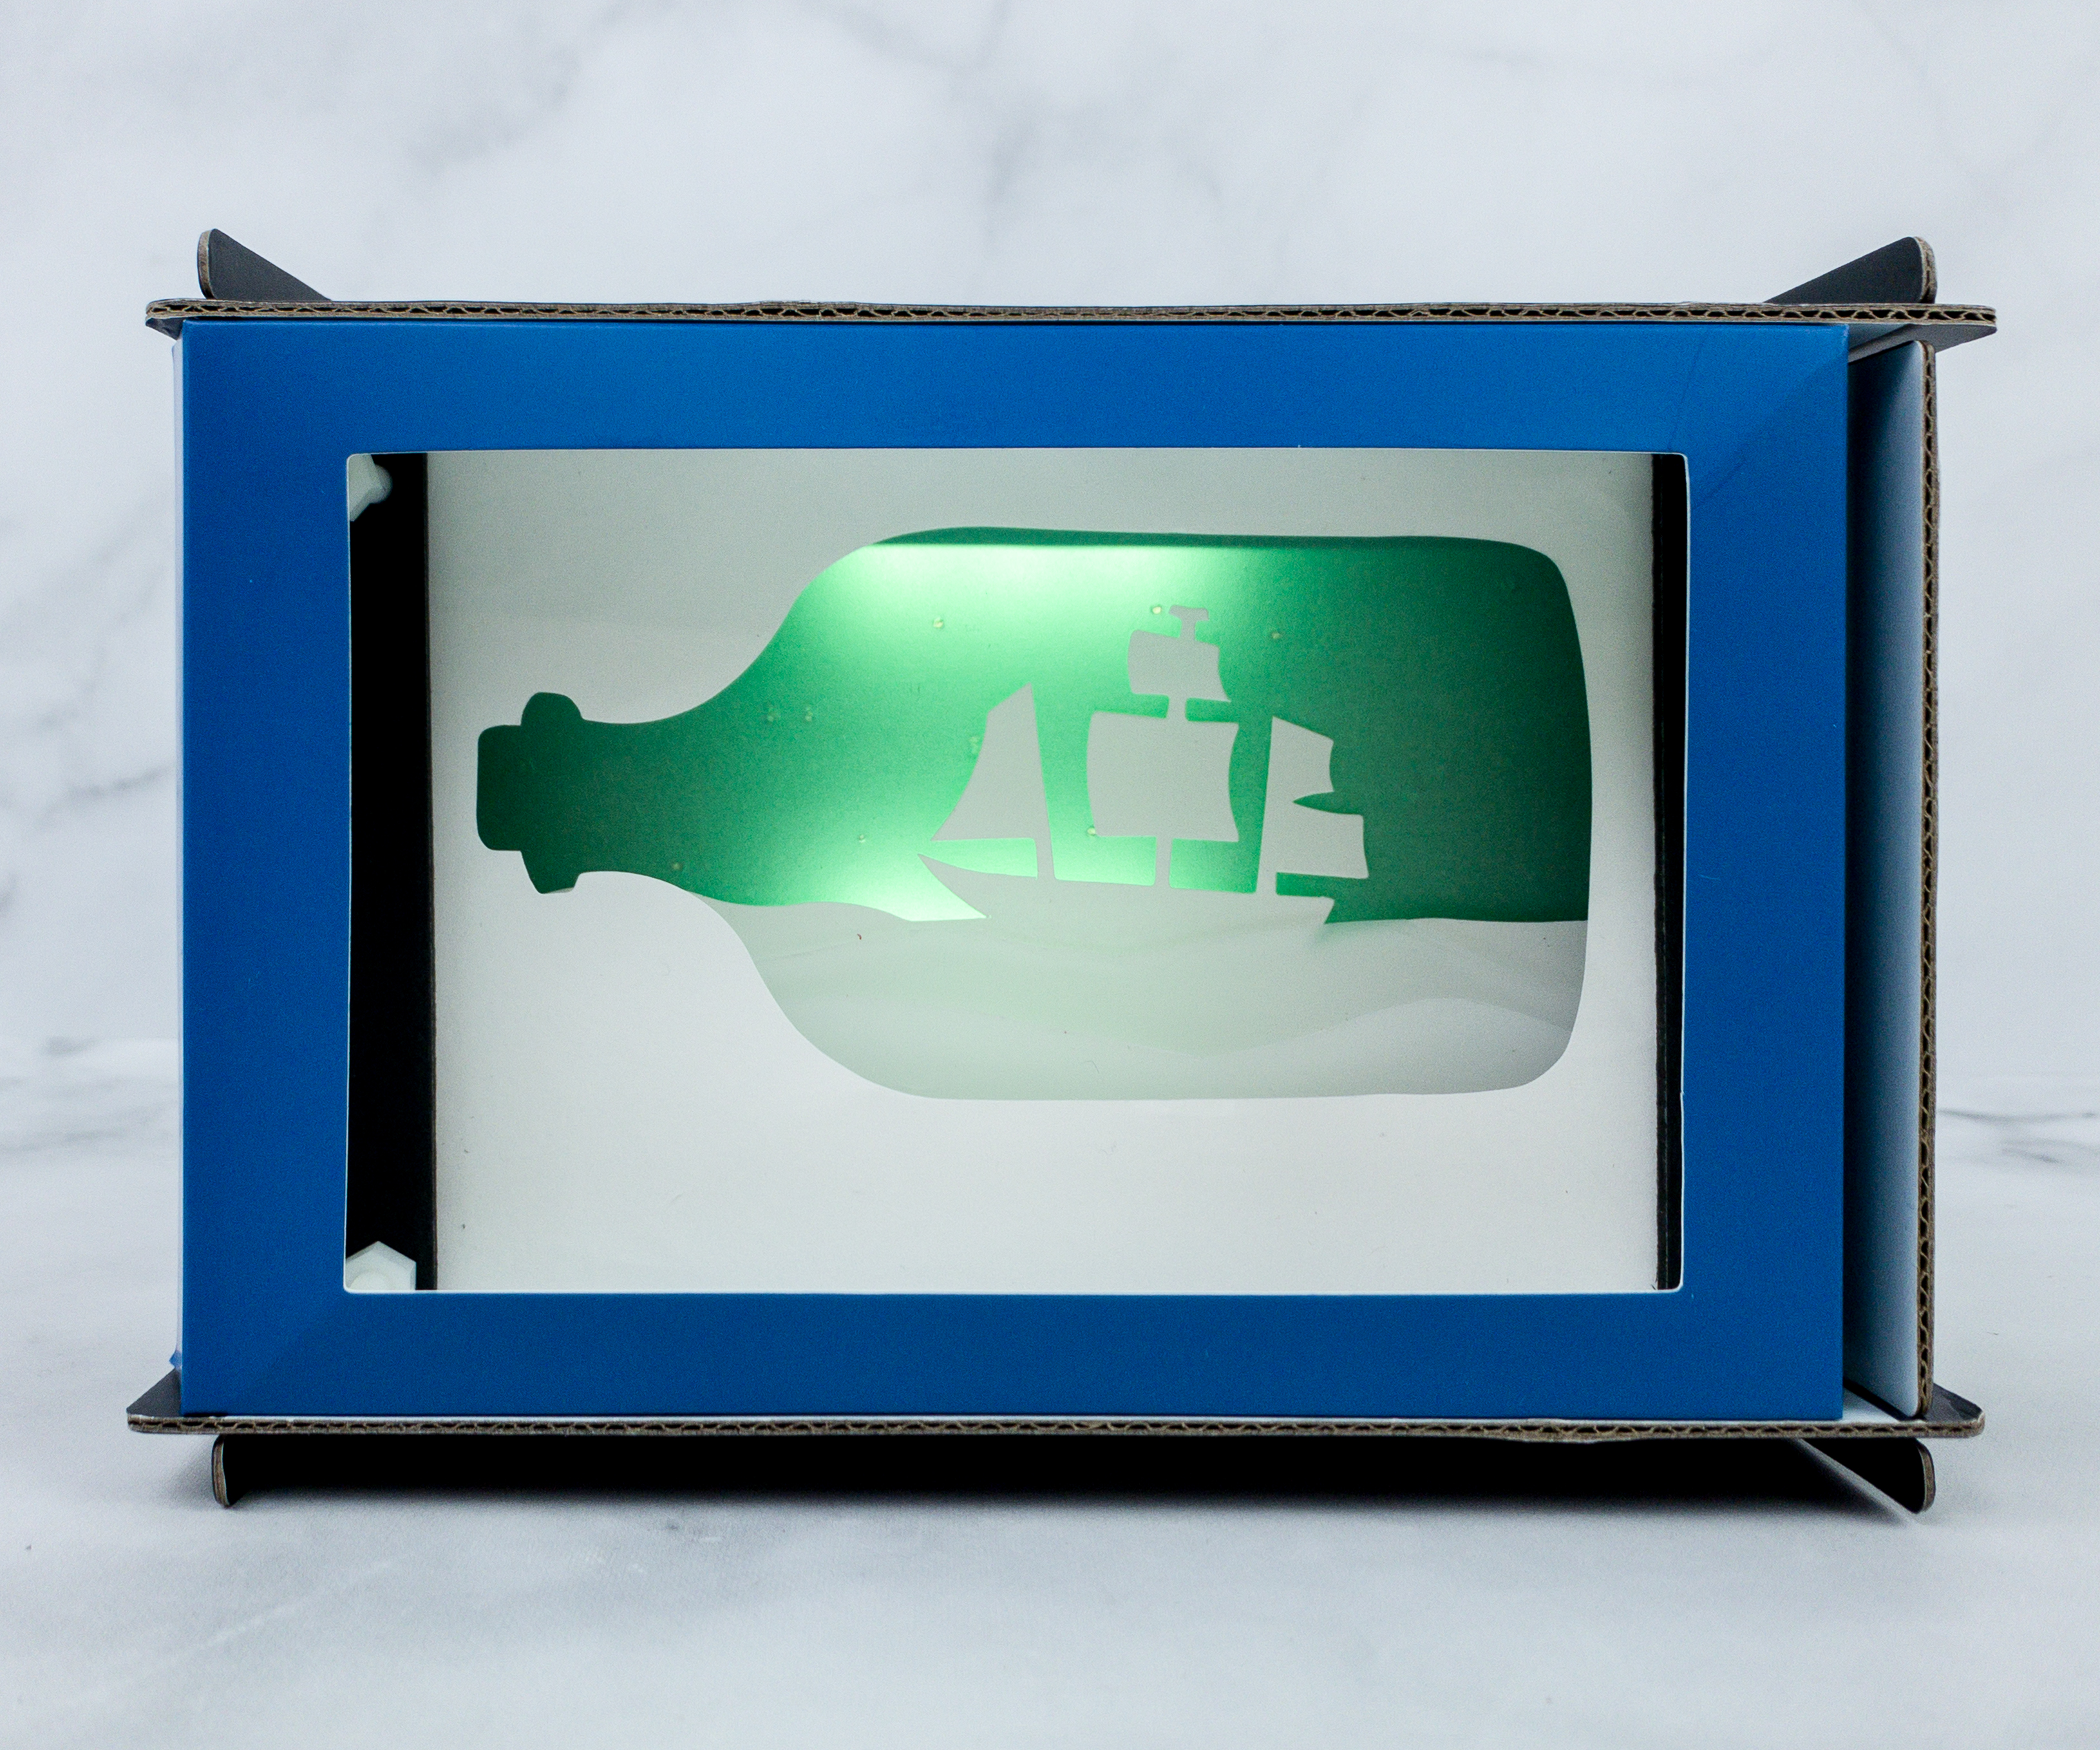
We turned the switch on, and poof! The light is on and the project was a success!
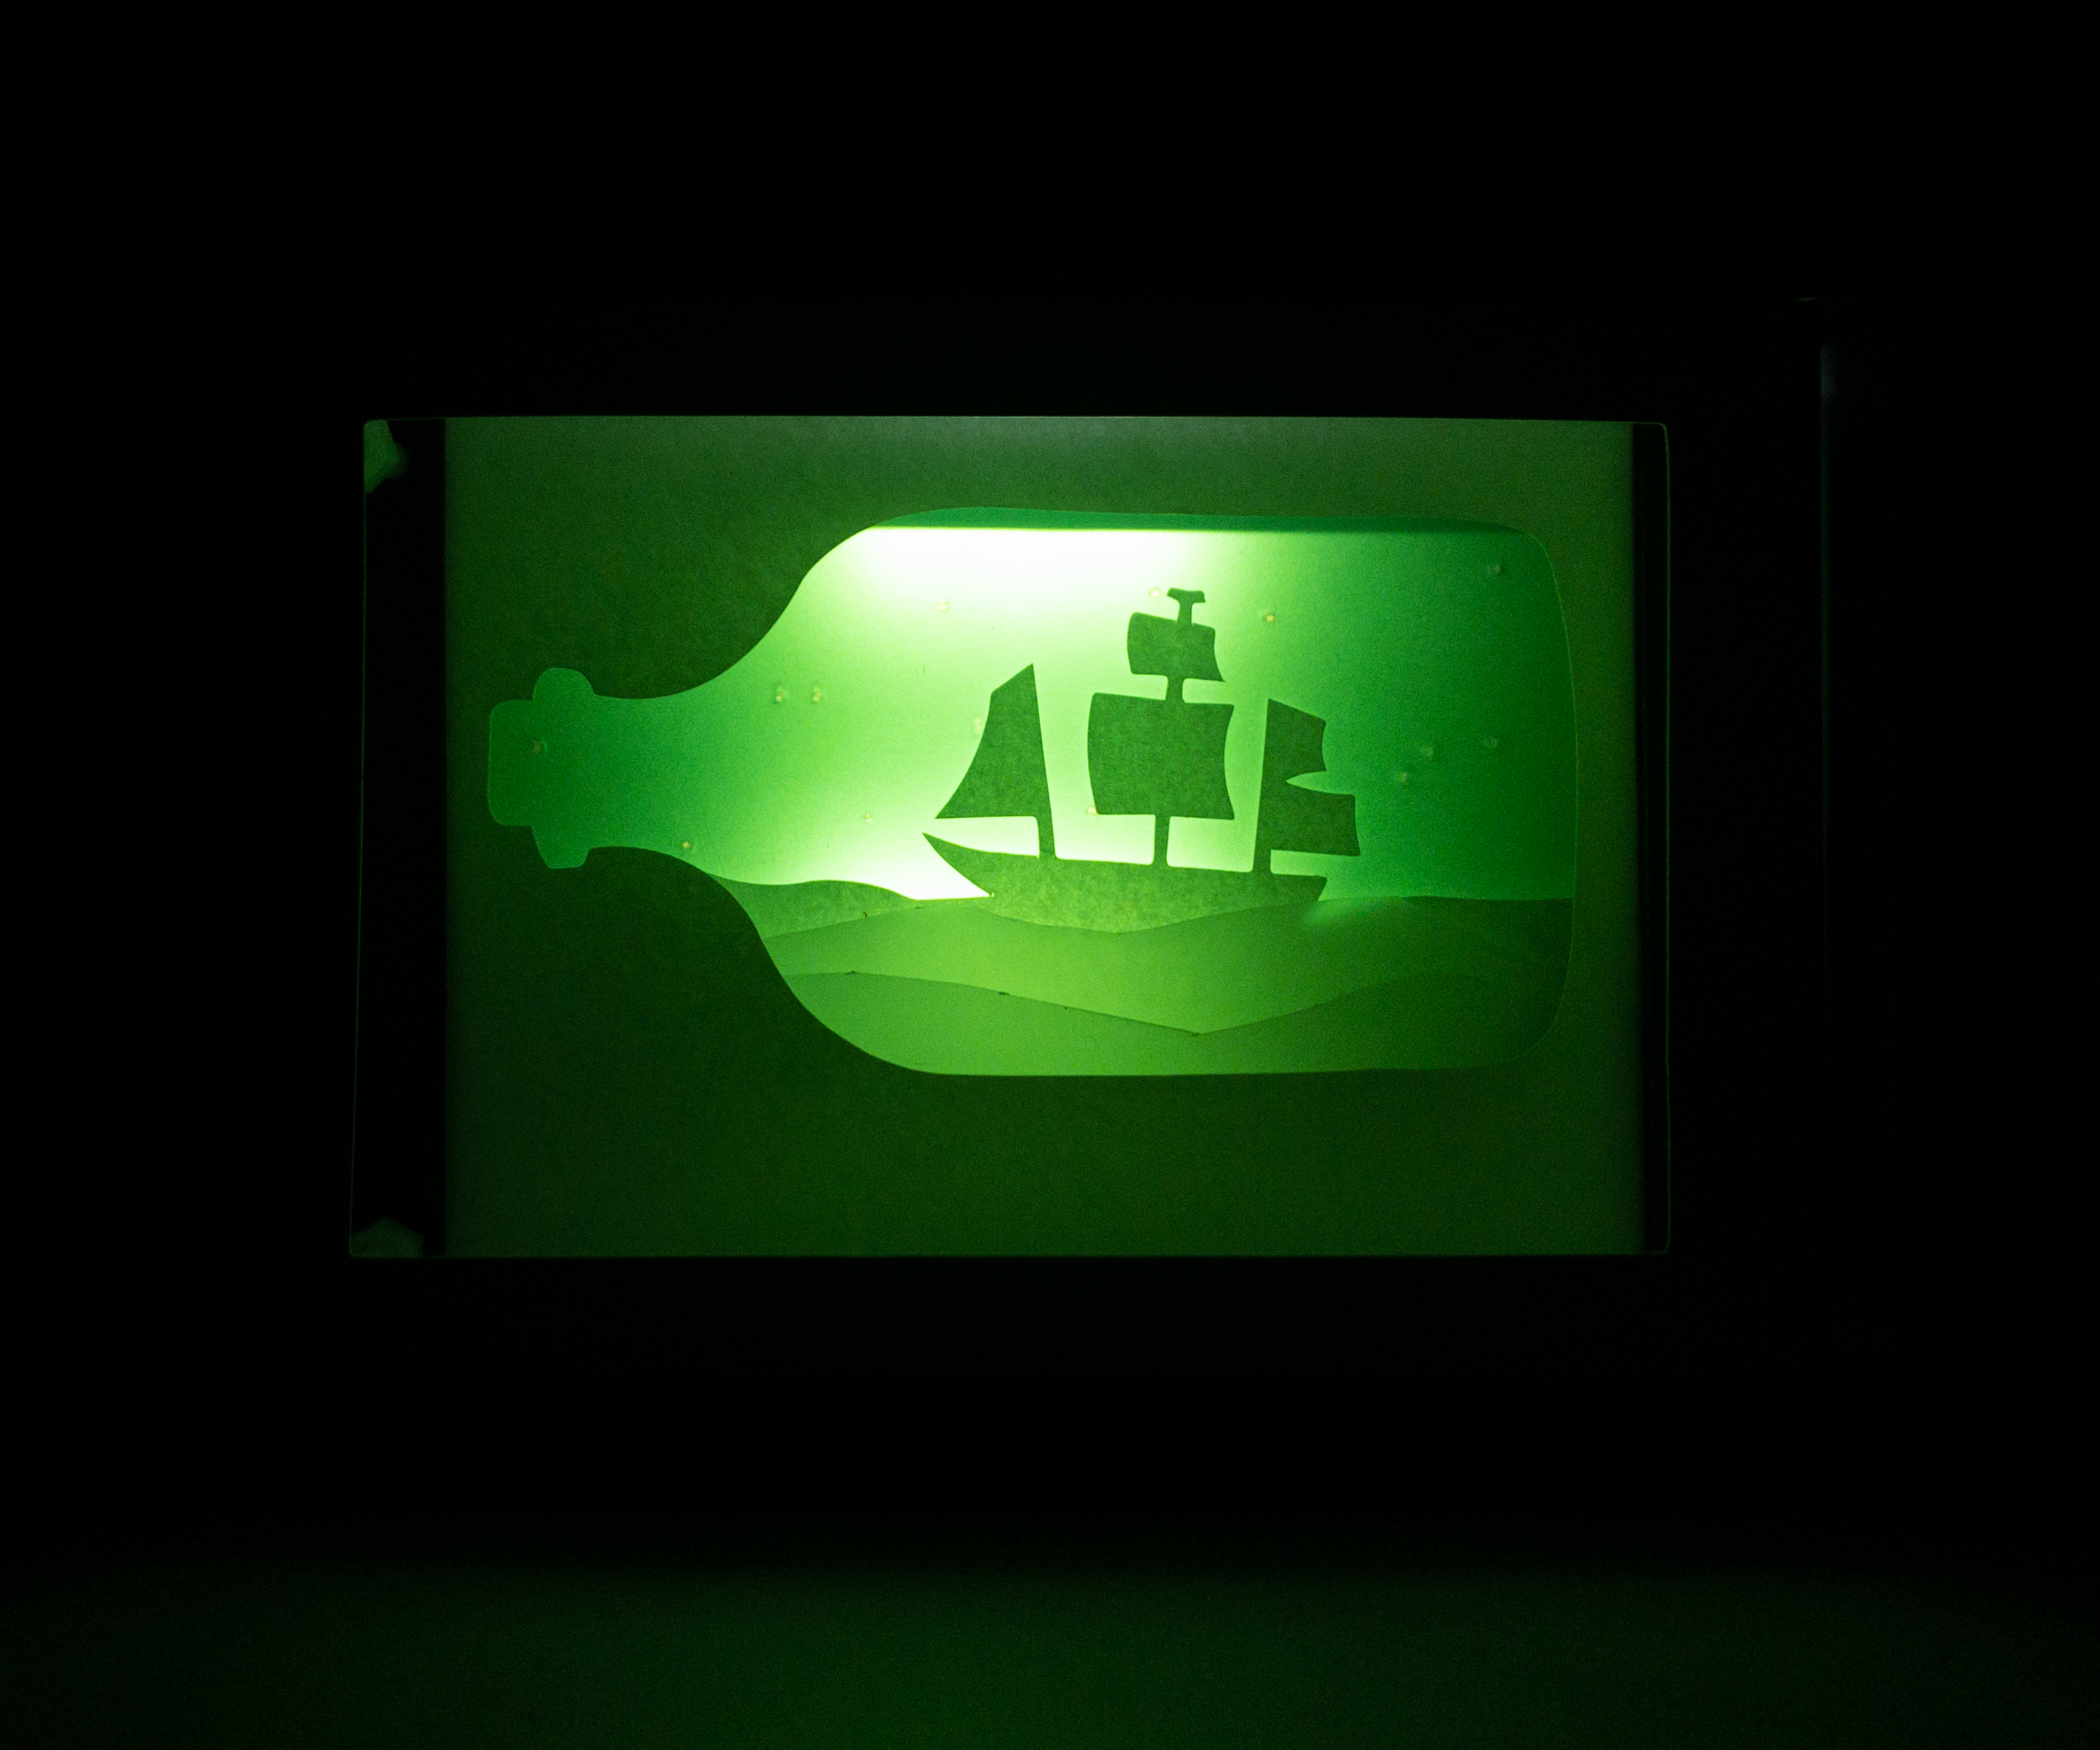
Turn the lights off to see the complete outcome of the project!
It’s been a while since we last received a Doodle Crate box, and my kids were so excited and thrilled about working on this new one! Making a lightbox is fun, and although there are many steps involved, my kids didn’t have a hard time because the instructions are easy to follow and there’s even a video guide. The materials are included in every crate, so there’s no need to go to a supplies store. My kids loved the final product and it’s now on display in our home! Another thing we love about this subscription is that each project helps enhance my kids’ creativity, as well as their troubleshooting skills. This box is ideal for any kid or for a family who loves to spend time working on projects together!
Did you enjoy this month’s activity as much as we did? Let us know in the comments!


Comments