Tinker Crate is a subscription box that inspires kids to learn about science, engineering, and technology, all while having lots of fun. Each month, the box explores a field of study within a STEM (Science, Technology, Engineering, and Math) discipline. Kids practice their problem-solving skills and learn how to engage in both structured and open-ended exploration and investigation. Most boxes walk the tinkerers through the construction of fairly complex mechanical devices.
DEAL: Use this link to save 30% on your first box of Tinker Crate! (or Kiwi Crate and the KiwiCo family subscriptions Koala Crate, Doodle Crate, Tinker Crate, Panda Crate, Maker Crate, and Eureka Crate).
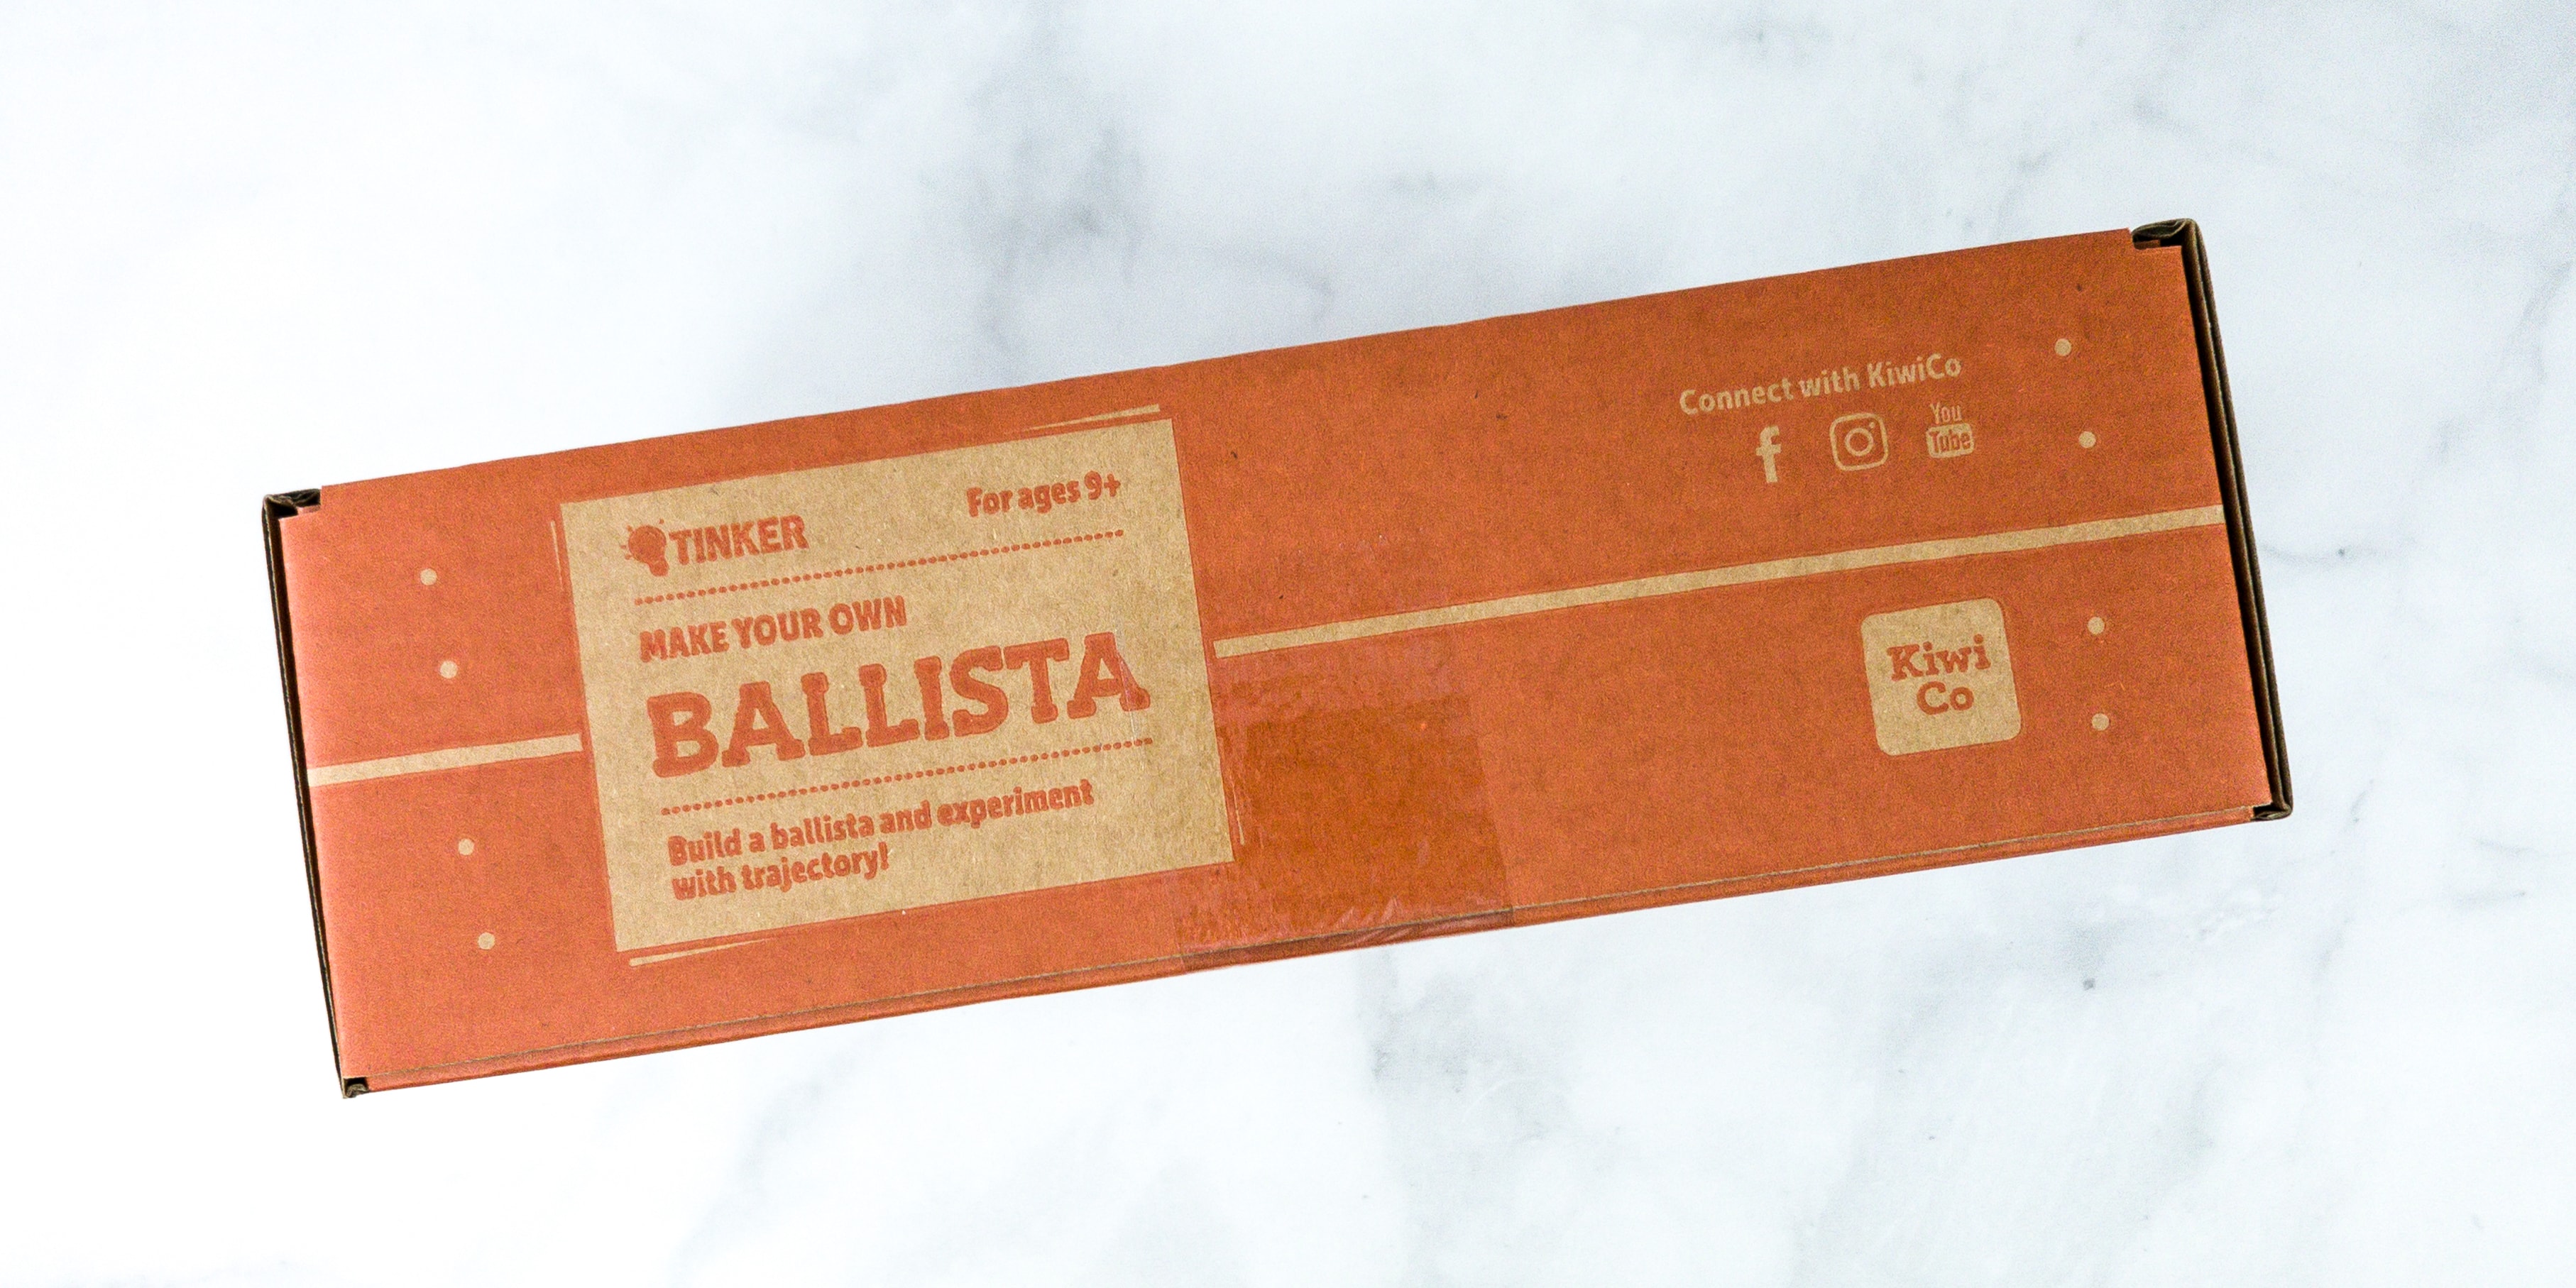
This month, we are building our own BALLISTA!
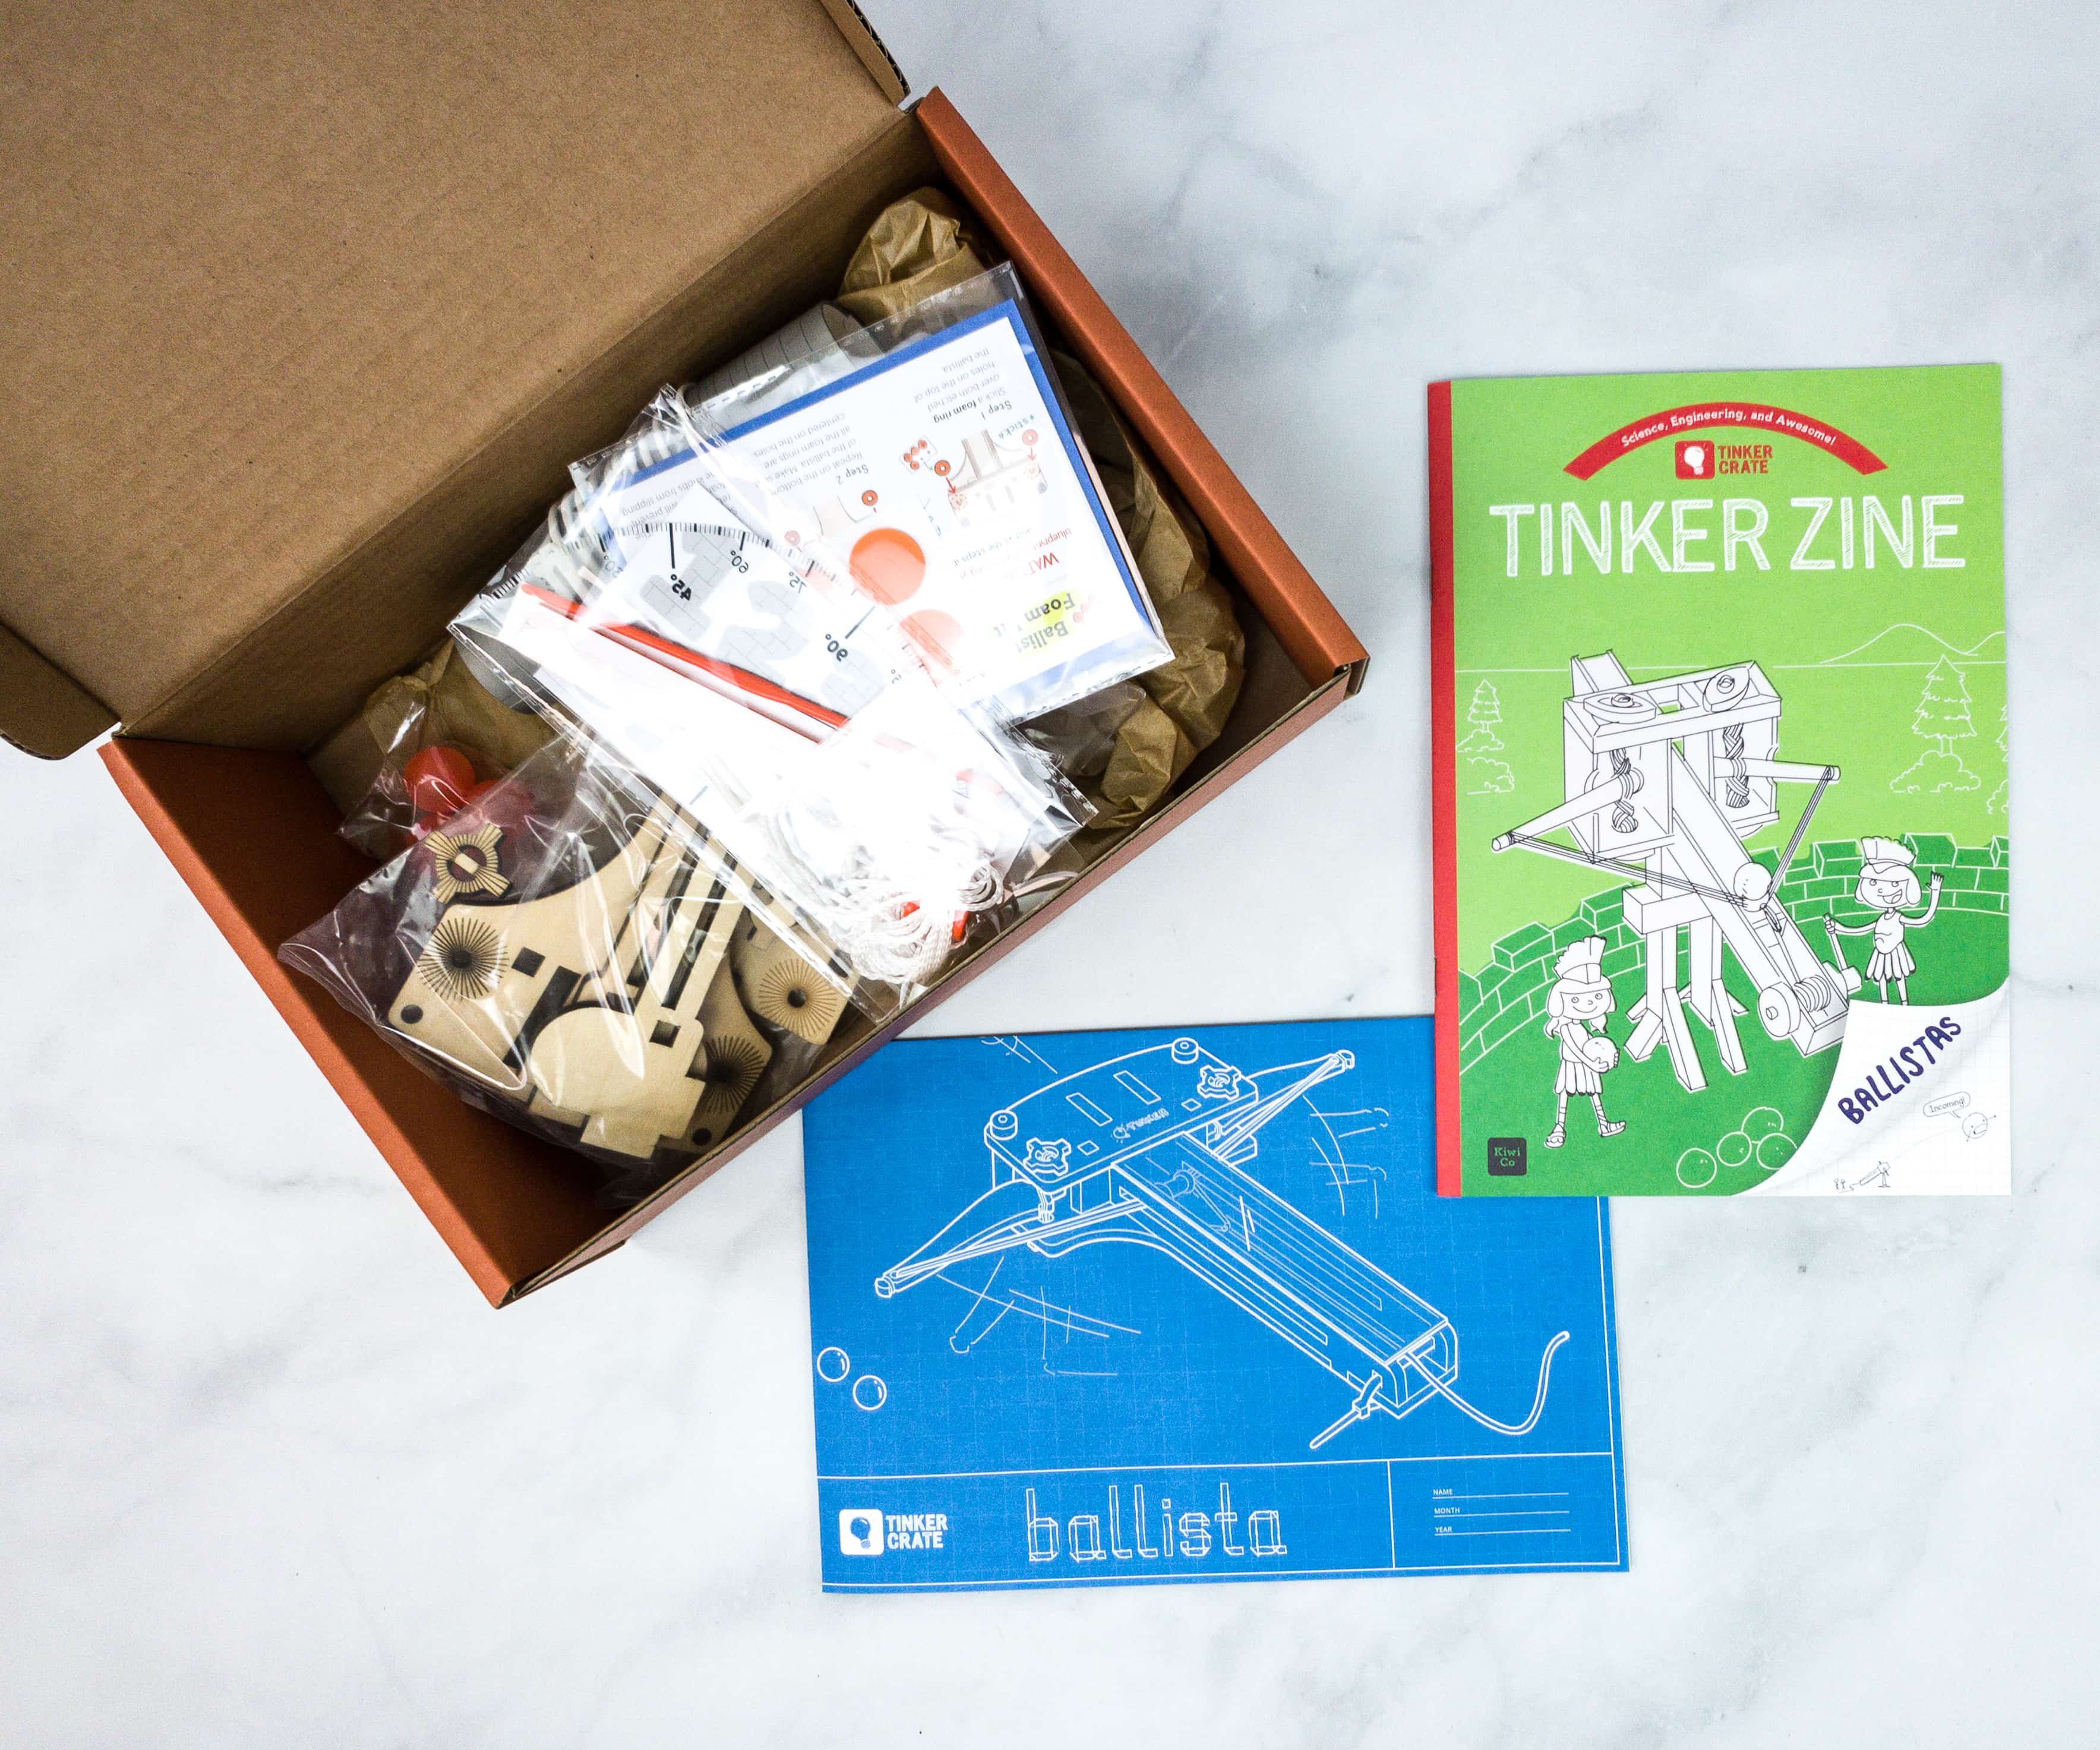
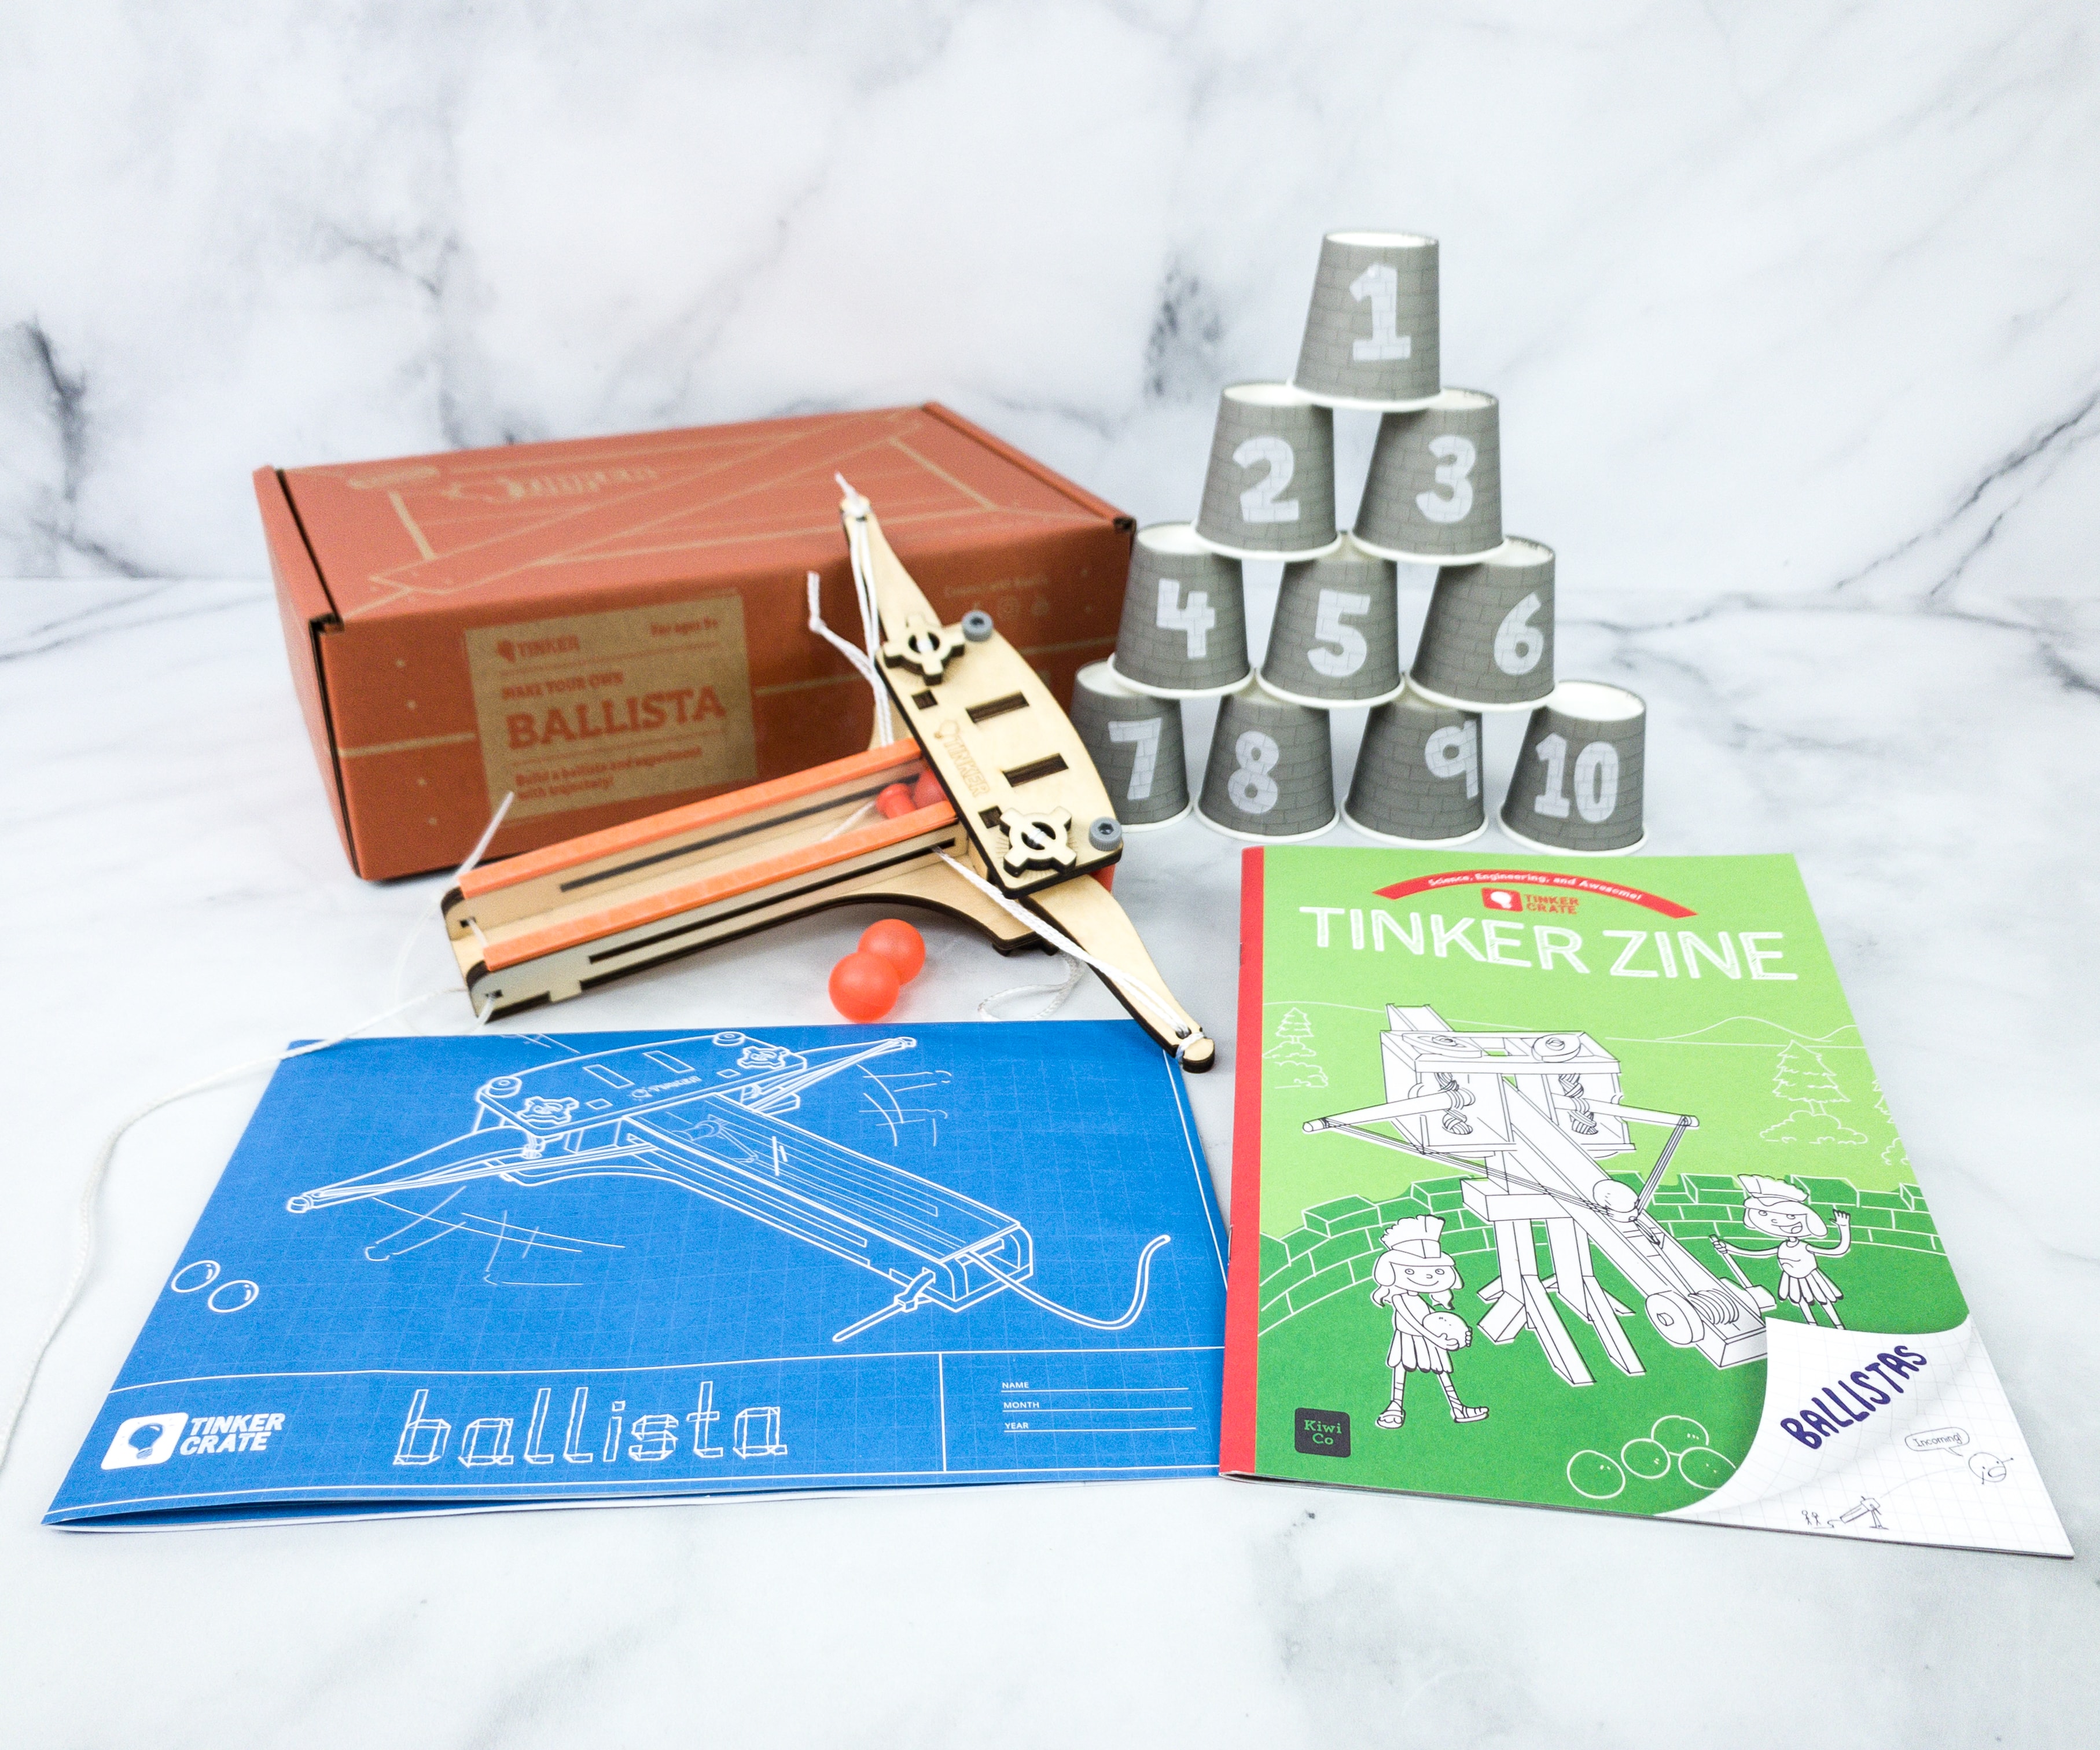
Everything arrives together in a single Tinker Crate – the supplies, a fold-out instruction sheet, and the Tinker Zine.
Tinker Zine
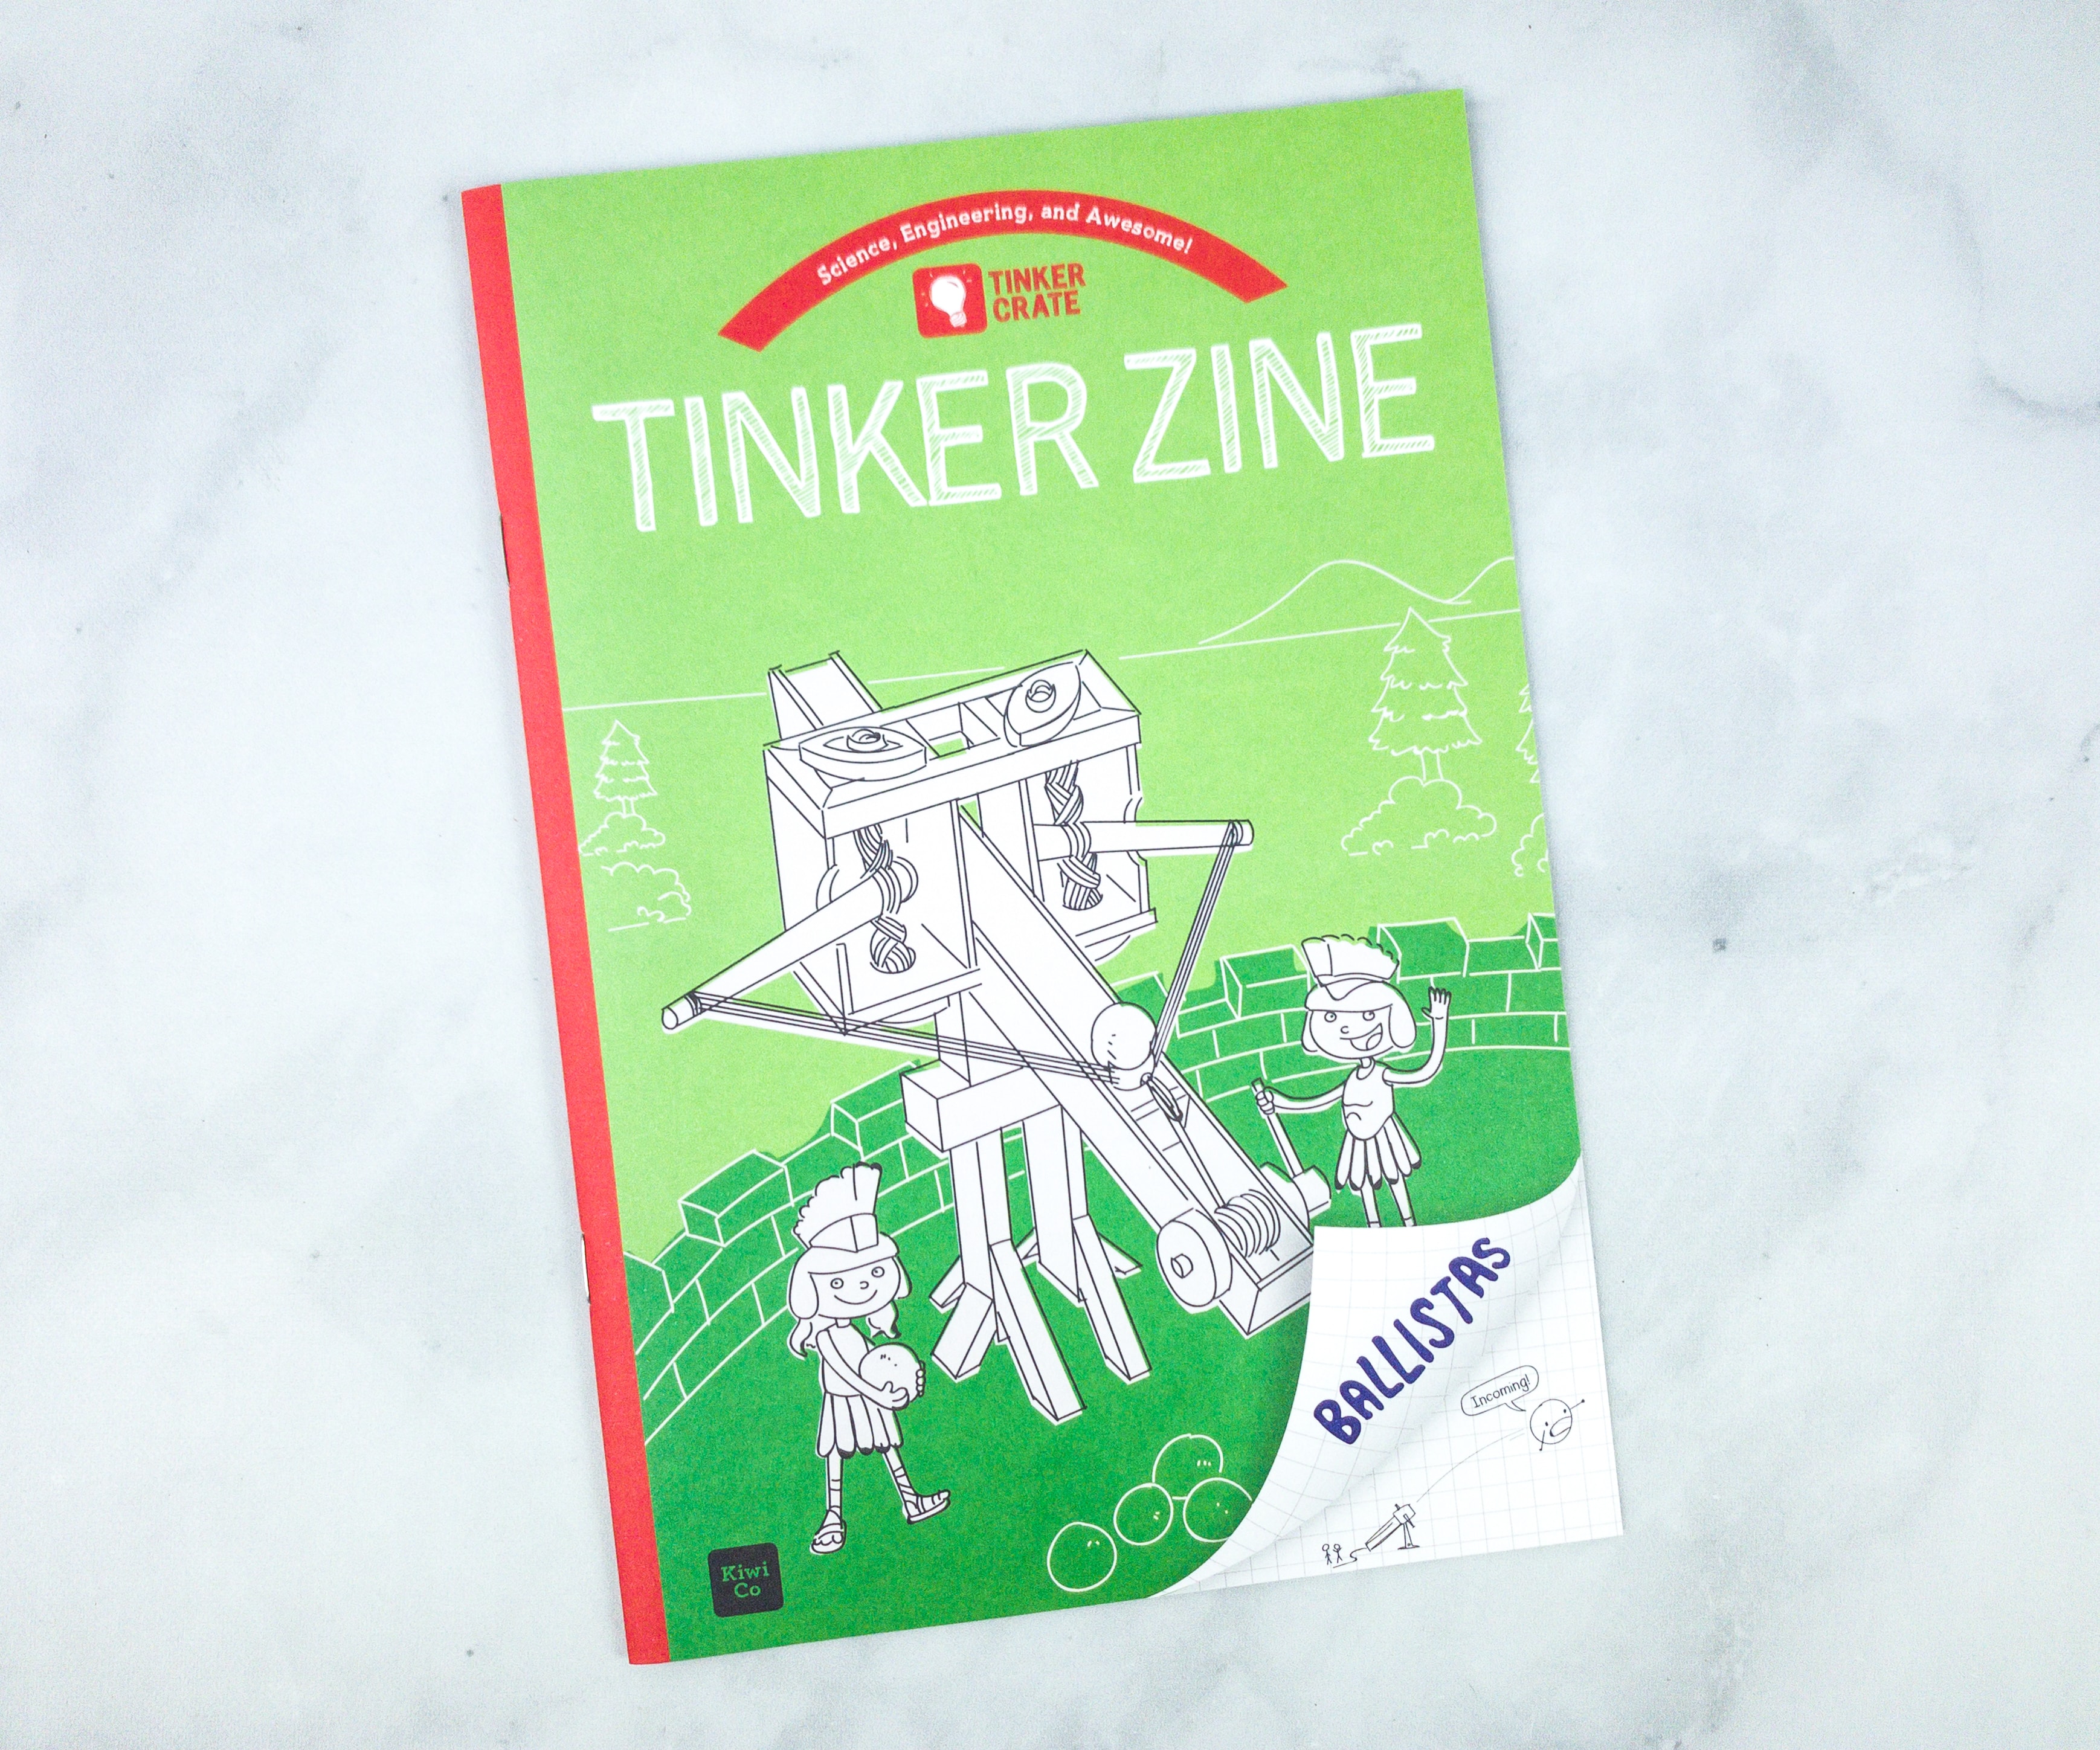
The main project is always a great hands-on activity and a great demonstration of the scientific principles featured in the box, but the Tinker Zine is full of well-written, historically and scientifically accurate background and explanatory materials. This where the lessons really take shape!
Tinker, Create, Innovate
KiwiCo equips the next generation of innovators with the tools and confidence for creative exploration and problem solving.
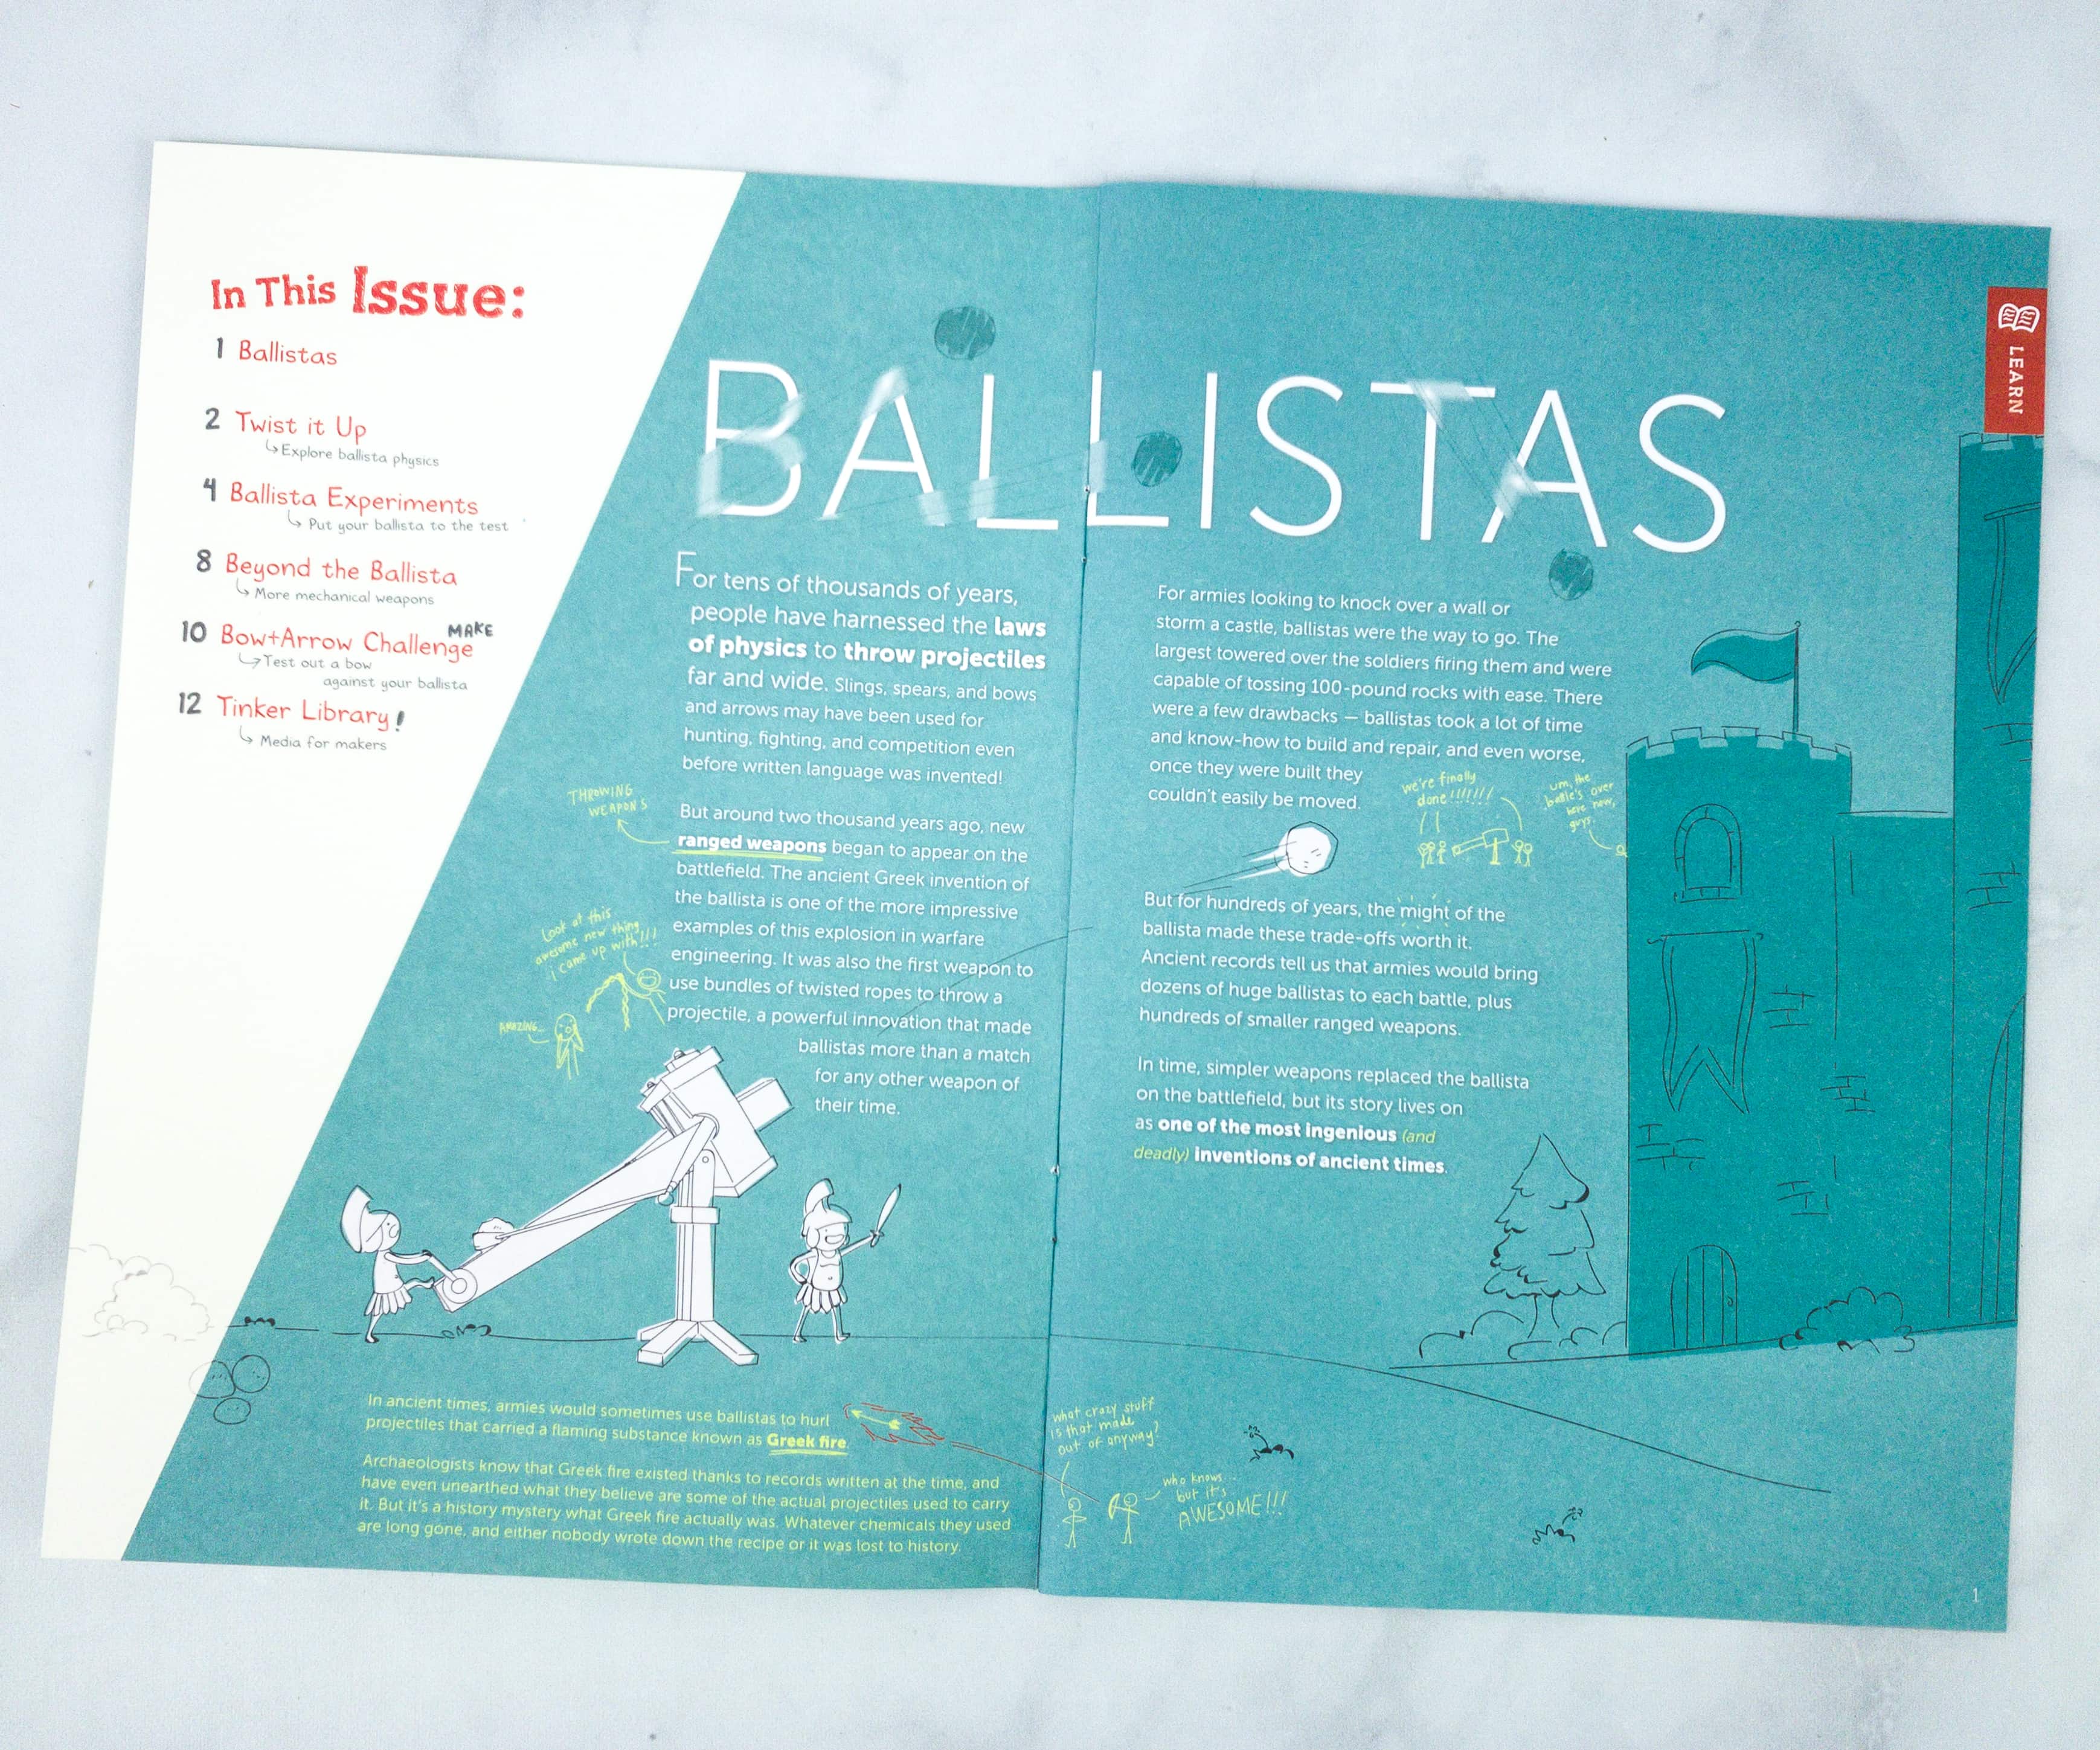
This month’s Tinker Zine discusses everything we need to know about the ballista and why it is classified as one of the most innovative and deadly inventions of ancient times!
In ancient times, armies would sometimes use ballistas to hurl projectiles that carried a flaming substance known as Greek fire.
Archaeologists know that Greek fire existed thanks to records written at the time, and have even unearthed what they believe are some of the actual projectiles used to carry it. But it’s a history mystery what Greek fire actually was. Whatever chemicals they used are long gone, and either nobody wrote down the recipe or it was lost to history.
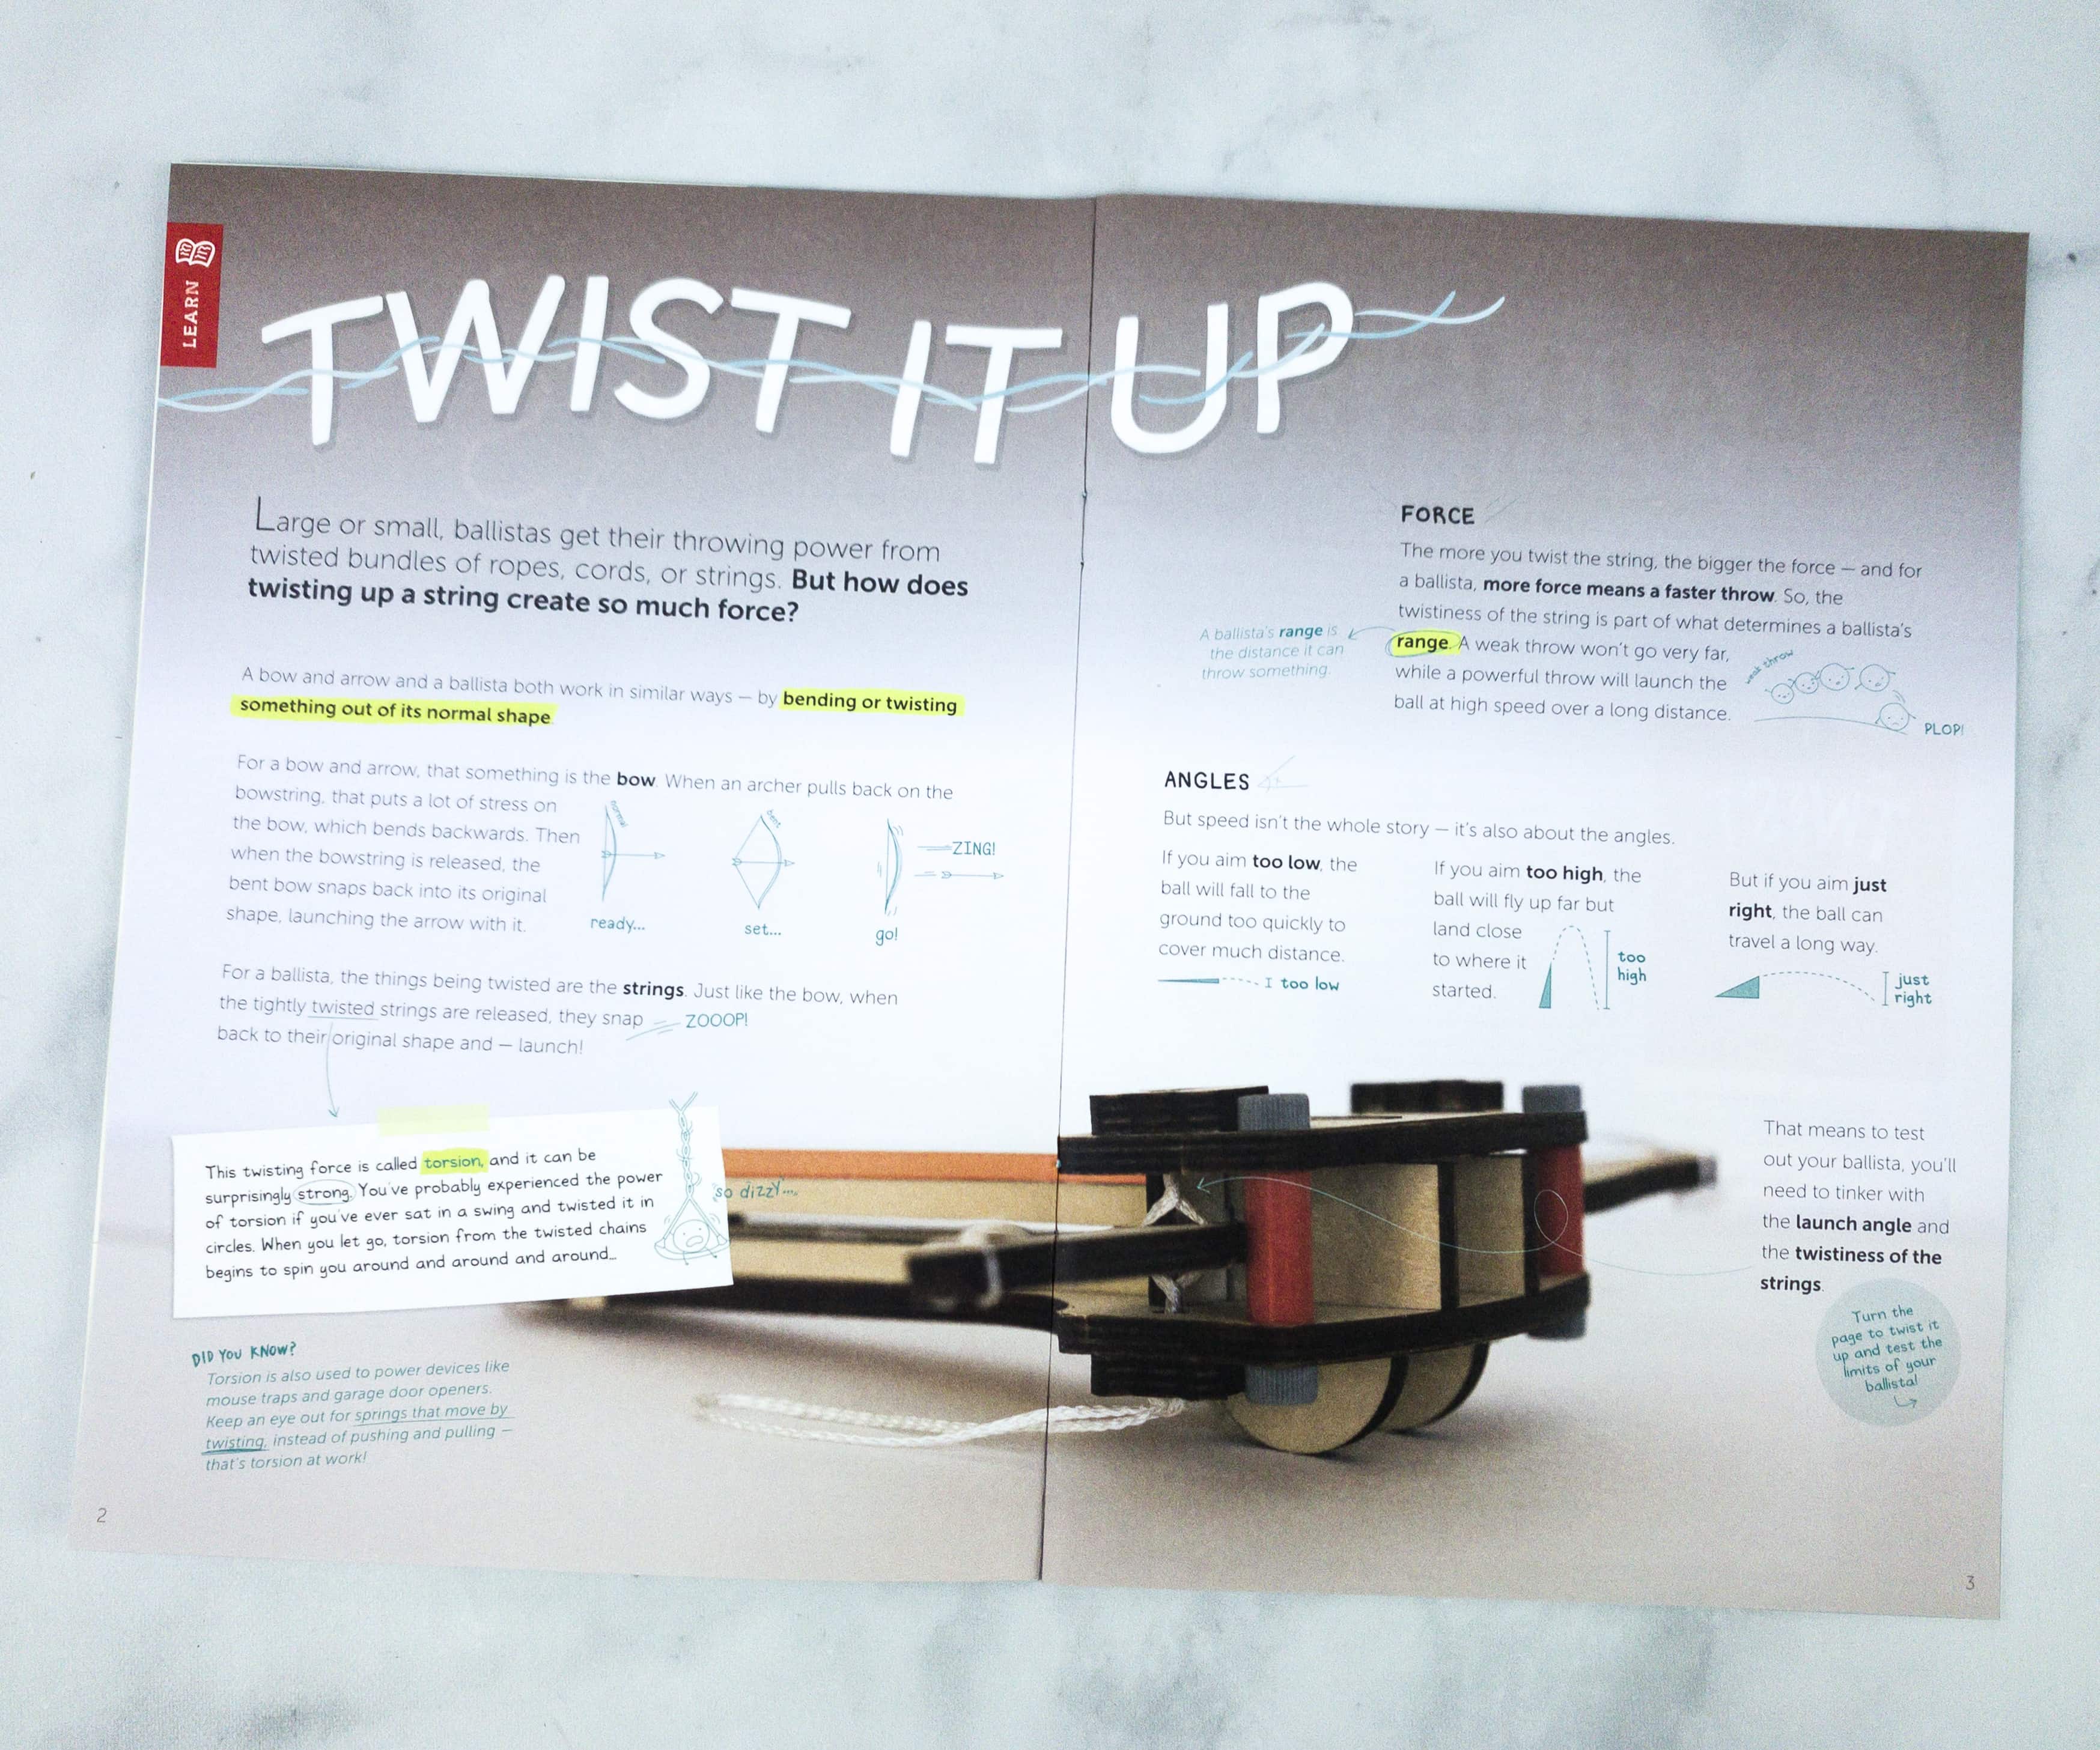
Featured on this part of the booklet is the different parts of the ballista and how they work.
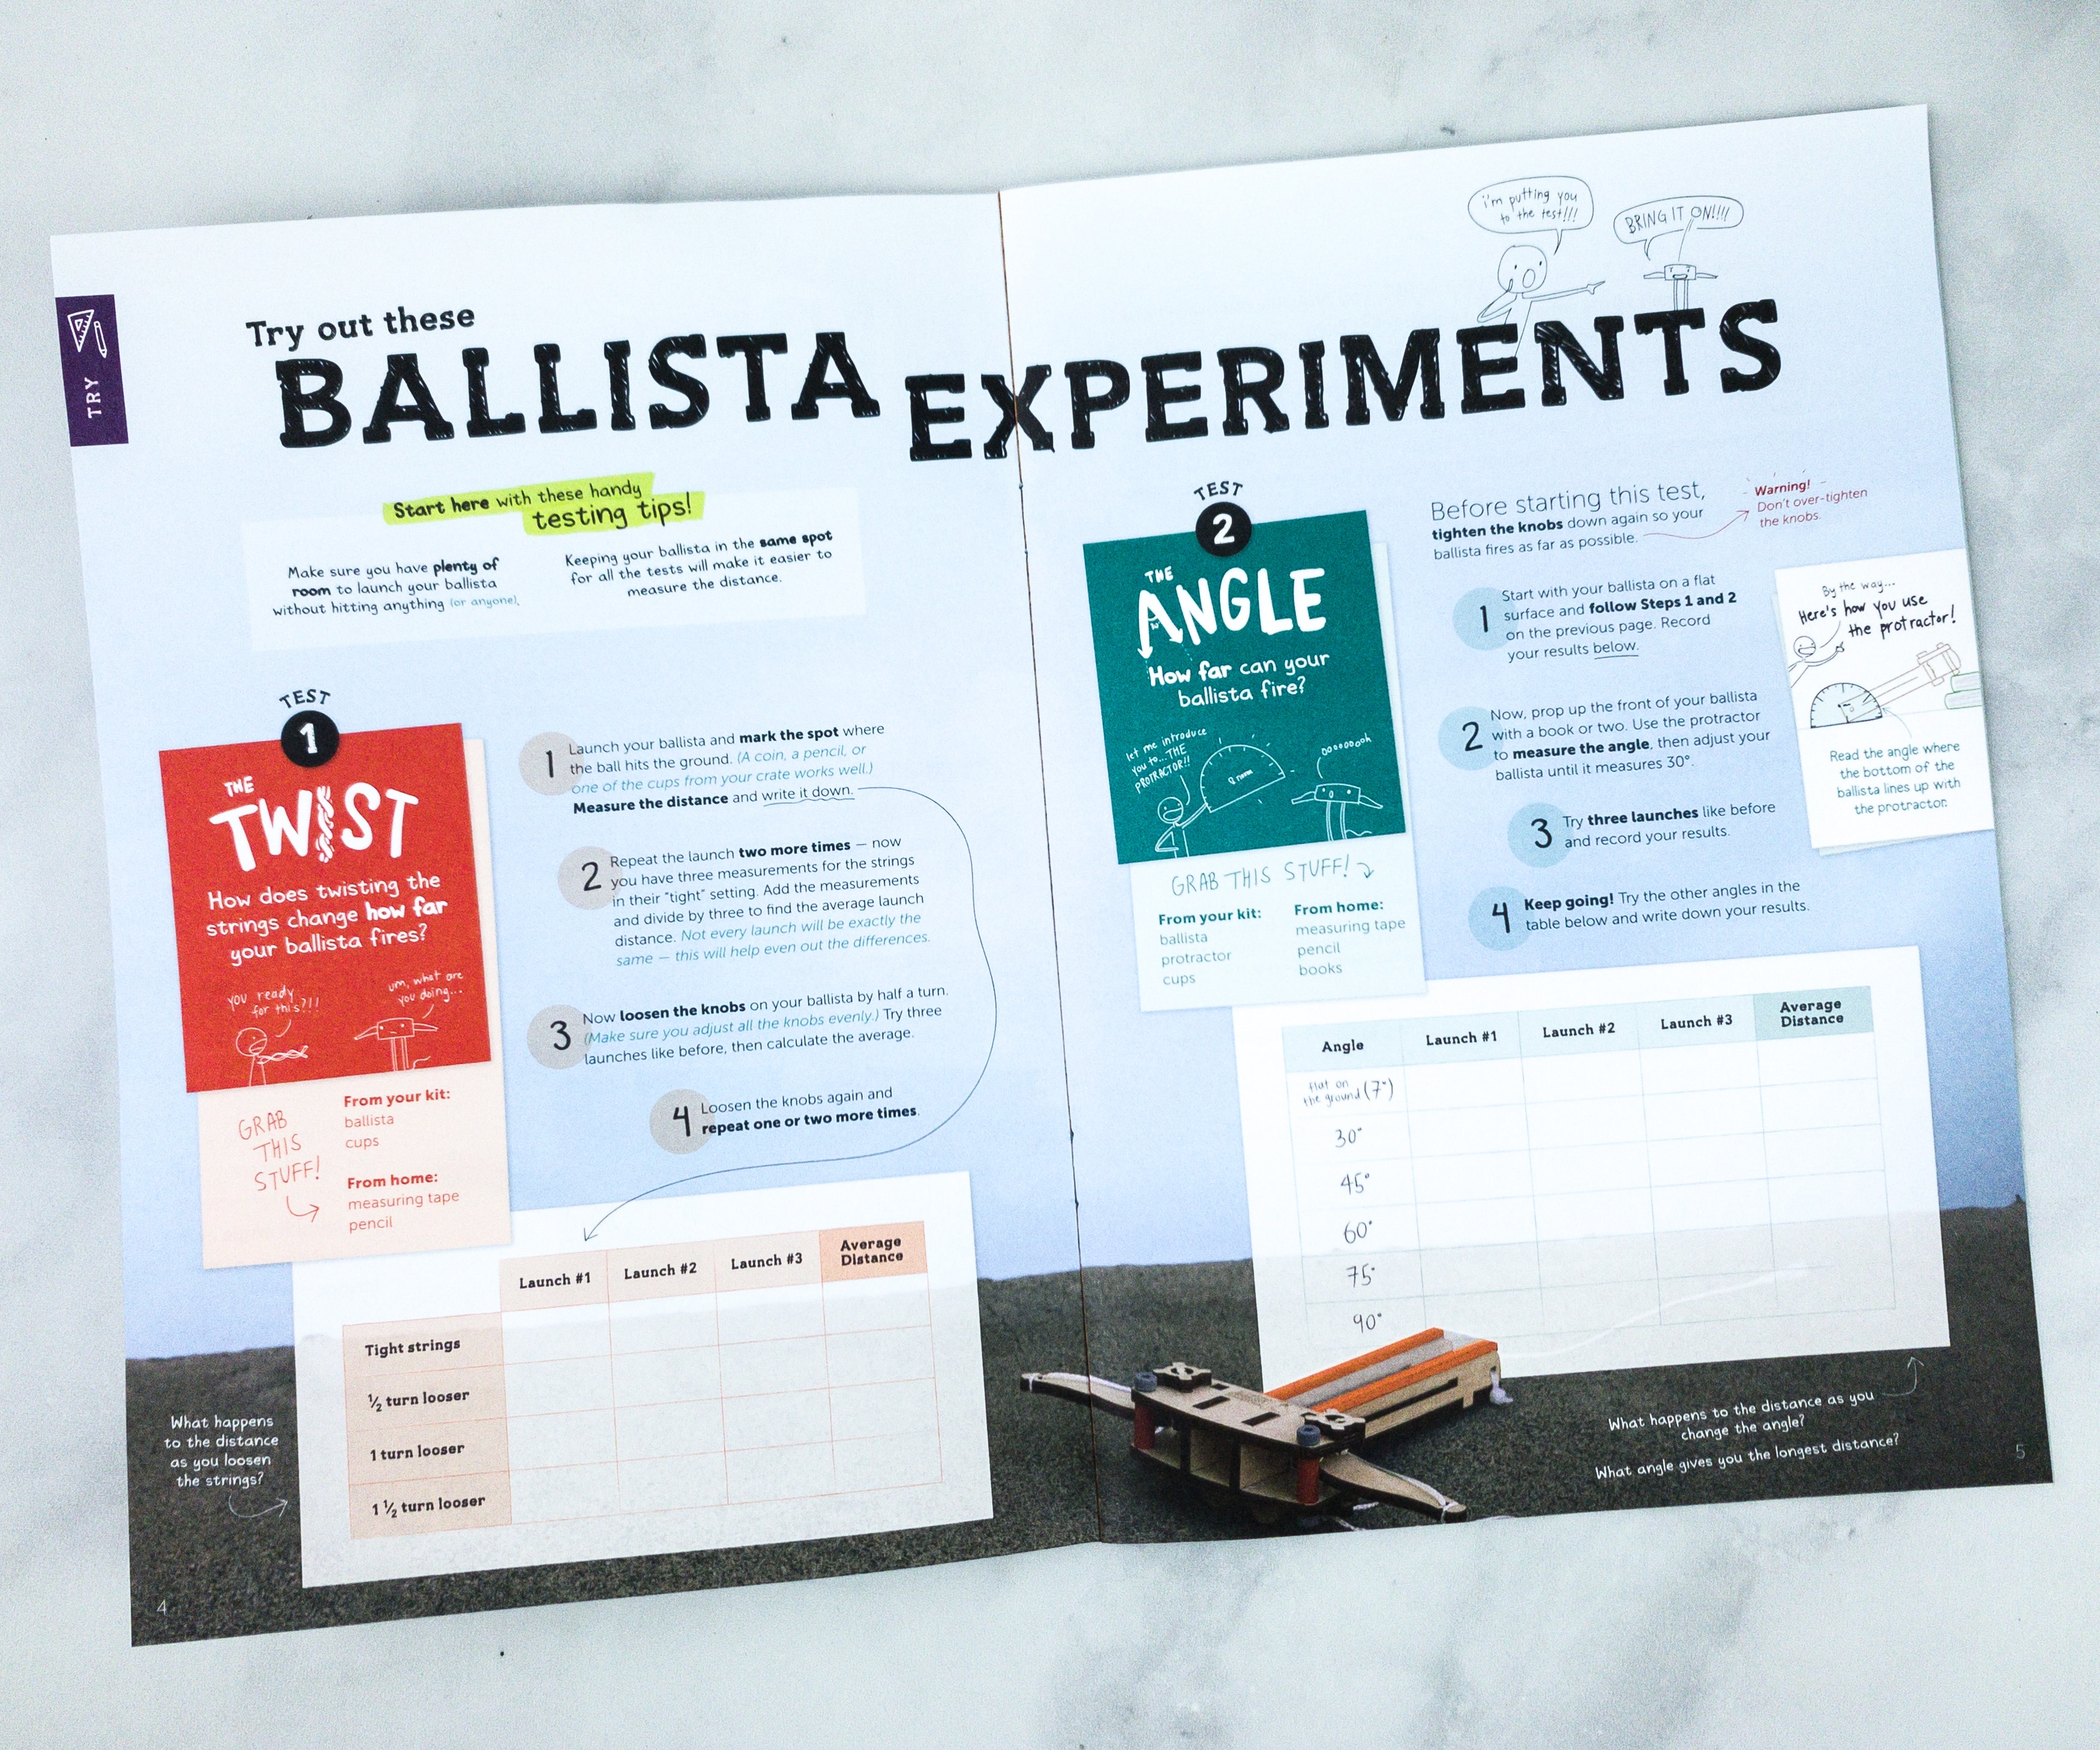
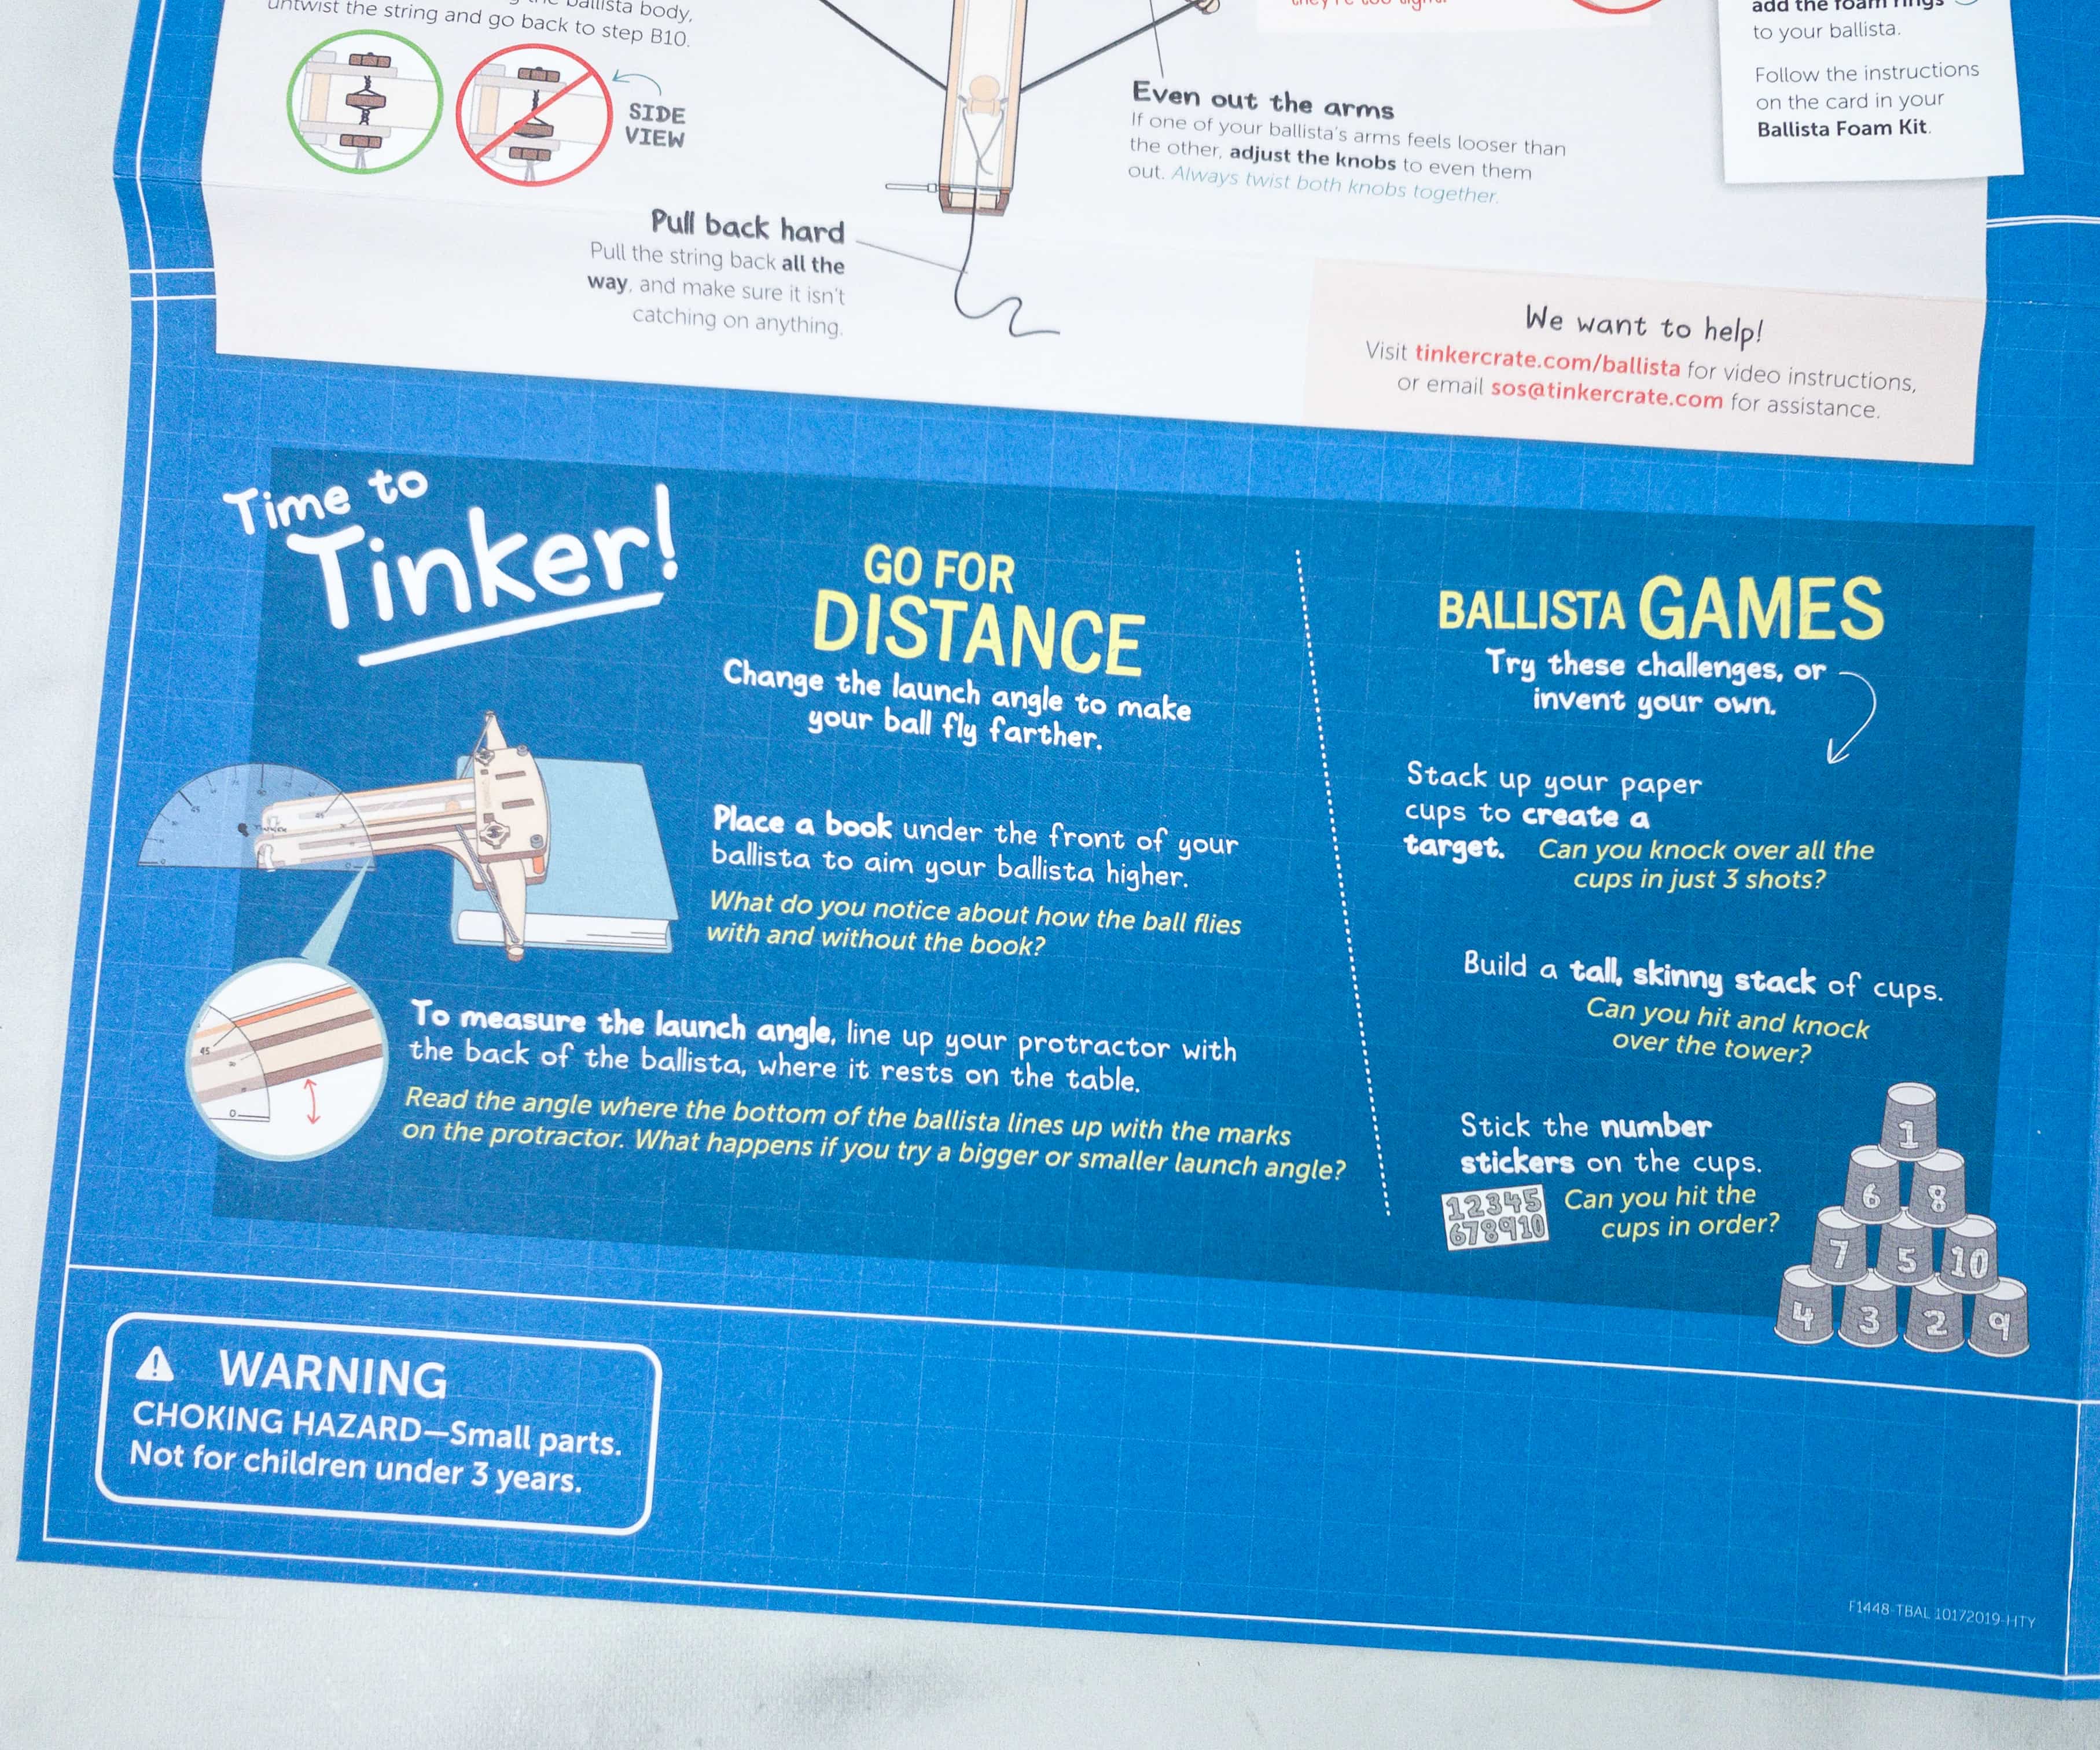
This booklet also included a list of experiments that we can try with our newly made ballista!
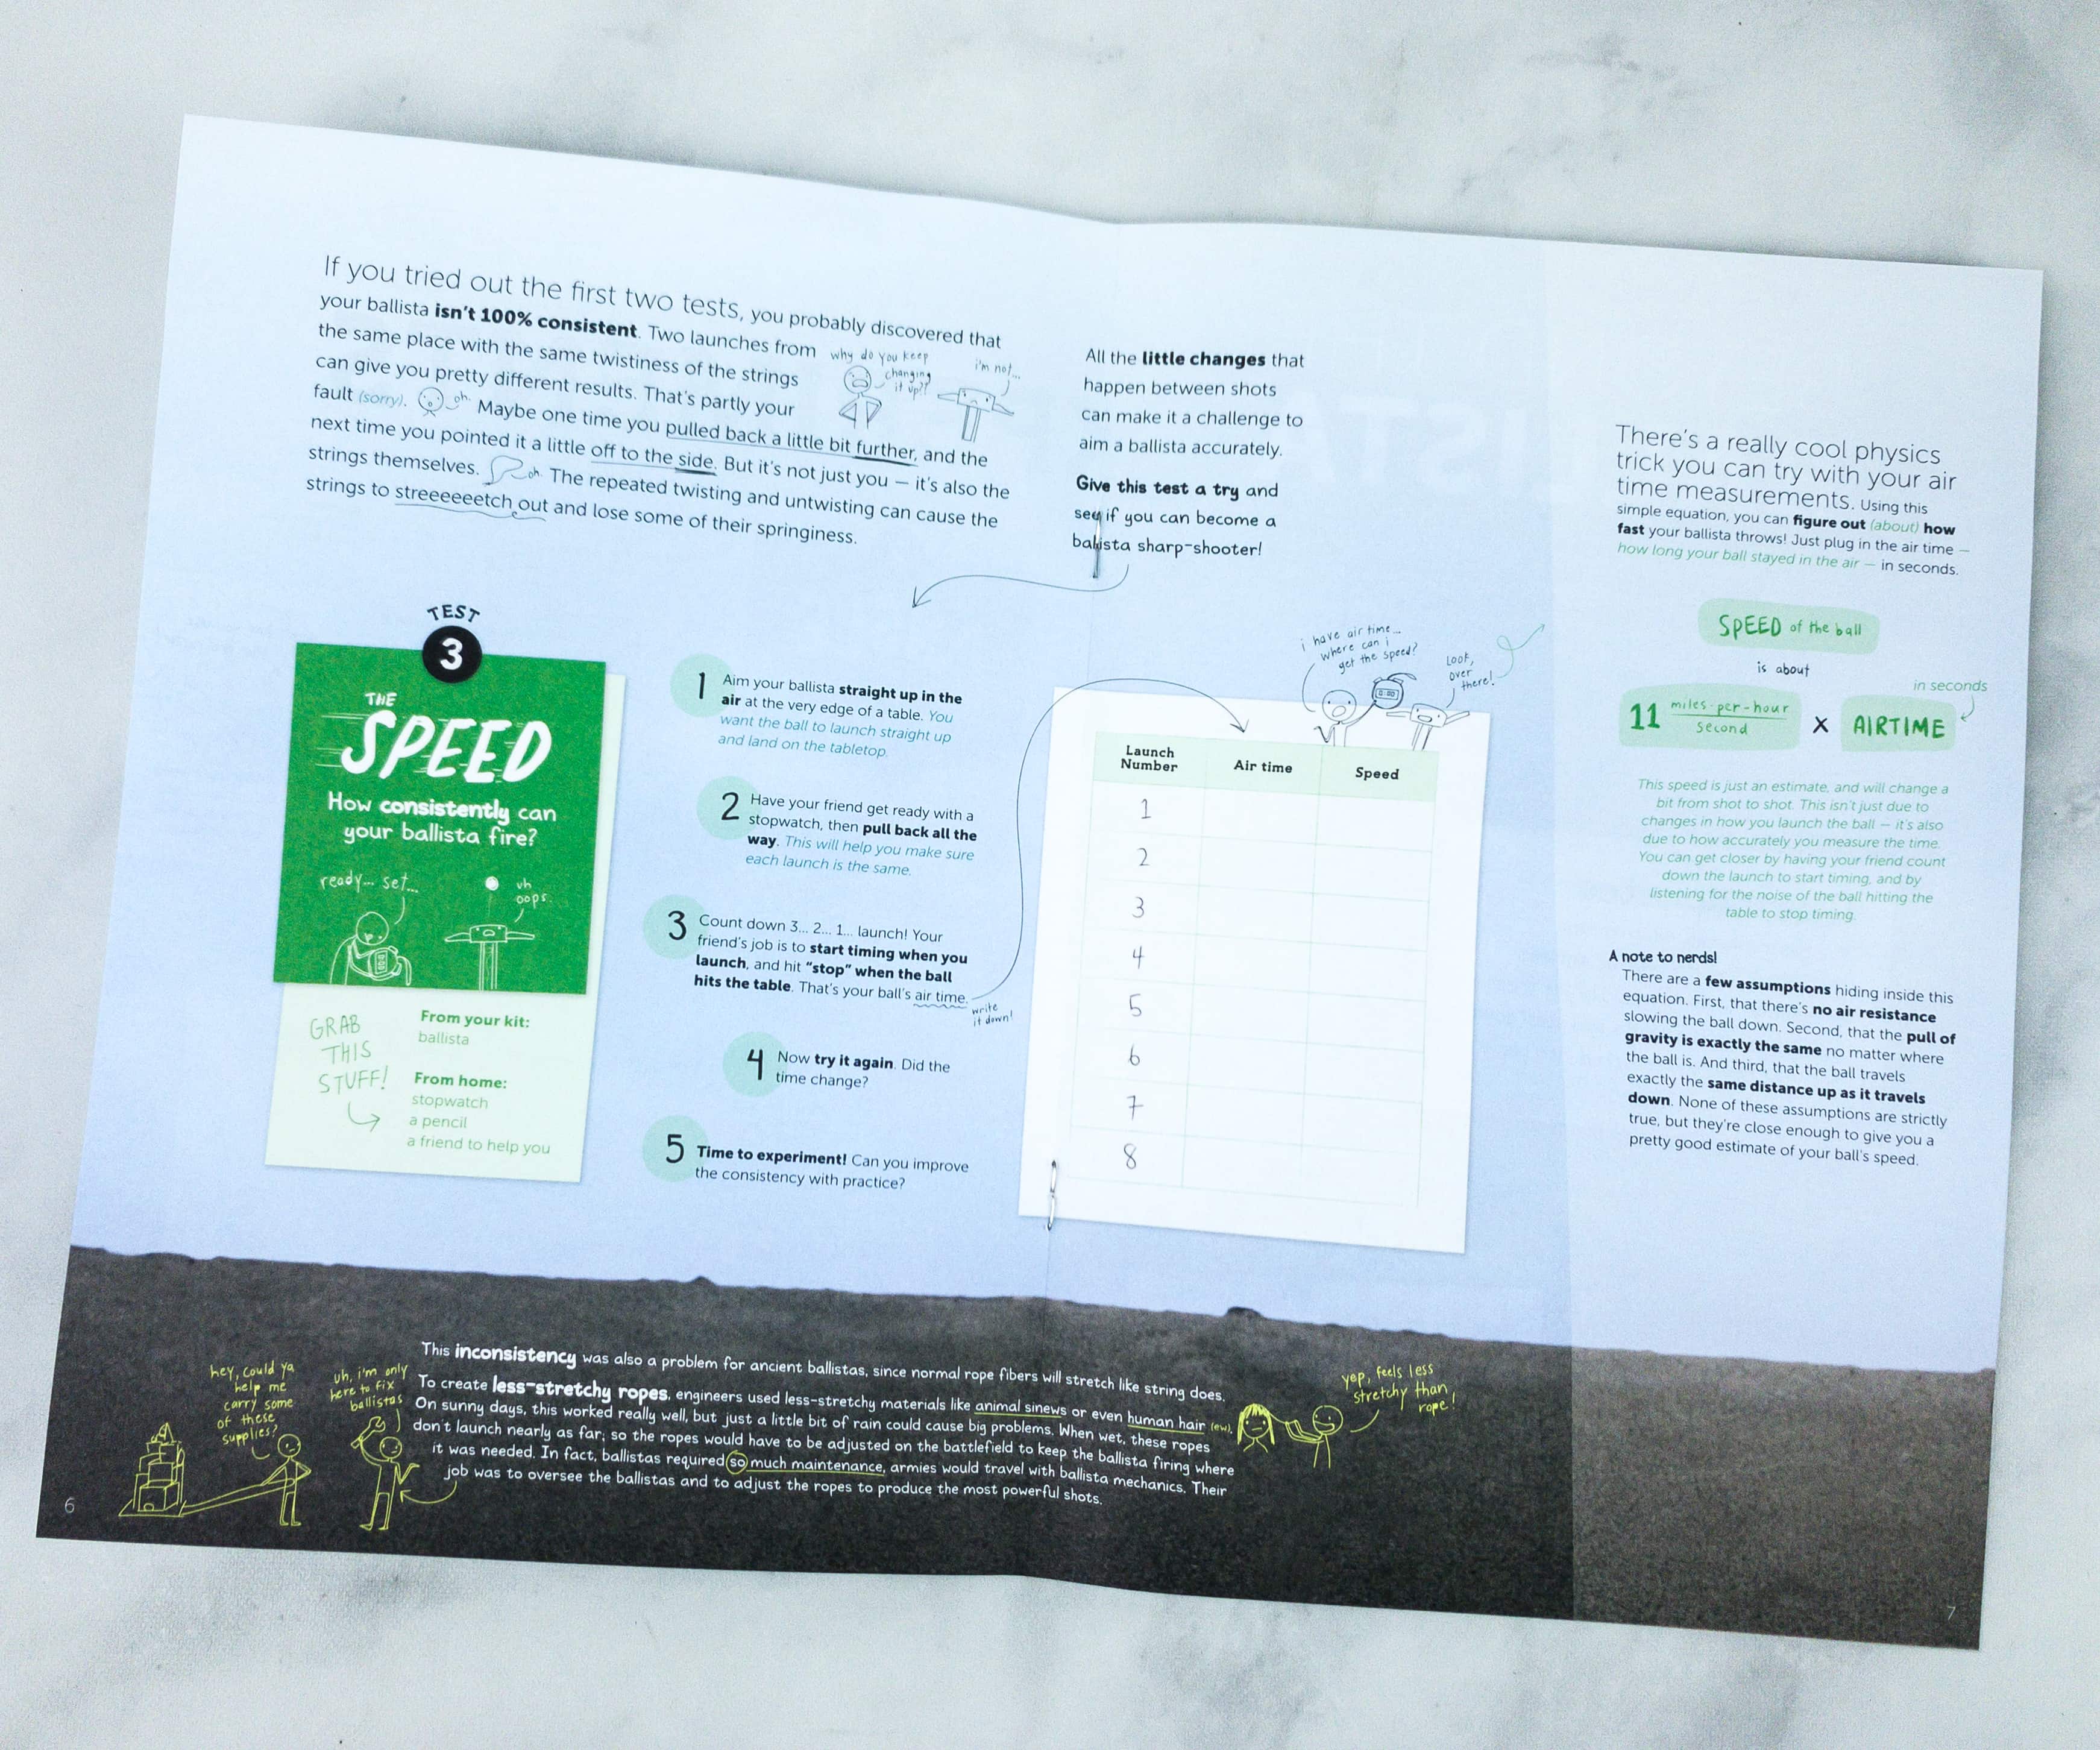
These experiments involve twisting the string, the perfect angle to use in aiming, and its speed.
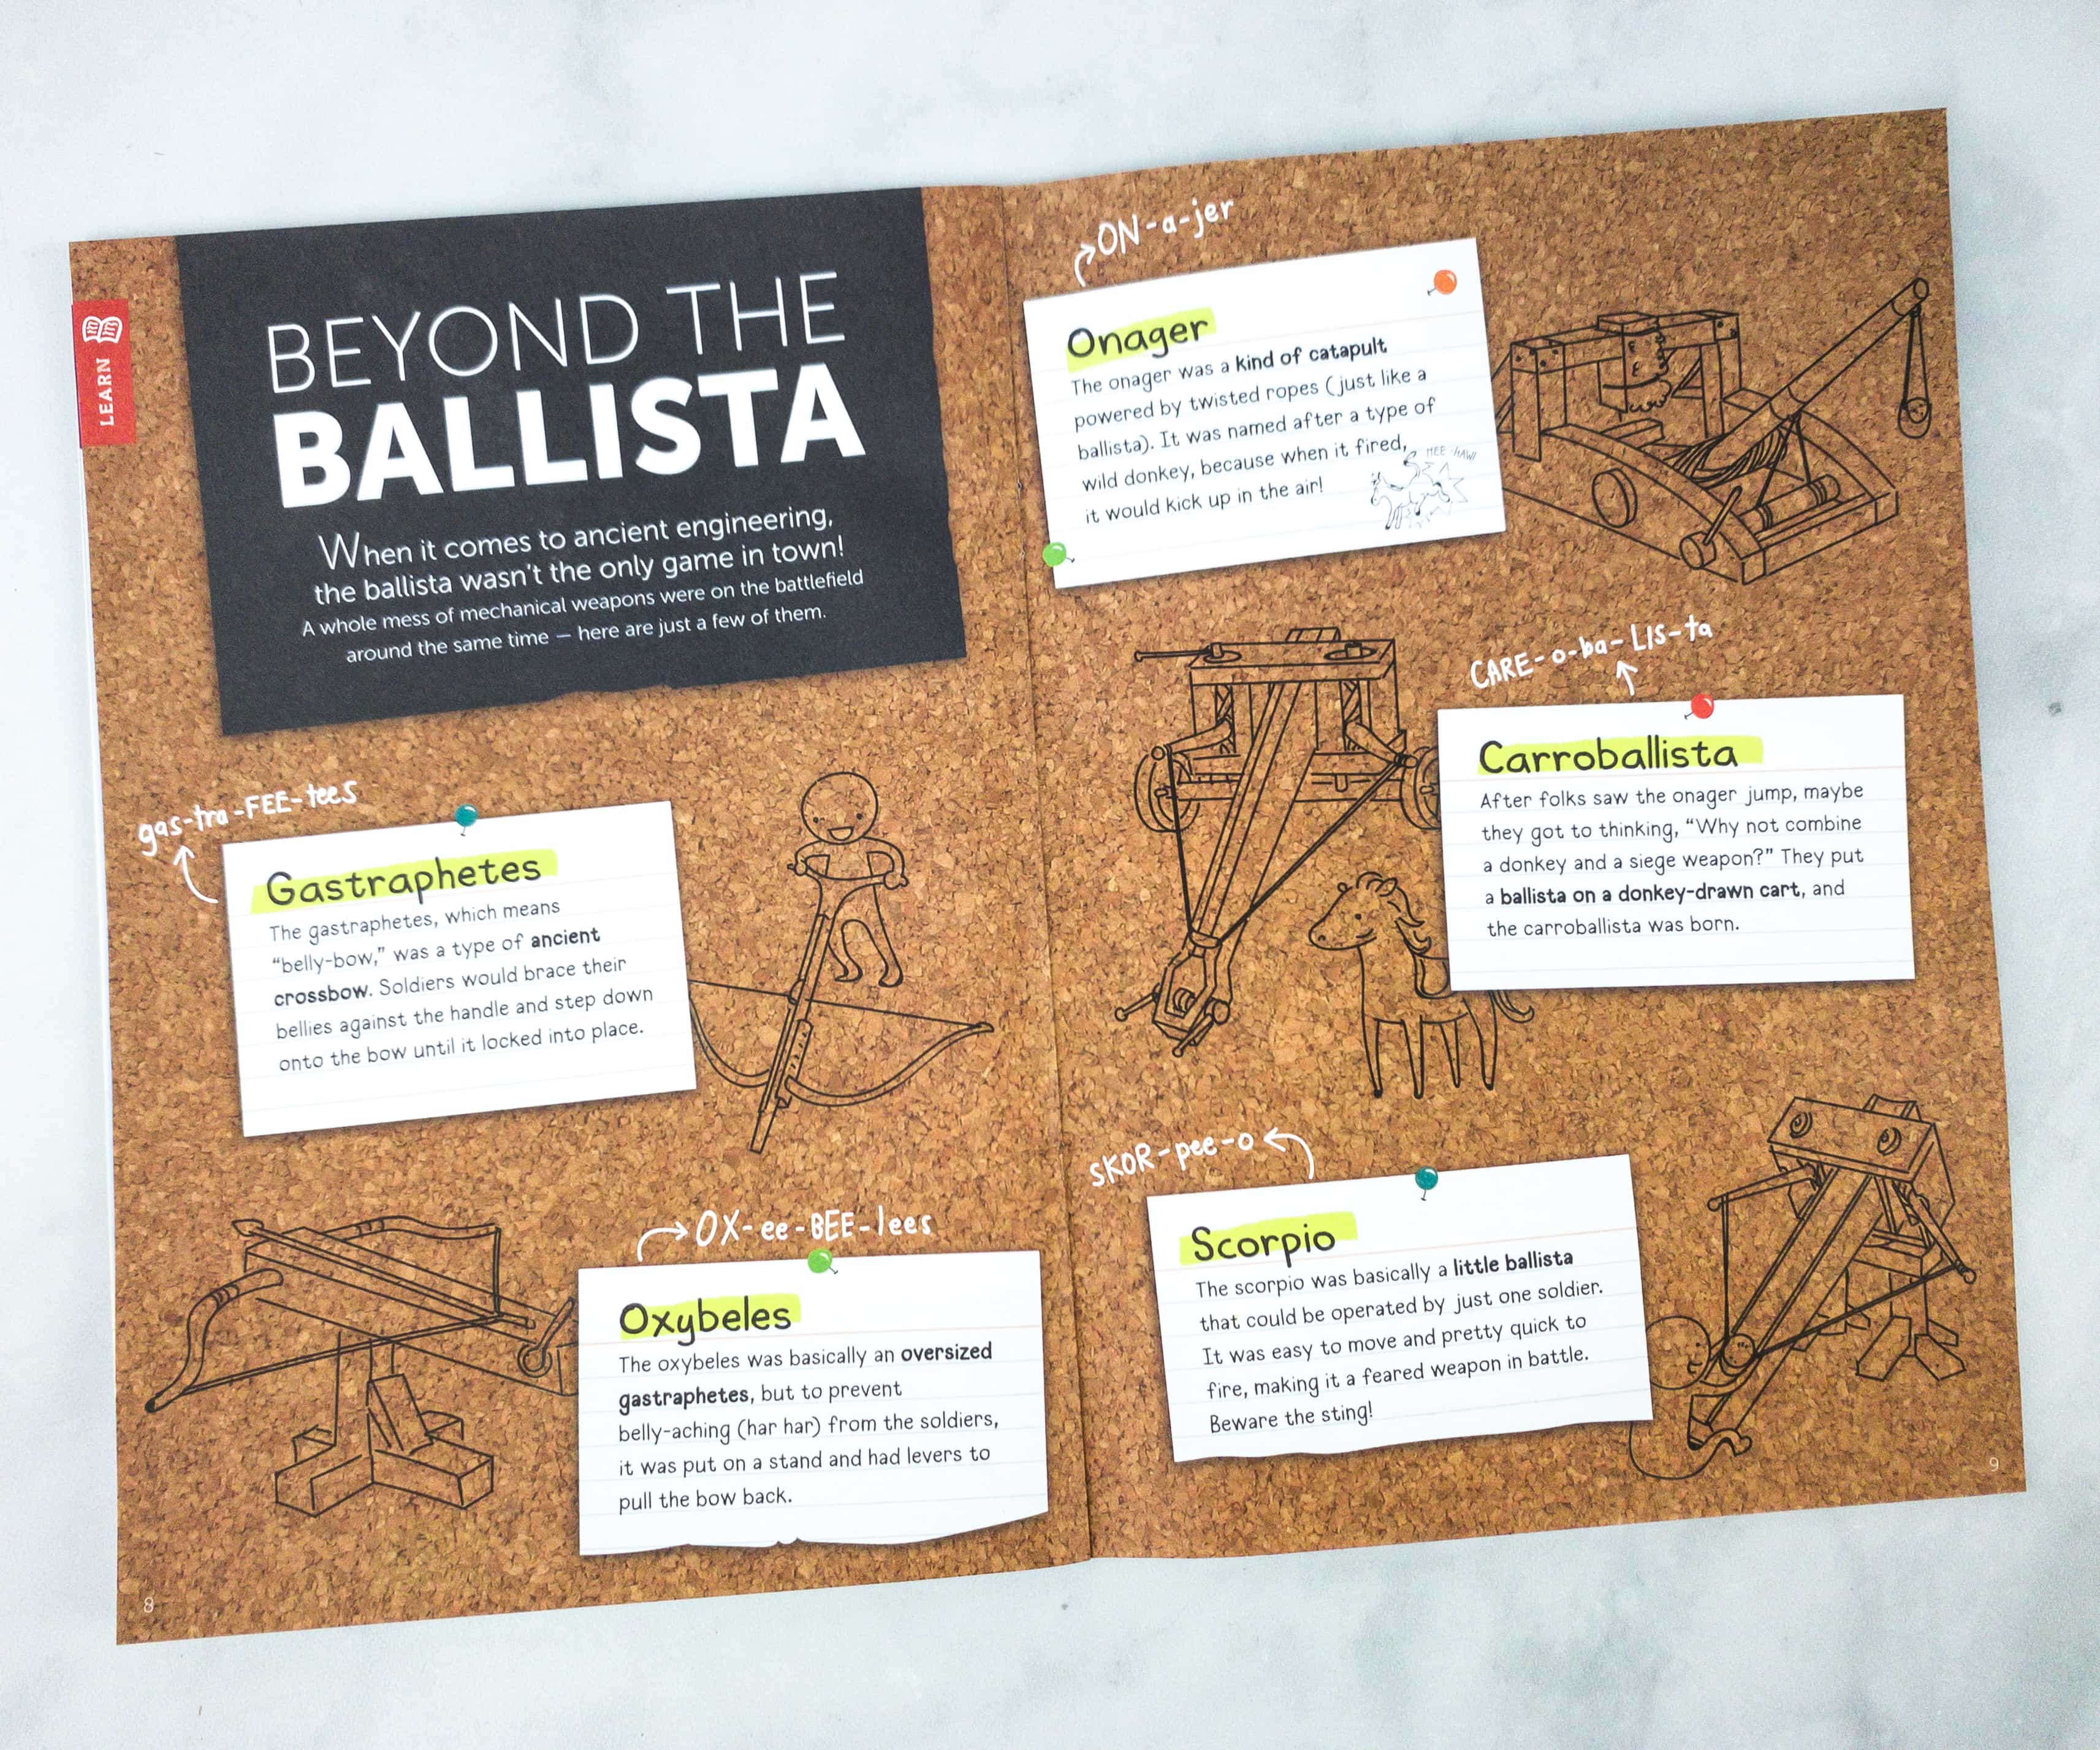
There’s also an article that tackles mechanical weapons other than ballista.
When it comes to ancient engineering, the ballista wasn’t the only game in town! A whole mess of mechanical weapons were on the battlefield around the same time- here are just a few of them.
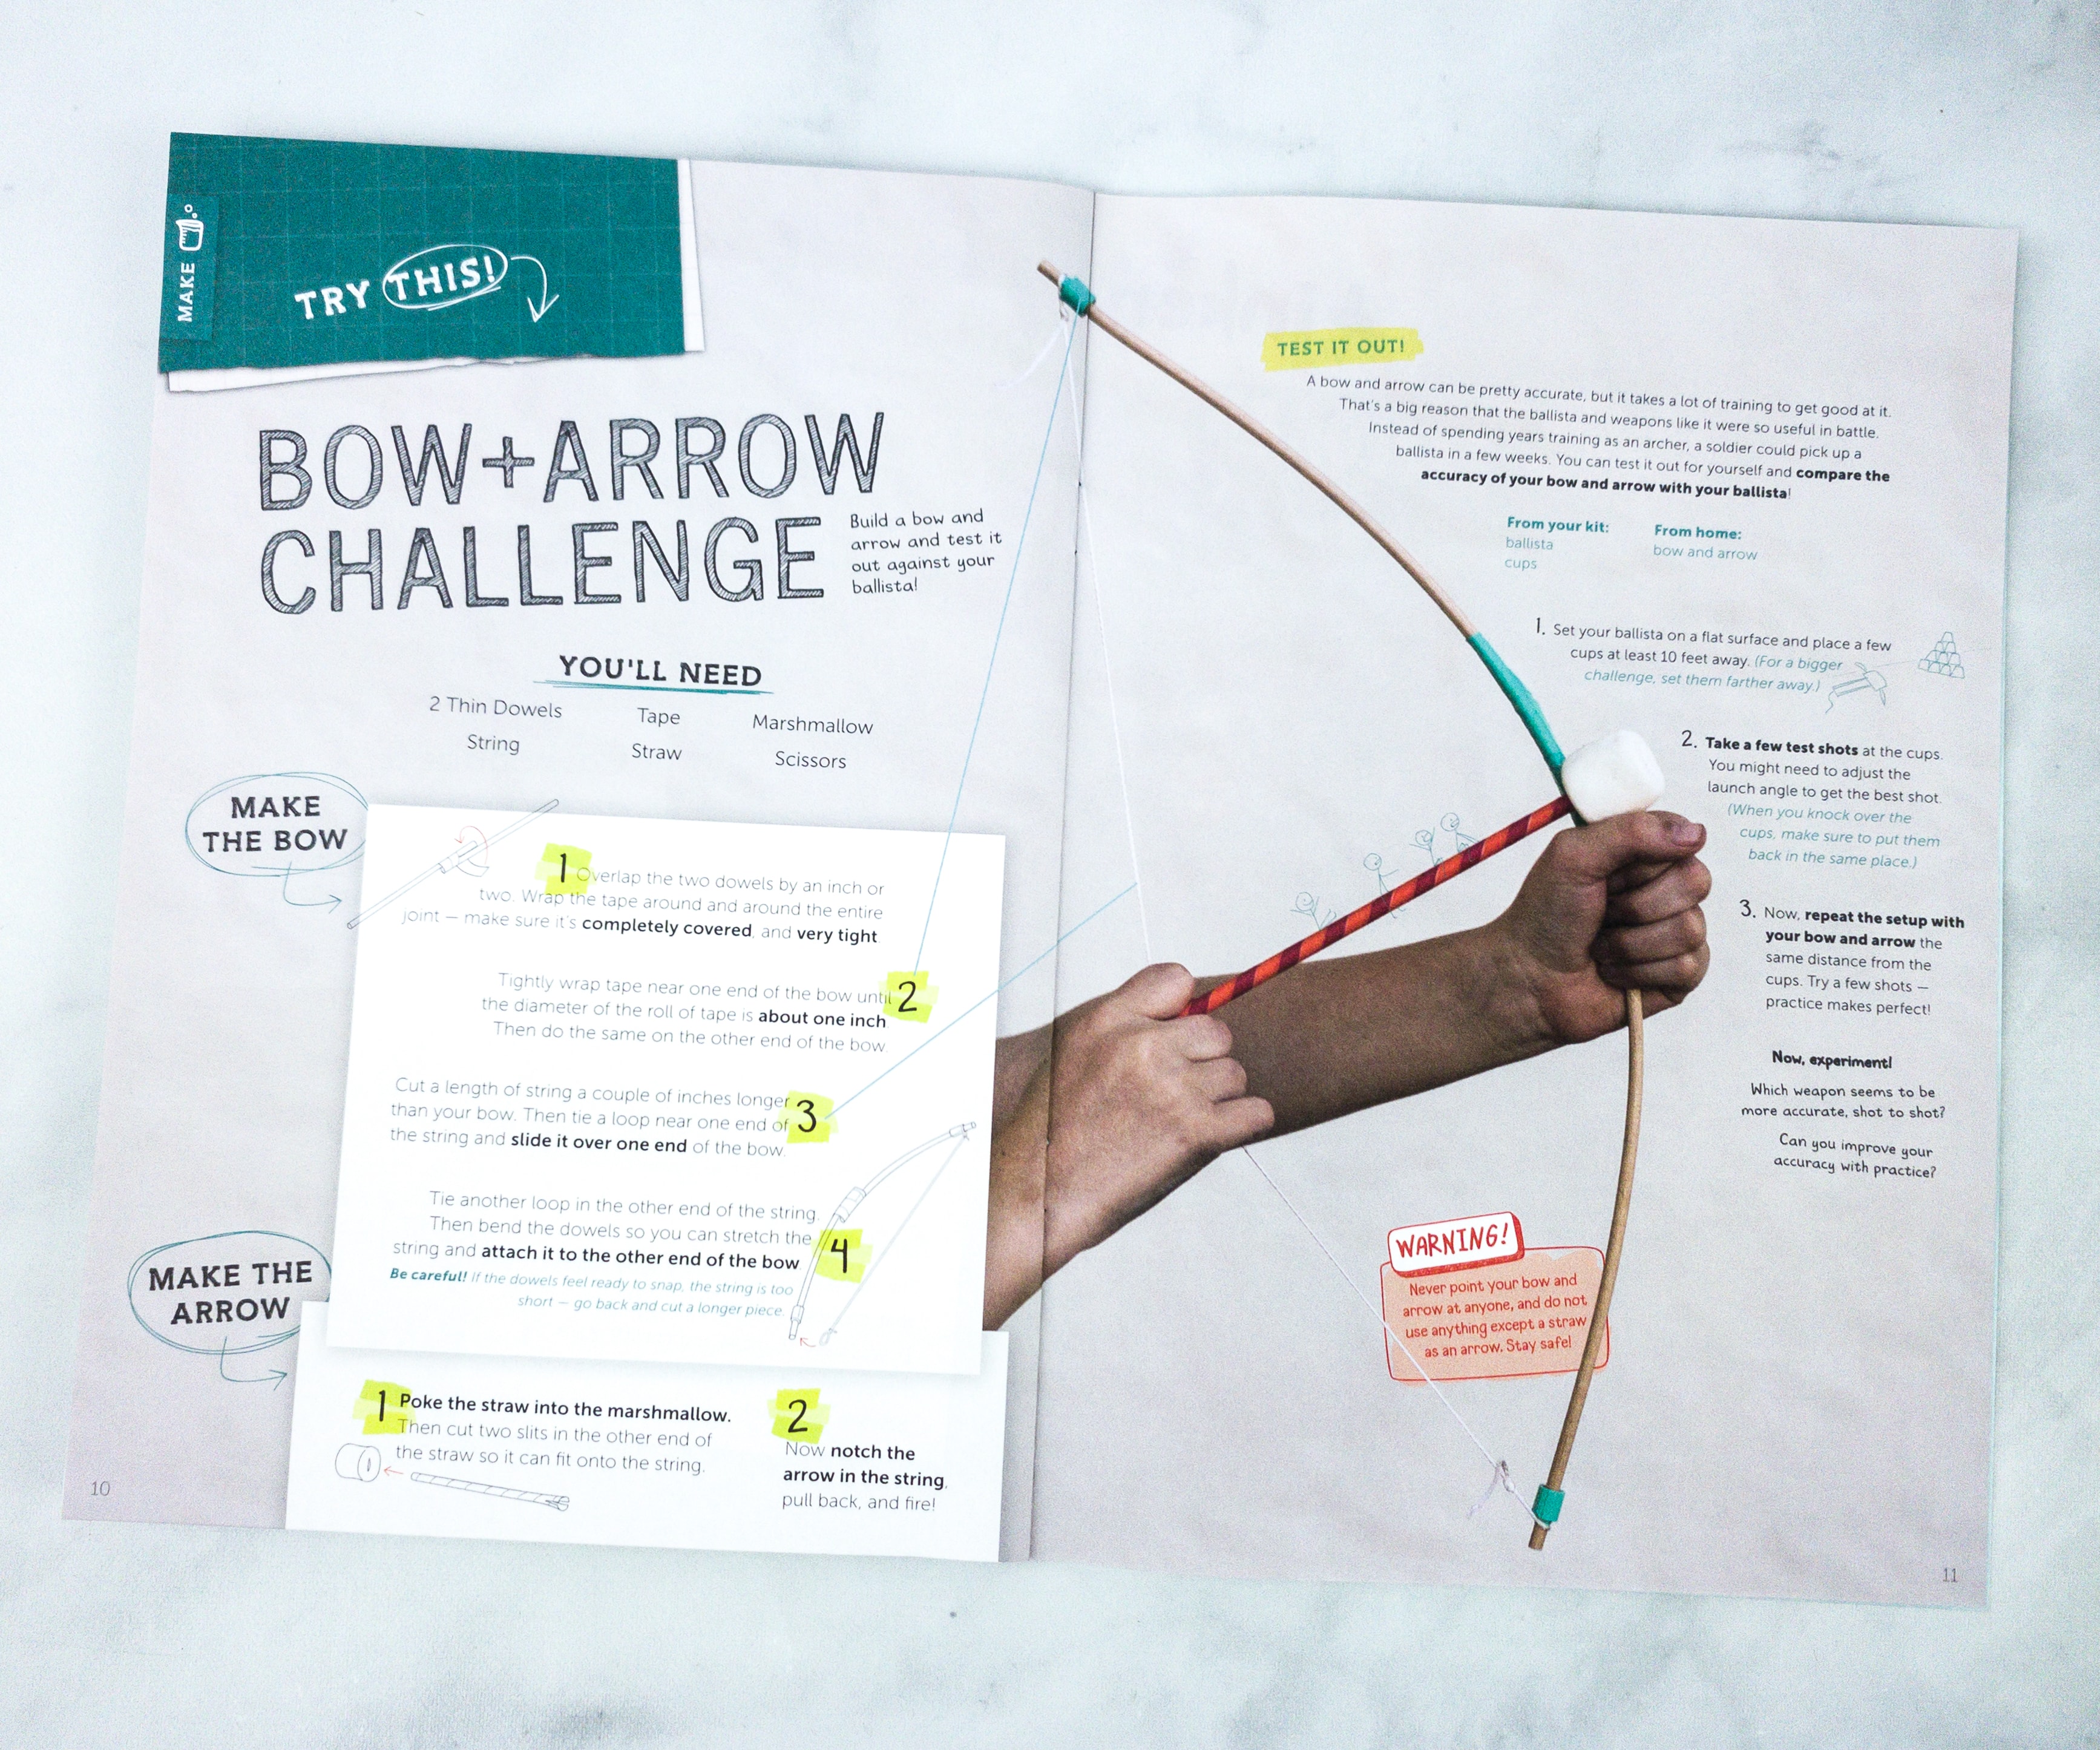
Another experiment to try is this Bow + Arrow Challenge. It’s about building a bow and arrow and testing it out against the ballista!
Tinker Crate Blueprint + Materials
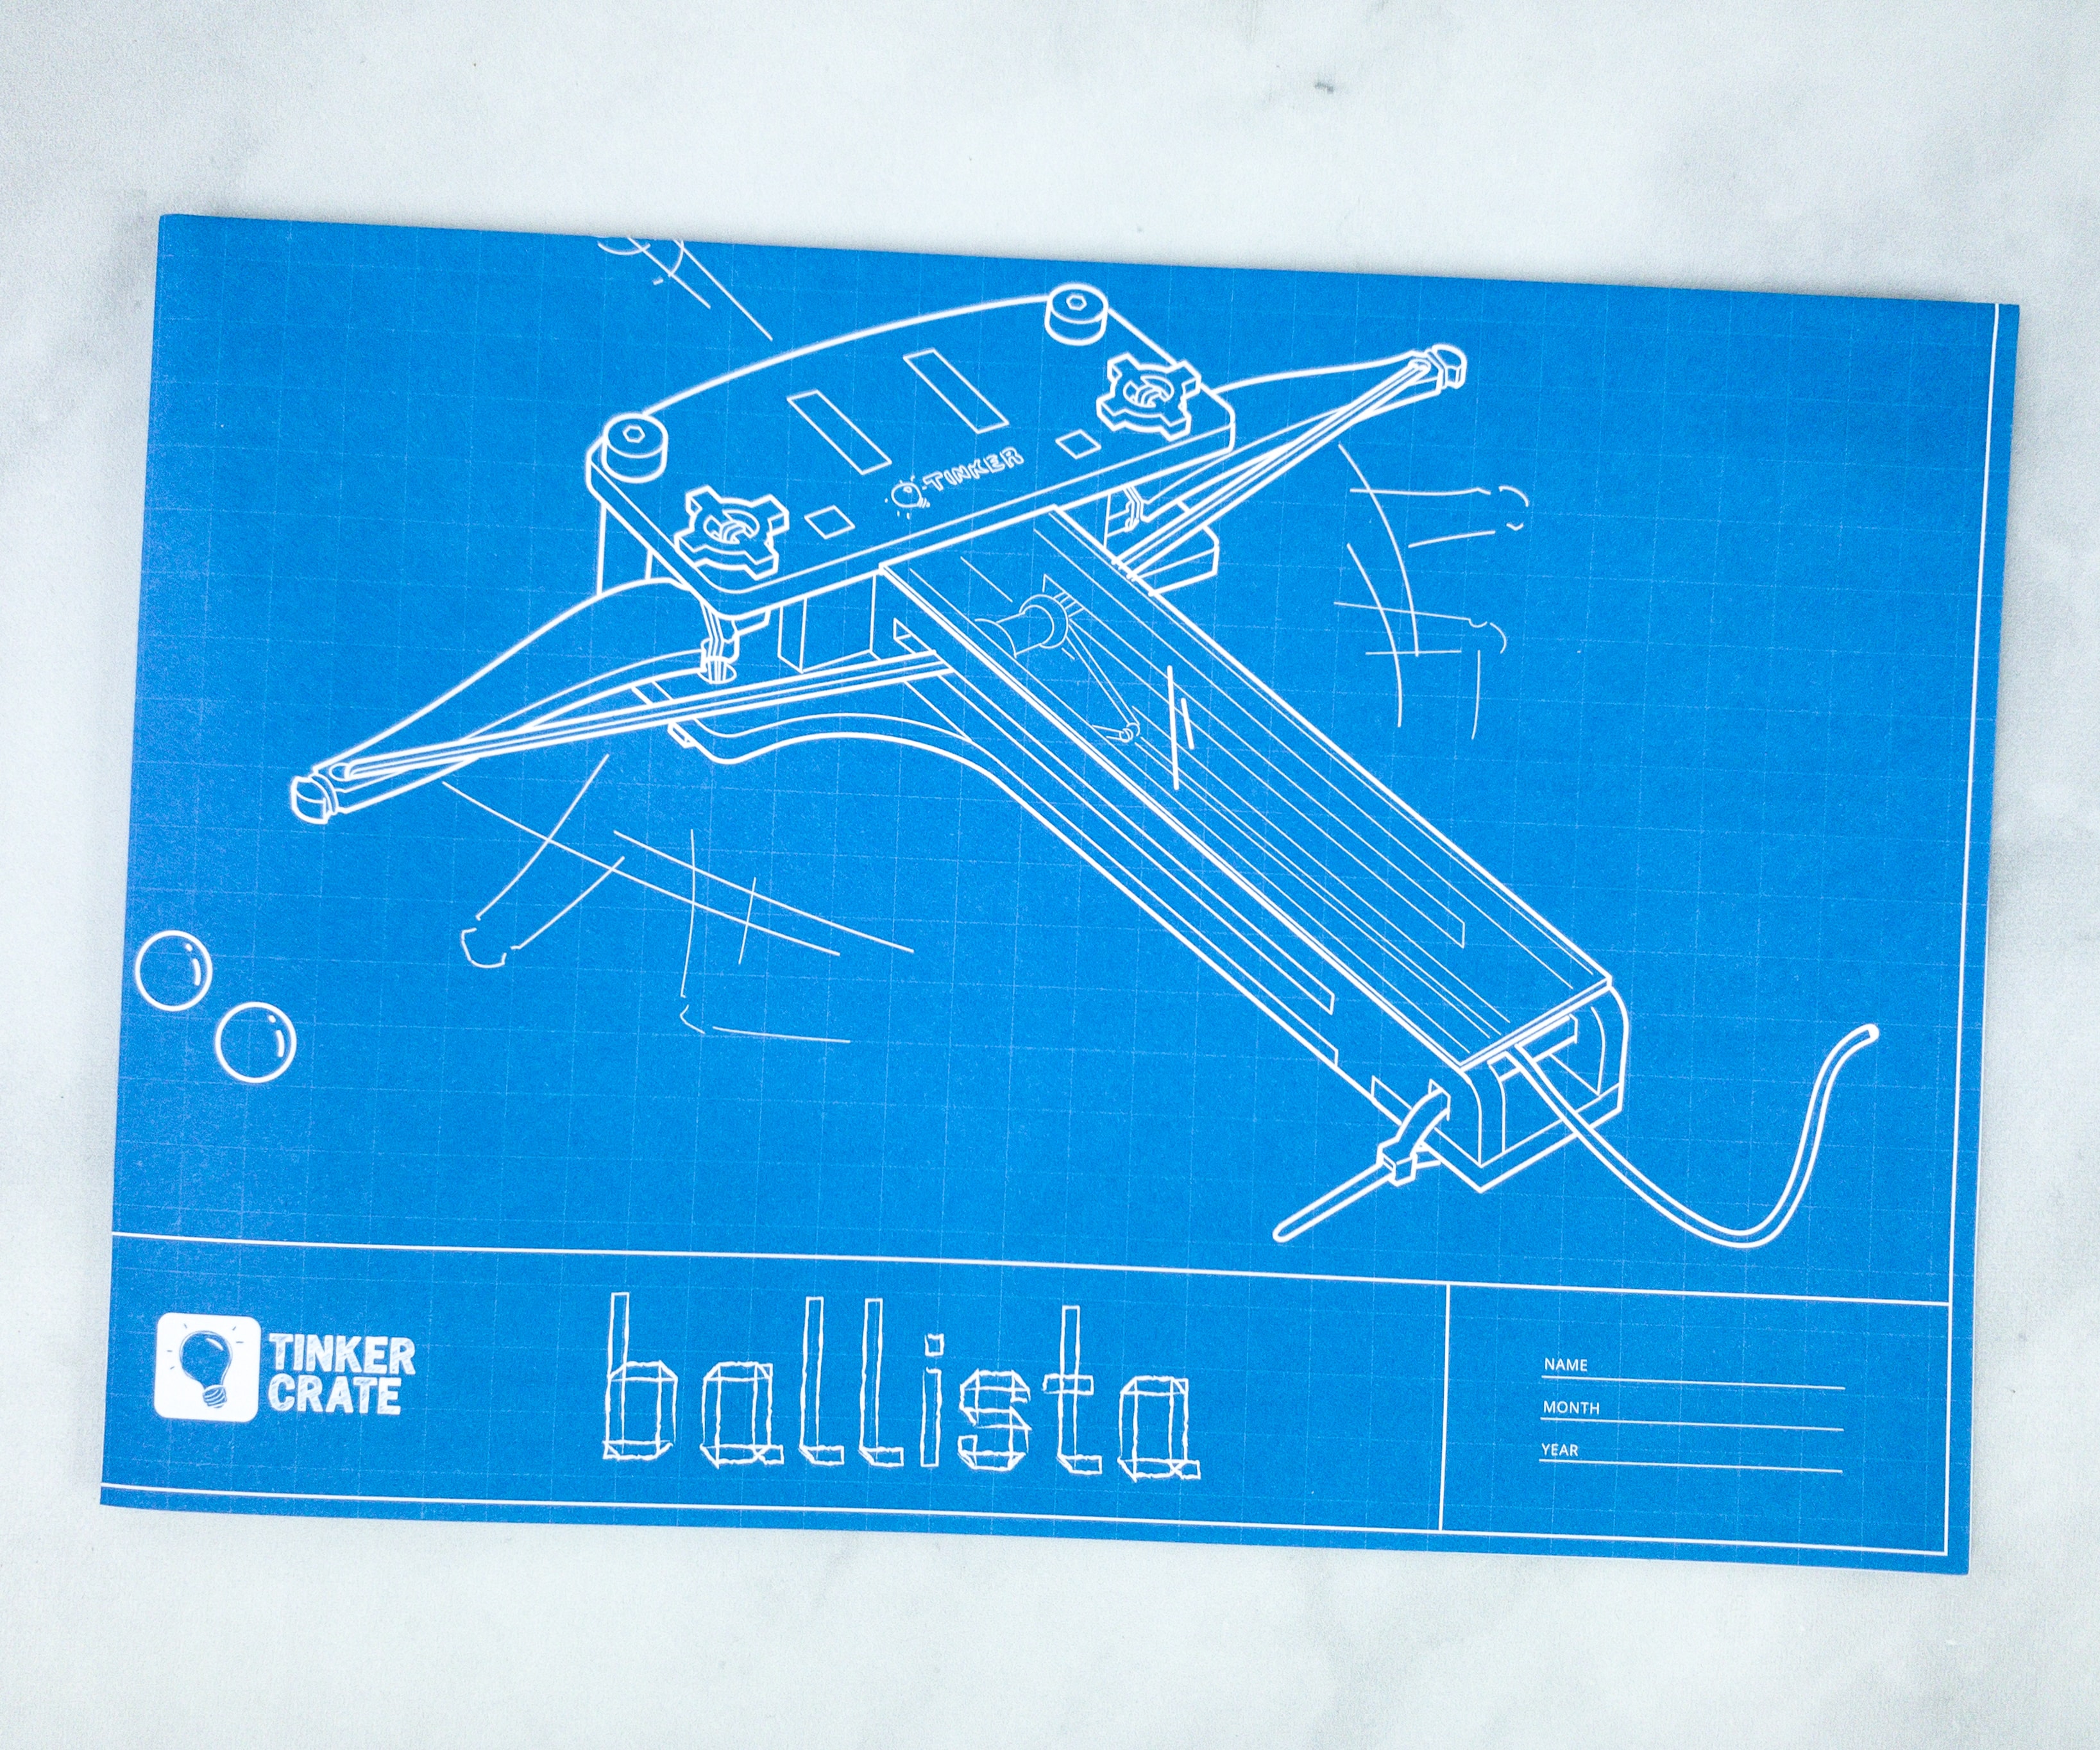
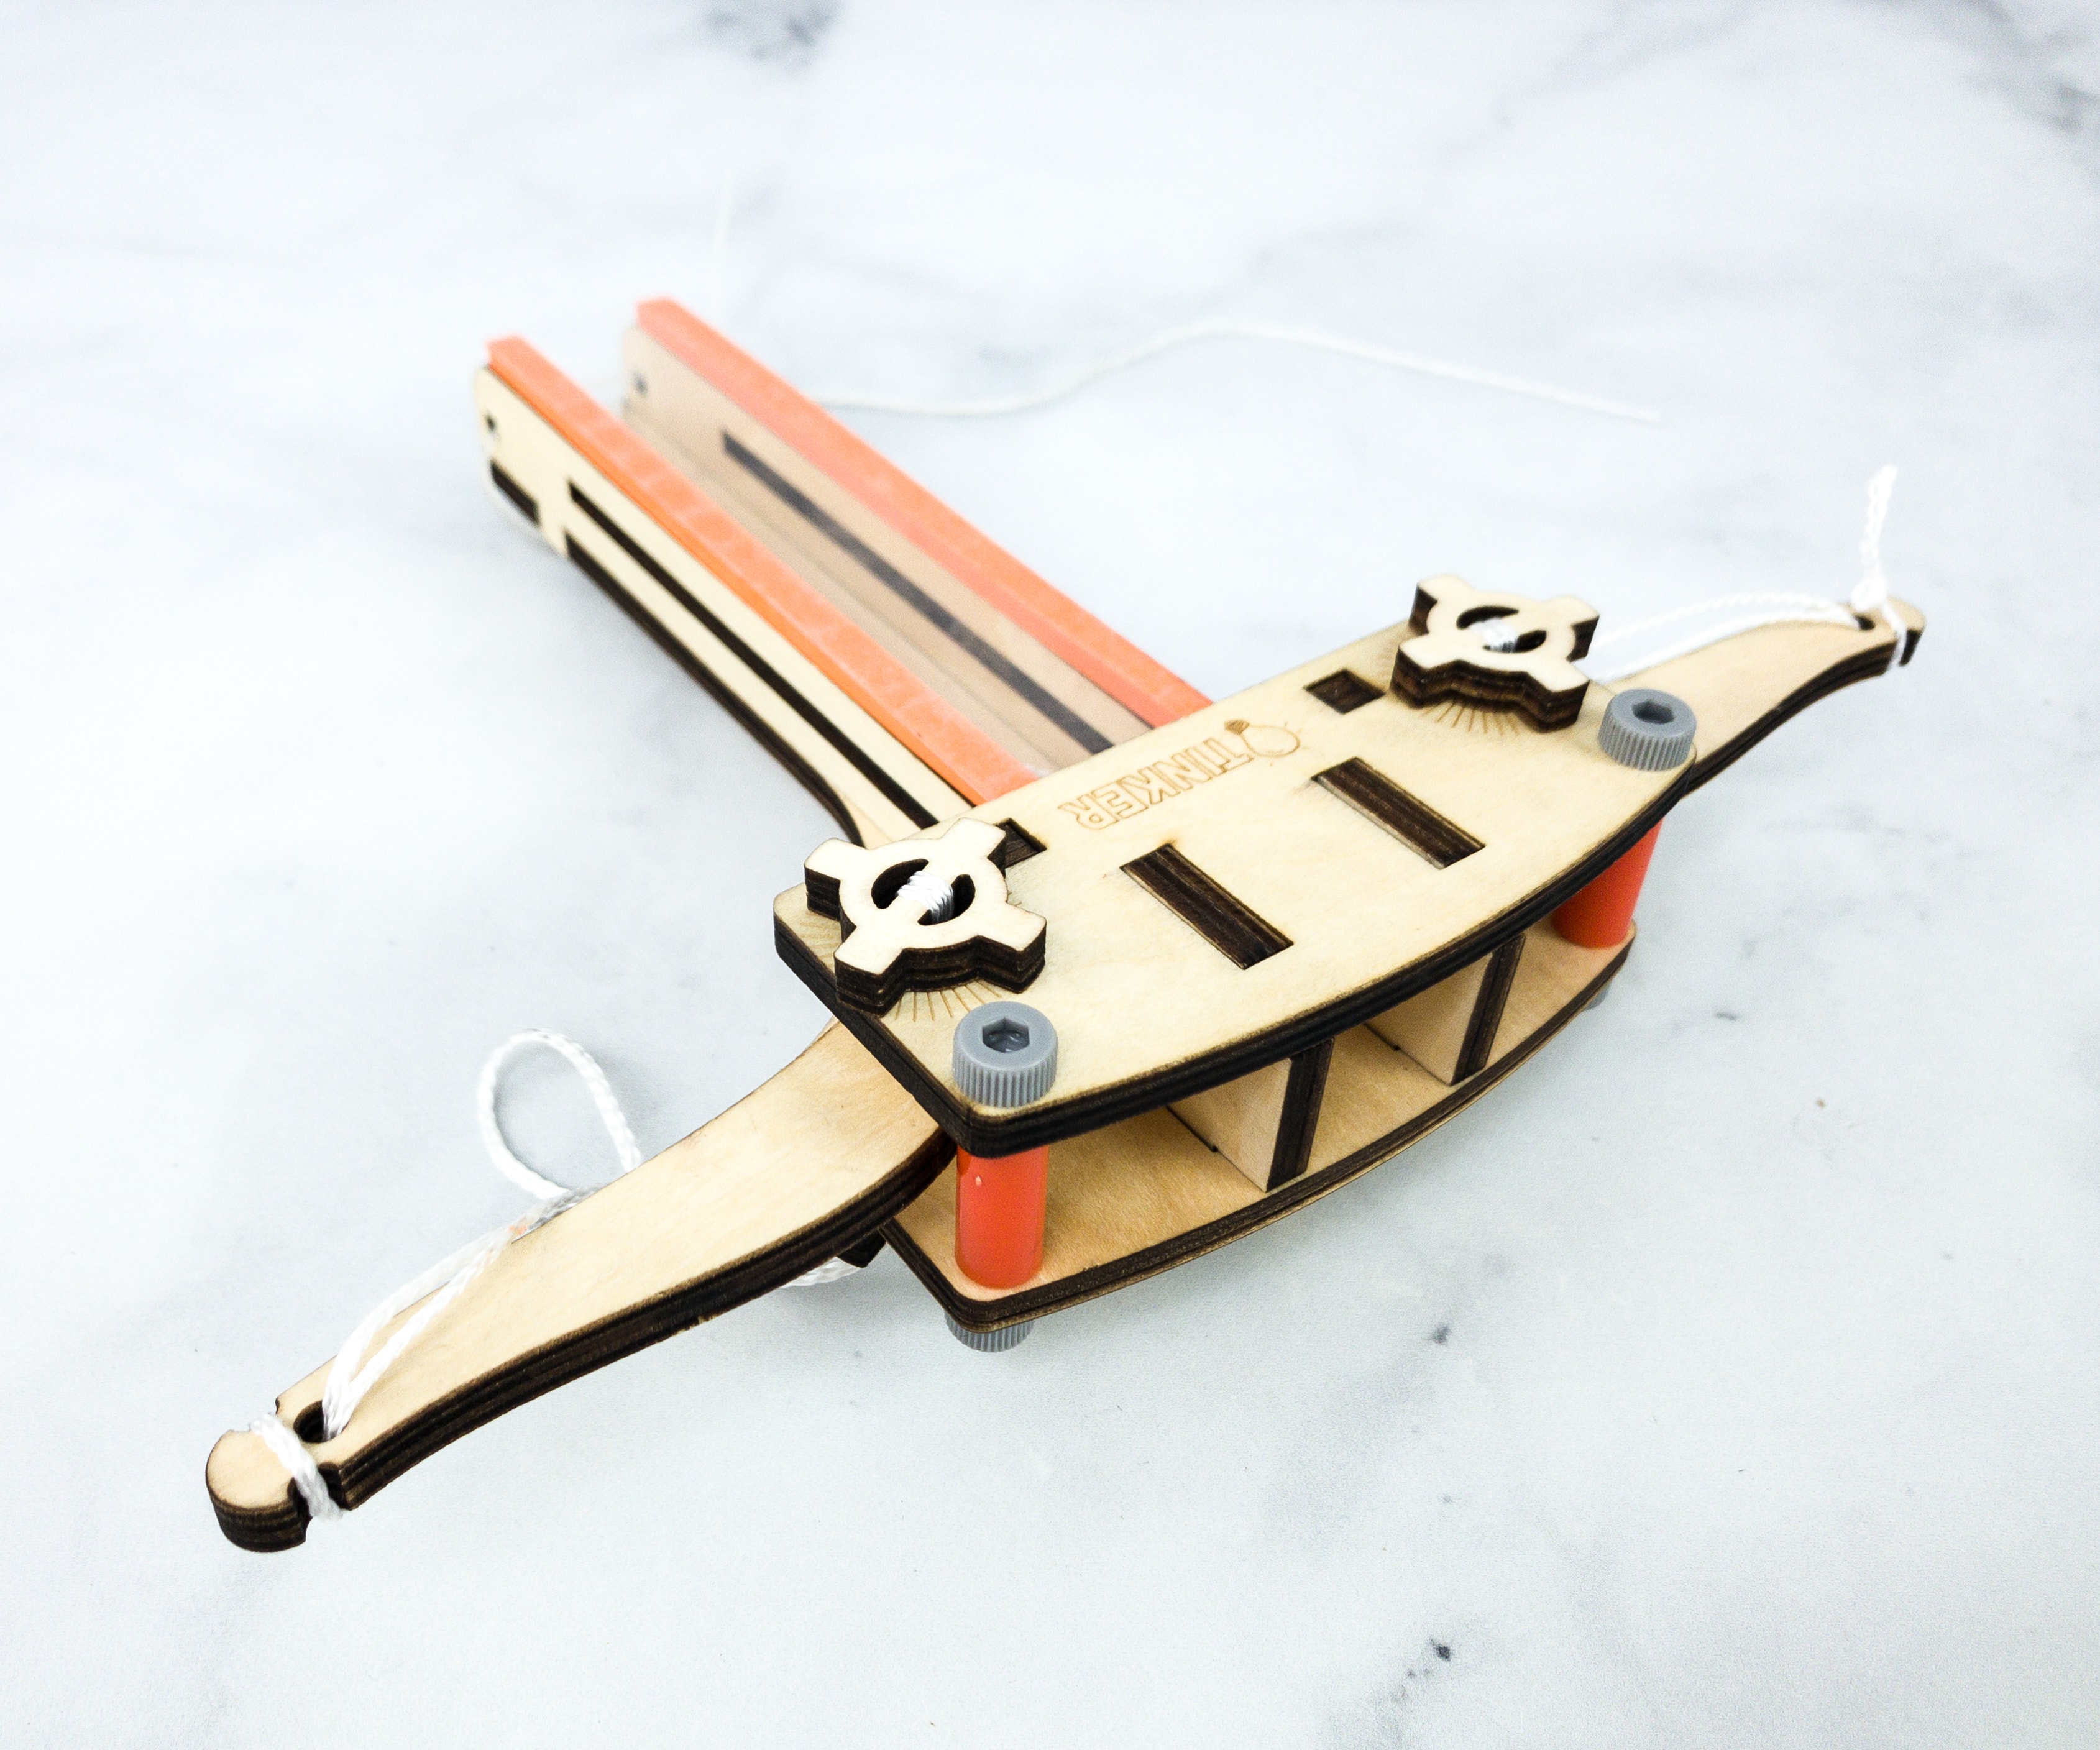
Here’s how our ballista project should look like once completely done!
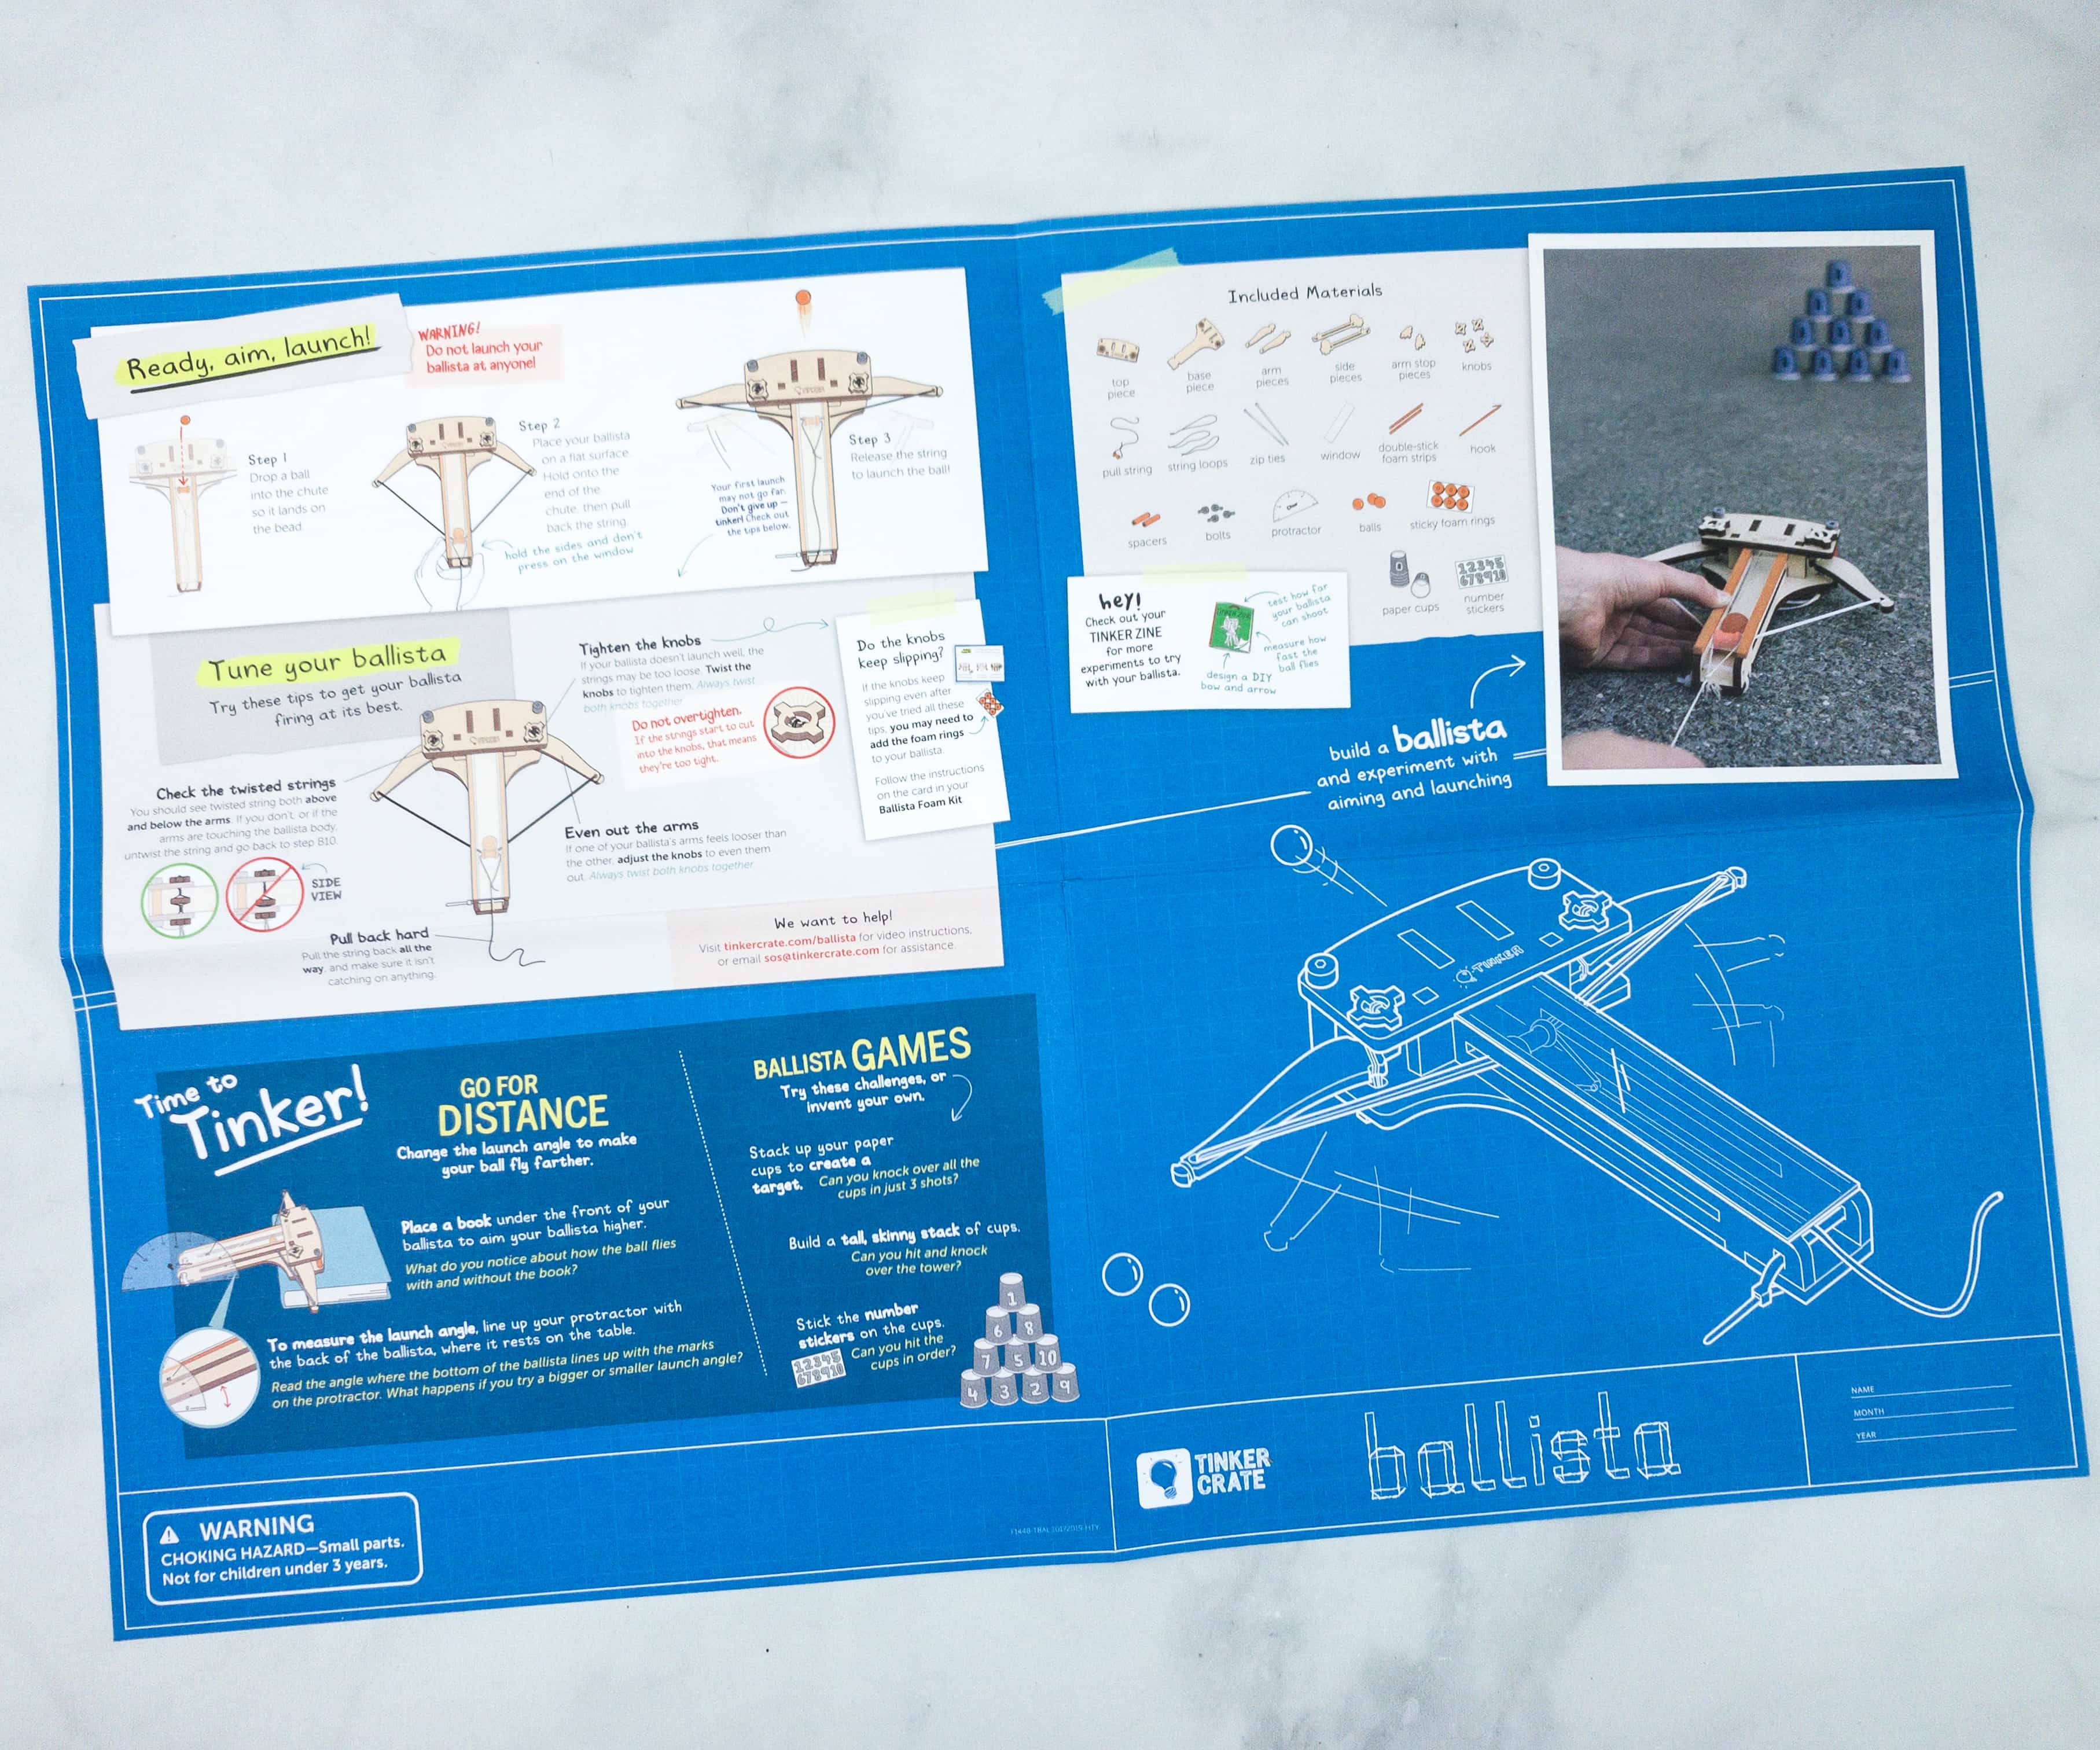
The instructions and other project info are printed on a faux blueprint fold-out sheet.
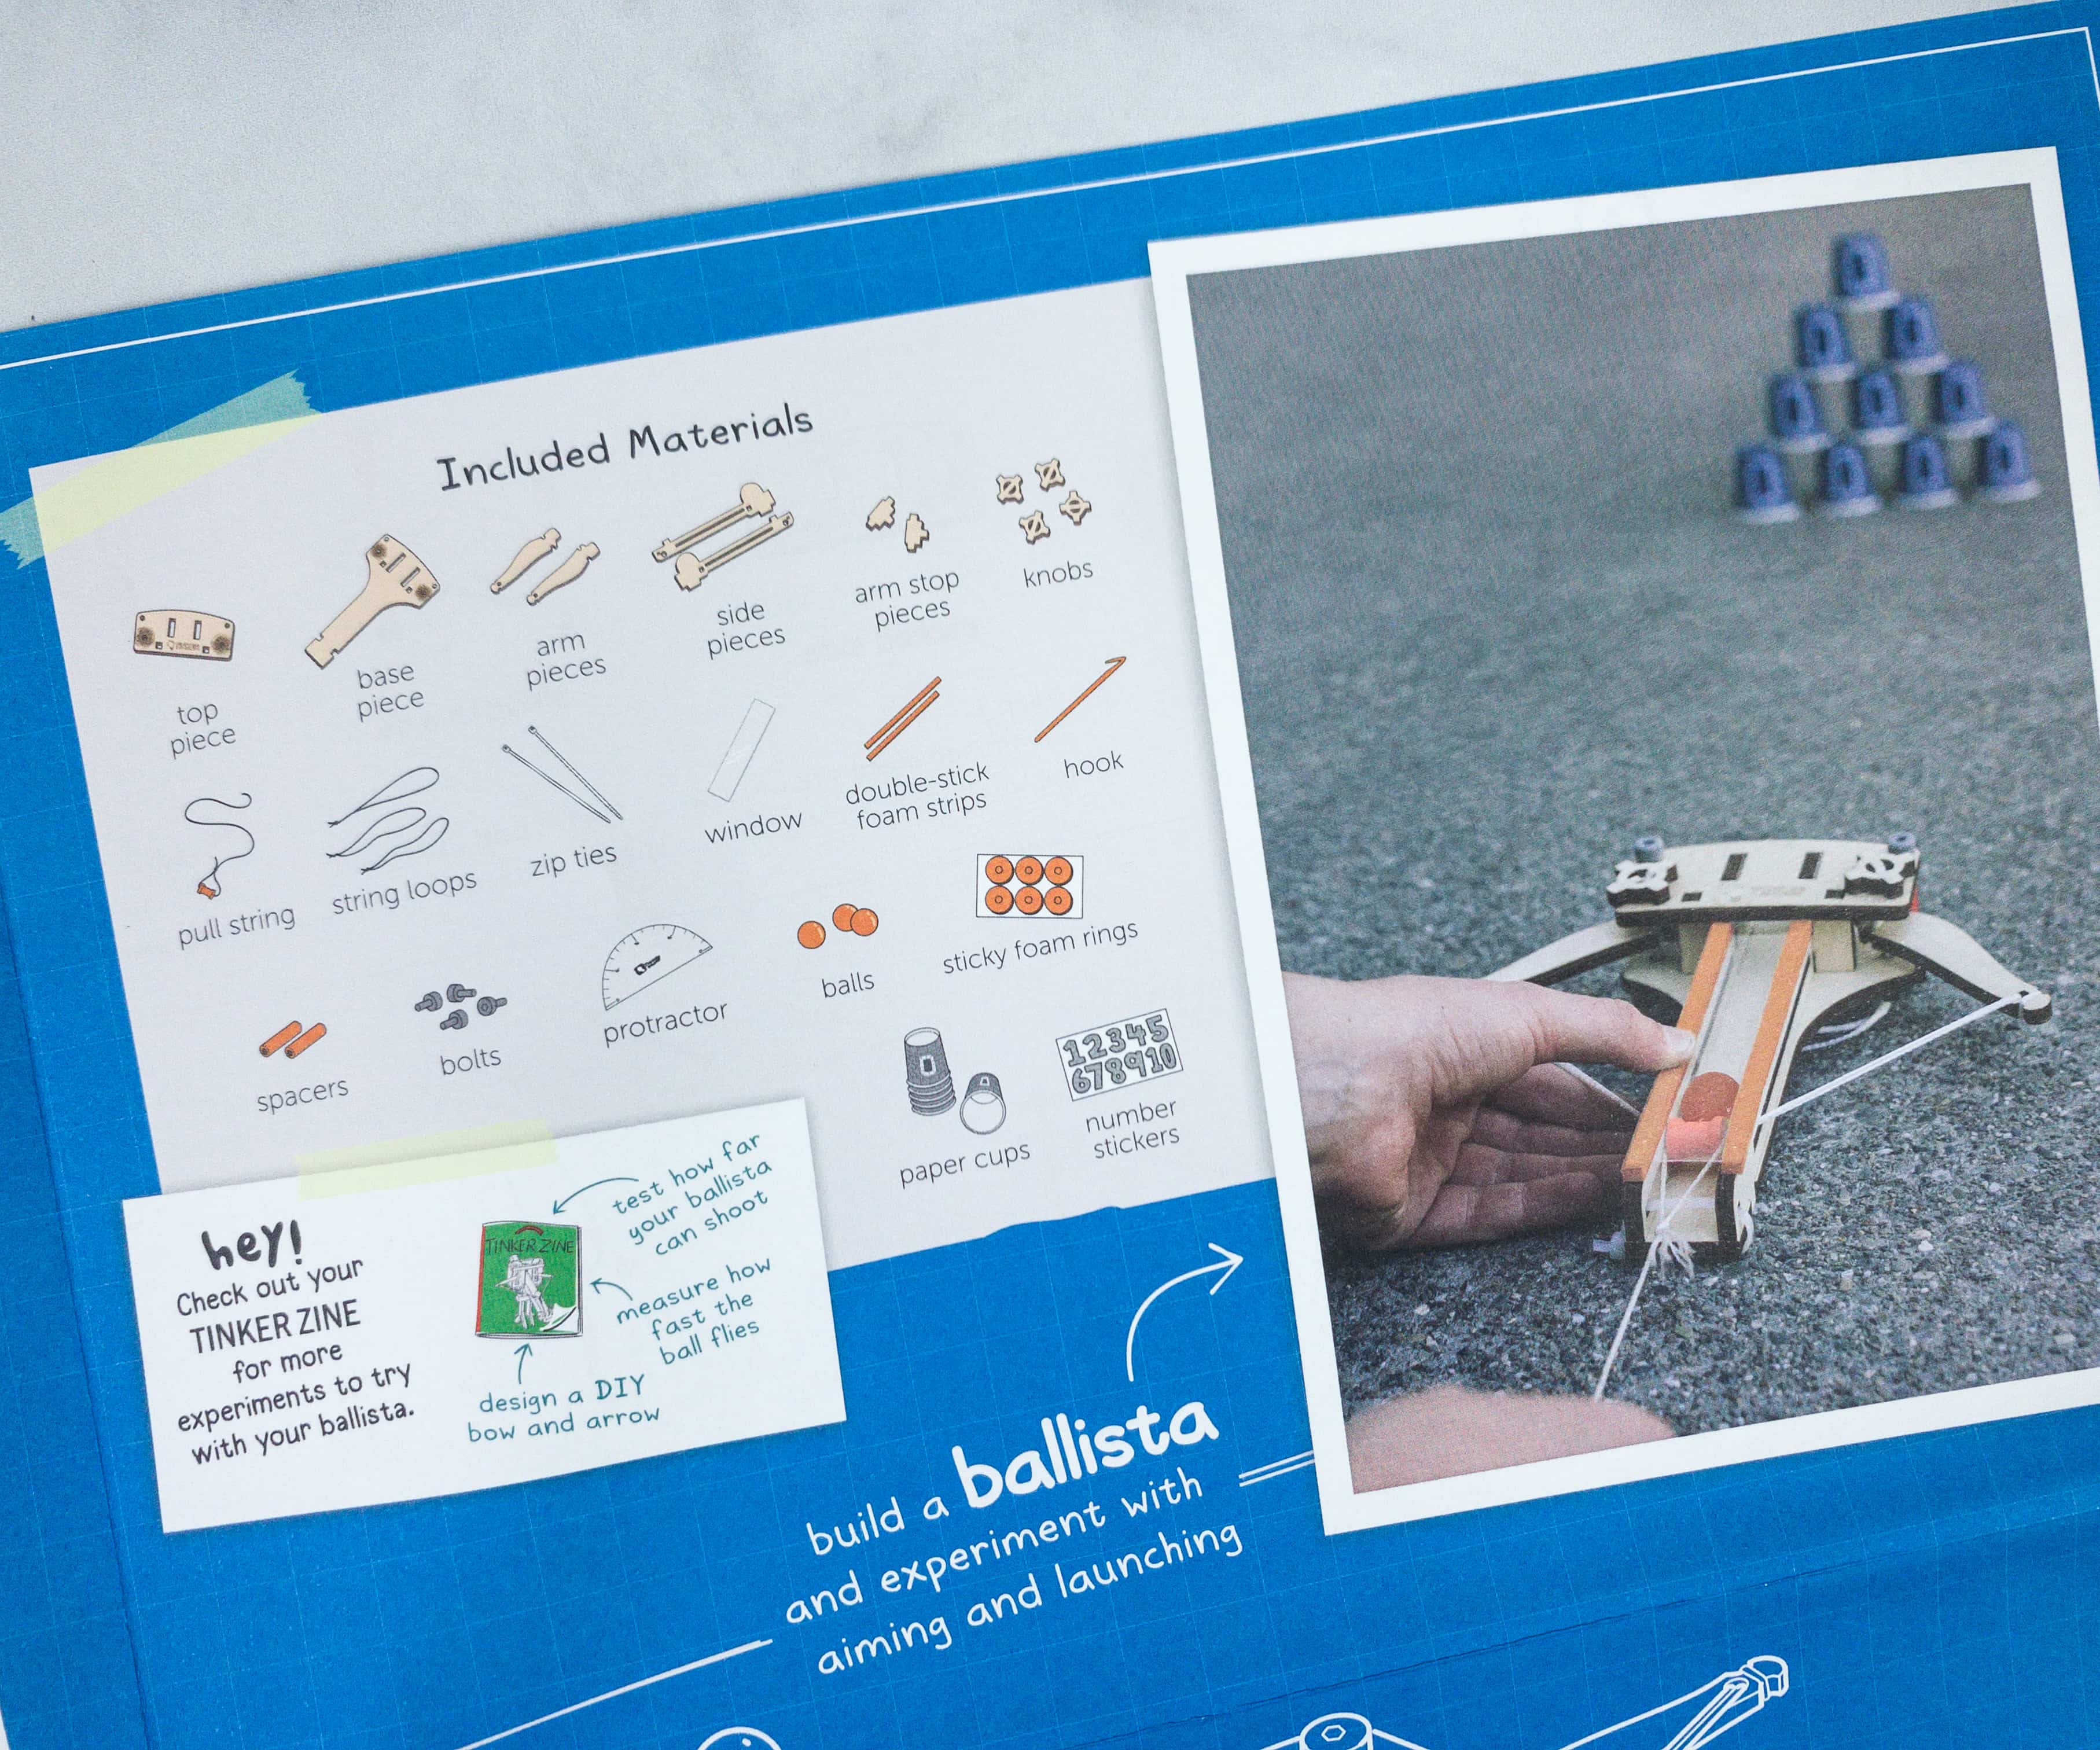
One side of the sheet has pointers for using your newly-constructed device, plus an inventory of all the supplies provided in the Crate.
If you are having trouble making the project, you can also visit their website for more detailed video instructions.
Tinker Crate Activities
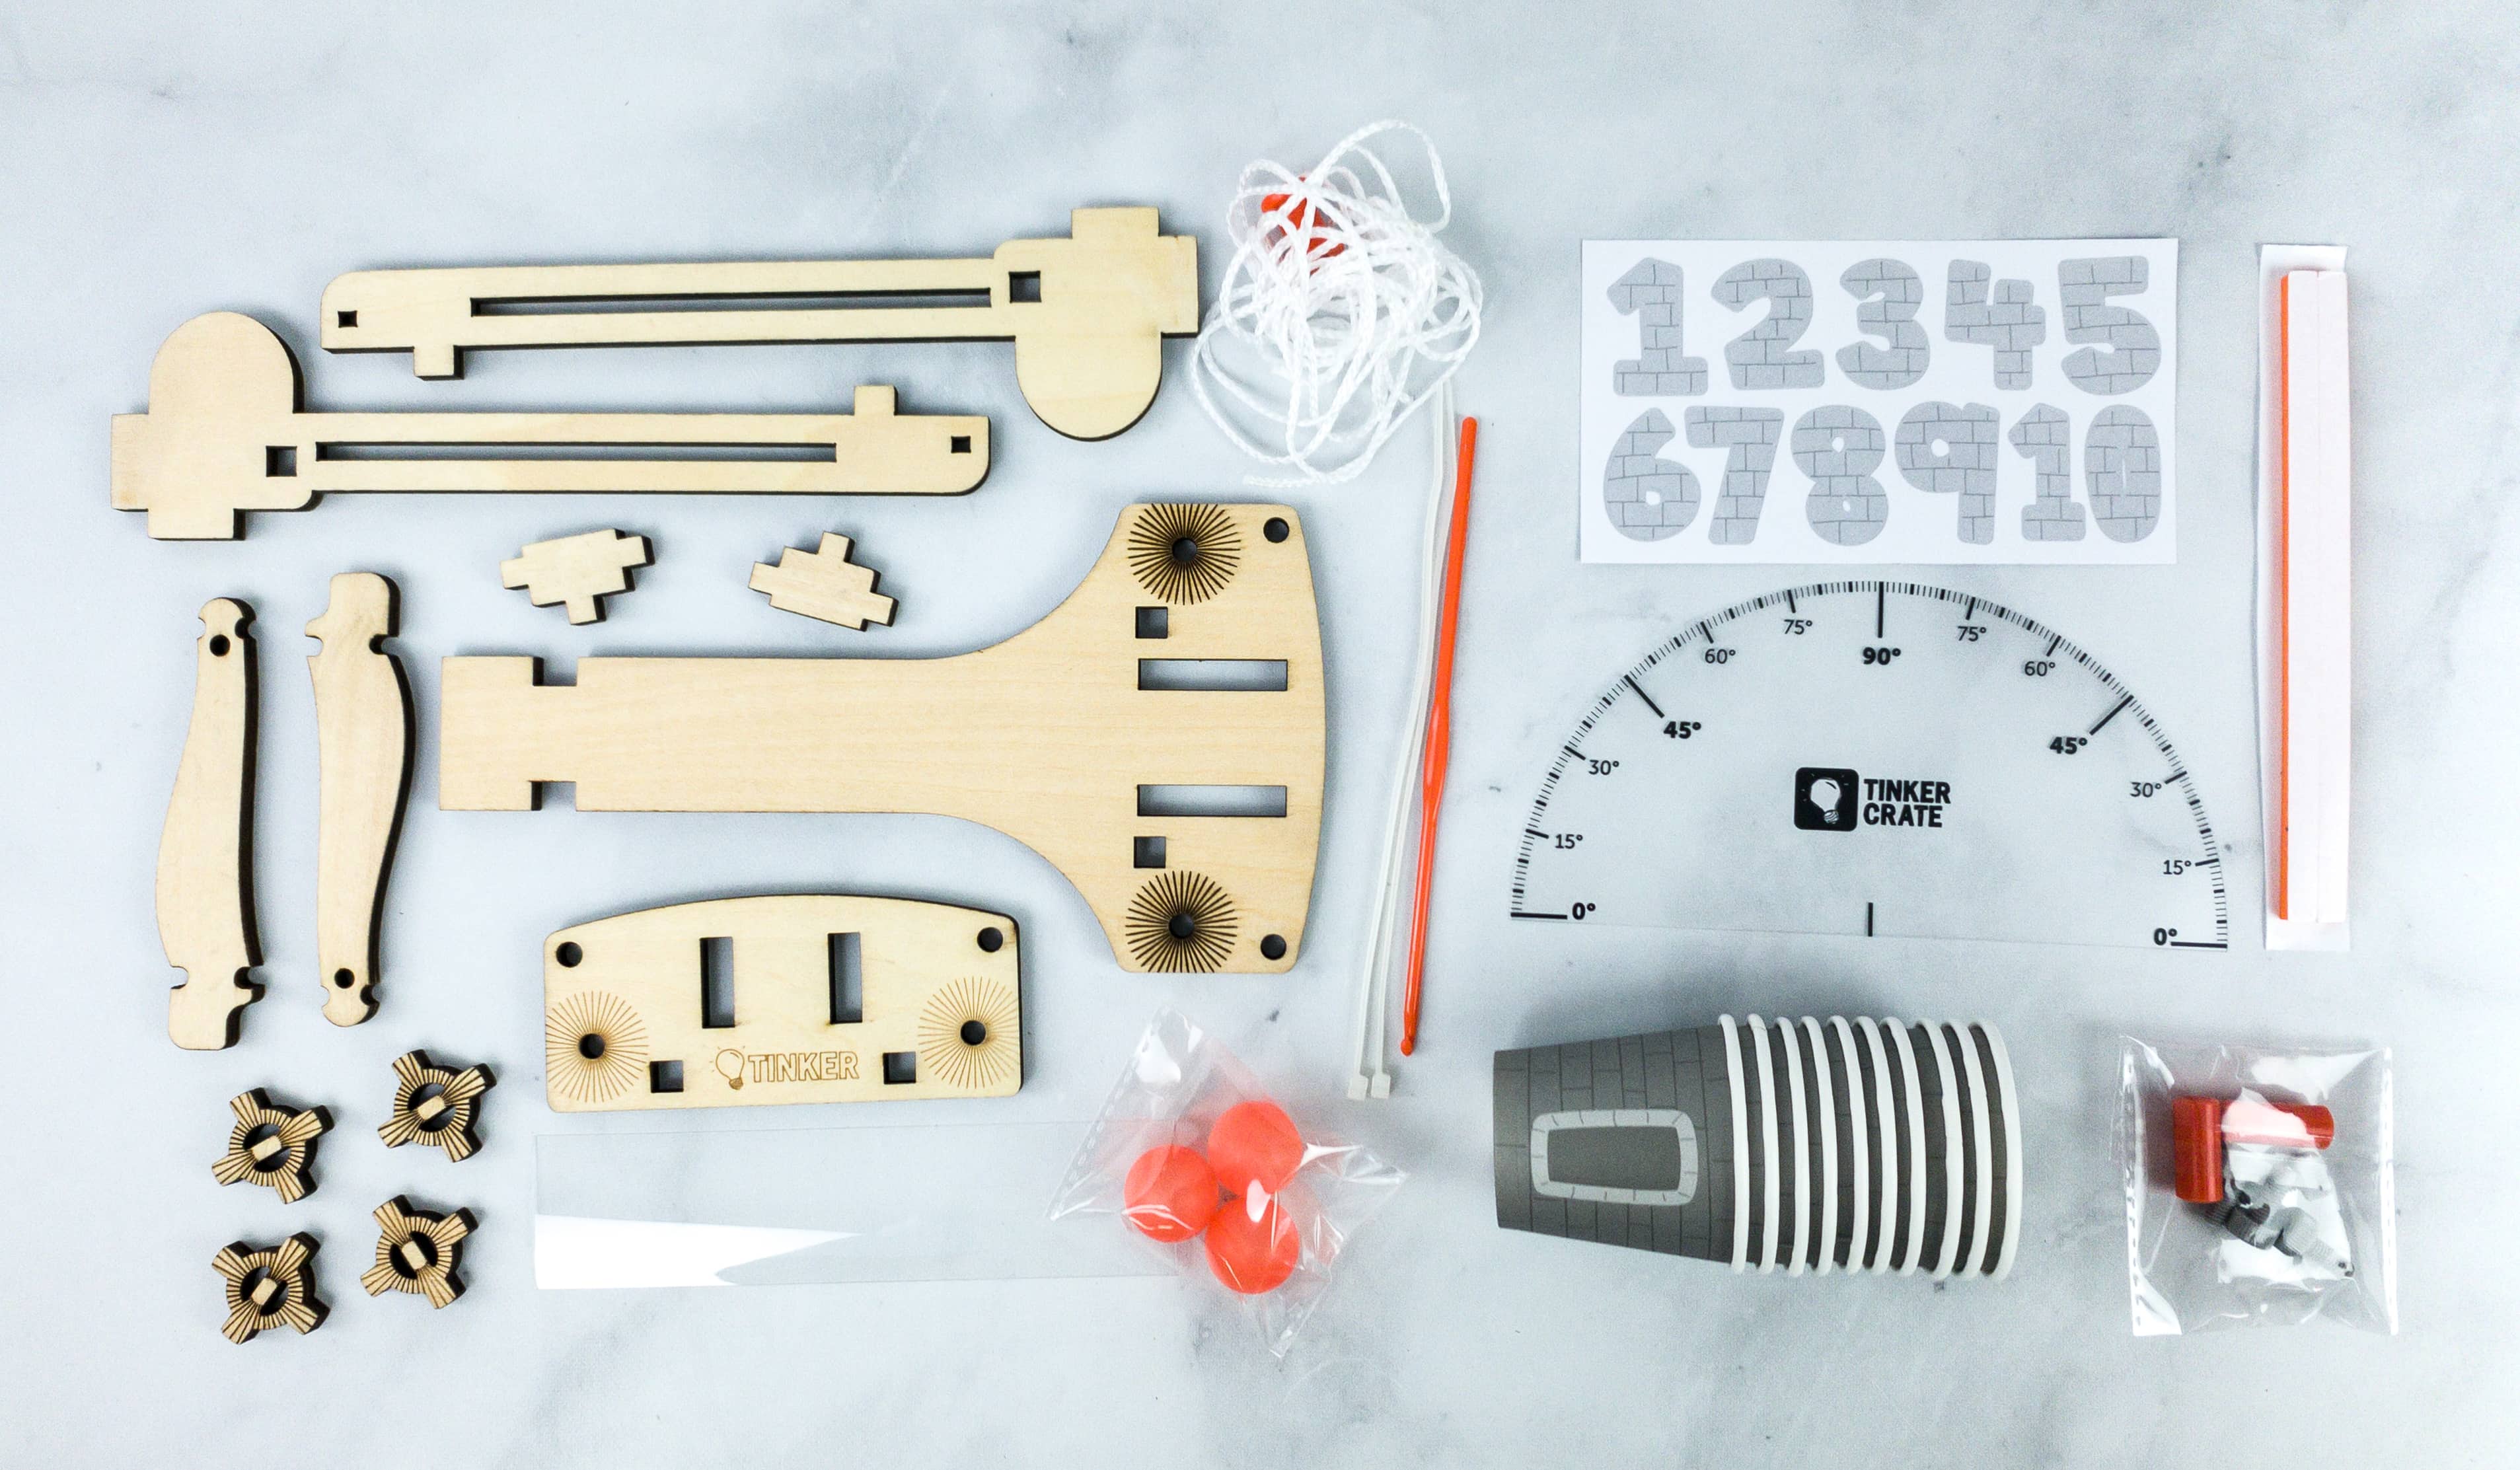
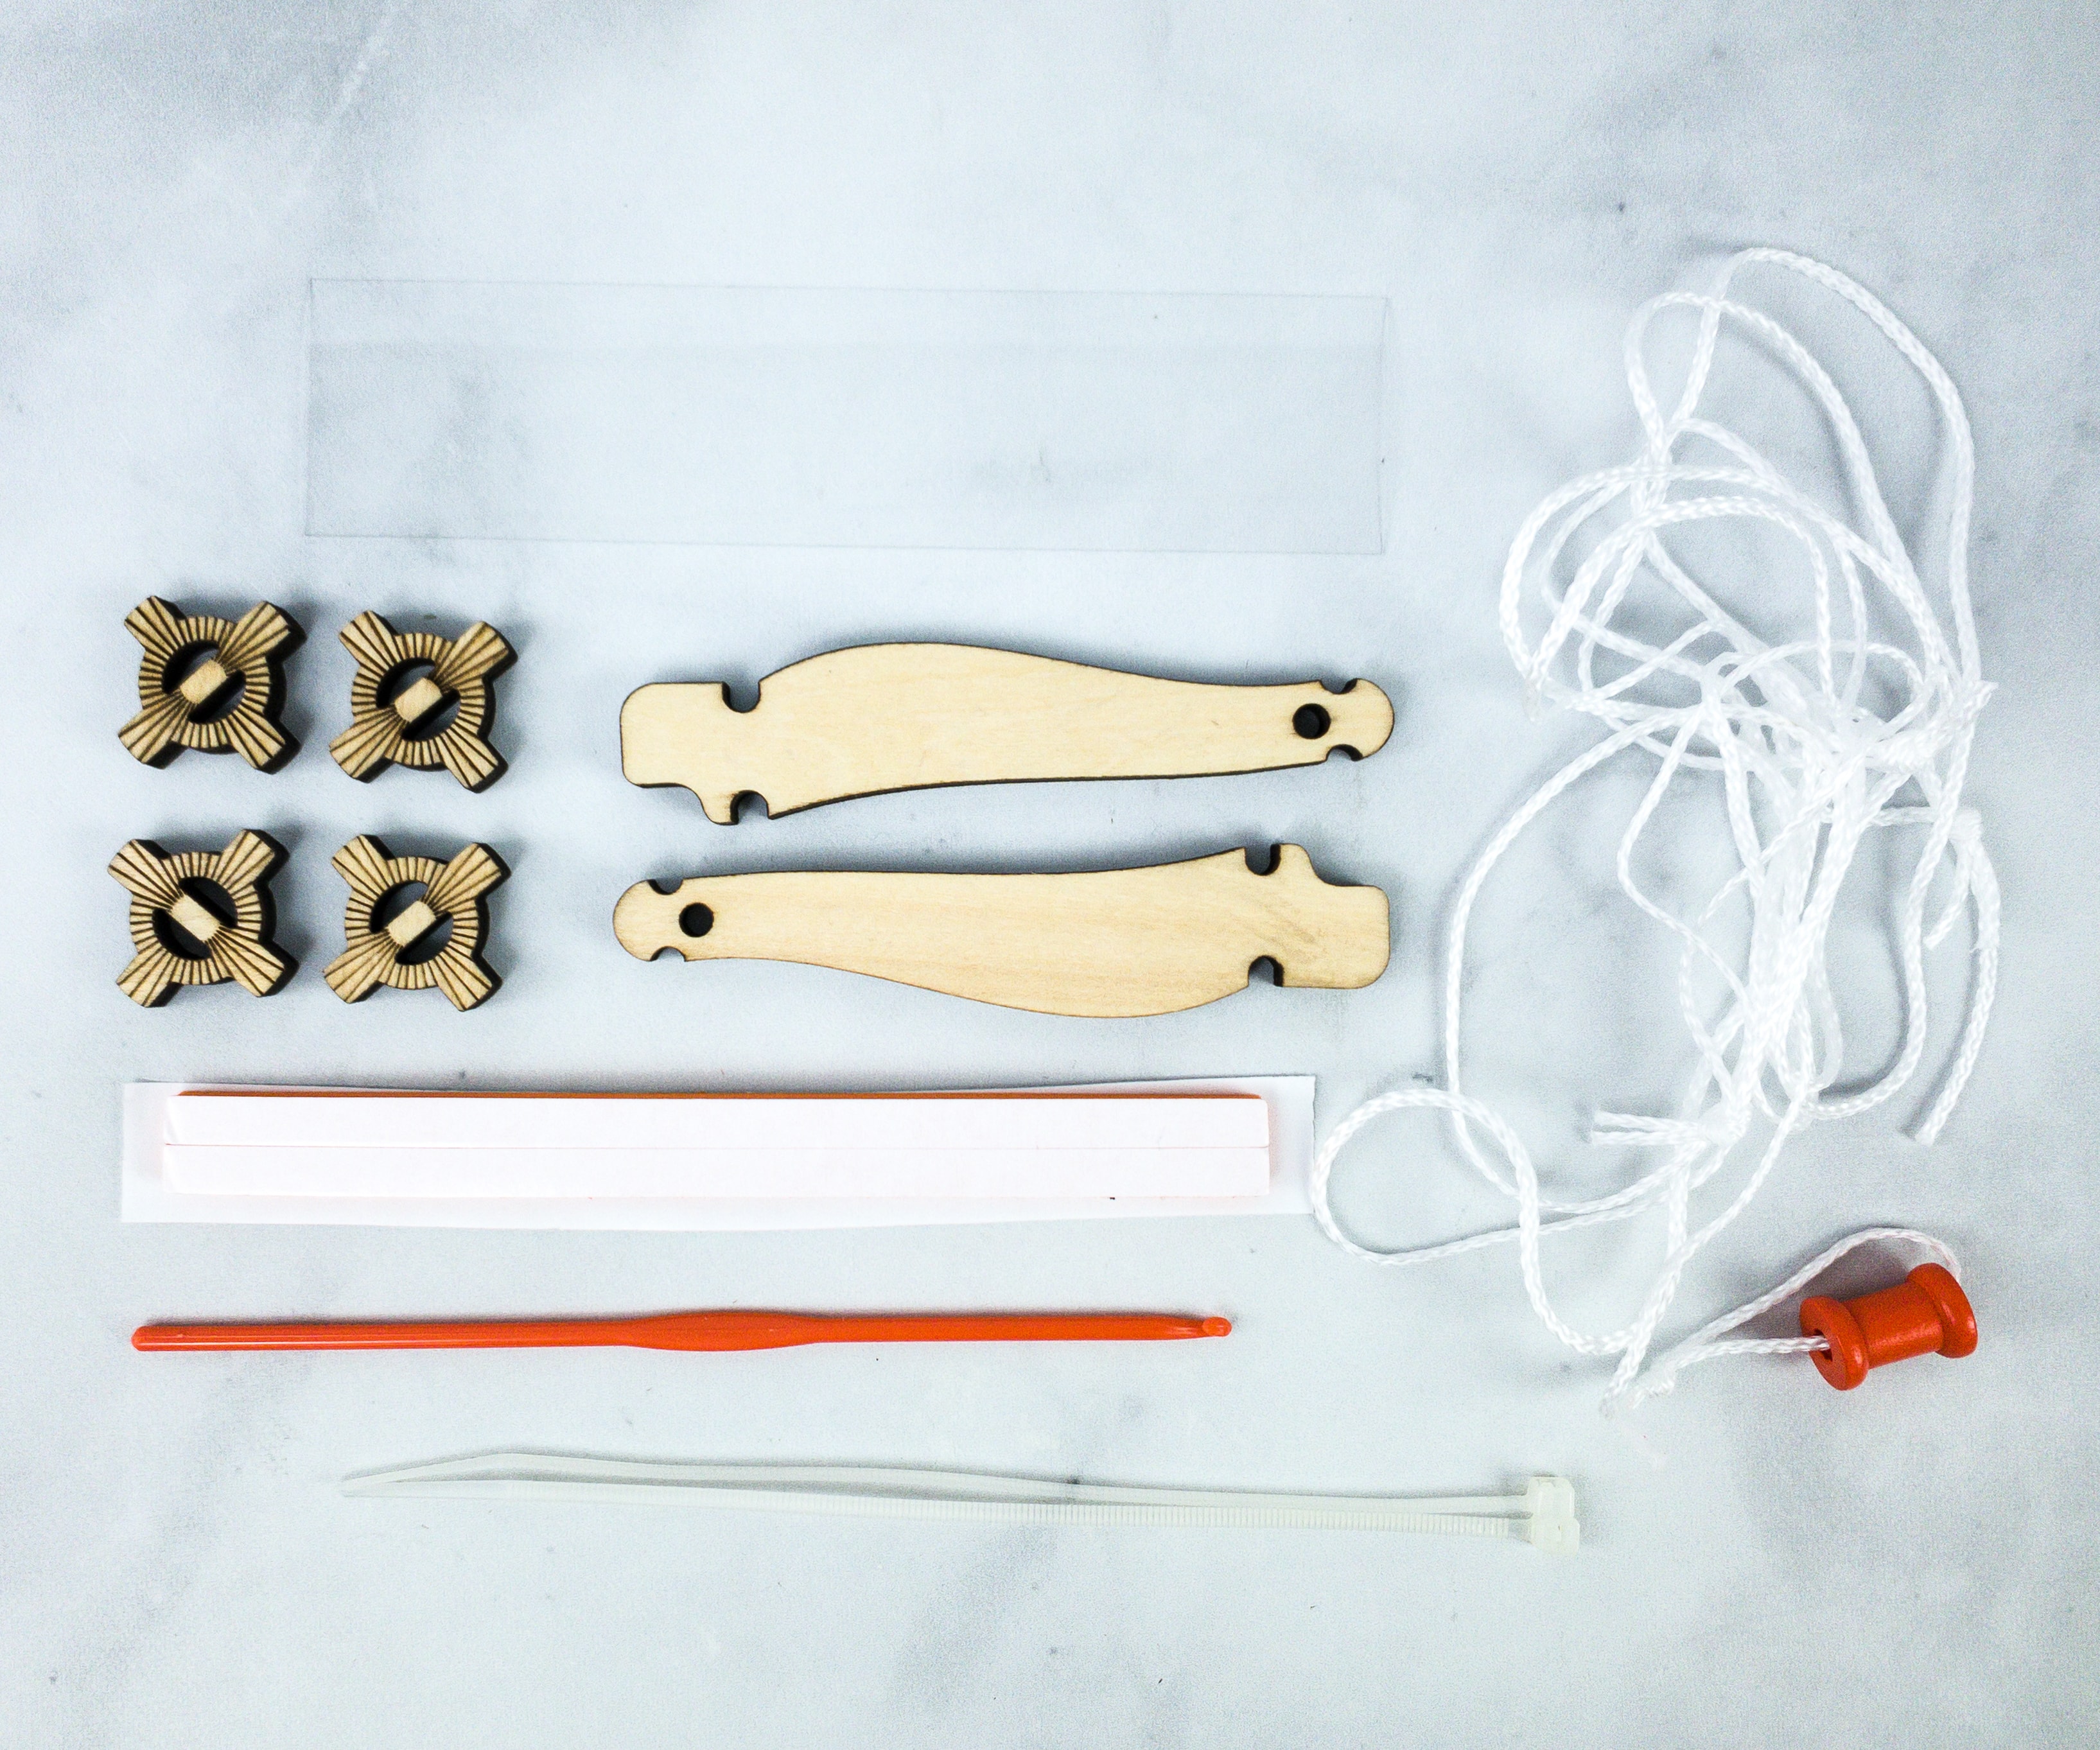
For this project, we used a wood set, knobs, pull string, string loops, zip ties, window, double-stick foam strips, hook, spacers, bolts, protractor, balls, sticky foam rings, paper cups, and number stickers.
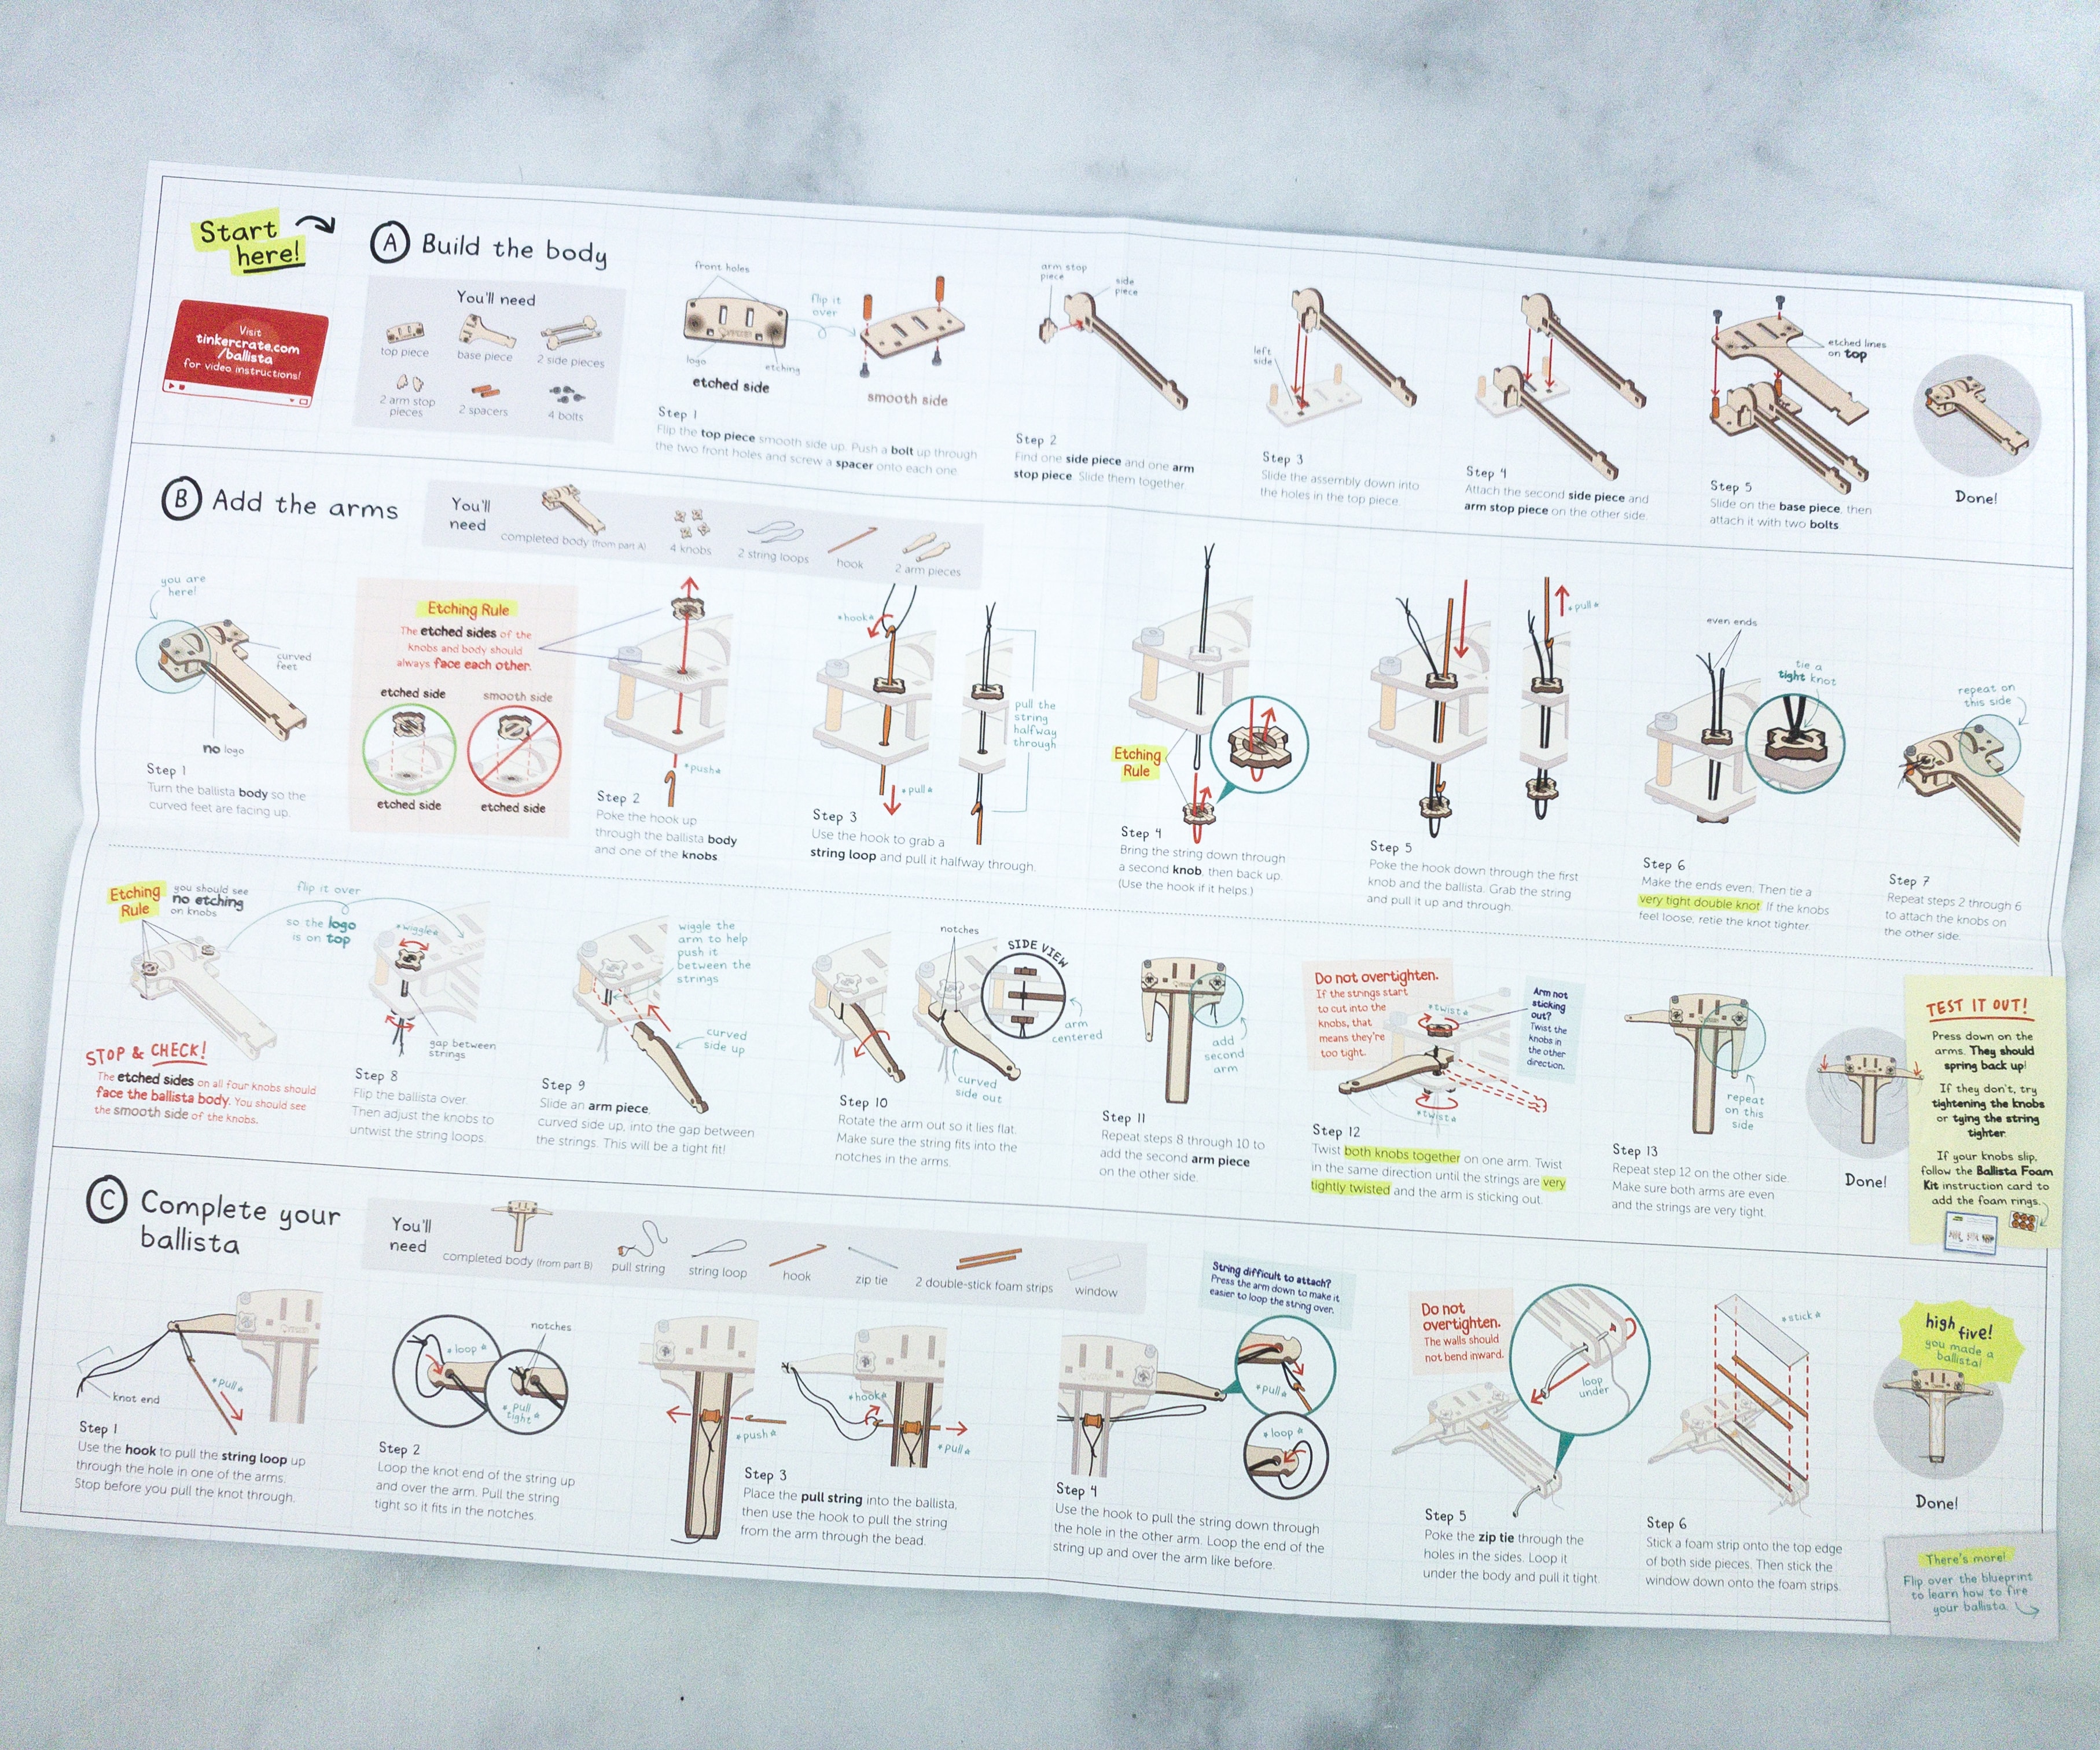
This sheet comes with illustrations of all the materials needed for each portion of the assembly. It’s so helpful, especially for those complex builds.
The sheet is well-detailed, they even highlighted all those important and technical areas.
They also had this stop and check portion, which makes sure you are on the right track!

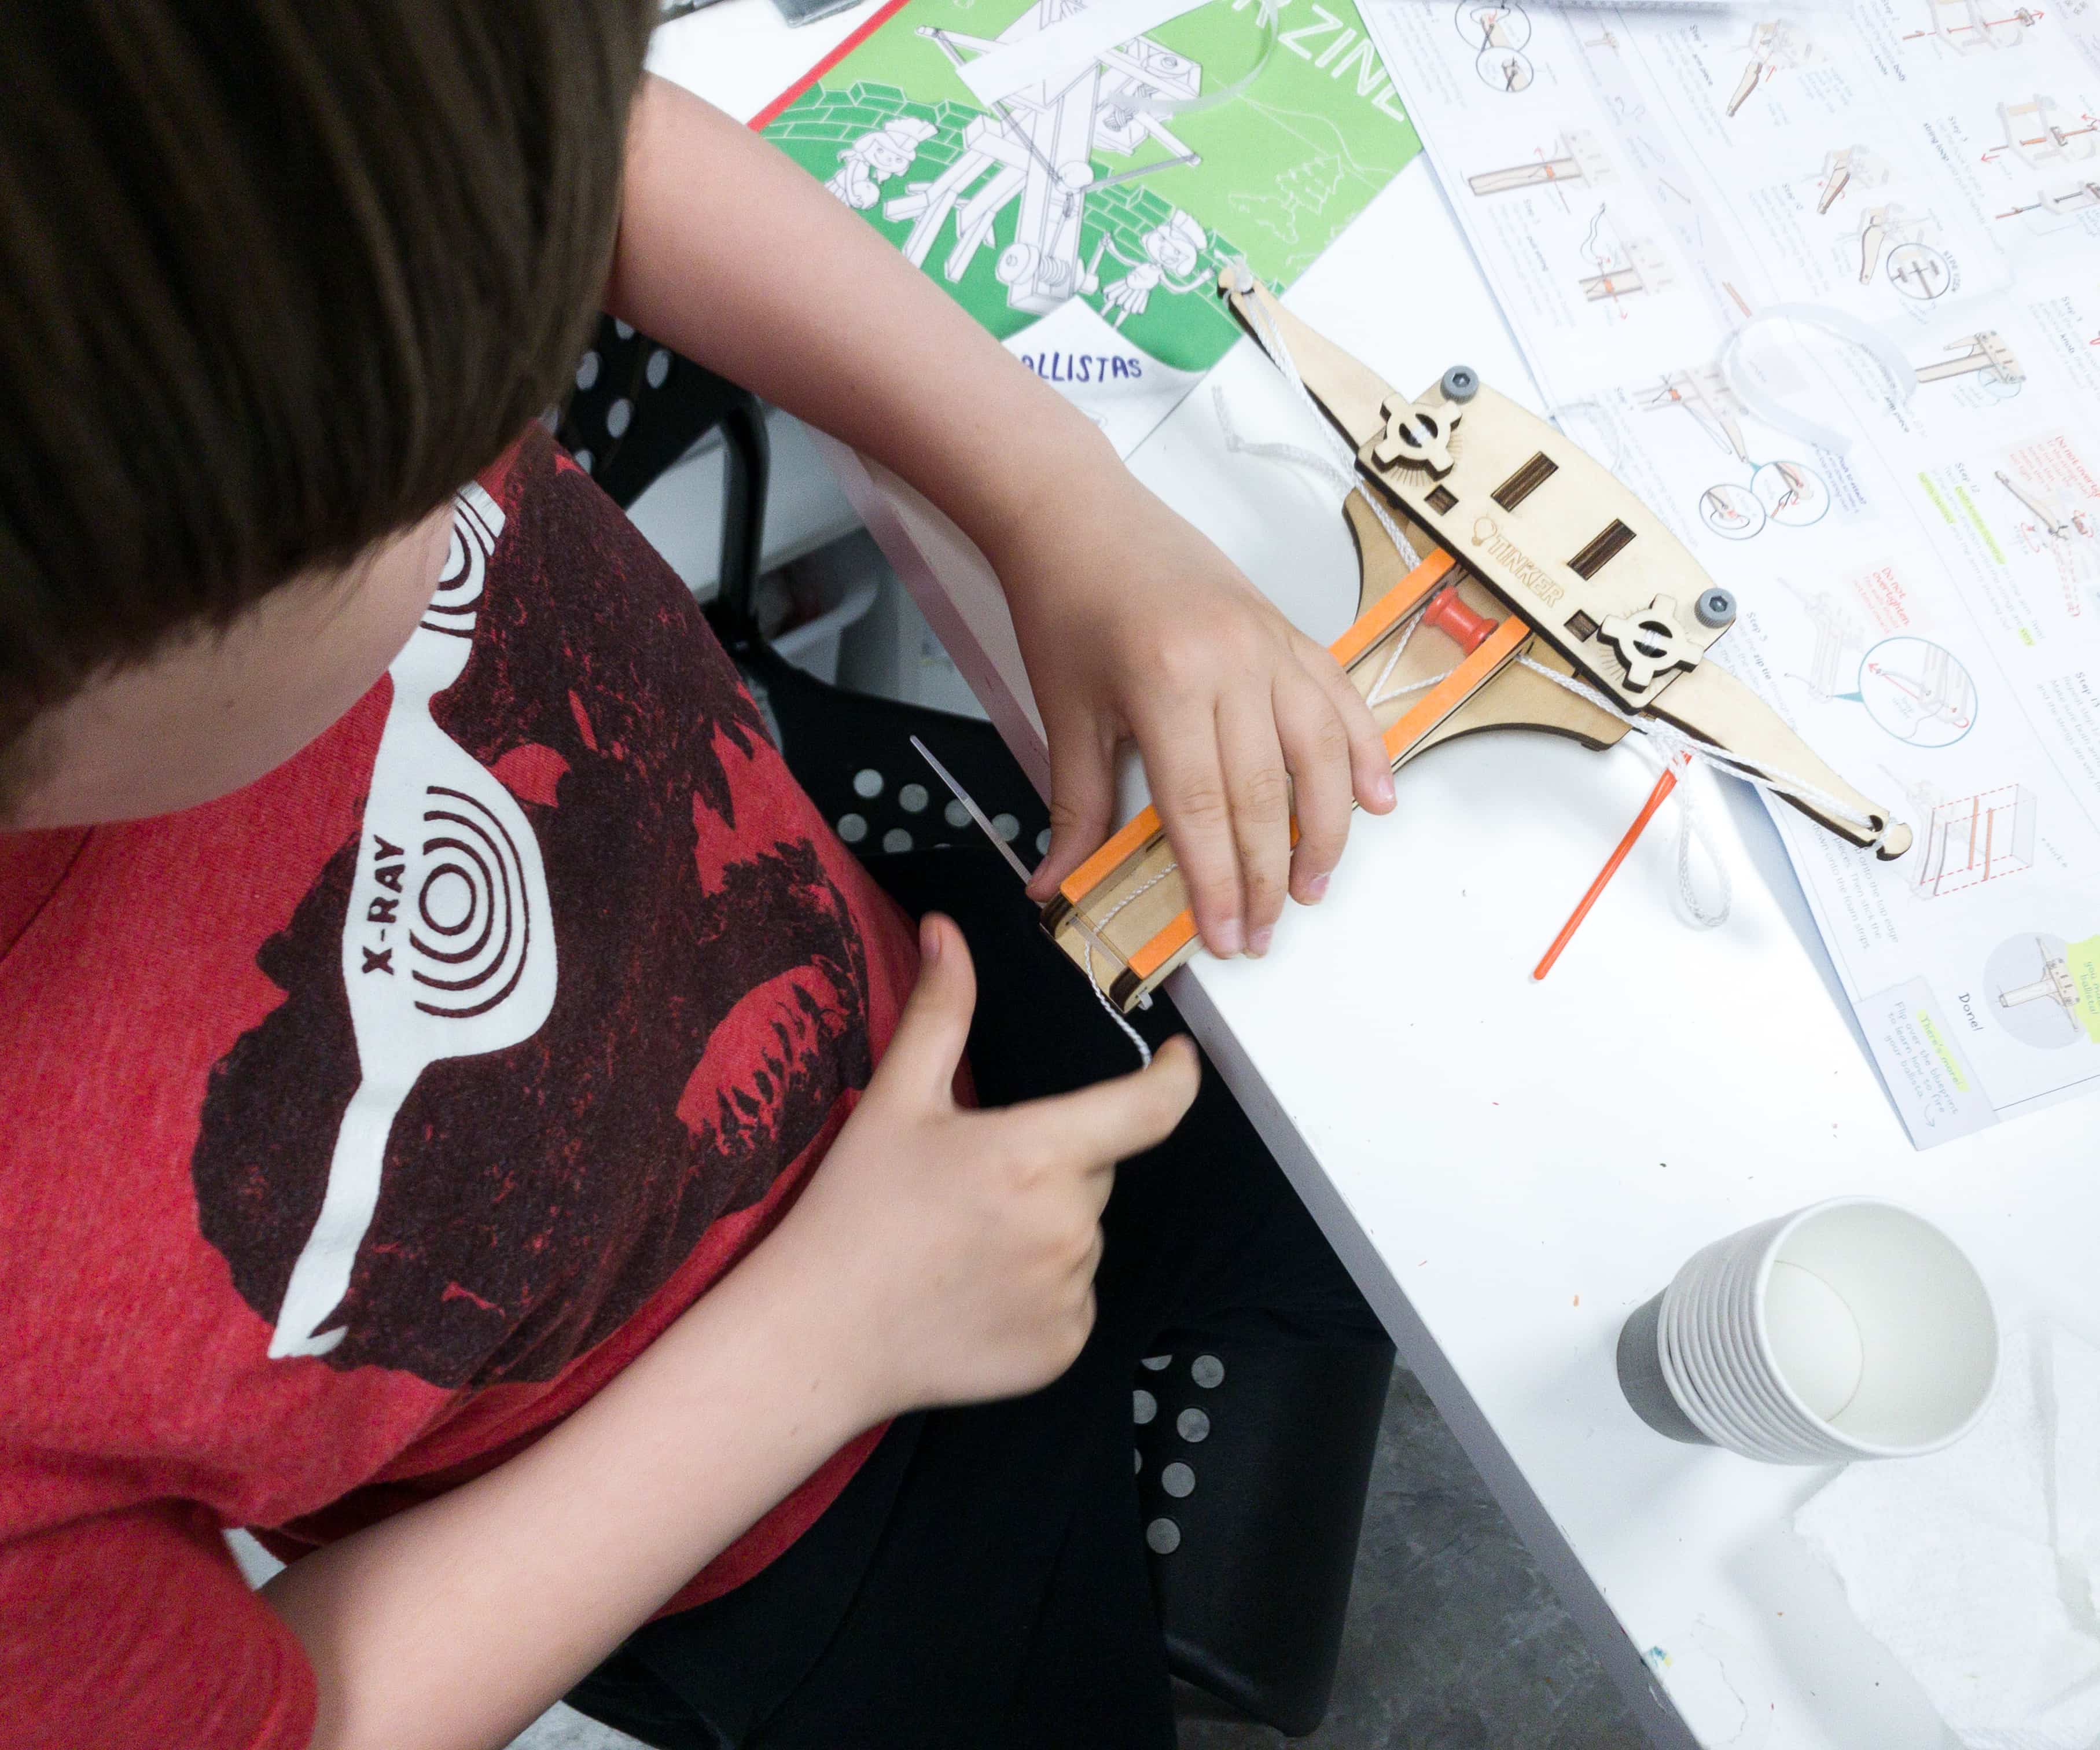
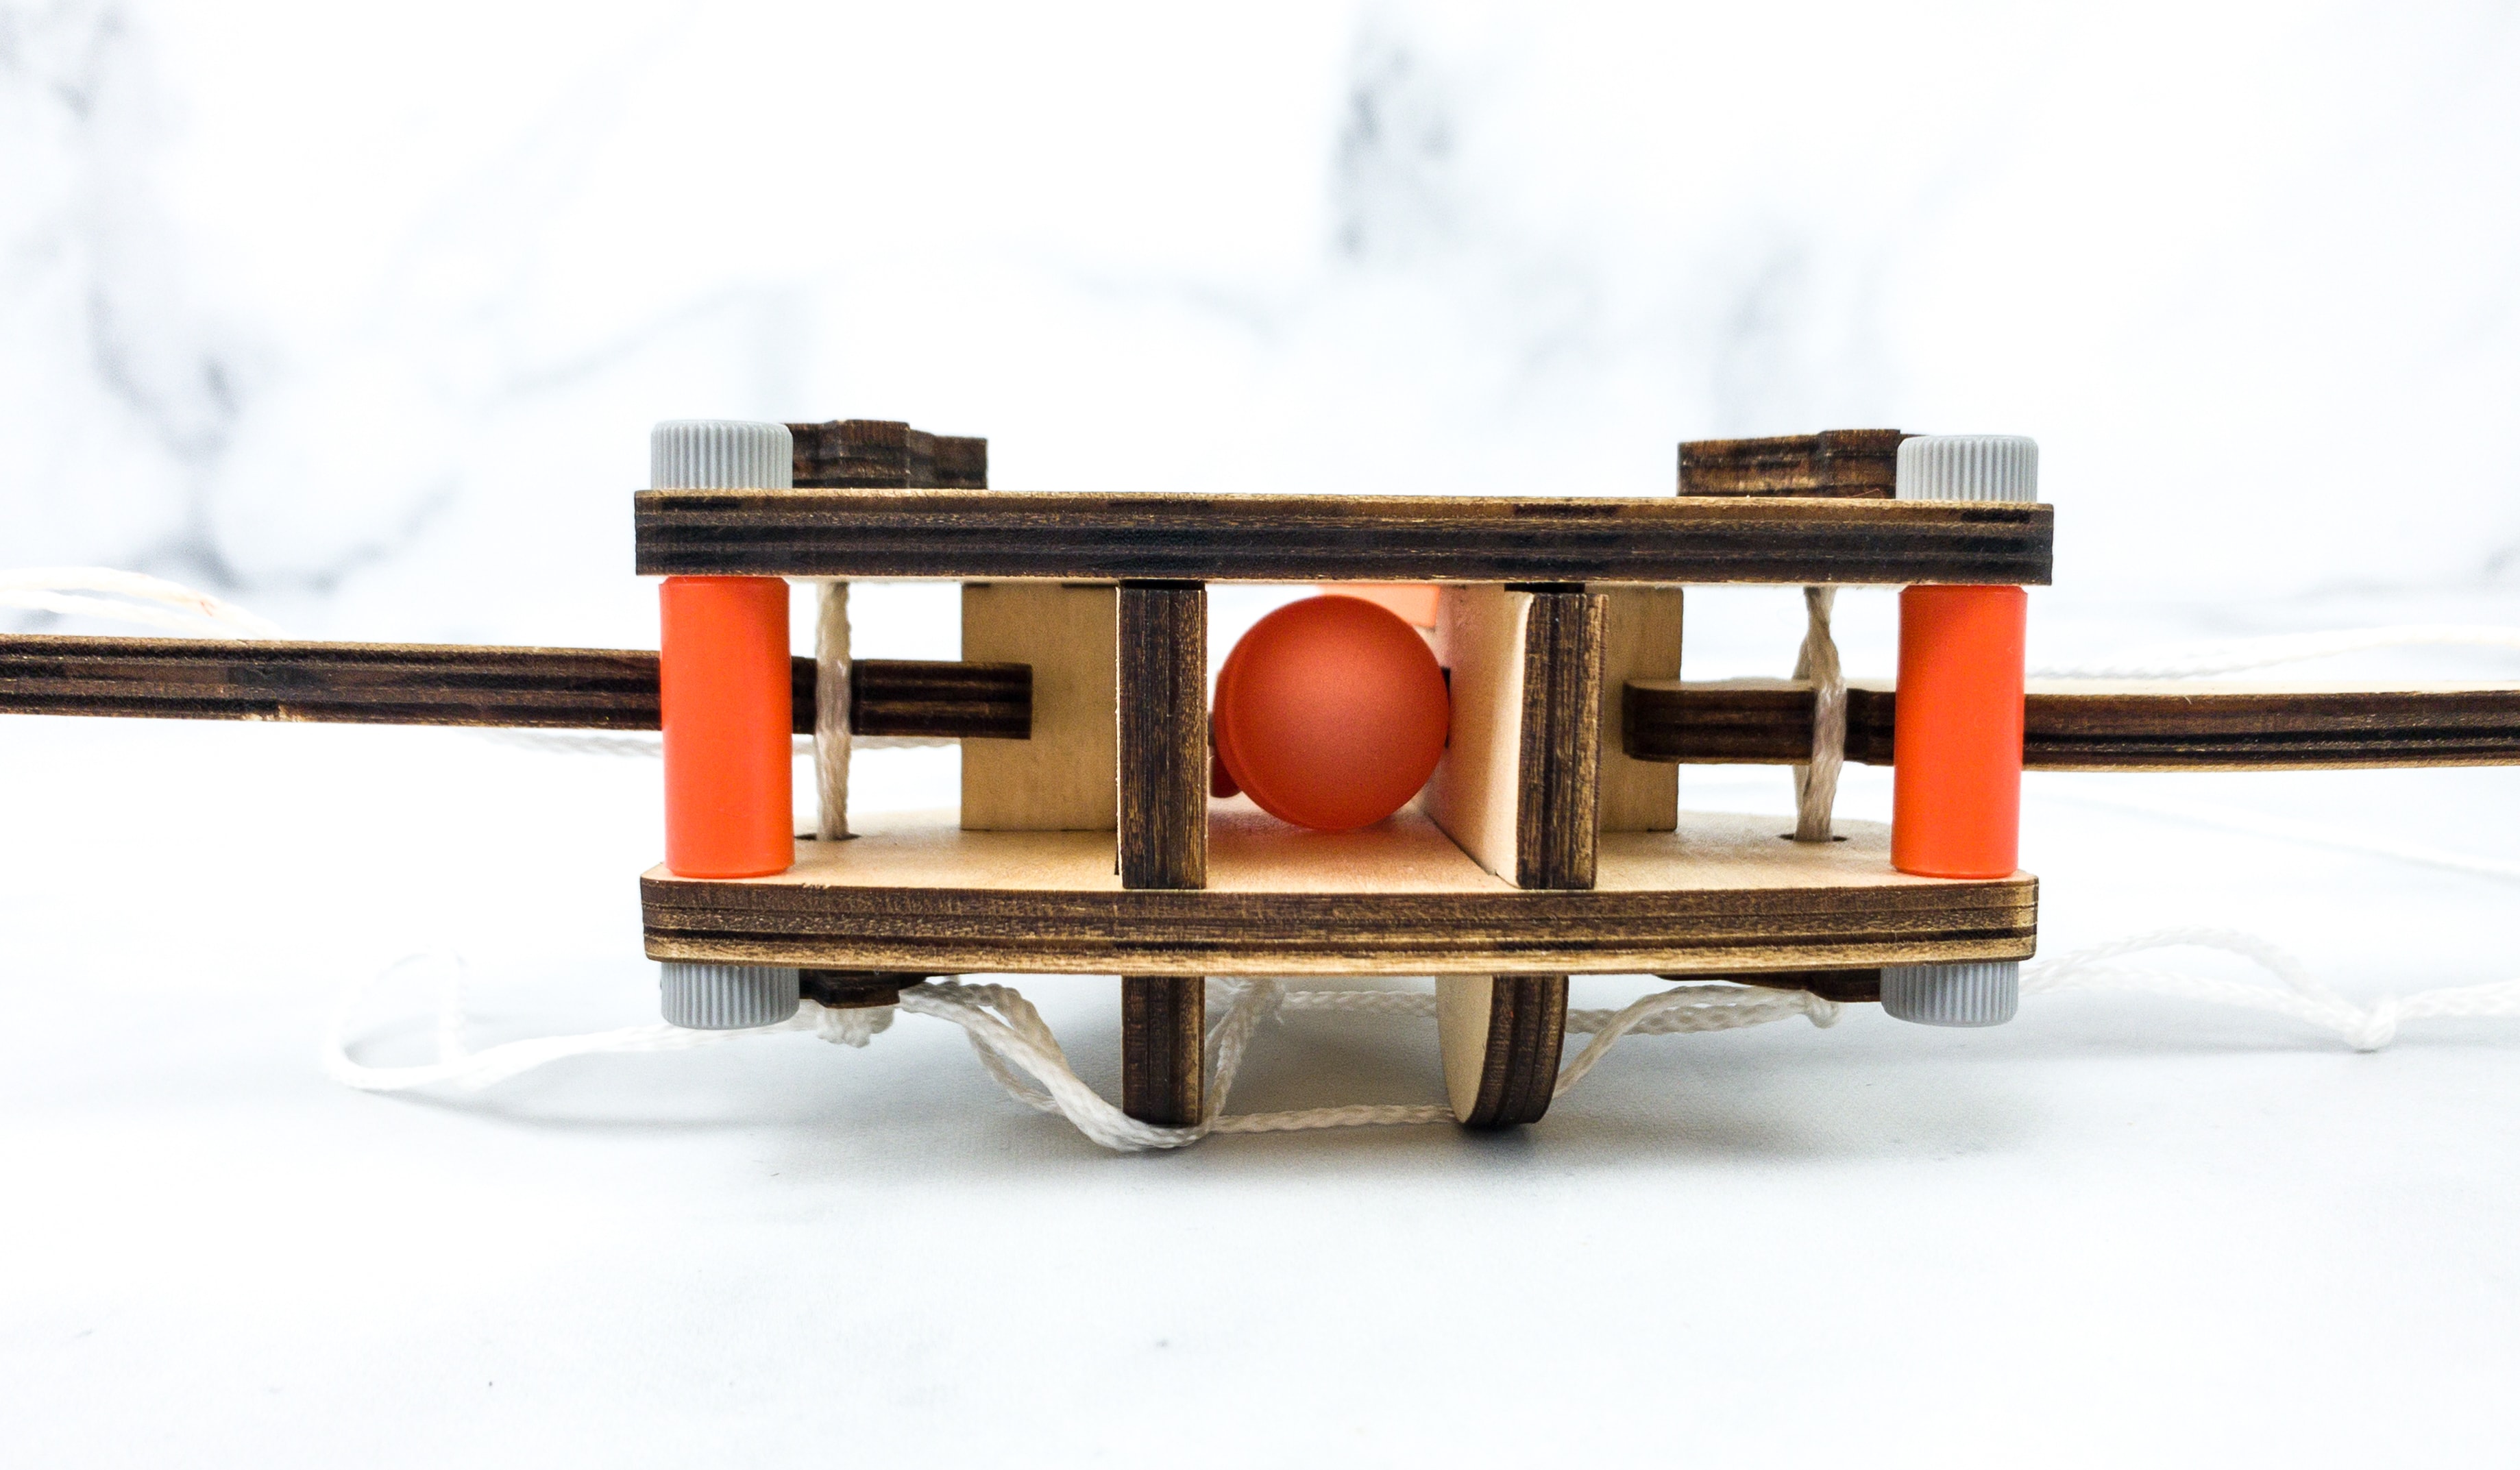
For the first part of the project, we used the top, base, side, and arm pieces. We also used spacers and bolts.
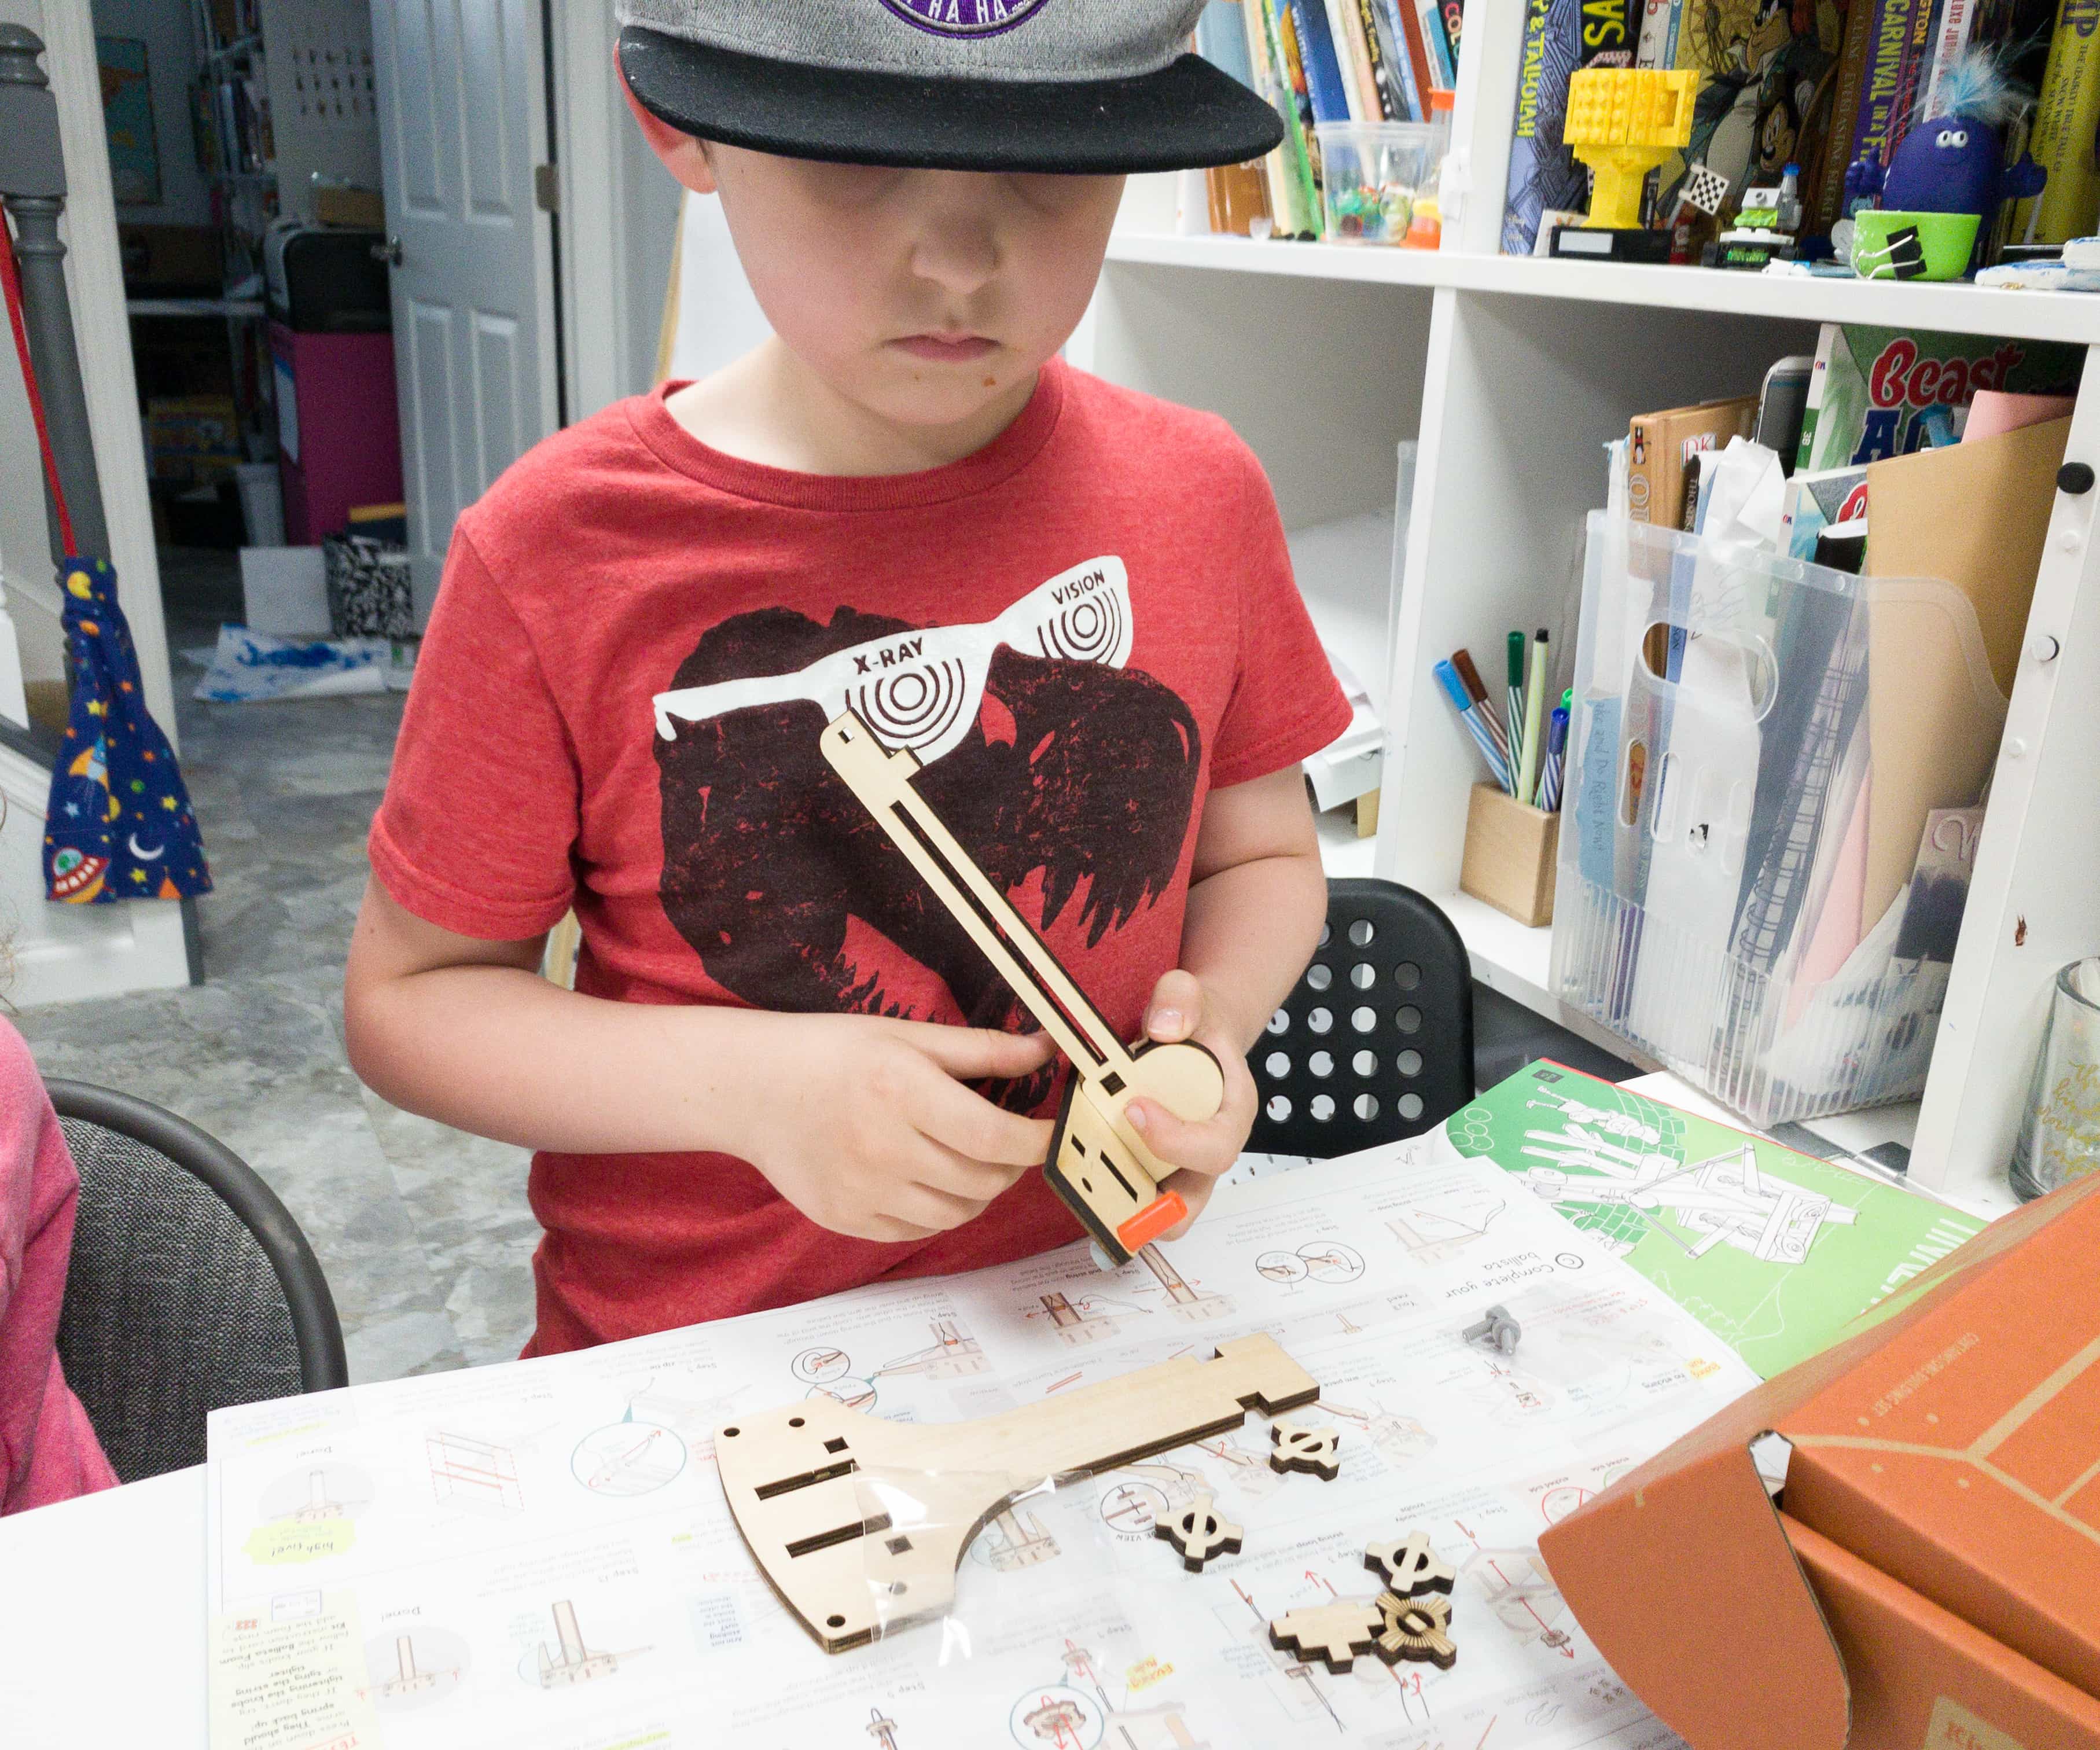
My kids started the project by building the ballista’s body. They connected one of the side pieces and slid it through the top piece.
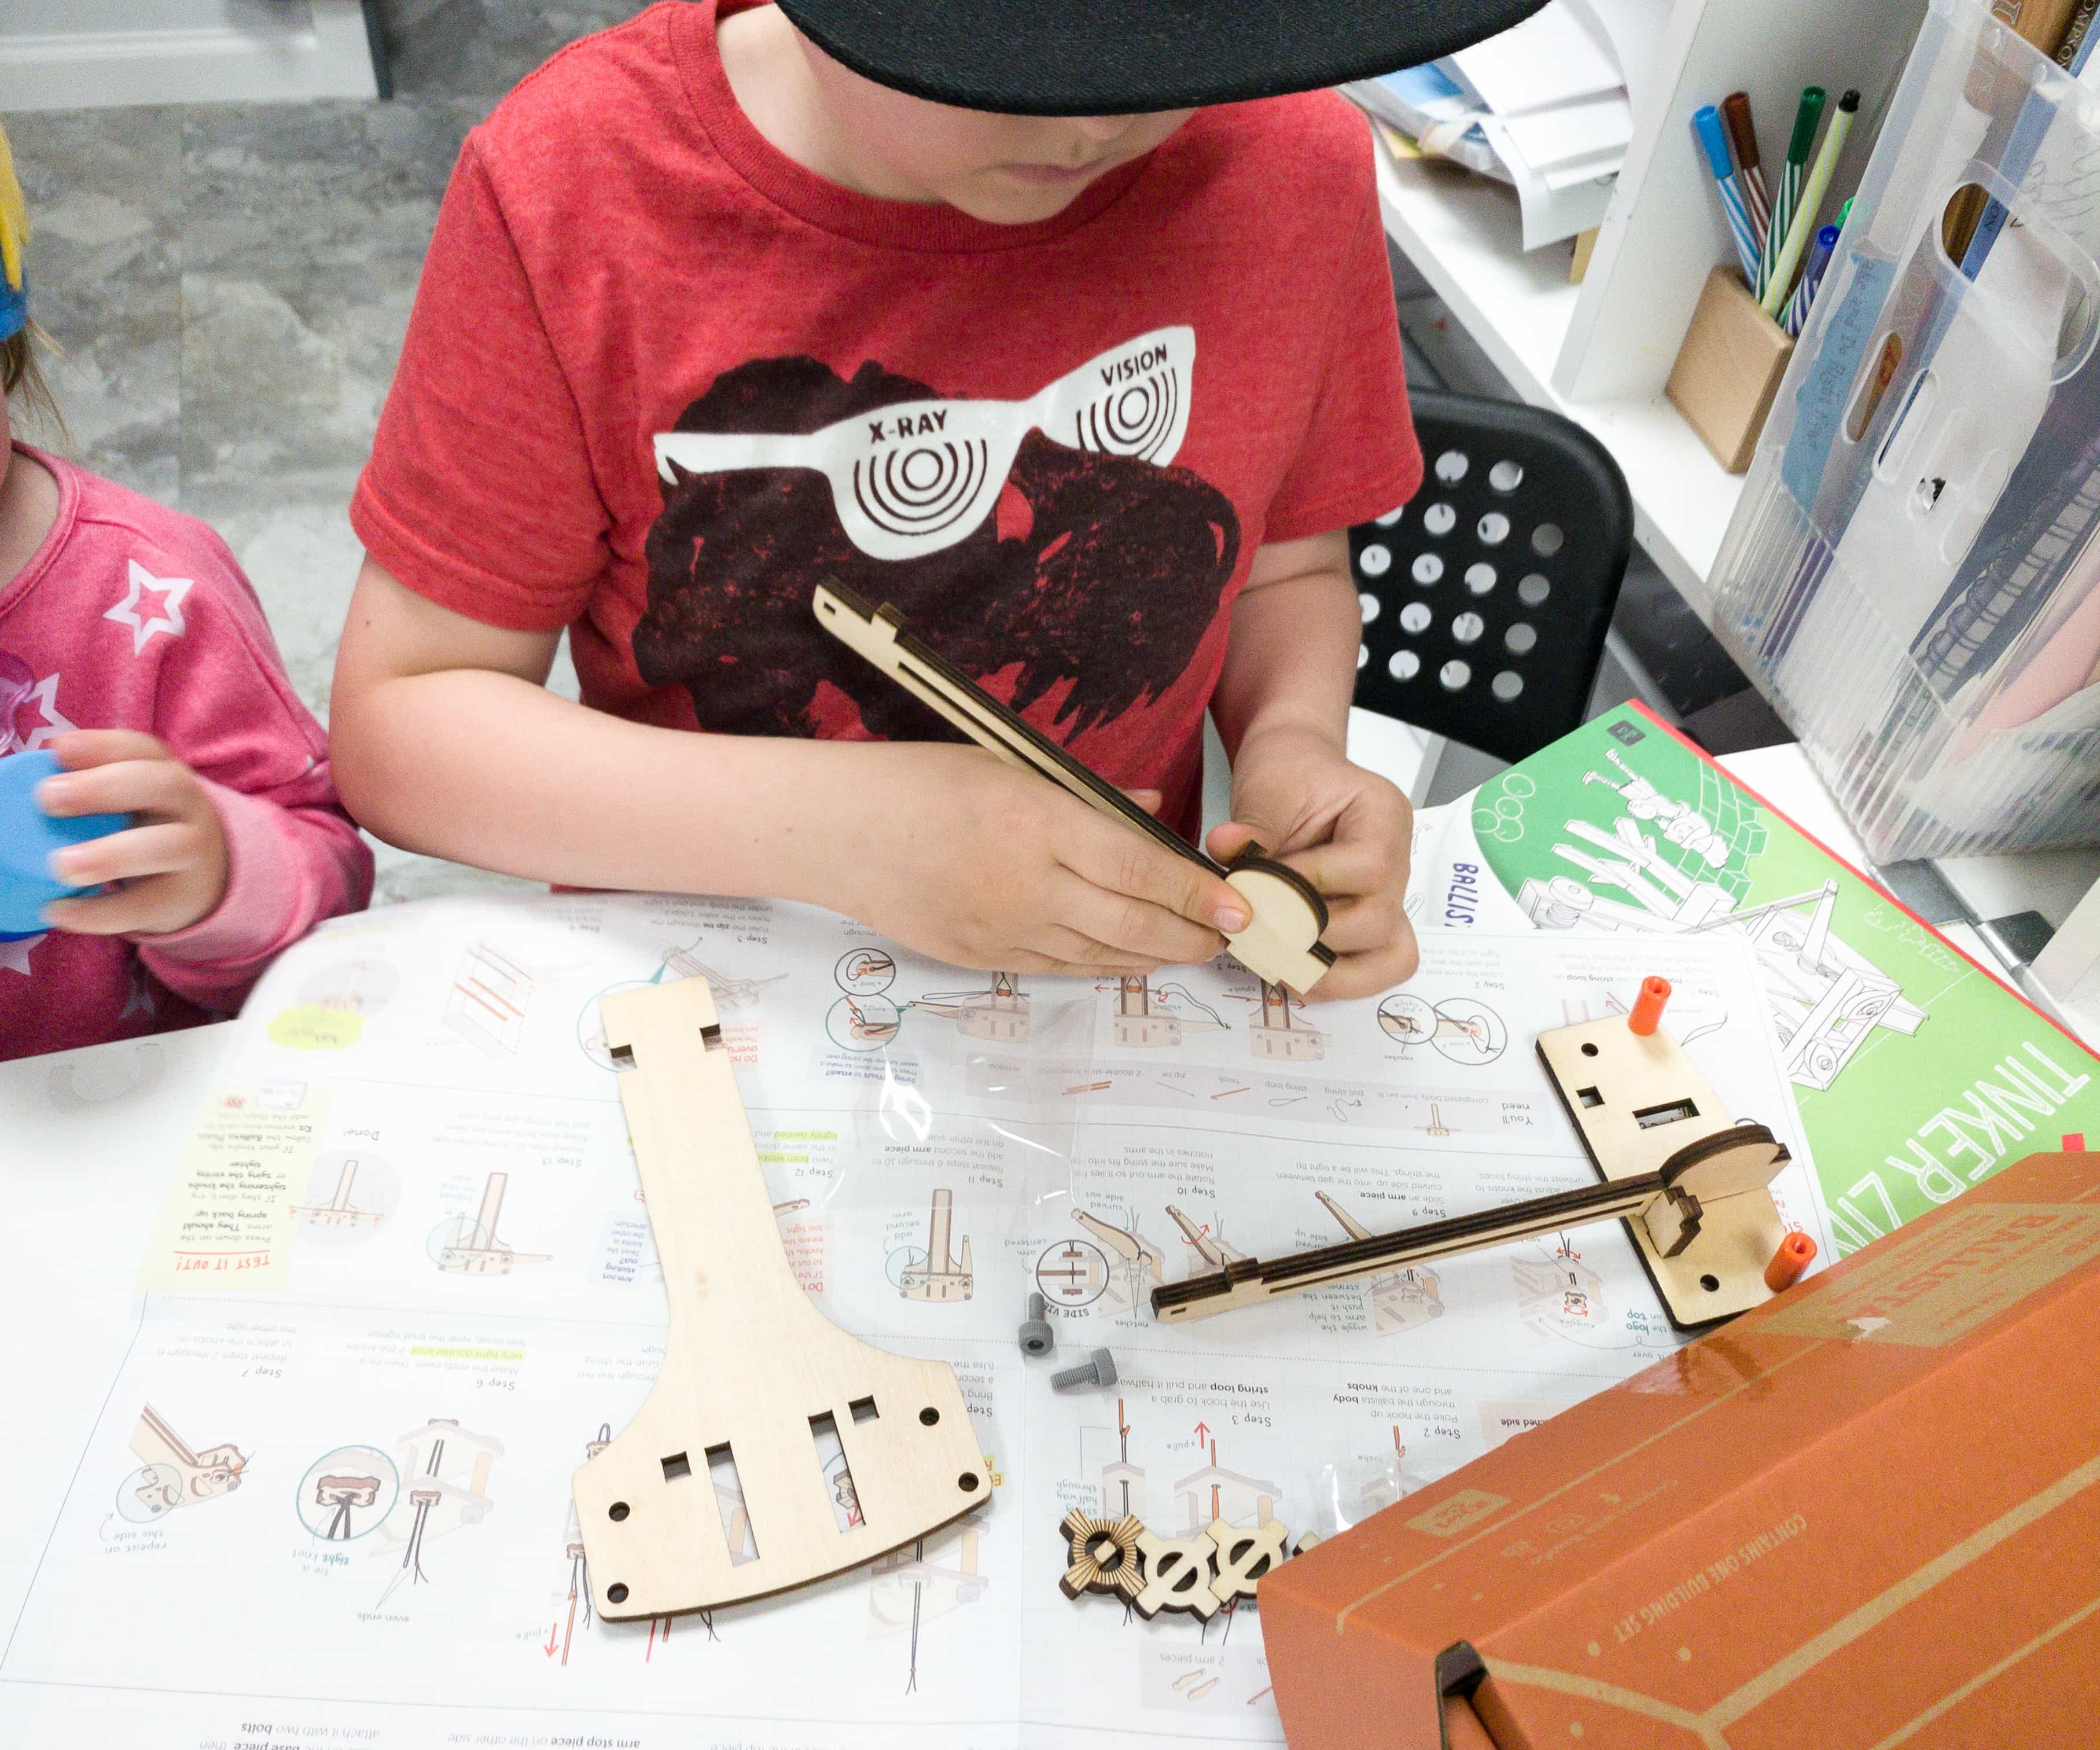
They also inserted the stopper piece on the other arm and then slid it again on the other side of the wooden top piece.
Once done, they inserted the base piece with the etched part on top and slid it through the top and side pieces. They also locked it using the two bolts.
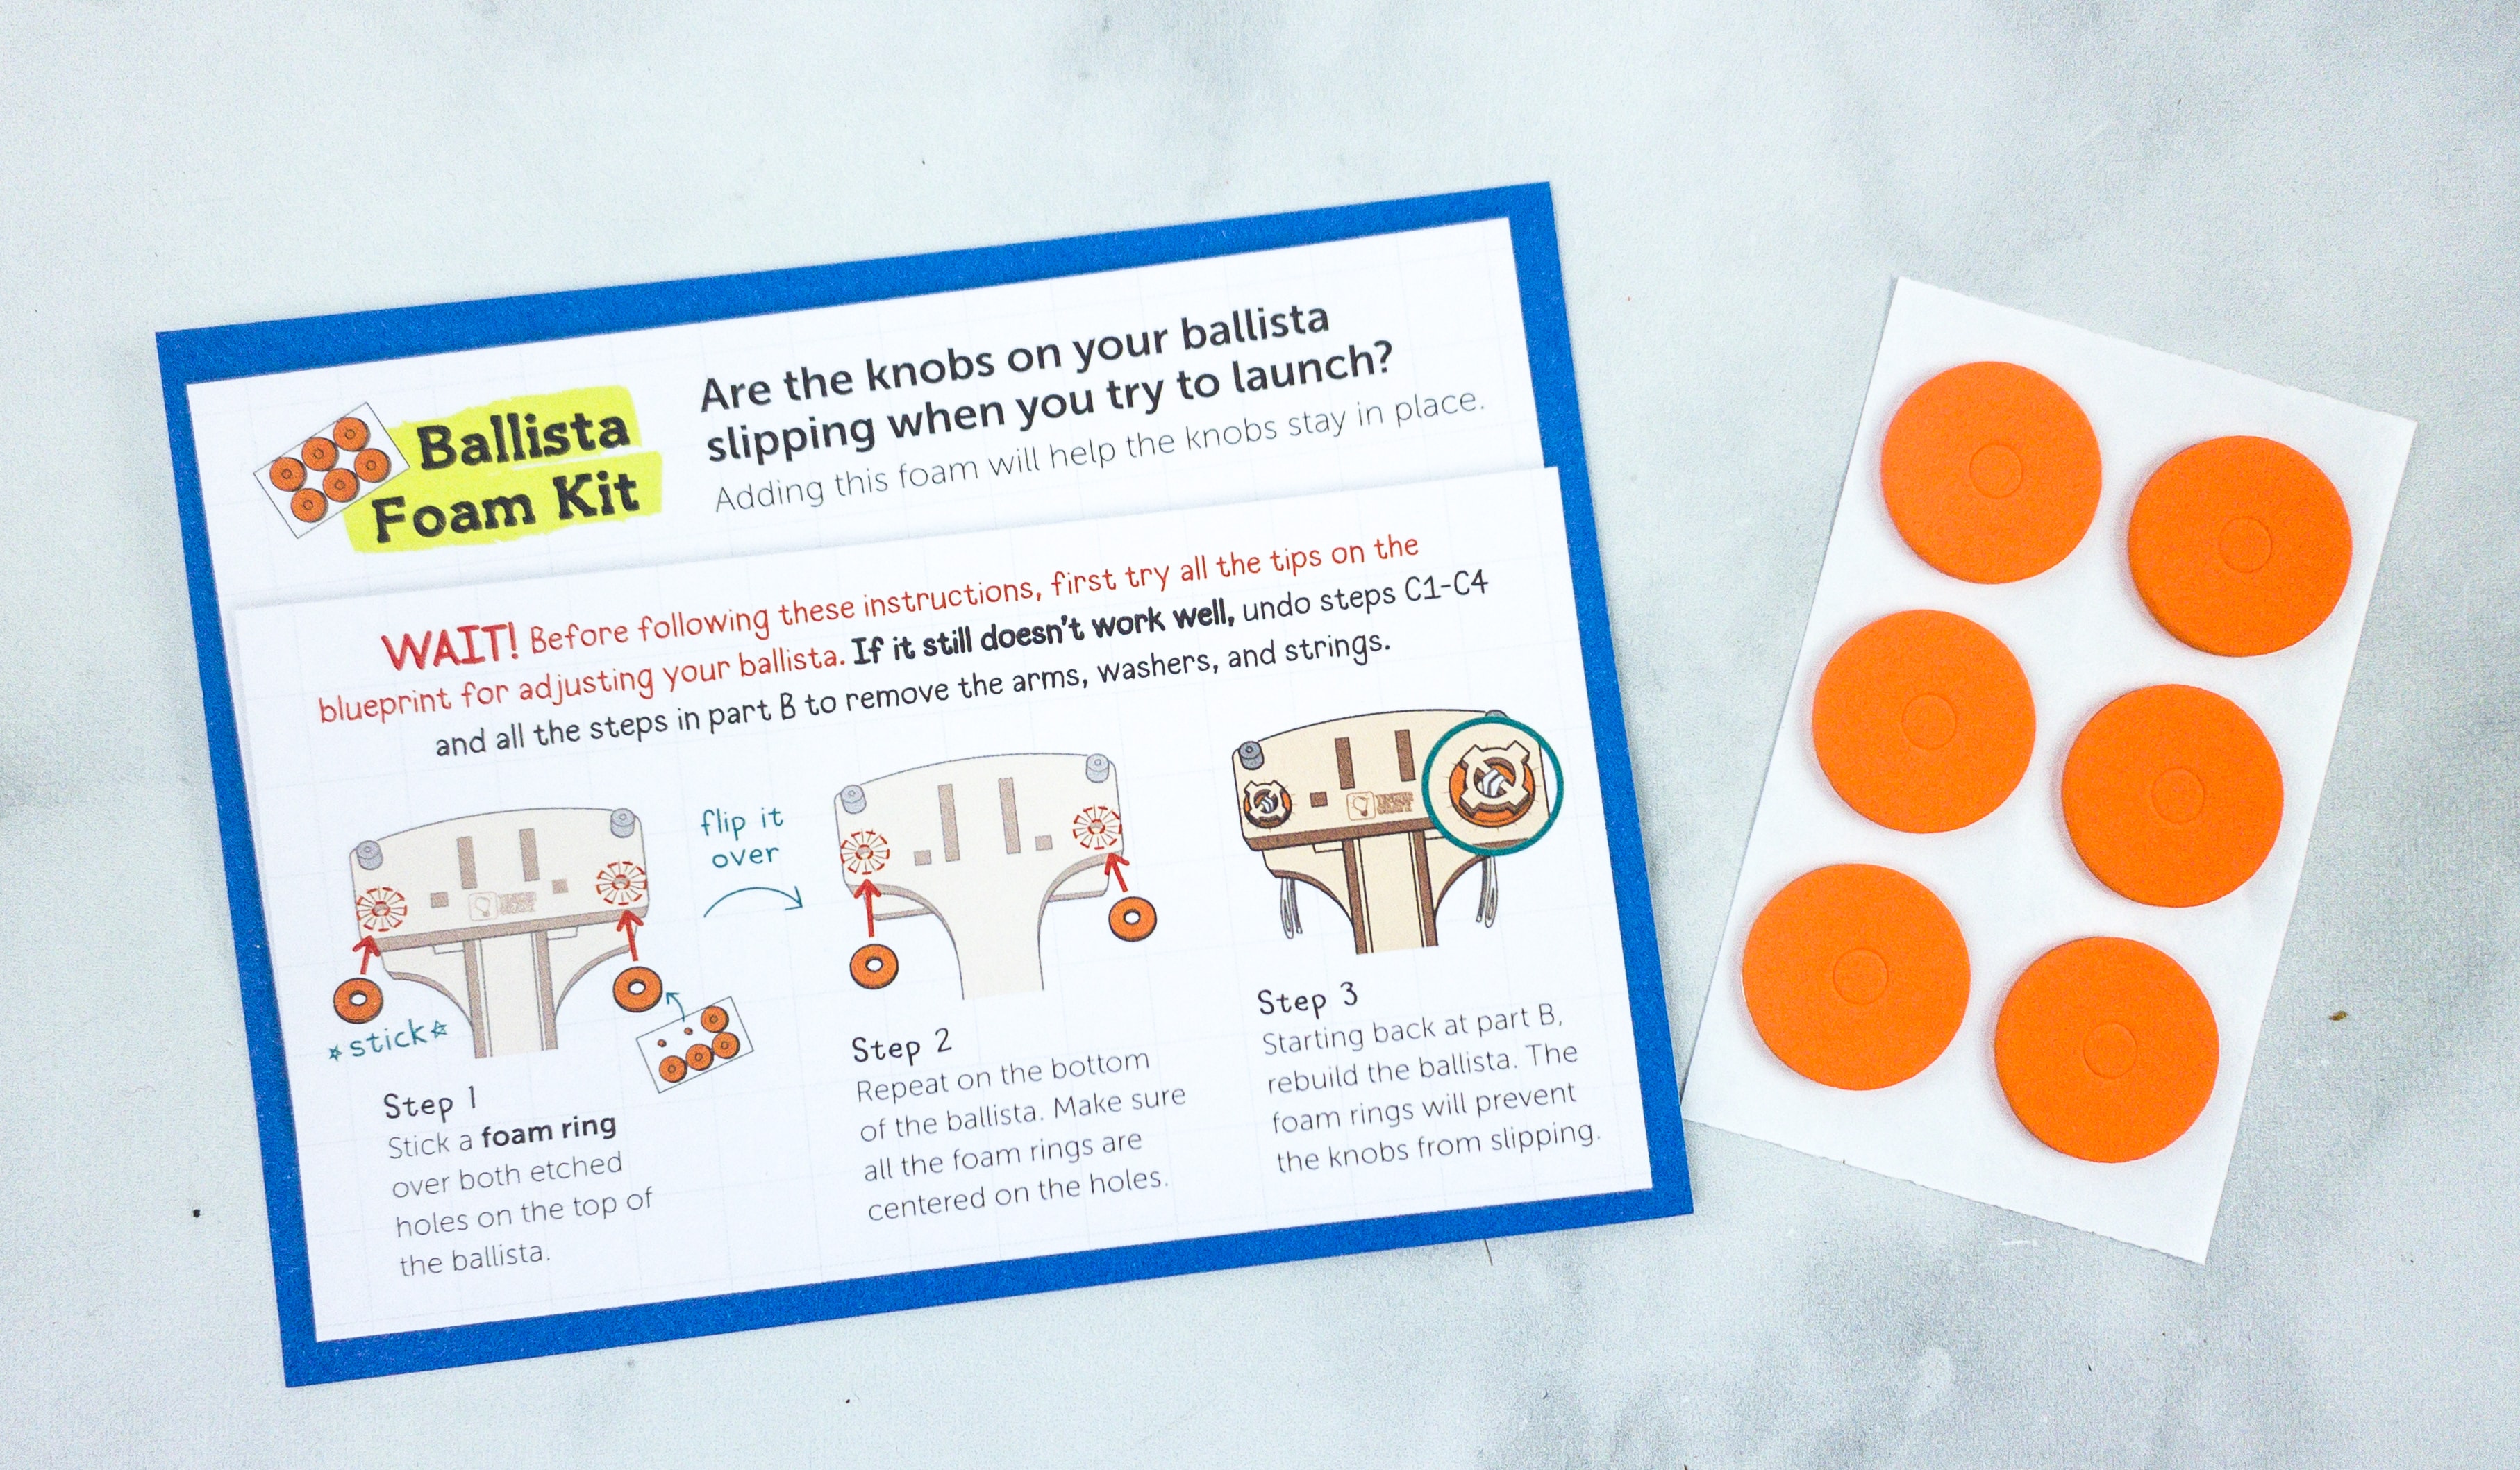
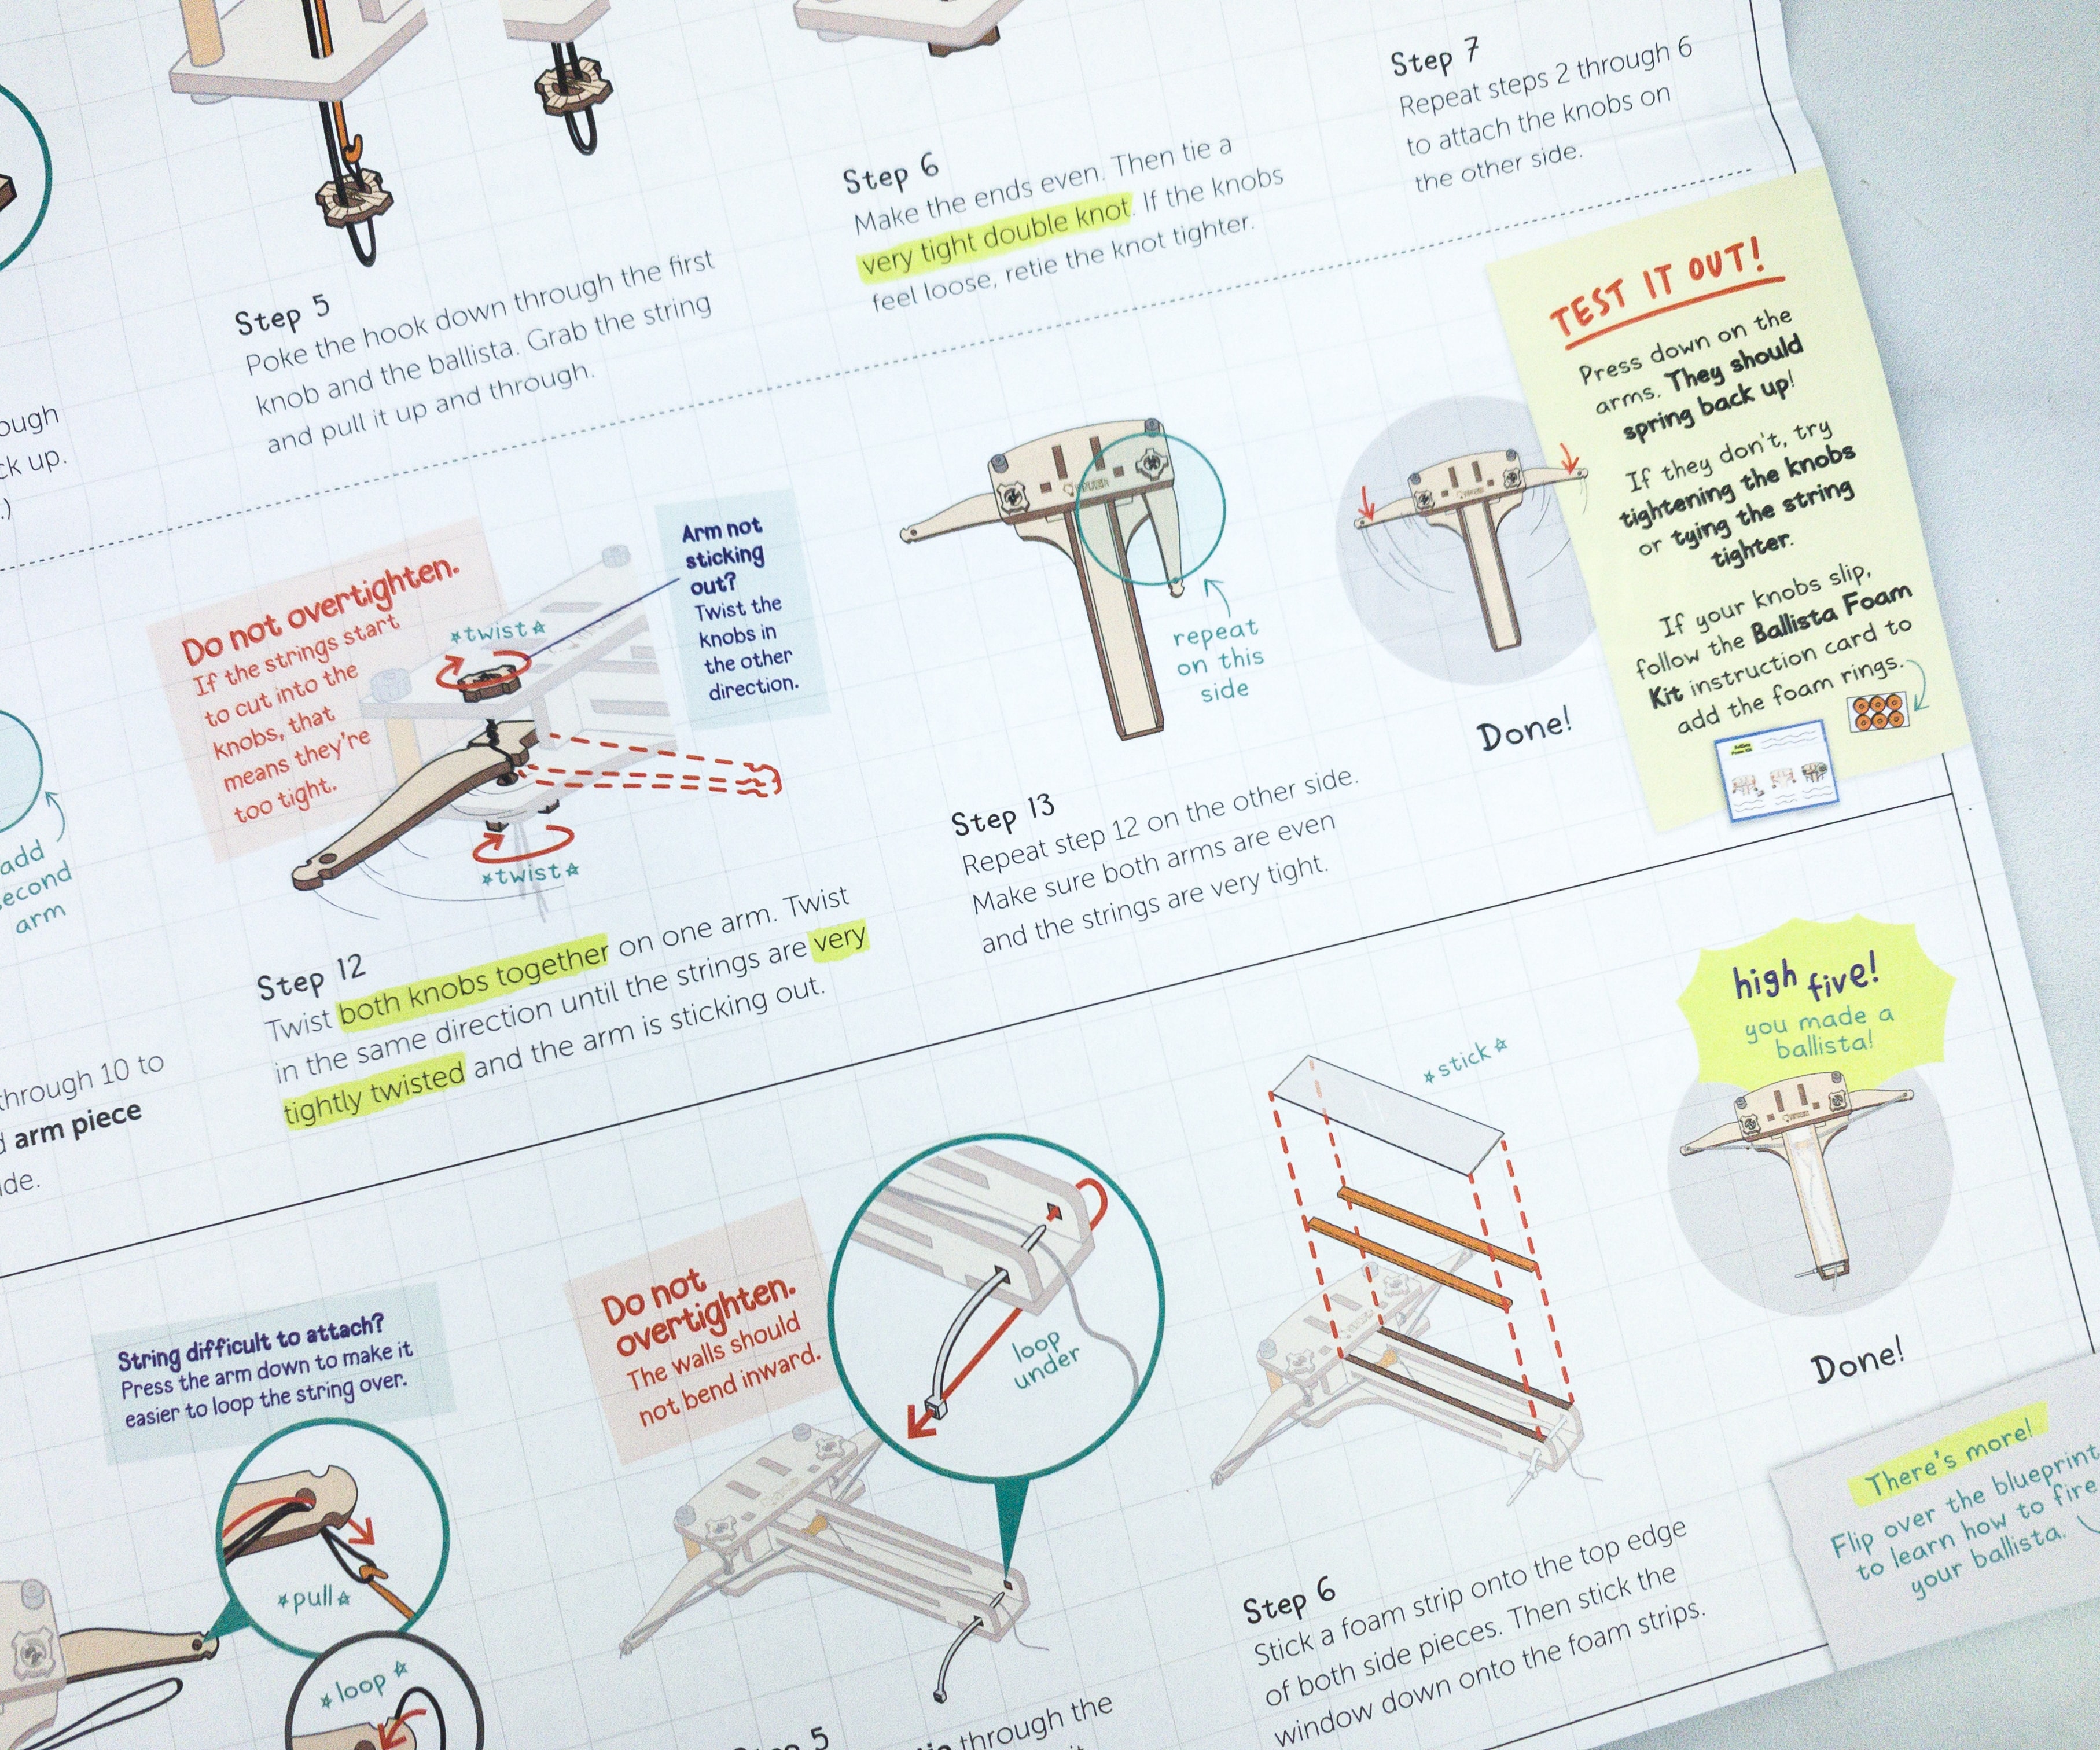
If the knobs on the ballista is slipping when launched, then adding this foam will definitely help the knobs to stay in place.
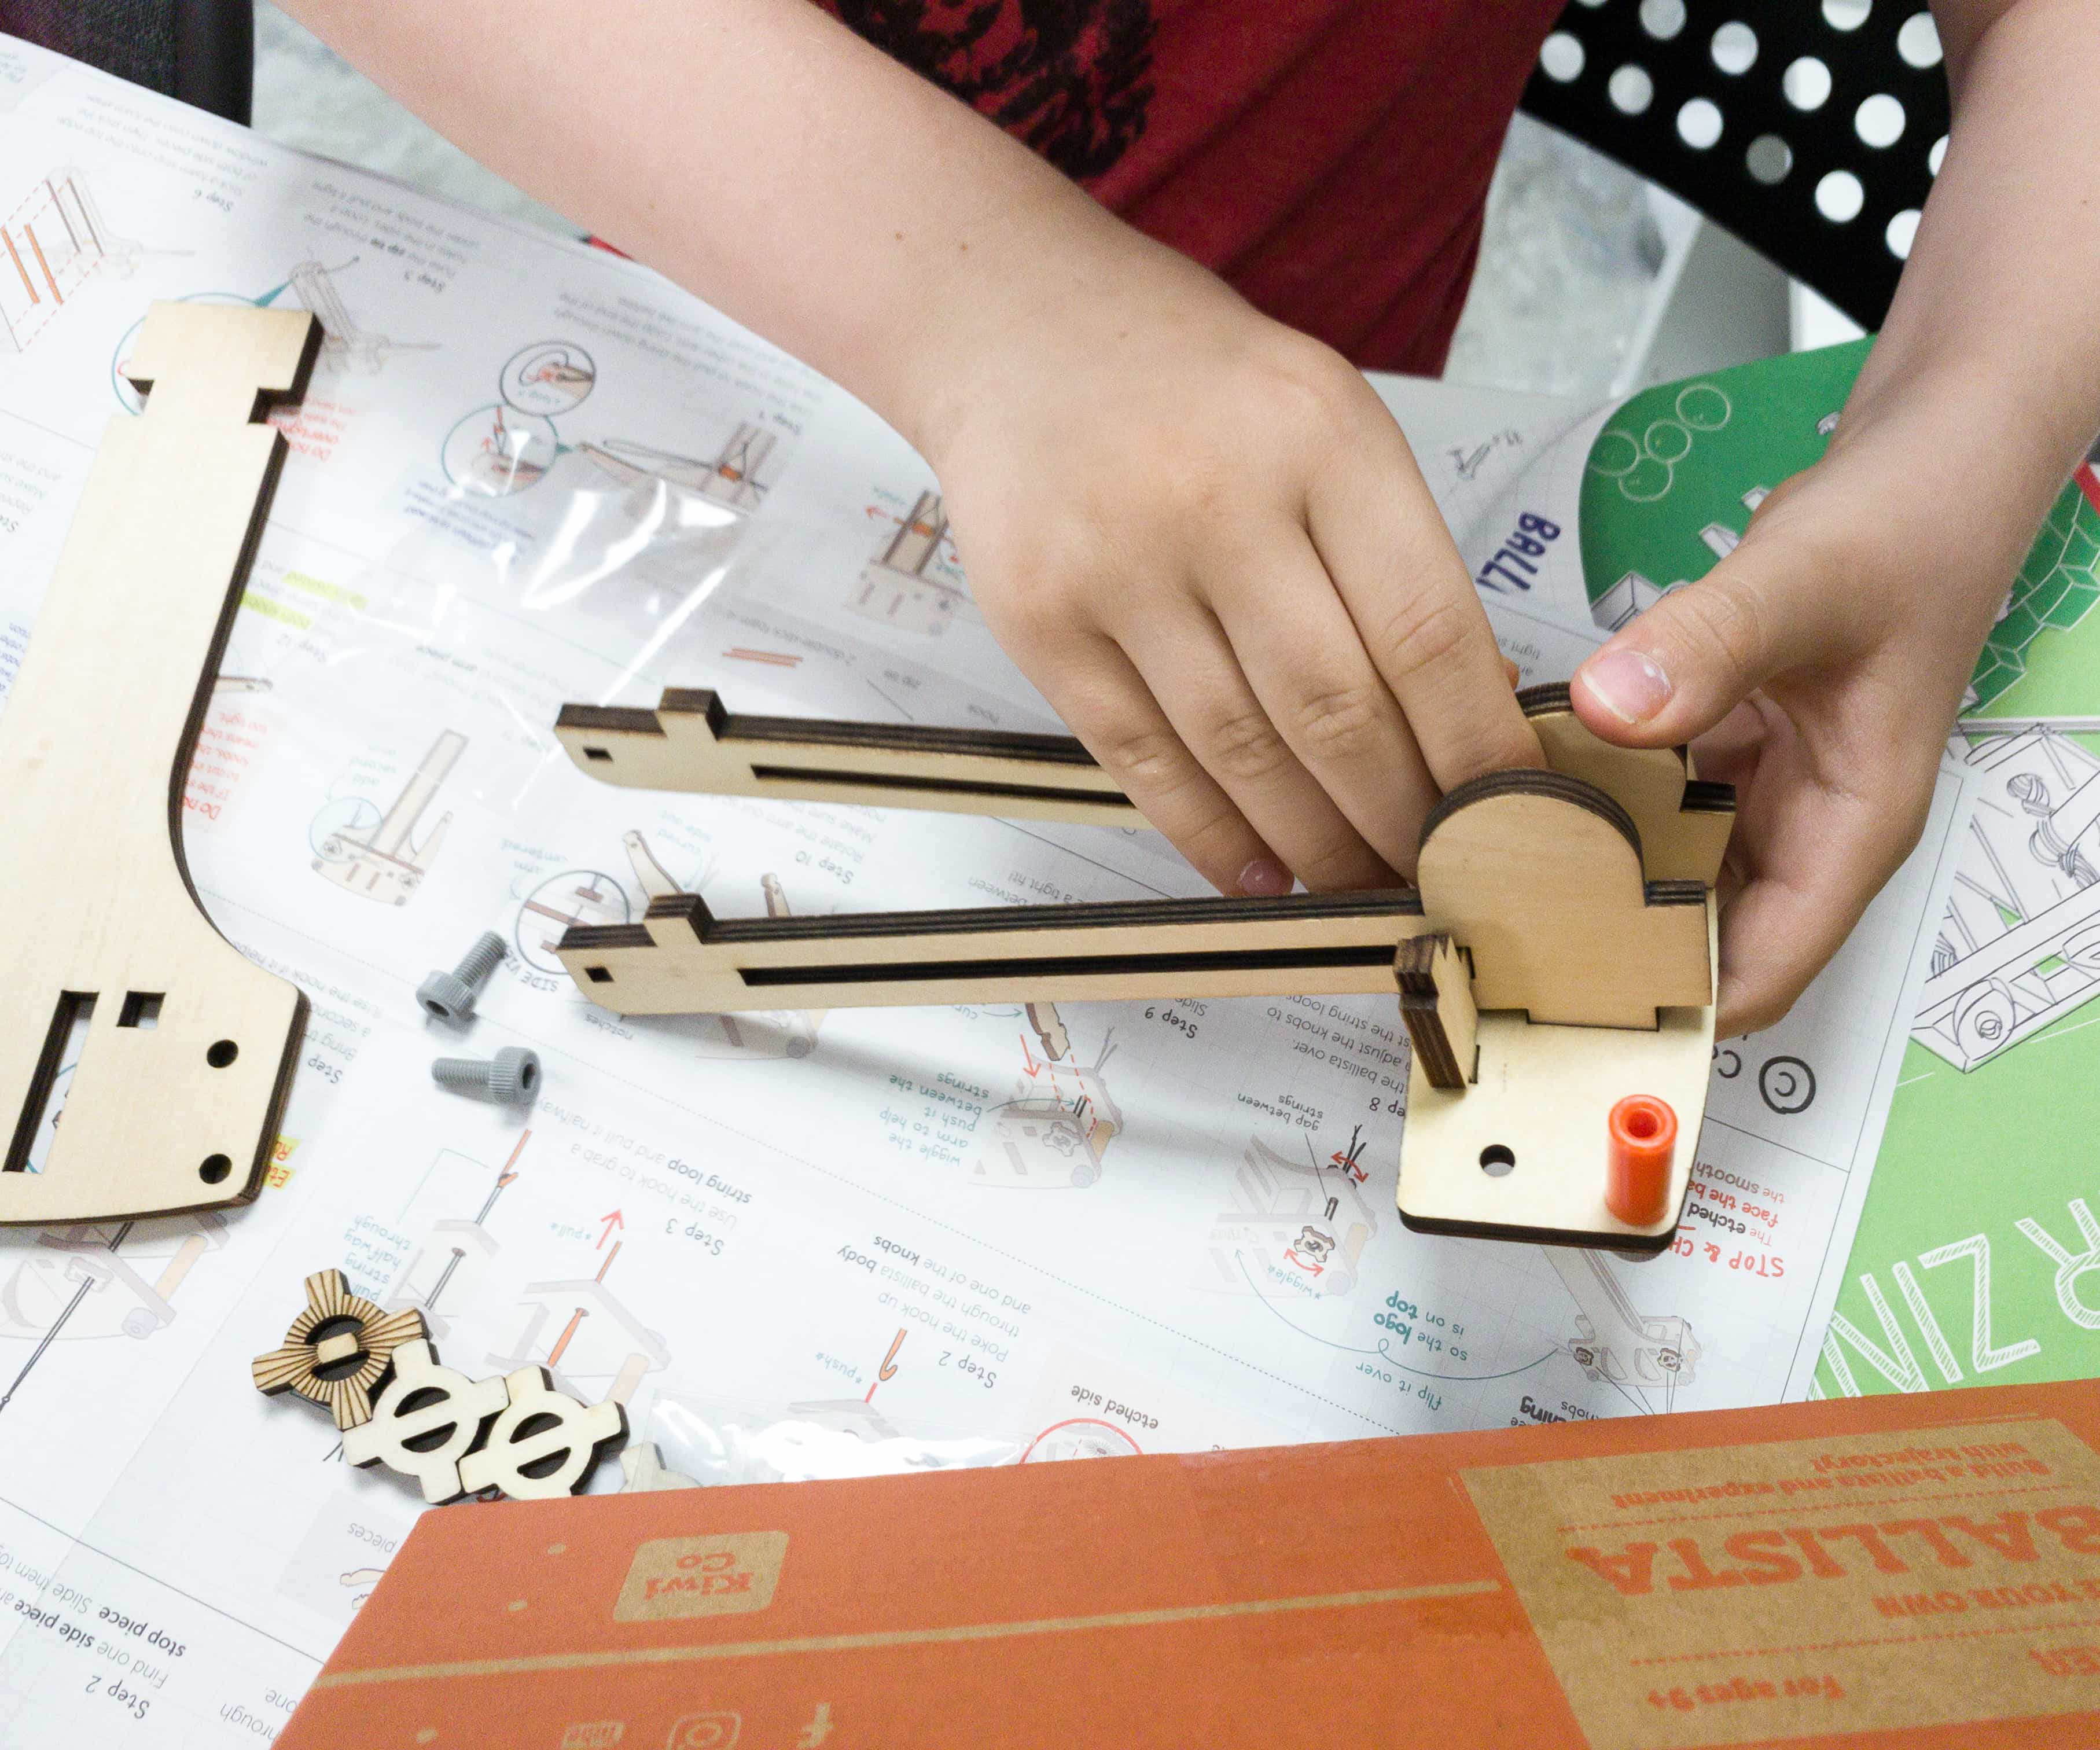
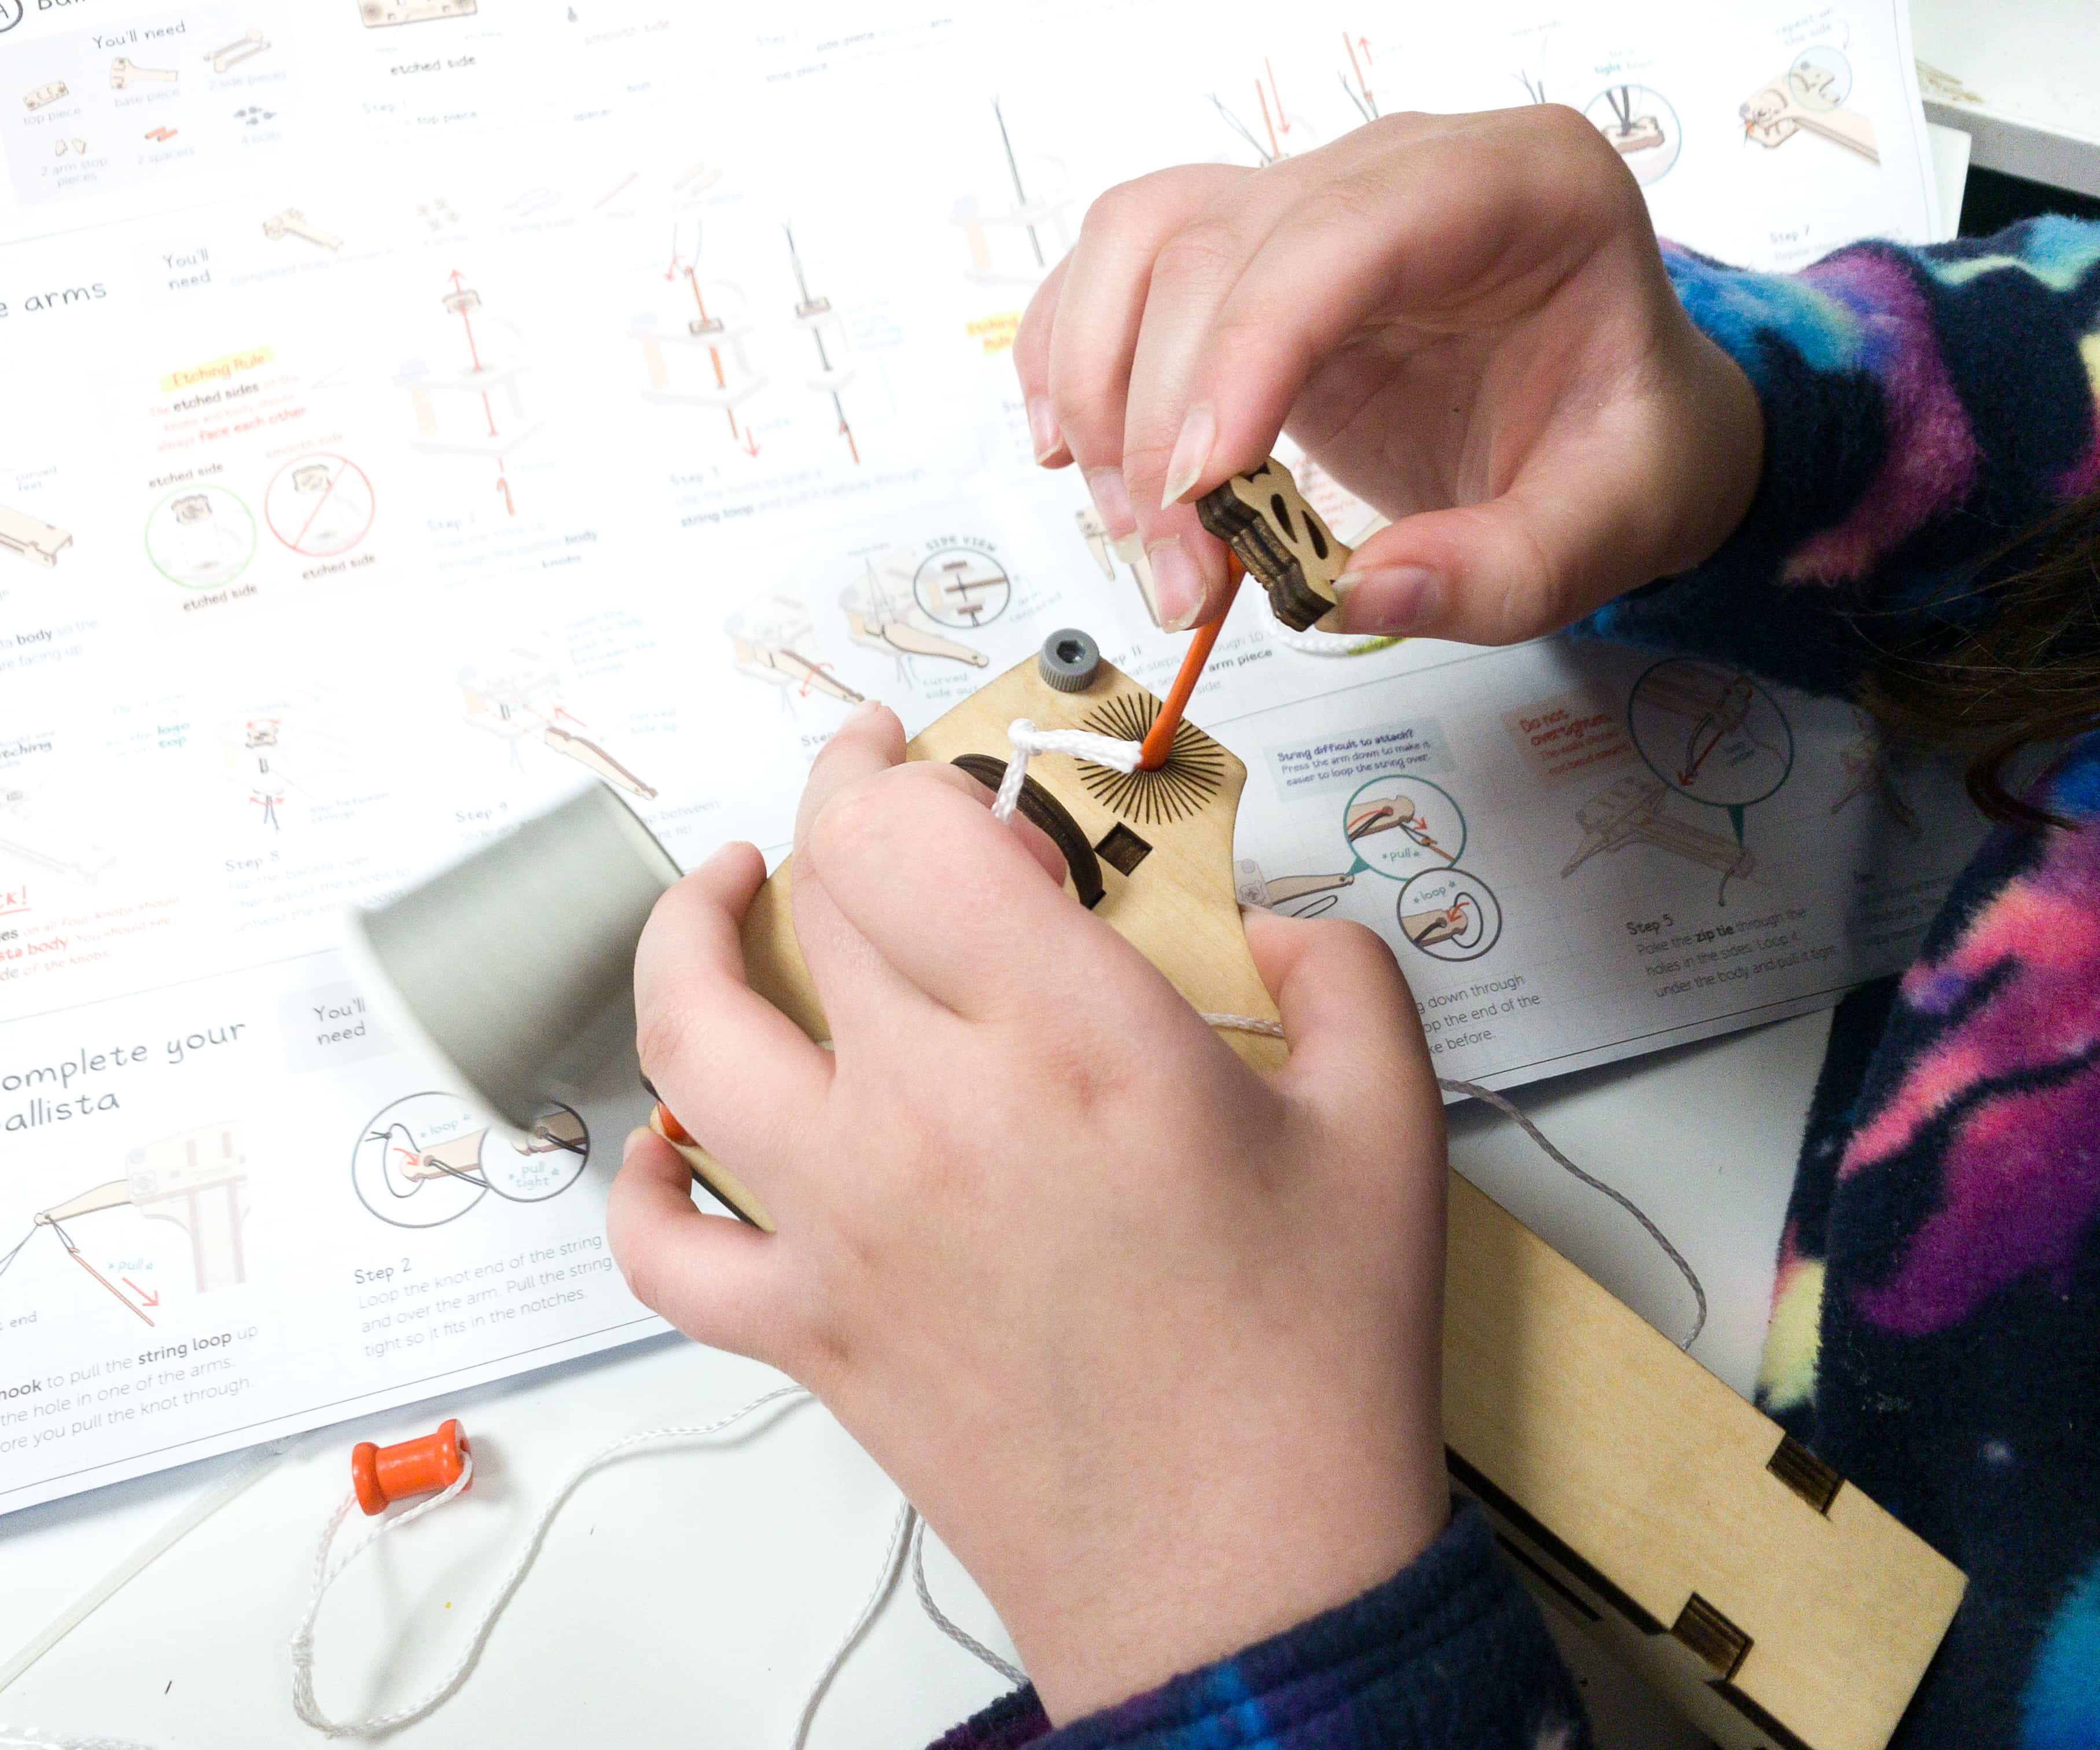
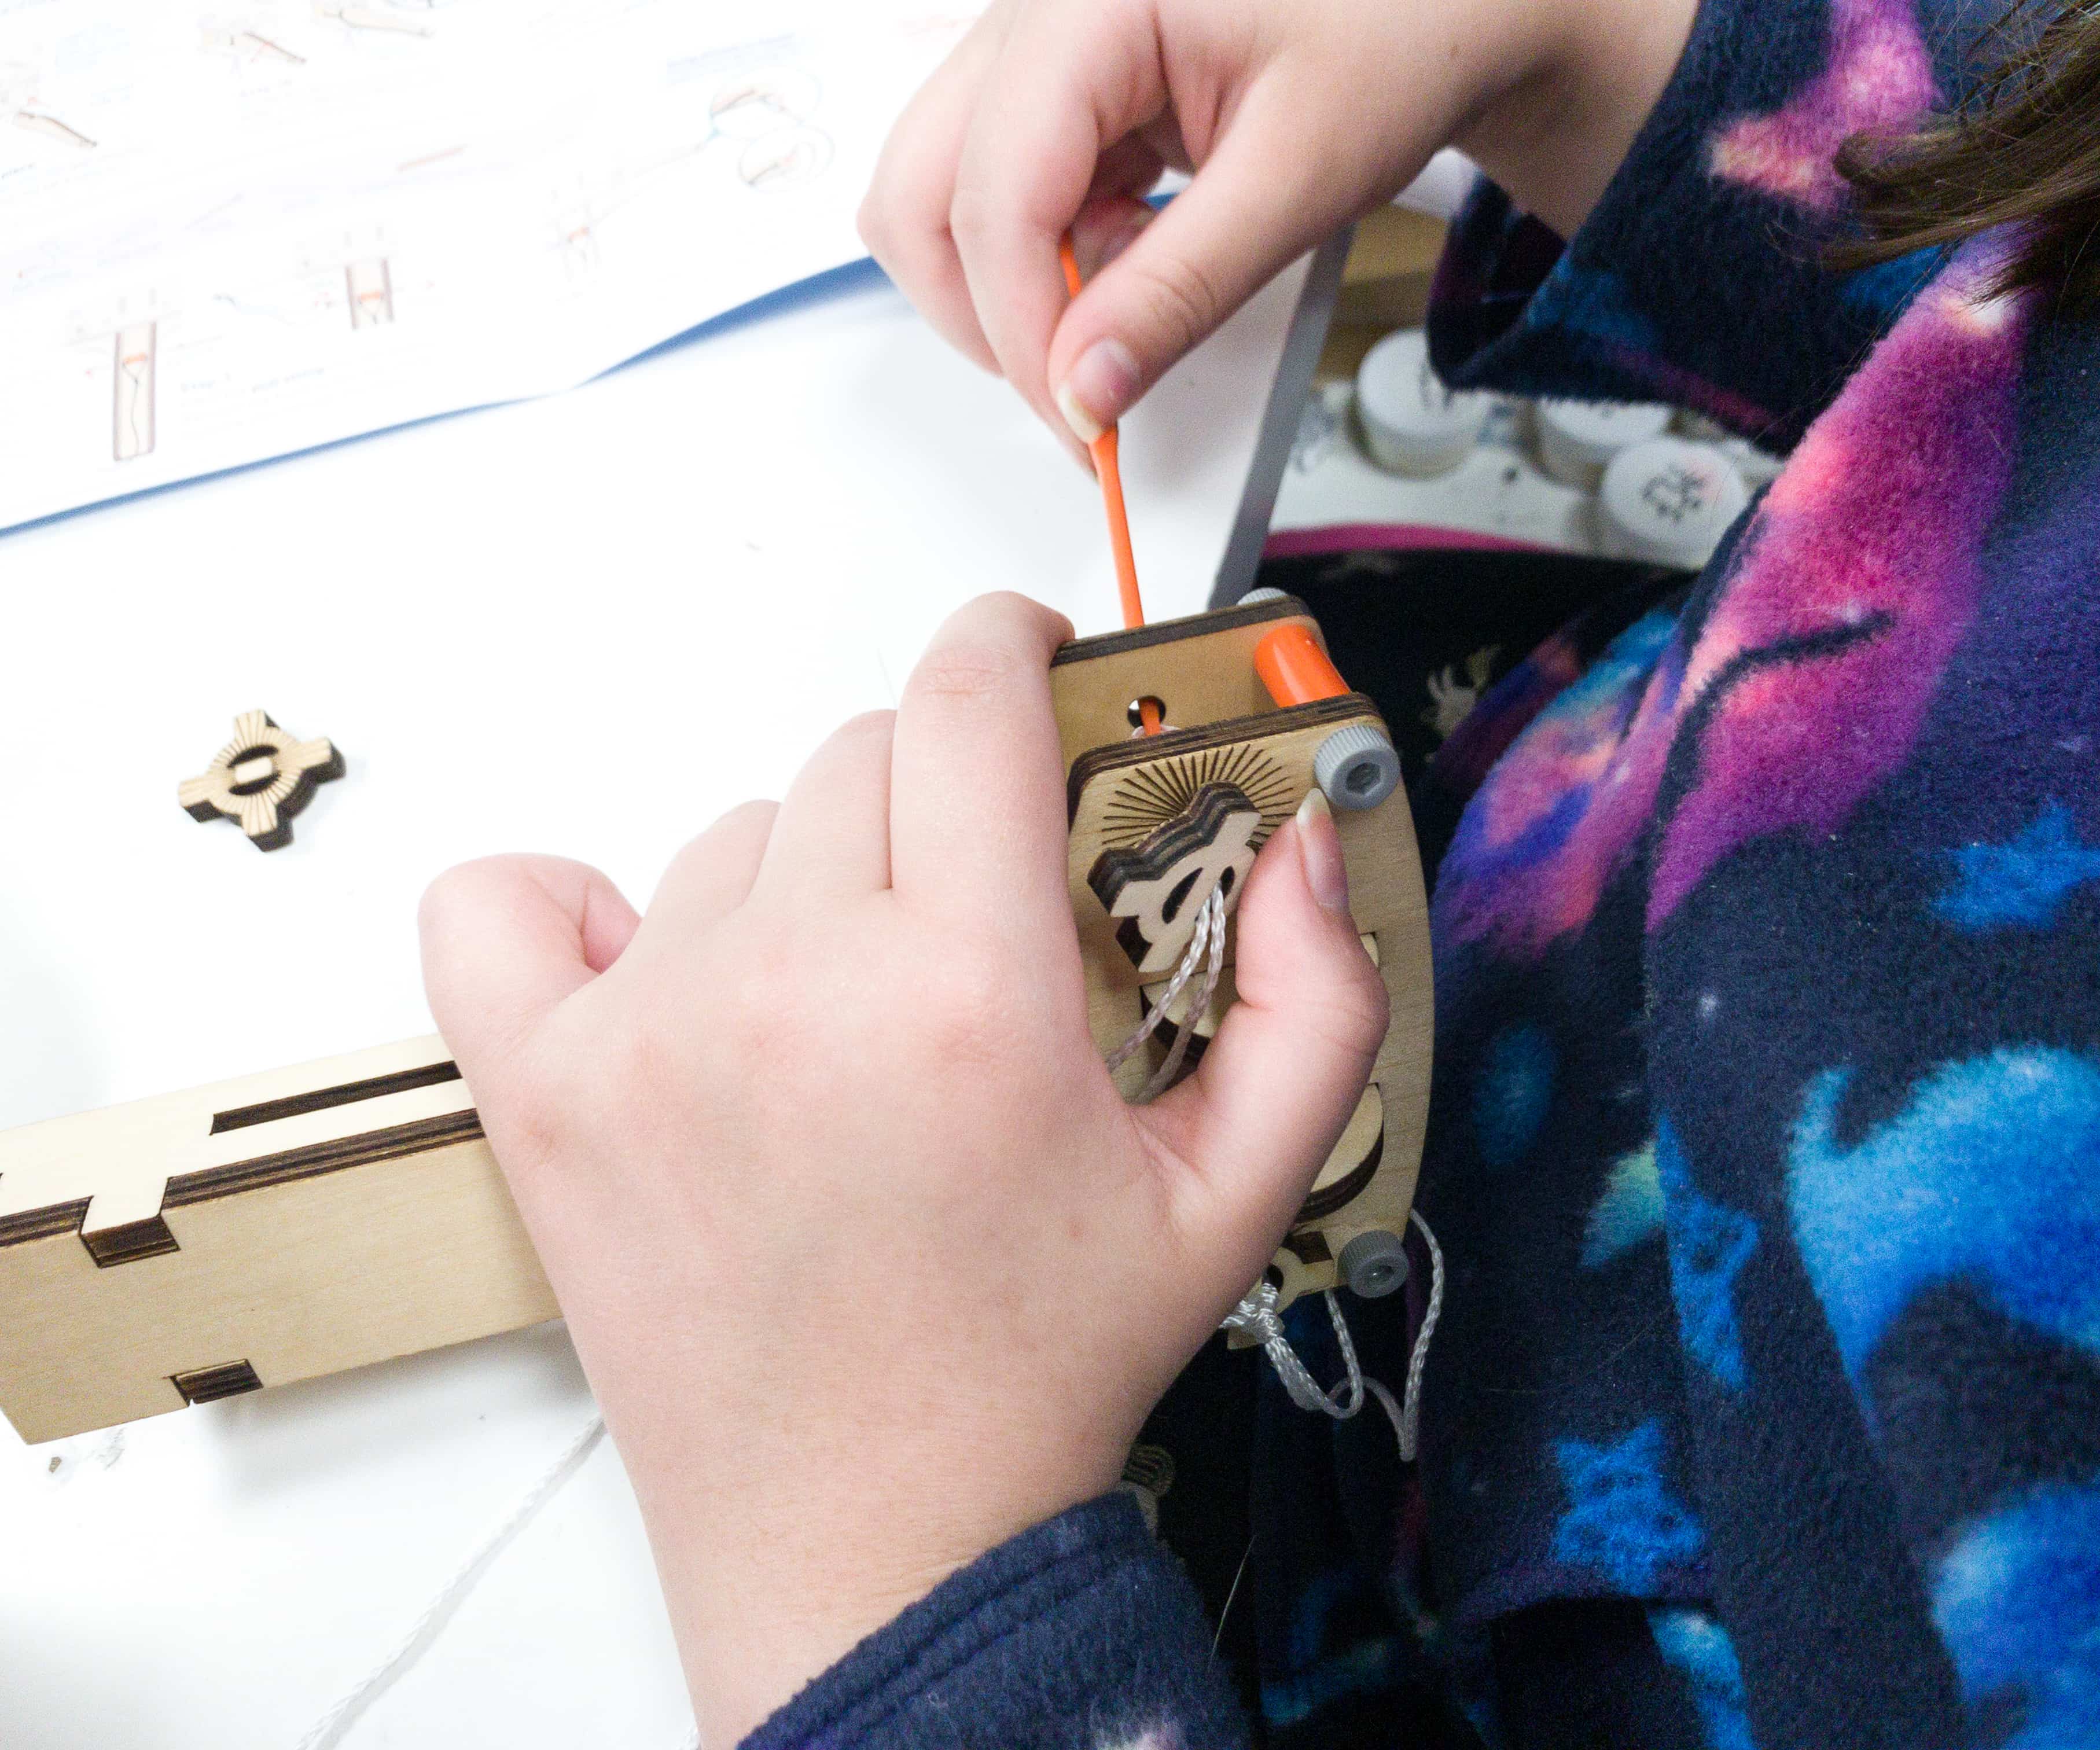
My kids used the completed ballista’s body, knobs, string loops, pull strings, hook, arm pieces, zip tie, double-stick foam strips, and window for the 2nd and 3rd part of the project.
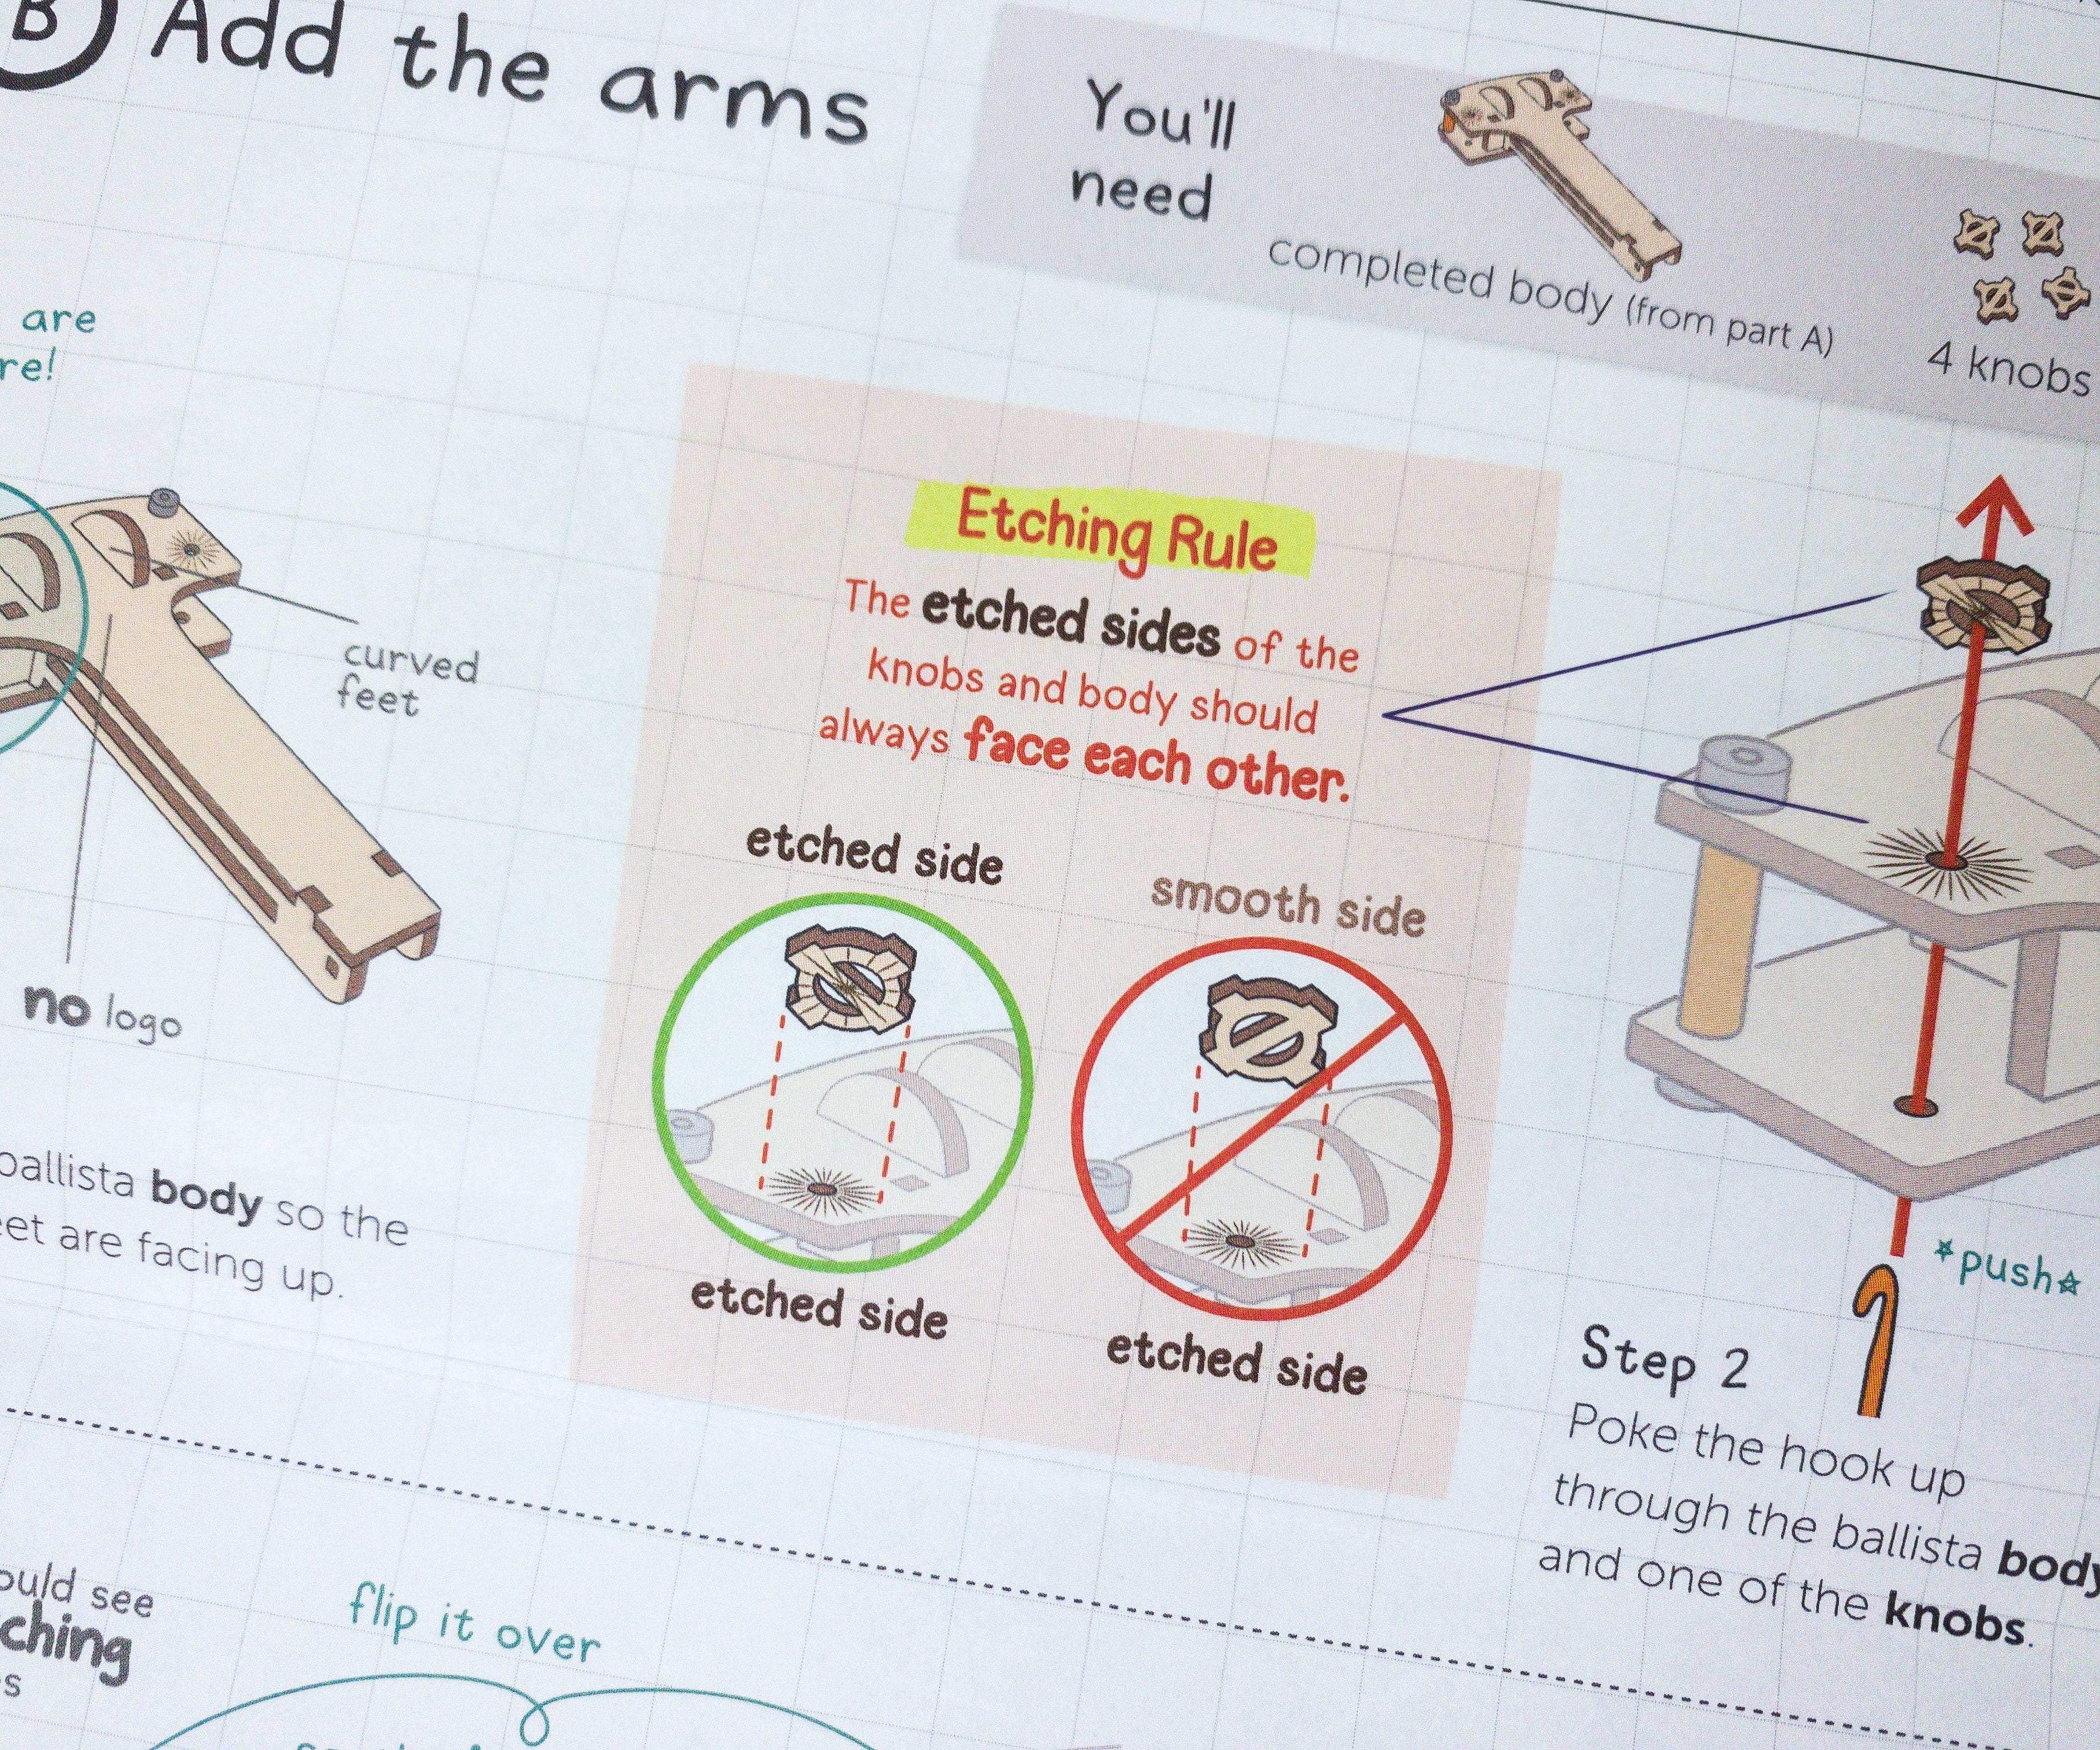
Before they started on this part of the project, they made sure that the ballista’s body is facing up.
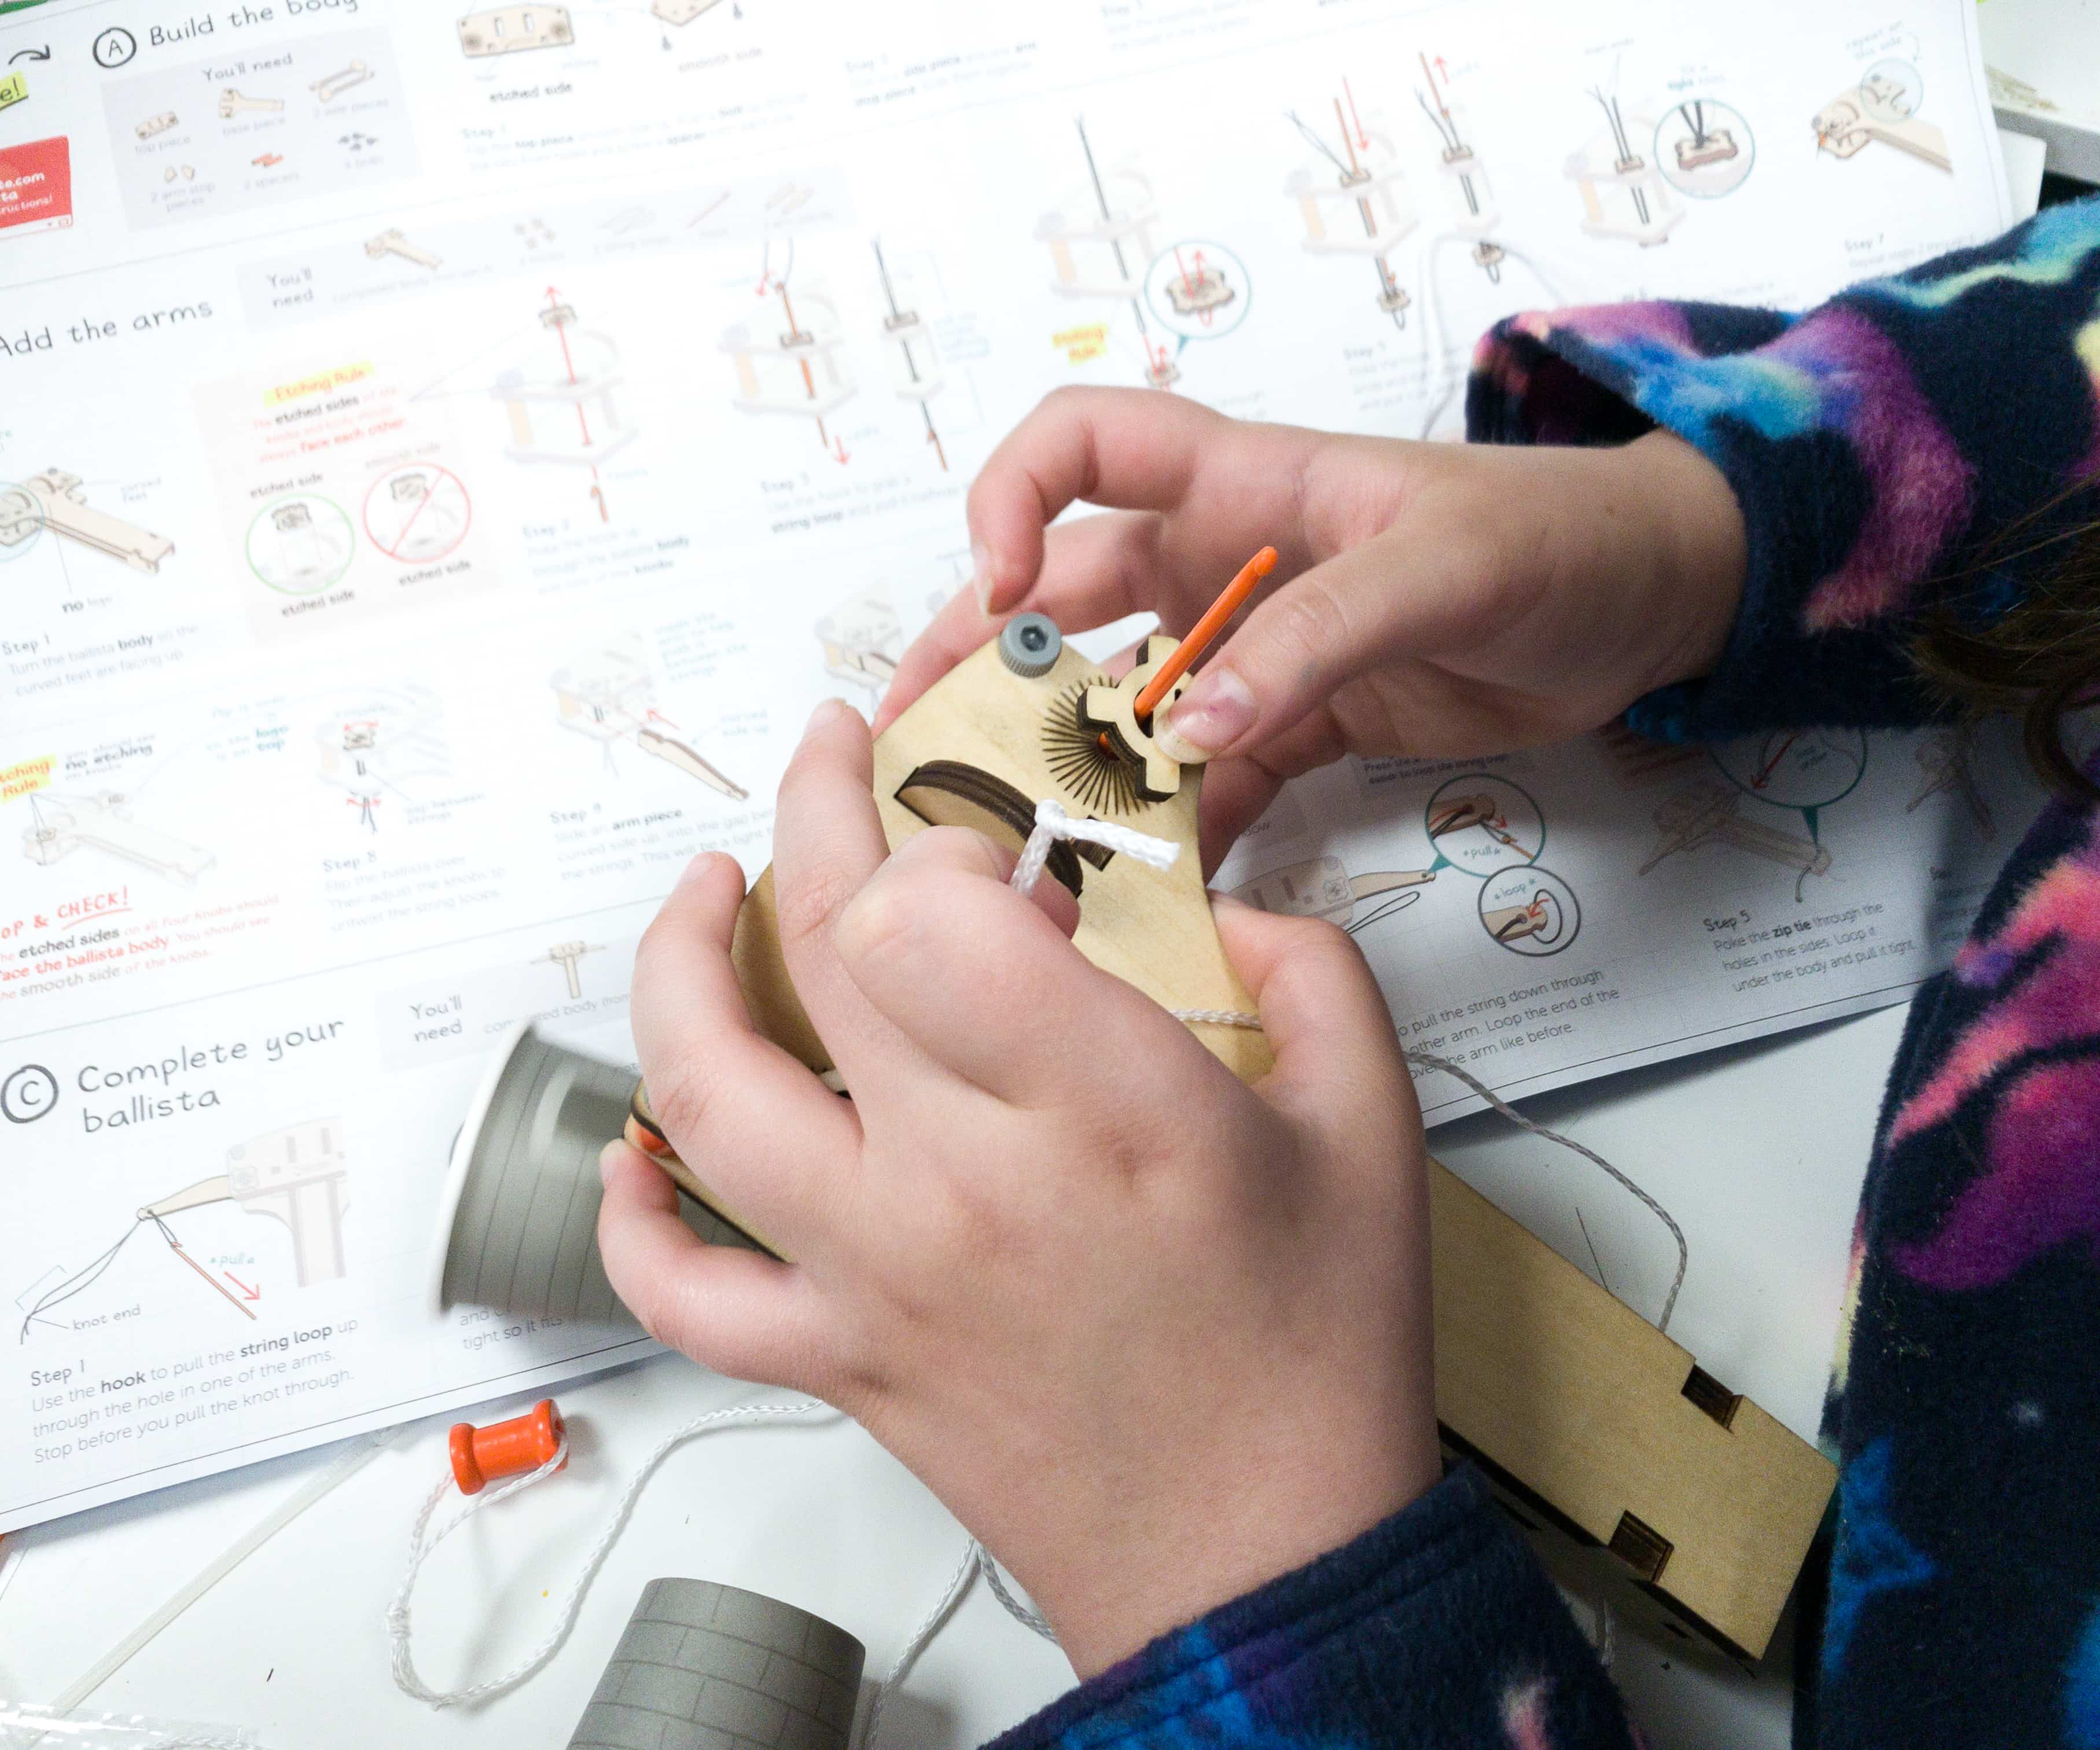
They poked the hook through the ballista body and one of the knobs.
Then, they used the hook to grab the string loop, poke the hook down through the first knob, and pull it up and through. My kids also made sure that the ends are even, then tied a very tight double knot to lock. They did the same for the other knob.
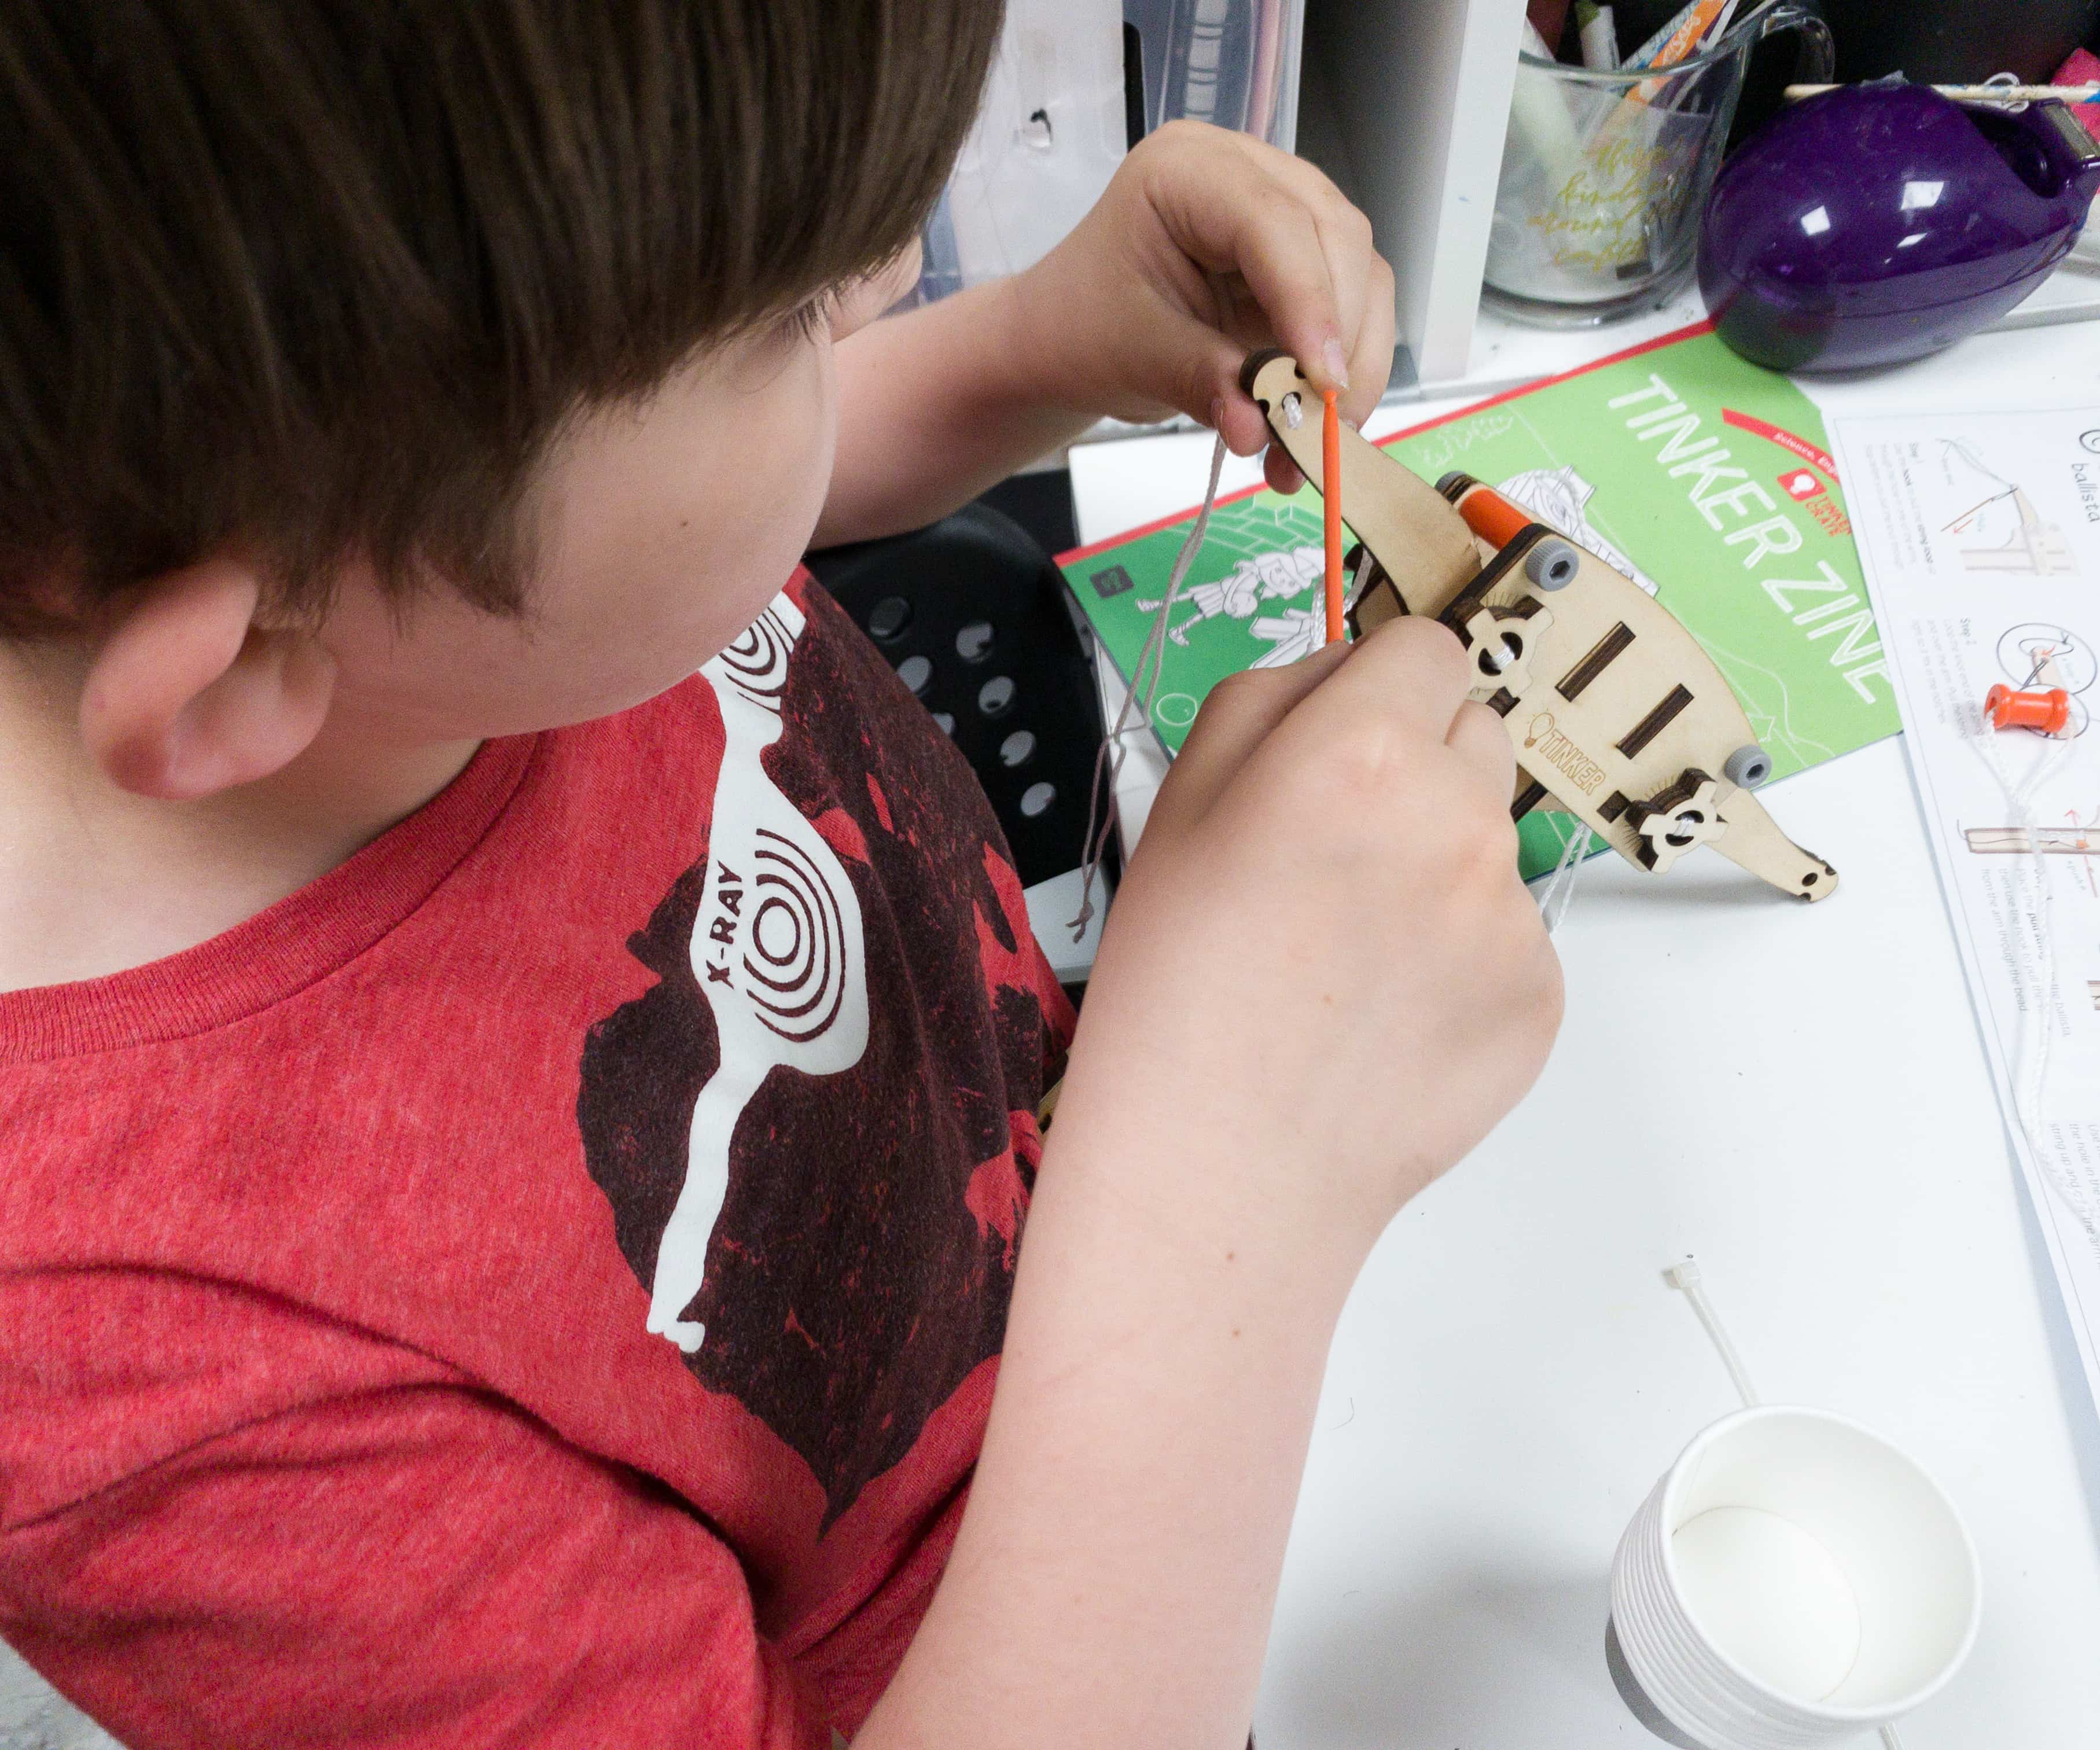
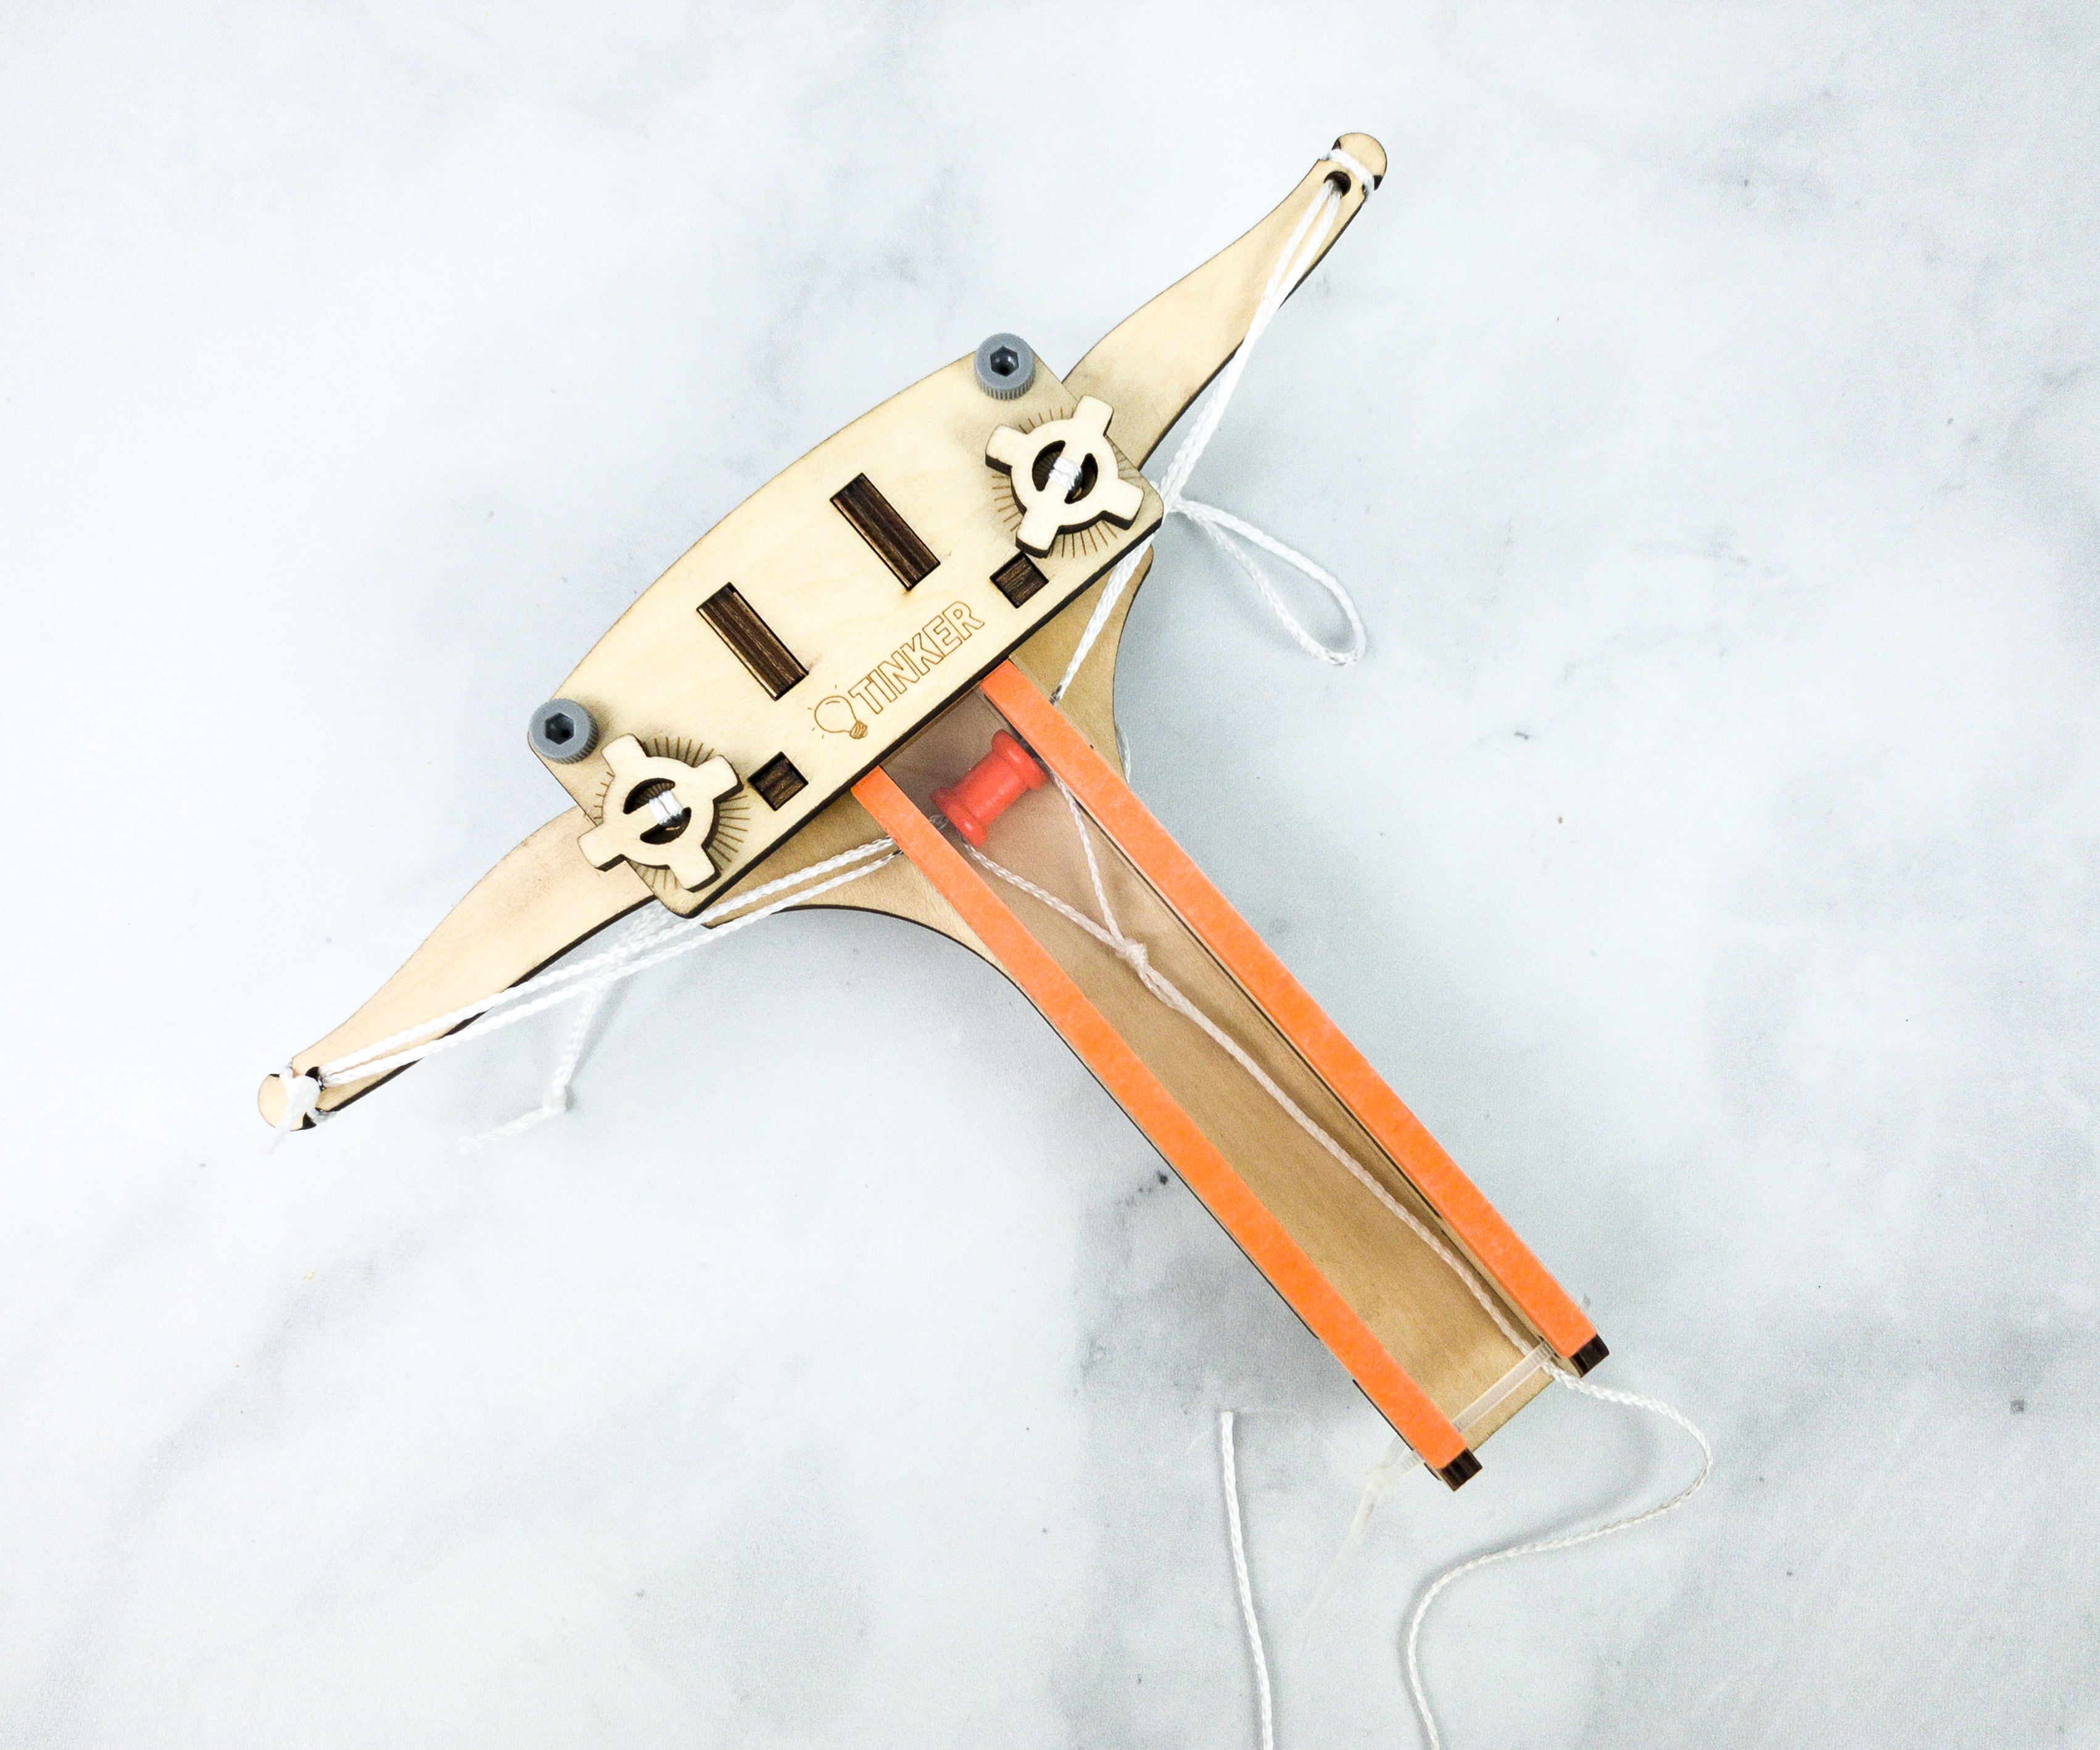
Now, it’s time to slide the arm piece into the gap between the strings. My kids also made sure that the curve sided upward, and once it went through, they rotated the arm out so it lies flat and the strings are notched into the arms.
Afterward, they looped the knot end of the string up and over the arm. They pulled the string tight and poked it through the orange bead, then pulled the other end of the string up and under over the next arm.
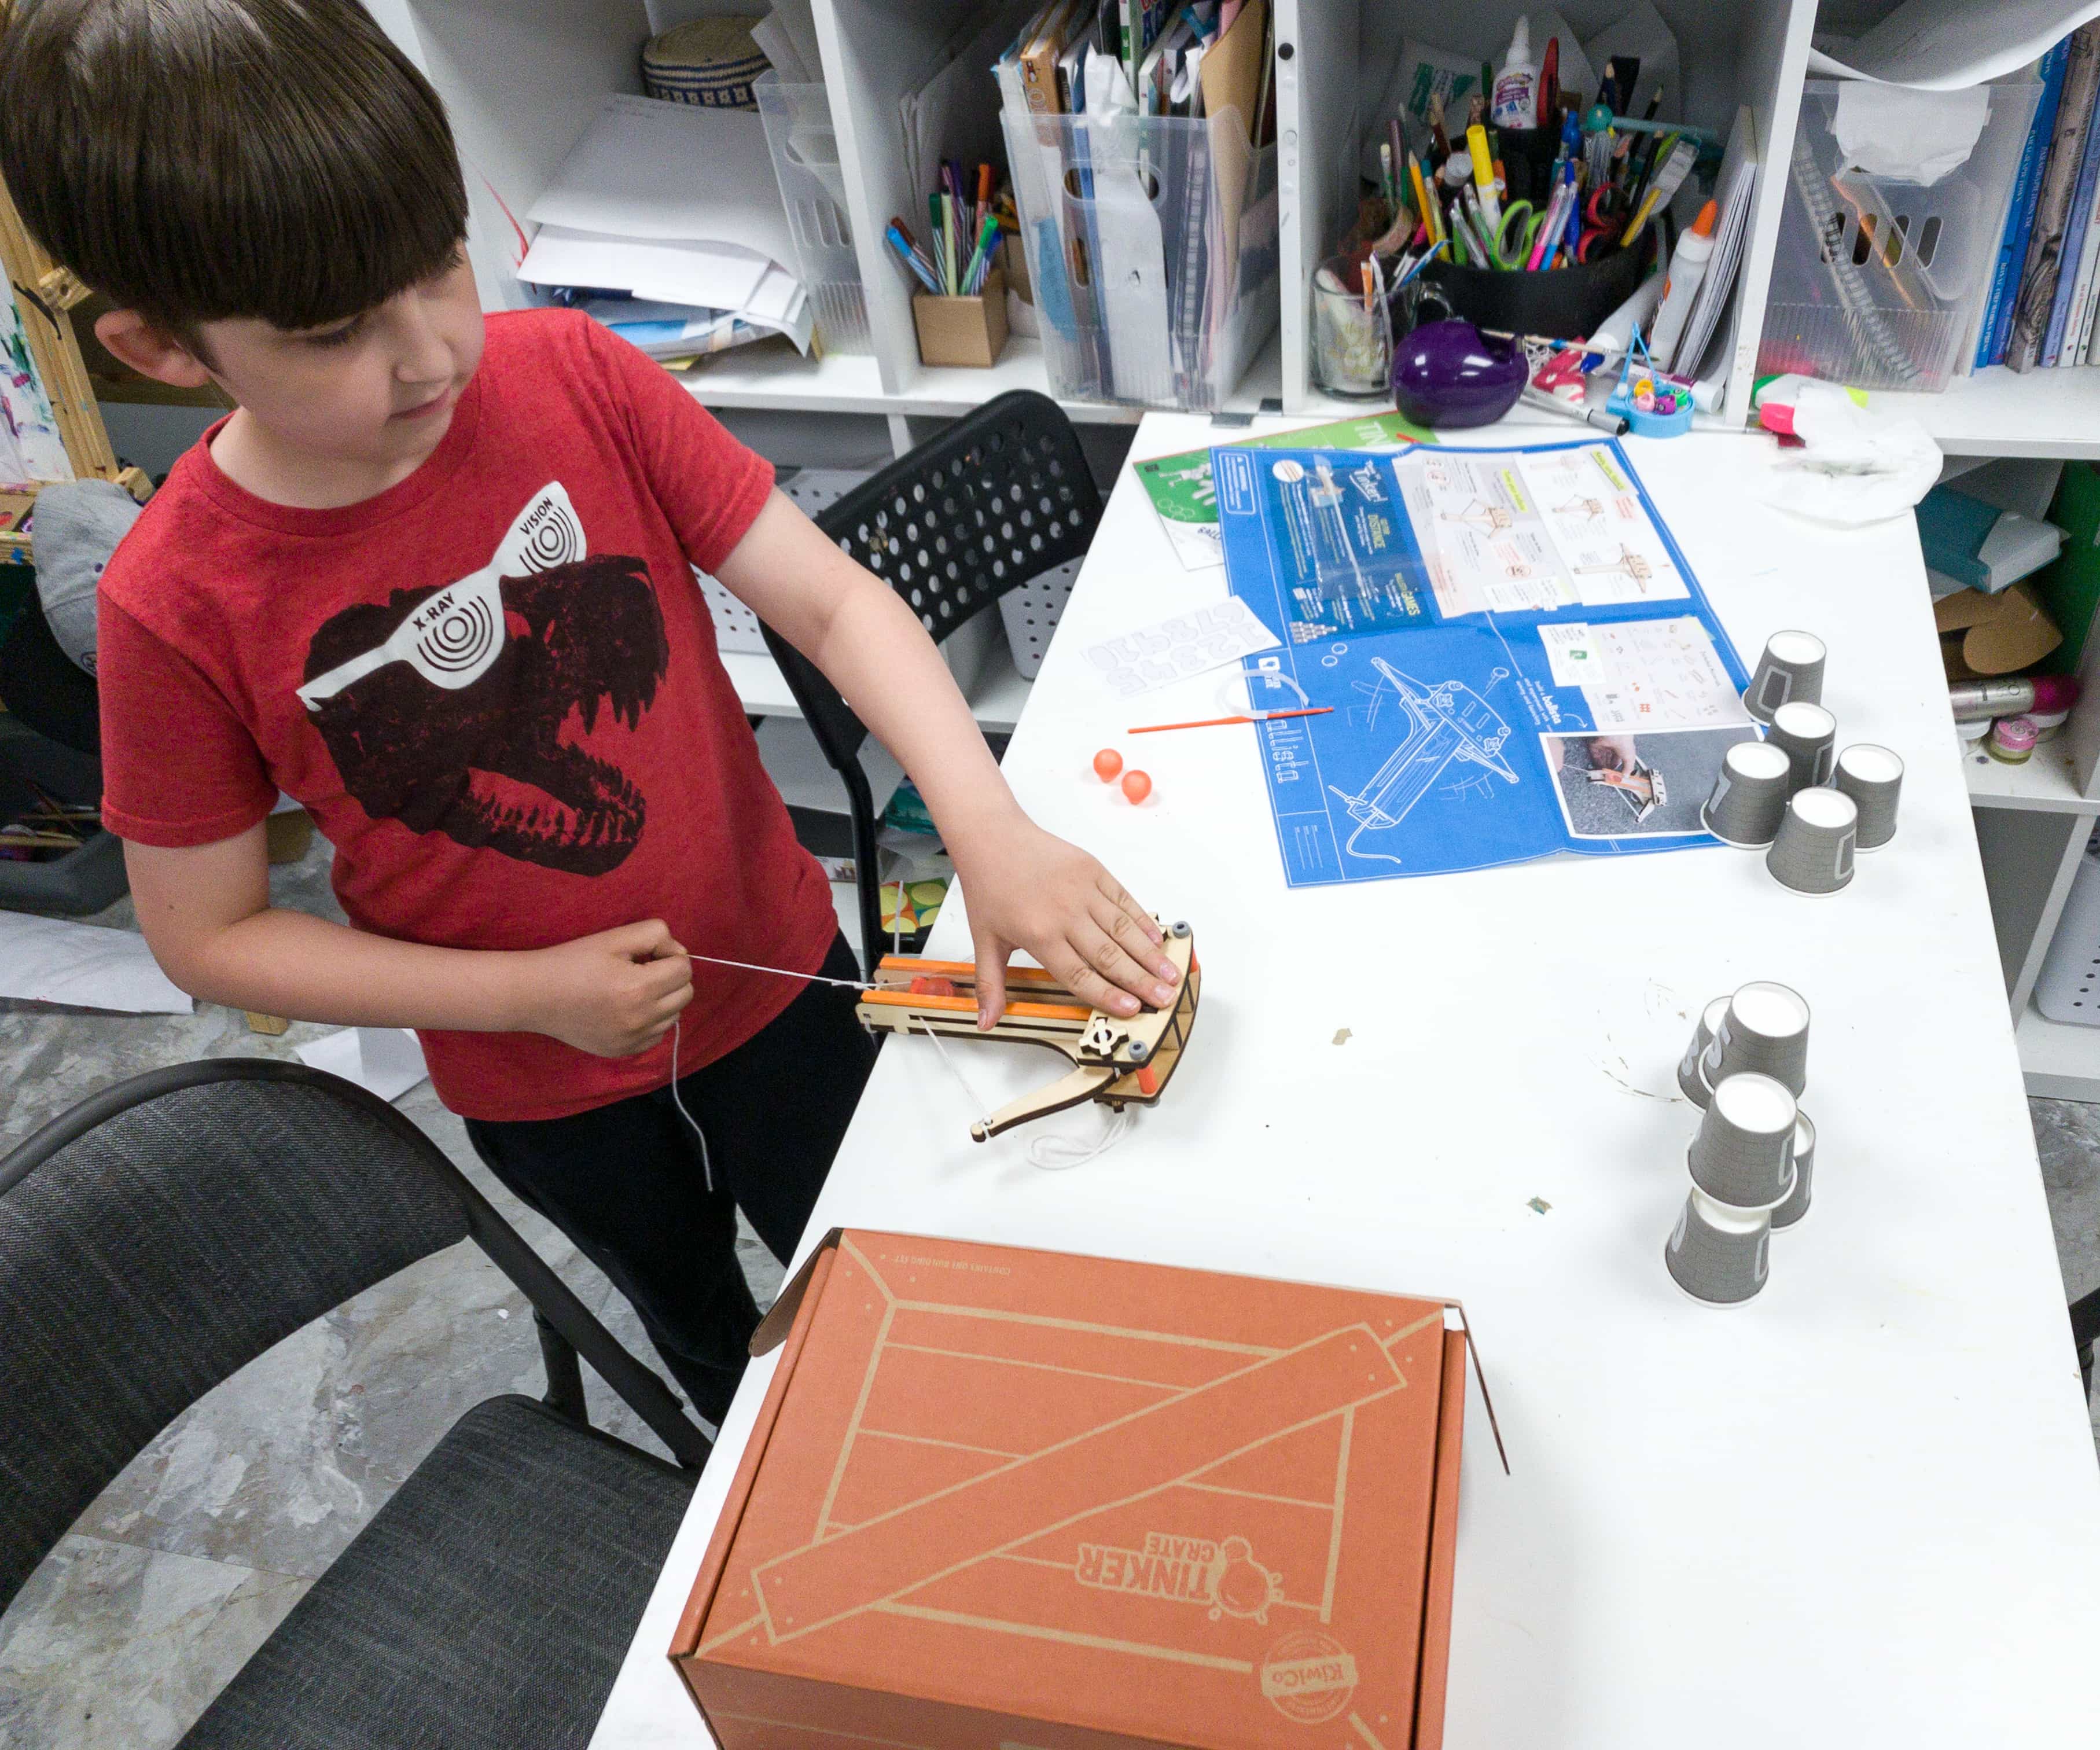
To check, just pull the string backward and release it. Observe if the arms returned to its original form once the string was released, and if it went back to its original form, then it means you’re almost done with our ballista. If not, return to the 2nd part and check the knobs and the arms of the ballista.
We made sure that the strings are all tied tightly, while the knobs should not be over tightened.
The ballista is done!
We have already equipped the ballista with our ball bullet, and it’s time to shoot down some targets!
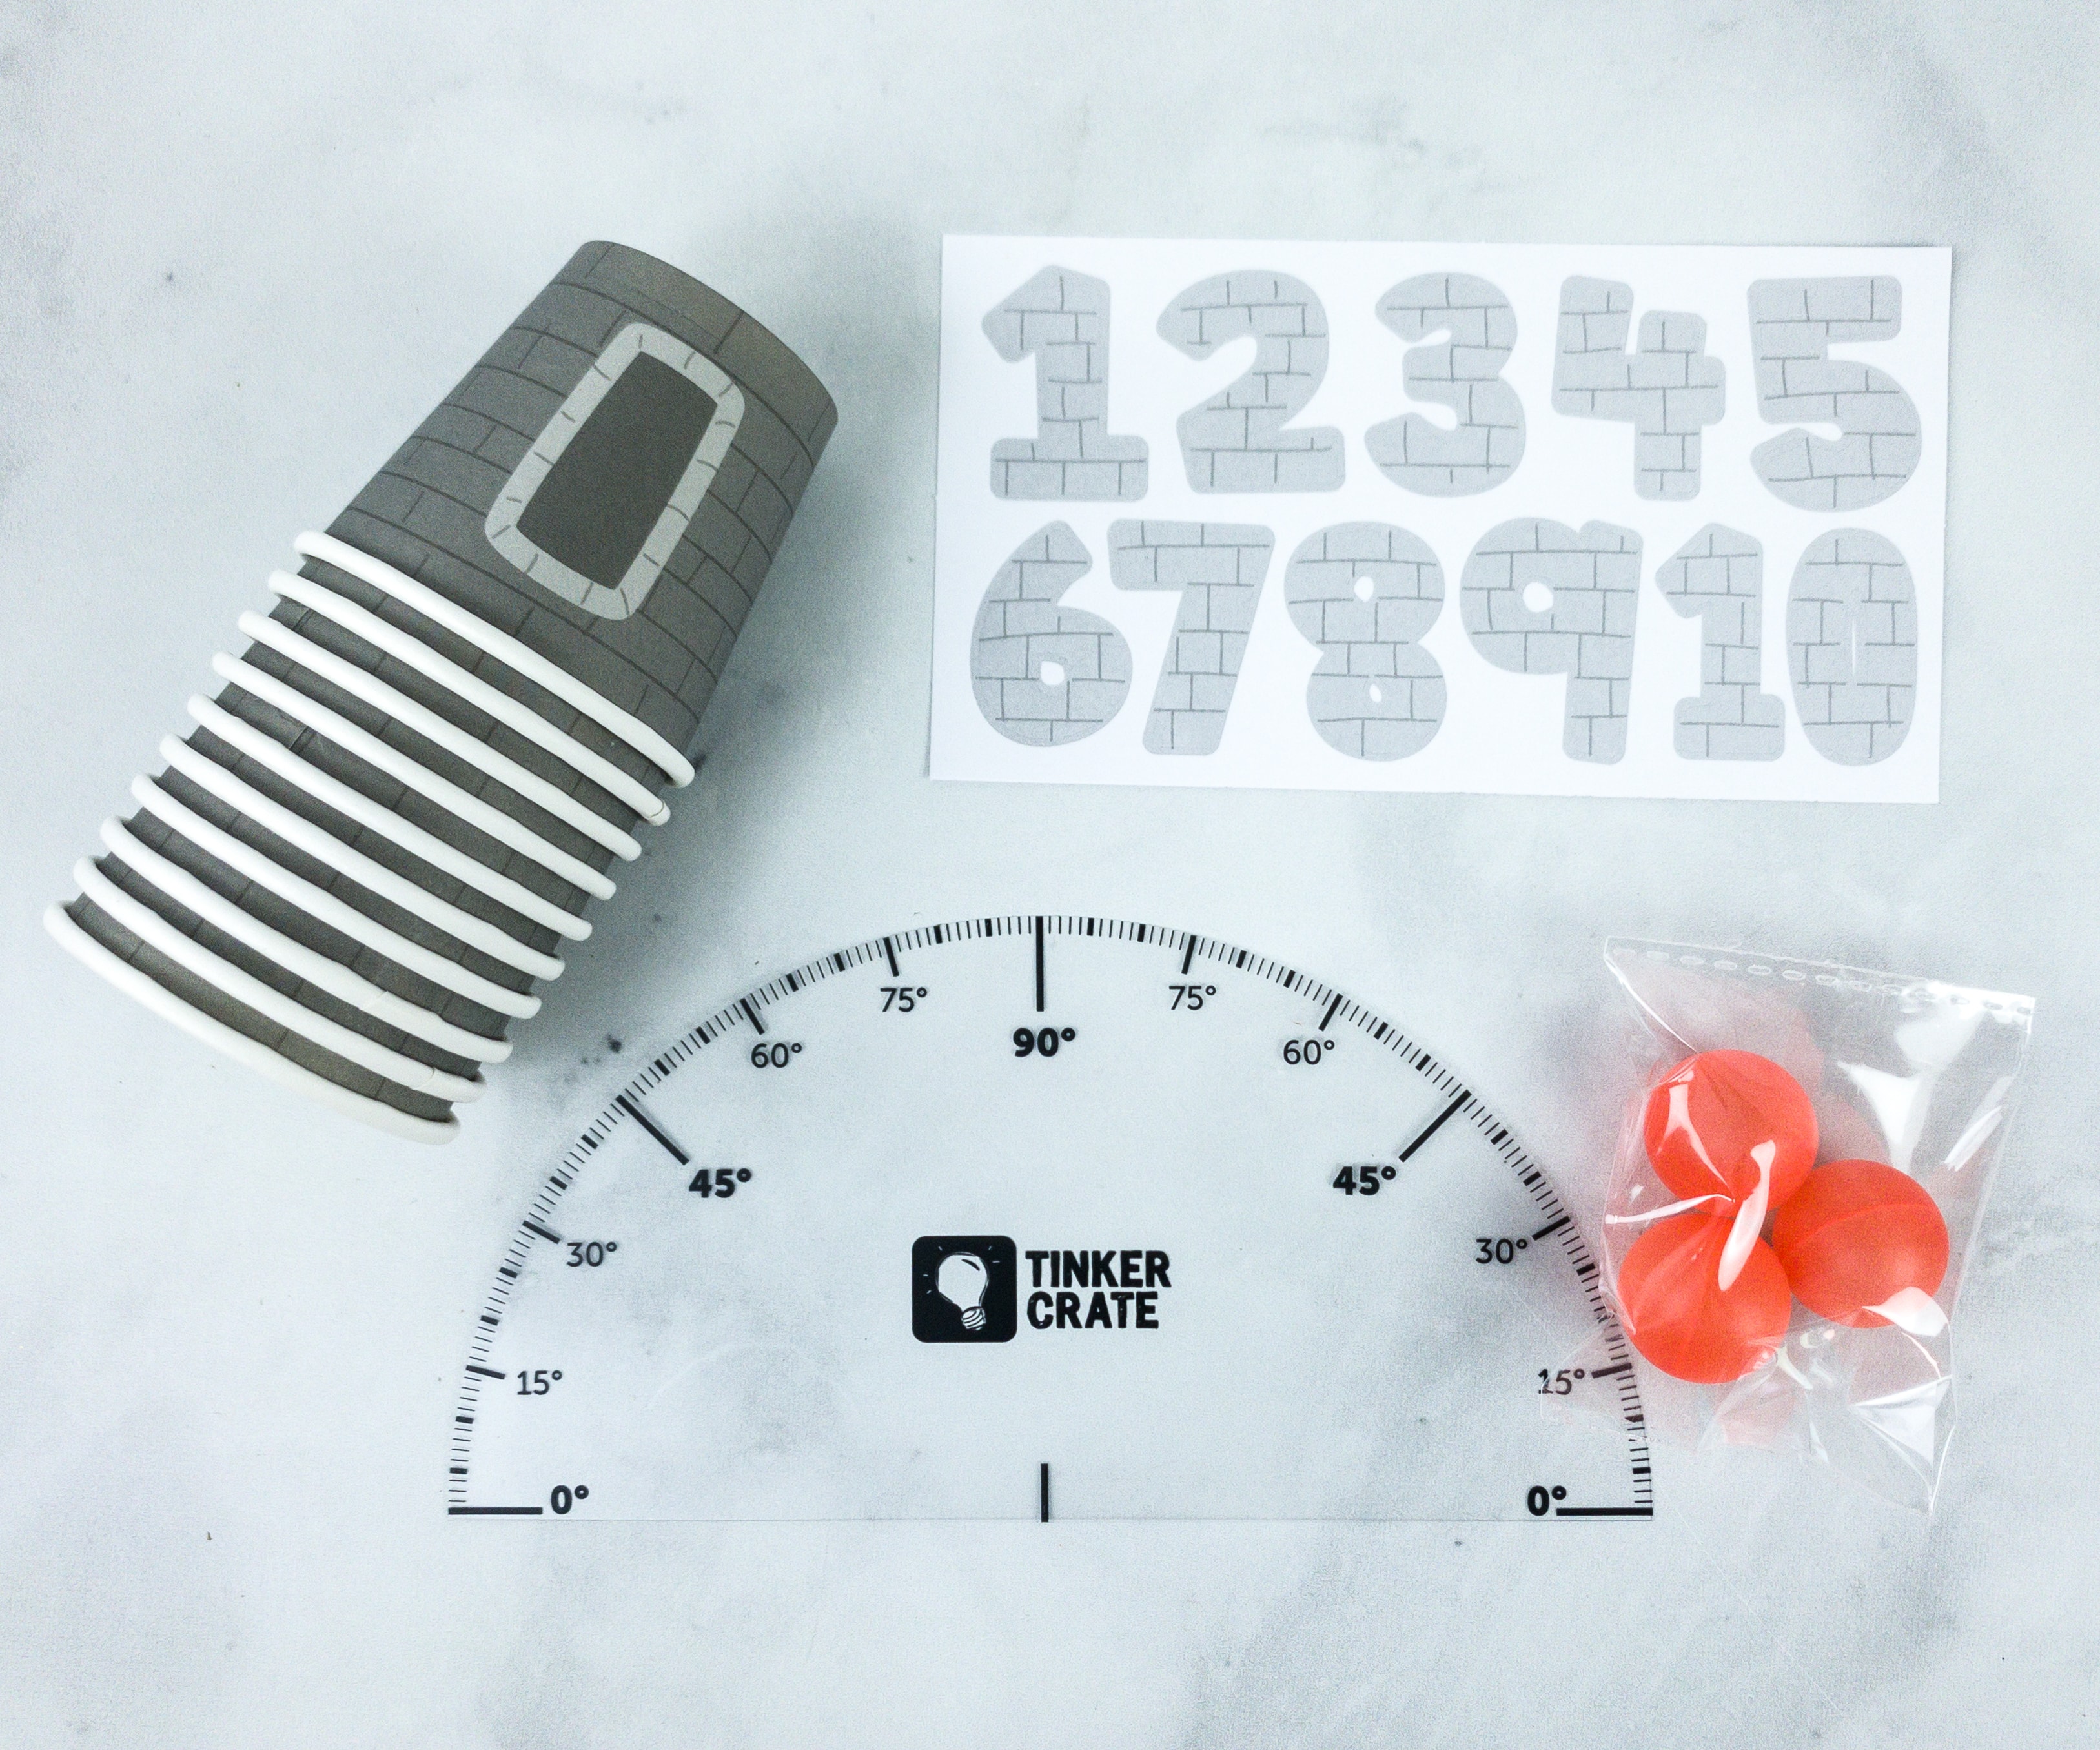
In making the target, we used paper cups, numbered stickers, balls, and protractor.
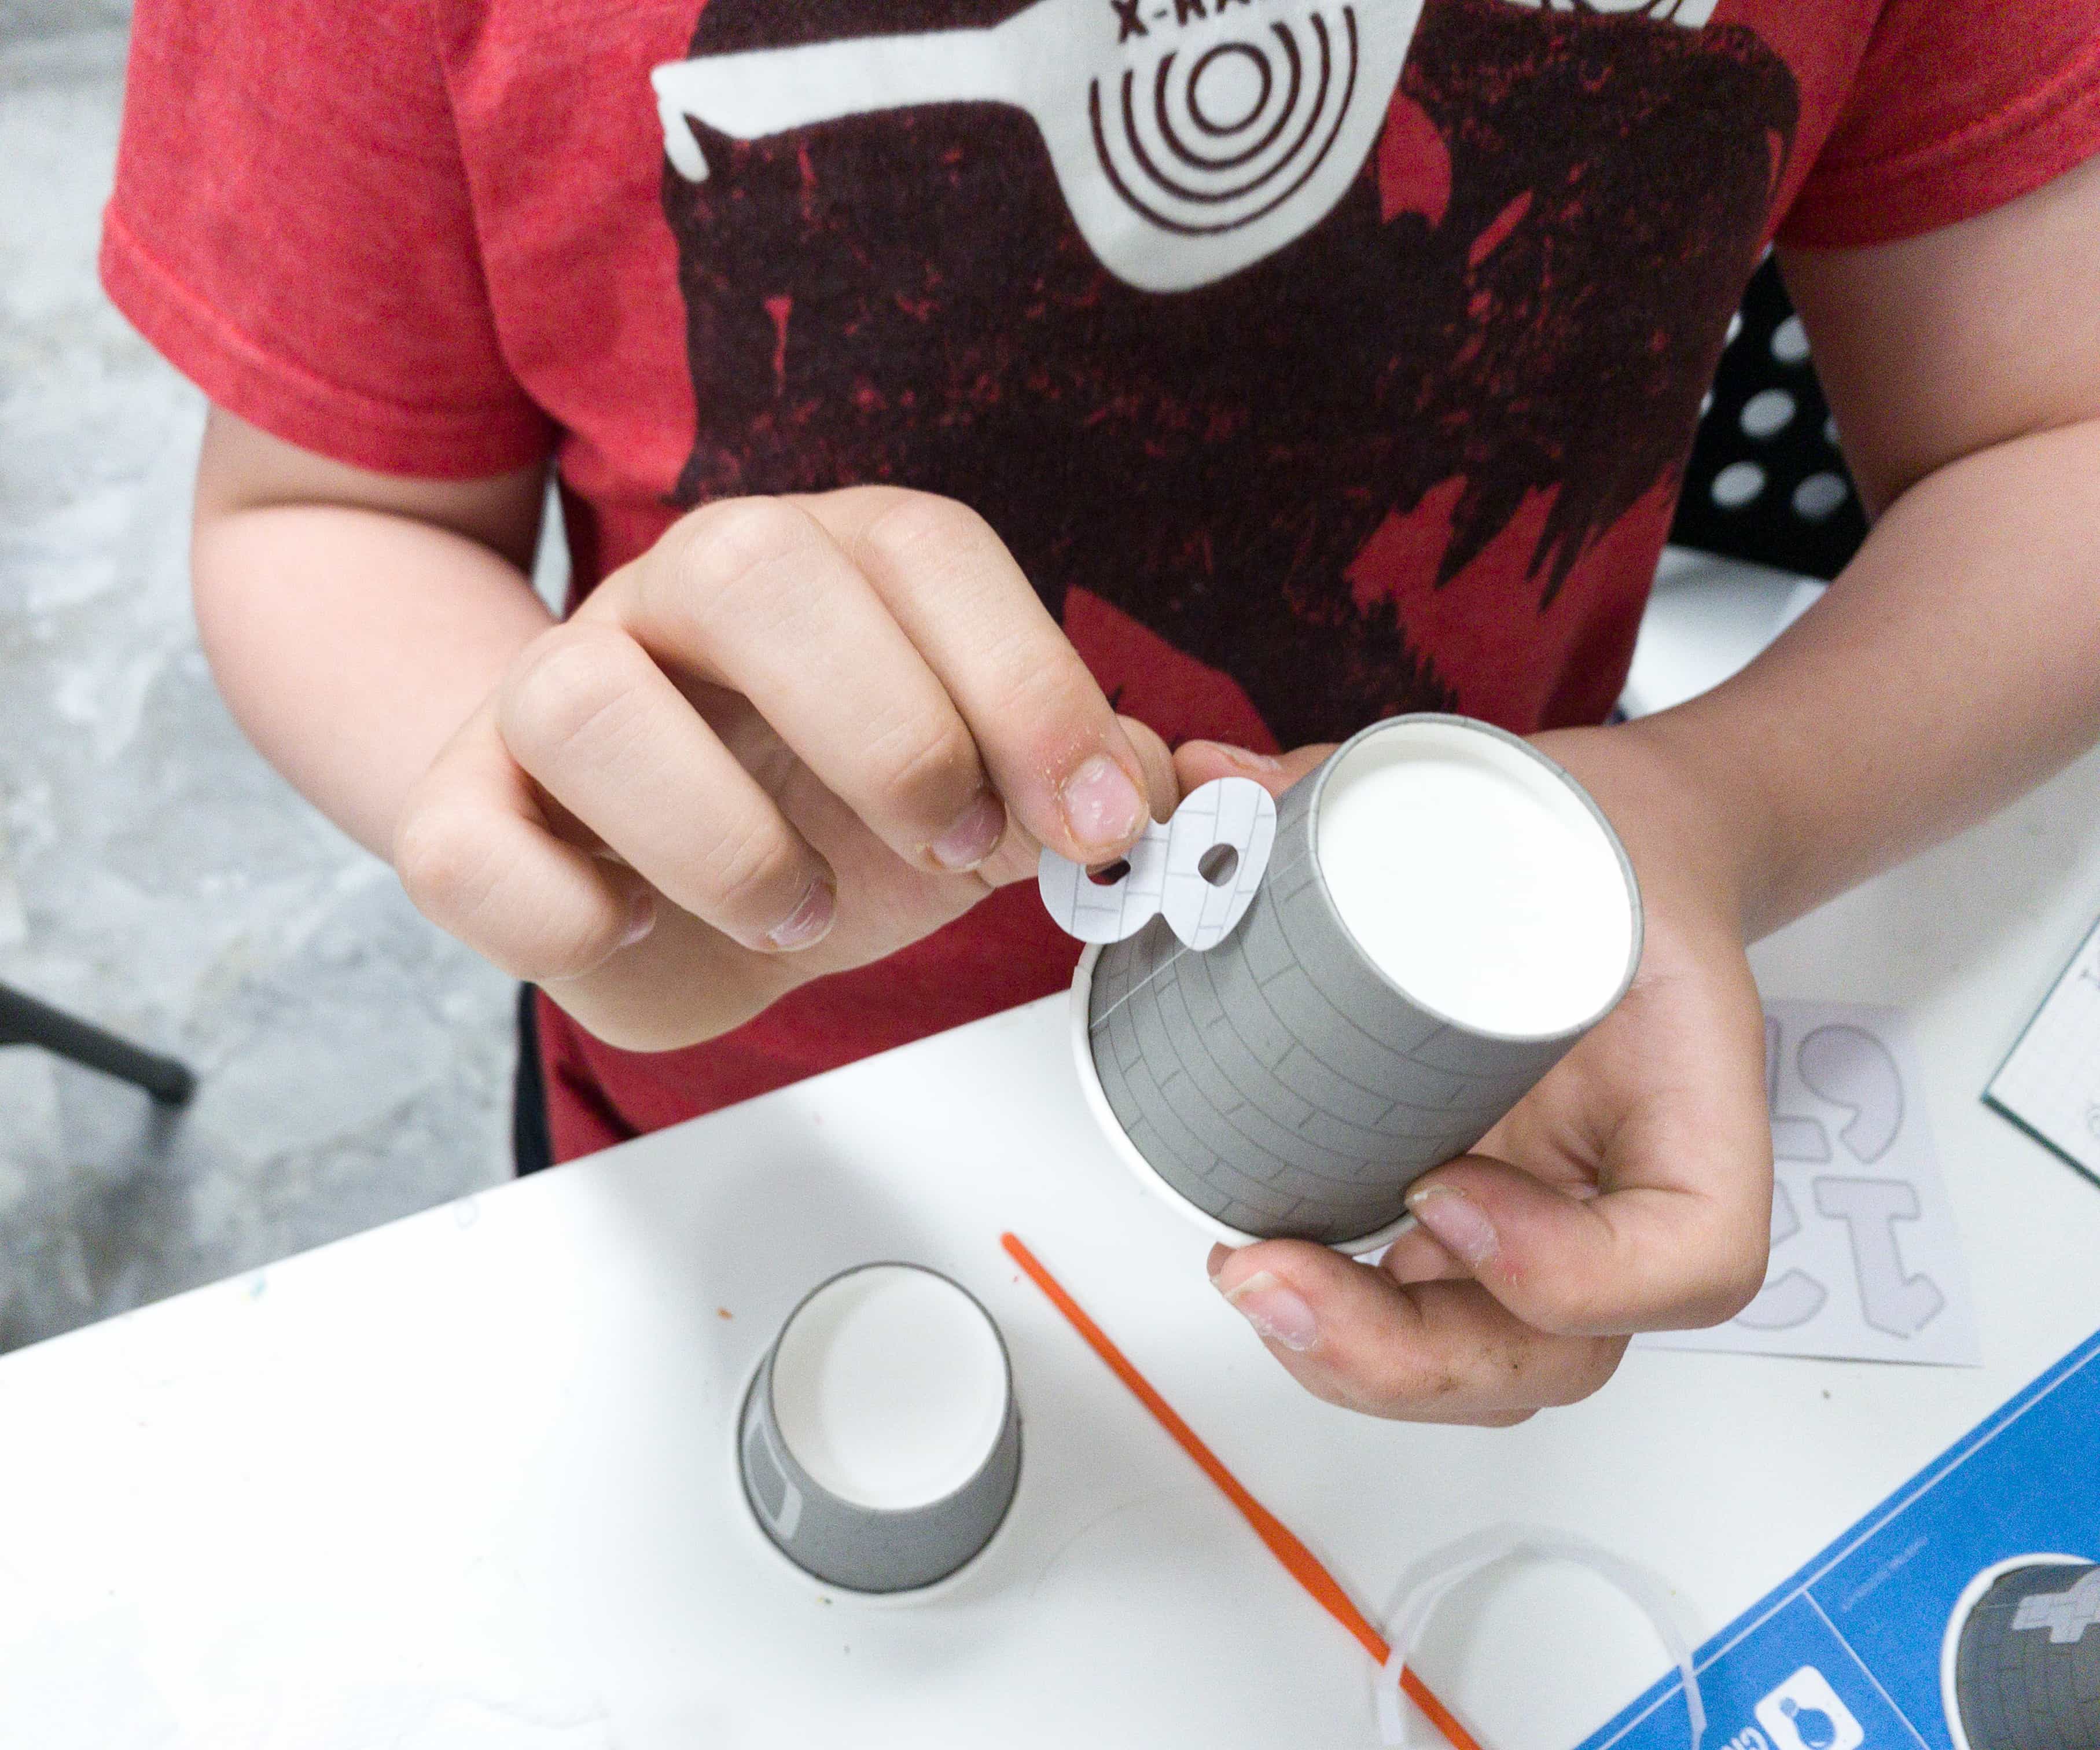
This is definitely the easiest part of the project! All my kids did was to stick the numbers on the paper cups and it’s done!
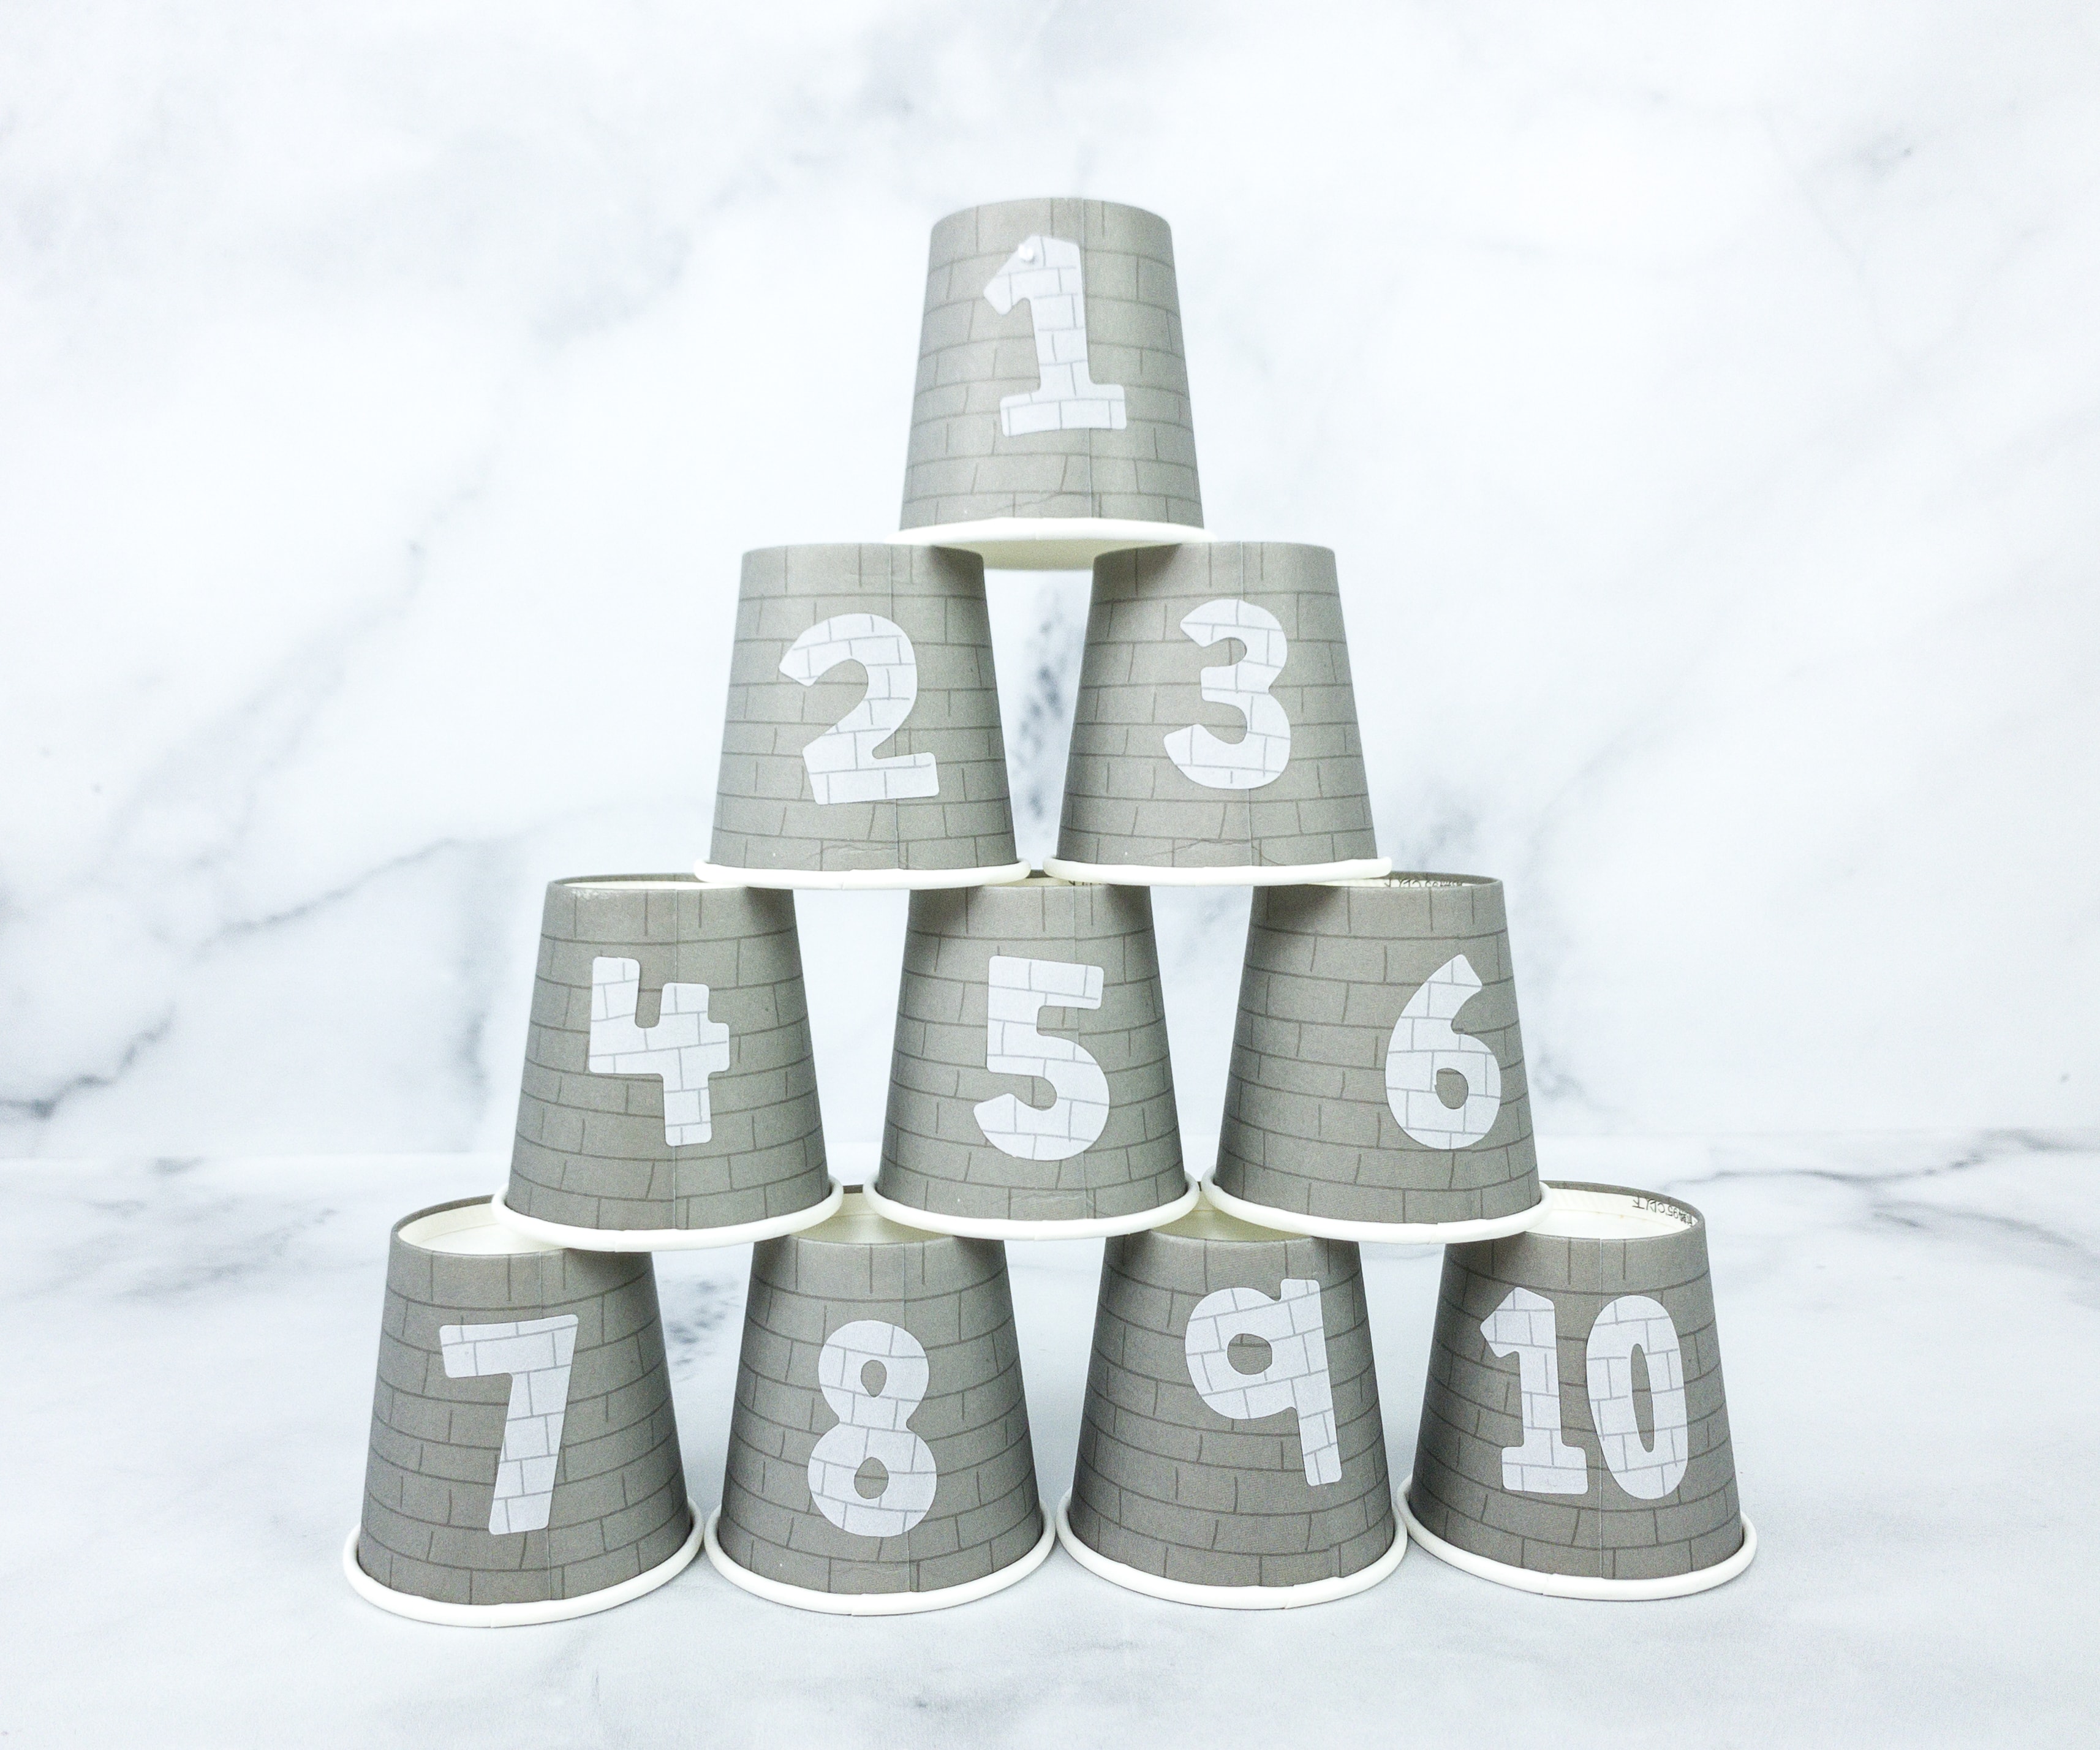
After my kids stuck the numbers to the cup, we then arranged the cups to form a pyramid!
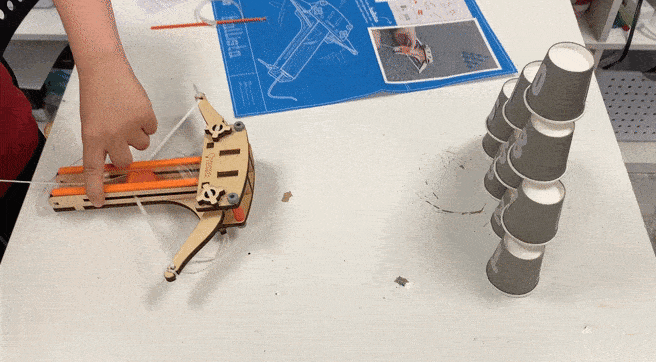
To play, just place the ballista in front of the target, load it with ball bullet, pull the string, and release!
Tinker Crate Extensions
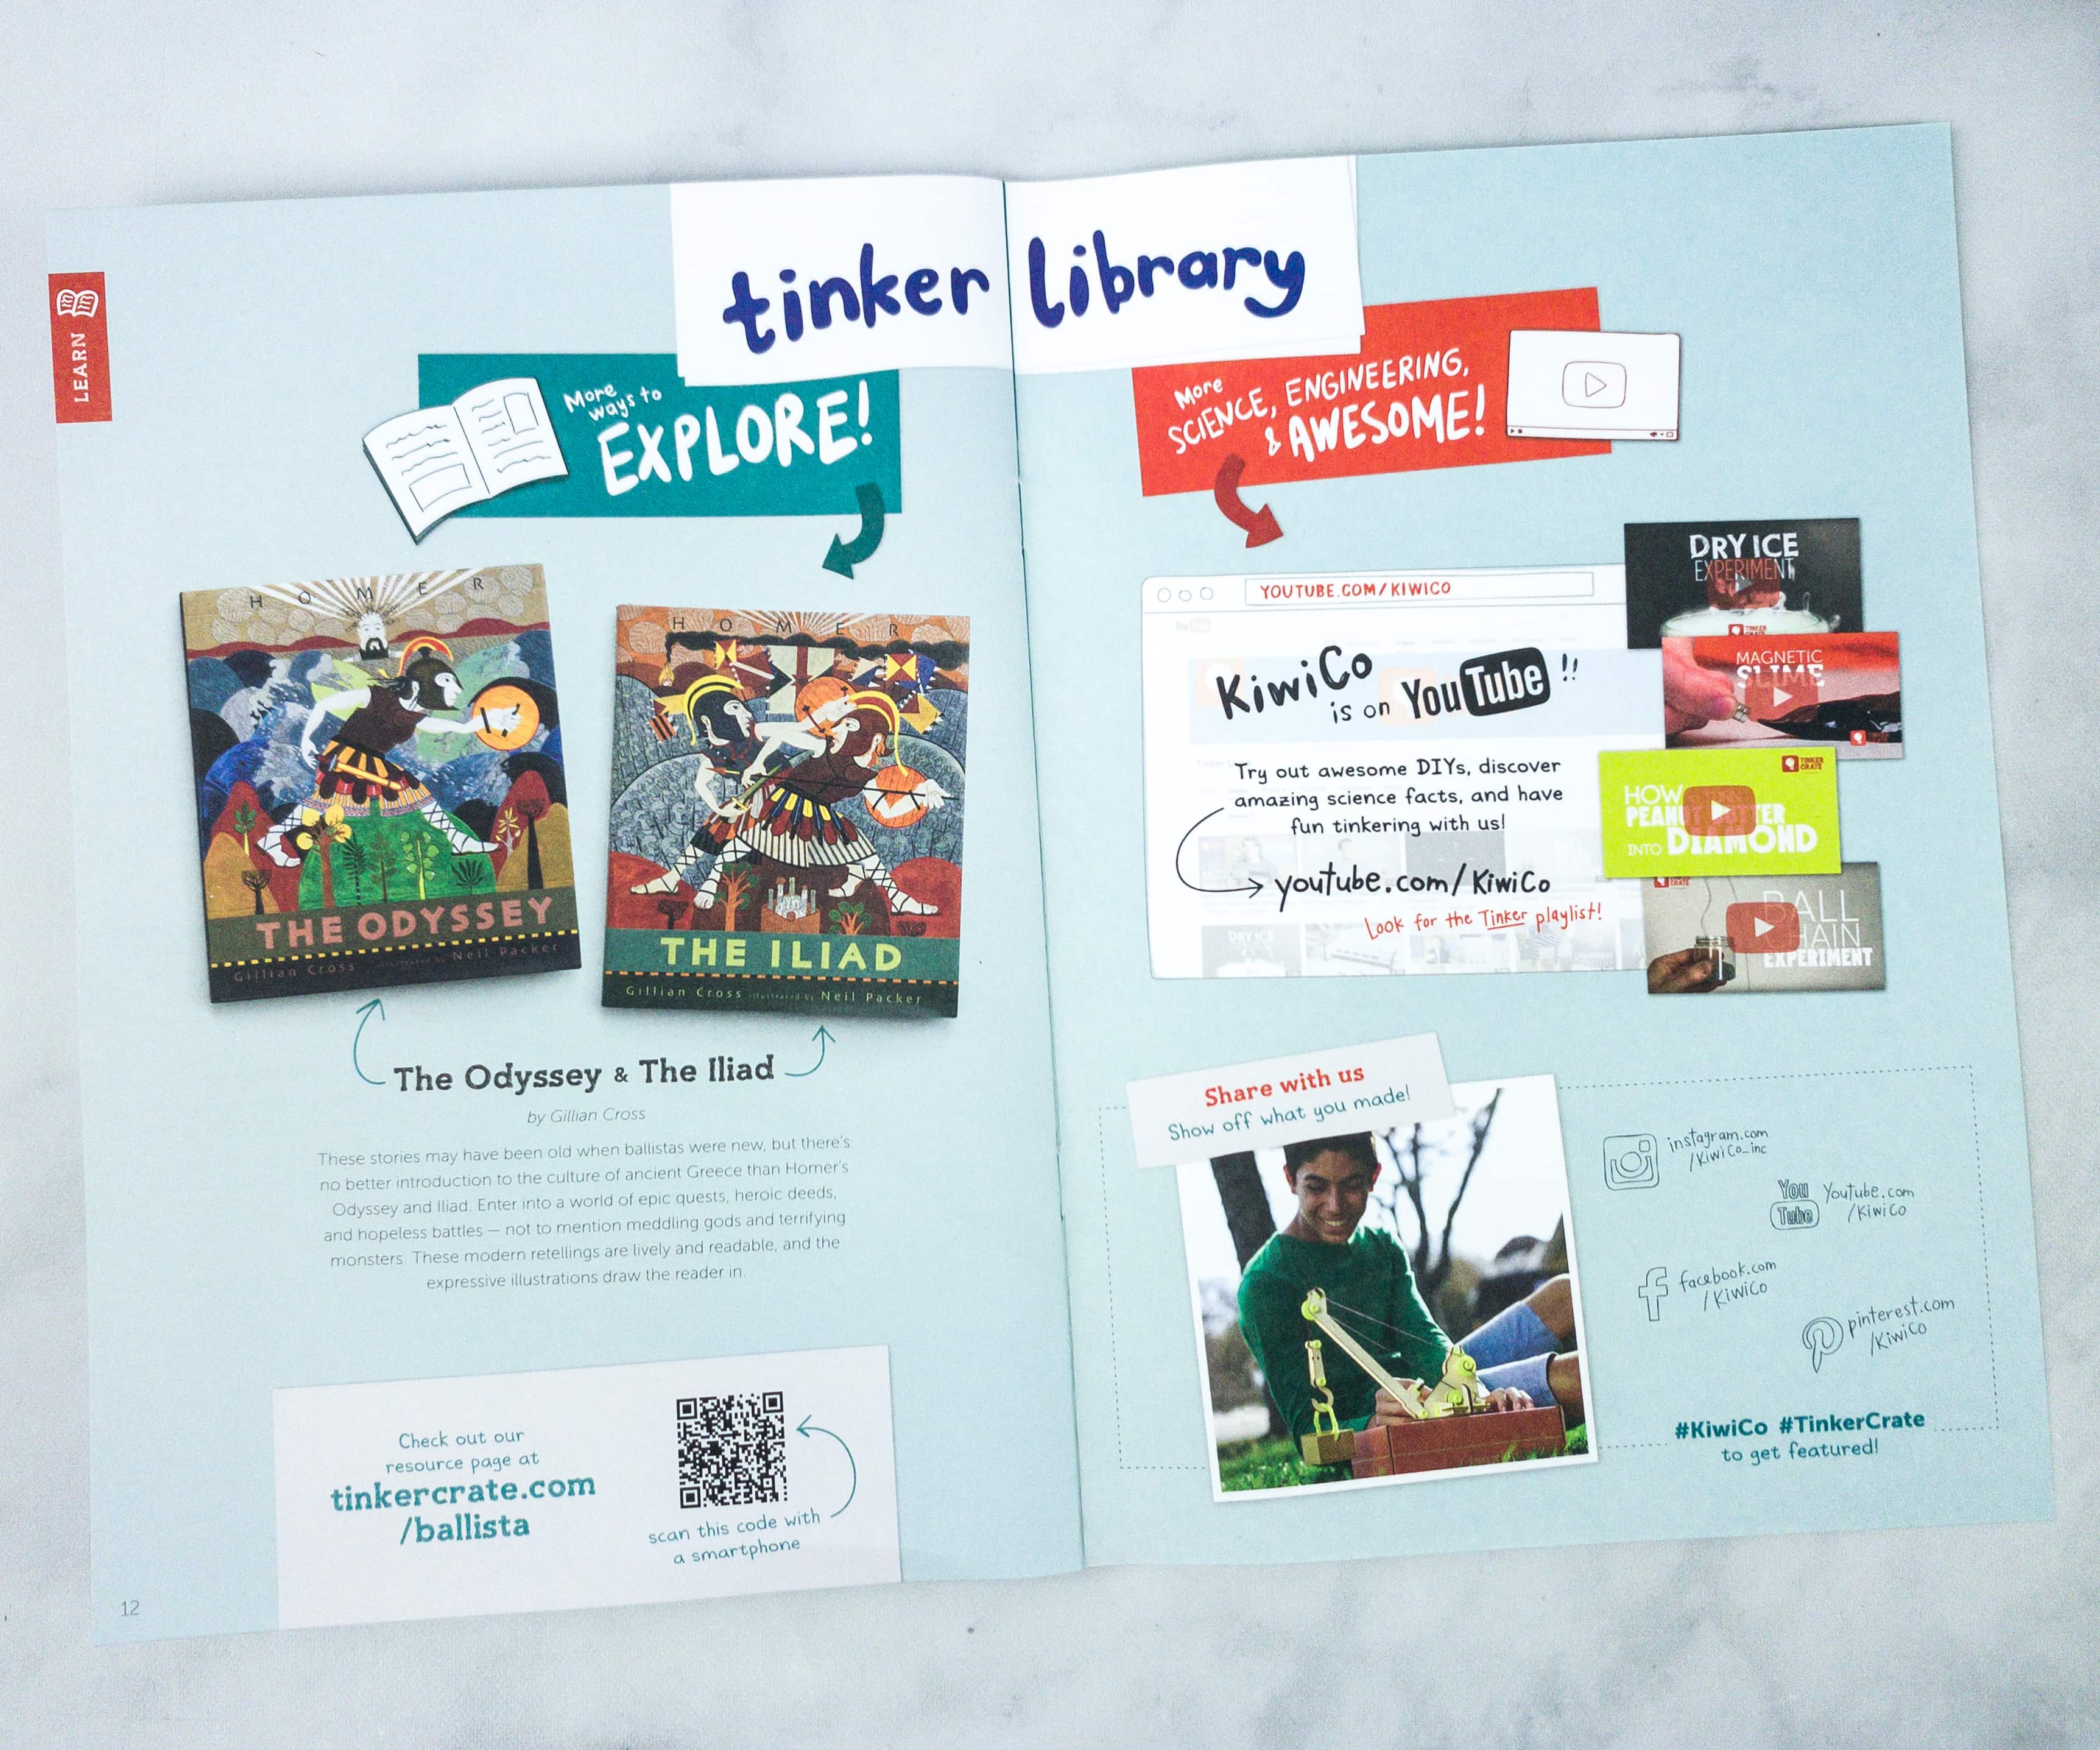
The Zine also provided more ways to tinker via the Tinker Library, where they suggest related literature for this month’s topic: The Odyssey and The Iliad!
My kids enjoyed working on this month’s project so much! The ballista is such an interesting mechanical device, and although the steps in making it is quite complex, things went smoothly because of the detailed instruction sheet they included in the crate. Tinker Crate has really been consistent in providing fun STEM activities that challenge the kids and also improve their creativity and problem-solving skills. It’s always great to see my kids having fun while working on the activities! This is definitely one of the best subscriptions to try for STEM education at home!
Have you tried Tinker Crate yet with your kids?


Comments