Eureka Crate is a monthly STEM and maker subscription box that teaches kids and adults how to apply principles of science and math to make awesome things you will love to use every day – from an articulated desk lamp to an electric pencil sharpener to a wooden ukulele. Every Eureka Crate includes an engineering project, detailed step-by-step instructions, everything you need to complete the project, a Maker’s Guide that explains all the design, process, and engineering behind the design, plus a design challenge to take your project knowledge to the next level!
DEAL: Save 30% on your first month! Just use this link to subscribe, no coupon code required! You can also use the same link to save 30% on the first month of any other KiwiCo crate – just check out this page to discover which box is right for you.
Eureka Crate is KiwiCo’s latest subscription! Eureka Crate is designed for ages 14-104. If you’re ready to graduate from KiwiCo’s other boxes or just can’t get enough (or are just too old for their other subscriptions), you’ll love this box, which is designed to create a hands-on learning experience using everyday items to delve deeply into the science and math principles they embody, along with the design process of the month’s project.
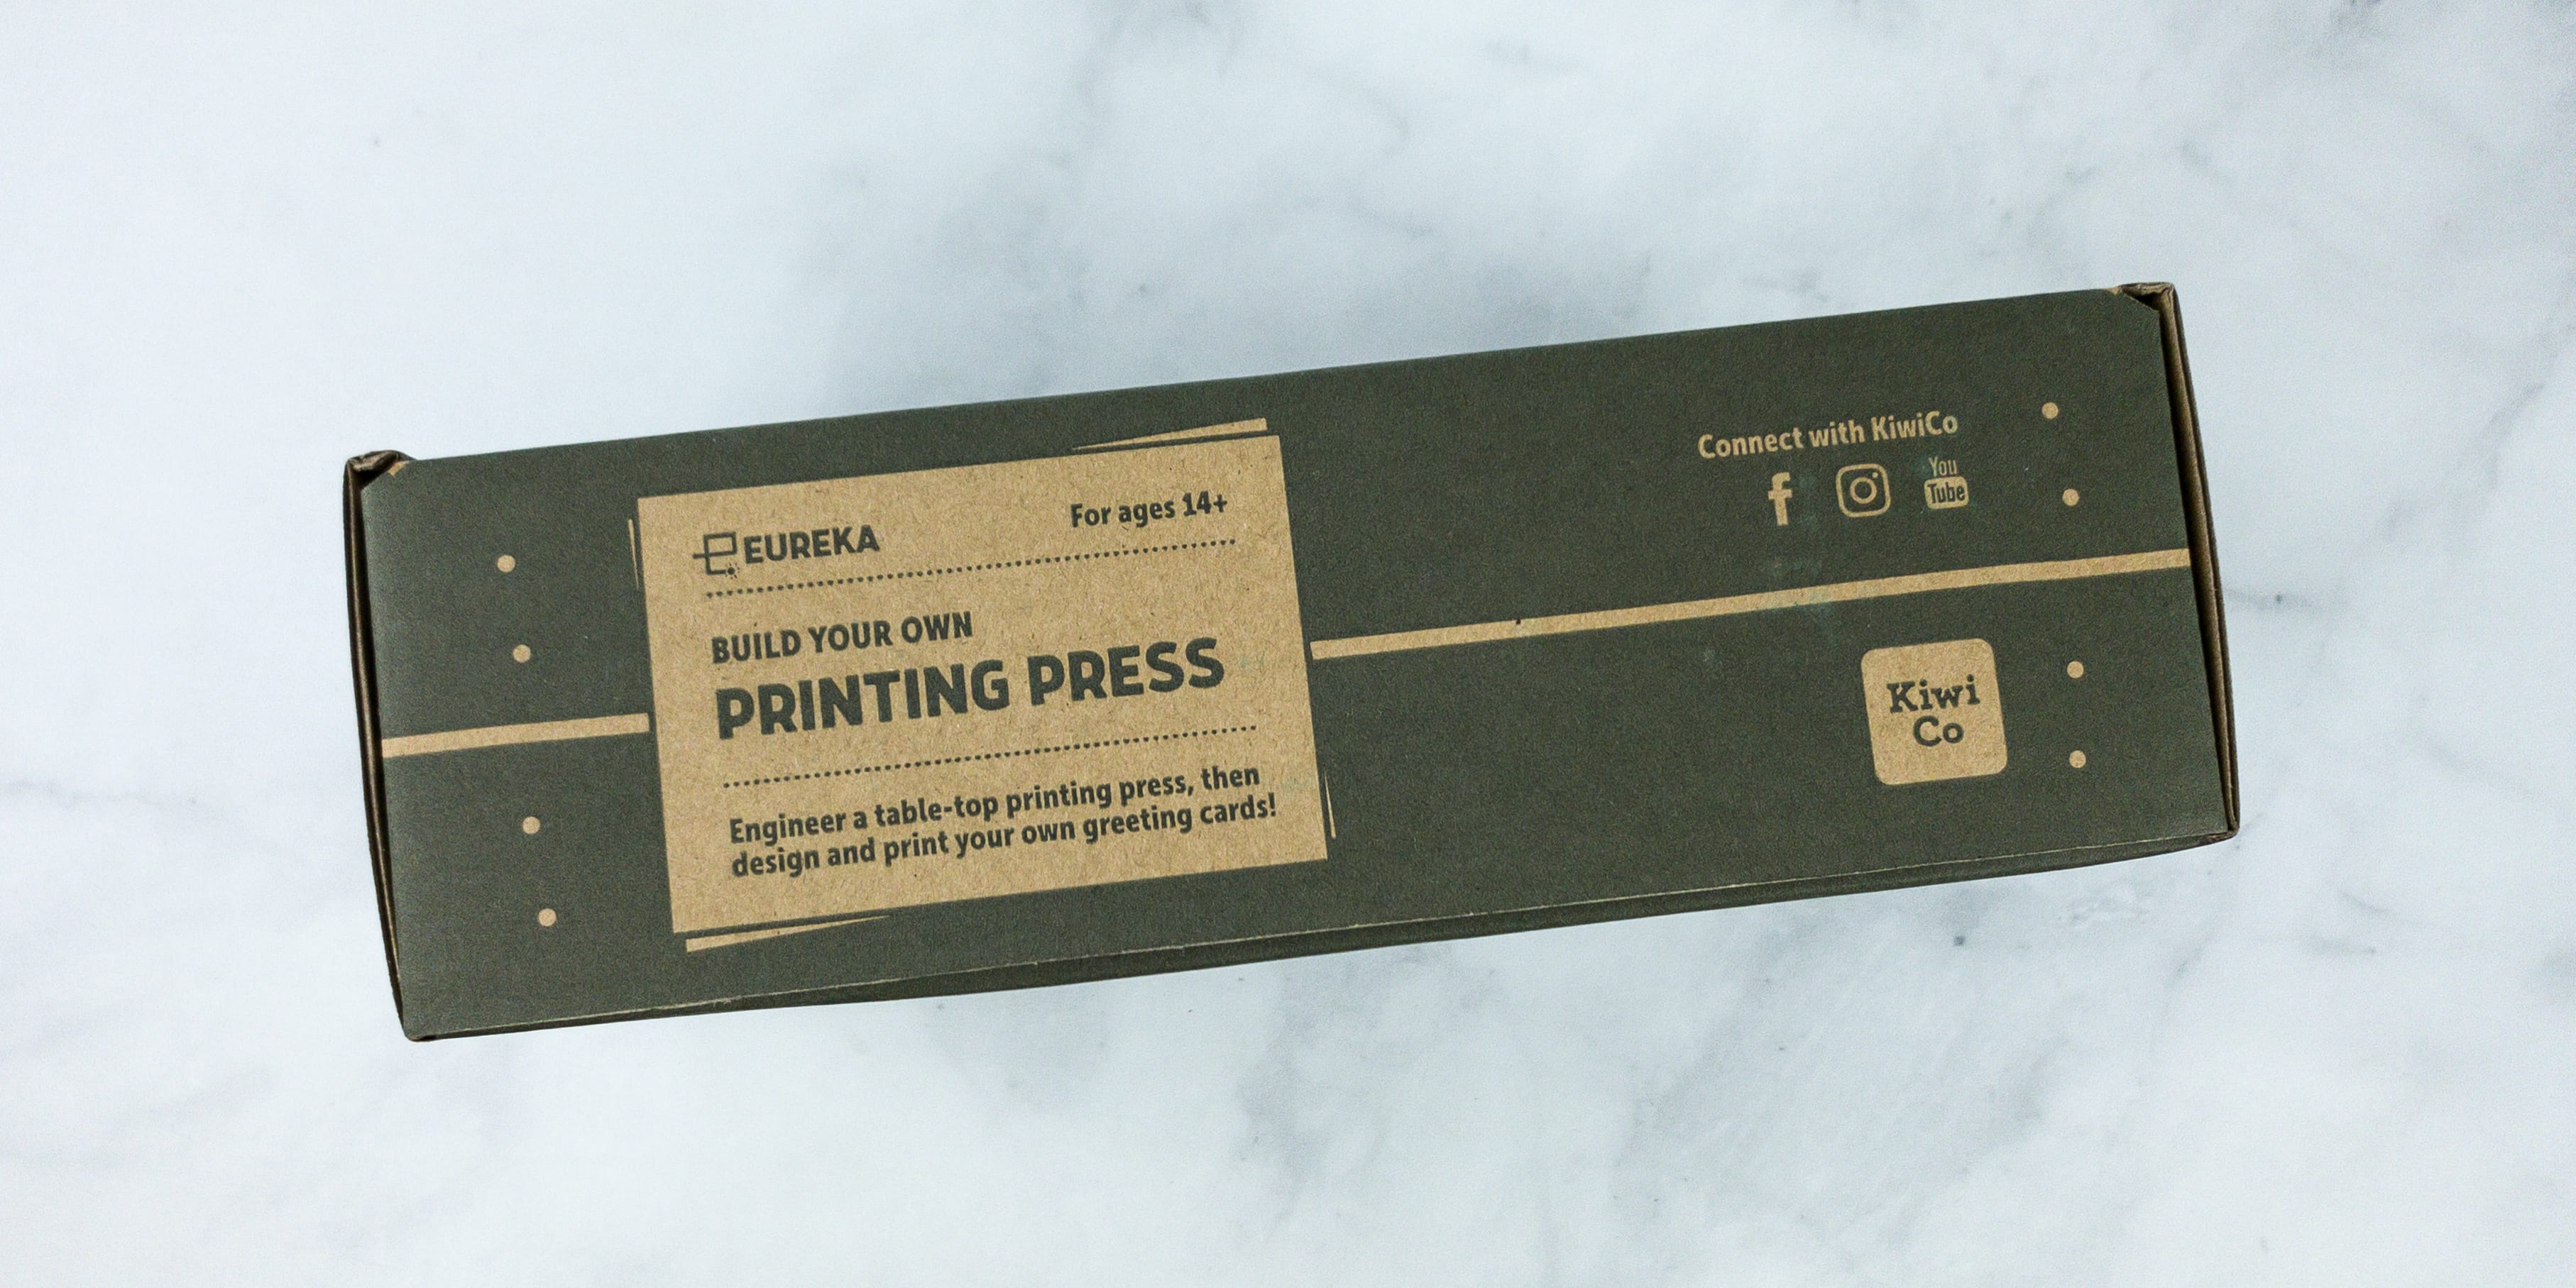
This month, we’re making a Printing Press!
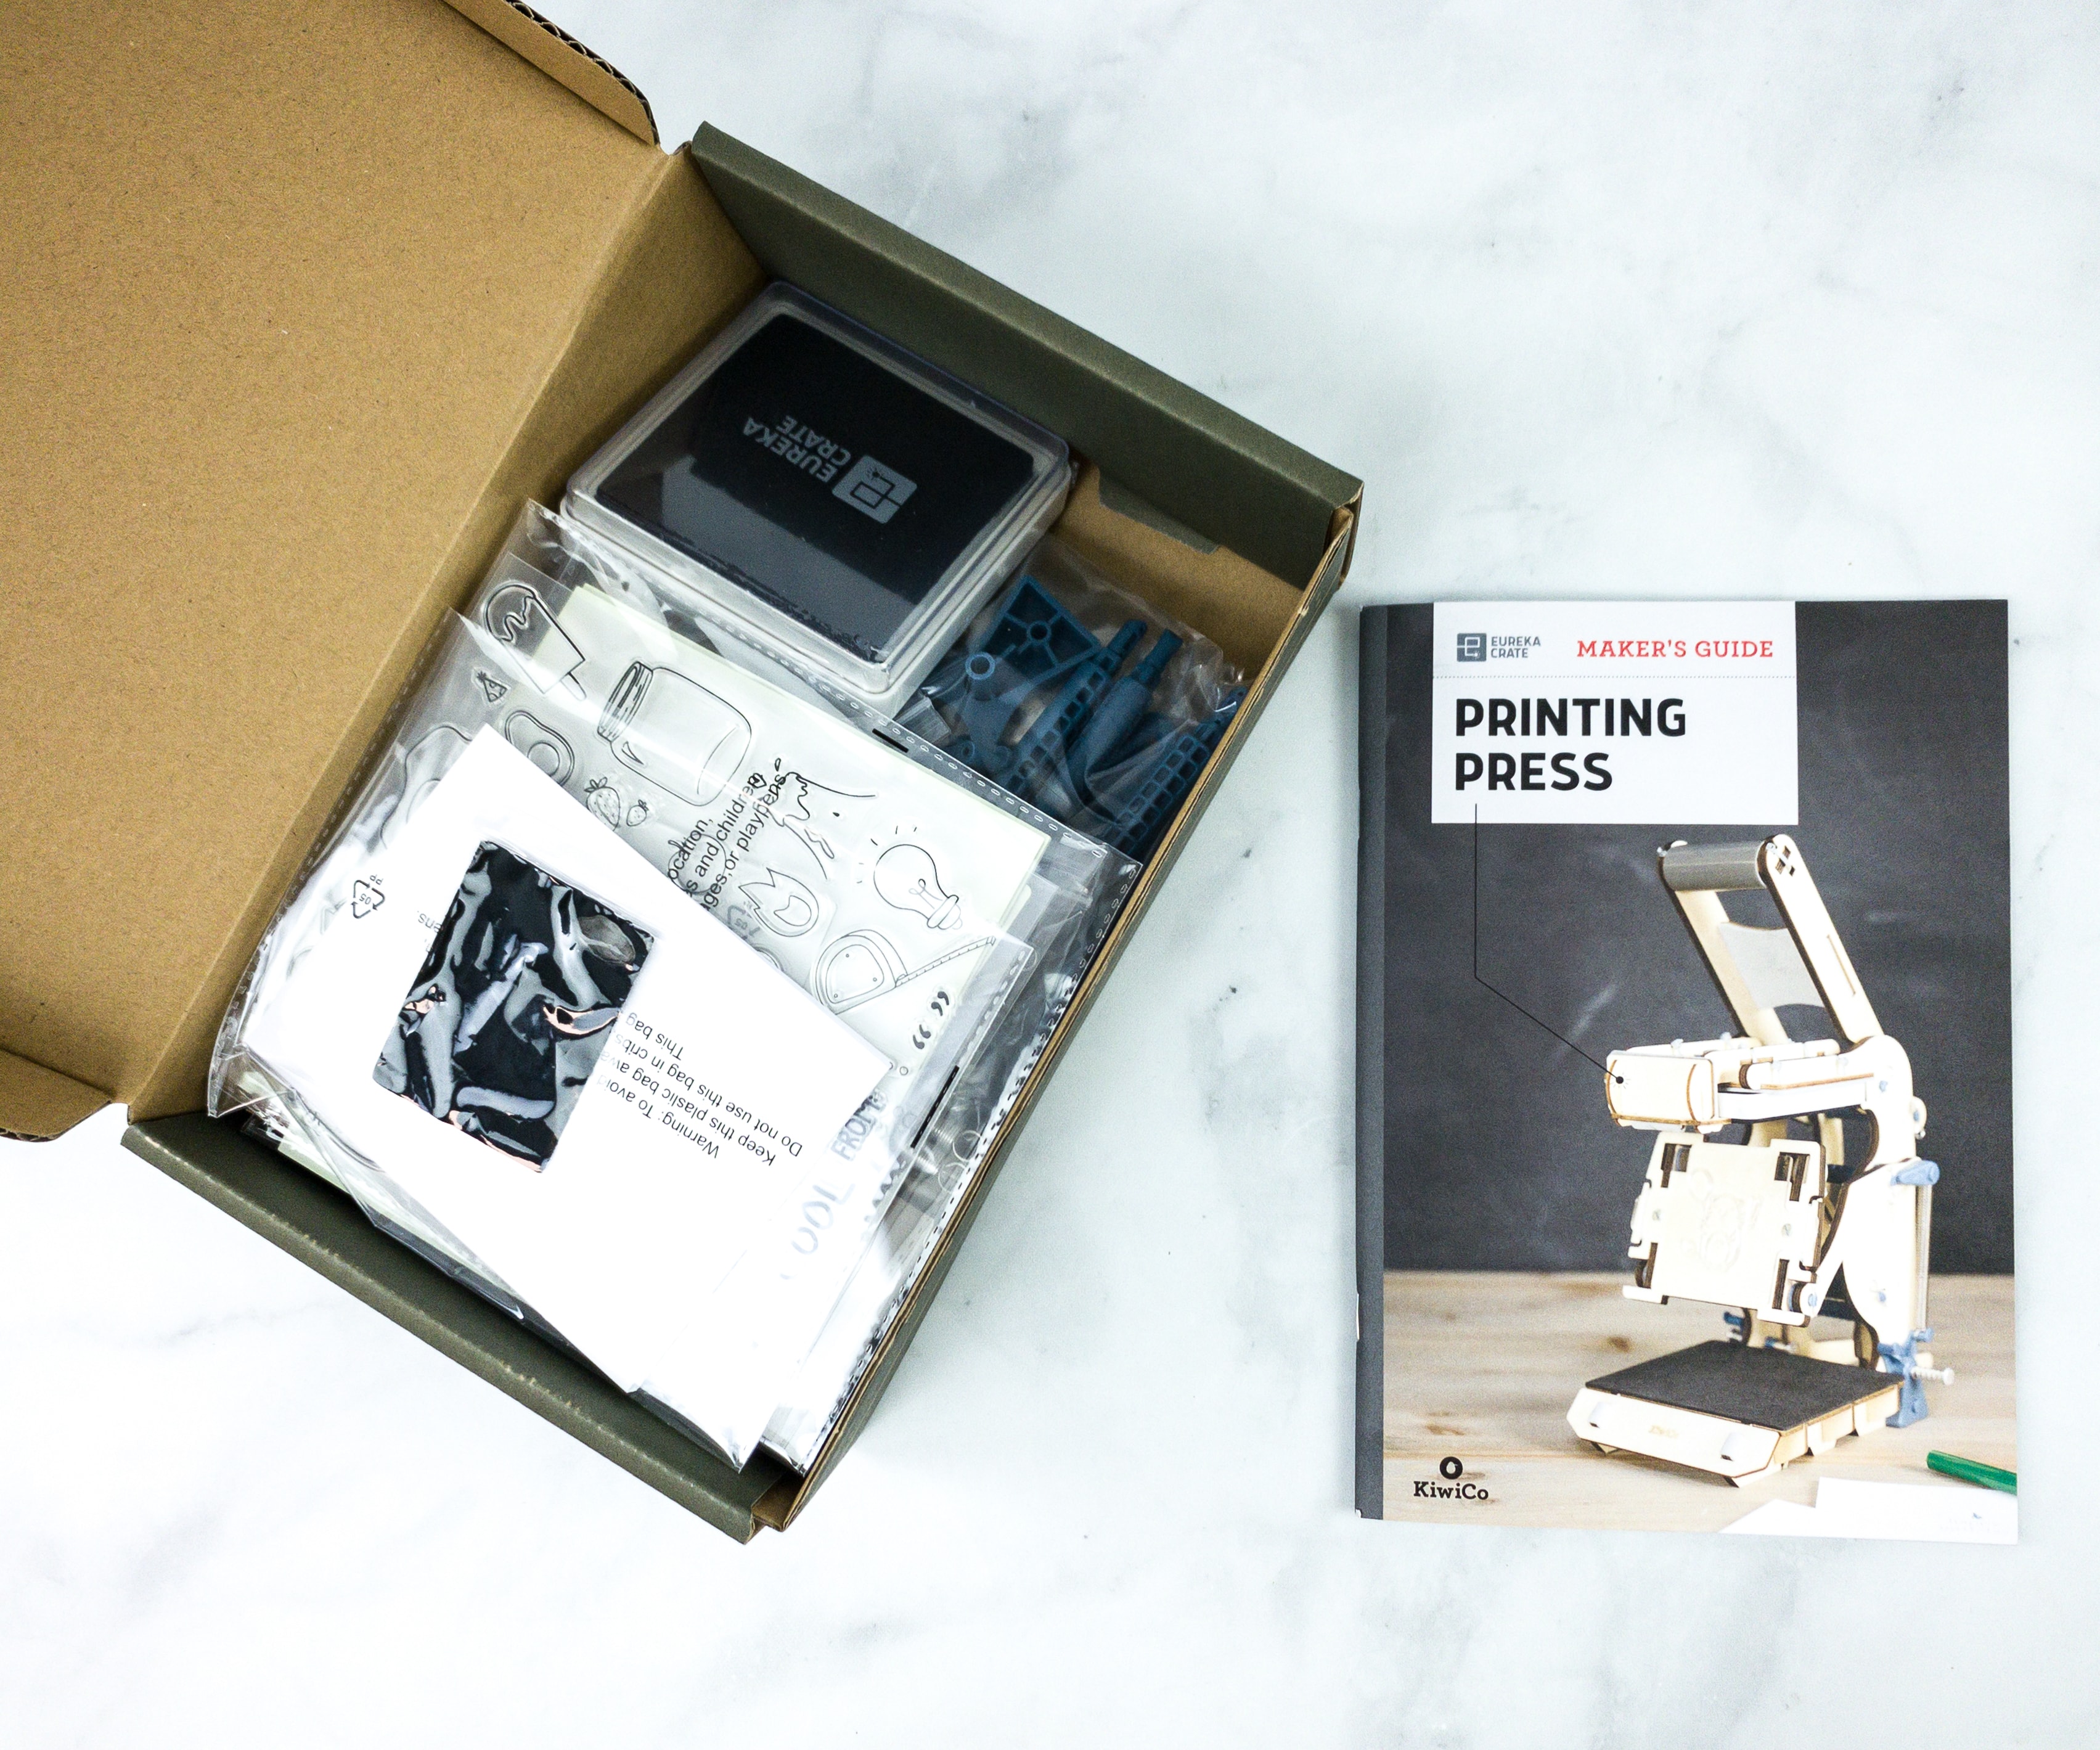
Like the other crates from KiwiCo, Eureka Crate includes a booklet.
One of KiwiCo’s goals is to equip the next generation of innovators with the tools and confidence for creative exploration and problem-solving.
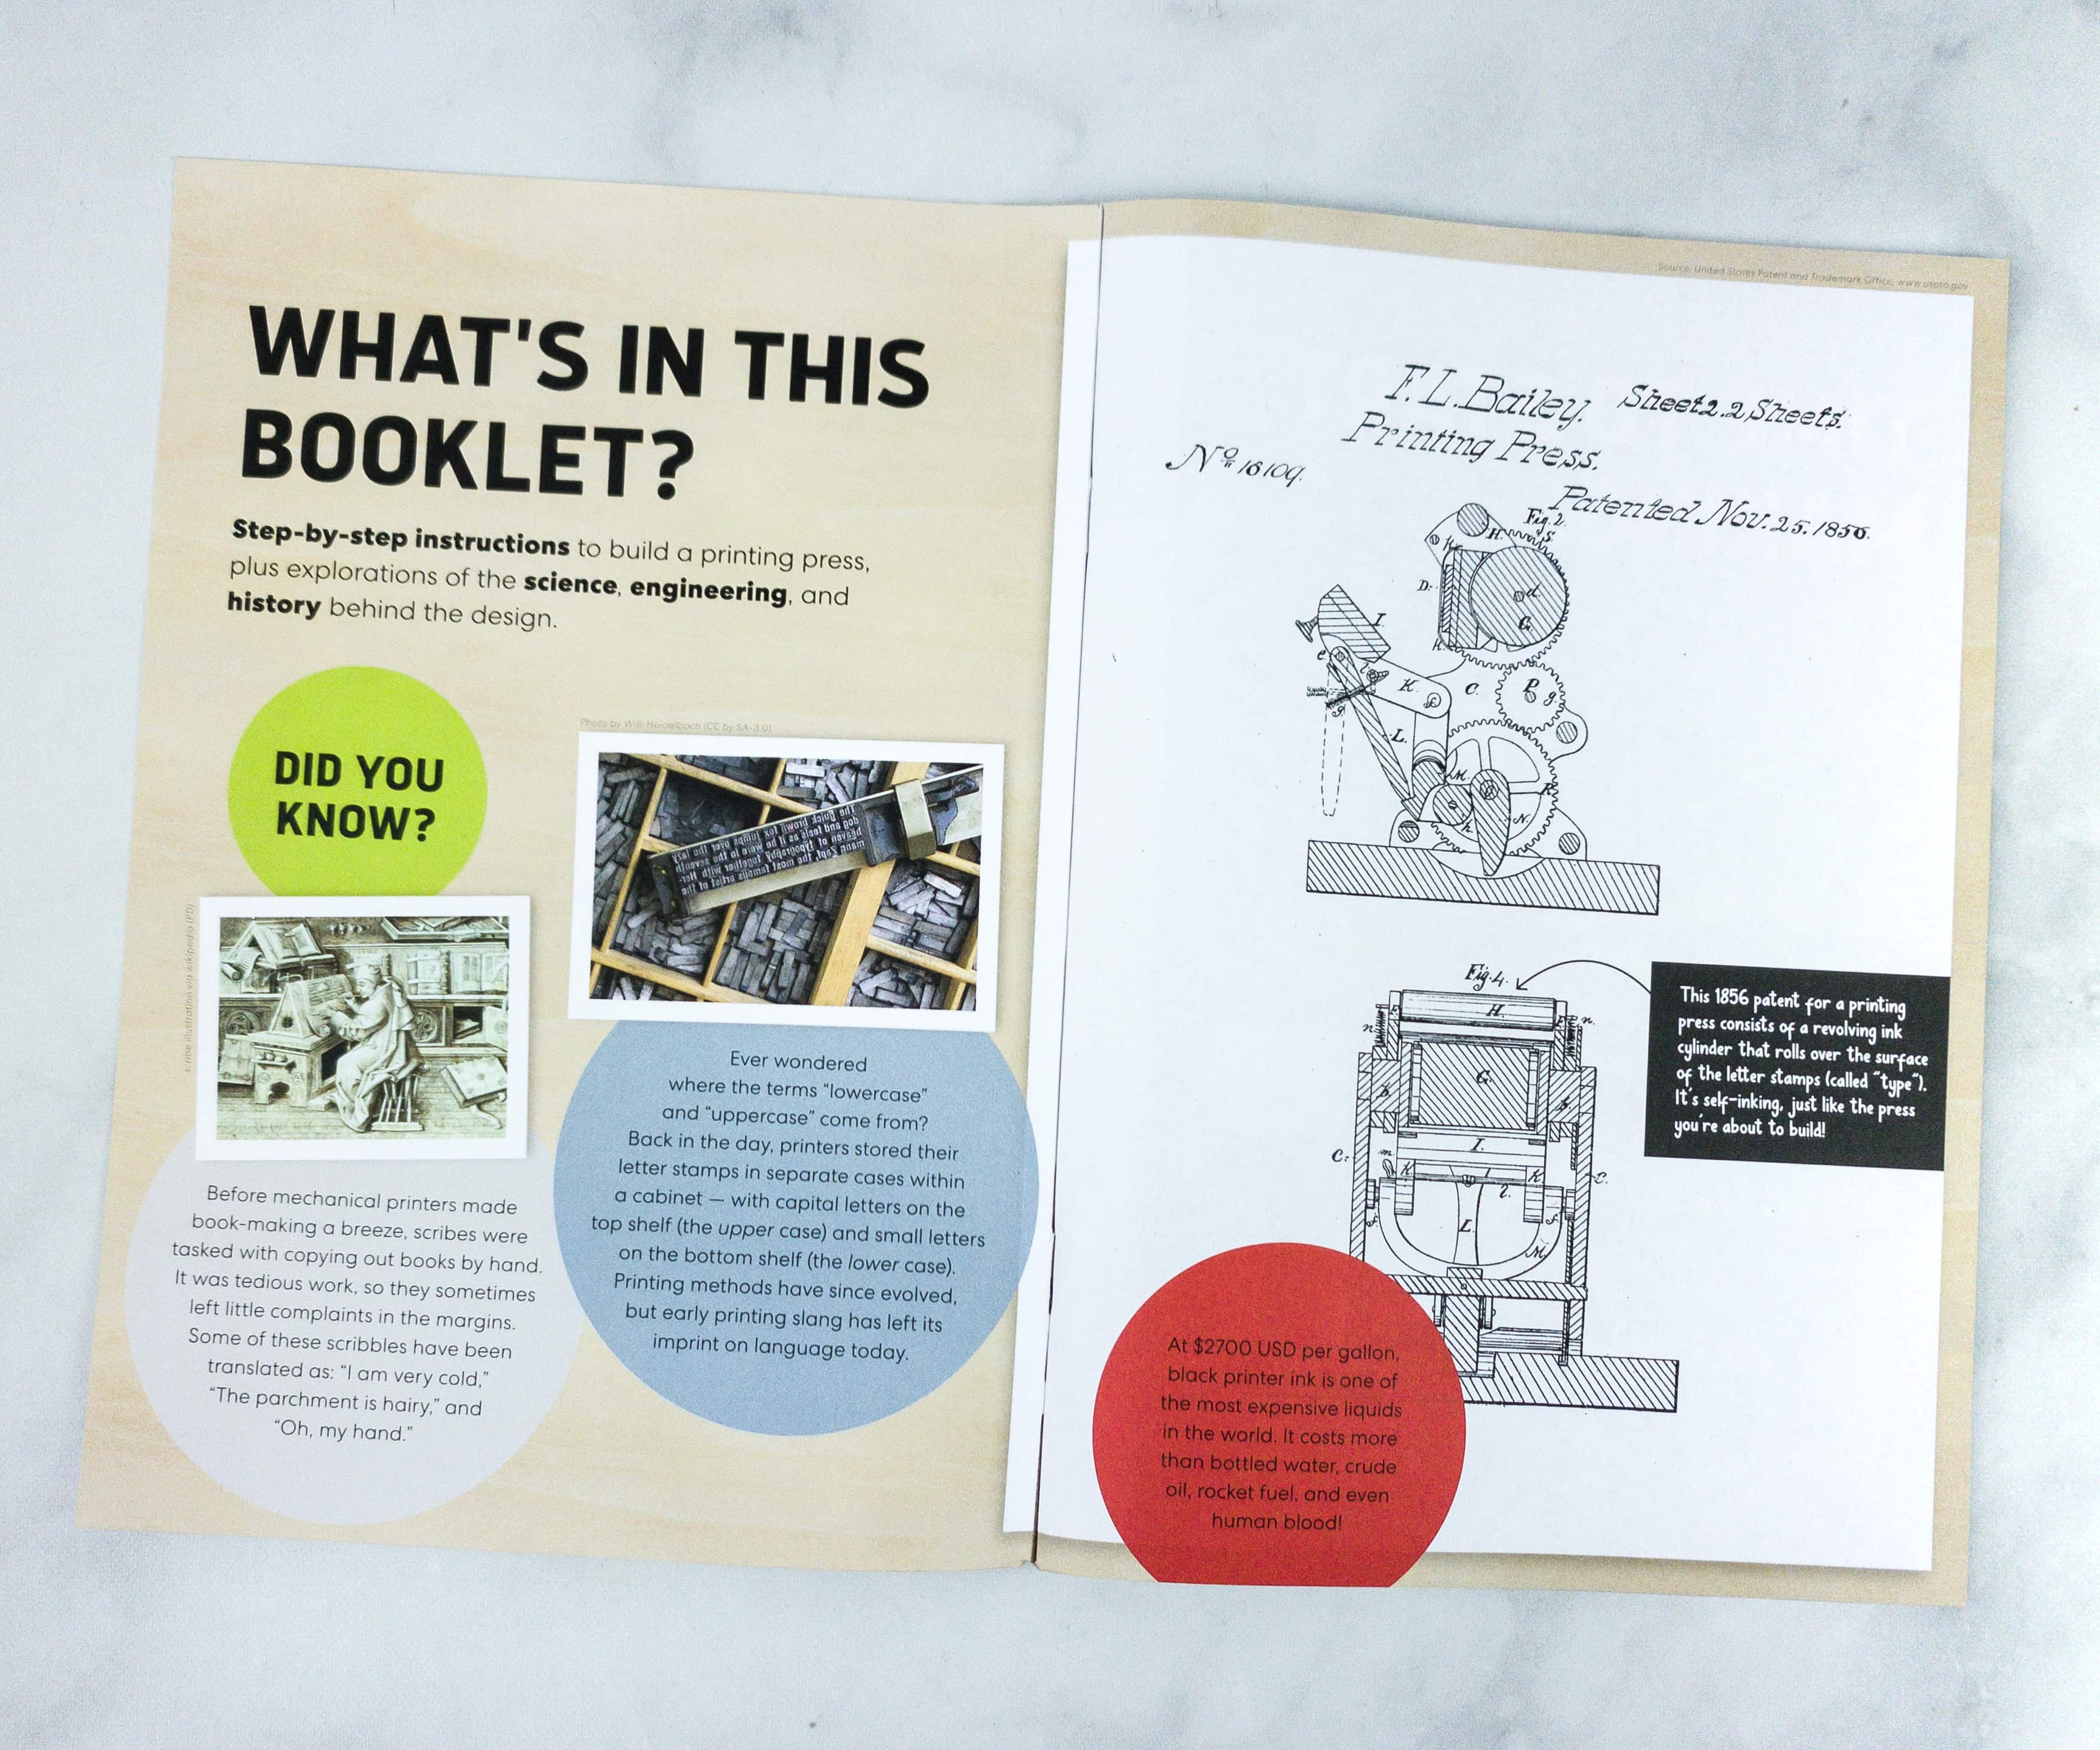
The booklet shares a complete history and details about this month’s project. They also included some fun facts and trivia related to the theme.
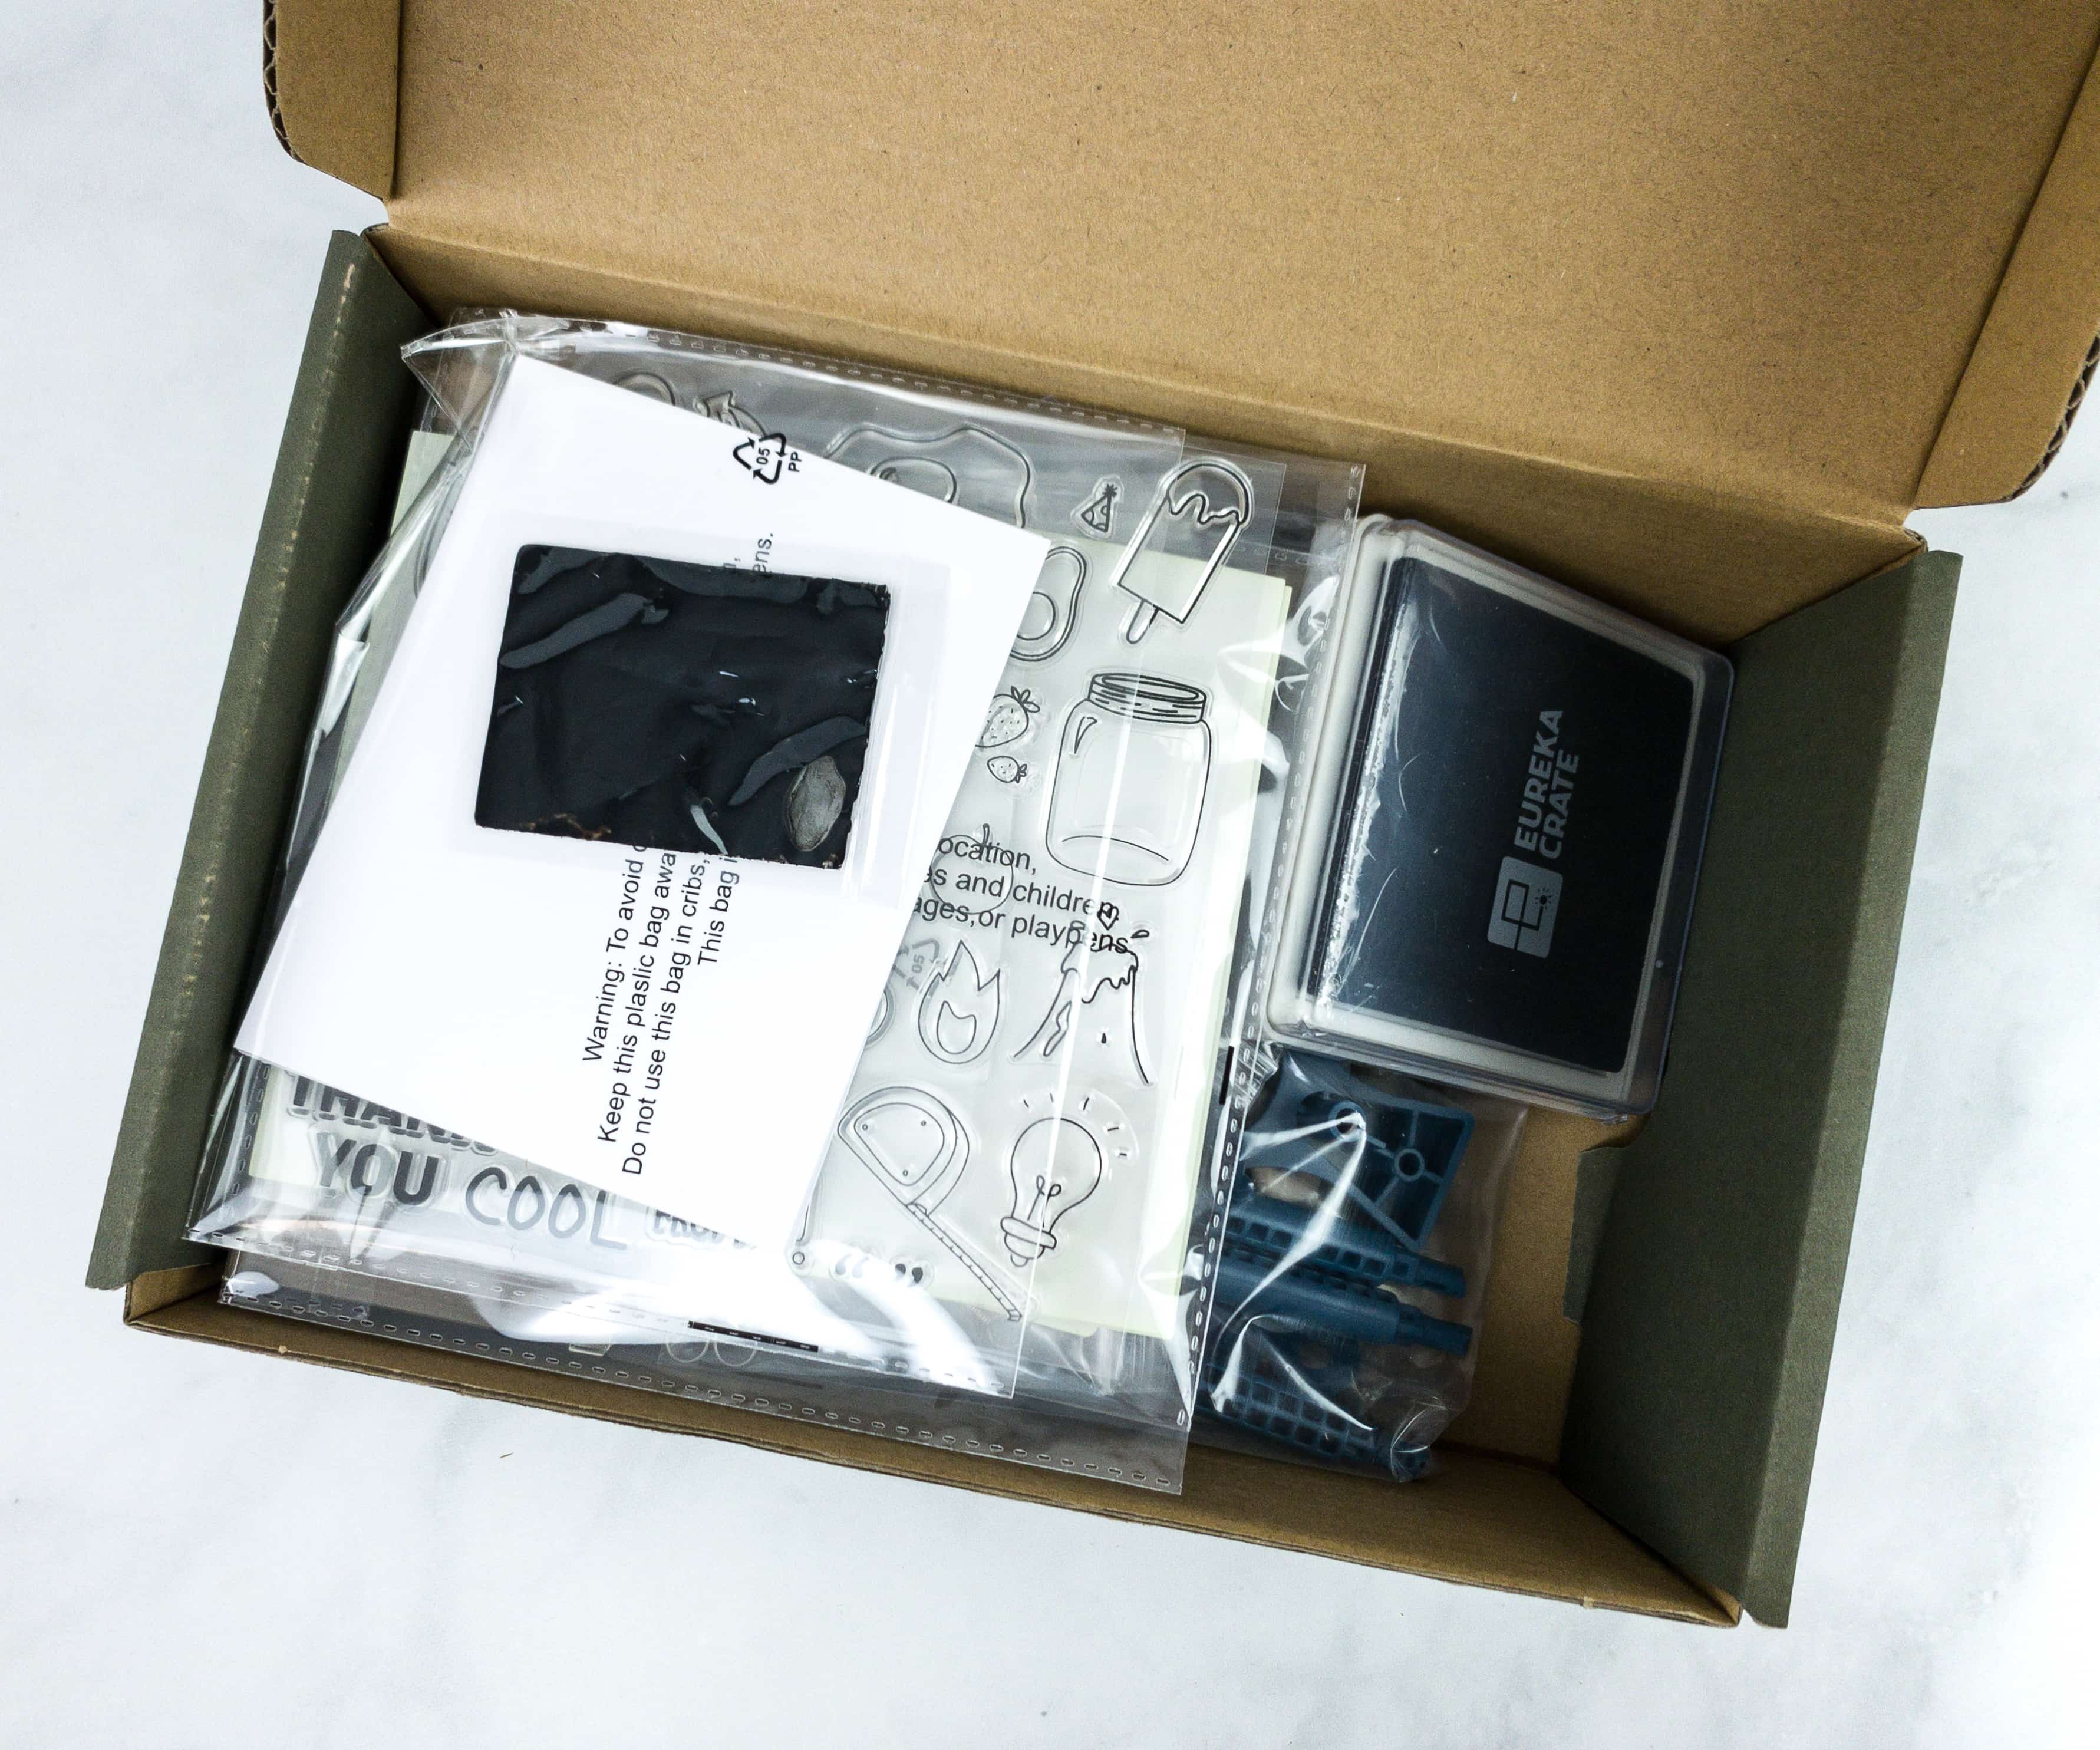
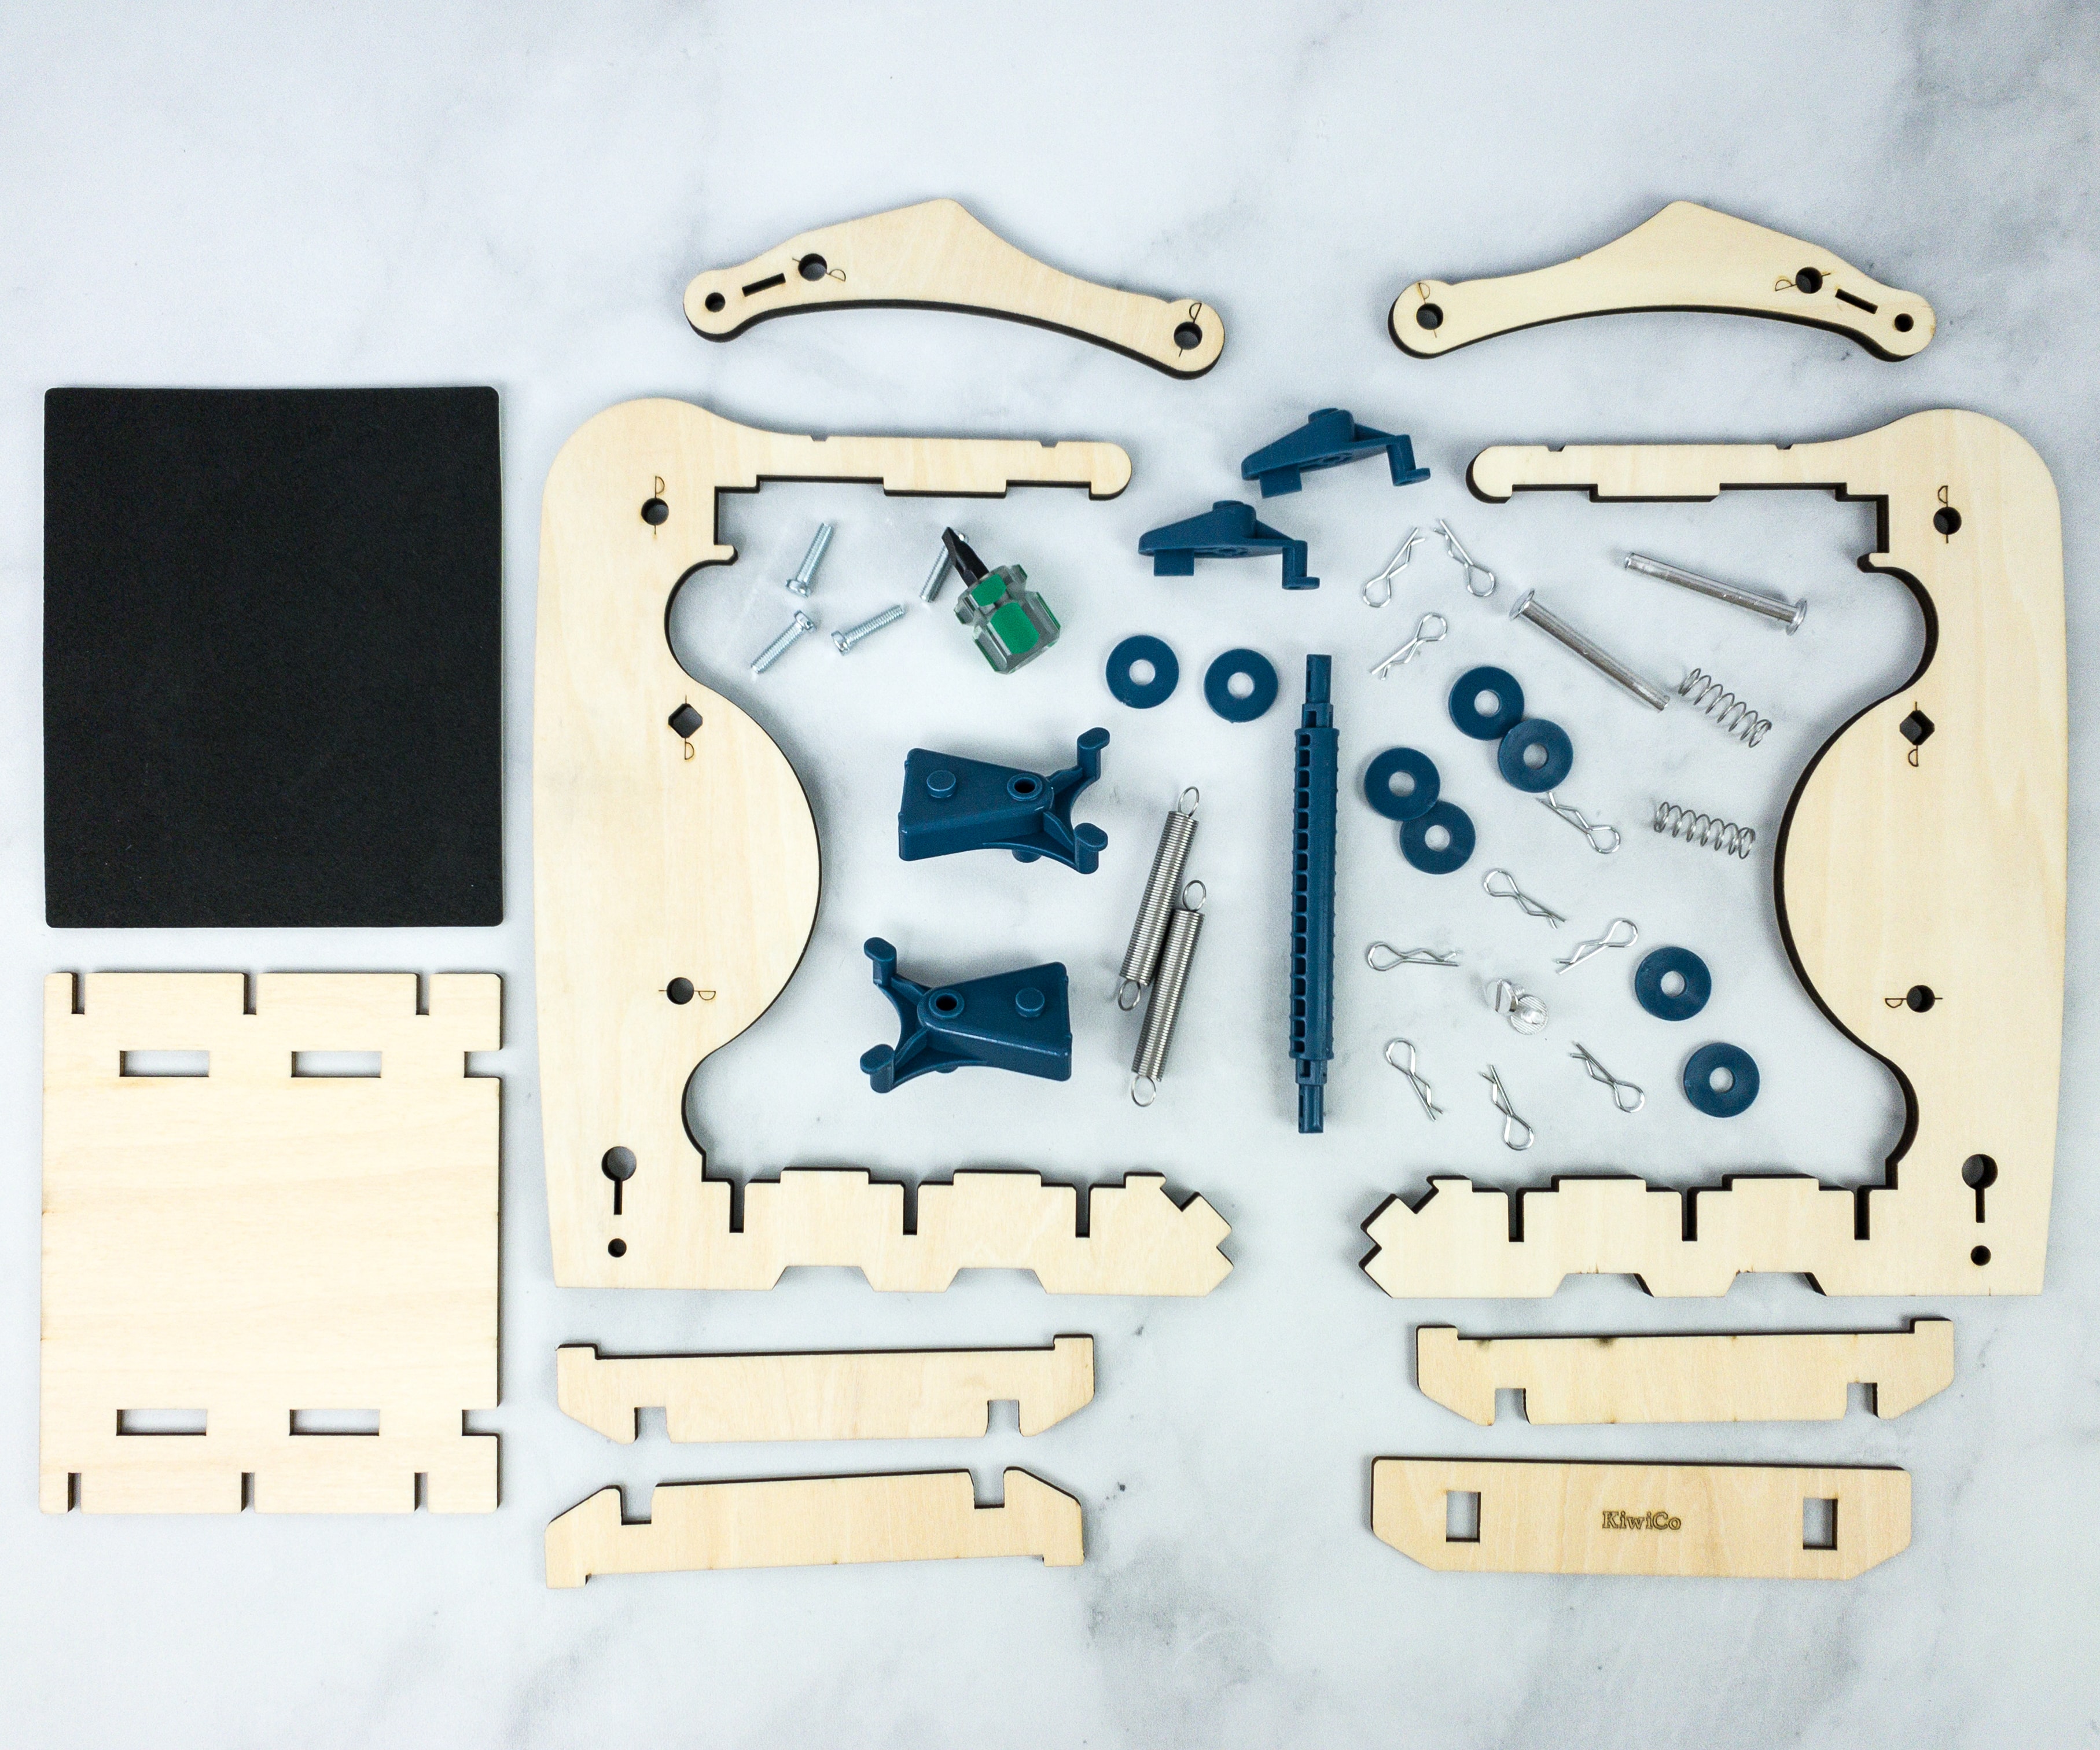
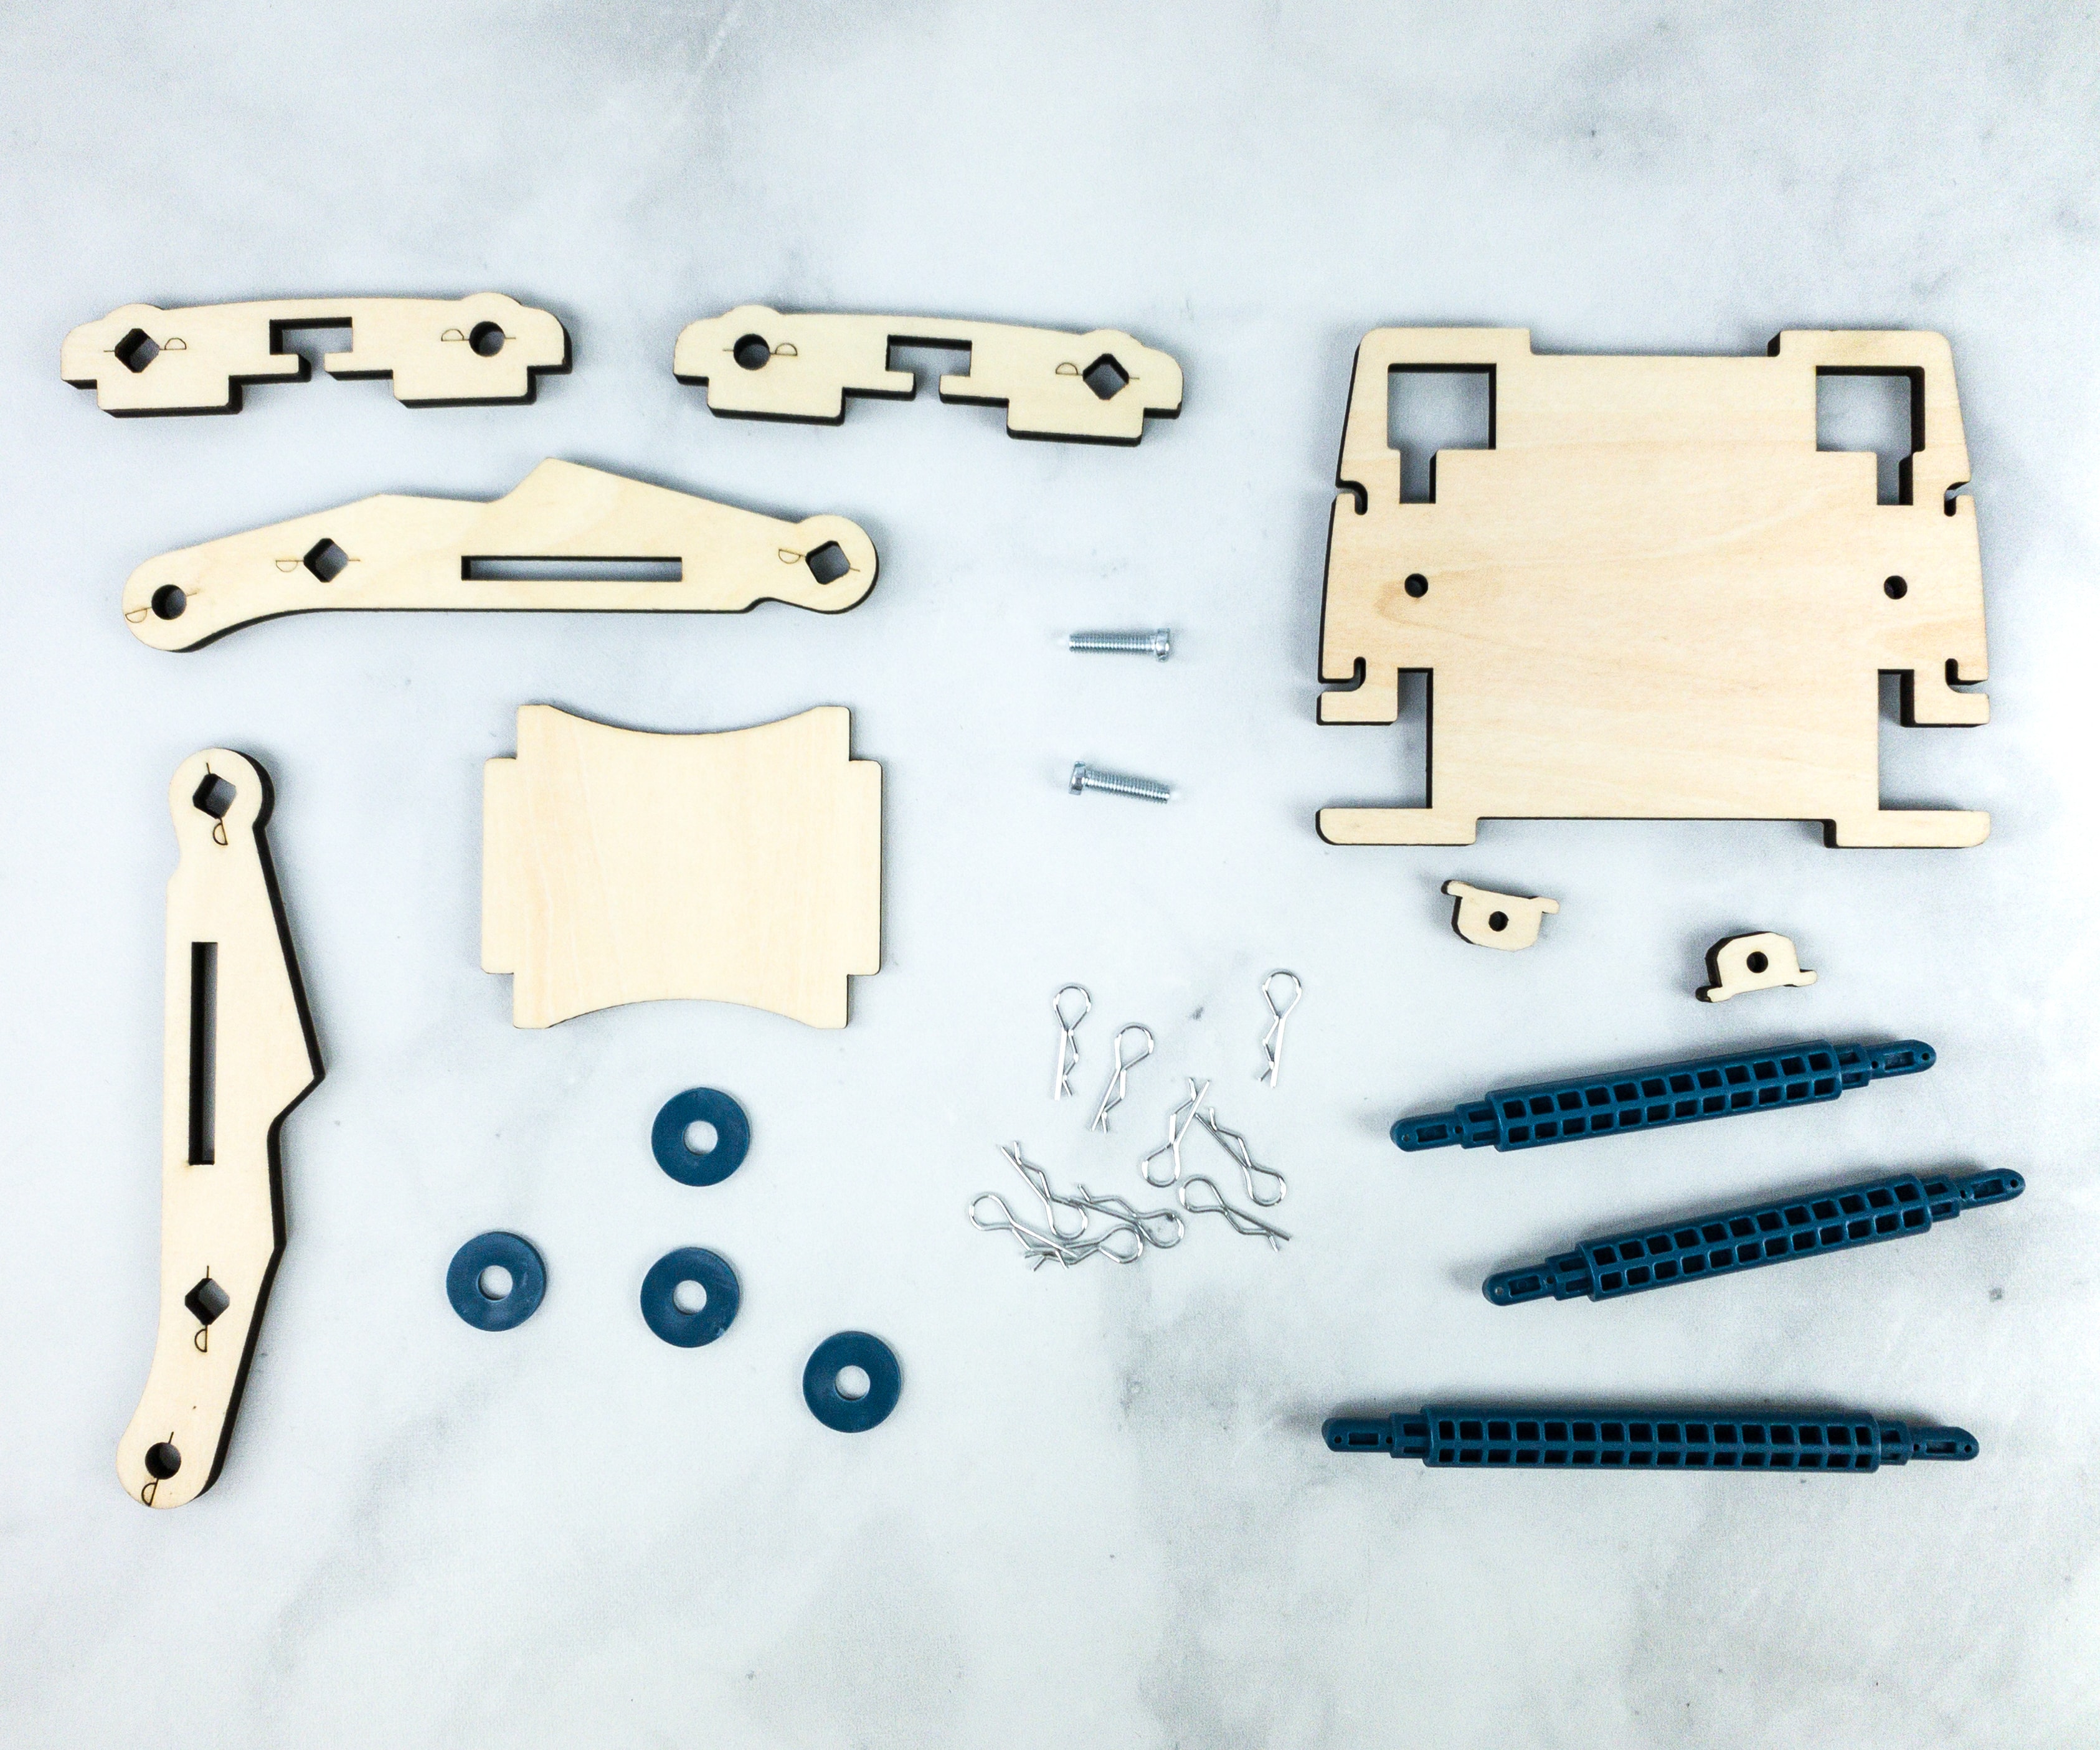
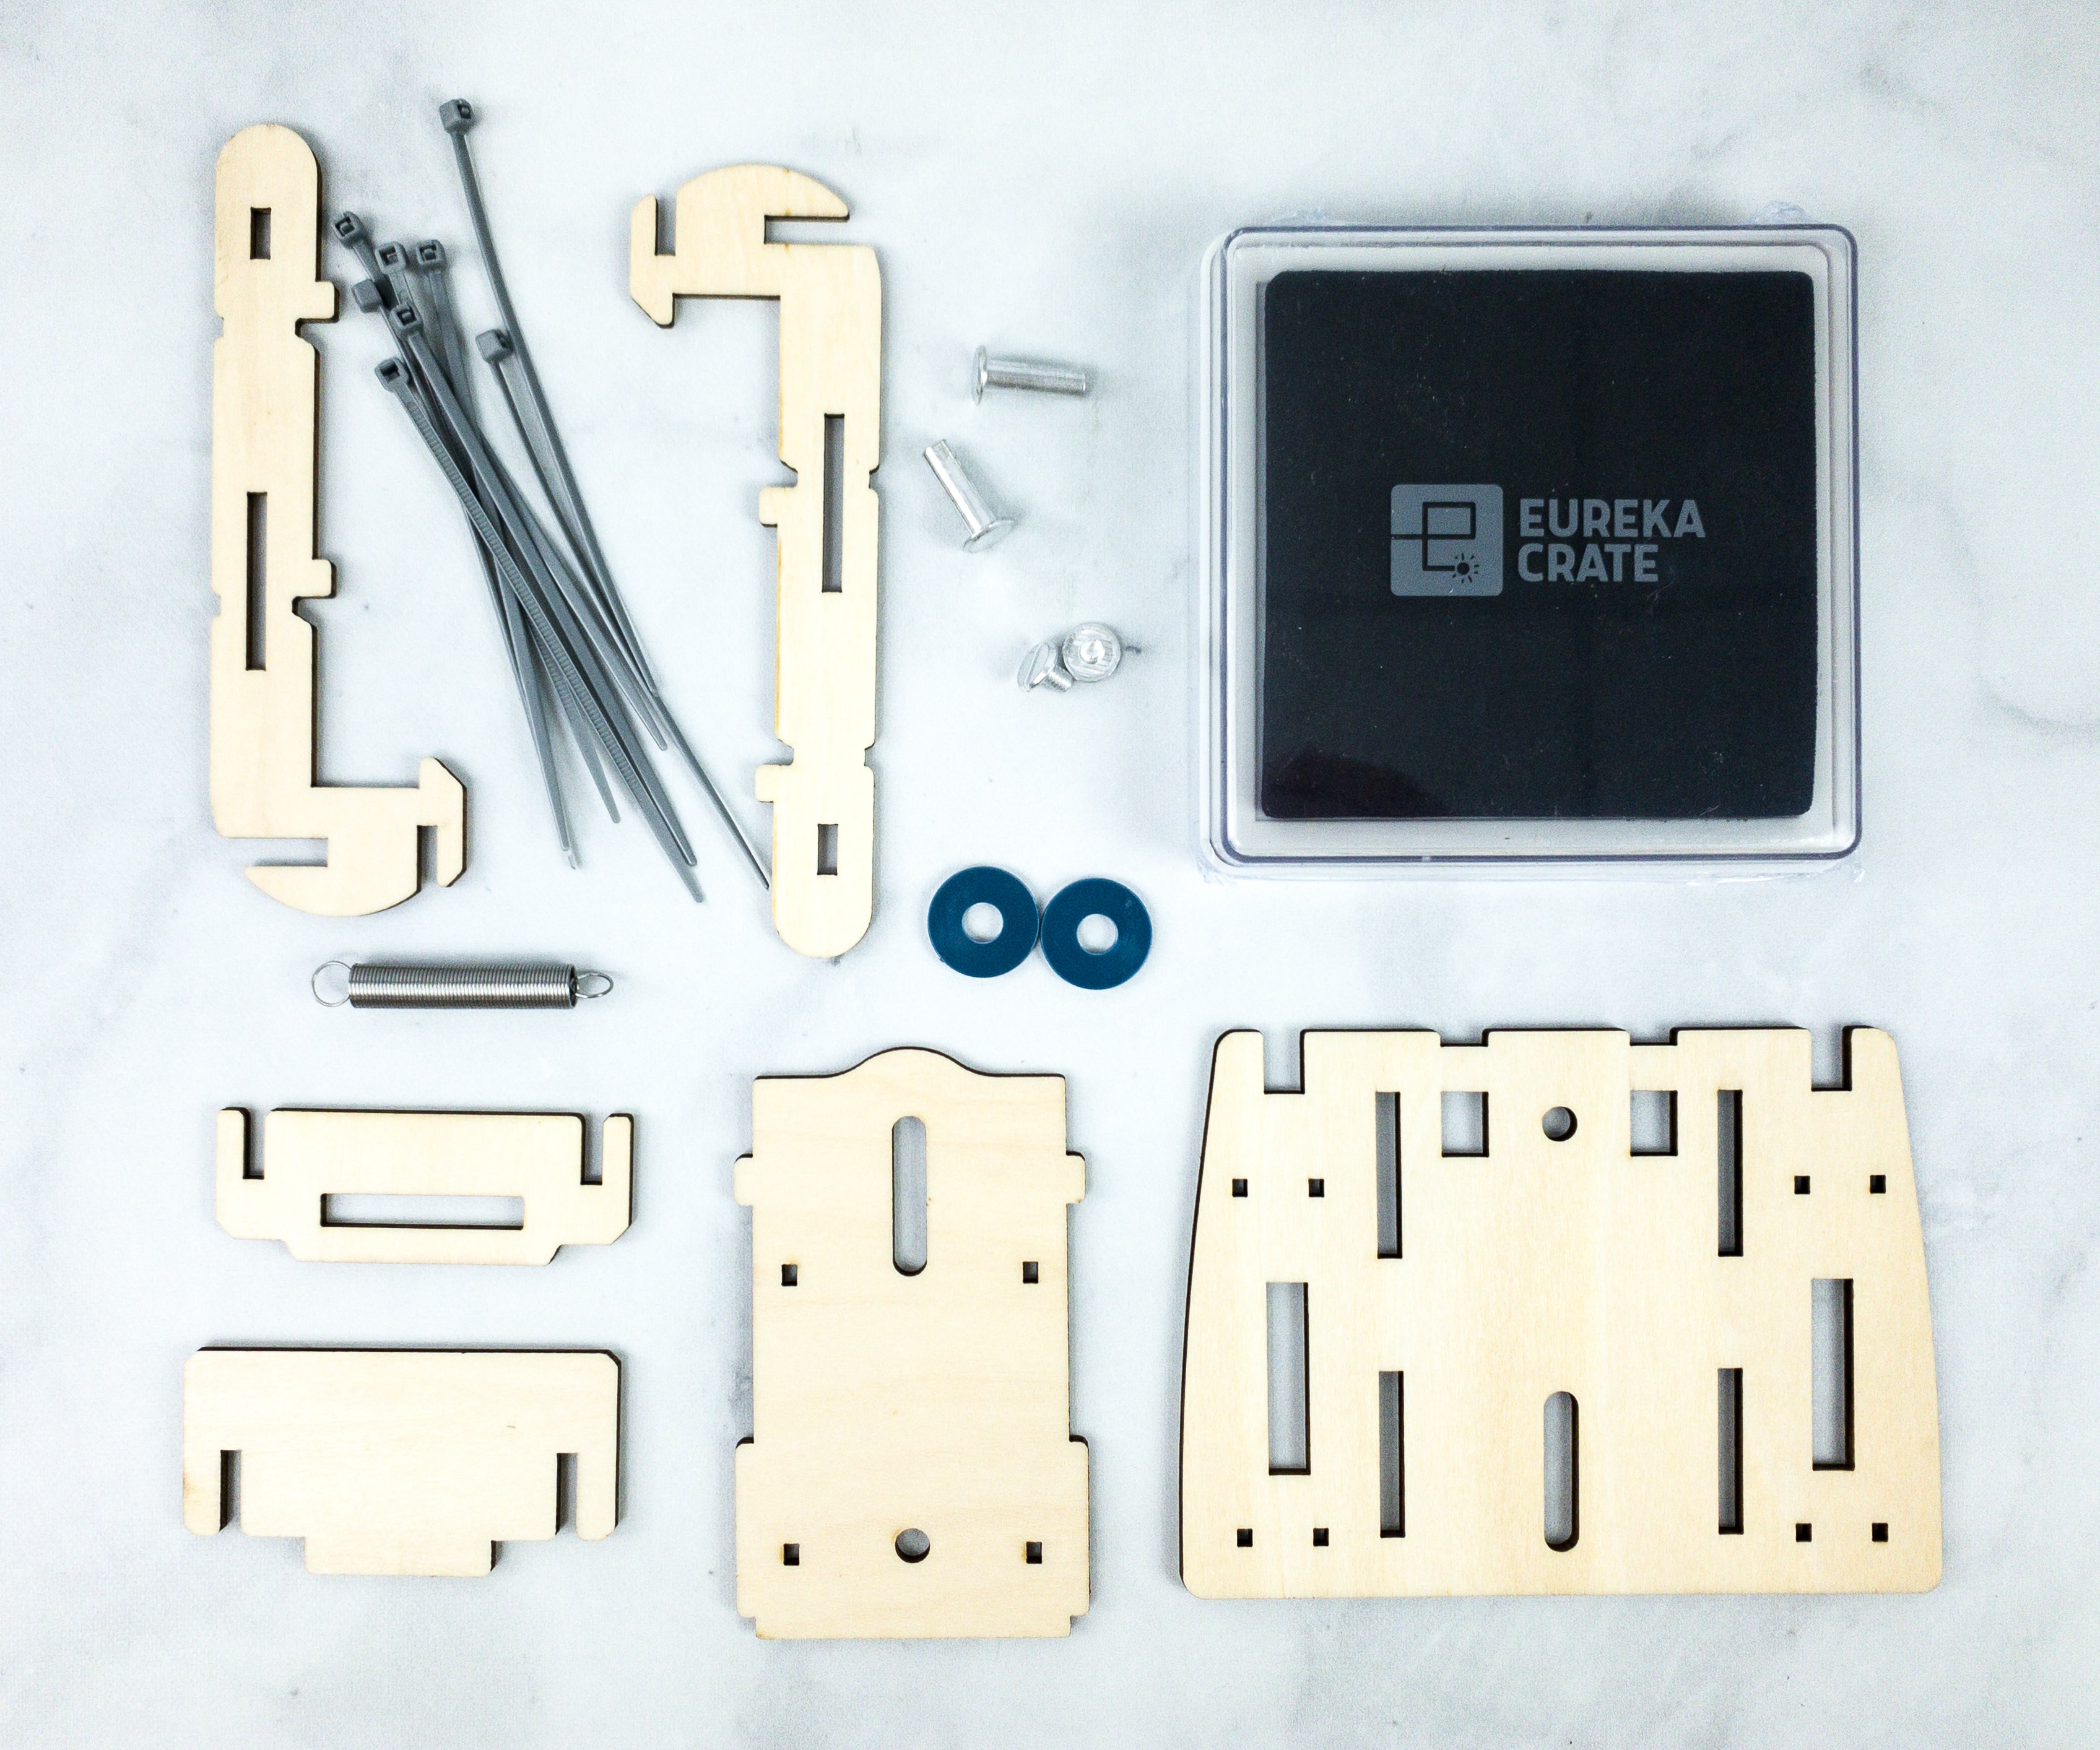
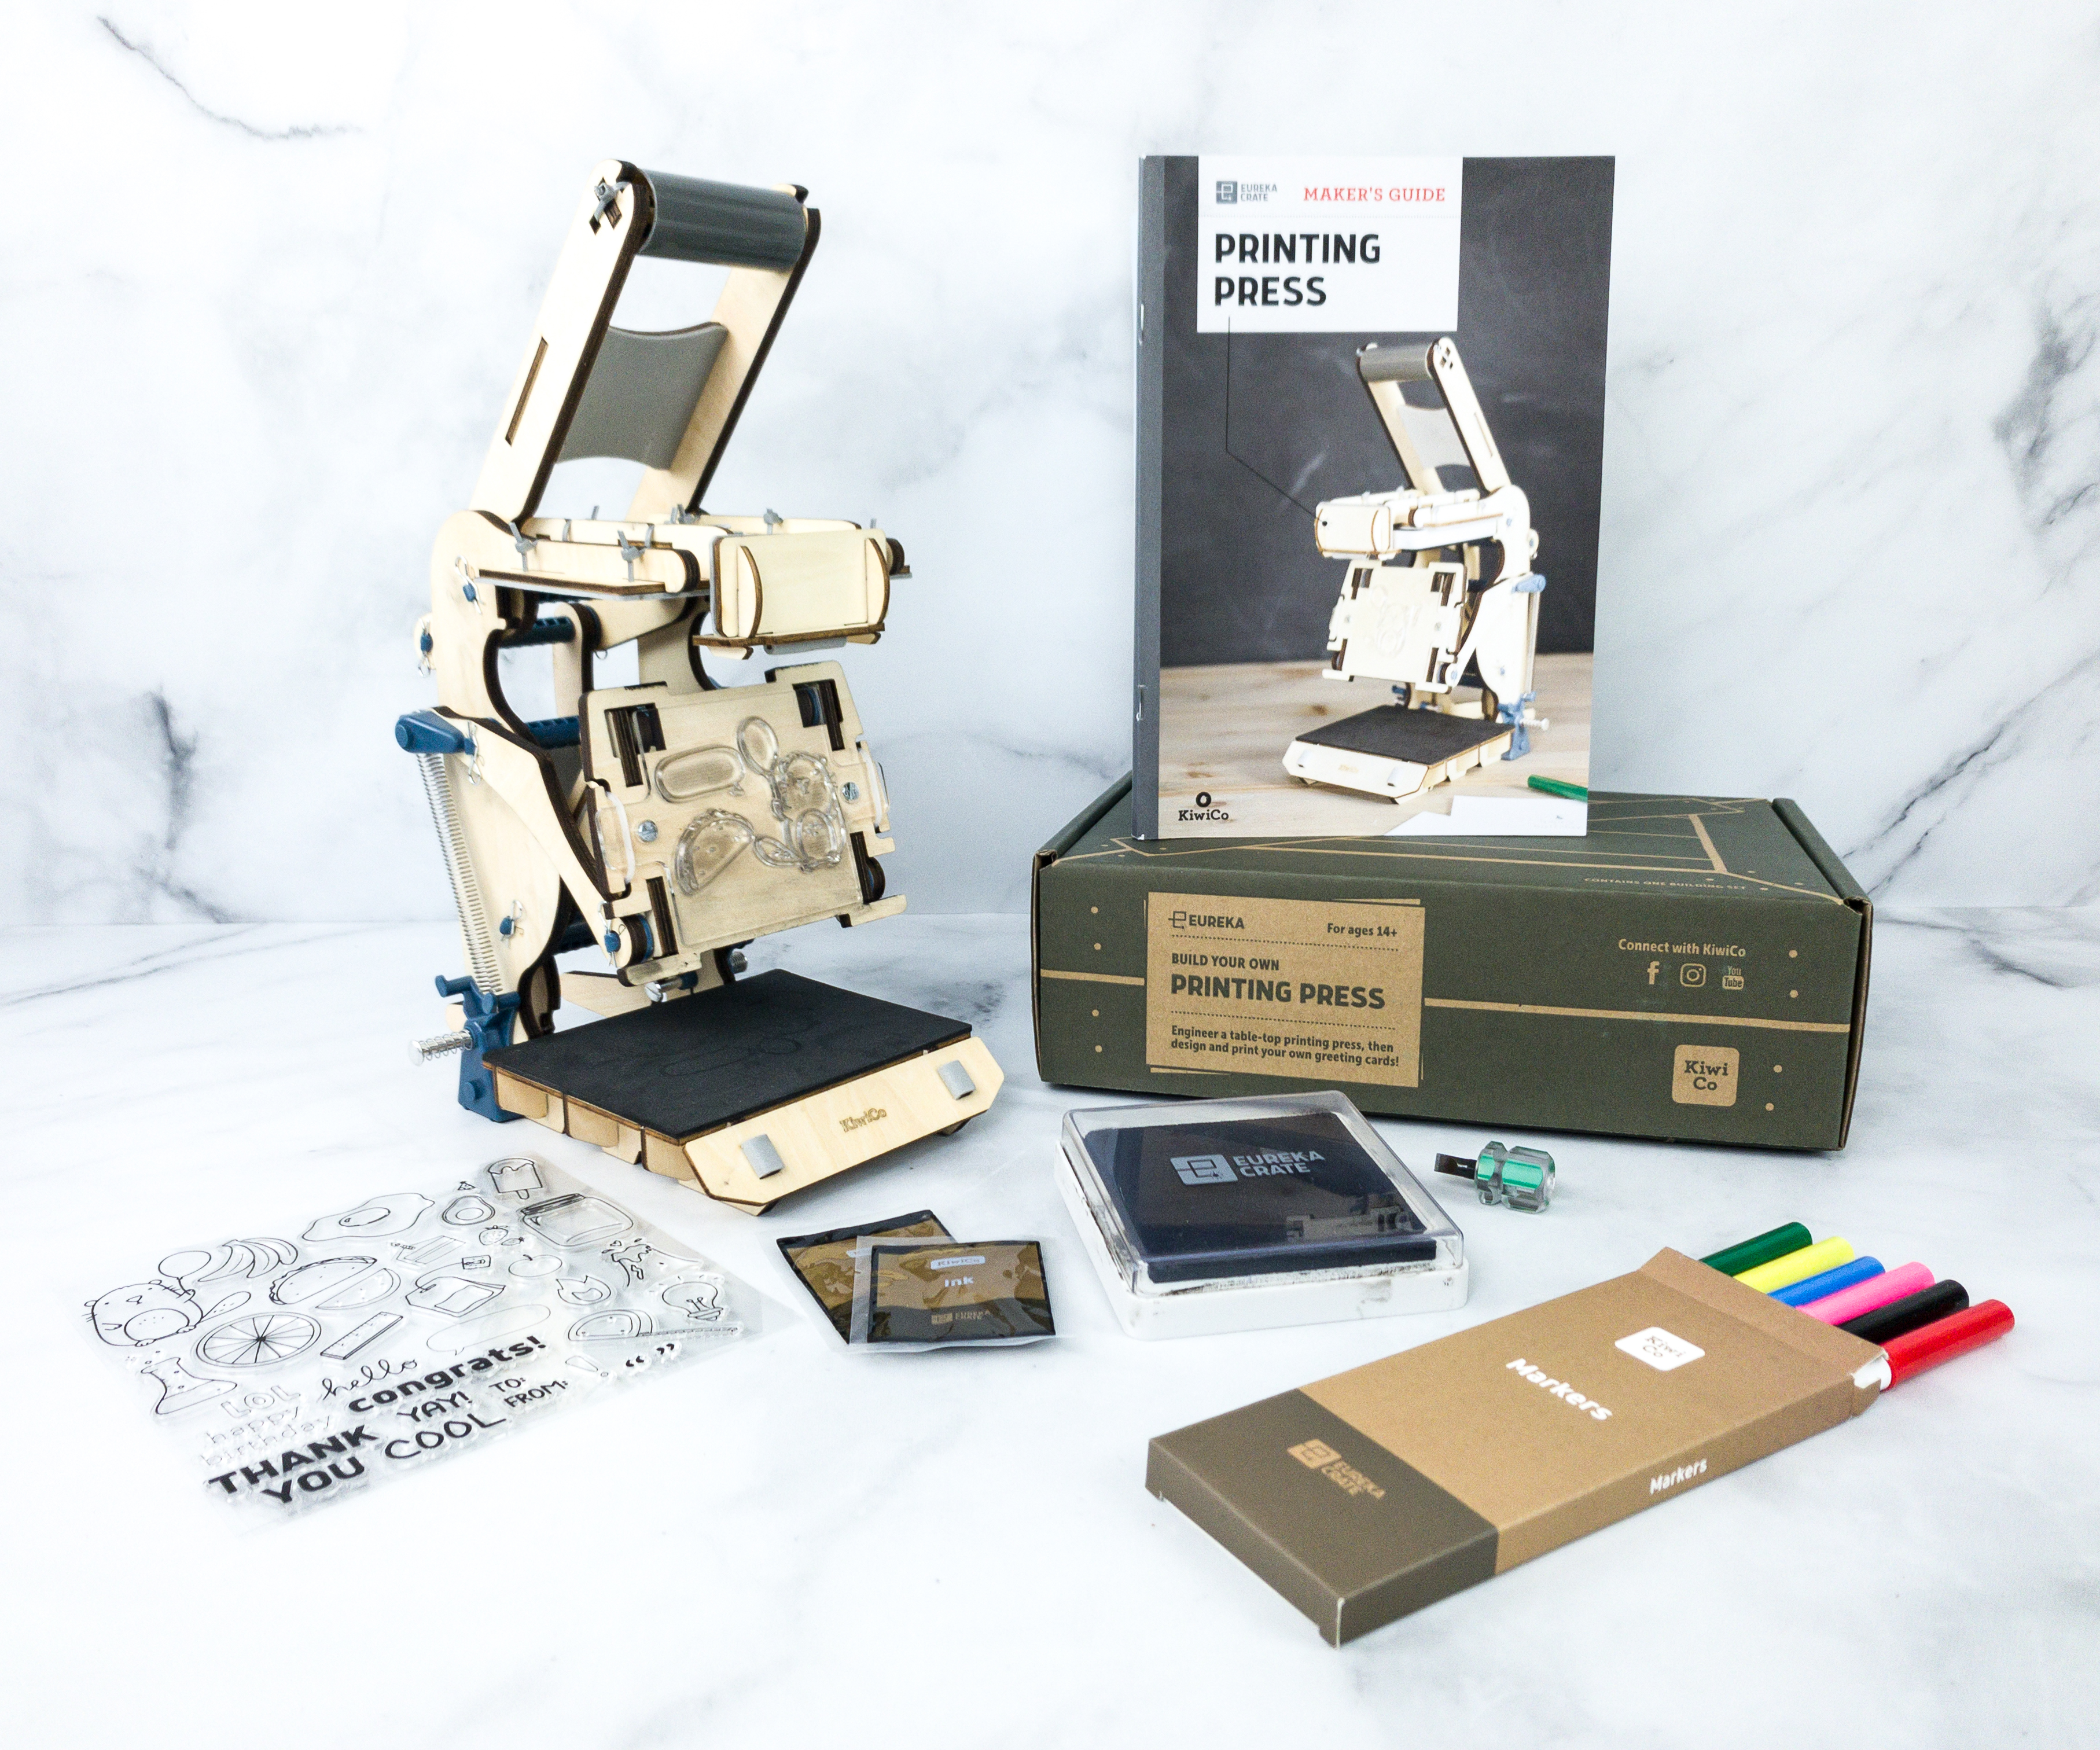
Most of the items inside the box are separately packaged.
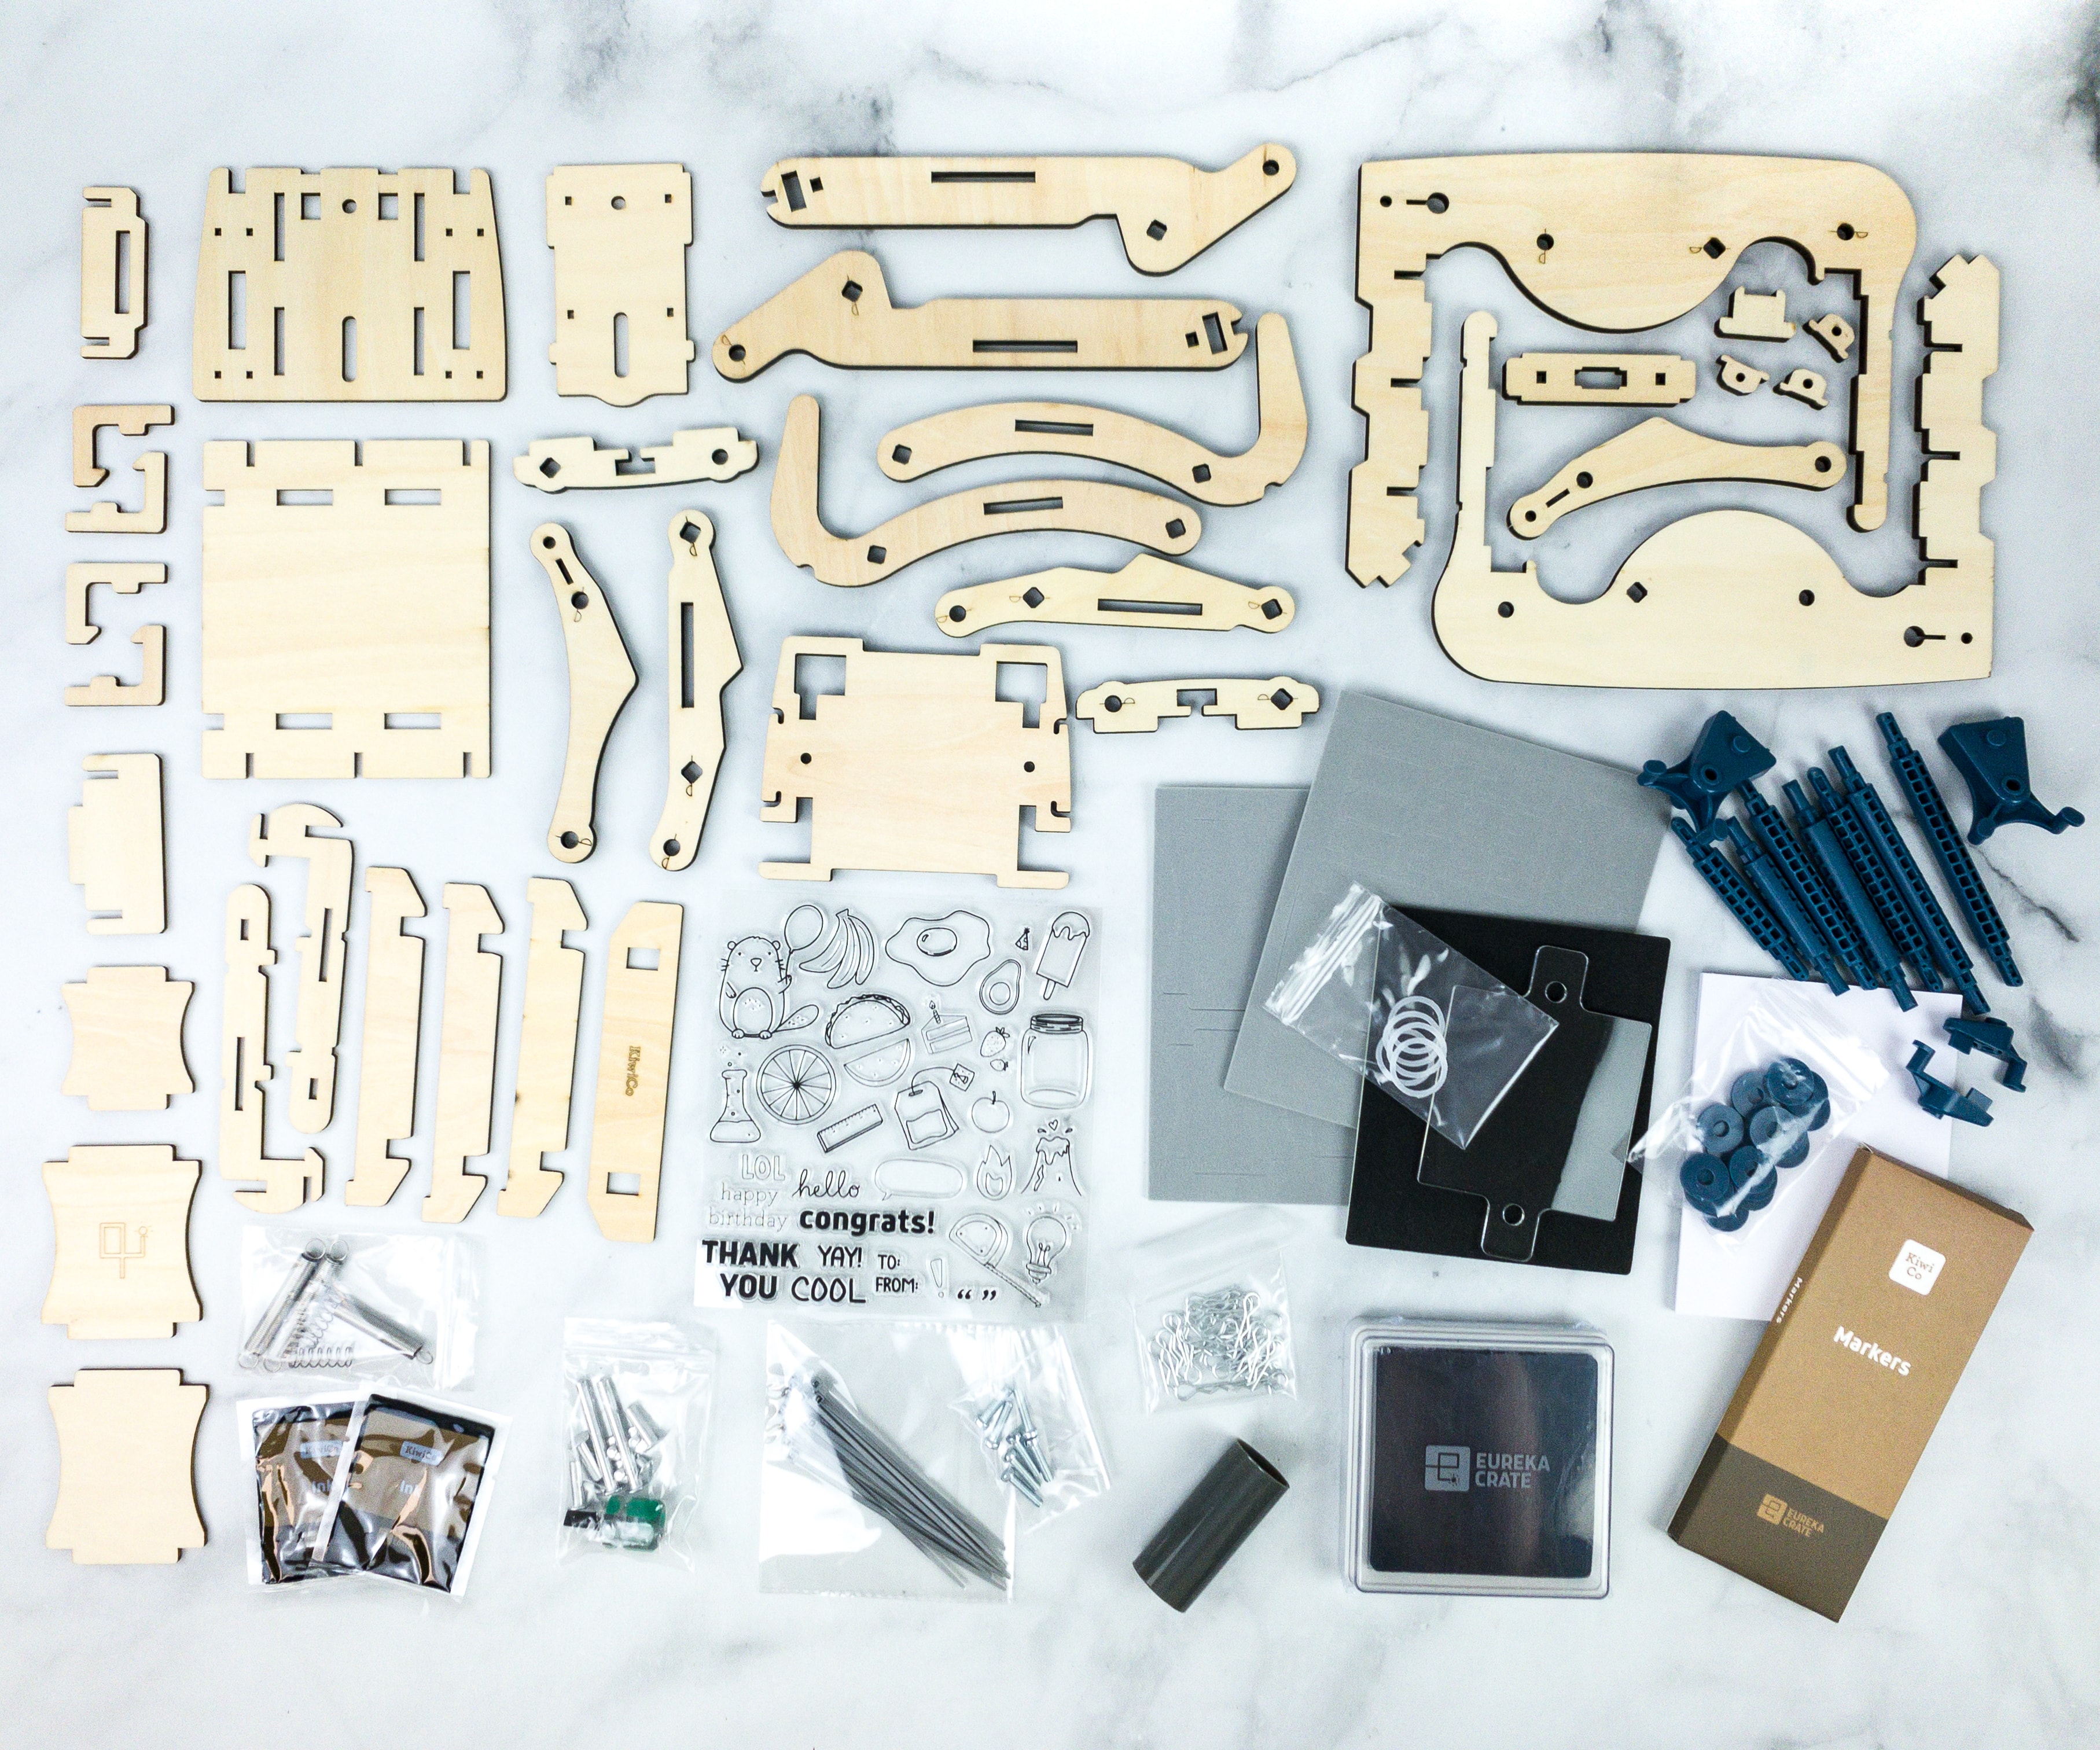
Everything in this month’s box!
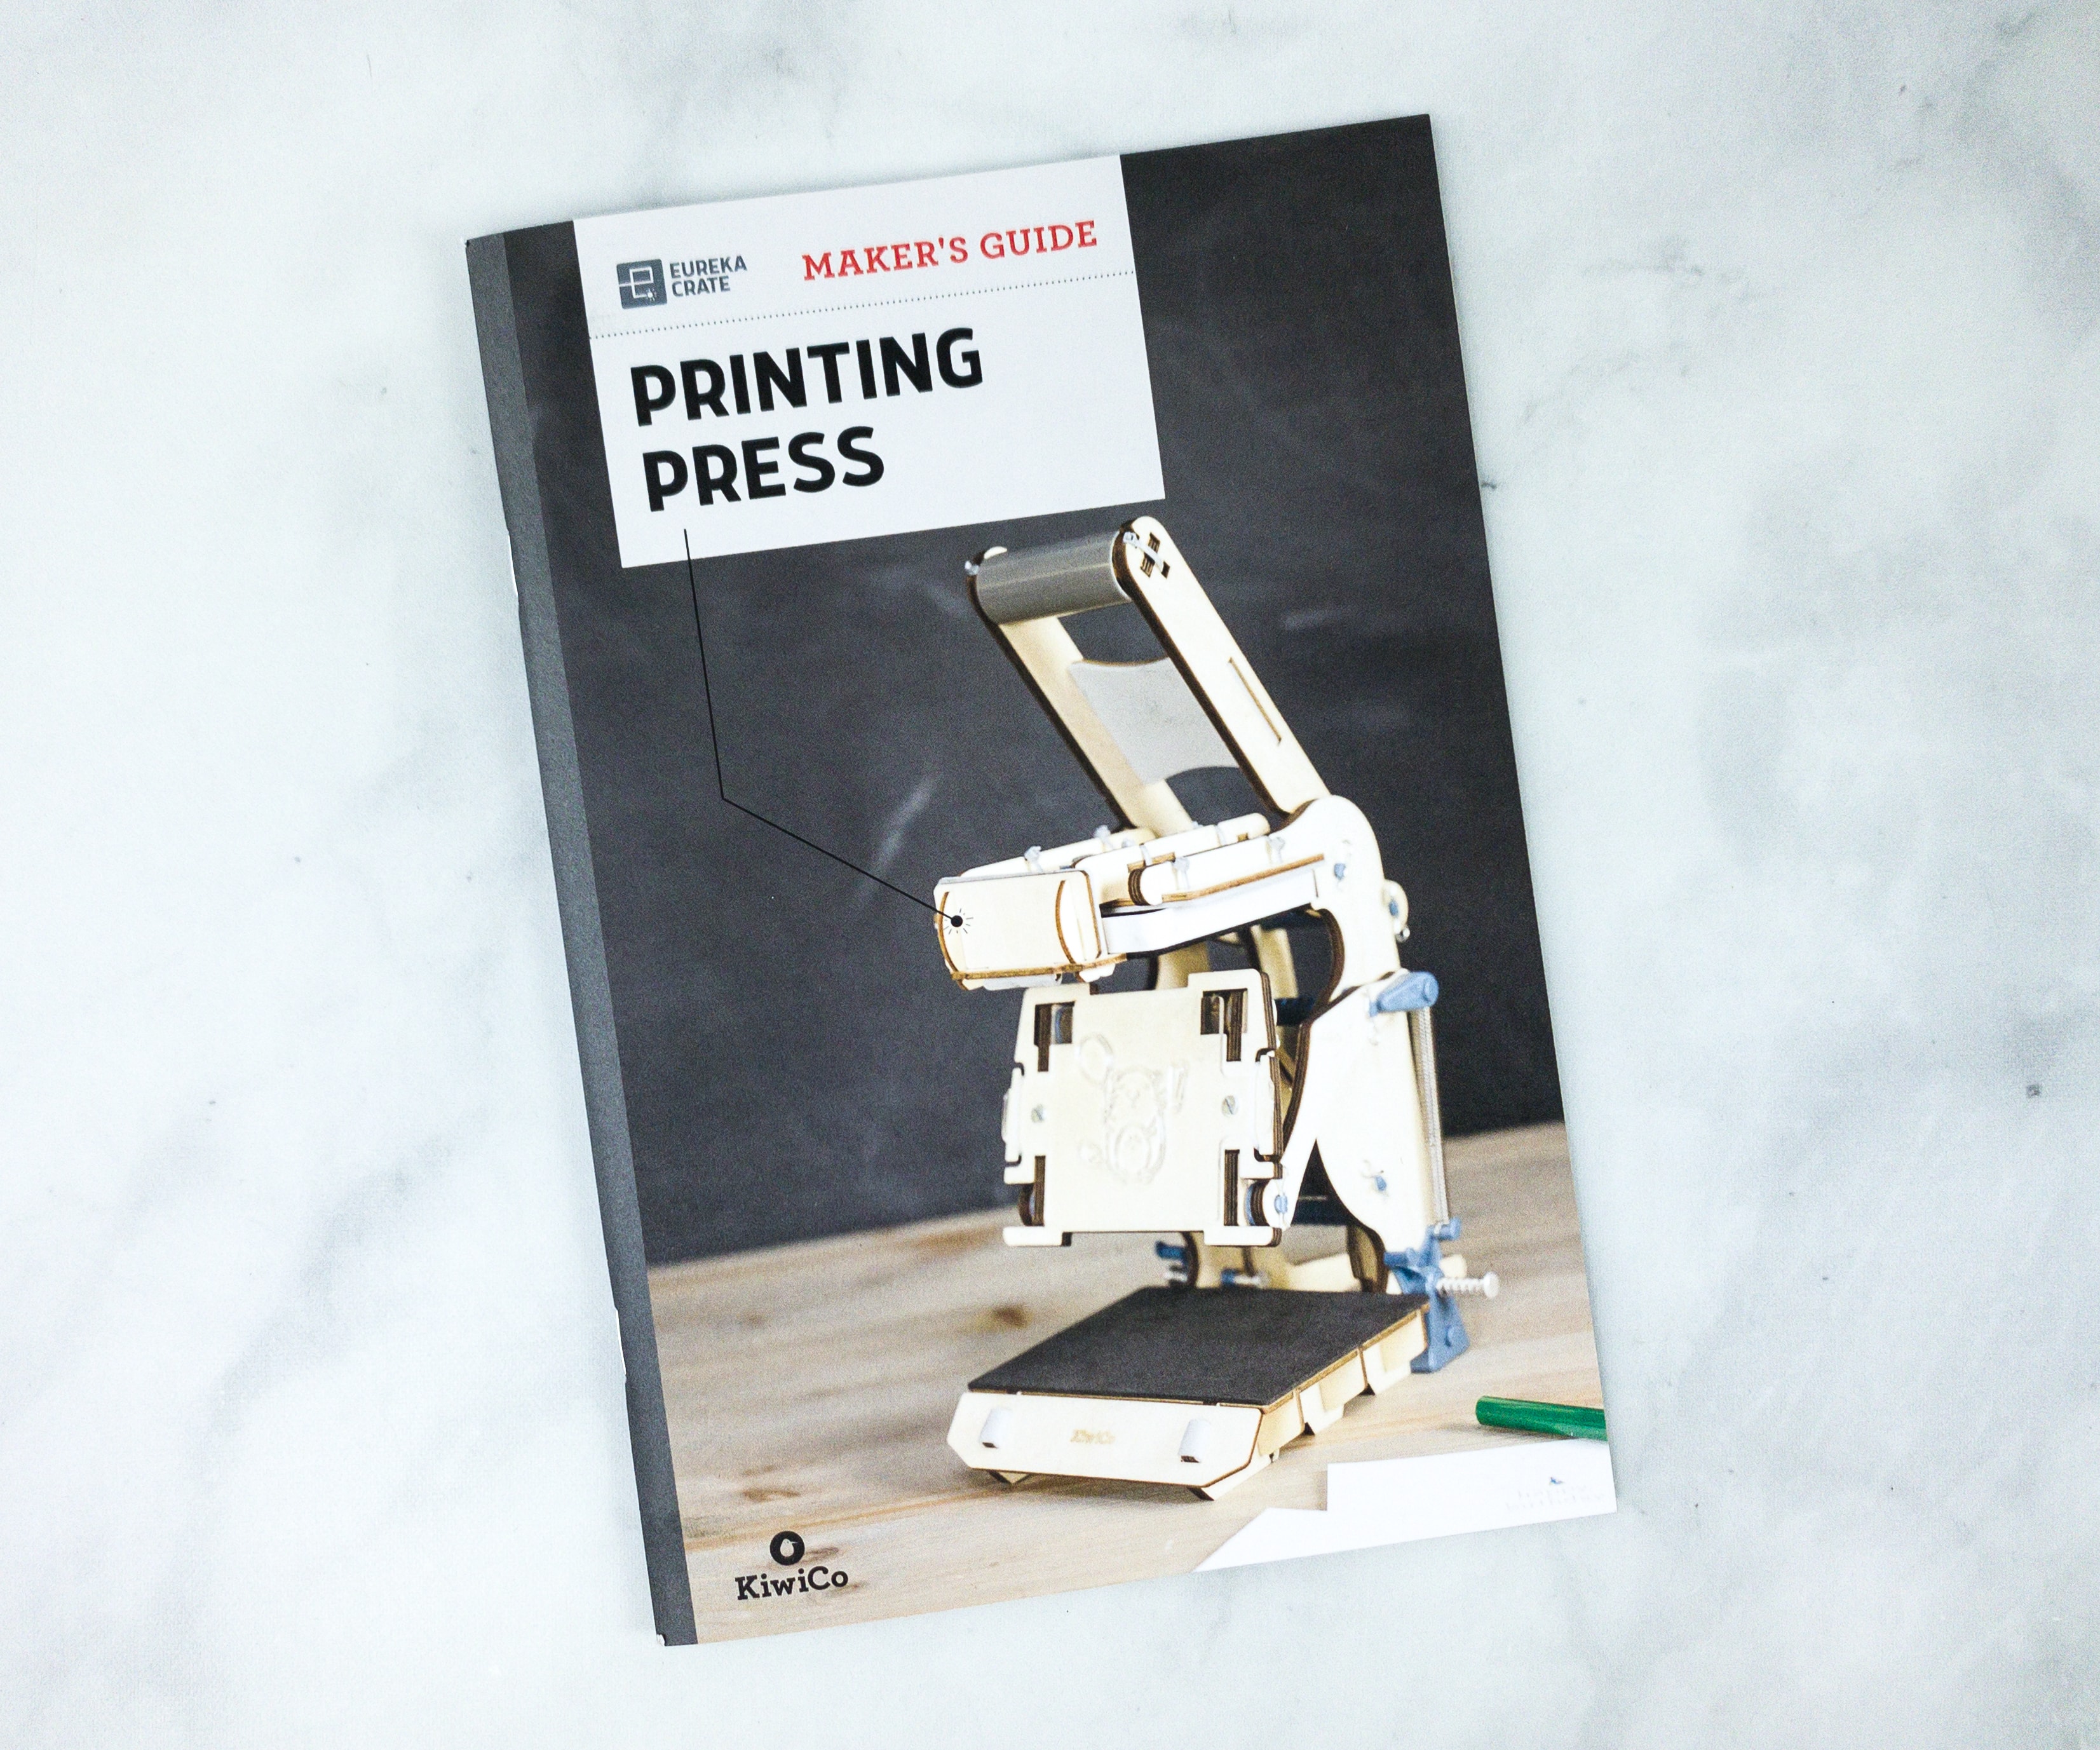
Eureka Crate Maker’s Guide
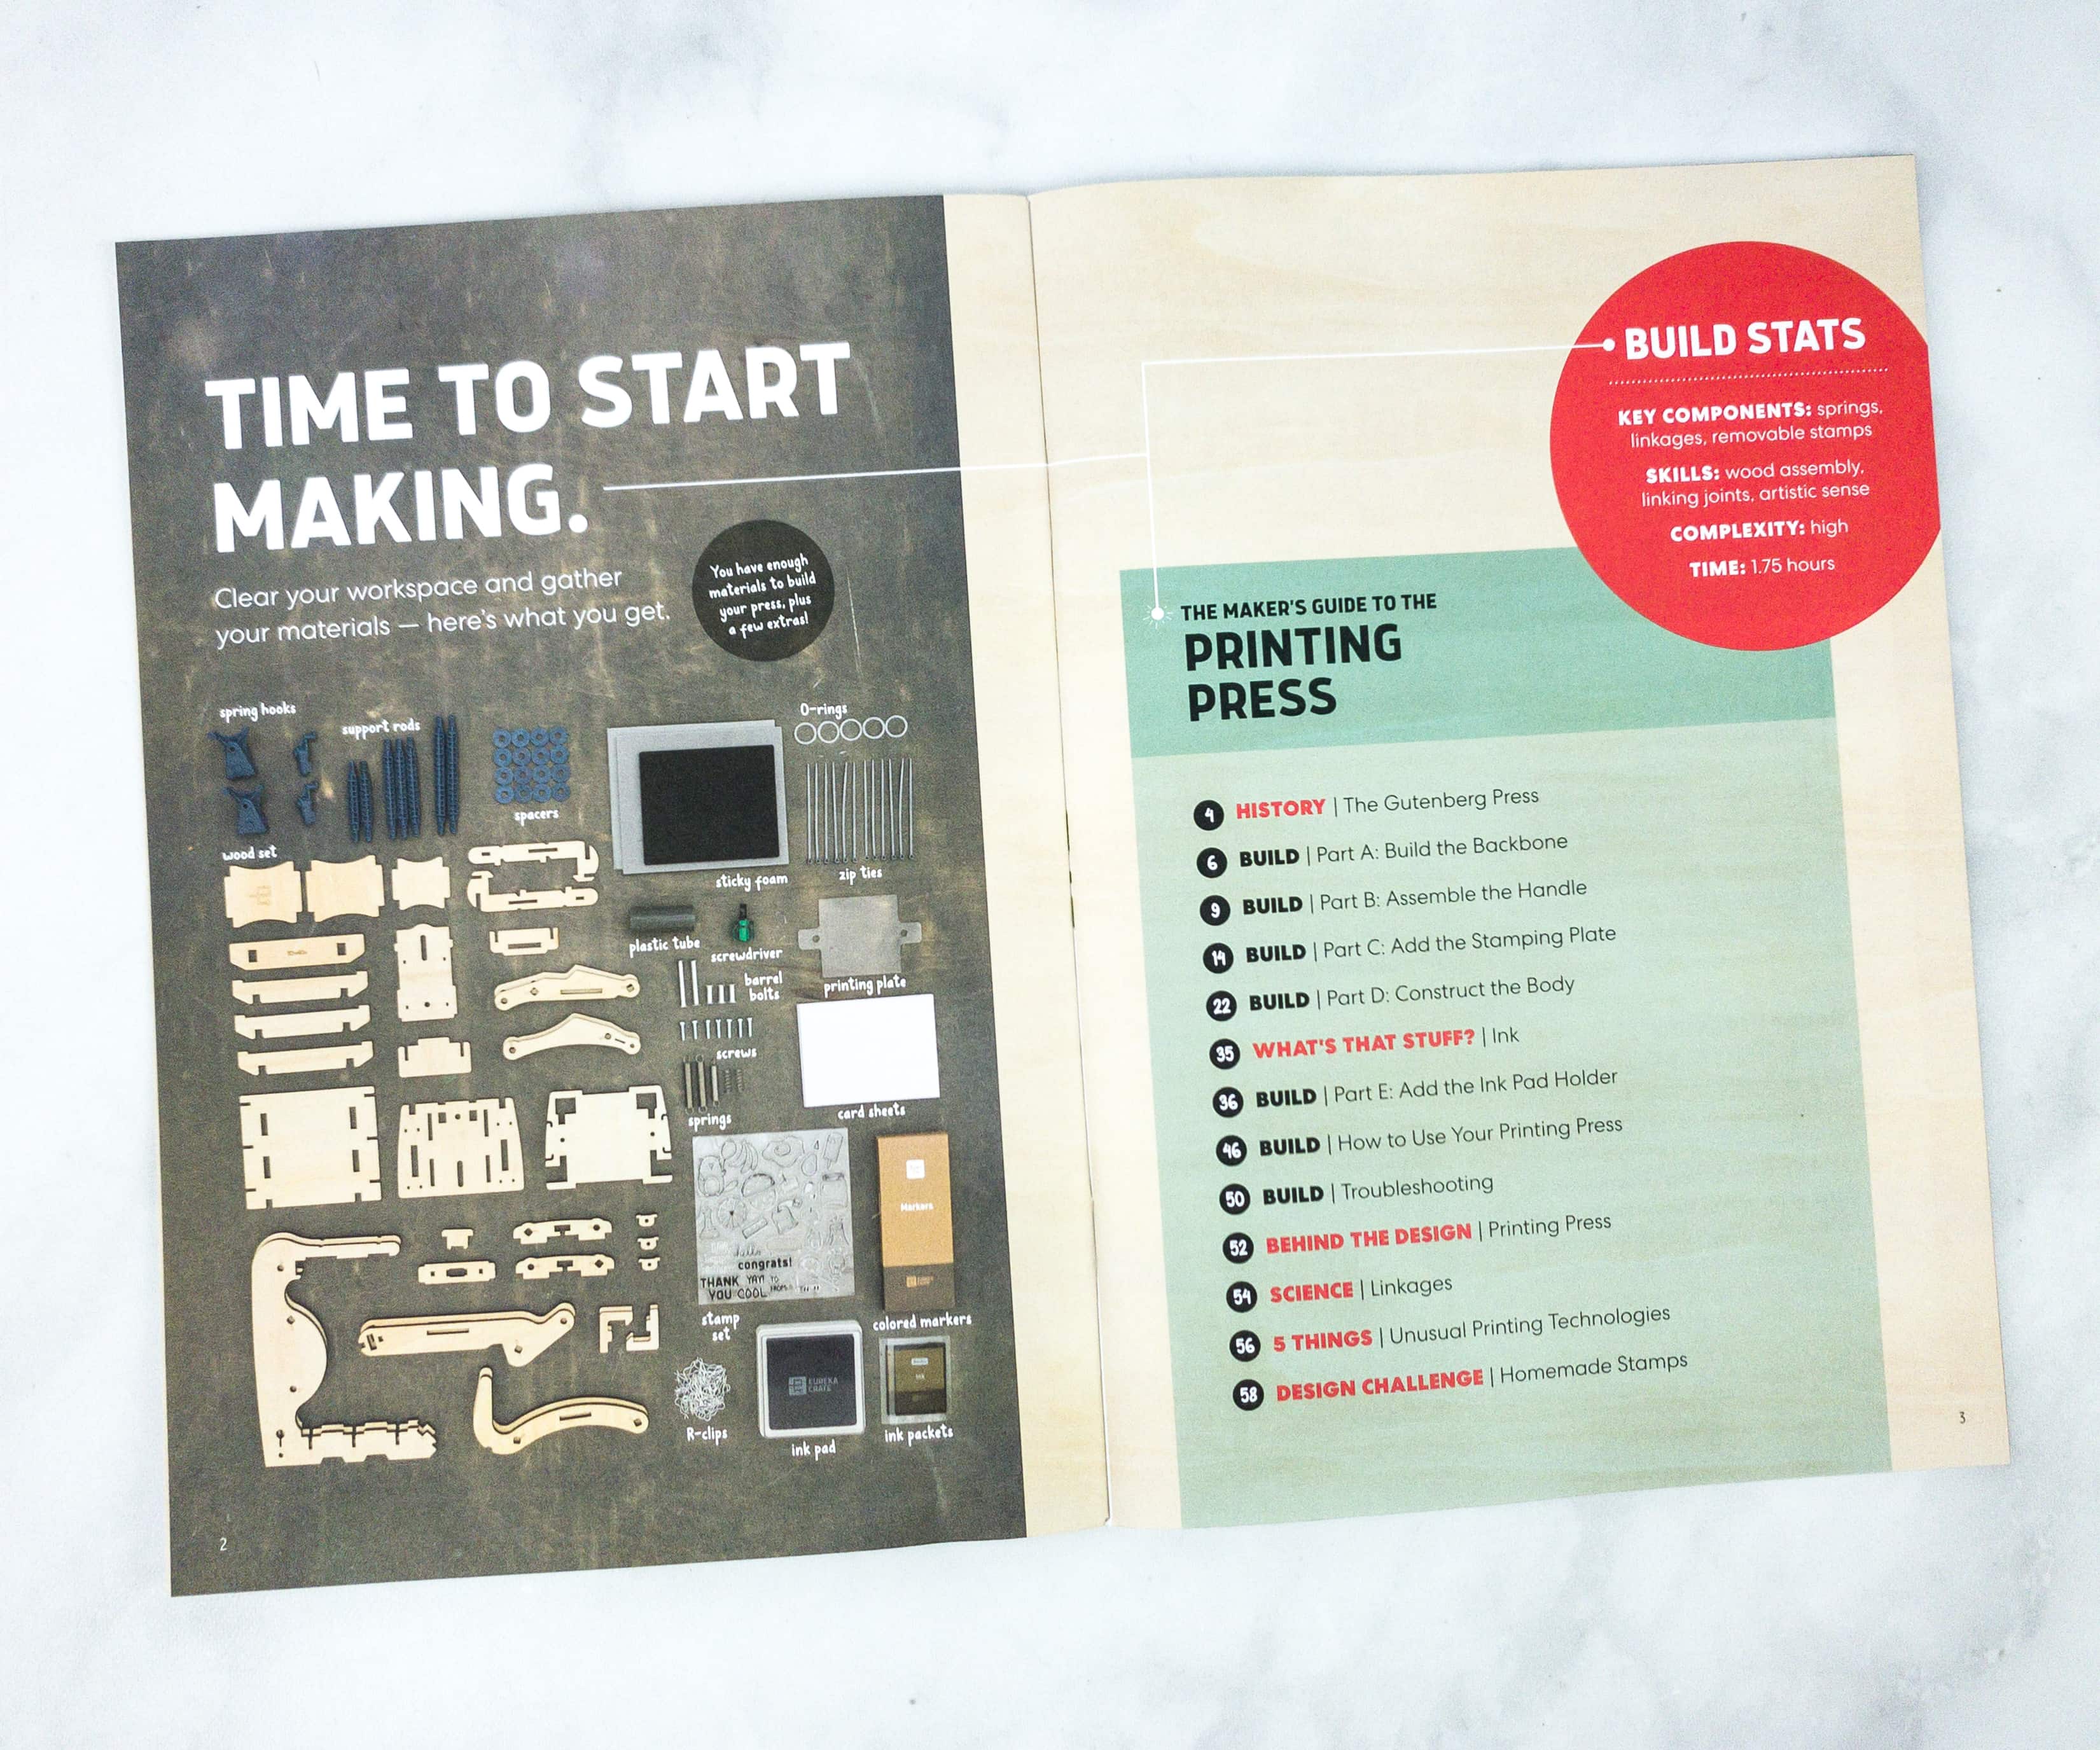
This booklet means business as it jumps right to the activity.
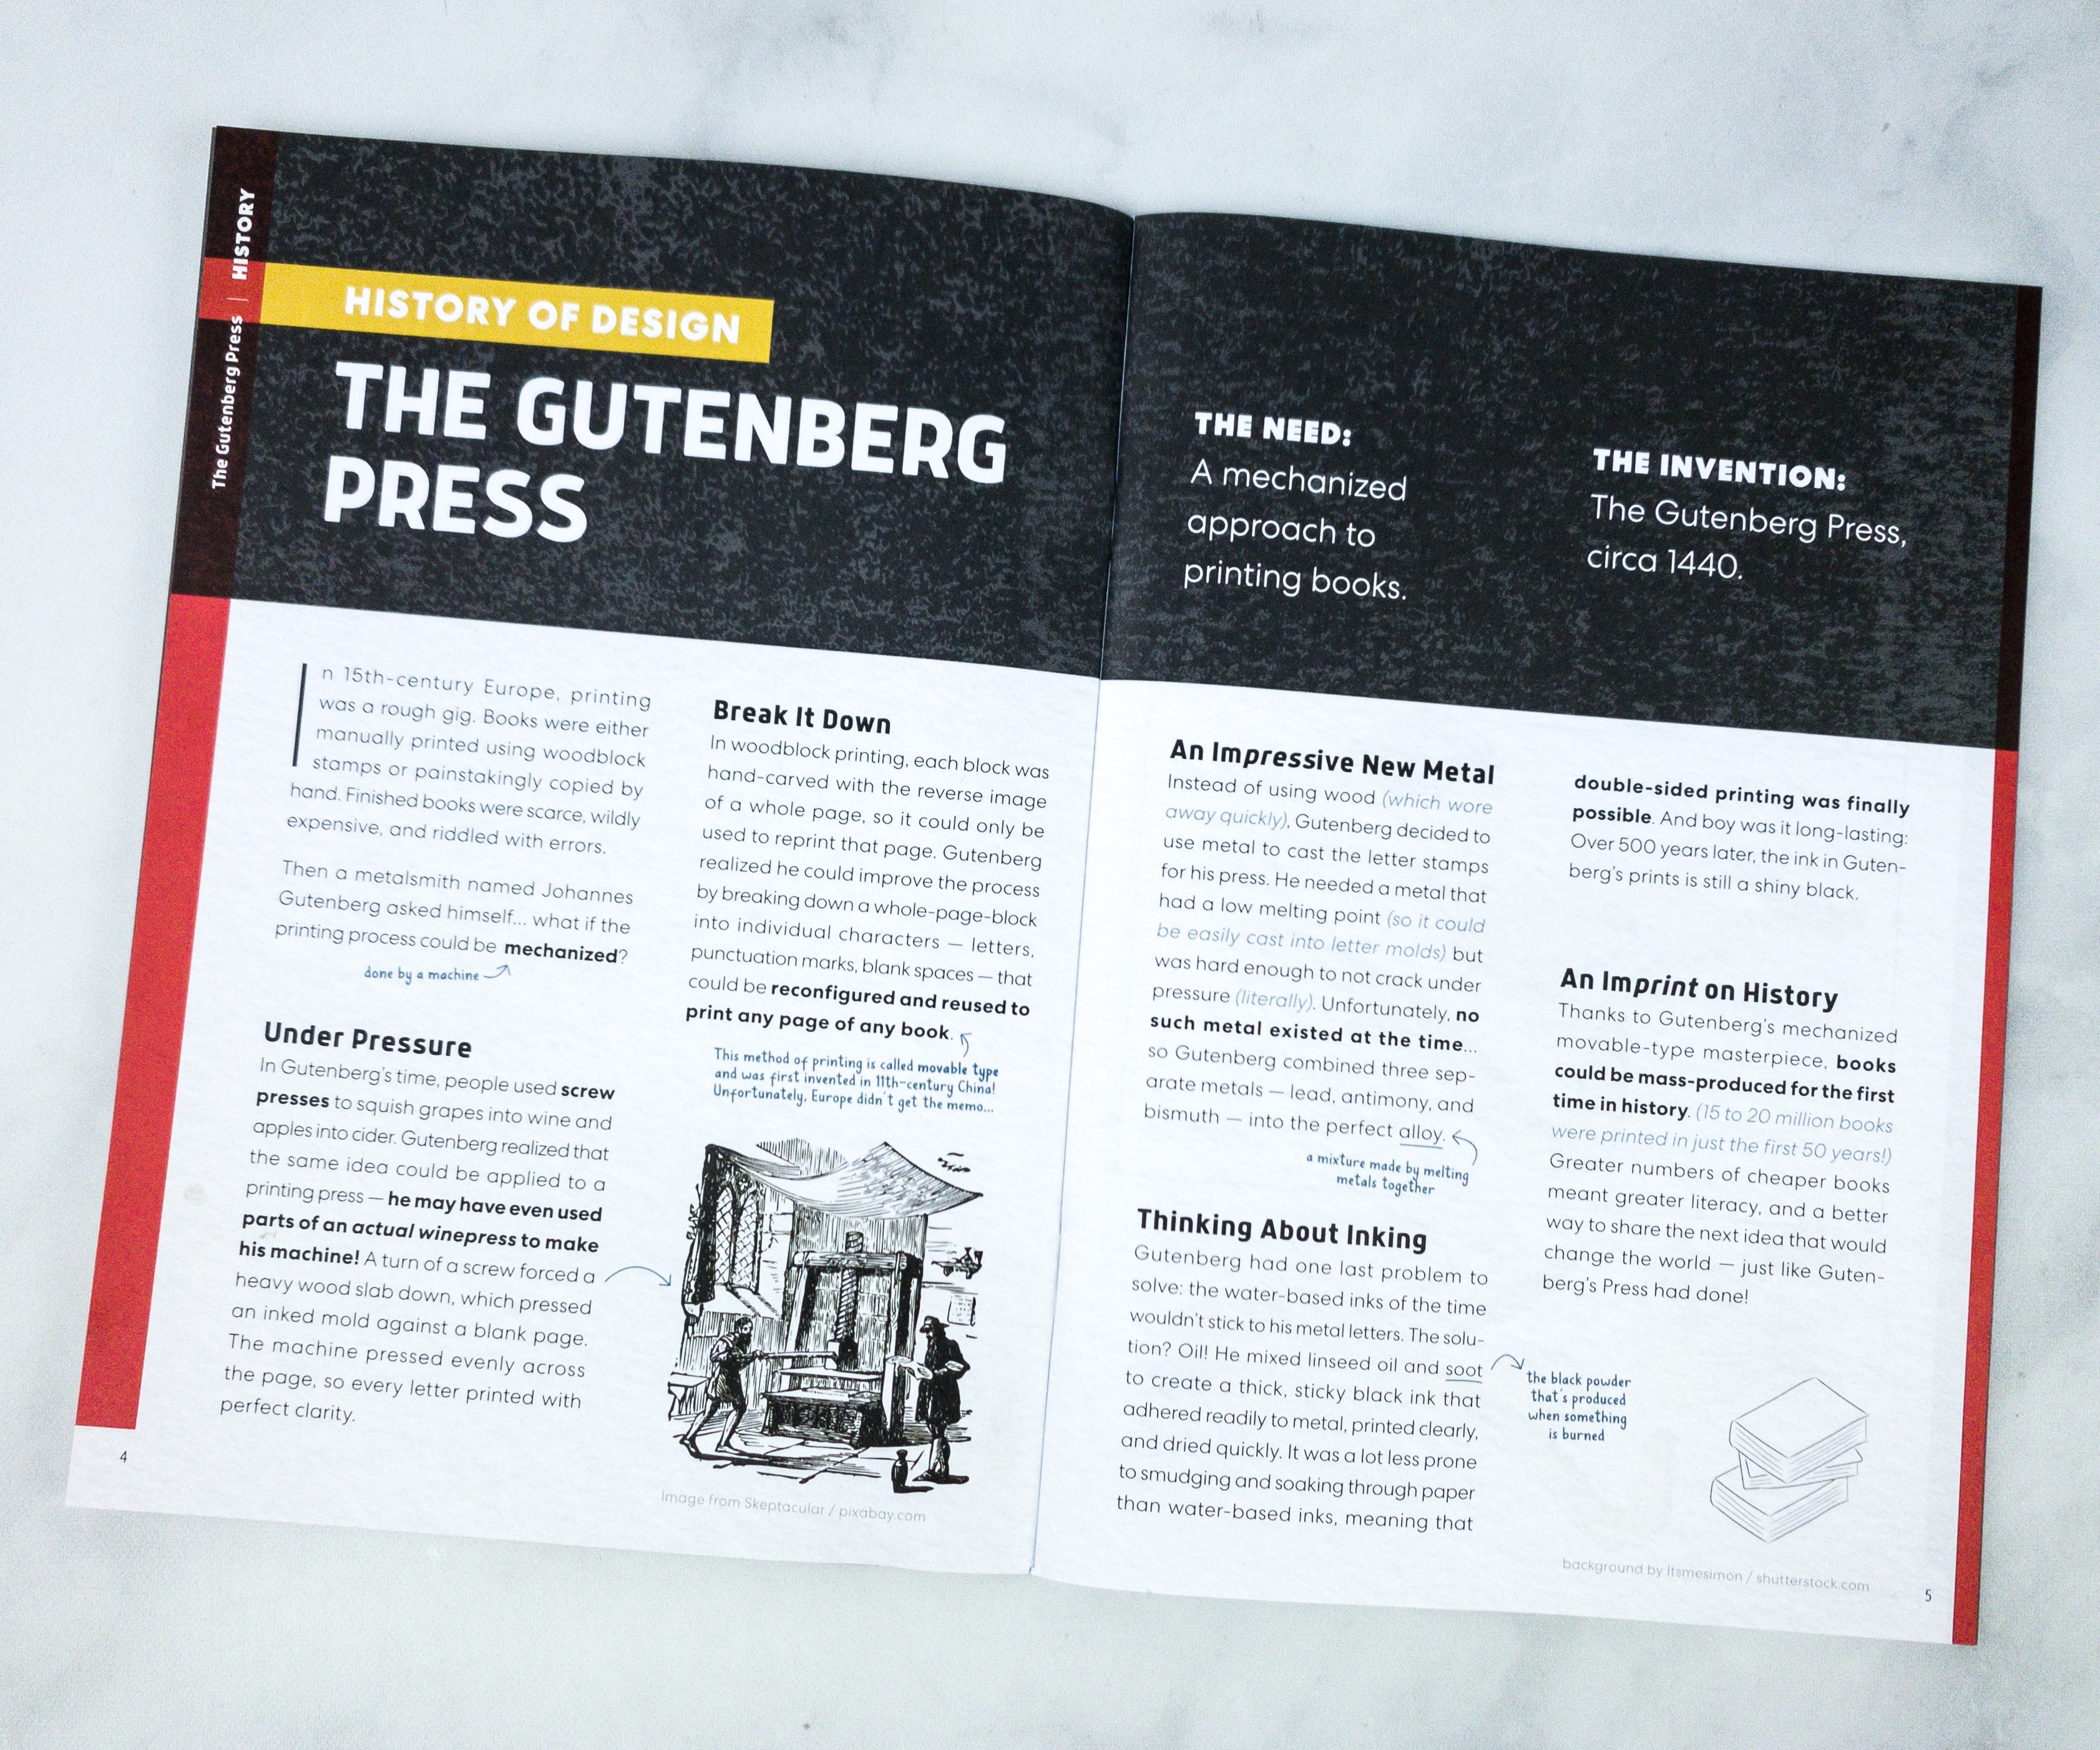
This page discusses everything about the Gutenberg Press, including how Johannes Gutenberg invented it!
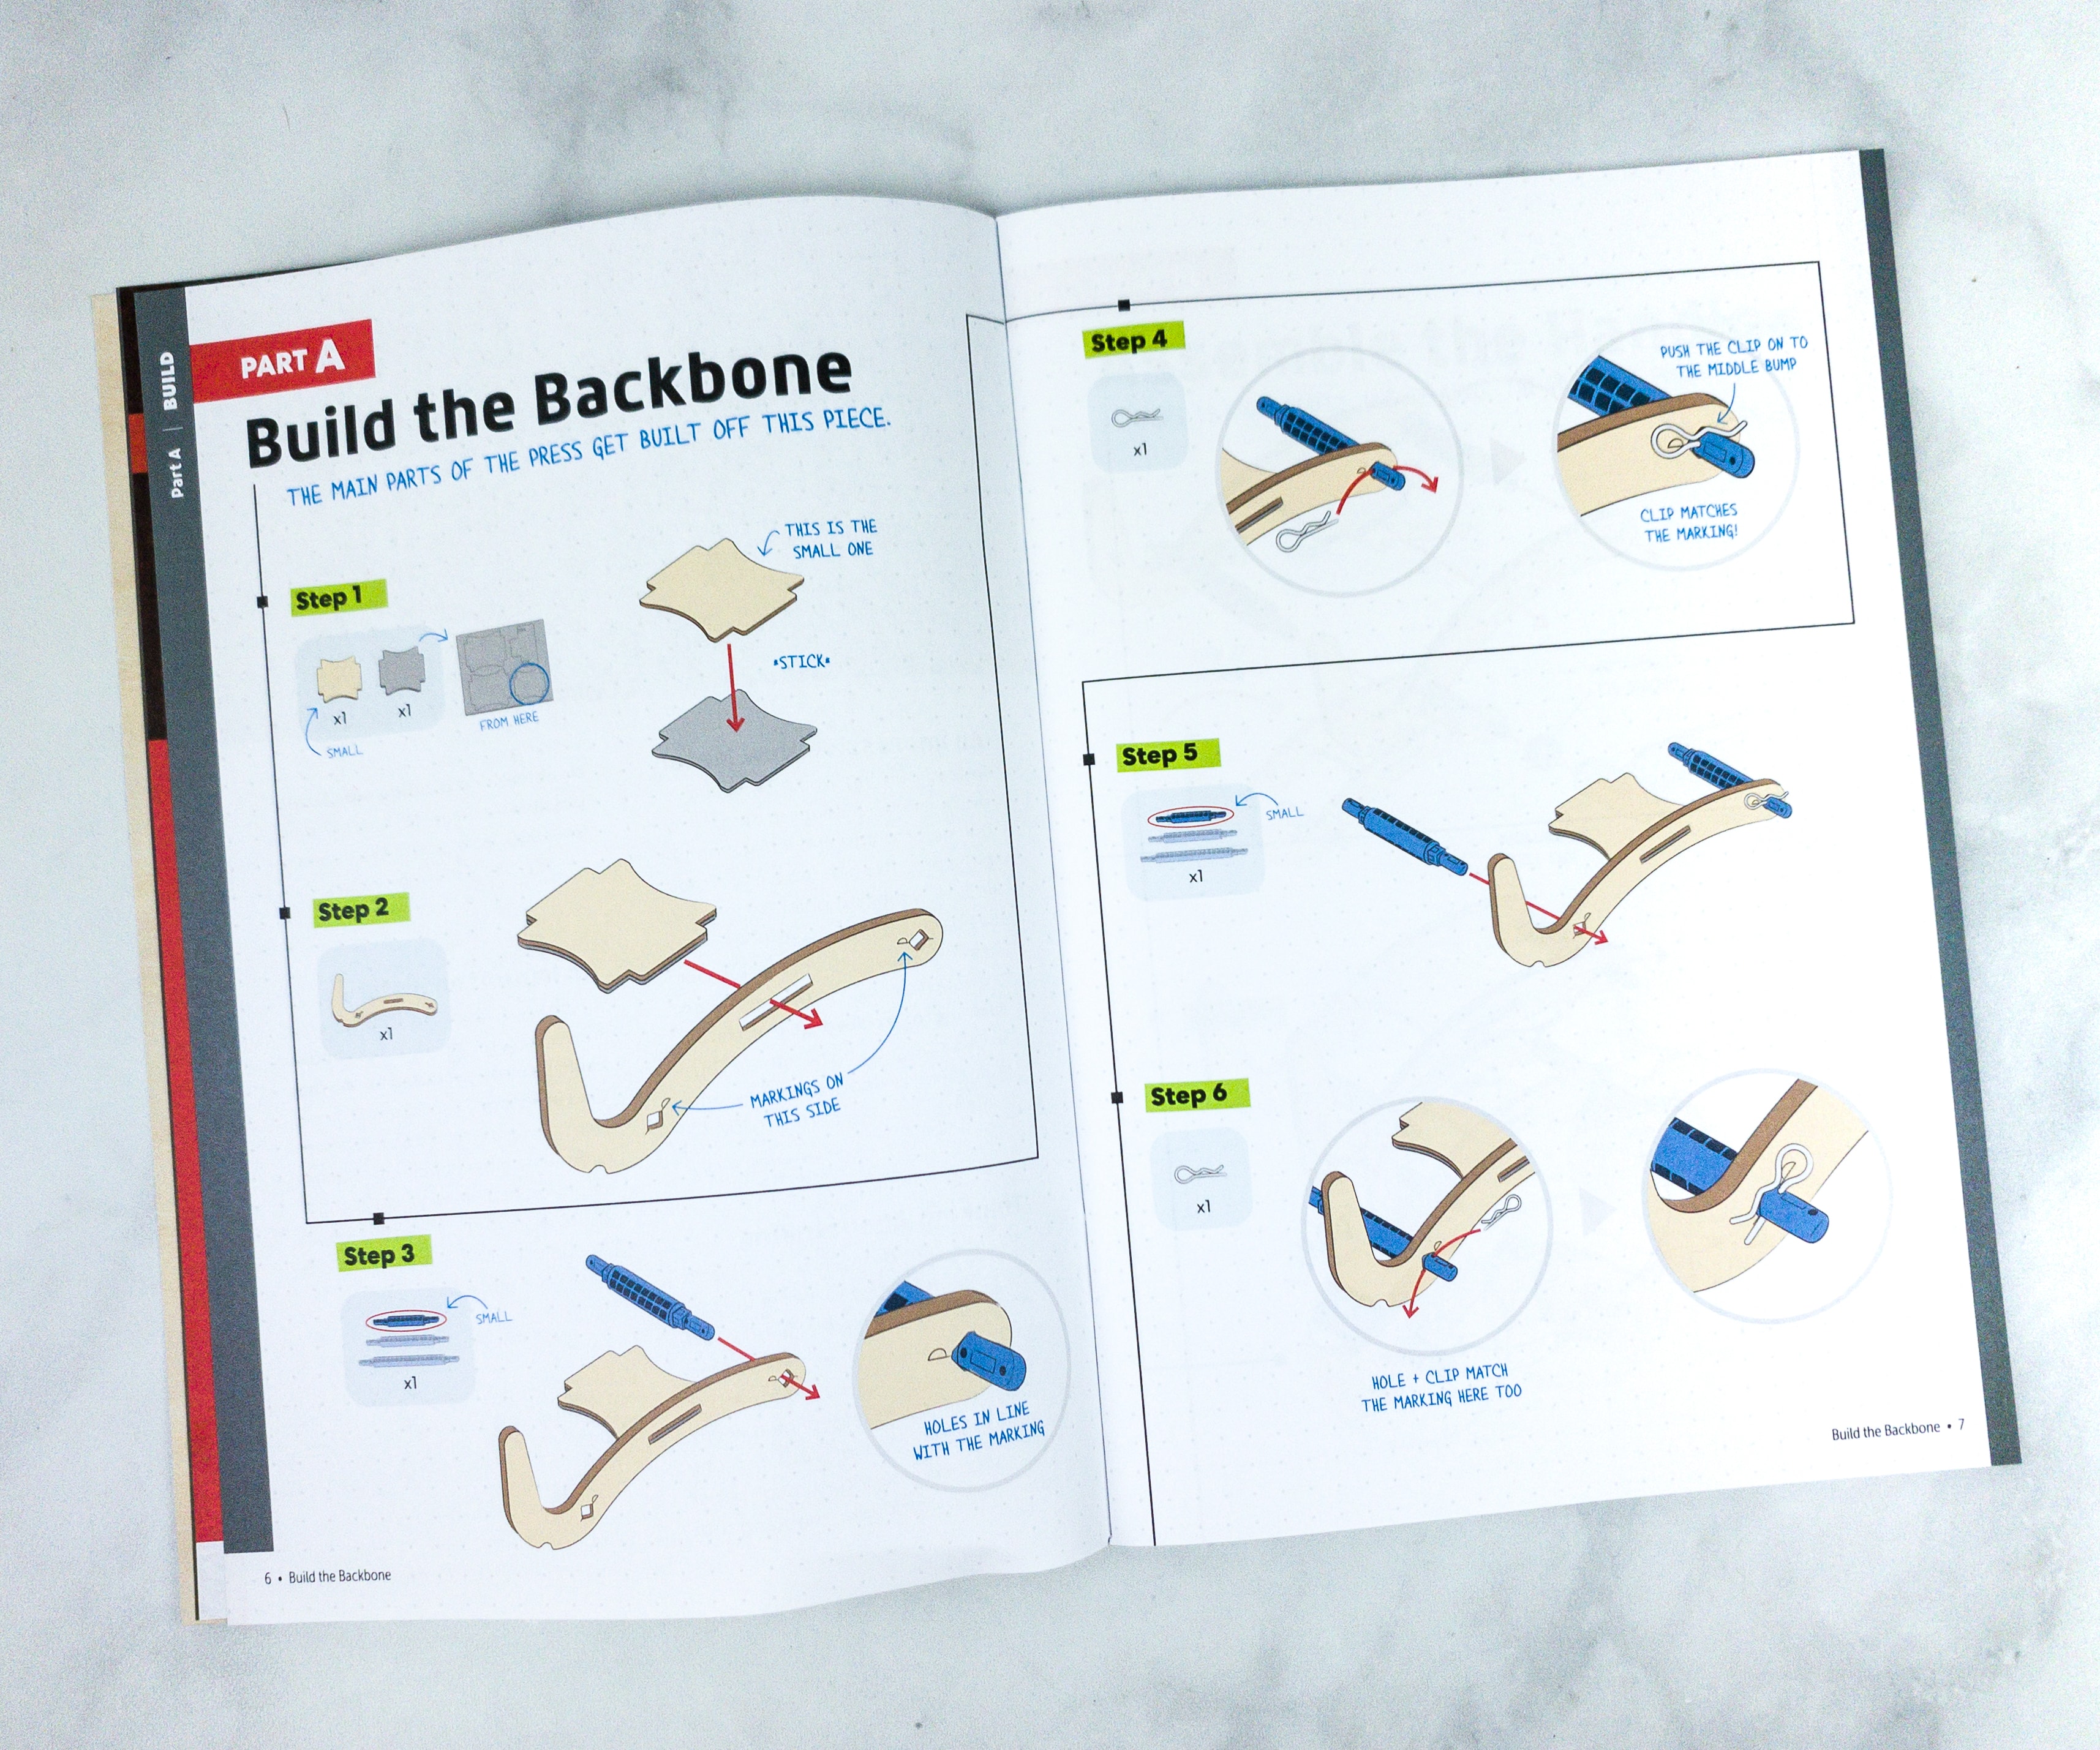
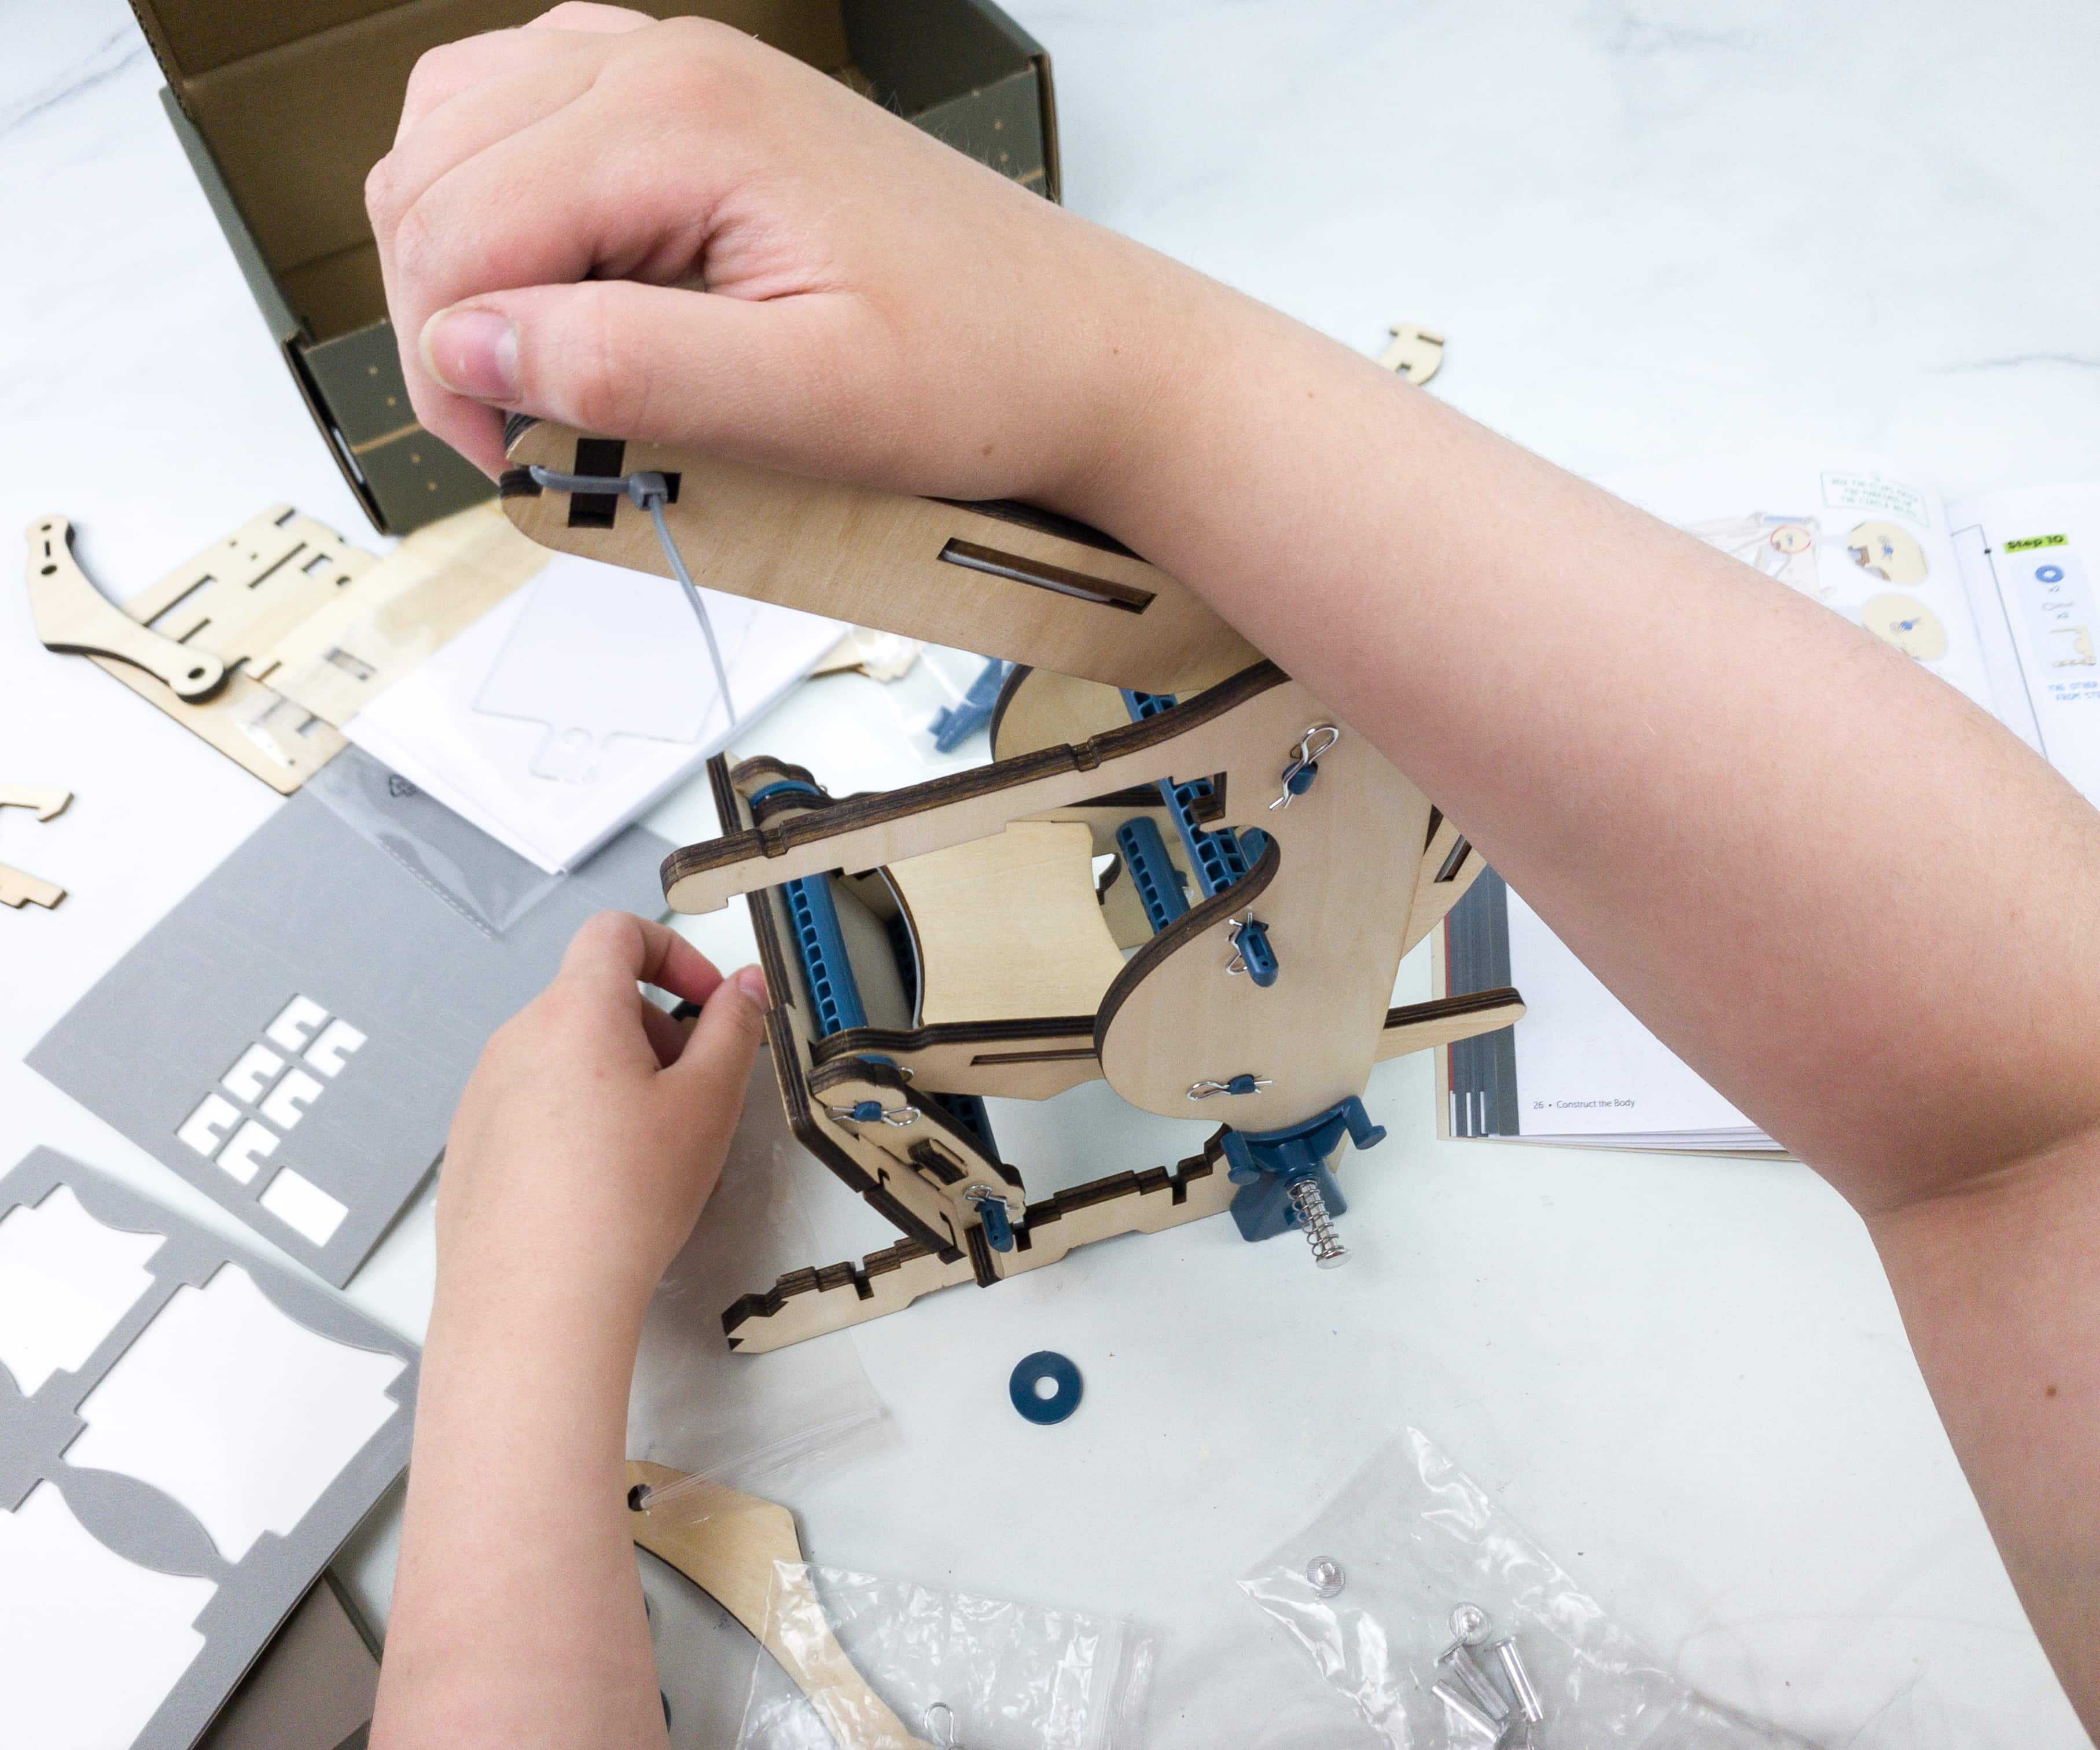
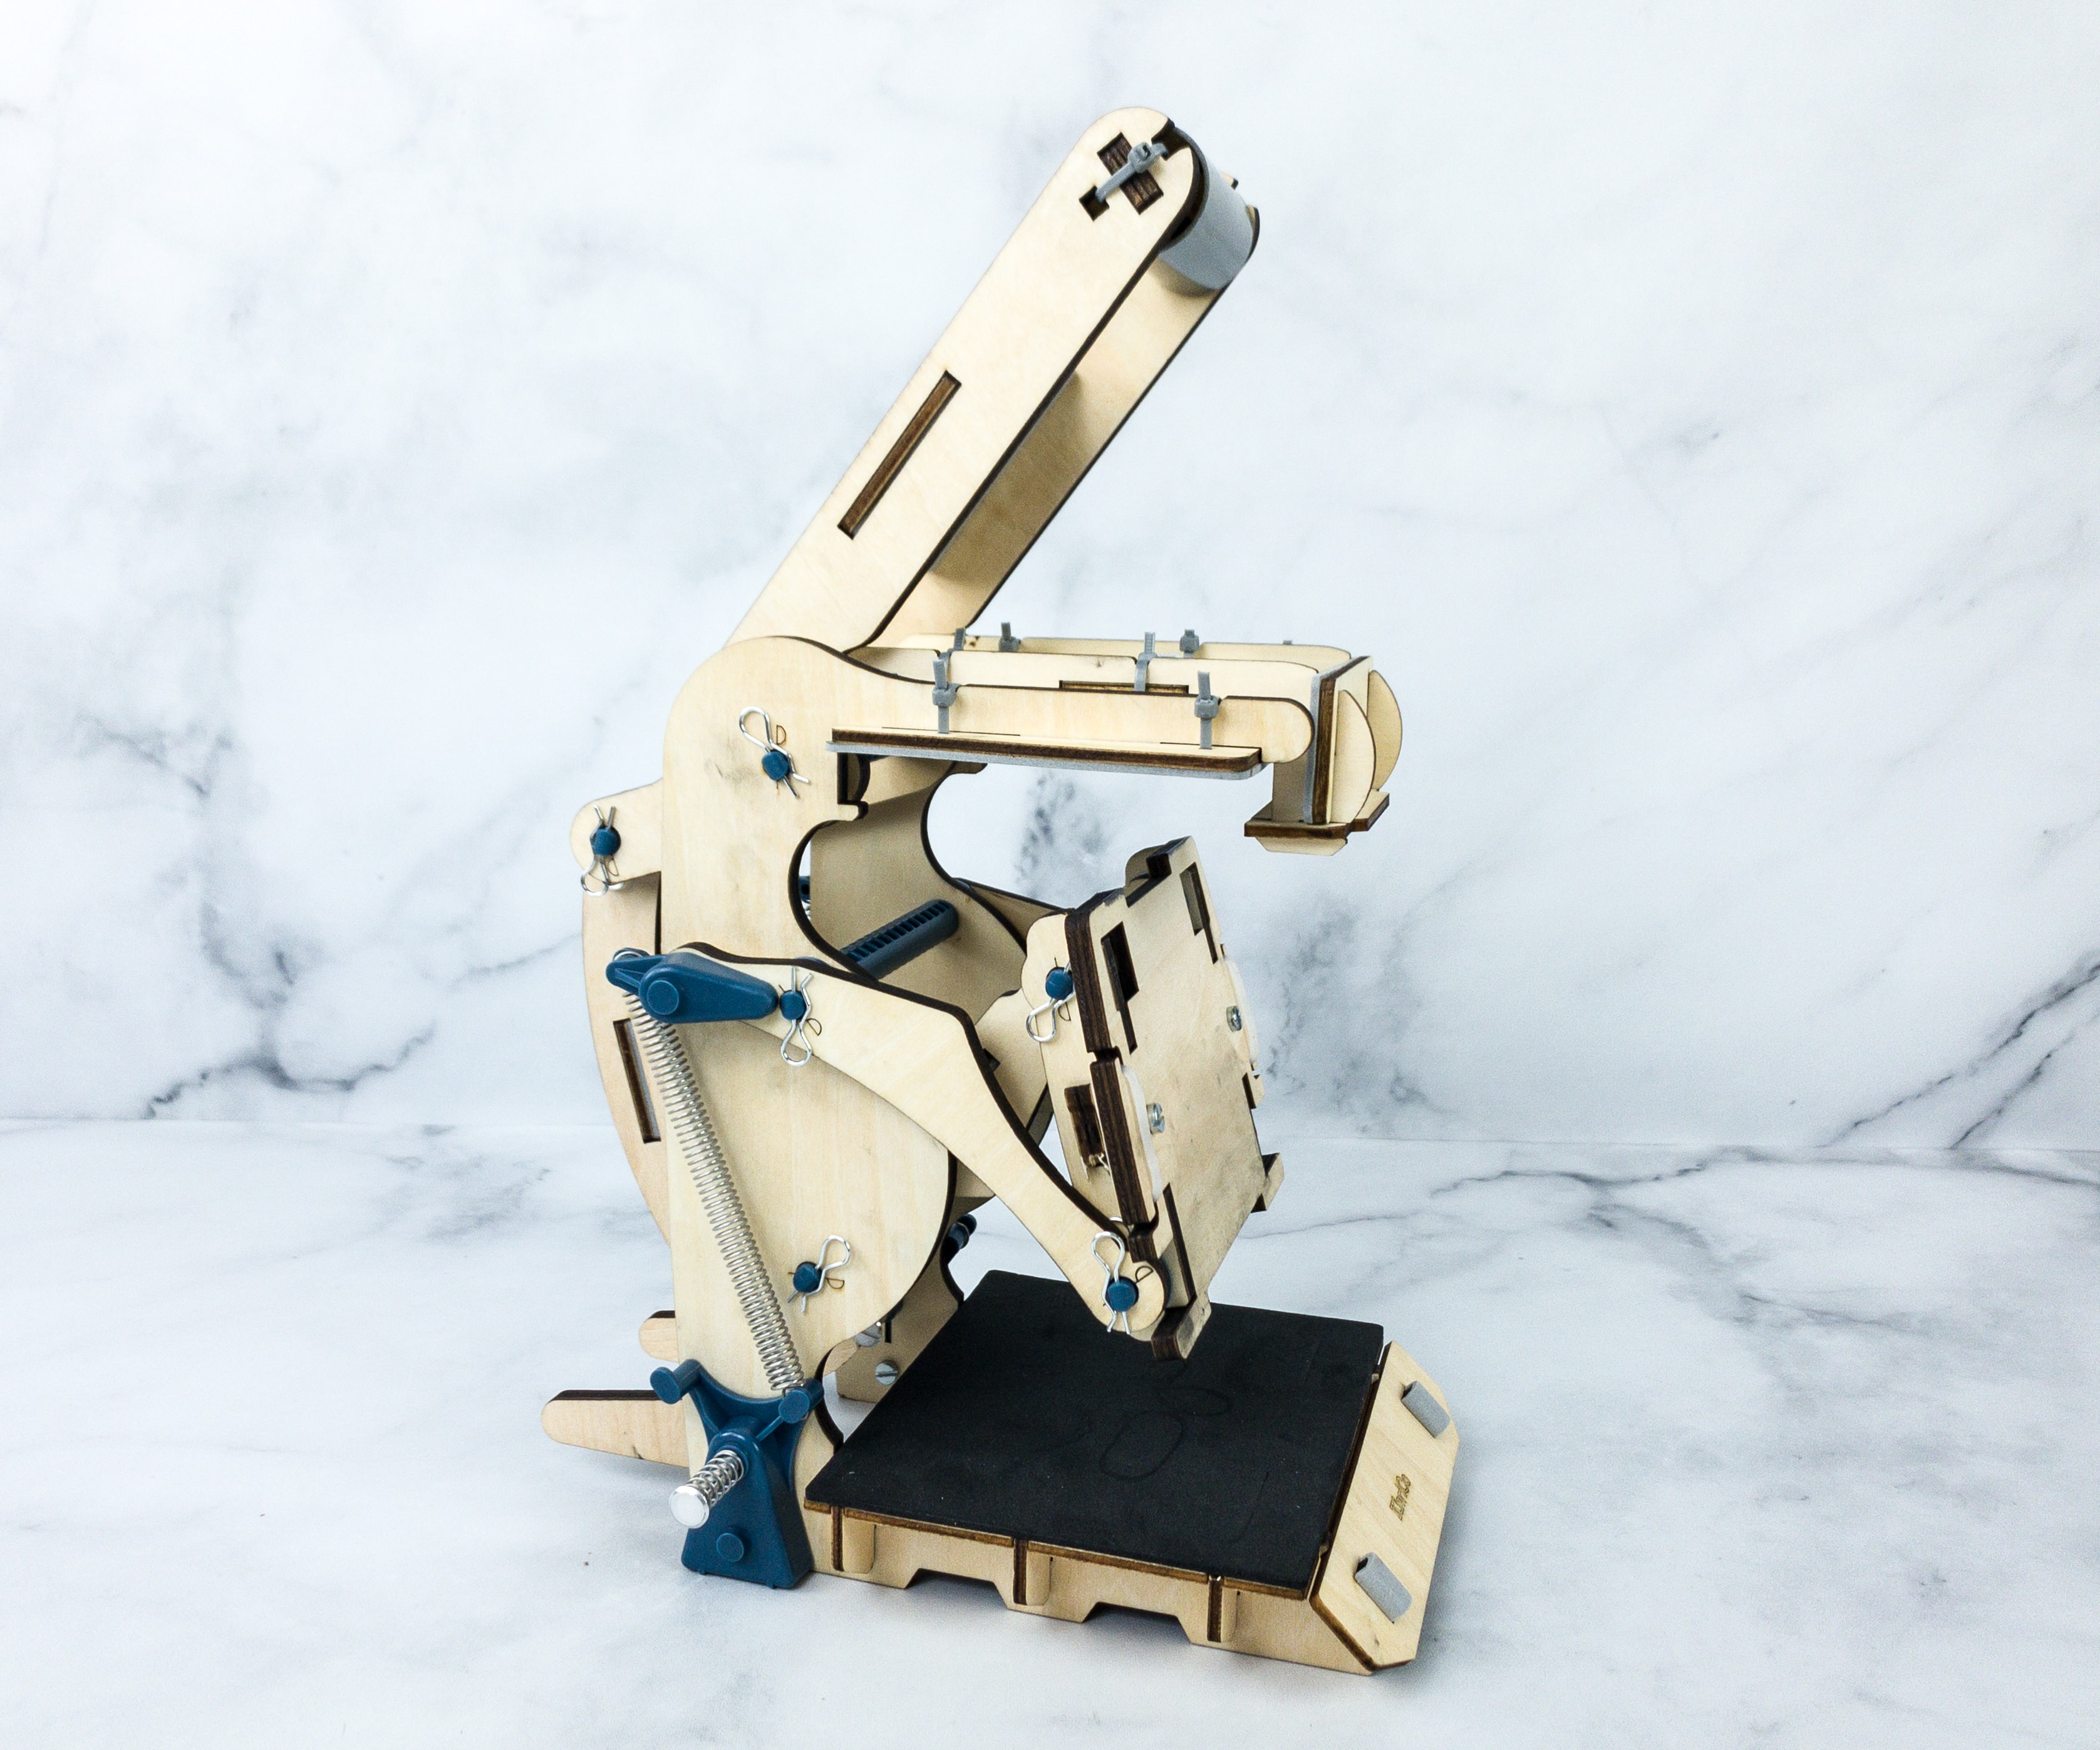
For the first part, we made the backbone! It is where the main parts of the press are built on.
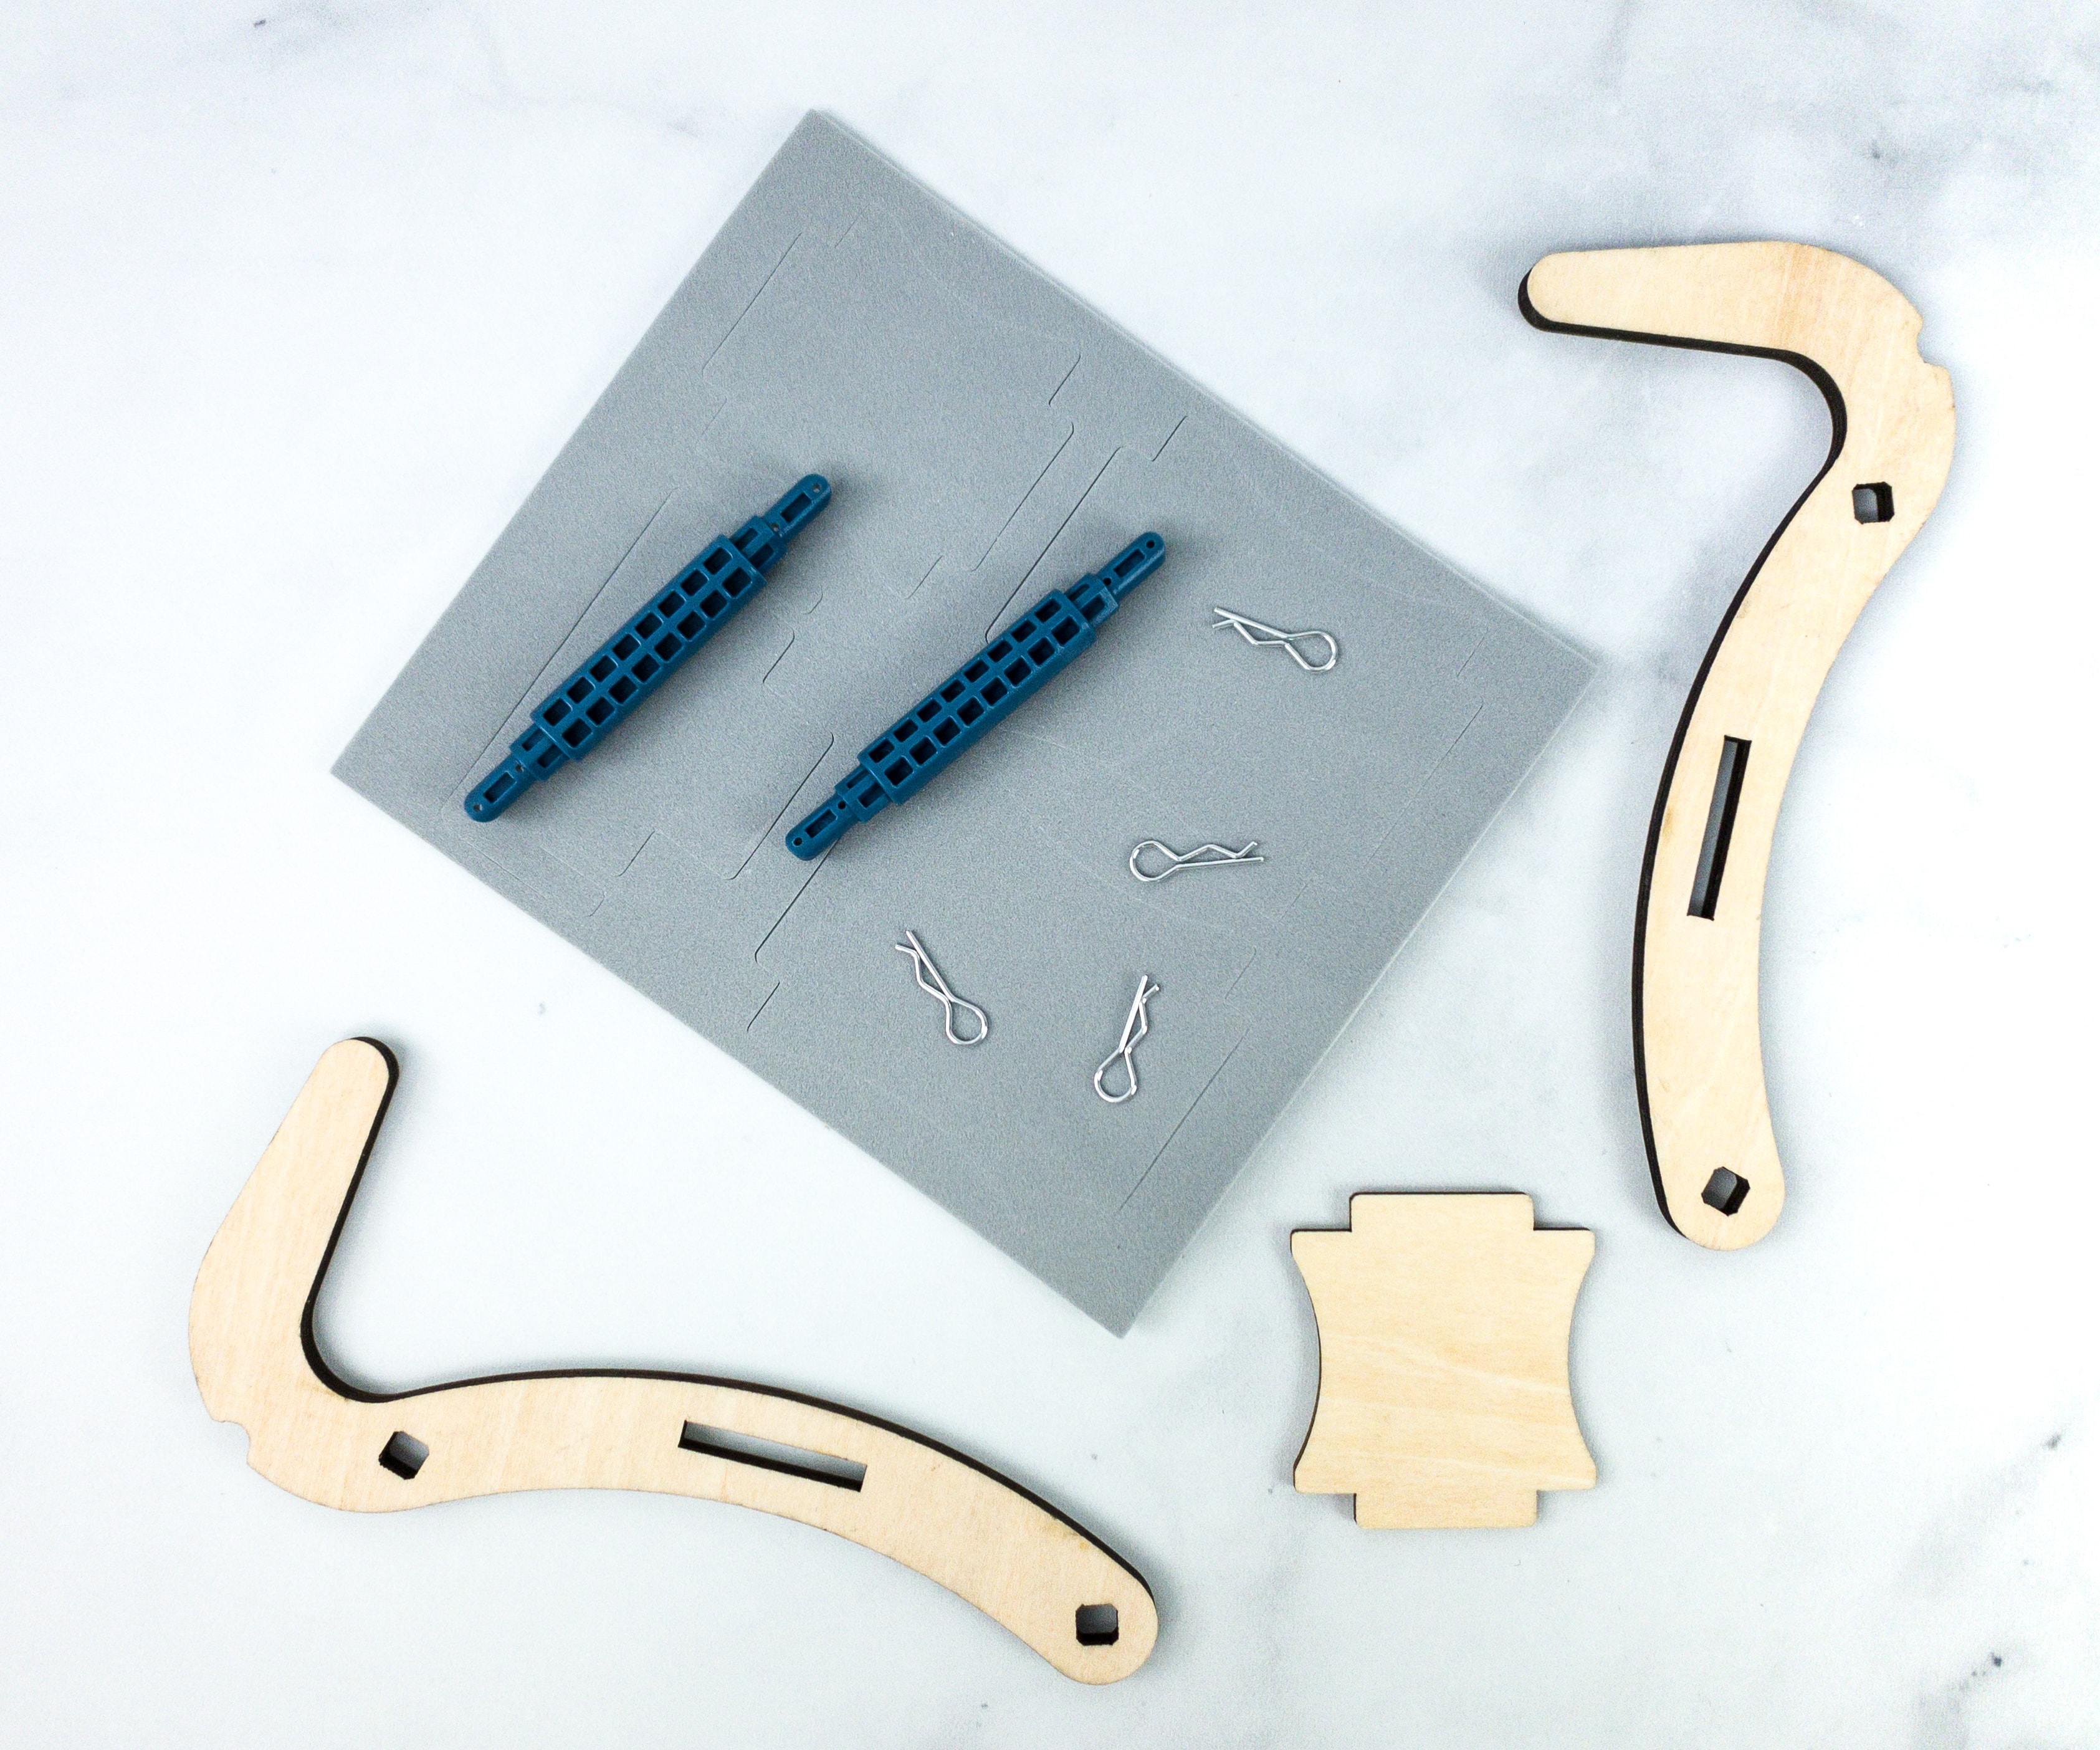
The crate provided everything we need for the project, including the wood set, support rods, sticky foam, and R-clips.
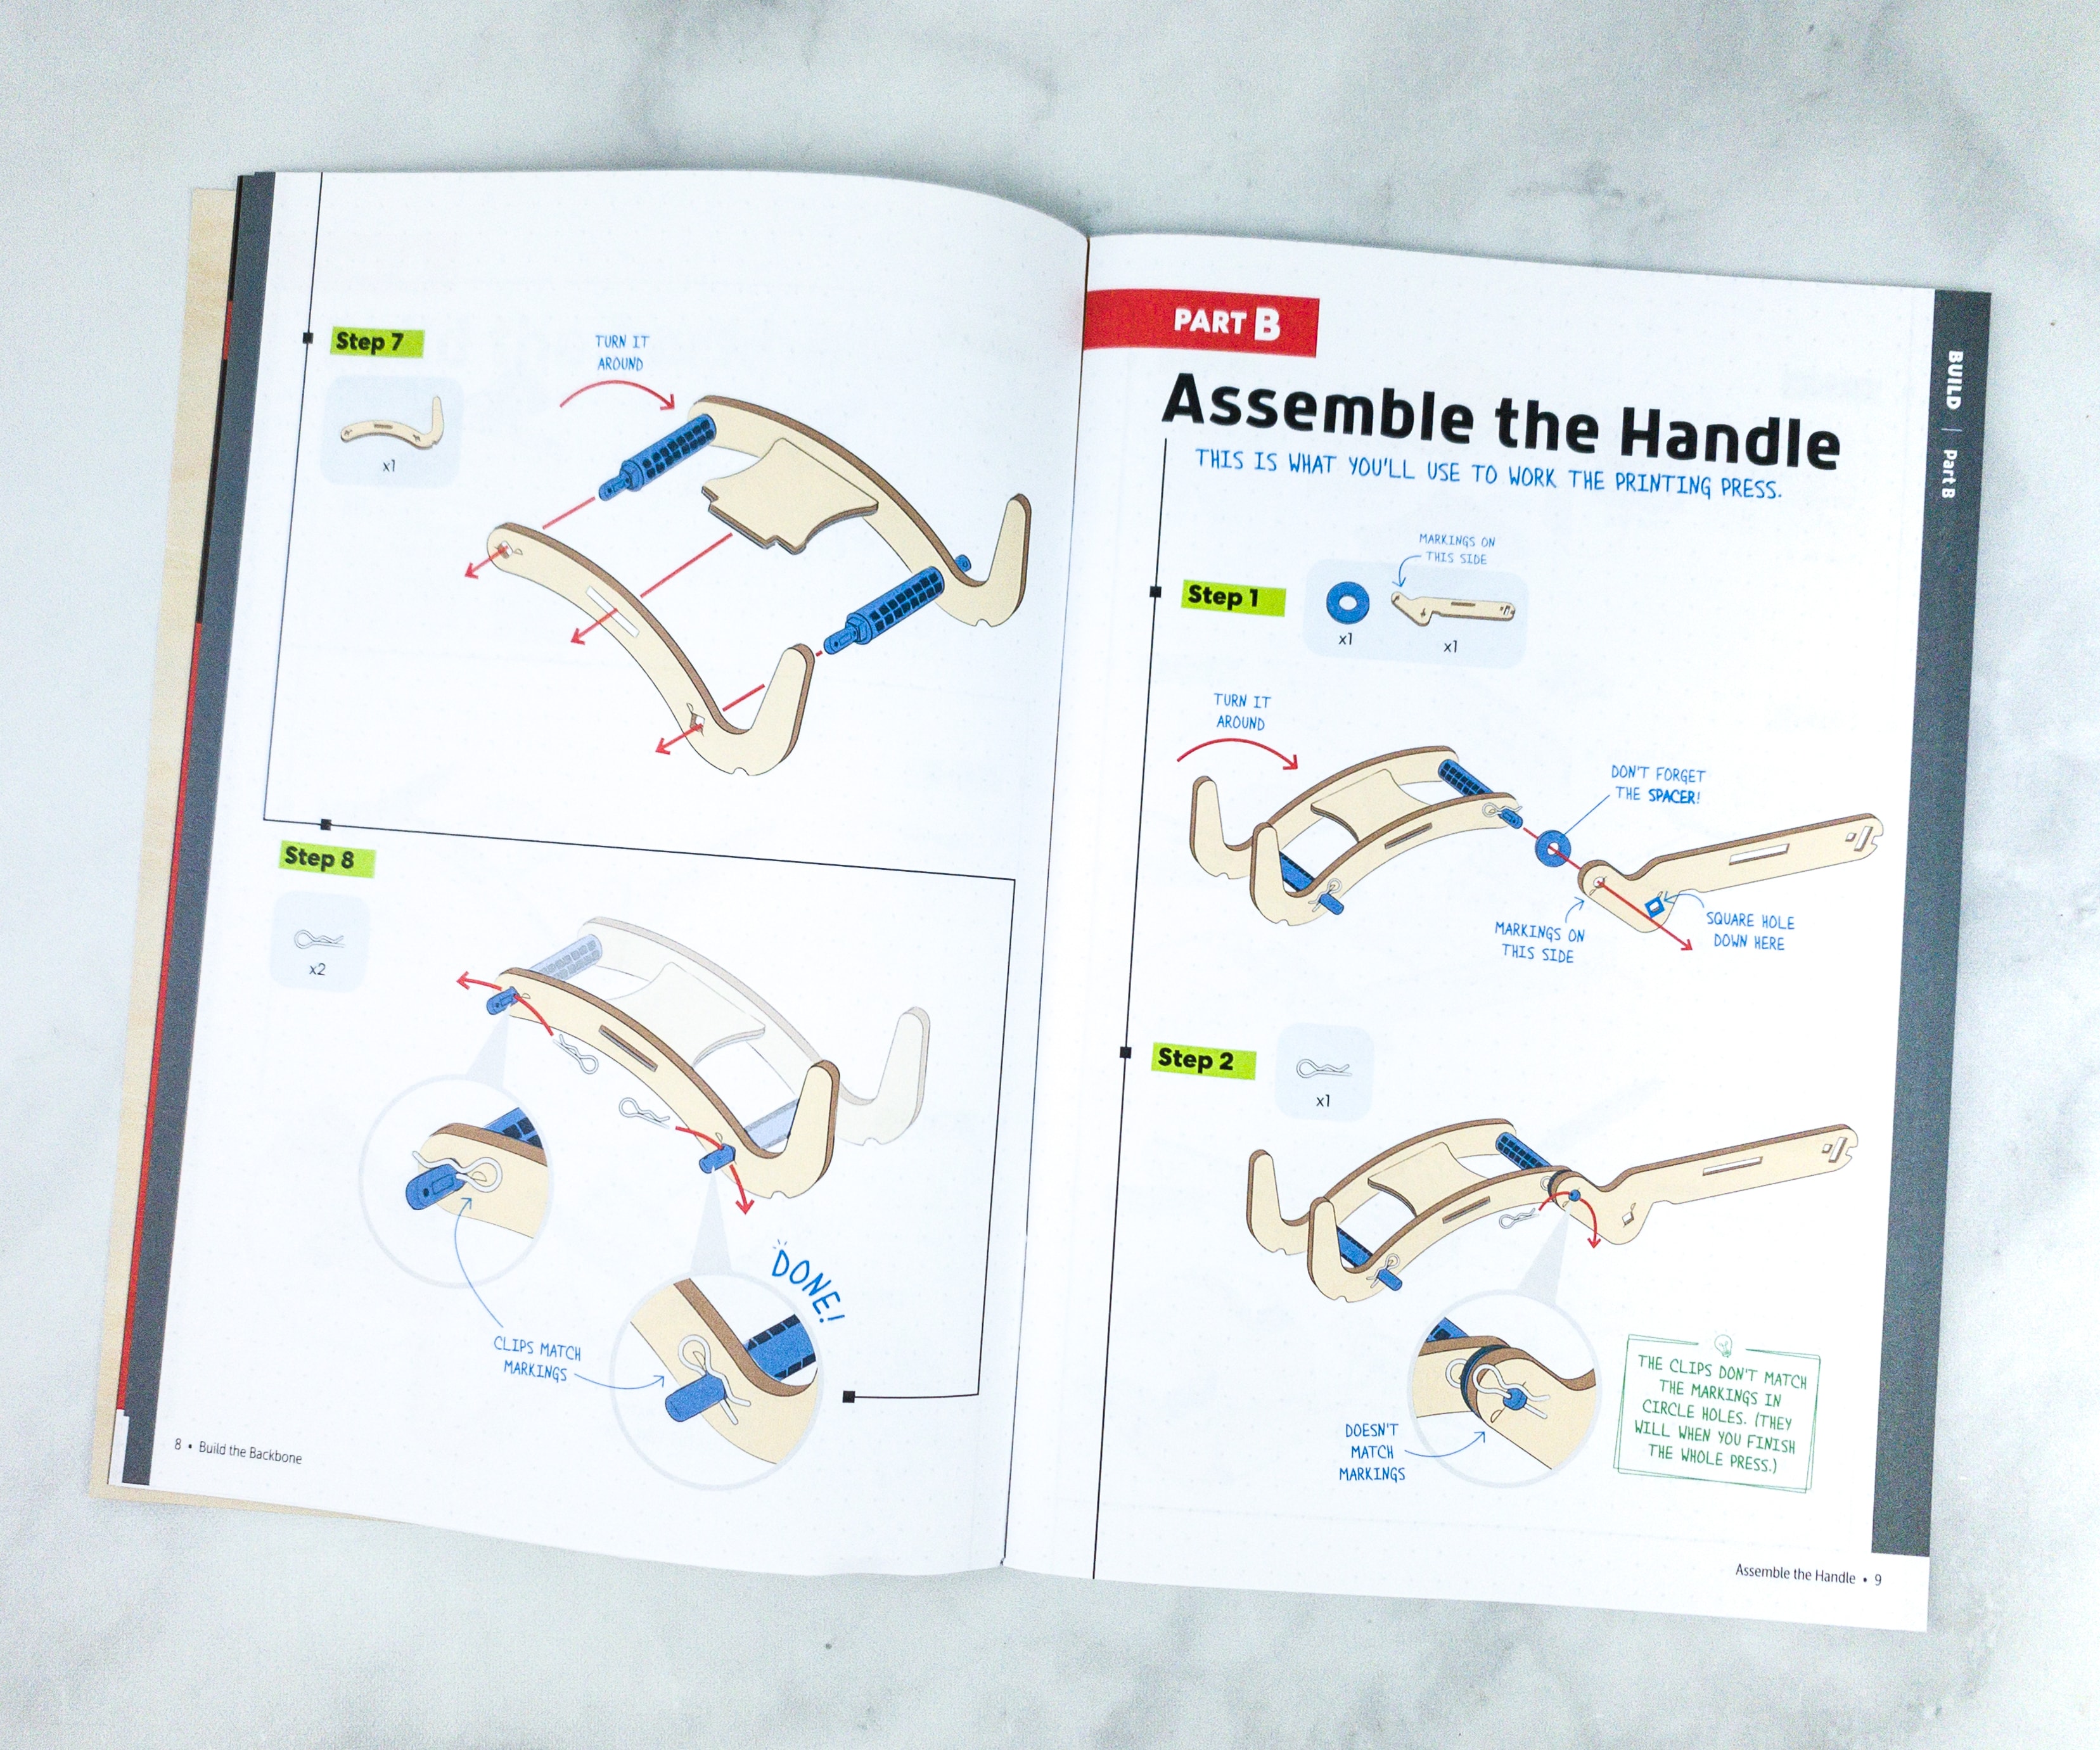
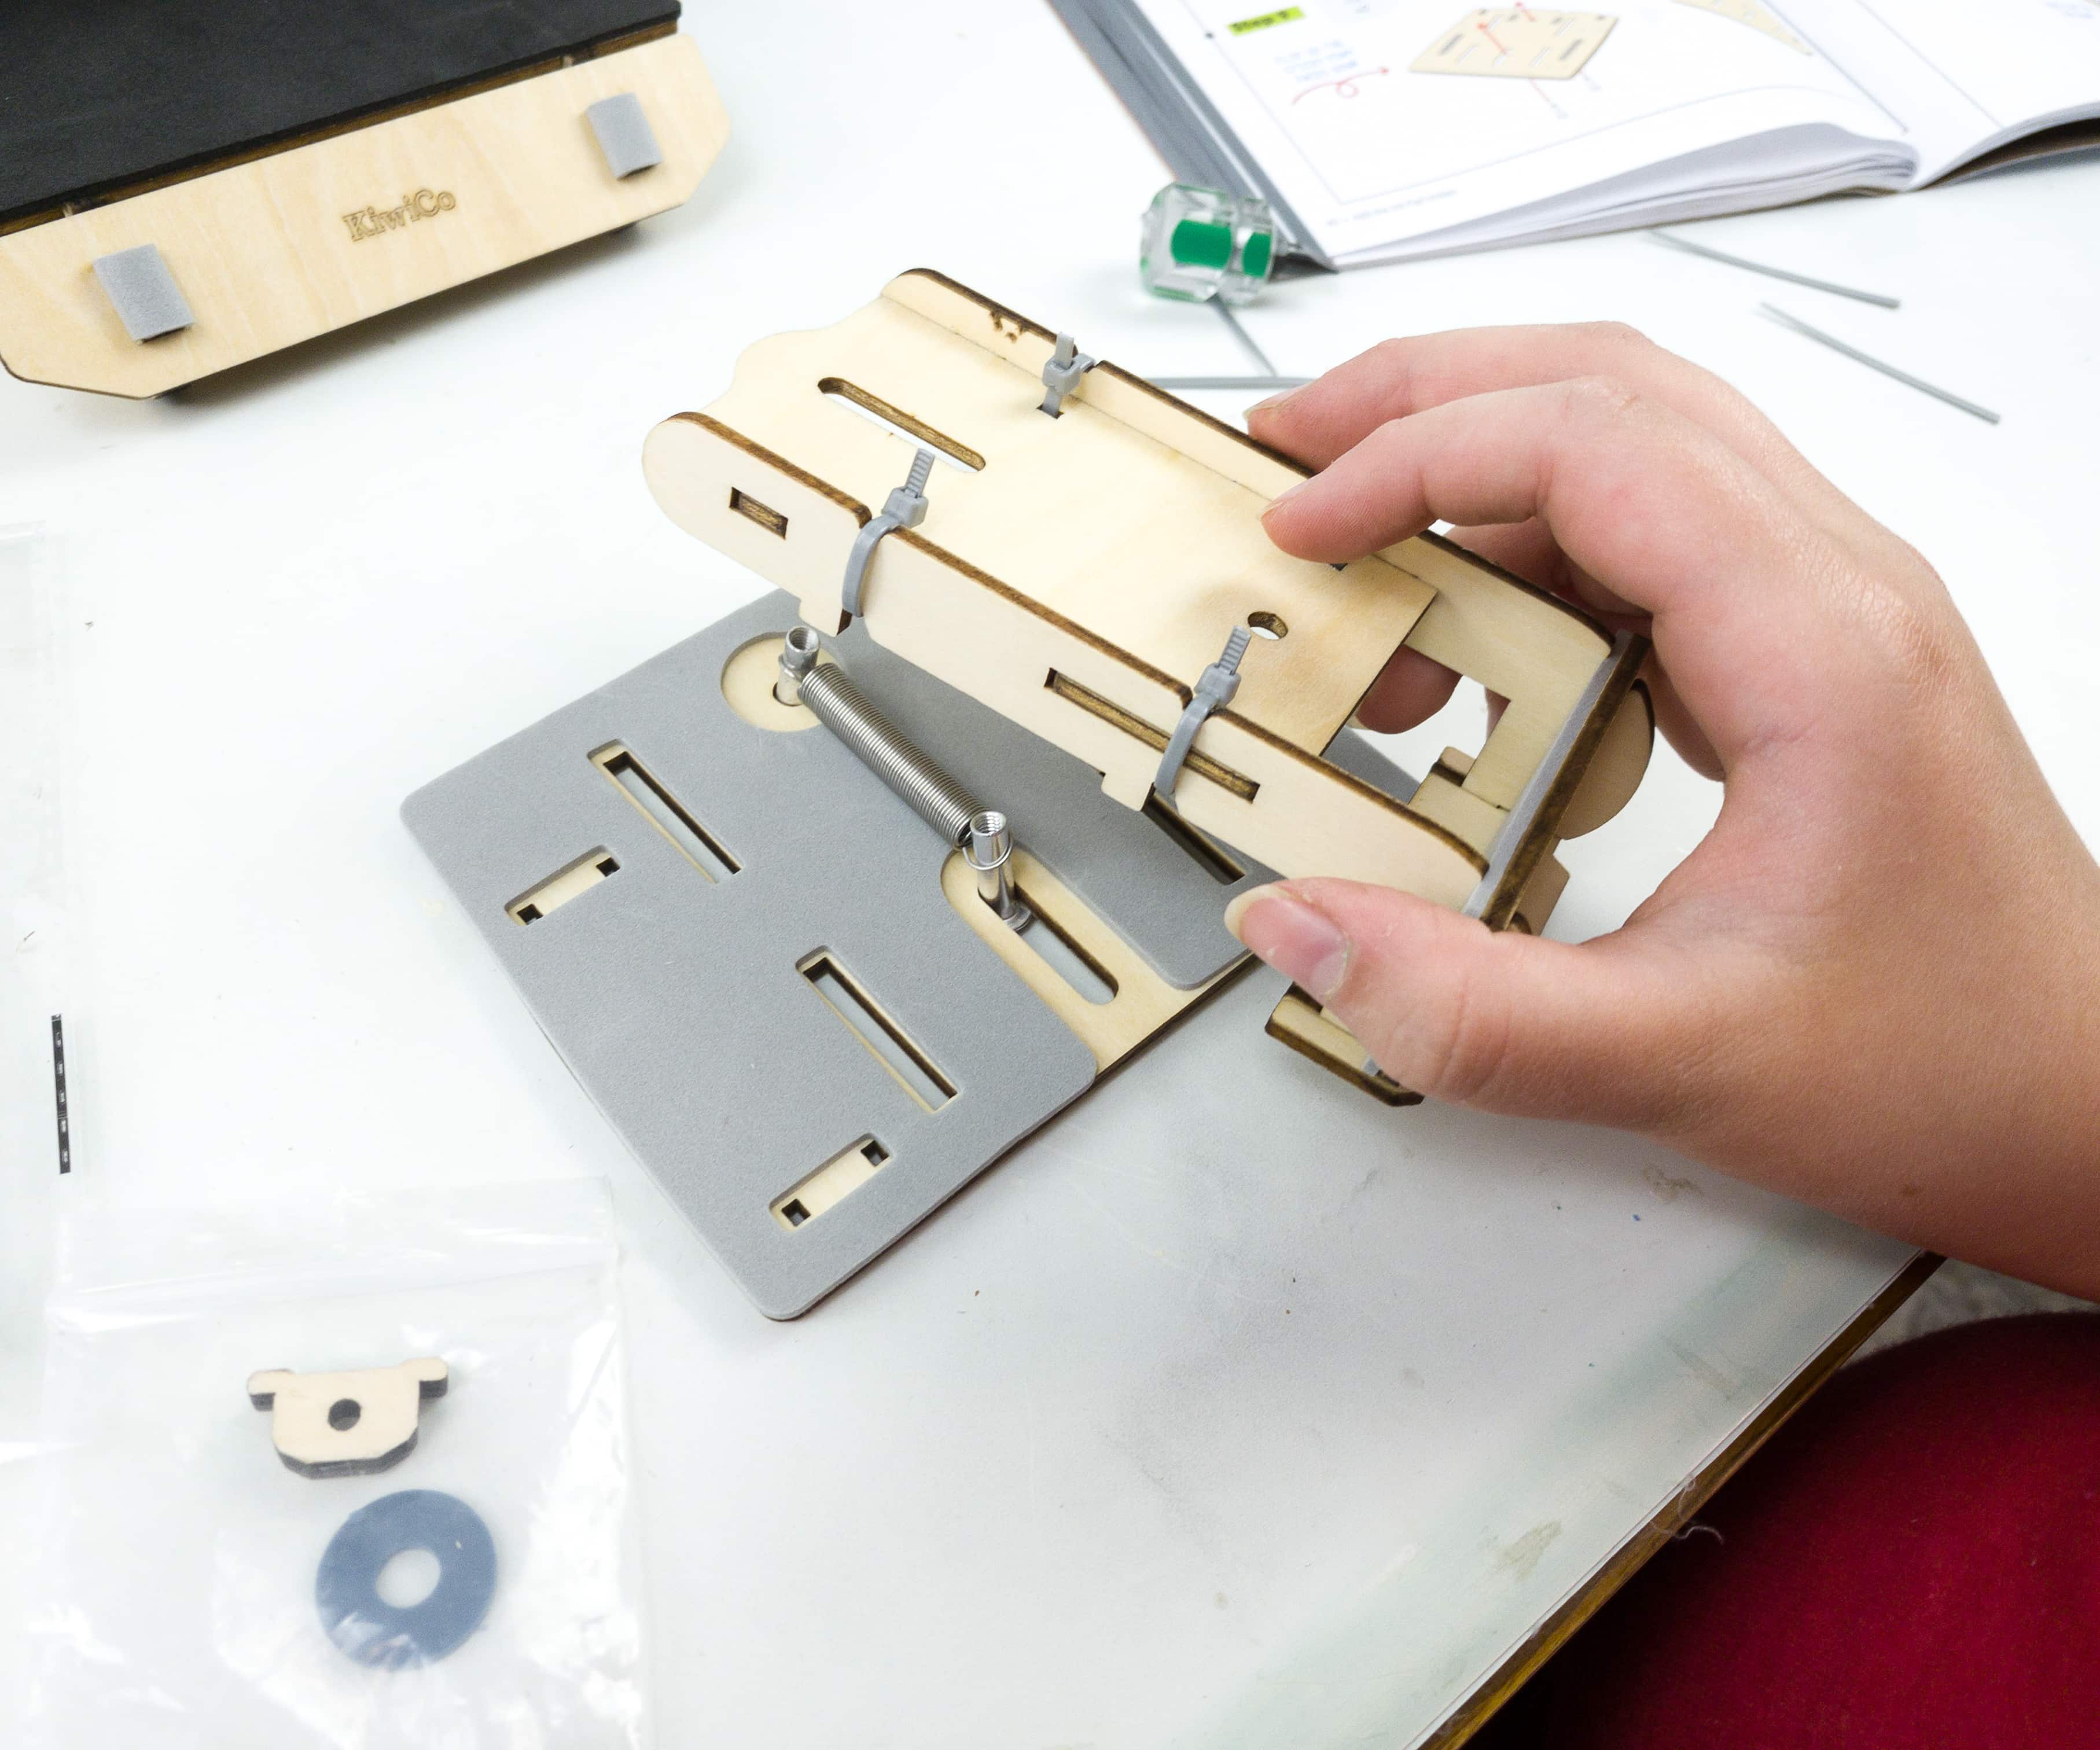
For the second part of the project, we assembled the handle.
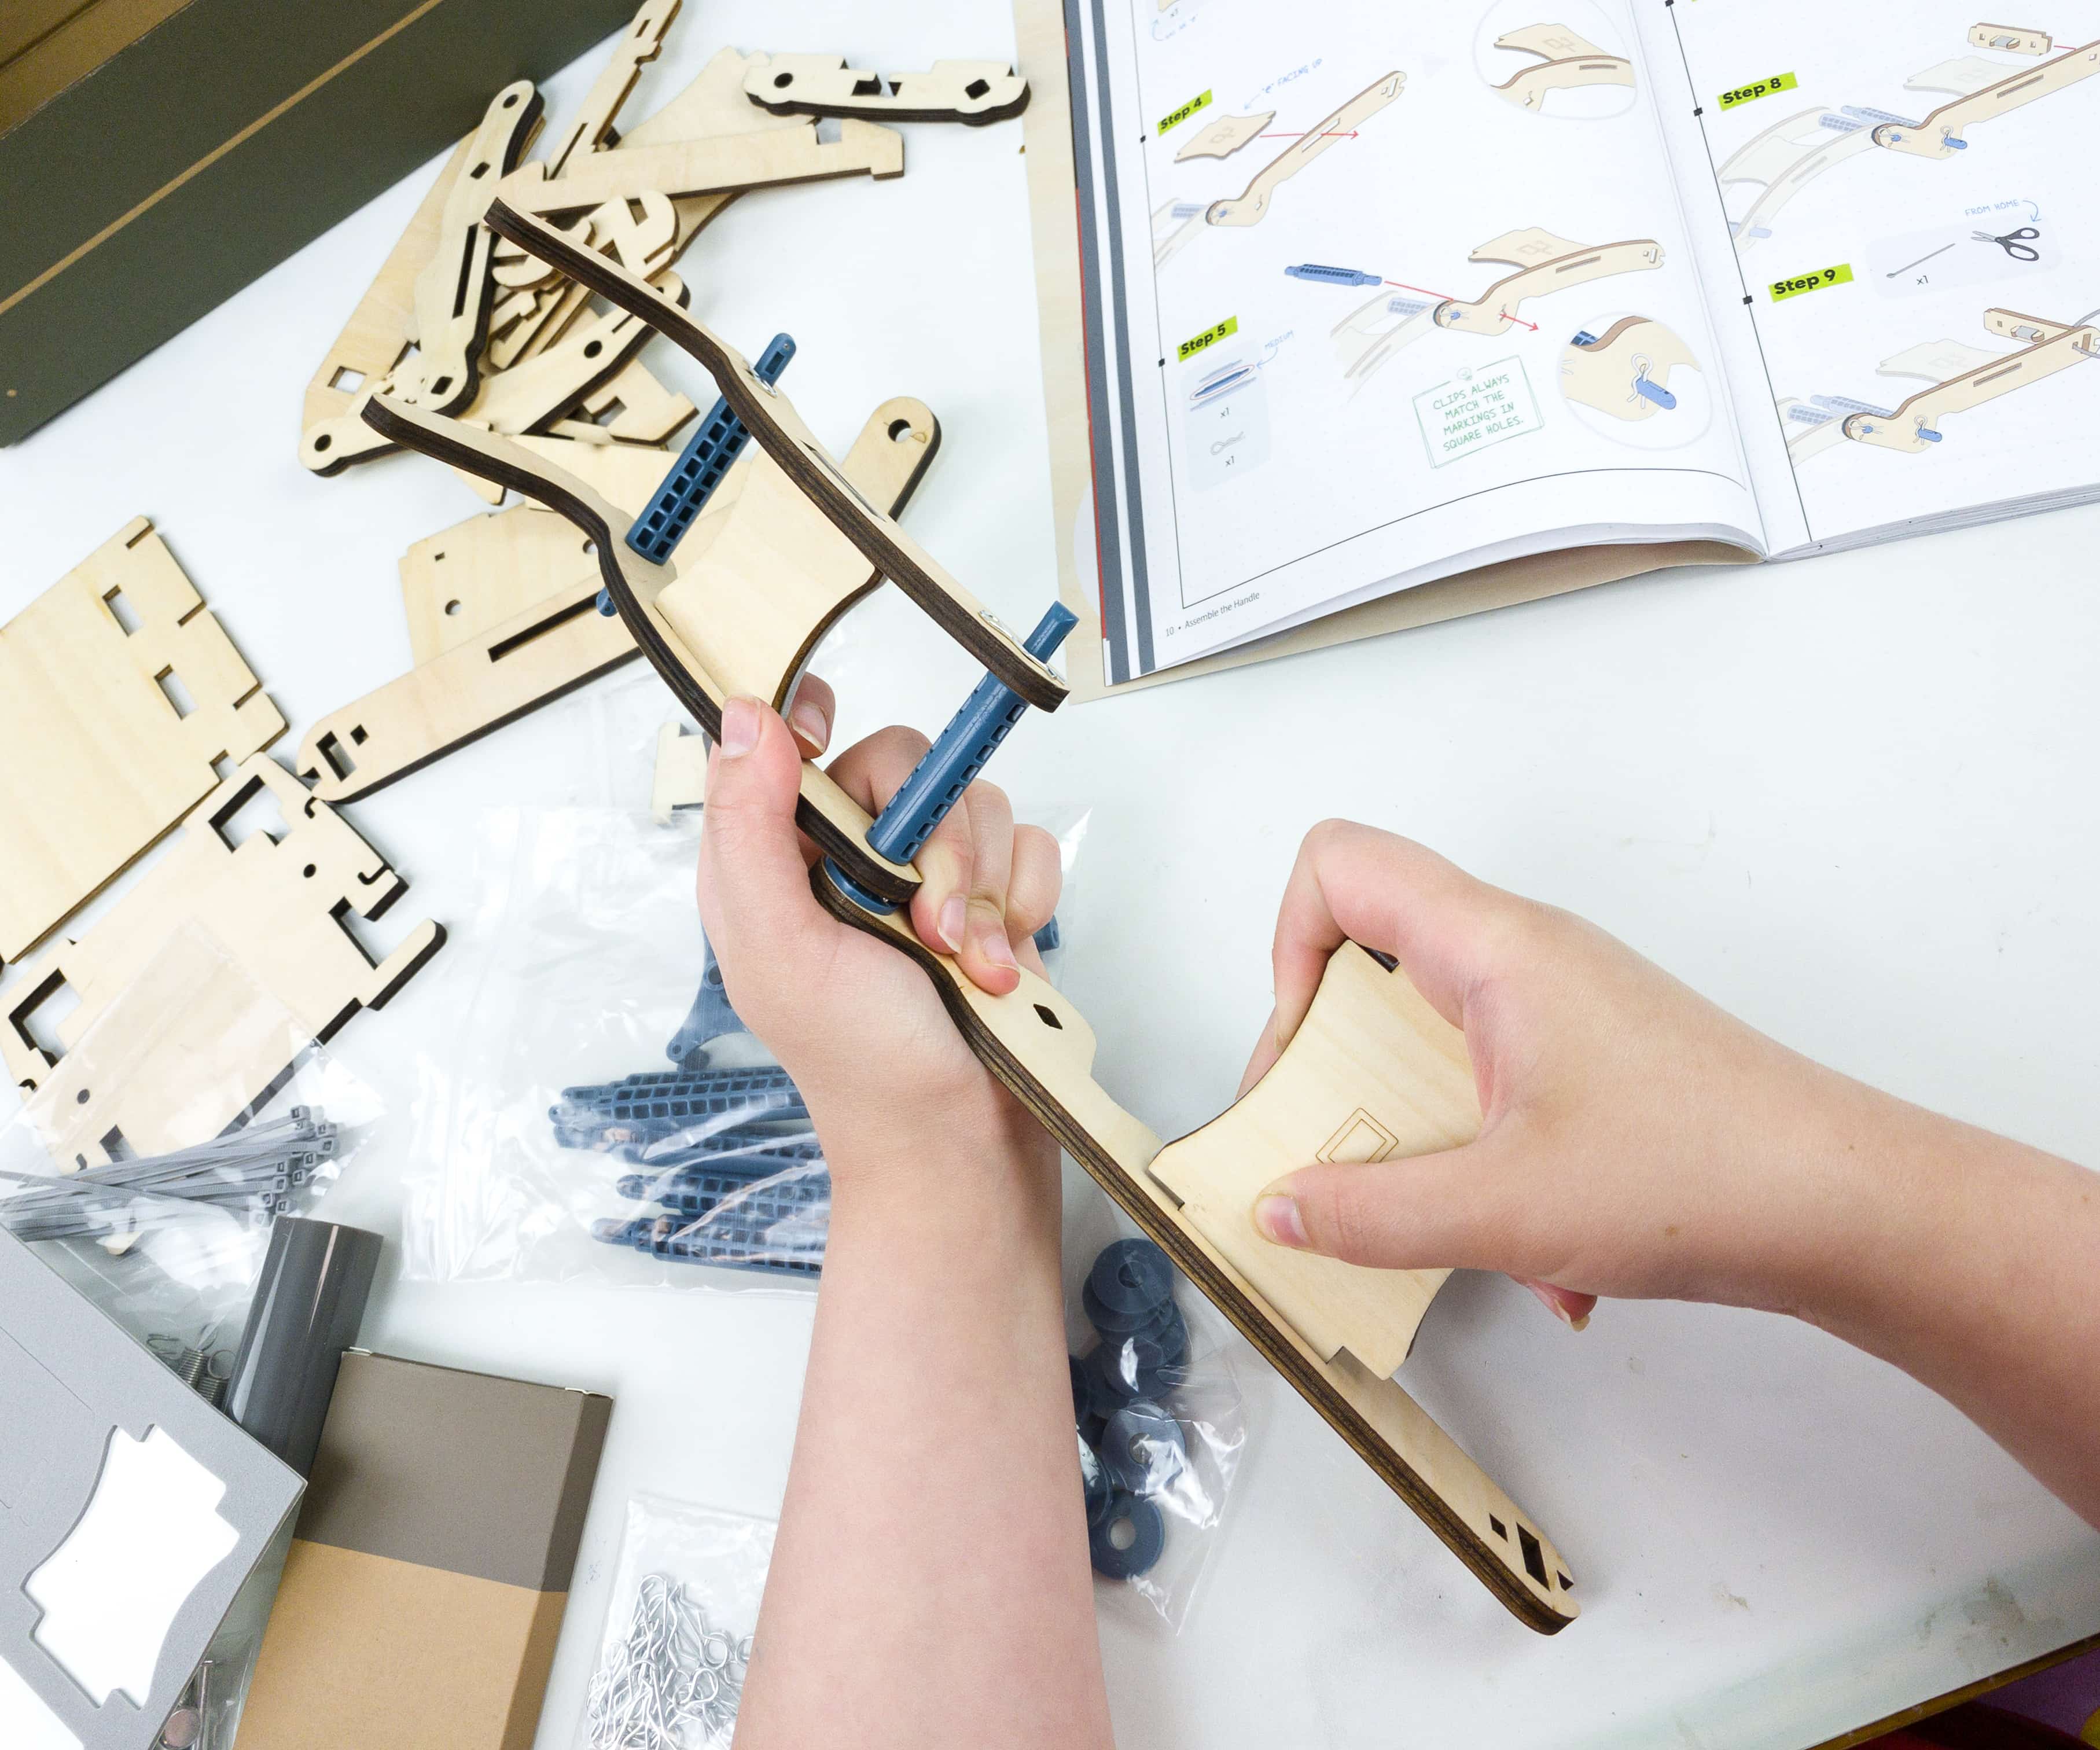
The backbone and the handle should be built simultaneously since they are interconnected with each other. My daughter poked the support rods on the holes between the handle and the backbone of the press, then placed the washer and locked it using the R-clip.
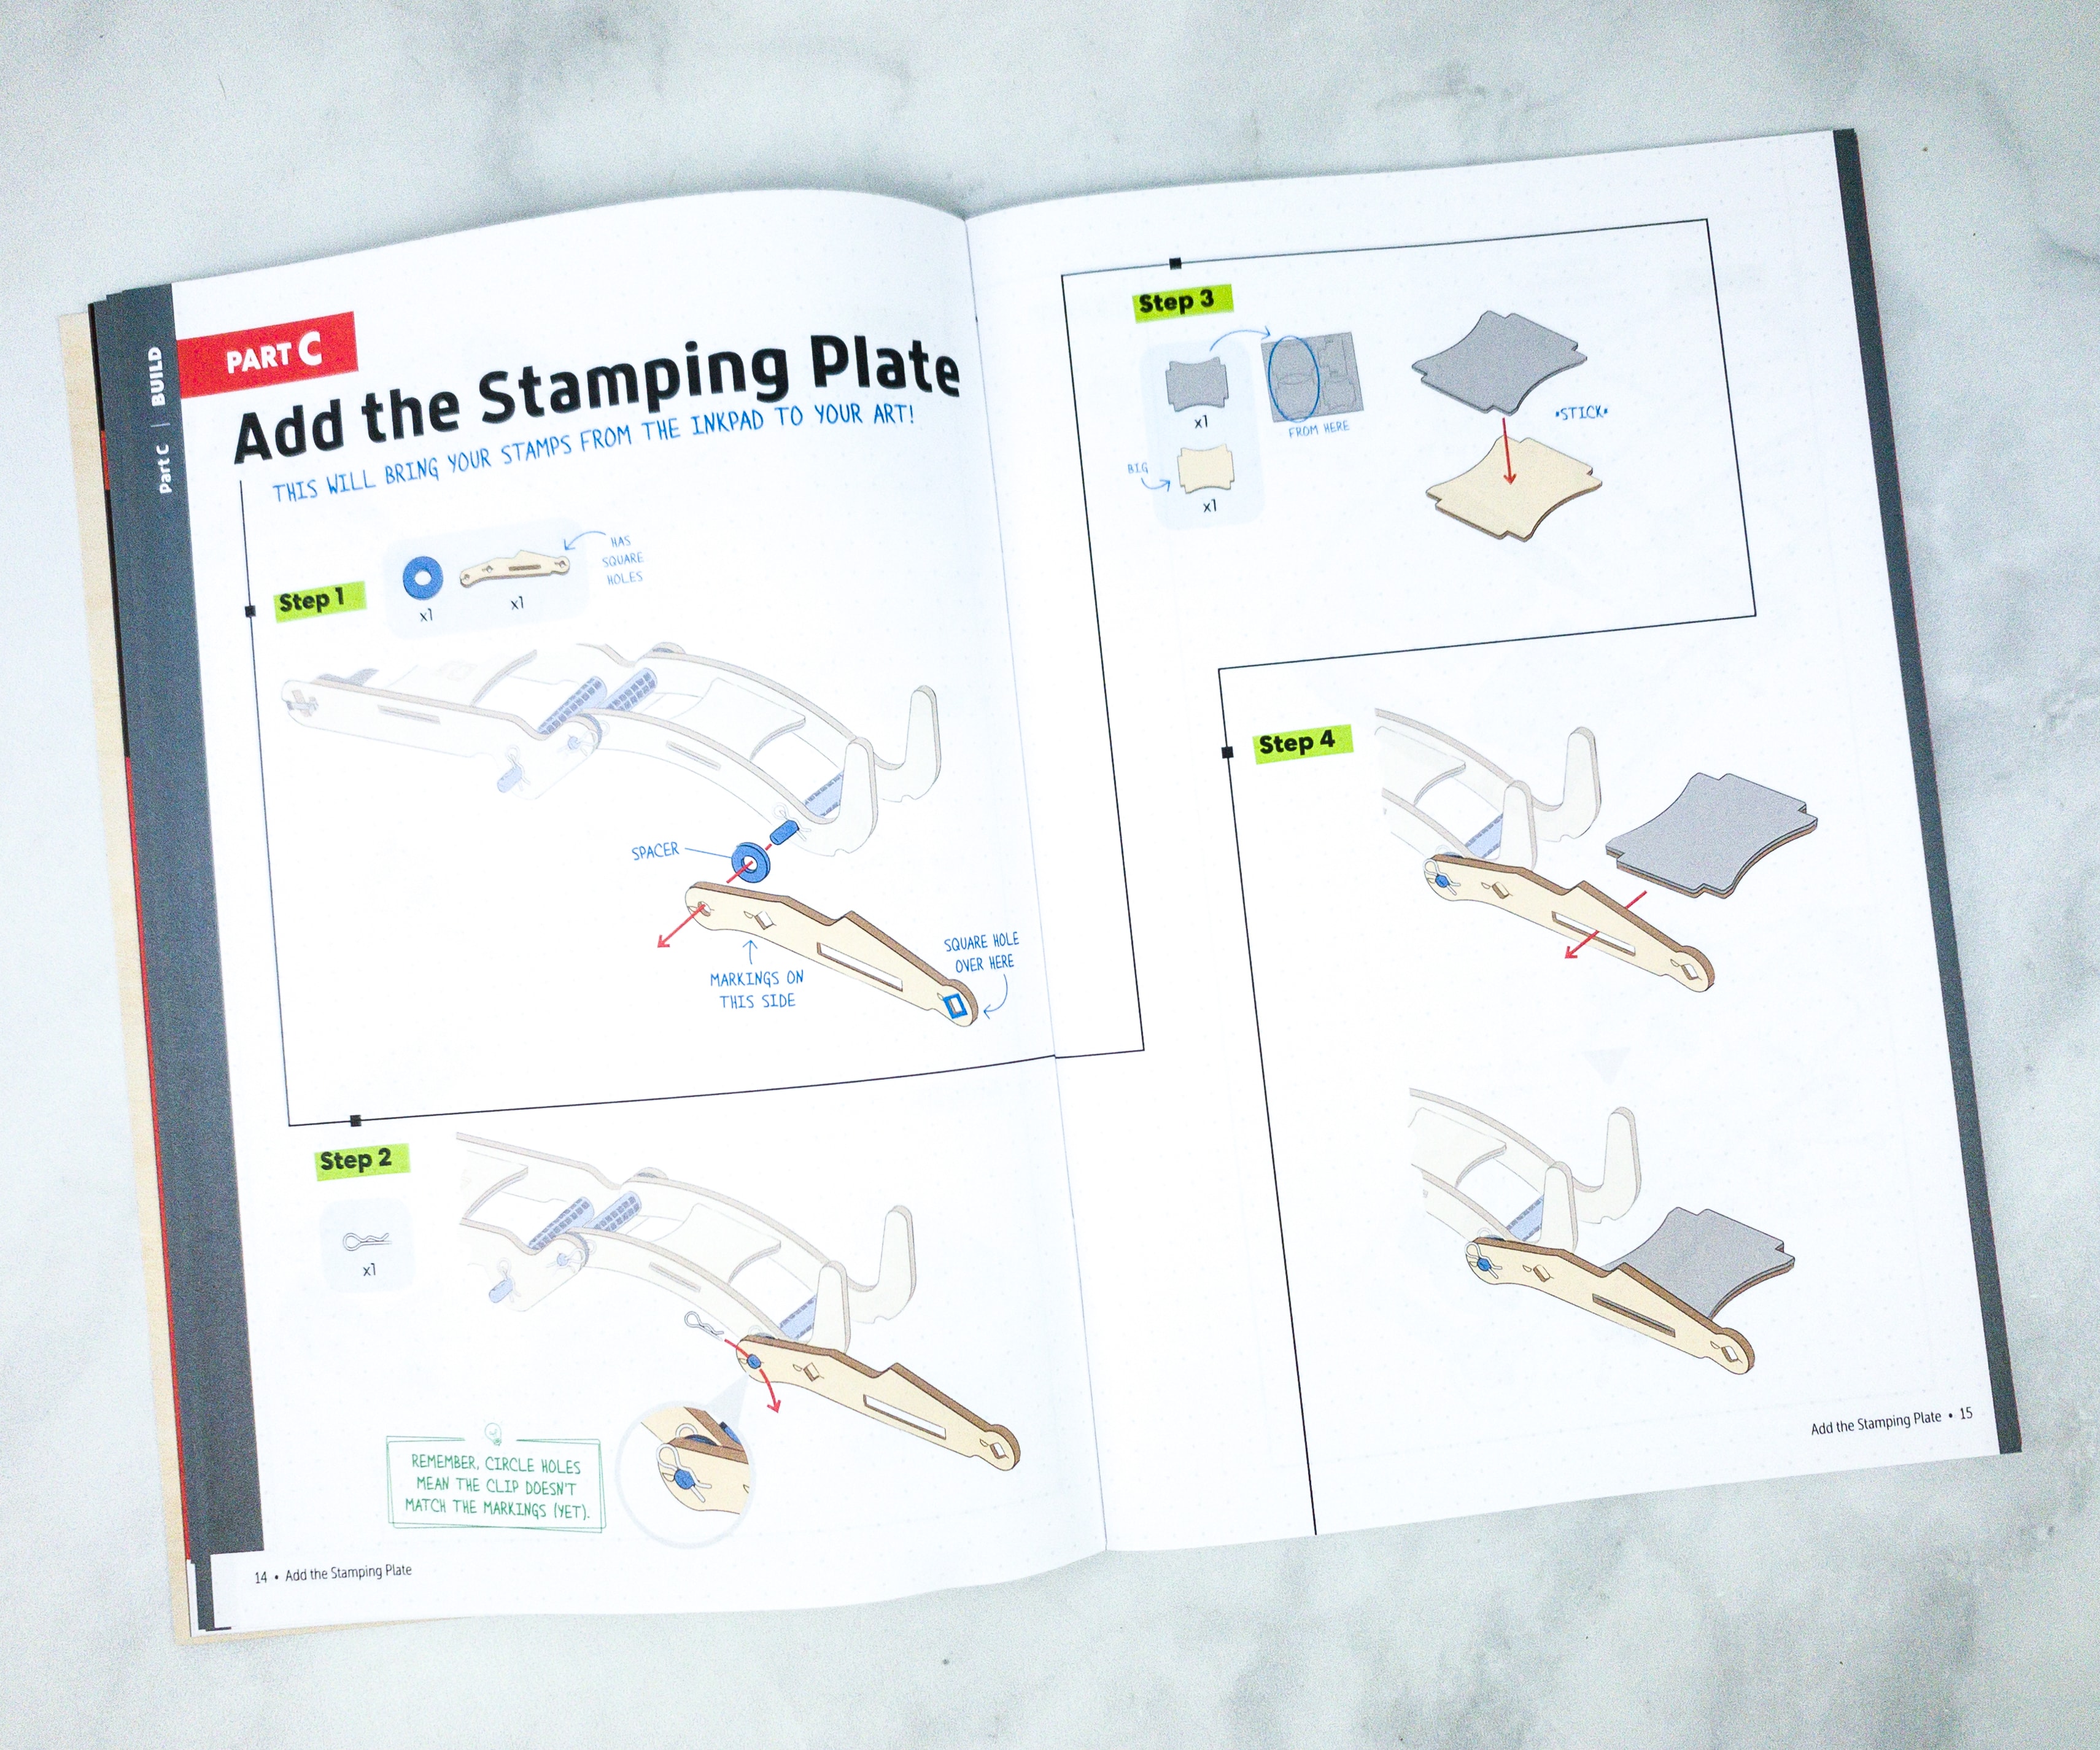
The stamping plate brings the stamps from the ink pad to your art!
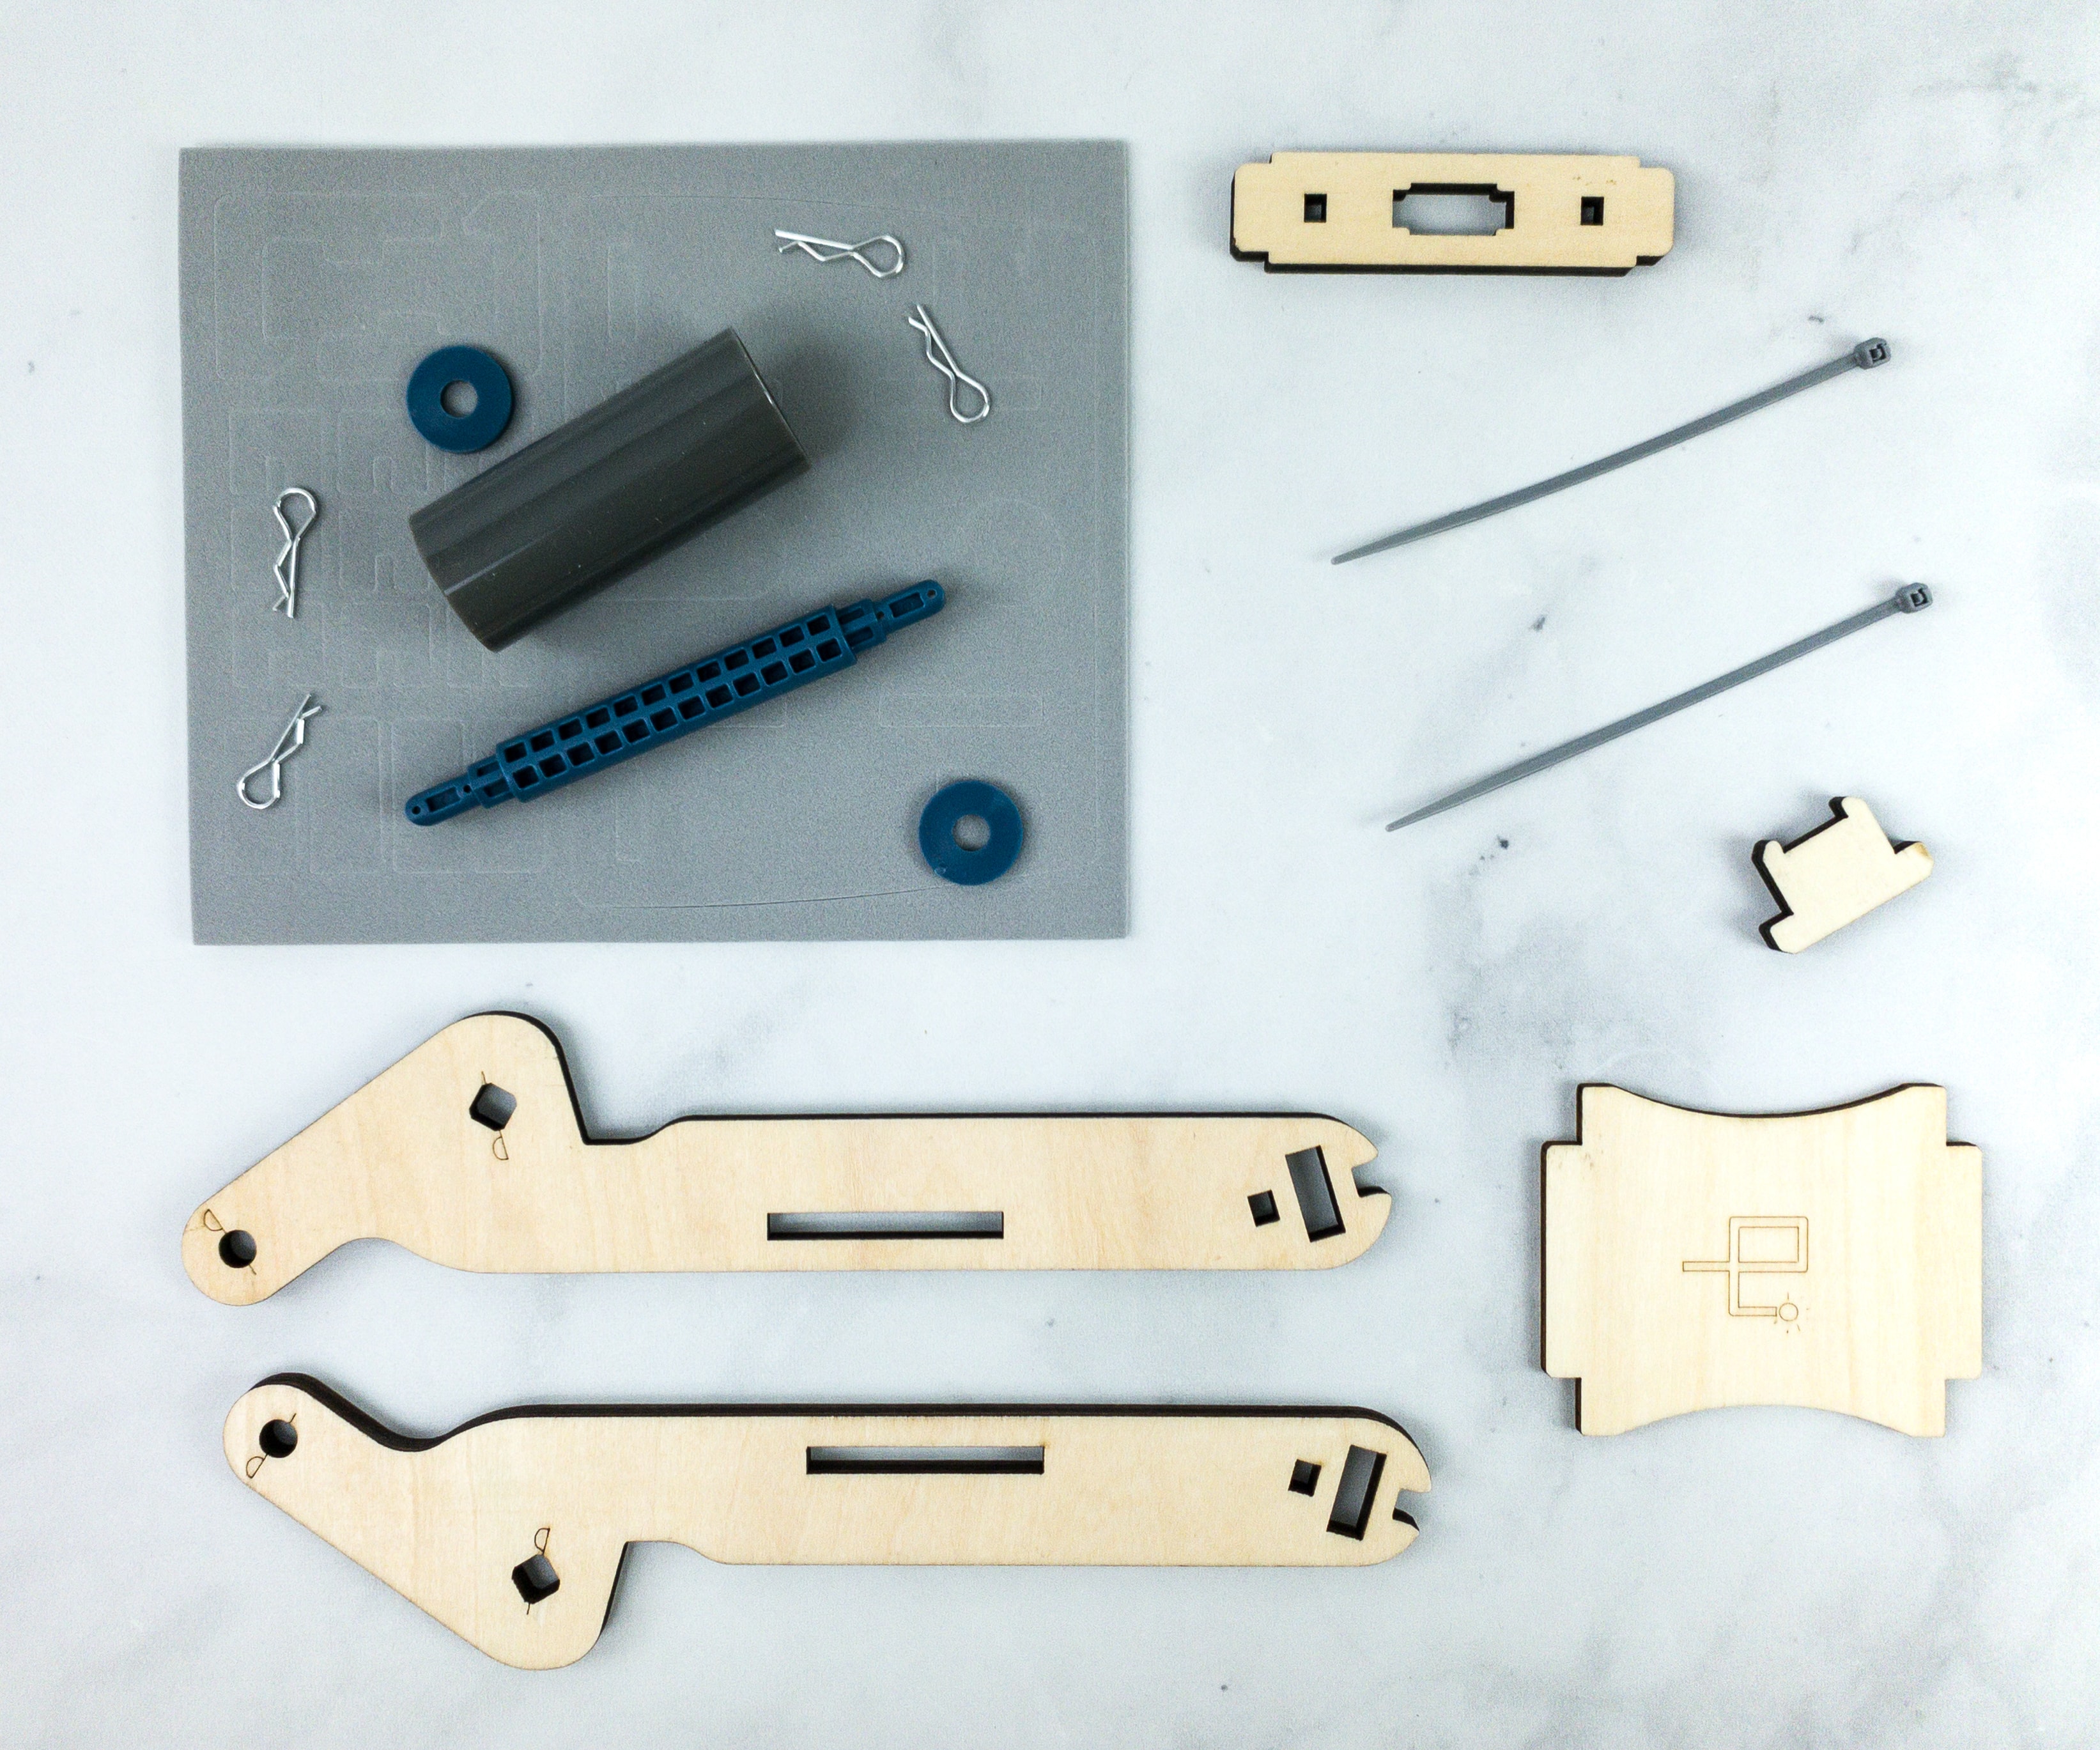
For this, we also used a wooden set, support rods, R-clips, spacers, and zip ties.
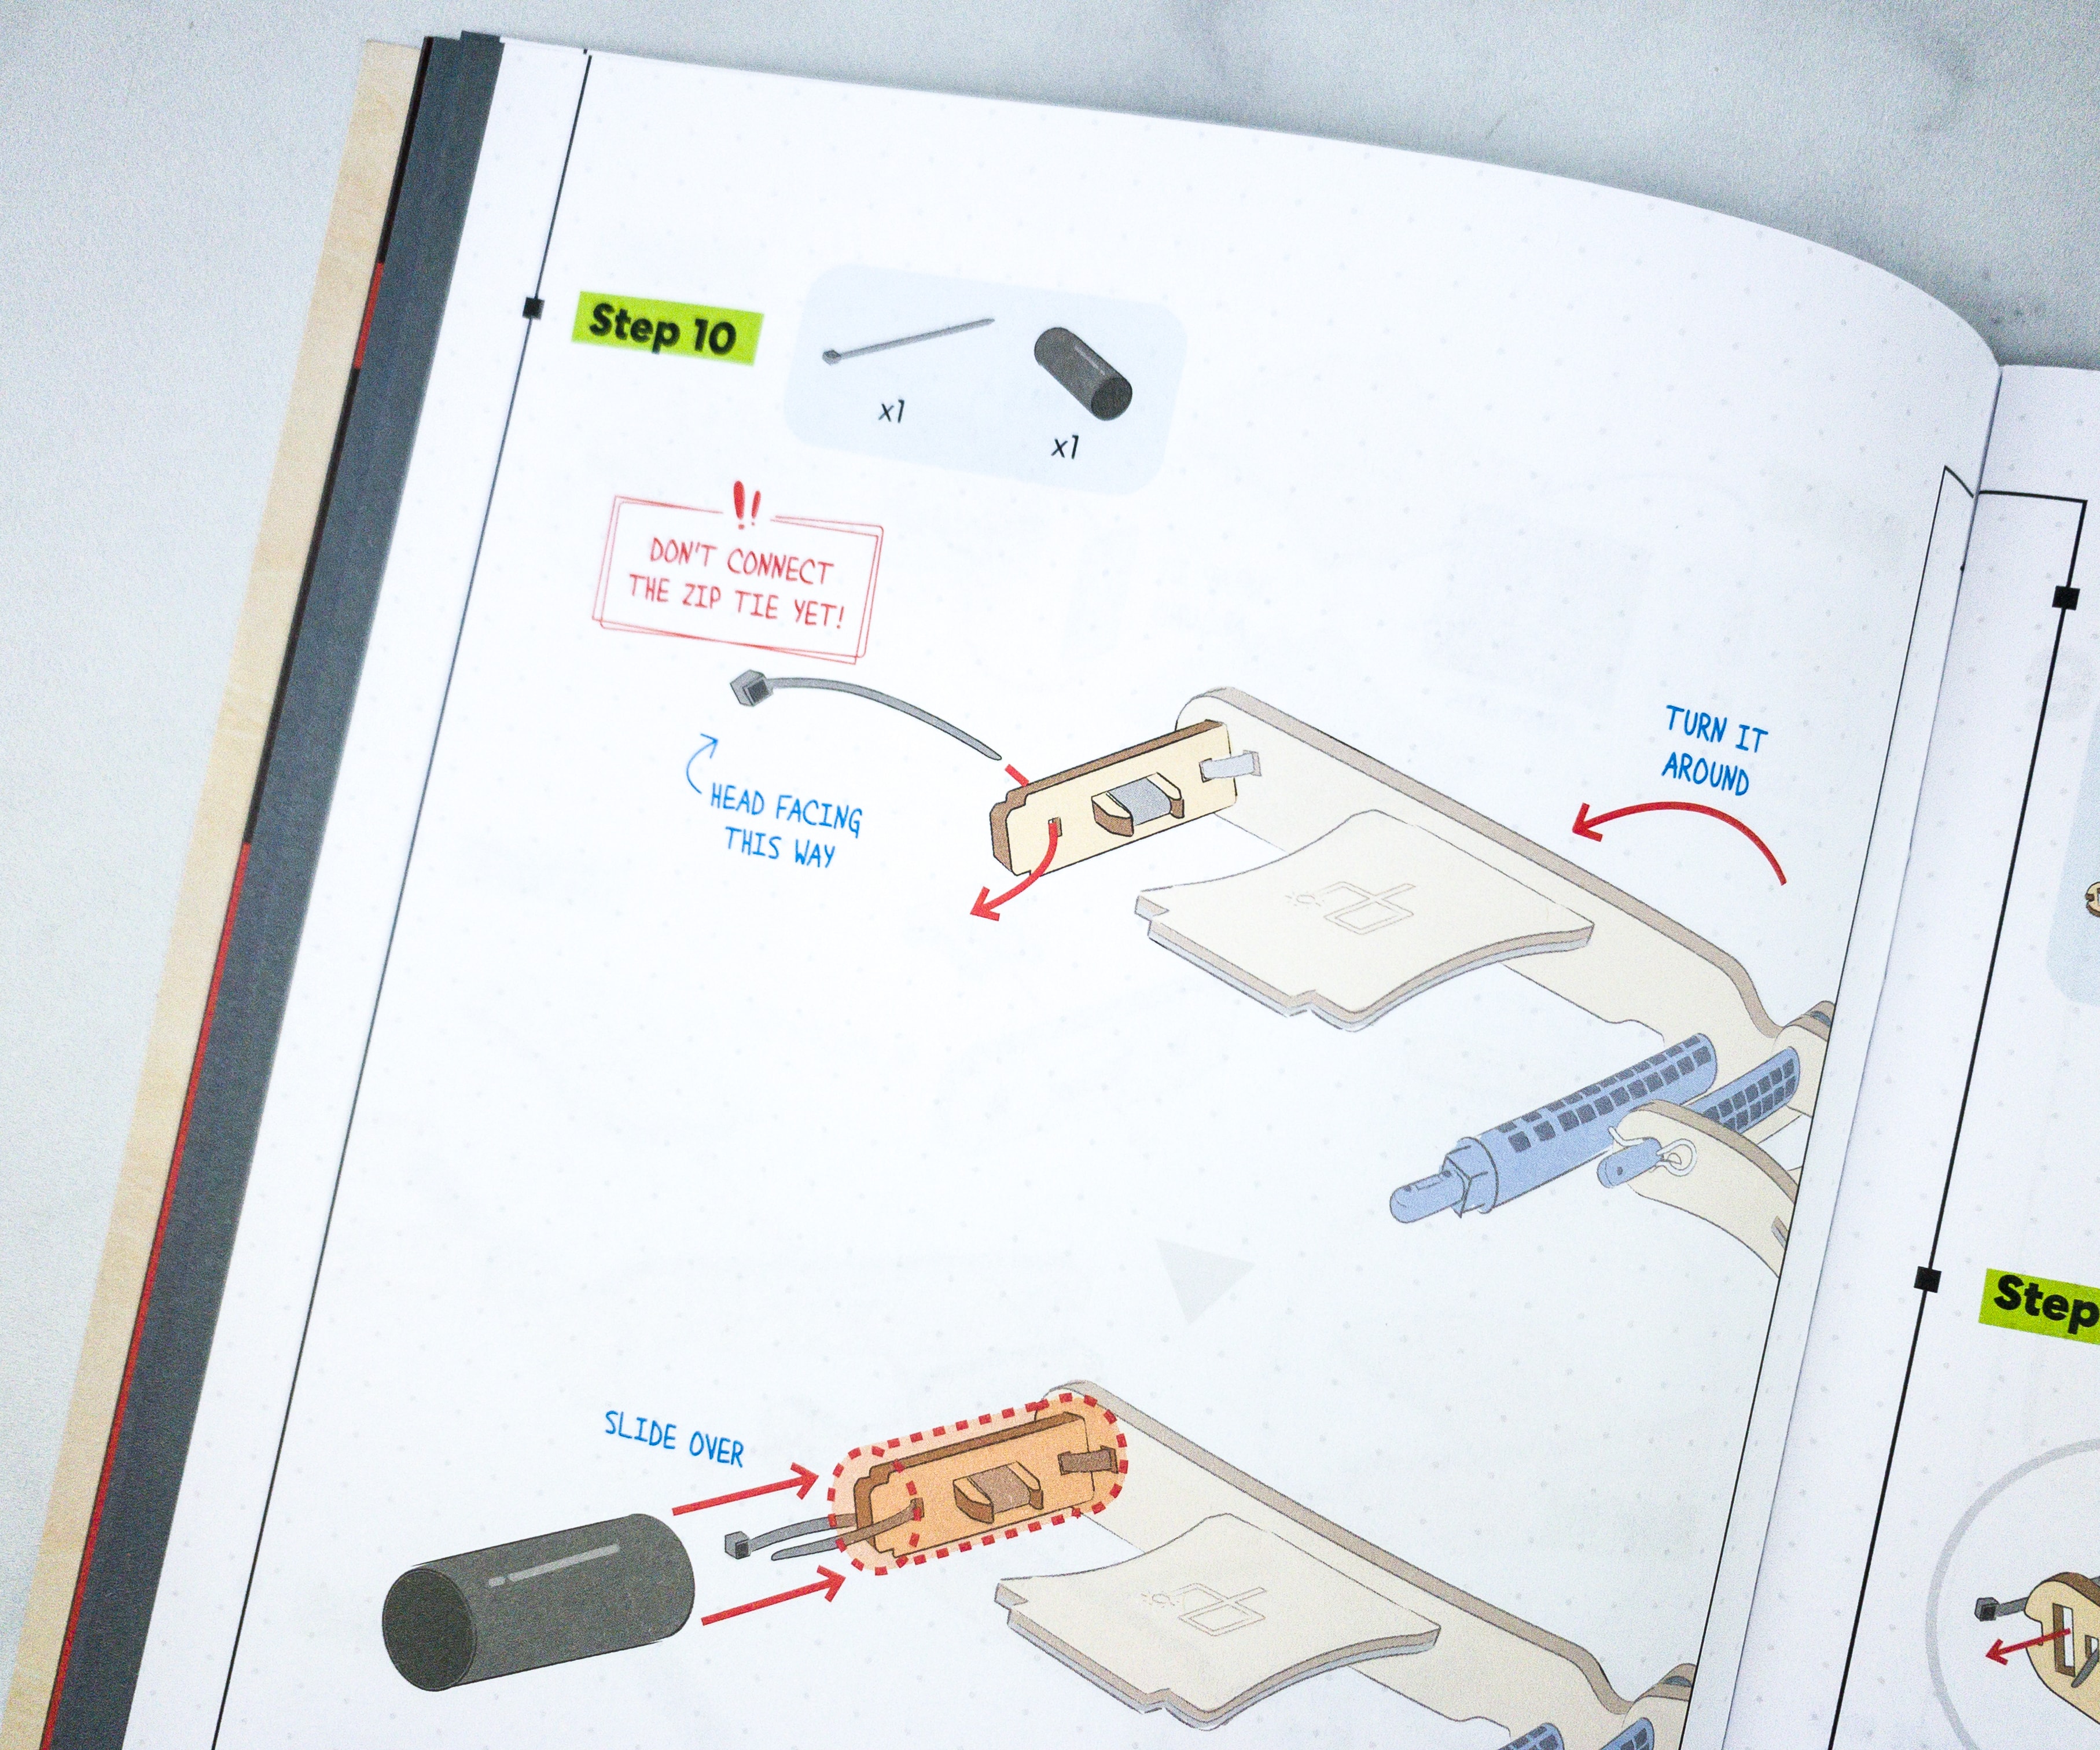
There’s a note on the booklet that the zip tie should not be locked yet until you have slid the plastic tube through it.
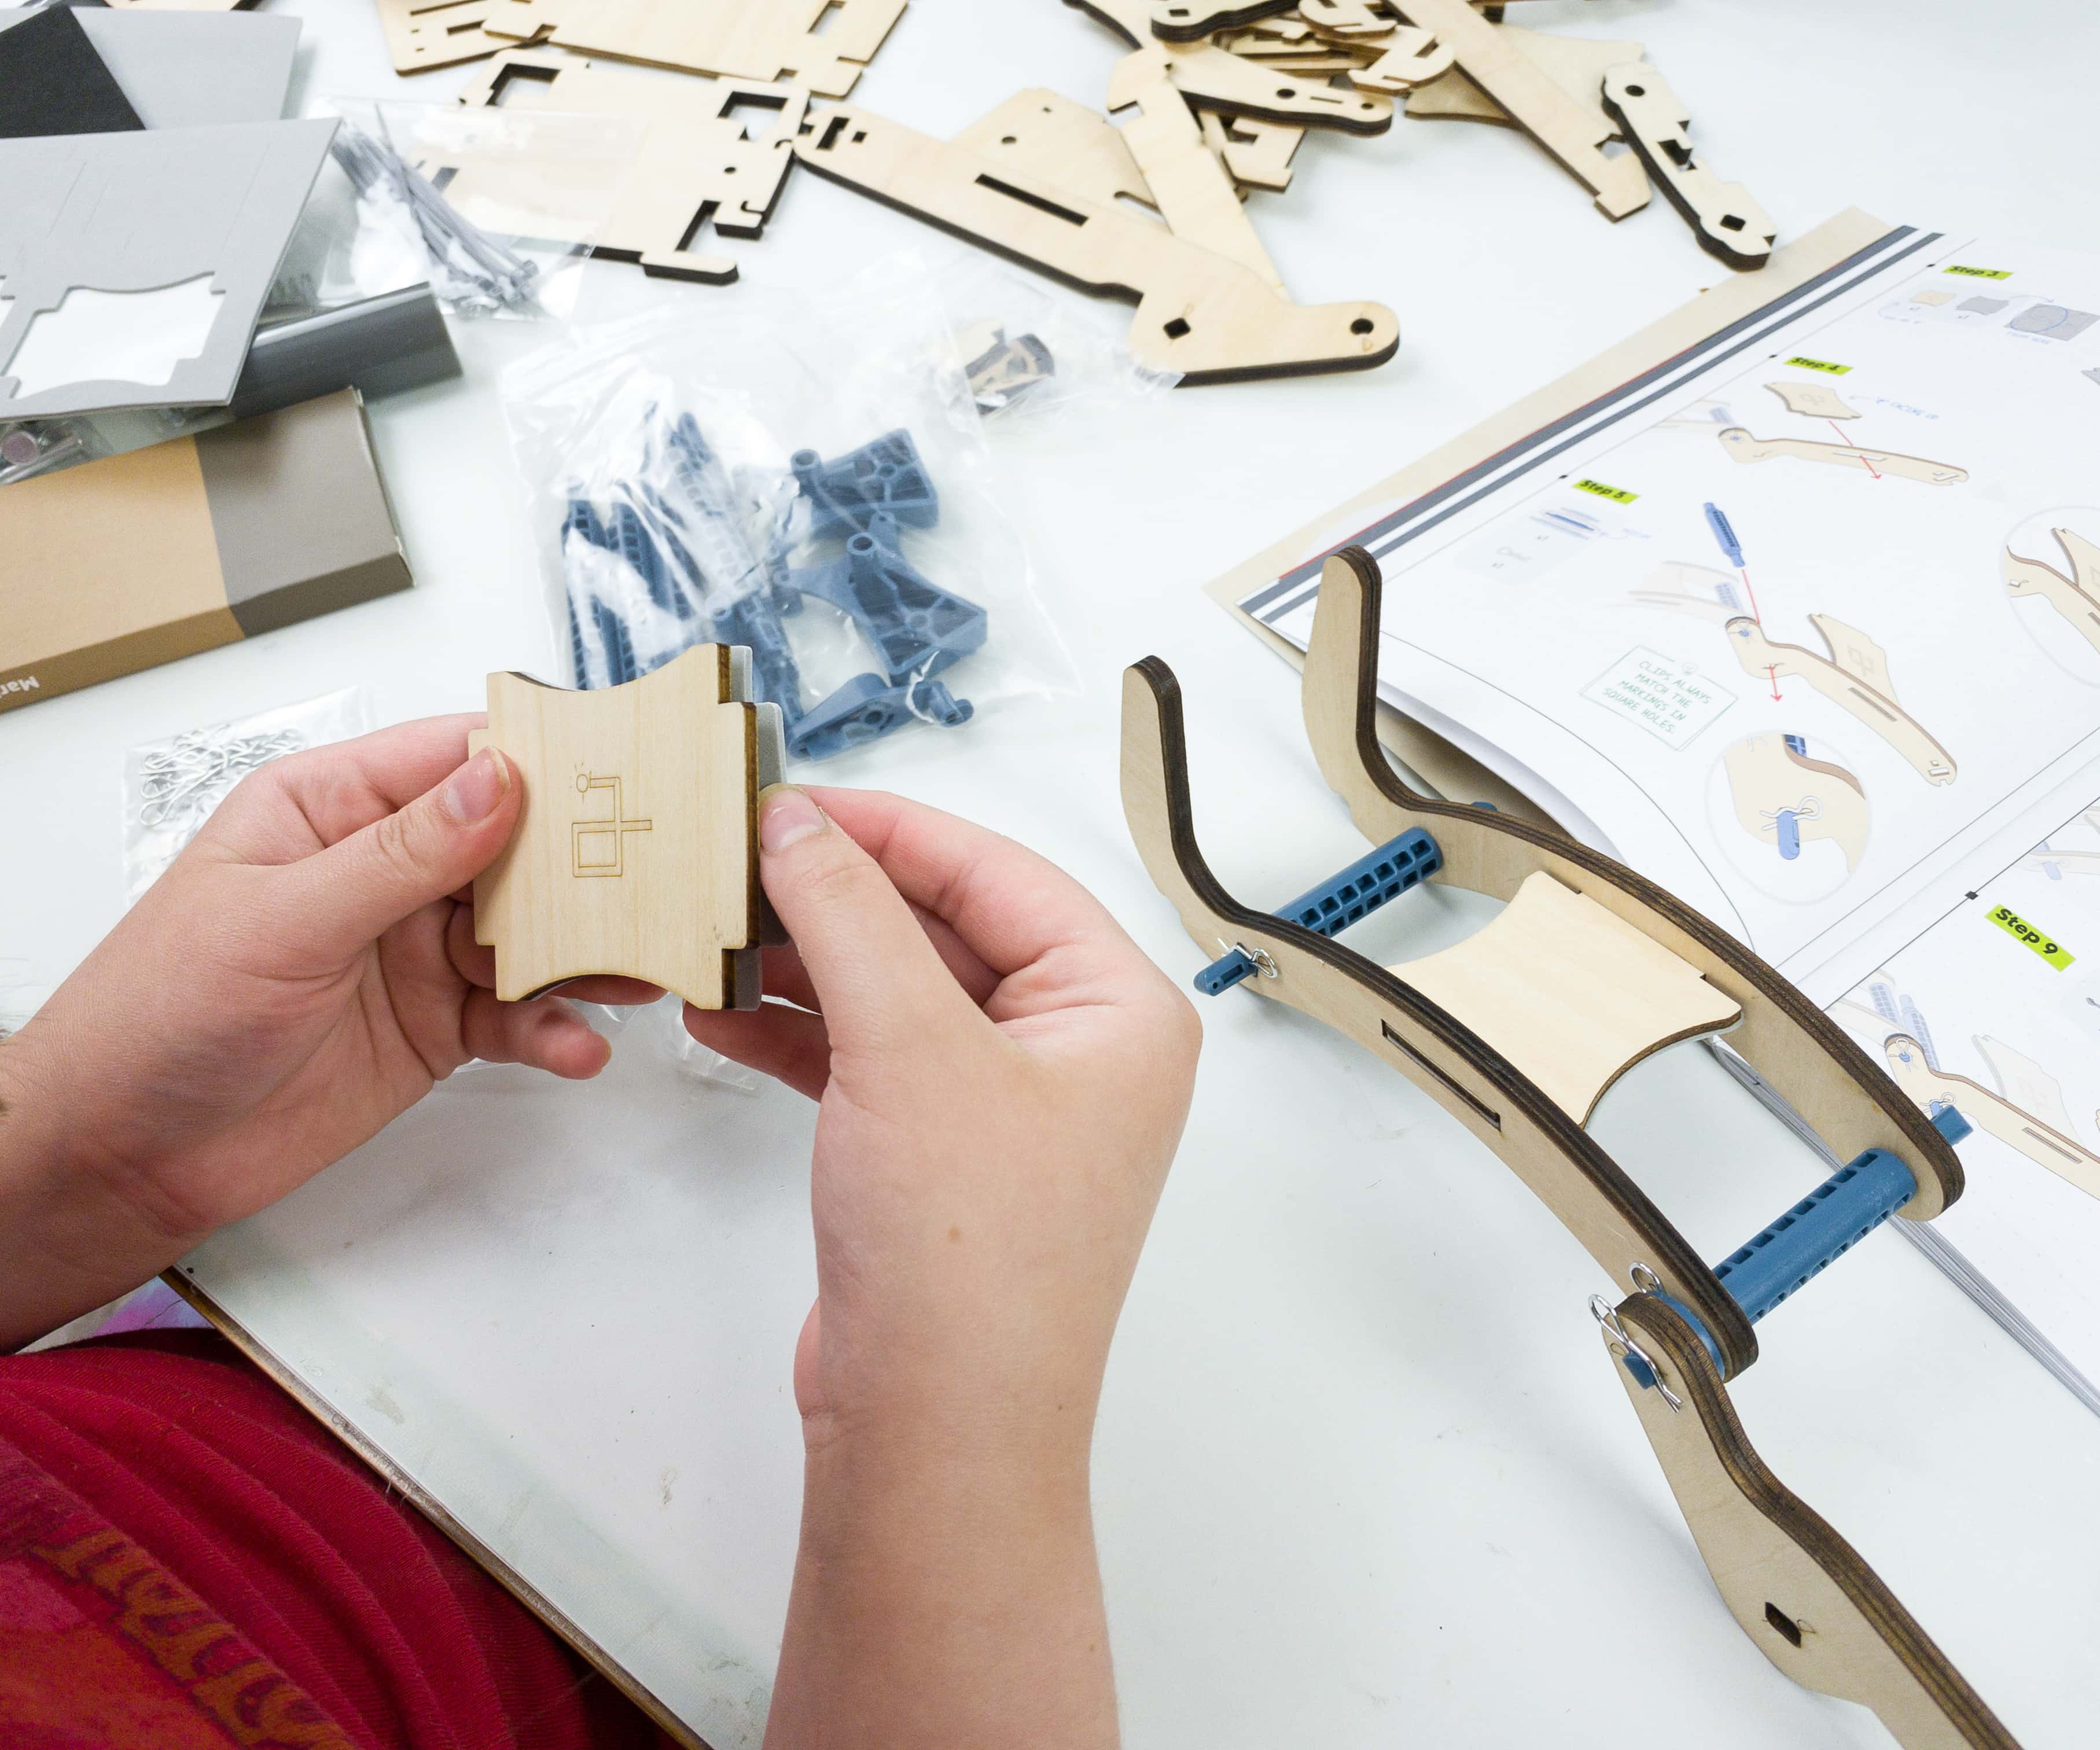
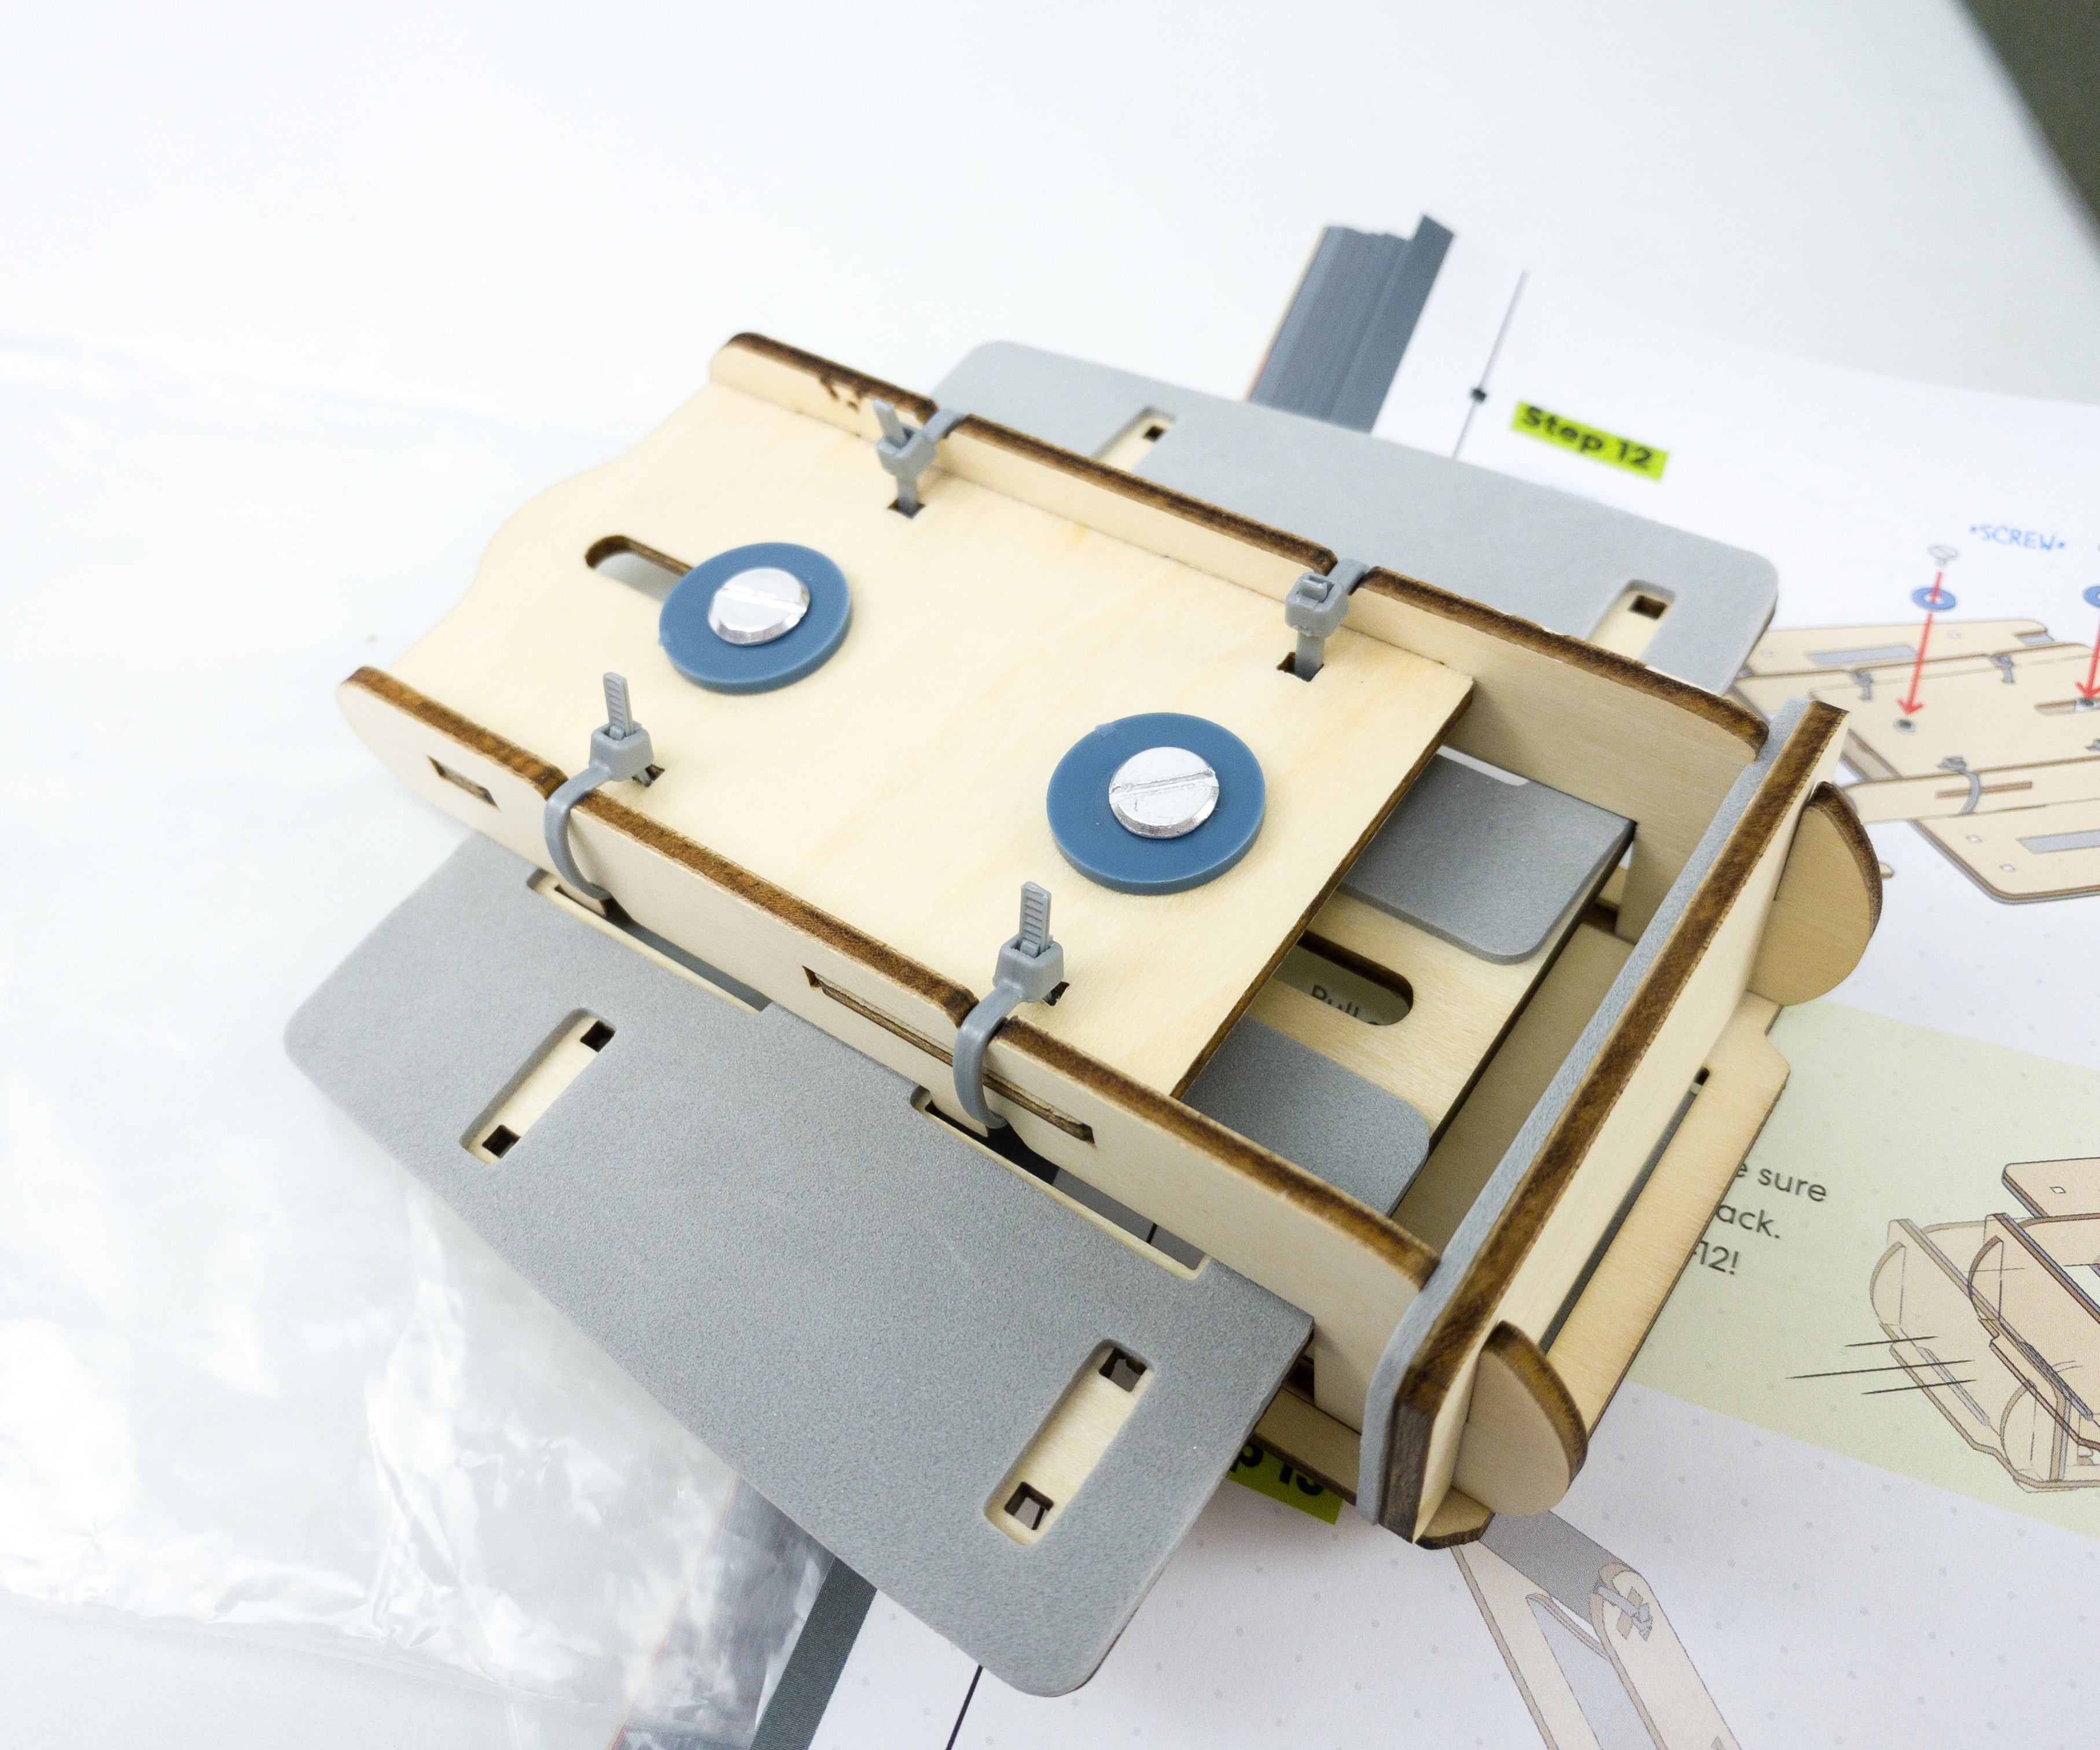
Next, my daughter grabbed the square-shaped stamp wood and then stuck the sticky foam in front of it.
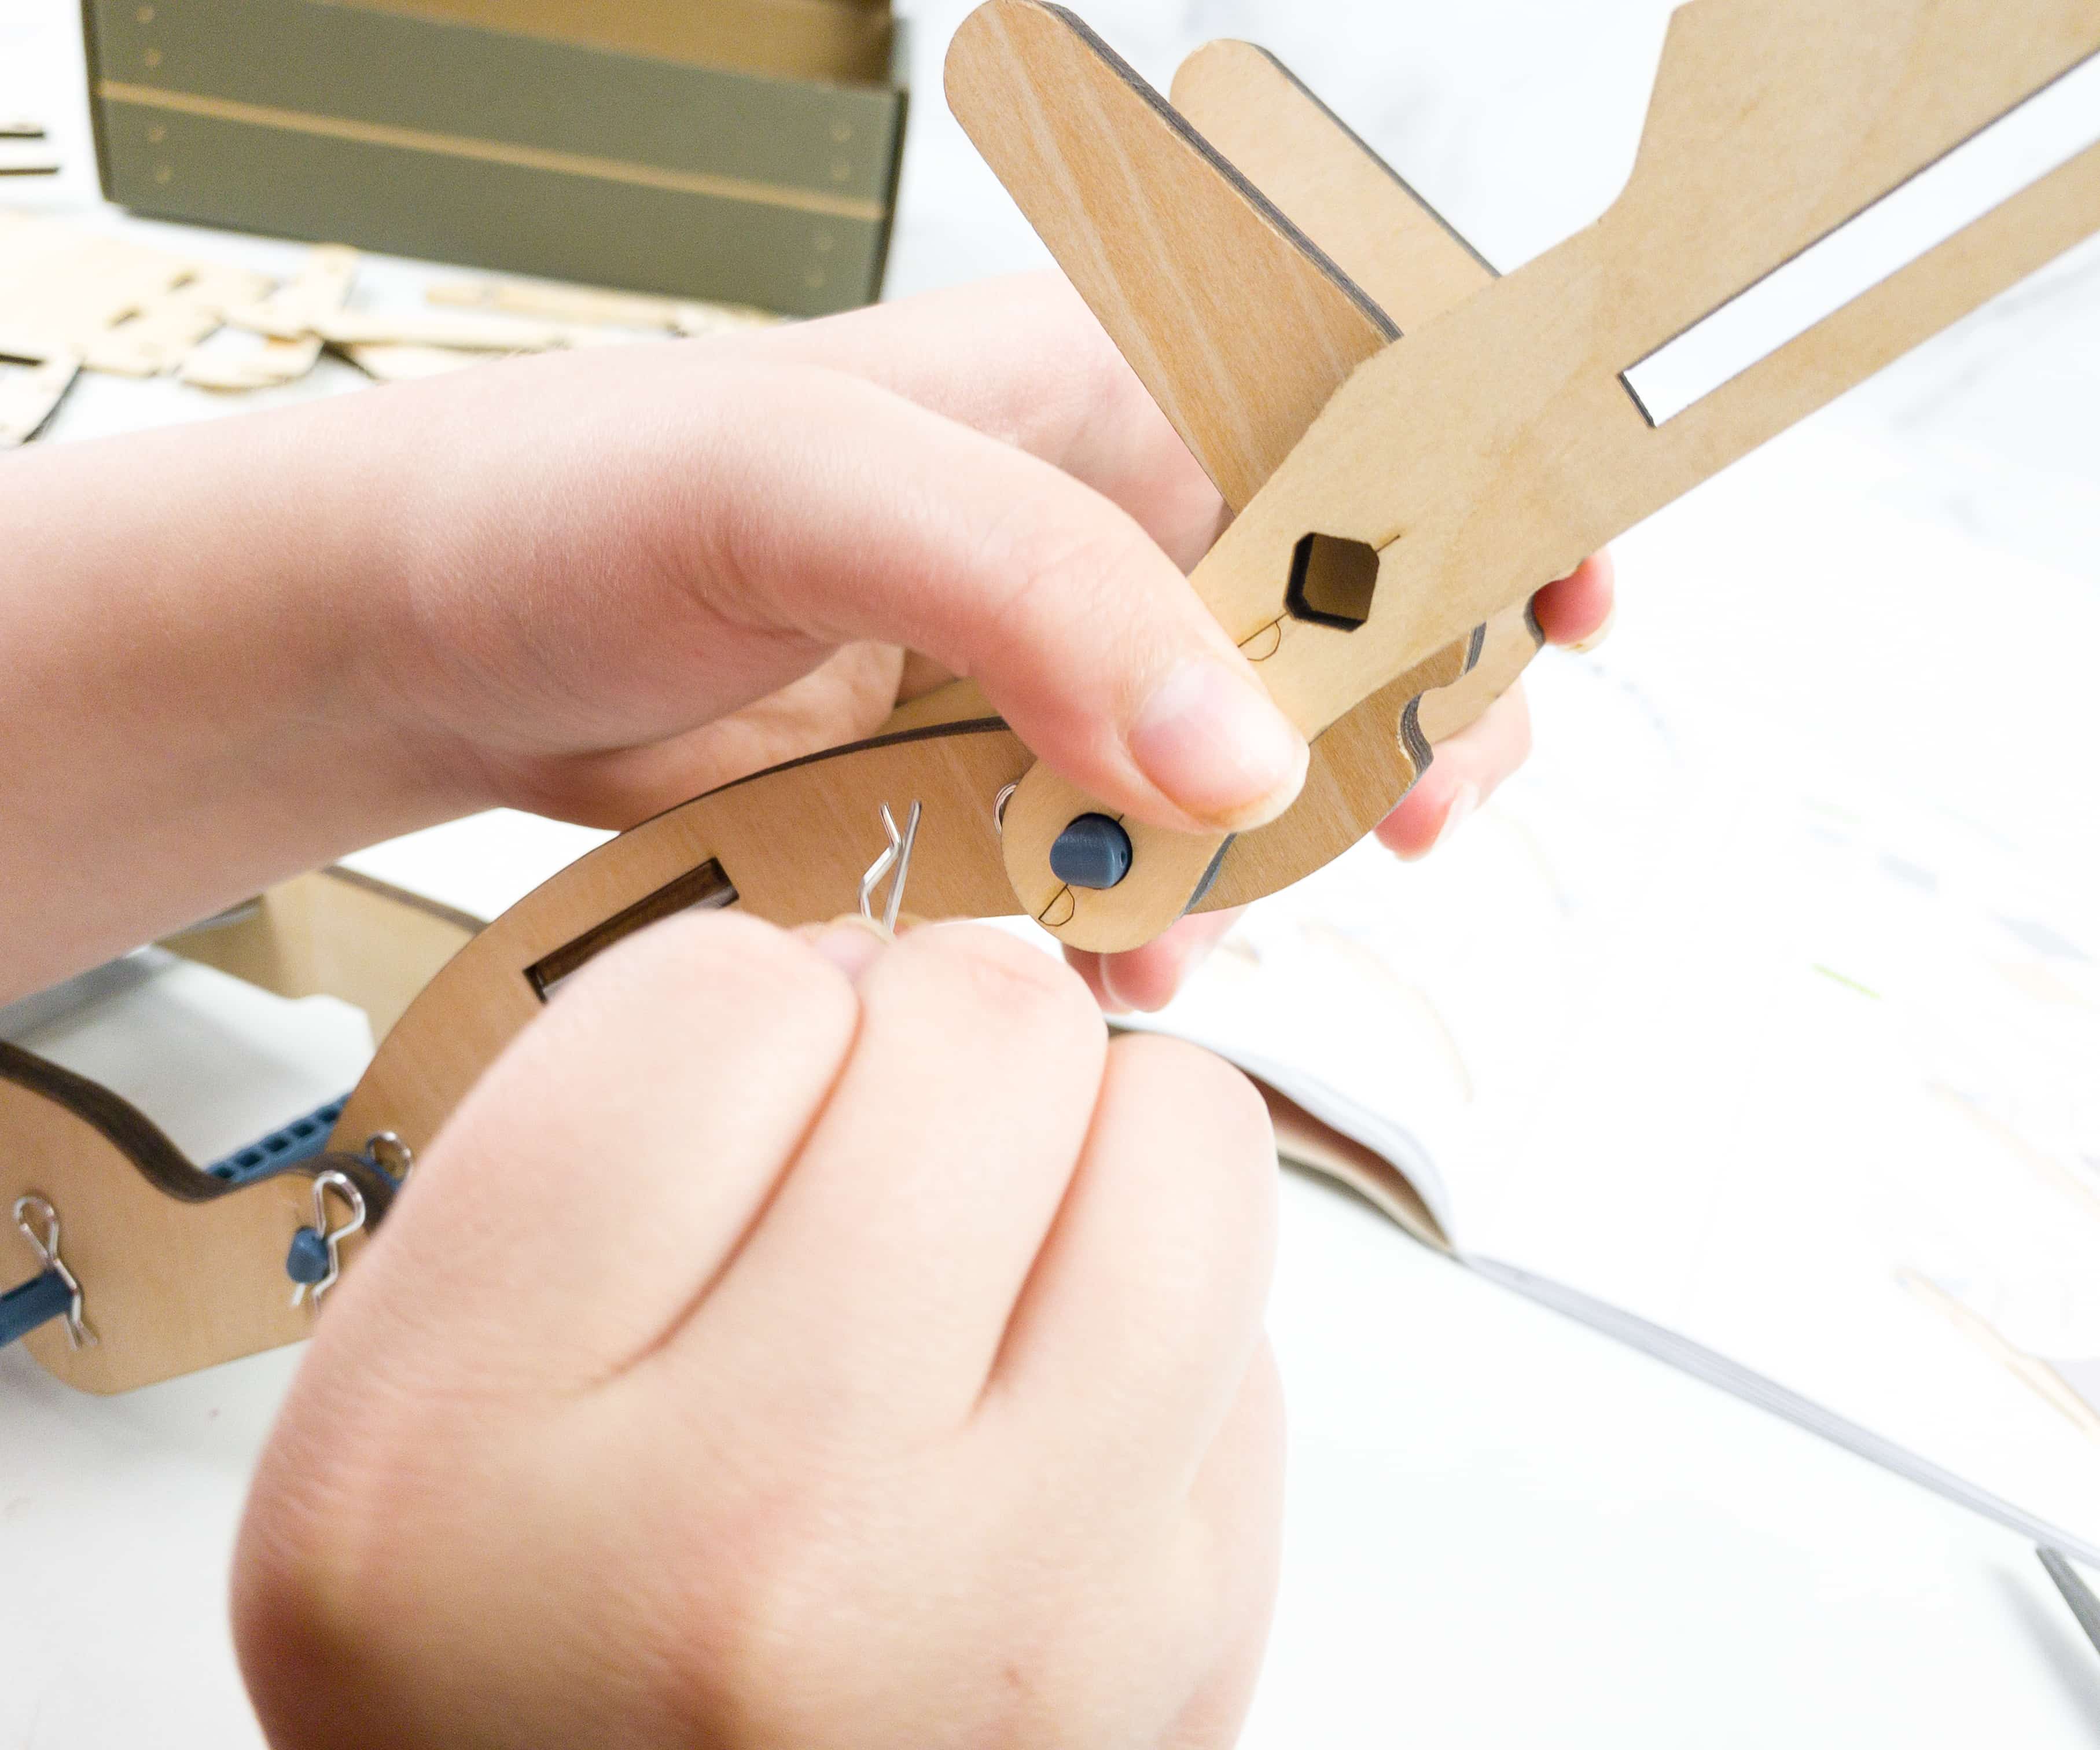
Using the rest of the R-clips, she locked the support rods on the handle, backbone, and stamp plate.

To use, simply just slide the clip through the support’s hole.
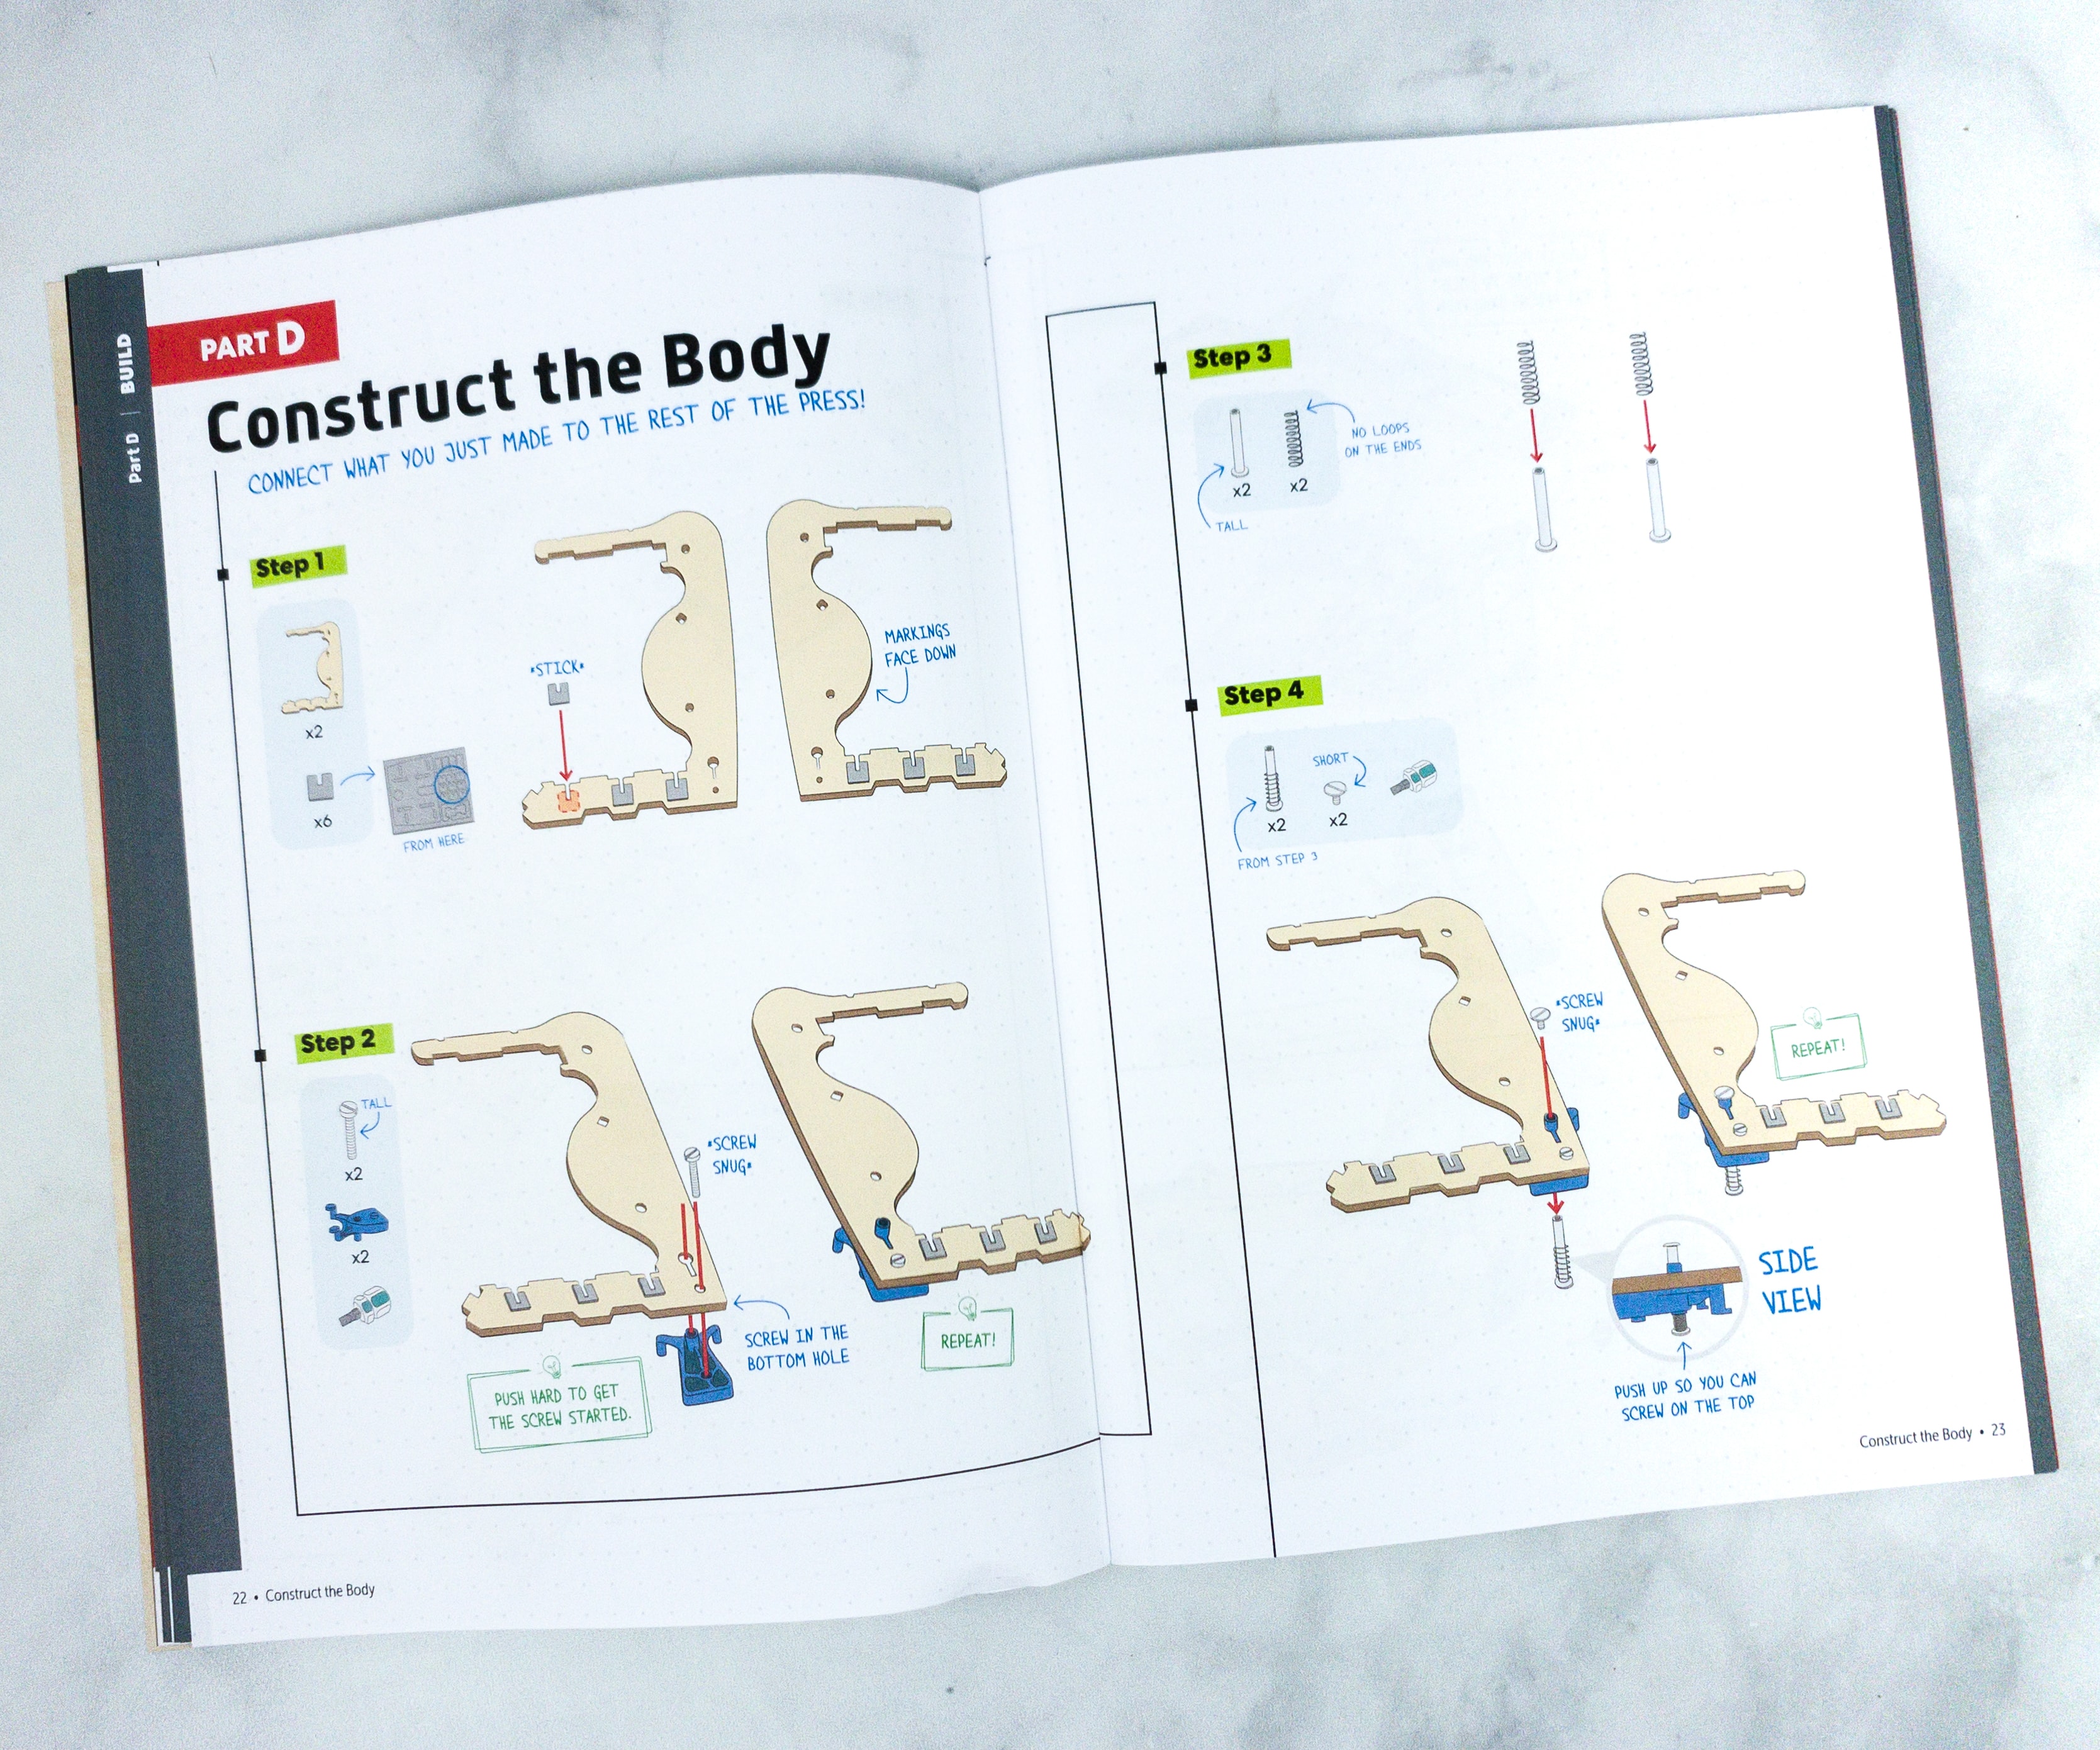
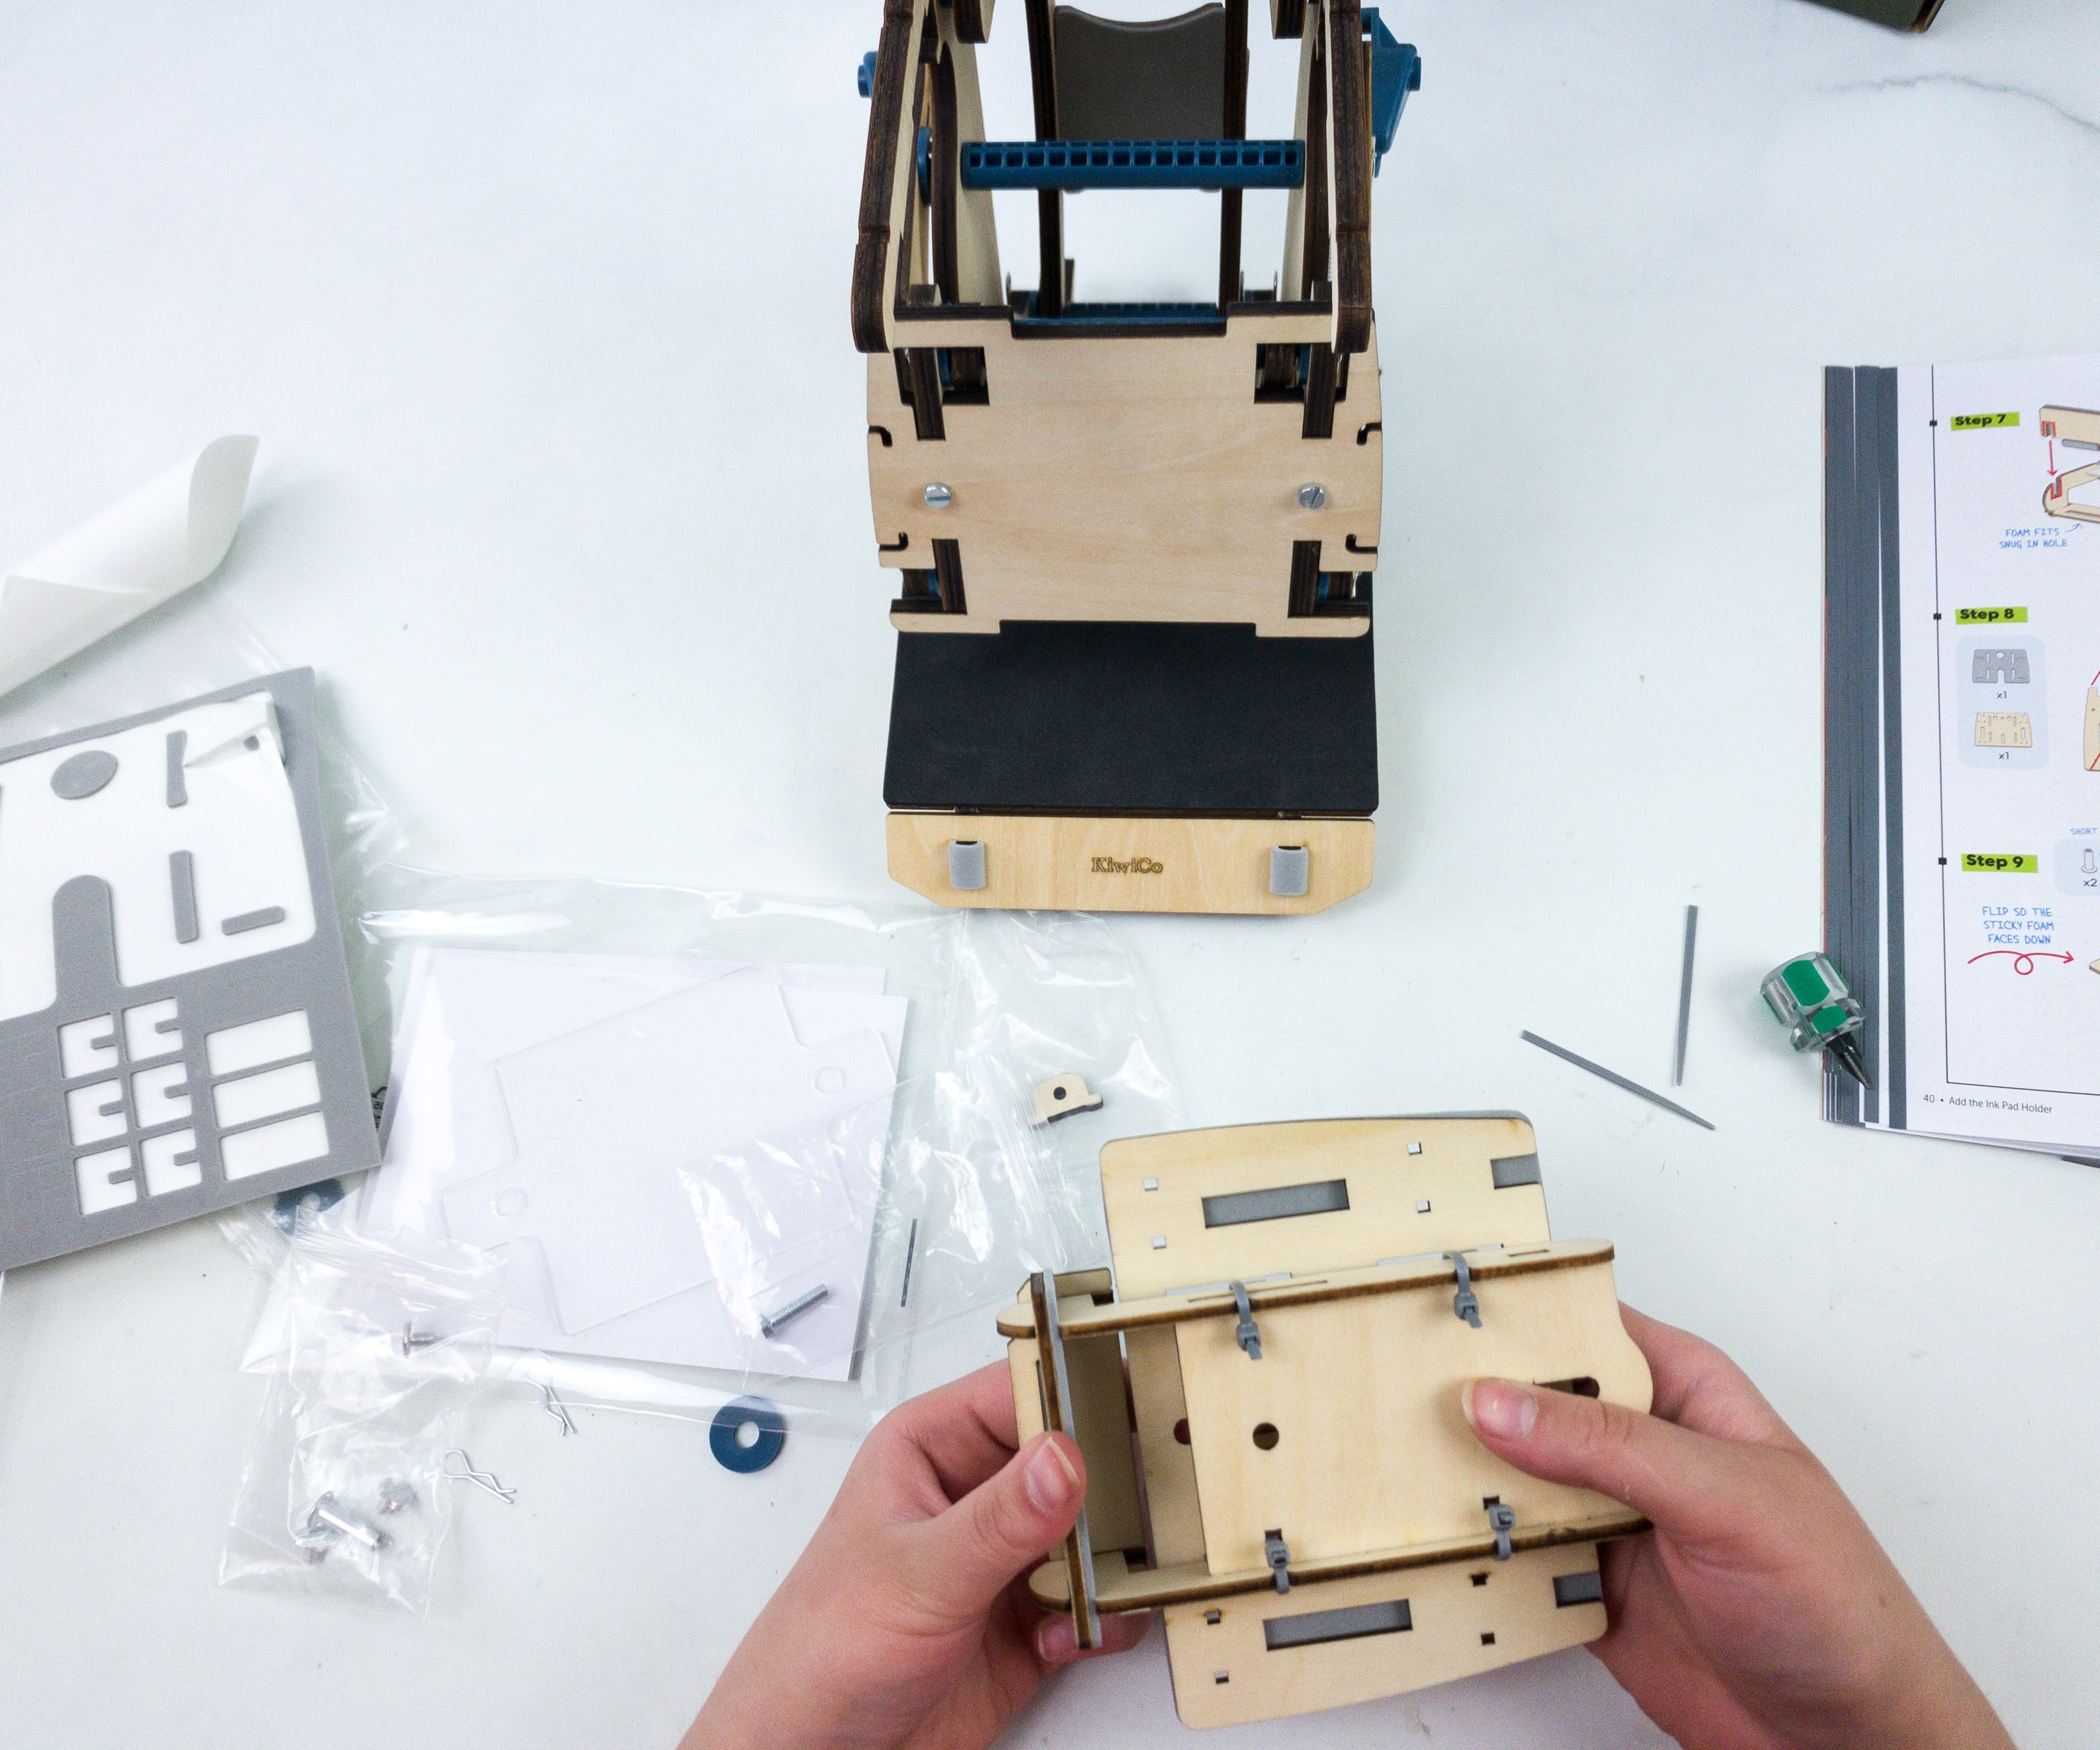
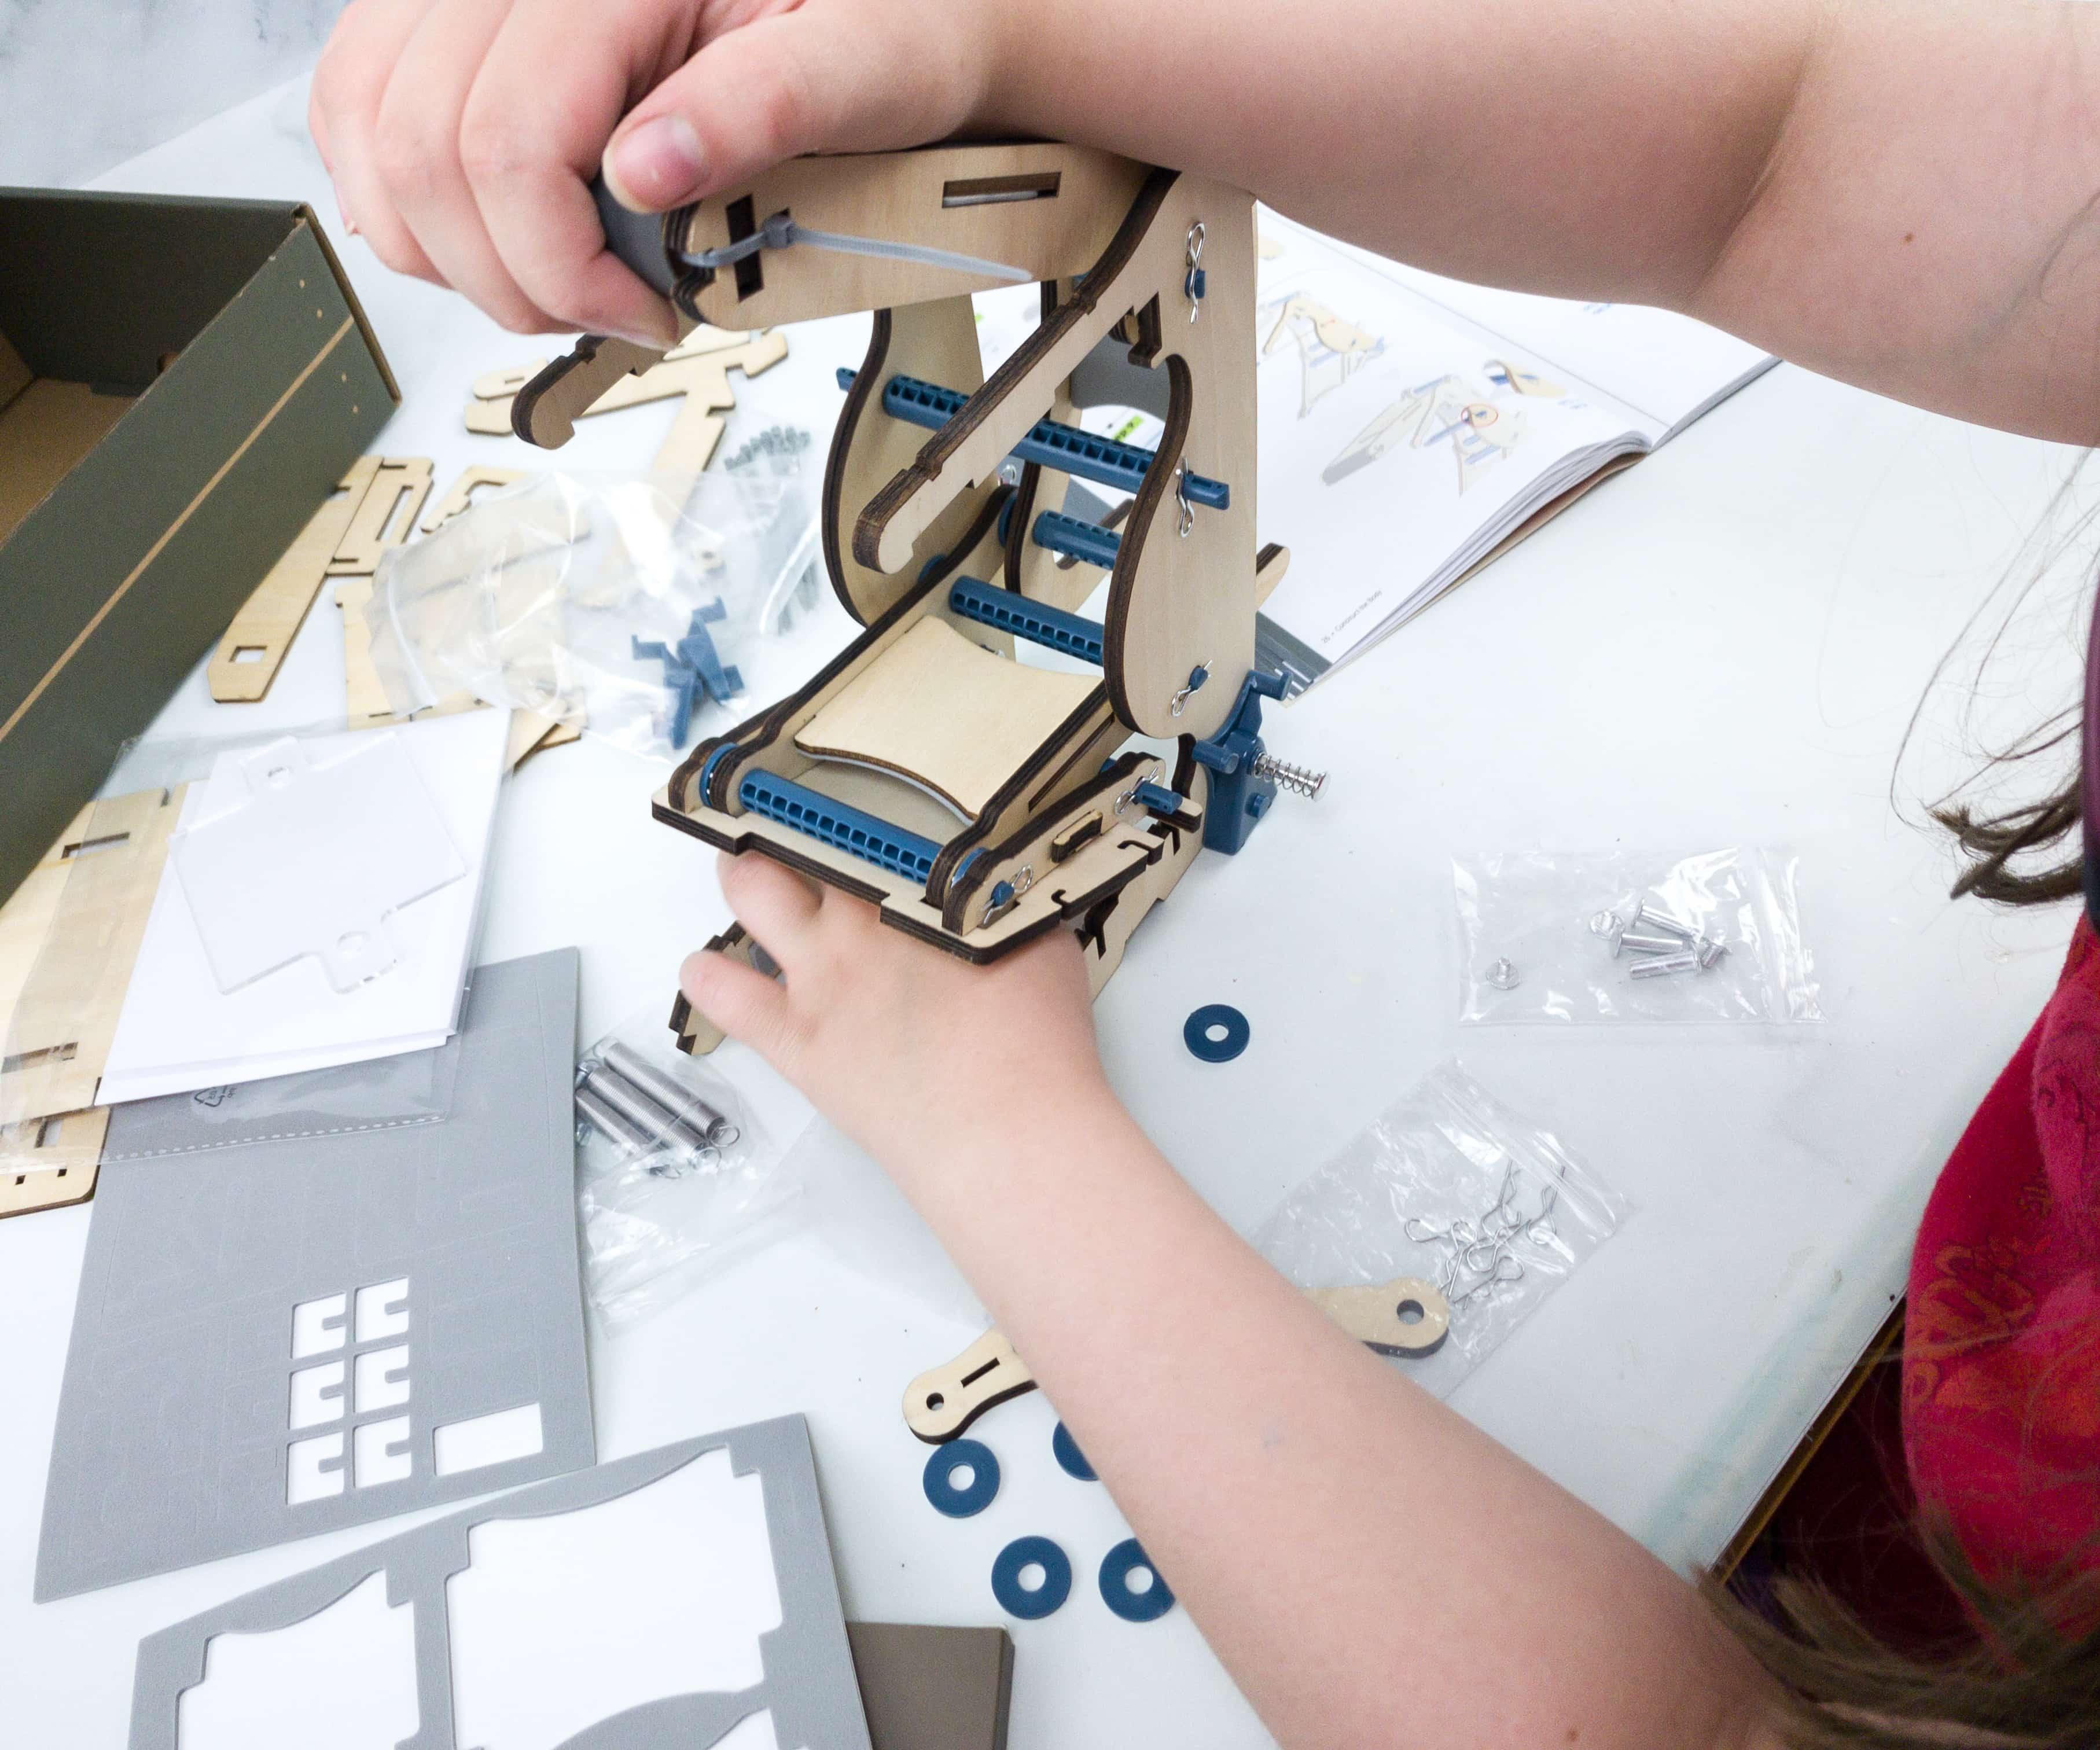
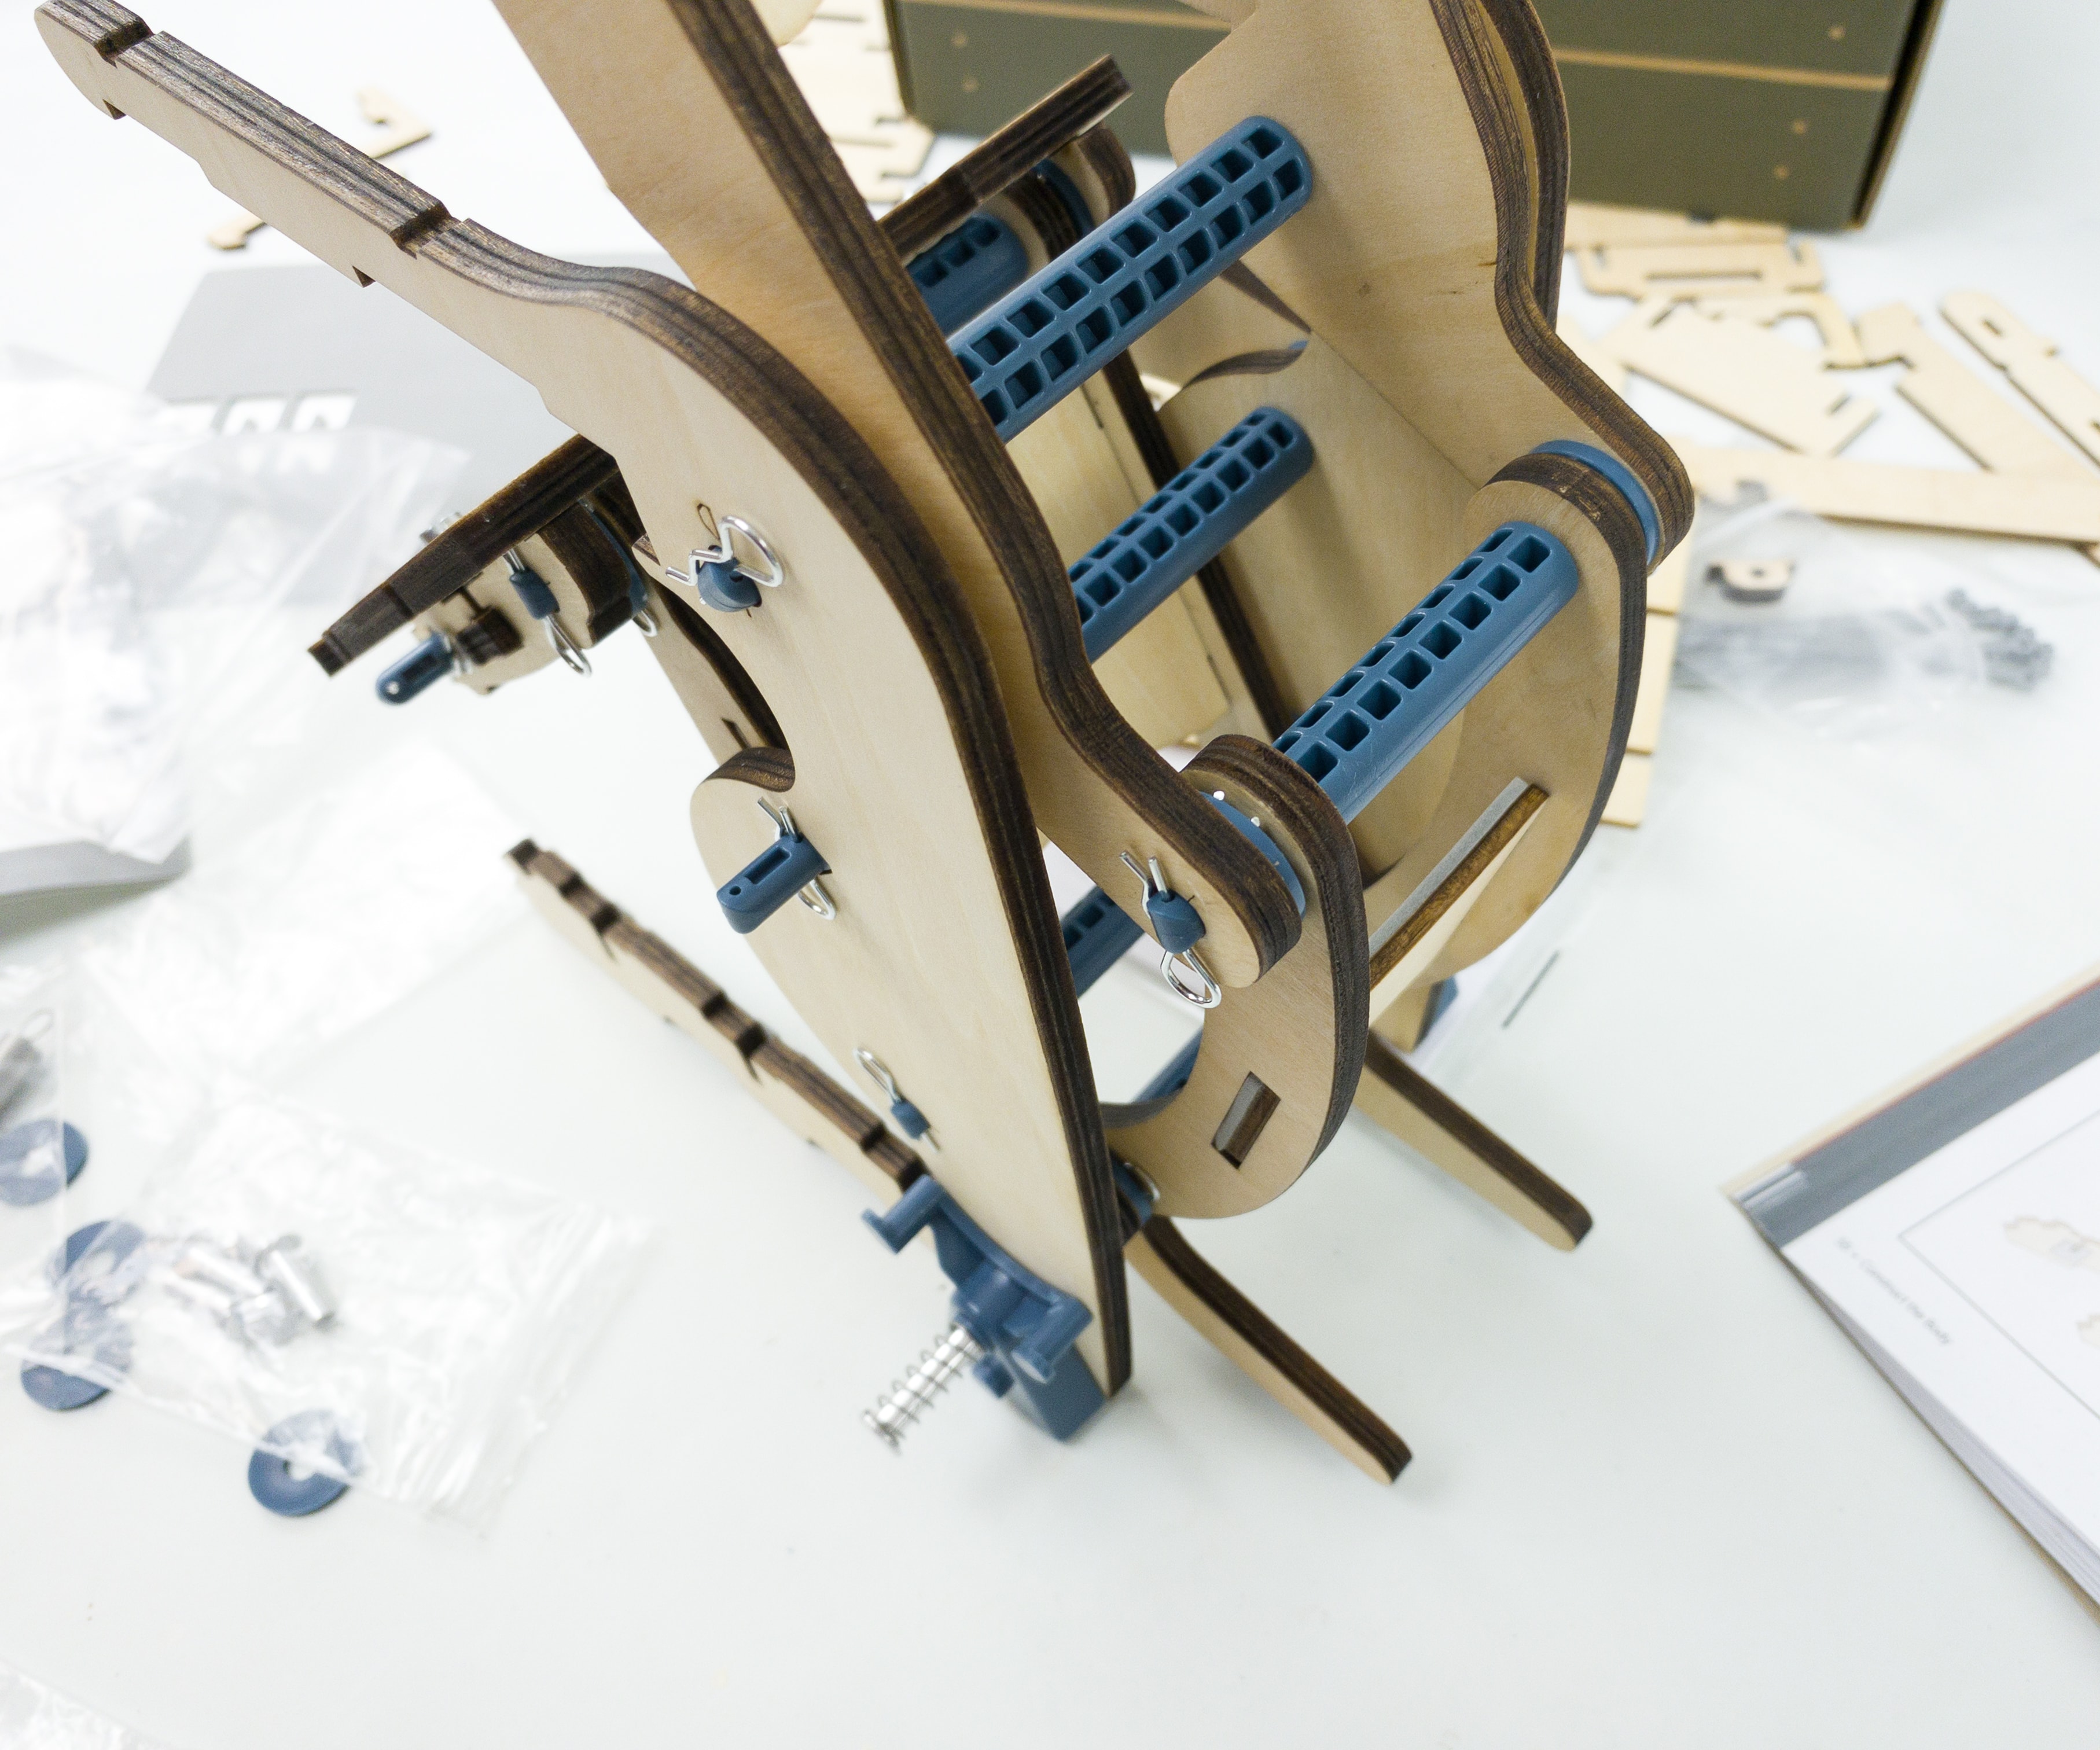
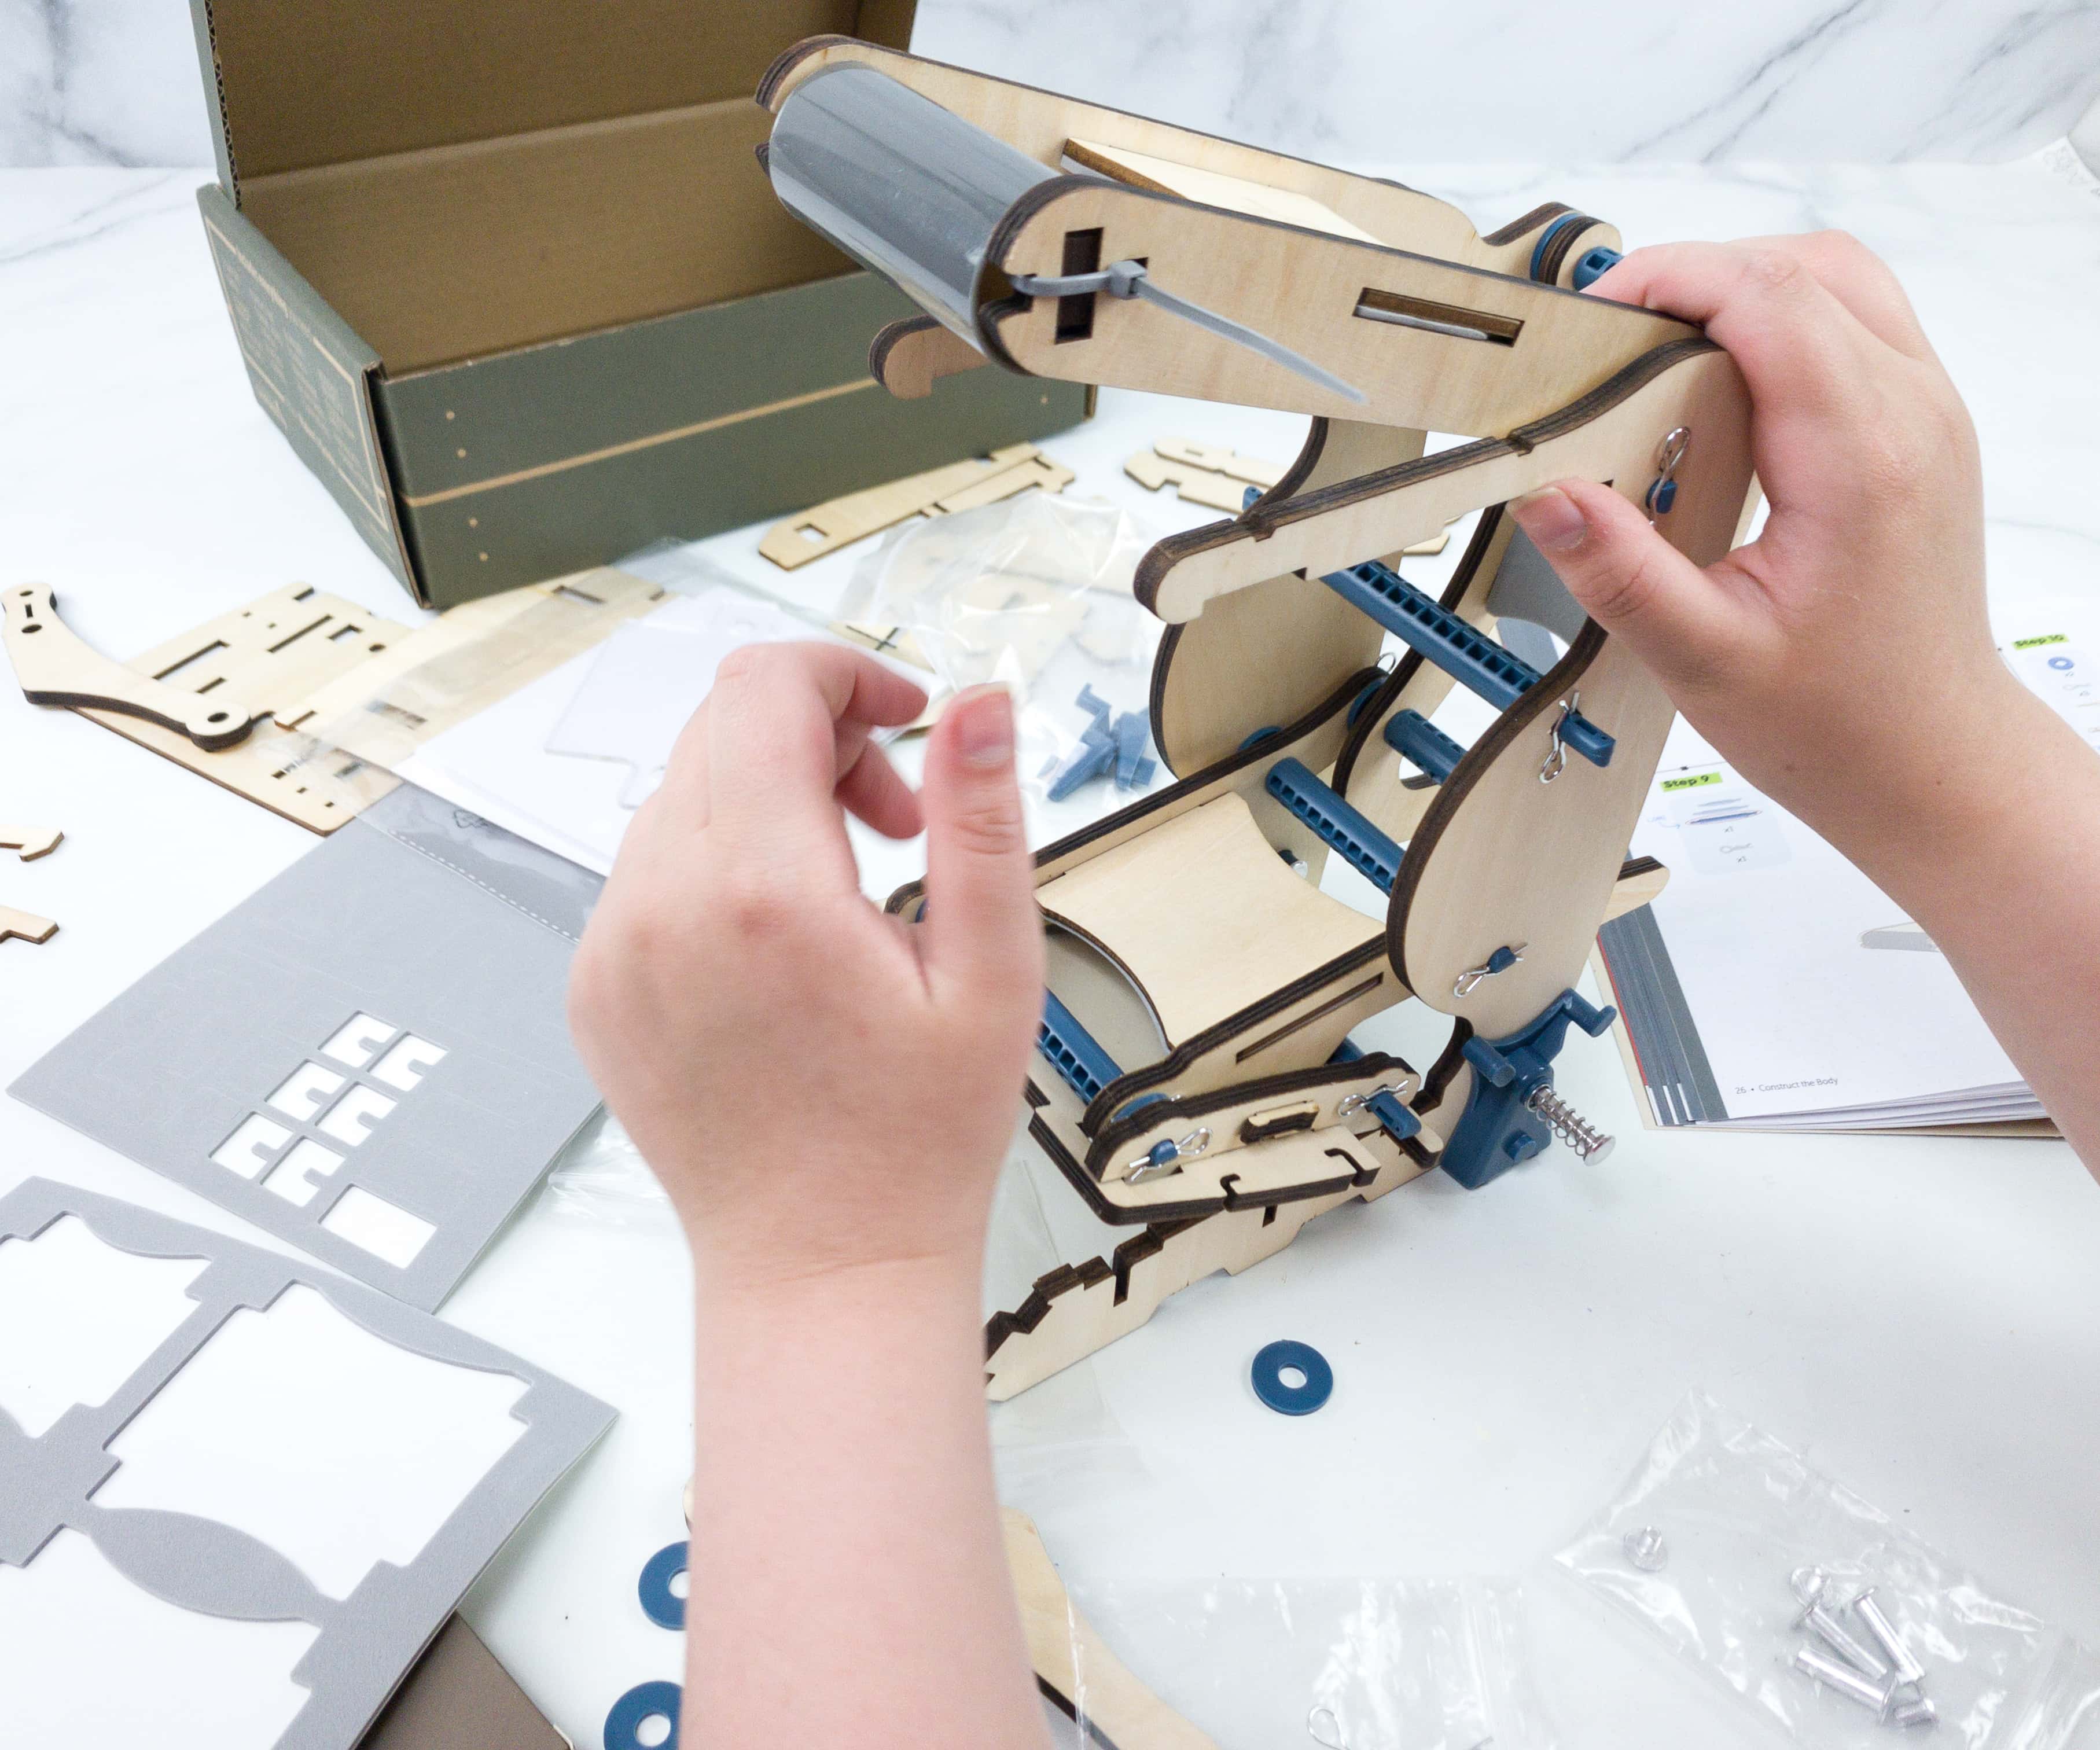
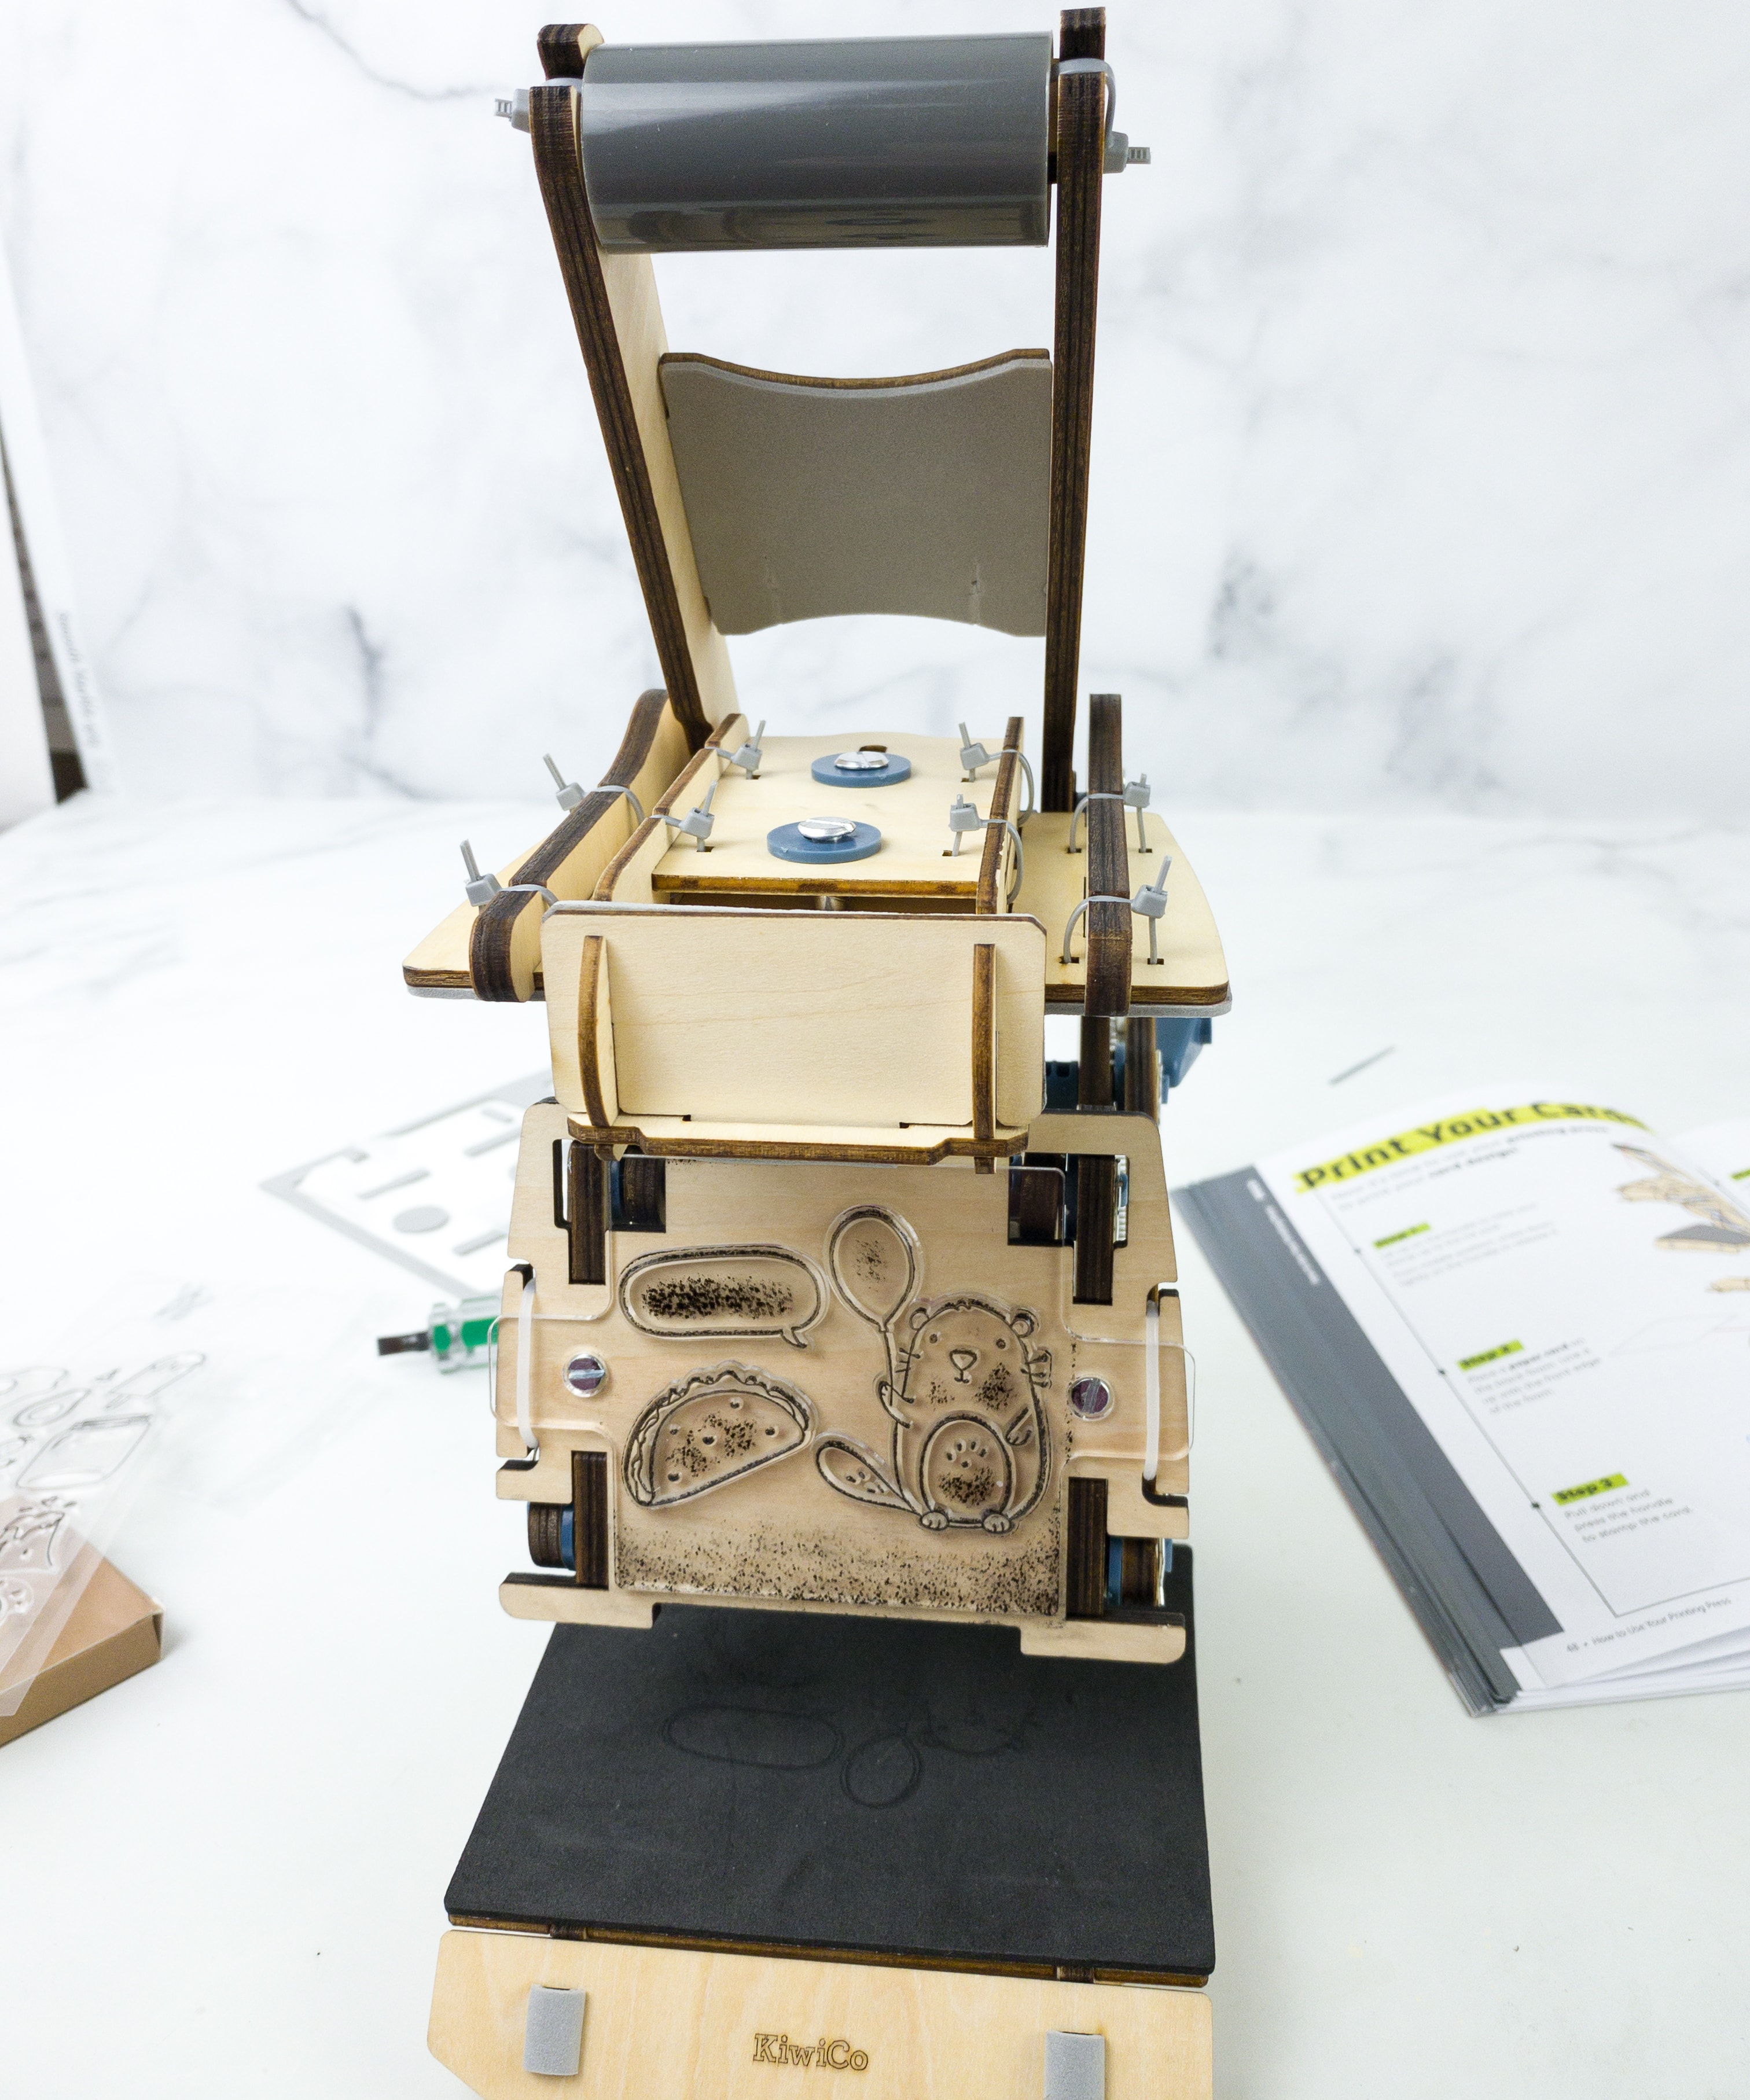
In the fourth part of the project, we worked on the printing press’ body which connects the rest of the press.
Here, we used most of the wooden pieces, sticky foam, stamp pad, spring hooks, springs, spacers, support rods, screws, screwdriver, and barrel bolts.

The Stop and Check Section asks us to pull on the top piece to make sure that this part slides apart and springs its way back. If it doesn’t work, we just have to return to steps 9-12.
Next, my daughter flipped the base and locked all the zip ties. She also cut off the extra strings.
Now, it’s time to flip the machine one more time and lock the other part of the press using screws.
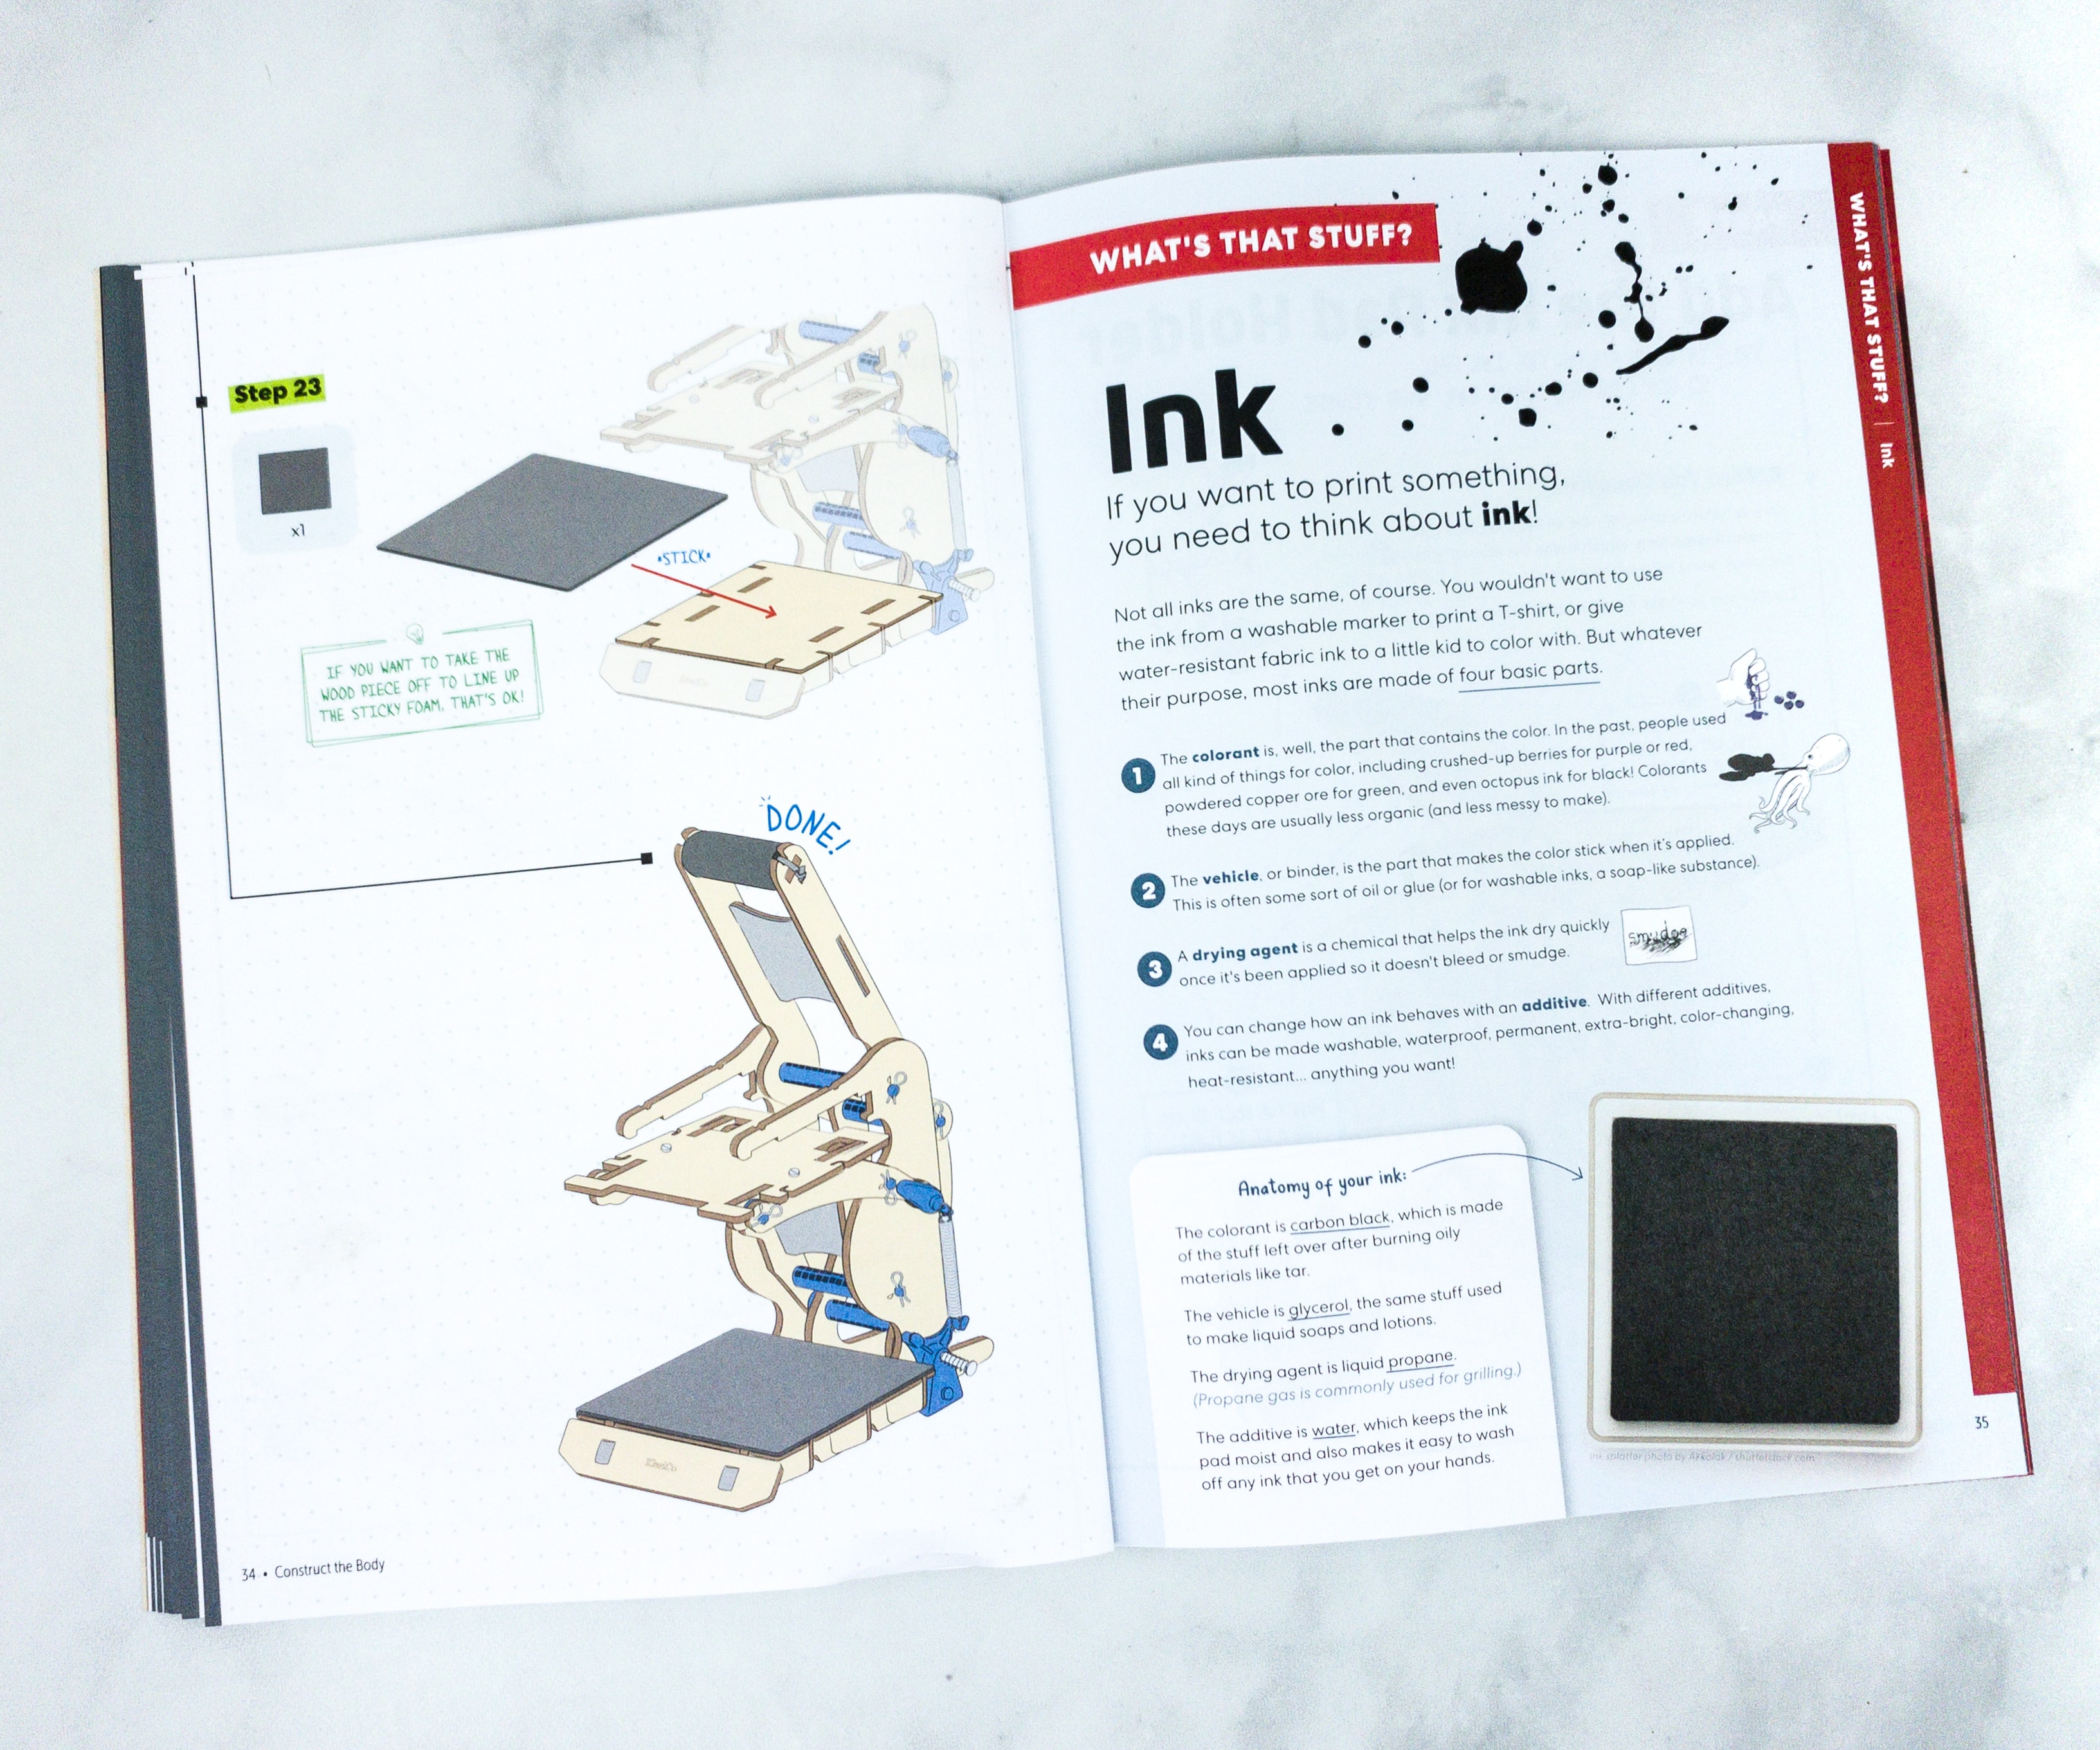
This part of the booklet contains a full article about the ink. Most inks are made of four basic parts, the colorant, vehicle, drying agent, and additive.
For this part, we used another set of wooden pieces, R-clip, washer, screw, and support rods.
First, my daughter connected the completed handle with the body and checked if the handle goes back to its original form when pressed.
She pushed the handle and it did really went back up!
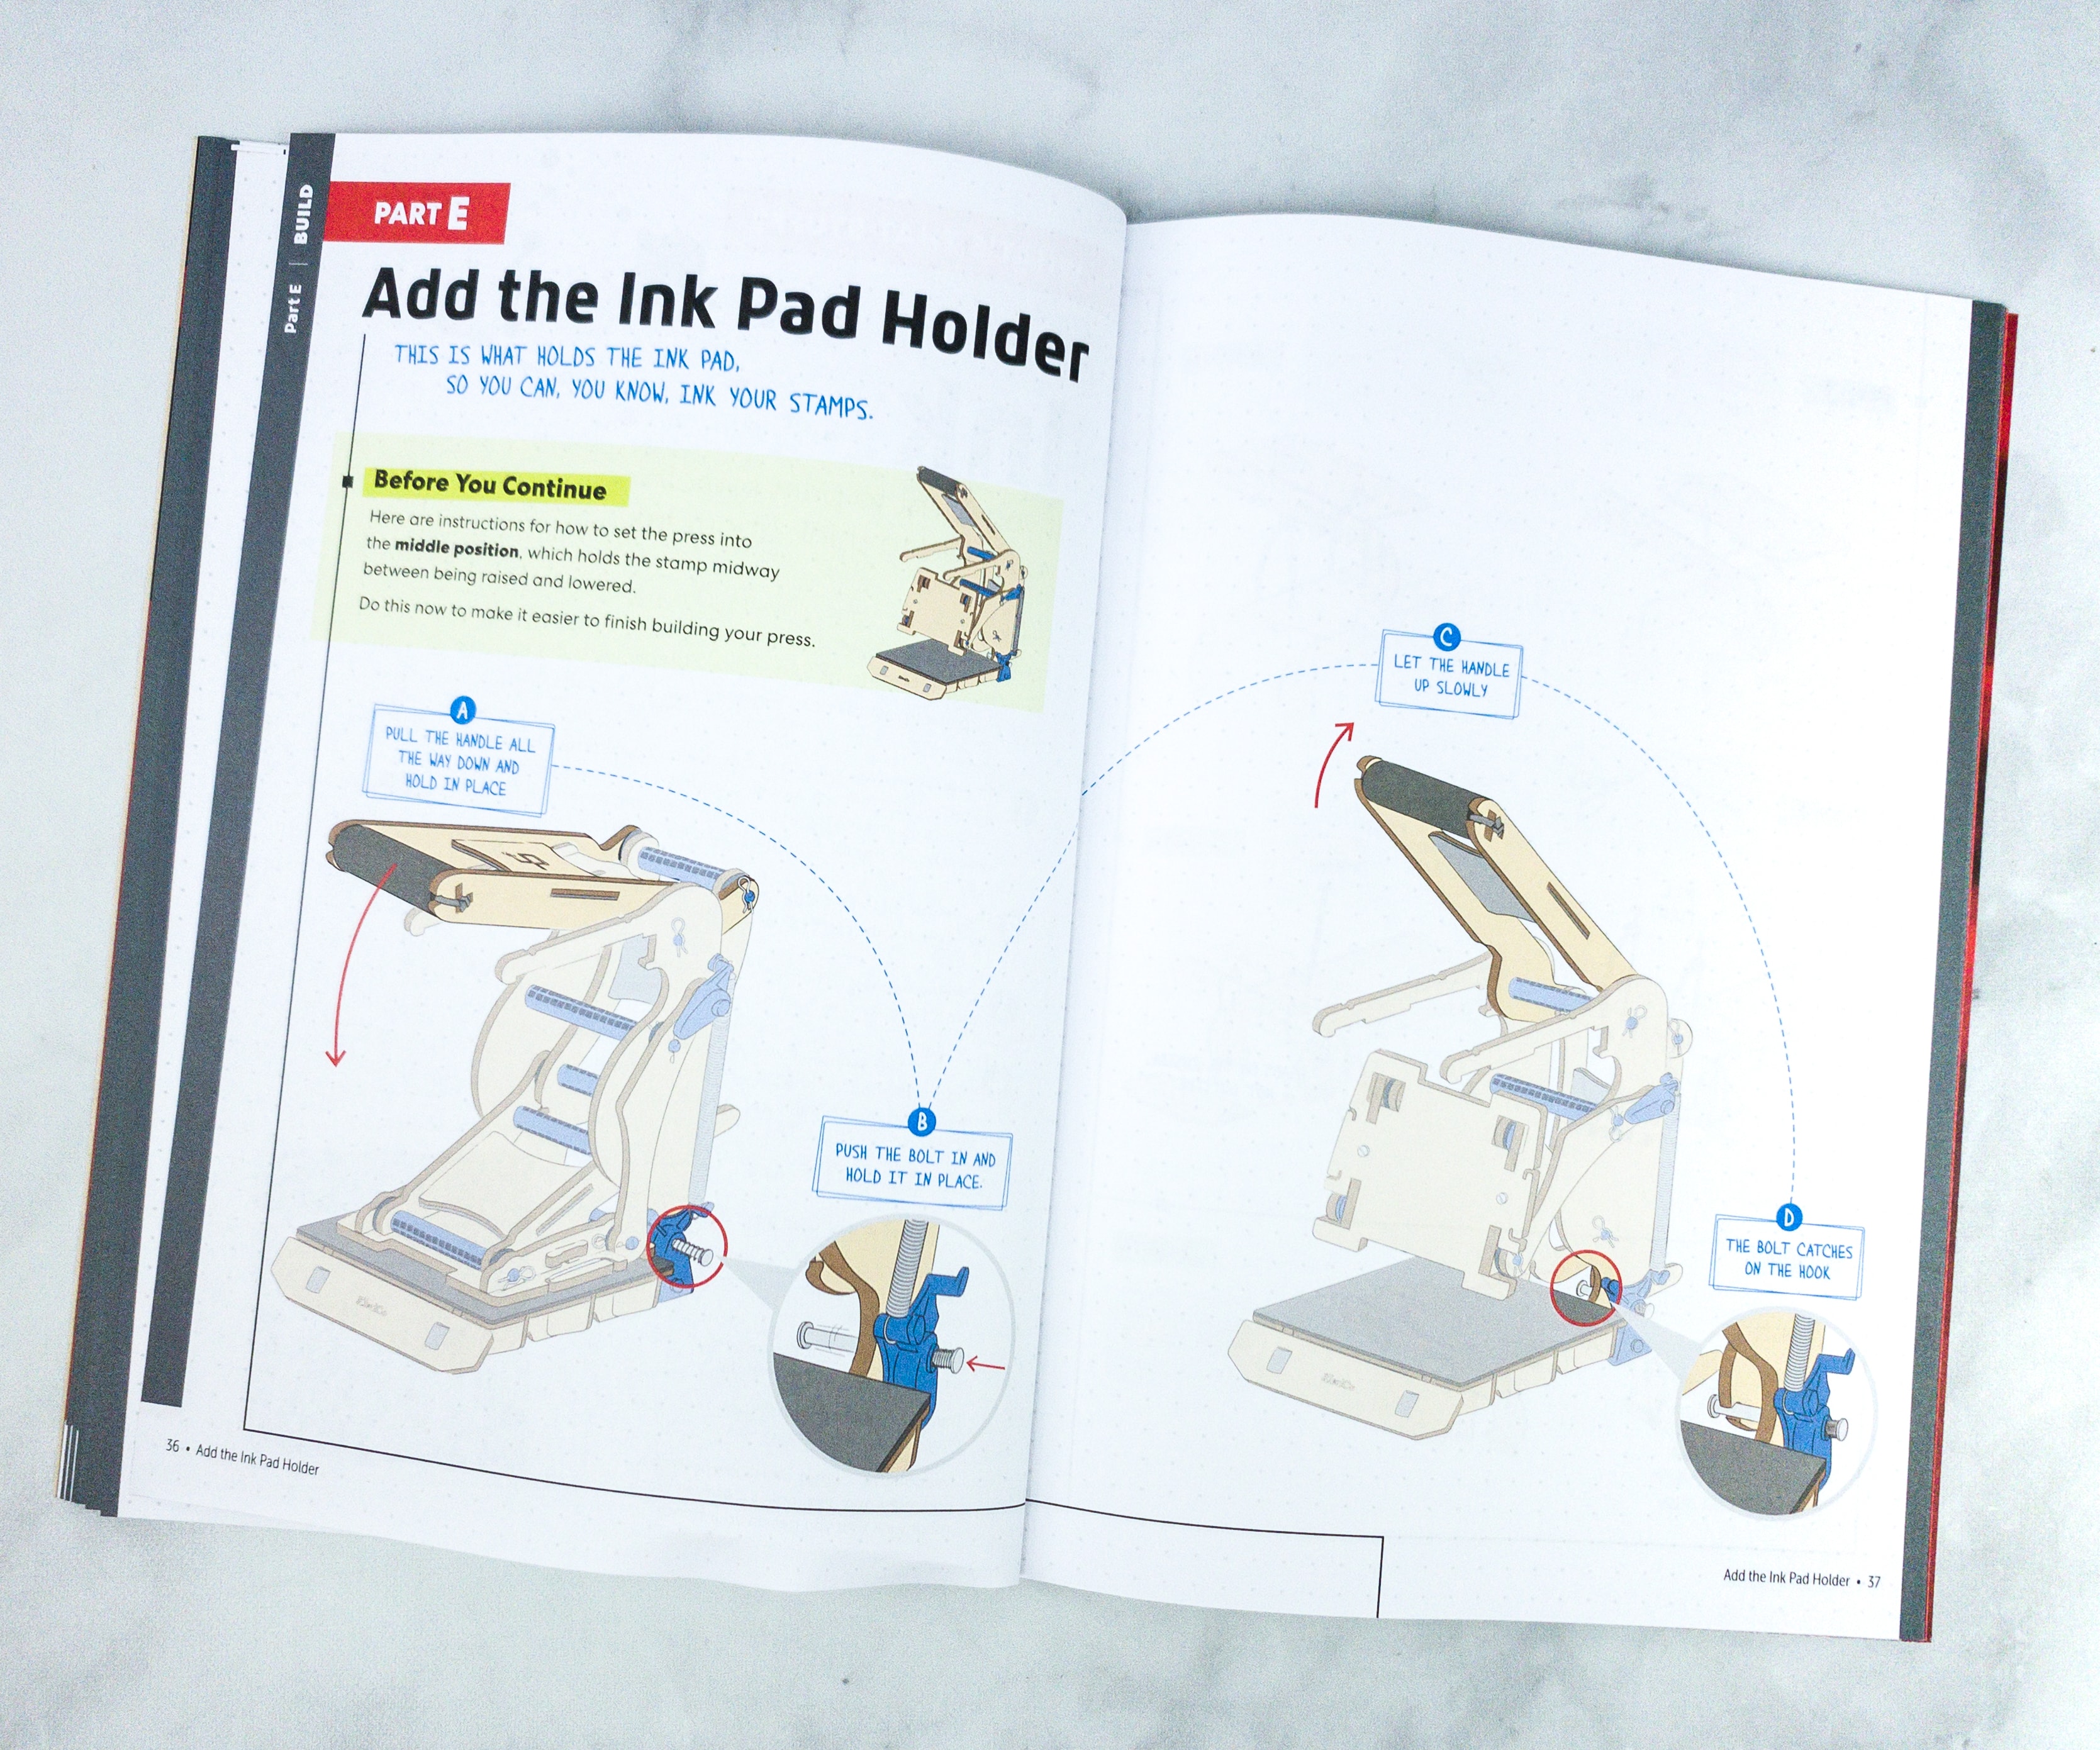
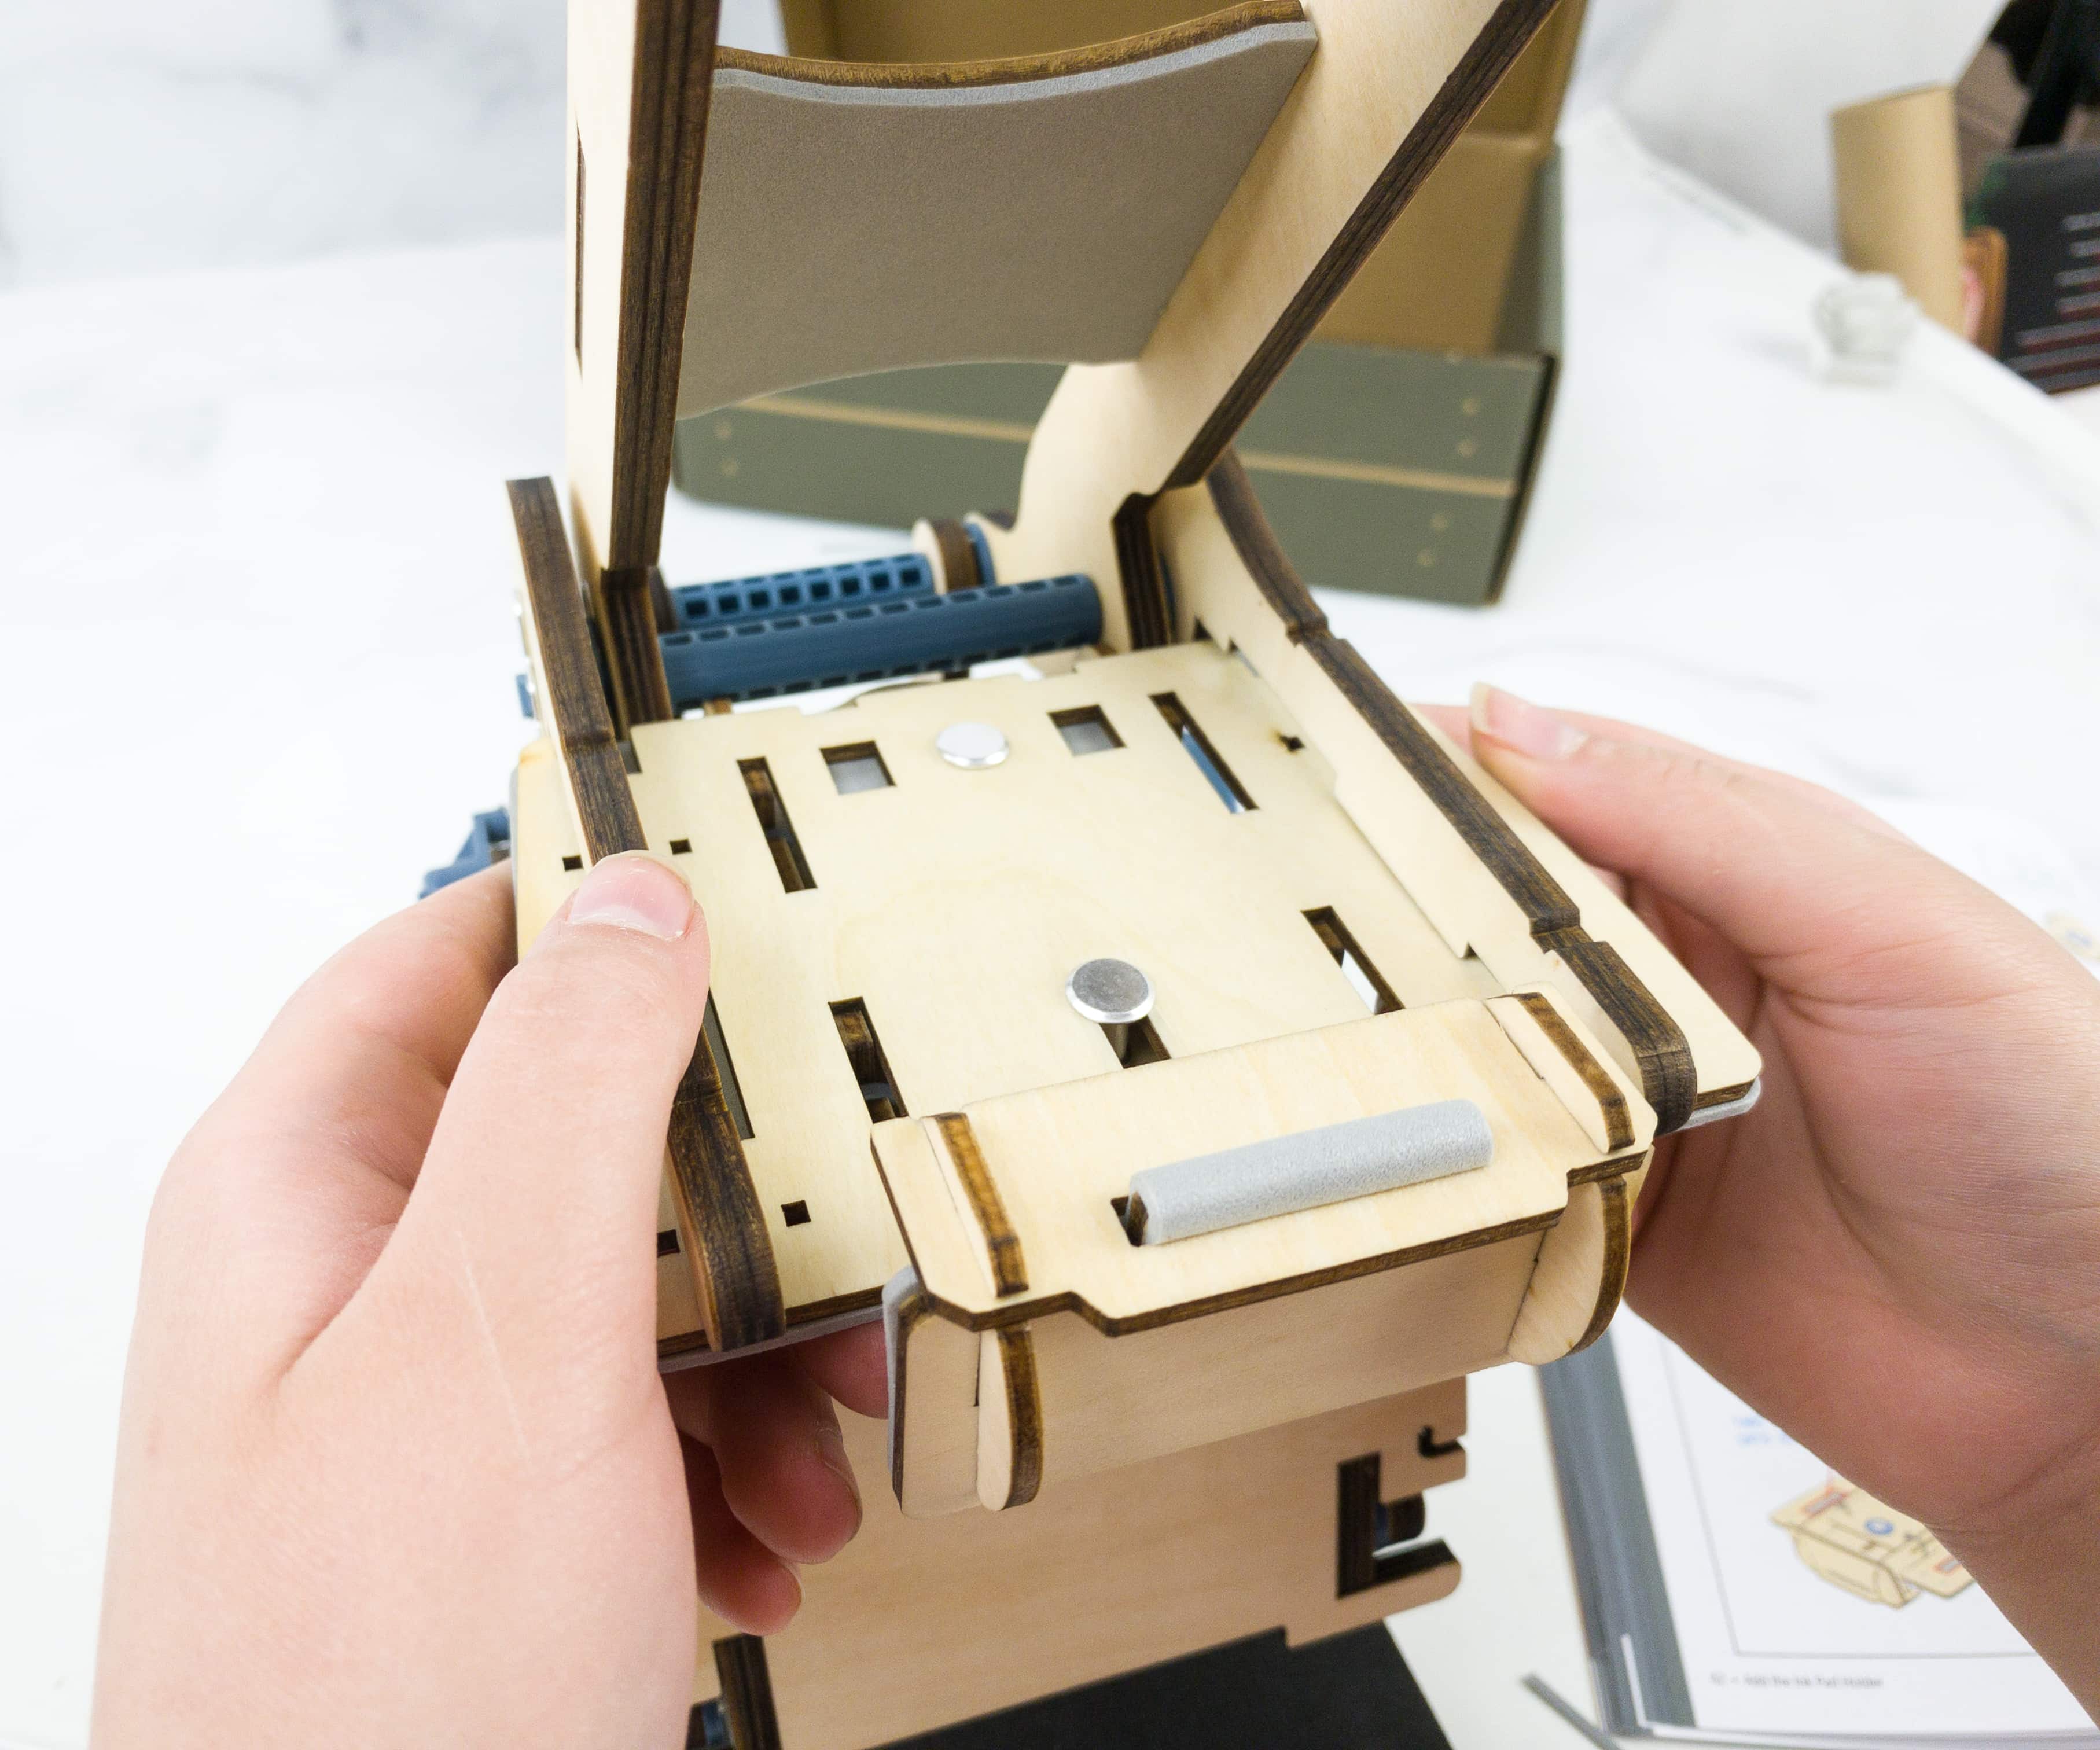
The last part of the project is adding the ink pad holder!
For the last part, we used the rest of the wooden pieces, ink pad, springs, spacers, screws, barrel bolt, and the rest of the zip ties.

My daughter connected the wooden pieces to form an ink pad holder and locked it using the zip ties.
She also poked the two barrel bolts on the pad holder holes, one on the circle and the other on the oblong-shaped hole and connected it using the long spring.
Next, she flipped the holder and made sure that it is completely locked-in by screwing it tightly.
She then slid the ink holder below the press and made sure that they are flatly aligned together.
Now the printing press is almost complete! We just need to add the stamp set the inks and check the rest of the machine’s parts!
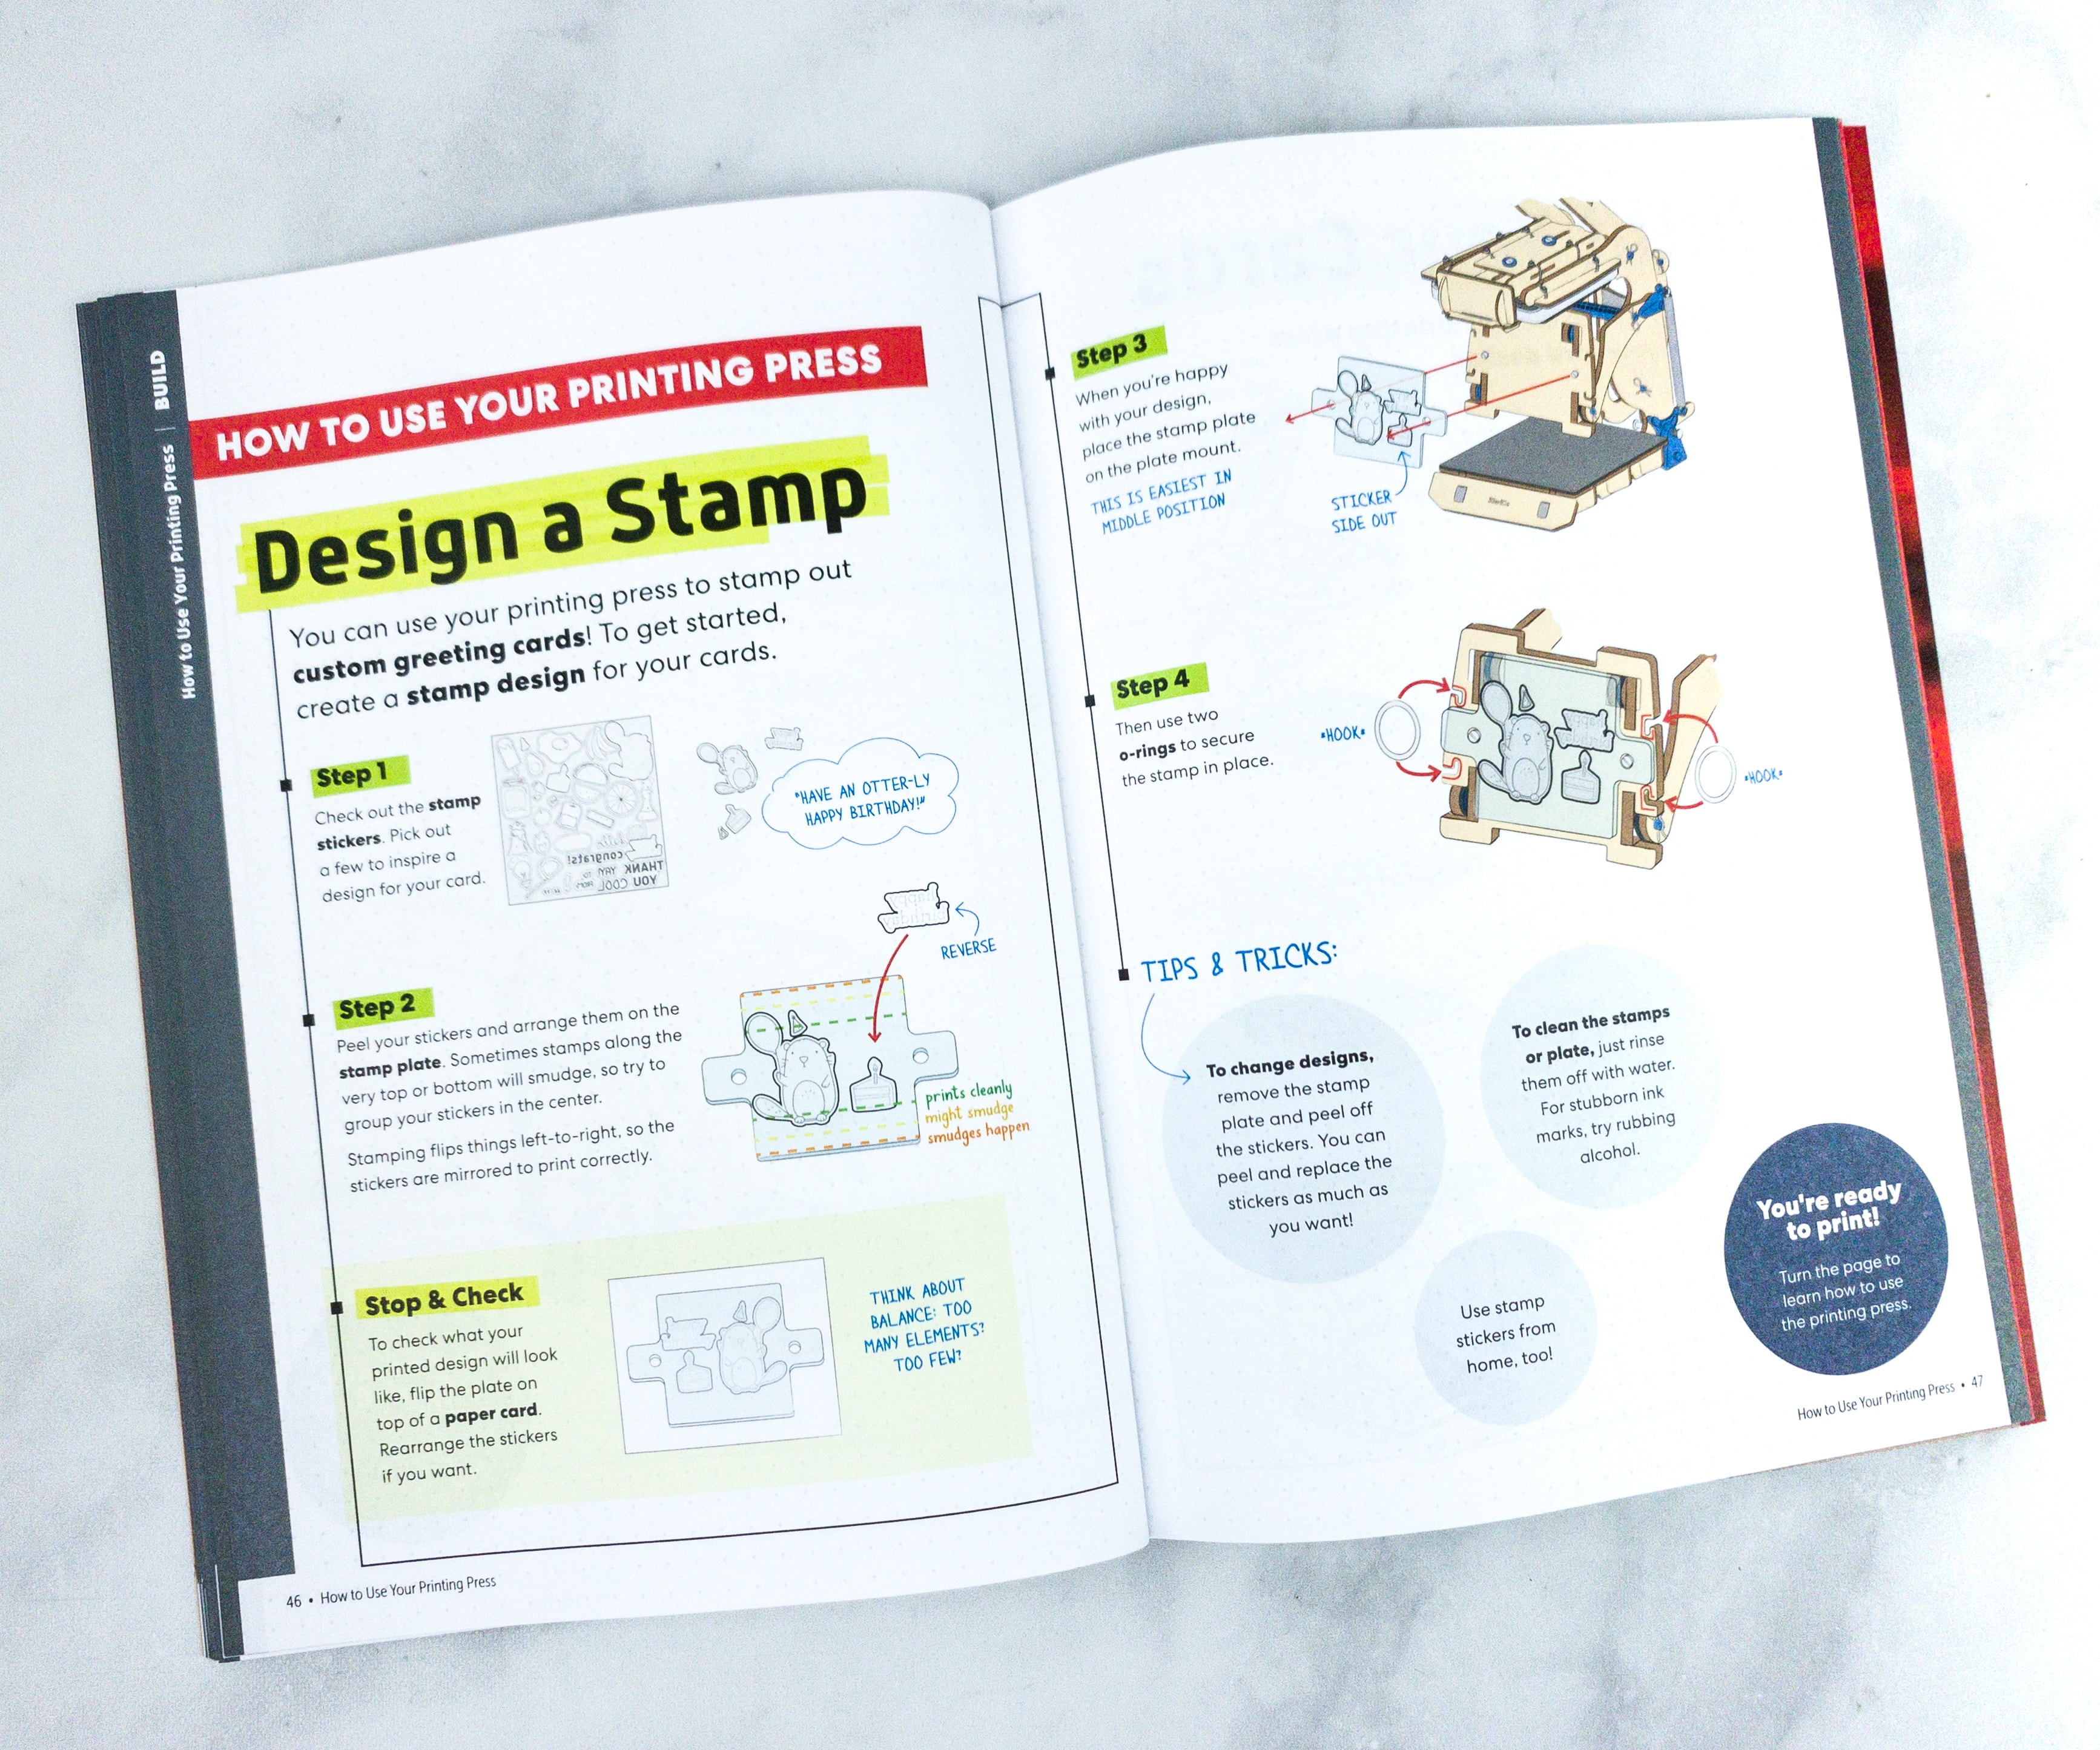
This article teaches us how to use our printing press and how to properly design our stamp.
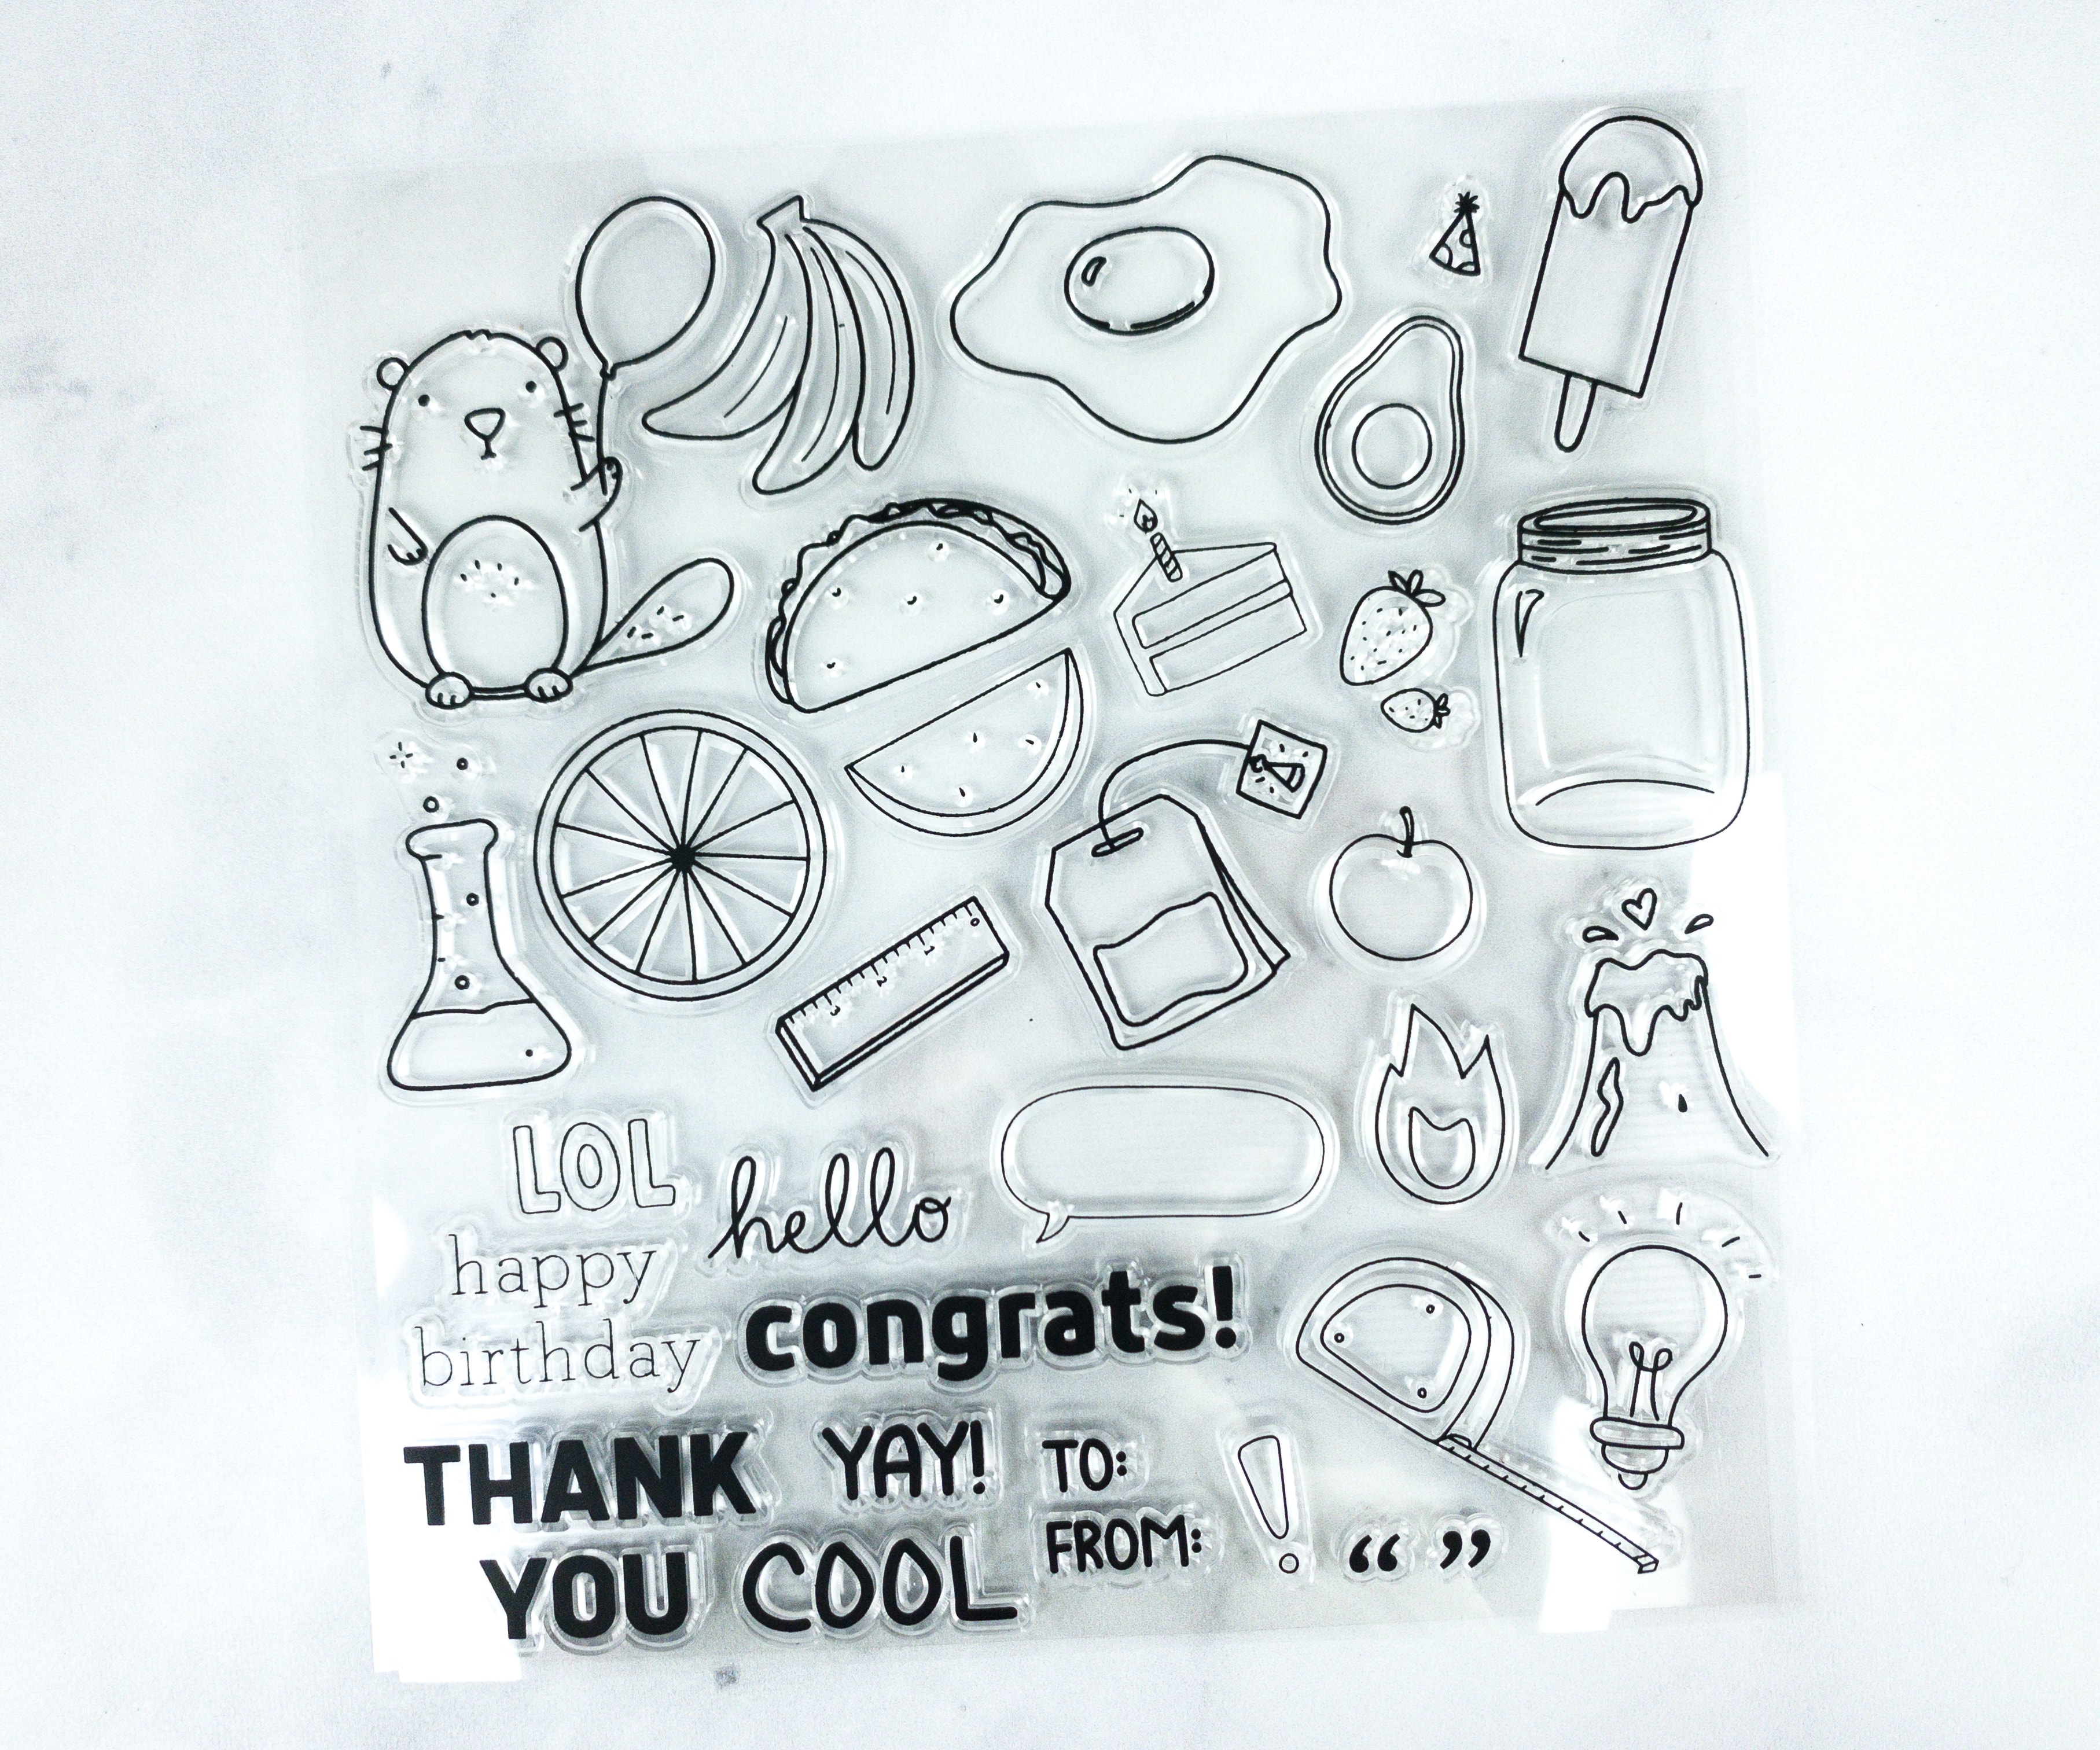
This design sheet contains a variety of stamp stickers which you can use to create and make your custom-made designs.
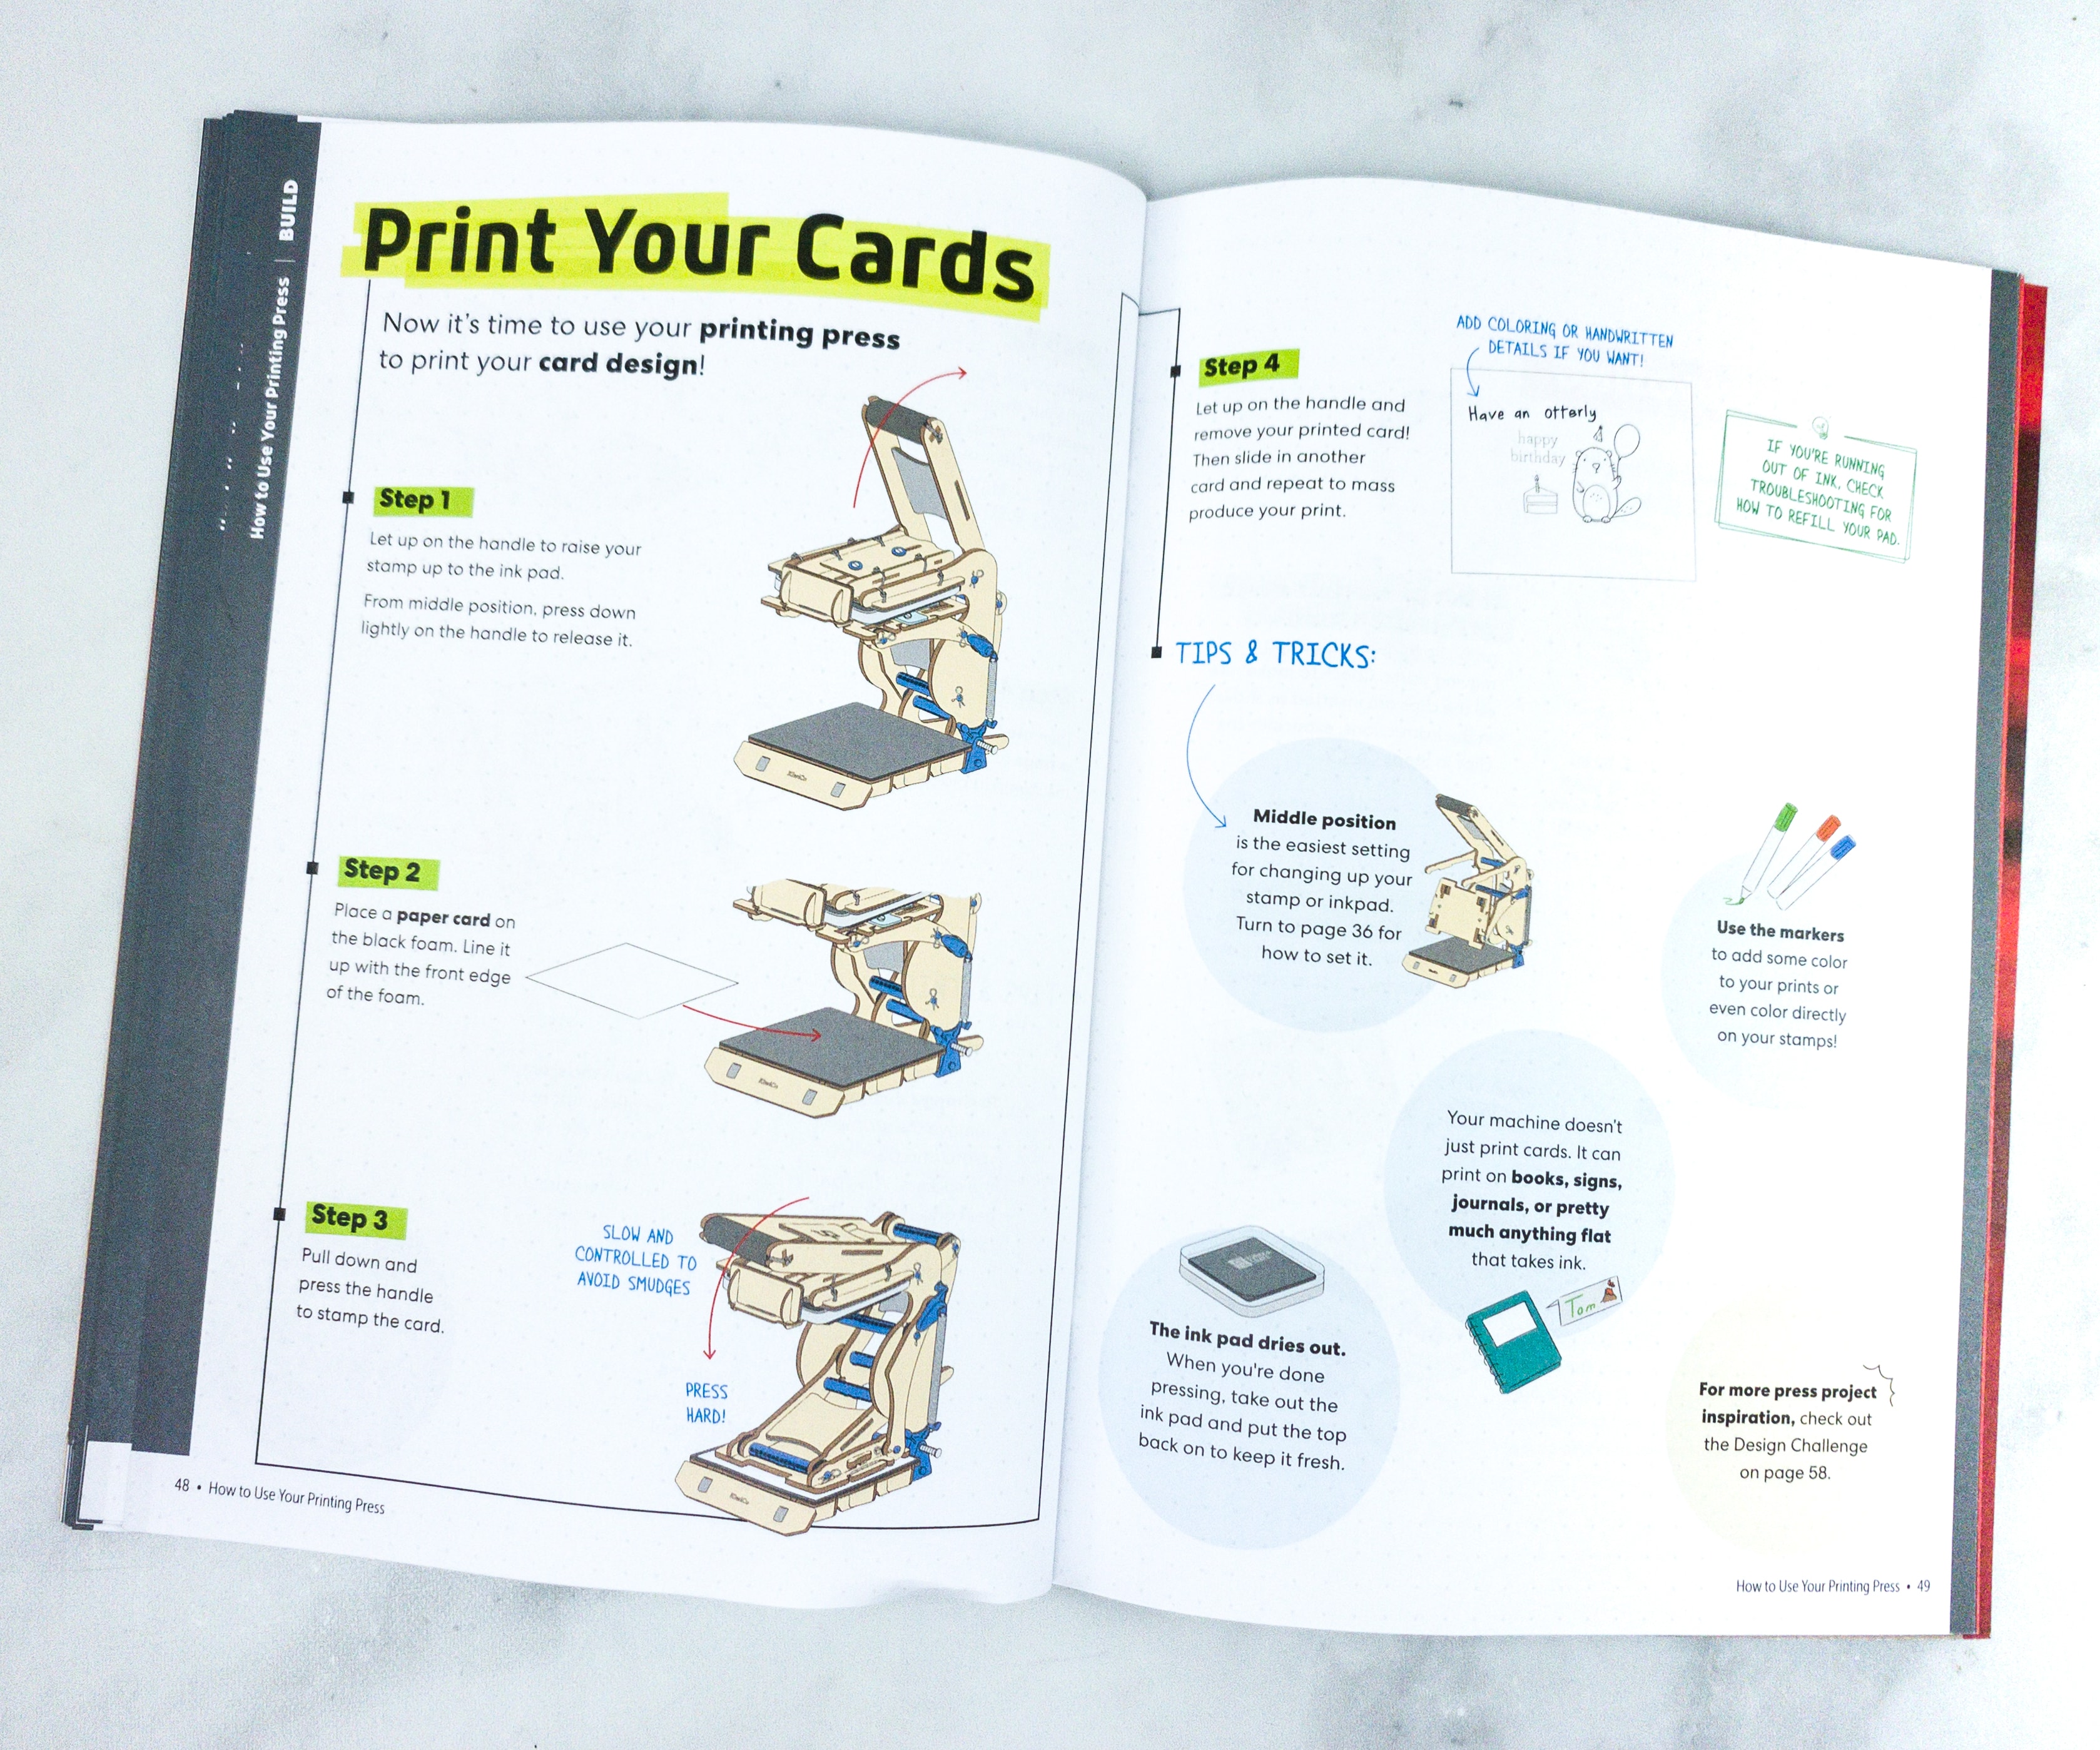
Here’s a detailed-step-by-step procedure on how you can make your own card design!
We’re ready to make stamp art! My daughter chose the design she wants, peeled it off the sticker, and arranged it on the stamp plate.
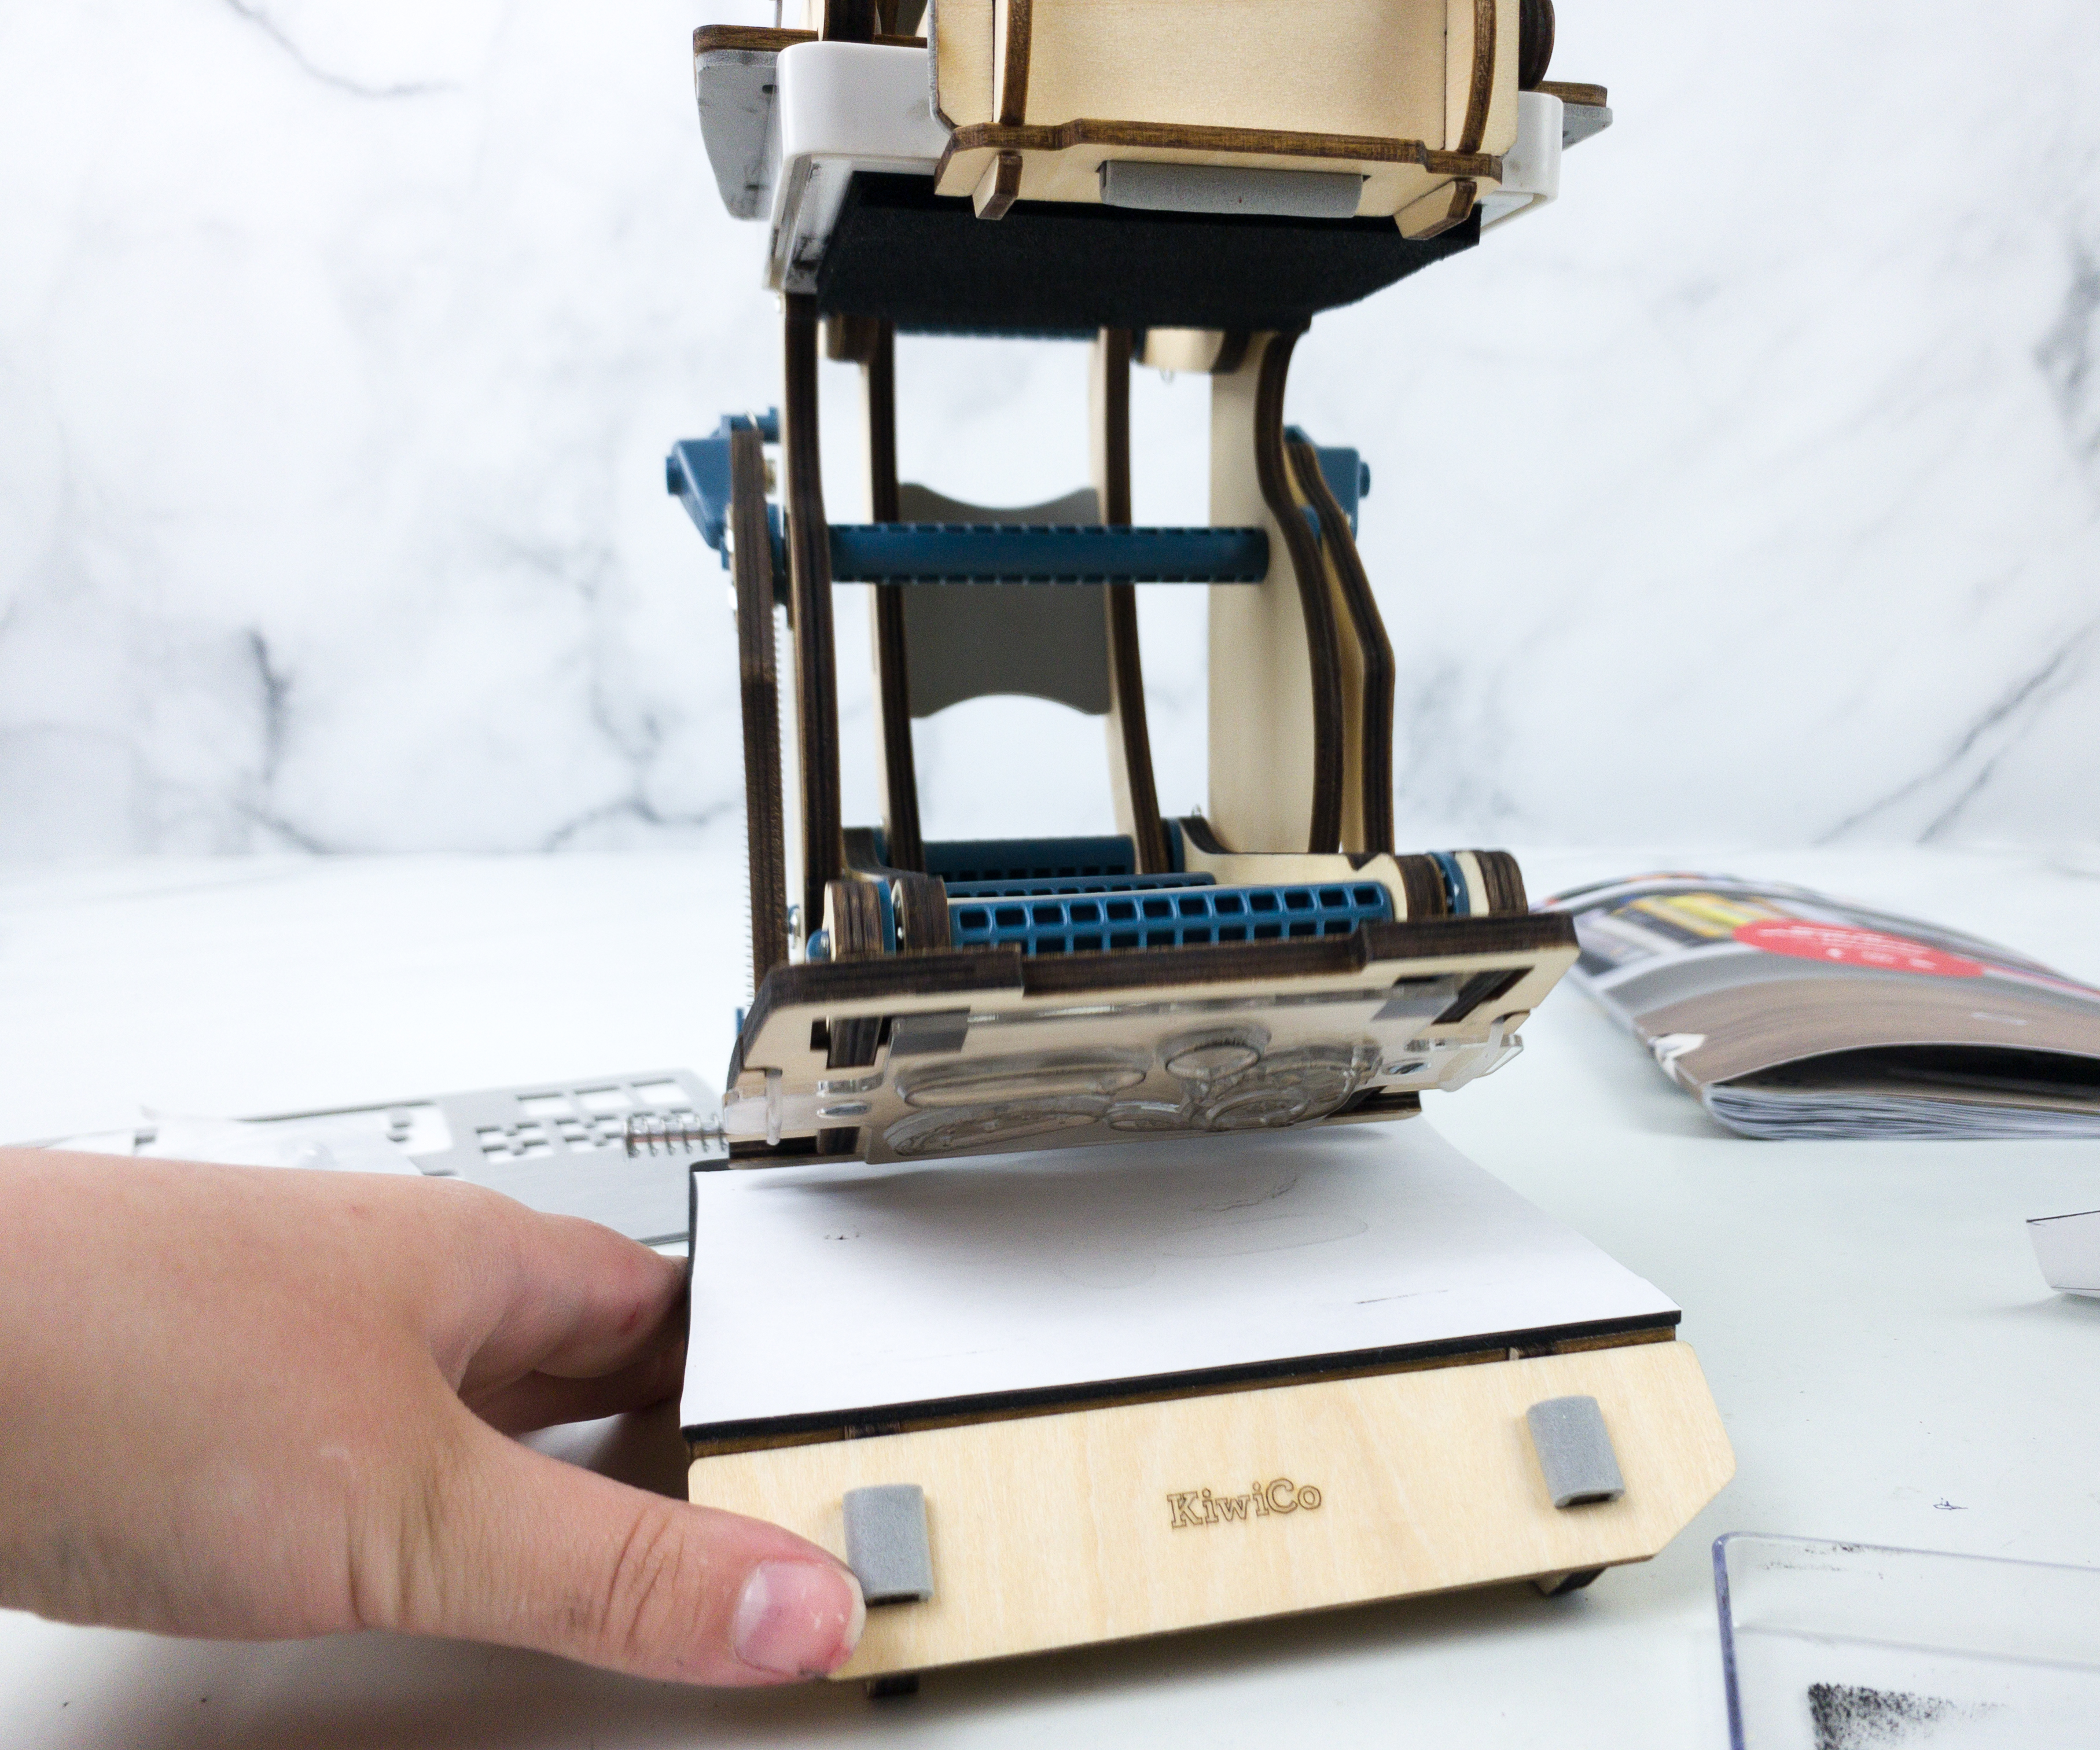
Then, she placed a paper card on the black foam and lined it up with the front edge of the foam. Afterward, she pulled down the handle and pressed it hard.
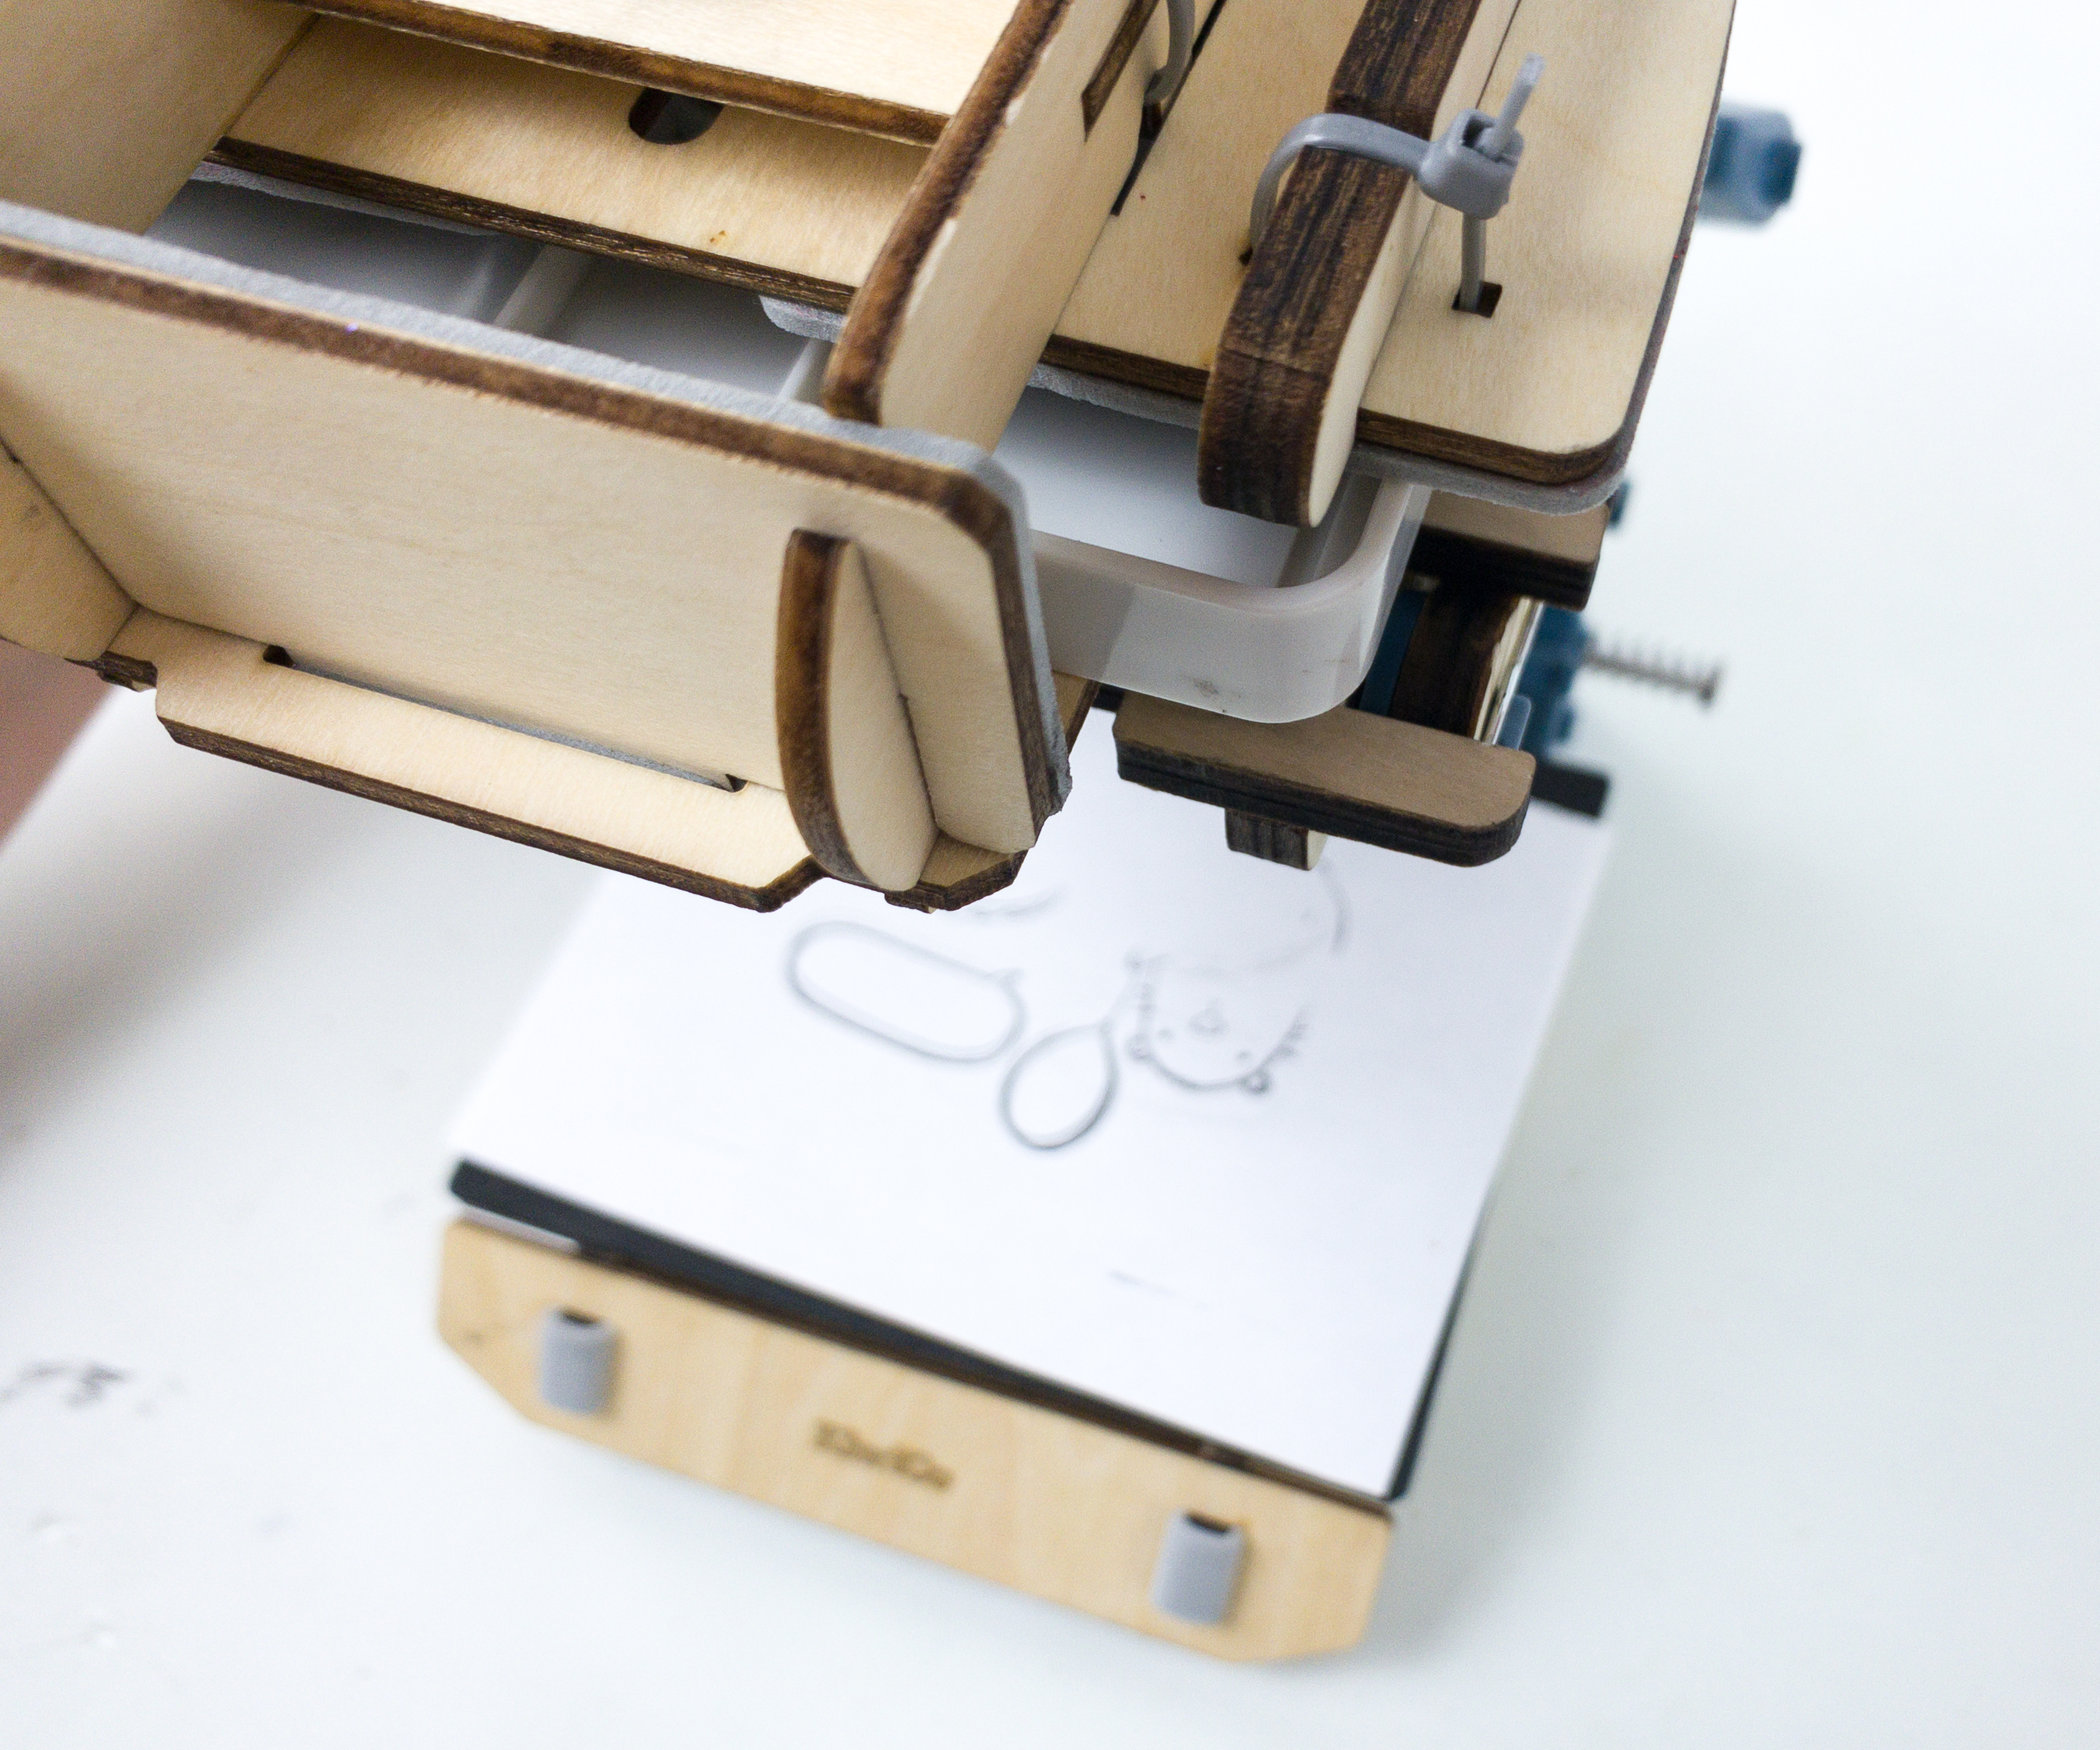
She slowly released the handle and there we have our first stamped design!
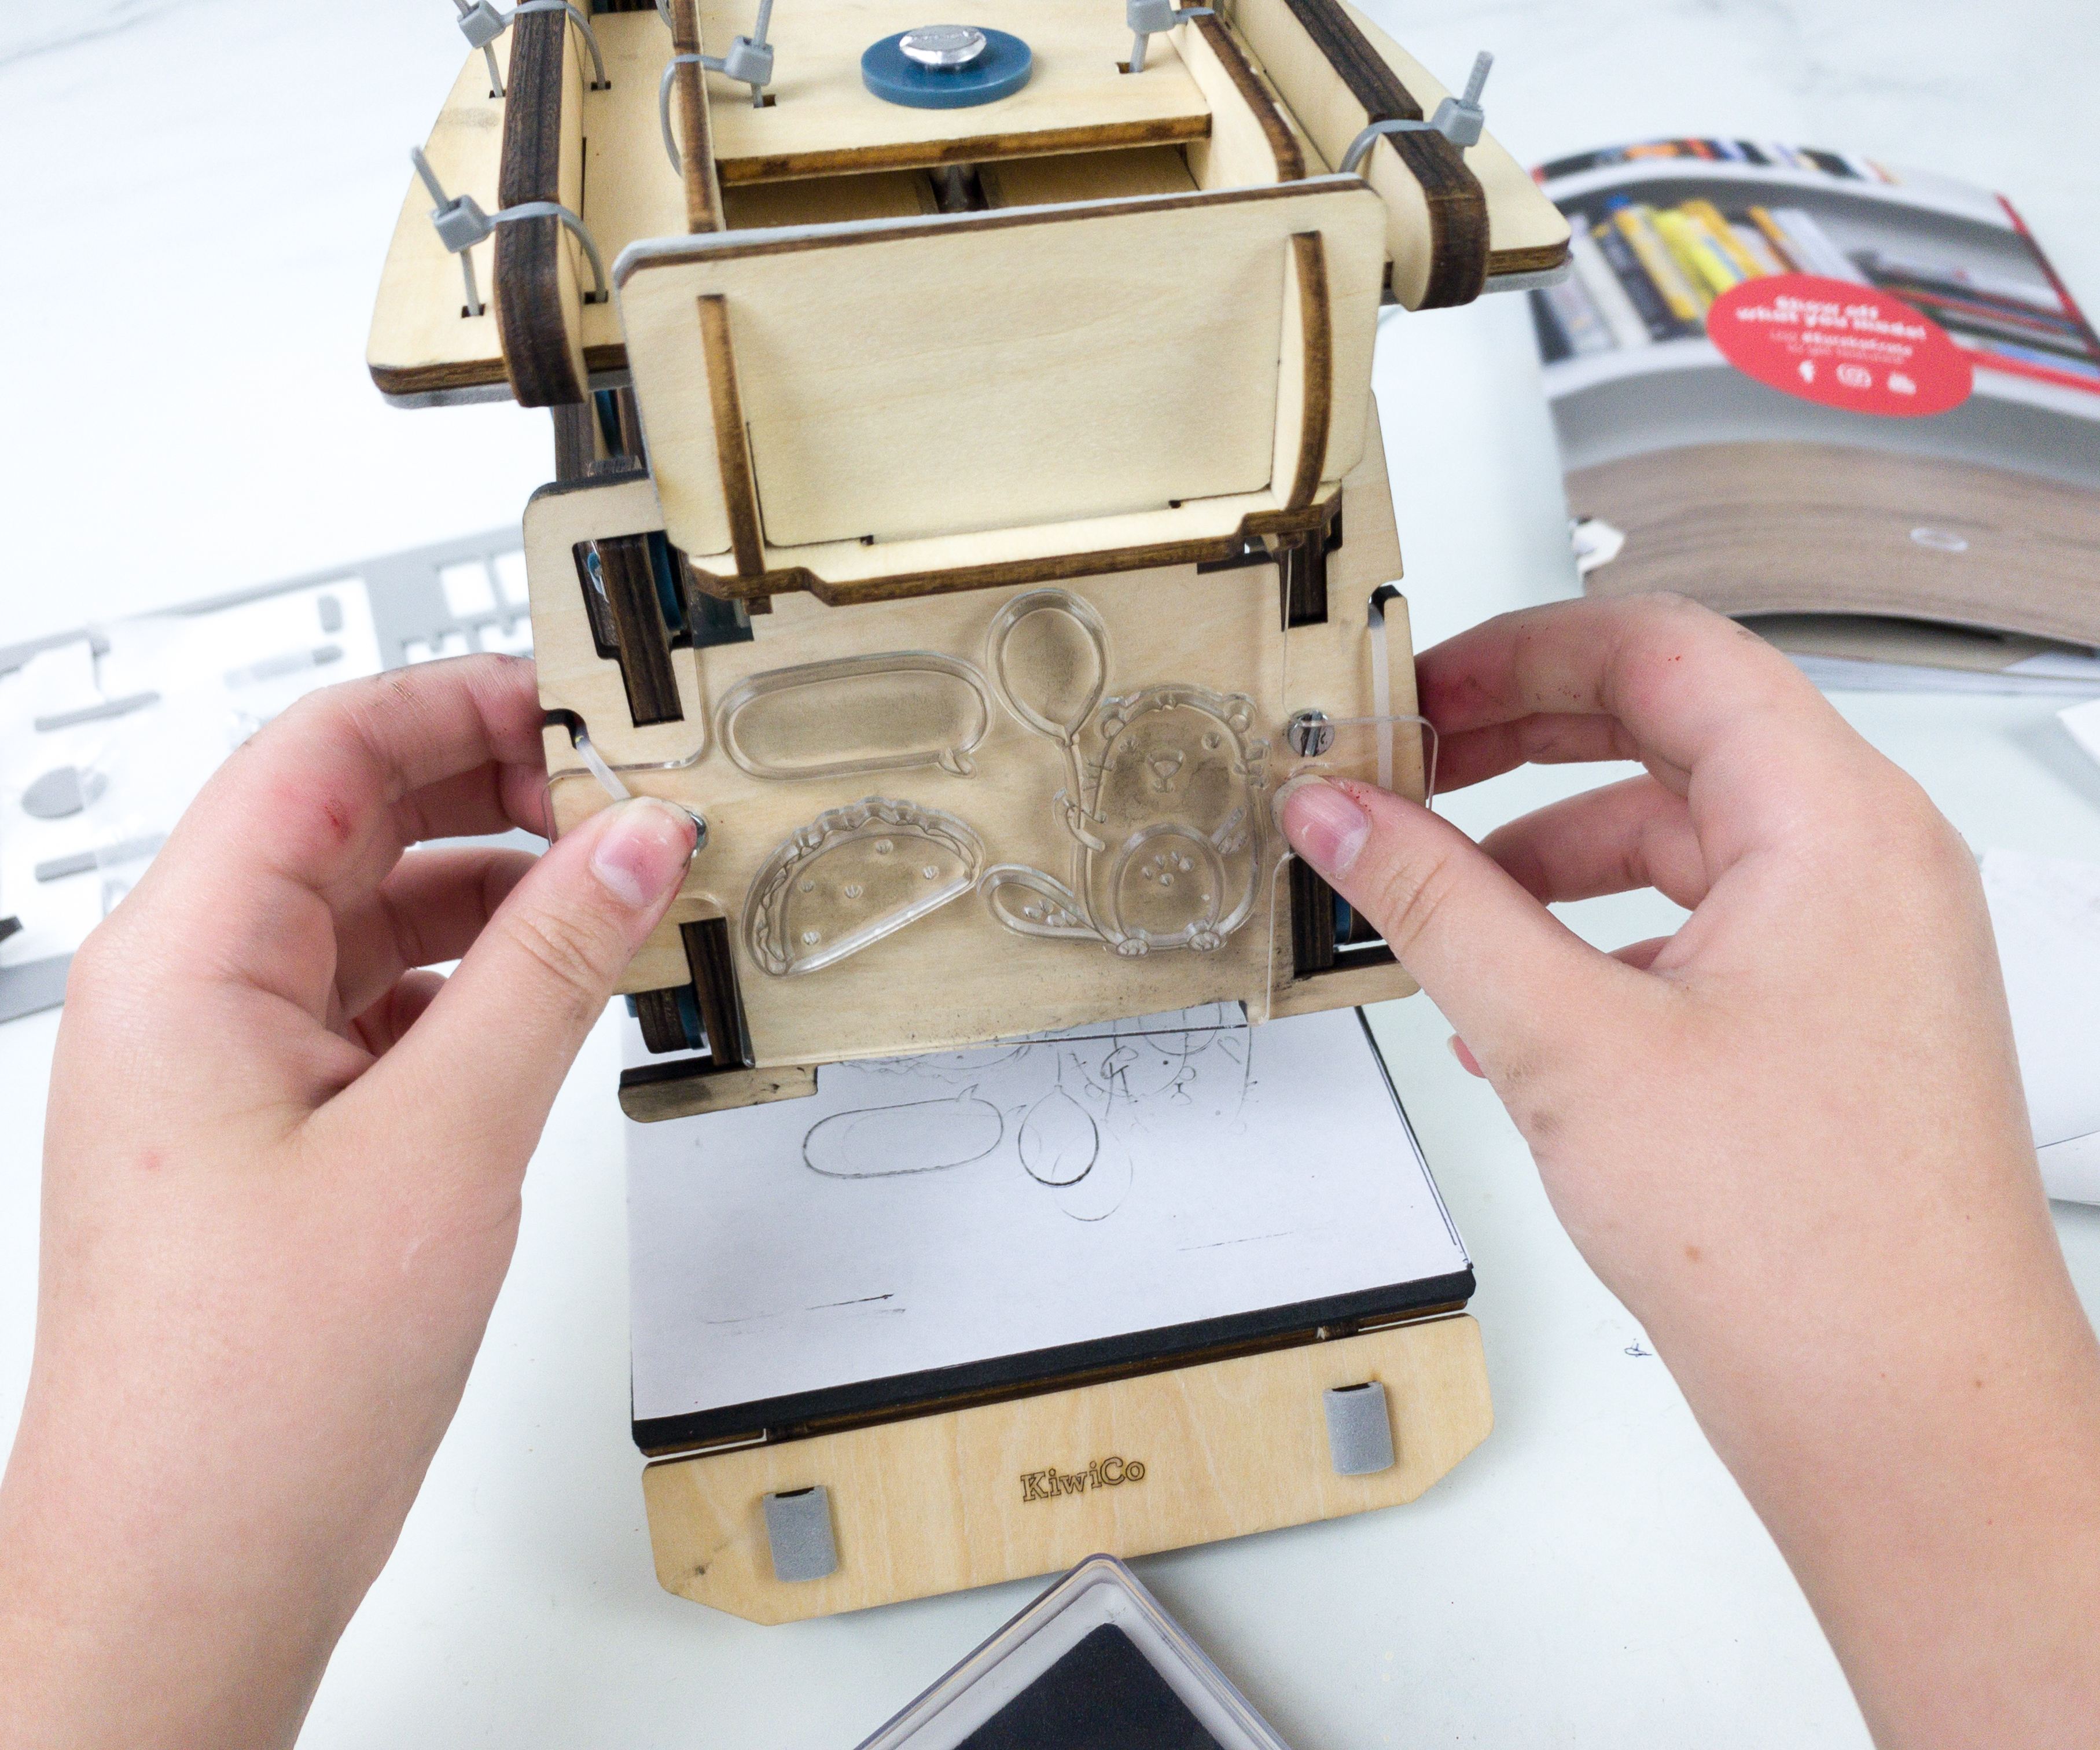
Changing the design is pretty easy too. Simply pull out the stamp template, remove the stamp stickers, and place a new one.
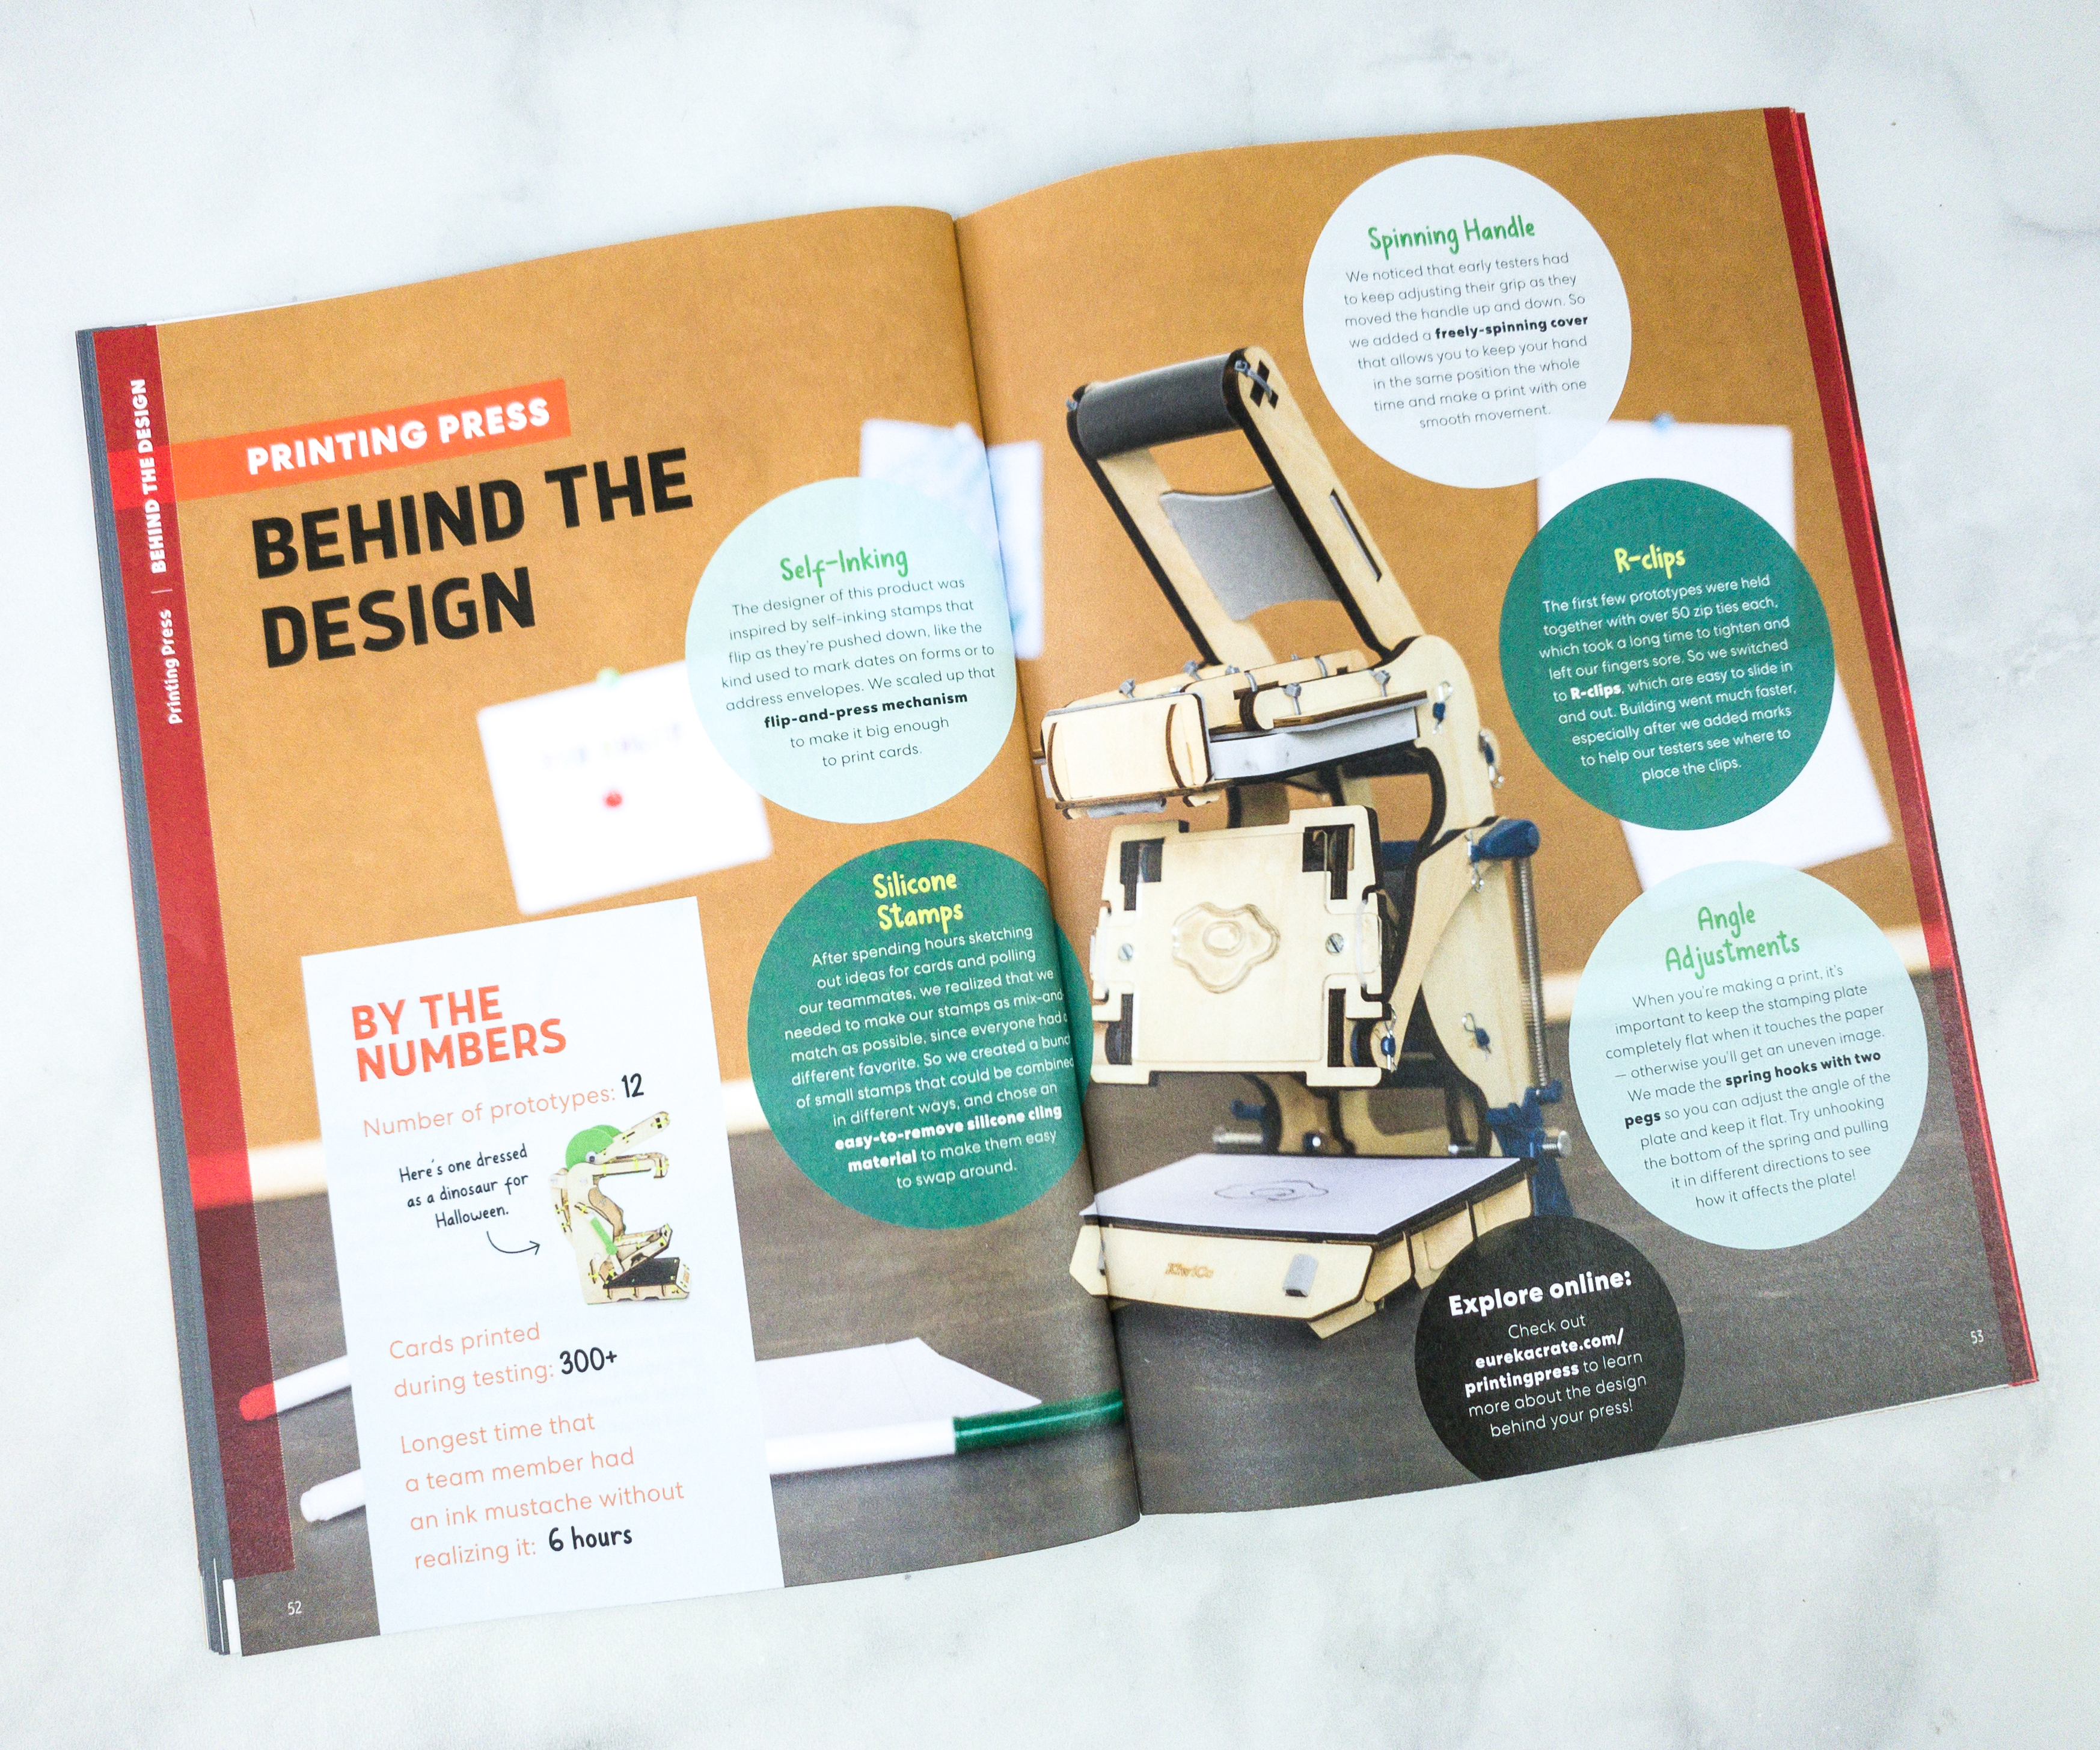
The booklet also provided us more information about this fun project, like the history behind the design.

There’s a full article on how they put the science to work with Linkages!
With just the press of a lever, your printing press can stamp cards, stationery, or whatever you’d like. And it’s all thanks to a handy system called a linkage.
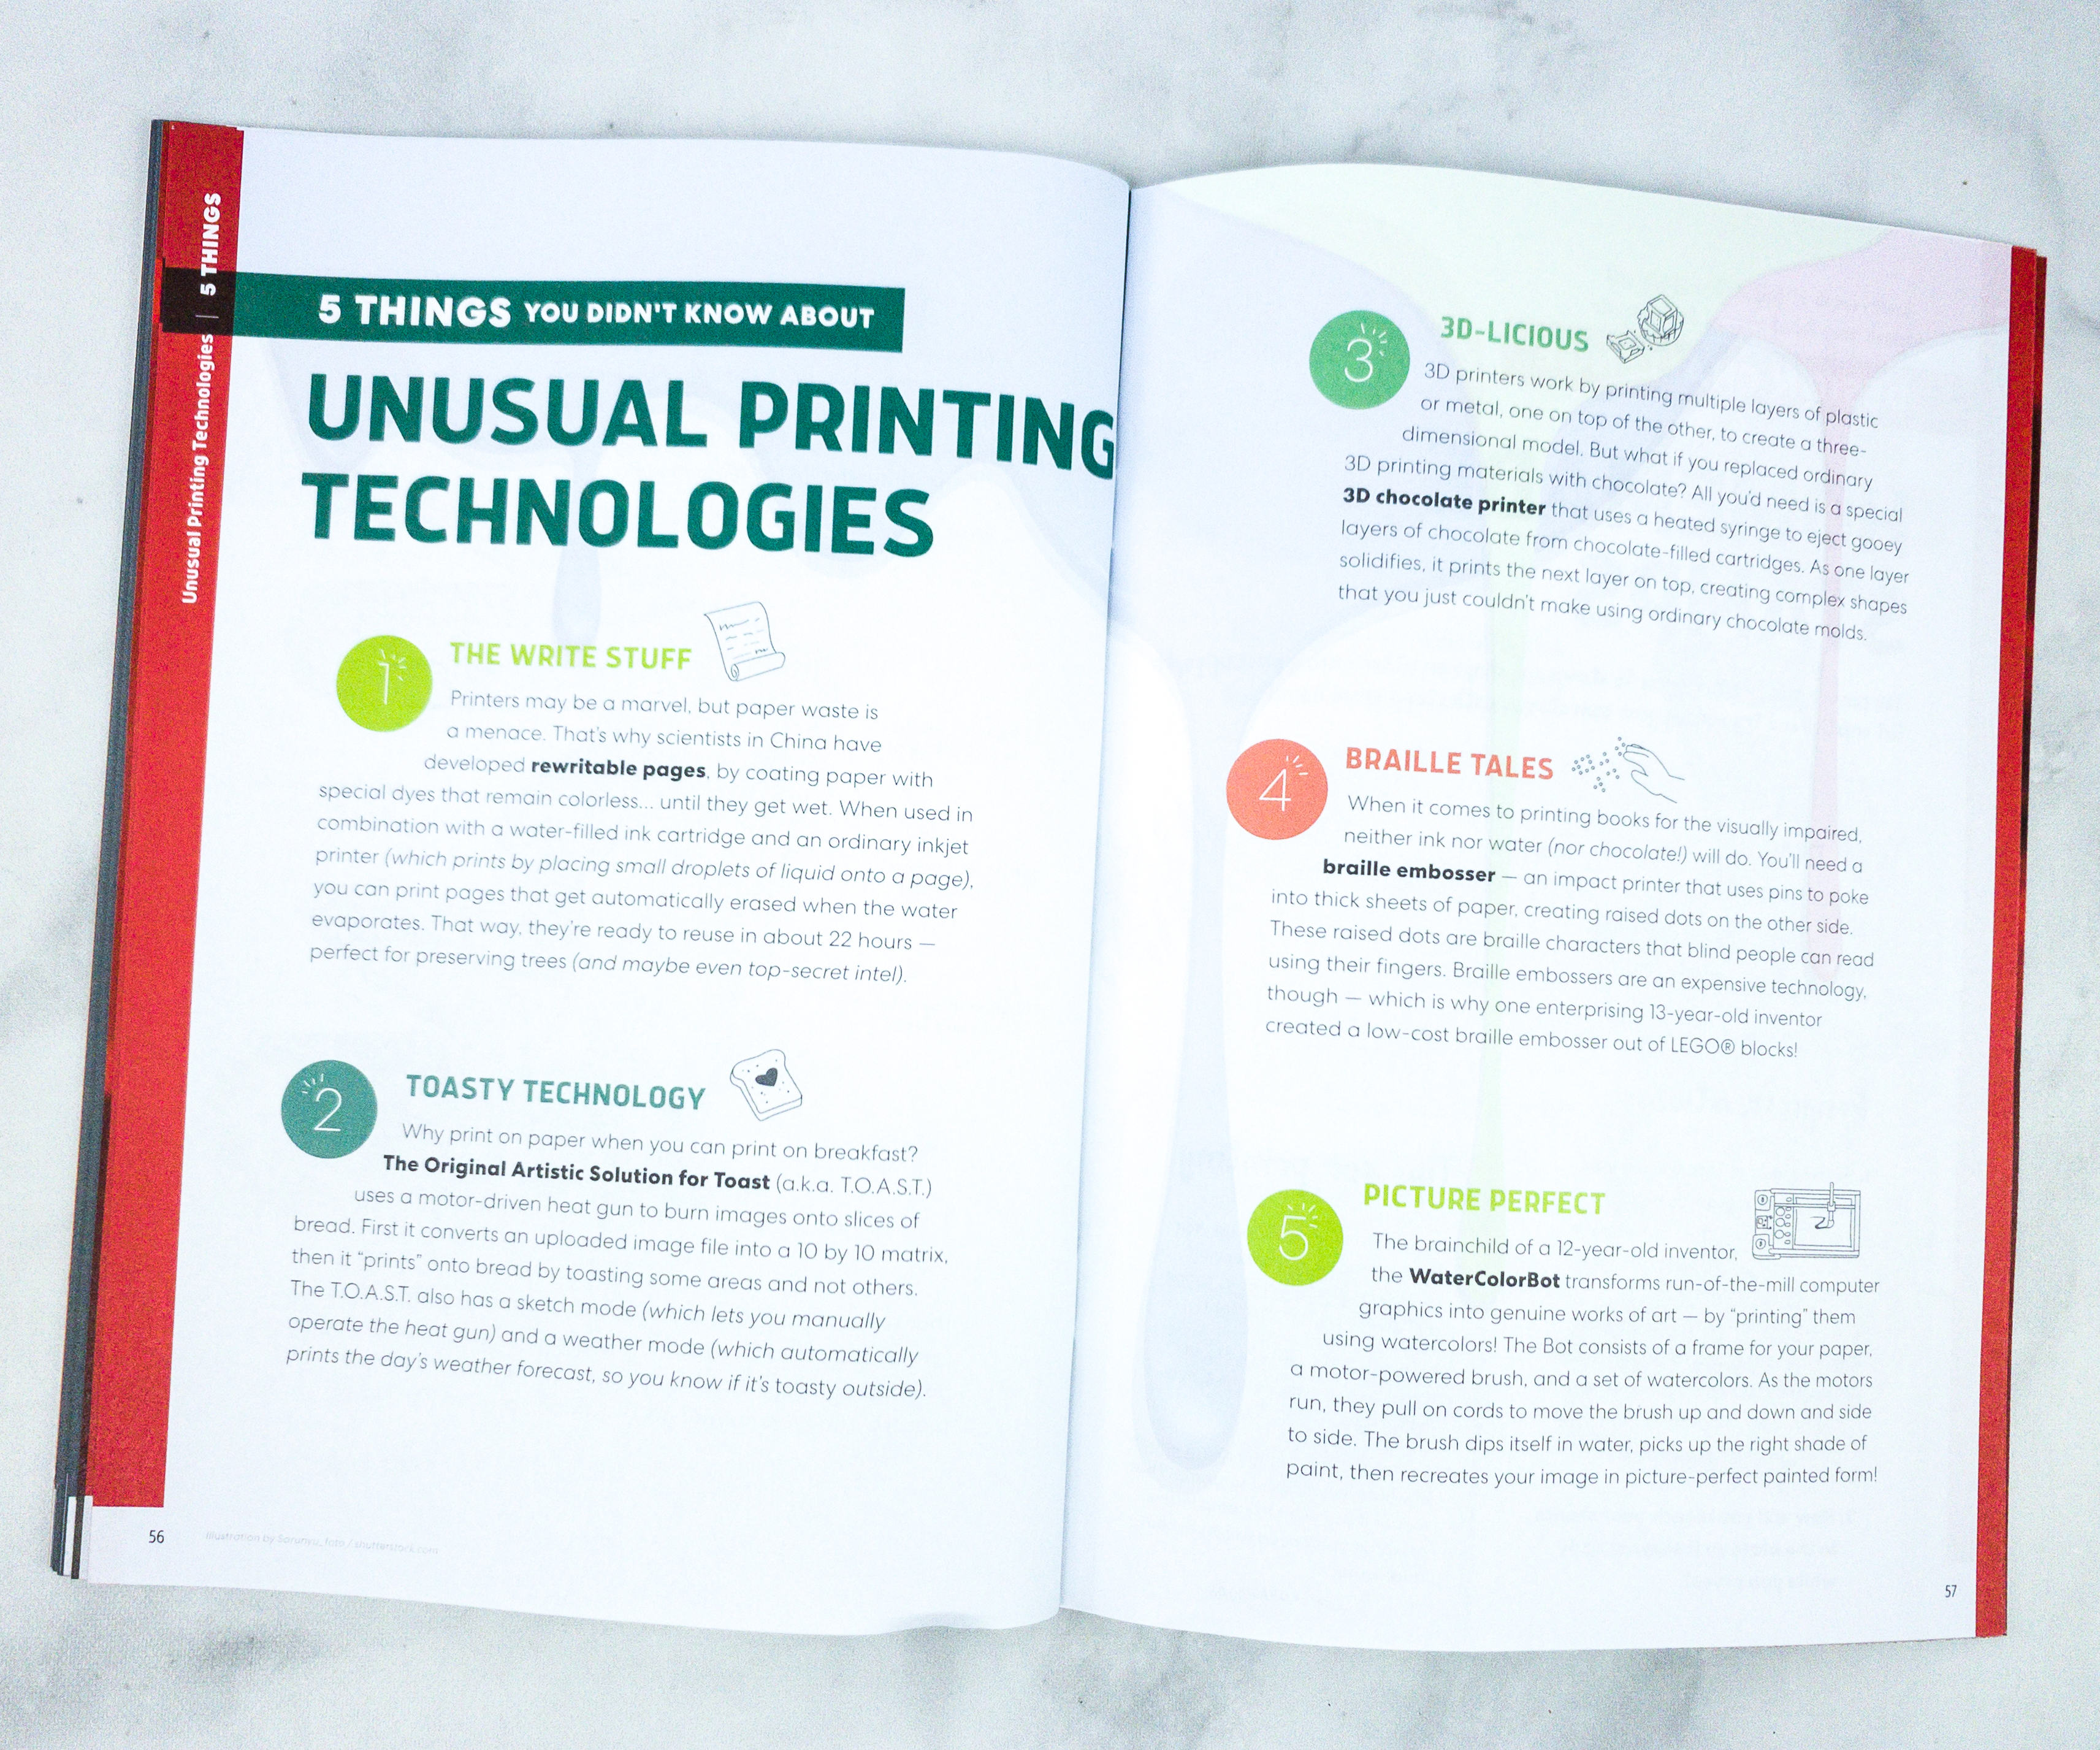
Here’s another article that features the 5 things that you might not know about the unusual printing technologies.
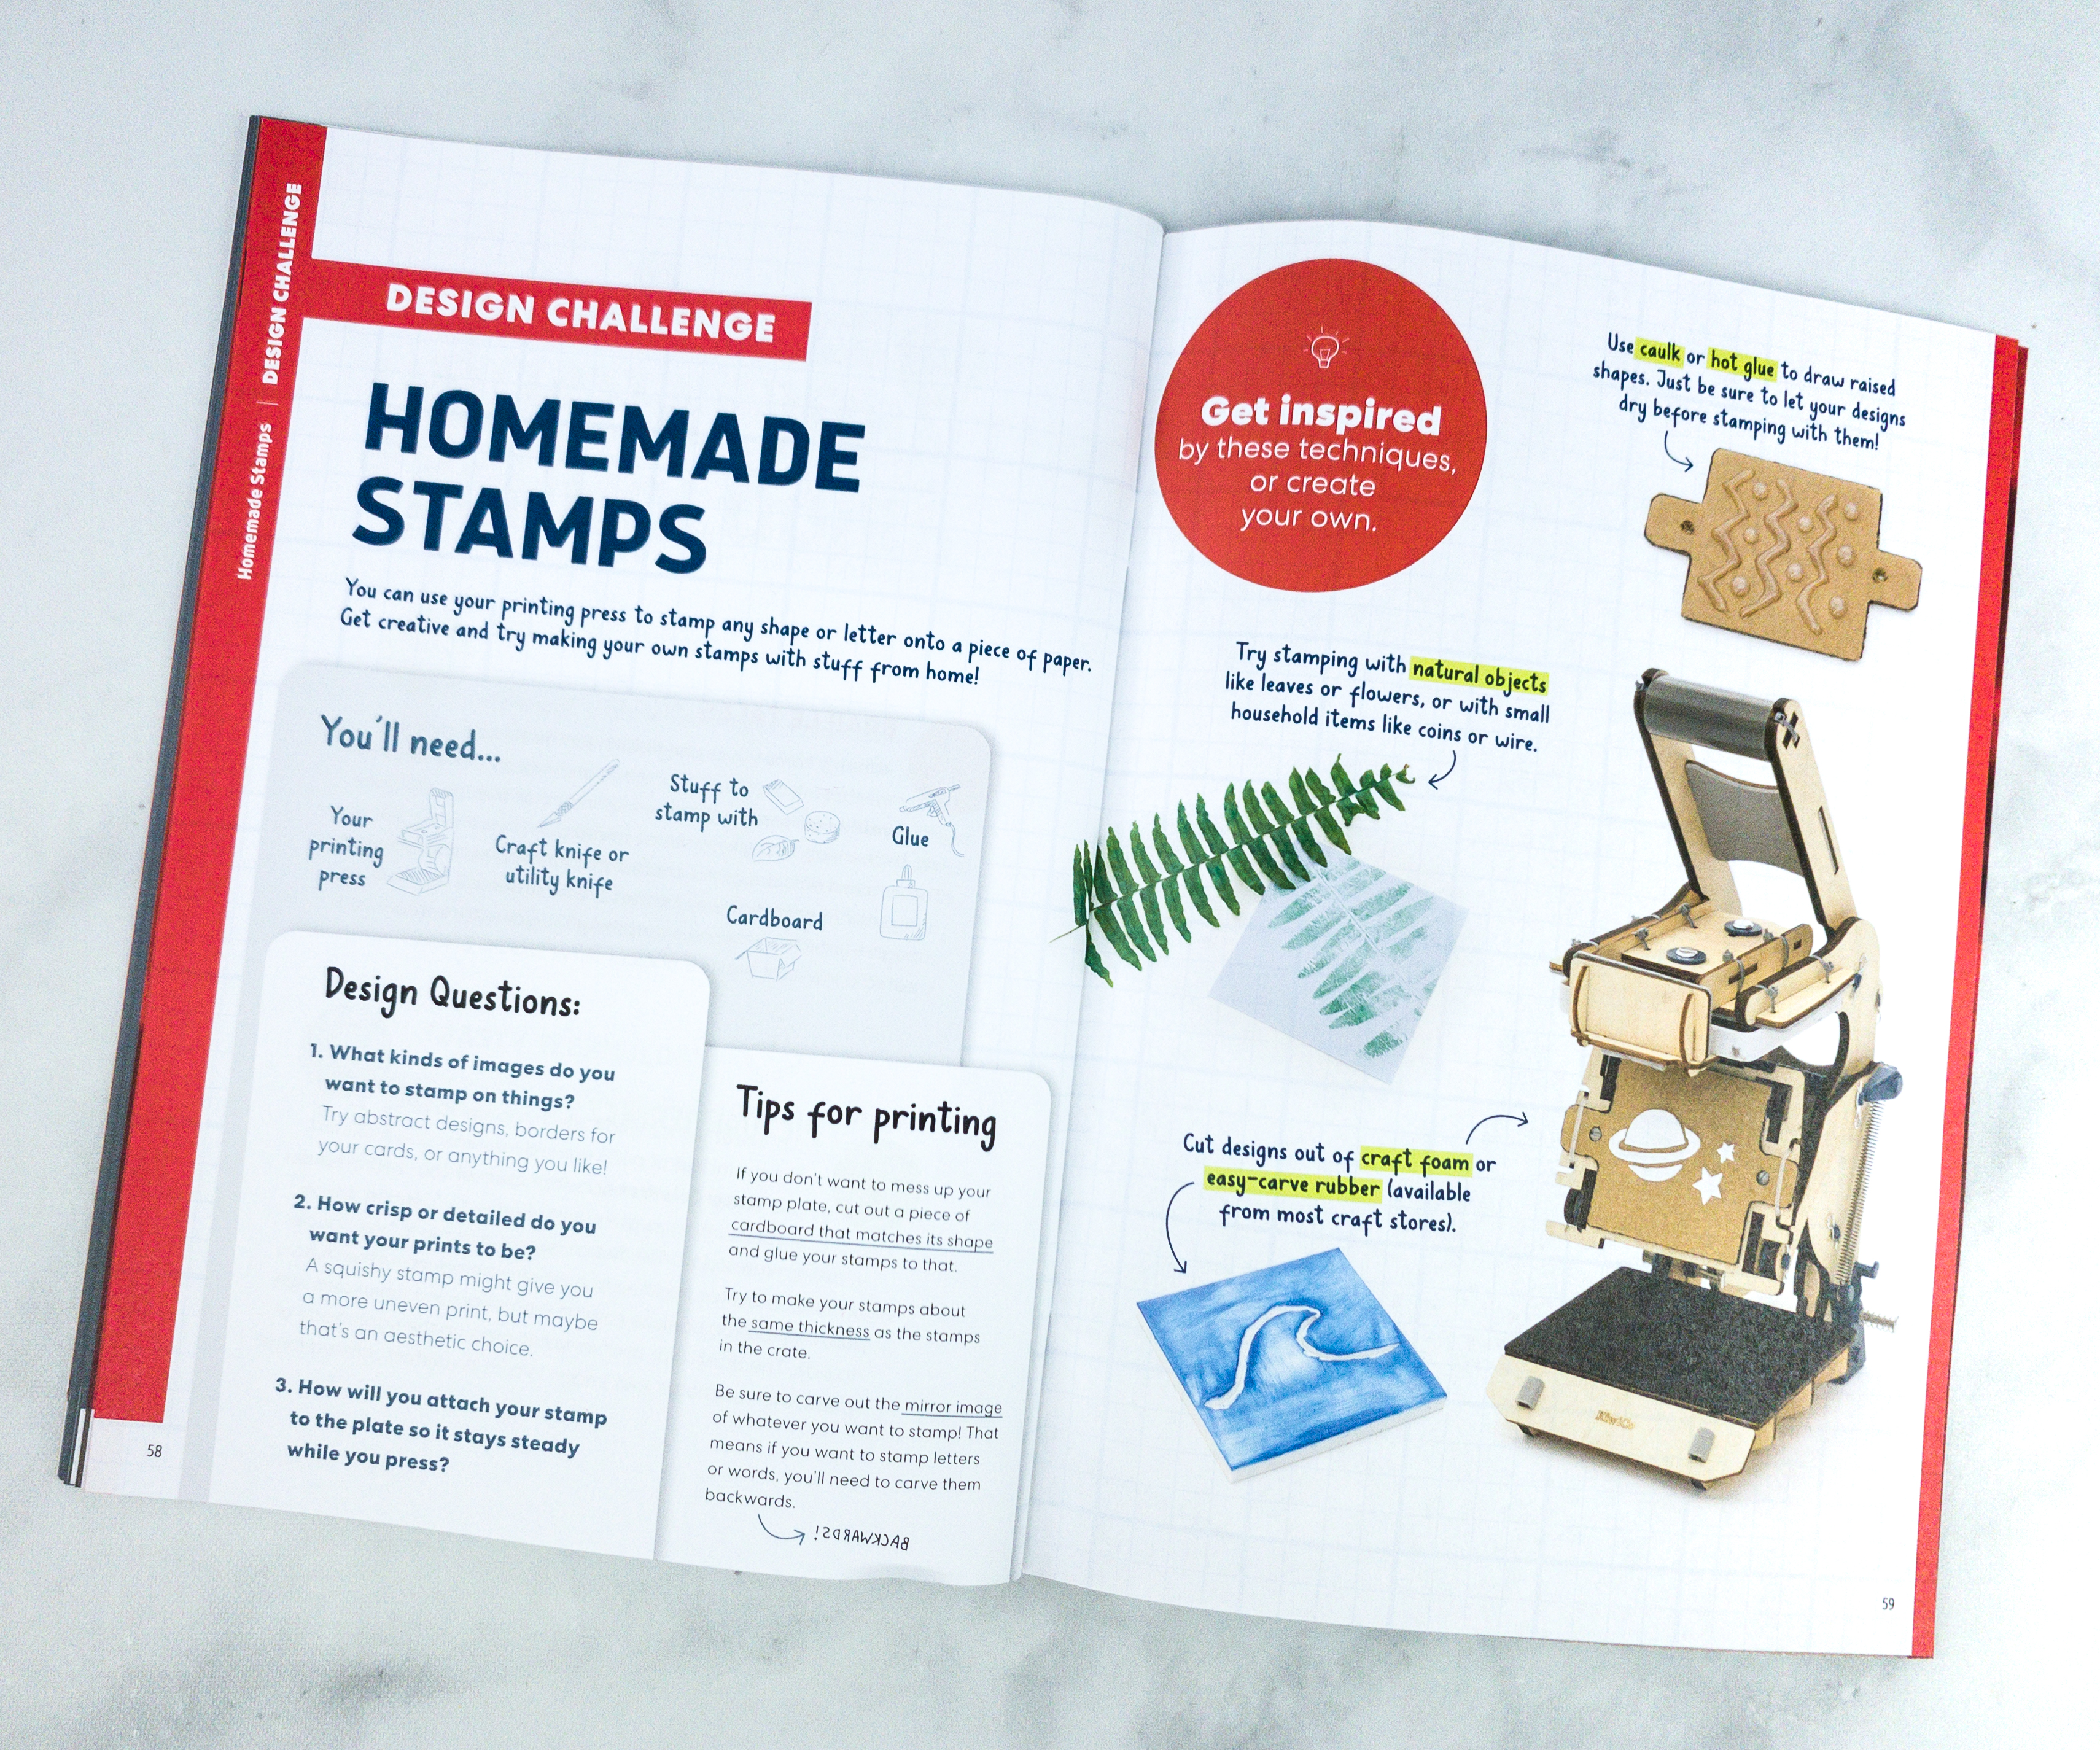
For the Design Challenge, they featured homemade stamps and provided instructions on how to create stamps with items from home!
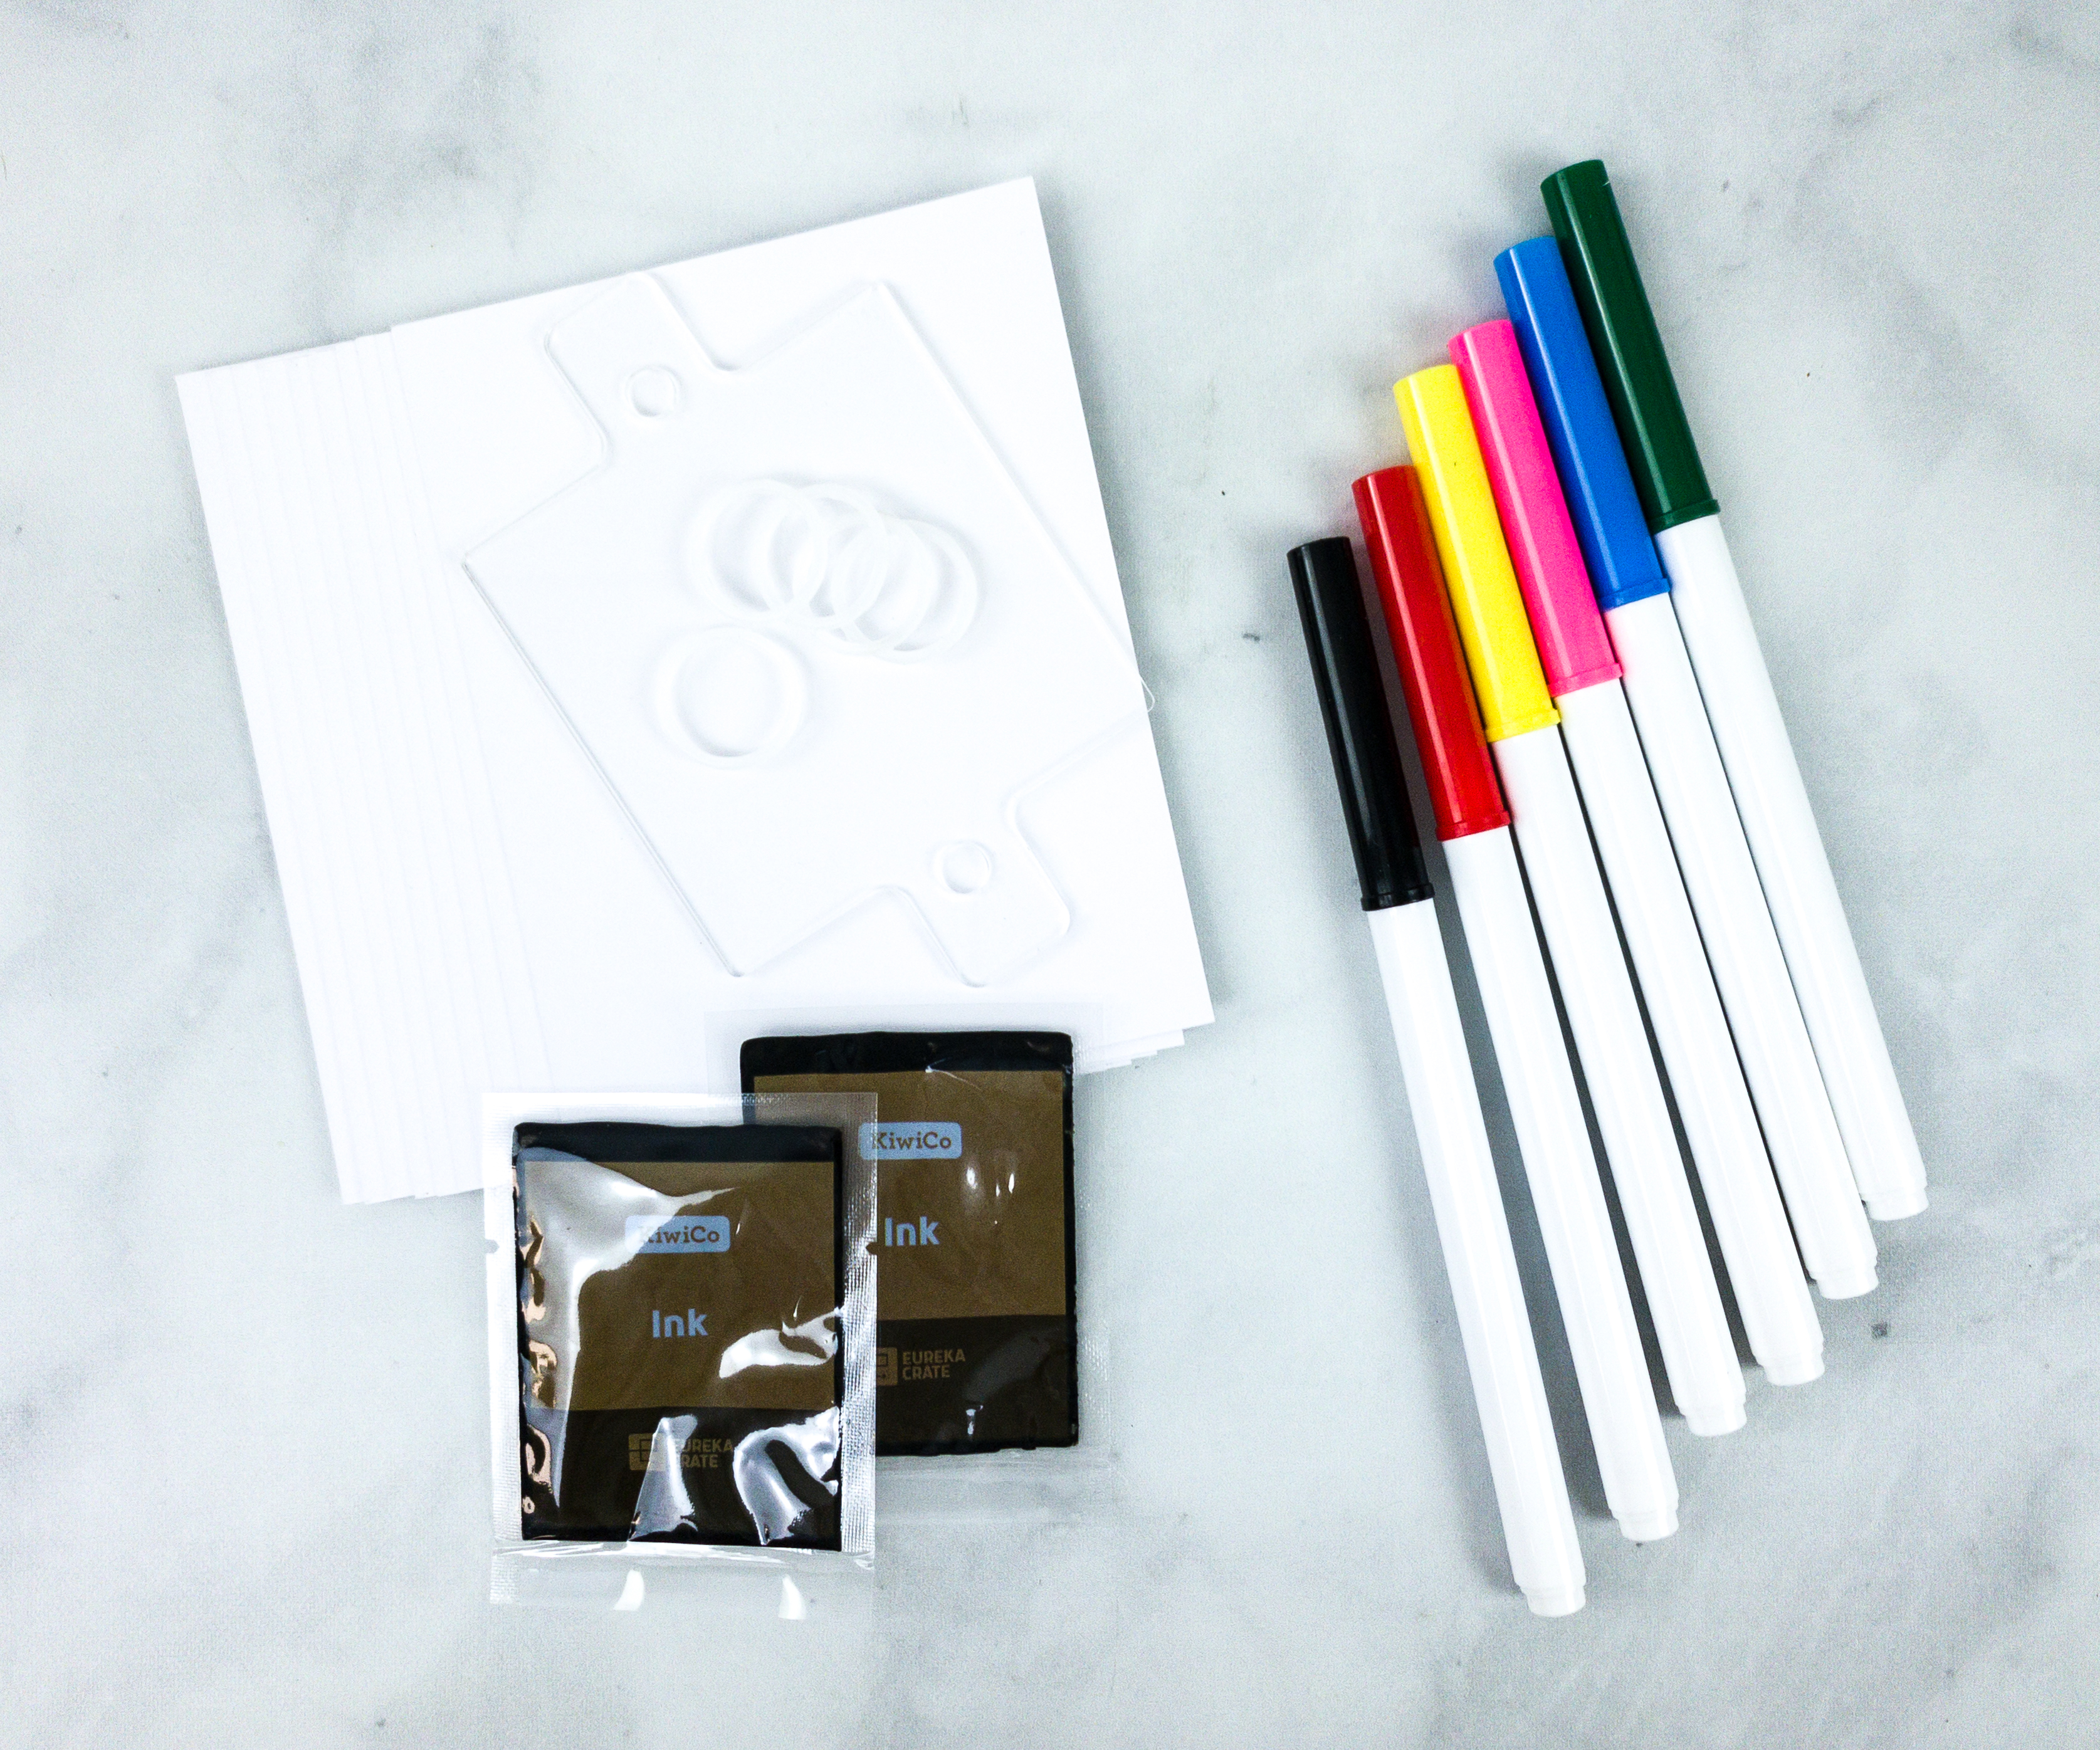
The crate also included these colorful marker pens, so we can complete the stamp art!
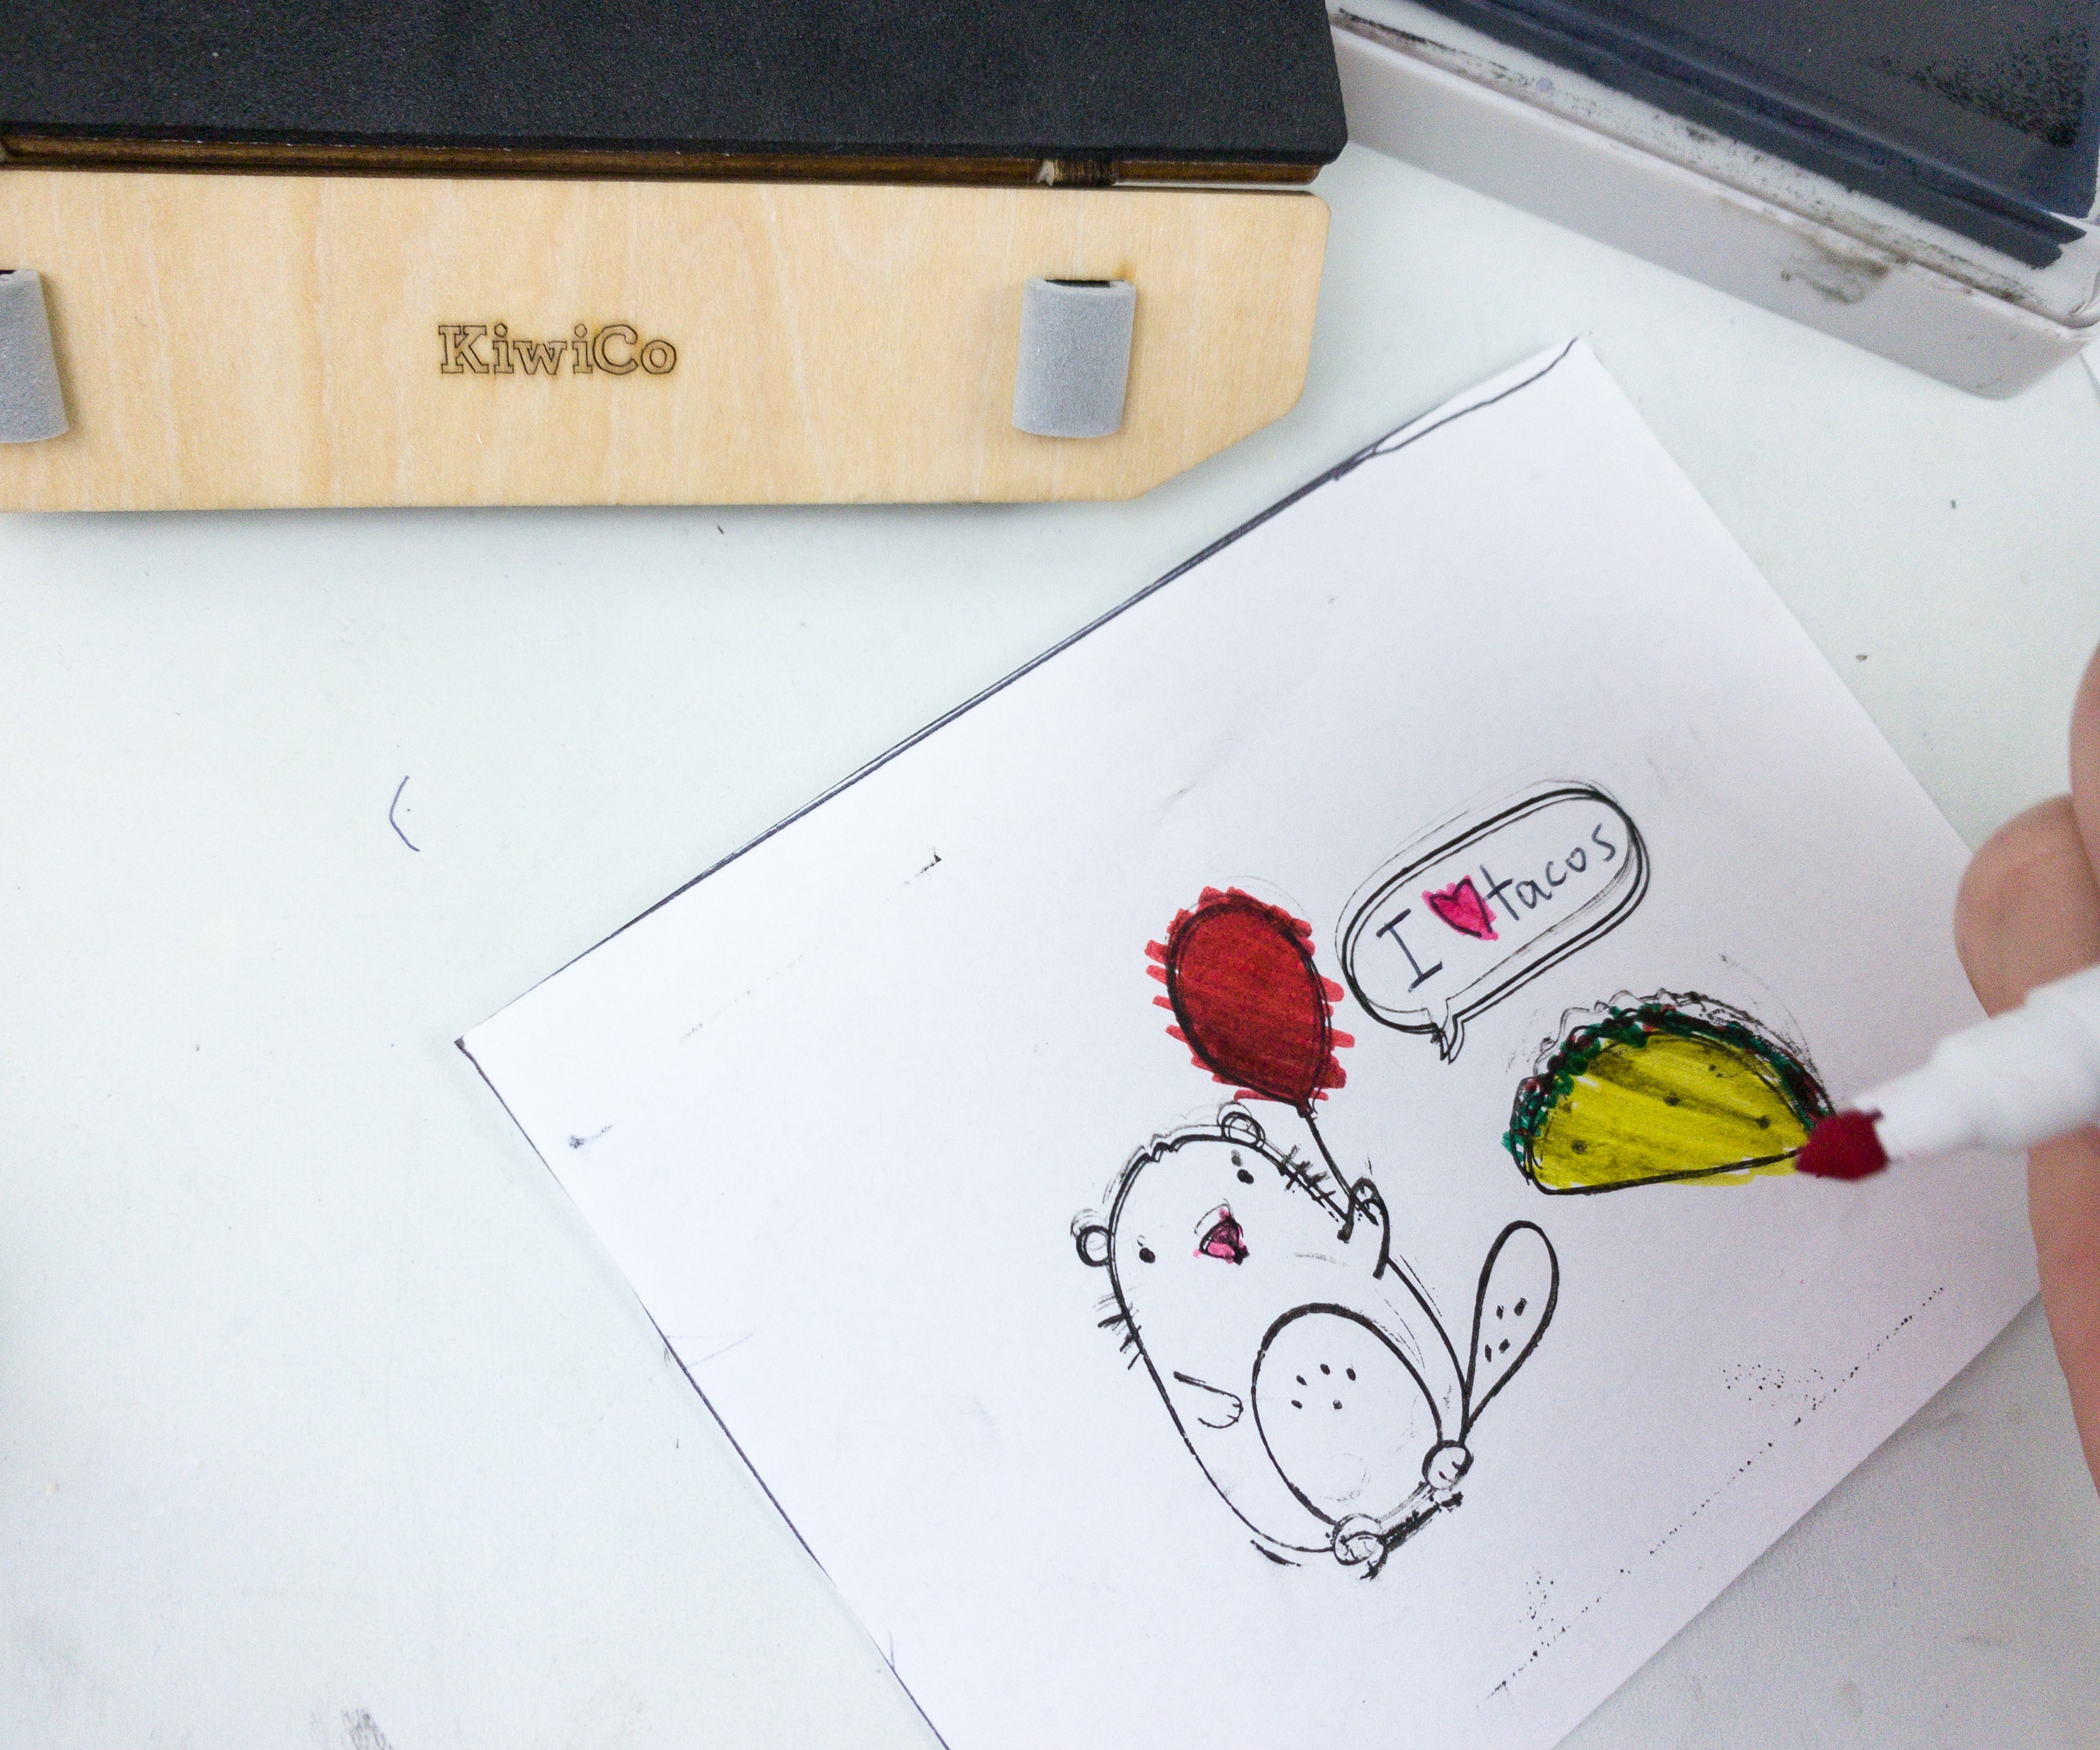
My daughter chose the beaver with a balloon and a taco. It’s cute!
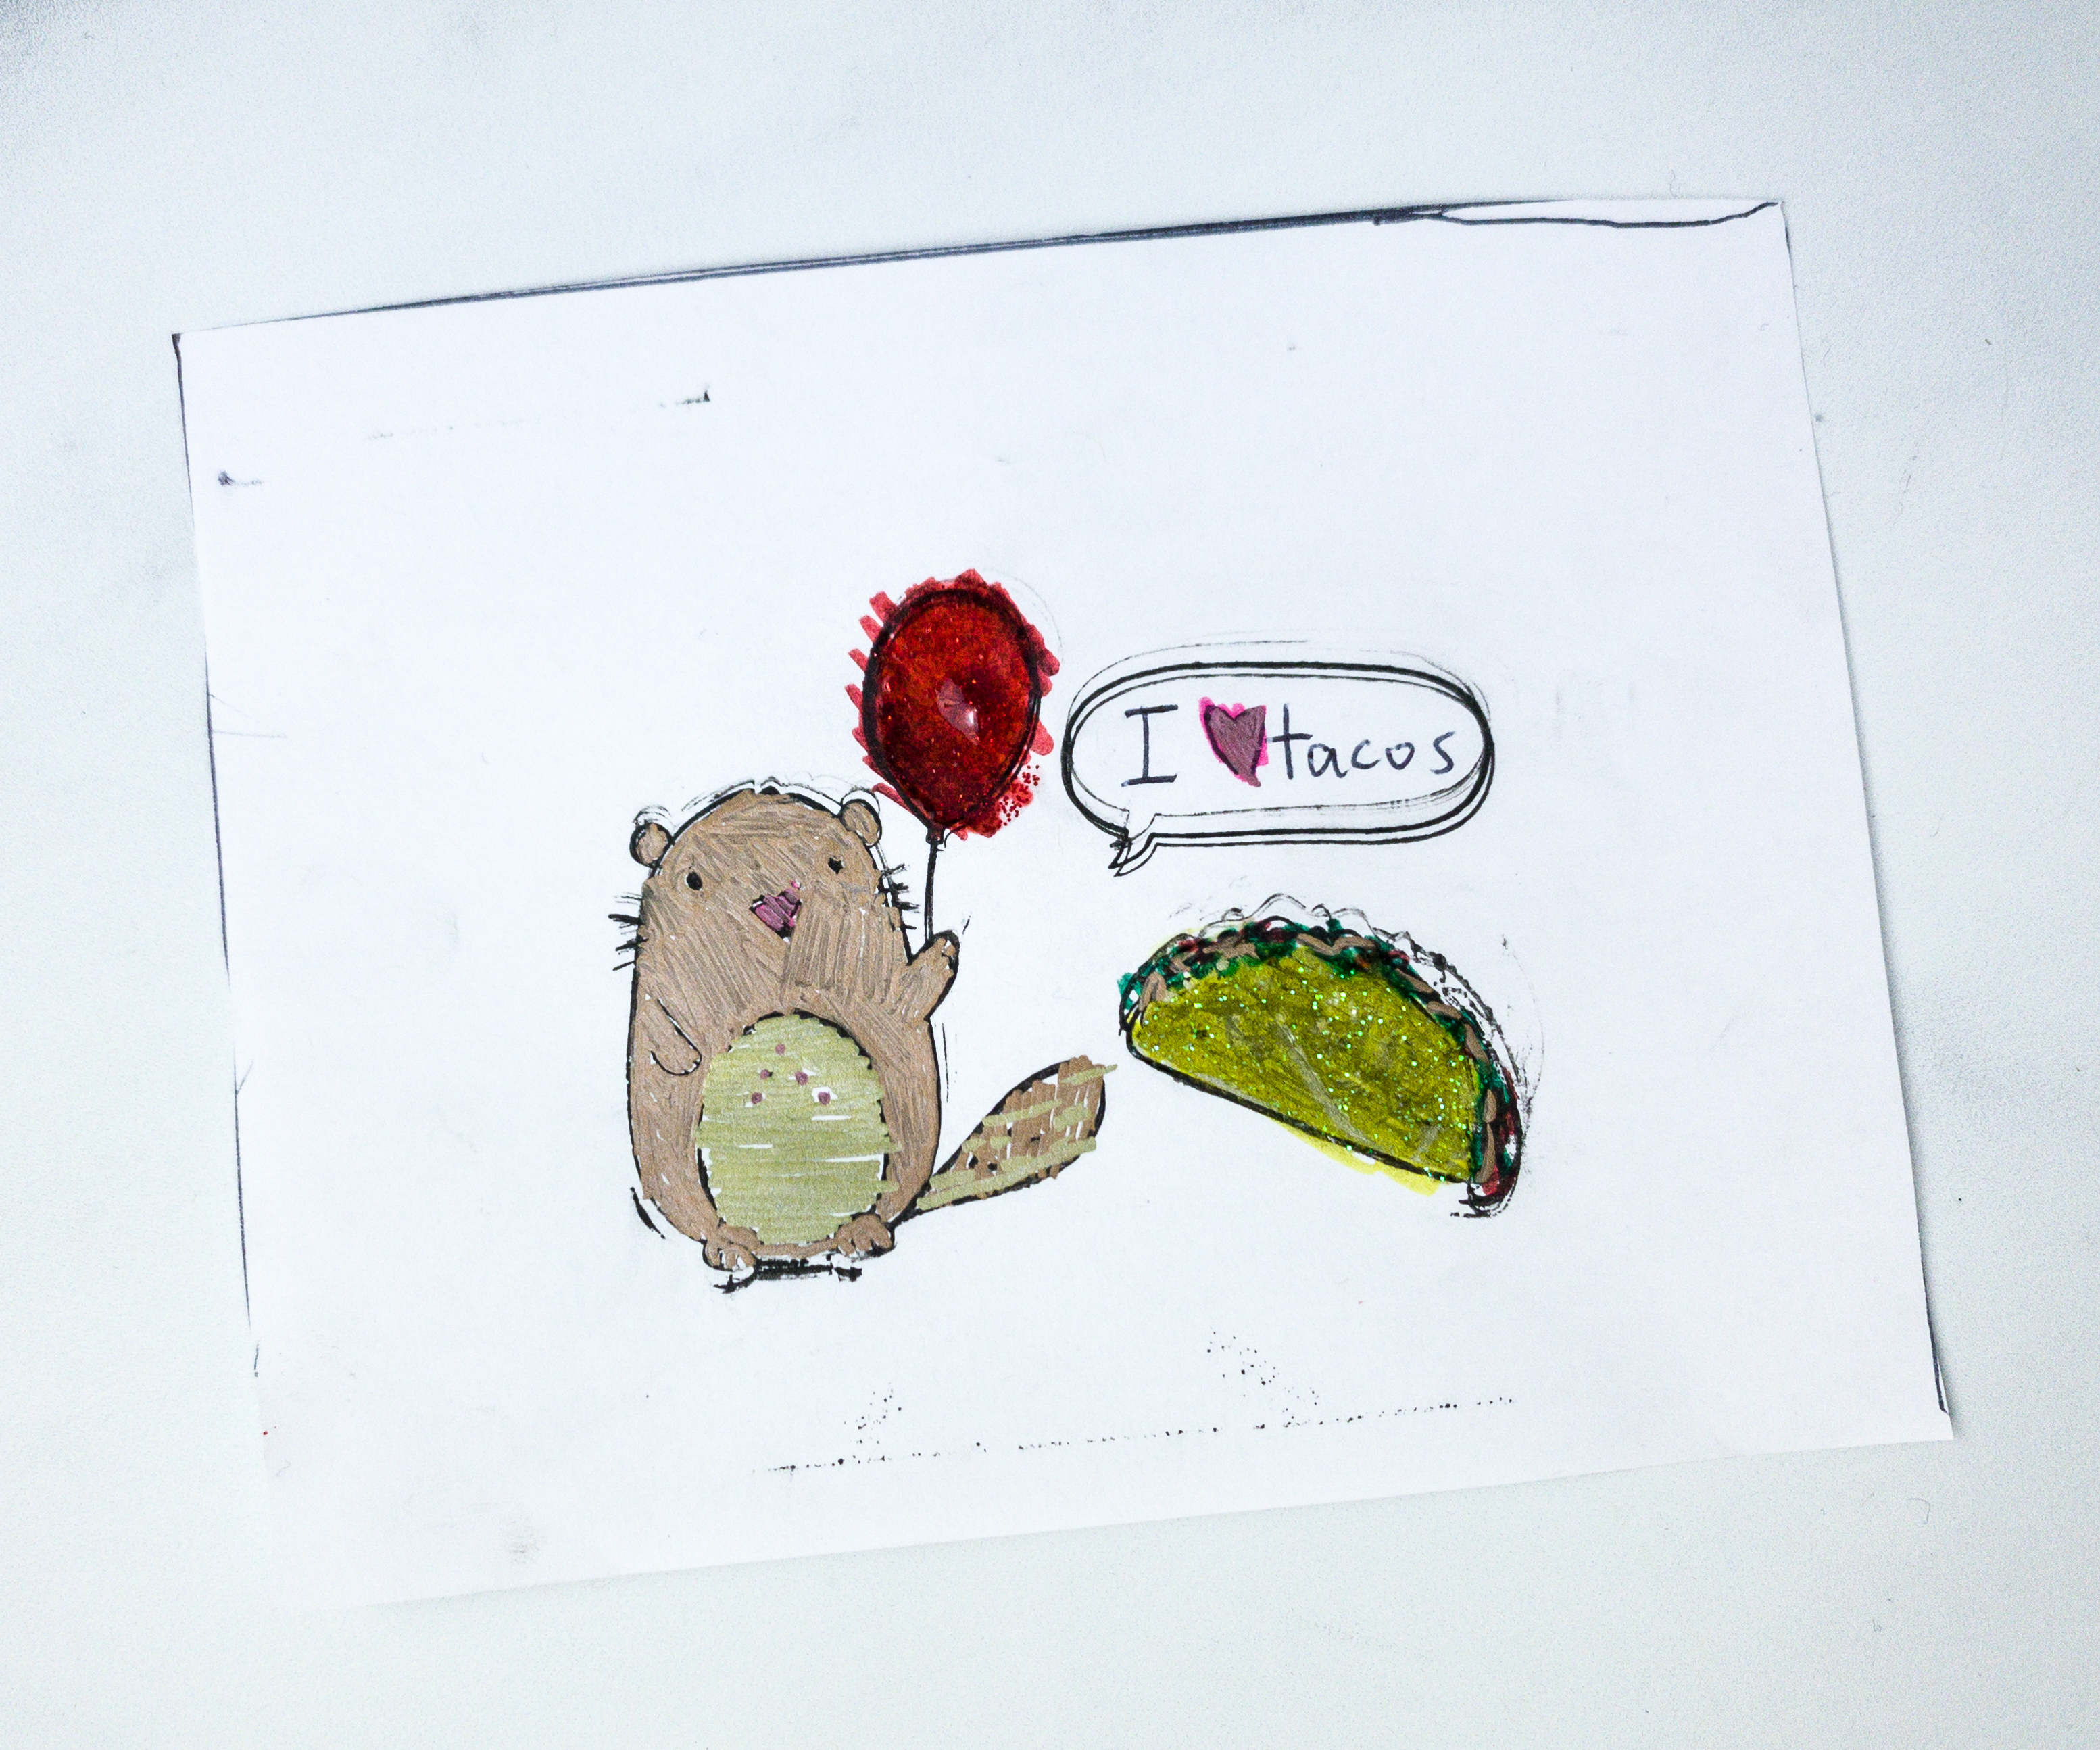
Here’s the finished stamp art!
This printing press is a pretty awesome machine!
It’s a challenging build, but my daughter definitely enjoyed working on it!
We enjoyed this month’s Eureka Crate so much! Building a printing press is a bit challenging, but the result is totally worth it. Aside from building, my daughter also enjoyed creating stamp arts and her favorite design is definitely the beaver. The crate had everything we needed for the project, as always. We also appreciate the comprehensive booklet, with thorough explanations and well-detailed instructions. This is truly a great subscription for any older teen or even adults who are looking for a fun and productive activity that they can do at home! Plus, the Eureka Crate builds really last, and putting one together melds the design principles with know-how, leading you to truly understand how things work!
What do you think of this month’s Eureka Crate?


Comments