
Eureka Crate is a monthly STEM and maker subscription box that teaches kids and adults how to apply principles of science and math to make awesome things you will love to use every day – from an articulated desk lamp to an electric pencil sharpener to a wooden ukulele. Every Eureka Crate includes an engineering project, detailed step-by-step instructions, everything you need to complete the project, a Maker’s Guide that explains all the design, process, and engineering behind the design, plus a design challenge to take your project knowledge to the next level!
DEAL: Save 30% on your first month! Just use this link to subscribe, no coupon code required! You can also use the same link to save 30% on the first month of any other KiwiCo crate – just check out this page to discover which box is right for you.
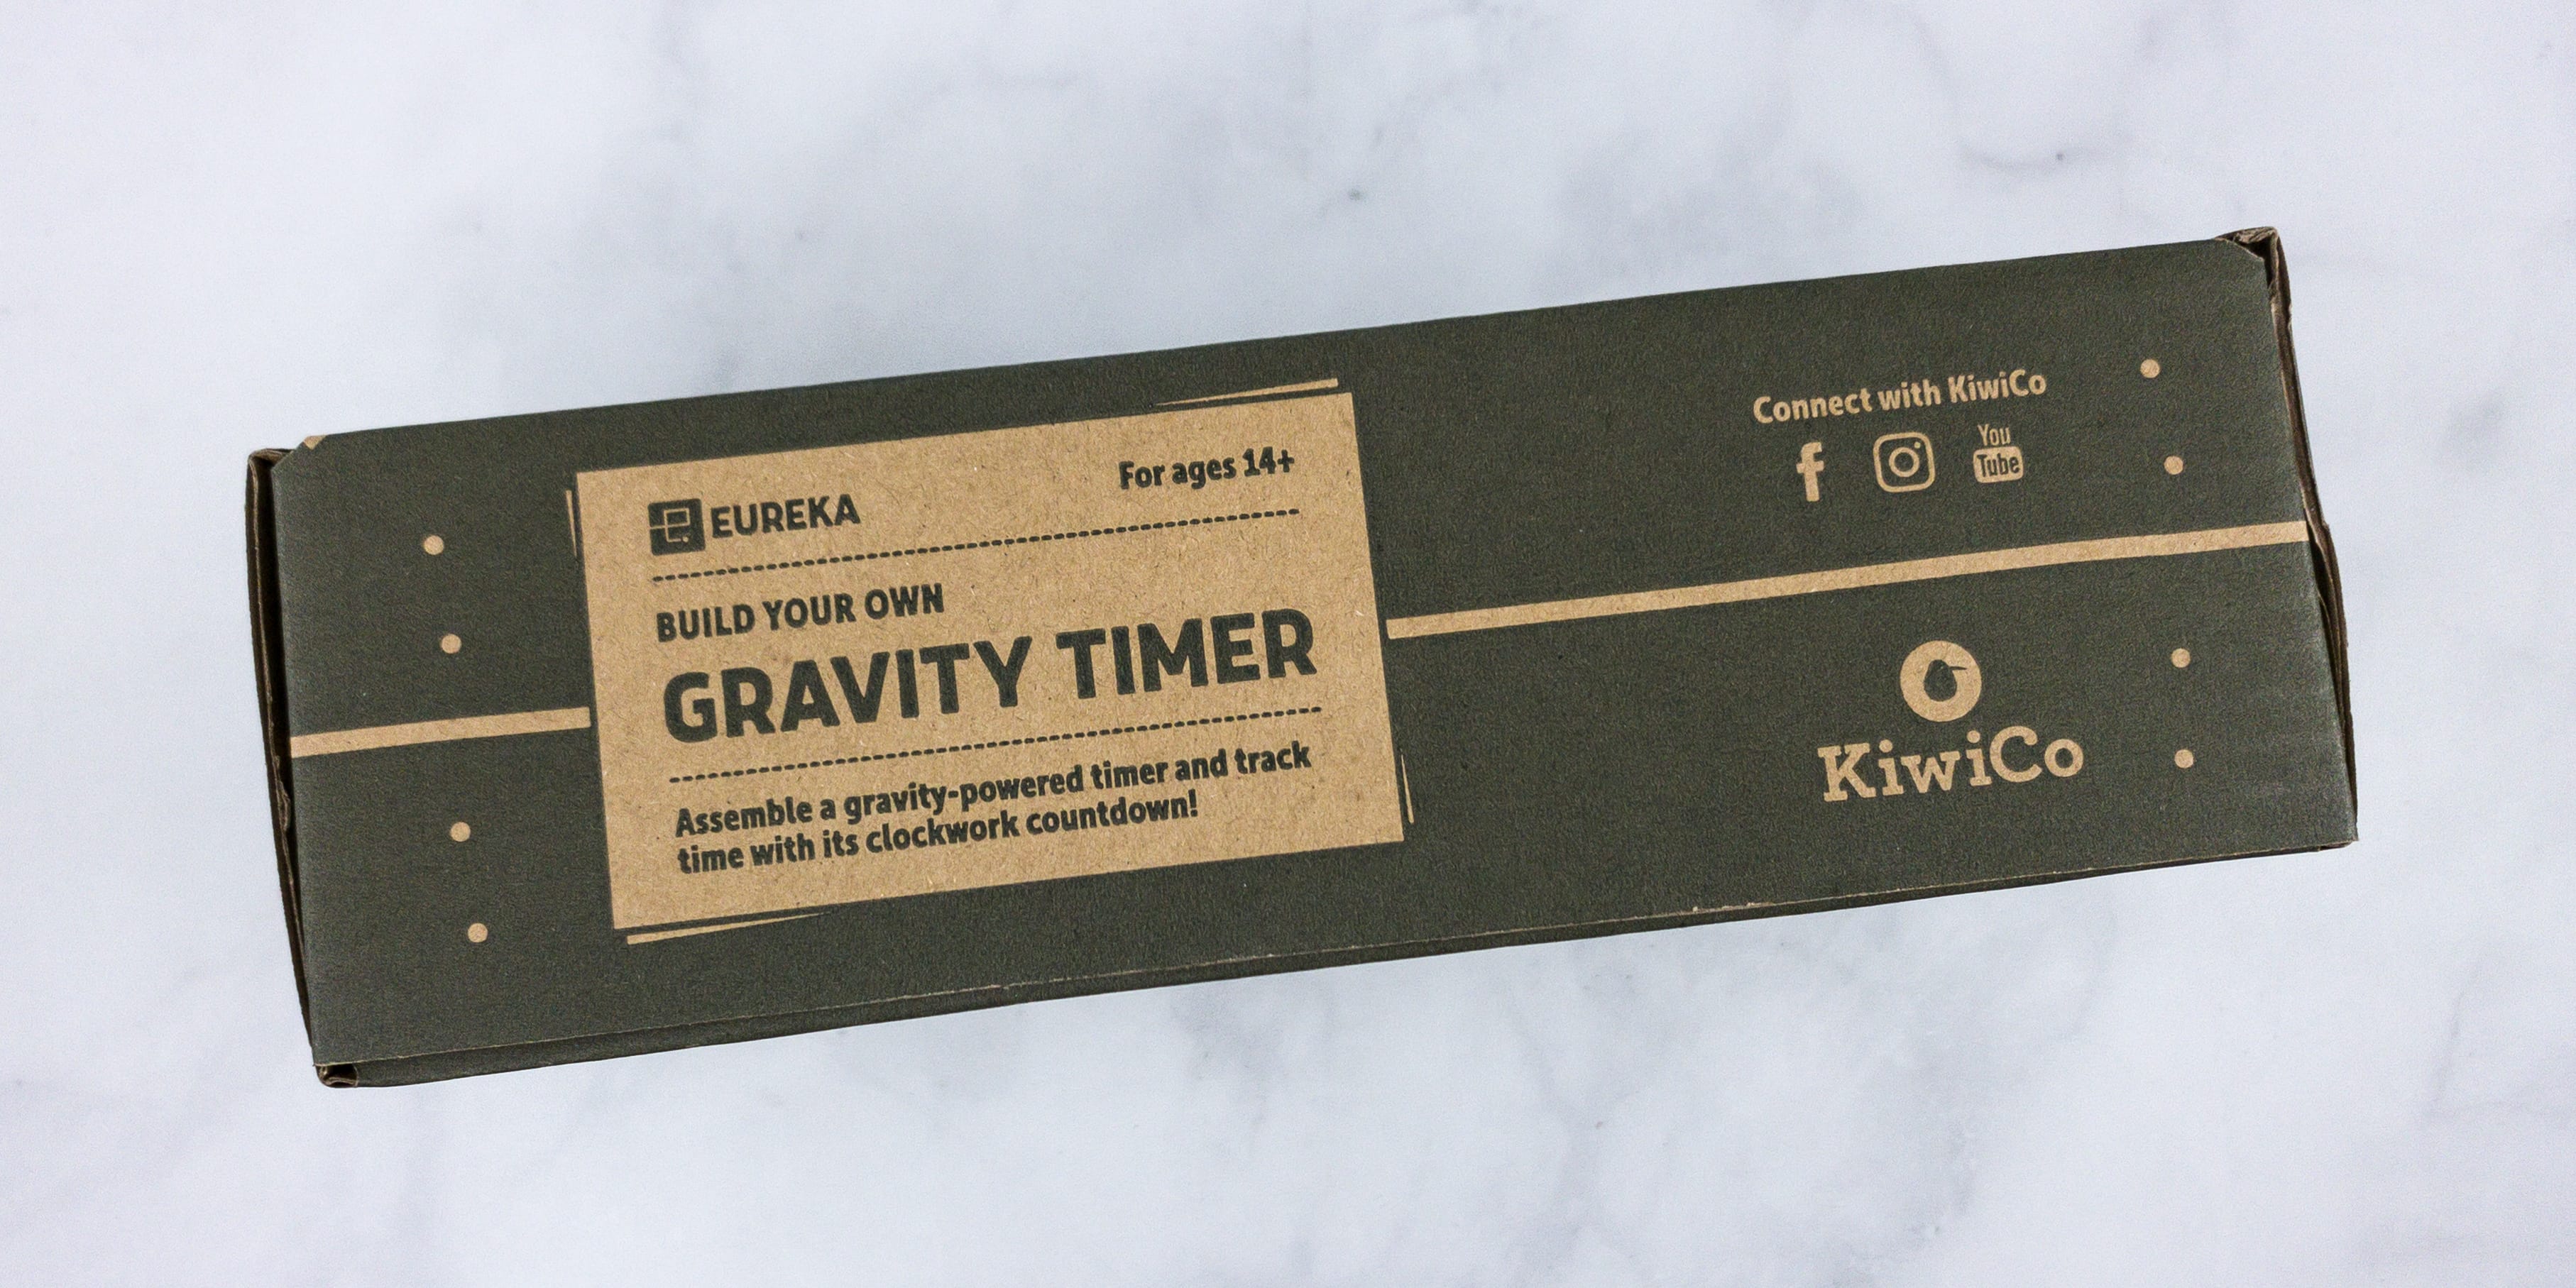
Eureka Crate is KiwiCo’s latest subscription! Eureka Crate is designed for ages 14-104. If you’re ready to graduate from KiwiCo’s other boxes or just can’t get enough (or are just too old for their other subscriptions), you’ll love this box, which is designed to create a hands-on learning experience using everyday items to delve deeply into the science and math principles they embody, along with the design process of the month’s project.
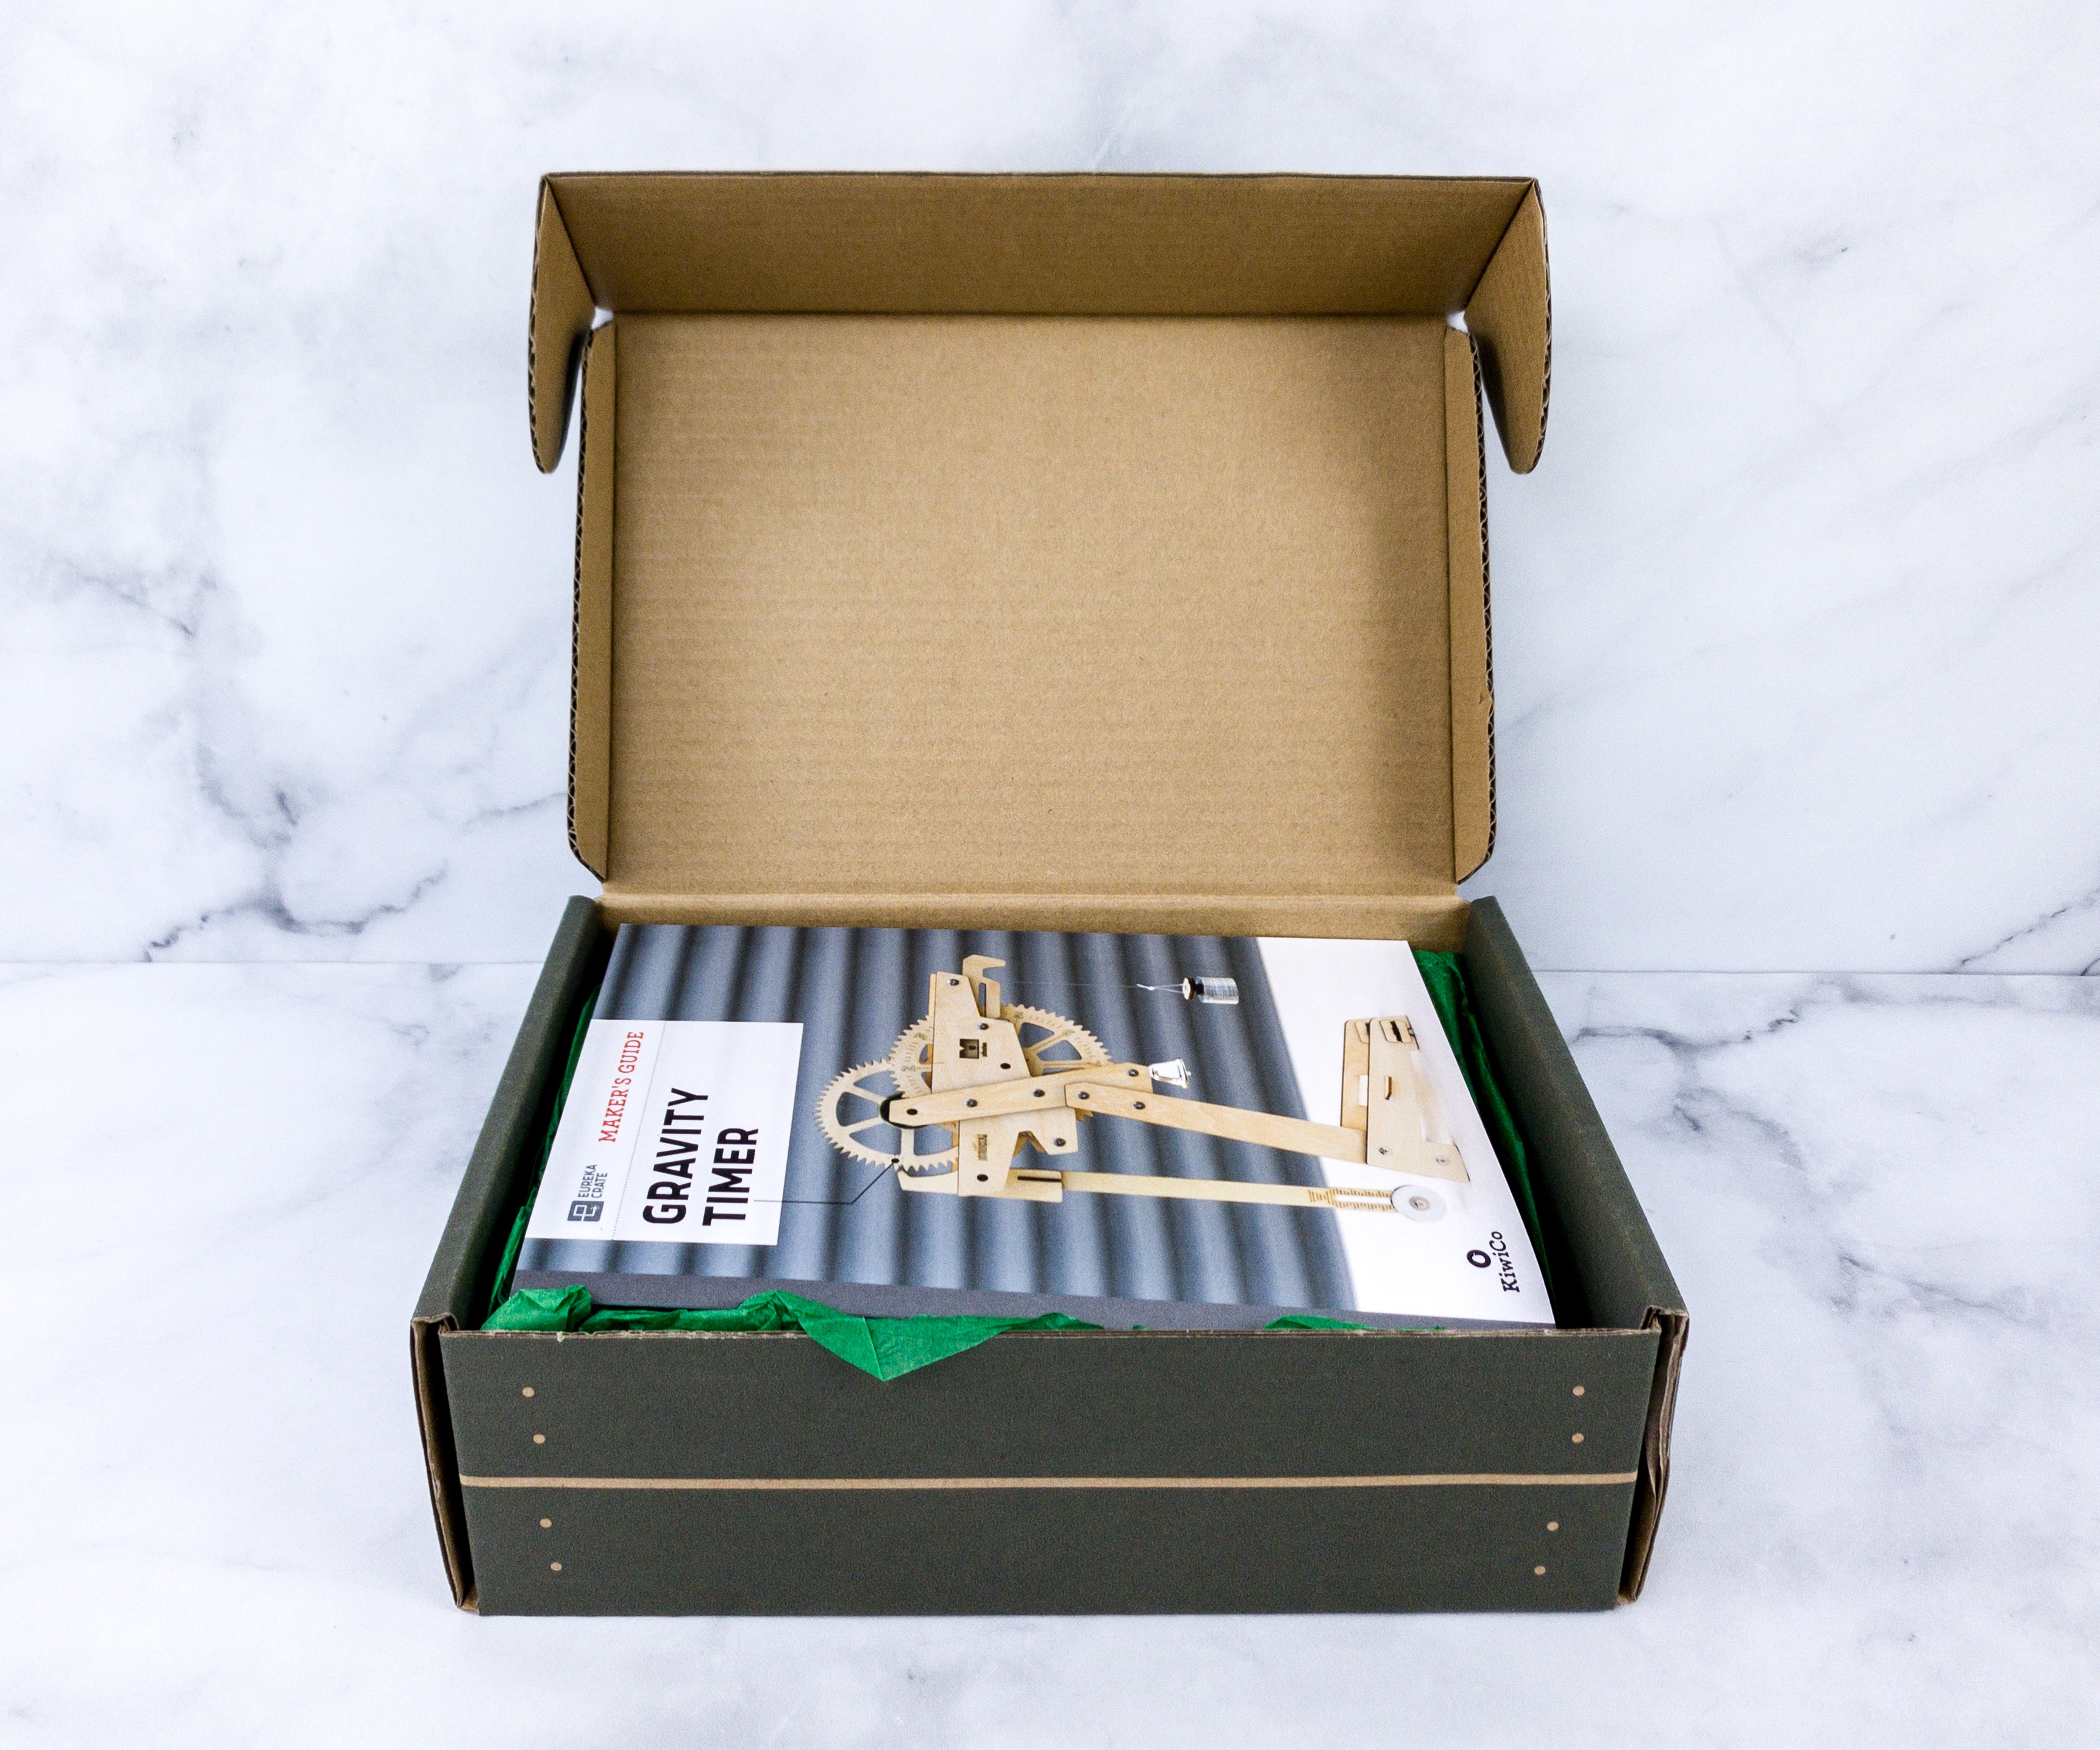
The box is full to the brim!
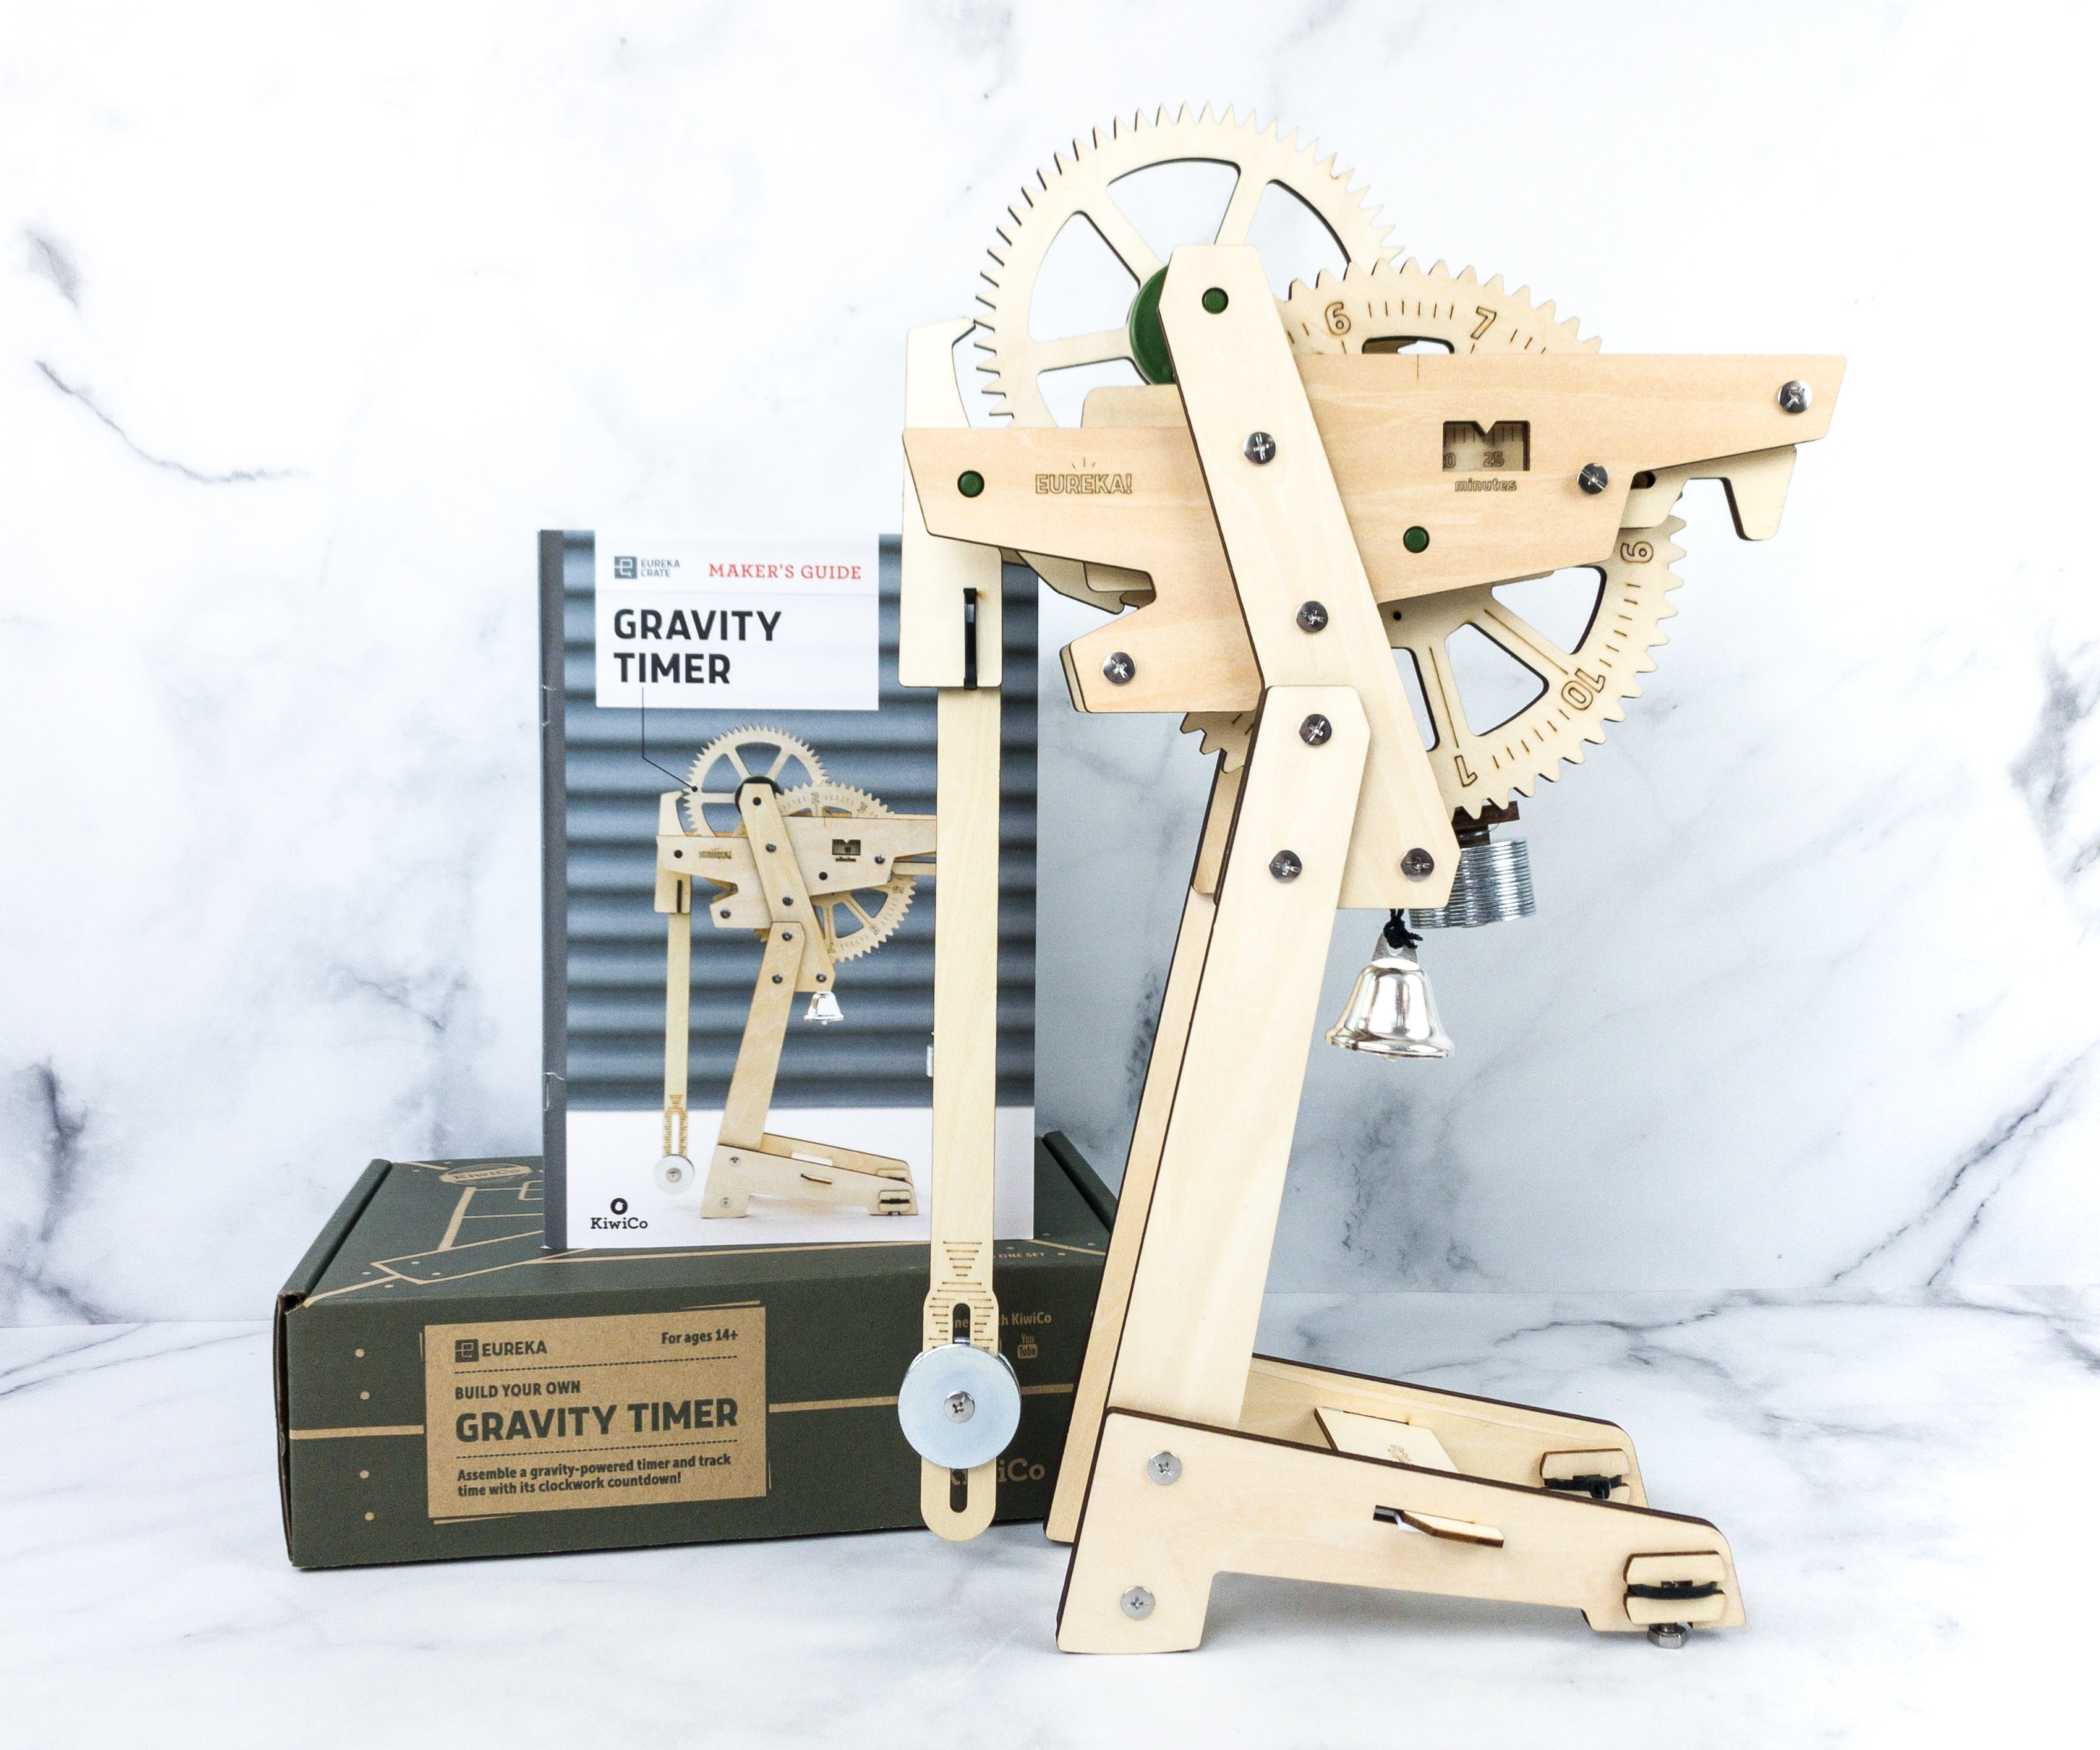
This month, we’re making a Gravity Timer!
Like the other crates from KiwiCo, Eureka Crate includes a booklet.

One of KiwiCo’s goals is to equip the next generation of innovators with the tools and confidence for creative exploration and problem-solving.
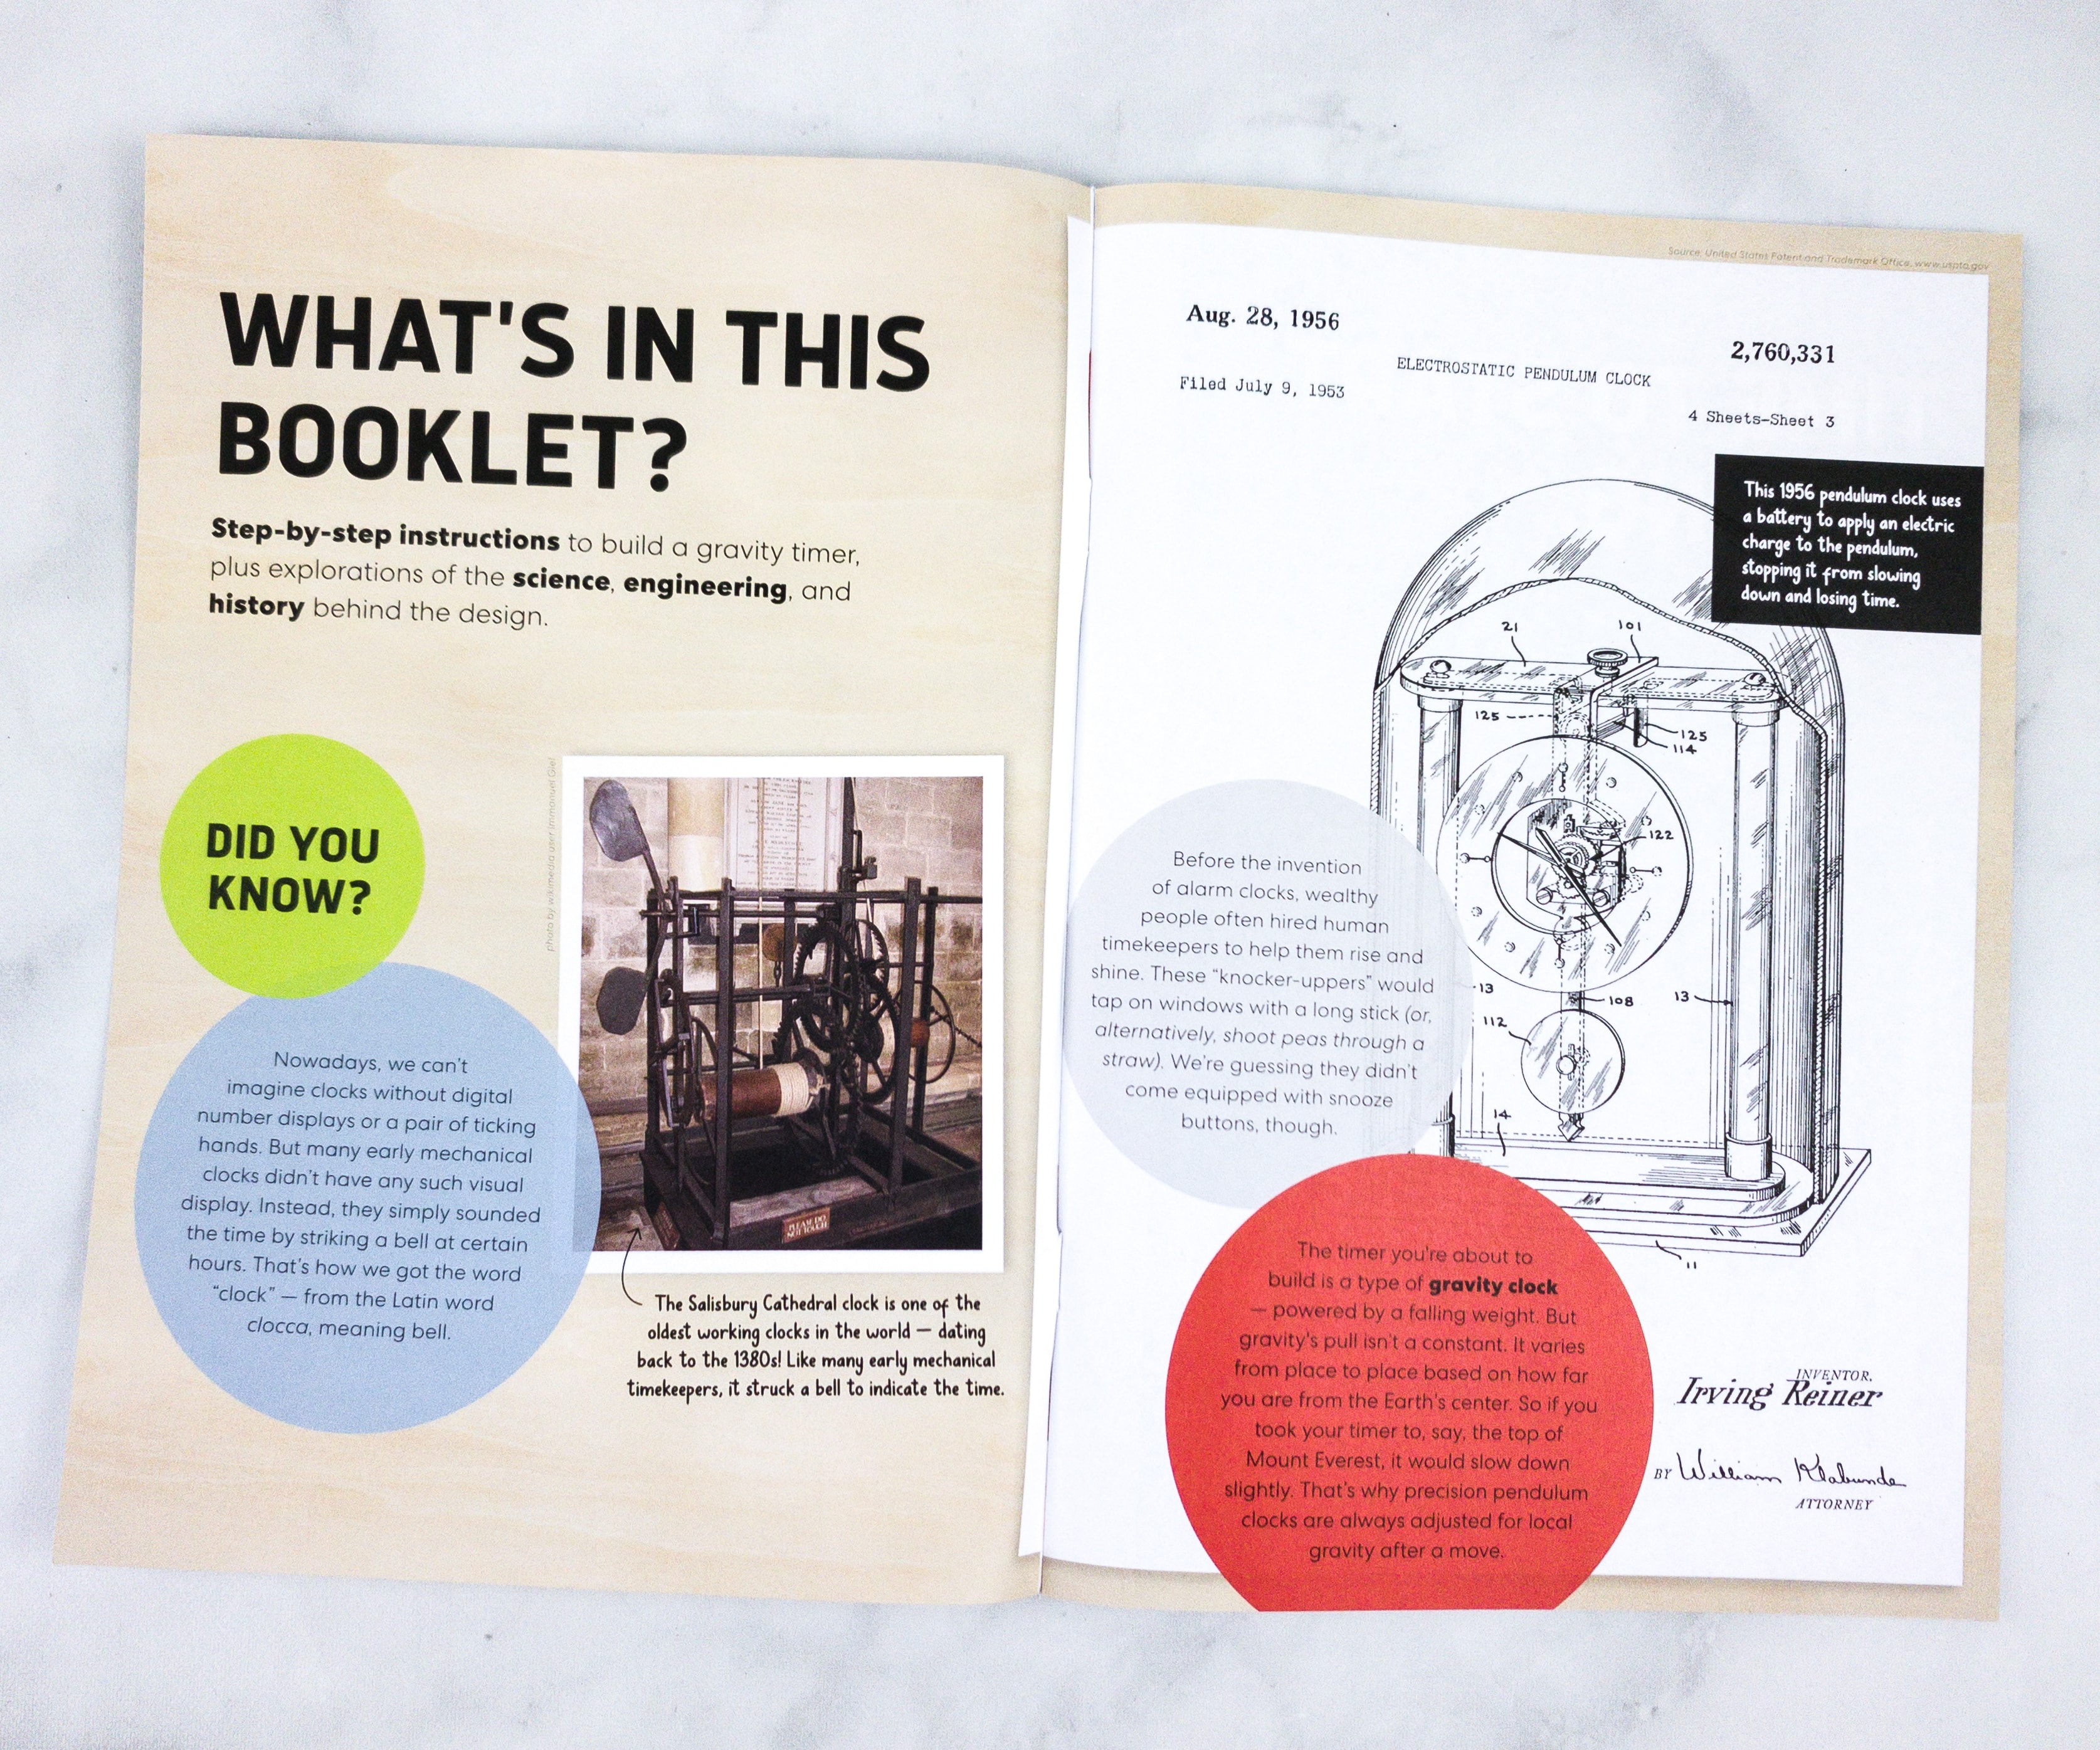
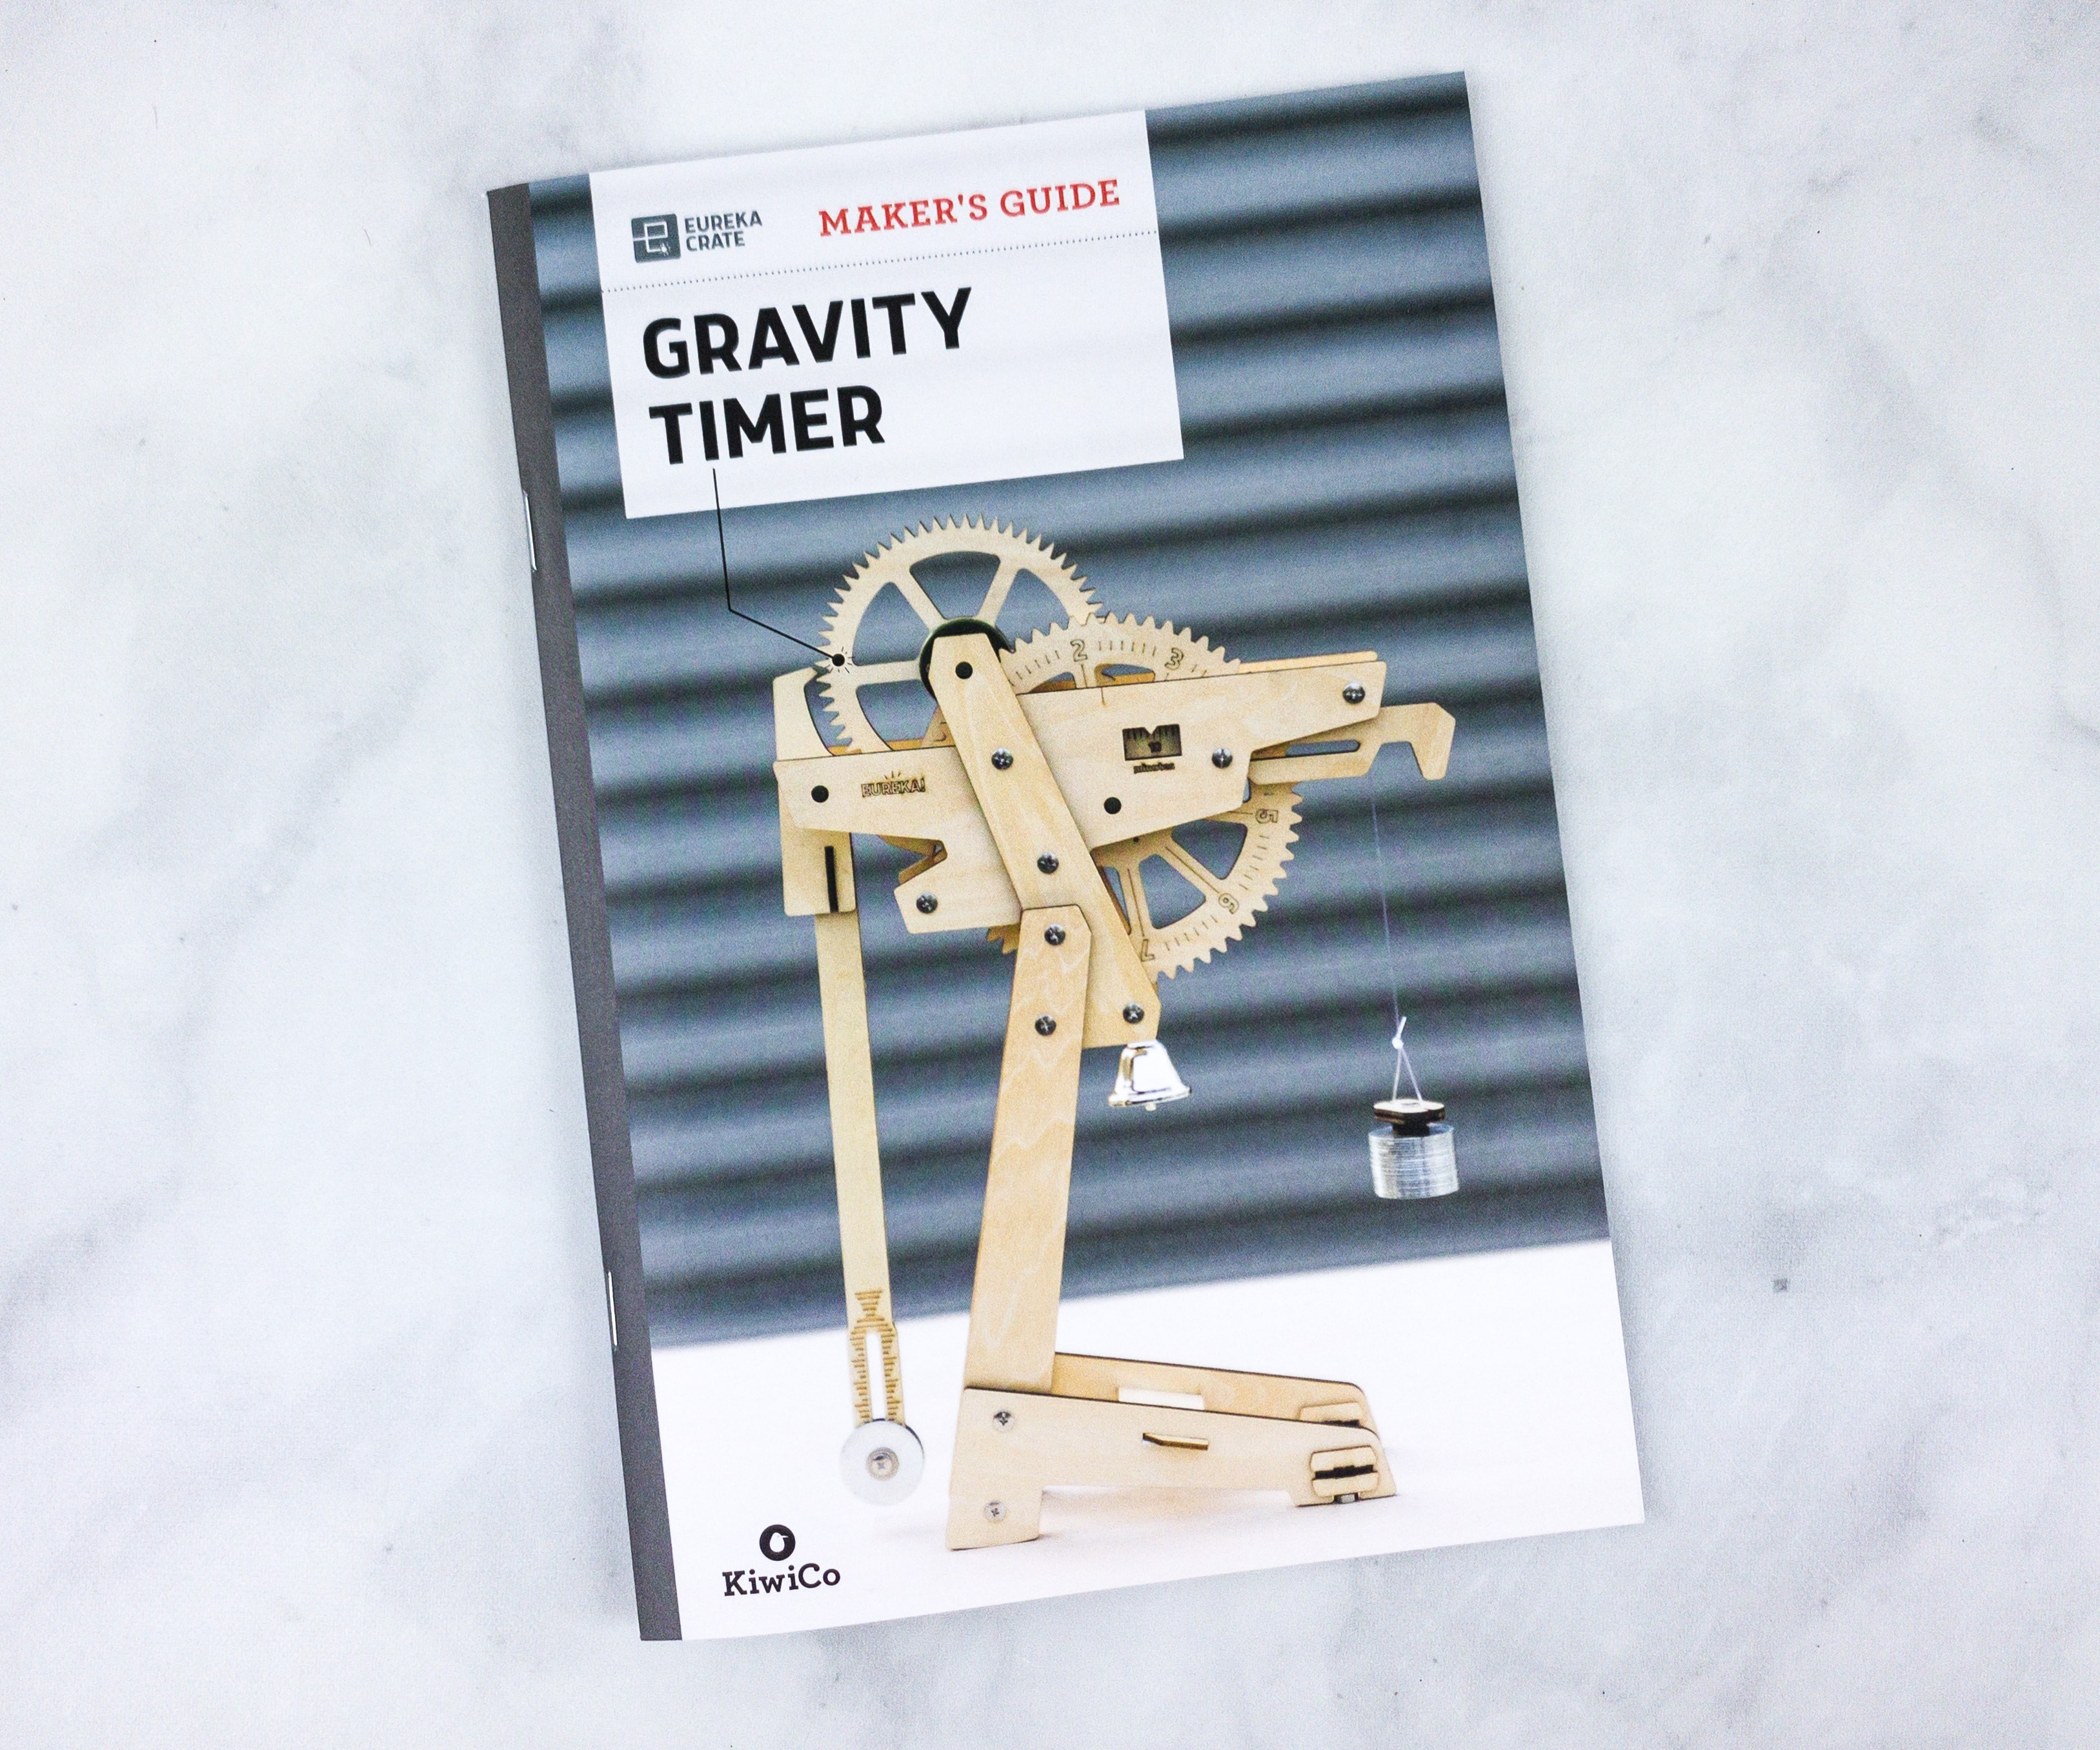
The booklet shares a complete history and details about this month’s project. They also included some fun facts and trivia related to the theme.
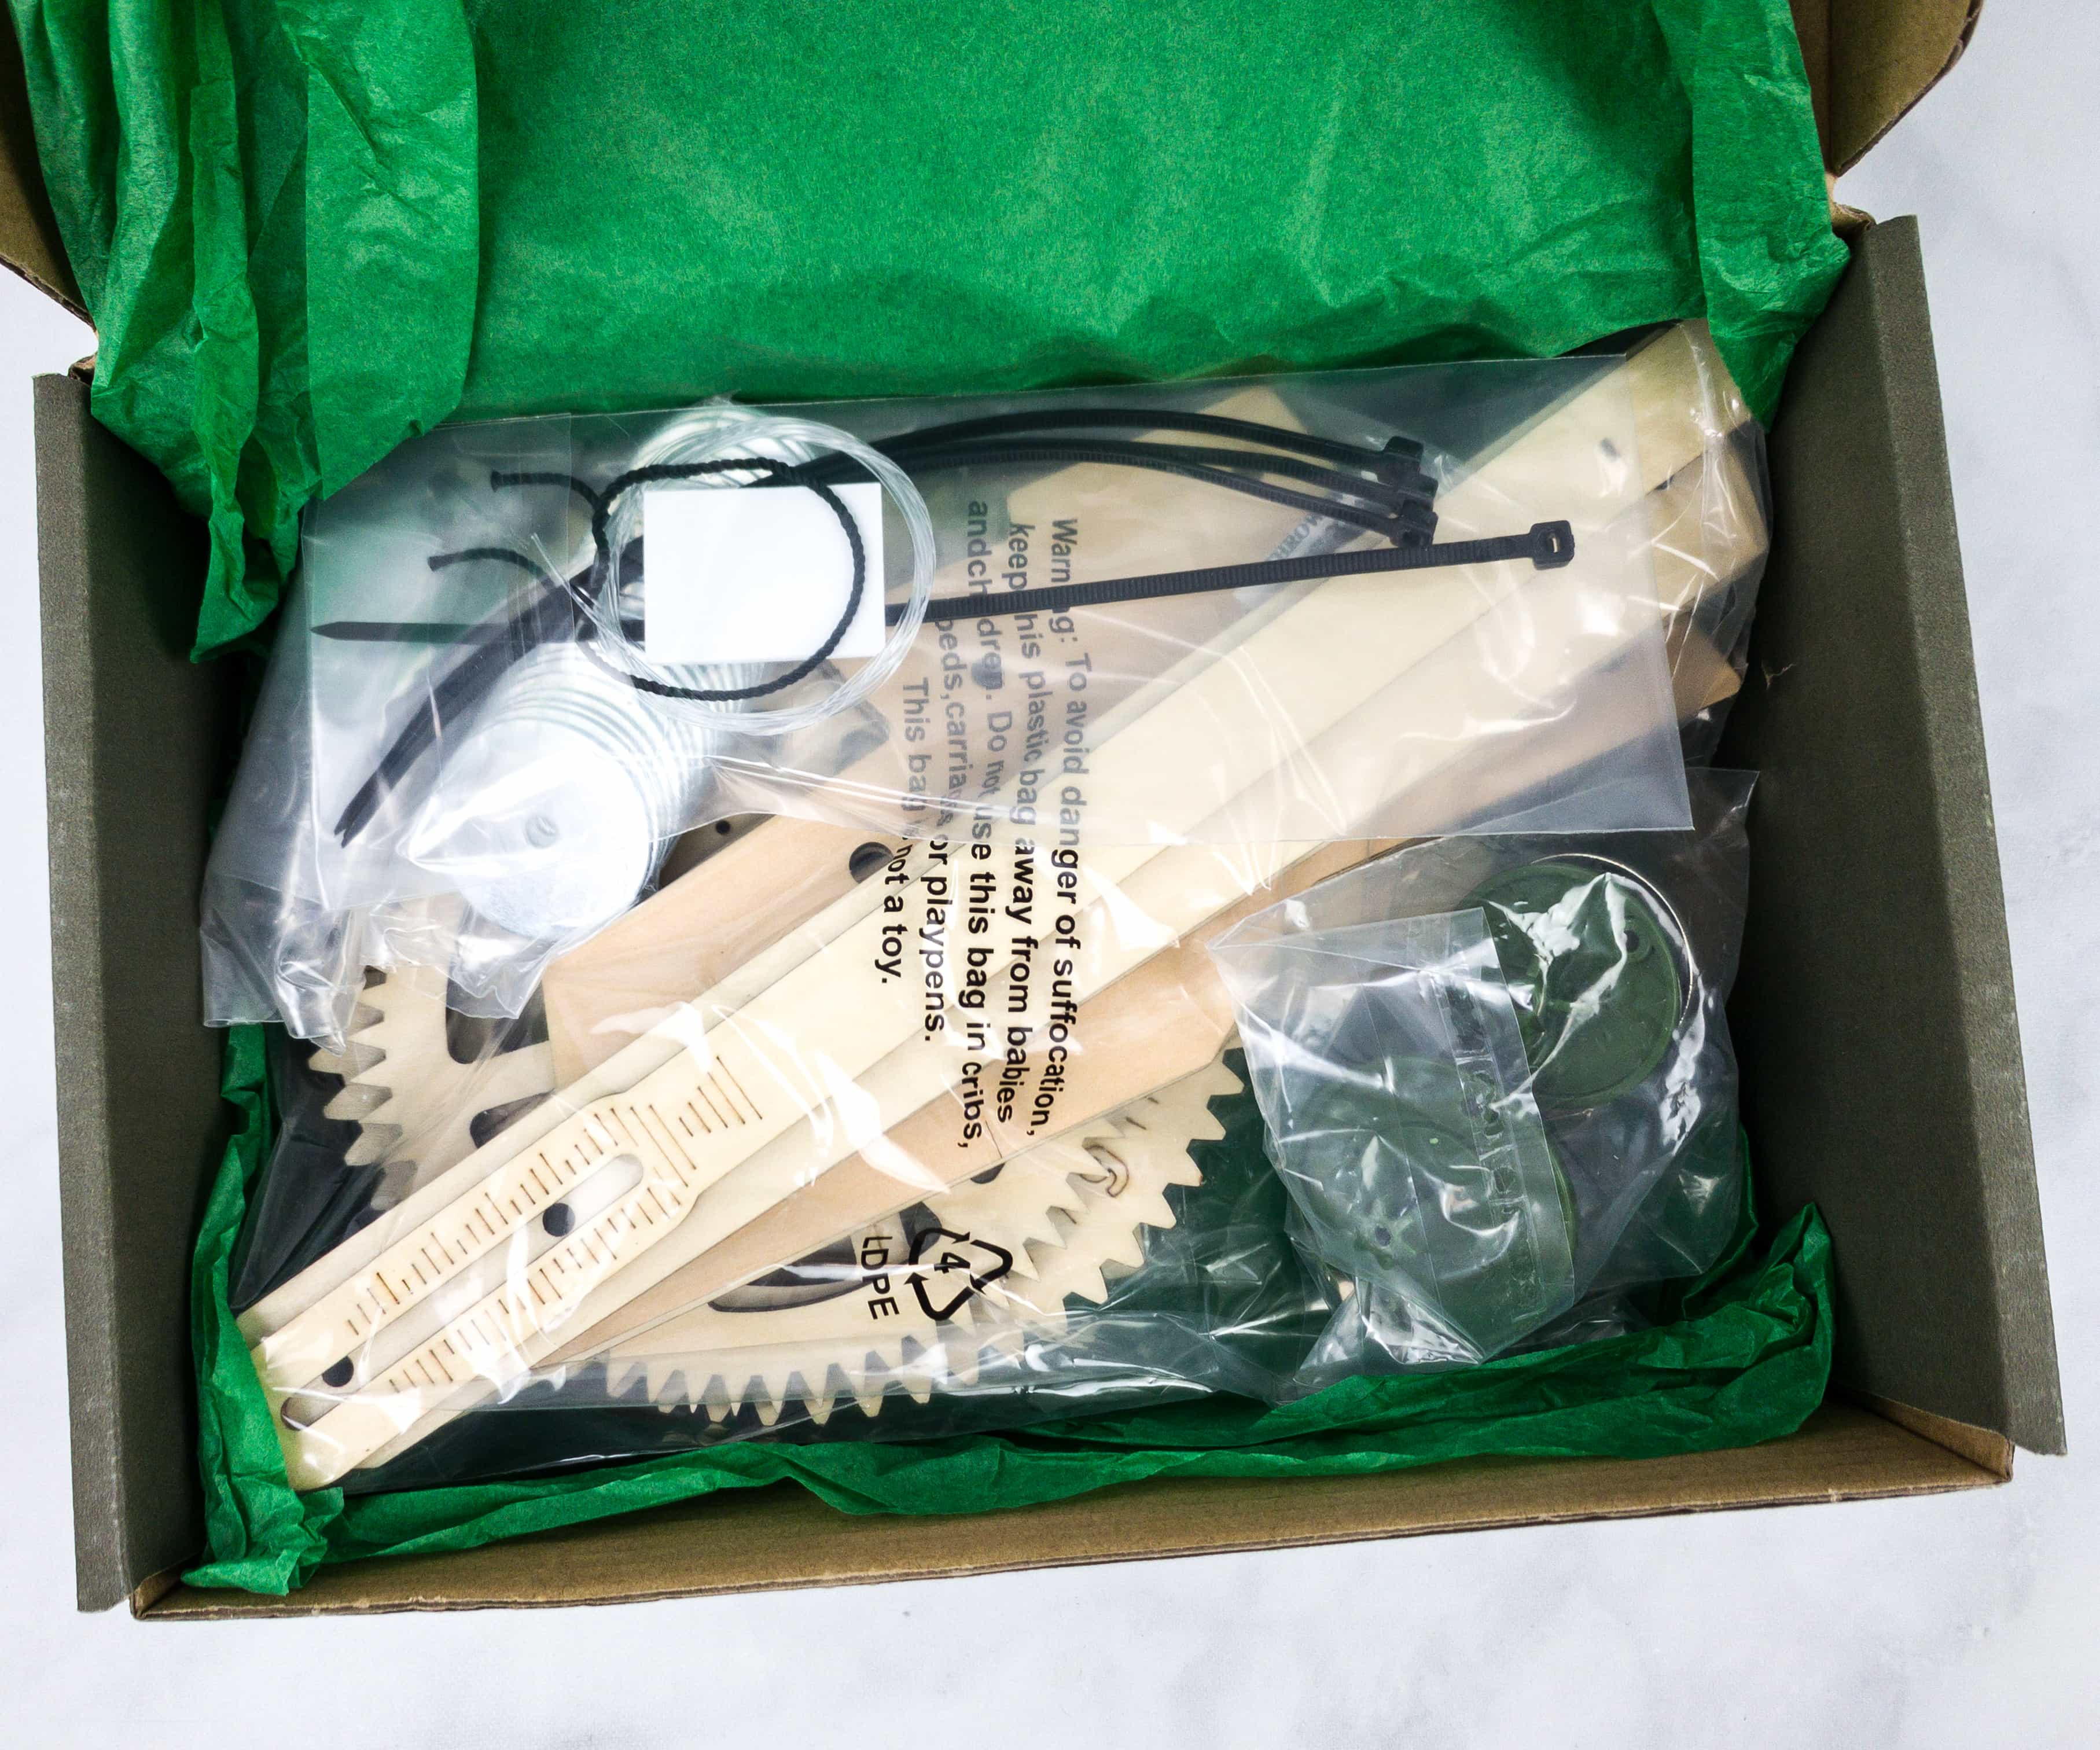
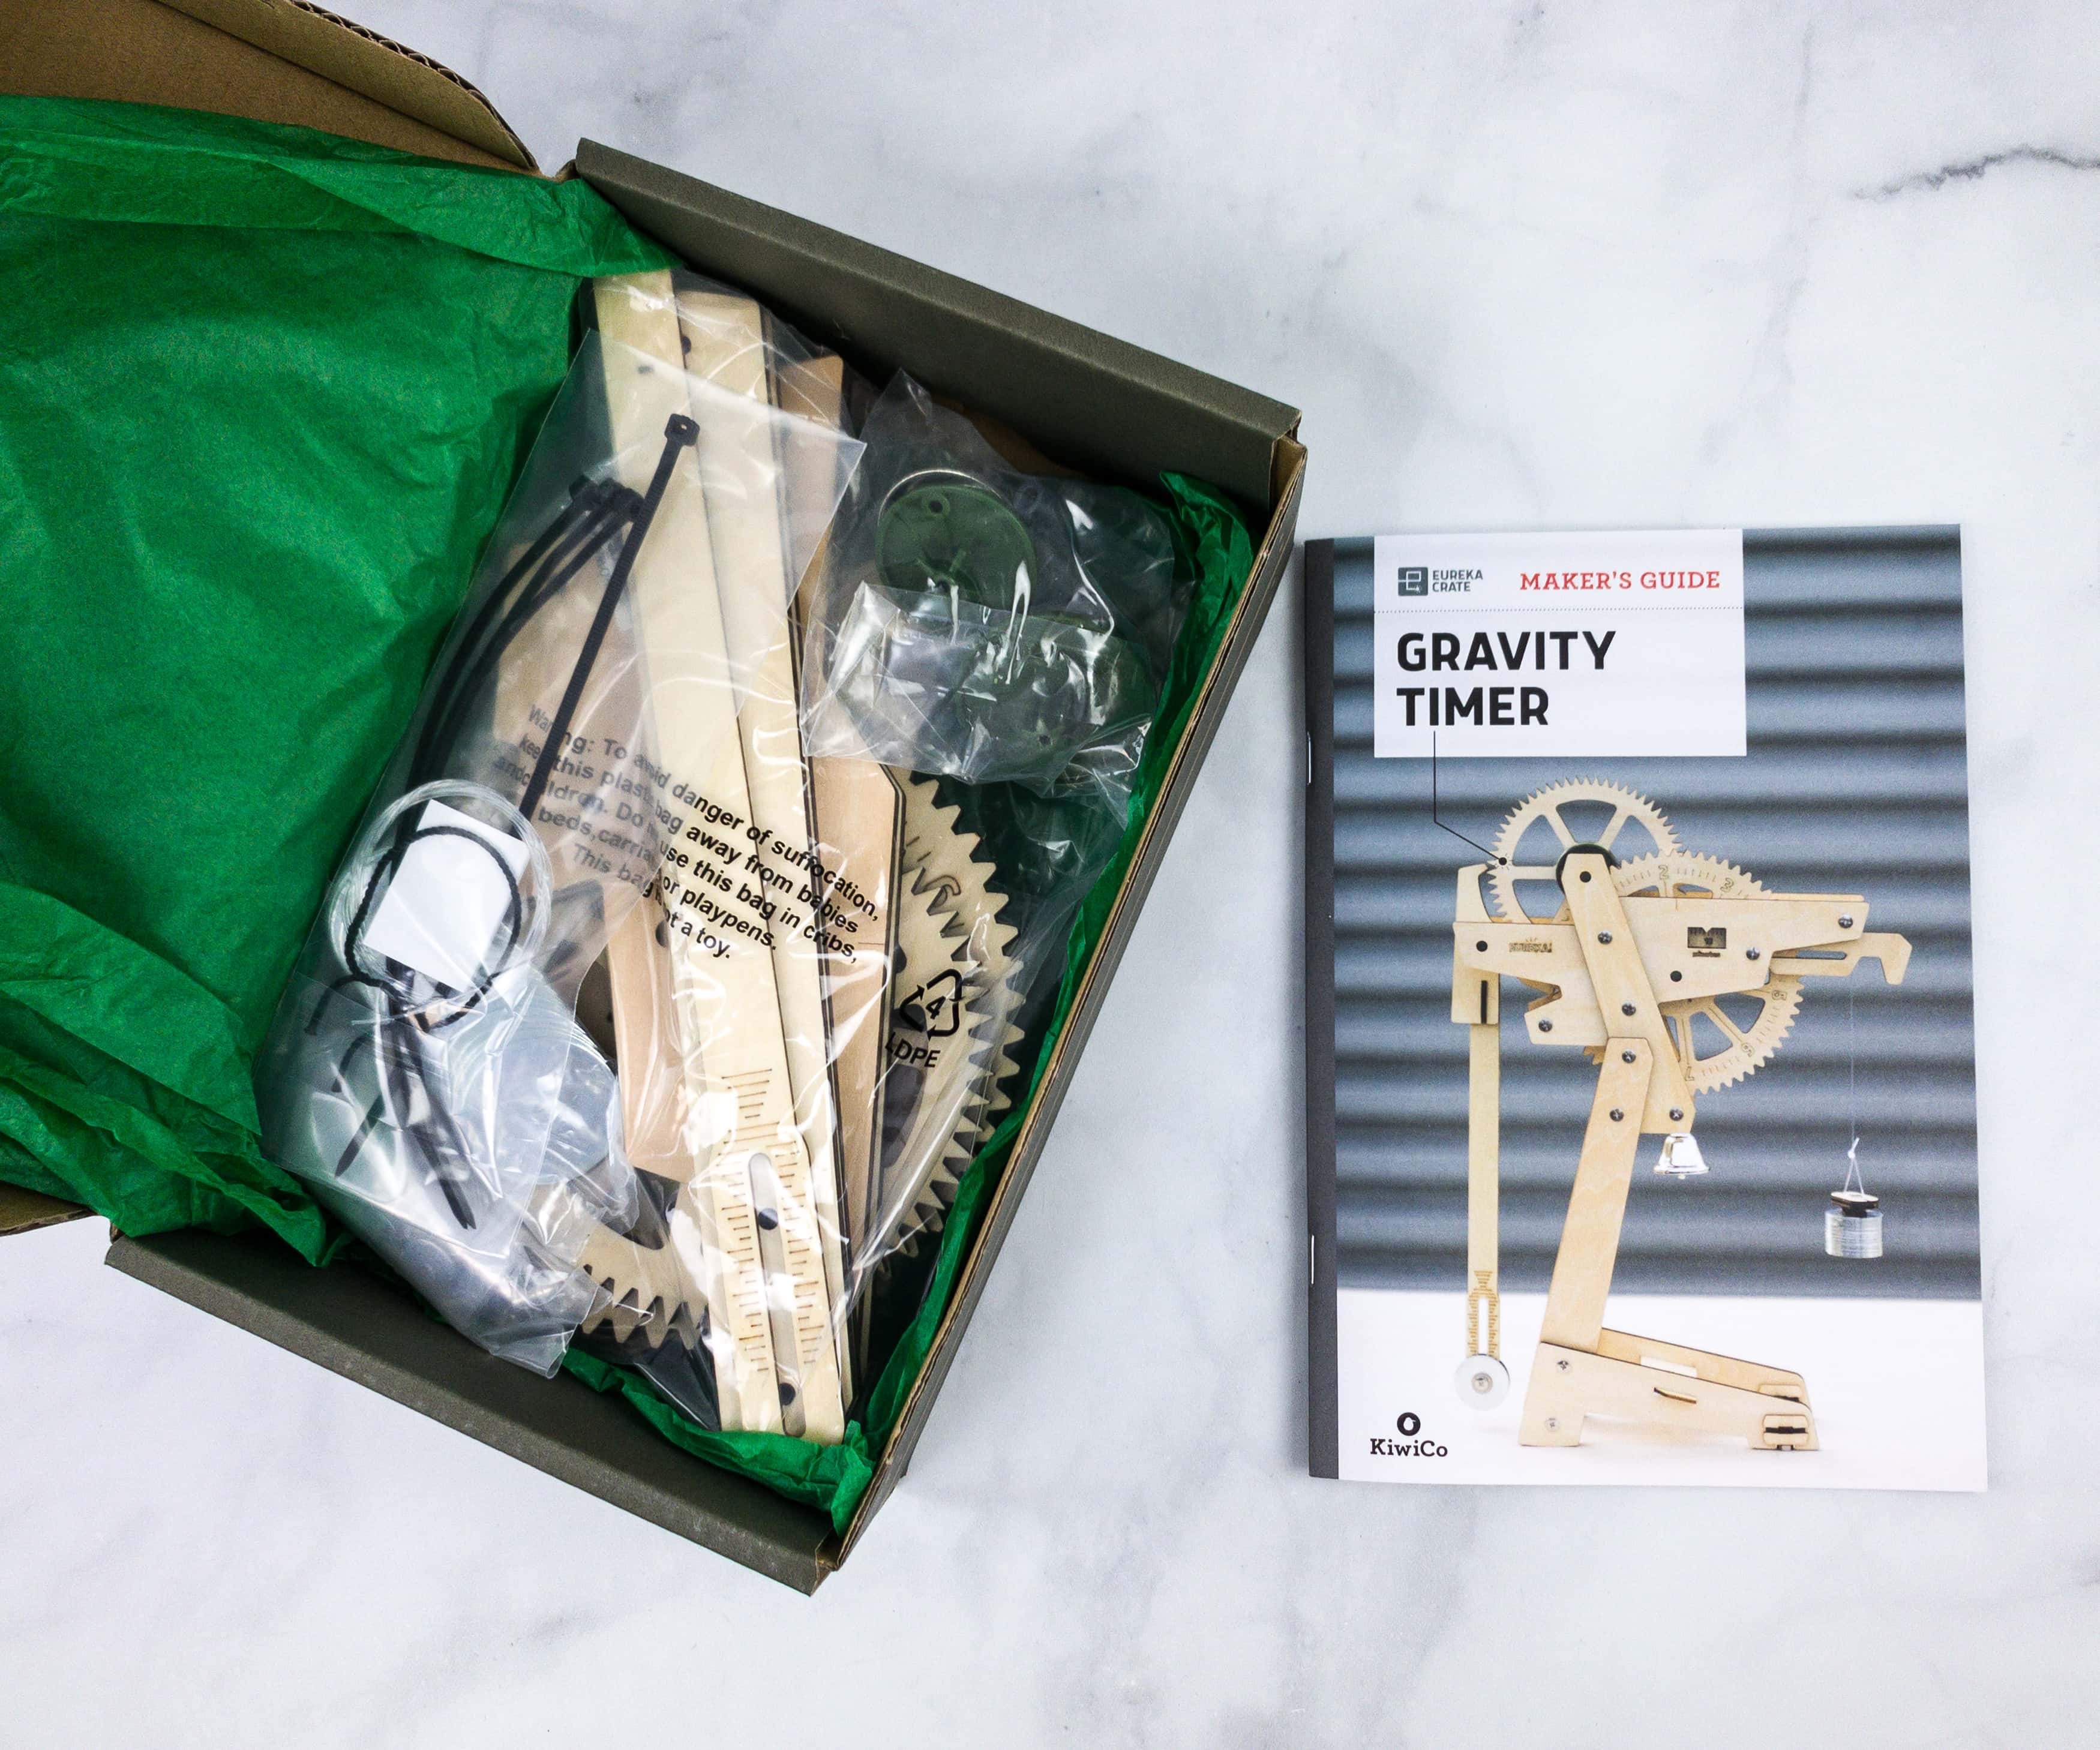
Most of the items inside the box are separately packaged.
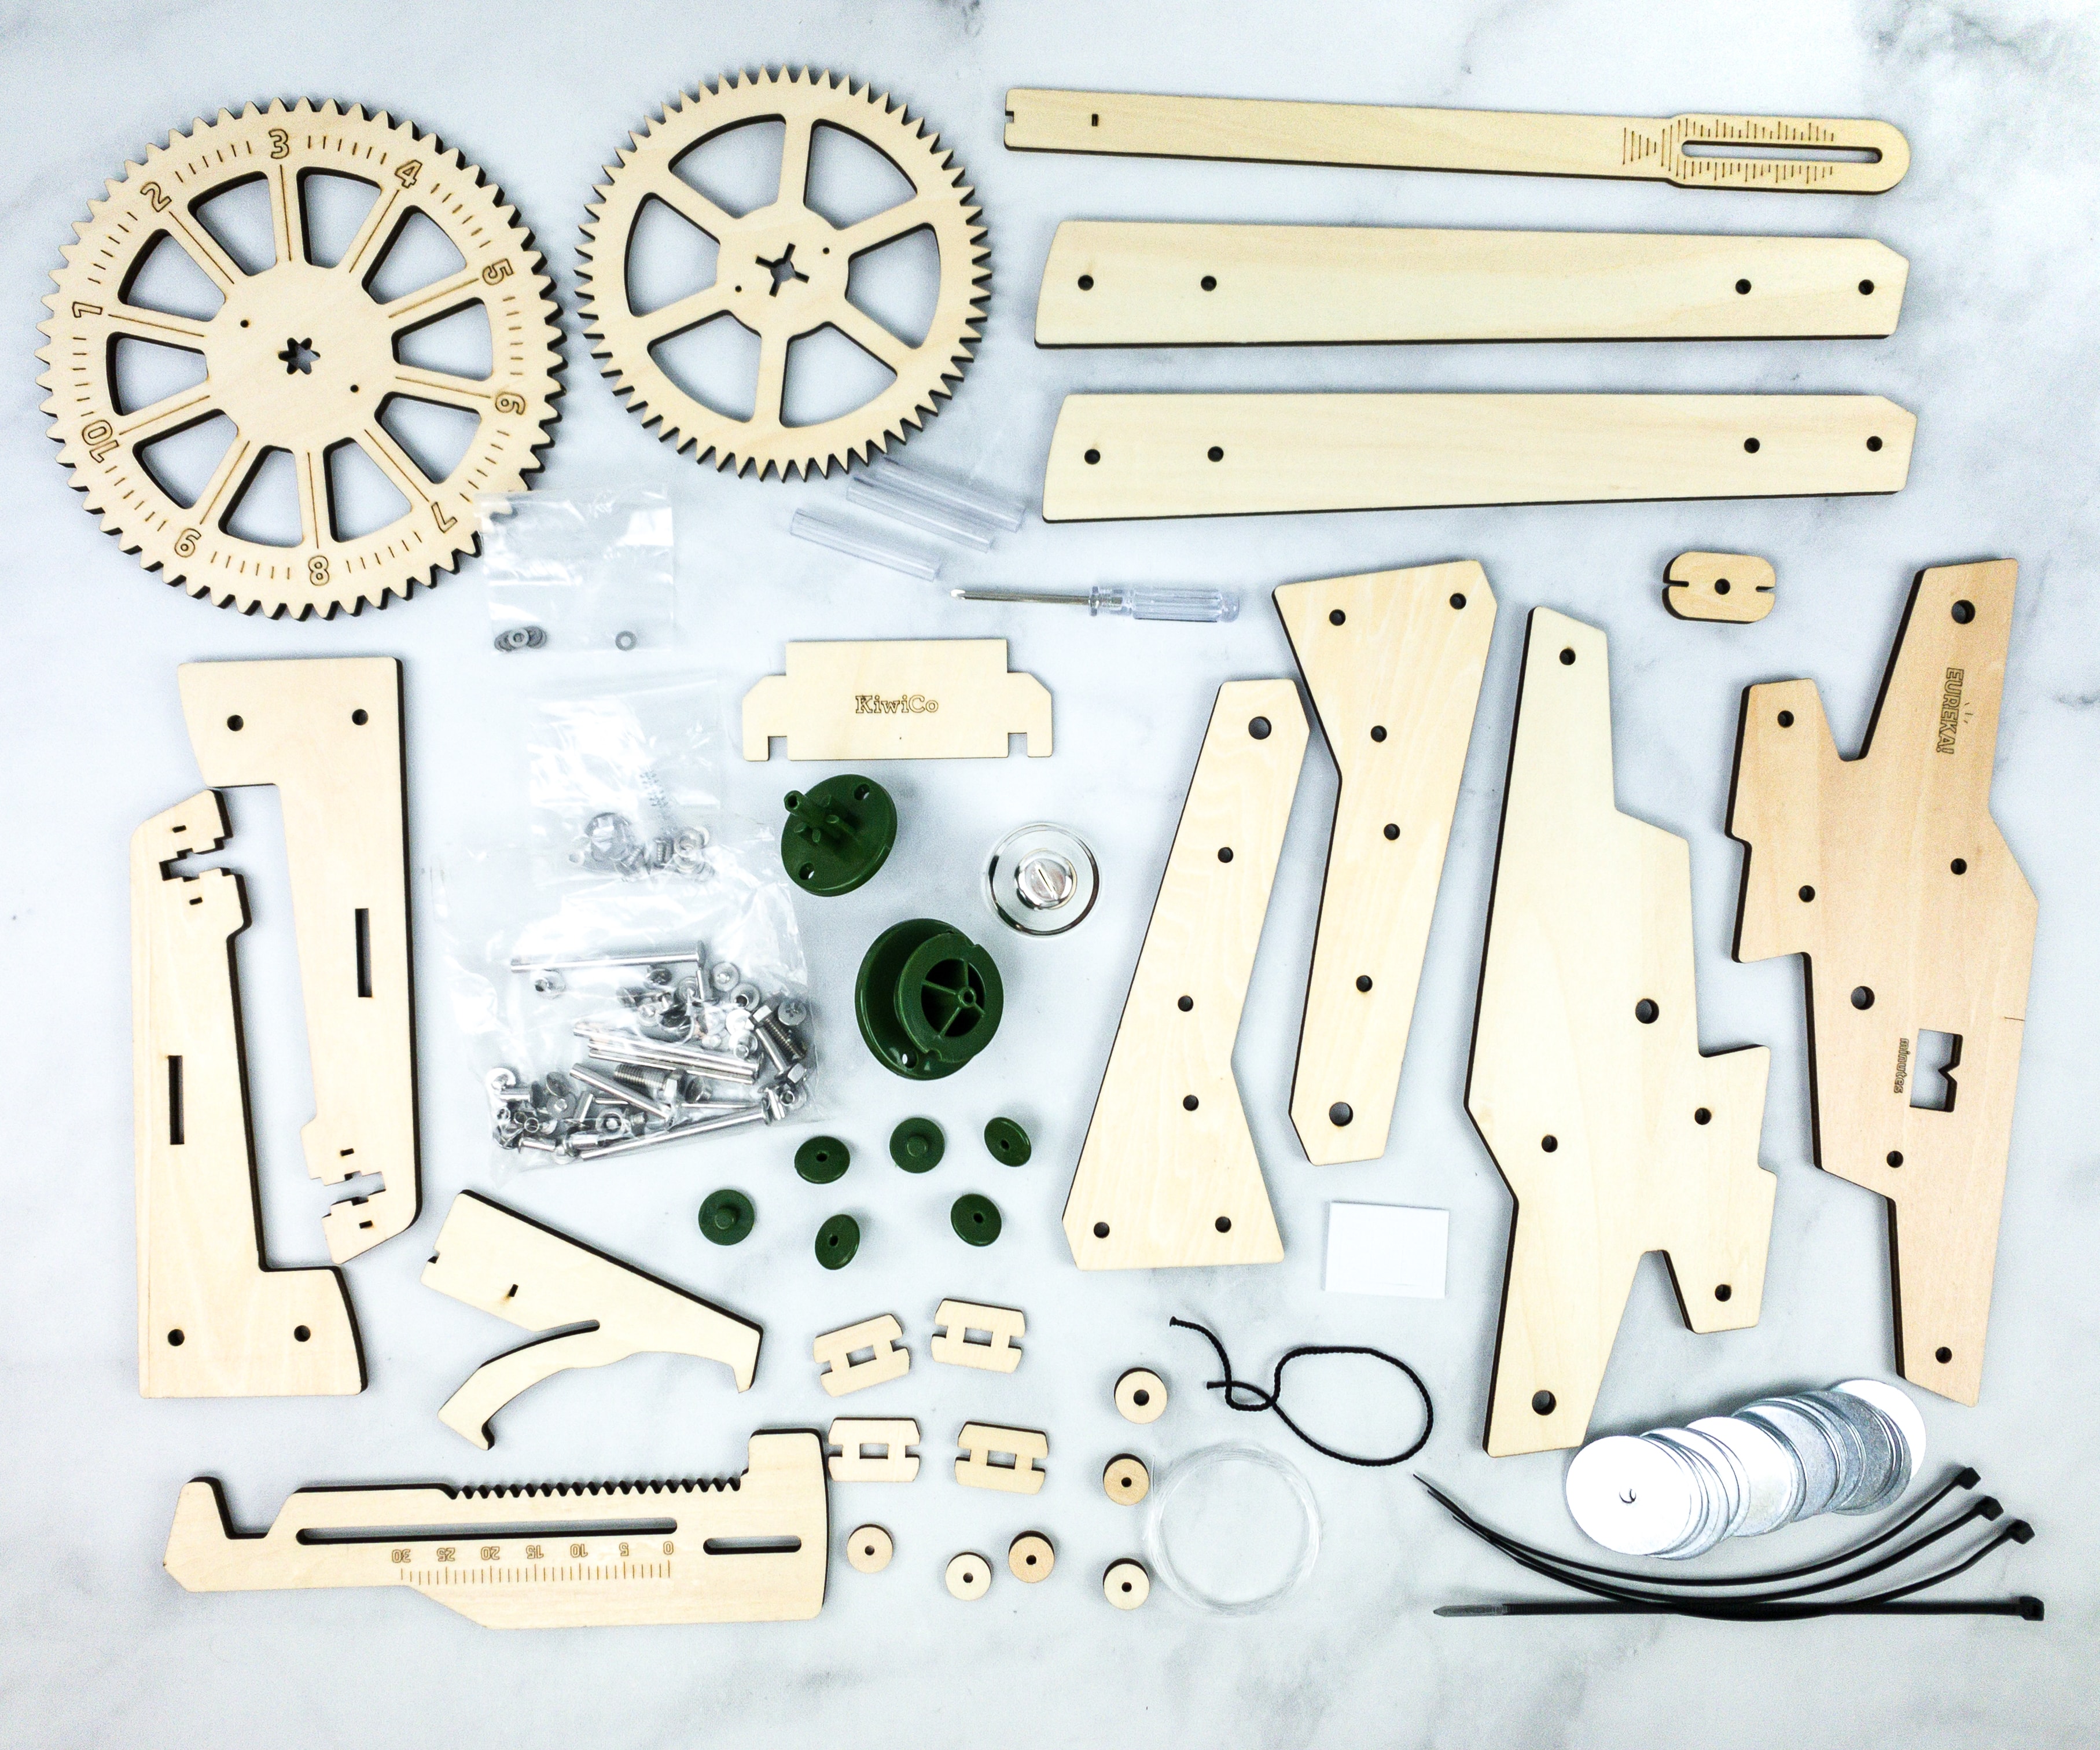
Everything in this month’s box!
Eureka Crate Maker’s Guide
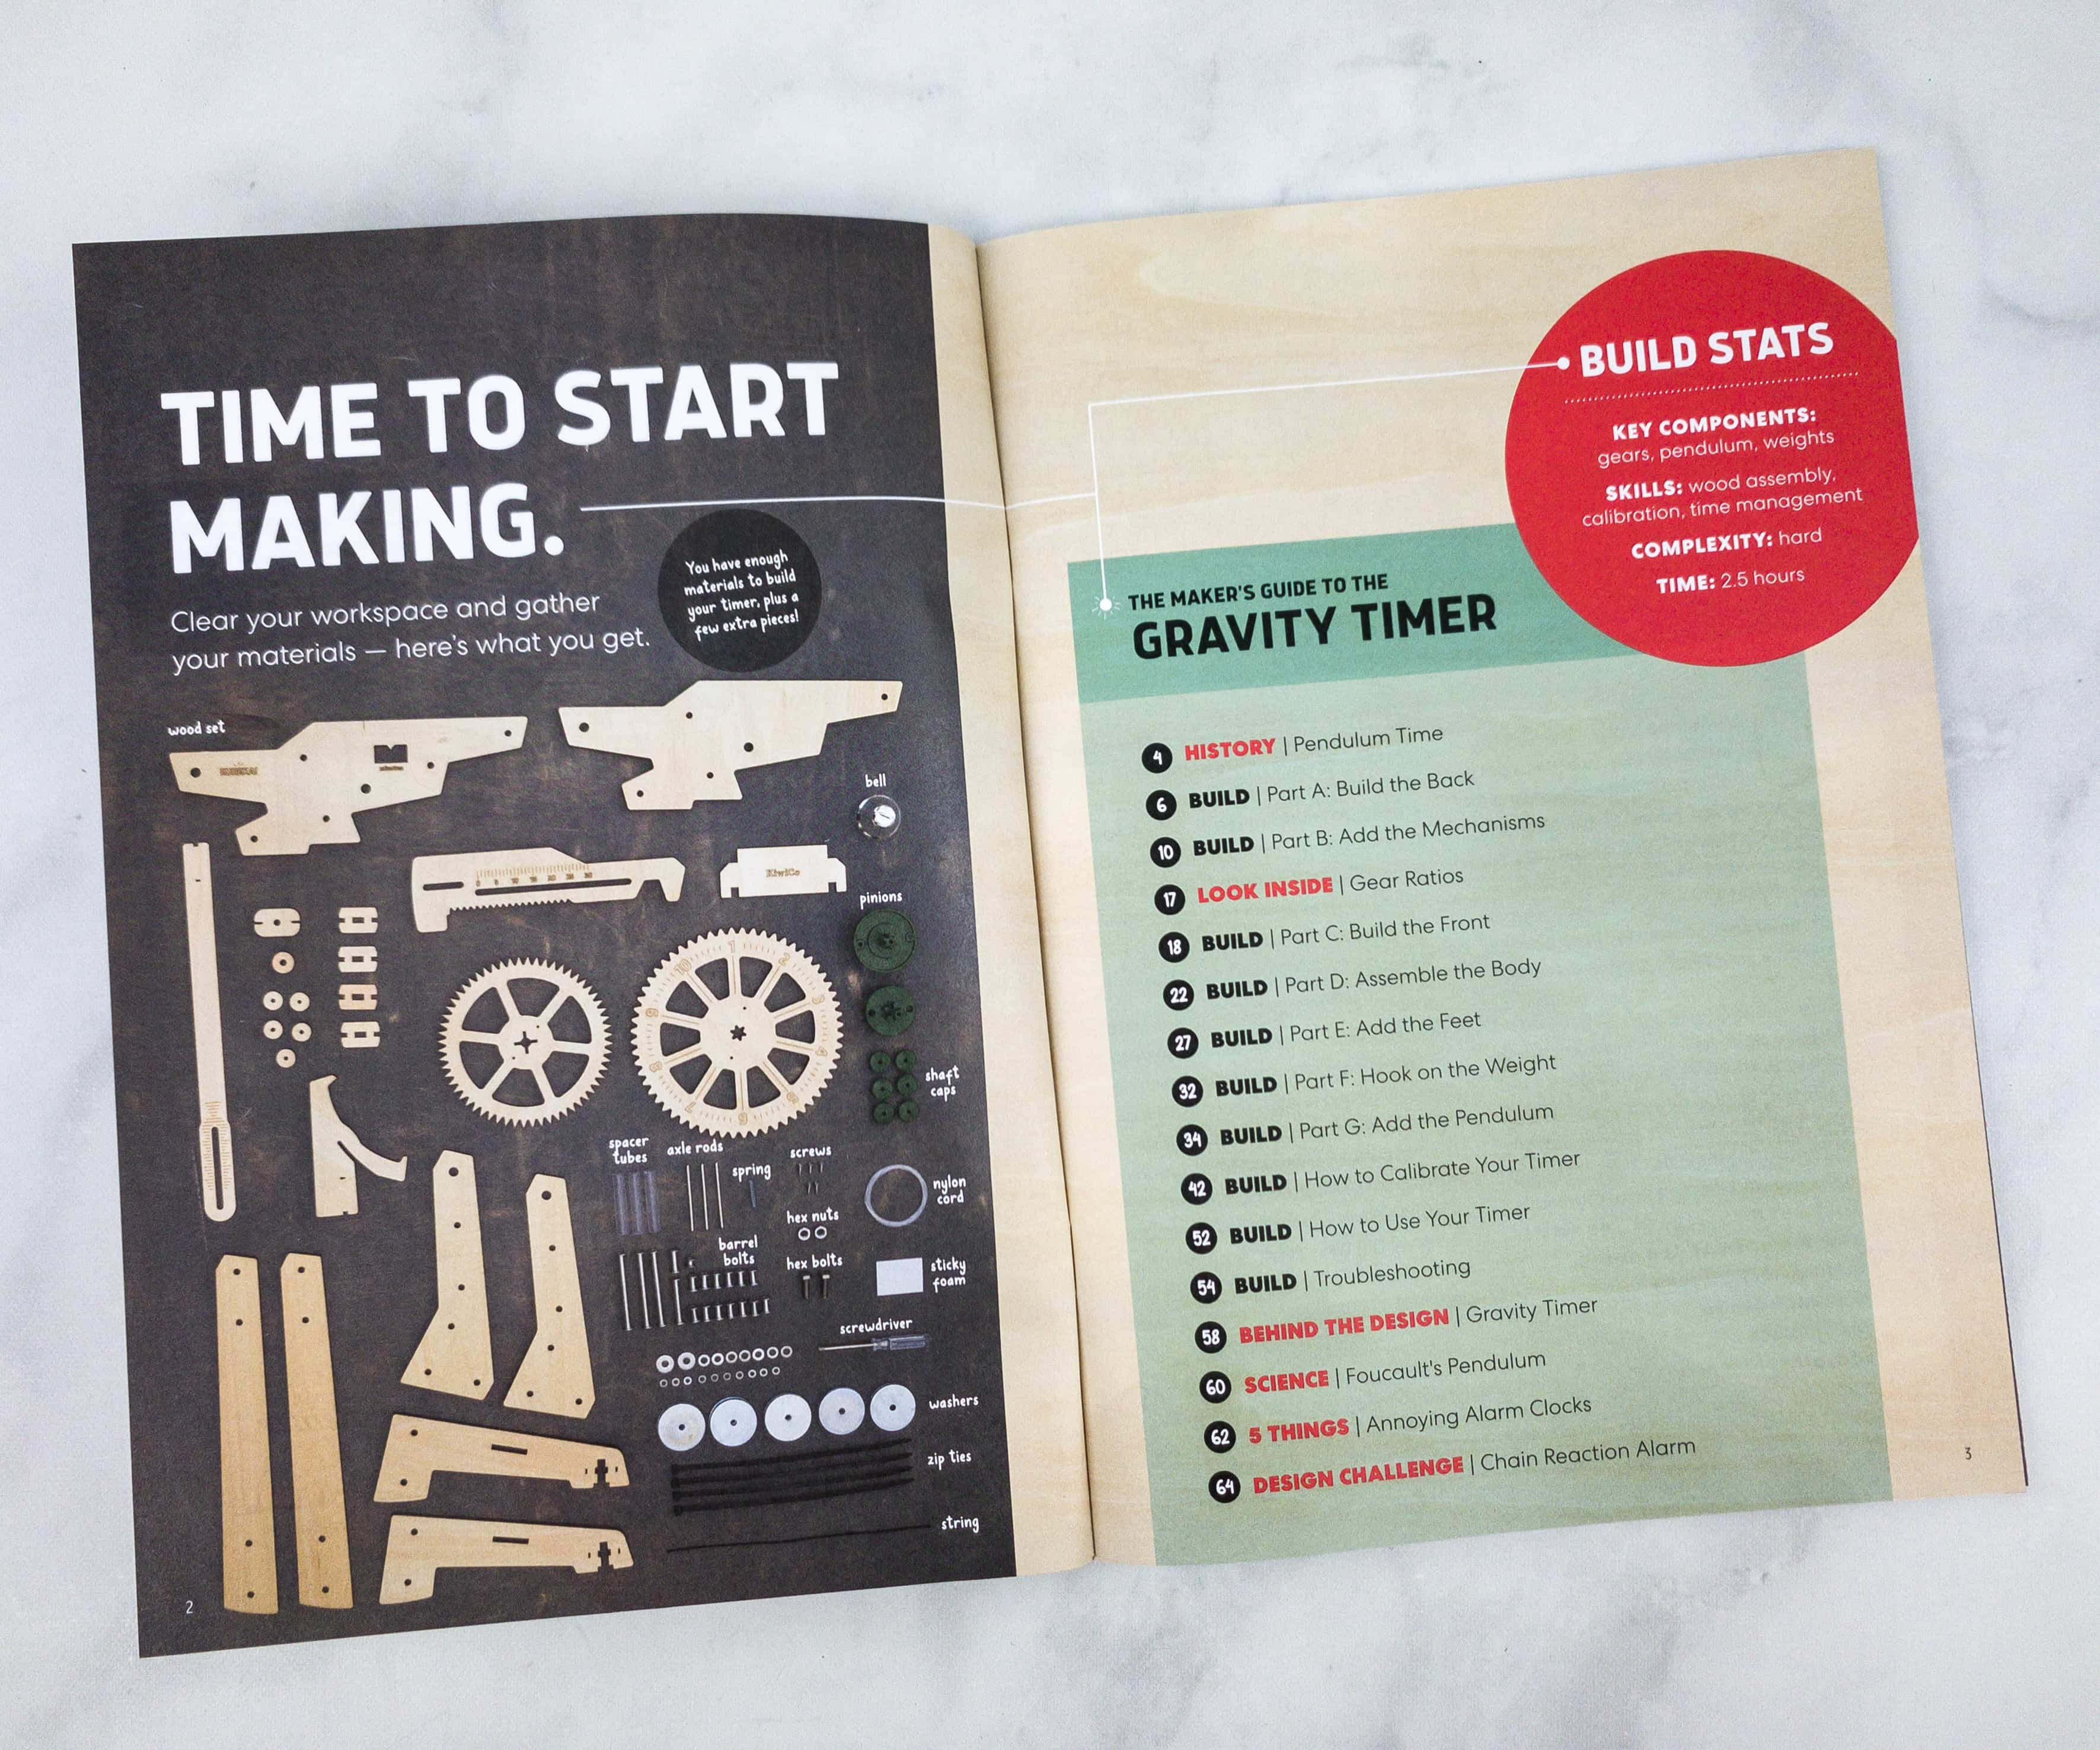
This booklet means business as it jumps right to the activity.

On the first few pages of the booklet, they included the history of Pendulum Time. It’s better to understand the project by knowing its origins before delving in to making the project.
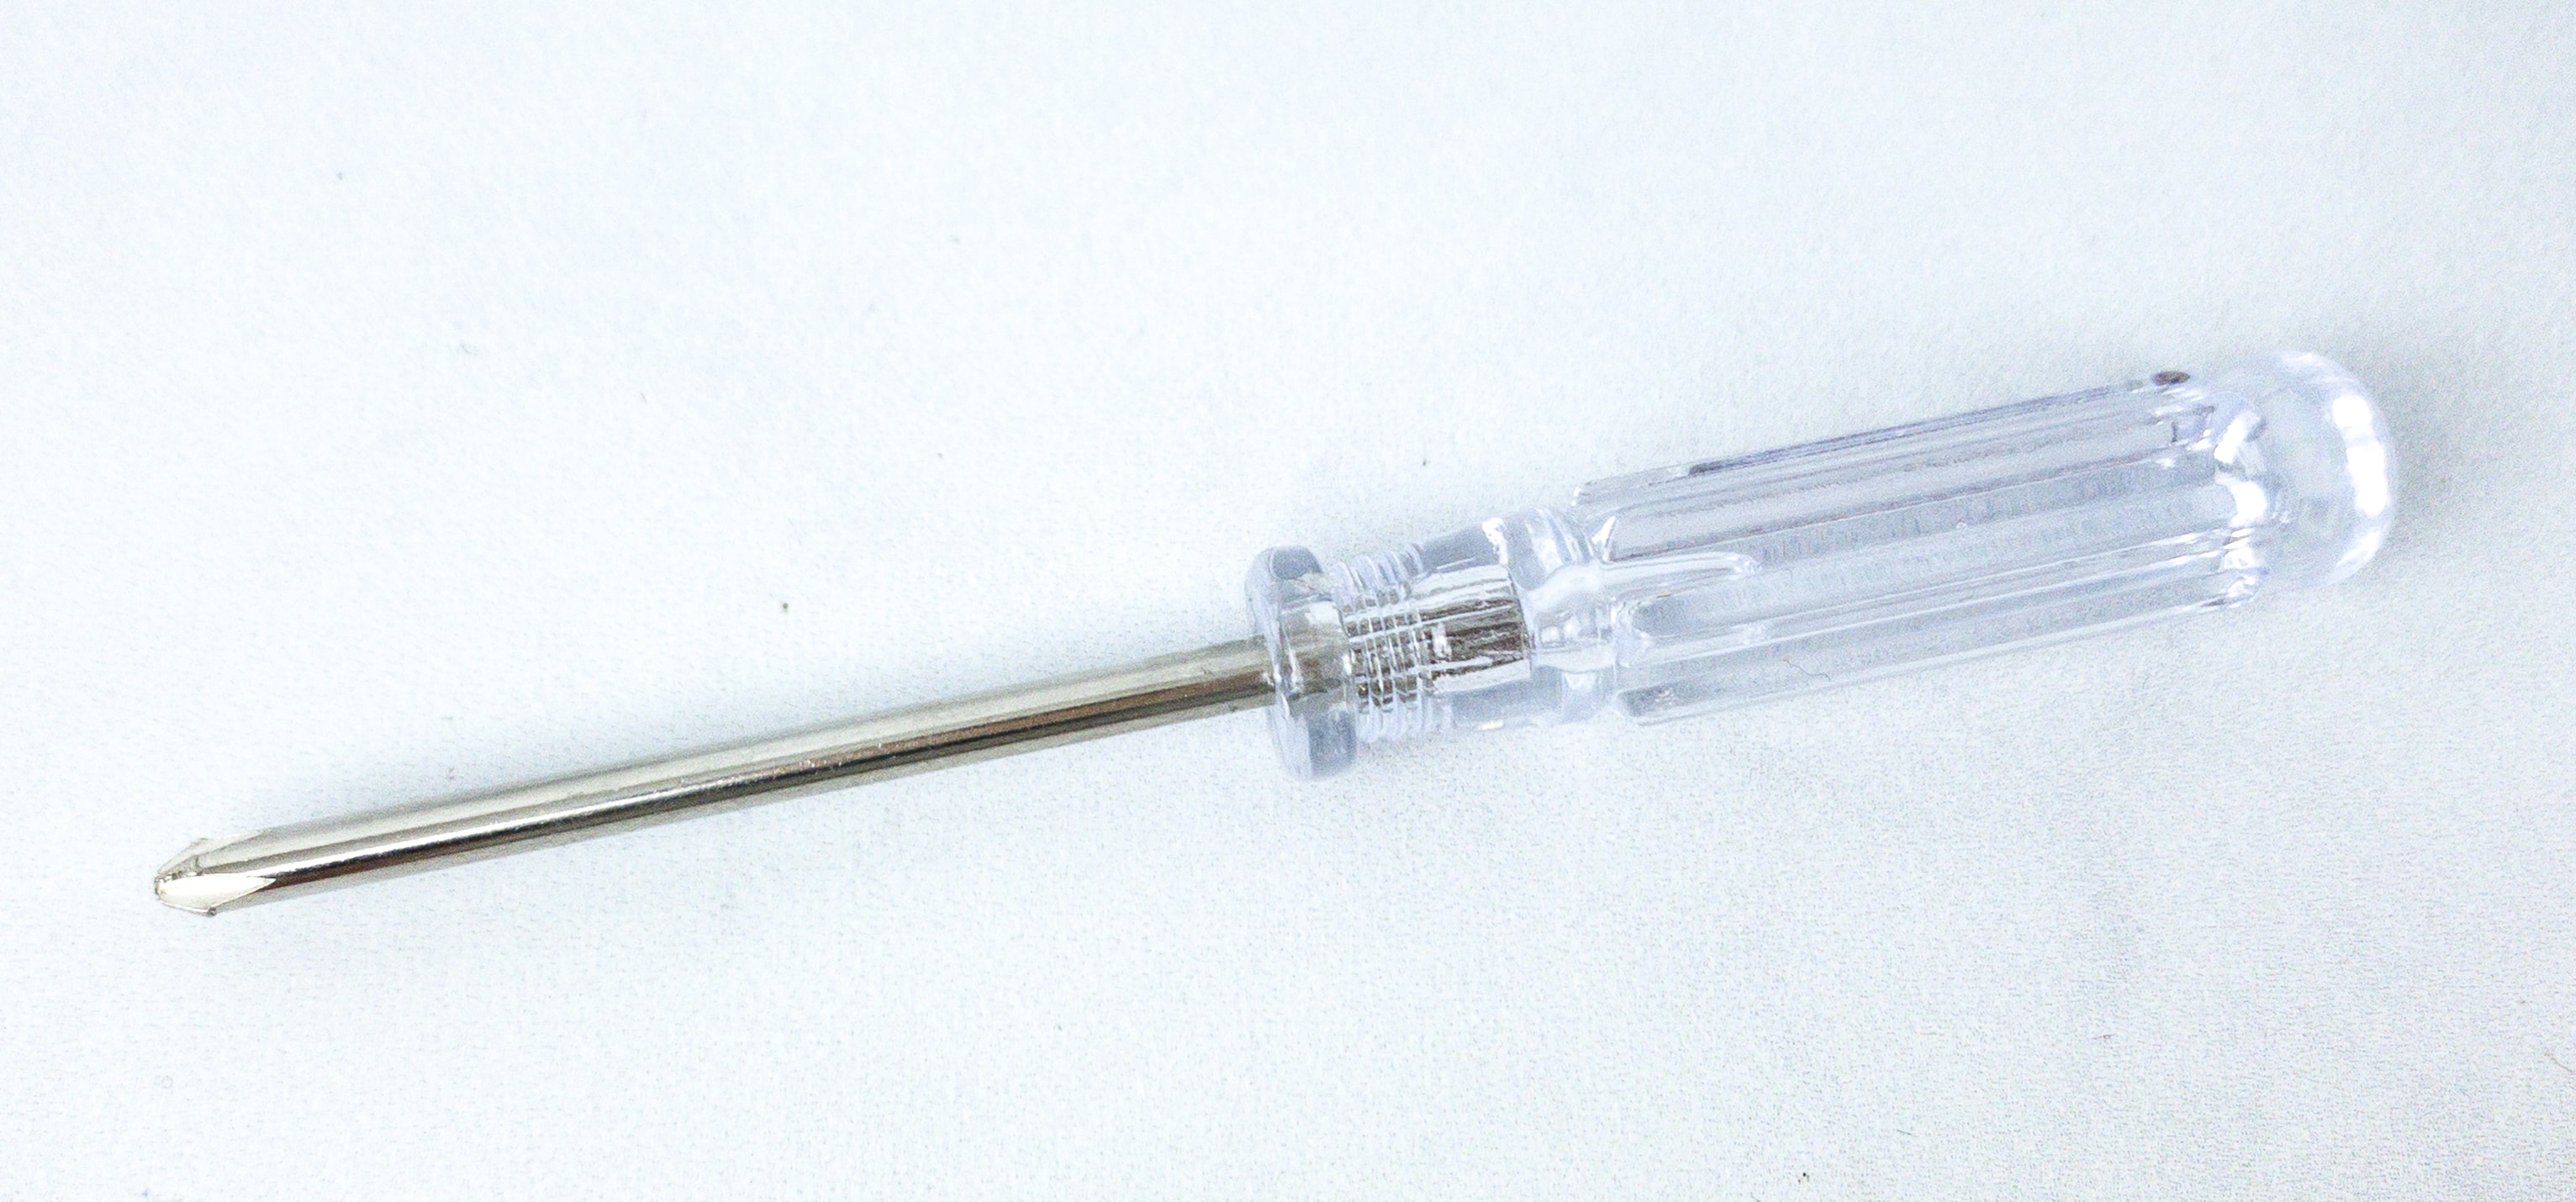
The activity will involve screwing so we also got a clear-handle screwdriver.
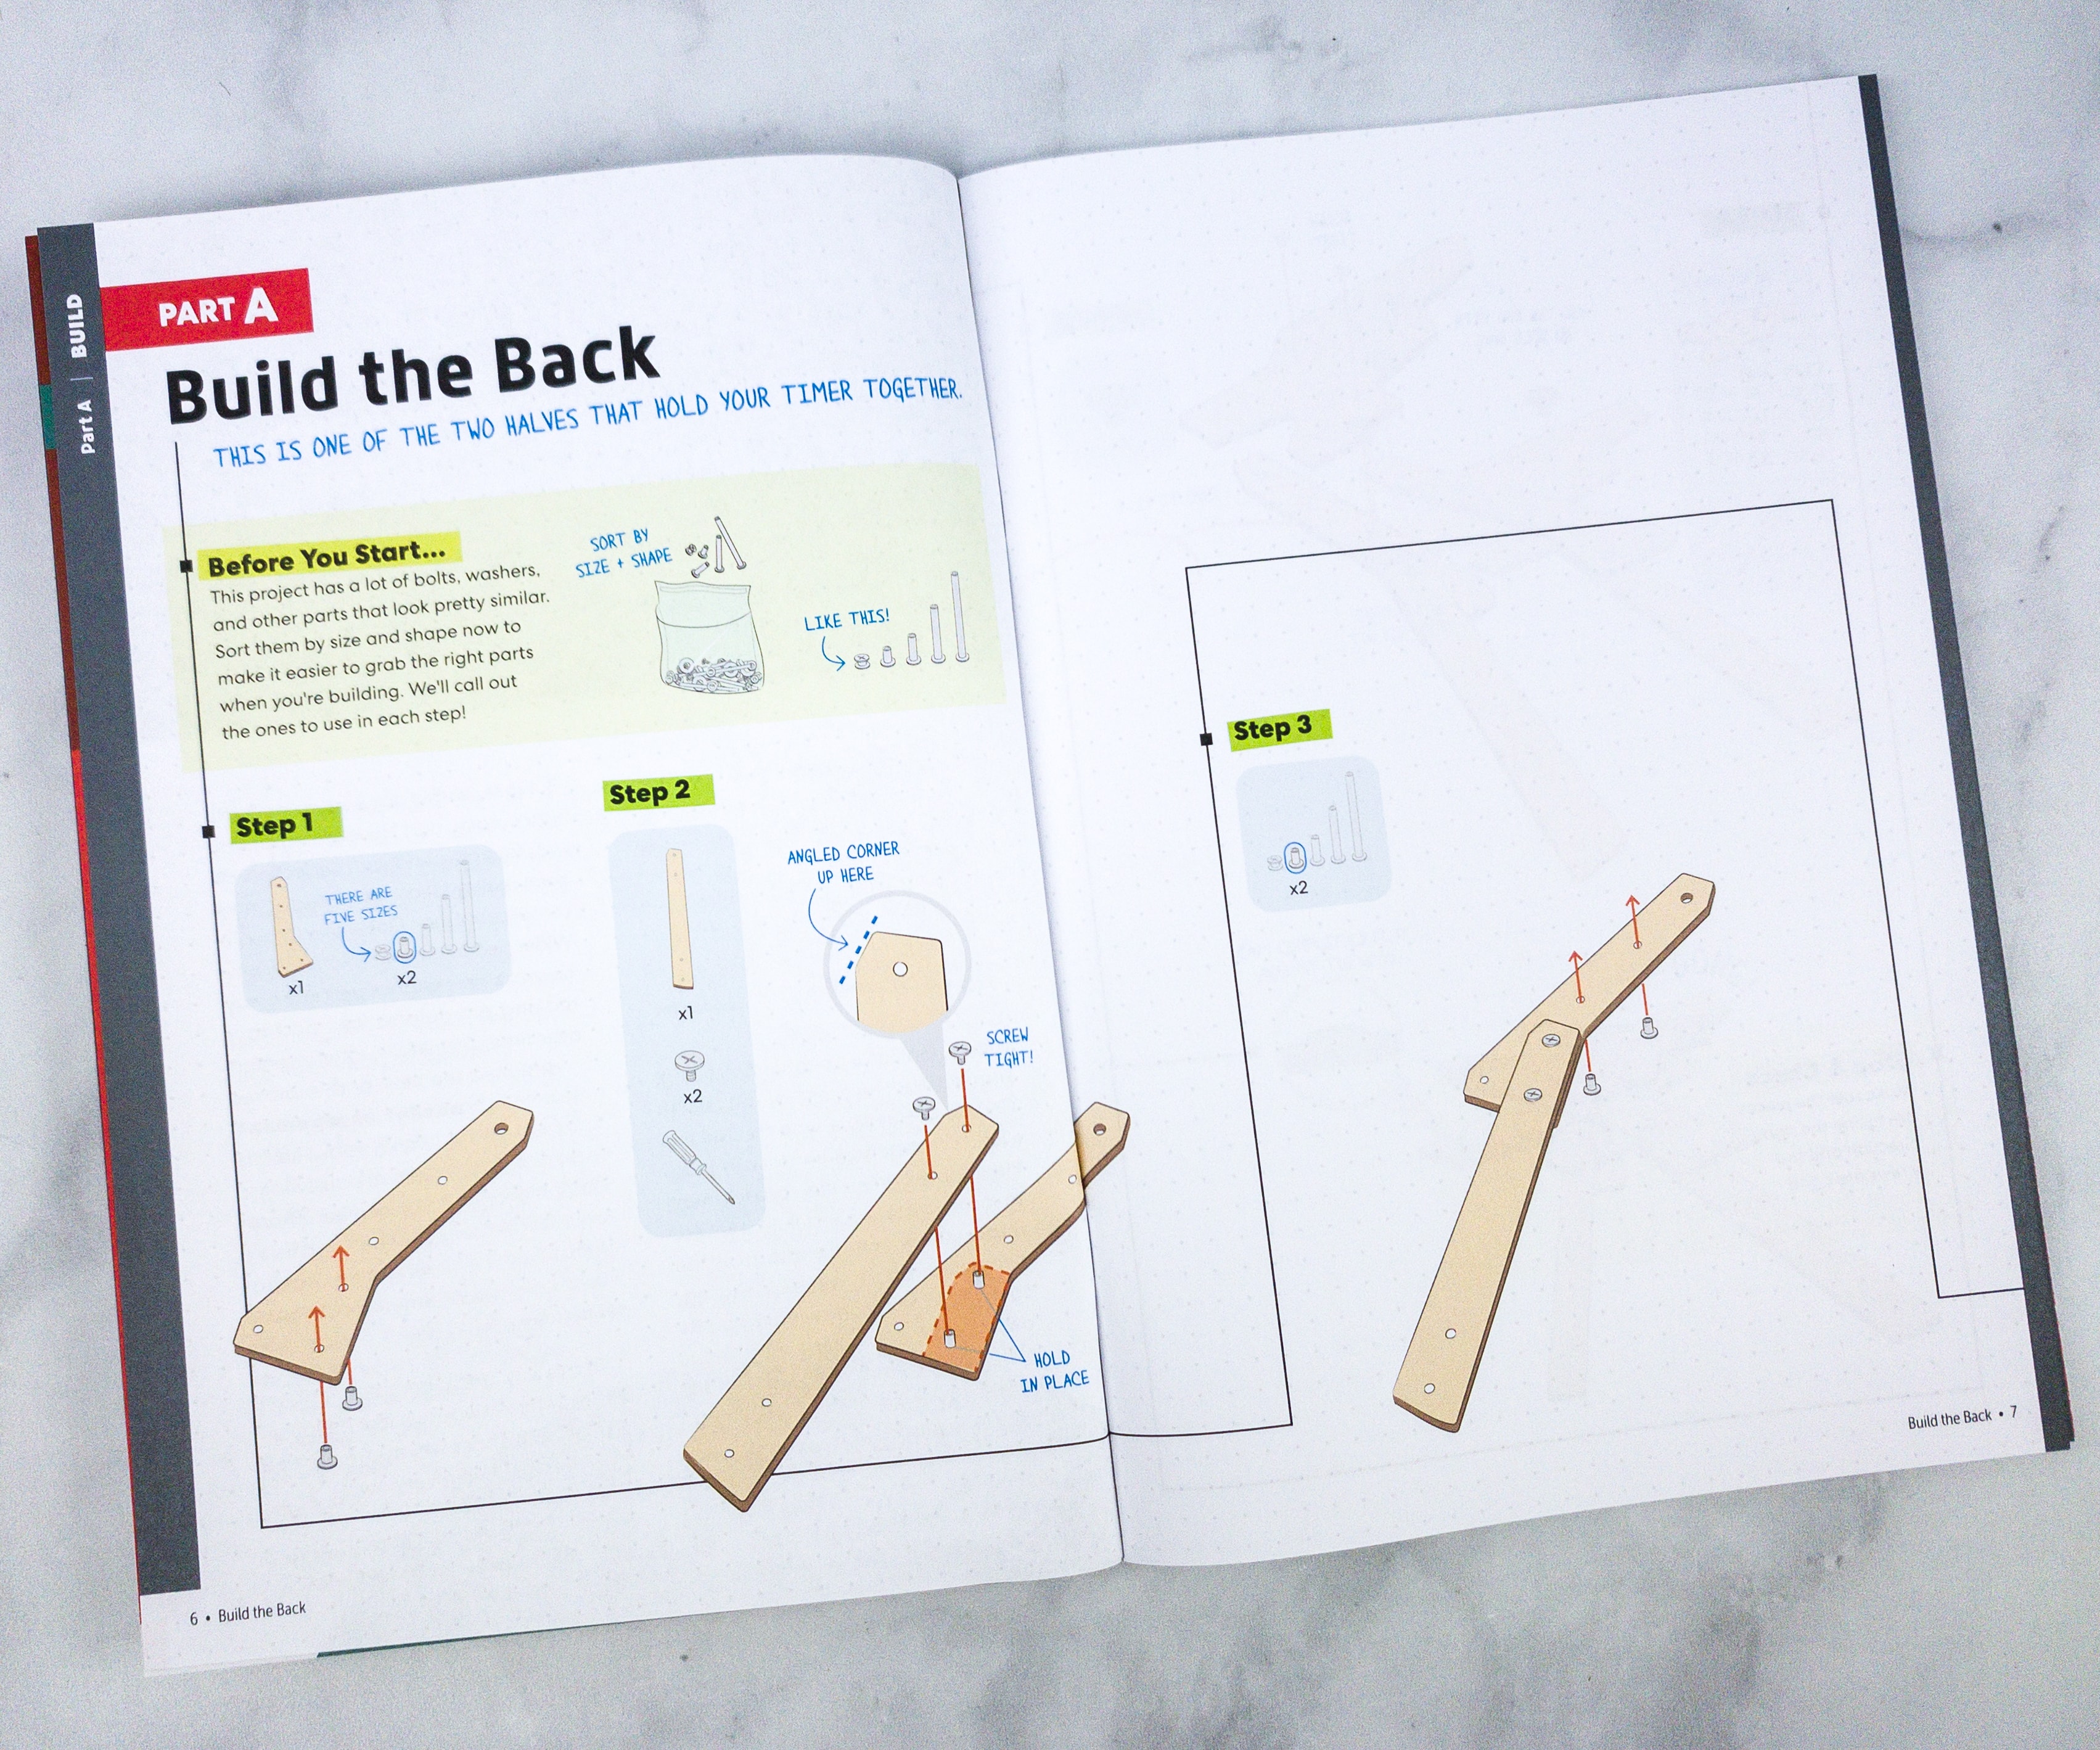
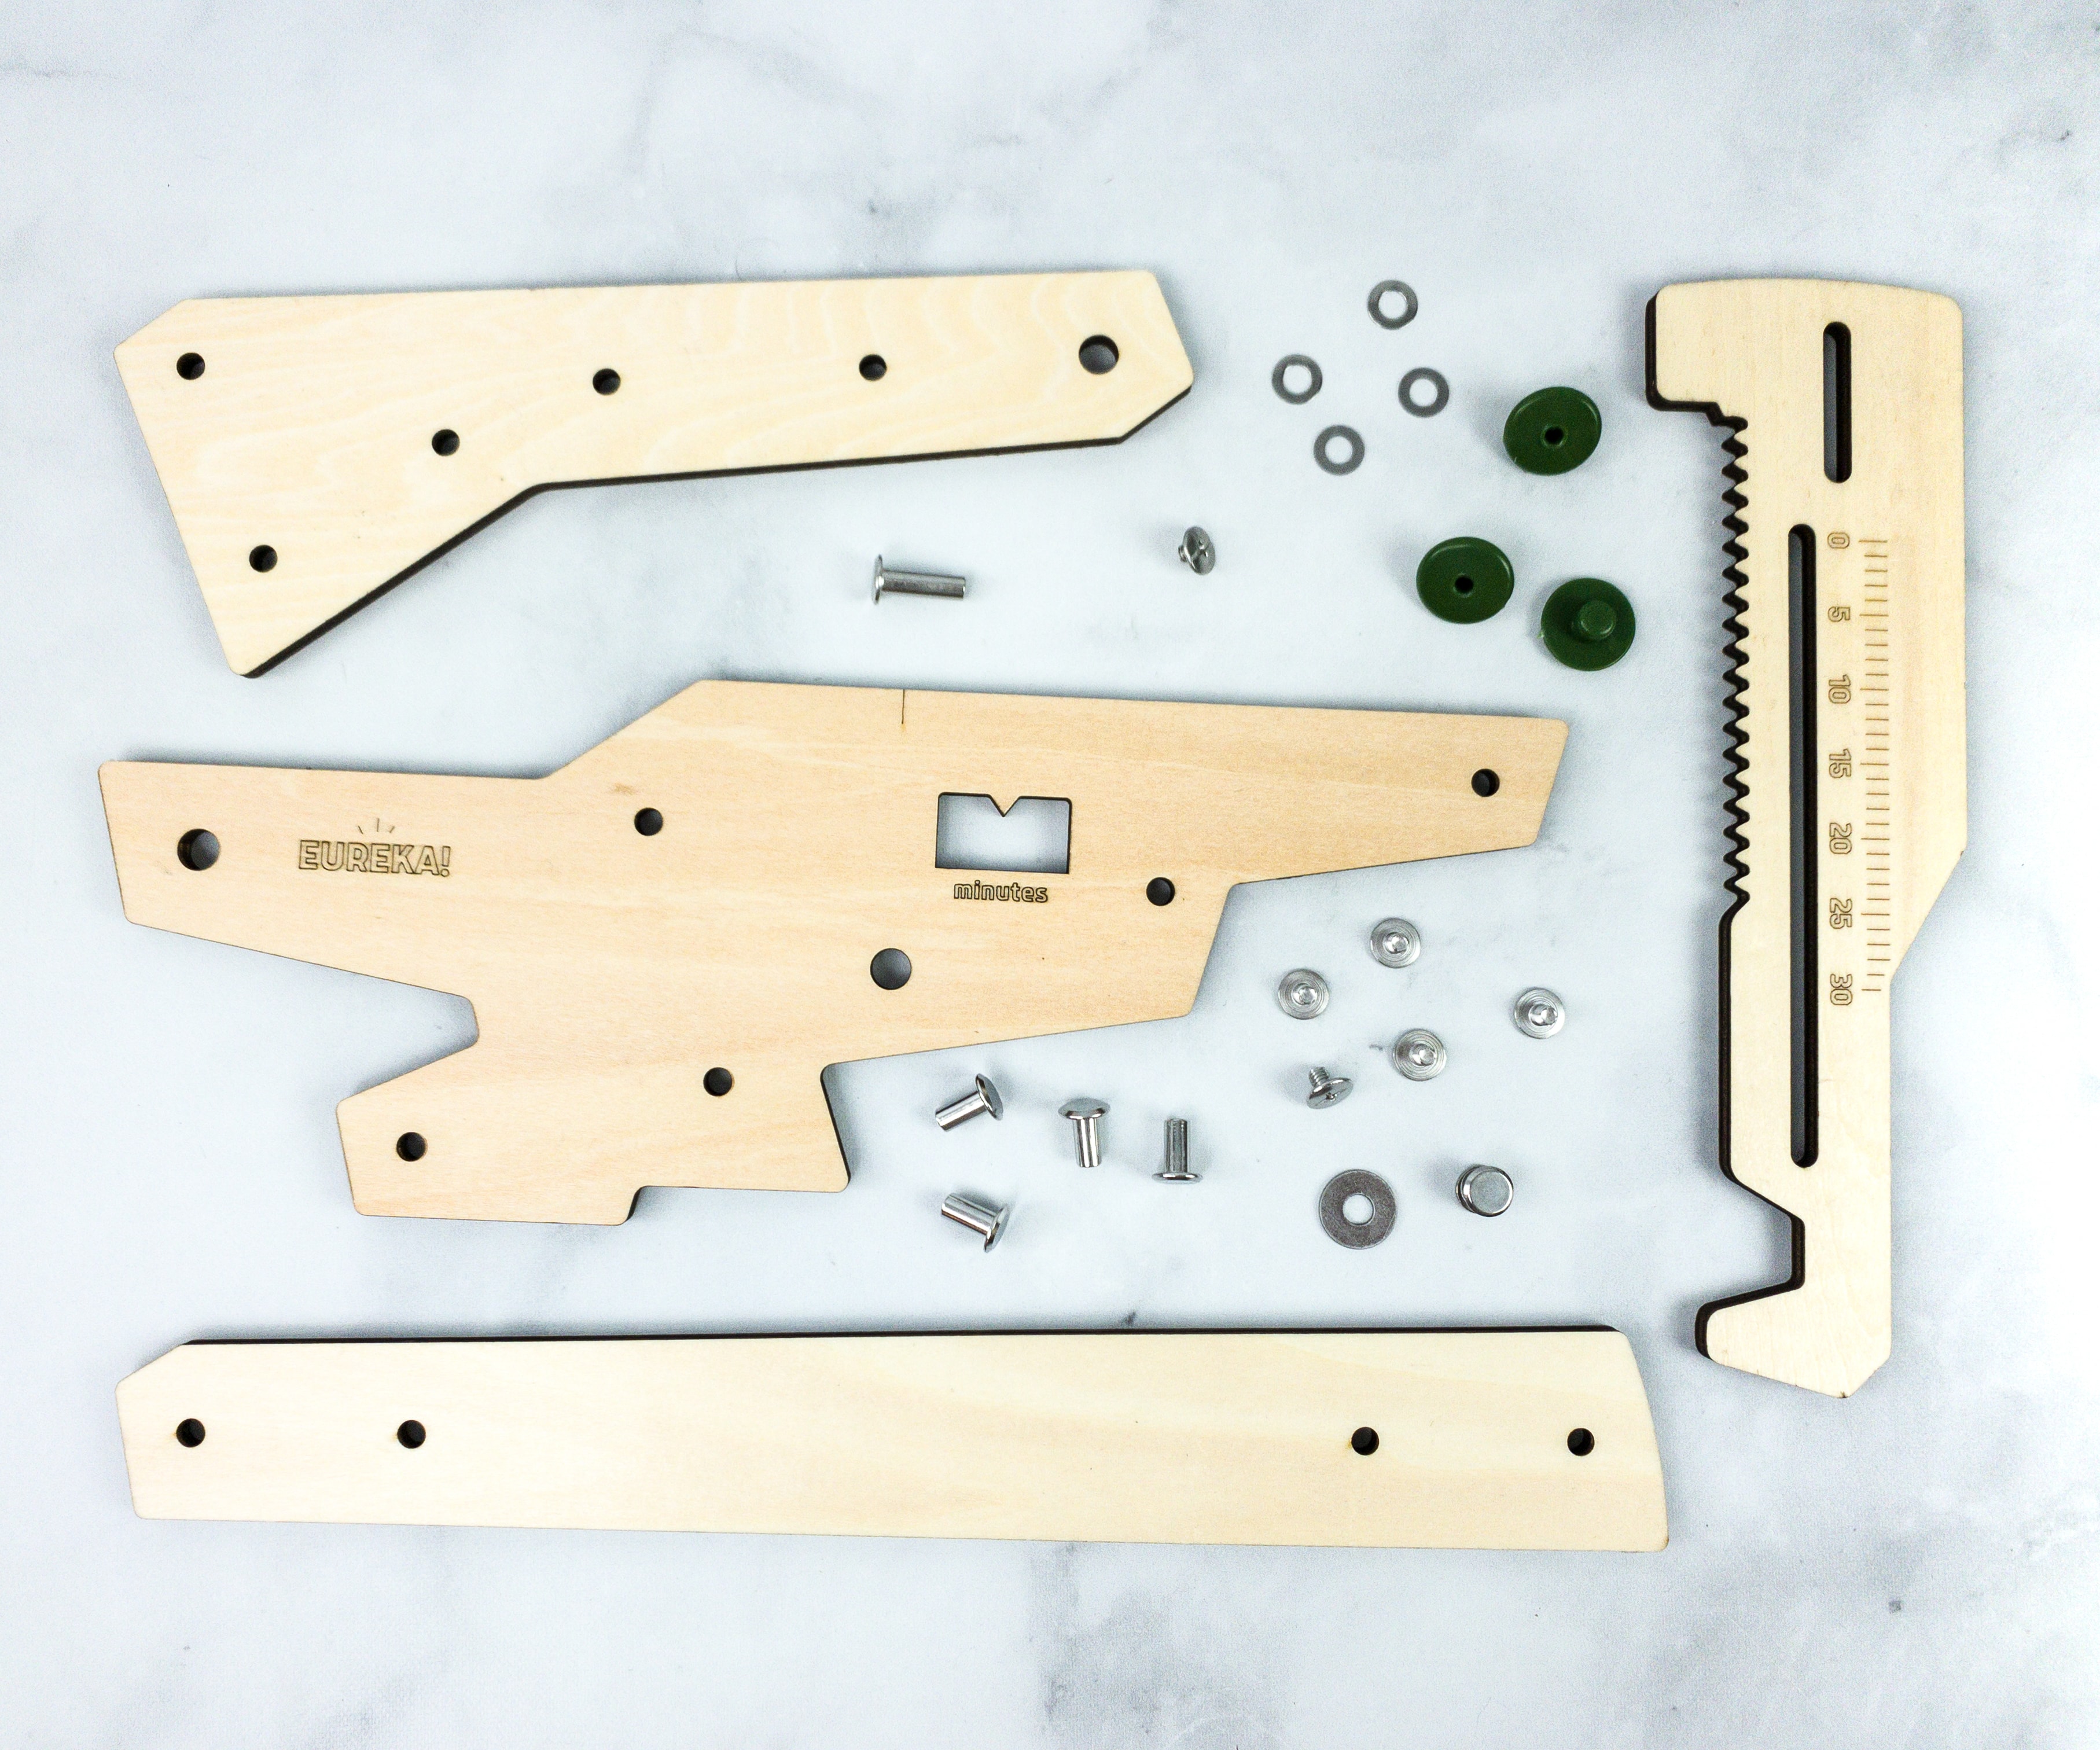
For the first part, we built the back, which is one of the two halves that will hold the timer together.
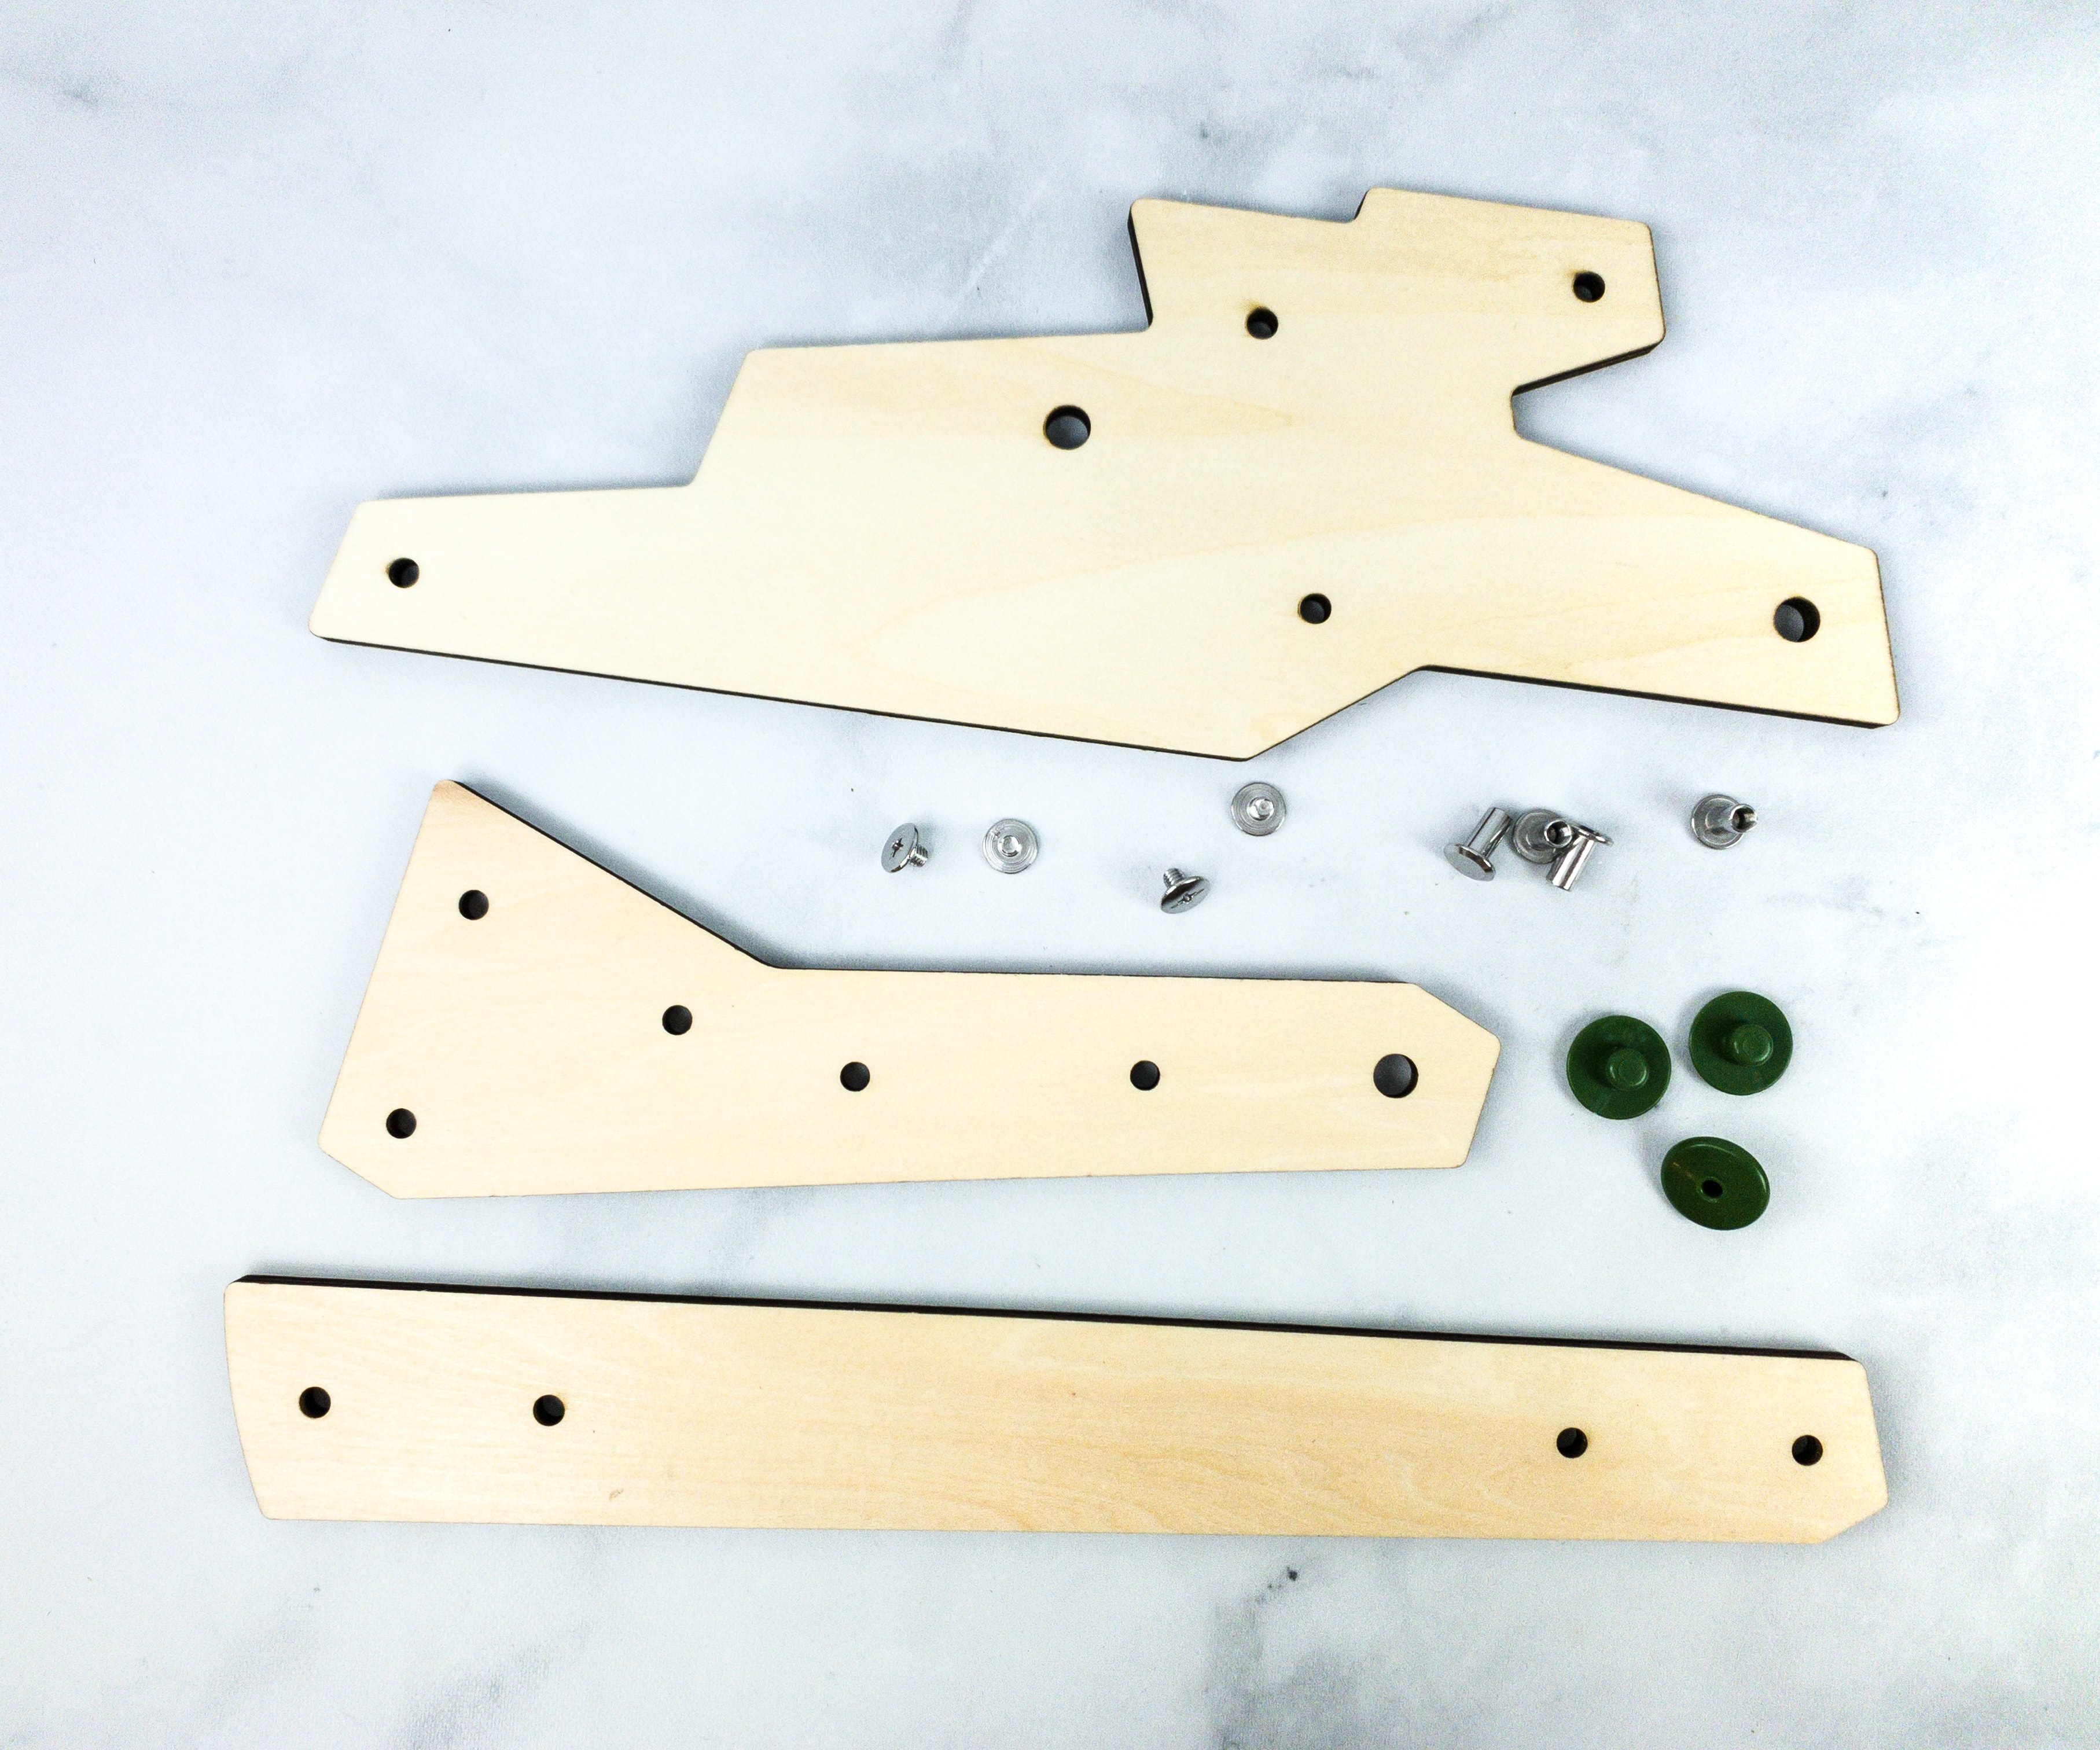
For this part, we used some of the wooden pieces, washers, and bolts. Some of the parts look similar so it’s better to separate them first according to size and shape to avoid confusion.
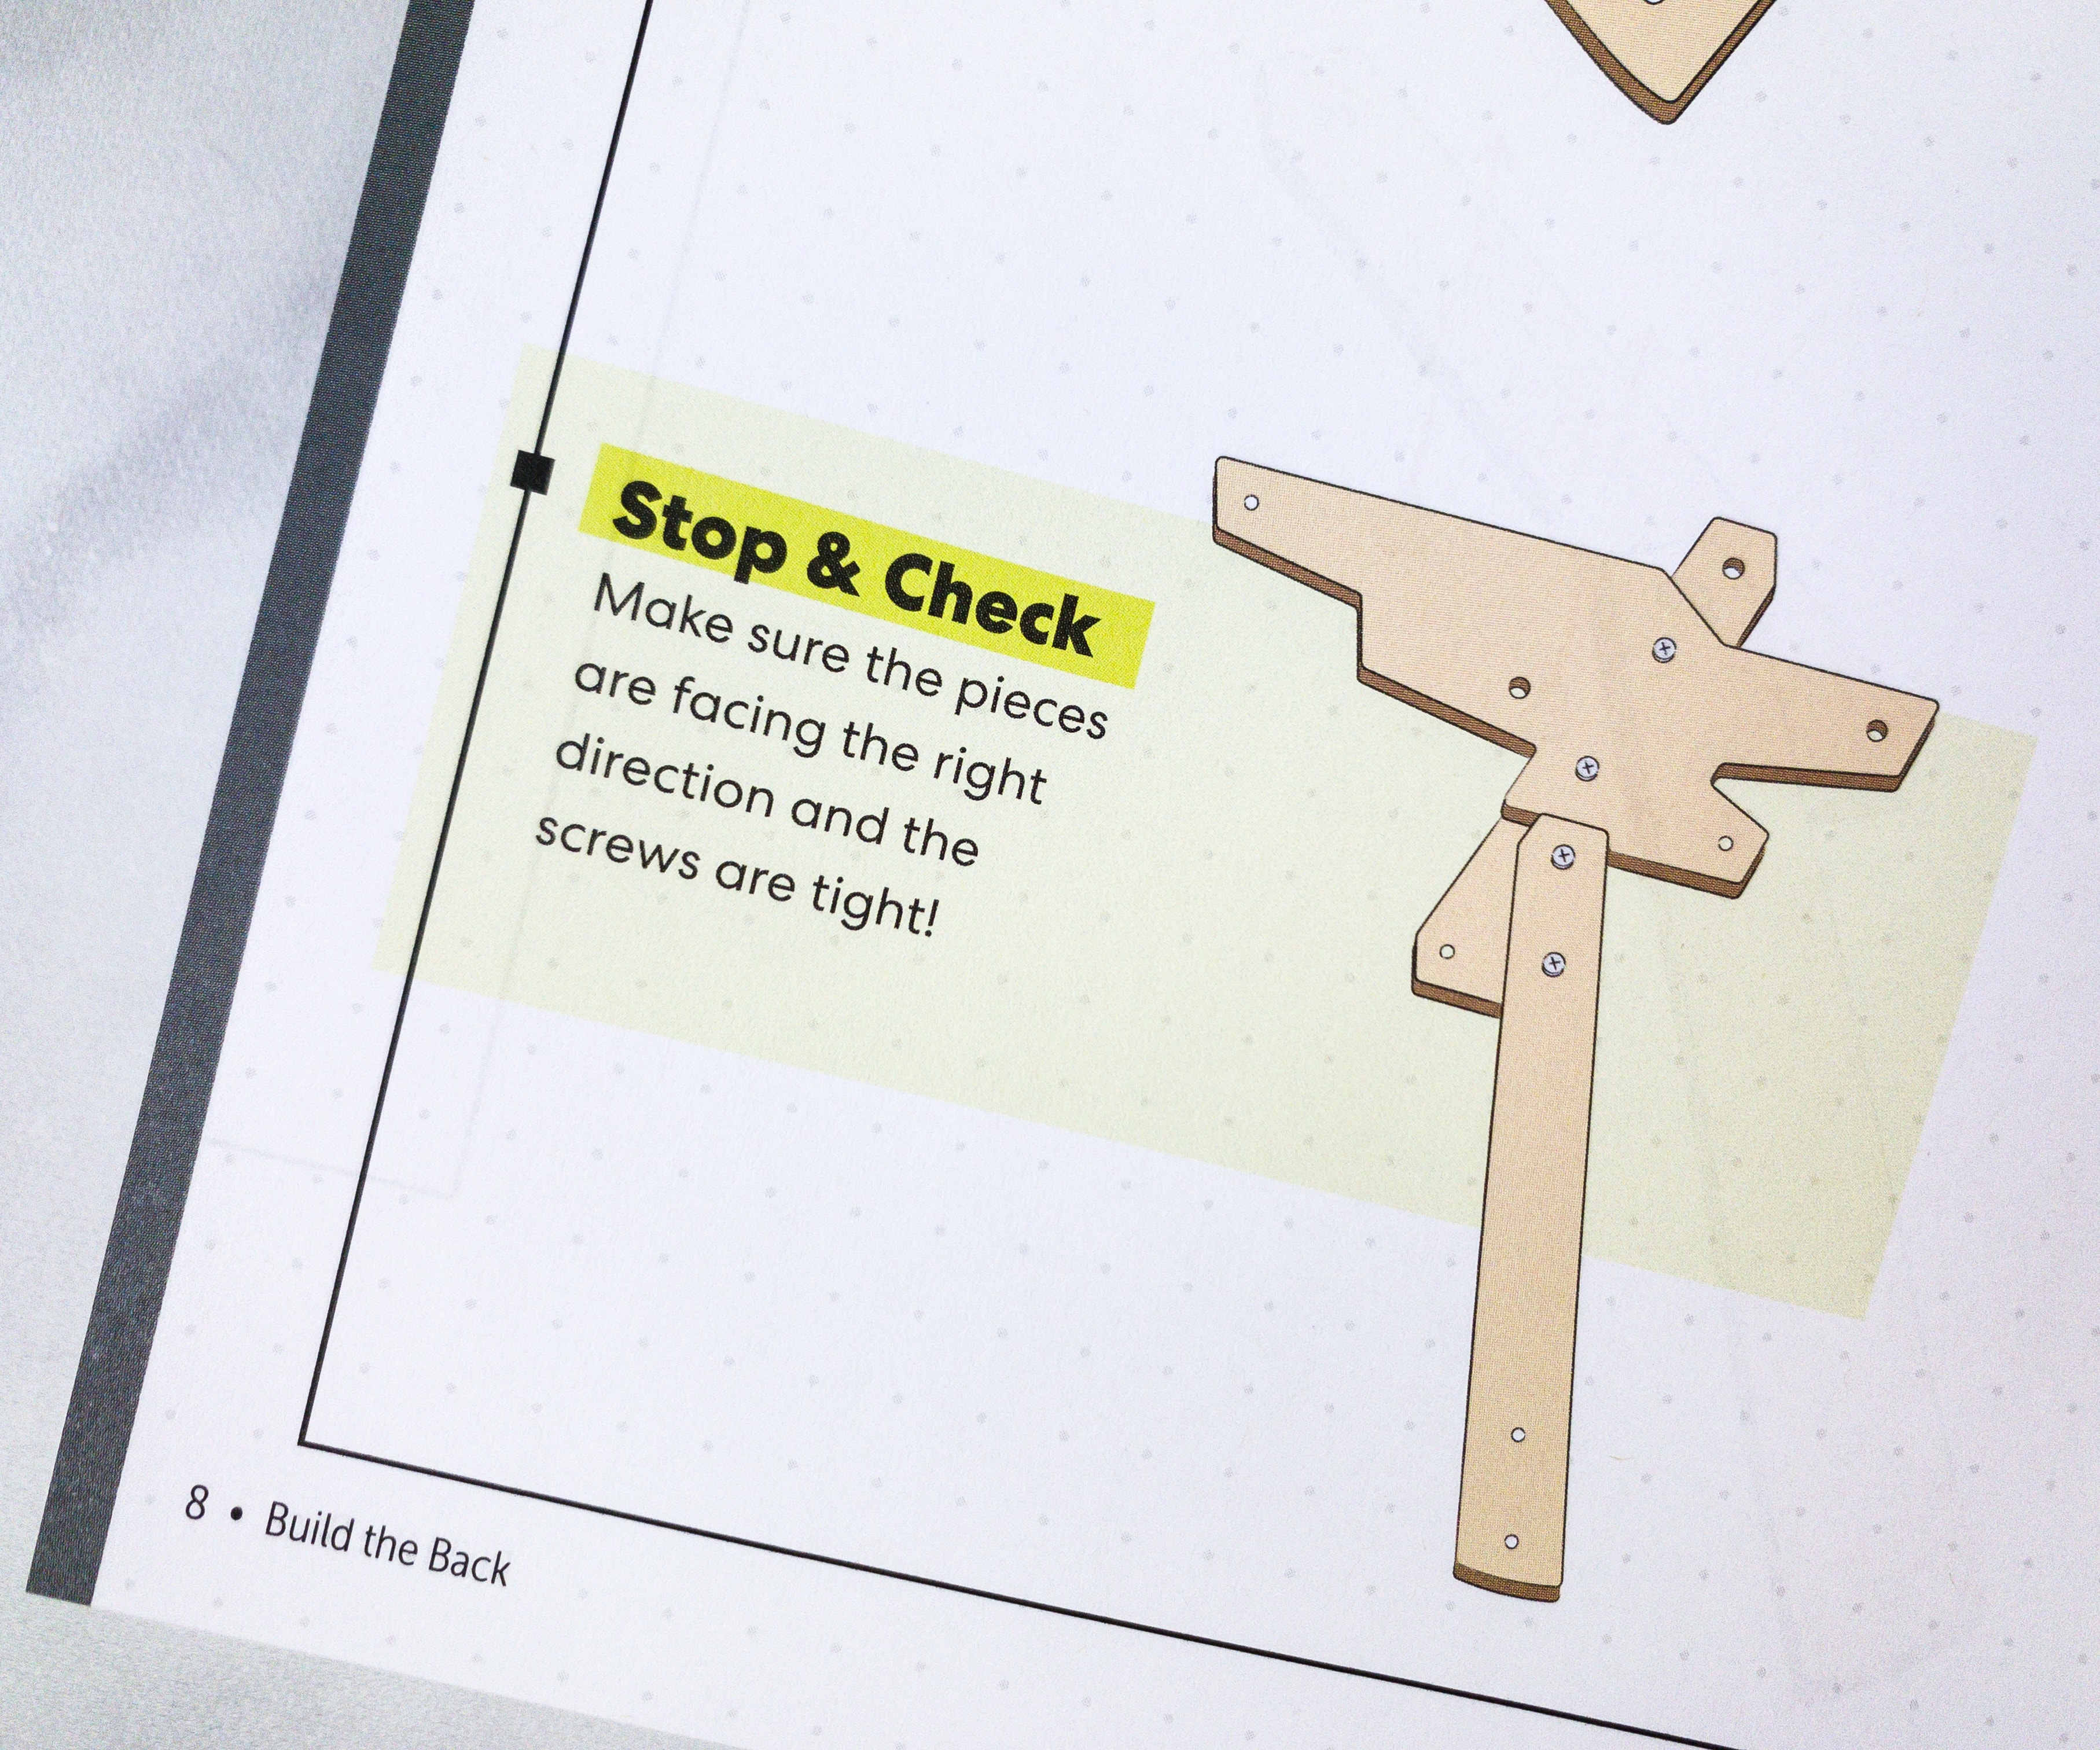
Every now and then, there’s a stop and check reminder so you can be sure that you’re doing the right thing.
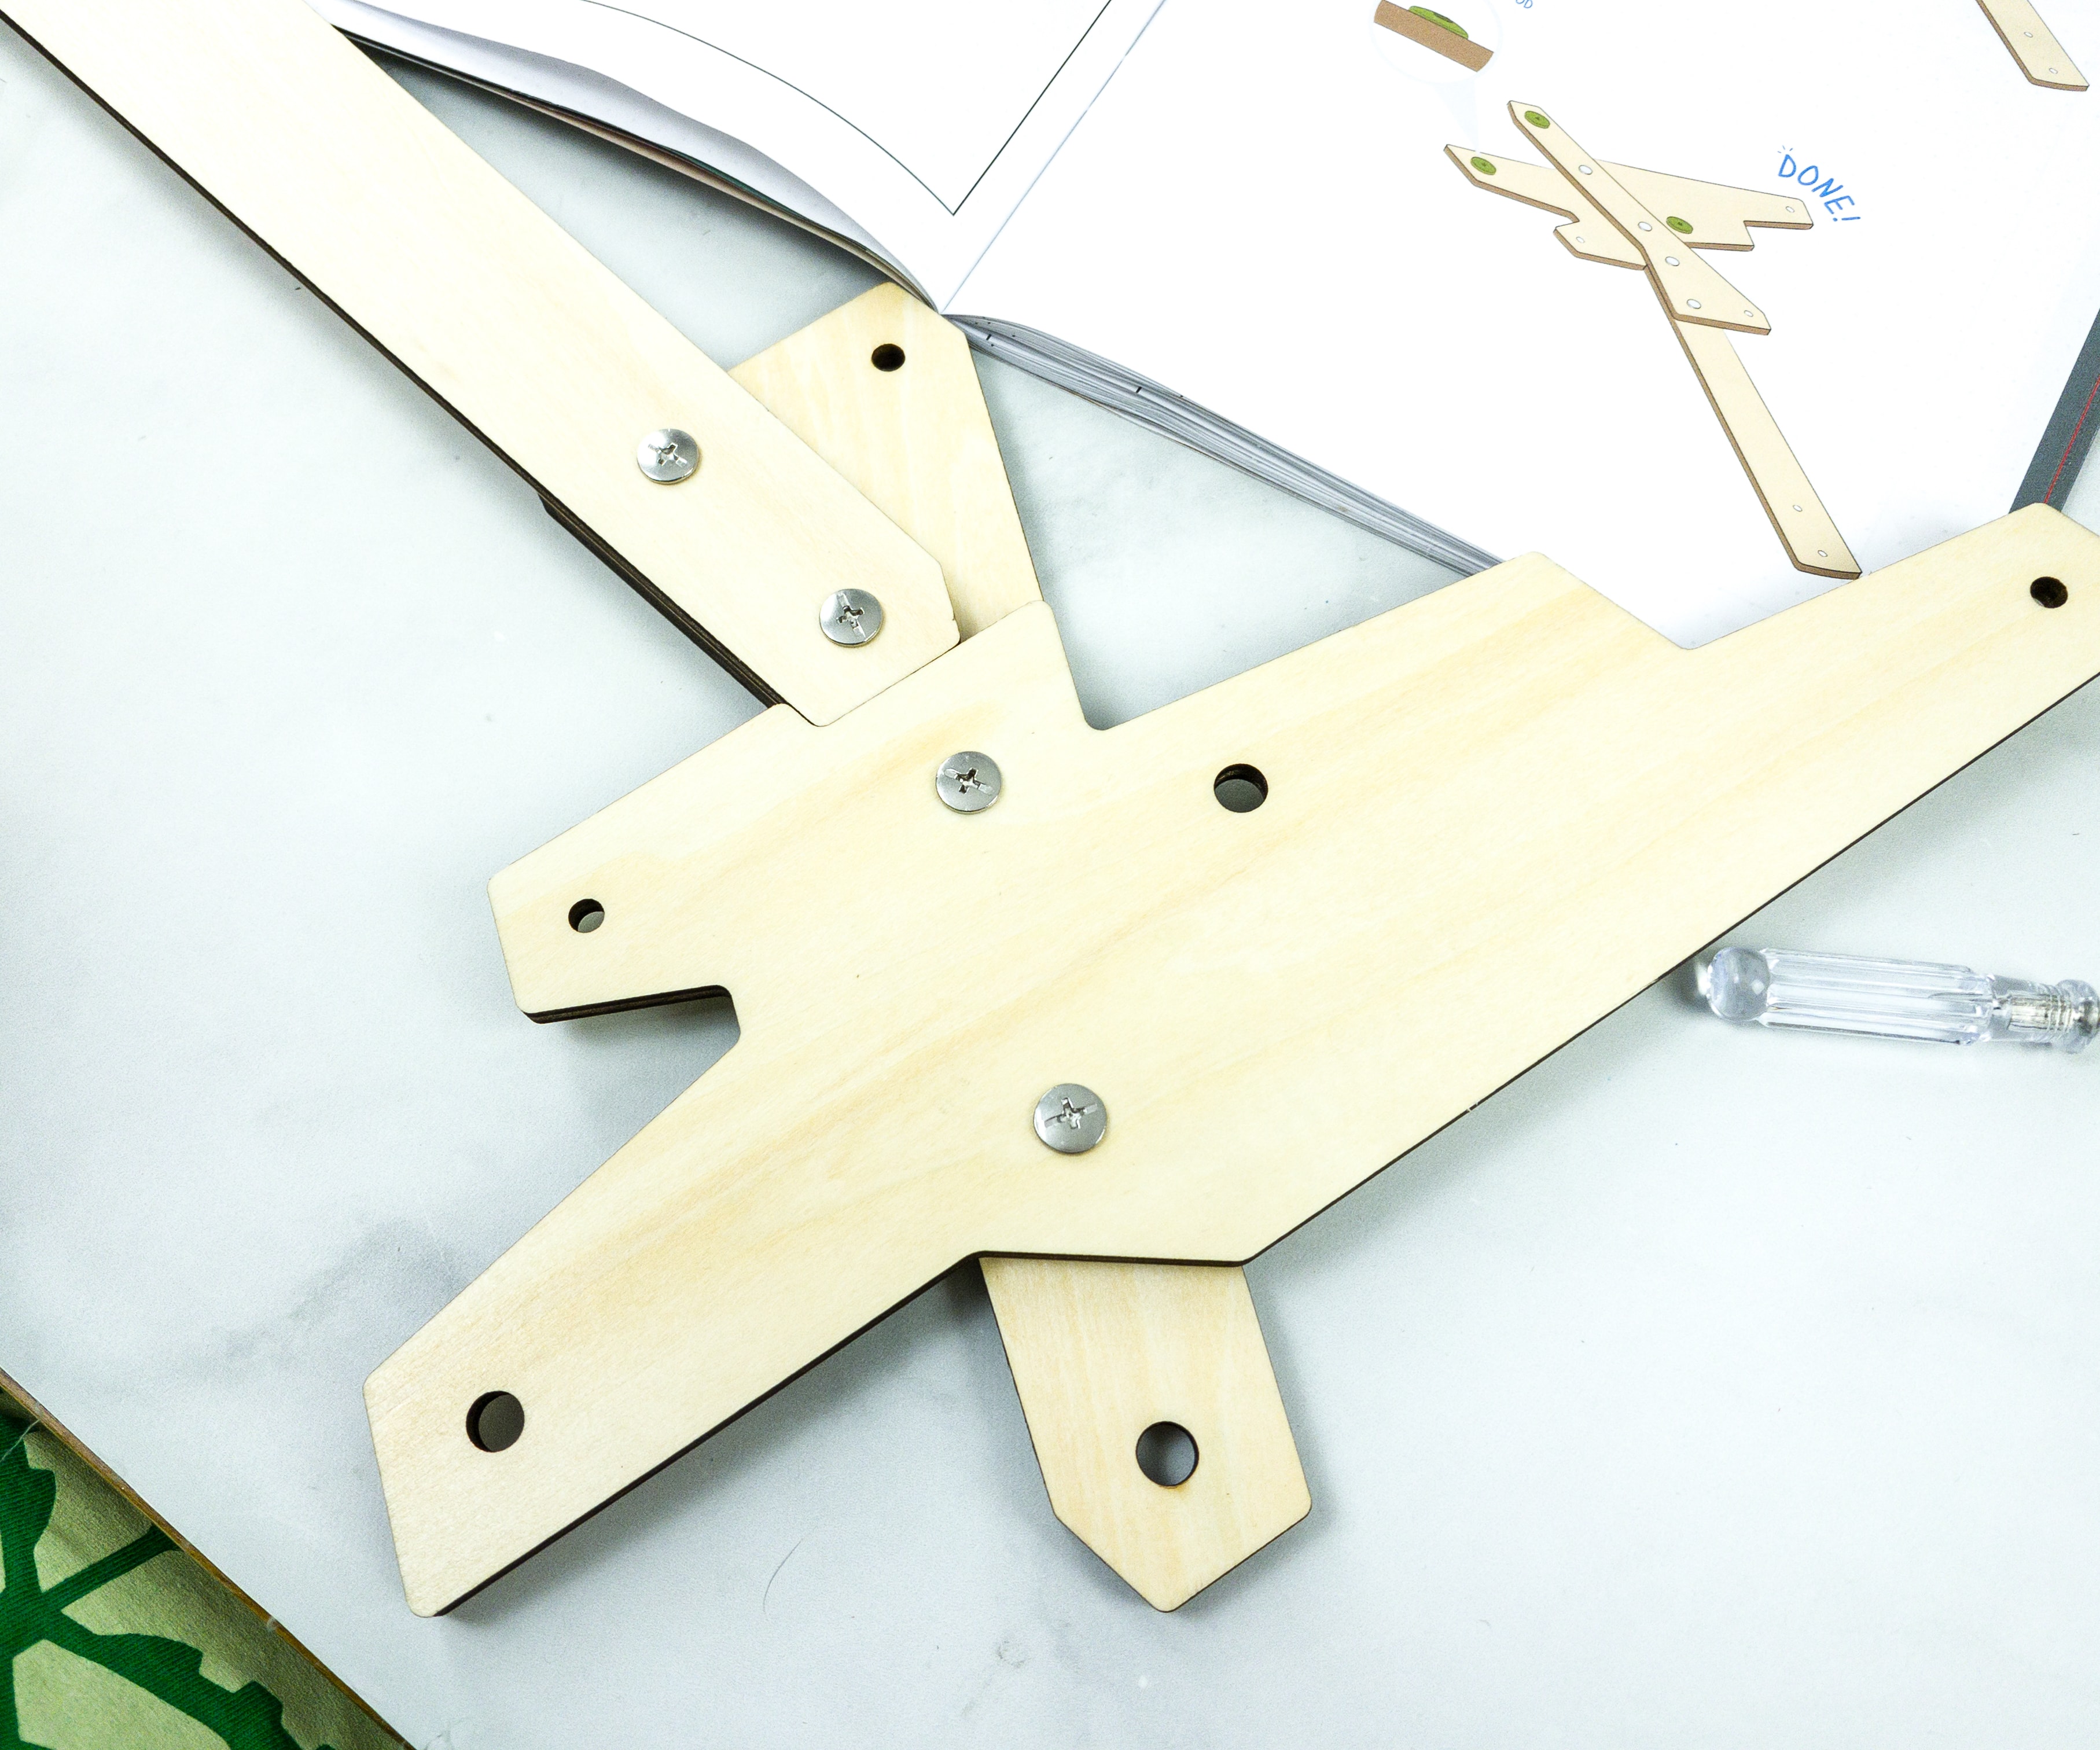
For this part, the screwdriver is really useful because it involves attaching the wooden parts with screws.
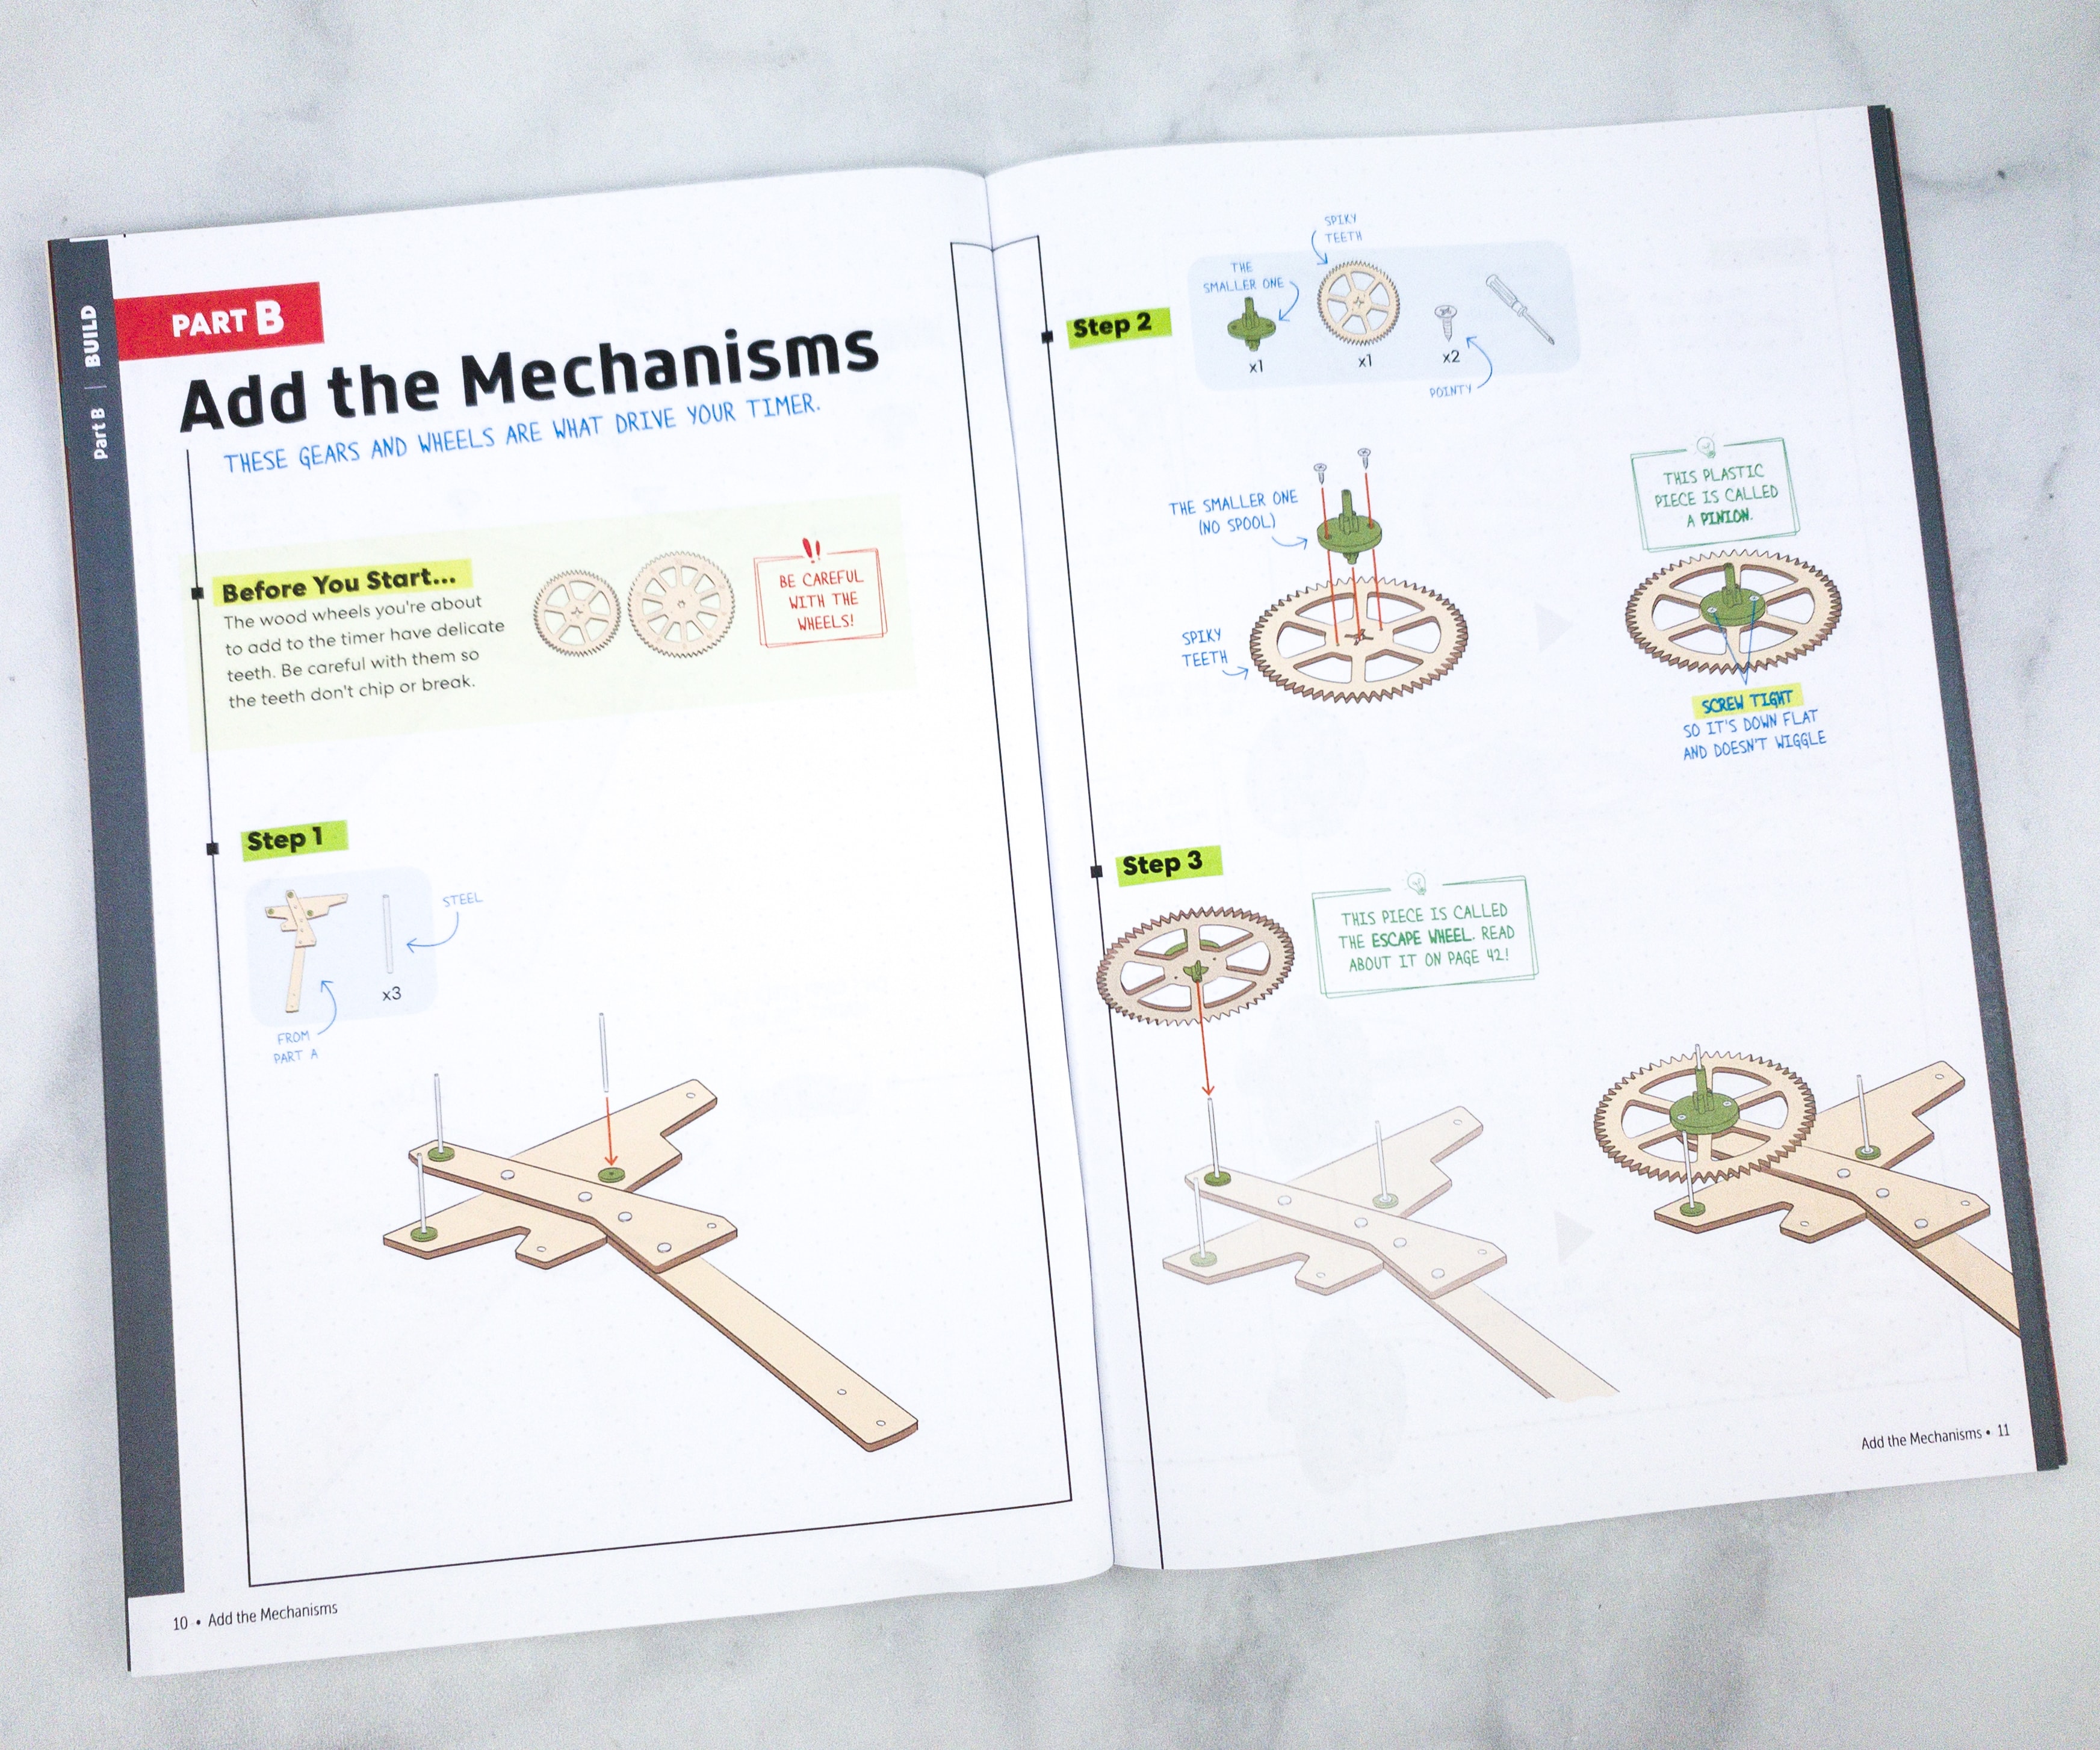
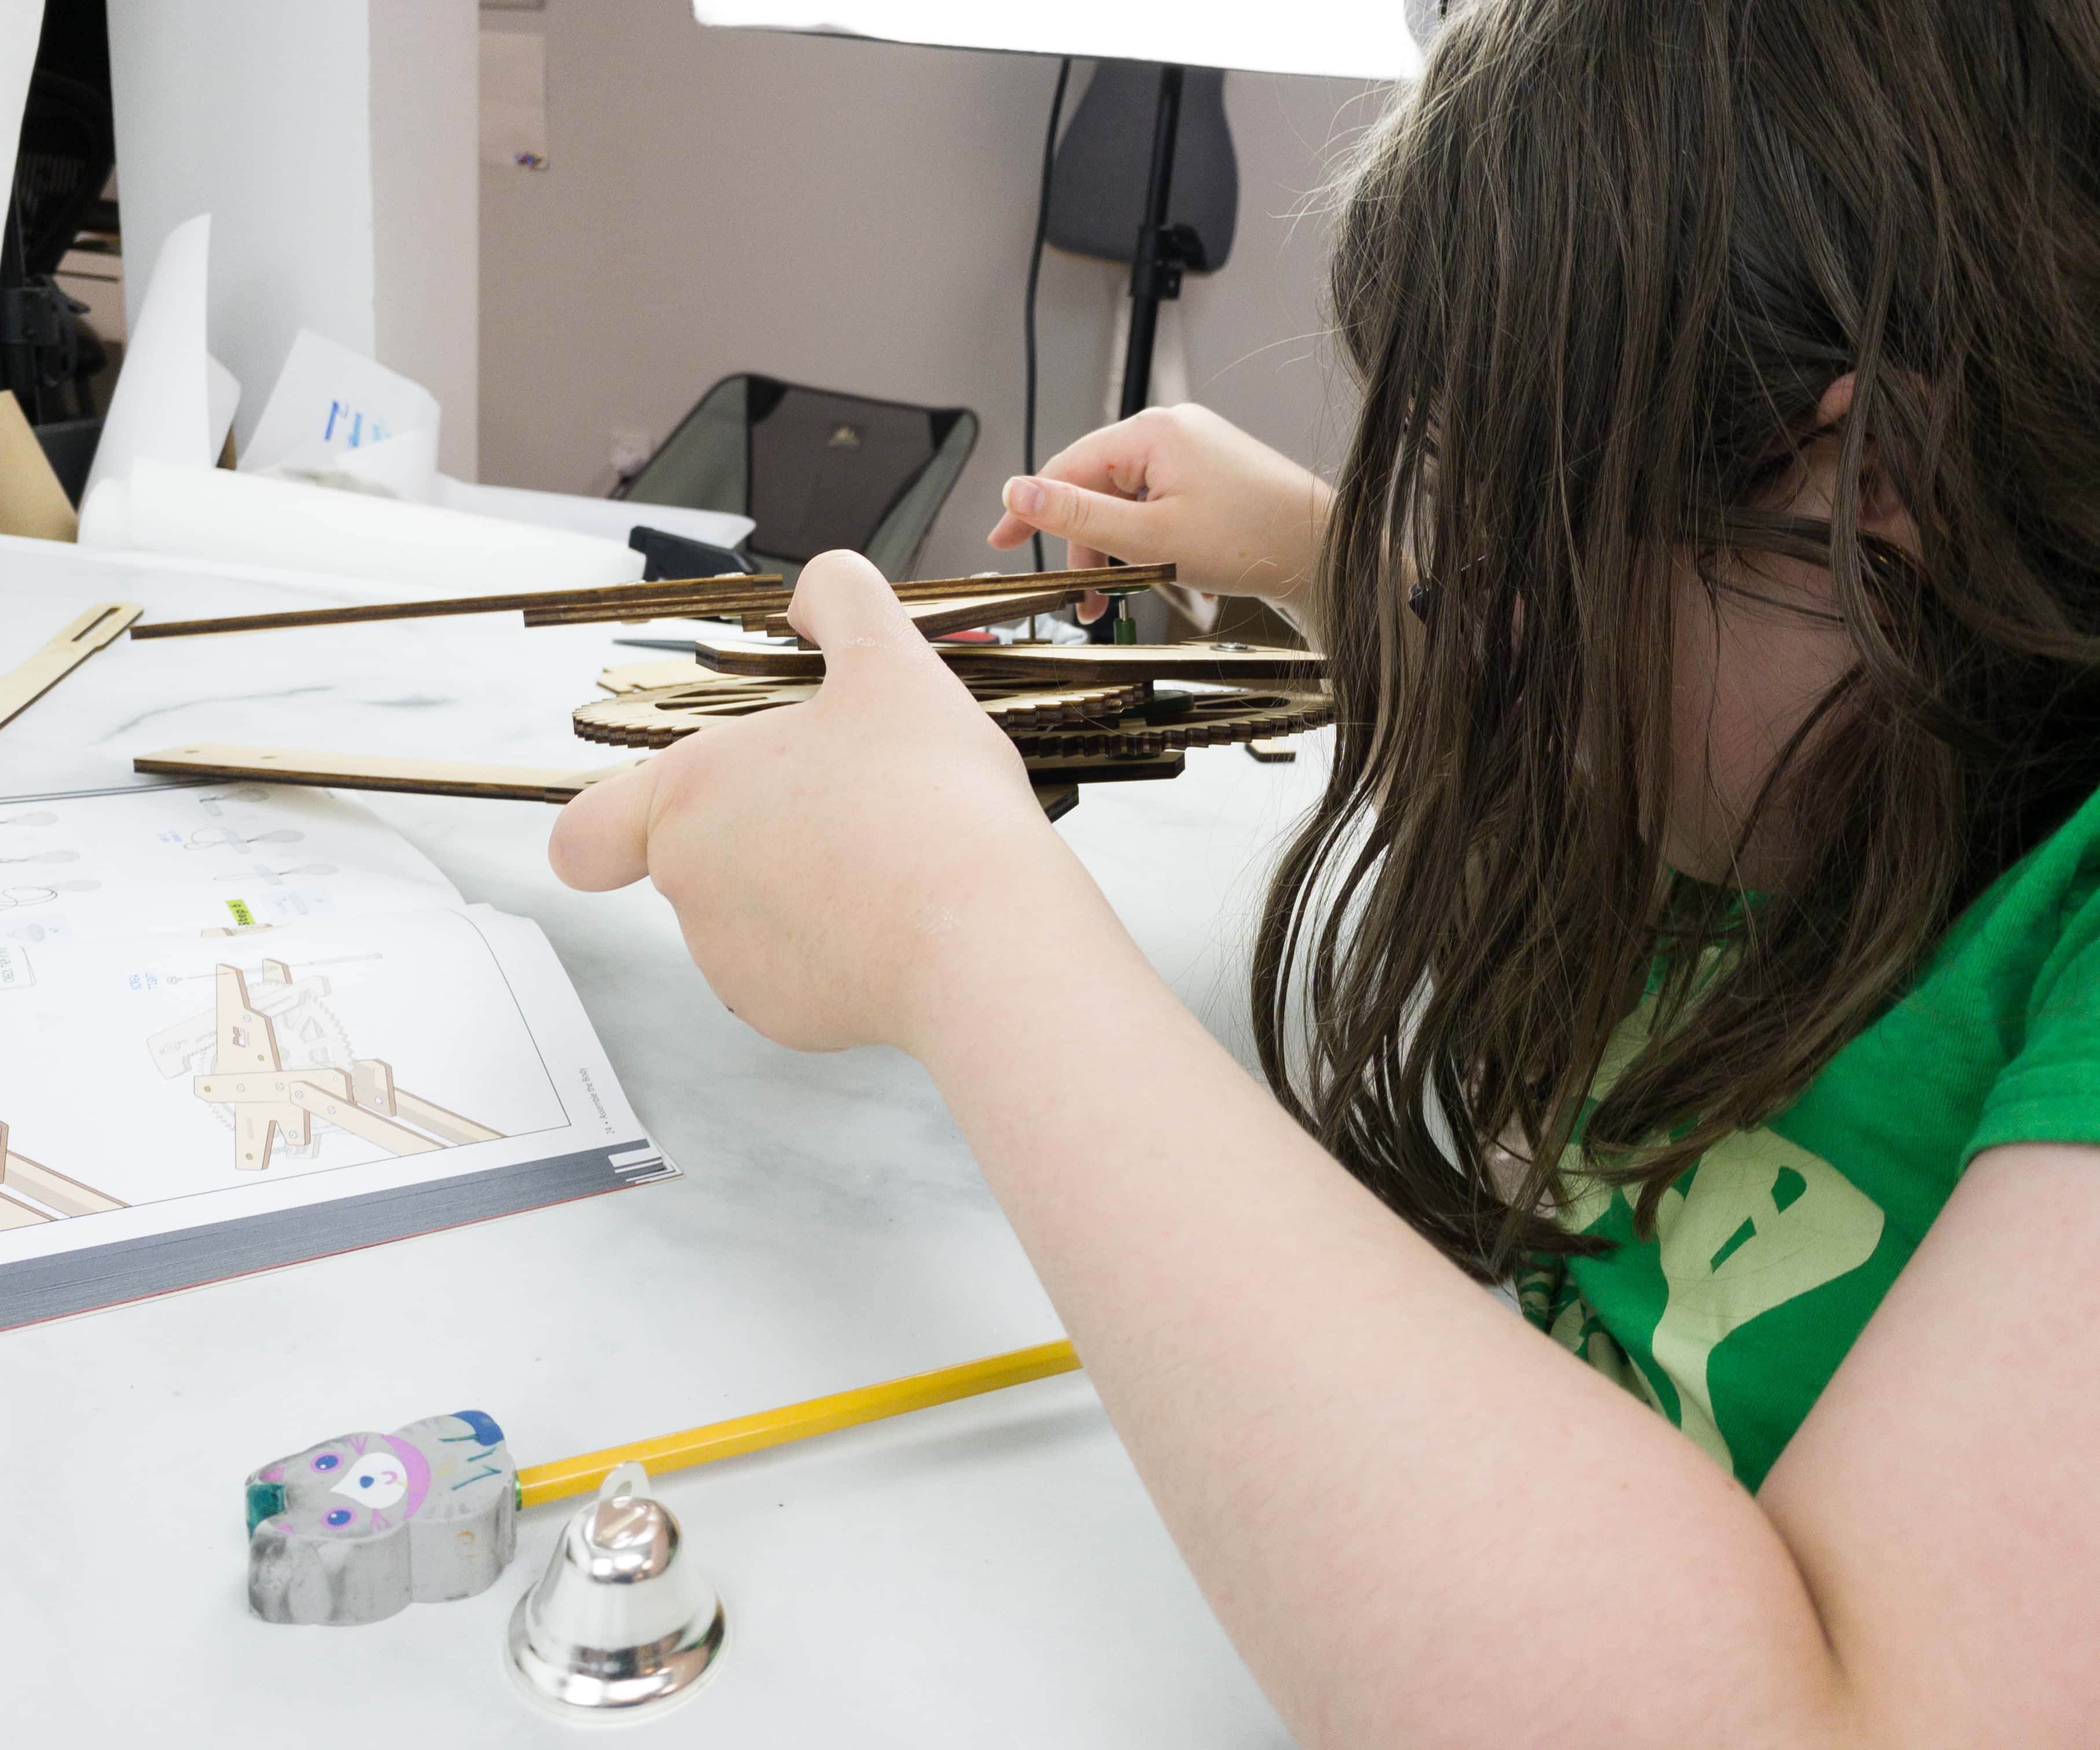
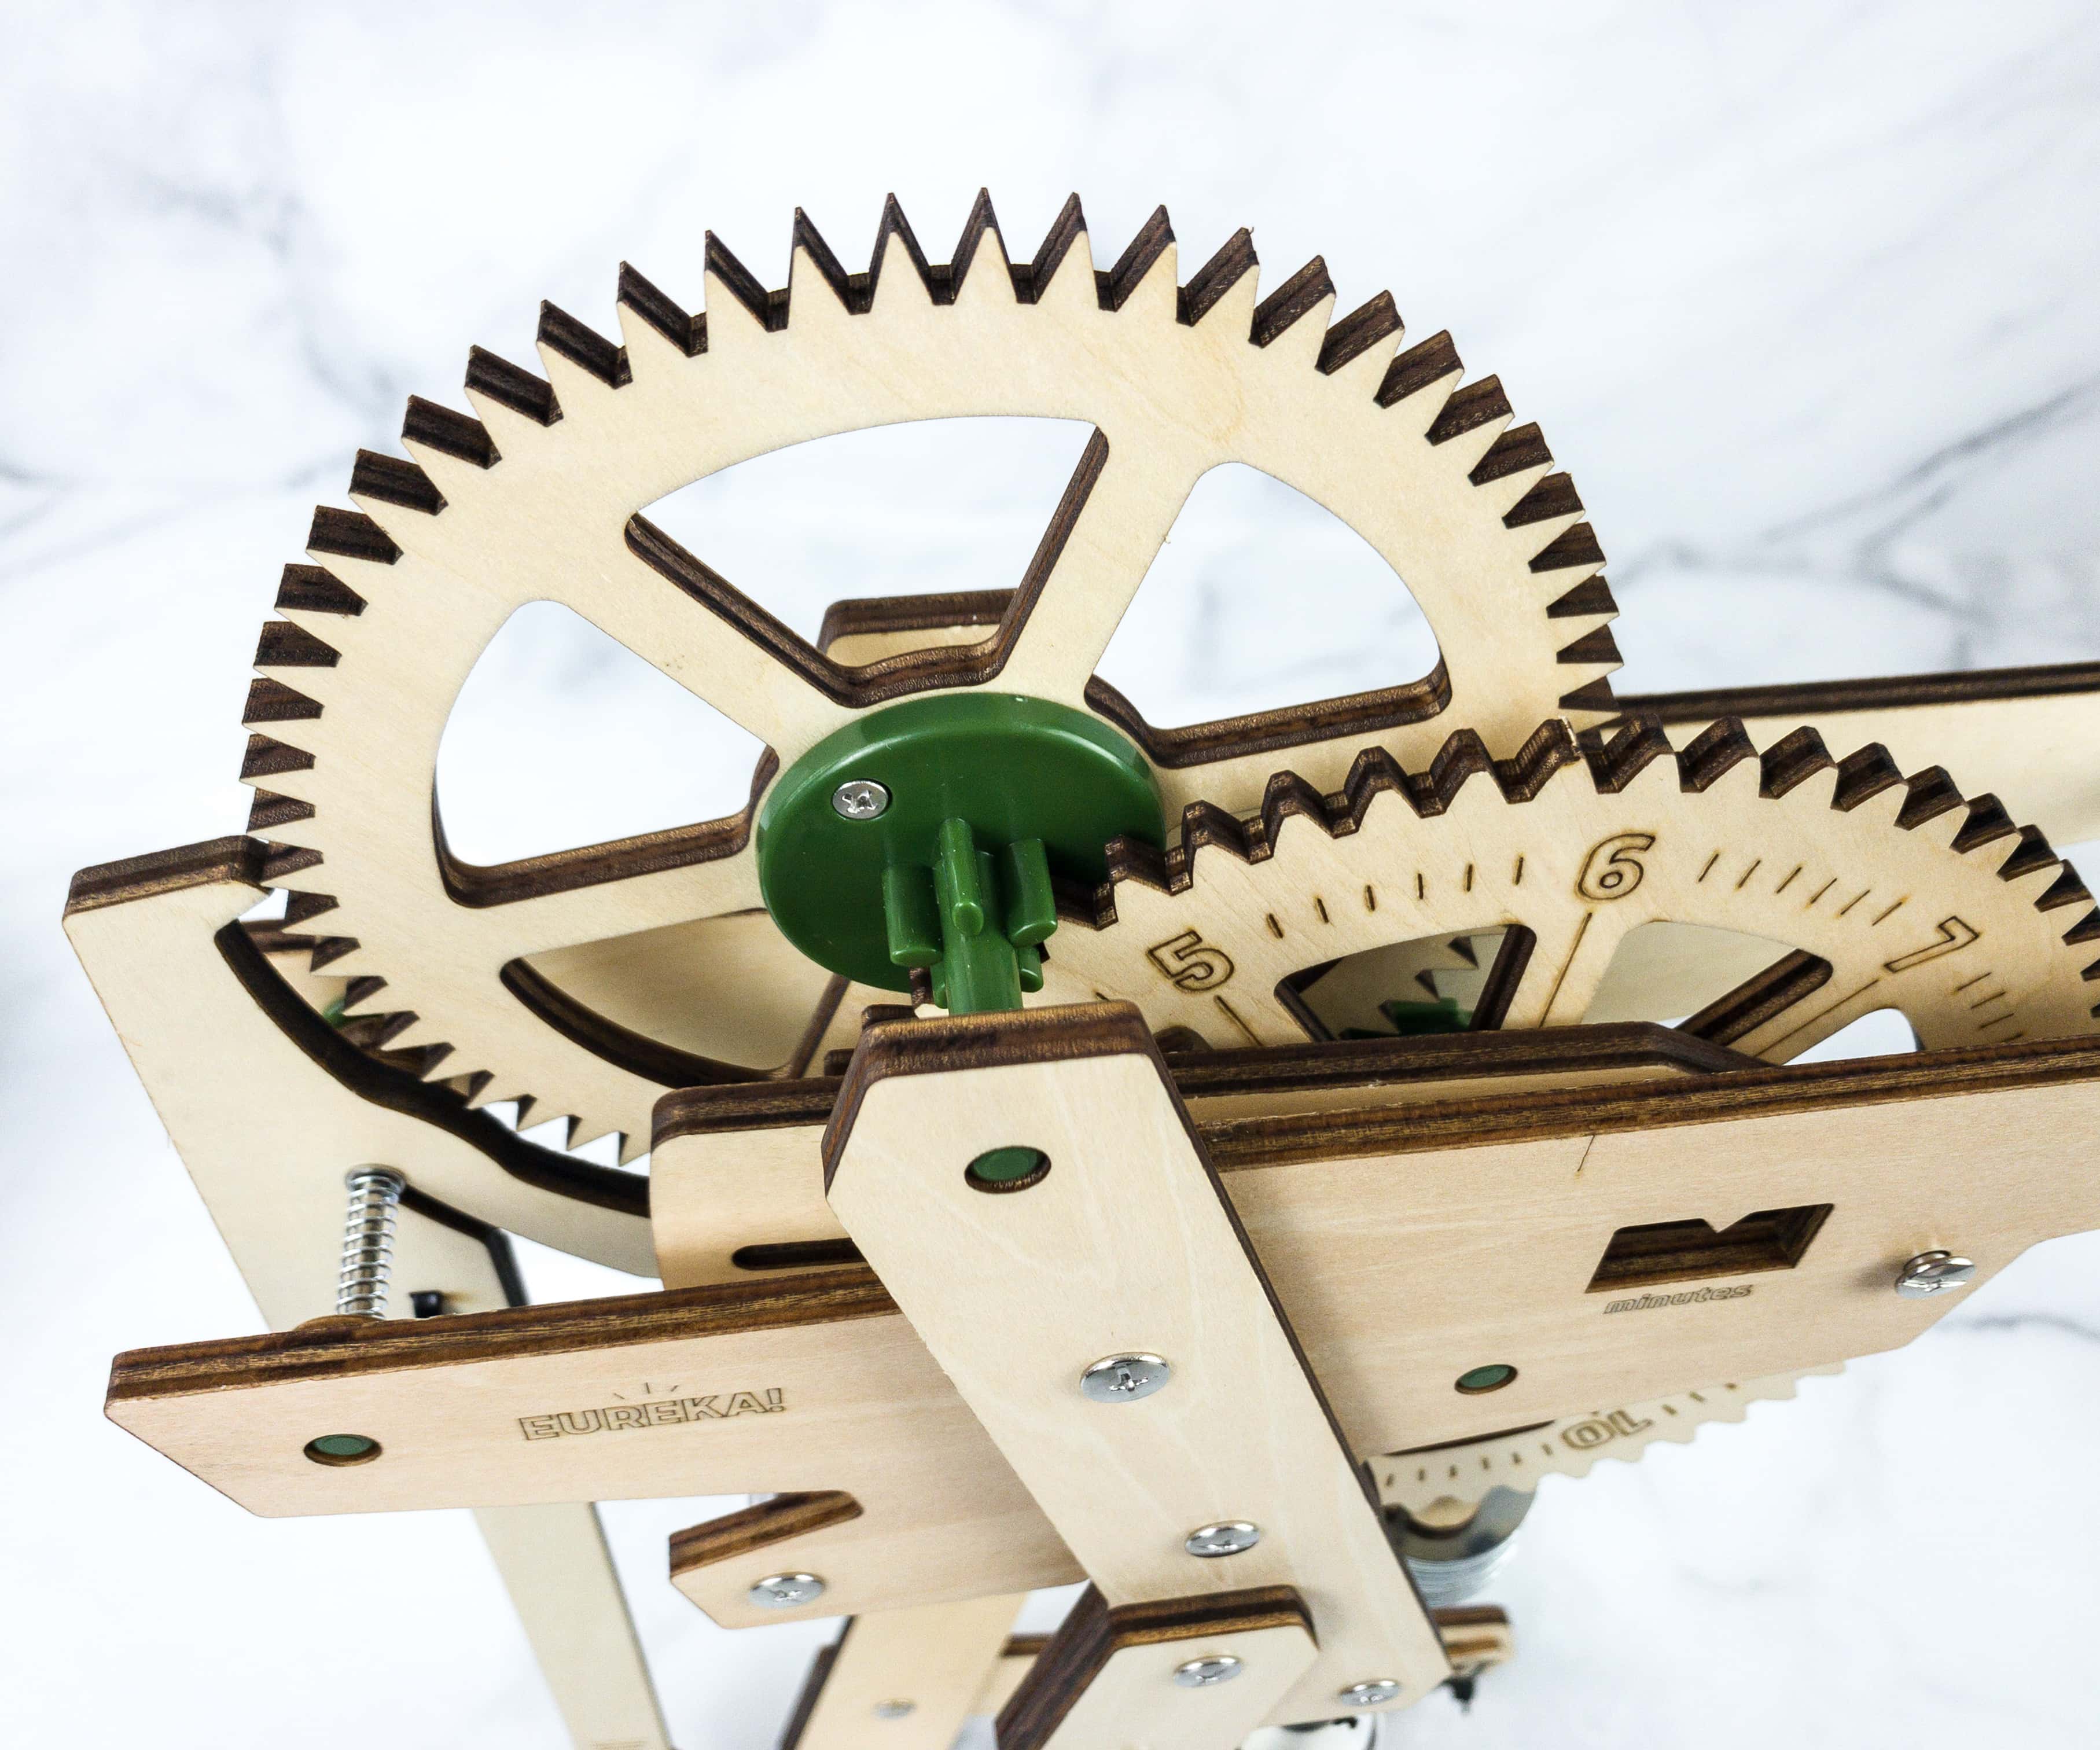
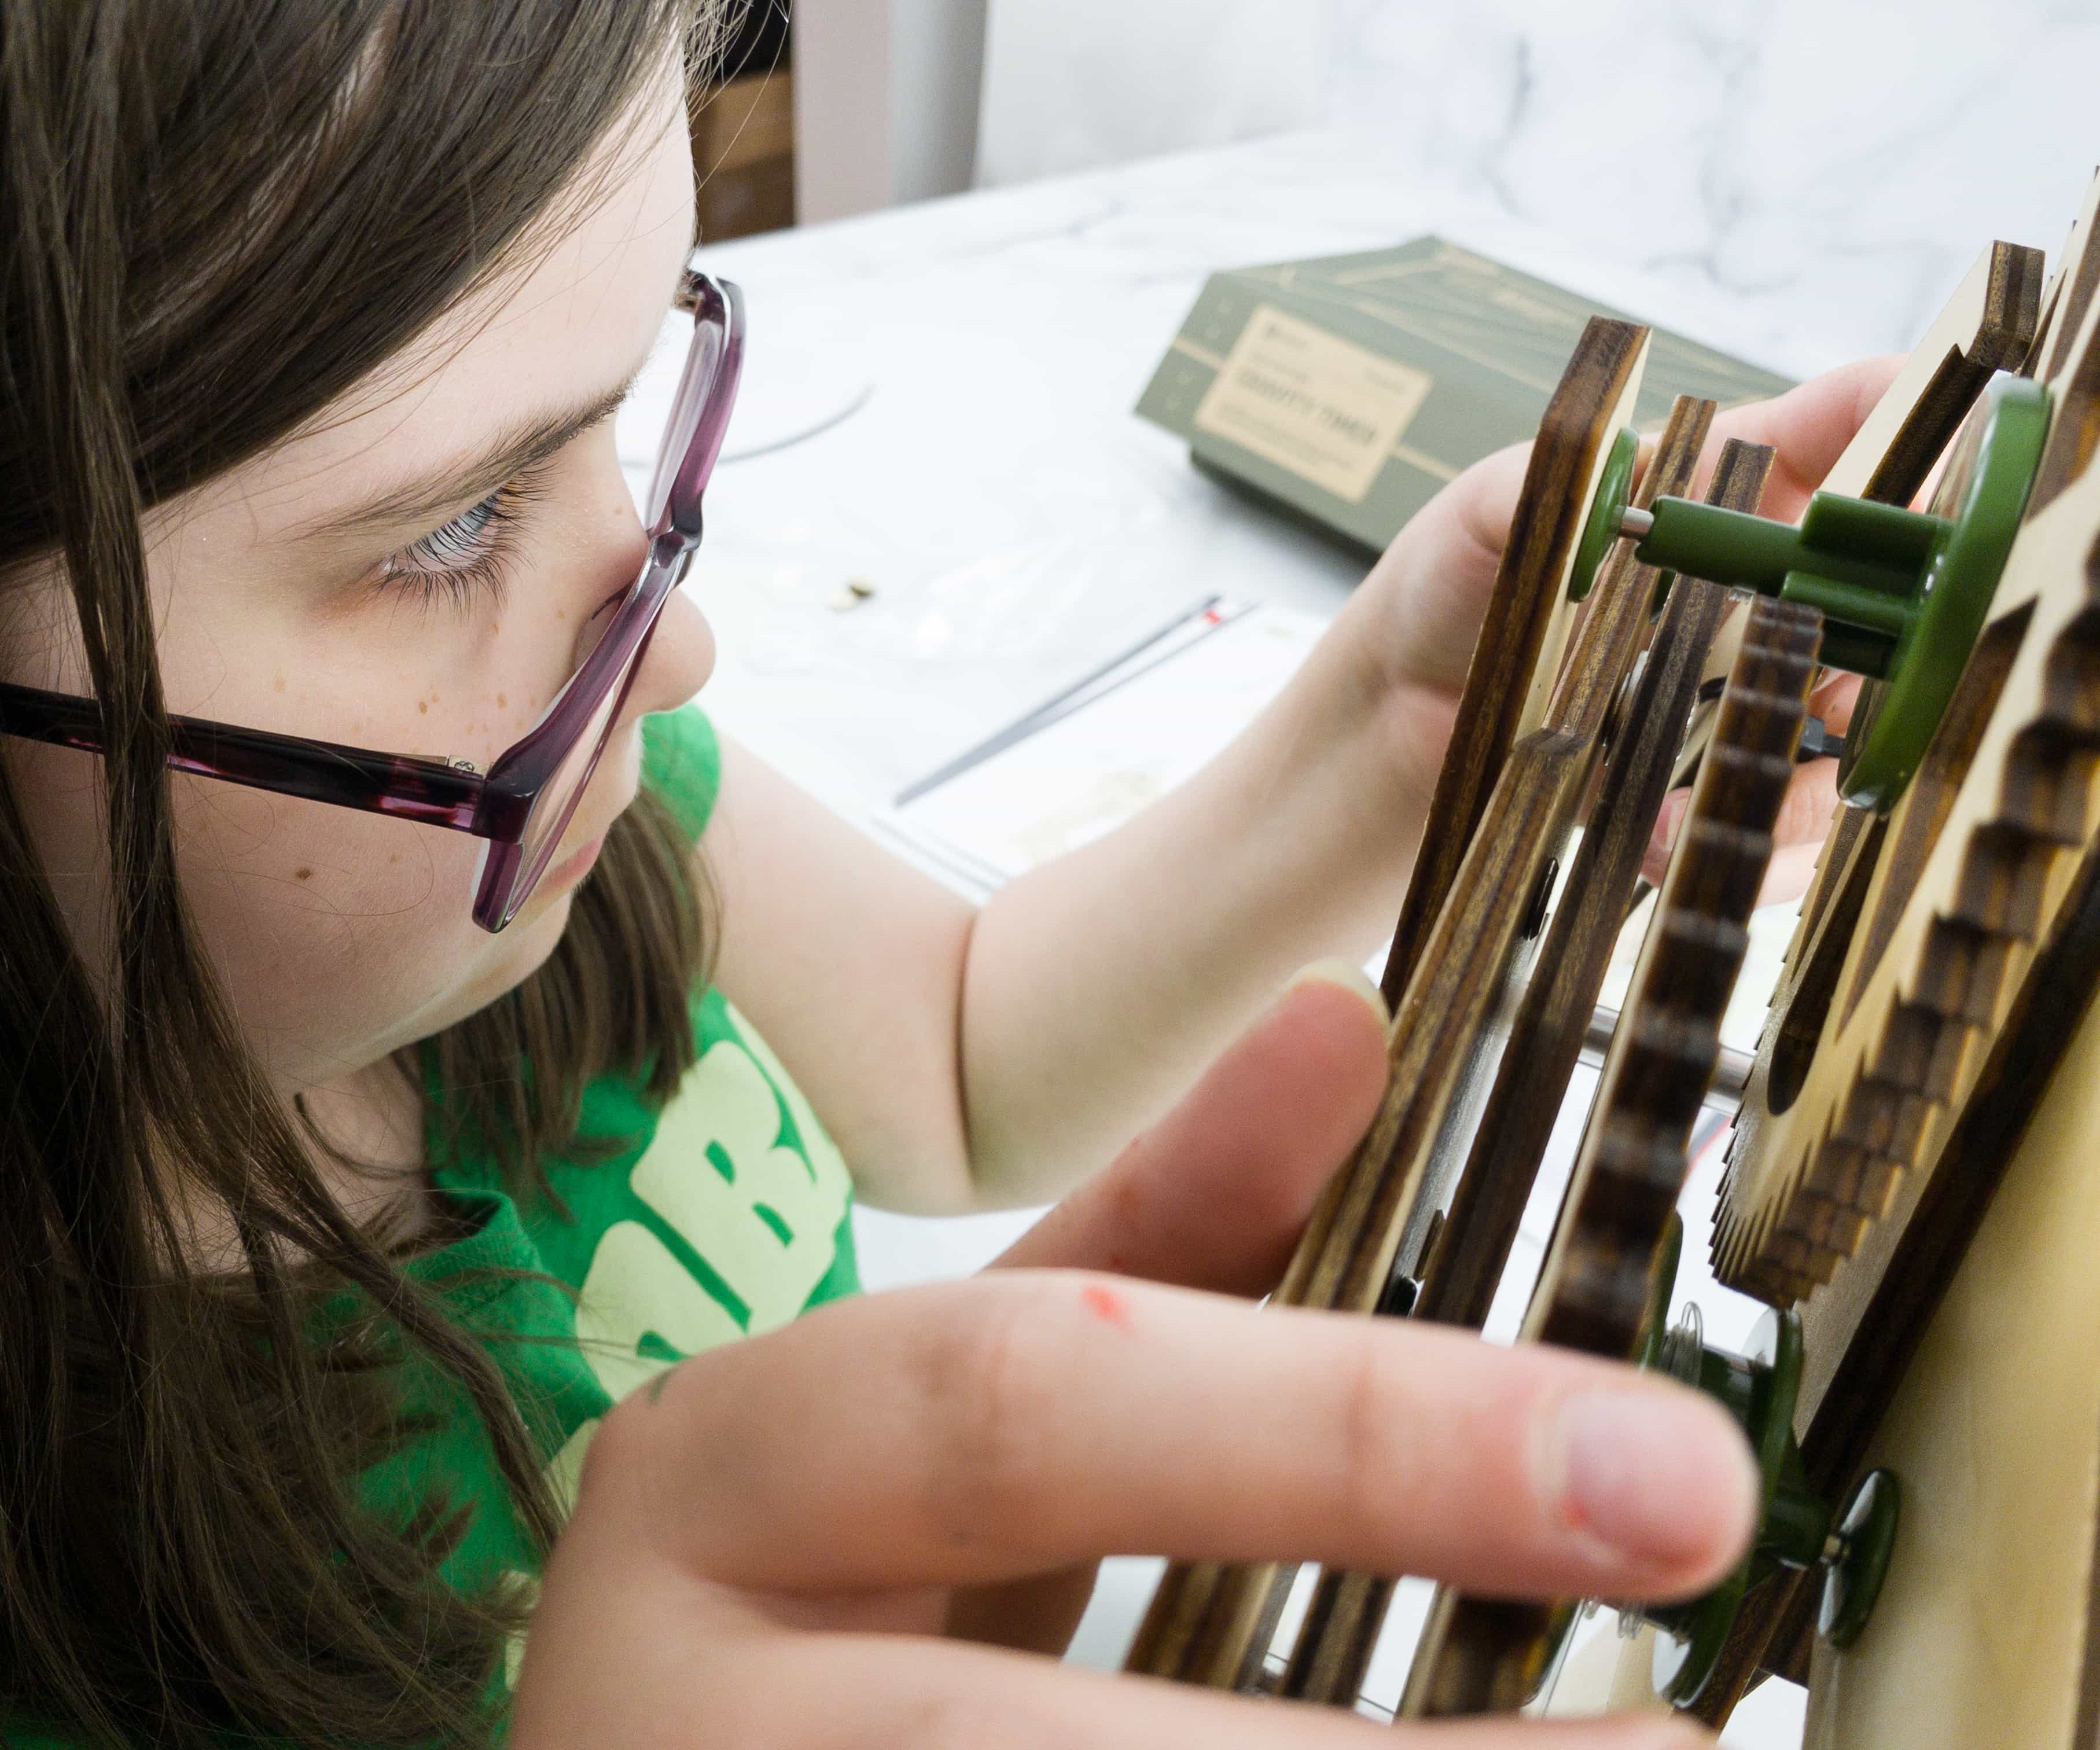
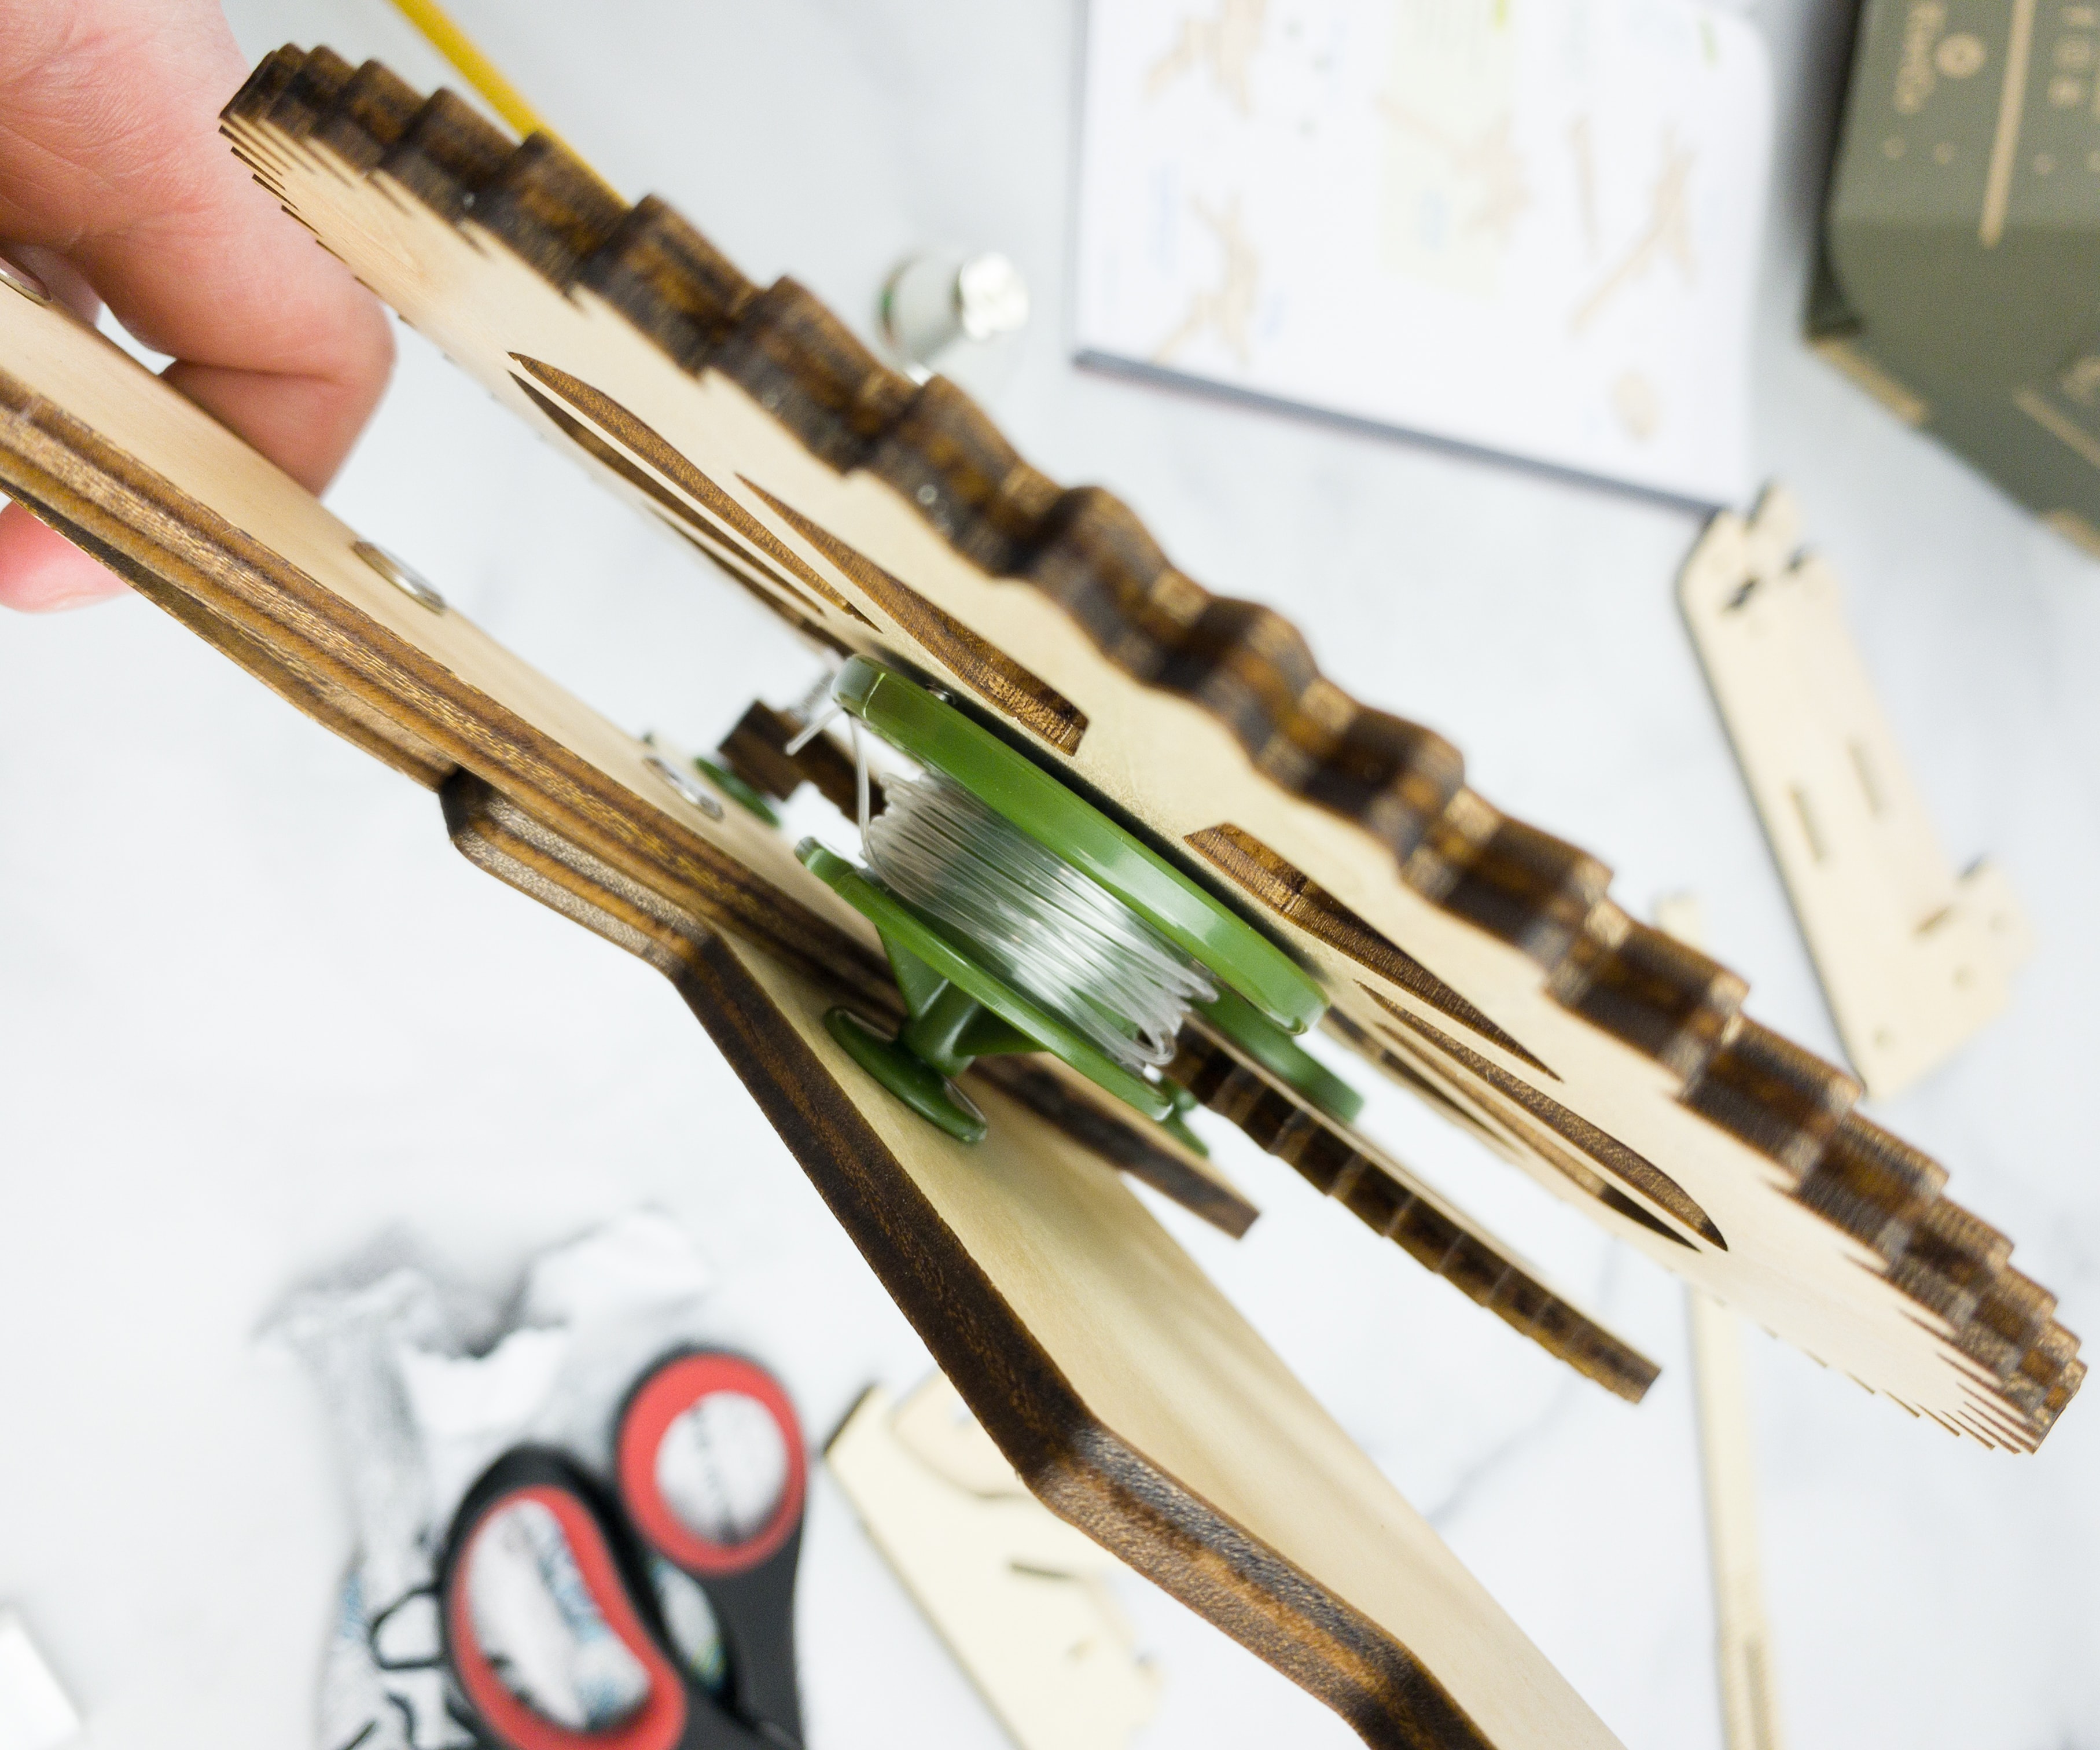
For the second part of the project, we added the mechanisms. These gears and wheels are the parts that will drive or make the timer work.
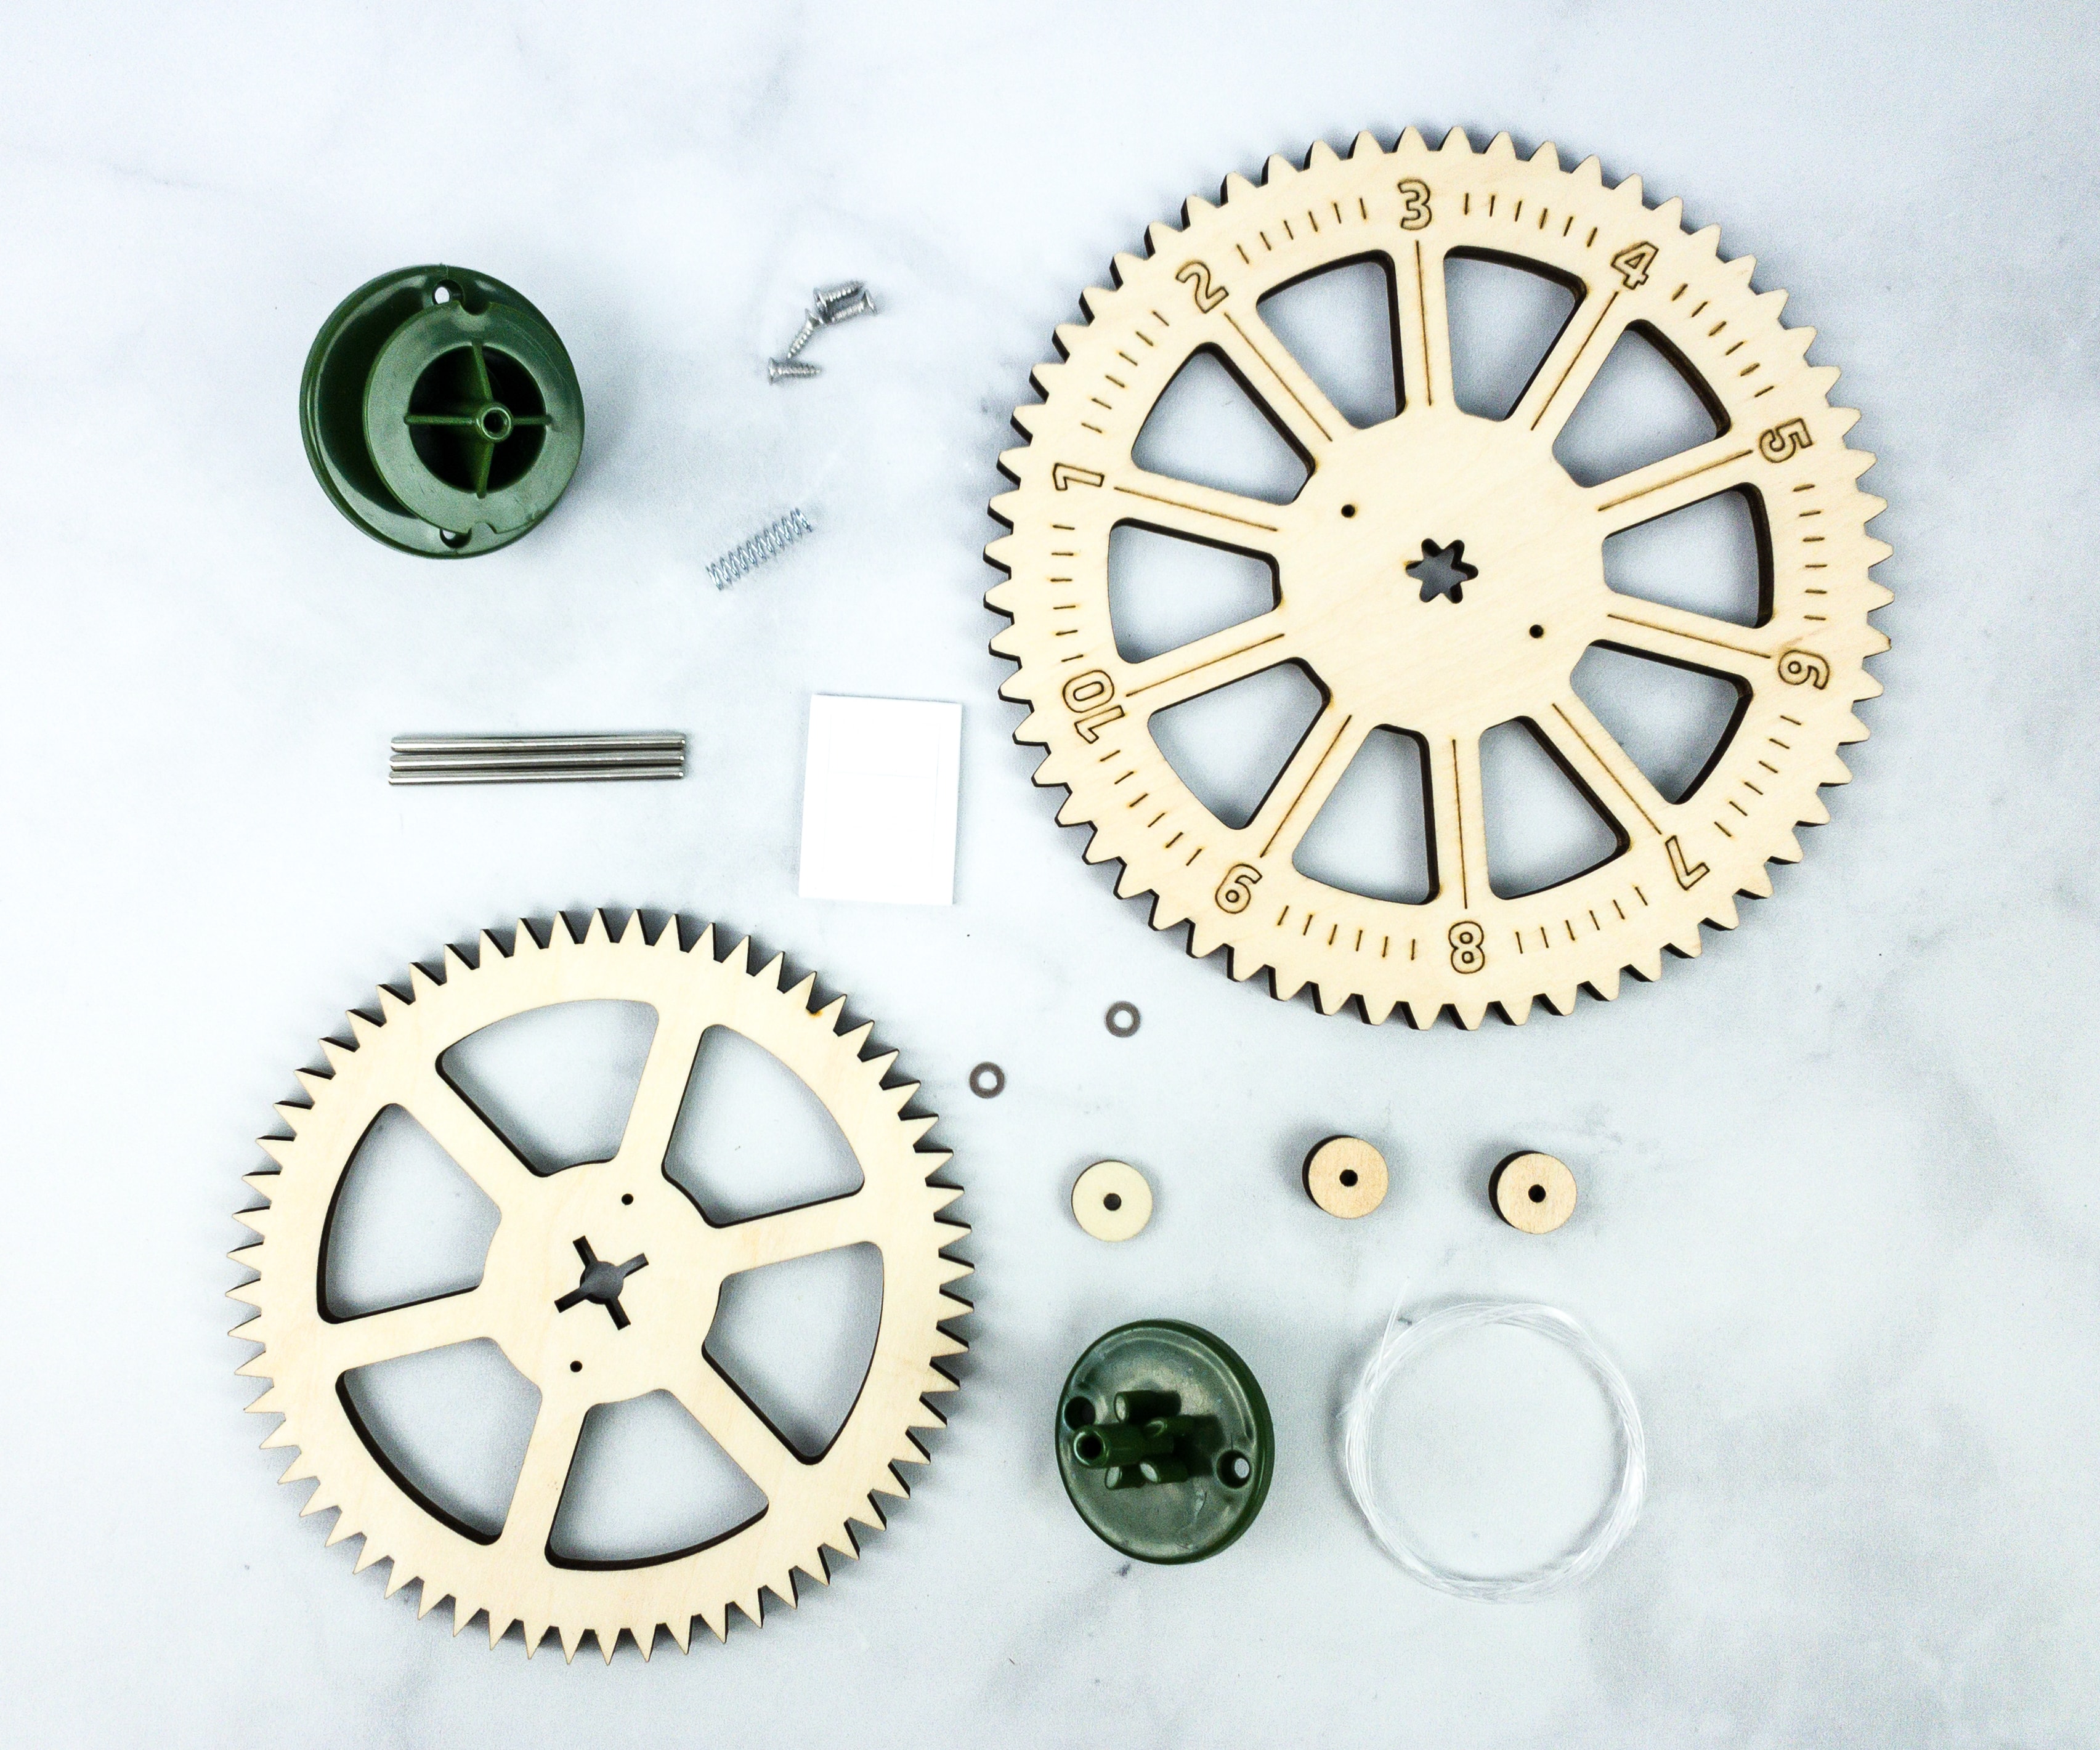
For this step, we used the following materials: wood wheels, pinions, nylon cord, spring, screws, axle rods, and hex nuts.
The booklet also explains some steps further, and it shows the correct assembly so that we can check every once in a while.
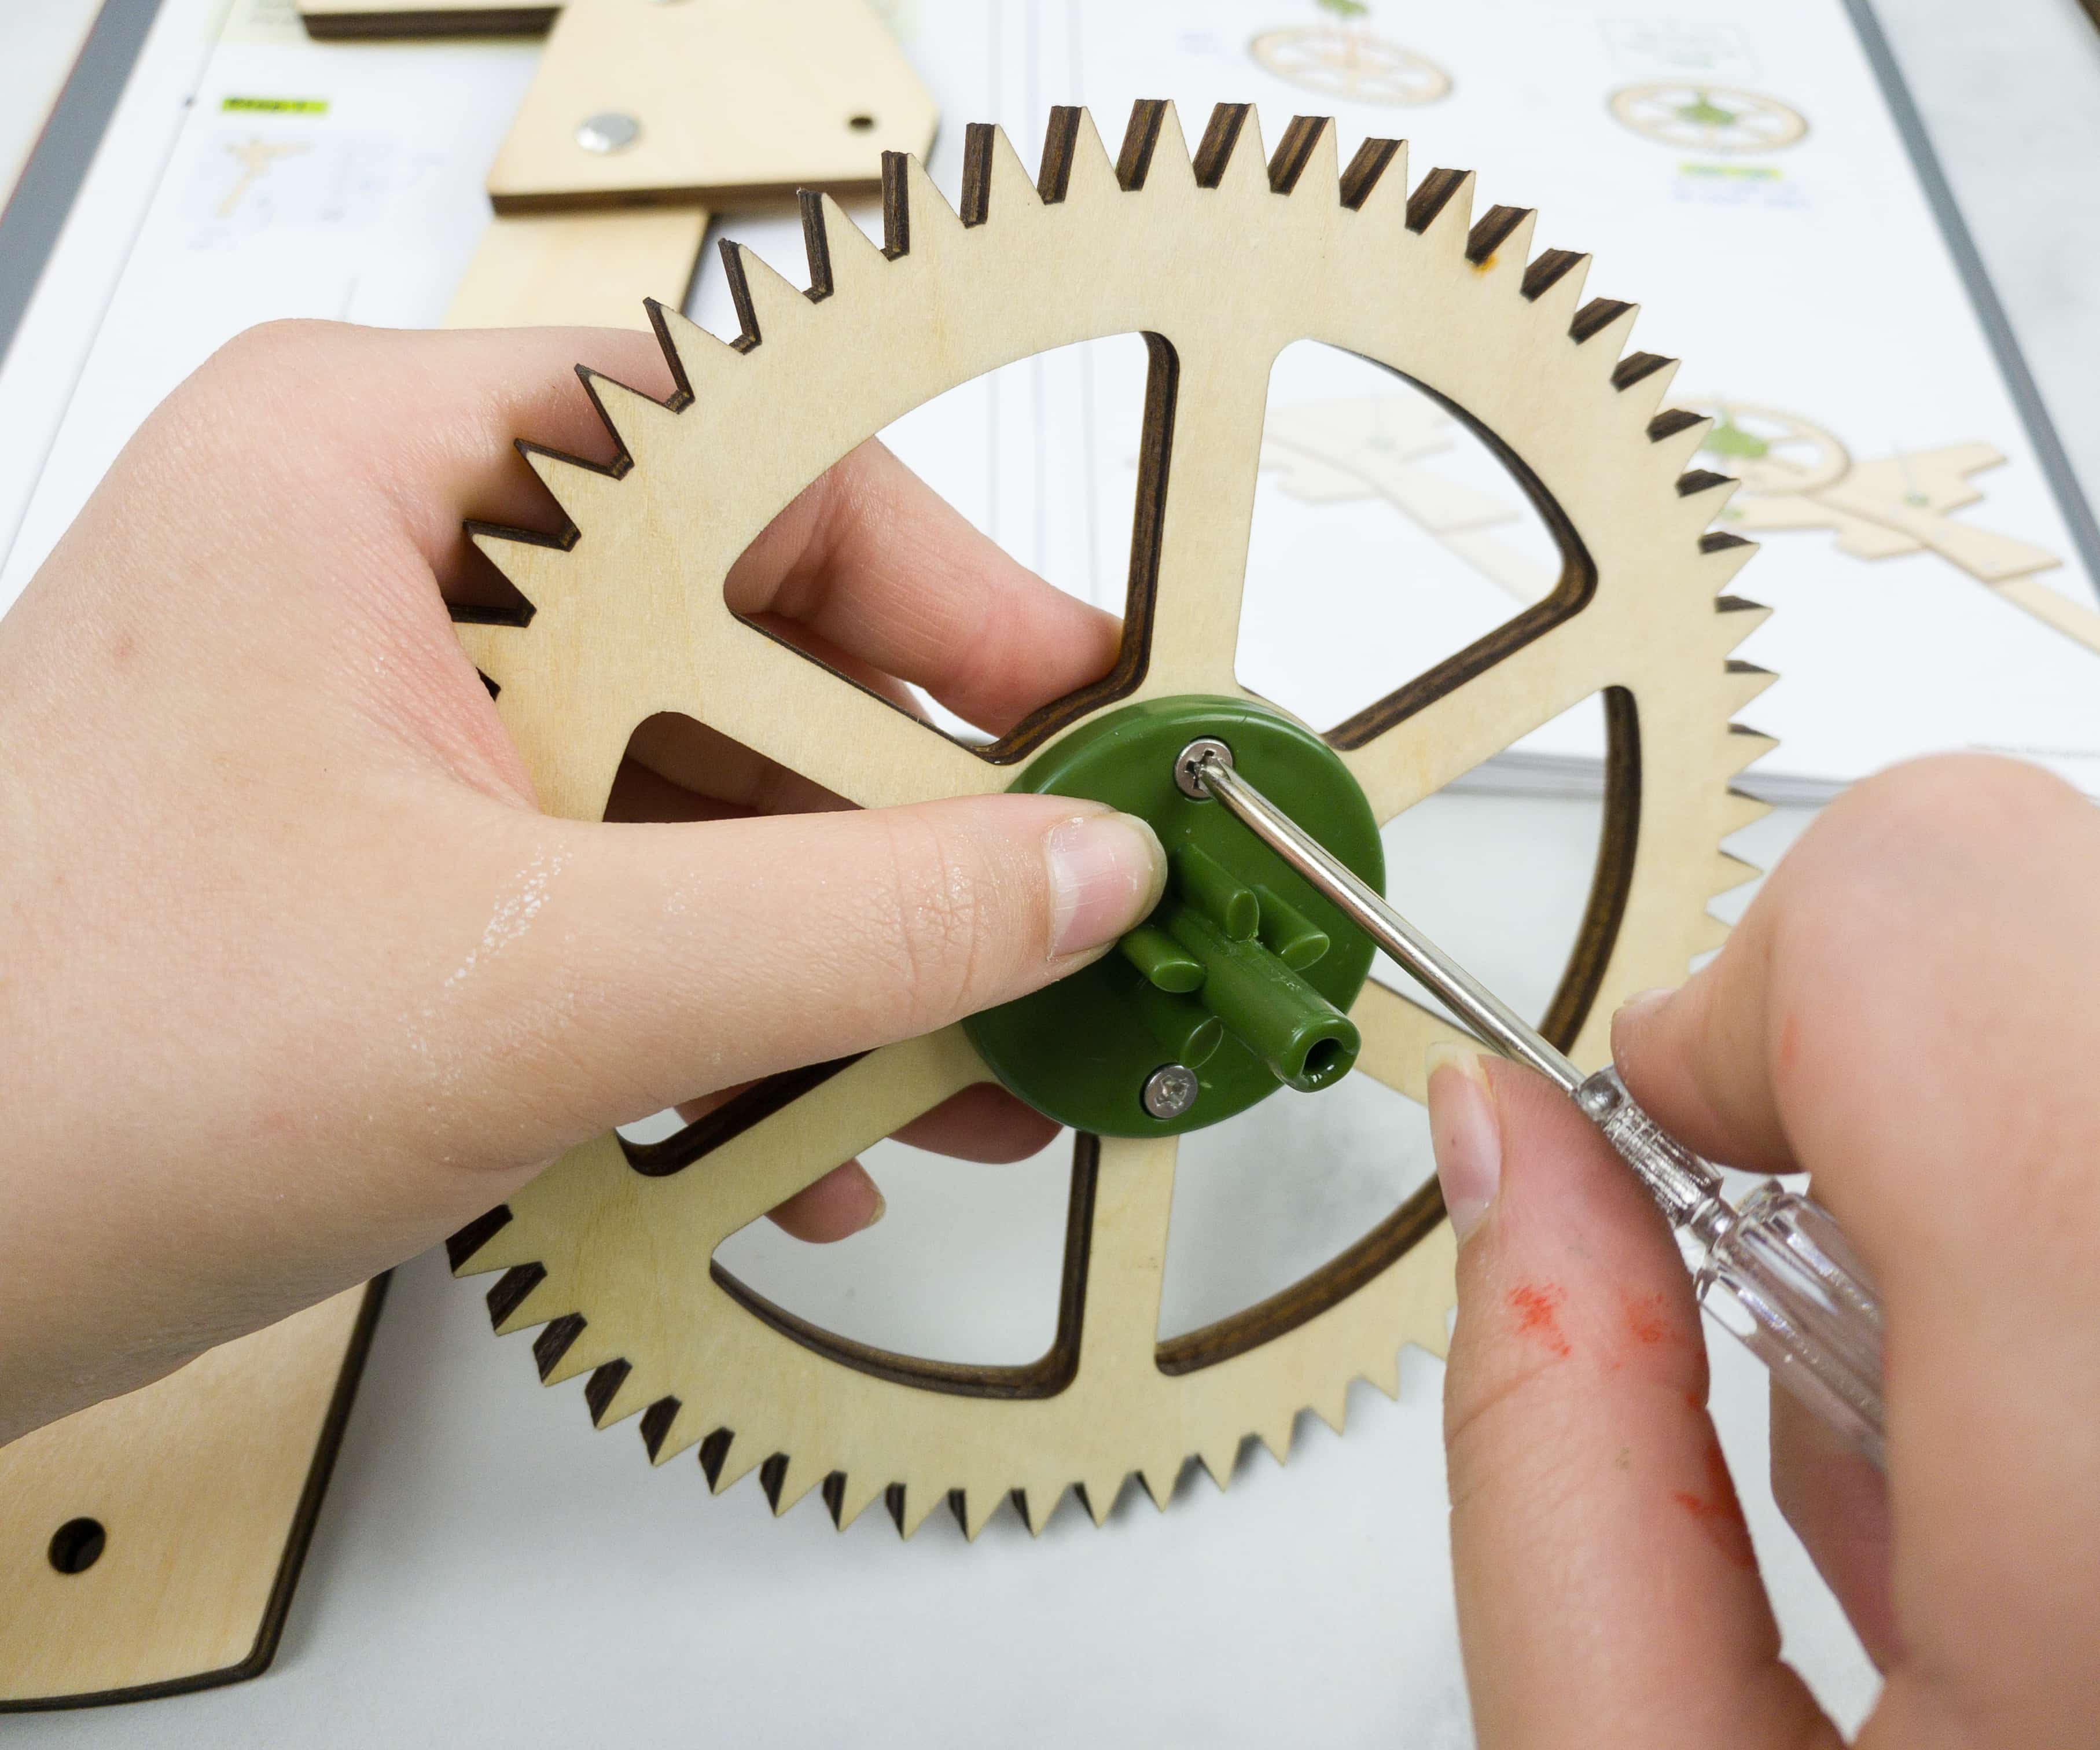
My daughter attached the pinions on the wooden wheels and secured them by screwing tightly.
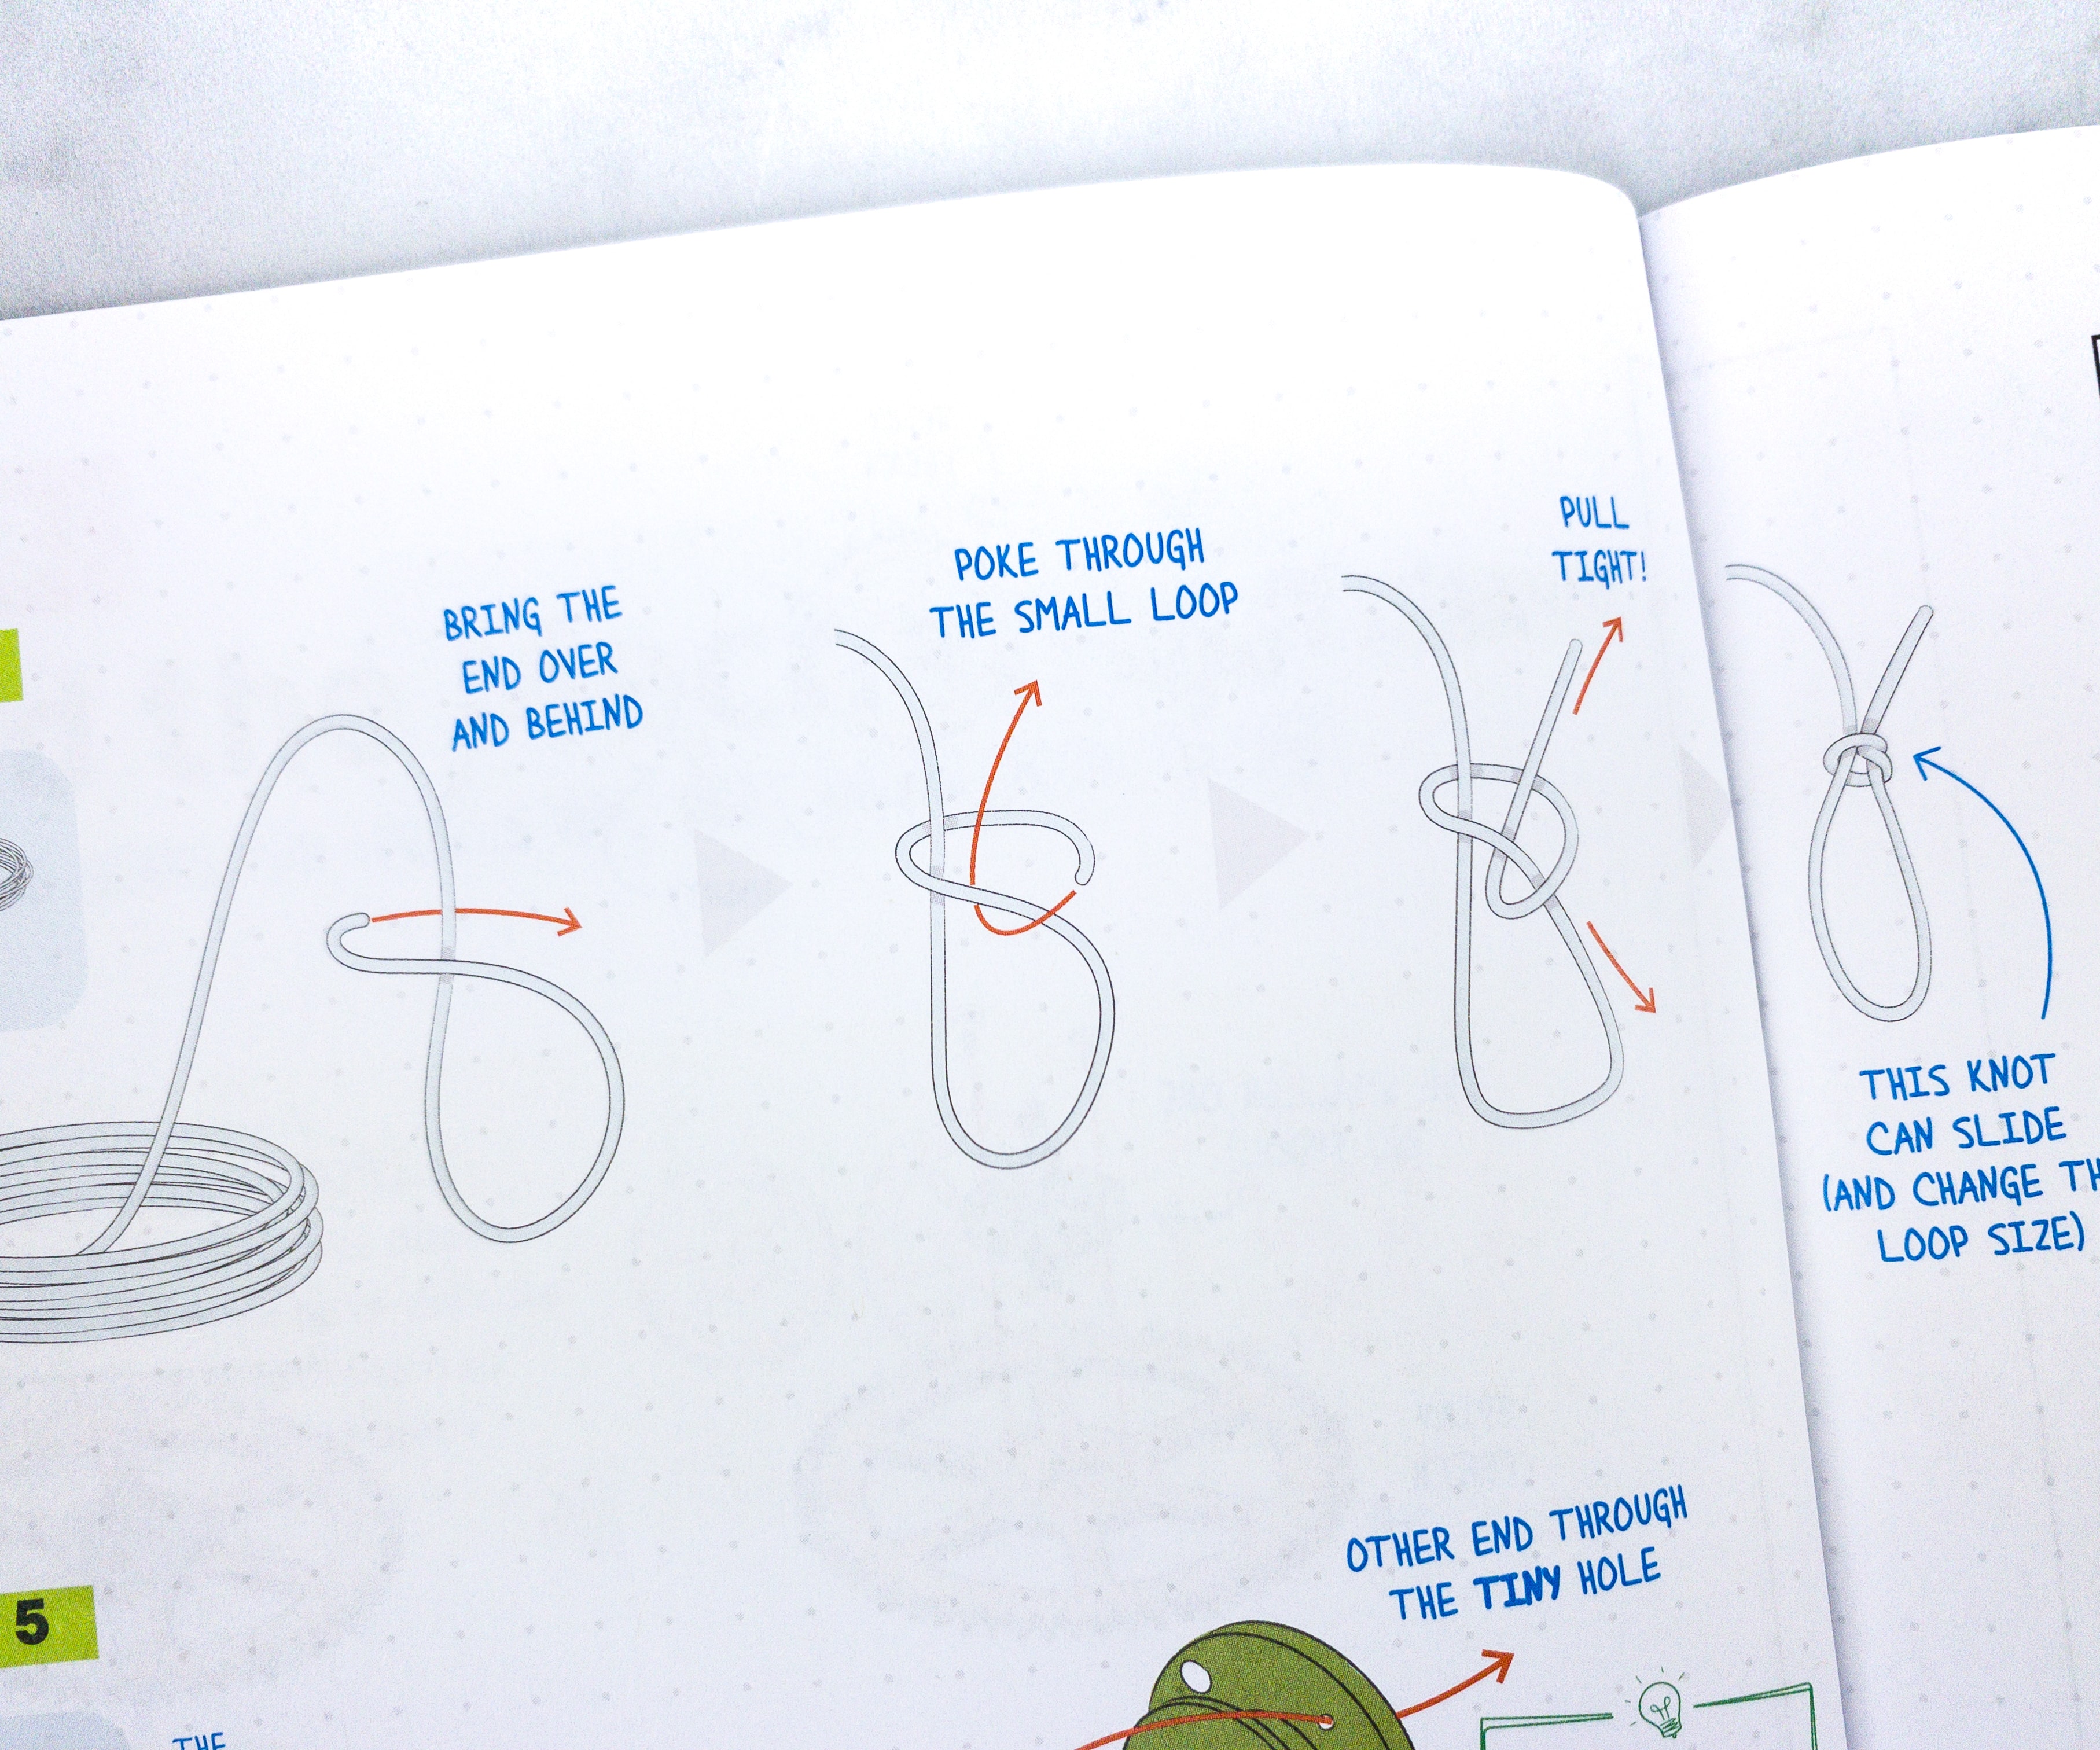
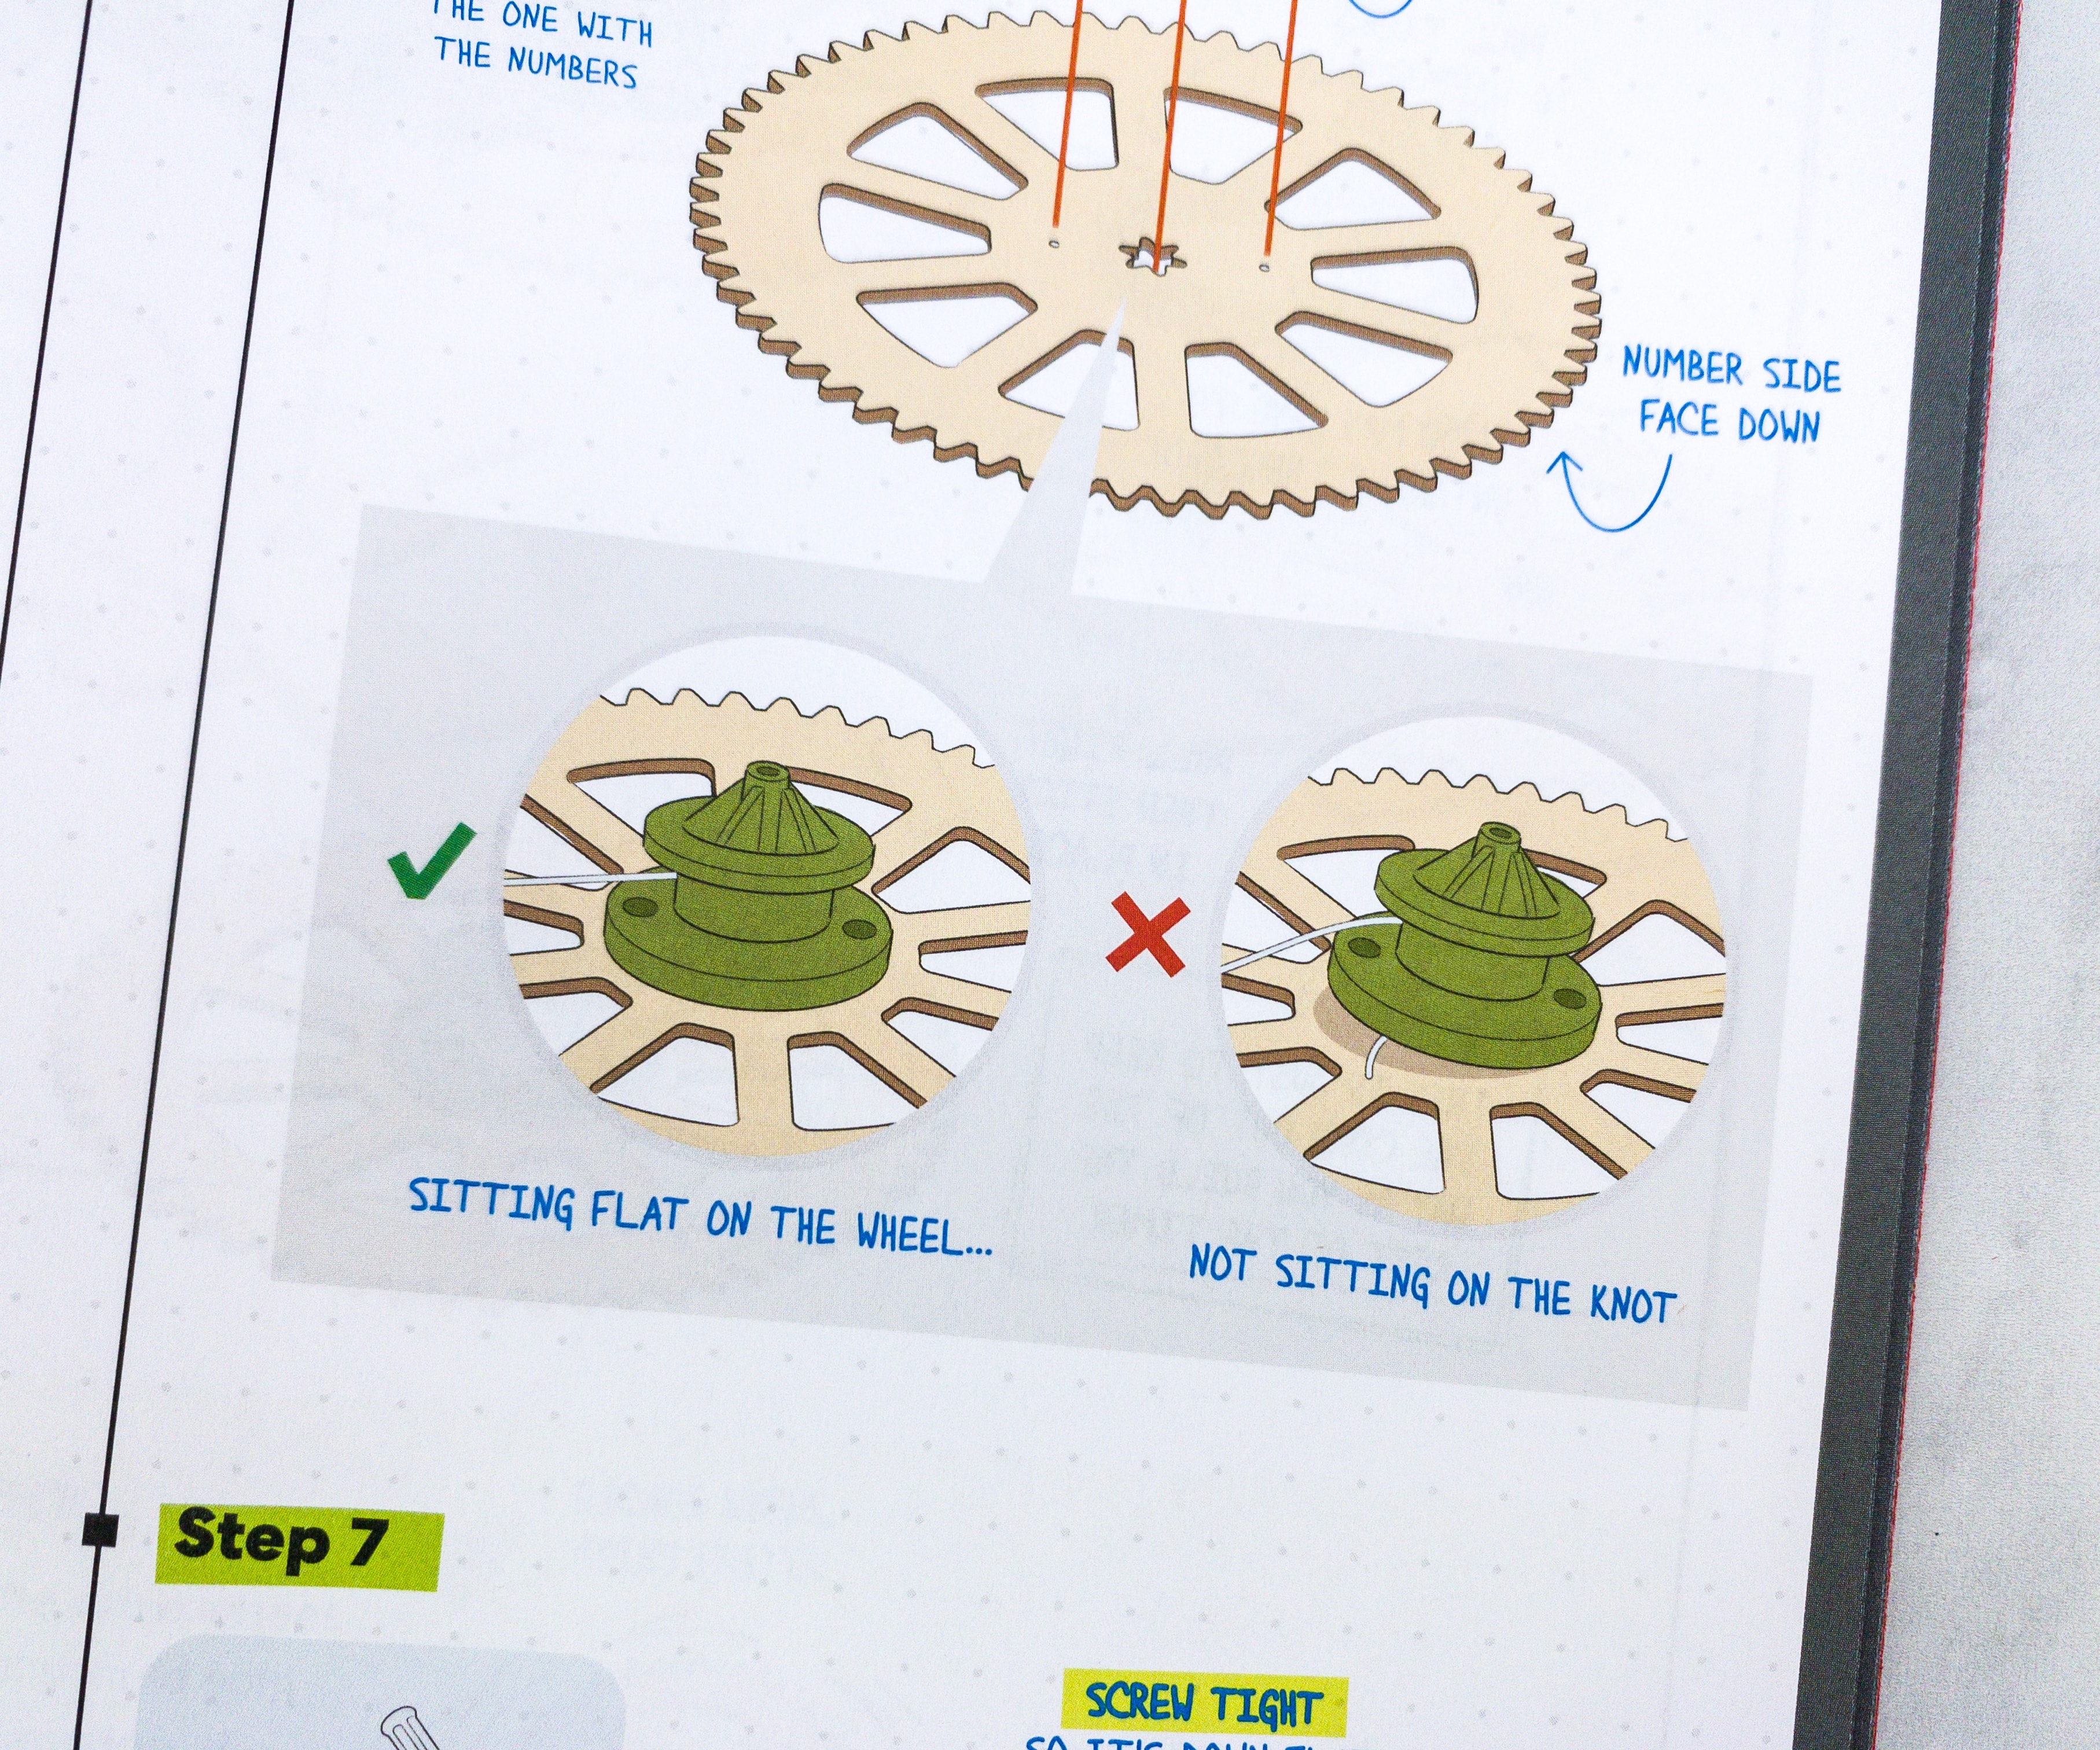
The booklet also shows how to correctly knot the nylon cord.
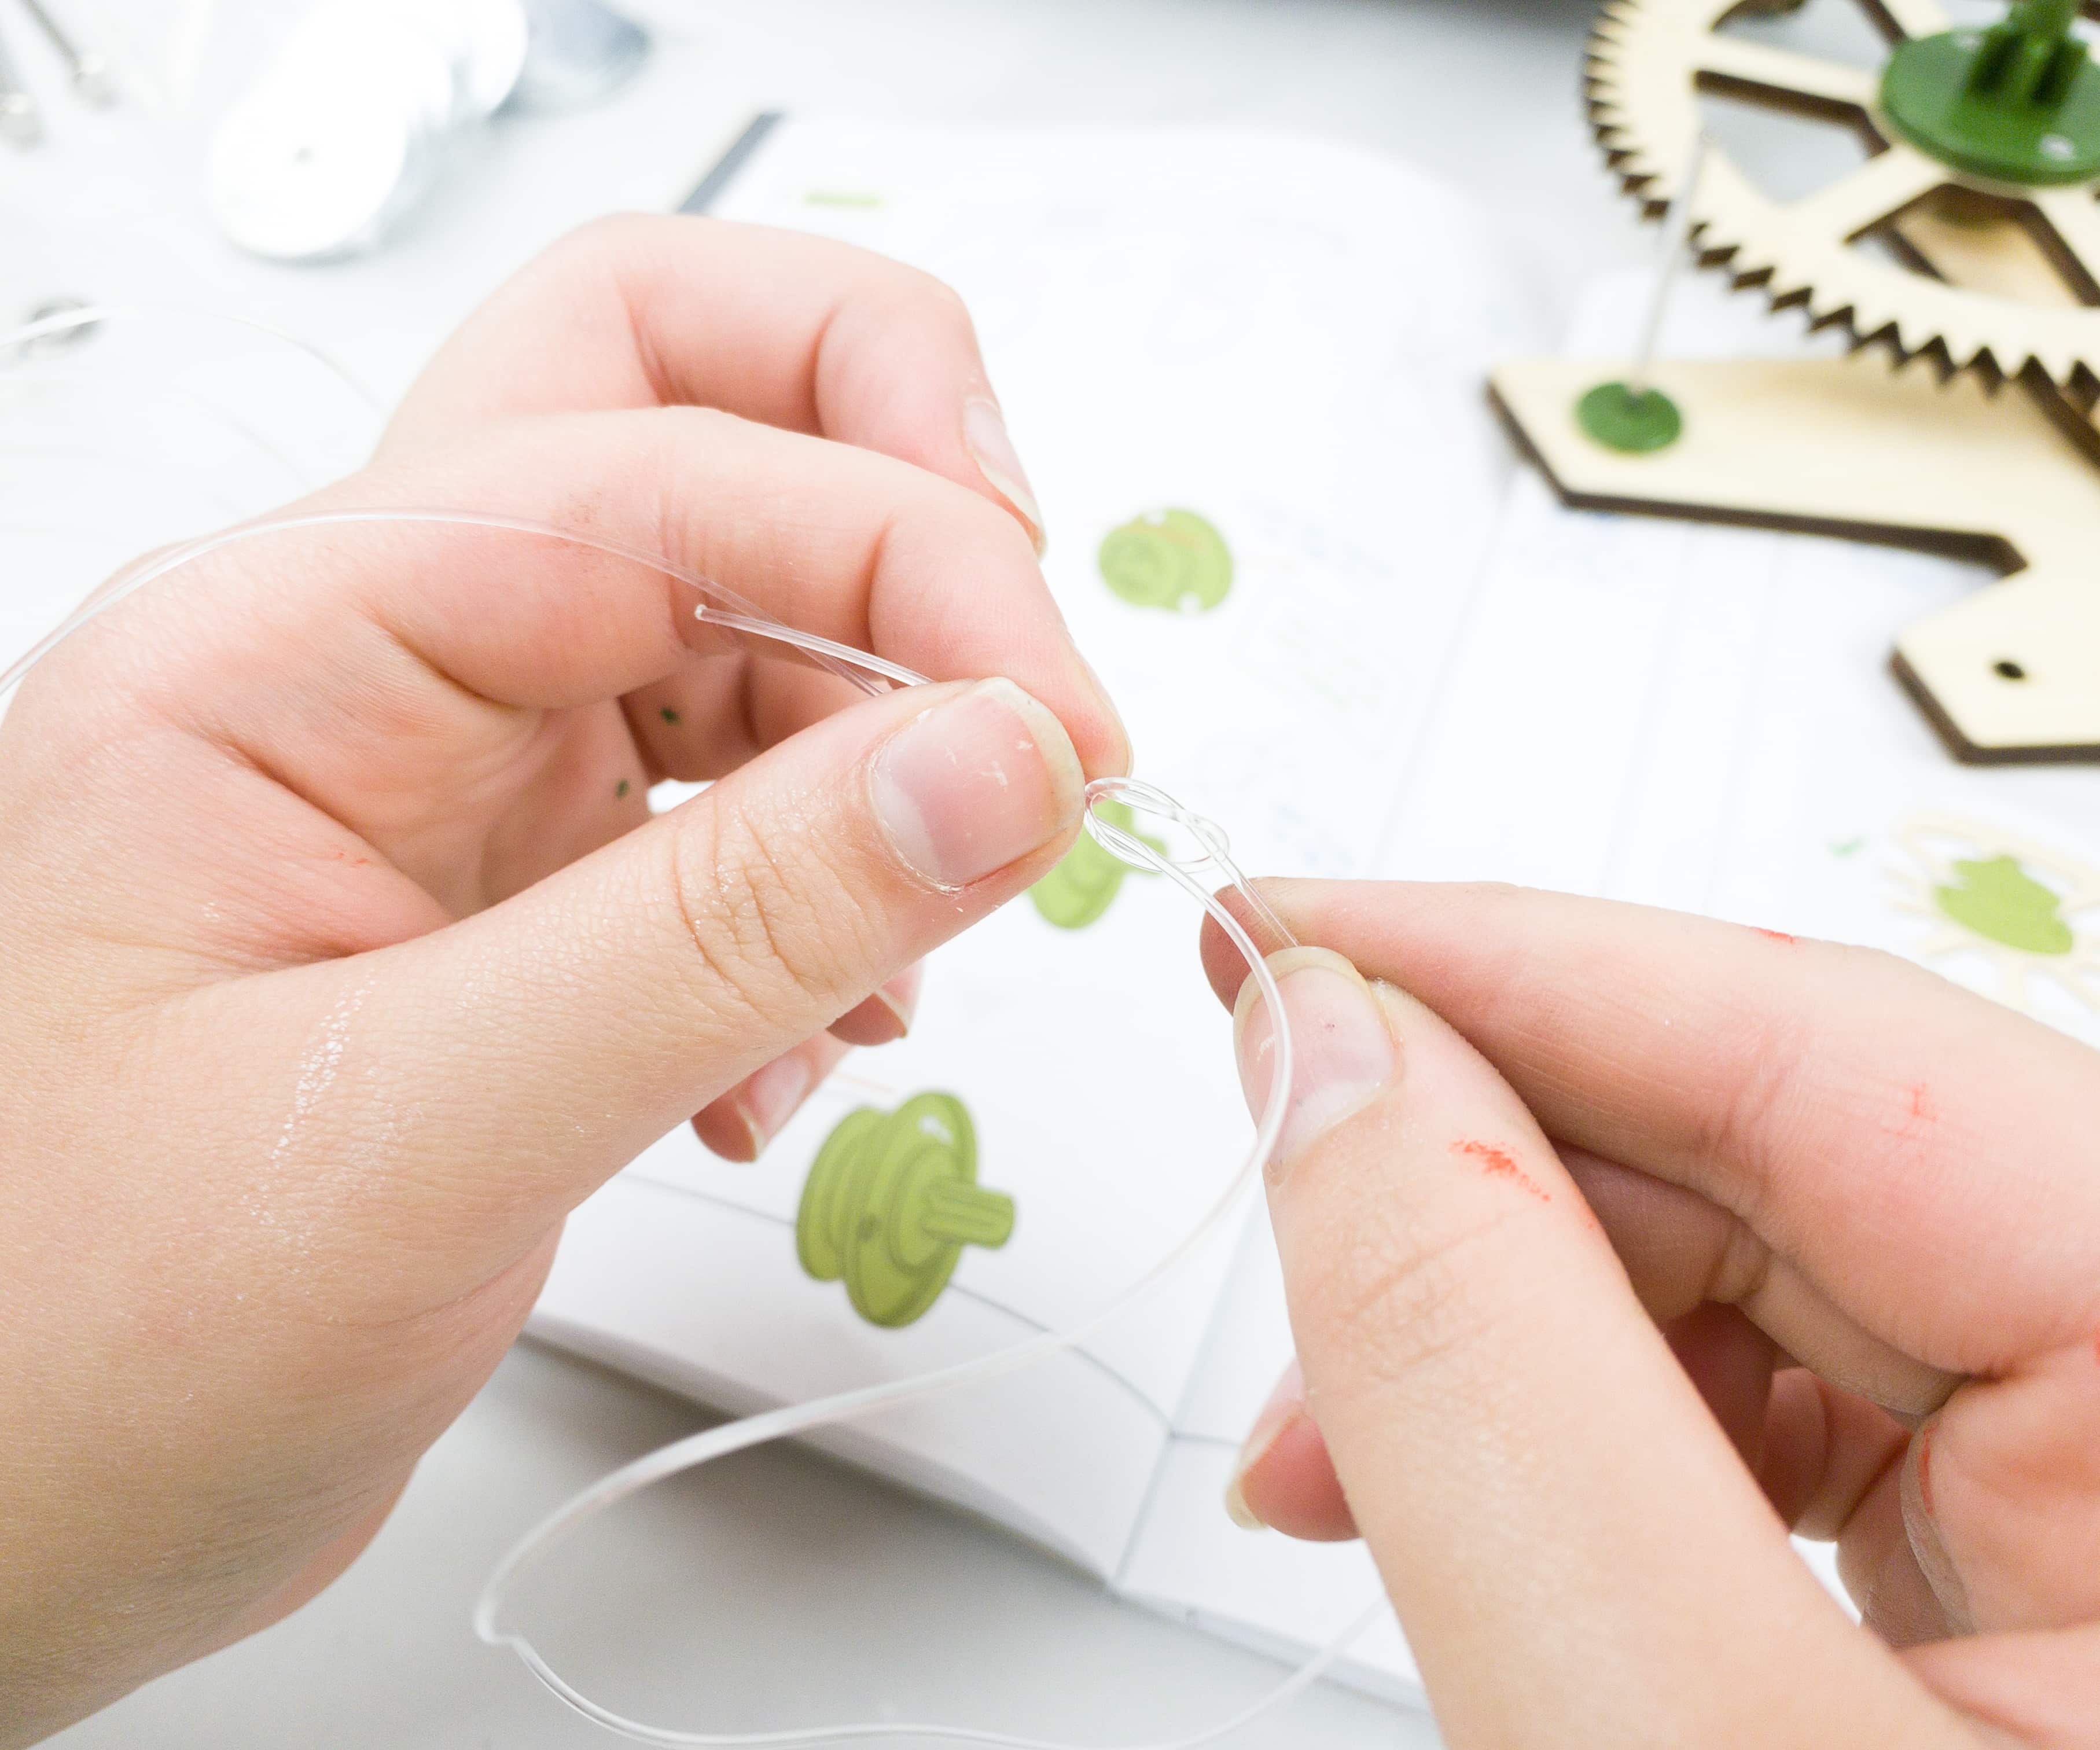
The illustration is well-detailed so my daughter was able to do it easily.
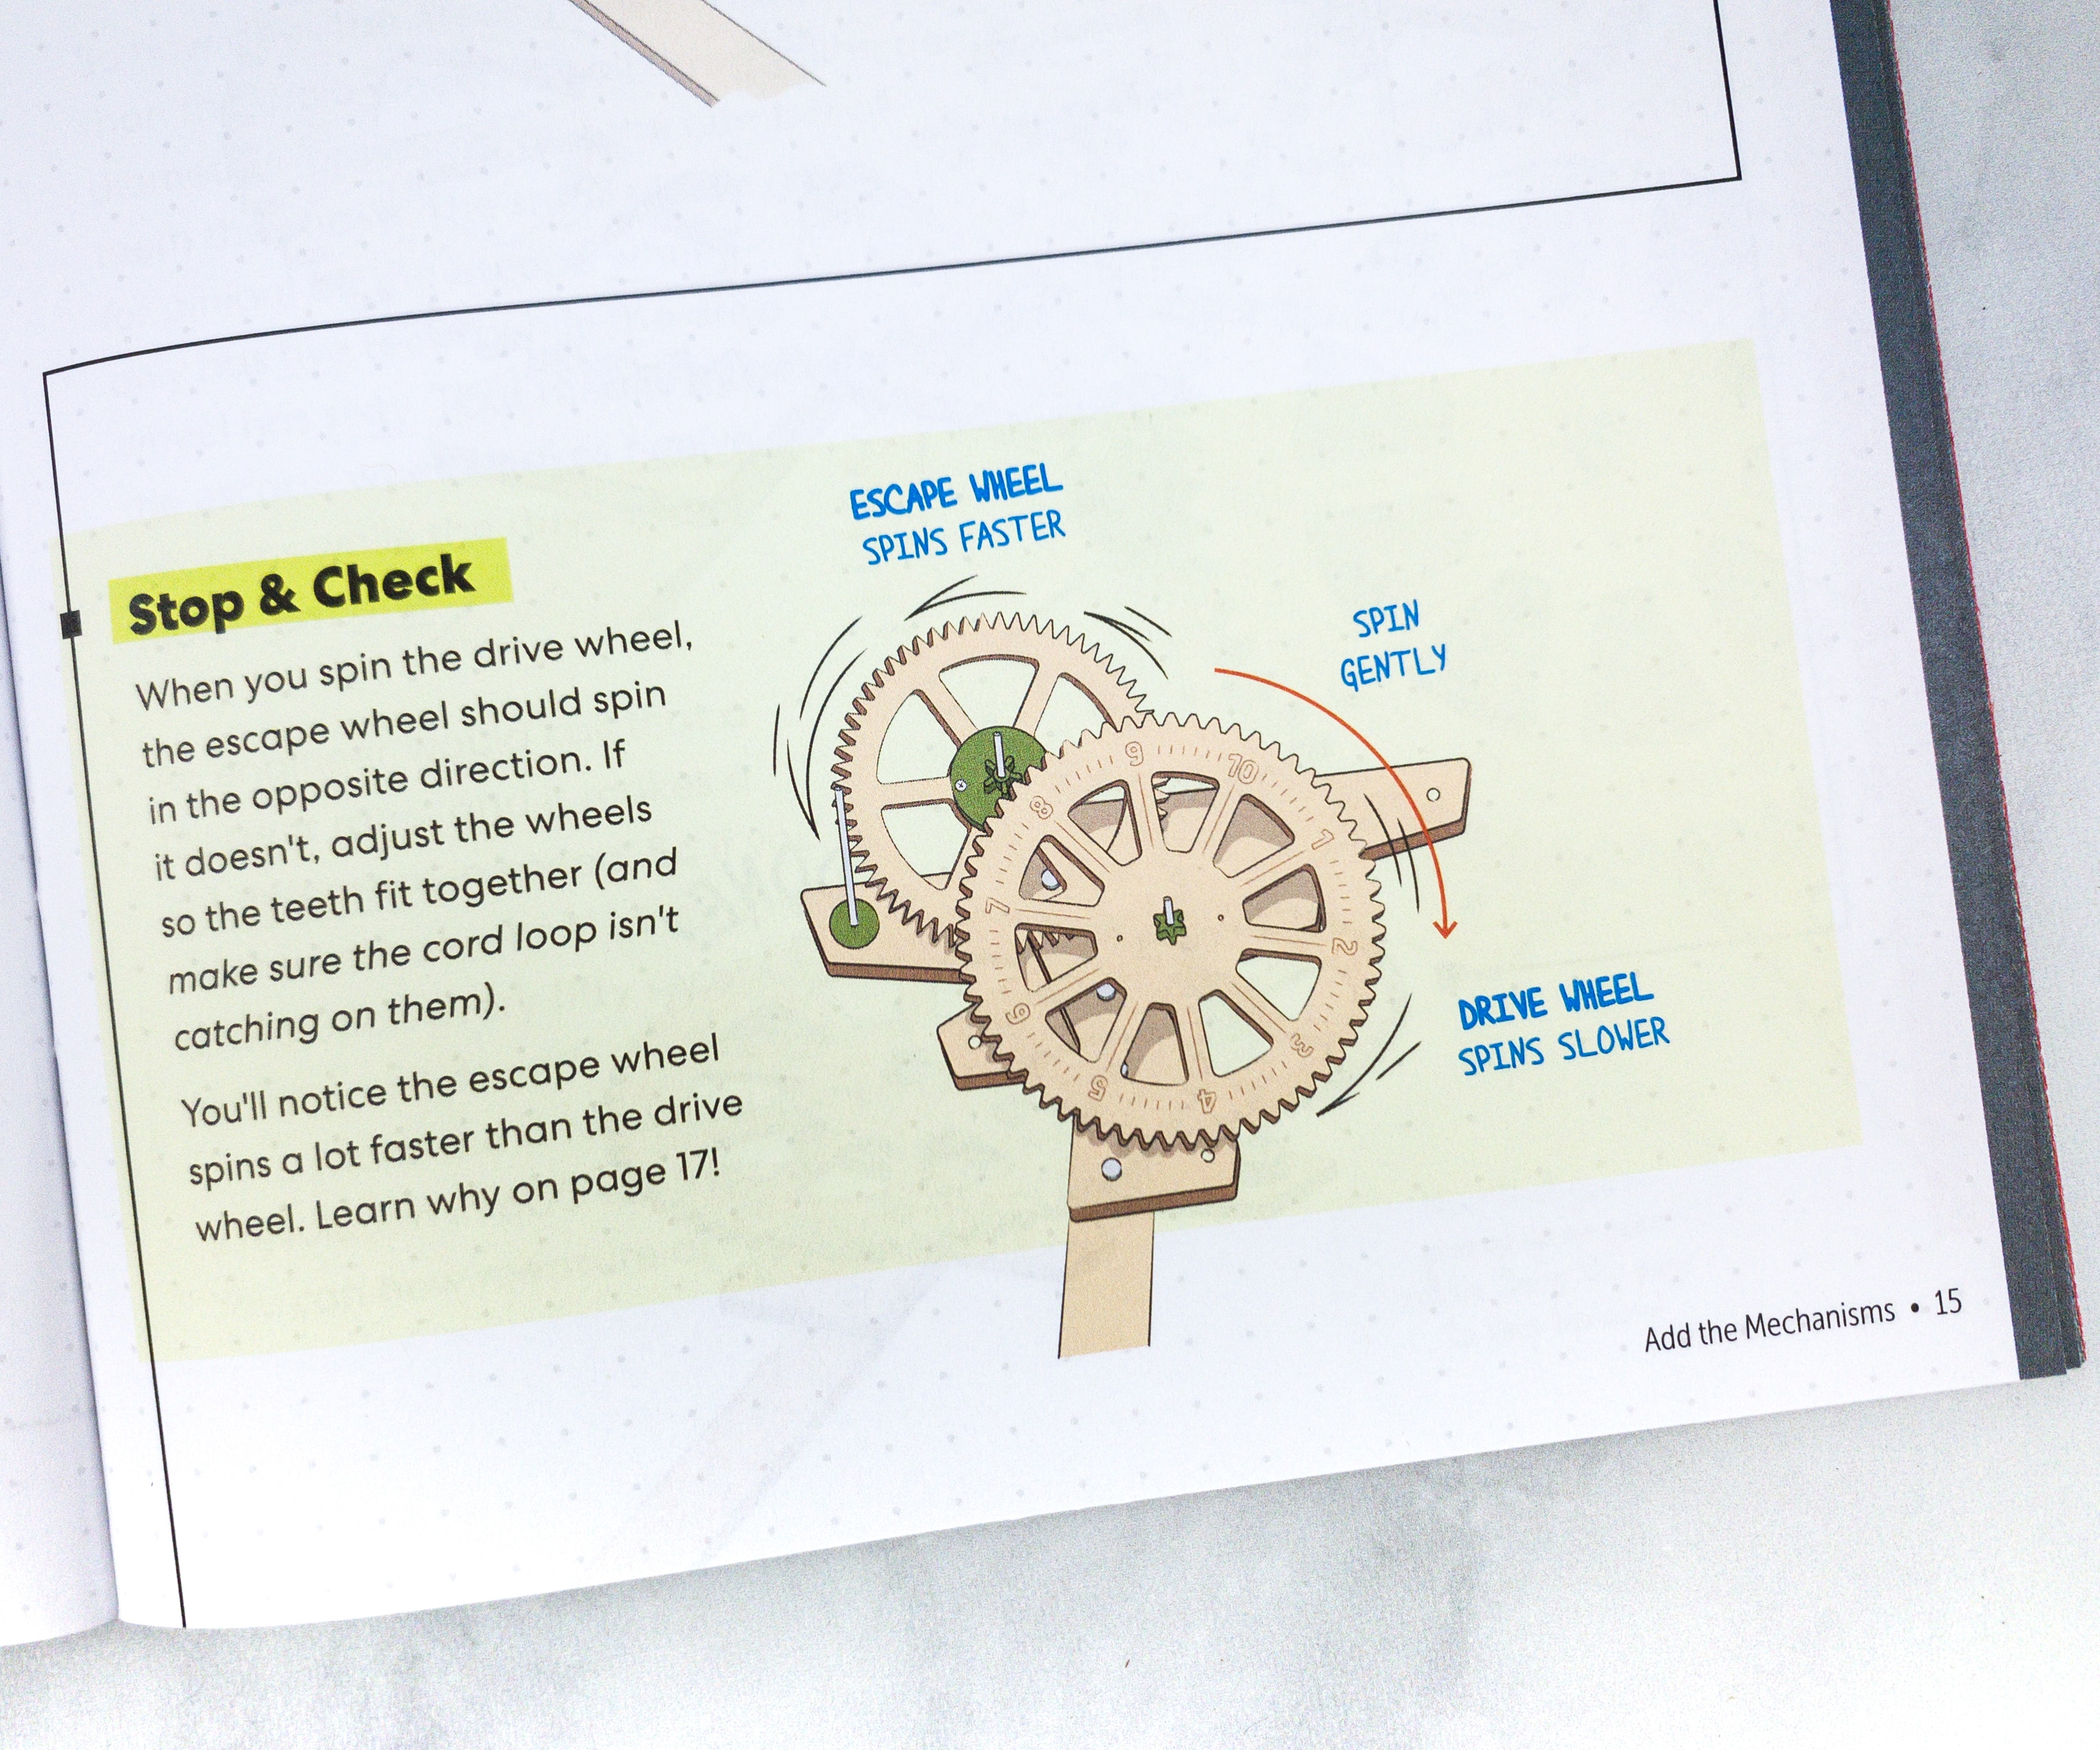
After assembling the mechanism, we checked it by spinning the wheels. The escape wheel should spin a lot faster than the drive wheel.
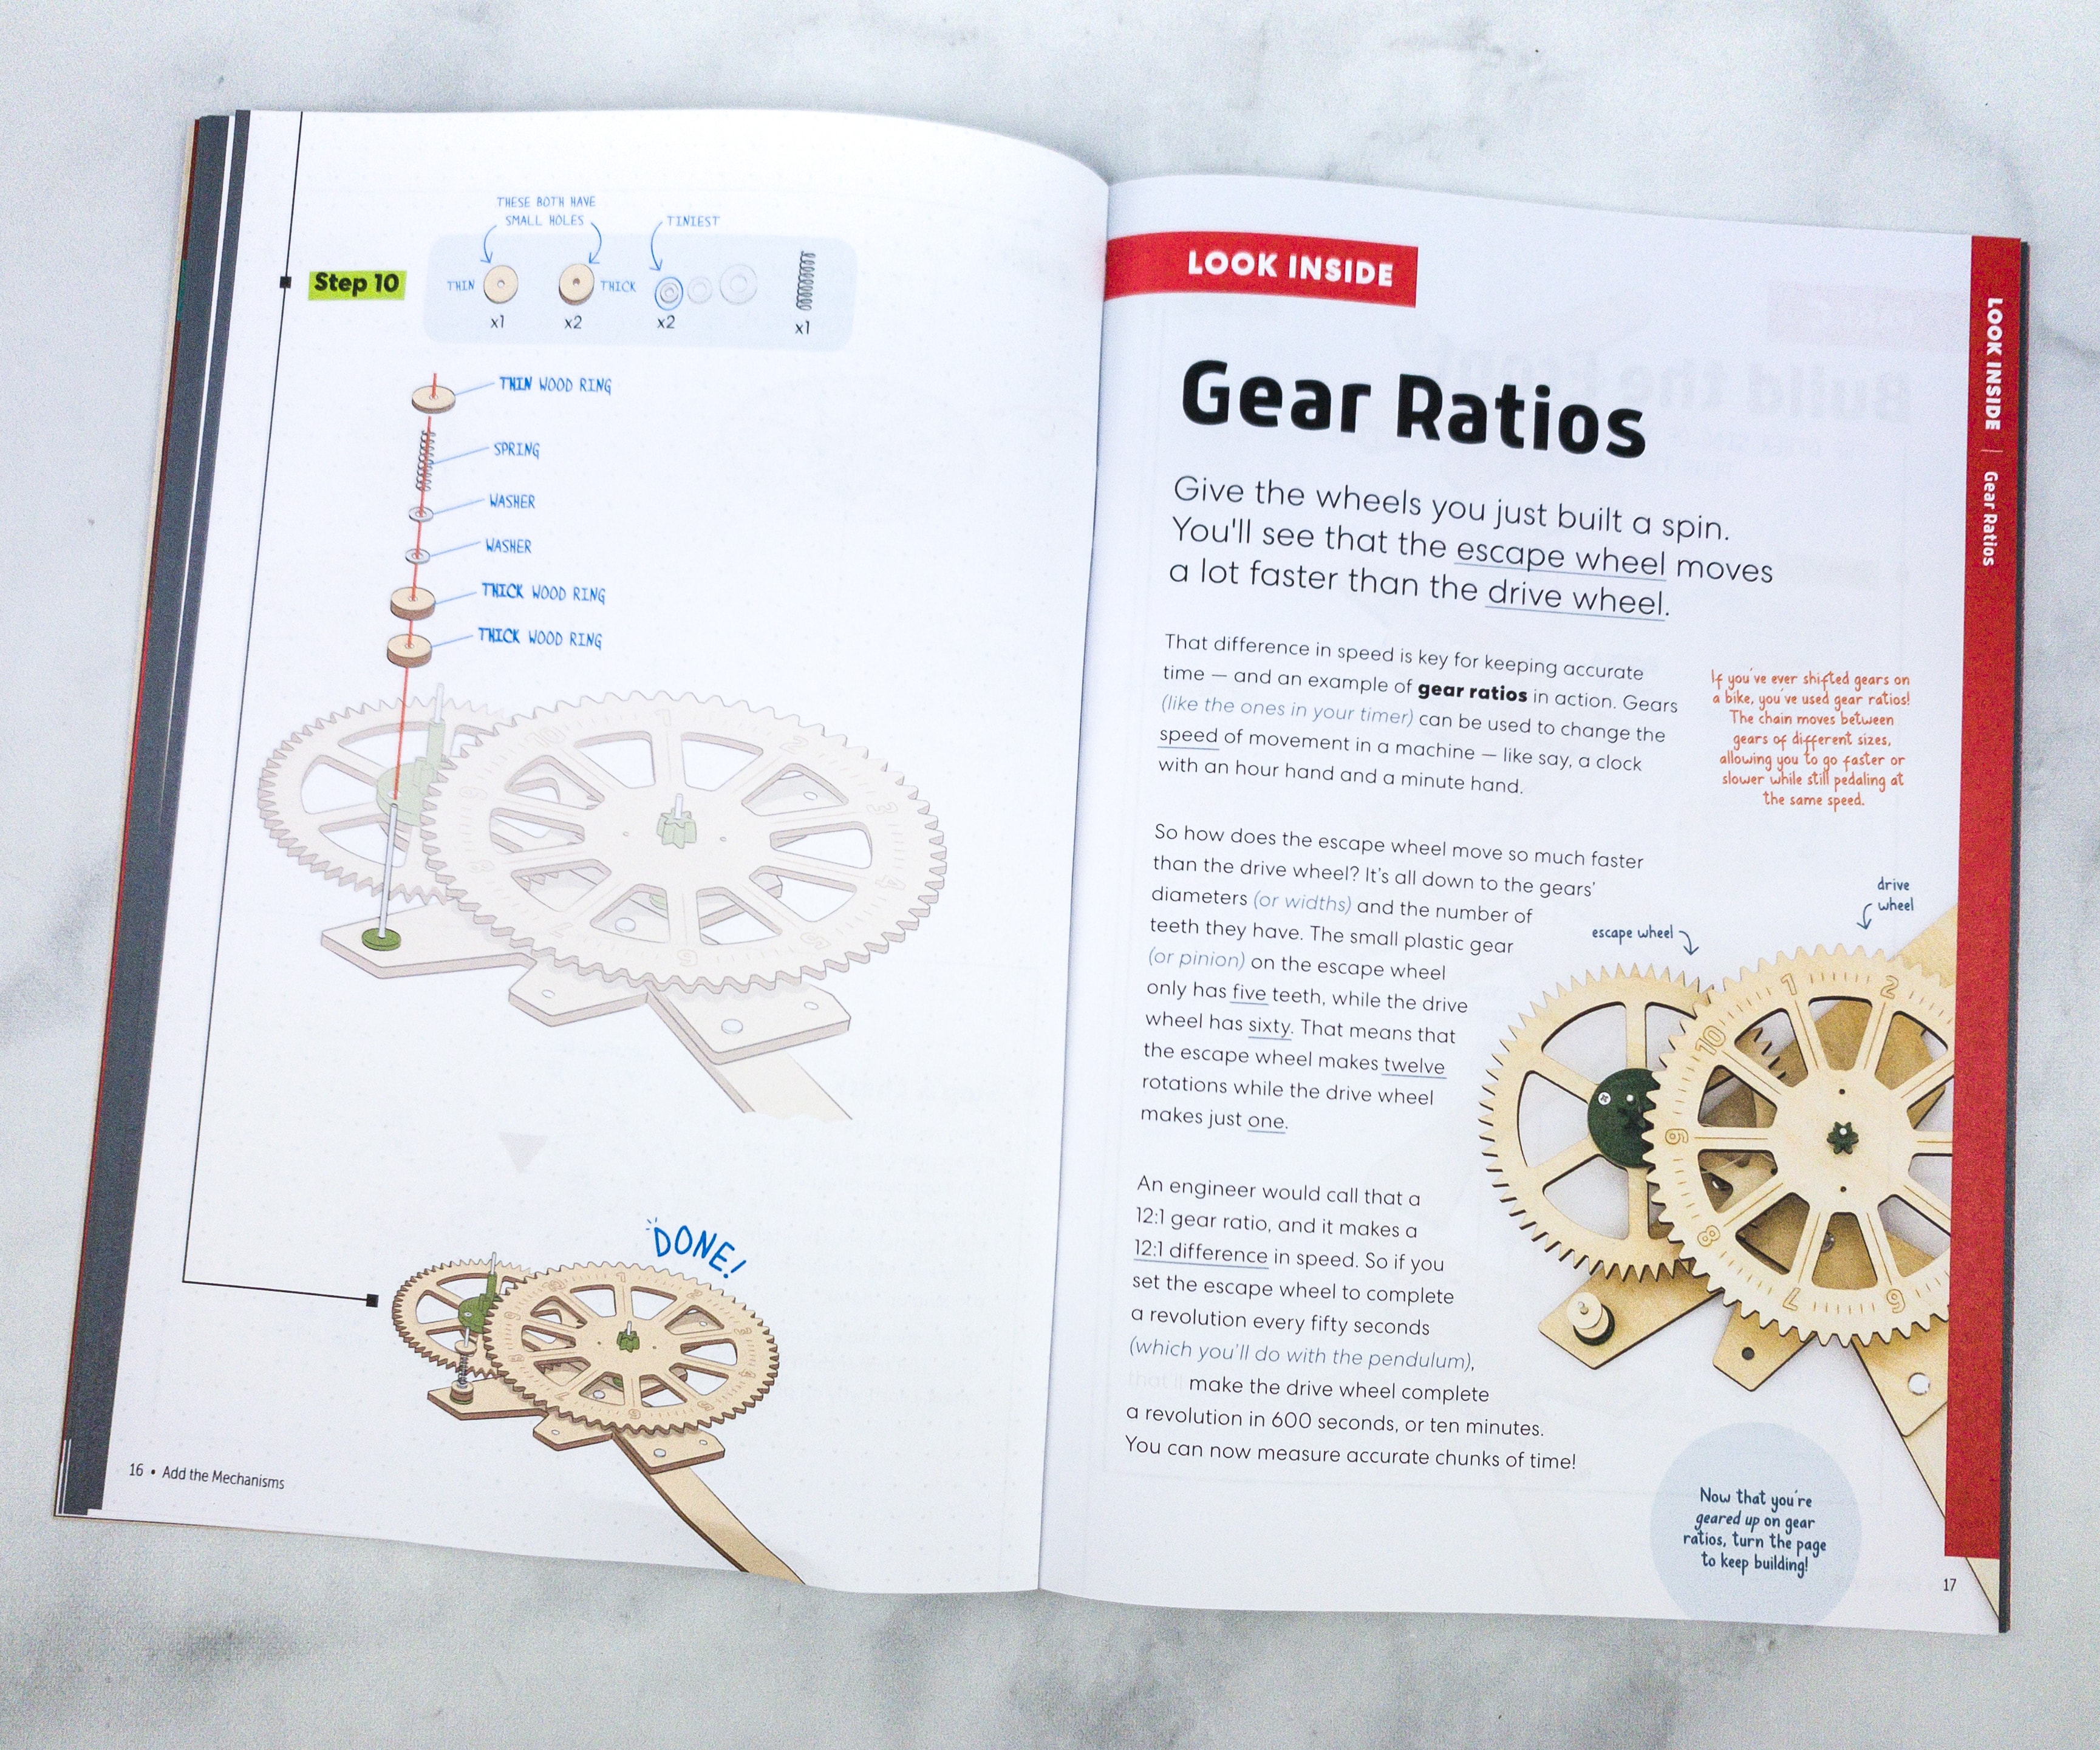
There’s also an article about Gear Ratios. When you spin the wheels, you’ll notice that the escape wheel moves a lot faster than the drive wheel, and that difference in speed is the key for keeping accurate time, which is an example of gear ratio in action because gears are used to change the speed of movement in a machine.
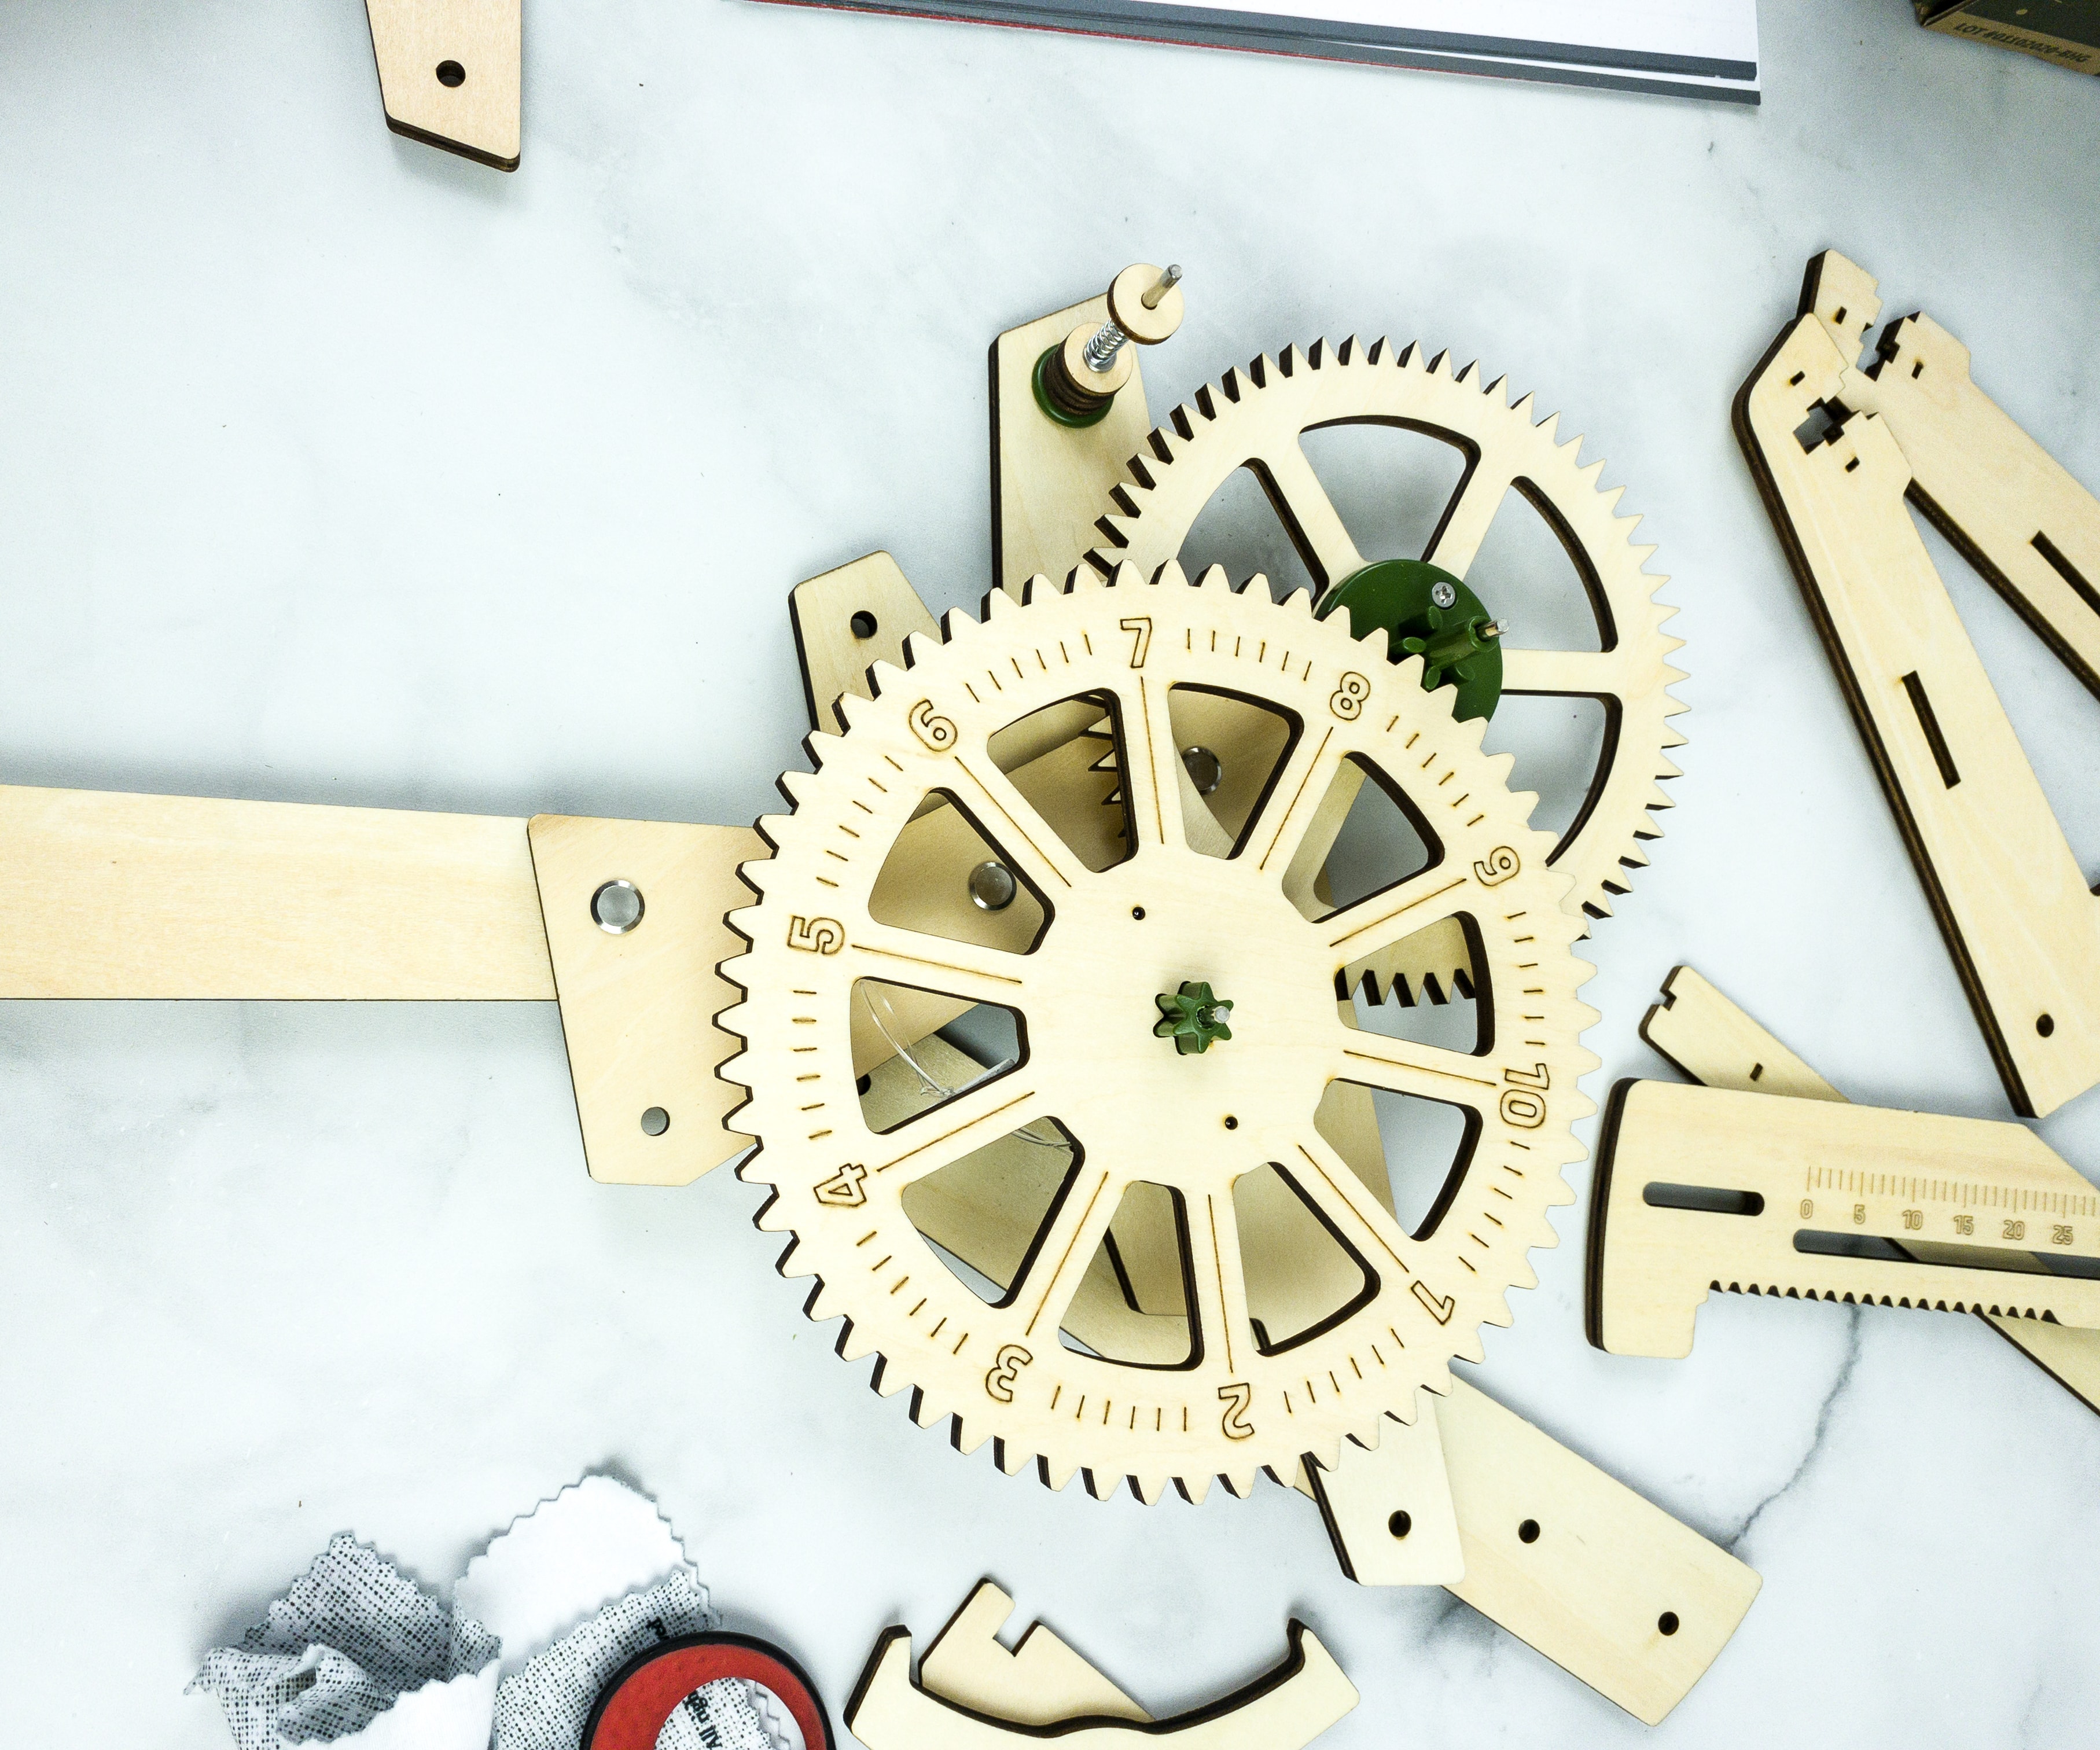
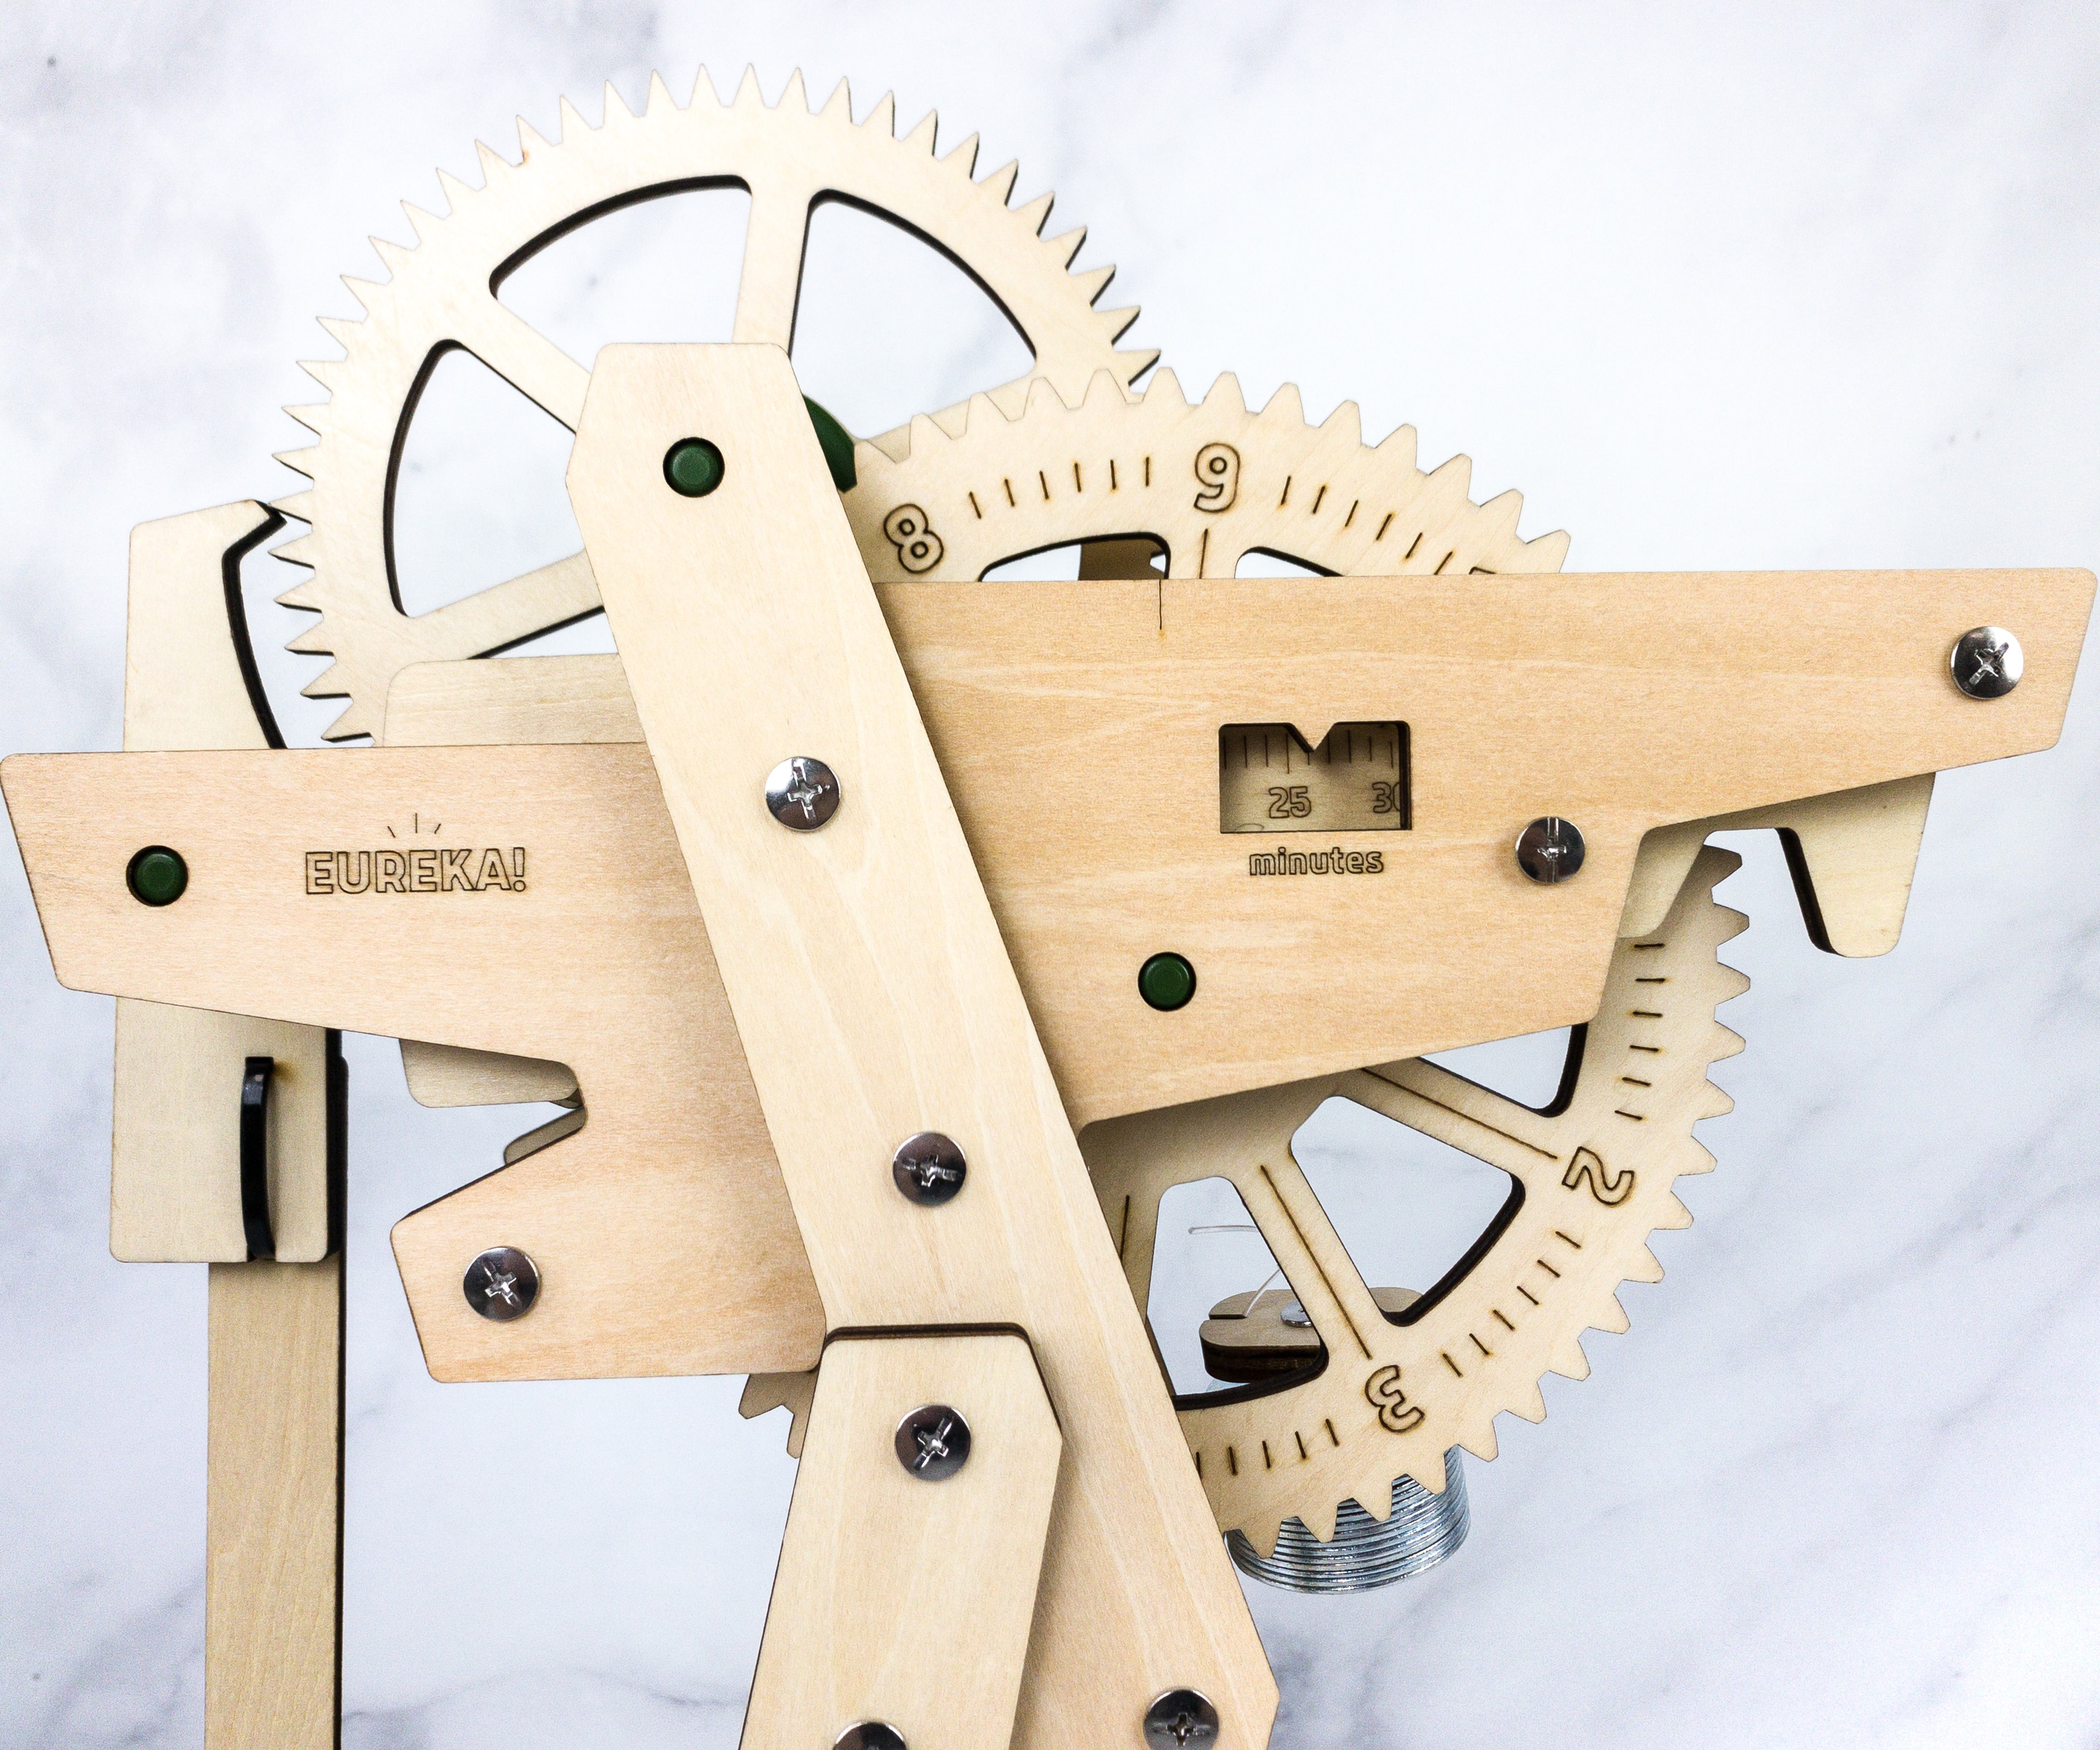
Here’s the finished mechanism. It’s kind of tricky to put this together, but just look at how majestic it looks (and works!) after we finished it!

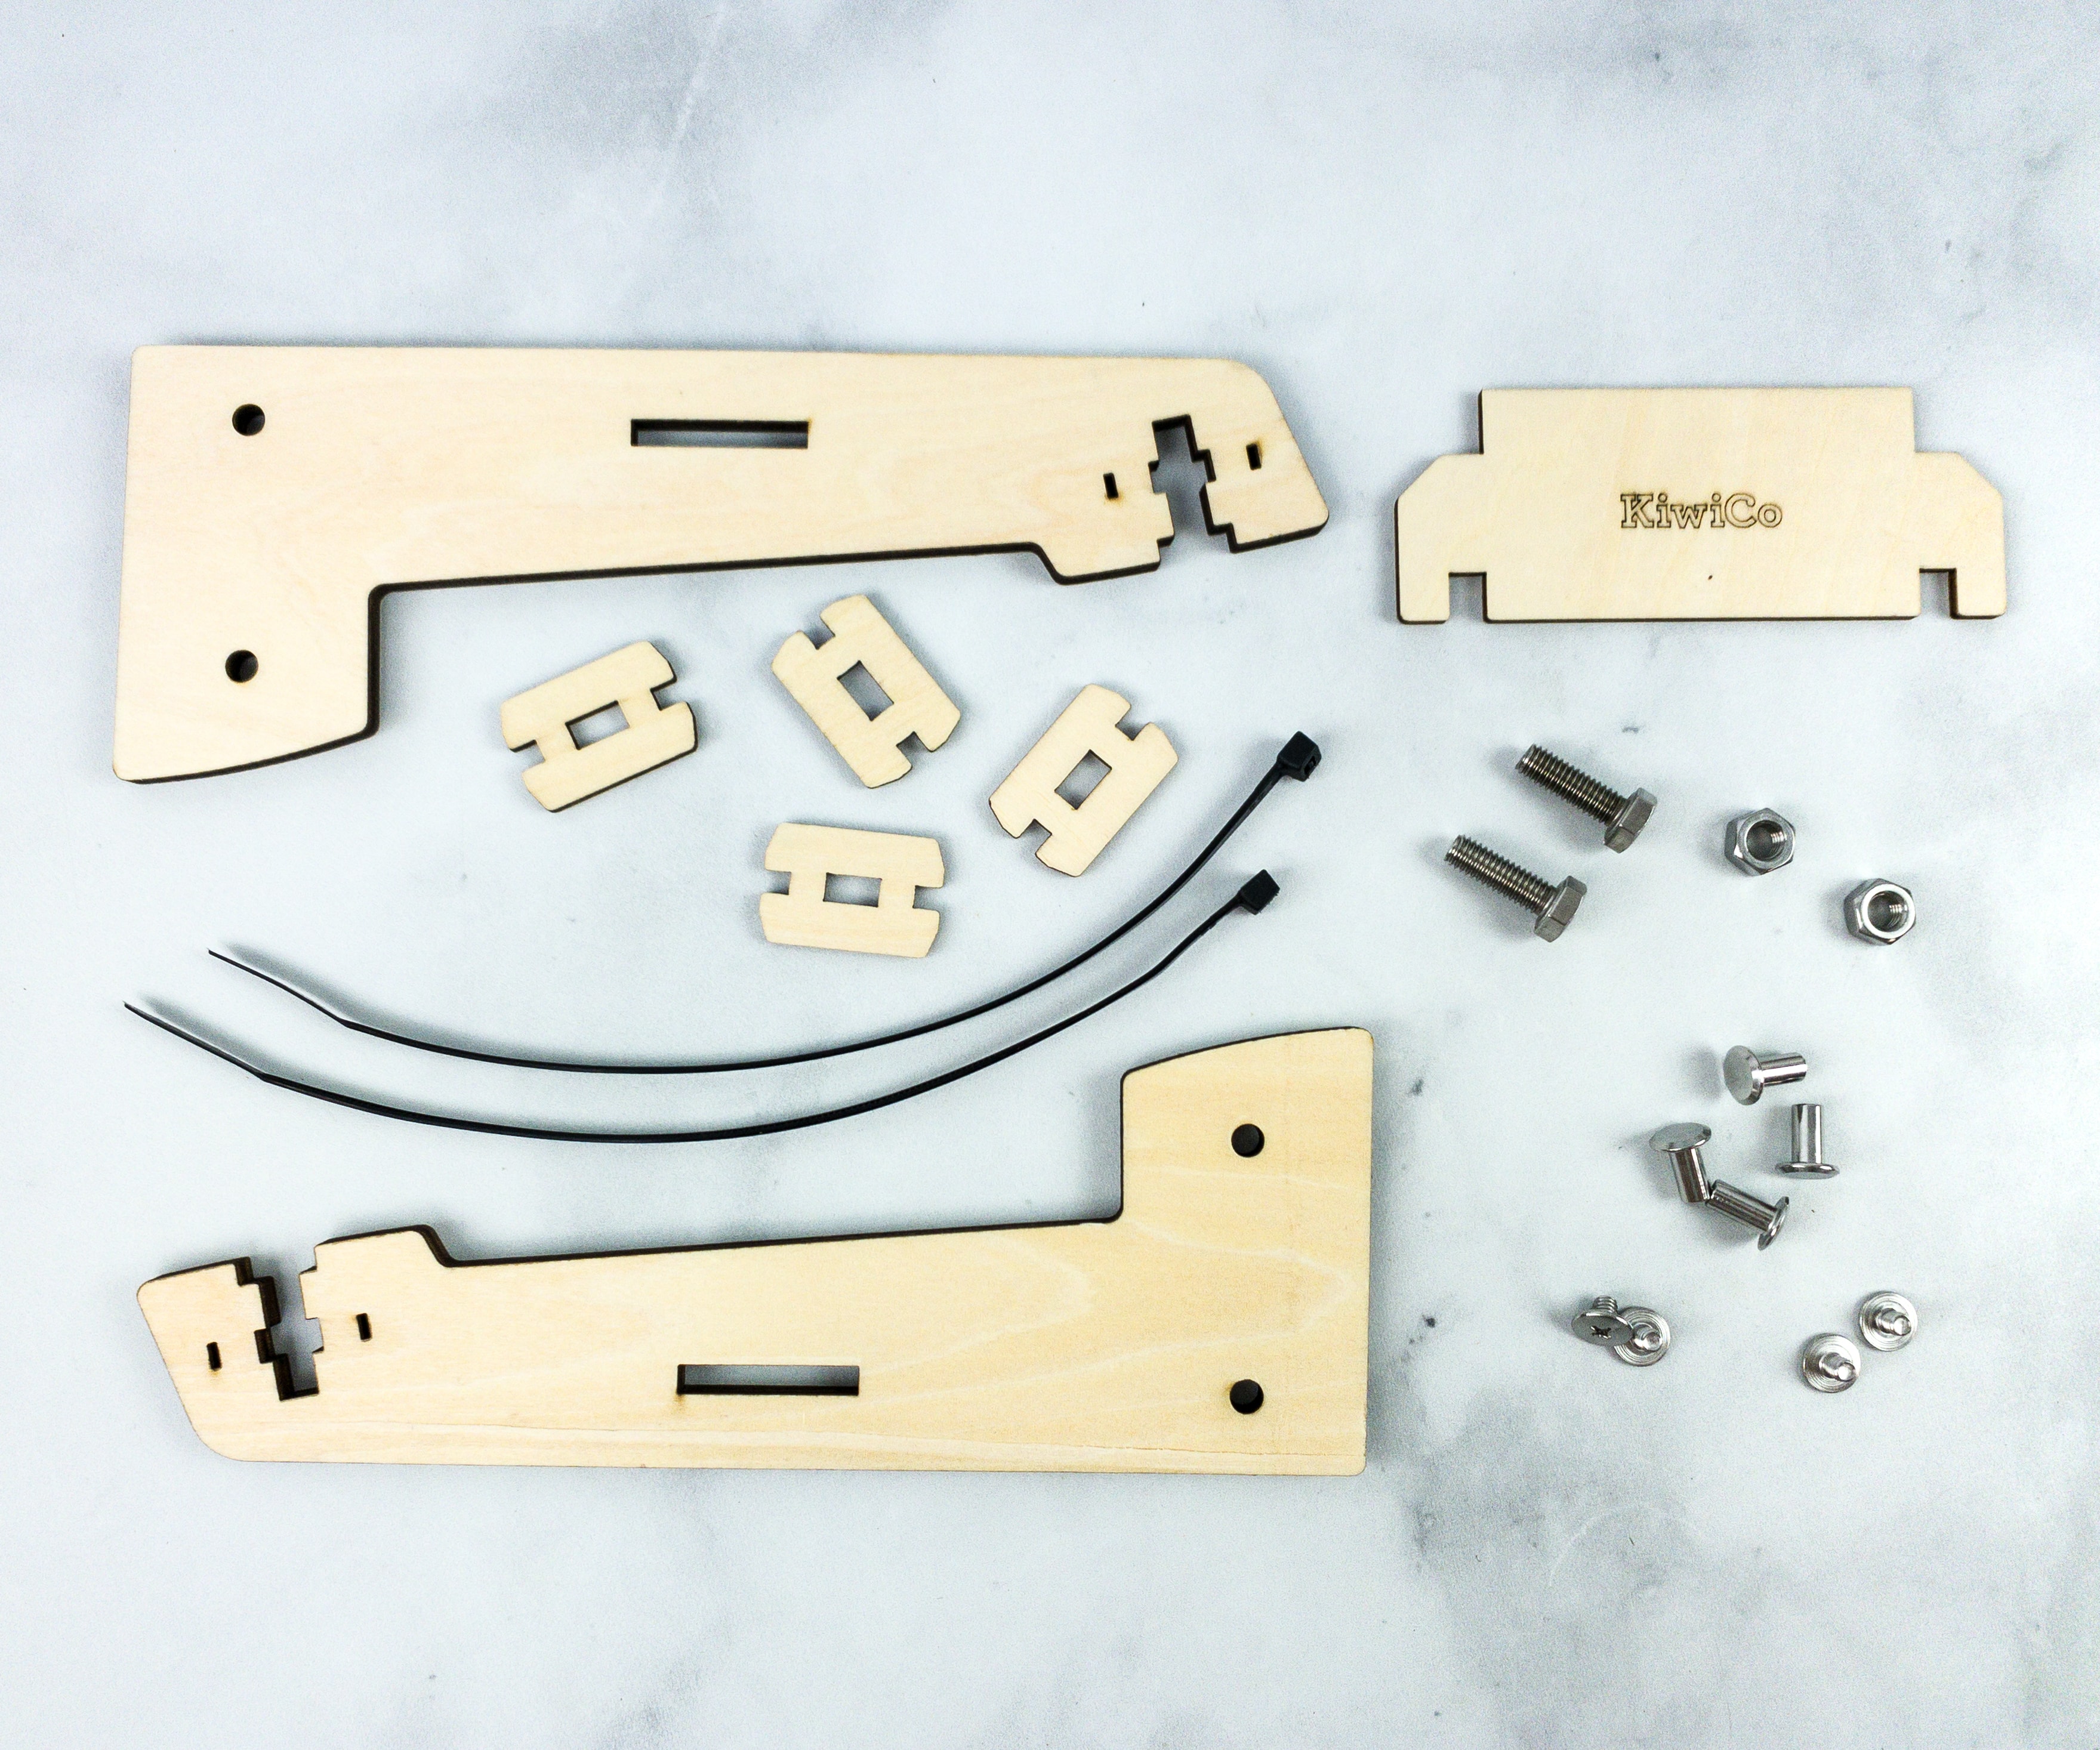
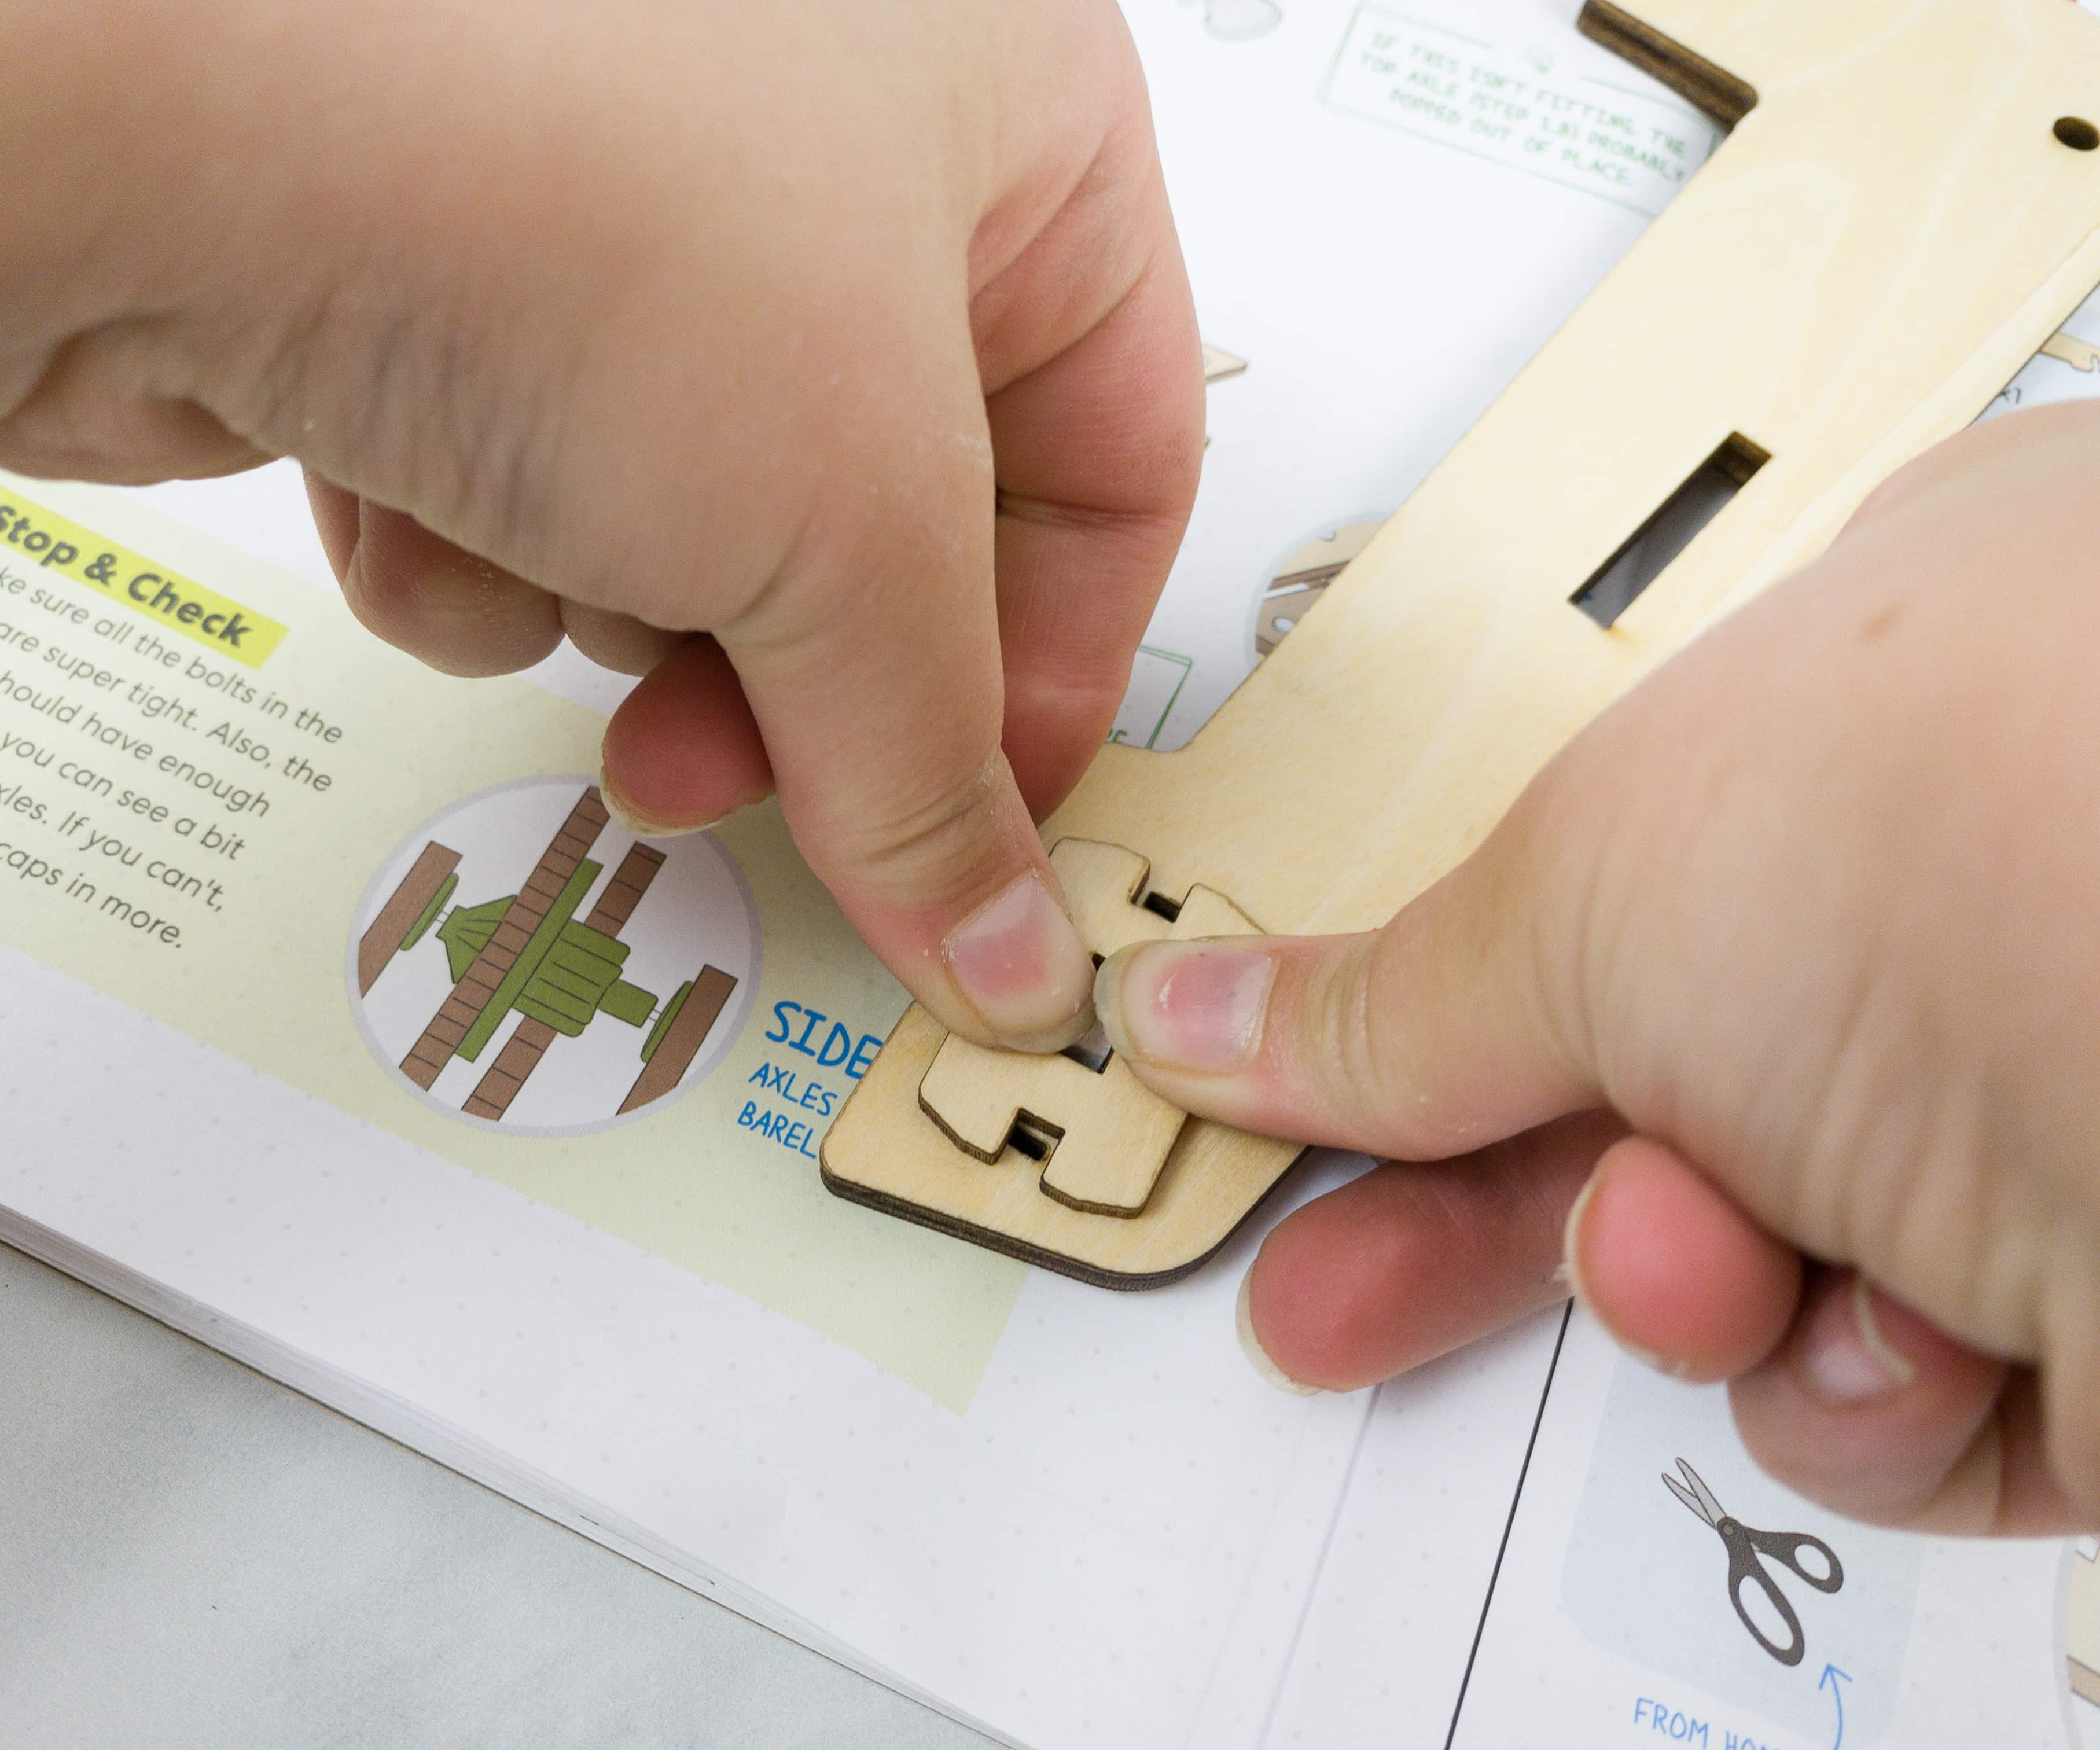
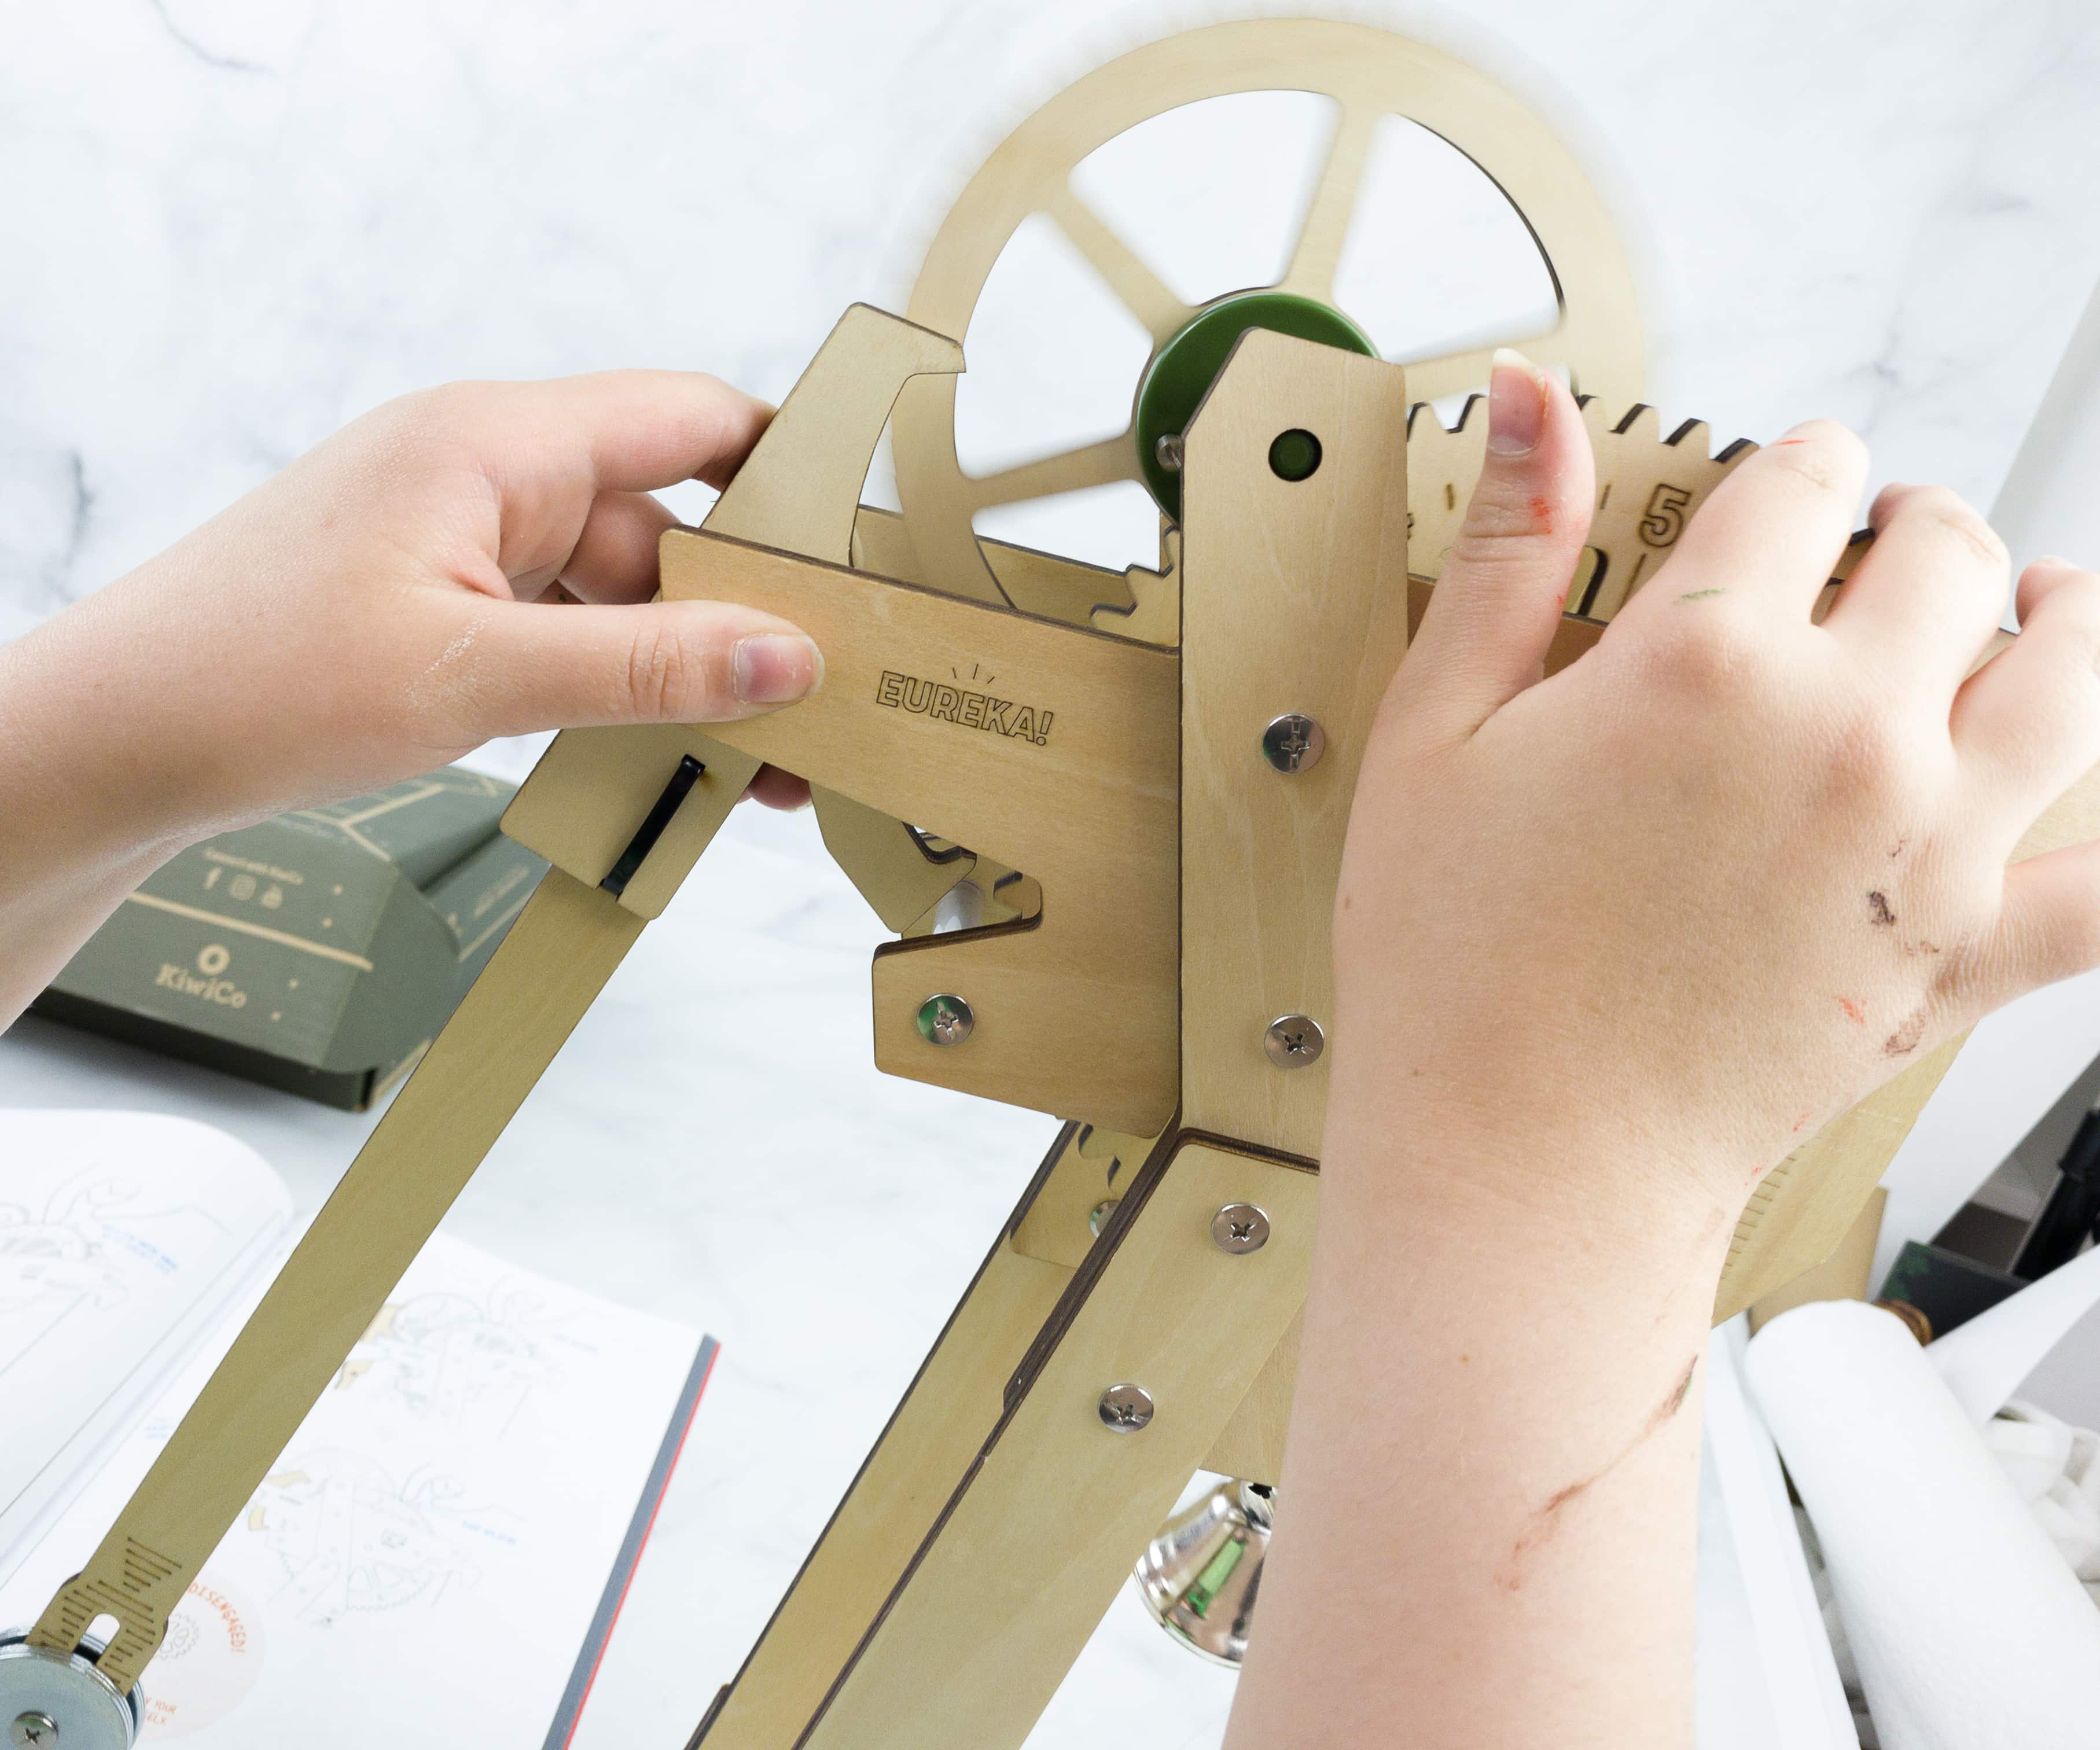
It’s time to build the other side of the timer, which is the front, plus the piece that sets the time.
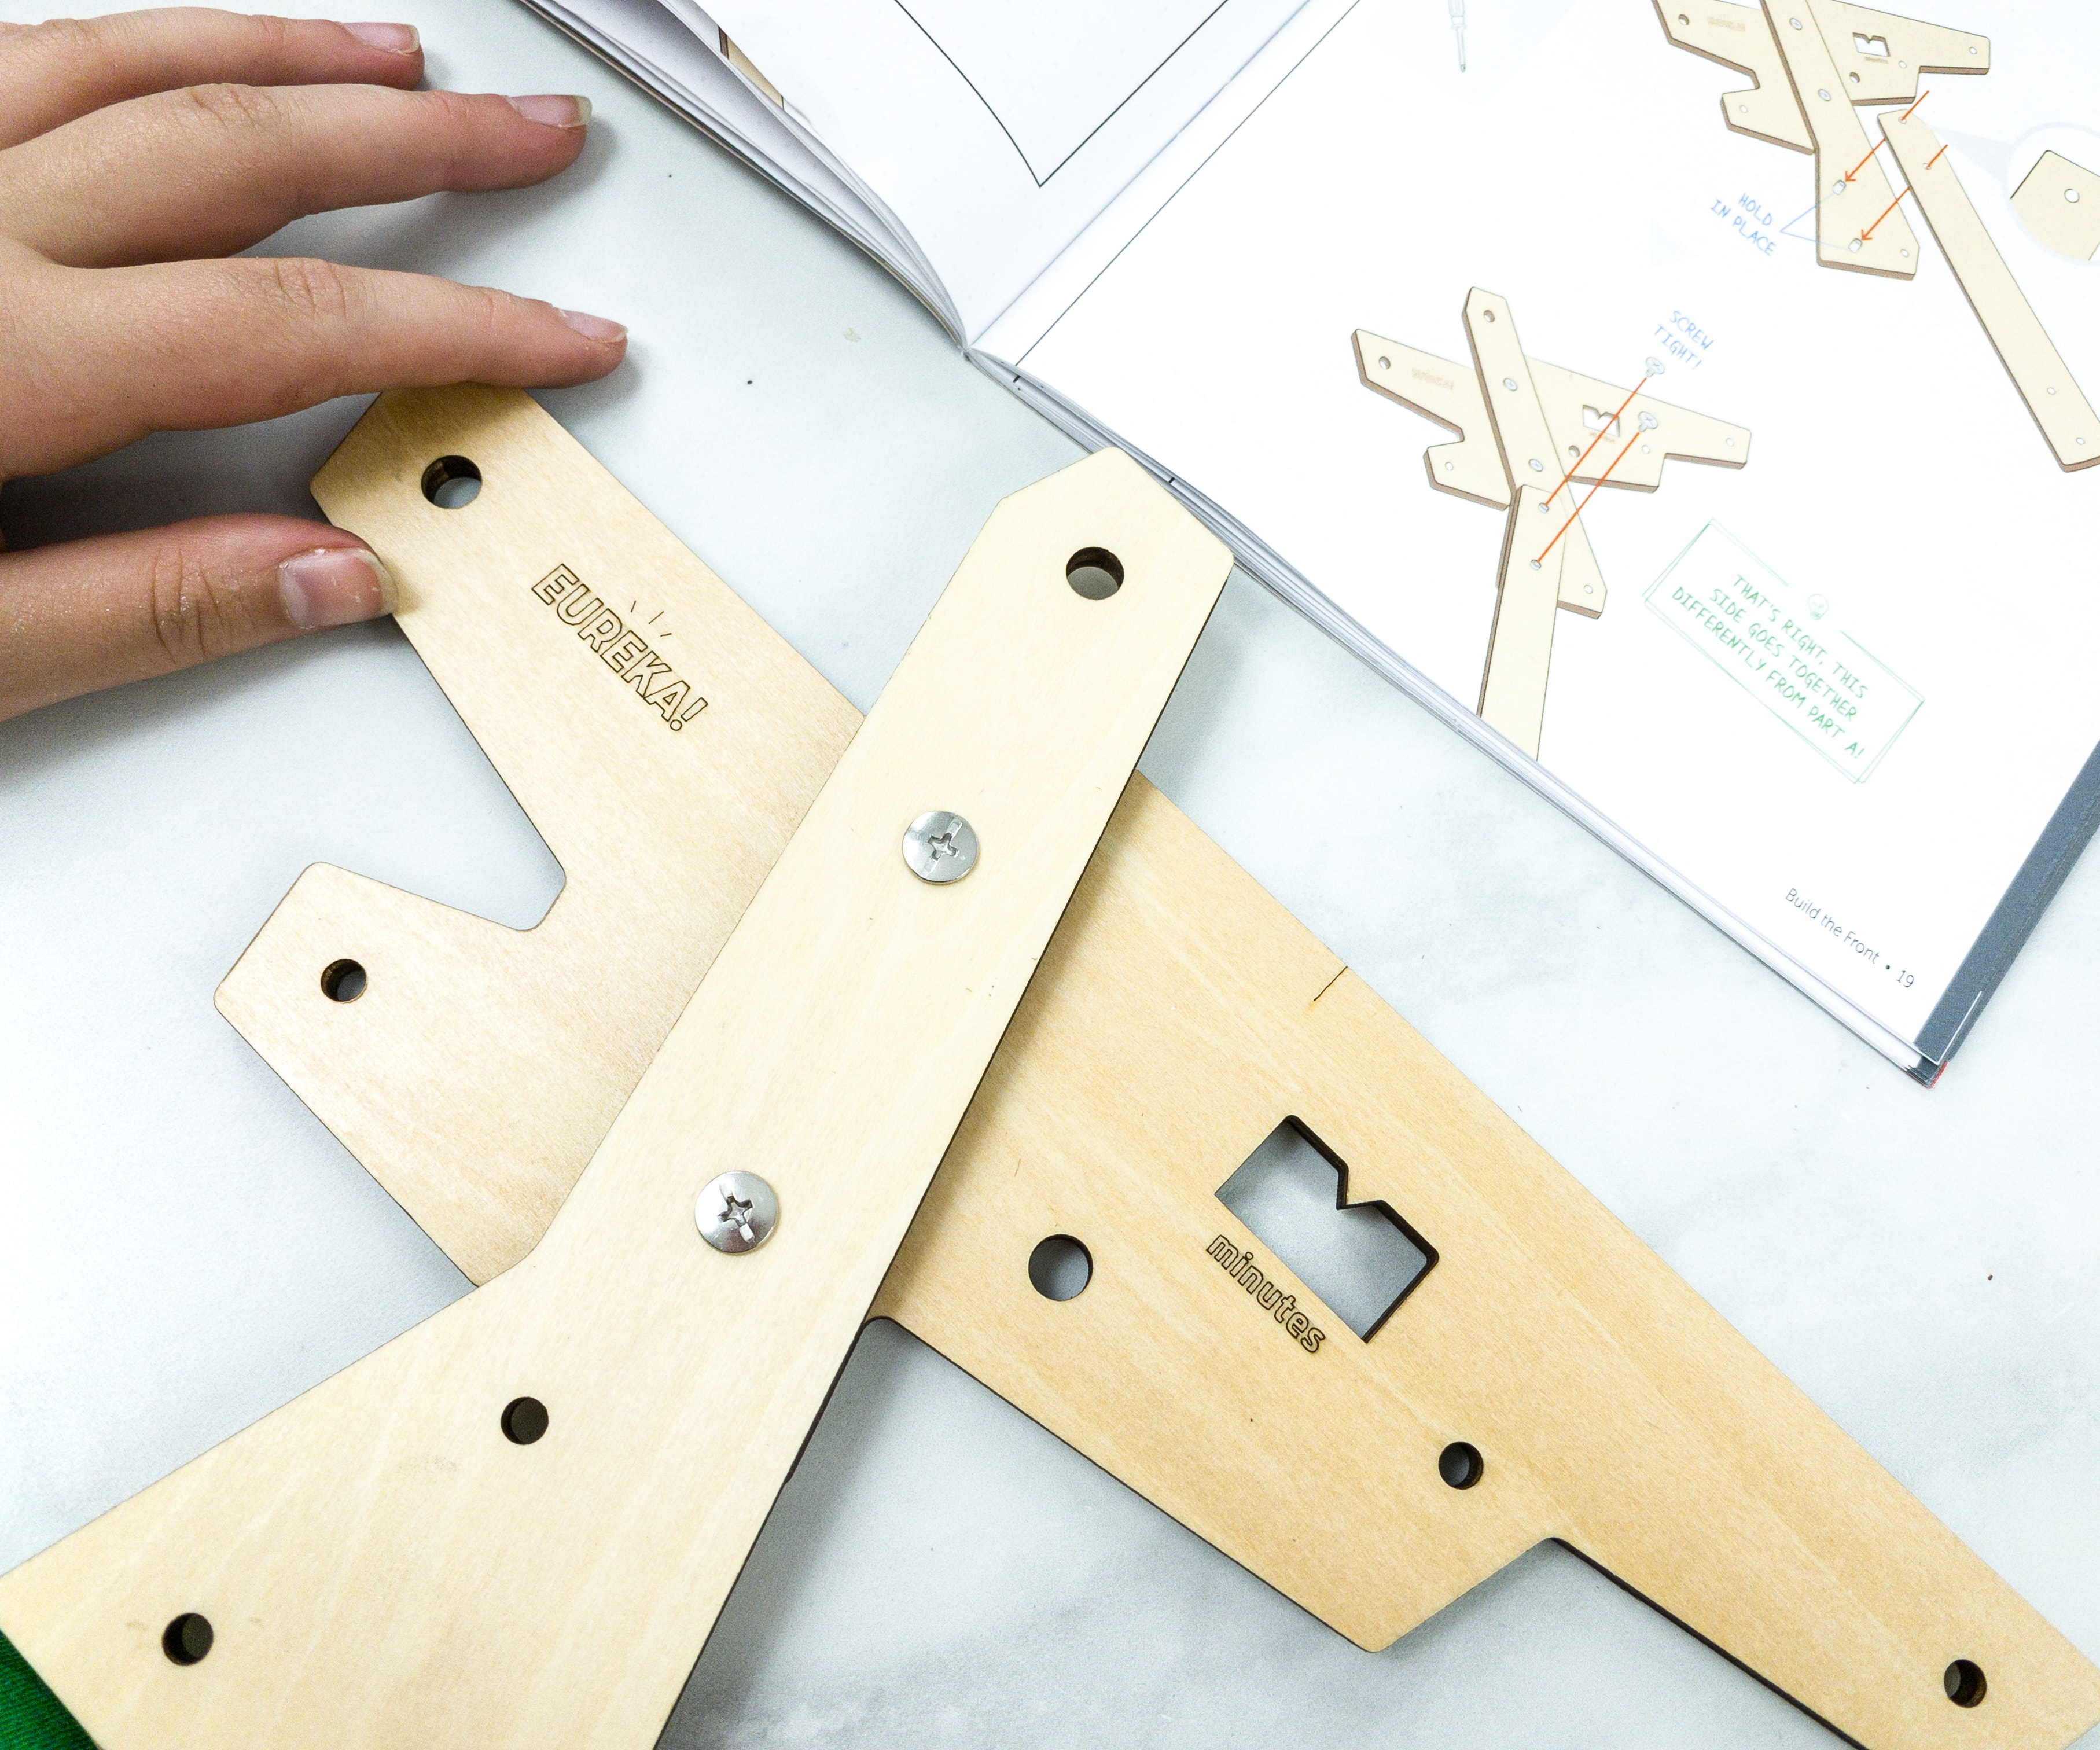
It’s like the first part where we assembled the wood parts and secured them with screws.
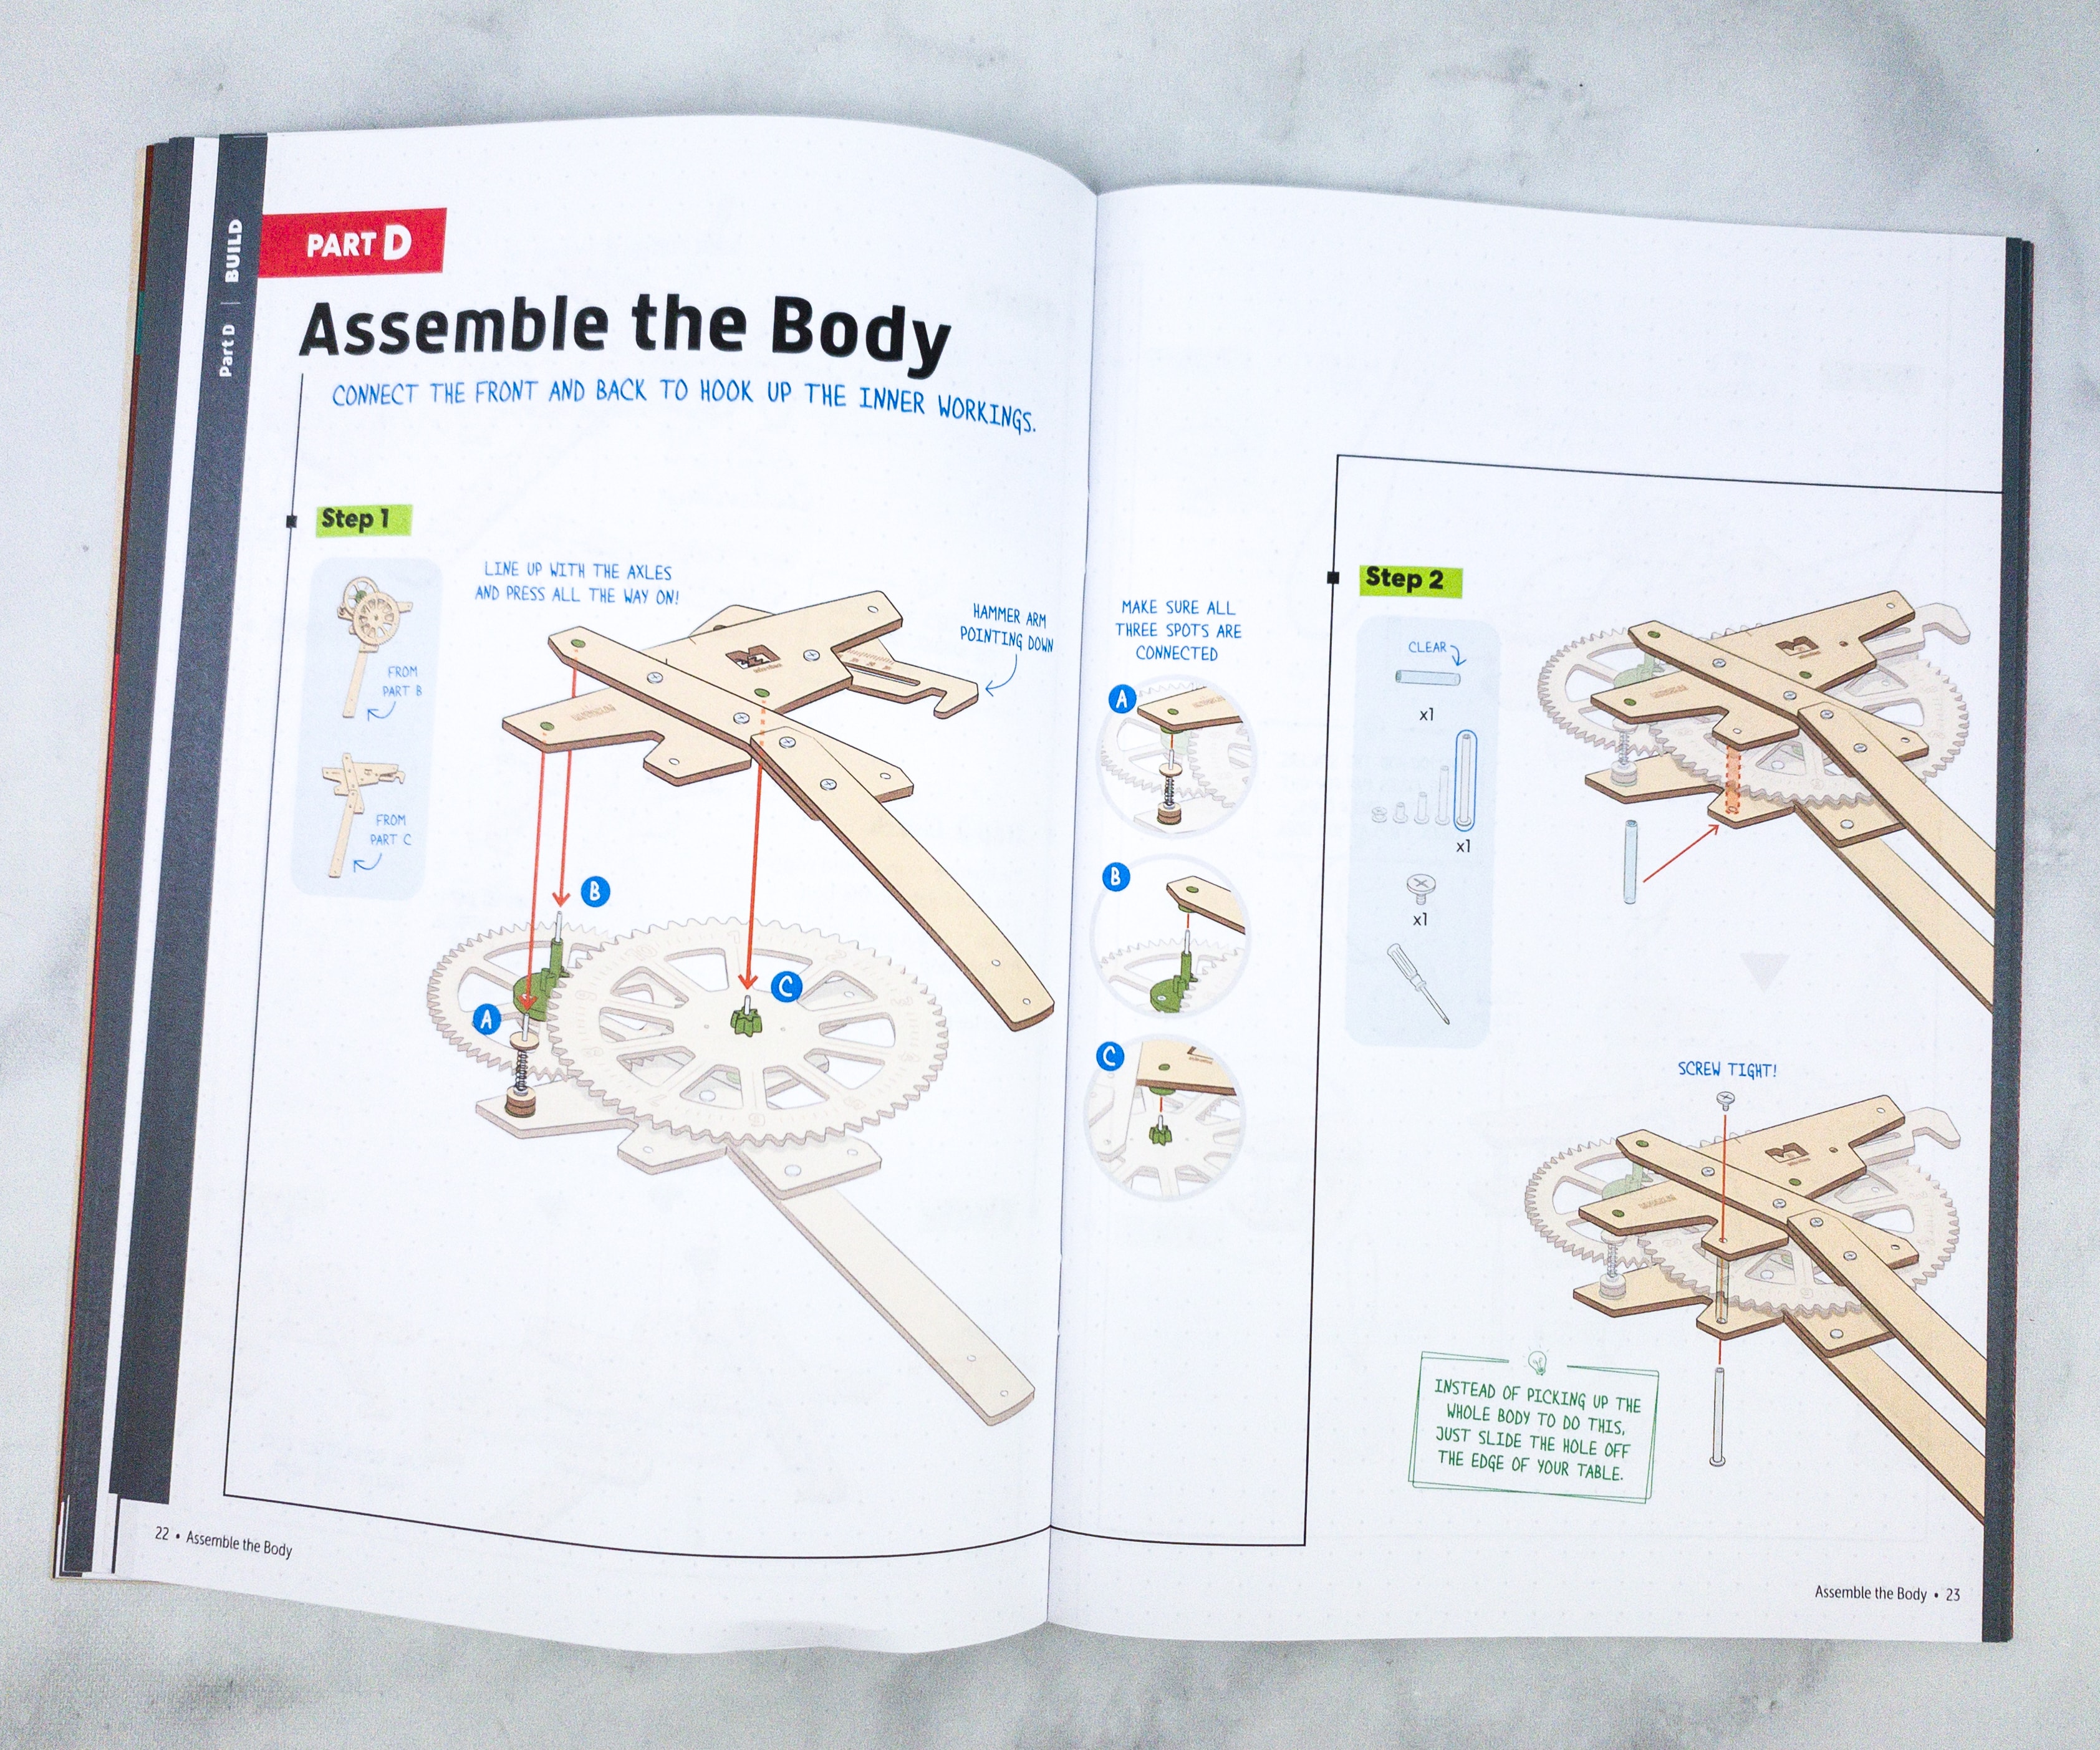
After finishing all the parts, it’s time to put everything together.
This step requires other wood parts, hex bolts, shaft caps, and hex nuts.
My daughter connected the front and back to hook up the inner workings and parts! It’s easy because she just fitted some of the parts on the allotted slots, and screwed them in place.
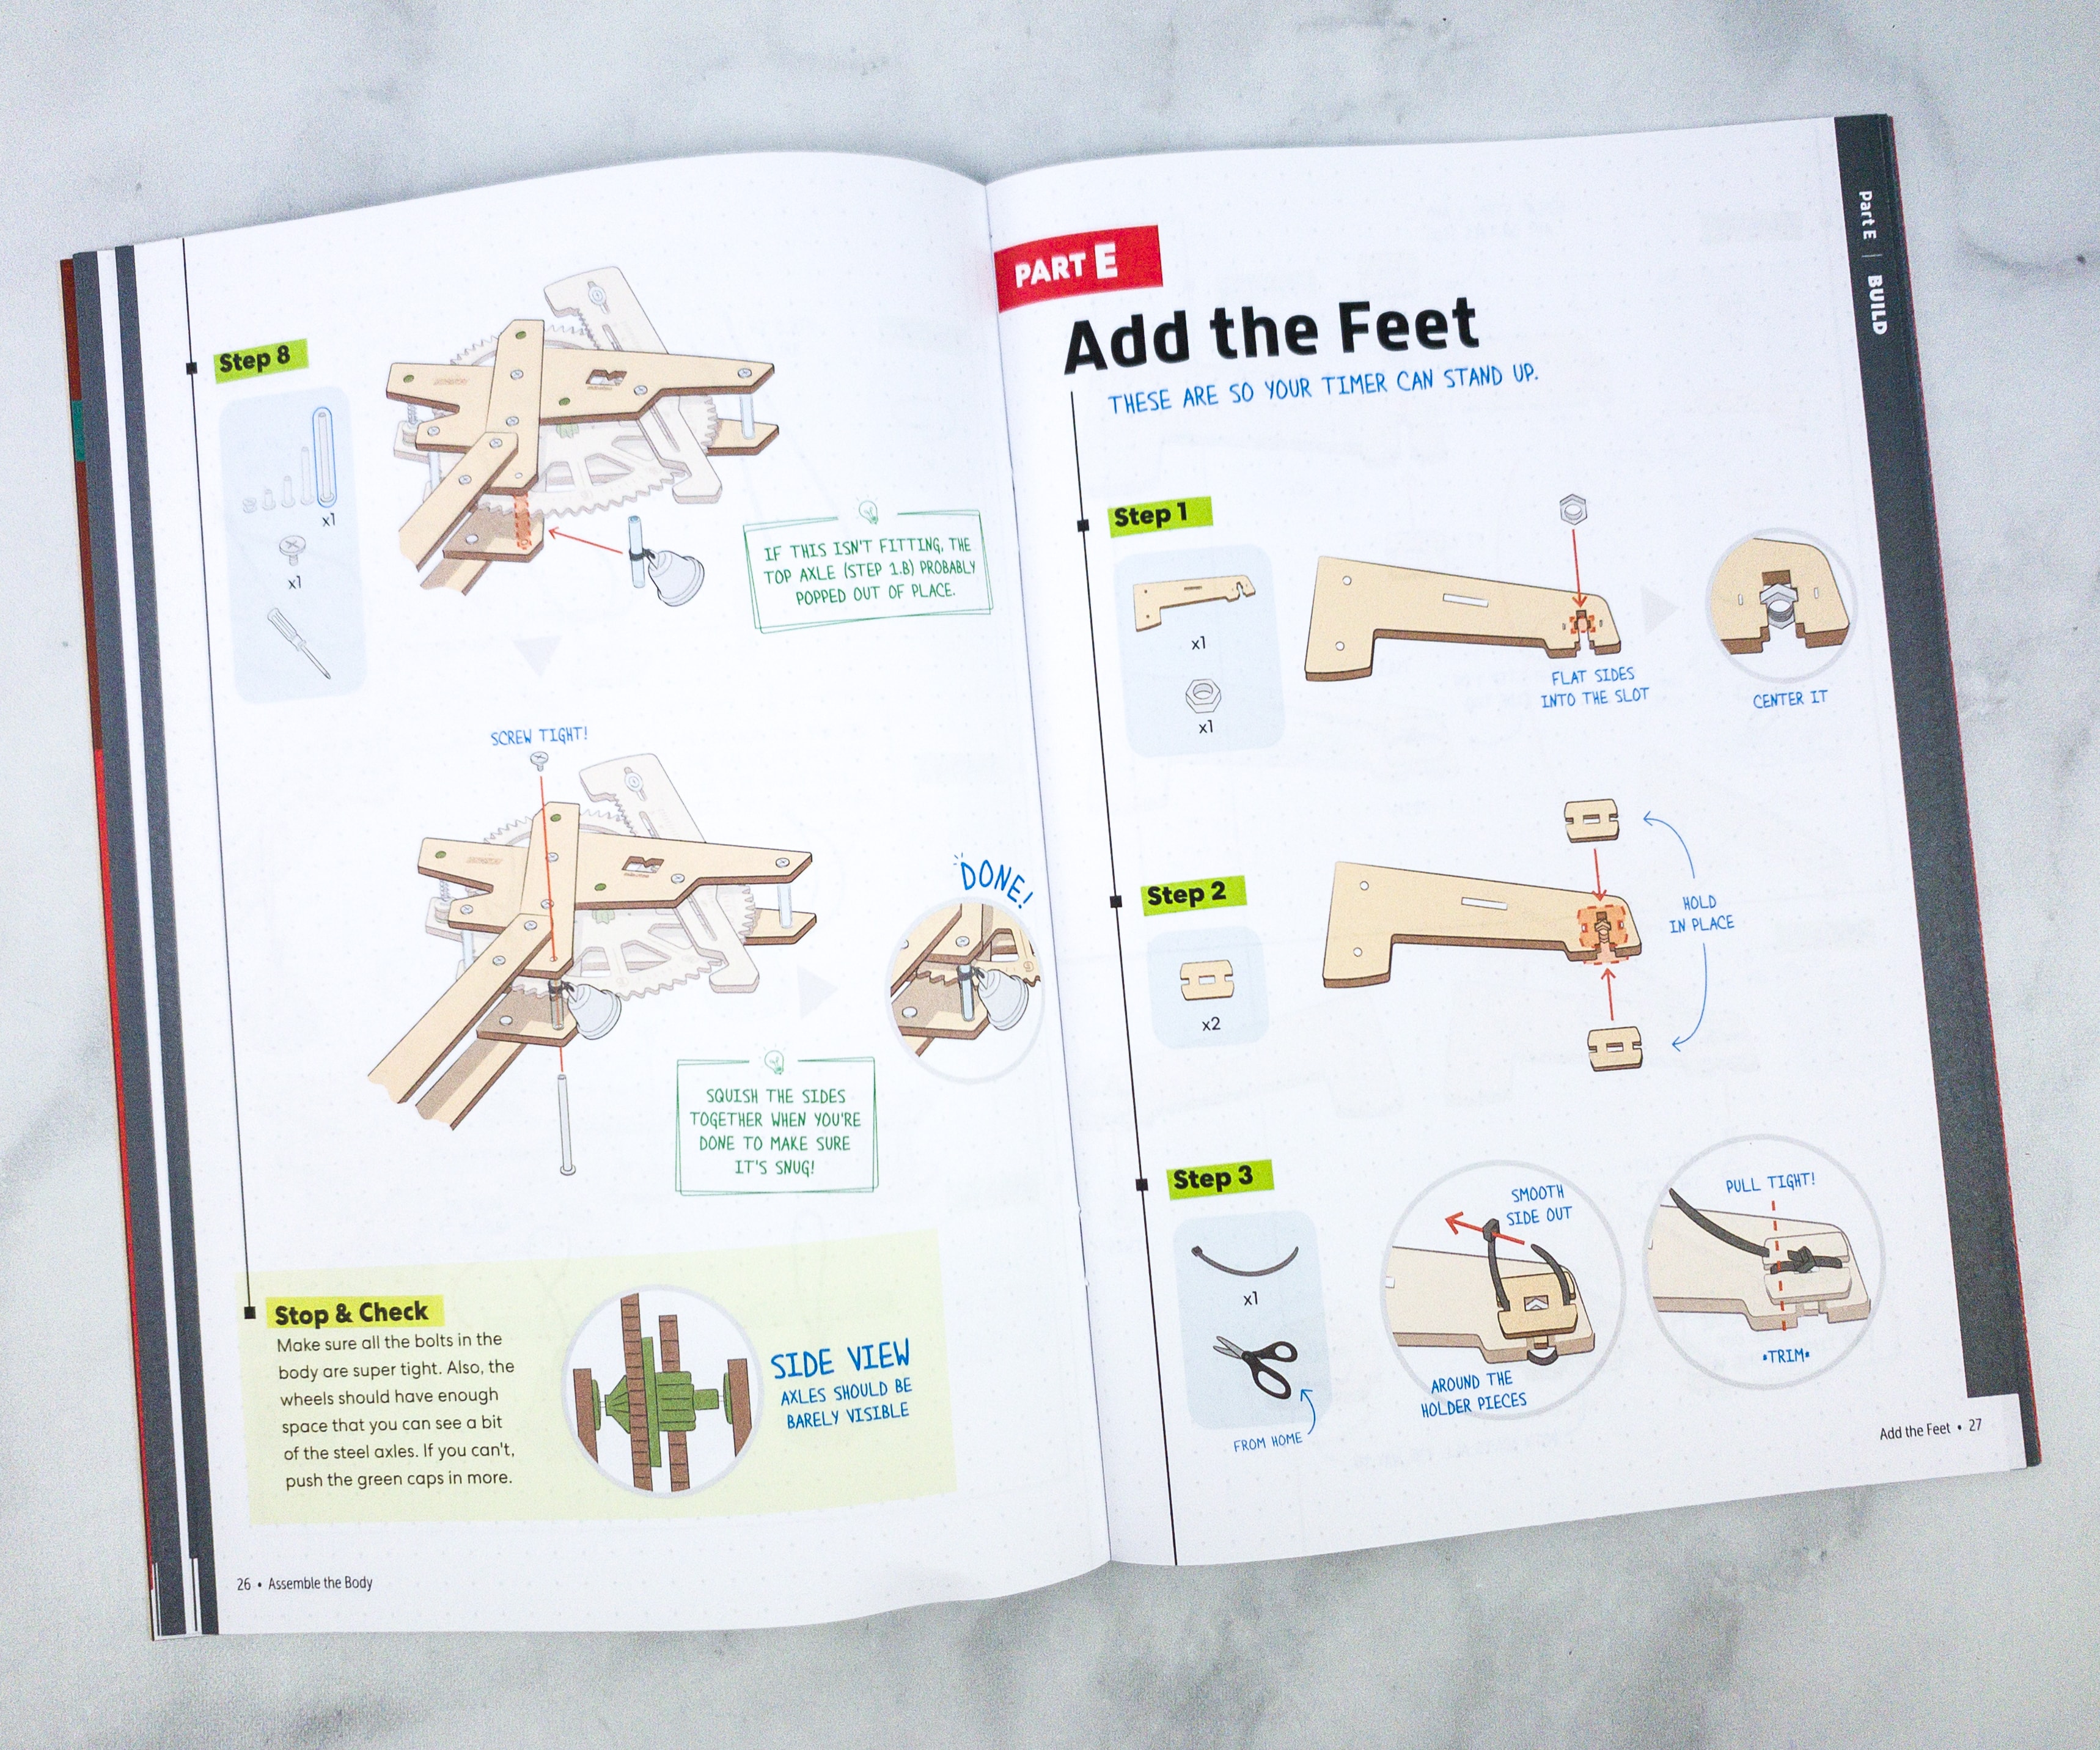
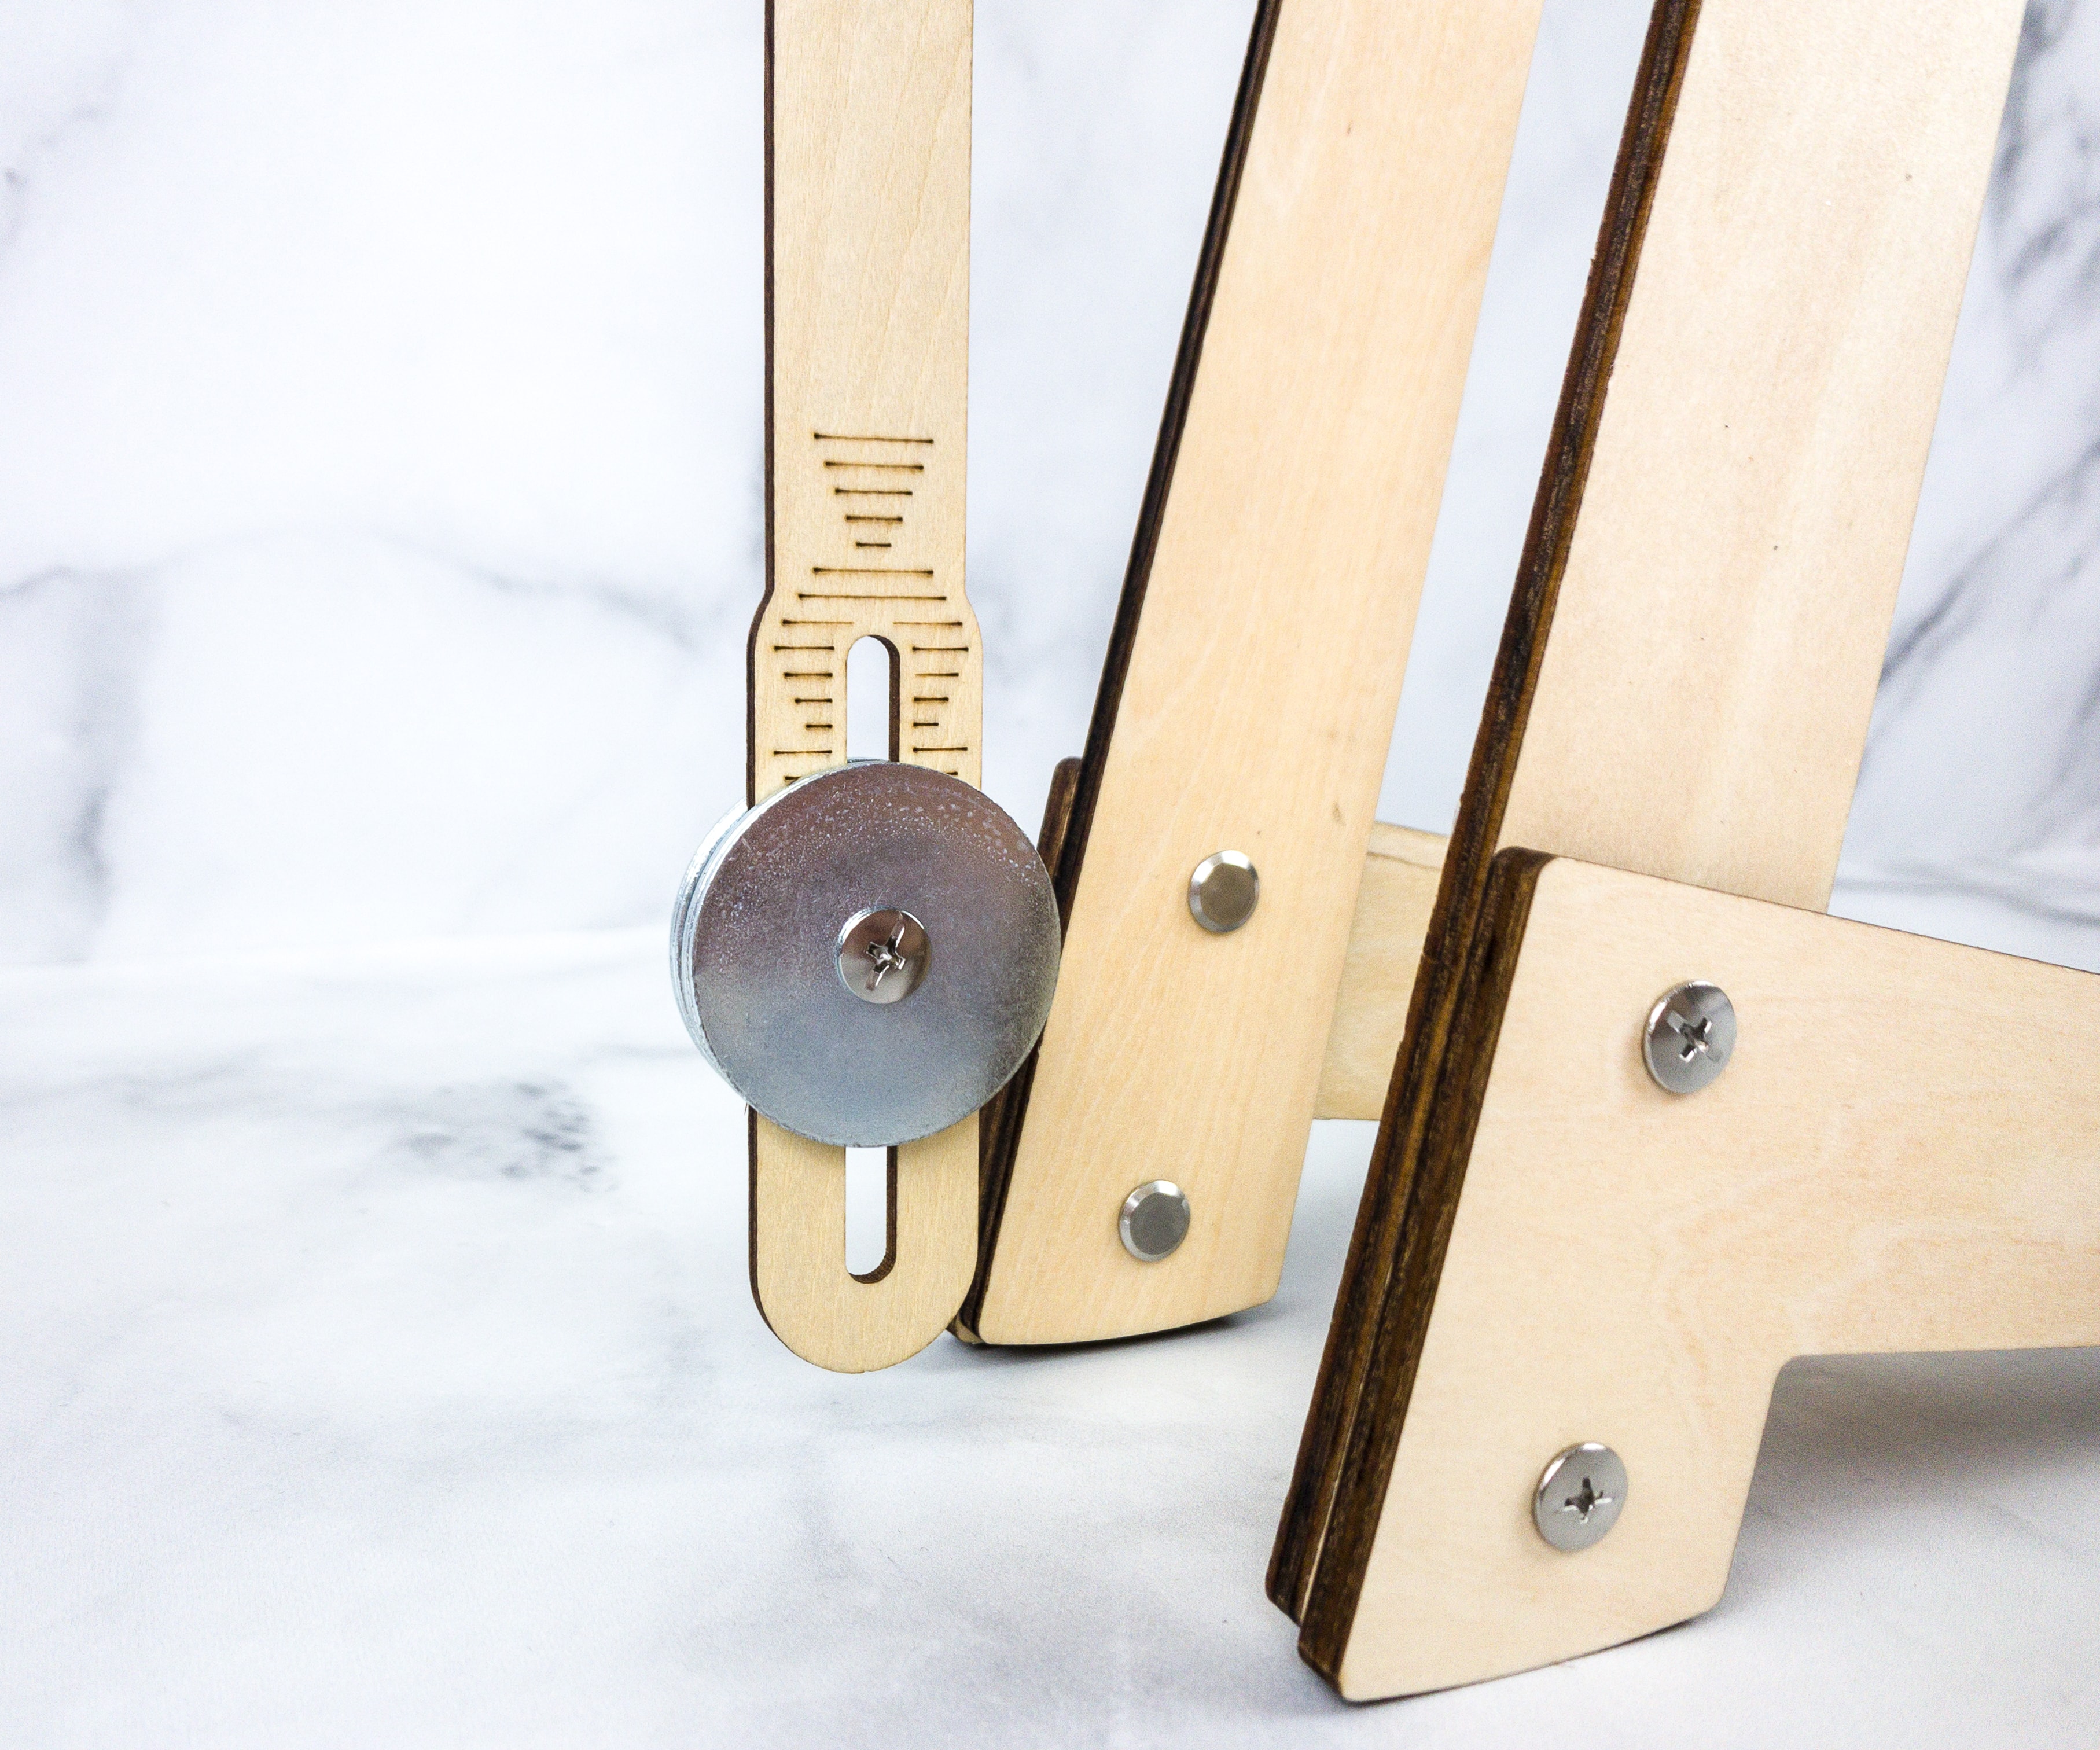
Next, we added the feet so the clock can stand up.
For this, they also included more wood parts, nuts and bolts, barrel bolts, and zip ties.
To secure this part, we used the included zip ties.
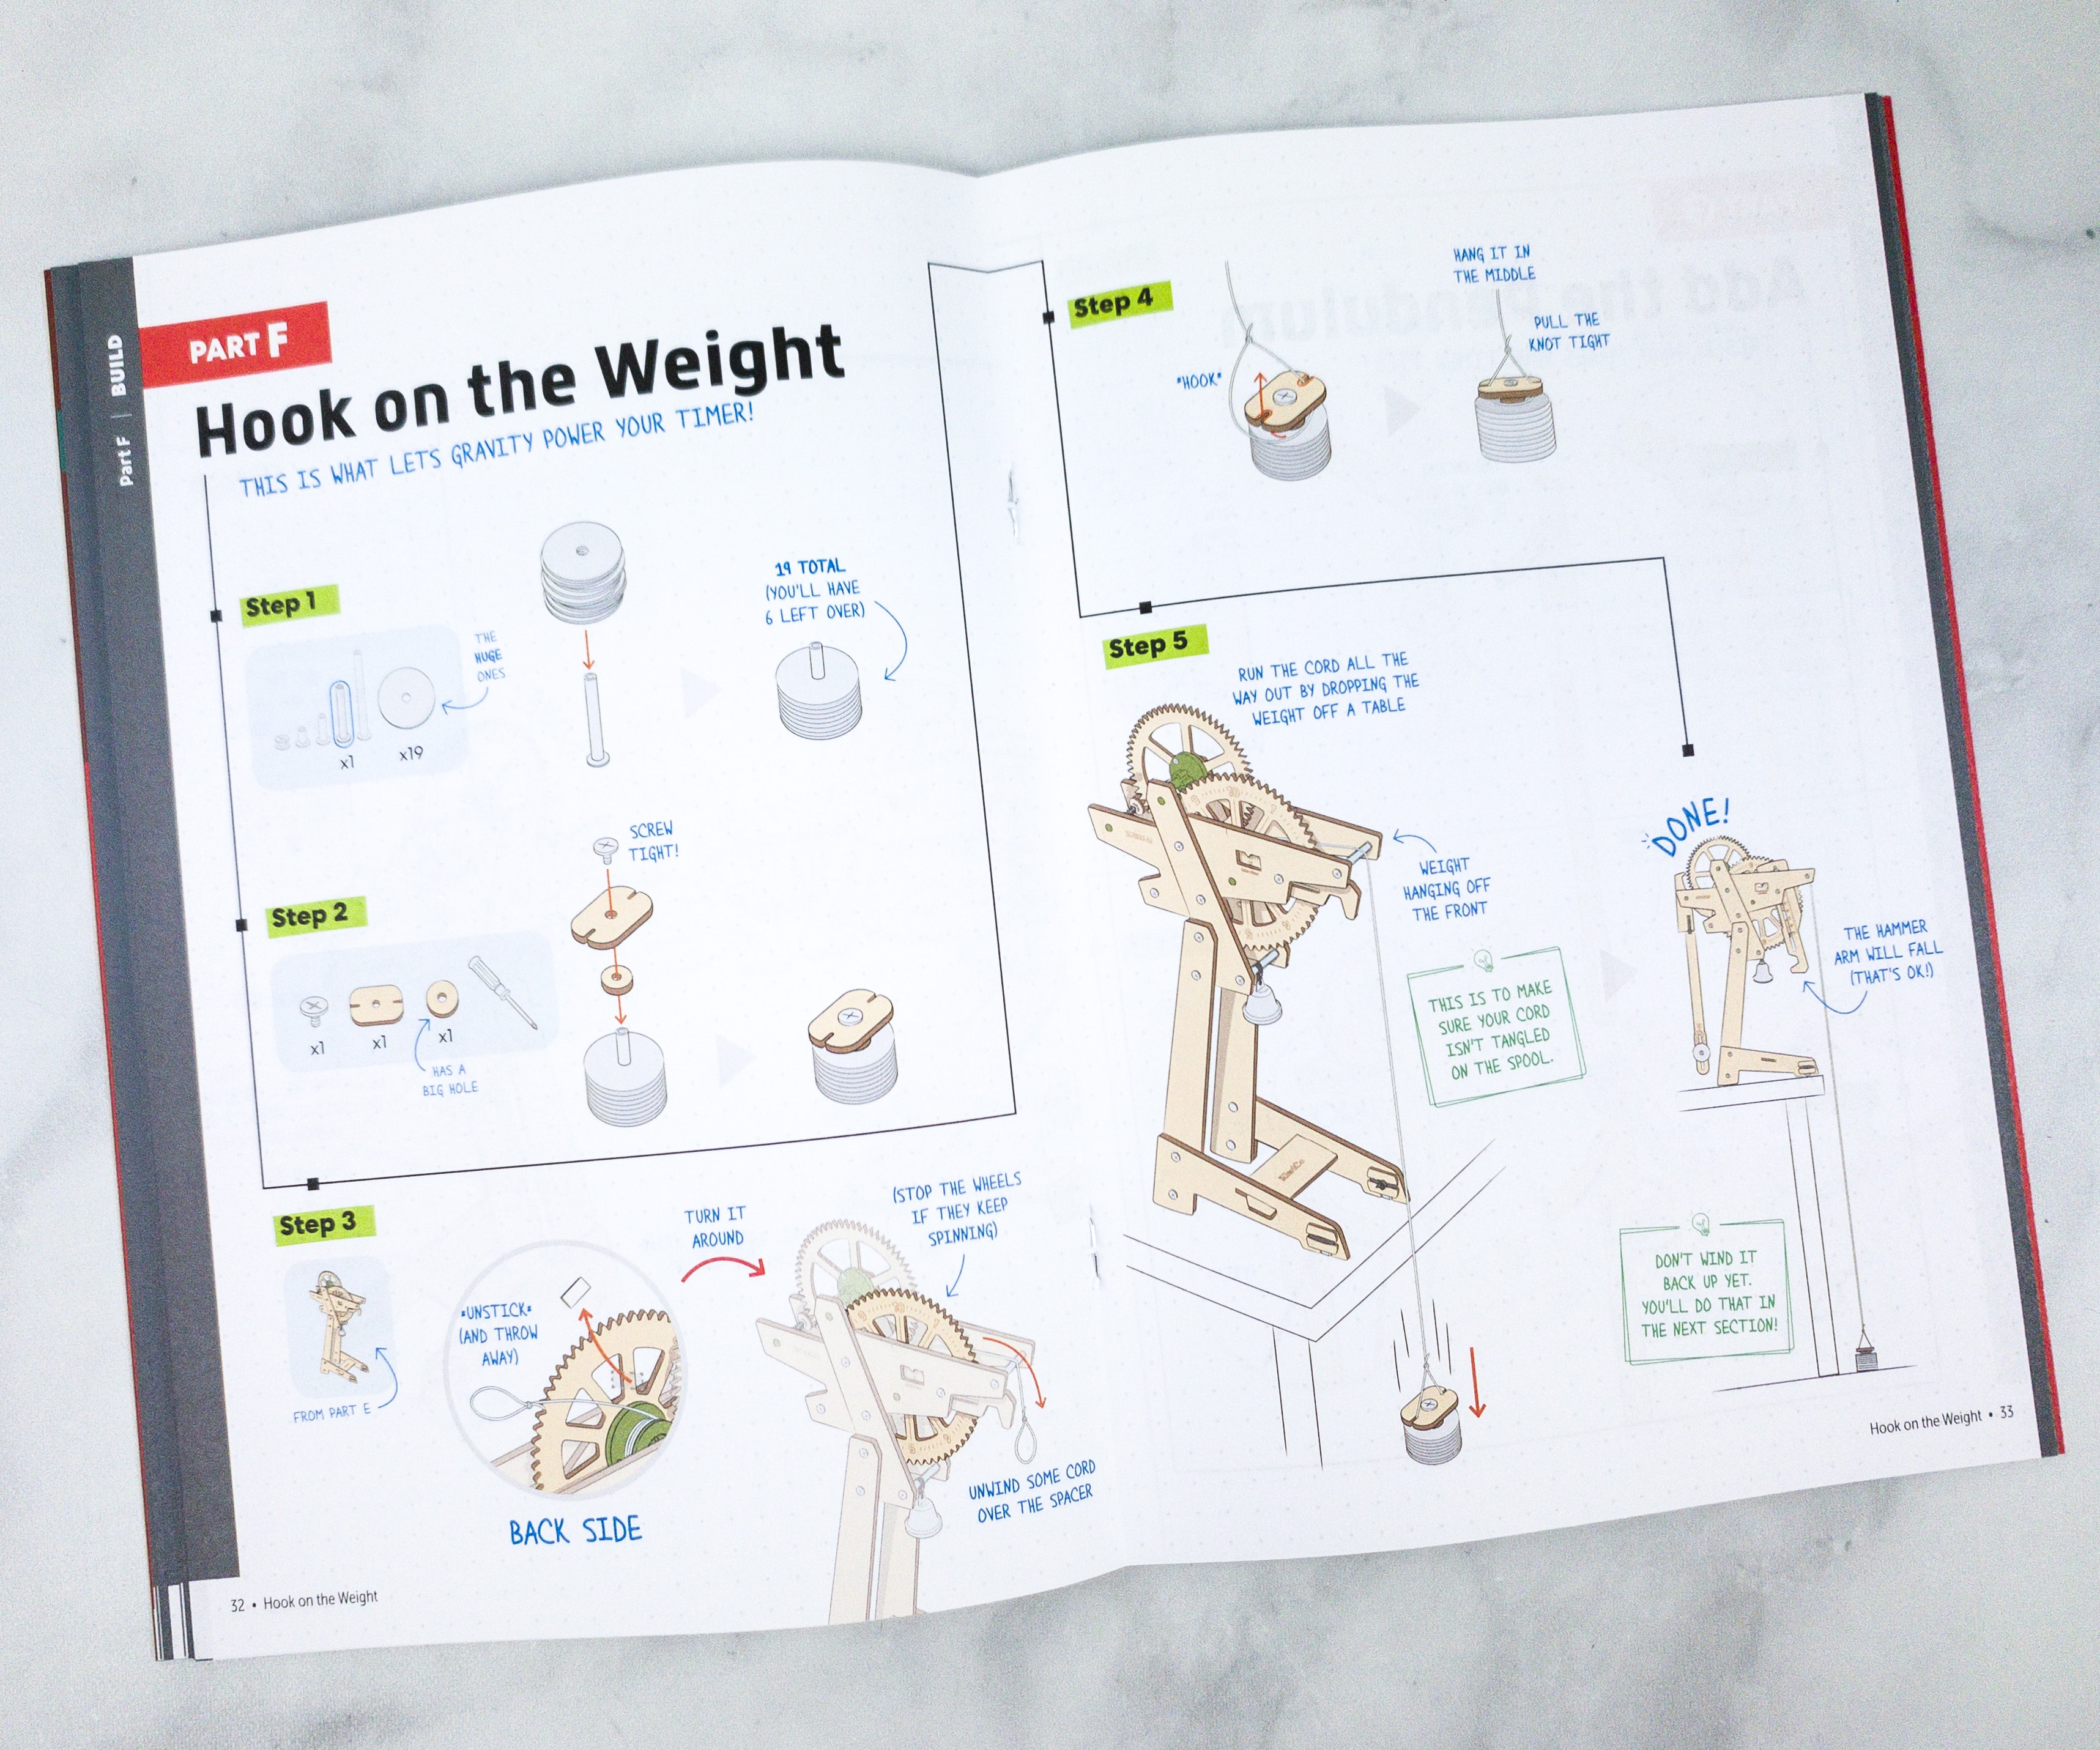
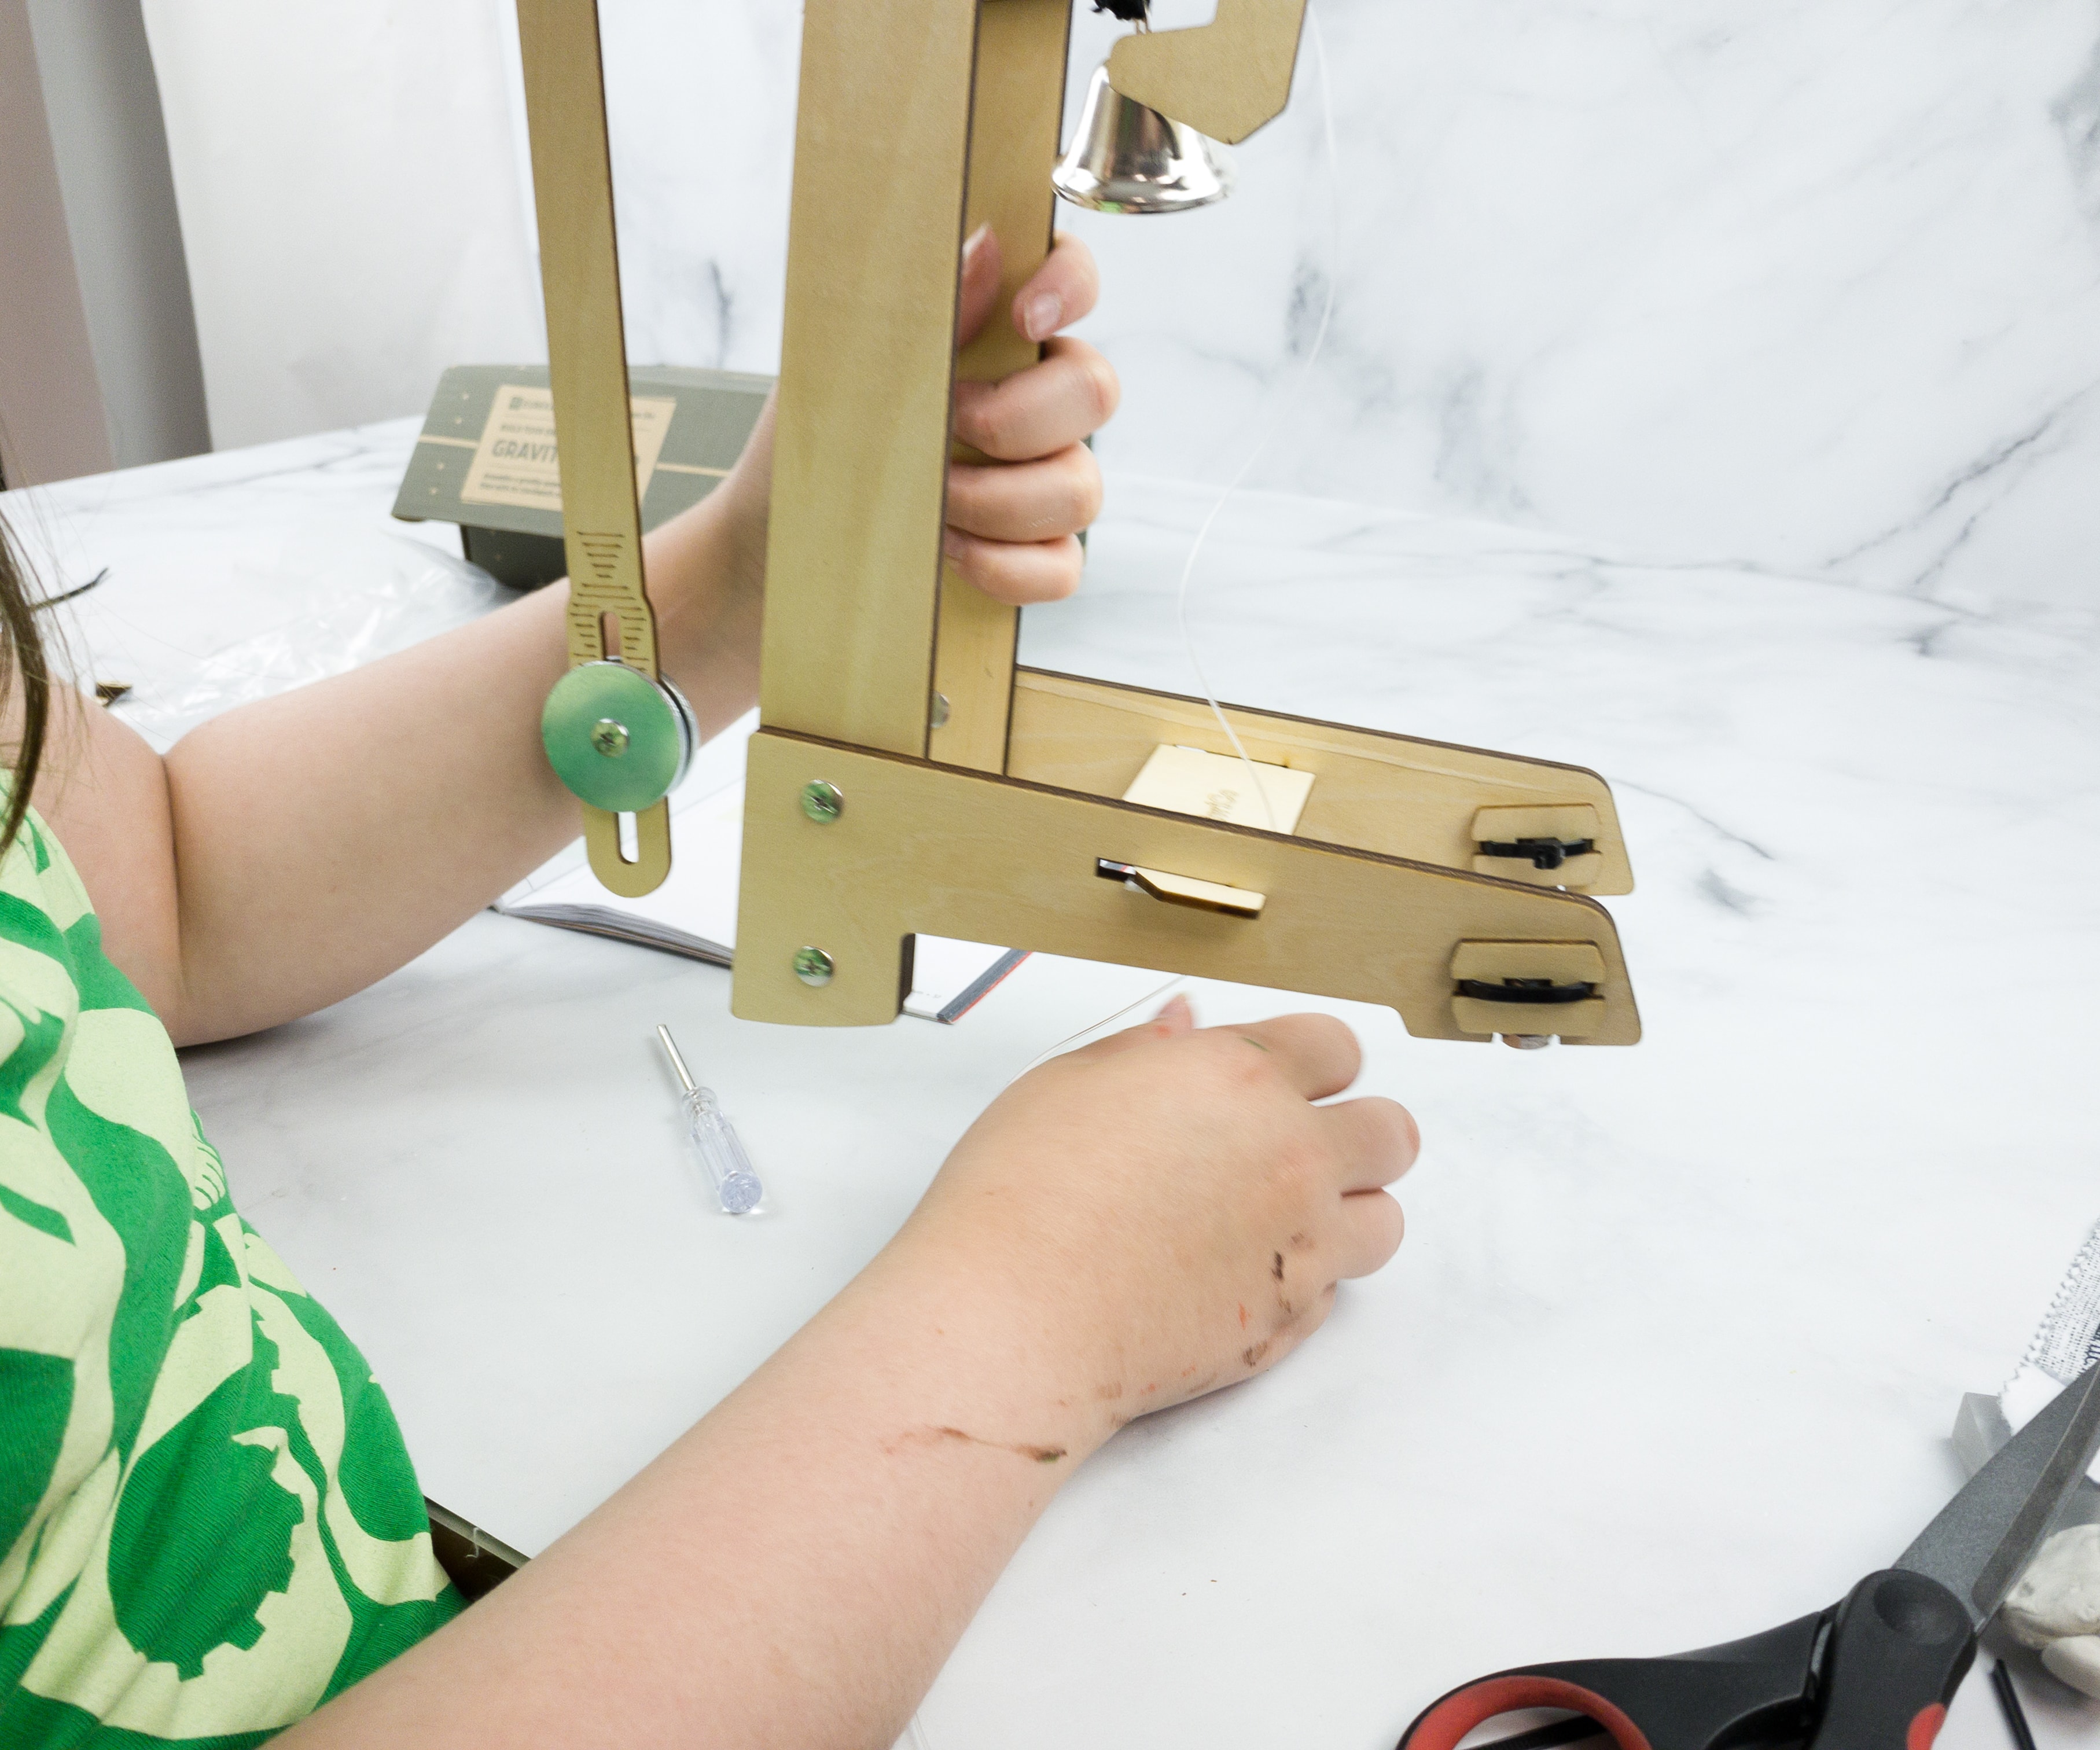
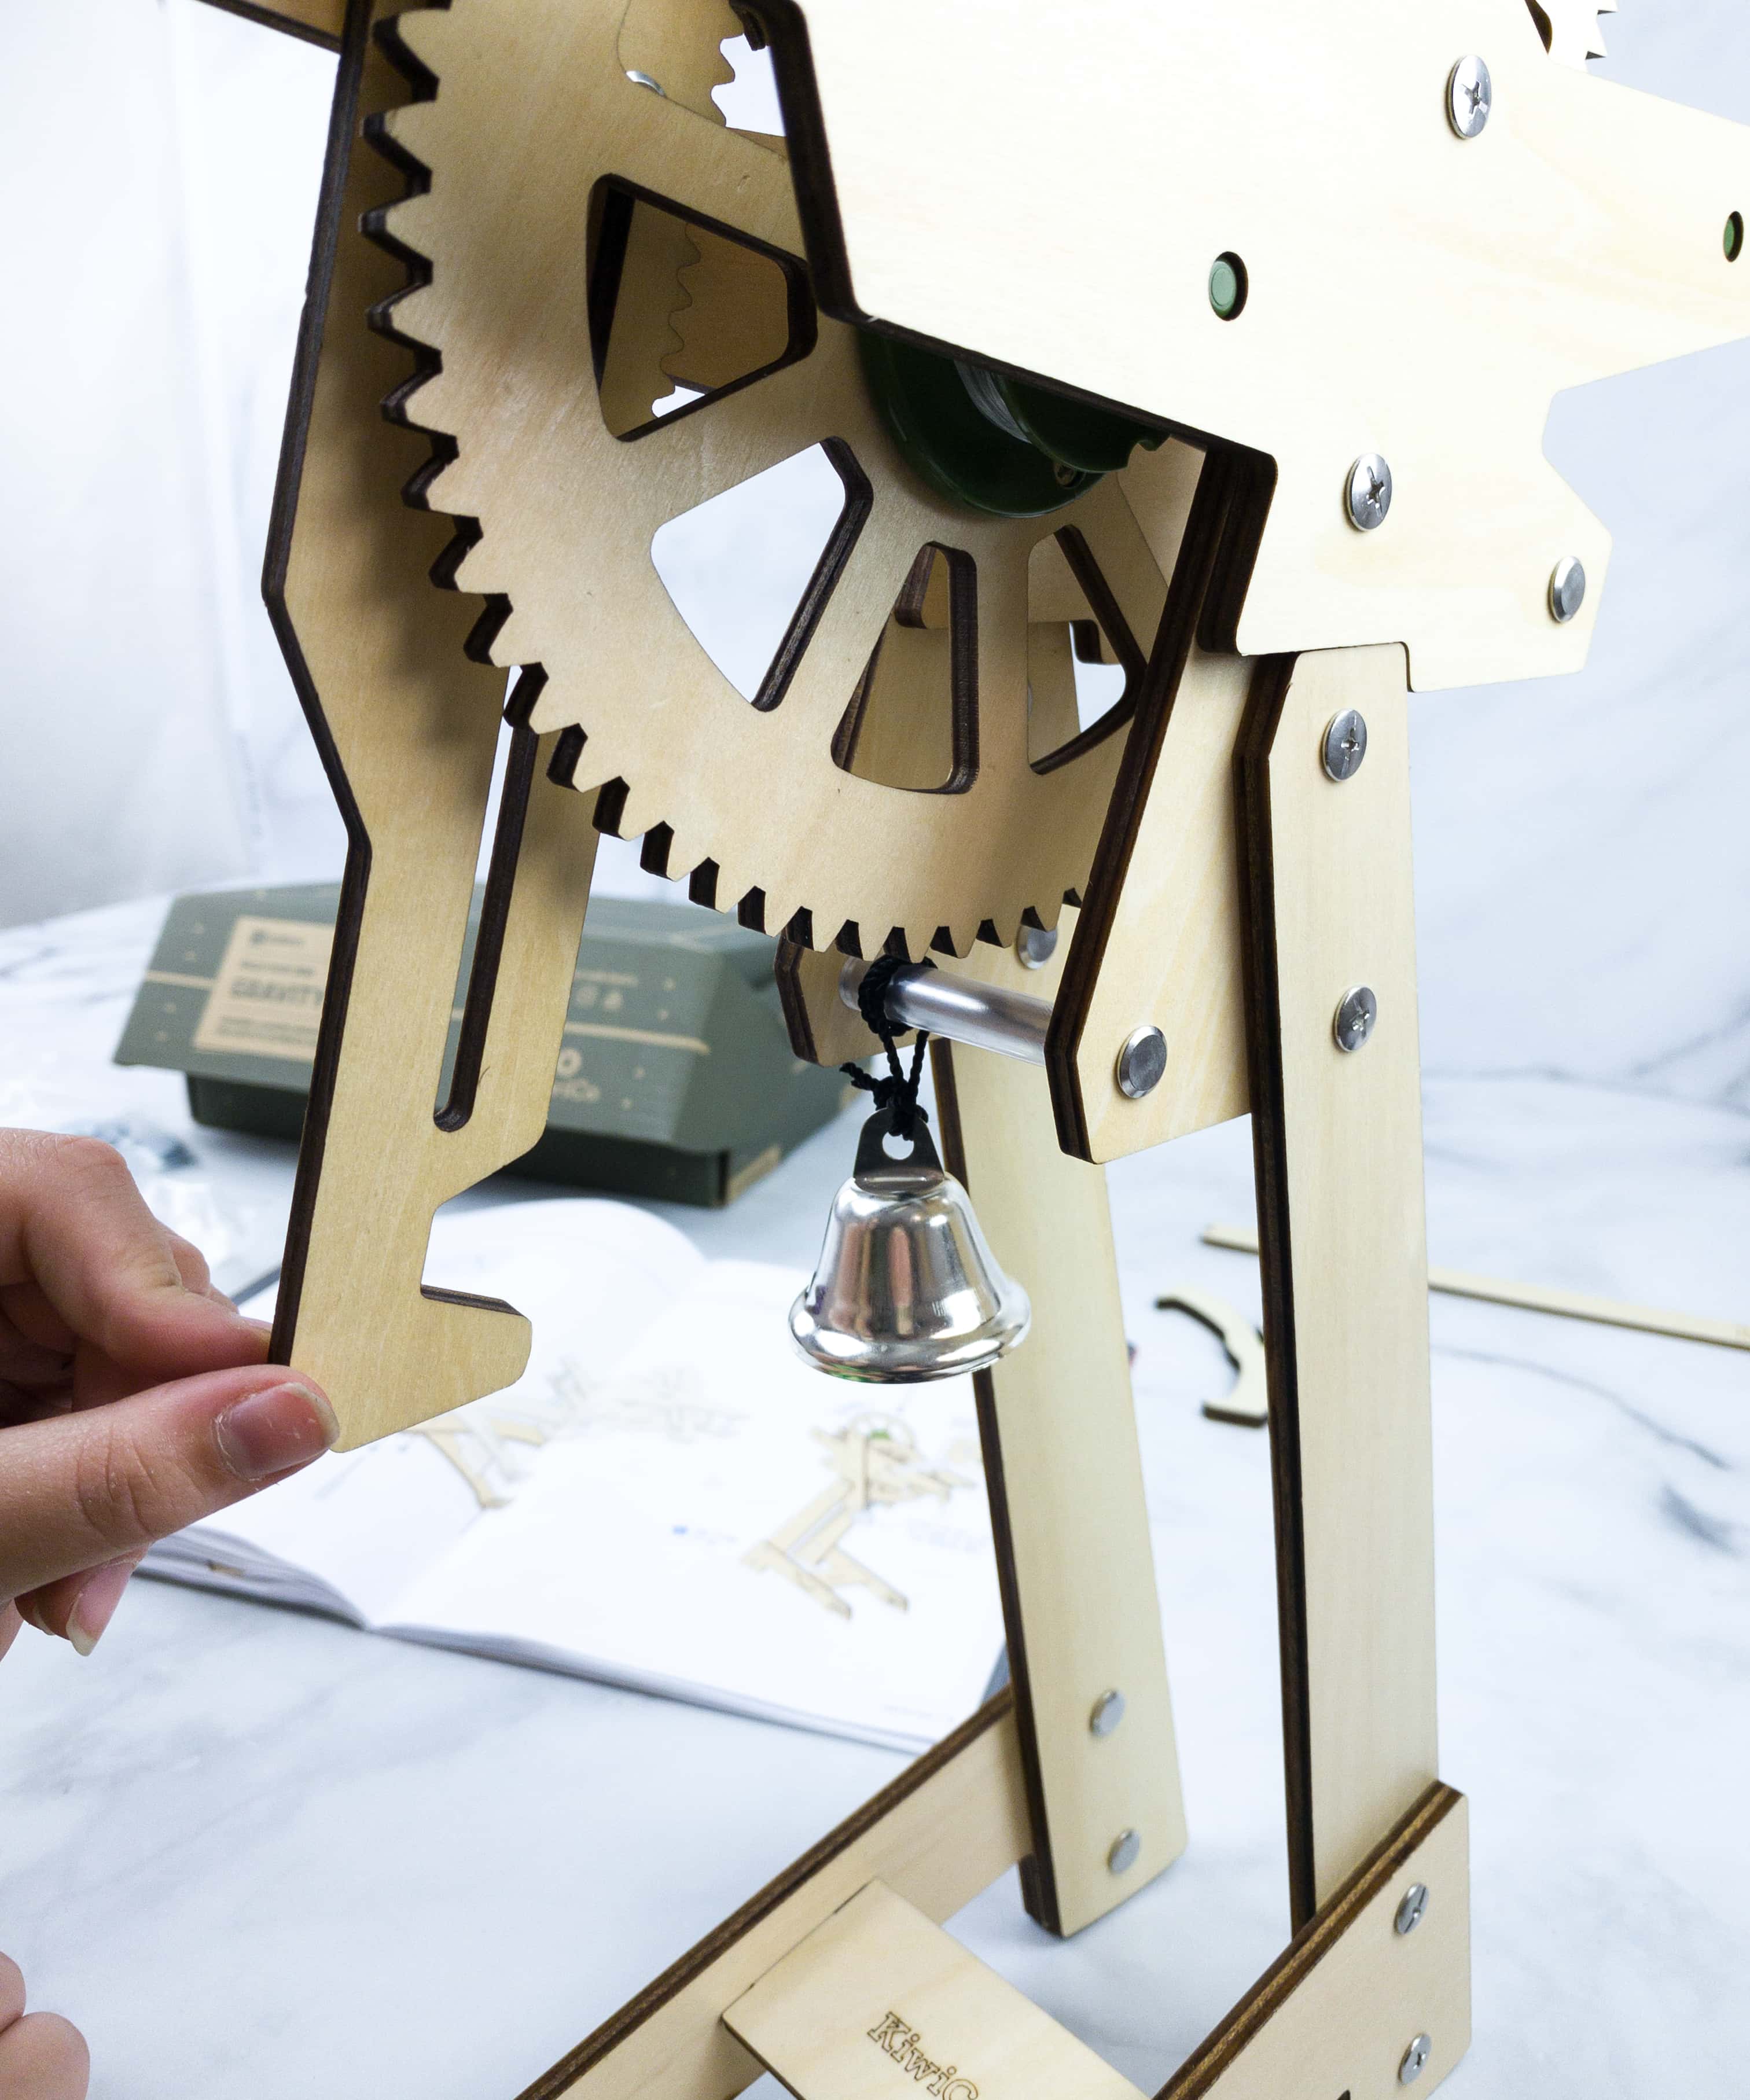
To power up the timer using gravity, we added weight on a hook.
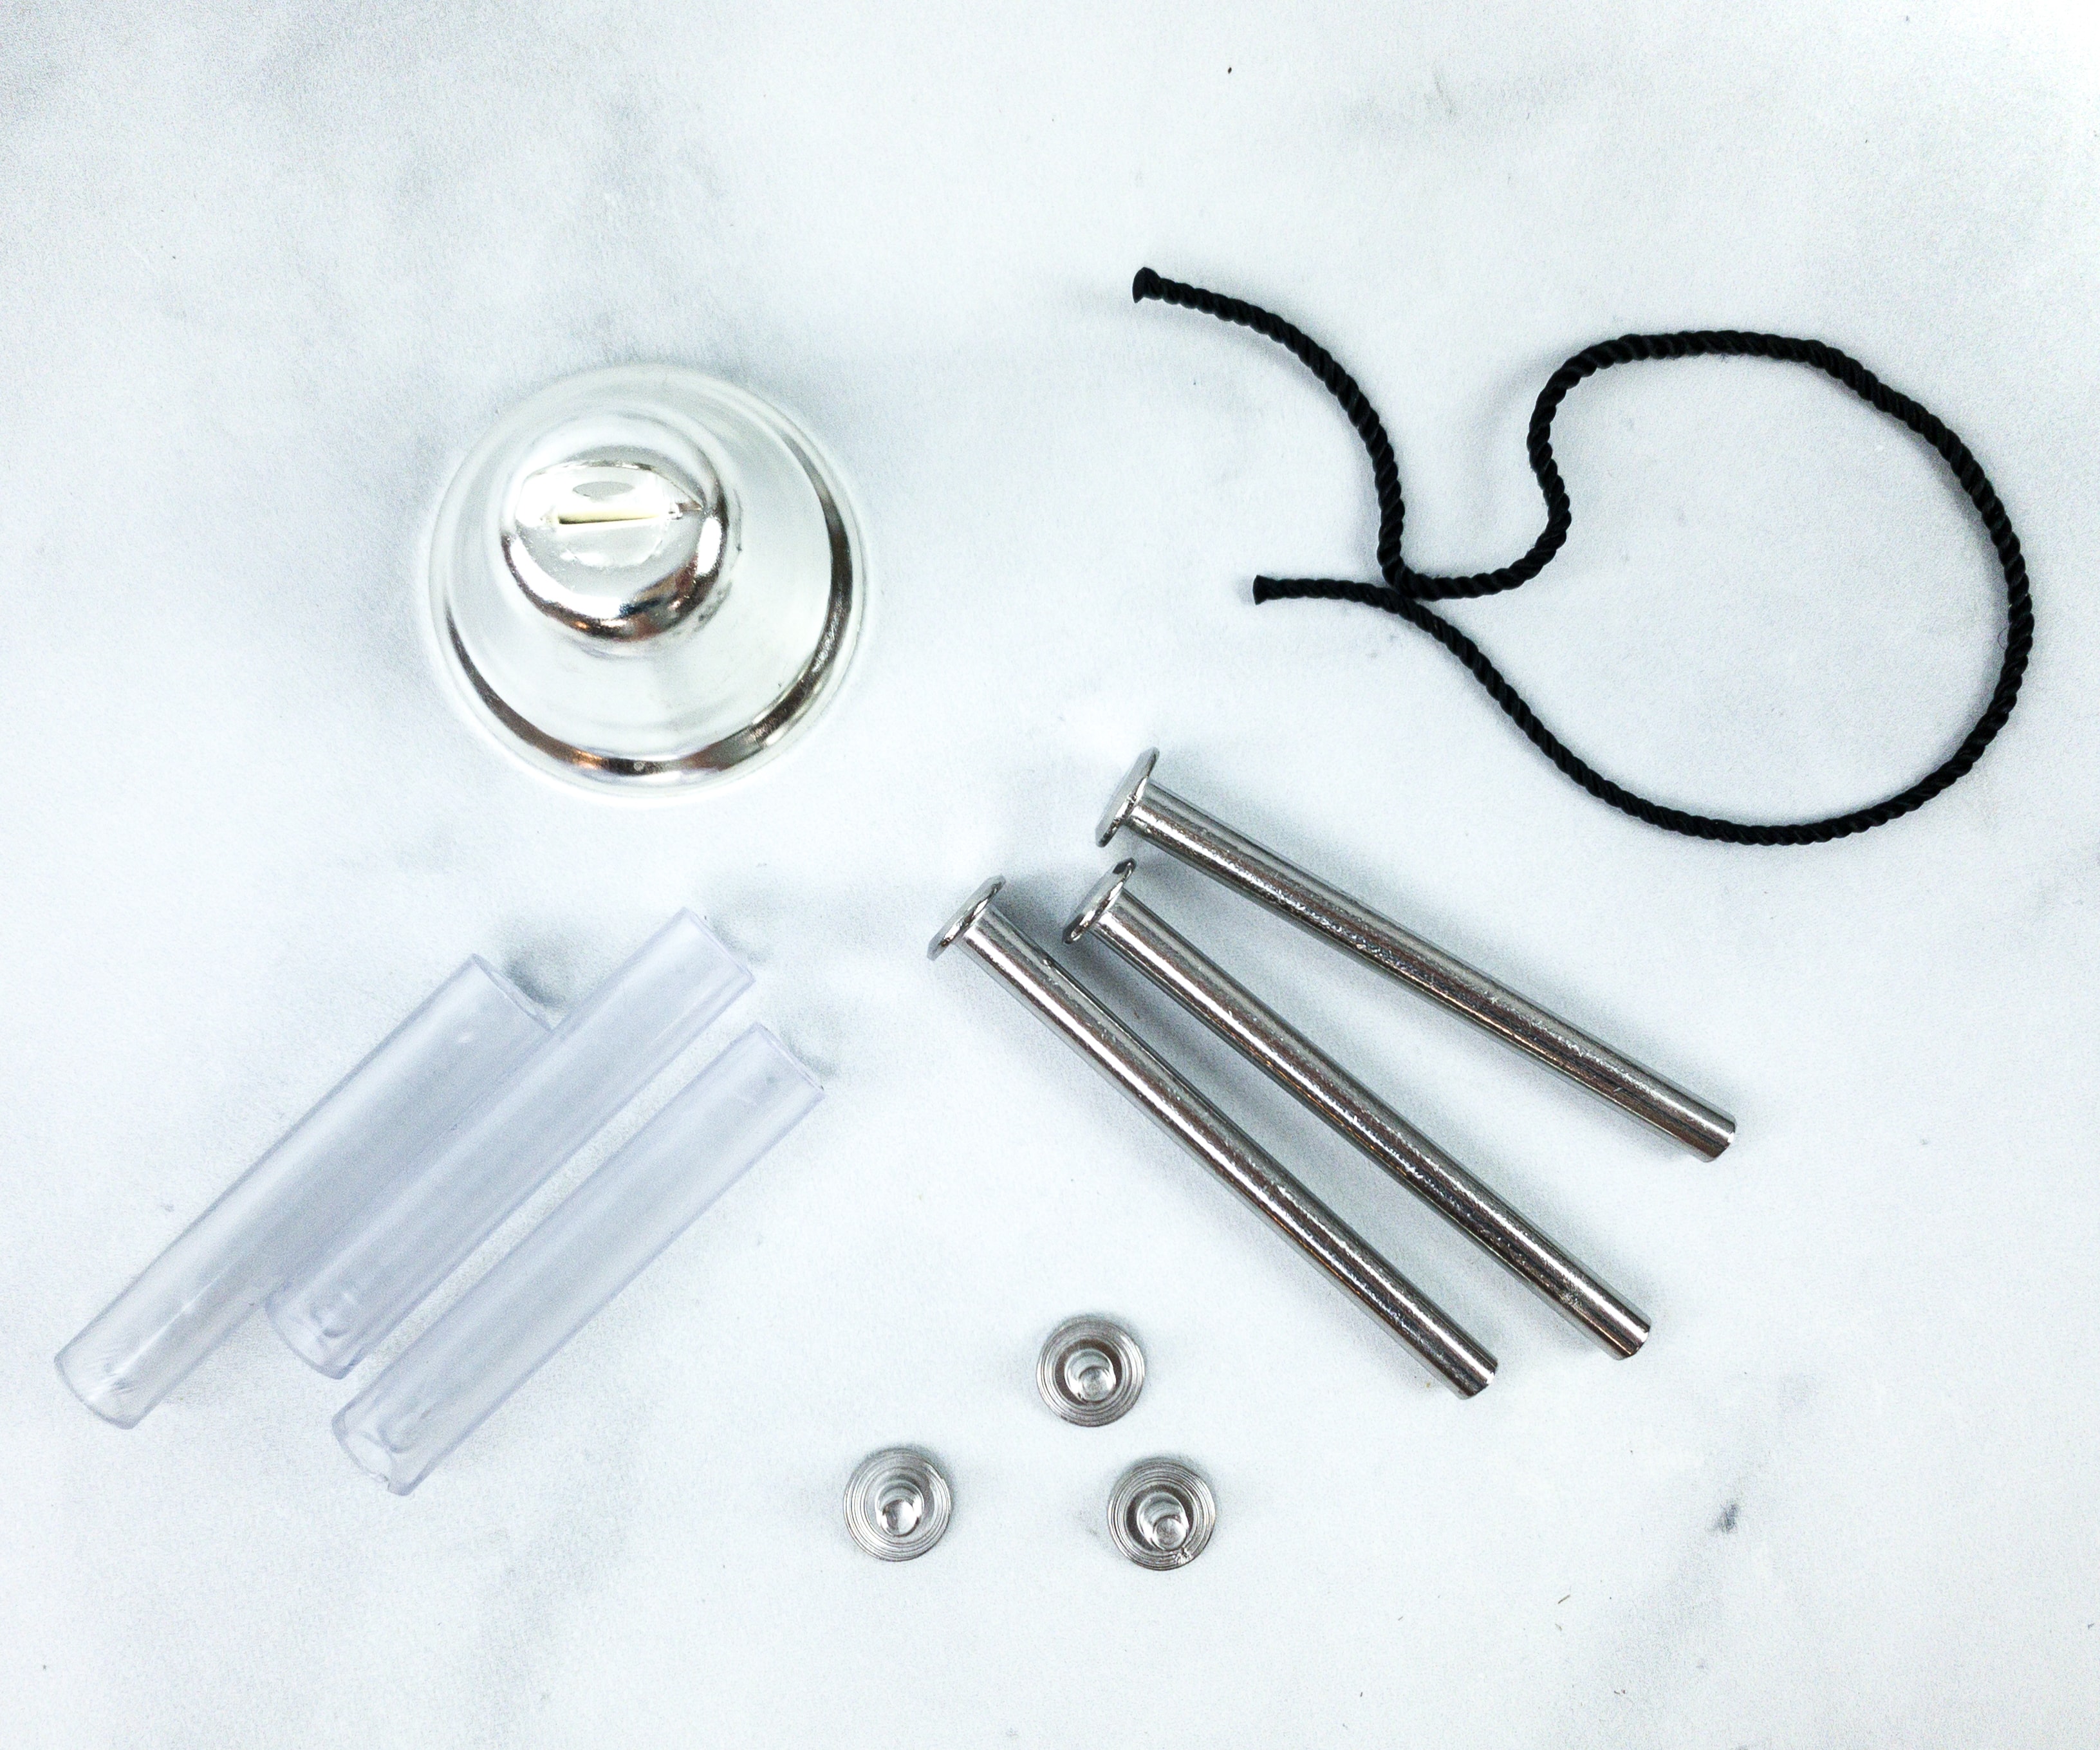
For this we used spacer tubes, barrel bolts, string, and the bell.
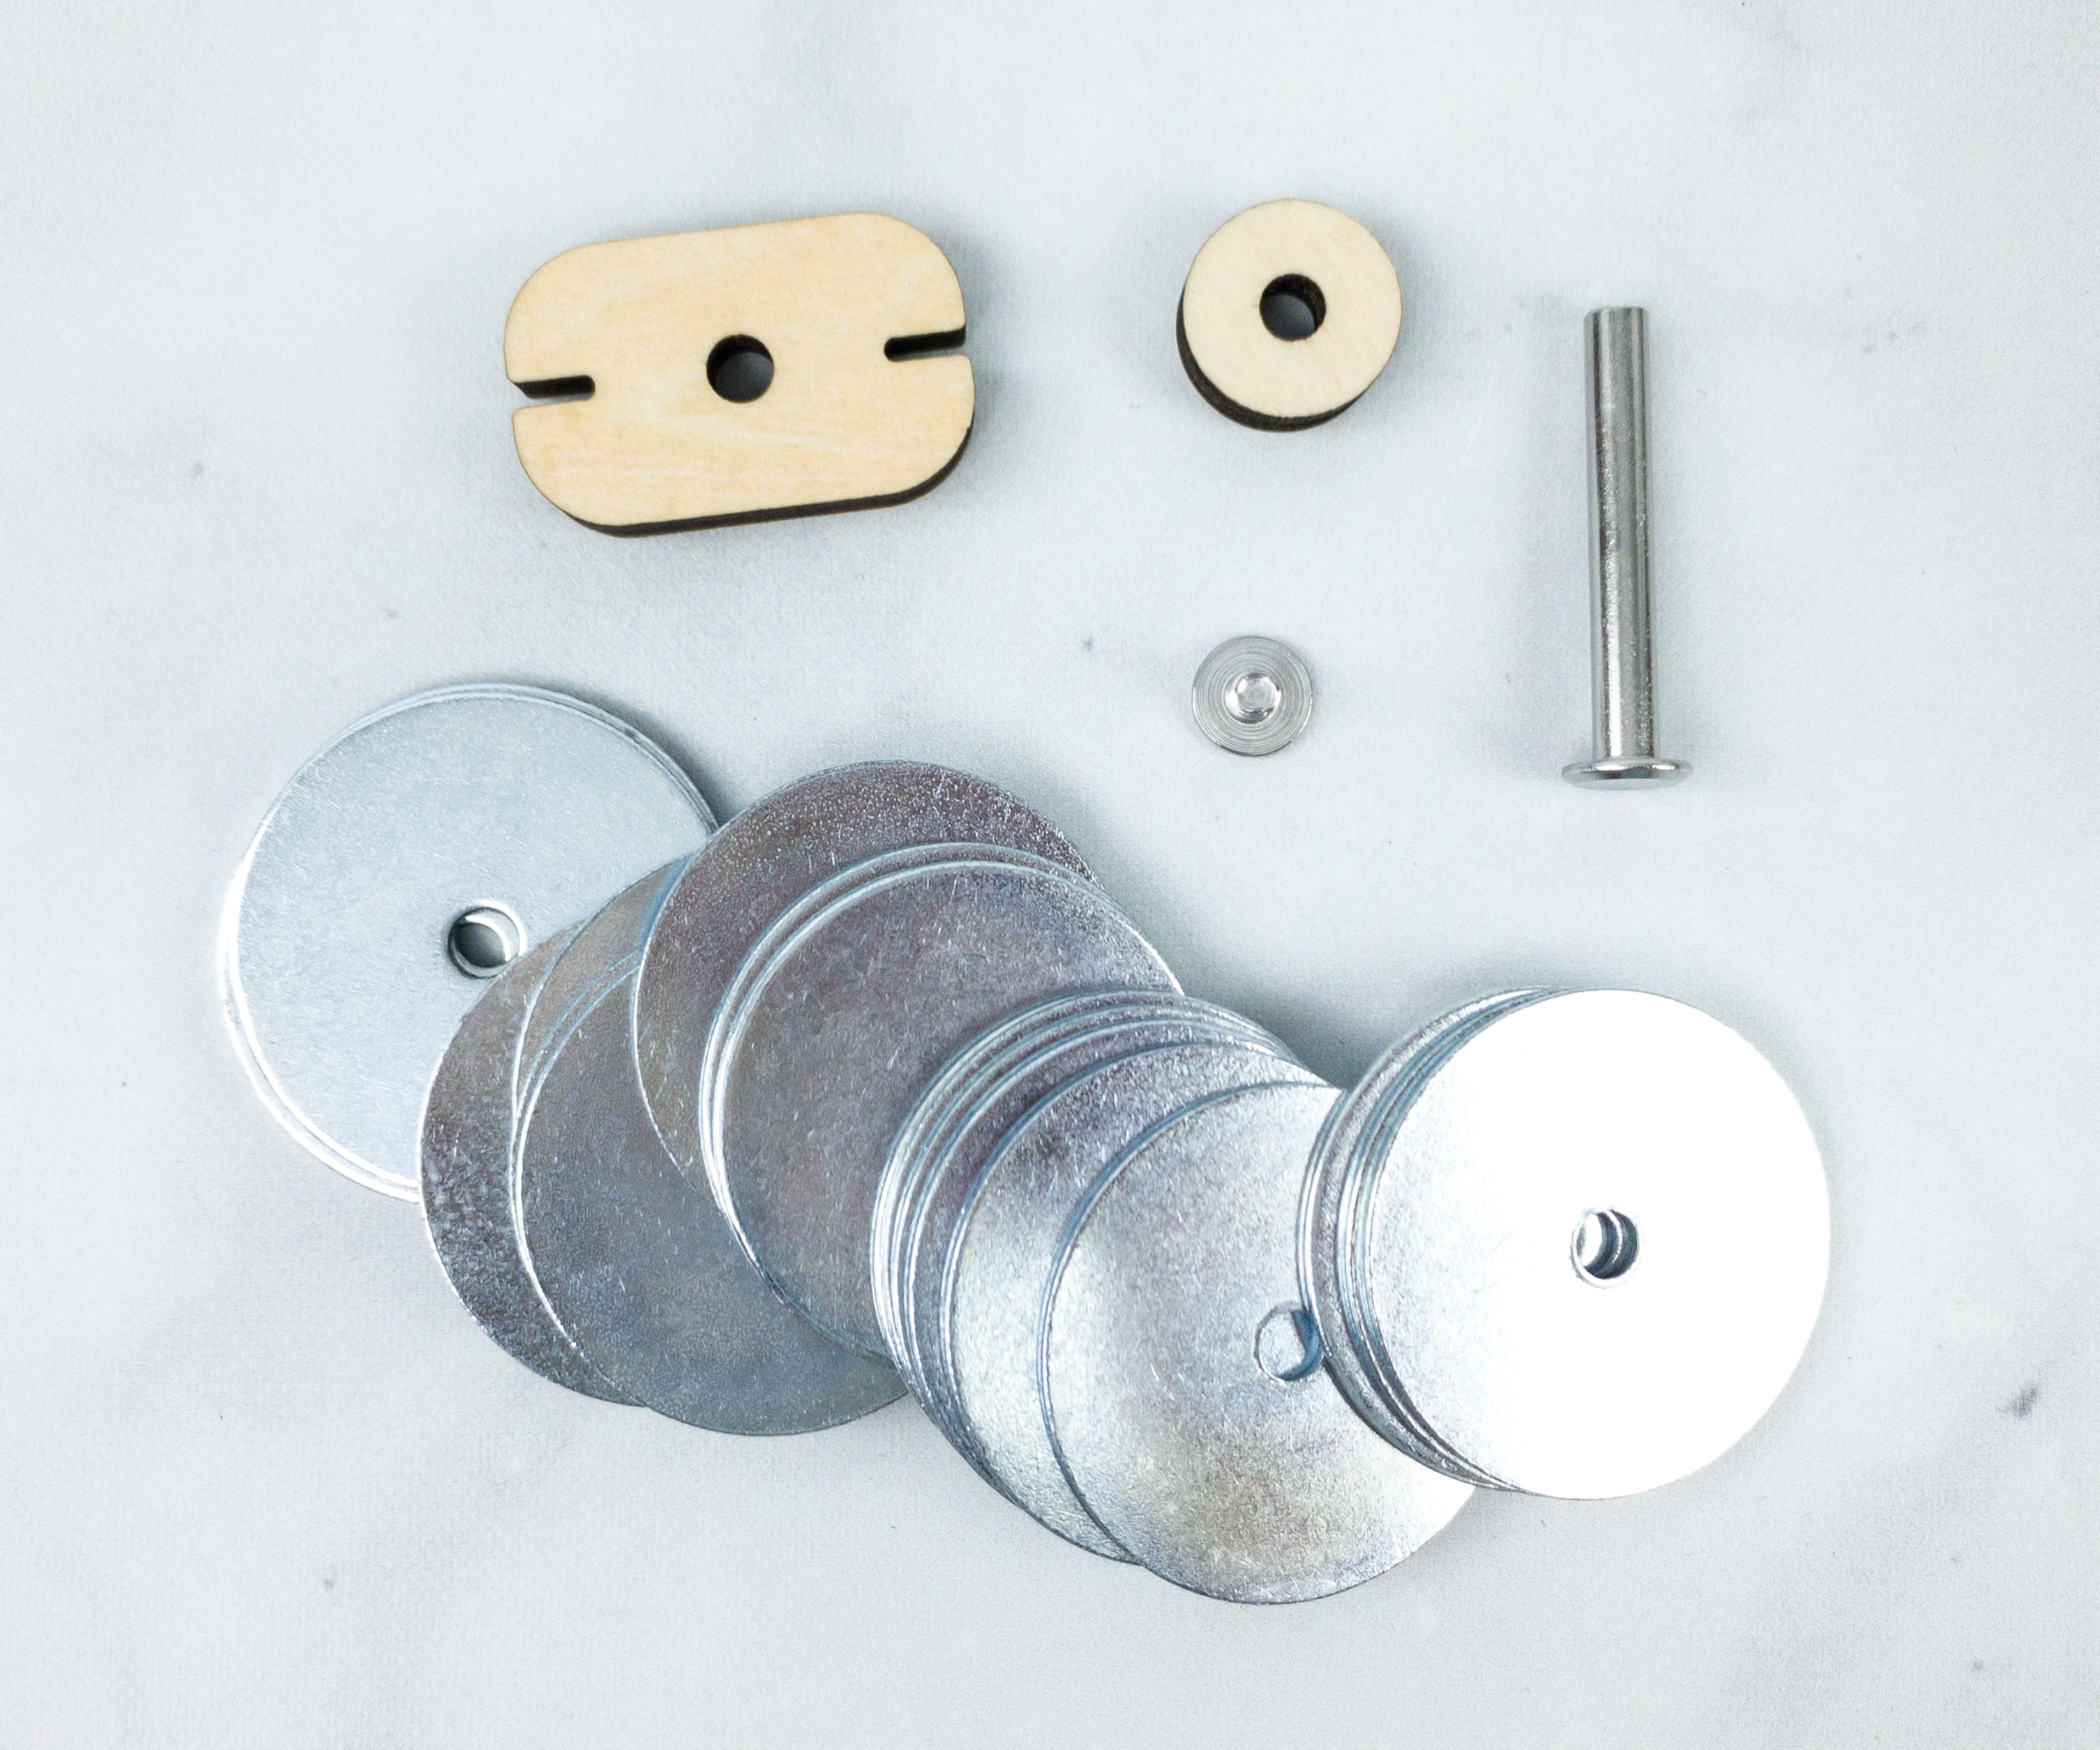
We also used the washers, aside from the other wood parts and bolts.
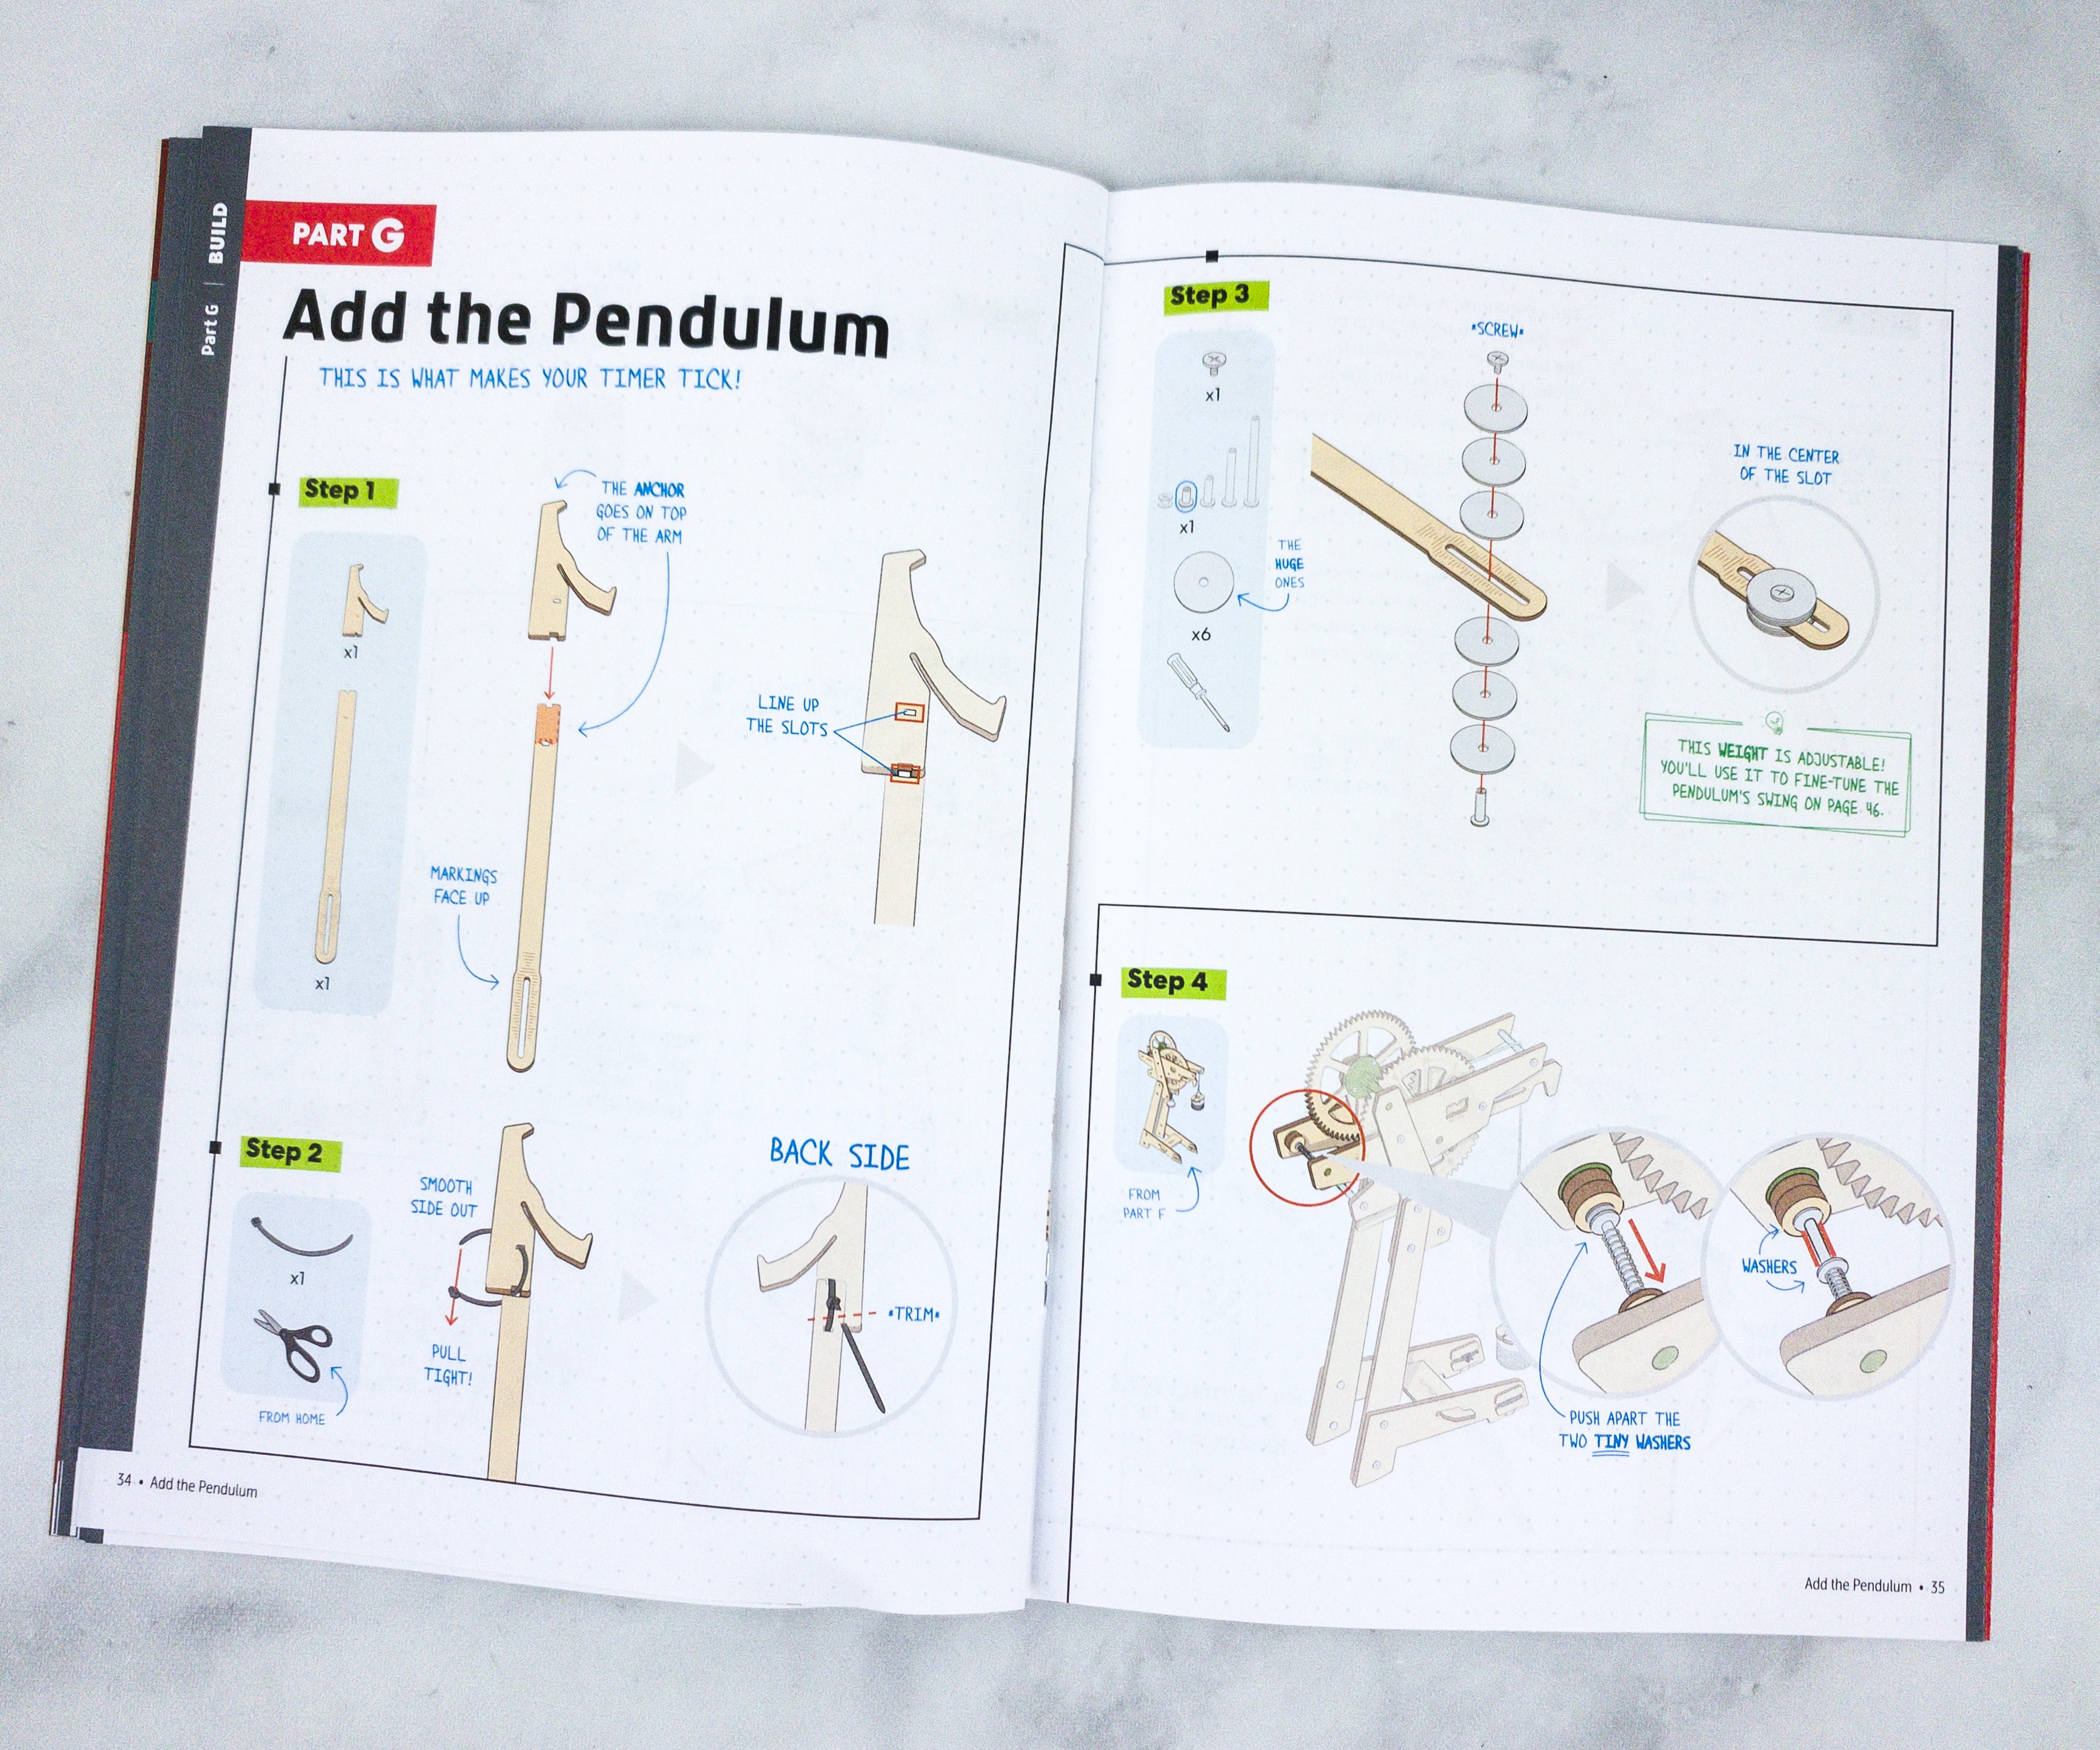
To make the timer tick, we also added a pendulum.
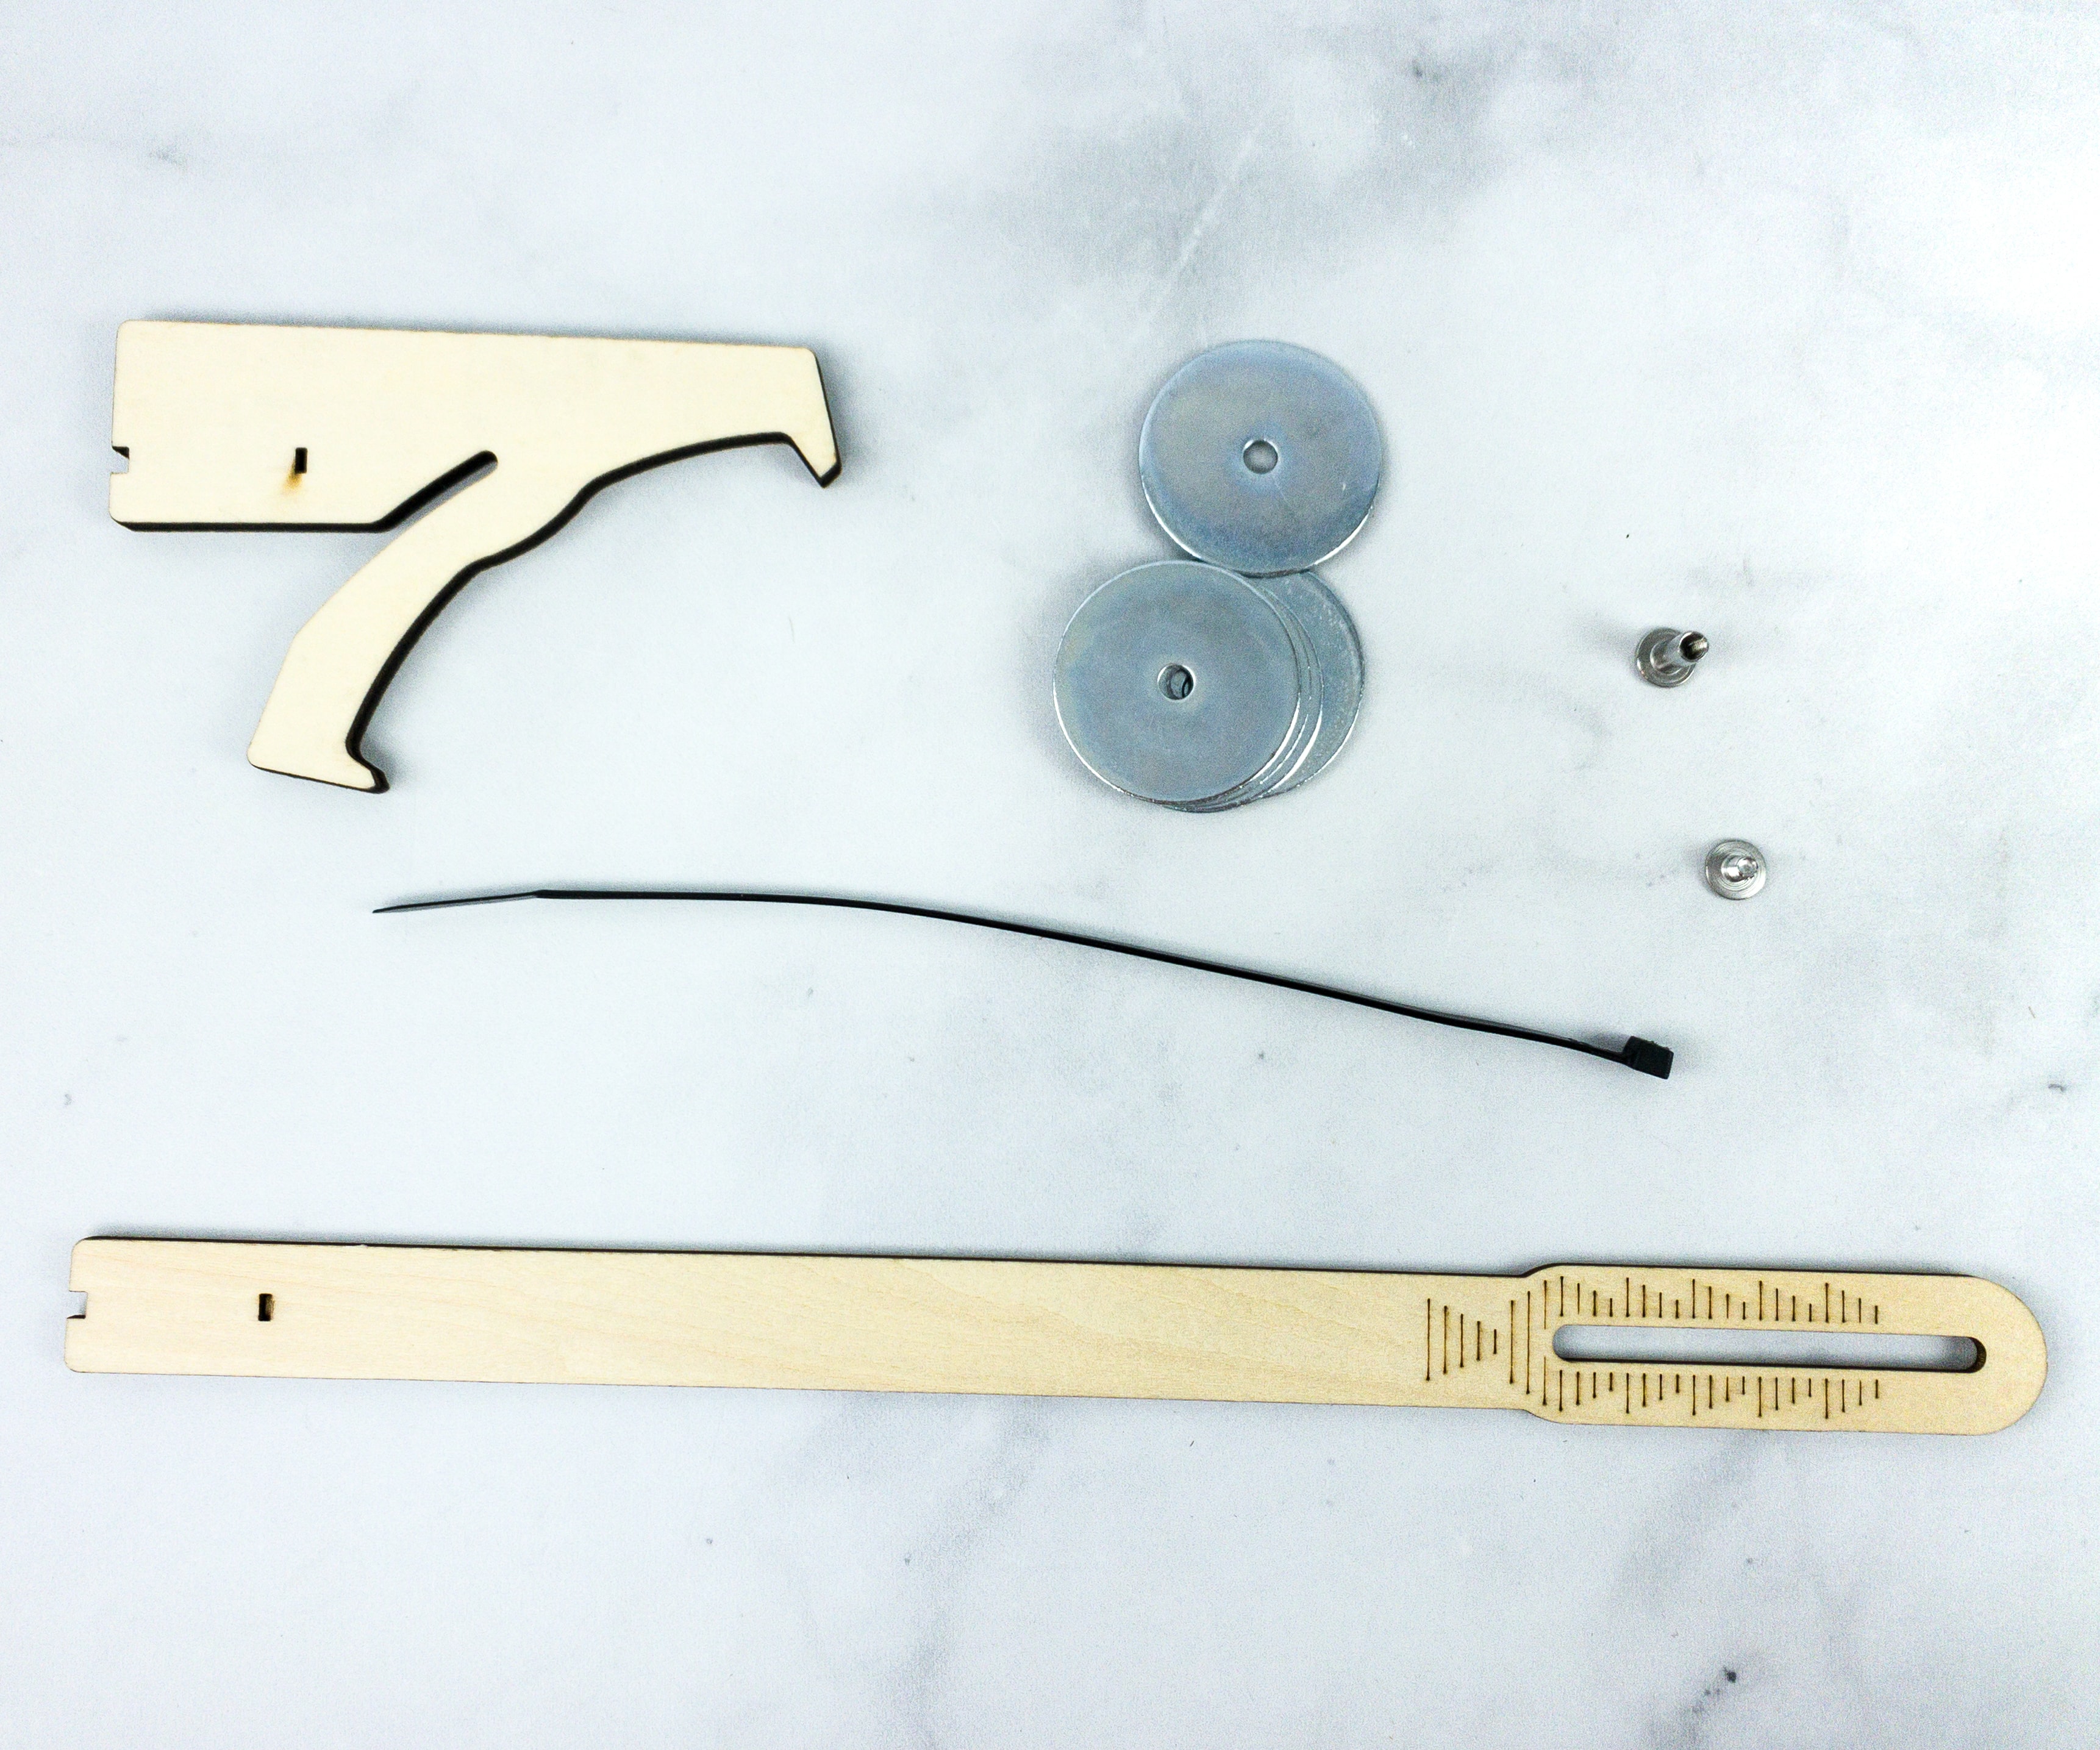
For this part, we used the anchor, washer, zip ties, and barrel bolts.

The mechanism really looks complicated. The project is categorized as a hard one, but it’s really fun, like a puzzle with a high difficulty level.

There are so many small parts in this project that’s why it’s important to read the booklet first and know all the materials to use so the building process will be much easier.
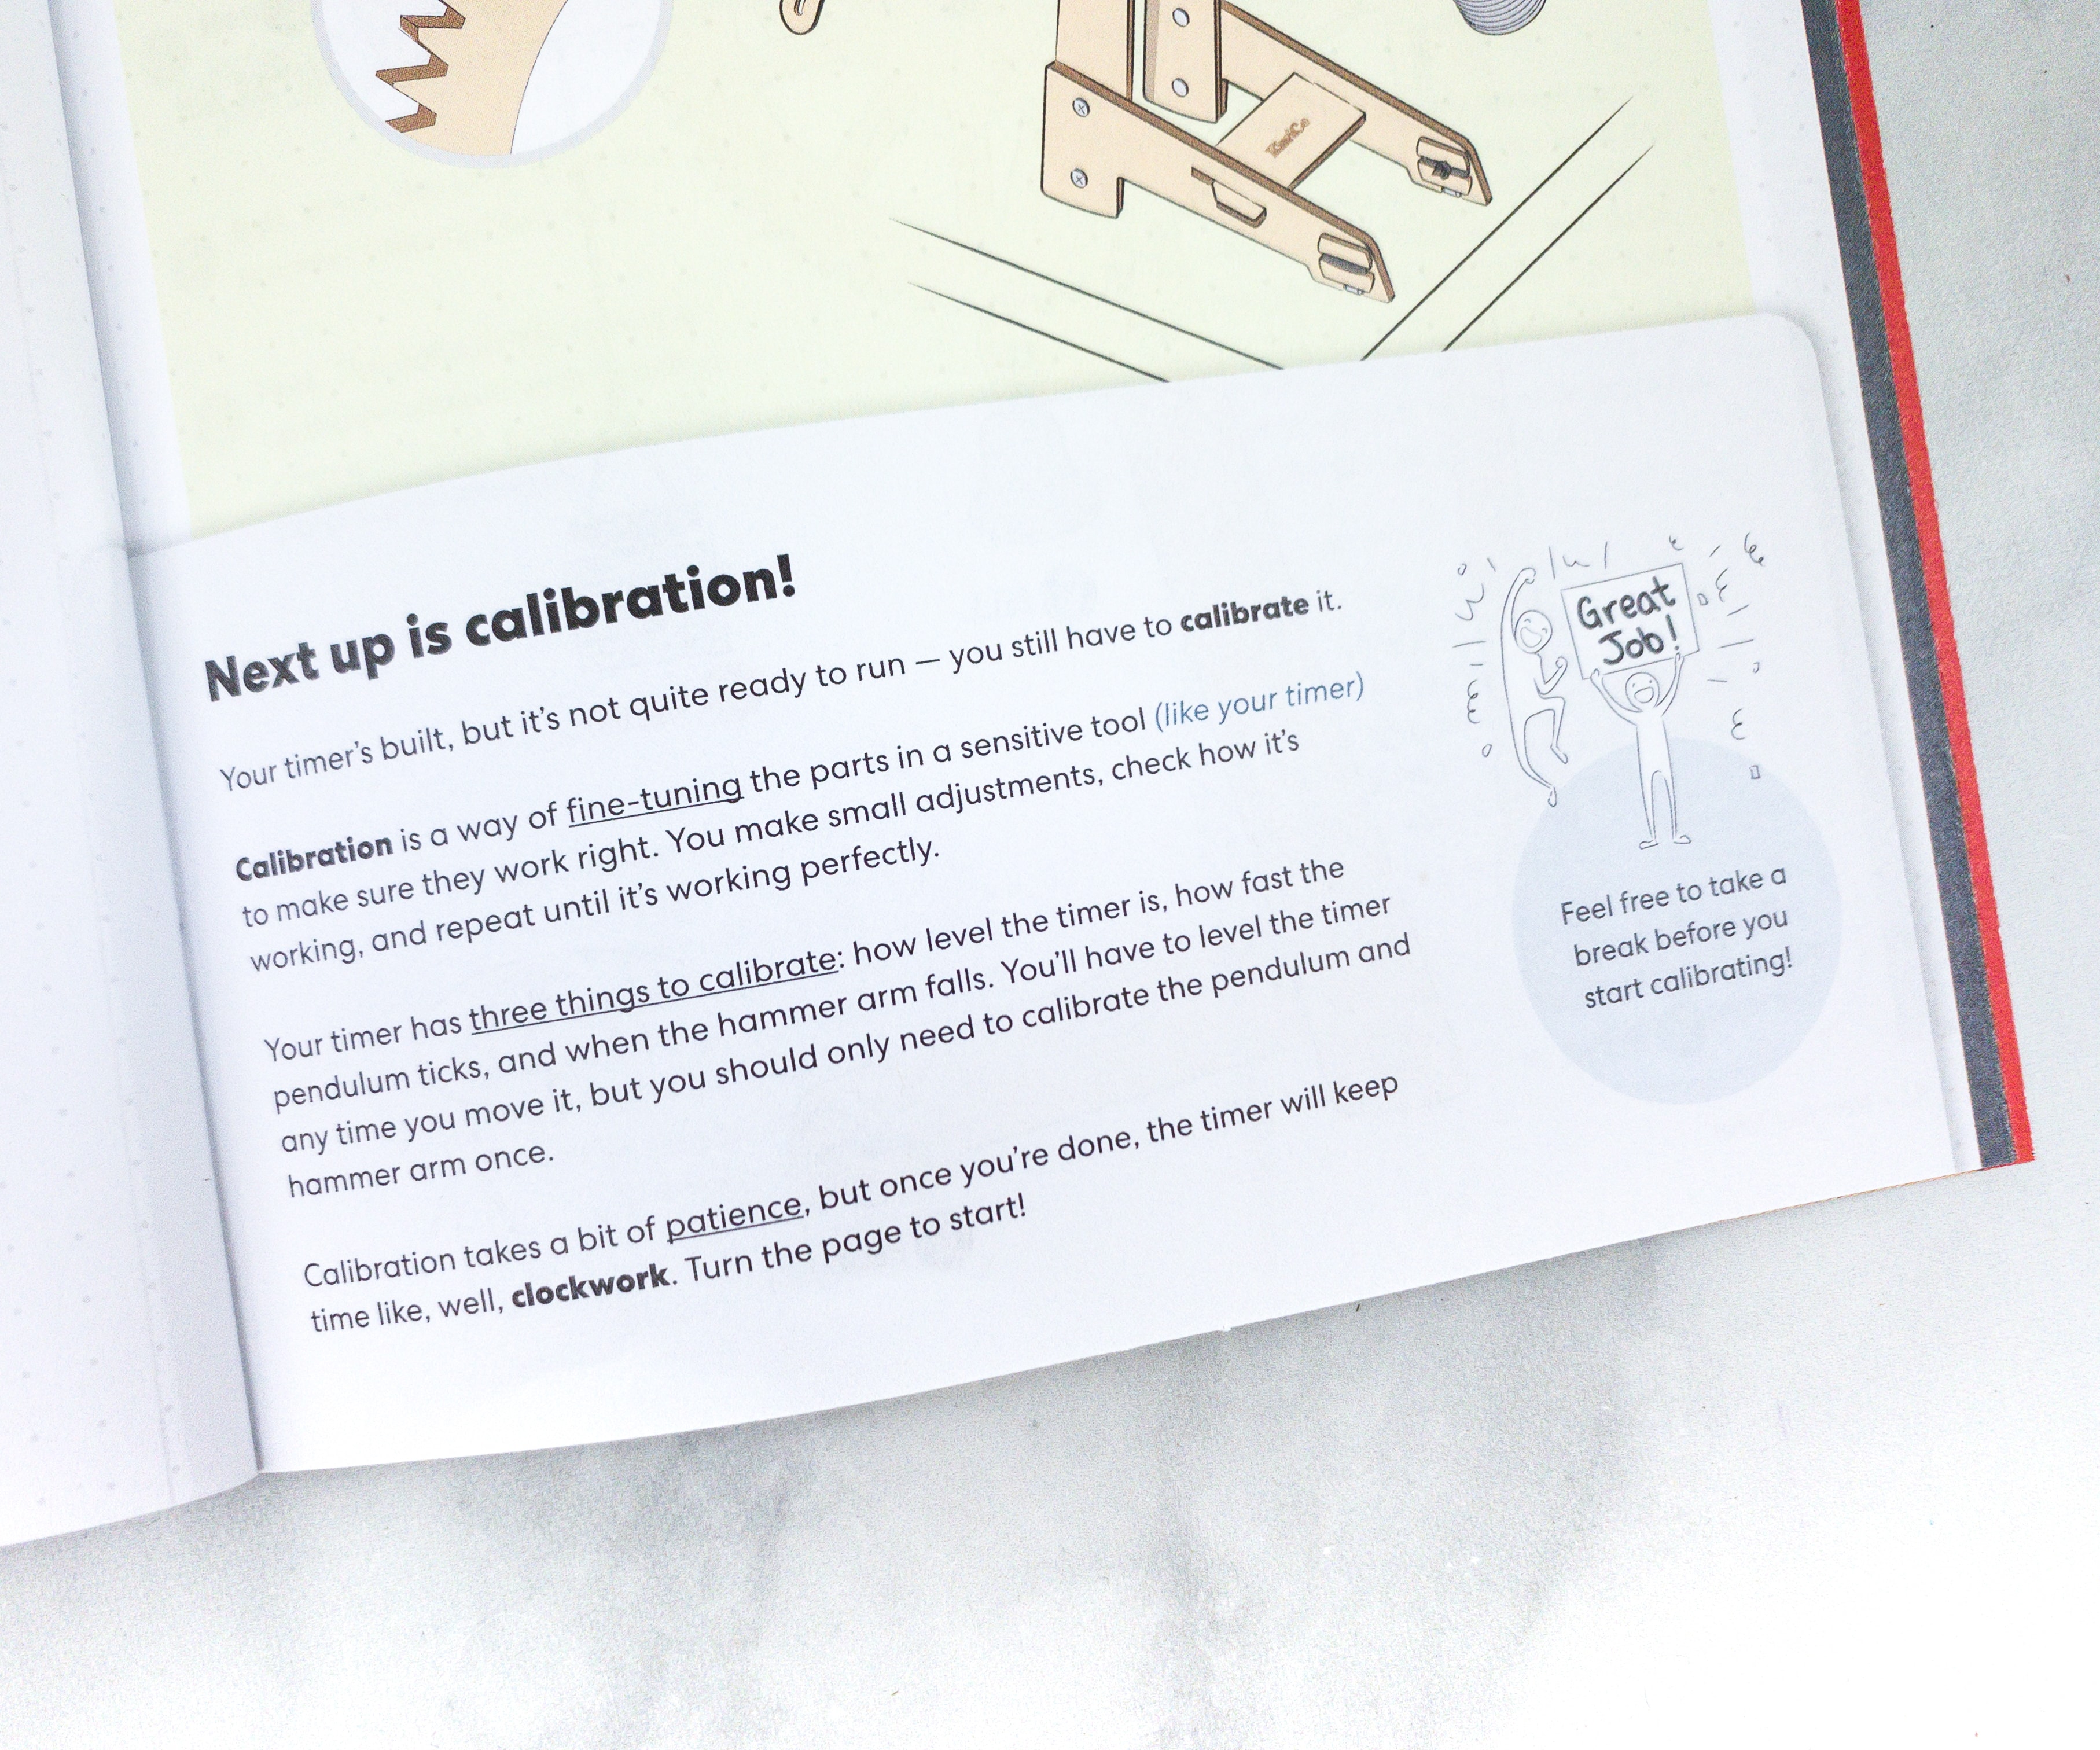
To make sure that the timer is working properly, we also need to calibrate it!
Calibration is a way of fine-tuning the parts in a sensitive tool to make sure they work right. You make small adjustments, check how it’s working, and repeat until it’s working perfectly.
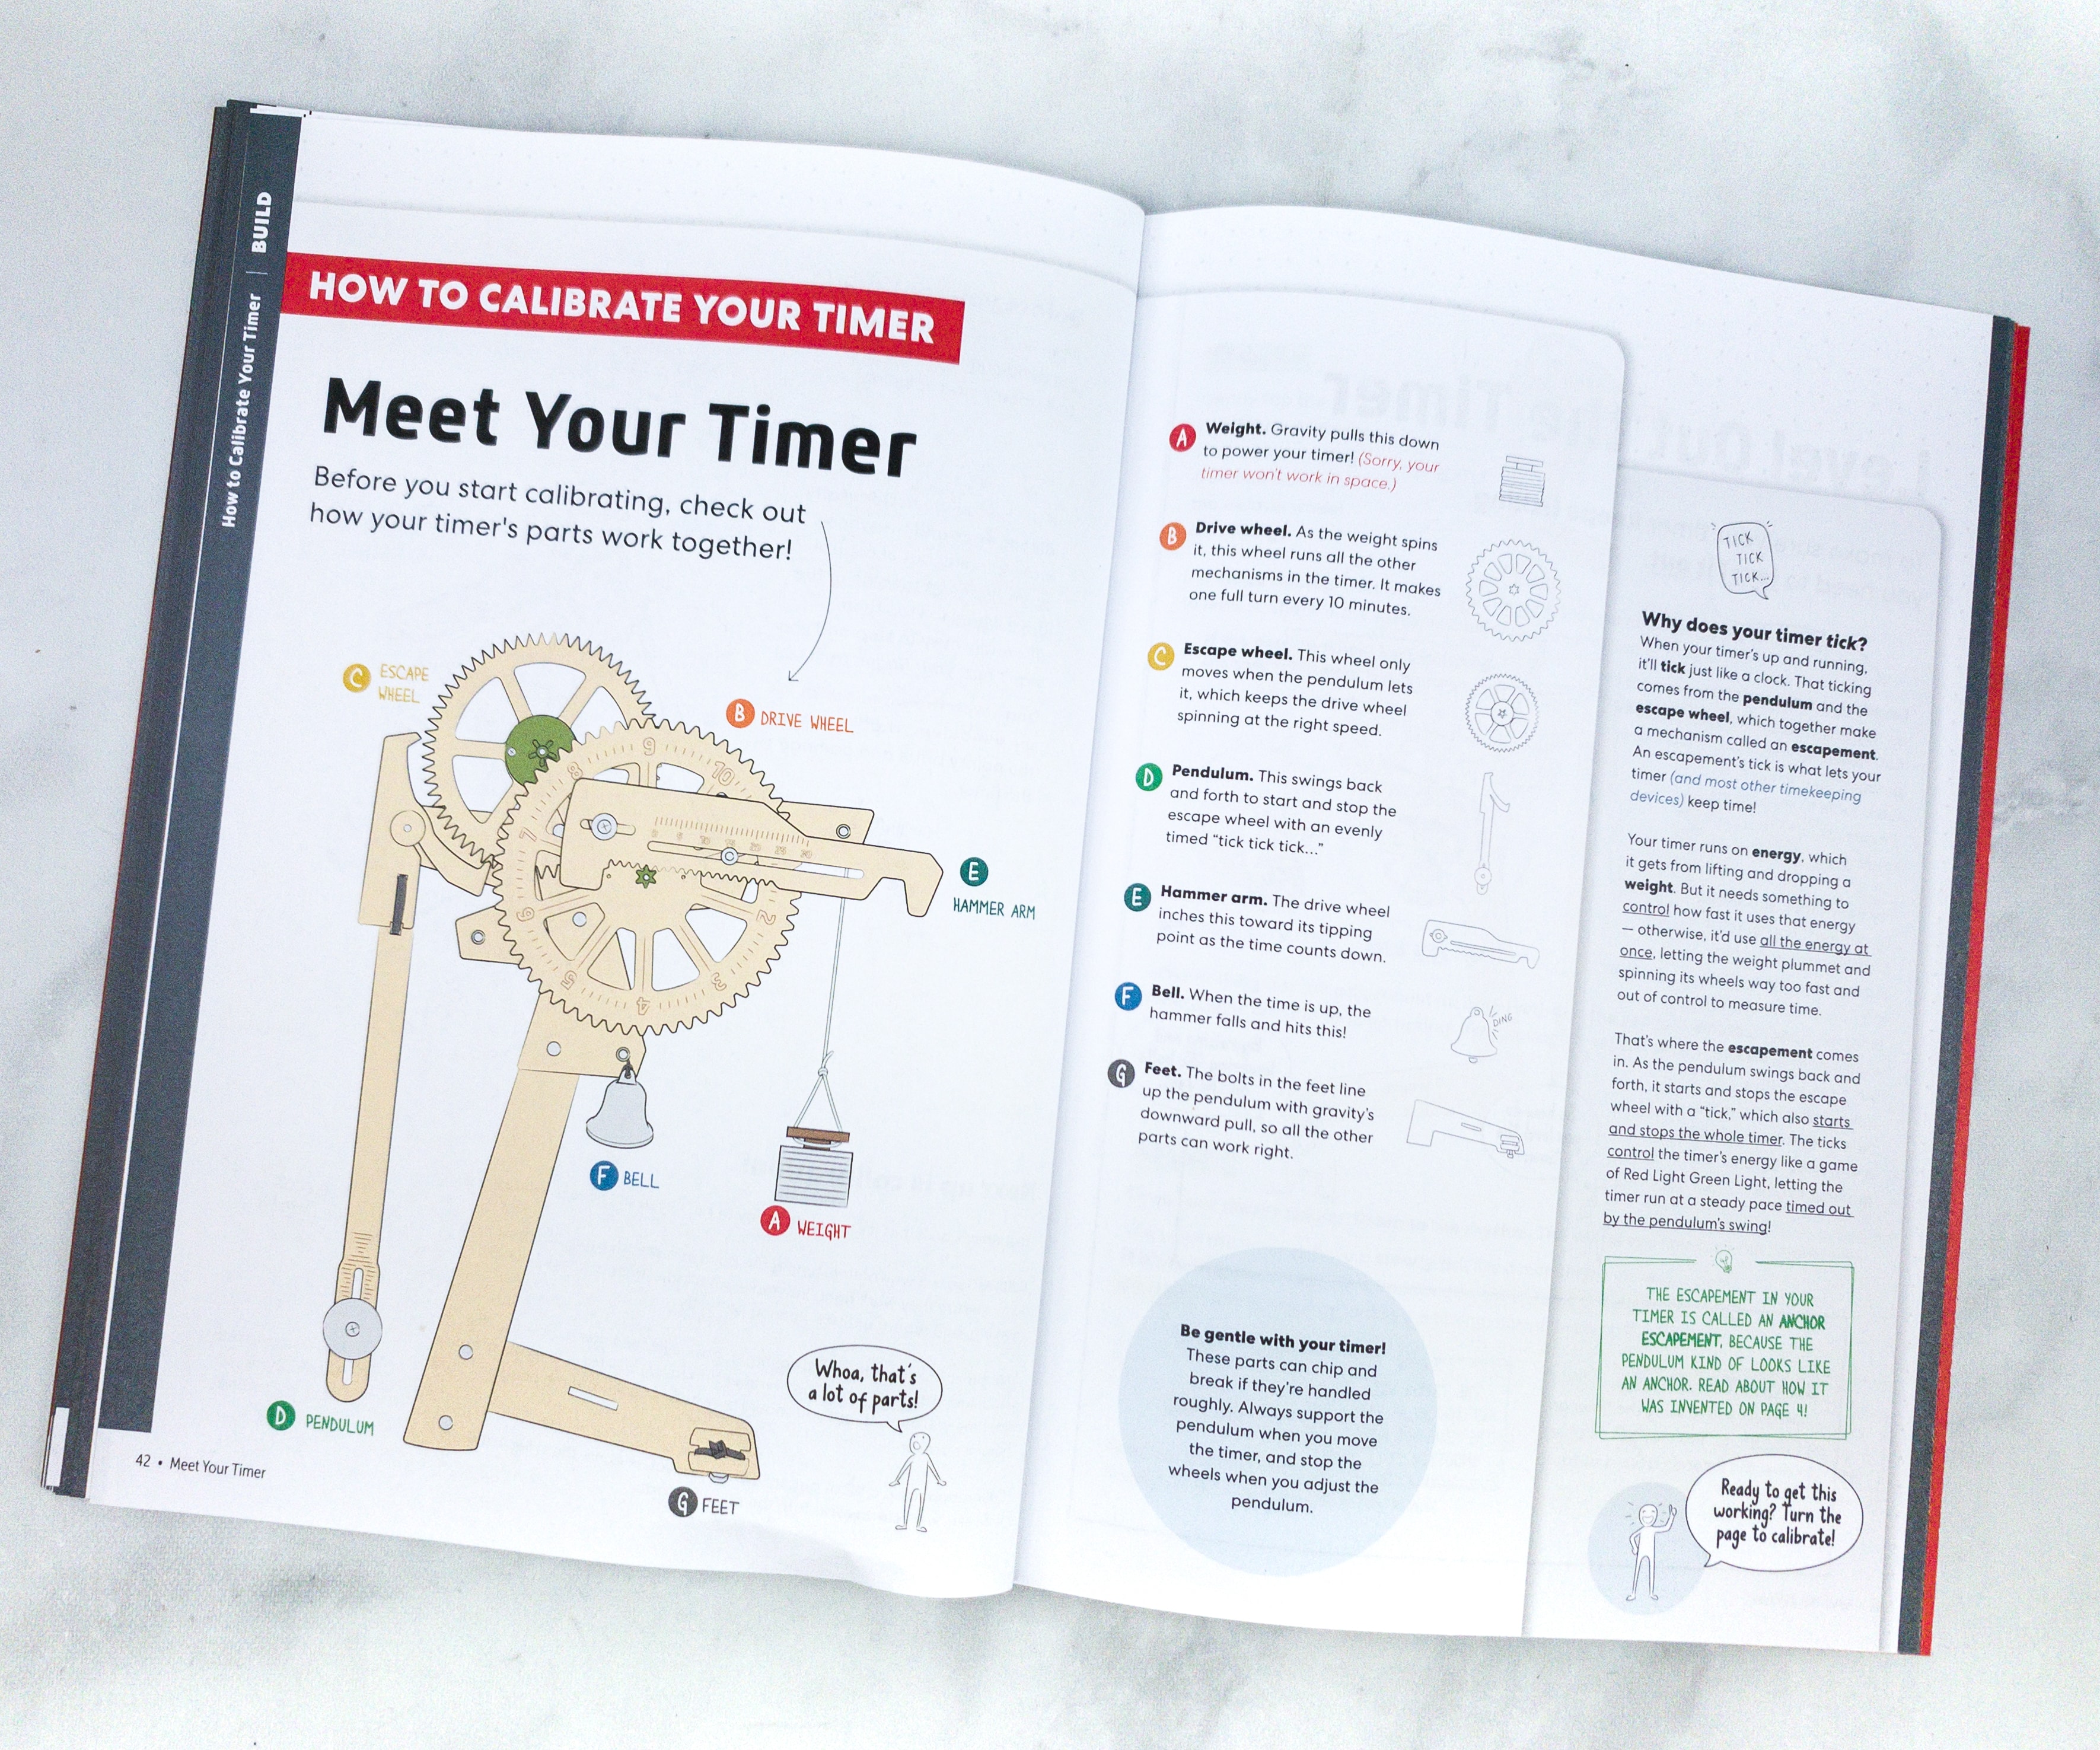
Before calibrating the timer, we also had a look at its parts and how they work together.
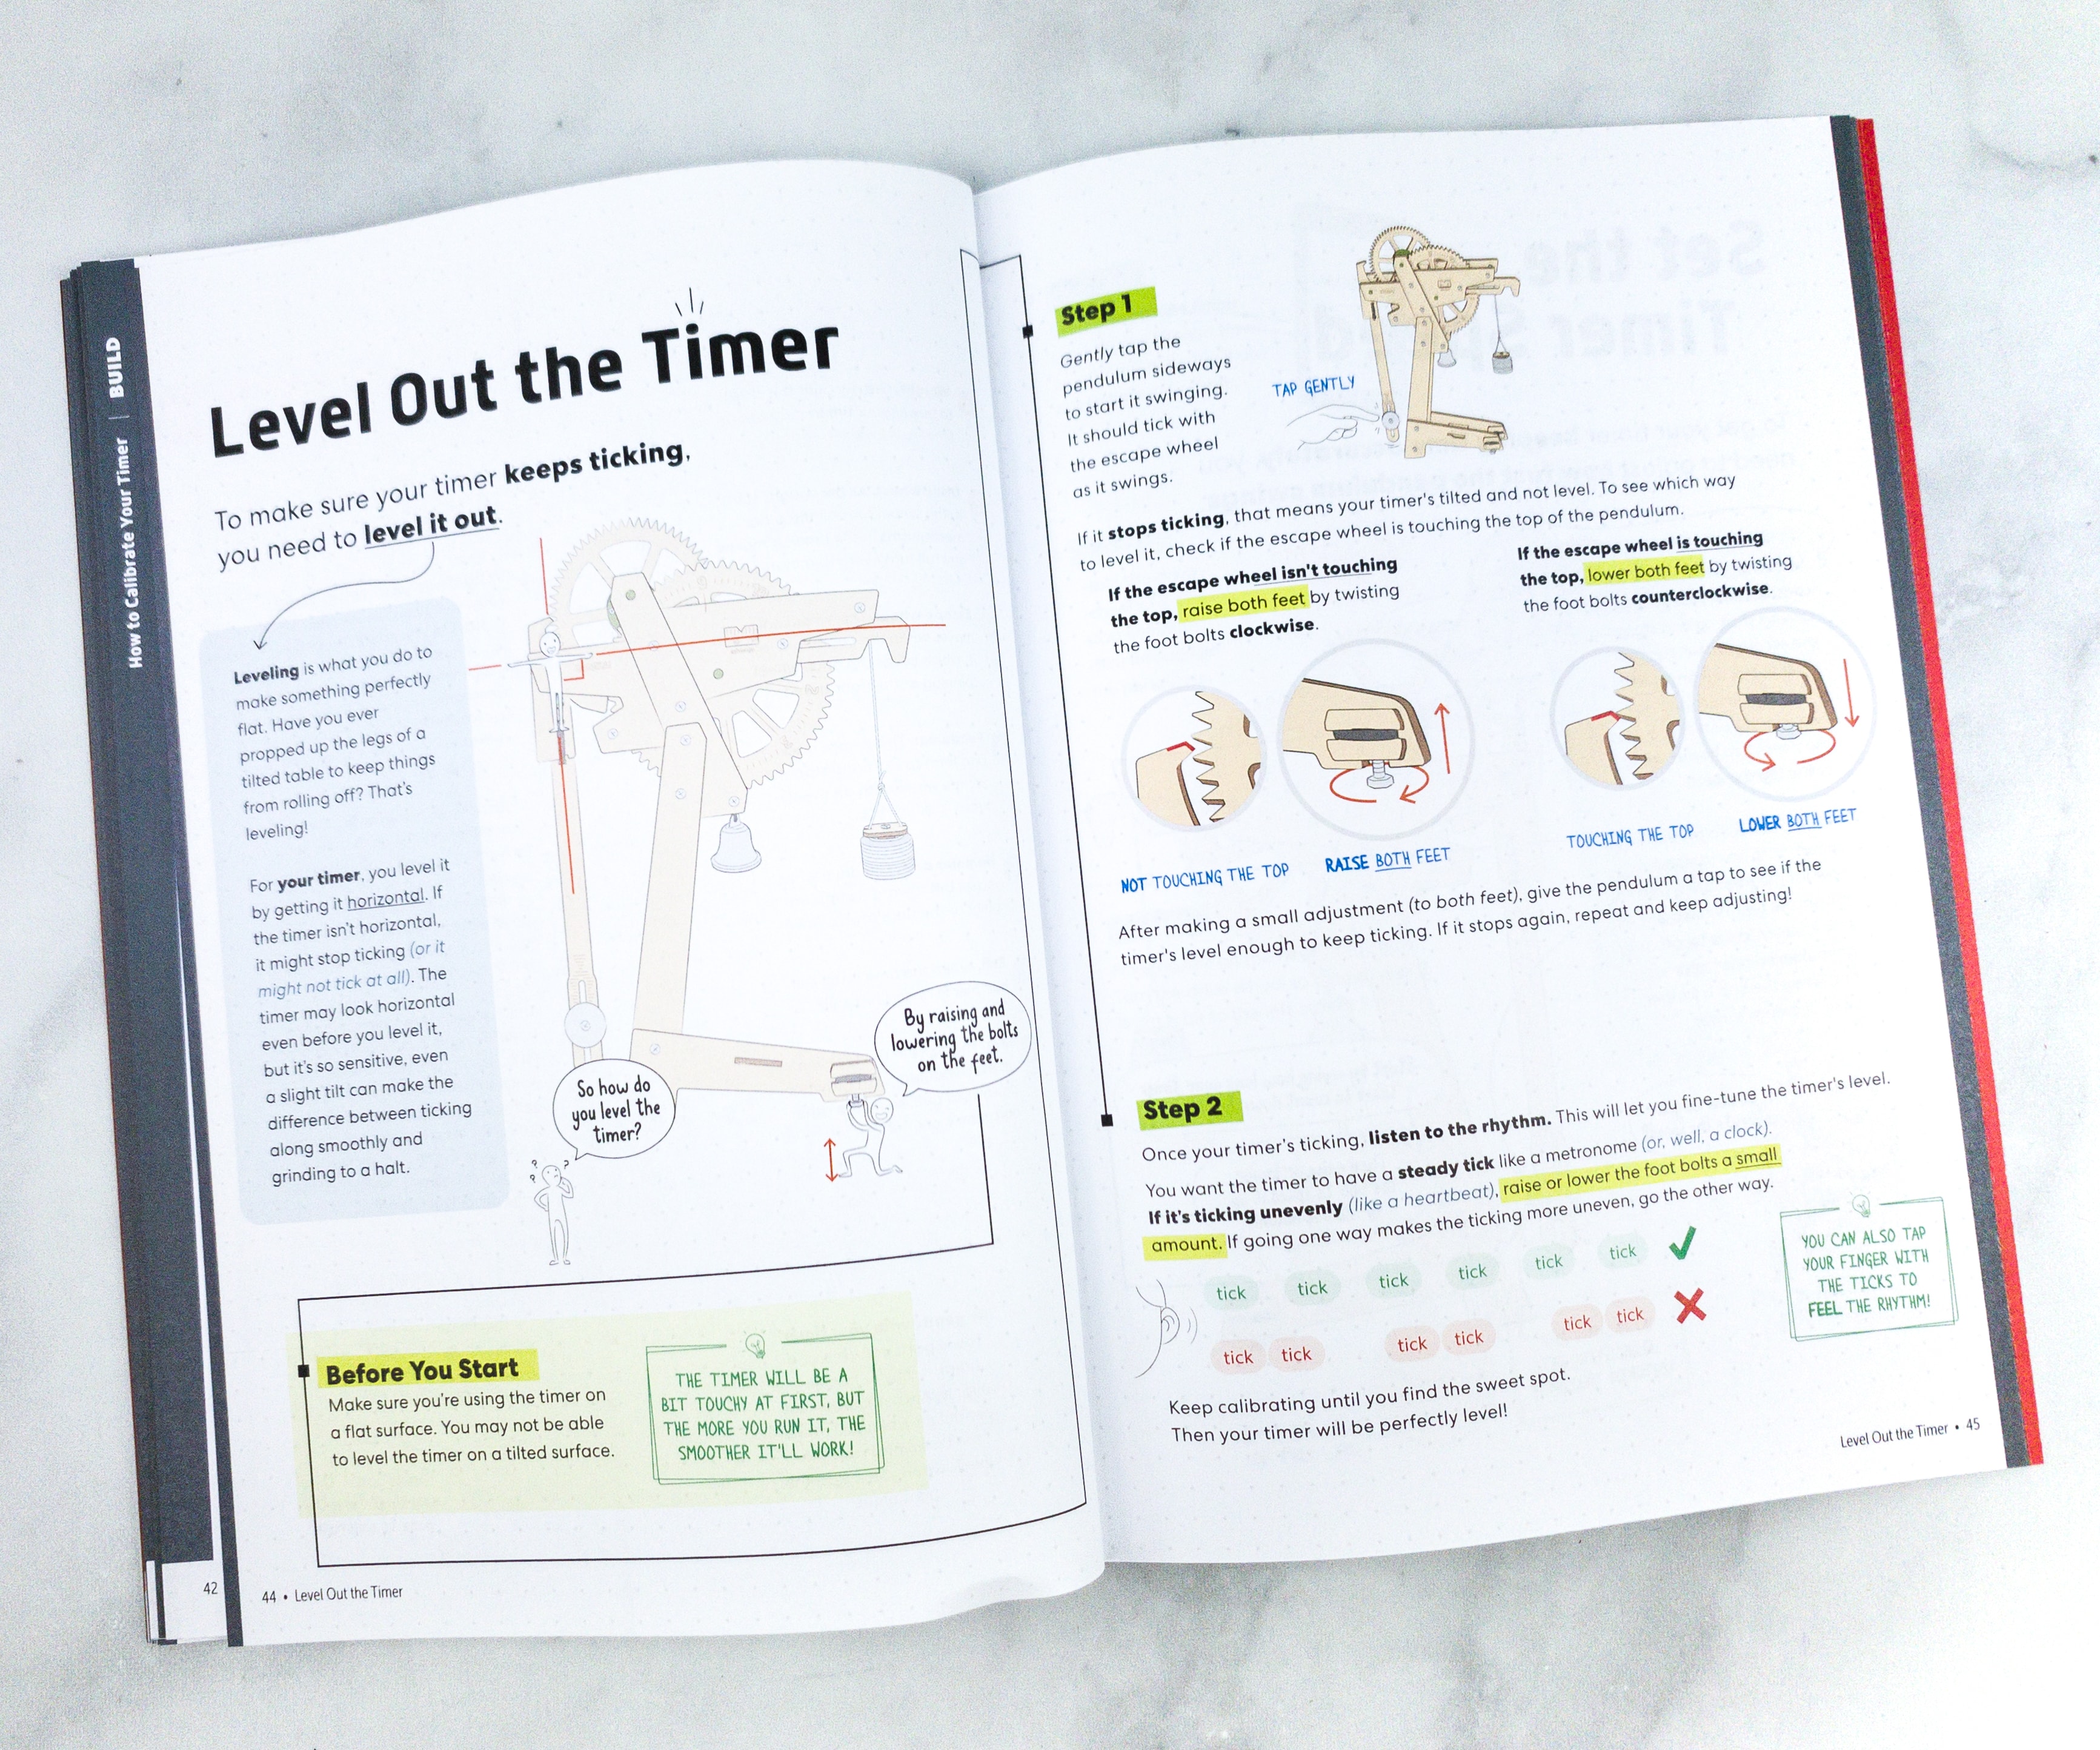
The timer has three things to calibrate: how level the timer is, how fast the pendulum ticks, and when the hammer falls.
Calibrating the timer really takes some patience, but after a while, it worked perfectly, and we’re so happy about it!

Also, we adjusted how fast the pendulum swings so that our timer will keep time accurately.
To see if the timer works, we compared our timer to a kitchen timer.
It works well, as the timer shows the correct numbers on the drive wheel, which represents the number of minutes.
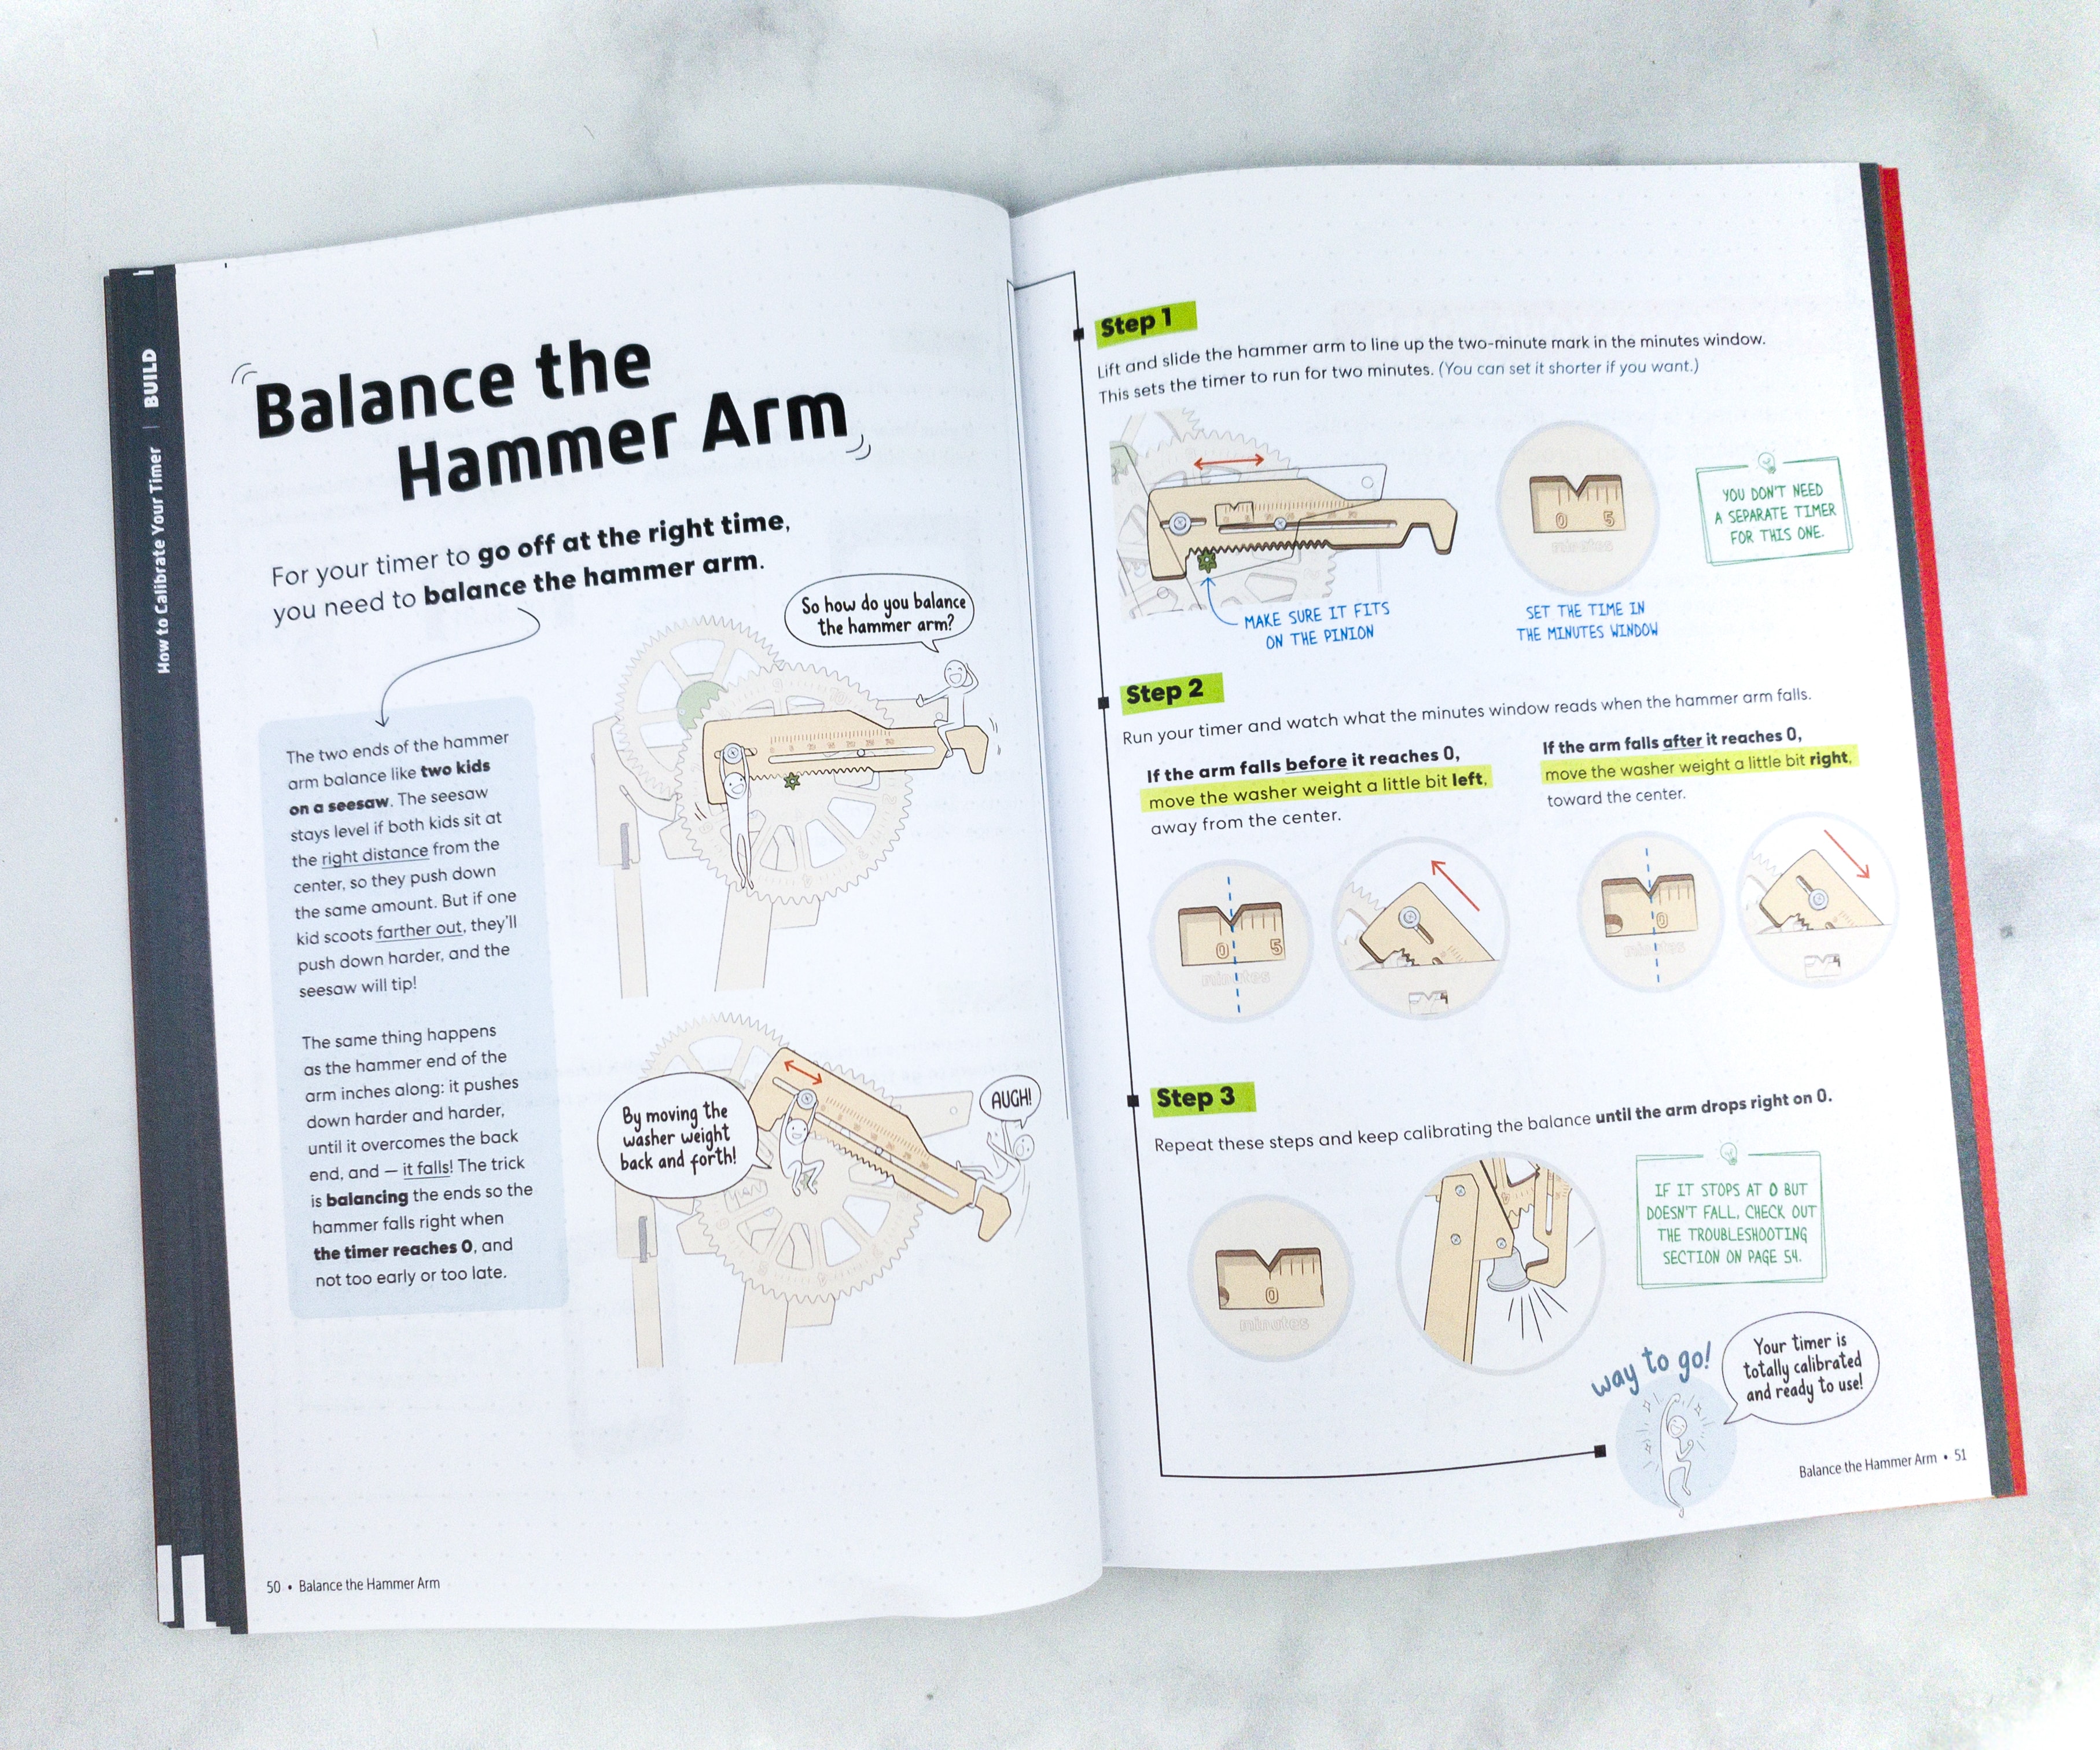
The last thing to calibrate is the hammer arm!
Balancing the hammer arm made our timer go off at the right time!
The part that shows the time is just amazing! It’s really fun that we are able to build this kind of mechanism!
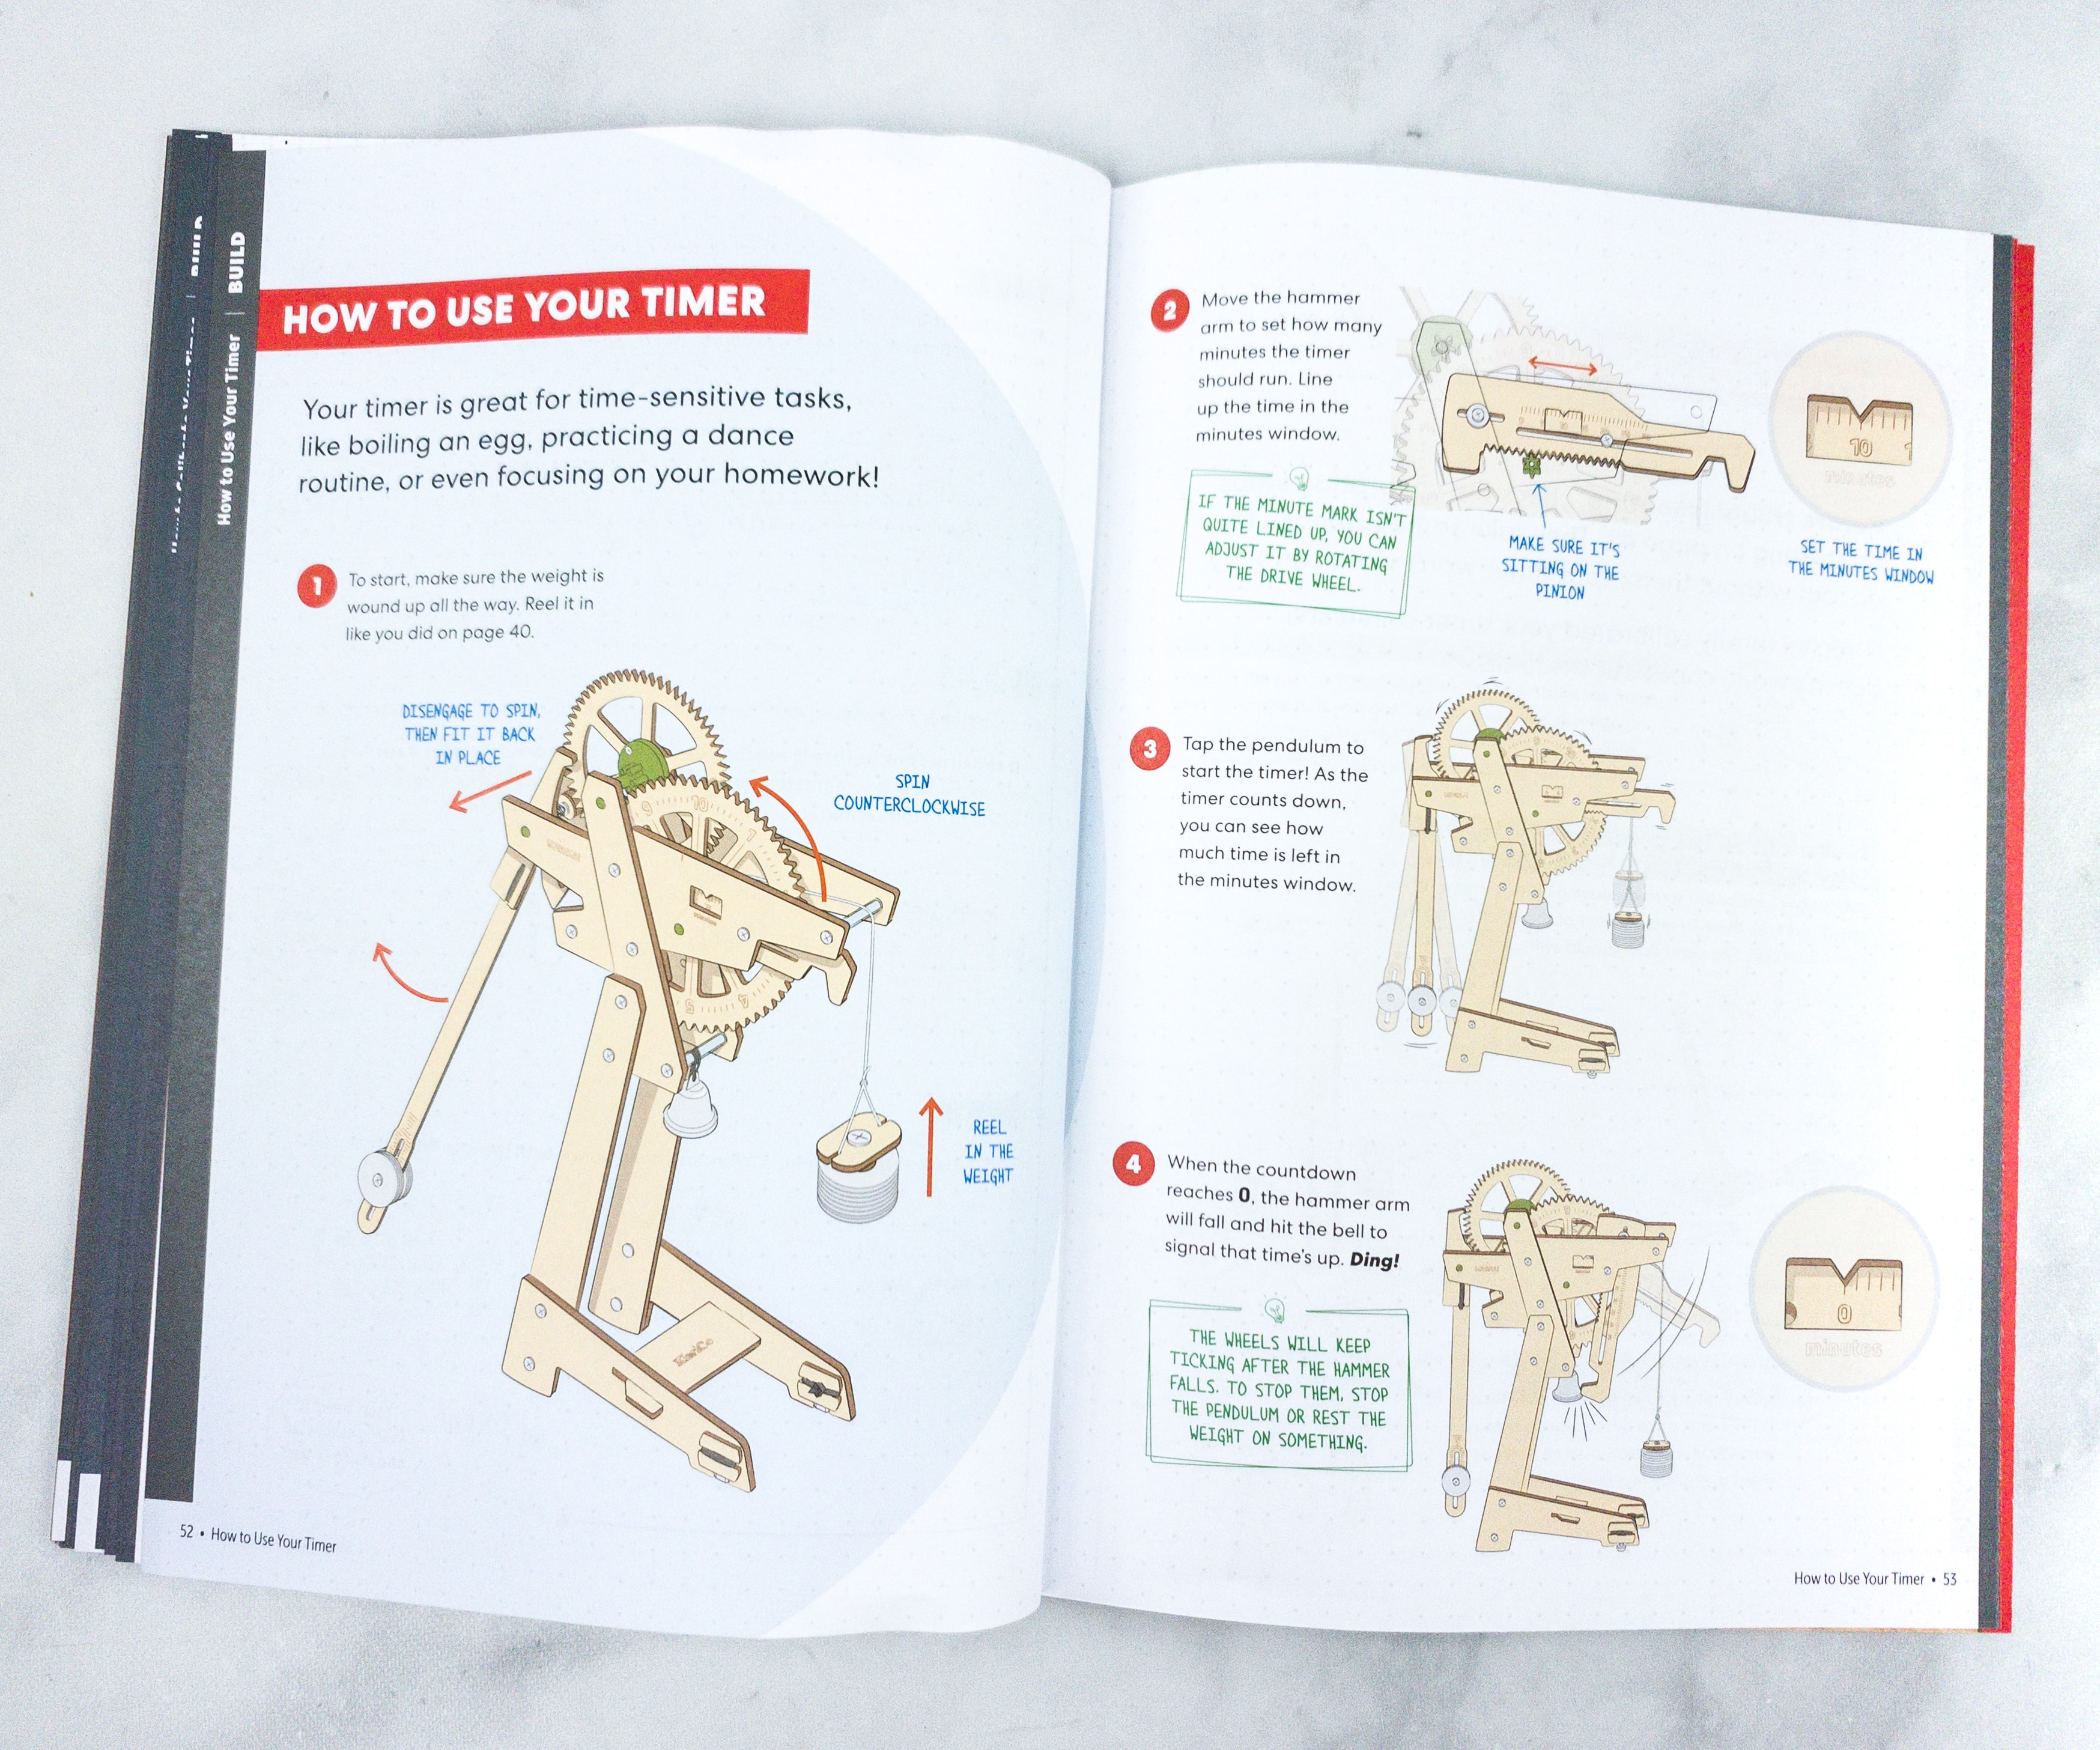
The booklet also contains instructions on how you can use the final output.
This timer can be used in many activities and applications, like cooking, doing homework, exercising, and more!
The wood parts are also looking sturdy and secured.
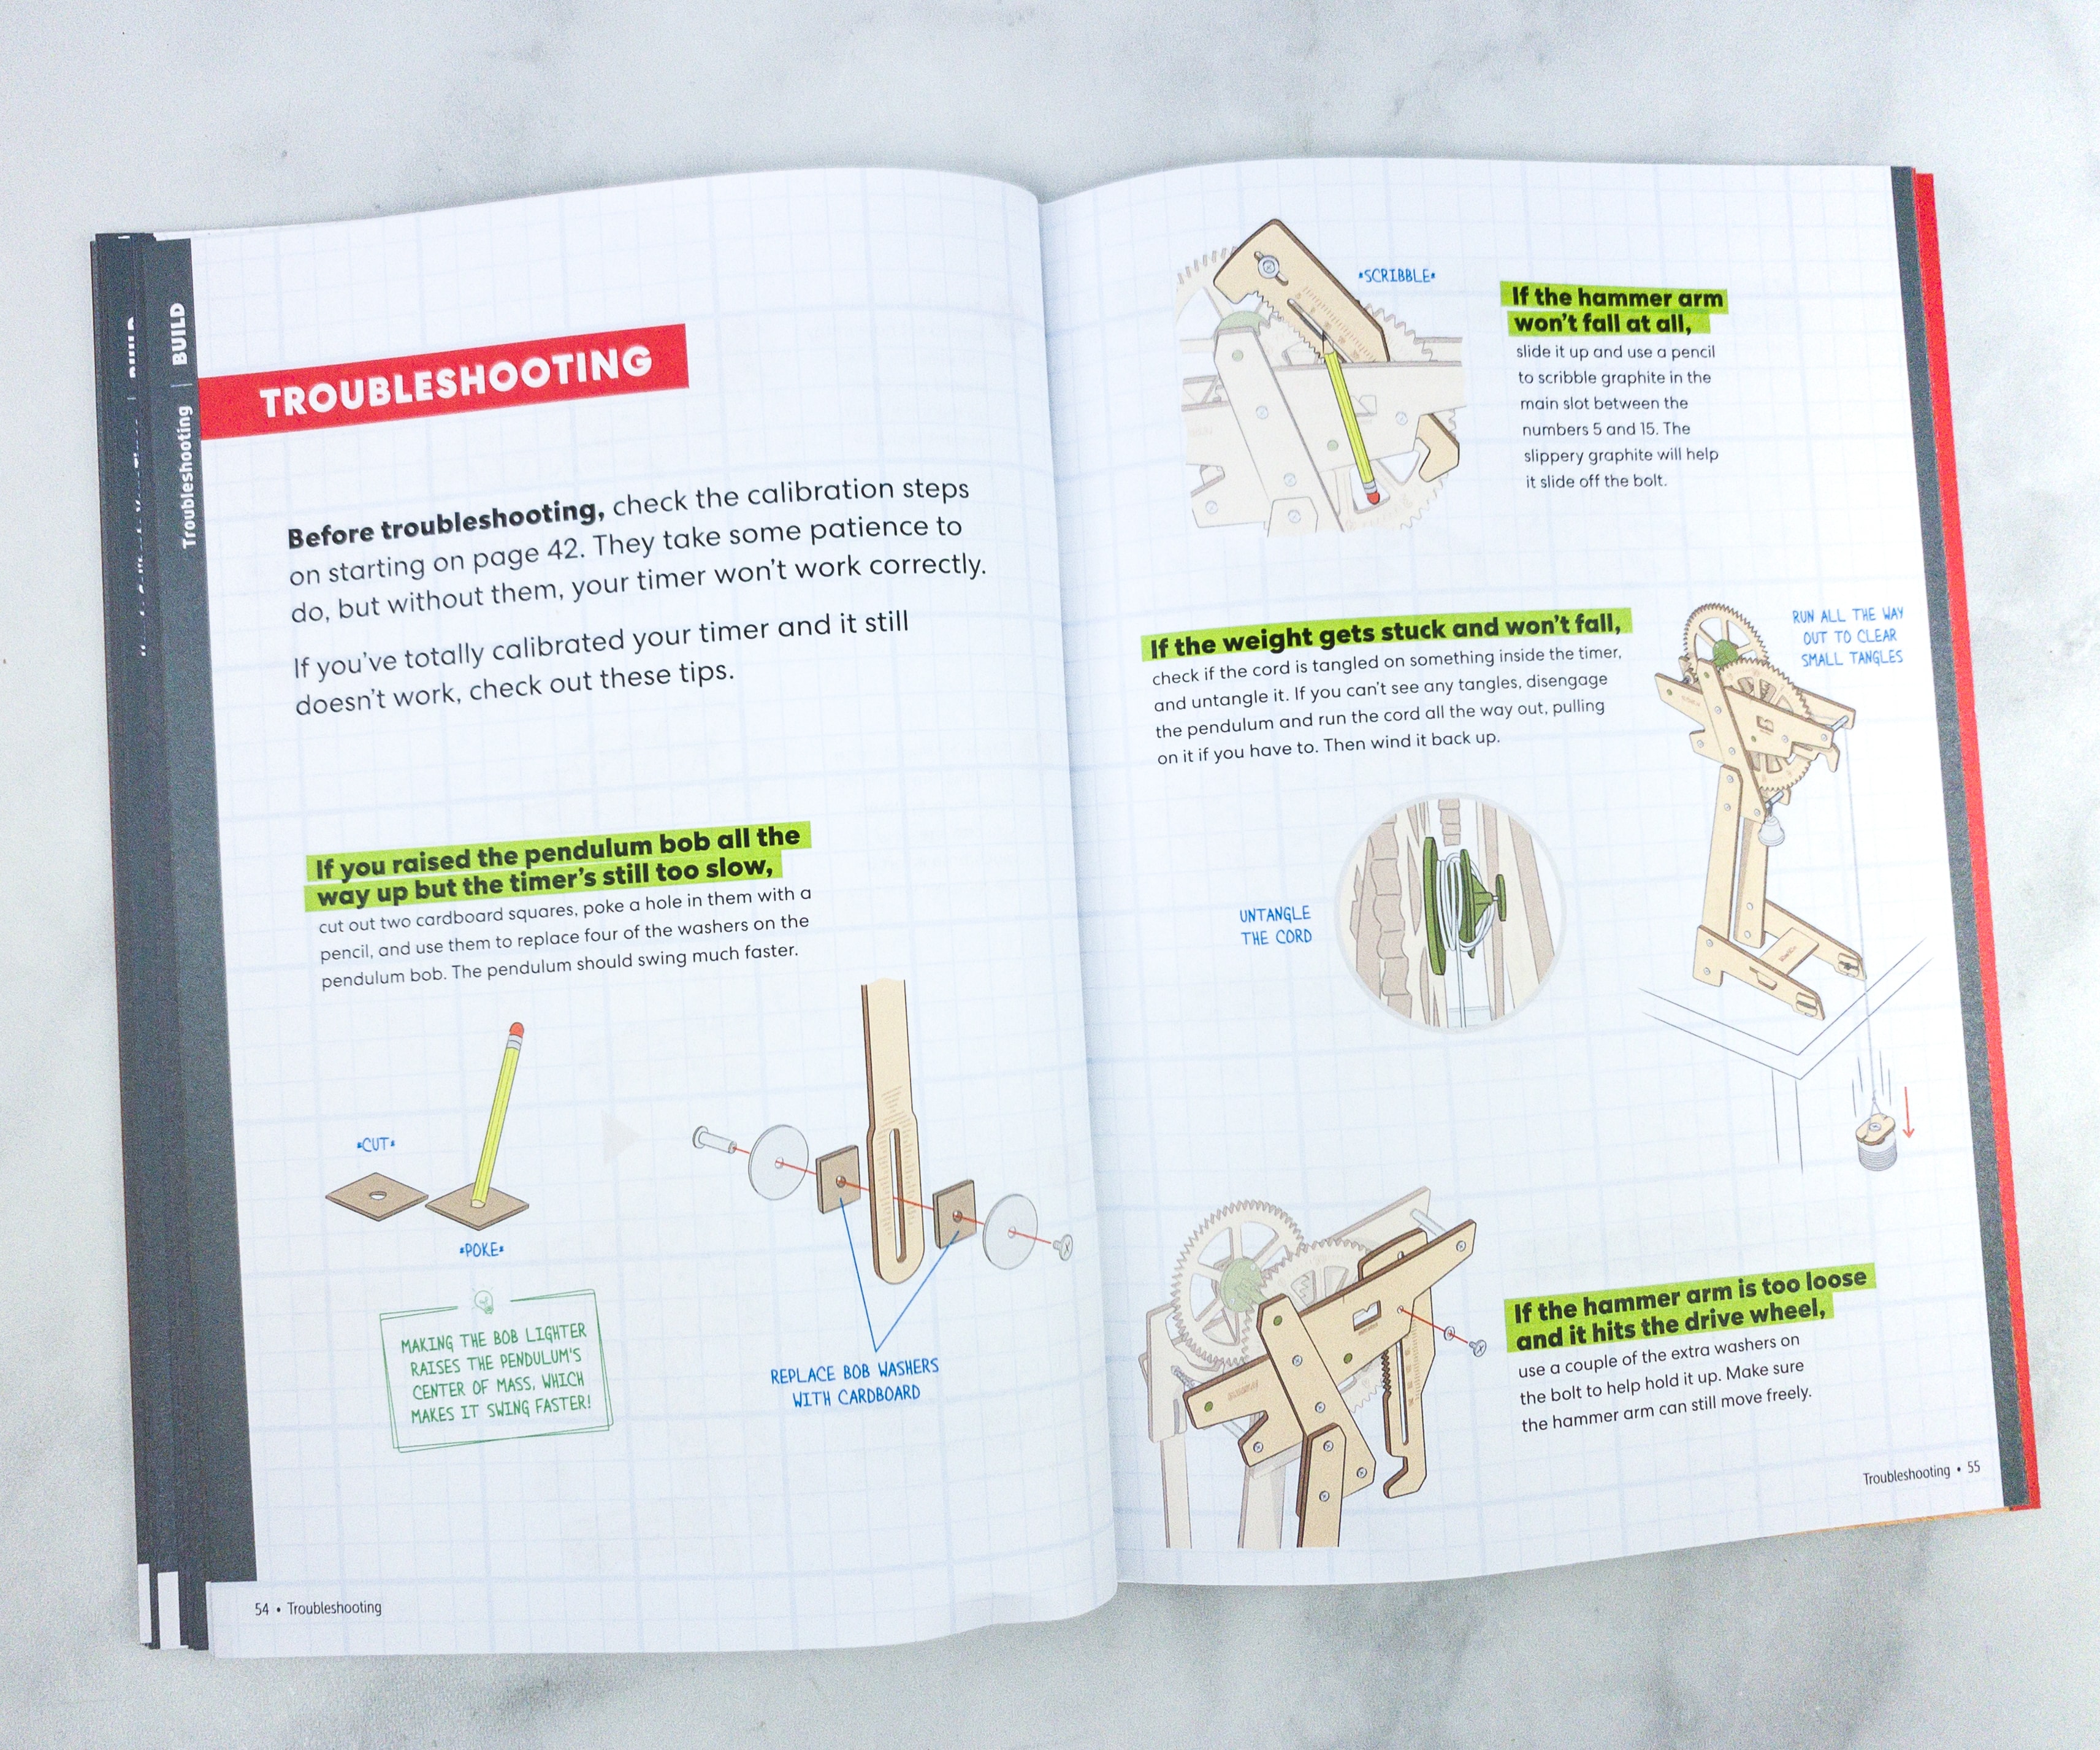
It’s unavoidable to encounter some difficulties and problems, so the booklet also included troubleshooting tips like if the weight gets stuck and won’t fall, or if the hammer arm is too loose and it hits the drive wheel.
If the weight gets stuck and won’t fall, you can check if the cord is tangled in something inside the timer.

The booklet also provided more information about this fun project, like the history behind the design.
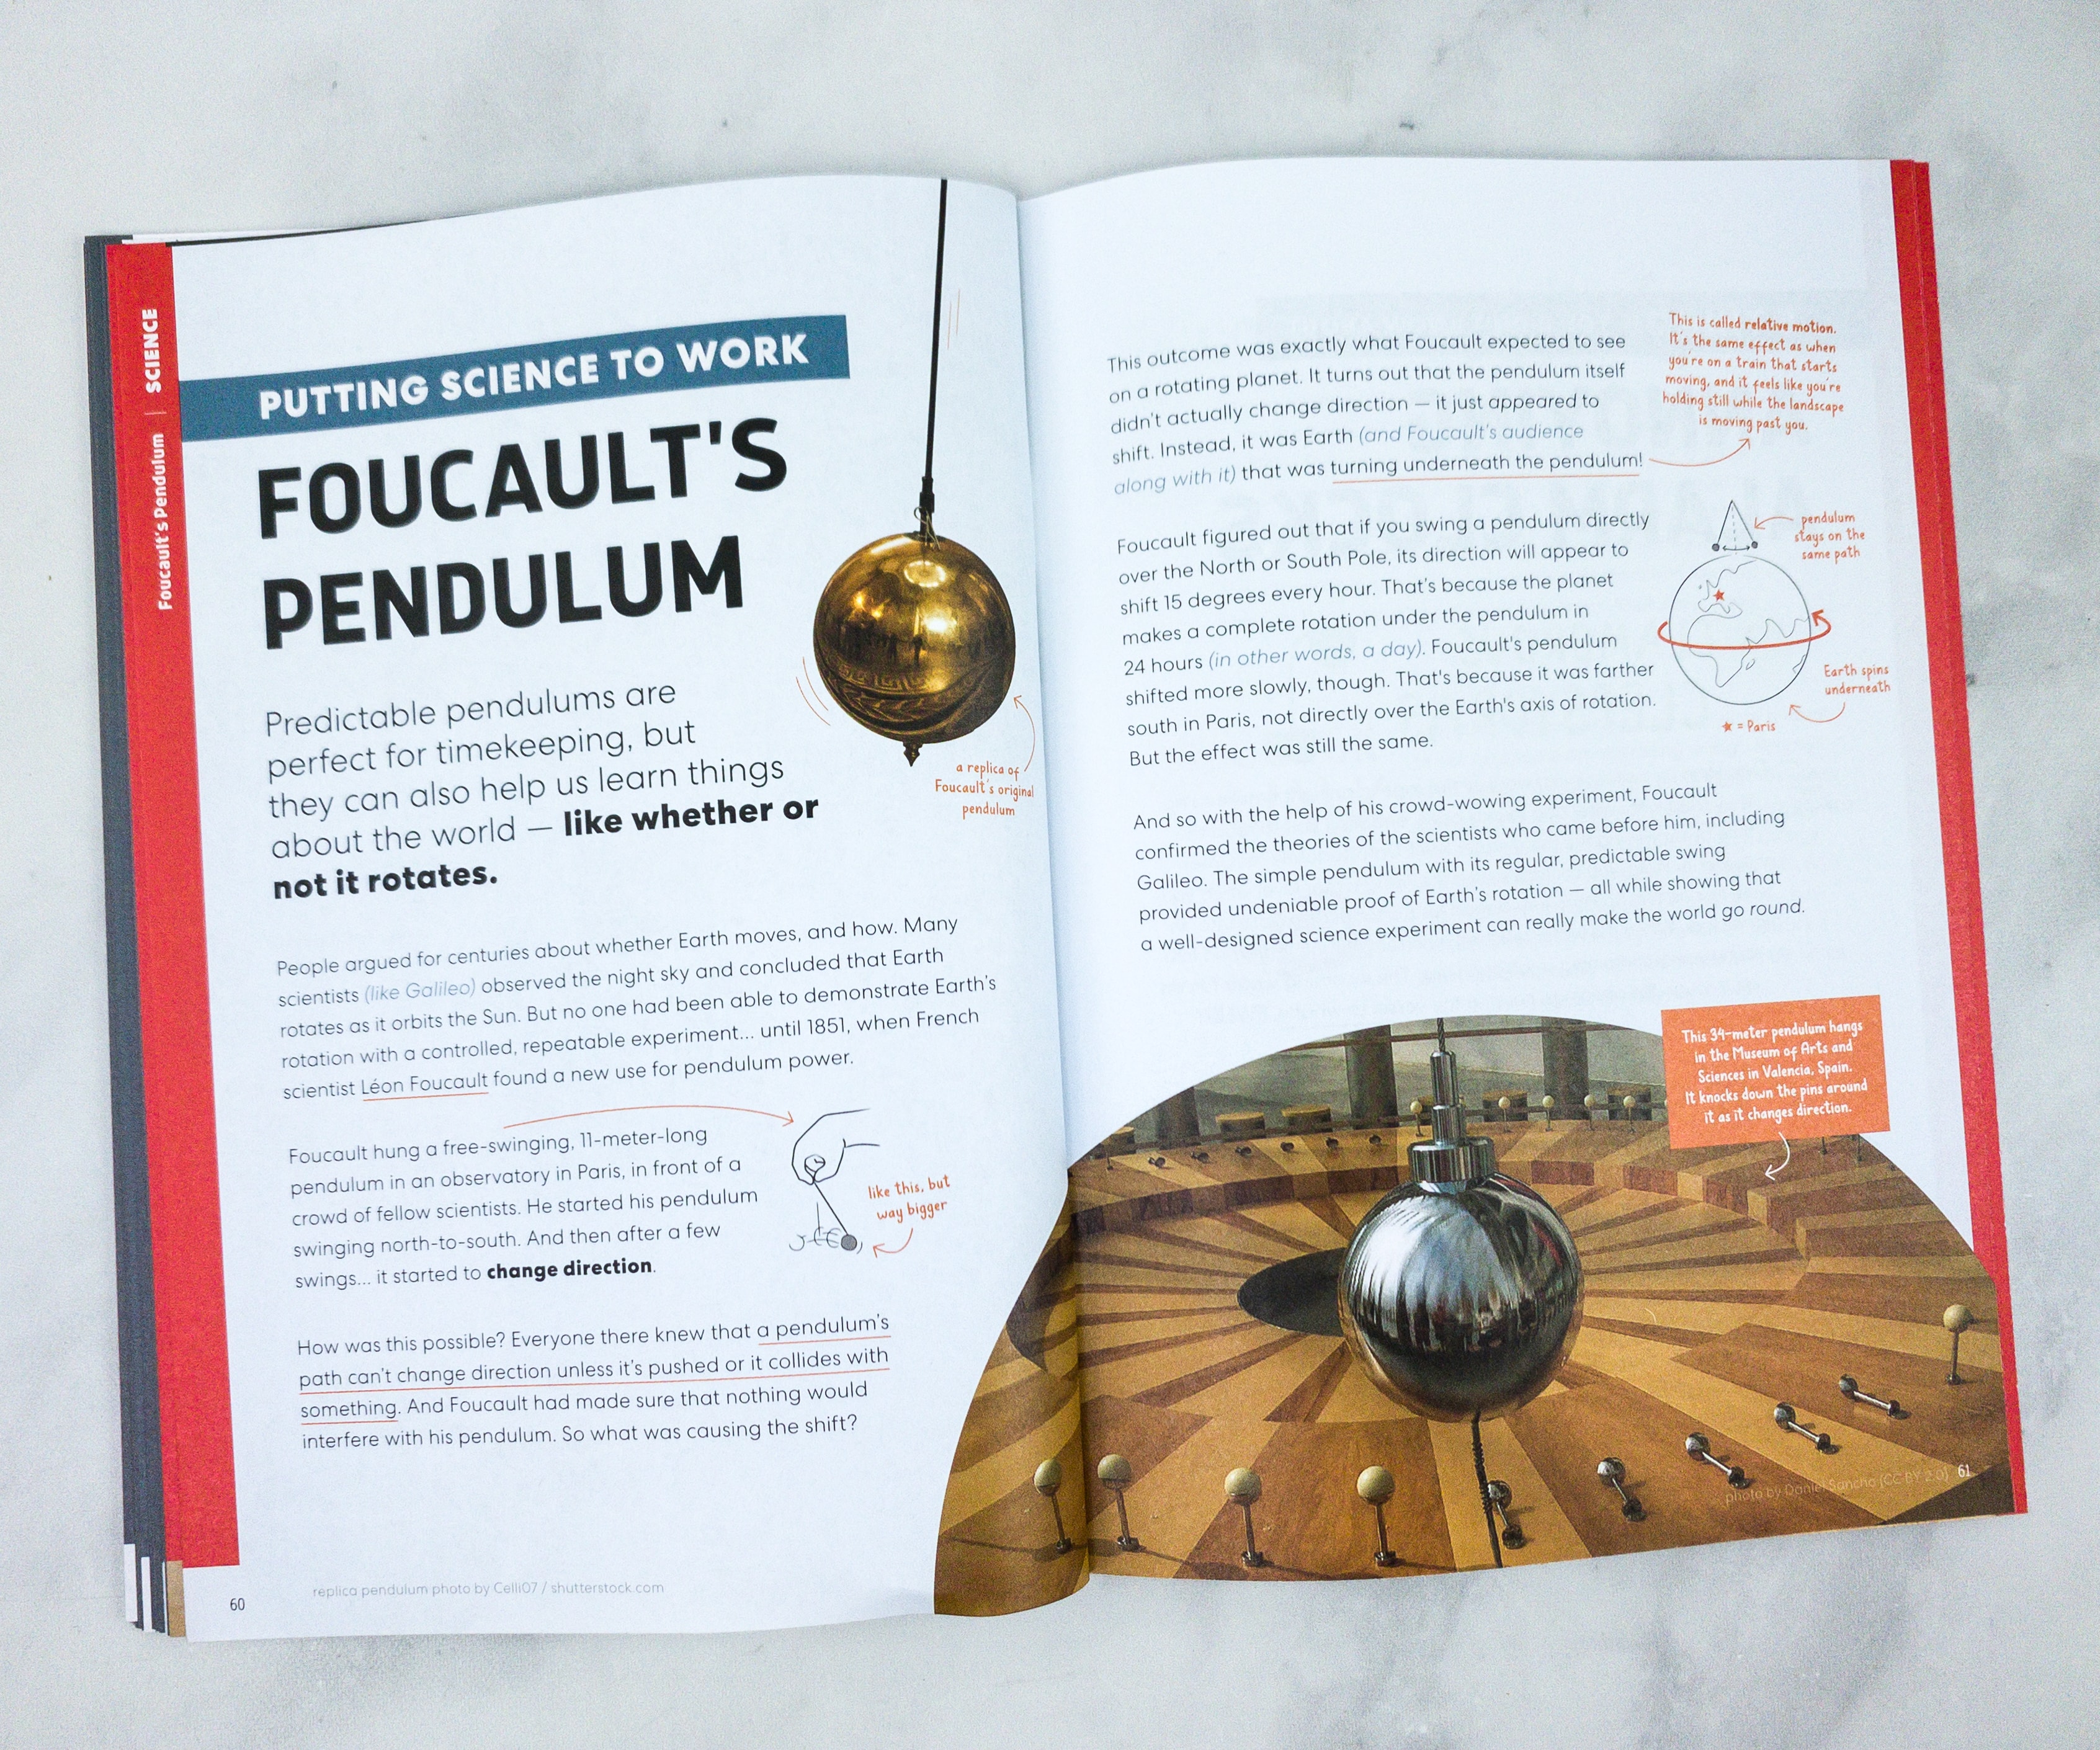
There’s a full article on how they put the science to work with Foucalt’s Pendulum!
Predictable pendulums are perfect for timekeeping, but they can also help us learn things about the world — like whether or not it rotates.
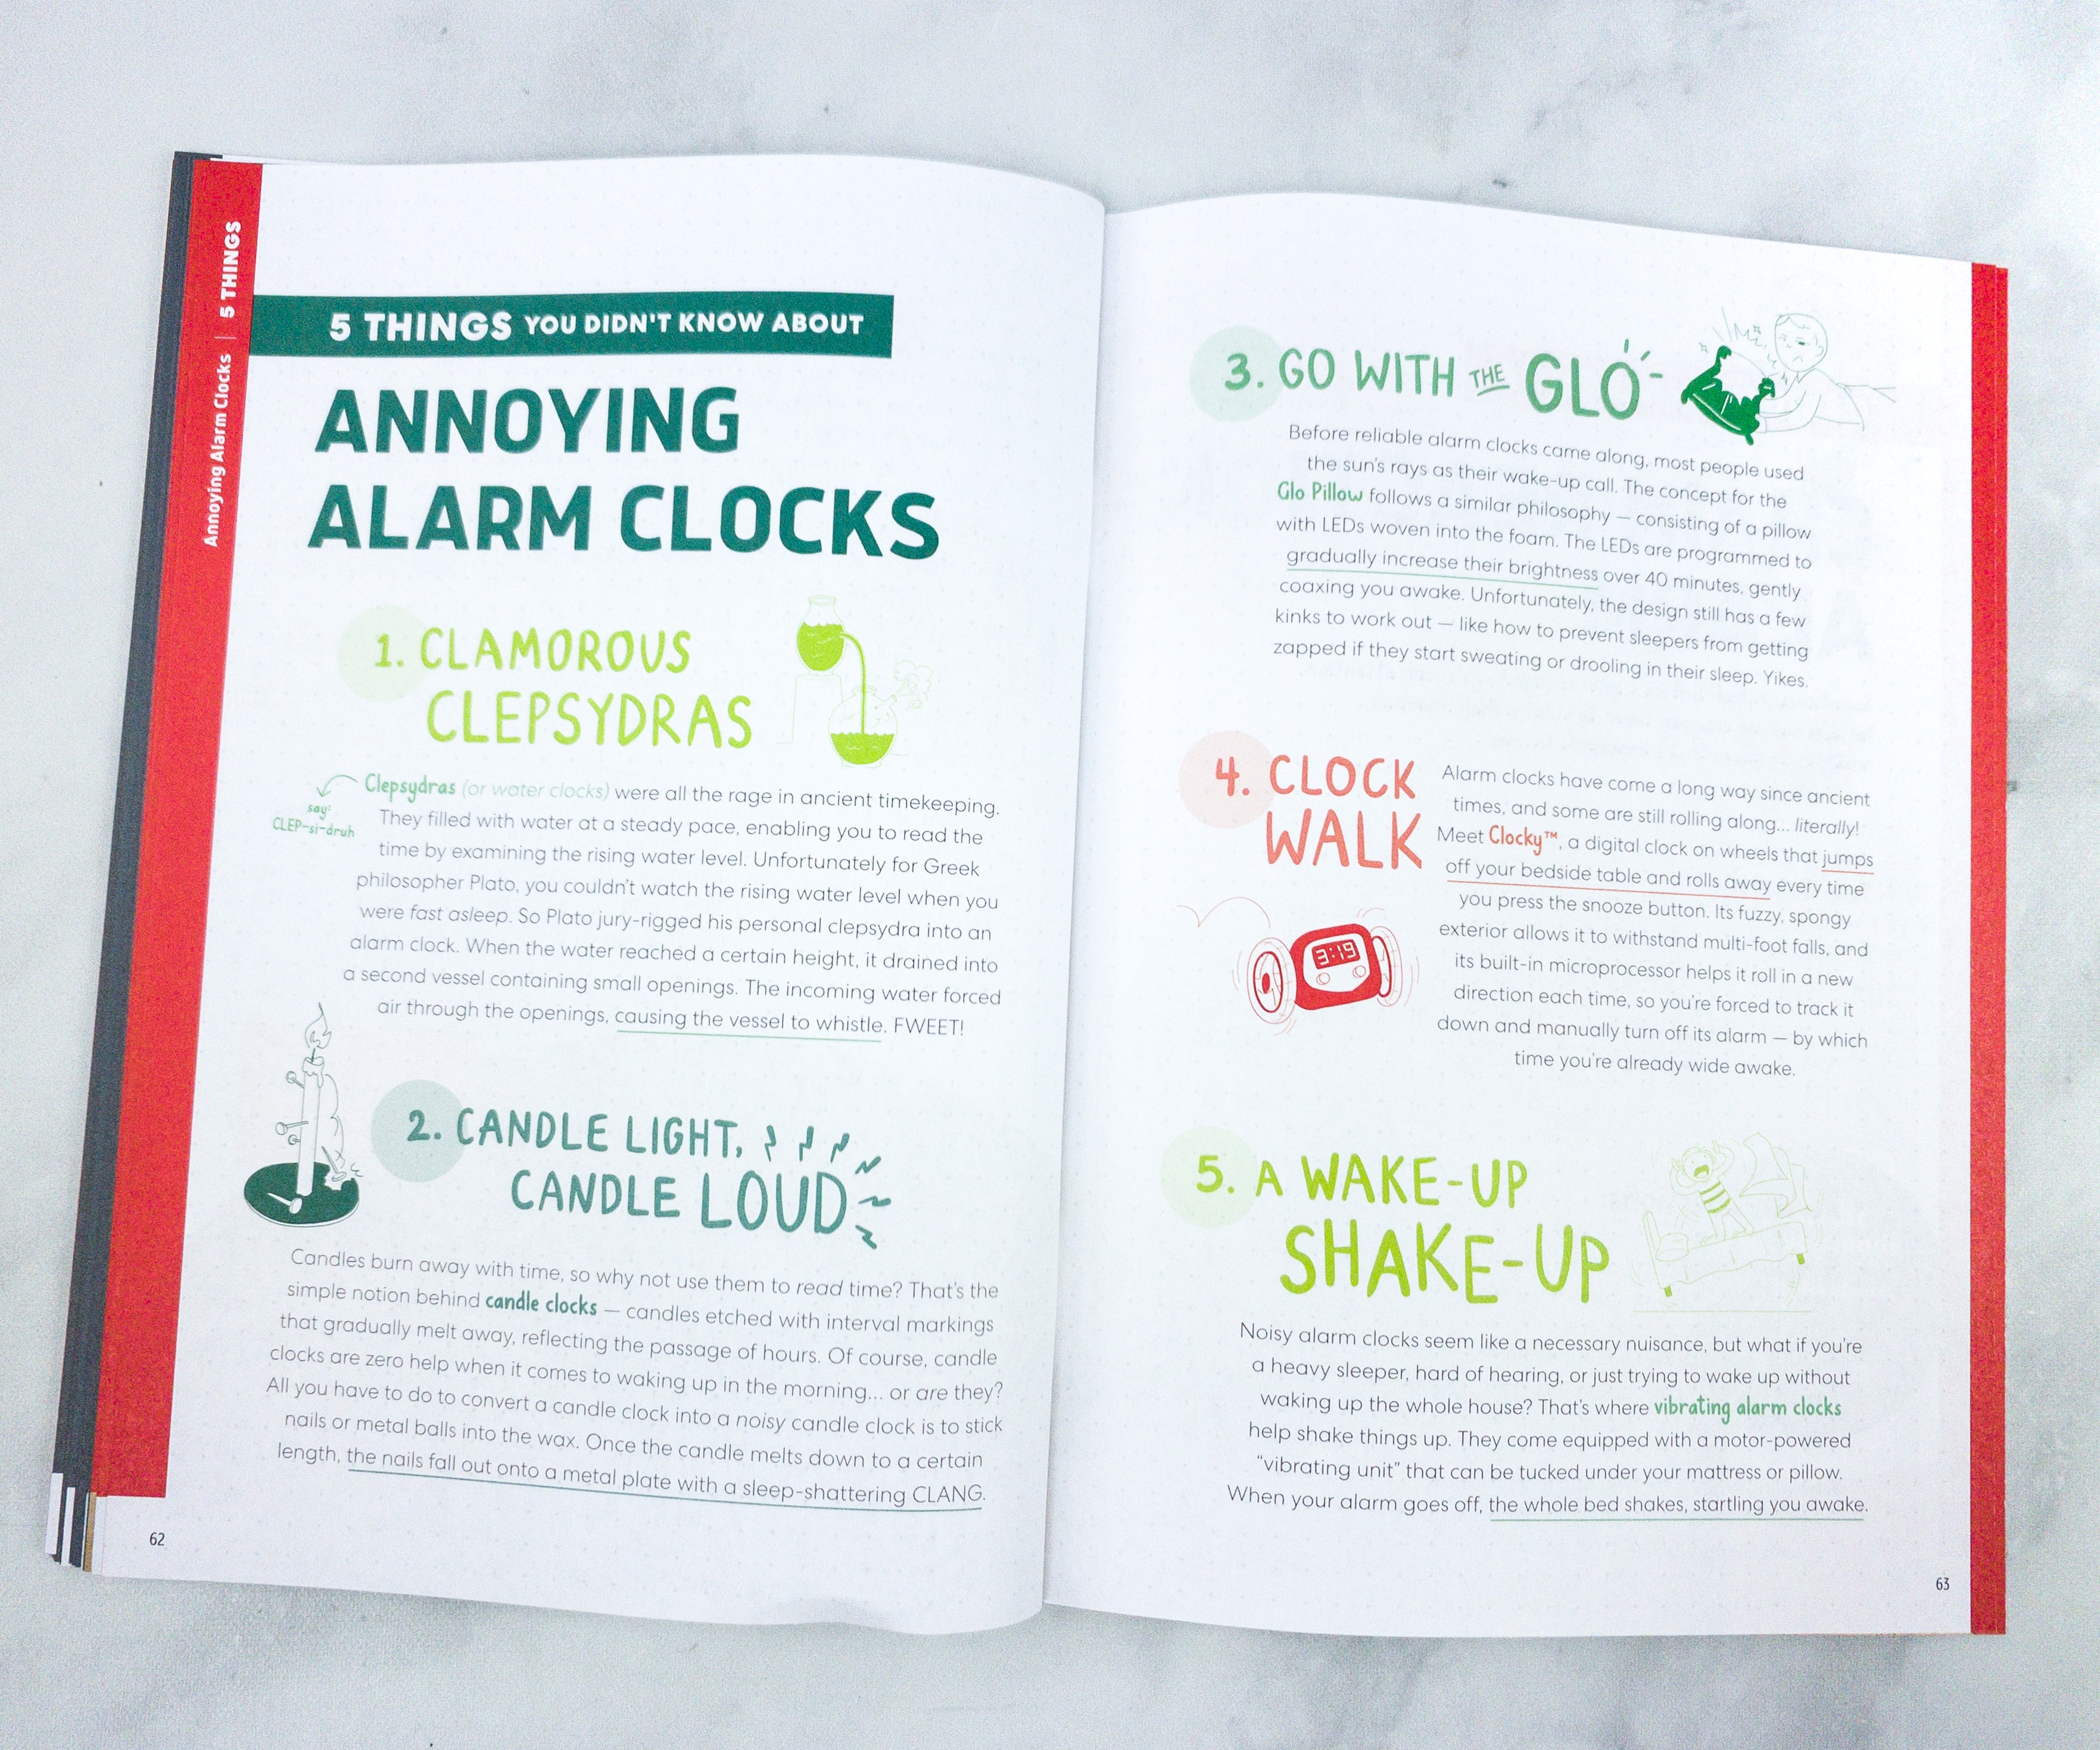
Another feature is about alarm clocks!
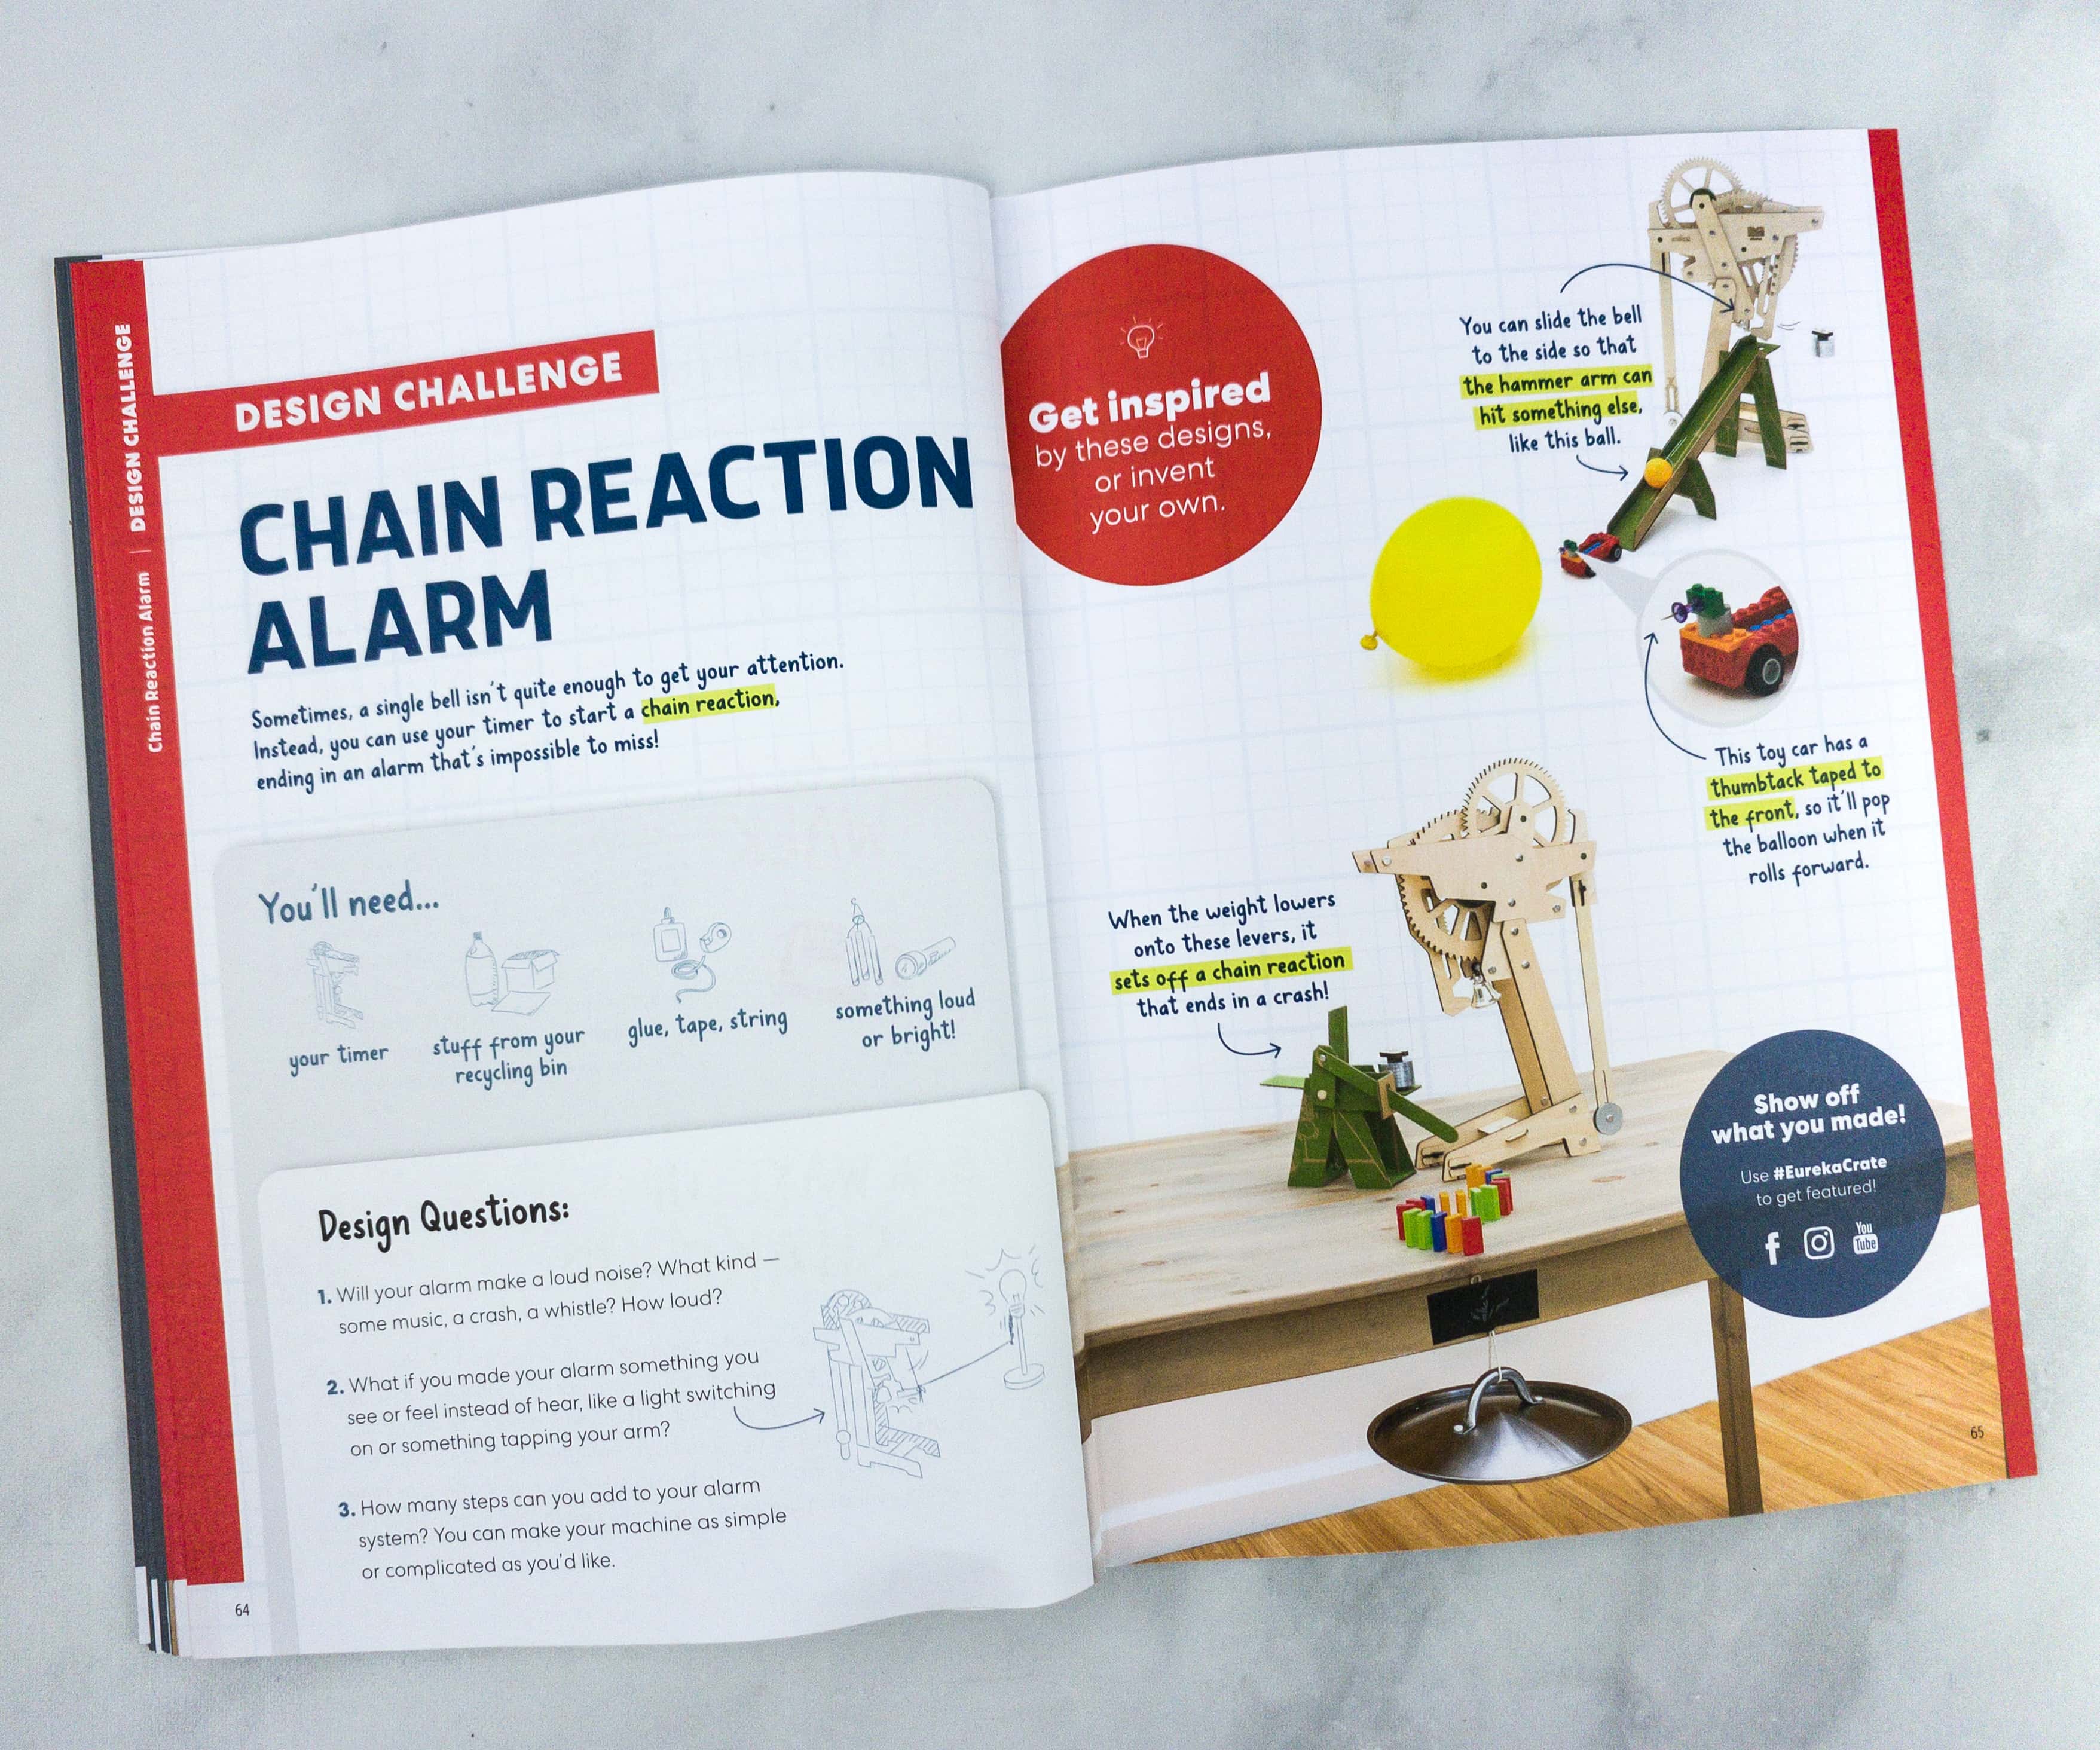
For the Design Challenge, they’re encouraging us to make a chain reaction alarm. They also included some design inspirations. You can also show-off what you made and use the hashtag #EurekaCrate to get featured on their social media accounts.
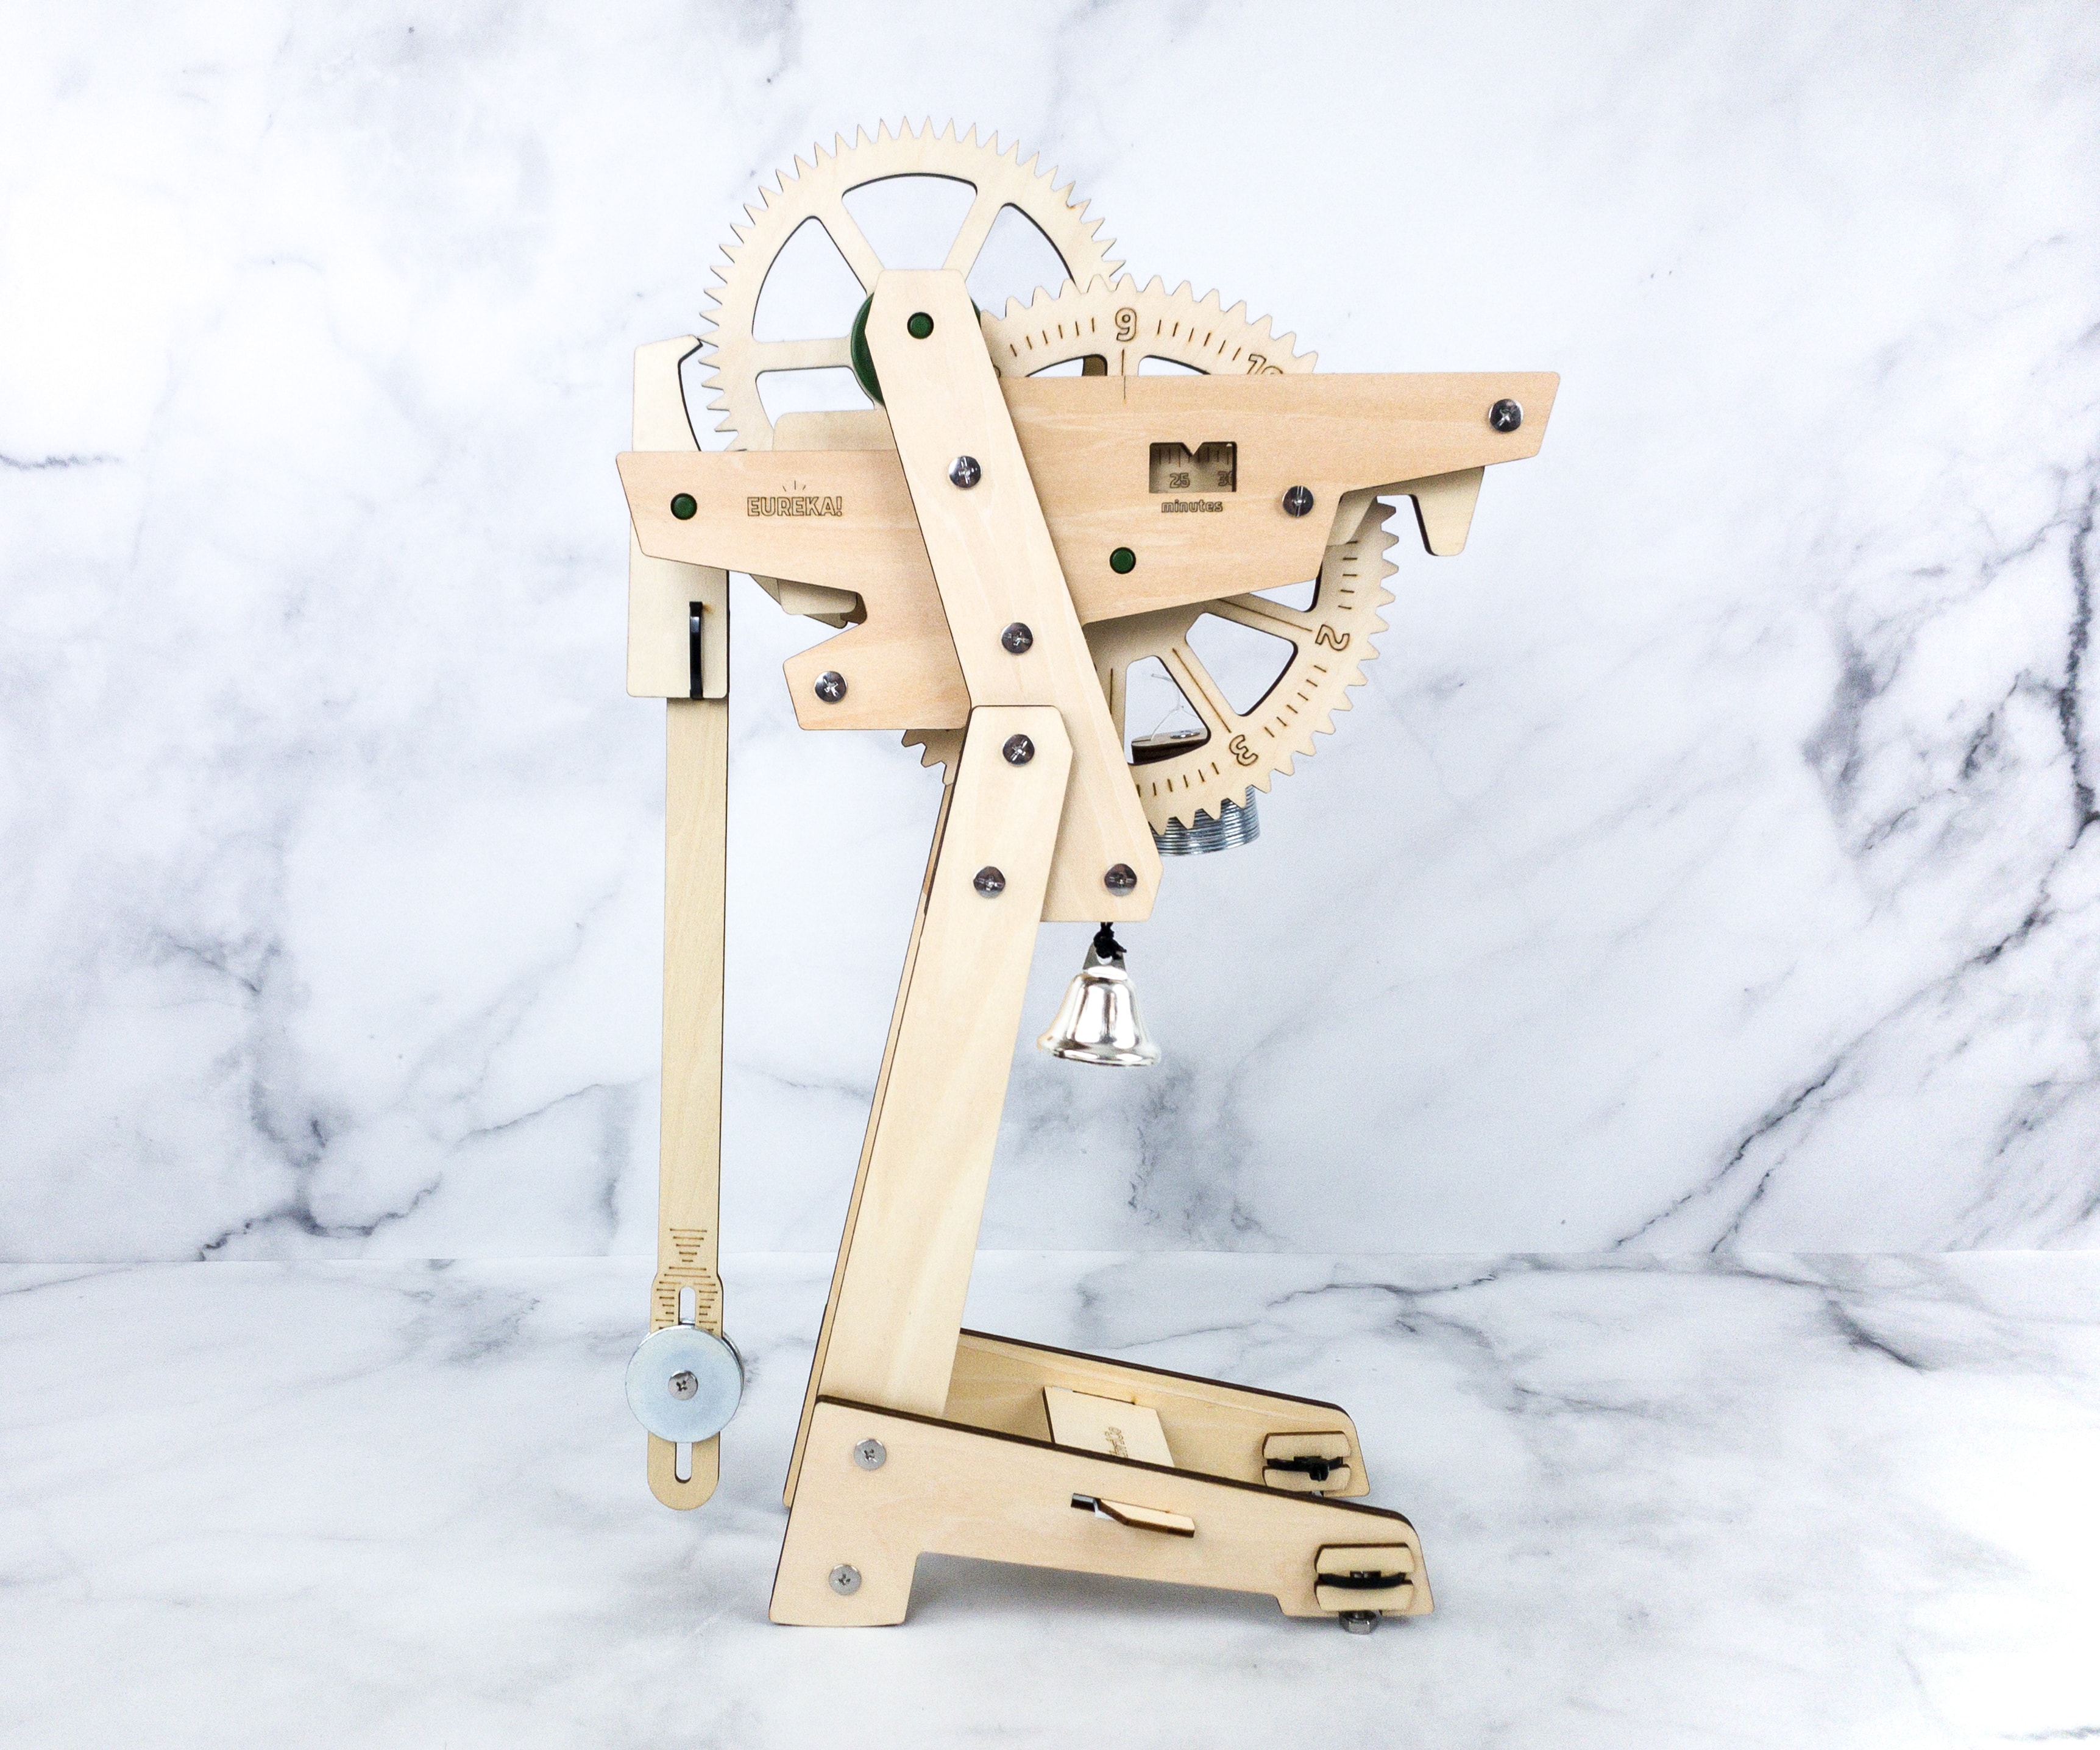
Here’s the completed project from this crate, and it looks great!
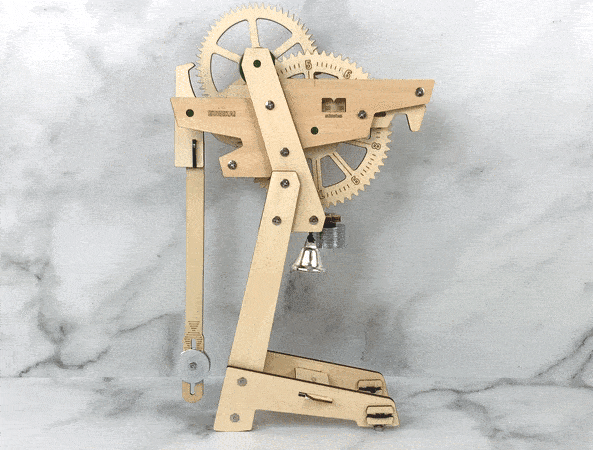
Here’s our timer at work! Look how the wheels turn while the pendulum swings!
This month’s STEM project is like a high-level puzzle! Building and making it work really requires a lot of patience, but it’s definitely worth it! My kids learned about timers and how they work, and how calibration helps make this project work effectively and accurately. Even the booklet has a lot to offer, including interesting trivia about pendulums and its importance and uses, plus information about the science and history behind the project. We recommend Eureka Crate for older teens and even adults! It also makes a great activity subscription box for family bonding and learning about STEM and design thinking at home!
What do you think of this month’s Eureka Crate?


Comments