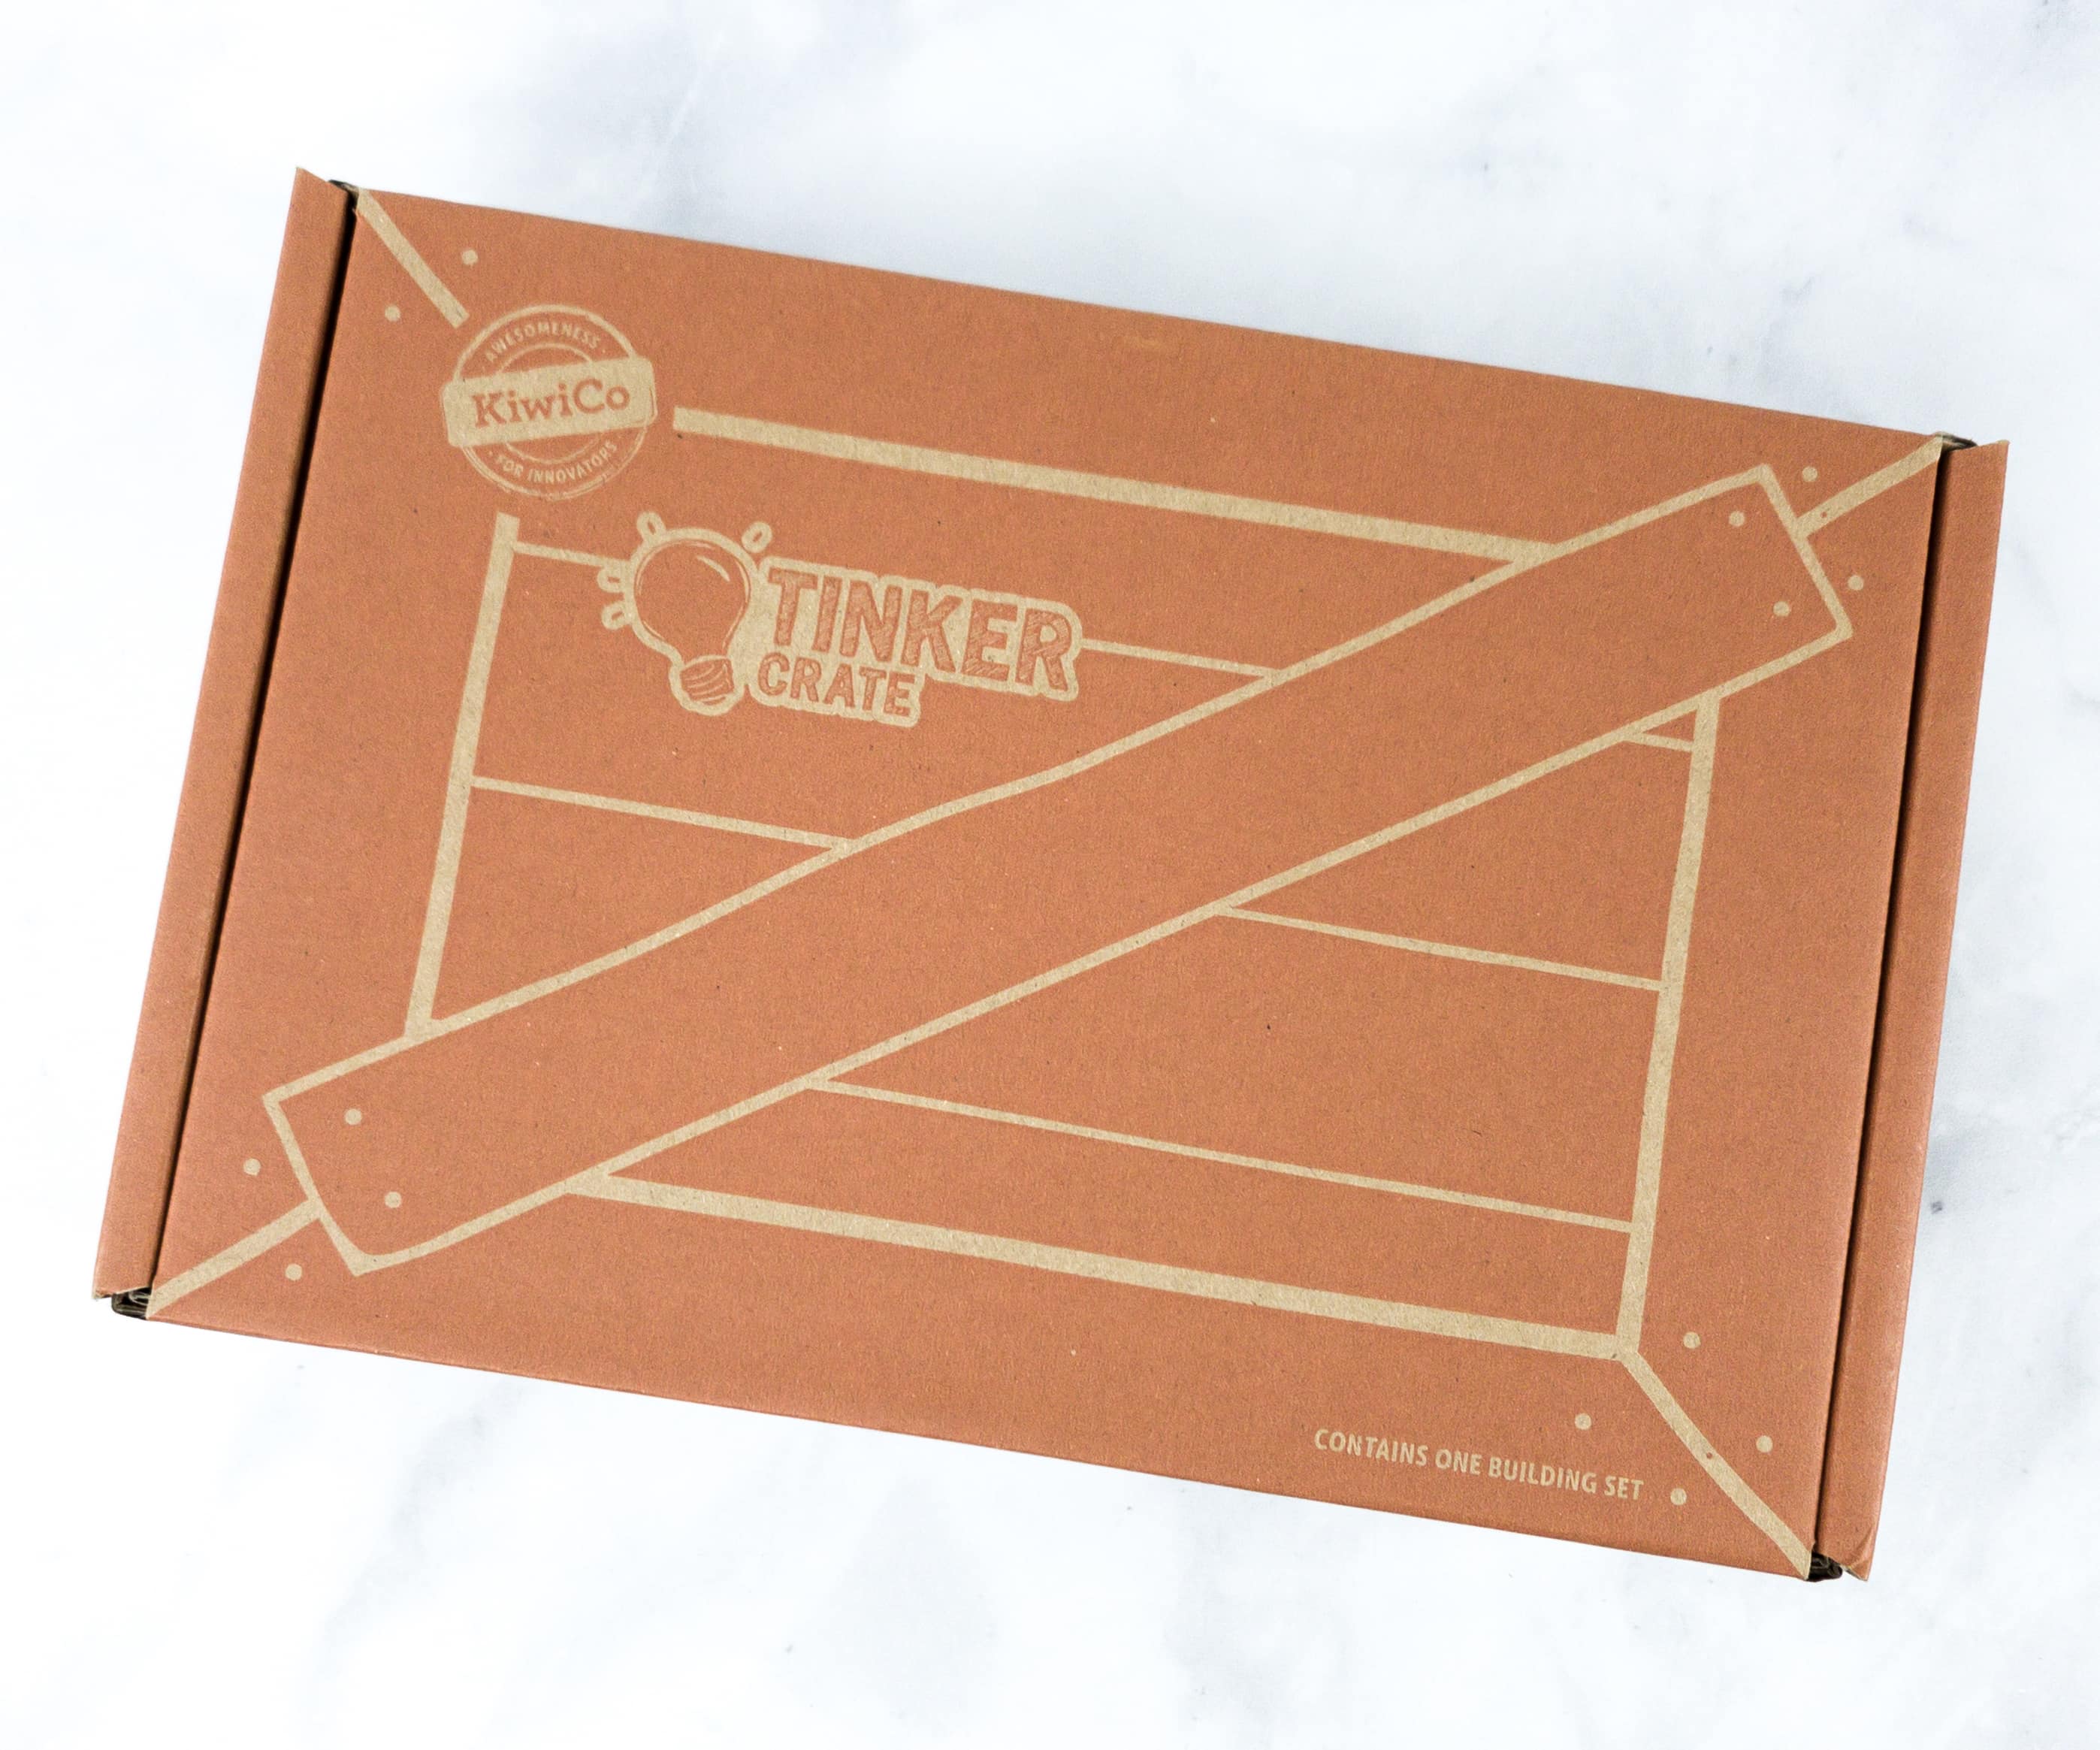
Tinker Crate is a subscription box that inspires kids to learn about science, engineering, and technology, all while having lots of fun. Each month, the box explores a field of study within a STEM (Science, Technology, Engineering, and Math) discipline. Kids practice their problem-solving skills and learn how to engage in both structured and open-ended exploration and investigation. Most boxes walk the tinkerers through the construction of fairly complex mechanical devices.
DEAL: Use this link to save 30% on your first box of Tinker Crate! (or Kiwi Crate and the KiwiCo family subscriptions Koala Crate, Tadpole Crate, Atlas Crate, Doodle Crate, and Eureka Crate).
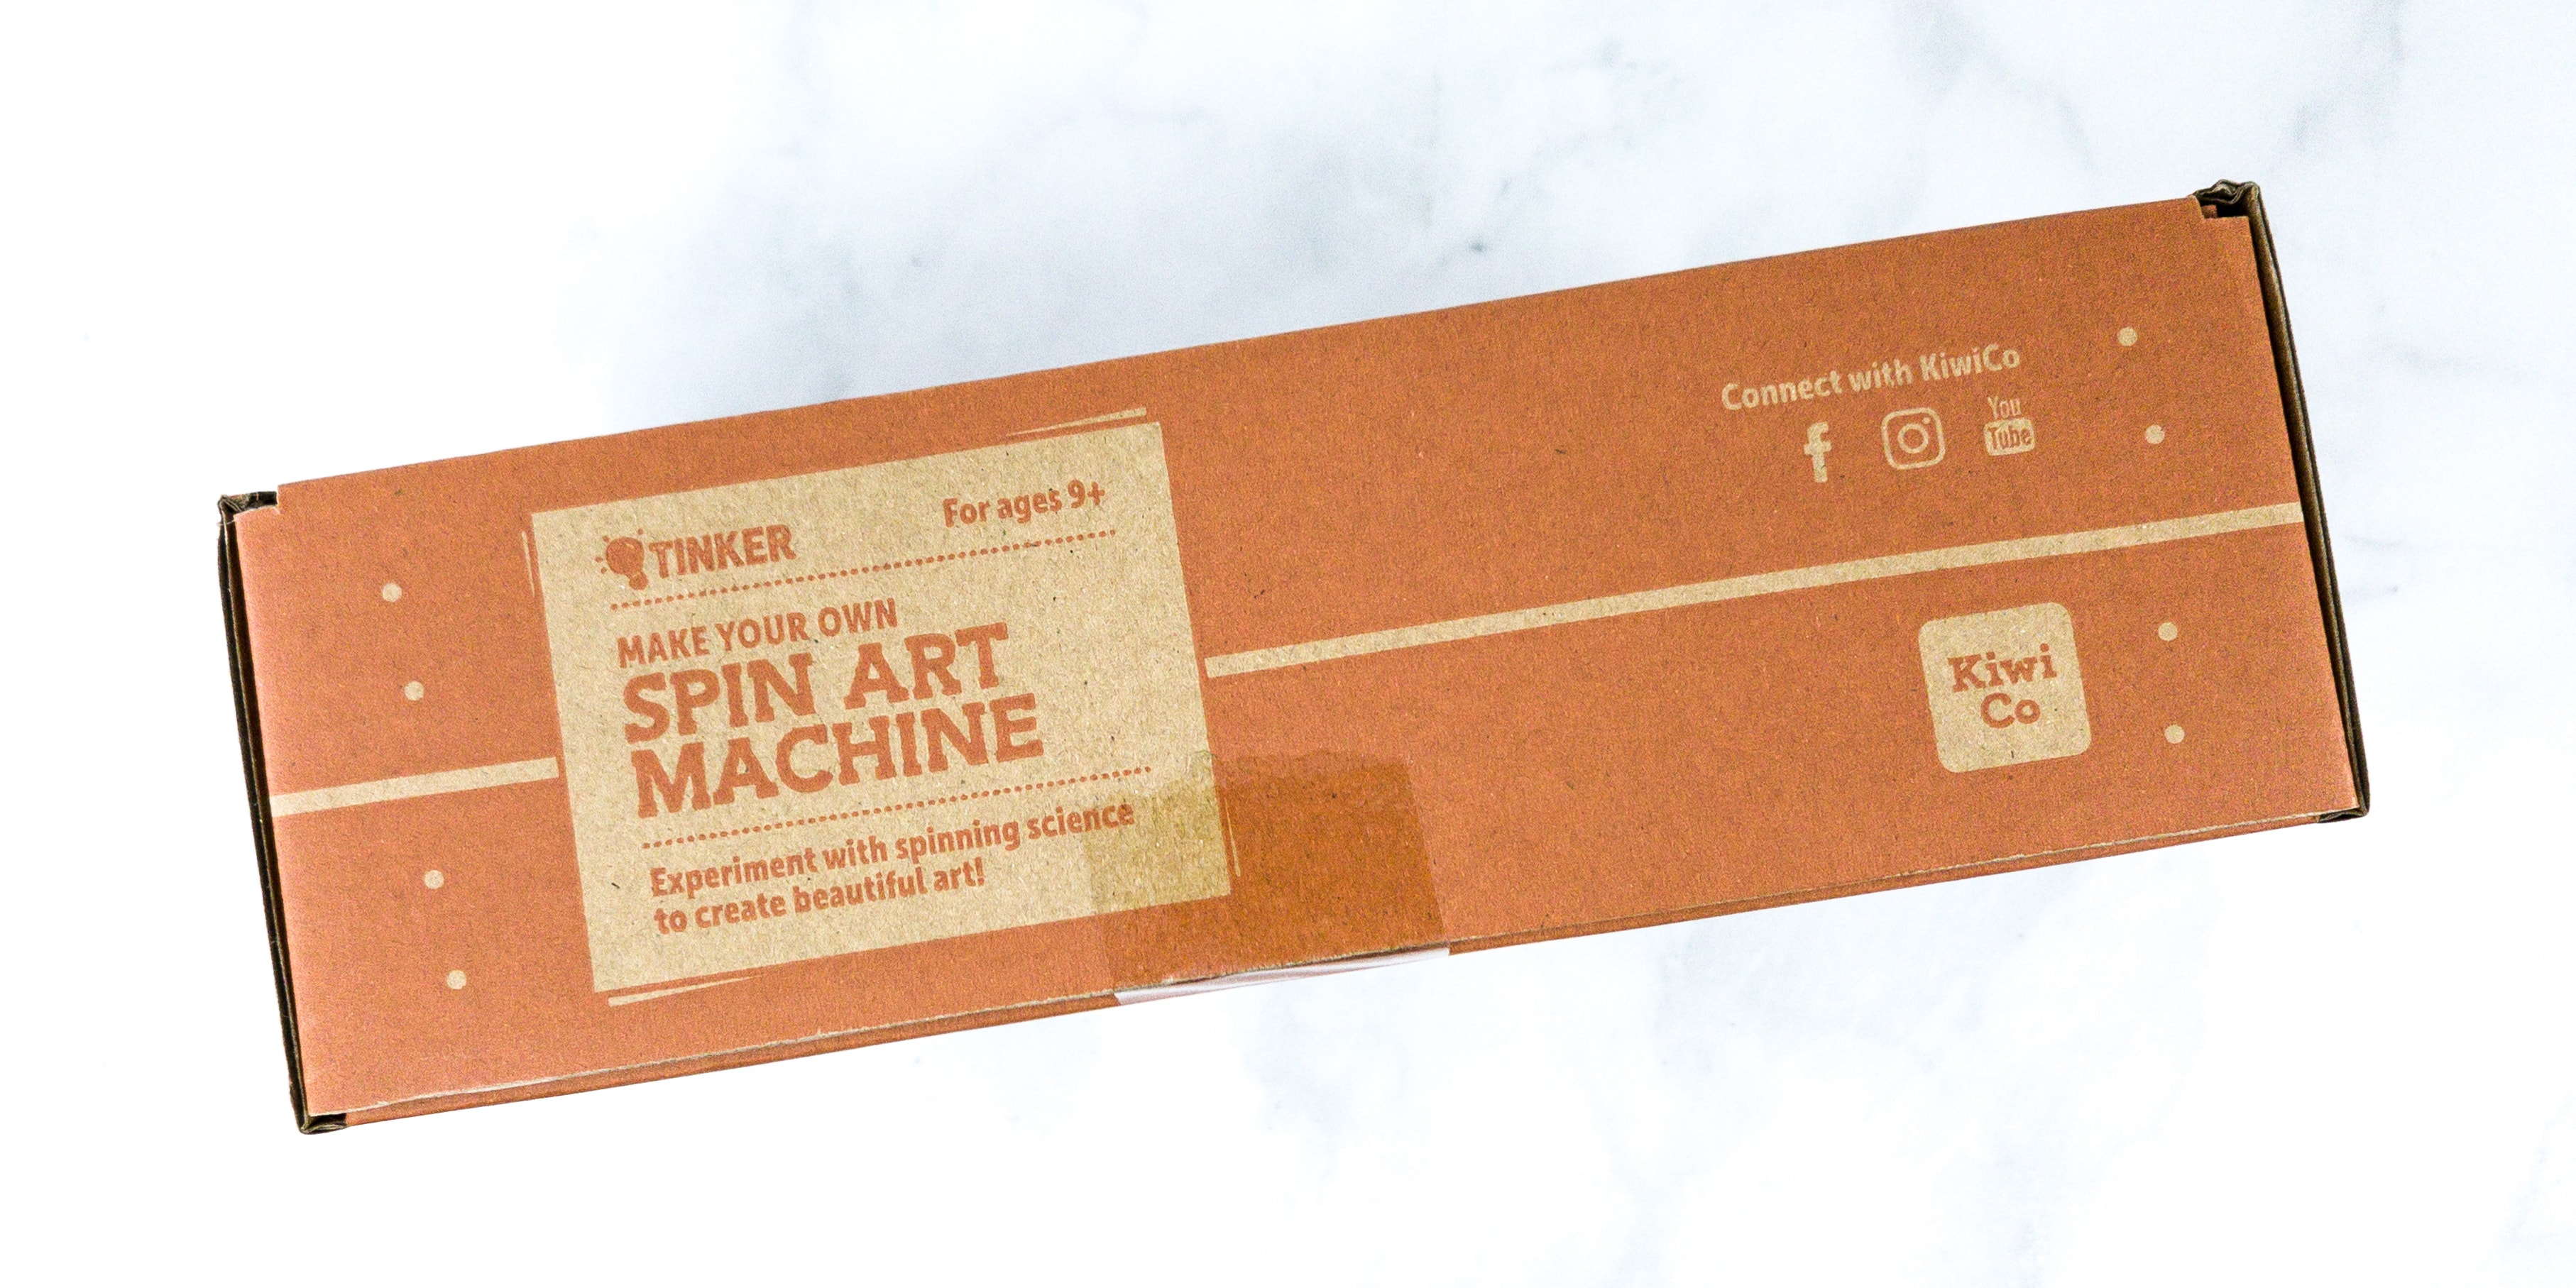
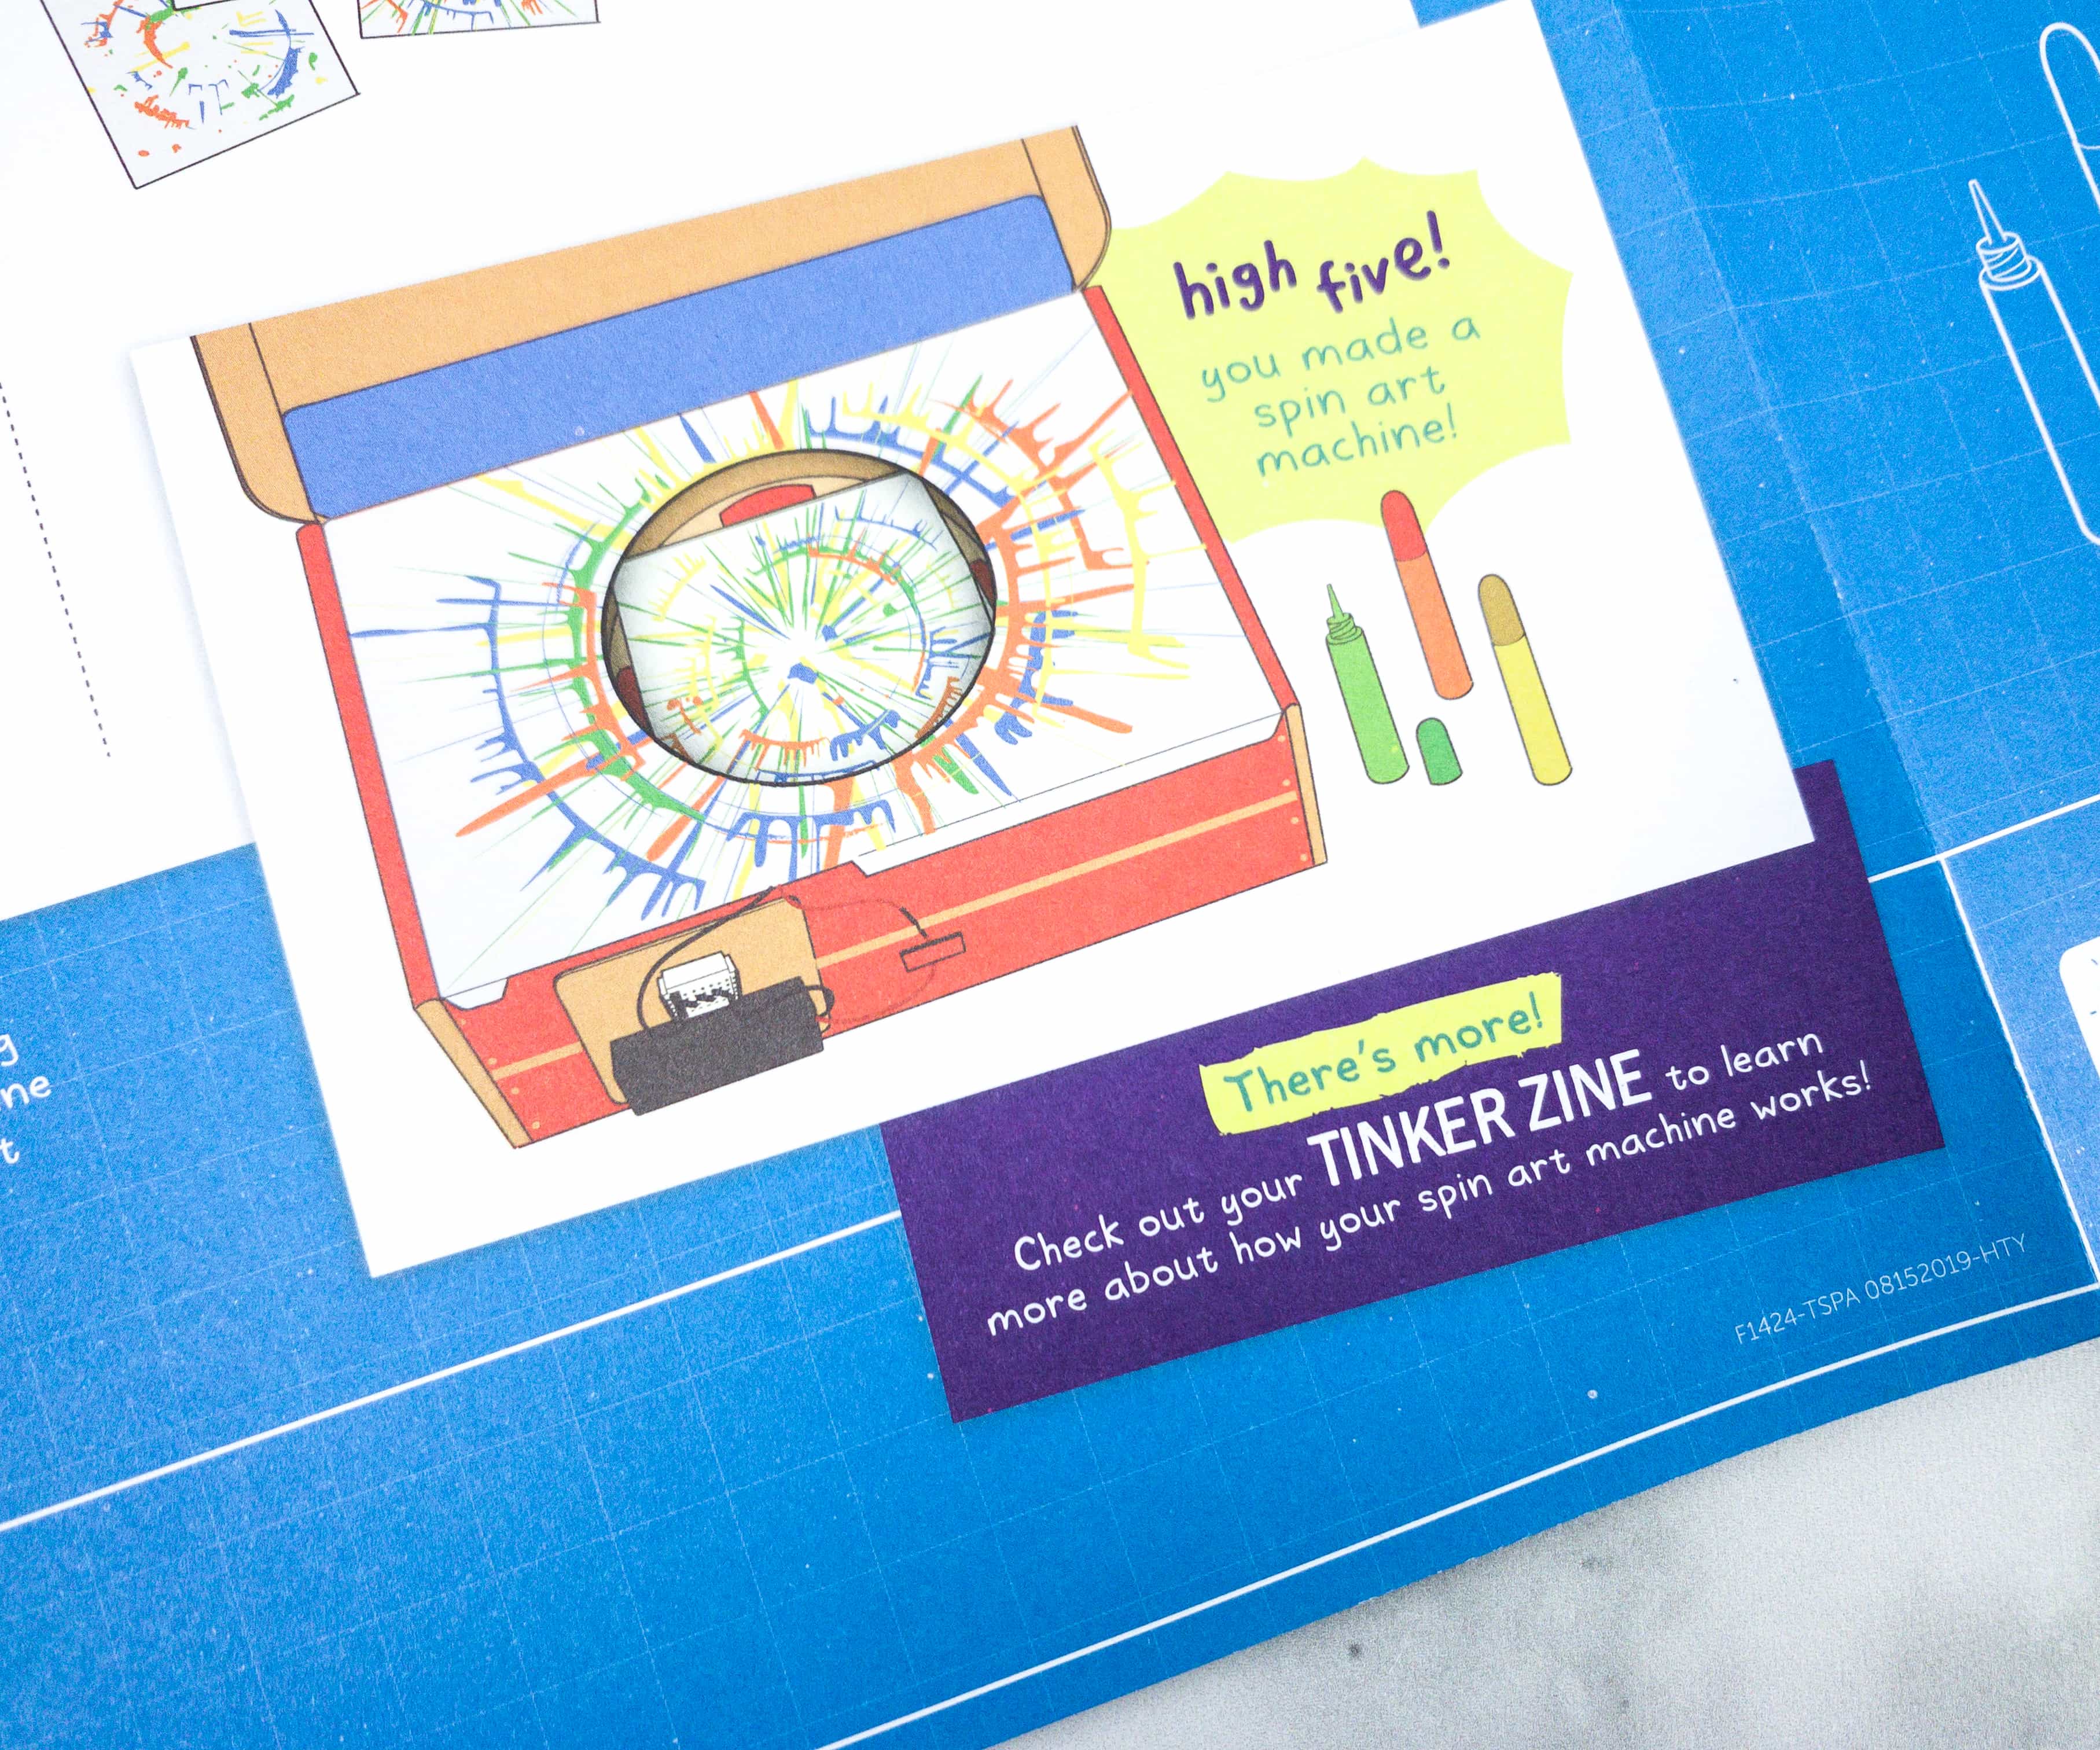
This month, we are building our own SPIN ART MACHINE.

Everything arrives together in a single Tinker Crate – the supplies, a fold-out instruction sheet, and the Tinker Zine.
Tinker Zine
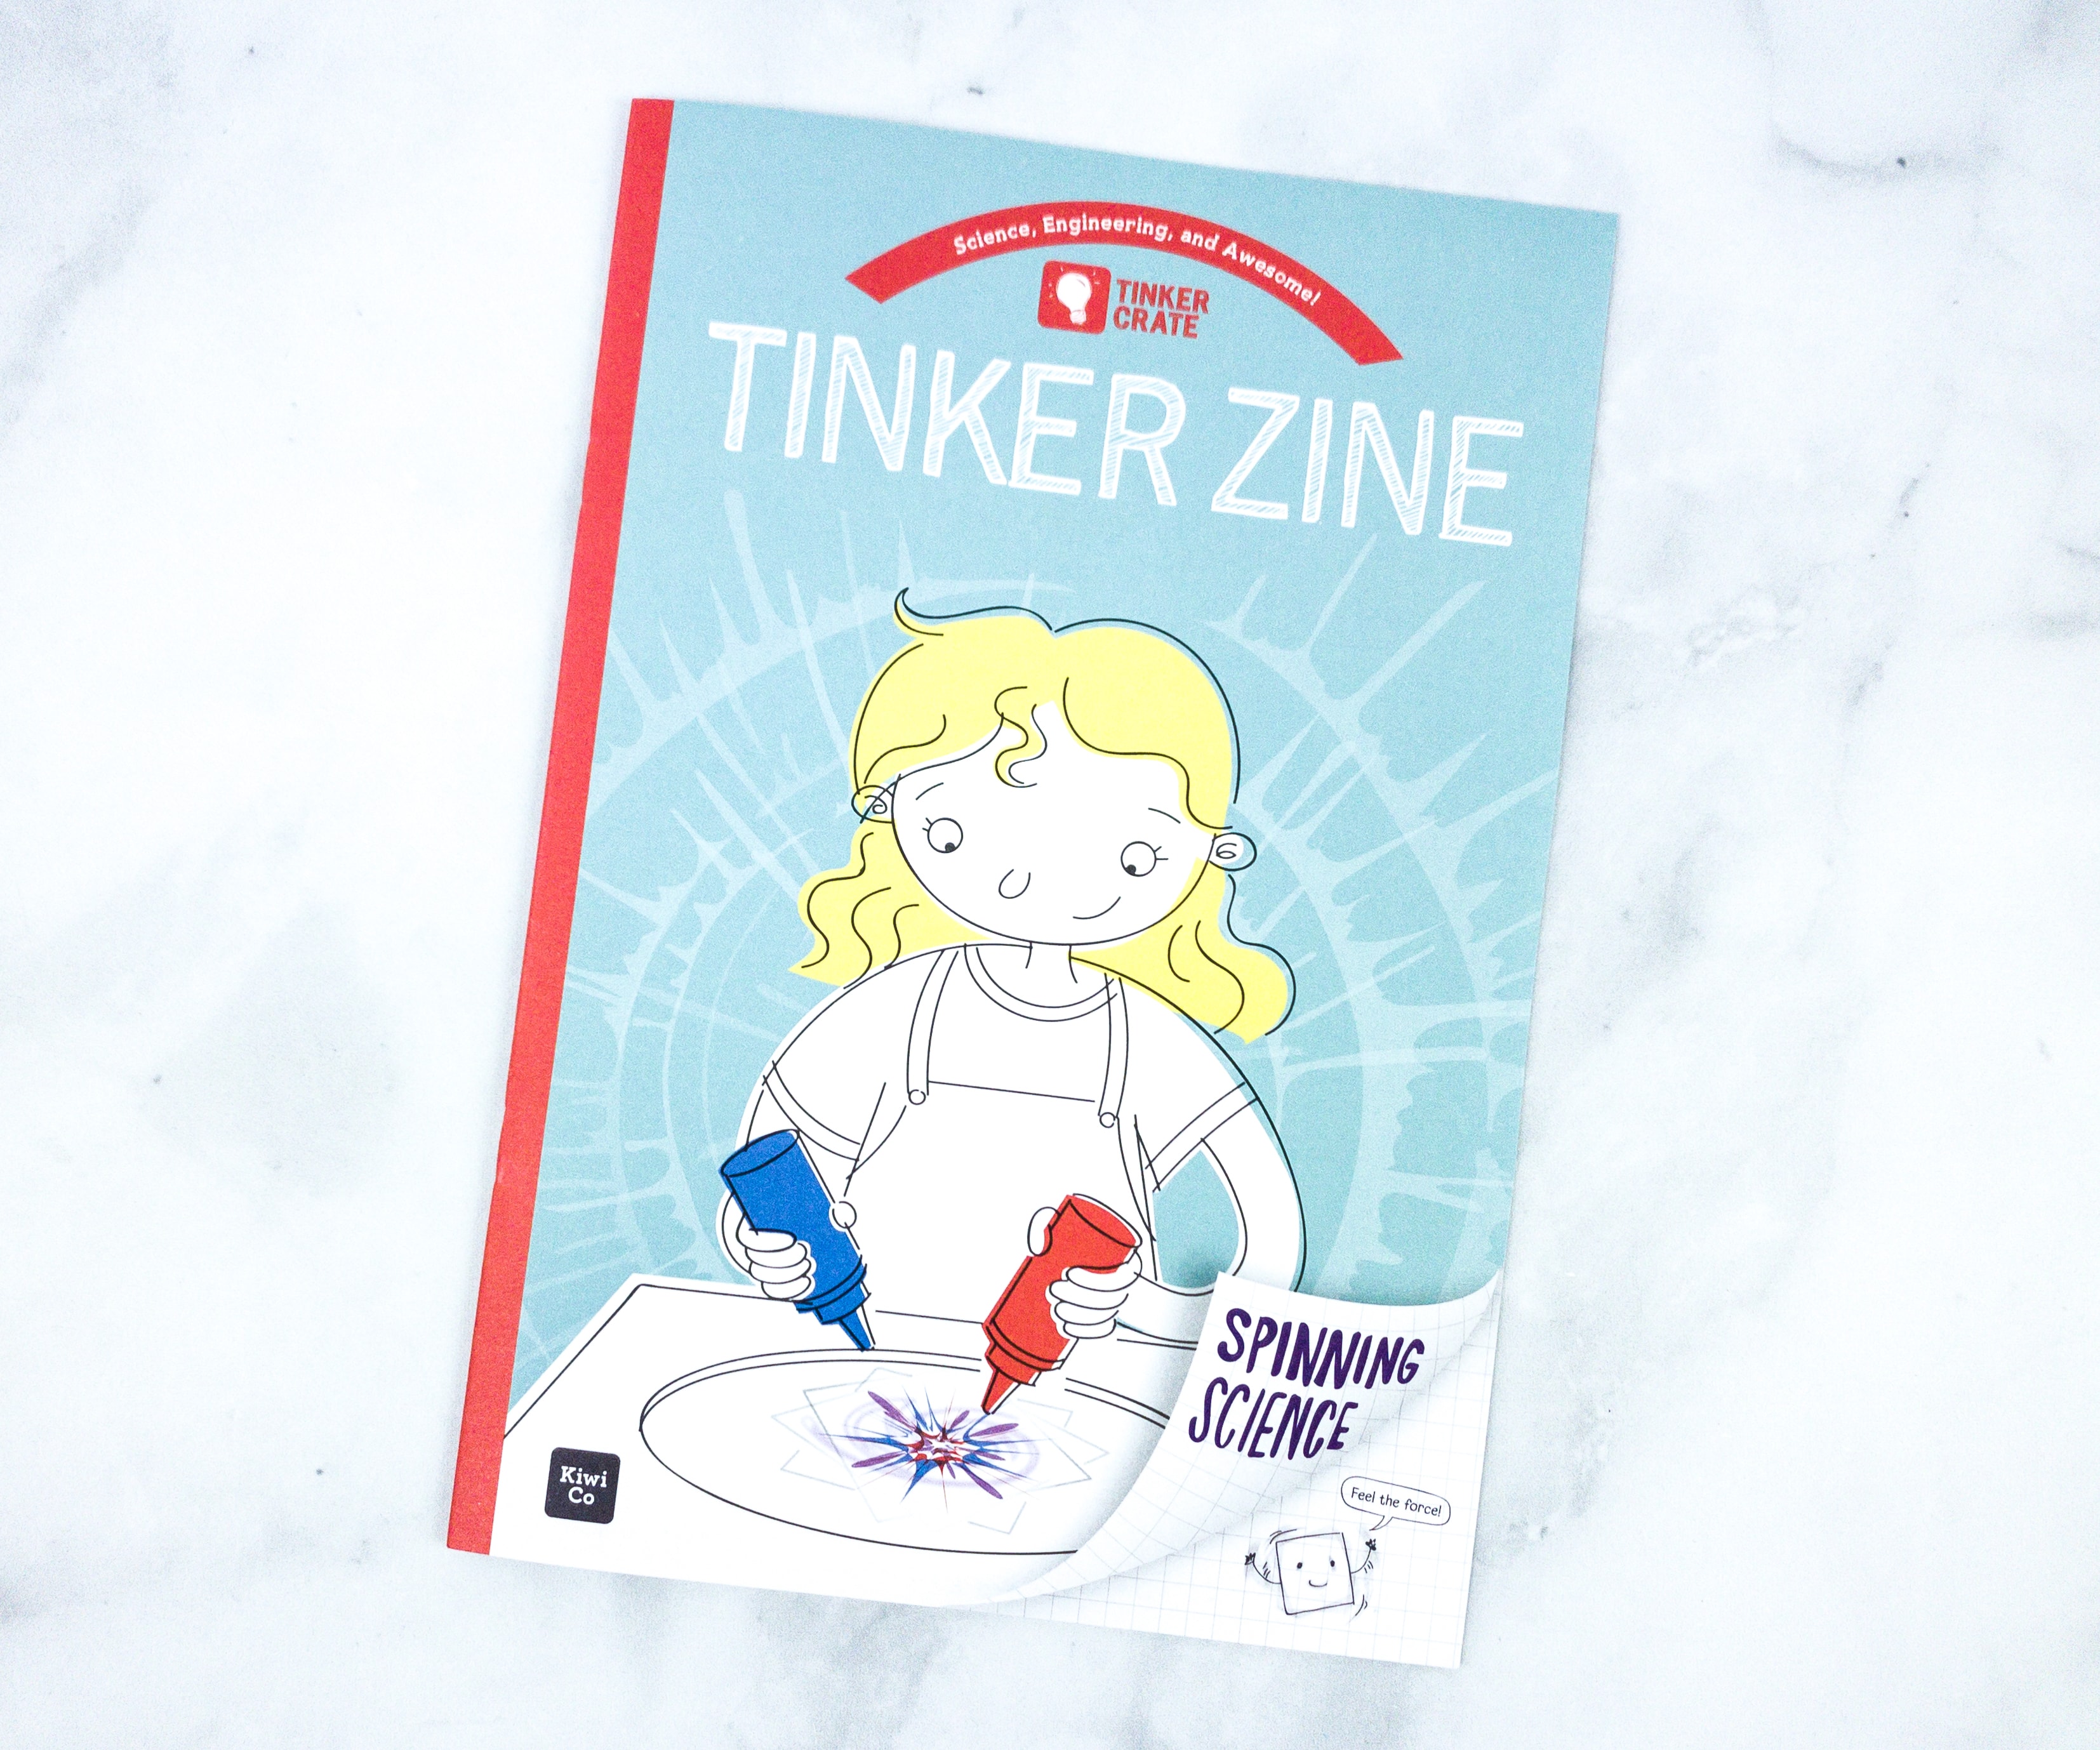
The main project is always a great hands-on activity and a great demonstration of the scientific principles featured in the box, but the Tinker Zine is full of well-written, historically and scientifically accurate background and explanatory materials. This where the lessons really take shape!
Tinker, Create, Innovate
KiwiCo equips the next generation of innovators with the tools and confidence for creative exploration and problem solving.

This month’s Tinker Zine is all about physics and centrifugal force.
The riders on the Super Spinner Swings (and the paint on your spin art machine) are both flung outwards, away from the center of rotation. This is called “centrifugal force” — except it’s not exactly a force.

In this part of the booklet, we have a list of experiments we can try with our spin art machine later!
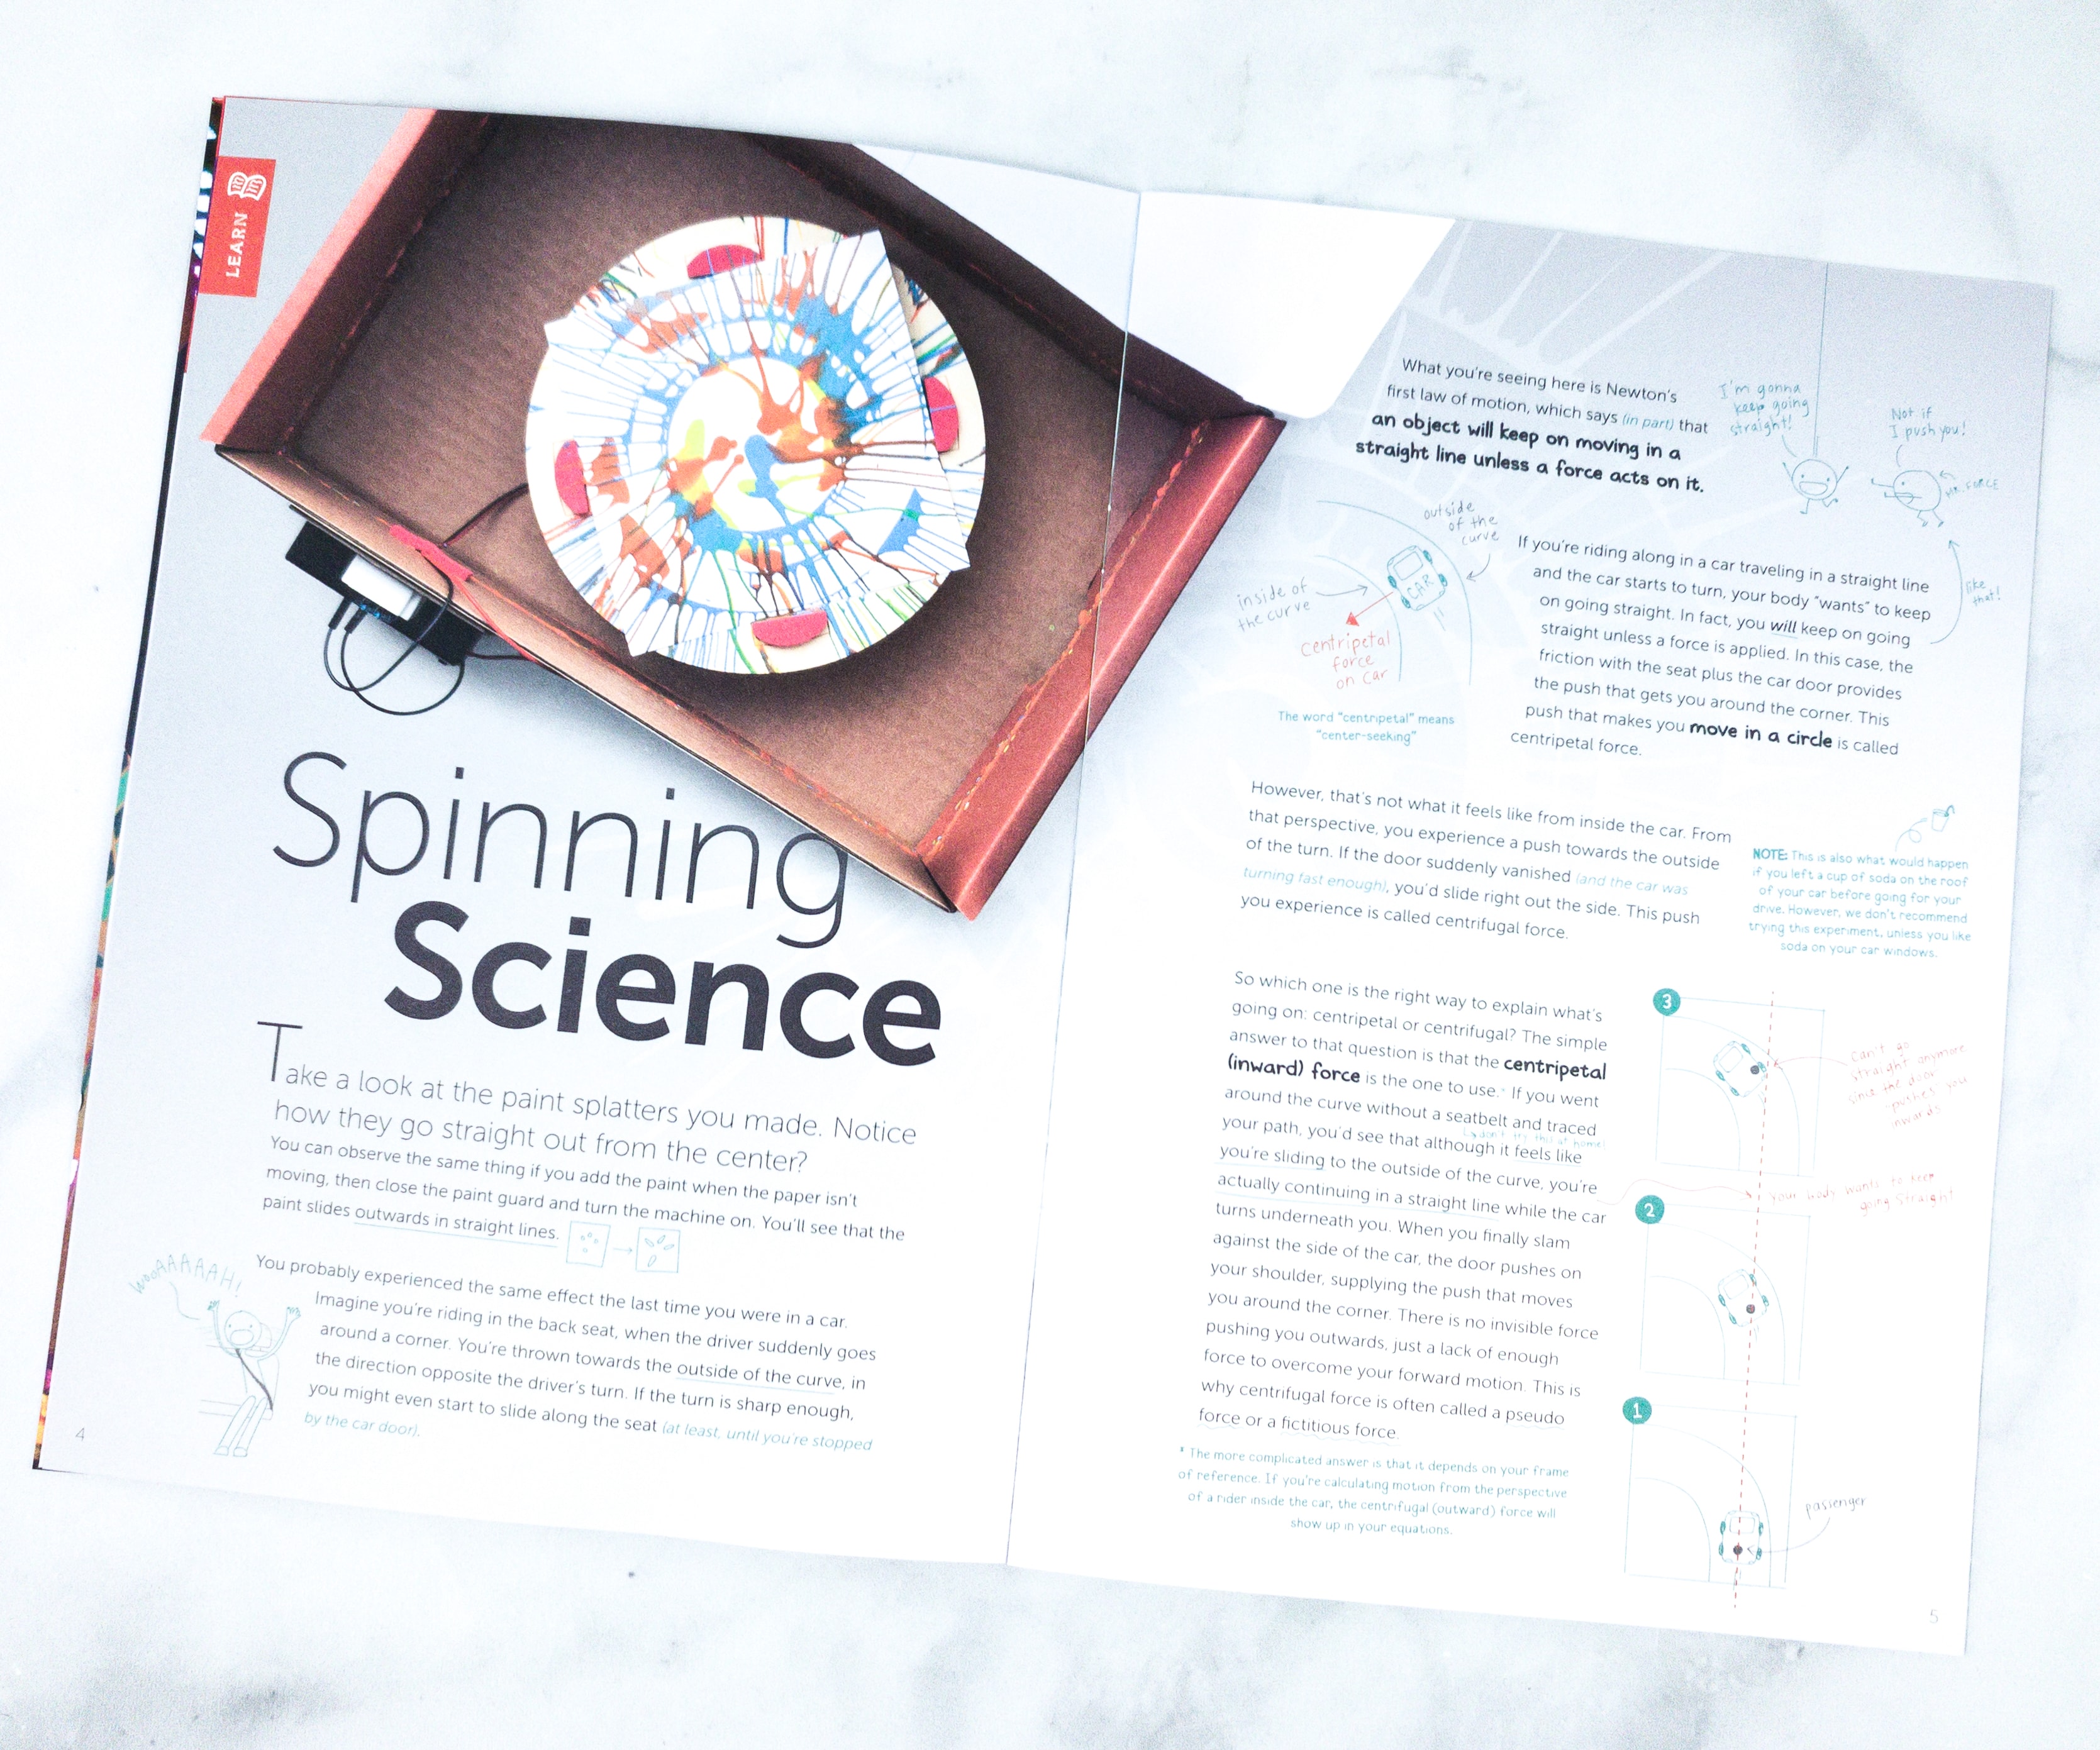
There’s also an article that explains how the centripetal force works, which uses a car and a passenger as an example.
If you went around the curve without a seatbelt and traced your path, you’d see that although it feels like you’re sliding to the outside of the curve, you’re actually continuing in a straight line while the car turns underneath you. When you finally slam against the side of the car, the door pushes your shoulder, supplying the push that moves you around the corner.There is no invisible force pushing you outwards, just lack of enough force to overcome your forward motion. This is why centrifugal force is often called a pseudo force or fictitious force.
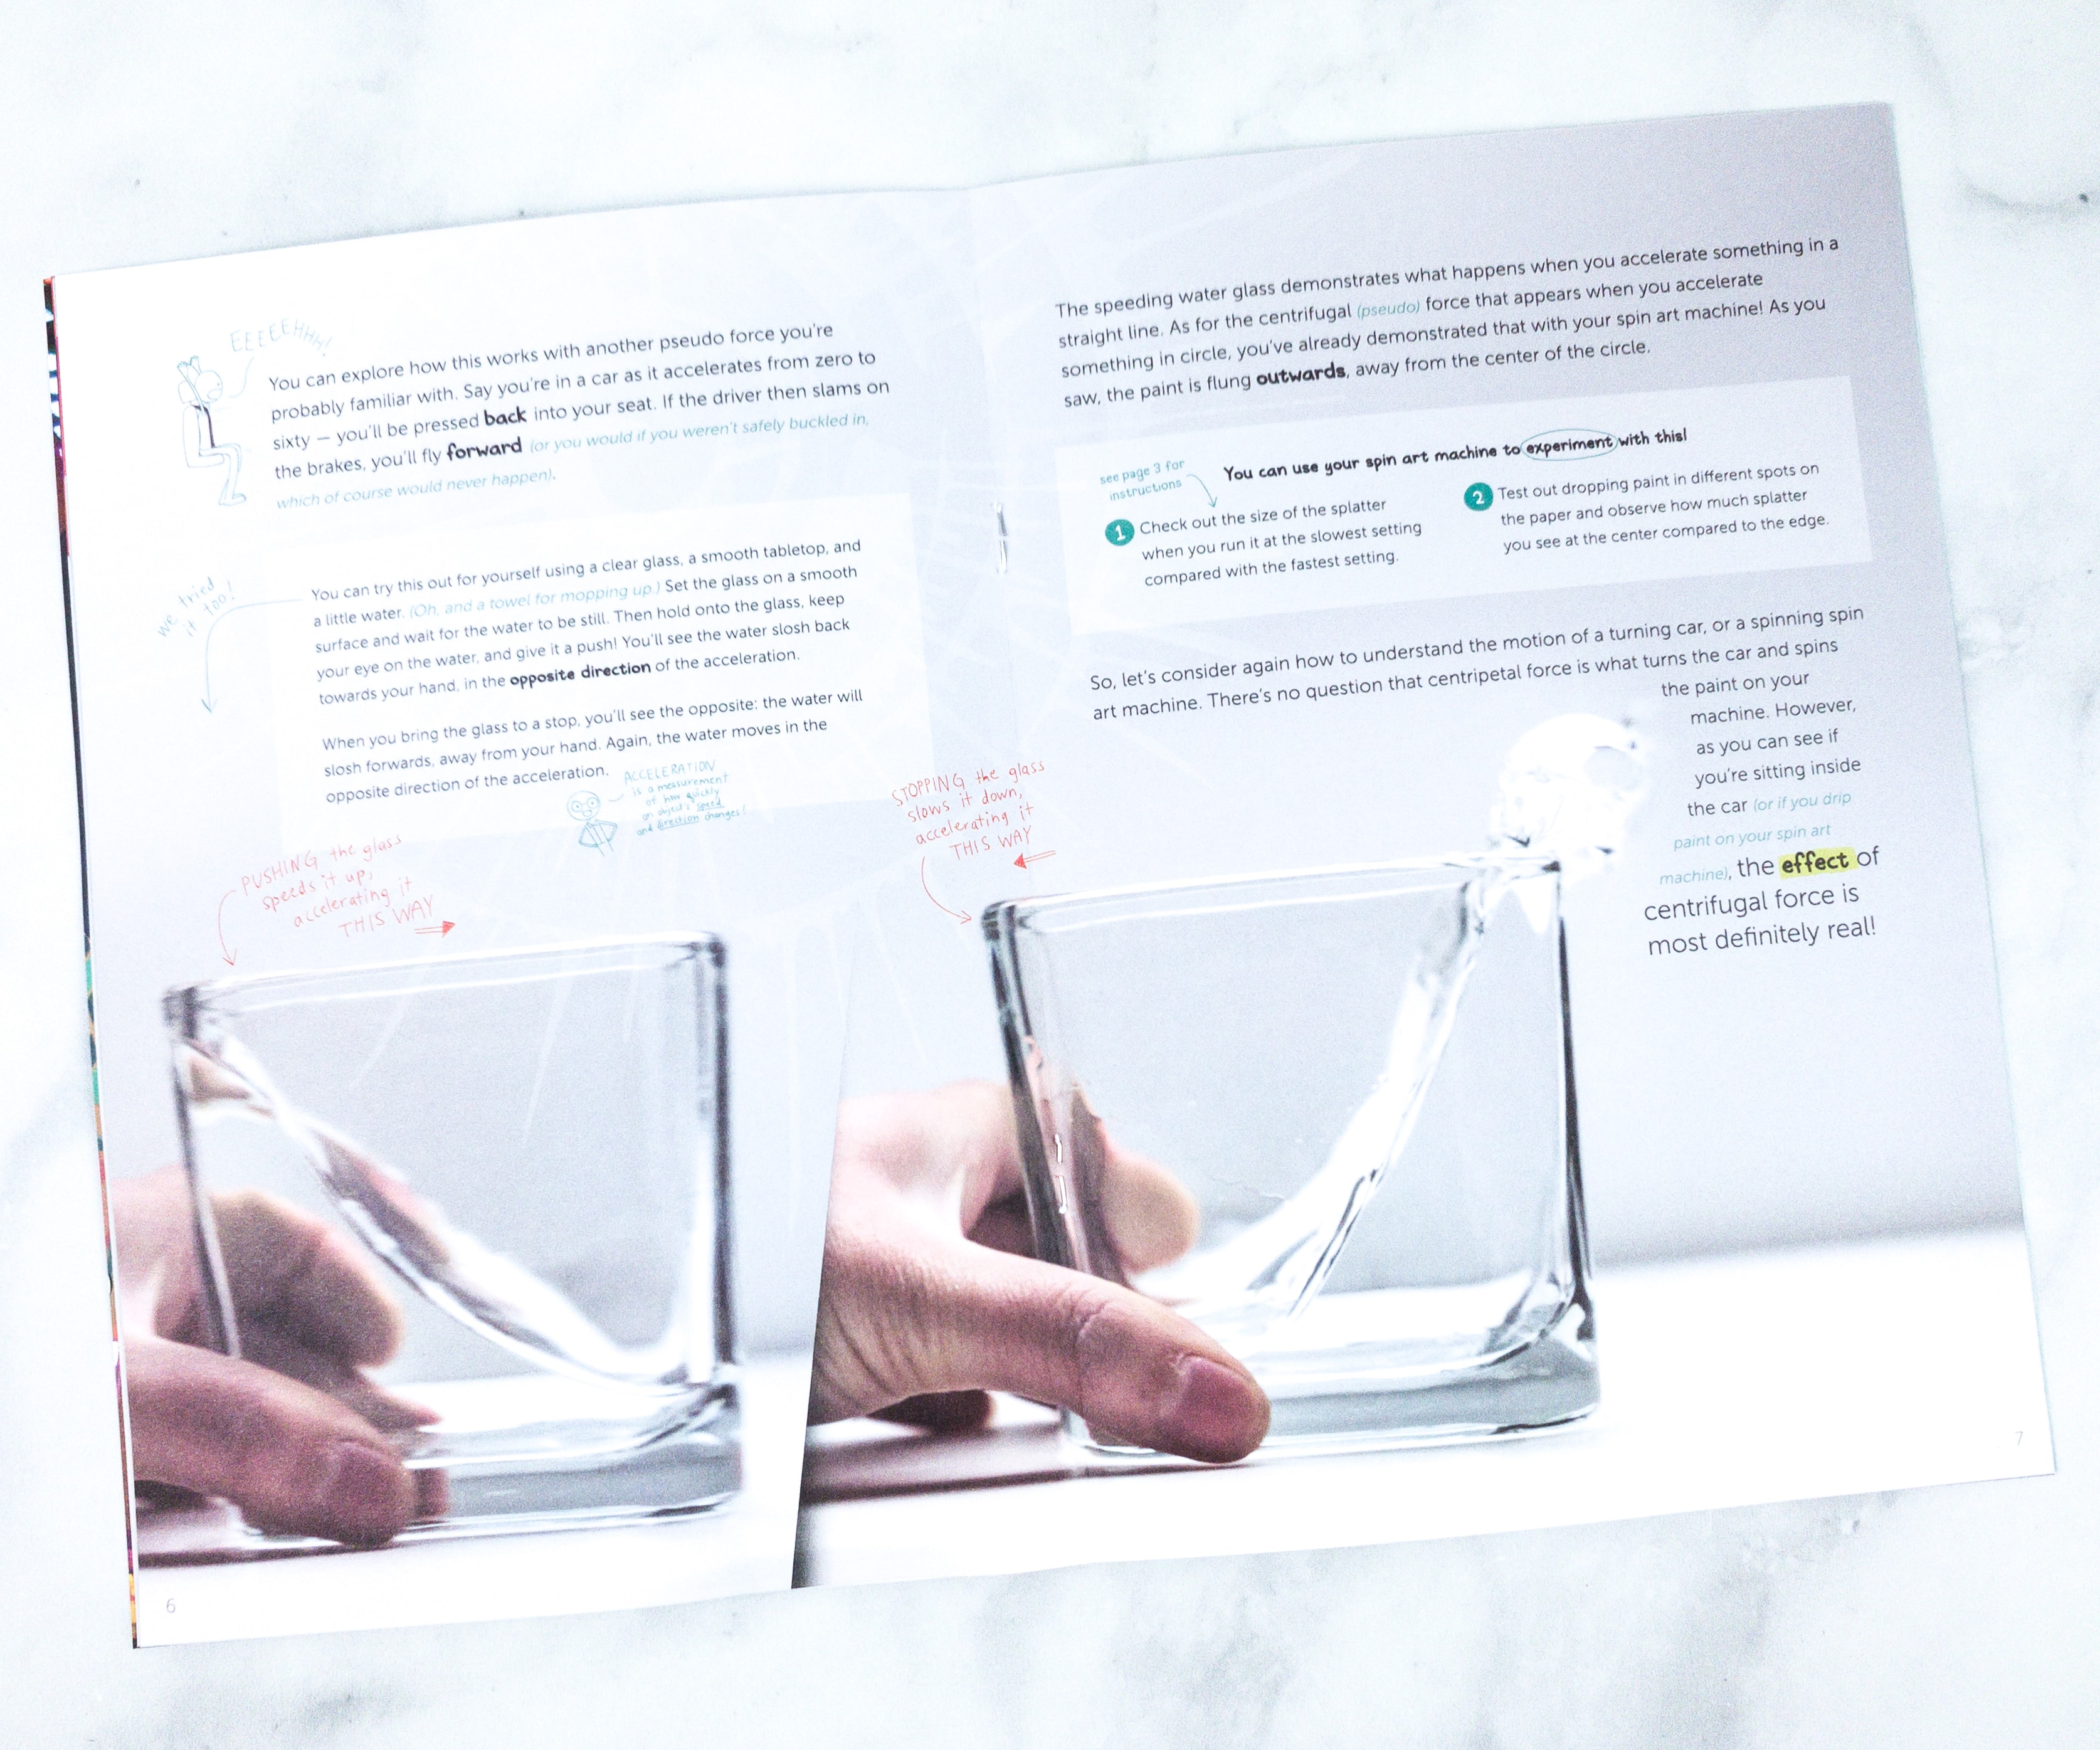
On the following page, there’s an explanation of how the centrifugal force works, where they used a glass, water, and an external force to explain what happens.
Set the glass on a smooth surface and wait for the water to be still. Then hold onto the glass, keep your eye on the water, and give it a push! You’ll see the water slosh back towards your hand, in the opposite direction of the acceleration.
When you bring the glass to stop, you’ll see the opposite: the water will slosh forwards, away from your hand. Again, the water moves in opposite direction of the acceleration.
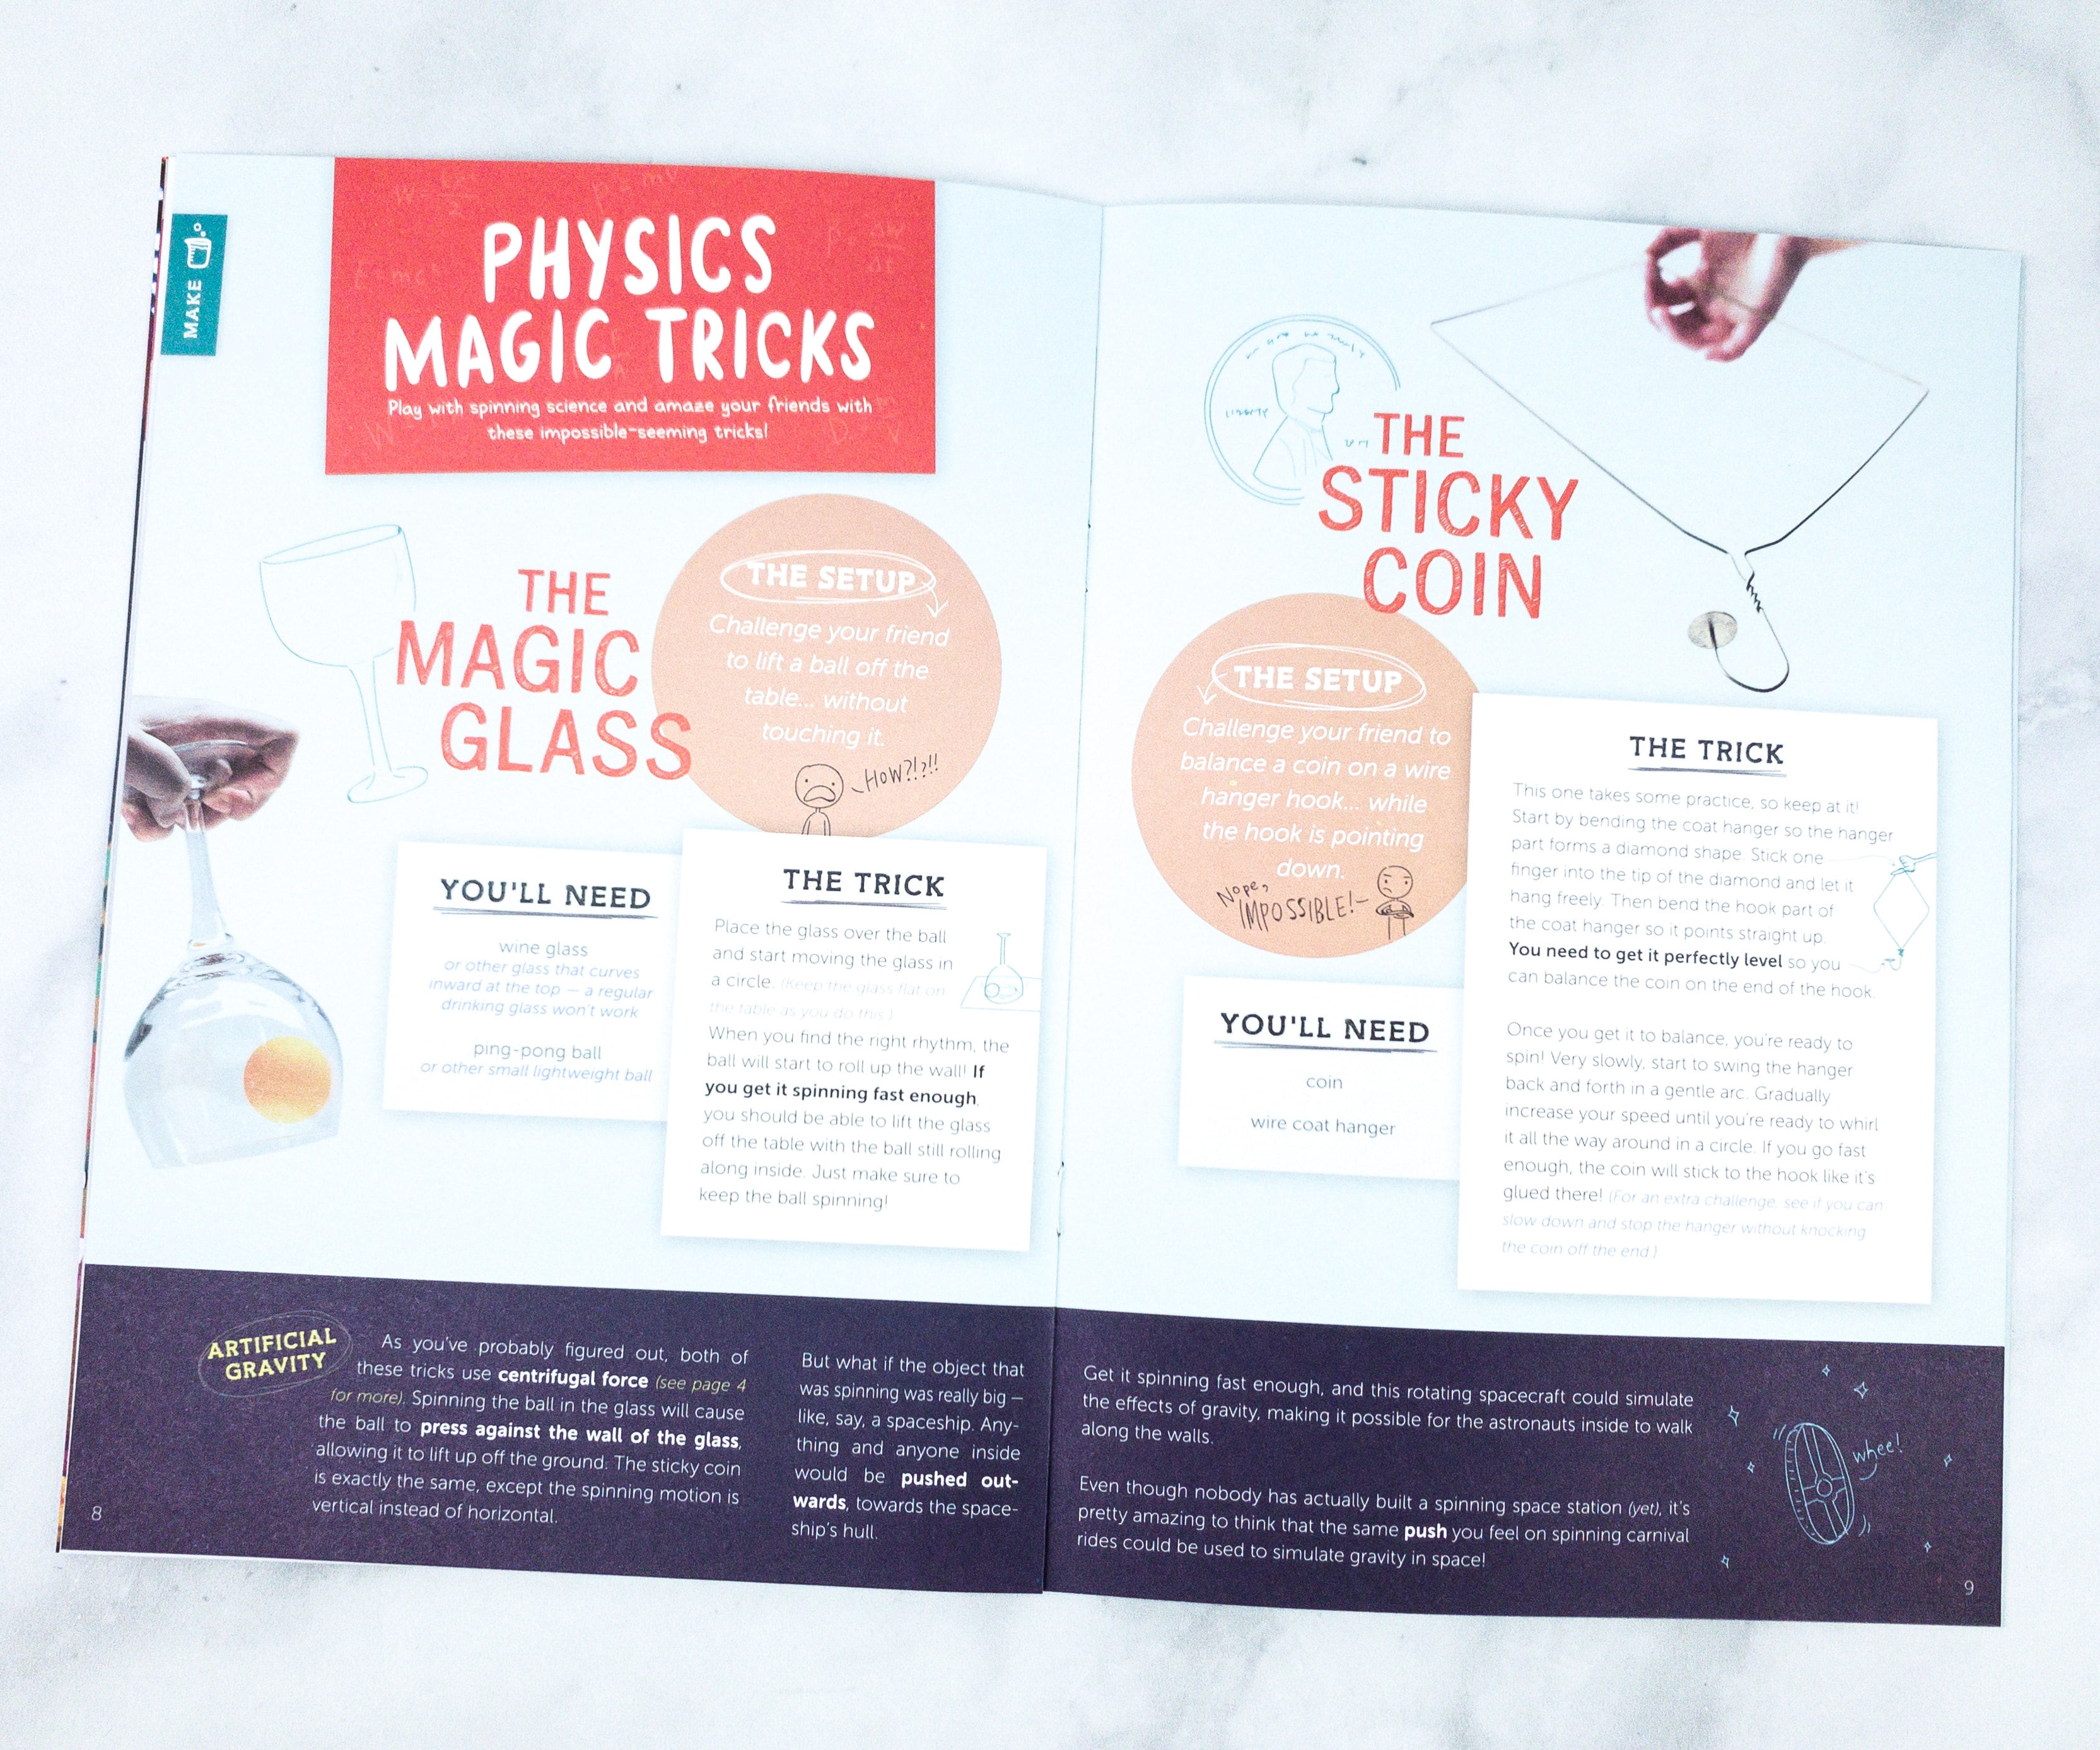
Next is an interesting feature about physics magic tricks! There are two tricks, The Magic Glass and The Sticky Coin, and both of them use centrifugal force.
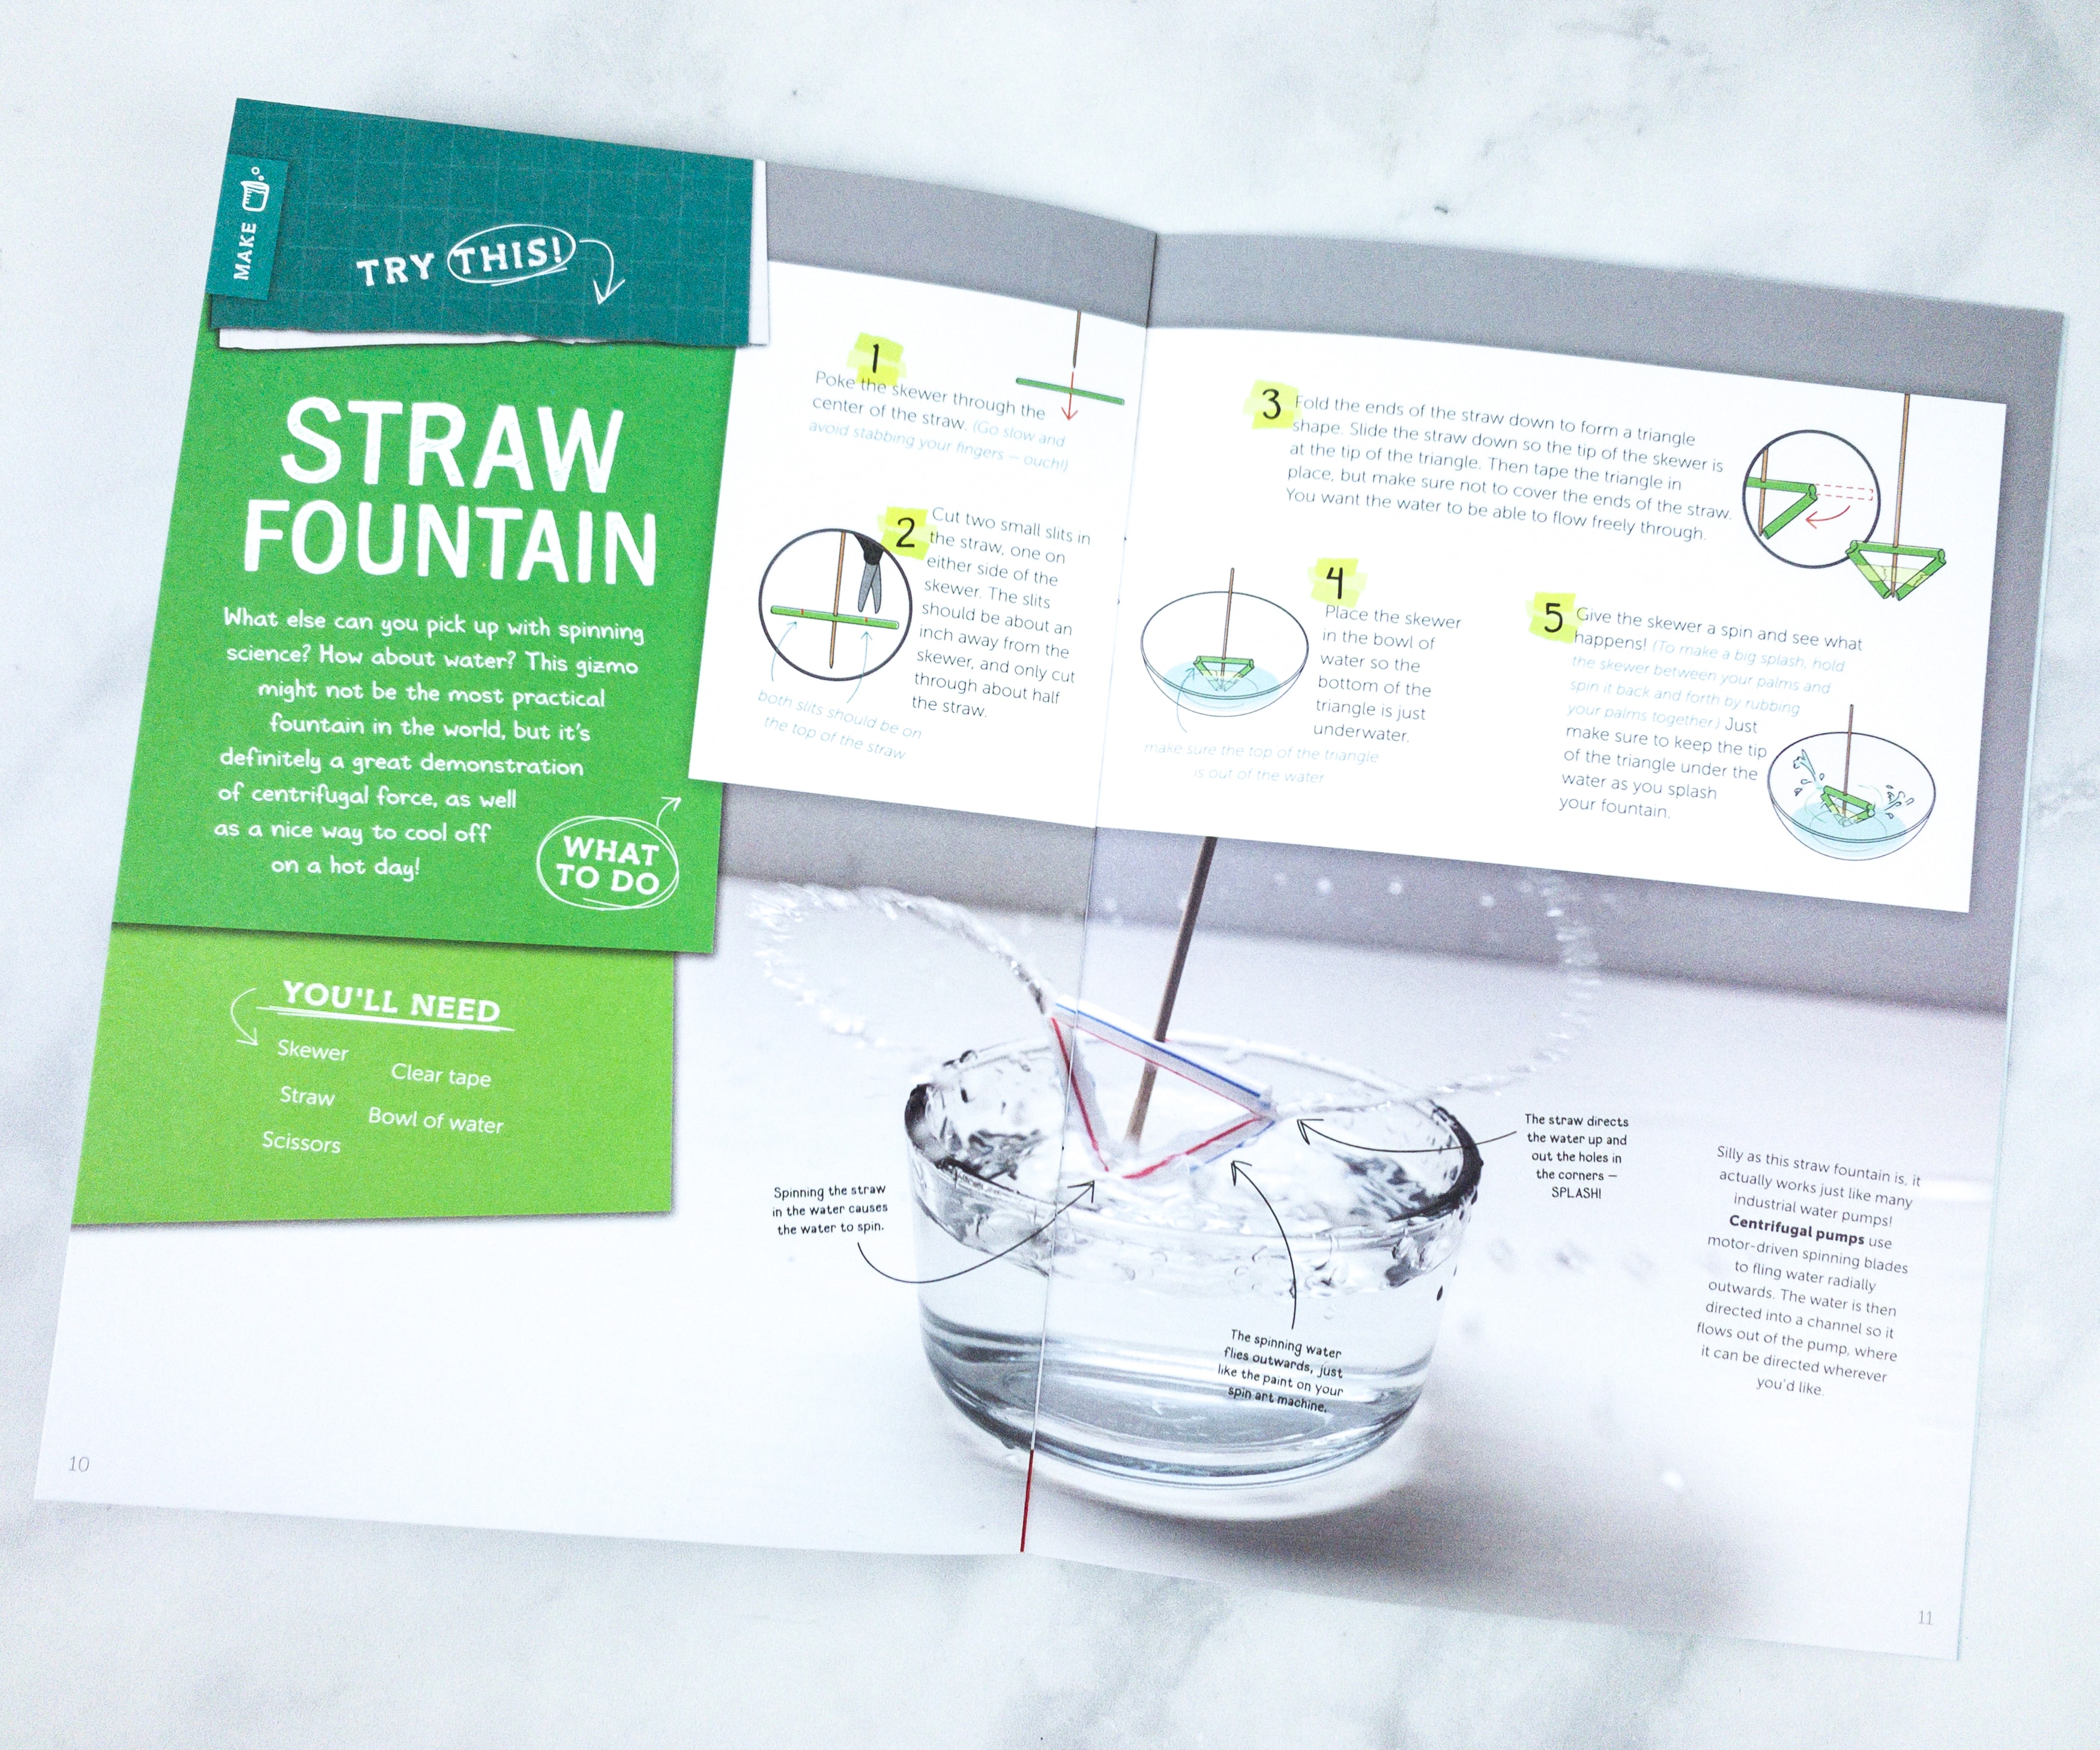
Another experiment to try is Straw Fountain. For this, you’ll need a skewer, straw, scissors, clear tape, and bowl of water.
Tinker Crate Blueprint + Materials
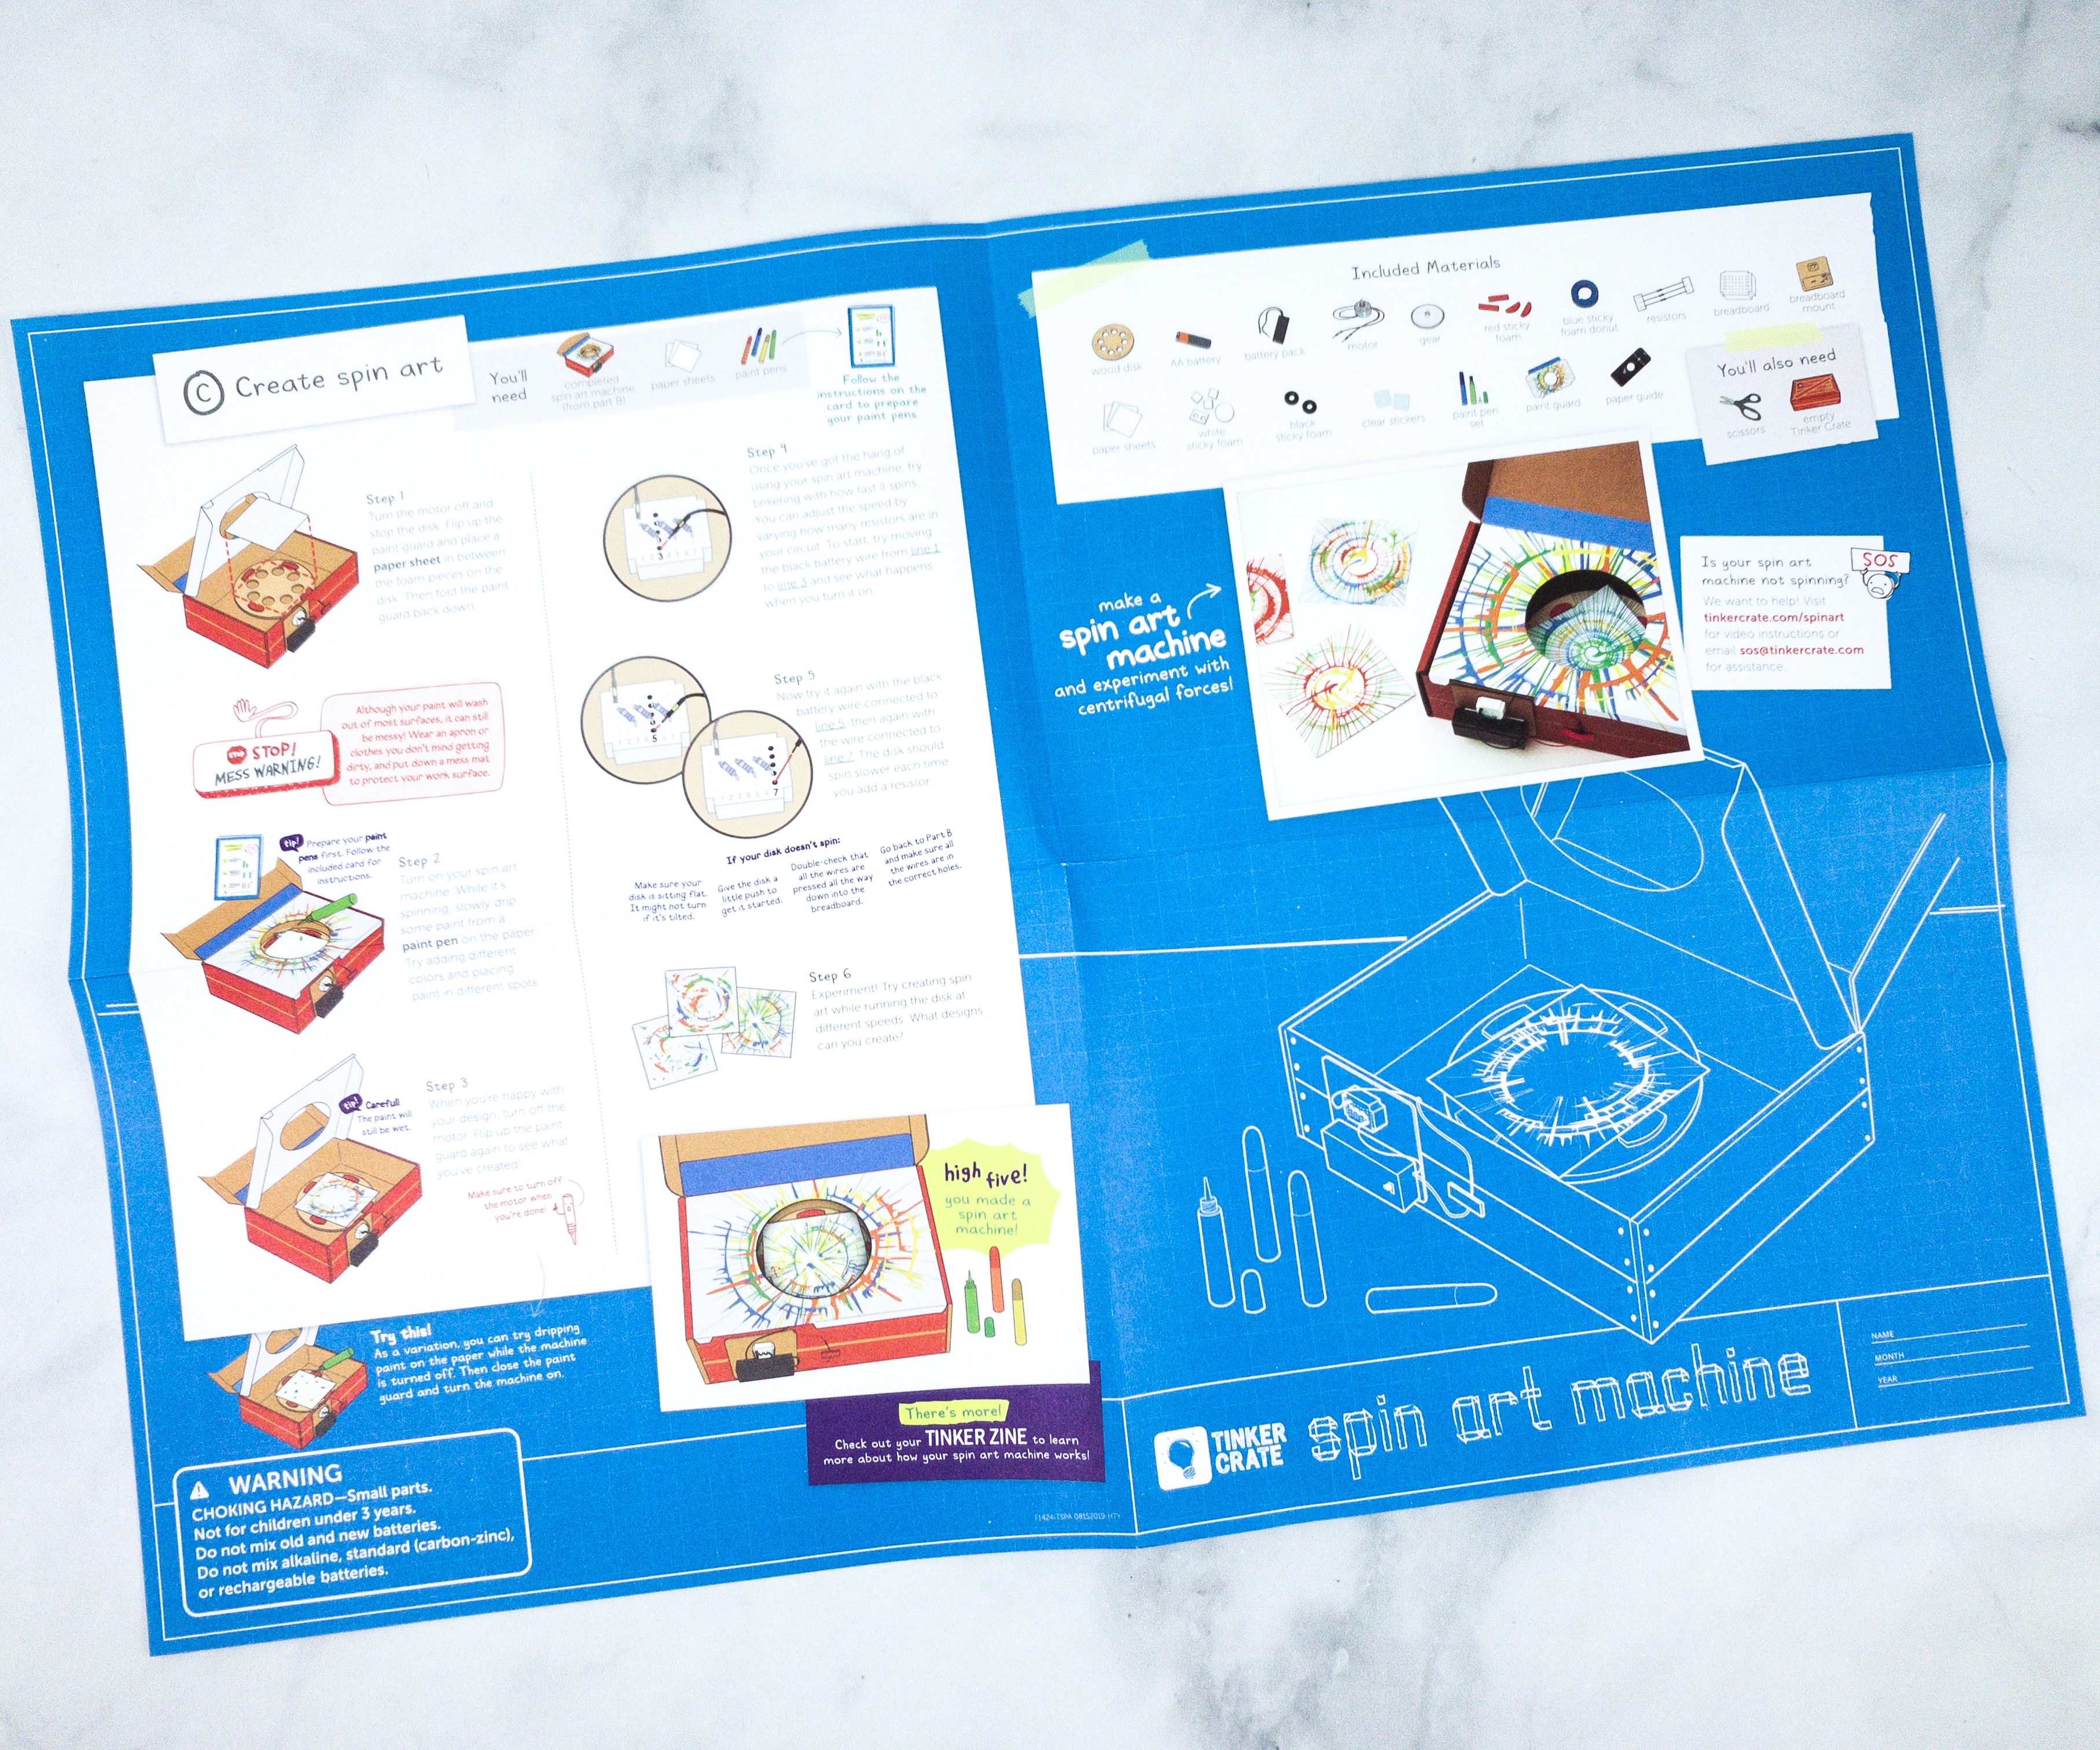
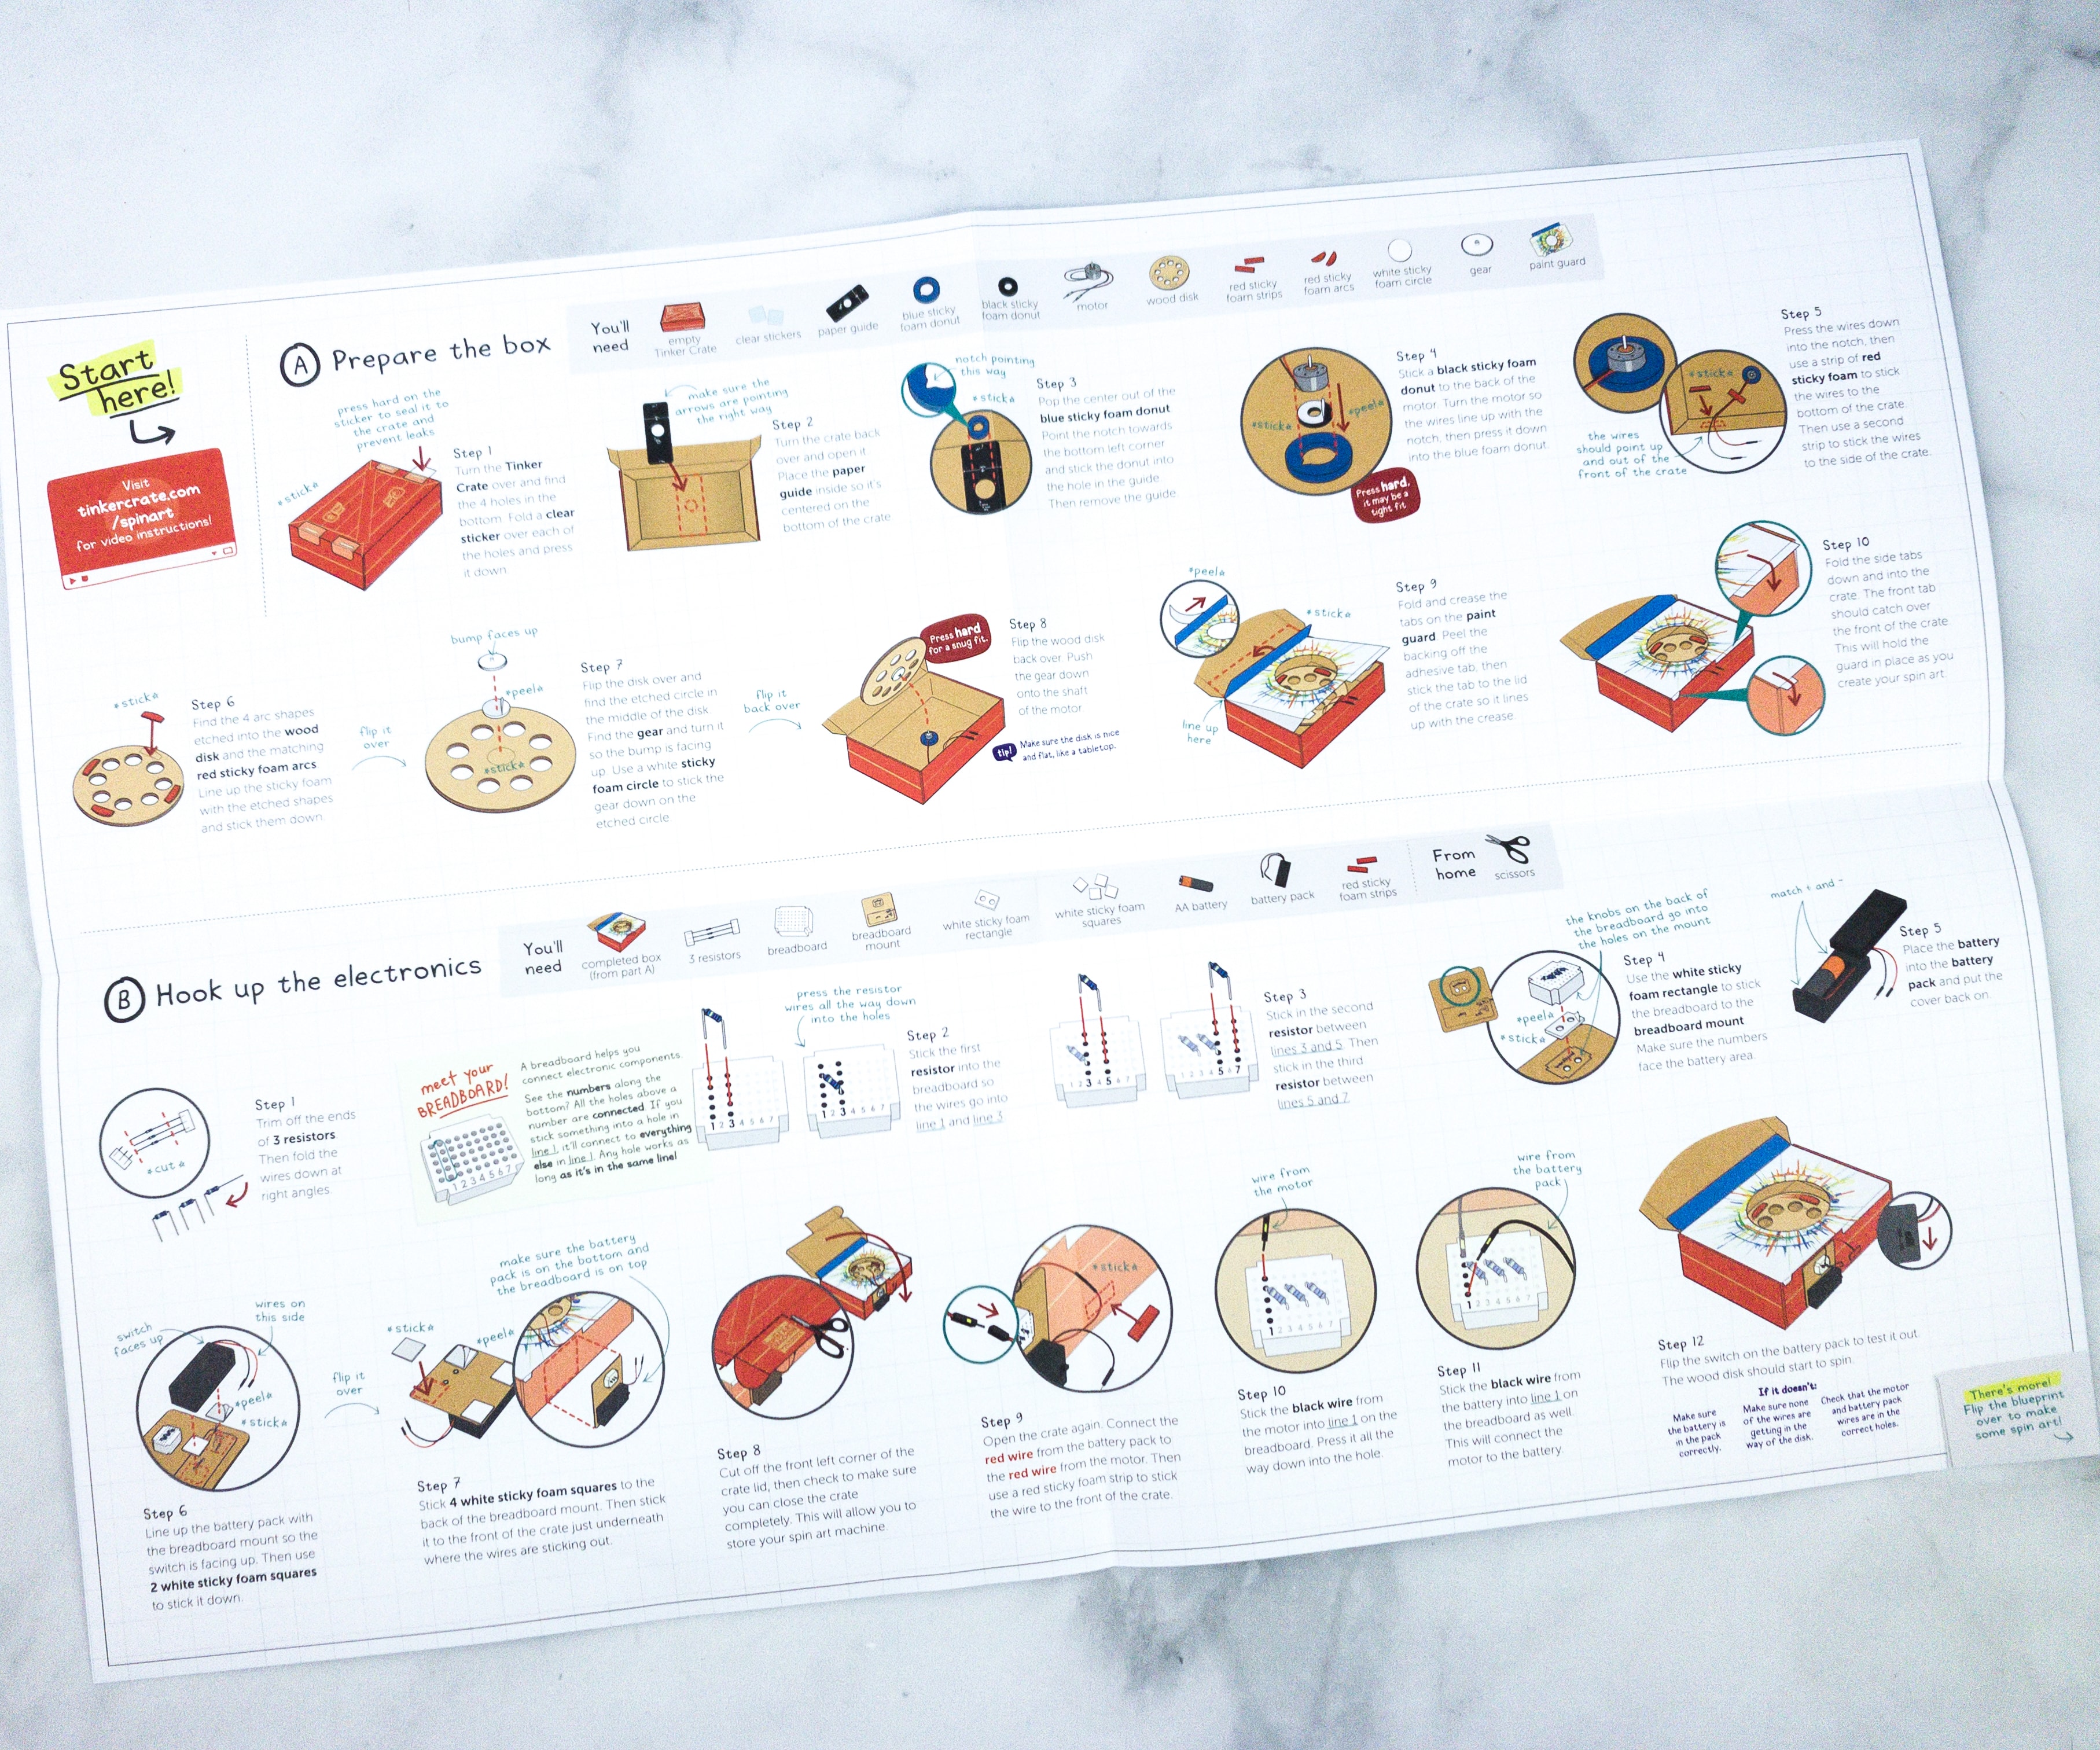
The instructions and other essential project information are printed on a faux blueprint fold-out sheet.
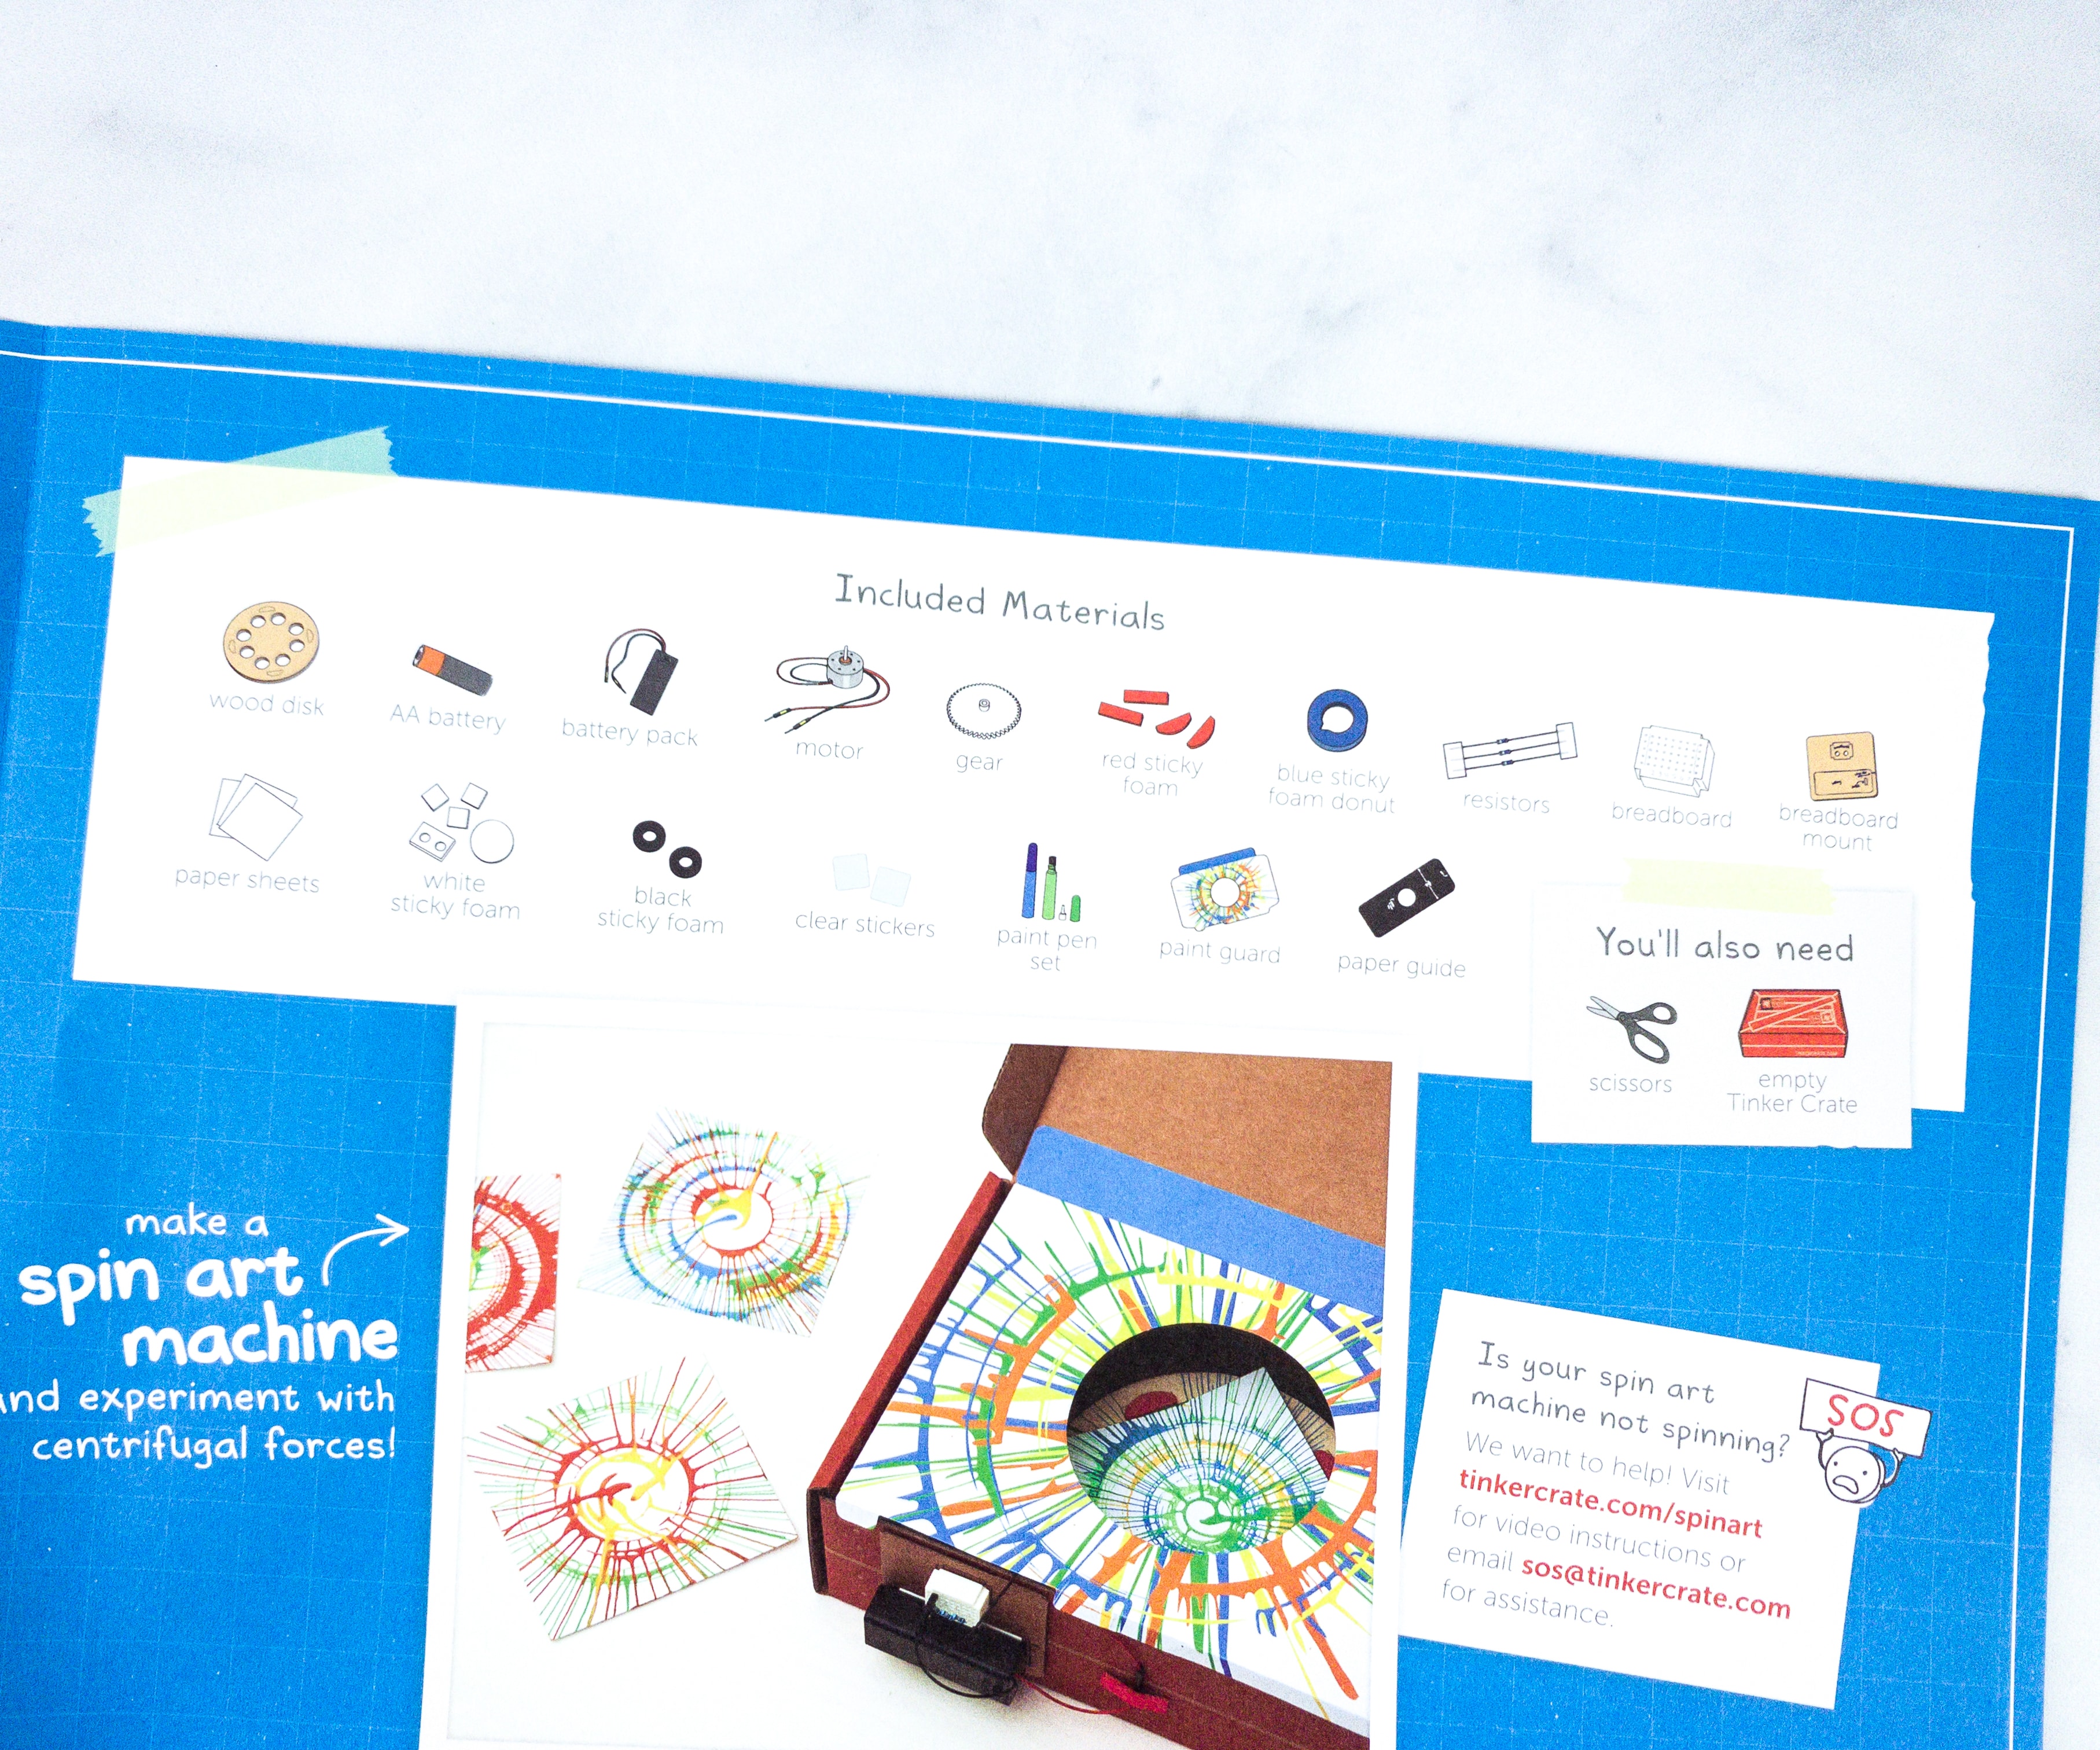
This sheet lists down all the materials needed for the project!
They even included a stop and check segment, and some tips to guide us to make the project easier and faster!
Tinker Crate Activities
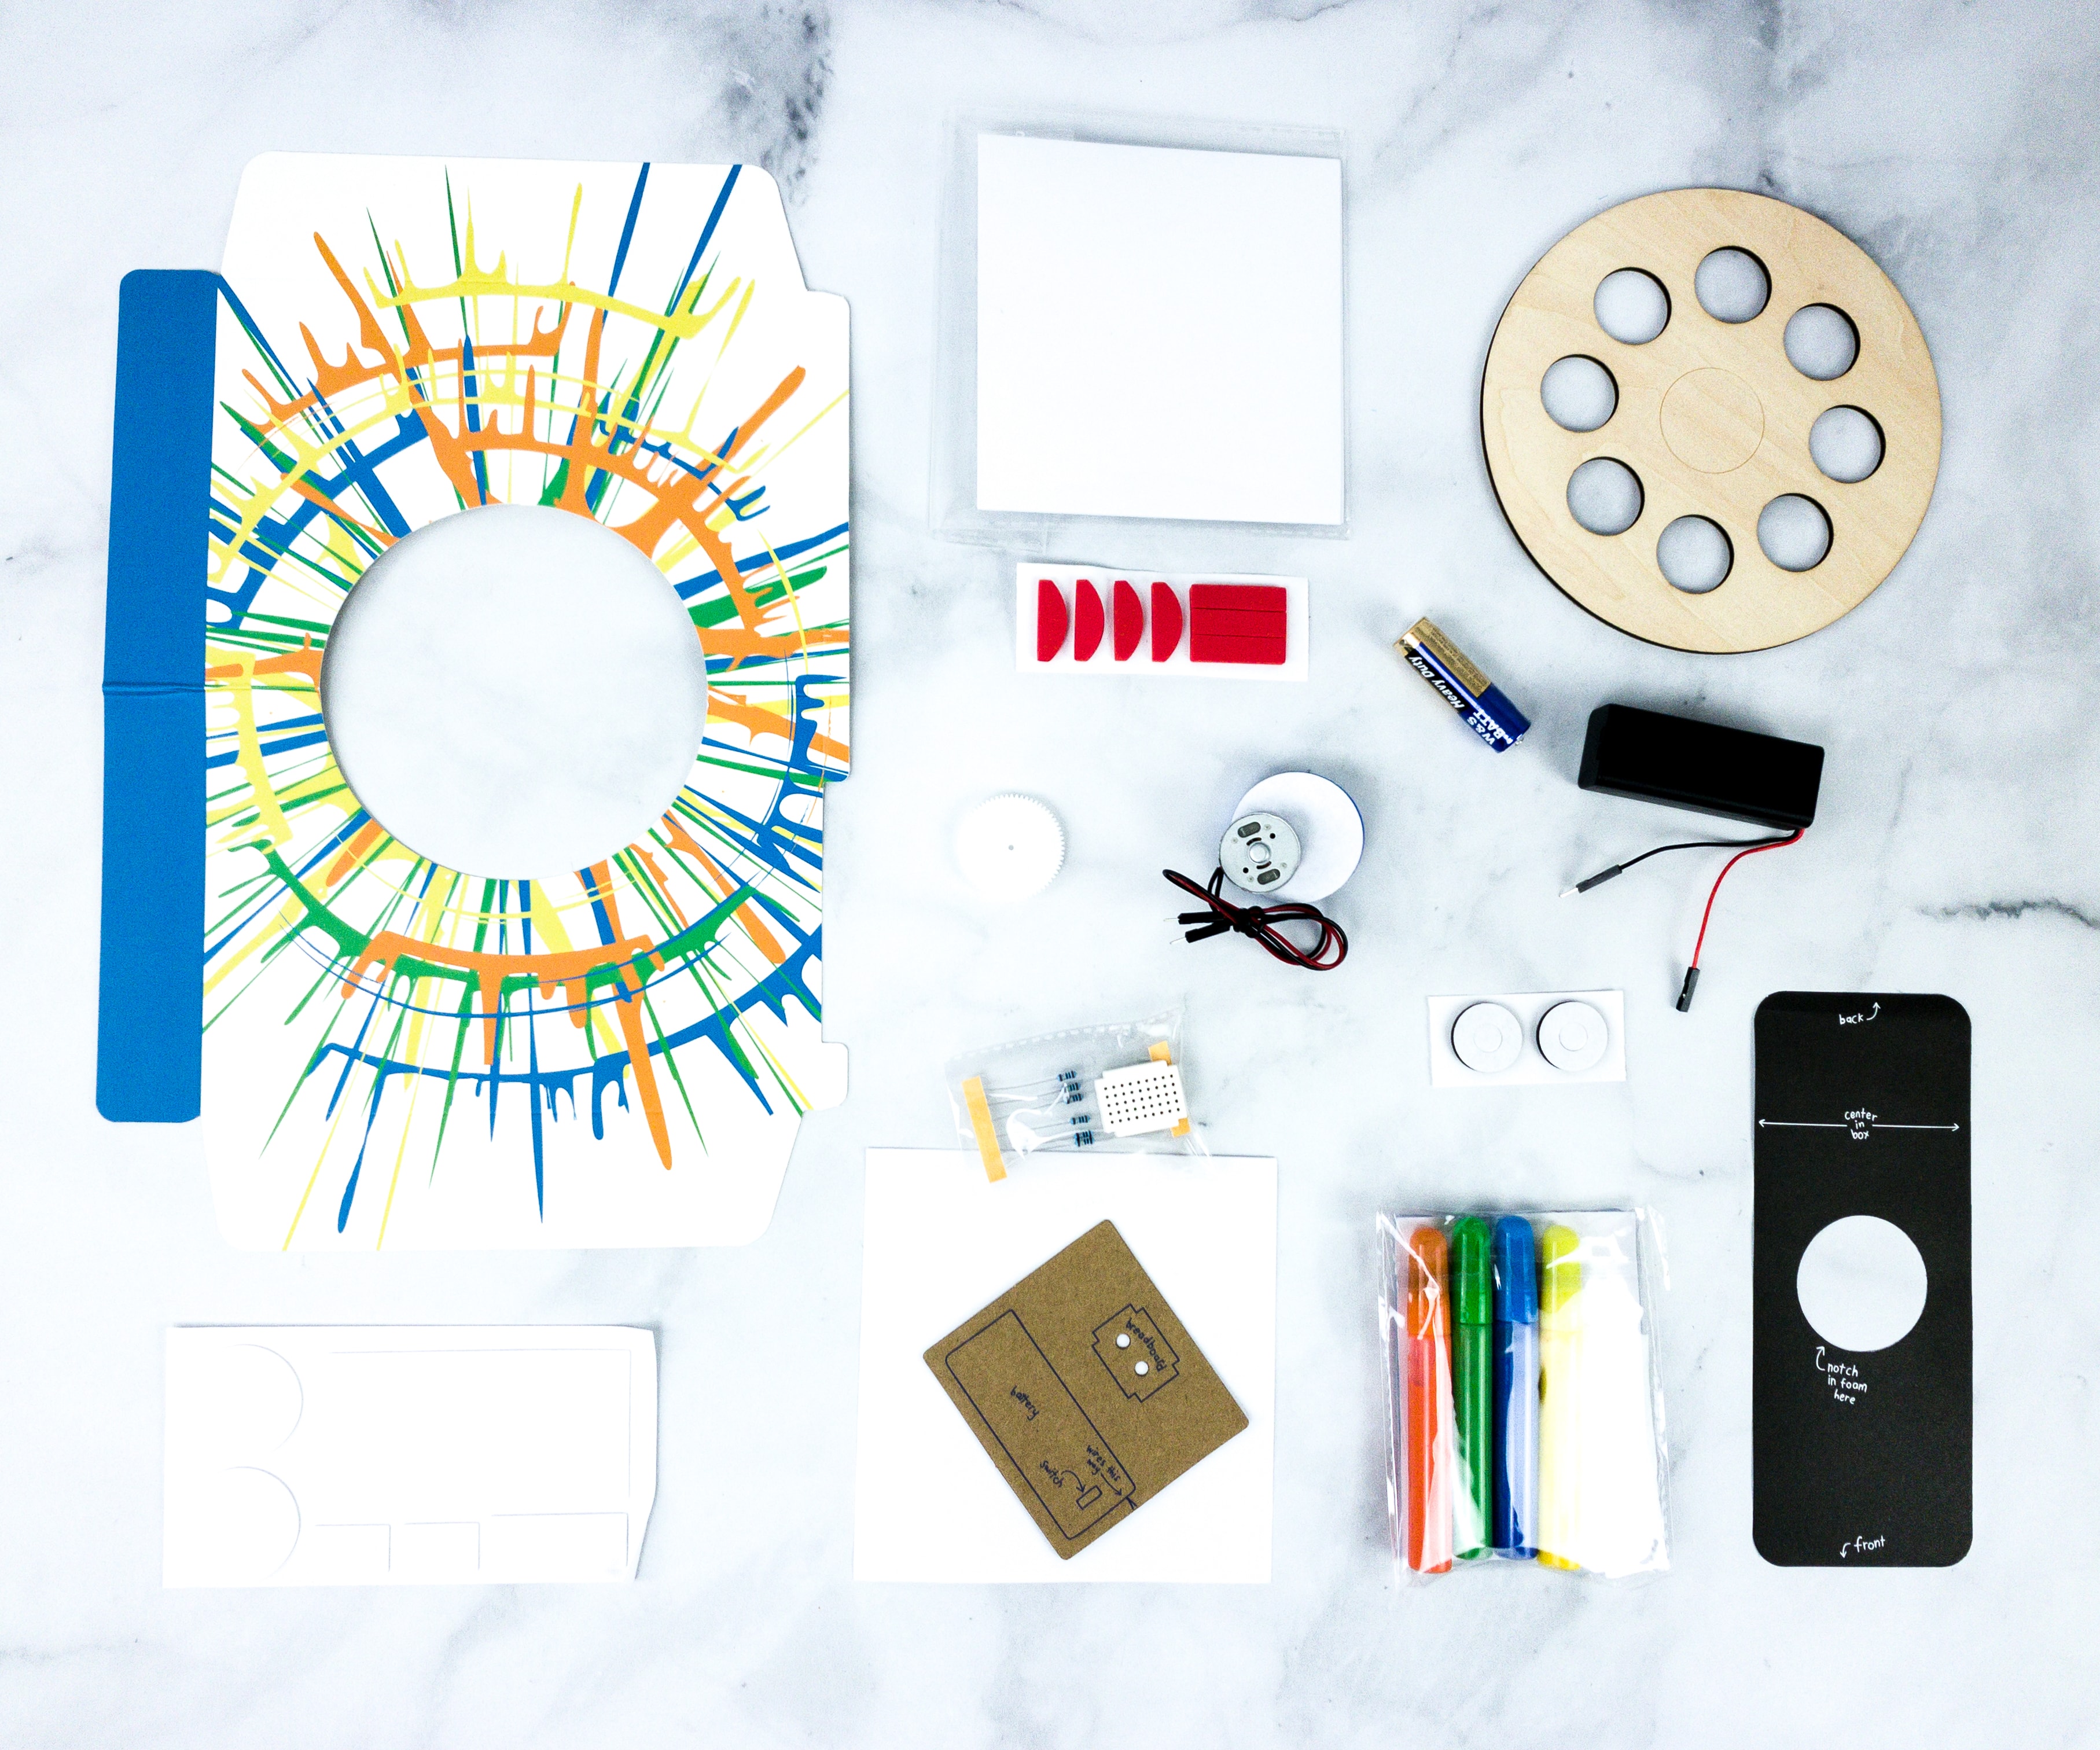
For this project, we used the following materials: wood disk, AA battery, battery pack, motor, gear, red sticky foam, blue sticky foam donut, resistors, breadboard, breadboard mount, paper sheets, white and black sticky foams, clear stickers, paint pen set, paint guard, and paper guide.
As always, the instruction sheet is well-detailed! It has a lot of great explanatory notes!
For more video information about this crate, they also encourage us to visit their website.
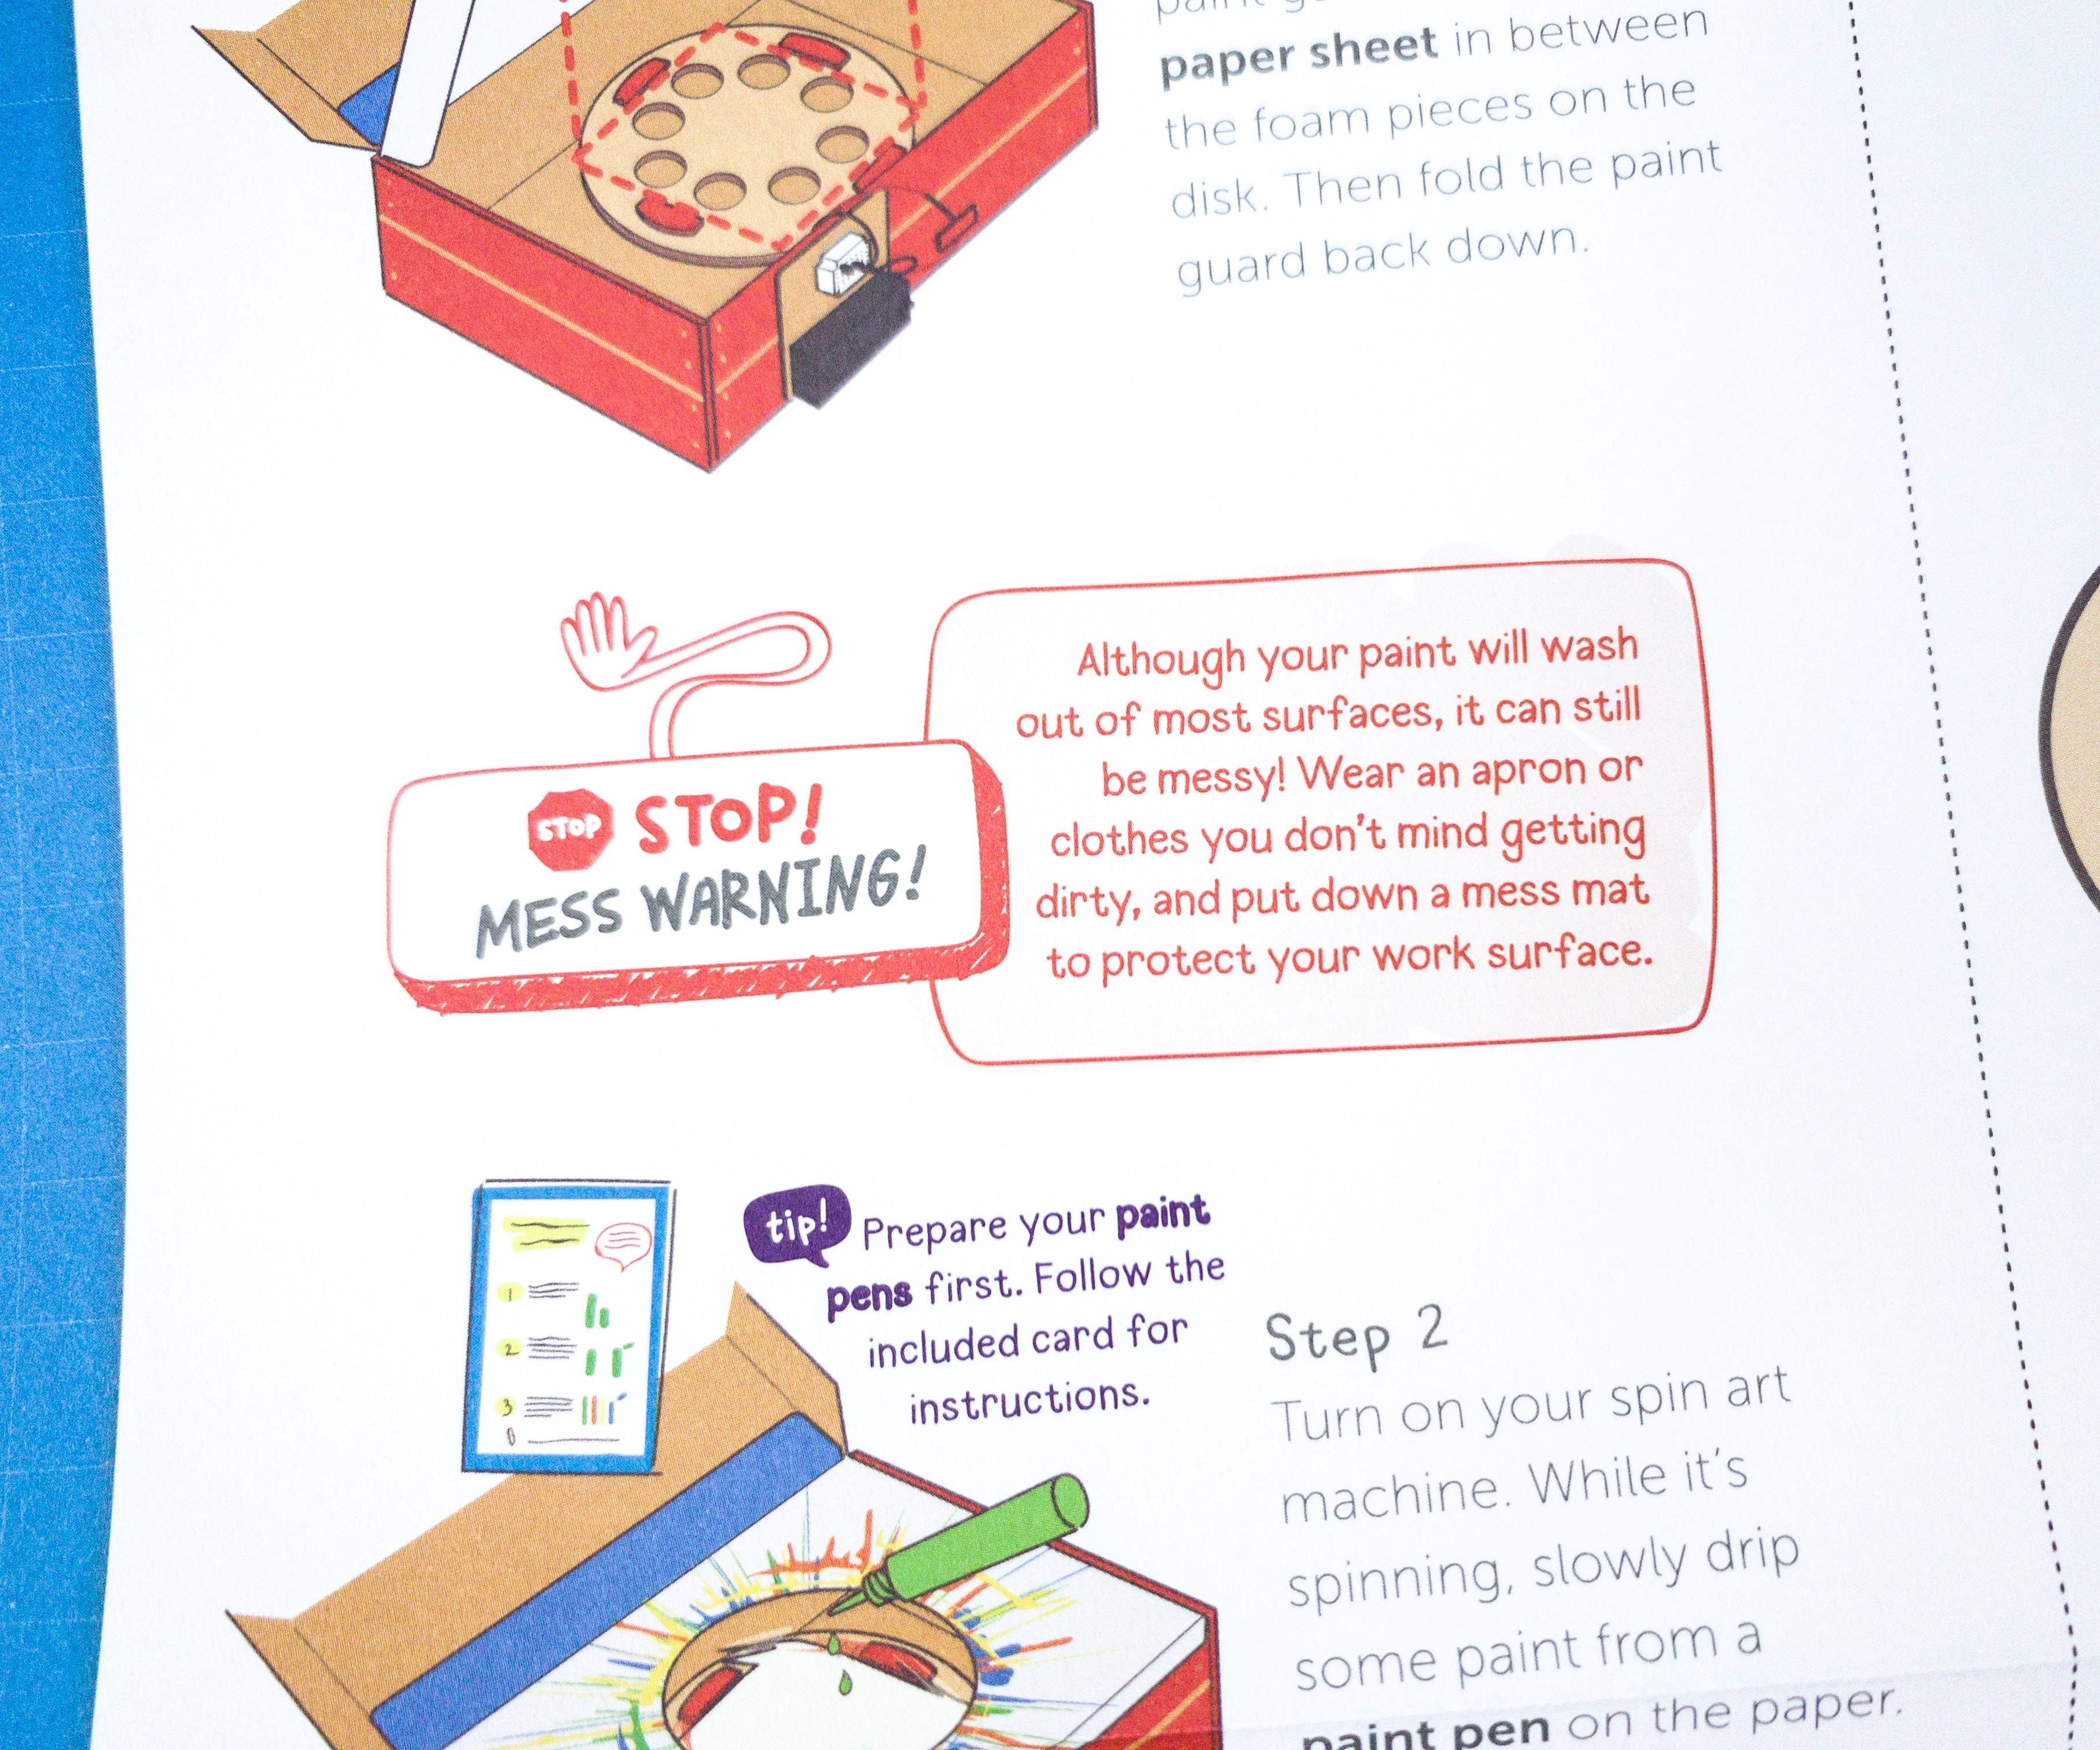
Aside from the worded instruction, the sheet also comes with a lot of instructional pictures that are really helpful in making the project.
Some key areas are highlighted because they are essential steps that might make or break your project!
This sheet also gives us a glimpse of how the end product would look like.

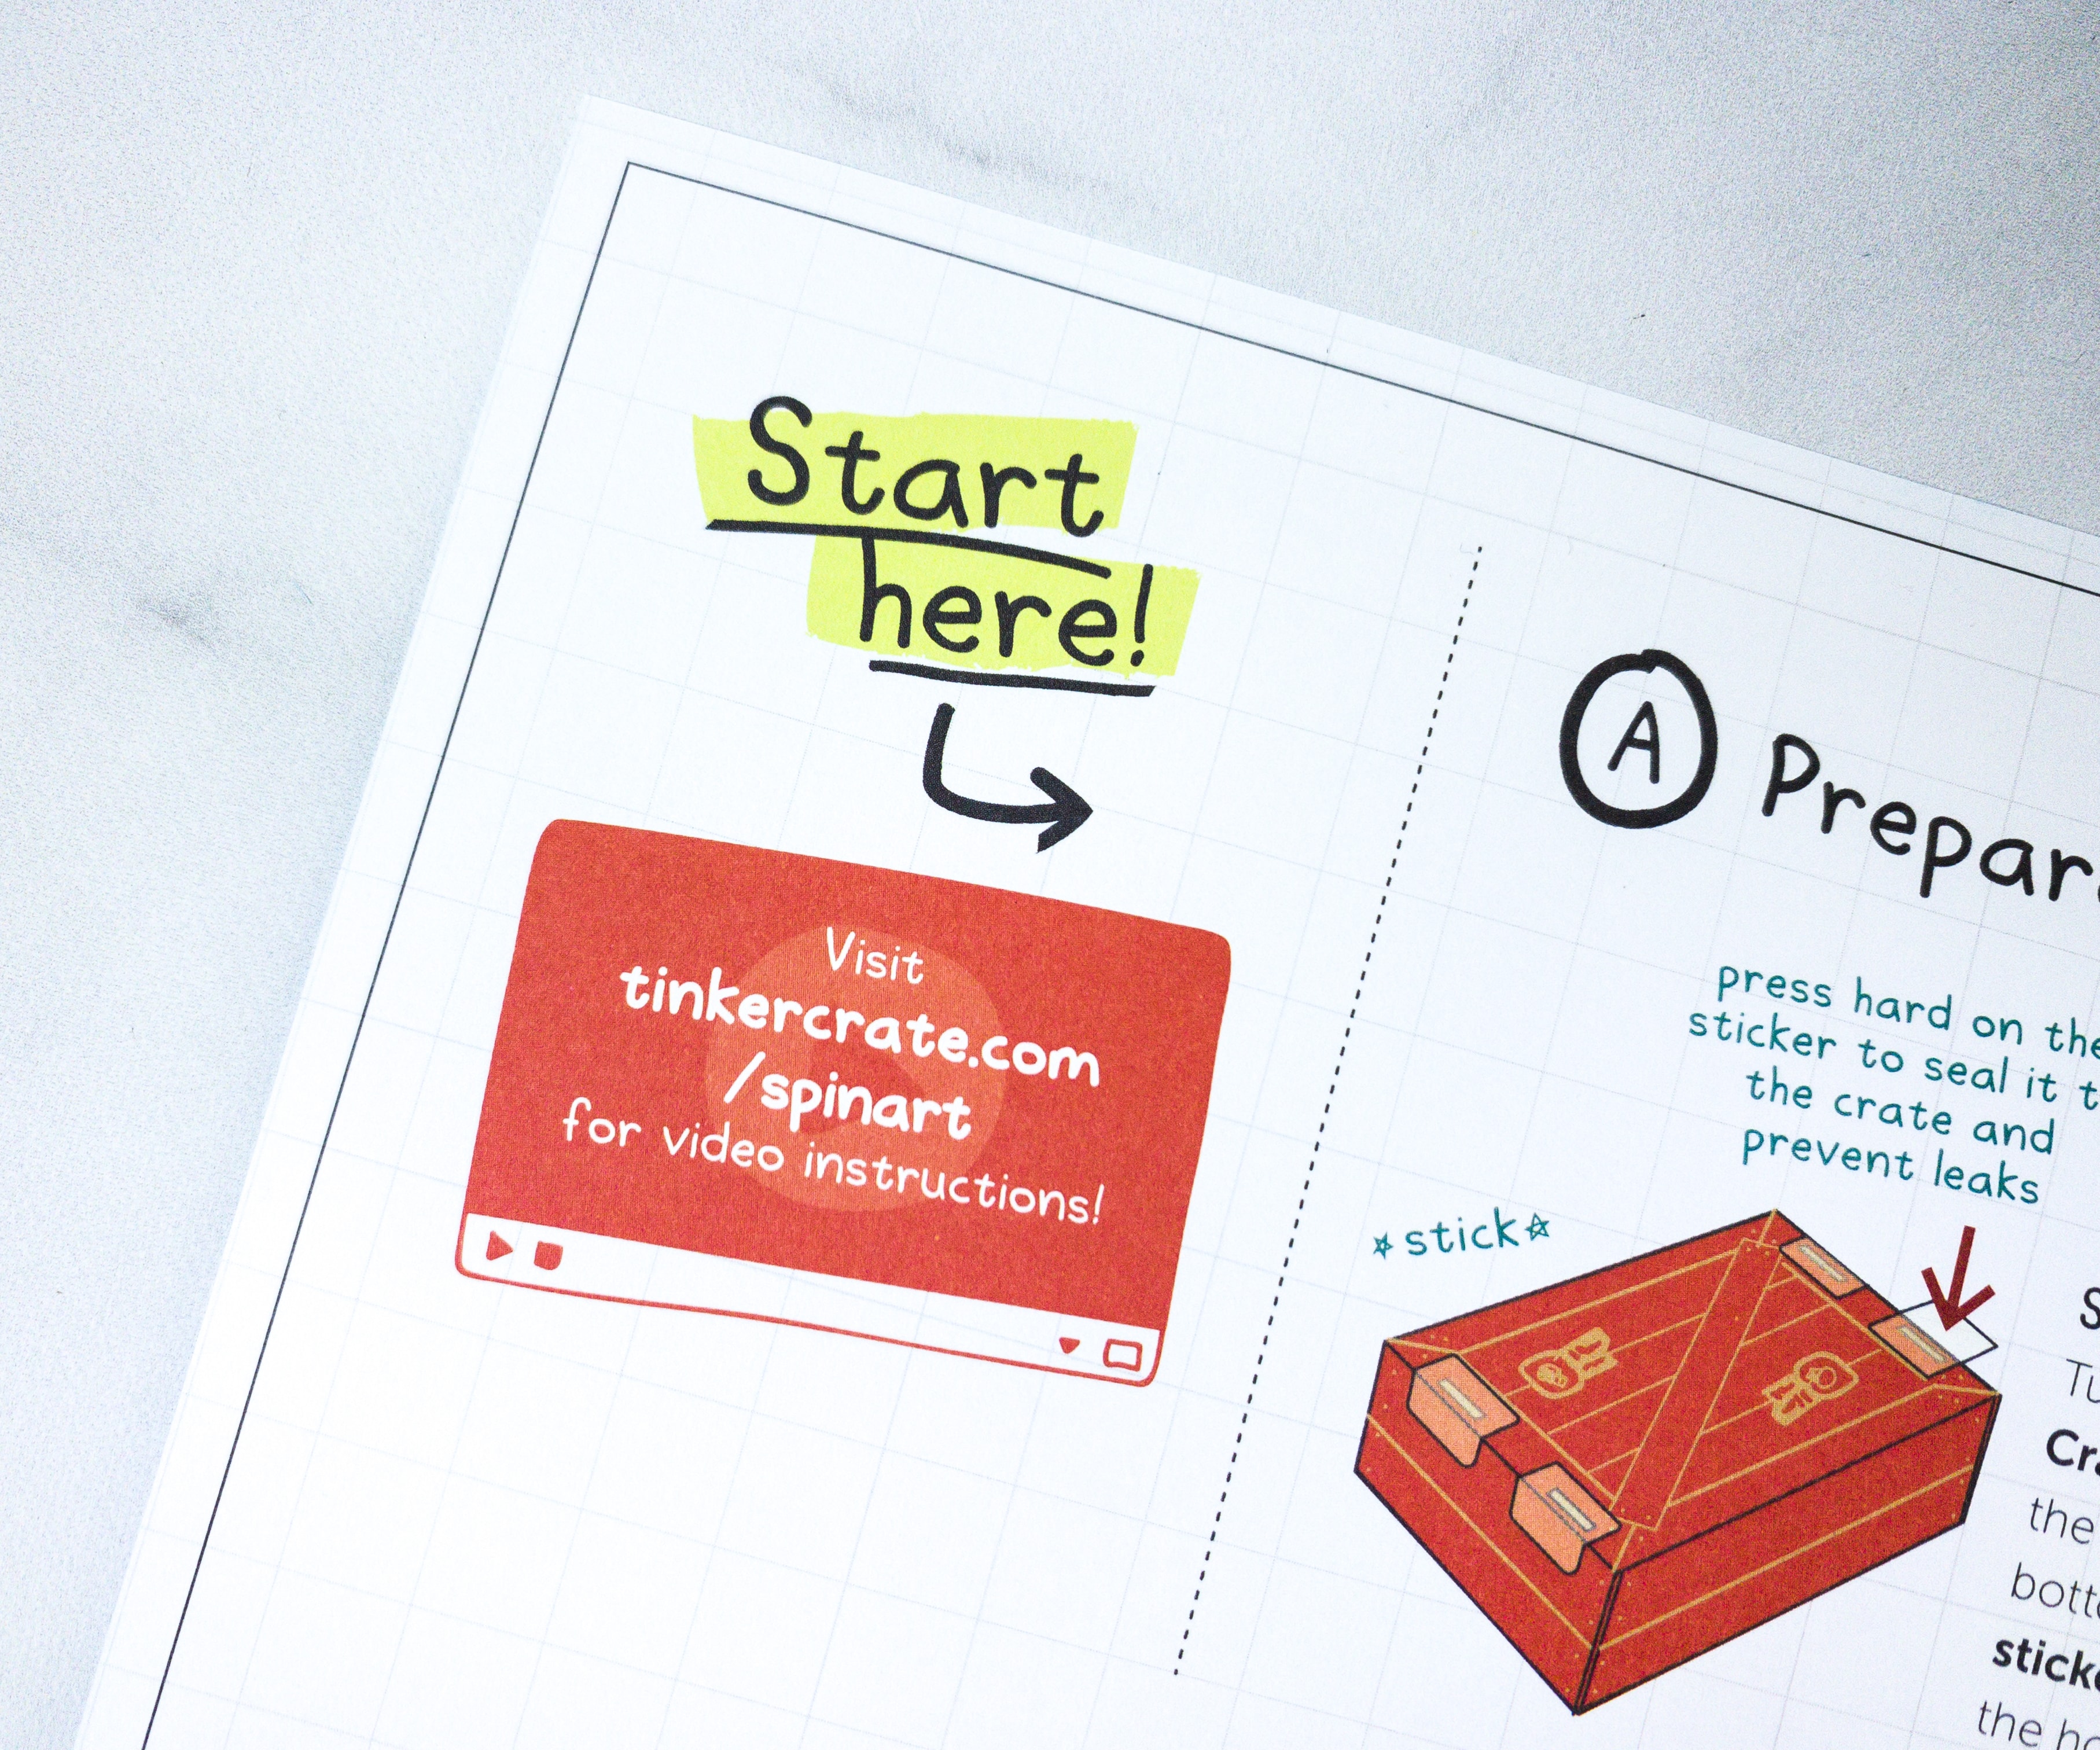
The first part of the project is the preparation of the box! For this one, we used the empty Tinker Crate box, clear stickers, paper guide, blue, red, white, and black sticky foam, gear, and paint guard.
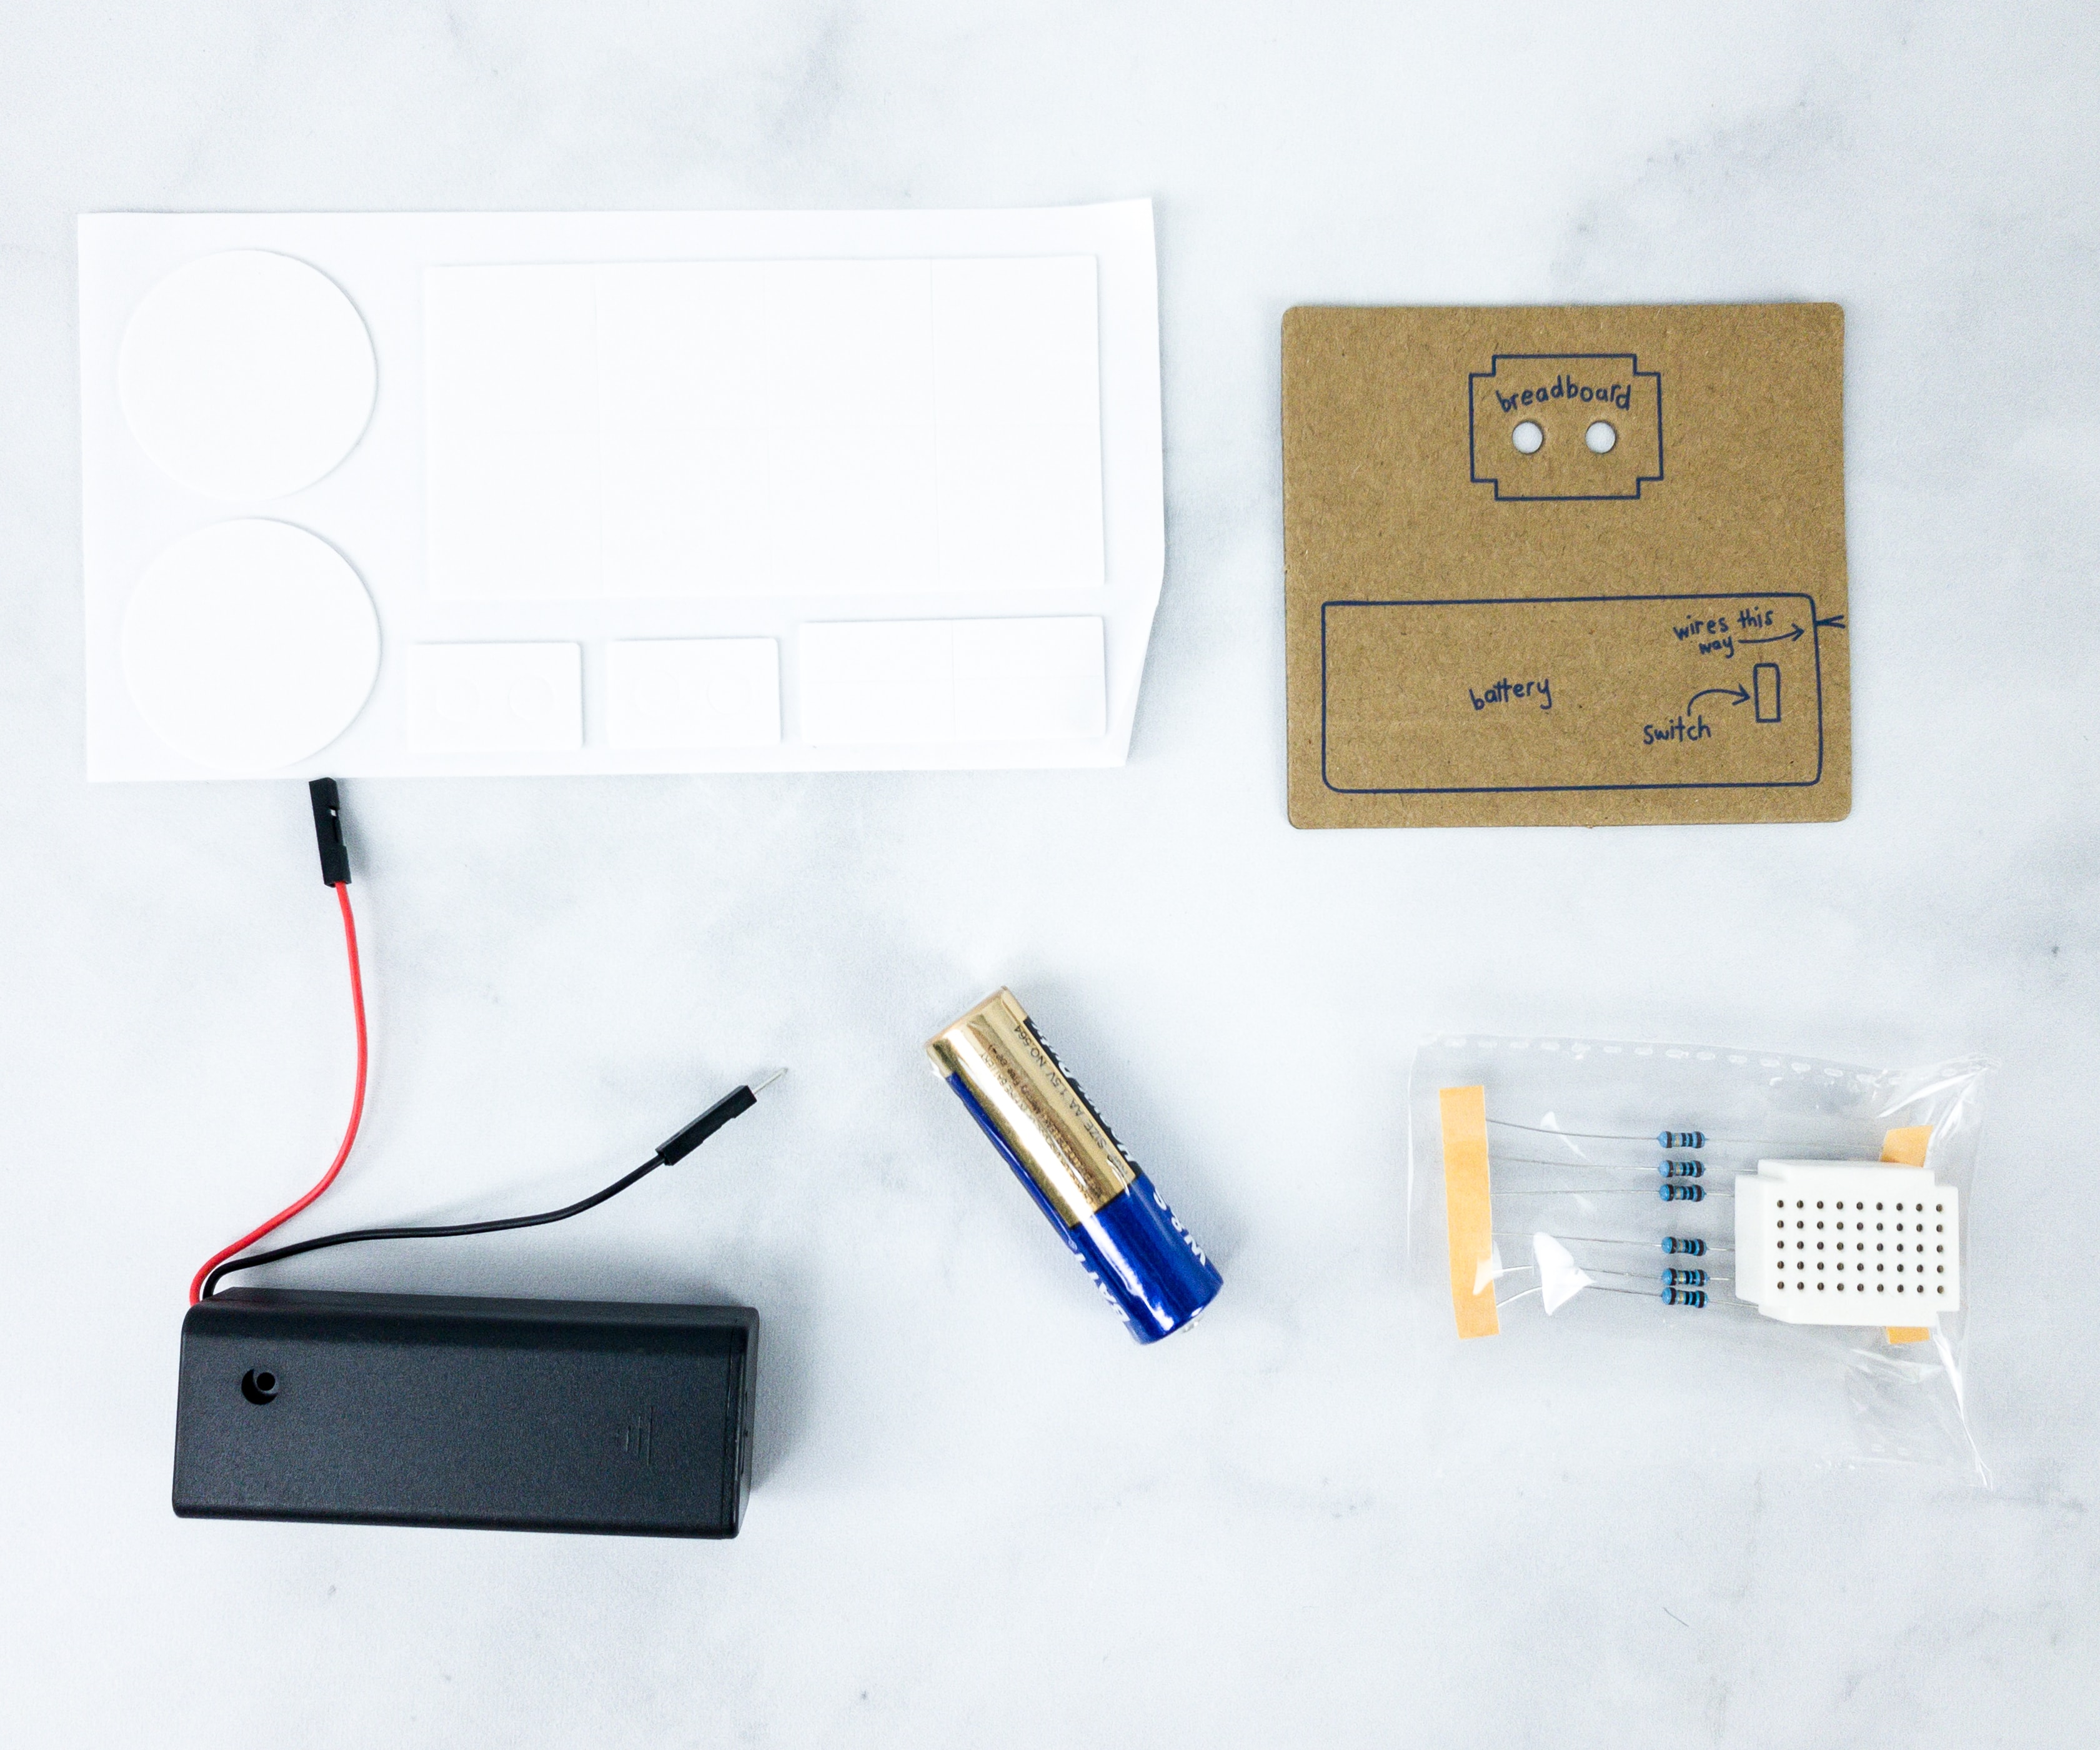
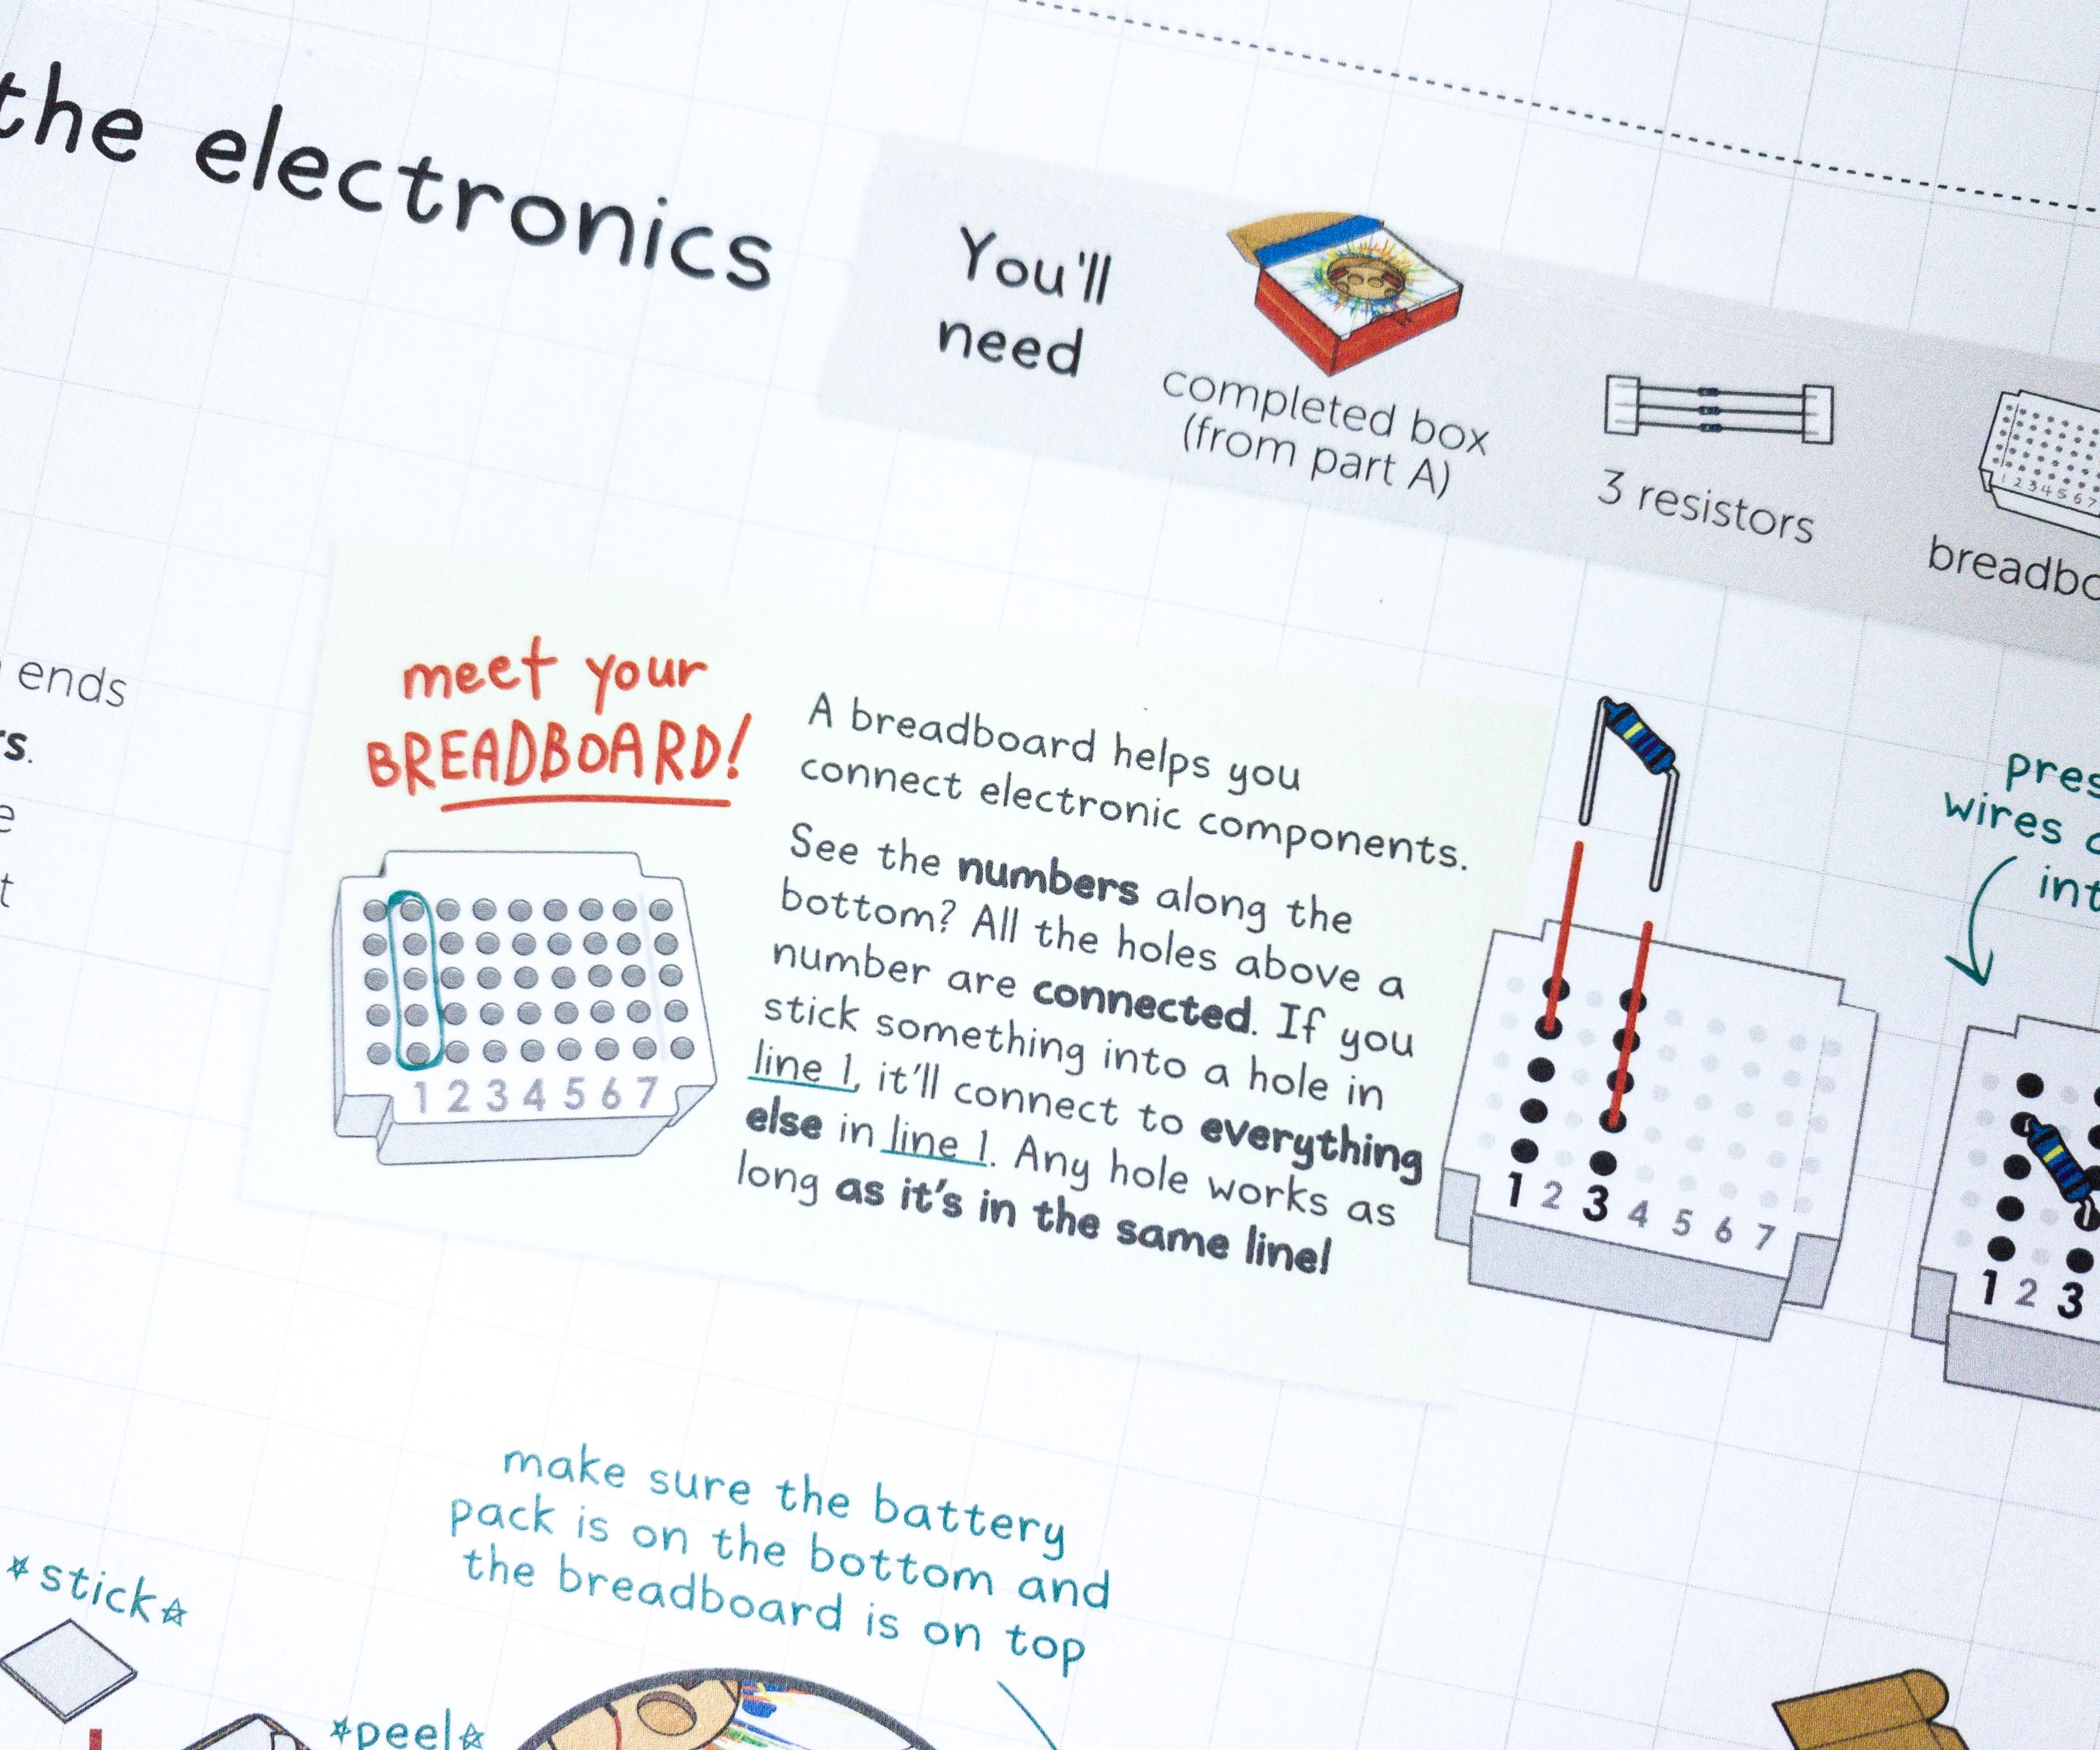
The second part is called the Hook-up the Electronics, which includes white sticky foam, resistors, AA battery, battery pack, breadboard, and breadboard mount.
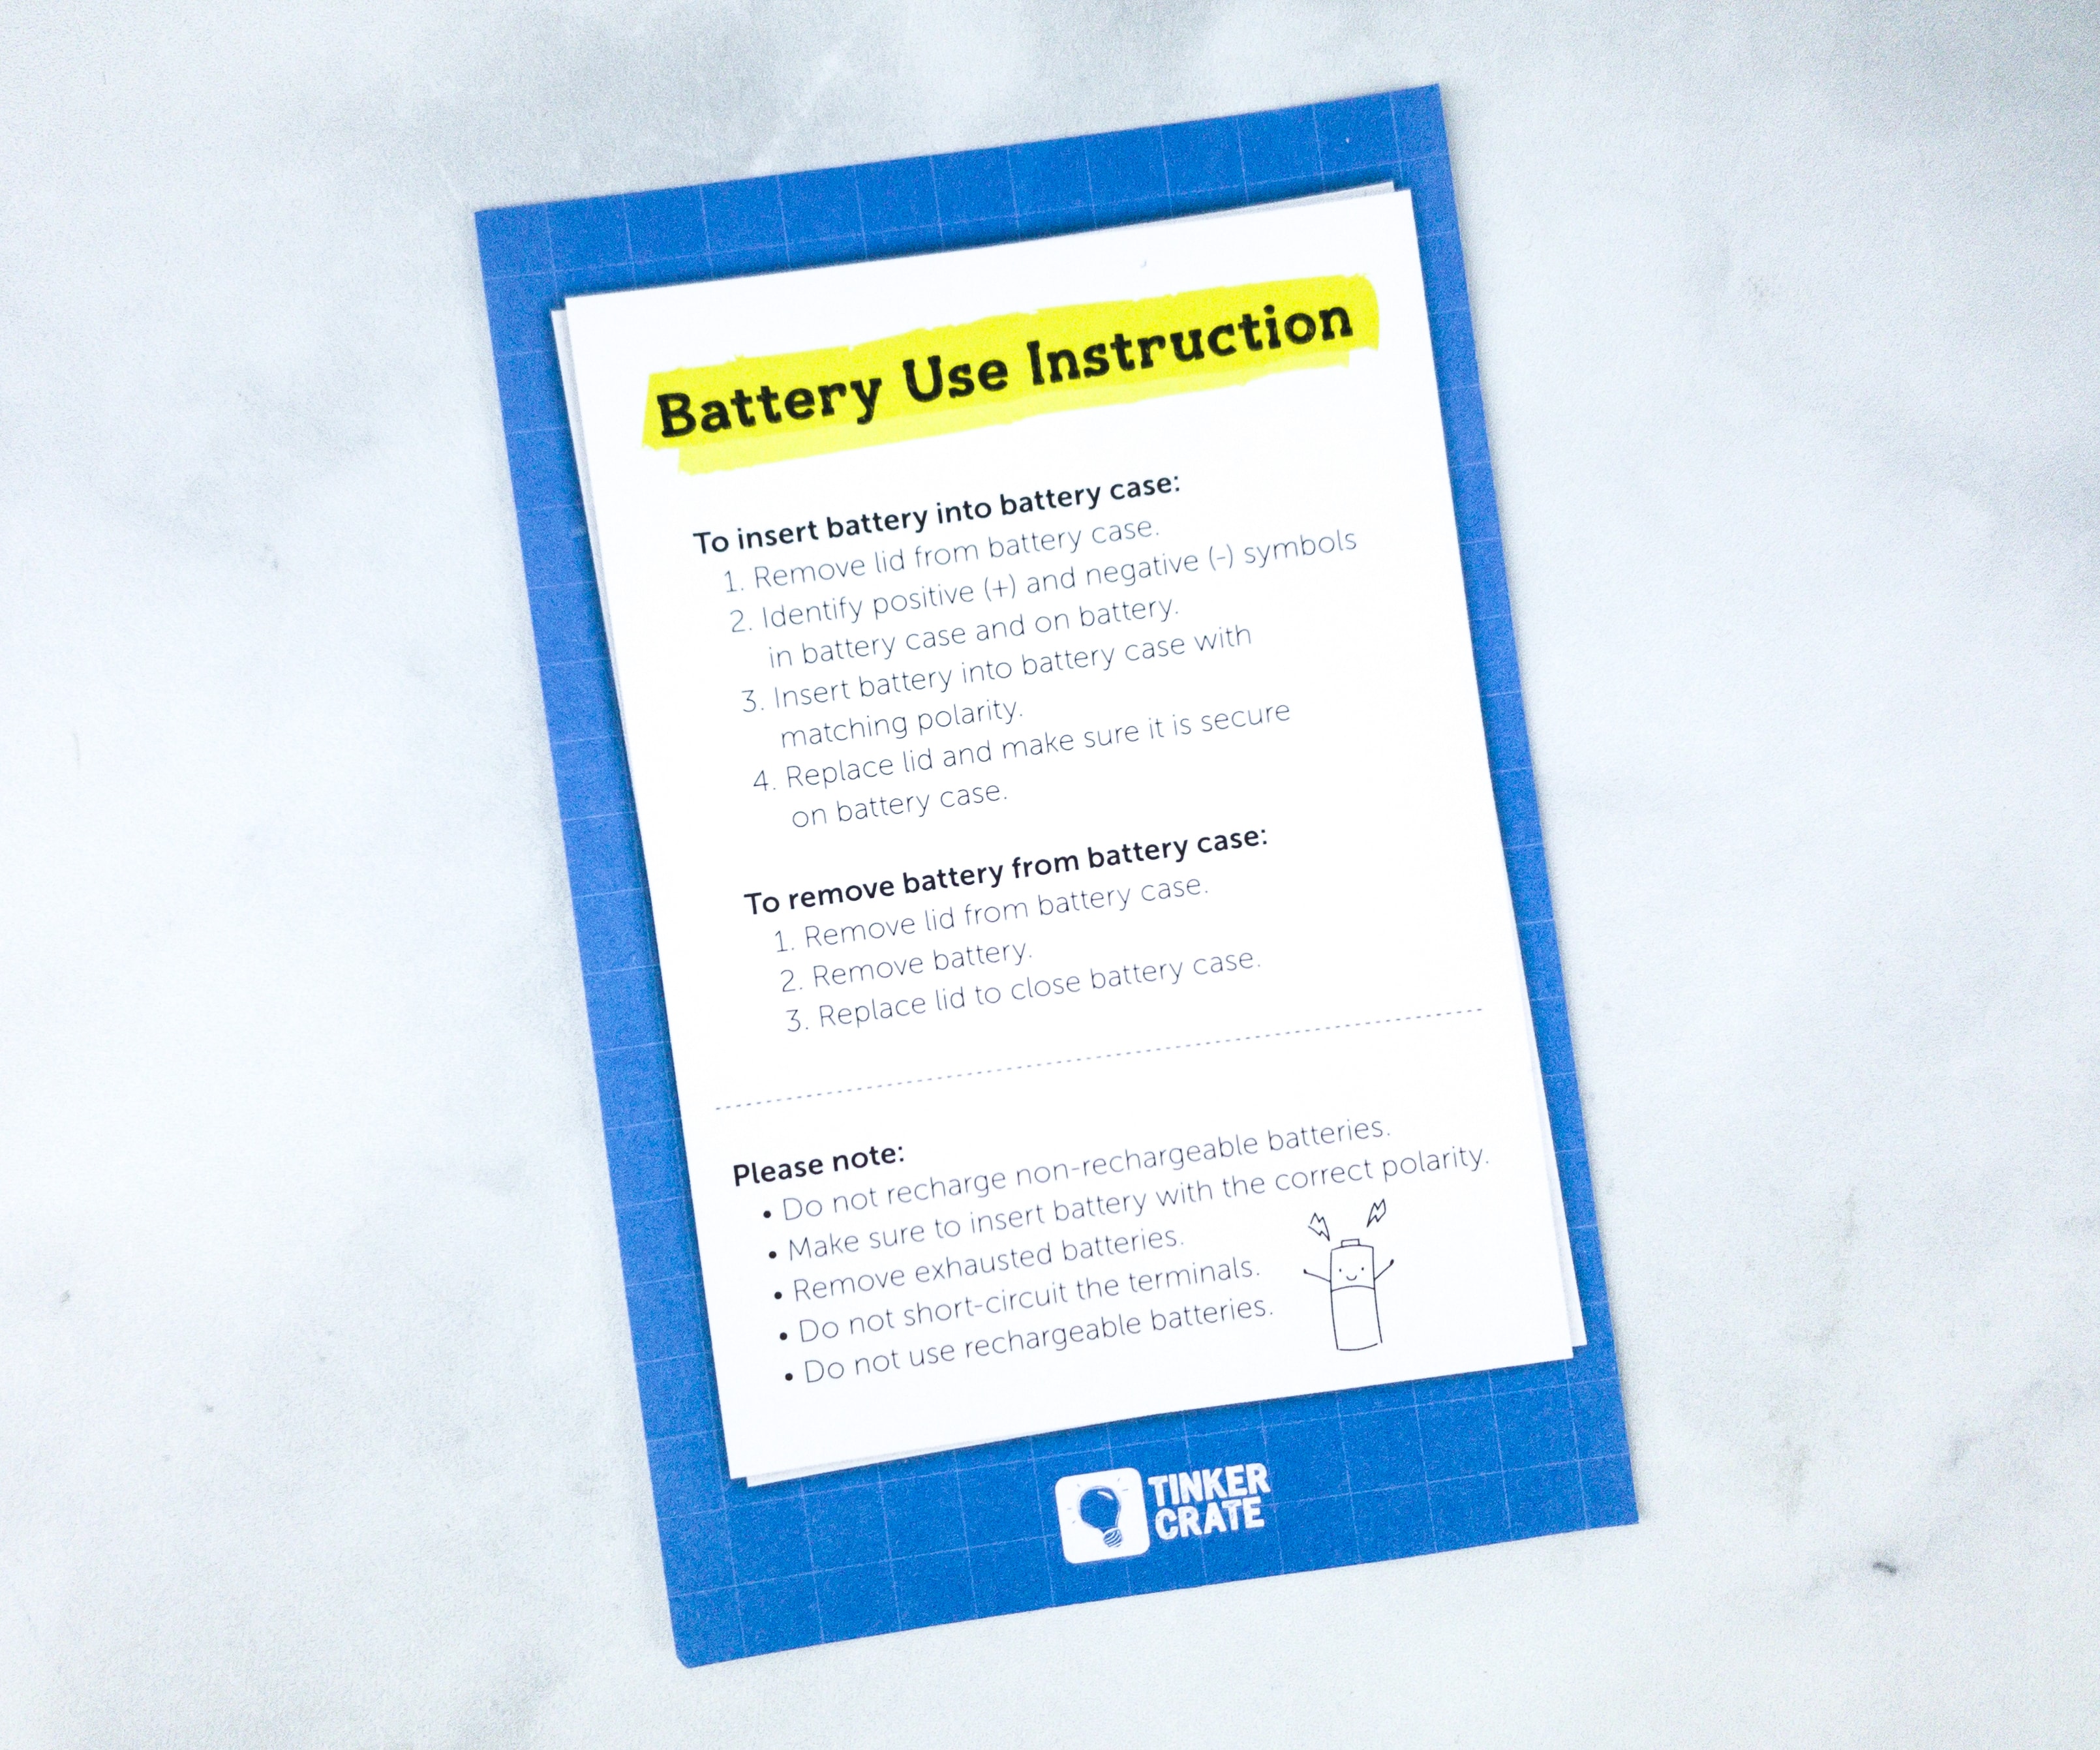
The sheet also comes with a battery instruction manual. According to this, you have to make sure to insert the battery with the correct polarity for it to work.
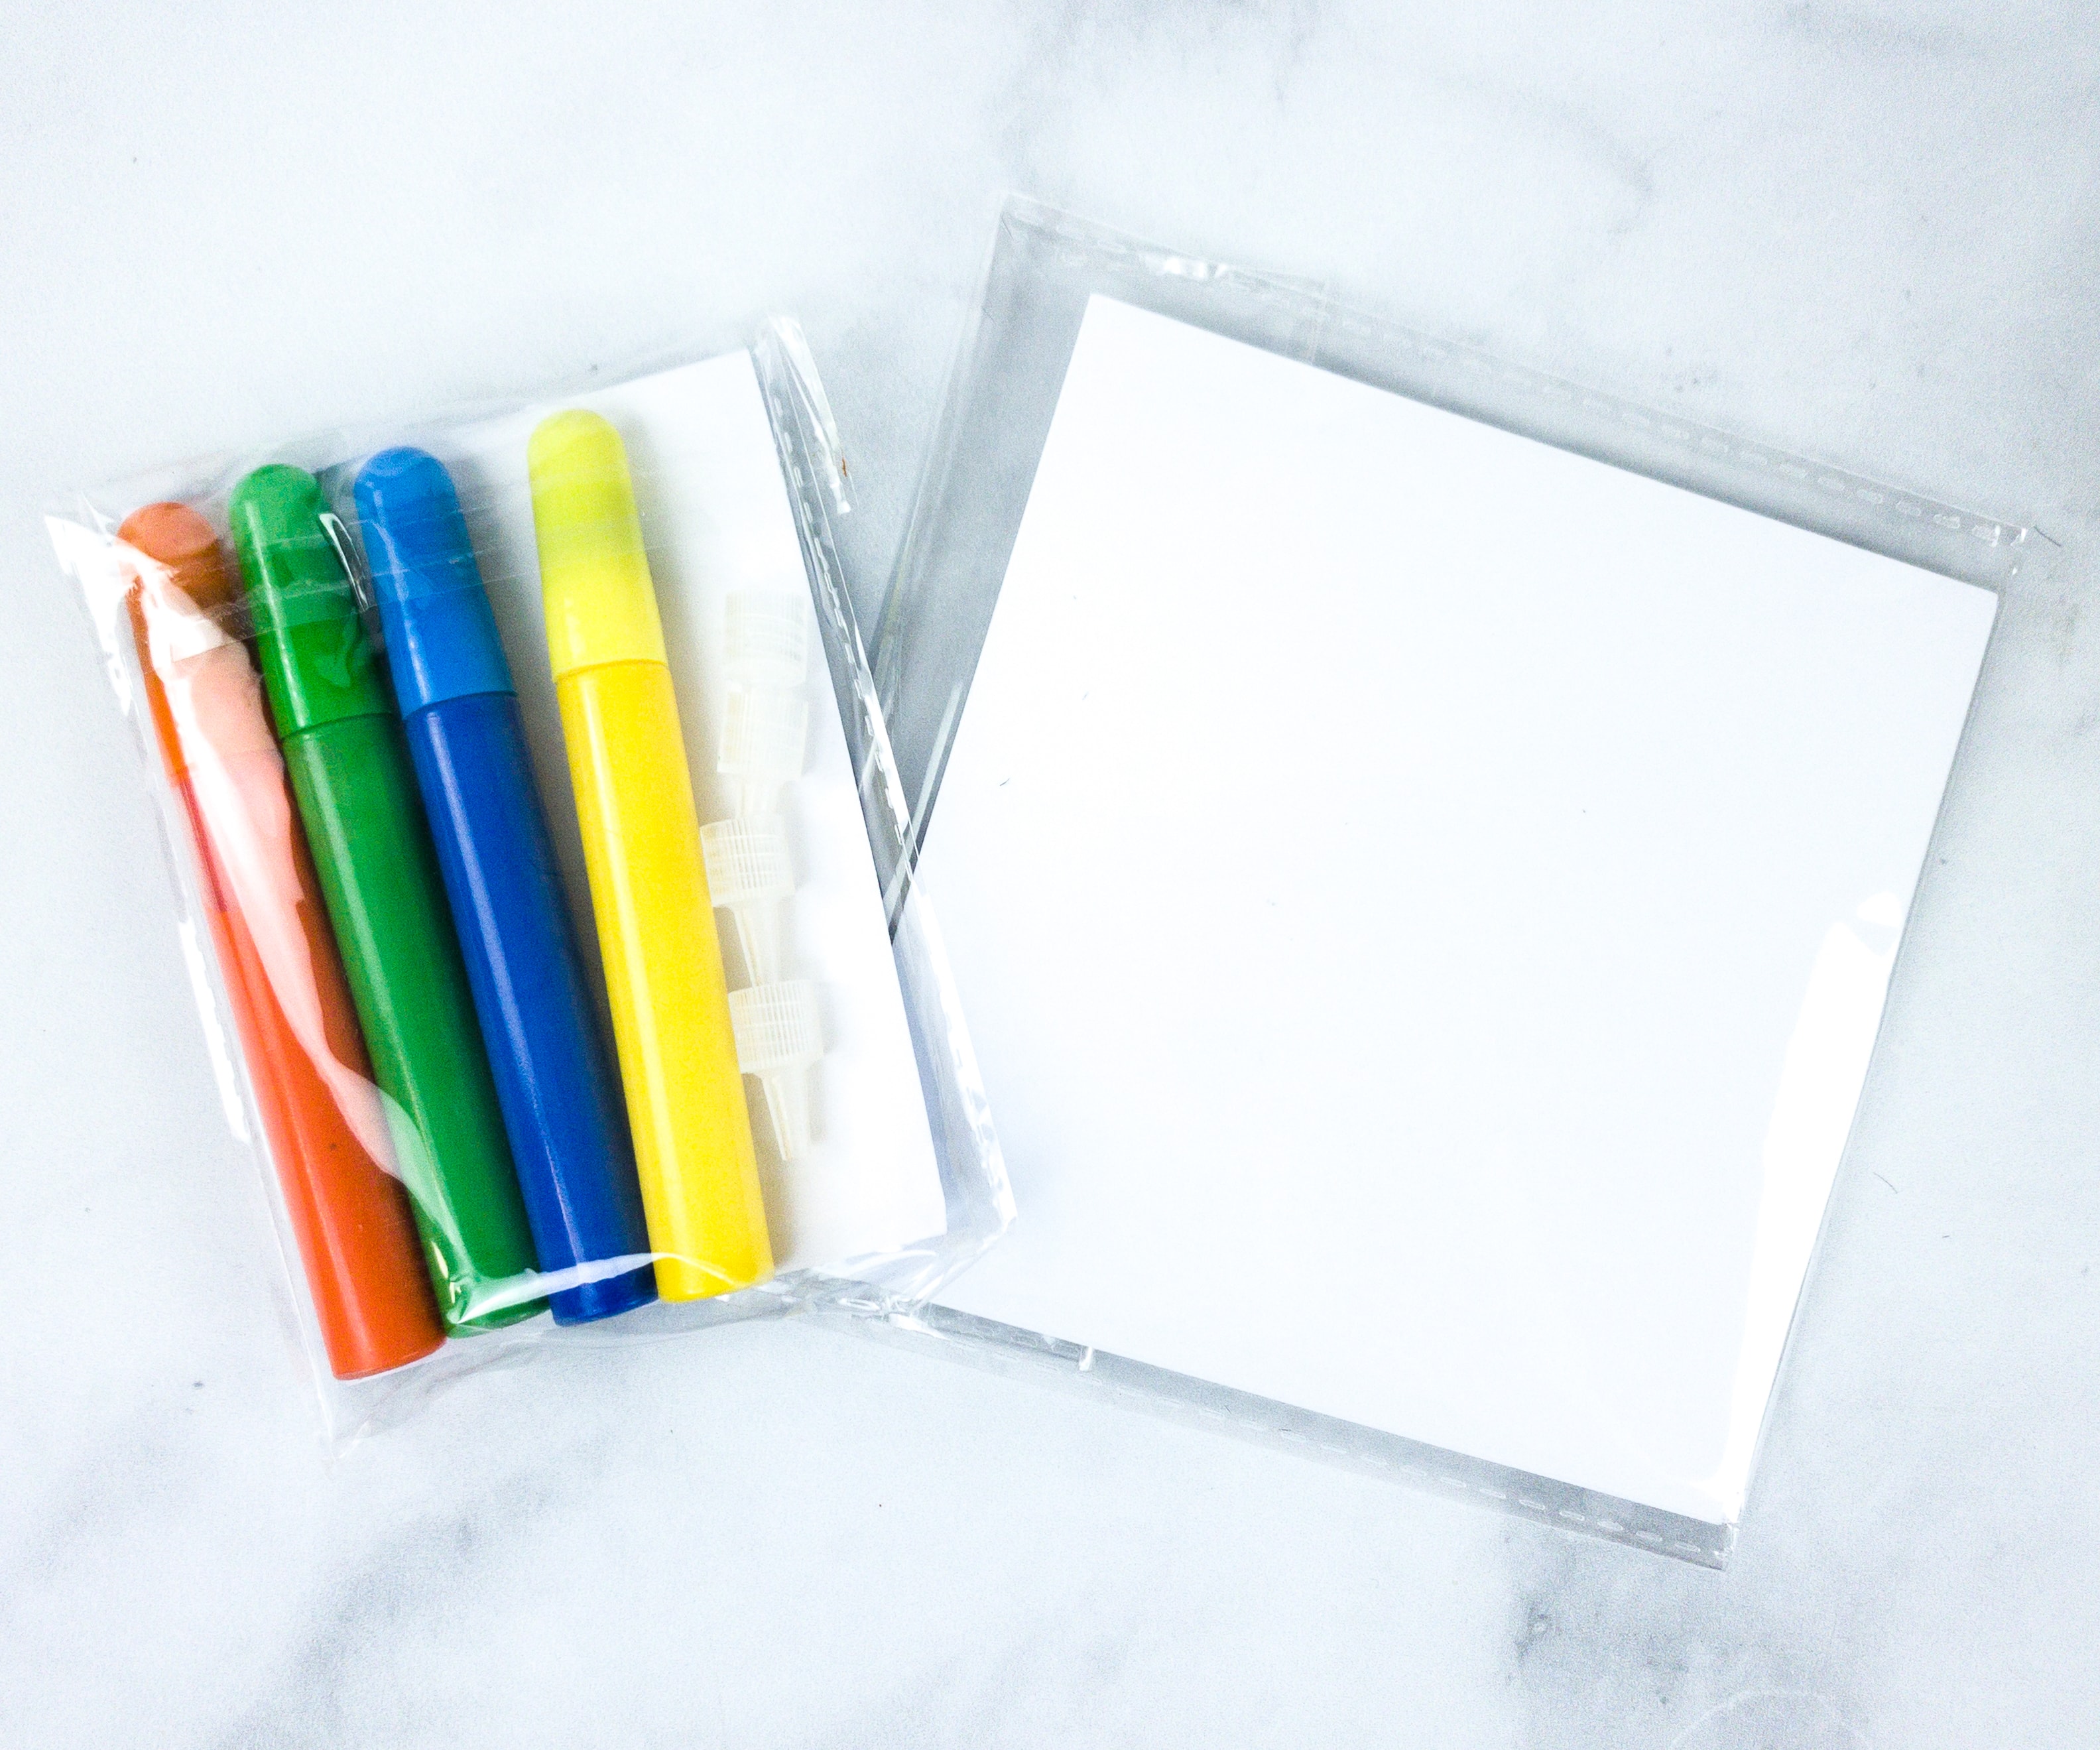
We also got here a paint pen set and sheets of paper.
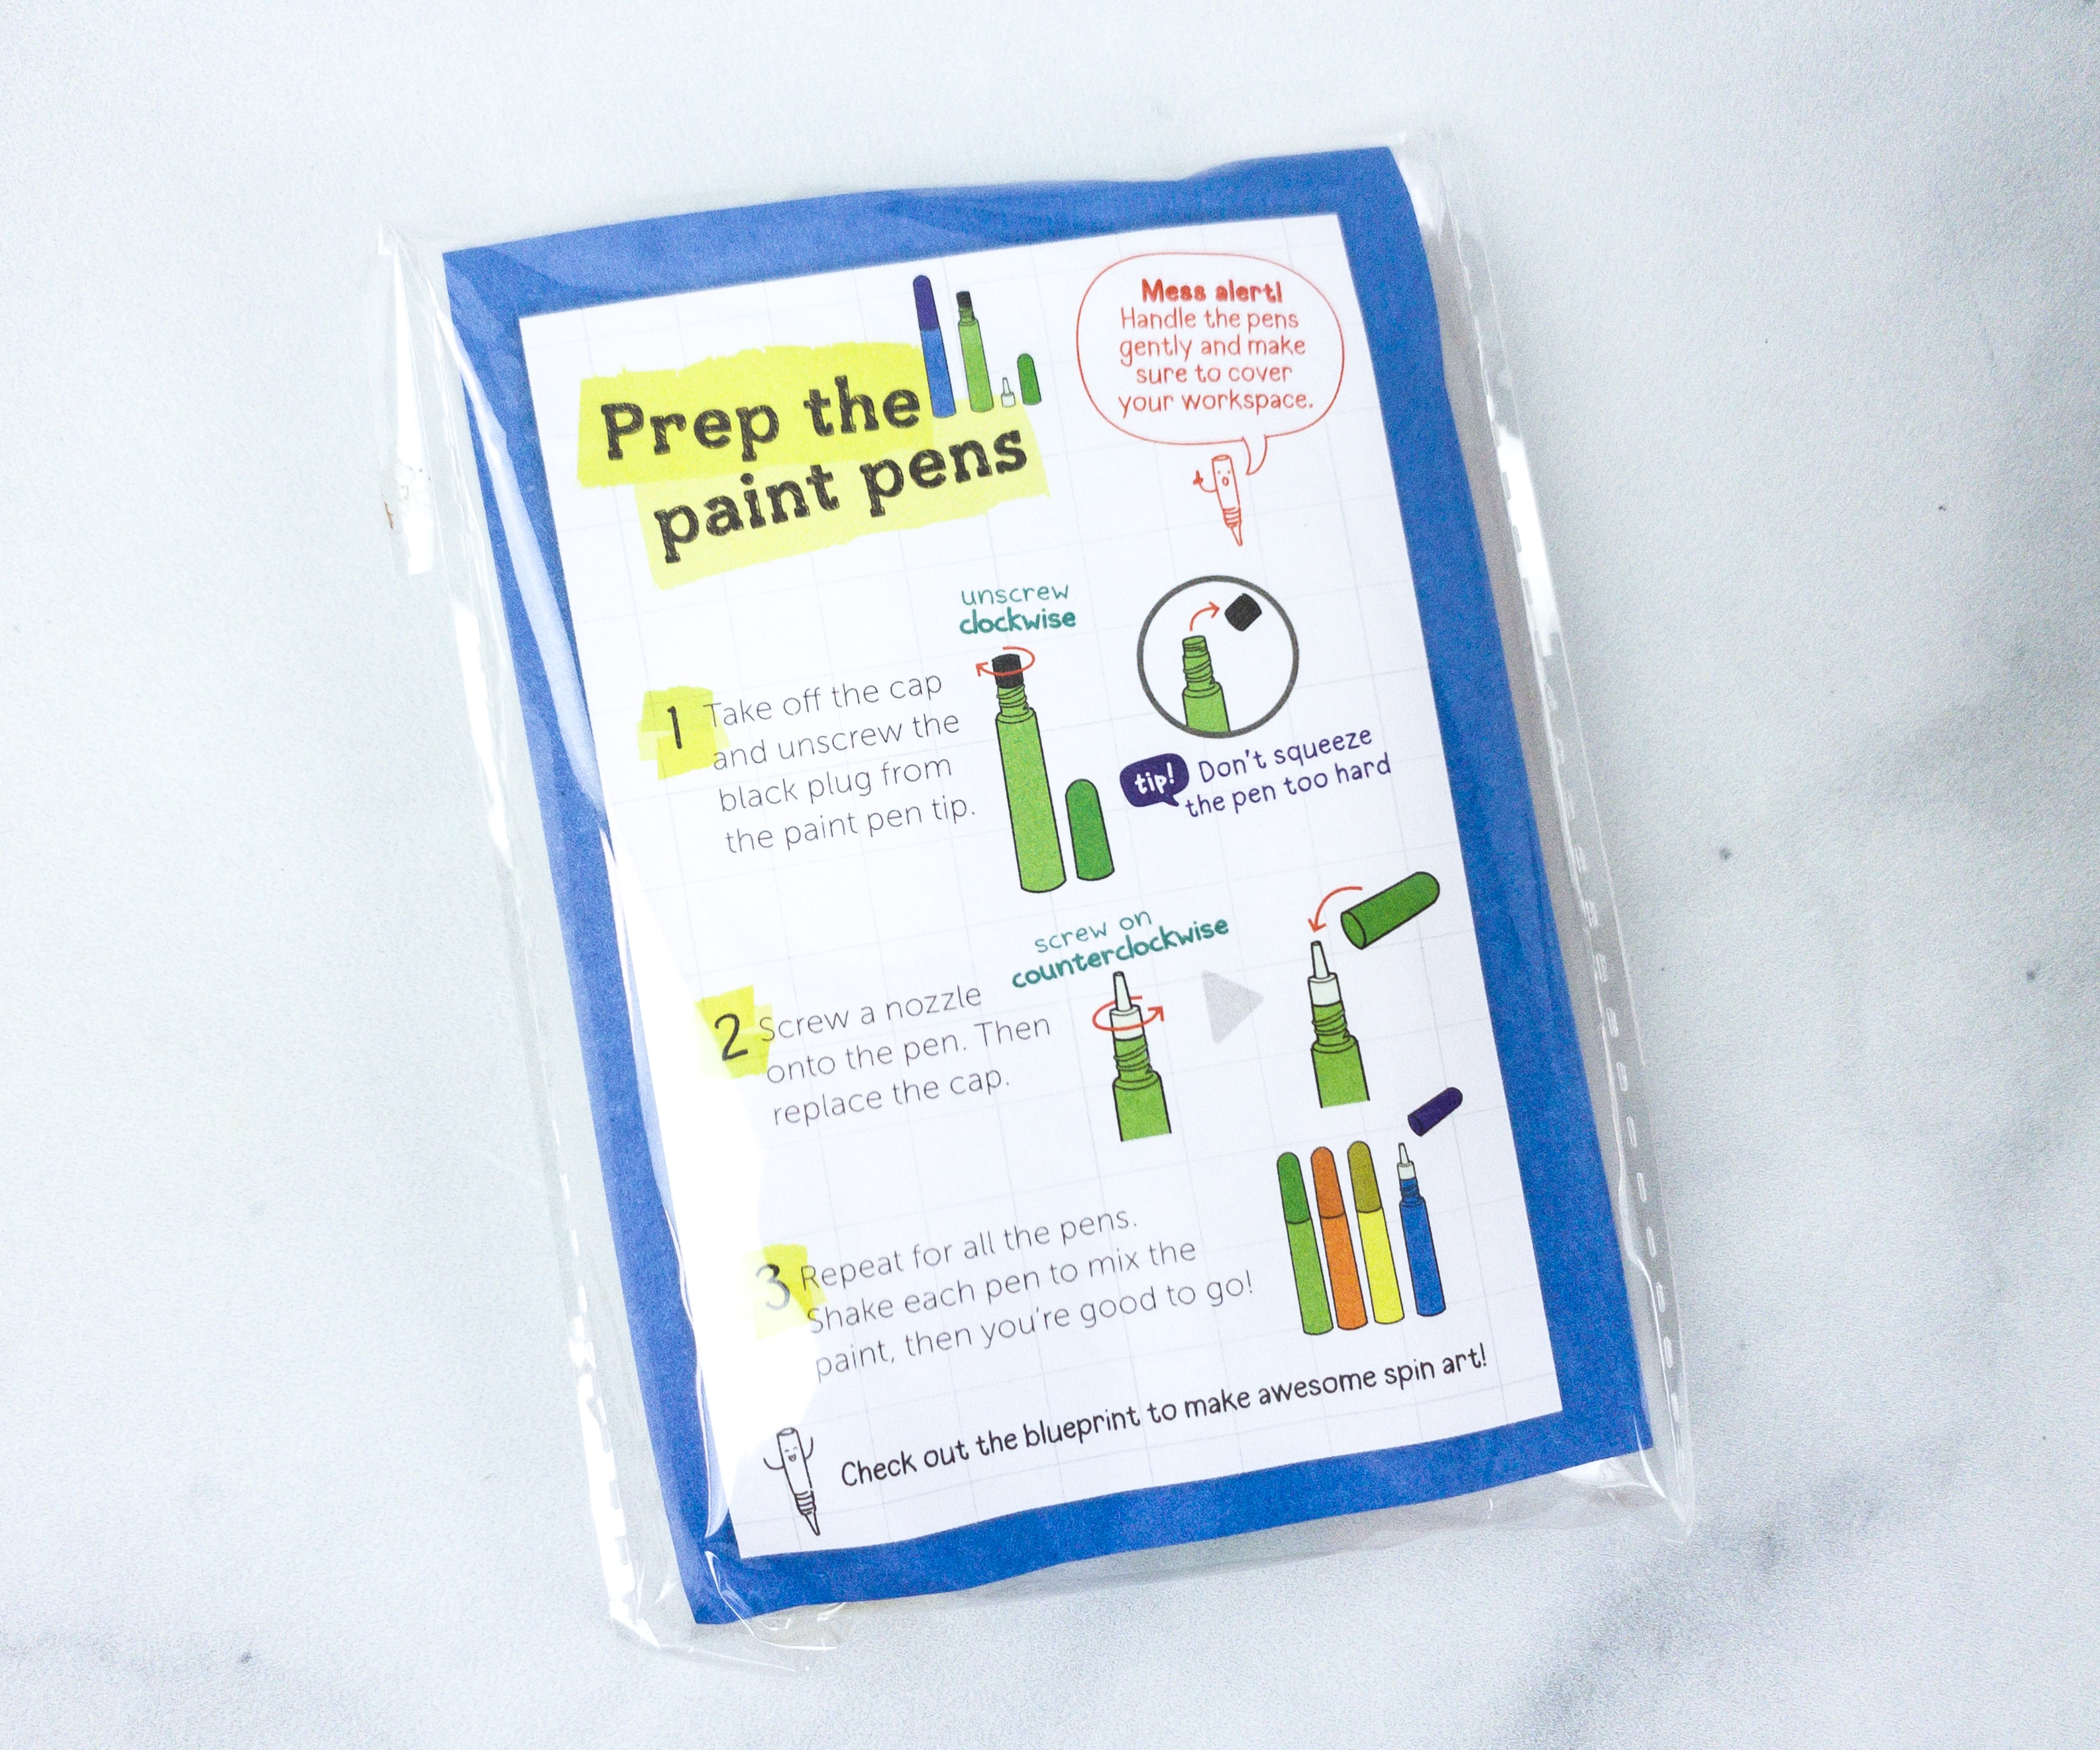
The back of the card features the steps to prepare the paint pens. You just have to take off the cap and unscrew the black plug from the tip and then screw a nozzle onto the pen then replace the cap.
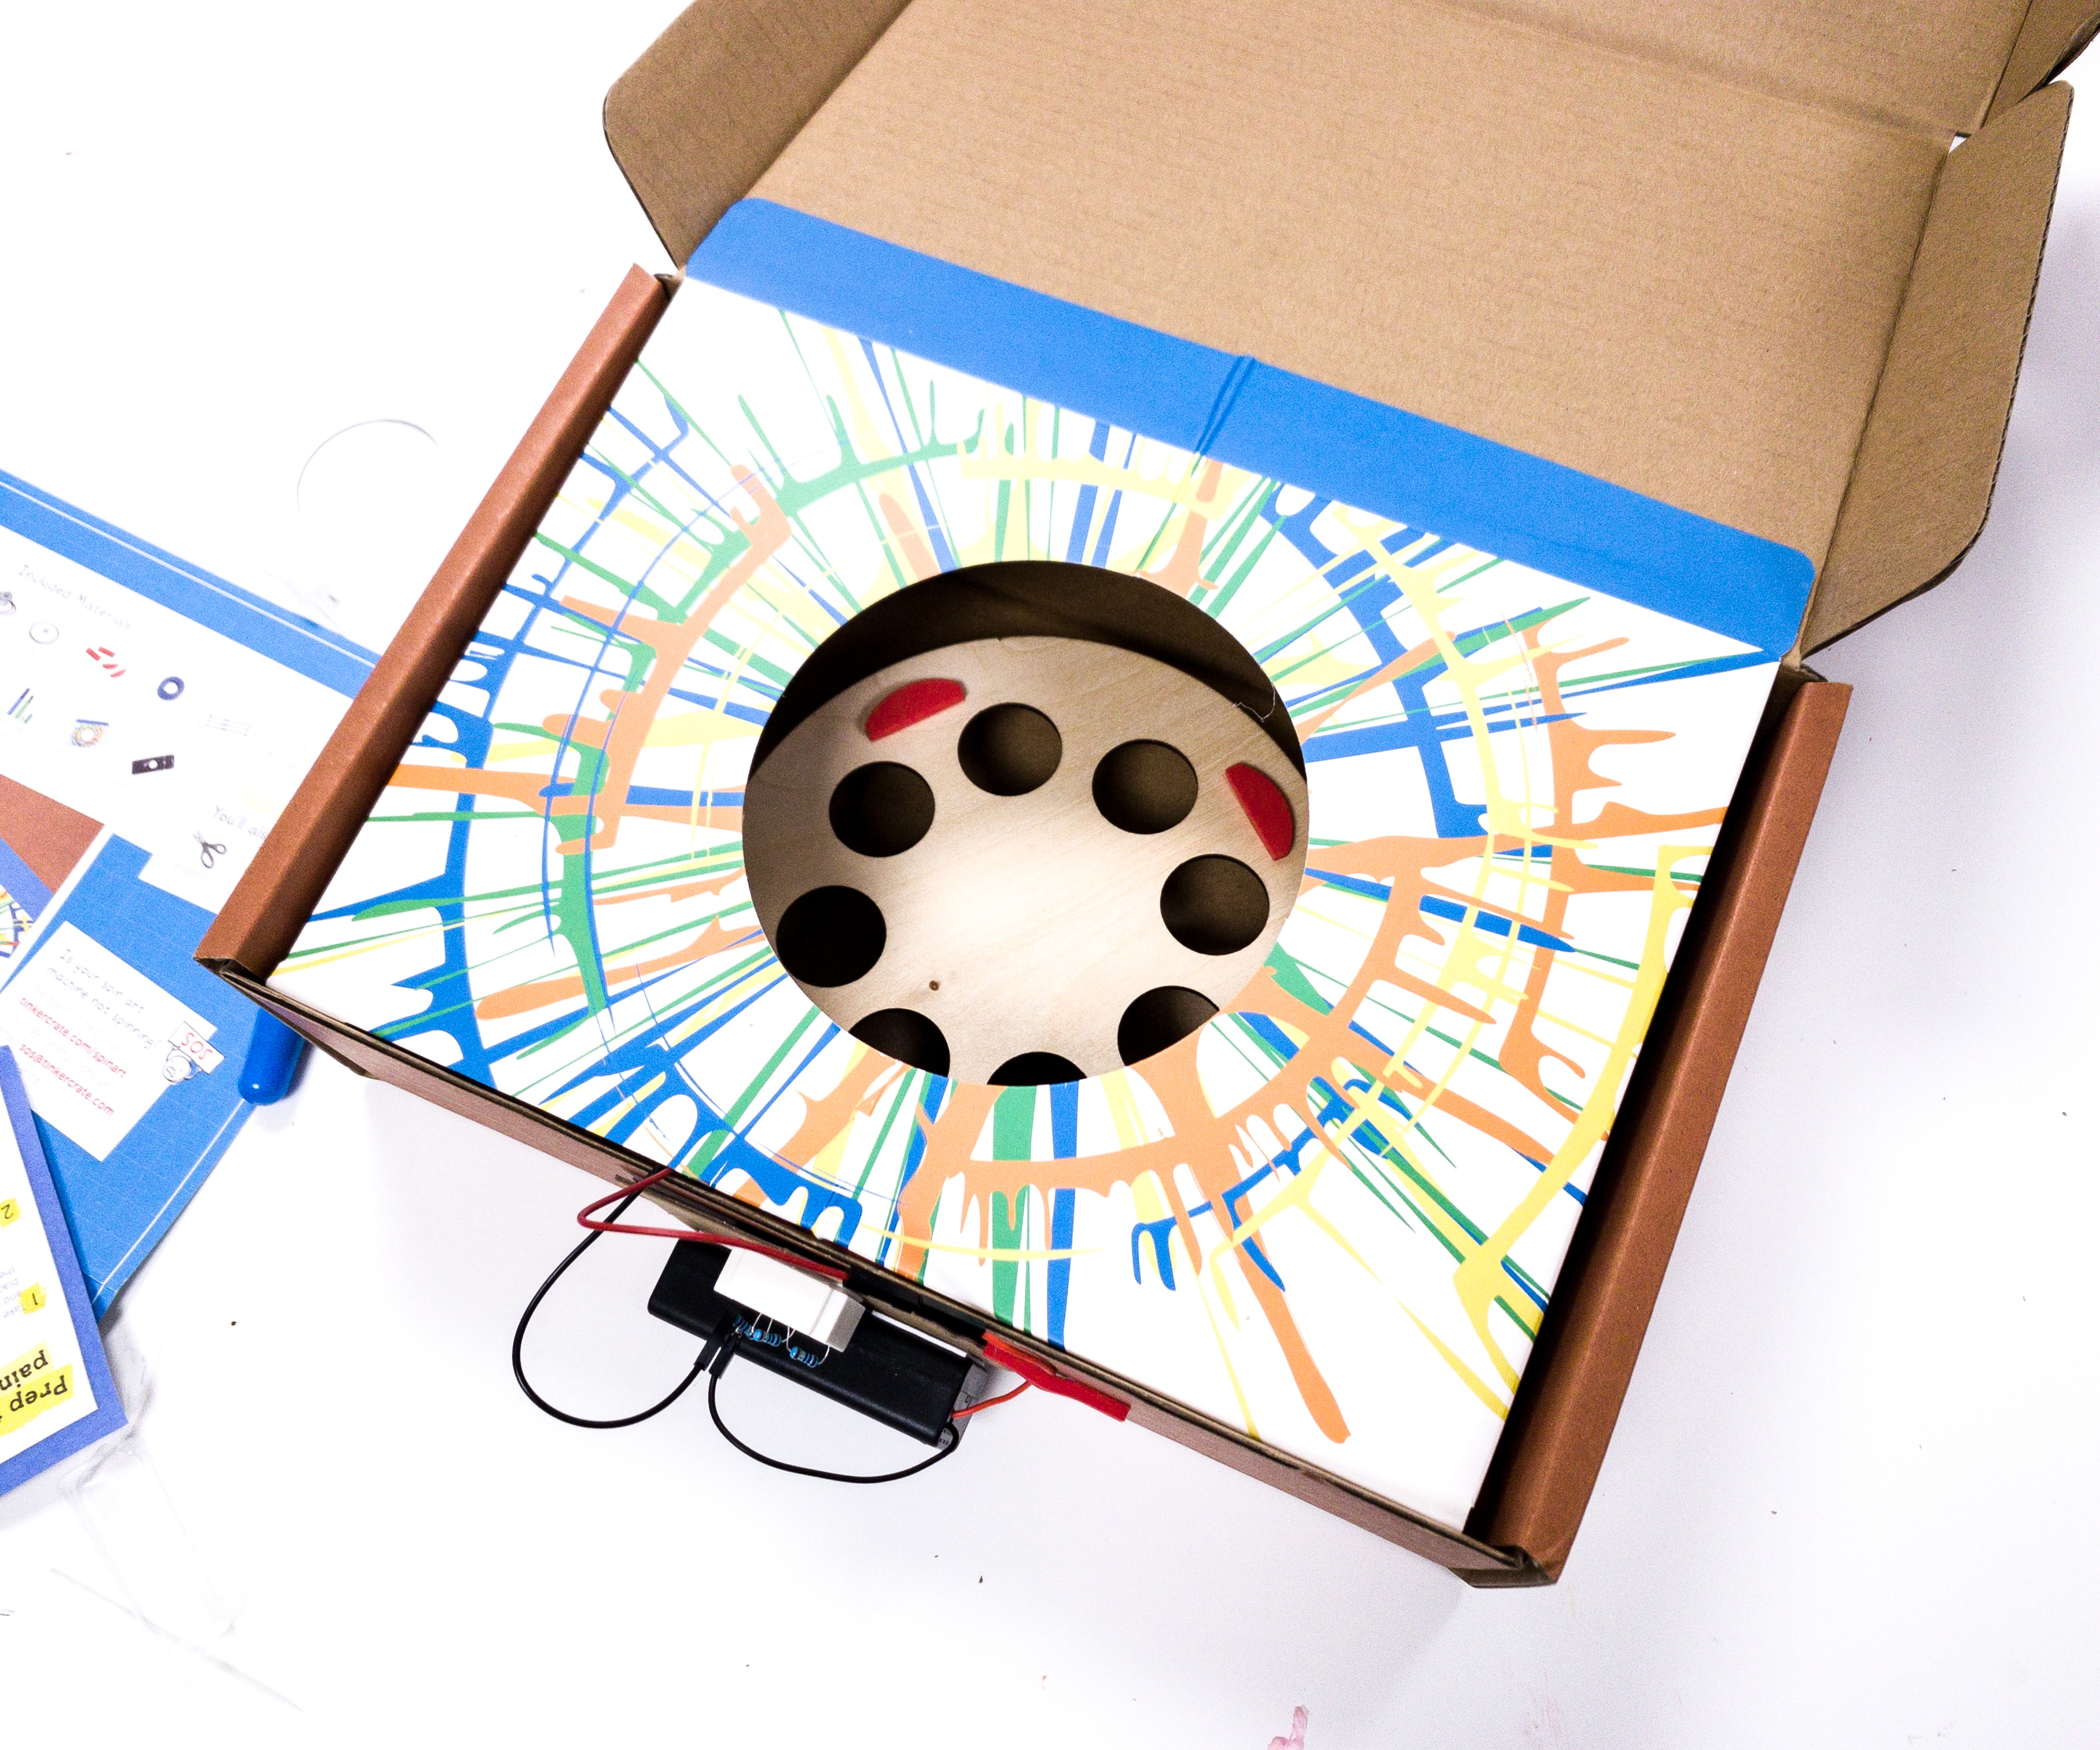
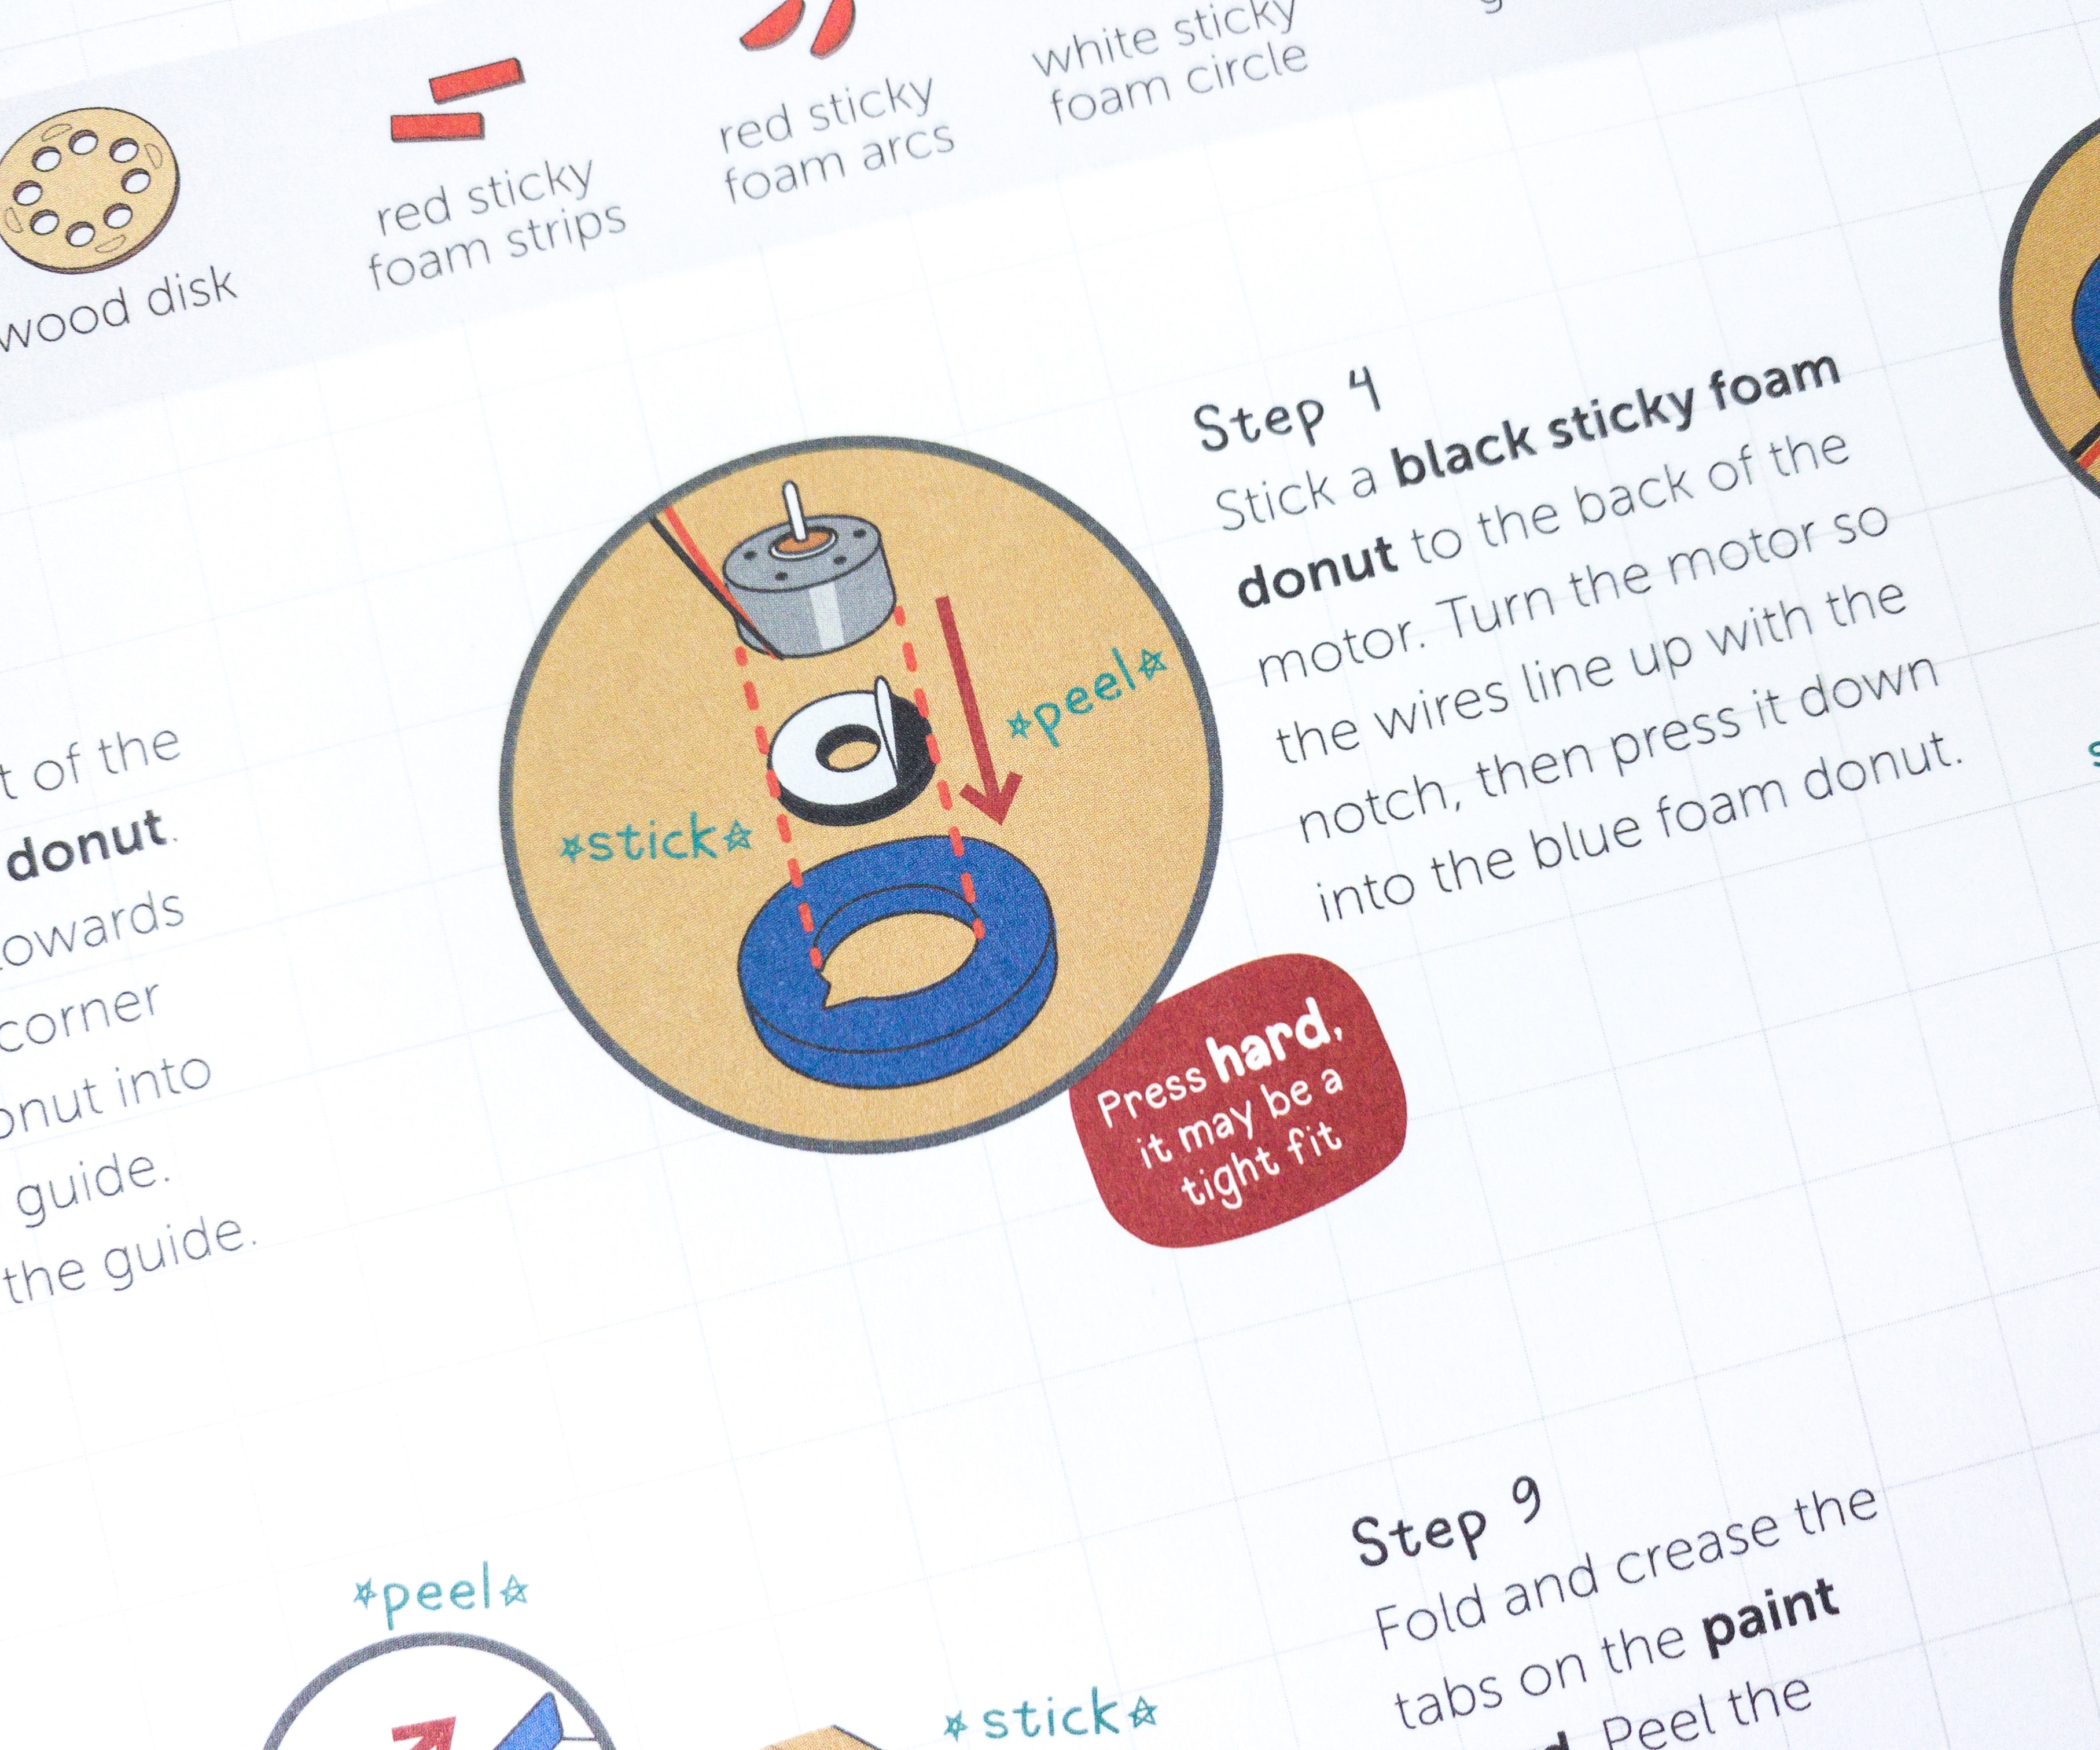
For the box, we installed the wood disk and motor inside the box using the paper guide, blue sticky foam donut, and red sticky foam strips. Then, we covered it using a paint guard.
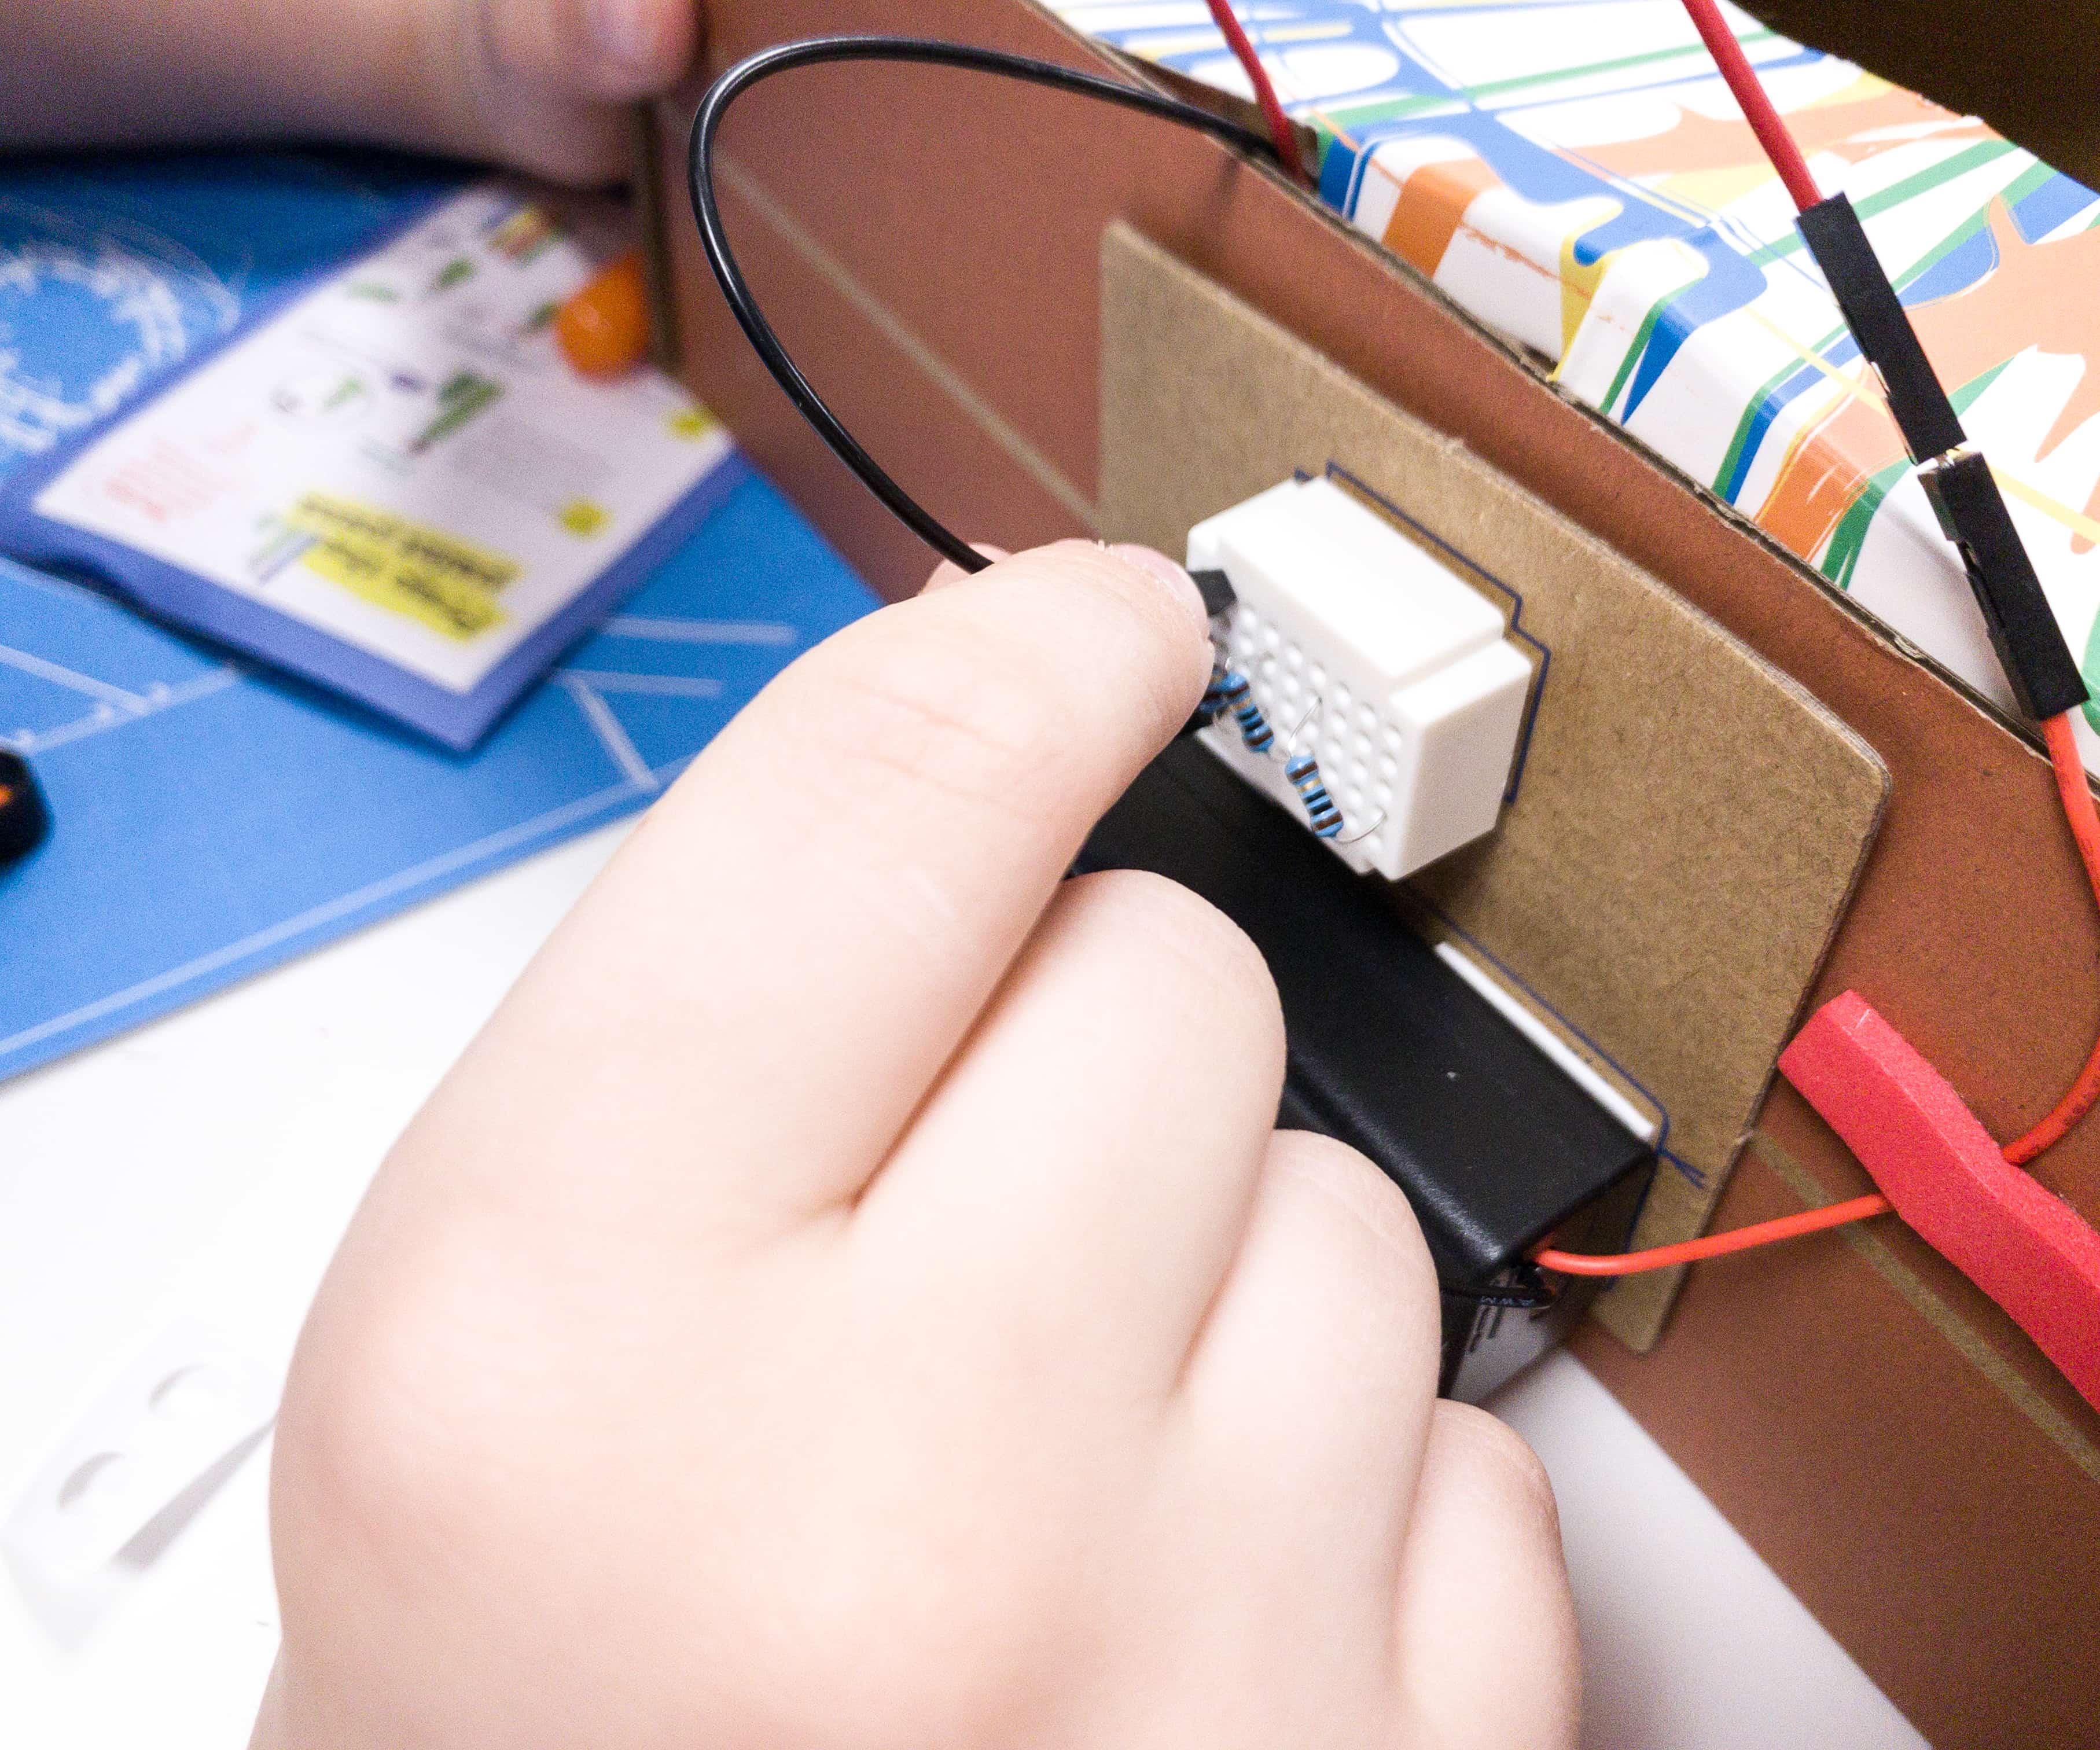
Once done with the box, we installed the electronics part on the longer side of the box using the sticky foam squares.
Connect the red wire from the battery pack to the red wire of the motor, and then do the same for the black wires. Before closing the box, make sure to turn the machine on and see if the wood disk rotates.
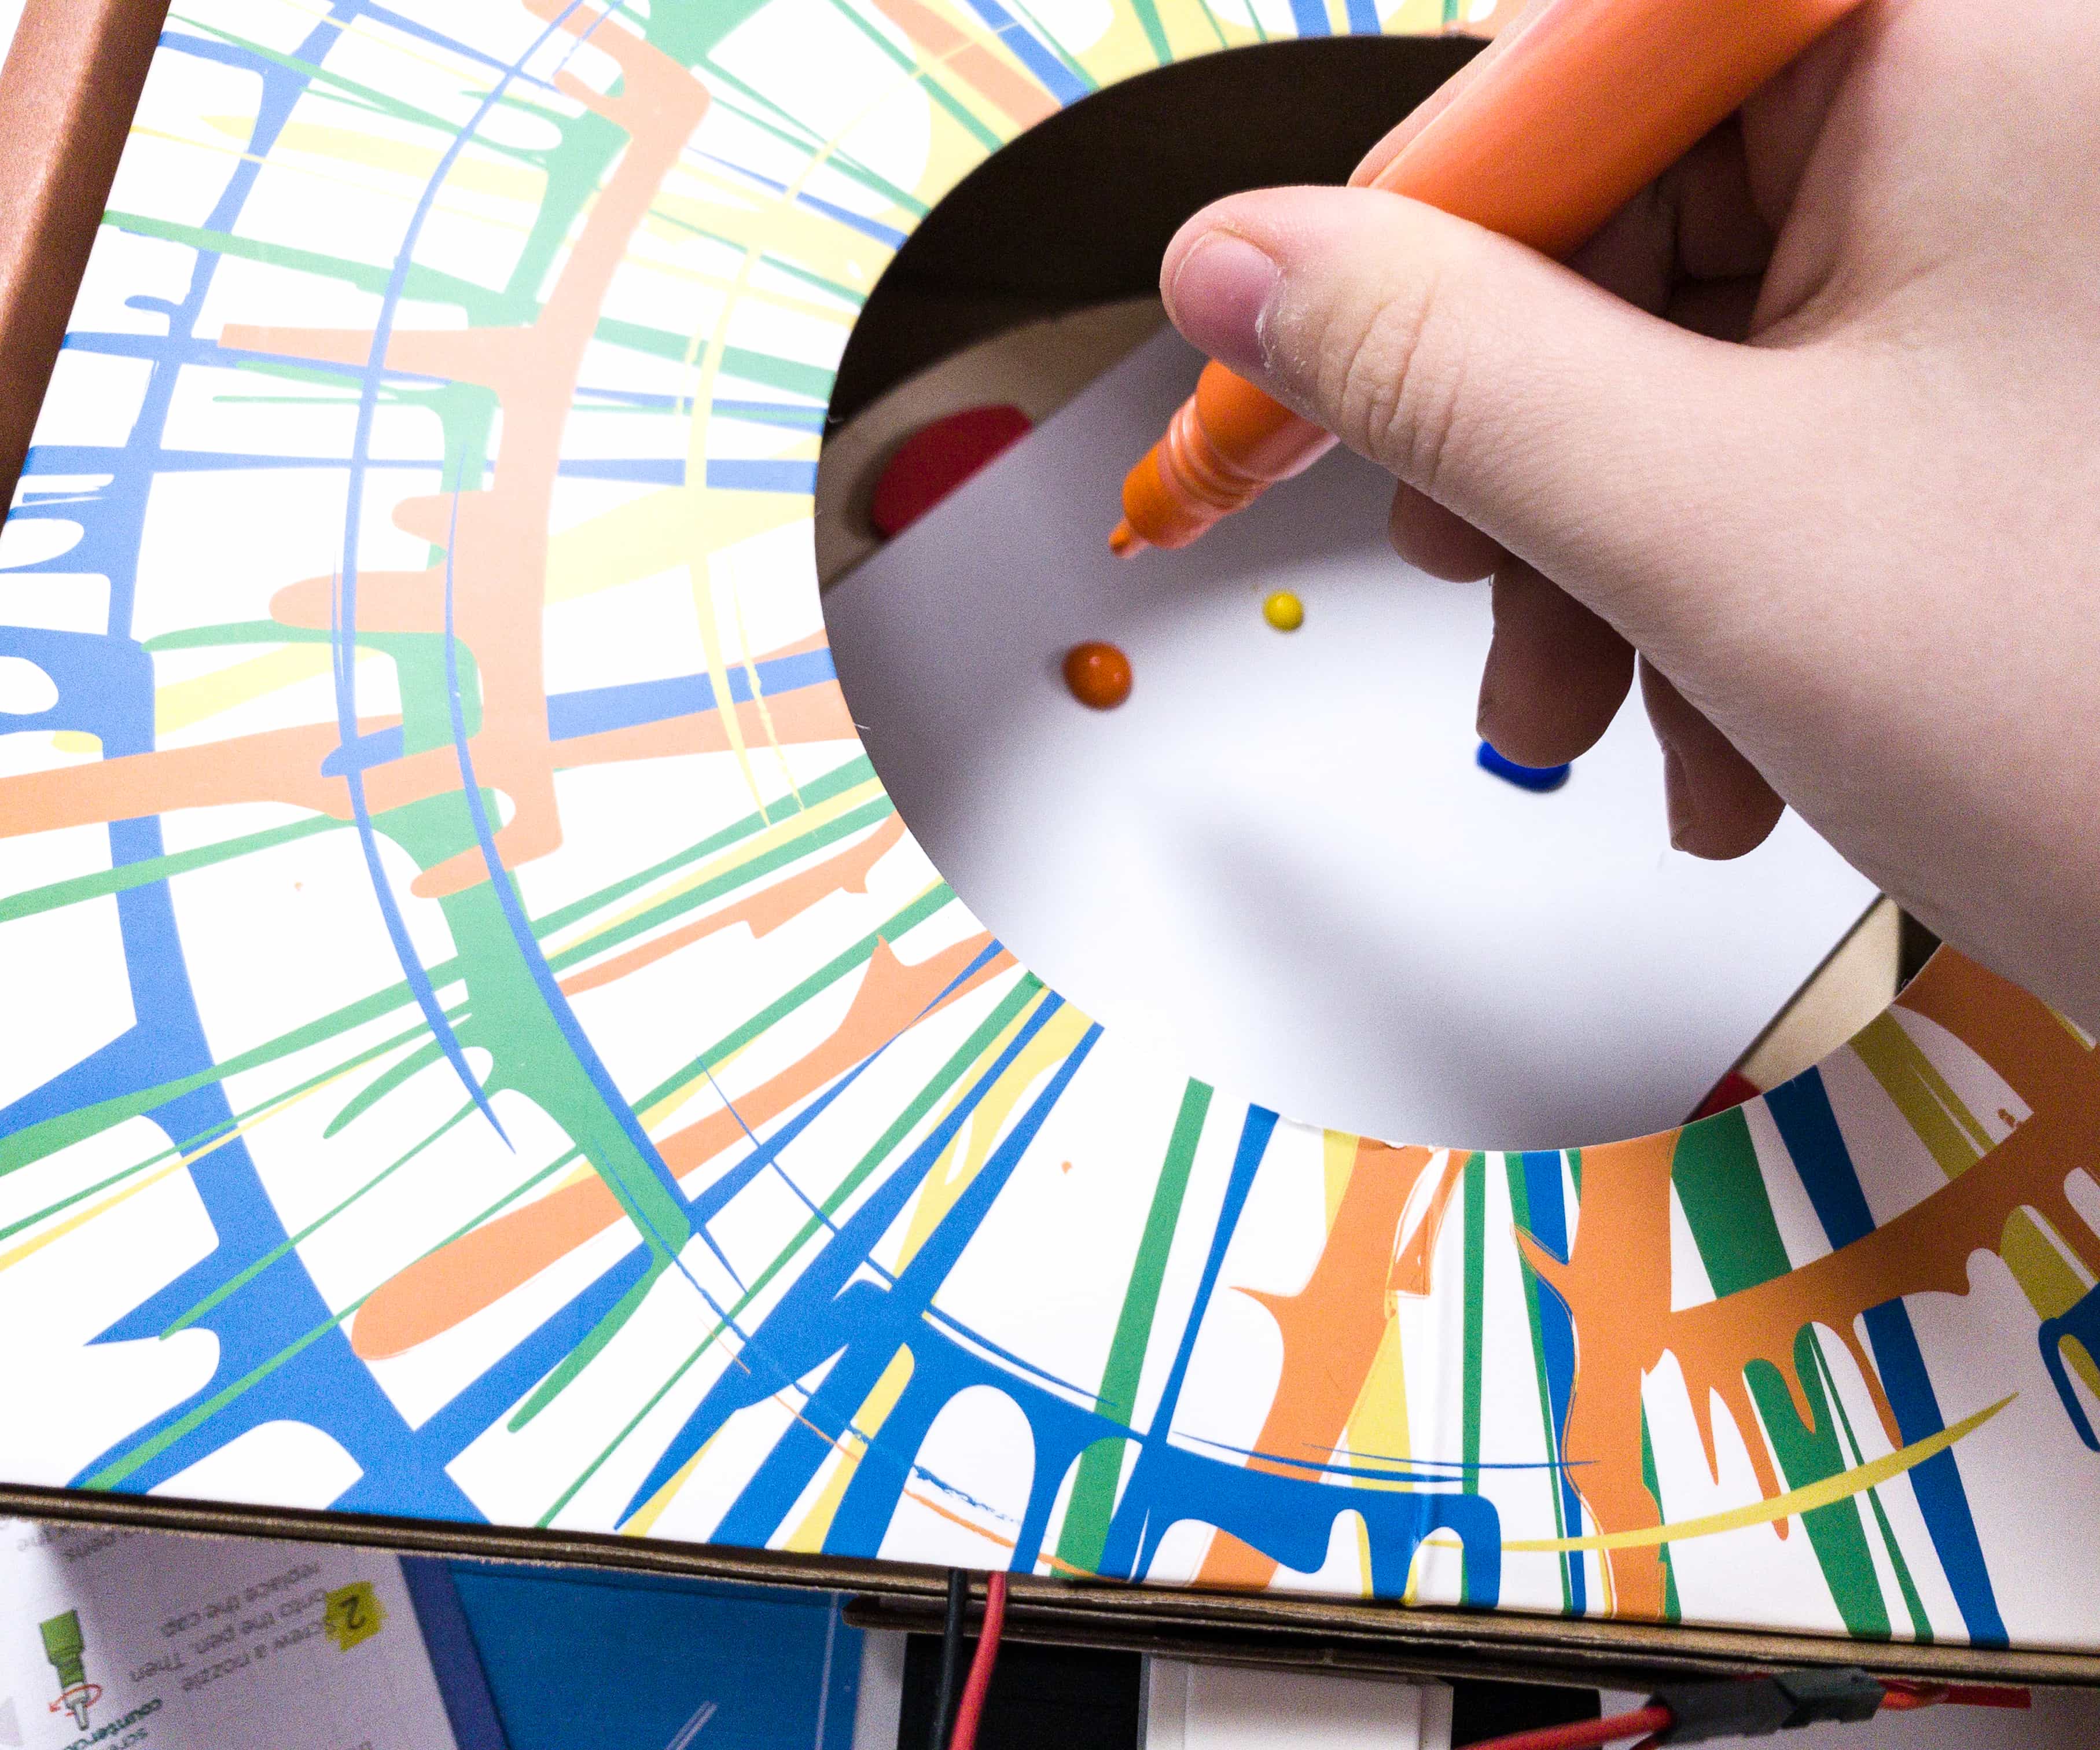
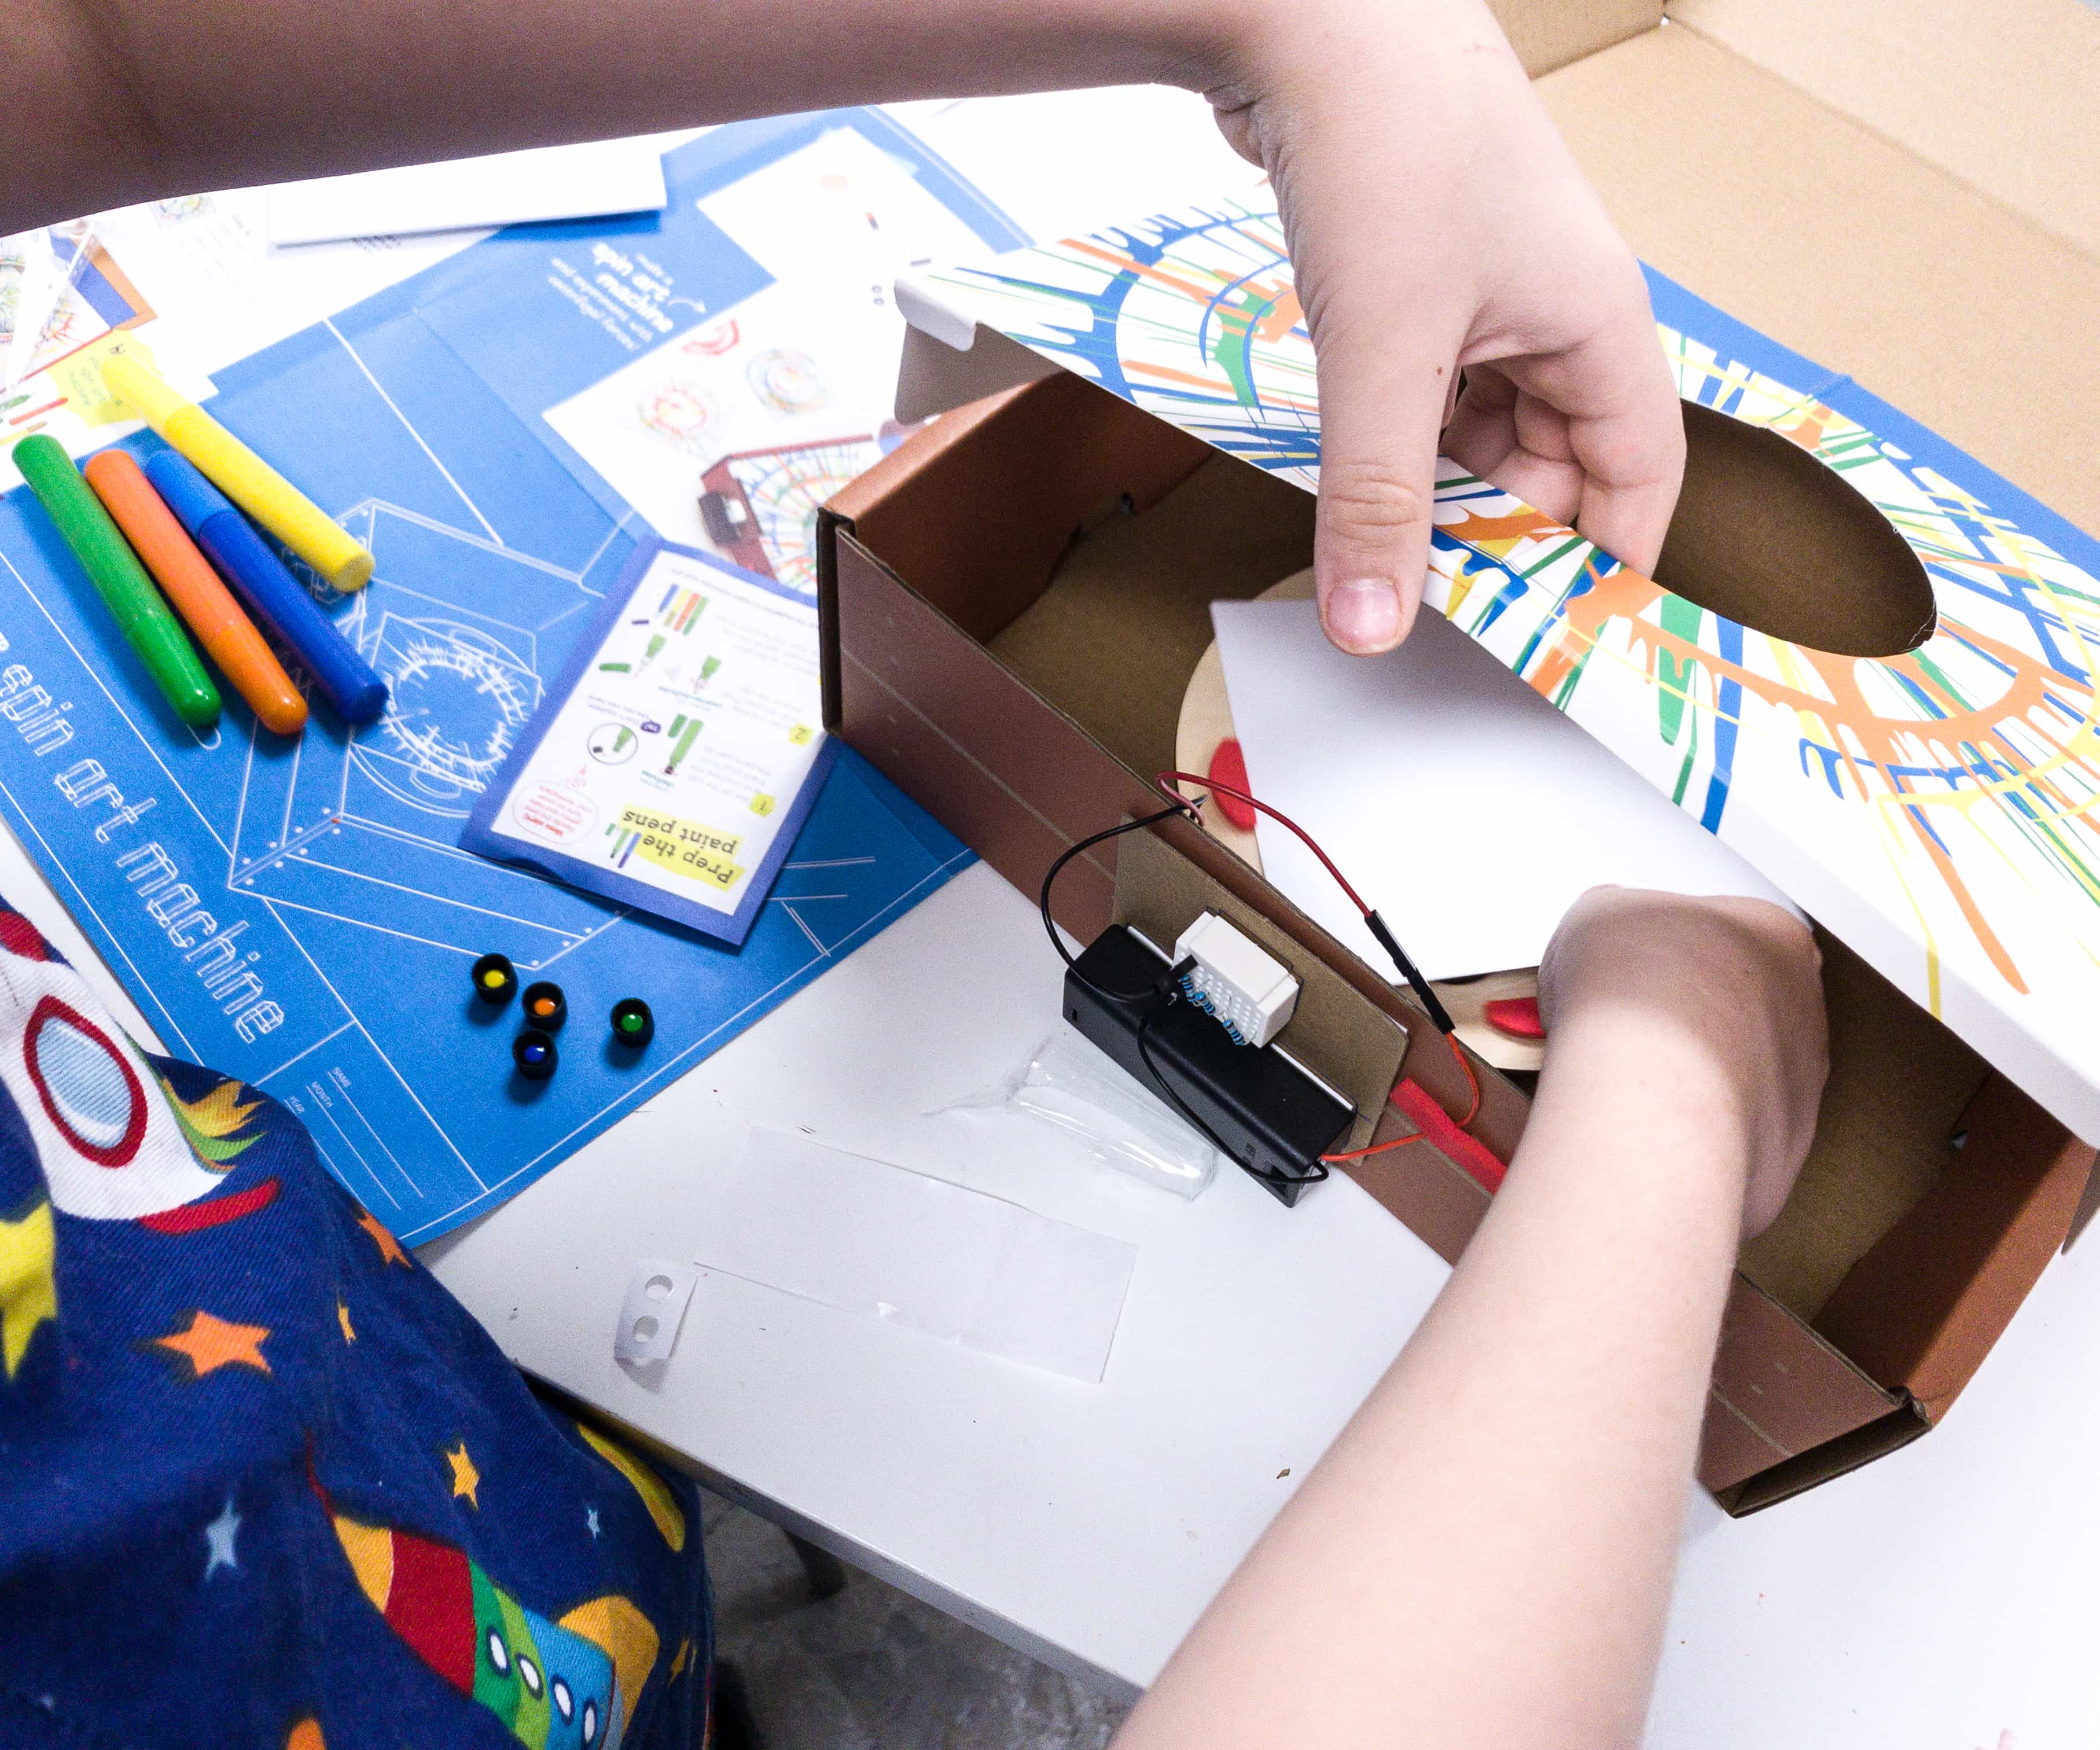
After ensuring that the machine works, we can now begin with our experiment by placing the paper sheet on the disk and putting droplets of color on top of it!

Turn on the machine and see how the centrifugal force affects the droplets of colors placed on the paper!
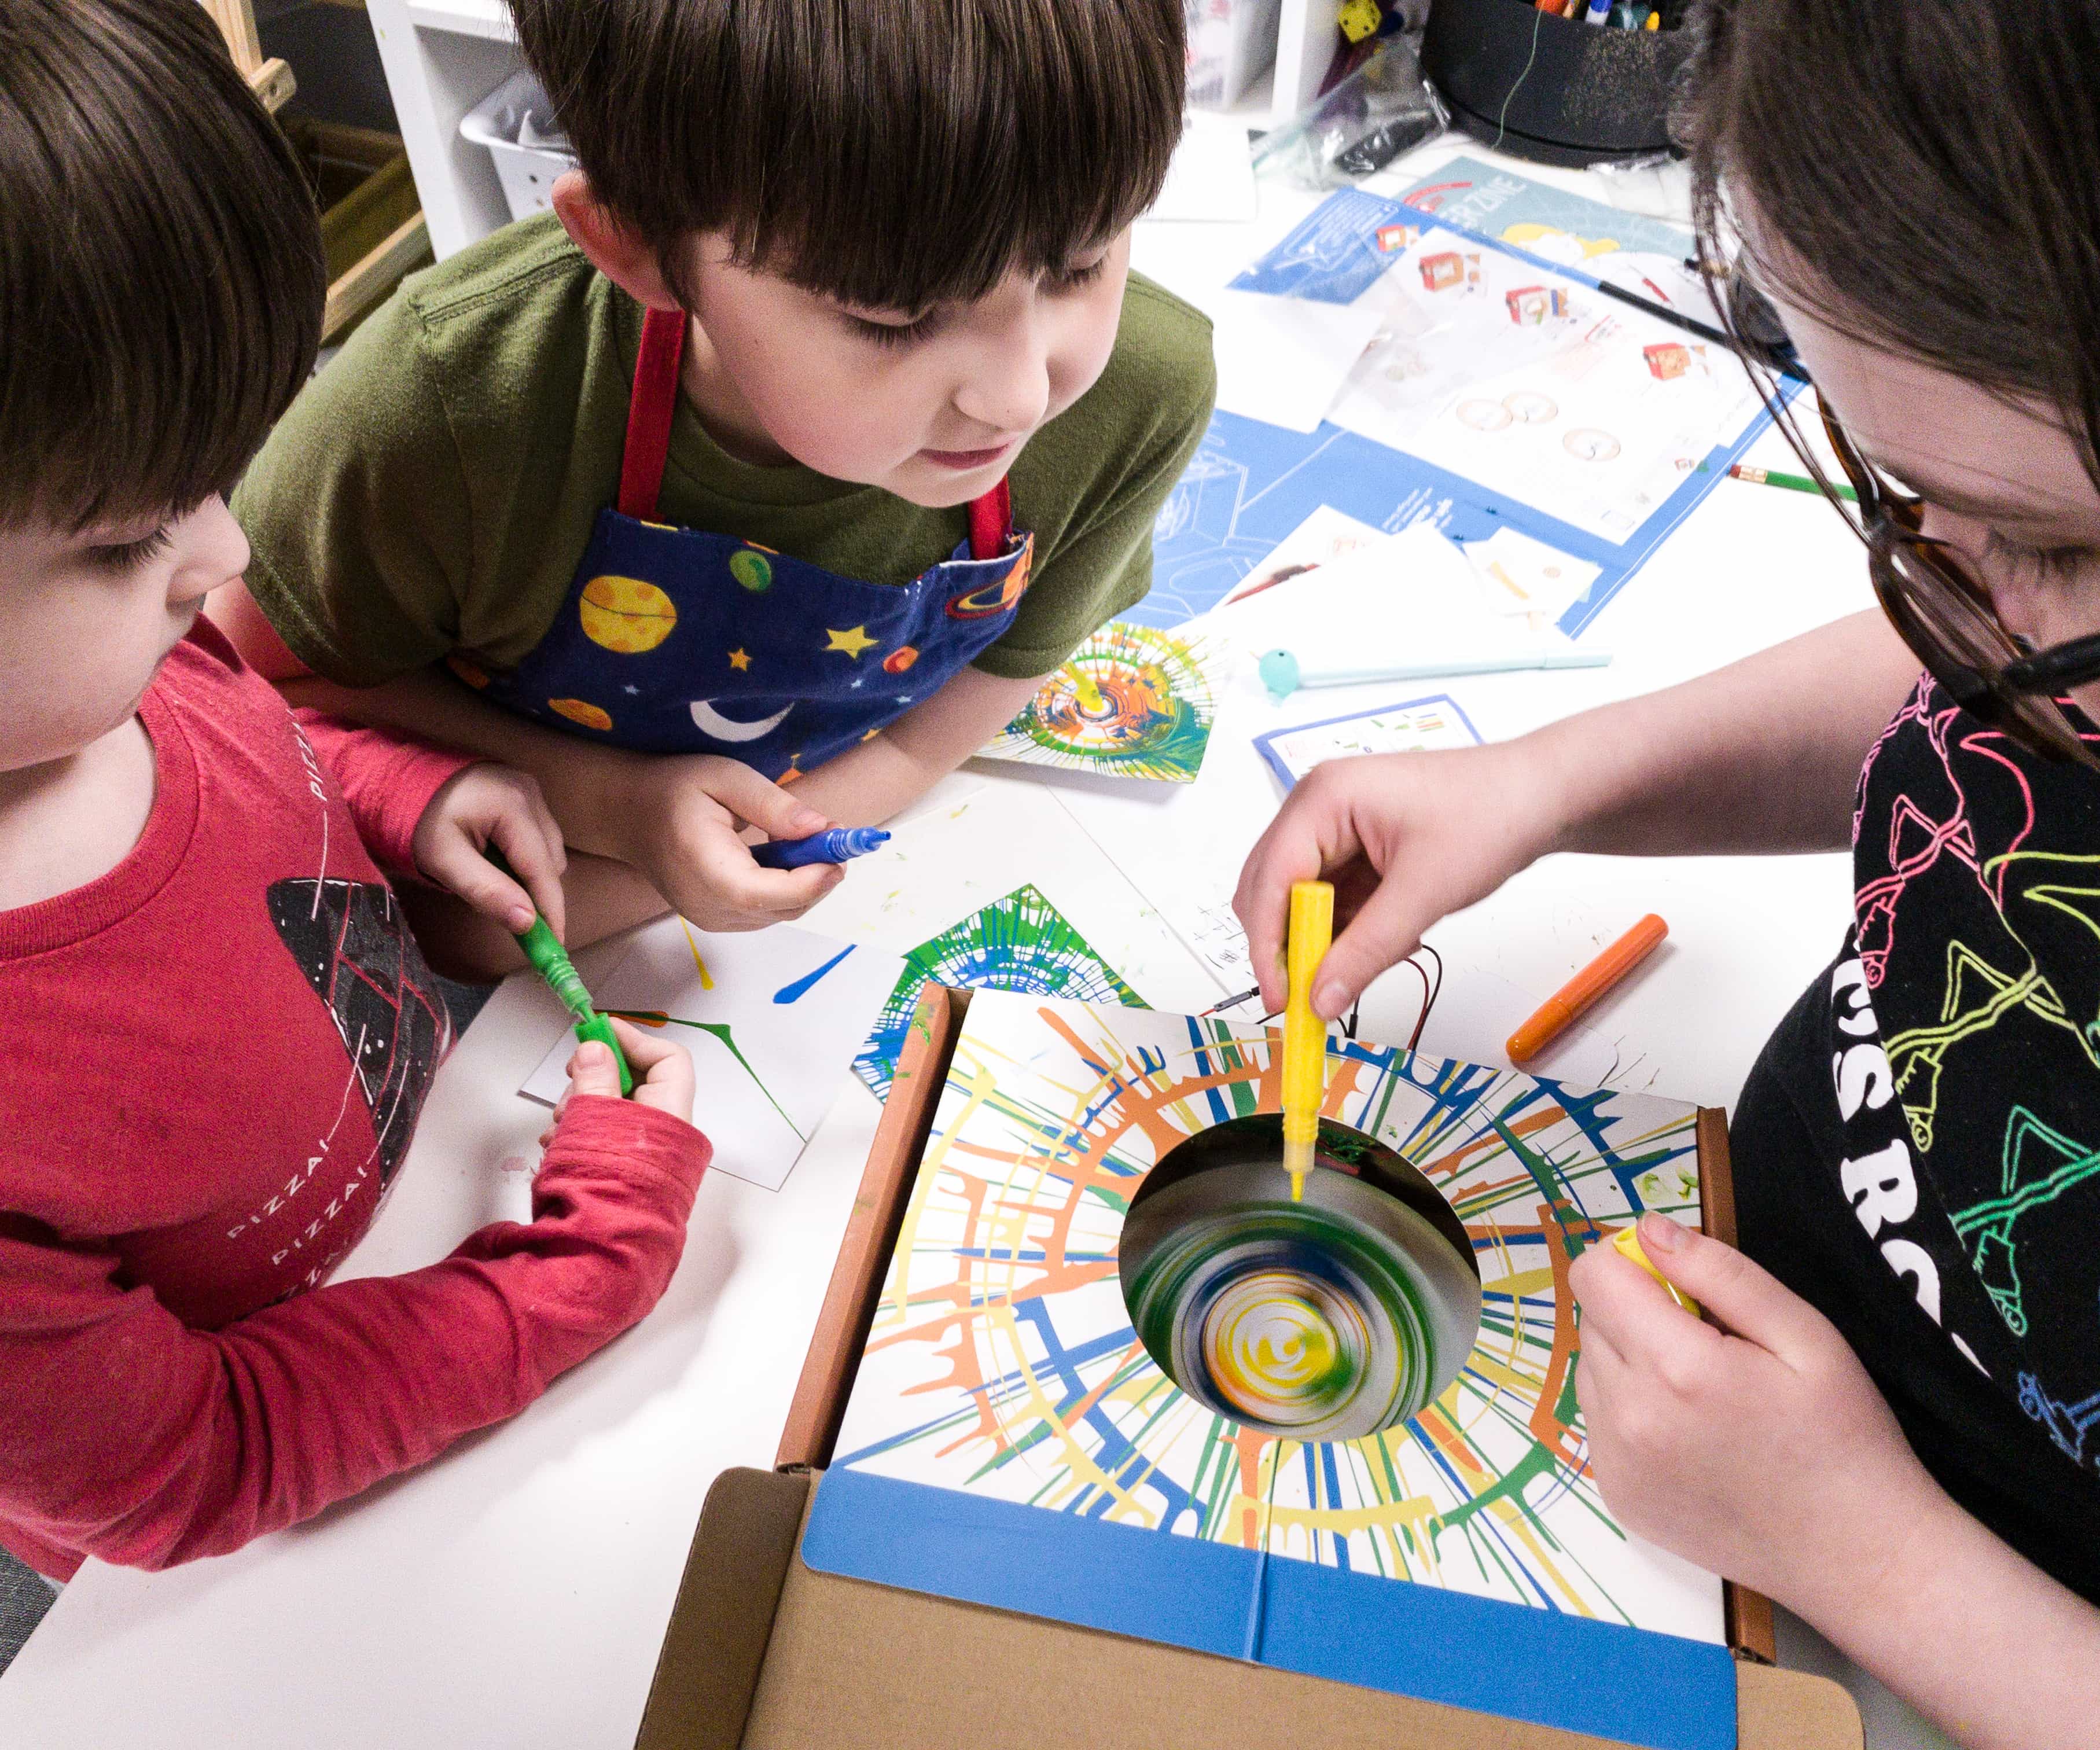
My kids really enjoyed watching how the machine works. The disk rotates really fast!
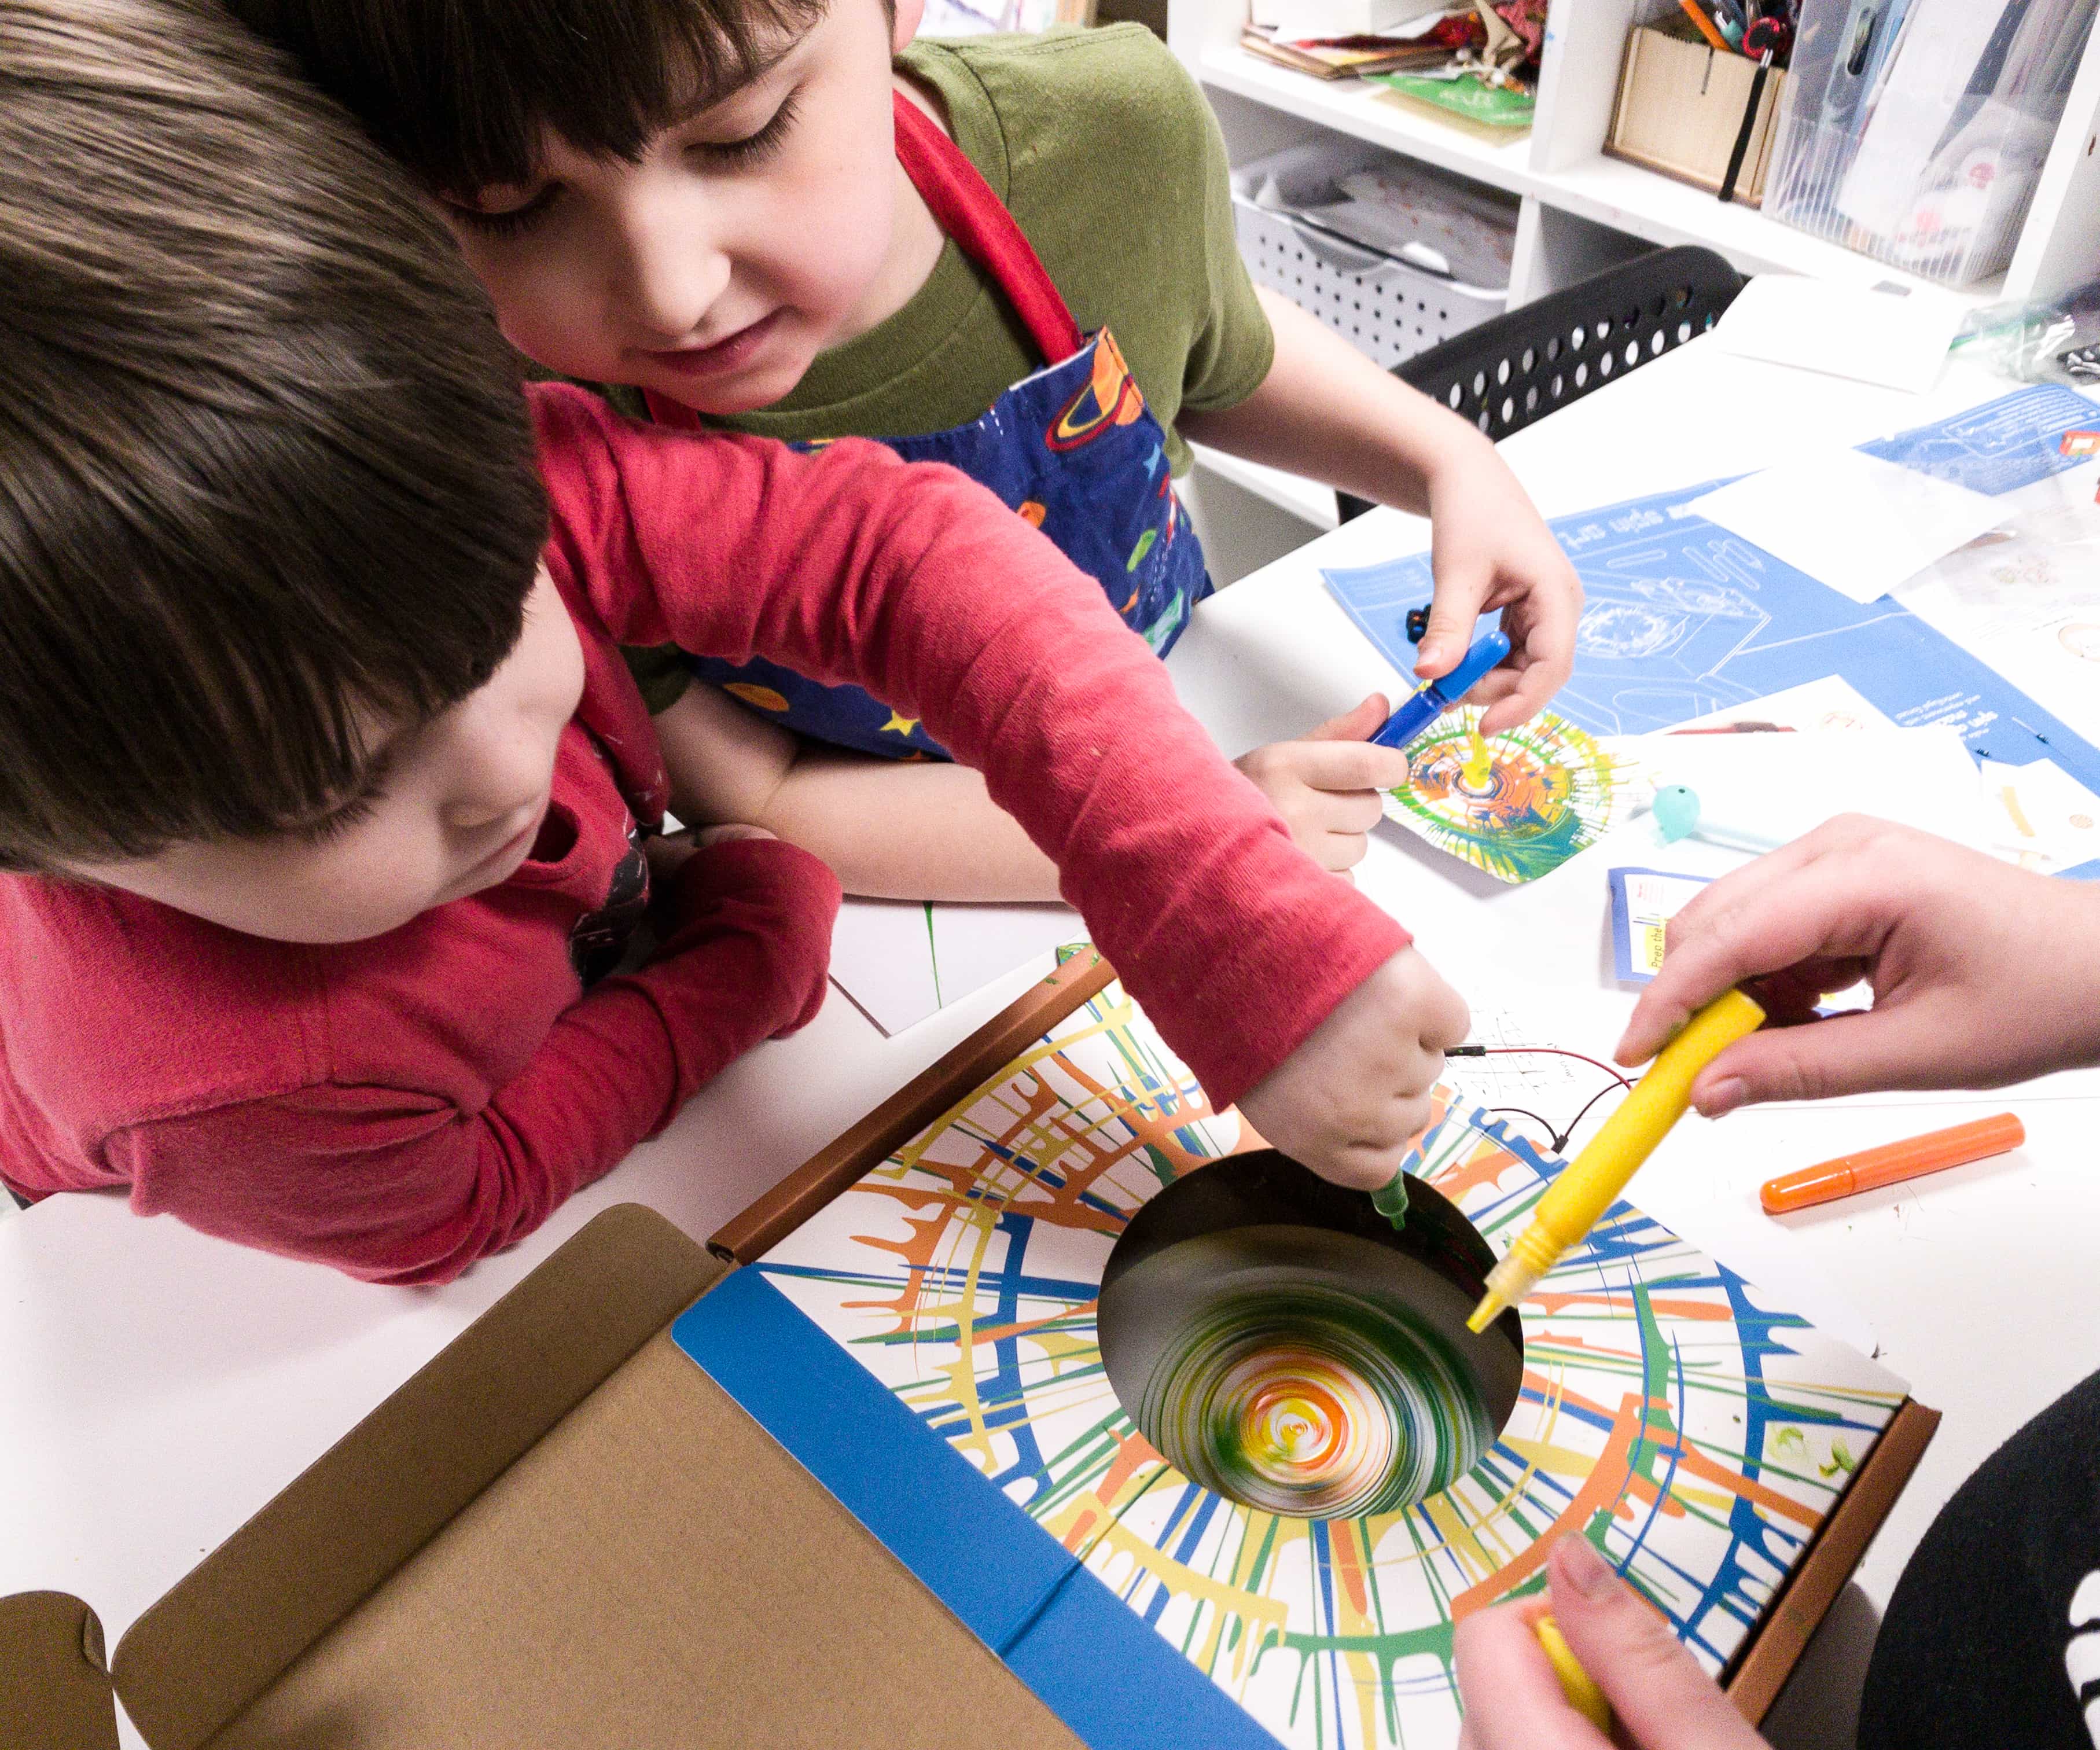
They even put more droplets of color on it while it’s still spinning.

The rapid spin of the disk forces the droplets of color to move away from the center of the paper.
Here’s the machine in action!
You can put as many droplets of color as you want! It will definitely make the project look more dazzling!
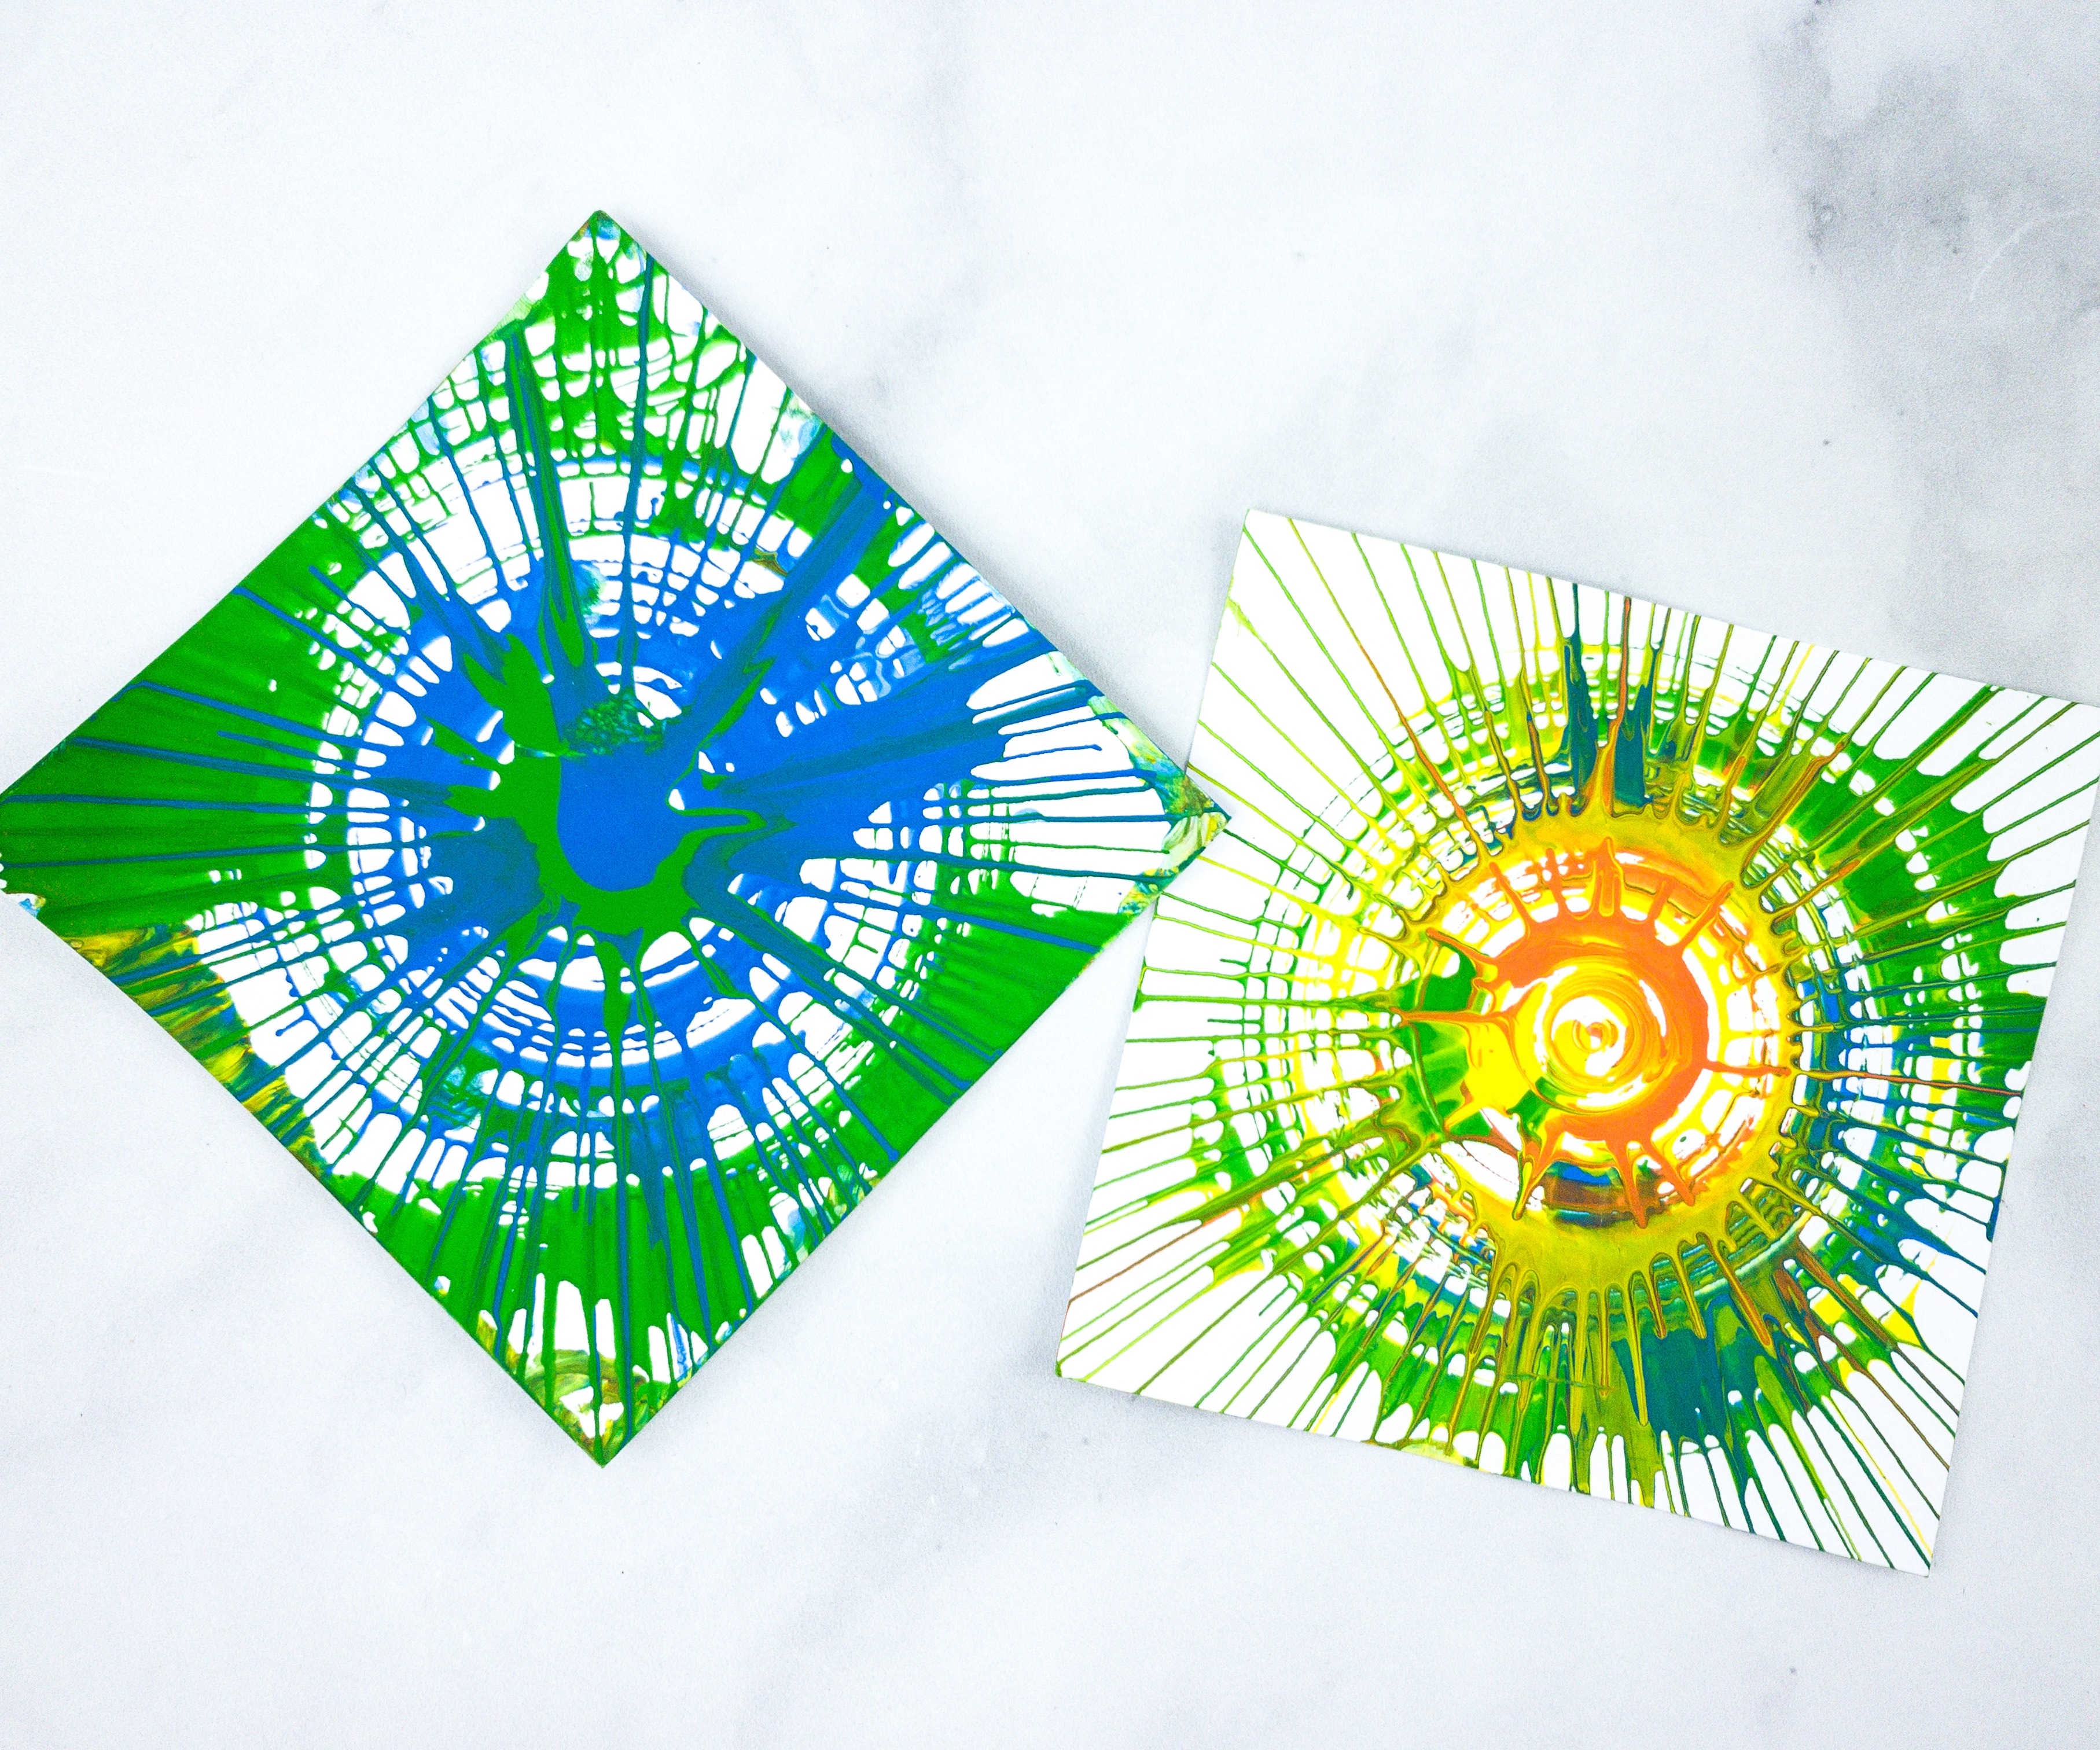
Here are some of my kids’ final output and they look amazing!
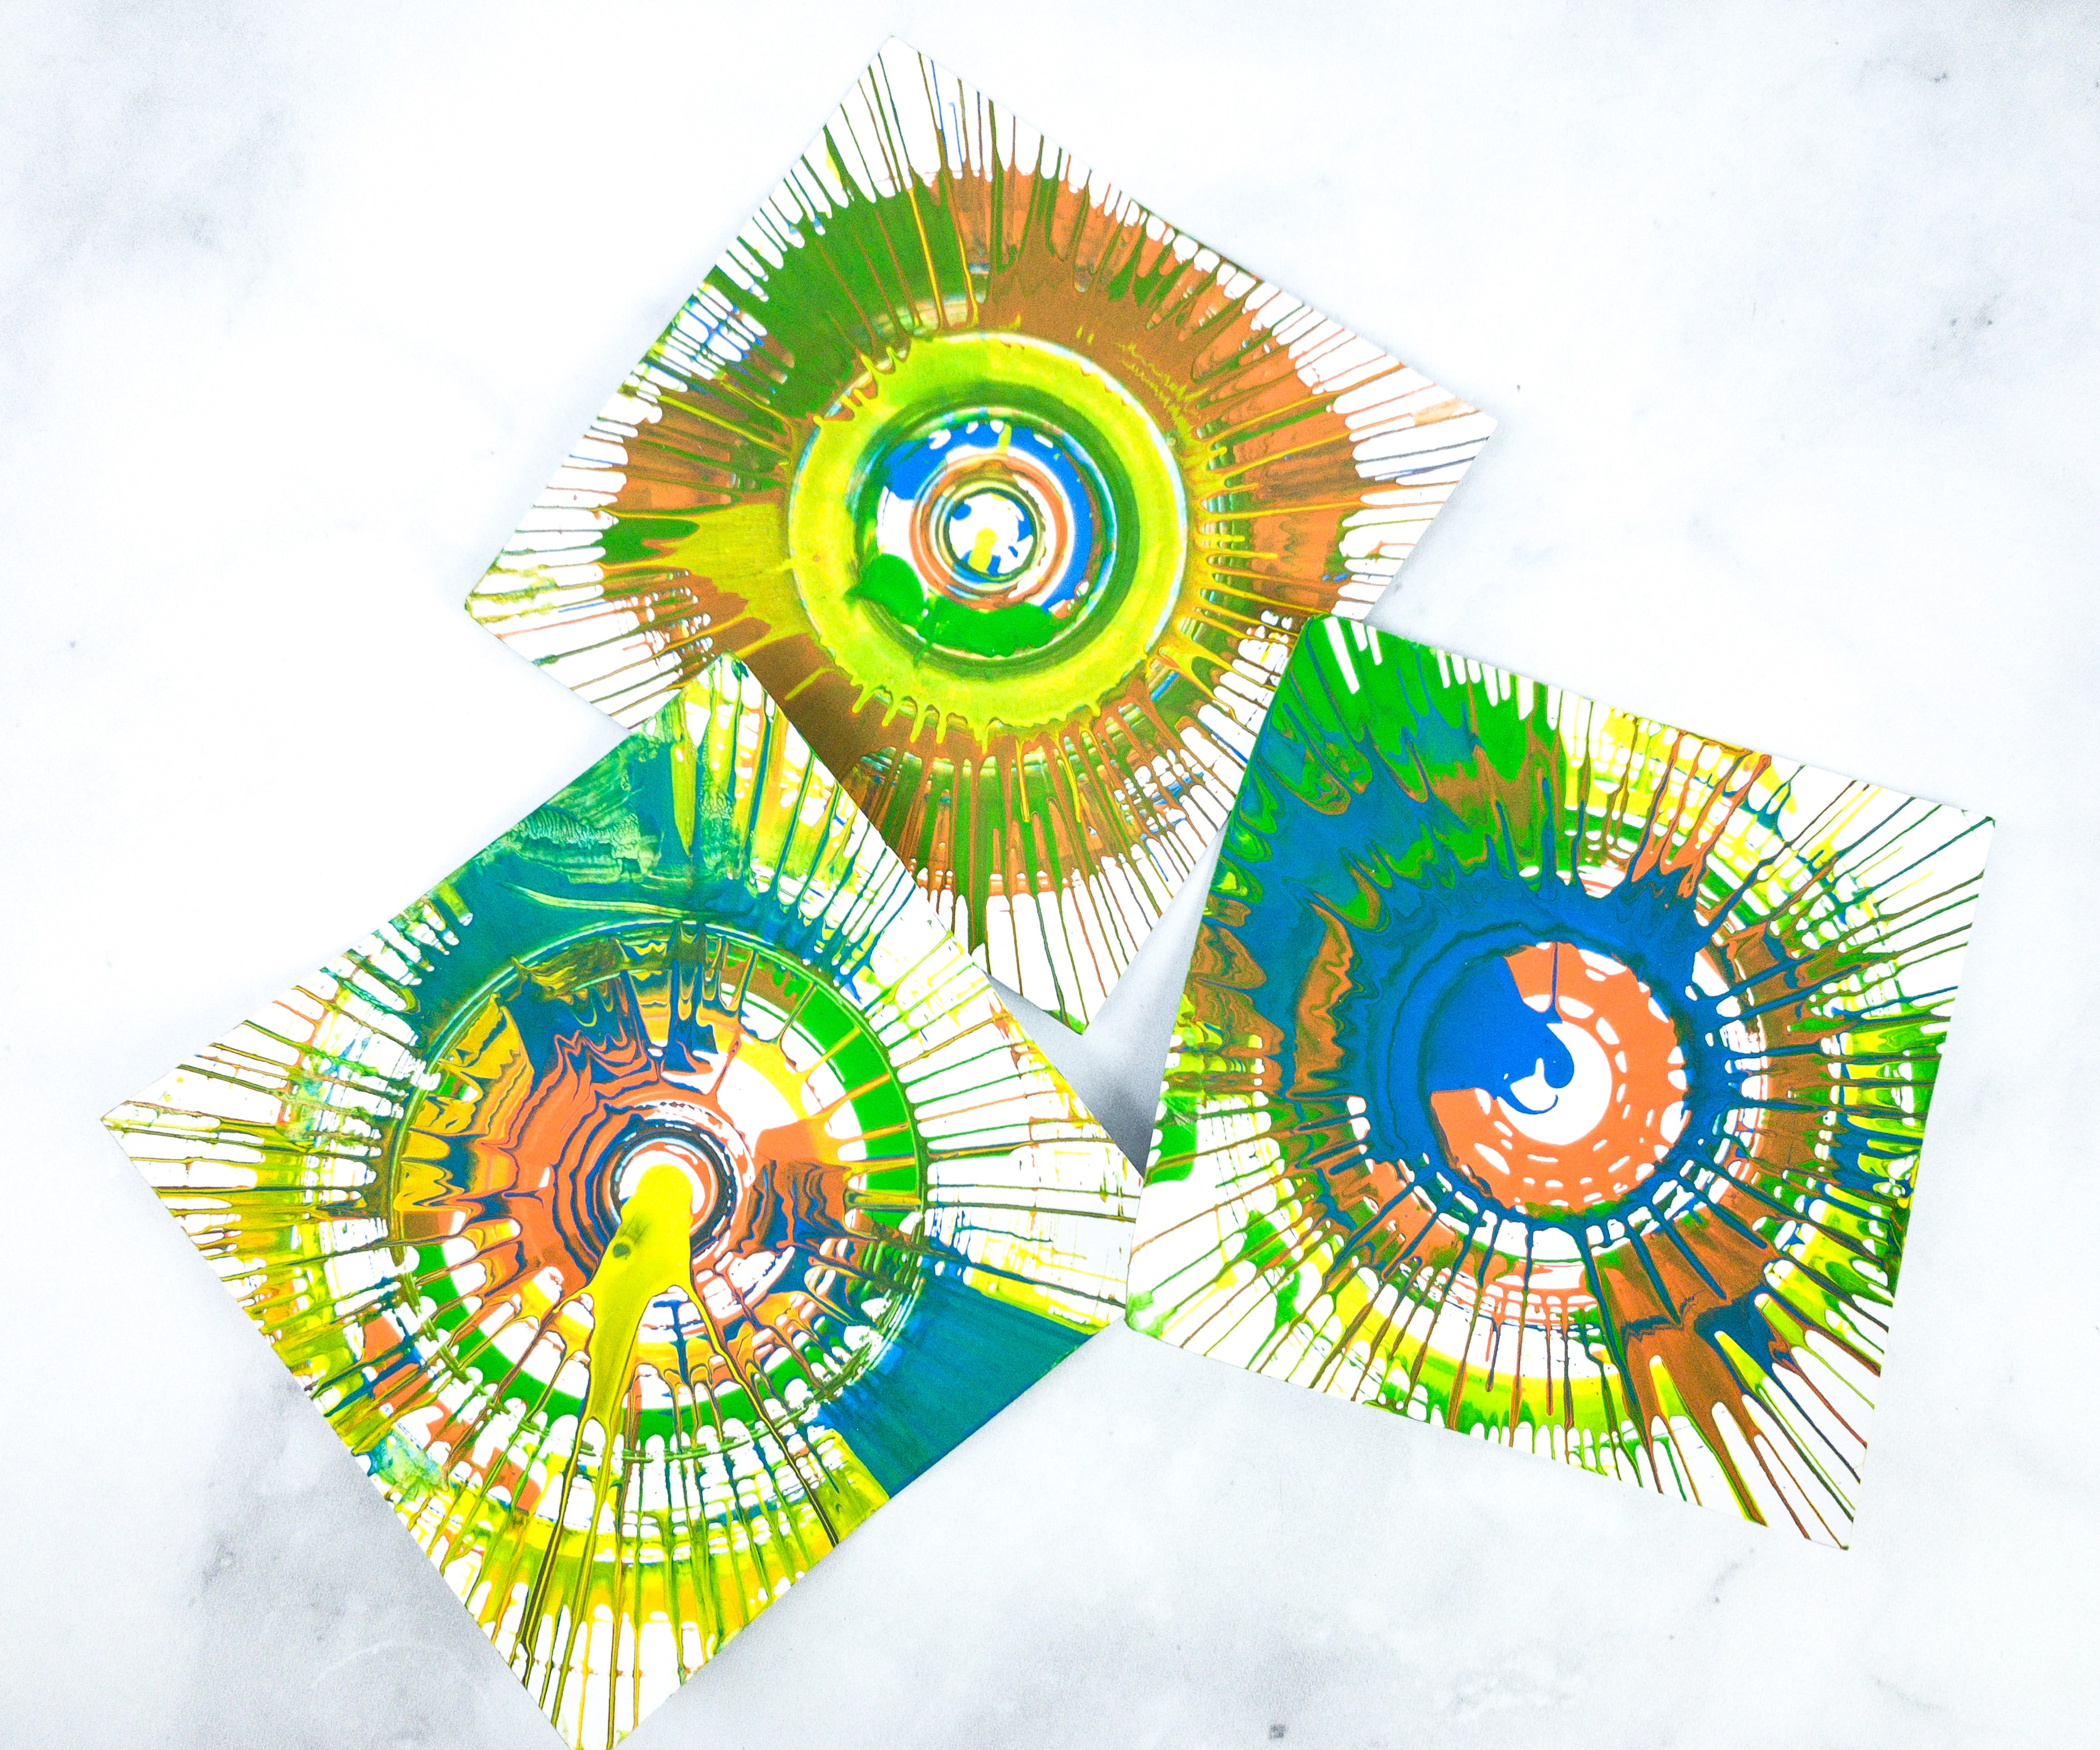
We made a lot of art from the spin machine because my kids really enjoyed them!
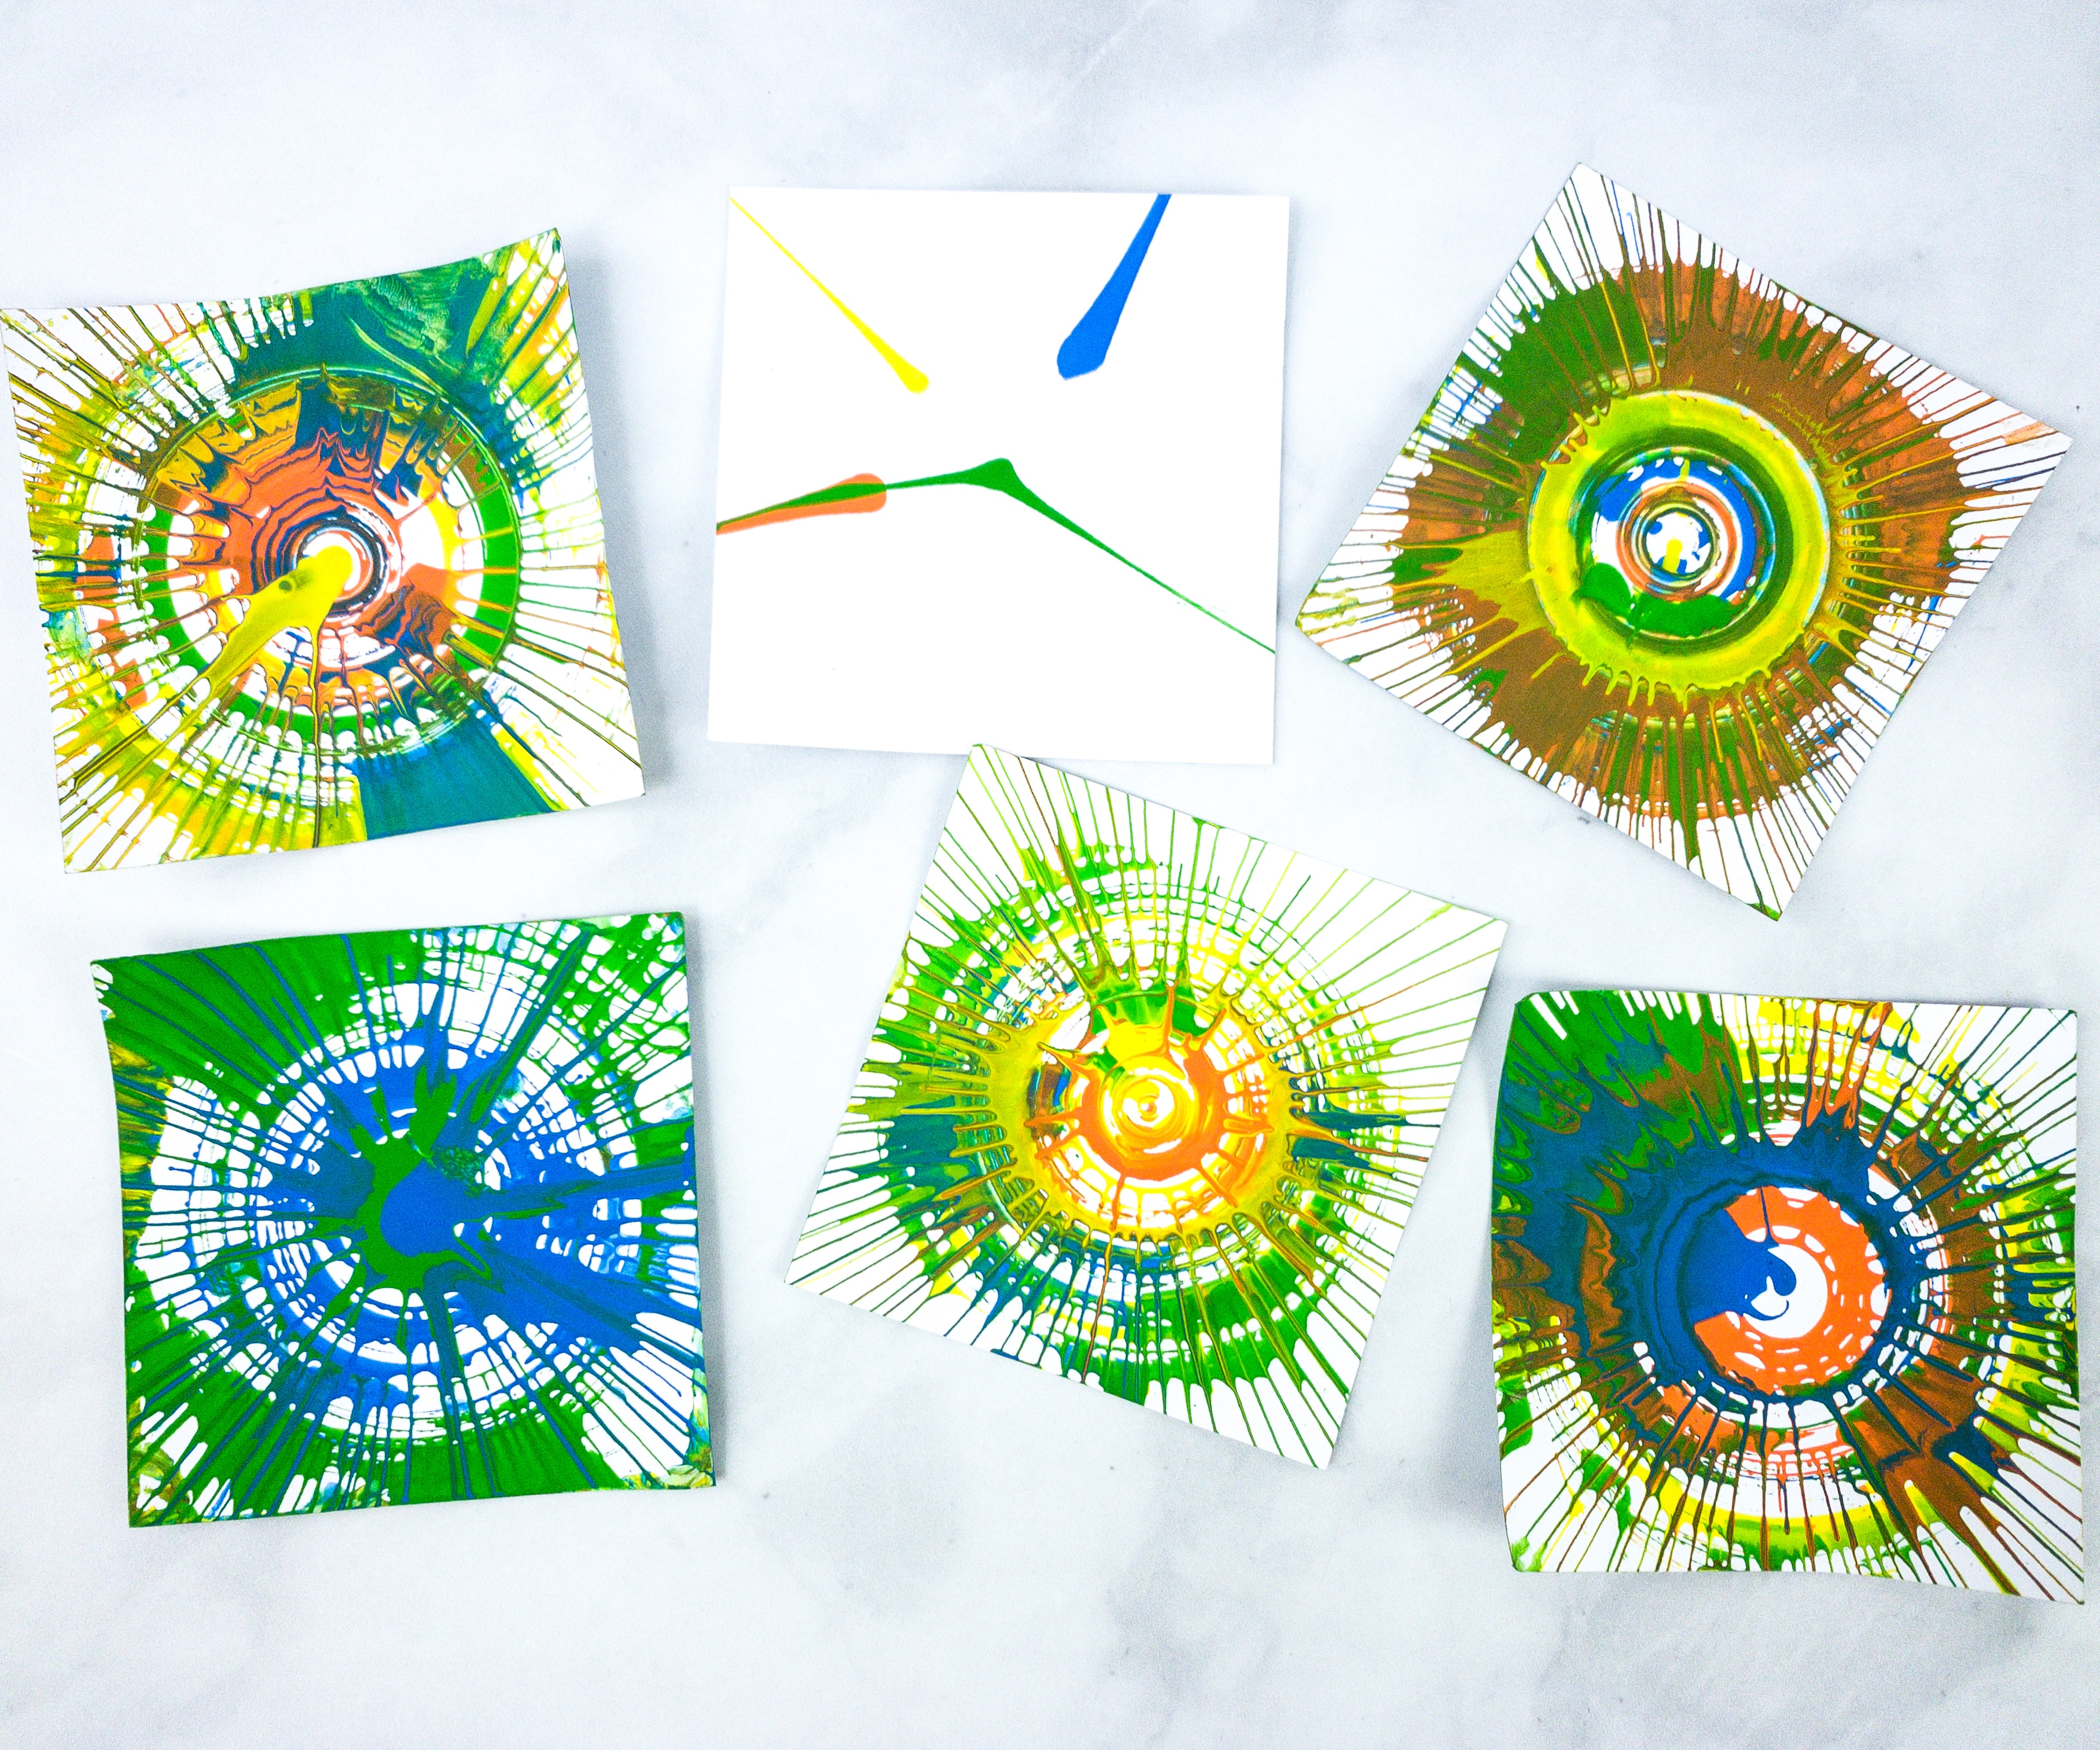
We observed that the distance the color traveled depends on the force of the disk’s spin, that’s why the length and the shapes of the colors are irregular.
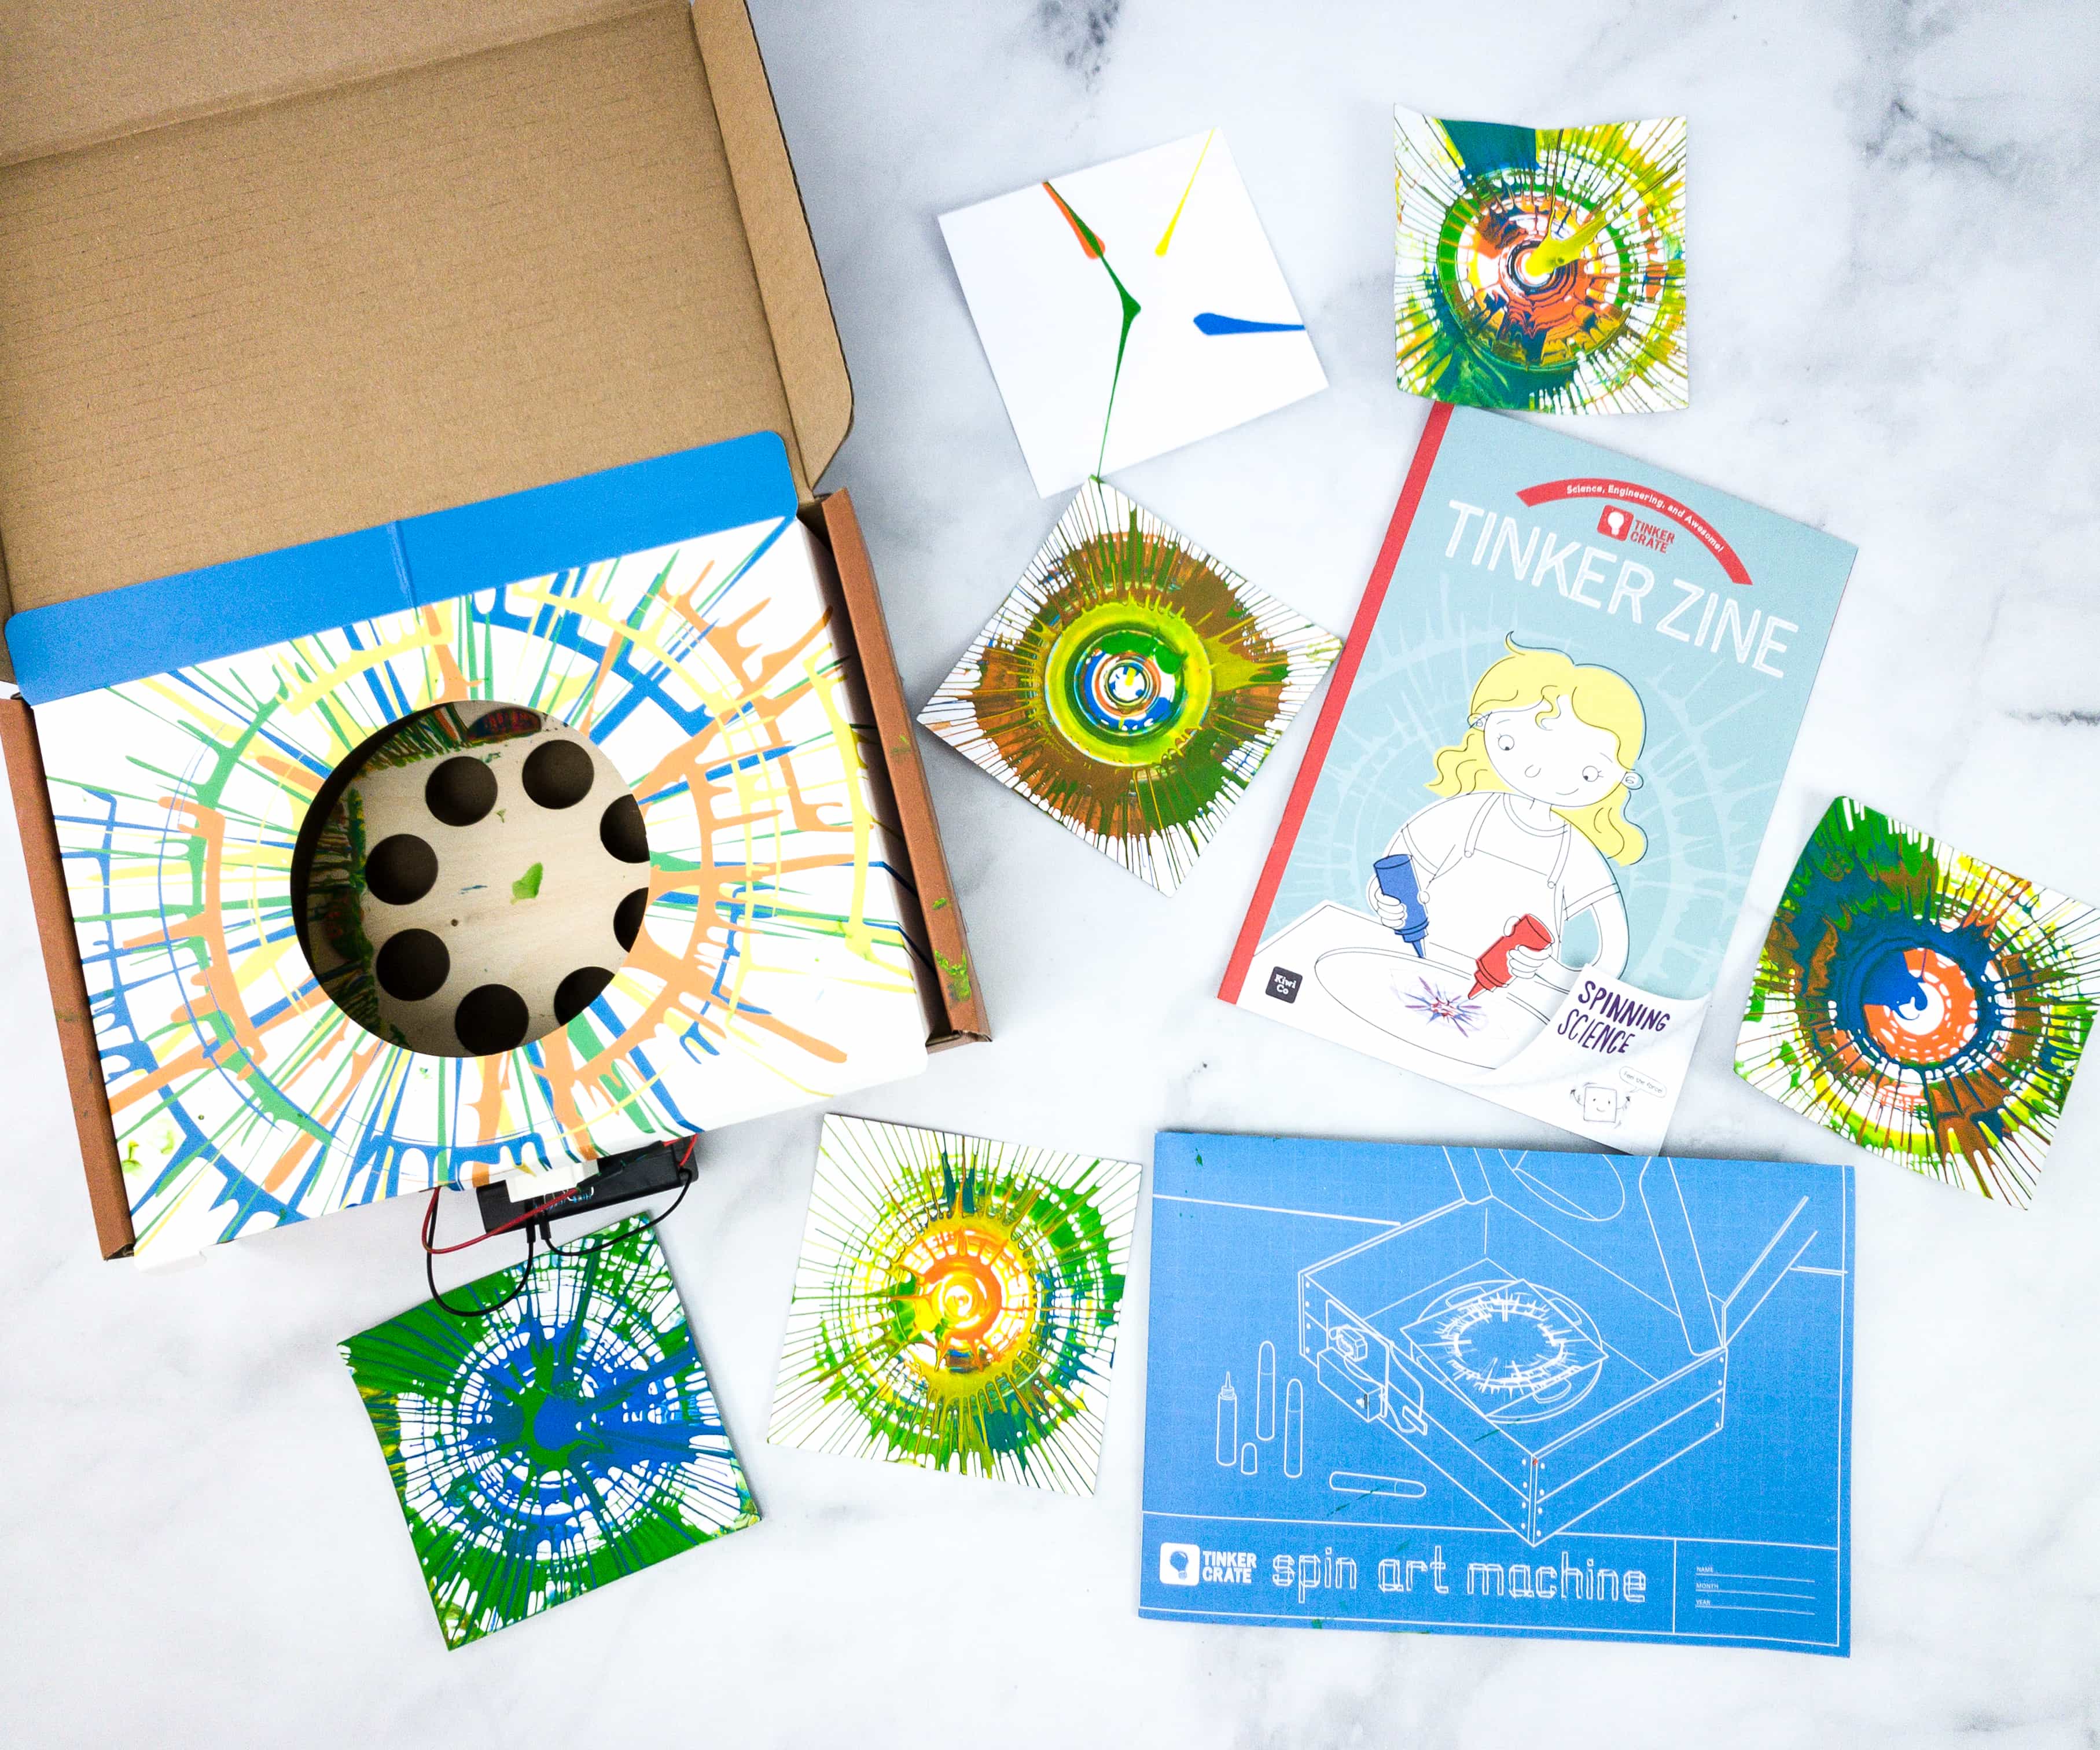
Here’s our completed Spin Art Machine together with all our own centrifugal color artwork!
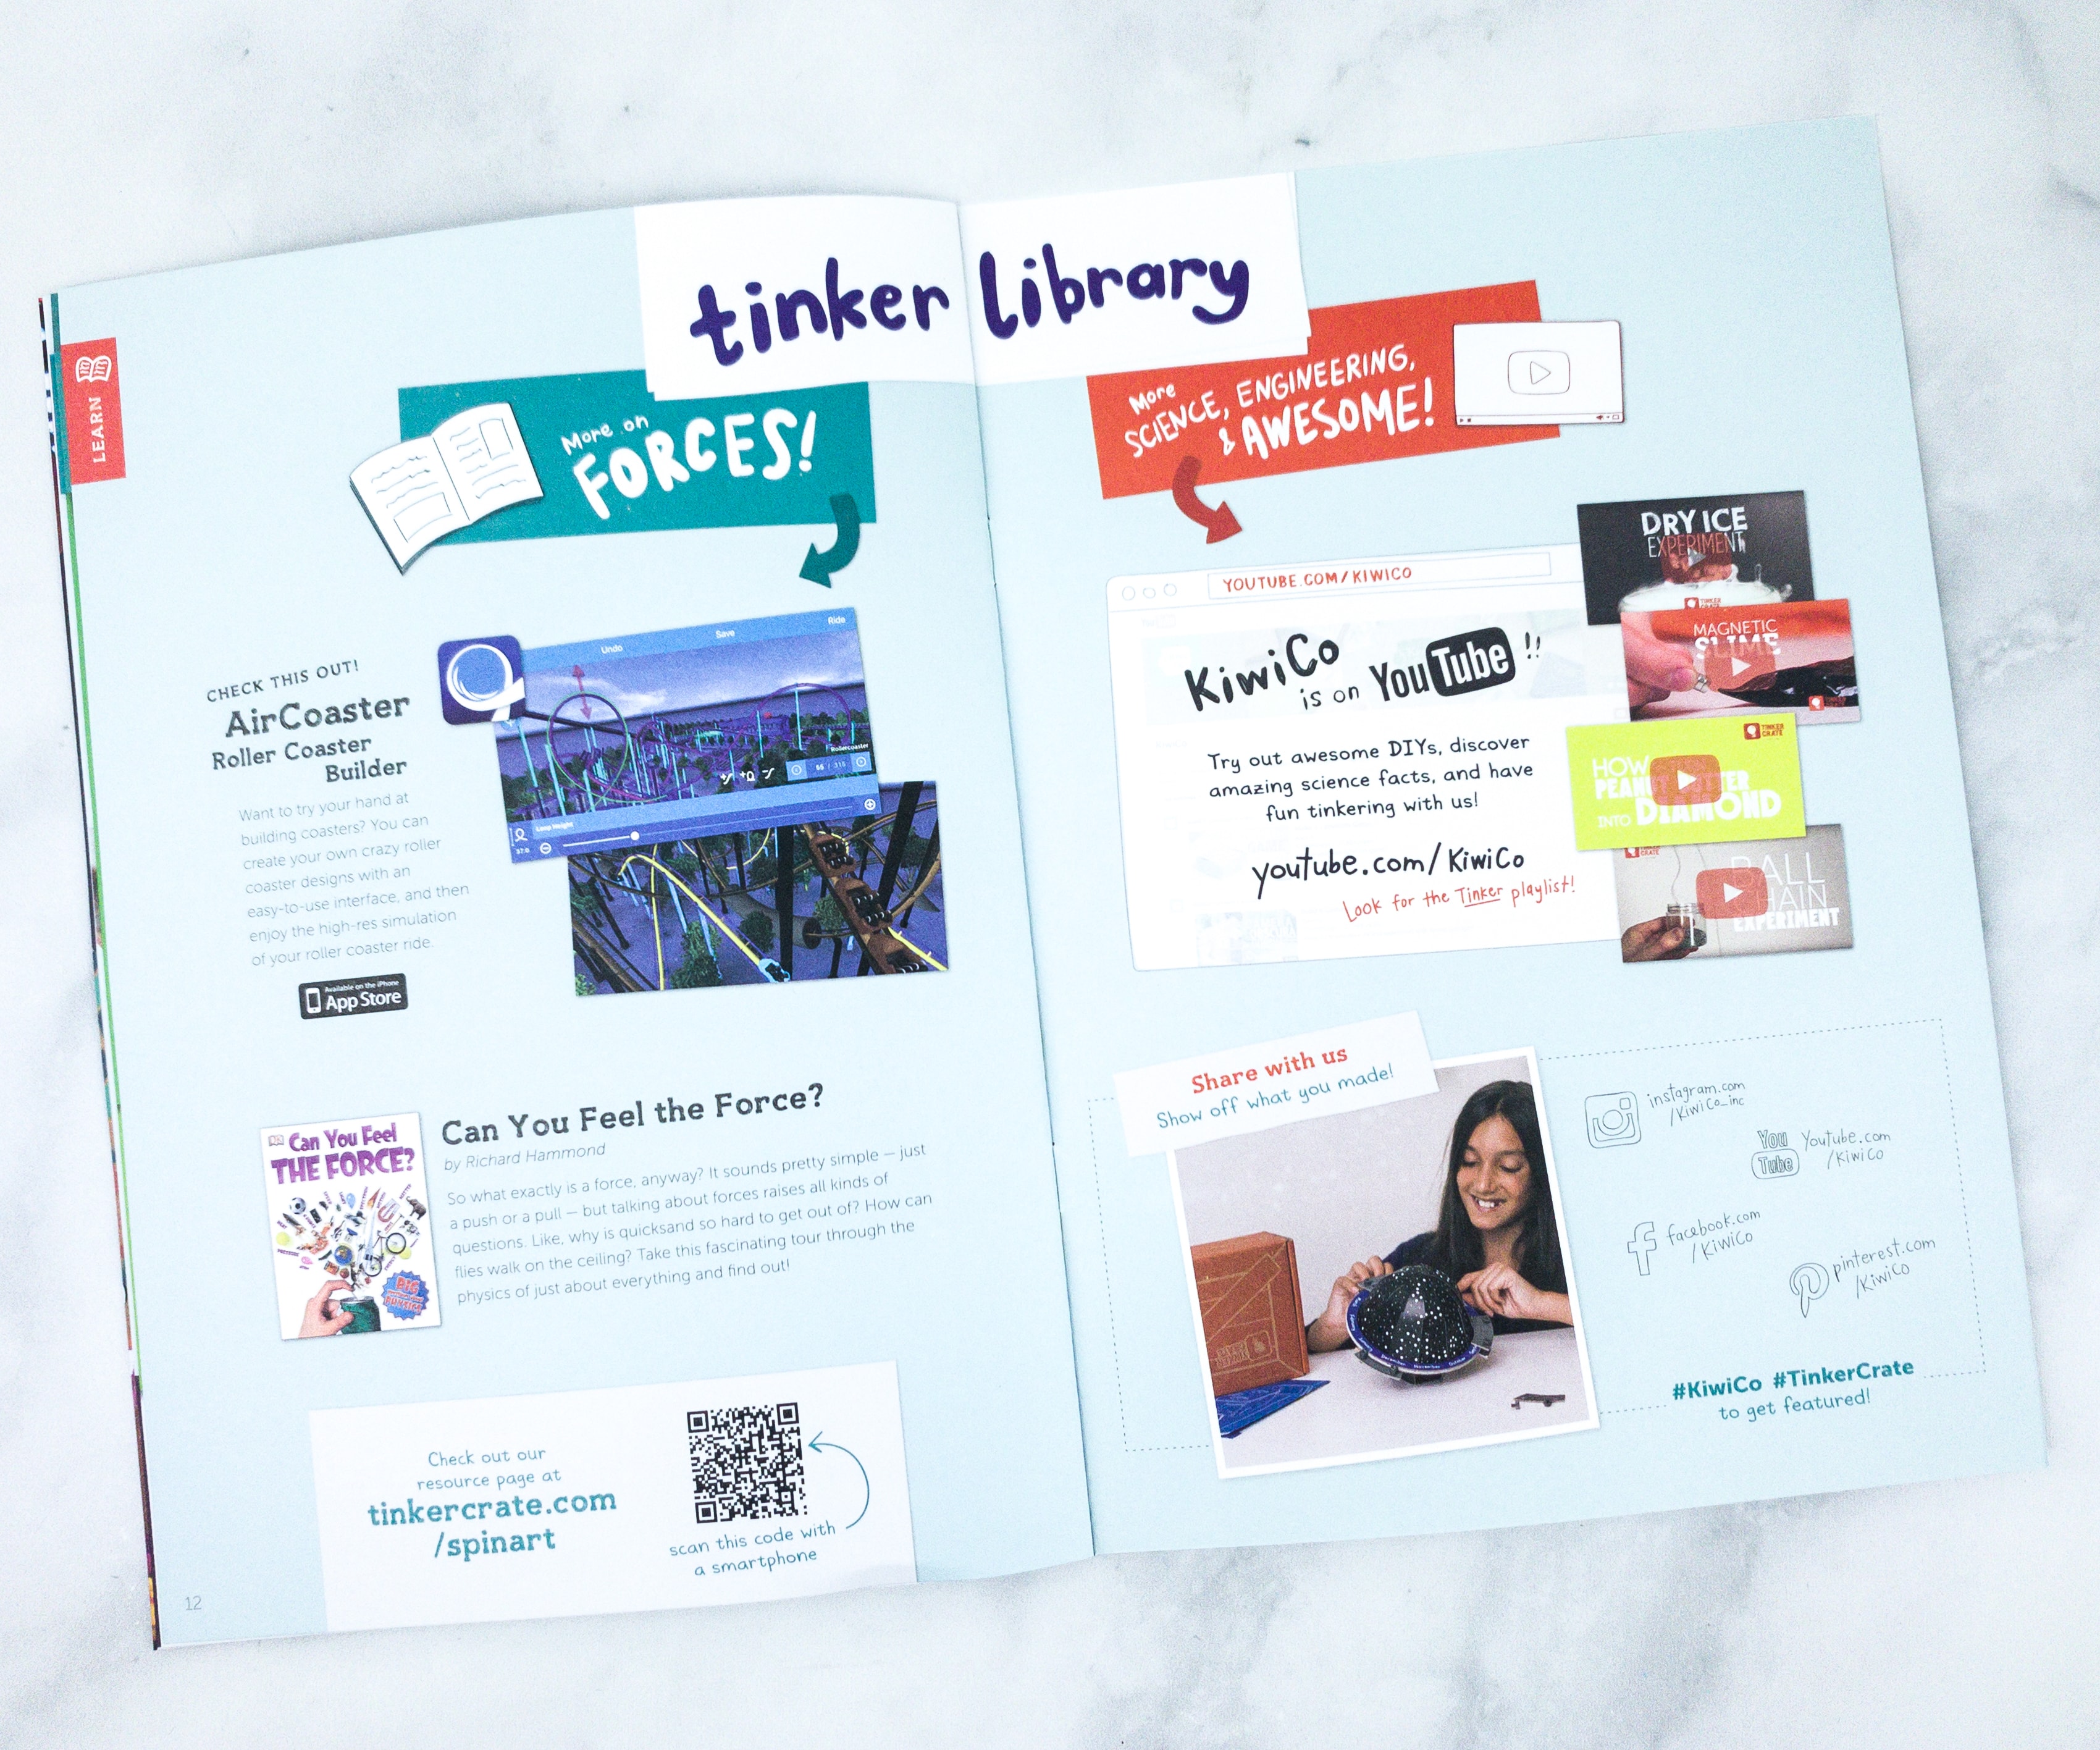
The Tinker Zine also provided more ways to tinker via the Tinker Library, where they suggest related literature for this month’s topic: Can You Feel the Force?
This is definitely one of the greatest crates ever! Through this crate, my kids get to make their own mechanical devices and further improve their overall skills including their analyzing, problem-solving, and motor skills, while learning STEM concepts at the same time. The Zine is a great mini-magazine that provides us with more related information about the project. My kids were really focused and concentrated on building the machine, and seeing their happy faces after they were able to complete it also made me happy. We all learned a lot from the project and we’re excited about the next box!
Have you tried Tinker Crate yet with your kids?


Comments