Tinker Crate is a subscription box that inspires kids to learn about science, engineering, and technology, all while having lots of fun. Each month, the box explores a field of study within a STEM (Science, Technology, Engineering, and Math) discipline. Kids practice their problem-solving skills and learn how to engage in both structured and open-ended exploration and investigation. Most boxes walk the tinkerers through the construction of fairly complex mechanical devices.
DEAL: Use this link to save 30% on your first box of Tinker Crate! (or Kiwi Crate and the KiwiCo family subscriptions Koala Crate, Tadpole Crate, Atlas Crate, Doodle Crate, and Eureka Crate).
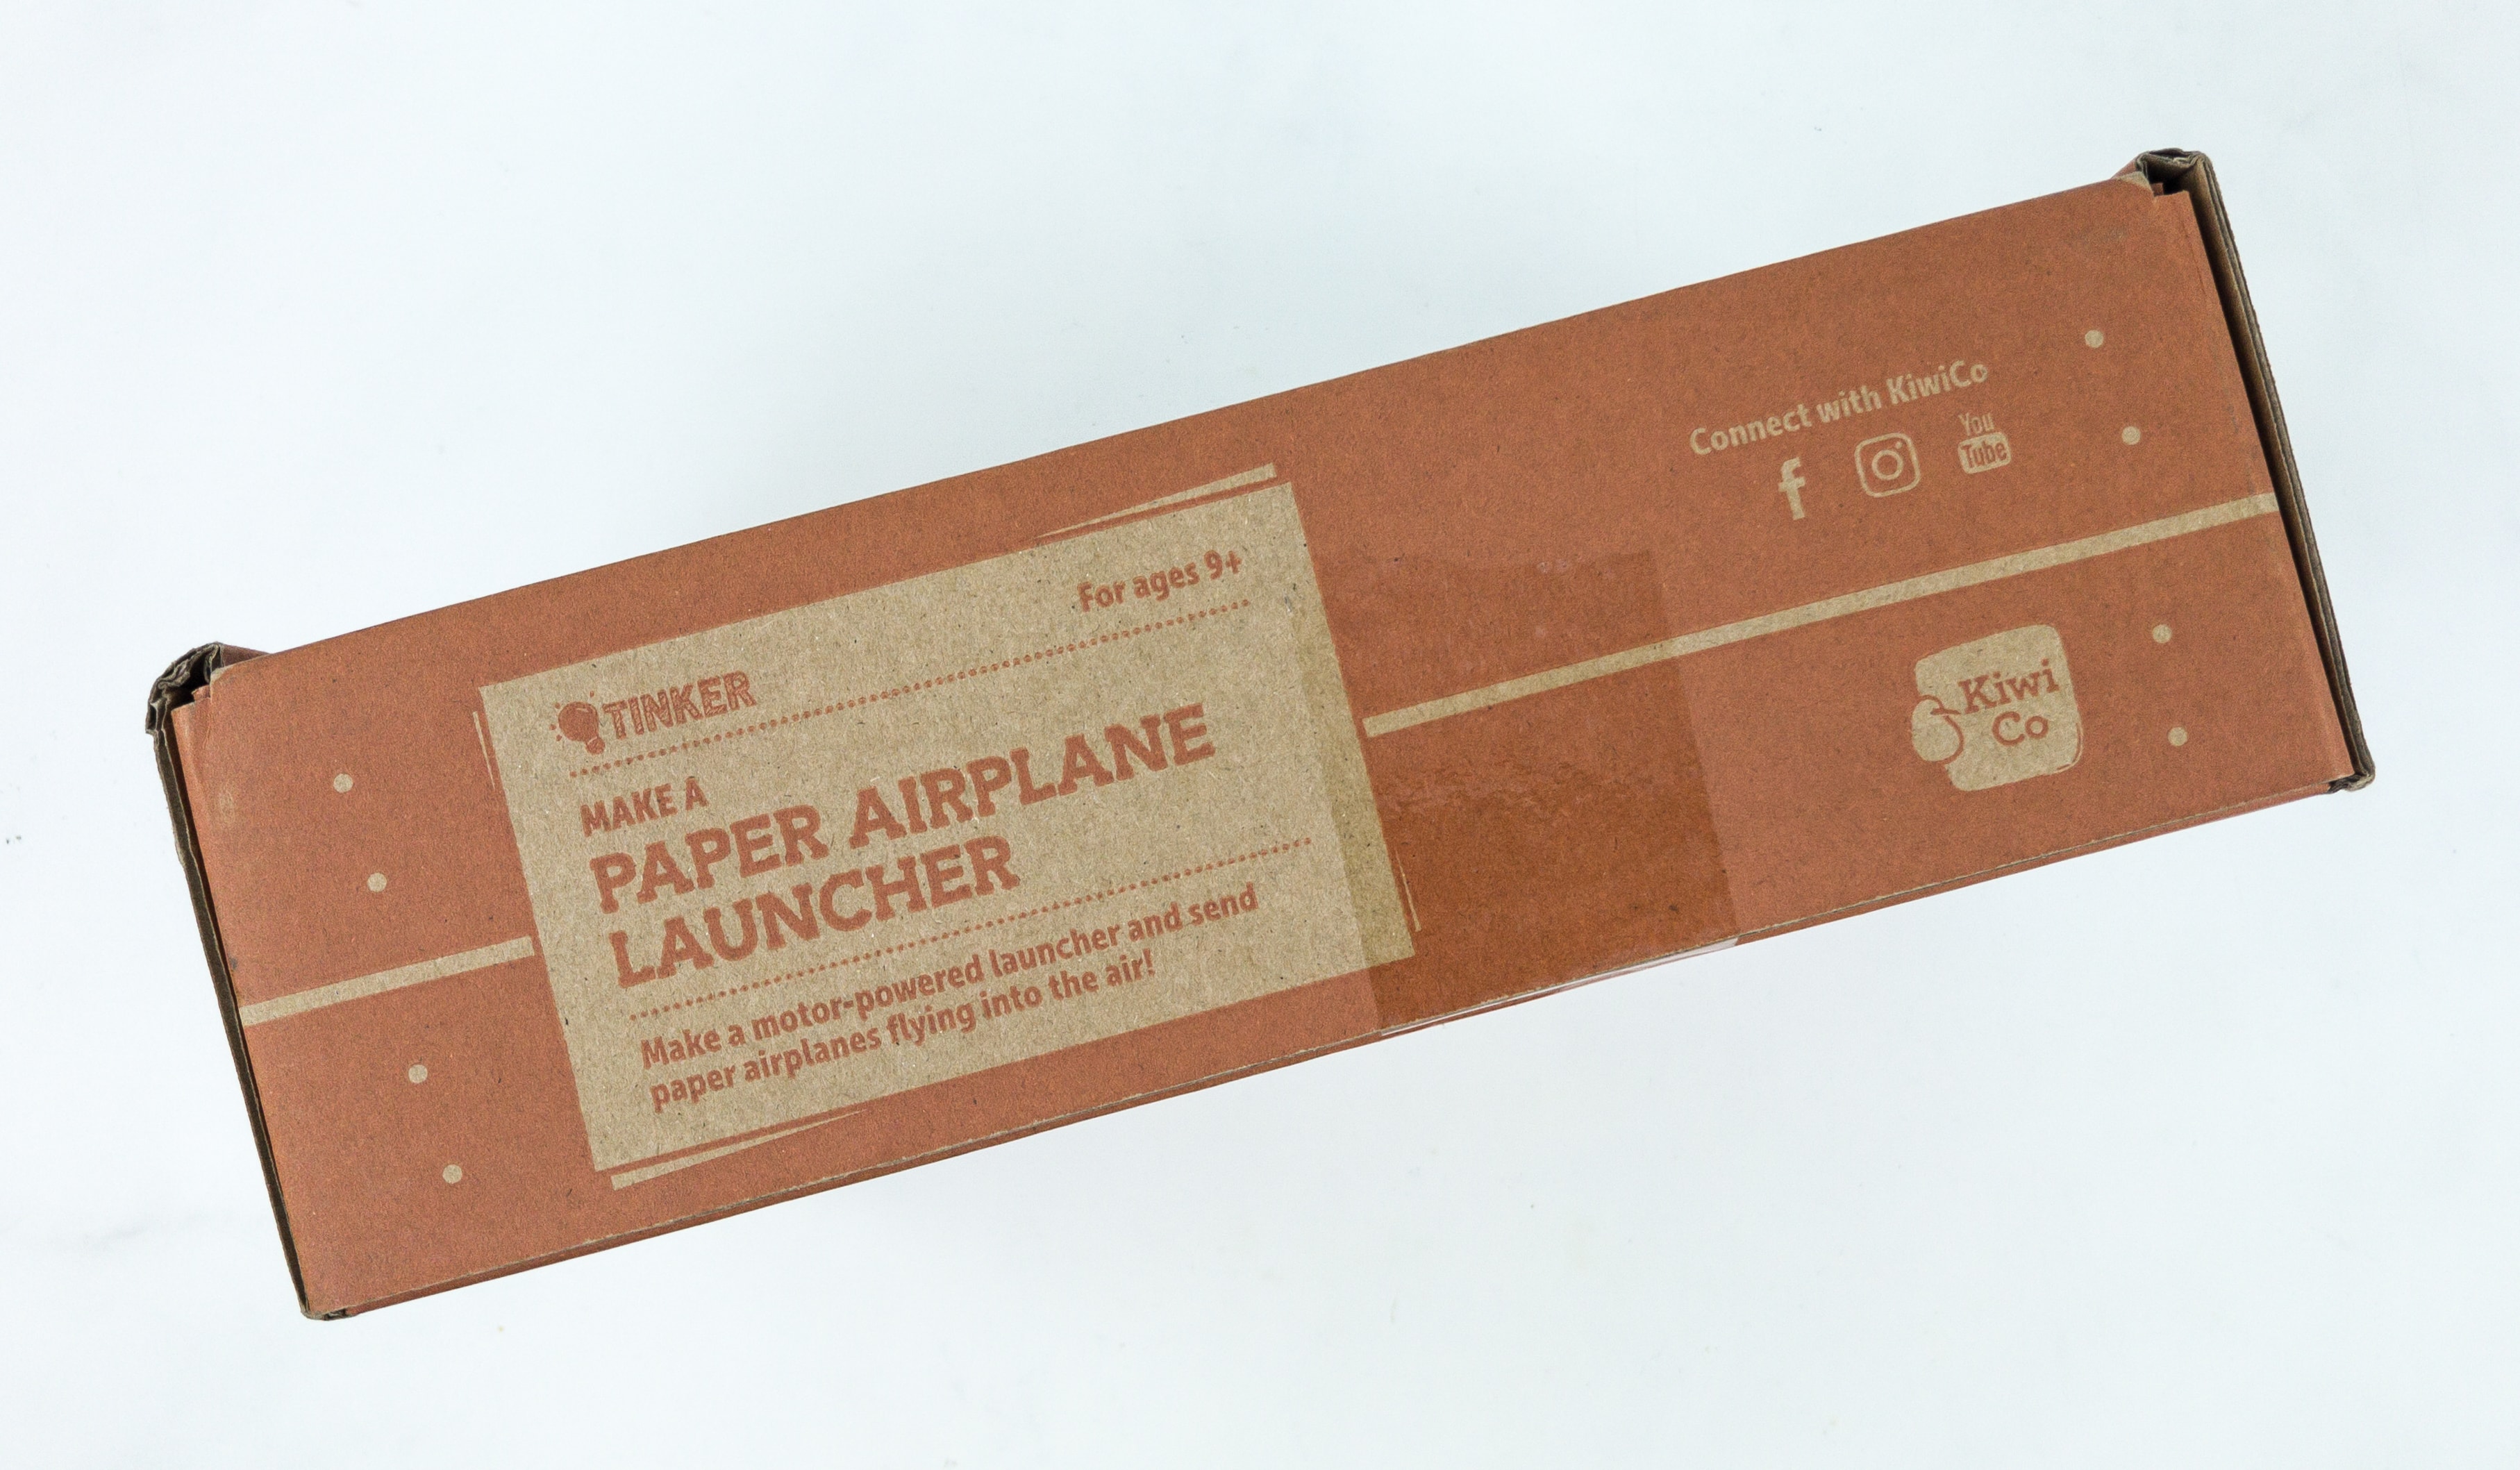
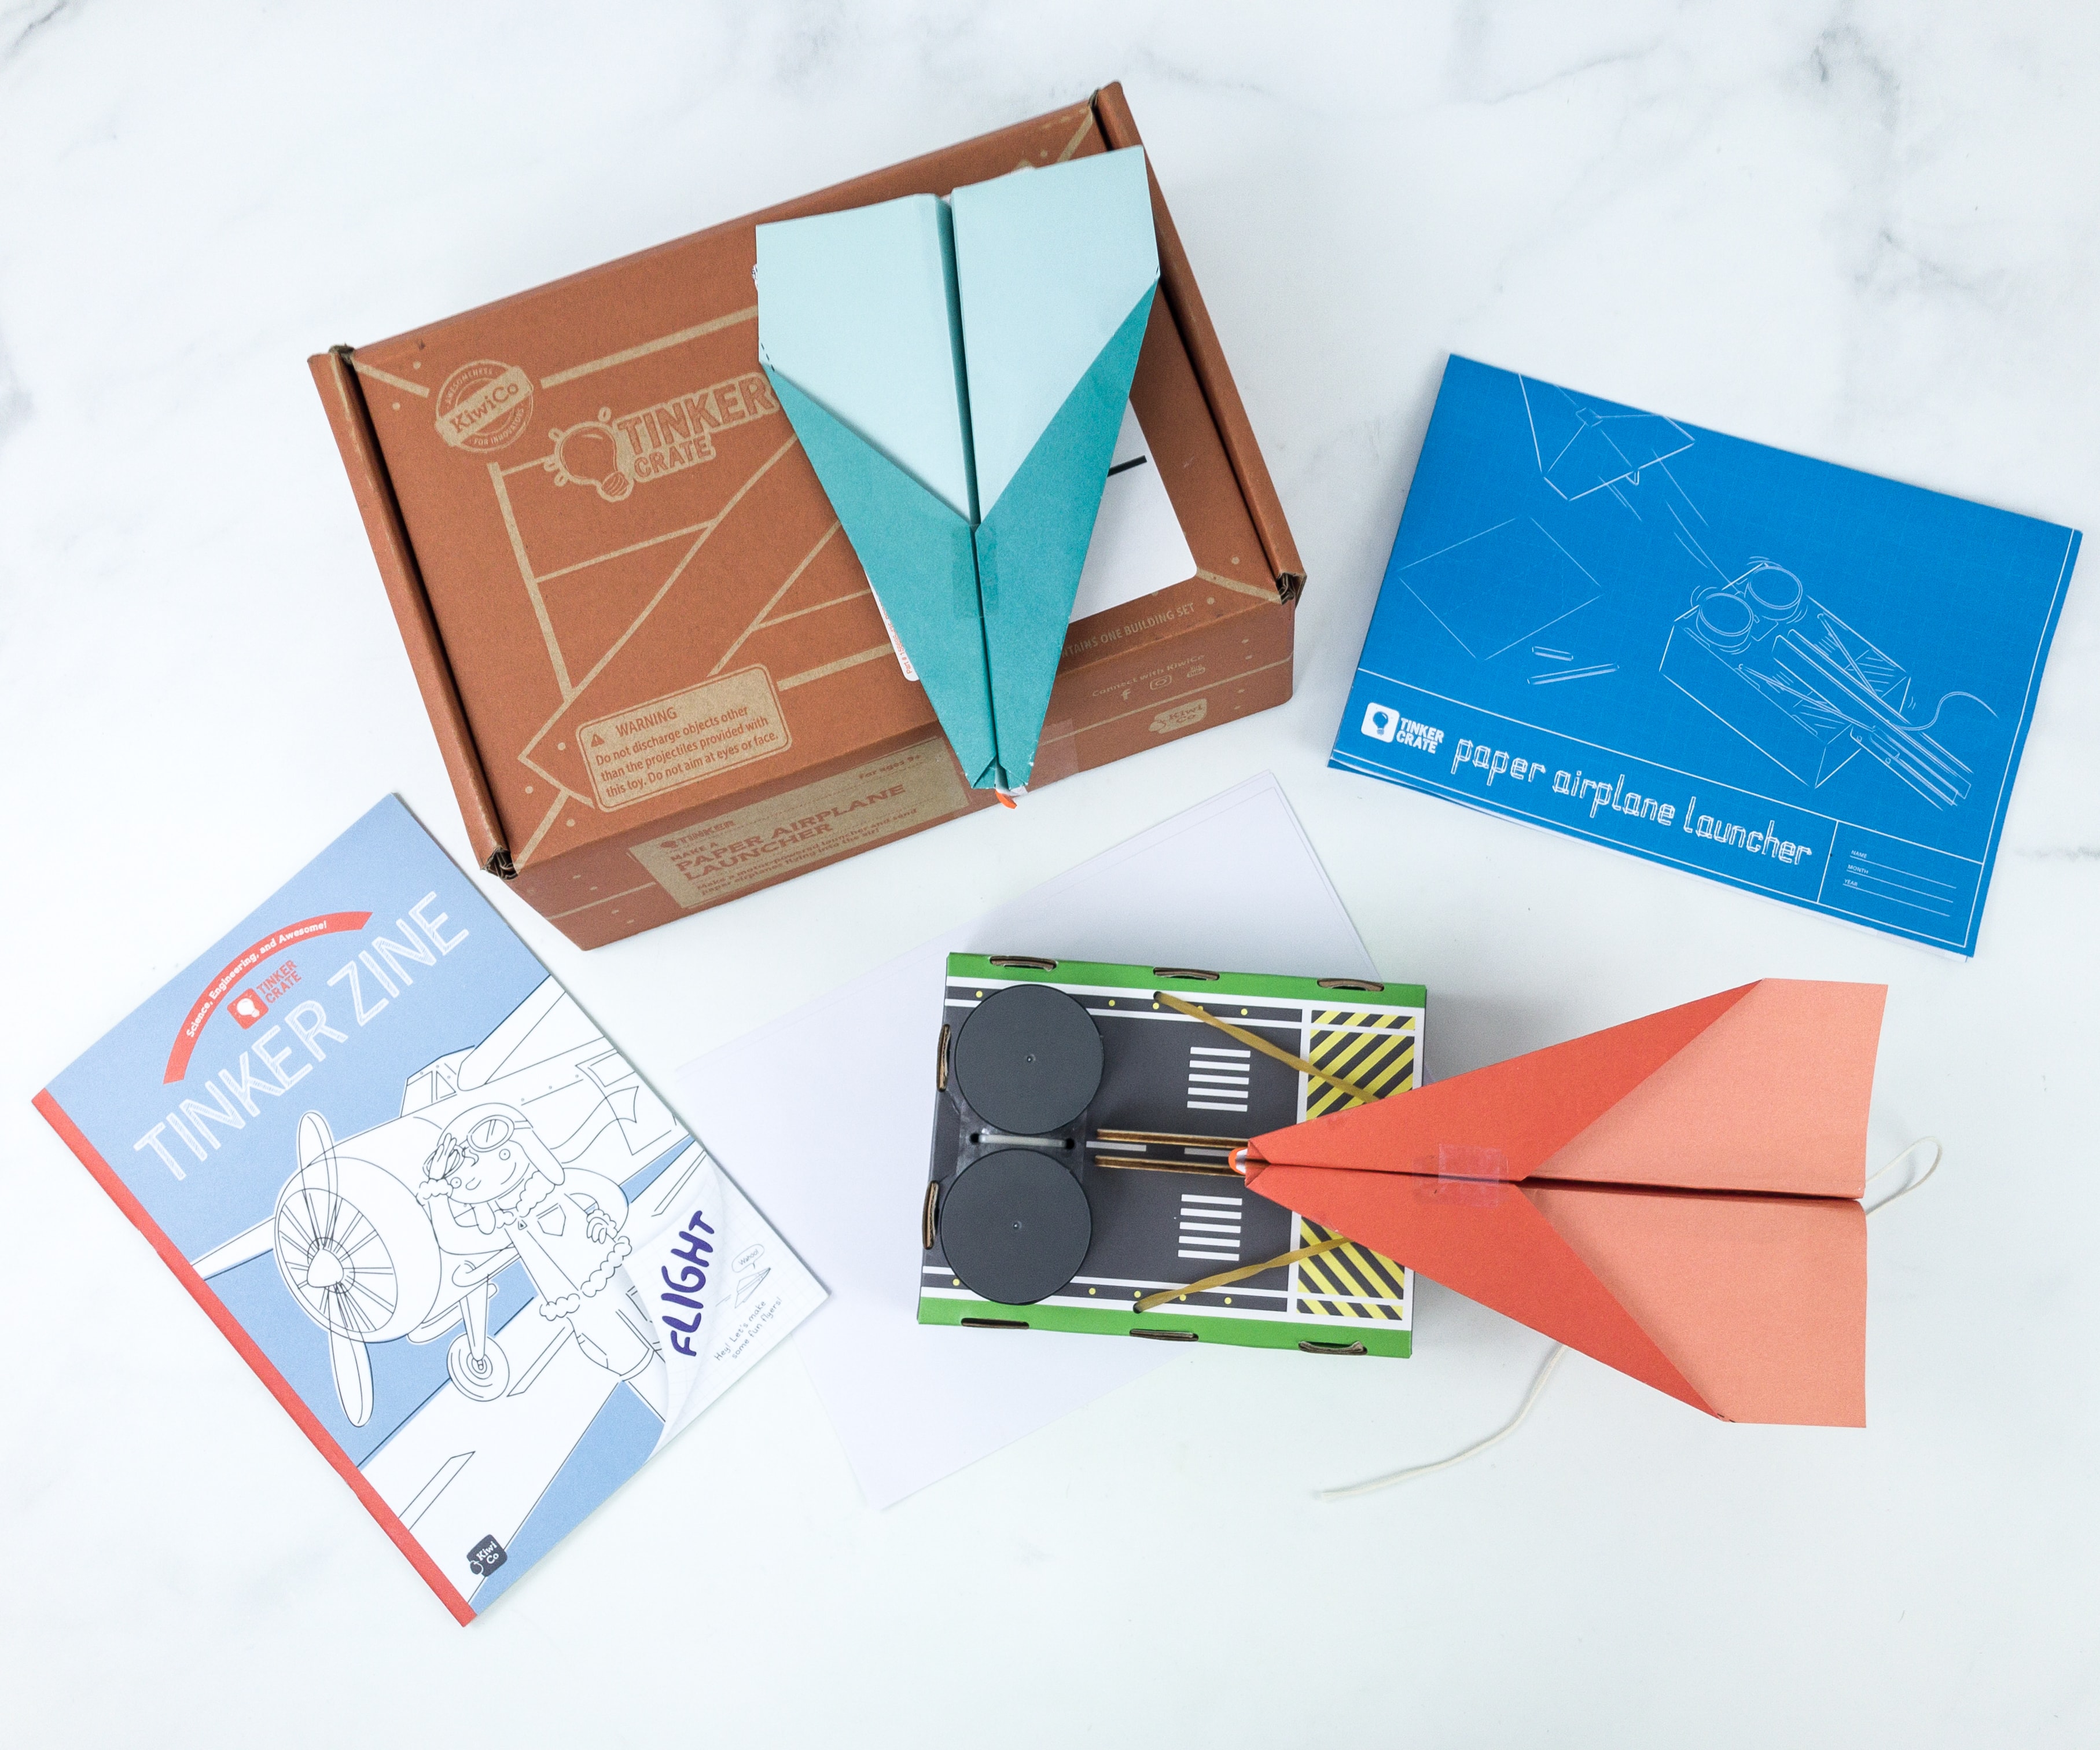
This month, we are building our own PAPER AIRPLANE LAUNCHER.

Everything arrives together in a single Tinker Crate – the supplies, a fold-out instruction sheet, and the Tinker Zine.
Tinker Zine
The main project is always a great hands-on activity and a great demonstration of the scientific principles featured in the box, but the Tinker Zine is full of well-written, historically and scientifically accurate background and explanatory materials. This where the lessons really take shape!
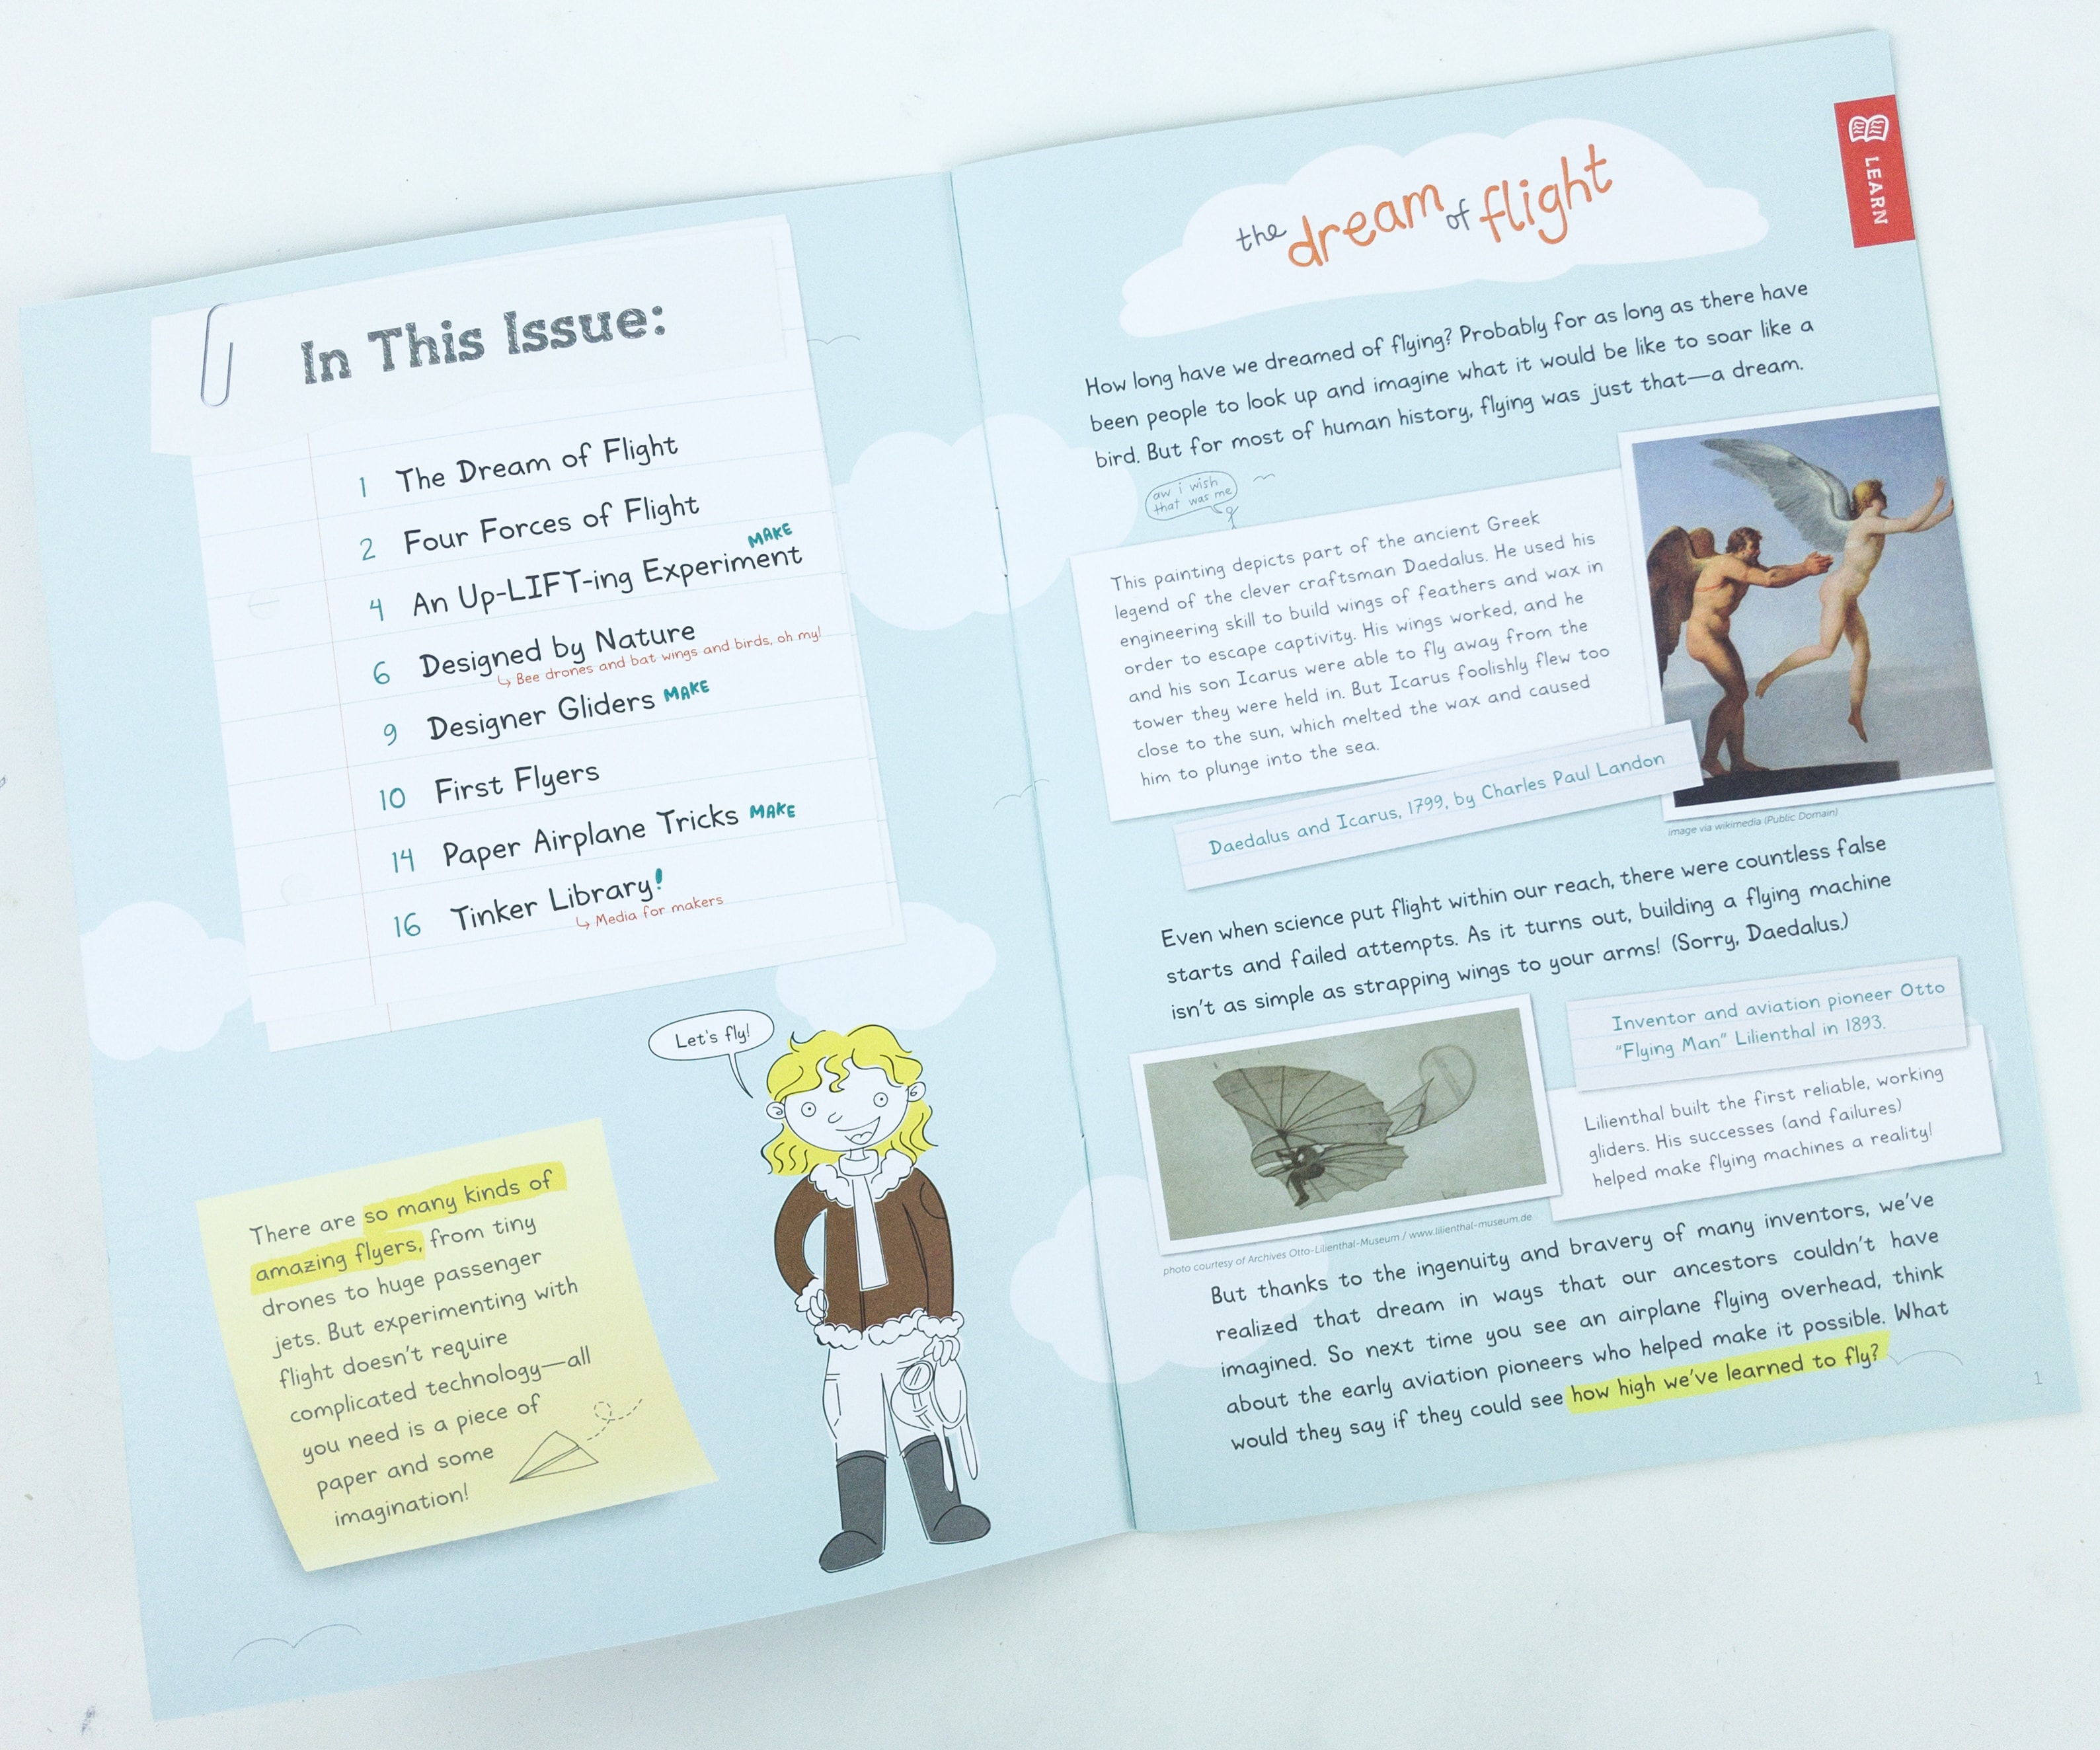
This month’s Tinker Zine discusses how people made things fly, what sustains those things up in the air, and many more!
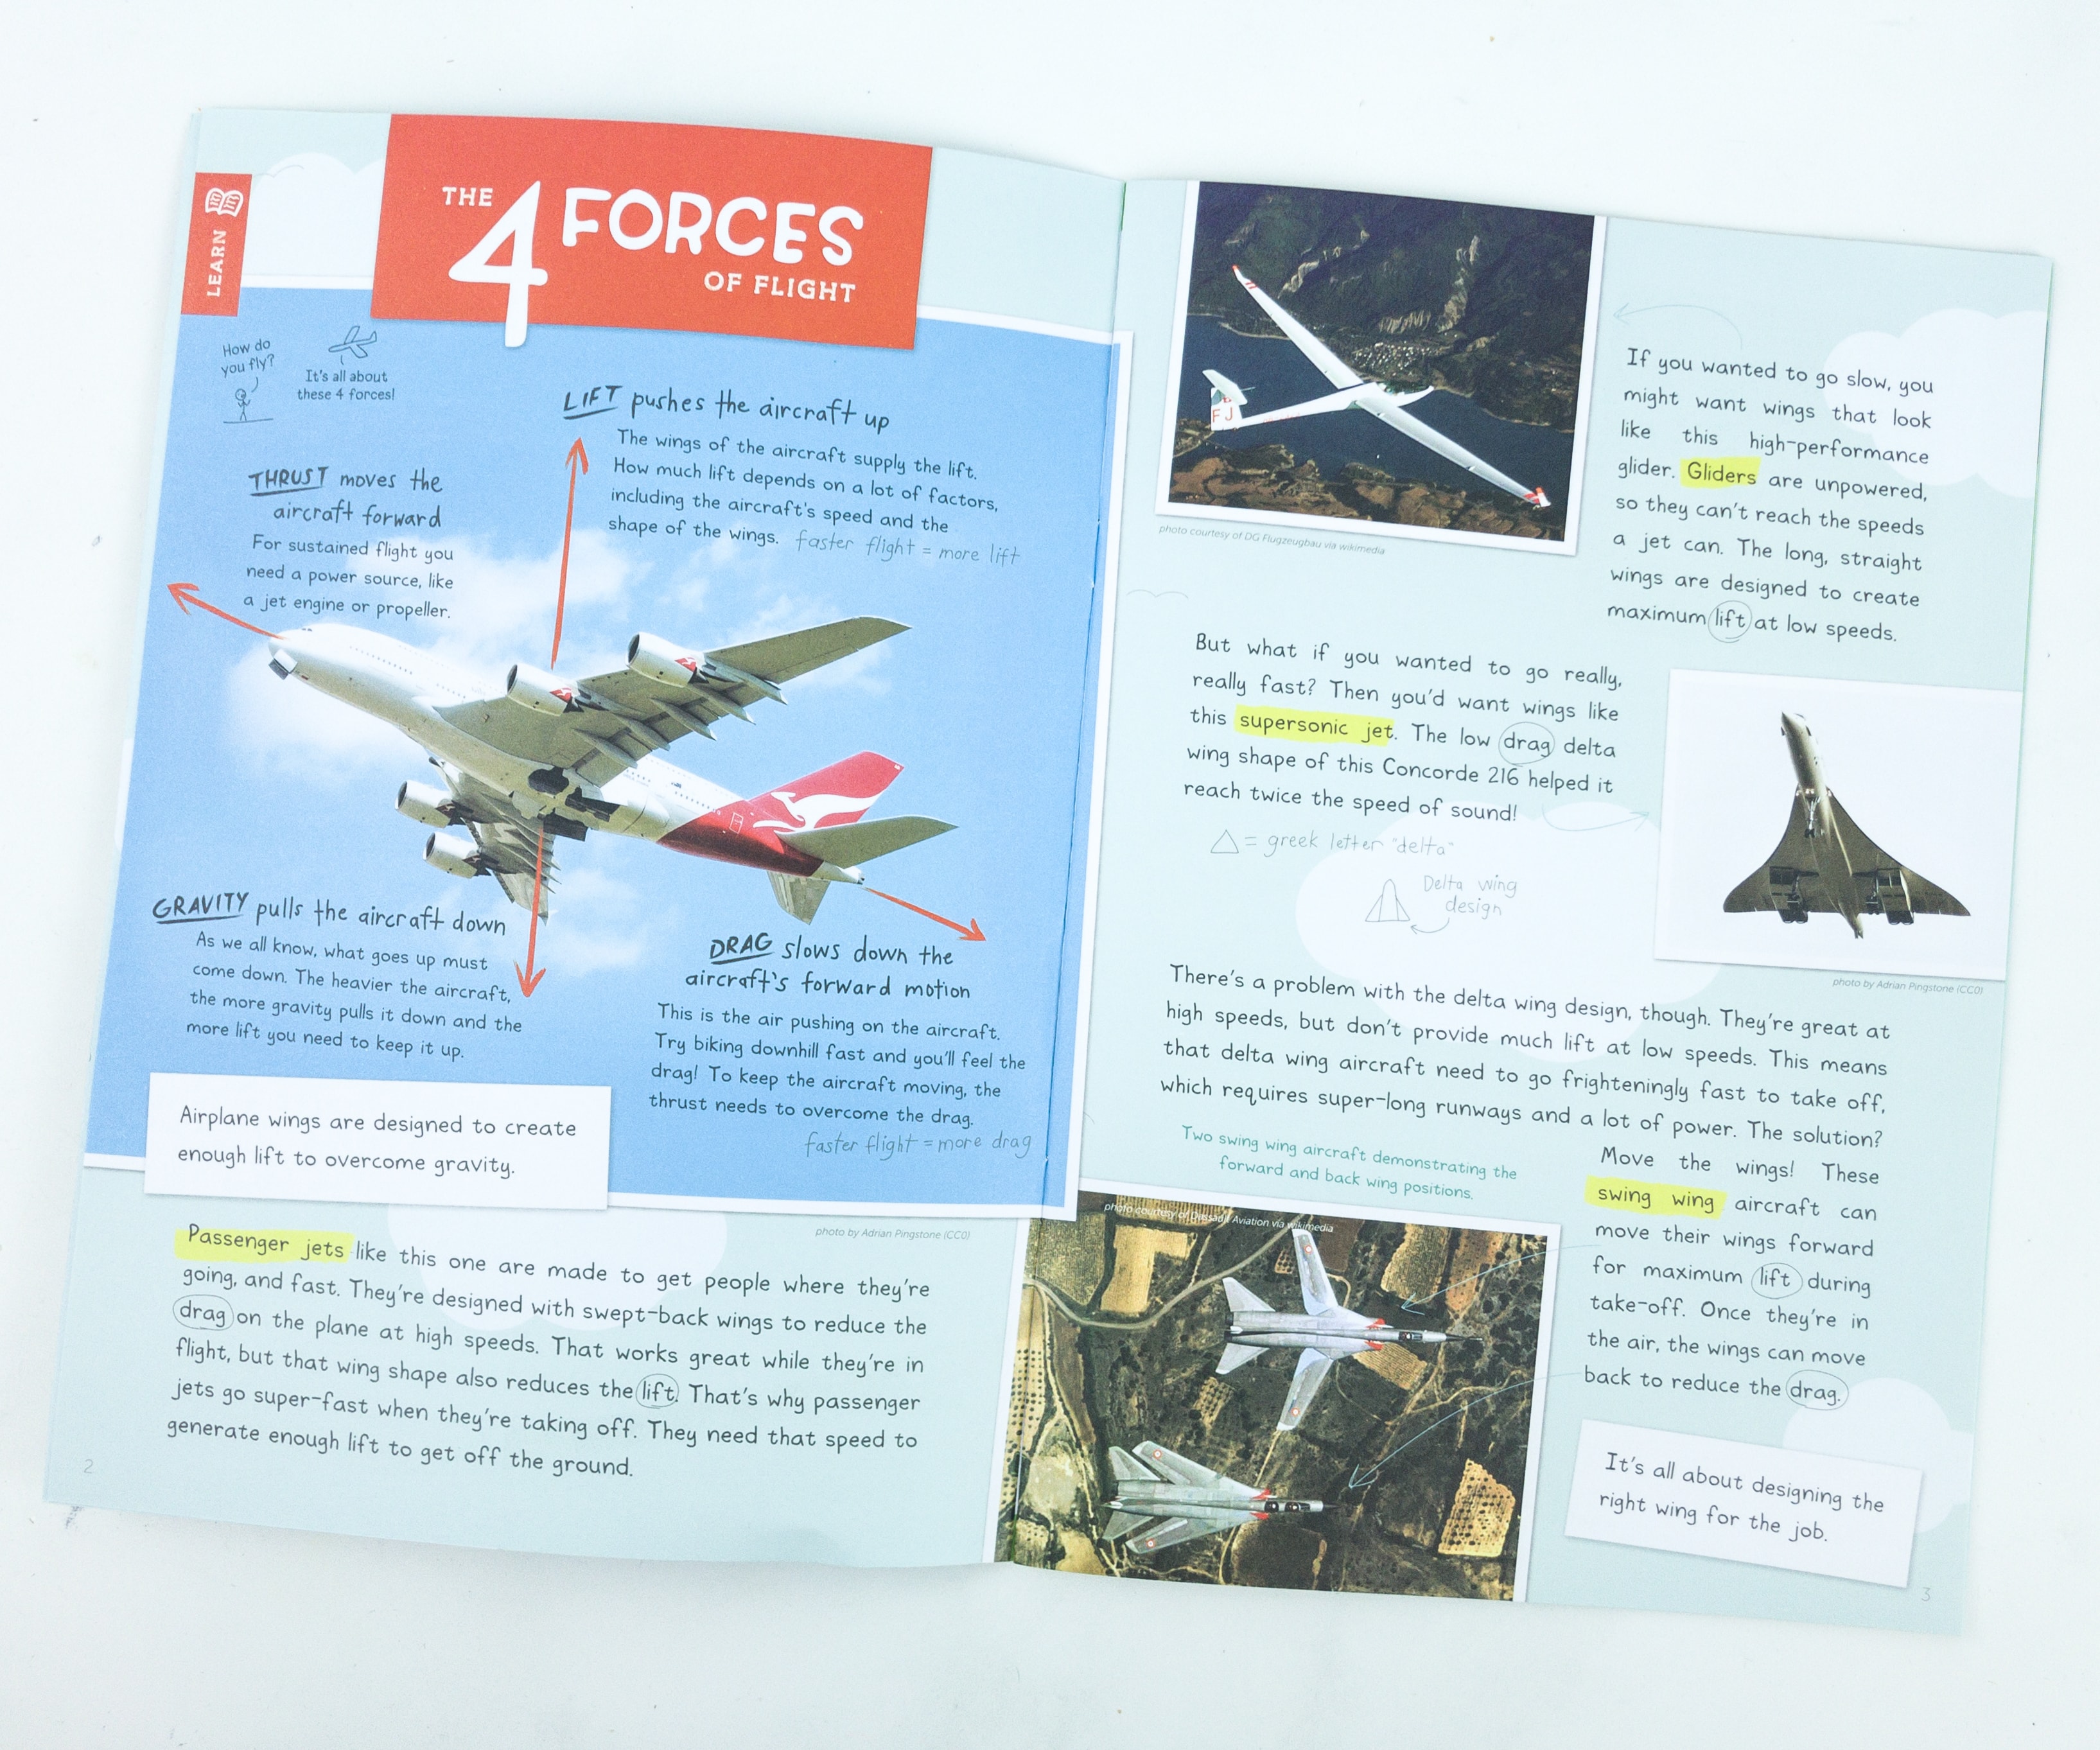
This part of the booklet features the four different forces that makes airplane fly: thrust, lift, gravity, and drag.
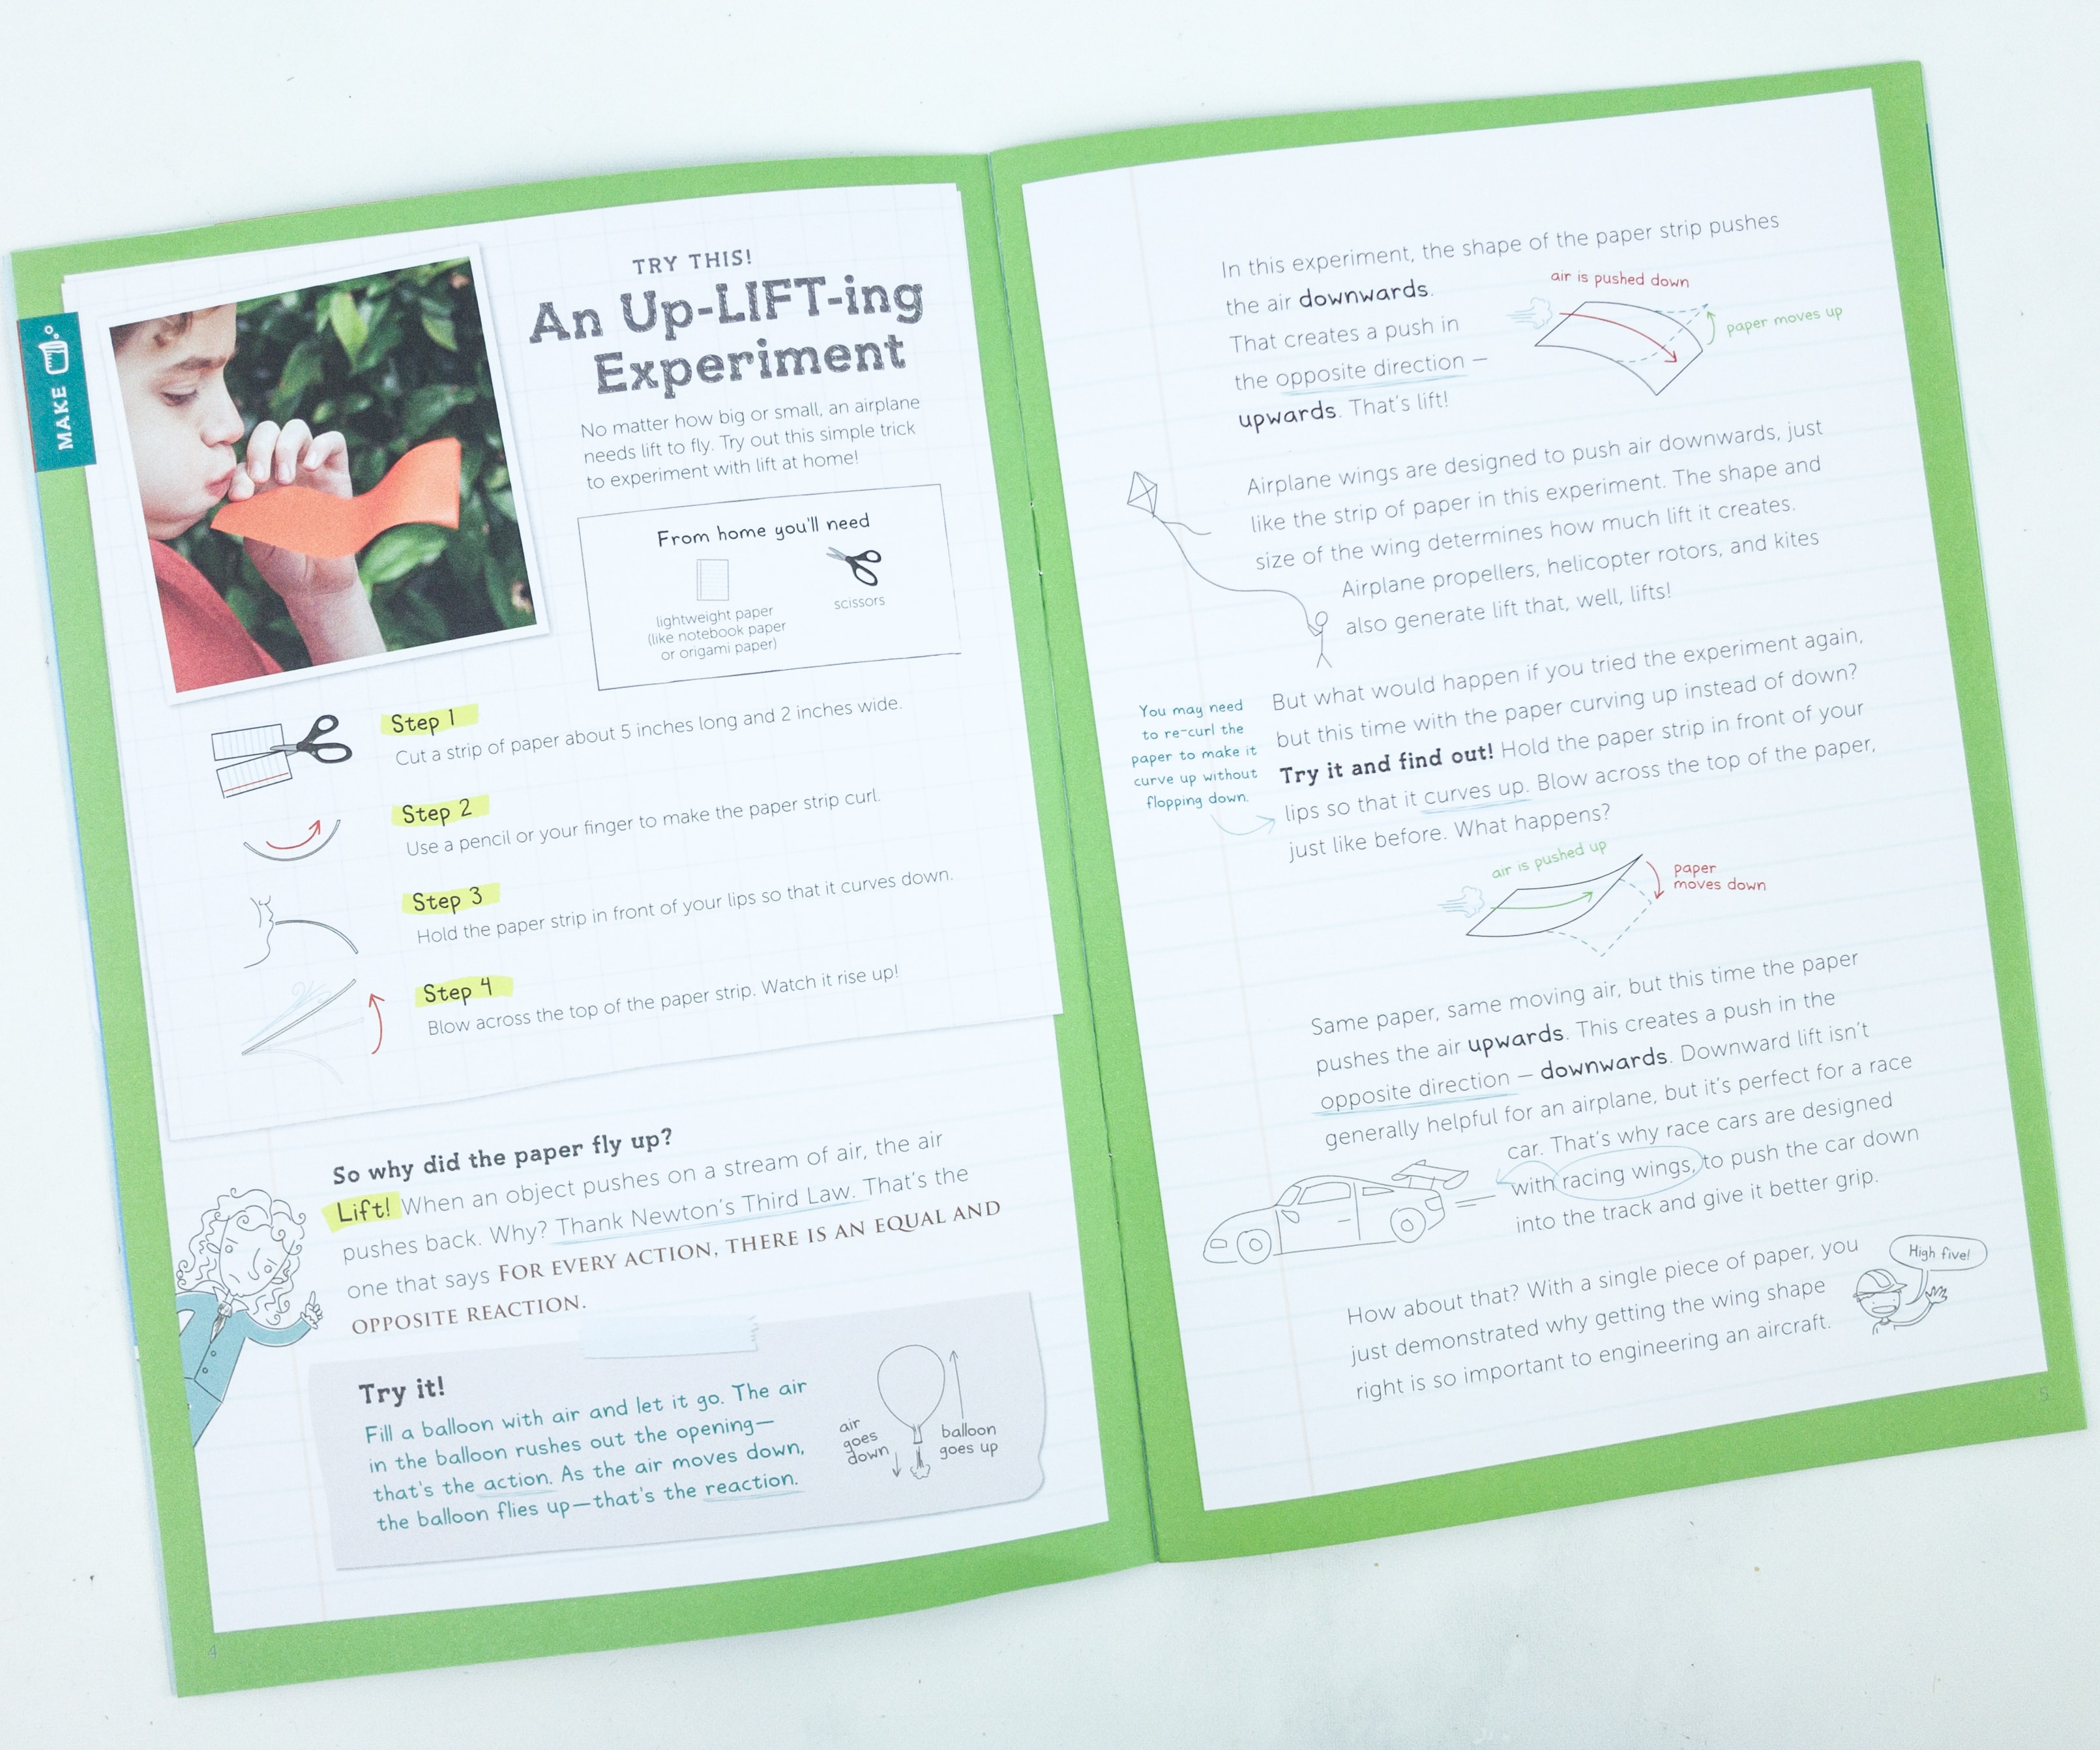
This booklet also comes with activities and suggested experiments your kids can work on. The first suggested experiment is all about lifts, which teaches us that no matter what size the airplane has, it will definitely need a lift to fly.
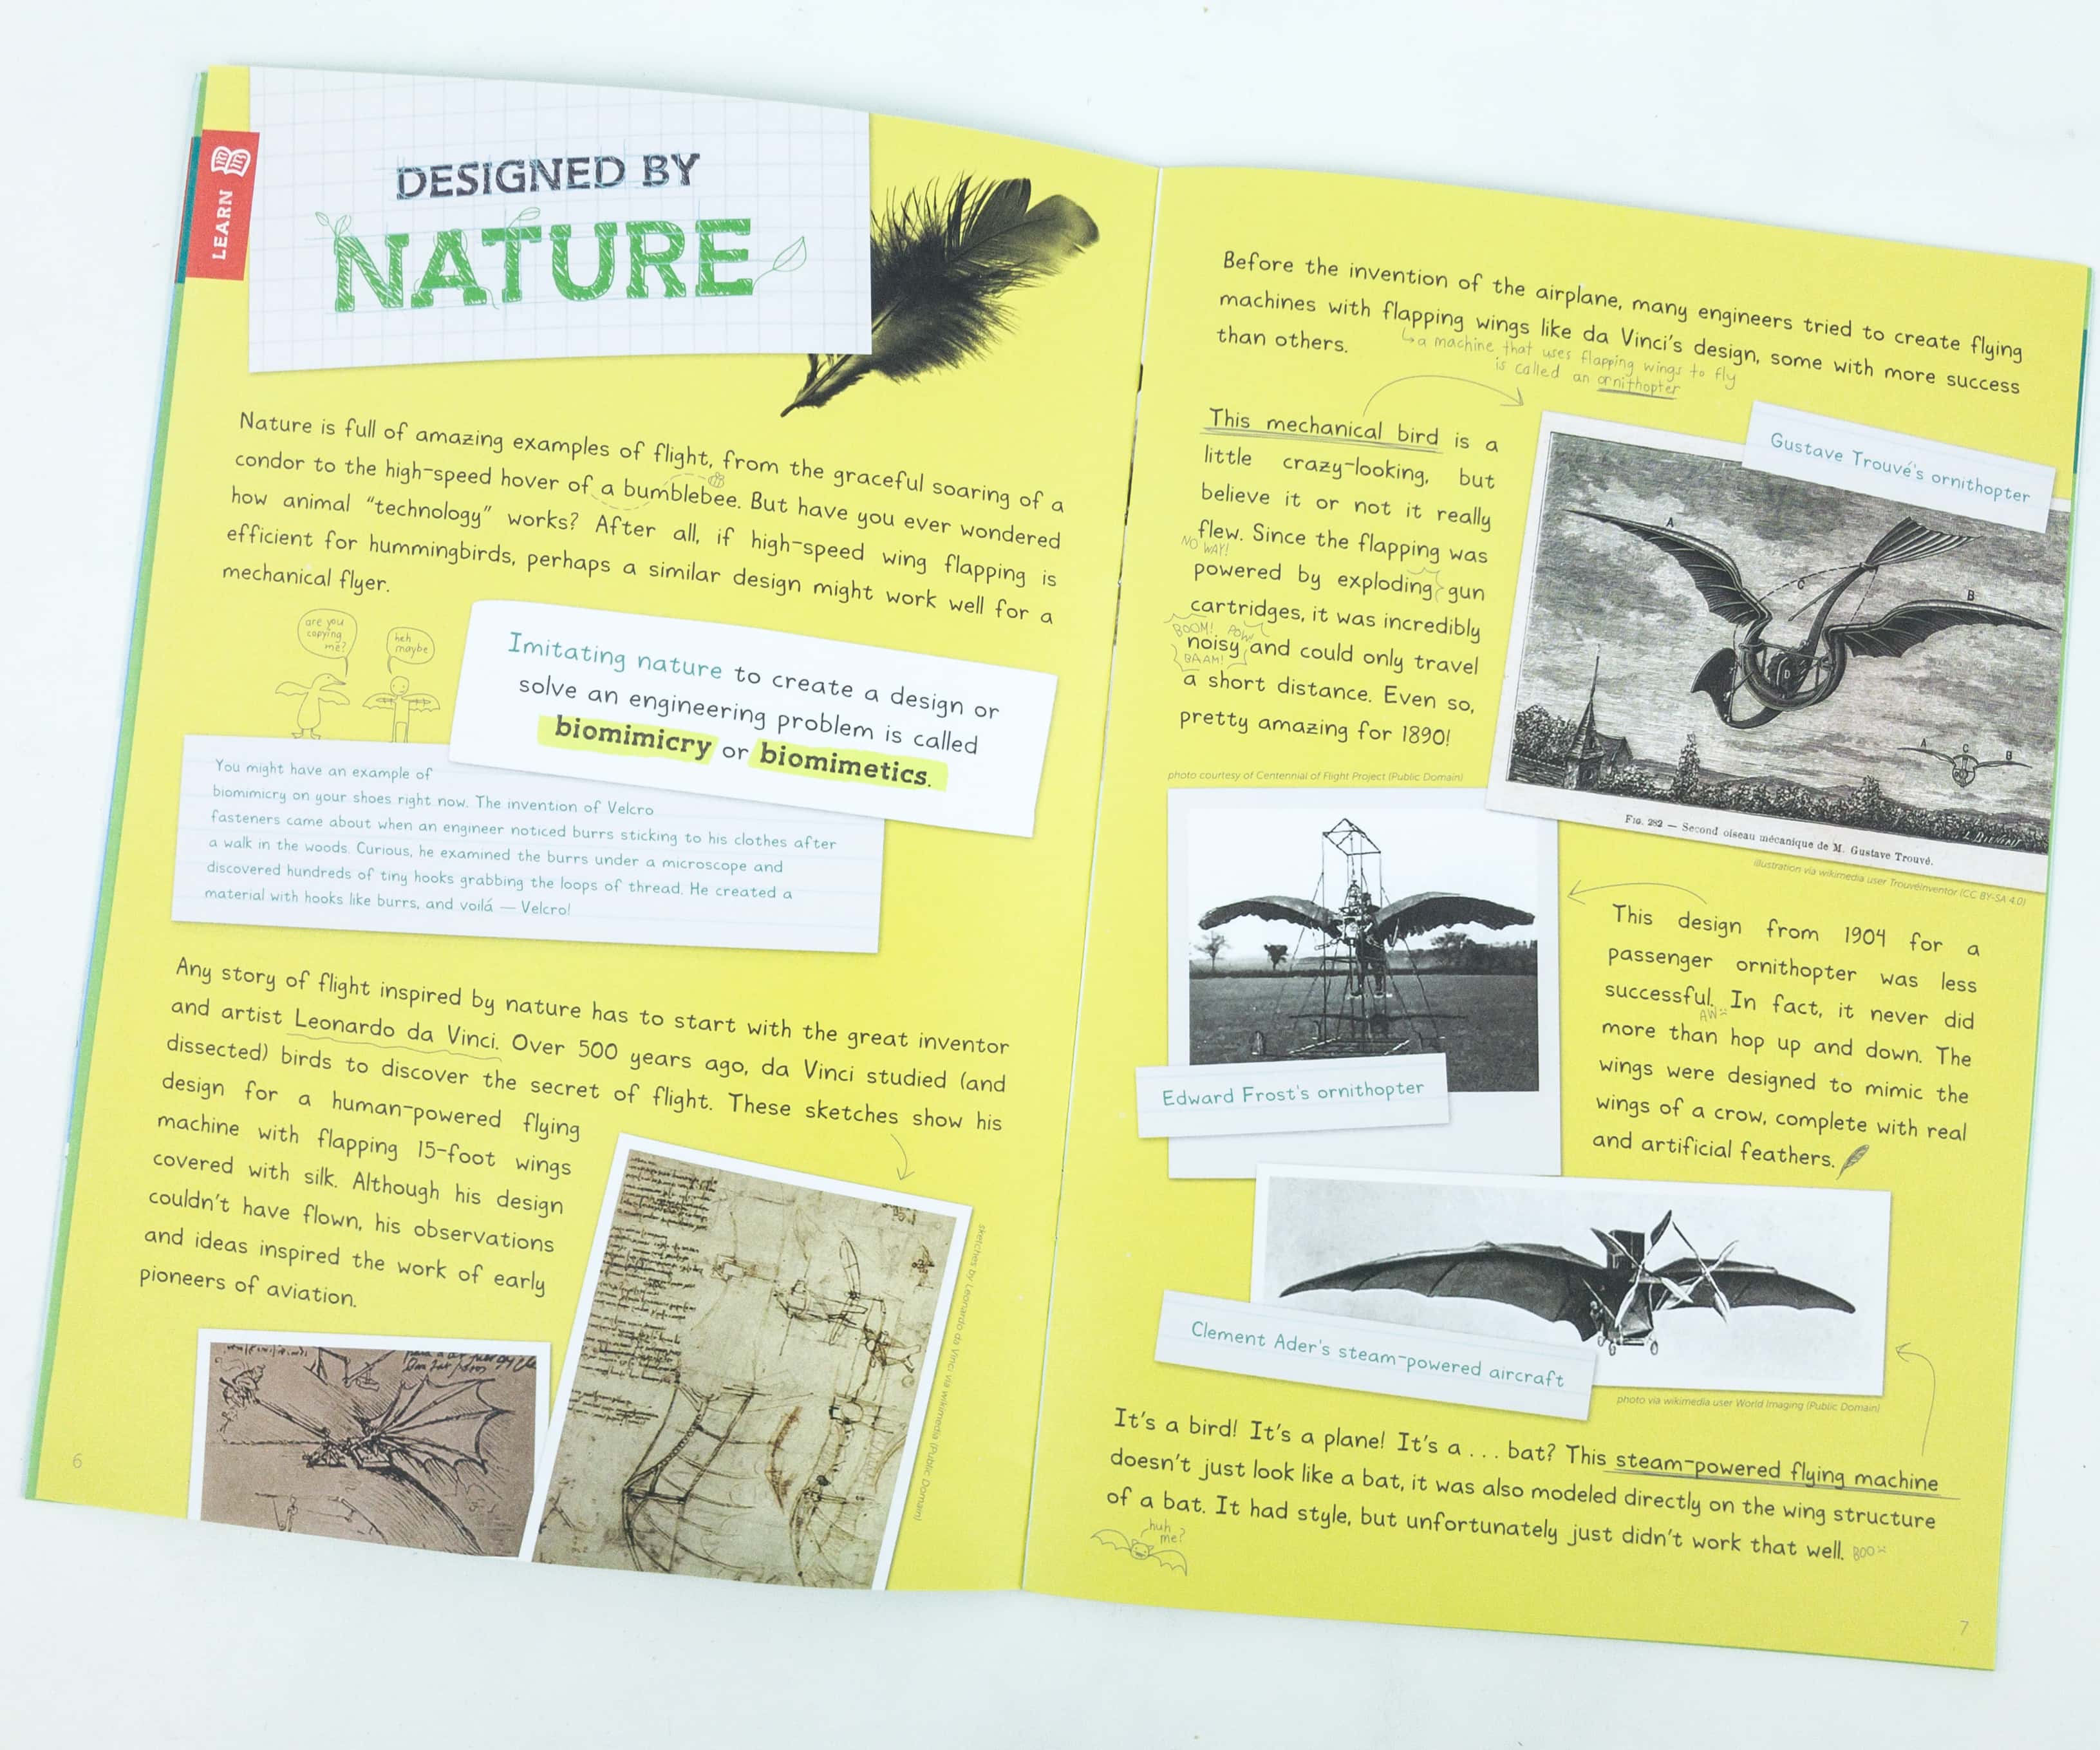
According to this article, nature has its own amazing way to demonstrate everything about flying. They also featured some experiment imitating this natural occurrence to solve an engineering problem, and it is called biomimicry or biometrics.
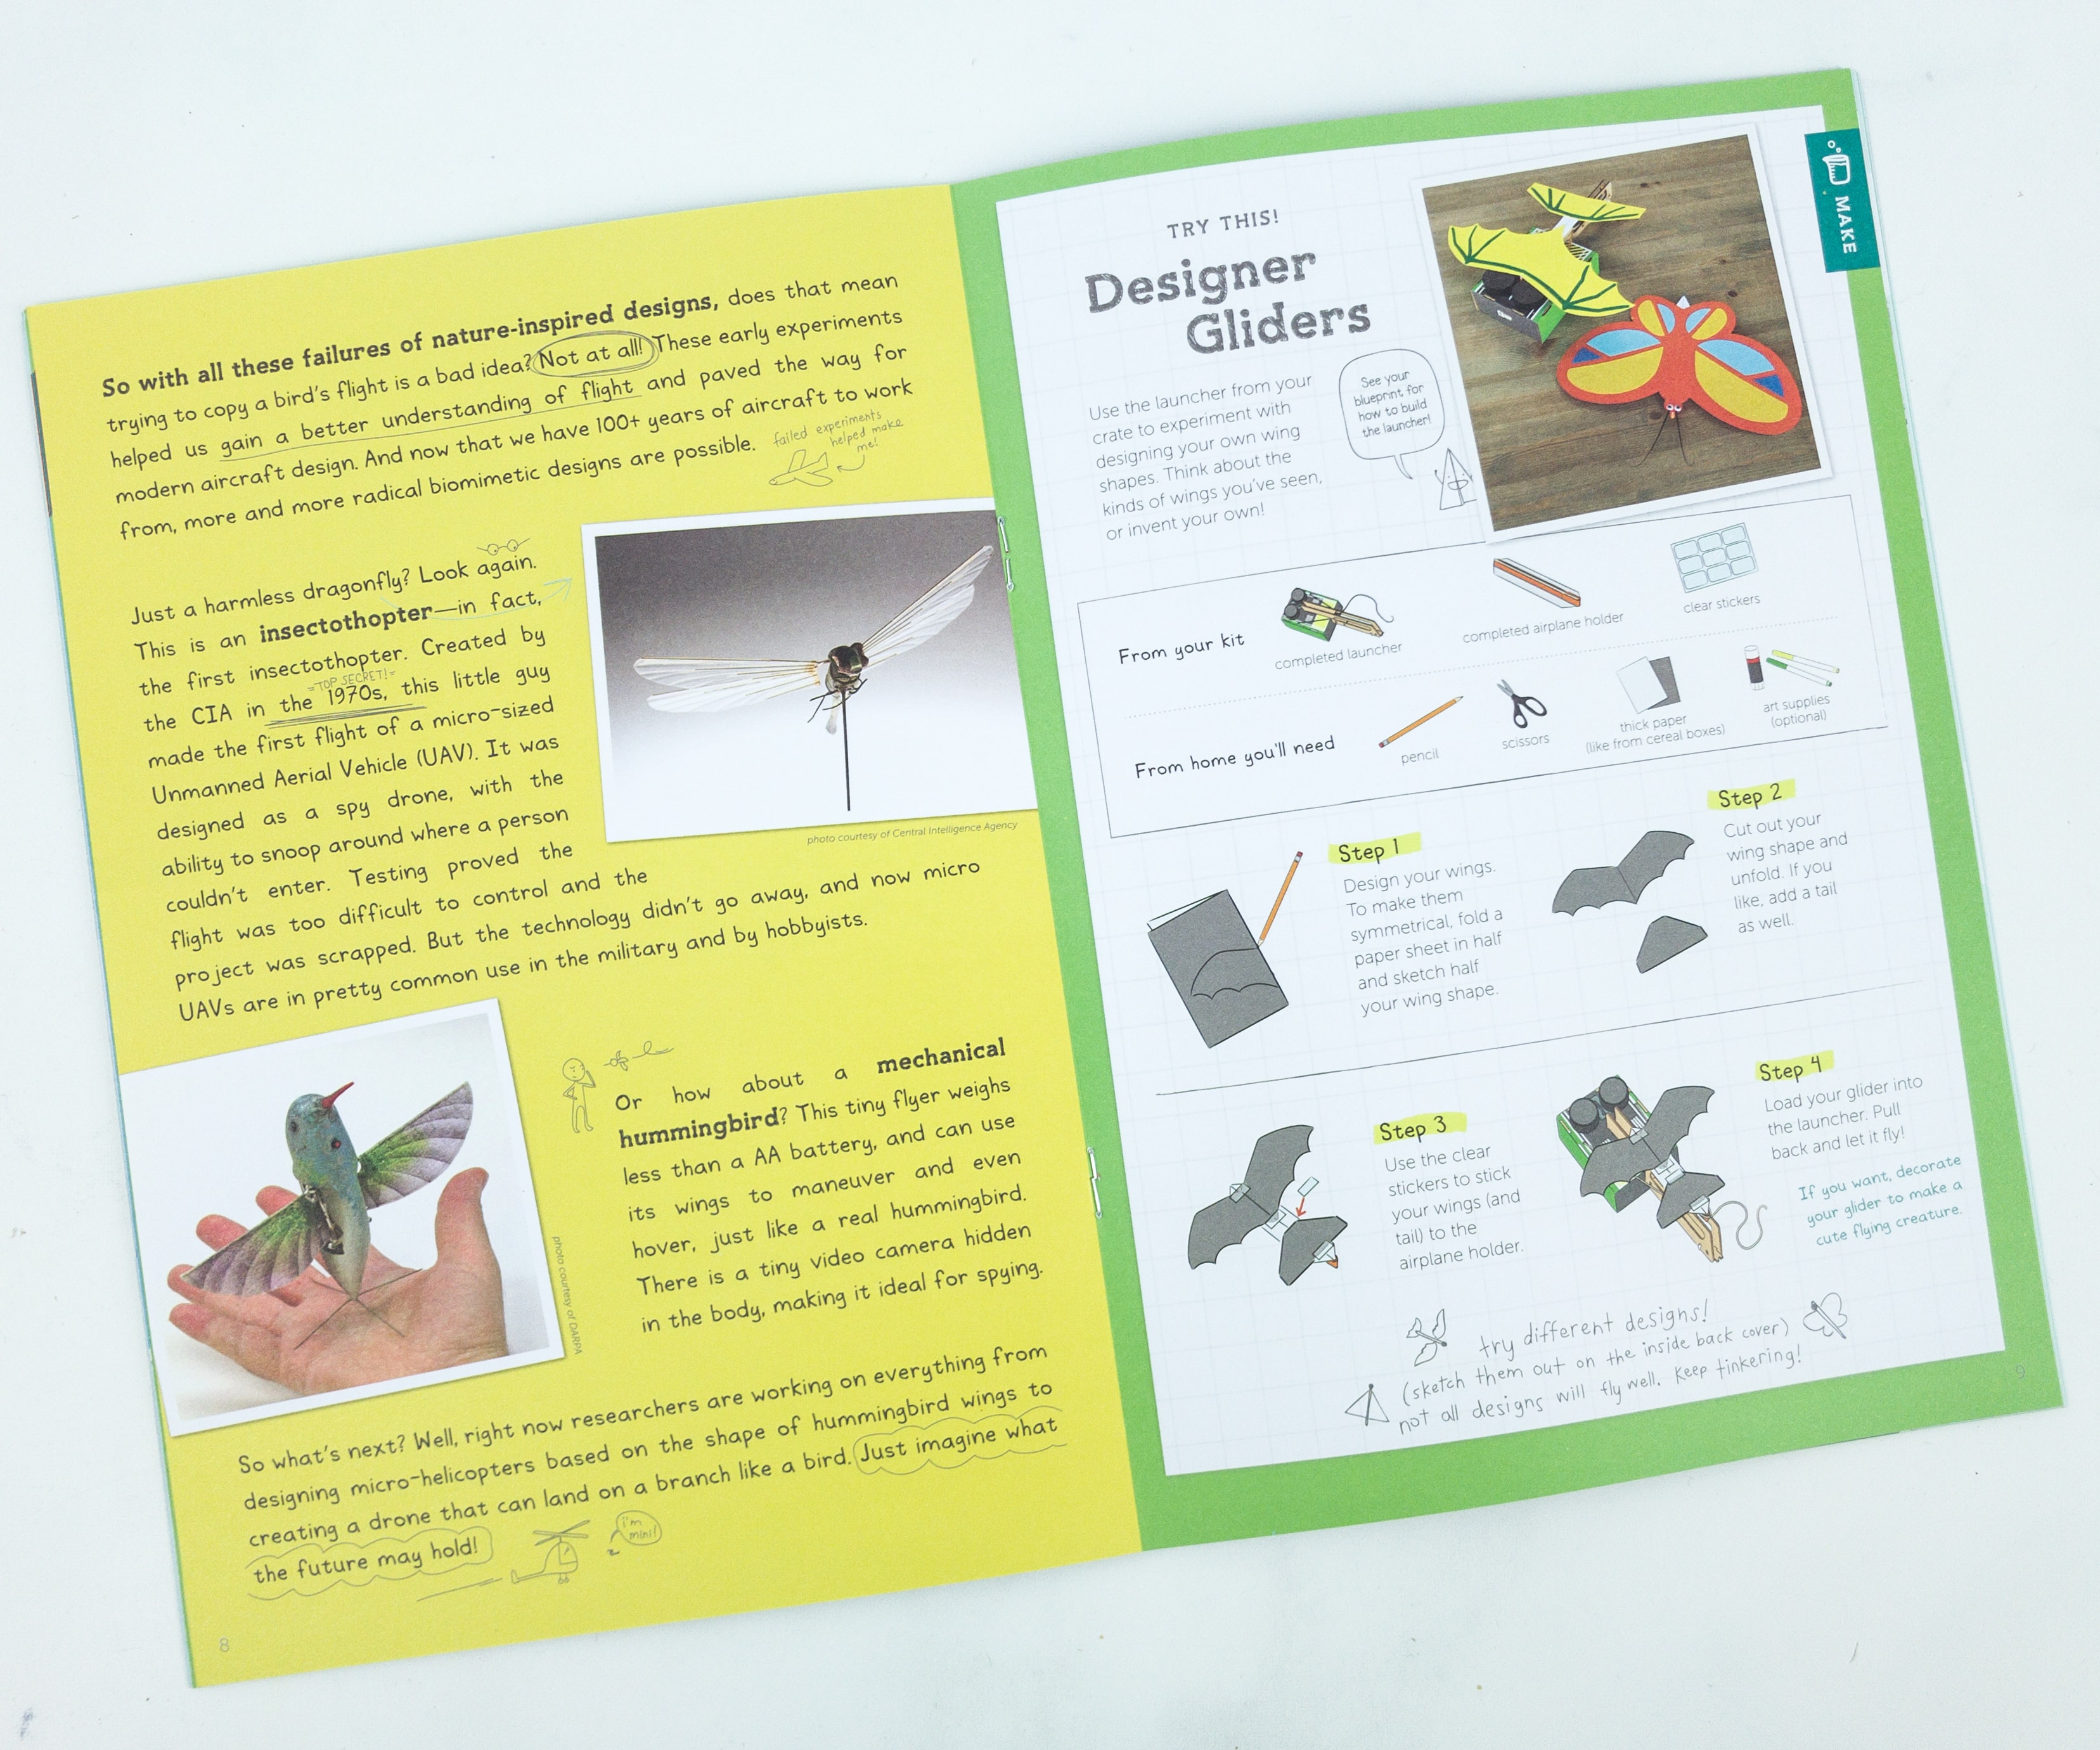
Another suggested activity is creating our own designer glider. The glider is the part which allows the plane to stay in the air for a long period of time.
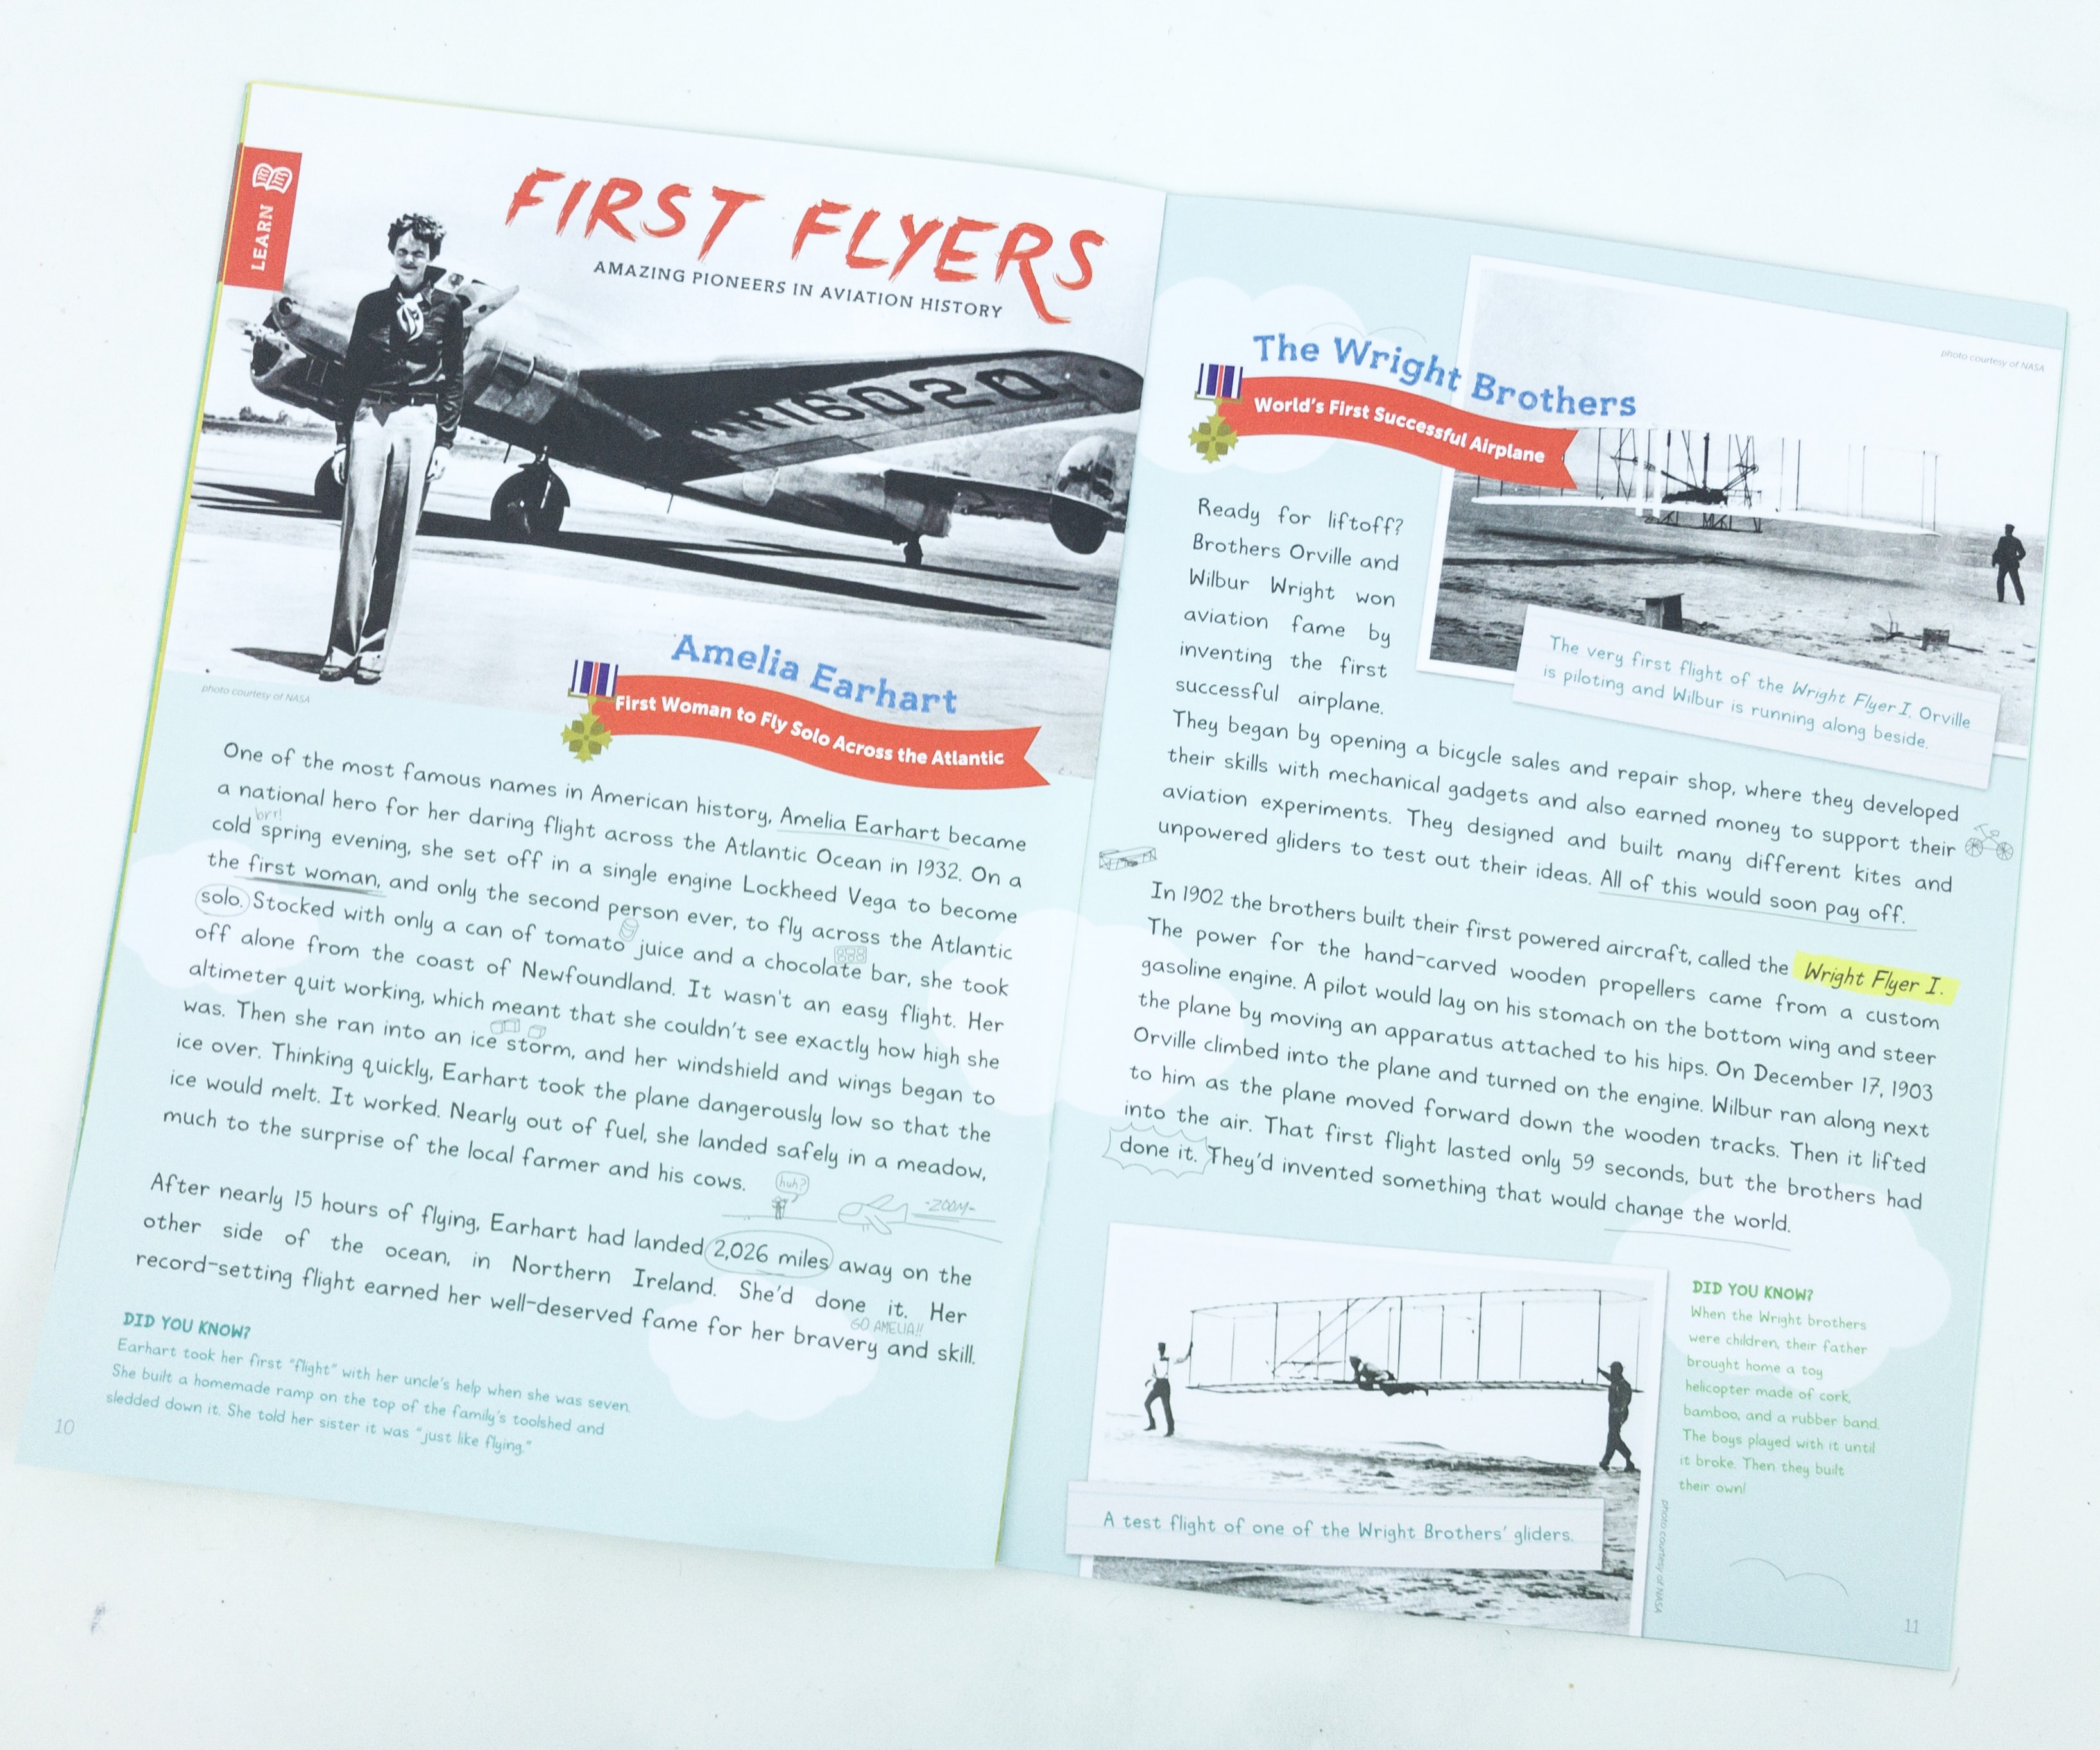
There’s even a feature about Amelia Earhart, the first woman to fly solo across the Atlantic, and the Wright Brothers who made the first-ever successful airplane.
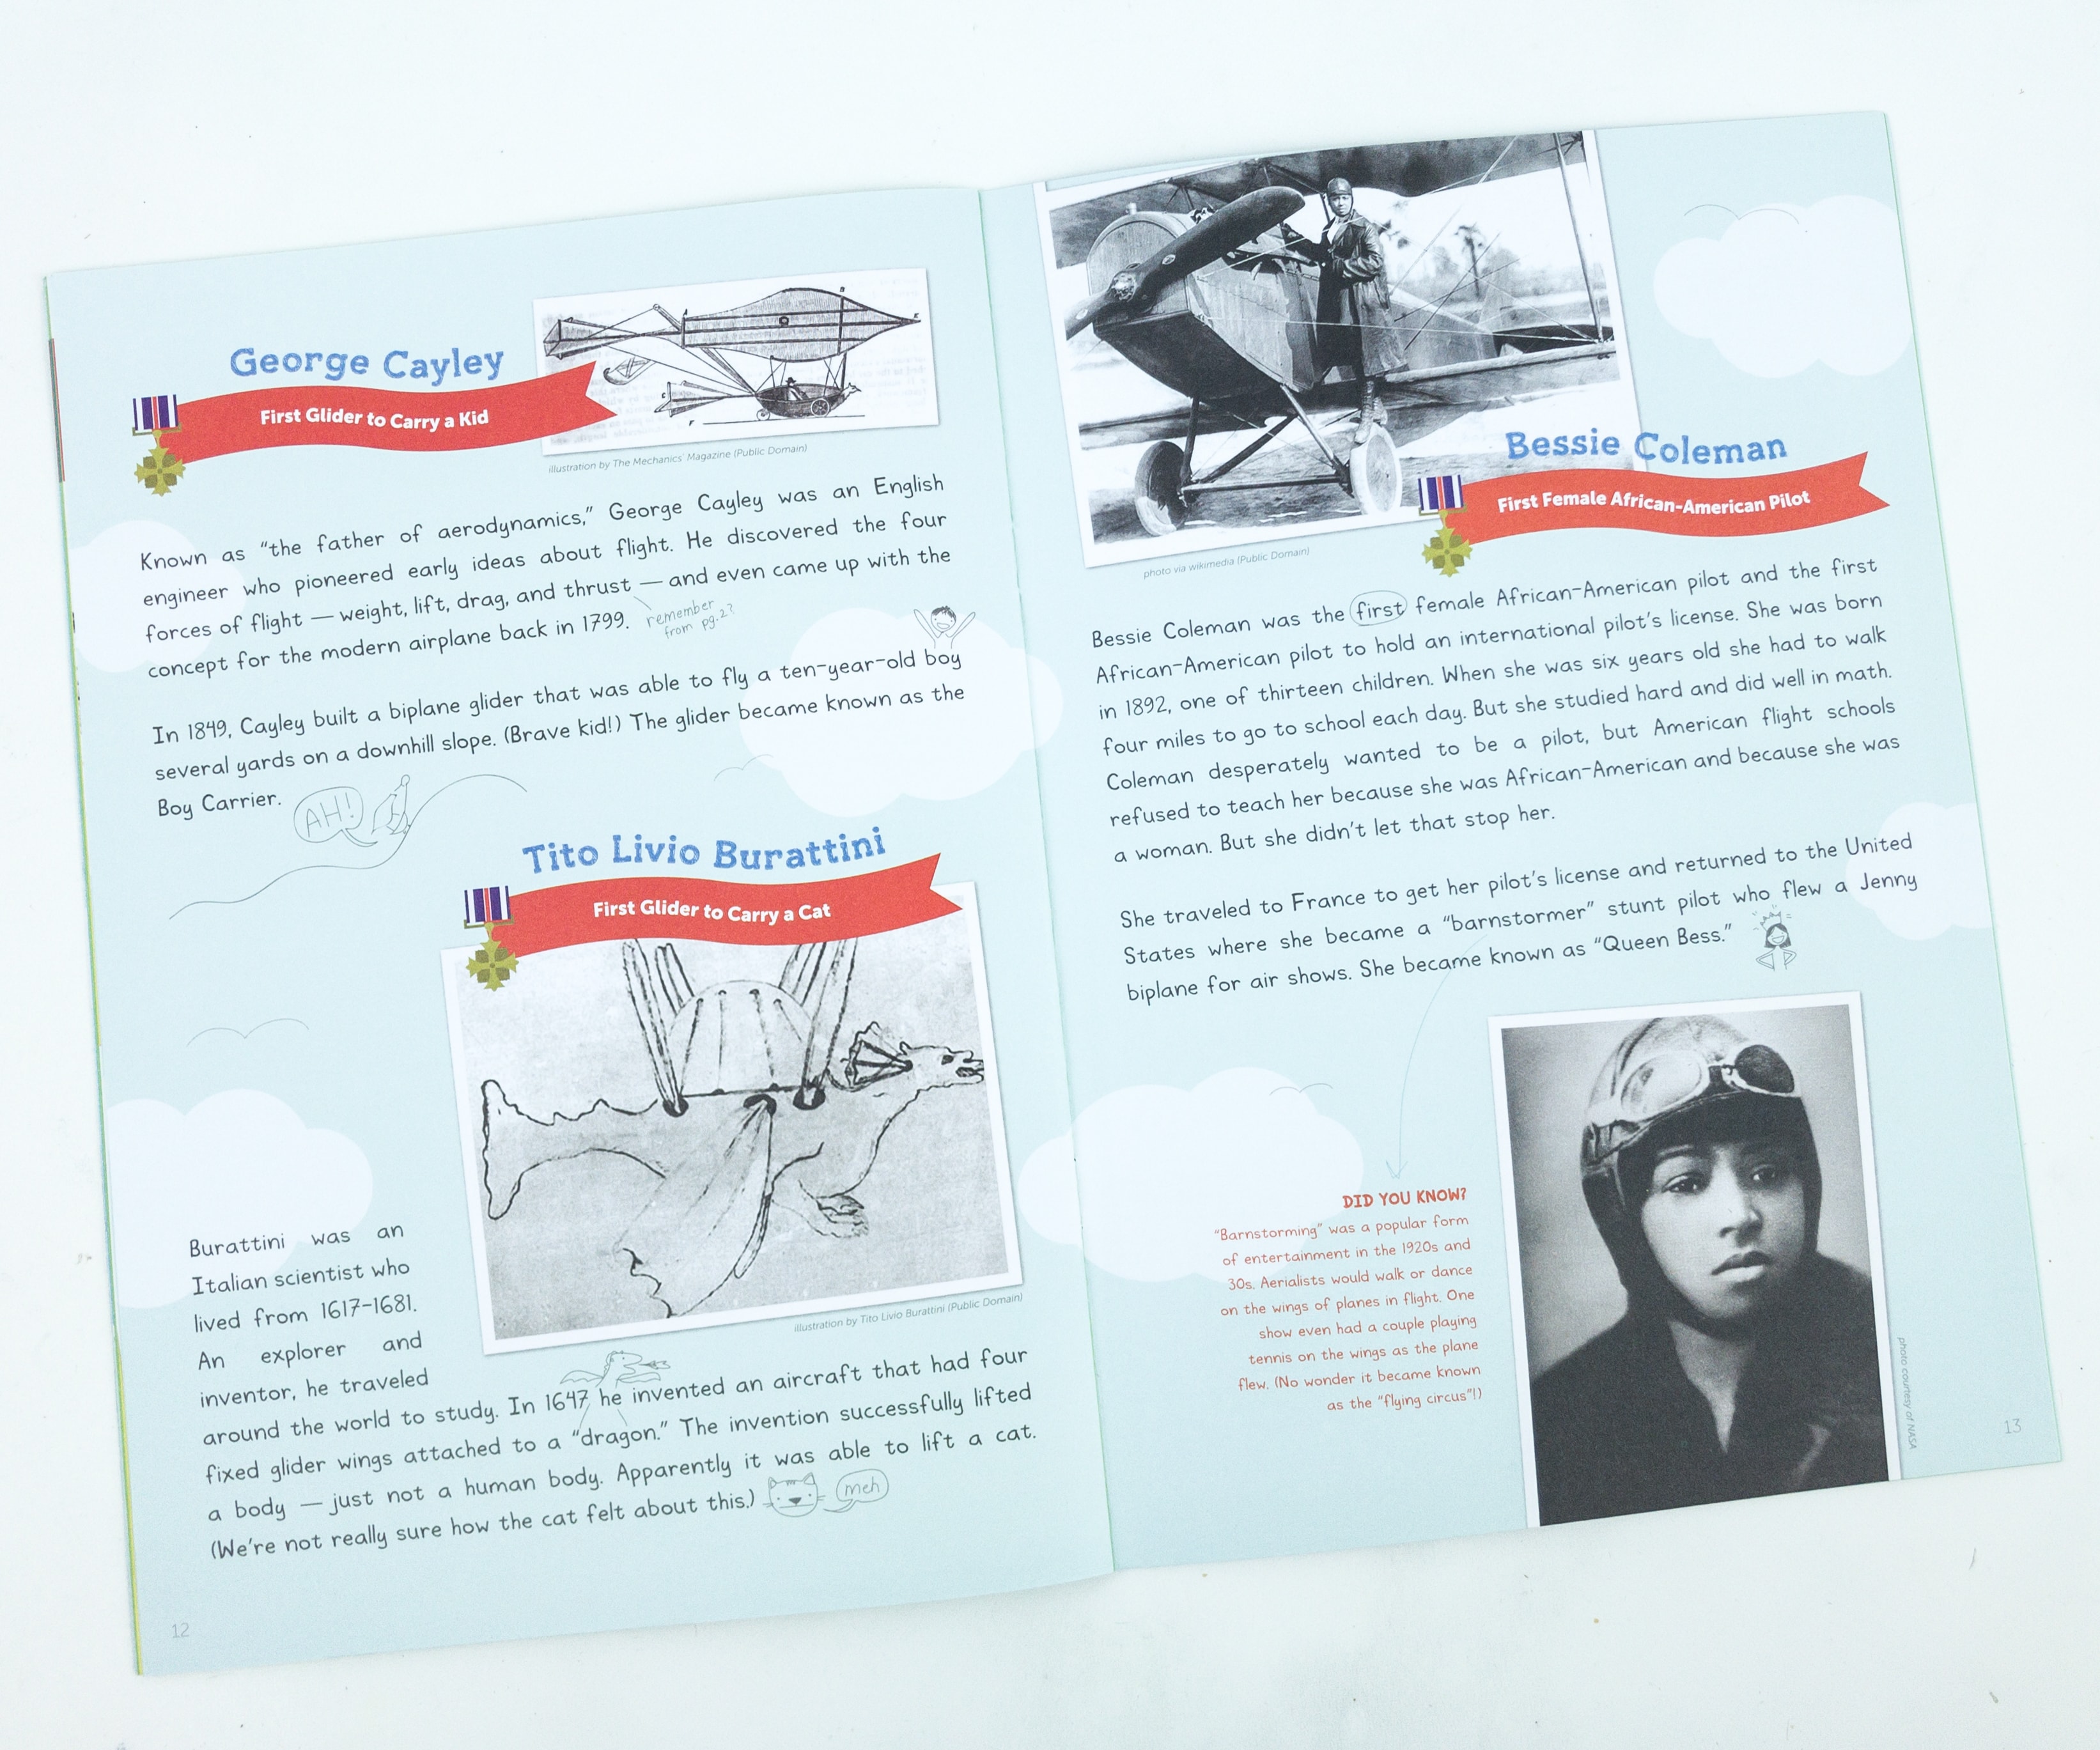
On the next pages, they listed more historical events that made a big impact on our current aeronautical technology.
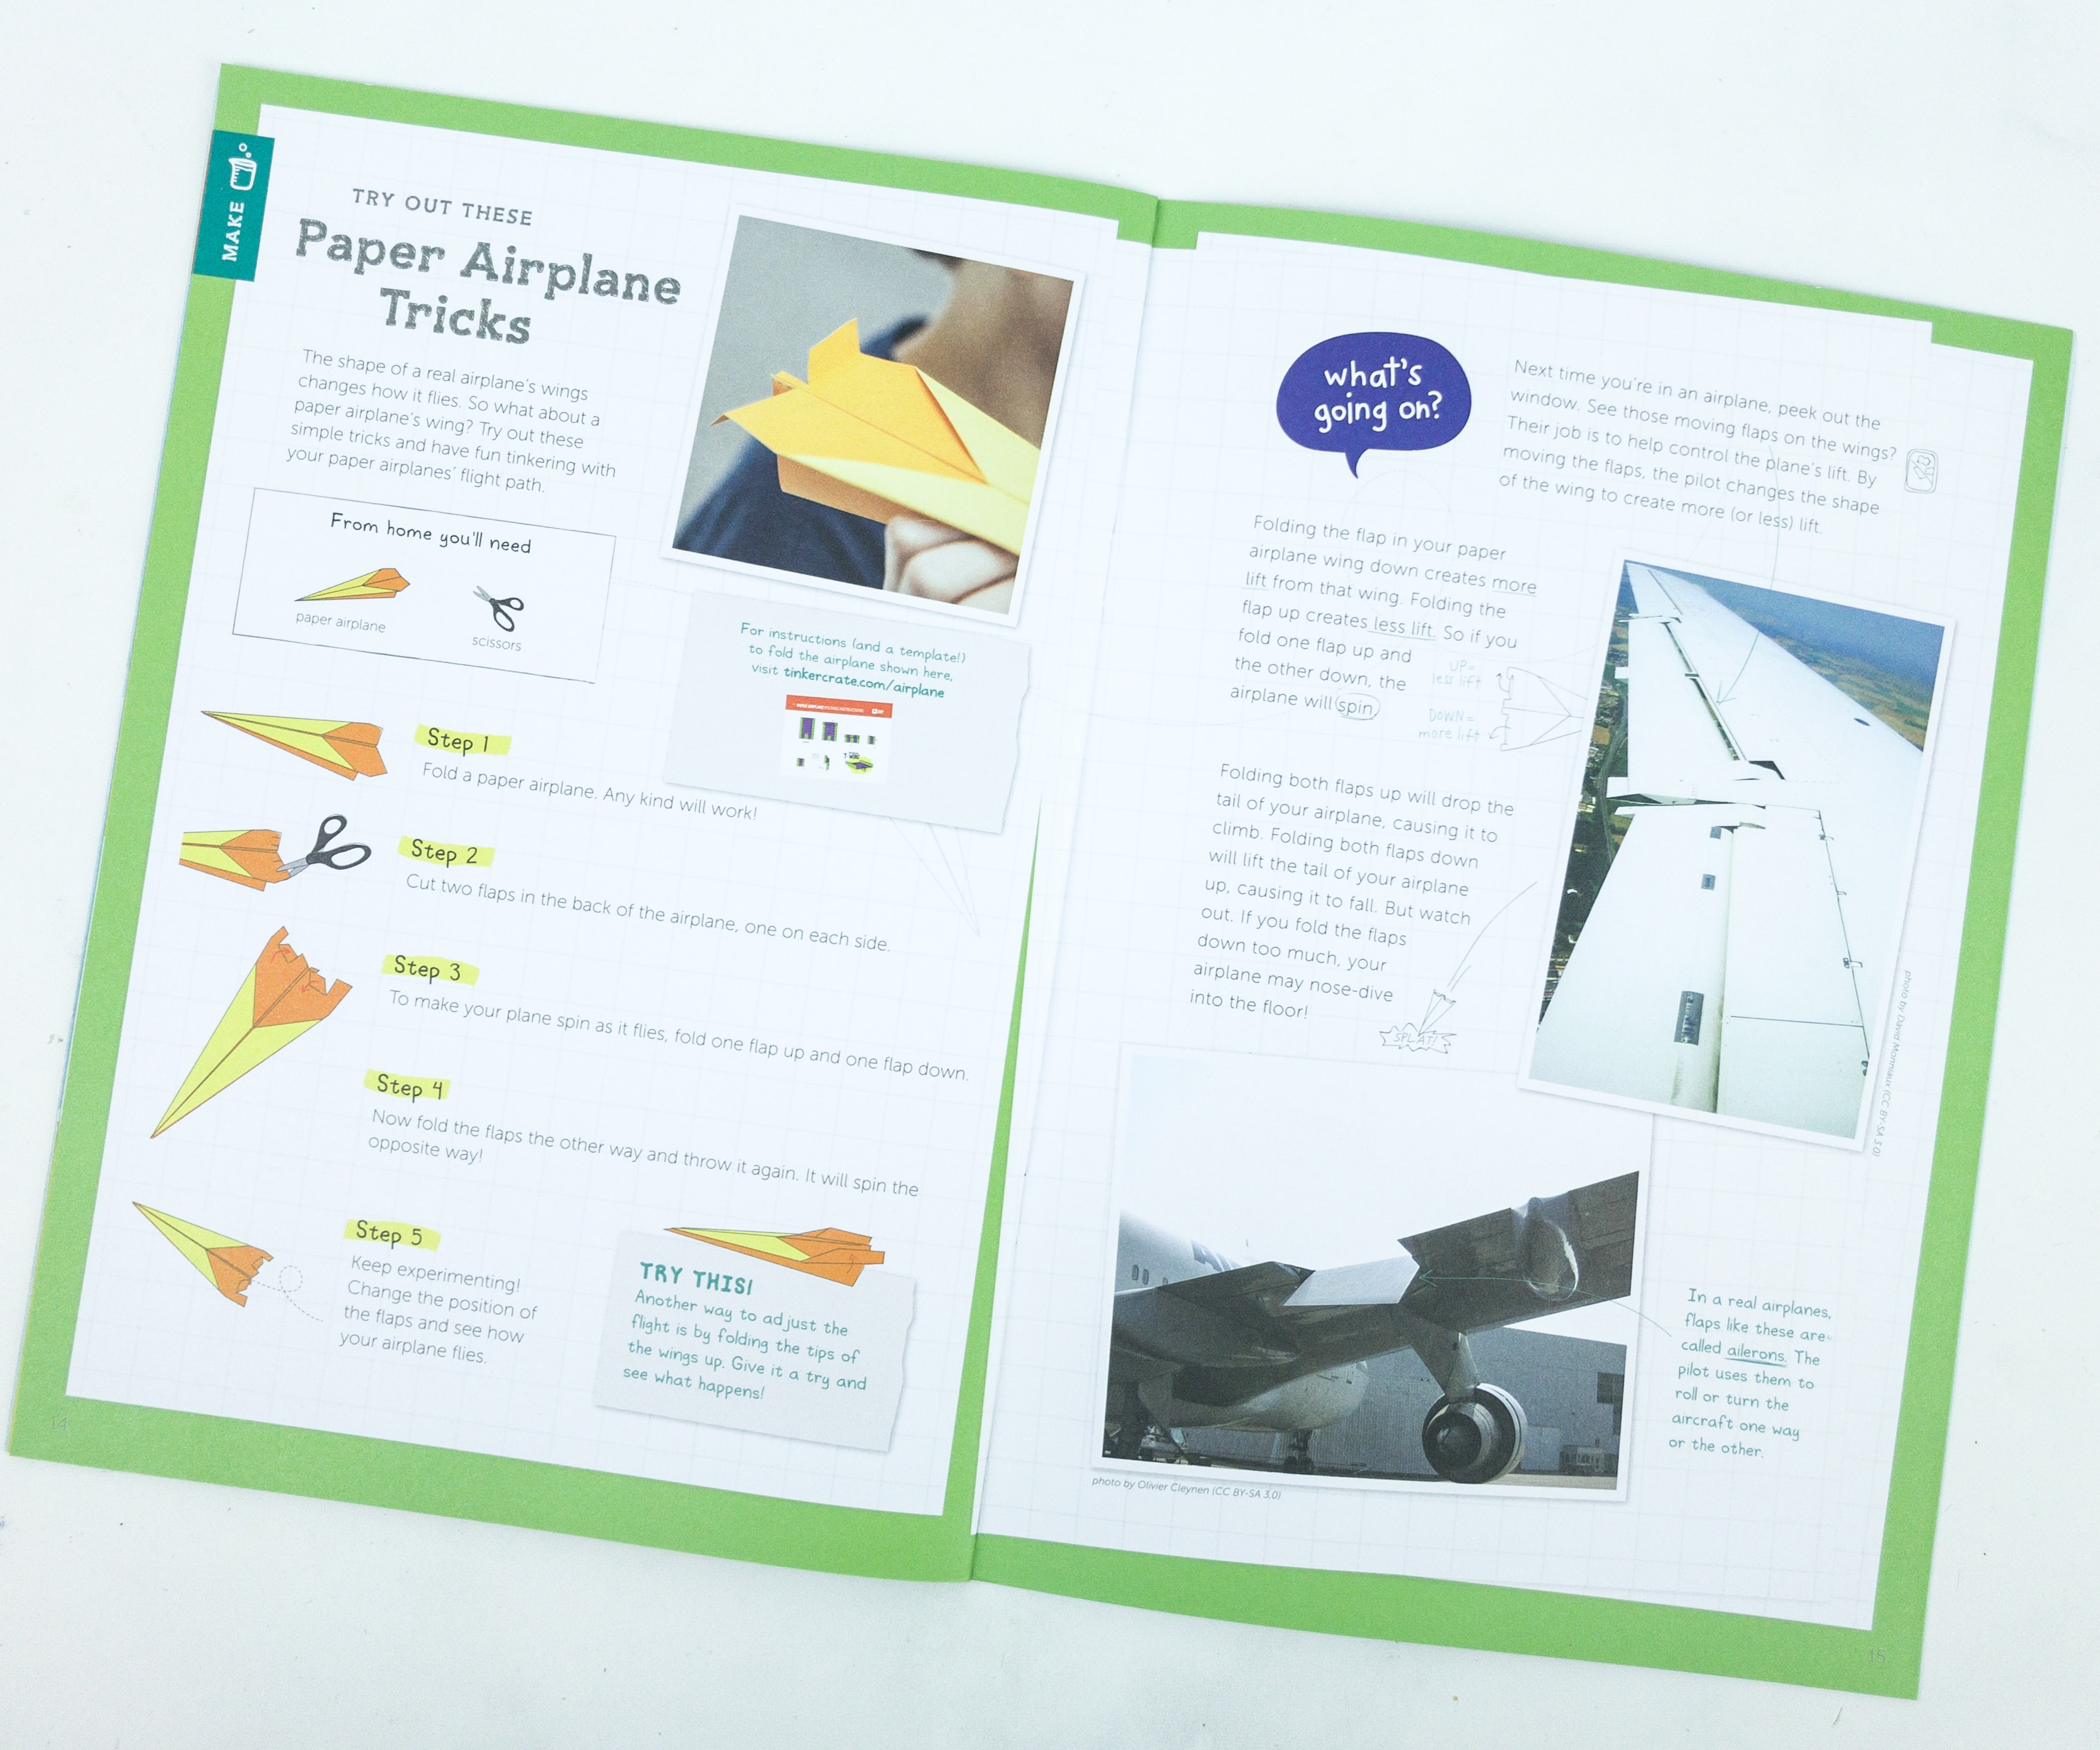
The last suggested activity teaches us simple tricks in making paper airplanes!
Tinker Crate Blueprint + Materials
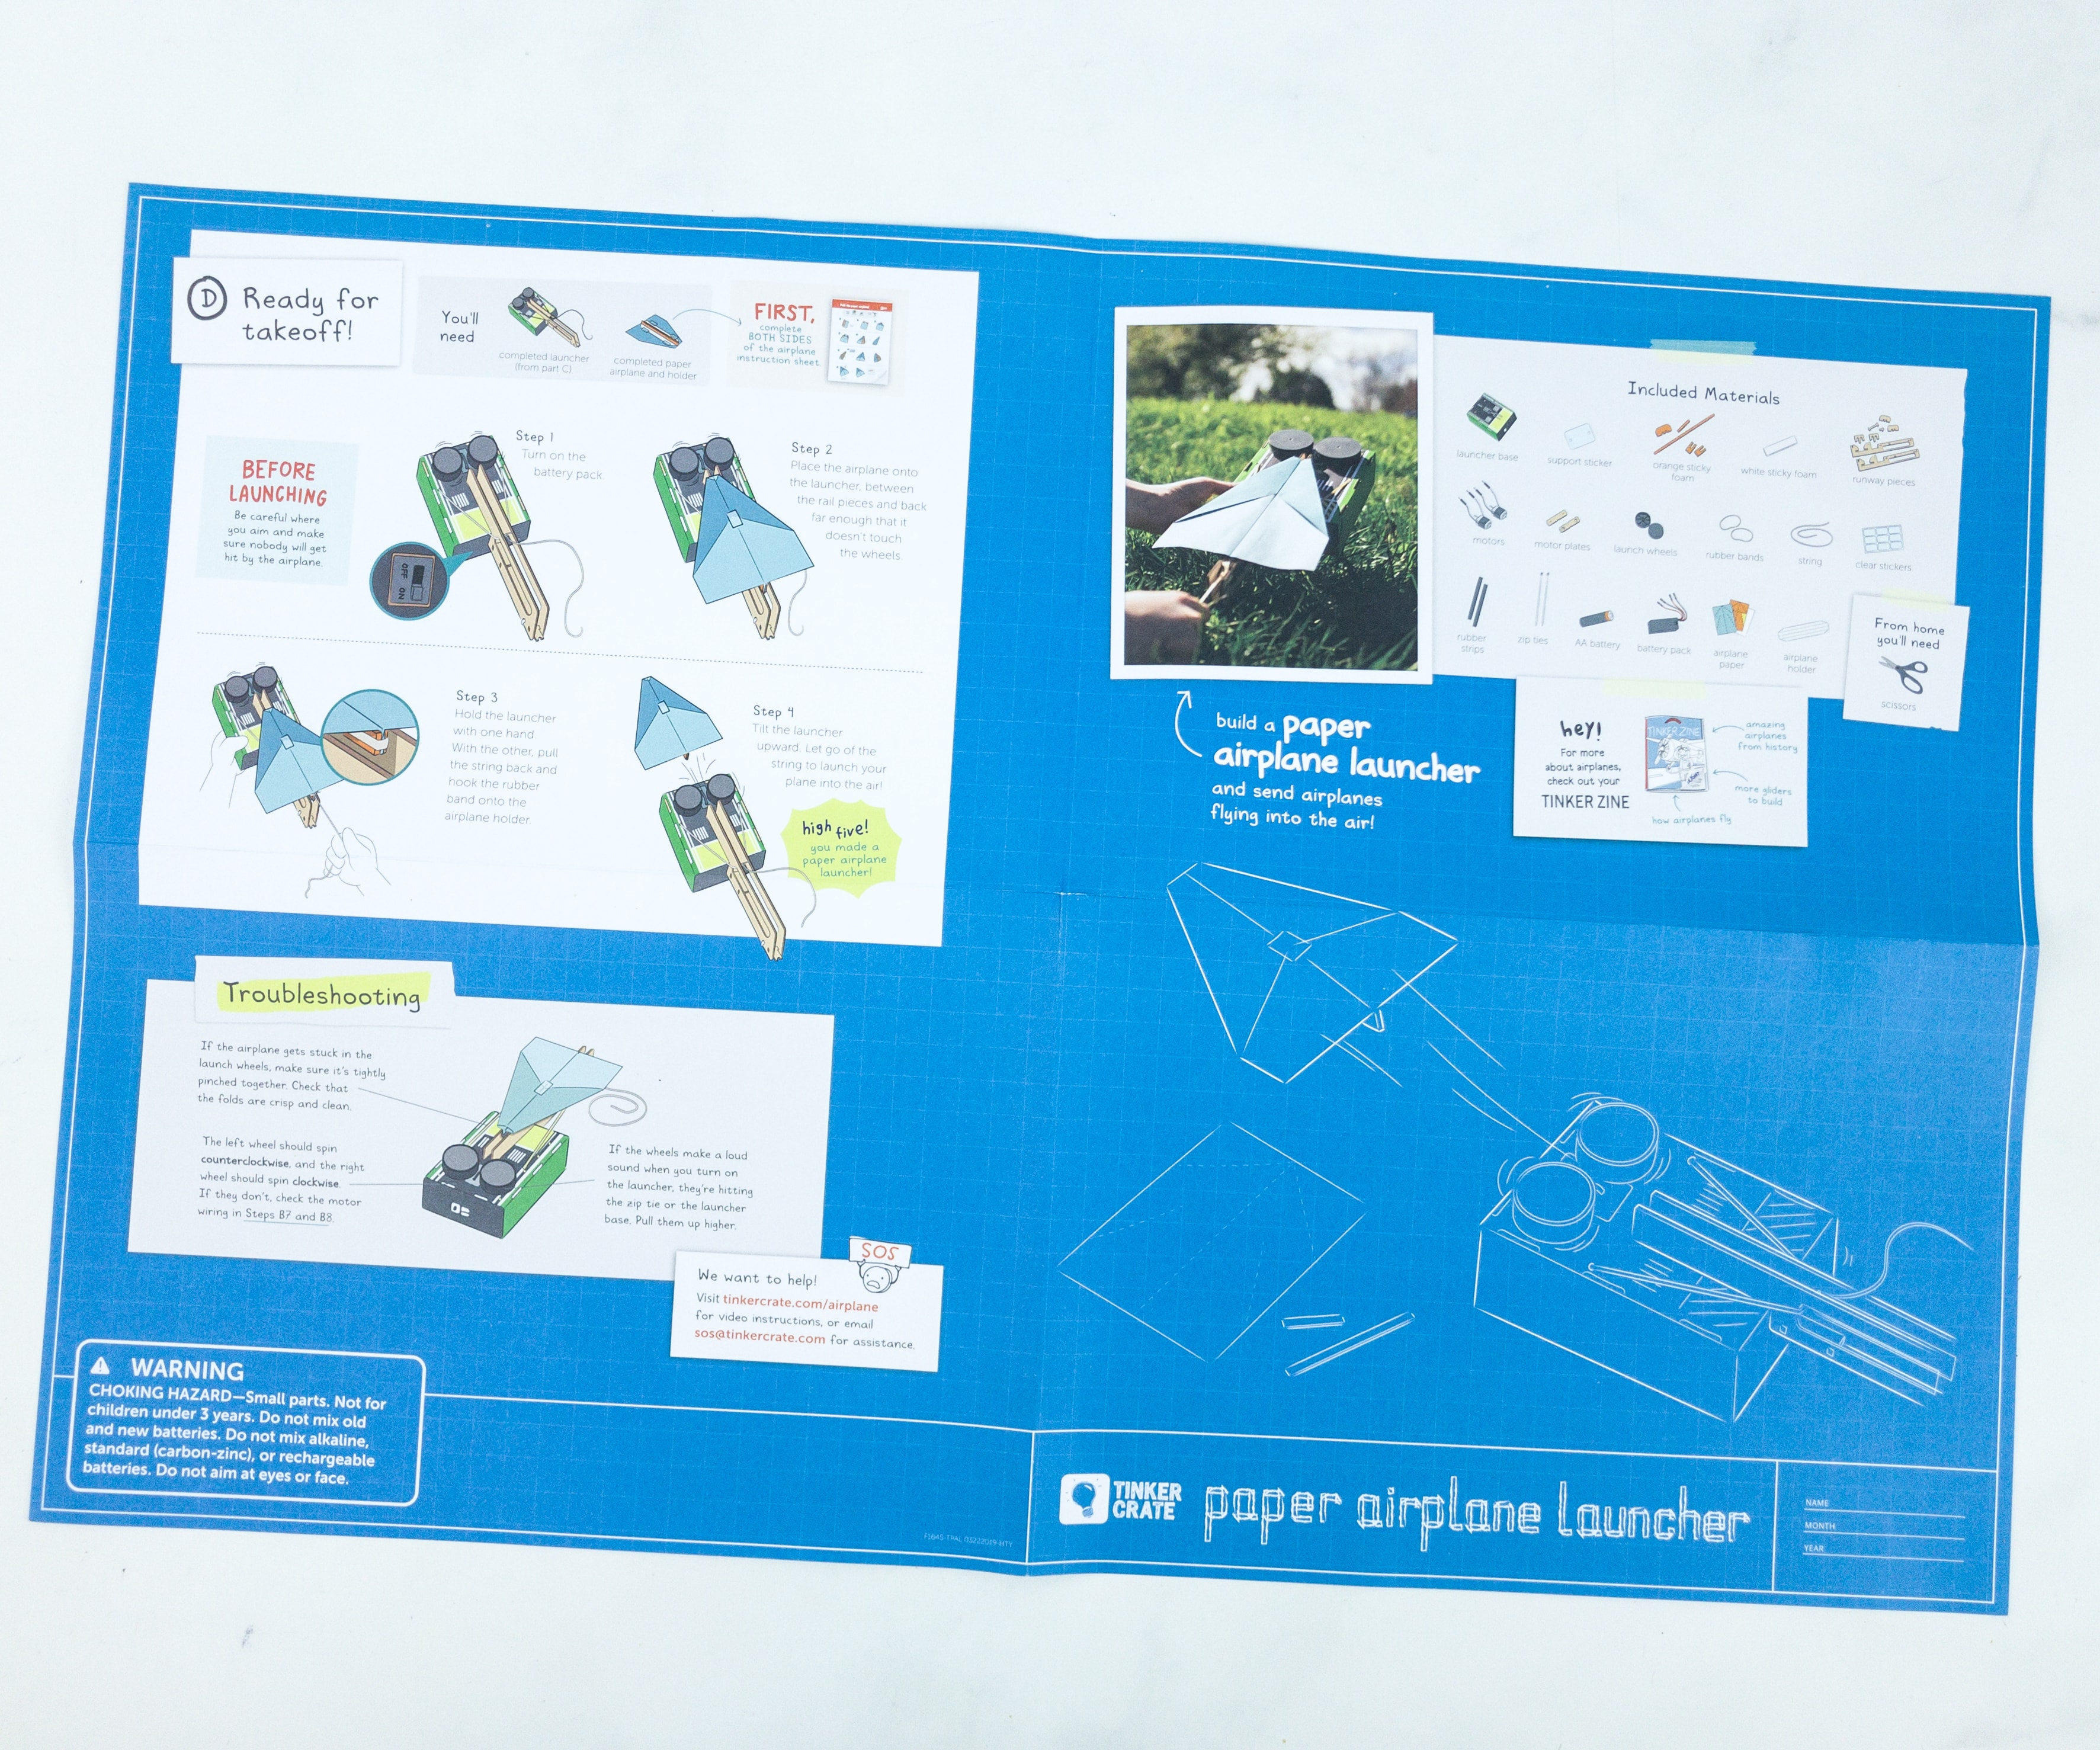
The instructions and other essential project information are printed on a faux blueprint fold-out sheet.
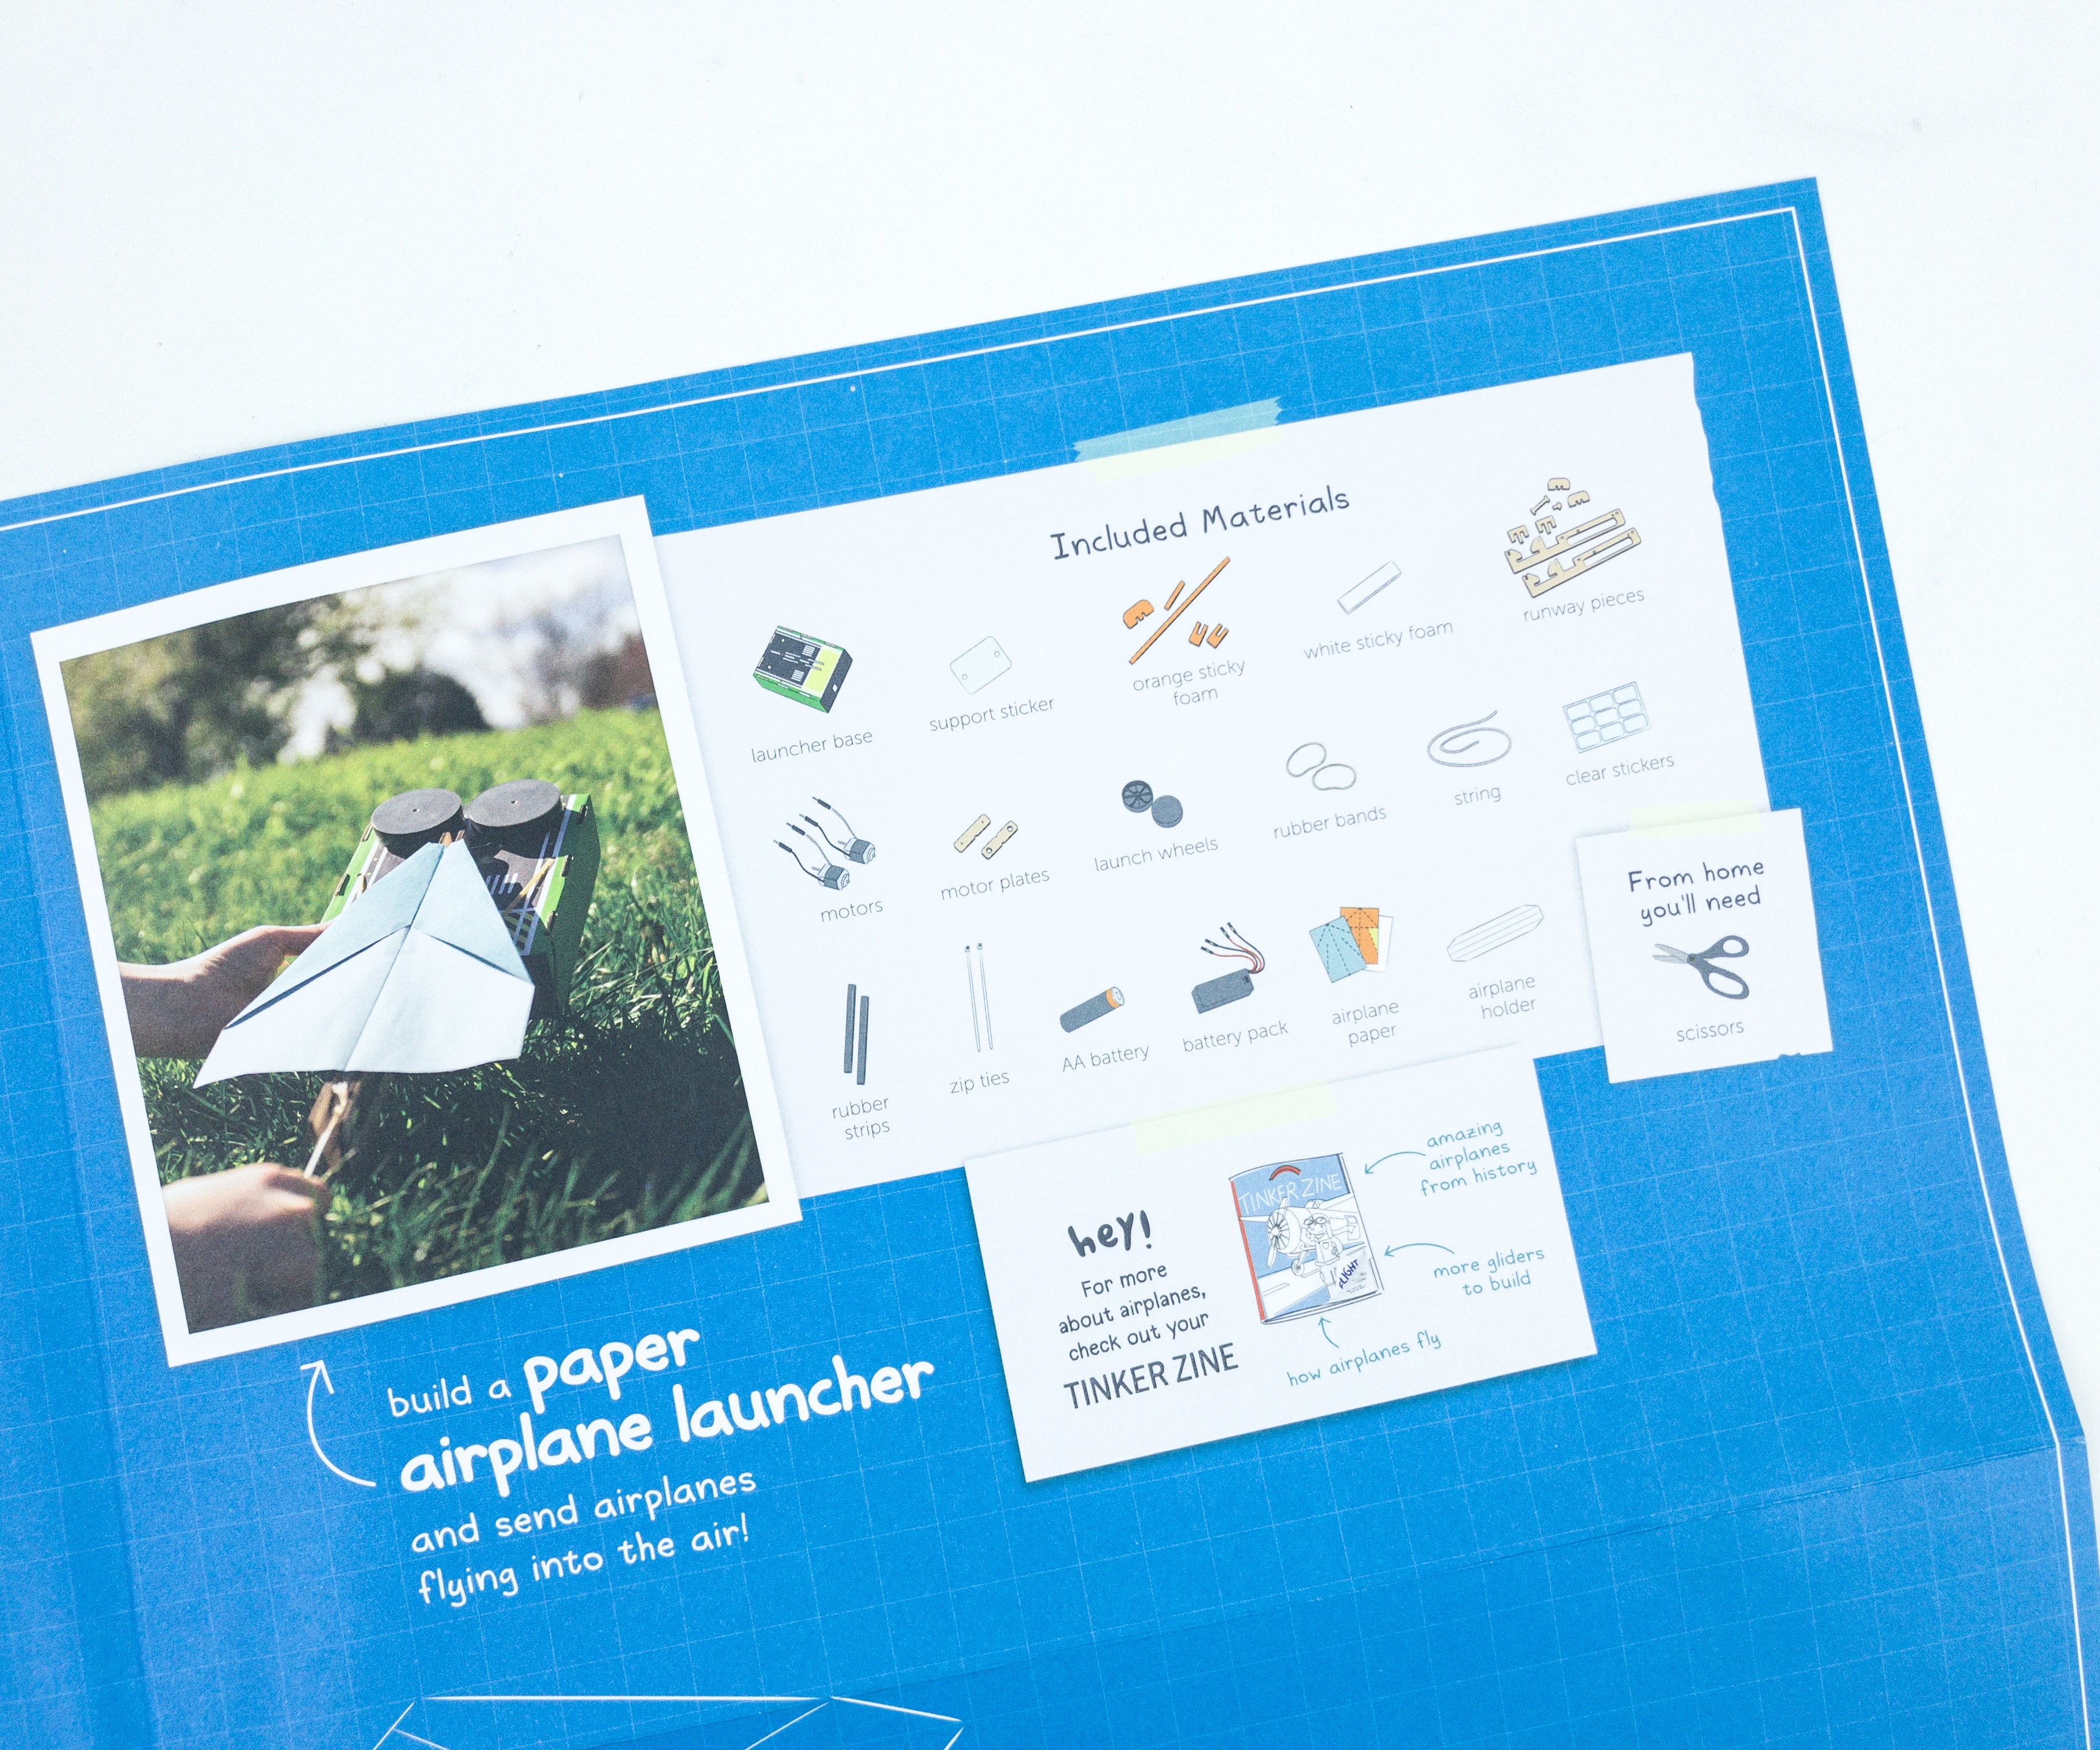
This sheet also gives you a glimpse of how the end product would look like and the materials that you should expect to inside the crate.
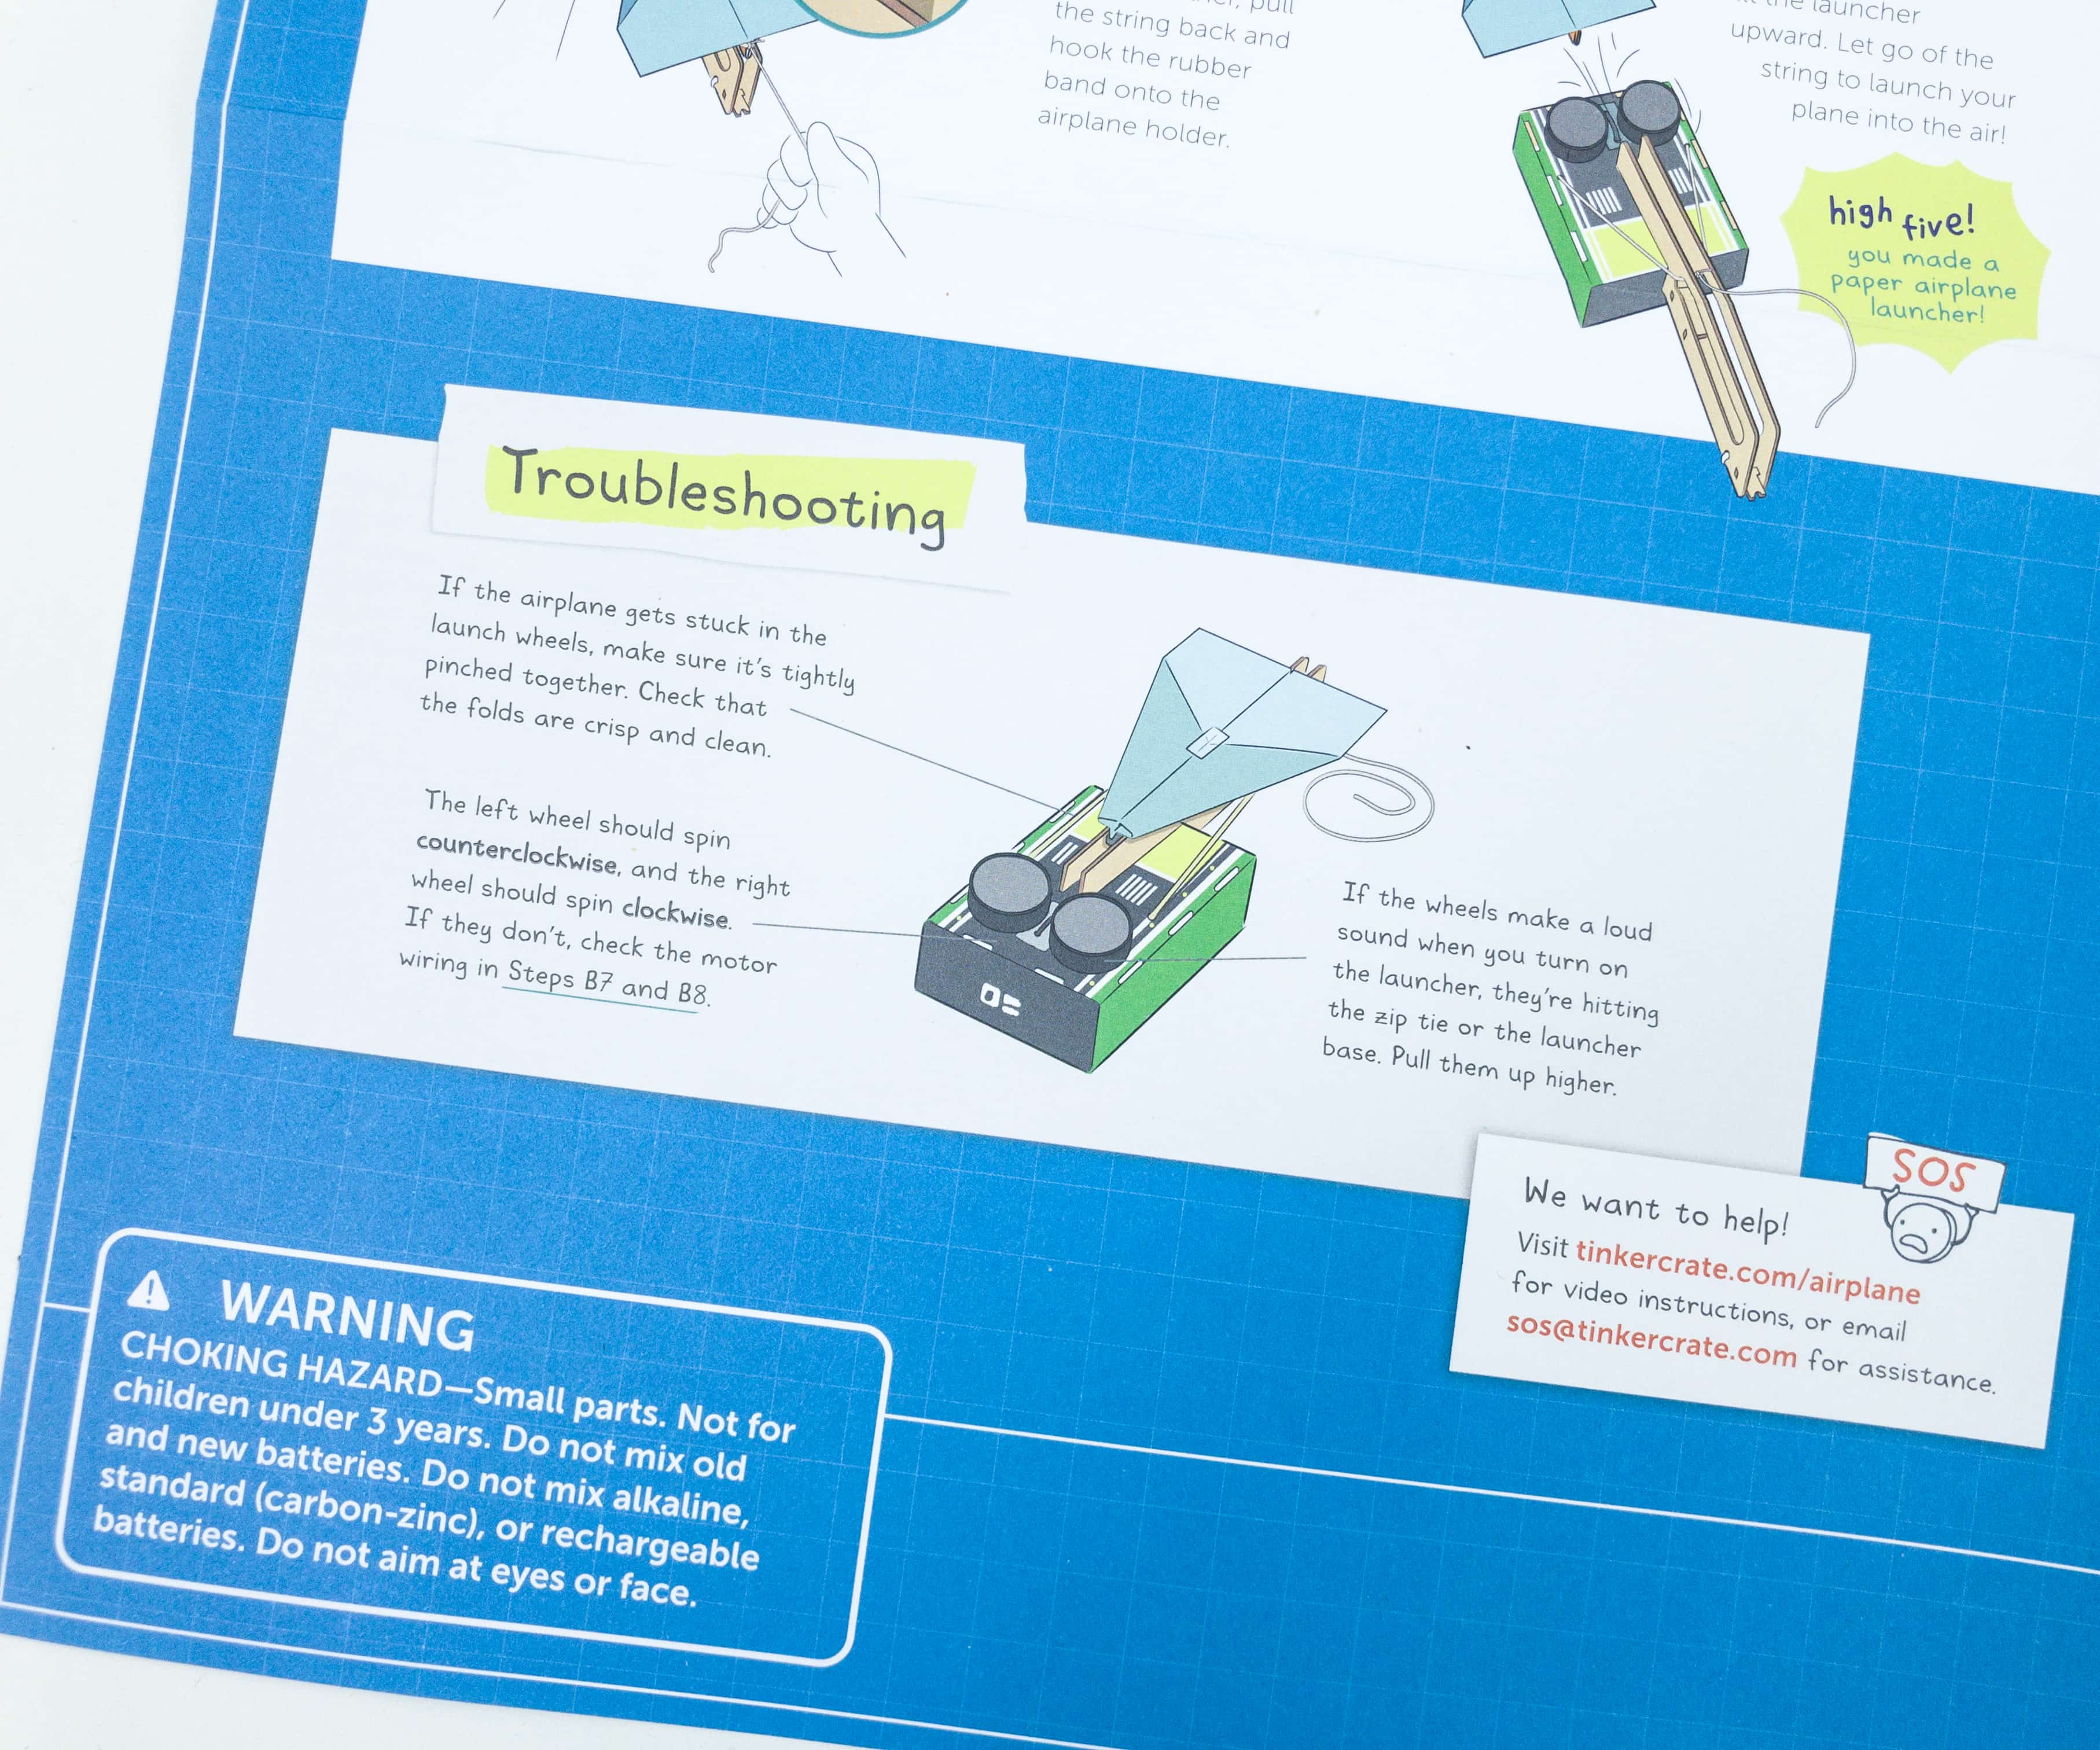
If your airplane gets stuck in the launch wheels, these troubleshooting tips may help you to solve the problem.
Tinker Crate Activities
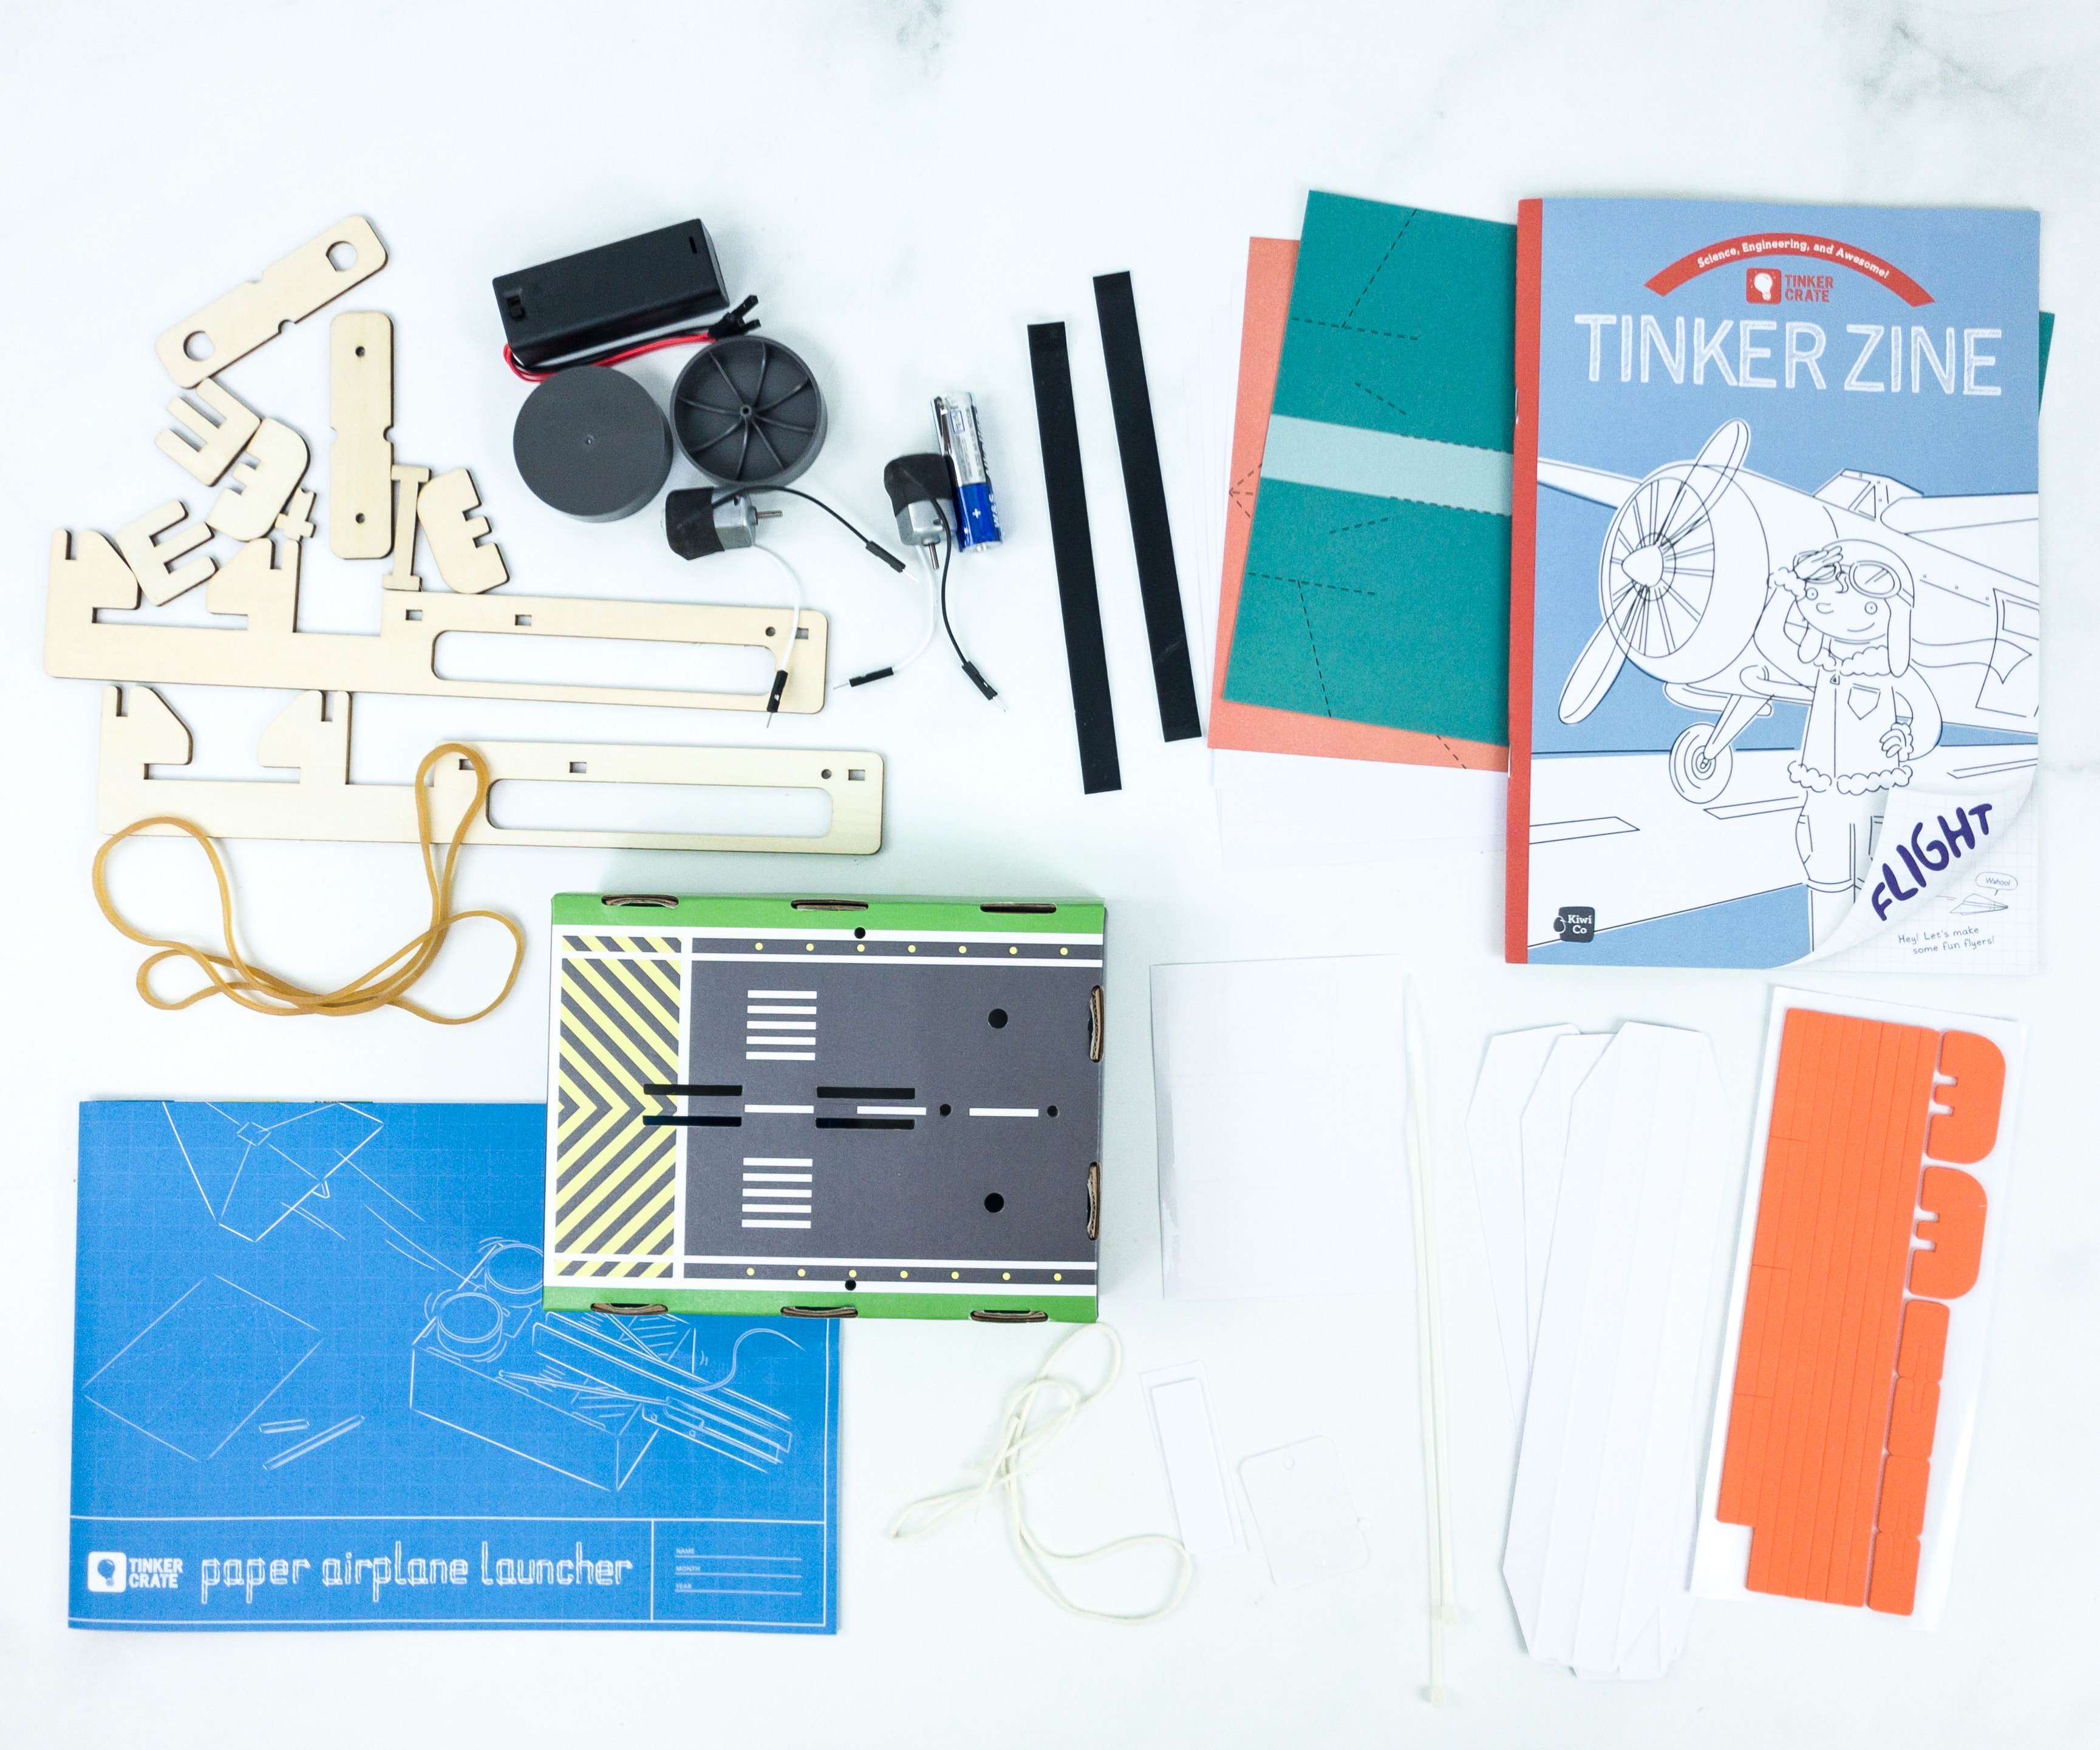
For this activity, the crate provided the launcher base, support sticker, locking tabs, orange sticky foam, zip tie, connector pieces, rail pieces, and brace pieces.
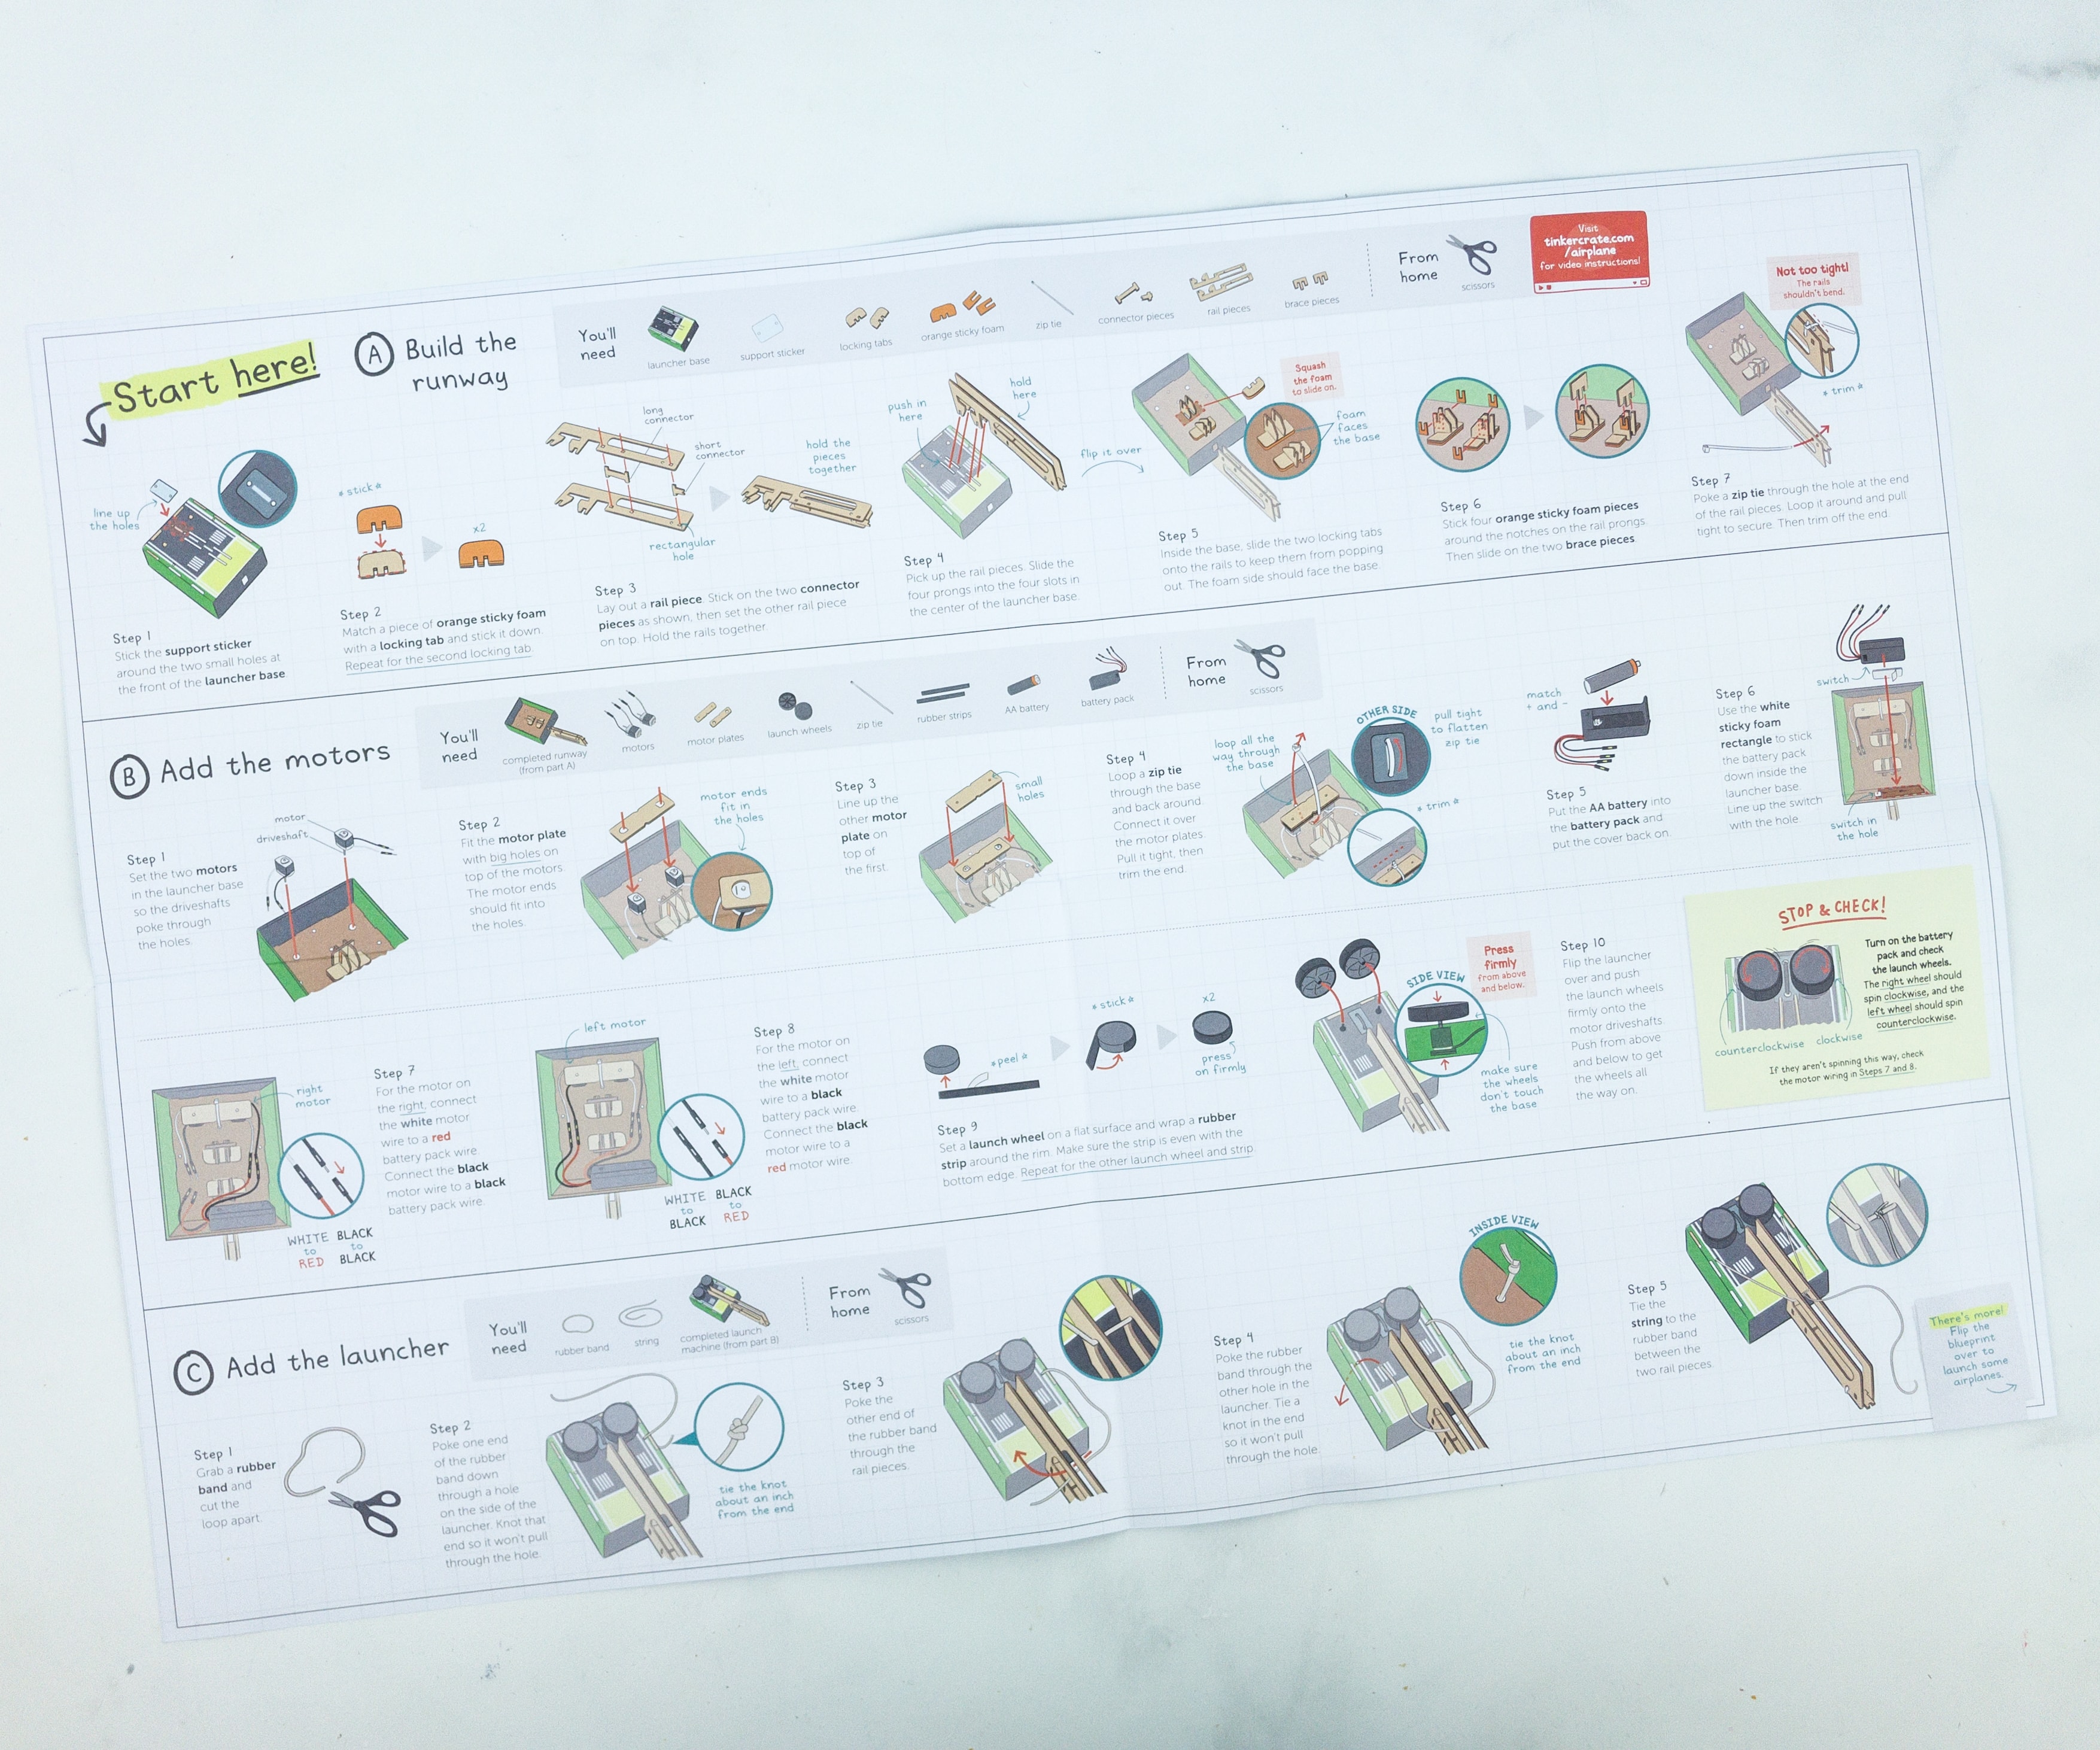
The instruction sheet has a lot of explanatory notes, and they even highlight or bold important and technical areas.
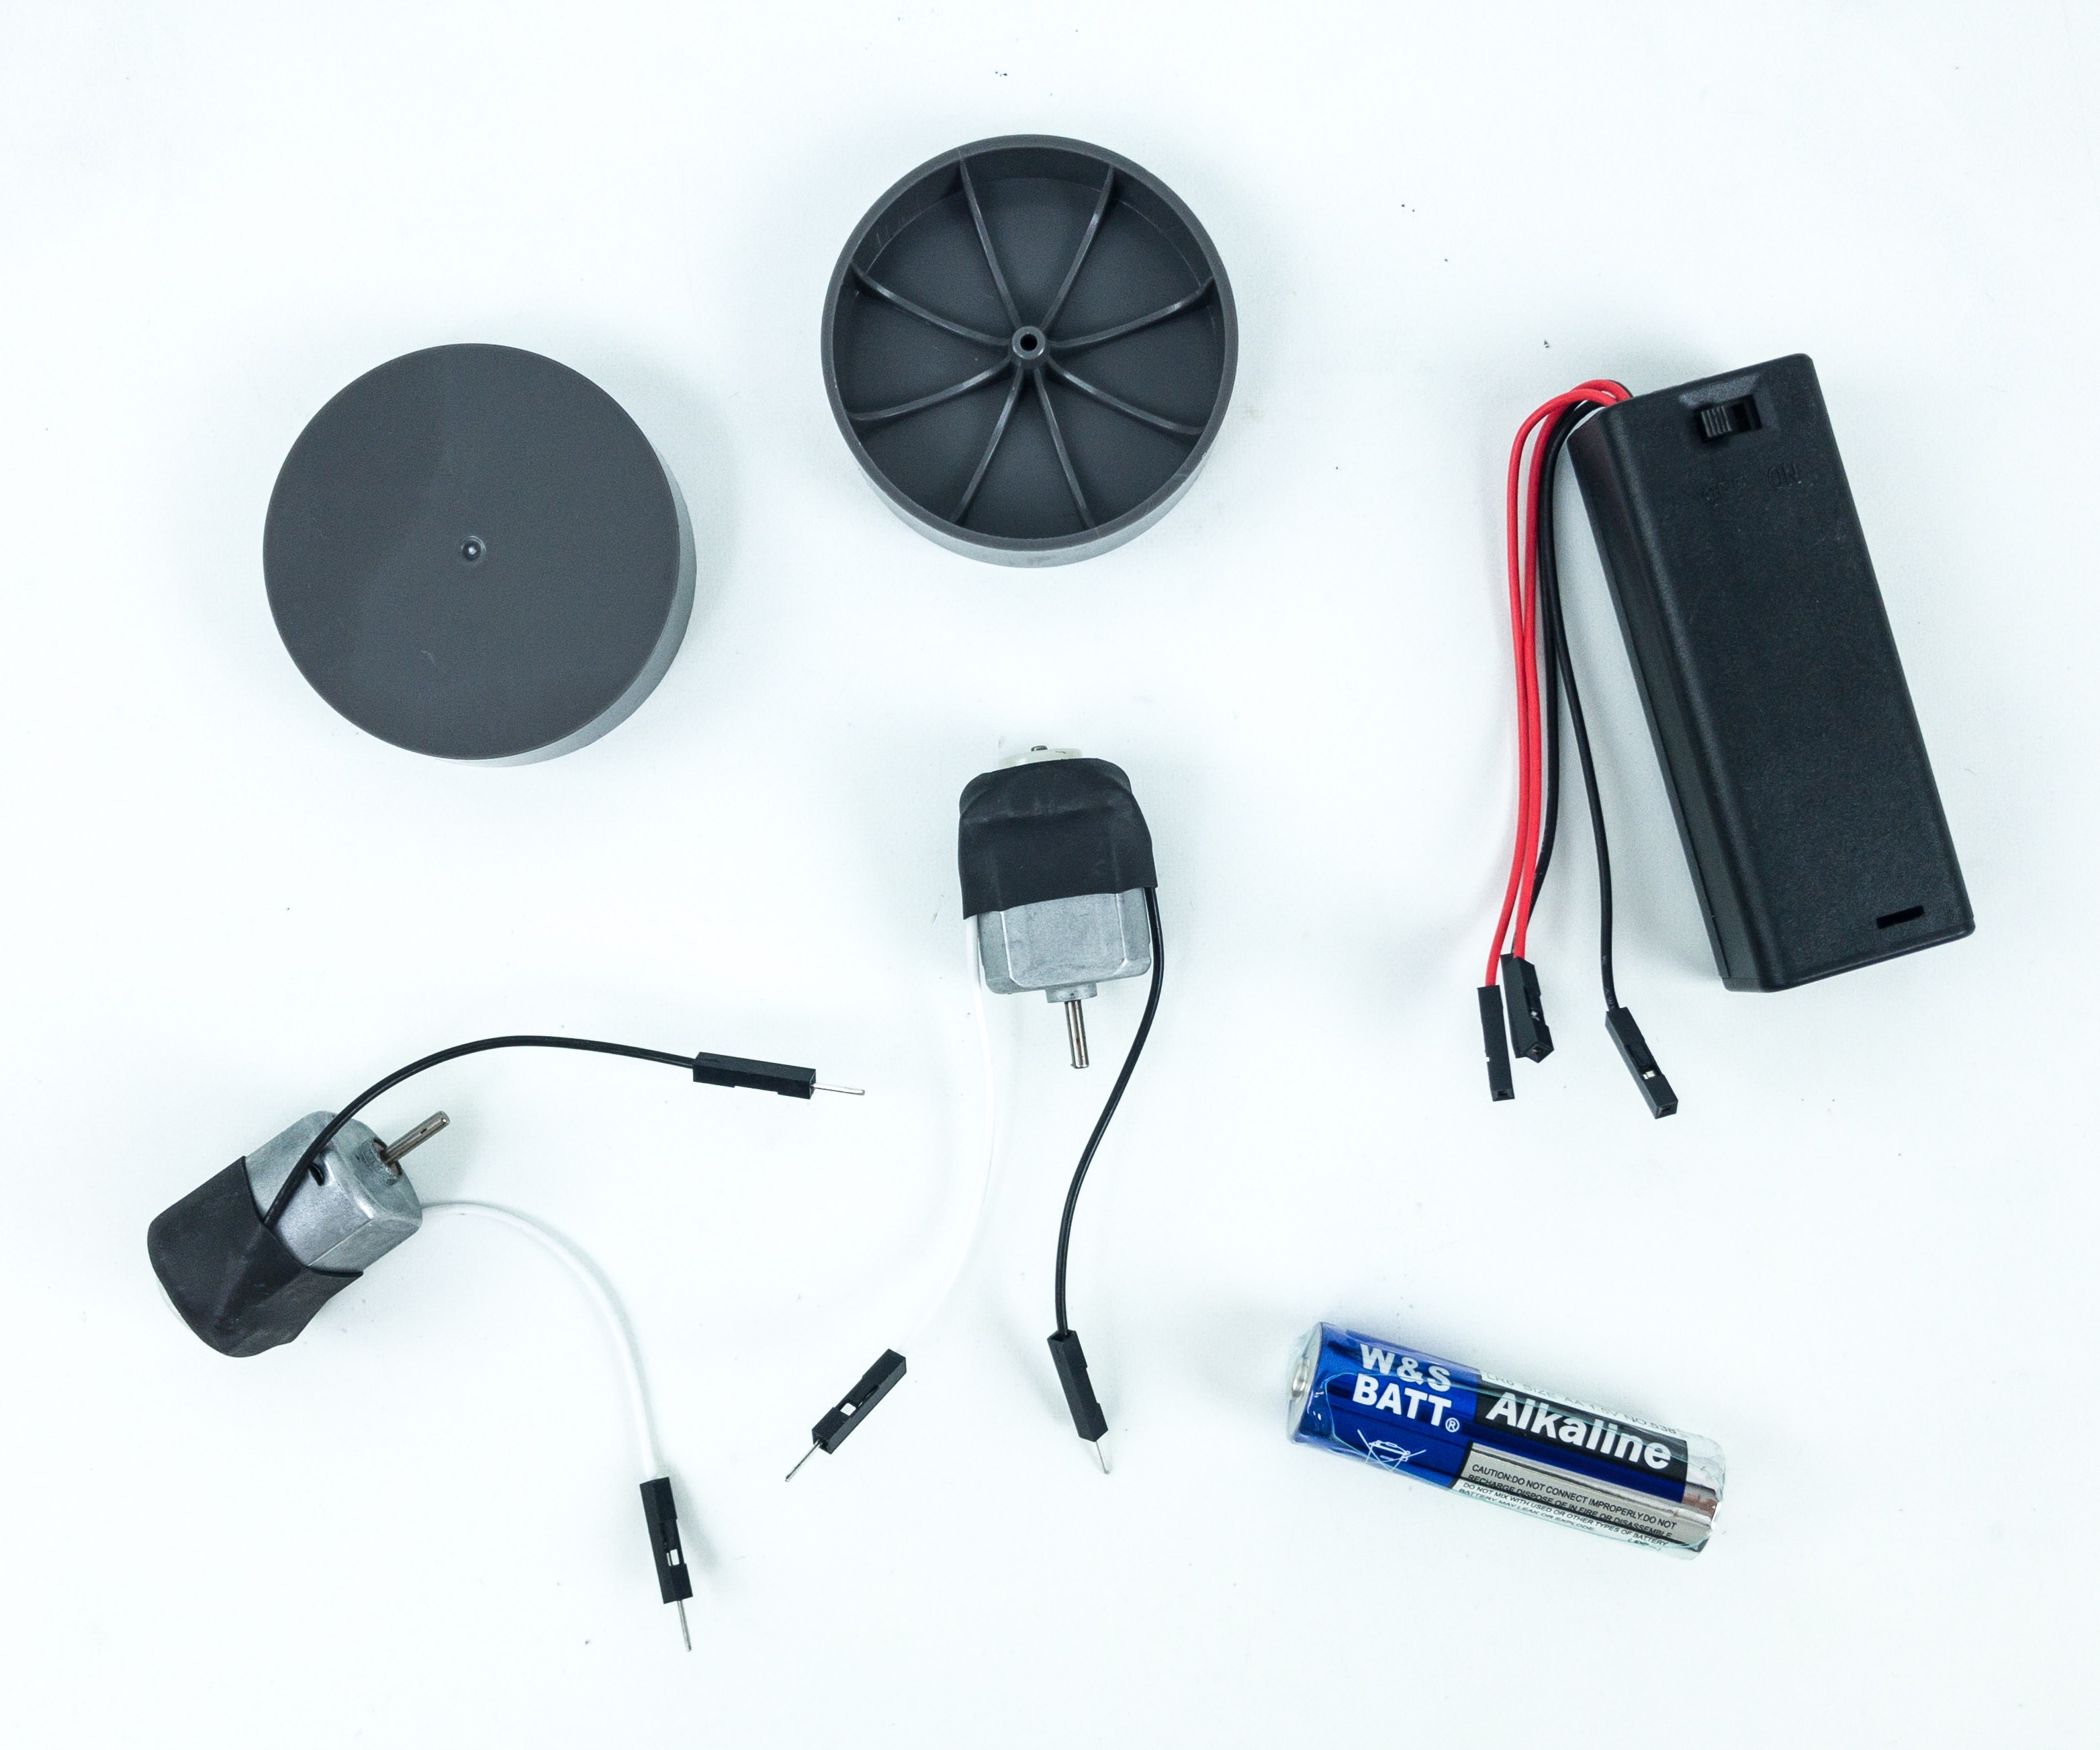
For this project, we also used a pair of motors, motor plates, launch wheels, AA battery, and a battery pack.
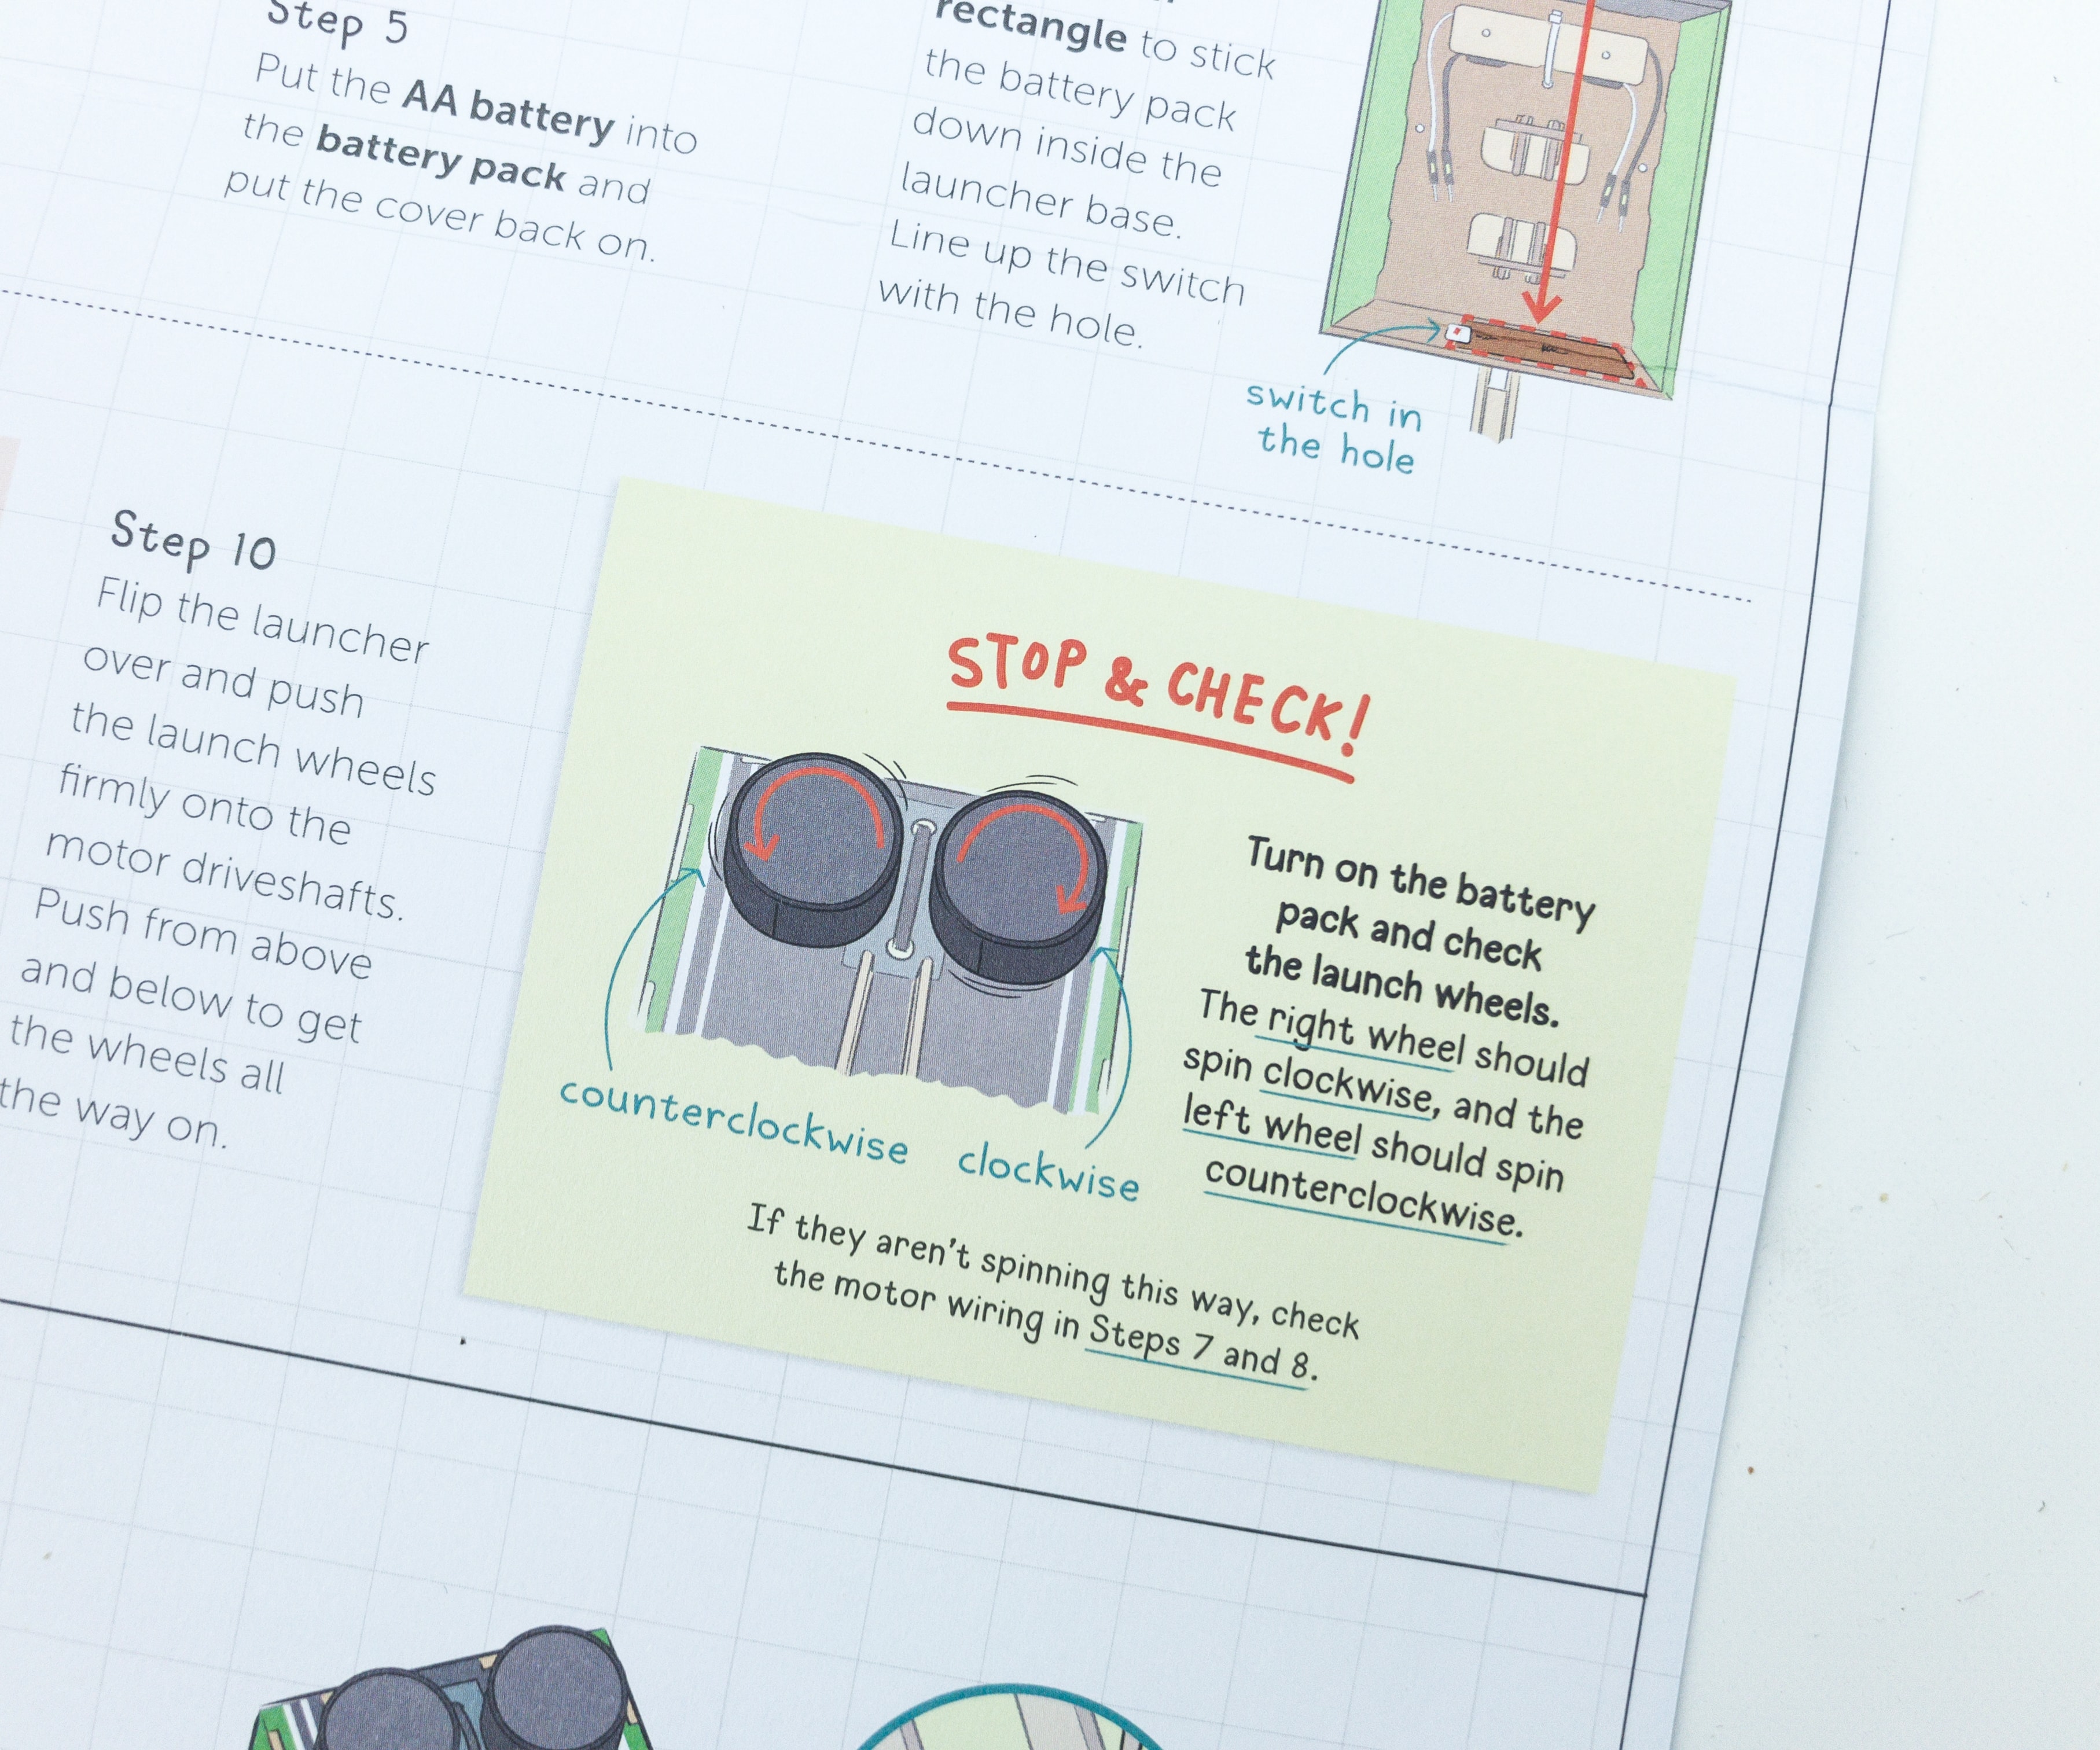
This portion of the sheet reminds you to stop and check if you are doing things accordingly. They even provided specific things to check and the things to do to correct it.
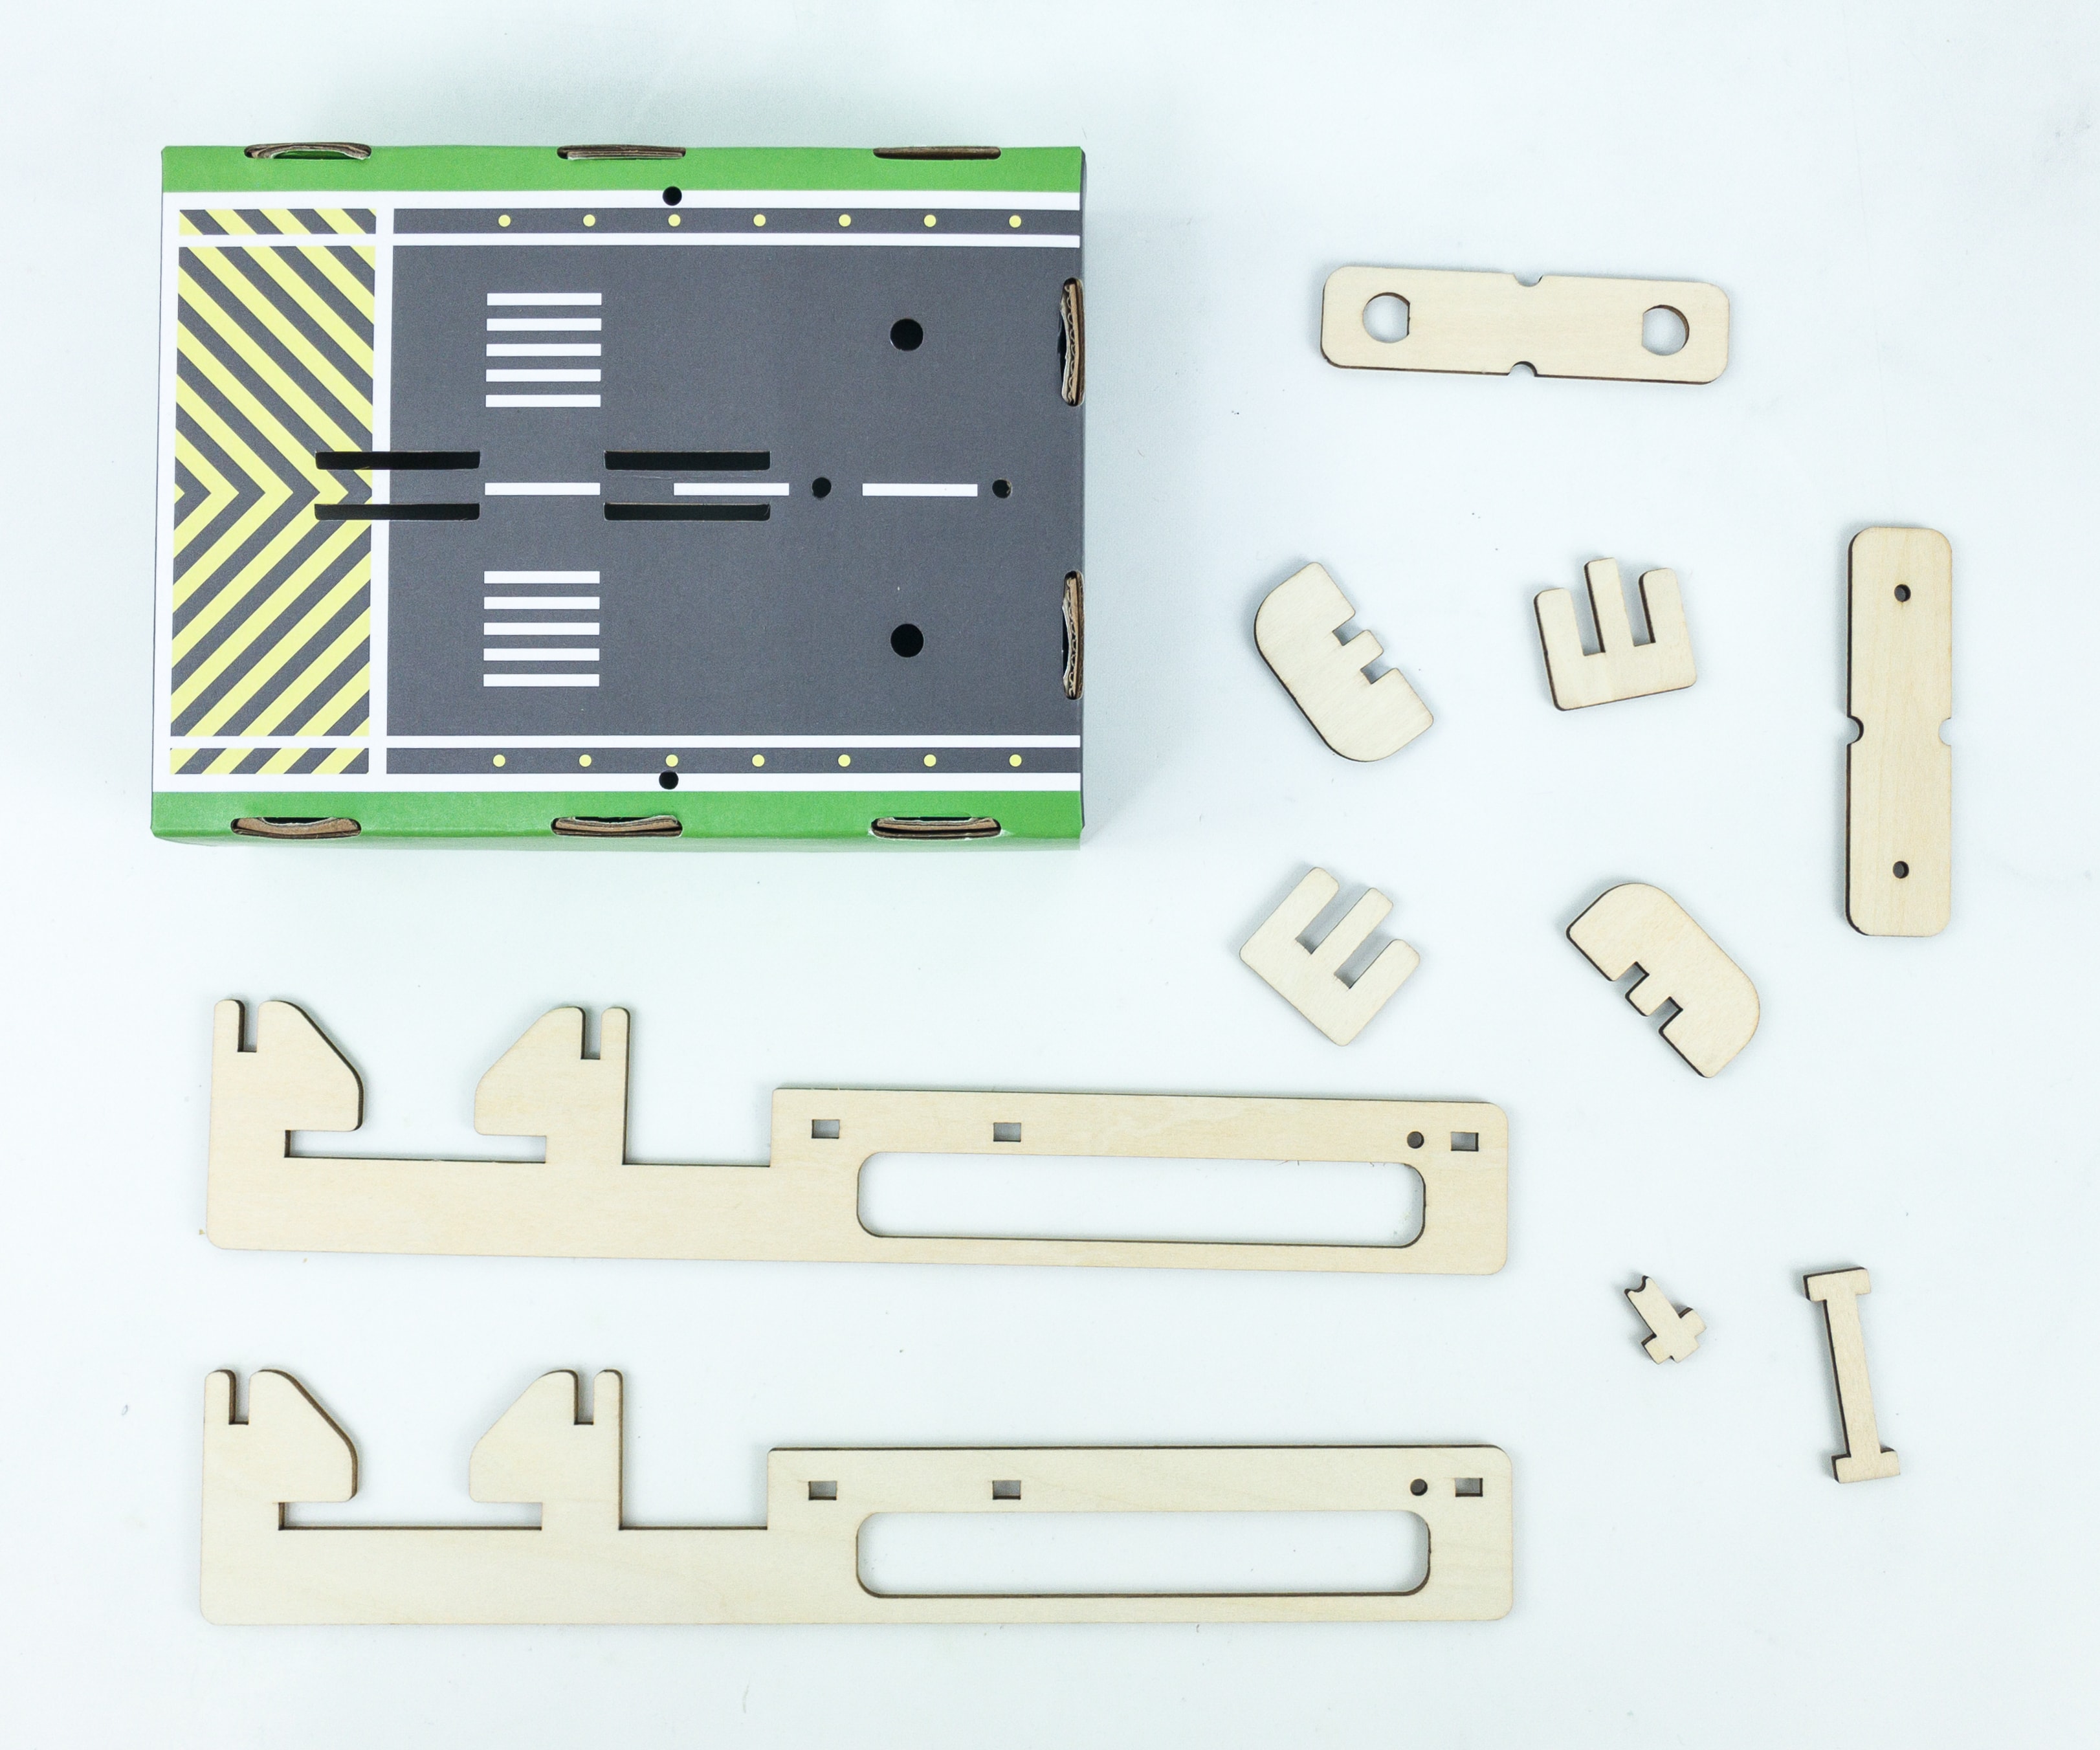
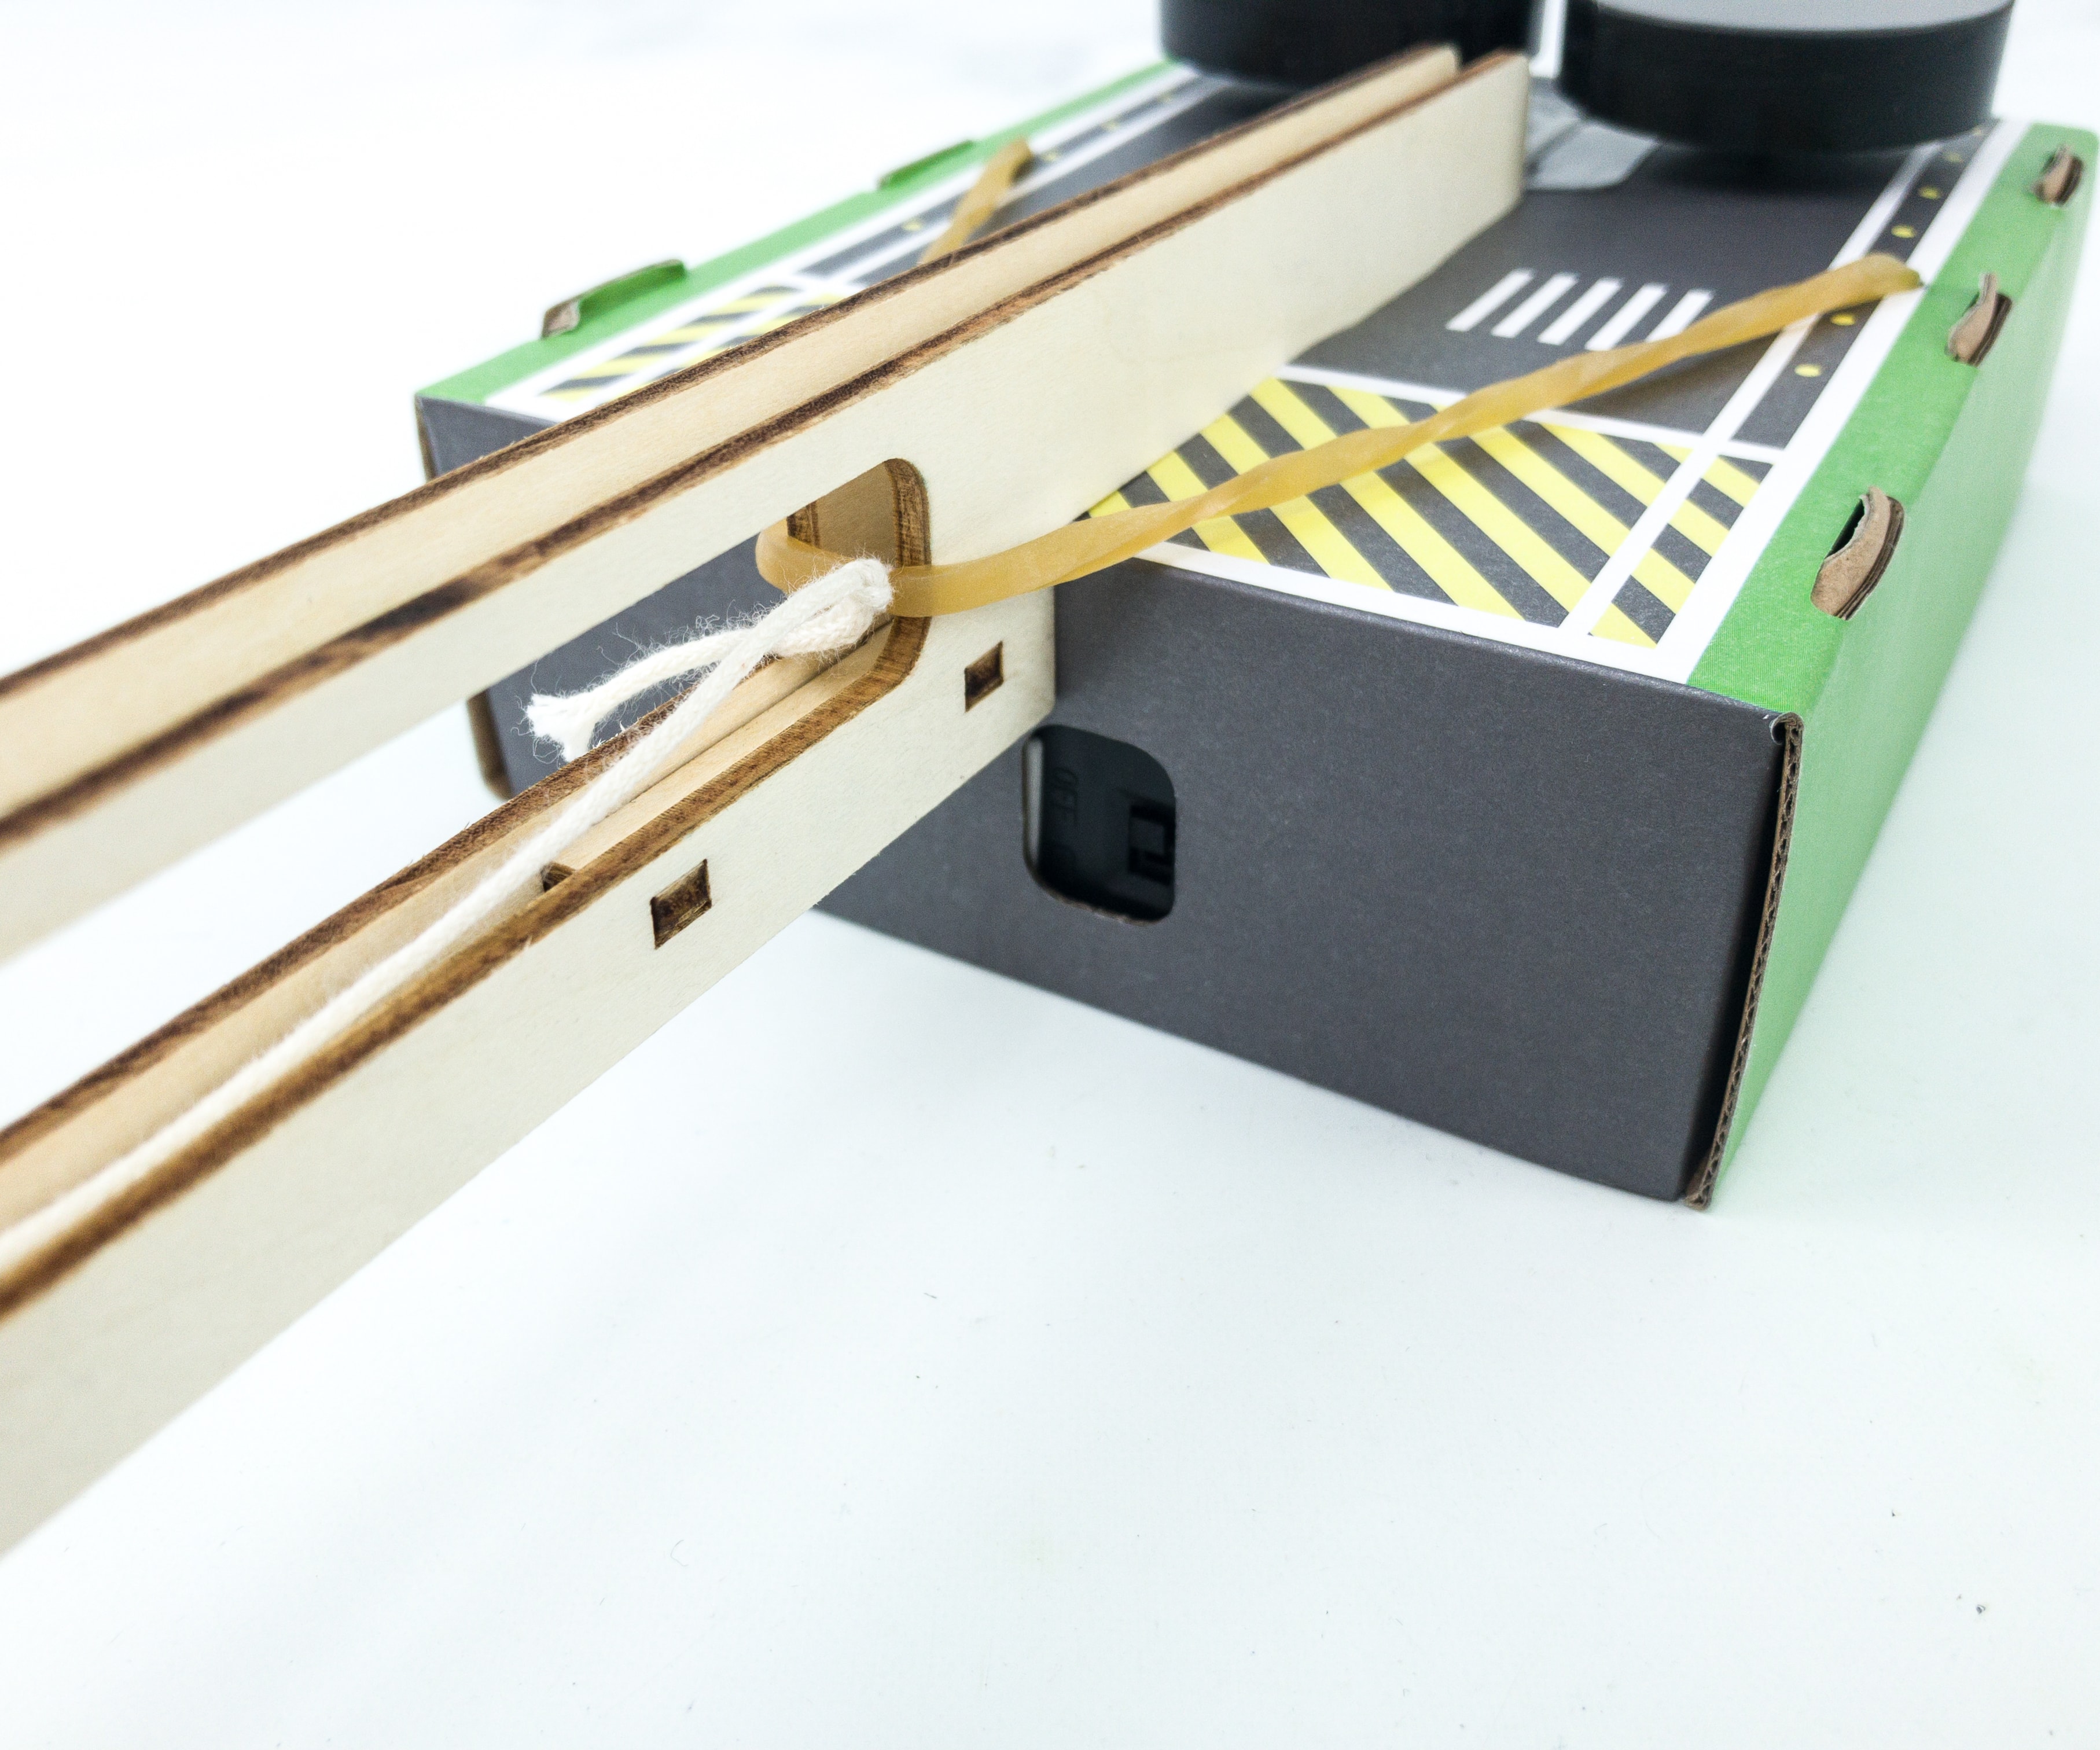
The key to making a successful airplane launcher is on the launching base because that is where all the action occurs. For the launcher, we used the launcher pad, locking tabs, rail and brace pieces.
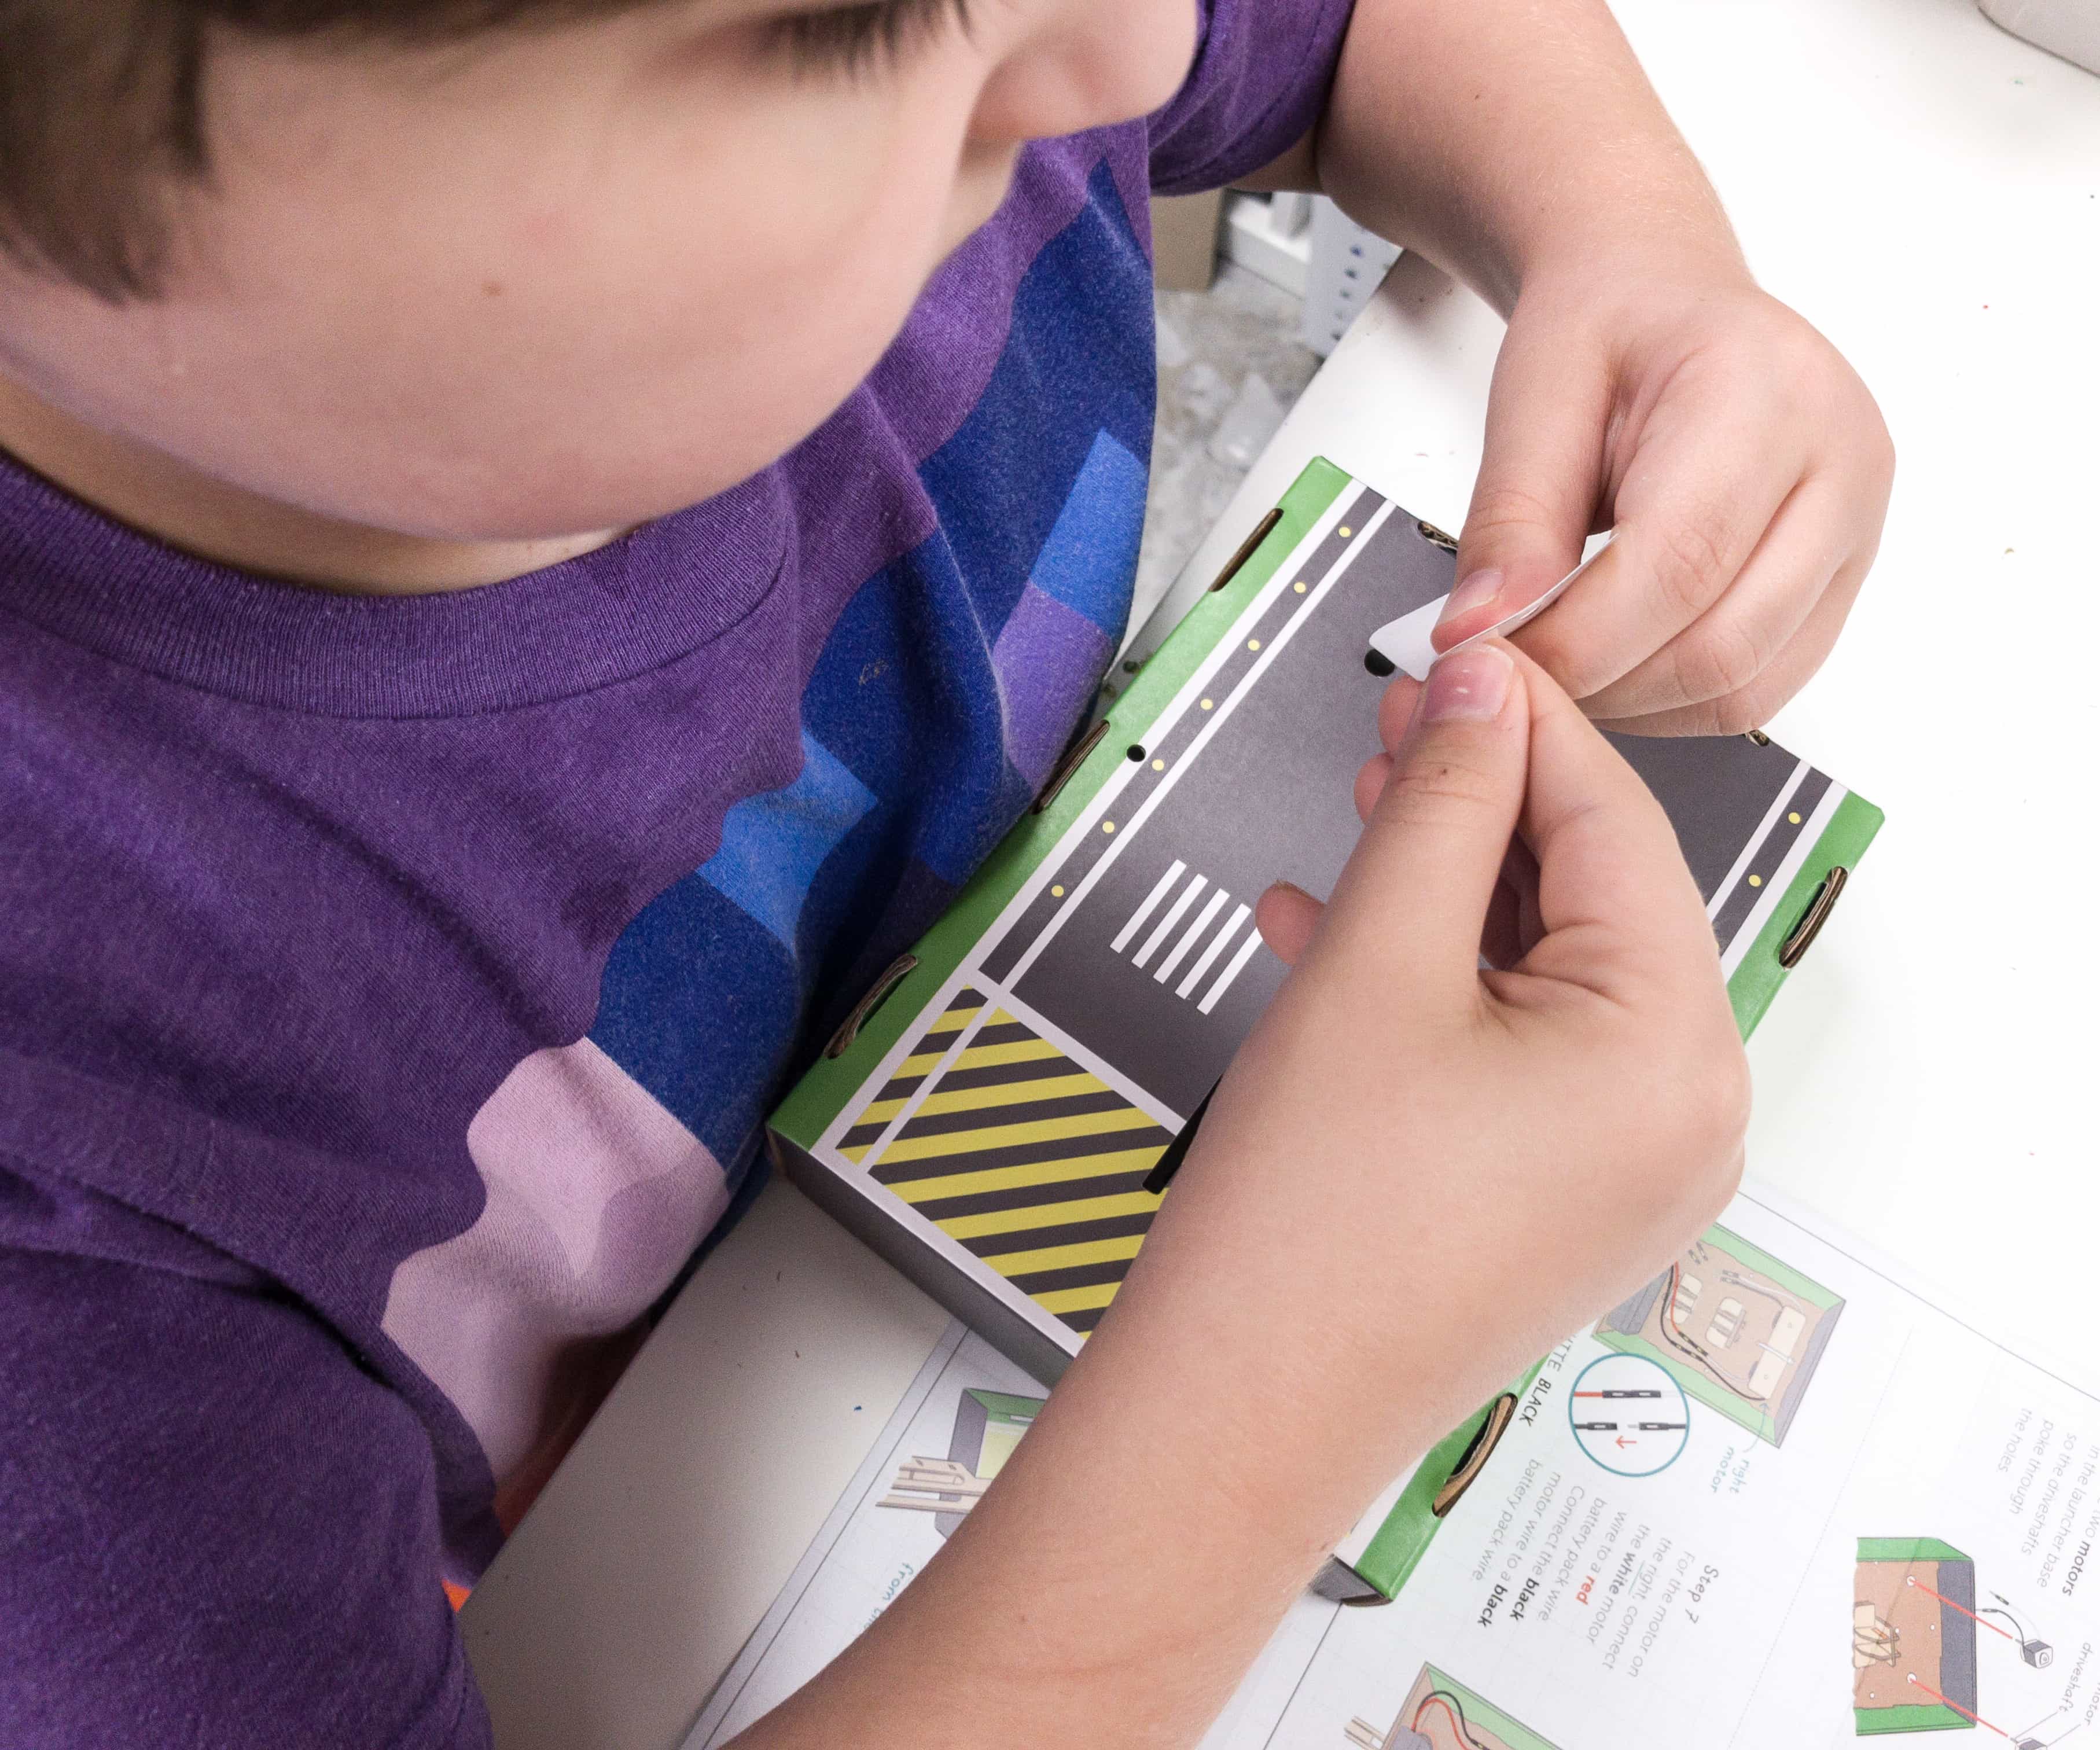
My son started the project by sticking the support sticker around the two small holes at the front of the launcher base.
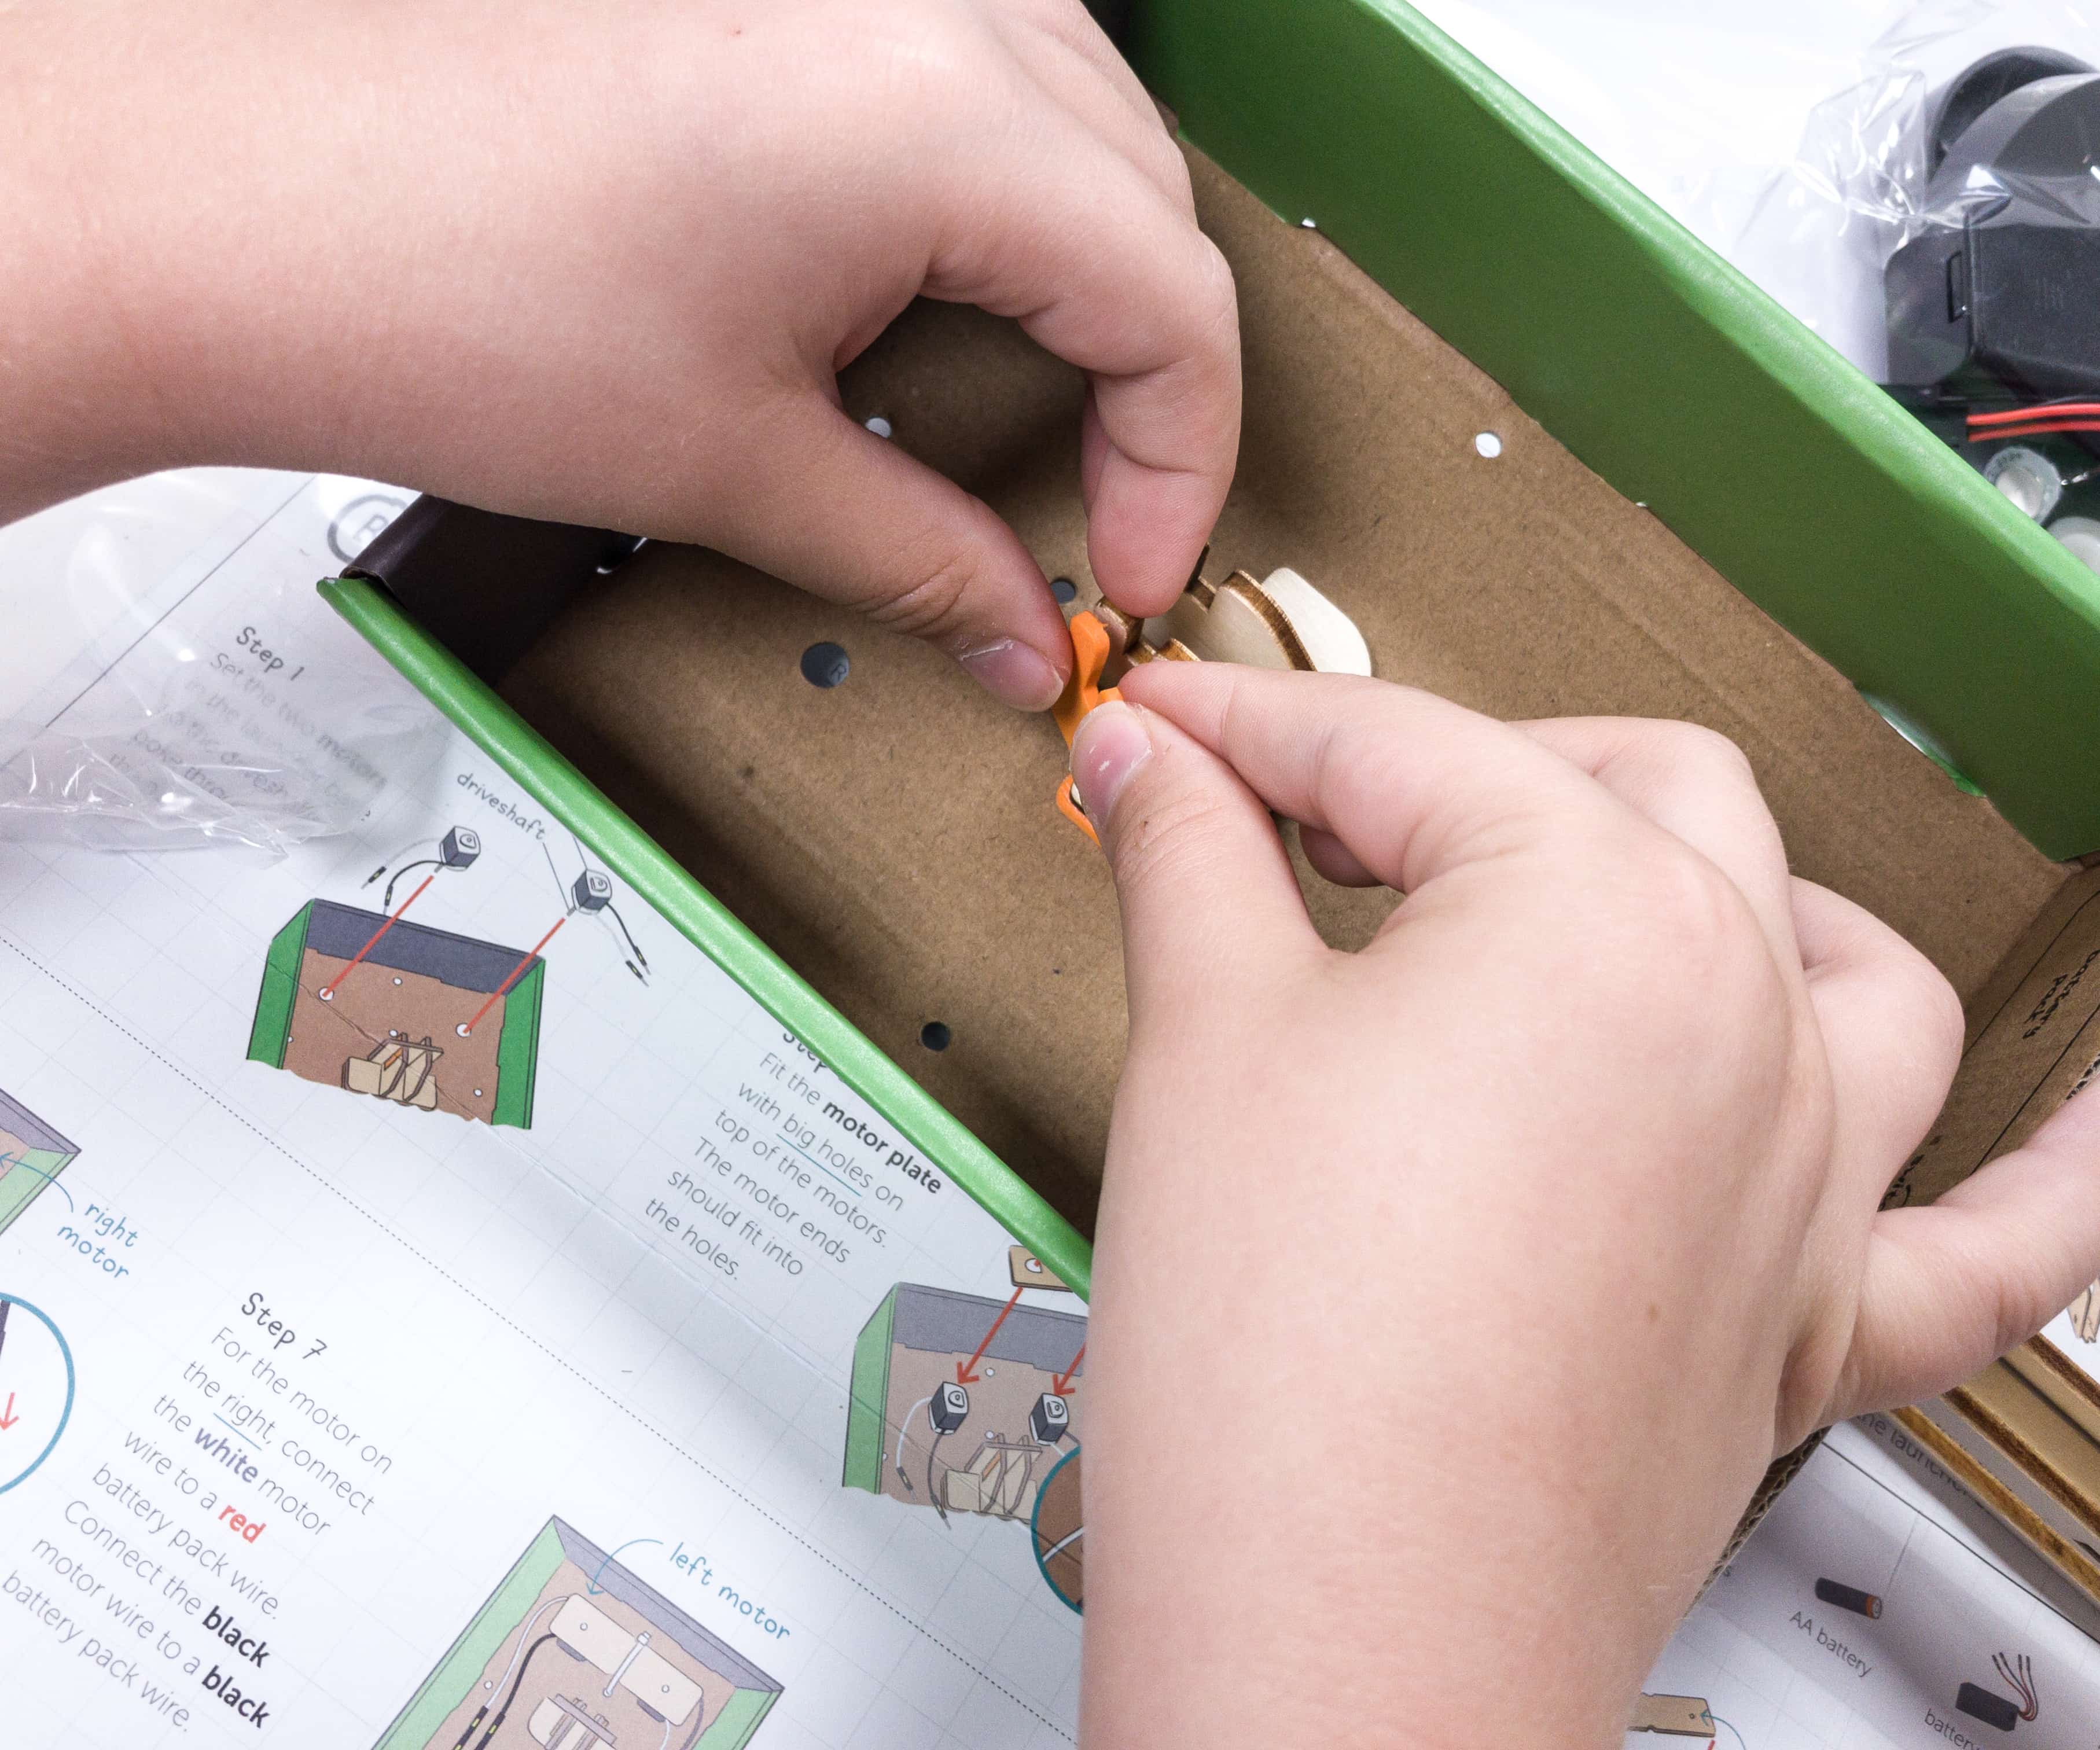
Then, he matched a piece of orange sticky foam with a locking tab and stuck it down inside the base.
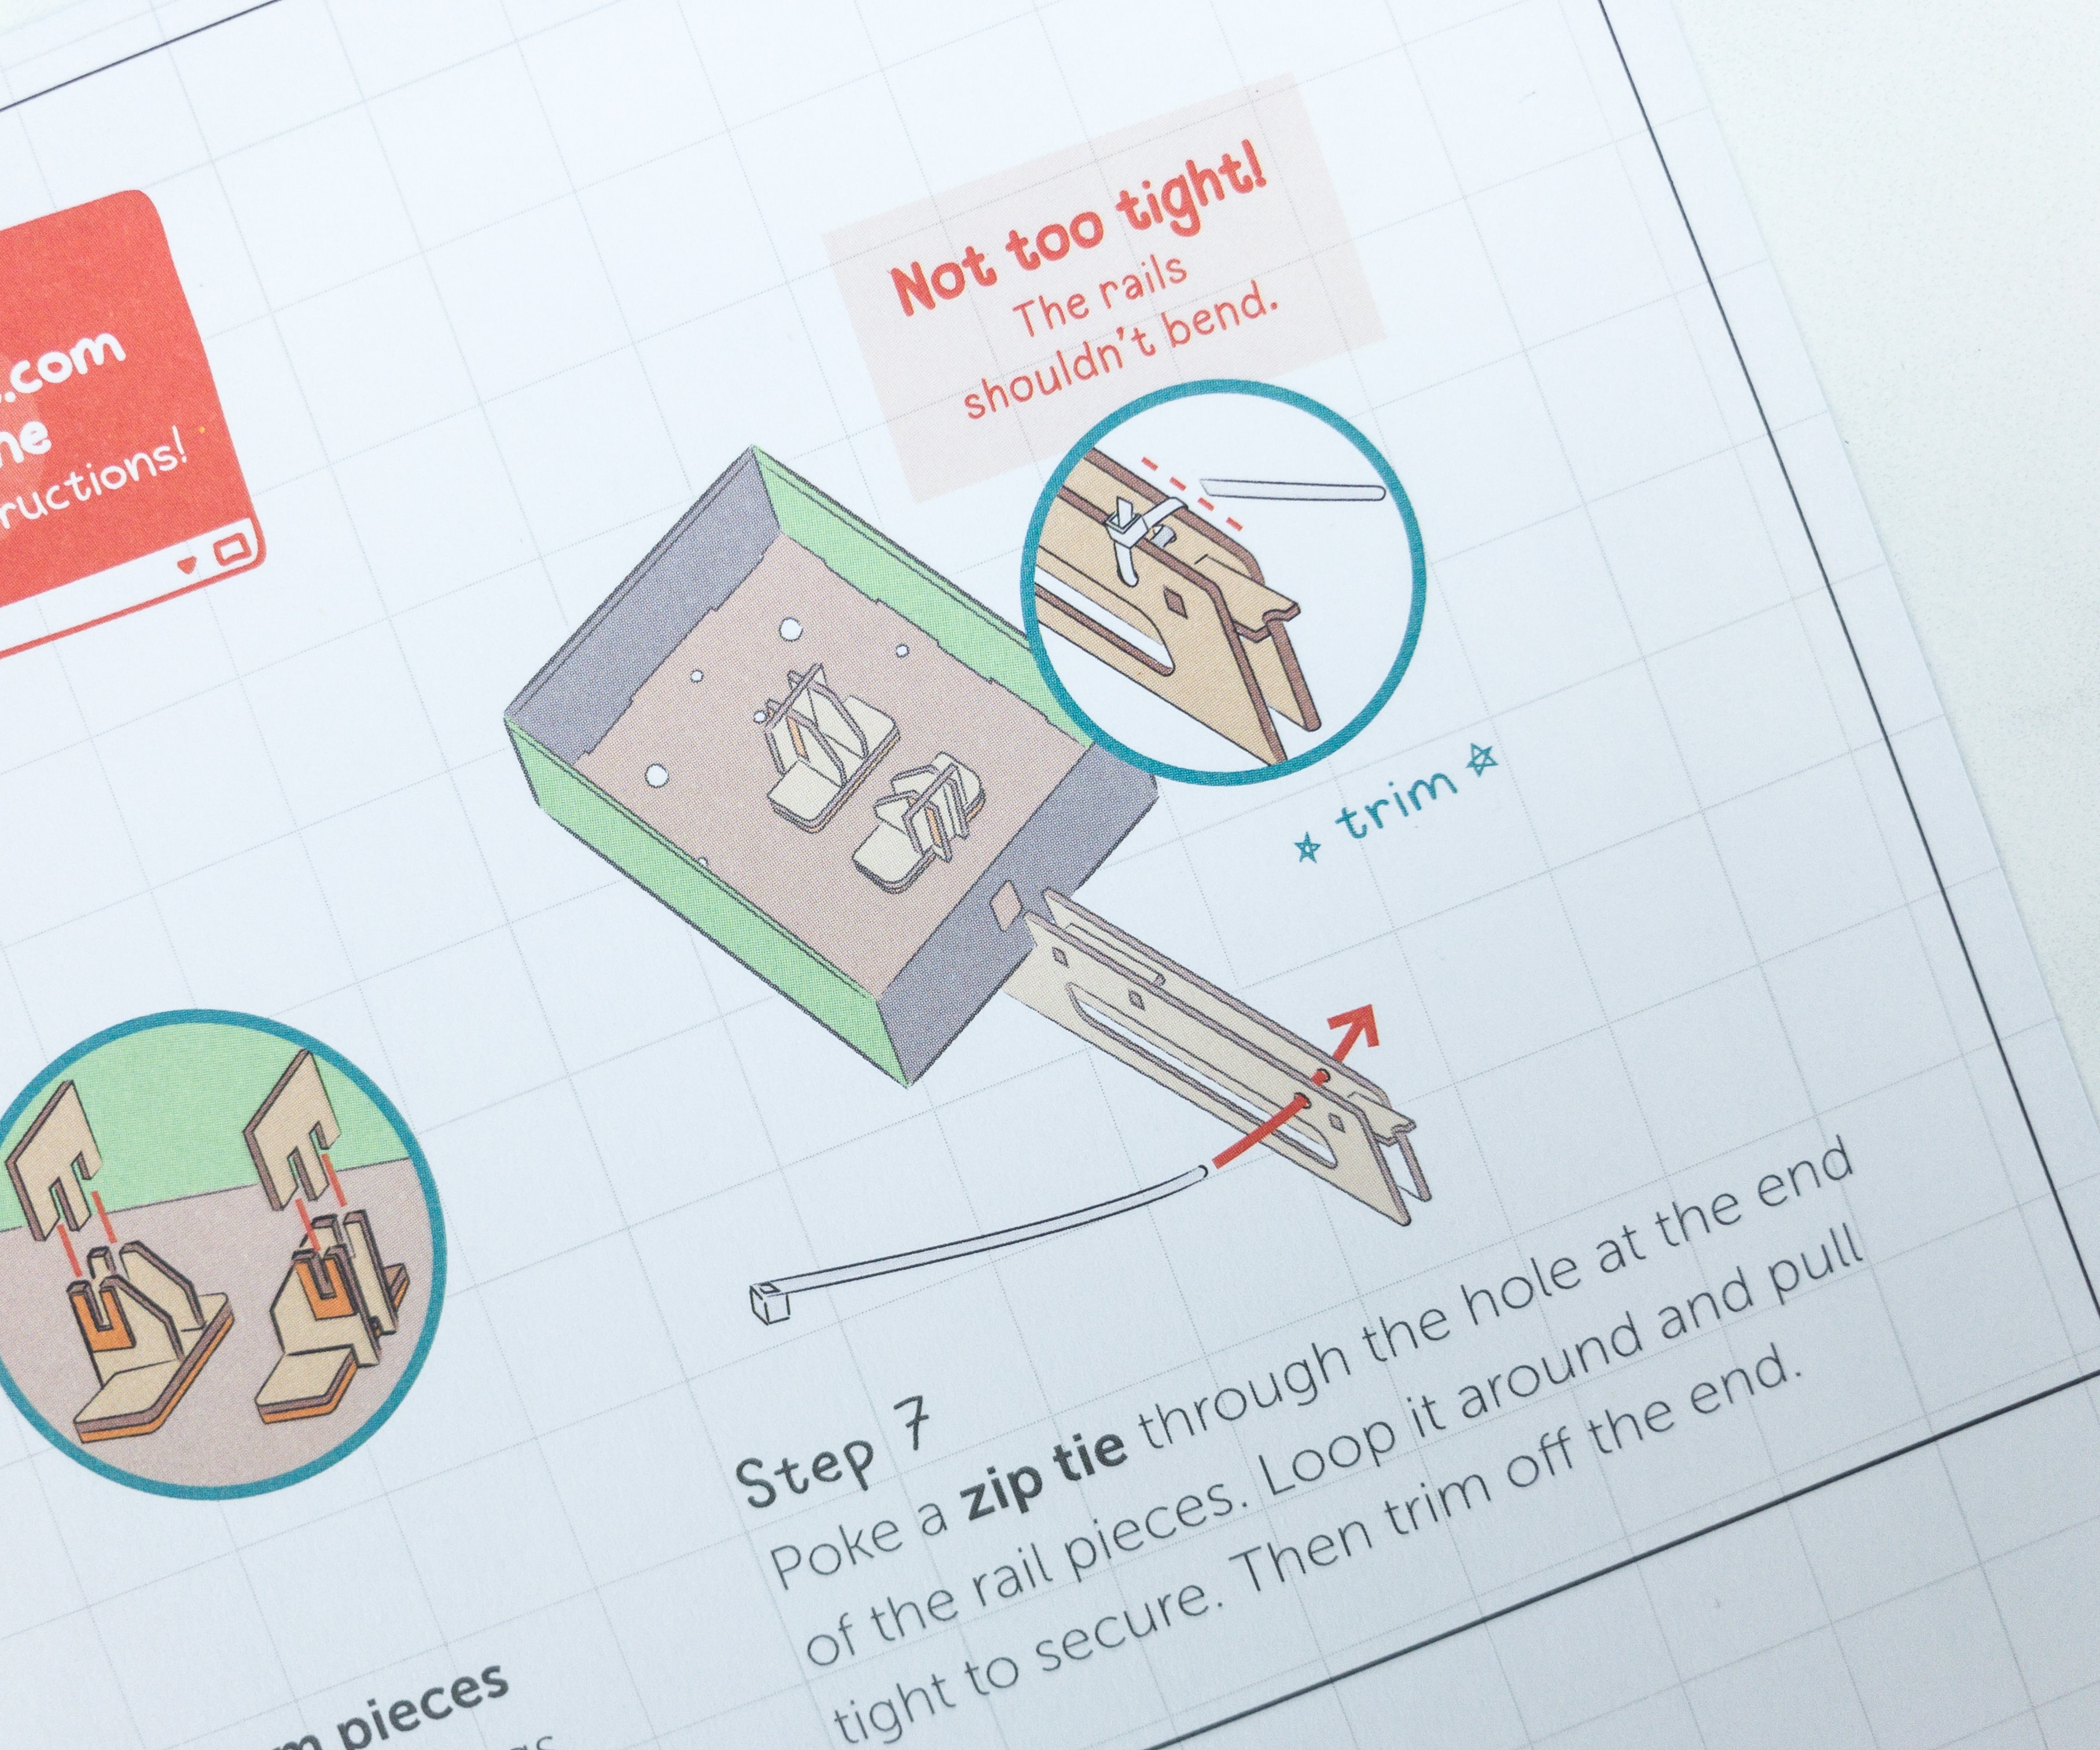
According to the sheet, the rails should be locked, but not too tightly to the point that they are bent.
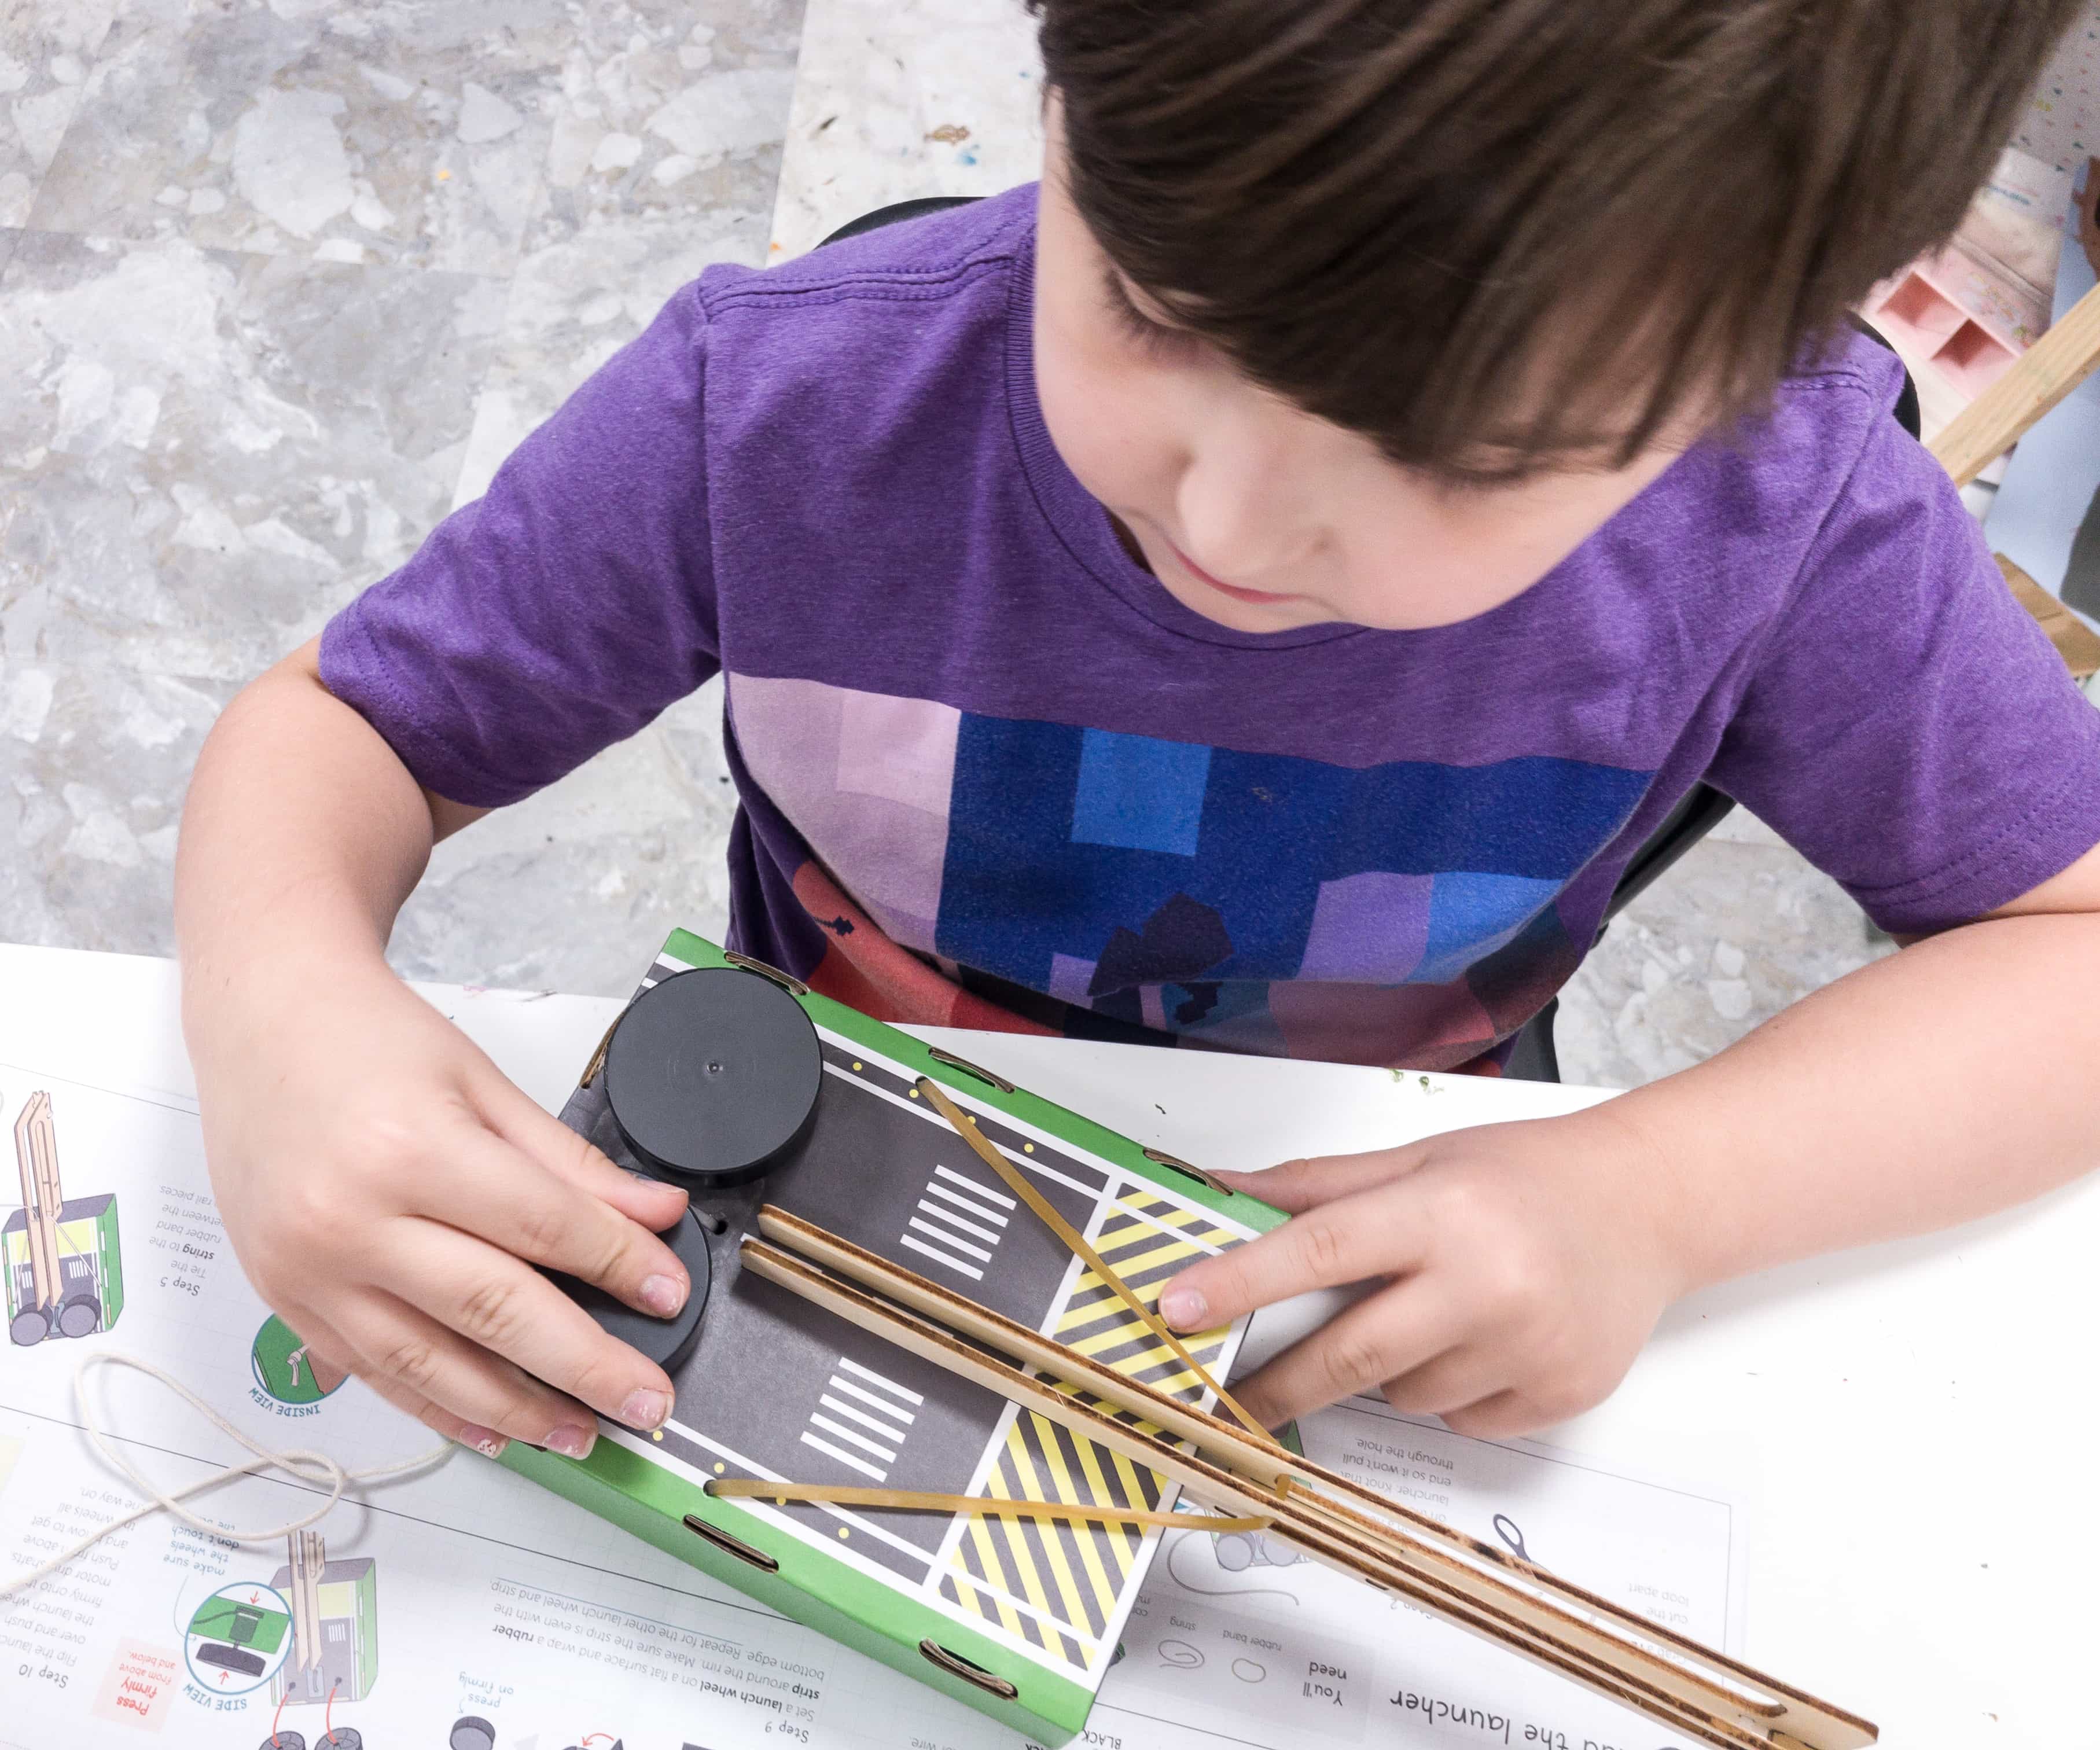
Once the rail is installed, you can now add the rest of the parts of the launching pad including the motors, the launch wheels, the strings, and the rubber band as well.

This is how the launch pad should look like when done.
The wheels should be pressed firmly, but you should make sure that the wheels won’t touch the base because it may derail or slow the wheel’s rotation.
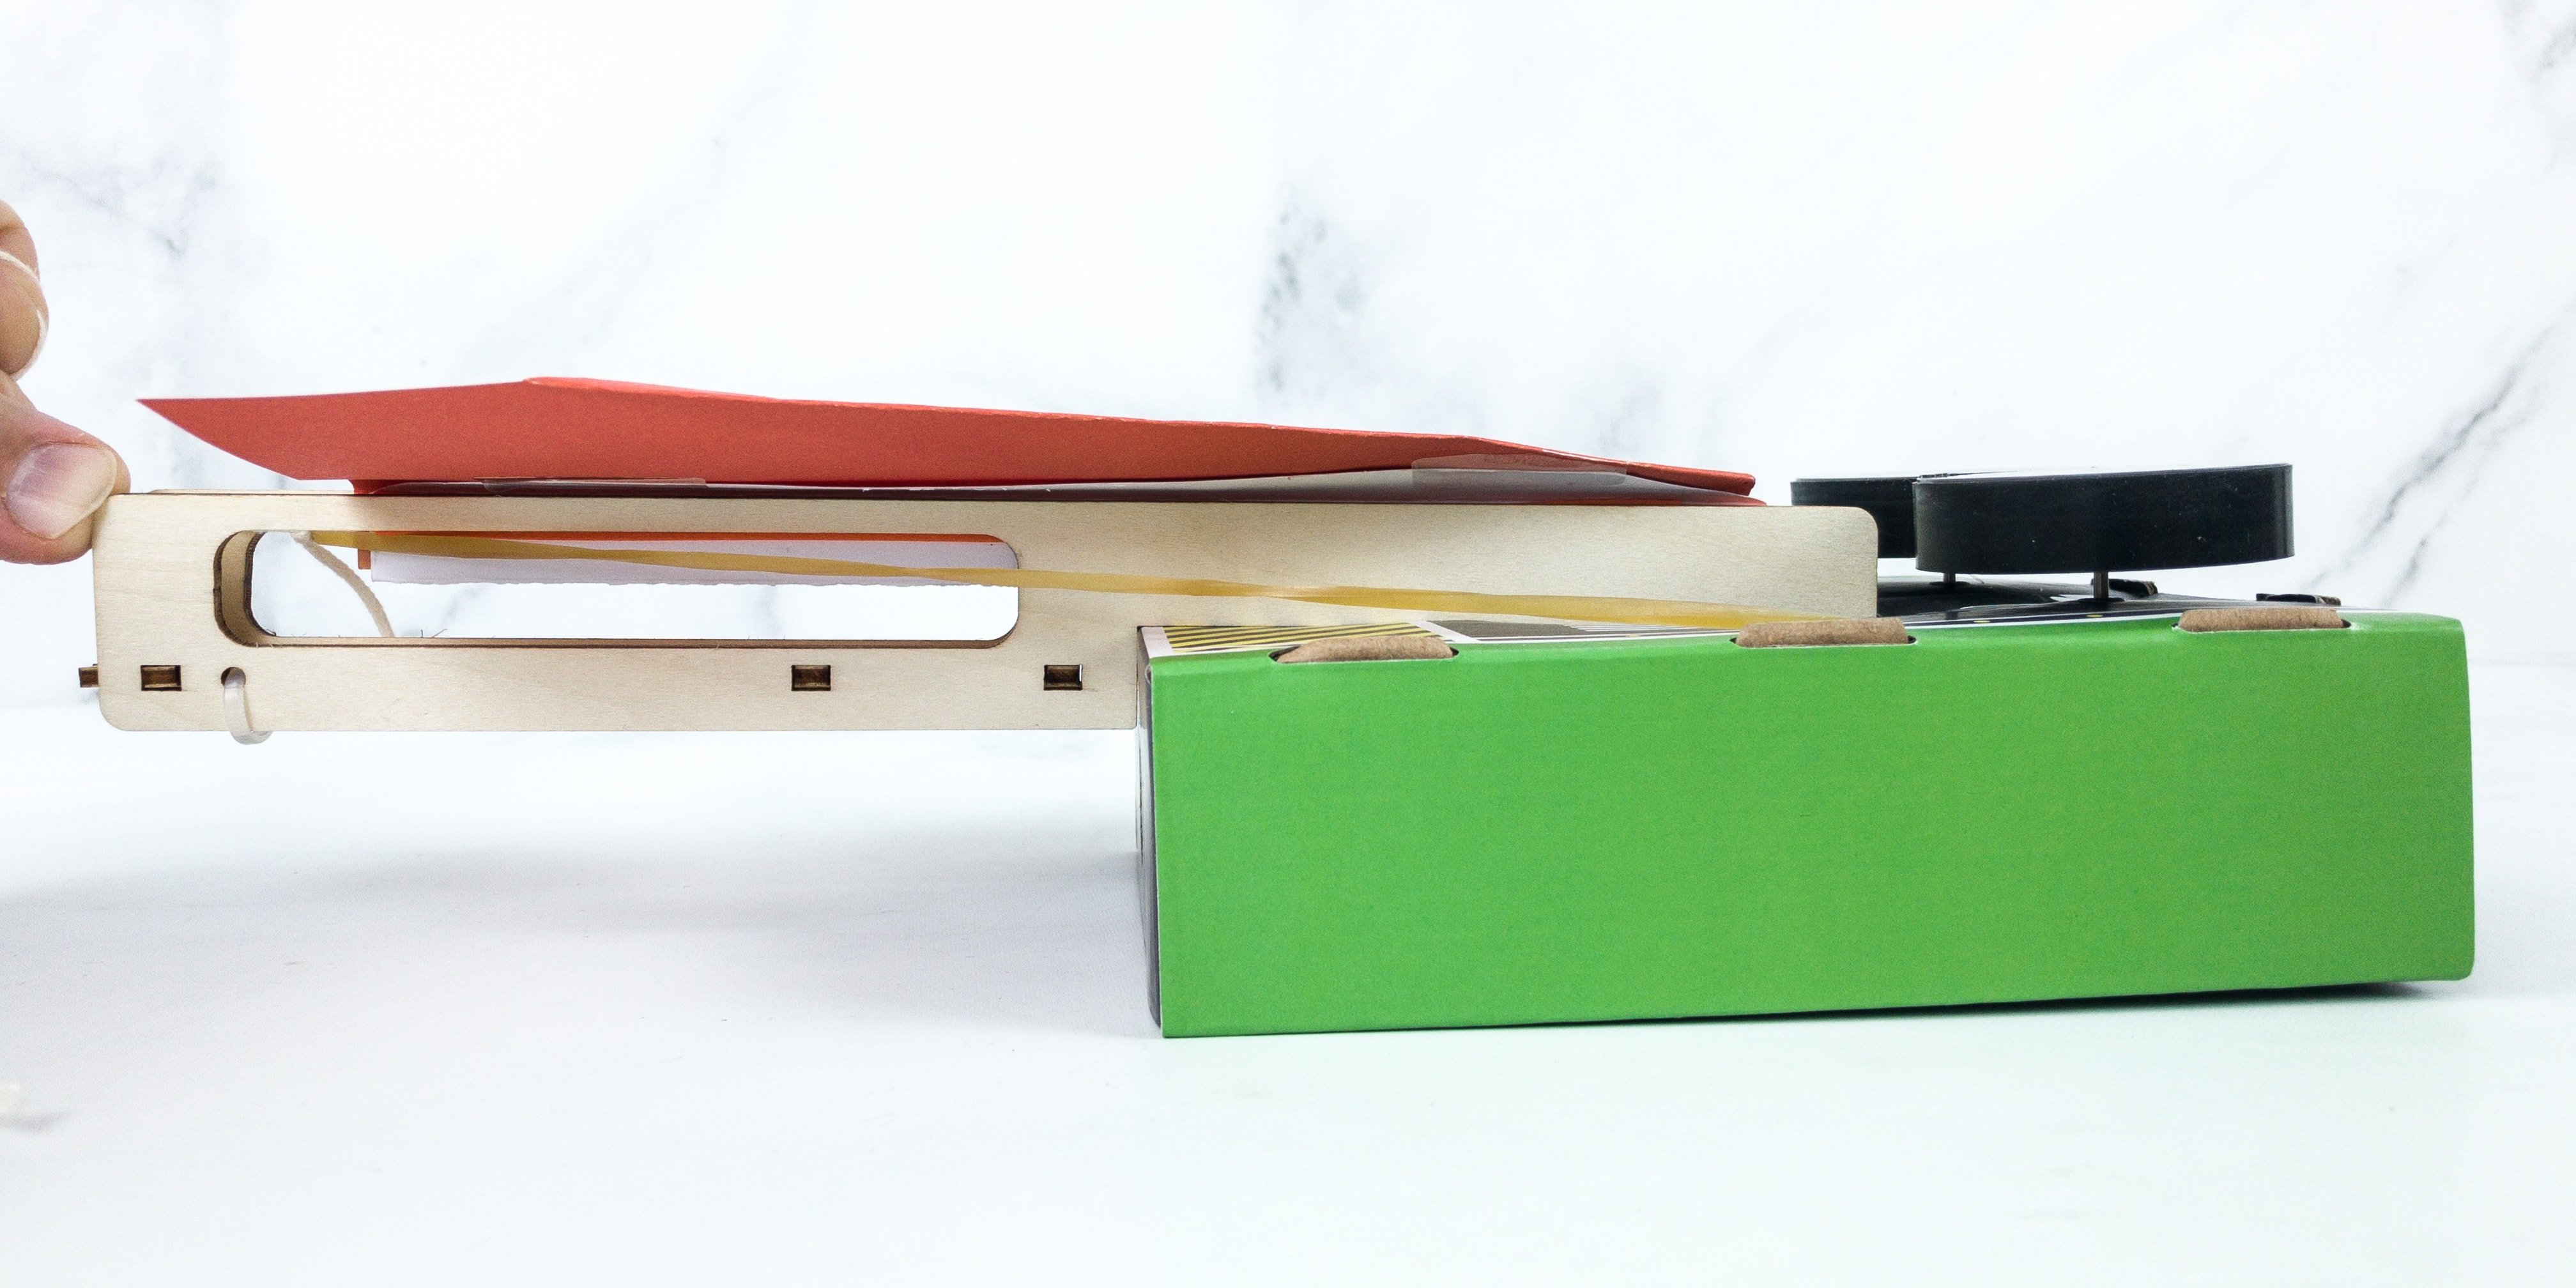
Test your rubber launcher by pulling it out using the string, and make sure that it would reach the end of the rail.
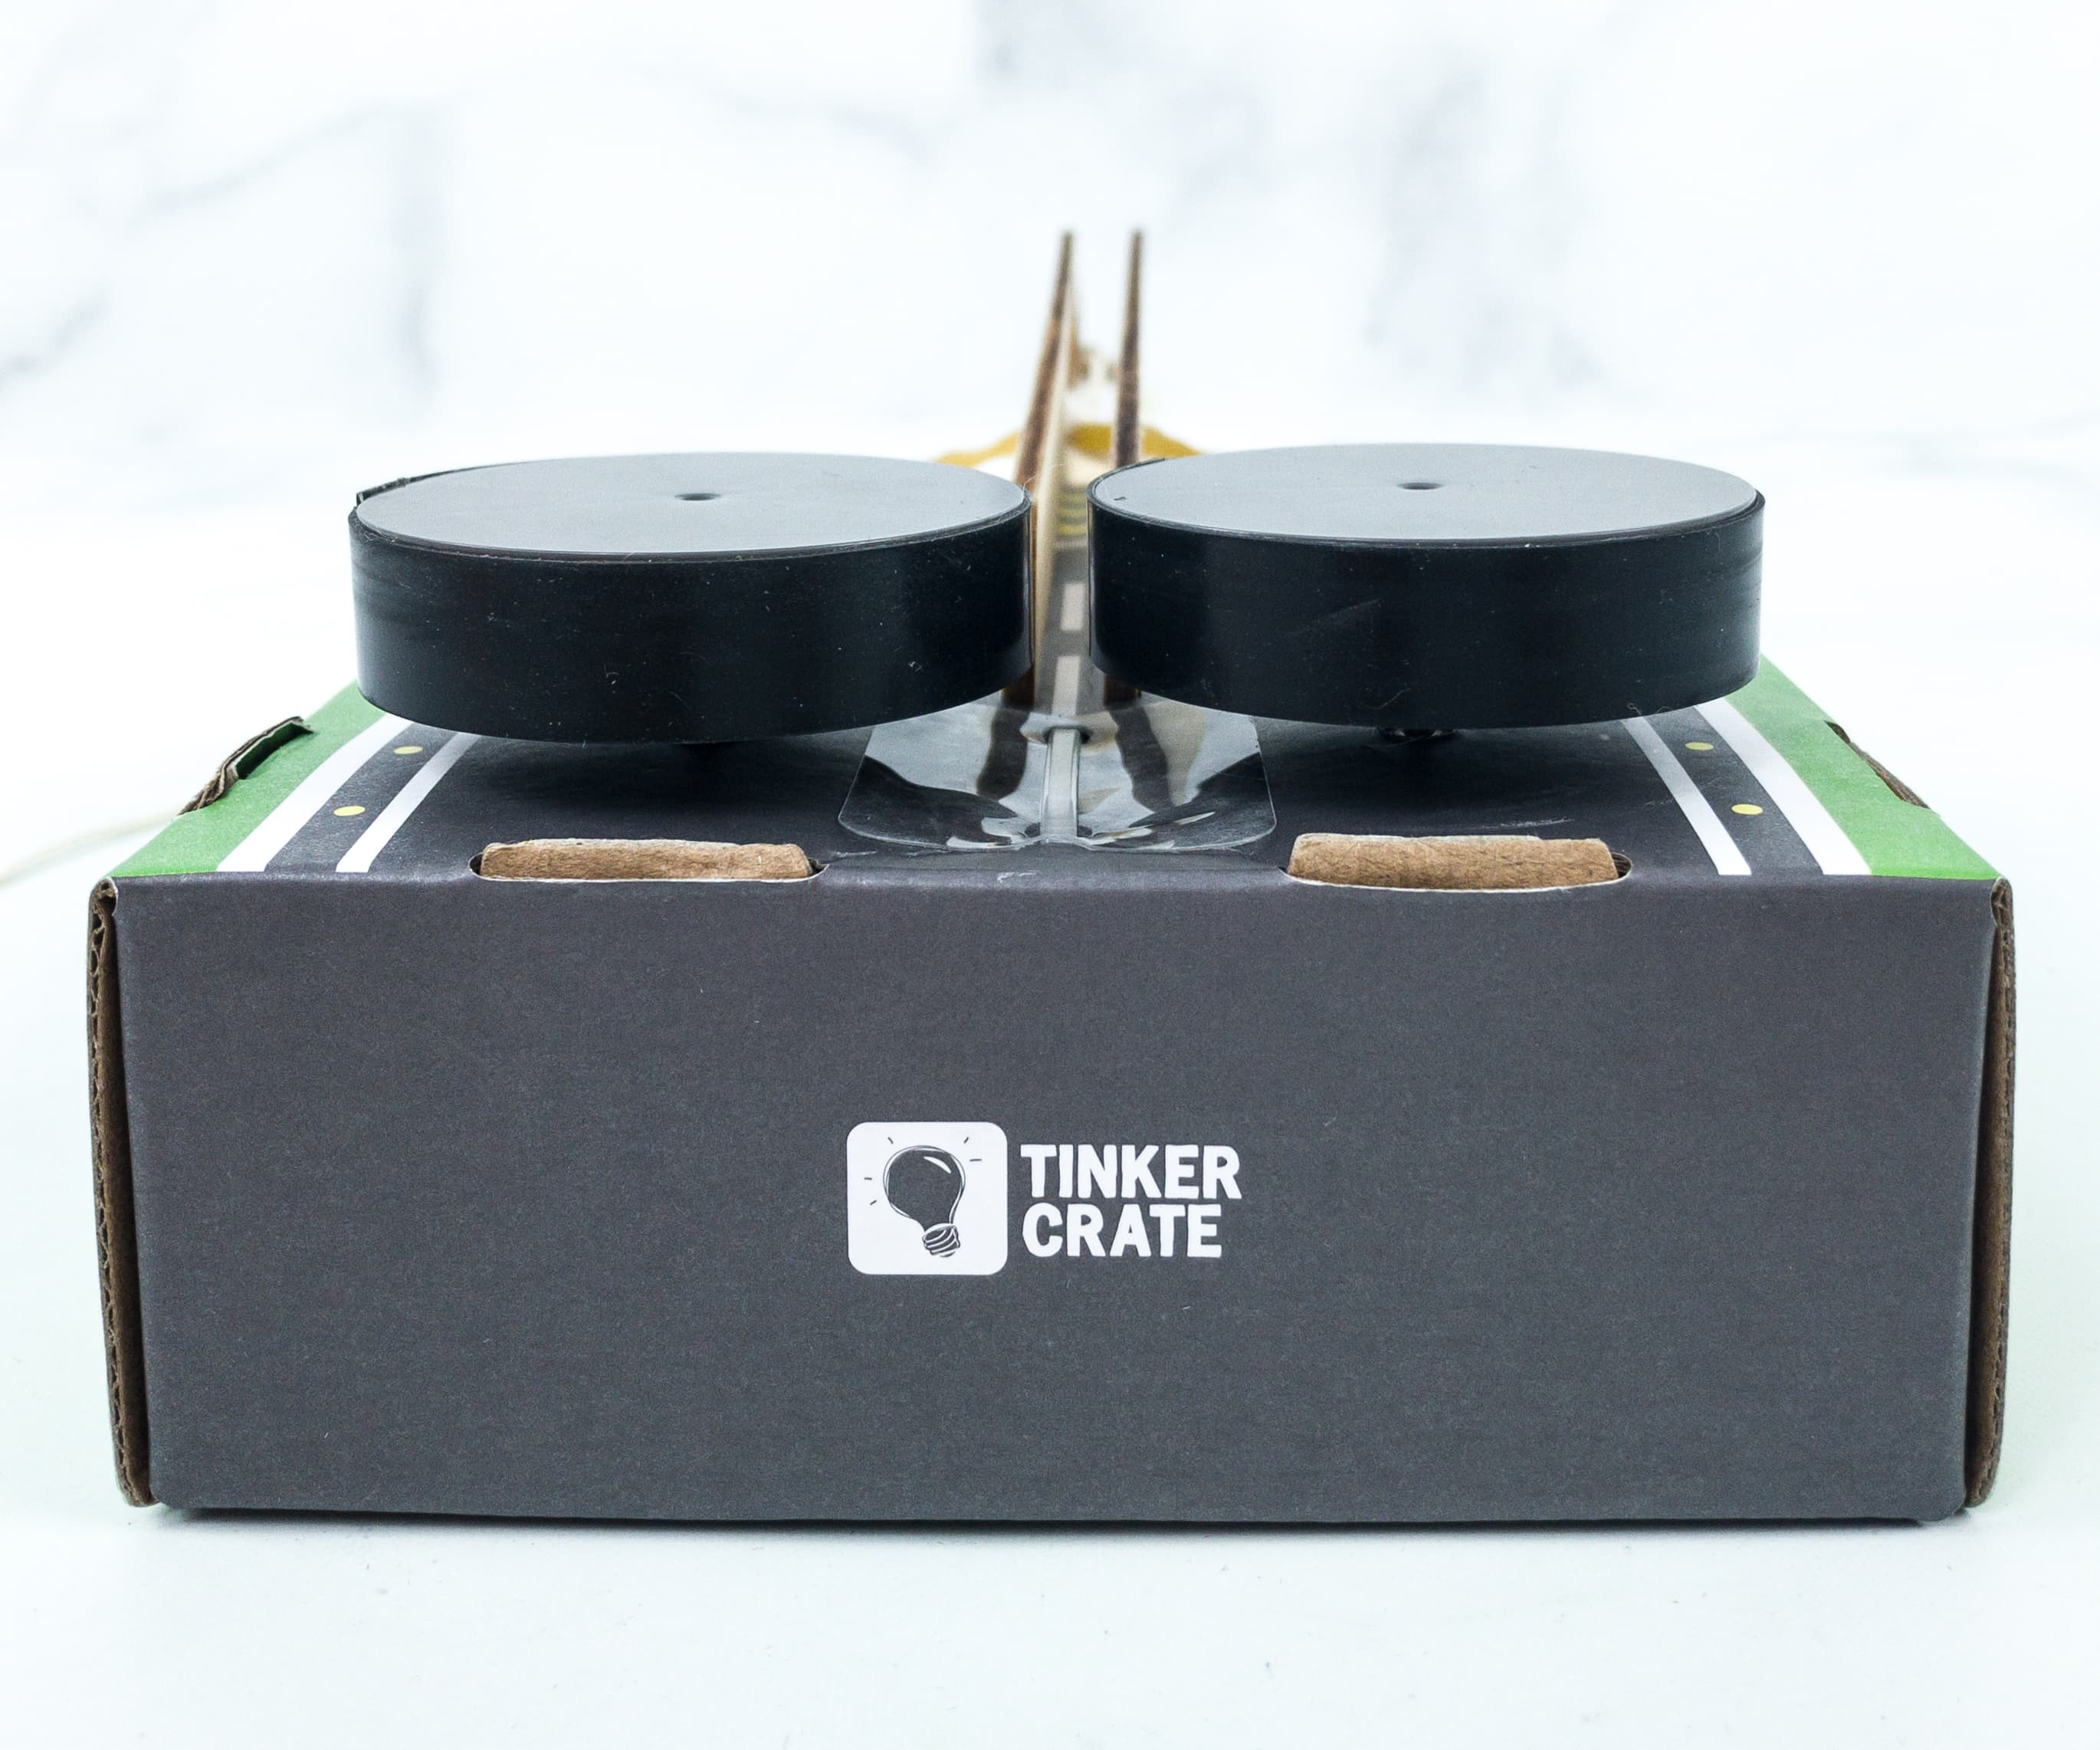
The wheel should also be rotating on the complete opposite sides. The left wheel should turn counterclockwise while the right wheel should turn clockwise.
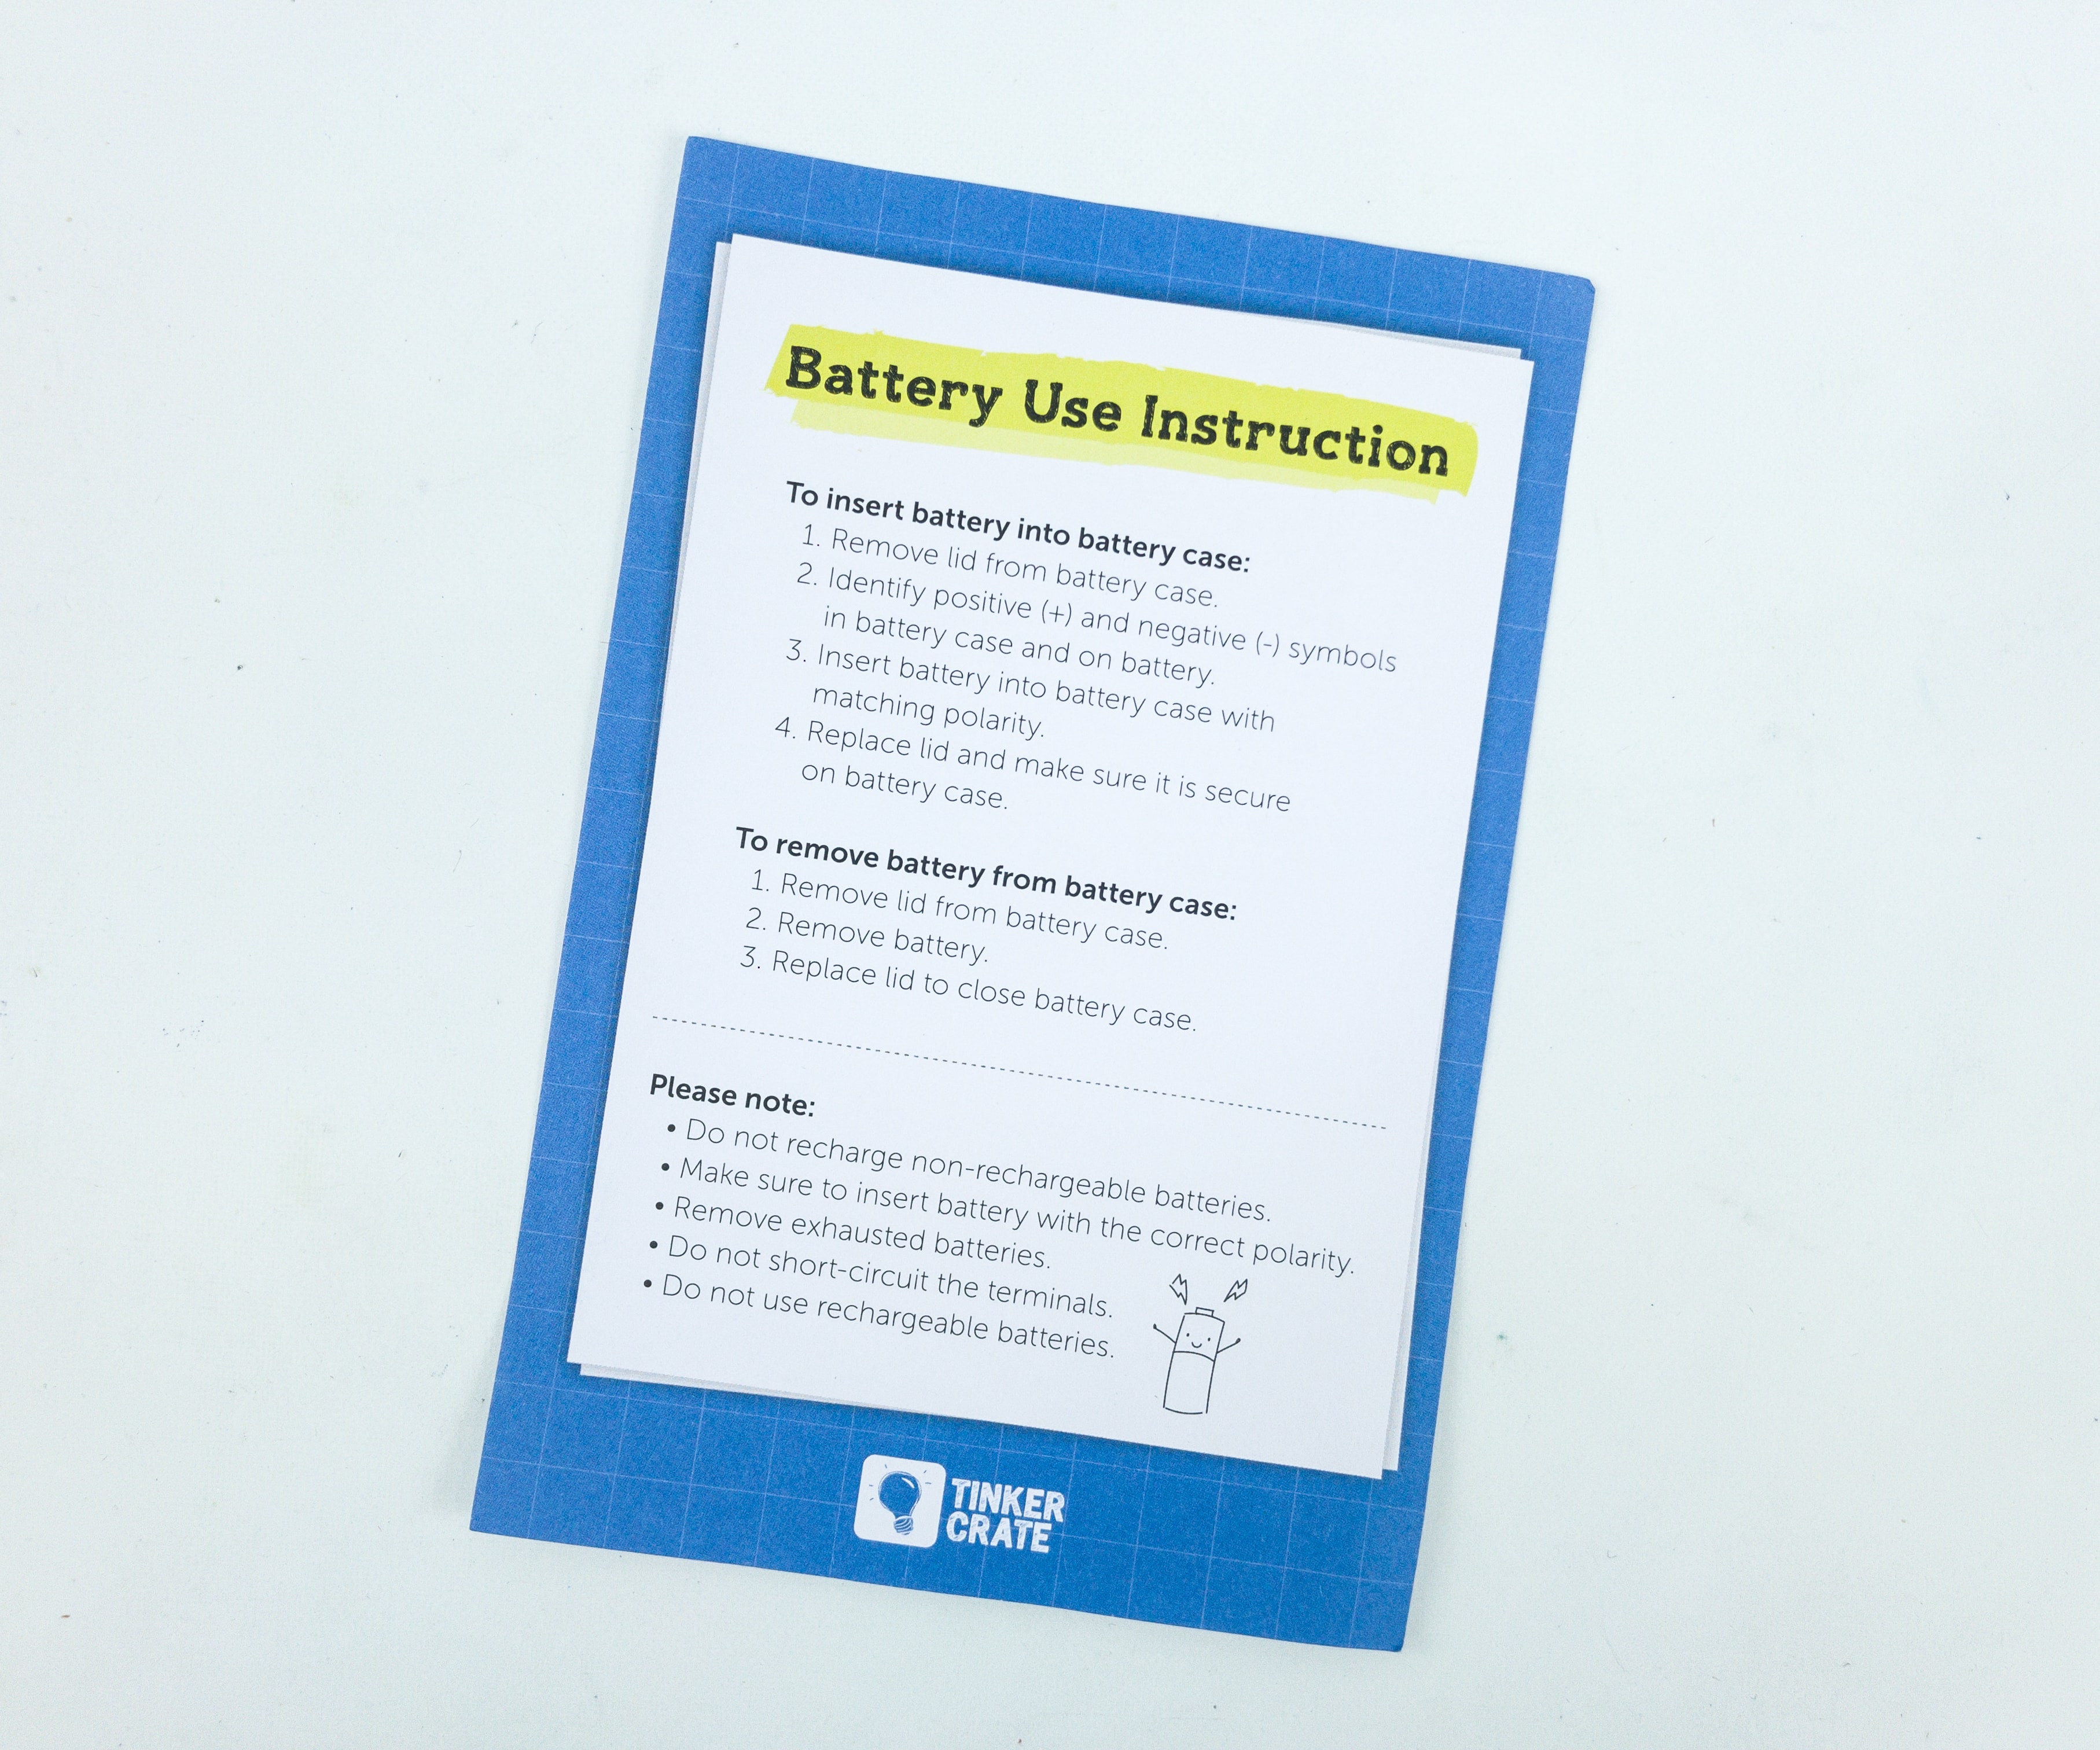
The sheet also features an instruction manual for the proper usage of battery. It teaches you how to insert and remove the batteries on the case.

After we’re done with the airplane launcher, it’s time to work for the airplane using these specialized airplane paper.
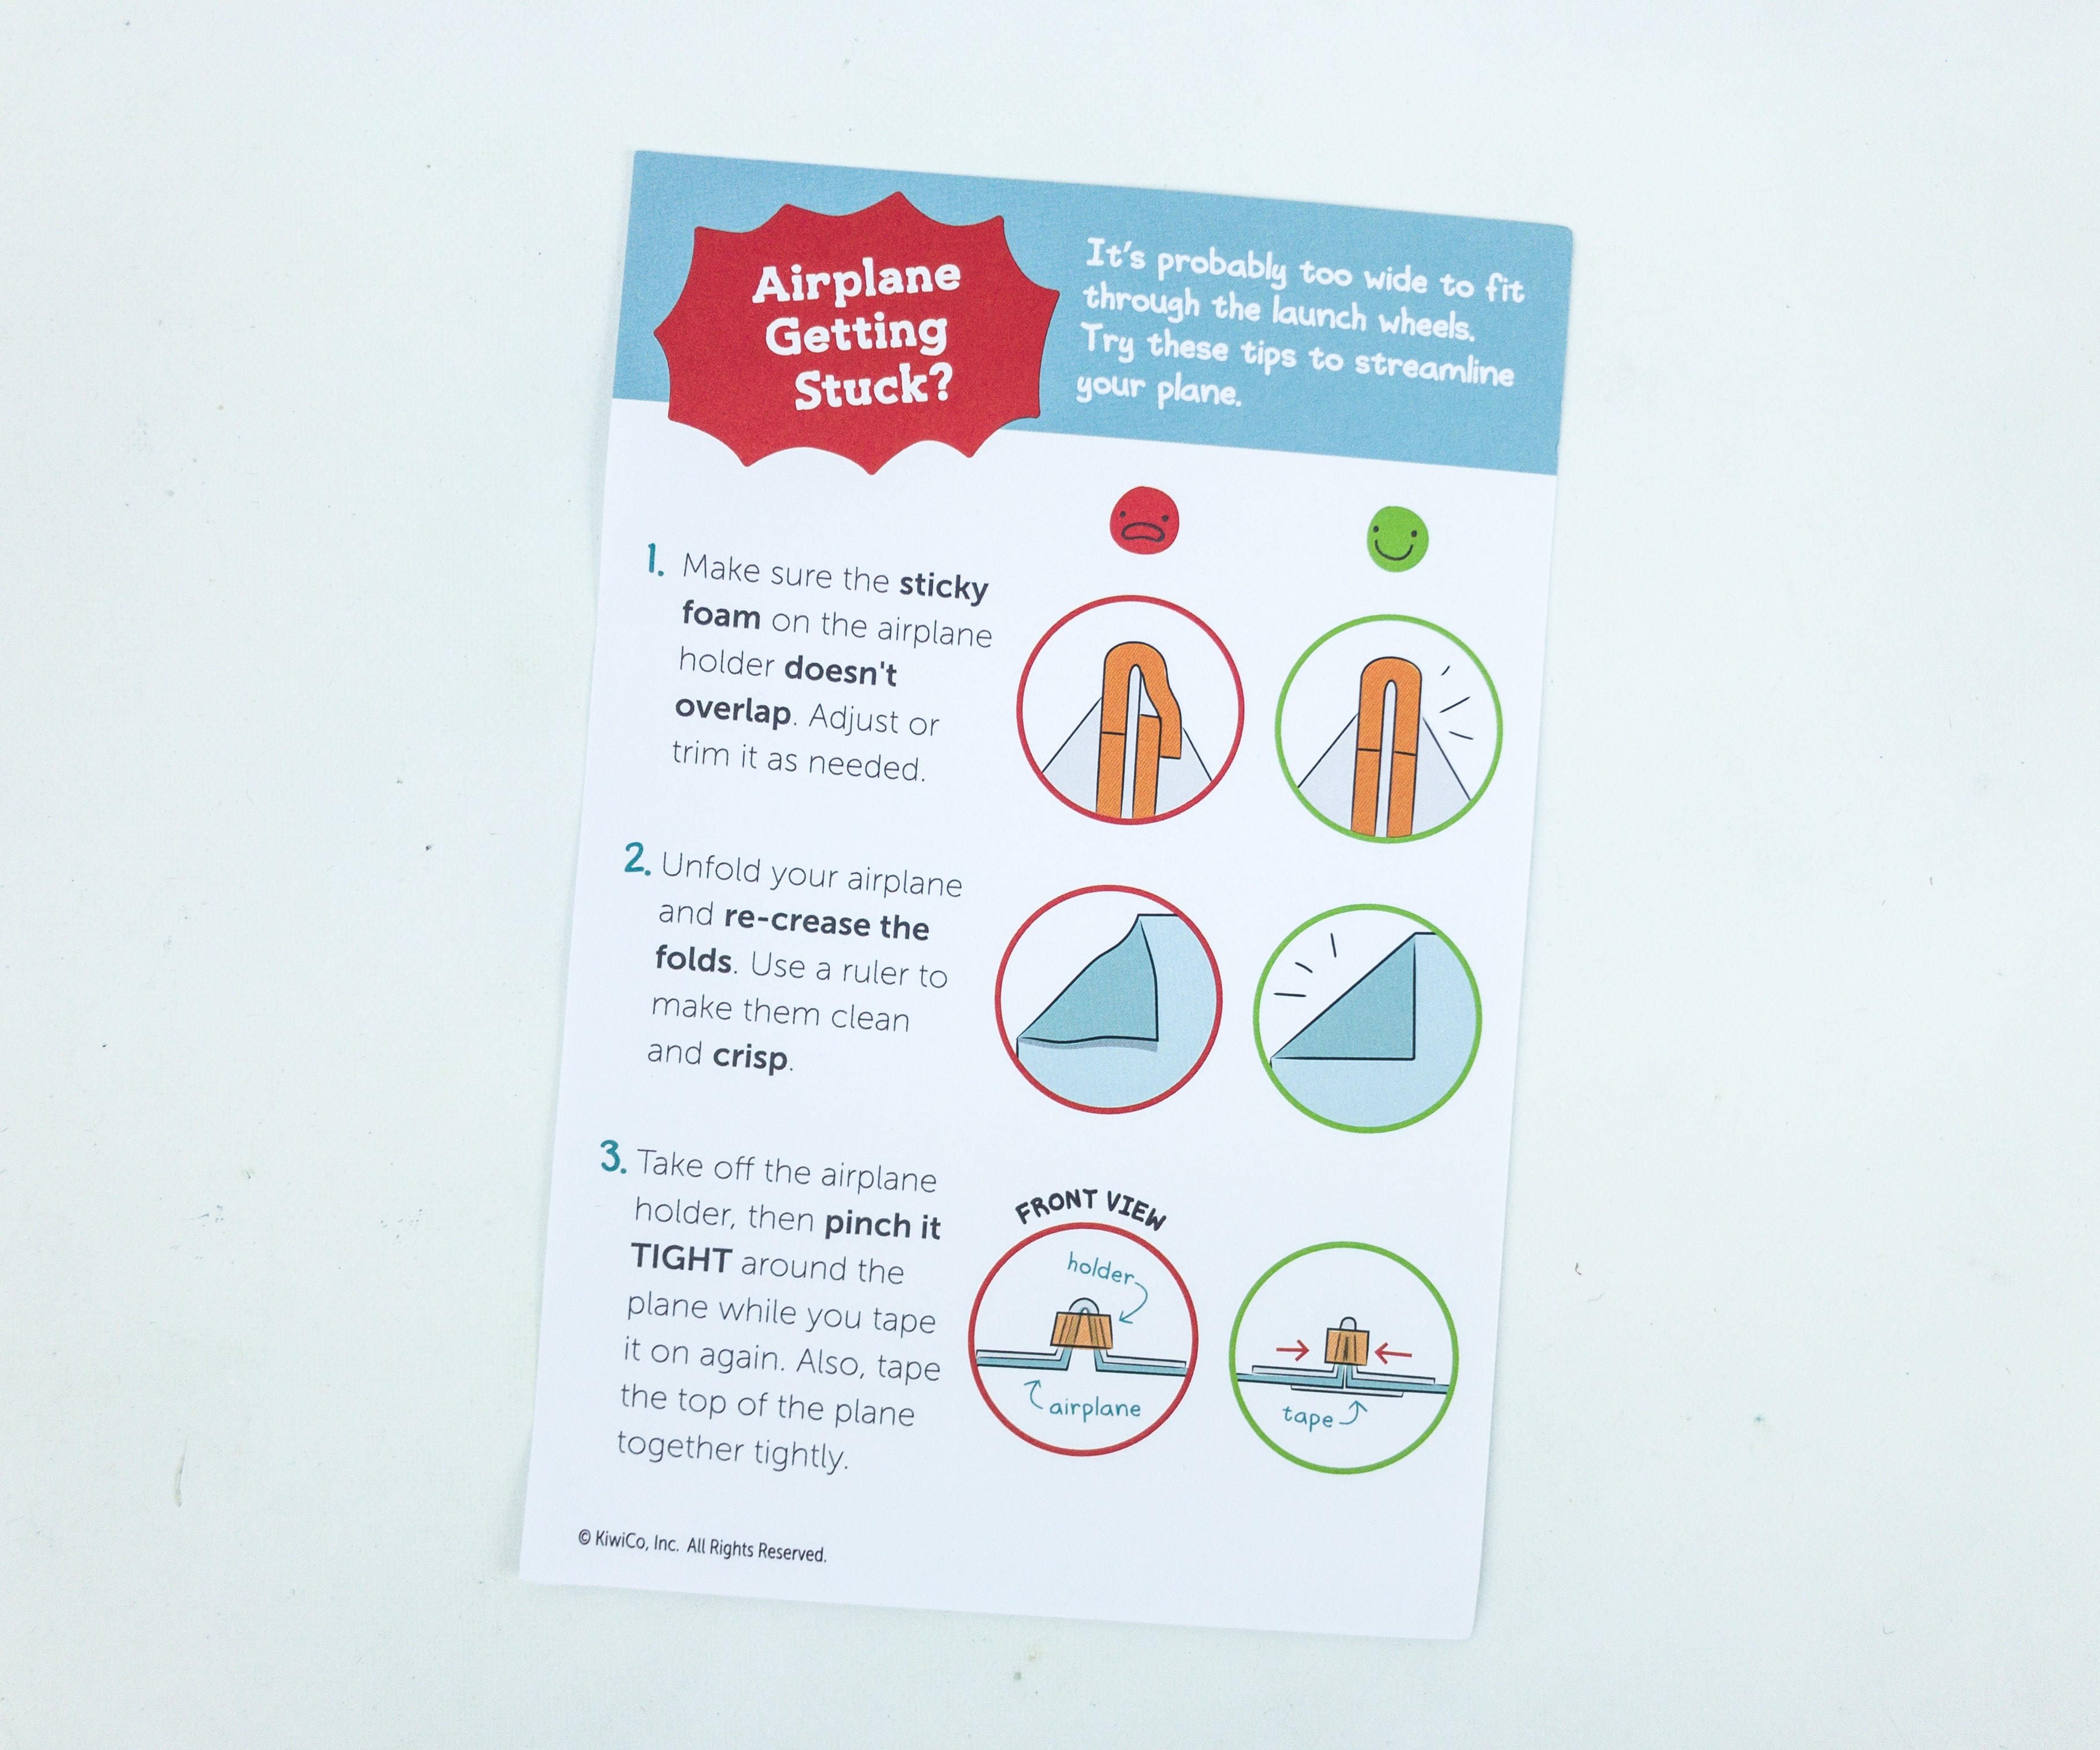
Check out these three simple tips to avoid your plane from being stuck and achieve a smooth launching!
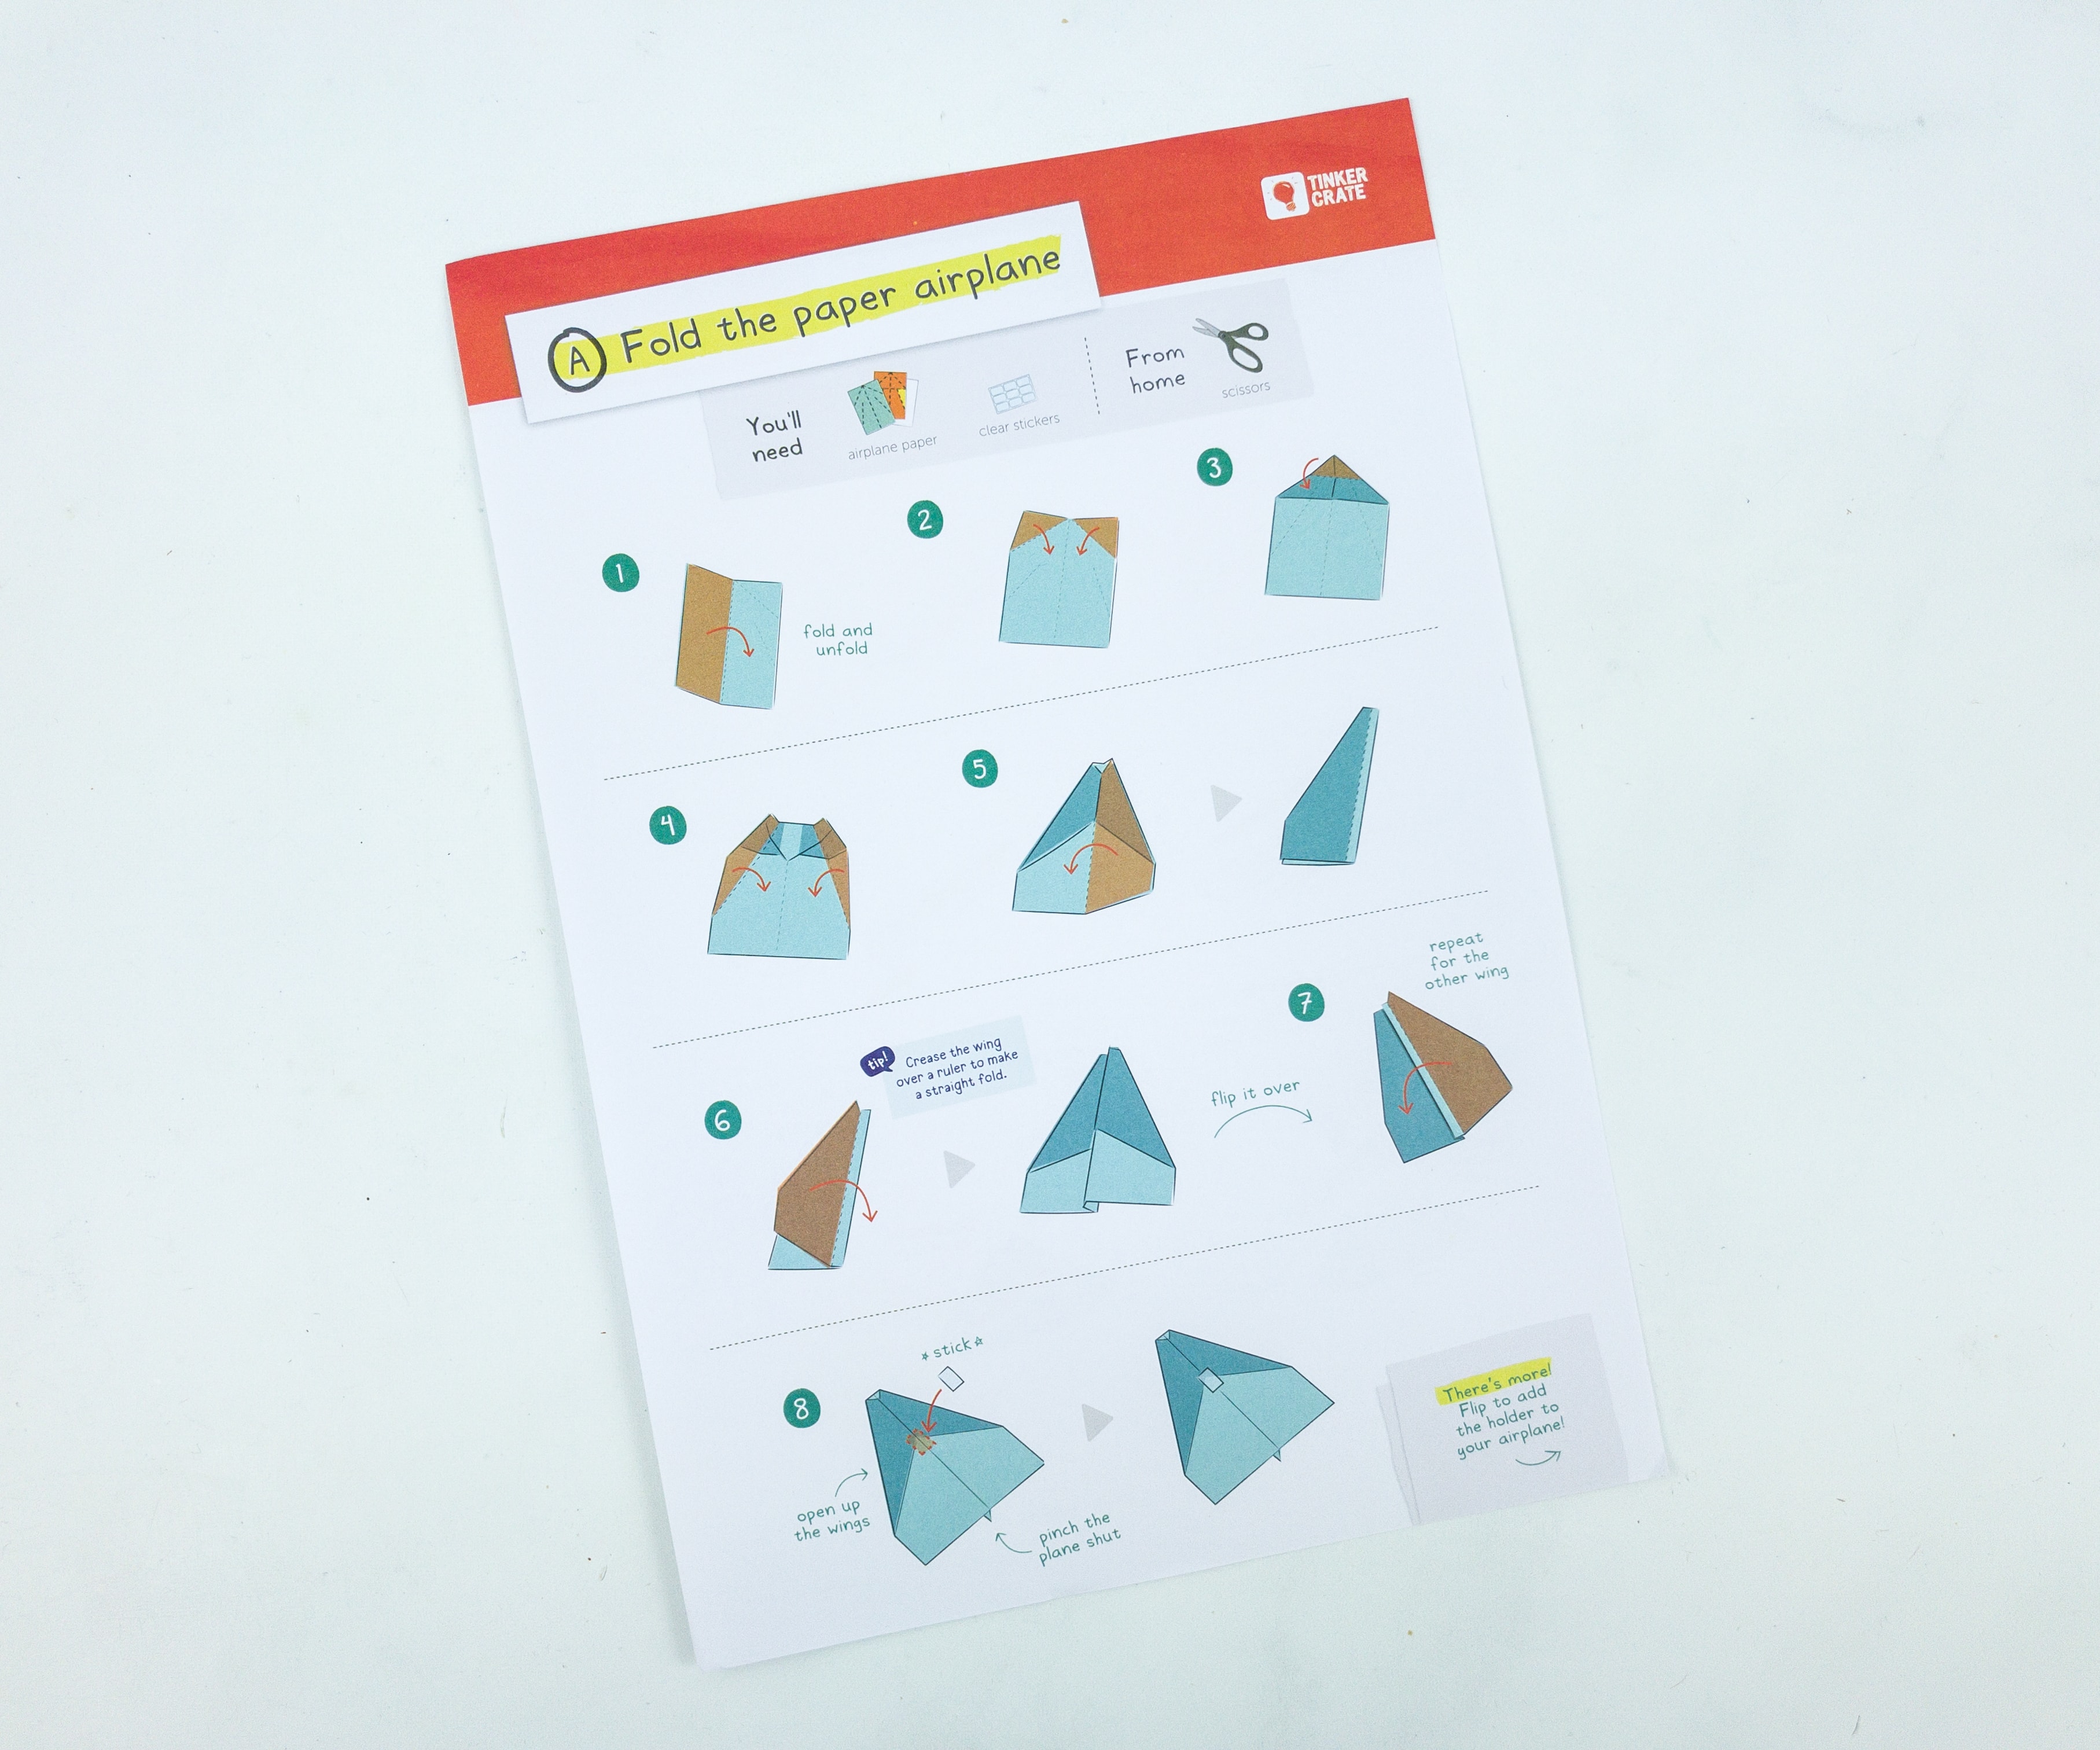
The back of the card features 8 simple steps to make your own paper airplane!

For our airplane holder, we used an orange sticky foam, paper airplane holder, clear stickers, and completed paper airplane.
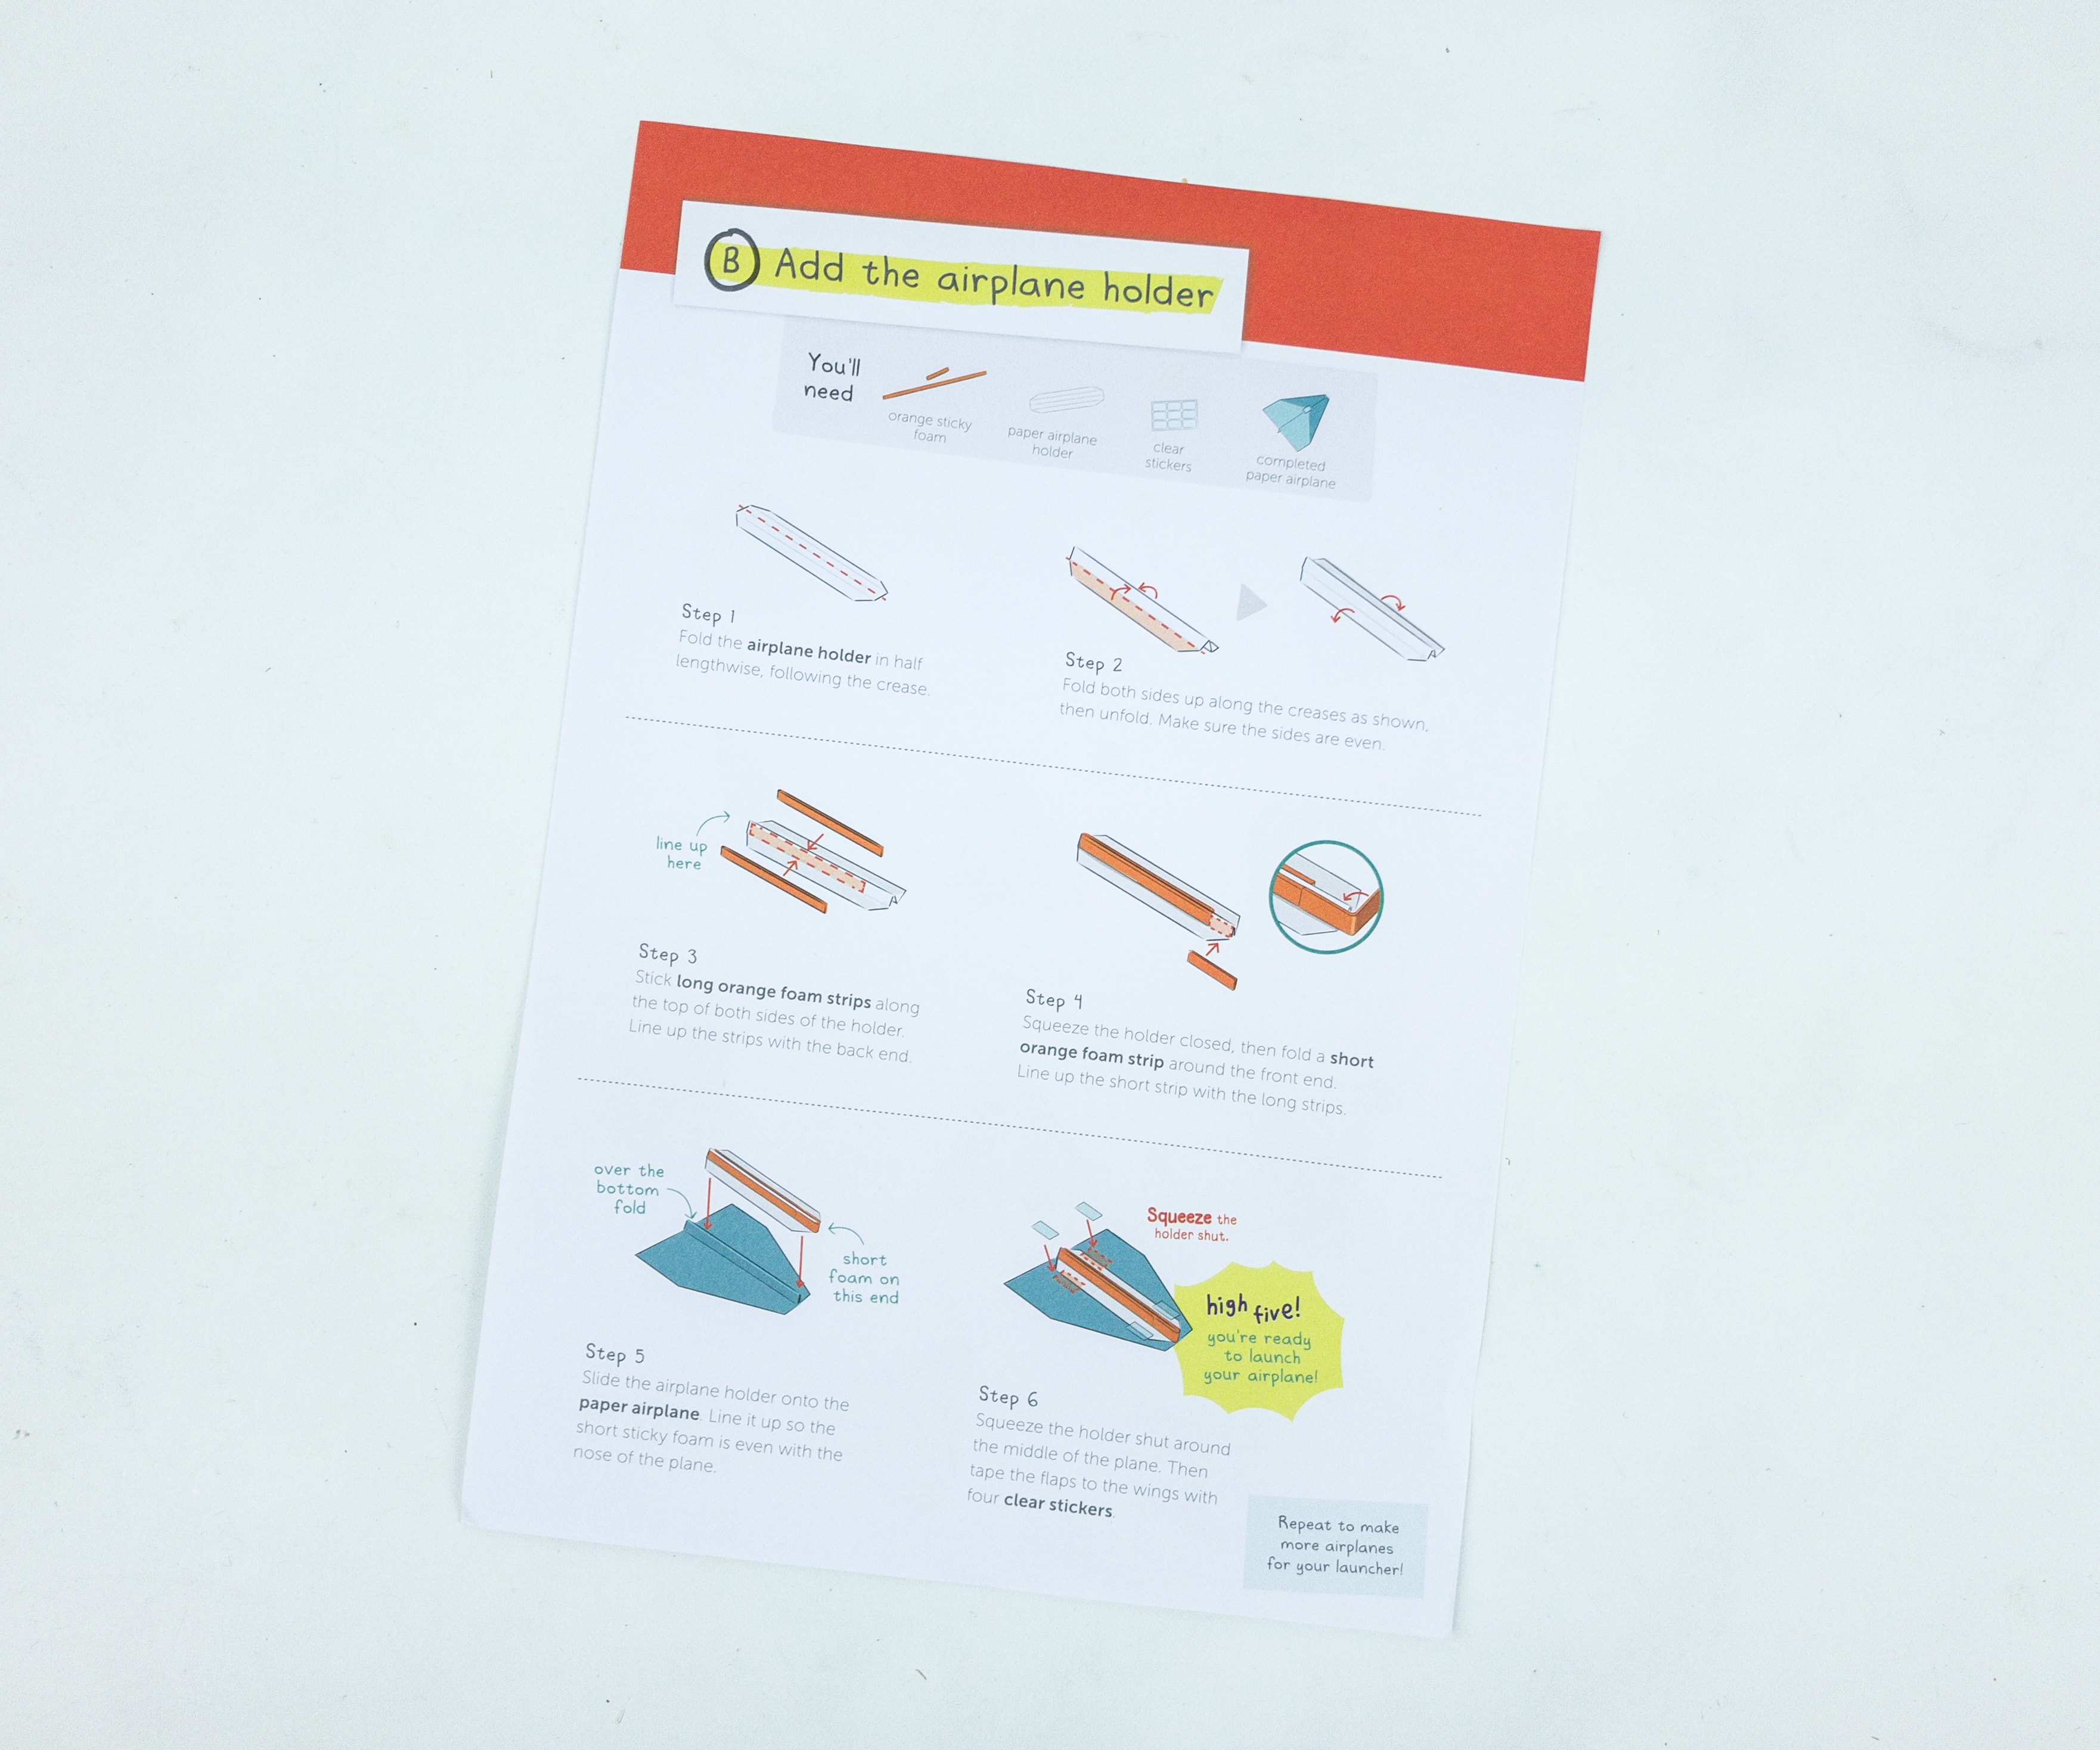
Fold the airplane holder in half lengthwise and then fold both sides along the creases, it will serve as the airplane’s support. Just make sure that the folded sides are even.
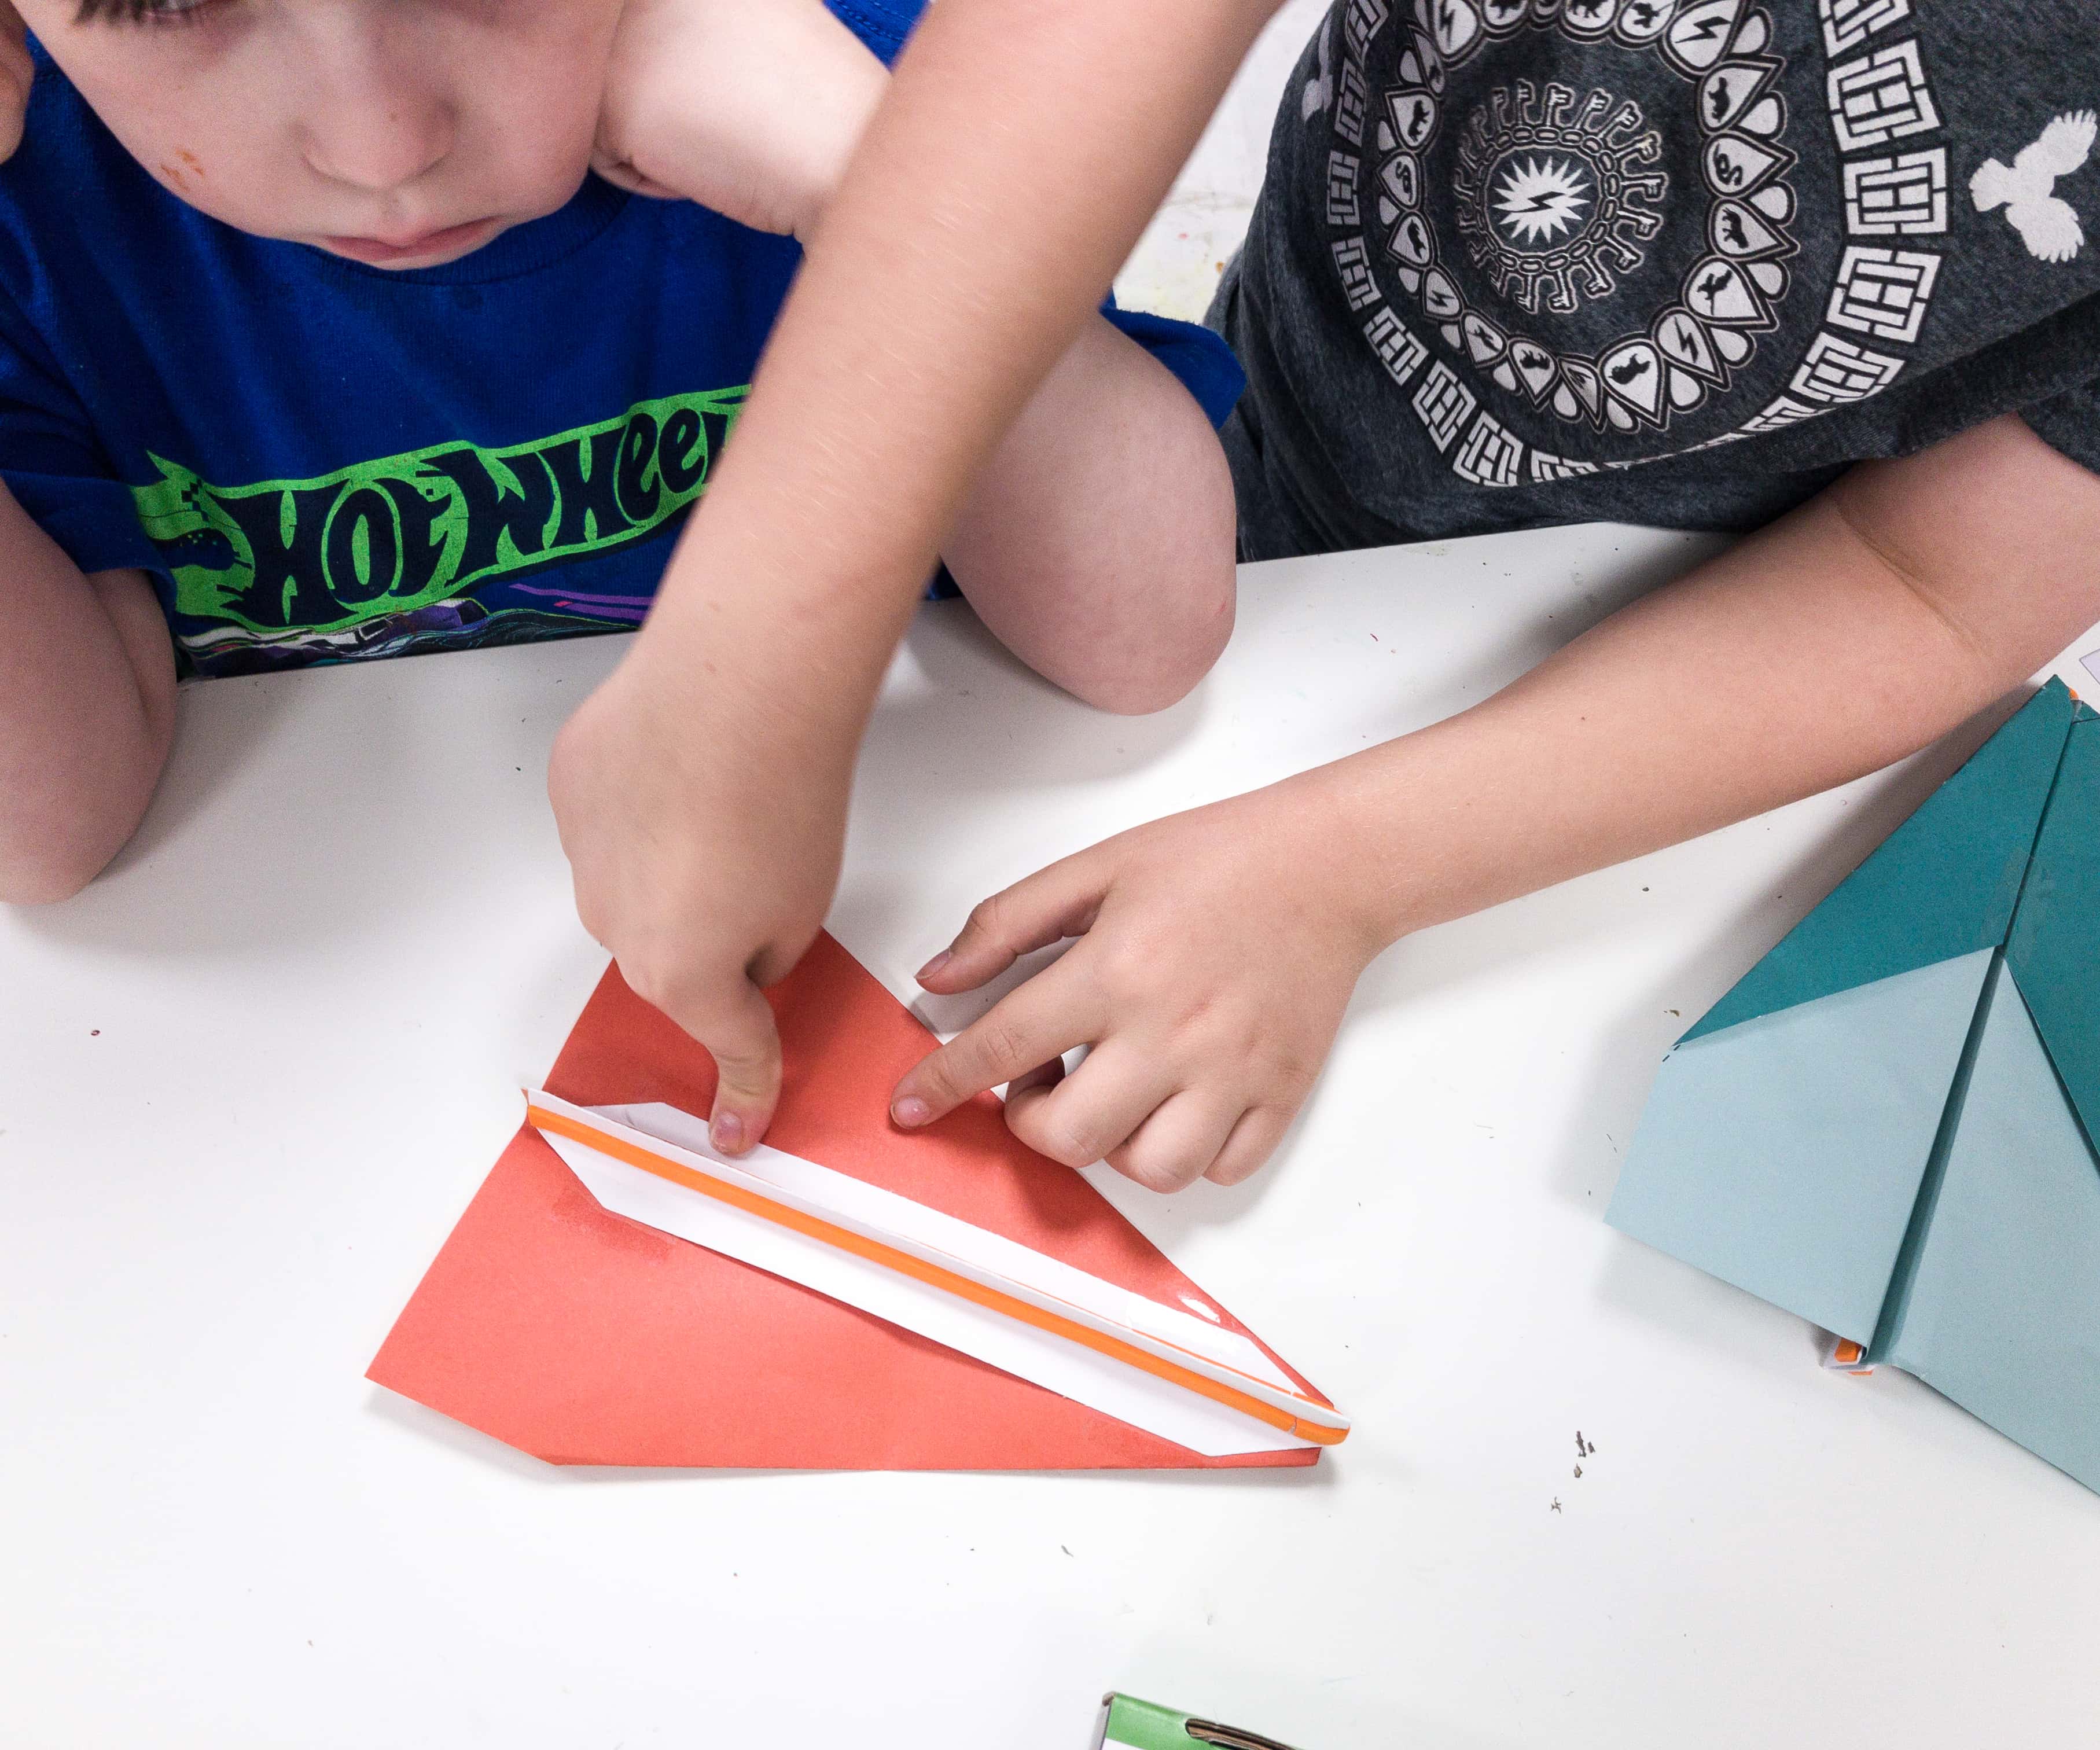
For the next step, my kids stuck the long orange foam strips along the top of both sides, and locked the front end using the short orange strip.
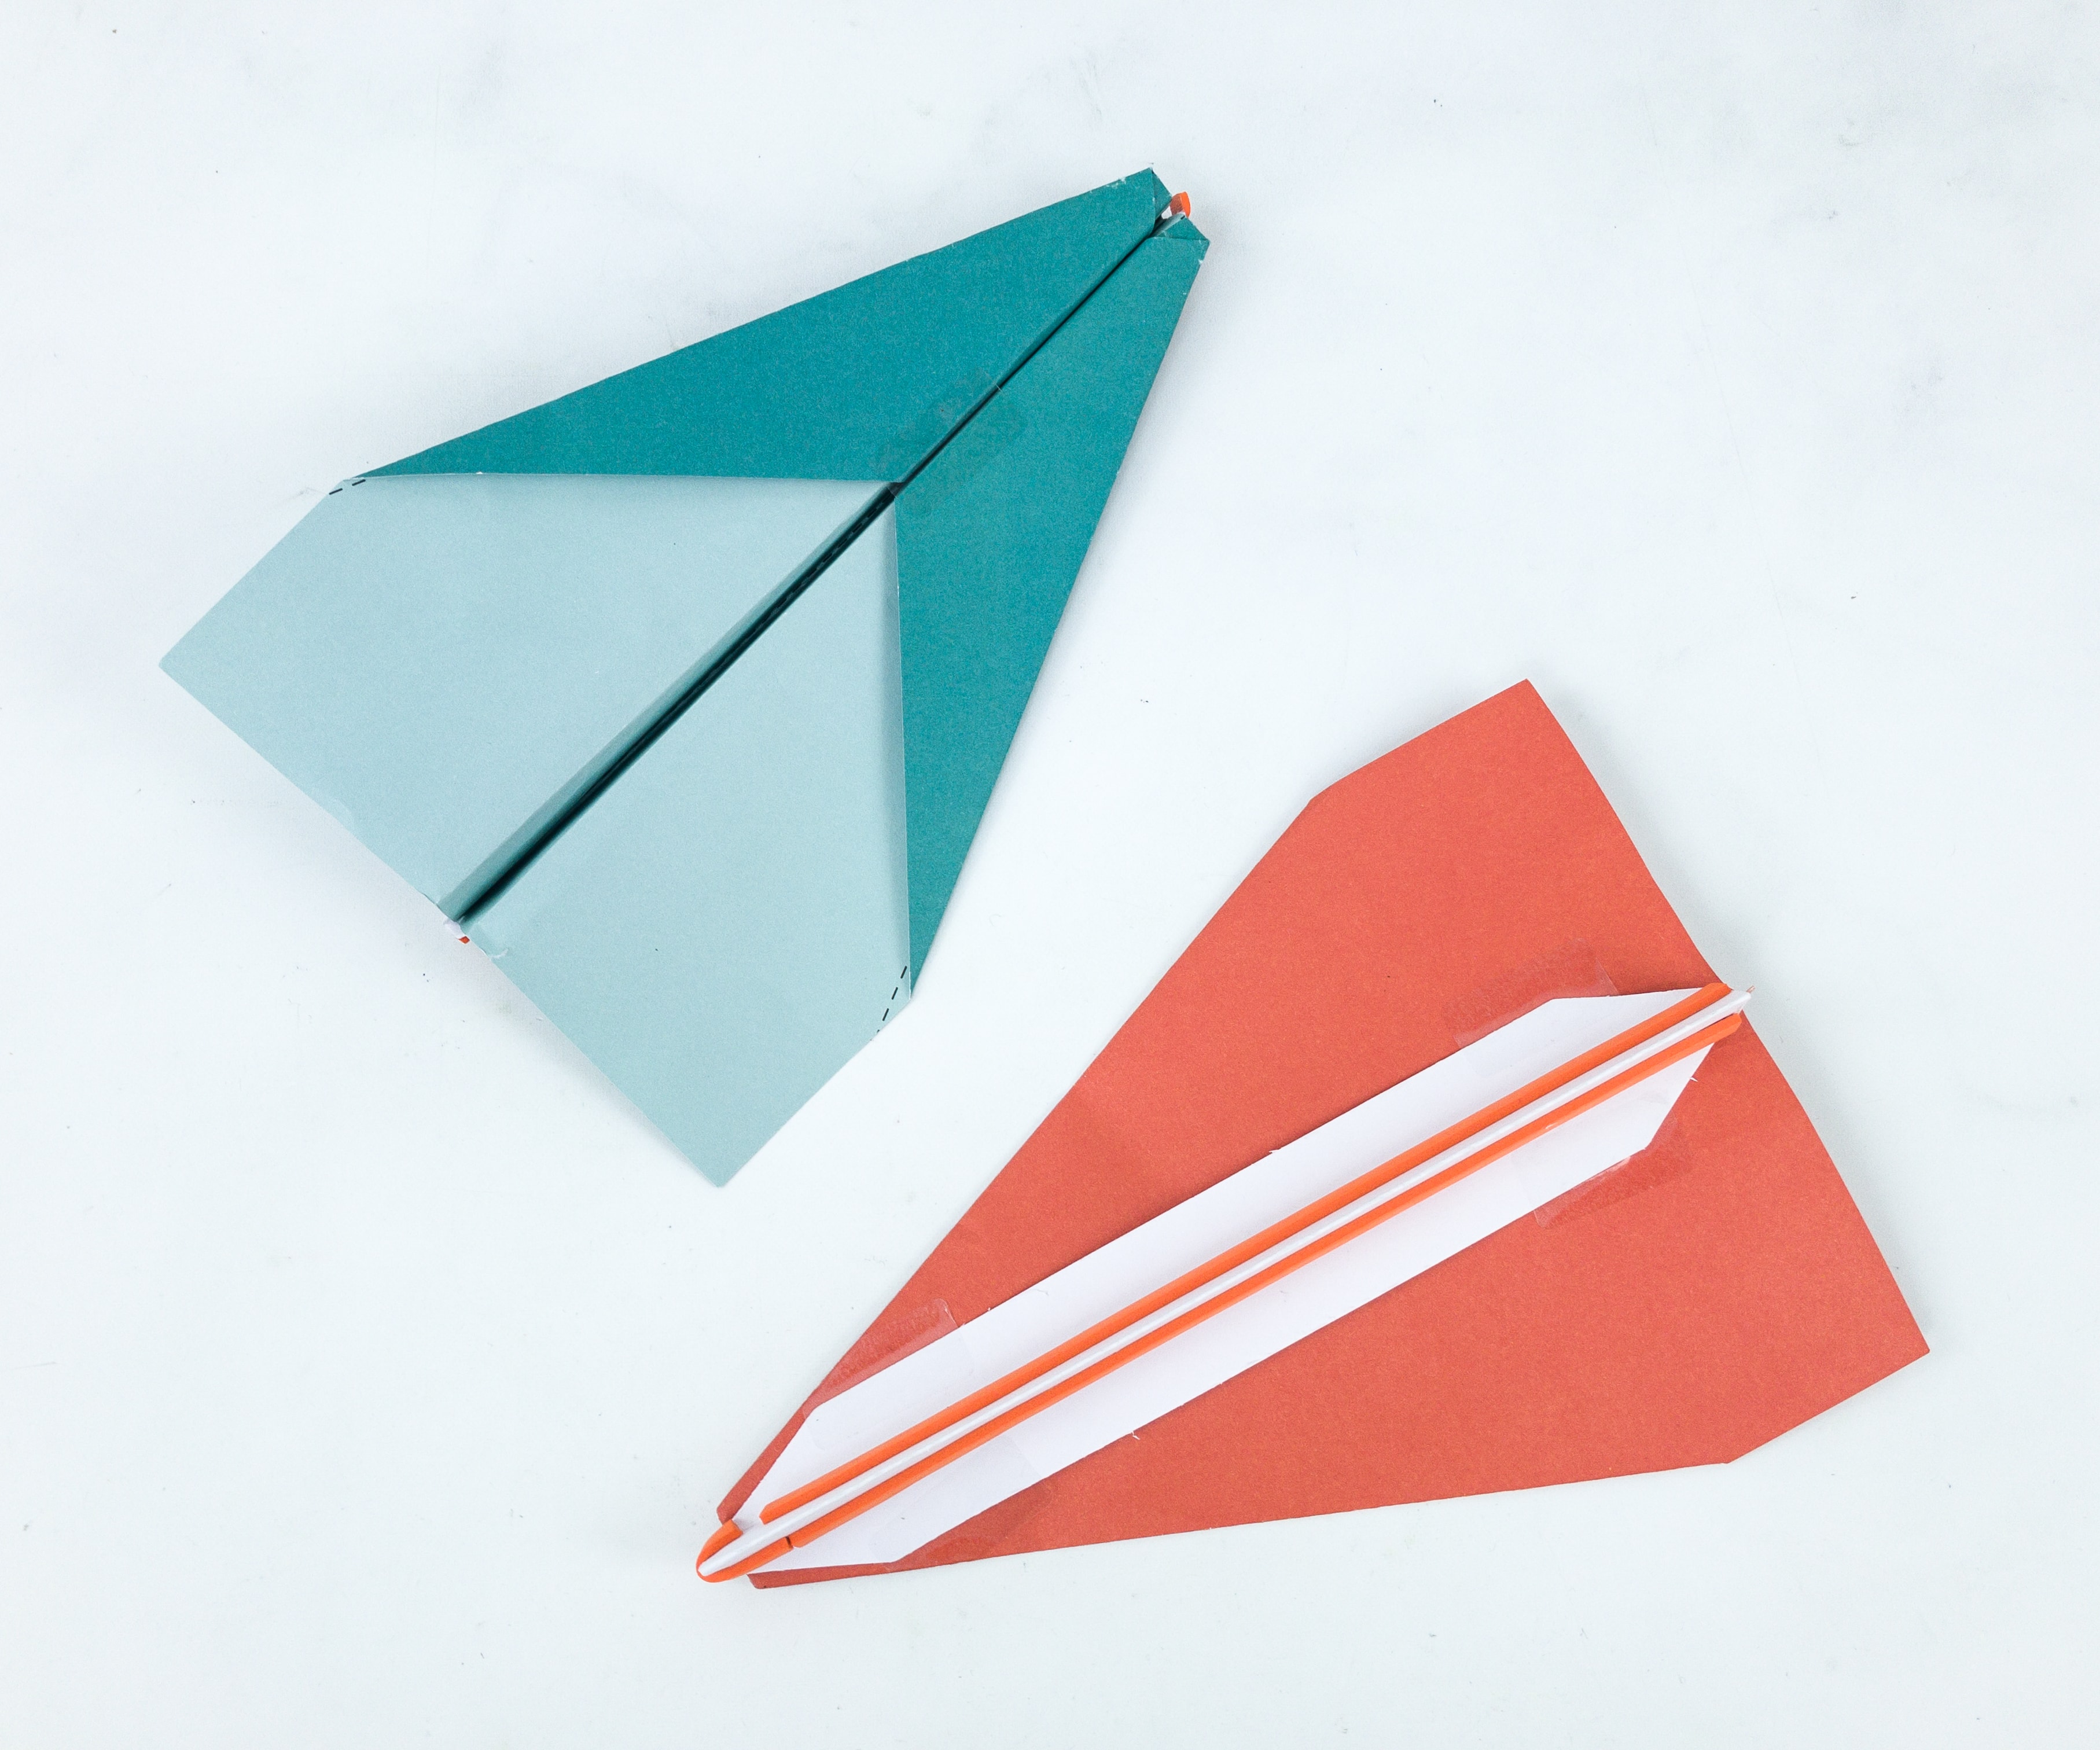
Lastly, squeeze the holder shut around the middle of the plane and tape the flaps to the wings using the four clear stickers.
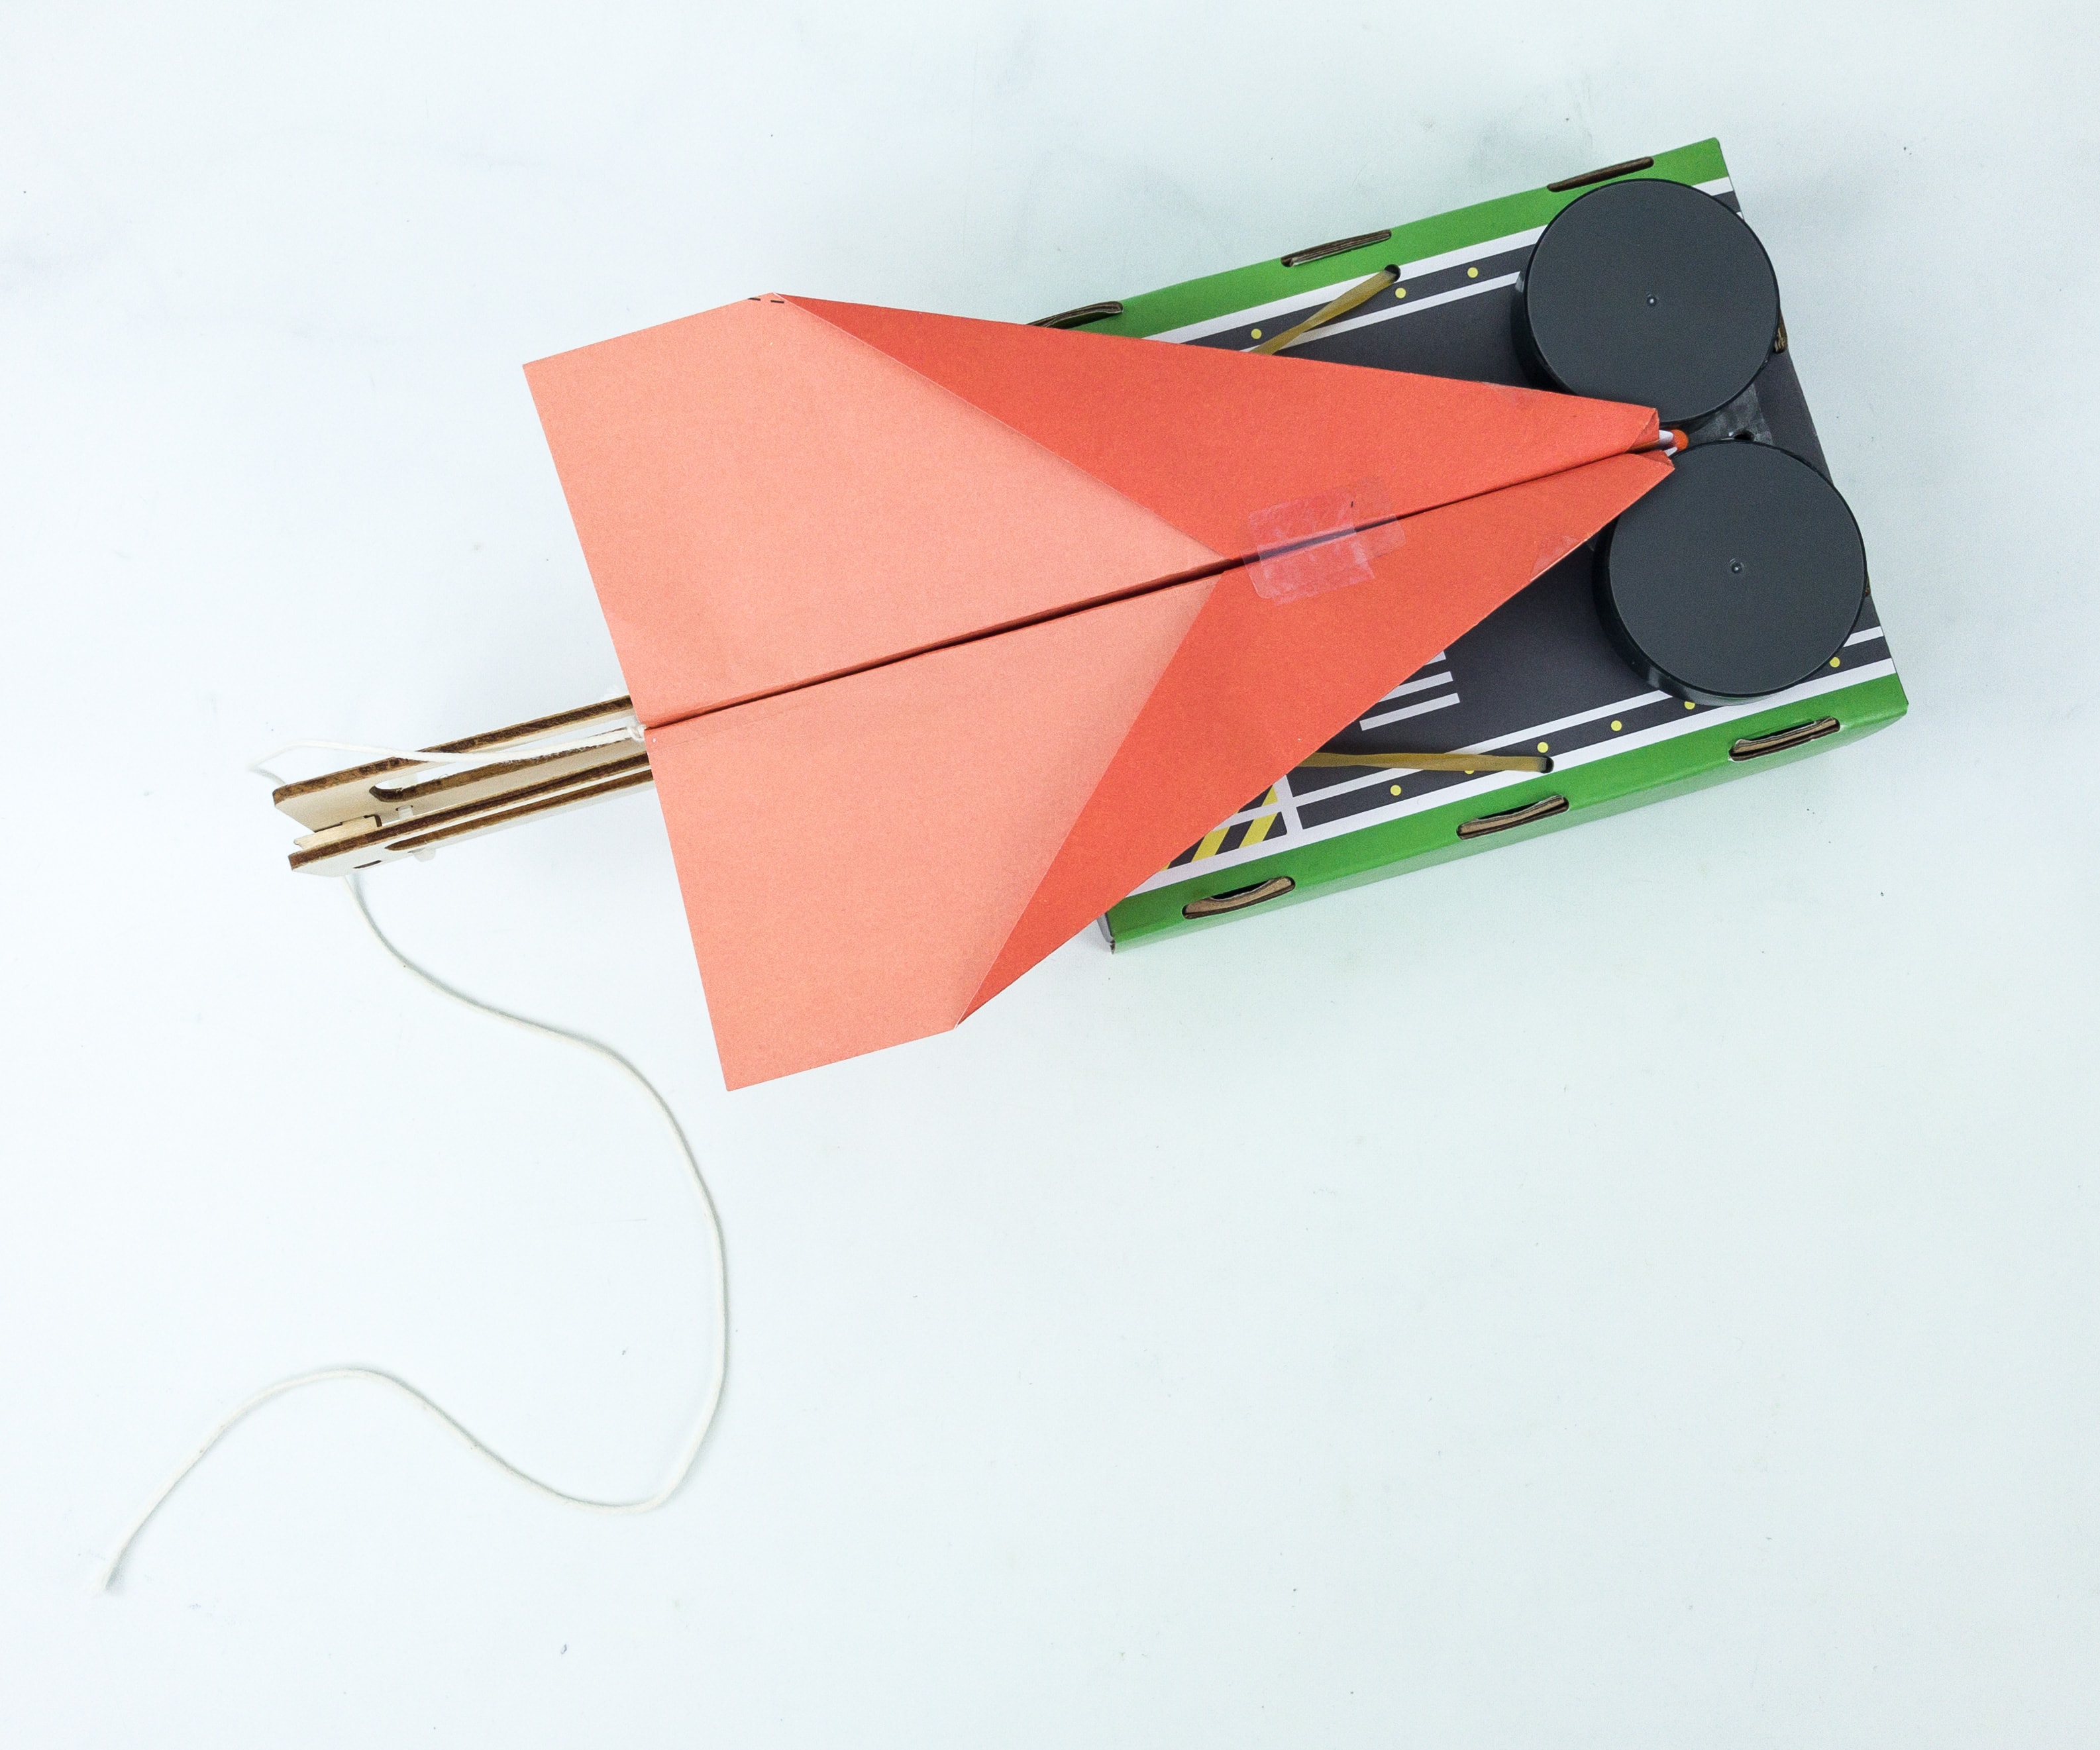
I think our paper plane is ready to fly!
Turn on the launch wheel, then pull the strings to the end of the rail, and put the paper airplane on top.

Make sure that the plane is properly placed on the rail. Once done, release the string and watch your airplane fly!
Tinker Crate Extensions
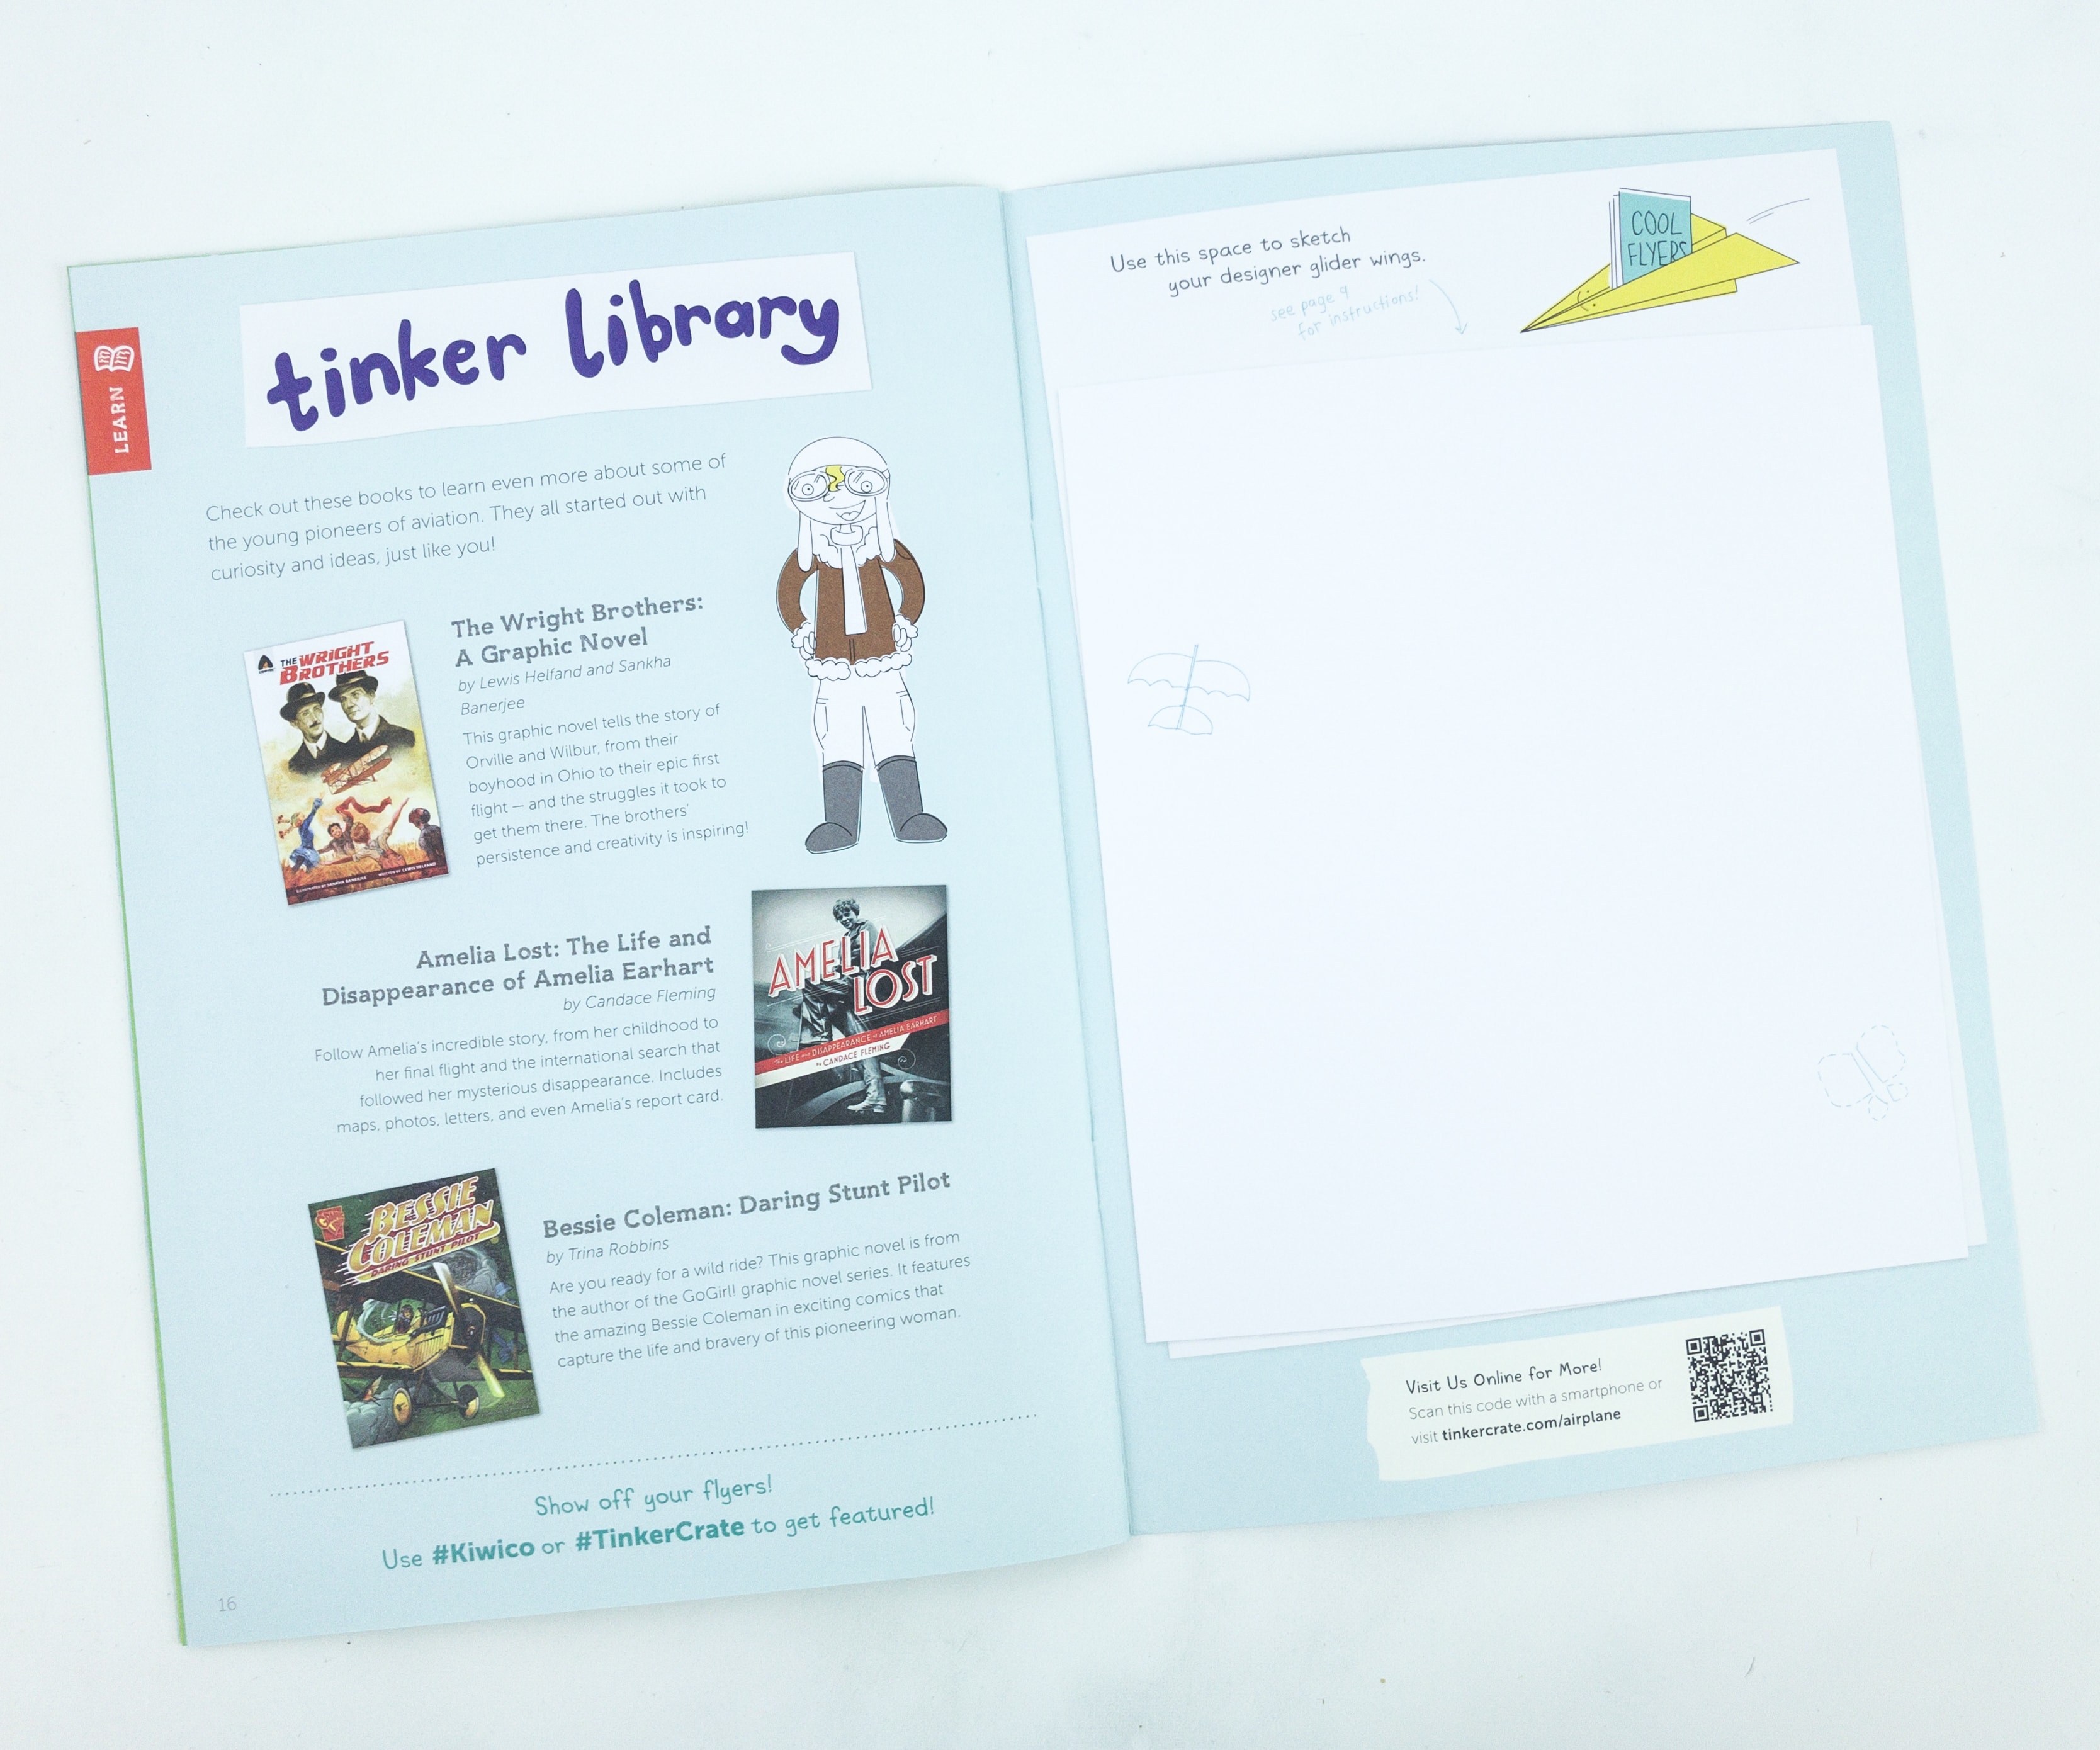
The Zine also provided more ways to tinker via the Tinker Library, where they suggest related literature for this month’s topic: The Wright Brothers: A Graphic Novel, Amelia Lost: The Life and Disappearance of Amelia Earhart, and Bessie Coleman: Daring Stunt Pilot.
Tinker Crate is a great subscription if you want a hands-on learning experience for kids! There are on-page activities in the zine, as well as suggested experiments for the kids to further understand each concept. As for the main project, most of the materials are provided so all we have to do is read the instructions and get started. My kids loved this particular box especially because the theme is all about the science of flying! They were curious about how planes fly and how they can recreate the same principles in the paper airplane launcher. It definitely helped enhance their creativity, analysis, and imagination. This subscription also teaches my kids a never-give-up attitude and to be more keen on details. If you are looking for an activity that will further develop your kids especially in the STEM area, this is the perfect subscription to try!
Have you tried Tinker Crate yet with your kids?


Comments